Posted on — Leave a comment

Pav Bhaji Masala Recipe: Homemade Powder, Best Brands & Substitutes

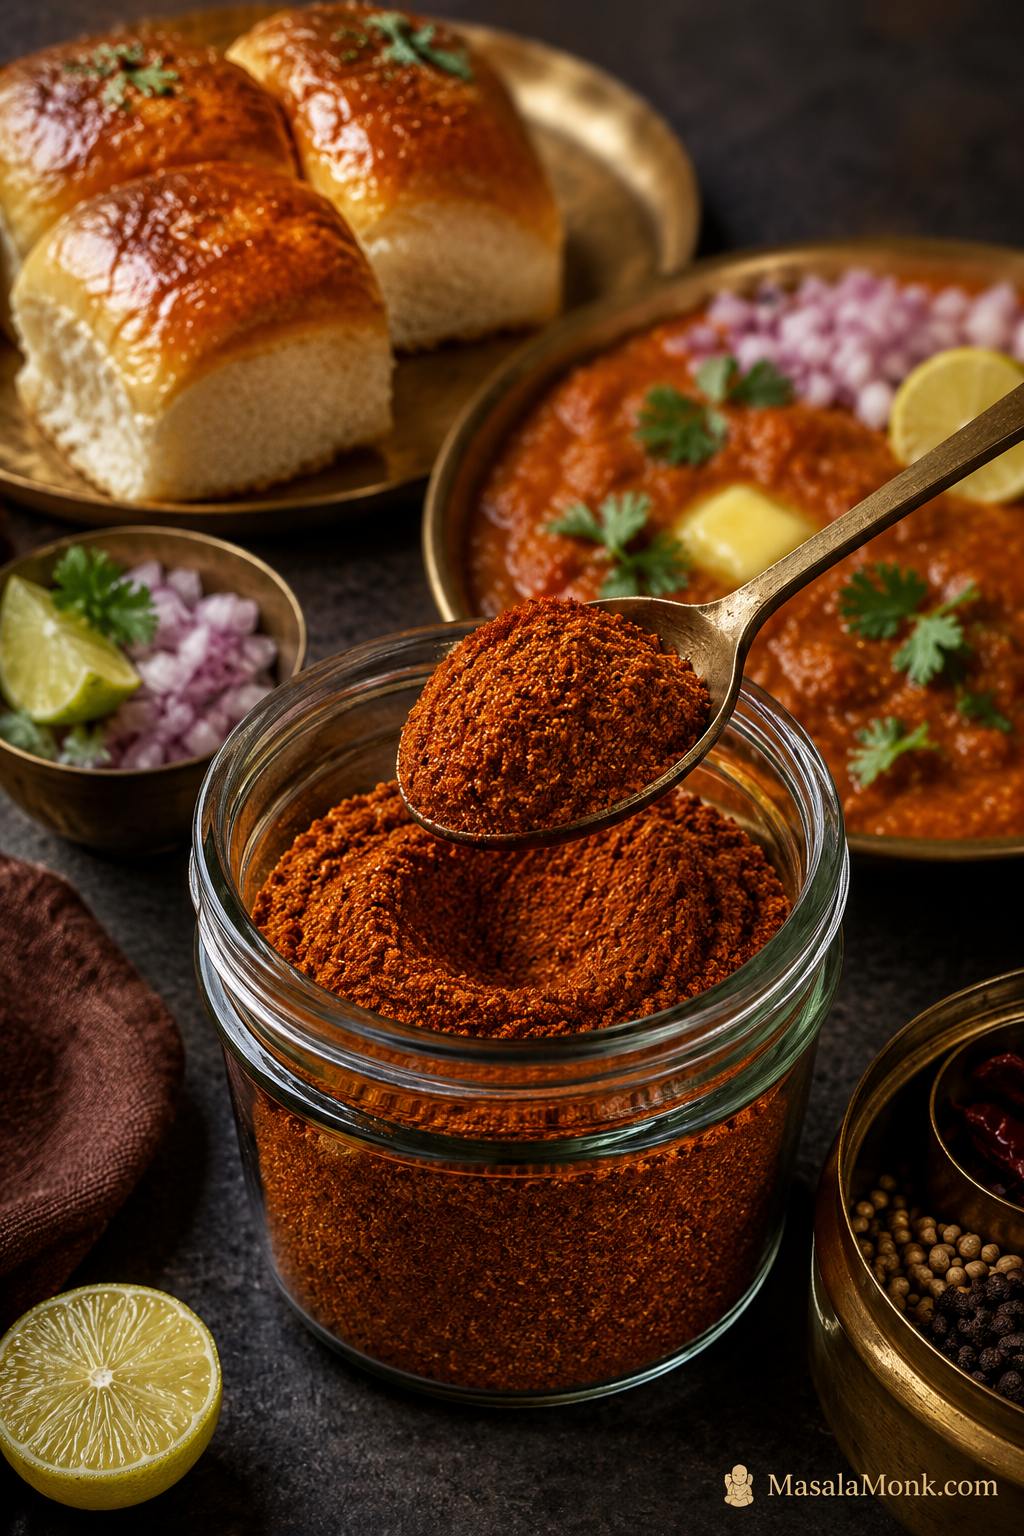
Glass jar of reddish-brown homemade pav bhaji masala with a spoon of spice powder, served beside pav bhaji, buttered pav, onion, lemon, and coriander.

A good pav bhaji masala recipe is often the difference between a pan of mashed vegetables and bhaji that actually tastes like pav bhaji. With the right blend, the dish gets its tang, color, warmth, Mumbai-style aroma, and that buttery, chatpata depth people keep trying to recreate at home.

The confusing part is that this masala is not one fixed thing. One packet may taste too salty. Another may taste flat. A homemade batch can smell wonderful but turn bitter if the spices are roasted too hard. Sometimes the bhaji looks pale, tastes dusty, or never gets that deep snack-shop finish no matter how much powder you add.

So instead of stopping at a spice list, let’s solve the whole problem: how to make the blend fresh, how much to use, which store-bought options are worth trying, what to use in an emergency, and how to get bhaji that tastes warm, tangy, buttery, and rounded instead of flat, dusty, or over-spiced.

The good news is that pav bhaji is forgiving. You do not need the “one true” packet or a perfect spice shelf. You need a blend with warmth and tang, enough butter and tomato to carry it, and the patience to let the bhaji simmer before you decide what is missing.

The goal is that familiar first bite: soft pav, glossy bhaji, butter on top, onion and lemon on the side, and a masala flavor that feels deep without tasting muddy.

Quick Answer: Homemade or Store-Bought Pav Bhaji Masala?

The best choice depends on what you need. If you want the freshest aroma and full control over salt, heat, and tang, make the homemade blend below. If you want convenience, a good packet works well, but every brand has a different strength.

Best choice Use it when
Homemade blend Best for fresh aroma, less hidden salt, and better control over chilli, tang, and warmth.
Everest Pav Bhaji Masala Familiar, easy to find, and useful as a first packet.
Badshah Pav Bhaji Masala Bolder and more Mumbai-style in direction.
MDH Pav Bhaji Masala Classic household masala-box choice.
Organic Tattva or Pure & Sure Useful for kitchens that already prefer organic spice blends.
Homemade pav bhaji masala in a glass jar, neutral packet-style masala, and finished pav bhaji arranged as a decision guide.
Homemade masala gives you control over salt, heat, and tang; meanwhile, a good packet helps when convenience matters and time is short.

For 4 servings of pav bhaji, start with 2–3 teaspoons homemade masala or about 1 tablespoon store-bought masala. Cook it into the tomatoes and butter, simmer with the vegetables, then add more only in small ½-teaspoon steps if the flavor still feels weak.

What Is Pav Bhaji Masala?

Pav bhaji masala is a spice blend made for pav bhaji, the Mumbai street-food dish of mashed vegetables cooked with tomatoes, butter, chillies, and spices, then served with toasted pav. The blend usually includes coriander, cumin, fennel, dried red chillies, black pepper, cinnamon, cloves, black cardamom, bay leaf, amchur, dry ginger, and sometimes stone flower, black salt, mace, nutmeg, turmeric, or other warming spices.
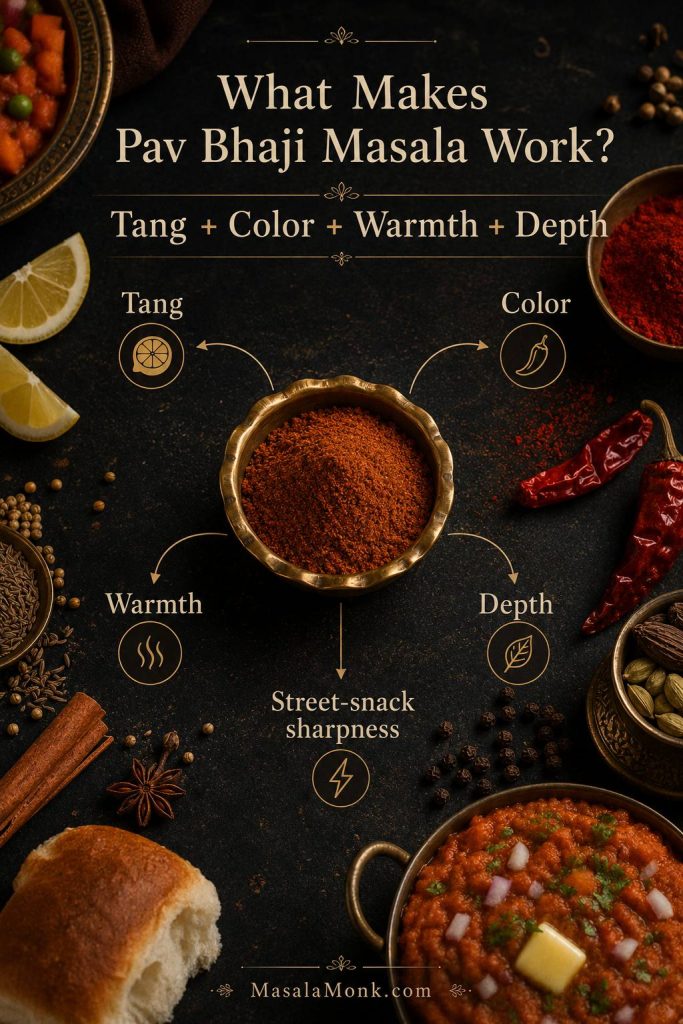
Bowl of pav bhaji masala surrounded by flavor labels for tang, color, warmth, depth, and street-snack sharpness.
Pav bhaji masala works because it is not only spicy; it balances tang, color, warmth, and depth against potatoes, tomatoes, butter, and pav.

Garam Masala vs Pav Bhaji Masala

It is not the same as garam masala. Garam masala can make bhaji warm, but it will not give the same tangy, red-orange, street-snack profile on its own. This blend is sharper, brighter, and built to stand up to potatoes, tomatoes, butter, and bread.
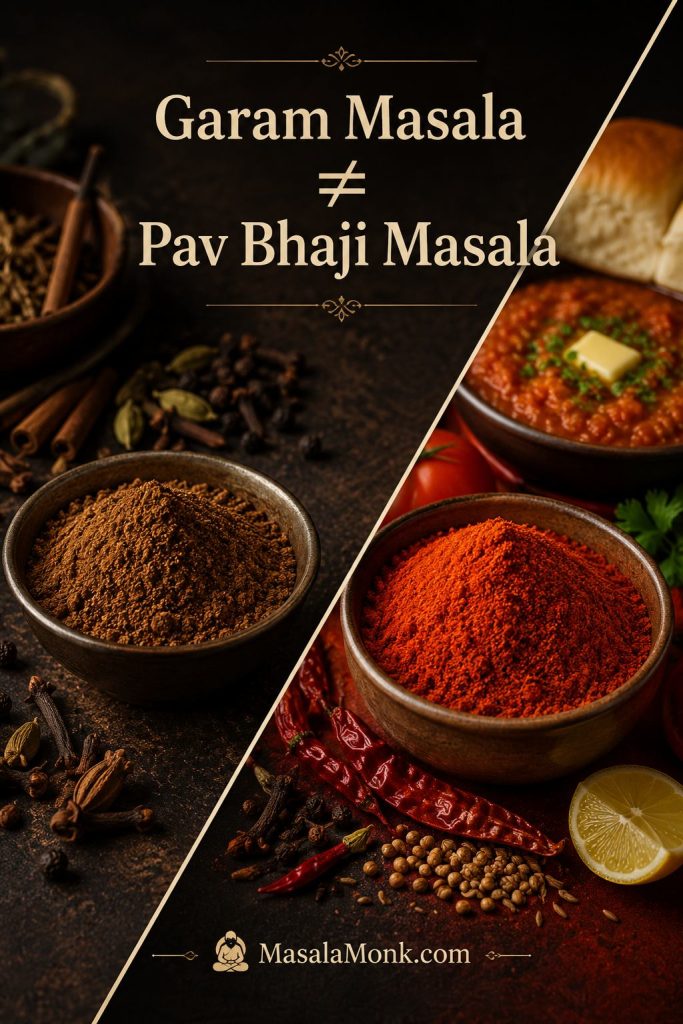
Diagonal comparison of darker garam masala and redder pav bhaji masala with a small pav bhaji serving cue.
Garam masala can warm the pan, but pav bhaji masala adds the chilli color, amchur tang, and snack-style sharpness that bhaji needs.

If garam masala is all you have, do not use it alone; jump to the emergency pav bhaji masala substitute for a better balance of color, tang, and warmth.

If you want to understand the broader warm-spice base first, MasalaMonk’s authentic Indian garam masala recipe is a helpful companion. Some spices overlap, but the goal here is tangier, sharper, and more snack-focused.

Simple way to understand it: garam masala adds general warmth. Pav bhaji masala adds the specific bhaji flavor: tang from amchur, color from Kashmiri chilli, depth from whole spices, and chaat-like sharpness from black pepper, black cardamom, and optional stone flower.

Homemade vs Store-Bought Pav Bhaji Masala

Both homemade and store-bought masala can make excellent bhaji. Homemade gives you freshness and control. A ready-made blend gives you speed and consistency. The bigger question is how often you cook pav bhaji and how much control you want over salt, chilli, and tang.

Option Why it works Watch out for
Homemade Fresh aroma, adjustable chilli, no mandatory salt, and better control over tang and heat. Needs whole spices and a grinder. Over-roasted spices can turn bitter.
Store-bought Convenient, consistent, easy for quick cooking, and practical if you make pav bhaji casually. Brand strength varies across salt, heat, color, and tang.

Frequent pav bhaji cooks will get more value from a small homemade batch. For occasional cooking, a good packet is practical. Either way, the flavor depends not just on the spice mix but on whether it is cooked properly into the bhaji.

If you enjoy making spice blends from scratch, MasalaMonk’s authentic sambar masala recipe follows a similar make-ahead logic: roast carefully, cool fully, grind fresh, and store the powder dry.

Pav Bhaji Masala Ingredients

A good powder needs body, heat, tang, color, and depth. The ingredient list looks long, but most of the flavor comes from a few core spices. The optional spices are there for a deeper packet-style flavor or a more Mumbai-style finish.

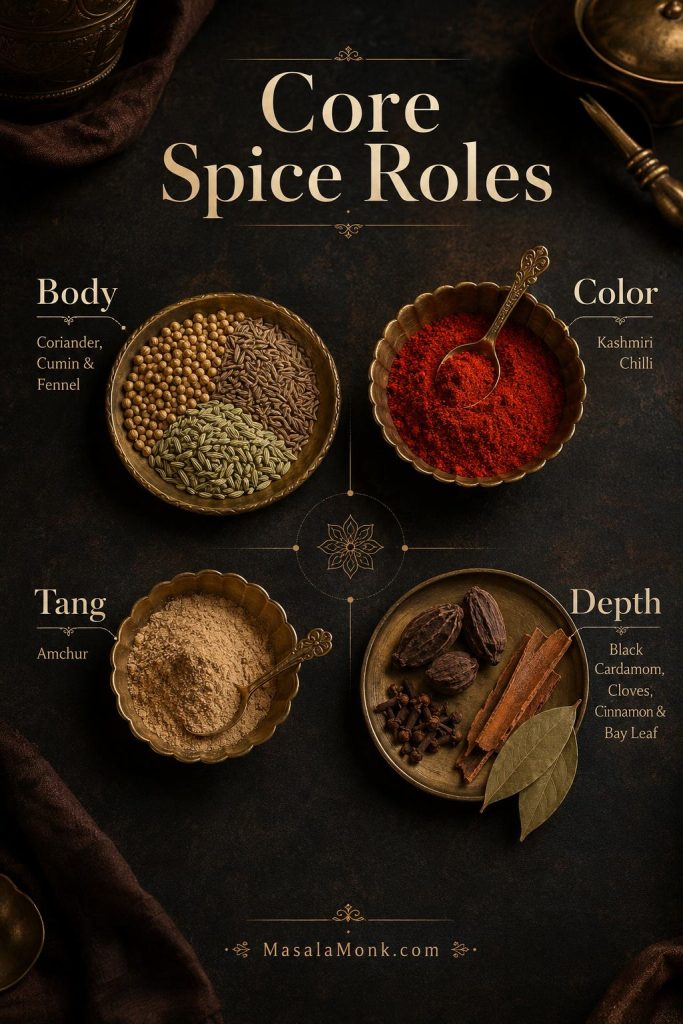
Think of the blend in layers: coriander and cumin build the body, chilli and amchur bring color and tang, and the darker spices add that deep background aroma that makes the bhaji taste rounded instead of plain.
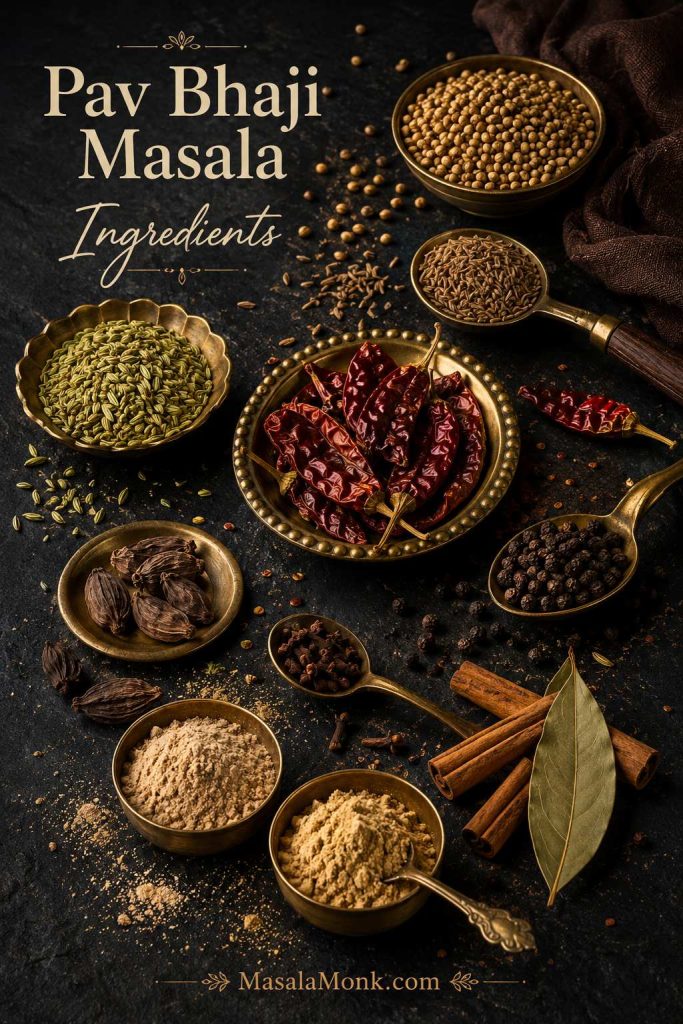
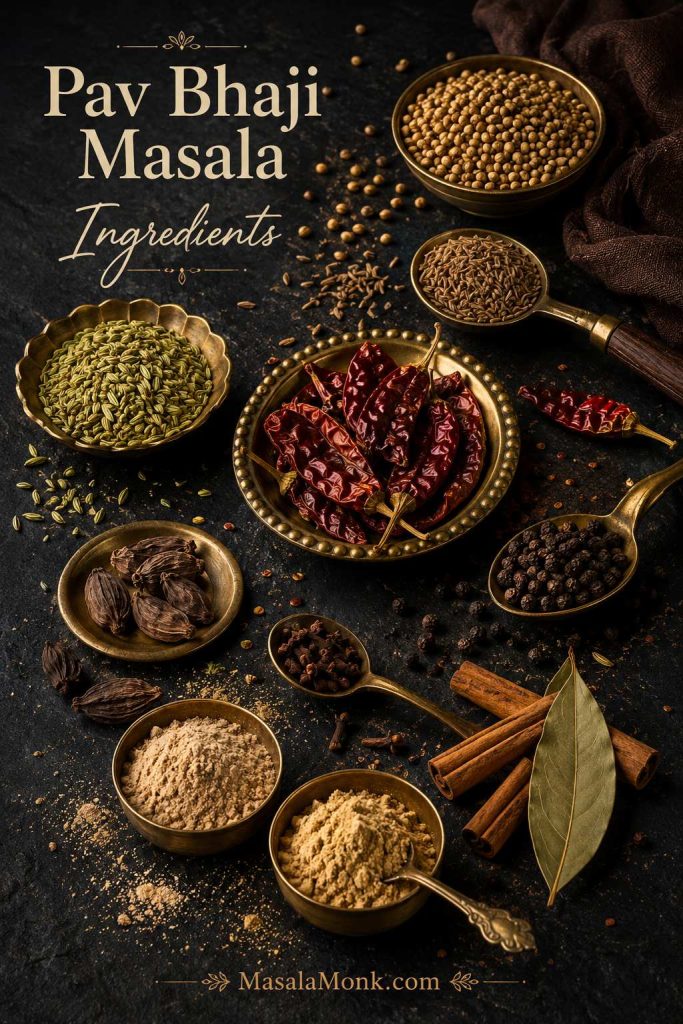
Pav bhaji masala ingredients including coriander seeds, cumin, fennel, Kashmiri chillies, amchur, dry ginger, black cardamom, cloves, cinnamon, and bay leaf.
The ingredient list looks long, yet each spice has a job: coriander for body, cumin for earthiness, Kashmiri chilli for color, and amchur for brightness.

Already have the spices ready? Go straight to the grams and spoon measurements or the step-by-step method.

Core Spices

Ingredient What it does
Coriander seeds Forms the body of the blend with citrusy, warm, slightly sweet flavor.
Cumin seeds Brings earthy tawa-style depth.
Fennel seeds Lifts the powder with a sweet aromatic note so it does not taste too heavy.
Kashmiri dried red chillies Gives red-orange color and mild heat. Use hotter chillies only if you want a spicier batch.
Black peppercorns Sharpens the heat in a way that works well with butter and potatoes.
Cinnamon and cloves Bring warm, sweet, intense spice notes. Both are strong, so use them carefully.
Black cardamom Creates smoky depth and a more pav bhaji stall-style aroma.
Bay leaf Builds background warmth and savory complexity.
Amchur powder Supplies the tang that separates this masala from garam masala.
Dry ginger powder Finishes the blend with warmth and a subtle dry spice note.
Core pav bhaji masala spices grouped by body, color, tang, and depth on a dark spice-pantry background.
Grouping spices by role makes the blend easier to adjust; instead of adding powder blindly, you can fix the flavor layer that is actually missing.

This blend is coriander-forward because pav bhaji needs body before it needs heat. Cumin and fennel keep the base earthy but not heavy, Kashmiri chillies give color without harshness, and amchur is added after roasting so the tang stays clean. The darker spices — black cardamom, cloves, cinnamon, bay leaf, and optional stone flower — should stay in the background. If they dominate, the bhaji tastes more like generic heavy masala than pav bhaji.

Street-Style Spices: Stone Flower, Amchur and Black Cardamom

If you want the blend to lean more Mumbai-style, three ingredients matter most: amchur, black cardamom, and a tiny amount of stone flower, also called dagad phool or pathar phool.

Amchur gives tang. Black cardamom adds smoky depth. Stone flower gives a slightly smoky, earthy, restaurant-style note, but it is powerful and not always easy to use. If your stone flower smells dusty, muddy, or stale, skip it.
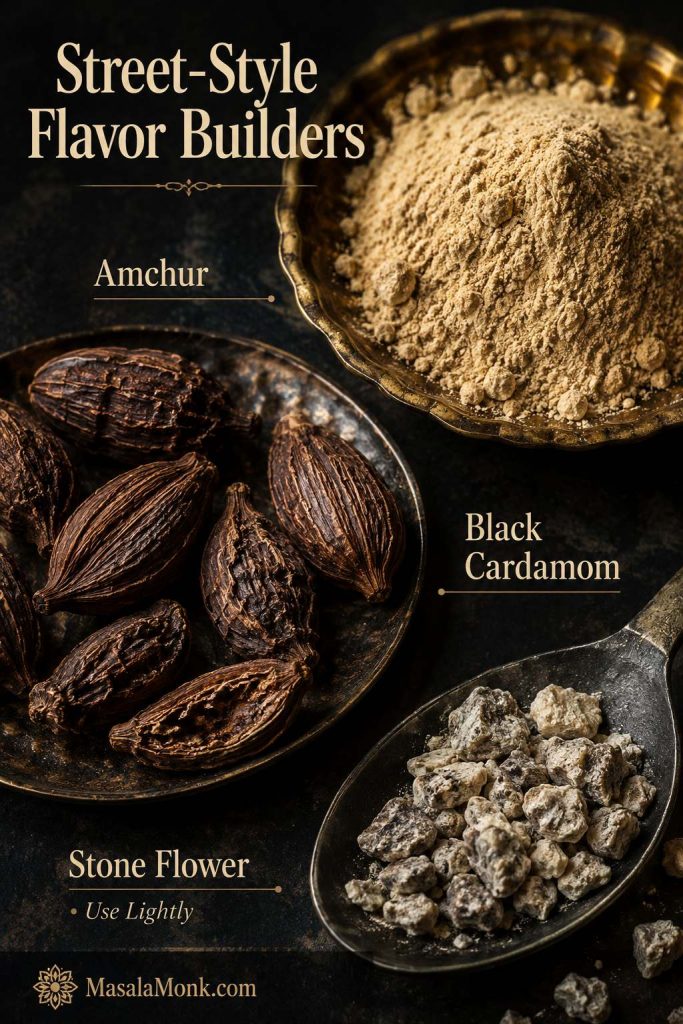
Close-up of amchur powder, black cardamom pods, and a small pinch of stone flower for street-style pav bhaji masala flavor.
Amchur, black cardamom, and stone flower can move the blend toward a street-style pav bhaji flavor, provided they stay in the background.

Optional Spices You Can Skip

  • Stone flower: good for depth, but optional and easy to overdo.
  • Mace or nutmeg: adds packet-style depth; use only a tiny pinch.
  • Black salt: gives a chaat-like savory note, but can make the blend salty.
  • Turmeric: helps color, but too much can taste earthy.
  • Star anise: adds sweet depth; one small piece is enough.
Important: salt is not mandatory in homemade pav bhaji masala. It is usually better to salt the bhaji separately, especially because store-bought masalas vary widely in salt level.

Do not let the long spice list scare you. Get the coriander-cumin base right, use Kashmiri chilli for color, add amchur for tang, and avoid burning the spices. That will get you much closer than simply adding garam masala to mashed vegetables.

Homemade Pav Bhaji Masala Recipe

This homemade pav bhaji masala recipe makes a practical small batch: enough for several rounds of pav bhaji, but not so much that the jar sits around until the aroma fades. The spoon measures are the working recipe; the gram weights are approximate because whole spices vary in size and freshness.

I prefer making this as a small batch because the aroma is noticeably better in the first few weeks. Bigger batches are convenient, but once the powder starts smelling dull in the jar, the bhaji needs more help from butter, lemon, and fresh coriander.

Freshness matters: if your coriander, cumin, or chillies have been sitting open for a year, the masala will taste dull no matter how carefully you roast it. Use fresh-smelling whole spices for the best result.

Measurements in Grams and Spoons

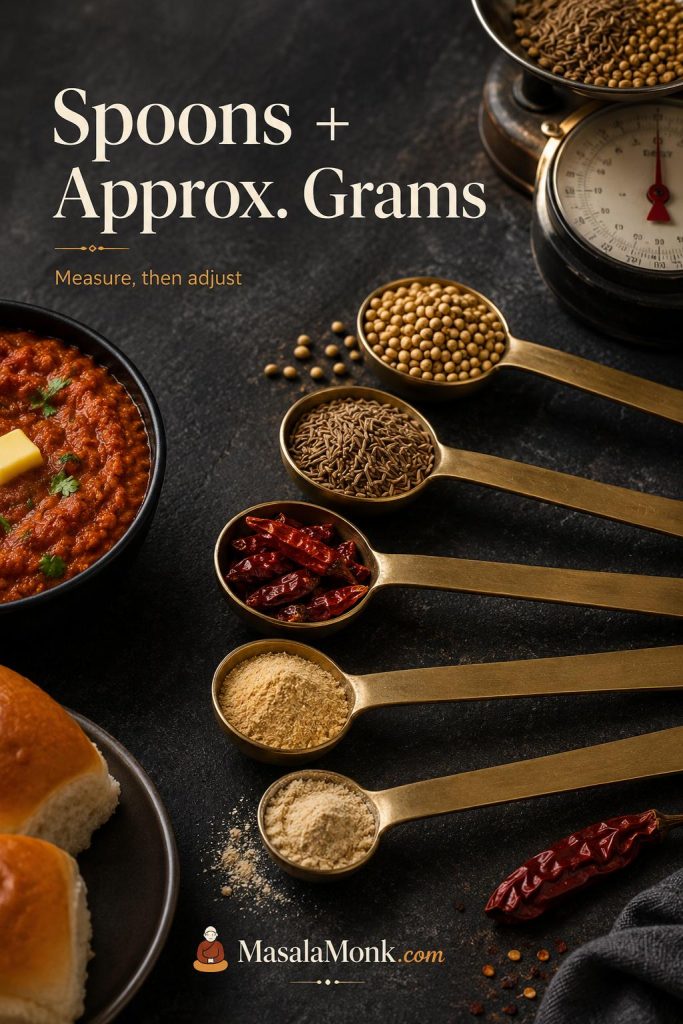
Measuring spoons, kitchen scale, and pav bhaji masala spices arranged to show spoon measures and approximate gram measurement.
Spoon measures keep this pav bhaji masala recipe easy for everyday cooking; approximate grams help when you want the next homemade batch to taste consistent.
Ingredient Spoon measure Approximate grams
Coriander seeds 4 tbsp 20–24g
Cumin seeds 2 tbsp 12–14g
Fennel seeds 1 tbsp 6g
Dried Kashmiri red chillies 6–8 whole chillies 8–12g, depending on size
Black peppercorns 1½–2 tsp 4–5g
Cinnamon 1 stick, about 2 inches 2–3g
Cloves 8–10 cloves 2g
Black cardamom 2 pods 3–4g
Bay leaf 1–2 leaves 1g
Star anise 1 small piece 1g
Amchur powder 1 tbsp 7–8g
Dry ginger powder ½–1 tsp 1–2g
Turmeric powder, optional ½ tsp 1–2g
Black salt, optional ½ tsp 2–3g
Stone flower / dagad phool, optional Tiny pinch Less than 1g
Mace or nutmeg, optional Tiny pinch Less than 1g

Step-by-Step Method

1. Check and clean the spices

Pick through the whole spices and remove any stones, stems, dust, or stale pieces. Wipe chillies if needed. Avoid washing the spices unless you plan to dry them completely afterward, because moisture can make the powder clump or spoil faster.

2. Choose the chillies based on color and heat

Use Kashmiri dried red chillies if you want good color with mild heat. For a spicier batch, replace 1–2 Kashmiri chillies with a hotter dried chilli. For a family-friendly version, shake out some of the chilli seeds before roasting.
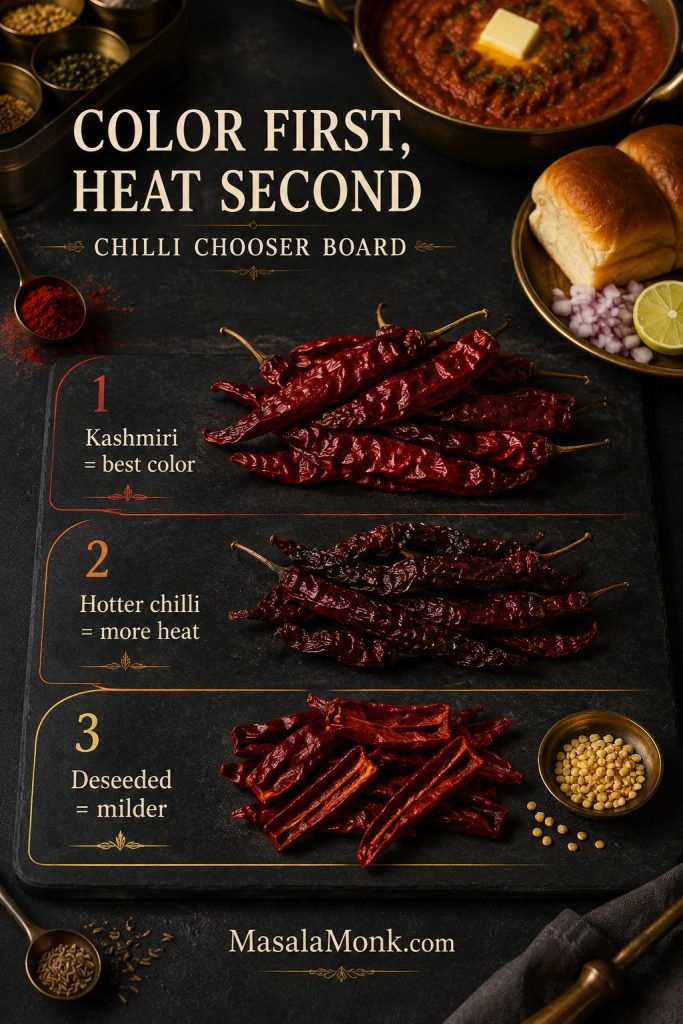
Kashmiri dried red chillies, hotter dried chillies, and deseeded chillies compared for color, heat, and mildness in pav bhaji masala.
Kashmiri chillies are the safest first choice because they build red-orange color without pushing the masala into harsh, overpowering heat.

3. Dry roast the whole spices on low heat

Heat a thick-bottomed pan on low to low-medium heat. Add coriander seeds, cumin seeds, fennel seeds, dried red chillies, black peppercorns, cinnamon, cloves, black cardamom, bay leaf, star anise, and optional stone flower.

Roast gently for 5–7 minutes, stirring often. Stop when the spices smell awake, not when they look dark. The coriander should smell warm, the chillies should look slightly deeper, and the whole pan should smell lively rather than smoky or scorched.
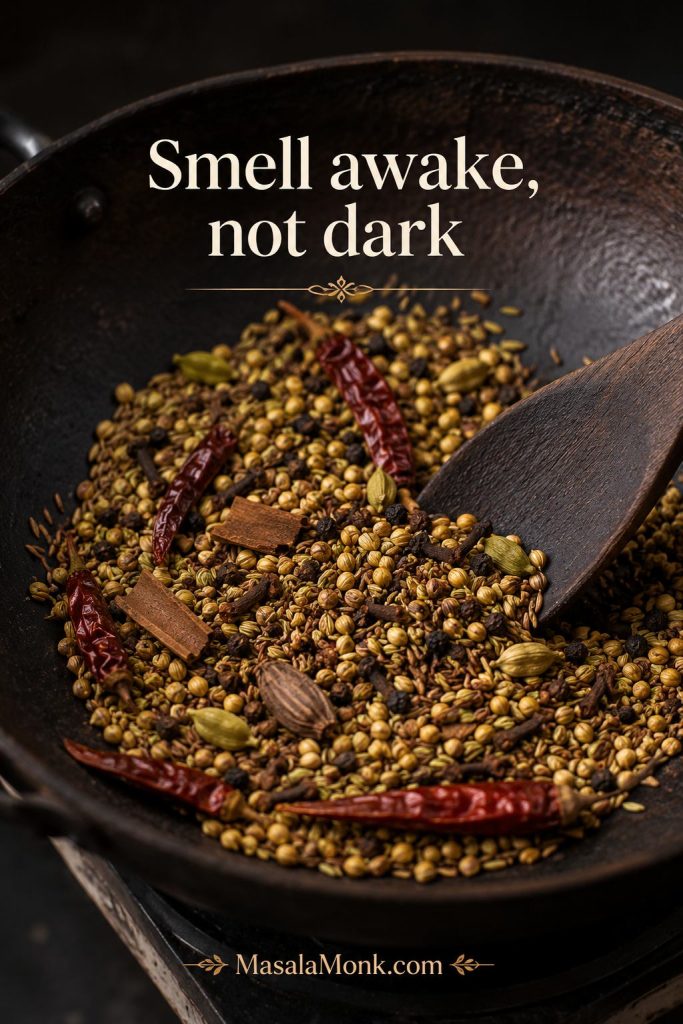
Whole spices dry roasting in a dark pan with coriander, cumin, fennel, dried red chillies, black cardamom, bay leaf, and cloves.
Dry roast the whole spices on low heat until they smell lively; if they darken too much, the finished powder can taste bitter.

If the chillies darken faster than the other spices, remove them from the pan early and keep roasting the coriander, cumin, and larger spices for another minute or two.

4. Cool completely before grinding

Transfer the roasted spices to a plate and let them cool fully for about 10 minutes. This is not a fussy step. Warm spices can trap steam in the grinder, dull the aroma, and make the powder clumpy.
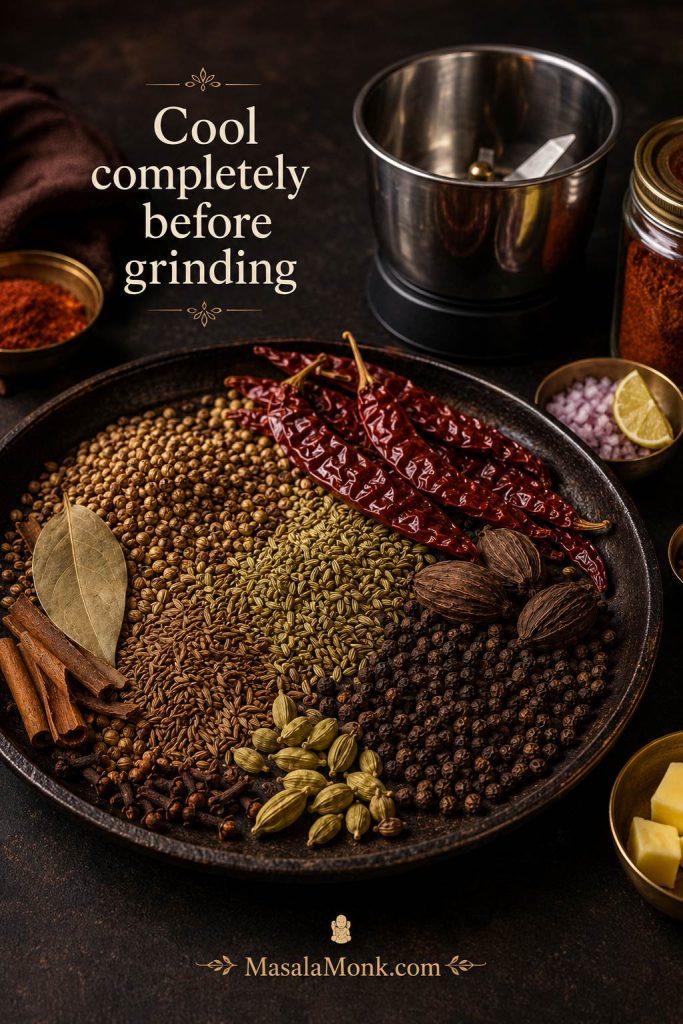
Roasted pav bhaji masala spices cooling on a dark tray with a mixer grinder jar waiting nearby.
Cooling the roasted spices first prevents trapped steam, dull aroma, and clumps, which is especially important for homemade pav bhaji masala powder.

5. Add the powdered spices after cooling

Once the roasted spices are cool, add amchur powder, dry ginger powder, optional turmeric, optional black salt, and optional mace or nutmeg. These powdered spices can scorch quickly, so they are better added after the pan step.
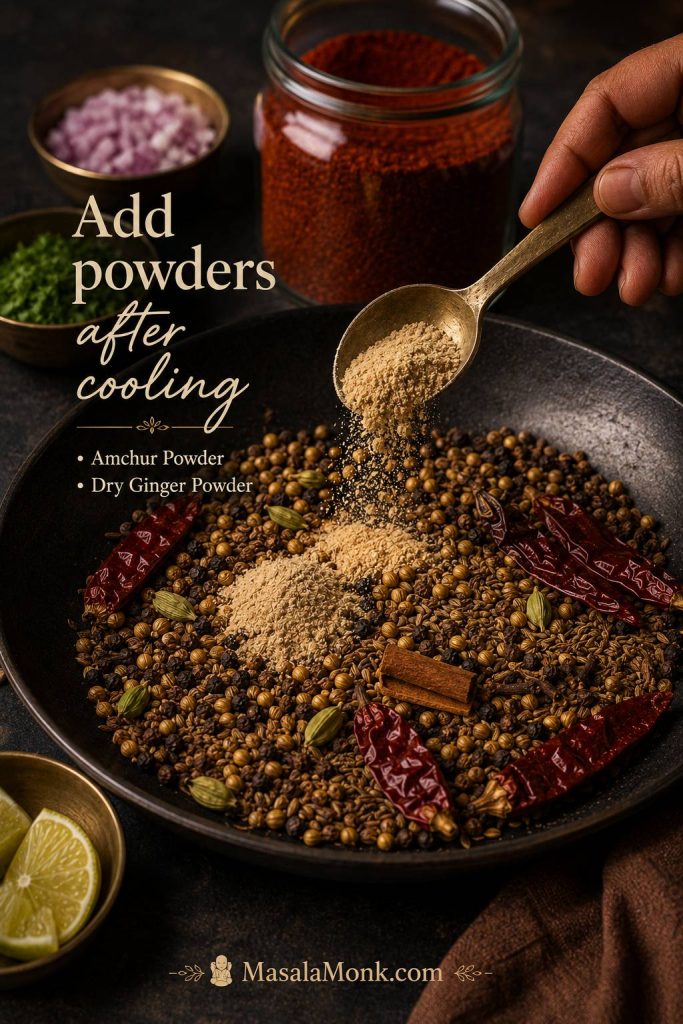
Amchur powder and dry ginger being added to cooled roasted spices before grinding pav bhaji masala.
Add amchur and dry ginger after roasting so the tang stays clean; otherwise, powdered spices can scorch and make the blend taste muddy.

6. Grind in short pulses

Grind the mixture in a dry spice grinder or the dry jar of a mixer grinder. Pulse a few times first, then grind until fine. Avoid running the grinder continuously for too long because heat can dull the aroma.

The finished powder should smell warm, tangy, and rounded. If it smells harsh, burnt, or dusty, the spices were likely stale or roasted too aggressively.

7. Sieve if needed

If the powder is coarse, pass it through a sieve and regrind the larger bits. A slightly coarse texture is still usable, but a finer powder blends more smoothly into bhaji.
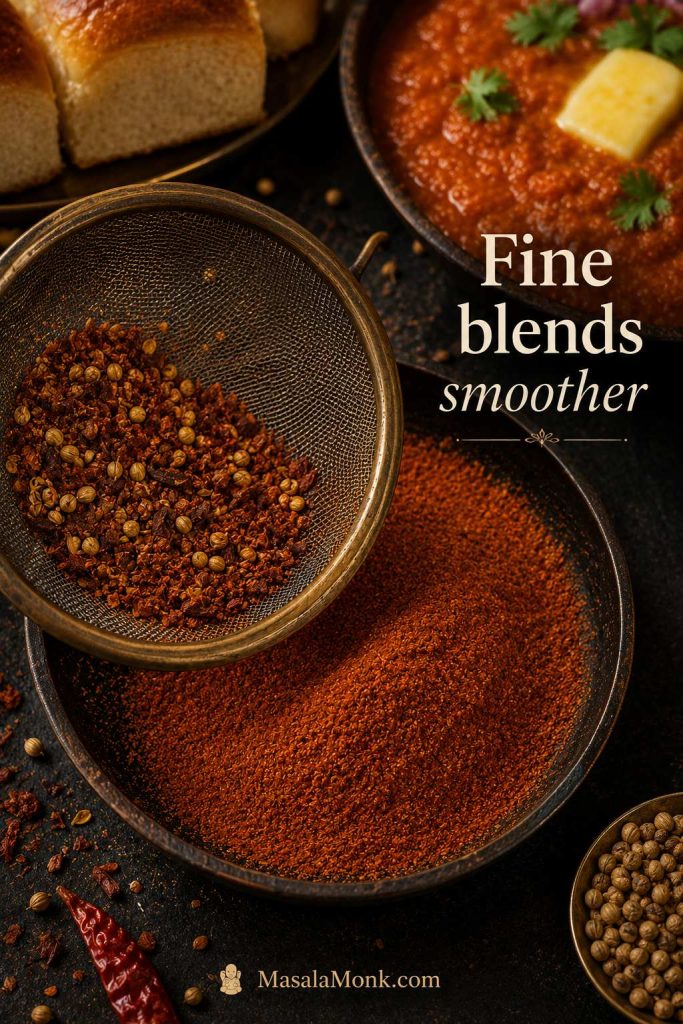
Fine reddish-brown pav bhaji masala powder compared with coarse spice bits caught in a sieve.
Fine pav bhaji masala powder blends smoothly into tomatoes, butter, and mashed vegetables, while coarse bits can leave the bhaji tasting uneven.

8. Store in an airtight jar

Transfer the powder to a clean, dry, airtight glass jar. Keep it away from heat, sunlight, steam, and wet spoons.

Recipe Card: Homemade Pav Bhaji Masala Powder

YieldAbout ½ cup / 75–90g
Prep Time10 minutes
Roast + Cool5–7 min roast + 10 min cool
Total TimeAbout 25 minutes

Ingredients

  • 4 tbsp coriander seeds
  • 2 tbsp cumin seeds
  • 1 tbsp fennel seeds
  • 6–8 dried Kashmiri red chillies
  • 1½–2 tsp black peppercorns
  • 1 cinnamon stick, about 2 inches
  • 8–10 cloves
  • 2 black cardamom pods
  • 1–2 bay leaves
  • 1 small star anise
  • 1 tbsp amchur powder
  • ½–1 tsp dry ginger powder
  • ½ tsp turmeric powder, optional
  • ½ tsp black salt, optional
  • Tiny pinch stone flower / dagad phool, optional
  • Tiny pinch mace or nutmeg, optional

Method

  1. Check and clean the spices.
  2. Choose Kashmiri chillies for color and adjust seeds for heat.
  3. Dry roast the whole spices on low to low-medium heat for 5–7 minutes.
  4. Cool the roasted spices completely for about 10 minutes.
  5. Add amchur, dry ginger, and optional powdered spices.
  6. Grind in short pulses until fine and aromatic.
  7. Sieve and regrind coarse bits if needed.
  8. Store in a clean airtight glass jar.

Notes

  • For 4 servings of pav bhaji, start with 2–3 teaspoons of this homemade blend.
  • Use Kashmiri chillies for color and mild heat. Add hotter chillies only if you want a spicier version.
  • If the chillies darken too quickly while roasting, remove them early and continue roasting the sturdier spices.
  • Add amchur, dry ginger, turmeric, black salt, mace, and nutmeg only after the roasted whole spices cool. Powdered spices can scorch quickly in the pan.
  • The final weight can vary because dried chillies, bay leaves, cardamom pods, and grind fineness all change the volume and weight of the powder.
  • Skip black salt if you prefer to adjust salt separately in the bhaji.
  • For a brighter red-orange bhaji, use Kashmiri chilli rather than extra turmeric.
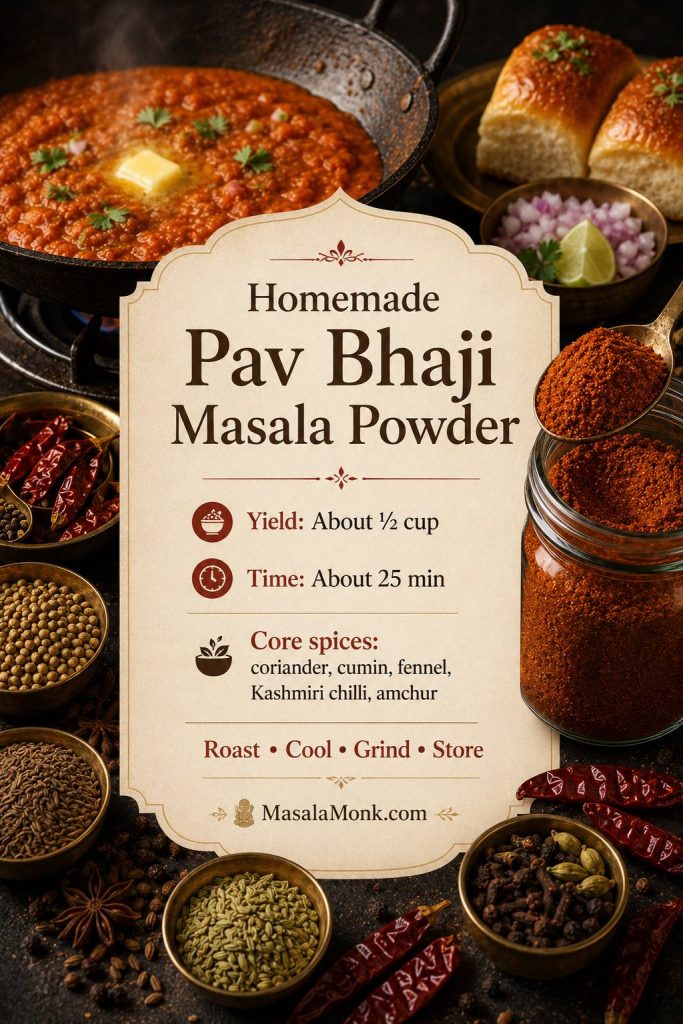
Saveable homemade pav bhaji masala recipe card with yield, timing, core spices, and roast-cool-grind-store method.
A small-batch homemade masala usually stays more aromatic than a large jar kept for months, especially when it is stored dry and airtight.

How Much Pav Bhaji Masala to Use

This is where many pav bhaji recipes become confusing. Homemade powder, Everest-style masala, Badshah-style masala, MDH-style masala, and organic blends do not all have the same strength. One packet may be saltier, another may taste sharper, a third may run hotter, and milder blends may need more quantity to show up in the bhaji.
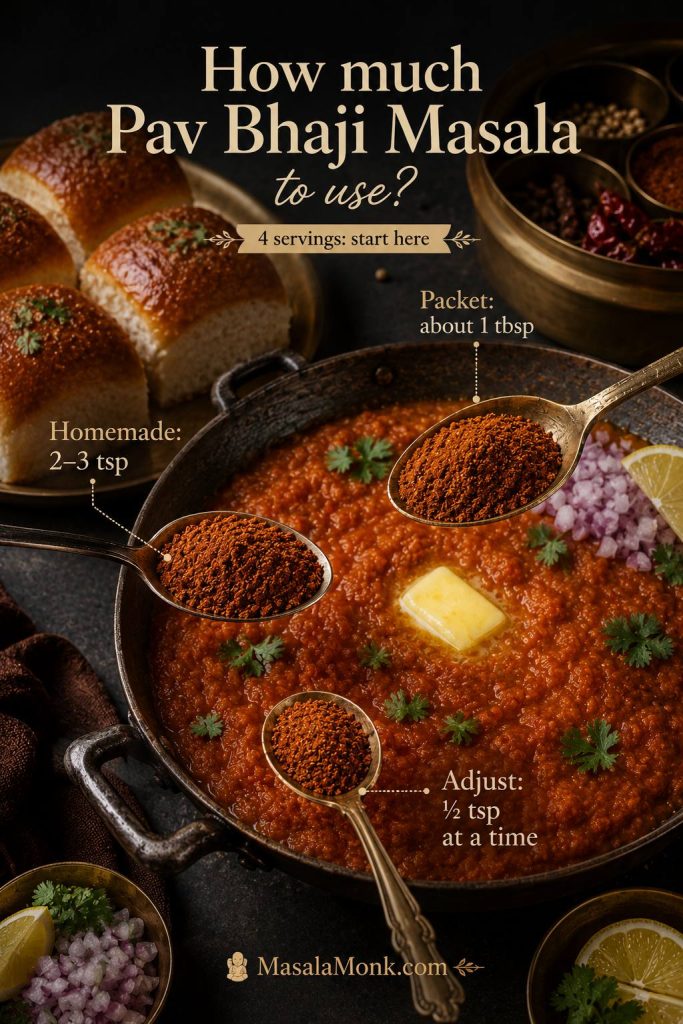
Measurement guide showing homemade pav bhaji masala, packet masala, and half-teaspoon adjustment amounts for four servings.
For 4 servings, treat the amount as a starting point, not a final verdict; pav bhaji masala tastes more balanced after it simmers.
Masala type Starting amount for 4 servings Adjustment note
Fresh homemade blend 2–3 tsp Use ½ tsp more only if the bhaji still tastes flat after simmering.
Store-bought blend 1 tbsp Start lower if the brand is salty, hot, or very strong.
Strong/chatpata brand 2 tsp–1 tbsp A little can dominate quickly, so build the flavor gradually.
Milder brand 1 tbsp The bhaji may need ½–1 tsp more after the vegetables cook down.
Final adjustment ½ tsp at a time Use only after the raw spice taste has cooked out.

If the bhaji tastes almost right but still dull, pause before adding another spoon of powder. Usually the missing piece is butter, salt, lemon, or simmering time. When the pan is already salty, reach for butter, tomato, lemon, coriander, or unsalted homemade powder before adding more packet masala.

If the amount looks right but the bhaji still tastes flat, raw, dusty, or too salty, go to the flavor and texture fixes before adding more powder.

The same measured-spice logic works in simple vegetable dishes too. For example, a dry potato-and-cauliflower dish like MasalaMonk’s easy aloo gobi recipe also depends on letting spices coat the vegetables properly instead of tasting raw on the surface.

How to Bloom Pav Bhaji Masala in the Bhaji

The timing matters. The blend tastes best when it is cooked into the bhaji, not sprinkled over the finished dish like a garnish.

  1. Cook onions, garlic, tomatoes, and capsicum until the tomatoes soften and the pan looks glossy.
  2. Add butter or oil, then add the masala.
  3. Fry for 30–60 seconds on medium-low heat so it blooms without burning.
  4. Add the boiled vegetables and mash everything together.
  5. Simmer for 5–10 minutes before deciding whether the flavor needs anything else.
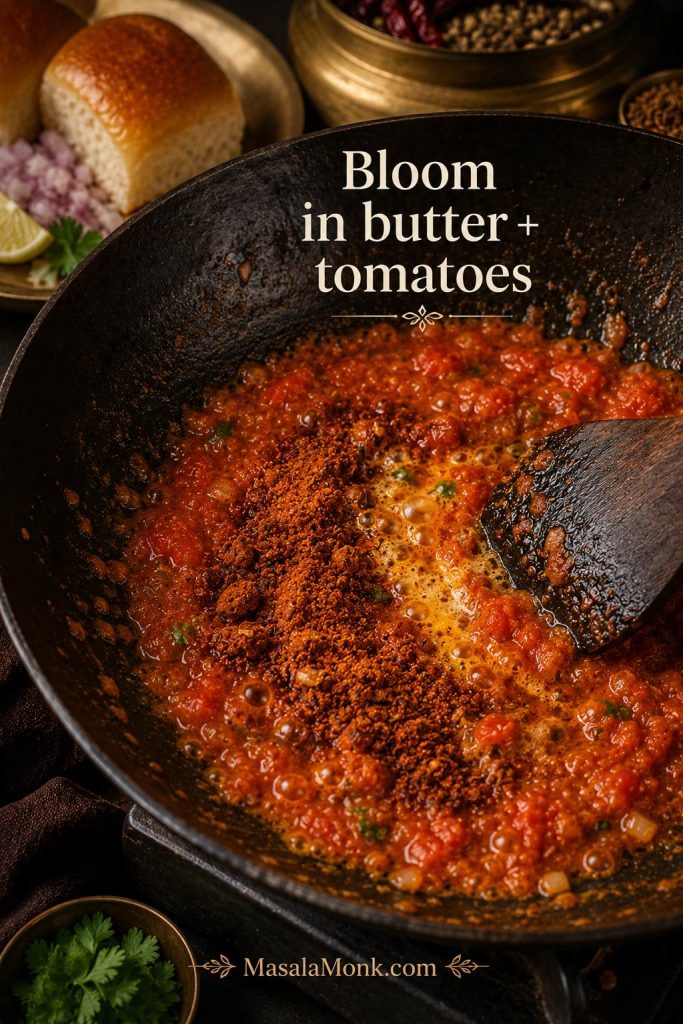
Pav bhaji masala blooming in butter and softened tomatoes in a dark pan with a spatula stirring the glossy red-orange base.
Bloom the masala before adding vegetables so the tomato, butter, and spice taste like one cooked base instead of separate layers.

This is the moment the powder turns into bhaji flavor: the tomatoes look glossier, the butter carries the spice, and the raw edge disappears. If the bhaji tastes like raw spice powder, the masala was probably added too late or not cooked long enough with the tomatoes and butter.

When it is right, the pan stops smelling like separate tomato and spice powder and starts smelling like pav bhaji.

What Good Pav Bhaji Masala Should Do in Bhaji

When the masala is working, the bhaji should not taste like separate potatoes, tomatoes, and spice powder. It should taste cohesive: warm from the whole spices, tangy from amchur or lemon, rounded by butter, and bright enough that one buttered pav is never quite enough.
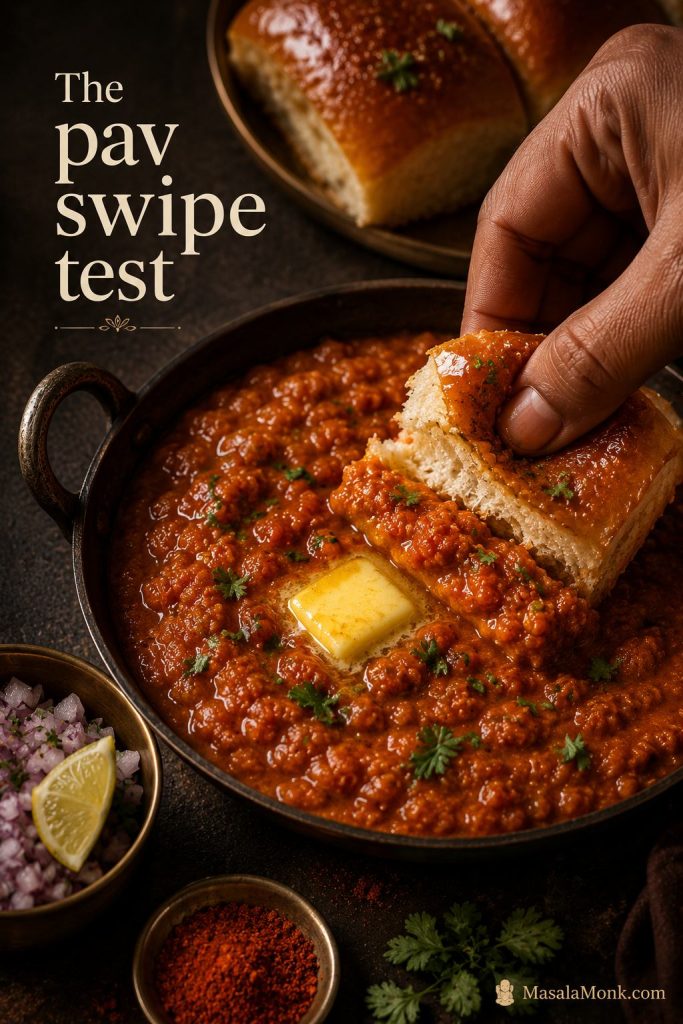
Buttered pav being swiped through glossy red-orange pav bhaji with onion, lemon, coriander, and melted butter.
The pav swipe test tells you if the masala worked: the bhaji should cling to the bread as a glossy, buttery mash with tang and depth.

A heavy-tasting bhaji usually needs acid or freshness. Sharp, powdery flavor means the powder needs more time in the pan. When the bhaji tastes rich but sleepy, add lemon, coriander, or a tiny final pinch after the main cooking is done.

The moment it comes together is easy to recognize: the bhaji looks glossy, the masala stops smelling raw, the butter rounds the edges, and the lemon-onion-coriander finish makes the whole pan taste brighter.

How to Store Pav Bhaji Masala

A homemade batch tastes best when it is fresh. Whole spices keep their aroma longer than ground spices, so once you grind the blend, storage matters.
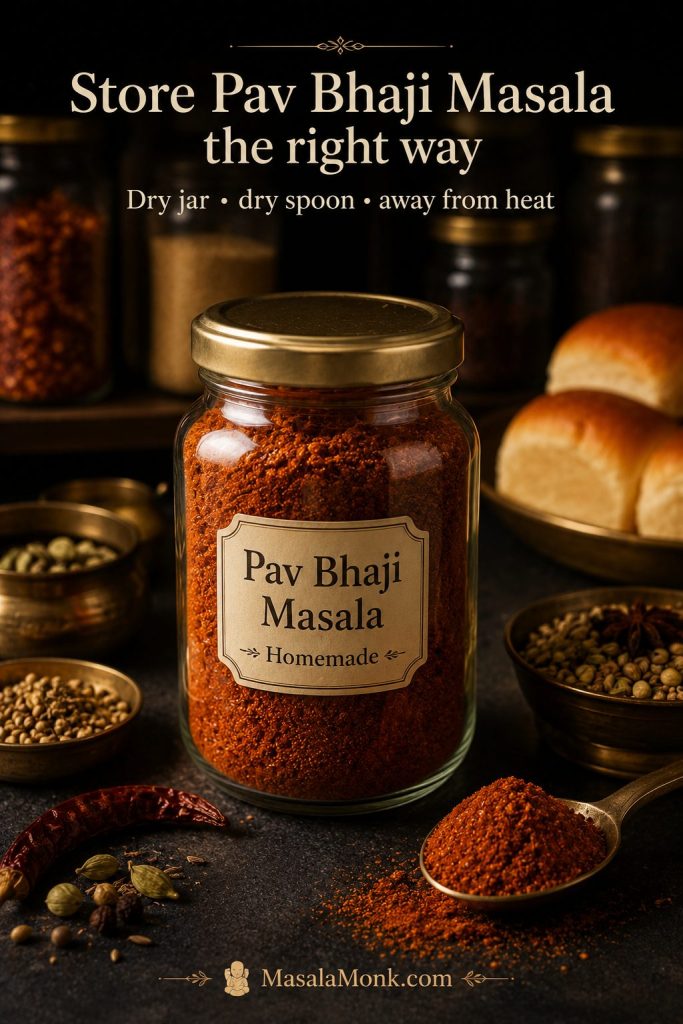
Homemade pav bhaji masala stored in a clean airtight glass jar with a dry spoon on a dark pantry-style surface.
A dry spoon matters as much as the jar; even a little steam can turn homemade pav bhaji masala dull and clumpy.
  • Use a clean, dry, airtight glass jar.
  • Keep the jar away from stove heat, sunlight, and steam.
  • Always use a dry spoon.
  • Make smaller batches if you do not cook pav bhaji often.
  • Use within 2–3 months at room temperature for best aroma.
  • Refrigerate up to about 6 months if tightly sealed.
  • If freezing, seal well so the powder does not absorb freezer smells.

A dull-smelling masala will taste dull in the bhaji too. For freezer storage, let the container come closer to room temperature before opening it so condensation does not hit the powder.

If your stored masala has clumped, faded, or started tasting bitter, check the color, bitterness, and storage fixes.

Best Pav Bhaji Masala Brands in India

A packet can still make excellent bhaji when it suits your taste and you cook it properly. The trick is not chasing the loudest masala on the shelf, but choosing one that matches the kind of bhaji you like: mild and familiar, bolder and more Mumbai-style, lower-salt, organic, or simply easy to find.
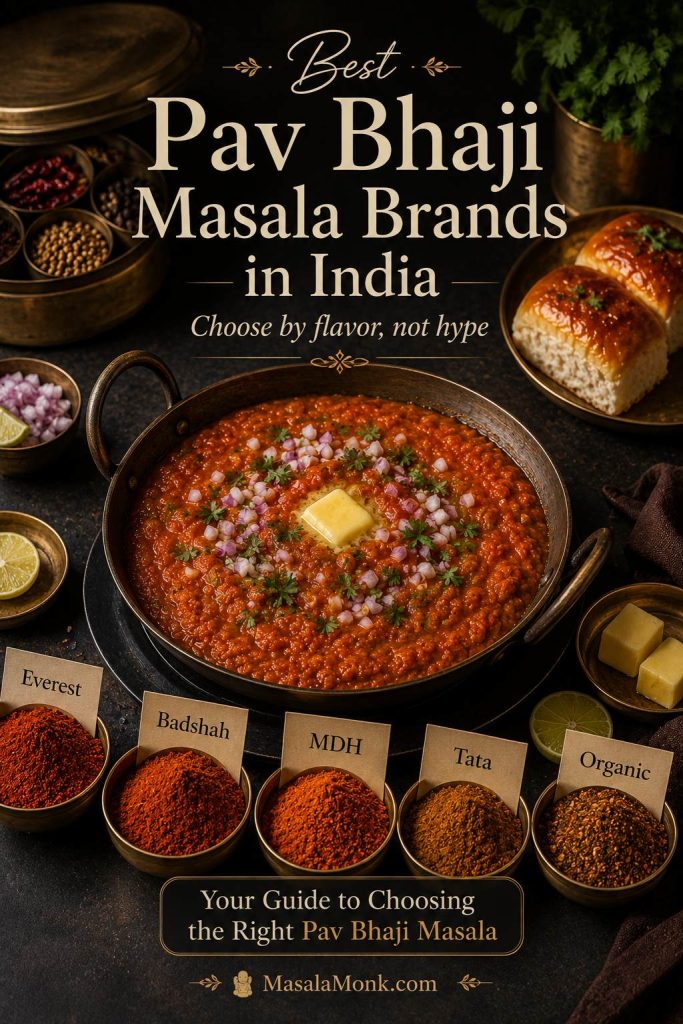
Pav bhaji pan surrounded by neutral labeled spice bowls and packet silhouettes for Everest, Badshah, MDH, Tata, and organic masala options.
Treat store-bought pav bhaji masala as a flavor choice: familiar, bolder, organic, lower-salt, or simply easier to find.

Store-bought pav bhaji masala is useful when you want convenience or do not keep many whole spices at home. Choose by flavor style, not by hype: familiar all-rounder, bolder Mumbai-style, classic household, organic option, or easy backup. This is a practical buying guide, not a blind taste-test ranking, so treat these as starting points.

Affiliate note: As an Amazon Associate, MasalaMonk earns from qualifying purchases. Some links below are affiliate links, which means MasalaMonk may earn a commission at no extra cost to you. The recommendations are limited to spice blends, storage jars, and tools that directly help with homemade pav bhaji masala or the bhaji you make from it.

Everest and Badshah are the strongest starting recommendations: Everest for the most familiar all-rounder direction, Badshah when your bhaji usually tastes too mild. MDH fits the classic pantry lane, while Tata, Catch, MTR, Suhana, Shan, and Zoff are better treated as availability or preference picks. Even the best packet still needs the same basics: cooked tomatoes, enough butter, proper mashing, and a final lift of lemon or coriander.

Whichever packet you buy, choose sealed, clearly labelled masala from a source you trust. Avoid loose ground spice blends if you cannot judge freshness, storage, or handling; FSSAI’s safe ground spices guidance is a useful reminder that ground spices need proper packaging and quality control.

Choose by Flavor Problem
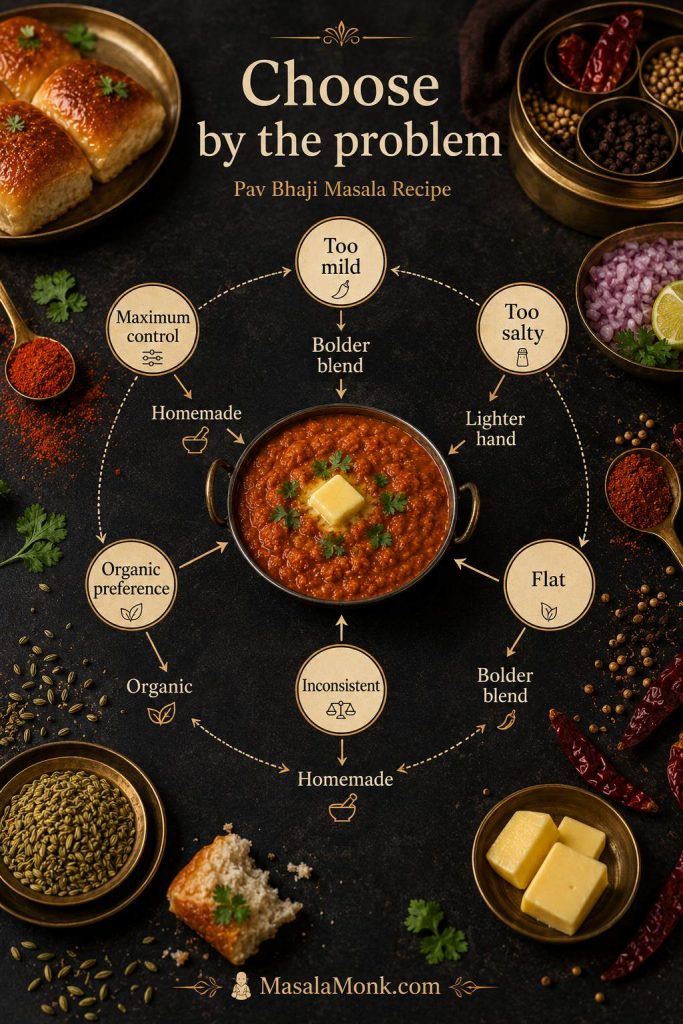
Decision wheel for choosing pav bhaji masala by flavor problem, including too mild, too salty, flat, inconsistent, organic preference, and maximum control.
Choose by the problem first: a salty bhaji needs control, a mild bhaji needs bolder flavor, and an inconsistent bhaji needs reliability.
If your bhaji usually tastes… Choose this direction
Too mild or too home-style Badshah-style bolder blend
Flat but not especially spicy Everest or Badshah direction
Too salty with packets Homemade blend, or use a lighter hand with any packet
Good but inconsistent Everest/MDH/Tata-style familiar packet
Organic matters more than a street-style profile Organic Tattva or Pure & Sure
You want maximum salt and heat control Homemade batch

Quick Brand Picks

Quick pick Brand Best for
Familiar all-rounder Everest Pav Bhaji Masala One easy, recognizable first packet.
Bolder Mumbai-style direction Badshah Pav Bhaji Masala For bhaji that needs a stronger masala push.
Classic household option MDH Pav Bhaji Masala A traditional Indian masala-box brand.
Easy mainstream backup Tata Sampann Pav Bhaji Masala A convenient pantry option for occasional use.
Organic option Organic Tattva / Pure & Sure For kitchens that already prefer organic spices.

Use Everest when you want the safest familiar profile, Badshah when your bhaji usually tastes too mild, MDH when you want a classic pantry option, and Tata or other backups when availability matters more than a specific street-style profile.

Everest vs Badshah Pav Bhaji Masala

Use this comparison as a flavor-direction shortcut, not as a hard ranking. Everest is the safer familiar lane, while Badshah is better when the bhaji needs a stronger snack-shop push.
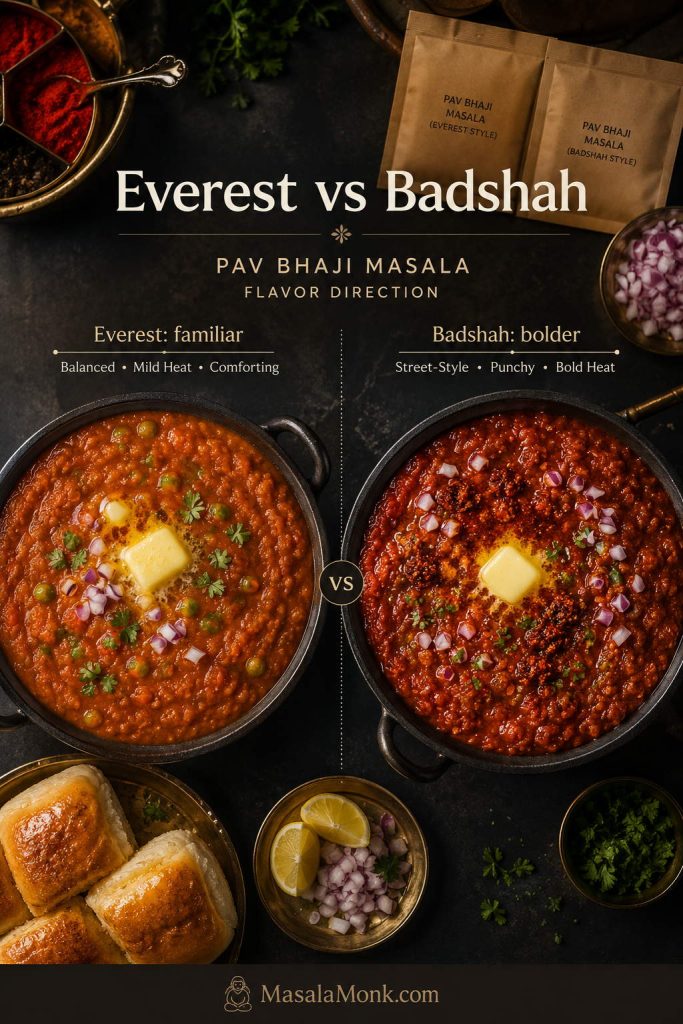
Everest-style and Badshah-style pav bhaji masala compared with two pans of pav bhaji showing familiar balanced flavor and bolder snack-shop flavor.
Choose Everest when you want a familiar, balanced packet; choose Badshah when your bhaji tastes too mild and needs a bolder Mumbai-style push.

Main Store-Bought Options

Everest is the familiar all-rounder to start with if you want a recognizable, easy-to-find packet. Check Everest Pav Bhaji Masala 100g on Amazon.

Badshah is the better direction if you want a bolder, more snack-shop profile. Check Badshah Pav Bhaji Masala 100g on Amazon.

MDH fits the classic masala-box lane: familiar, straightforward, and easy to keep in the pantry. Check MDH Pav Bhaji Masala 100g on Amazon.

Tata Sampann is an easy mainstream backup for occasional pav bhaji, tawa pulao, or quick masala pav. Check Tata Sampann Pav Bhaji Masala 100g on Amazon.

Other Store-Bought Options

Catch, MTR, Suhana, Shan, and Zoff are useful backup options when they are easier to find, better priced, or already familiar in your pantry. They are not essential to buy if you already have a fresh packet that works for your taste.

Backup options: Catch, MTR, Suhana, Shan, and Zoff.

Organic Pav Bhaji Masala Options

Choose Organic Tattva or Pure & Sure if you already buy organic spices and want the same approach here. They are preference picks, not shortcuts to a stronger or more street-style pav bhaji flavor.

Check Organic Tattva Pav Bhaji Masala 100g on Amazon

Check Pure & Sure Organic Pav Bhaji Masala 100g on Amazon

If you do not want to use a packet today, use the emergency substitute or build the flavor from scratch in the without ready-made masala section.

Pav Bhaji Masala Substitute

If you do not have the blend, you can make an emergency substitute from common spices. It will not taste identical because the original has a specific tangy, smoky, snack-style profile, but it will move your bhaji in the right direction.

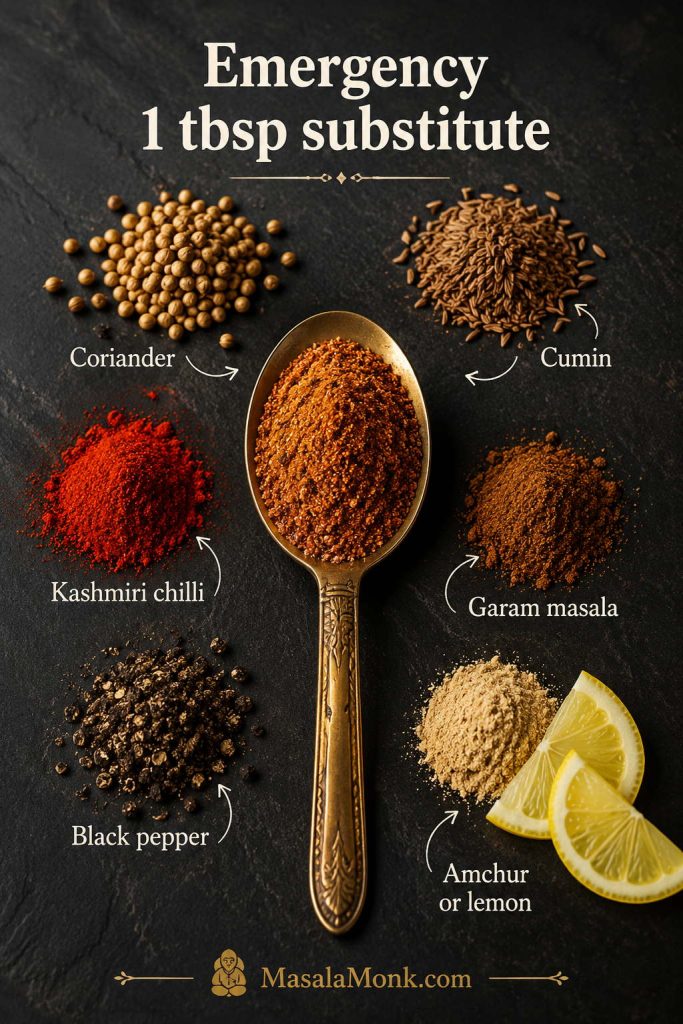
Emergency Substitute for 1 Tablespoon Pav Bhaji Masala

  • 1½ tsp coriander powder
  • ¾ tsp cumin powder
  • ½ tsp Kashmiri chilli powder or paprika
  • ¼ tsp garam masala
  • Pinch black pepper
  • Pinch amchur powder, or finish the bhaji with lemon/lime juice
  • Optional tiny pinch fennel powder
  • Optional tiny pinch black salt
Emergency pav bhaji masala substitute with coriander, cumin, Kashmiri chilli, garam masala, black pepper, and amchur or lemon around a spoon of spice mix.
This pav bhaji masala substitute will not taste identical, but coriander, cumin, Kashmiri chilli, black pepper, and amchur can still build warmth, color, and tang.

Mix these together and add them while the bhaji is cooking. Fry or simmer the substitute with the tomatoes, butter, and vegetables so it does not taste raw.

If you have chaat masala, use it carefully. It can help with tang, but it can also be salty and sour, so add only a pinch and taste before adding more.

If the bhaji tastes heavy even after the spice balance is fixed, serve it with something fresh on the side. MasalaMonk’s green chutney recipe gives that bright coriander-mint lift that works well with street-style snacks, sandwiches, and pav-based dishes.

Substitute warning: garam masala alone is not a 1:1 replacement. It gives warmth, but it misses the tang, color, and snack-shop edge of pav bhaji masala.

How to Make Pav Bhaji Without Ready-Made Masala

If you want pav bhaji without a packet, use the homemade recipe above or build the flavor directly in the pan. The goal is to create four things: warmth, tang, color, and savory depth.
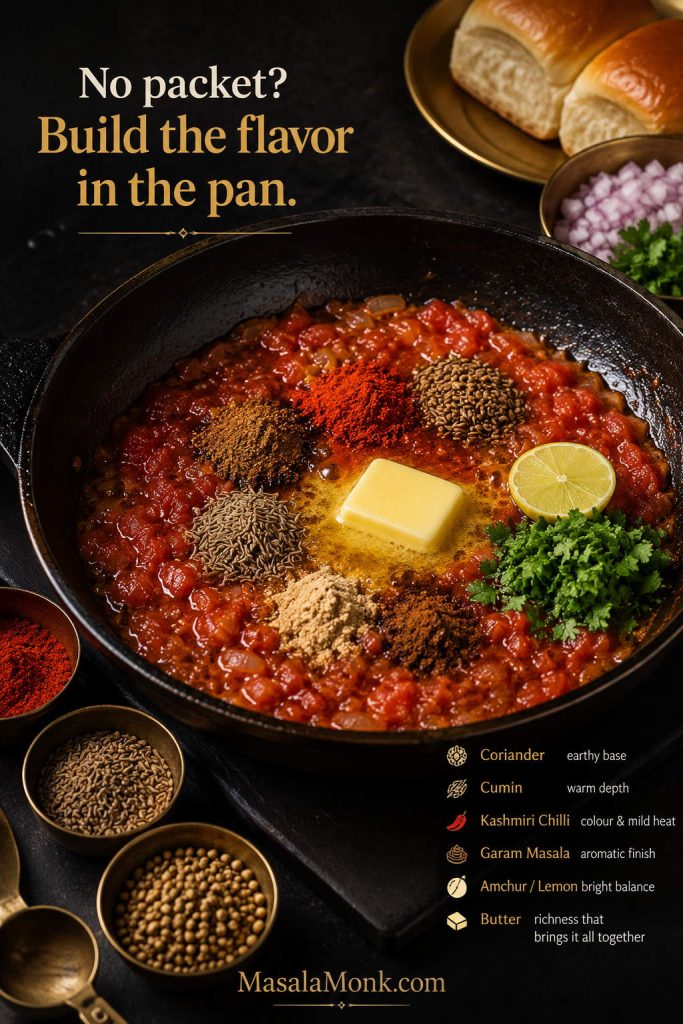
Tomatoes, butter, coriander, cumin, Kashmiri chilli, garam masala, amchur or lemon, and herbs cooking in a pan without ready-made masala.
No packet does not mean no pav bhaji flavor; tomatoes, butter, Kashmiri chilli, cumin, coriander, and lemon can still build a convincing base.

For a quick bhaji without packaged masala, use coriander powder, cumin powder, Kashmiri chilli powder, a small amount of garam masala, amchur or lemon, black pepper, and enough butter. Cook these into tomatoes and mashed vegetables until the raw spice smell disappears.

The result will be more home-style than packet-masala Mumbai-style, but it can still taste excellent if the vegetables are well mashed and the tomato-butter masala is cooked properly.

How to Fix Pav Bhaji Masala Problems

Most pav bhaji problems are fixable once you identify the real issue: salt, acid, raw spice, weak aroma, poor mashing, or over-roasting. Unless the masala is badly burnt, adjust slowly with simmering, fat, acid, or unsalted vegetable bulk instead of adding more powder blindly.

Flavor and Texture Fixes
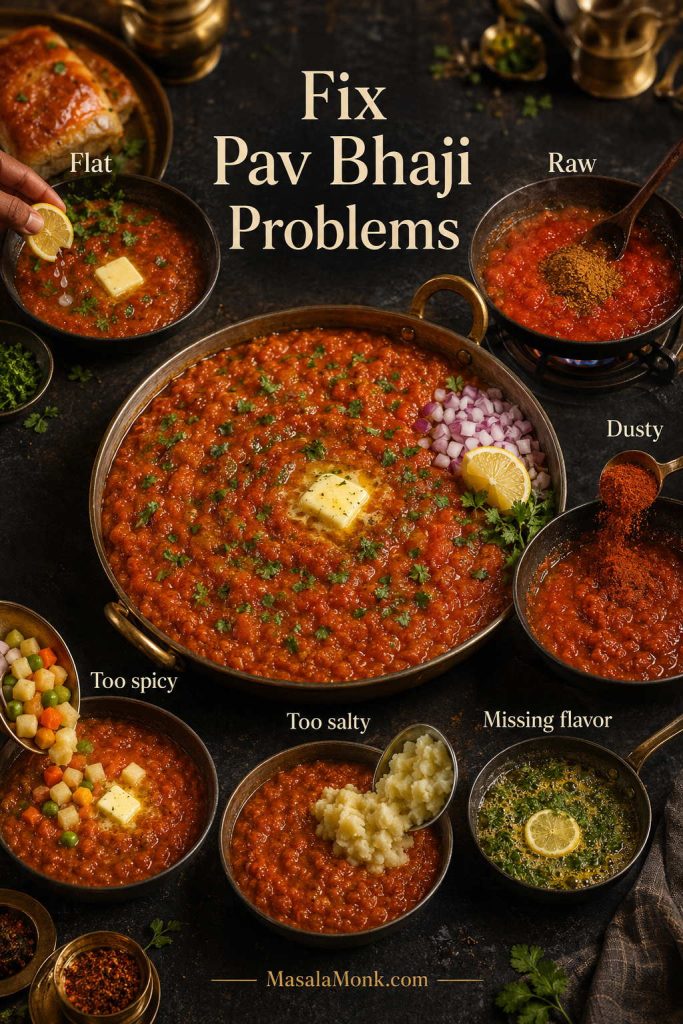
Central pan of glossy pav bhaji surrounded by small fix scenes for flat, raw, dusty, too spicy, too salty, and missing flavor problems.
More powder is not always the fix; flat bhaji needs brightness, raw masala needs cooking, and salty bhaji needs dilution.
Problem Likely reason Fix
Flat flavor Not enough salt, acid, butter, or cooked masala Add a little salt, butter, lemon, or ½ tsp more masala after simmering.
Raw masala taste Added too late or not fried into the tomatoes Cook it with butter/oil and tomatoes for a few minutes.
Dusty or powdery bhaji Too much dry powder added at once, or masala added late Fry the masala in butter and tomatoes, add a splash of water, simmer, then finish with butter and coriander.
Spices show, but pav bhaji flavor is missing Butter, tomato reduction, mashing, or final brightness may be missing Mash more, simmer longer, add butter, and finish with coriander and lemon.
Too spicy Chilli level is too high, or the packet is very strong Soften the heat with mashed potato/vegetables, butter, and a little tomato.
Overly sour Too much amchur, lemon, or tomato Round it out with more potato/vegetables and butter; avoid more tangy masala.
Too salty Packet masala may contain salt, or salt was added twice Dilute with unsalted mashed potato or vegetables. Avoid adding more packet masala.

Color, Bitterness and Storage Fixes

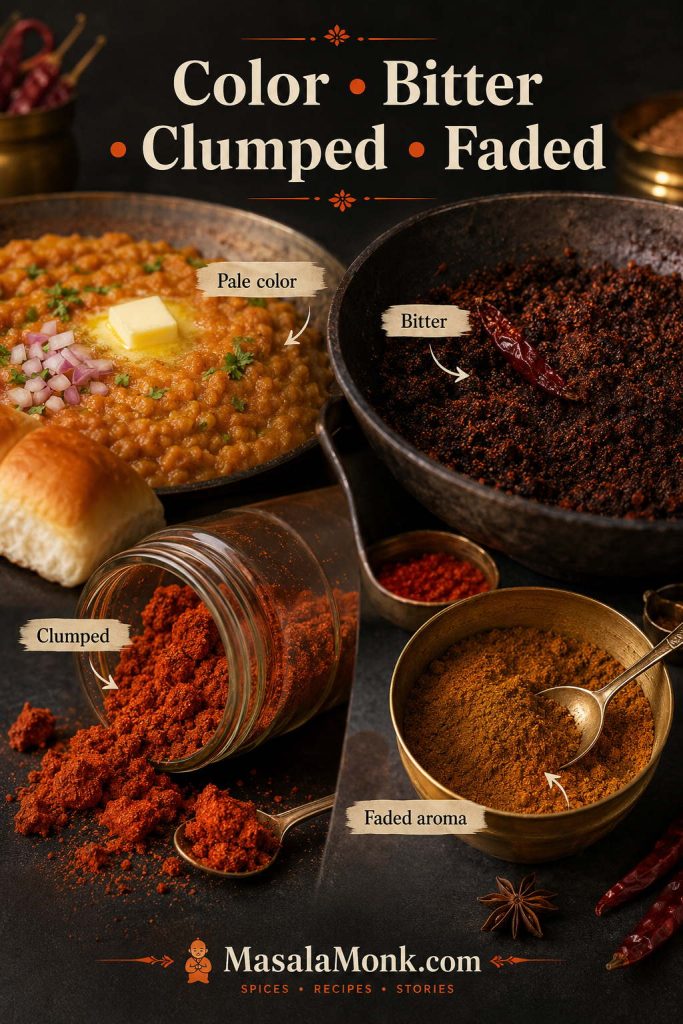
Troubleshooting board showing pale pav bhaji, bitter over-roasted masala, clumped spice powder in a jar, and faded old masala powder.
Pale color usually points to chilli choice, bitterness to over-roasting, clumps to moisture, and faded aroma to old spices or poor storage.
Problem Likely reason Fix
Bitter masala Spices were roasted too hard or burnt Use low heat next time. For the current bhaji, soften with potato, butter, and tomato.
Pale or weak color Kashmiri chilli, tomato, or proper cooking may be missing Boost color with Kashmiri chilli powder, tomato paste, or better chillies. Avoid relying only on food color.
Clumped homemade powder Moisture entered the jar or spices were ground warm Store airtight, use a dry spoon, and cool spices fully before grinding.
Faded aroma Old spices or poor storage Make smaller batches and store away from heat, light, and steam.

Most fixes work better when the masala is cooked into the tomato-butter base first, so revisit how to bloom pav bhaji masala if the flavor still tastes raw or separate.

For a different Mumbai-style dry spice hit, MasalaMonk’s vada pav dry chutney recipe is a useful contrast. It is roasted, garlicky, peanut-coconut based, and meant to be sprinkled rather than cooked into a bhaji.

Useful Tools for Homemade Pav Bhaji Masala

Once the blend is chosen, equipment matters only if it changes the result: a finer grind, drier storage, or smoother bhaji. You only need three basics — a dry pan, a grinder, and an airtight jar — but these tools can help if you cook this often.
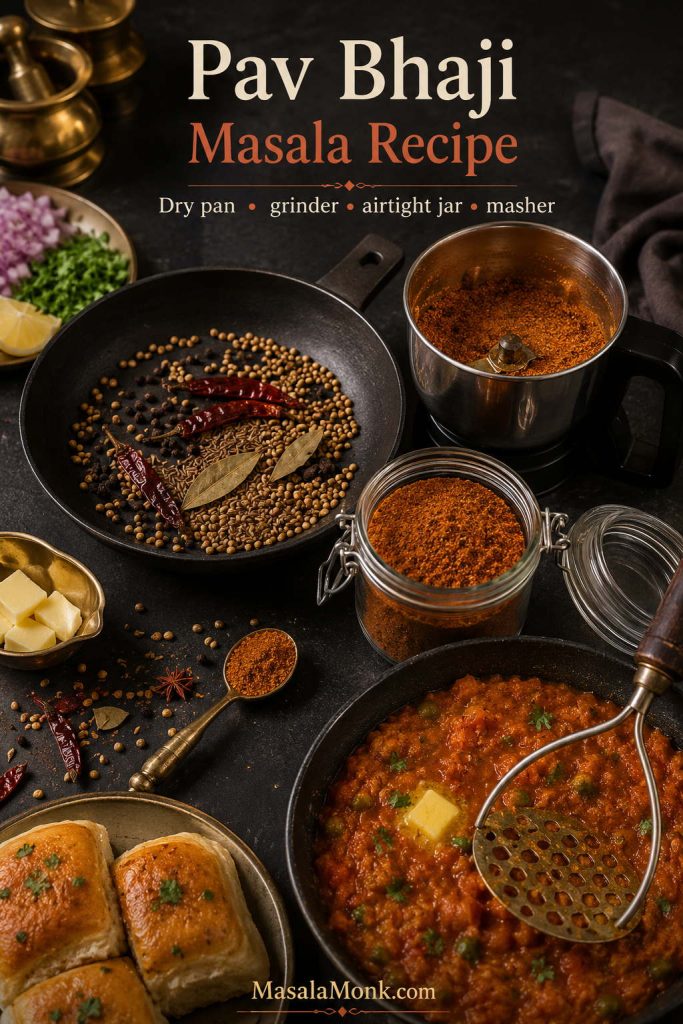
Dry pan, mixer grinder jar, airtight glass jar, dry spoon, roasted spices, potato masher, pav, and pav bhaji arranged as useful tools for the recipe.
You do not need many tools for homemade pav bhaji masala; a dry pan, grinder, airtight jar, and masher cover the steps that affect flavor most.

For Making the Masala

Sujata Supermix Mixer Grinder: the main practical grinder pick for turning roasted whole spices into a fine, aromatic powder.

Check Sujata Supermix Mixer Grinder on Amazon

Nestasia Airtight Glass Jars: helpful for storing homemade masala away from steam, heat, and moisture.

Check Nestasia Glass Jars on Amazon

For Making Pav Bhaji with the Masala

Wonderchef Ambrosia Potato Masher: useful when cooking pav bhaji because it helps mash potatoes, peas, tomatoes, capsicum, and cooked vegetables directly in the pan.

Check Wonderchef Ambrosia Potato Masher on Amazon

Optional upgrades: a heavier mixer grinder or cast iron tava can help if you cook Indian snacks often, but they are not necessary for this homemade masala. For this post, the most useful tools are still a reliable grinder, a dry airtight jar, and a masher for the bhaji itself.

That same tawa-and-butter style also shows up in Mumbai sandwiches. If you want another snack built around chutney, vegetables, butter, and heat, MasalaMonk’s authentic grilled Bombay sandwich recipe fits naturally beside this pav bhaji masala guide.

Other Ways to Use Pav Bhaji Masala

This blend is not only for pav bhaji. Once you have a fresh homemade jar or a good store-bought mix, use it in small amounts to add Mumbai street-food flavor to quick dishes.
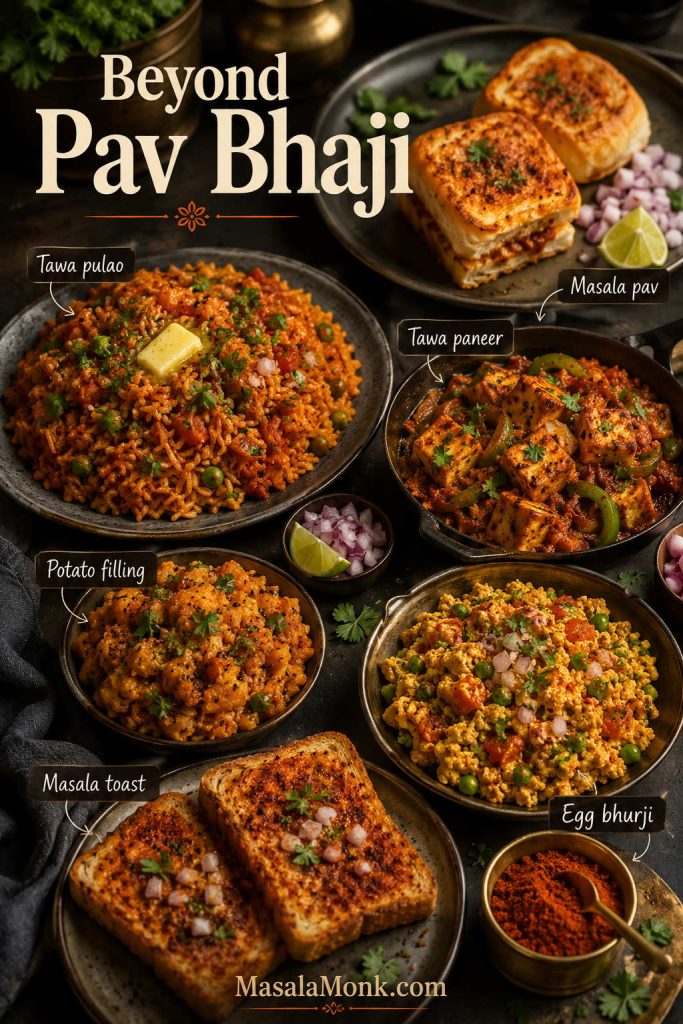
Dishes made with pav bhaji masala including masala pav, tawa pulao, tawa paneer, potato filling, egg bhurji, and masala toast.
A fresh jar of pav bhaji masala can season more than bhaji, so use small amounts in tawa pulao, masala pav, paneer, potato fillings, eggs, or toast.
  • Masala pav: cook onions, tomatoes, capsicum, butter, and pav bhaji masala until glossy, then toss pav in the mixture.
  • Tawa pulao: add a small spoon to rice with vegetables, tomato, butter, and coriander.
  • Masala upma: use just a pinch when you want everyday upma to taste fuller and more lunch-like; MasalaMonk’s upma recipes already include a masala-upma direction.
  • Tawa paneer: use a little in a tomato-capsicum masala.
  • Potato filling: add a little to mashed potatoes for sandwiches, rolls, toasties, or snack fillings. For more snack-style potato ideas, see MasalaMonk’s potato appetizers guide.
  • Egg bhurji: use a small pinch for a tawa-style twist.
  • Vegetable stir-fry: add near the end, but cook briefly so it does not taste raw.
  • Masala toast: mix with butter, onions, tomatoes, and capsicum.
  • Quick spiced rice: add a small amount to leftover rice with butter and vegetables.
Use lightly outside pav bhaji: this blend is assertive. Start with ¼–½ teaspoon in small dishes and increase only after tasting.

FAQs

What is pav bhaji masala made of?

It is usually made from coriander seeds, cumin, fennel, dried red chillies, black pepper, cinnamon, cloves, black cardamom, bay leaf, amchur, dry ginger, and sometimes stone flower, black salt, turmeric, mace, or nutmeg.

Which pav bhaji masala brand is best?

Everest is a good familiar first packet, Badshah leans bolder, and MDH fits the classic household masala lane. Choose the rest based on availability, price, heat level, salt level, and whether you prefer organic spices.

Is homemade better than store-bought?

Homemade is better for freshness and control. Store-bought is better for convenience. Both can make good bhaji if used correctly.

How much should I use for 4 servings?

Start with 2–3 teaspoons homemade powder or about 1 tablespoon store-bought masala for 4 servings. Add more only after the bhaji has simmered.

What can I use instead of pav bhaji masala?

Use coriander powder, cumin powder, Kashmiri chilli powder, a little garam masala, black pepper, and amchur or lemon juice. It will not taste identical, but it gives warmth, color, and tang.

Does pav bhaji masala contain salt?

Some store-bought blends may contain salt. Homemade versions do not need to. Taste before adding extra salt, especially when using a packet.

Is it the same as garam masala?

No. Garam masala is warmer and more general-purpose. Pav bhaji masala is tangier, more savory, and built specifically for pav bhaji-style flavor.

Why does my pav bhaji not taste street-style?

The usual reasons are weak masala, undercooked tomatoes, not enough butter, poor mashing, not enough salt or acid, or adding the powder too late. Cook it into the tomatoes and butter, mash well, then finish with butter, coriander, onion, and lemon.

How long does homemade masala last?

For best aroma, use it within 2–3 months at room temperature. It can last longer if refrigerated or frozen tightly, but the flavor is brightest when fresh.

Can I use it in other recipes?

Yes. Use it in masala pav, tawa pulao, tawa paneer, egg bhurji, vegetable stir-fries, potato fillings, sandwiches, and spiced rice. Start small because the blend is strong.

Which spices are optional in homemade pav bhaji masala?

Stone flower, mace, nutmeg, black salt, turmeric, and star anise are optional. The core blend can still work without them.

Should I roast store-bought masala before using it?

No. Do not dry-roast store-bought powder in an empty pan because it can burn quickly. Bloom it briefly in butter or oil with tomatoes instead.

Final Thoughts

The best pav bhaji masala is not the packet with the loudest flavor or the homemade blend with the longest spice list. It is the one that makes the bhaji taste whole: warm, tangy, buttery, bright, and deep enough that the potatoes, tomatoes, vegetables, and spices feel like one glossy pan of pav bhaji.

Once you learn that rhythm, pav bhaji stops feeling like a packet-masala gamble and starts feeling like something you can control from the pan.

That is the real win: bhaji that tastes glossy, tangy, buttery, and whole, not like vegetables trying to hide under spice powder.

Posted on — Leave a comment

Tater Tot Breakfast Casserole

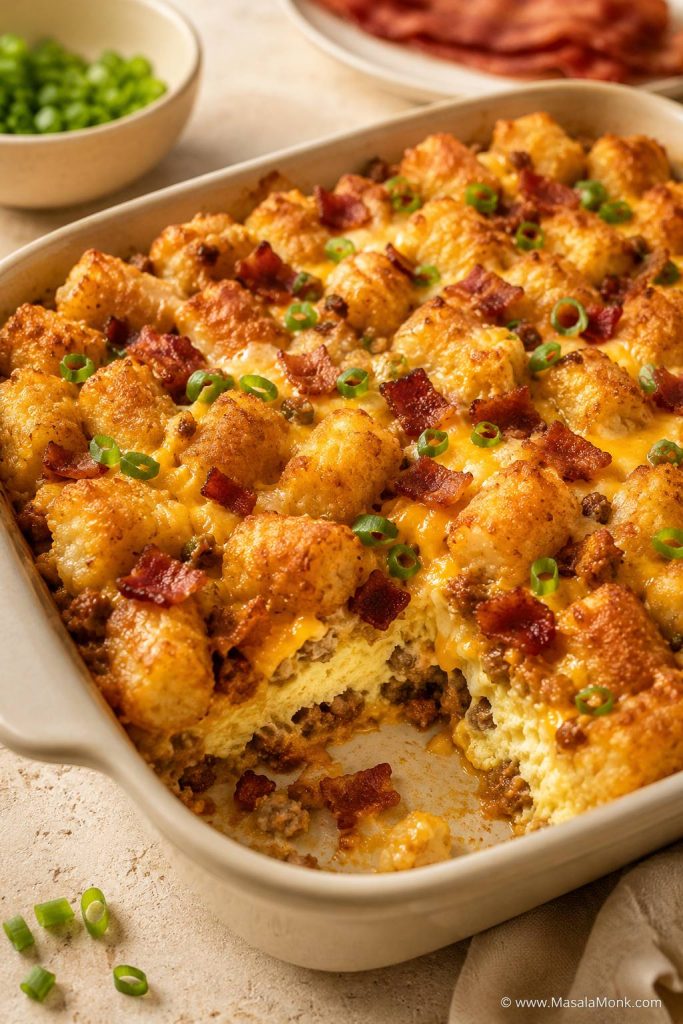
Tater tot breakfast casserole in a white baking dish with golden-browned tots, melted cheese, sausage, and a cut corner showing the egg layer.

This tater tot breakfast casserole is for the morning when people are already wandering into the kitchen hungry. The sausage is savory, the eggs bake up tender but sliceable, and the frozen tots turn into the crisp-edged potato topping everyone reaches for first.

It feels generous enough for holidays, brunch guests, and slow weekend mornings, but it is still practical: one skillet, one bowl, one 9×13 pan, and no frying potatoes on the side. Make it when breakfast needs to feel abundant without turning the cook into a short-order chef; the oven does most of the work while the kitchen starts to smell like sausage, potatoes, and melted cheese.

The key is keeping the tots on top instead of burying them under the eggs. That way, the center can bake into a tender egg casserole while the potatoes stay visible, crisp-edged, and browned.

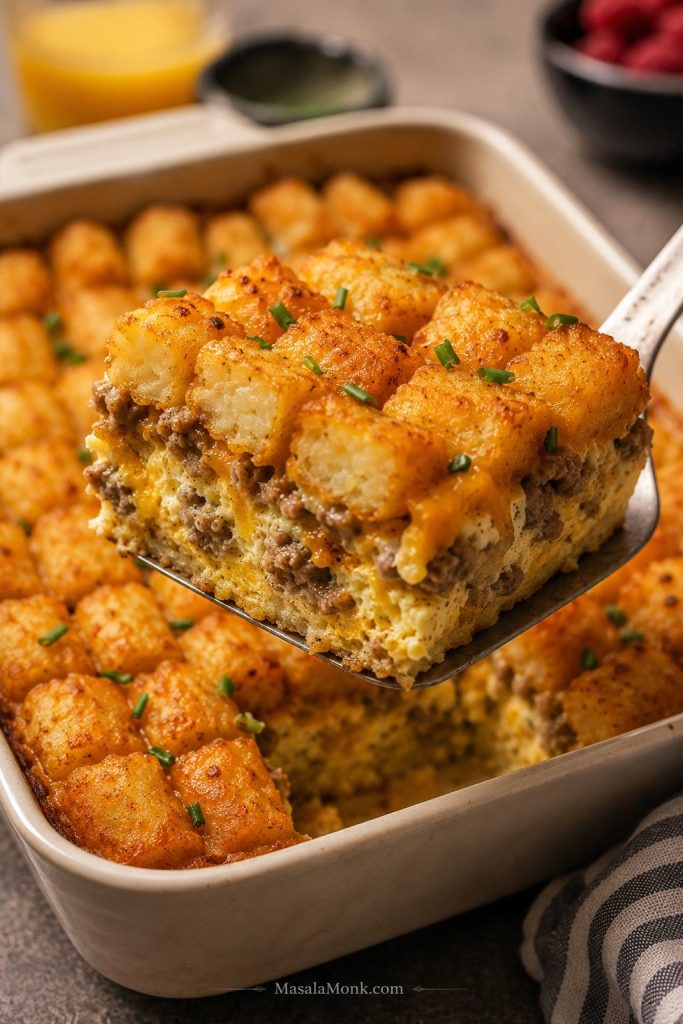
A spatula lifting a square slice of tater tot breakfast casserole with visible eggs, sausage, cheese, and browned tater tots.
After resting, a well-baked casserole should lift from the pan in clean squares instead of collapsing into loose egg and potatoes.

Quick Answer: Tater Tot Breakfast Casserole

For a golden-browned, sliceable tater tot breakfast casserole, use 1 pound / 454 g breakfast sausage, 10 large eggs, 1 cup / 240 ml milk or half-and-half, 2 cups / about 225 g shredded cheese, and 32 oz / 907 g frozen tater tots. Brown the sausage, whisk the eggs with the dairy, layer everything in a greased 9×13-inch pan, arrange the tots on top, and bake uncovered at 350°F / 175°C for 50–60 minutes.

The overnight choice is simple: easiest morning, or better potato texture. A fully assembled overnight casserole works, but the topping loses some crispness. For the neatest potato top, prep the sausage and egg mixture ahead, then add the tots right before baking.

Best first version: sausage, cheddar, 10 eggs, 1 cup dairy, and a full layer of tots. It is hearty, sliceable, and built for a browned potato top without needing a separate pan of breakfast potatoes.
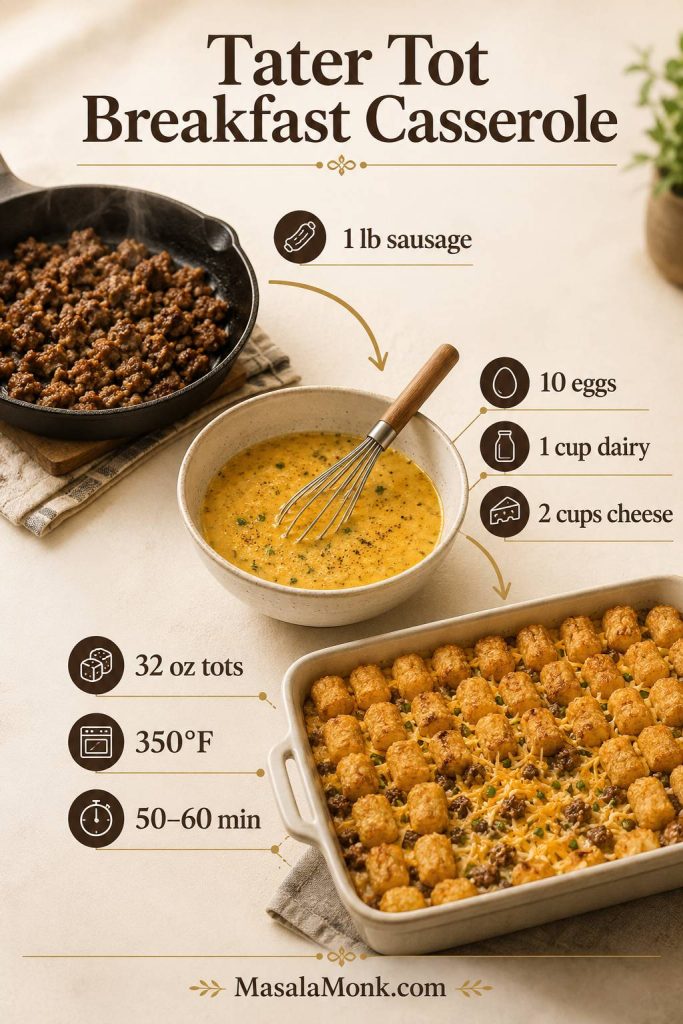
Quick guide for tater tot breakfast casserole showing sausage, eggs, dairy, cheese, frozen tots, bake temperature, and bake time.
For the quickest path to a reliable 9×13 brunch bake, keep the ratio simple: meat, eggs, dairy, cheese, and frozen tots.

At a Glance

Detail Recommended Setup
Pan 9×13 inch / 23×33 cm baking dish
Tater tots 32 oz / 907 g frozen tater tots
Eggs 10 large eggs
Protein 1 lb / 454 g breakfast sausage
Dairy 1 cup / 240 ml milk or half-and-half
Cheese 2 cups / about 225 g shredded cheese
Oven 350°F / 175°C
Bake time 50–60 minutes, longer if chilled
Rest time 10 minutes before slicing
Doneness 165°F / 74°C in the center

Those amounts give you a casserole that slices cleanly without turning into a dry block of eggs and potatoes. The bottom stays savory and tender, while the top gives you the crisp potato bite people usually reach for first, especially around the edges.

What Is Tater Tot Breakfast Casserole?

A tater tot breakfast casserole is an egg-based brunch bake with frozen tots, cheese, and a breakfast-style filling such as sausage, bacon, ham, or vegetables. It gives you the comfort of eggs and potatoes in one pan, with the tots standing in for hash browns or breakfast potatoes on the side.

If you want crispy potatoes without the full egg bake, these air fryer hash browns are a quicker potato side. This casserole is for the morning when you want the eggs, sausage, cheese, and potatoes baked together in one pan so you can slice and serve it to a group without juggling separate skillets on the stove.

Unlike a classic dinner-style tater tot casserole, this breakfast version does not use cream of mushroom soup. Eggs, milk, and cheese hold everything together, so the finished dish eats like a brunch egg bake rather than a creamy ground-beef casserole.

Breakfast Version vs Dinner Casserole

If you landed here looking for the dinner-style version, MasalaMonk also has a cozy tater tot casserole recipe made with ground beef, creamy filling, vegetables, cheese, and crisp tots. This breakfast version is different: it is built around eggs, breakfast sausage, cheese, and frozen tots, so it eats more like a brunch casserole than a creamy dinner bake.

Version Main Ingredients Best For
Tater tot breakfast casserole Eggs, sausage or bacon, cheese, milk, frozen tots Brunch, holiday breakfast, breakfast meal prep
Regular tater tot casserole Ground beef, creamy sauce, vegetables, cheese, frozen tots Dinner, potlucks, comfort food meals
Hash brown breakfast casserole Eggs, sausage or bacon, cheese, shredded hash browns A classic breakfast casserole with a softer potato base
Comparison of breakfast tater tot casserole with eggs and sausage and dinner tater tot casserole with ground beef and creamy filling.
Although both versions use tots, the breakfast casserole is egg-based, while the dinner casserole usually depends on ground beef and a creamy filling.

If you want a more traditional shredded-potato brunch bake, use this breakfast casserole with hash browns. If you want the crisp-topped, golden-potato version, this egg-and-tot bake is the better fit.

Why This Recipe Works

The problem with many tater tot breakfast casseroles is that the top looks ready before the egg center is fully cooked, or the tots turn limp because they are buried under too much filling. This version is built around two things: an egg layer that sets properly and a potato layer that gets a chance to brown.

  • The tots stay exposed. That gives the potatoes a chance to brown instead of steaming inside the egg layer.
  • The sausage is browned first. This gives the casserole flavor and prevents greasy raw sausage from cooking inside the eggs.
  • Vegetables are cooked before baking. Onion, peppers, mushrooms, and spinach can release water. Cooking them first keeps the middle from turning watery.
  • Ten eggs are deliberate. For a 9×13 pan, 10 eggs give the best middle ground: 8 eggs make the casserole looser and more potato-heavy, while 12 eggs push it closer to a firm egg bake.
  • One cup of dairy keeps the eggs tender. It softens the texture without flooding the pan.
  • Frozen tots make the method predictable. They hold their shape, cover the top neatly, and are less likely to collapse into the egg layer.
Cutaway guide showing tater tots on top of breakfast casserole, with egg and sausage filling underneath.
Since the potato layer needs dry heat to brown, the tots work better as a topping than as a hidden layer inside the eggs.

Choose Your Version

If you already know the kind of morning you are cooking for, use this as a shortcut. The base recipe stays the same; the meat, timing, and topping method change the personality of the casserole.

Want This? Make It This Way
Classic brunch pan Sausage, cheddar, 10 eggs, and tots arranged on top.
Easiest holiday morning Fully assemble, cover, refrigerate, then bake covered first and uncovered to finish.
Crispest tot topping Prep the sausage and egg mixture ahead, then add frozen tots in the morning.
Bacon-lover version Use cooked bacon with cheddar-Jack or sharp cheddar.
Leftover ham brunch Use diced ham with cheddar, Swiss, or Monterey Jack.
Vegetable-packed bake Use cooked mushrooms, peppers, onions, spinach, broccoli, or roasted poblanos.
Creamier high-protein bake Add cottage cheese and reduce the milk slightly.
Six plated tater tot breakfast casserole variations, including classic, bacon, ham, vegetarian, and high-protein styles.
Once the base is right, the same casserole can shift toward classic sausage, smoky bacon, leftover ham, vegetarian, or higher-protein brunch versions.

Ingredients for Tater Tot Breakfast Casserole

The ingredient list is short, so the ratios do most of the work. Too many eggs make the bake firm, too much dairy loosens the center, and thawed tots lose structure.

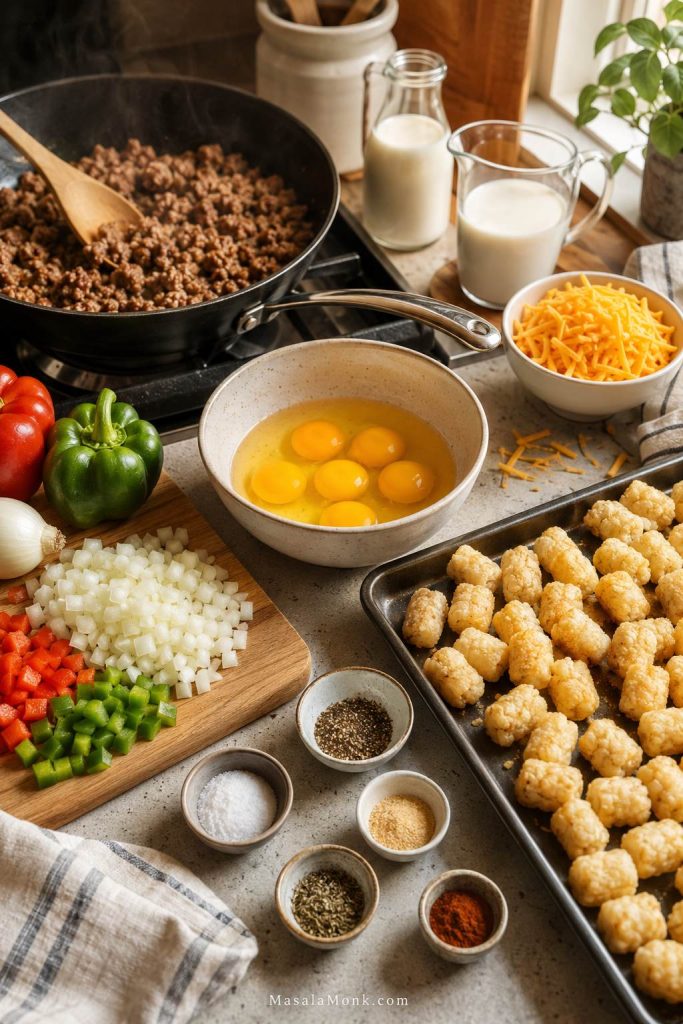
Ingredients for tater tot breakfast casserole, including sausage, eggs, milk, shredded cheese, frozen tots, vegetables, and seasonings.
The ingredients are familiar, but the balance matters: enough eggs for structure, enough dairy for tenderness, and frozen tots for a defined top.

Frozen tater tots

Use 32 oz / 907 g frozen tater tots for a generous 9×13 casserole. Keep them in the freezer until you are ready to assemble so they hold their shape and are less likely to break apart.

Breakfast sausage

Breakfast sausage brings seasoning, fat, and savory depth. Use 1 pound / 454 g pork breakfast sausage, turkey sausage, chicken sausage, or spicy breakfast sausage. Brown it fully and drain excess grease before layering it into the casserole.

Eggs

Ten large eggs give the casserole enough structure for a 9×13 pan without making it feel dry or rubbery. For a lighter, more potato-heavy bake, use 8 eggs. However, if you want it firmer and more egg-forward, use 12.

Egg ratio guide for tater tot breakfast casserole showing 8 eggs, 10 eggs, and 12 eggs with different casserole textures.
For a 9×13 pan, 10 eggs give the most balanced texture; 8 eggs lean looser, while 12 eggs make the bake firmer.

If you want a smaller skillet egg bake instead of a full brunch pan, this frittata recipe uses a similar cooked-filling logic but bakes faster and serves fewer people.

Milk or half-and-half

Use 1 cup / 240 ml whole milk or half-and-half. This helps the eggs bake into a tender layer. Too much dairy can make the center loose, especially if you also add vegetables that release moisture.

Cheese

Use 2 cups / about 225 g shredded cheese. Sharp cheddar gives the boldest flavor, while Monterey Jack, Colby Jack, or pepper jack melt smoothly. A cheddar-Jack blend gives you both flavor and melt.

Vegetables and seasonings

Onion and bell pepper are optional but useful. Cook them with the sausage so they soften before going into the baking dish. Garlic powder, onion powder, black pepper, dry mustard, and a little hot sauce all help the egg mixture taste seasoned instead of flat.

Try to keep added vegetables to about 1 1/2 to 2 cups cooked total so the egg layer still sets cleanly.

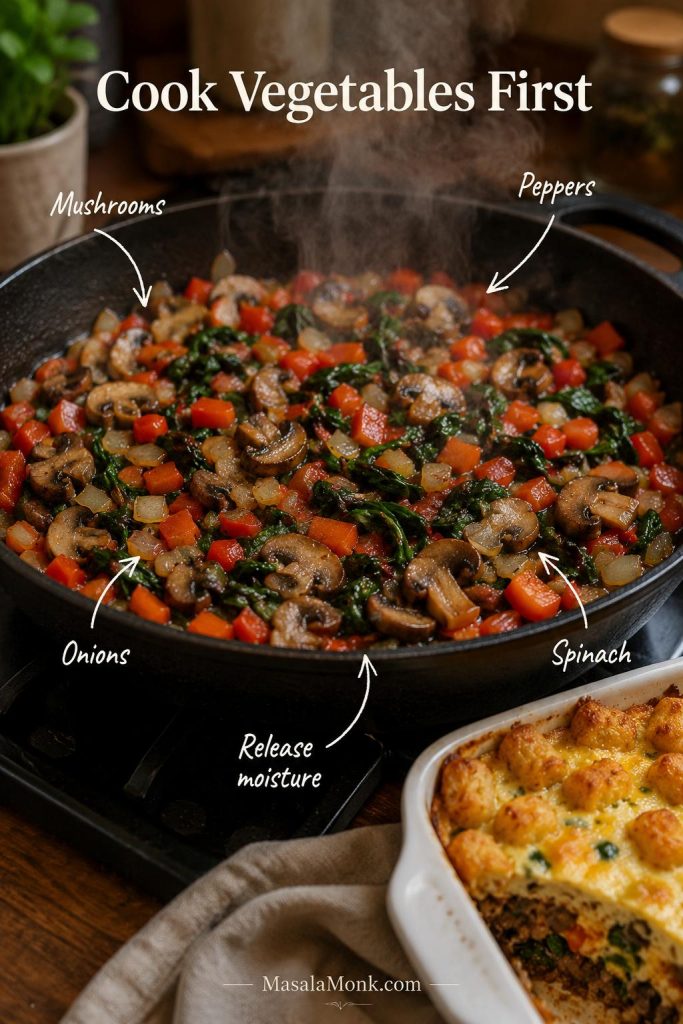
Vegetables cooking in a pan before being added to tater tot breakfast casserole, with mushrooms, peppers, onions, and spinach.
Before vegetables go into the casserole, sautéing them helps remove moisture so mushrooms, peppers, onions, and spinach do not loosen the egg layer.

Which Tater Tots to Use

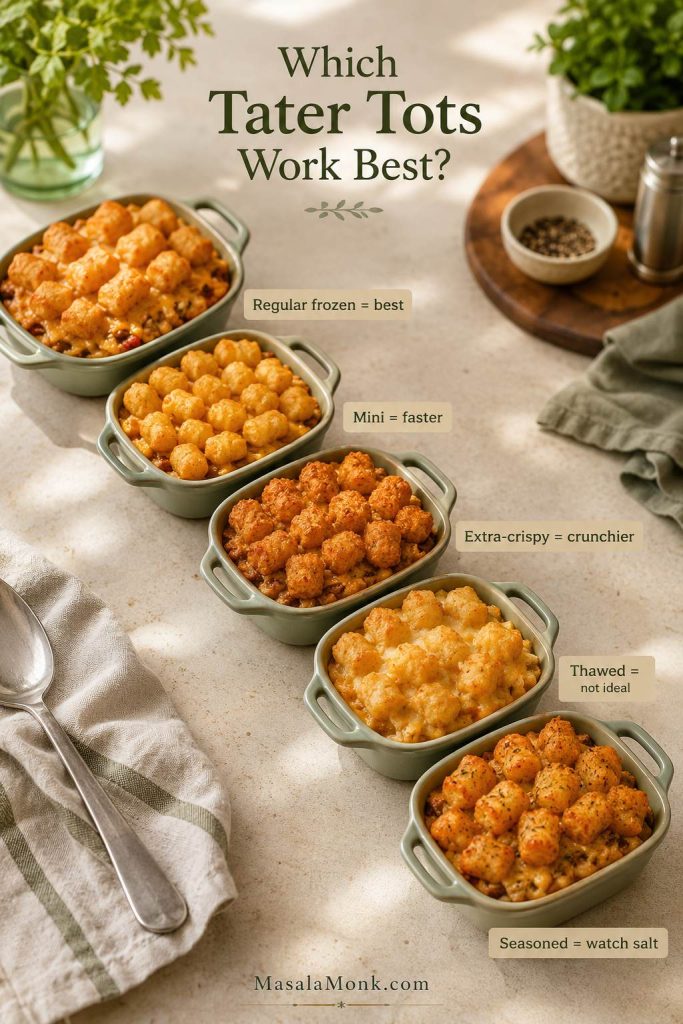
Regular frozen tater tots are the easiest choice for this breakfast bake because they hold their shape and brown predictably. They are already shaped, par-cooked, and ready to go straight from the freezer to the casserole.

Type of Tot Will It Work? Notes
Regular frozen tater tots Recommended Strong structure and the most predictable bake time.
Mini tots Yes They brown faster, so start checking earlier.
Extra-crispy tots Yes Good for a stronger crunch on top.
Thawed tots Not ideal They can soften, break, and lose structure.
Seasoned tots Sometimes Use less added salt if the tots are already salty.
Guide comparing regular frozen, mini, extra-crispy, thawed, and seasoned tater tots for breakfast casserole.
Regular frozen tots are the safest first choice; however, mini, extra-crispy, and seasoned tots can work when timing and salt are adjusted.

If you are using a smaller bag, 28 oz / about 794 g will still work. The top layer will be a little less full, but the casserole will bake well.

Tots on Top vs Tots on Bottom

This is the biggest texture decision in the whole recipe. Some tater tot breakfast casserole recipes place the tots on the bottom, some mix them in, and some arrange them on top. None of those methods is wrong, but they do not give the same result.

Method Texture When to Use It
Tots on top Crisp, browned top, clear potato layer Best for a classic tater tot topping
Tots on bottom More hotdish-style, absorbs egg mixture Overnight casseroles or a softer potato texture
Tots mixed in Easy, but least crisp Casual family bake
Pre-baked tots Crunchiest, but takes extra time When you do not mind an extra step
Comparison of tater tots on top, on the bottom, mixed in, and pre-baked for tater tot breakfast casserole texture.
Placement changes the texture: tots on top stay more distinct, while bottom or mixed-in tots create a softer, hotdish-style bite.

For this recipe, the tots go on top because that is where they can actually brown. The eggs, sausage, and cheese bake underneath, while the corners get the best crisp-edged potato bites. Once you choose that texture, follow the step-by-step method below.

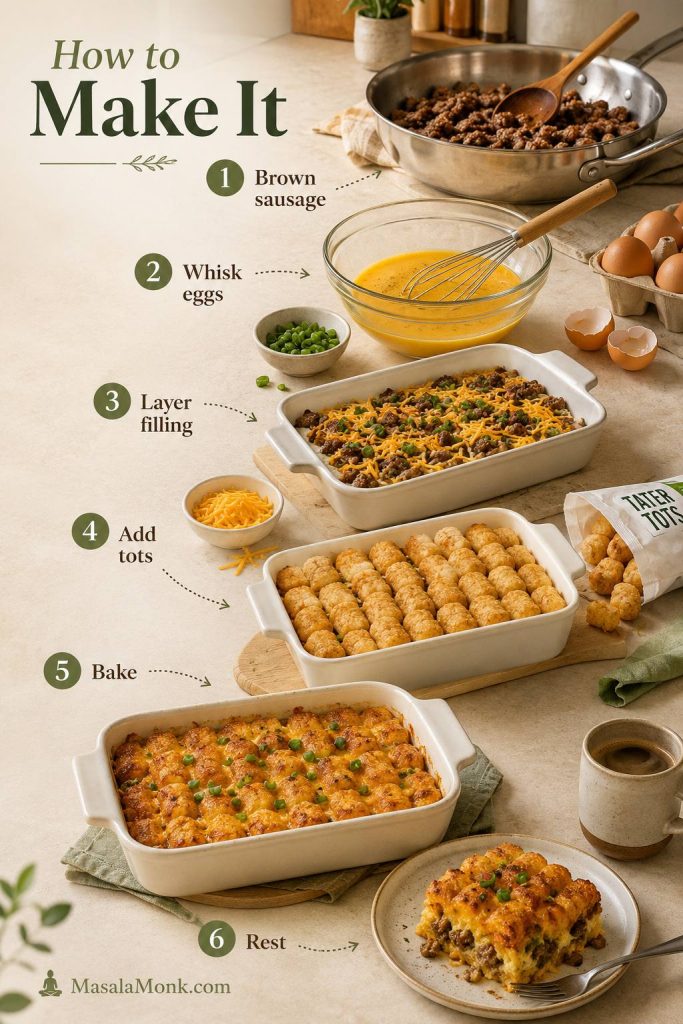
How to Make Tater Tot Breakfast Casserole

The method is easy, but a little order makes a big difference. Brown and drain the sausage first, season the eggs before they hit the pan, and keep the tots frozen until the casserole is ready for the oven. If you are baking a chilled casserole, use the bake time and doneness section before you start.

Step-by-step guide showing sausage browning, eggs whisked, filling layered, tots added, casserole baked, and slices rested.
The casserole comes together more predictably when the filling is cooked first, the eggs are seasoned separately, and the tots are added last.

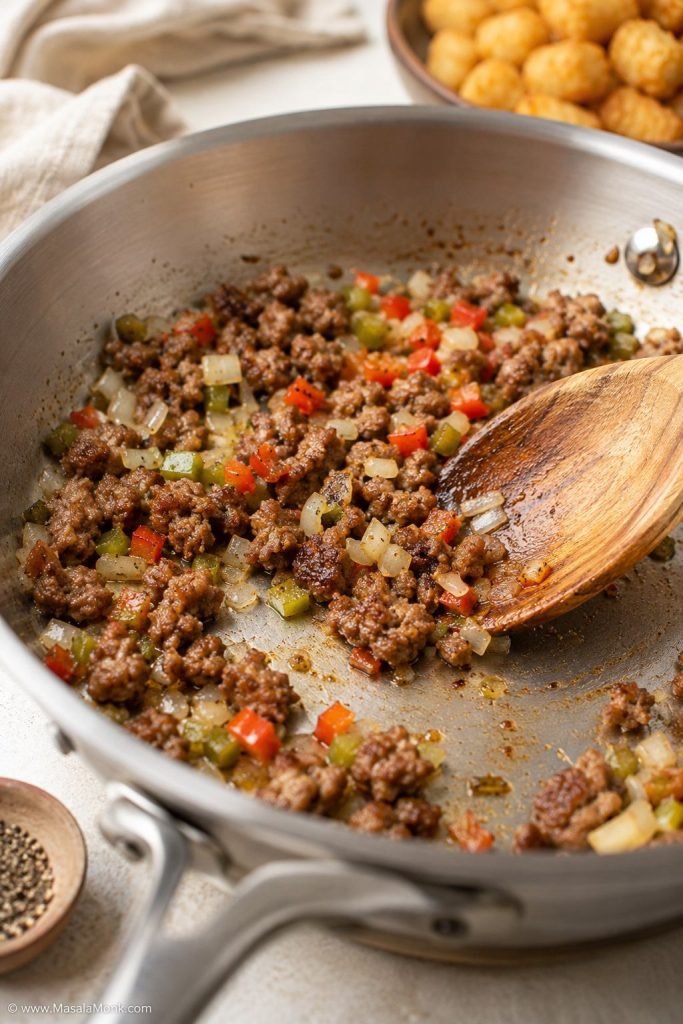
1. Brown the sausage

Heat a large skillet over medium heat. Add 1 pound / 454 g breakfast sausage and cook until browned, no longer pink, and the crumbles have a little color. If you are using onion or bell pepper, add them once the sausage has started to brown and cook until softened.

Drain excess grease so the bottom of the casserole does not turn heavy or oily.

Breakfast sausage browning in a skillet with onions and peppers for tater tot breakfast casserole.
Browning the sausage before baking adds deeper flavor, and draining it helps keep the finished egg layer from turning greasy.

2. Whisk the eggs

In a large bowl, whisk 10 large eggs with 1 cup / 240 ml milk or half-and-half. Add garlic powder, onion powder, black pepper, dry mustard if using, hot sauce if using, and a little salt. Be careful with salt if your sausage and cheese are already salty.

3. Layer the filling

Grease a 9×13-inch / 23×33 cm baking dish. Spread the cooked sausage mixture evenly over the bottom. Sprinkle most of the cheese over the sausage, saving a little for the top if you like a cheesy finish.

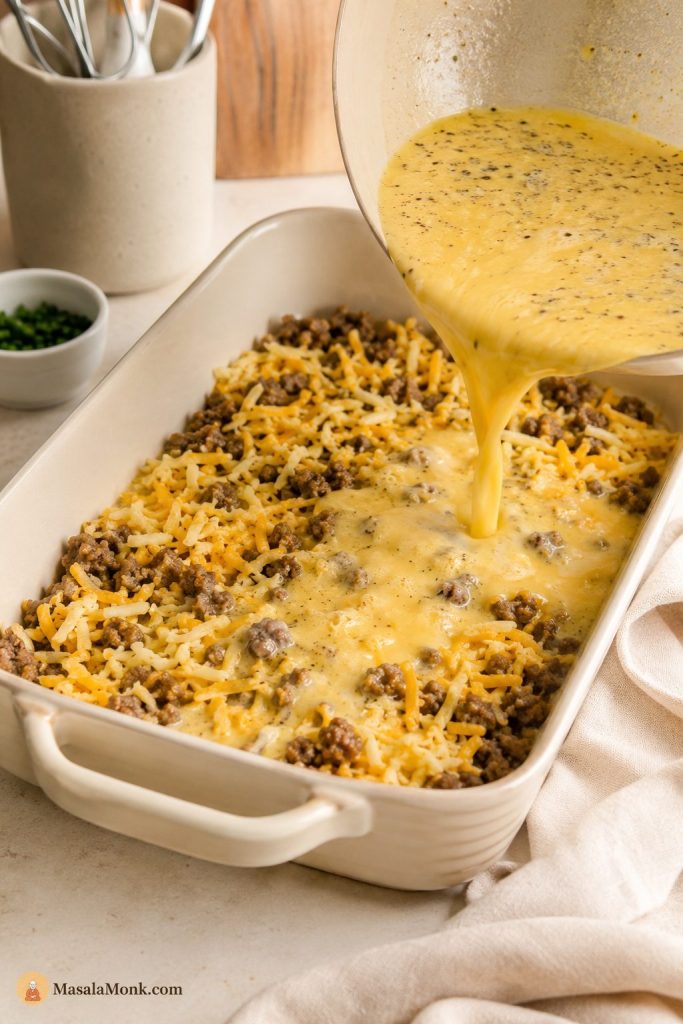
4. Add the egg mixture

Pour the egg mixture evenly over the sausage and cheese. Tilt the dish gently if needed so the eggs settle into the corners.

Egg mixture being poured over cooked sausage and shredded cheese in a baking dish for tater tot breakfast casserole.
Once the filling is spread evenly, pouring the eggs slowly helps them reach the corners and hold the casserole together when sliced.

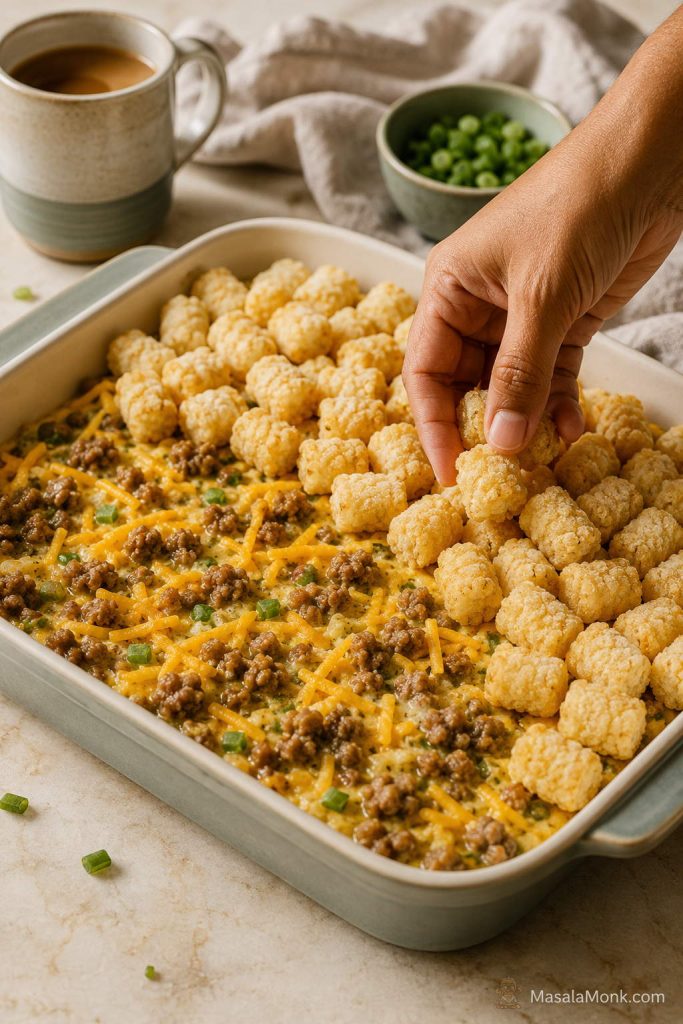
5. Arrange the frozen tots

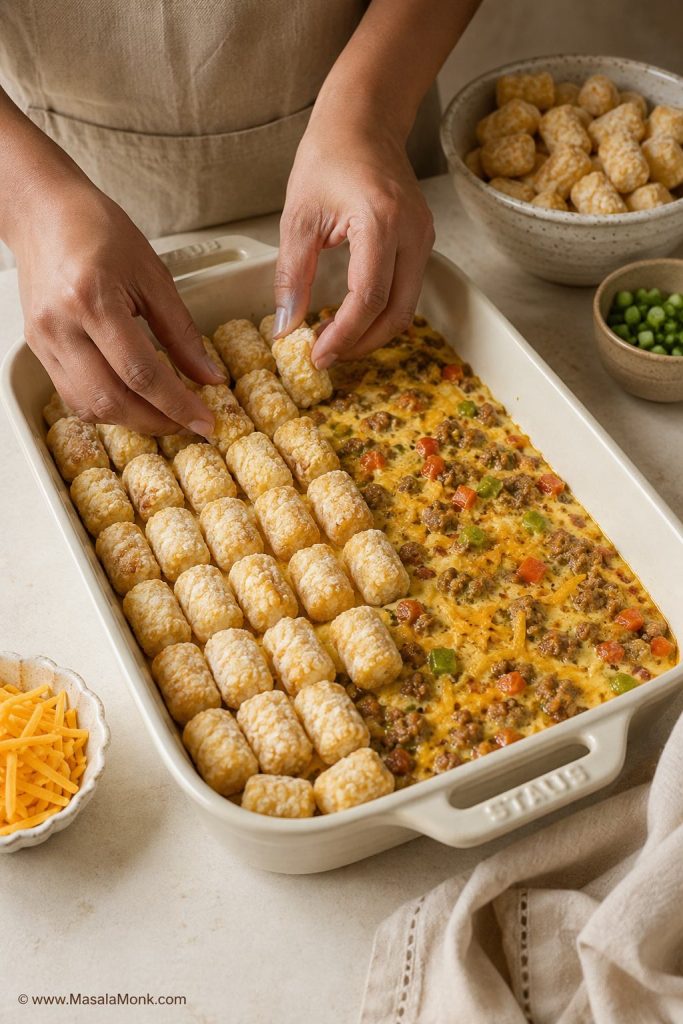
Place the frozen tater tots on top in a single layer. They do not need to be perfectly lined up, but try to keep them exposed rather than buried under the egg mixture.

A hand arranging frozen tater tots over sausage, cheese, and egg filling in a rectangular baking dish.
Instead of thawing them first, add the tots frozen so they keep their shape and remain visible as the casserole bakes.

6. Bake and rest

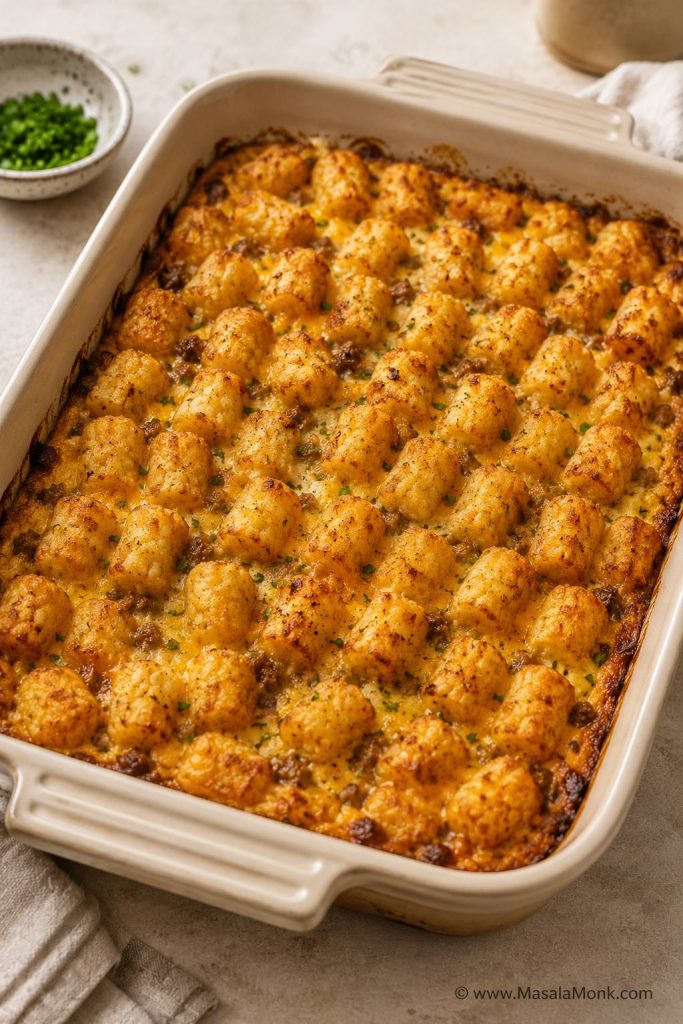
Bake uncovered at 350°F / 175°C for 50–60 minutes, until the egg layer has firmed and the tots are crisp-edged and golden. Add the remaining cheese during the last 5–10 minutes if you want a cheesy top. Let the casserole rest for 10 minutes before slicing so the squares hold together.

By the end, the edges should look lightly browned and the center should feel set rather than sloshy.

Baked tater tot breakfast casserole with golden-browned tots, melted cheese, and crisp edges in a ceramic dish.
By the end of baking, the tots should look golden-browned and crisp-edged, but the center still needs a final doneness check.
For the best-looking top: keep most or all of the cheese under the tots. If adding cheese on top, sprinkle it lightly during the last 5–10 minutes instead of covering the tots completely.

Bake Time and Doneness

The top will usually look ready before the middle is done, so use the clock as a guide and the center as the final judge. For a freshly assembled 9×13 tater tot breakfast casserole, plan on 50–60 minutes at 350°F / 175°C. If the casserole is cold from the refrigerator, it may need 60–70 minutes total.

Version Temperature Approximate Time
Freshly assembled 9×13 casserole 350°F / 175°C 50–60 minutes
Cold overnight casserole 350°F / 175°C 60–70 minutes
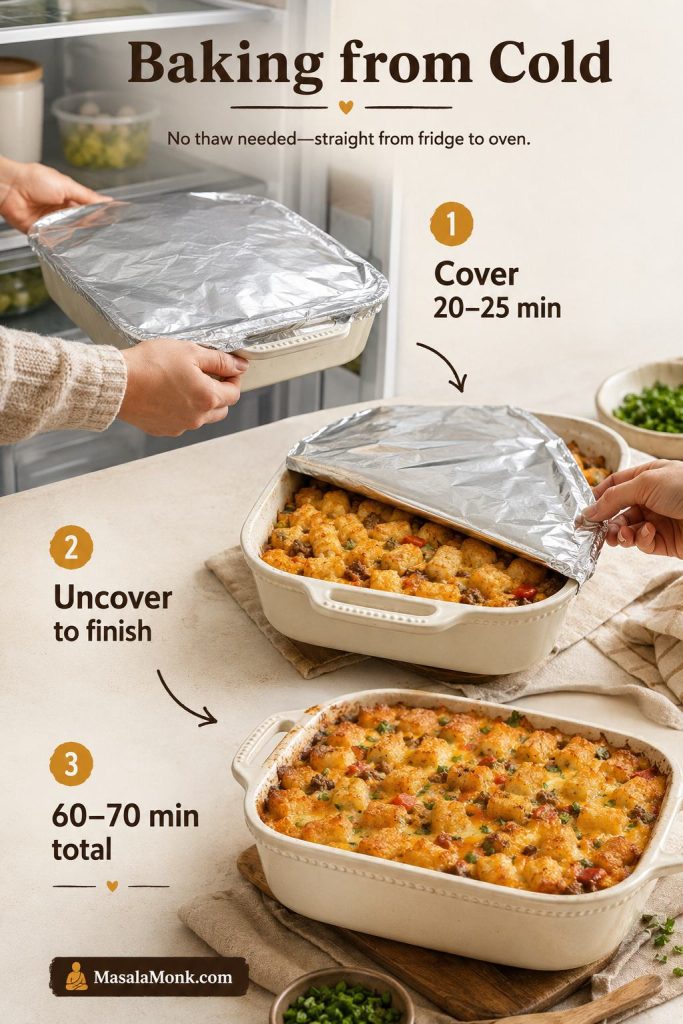
Covered start for chilled casserole 350°F / 175°C Cover 20–25 minutes, then uncover until done
More browned top Finish at 400°F / 200°C Last 5 minutes only, if needed

Baking from Cold

Cover only a cold casserole that needs help warming through before the top gets too brown. For a freshly assembled casserole, bake uncovered from the start.

Guide for baking cold overnight tater tot breakfast casserole with covered start, uncovered finish, and longer bake time.
When the dish starts cold, a covered start helps the middle warm through before the potato topping gets too dark.

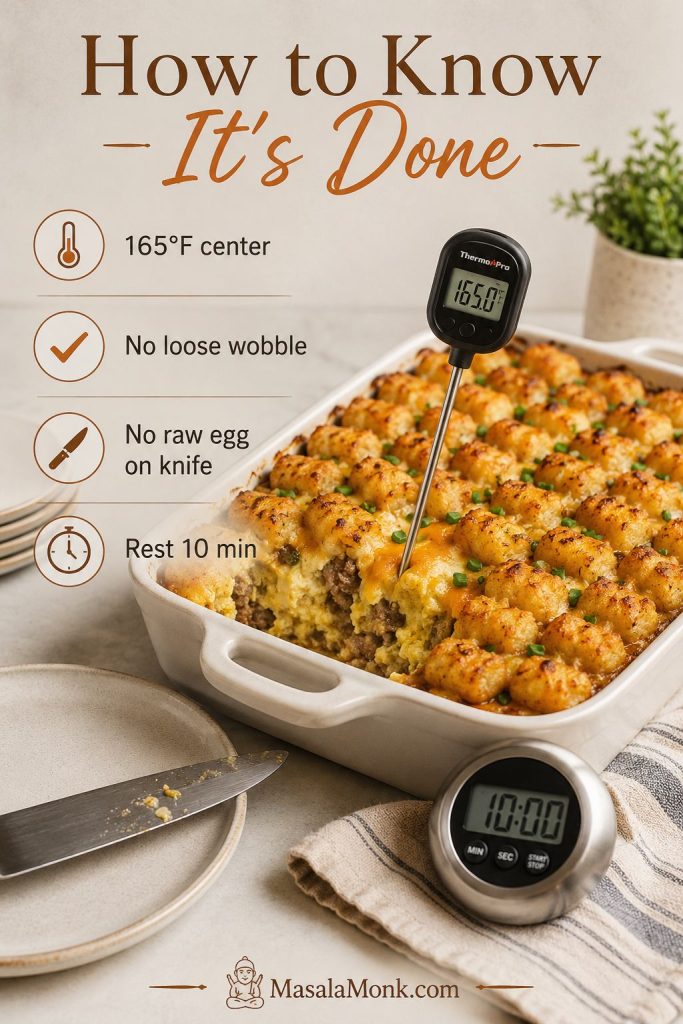
For the simplest safe target, check the center with an instant-read thermometer and look for 165°F / 74°C. FoodSafety.gov lists casseroles, including meatless casseroles, at 165°F / 74°C, so that is the clearest doneness target for this full breakfast bake. You can review the safe internal temperature guidance from FoodSafety.gov.

If you do not have a thermometer, look for no loose wobble in the middle and no raw egg on a knife inserted near the center.

Doneness guide for tater tot breakfast casserole with a thermometer, knife test, and resting time cues.
Because the surface can brown early, the safest cue is the center: look for 165°F, no loose wobble, and no raw egg on the knife.
Do not pull it too early: a casserole can look browned on top while the egg center is still loose underneath. Check near the middle, not just the edges. If the center stays loose or the tots are browning too fast, use the troubleshooting table.

Sausage, Bacon, Ham, and Vegetarian Variations

Once the egg-to-dairy balance is right, the casserole is forgiving. The flavor can go smoky with bacon, milder and holiday-friendly with ham, or vegetable-heavy with a vegetarian version as long as the moisture is cooked off first.

Sausage tater tot breakfast casserole

Sausage works especially well because it seasons the whole pan as it cooks. Use 1 pound / 454 g breakfast sausage, cooked and drained. Pork sausage gives the richest flavor, but turkey or chicken breakfast sausage works too. For a spicier casserole, use hot breakfast sausage or add pepper jack cheese.

If your sausage is very salty, reduce the salt in the egg mixture. The cheese and tots will add salt too.

For a richer sausage-and-cream-cheese version, stir 4 oz / 115 g softened cream cheese into the cooked sausage before layering. Keep the milk at 1 cup so the egg layer does not turn too loose.

Bacon tater tot breakfast casserole

Bacon gives the casserole a smokier, saltier flavor than sausage. Use 12–16 oz / 340–454 g bacon, cook it until crisp, drain it well, and crumble it before adding it to the dish. For a few strips, this air fryer bacon guide keeps the process quick. For a full pack, oven bacon is usually easier because you get more space and less batch work.

Because bacon adds more salt and fat than sausage, go lighter with added salt and avoid pouring bacon grease into the casserole.

Bacon tater tot breakfast casserole with crisp bacon pieces, eggs, cheese, green onion, and browned tater tots.
Since bacon brings salt, smoke, and fat, the best bacon version usually needs less added salt in the egg mixture.

Ham and cheese tater tot casserole

Diced ham turns this into a milder, holiday-friendly brunch casserole. Use 12–16 oz / 340–454 g diced cooked ham, especially if you have leftovers from Easter, Christmas, or a weekend dinner.

Ham can be salty, so season the eggs carefully. Cheddar, Monterey Jack, Swiss, or a cheddar-Jack blend all work well, while green onions, bell peppers, or a little Dijon-style mustard in the egg mixture help balance the richness.

Ham and cheese tater tot breakfast casserole served with fruit, showing diced ham, eggs, cheese, and golden tots.
Leftover ham gives the casserole a milder holiday-brunch feel, especially with cheddar, Swiss, or Monterey Jack.

Vegetarian tater tot breakfast casserole

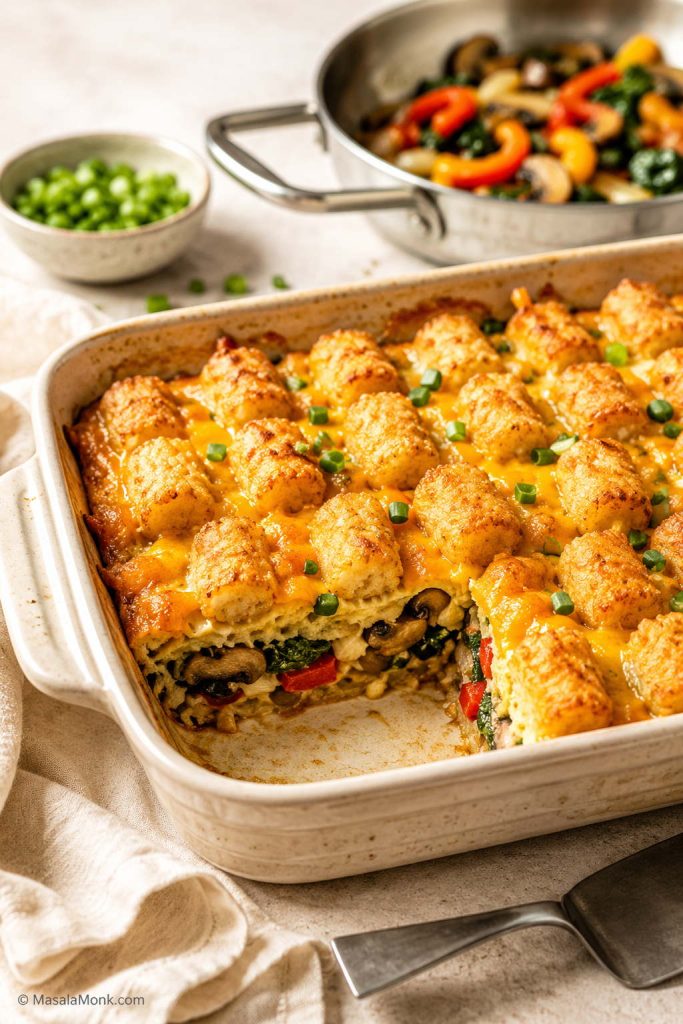
A vegetarian version works well as long as the vegetables are cooked first. Mushrooms, peppers, onions, spinach, broccoli, green onions, and roasted poblano peppers are all good choices.

The key is managing moisture. Mushrooms, spinach, peppers, and onions can all release water as they bake. Sauté them before adding them to the casserole, and squeeze spinach dry if using frozen spinach.

Vegetarian tater tot breakfast casserole with mushrooms, peppers, spinach, onions, eggs, cheese, and browned tater tots.
For a vegetarian tater tot breakfast casserole, cooked vegetables add color and flavor while helping the center stay set.

Cottage cheese or high-protein version

For a higher-protein version, add 1/2 to 1 cup cottage cheese to the egg mixture and reduce the milk slightly. This makes the egg layer creamier and more filling. Blend the cottage cheese first if you want a smoother texture. For a smaller breakfast with the same creamy, higher-protein idea, try these scrambled eggs with cottage cheese.

You can also use turkey sausage and add extra egg whites, but avoid making the casserole too lean or it can bake up dry.

Make-Ahead and Overnight Tips

This is the section to read if you are making the casserole for Christmas morning, a brunch table, overnight guests, or a weekend when you do not want to think before coffee.

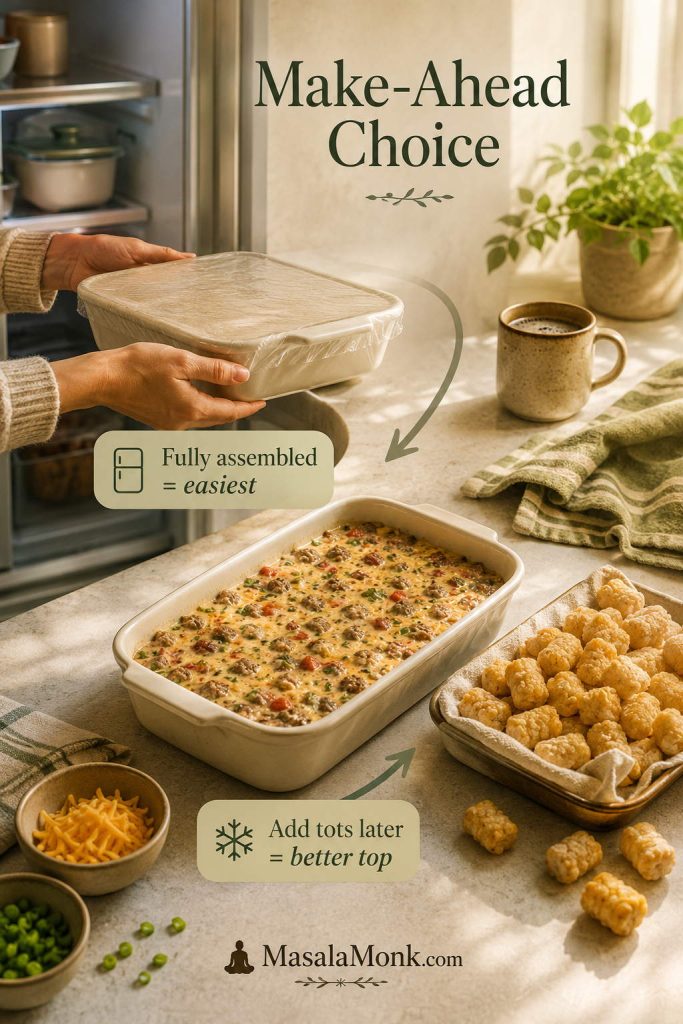
The tradeoff is simple: easiest morning, or best tot texture. Both work. You just decide which one matters more that day.

The best topping comes from prepping the filling ahead and adding the tots just before baking; the fully assembled overnight version is easier, but the top bakes less crisp.

Make-ahead guide showing a covered casserole near the refrigerator and prepped filling with frozen tater tots added later.
The make-ahead choice depends on the morning: fully assembled is easiest, while adding tots later gives a more defined top.
Method What to Do Result
Fully assemble overnight Assemble the casserole, cover, and refrigerate overnight Easiest morning, less crisp topping
Add tots in the morning Cook sausage, prep egg mixture, refrigerate separately, then add tots before baking Better browned top and clearer potato layer
Same-day bake Assemble and bake right away Most predictable texture

Either way, let the casserole sit at room temperature while the oven preheats. That short rest takes the chill off the dish and helps the center bake more evenly.

If convenience matters most, assemble the whole casserole the night before. Cover it tightly and refrigerate. In the morning, bake it covered for the first 20–25 minutes, then uncover and continue baking until the center reaches 165°F / 74°C.

Add Tots in the Morning for Better Texture

If the topping matters most, cook the sausage and vegetables the night before, whisk the eggs and milk, and refrigerate those separately. In the morning, layer everything in the baking dish and add the tots right before baking.

A hand adding frozen tater tots to a prepared breakfast casserole filling in a baking dish.
Adding frozen tots right before baking is the better make-ahead move when the topping matters more than total overnight convenience.

If you are planning several freezer-friendly breakfasts at once, these meal prep breakfast burritos are a good companion recipe because they use the same no-soggy logic: cool the filling first, control moisture, and reheat with texture in mind. For leftover casserole slices, use the storage, freezing, and reheating section below.

Storage, Freezing, and Reheating

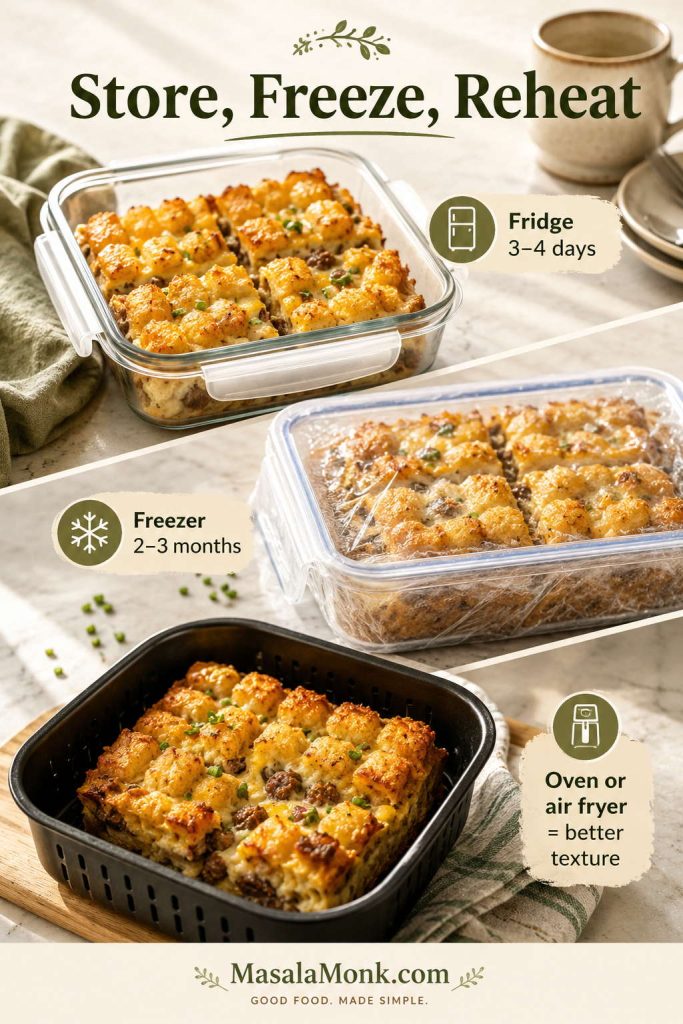
Let leftovers cool briefly, then refrigerate them in an airtight container within 2 hours. Stored properly, the casserole keeps for 3–4 days. The tots will lose some crispness as they sit, but the flavor stays good. The FoodSafety.gov cold storage chart gives the same general window for baked egg casseroles: 3–4 days in the refrigerator and 2–3 months in the freezer.

For freezing, baked portions work better than an unbaked fully assembled casserole. Wrap slices tightly or store them in freezer-safe containers for up to 2–3 months. Thaw overnight in the refrigerator before reheating.

For better texture, reheat slices in a 350°F / 175°C oven or air fryer until hot. The microwave is faster, but the oven or air fryer helps the tots regain more texture than the microwave gives.

Storage guide for tater tot breakfast casserole showing fridge storage, freezer portions, and reheating in an air fryer or oven.
After baking, fridge or freezer portions reheat best with dry heat, so the oven or air fryer gives better texture than the microwave.

For a smaller freezer breakfast that reheats faster, these egg muffins are easier to portion, while this casserole is better when you want one big brunch pan.

Troubleshooting

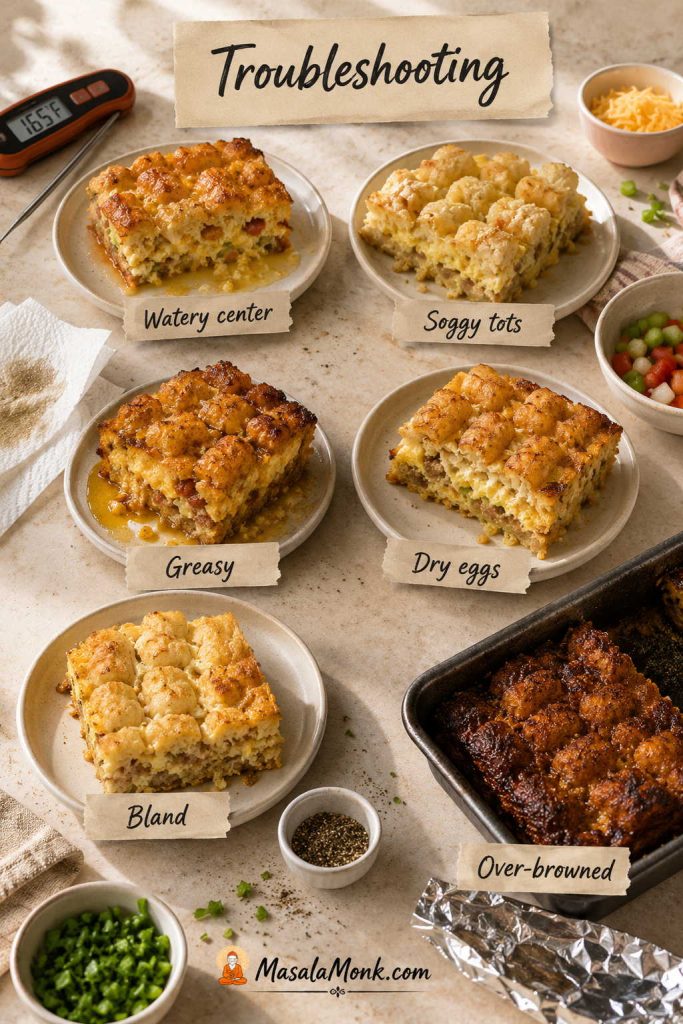
Most problems with this casserole come down to moisture, timing, or where the tots sit in the pan. The fixes are simple once you know what caused the problem.

Problem Likely Cause Fix
Watery center Raw vegetables, too much dairy, or underbaked eggs Sauté vegetables first, use 1 cup dairy, and bake until the center reaches 165°F / 74°C.
Soggy or soft tots Tots were buried, thawed, or fully assembled overnight Use frozen tots, keep them exposed, and add them just before baking when texture matters.
Greasy casserole Sausage or bacon was not drained Drain cooked meat before layering it into the dish.
Dry eggs Overbaked casserole or too little dairy Use 1 cup milk or half-and-half and start checking near the low end of the bake time.
Bland flavor Egg mixture was not seasoned Season the eggs directly and use sharp cheese or spicy sausage.
Too salty Sausage, bacon, ham, cheese, and tots all added salt Reduce added salt and balance with vegetables, herbs, or a milder cheese.
Middle not setting Casserole was cold, pan was deep, or egg layer was too thick Bake longer, cover briefly if the top browns too fast, and check the center temperature.
Tots browned before eggs set Oven runs hot or pan is too close to top heat Loosely tent with foil and keep baking until the center is done.
Troubleshooting board for tater tot breakfast casserole showing watery center, soggy tots, greasy casserole, dry eggs, bland flavor, and over-browned top.
Most fixes start with one question: is the problem moisture, timing, seasoning, or tot placement? That usually points to the right correction.

What to Serve with It

Because this casserole is hearty, fresh sides help the plate feel lighter. A bowl of berries, sliced oranges, salsa, avocado, or a sharp green salad cuts through the eggs, cheese, and potatoes.

For a brunch table, pair it with coffee, orange juice, berries, and something crisp or acidic on the side. Hot sauce, salsa, or pickled jalapeños are especially good if you use mild sausage and cheddar because they cut through the richness.

If you want something handheld and freezer-friendly instead, this breakfast burrito recipe is easier to eat on the go. For a lighter brunch side, a cold berry smoothie keeps the meal bright and easy.

Recipe Card: Tater Tot Breakfast Casserole

This tater tot breakfast casserole is a hearty 9×13 breakfast bake with sausage, eggs, melted cheese, and frozen tots arranged on top for a golden-browned potato finish.

Prep Time 20 minutes
Cook Time 50–60 minutes
Rest Time 10 minutes
Total Time 1 hour 20–30 minutes
Yield 10–12 servings

Equipment

  • 9×13-inch / 23×33 cm baking dish
  • Large skillet
  • Mixing bowl
  • Whisk
  • Measuring cups and spoons
  • Instant-read thermometer, recommended

Ingredients

  • 1 lb / 454 g breakfast sausage
  • 1/2 cup / about 75 g diced onion, optional
  • 1/2 to 1 cup / about 75–150 g diced bell pepper, optional
  • 10 large eggs
  • 1 cup / 240 ml whole milk or half-and-half
  • 1/2 teaspoon garlic powder
  • 1/2 teaspoon onion powder
  • 1/2 teaspoon black pepper
  • 1/2 teaspoon dry mustard, optional
  • 1–2 teaspoons hot sauce, optional
  • 1/2 to 3/4 teaspoon salt, depending on your sausage and cheese
  • 2 cups / about 225 g shredded cheddar, Monterey Jack, Colby Jack, or a blend
  • 32 oz / 907 g frozen tater tots, do not thaw
  • Butter or oil, for greasing the dish

Instructions

  1. Preheat the oven to 350°F / 175°C. Grease a 9×13-inch / 23×33 cm baking dish.
  2. Cook the sausage in a large skillet over medium heat, breaking it into crumbles, until browned and cooked through.
  3. If using onion and bell pepper, add them to the skillet and cook until softened. Drain excess grease.
  4. In a large bowl, whisk the eggs, milk or half-and-half, garlic powder, onion powder, black pepper, dry mustard, hot sauce, and salt.
  5. Spread the sausage mixture evenly in the prepared baking dish.
  6. Sprinkle about 1 1/2 cups of the cheese over the sausage.
  7. Pour the egg mixture evenly over the filling.
  8. Arrange the frozen tater tots on top in a single layer.
  9. Bake uncovered for 50–60 minutes, until the center reaches 165°F / 74°C and the tots are golden-browned. If using the remaining 1/2 cup cheese on top, add it during the last 5–10 minutes.
  10. Let the casserole rest for 10 minutes before slicing.

Notes

  • Keep the tots frozen and add them right before baking for the neatest topping; thawed tots soften and break more easily.
  • For the best-looking top, keep most or all of the cheese under the tots. If adding cheese on top, sprinkle it lightly during the last 5–10 minutes instead of covering the tots completely.
  • Bake on the center rack so the eggs cook evenly. If the tots need more color at the end, move the dish slightly higher for the last few minutes or finish briefly at 400°F / 200°C.
  • Overnight choice: fully assemble for ease, or prep the filling separately and add tots in the morning for better texture.
  • If baking from cold, plan on 60–70 minutes total. Cover for the first 20–25 minutes if the tots are browning before the center is done, then uncover and finish baking.
  • For bacon, use 12–16 oz / 340–454 g cooked and crumbled bacon.
  • For ham, use 12–16 oz / 340–454 g diced cooked ham and reduce the added salt.

Serve It from One Hot Brunch Pan

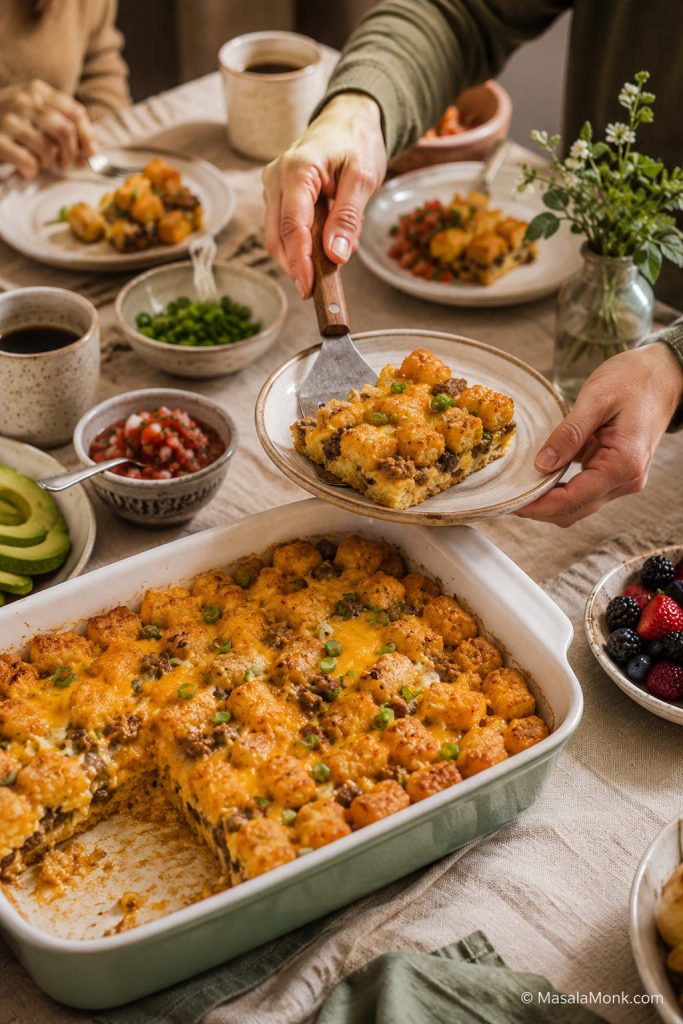
Once the filling is browned, the eggs are whisked, and the tots are added, the oven turns the dish into a breakfast people can serve themselves from — the kind of brunch that feels relaxed even when the kitchen is full.

Hands serving tater tot breakfast casserole from a large baking dish at a brunch table with plates, fruit, salsa, and coffee.
Finally, the payoff is one hot brunch pan that feeds the table without making anyone stand over the stove for separate eggs, meat, and potatoes.

FAQs

Do tater tots need to be thawed first?

No. Keep them frozen so they hold their shape on top. Thawed tots can soften, break apart, and sink into the egg layer instead of giving you a clear potato topping.

Is it better to put tater tots on top or bottom?

Put them on top if you want a browned, classic tater tot topping. Put them on the bottom if you prefer a softer, hotdish-style casserole where the tots absorb more of the egg mixture.

How many eggs go in a 9×13 tater tot breakfast casserole?

Ten large eggs are a good middle ground for a 9×13 pan with 32 oz / 907 g tots. Eight eggs will make it a little lighter and more potato-heavy; 12 eggs will make it firmer and more egg-forward.

Why did my casserole turn watery?

The most common causes are raw vegetables, too much milk, greasy sausage, or an underbaked center. Cook vegetables first, drain meat well, keep the dairy to about 1 cup, and bake until the center reaches 165°F / 74°C.

How far ahead can I assemble it?

Assemble it the night before and refrigerate it, or prep the sausage and egg mixture separately and add the tots in the morning. Fully assembled is easiest; morning-added tots give the better topping.

Does this casserole freeze well?

Baked portions freeze better than an unbaked fully assembled casserole. Let it cool, slice it, wrap portions tightly, and freeze for up to 2–3 months. Reheat in the oven or air fryer for better texture than the microwave gives.

What is the difference between tater tot breakfast casserole and breakfast hotdish?

The terms can overlap. “Breakfast hotdish” is often used for a hearty baked dish with potatoes, eggs, cheese, and meat, especially in Midwest-style cooking. This recipe fits that style, though most readers will recognize it as an egg-and-tot breakfast casserole or brunch bake.

What can I use instead of sausage?

Use cooked bacon, diced ham, turkey sausage, chicken sausage, chorizo-style sausage, sautéed vegetables, or a mix of vegetables and cheese. If you skip meat entirely, cook and drain the vegetables well so the casserole does not turn watery.

Can I use hash browns instead of tater tots?

Yes, but the recipe becomes a different style of breakfast casserole. Shredded hash browns create a softer potato base, while frozen tots give this version a more defined, golden topping. If swapping them here, use thawed shredded hash browns and expect a softer, less crisp casserole.

Back to top

Posted on — 1 Comment

Salsa Verde Recipe: Easy Roasted Tomatillo Salsa

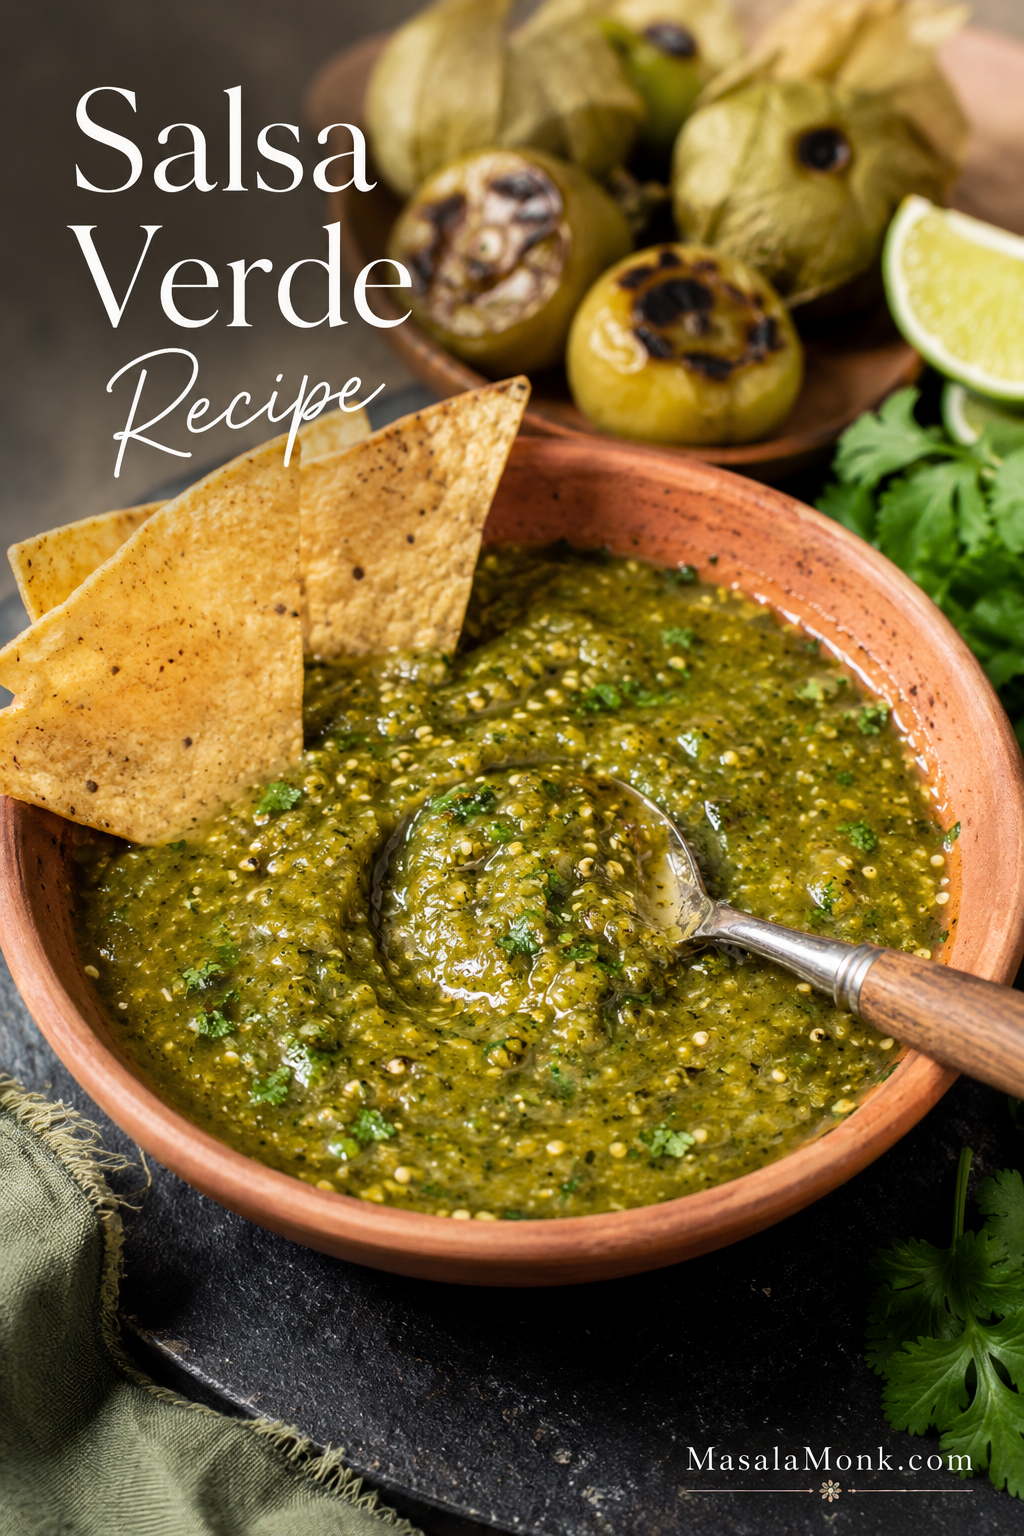
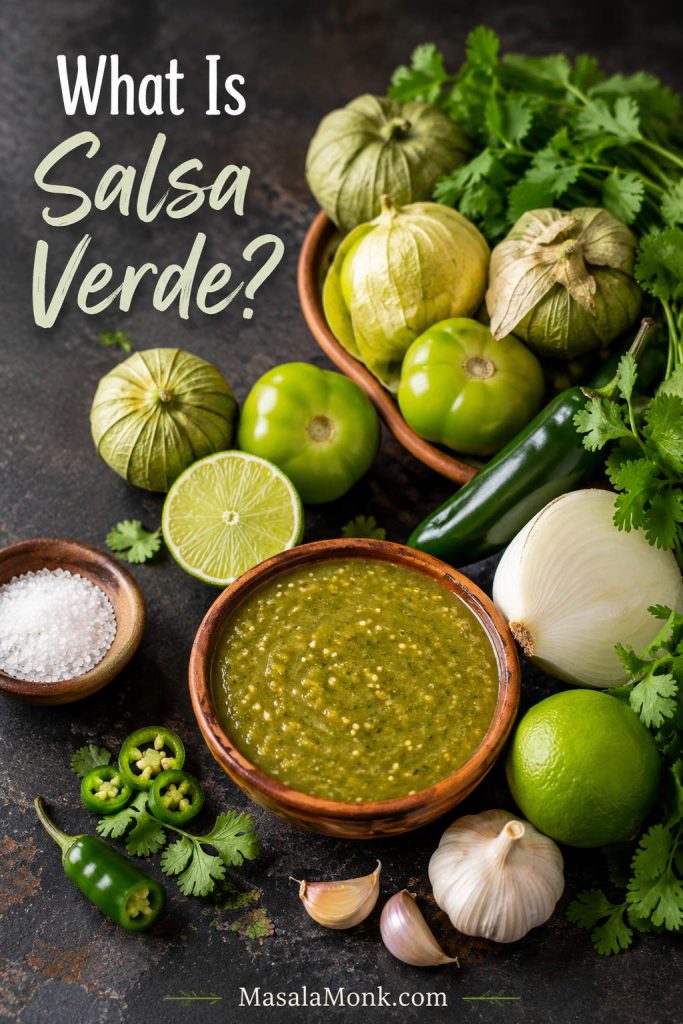
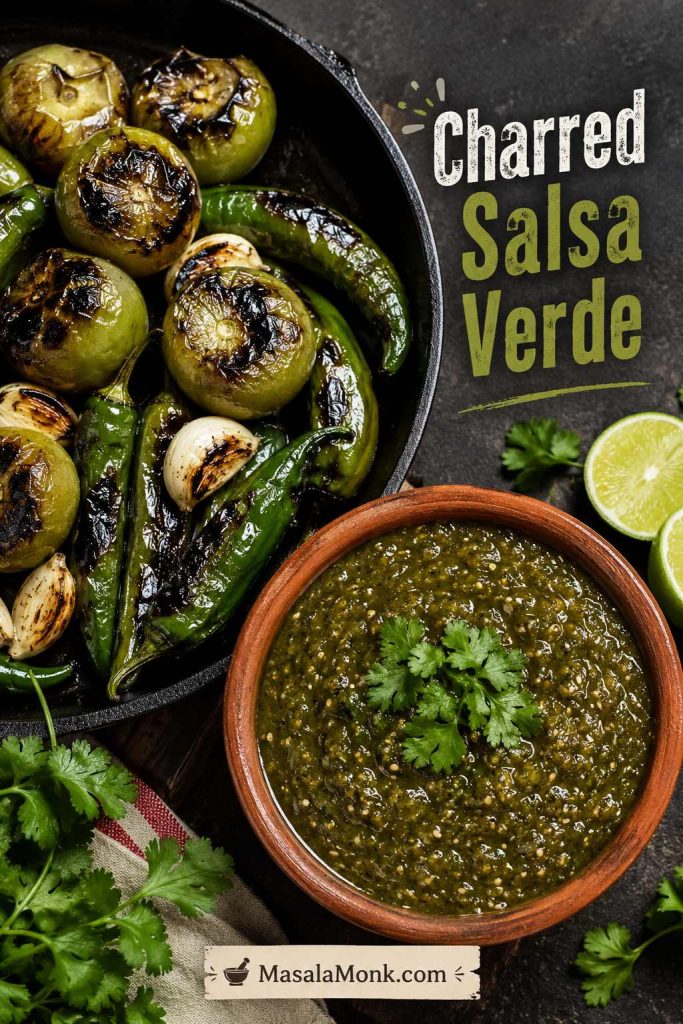
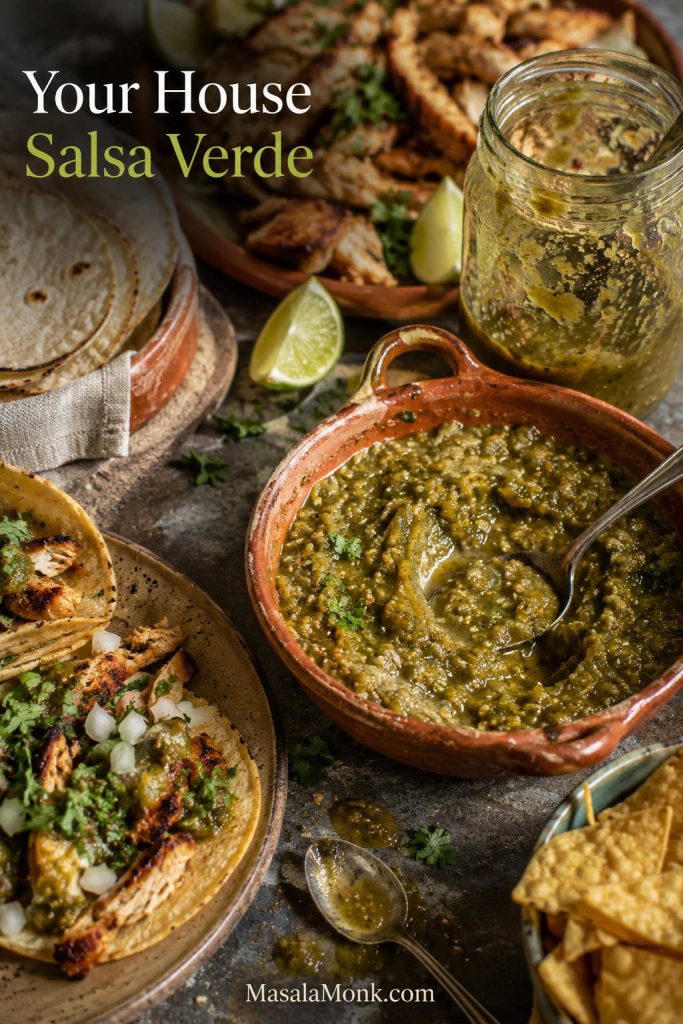
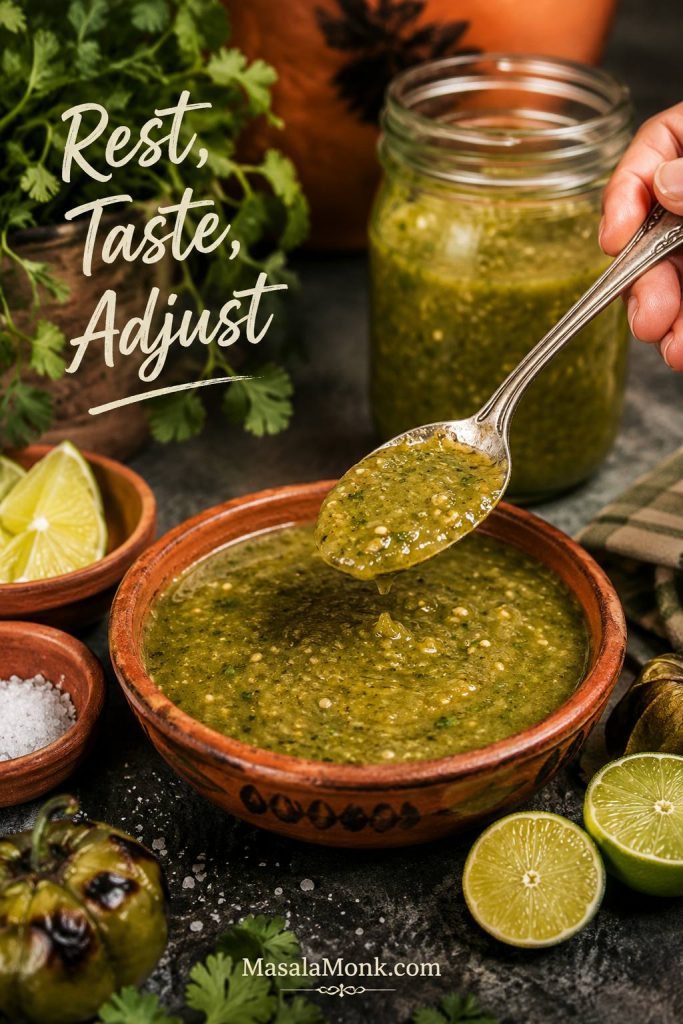
Bowl of roasted salsa verde with tortilla chips, lime, roasted tomatillos, and a spoon showing chunky green texture.

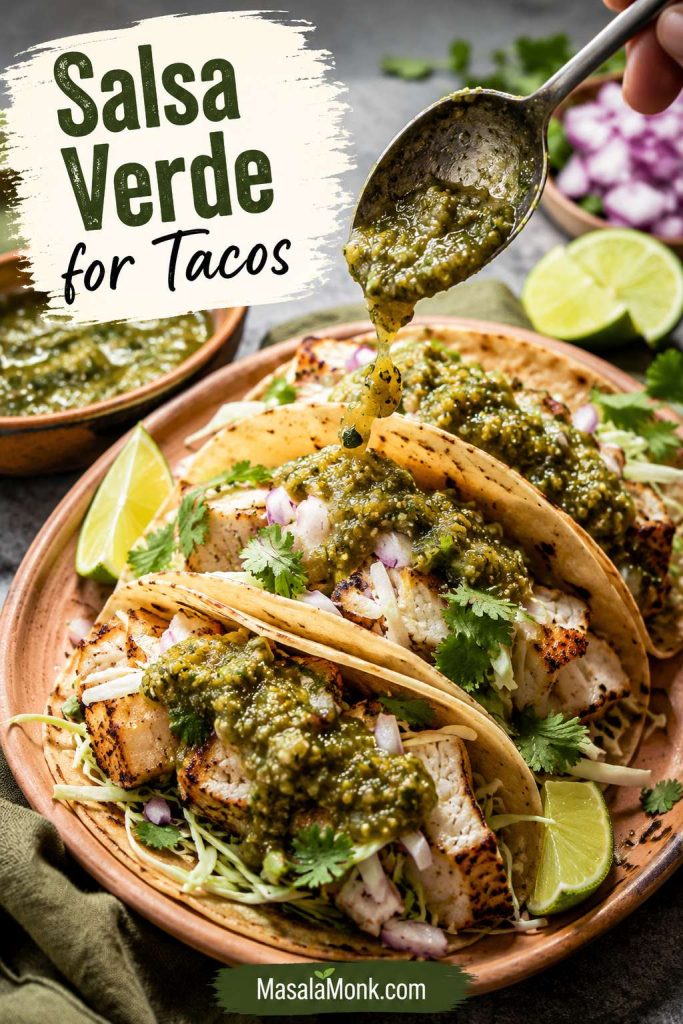
Some sauces sit politely on the side. Salsa verde wakes the plate up. It is bright, green, and alive — the kind of sauce that makes tacos taste fresher, eggs feel less ordinary, grilled chicken more exciting, and tortilla chips almost impossible to leave alone.

At its simplest, this is a one-pan, one-blender salsa: roast the tomatillos, blend everything together, then taste for salt and lime. It should be bright enough to wake up the plate, salty enough to keep you going back for one more chip, and balanced enough to spoon over dinner without thinking twice.

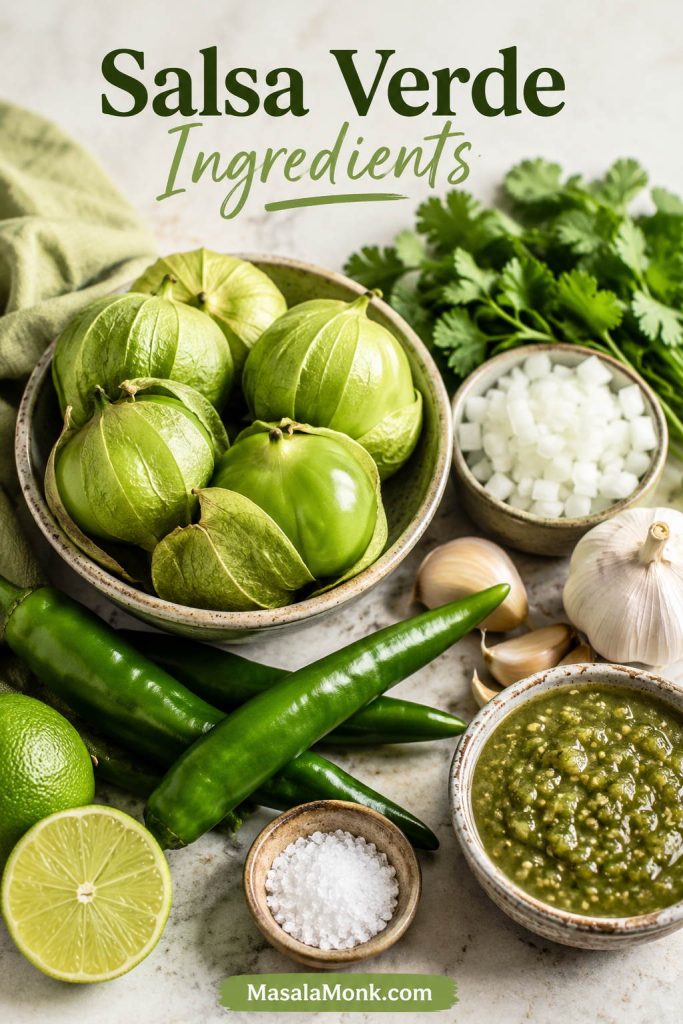
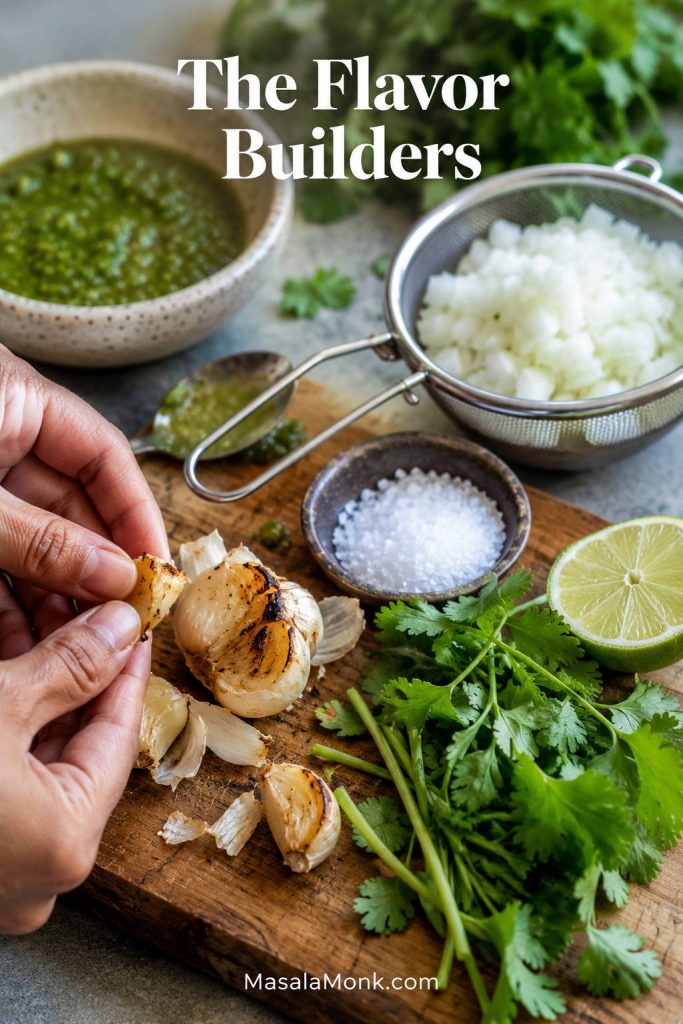
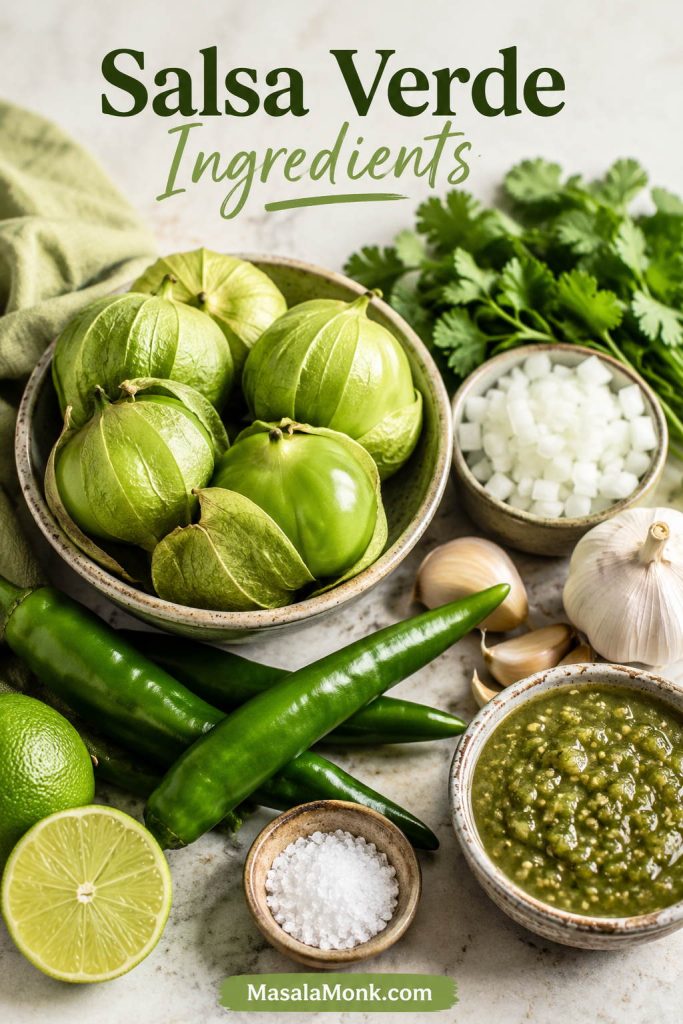
This recipe is made with tomatillos, green chiles, garlic, onion, cilantro, lime, and salt. The roasted version is the one to make first because it softens the tomatillos’ tart edge and gives the salsa a deeper, rounder flavor. Boiled, raw, and charred options are included later, but they are backup help — not homework.

One quick clarification before we start: this is Mexican salsa verde, not Italian salsa verde. Mexican salsa verde is usually made with tomatillos and green chiles. Italian salsa verde is an herb sauce made with parsley, capers, garlic, olive oil, and vinegar or lemon. Both are green sauces, but they are completely different in flavor and use.

In This Guide

Use this as a quick map for the recipe, method choices, heat control, fixes, storage, and serving ideas.

Quick Answer: What Is Salsa Verde?

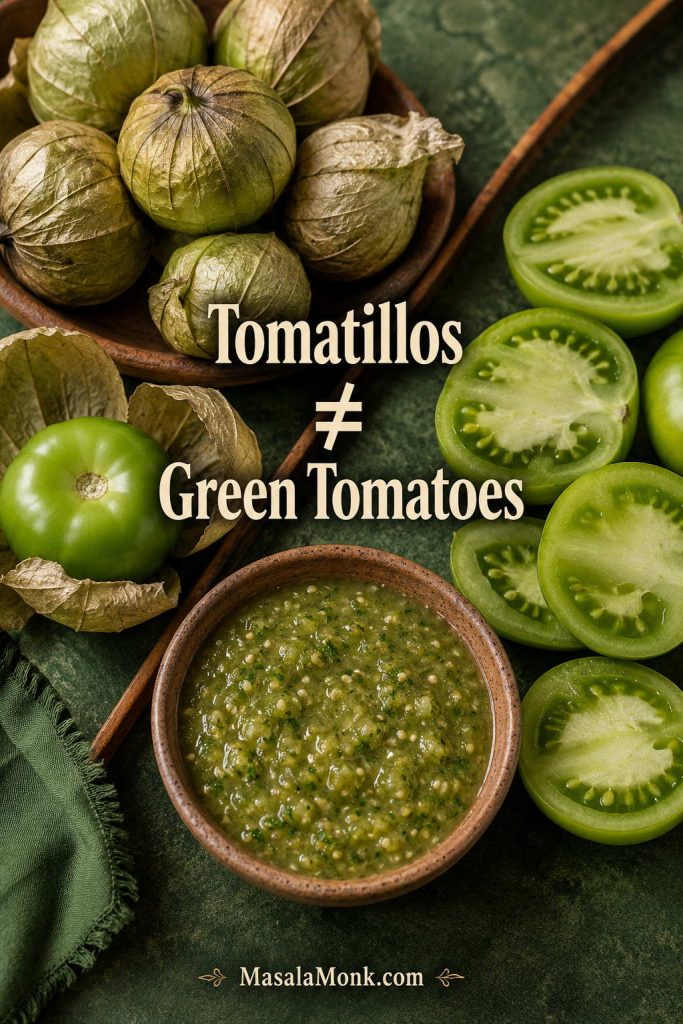
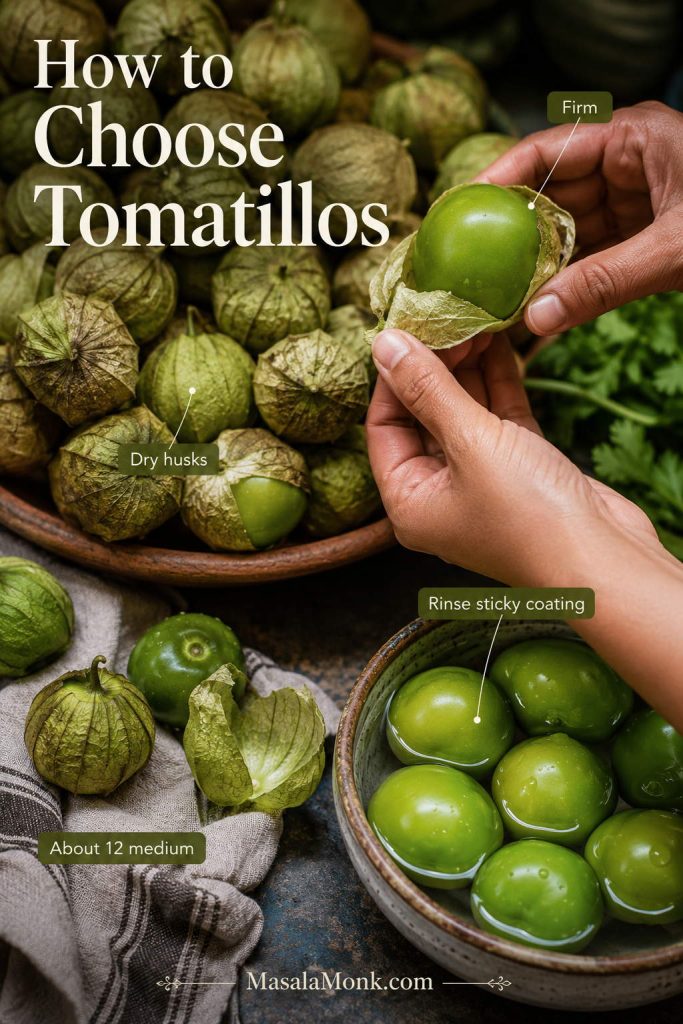
Salsa verde means “green sauce,” but in Mexican cooking it usually refers to a green salsa made with tomatillos, green chiles, onion, garlic, cilantro, salt, and sometimes lime. Tomatillos are not green tomatoes; they have papery husks and a naturally tangy, slightly fruity flavor that makes them perfect for a lively green salsa.

For the fastest path, go straight to the roasted tomatillo salsa recipe. If you are deciding between raw, boiled, roasted, or charred, use the method guide first.

Tomatillos in papery husks with green chiles, cilantro, onion, garlic, lime, salt, and a bowl of salsa verde
Tomatillos and green chiles give Mexican salsa verde its lively backbone; compared with tomato salsa, the flavor is greener, sharper, and more citrus-friendly.
Start here: If this is your first batch, roast the tomatillos. It is the easiest method to love because it keeps the salsa bright while taking away the harshest raw edge.

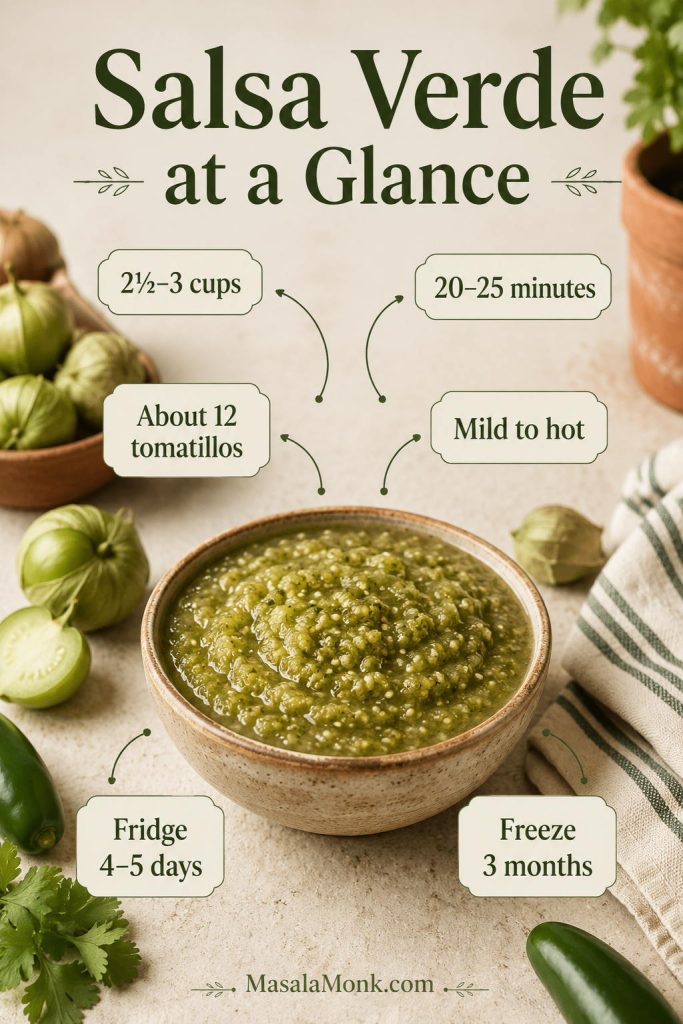
At a Glance

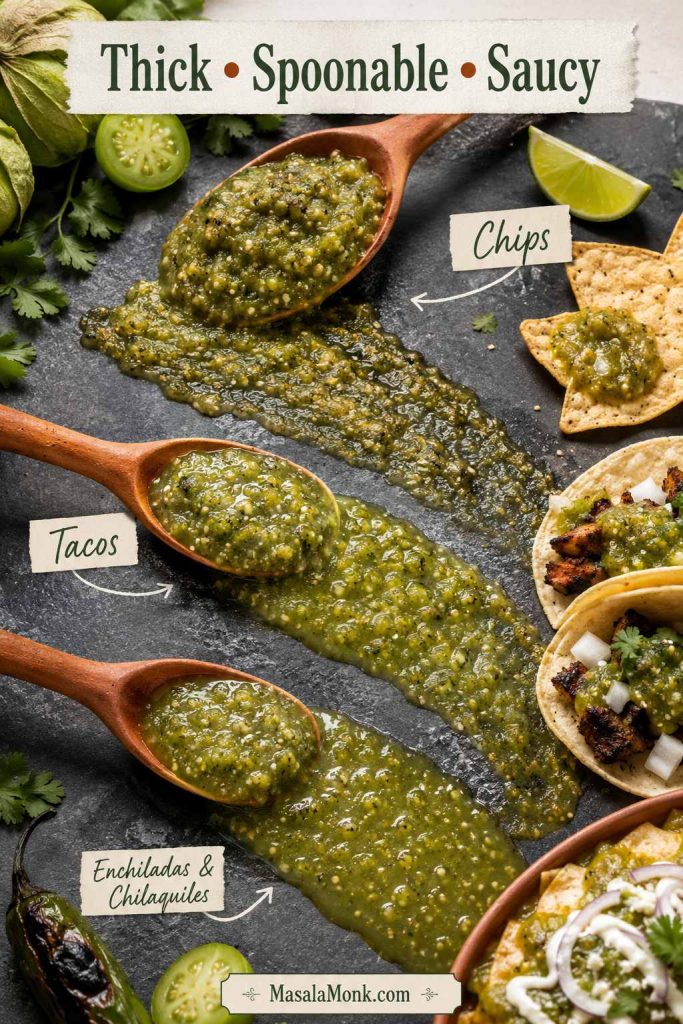
This is the kind of salsa that earns a permanent jar spot in the fridge: thick enough for chips, bright enough for tacos, and easy to loosen into a sauce when dinner needs help.

Start withRoasted tomatillo salsa verde
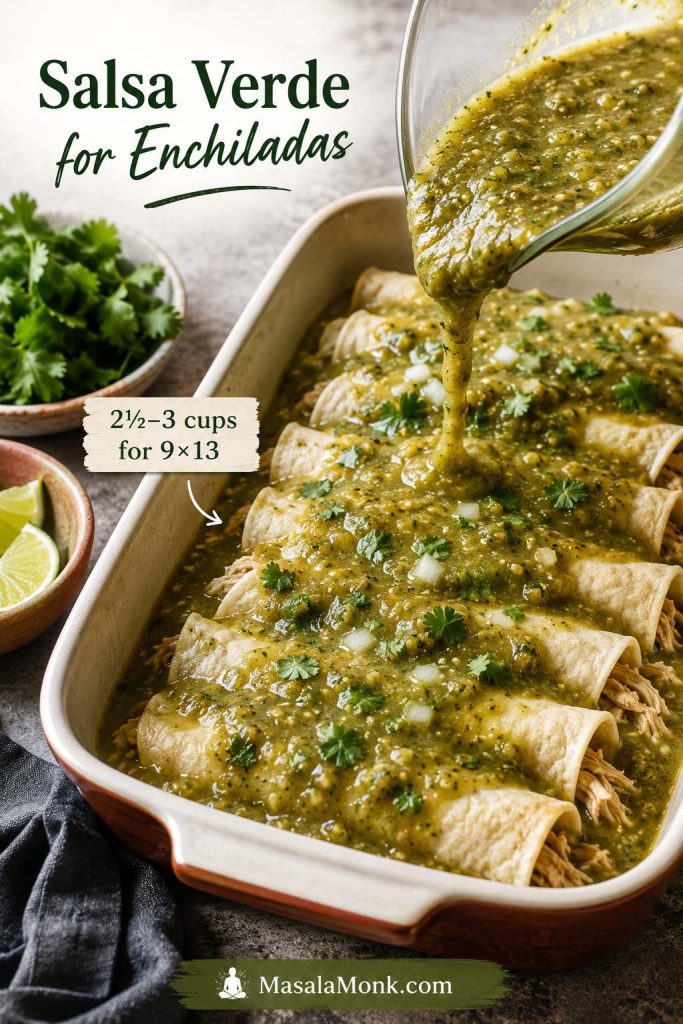
YieldAbout 2½ to 3 cups
Total time20 to 25 minutes under the broiler, or about 25 to 30 minutes with the oven-roasted method
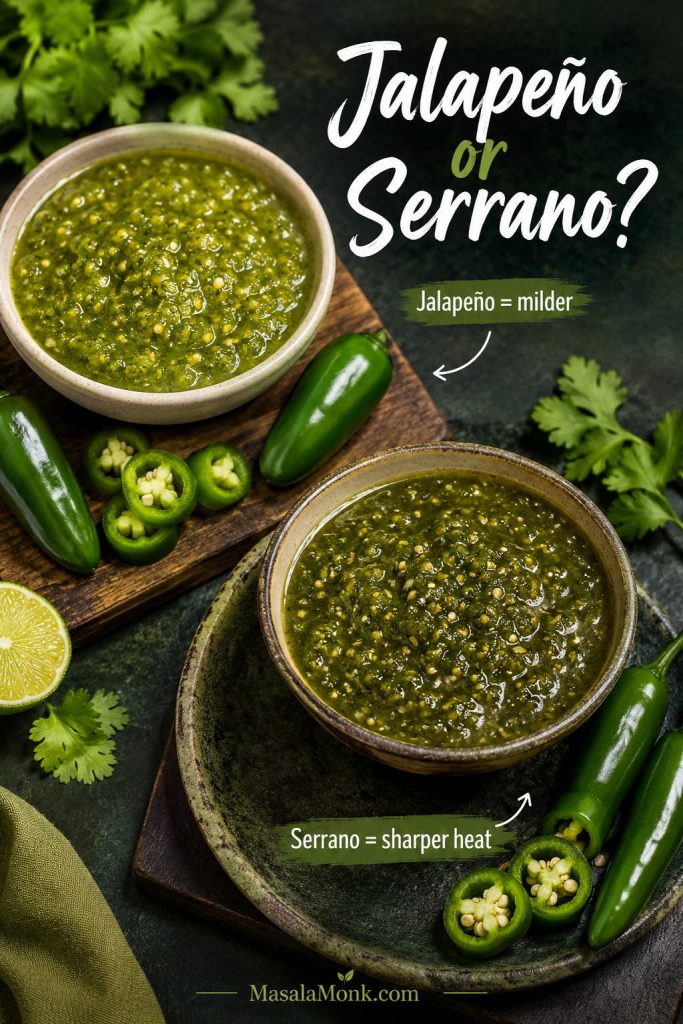
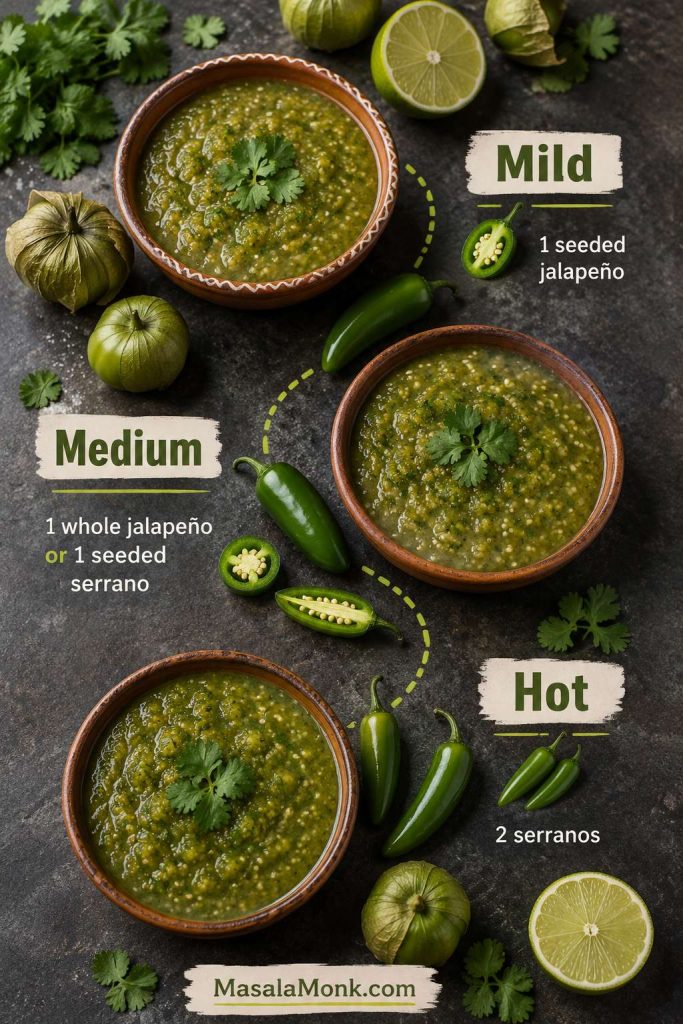
Heat levelMild, medium, or hot depending on jalapeño or serrano amount
Ideal textureSpoonable, lightly textured, not watery
Works withTacos, chips, eggs, enchiladas, chicken, chilaquiles, bowls, nachos
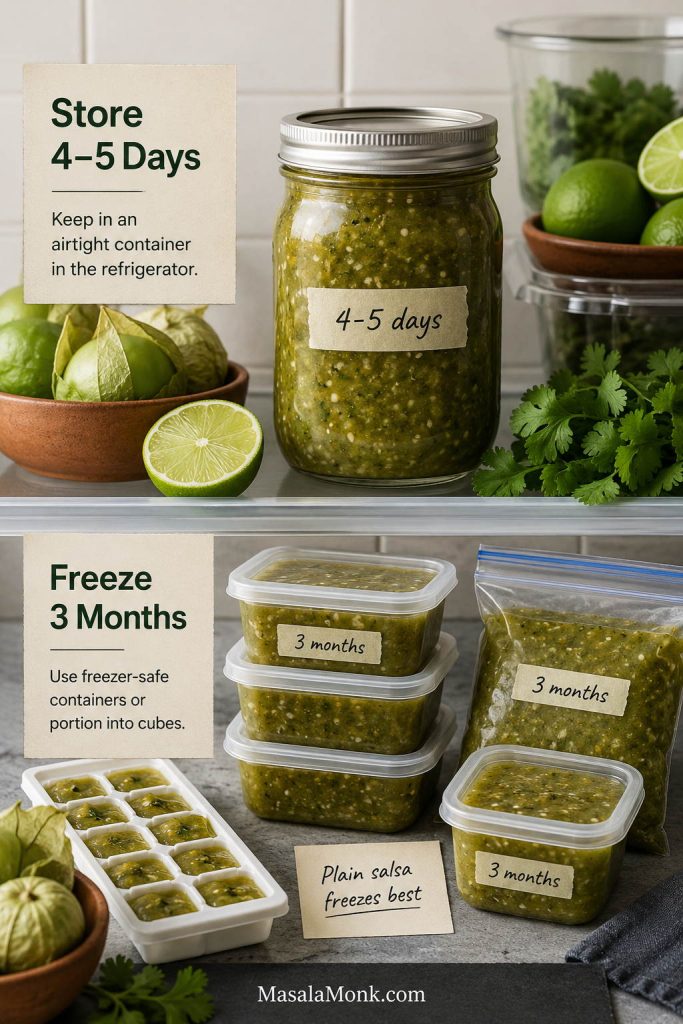
Storage4 to 5 days in the fridge, up to 3 months in the freezer
Salsa verde jar with callouts for yield, time, tomatillo count, heat level, refrigerator storage, and freezer storage
One roasted batch gives about 2½ to 3 cups, so you can serve it with chips now and still have enough left for tacos, eggs, or enchiladas later.

Why This Works

This version is built around the things that usually go wrong: watery texture, harsh garlic, too much tartness, unpredictable heat, and flat flavor. The small details — roasting the garlic, holding back pan juices, tasting before adding extra lime, and resting before the final adjustment — keep the salsa balanced instead of thin, sharp, or dull.

  • Roasting softens the tomatillos. It keeps their tangy flavor but rounds off the sharpest raw edge.
  • Pan juices are added gradually. Roasted tomatillos can release more liquid than expected, so holding some back keeps the salsa from turning watery.
  • Salt comes before extra lime. Under-salted salsa tastes flat, while too much lime can make already-tart tomatillos taste harsh.
  • The method can match the meal. Roasted is the main recipe, but boiled, raw, and charred styles help you make the salsa smoother, brighter, smokier, or more sauce-like.

What You Need

A good batch does not need a long ingredient list. The flavor comes from balancing tangy tomatillos, green chile heat, fresh cilantro, enough salt, and a little lime.

Tomatillos, green chiles, garlic, white onion, cilantro, lime, salt, and finished salsa verde arranged on a prep surface
A good salsa verde recipe does not need many ingredients, but each one has a job: tomatillos bring tang, chiles bring heat, and salt wakes everything up.

Tomatillos

Look for firm tomatillos with dry papery husks. A little stickiness under the husk is normal; rinse it off before cooking or blending. You need 1½ pounds / 680 g tomatillos, usually about 12 medium tomatillos, for about 2½ to 3 cups salsa.

Tomatillos with papery husks beside sliced green tomatoes and a bowl of green tomatillo salsa
Tomatillos are not green tomatoes; instead, they bring the tart, fruity base that gives classic tomatillo salsa verde its lively flavor.

To prep them, remove the husks, rinse the sticky coating, and trim away any damaged spots. Large tomatillos can be halved before roasting so they soften evenly.

Hands choosing fresh tomatillos with papery husks, peeled tomatillos, and labels for firmness, dry husks, and rinsing
Firm tomatillos with dry husks usually roast best; after peeling, rinse the sticky coating so the finished salsa tastes clean rather than tacky or dull.

Jalapeño or Serrano

Jalapeño makes a milder, more approachable salsa. Serrano gives a sharper, more intense green-chile heat. Use one pepper for mild to medium, two serranos for hot, or three to four serranos for a very spicy batch.

Remove the seeds and white ribs for gentler heat before blending. Keep some seeds for a sharper salsa, then adjust after tasting.

Need exact mild, medium, and hot options? Use the heat level guide before blending.

Jalapeños and serrano peppers beside two bowls of salsa verde with labels comparing milder and sharper heat
Jalapeño makes the sauce milder and rounder, while serrano gives sharper green-chile heat, so choose based on who will be eating it.

Onion, Garlic, Cilantro, Lime, and Salt

White onion gives the salsa a clean bite. Rinsing chopped onion under cold water softens harsh raw onion flavor without making the sauce dull. Garlic roasts with the tomatillos in the main recipe so it turns mellow instead of sharp.

Cilantro brings the classic fresh green finish, and tender stems are fine because they carry plenty of flavor. Lime brightens the batch, but tomatillos are already tart, so add it with a light hand and adjust after tasting.

Roasted garlic, rinsed chopped onion, cilantro, lime, salt, and salsa verde arranged as flavor-building ingredients
Garlic, onion, cilantro, lime, and salt build balance around the tomatillos, so the finished green salsa tastes layered instead of flat.

How to Make It

Roast the tomatillos, chile, and garlic until blistered, then blend them with onion, cilantro, lime, and salt. Keep the texture lightly spoonable and add water only at the end when the salsa is too thick.

Four-step salsa verde process showing tomatillo prep, roasting, blending, and tasting to adjust flavor
This four-step flow keeps the recipe simple: prep clean tomatillos, roast for flavor, blend for texture, and adjust only after the salsa settles.

The one thing to watch is liquid. Roasted tomatillos can release a lot of juice, so add the tomatillos first, pulse, and use the pan juices gradually only if the salsa needs them.

Roasted tomatillos going into a blender with reserved pan juices held aside in a small cup
The roasted juices carry flavor, but adding them slowly gives you control over thickness before the salsa turns too loose for chips or tacos.

Do not worry if one batch tastes a little brighter, smokier, or spicier than the last. Tomatillos and chiles vary, so the final taste check is part of making the salsa yours.

Spoon tasting salsa verde with lime wedges, salt, and a jar of green salsa nearby
A short rest makes the flavors easier to read, so taste again before adding more lime, salt, or heat.

Roasted Tomatillo Salsa Verde Recipe

Tomatillos, green chiles, and unpeeled garlic blistered on a sheet pan for roasted salsa verde
Roast the tomatillos until they blister and soften; this rounds off their raw edge while keeping enough acidity for tacos and chips.

Roasted Tomatillo Salsa

This roasted tomatillo salsa is tangy, lightly smoky, and spoonable, with enough body for chips and enough brightness for tacos, eggs, chicken, chilaquiles, bowls, and nachos.

Prep Time 10 minutes
Cook Time About 10 to 13 minutes
Total Time 20 to 25 minutes under the broiler
Yield About 2½ to 3 cups

Equipment

  • Rimmed baking sheet
  • Foil or a bare baking sheet for broiling
  • Blender or food processor
  • Tongs
  • Fine-mesh strainer, optional, for rinsing onion
  • Airtight jar or container

Blender or food processor? Use a food processor for a lightly textured salsa and a blender for a smoother sauce-style salsa.

Broiler note: Use foil or a bare rimmed baking sheet under the broiler. Do not place parchment directly under the broiler. Parchment is only for the 450°F oven method when rated for that heat.

Ingredients

  • 1½ pounds tomatillos, husked and rinsed, about 680 g or 12 medium tomatillos
  • 1 to 2 jalapeños or serranos, roughly 15 to 40 g depending on size
  • 2 to 3 garlic cloves, unpeeled for roasting
  • ½ cup chopped white onion, about 70 g
  • ½ cup chopped cilantro leaves and tender stems, about 8 to 12 g
  • 1 to 2 tablespoons fresh lime juice, 15 to 30 ml, to taste
  • ¾ teaspoon fine salt, about 4 g, plus more to taste
  • 1 to 3 tablespoons water, broth, cooking liquid, or pan juices, only as needed

Instructions

  1. Prep the tomatillos. Remove the papery husks and rinse off the sticky coating. Pat dry before roasting.
  2. Set up the pan. Place tomatillos, jalapeño or serrano, and unpeeled garlic cloves on a foil-lined or bare rimmed baking sheet. Halve large tomatillos and place them cut-side down.
  3. Broil the first side. Broil 4 to 6 inches from the heat for 5 to 7 minutes, until the tomatillos begin to blister and soften.
  4. Finish roasting. Use tongs to turn the chile and garlic as needed, then broil another 4 to 6 minutes. The tomatillos may collapse; that is fine. You are looking for browned spots and a tangy-sweet smell instead of a raw, grassy one.
  5. Cool briefly. Let the roasted ingredients cool for a few minutes. Peel the garlic. Stem the chile. Remove seeds for milder salsa.
  6. Rinse the onion, optional. For a cleaner onion flavor, rinse the chopped onion under cold water and drain well.
  7. Blend carefully. Add the roasted tomatillos, chile, garlic, onion, cilantro, 1 tablespoon lime juice, and salt to a blender or food processor. When there is a lot of liquid on the pan, hold some of it back at first.
  8. Set the texture. Pulse until mostly smooth but still lightly textured. Blend longer only for a thinner sauce-style salsa.
  9. Adjust liquid. Add pan juices, water, broth, or cooking liquid 1 tablespoon at a time only when the salsa is too thick.
  10. Taste. Rest 10 to 15 minutes, then taste again. Add salt first when it tastes dull. Add more lime only when it needs brightness.
  11. Serve or store. Serve warm, room temperature, or chilled. Refrigerate leftovers in an airtight jar.

Notes

  • For mild salsa, use 1 seeded jalapeño.
  • For medium heat, use 1 whole jalapeño or 1 seeded serrano.
  • For a hot batch, use 2 serranos.
  • Without a broiler, roast at 450°F / 230°C for 15 to 20 minutes. Total time will be closer to 25 to 30 minutes.
  • For storage details, see how to store and freeze it. For shelf-stable jars, read the canning safety note before changing the recipe.

Before broiling, pan setup matters: keep the tomatillos close enough to blister, and use foil or a bare rimmed pan instead of parchment.

Sheet pan of tomatillos, green chile, and garlic under a broiler with guidance for heat distance and foil or bare pan
Broiling close to the heat helps tomatillos blister quickly; meanwhile, foil or a bare pan is safer under the broiler than parchment.

Texture depends on the tool: a food processor keeps the salsa lightly textured, while a blender makes it smoother and more sauce-like.

Salsa verde in a food processor with a spoonful of chunky salsa and a blender nearby for a smoother texture
Use a food processor for lightly textured tomatillo salsa, but use a blender when you want a smoother sauce-style finish.

You can stop with the roasted recipe above and be happy. Everything after this point is optional help for method, texture, heat, and use cases.

Raw, Boiled, Roasted, or Charred?

Once you know the base recipe, the method becomes your style choice: raw for sharp and fresh, boiled for smooth, roasted for balanced, and charred for smoky.

Four bowls of salsa verde showing raw, boiled, roasted, and charred versions with different colors and textures
Once you know the base recipe, the method becomes a style choice: raw is sharp, boiled is smooth, roasted is balanced, and charred is smoky.
MethodHow to Do ItFlavorWorks With
RawBlend raw tomatillos, chile, onion, cilantro, lime, and salt.Sharp, tart, fresh, grassy.Tacos, grilled meats, rich or fatty fillings.
BoiledSimmer tomatillos, chile, and garlic for 5 to 12 minutes, then blend.Smoother, cleaner, softer.Taqueria-style salsa, enchiladas, chilaquiles, chicken.
RoastedBroil 9 to 13 minutes total, or roast at 450°F for 15 to 20 minutes.Balanced, rounded, lightly smoky.The most flexible homemade version.
CharredBroil until deeply blistered, blend, then optionally simmer in 1 tablespoon oil for 2 to 3 minutes.Smoky, deeper, more intense.Restaurant-style salsa, tacos, grilled meats, bold bowls.

If you are unsure, choose roasted. It behaves best on a normal weeknight: bright enough for tacos, thick enough for chips, and rounded enough to spoon over dinner.

If the salsa looks too thick or too loose after blending, check the texture guide before adding more liquid.

Boiled Version

The boiled version is smooth, clean, and useful when you need a green salsa that behaves more like a sauce. Place the tomatillos, chile, and garlic in a saucepan, cover with water, and simmer until the tomatillos turn dull green and soften. This usually takes 5 to 12 minutes depending on size.

Stop when the tomatillos are soft but not completely falling apart. Drain them, save a little cooking liquid, then blend with onion, cilantro, salt, and lime to taste. Add the reserved liquid only as needed. This style is especially good for enchiladas, chilaquiles, simmered chicken, and everyday taco-shop-style salsa.

Tomatillos and green chile simmering in a pot beside a bowl of smooth boiled salsa verde
Boiled salsa verde is smoother and cleaner than roasted salsa, which makes it useful for enchiladas, chilaquiles, simmered chicken, and taqueria-style sauces.

Raw Version

Raw salsa verde, also called salsa verde cruda, is the fastest style. It is bracing and fresh, with a sharper edge than cooked salsa verde. Use it for a fresh taco salsa when a more assertive tomatillo flavor sounds good.

Because raw tomatillos can be quite tangy, taste carefully before adding much lime. Salt is usually more important than extra acid in this version.

Bright raw salsa verde cruda spooned over tacos with raw tomatillos and green chile nearby
Raw salsa verde cruda has the sharpest bite, so it works especially well when rich taco fillings need a clean green finish.

Charred Version

The charred version is for deeper flavor. Let the tomatillos and chiles blister more aggressively under the broiler. After blending, heat 1 tablespoon neutral oil in a saucepan, add the salsa, and simmer it for 2 to 3 minutes. The color will darken slightly and the flavor will become more rounded.

This step is optional, but it is excellent for tacos, grilled meats, chilaquiles, or chicken.

Charred tomatillos, green chiles, garlic, and a bowl of dark smoky salsa verde
Charring deepens the flavor of tomatillo salsa, but the vegetables should look blistered and smoky rather than burned.

Mild, Medium, or Hot

For a table of mixed heat levels, start gentler than your own taste. You can always make the next batch sharper, but once this batch is too hot, you need extra tomatillos, avocado, or crema to bring it back.

Heat LevelUse ThisWorks For
Mild1 seeded jalapeñoKids, parties, chips, mild tacos.
Medium1 whole jalapeño or 1 seeded serranoEveryday salsa with a gentle kick.
Hot2 serranosTacos, grilled meats, spicy bowls.
Very hot3 to 4 serranos, with some seeds includedHeat lovers and bold taqueria-style salsa.

If the batch is already hotter than you wanted, go straight to the too-spicy fix instead of adding water.

Mild, medium, and hot salsa verde bowls with jalapeño and serrano pepper amounts shown as labels
For a crowd-friendly salsa verde, start with jalapeño or a seeded serrano; then move hotter only when you know the table wants it.

If you like building heat with different chiles, MasalaMonk’s pepper sauce guide goes deeper into jalapeño, habanero, chipotle, and other chile-based sauces.

Once the salsa is already blended and too spicy, do not add water first. Water will thin the sauce without softening the burn much. Instead, blend in more cooked tomatillo, avocado, sour cream, Mexican crema, or a little more roasted onion, depending on the flavor you want.

The Right Texture

Good salsa verde should be spoonable, lightly glossy, and a little textured. It should not pour like water, but it should not be stiff like guacamole either.

For chips, keep it medium-thick so it clings. On tacos, it should be spoonable and a little loose, so it runs slightly into the filling. For enchiladas or chilaquiles, thin it with broth, water, or cooking liquid so it coats instead of clumping. Bowls and nachos need a thicker salsa so it does not flood the plate.

Serving temperature changes the way it feels, too. Chilled works best for chips, room temperature is great for tacos, and warm is useful when the salsa acts like a sauce for eggs, chicken, enchiladas, or chilaquiles.

If the texture has already gone wrong, the troubleshooting section covers watery, too thick, bland, bitter, tart, and too-spicy salsa.

Three salsa verde textures labeled thick, spoonable, and saucy for chips, tacos, enchiladas, and chilaquiles
A thicker salsa clings to chips, a spoonable one sits better on tacos, and a looser version spreads more evenly through enchiladas or chilaquiles.

How to Fix the Flavor or Texture

Most salsa problems are not disasters. They are usually small balance issues: too much liquid, not enough salt, too much heat, or tomatillos that were sharper than expected.

ProblemLikely CauseHow to Fix It
Watery salsaToo much liquid, hot salsa not rested, or over-blending.Chill first. If still loose, simmer briefly to reduce or blend in avocado for a creamy style.
Too tartVery sharp tomatillos or too much lime.Add roasted onion, a tiny pinch of sugar, or avocado.
BitterOld tomatillos, over-charred skins, or harsh raw garlic.Add more cooked tomatillo, cilantro, salt, or a little lime. Next time, roast until blistered, not scorched.
Too spicyToo many serranos or too many seeds.Blend in more cooked tomatillo, avocado, crema, sour cream, or roasted onion.
BlandUsually not enough salt.Add salt in small pinches, rest for a few minutes, then taste again.
Too thickNot enough liquid or salsa chilled very thick.Add water, broth, cooking liquid, or reserved pan juices 1 tablespoon at a time.
Troubleshooting board for salsa verde with fixes for watery, tart, bitter, spicy, bland, and thick salsa
Most salsa verde problems are balance problems, so the fix is usually small: chill, simmer, salt, thin slowly, or add body instead of starting over.
If you only remember one fix: adjust salt before lime. Under-salted salsa tastes flat, but too much lime can make already-tangy tomatillos taste harsh.

Watery Salsa Verde

Watery salsa verde is usually easy to rescue. Tomatillos release liquid as they cook, and warm salsa can seem thinner than chilled salsa. First, let it cool or refrigerate it for 30 minutes. When it is still too loose, simmer it in a small saucepan for a few minutes until it thickens.

Watery salsa verde simmering in a pan with a spoonful of thicker salsa lifted above the surface
If the salsa looks thin after cooling, a brief simmer concentrates the tomatillo flavor and brings the texture back to spoonable.

For tacos and chips, you want salsa that clings. For enchiladas and chilaquiles, a looser sauce is actually useful.

Bitter or Too Tart

Tomatillos are naturally tart, so add lime slowly. When the salsa tastes too sharp, add roasted onion, a tiny pinch of sugar, or avocado. Avocado is especially helpful because it softens both tartness and heat.

Salsa verde with avocado, roasted onion, cooked tomatillo, cilantro, and lime used to fix bitter or tart flavor
If the sauce tastes too tart or bitter, ingredients with body and sweetness, such as avocado, roasted onion, or cooked tomatillo, can soften the edge.

Bitterness usually comes from old tomatillos, over-charred skins, or too much raw garlic. Next time, use firm fresh tomatillos and roast until blistered and browned in spots, not blackened all over.

Too Spicy

The easiest way to cool down heat is to add body, not water. Cooked tomatillos, avocado, sour cream, Mexican crema, or roasted onion will calm the burn while keeping the sauce useful.

Salsa verde with avocado, crema, roasted onion, and cooked tomatillos used to reduce heat
When the salsa is too spicy, add body with avocado, crema, roasted onion, or more tomatillo instead of thinning the sauce with water.

Served with rich foods like pork, fried eggs, cheese, or grilled chicken, a slightly spicy batch may taste more balanced once it is on the food.

Bland or Flat

When the salsa tastes dull, add salt in small pinches, stir, and wait a minute before tasting again. Once the tomatillo and chile flavor wakes up, you can decide whether it needs more brightness.

Ways to Use It Beyond Chips

Chips may be the first thing that comes to mind, but this is where the jar starts earning its space in the fridge. It can wake up eggs, rescue leftover chicken, make plain rice or tortillas feel intentional, and turn a simple plate into dinner.

Use the sections below for quick details on tacos, enchiladas, salsa verde chicken, chilaquiles verdes, and eggs, bowls, and nachos.

Salsa verde jar surrounded by tacos, eggs, chicken, chilaquiles, chips, and a bowl meal
Once there is a jar in the fridge, salsa verde becomes the green shortcut for tacos, eggs, chicken, chilaquiles, bowls, nachos, and chips.
UsePractical GuideTexture to Aim For
ChipsServe chilled or room temperature with tortilla chips or vegetables.Medium-thick and scoopable.
TacosUse 1 to 2 tablespoons per taco.Spoonable, bright, salty.
EnchiladasUse about 2 cups for a small 8-inch pan, or 2½ to 3 cups for a 9×13-inch pan.Looser, simmered, saucy.
ChickenUse 1½ to 2 cups salsa for about 1½ pounds boneless chicken.Thicker for spooning, looser for simmering.
ChilaquilesWarm 2 cups salsa with ½ to 1 cup broth or water.Loose enough to coat chips.
EggsUse about ¼ cup warm salsa per serving.Spoonable and warm or room temperature.
Bowls and nachosSpoon over at the end, not too early.Thicker so it does not flood the plate.

That is the real value of a good batch: it starts as salsa, then quietly becomes the sauce that helps you finish the week’s tacos, eggs, bowls, and chicken.

Tacos

On tacos, the salsa should be bold enough to cut through rich fillings. Raw salsa is sharp and fresh. Roasted is more rounded. Charred is excellent with grilled meats, crispy potatoes, mushrooms, chicken, pork, or eggs. It works beautifully on fish tacos when you want a clean, bright topping.

Salsa verde being spooned over tacos with lime, cilantro, onion, and warm tortillas
For tacos, the sauce should be bold enough to cut through the filling while still tasting fresh, tangy, and spoonable.

Enchiladas

For enchiladas, make the salsa looser than you would for chips. Simmer it briefly in a little oil or broth, then use enough to coat the tortillas well. Use about 2 cups for a small 8-inch pan, or 2½ to 3 cups for a 9×13-inch pan, depending on how saucy you like your enchiladas.

Salsa verde being poured over rolled tortillas in a baking dish with a note for a 9 by 13 inch pan
For enchiladas, make salsa verde looser than a dip so it can coat the tortillas evenly instead of sitting in thick clumps.

Salsa Verde Chicken

Salsa verde chicken is one of the easiest ways to turn this sauce into dinner. Use 1½ to 2 cups for about 1½ pounds boneless chicken, whether you simmer raw chicken until cooked through or spoon the sauce over sliced baked chicken breast.

Once shredded, the chicken works in tacos, bowls, nachos, quesadillas, or enchilada filling.

Shredded chicken tossed with salsa verde in a skillet with tortillas nearby
Salsa verde chicken is an easy dinner shortcut because the sauce seasons shredded chicken and turns it into filling for tacos, bowls, nachos, or enchiladas.

Chilaquiles Verdes

Chilaquiles verdes need a looser sauce than tacos. Warm 2 cups salsa with ½ to 1 cup broth or water, then add tortilla chips just long enough to coat them. Keep the chips slightly tender but not completely mushy. Finish with eggs, crema, onion, cilantro, and cheese if you like.

Chilaquiles verdes in a skillet with tortilla chips, salsa verde, egg, crema, cilantro, onion, and cheese
For chilaquiles verdes, warm the sauce first so the chips get coated quickly without soaking until they collapse.

Eggs, Bowls, and Nachos

With eggs, this salsa tastes best slightly warm or at room temperature. It is also a strong add-on for breakfast burritos, especially with eggs, potatoes, cheese, beans, or chorizo. For bowls and nachos, keep it thicker so it acts like a topping instead of a puddle.

Breakfast burrito filled with eggs, potatoes, beans, and cheese with salsa verde spooned over the top
Salsa verde wakes up eggs, potatoes, beans, and breakfast burritos, especially when the sauce is served slightly warm or at room temperature.

Creamy, Avocado, Green Tomato, and Hatch Chile Versions

Once the base salsa tastes balanced, the variations become easy. You are not starting over — you are simply changing the richness, heat, or chile character.

Because creamy and avocado versions store differently, check the storage notes before making a large batch.

Creamy Version

To make it creamy, blend ½ cup sour cream or Mexican crema into 1½ to 2 cups cooled salsa. This makes a softer taco sauce that is especially good with grilled chicken, fish tacos, potatoes, roasted vegetables, and breakfast burritos.

Do not can creamy salsa verde. Dairy changes the safety and storage rules. Keep it refrigerated and use it within 2 to 3 days.

Avocado Version

Avocado turns the sauce richer and softer. Blend 1 ripe avocado into 1½ to 2 cups cooled salsa, then thin it one tablespoon at a time only when needed. This is a good fix for a batch that tastes too sharp or too spicy.

Avocado salsa verde is best eaten the same day or within 1 to 2 days. Press plastic wrap directly against the surface before refrigerating to slow browning.

Two bowls of salsa verde showing a pale creamy version and a thicker avocado version with avocado, lime, cilantro, and roasted tomatillos
Creamy salsa verde tastes softer and tangier with crema, while avocado salsa verde becomes richer and helps tame sharpness or heat.

Green Tomato Version

Tomatillos are best for classic Mexican salsa verde. Green tomatoes can make a tangy green salsa, but the flavor is different: more tomato-like, less fruity, and often less naturally bright. Use green tomatoes as a variation when you have them, not as the first choice for this recipe.

When using green tomatoes, roast them well and taste carefully. They may need more lime, salt, or chile to get the same lively balance.

Finished tomatillo salsa and green tomato salsa in separate bowls with tomatillos, husks, sliced green tomatoes, cilantro, and lime
Green tomato salsa can work as a variation, but tomatillos give classic salsa verde its brighter, fruitier tang.

Hatch Green Chile Version

Roasted Hatch green chiles give the salsa a deeper green-chile flavor. Start with ¼ to ½ cup chopped roasted green chile for this batch, then adjust to taste. Hatch chiles can vary widely in heat, so taste before adding extra serrano or jalapeño.

Roasted Hatch green chiles being added to a bowl of salsa verde with tomatillos, cilantro, lime, and salt nearby
Hatch green chiles add deeper roasted chile flavor, so start with a small amount and taste before adding more heat.

For a sweeter, fruitier salsa for tacos, fish, shrimp, or grilled chicken, MasalaMonk’s mango salsa recipe is the better direction. This salsa is tangy and green; mango salsa is juicy, chunky, and fruit-forward.

Salsa Verde and Other Green Sauces

“Salsa verde” simply means green sauce, so different cuisines use the name for different things. The table below is not saying these sauces are interchangeable. It is here to help you recognize which green sauce a recipe or restaurant menu might mean.

SauceMain IngredientsWorks With
Mexican salsa verdeTomatillos, green chiles, onion, garlic, cilantro, salt, sometimes lime.Tacos, chips, enchiladas, chicken, eggs, chilaquiles.
Italian salsa verdeParsley, capers, garlic, olive oil, vinegar or lemon, sometimes anchovy.Fish, steak, roasted vegetables, boiled meats.
Peruvian aji verdeCilantro, green chile or aji amarillo-style heat, lime, mayo or cheese-style creaminess.Roast chicken, fries, grilled meats, rice bowls.
Chile verdeUsually pork or meat cooked with green chiles and tomatillo-style sauce.A stew or main dish, not just a table salsa.

How to Store and Freeze It

Store the salsa in an airtight jar or container in the refrigerator. Plain salsa verde is often even better after 30 minutes to a few hours because the salt, chile, cilantro, and tomatillo flavors settle together.

If you want shelf-stable jars instead of refrigerator salsa, read the canning safety section before changing the ingredients or acid.

Storage MethodHow LongStorage Tip
Refrigerator4 to 5 daysKeep it in a clean airtight jar and stir before serving.
FreezerUp to 3 monthsFreeze in small portions so you can thaw only what you need.
Avocado or creamy version1 to 2 days for avocado, 2 to 3 days for creamyKeep refrigerated and do not freeze if texture matters.
Salsa verde stored in a refrigerator jar, freezer containers, freezer bag, and ice cube tray with storage time labels
Plain salsa verde stores well in the refrigerator and freezer, but add avocado, sour cream, or crema only after thawing for the best texture.

Freeze the plain version before adding avocado, sour cream, or crema. Dairy and avocado versions do not freeze as cleanly and can turn grainy or dull after thawing. When the salsa smells off, looks fizzy, shows mold, or changes in a way that makes you unsure, throw it out.

Can You Can Salsa Verde?

Important: This fresh salsa verde recipe is for the refrigerator or freezer. Do not water-bath can this exact recipe unless you are following a tested canning formula with the correct acid level, jar size, headspace, and processing time.
Canning safety graphic with fresh salsa verde, bottled lime juice, jars, canning equipment, and notes to refrigerate or freeze this recipe
Fresh salsa verde belongs in the refrigerator or freezer unless you are using a tested canning recipe with verified acid, jar, and processing guidance.

Shelf-stable salsa is different from fresh salsa. Tomatillos are acidic, but salsa also contains low-acid ingredients like onions, garlic, and chiles. Safe canning recipes use tested ratios and added acid. The National Center for Home Food Preservation provides a tested tomatillo green salsa formula with measured tomatillos, chiles, onions, and bottled lemon or lime juice. New Mexico State University also publishes salsa canning guidance with tested processing information.

For shelf-stable salsa verde, use a tested canning recipe from a university extension, NCHFP, USDA-style source, or another reputable canning authority. Do not simply add vinegar or lemon juice to this fresh recipe and assume it is safe. Do not change the tomatillo, onion, chile, or acid ratios in a tested canning recipe unless the source specifically says that change is safe.

FAQs

Is salsa verde the same as green salsa?

In Mexican cooking, salsa verde usually means green salsa made with tomatillos and green chiles. The phrase can mean different green sauces in other cuisines, so “Mexican salsa verde” or “tomatillo salsa verde” is the clearer name.

Are tomatillos the same as green tomatoes?

Tomatillos and green tomatoes are different ingredients. Tomatillos have papery husks and a tart, fruity flavor, while green tomatoes are unripe tomatoes. You can make a green tomato salsa, but it will not taste exactly like classic tomatillo salsa verde.

Do you have to cook tomatillos?

You do not have to cook them. Raw salsa verde is sharp and fresh, boiled salsa verde is smooth and clean, roasted salsa verde is rounder, and charred salsa verde tastes deeper and smokier. When in doubt, roast them first; it is the easiest method to love.

Is roasted or boiled better?

Roasted is usually the most flexible homemade version because it tastes rounder and lightly smoky. Boiled is smoother and cleaner, which makes it excellent for taqueria-style salsa, enchiladas, chilaquiles, and simmered chicken.

Is it spicy?

The heat depends on the chile. Start with one seeded jalapeño for a gentle batch, especially when serving a crowd. You can always add more heat next time.

How do I make it less spicy?

The easiest way to cool down the heat is to add body, not water. Blend in more cooked tomatillo, avocado, sour cream, Mexican crema, or roasted onion. Plain water will thin the salsa without balancing the burn very much.

Can I use it as enchilada sauce?

For enchiladas, make the salsa looser than you would for chips. Simmer it briefly, then use enough to coat the tortillas well: about 2 cups for a small 8-inch pan, or 2½ to 3 cups for a 9×13-inch pan.

Why is my salsa verde watery?

Watery salsa usually has too much added liquid or has not cooled yet. Chill it first. If it is still loose, simmer it briefly to reduce. For a creamy fix, blend in avocado instead.

Why is my salsa verde bitter?

Bitterness can come from old tomatillos, over-charred skins, or too much harsh raw garlic. Add more cooked tomatillo, cilantro, salt, or a little lime. Next time, roast until blistered and browned in spots, not blackened all over.

Can I make it without cilantro?

You can leave cilantro out if it is not your thing. The flavor will be less classic, but the salsa can still work with enough chile, onion, lime, and salt. Flat-leaf parsley gives a green herb note, but it will not taste the same.

Can I use canned tomatillos?

Fresh tomatillos are best, but canned tomatillos can help when that is what you have. Drain them well, then blend with chile, onion, garlic, cilantro, lime, and salt. The flavor is usually softer, so taste carefully before serving.

Can I freeze it?

Plain salsa freezes well in small portions for up to 3 months. Thaw it in the refrigerator and stir before serving. Add avocado, sour cream, or crema after thawing, not before freezing.

Can I can this recipe?

This is a fresh refrigerator/freezer recipe, not a canning formula. For shelf-stable canning, use a tested recipe with the correct acid, jar size, headspace, and processing time from a reputable canning authority.

What is the difference between salsa verde and chile verde?

Salsa verde is a green salsa or sauce. Chile verde usually refers to a cooked dish, often pork or another meat simmered with green chiles and tomatillo-style sauce. They are related, but they are not the same thing.

Once you make salsa verde this way, you will start noticing how many meals need it. Keep it thick for chips and tacos, loosen it for enchiladas or chilaquiles, or blend in avocado when you want something softer and creamy. After a few batches, you will know your house style: raw and sharp, boiled and smooth, roasted and round, or charred and smoky. The best version is the one your table keeps reaching for first.

Used table scene with a bowl and jar of salsa verde, tacos, tortilla chips, lime wedges, tortillas, and grilled chicken
After a few batches, salsa verde becomes a house sauce: keep it chunky for tacos, loosen it for saucy meals, or adjust the method until it fits your table.

Back to top

Posted on — 1 Comment

Pad Kra Pao Recipe: Thai Basil Chicken, Pork, or Beef: Thai Basil Chicken, Pork, or Beef

Finished Pad Kra Pao rice plate with glossy basil minced meat, red chilies, fluffy white rice, lime, and a crispy fried egg on a dark plate.

Pad Kra Pao is the Thai rice plate you want when dinner needs to be fast but still loud: garlic in hot oil, chilies, glossy minced meat, fresh basil, steamed rice, and a crispy fried egg that breaks into the sauce.

It is bold without being complicated. Once the rice is ready and the sauce is mixed, the stir-fry itself takes only a few minutes, which is why this dish works so well for weeknights, leftovers, and those “I want takeout, but I can cook” nights.

You may know this dish as Thai basil chicken, pad krapow, pad ka pow, kra pao, or holy basil chicken. The names and spellings vary, but the craving is usually the same: a spicy basil stir-fry that tastes fresh, savory, chili-hot, and glossy.

Here, you can make it with chicken, pork, or beef, then use the same base for tofu or eggplant. You will also see what to do if you only have Thai basil instead of holy basil, how to adjust the sauce, and how to fix the common problems that make homemade Pad Kra Pao taste flat, salty, or dry.

Quick Answer: What Is Pad Kra Pao?

Pad Kra Pao is a Thai basil stir-fry made with garlic, chilies, meat or tofu, a salty-savory sauce, and basil. It is usually served over rice, often with a crispy fried egg on top.

If you came here looking for Thai basil chicken, this is the same dish family. Thai basil chicken is the version many people know from Thai restaurants: minced or chopped chicken stir-fried with garlic, chilies, basil, and sauce, then spooned over rice.

The most traditional version is made with holy basil, which has a sharper, peppery, clove-like aroma. Thai basil gives a different but still excellent home version: sweeter, more anise-like, and closer to many restaurant-style Thai basil chicken plates outside Thailand.

Best quick version: Use 450g / 1 lb ground chicken, pork, or beef; 5–8 garlic cloves; 3–6 chilies; 1½–2 cups basil leaves; and a sauce made with oyster sauce, fish sauce, soy sauce, dark soy, sugar, and a little water or stock. Stir-fry hot and fast, add basil at the end, and serve over rice with a crispy fried egg.

Need exact measurements? See the sauce ratio or jump to the recipe card.
Labeled Pad Kra Pao plate with basil stir-fry, white rice, and crispy fried egg callouts.
If you know this dish as Thai basil chicken, the idea is the same: a fast garlic-chili basil stir-fry made to land on rice, usually with a crispy fried egg on top.

Why This Pad Kra Pao Works

The flavor does not come from marinating or simmering. It comes from a hot pan, crushed garlic and chilies, meat that sizzles instead of steams, sauce that reduces until glossy, and basil added right at the end.

Keep those five things in place and the dish tastes bold even with practical substitutions. When it works, the pan smells sharp with garlic and chilies, the meat looks shiny instead of wet, and the basil hits at the end with a fresh, peppery lift.

That rhythm is the whole dish: hot, sharp, glossy, fresh.

Pad Kra Pao, Pad Krapow, Pad Ka Pow: Why So Many Spellings?

You may see this dish written as pad kra pao, pad krapow, pad ka pow, pad ka prao, pad gaprao, phat kaphrao, kra pao, or gai pad krapow. These spellings come from different ways of transliterating Thai into English.

For a home cook, the idea is simpler than the name: a hot, fast basil stir-fry with garlic, chilies, sauce, rice, and usually a fried egg. Here, we’ll call it Pad Kra Pao for consistency, but if a menu uses another spelling, you are still in the right place.

Editorial spelling guide for Pad Kra Pao with terms pad krapow, pad ka pow, pad gaprao, and a small plated basil stir-fry.
Because Thai names are transliterated several ways, pad kra pao, pad krapow, pad ka pow, and pad gaprao usually lead readers to the same basil-heavy stir-fry family.

Holy Basil vs Thai Basil

The basil question matters because it changes the flavor of the dish. It should not stop you from cooking, though.

Strictly speaking, holy basil is what gives Pad Kra Pao its name and sharper, peppery character. Thai basil is the easiest excellent home-cook route: not identical, but fresh, aromatic, easy to find, and deeply satisfying in this garlic-chili rice plate. For a deeper Thai cooking perspective on the dish, see this explanation from Hot Thai Kitchen.

Comparison board showing holy basil and Thai basil leaves with flavor notes beside a small Pad Kra Pao dish.
Holy basil gives Pad Kra Pao its sharper traditional bite; however, Thai basil is often the easiest excellent route for a home-style Thai basil chicken plate.

Holy Basil

Holy basil is the most traditional choice for Pad Kra Pao. It has a sharper, peppery, slightly clove-like flavor. If you can find Thai holy basil at an Asian grocery store, use it.

The leaves wilt quickly, so add them at the very end. Do not simmer them for several minutes or the aroma will fade.

Thai Basil

For most home cooks, Thai basil is the easiest reliable substitute. Its aroma is sweeter and more anise-like than holy basil, and it is easier to find in many places.

Many restaurant-style Thai basil chicken recipes use Thai basil, so the flavor will still feel familiar and satisfying. If you are cooking this on a normal weeknight, do not let the basil question stop dinner.

Sweet Basil

Sweet basil, also called Italian basil, will not taste the same as holy basil or Thai basil. Still, it can work when that is all you have.

The result will taste softer, sweeter, and less peppery. It may lean slightly toward a regular basil stir-fry rather than classic Pad Kra Pao, but it is better to make a good basil rice plate than to skip the dish completely.

Can You Use Tulsi?

Tulsi is related to holy basil, but it is not always a simple one-for-one replacement in cooking. Depending on the variety, it can taste medicinal, bitter, or very strong when used in large amounts.

If you want to try tulsi, use a smaller amount first and mix it with Thai basil or sweet basil if possible. Fresh basil in a hot pan is still better than waiting for the perfect herb and never cooking the dish.

Whatever basil you use, wash the leaves ahead of time and dry them well. Wet basil can splutter in the pan and add extra moisture right when you want the sauce to stay glossy.

Sweet basil and tulsi fallback herb board with notes about softer flavor and careful tulsi use.
When holy basil and Thai basil are not available, fresh herbs still help; sweet basil makes the dish softer, while tulsi should be used lightly because its flavor can turn strong.
Simple basil rule: use holy basil if you can get it, Thai basil when you want the easiest excellent home version, sweet basil only if that is what you have, and tulsi carefully.

Already know your basil choice? Go to the ingredients.
Decision board comparing holy basil, Thai basil, sweet basil, and tulsi for Pad Kra Pao.
Use the best basil you can find, but do not pause dinner over the herb question; the bigger win is keeping the garlic-chili-basil structure intact.

Ingredients You Need

Pad Kra Pao is short on ingredients, but every ingredient has a job. Think of them in two groups: the loud things that wake up the pan — garlic, chilies, basil — and the salty-sweet sauce that makes the rice worth eating.

Overhead Pad Kra Pao ingredient map with protein, garlic, chilies, basil, sauce ingredients, rice, egg, and shallot.
The ingredients work in groups: protein catches the sauce, garlic and chilies wake up the pan, basil finishes fresh, and rice plus egg turn it into dinner.

Chicken, Pork, Beef, Tofu, or Eggplant

Ground meat is easiest because it cooks quickly and catches the sauce well. Use ground chicken, ground pork, ground beef, or finely chopped boneless meat. Hand-chopped chicken thigh gives a slightly chunkier, more restaurant-style bite.

For the main recipe, use 450g / 1 lb meat. If your pack is 500g, that is fine. You may need a small extra handful of basil or a splash more water, but do not automatically increase every sauce ingredient.

You do not need to marinate the meat. The flavor comes from the hot garlic-chili base, the sauce reducing onto the meat, and the basil added at the end.

Pork gives the juiciest, most classic-feeling version. Chicken is the version many people recognize from Thai restaurant menus. Beef gives a deeper, richer stir-fry.

Garlic and Chilies

Do not be shy with garlic. Pad Kra Pao should taste bold.

Use 5–8 garlic cloves for 450g / 1 lb meat. For heat, use 3–6 Thai bird chilies, or use 2–4 Indian green chilies if that is what you have. For a mild family version, start with 1 Thai chili or 1 small green chili, then add extra chopped chilies at the table.

Shallots are optional. They add a little sweetness and body, but the dish still works without them.

A mortar and pestle gives the strongest aroma because it crushes the garlic and chilies instead of only cutting them. Finely chopping with a knife also works. The goal is rough, fragrant pieces, not a watery paste.

Garlic and chili guide with crushed garlic, Thai bird chilies, Indian green chilies, optional shallots, and a heat spectrum.
Garlic and chilies are not background flavor here; instead, they create the sharp first hit that keeps Pad Kra Pao from tasting like a regular soy-sauce stir-fry.

Sauce Ingredients

The sauce usually includes oyster sauce, fish sauce, light soy sauce, optional dark soy sauce, sugar, and a little water or stock.

Oyster sauce gives body and savory sweetness. Fish sauce gives salty depth. Light soy adds more salt and umami. Dark soy adds color, but the dish can still work without it. Sugar rounds the heat and salt.

For a vegetarian version, use vegetarian oyster sauce or mushroom sauce, replace fish sauce with light soy sauce, and keep the sugar modest because many mushroom sauces are already slightly sweet.

Pad Kra Pao sauce ingredients board with oyster sauce, fish sauce, light soy, dark soy, sugar, and water or stock role labels.
Oyster sauce gives body, fish sauce adds depth, soy brings umami, and a splash of water or stock helps the sauce coat instead of clump.

Rice and Crispy Fried Egg

Serve it over hot rice so the sauce has somewhere to land. Jasmine rice gives the most classic feel, but plain steamed rice, basmati, or even leftover rice will still do the job.

The crispy fried egg is optional only in the technical sense. In practice, it makes the plate feel complete. The runny yolk mixes with the salty basil stir-fry and rice, while the crisp edges add texture. If the egg yolk runs into the rice, that is not a problem. That is the point.

Pad Kra Pao rice plate with glossy basil meat, fluffy rice, a lacy crispy fried egg, and a close-up egg texture inset.
The crispy fried egg is more than garnish; once the yolk runs into hot rice, it softens the salty chili-basil stir-fry into a satisfying plate.

Easy Substitutions for Indian and Everyday Kitchens

Missing one bottle should not kill the dish. Losing the garlic-chili-basil structure will.

The goal is not to fake perfection. It is to keep the core of the dish intact with what you can actually buy.

Pad Kra Pao substitutions board for Indian kitchens with basil, green chilies, sauces, chicken keema, garlic, and a skillet or kadai cue.
Even with everyday swaps, keep the structure intact: fresh basil, sharp chilies, a salty-savory sauce, and a hot wide pan.
If You Do Not Have… Use This What Changes
Holy basil Thai basil Sweeter and more anise-like, but still excellent
Thai basil Sweet basil Softer and less peppery; still fresh and usable
Thai bird chilies Indian green chilies or serrano chilies Heat is less sharp, but the recipe still works
Dark soy sauce Skip it, or use a tiny extra splash of light soy Less dark color, but the flavor is still good
Fish sauce Light soy sauce plus a pinch of mushroom seasoning Less funky depth, but still savory
Oyster sauce Vegetarian oyster sauce or mushroom sauce Best vegetarian replacement for body and umami
Jasmine rice Plain steamed rice Less fragrant, but perfectly usable
Ground chicken Chicken keema or finely chopped boneless thigh Similar texture; chopped thigh stays juicier
Wok Wide skillet or wide kadai Works well if the pan is hot and not crowded

If your regular soy sauce is very dark and salty, use it like light soy sauce and skip the dark soy. Some supermarket soy sauces do not map neatly to “light soy” and “dark soy,” so taste and adjust gently.

The biggest substitution mistake is not using the “wrong” basil. It is crowding the pan and boiling the meat instead of stir-frying it. A hot, wide pan matters more than having every bottle exactly right.

Once your swaps are sorted, check the sauce ratio before you start cooking.

Best Pan and Equipment for Pad Kra Pao

A wok gives you quick heat and fast evaporation, but a wide skillet works very well for home cooking.

Use a 12-inch / 30cm skillet if you do not have a wok. A wide kadai can also work if it gives the meat enough surface area. Avoid using a small deep pan for a full batch because the meat will steam and release liquid.

For nonstick pans, use medium-high heat instead of the highest possible heat. For a wok or stainless-steel skillet, high heat is fine as long as you keep the food moving.

You will also need a small bowl for the sauce, a knife or mortar and pestle for the garlic and chilies, and a small frying pan if you are making crispy eggs.

Pan rule: the meat should sizzle, not steam. If the pan sounds quiet and wet, it is not stir-frying yet.
Best pan guide showing wok, wide skillet, and wide kadai with a sizzle versus steam cue for Pad Kra Pao.
A wide hot pan is the difference between stir-fried and steamed meat; therefore, listen for a real sizzle before adding the sauce.

If your pan setup is ready, go straight to the method.

Pad Kra Pao Sauce Ratio

The sauce should cling to the meat first and season the rice second. It should look glossy, not soupy.

When the sauce hits the pan, it should bubble hard almost immediately. When it looks like the rice underneath will want a spoonful of it, but the pan is not swimming, you are in the right zone.

Texture comparison board showing too wet Pad Kra Pao versus just-right glossy meat with basil and chilies.
The best texture is glossy and spoonable, not soupy; once the sauce clings to the meat, it flavors the rice without flooding the plate.

Balanced Sauce for 450g / 1 lb Meat

Ingredient Amount What It Does
Oyster sauce 1 tbsp / 15 ml Adds savory body and slight sweetness
Fish sauce 1 tbsp / 15 ml Gives salty, Thai-style depth
Light soy sauce 1 tbsp / 15 ml Adds salt and umami
Dark soy sauce 1–2 tsp / 5–10 ml, optional Adds color and deeper flavor
Sugar 1 tsp / about 4g Rounds the salt and chili heat
Water, chicken stock, or vegetable stock 2–3 tbsp / 30–45 ml Helps the sauce coat the meat
Saveable Pad Kra Pao sauce ratio card with measured oyster sauce, fish sauce, light soy, dark soy, sugar, and water or stock.
This Pad Kra Pao sauce ratio is built for 450g or 1 lb of meat, so the sauce should cling to the mince and lightly season the rice below.

Lower-Salt Sauce Ratio

If your fish sauce, soy sauce, or oyster sauce tastes especially salty, use this version first.

Ingredient Amount
Oyster sauce 1 tbsp / 15 ml
Fish sauce 2 tsp / 10 ml
Light soy sauce 2 tsp / 10 ml
Dark soy sauce 1 tsp / 5 ml, optional
Sugar 1 tsp / about 4g
Water, chicken stock, or vegetable stock 2 tbsp / 30 ml
Lower-salt Pad Kra Pao sauce ratio card with smaller fish sauce and soy sauce amounts for salty sauce brands.
If your fish sauce or soy sauce tastes very salty, start lower; then, after cooking, balance the plate with rice, lime, or a small extra splash of sauce.

Sauce brands vary, especially oyster sauce and soy sauce. If yours tastes very salty or very sweet straight from the bottle, start with the lower-salt ratio and adjust after cooking.

Taste after cooking. If the stir-fry is too salty, serve it with more rice and reduce fish sauce next time. If it tastes flat, it may need more garlic, chili, basil, or a better salt-sugar balance.

Once the sauce is mixed, move to the cooking method.

How to Make Pad Kra Pao

Pad Kra Pao cooks quickly, so the method is more about timing than difficulty. Once everything is lined up, the cooking feels fast rather than stressful.

Before turning on the stove, have the sauce mixed, basil picked and dried, garlic and chilies chopped, rice cooked, and eggs ready to fry. Once the pan is hot, there is not much time to stop and measure.

Pad Kra Pao prep setup with mixed sauce, basil, chopped garlic and chilies, cooked rice, and eggs on a dark surface.
Because Pad Kra Pao moves fast, prep the sauce, basil, aromatics, rice, and eggs first; then the cooking feels quick instead of chaotic.

Cook the Rice First

Start the rice before you cook the stir-fry. Once the garlic and chilies hit the pan, the dish moves fast.

Jasmine rice is the classic choice, but any plain steamed rice will work. If rice timing or water ratios are the part that usually slows you down, MasalaMonk’s guide to cooking perfect rice can help you get the base ready before the stir-fry starts. Avoid heavily seasoned rice because the stir-fry already has plenty of salt, chili, garlic, and basil.

Mix the Sauce Before You Start

Stir the oyster sauce, fish sauce, soy sauces, sugar, and water or stock in a small bowl.

Measure the sauce first, because garlic can burn while you are still looking for bottles.

Pound or Chop Garlic and Chilies

For the strongest aroma, pound garlic and chilies together in a mortar and pestle until roughly crushed. You do not need a smooth paste.

If you do not have a mortar and pestle, finely chop everything with a knife. A mini chopper also works, but stop before the mixture turns wet and pasty.

Fry the Crispy Egg

For each serving, use one egg. Heat 2–3 tablespoons of oil in a small pan, then fry the eggs one at a time or in batches. Add a little more oil between eggs only if the pan gets dry.

Crack in the egg and spoon hot oil over the whites until the edges are crisp and lacy. Keep the yolk runny if you like the classic rice-plate effect.

You can fry the eggs before the stir-fry and set them aside, or fry them right after the stir-fry if you prefer the egg hot from the pan.

Crispy fried egg technique board with hot oil, lacy golden edges, runny yolk, and spooning oil over the whites.
For a Thai-style crispy egg, hot oil matters; spoon it over the whites so the edges turn lacy while the yolk stays rich.

Stir-Fry the Meat Hot and Fast

Heat a wok over high heat, or use medium-high heat if you are cooking in a nonstick skillet. Add oil, then the garlic, chilies, and optional shallots.

The garlic and chilies should become fragrant within seconds. Do not let the garlic turn dark brown. This is the point where the kitchen should smell sharp, garlicky, and a little wild.

Garlic and sliced red and green chilies sizzling in oil in a wok with a spatula.
This is the aroma stage, so move quickly: the garlic should smell sharp and toasty before it gets dark.

Add the meat and break it up as it cooks. It should sizzle, not sit in liquid. If it releases moisture, spread it across the pan and keep cooking until most of that moisture evaporates.

If you add the sauce while the pan is still watery, the finished dish can taste boiled instead of stir-fried.

Before-and-after pan comparison showing wet minced meat versus moisture-cooked-off meat ready for sauce.
Add sauce only after the released moisture cooks off; otherwise, Pad Kra Pao turns boiled and watery instead of glossy.

If your pan is already looking wet, jump to the troubleshooting guide before adding basil.

Add Sauce and Reduce Until Glossy

Pour in the sauce and toss well. It should bubble quickly, coat the meat, and tighten around the pieces instead of pooling underneath.

If the pan looks dry, add 1–2 tablespoons of water or stock. If the pan looks soupy, keep cooking over high heat for another minute before adding basil.

The finished meat should look shiny and loose, not wet or clumpy.

Add Basil at the End

Turn the heat down or off, then add the basil leaves. Toss just until wilted.

Once the basil hits the hot meat, the whole pan should wake up. Long cooking dulls that aroma, so let the leaves collapse into the stir-fry and stop there.

Sequential board showing sauce bubbling into minced meat, coating the meat, and fresh basil added last.
Sauce goes in before basil because it needs heat to reduce; meanwhile, basil should only wilt at the end so the aroma stays fresh.

Serve Immediately

Spoon the basil stir-fry over hot rice. Add a crispy fried egg, cucumber slices, and lime if you like.

The first bite should be hot, salty, fresh, and softened by rice and yolk. This is not a dish that improves by sitting around, so serve it while the basil still smells alive.

Step-by-step Pad Kra Pao board with sauce, basil, garlic and chilies, stir-fried meat, sauce, basil, and a finished rice plate.
The method is simple when the order is clear: prep first, cook aromatics, brown the meat, reduce the sauce, then add basil right at the end.

Chicken, Pork, or Beef: Which Version Should You Make?

The same sauce and method work for chicken, pork, or beef, but each one gives the plate a different mood.

Choose chicken for the cleanest restaurant-style Thai basil chicken, pork for the juiciest street-food-style version, and beef for the darkest, most savory bowl.

Three-way Pad Kra Pao chooser board comparing chicken, pork, and beef rice plates with text labels.
The same sauce can lead to three moods: chicken is clean and fast, pork is juicy and classic, and beef is darker and more savory.

Once you choose the protein, use the recipe card for exact quantities and timing.

Thai Basil Chicken Version

For Thai basil chicken, use ground chicken, chicken keema, or finely chopped boneless chicken thigh.

Hand-chopped thigh gives little juicy pieces that catch the sauce, while ground chicken keeps the dish quick and familiar. Chicken breast works too, but it dries out faster, so chop it small and cook it quickly.

This is the lightest, fastest version and lets the basil come through clearly.

Thai basil chicken plate with glossy chicken pieces, red chilies, basil, rice, cucumber, lime, and crispy fried egg.
Thai basil chicken is the cleanest, fastest version; however, it still needs enough garlic, chilies, and basil to taste bold.

Pork Pad Kra Pao Version

Ground pork gives the richest, juiciest Pad Kra Pao. It is the version to make when you want the dish to feel more street-food-style and deeply satisfying.

Use 450g / 1 lb ground pork. If the pork is fatty, use slightly less oil and let some edges brown before adding the sauce. If it is very lean, keep the full 2 tablespoons of oil and avoid overcooking.

The fat carries the garlic and chili beautifully, especially if you can find holy basil.

Pork Pad Kra Pao plate with glossy browned pork mince, basil, red chilies, rice, and a crispy egg with runny yolk.
Pork gives the juiciest Pad Kra Pao because the fat carries garlic and chili especially well, while the egg makes the rice plate feel complete.

Thai Basil Beef Version

Thai basil beef gives the deepest, most savory bowl. Use ground beef, minced beef, or very thinly chopped steak.

Beef needs a hot, wide pan. If it steams instead of browns, the flavor turns flat. Cook in batches if needed, and use the higher end of the dark soy sauce range if you want a deeper color.

This is the version for a darker, richer rice plate with a strong garlic-chili base.

Thai basil beef rice plate with dark glossy beef, basil, red chilies, white rice, and crispy fried egg.
Thai basil beef should taste deeper and more savory than chicken, so keep the pan hot enough to brown without turning the basil dark.

Vegetarian, Tofu, and Eggplant Options

You can make a vegetarian Pad Kra Pao-style stir-fry with tofu, eggplant, mushrooms, or a mix of vegetables. These versions are not exactly the same as the classic meat rice plate, but the same garlic-chili-sauce-basil structure works well if you control moisture.

The best vegetarian version still needs the same attitude as the meat version: high heat, strong aromatics, and enough basil that the pan smells alive at the end.

For tofu, use firm or extra-firm tofu. Press it if it is very wet, then crumble it into small pieces. Cook it in a hot pan until the edges look lightly browned. The goal is the same as with meat: drive off moisture first, then let the sauce cling instead of slide off.

Tofu Pad Kra Pao plate with crisp glossy tofu, basil, red chilies, rice, and fried egg on a dark plate.
Tofu works best when it gets crisp edges first; after that, the sauce can cling instead of sliding off a wet surface.

If tofu is your main protein more often than a one-time swap, MasalaMonk’s tofu meal prep ideas go deeper into pressing, browning, saucing, and building rice-box style meals that still taste good later.

For eggplant, cut it into small pieces and cook it until tender before adding the sauce. Eggplant absorbs oil, so use a wide pan and avoid stirring too aggressively once it softens.

For mushrooms, cook them until their liquid evaporates. Then add the garlic-chili base, sauce, and basil.

Vegetarian Pad Kra Pao options board with glossy eggplant bowl and browned mushroom bowl with basil and red chilies.
Eggplant should turn tender and glossy, while mushrooms need their moisture cooked off first; otherwise, the vegetarian version can taste watery.

Use vegetarian oyster sauce or mushroom sauce. Replace fish sauce with soy sauce and, if you have it, a small pinch of mushroom seasoning.

For vegetarian sauce swaps, use the substitution guide before cooking.

What to Serve With Pad Kra Pao

Pad Kra Pao is usually served as a rice plate, not as a saucy curry. Keep the sides simple so the basil, garlic, chilies, and fried egg stay in focus.

  • Steamed jasmine rice
  • Crispy fried egg
  • Cucumber slices
  • Lime wedges
  • Extra chopped chilies
  • Prik nam pla — chopped chilies in fish sauce and lime — or soy sauce and lime for a vegetarian plate
Serving spread for Pad Kra Pao with rice, crispy fried egg, cucumber, lime, extra chilies, and prik nam pla labels.
The best sides are simple on purpose: cucumber cools the heat, lime brightens the sauce, extra chilies add control, and prik nam pla sharpens the rice.

Cucumber is especially useful because it cools the heat and gives the plate a fresh crunch. If you want that cooling side to feel a little more complete, a simple cucumber salad works well beside the hot basil stir-fry.

For a brighter Thai-style side, you can also serve it with a small portion of vegan Som Tam raw papaya salad. The crunch, lime, chili, and freshness make sense next to the rich fried egg and savory basil meat.

For the table-side chili condiment, keep the spoonful small and bright rather than drowning the rice.

Prik nam pla condiment bowl with sliced red and green chilies in fish sauce and lime, plus a soy-lime vegetarian note.
Prik nam pla adds salty heat in tiny spoonfuls; for vegetarian plates, soy sauce with lime gives a similar bright table-side lift.

If you bought a large bunch of basil, use the extra leaves quickly in another fresh herb recipe rather than letting them wilt. This dish is best when the basil tastes alive, not tired.

How to Fix Pad Kra Pao

Most Pad Kra Pao problems come from heat, timing, or sauce balance. Fortunately, the fixes are usually simple once you know what happened.

Fast diagnosis: watery usually means crowding or low heat, bland usually means weak garlic-chili-basil energy, salty usually means the sauce needs more rice or a lower-salt ratio, and dull basil flavor usually means the basil cooked too long.
Seasoning troubleshooting board for Pad Kra Pao with rice, lime, chilies, garlic, basil, fish sauce, and a glossy stir-fry bowl.
Fix the plate before you panic: rice and lime soften salt, fresh chilies restore heat, and garlic, basil, or fish sauce can wake up flat flavor.

Too Watery

Watery Pad Kra Pao almost always means the meat steamed before it fried.

Keep cooking until the liquid evaporates before adding basil. Next time, use a wider pan, higher heat, and do not double the recipe in one skillet. For larger batches, cook the meat in rounds.

Troubleshooting board showing watery Pad Kra Pao from a crowded pan and low heat beside glossy fixed stir-fry.
Watery Pad Kra Pao usually starts before the sauce goes in, so use a wider pan and cook off moisture before adding basil.

Sauce Is Pooling Under the Meat

Pooling sauce usually means the sauce went in before the pan was ready.

Keep the pan on high heat and toss until the sauce clings to the meat. Next time, start with 2 tablespoons water or stock, then add more only if the pan looks dry.

Too Salty

Salty Pad Kra Pao is usually easiest to fix on the plate, not in the pan.

Serve it with more plain rice and add a squeeze of lime. Next time, use the lower-salt sauce ratio and reduce fish sauce and light soy before reducing oyster sauce, because oyster sauce also gives body.

Too Sweet

Too much sweetness usually comes from sweet oyster sauce, dark sweet soy, or too much sugar.

To balance the current batch, add a small splash of fish sauce or light soy and serve it with plain rice. Next time, keep the added sugar modest.

Too Dry

If the meat tastes plain and dry instead of glossy, the pan probably needed a small splash of liquid near the end.

Add 1–2 tablespoons of water or stock and toss briefly over heat. The meat should be glossy enough to season the rice, not dry like plain mince.

Not Spicy Enough

If the dish tastes warm but not lively, the chilies are probably too mild or too few.

Add more chopped fresh chili next time, or serve extra chilies on the side. Fresh chilies give sharper flavor and better aroma than chili flakes alone.

Tastes Like Generic Stir-Fry

If it tastes like a regular soy-sauce stir-fry, the sharp things have been muted: garlic, chili, fish sauce, basil, or heat.

Use enough fresh basil, add it at the end, and make sure the sauce reduces onto the meat instead of staying loose in the pan.

Not Enough Basil Flavor

Weak basil flavor usually means one of two things: too little basil, or basil added while the pan was still boiling.

Use 1½–2 cups basil leaves for 450g / 1 lb meat. Add them only at the end and toss just until wilted.

Basil Turned Dark or Lost Its Aroma

Basil turns dull when it cooks too long.

Add it after the sauce has reduced and the heat is low or off. The leaves should wilt into the meat, not simmer.

Garlic Tastes Burnt

Burnt garlic means the aromatics waited too long before the meat went in.

Next time, stir the garlic and chilies only until fragrant, then add the meat as soon as the garlic smells sharp and toasty.

Meat Turned Rubbery

Rubbery meat is usually an overcooking problem, especially with chicken breast or lean beef.

Stir-fry until just cooked, reduce the sauce quickly, then finish with basil.

For texture and basil problems, focus on timing: keep the meat glossy, keep the garlic golden, and add basil only at the end.

Texture and basil troubleshooting board with dry meat, rubbery meat, weak basil, burnt garlic, glossy meat, basil leaves, and spooned stock.
Texture problems have small fixes: a splash of stock rescues dry meat, shorter cooking prevents rubbery meat, and basil belongs at the end.

Need to cook another batch instead? Return to the recipe card with the fixes in mind.

Storage and Reheating

Pad Kra Pao tastes best immediately, when the basil is fresh and the egg is crisp, but leftovers are still useful.

Store the cooked stir-fry in an airtight container in the fridge for up to 3 days. That sits within the USDA’s general 3–4 day guidance for refrigerated leftovers. Store rice separately if possible. Fried eggs are best cooked fresh, but you can skip the egg when reheating and fry a new one before serving.

To reheat, warm the stir-fry in a skillet with a splash of water. Heat just until hot. Do not cook it for too long or the basil flavor will fade further.

Leftovers will not have the same just-wilted basil aroma, but they still make a very good rice bowl the next day.

If you want to prep ahead, mix the sauce, chop the garlic and chilies, wash and dry the basil leaves, and cook the rice. Leave the actual stir-fry for right before eating.

Storage, reheating, and make-ahead board with cooked Pad Kra Pao in a glass container, reheating skillet, rice, eggs, sauce, basil, garlic, and chilies.
Pad Kra Pao is best fresh, but leftovers still work; reheat with a splash of water and fry a fresh egg if possible.

If you like salty-garlicky rice-plate dinners, MasalaMonk’s chicken adobo recipe is another strong one to cook next.

Pad Kra Pao Recipe Card

If this is your first time making it, start with the balanced sauce, use Thai basil if holy basil is hard to find, and keep the pan wide and hot. The first batch will quickly teach you your preferred salt, chili, and basil level.

Pad Kra Pao Recipe: Thai Basil Chicken, Pork, or Beef

This Pad Kra Pao recipe gives you a fast, garlicky Thai basil rice plate with chicken, pork, or beef, glossy sauce, and a crispy fried egg. Use holy basil if you can find it, or Thai basil for the easiest restaurant-style home version.

Prep Time 10 minutes
Cook Time 10–12 minutes
Total Time 20–22 minutes
Servings 4

Equipment

  • Wok or 12-inch / 30cm skillet
  • Small bowl for mixing the sauce
  • Mortar and pestle, knife, or mini chopper
  • Small frying pan for eggs
  • Spatula

Ingredients

For the Stir-Fry

  • 450g / 1 lb ground chicken, pork, or beef
  • 2 tbsp neutral oil, for the stir-fry
  • 5–8 garlic cloves, finely chopped or pounded
  • 3–6 Thai bird chilies, chopped, or 2–4 Indian green chilies
  • 1–2 shallots, thinly sliced, optional
  • 1½–2 cups holy basil or Thai basil leaves, about 30–60g depending on how tightly packed the leaves are
  • Steamed jasmine rice, for serving
  • 4 eggs
  • 2–3 tbsp neutral oil to start, plus more as needed for frying the eggs
  • Cucumber slices, optional
  • Lime wedges, optional

For the Sauce

  • 1 tbsp oyster sauce, 15 ml
  • 1 tbsp fish sauce, 15 ml
  • 1 tbsp light soy sauce, 15 ml
  • 1–2 tsp dark soy sauce, 5–10 ml, optional for deeper color
  • 1 tsp sugar, about 4g
  • 2–3 tbsp water, chicken stock, or vegetable stock, 30–45 ml

Instructions

  1. Cook the rice first. Pad Kra Pao cooks quickly, so have rice ready before you start the stir-fry.
  2. Mix the sauce. In a small bowl, stir together oyster sauce, fish sauce, light soy sauce, optional dark soy sauce, sugar, and water or stock.
  3. Prepare the aromatics. Pound or finely chop the garlic and chilies. Pick the basil leaves from the stems, wash them if needed, and dry them well.
  4. Fry the eggs. Heat 2–3 tablespoons oil in a small pan. Fry the eggs one at a time or in batches, spooning hot oil over the whites until the edges are crisp. Add more oil only if the pan gets dry. Set aside.
  5. Heat the pan. Heat a wok over high heat, or a wide nonstick skillet over medium-high heat.
  6. Cook the garlic and chilies. Add oil, then garlic, chilies, and optional shallots. Stir briefly until fragrant, without letting the garlic burn.
  7. Add the meat. Add ground chicken, pork, or beef. Break it up and stir-fry until cooked through and most moisture has evaporated.
  8. Add the sauce. Pour in the sauce and toss until the meat is glossy and coated. It should not be soupy.
  9. Add basil last. Turn the heat down or off, add basil, and toss just until wilted.
  10. Serve immediately. Spoon over rice and top each serving with a crispy fried egg. Add cucumber and lime if you like.

Notes

  • Holy basil gives the most traditional flavor; Thai basil is the easiest excellent home version.
  • Use neutral oil because olive oil or strongly flavored oils can fight the basil, garlic, and fish sauce.
  • You do not need to marinate the meat. The sauce and aromatics flavor it during the fast stir-fry.
  • If using 500g meat instead of 450g, keep the same sauce ratio first, then adjust only if needed.
  • For a less salty or milder version, reduce fish sauce and soy slightly, and start with 1 Thai chili or 1 small green chili.
  • If doubling the recipe, cook the meat in batches and add the basil only at the end.
Pad Kra Pao recipe card with serving time, ingredients, sauce amounts, method bullets, and a plated basil stir-fry with rice and egg.
Keep this card for the core formula: 1 lb meat, bold aromatics, balanced sauce, basil at the end, and rice plus egg to serve.

By the time the rice, basil stir-fry, and egg come together, the plate should feel hot, glossy, and immediate.

Close-up final Pad Kra Pao serving with glossy basil meat, white rice, crispy fried egg, runny yolk, red chilies, basil leaves, and spoon.
A good final plate should feel immediate: glossy meat, fresh basil, hot rice, and a yolk that runs into everything.

FAQs

Is Pad Kra Pao the same as Thai basil chicken?

Thai basil chicken is usually the chicken version of Pad Kra Pao. Traditionally, the dish is made with holy basil, but many restaurant and home versions use Thai basil because it is easier to find.

What does Pad Kra Pao taste like?

Pad Kra Pao tastes garlicky, salty-savory, spicy, and fresh from the basil. It should feel bold and punchy, with just enough glossy sauce to season the rice without turning the plate into curry.

What basil is best for Pad Kra Pao?

Holy basil gives the most traditional sharp, peppery flavor. Thai basil is the best practical substitute for most home kitchens. Sweet basil works only in a pinch; it makes the dish softer and less like classic Pad Kra Pao.

Can I use dried basil?

Dried basil is not a good replacement because Pad Kra Pao depends on the fresh aroma of basil added at the end. If dried basil is all you have, you can still make a garlic-chili stir-fry, but it will not taste like Pad Kra Pao or a fresh Thai basil chicken-style stir-fry.

Is Pad Kra Pao supposed to be saucy?

No, it should be glossy rather than soupy. You want enough sauce to season the rice, but not so much that the meat swims. Think juicy rice plate, not curry.

Does Pad Kra Pao need a fried egg?

The fried egg is technically optional, but it is part of the pleasure of the plate. The crisp edges add texture, and the yolk softens the salty, spicy meat into the rice.

Chicken breast, sliced chicken, or ground chicken: which works best?

Ground chicken or chopped chicken thigh is easiest and juiciest. Sliced chicken works too if you cut it small and cook it quickly. Chicken breast is usable, but it dries out faster than thigh.

What can replace fish sauce?

Use light soy sauce with a small pinch of mushroom seasoning if you have it. The flavor will be less funky and less Thai-style, but still savory.

What can replace oyster sauce?

Vegetarian oyster sauce or mushroom sauce is the best replacement. If you do not have either, use soy sauce with a little sugar, but the sauce will be thinner and less rounded.

Why did my Pad Kra Pao turn watery?

Watery Pad Kra Pao usually means the meat steamed before it fried. Use a wider pan, higher heat, and cook off moisture before adding the sauce.

Can I make Pad Kra Pao ahead?

You can prep the sauce, garlic, chilies, basil, and rice ahead of time. For the best flavor, cook the stir-fry right before eating because basil tastes freshest when added at the end.

How long does Pad Kra Pao keep in the fridge?

The cooked stir-fry keeps for up to 3 days in an airtight container. Reheat it in a skillet with a splash of water. Fry a fresh egg when serving if possible.

Once this rhythm clicks, Pad Kra Pao becomes less like a strict recipe and more like a rice-plate formula you can repeat with chicken, pork, beef, tofu, or whatever needs cooking.

Back to top ↑

Posted on — 1 Comment

Cream of Mushroom Chicken Recipe

Cream of mushroom chicken served over mashed potatoes with sliced mushrooms, creamy sauce, black pepper, and fresh herbs.

This cream of mushroom chicken recipe is for the night when you have chicken in the fridge, a can of cream of mushroom soup in the pantry, and no patience for a complicated sauce. The goal is simple: tender chicken, creamy mushroom gravy, and a dinner that works with rice, egg noodles, mashed potatoes, biscuits, or whatever vegetable you already have.

This is the kind of dinner that feels like a shortcut while it cooks, but like comfort food once it hits the plate. It is not fancy food; it is the creamy, spoon-over-something meal you make when the day has been long and everyone still needs to eat.

Bake it when you want the easiest family dinner. Use the skillet when dinner needs to happen faster, the slow cooker when the meal should take care of itself, and the rice bake when chicken and rice should land in one dish.

The dish works best with condensed cream of mushroom soup, thin or evenly pounded chicken, and just enough milk or broth to turn the soup into a spoonable sauce. A thermometer keeps the chicken from drying out while still getting it safely to 165°F / 74°C.

Quick Answer: How to Make Cream of Mushroom Chicken

To make cream of mushroom chicken, season chicken breasts or thighs, place them in a baking dish, whisk condensed cream of mushroom soup with milk or low-sodium chicken broth, pour the sauce over the chicken, cover, and bake until the chicken reaches 165°F / 74°C. Uncover near the end if the sauce needs to thicken or cheese is going on top.

The result should be chicken that slices easily with creamy mushroom gravy you can spoon over rice, noodles, mashed potatoes, biscuits, or vegetables. This is still a low-effort dinner: about 10 minutes of prep, then the oven does most of the work.

The skillet version is faster, the slow cooker version is more hands-off, and the rice bake turns it into a one-dish meal. The trick is changing the liquid slightly for each method, so use the version guide or the soup and liquid ratios before switching methods.

Best first version: Bake thin chicken breasts or thighs with 1 can condensed cream of mushroom soup and ½ cup milk or broth at 375°F / 190°C. Cover first for moisture, then uncover near the end so the sauce thickens.
Quick answer board showing cream of mushroom chicken, chicken pieces, condensed soup, milk or broth, and covered baking instructions.
For the simplest version, build the dish in four parts: chicken, condensed cream of mushroom soup, a little milk or broth, and a covered bake.

For food safety, chicken should reach 165°F / 74°C in the thickest part; FoodSafety.gov lists poultry and casseroles at this internal temperature.

Which Version Should You Make?

Before you open the soup can, decide how dinner needs to work tonight. The same basic ingredients can become an easy oven dinner, a quick skillet meal, a slow cooker comfort dish, or a chicken-and-rice bake.

The one thing that changes most between versions is the soup-to-liquid ratio. The oven, skillet, slow cooker, and rice bake each need slightly different treatment, which is what keeps the chicken juicy and the sauce creamy instead of watery.

Choose This Version Best When Key Ratio
Baked cream of mushroom chicken You want the easiest family dinner with minimal prep. 1 can soup + ½ cup milk or broth
Skillet cream of mushroom chicken You want dinner faster and more control over the sauce. 1 can soup + ½–1 cup broth or milk
Slow cooker cream of mushroom chicken You want hands-off creamy chicken for rice, noodles, or potatoes. 2 cans soup + ½ cup liquid
Cream of mushroom chicken and rice You want a full one-dish meal. 1 can soup + 1 cup liquid + ¾ cup rice
Creamy chicken over egg noodles You want mushroom-sauce chicken without baking rice. Cook noodles separately and spoon sauce over them
Guide comparing baked, skillet, slow cooker, and chicken and rice versions of cream of mushroom chicken.
Instead of using one formula for every method, adjust the liquid for baked, skillet, slow cooker, and chicken-and-rice versions.

How Much Liquid to Add to Cream of Mushroom Soup

Use these ratios as starting points, then adjust until the sauce looks spoonable, not stiff and not soupy.

Version Condensed Soup Added Liquid Why It Works
Baked chicken 1 can / 10.5 oz / 298 g ½ cup / 120 ml milk or broth Creates a creamy, spoonable sauce without making the dish watery.
Skillet chicken 1 can / 10.5 oz / 298 g ½–1 cup / 120–240 ml broth or milk The sauce reduces as it simmers, so you can loosen or thicken it as needed.
Slow cooker chicken 2 cans / about 596 g total ½ cup / 120 ml broth or water The slow cooker traps moisture, so too much liquid makes the sauce thin.
Small chicken and rice bake 1 can / 10.5 oz / 298 g 1 cup / 240 ml liquid + ¾ cup rice Rice needs measured liquid and trapped steam to cook properly.
Large 9×13 rice bake 2 cans / about 596 g total 2 cups / 480 ml broth + 1¼ cups rice Better for a family-size casserole with more rice and chicken.
Liquid ratio guide for baked, skillet, slow cooker, and chicken and rice cream of mushroom chicken recipes.
Condensed soup gives the sauce body; however, each cooking method needs a different amount of liquid to stay creamy.

Once the ratio is right, everything gets easier: the chicken cooks gently, the sauce stays spoonable, and the sides do half the work. When you are ready to cook the oven version, go straight to the cream of mushroom chicken recipe card.

Water works in a pinch, but broth gives the dish more savory flavor and milk makes the sauce softer and creamier. Regular condensed soup, regular broth, cheese, and onion soup mix can all add salt, so taste before adding more.

Basic Oven Method at a Glance

Use this as the quick map before the full recipe card.

  1. Thin and season the chicken. Slice large breasts in half lengthwise or pound them evenly, then season lightly.
  2. Whisk the soup mixture. Mix condensed cream of mushroom soup with milk or broth until smooth.
  3. Cover and bake. Pour the mixture over the chicken, cover with foil, and bake so the meat stays moist.
  4. Uncover, check, and rest. Finish uncovered, cook to 165°F / 74°C, and rest before serving.
Four-step oven method for cream of mushroom chicken showing thin chicken, soup mixture, covered baking, and temperature check.
Once the chicken is even in thickness and the soup mixture is loosened, the oven version becomes simple and predictable.

Cream of Mushroom Chicken Recipe Card

This baked cream of mushroom chicken is the oven version to make first: tender chicken, condensed cream of mushroom soup, a little milk or broth, simple seasonings, and enough creamy mushroom sauce to spoon over rice, egg noodles, mashed potatoes, or vegetables.

Prep Time10 minutes
Cook Time30–35 minutes
Total Time40–45 minutes
Yield4 servings

Course: Dinner
Cuisine: American
Method: Baked
Equipment: 9×13-inch baking dish, foil, mixing bowl, instant-read thermometer

Ingredients

  • 1½ lb / 680 g boneless skinless chicken breasts or thighs
  • 1 can condensed cream of mushroom soup, 10.5 oz / 298 g
  • ½ cup / 120 ml milk or low-sodium chicken broth
  • ½ tsp garlic powder, divided
  • ½ tsp onion powder, divided
  • ½ tsp paprika, divided
  • ¼ tsp black pepper, divided, plus more to taste
  • 8 oz / 225 g sliced mushrooms, optional
  • ¼–½ cup / 60–120 g sour cream, optional
  • ¾–1 cup / 85–115 g shredded mozzarella, Monterey Jack, or cheddar, optional
  • Salt only after tasting, if needed

Instructions

  1. Heat oven to 375°F / 190°C. Lightly grease a 9×13-inch baking dish.
  2. Slice large chicken breasts in half lengthwise or pound them to an even thickness.
  3. Place the chicken in the baking dish. Sprinkle with about half of the garlic powder, onion powder, paprika, and black pepper.
  4. Scatter raw mushrooms around the chicken for convenience, or brown them first for deeper flavor and less extra moisture.
  5. In a bowl, whisk the condensed cream of mushroom soup with milk or broth and the remaining garlic powder, onion powder, paprika, and pepper until smooth. Whisk in sour cream now if using it for the baked version.
  6. Taste the sauce. Add salt only if it needs it. A flat-tasting sauce can take a little more pepper, paprika, thyme, garlic powder, or Dijon.
  7. Pour the sauce over the chicken and spread it so the chicken is mostly covered.
  8. Cover the dish tightly with foil.
  9. Bake for 25 minutes.
  10. Uncover and bake 5–10 minutes more, or until the chicken reaches 165°F / 74°C in the thickest part.
  11. Sprinkle cheese over the chicken during the uncovered finish if using it, then bake until melted.
  12. When the chicken is done but the sauce is still thin, move the chicken to a plate and thicken the sauce separately in a small pan, or in the baking dish only if your dish is stovetop-safe.
  13. Rest for 5 minutes before serving.
  14. Serve over rice, egg noodles, mashed potatoes, biscuits, broccoli, green beans, or roasted vegetables.

Notes

  • Use condensed cream of mushroom soup, not ready-to-eat mushroom soup.
  • Browned mushrooms give the sauce a deeper, less canned flavor.
  • Water works if that is all you have, but broth gives better flavor and milk makes the sauce creamier.
  • A cream of chicken swap works too: replace half or all of the cream of mushroom soup with condensed cream of chicken soup.
  • For skillet or slow cooker versions, add sour cream or cheese near the end over gentle heat for the smoothest finish.
Recipe card for cream of mushroom chicken with prep time, cook time, oven temperature, chicken, condensed soup, milk or broth, and method notes.
Save this basic baked cream of mushroom chicken formula first, then use the other sections when you want skillet, slow cooker, or rice variations.

Making a different version? Use the skillet method, slow cooker method, or chicken and rice bake so the liquid and timing stay right.

Why This Recipe Works

The baked version works because it solves two problems at once: thick chicken and loose sauce. Thin pieces cook before they dry out, while condensed soup gives the sauce enough body to stay creamy. A small splash of milk or broth loosens the canned base, covered baking protects the chicken, and the uncovered finish lets the sauce settle.

The real win is not making it fancy. It is keeping the chicken juicy and turning the canned soup into a sauce that tastes like it belongs on the plate.

Ingredient Notes That Keep It Creamy, Not Watery

Nothing here is precious. The point is knowing which shortcuts help and which ones make the dish watery, salty, or dry.

Ingredients for cream of mushroom chicken including chicken, condensed mushroom soup, milk or broth, mushrooms, seasonings, sour cream, and cheese.
A pantry base can still taste rounded when you add smart upgrades like broth, browned mushrooms, thyme, pepper, sour cream, or cheese.
  • Chicken: Boneless skinless breasts or thighs both work. Breasts give you a classic sliced dinner; thighs give you more forgiveness.
  • Condensed cream of mushroom soup: The word condensed matters because the soup starts thick and becomes sauce when you add liquid.
  • Milk, broth, or water: Broth gives savory depth, milk gives a softer creamy finish, and water works when that is all you have.
  • Fresh mushrooms: Raw mushrooms are convenient, but browned mushrooms add deeper flavor and release less water into the dish.
  • Sour cream: Use it for tang. Whisk it into the oven version before baking, or stir it into skillet and slow cooker versions near the end over gentle heat.
  • Cheese: Mozzarella, Monterey Jack, cheddar, Swiss, or Muenster can turn this into a richer family bake.
Taste before baking: Once the soup, liquid, and seasonings are mixed, taste the sauce before pouring it over the chicken. A bland sauce can take black pepper, garlic powder, paprika, thyme, or a small spoon of Dijon; a salty sauce does not need extra salt.

For the oven version, a 9×13-inch baking dish, foil, a mixing bowl, and an instant-read thermometer are enough. The stovetop route needs a lidded skillet, while the crockpot option works best in a 4–6 quart slow cooker.

Using Campbell’s or Any Condensed Mushroom Soup

Campbell’s condensed cream of mushroom soup works well here, and so do other condensed brands. The label matters less than the word condensed.

Condensed vs Ready-to-Eat Soup

Condensed soup is thick enough to become sauce when mixed with a small amount of milk, broth, or water. Ready-to-eat mushroom soup is already diluted, so it can make the dish watery unless you reduce or skip the added liquid.

Comparison of thick condensed cream of mushroom soup and thinner ready-to-eat mushroom soup.
Condensed cream of mushroom soup starts thick, while ready-to-eat soup is already diluted; that difference matters when you want a creamy sauce.

Low-sodium condensed soup gives you more control if you are also using broth, cheese, onion soup mix, or another salty ingredient.

The same cream-soup comfort logic shows up in MasalaMonk’s tuna noodle casserole recipe, where condensed soup turns into a creamy noodle bake.

Best Chicken to Use: Breasts, Thighs, or Cubed Chicken

That is really the whole chicken decision: breasts for a classic sliced dinner, thighs when you want more forgiveness, and cubed chicken when you want a faster skillet or casserole-style meal.

Chicken guide showing breasts, thighs, cubed chicken, and thinner cutlets for cream of mushroom chicken.
Your cut changes the result: breasts slice neatly, thighs stay juicy, and cubed chicken cooks quickly for skillet-style dinners.

Chicken Breasts

Chicken breasts work well when they are not too thick. Large breasts should be sliced in half lengthwise to make thinner cutlets, or pounded to an even thickness. This helps the chicken cook through before the sauce dries out.

For more detail on baking chicken breast without drying it out, see MasalaMonk’s baked chicken breast recipe.

Chicken Thighs

Boneless skinless thighs stay juicy even when the dish needs a few extra minutes. They are especially good for the slow cooker or chicken-and-rice versions because they can handle longer cooking better than thin breasts.

Cubed Chicken

Cubed chicken is useful for a quick skillet dinner or a casserole-style variation. It cooks faster and mixes easily with noodles or rice, though it does not give you the same sliced-chicken presentation as baked breasts or thighs.

Baked Cream of Mushroom Chicken

This is the version to make first. It gives you the classic creamy mushroom chicken experience without needing a skillet, a roux, or a separate sauce.

The best pan comes out bubbling around the edges, with mushroom gravy tucked around the chicken and enough creamy sauce to drag through rice, noodles, or mashed potatoes.

Before Baking

The dish should look assembled but not finished: chicken tucked into the mushroom mixture, mushrooms visible, and just enough sauce to coat the pan before it is covered.

Raw chicken breasts in a baking dish with cream of mushroom sauce, sliced mushrooms, foil, and a spoon nearby.
Before baking, the chicken should be coated and nestled into the mushroom mixture, not buried under too much liquid.

Baked Version at a Glance

Detail Best Answer
Oven temperature 375°F / 190°C
Baking dish 9×13-inch dish
Chicken 1½ lb / 680 g boneless skinless breasts or thighs
Soup 1 can condensed cream of mushroom soup, 10.5 oz / 298 g
Liquid ½ cup / 120 ml milk or low-sodium chicken broth
Covered bake 25 minutes
Uncovered finish 5–10 minutes
Safe internal temperature 165°F / 74°C
Resting time 5 minutes
Baked cream of mushroom chicken guide showing 375°F oven, covered baking, uncovered finish, 165°F temperature, and resting time.
Baked cream of mushroom chicken works best with a covered start, a short uncovered finish, and a thermometer check at 165°F.

Once this version is in the oven, there is not much left to do except make something for the sauce to land on.

Covered or Uncovered?

Cover the chicken for the first part of baking. The foil traps steam, keeps the meat moist, and prevents the sauce from drying out too quickly. The final uncovered minutes help looseness cook off and let cheese melt if you are using it.

Very thin pieces should be checked early. Thicker pieces need a thermometer more than they need a guessed time.

Comparison of covered and uncovered baked cream of mushroom chicken in a casserole dish.
Covering helps the chicken stay moist; afterward, uncovering lets the creamy mushroom sauce reduce just enough.
If the chicken is done but the sauce is thin: Do not keep baking the chicken just to thicken the sauce. Move the chicken to a plate, cover it loosely, and thicken the sauce in a small pan, or in the baking dish only if your dish is stovetop-safe.

What the Sauce Should Look Like

The finished sauce should be creamy and spoonable, thick enough to coat the chicken but loose enough to run into rice, noodles, or mashed potatoes. It should not be stiff like paste, and it should not run like soup.

A sauce that looks too thick before baking needs another splash of milk or broth. When the sauce looks watery but the chicken still needs time, uncover the dish for the last few minutes. Once the chicken is already at 165°F / 74°C, remove it and thicken the sauce separately instead of overbaking dinner.

Sauce texture guide for cream of mushroom chicken showing too thick, just right, and too thin sauces.
Look for sauce that coats a spoon without running like soup, since that texture will sit better on rice, noodles, or mashed potatoes.

In the oven version, ½ cup / 120 ml milk or broth per 10.5 oz / 298 g can of condensed soup is the safest starting point. The skillet version can handle more liquid because the pan sauce reduces as it simmers. The slow cooker needs less because the lid traps moisture as everything cooks. When the texture looks off, use the troubleshooting guide instead of guessing.

Skillet Cream of Mushroom Chicken

The skillet version is best when dinner needs to be faster and the sauce needs more hands-on control. It tastes a little more cooked, not just assembled, because the chicken and mushrooms get direct heat before the sauce comes together.

This is the version with the most dinner-pan flavor: a little browning, a little butter, and creamy mushroom sauce pulled together in the same skillet.

Skillet cream of mushroom chicken with seared chicken, browned mushrooms, creamy sauce, black pepper, and herbs.
The skillet version adds extra savory depth because the chicken and mushrooms brown before the cream sauce is finished.

Skillet Formula

  • 1½–2 lb / 680–900 g chicken
  • 1 tbsp oil or butter, for searing
  • 1 can condensed cream of mushroom soup, 10.5 oz / 298 g
  • ½–1 cup / 120–240 ml milk, water, or low-sodium chicken broth
  • 8 oz / 225 g sliced mushrooms, optional
  • Garlic powder, onion powder, paprika, black pepper, and herbs to taste

Oil helps the chicken sear without burning. A small knob of butter added with the mushrooms gives the pan a richer, rounder flavor.

Skillet Timing

Chicken Type Timing What to Watch
Thin chicken cutlets Sear 3–4 minutes per side, then simmer 5–8 minutes in sauce Check early so they do not dry out.
Boneless thighs Sear 4–5 minutes per side, then simmer 8–12 minutes in sauce They stay juicier and can handle a little longer cooking.
Cubed chicken Cook 8–12 minutes total, depending on cube size Stir often so the sauce coats the pieces evenly.
Skillet formula and timing guide for cream of mushroom chicken with cutlets, thighs, and cubed chicken.
Skillet cream of mushroom chicken cooks quickly, so cut size matters: thin cutlets, thighs, and cubed chicken all need different timing.

How to Make It in a Skillet

Season the chicken, then sear it in a large skillet until lightly browned on both sides. Add fresh mushrooms after removing the chicken briefly, then cook them until they release moisture and start to brown. Whisk in the condensed soup with enough broth or milk to make a sauce, then return the chicken to the pan.

Step-by-step skillet method showing seared chicken, browned mushrooms, sauce mixture, returned chicken, and gentle simmering.
Sear first, then simmer gently; that sequence builds flavor while keeping the chicken from drying out.

Cover and simmer gently until the chicken reaches 165°F / 74°C. A pan sauce that tightens too much only needs a tablespoon or two of milk or broth. A loose sauce needs the opposite: a few uncovered minutes so extra moisture can cook off. Use the sauce texture guide if you are unsure whether to loosen or reduce it. For a quick slurry, mix 1 tsp cornstarch with 1 tbsp cold water, then stir it into the simmering sauce. Sour cream should go in near the end over low heat so everything stays smooth.

Slow Cooker Cream of Mushroom Chicken

The slow cooker is best when you want tender, saucy chicken waiting for you later. It is less about speed and more about having creamy chicken ready when the rice, noodles, or potatoes are done.

Because the lid traps moisture, start with less liquid than you would use in the oven or skillet. Thawed chicken gives the most predictable timing and texture; frozen chicken releases more moisture and can make the sauce thin.

Slow cooker cream of mushroom chicken before and after cooking, with chicken, mushrooms, condensed soup, and creamy finished sauce.
Slow cooker cream of mushroom chicken needs a thicker starting mixture because the covered cooker creates its own moisture.

If you like this kind of hands-off chicken dinner, MasalaMonk’s crock pot chicken breast recipes has more ways to keep slow-cooked chicken juicy instead of dry.

Slow Cooker Formula

  • 1½–2 lb / 680–900 g chicken breasts or thighs
  • 2 cans condensed cream of mushroom soup, 10.5 oz / 298 g each
  • ½ cup / 120 ml low-sodium chicken broth or water
  • 8 oz / 225 g sliced mushrooms, optional
  • ½ packet onion soup mix, optional, only if you like a saltier old-school flavor
  • Sour cream or cheese near the end, optional
Slow cooker formula board for cream of mushroom chicken with chicken, condensed soup, broth or water, timing, and temperature.
Start the slow cooker with less liquid than the oven version, then adjust near the end if the sauce needs loosening or enrichment.

Cook on High for 3–4 hours or Low for 6–7 hours, until the chicken reaches 165°F / 74°C. Thighs handle the longer cook better than thin breasts. By the end, the chicken should be fork-tender and the sauce should taste like it has had time to settle into the meat.

Serve the pieces whole, or shred the chicken into the sauce if you want it to spoon over rice, noodles, or potatoes. Add sour cream or cheese near the end, not at the beginning, for the smoothest finish.

How to Thicken Slow Cooker Cream of Mushroom Chicken

A thin slow cooker sauce can be fixed by removing the lid for a short time, shredding the chicken into the sauce, or thickening it with a small slurry made from 1 tsp cornstarch and 1 tbsp cold water. Use this fix before the chicken overcooks.

Guide showing how to thicken slow cooker cream of mushroom chicken sauce by removing the lid, shredding chicken, or adding slurry.
If slow cooker sauce turns thin, you can fix it calmly with uncovered time, shredded chicken, or a small cornstarch slurry.

For another saucy crockpot chicken dinner, MasalaMonk’s slow cooker French onion chicken follows a similar comfort-food idea with onion gravy, cheese, and a base of noodles, potatoes, rice, or toast.

Cream of Mushroom Chicken and Rice

Rice can absolutely work here, but it needs its own formula. Dry rice needs extra liquid, trapped steam, and more time than the basic baked chicken version. Before you bake, scan the rice mistakes to avoid if you are using brown rice, instant rice, or thick chicken pieces.

Rice version rule: Use extra liquid, a tight foil cover, and longer baking time. The soup base alone is too thick to cook raw rice evenly.
Cream of mushroom chicken and rice casserole in a baking dish with tender rice, mushrooms, creamy sauce, and a serving spoon.
Cream of mushroom chicken and rice needs its own method, since dry rice requires extra liquid, trapped steam, and resting time.

Campbell’s classic one-dish chicken and rice bake follows this same condensed-soup pattern: condensed soup, measured liquid, uncooked long-grain white rice, and chicken baked together under a tight cover. You can see that reference here: Campbell’s One-Dish Chicken & Rice Bake.

Small Classic Chicken and Rice Bake

This smaller rice bake makes about 4 servings.

  • 1 can condensed cream of mushroom soup, 10.5 oz / 298 g
  • 1 cup / 240 ml water or low-sodium chicken broth
  • ¾ cup / about 140 g uncooked long-grain white rice
  • 1¼ lb / 565 g boneless skinless chicken breast or thighs
  • ¼ tsp paprika, plus pepper and garlic powder if desired

Mix the soup, liquid, rice, and seasoning in a greased baking dish. Place the chicken on top, cover tightly, and bake at 375°F / 190°C for about 45 minutes, or until the rice is tender and the chicken reaches 165°F / 74°C. Let it stand for 10 minutes before serving so the rice can finish absorbing the sauce.

Chicken and rice timing tip: Thicker chicken pieces or thighs work better for rice bakes because the rice needs longer to cook. Thin chicken breasts may finish before the rice is tender. When that happens, remove the chicken, keep the rice covered, and continue baking the rice until soft.
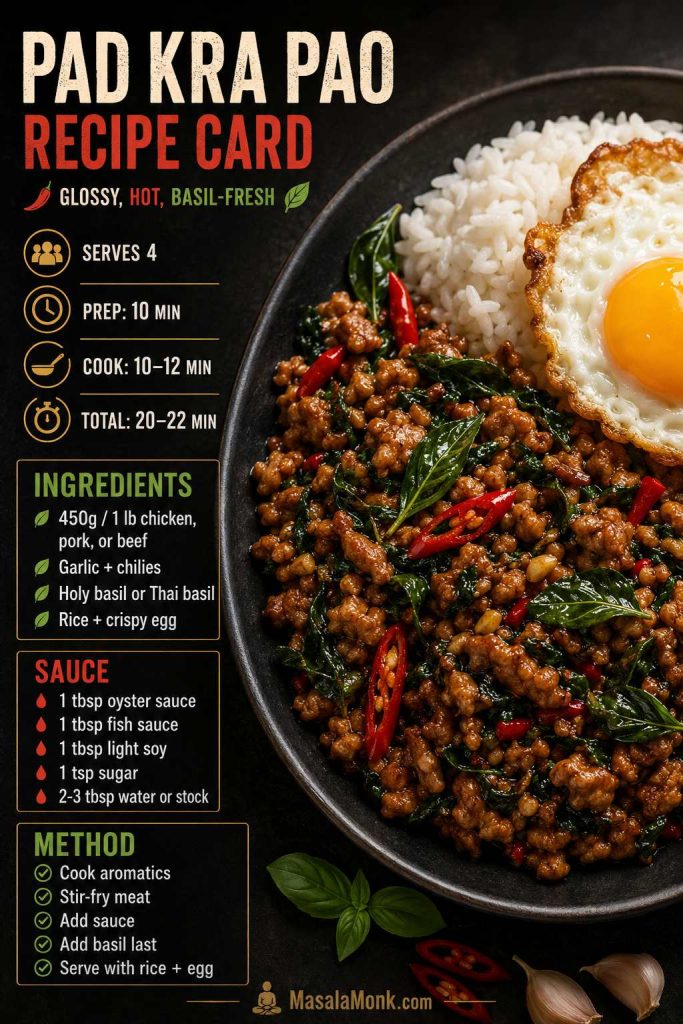
Larger 9×13 Family Rice Bake

A larger family-style casserole needs more soup, more rice, and more liquid.

  • 2 cans condensed cream of mushroom soup, 10.5 oz / 298 g each
  • 2 cups / 480 ml low-sodium chicken broth
  • 1¼ cups / about 230 g long-grain white rice
  • 1½–2 lb / 680–900 g chicken
  • Optional onion, thyme, Dijon, black pepper, or Parmesan

Cover tightly and bake at 350°F / 175°C for about 60 minutes. Check the rice, stir gently around the chicken if needed, add a splash of hot broth if the rice is still firm, then cover again and bake 10–15 minutes more. Rest 10 minutes before serving.

Chicken and Rice Formula Guide

Use the small bake when you want a compact dinner, and use the 9×13 formula when the casserole needs to feed more people without leaving the rice undercooked.

Formula guide for small and family-size cream of mushroom chicken and rice bakes with soup, liquid, rice, chicken, oven temperature, and time.
Use the right chicken-and-rice formula from the start, and you avoid the common problem of tender chicken with undercooked rice.

Rice Mistakes to Avoid

The rice version is forgiving once the steam is right, but it is less forgiving when the cover is loose or the liquid is guessed.

  • A loose cover will not trap enough steam. Rice needs a tight cover to soften properly.
  • Brown rice needs a different plan. It takes more time and usually more liquid than white rice.
  • Instant rice cooks too fast for this long bake. It can turn mushy unless you change the method.
  • Ready-to-eat soup can make the bake watery. It is already diluted, unlike condensed soup.
  • The chicken can finish before the rice. Check both before calling the dish done.
  • Resting matters. The rice absorbs the final sauce as it stands.
Chicken and rice mistakes guide showing loose cover, wrong rice, too little liquid, chicken done before rice, skipped resting time, and rice choices.
Long-grain white rice is the easiest choice; brown rice and instant rice need different liquid and timing to work well.

Serving the chicken over plain rice instead of baking rice in the dish? MasalaMonk’s how to cook rice guide is useful for getting fluffy grains that do not turn gummy under the sauce.

Cream of Chicken + Cream of Mushroom Variation

You can mix cream of chicken and cream of mushroom soup. Cream of chicken makes the sauce milder and more savory, while cream of mushroom adds deeper mushroom flavor. A 50/50 mix works especially well for larger bakes, chicken and rice, and slow cooker meals.

For a bigger casserole or crockpot dinner, try 1 can cream of mushroom soup and 1 can cream of chicken soup. Low-sodium versions are the safest choice because two condensed soups can make the dish salty fast.

Comparison of cream of mushroom soup, cream of chicken soup, and a 50 50 blend spooned over chicken.
Cream of mushroom brings deeper flavor, cream of chicken tastes milder, and a 50/50 blend gives a softer creamy sauce.

This same cream-soup swap logic also shows up in comfort casseroles like MasalaMonk’s green bean casserole recipe ideas, where condensed cream soup is part of the classic creamy base.

How to Make Cream of Mushroom Chicken Taste Better

The shortcut works as-is, but one or two small upgrades can make it taste more like a creamy mushroom dinner than plain canned soup.

The easiest upgrades are browned mushrooms for depth, broth for savoriness, and a small spoon of Dijon or thyme for balance.

Flavor upgrade board for cream of mushroom chicken with browned mushrooms, broth, thyme, Dijon, sour cream, cheese, pepper, and parsley.
Small upgrades like browned mushrooms, broth, Dijon, thyme, sour cream, cheese, pepper, and parsley make the shortcut taste more complete.

Browned vs Raw Mushrooms

Raw mushrooms can go straight into the dish, but browning them first gives the sauce more flavor and reduces the extra moisture that can loosen the pan.

Comparison of raw sliced mushrooms and browned mushrooms for cream of mushroom chicken.
Raw mushrooms keep prep easy; meanwhile, browned mushrooms add deeper flavor and reduce extra moisture in the sauce.
  • Brown fresh mushrooms first: This adds real mushroom flavor, cooks off extra moisture, and gives the sauce a deeper base.
  • Choose broth instead of water: Low-sodium chicken broth gives the dish more savory depth.
  • Add garlic and onion powder: These make the pantry version taste fuller.
  • Add thyme: Thyme works naturally with mushrooms and chicken.
  • Stir in a small spoon of Dijon: It cuts through the richness without making the dish taste mustardy.
  • Finish with sour cream: It gives the sauce a tangier, creamier finish. In skillet and slow cooker versions, add it near the end over gentle heat.
  • Melt cheese on top: Mozzarella, Monterey Jack, cheddar, Swiss, or Muenster can turn this into a cheesy baked chicken dinner.
  • Add black pepper and parsley at the end: This keeps the final plate from tasting too heavy.
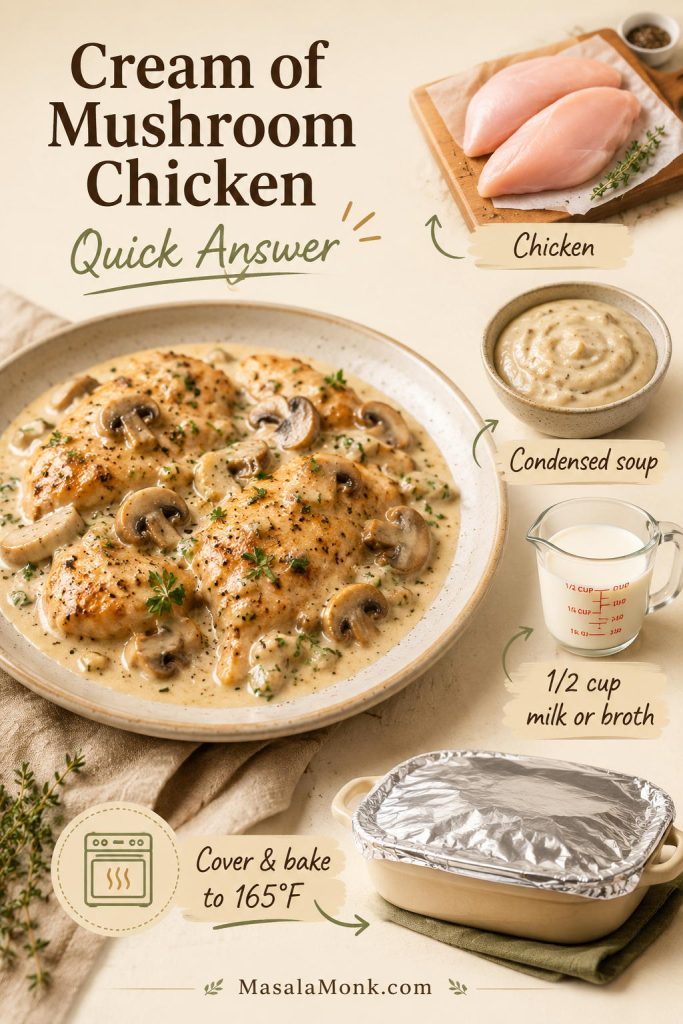
What to Serve with Cream of Mushroom Chicken

The sauce is the point, so serve it with something that catches every spoonful: fluffy rice, buttered egg noodles, mashed potatoes, biscuits, broccoli, or green beans.

Side dish guide for cream of mushroom chicken with rice, egg noodles, mashed potatoes, biscuits, broccoli, and green beans.
The best sides give the sauce somewhere to go, whether you choose rice, egg noodles, mashed potatoes, biscuits, broccoli, or green beans.

Over Rice

Plain white rice is the easiest pairing. Brown rice, leftover rice, or seasoned rice also work, but keep them separate unless you are following a true chicken-and-rice bake formula.

Cream of mushroom chicken served over fluffy white rice with sliced mushrooms, creamy sauce, black pepper, and herbs.
Rice keeps this creamy chicken dinner simple, filling, and easy to serve on a busy weeknight.

Over Egg Noodles

Egg noodles make this feel like old-school chicken and gravy. Cook the noodles separately, then spoon the chicken and mushroom sauce over the top. Dry egg noodles should not go into the baking dish unless you are using a tested noodle-casserole formula.

Cream of mushroom chicken served over broad egg noodles with creamy mushroom sauce, chicken pieces, herbs, and a fork lifting a bite.
Broad egg noodles hold the mushroom sauce in their folds, so this version feels cozy without needing extra prep.

Over Mashed Potatoes

Mashed potatoes make the plate even cozier. If you want a creamy potato side that will hold the sauce without turning gluey, try MasalaMonk’s garlic mashed potatoes recipe.

Sliced cream of mushroom chicken served over mashed potatoes with mushrooms, creamy sauce, black pepper, and herbs.
Mashed potatoes make the richest plate because the soft potatoes hold the creamy mushroom sauce instead of letting it run.

With Vegetables

Green beans, broccoli, peas, carrots, roasted mushrooms, or a simple salad balance the richness. For a holiday-style comfort plate, serve it with green bean casserole, roasted vegetables, or a crisp side salad.

For a bigger comfort-food spread, MasalaMonk’s hashbrown casserole recipe also works as a creamy potato side, especially when the chicken is served with green beans or salad. Planning leftovers? The storage and reheating tips explain how to loosen the sauce again without drying out the chicken.

How to Fix Cream of Mushroom Chicken

Even when this dish goes a little sideways, it is usually fixable. Most problems are texture problems: the sauce is too thick, too watery, or too salty, while the chicken dries out because the pieces were too thick or cooked too long.

The usual culprits are ready-to-eat soup instead of condensed soup, too much liquid, a loose cover on rice, or thick chicken breasts that needed more time than the sauce did.

Common Sauce, Chicken, and Rice Fixes

Problem What Happened How to Fix It
Sauce is too thick or gluey Not enough liquid was added to the condensed soup. Add milk or broth 1–2 tbsp at a time until it is spoonable.
Sauce is watery Too much liquid was added, ready-to-eat soup was used, or raw mushrooms released extra moisture. When the chicken still needs time, bake uncovered 5–10 minutes. When the chicken is already done, remove it and thicken the sauce separately with a small slurry: 1 tsp cornstarch mixed with 1 tbsp cold water.
Sauce is too salty Condensed soup, broth, cheese, or onion soup mix added too much salt. Serve with rice, noodles, or potatoes to soften the saltiness. A spoonful of sour cream can also mellow the sauce. Next time, use low-sodium soup and broth.
Chicken is dry The pieces were too thick, uncovered too long, or cooked past 165°F / 74°C. Slice breasts thinner, cover while baking, check early, or use thighs.
Chicken is done but sauce is thin The sauce needs more time, but the chicken does not. Remove the chicken, cover it loosely, and thicken the sauce separately in a small pan.
Rice is undercooked The dish needed more steam, liquid, or time. Add ¼–½ cup hot broth, cover tightly again, and bake longer.
Rice is mushy Too much liquid or too much bake time. Use long-grain white rice, measure carefully, and rest the dish instead of overbaking.
Dish tastes bland The sauce was not boosted with enough seasoning or fresh ingredients. Add black pepper, garlic powder, onion powder, thyme, paprika, Dijon, or browned mushrooms.
Sauce splits when reheated It was reheated too aggressively. Reheat gently with a splash of milk or broth and stir slowly.
Troubleshooting guide for cream of mushroom chicken showing fixes for watery sauce, thick sauce, salty sauce, dry chicken, undercooked rice, and bland flavor.
Most cream of mushroom chicken problems are fixable once you know whether the issue is texture, salt, timing, or seasoning.

Storage, Freezing and Reheating

Store leftovers in an airtight container in the refrigerator for 3–4 days. Rice or noodles are best stored separately when possible so they do not soak up all the sauce.

To reheat, warm the chicken gently on the stovetop or in the microwave with a splash of milk or broth. The sauce thickens as it chills, so that splash of liquid helps bring it back to a spoonable texture.

You can freeze the cooked chicken and sauce, but the sauce may loosen or look slightly grainy after thawing. It is still usable; reheat gently and whisk in a splash of milk or broth to bring it back together.

Chicken-and-rice leftovers thicken more in the fridge because the rice keeps absorbing the sauce. Reheat them with a splash of broth or milk so the rice loosens instead of turning dry.

Storage guide for cream of mushroom chicken showing a fridge container, freezer bag, and reheating in a skillet with milk or broth.
Creamy leftovers thicken in the fridge, so reheat gently and add a splash of milk or broth to bring the sauce back.

Cream of Mushroom Chicken FAQs

How long should cream of mushroom chicken bake?

Thin boneless chicken breasts or thighs usually need about 25 minutes covered at 375°F / 190°C, then 5–10 minutes uncovered. Thickness matters more than the clock, so check that the chicken reaches 165°F / 74°C.

Covered or uncovered?

Cover the dish first so the chicken stays moist and the sauce does not dry out. Uncover near the end when the sauce needs to thicken or cheese is going on top.

Campbell’s soup vs other condensed brands

A standard 10.5 oz / 298 g can of Campbell’s condensed cream of mushroom soup works well, but other condensed brands work too. The important detail is that the soup is condensed, not ready-to-eat.

Chicken breasts vs thighs

Boneless skinless thighs are the more forgiving choice because they stay juicy even when the dish needs a few extra minutes. Breasts work well too, but they should be thin and even before baking.

How much liquid should I add to condensed soup?

For baked chicken, ½ cup / 120 ml milk or low-sodium broth per 10.5 oz / 298 g can makes a creamy sauce. Skillet chicken can take ½–1 cup / 120–240 ml because the pan sauce reduces as it simmers.

How to make it on the stove

The stovetop version works best with thin pieces because they cook quickly and stay tender. Sear them first, then simmer gently in the mushroom sauce until they reach 165°F / 74°C. A few uncovered minutes will tighten a loose pan sauce.

Homemade mushroom sauce instead of canned soup

This becomes a different style of recipe, but it can work. For a quick homemade mushroom cream sauce, start with 2 tbsp butter, 8 oz mushrooms, 1 minced garlic clove, 2 tbsp flour, 1 cup broth, and ½ cup milk or cream, then cook the chicken in that sauce. For the classic shortcut flavor, use condensed soup.

Adding rice safely

Rice can work beautifully, but treat it like its own bake, not a last-minute add-in. It needs extra liquid, trapped steam, and more time than the basic chicken version. Start with 1 can condensed soup, 1 cup / 240 ml water or broth, ¾ cup / about 140 g long-grain white rice, and about 1¼ lb / 565 g chicken.

Should you use frozen chicken?

Thawed chicken is the safer bet here because it cooks more evenly and keeps the sauce from turning watery. Frozen chicken can release a lot of moisture, especially in the oven or skillet, so thaw it first when you can.

Why the sauce turns watery

Watery sauce usually comes from too much liquid, ready-to-eat soup instead of condensed soup, raw mushrooms releasing moisture, or keeping the dish covered for the whole bake. Once the chicken is done, remove it and thicken the sauce separately with a small slurry made from 1 tsp cornstarch and 1 tbsp cold water.

Fixing a salty sauce

Condensed soup is already salty, and broth, cheese, or onion soup mix can add even more. Rice, noodles, or potatoes help soften the saltiness on the plate. A spoonful of sour cream can also mellow the sauce.

Best sides for creamy mushroom chicken

Rice, egg noodles, mashed potatoes, biscuits, broccoli, green beans, peas, carrots, and roasted mushrooms all work. The best side is something that catches the creamy mushroom sauce.

Slow cooker ratio

In the slow cooker, use less liquid than you might expect because the lid traps moisture. For 1½–2 lb / 680–900 g chicken, use 2 cans condensed cream of mushroom soup and about ½ cup / 120 ml broth or water. Cook on High for 3–4 hours or Low for 6–7 hours, until the chicken reaches 165°F / 74°C.

Final Thoughts

Start with the oven version first. Once you understand the soup-to-liquid ratio, the recipe bends to the night: faster in a skillet, easier in the slow cooker, or heartier with rice.

However you make it, the goal stays the same: juicy chicken, creamy mushroom gravy, and a dinner that asks very little from you but still feels like someone cared.

Back to top