Posted on — Leave a comment

Hot and Sour Soup Recipe: Easy Chinese Restaurant-Style Soup

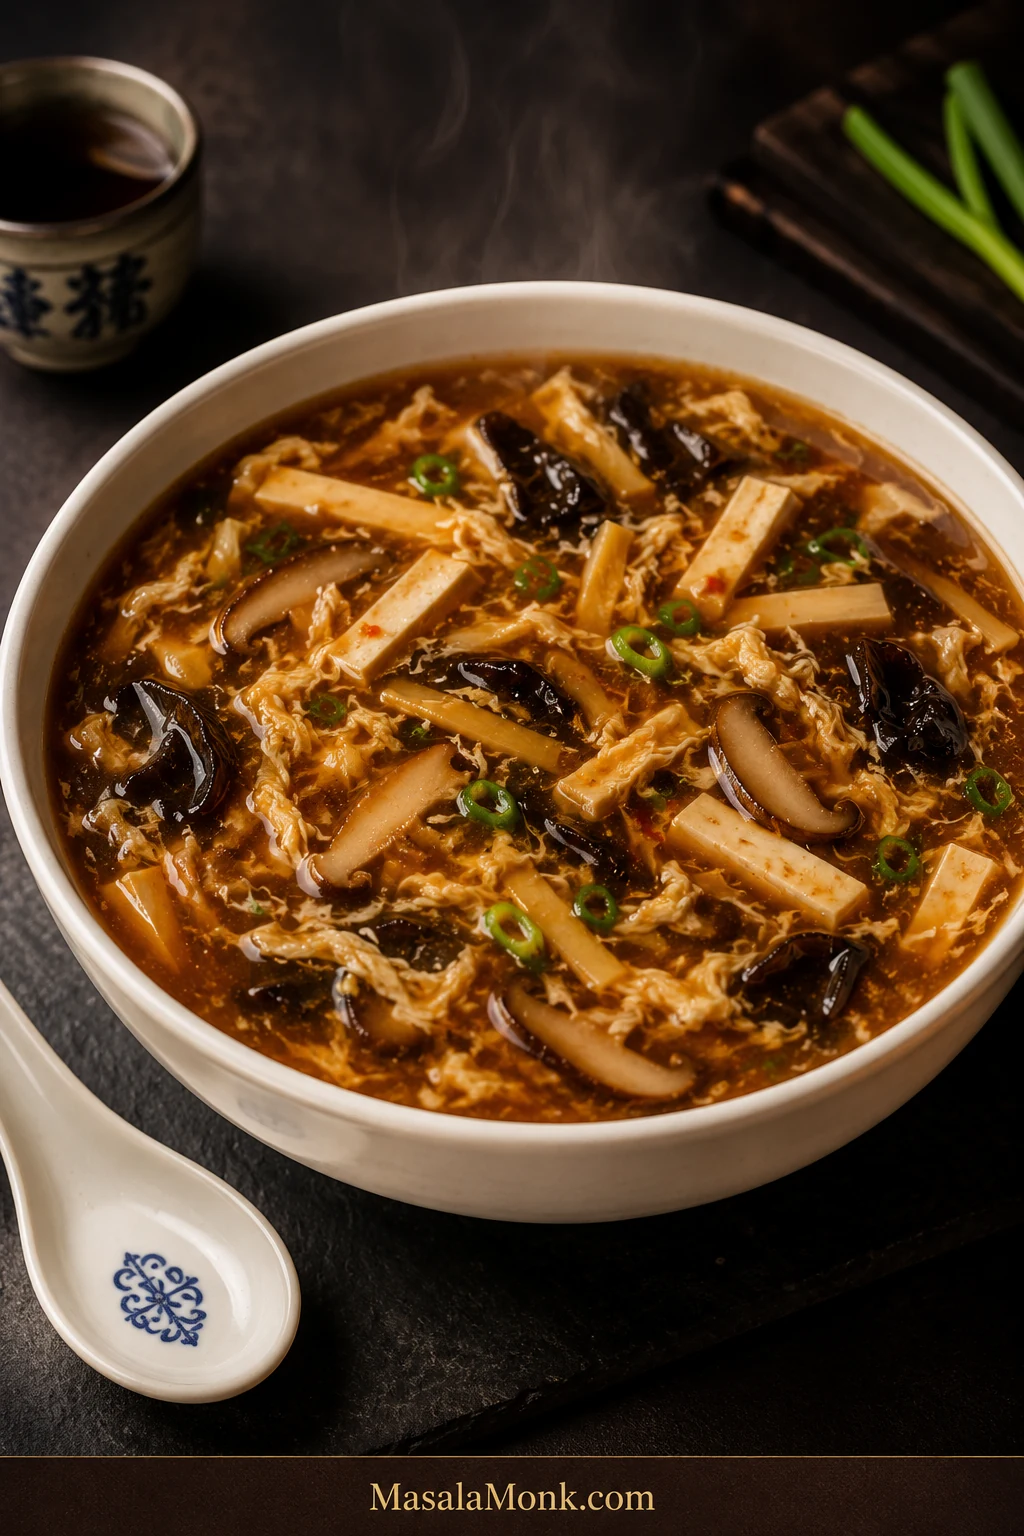
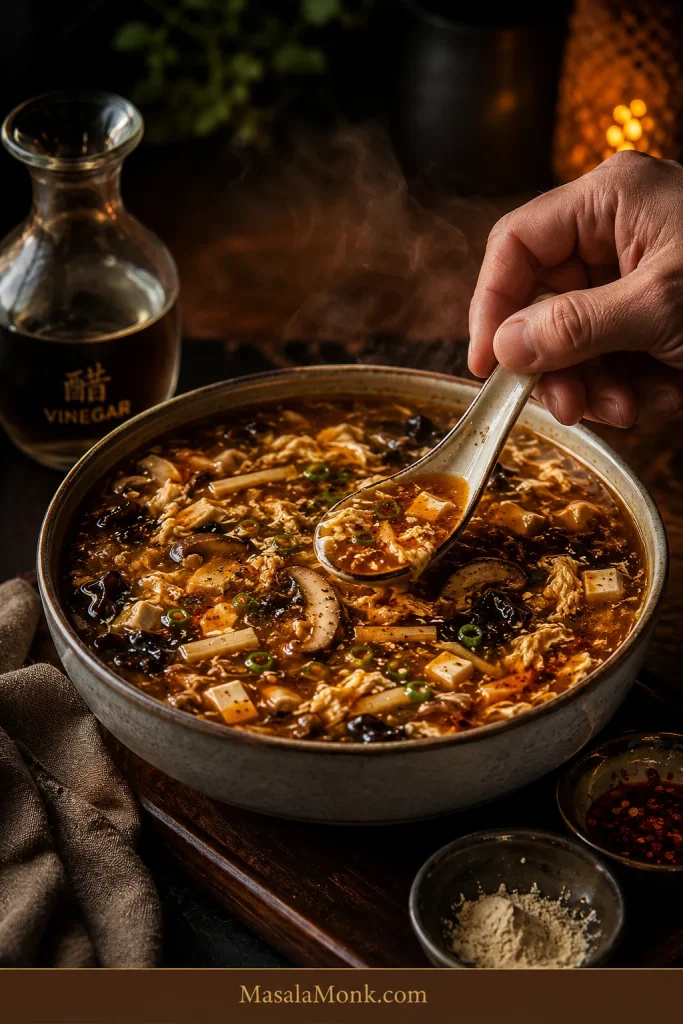
White ceramic bowl of glossy deep amber-brown hot and sour soup with egg ribbons, tofu, shiitake, wood ear mushrooms, bamboo shoots and scallions on a dark tabletop, with steam rising.

Hot and sour soup is one of those bowls you notice before the first spoonful. Vinegar rises with the steam, white pepper catches gently at the back of your throat, and underneath it all is savory broth threaded with mushrooms, tender tofu and silky ribbons of egg.

It is also surprisingly easy to get almost right. Plenty of chilli makes the soup spicy without necessarily giving it that familiar white-pepper warmth. Too much starch turns the broth gluey. Let the vinegar cook too long and some of its brightness fades. Pour the egg too quickly and it disappears into cloudy flecks instead of ribbons.

The simplest way to make restaurant-style hot and sour soup is to build it in layers: make the broth savory first, thicken only until it looks right, set the egg, then adjust sourness and peppery heat separately at the end.

Maybe the bowl in your head is thin and sharply peppery. Maybe it is darker and glossy, with enough vinegar to catch in your nose over the first spoonful. This method gives you a reliable place to start—and enough room to take the pot toward whichever version you remember.

Quick Answer: What Makes Hot and Sour Soup Hot and Sour?

White pepper gives hot and sour soup its characteristic peppery heat. Vinegar supplies the sourness. Chilli oil gives a more immediate chilli burn. White pepper leaves the cleaner warmth that lingers after each sip.

Broth, mushrooms and soy sauce provide the savory foundation. Cornstarch controls the body of the soup, while egg provides the silky strands.

Check one thing at a time. Is the broth savory enough? Then judge the heat, sourness and thickness. Finally, look for some contrast—soft tofu or egg against something chewy or crisp. Fix only what is missing.
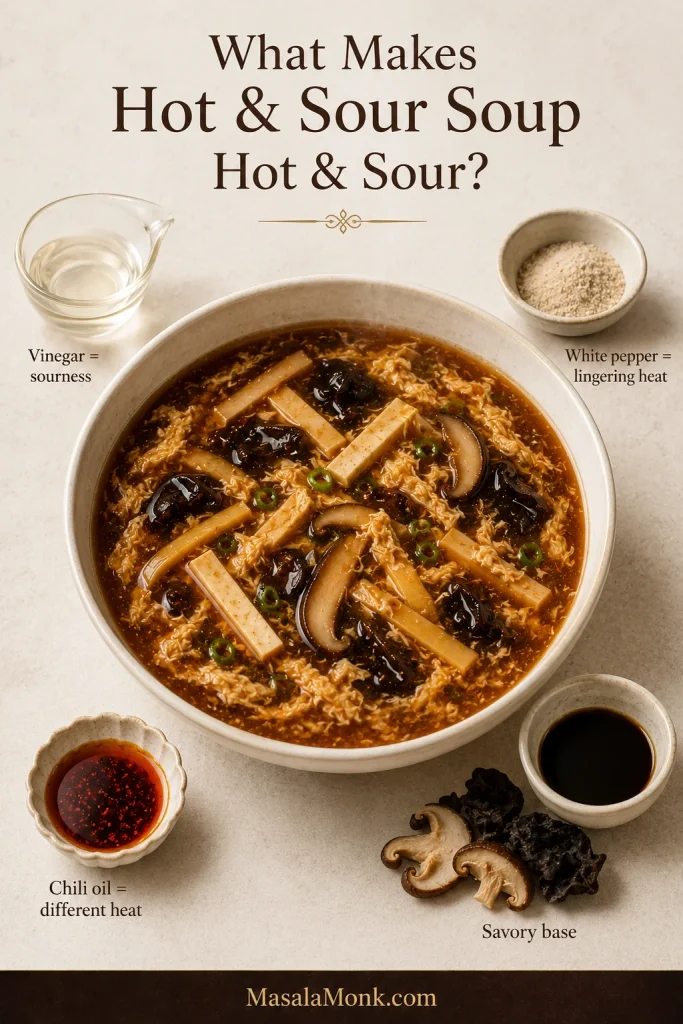
Teaching board with a bowl of glossy brown soup surrounded by vinegar, pale ground white pepper, chilli oil, and broth, mushroom and soy cues explaining sourness, heat and savory flavor.
Sourness and heat are separate controls. Vinegar brightens the broth; white pepper provides the lingering warmth that chilli alone does not recreate.

Which Hot and Sour Soup Are You Looking For?

Hot and sour soup is a Chinese soup built around peppery heat and vinegar sourness, usually with ingredients such as mushrooms, tofu and egg; restaurant versions vary considerably in thickness and supporting ingredients.

Two excellent hot and sour soups can look surprisingly different. It helps to know which style you are chasing before you start changing the vinegar, chilli or starch.
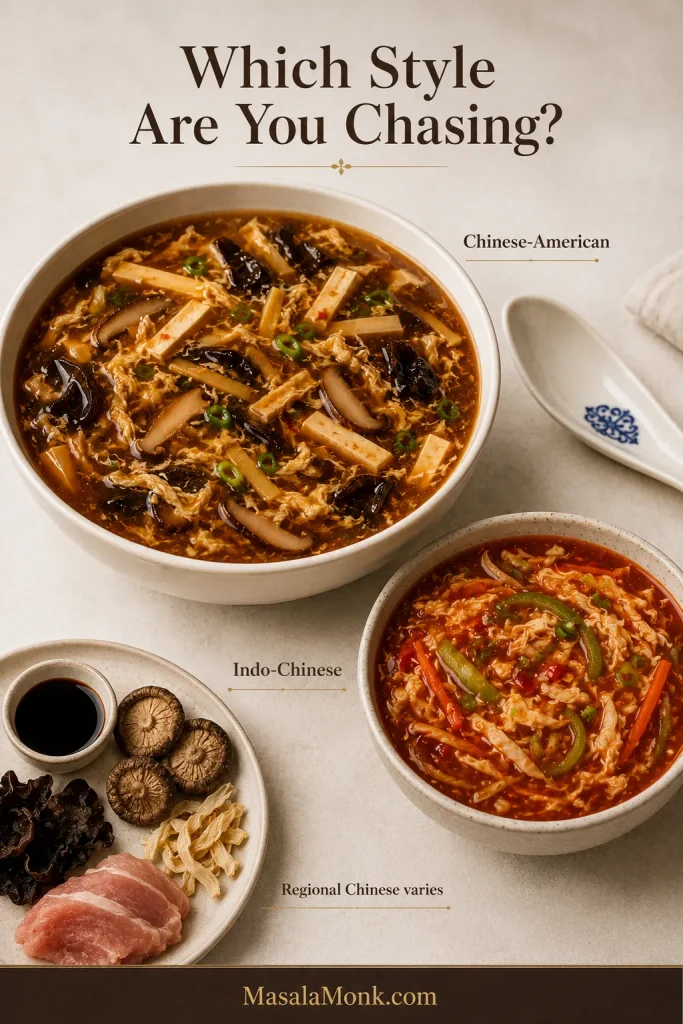
Comparison guide with a dominant Chinese-American hot and sour soup bowl, a redder vegetable-heavy Indo-Chinese bowl, and regional Chinese ingredient cues including black vinegar and dried mushrooms.
Color can mislead. Chinese-American, regional Chinese and Indo-Chinese hot and sour soups can differ in thickness, heat and ingredients, so season toward the bowl you actually want.
StyleWhat to Expect
Chinese-American restaurant styleBrownish, glossy, peppery and tangy, usually with mushrooms, tofu and egg. This is the style made below.
Regional Chinese versionsRecipes vary widely and may use black vinegar, dried shiitake, wood ear, dried lily buds and pork, with thickness varying considerably by style.
Indo-Chinese restaurant styleOften redder and more chilli-forward, with vegetables such as cabbage, carrot and capsicum/bell pepper, and sometimes chicken.

This recipe makes the first style: savory broth with a clear vinegar tang, white-pepper warmth, a glossy broth that still pours freely and enough contrast between mushrooms, tofu and egg to keep the soup interesting.

Many Chinese-American restaurant versions also include thin strips of pork or chicken. Here, added meat is optional, with an easy chicken or pork variation later.

Hot and Sour Soup Recipe

Using fresh mushrooms, this takes about 30–35 minutes from prep to bowl. Dried mushrooms need soaking time but give the broth more depth. Keep some vinegar and white pepper in reserve either way so you can make the final adjustment by taste.

Recipe Snapshot

  • Prep: about 15 minutes
  • Cook: about 15–20 minutes
  • Total with fresh mushrooms: about 30–35 minutes
  • Total with dried mushrooms: about 40–50 minutes, depending on how much soaking overlaps with prep
  • Makes: 4 generous bowls or about 6 appetizer servings

No specialty market tonight? Fresh shiitake or cremini, ordinary low-sodium broth and distilled white or unseasoned rice vinegar still make a very good soup. Wood ear and bamboo are optional.

Equipment: a 4–5 quart / 4–5 litre saucepan or Dutch oven, a few small prep bowls, and a fine-mesh strainer if using shiitake soaking liquid.

Ingredients and Measurements

Broth & Solids

  • Mushrooms: 15 g dried shiitake, about 4 medium mushrooms, or 5 oz / 140 g fresh shiitake or cremini. Use up to 6 oz / 170 g fresh mushrooms for a mushroom-heavy soup.
  • Wood ear: ¼ oz / 7 g dried wood ear mushrooms (black fungus), dry weight, optional.
  • Broth: 6 cups / 1.4 litres total low-sodium chicken or vegetable broth. If using strained shiitake soaking liquid, substitute up to ½ cup / 120 ml for the same amount of broth.
  • Tofu: 8 oz / 225 g firm or medium-firm tofu, cut into thin strips or small spoon-sized cubes.
  • Bamboo: ½ cup / about 70 g bamboo shoots, drained, rinsed and cut into strips, optional.
  • Ginger: 1 teaspoon finely grated fresh ginger.

Broth Seasoning

  • 1½ tablespoons / 22 ml Chinese light soy sauce or regular soy sauce; start with 1 tablespoon / 15 ml if your broth or bouillon is already quite salty
  • 1 teaspoon / 5 ml dark soy sauce, optional
  • ½ teaspoon sugar
  • Fine salt, only if needed after tasting

Thickening & Egg

  • 3 tablespoons / about 24 g cornstarch (UK: cornflour). Make the full slurry but expect to begin with about two-thirds.
  • ¼ cup / 60 ml cold water or cold broth
  • 2 large eggs
  • 1 teaspoon water, optional, to loosen the beaten eggs slightly

Hot-Sour Finish

  • ¼ cup / 60 ml distilled white vinegar or unseasoned rice vinegar, divided: 3 tablespoons / 45 ml to start, plus up to 1 tablespoon / 15 ml more to taste
  • 1 teaspoon ground white pepper, divided: ¾ teaspoon to start, plus up to ¼ teaspoon more to taste
  • 1 teaspoon toasted sesame oil
  • 2 scallions, thinly sliced, optional
  • Chilli oil, optional, for serving

1. Soak and Prep Before the Pot Gets Hot

Using fresh mushrooms? Skip the soaking instructions below, slice them, and continue with the rest of the prep.
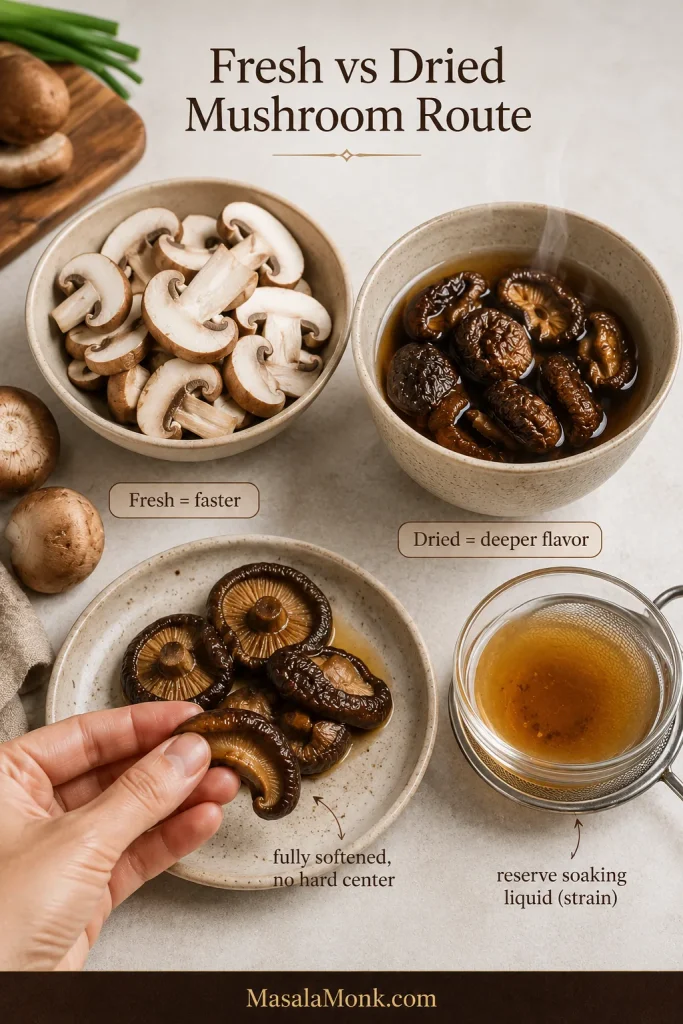
Comparison showing fresh mushrooms sliced and ready beside dried shiitake soaking until pliable, with a small vessel of clear strained shiitake soaking liquid.
Fresh mushrooms are the faster route. Dried shiitake are worth the soak when you want more mushroom depth, especially with a mild broth.

If using dried mushrooms, cover them with very hot water and soak until completely pliable. Most soften in about 20–30 minutes, but the mushrooms get the final say: there should be no hard, dry center left.

If you plan to use shiitake soaking liquid in the broth, soak the dried shiitake separately from the wood ear. Lift the softened mushrooms from the water, trim any tough stems and slice thinly. Strain the shiitake liquid through fine mesh or carefully pour off only the clear upper portion. Leave the sediment behind.

For a more restaurant-like spoonful, cut the mushrooms, tofu and bamboo into fairly thin pieces of similar length. Measure the seasonings, beat the eggs and mix the cornstarch with cold water or cold broth.
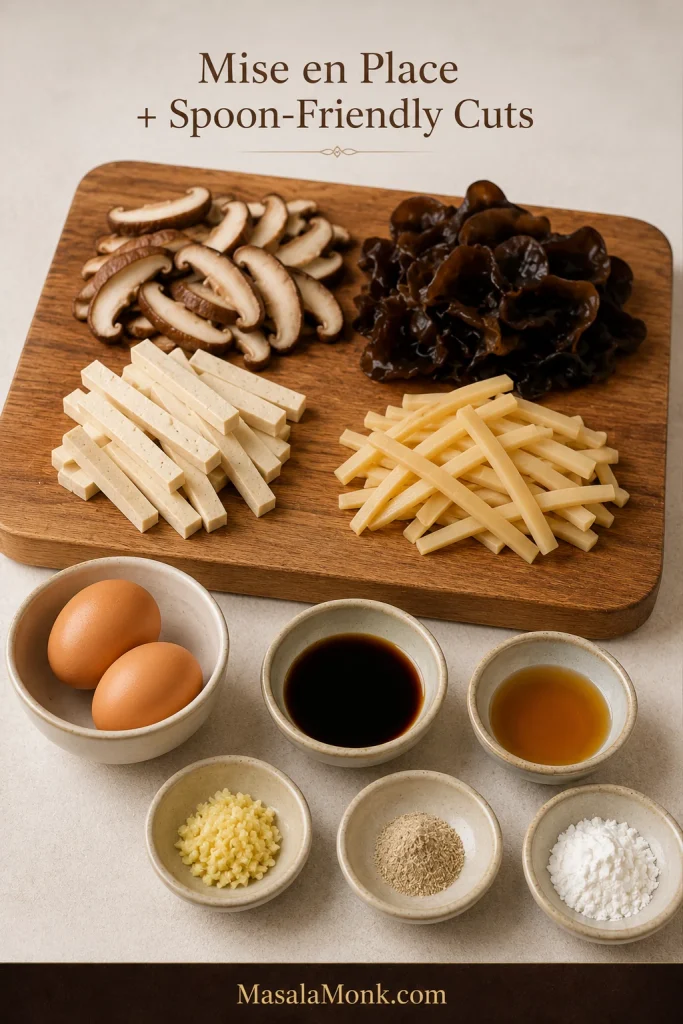
Prep board with sliced shiitake, wood ear mushrooms, tofu strips, bamboo shoots, grated ginger, eggs, soy sauce, vinegar, white pepper and cornstarch arranged as soup mise en place.
Use the spoon as the size guide. Tofu, mushrooms and bamboo should fit comfortably into one bite instead of arriving as long, awkward pieces.

In another small bowl, whisk together 3 tablespoons / 45 ml vinegar and ¾ teaspoon white pepper for the finish. Once the broth starts simmering, the remaining steps move quickly, so have everything within reach.

2. Build a Broth That Already Tastes Good

Add the broth, mushrooms, bamboo shoots, ginger, soy sauce, optional dark soy and sugar to the pot. Bring to a gentle simmer over medium-high heat, then lower the heat and cook for about 5 minutes.

Add the tofu and simmer for another 2–3 minutes. Firm tofu tolerates stirring well. With softer tofu, sweep the spoon around the pieces so they stay intact.

Check the broth here. It should already be savory enough to drink on its own, even though the vinegar and white pepper are still missing.

If the broth has good depth but simply needs more seasoning, add salt a small pinch at a time. If it tastes weak or hollow, deepen the base with a small amount of concentrated broth or bouillon. Extra soy alone can push the salt too far. Starch can change a watery texture; it cannot fix watery flavor.
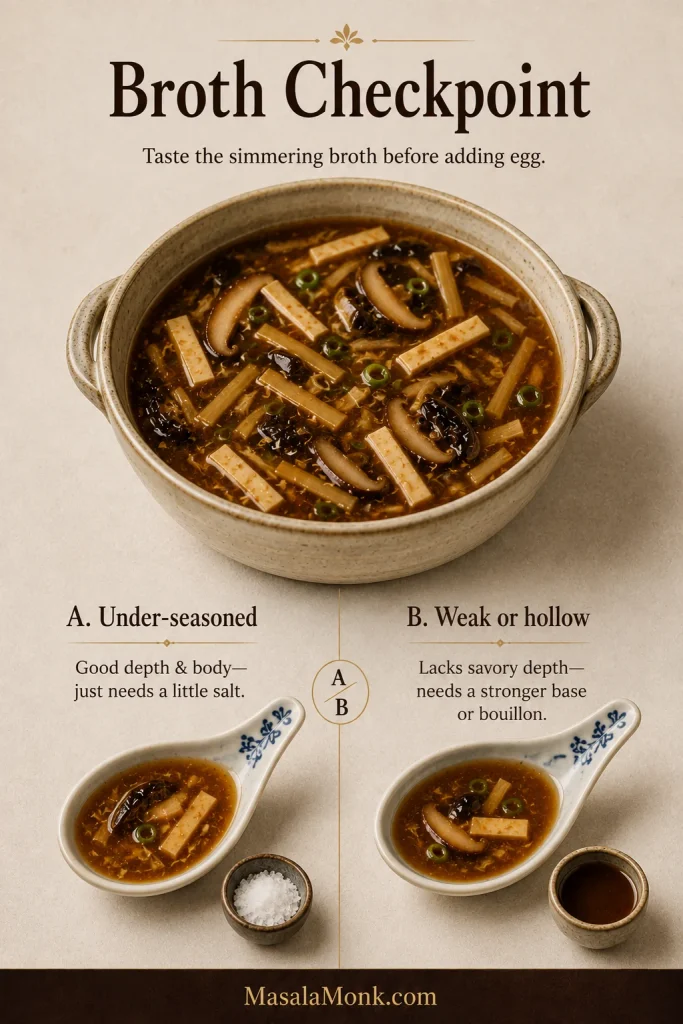
Broth checkpoint guide showing the same pre-egg hot and sour soup with two tasting paths: under-seasoned broth needing salt and weak or hollow broth needing a stronger base or bouillon.
Taste before thickening. Once starch and the final seasonings go in, a weak broth becomes harder to diagnose cleanly.

3. Add the Slurry Gradually

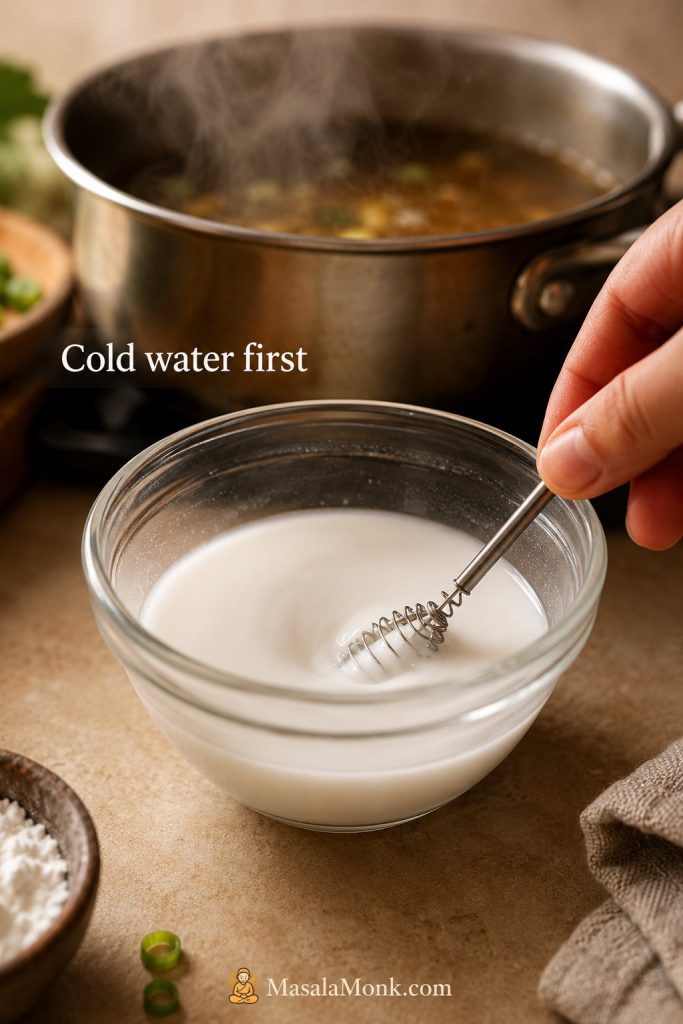
Cornstarch has a habit of settling the moment you stop looking at it, so stir the slurry thoroughly just before it goes into the soup.

While stirring, pour in about two-thirds of the slurry. Return the soup to a simmer and wait 20–30 seconds before judging the texture.

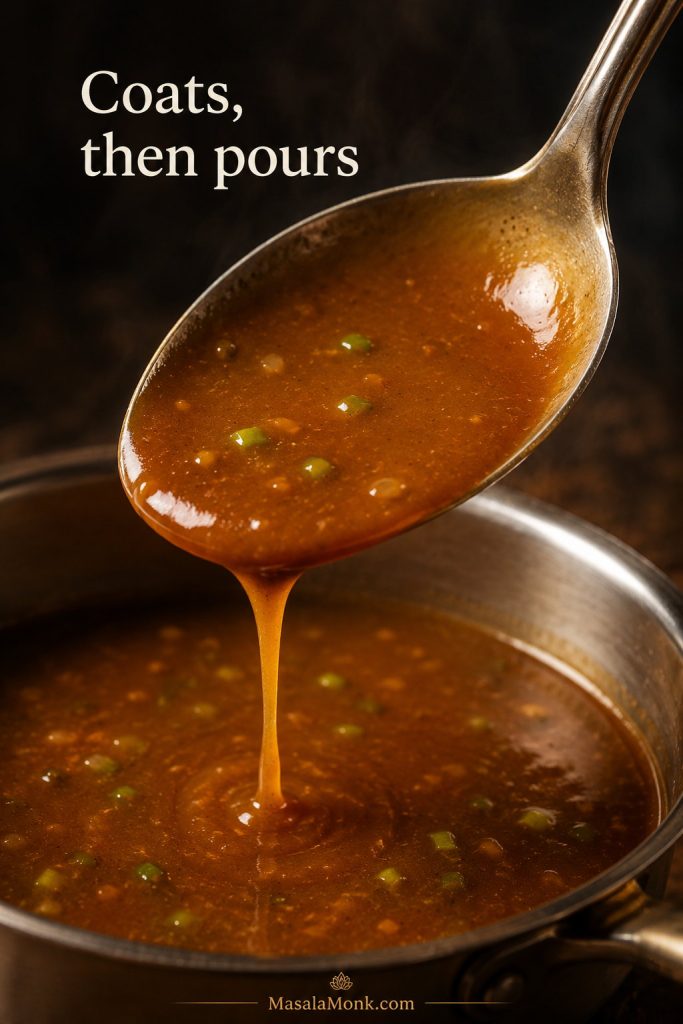
Lift some with a spoon and tip it back. The broth should leave a glossy trace, then fall away cleanly. It should still move like soup, not gravy.

Still too light? Remix the remaining slurry and add it in stages. Bring the soup back to a simmer each time before deciding whether it needs more.
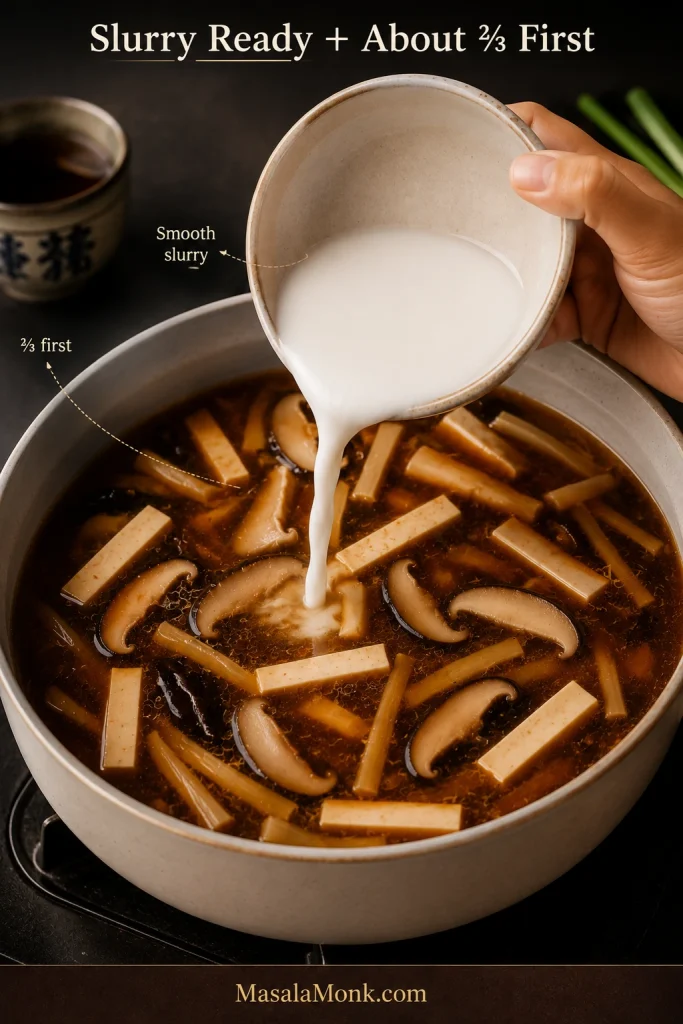
Smooth cornstarch slurry being poured from a small bowl into a pot of pre-egg hot and sour soup, with a cue to add about two-thirds first.
Start with about two-thirds of the slurry, bring the soup back to a simmer, then judge. Add more only if the broth still needs body.

4. Pour the Egg Ribbons

Beat the eggs until the whites and yolks are completely combined. A teaspoon of water makes them slightly easier to pour in a fine stream, but it is optional.

Keep the thickened soup at a gentle simmer. Stir slowly in one direction to create a mild current, then pour the beaten egg in a thin stream as you move your hand around the pot.

Then stop.

Once all the egg is in, leave the pot unstirred until the strands look set. Stir once or twice afterward to separate them without breaking them into tiny flecks.
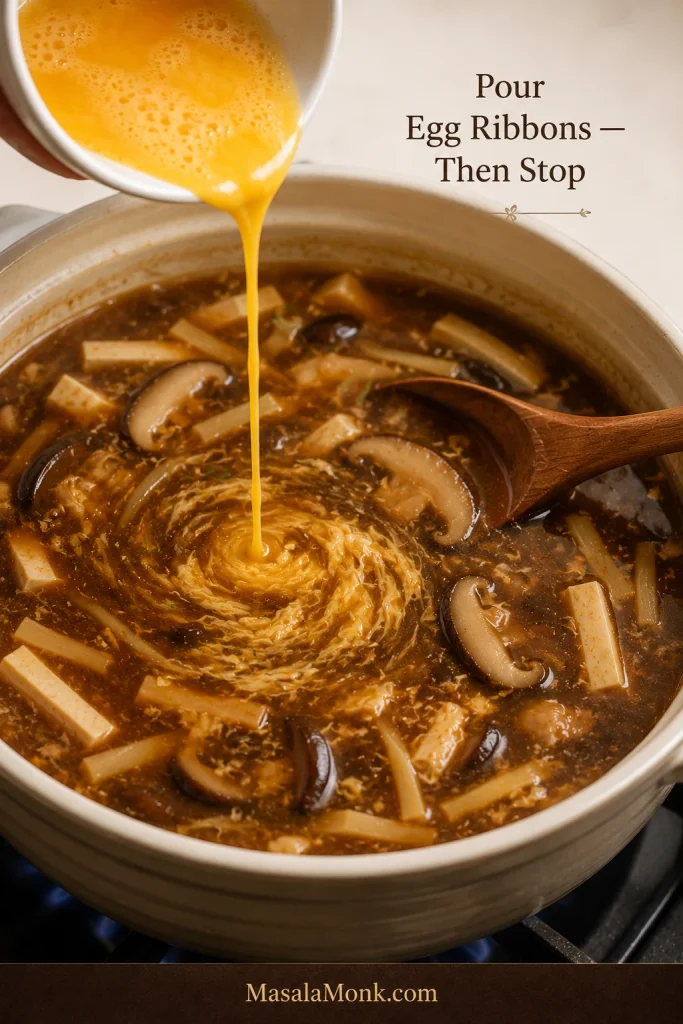
Thin stream of beaten egg being poured into glossy brown hot and sour soup with tofu and mushrooms, with a resting spoon and a cue to stop stirring while the egg sets.
Pour the egg in a thin stream into a mild current, then stop stirring until the strands look set.

5. Turn Off the Heat—Then Make It Hot and Sour

Add the vinegar and white pepper after the heat is off. Stir in the prepared vinegar-and-pepper mixture, then add the toasted sesame oil.
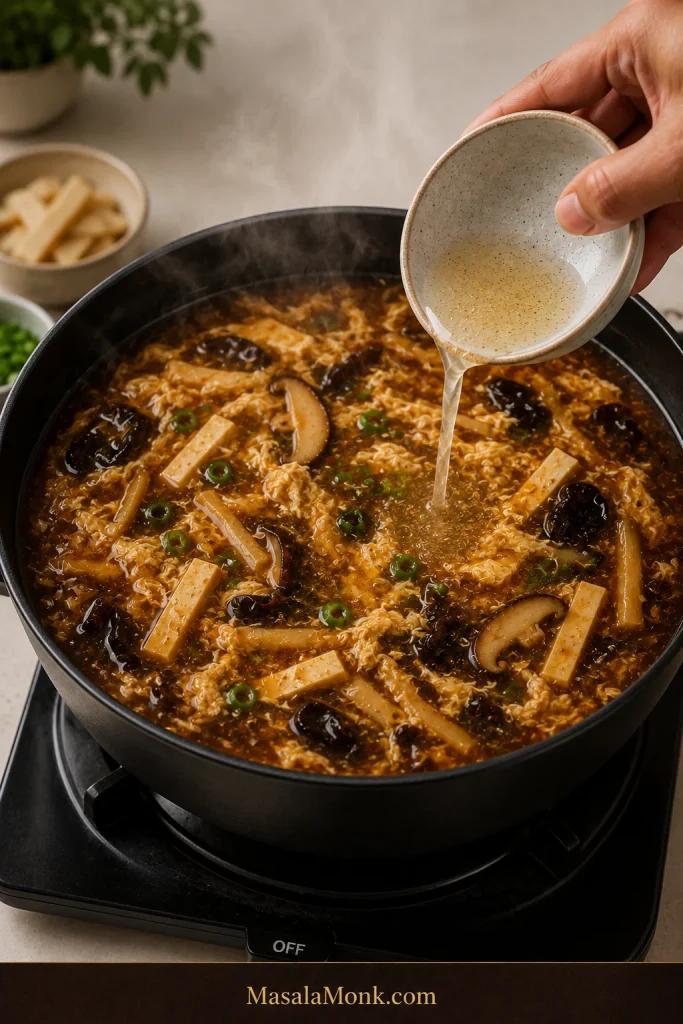
Hand pouring a pale vinegar and ground white pepper mixture into a steaming pot of finished hot and sour soup on a stovetop with the burner visibly off.
Once the heat is off, the job changes from cooking to preserving aroma. That is when vinegar and white pepper can stay sharp, fragrant and distinct.

Taste, Adjust and Stop

Now taste. This is where you steer the soup toward the one you remember. For more sourness, add the remaining vinegar 1 teaspoon / 5 ml at a time. For stronger peppery warmth, add the reserved white pepper in small pinches. If it tends to clump, first mix it with a teaspoon of vinegar or broth.

The vinegar should brighten the broth without erasing the mushrooms and soy underneath it. White pepper should become more noticeable toward the finish than on the first instant of the sip.

Add scallions if using and put extra vinegar, white pepper and chilli oil on the table.

Try one complete spoonful before serving. Check the savory base first, then the vinegar and white pepper, then the body and textures.

Change one thing at a time. A pale soup may already taste right. A glossy soup does not need more starch just because another restaurant serves theirs thicker.
Warm close-up of a finished bowl of hot and sour soup being tasted and adjusted, with small bowls of vinegar, ground white pepper and chilli oil nearby.
Taste broth and solids together. Mushrooms, tofu and egg can change how strong the vinegar or white pepper feels in a complete bite.

Something crisp is lovely beside the soft tofu and egg. Crispy vegetable spring rolls make an especially good contrast.


Dial in the soup you want:

White Vinegar, Rice Vinegar or Black Vinegar?

For Chinese-American takeout-style soup, distilled white vinegar gives the sharpest, cleanest tang. Use unseasoned rice vinegar for gentler acidity, or Chinkiang black vinegar for a deeper, earthier sourness.

Distilled white vinegar is direct and bright. If the soup you remember has a nose-tingling takeout tang, this will usually get you there fastest.

Unseasoned rice vinegar is softer and rounder. The soup remains distinctly sour, but the acidity lands less sharply.

Chinkiang or Chinese black vinegar brings earthy, slightly malty flavor along with acidity. Use it in place of the white or rice vinegar, starting with the same 3 tablespoons / 45 ml off heat, then adjust by taste because brands vary.
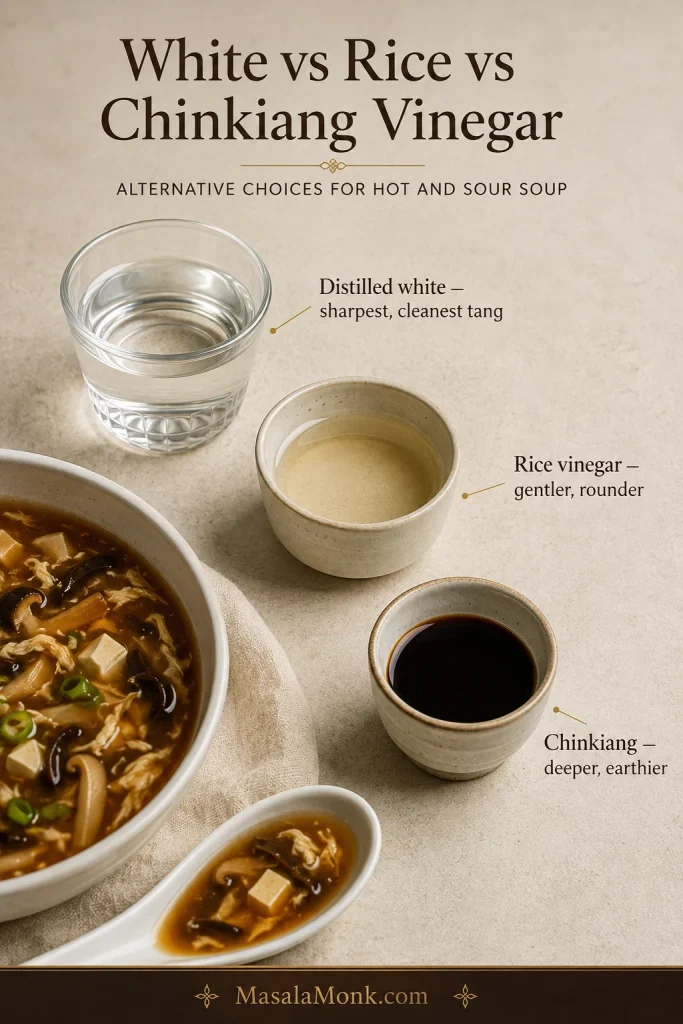
Three unbranded vessels containing clear distilled white vinegar, pale rice vinegar and dark Chinkiang vinegar beside a bowl and spoonful of finished brown soup.
For familiar Chinese-American takeout-style hot and sour soup, distilled white vinegar is the cleanest starting point; rice vinegar softens the edge, while Chinkiang adds darker depth.

If Chinkiang vinegar is new to you, this guide to Chinese black vinegar from The Woks of Life explains how it differs from lighter rice vinegars.

Adding most of the vinegar after cooking keeps the acidity lively. Prolonged boiling makes its sharp edge less noticeable.

White Pepper vs Chilli

White pepper delivers the sharp warmth that builds toward the end of the sip. Chilli oil hits sooner with a more obvious chilli burn.

Black pepper will still add heat, but its aroma is different; white pepper gives the more familiar Chinese-American restaurant-style finish.
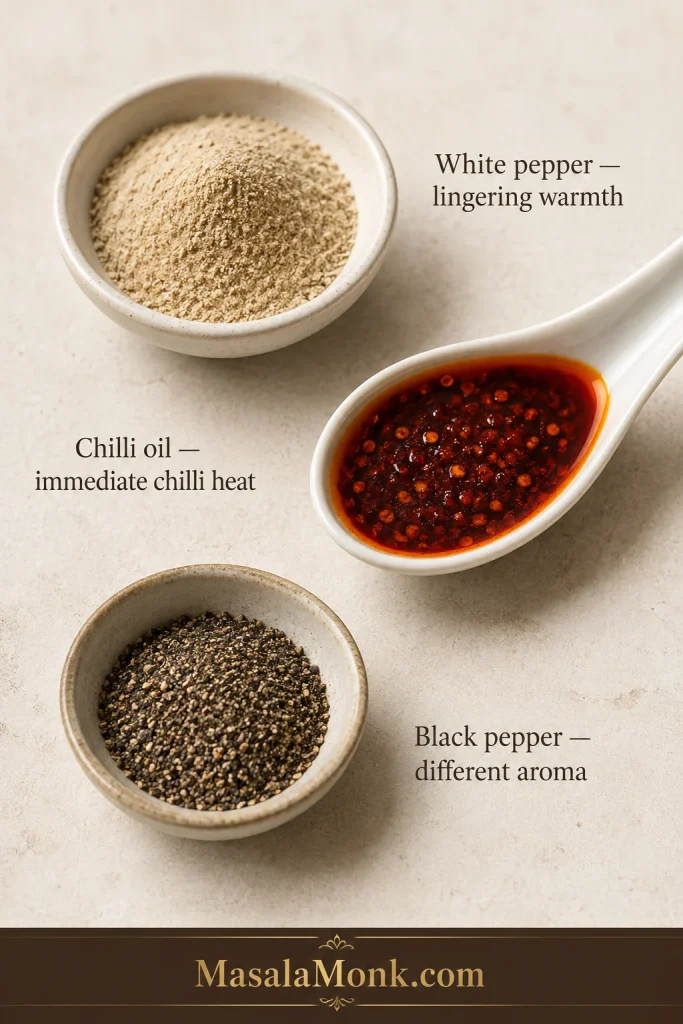
Small bowls of pale ground white pepper and black pepper with a Chinese soup spoon filled with red chilli oil on a light stone surface, each labeled by its heat profile.
Use the timing of the heat as a clue: chilli burns sooner, while white pepper is more noticeable toward the finish and lingers differently from black pepper.

If you know you prefer gentler heat, start with ½ teaspoon white pepper instead of ¾ teaspoon in the finishing mixture. The standard recipe starts with ¾ teaspoon and keeps the final ¼ teaspoon in reserve.

Keep chilli at the table unless everyone wants it. One serving may be fiery while another stays purely peppery.

How Thick Should Hot and Sour Soup Be?

Hot and sour soup should be glossy and lightly spoon-coating while still flowing freely. It should not move like gravy.
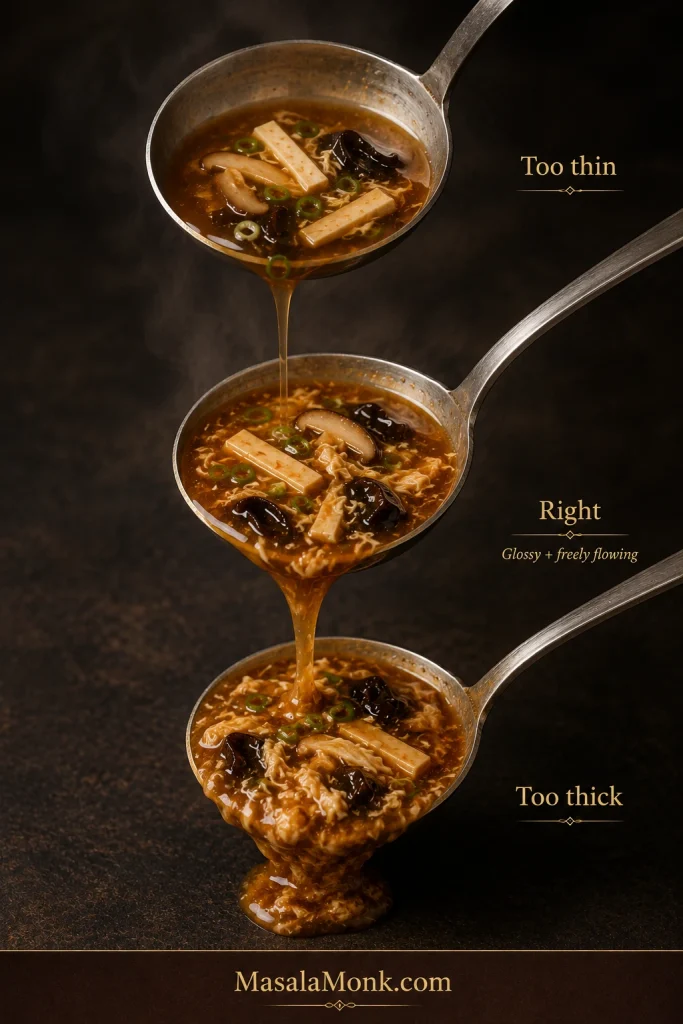
Three ladles show hot and sour soup at different consistencies: watery and thin, glossy and freely flowing, and very thick and gloopy.
Thickness is easiest to judge while the soup is moving. The right broth briefly coats the ladle, then falls cleanly instead of hanging like sauce.

Restaurants disagree on exactly where that line sits. Some versions are almost brothy. Others are thick enough to keep strips of tofu and mushroom suspended.

If the takeout soup you love is particularly dense, take this one thicker too. The staged slurry lets you stop early or keep building body without committing the entire pot at once.

Used all the slurry and still want it very thick? Mix another 1 tablespoon cornstarch with 1 tablespoon cold water. Add it gradually, return the soup to a simmer and reassess before making another batch.

If you overshoot, loosen the soup with hot broth and check the seasoning again.

How to Make Silky Egg Ribbons

Why do some bowls have broad egg ribbons while others have fine wisps? Broth thickness, pour speed and movement all affect the shape.

A broth with some body supports the egg better than a completely thin liquid. A calm current encourages broader ribbons. More movement breaks the egg into finer strands.

The pause matters too. Stir before the egg has set and the strands break into flecks. Pour too much into one place and you get larger clumps.
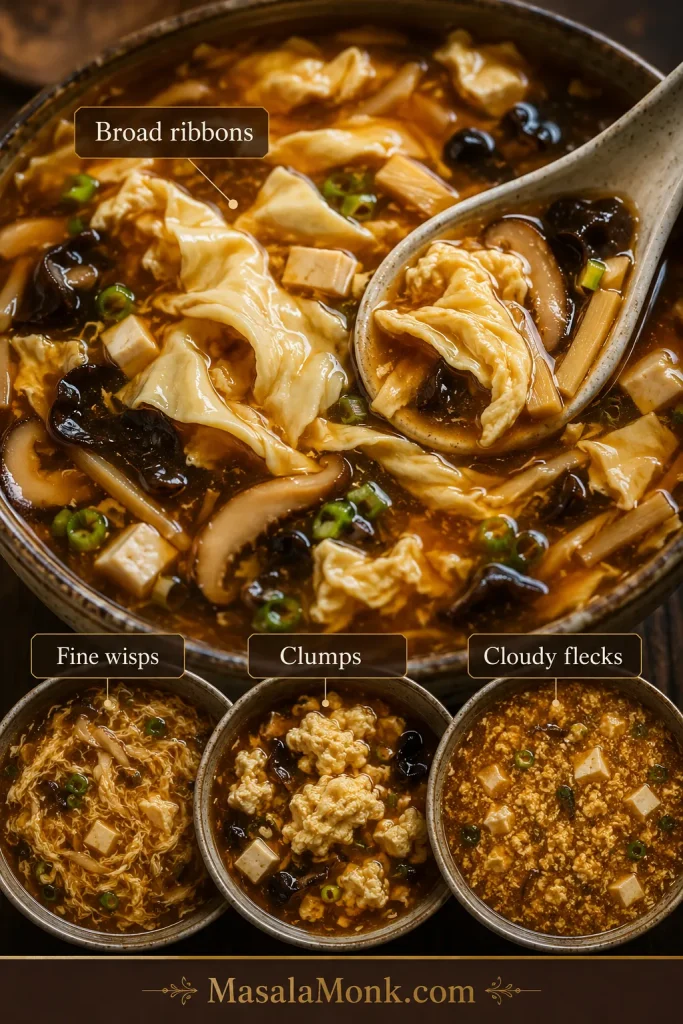
Egg texture guide with a main bowl showing broad silky egg ribbons and three smaller examples showing fine wisps, egg clumps and cloudy flecks in hot and sour soup.
The egg itself records what happened in the pot. Broad ribbons, fine wisps, clumps and cloudy flecks reveal differences in pour speed and stirring.

Imperfect ribbons do not ruin dinner. The technique helps you get the shape you prefer more consistently.

Why Doesn’t My Homemade Hot and Sour Soup Taste Like Chinese Takeout?

You can make a perfectly good hot and sour soup and still know after the first taste that it is not the restaurant soup you were trying to make.

The usual differences are a weaker broth base, not enough fresh vinegar or white-pepper heat, and a starch level that does not match the restaurant version you remember.

  • The base tastes weak. Some restaurants start with a more concentrated broth or bouillon-style base.
  • The heat is mostly chilli. Chilli burn does not taste the same as white-pepper warmth.
  • The vinegar has gone quiet. A fresh splash after cooking brings the sourness back into focus.
  • The texture is wrong. Your favorite place may use considerably more—or less—starch.
  • The soup lacks mushroom depth or contrast. Dried shiitake brings savoriness. Wood ear or bamboo adds a firmer bite beside the soft tofu and egg.
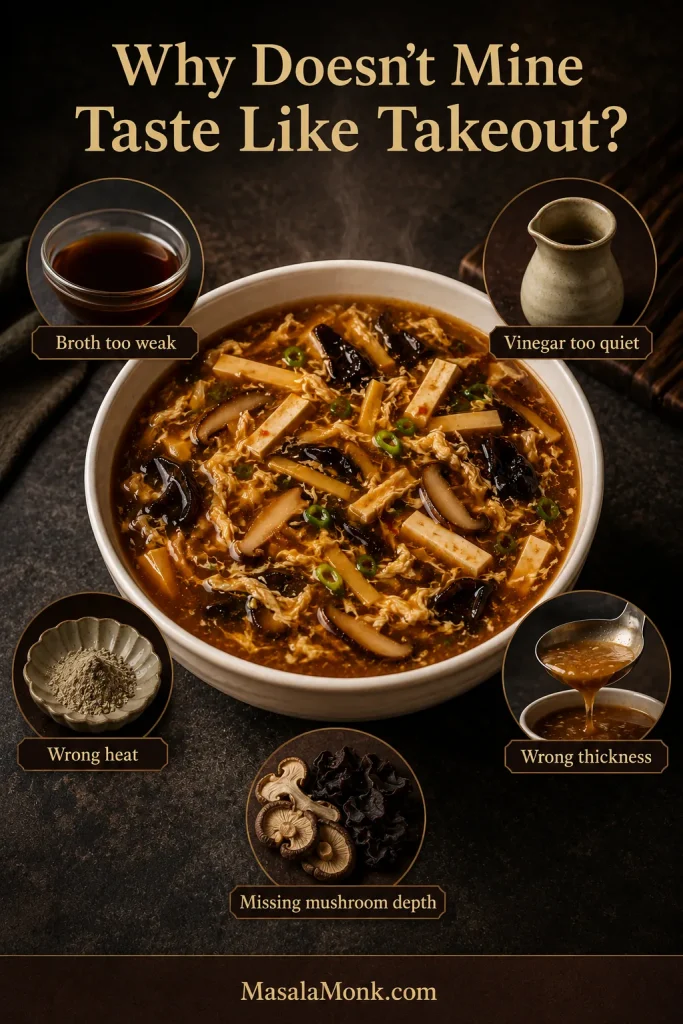
Dark editorial guide centered on a bowl of hot and sour soup with five surrounding cues for weak broth, quiet vinegar, wrong heat, wrong thickness and missing mushroom depth.
When homemade hot and sour soup feels close but not quite right, start with broth depth before chasing extra vinegar, pepper or soy sauce.

Restaurant kitchens may also lean on more sodium or MSG. Our guide to MSG and umami explains what MSG does to savory perception. It is optional here; if you use it, count it as part of the overall seasoning so the broth does not become overly salty.

Once the soup is where you want it, shrimp fried rice turns it into a fuller takeout-style meal without making the soup itself heavier.

Hot and Sour Soup Ingredients: What Each One Adds

The ingredient list looks less intimidating once flavor and texture are separated. Some ingredients deepen the broth; others are there for chew, crunch or softness.

IngredientMain JobIf You Skip It
Dried shiitakeDeep mushroom savorinessThe broth tastes lighter
Wood earSpringy chewLess textural contrast
TofuSoft bodyThe soup feels less substantial
BambooClean crunchLittle change to the broth itself
Dark soyDeeper colorThe soup looks lighter

Broth: Mild Homemade or Deeper Takeout Flavor?

Chicken broth gives the most familiar base, while vegetable broth works well for a meatless version. Mild carton broth makes a lighter soup. A more concentrated chicken or bouillon-style base gets closer to the savory intensity of many Chinese-American takeout versions.

You should still be able to taste the broth after the vinegar goes in. If all you notice is sourness, the foundation was probably too weak. Concentrated broth also brings more sodium, so start with less soy and salt and adjust once everything is hot.

Mushrooms: Flavor and Texture Are Separate Jobs

Dried shiitake deepens both the smell and flavor of the broth as it simmers. Its brown soaking liquid is intensely mushroomy too, which is why a strained portion is useful in the pot.

Wood ear does something different. It brings a springy bite against the softer tofu and egg. If you omit it, bamboo or water chestnuts restore some crunch.
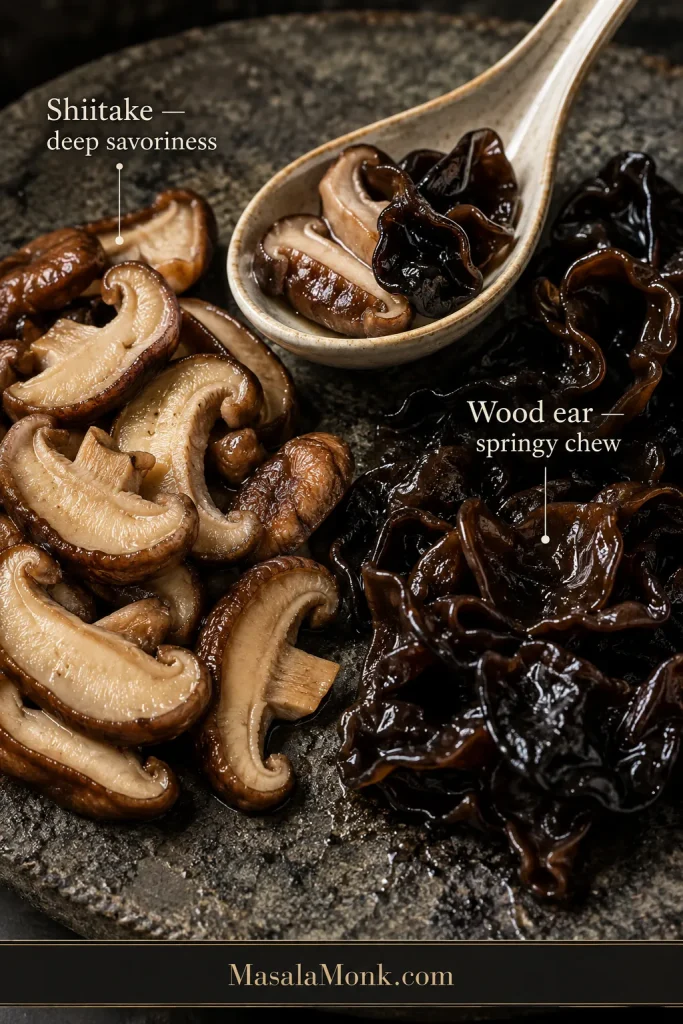
Macro comparison of hydrated sliced shiitake mushrooms and glossy wrinkled wood ear mushrooms, with a ceramic spoon holding both and labels for deep savoriness and springy chew.
Using both mushrooms gives depth without making every bite soft. If one is missing, replace the job it performs—not simply the mushroom name.

Dried lily buds are another traditional addition in some Chinese versions, bringing an earthy, slightly chewy element. They are optional and not needed for the restaurant-style recipe above.

Tofu: Firm Is Easiest

Firm or medium-firm tofu is easiest because it holds its shape. Soft tofu gives the soup a silkier, more delicate texture but is more fragile.

A partly used block can go into Mapo tofu, which takes the same ingredient in a much bolder, spicier direction.

Bamboo Shoots: Taste Before They Go In

Some canned bamboo carries a strong aroma straight from the tin. Drain and rinse it well. If a piece still tastes unpleasant, blanch the bamboo in boiling water for 30–60 seconds and drain it before adding it to the soup.
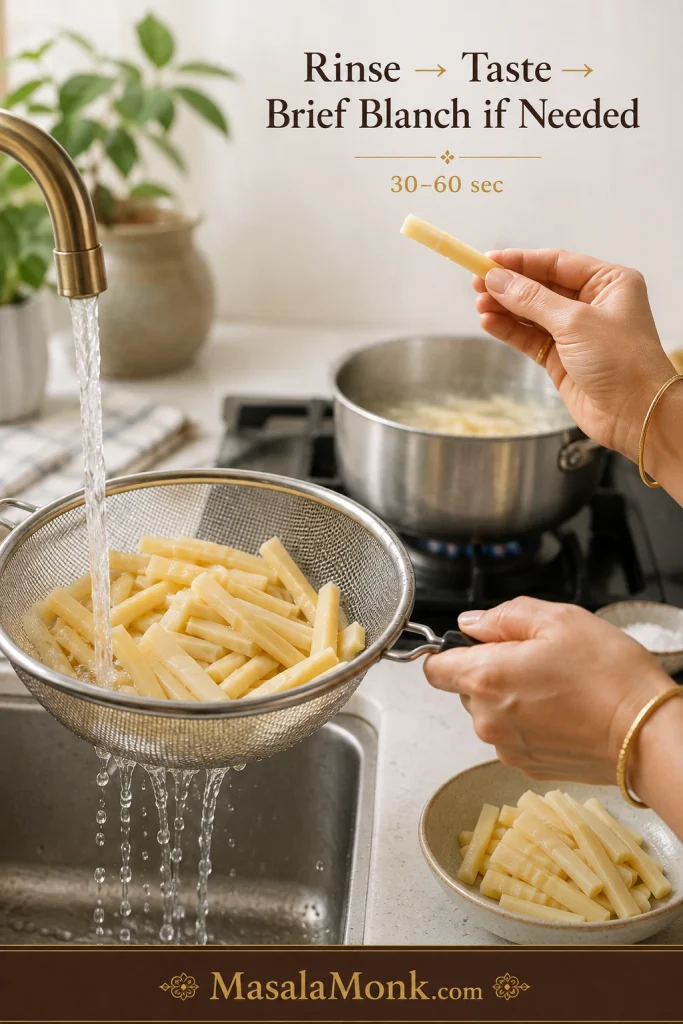
Bamboo strips being rinsed under water in a mesh strainer, one strip held for tasting, with a saucepan of bamboo in the background for a brief 30-to-60-second blanch.
The quick blanch is about cleaner flavor, not softer bamboo. If rinsing removes the canned note, there is no reason to cook it again.

Soy, Ginger, Sugar and Final Aromatics

Chinese light soy sauce or regular soy sauce supplies salt and savoriness. Dark soy is mainly useful for deeper color and is entirely optional.

A lighter-colored soup may already taste exactly right. Adding regular soy merely to darken the liquid risks making the soup saltier than intended. No need to chase the color.

Ginger gives the base a fresh aromatic edge. The small amount of sugar rounds the soy and vinegar without making the soup sweet. Toasted sesame oil goes in after cooking so its nutty aroma remains noticeable.

Making the soup without onion or garlic? Neither is required. Omit the scallions, avoid garlic-containing chilli condiments, and check packaged broth and sauce labels because some brands include onion or garlic.

Where next? Need an ingredient swap? See substitutions and variations. Trying to fix a bowl that already tastes off? Go to troubleshooting.

Hot and Sour Soup Substitutions & Variations

Missing one ingredient rarely ruins the soup. Most substitutions change flavor, texture or both.

  • No dried shiitake? Use fresh shiitake or cremini. The mushroom flavor will be lighter.
  • No wood ear? Leave it out, or use bamboo or water chestnuts for some crunch.
  • No cornstarch? Leave it out for a brothier soup. The egg ribbons may not stay suspended as evenly. Potato starch is another option; add it gradually because it thickens differently.
  • No tofu? Omit it or use cooked chicken or pork for a firmer, meatier result.

Adding Chicken or Pork

Stir about 4 oz / 115 g cooked shredded chicken or thinly sliced cooked pork into the soup with the tofu, or use the meat in place of tofu. Heat it through briefly before finishing the soup.

Vegetarian, Vegan & Gluten-Free

For vegetarian hot and sour soup, use vegetable broth and keep the tofu, mushrooms and egg. For a vegan version, omit the egg as well. A mushroom-forward broth becomes especially useful once the chicken broth and egg are gone.

For a gluten-free version, use certified gluten-free tamari or soy sauce and check the broth, vinegar and chilli-condiment labels. Chinese black vinegars vary by brand, and some contain wheat-derived ingredients.
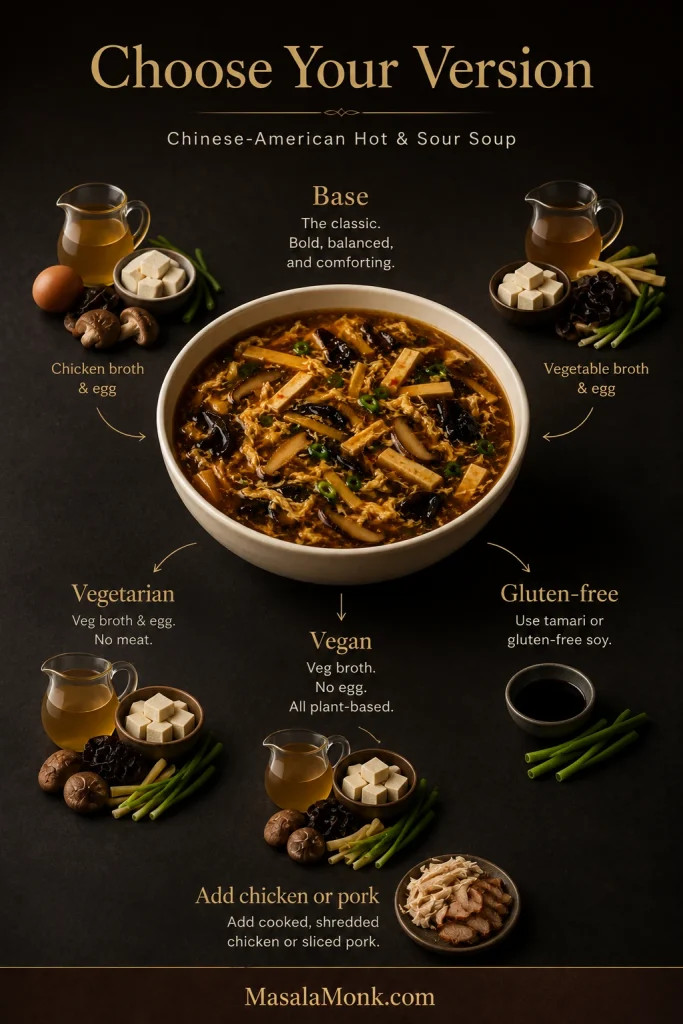
Adaptation guide centered on Chinese-American hot and sour soup with ingredient cues for the base, vegetarian, vegan, gluten-free, and optional chicken or pork versions.
Most variations need only targeted swaps. Change the broth, egg, soy sauce or protein according to the version you want rather than rebuilding the entire soup.

Keep additions in proportion to the broth. Pile in too many extras and the vinegar and white pepper start getting lost among all the solids.

You want soft tofu or egg, something with bite, and enough broth around both for the soup to remain lively.

What About Indo-Chinese Hot and Sour Soup?

Indo-Chinese hot and sour soup is usually redder, more vegetable-heavy and more chilli-driven than this Chinese-American version. It works better as its own style than as this soup with extra chilli sauce.

Common additions include cabbage, carrot, capsicum/bell pepper, chicken, chilli sauce or chilli paste and sometimes tomato or ketchup, with green-chilli vinegar alongside. When that is the soup you want, those ingredients should shape the pot from the beginning.

Chosen your version? Back to the recipe and method.

Hot and Sour Soup Troubleshooting

Most problems become much easier to fix once you identify which part of the soup actually went wrong.
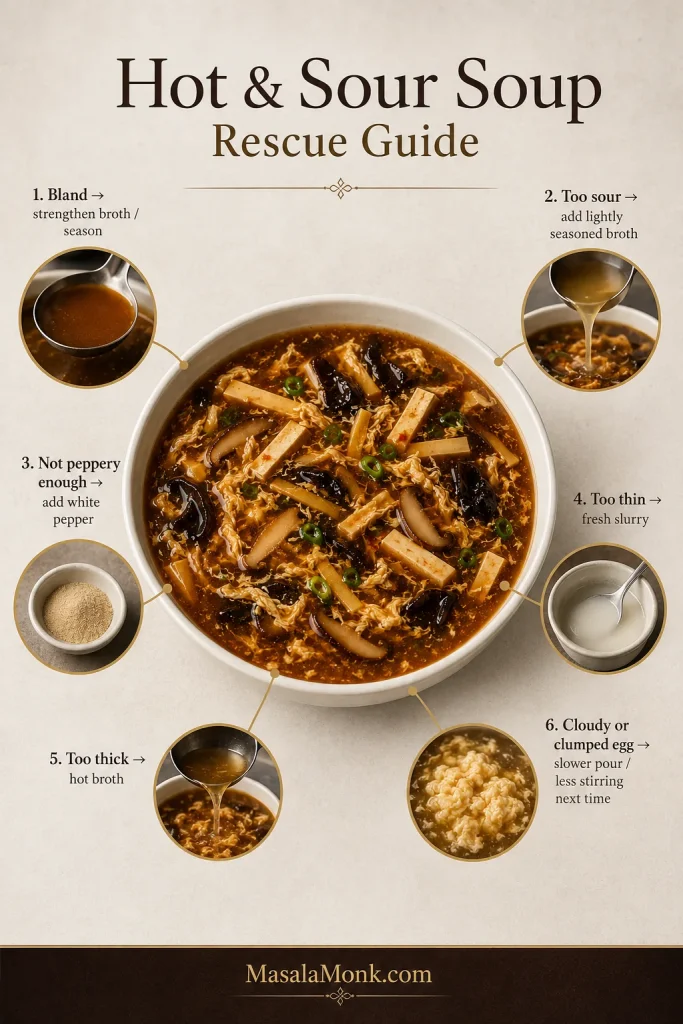
Hot and Sour Soup Rescue Guide with a central bowl and six callouts for bland soup, too sour, not peppery enough, too thin, too thick, and cloudy or clumped egg.
Fix the problem that actually failed, retaste, then move on. Changing salt, vinegar, white pepper and starch together makes the next adjustment harder to read.
What Happened?Likely ReasonQuick Fix
BlandThe savory base is weakStrengthen the broth; then adjust soy or salt
Not sour enoughToo little fresh acidityAdd vinegar 1 tsp / 5 ml at a time
Too sourToo much vinegarAdd lightly seasoned broth gradually, then reassess seasoning and body
Not peppery enoughToo little white pepperAdd small pinches after cooking
Too chilli-hotToo much chilliDilute gradually with lightly seasoned broth, then rebalance
Too thinNot enough starchAdd a small fresh slurry and return to a simmer
Too thickToo much starchAdd hot broth gradually, then reseason
Cloudy eggThe egg dispersed before settingPour more slowly and wait before stirring next time
Big egg clumpsToo much egg entered one spotUse a finer stream around the pot next time
Broken tofuHard boiling or too much stirringUse a softer simmer and less movement
Gritty or grainySediment or a starch problemCheck the soaking liquid and slurry; see below

What the Egg Shape Tells You

Large clumps usually mean too much egg reached one area at once. Very fine flecks suggest too much movement before the egg set. A milky or cloudy broth means the egg dispersed through the liquid before distinct strands formed.

There is nothing urgent to rescue—the soup will still taste good. The shape tells you what to change next time.

Gritty, Grainy or Muddy-Tasting Soup

Visible or earthy grit often points to sediment from shiitake soaking liquid. A powdery or starchy mouthfeel may mean the slurry was not mixed smoothly, the soup did not return to a simmer after the starch went in, or the wrong corn product was used.

For thickening, use the fine white starch sold as cornstarch in the US and cornflour in the UK—not cornmeal or coarser US-style corn flour.

Poorly rinsed bamboo sometimes carries an unpleasant canned flavor. White pepper varies by brand; if yours tastes stale or unpleasantly harsh to you, try a fresher or different one before increasing the amount. Too much dark soy added only for color may make the broth taste muddy.

If one ingredient tastes wrong on its own, piling on extra vinegar or chilli usually just hides it.

Make Ahead, Storage and Reheating

For make-ahead prep, prepare the broth, mushrooms, bamboo and tofu in advance. Reheat the base before serving, then do the final starch adjustment, egg ribbons, vinegar, white pepper and sesame oil close to serving time for the freshest texture and aroma.
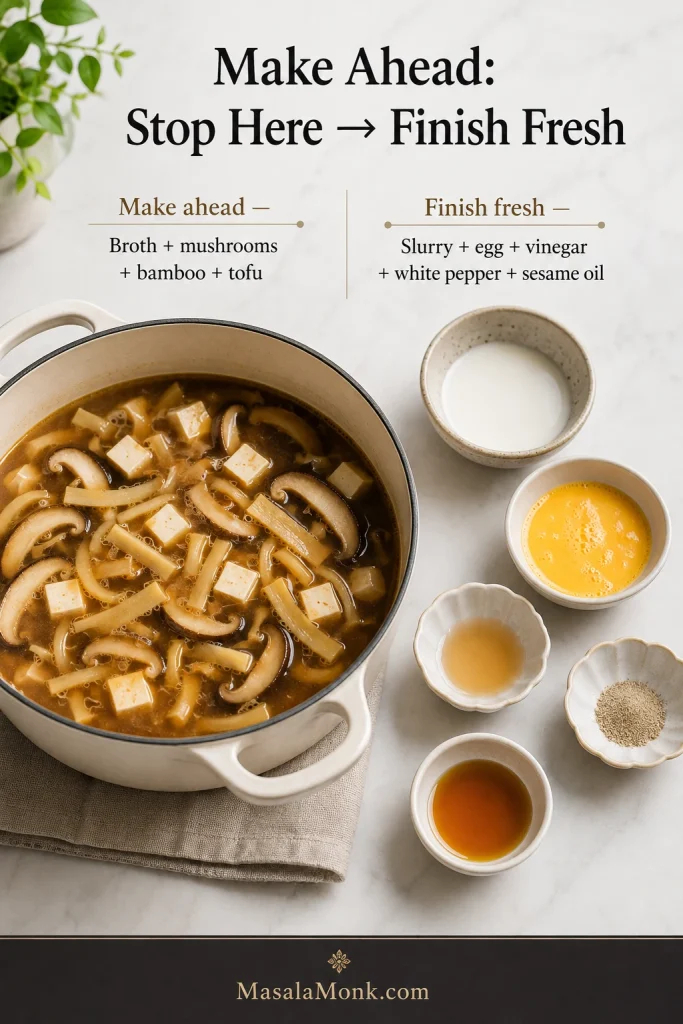
Make-ahead guide showing a pot of broth with mushrooms, bamboo and tofu beside small bowls of slurry, beaten egg, vinegar, ground white pepper and sesame oil for finishing fresh.
This make-ahead split protects the two things that fade fastest: freshly set egg texture and the bright finish from vinegar, white pepper and sesame oil.

Storage, Reheating and Freezing

Cool leftovers promptly and refrigerate them in a covered container for 3–4 days. The USDA leftovers guidance recommends reheating leftovers thoroughly to 165°F / 74°C and bringing soups to a boil during reheating.

After the soup is thoroughly reheated, lower the heat and check it again. If it has loosened, stir in a small fresh slurry and briefly return it to a simmer. If the flavor seems dull, fresh vinegar and white pepper are often more useful than extra salt.

You can freeze hot and sour soup, but the tofu, egg and starch-thickened broth may not return to exactly the same texture after thawing. Correct the body and seasoning after reheating.

Leftovers also make a quick noodle soup. Add cooked noodles or ramen, loosen with broth if needed, and refresh the vinegar and white pepper just before eating.

One Last Taste

A good hot and sour soup should feel lively rather than heavy: savory broth underneath, vinegar bright in the steam, white pepper warming the finish, and soft tofu and egg interrupted now and then by the springy bite of wood ear or the crunch of bamboo.

Some people will want another splash of vinegar. Others will reach for more white pepper. Keep both on the table, taste once more, and stop when the bowl tastes like the one you were hoping for.
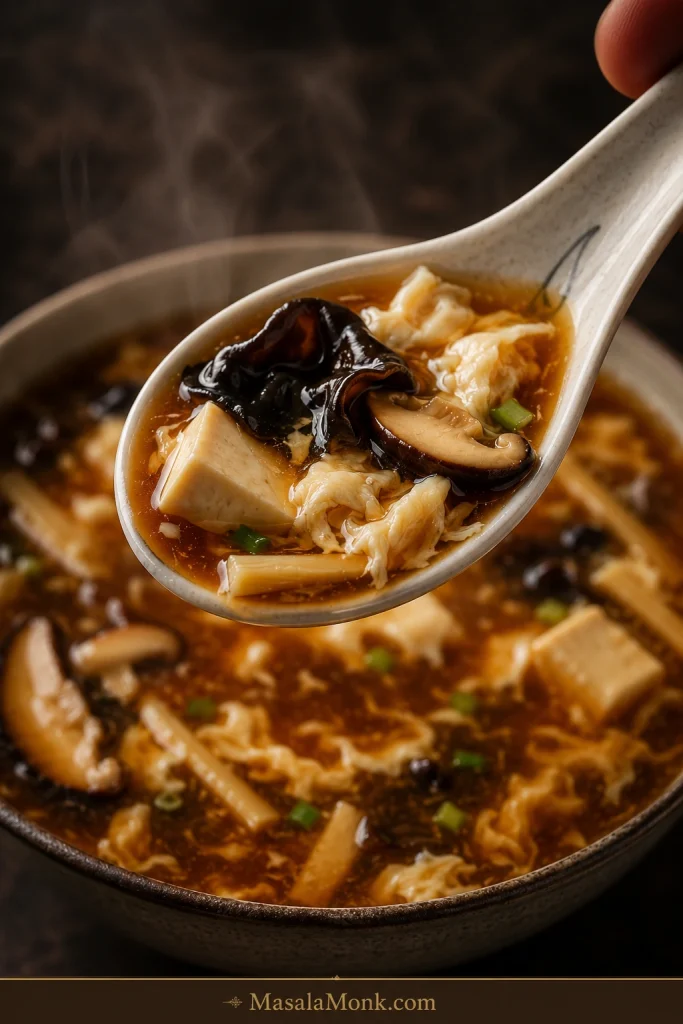
Porcelain spoon held above a bowl of hot and sour soup, carrying glossy brown broth, tofu, shiitake, dark wood ear mushroom, bamboo, soft egg ribbons and a small piece of scallion.
The best bite carries several textures at once: silky egg and tofu, meaty shiitake, springy wood ear and crisp bamboo in the same bright, peppery-sour broth.

Back to Recipe · Back to Top

Posted on — Leave a comment

Mapo Tofu Recipe: Easy Sichuan-Style Tofu With Pork

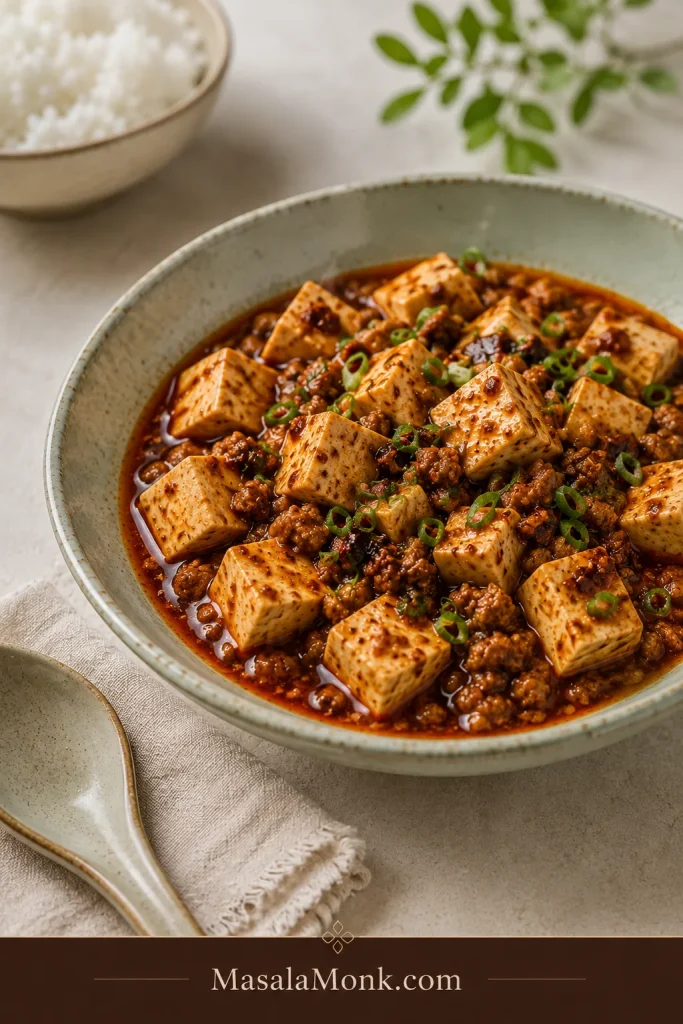
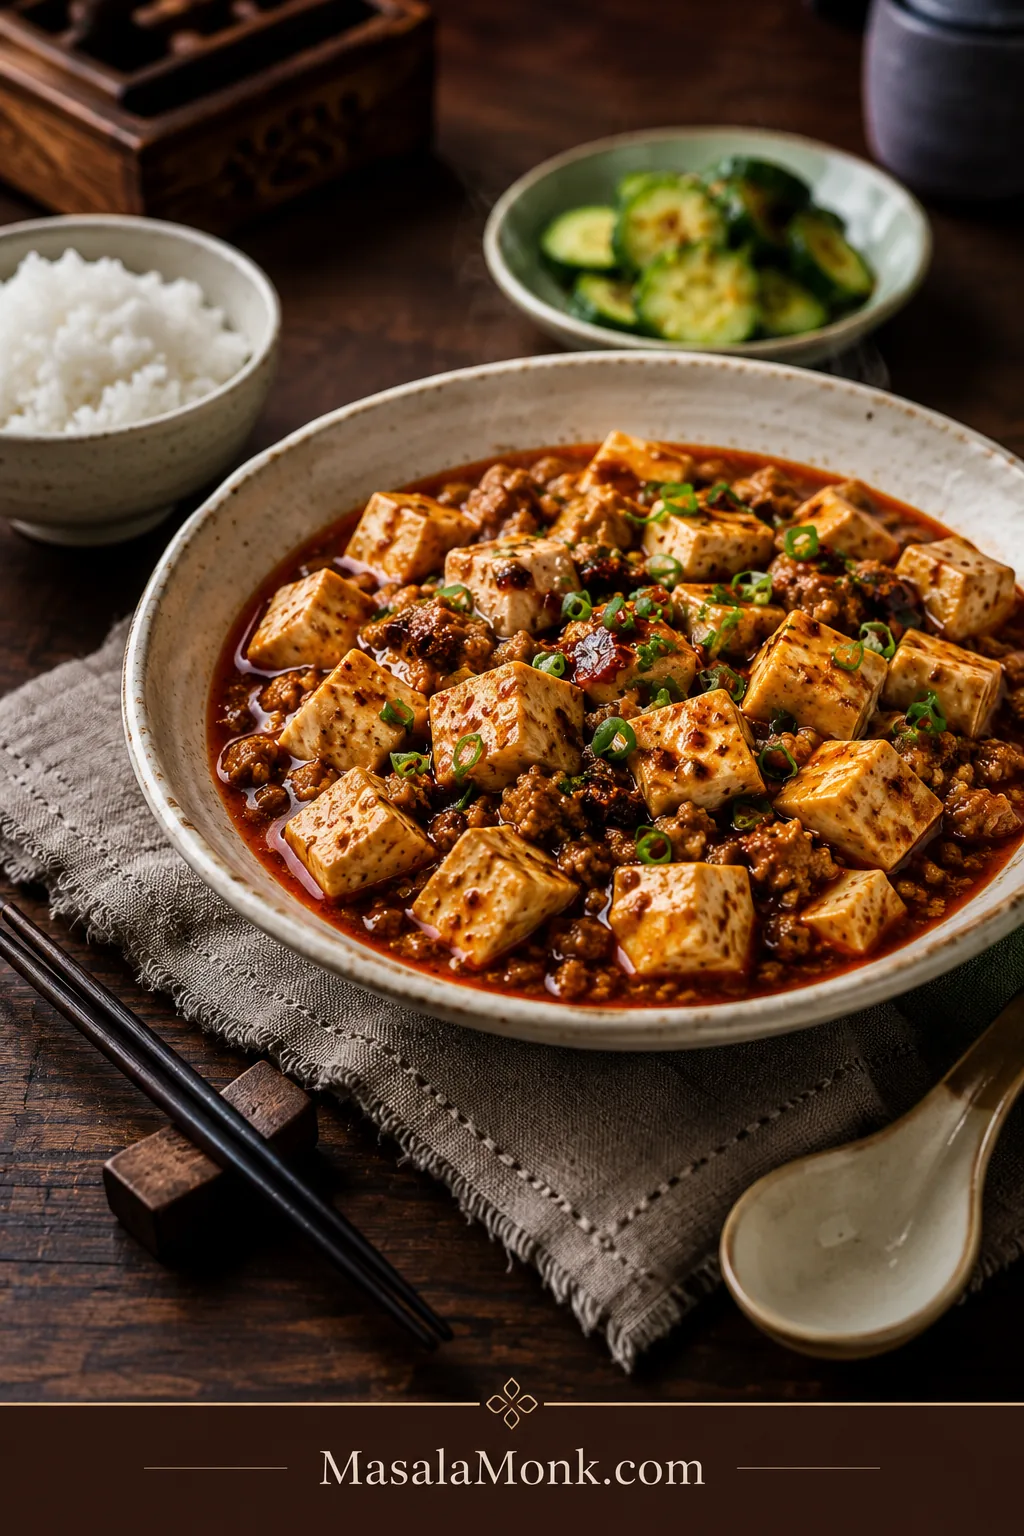
Shallow ivory bowl of mapo tofu with pale tofu cubes, small pork crumbles, glossy brick-red sauce and sliced scallions, served beside white rice and cucumber.

Mapo tofu should feel alive in the bowl: soft tofu barely holding its shape, tiny browned pieces of pork, a glossy brick-red sauce, and a floral Sichuan-pepper tingle that arrives just after the chilli. It is bold food, but it should still feel balanced enough that the next spoonful comes easily.

Mapo tofu (麻婆豆腐) is a Sichuan dish of tender tofu braised with chilli bean paste, Sichuan pepper and a small amount of minced meat.

The cooking itself moves quickly. The uncertainty usually comes before the wok heats: which chilli bean paste is right, whether soft tofu will collapse, and how a thin-looking braise becomes a glossy sauce without turning gluey.

Three moves keep the whole dish under control: fry the paste until the oil turns red, slide warm tofu into the sauce, and thicken in two pours. Add most of the Sichuan pepper at the end, when its citrusy aroma can stay bright instead of scorching in the pan.

Closely associated with Chengdu, the dish’s name is commonly translated as “pockmarked grandmother’s tofu.” Traditional Sichuan versions often use beef and keep the tofu at the centre, as in Fuchsia Dunlop’s Sichuan recipe.

This from-scratch version keeps the tofu at the centre, with just enough ground pork—also called pork mince—to season the sauce. The default heat is lively but manageable, and dinner is ready in about 30–40 minutes.

Start here

Quick Answer: How to Make Mapo Tofu

Warm 400–450 g / 14–16 oz medium block tofu in lightly salted water. Brown 100 g / 3½ oz ground pork, then fry 20–25 g doubanjiang when the brand is unfamiliar, or up to 30 g / about 2 tablespoons for a paste you know is milder. Stop when the oil turns brick red and the paste loses its raw edge.

Add the aromatics and 240 ml / 1 cup unsalted stock or water. Slide in the tofu, simmer for 4–5 minutes and thicken with the slurry in two pours. Finish off the heat with freshly ground Sichuan pepper and scallions.

Your doubanjiang decides the salt. Leave soy sauce and extra salt until the final taste, and stop thickening while the sauce still moves.

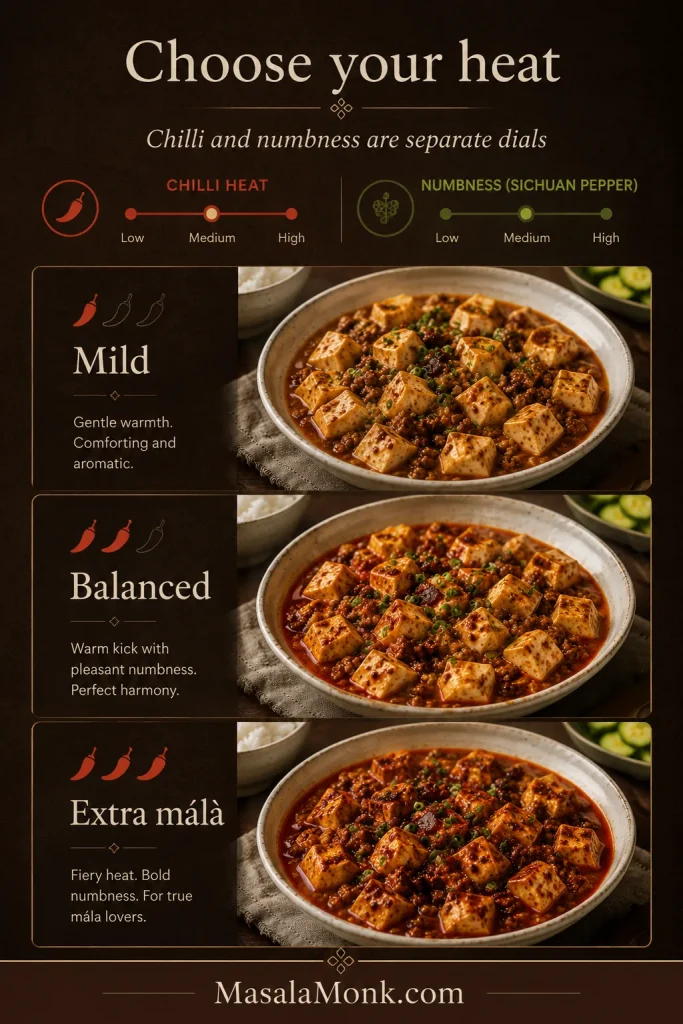
Is Mapo Tofu Spicy? Choose Mild, Balanced or Extra Málà

Mapo tofu has two separate sensations. Chilli supplies the direct warmth. Sichuan pepper supplies má—the floral, citrusy tingle that can make the lips and tongue feel lightly numb. Once you treat them as separate dials, the dish becomes much easier to tailor.
Swipe or scroll sideways to see the full table.

Version Ground chilli Ground Sichuan pepper Finishing chilli oil
Milder Sichuan-style ¼–½ teaspoon ½ teaspoon Offer at the table
Balanced—start here ¾–1 teaspoon 1 teaspoon Optional
Extra málà 1½ teaspoons 1½–2 teaspoons 1–3 teaspoons
Increase chilli for more burn and Sichuan pepper for more numbness. The table assumes a mild ground chilli or mild Chinese chilli flakes; use about half as much standard crushed red pepper, and begin cayenne at ⅛ teaspoon.
Dark heat-level guide with mild, balanced and extra málà bowls, plus separate controls for chilli heat and Sichuan-pepper numbness.
Chilli flakes control heat; Sichuan pepper controls numbness. Adjust them separately, then use chilli oil only if the finished bowl needs more intensity.

Even the mild setting carries a little warmth because doubanjiang is a chilli bean paste. It keeps the fermented character while leaving the tofu and plain rice easy to taste. At the hotter end, a cold, sharp cucumber salad gives the palate a clean reset between bites.

Start with the balanced setting when your chilli flakes or Sichuan peppercorns are new to you. Both vary in strength, and it is much easier to add chilli oil or freshly ground Sichuan pepper at the table than to pull either sensation back out of the pan.

The balanced version

Easy Sichuan-Style Mapo Tofu With Pork

Tender tofu, scattered pork and a glossy fermented chilli-bean sauce. The balanced version has enough heat to feel unmistakably Sichuan-style without overpowering the tofu or the plain rice beside it.

Prep
15–20 minutes

Cook
15–20 minutes

Total
30–40 minutes

Yield
2 generous main-dish servings or 4 as part of a multi-dish meal

Best pan
12-inch / 30 cm wok or 10–11-inch / 25–28 cm deep sauté pan

Finished texture
Glossy, loose and lightly clinging

Equipment

  • 12-inch / 30 cm wok, 10–11-inch / 25–28 cm deep sauté pan, or medium wide saucepan
  • Medium saucepan for warming the tofu
  • Slotted spoon or spider, plus a rounded spatula or silicone turner
  • Small bowl for the slurry and a mortar, pestle or spice grinder

Ingredients

For the Tofu and Pork

  • 400–450 g / 14–16 oz medium block tofu; use medium-firm for easier handling or soft block tofu for a more delicate texture
  • 100 g / 3½ oz ground pork
  • 1 teaspoon fine salt, for about 1.5 L / 6 cups tofu water
  • 30 ml / 2 tablespoons neutral cooking oil

For the Sauce

  • 20–30 g / about 1½–2 tablespoons Sichuan doubanjiang, preferably Pixian-style; use the gram weight when possible and chop if coarse
  • 10 g / about 1 tablespoon fermented black beans, chopped; rinse briefly only if heavily salted
  • 3 garlic cloves, finely minced
  • 2 teaspoons finely minced fresh ginger
  • ¼–1½ teaspoons mild ground red chilli or mild Chinese chilli flakes, according to your heat level; use about half as much standard crushed red pepper, or begin cayenne at ⅛ teaspoon
  • 15 ml / 1 tablespoon Shaoxing wine or dry sherry; check the label because salted cooking wine calls for the lower end of the doubanjiang range. For an alcohol-free version, use the same amount of stock or water
  • 240 ml / 1 cup unsalted chicken stock or water
  • 7 g / about 2½ teaspoons cornstarch (cornflour in the UK)
  • 1½ tablespoons cold water, for the slurry
  • 2 teaspoons whole red Sichuan peppercorns, or 3 teaspoons for extra málà; toast and grind, then use ½ teaspoon for mild, 1 teaspoon for balanced or up to 2 teaspoons for extra málà. Keep any remainder in a small airtight jar for serving or another batch.
  • 2 scallions / spring onions, thinly sliced, white and green parts separated
  • Up to ⅛ teaspoon sugar, only if the finished sauce tastes unusually sharp
  • 1–3 teaspoons chilli oil, optional, for finishing
  • Steamed rice, for serving

Using an unfamiliar doubanjiang? Start with 20–25 g. Move closer to 30 g only when you already know the brand is comparatively mild. Weigh it when possible; coarse pastes do not pack consistently into a tablespoon.

Method

Prepare the Tofu and Mise en Place

  1. Condition the tofu. Cut it into 2.5 cm / 1-inch cubes. Bring about 1.5 L / 6 cups water to a bare simmer, add the salt and slide in the tofu. Simmer for 1–2 minutes, turn off the heat and leave the cubes warm in the water.
  2. Toast and grind the peppercorns. Toast them in the dry cooking pan over low heat for 30–60 seconds, shaking, just until fragrant. Transfer to a plate, cool and grind.
  3. Finish the mise en place. Mix the cornstarch with the cold water. Chop the doubanjiang and douchi, measure the liquid and place the remaining measured ingredients beside the stove; once the paste begins frying, the recipe moves quickly.

Build the Fermented Pork Sauce

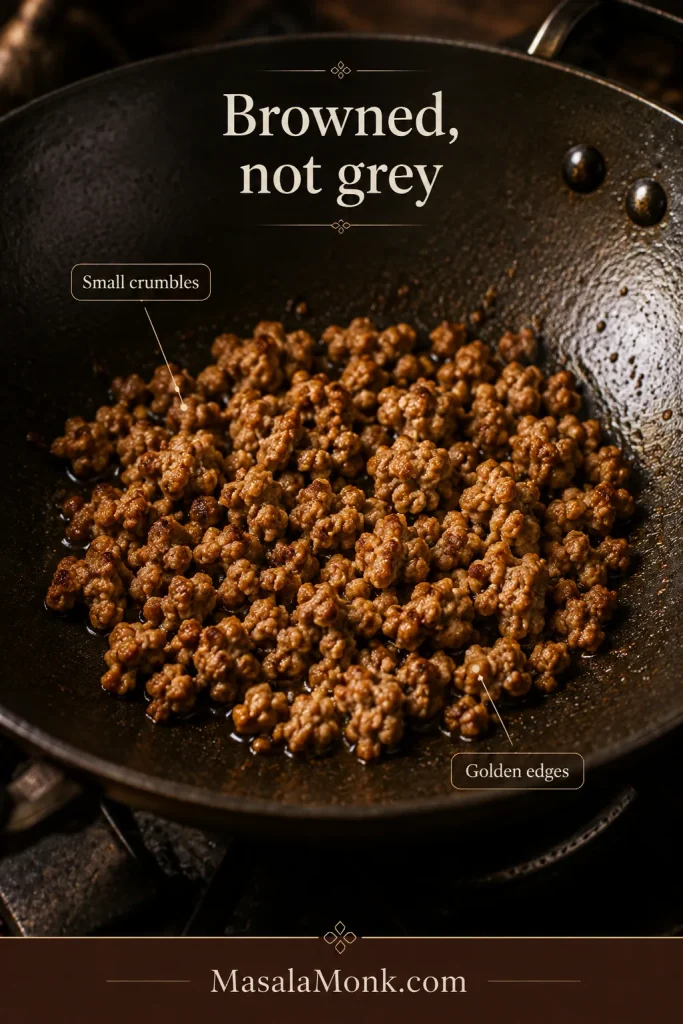
  1. Brown the pork. Heat the pan over medium-high. Add 15 ml / 1 tablespoon oil and the pork, breaking it into small crumbs. Cook for 2–3 minutes, until no pink remains and a few edges turn golden.
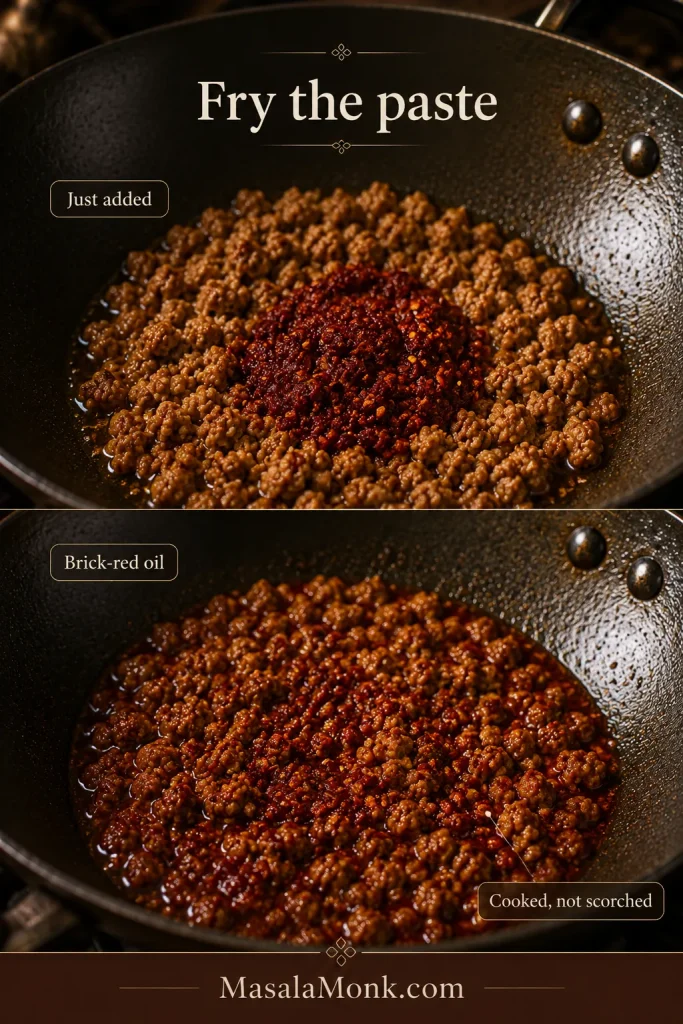
  2. Fry the doubanjiang in fresh oil. Push the pork aside and lower the heat to medium. Add the remaining 15 ml / 1 tablespoon oil and the doubanjiang to the cleared space. Fry for 60–90 seconds, stirring, until the oil turns brick red and the raw, sharp smell softens into something deeper and savoury. This is the moment the unfamiliar paste begins to make sense. Fold the pork back through.
Two-panel wok comparison showing doubanjiang just added as a dark red mound, then fried into the pork with glossy brick-red oil around it.
Fry until the paste loosens, the oil turns brick red and the sharp aroma softens; then add the aromatics.
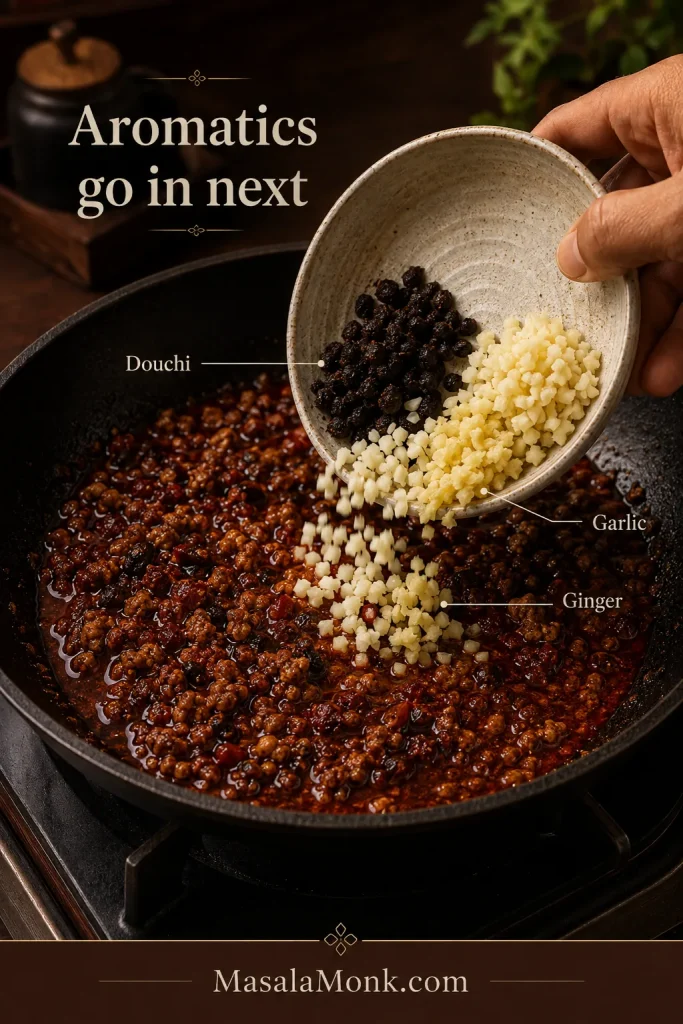
  1. Add the beans and aromatics. Stir in the douchi, garlic, ginger, ground chilli and scallion whites. Cook for 20–30 seconds, stopping as soon as the garlic smells fragrant.
  2. Build the sauce. Add the Shaoxing wine and let it hiss for a few seconds. Pour in the unsalted stock or water, scrape up the browned bits and bring the sauce to a controlled simmer.

Braise, Thicken and Finish

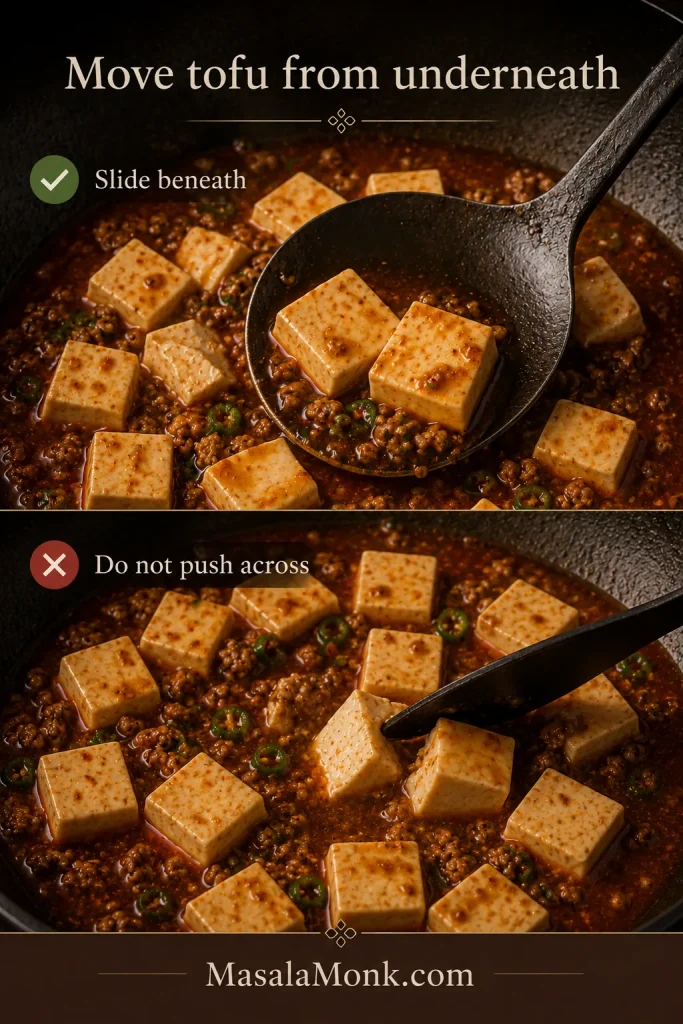
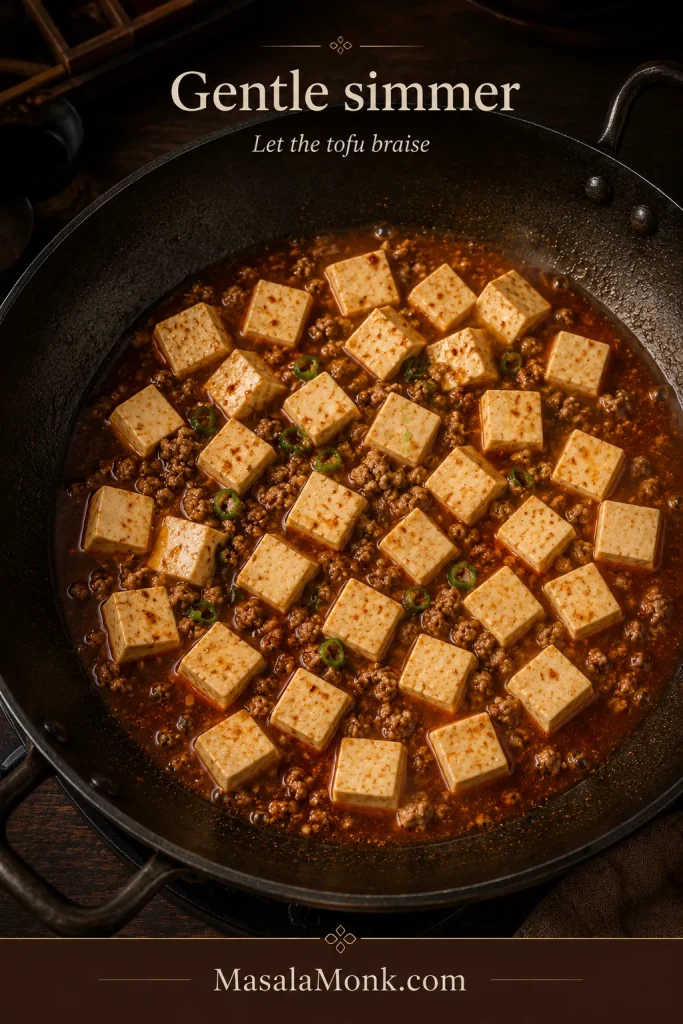
  1. Braise the tofu. Lift the warm tofu with a slotted spoon or spider and let excess water drain for a moment. Hold it close to the sauce and let the cubes slide in. From here, slow the movement down. Simmer uncovered for 4–5 minutes, sliding the spatula beneath the cubes when they need moving and spooning sauce over exposed tops.
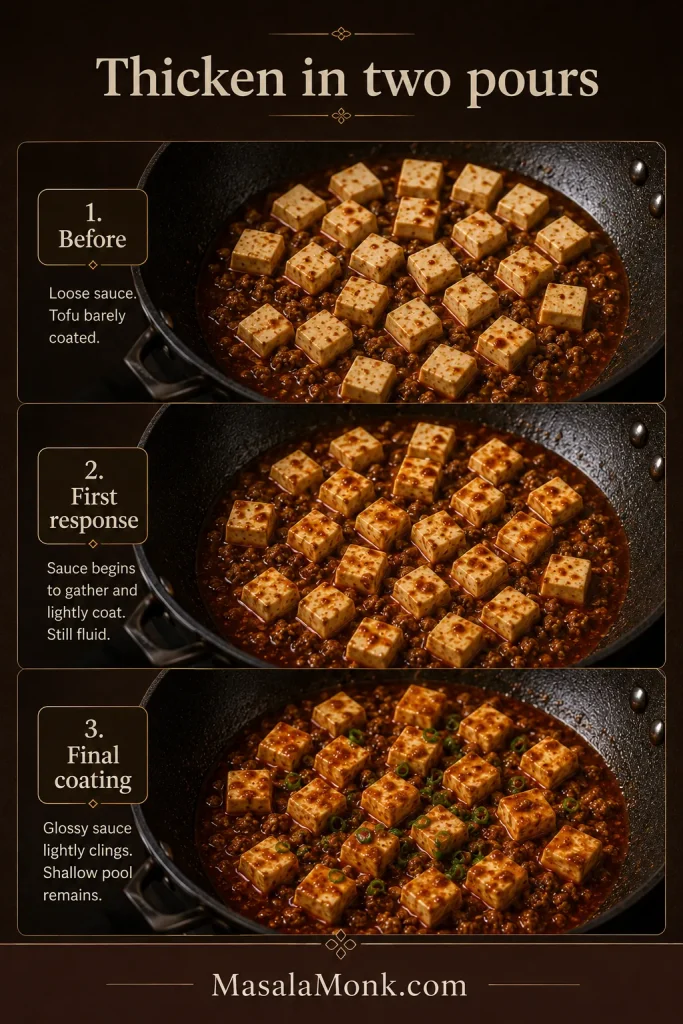
  2. Thicken in two pours. Stir the slurry again. Drizzle about half around the sauce—not directly over one pile of tofu—and simmer for 15–20 seconds. The pan may look unchanged for a moment before the sauce suddenly gathers. Add the rest a little at a time only until it looks glossy, flows slowly and clings lightly. You may not need every drop.
Three-stage wok guide showing loose sauce before slurry, a lightly gathering sauce after the first addition and a glossy final coating with a shallow pool remaining.
Drizzle slurry around the open sauce, not over a pile of tofu, so each addition disperses before it sets.
  1. Finish the aroma. Turn off the heat. Sprinkle in the amount of ground Sichuan pepper chosen for your heat level and most of the scallion greens, rock the pan once, then wait 30 seconds before judging the final thickness.
  2. Adjust and serve. Loosen a tight sauce with hot water or unsalted stock. Taste, then add soy or salt only when needed; use up to ⅛ teaspoon sugar for unusual sharpness and chilli oil for more heat. Slide into a shallow bowl, add the remaining scallion greens and serve with rice.

Recipe Notes

  • Leave the tofu unpressed: its moisture keeps the centre tender and creamy.
  • Salt comes last: doubanjiang, douchi and salted cooking wine may already provide enough. Taste before adding soy sauce or salt.
  • The full slurry is not a target: stop when the sauce lightly coats the tofu and still flows back into a spoon trail.

With the core method in place, the sections below explain how to read the paste, choose the tofu and recognise when the sauce is ready.

Explore the technique · Understand the key ingredients · Choose and handle the tofu · See the finished-pan cues

What Does Mapo Tofu Taste Like?

Mapo tofu should taste deeper than “spicy tofu.” Fried doubanjiang supplies salty fermented savouriness. Douchi adds an earthy edge. Chilli gives the first warmth; Sichuan pepper follows with a floral, lemony tingle that makes the mouth feel briefly awake and lightly numb.

Then the tofu changes the experience. Its mild, creamy centre spreads those assertive flavours across a soft bite, while the browned pork appears in small savoury bursts—not as a heavy meat layer. Rice catches the sauce and gives the chilli somewhere to land.

The sauce can be reddish-brown or brick red depending on the paste, chilli and oil. It should cling to the tofu but still collect beneath it, with a few red-oil beads shining at the edges. It should not taste like sweet chilli sauce, tomato-heavy pork sauce or generic soy gravy.

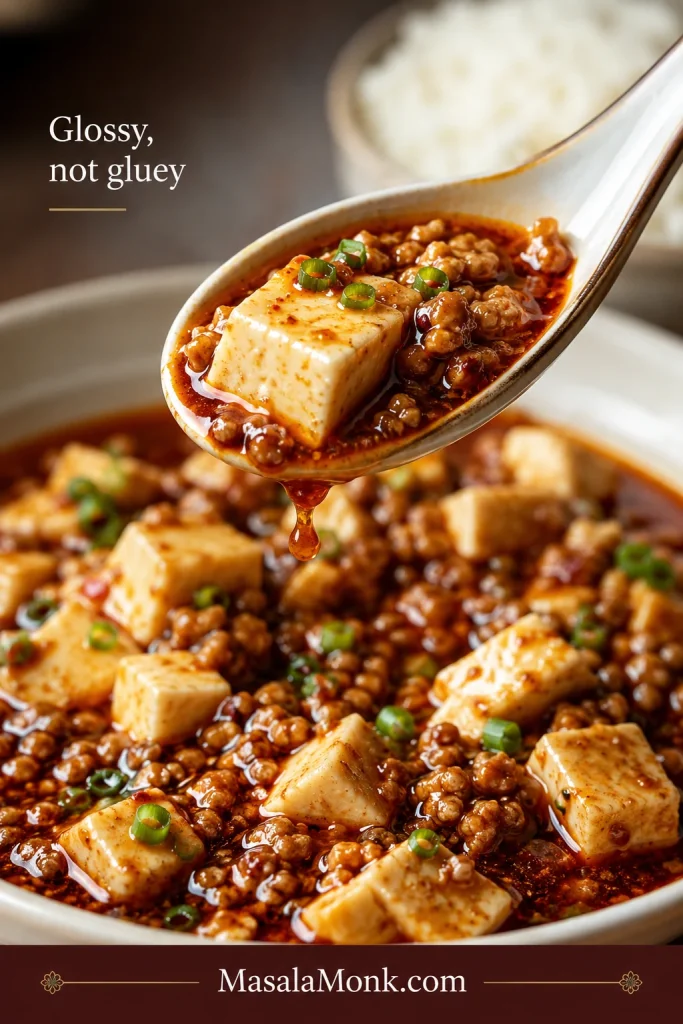
A spoon lifts one pale tofu cube and small pork crumbles from glossy red sauce, with a short drip falling back toward the bowl.
The sauce should coat the tofu lightly, then fall from the spoon in a short, loose drip—not stretch like glue.

What Is Mapo Tofu Sauce Made Of?

Mapo tofu sauce is built in the pan rather than poured from one bottle. It starts with browned pork, oil, doubanjiang and douchi. At first the chilli bean paste smells salty and sharp; after a minute in visible oil, that edge softens, the oil turns red and the aroma becomes deeper and more savoury.

Small separated ground-pork crumbles browned in a dark wok, with golden edges and no visible pool of cooking liquid.
If the pork is still grey and the pan looks wet, keep cooking until the moisture evaporates and a few edges turn golden.

Stock or water then turns that concentrated base into a braise. The tofu warms in the seasoned liquid for 4–5 minutes while the sauce settles around its surface and softened edges.

The slurry comes only after the tofu has braised. It gathers the sauce around the cubes without turning the pan into gravy. Sichuan pepper, scallion greens and optional chilli oil arrive last because their brightest aromas fade fastest.

Ingredient Guide: What Matters Most

Three choices matter most: the doubanjiang sets the fermented base and much of the salt, fresh Sichuan pepper brings the tingle, and medium tofu gives the best balance of tenderness and control. Douchi, wine, stock and chilli oil can flex around that foundation.

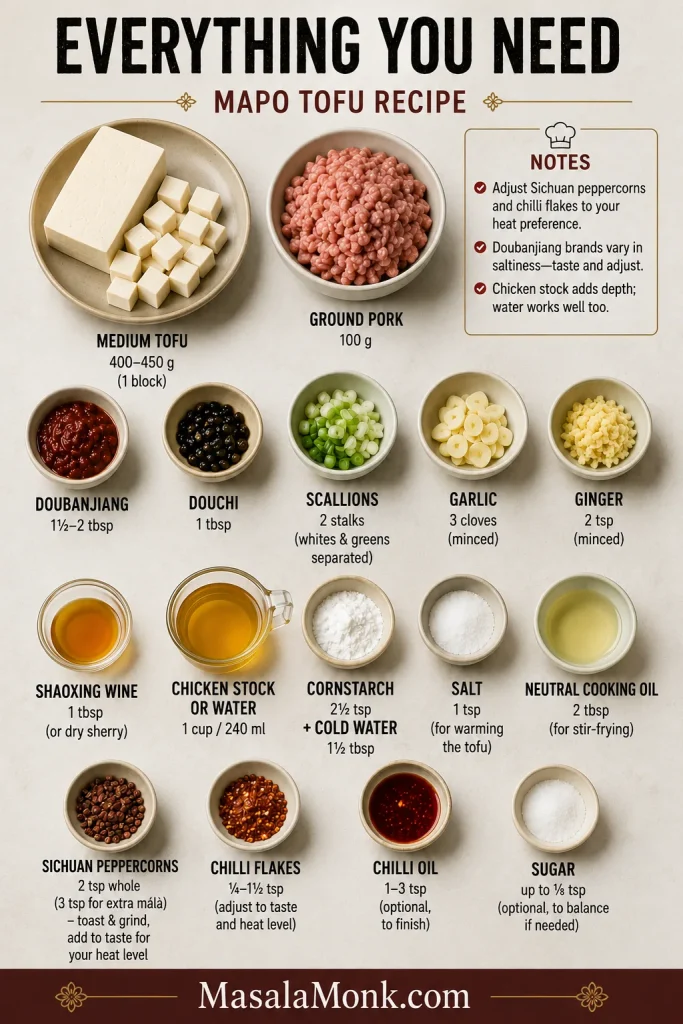
Overhead ingredient layout with tofu, ground pork, doubanjiang, douchi, Sichuan peppercorns, chilli flakes, scallions, garlic, ginger, wine, stock, oil and cornstarch slurry ingredients.
Because the cooking moves quickly, measure every mapo tofu ingredient before heating the wok—especially the fermented pastes, aromatics and slurry.

Shopping shortcut

If you can find only two specialist ingredients, buy doubanjiang and whole Sichuan peppercorns. Douchi is the useful third purchase.

In Chinese or Asian groceries, doubanjiang is usually near fermented bean and chilli sauces; douchi may be nearby or with dried and preserved pantry ingredients. Sweet bean sauce, bottled black bean garlic sauce and Indo-Chinese Schezwan sauce are sweeter or wetter and are not direct substitutes here.

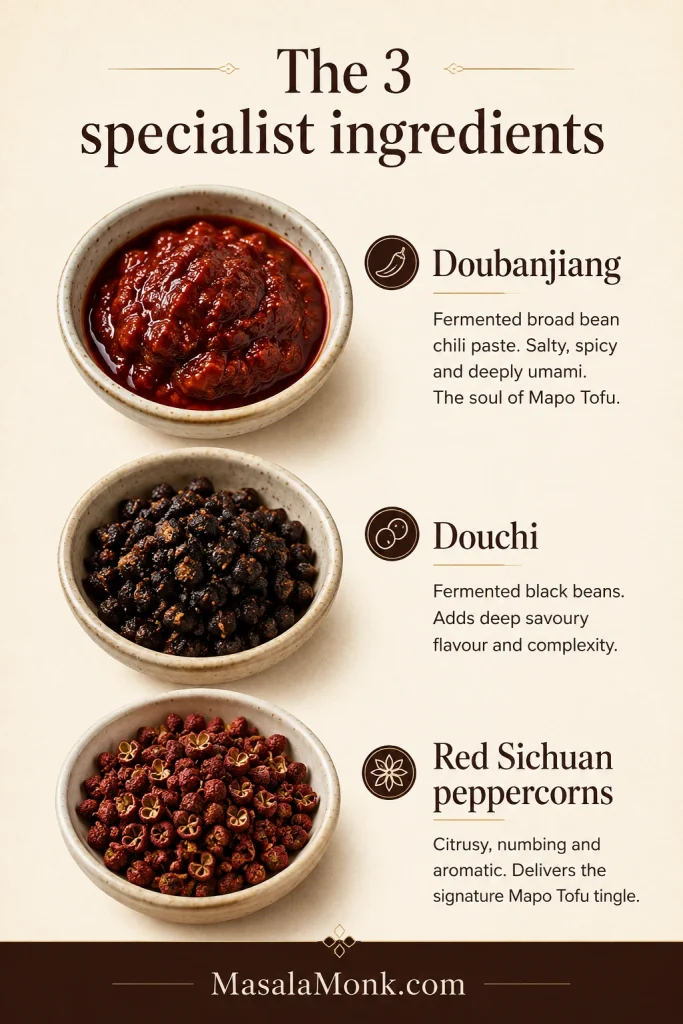
Three labelled bowls containing red doubanjiang paste, black fermented douchi beans and red Sichuan peppercorn husks.
Doubanjiang brings fermented chilli depth, douchi adds concentrated savouriness, and freshly ground Sichuan pepper supplies the floral numbing finish.

Ground pork: 100 g is enough to scatter savoury browned crumbles through the sauce without turning the dish meat-heavy. For more ways to use the rest of a pack, see our ground pork recipes.

Doubanjiang

Doubanjiang is fermented broad bean and chilli paste with salty, earthy heat. Labels may say Pixian doubanjiang, Sichuan chilli bean paste, spicy broad bean paste or toban djan. Brands vary sharply. With an unfamiliar paste, begin at 20–25 g; move toward 30 g only after you know it is comparatively mild. Weigh it when possible, chop coarse paste and fry it in visible oil until the sharp edge softens.

Fermented Black Beans

Douchi are small fermented black soybeans with earthy, salty depth. Chop them and rinse briefly only when they are heavily coated in salt. Without douchi, simply leave them out. In an emergency, use no more than 1 teaspoon prepared black bean garlic sauce and reduce other salty ingredients.

Douchi beans, minced garlic and minced ginger being tipped into a dark wok containing browned pork and a brick-red doubanjiang base.
After the oil turns red, add douchi, garlic and ginger briefly so their fragrance blooms without scorching.

Sichuan Peppercorns

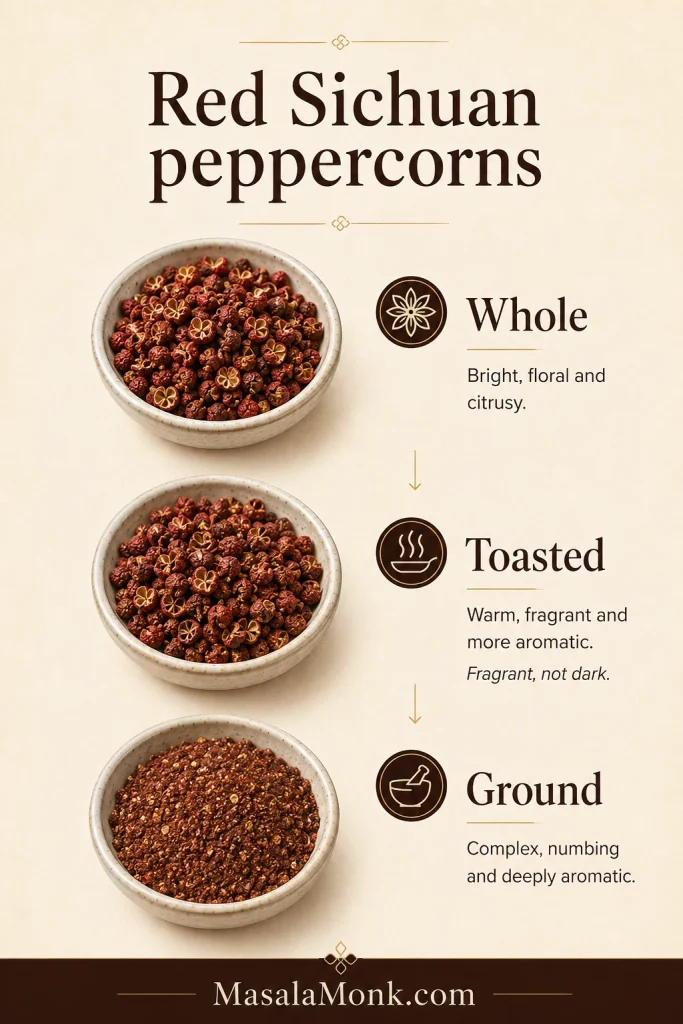
Three-stage guide showing red Sichuan peppercorns whole, lightly toasted to a deeper red-brown and ground into a textured reddish powder.
Before grinding, discard hard black seeds and obvious stems; the fragrant red husks provide the floral Sichuan-pepper tingle.

Sichuan peppercorns bring a floral, citrusy aroma followed by the tingling sensation called má. Whole husks hold their aroma longer than powder: toast them gently, remove obvious hard black seeds and grind close to cooking. Add most of the powder off the heat. A faint aroma usually calls for fresher husks, not simply more powder.

Ground Chilli and Chilli Oil

Doubanjiang already contributes some heat, but using more paste to make the dish hotter also raises the salt. Use mild ground chilli or mild Chinese chilli flakes at the quantities in the heat table; begin standard crushed red pepper at about half that amount and cayenne at ⅛ teaspoon. Blends containing cumin or oregano take the sauce in another direction.

Chilli oil is a finishing dial, not the sauce’s foundation. One or two teaspoons deepen the red sheen and lift the heat without changing the fermented base. The Asian chilli-oil section in our pepper sauce guide explains a basic Sichuan-style infusion.

Stock, Wine and Starch

Unsalted stock gives the sauce a little more body; water keeps the fermented flavours clearer. Shaoxing wine adds aroma, while dry sherry or extra stock works when it is unavailable. Salted cooking wine calls for the lower end of the doubanjiang range.

Cornstarch is the accessible thickener; potato starch usually needs a lighter hand. Treat the slurry as a reserve and stop as soon as the sauce lightly coats the tofu. Our stir-fry sauce guide goes deeper into reduction, moisture and starch.

Seasoning note

Taste after the tofu has braised. Add a small splash of light soy only when the bowl needs more salt; use chilli oil for more heat and fresh Sichuan pepper for more tingle.

Once the fermented base is right, the tofu makes the biggest difference to the finished bowl.

Best Tofu for Mapo Tofu—and How to Handle It

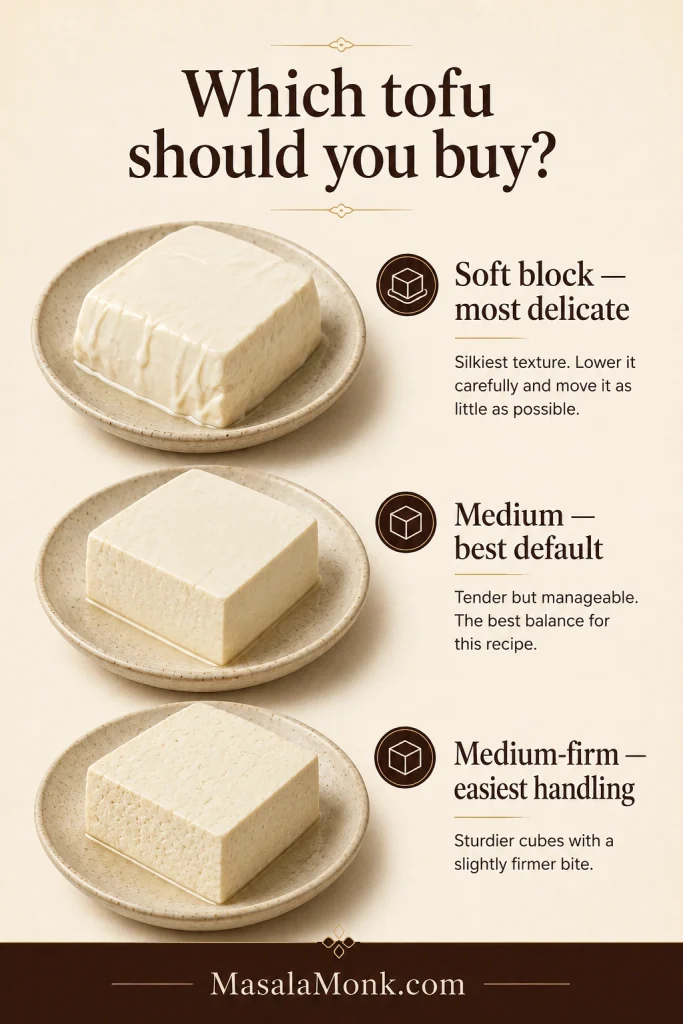
Medium block tofu is the best default: tender enough to feel creamy, but stable enough to warm and braise. Firmness labels vary by brand and country, so use the comparison below when the packet wording is unfamiliar.

Three-column guide comparing soft block tofu as most delicate, medium tofu as the best default and medium-firm tofu as easiest to handle.
When packet labels are inconsistent, choose tofu that lifts out whole yet yields easily to a spoon—the most reliable texture for mapo tofu.

Swipe or scroll sideways to see the full table.

Tofu type Finished texture Handling Best use
Soft block tofuCreamy and delicateModerately fragileMost delicate texture
Medium tofuTender with gentle structureRelatively easyBest default
Medium-firm block tofuSlightly firmer but still tenderEasyEasiest handling
Firm tofuChewier and more bean-forwardVery easyAcceptable, less delicate
Silken tofuCustardy and very softDifficultUse a firmer silken variety
Extra-firm tofuDense and chewyVery easyNot preferred for this dish
Soft block tofu and silken tofu are not always the same product. Choose tofu that feels tender but still lifts from the packet as a block.

Leave the tofu unpressed. Its moisture keeps the centre soft and creamy. Drain the packet, cut the block carefully and let the warm-water step prepare it for the sauce.

Vacuum-packed extra-firm tofu will survive the pan, but its dense chew stays separate from the sauce. Save it for crisp-edged bowls, wraps or salads when possible.

Should You Warm or Blanch the Tofu?

You can add firm tofu directly when time is tight. Soft, medium and medium-firm tofu become easier to handle after a brief warm-water step: the centre warms, the surface picks up a light seasoning and the sauce returns to a simmer faster.

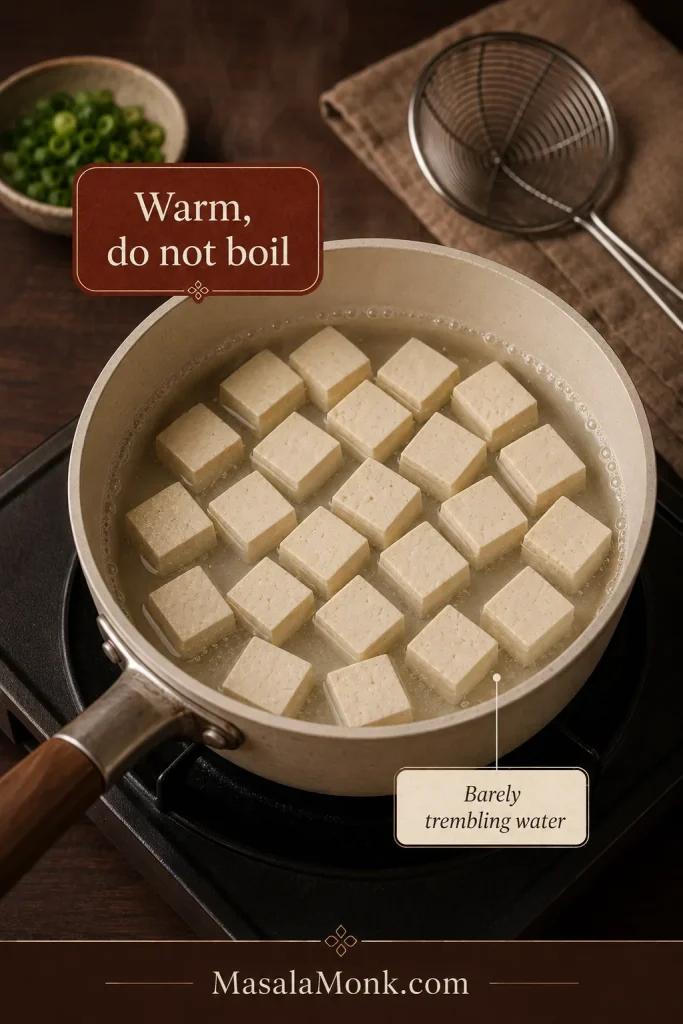
Pale tofu cubes warming in clear water inside a light saucepan, with only small bubbles around the edge rather than a rolling boil.
Keep the cubes submerged and almost motionless; quiet water protects their corners before the braise begins.

For the saucepan method, simmer the cubes in lightly salted water for 1–2 minutes, turn off the heat and leave them warm until the sauce is ready. The water should tremble while the cubes remain almost still.

For very fragile tofu, cover the cubes with just-boiled salted water in a heatproof bowl and leave them for 10–15 minutes.

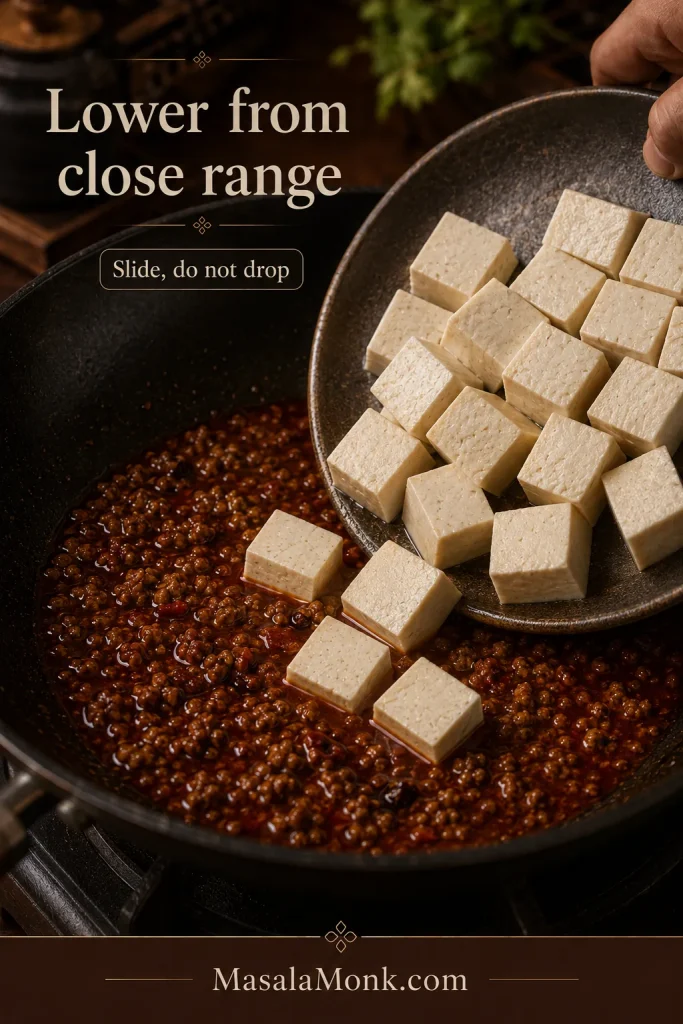
Lift the tofu with a spider or slotted spoon. Keeping the spoon close to the sauce lets the cubes slide in without falling or colliding.

A plate held close to a dark wok as pale tofu cubes slide gently into loose brick-red sauce without splashing.
Hold the plate lip just above the sauce and let the tofu cubes slide off under their own weight.

Best Pan and Utensil

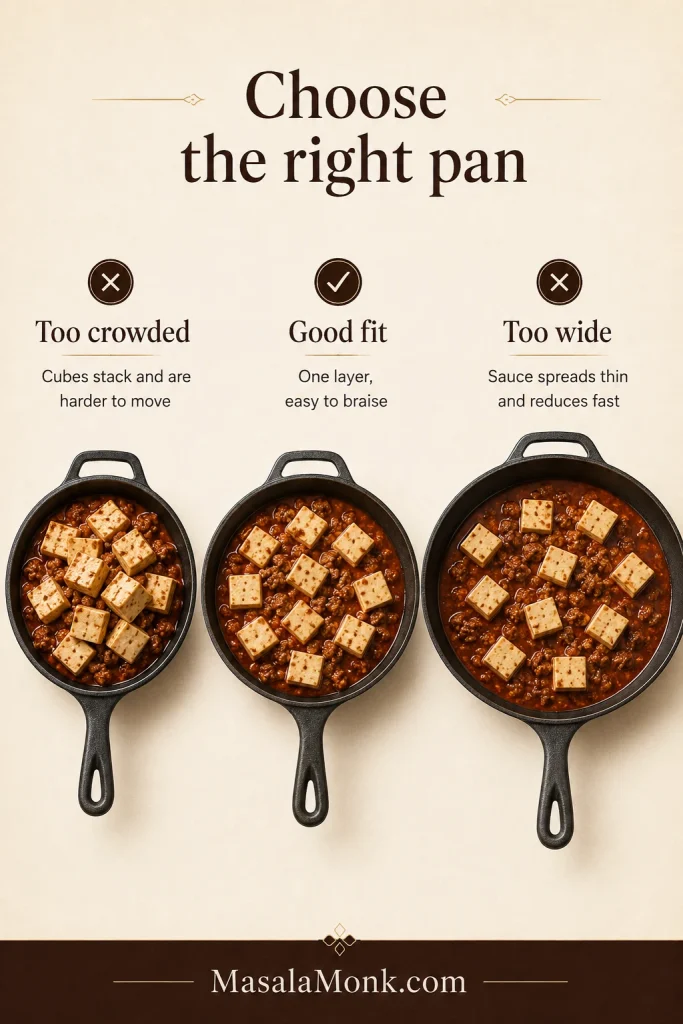
A wok is useful but optional. Choose a pan wide enough to move a rounded spatula beneath the tofu and deep enough to hold the braising liquid.

  • 12-inch / 30 cm wok: generous working space, with sloped sides that gather the sauce around the tofu.
  • 10–11-inch / 25–28 cm deep sauté pan: the easiest non-wok option; sides around 2½ inches / 6 cm high work well.
  • Medium wide saucepan or 3–4-quart / approximately 3–4 L Dutch oven: useful when your frying pans are extremely broad and shallow.
Three-pan comparison showing a good fit with tofu in one layer, a crowded small pan with stacked cubes and an oversized pan with sauce spread too thin.
Look for a narrow moat of sauce around the tofu and enough room to slide a spatula underneath without stacking the cubes.

The tofu should sit in roughly one layer, with sauce reaching partway up the cubes. A narrow pot stacks the tofu; a huge shallow skillet can reduce the liquid before the tofu has finished braising. Nonstick is completely acceptable for a first attempt.

How to Move the Tofu Without Breaking It

A cracked cube or a few softened corners are normal. They help the sauce and tofu feel connected. The aim is to keep most cubes recognisable, not to make every edge picture-perfect.

Two-panel technique guide showing a broad spatula supporting tofu from beneath, contrasted with a utensil pushing across a cube and beginning to split it.
Think lift, rock and spoon—not stir. Those three movements keep soft tofu recognisable throughout the braise.

Pushing across the top cuts easily through soft tofu. Slide it into the sauce from close range, then keep the spatula beneath the cubes so their weight is supported. Rock the pan when the sauce needs to circulate.

During the 4–5-minute braise, look for cubes that quiver when the pan moves yet remain recognisable. Thicken only after the tofu is hot and has braised in the sauce for the full time.

Overhead view of tofu cubes in one layer in a dark wok, surrounded by loose red sauce with only a few small bubbles at the edges.
Keep only a few small bubbles around the pan’s edge; vigorous boiling knocks tender tofu around and reduces the sauce too quickly.

How to Know When Mapo Tofu Is Ready

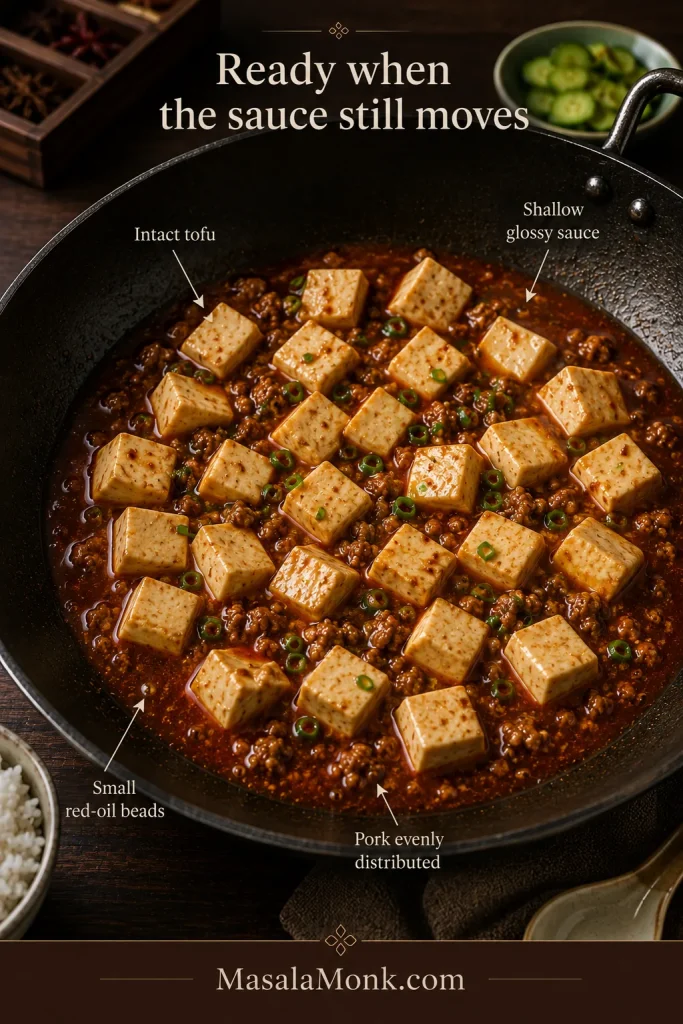
Finished mapo tofu in a dark wok with intact tofu cubes, small pork crumbles, shallow glossy red sauce, scattered red-oil beads and sliced scallions.
Rock the pan once: the cubes should shift gently while glossy sauce runs between them and settles in a shallow pool.
  • Most tofu cubes remain intact, with a few naturally softened edges.
  • Small browned pieces of pork appear throughout the sauce.
  • The doubanjiang’s sharp raw edge is gone, leaving it rounded and savoury.
  • The sauce is reddish-brown to brick red and visibly glossy.
  • It coats the sides of the tofu but still leaves a shallow pool beneath it.
  • Small red-oil beads appear at the surface or around the edges.
  • Fresh Sichuan pepper lifts the bowl with a floral, citrusy aroma.

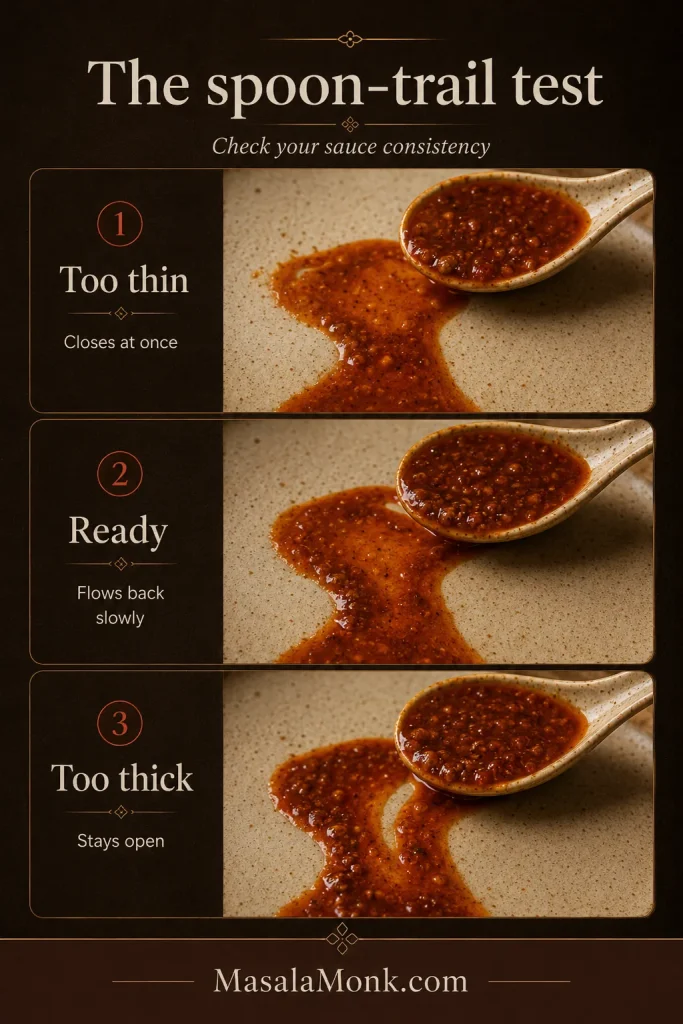
The spoon-trail test

  • Closes immediately: the sauce is still thin; reduce briefly or add another small drizzle of slurry.
  • Flows back slowly: the sauce is ready.
  • Stays open: the sauce is too thick; loosen it while the pan is still hot.
Three-panel spoon-trail test showing thin sauce closing immediately, ready sauce leaving a soft narrowing trail and thick sauce leaving a clear open channel.
Judge mapo tofu sauce only after it returns to a simmer; starch thickens with a short delay, so patience prevents over-correction.

Taste one spoonful without rice. The flavour can be assertive, but it should not be punishingly salty. Then spoon it over hot rice while the sauce still moves and the peppercorn aroma is fresh. The rice should balance the dish—not rescue it.

Choose your next step · Back to the recipe · Fix sauce or tofu problems · Check substitutions · Scale the recipe

Substitutions That Work

Once you understand what makes the dish work—a fermented base, tender tofu and a light coating—substitutions become easier to judge. Some preserve that balance; others make an excellent spicy tofu dish with a different character. The table shows the best option and the trade-off.

Swipe or scroll sideways to see the full table.

Missing or changed ingredientBest optionWhat to watch
Pixian doubanjiangAnother Chinese chilli bean paste or spicy broad bean pasteTaste for salt and fry it in oil. Miso or doenjang plus chilli can make a useful emergency adaptation, with a clearly different flavour.
DouchiOmit it; emergency option: 1 teaspoon prepared black bean garlic saucePrepared sauce is stronger, wetter and often sweeter; reduce other salty ingredients.
Sichuan peppercornOmit it and make a chilli-forward versionThe dish will still have chilli heat, but black pepper cannot recreate the floral numbing sensation.
Shaoxing wineDry sherryFor an alcohol-free version, replace it with the same amount of unsalted stock or water.
Ground porkGround beef, chicken, turkey, plant mince or finely chopped mushroomsBrown mushrooms until dry. Add a little oil for very lean poultry and cook ground poultry to 74°C / 165°F.
Soft or medium tofuMedium-firm tofu; firm tofu if necessaryMedium-firm remains fairly tender. Firm tofu will be chewier; keep the cubes large and braise for the full 5 minutes.
CornstarchPotato starchBegin with about three-quarters of the amount because it may thicken more strongly.
A substitute may change salt, heat or texture, so taste before adjusting anything else.

Gochujang can make a delicious Korean-style mapadubu, but its sweetness and chilli profile are different. Treat it as a new direction, not a one-for-one shortcut to Sichuan flavour.

Mapo Tofu Troubleshooting: Fix the Pan You Have

Most first-batch problems come from one of three things: a salty paste, too much heat under the tofu or slurry added faster than the sauce can respond. Start with the symptom you see. Most pans can still be brought back.

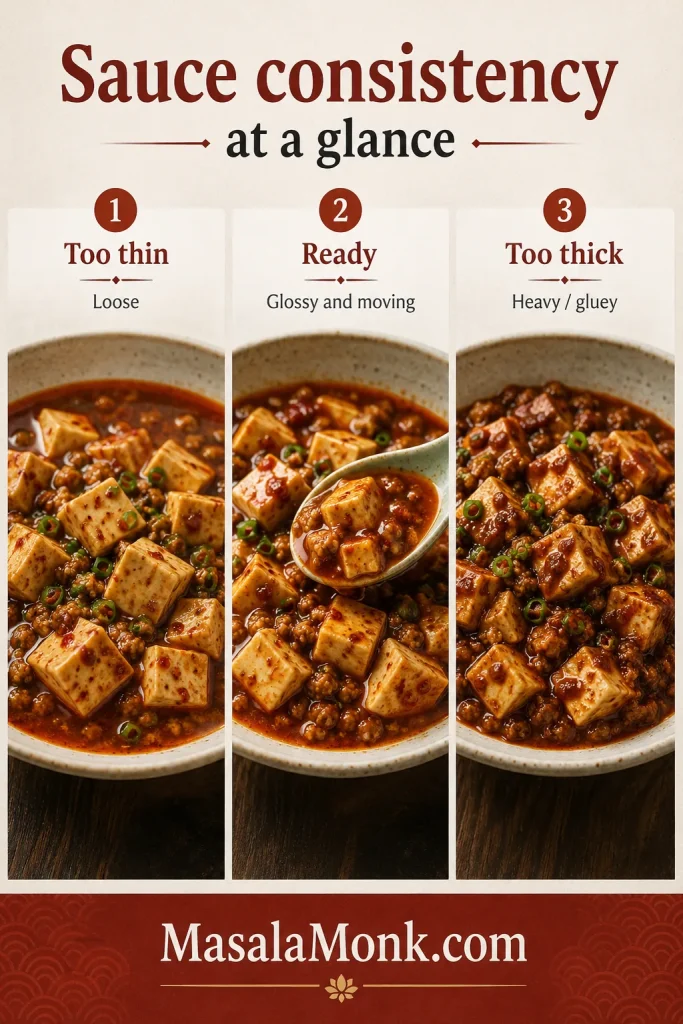
Three-column comparison showing thin mapo tofu sauce with a loose pool, ready sauce with a glossy spoonable coating and overly thick sauce clinging heavily to the tofu.
A ready mapo tofu sauce coats lightly and still flows. Reduce a thin sauce briefly; loosen an over-thickened one with hot unsalted stock.

The Sauce Is Too Salty

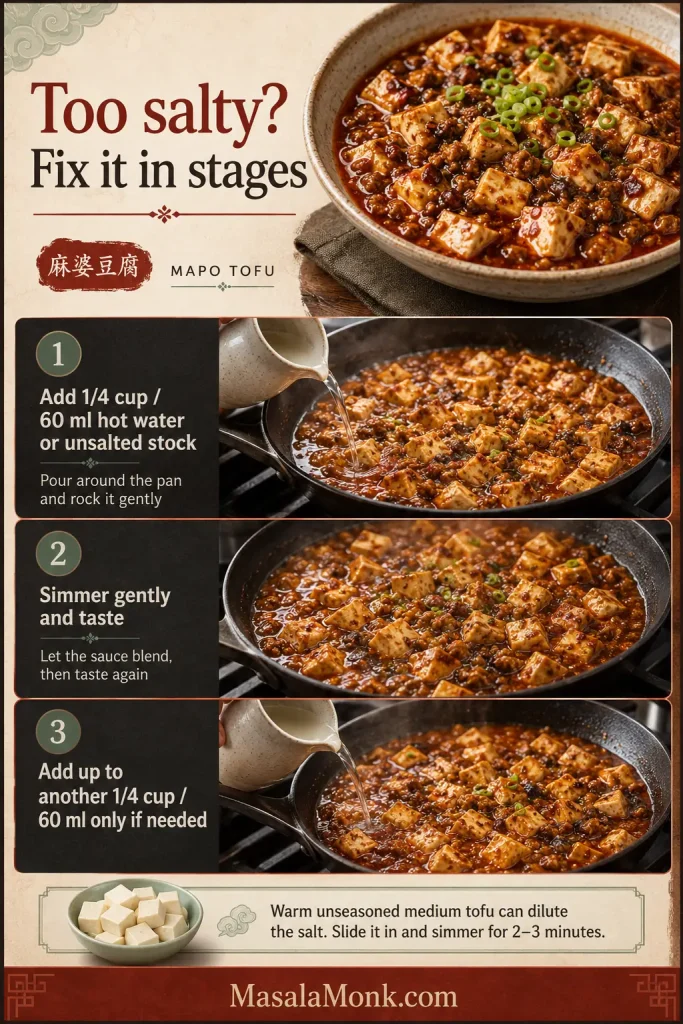
This is one of the most common first-batch problems, and it is usually fixable. Start with 60 ml / ¼ cup hot water or unsalted stock and return the sauce to a gentle simmer. Taste, then add up to another 60 ml / ¼ cup only if needed.

Warm unseasoned tofu is an even better rescue when you have it; slide it in and simmer for 2–3 minutes. Serve with more plain rice. Sugar only trades the salt problem for a sweet-and-salty one.

Three-step guide showing hot unsalted liquid poured around mapo tofu, the sauce gently simmered and tasted, and a second small addition used only if needed, with warm unseasoned tofu as a backup.
Pour the rescue liquid around the mapo tofu, then rock rather than stir so dilution does not become tofu breakage.

Next time, begin with less doubanjiang, use unsalted liquid and leave soy sauce until the final taste. The paste is usually the main source of the extra salt.

The Sauce Is Watery

A loose pan is easier to correct than a gluey one. Simmer uncovered for another minute so some liquid evaporates and the flavour concentrates. When it tastes right but still runs thin, add another small drizzle of slurry and let it bubble before deciding again.

The Sauce Is Too Thick or Gluey

Catch it while the pan is hot. Add hot water or unsalted stock one tablespoon at a time and rock the pan after each addition. Stop when the sauce flows back slowly after a spoon passes through it.

The Tofu Is Breaking

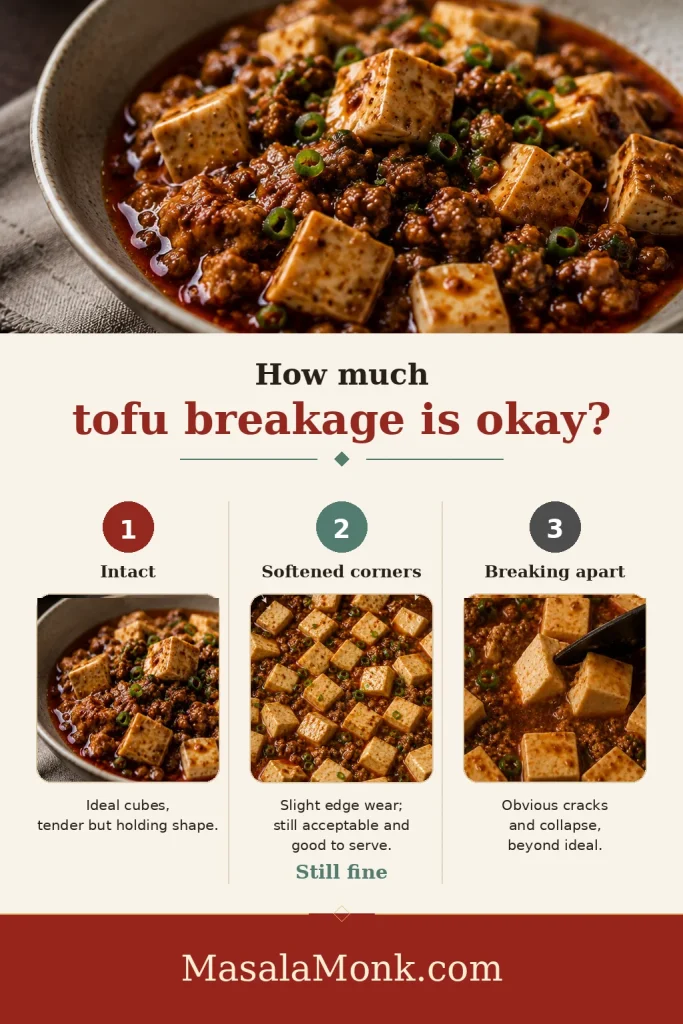
One broken cube or a few softened corners are normal. Step in only when the pan is beginning to look more like tofu scramble than distinct pieces.

Tofu breakage guide comparing intact cubes, cubes with slightly softened corners marked still fine and tofu pieces with obvious cracks and collapse.
Softened tofu corners are still fine. When cubes begin cracking or collapsing, stop stirring and support them from underneath.
  • Use medium or medium-firm block tofu.
  • Cut one-inch cubes and warm them before braising.
  • Keep the sauce at a gentle simmer.
  • Support the cubes from beneath instead of stirring across them.

Diagnose the Flavour Before Adjusting

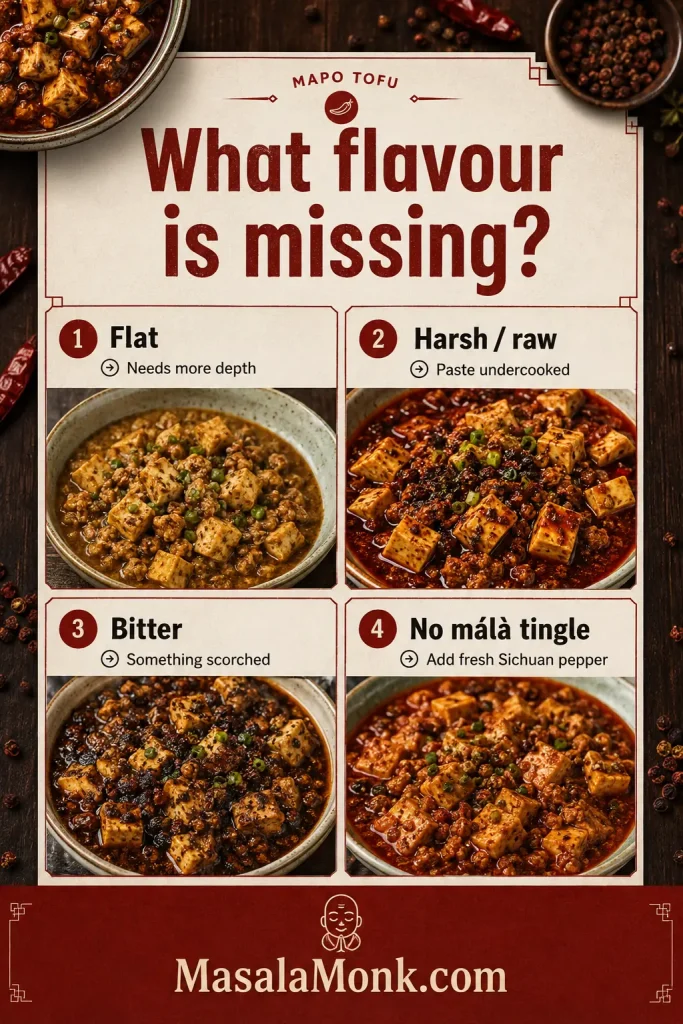
Before adding more seasoning, identify the kind of imbalance you are tasting. Flat, harsh, bitter and low-tingle sauces point to different causes, so they need different fixes.

Four-part guide linking flat flavour with missing depth, harsh or raw flavour with under-fried paste, bitterness with scorching and weak málà with too little fresh Sichuan pepper.
Diagnose mapo tofu before seasoning: flat sauce needs depth, harshness suggests under-fried paste, bitterness points to scorching, and weak málà needs fresh Sichuan pepper.

The Sauce Tastes Raw or Harsh

The doubanjiang probably needed more time in the oil. If the tofu is already in the pan, simmer uncovered for another 2–3 minutes; the extra cooking can soften the sharp edge. Next time, give the paste visible oil and wait for that oil to turn red before adding liquid.

The Dish Tastes Bitter

Scorched doubanjiang, burned garlic, burned chilli or overheated Sichuan pepper are the usual causes. If something has caught on the base, transfer the unburned sauce and tofu to a clean pan without scraping up the dark layer, then dilute slightly with stock.

When the bitter taste is strong, starting the sauce again is kinder to the rest of the ingredients.

The Flavour Tastes Flat

Before adding salt, decide what the bowl actually lacks: fermented depth, chilli heat, fresh Sichuan pepper or another minute of reduction.

For this batch, finely chop a little extra douchi and simmer it for at least a minute. When the bowl still lacks fermented depth, increase the doubanjiang next time; stirring raw paste directly into the finished sauce can make it harsh.

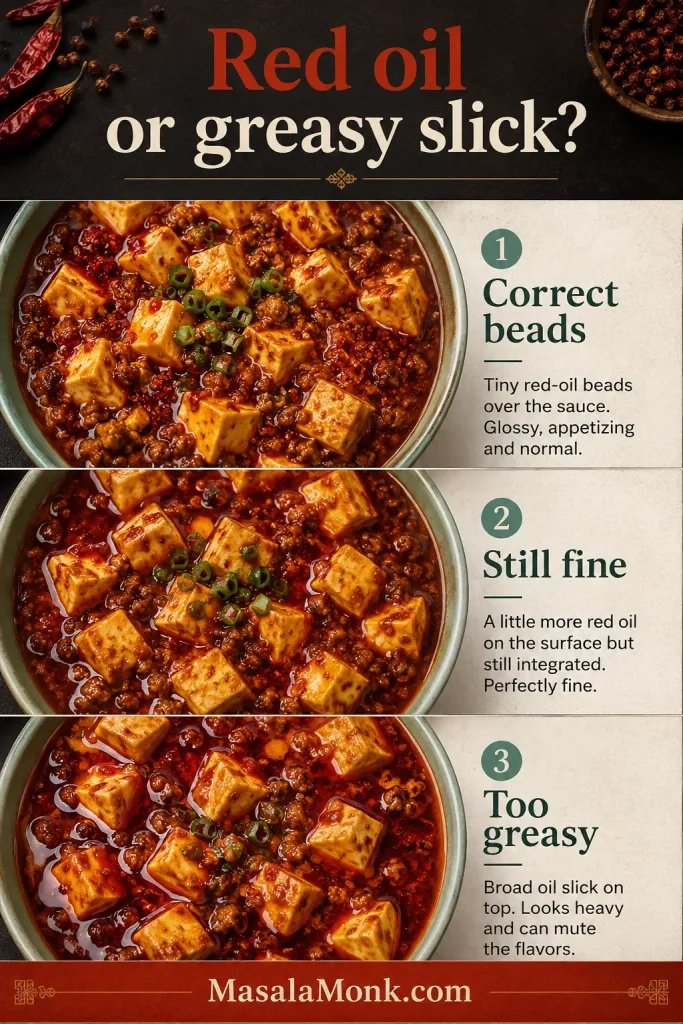
The Dish Is Greasy

A few red-oil beads are part of the look. A heavy slick can come from fatty pork, extra cooking oil or an enthusiastic pour of chilli oil. Spoon off the obvious excess and let the sauce simmer for a minute. Correct thinness separately with a very small drizzle of slurry, but use starch for texture—not to hide grease.

Three-state comparison showing small red-oil beads over the sauce, a slightly richer but integrated surface and an excessive broad oil slick.
Tilt the pan: healthy red-oil beads travel with the mapo tofu sauce, while excess grease slides as a separate top layer.

The Sauce Is Brown Instead of Red

Brown-red can be completely correct. Colour depends on the paste, the chilli and how thoroughly the doubanjiang coloured the oil. Add a little chilli oil for brighter sheen, and let flavour matter more than matching a photograph.

There Is Heat but No Sichuan-Pepper Tingle

Old pre-ground peppercorn loses aroma quickly. Toast whole peppercorns gently, grind them close to serving and add most of the powder off the heat. Offer extra at the table so the numbing effect can be increased without changing the salt or sauce texture.

Pan back on track? · Return to the recipe · Choose serving sides · Store leftovers · Back to the top

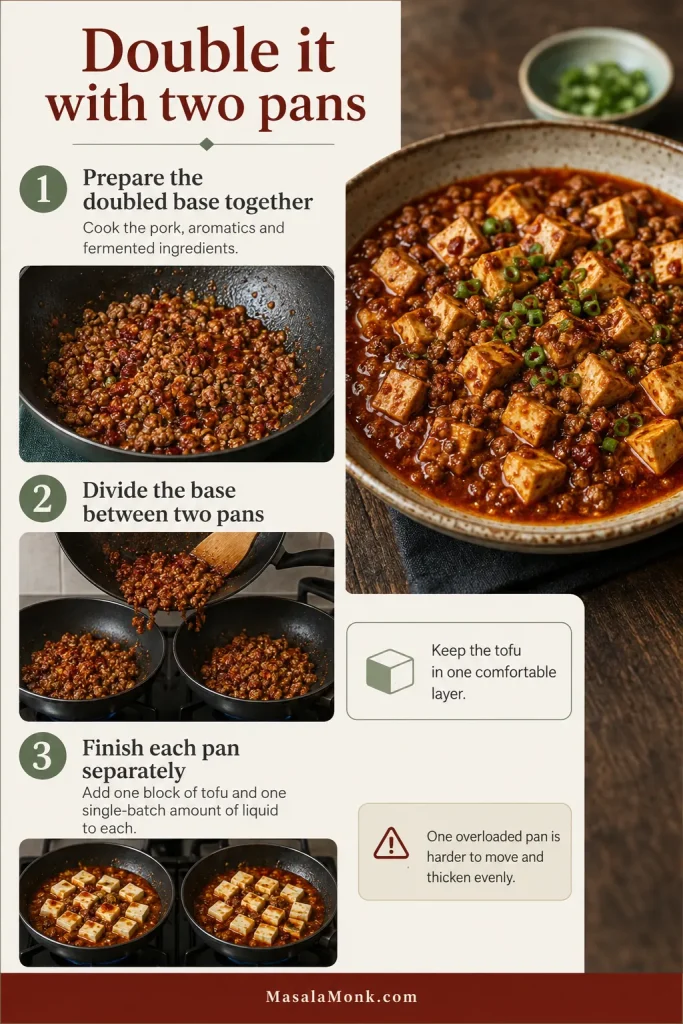
How to Double the Recipe

Two separate pans are more reliable than one crowded batch. Prepare double the pork, aromatics and fermented base together, divide that mixture between two pans, then add one block of tofu and the single-batch liquid to each pan.

Finish each pan separately with fresh slurry and Sichuan pepper. This keeps the tofu in one layer, returns the sauce to a simmer quickly and avoids pretending that evaporation, spice and starch scale in a perfectly straight line.

Three-step guide showing one cooked pork and fermented-chilli base, the base divided between two pans and each pan finished separately with tofu in one layer.
The success cue is space: each pan should hold one tofu layer with room for sauce to circulate and a spatula to pass underneath.

For a triple batch or larger: cook consecutive single batches. The pork-and-paste base can be prepared together, but the tofu and final thickening are best handled one pan at a time.

What to Serve With Mapo Tofu

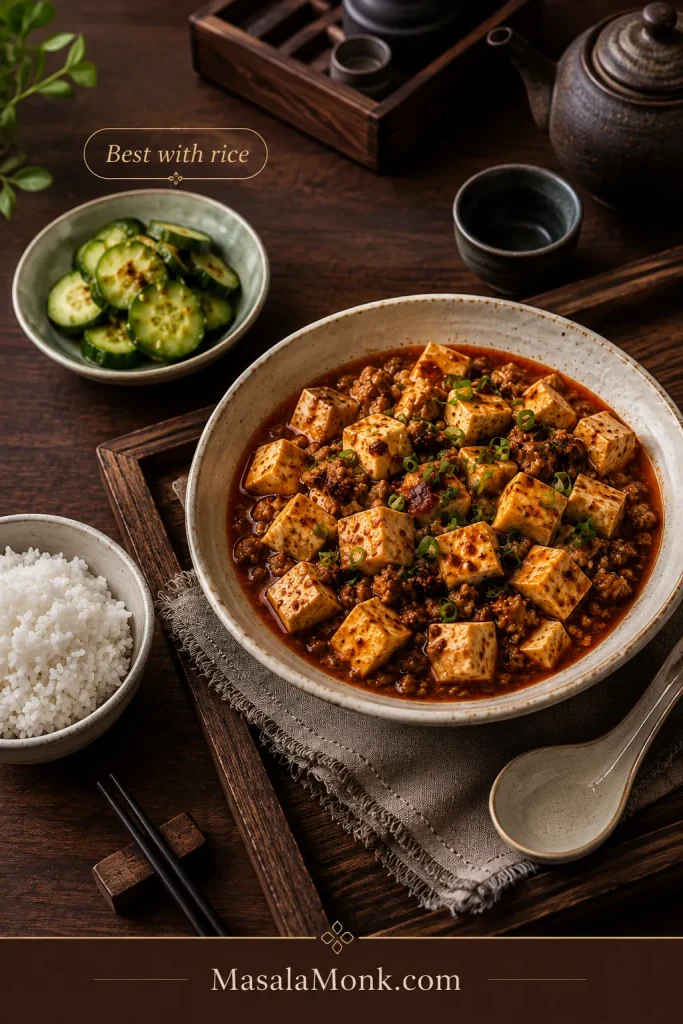
Steamed rice is the natural partner because it absorbs the glossy sauce and gives the salt, chilli and Sichuan pepper somewhere to land.

One cup uncooked rice generally produces roughly 2½–3 cups cooked rice, enough for two substantial main-dish servings or two generous mapo tofu rice bowls. Use our guide to cook rice when you want the timing to line up with the sauce.

Overhead table setting with a bowl of mapo tofu, steamed white rice and a small pale-green dish of sliced cucumber.
Plain rice catches the savoury sauce, while cool cucumber refreshes the palate between spicy, numbing bites.
  • Jasmine, short-grain or medium-grain white rice for a soft, neutral base
  • Cucumber salad for cold crunch and acidity
  • Garlicky bok choy or Chinese greens for something clean and leafy
  • Lightly dressed cabbage for freshness without another heavy sauce
  • Steamed broccoli or simple green beans for an easy weeknight plate
  • A clear broth or light egg-drop soup when serving several dishes

The most satisfying table has contrast: something plain, something fresh and something crisp. Serve the mapo tofu as soon as it is finished; the sauce continues tightening as it sits.

Storage and Reheating

Transfer leftovers to a shallow airtight container and refrigerate within 2 hours. Use within 3 days, and store rice separately so it stays light. The tofu firms slightly and the sauce thickens in the refrigerator, but both loosen again with gentle heat and a little liquid.

Reheat on the Stove

Add 1–2 tablespoons water or unsalted stock, cover and warm over low to medium-low heat. Rock the pan or spoon sauce over the tofu until it is steaming throughout and reaches 165°F / 74°C. Add fresh Sichuan pepper and scallions after reheating.

Reheat in the Microwave

Add a teaspoon or two of water, cover loosely and heat in 30–45-second intervals. Let the dish stand briefly between intervals so the centre catches up while the edges stay gentle.

Can You Freeze It?

You can, but freezing creates tiny cavities in tofu and changes it from creamy to firmer and spongier. That texture absorbs sauce well, but it is different from this version. Refrigeration is the better choice when possible.

Frequently Asked Questions

Can I make mapo tofu vegetarian?

Yes. Replace the pork with finely chopped mushrooms or plain plant-based mince, brown it until the excess moisture is gone, and use vegetable stock. Keep the doubanjiang, douchi and Sichuan pepper so the bowl retains its fermented chilli base and Sichuan-pepper tingle.

Is mapo tofu gluten-free?

Not automatically. Some doubanjiang, fermented black bean products, stock and cooking wine contain wheat. Check every label and choose verified gluten-free products. Soy sauce is optional, so leave it out unless yours is labelled gluten-free.

Can I make it without Shaoxing wine?

Yes. Dry sherry is the closest easy substitute. For an alcohol-free bowl, replace the tablespoon of wine with the same amount of unsalted stock or water. The sauce loses a little aroma but keeps its core fermented flavour.

Can mapo tofu be made ahead?

Chop the garlic, ginger, scallions and fermented ingredients ahead. Toast the peppercorns if useful, but grind them close to serving. For the best tofu texture, braise and thicken the dish shortly before eating.

Is Japanese mabo dofu the same dish?

It belongs to the same family, but Japanese mabo dofu is often milder, sweeter and more heavily thickened. This recipe follows the more fermented, chilli-forward and numbing Sichuan profile while keeping the intensity adjustable.

Can I use a mapo tofu sauce packet?

Yes. Follow the packet’s tofu, water and meat ratios because products vary sharply in concentration and salt. A packet is a useful shortcut, but follow that packet rather than combining its measurements with this from-scratch formula.

Notes from your kitchen

Made it? Share the tofu firmness, doubanjiang brand and heat level you used—especially when the paste was unusually salty or mild. Those details can help the next cook.

The Final Spoonful

The first bowl asks you to watch every step. By the second or third, you recognise the red oil, feel the tofu quiver and know when the sauce has gathered enough.

Close view of finished mapo tofu in a pale celadon bowl, with intact tofu cubes, pork crumbles, glossy red sauce and scallions.
A shallow bowl keeps the cubes visible and lets the loose sauce settle around them instead of burying their delicate shape.

The cooking settles into one memorable rhythm: fry the paste, slide the tofu, thicken twice. That is when mapo tofu stops feeling like a collection of unfamiliar ingredients and becomes a dish you know how to cook.

Back to the top

Posted on — Leave a comment

Peanut Sauce Recipe for Spring Rolls, Satay, Noodles & Chicken

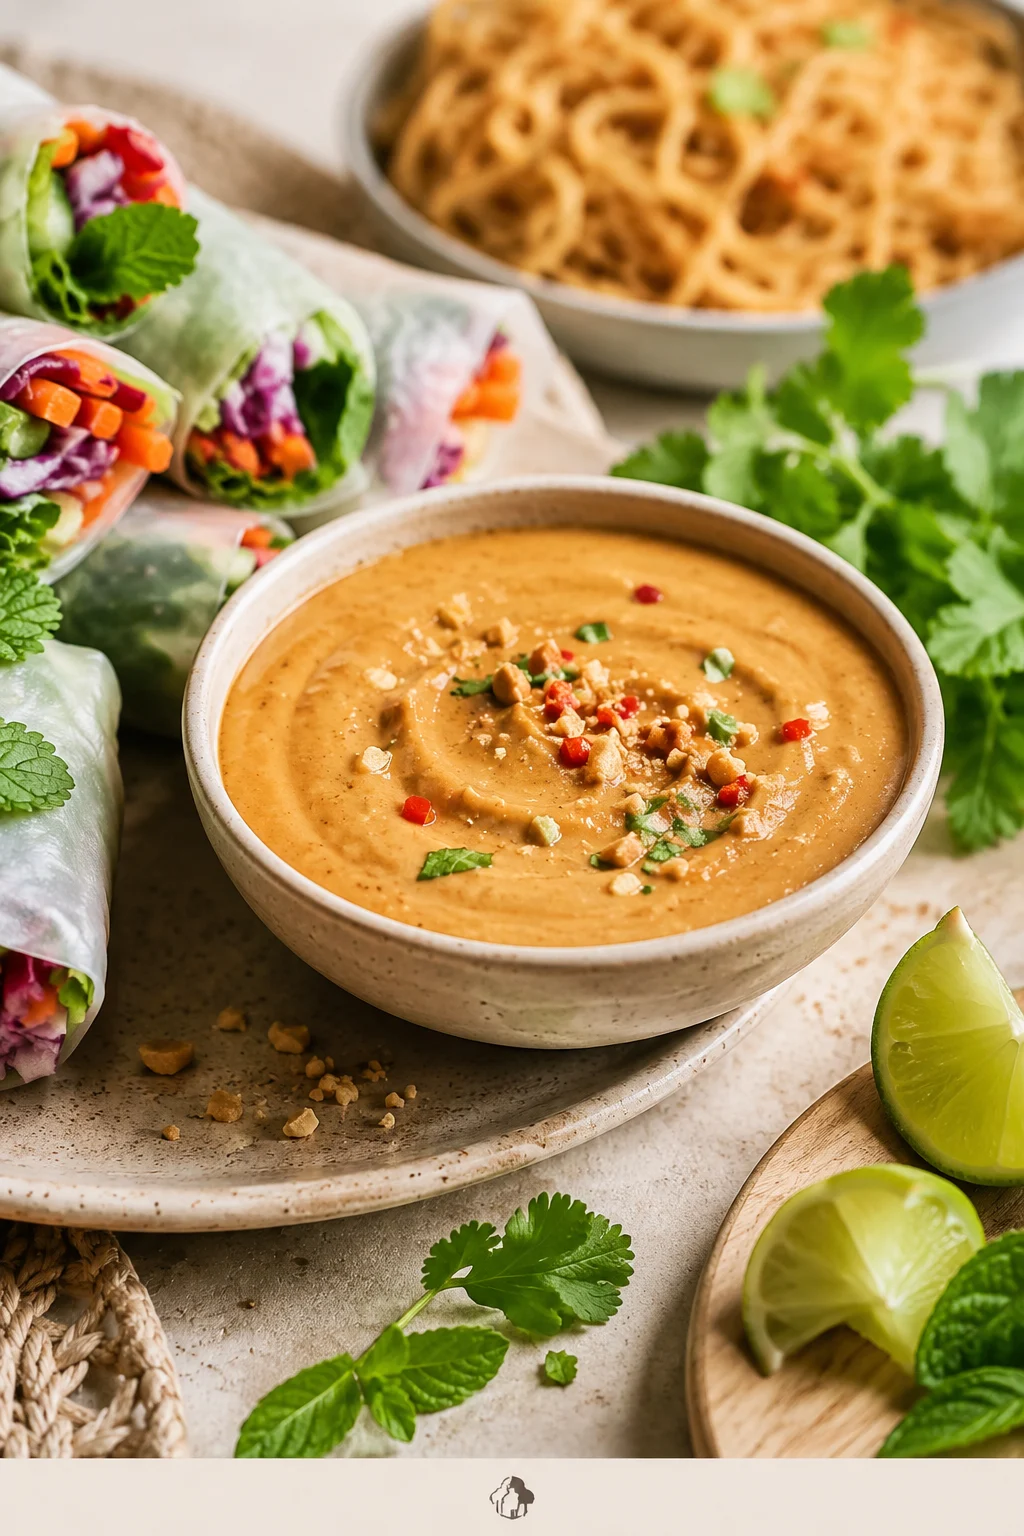
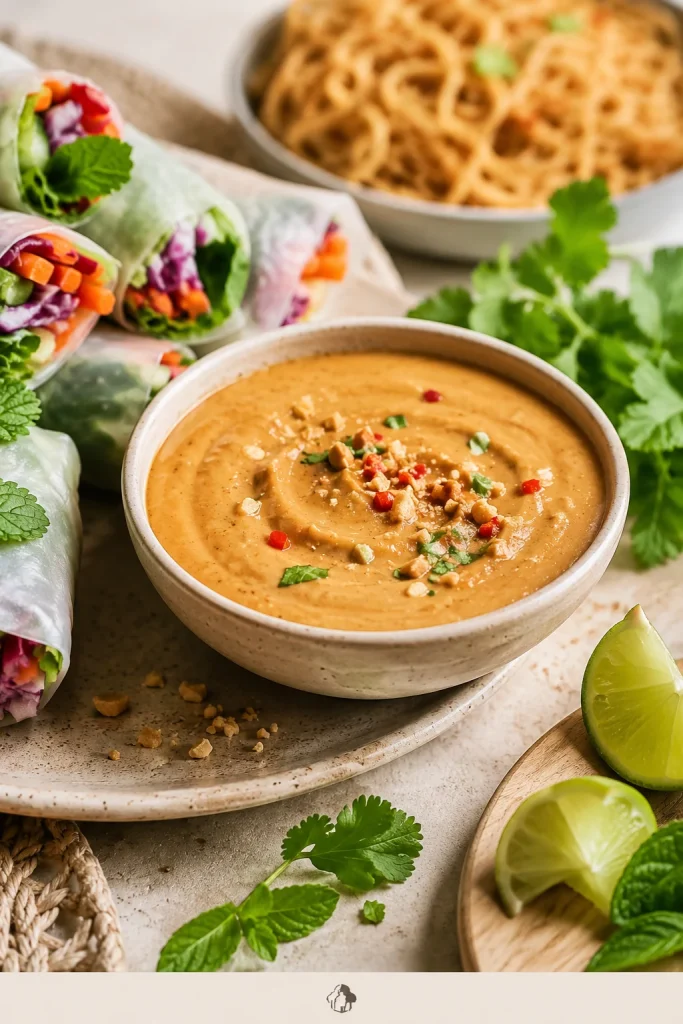
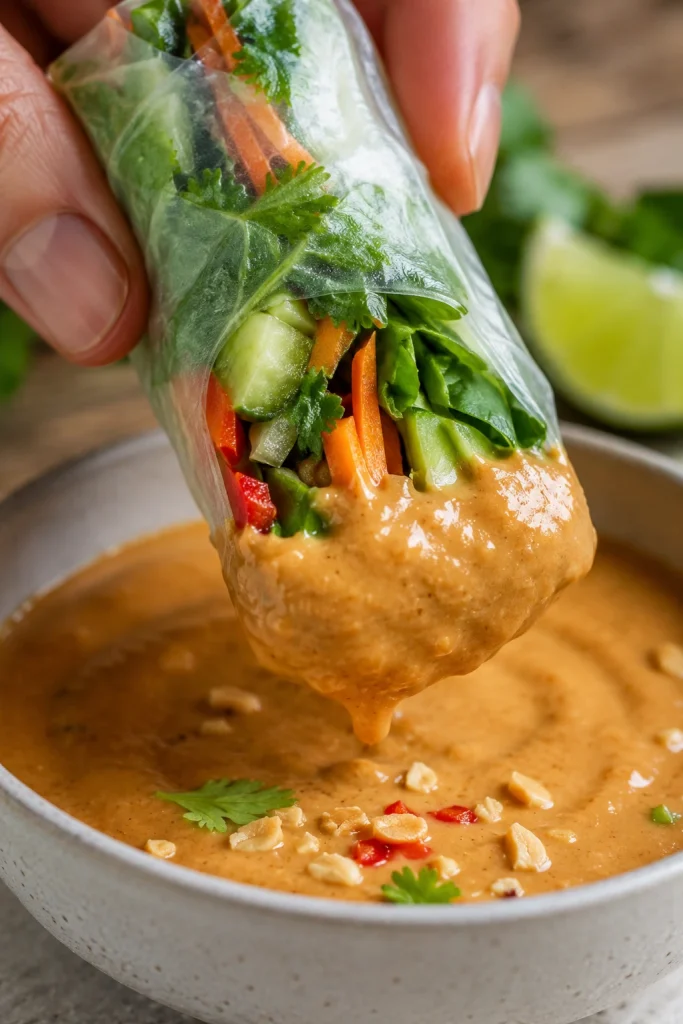
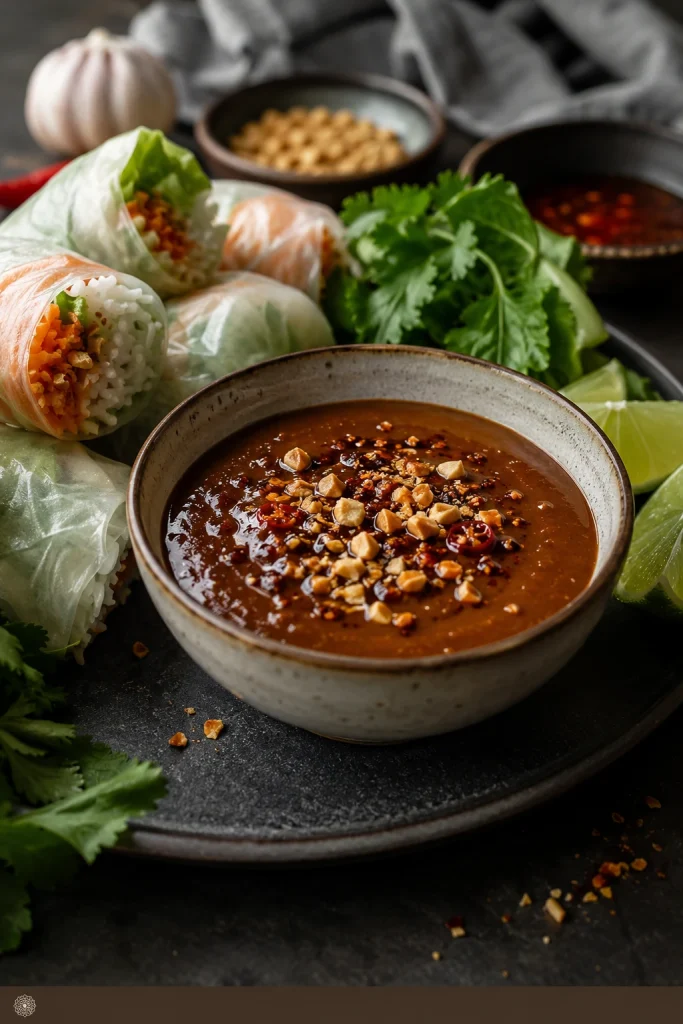
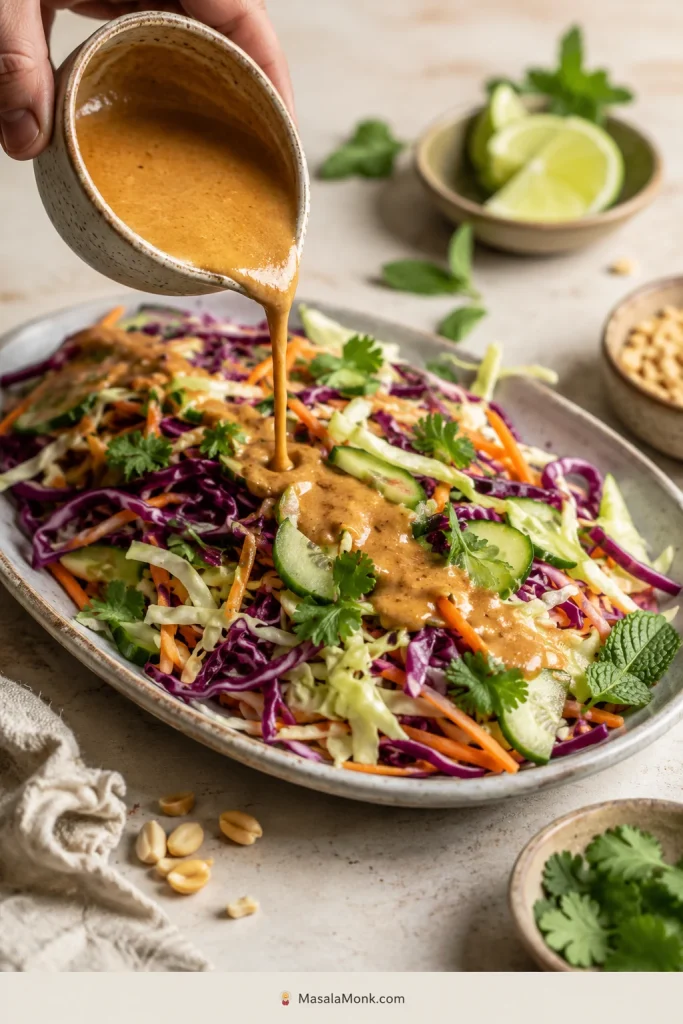
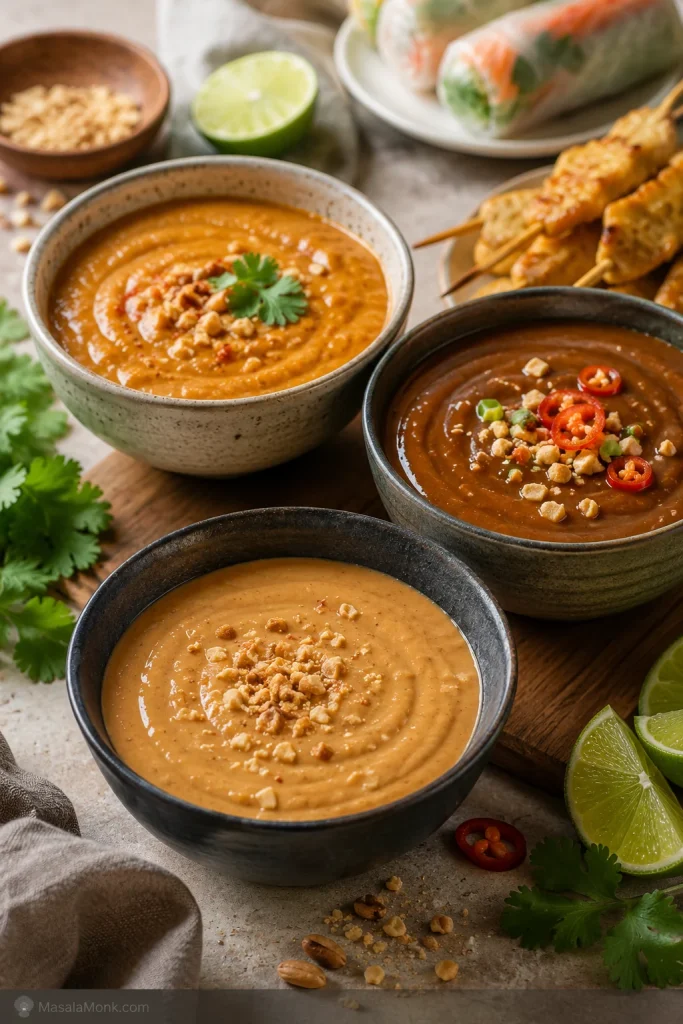
Bowl of creamy peanut sauce with spring rolls, noodles, lime wedges, herbs and crushed peanuts on a dinner table.

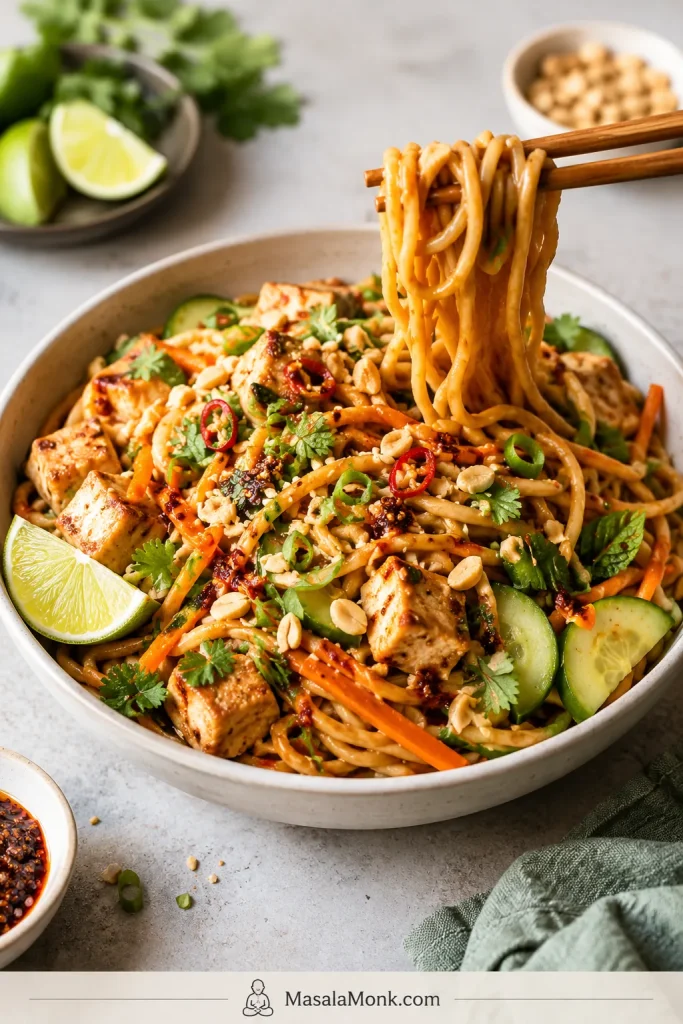
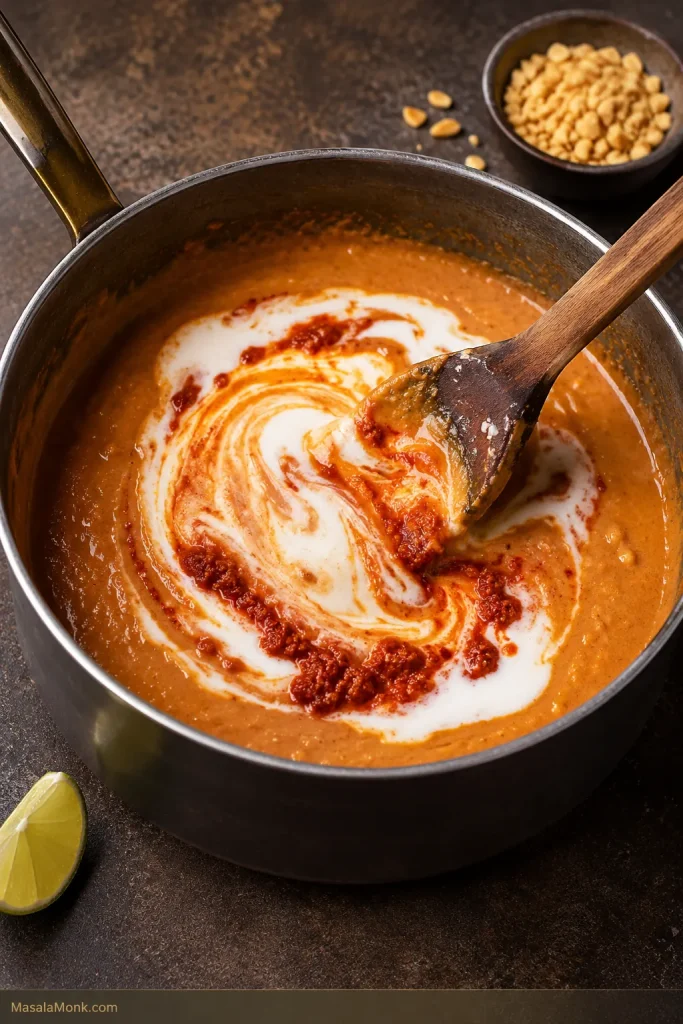
This is the peanut sauce you make when dinner is almost there but needs one creamy, salty-sweet thing to pull it together. It is rich from peanut butter, bright with lime and rice vinegar, warm with ginger and garlic, and easy to adjust depending on what is on the plate.

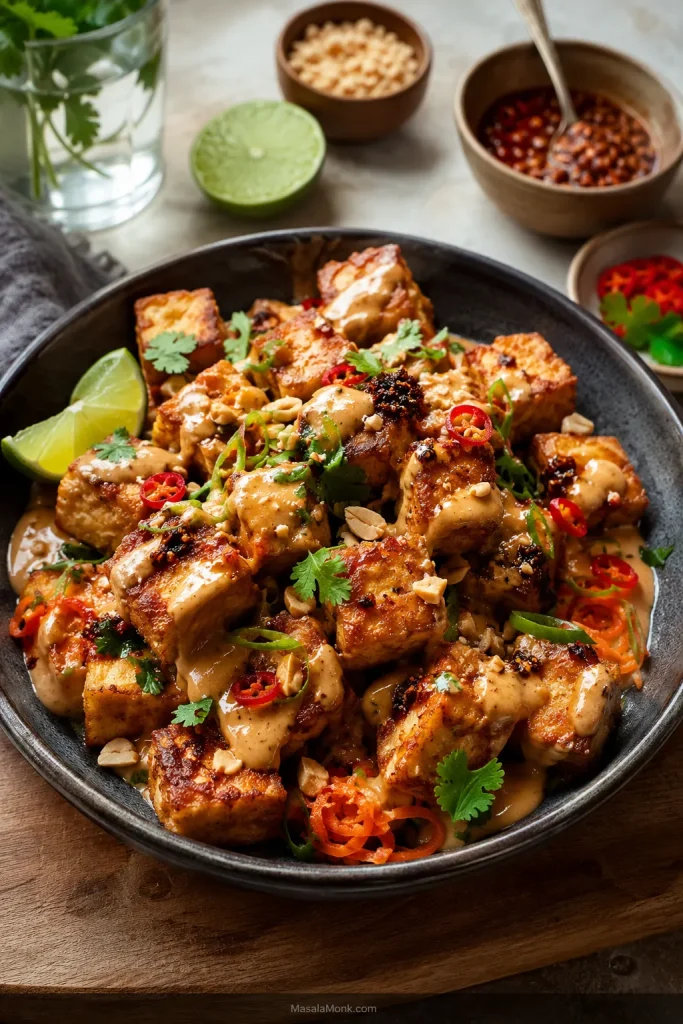
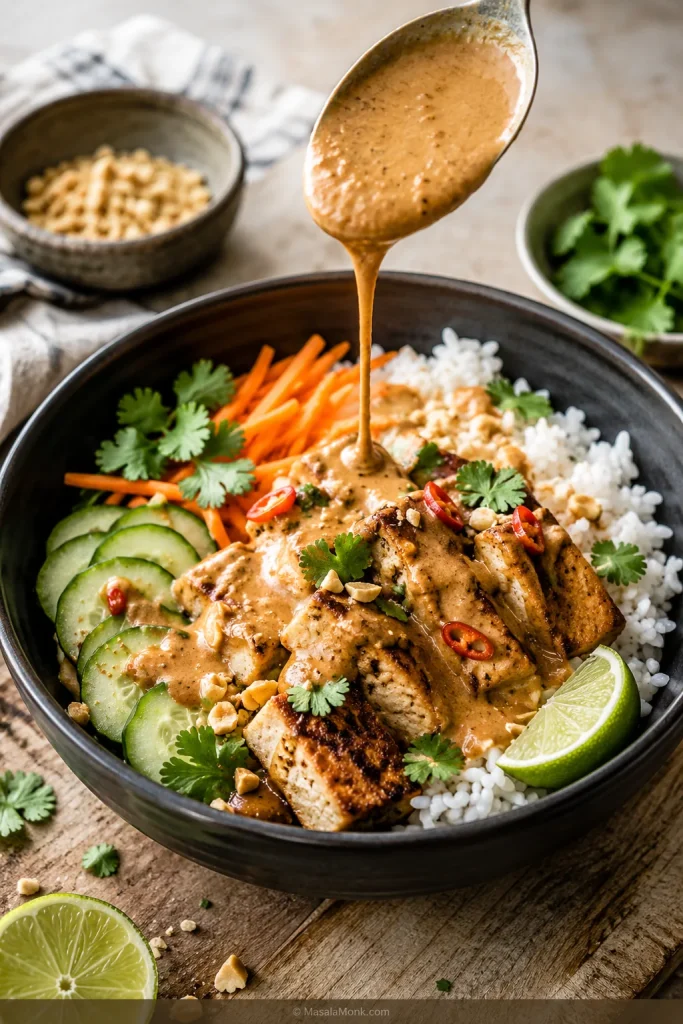
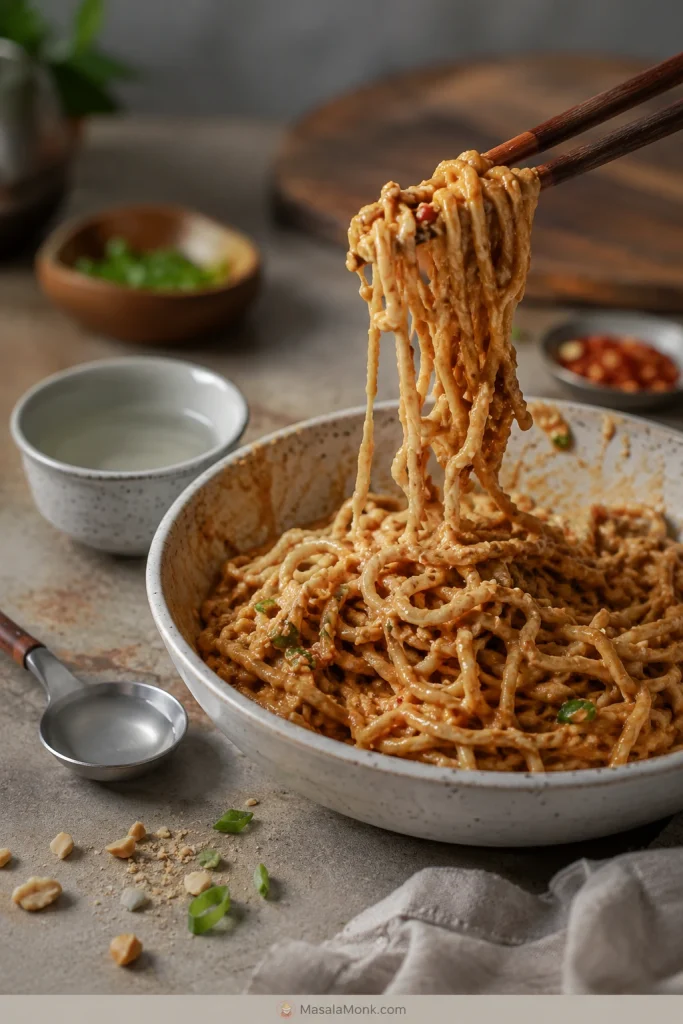
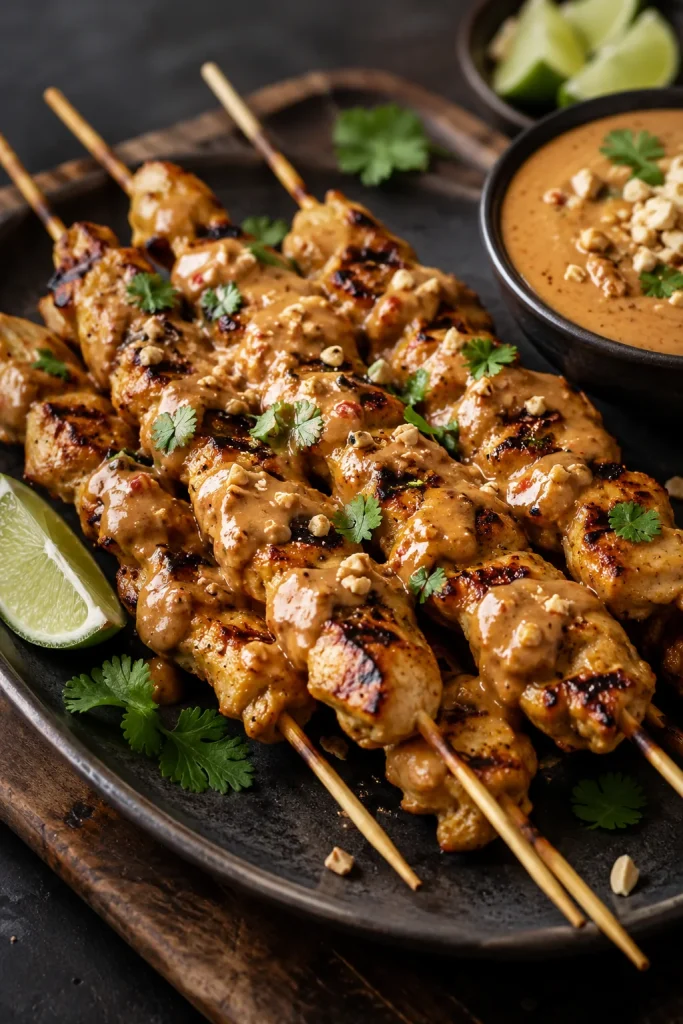
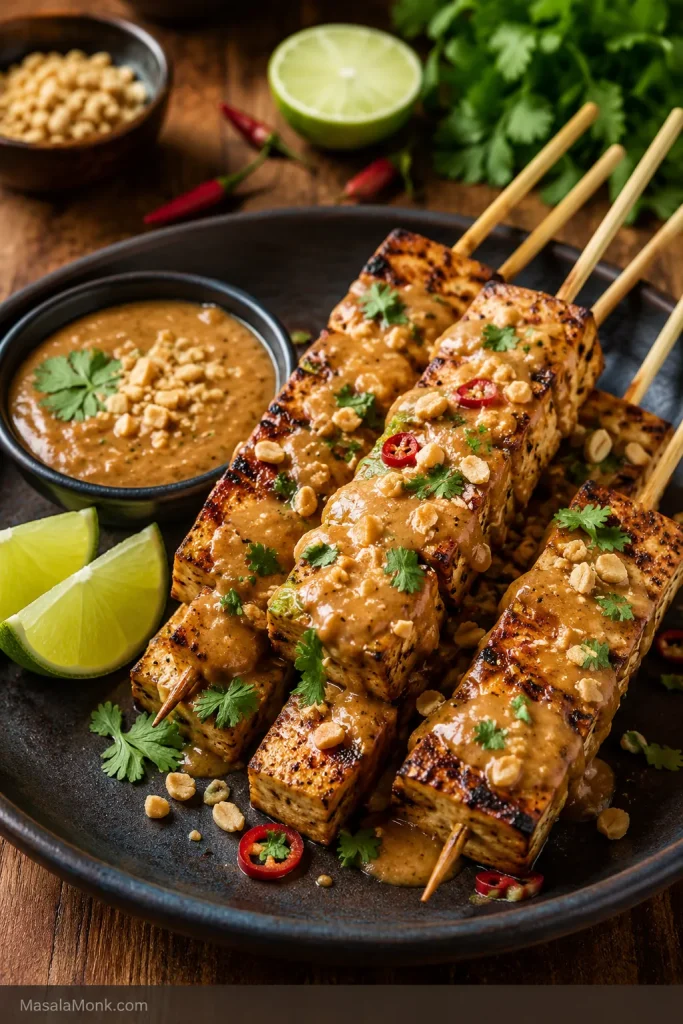
The promise is simple: one 5-minute peanut sauce, adjusted by texture. Make it easy to dip with spring rolls, warmer and richer for satay-style chicken or tofu skewers, looser for noodles, and brighter for salads or slaw.

Once you understand how the sauce should behave, the recipe becomes more than a dip. It becomes the jar that helps fresh rolls, plain noodles, grilled chicken, crispy tofu, rice bowls, vegetables, and leftovers feel like dinner. This is the kind of sauce that makes you feel like you planned dinner, even when you mostly assembled it.

Quick Answer: How to Make Peanut Sauce

To make peanut sauce, whisk the soy sauce or tamari, rice vinegar, lime juice, sweetener, chili sauce, ginger, garlic, and sesame oil first, then whisk in peanut butter and water until the sauce comes together. Start with less liquid, then add more until the sauce matches the food you are serving.

Rule one: fix texture before flavor. A thick peanut sauce can taste saltier, sweeter, and heavier than it really is, so get it close to the right consistency first. Then adjust with lime, soy sauce, sweetener, or chili.
Once the base comes together, the question is not only “is it smooth?” but “will it behave on the food?” If you are unsure, use the texture guide before adding all the liquid.

Jump to

5-Minute Peanut Sauce Recipe

Recipe name: Peanut Sauce Recipe

Prep time: 5 minutes
Cook time: 0 minutes
Total time: 5 minutes
Yield: About 1 to 1¼ cups / 240 to 300 ml, depending on how much water you add
Servings: 8 to 10
Serving size: About 2 tablespoons / 30 ml

Best as a dip: spring rolls, satay, lettuce wraps, dumplings, rice paper rolls
Best as a sauce: noodles, chicken, tofu, salads, rice bowls, roasted vegetables, slaw

Equipment: bowl and whisk or fork. Optional: jar for storage, grater for fresh ginger and garlic, small saucepan for the satay-style variation.

Ingredients

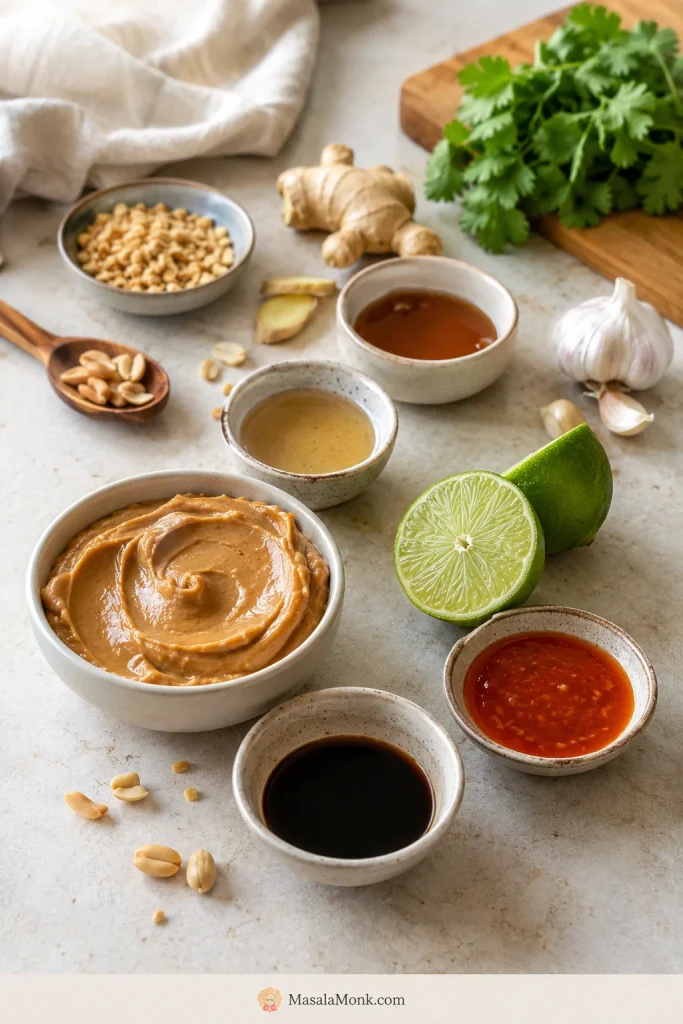
Line up the peanut sauce ingredients before you start so the balance is clear: nutty body, salty depth, tang, heat and just enough sweetness.

Peanut sauce ingredients including peanut butter, soy sauce, lime, rice vinegar, ginger, garlic, chili sauce, sweetener and sesame oil.
Peanut butter gives the sauce body, while soy sauce, lime, vinegar, ginger, garlic and chili give it balance. Together, they keep the peanut sauce savory enough for dinner instead of sweet and flat.
IngredientAmount
Creamy natural peanut butter½ cup / about 128 g
Low-sodium soy sauce or tamari2 tablespoons / 30 ml
Rice vinegar1 tablespoon / 15 ml
Fresh lime juice1 tablespoon / 15 ml
Maple syrup or honey1 to 2 tablespoons / 15 to 30 ml
Brown sugar, if using instead1 to 2 tablespoons / about 12 to 25 g
Sriracha or chili garlic sauce1 to 2 teaspoons / 5 to 10 ml
Fresh grated ginger1 teaspoon / about 2 g
Garlic1 small clove, finely grated, about 3 g
Toasted sesame oil, optional1 teaspoon / 5 ml
Warm water3 to 6 tablespoons / 45 to 90 ml, plus more as needed

Instructions

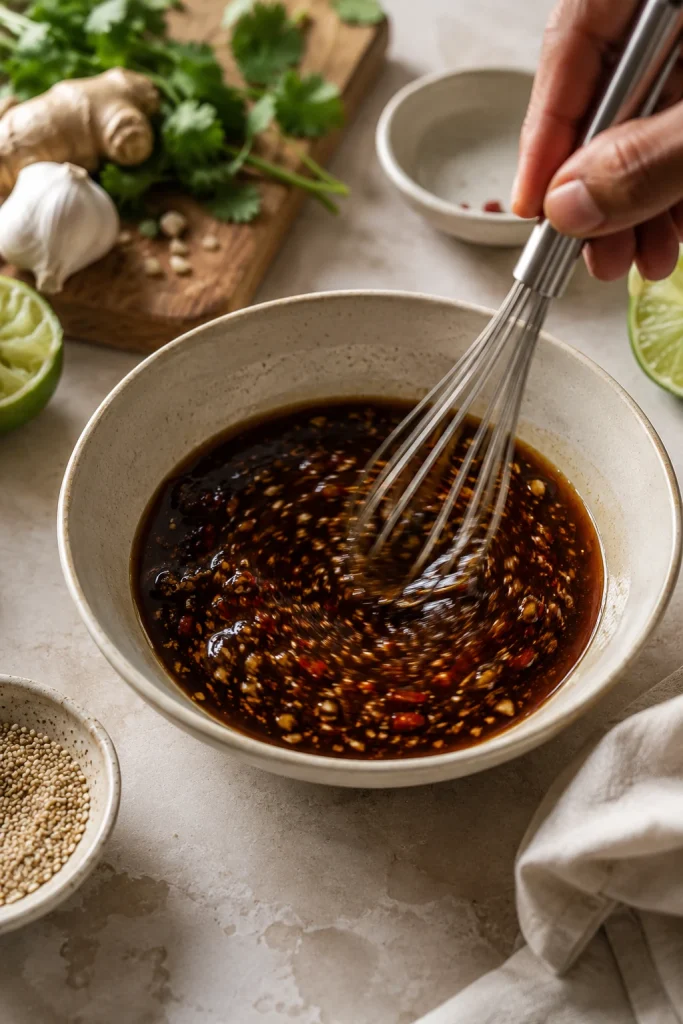
Start the peanut sauce by mixing the salty, tangy and spicy ingredients before the peanut butter goes in.

Soy sauce, lime juice, rice vinegar, chili sauce, ginger, garlic and sesame oil being whisked in a bowl before peanut butter is added.
First, whisk the salty, tangy and spicy ingredients together. Then the peanut butter blends into a balanced base instead of forcing you to fix the flavor later.
  1. Add the soy sauce or tamari, rice vinegar, lime juice, sweetener, chili sauce, ginger, garlic, and sesame oil to a medium bowl. Whisk briefly so the salty, tangy, spicy ingredients come together first.
  2. Add the peanut butter and whisk until the mixture looks thick, dark, and mostly combined. It may look stubborn before it turns silky.
  3. Add warm water or another thinning liquid 1 tablespoon at a time, whisking well after each addition.
  4. Stop when the texture matches the food you are serving. Satay can stay thicker, spring roll dip should glide, and noodles or salad dressing need more flow.
  5. Taste and adjust. More lime or vinegar helps if it tastes heavy, soy sauce or tamari helps if it tastes flat, sweetener softens sharpness, and chili adds heat.
  6. Serve right away, or store in an airtight jar in the fridge and re-whisk with a splash of water before using.

Recipe Notes

  • The 3 to 6 tablespoons water gives you a standard dip or drizzle. Noodles and salad dressing usually need more.
  • Warm liquid helps peanut butter loosen faster than cold liquid.
  • Natural peanut butter often needs more patience because it can start thicker, stiffer, or more separated than regular creamy peanut butter.
  • Regular sweetened peanut butter works, but start with less sweetener. The sauce should taste like peanut butter went to dinner, not dessert.
  • The sauce thickens as it sits, especially after refrigeration. If it has already thickened, jump to storage and make-ahead before changing the flavor.
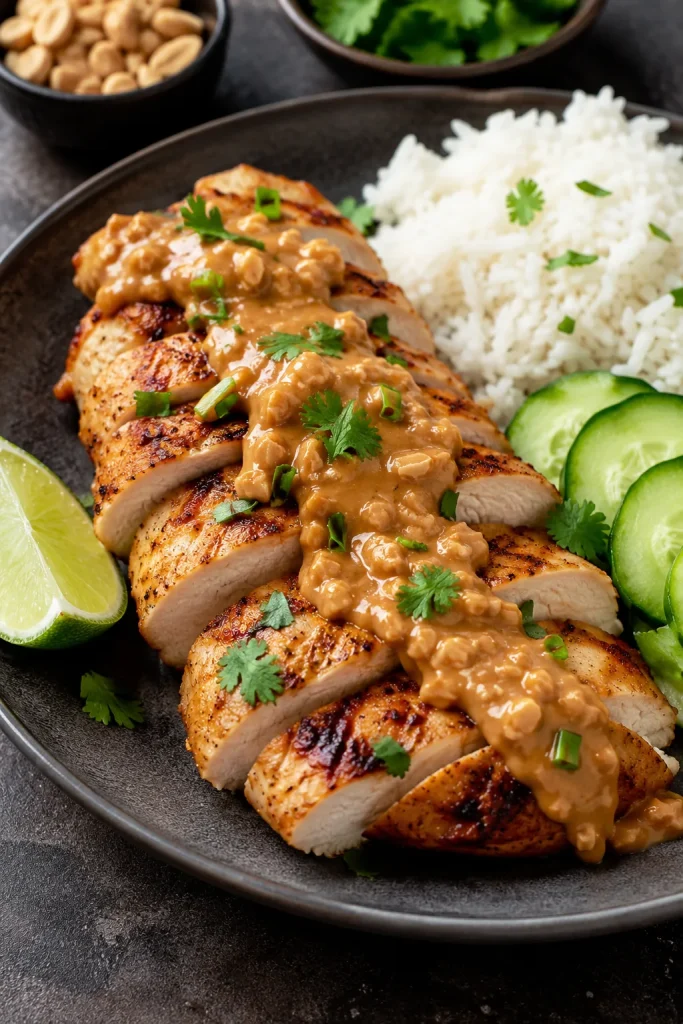
  • For chicken, use this as a dip, drizzle, or finishing sauce. Keep any sauce that touches raw chicken separate from the serving sauce, and cook chicken to 165°F / 74°C.
  • Since this is peanut-based, check for peanut allergies before serving it to guests and read labels on bottled sauces if allergies are a concern.

Texture Guide for Spring Rolls, Satay, Noodles and More

If your sauce looks clumpy, tastes too heavy, or turns noodles sticky, you probably have not ruined anything. Peanut sauce is usually a texture problem before it is a flavor problem.

Clumps usually mean the sauce needs liquid and whisking, not a full restart.

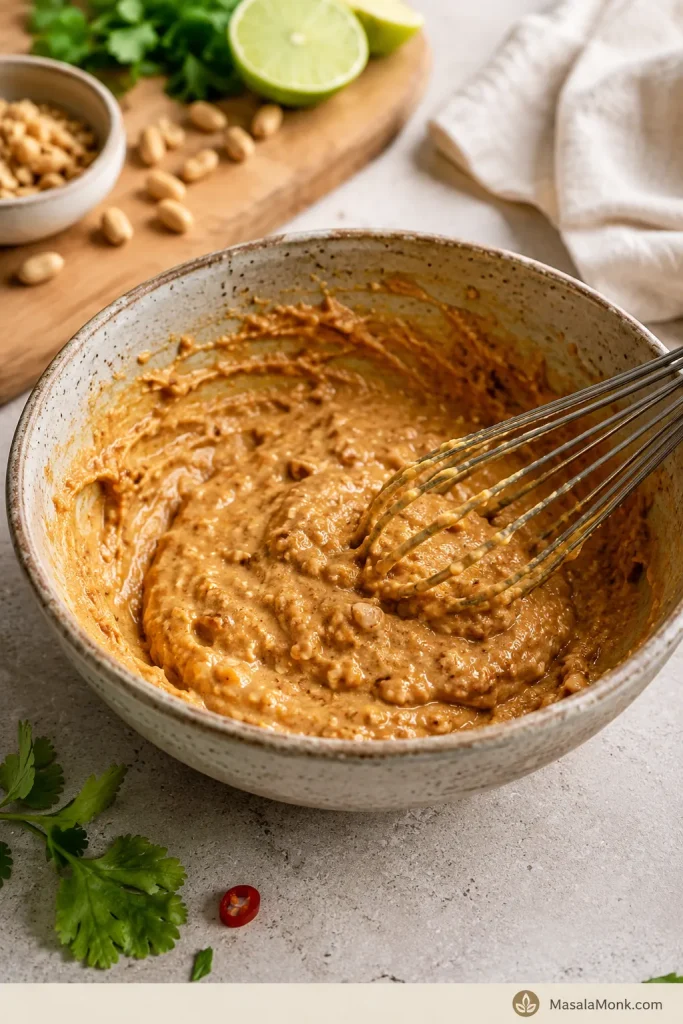
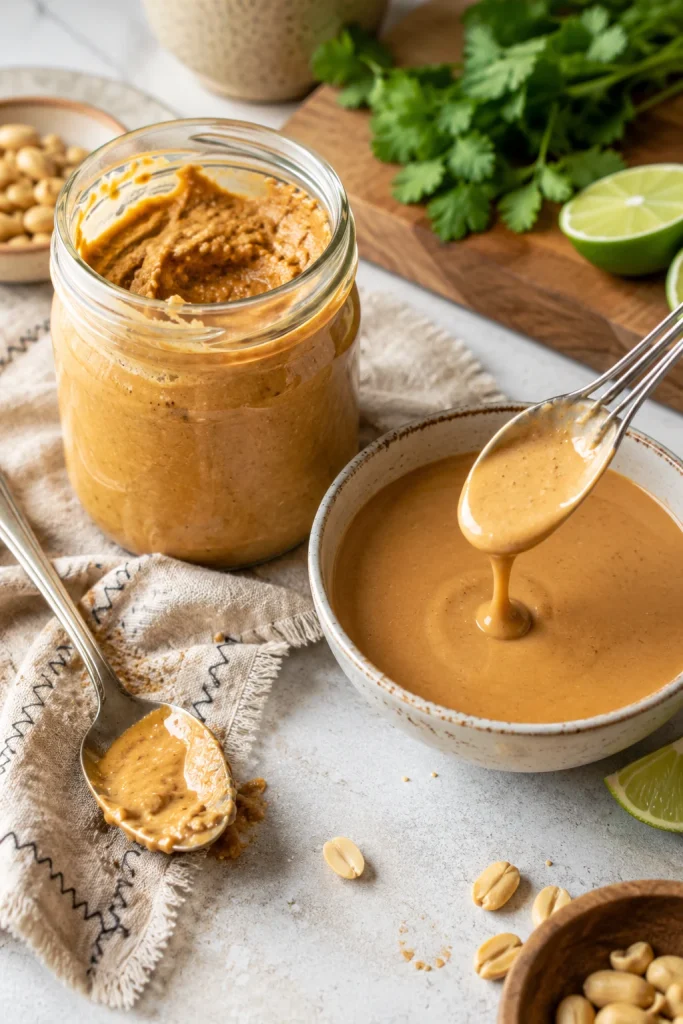
Thick clumpy peanut sauce in a bowl with whisk marks before enough liquid has been added.
At first, peanut sauce can look clumpy and stubborn. Instead of starting over, add liquid slowly and keep whisking until the mixture turns smooth and cohesive.

The mistake most people make is stopping when the sauce looks smooth. Peanut sauce is not done until it behaves right on the food. A spring roll dip should glide, satay sauce should cling, noodle sauce should fall from the spoon in a loose stream, and dressing should pour easily.

How to Read the Sauce Texture

Thin the sauce gradually so you can stop at dip, drizzle, noodle sauce or dressing instead of overshooting the texture.

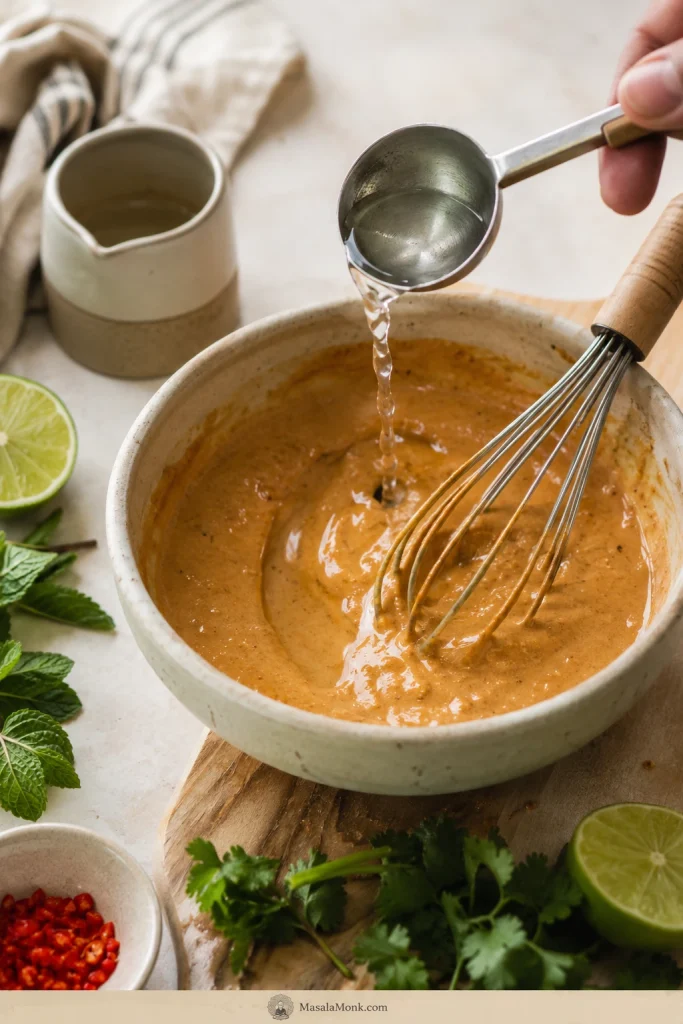
Water being added by spoon to thick peanut sauce while a whisk rests in the bowl.
Add liquid one spoonful at a time and watch how the sauce changes. Stop when it loosens for the job you need: thick dip, noodle sauce or pourable peanut dressing.
UseSauce Should Look LikeAdd This Much LiquidServe It
Spring rollsSoft sheen, easy to dip, clings lightly to rice paperAbout 4 to 6 tablespoons water totalRoom temperature or slightly chilled
SatayThicker, warm, spoonable, not mounded like pasteAbout 2 to 4 tablespoons water, or use the coconut milk variationWarm
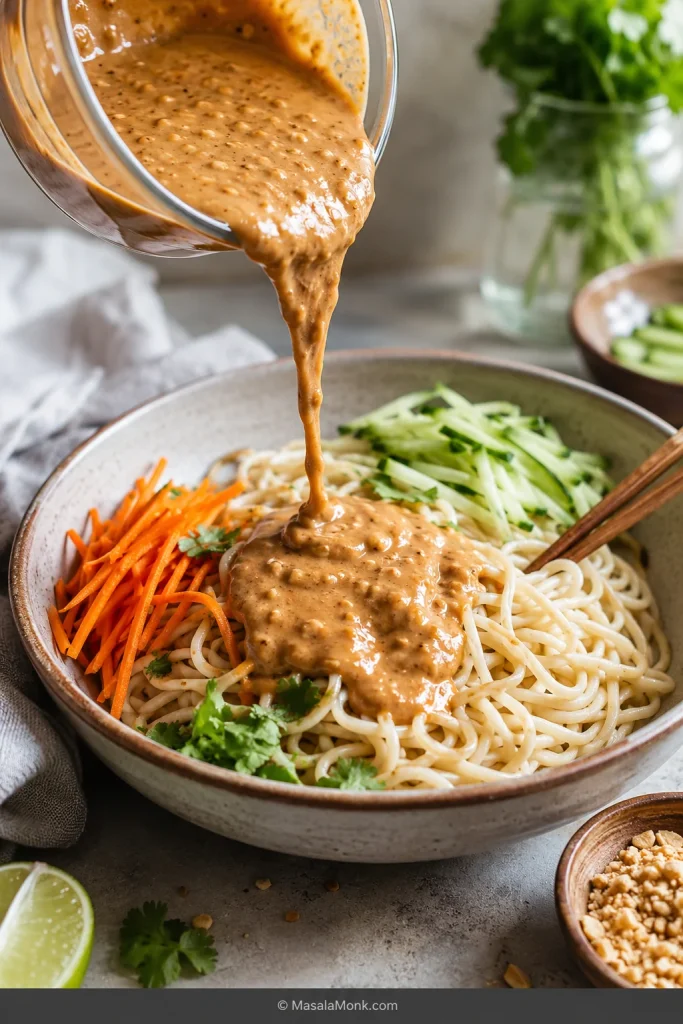
NoodlesLoose stream from the spoon, easy to tossAbout 6 to 8 tablespoons hot water or noodle waterWarm or opened up with hot water
Salad dressingPourable, bright, thinner than dipping sauceExtra water plus more lime juice or rice vinegarChilled or room temperature
ChickenMedium-thick dip or drizzleKeep it savory and not too sweetRoom temperature or warm
TofuThicker for coating, thinner for bowlsAdd extra chili and lime for punchRoom temperature or warm
Rice bowlsSlow drizzle, not wateryThin slightly and re-whisk before servingRoom temperature

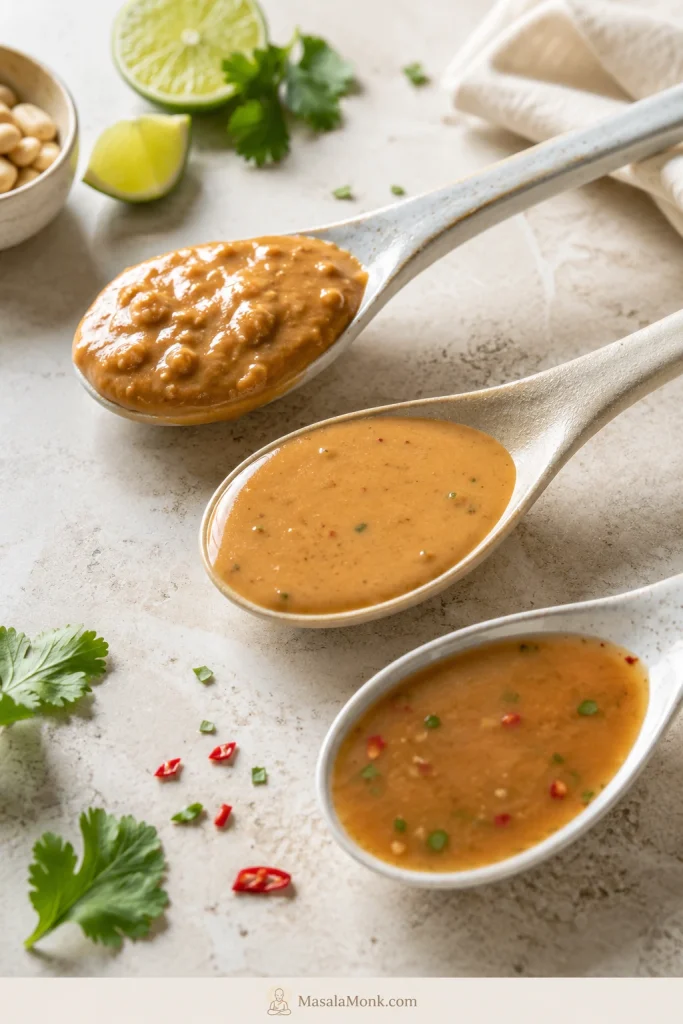
Use this visual guide when you are deciding whether the sauce should cling, glide, coat or pour.

Three spoons holding different peanut sauce textures for satay, spring rolls and noodles.
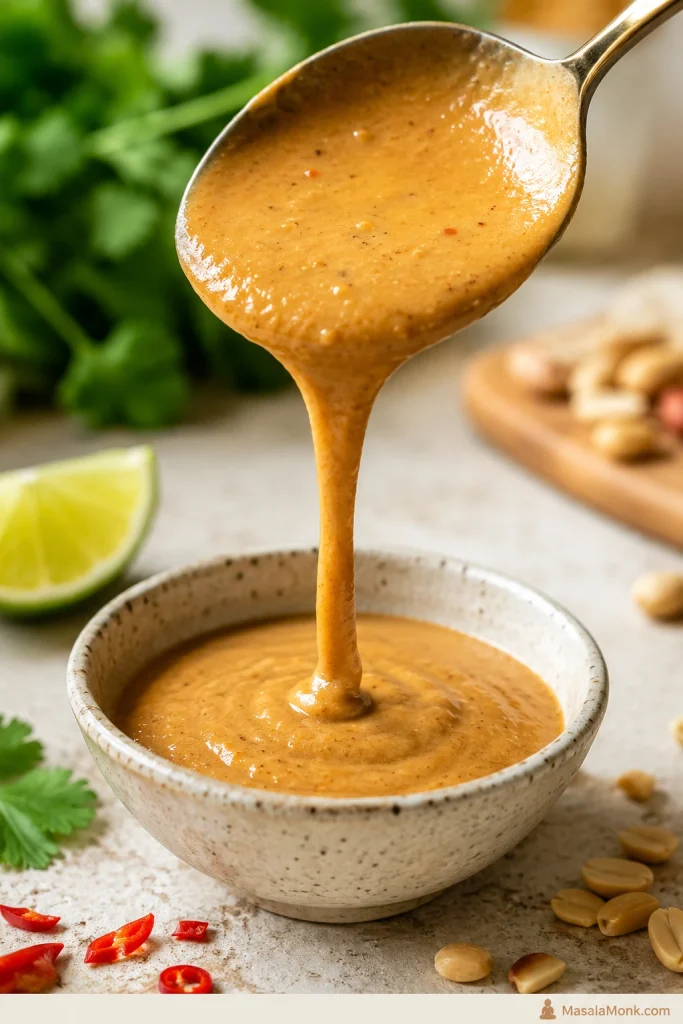
This is the texture rule worth saving: thicker peanut sauce clings to satay, softer sauce works for spring rolls, and looser sauce coats noodles without grabbing them.

Before you taste, fix the texture: peanut butter can look clumpy or slightly broken before it turns silky. Keep whisking, add liquid slowly, and taste only after the sauce is close to the consistency you want. A sauce that is too thick will taste saltier, sweeter, and heavier than it really is.

When in doubt, keep it a little thicker at first. You can always add a splash more liquid, but it takes extra peanut butter to fix a sauce that has gone too thin.

Why This Peanut Sauce Works

The finished sauce should not taste like sweet peanut butter. It should taste nutty first, then salty, tangy, lightly sweet, and gently spicy at the end.

Peanut butter gives body and nutty richness. Soy sauce or tamari gives dinner-level savoriness. Lime juice and rice vinegar cut the heaviness. Sweetener rounds the sharp edges. Ginger, garlic, and chili keep the sauce lively instead of flat.

Water is not filler here. It is the texture tool. A little gives the sauce enough body for dipping; more turns it into a noodle sauce or dressing. That is why the same bowl can taste right with cool rolls, hot noodles, grilled chicken, tofu, or a pile of vegetables. If the sauce already tastes off, check the troubleshooting table before adding more soy sauce, sugar or lime.

If the sauce tastes like peanut butter first and dinner second, it usually needs salt, acid, or chili before it needs more sweetness.

Ingredients and Smart Swaps

Peanut Butter

Creamy natural peanut butter gives the cleanest peanut flavor. If your jar has separated, stir it well before measuring. Homemade peanut butter also works well if you want more control over roast, salt, and texture.

Regular creamy peanut butter works too, but it is usually sweeter, so start with less sweetener. Crunchy peanut butter is fine if you like texture, especially for satay-style sauce or rice bowls.

Soy Sauce or Tamari

Low-sodium soy sauce keeps the sauce savory without pushing it too salty. Tamari is the best swap for gluten-free peanut sauce, as long as the label says gluten-free. Coconut aminos can work for a soy-free version, but it is sweeter and less salty, so adjust with salt and lime at the end.

Rice Vinegar and Lime Juice

Rice vinegar gives a clean tang; lime makes the sauce taste fresher. Together, they keep peanut butter from feeling heavy. Apple cider vinegar or white vinegar can work in a pinch, especially for a satay-style version.

Sweetener

Maple syrup keeps the sauce vegan and blends easily. Honey gives rounder sweetness. Brown sugar adds deeper flavor, especially in satay-style peanut sauce. When your peanut butter is already sweet, let the lime and soy sauce lead before adding more sugar.

Chili Sauce

Sriracha, chili garlic sauce, sambal, or chili crisp can all work. One teaspoon keeps the heat mild; two or more pushes it into spicy peanut sauce territory. For the satay-style variation, red curry paste adds better depth than sriracha alone.

Garlic and Ginger

Fresh grated garlic and ginger make the sauce taste alive. Grating them finely helps them disappear into the sauce instead of leaving sharp pieces. If raw garlic is too strong for you, use half a clove or a small pinch of garlic powder.

Sesame Oil

Toasted sesame oil is optional, but a small amount gives the sauce a deeper, nuttier flavor. Use it lightly because peanut butter is already rich.

Coconut Milk

Coconut milk is not required for the 5-minute sauce. Water keeps it quick, bright, and flexible.

Coconut milk is what makes the satay-style version feel rounder and warmer. Use it for skewers, grilled chicken, tofu satay, or roasted vegetables. Coconut cream makes the sauce thicker and more luxurious, while regular coconut milk keeps it smoother and more pourable. Making skewers? Jump to the satay-style peanut sauce variation. If you like that coconut-curry direction, the same balance shows up in Chicken Panang Curry, where peanut stays in the background instead of taking over like satay sauce.

Hoisin Sauce

Hoisin is not part of the main sauce, but it is very useful for a Vietnamese-style spring roll dip. It adds sweetness, body, and a deeper savory flavor that works beautifully with rice paper rolls, shrimp rolls, and fresh vegetable rolls.

Peanut Sauce for Spring Rolls

For spring rolls, fresh rolls, summer rolls, and rice paper rolls, the dip should be smooth enough for dipping but thick enough to cling. When it sits on the roll like paste, it needs more liquid. When it runs off immediately, it needs more peanut butter.

Start with the sauce as written and add liquid until it becomes easy to dip. A little extra lime juice or rice vinegar also helps because fresh rolls are usually full of cool vegetables, herbs, shrimp, tofu, or noodles. A good spring roll dip should catch on the rice paper, slide over the herbs and vegetables, and leave a little peanut richness behind.

Use fresh spring rolls as a texture check: the dip should feel light around herbs and vegetables while still leaving a creamy coat.

Fresh rice paper spring rolls cut open and served with peanut sauce, herbs and lime.
The dip should coat rice paper lightly, then get out of the way so the herbs, vegetables and filling still taste fresh.

How to Adjust the Sauce for Spring Rolls

  • Vegetable-heavy rolls taste better with a little extra lime juice or rice vinegar.
  • Shrimp rolls can handle a slightly sweeter dip, which is where the hoisin variation works especially well.
  • Tofu rolls benefit from chili crisp, extra ginger, or crushed peanuts for more punch.
  • A dip that drags across rice paper needs a small splash of water until it glides.
  • A dip that slides off the roll needs a small spoon of peanut butter to bring back body.

Before moving to the hoisin variation, check the basic spring roll texture: the dip should coat rice paper without dragging.

Fresh spring roll dipped into peanut sauce that clings lightly to the rice paper wrapper.
For spring rolls, the dip should leave a light coat on the rice paper. Too much drag means it needs liquid; too much slide means it needs more body.

Vietnamese-Style Hoisin Peanut Sauce for Rice Paper Rolls

Use this version when spring rolls are the main event. Hoisin gives the dip the darker, sweeter body people often expect with rice paper rolls, while peanut butter keeps it creamy and rich.

The hoisin version should look darker and glossier than the everyday peanut sauce, especially for rice paper rolls.

Dark Vietnamese-style hoisin peanut sauce served with rice paper rolls and crushed peanuts.
When rice paper rolls are the main event, hoisin gives peanut sauce a darker, sweeter body. After mixing, add lime or vinegar if the dip starts tasting too sweet.

Use this quick formula:

  • ½ cup peanut sauce
  • 1 tablespoon hoisin for lighter sweetness, or 2 tablespoons for a deeper dip
  • 1 to 3 tablespoons water, milk, or coconut milk, as needed
  • ½ teaspoon chili garlic sauce, optional
  • Crushed peanuts, optional, for finishing

Whisk until the dip has a soft sheen. It should be looser than satay sauce but thicker than salad dressing. Too sweet? Add lime juice or rice vinegar. Too thick? Add liquid a spoonful at a time.

This is the variation to reach for when the meal is built around fresh rolls, shrimp rolls, or rice paper rolls and you want a dip that feels complete on its own.

Satay-Style Peanut Sauce

Satay sauce is usually richer, warmer, and thicker than a quick peanut dipping sauce. Depending on the region and recipe, more traditional versions may use roasted peanuts, coconut milk, curry paste, tamarind, palm sugar, fish sauce, or other aromatics.

Think of this as the weeknight bridge between a quick peanut dip and a fuller satay sauce. Start with the 5-minute base, then add coconut milk and curry paste for depth. Warmth changes everything here: the sauce softens, the curry paste blooms, and the peanut flavor feels rounder before it ever reaches the skewers.

Use this as a satay-style shortcut, not as a claim that all satay sauces are the same. It works well with chicken satay, tofu satay, grilled paneer, roasted vegetables, and rice bowls because it clings well and tastes more complete with grilled food.

Satay-Style Peanut Sauce Variation

Coconut milk and curry paste turn the quick peanut sauce into a warmer satay-style sauce for skewers and grilled food.

Coconut milk and red curry paste being stirred into peanut sauce in a saucepan.
For satay-style peanut sauce, coconut milk and curry paste add warmth and depth. Warm it gently so the curry paste blooms without reducing the sauce into paste.
  • ½ cup peanut sauce
  • ¼ cup coconut milk or coconut cream
  • 1 to 2 teaspoons red curry paste
  • 1 teaspoon brown sugar, optional
  • ½ teaspoon fish sauce, optional
  • 1 to 2 tablespoons crushed roasted peanuts, optional

Warm everything in a small saucepan over medium-low heat for 3 to 5 minutes, stirring often. Do not hard-boil the sauce. The goal is to warm it, not reduce it into paste. It should be thick, warm, and spoonable, but still loose enough to drizzle over skewers.

If it tightens too much, add water or coconut milk, a spoonful at a time. A squeeze of lime or splash of rice vinegar helps when the sauce tastes too rich.

For chicken satay, the sauce should be warm, spoonable and thick enough to cling to grilled edges.

Grilled chicken satay skewers with peanut sauce, lime wedges, herbs and crushed peanuts.
Chicken satay needs a peanut sauce that clings to grilled edges without stiffening. If the sauce tightens as it warms, loosen it with a spoonful of water or coconut milk.

Because tofu starts mild, give the satay-style sauce more contrast with lime, chili and crunch.

Grilled tofu satay skewers drizzled with peanut sauce, herbs, chili and crushed peanuts.
Keep the sauce thick enough to cling to grilled tofu, then use lime, ginger, chili and crushed peanuts for contrast.

Is Peanut Sauce the Same as Satay Sauce?

Not always. Peanut sauce is a broad term for sauces made with peanuts or peanut butter. Satay sauce usually refers to the peanut-based sauce served with satay skewers, and it is often warmer, richer, and more deeply seasoned.

For everyday cooking, this sauce can move in a satay-style direction with coconut milk, curry paste, and gentle heat. A very specific Thai, Indonesian, Malaysian, or Singaporean satay sauce may need a more traditional recipe built around that cuisine.

Peanut Sauce for Noodles

This is where the sauce becomes dinner, not just a dip. Noodles need a looser peanut sauce than spring rolls or satay. Peanut butter thickens quickly when it hits warm noodles, and a mixture that looks pourable in the bowl can turn sticky once tossed.

For 2 servings, start with about ½ cup peanut sauce and add 2 to 4 tablespoons hot water or noodle cooking water before tossing. For 8 ounces / 225 g noodles, use ½ to ¾ cup sauce, depending on how saucy you like your noodles.

Before sauce meets noodles, it should already move in a loose stream from the spoon.

Loose peanut sauce falling from a spoon to show the texture needed for noodles.
For noodles, the sauce should fall from the spoon in a loose stream before tossing. Otherwise, peanut butter can tighten around warm noodles and make the bowl sticky fast.

The idea is similar to glossy pasta sauces: loosen first, then toss. The same idea shows up in pesto pasta, where pasta water keeps the sauce glossy instead of oily or dry.

Pour the peanut sauce over noodles only after it has enough movement to coat the strands evenly.

Peanut sauce being poured over noodles before tossing, with vegetables and herbs nearby.
Before tossing noodles, loosen the peanut sauce until it moves easily. As a result, it coats the strands evenly instead of grabbing them into sticky clumps.

Sometimes the bowl looks perfect, then tightens while you are setting the table. Do not panic. Add hot water or noodle water, a spoonful at a time, and toss again until the sauce relaxes around the noodles instead of grabbing them. If it keeps clumping, jump to how to fix peanut sauce.

Tips for Peanut Noodles

  • Hot water or noodle water helps the sauce loosen cleanly; cold water can make it tighten.
  • Make the sauce looser before adding it to the noodles.
  • Toss gradually instead of dumping everything in at once.
  • Lime juice or rice vinegar helps when the noodles taste heavy.
  • Soy sauce or tamari helps when the noodles taste flat.
  • Cold peanut noodles need a looser sauce because it thickens as it chills.

Toss it with rice noodles, spaghetti, ramen, soba, udon, or egg noodles. Add cucumber, carrots, cabbage, scallions, cilantro, mint, edamame, tofu, chicken, shrimp, or a fried egg to turn it into a full meal.

Once the sauce is coating properly, fresh toppings finish the noodle bowl and keep it from tasting heavy.

Peanut sauce noodle bowl with vegetables, herbs, lime, chili and crushed peanuts.
Once the noodles are coated, add crunch, herbs, lime and protein to turn peanut sauce noodles into dinner. The finish should taste fresh, not just creamy.

Peanut Sauce for Chicken, Tofu and Bowls

This is where peanut sauce earns its place in the fridge: plain chicken, tofu, rice, and vegetables suddenly taste like a planned meal. The trick is matching the texture to the job, not pouring the same thickness over everything.

UseBest TextureBest Adjustment
Grilled chickenMedium-thick drizzleAdd lime after cooking so the sauce tastes bright, not heavy
Chicken rice bowlsSlow drizzleKeep it savory enough to season the rice
Peanut chicken noodlesLoose, tossable sauceUse hot water or noodle water before tossing
Crispy tofuThicker coating sauceAdd chili crisp, extra ginger, or crushed peanuts
Tofu bowlsDrizzle-able but not wateryAdd lime and tamari so the tofu does not taste flat
Lettuce wrapsEasy dip with bodyAdd lime and herbs for freshness

Chicken

Spoon it over cooked chicken, serve it as a dip for grilled chicken, or use the warm satay-style version with skewers. Plain baked chicken works well here because the sauce brings most of the flavor. Once the chicken is cooked, you can slice it into bowls, tuck it into lettuce wraps, or serve it beside spring rolls and cucumber salad.

Everyday chicken needs a peanut sauce that drizzles cleanly and seasons the plate without turning sweet.

Sliced grilled chicken with peanut sauce, white rice, cucumber, lime and herbs.
For everyday chicken, keep the sauce savory and medium-thick. It should drizzle over the slices, season the rice and stay balanced without tasting dessert-sweet.

Tofu

Tofu can take this sauce in two directions. Keep it thicker if you want to coat crispy tofu, or make it slightly looser if you want to drizzle it over a tofu bowl. Tofu loves a bolder sauce because it gives the peanut, lime, chili, and ginger room to show up.

For crispy tofu, keep the sauce thick enough to coat without covering every crunchy edge.

Crispy golden tofu cubes with peanut sauce, chili, herbs, lime and crushed peanuts.
Crispy tofu can take a thicker peanut sauce because the edges stay sturdy. Then chili, lime, ginger and crushed peanuts help the tofu taste bold instead of bland.

For a vegan version, maple syrup or brown sugar keeps the sweetness simple. Gluten-free bowls work best with tamari for the same savory depth. When you need a soy-free version, use coconut aminos and adjust with salt and lime at the end.

Rice Bowls and Meal Prep

In rice bowls, aim for a slow drizzle, not a watery pour. It should settle into the rice, vegetables, and protein without disappearing. Fluffy rice matters because it can hold the sauce without turning gummy.

Rice bowls need a slow drizzle that settles into the grains and makes leftovers feel intentional.

Rice bowl with tofu, vegetables, herbs, lime and peanut sauce being drizzled from a spoon.
In rice bowls, aim for a slow peanut sauce drizzle that settles into the grains without disappearing. This is where leftover rice and vegetables start to feel planned.

When meal prepping, store the sauce separately. It will thicken in the fridge, so re-whisk it with a splash before adding it to bowls, noodles, or salads. A jar of peanut sauce can make leftover rice, roasted vegetables, cooked chicken, tofu, or even plain cucumber feel intentional.

For a full bowl meal, the same creamy-salty idea works beautifully in a Thai-style vegan bowl with peanut butter dressing.

Peanut Dressing for Salads, Slaw and Bowls

To make peanut dressing for salad, slaw, or cold noodle salad, use more liquid than you would for dipping. It should pour easily from a spoon and taste brighter than satay sauce.

Start with ½ cup peanut sauce, then whisk in 2 to 4 tablespoons water. Add 1 to 2 teaspoons extra lime juice or rice vinegar if the dressing tastes heavy. A good peanut dressing should taste a little brighter than you think, because raw vegetables soften its sharpness once everything is tossed.

For salad and slaw, the sauce has to pour easily and taste brighter than it would as a dip.

Pourable peanut dressing being drizzled over cabbage, cucumber and carrot slaw.
For slaw and salads, make the peanut dressing brighter and thinner than a dip. Once it hits cabbage, cucumber and carrots, the extra tang keeps everything fresh instead of heavy.

Once it hits cabbage, cucumber, herbs, or shredded carrots, that extra brightness settles into balance. Use it on cabbage slaw, Thai peanut salad, cold noodle salad, lettuce wraps, grilled vegetables, or shredded chicken salad. It also works beautifully beside a crisp cucumber salad, especially when the meal has satay-style chicken, tofu, noodles, or grilled vegetables.

Rich toppings like avocado, fried tofu, or chicken need more lime. Mostly raw vegetables can handle a dressing that is a little sweeter and saltier.

Everyday Peanut Sauce, Vietnamese-Style Hoisin Dip and Satay-Style Sauce

Peanut sauce can mean different things depending on the dish. This recipe is an everyday peanut-butter sauce for home cooking, not a claim that all peanut sauces are the same. Traditional and regional versions may use roasted peanuts, tamarind, palm sugar, fish sauce, coconut milk, hoisin, curry paste, or other aromatics depending on the cuisine and dish.

Use the color and thickness of the sauce to understand which direction it has moved: everyday dip, hoisin dip or satay-style sauce.

Three bowls showing light peanut sauce, darker hoisin peanut dip and golden satay-style peanut sauce.
One peanut sauce base can move in three directions: everyday dip, Vietnamese-style hoisin peanut sauce or warmer satay-style sauce. The color and thickness show where it belongs.
  • Thai-inspired home-cooking peanut sauce: often a flexible peanut butter sauce with soy or tamari, lime, rice vinegar, chili, ginger, garlic, and water. Use it for dipping, noodles, chicken, tofu, bowls, and salads.
  • Vietnamese-style spring roll sauce: often brings in hoisin with peanut butter, garlic, and water, milk, or coconut milk. Use it for fresh spring rolls, rice paper rolls, shrimp rolls, and summer rolls.
  • Satay-style peanut sauce: usually richer, thicker, and often warm, sometimes with coconut milk, curry paste, fish sauce, or crushed peanuts. Use it for chicken satay, tofu satay, skewers, and grilled vegetables.

The main sauce here is flexible and quick. Add hoisin, and it moves toward a Vietnamese-style spring roll dip. Stir in coconut milk and curry paste, and it becomes warmer, richer and closer to a satay-style sauce.

Substitutions and Variations

This is where peanut sauce is forgiving, but not automatic: every swap changes the balance a little. Use the table as a starting point, then taste again once the texture is right.

NeedUseWatch Out For
Gluten-free peanut sauceTamari or certified gluten-free soy sauceCheck labels on hoisin, chili sauce, and curry paste
Soy-free peanut sauceCoconut aminosAdd salt and lime because coconut aminos are sweeter and less salty
Vegan peanut sauceMaple syrup or brown sugar instead of honeySkip fish sauce in the satay-style variation
Richer satay-style sauceCoconut milk or coconut creamAdd lime or vinegar if it tastes too heavy
Vietnamese-style dipHoisin added to the base sauceAdd lime or vinegar if it tastes too sweet
Spicy peanut sauceSriracha, chili garlic sauce, sambal, chili crisp, or red pepper flakesAdd heat slowly; peanut butter can hide spice at first
Mild peanut sauceSkip chili sauce or use a tiny pinch of chili flakesAdd extra ginger or lime so it does not taste flat
More textureCrushed roasted peanuts or blended roasted peanutsAdd extra liquid if the sauce thickens

Emergency 3-Ingredient Peanut Sauce

If you do not have all the ingredients, you can still make a quick peanut sauce. It will not taste as layered as the full version, but it works for noodles, dipping, wraps, or a fast bowl sauce.

Simple Version

  • 3 tablespoons peanut butter
  • 1 tablespoon soy sauce or tamari
  • 1 to 3 tablespoons warm water

Whisk everything together until smooth. Add lime juice, rice vinegar, chili sauce, garlic, or sweetener if you have them.

Better 3-Ingredient Version

  • 3 tablespoons peanut butter
  • 1 tablespoon soy sauce or tamari
  • 1 tablespoon lime juice or rice vinegar

Whisk with enough liquid until the sauce reaches the texture you need. This version tastes more balanced because the acid cuts through the peanut butter.

How to Fix Peanut Sauce

Most peanut sauce problems are not recipe failures; they are texture problems. Too thick, too salty, too heavy, grainy, separated, or sticky on noodles usually means the sauce needs one small adjustment, not a full restart.

Rule one still applies: fix texture first, then salt, then acid, then sweetness, then heat. If the problem happened after chilling, the storage and make-ahead fix may be all you need.

Fix Texture First, Then Flavor

If the noodles clump, treat it as a sauce-texture problem before you change the flavor.

Chopsticks lifting peanut noodles that have clumped because the sauce is too thick.
If peanut noodles turn sticky, the sauce usually needs hot water or noodle water, not a remake. Add a spoonful, toss again and let the sauce relax around the noodles.
ProblemWhy It HappenedFix
Too thickPeanut butter seized, not enough water, or sauce chilledWhisk in warm water 1 tablespoon at a time
Too thinToo much liquid was addedAdd peanut butter 1 tablespoon at a time
Too saltyToo much soy sauce, tamari, or fish sauceAdd peanut butter, lime juice, sweetener, or water
Too sweetToo much sugar, honey, maple syrup, or hoisinAdd lime juice, rice vinegar, chili, or soy sauce
Too spicyToo much chili sauce or curry pasteAdd peanut butter, coconut milk, sweetener, or water
GrainyNatural peanut butter, cold liquid, or poor mixingUse warm water and whisk hard, or blend briefly
Oily or separatedPeanut butter separated, sauce chilled, or sauce overheatedRewarm gently and whisk in warm water
BlandNeeds salt, acid, heat, or aromaticsAdd soy sauce or tamari, lime, vinegar, ginger, garlic, or chili
Too heavyToo much peanut butter or not enough acidAdd lime juice, rice vinegar, water, and fresh herbs
Noodles turned stickyThe sauce thickened after tossingAdd hot water or noodle water and toss again

Noodles need the loosest sauce. Satay can stay thicker and warmer. Spring rolls need a dip that coats the rice paper but still feels easy to bite through.

Storage and Make-Ahead

Store peanut sauce in an airtight jar or container in the fridge for up to 1 week. It will thicken as it chills, so do not judge the texture straight from the fridge.

Straight from the fridge, peanut sauce can look hopeless, but it is not broken; it is just waiting for a splash of water and a firm whisk. Let it sit for a few minutes before adding too much liquid, because the sauce often softens as it warms slightly.

A short rest and a firm whisk are usually enough to bring refrigerated peanut sauce back.

Glass jar of thick refrigerated peanut sauce beside a bowl of re-whisked pourable peanut sauce.
After chilling, peanut sauce often looks thicker than expected. Let it sit briefly, then re-whisk with a splash of water until it flows again.

Noodles usually need more liquid than you expect. Spring roll dip only needs enough water to flow again. Satay-style sauce is best rewarmed gently, then loosened with water or coconut milk.

You can freeze peanut sauce if needed, but the texture may change after thawing. Thaw it in the fridge, then whisk or blend it with a splash of warm water until smooth.

What to Serve with Peanut Sauce

Once the sauce is in the fridge, the question becomes less “what recipe am I making?” and more “what needs help tonight?” Use it where you want something fresh and cool, warm and grilled, dinner-like, or snacky and dippable.

MoodServe It With
Fresh and coolFresh spring rolls, rice paper rolls, summer rolls, shrimp rolls, cabbage slaw, cucumber salad, Vegan Som Tam / Thai raw papaya salad
Warm and grilledChicken satay, tofu satay, grilled chicken, grilled paneer or tofu skewers, roasted shrimp, roasted vegetables
Full dinnerPeanut noodles, rice noodles, cold noodle salad, rice bowls, chicken bowls, tofu bowls, roasted vegetable bowls
Snacky and dippableLettuce wraps, dumplings, potstickers, fresh vegetables, crispy tofu bites

If the sauce is going over something rich, add more lime or vinegar. If it is going over plain rice, noodles, or vegetables, keep it a little saltier and spicier so it can carry the whole bowl. For a thicker Indian peanut condiment rather than a pourable sauce, try peanut chutney.

FAQ

What is peanut sauce made of?

Peanut sauce is usually made with peanut butter or ground peanuts, soy sauce or tamari, vinegar or lime juice, sweetener, chili, garlic, ginger, and water. Some satay-style versions also use coconut milk, curry paste, fish sauce, tamarind, or crushed roasted peanuts.

Is peanut sauce the same as satay sauce?

Not exactly. Peanut sauce is broad; satay sauce usually means the richer peanut-based sauce served with satay skewers.

Do you serve peanut sauce warm or cold?

Serve it room temperature or slightly chilled for spring rolls, warm for satay, and loosened with hot water for noodles. For salad dressing, chilled or room temperature both work.

How do you thin peanut sauce for spring rolls?

Add water 1 tablespoon at a time until the sauce is easy to dip. It should cling lightly to the spring roll without feeling pasty or running off immediately.

Why did my peanut sauce get so thick?

It thickens because peanut butter absorbs liquid and firms up as it sits, especially in the fridge. Whisk in a splash of water at a time until it relaxes again.

What peanut butter works best for peanut sauce?

Creamy natural peanut butter gives the cleanest peanut flavor. Regular creamy peanut butter also works, but it is usually sweeter, so start with less sweetener. Crunchy peanut butter works if you do not mind a textured sauce.

How long does peanut sauce last in the fridge?

It keeps well in an airtight jar in the fridge for up to 1 week. It will thicken as it chills, so whisk in a splash of water before serving.

Is peanut sauce gluten-free?

It can be gluten-free if you use tamari or certified gluten-free soy sauce. Check labels on hoisin, chili sauce, curry paste, and any bottled ingredients because they can vary.

How do you make peanut sauce vegan?

Use maple syrup or brown sugar instead of honey, and skip fish sauce in the satay-style variation. The 5-minute sauce is easy to keep vegan with peanut butter, tamari or soy sauce, lime, vinegar, chili, garlic, ginger, and water.

Can you make peanut sauce without peanut butter?

Yes, but it becomes a different sauce. For a similar creamy dip, use tahini, almond butter, cashew butter, or sunflower seed butter, then adjust salt, acid, sweetness, and liquid to taste. For peanut allergies, do not call it peanut sauce when serving guests; label it clearly.

How much peanut sauce do you need for noodles?

For 2 servings of noodles, start with about ½ cup peanut sauce and thin it with 2 to 4 tablespoons hot water or noodle water before tossing. For 8 ounces / 225 g noodles, use about ½ to ¾ cup sauce depending on how saucy you want them.

Make It Your House Sauce

Make it once, then keep adjusting it by feel. One night, it is a dip for fresh rolls. Another night, it saves plain noodles. Later in the week, it can turn leftover rice, tofu, chicken, or vegetables into a meal you actually meant to make. That is when peanut sauce becomes the jar you are glad to have waiting in the fridge.

If you try it, I would love to know where it landed first: spring rolls, noodles, satay, tofu, or a fridge-cleanout bowl. That is usually the version worth saving and making again.

Posted on — Leave a comment

Stir Fry Sauce Recipe: One Sauce for Chicken, Beef, Tofu, Vegetables & Noodles

Finished chicken stir-fry with broccoli, bell peppers, carrots, mushrooms, rice, and a small jar of brown stir fry sauce in the background.

A stir-fry can look perfect in the pan and still taste disappointing if the sauce is off. Use too little, and dinner feels dry. Pour too much, and the vegetables turn watery. Go too salty, and you lose the freshness. Let it get too sweet, and everything starts tasting bottled.

The short version: mix one jar, add it near the end, and use about 1 cup for a family-size stir-fry so dinner turns glossy, not watery.

This homemade stir fry sauce is built around a simple MasalaMonk rule: salt, loosen, brighten, round, aroma, cling. Soy sauce gives the savory base, water or broth keeps it balanced, vinegar brightens it, honey or brown sugar rounds it, garlic-ginger-sesame bring aroma, and cornstarch helps it cling to the food instead of pooling at the bottom of the pan.

It takes about five minutes to mix and works with chicken, beef, tofu, shrimp, vegetables, noodles, rice bowls, and those tired weeknight dinners where the fridge has a few vegetables, a protein, and no clear plan.

This is the sauce to keep in your back pocket: flexible enough for whatever is in the pan, reliable enough to make a random skillet taste like a real dinner, and easy enough to adjust lighter, deeper, sweeter, spicier, lower-sodium, vegan, keto-friendly, gluten-free, or soy-free.

Quick Answer: What Is Stir Fry Sauce Made Of?

A basic stir fry sauce is made with soy sauce, water or broth, rice vinegar, honey or brown sugar, toasted sesame oil, garlic, ginger, and cornstarch. Whisk everything together, add it near the end of cooking, and let it bubble for 30 to 60 seconds until it turns glossy and coats the food.

For most stir-fries, use about ¾ to 1 cup sauce for 1 lb / 450 g protein plus vegetables. Use less for fried rice, more for noodles, and slightly less if your vegetables release a lot of water.

If you have ever poured sauce into a stir-fry and watched it turn thin, salty, or soupy, the problem was probably not you. It was usually timing, pan moisture, or too much sauce for the amount of food in the pan.

Need a specific fix? Jump to how much sauce to use, when to add it, or how to fix watery stir-fry sauce.

What the sauce texture should look like

Before the sauce ever hits the pan, check the texture. It should be thin enough to pour, but balanced enough to turn shiny and cling once heated.

Close-up of glossy brown stir fry sauce coating a spoon, with visible bits of garlic, chili, sesame, and scallion.
Use the spoon as a quick texture check: the sauce should pour easily, but still leave a shiny coating behind. That is the texture that helps it cling in the pan.

Recipe at a Glance

Prep time:
5 minutes
Cook time:
No cooking until added to the pan
Yield:
About 1 cup / 250 ml
Servings:
1 family-size stir-fry / about 4 portions
Best for:
Chicken, beef, tofu, vegetables, noodles, rice bowls
Flavor:
Savory, lightly sweet, garlicky, gingery
Make-ahead:
5–7 days in the fridge
Main cue:
Add near the end; stop when shiny and coating

Easy Homemade Stir-Fry Sauce

This is the all-purpose version to start with. It is balanced enough for chicken, beef, tofu, vegetables, noodles, and rice bowls, but simple enough to mix before the pan is even hot.

All-Purpose Stir Fry Sauce

Prep: 5 minutes
Cook: no-cook sauce; 1–3 minutes in pan
Yield: about 1 cup / 250 ml
Serves: 1 family-size stir-fry / about 4 portions

Equipment

No special equipment is needed. A small bowl or jar, a whisk or fork, measuring spoons, and a hot wok or large skillet are enough.

Best For

Chicken, beef, tofu, shrimp, vegetables, noodles, rice bowls, and quick weeknight stir-fries.

Not Best For

It is not meant for deep-frying or as a thick dip straight from the jar. This sauce shines when it hits hot food in the pan and has a minute to thicken.

Ingredients

  • ½ cup / 120 ml water or low-sodium broth
  • ⅓ cup / 80 ml low-sodium soy sauce
  • 1 tablespoon / 15 ml rice vinegar
  • 1 tablespoon honey or brown sugar, about 20 g honey or 12–13 g sugar
  • 2 teaspoons / 10 ml toasted sesame oil
  • 2 garlic cloves, grated or very finely minced
  • 2 teaspoons fresh ginger, grated
  • 1 tablespoon cornstarch / cornflour (the white thickening starch), about 8 g
  • ¼ to ½ teaspoon red pepper flakes, chili garlic sauce, or sriracha, optional

Instructions

  1. Add the water or broth, soy sauce, rice vinegar, honey or brown sugar, sesame oil, garlic, ginger, cornstarch, and chili if using to a bowl or jar.
  2. Whisk well, or close the jar and shake until the cornstarch is fully dissolved.
  3. Use immediately, or refrigerate in an airtight jar.
  4. Shake or whisk again before using because the cornstarch settles as the sauce sits.
  5. Add near the end of stir-frying, after the protein and vegetables are mostly cooked.
  6. Let it bubble for 30 to 60 seconds, tossing until it turns shiny and coats the food.

Recipe Notes

  • Use low-sodium soy sauce for the best balance. Regular soy sauce can become too salty once reduced.
  • Use broth instead of water when you want a deeper sauce for chicken or beef.
  • For a brighter sauce, add 1 extra teaspoon rice vinegar at the end.
  • For a saucier rice bowl, add 2 to 4 tablespoons extra water or broth when the sauce hits the pan.
  • Do not pour it into a pan full of watery vegetables. Cook off extra moisture first.
  • If using this as a marinade, leave out the cornstarch. Cornstarch is for thickening in the hot pan; in a marinade, it can settle, clump, or make the surface pasty.
  • Yes, you can double the recipe. Double all ingredients, store in a larger jar, and shake well before each use.
  • It is also a good meal-prep sauce. Keep a jar in the fridge, and you are halfway to a stir-fry before the pan is even hot.

Why a jar of sauce makes stir-fry easier

A mixed sauce jar turns stir-fry into assembly cooking. With the flavor base ready, you can focus on heat, sequence, and not overcrowding the pan.

Clear glass jar of brown homemade stir fry sauce on a counter with garlic, ginger, scallions, soy sauce, and sesame oil nearby.
Because the sauce is mixed before cooking, weeknight stir-fries move faster. Keep it in a jar, then shake before using so the cornstarch blends back into the sauce.

Stir fry sauce ingredients before you mix

Keep the ingredients measured before cooking starts. Stir-fries move quickly, so the sauce should be ready before the wok or skillet gets hot.

Overhead flat-lay of stir fry sauce ingredients including soy sauce, broth, rice vinegar, honey, sesame oil, garlic, ginger, cornstarch, chili, and scallions.
The ingredient list is short, but each part matters: soy sauce brings salt, vinegar brightens, sweetener rounds, aromatics wake it up, and cornstarch helps it finish properly.

Mix the sauce before the pan gets hot

Whisk or shake until the cornstarch disappears into the liquid. That prevents last-minute measuring and gives the thickener time to disperse evenly.

Hand whisking brown homemade stir fry sauce in a ceramic bowl, with a wok of vegetables in the background and garlic, ginger, chili, scallions, and sesame nearby.
Mix the sauce before the pan gets hot. Then, once the protein and vegetables are ready, you can add it quickly instead of overcooking dinner while you measure.

Before you pour it into the pan: check how much sauce to use and when to add it so the stir-fry turns glossy instead of soupy.

The first time this sauce really clicks is when you stop treating it like a separate recipe and start treating it like a dinner shortcut. A jar in the fridge means chicken, tofu, broccoli, mushrooms, noodles, or leftover rice can turn into something that feels planned — as long as you use the right amount.

Timing cue: Mix the sauce before the pan gets hot. The protein should be cooked, the vegetables should be crisp-tender, and the pan should be hot but not swimming in liquid before the sauce goes in.

The MasalaMonk Stir-Fry Sauce Rule

A good stir-fry sauce is not just soy sauce plus thickener. It needs balance. Once you understand what each part is doing, you can adjust the sauce without guessing.

The six-part sauce rule

Use this as the control panel for the recipe. If dinner tastes off, fix the missing role instead of adding random ingredients.

Educational graphic showing a bowl of stir fry sauce and the MasalaMonk stir-fry sauce rule: salt, loosen, brighten, round, aroma, and cling, with ingredient examples around the bowl.
This is the control system for the whole recipe: salt, loosen, brighten, round, aroma, and cling. Once you understand those six jobs, you can fix the sauce without guessing.
Balance Part Ingredient Job in the Sauce
Salt Soy sauce, tamari, coconut aminos Creates the savory base.
Loosen Water or broth Keeps the sauce from becoming too salty or heavy.
Brighten Rice vinegar, lime juice Cuts through richness and keeps the flavor awake.
Round Honey, brown sugar, maple syrup Softens salt, acid, and heat.
Aroma Garlic, ginger, toasted sesame oil Makes the sauce smell fresh instead of flat.
Cling Cornstarch, arrowroot, xanthan gum Helps the sauce coat the food instead of pooling.

That is the real trick. The recipe gives you the base, but this rule tells you how to fix it. Too salty? Loosen. Too flat? Brighten. Too sharp? Round. Too thin? Help it cling. Too bottled? Add aroma.

Using the rule to fix dinner? If the sauce tastes too salty, too flat, too thin, or too sweet, jump to the troubleshooting table.

How Much Stir Fry Sauce to Use

This is the part most recipes skip, and it is also the part that saves dinner. The same sauce can taste perfect or overwhelming depending on how much food is in the pan.

If your stir-fries usually taste either dry or soupy, use the table first, then check the image cue that matches what you are cooking.

What You Are Cooking How Much Sauce to Use What to Watch
1 lb / 450 g chicken + vegetables ¾ to 1 cup Use the full cup if serving over rice and you want extra sauce.
1 lb / 450 g beef + vegetables ⅔ to 1 cup Beef can handle a deeper, slightly stronger sauce.
14 oz / 400 g tofu + vegetables About ⅔ cup Use a slightly thicker sauce so it clings to crisp tofu.
4 cups vegetables only About ½ cup Use less if the vegetables release water.
6 cups vegetables + 1 lb protein About 1 cup This is the classic family-size stir-fry amount.
200 g fresh noodles or 100 g dried noodles + add-ins ⅔ to 1 cup Noodles absorb sauce quickly; add water or broth if needed.
Fried rice-style stir fry 3 to 5 tablespoons Too much sauce makes rice wet and soft.
Very saucy takeout-style stir fry 1 cup plus 2 to 4 tablespoons water or broth Best when serving over plain rice.

How much sauce to use for chicken stir-fry

For chicken and vegetables, start with ¾ cup if the pan is modest and go up to 1 cup when you want extra sauce for plain rice.

Cooked chicken pieces, mixed vegetables, and a measuring cup of brown stir fry sauce with text reading “Chicken + vegetables” and “Use ¾–1 cup sauce.”
Chicken and vegetables usually need ¾ to 1 cup sauce for a family-size pan. Use the higher end when serving over plain rice, where a little extra sauce is useful.

How much sauce to use for tofu stir-fry

Tofu works better with restraint. Too much sauce softens the crisp edges before they can hold flavor.

Crisp golden tofu cubes with broccoli, peppers, snap peas, carrots, and a measuring cup of sauce, with text reading “Tofu + vegetables” and “Use about ⅔ cup sauce.”
Tofu needs enough sauce to cling to its crisp edges, but not so much that the pan floods. About ⅔ cup is a good starting point for tofu and vegetables.

How much sauce to use for vegetables

Vegetables release moisture as they cook, so a smaller amount of sauce often looks light at first but finishes better after bubbling.

Colorful vegetable stir-fry with broccoli, peppers, carrots, mushrooms, snap peas, zucchini, and a measuring cup of sauce, with text reading “Vegetables only” and “Use about ½ cup sauce.”
Vegetable-only stir-fries need restraint because the vegetables release water as they cook. Start with about ½ cup, then add more only after the sauce thickens.

How much sauce to use for noodles

Noodles absorb sauce quickly. Keep water or broth nearby so you can loosen the pan without adding more salt or sweetness.

Glossy noodle stir-fry being lifted with tongs, with chicken, broccoli, peppers, and a measuring cup of sauce labeled “Noodles” and “Use ⅔–1 cup sauce.”
Noodles absorb sauce as they sit, so keep the finish flexible. Start with ⅔ to 1 cup sauce, then loosen with a splash of water if the noodles tighten up.

How much sauce to use for fried rice

Fried rice needs seasoning, not a full stir-fry sauce pour. Start with a few tablespoons, toss, taste, and stop before the grains clump.

Pan of fried rice with vegetables, egg, scallions, and a tablespoon of sauce, with text reading “Fried rice,” “Use only 3–5 tbsp,” and “Seasoned, not wet.”
Fried rice is seasoned, not sauced. Use only 3 to 5 tablespoons so the grains stay separate instead of turning wet and clumpy.

Amount rule: Start lower if your pan is crowded, your vegetables are watery, or your noodles are already soft. You can always add more sauce after it thickens; you cannot easily remove extra once the pan turns soupy.

When to Add the Sauce

Add it near the end of cooking, not at the beginning. The sauce is there to coat and finish the food, not to boil the vegetables or stew the protein.

The stir-fry order before sauce goes in

The pan should be hot, the protein mostly cooked, and excess vegetable moisture reduced before the sauce goes in.

  1. Heat the wok or large skillet first. A hot pan helps food sear instead of steam.
  2. Cook the protein. Chicken, beef, shrimp, pork, or tofu need direct heat before sauce.
  3. Remove the protein if needed. This prevents overcooking while vegetables finish.
  4. Cook firm vegetables first. Broccoli and carrots need more time than bok choy leaves or peppers.
  5. Cook off extra moisture. A watery pan dilutes the sauce.
  6. Return the protein and shake the sauce. Cornstarch settles, so mix it again.
  7. Add the sauce and toss for 30 to 60 seconds. Stop when it thickens and finishes the pan.
Brown stir fry sauce being poured from a jar into a wok of mostly cooked chicken, broccoli, carrots, peppers, snap peas, and scallions.
Add the sauce near the end, not at the beginning. The food should already be mostly cooked, so the sauce only needs a short bubble to thicken and coat.

Cloudy to glossy: what the sauce should do in the pan

In the pan, the sauce often starts cloudy because the cornstarch is just beginning to hydrate. Once it bubbles around the edges, it should turn clearer, darker, and shinier.

Wok of chicken and vegetables with cloudy brown sauce bubbling around the food and text reading “Cloudy at first is normal.”
At first, cornstarch sauce can look cloudy in the pan. Give it 30 to 60 seconds of bubbling, and it should turn clearer, shinier, and more clingy.

Stop when the sauce turns glossy

The stop point is short and visual: the sauce tightens, the food looks coated, and the vegetables still look bright. Keep cooking after that and the flavor can turn too salty.

Close-up of glossy chicken stir-fry with broccoli, carrots, red peppers, mushrooms, scallions, and sauce clinging to the food, with small text reading “Stop when glossy.”
This is the stop point: the sauce has tightened, the food looks coated, and the vegetables still look bright. Keep cooking much longer and the sauce can turn too salty.

Glossy, not soupy: the final texture cue

The goal is glossy, not soupy — coated, not drowned. If sauce sits under the food instead of clinging to it, the pan probably has too much liquid.

Comparison image with one side showing a stir-fry in too much liquid and the other side showing a coated stir-fry, with text reading “Glossy, not soupy,” “Coated, not drowned,” “Too much liquid,” and “Just enough sauce.”
The difference is liquid control. Too much stir-fry sauce drowns the pan; just enough coats the food and keeps the vegetables crisp-looking.

Good stir-frying is mostly prep, heat, and sequence. Serious Eats explains those stir-frying basics in depth, but for this sauce the main thing is simple: mix it first and add it near the end.

If you need rice underneath your stir-fry, MasalaMonk’s how to cook rice guide is useful when you want fluffy rice that can hold sauce without turning mushy.

Why This Recipe Works

Why each ingredient has a job

This recipe works because each ingredient solves a specific sauce problem. Use the roles below when you need to adjust taste, thickness, or balance.

Ingredient-role graphic with labeled bowls showing soy sauce as savory base, water or broth as balance, vinegar as brightness, honey as roundness, garlic and ginger as aroma, and cornstarch as cling.
When a sauce tastes off, fix the role that is missing. Add broth to loosen, vinegar to brighten, honey or sugar to round, garlic and ginger for aroma, or cornstarch for cling.

This sauce is simple, but it is not random. Soy sauce brings salt and savory depth, while water or broth keeps it from becoming too intense. Rice vinegar adds brightness, and honey or brown sugar rounds the sharp edges so the sauce tastes balanced instead of harsh.

Garlic and ginger give the sauce its classic stir-fry aroma. Toasted sesame oil adds a warm nutty finish. Cornstarch is what changes the sauce from thin liquid into a shiny coating in the hot pan.

The goal is not a heavy glaze. The goal is a thin mixture that thickens in the hot pan, grabs onto the food, and leaves everything tasting seasoned but still fresh.

When it is right, you should smell the garlic and ginger first, see the sauce turn from cloudy to shiny, and still taste the freshness of the vegetables underneath. The sauce should make the food feel finished, not hidden.

Ingredients and Substitutions

Think of this section as permission to adjust. The sauce does not fall apart if you swap broth for water, honey for maple syrup, or tamari for soy sauce. You just need to keep the balance: salt, loosen, brighten, round, aroma, and cling.

Cooking for a specific need? Jump to gluten-free, soy-free, vegan, lower-sodium, and keto variations.

Soy Sauce

Low-sodium soy sauce is the best default. Regular soy sauce can work, but it becomes stronger as it reduces. If you only have regular soy sauce, use ¼ cup instead of ⅓ cup, then add 1 to 2 extra tablespoons water or broth.

For gluten-free sauce, use certified gluten-free tamari, certified gluten-free soy sauce, or coconut aminos. For a soy-free style version, coconut aminos are usually the easiest starting point, but they are sweeter and less salty than soy sauce, so reduce the sweetener and taste at the end.

Water or Broth

Water keeps the flavor clean and light. Broth gives more depth. Chicken broth works well with chicken, beef broth gives beef stir-fries a deeper base, and vegetable broth keeps tofu or vegetable stir-fries flexible. Low-sodium broth is best because the soy sauce already brings salt.

Honey or Brown Sugar

A little sweetness balances the saltiness of soy sauce and the sharpness of vinegar. Honey gives a smooth feel. Brown sugar gives deeper flavor. Maple syrup works well for a vegan version.

For the base sauce, keep the sweetener modest. This is a balanced weeknight sauce, not a sticky glaze. If you want something sweeter, use the honey soy variation below.

Rice Vinegar

Rice vinegar keeps the sauce bright. Apple cider vinegar can work in a pinch. Lime juice also works, especially for a Thai-inspired version, but it changes the flavor and makes the sauce sharper.

Garlic and Ginger

Fresh garlic and ginger make the sauce taste more alive. Grating them helps them disappear into the mixture and spread evenly through the pan.

Close-up of fresh ginger being grated beside minced garlic on a wooden cutting board, with garlic cloves and a small bowl in the background.
Fresh garlic and ginger do more than add flavor; they make the sauce smell freshly cooked instead of bottled. Grating them helps that aroma spread quickly through the stir-fry.

If you need to use powders, replace 2 garlic cloves with about ½ teaspoon garlic powder, and replace 2 teaspoons fresh ginger with about ½ to ¾ teaspoon ground ginger. The sauce will still work, but fresh gives better aroma.

Toasted Sesame Oil

Use toasted sesame oil for flavor, not as the main cooking oil. Two teaspoons are enough to make the sauce taste warm and nutty without overpowering the garlic and ginger.

Cornstarch / Cornflour

Cornstarch thickens the sauce and gives it that takeout-style finish. It must be mixed into cold or room-temperature liquid before heating. If dry cornstarch hits hot liquid directly, it can clump.

Bowl of brown stir fry sauce being whisked with visible text reading “Whisk cornstarch cold first” and “No clumps in the pan.”
Cornstarch works best when it is whisked into cool liquid first. That small step prevents clumps and helps the sauce turn smooth when it bubbles.

It also settles when the sauce sits, so always shake or whisk before adding it to the pan.

Can you make it without cornstarch? Yes, but it will be thinner. You can simmer it slightly longer, use arrowroot for some gluten-free or grain-free versions, or use a tiny amount of xanthan gum for keto sauce. Cornstarch is still the easiest everyday thickener.

How to Use This Sauce for Different Stir-Fries

Once the base is mixed, the rest is about matching the sauce to the food. Chicken wants balance. Beef can take depth. Tofu needs cling. Vegetables need restraint. Noodles need room to move.

For Chicken

Chicken is mild, so the sauce should stay balanced rather than too salty or too sweet. The base recipe works as written, especially if you use broth instead of water.

For 1 lb / 450 g chicken plus vegetables, ¾ to 1 cup is usually right. Go closer to the full cup if you are serving it over rice and want a little extra sauce to catch underneath.

The main danger with chicken is not the sauce; it is overcooking the chicken while waiting for the sauce to thicken. Keep the final simmer short.

Good vegetables for chicken include broccoli, bell peppers, carrots, snap peas, green beans, mushrooms, cabbage, bok choy, zucchini, and onions.

Chicken stir-fry being served from a wok onto rice, with broccoli, carrots, peppers, mushrooms, peas, and glossy brown sauce.
This is the chicken use-case: tender pieces, crisp vegetables, and enough sauce to catch on the rice without turning the bowl soupy.

For Beef

Beef likes a darker, more savory sauce. Start by swapping water for broth. Oyster sauce gives the quickest savory boost, Shaoxing wine or dry sherry adds restaurant-style depth, white pepper brings quiet warmth, and a small splash of dark soy sauce gives color if you have it.

You do not need every add-in at once. Even one or two — broth, oyster sauce, or white pepper — can make the sauce taste deeper.

For 1 lb / 450 g beef plus vegetables, ⅔ to 1 cup works well. Beef can carry a stronger sauce, especially with broccoli, mushrooms, green beans, or rice underneath.

Slice beef thinly across the grain and cook it quickly over high heat. Add the sauce only after the beef and vegetables are mostly cooked, then toss just long enough for everything to thicken and coat.

Beef stir-fry with thin beef slices, broccoli, mushrooms, red peppers, green beans, scallions, sesame seeds, and glossy dark brown sauce.
For beef, lean deeper and more savory. A darker brown sauce works well with mushrooms, broccoli, peppers, and thin slices of tender beef.

For Tofu

Tofu needs the sauce to cling, not slide off. If the tofu is not browned first, it can taste bland even when the sauce itself tastes good.

A 14 oz / 400 g block of tofu plus vegetables usually needs about ⅔ cup. More than that can flood the pan before the tofu has a chance to hold the flavor.

Press firm or extra-firm tofu, cut it into cubes or slabs, and pat it dry before it hits the pan. A dry surface browns better, and browned tofu holds sauce better.

Golden tofu cubes in a wok with broccoli, bell peppers, snap peas, mushrooms, scallions, sesame seeds, and glossy brown sauce.
Brown the tofu first so the sauce has something to hold onto. Crisp edges make tofu taste more seasoned and keep the sauce from sliding off.

For a lower-carb tofu dinner idea, MasalaMonk’s tofu and broccoli stir-fry with cauliflower rice is a natural fit, especially when you want a high-protein meal without noodles or regular rice.

For a vegan tofu stir-fry, use vegetable broth and maple syrup or sugar instead of honey. If you want deeper savory flavor, add mushroom powder or a little dried-shiitake soaking liquid.

For Vegetables

Vegetables are sneaky. They look dry when they first hit the pan, then suddenly release enough water to thin the whole sauce. That is why vegetable stir-fries need less sauce and a hotter pan.

Four cups of vegetables usually need only about ½ cup sauce. That may look modest, but vegetables release their own moisture as they cook.

Mushrooms and zucchini are the biggest water releasers here. Give them space, use higher heat, and wait until their moisture cooks off before adding the sauce.

Cook firm vegetables first: broccoli, carrots, cauliflower, green beans, cabbage stems. Add softer vegetables later: bell peppers, mushrooms, zucchini, bok choy leaves, snap peas, and scallions.

Colorful vegetable-only stir-fry with broccoli, red and yellow peppers, carrots, mushrooms, snap peas, zucchini, scallions, and a light glossy sauce.
A vegetable stir-fry should still look fresh after saucing. Keep the coating light so the broccoli, peppers, carrots, mushrooms, and snap peas stay colorful.

For Noodles and Rice

Noodles drink sauce quickly, so they need a looser finish. For noodles, use ⅔ to 1 cup sauce for about 200 g fresh noodles or 100 g dried noodles, plus your protein and vegetables. Start lower if the noodles are already soft or oily; add a splash of water or broth if they drink up the sauce too quickly.

If cooked noodles are clumped before they go into the pan, loosen them first with a splash of water or oil. Sauce cannot coat noodles evenly if they enter the pan as one sticky block.

Chopsticks lifting glossy stir-fried noodles from a wok with vegetables, tofu or chicken pieces, scallions, and brown sauce.
Noodle stir-fry is ready when the strands separate and shine instead of clumping together. If the pan feels tight, add a splash of water and toss briefly.

For fried rice-style cooking, use much less. Start with 3 to 5 tablespoons. Too much liquid makes rice wet and heavy. Cold cooked rice works better than freshly cooked hot rice because it is drier and separates more easily in the pan.

If you like saucy rice-bowl dinners, use the full cup in the stir-fry and serve it over plain rice. For fried rice, season gradually.

For a takeout-style egg dish with a glossy sauce, MasalaMonk’s egg foo young recipe is a useful companion because it also leans on a savory sauce that thickens and coats.

Back to top ↑

Easy Sauce Variations

You do not need every variation today. Make the base sauce first. Come back to this section when you want it sweeter, spicier, darker, lower-sodium, vegan, gluten-free, keto-friendly, or soy-free.

Choose the sauce direction that fits dinner

Use the base recipe as your starting point, then nudge it sweeter, hotter, darker, or looser depending on what is in the pan.

Three labeled bowls of stir fry sauce showing Honey Soy, Spicy, and Dark Takeout-Style variations with honey, chilies, mushrooms, ginger, and scallions nearby.
Once the base sauce works, choose the direction that fits dinner: honey soy for shine, spicy for heat, or dark takeout-style for a deeper brown sauce.
If You Want Change This Best For
Balanced everyday sauce Use the base recipe as written. Chicken, tofu, vegetables, rice bowls
Sweeter honey soy Increase honey to 2 tablespoons. Chicken, shrimp, tofu, noodles
Darker takeout-style sauce Use broth, oyster sauce, Shaoxing wine, and white pepper. Beef, broccoli, mushrooms, cabbage
Spicy sauce Add chili garlic sauce, sriracha, chili crisp, or fresh chilies. Chicken, shrimp, tofu, noodles
Noodle-friendly sauce Keep it looser with extra water or broth. Fresh noodles, dried noodles, rice noodles
Soy-free style Use coconut aminos and reduce the sweetener. Tofu, vegetables, chicken, rice bowls

Pick the version closest to tonight’s dinner, then adjust from there. Chicken and noodles may want sweeter or looser; beef may want darker; vegetables usually want restraint.

If you find a version that works especially well — extra ginger, chili crisp, coconut aminos, mushroom broth, less sweetener, or something completely your own — leave it in the comments so another reader can borrow the idea.

3 Ingredient Stir Fry Sauce

A 3 ingredient version is useful when you need something fast and do not have the full list of ingredients. Mix soy sauce, honey or brown sugar, and a cornstarch slurry. It works in a pinch, but the full sauce tastes more balanced because it includes acid, aromatics, sesame oil, and a proper loosened base.

Chinese Takeout-Style Brown Sauce Variation

For a deeper, darker, more takeout-style sauce, start by swapping water for broth. Oyster sauce brings the quickest savory boost, Shaoxing wine or dry sherry adds restaurant-style depth, white pepper brings quiet warmth, and a small splash of dark soy sauce gives color if you have it. Reduce the honey or brown sugar slightly so the sauce stays savory.

Vegetarian cooks can use mushroom sauce instead of oyster sauce. For a vegan version, skip oyster sauce and use mushroom powder, shiitake soaking liquid, or a vegan mushroom stir-fry sauce.

Honey Soy Stir Fry Sauce

The honey soy version is sweeter and shinier: increase the honey to 2 tablespoons. It works especially well with chicken, shrimp, salmon, tofu, broccoli, carrots, bell peppers, and noodles. If it tastes too sweet, balance it with rice vinegar, lime juice, chili flakes, or a little more soy sauce.

Spicy Stir Fry Sauce

To make it spicy, add red pepper flakes, chili garlic sauce, sriracha, gochujang, chili crisp, or fresh chopped chilies to the base recipe. Start small. Spicy sauce tastes better when it still has balance: salt, sweetness, acid, garlic, ginger, and heat.

Thai-Inspired Quick Stir-Fry Sauce

This is not a replacement for a specific Thai dish sauce. It is a quick direction for weeknight stir-fries when you want the flavor to lean brighter, sharper, and more chili-forward. Replace some rice vinegar with lime juice, add a little fish sauce if you are not vegetarian, reduce the soy sauce slightly, and keep the garlic and chili strong.

If you want a full Thai basil stir-fry, MasalaMonk’s Pad Kra Pao recipe goes deeper into that sharper, basil-heavy sauce style.

Teriyaki-Style Stir Fry Sauce

For a teriyaki-style version, make the sauce sweeter and shinier. Increase the sweetener, use a little more ginger, and let it reduce until it looks lightly glazed. Use this when you want a sweeter rice-bowl style dinner rather than a lighter vegetable stir-fry. For a dedicated sweeter glaze, see MasalaMonk’s teriyaki sauce recipe.

Diet and Substitution Variations

These versions are not here to make the sauce feel restricted. They are here so the same jar can still work when someone at the table needs less sodium, no gluten, no soy, no animal products, or no sugar.

Use this section like a shortcut: lower-sodium if salt is the problem, gluten-free if wheat is the problem, soy-free if soy itself is the problem, and keto if sugar or starch is the problem.

Easy stir fry sauce swaps that are not interchangeable

The labels matter here. Gluten-free, soy-free, vegan, and lower-sodium changes solve different problems, so choose the swap that matches the actual need.

Ingredient-swap guide for stir fry sauce with visible labels for gluten-free tamari or coconut aminos, soy-free coconut aminos, vegan maple syrup and vegetable broth, and lower-sodium dilute and taste.
Substitution labels matter. Tamari can help with gluten-free stir fry sauce, but it is usually soy-based; coconut aminos are the better soy-free starting point.

Lower-Sodium Version

A lower-sodium version needs more than just low-sodium soy sauce. Low-sodium soy sauce still contains sodium, and the sauce can become saltier as it reduces. Reduce the soy sauce first, increase water or unsalted broth, and build flavor with garlic, ginger, vinegar, chili, scallions, mushrooms, and sesame aroma.

Do not add salt until the stir-fry is finished and tasted. If you are cooking for a strict sodium limit, use label numbers rather than taste alone.

Keto / Sugar-Free Version

For a keto or sugar-free version, skip the honey or brown sugar and use a keto-friendly sweetener only if needed. Cornstarch is not ideal for strict keto. Use up to ⅛ teaspoon xanthan gum for 1 cup sauce, starting with a smaller pinch if your brand thickens aggressively.

Xanthan gum does not behave like cornstarch: cornstarch thickens as it cooks, while xanthan gum thickens as it hydrates. Whisk well, wait a minute, and add more only if you really need it. A sauce can go from glossy to gummy quickly.

Vegan Version

To make it vegan, use vegetable broth and maple syrup or sugar instead of honey. Avoid oyster sauce, fish sauce, chicken broth, chicken bouillon, and non-vegan bottled sauces. For deeper savory flavor, add mushroom powder, finely minced mushrooms, or a little dried-shiitake soaking liquid.

If you are building more plant-forward meals around tofu, tempeh, edamame, lentils, or beans, MasalaMonk’s plant-based protein sources guide can help you choose what to pair with the sauce.

Gluten-Free Version

Regular soy sauce often contains wheat, so it is not always gluten-free. Use certified gluten-free tamari, certified gluten-free soy sauce, or coconut aminos. Also check the labels on broth, oyster sauce, hoisin sauce, chili garlic sauce, and bottled sauces because gluten can appear in places you may not expect.

No Soy Sauce vs Soy-Free vs Gluten-Free

These terms sound similar, but they are not interchangeable. That matters when you are cooking for allergies, gluten-free needs, or someone who is avoiding soy completely. For a broader look at tamari, coconut aminos, and liquid aminos, EatingWell’s guide to soy sauce substitutes is a helpful reference.

Phrase What It Actually Means What to Watch
Without soy sauce The recipe does not use soy sauce. It may still contain soy from hoisin, oyster-style sauces, or other condiments.
Soy-free No soy ingredients at all. Check every label carefully.
Gluten-free No wheat/gluten ingredients. Tamari may be gluten-free but still contains soy.
Coconut aminos A common soy-free and gluten-free substitute for soy sauce. Usually sweeter and less salty, so reduce sweetener.
Liquid aminos A savory soy-sauce-like seasoning. Many versions are soy-based and can still be high in sodium; check the label.

Without Soy Sauce

A sauce without soy sauce is not always the same as a soy-free sauce. Some recipes skip soy sauce but use hoisin sauce, oyster sauce, or other bottled condiments that may still contain soy. That may be fine if you only want to avoid soy sauce specifically, but it is not appropriate for someone who needs a truly soy-free version.

Coconut aminos are the easiest starting point for a soy-sauce-style substitute. From there, garlic, ginger, vinegar, chili, and a little mushroom depth help bring back the savory edge that soy sauce usually provides.

Truly Soy-Free Version

For a truly soy-free version, check every ingredient label carefully. Do not use soy sauce, tamari, hoisin sauce, or oyster-style sauces unless they are clearly labeled soy-free. Use coconut aminos as the main savory base, then add garlic, ginger, rice vinegar, sesame oil if tolerated, chili, and mushroom flavor for depth.

Back to top ↑

Homemade vs Store-Bought Stir Fry Sauce

Store-bought sauce is convenient, but it often leans too sweet, too salty, or too thick. Homemade sauce lets you adjust the balance in the moment: more vinegar for brightness, more broth for looseness, more garlic or ginger for freshness, and a little sweetener only when the sauce tastes harsh.

If you are using bottled sauce, start with ⅓ to ½ cup for a small two-serving stir-fry, or ½ to ¾ cup for a larger pan. Bottled sauces are often saltier and sweeter than homemade, so add less first and stretch with water or broth if needed.

  • Too salty? Dilute with water or broth and add more vegetables.
  • Too sweet? Add rice vinegar, lime juice, chili, or a little soy sauce.
  • Too thick? Loosen with water or broth.
  • Too flat? Add fresh garlic, ginger, scallions, chili, or toasted sesame oil.
  • Tastes bottled? Add fresh aromatics and a splash of acid.

Use bottled sauce near the end of cooking, just like homemade. If it is already thick and sweet, do not simmer it for too long or it can become sticky and overpowering.

How to Fix Sauce Problems

A stir-fry can go sideways fast, but most sauce problems are fixable while the pan is still hot. Usually the pan needs one small correction, not a restart.

Most sauce problems start earlier: check the amount guide and the timing cue if your stir-fries often turn watery, salty, or too thick.

Quick fixes for common stir-fry sauce problems

Problem Why It Happened Fix
Sauce is too salty Too much regular soy sauce, salty broth, or bottled sauce. Add water or broth, vinegar or lime, more vegetables, or a little sweetener.
Sauce is too thin Not enough cornstarch, not simmered long enough, or pan is watery. Simmer 30–60 seconds more or add a small slurry.
Sauce is too thick Too much cornstarch or sauce reduced too much. Add water or broth 1 tablespoon at a time.
Sauce tastes flat Not enough acid, garlic, ginger, or heat. Add vinegar, lime, garlic, ginger, chili, or sesame oil.
Sauce is too sweet Too much honey, sugar, or bottled sauce. Add vinegar, chili, soy sauce, or broth.
Sauce clumps Cornstarch was added directly to hot liquid. Mix cornstarch with cold liquid first.
Stir-fry turns watery Vegetables released moisture into the pan. Cook off liquid before adding sauce.
Sauce burns Sugary sauce cooked too long over high heat. Add sauce at the end, lower the heat slightly if needed, and stop once glossy.
Noodles absorb everything Noodles are thirsty or sauce is too thick. Add water or broth and toss briefly.
Tofu tastes bland Tofu was not crisped or sauce was too thin. Crisp tofu first and use a slightly thicker sauce.
Sauce tastes bottled It is sweet, salty, and thick but missing freshness. Add fresh garlic, ginger, vinegar or lime, scallions, chili, or sesame oil.

Why your stir-fry turns watery

The most common mistake is adding sauce to a crowded, watery pan. Cook the vegetables until extra moisture reduces, then add the sauce and let it bubble briefly.

Wok of chicken and vegetables sitting in thin watery sauce with text reading “Watery pan? Cook off moisture first.”
If the pan turns watery, pause before adding more sauce. Cook off vegetable moisture first, especially with mushrooms, zucchini, or a crowded skillet.

Small fixes before you restart dinner

Small save: If the pan tastes almost right but not quite, add a splash of water if it is too strong, a little vinegar if it feels flat, or a pinch of sugar if it tastes harsh. Tiny changes fix most stir-fry sauce problems.

How to Store It

Store the sauce in an airtight jar in the refrigerator for 5 to 7 days. Shake or whisk before using because the cornstarch settles at the bottom.

You can also freeze it for up to 3 months. Thaw in the refrigerator, then whisk or shake well before adding it to the pan. If freezing, use a freezer-safe container and leave a little room for expansion.

Do not worry if it looks cloudy or separated when cold. Cornstarch can settle and make the sauce look uneven. Once heated and stirred, it should smooth out again.

If the sauce has already been cooked into a stir-fry, store leftovers in an airtight container. For best texture, store noodles or rice separately from saucy stir-fry when possible.

What to Serve With It

It fits easy dinners like chicken and broccoli, beef and green beans, tofu and bok choy, shrimp and vegetables, cabbage and mushrooms, or zucchini and peppers.

Serve those over steamed jasmine rice, brown rice, cauliflower rice, stir-fried noodles, lettuce wraps, or fried rice. For choosing between rice, quinoa, cauliflower rice, or lighter base options, MasalaMonk’s quinoa vs rice guide is helpful, especially if you are balancing fullness, carbs, and texture.

If you want a cool, crisp side beside a salty-sweet stir-fry, MasalaMonk’s cucumber salad is a simple contrast: fresh, tangy, and fast enough to make while the sauce is resting in the jar.

If you want a rice-based takeout-style meal with a different flavor direction, MasalaMonk’s Spam fried rice recipe shows how little sauce fried rice actually needs compared with a saucy stir-fry.

At its best, the sauce leaves you with crisp vegetables, tender protein, and just enough savory-sweet shine for the rice or noodles to catch.

Frequently Asked Questions

What is stir fry sauce made of?

It is usually made with soy sauce, water or broth, rice vinegar, a little sweetener, garlic, ginger, sesame oil, and cornstarch. Together, they make a sauce that is savory, lightly sweet, aromatic, and able to thicken in the pan.

How much sauce should I use for a stir-fry?

Use about ¾ to 1 cup for 1 lb / 450 g protein plus vegetables. Use about ½ cup for vegetables only, ⅔ to 1 cup for noodles, and only 3 to 5 tablespoons for fried rice.

When should I add sauce to a stir-fry?

Add it near the end of cooking, after the protein and vegetables are mostly cooked. Let it bubble for 30 to 60 seconds until it turns glossy and coats the food.

Can I make this without soy sauce?

Yes. Coconut aminos are the easiest soy-sauce-style substitute. They are usually sweeter and less salty than soy sauce, so reduce the sweetener and adjust the flavor at the end. Be careful with hoisin, oyster sauce, and bottled sauces because they may still contain soy even if they are not soy sauce.

Is this sauce gluten-free?

Only if you use the right soy sauce substitute. Regular soy sauce often contains wheat, so choose certified gluten-free tamari, certified gluten-free soy sauce, or coconut aminos, and check all bottled add-ins.

How do I make a lower-sodium version?

Use low-sodium soy sauce or a lower-sodium alternative, water or unsalted broth, and extra garlic, ginger, vinegar, chili, scallions, or mushroom flavor. Avoid high-sodium bottled sauces unless the label works for your needs.

How do I make a keto version?

Skip honey or sugar and use a keto sweetener only if needed. Replace cornstarch with up to ⅛ teaspoon xanthan gum for 1 cup sauce, starting with a small pinch. Soy sauce, tamari, or coconut aminos can all work depending on your carb and sodium needs.

Can I use this for noodles?

Yes. Use ⅔ to 1 cup for a noodle stir-fry, and keep a little water or broth nearby. Noodles absorb sauce quickly, so you may need a splash to loosen everything in the pan.

Can I use this as a marinade?

Yes, but leave out the cornstarch if using it as a marinade. Cornstarch is for thickening in the pan, not for soaking raw protein. Add the cornstarch later when you are ready to cook.

Why is my sauce too salty?

The most common reason is regular soy sauce, salty broth, or too much bottled sauce. Dilute with water or broth, add more vegetables, brighten with vinegar or lime, or balance with a small amount of sweetener.

Why did it not thicken?

It may not have simmered long enough, the pan may have too much vegetable liquid, or there may not be enough cornstarch. Let it bubble briefly, or add a small slurry made from cornstarch and cold water.

How long does homemade stir fry sauce last?

It lasts 5 to 7 days in an airtight jar in the refrigerator. Shake or whisk before using because the cornstarch settles.

Final Notes

Do not let the length of the guide make the sauce feel complicated. The base recipe is simple; the extra notes are just here to help you adjust it without guessing.

Once you know the rule — salt, loosen, brighten, round, aroma, cling — stir-fry sauce stops feeling like a fixed recipe and starts feeling like something you can control.

Keep a jar ready, and a random mix of protein, vegetables, and rice or noodles starts to feel like dinner instead of leftovers. If you make it your own — sweeter, spicier, soy-free, or extra garlicky — share what worked so others can borrow the idea too.

Back to top ↑

Posted on — Leave a comment

Egg Foo Young Recipe with Takeout-Style Gravy

Golden Egg Foo Young patties served with brown gravy, sliced scallions, steamed rice, chopsticks, and a spoon on a ceramic plate.

The best Egg Foo Young recipe tastes like old-school Chinese-American takeout rebuilt for a home skillet: soft egg in the center, browned edges outside, little snaps of vegetable crunch, and brown gravy that turns plain rice into dinner. It should not taste like a flat breakfast omelet wearing sauce. It should feel sturdier, saucier, and more generous than that.

Homemade Egg Foo Young usually goes wrong in predictable ways: the filling is too wet, the patties tear when flipped, the eggs turn rubbery, or the gravy thickens into paste. This version keeps the mixture balanced, uses a clear 6-egg to 2–2½ cup filling ratio, and treats the first patty as a test round so you can adjust the heat, oil, or scoop size before the whole batch is cooked. If your first patty misbehaves, jump to troubleshooting before cooking the next one.

The method starts in a skillet and ends with hot gravy over rice. You can pan-fry for an easy weeknight dinner, shallow-fry for better browned edges, or use the restaurant-style method when you want puffier patties. Either way, the goal is the same: tender egg patties that hold together, a sauce that moves instead of sitting like paste, and a plate that finally feels like Egg Foo Young rather than an omelet with toppings.

Why the gravy should move: the sauce should coat the patty while still flowing into the rice. If it sits like paste, the dish starts feeling heavy before the eggs have a chance to shine.

Glossy brown gravy being poured from a small pitcher over a golden Egg Foo Young patty with rice blurred in the background.
The sauce should move as it pours. If it sits heavily on the patty, thin the gravy before serving so the eggs stay tender instead of buried.

Quick Answer: What Is Egg Foo Young?

Egg Foo Young is a Chinese-style egg patty made with beaten eggs, vegetables, and often shrimp, chicken, pork, beef, tofu, or extra vegetables. In Chinese-American takeout, it is usually served as separate patties with brown gravy and rice.

You may also see it written as Egg Foo Yung, Egg Fu Yung, or Egg Foo Yong. The spelling changes, but the idea stays the same: vegetables and protein are mixed directly into beaten eggs, cooked into patties, and finished with a savory brown sauce.

This recipe is built for the gravy-over-rice version people usually mean when they crave Egg Foo Young: browned edges, a tender center, crisp little vegetables, and enough sauce to make rice feel like part of the dish. It is not a folded breakfast omelet, a baked egg casserole, or a dry scramble. The patty should be sturdy enough for sauce, soft enough to cut cleanly, and generous enough that every bite tastes like more than plain egg. If the sauce is the part you came for, go straight to the brown gravy method.

Cut-open Chinese-American Egg Foo Young patty served with rice, brown gravy, scallions, a spoon, and a takeout box in the background.
This is the old-school Chinese-American version many people mean when they crave Egg Foo Young: separate patties, rice, scallions, and a savory brown sauce.

What this recipe prevents: wet filling that tears the patties, flat omelet-like rounds with no browned edges, bland eggs that depend completely on sauce, and gravy that turns gluey before it reaches the plate.

Recipe snapshot

Egg Foo Young at a Glance

Yield4 servings / 6 medium patties
Prep Time15 minutes
Cook Time20 minutes
Total Time35 minutes

Main method: pan-fried or shallow-fried patties in a skillet.

Restaurant-style option: deeper oil for puffier, crisp-edged patties.

Sauce: brown cornstarch gravy with stock, soy sauce, oyster sauce, sesame oil, and white pepper.

Best served with: steamed rice, fried rice, noodles, stir-fried vegetables, or a crisp cucumber salad.

Fastest weeknight version: use cooked shrimp, leftover chicken, roast pork, pressed tofu, or quick-cooking vegetables. Make the gravy first, cook smaller ⅓- to ½-cup patties, and adjust after the first one instead of forcing the whole batch through the same heat.

Cooked shrimp, chopped chicken, pressed tofu, scallions, eggs, and a skillet arranged for a quick Egg Foo Young dinner.
For a faster weeknight Egg Foo Young, start with cooked protein or pressed tofu; then keep the patties smaller so they set quickly and flip cleanly.

Why This Egg Foo Young Recipe Works

The egg has to stay in charge. That is the whole recipe. You want enough vegetables and protein to make the patties taste generous, but enough beaten egg to set around everything and hold the shape when you lift it from the pan.

  • The ratio keeps the patties stable. Six large eggs comfortably hold about 2 to 2½ cups total filling.
  • Small, controlled add-ins cook cleanly. Drained sprouts, thin cabbage, diced onion, and chopped protein stay tucked inside the egg instead of leaking water into the pan.
  • A tiny cornstarch slurry helps structure. One teaspoon in the egg mixture helps the patty hold without making it bouncy.
  • The sauce stays adjustable. Making the gravy separately means you can thin, thicken, or season it without overcooking the eggs.
  • The oil level controls texture. Pan-fry for weeknight ease, shallow-fry for better edges, or use deeper oil for restaurant-style puff.

The main rule: think of the mixture as eggs carrying filling, not vegetables barely glued together with egg. If the bowl looks like a dry pile or a loose soup, fix that before the first patty hits the pan.

Spoon lifting scoopable Egg Foo Young batter with beaten egg coating bean sprouts, scallions, onion, and chopped protein.
Before the mixture reaches the skillet, it should look scoopable and egg-forward. In other words, the eggs should carry the filling, not barely glue it together.

Ingredients for Fluffy Egg Foo Young

This is the kind of recipe that turns a few eggs, a handful of vegetables, and a little gravy into a proper meal. The ingredient list is simple; the important part is cutting the filling small enough to cook quickly and keeping it steady enough to stay inside the patty.

Small pieces are your friend here. They cook quickly, stay tucked into the egg, and give every bite crunch, sweetness, and little pockets of savoriness.

Egg Foo Young ingredients including eggs, bean sprouts, scallions, cabbage, chopped protein, soy sauce, stock, oyster sauce, and cornstarch on a prep counter.
Good Egg Foo Young starts before the pan: dry sprouts, small vegetables, measured filling, and a ready gravy base make the cooking much easier to control.

To make the Egg Patties

Eggs, Vegetables, and Protein

  • Eggs: Six large eggs make 6 medium patties, enough for 4 servings with rice and gravy.
  • Bean sprouts: One cup / about 70–85 g gives the patties classic crunch without crowding the eggs. Drain them well so the mixture stays scoopable. No sprouts? See the bean sprout substitutes.
  • Protein or tofu: Keep this to 115–140 g / 4–5 oz for the 6-egg version. Cooked shrimp, chicken, roast pork, or firm tofu all work as long as they are chopped small.
  • Vegetable-only version: Choose thin vegetables and keep the total filling within the ratio below. A quick sauté helps mushrooms, zucchini, or bell pepper settle into the eggs instead of loosening the mixture.
  • Onion: A small ¼ cup / about 35 g is enough once it is finely diced.
  • Cabbage or mushrooms: Use ⅓ to ½ cup / about 35–50 g finely shredded cabbage or thinly sliced mushrooms. Mushrooms should be pre-cooked if they seem watery.
  • Scallions / spring onions: Two scallions / about 15–20 g add freshness without making the mixture heavy.

Drain Bean Sprouts Before Mixing

Bean sprouts add the classic crunch, but they also carry water. Drain them before mixing so the egg can set cleanly around the filling.

Fresh bean sprouts draining in a fine mesh strainer over a bowl on a kitchen counter.
Wet sprouts can loosen the egg mixture quickly, so draining them well gives the first patty a much better chance of holding together.

Seasoning, Structure, and Frying Oil

  • Cornstarch: Mix 1 teaspoon / about 3 g cornstarch with 1 tablespoon / 15 ml cold water before whisking it into the eggs.
  • Sesame oil: A small ½ teaspoon / 2.5 ml adds aroma. More can overpower the patties.
  • White pepper: A little white pepper gives the eggs and gravy that warm Chinese-restaurant note without making the dish spicy.
  • Neutral oil: Use just enough to coat the pan for tender patties, or about ¼ inch / 6 mm for puffier shallow-fried edges.

Egg-to-filling ratio: for 6 large eggs, keep the total filling around 2 to 2½ cups. That includes bean sprouts, onion, cabbage or mushrooms, scallions, and protein. Use the numbers as a guide, but trust the bowl too: the egg should still visibly surround the filling.

Egg Foo Young ratio guide showing bowls for 4 eggs, 6 eggs, and 8 eggs with measured amounts of vegetables and protein.
The egg-to-filling ratio is the reason the patties hold together. Too much filling makes them tear, while enough beaten egg helps everything set into a stable round.
EggsTotal FillingBest Yield
4 large eggsAbout 1½ cups4 small patties
6 large eggs2 to 2½ cups6 medium patties
8 large eggs3 to 3½ cups8 medium patties or 6 large patties

Ingredient Prep Matters

If you remember only one prep rule, make it this: the add-ins should help the egg set, not fight it. When vegetables are drained and cut small, the patties cook calmly instead of sputtering, tearing, or leaking in the pan.

Hand slicing cabbage, scallions, onion, and mushrooms into small pieces on a cutting board for Egg Foo Young.
Small, thin vegetables cook more evenly inside the patties, so the egg can set around them instead of tearing around bulky pieces.

Cook Watery Vegetables First

Mushrooms, zucchini, bell pepper, and similar vegetables can release liquid as they cook. If you use more than ⅓ to ½ cup, sauté them briefly first, then let them cool before adding them to the eggs. Cooked shrimp, chicken, pork, or tofu should also be chopped small enough to stay tucked into the patty when you flip it.

Mushrooms and zucchini being sautéed in a skillet before being added to Egg Foo Young batter.
A quick sauté lets mushrooms, zucchini, and other watery add-ins release steam before they weaken the Egg Foo Young batter.

What Goes Into Egg Foo Young Gravy

Some people call it Egg Foo Young sauce, but the takeout version eats more like a light brown gravy. It should taste rounded, not just salty: savory from stock and soy sauce, slightly rich from oyster sauce, and smooth enough to coat the eggs without weighing them down.

Saucepan with Egg Foo Young gravy ingredients including stock, soy sauce, oyster sauce, cornstarch, white pepper, sesame oil, and dark soy sauce.
Egg Foo Young gravy gets its flavor before it thickens, so build the base with stock, soy sauce, oyster sauce, white pepper, and sesame oil first.
  • Stock: Chicken stock gives the most familiar flavor; 2 cups / 480 ml is enough sauce for the patties and rice. Vegetable stock works for a meatless version.
  • Light soy sauce: 1½ tablespoons / about 22 ml seasons the gravy and adds umami.
  • Oyster sauce: 1 tablespoon / 15 ml gives the sauce body and a deeper restaurant-style flavor.
  • Dark soy sauce: ½ teaspoon / 2.5 ml is optional, but it gives the gravy a deeper brown color.
  • Sugar: 1–2 teaspoons / 4–8 g rounds out the salty sauces without making the gravy sweet.
  • White pepper: ¼ teaspoon adds gentle warmth.
  • Cornstarch slurry: 2 tablespoons / about 16 g cornstarch mixed with 3 tablespoons / 45 ml cold water thickens the gravy.
  • Sesame oil: ½ teaspoon / 2.5 ml goes in at the end so the aroma stays fresh.

Easy swaps: use vegetable stock for a meatless gravy, vegetarian oyster sauce or mushroom sauce instead of oyster sauce, and tamari only if every other ingredient is also gluten-free. Dark soy sauce is optional; the gravy will be lighter without it but still good.

Pan-Fried vs Restaurant-Style Egg Foo Young

There are two common versions of Egg Foo Young in people’s minds. One is an easy skillet patty with gravy. The other is the puffier, crisp-edged Chinese restaurant version cooked in more oil. Both can be delicious, but the oil level changes the texture.

Pan-fried Egg Foo Young patty compared with a puffier restaurant-style patty near a wok and wire rack.
Pan-fried Egg Foo Young is easier at home; however, more oil creates puffier restaurant-style edges and a richer takeout texture.
MethodBest ForTextureNotes
Pan-friedEasy home cookingTender, lightly goldenUses the least oil and is easiest for beginners.
Shallow-friedBest home balanceGolden edges, slightly fuller centerUse about ¼ inch / 6 mm oil in a skillet or wok.
Deep-friedRestaurant-style puffPuffy, crisp-edged, richerUses more oil and needs temperature control.

Best setup for most home cooks: use a 10-inch nonstick skillet, a ½-cup measure, and a thin flexible spatula. Shallow-frying with about ¼ inch / 6 mm oil gives better browning than a barely oiled pan without the mess of deep-frying. Want the puffier version? Skip to the restaurant-style method.

How to Make Egg Foo Young

Once the filling is chopped, the gravy ingredients are measured, and your pan is ready, the recipe moves quickly. Keep the bowl close to the stove, cook in small batches, and adjust the heat after the first patty if you need to.

1. Prep the Filling

Drain the bean sprouts very well. Finely dice the onion, slice the scallions, and shred the cabbage or slice the mushrooms thinly. Chop your shrimp, chicken, pork, tofu, or vegetables into small pieces.

Cook chicken or pork first so the eggs can stay tender instead of waiting in the pan for meat to finish. Cooked shrimp, cooked chicken, roast pork, or tofu can go straight into the filling.

2. Make the Gravy Before Frying

Once the eggs hit the pan, things move quickly. Having the gravy ready means the patties can go straight from skillet to plate while they are still soft in the center and browned at the edges. If the sauce thickens while the patties cook, a splash of stock or water will bring it back.

3. Mix the Eggs

In a large bowl, whisk the eggs until the whites and yolks are fully combined. In a small bowl, mix 1 teaspoon cornstarch with 1 tablespoon cold water, then whisk that slurry into the eggs with sesame oil and white pepper.

Fold in the bean sprouts, onion, cabbage or mushrooms, scallions, and protein. The mixture should scoop easily: glossy egg around the filling, not soup and not a dry vegetable pile. Mix right before cooking so the vegetables keep their snap and the batter stays light.

4. Cook the Patties

Heat the Pan and Scoop the Batter

Heat a nonstick skillet, wok, or well-seasoned pan over medium to medium-high heat. Add enough neutral oil to coat the bottom for pan-frying, or about ¼ inch / 6 mm oil for a more shallow-fried texture.

Egg Foo Young patty frying in shallow oil with bubbles around the golden edge and a spatula near the pan.
A shallow layer of oil helps the edge set before the center dries out, which makes the patty sturdier when it is time to flip.

Use a ½-cup measure for standard patties. Scoop the egg mixture into the pan, nudging the filling into a round shape. Cook until the edges are set and the bottom is golden, about 2 to 3 minutes. Flip carefully and cook the second side until the middle has no liquid egg, about 1½ to 2 minutes more.

Let It Set Before Flipping

Egg Foo Young patty being lifted and flipped on a thin spatula in a skillet with shallow oil.
Wait until the first side feels stable on the spatula. Then flip once, gently, instead of moving the patty while the center is still loose.

Use the First Patty as Your Test

The first patty is often the test patty. If it browns too fast, lower the heat before the next batch; if it sticks or looks dry around the edges, add a little more oil. Look for a center that springs lightly and no loose egg running from the middle. After that first patty, the recipe usually relaxes: you know whether the pan wants less heat, more oil, or a smaller scoop. If the first one tears, browns too fast, or stays runny, do not guess; check the troubleshooting table before cooking the next batch.

Slightly uneven first Egg Foo Young patty on a spatula beside a skillet and a bowl of batter.
One imperfect first patty can save the whole batch, because it shows whether the pan needs less heat, more oil, or a smaller scoop.

Scoop size guide: use ⅓-cup scoops for small beginner-friendly patties, ½-cup scoops for standard home patties, and ¾-cup scoops only if you are using more oil and feel confident flipping larger rounds.

How to Know the Patties Are Right

Cut-open Egg Foo Young patty with golden edges, a set center, bean sprouts, scallions, and visible filling.
The best doneness cue is texture: the center should be set, the edge should be browned, and the inside should still look tender rather than dry.

You nailed the patties when:

  • The edges are golden but not hard.
  • The center springs lightly when pressed.
  • No loose egg runs from the middle.
  • The patty lifts without tearing.
  • The sprouts still have a little snap.

Doneness cue: the egg should be set in the center, not wet or liquid. Shrimp should look opaque. Chicken and pork are safest and easiest when cooked before they go into the egg mixture. For exact food-safe temperatures for egg dishes and poultry, the USDA safe temperature chart is a useful reference.

5. Rest Briefly, Then Serve

Transfer the cooked patties to a wire rack or a plate lined with paper towel. Let them rest in a single layer so the edges stay better. Spoon hot gravy over the top right before serving so the eggs stay tender and the sauce softens the edges without making the plate soupy.

How to Make the Brown Gravy

Bad Egg Foo Young gravy usually goes watery or gluey. The sweet spot is smooth, savory, and spoon-coating, with enough body to cling to the patties but enough movement to sink into the rice. That is the difference between plain egg patties and the takeout-style plate people remember.

Once the slurry is smooth, the sauce is simple. Cornstarch must be mixed with cold water before it touches hot liquid; otherwise, it can clump almost instantly.

Cornstarch slurry being stirred with cold water in a small glass bowl for Egg Foo Young gravy.
A smooth slurry is the shortcut to smooth Egg Foo Young gravy; mix it cold first, then whisk it into the hot sauce gradually.
  1. Combine the base. In a small saucepan, combine stock, light soy sauce, oyster sauce, optional dark soy sauce, sugar, and white pepper.
  2. Bring to a simmer. Heat gently until the mixture is steaming and lightly bubbling.
  3. Make the slurry. In a small bowl, stir cornstarch with cold water until smooth.
  4. Thicken slowly. Whisk the slurry into the simmering gravy a little at a time.
  5. Simmer until shiny. Cook for 30 to 60 seconds, until the gravy coats the back of a spoon.
  6. Finish with sesame oil. Add sesame oil at the end so the aroma stays fresh.

Gravy texture cue: the gravy should look shiny, coat the back of a spoon, and still pour easily. If it sits heavily on the patty, thin it before serving. If it disappears through the rice like broth, give it a little more time or a little more slurry.

Glossy brown Egg Foo Young gravy coating the back of a spoon with a visible drip over a saucepan.
Once the gravy coats the spoon and drips slowly, it is ready: thick enough for the patties, but still loose enough to flow into the rice.

Cornstarch Gravy vs Roux Gravy

The main recipe uses cornstarch because it is fast, glossy, and easy to control. If you want a richer old-school body, start with a light roux and finish with a smaller amount of slurry.

Two bowls of brown gravy showing a glossy cornstarch gravy and a thicker roux-style gravy with spoon trails.
Cornstarch gives Egg Foo Young gravy a glossy, lighter finish, while a roux adds a rounder restaurant-style body. Choose based on the texture you want.
StyleBest ForTexture
Cornstarch-only gravyFast weeknight Egg Foo YoungGlossy, light, pourable
Roux + cornstarch gravyMore old-school restaurant bodyRounder, richer, more gravy-like
Arrowroot gravyCorn-free adjustmentClearer and slightly slicker; avoid long boiling

For a roux version, cook 1 tablespoon neutral oil with 1 tablespoon flour for 1 to 2 minutes, then whisk in the stock and seasonings before finishing with a smaller amount of cornstarch slurry. Making the gravy gluten-free means checking every ingredient, not just swapping the soy sauce. Use tamari only if the stock, oyster sauce or vegetarian oyster sauce, and thickener are also gluten-free.

Restaurant-Style Egg Foo Young: How to Get Puffier Patties

Restaurant-style Egg Foo Young is not just “more oil.” Hotter oil sets the outside quickly, which helps the patty puff and brown before the center overcooks. That is why shallow-frying gives you a better home version than a barely oiled pan, and deeper oil gives you the most dramatic restaurant-style texture.

Oil Temperature for Restaurant-Style Puff

For puffier patties, use a wok or deep pot with 2–3 inches of neutral oil. Heat the oil to about 350°F / 175°C. When the egg mixture goes in, the oil temperature will drop. Letting the patties cook closer to 325°F / 160°C helps them puff and set without scorching.

Restaurant-style Egg Foo Young patty puffing in hot oil with a thermometer clipped to a wok and a wire rack nearby.
For restaurant-style Egg Foo Young, hot oil sets the outside quickly. Meanwhile, the center stays tender because the patty puffs before it overcooks.
  • Use a ladle instead of pouring from the bowl.
  • Lower the egg mixture gently into the oil so it forms a round patty.
  • Let the first side set before moving it.
  • Flip once the edges look golden and the patty feels stable.
  • Drain on a wire rack, not a flat plate, so the edges stay crisp.
  • Give each patty room so the oil stays hot and the edges set quickly.

Egg Foo Young Variations

Choose the variation by what you want from the plate. Shrimp gives the most classic takeout feel, chicken is the easiest leftover dinner, pork or char siu brings deeper flavor, and tofu or vegetables make the lightest version. The rule stays the same for all of them: keep the pieces small, control watery add-ins, and let the egg remain the binder.

How to Prep Add-Ins

Before you choose shrimp, chicken, pork, tofu, or vegetables, check how much moisture and cooking time that add-in brings to the eggs.

Prep bowls of shrimp, cooked chicken, pork or char siu, tofu, mushrooms, and cabbage for Egg Foo Young variations.
Different add-ins need different prep. Cooked meats are easiest, while mushrooms, tofu, and cabbage need the right size and moisture control.
Add-InCooked or Raw?Prep CueWatch-Out
ShrimpCooked easiest; raw okay if smallChop large shrimpRaw shrimp must turn opaque
ChickenCooked bestDice or shred smallRaw chicken can overcook the eggs
Pork / char siuCooked bestDice smallCan make the filling salty
Firm tofuUse pressed tofuPat dry and dice smallSoft tofu breaks down
MushroomsPre-cook if using more than a littleSlice thinReleases water
CabbageRaw okay if thinShred fineToo much makes patties loose

Shrimp Egg Foo Young

Shrimp is the most takeout-feeling version: sweet, quick-cooking, and easy to pair with brown gravy. Cooked small shrimp are easiest. If using raw shrimp, chop them small enough to turn opaque by the time the egg sets.

Shrimp Egg Foo Young patty cut open to show shrimp inside, served with brown gravy, scallions, and rice.
Shrimp Egg Foo Young gives the most classic takeout feel; for best results, chop large shrimp so the pieces stay tucked inside the patty.

Chicken Egg Foo Young

Chicken is the best leftover version. Use cooked chicken, chopped or shredded small, so the eggs can stay tender instead of waiting in the pan for raw meat to finish.

Cooked chopped chicken being folded into Egg Foo Young batter with bean sprouts, scallions, and vegetables in a glass bowl.
Chicken Egg Foo Young works best with cooked, chopped chicken because the eggs can set quickly instead of waiting for raw meat to cook through.

Pork Egg Foo Young

Pork, roast pork, or char siu gives the deepest old-school flavor. Dice it small and season the egg mixture lightly because cooked pork can bring plenty of salt on its own.

Pork Egg Foo Young patty cut open with diced char siu inside, scallions on top, and brown gravy in a bowl nearby.
Pork or char siu adds deeper flavor, but the pieces still need to be small enough for the egg to bind into a clean patty.

Vegetable Egg Foo Young

Vegetable Egg Foo Young works best when the vegetables are chosen for texture, not just volume. Thin cabbage, sprouts, scallions, and shredded carrot can usually go in raw; mushrooms, zucchini, bell pepper, and watery greens should be cooked briefly first.

Firm tofu works well if you want a meatless version with more body. Press it, pat it dry, and dice it small before adding it to the bowl. For vegetarian gravy, use vegetable stock and vegetarian oyster sauce or mushroom sauce.

Vegetable and tofu Egg Foo Young patty cut open with tofu cubes, bean sprouts, cabbage, carrot, scallions, and brown gravy.
Vegetable Egg Foo Young works best when the filling is chosen for texture, not volume. Firm tofu, cabbage, sprouts, and scallions keep it light but satisfying.

No Bean Sprouts? Use These Instead

Bean sprouts give Egg Foo Young its classic crunch, but you can still make good patties without them. Choose the substitute by what the mixture needs.

Bean sprout substitutes for Egg Foo Young including Napa cabbage, water chestnuts, snow peas, shredded cabbage, carrot, scallions, mushrooms, zucchini, and greens.
No bean sprouts? Use crisp substitutes like Napa cabbage, water chestnuts, or snow peas. Cook watery vegetables first so they do not loosen the batter.
  • For crunch: thin Napa cabbage, diced water chestnuts, or julienned snow peas.
  • For easy volume: finely shredded cabbage, shredded carrot, or extra scallions.
  • Use carefully: mushrooms, zucchini, and watery greens. Cook them briefly first, then cool before adding them to the eggs.

The substitute should support the egg, not take over the bowl. If the mixture starts looking like vegetables barely coated in egg, add another beaten egg or hold some filling back for the next batch.

Troubleshooting Egg Foo Young

Start with the First Patty

If your first patty is messy, do not panic. Egg Foo Young is easy to adjust batch by batch because you can change the scoop size, heat, oil, or mixture before the next patty goes in.

Most Egg Foo Young problems are batch-by-batch problems, not recipe-ending problems. Even restaurant-style Egg Foo Young is not about perfect circles; it is about tender eggs, enough filling, and a sauce that brings the plate together.

Egg Foo Young troubleshooting guide showing patties that fall apart, stay too runny, have burnt edges, and turn out just right.
One messy patty does not ruin Egg Foo Young; instead, use it to fix the mixture, heat, oil, or scoop size before the next round.

Common Problems and Quick Fixes

ProblemFix NowFix Next Time
Patties fall apartMake smaller patties and add 1 beaten egg to the remaining mixture if needed.Keep total filling to 2–2½ cups per 6 eggs.
Mixture looks waterySpoon off excess liquid before frying.Drain sprouts well and pre-cook vegetables that release liquid.
Center stays runnyLower heat slightly and cover the pan briefly.Use ½-cup scoops instead of oversized patties.
Edges burn before center setsReduce heat and add a little more oil if the pan is dry.Cook over medium to medium-high heat, not high heat.
Patties taste blandServe with hot gravy and garnish with scallions or white pepper.Use flavorful stock, white pepper, sesame oil, and a well-seasoned gravy.
Patties turn rubberyReheat gently and avoid cooking them further.Pull patties once the egg is set; do not cook until dry.
Gravy is too thinAdd a little more cornstarch slurry and simmer briefly.Bring the sauce to a simmer before adding slurry.
Gravy is too thickWhisk in stock or water, a splash at a time.Add slurry gradually instead of all at once.
Gravy is lumpyStrain it if needed, then whisk smooth.Mix cornstarch with cold water first and stream it in while whisking.
Leftovers become soggyReheat patties separately from the gravy.Store patties and gravy in separate containers.

What to Serve with Egg Foo Young

Plain steamed rice is the classic base because it catches the salty-silky finish and keeps the plate from feeling too rich. The rice is not just filler here; it is part of why the dish feels like dinner.

If you are making Egg Foo Young for brunch, keep the sides lighter with something crisp like this cucumber salad recipe. If you are building a Chinese restaurant-style dinner, pair it with fried rice, noodles, or stir-fried greens.

  • Steamed jasmine rice: the easiest and most classic base.
  • Spam fried rice: ideal when you want a full restaurant-style plate. You can also use the same cold-rice method with simpler add-ins.
  • Garlic noodles: richer, cozier, and good with extra gravy.
  • Stir-fried greens: bok choy, cabbage, green beans, broccoli, or snow peas all work well.
  • Cucumber salad: a cool, crisp contrast to the hot gravy.
  • Chili oil: add at the table if you want heat.
  • Extra scallions: a fresh finish that keeps the dish from feeling heavy.

Storage, Make-Ahead Tips, and Reheating

Egg Foo Young is at its best when the patties are hot and the gravy is freshly spooned over the top, but leftovers can still be very good if the sauce and eggs are stored separately. This keeps the patties from absorbing too much gravy and turning soft. For general leftover timing and storage safety, the USDA’s leftovers and food safety guidance is a useful reference.

  • Make the gravy ahead: prepare it up to 2 days ahead and refrigerate it separately. Reheat gently and thin with stock or water if needed.
  • Prep the vegetables ahead: chop them earlier in the day and keep them dry in the fridge. Mix them with the eggs only right before cooking.
  • Refrigerate: store cooked patties and gravy in separate airtight containers for up to 3–4 days.
  • Reheat patties: warm gently in a skillet over low to medium heat, or use an air fryer briefly if you want firmer edges.
  • Reheat gravy: warm in a saucepan, whisking in a splash of stock or water if it has thickened.
  • Microwave carefully: use short bursts because eggs can turn rubbery when overheated.
  • Freeze only if needed: freeze patties without gravy. The texture is better refrigerated than frozen.

FAQs

Is Egg Foo Young the same as an omelet?

It is omelet-like, but not exactly the same as a Western folded omelet. Egg Foo Young has the vegetables and protein mixed directly into the eggs, is usually cooked as separate patties, and is served with brown gravy.

What is Egg Foo Young gravy made of?

Most Egg Foo Young gravy is made with stock, soy sauce, oyster sauce, white pepper, sesame oil, and a cornstarch slurry. A roux can be added for a rounder, more old-school restaurant-style body.

Why does my Egg Foo Young fall apart?

Usually, the filling is too wet, too heavy, or the patties are too large. Keep the filling around 2 to 2½ cups for 6 eggs, drain vegetables well, and use ½-cup scoops.

Why is my Egg Foo Young not fluffy?

Flat Egg Foo Young usually comes from a dry pan, oversized patties, or watery filling. A barely oiled skillet makes the mixture behave like a flat omelet. A little more oil, smaller scoops, and controlled add-ins help the edges puff before the center dries out.

What meat is best for Egg Foo Young?

Shrimp gives the most classic takeout feel, chicken is easiest for leftovers, and roast pork or char siu gives deeper flavor. Whatever protein you choose, keep it small so the egg can hold it.

Can Egg Foo Young be made without bean sprouts?

Yes. Use thin Napa cabbage, shredded cabbage, water chestnuts, snow peas, shredded carrot, or extra scallions. Choose small, controlled substitutes so the egg patties still hold together.

Is Egg Foo Young Chinese or Chinese-American?

Egg Foo Young has roots in Chinese egg dishes, but the gravy-covered version many people order from takeout menus is strongly Chinese-American. This recipe is built around that restaurant-style plate: separate egg patties, vegetables, optional protein, rice, and brown gravy.

Can the gravy be vegetarian?

Yes. Use vegetable stock and vegetarian oyster sauce or mushroom sauce. Check the soy sauce and other condiments too if you need the whole dish to meet a specific dietary requirement.

How do I make Egg Foo Young taste like takeout?

The takeout flavor comes from three things working together: enough oil to brown the edges, small amounts of white pepper and sesame oil, and a brown gravy that tastes savory before it thickens. If the patties are dry and the gravy is flat, it will taste like an omelet with sauce, not Egg Foo Young.

Should the gravy go on before or after serving?

Spoon the gravy over the patties just before serving. If the patties sit in gravy too long, they soften and lose their best texture.

Can you bake or air-fry Egg Foo Young?

You can bake or air-fry the egg mixture in a small greased pan, but it will eat more like a baked omelet or mini frittata than classic Egg Foo Young. For browned edges and takeout-style texture, a skillet with enough oil is still the better method. For a baked egg texture, these egg muffin cups are a better fit.

Once the ratio clicks, Egg Foo Young stops feeling fussy. The first patty teaches you the heat, the sauce goes on at the end, and the rest becomes a flexible dinner you can make with shrimp, chicken, pork, tofu, or the vegetables already in the fridge.

Egg Foo Young Step by Step

Use this quick visual recap before the recipe card if you want the whole cooking flow in one place: prep the filling, mix the eggs, cook the patties, thicken the gravy, and serve hot.

Step-by-step Egg Foo Young process showing filling prep, egg mixing, patty cooking, gravy thickening, and serving with rice.
This visual roadmap shows the whole flow: prep the filling, mix the eggs, cook the patties, thicken the gravy, then serve hot.

Recipe card

Egg Foo Young Recipe with Takeout-Style Gravy

Fluffy Chinese-American egg patties with crisp vegetables, your choice of shrimp, chicken, pork, tofu, or extra vegetables, and smooth brown gravy to spoon over rice.

Prep Time15 minutes
Cook Time20 minutes
Total Time35 minutes
Servings4

Yield: 6 medium patties

Method: Pan-fried / shallow-fried

Cuisine: Chinese-American

Course: Dinner, main dish, brunch

Ingredients

For the Egg Patties

  • 6 large eggs
  • 1 teaspoon / about 3 g cornstarch mixed with 1 tablespoon / 15 ml cold water
  • ½ teaspoon / 2.5 ml toasted sesame oil
  • ¼ teaspoon white pepper
  • 1 cup / about 70–85 g bean sprouts, rinsed and very well drained
  • 115–140 g / 4–5 oz chopped cooked shrimp, cooked chicken, roast pork, or firm tofu
  • ¼ cup / about 35 g finely diced onion
  • ⅓ to ½ cup / about 35–50 g finely shredded cabbage or thinly sliced mushrooms
  • 2 scallions / spring onions, thinly sliced
  • 2–4 tablespoons / 30–60 ml neutral oil for pan-frying, or more as needed for shallow-frying

For the Gravy

  • 2 cups / 480 ml chicken stock or vegetable stock
  • 1½ tablespoons / about 22 ml light soy sauce
  • 1 tablespoon / 15 ml oyster sauce or vegetarian oyster sauce
  • ½ teaspoon / 2.5 ml dark soy sauce, optional
  • 1–2 teaspoons / 4–8 g sugar, to taste
  • ¼ teaspoon white pepper
  • 2 tablespoons / about 16 g cornstarch
  • 3 tablespoons / 45 ml cold water
  • ½ teaspoon / 2.5 ml toasted sesame oil

For Serving

  • Steamed rice or fried rice
  • Extra sliced scallions
  • Chili oil, optional

Instructions

Make the Gravy

  1. Prep the filling. Drain the bean sprouts well. Dice the onion, slice the scallions, shred the cabbage or mushrooms, and chop the protein small. Pre-cook raw chicken, raw pork, mushrooms, or vegetables that release a lot of moisture.
  2. Start the gravy. In a small saucepan, combine the stock, soy sauce, oyster sauce, optional dark soy sauce, sugar, and white pepper. Bring to a gentle simmer.
  3. Thicken the gravy. Stir 2 tablespoons cornstarch with 3 tablespoons cold water until smooth. Whisk the slurry into the simmering gravy a little at a time. Simmer for 30 to 60 seconds, until smooth and spoon-coating. Stir in sesame oil and keep warm.

Mix and Cook the Patties

  1. Mix the eggs. In a large bowl, whisk the eggs. Stir 1 teaspoon cornstarch with 1 tablespoon cold water, then whisk it into the eggs with sesame oil and white pepper.
  2. Add the filling. Fold in the bean sprouts, protein, onion, cabbage or mushrooms, and scallions. The mixture should scoop easily: glossy egg around the filling, not soup and not a dry vegetable pile.
  3. Heat the pan. Heat a nonstick skillet or wok over medium to medium-high heat. Add enough oil to coat the bottom, or about ¼ inch / 6 mm oil for a shallow-fried texture.
  4. Cook the patties. Scoop about ½ cup egg mixture into the pan for each patty. Cook for 2 to 3 minutes, until the edges set and the bottom is golden. Flip carefully and cook for 1½ to 2 minutes more, until the middle has no liquid egg.
  5. Adjust after the first patty. If it browns too quickly, lower the heat. If it sticks or looks dry around the edges, add a little more oil before the next batch.

Rest and Serve

  1. Repeat and serve. Cook the remaining patties in batches. Transfer to a wire rack or paper towel-lined plate, let them rest in a single layer, and spoon hot gravy over the patties just before serving.

Notes

  • Keep total filling around 2 to 2½ cups for 6 eggs.
  • The mixture should look egg-forward: glossy egg around the filling, not vegetables barely coated in egg.
  • The first patty is your test patty. Adjust heat, oil, or scoop size before continuing.
  • Use ⅓-cup scoops for easier flipping or ½-cup scoops for standard patties.
  • Cook chicken or pork before adding it. Cooked shrimp is easiest; raw shrimp should be chopped small and cooked until opaque.
  • For puffier edges, shallow-fry with about ¼ inch / 6 mm oil.
  • For roux-style gravy, cook 1 tablespoon oil with 1 tablespoon flour for 1 to 2 minutes, whisk in the stock and seasonings, then finish with less slurry.
  • Spoon gravy over the patties just before serving, not far ahead.
  • Store patties and gravy separately.

Back to top