Posted on — Leave a comment

Egg Foo Young Recipe with Takeout-Style Gravy

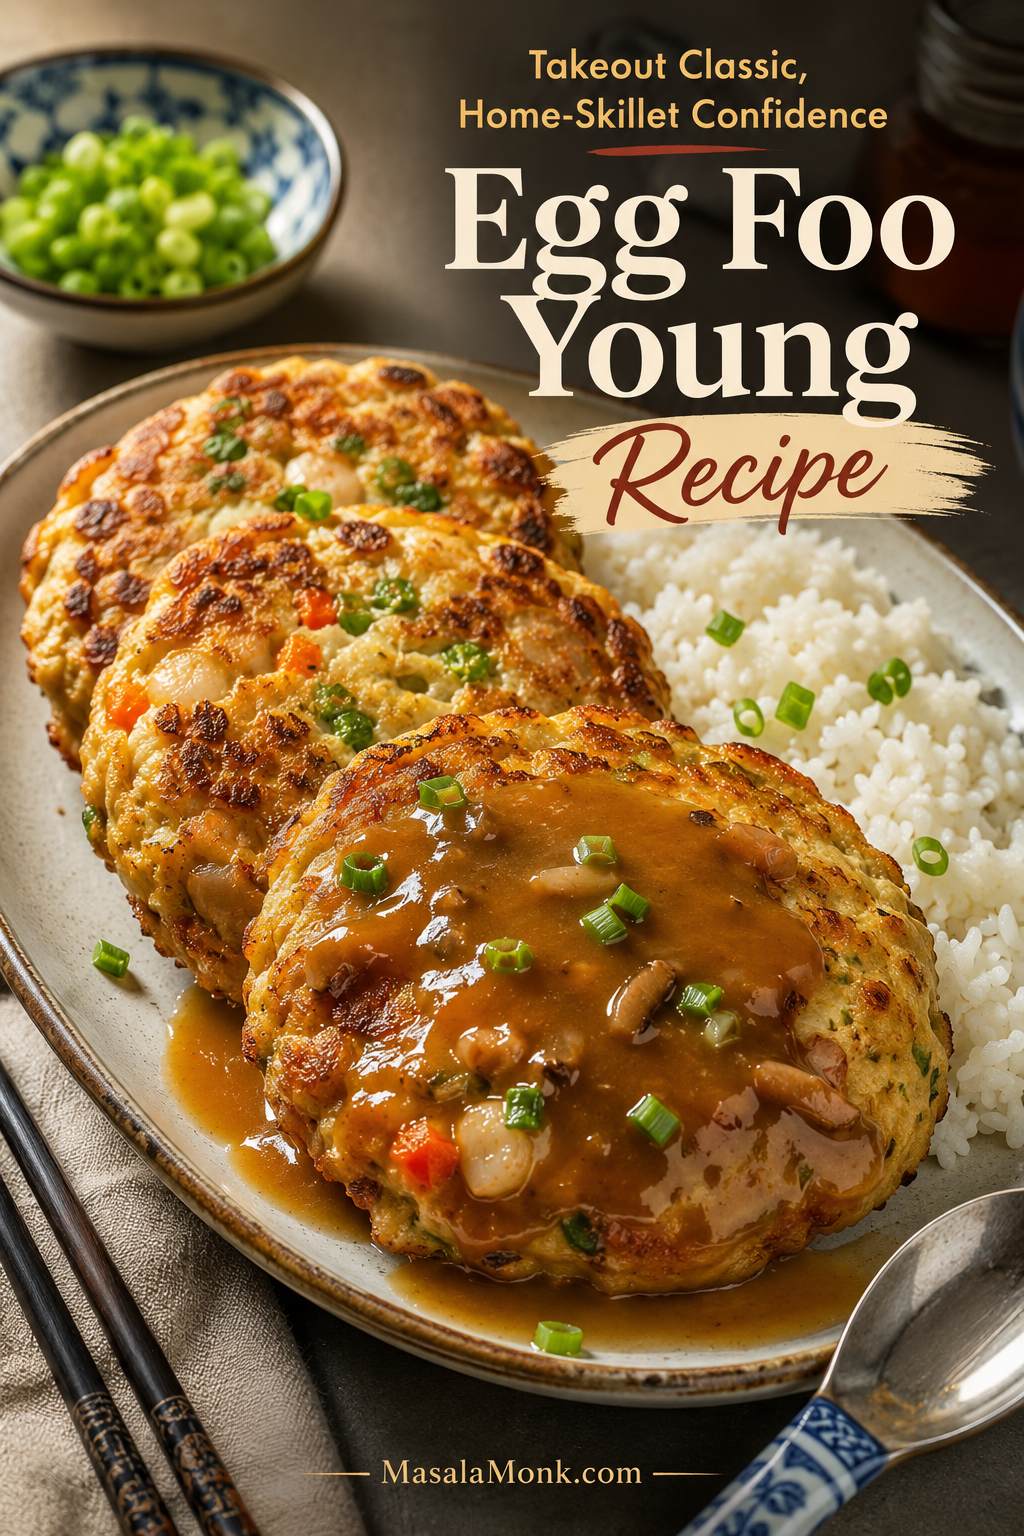
Golden Egg Foo Young patties served with brown gravy, sliced scallions, steamed rice, chopsticks, and a spoon on a ceramic plate.

The best Egg Foo Young recipe tastes like old-school Chinese-American takeout rebuilt for a home skillet: soft egg in the center, browned edges outside, little snaps of vegetable crunch, and brown gravy that turns plain rice into dinner. It should not taste like a flat breakfast omelet wearing sauce. It should feel sturdier, saucier, and more generous than that.

Homemade Egg Foo Young usually goes wrong in predictable ways: the filling is too wet, the patties tear when flipped, the eggs turn rubbery, or the gravy thickens into paste. This version keeps the mixture balanced, uses a clear 6-egg to 2–2½ cup filling ratio, and treats the first patty as a test round so you can adjust the heat, oil, or scoop size before the whole batch is cooked. If your first patty misbehaves, jump to troubleshooting before cooking the next one.

The method starts in a skillet and ends with hot gravy over rice. You can pan-fry for an easy weeknight dinner, shallow-fry for better browned edges, or use the restaurant-style method when you want puffier patties. Either way, the goal is the same: tender egg patties that hold together, a sauce that moves instead of sitting like paste, and a plate that finally feels like Egg Foo Young rather than an omelet with toppings.

Why the gravy should move: the sauce should coat the patty while still flowing into the rice. If it sits like paste, the dish starts feeling heavy before the eggs have a chance to shine.
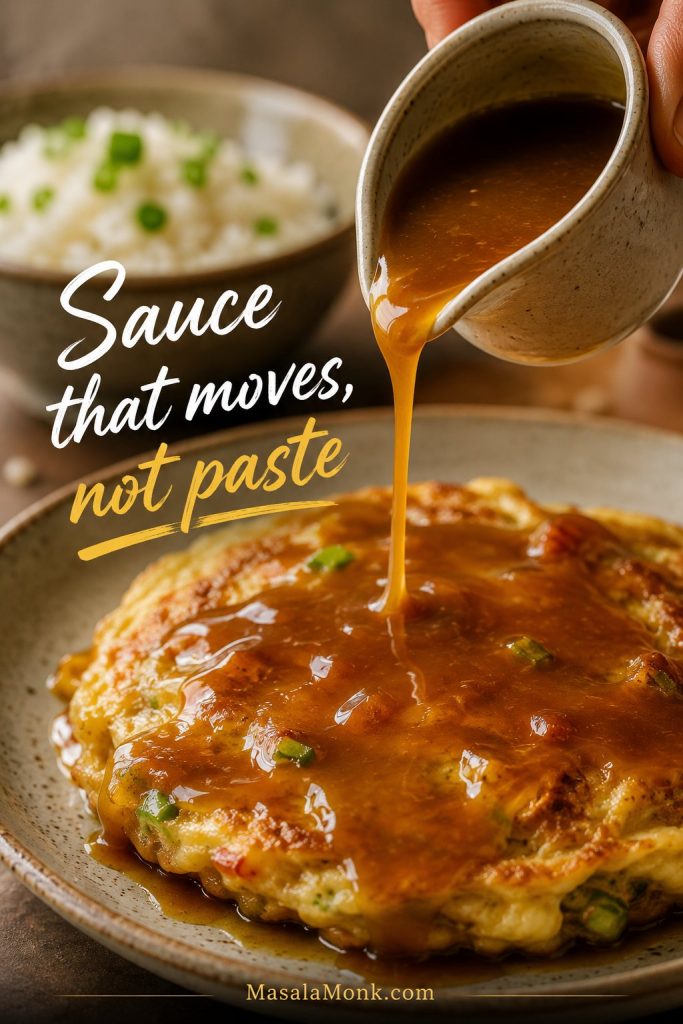
Glossy brown gravy being poured from a small pitcher over a golden Egg Foo Young patty with rice blurred in the background.
The sauce should move as it pours. If it sits heavily on the patty, thin the gravy before serving so the eggs stay tender instead of buried.

Quick Answer: What Is Egg Foo Young?

Egg Foo Young is a Chinese-style egg patty made with beaten eggs, vegetables, and often shrimp, chicken, pork, beef, tofu, or extra vegetables. In Chinese-American takeout, it is usually served as separate patties with brown gravy and rice.

You may also see it written as Egg Foo Yung, Egg Fu Yung, or Egg Foo Yong. The spelling changes, but the idea stays the same: vegetables and protein are mixed directly into beaten eggs, cooked into patties, and finished with a savory brown sauce.

This recipe is built for the gravy-over-rice version people usually mean when they crave Egg Foo Young: browned edges, a tender center, crisp little vegetables, and enough sauce to make rice feel like part of the dish. It is not a folded breakfast omelet, a baked egg casserole, or a dry scramble. The patty should be sturdy enough for sauce, soft enough to cut cleanly, and generous enough that every bite tastes like more than plain egg. If the sauce is the part you came for, go straight to the brown gravy method.
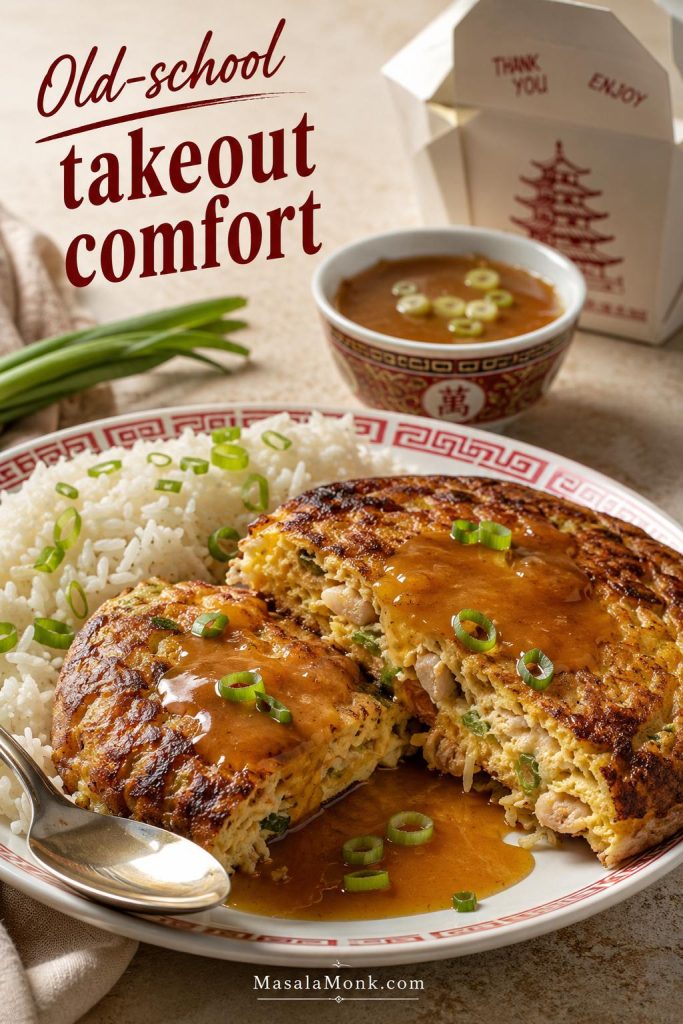
Cut-open Chinese-American Egg Foo Young patty served with rice, brown gravy, scallions, a spoon, and a takeout box in the background.
This is the old-school Chinese-American version many people mean when they crave Egg Foo Young: separate patties, rice, scallions, and a savory brown sauce.

What this recipe prevents: wet filling that tears the patties, flat omelet-like rounds with no browned edges, bland eggs that depend completely on sauce, and gravy that turns gluey before it reaches the plate.

Recipe snapshot

Egg Foo Young at a Glance

Yield4 servings / 6 medium patties
Prep Time15 minutes
Cook Time20 minutes
Total Time35 minutes

Main method: pan-fried or shallow-fried patties in a skillet.

Restaurant-style option: deeper oil for puffier, crisp-edged patties.

Sauce: brown cornstarch gravy with stock, soy sauce, oyster sauce, sesame oil, and white pepper.

Best served with: steamed rice, fried rice, noodles, stir-fried vegetables, or a crisp cucumber salad.

Fastest weeknight version: use cooked shrimp, leftover chicken, roast pork, pressed tofu, or quick-cooking vegetables. Make the gravy first, cook smaller ⅓- to ½-cup patties, and adjust after the first one instead of forcing the whole batch through the same heat.
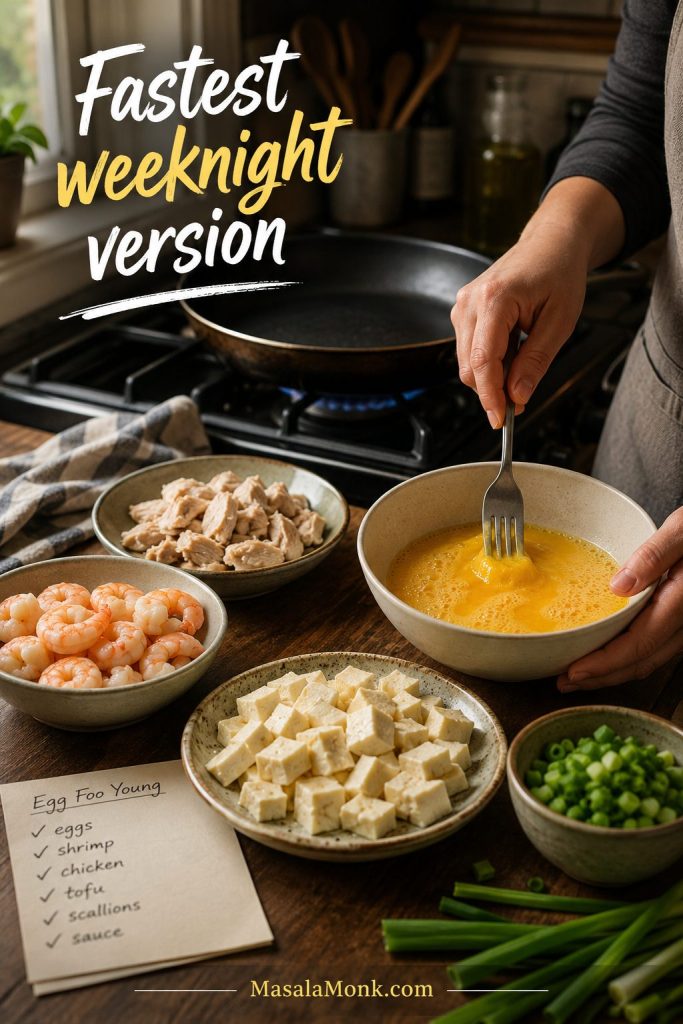
Cooked shrimp, chopped chicken, pressed tofu, scallions, eggs, and a skillet arranged for a quick Egg Foo Young dinner.
For a faster weeknight Egg Foo Young, start with cooked protein or pressed tofu; then keep the patties smaller so they set quickly and flip cleanly.

Why This Egg Foo Young Recipe Works

The egg has to stay in charge. That is the whole recipe. You want enough vegetables and protein to make the patties taste generous, but enough beaten egg to set around everything and hold the shape when you lift it from the pan.

  • The ratio keeps the patties stable. Six large eggs comfortably hold about 2 to 2½ cups total filling.
  • Small, controlled add-ins cook cleanly. Drained sprouts, thin cabbage, diced onion, and chopped protein stay tucked inside the egg instead of leaking water into the pan.
  • A tiny cornstarch slurry helps structure. One teaspoon in the egg mixture helps the patty hold without making it bouncy.
  • The sauce stays adjustable. Making the gravy separately means you can thin, thicken, or season it without overcooking the eggs.
  • The oil level controls texture. Pan-fry for weeknight ease, shallow-fry for better edges, or use deeper oil for restaurant-style puff.

The main rule: think of the mixture as eggs carrying filling, not vegetables barely glued together with egg. If the bowl looks like a dry pile or a loose soup, fix that before the first patty hits the pan.
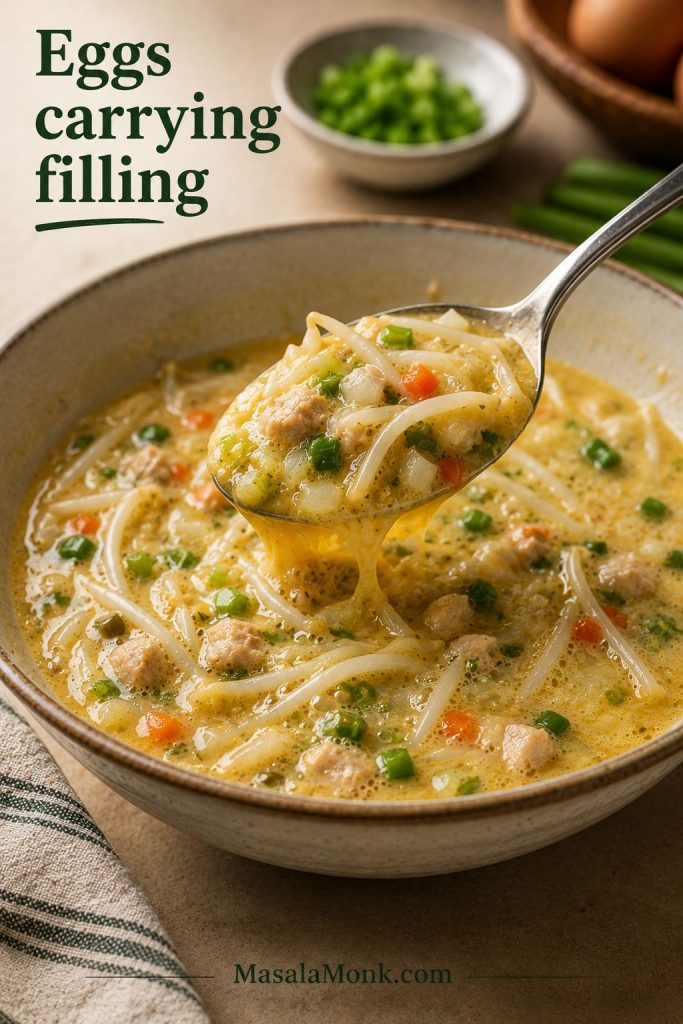
Spoon lifting scoopable Egg Foo Young batter with beaten egg coating bean sprouts, scallions, onion, and chopped protein.
Before the mixture reaches the skillet, it should look scoopable and egg-forward. In other words, the eggs should carry the filling, not barely glue it together.

Ingredients for Fluffy Egg Foo Young

This is the kind of recipe that turns a few eggs, a handful of vegetables, and a little gravy into a proper meal. The ingredient list is simple; the important part is cutting the filling small enough to cook quickly and keeping it steady enough to stay inside the patty.

Small pieces are your friend here. They cook quickly, stay tucked into the egg, and give every bite crunch, sweetness, and little pockets of savoriness.
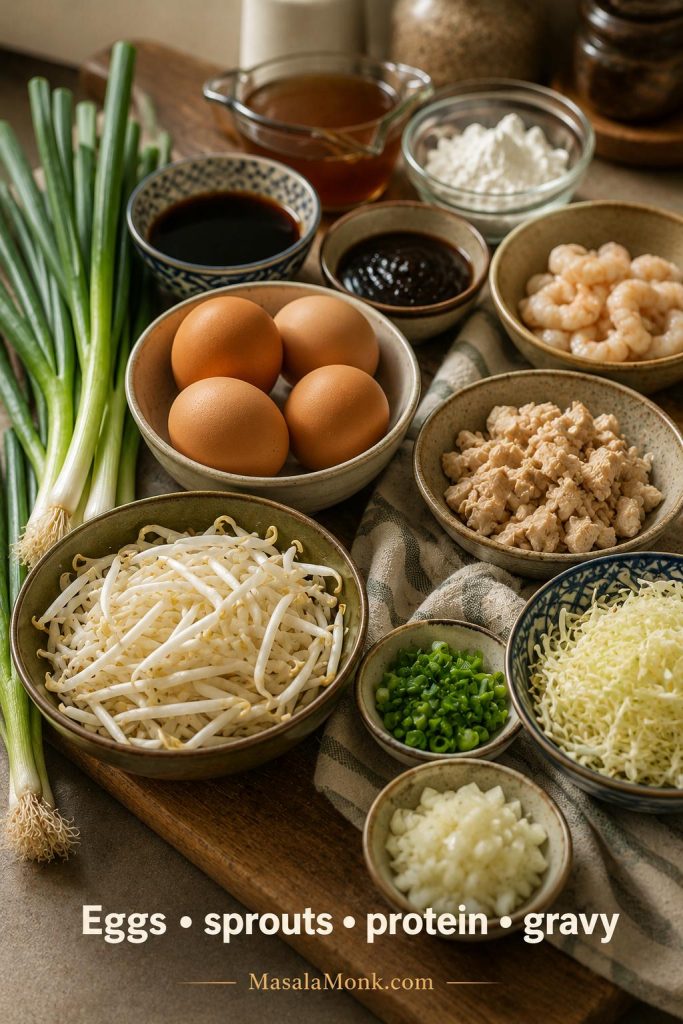
Egg Foo Young ingredients including eggs, bean sprouts, scallions, cabbage, chopped protein, soy sauce, stock, oyster sauce, and cornstarch on a prep counter.
Good Egg Foo Young starts before the pan: dry sprouts, small vegetables, measured filling, and a ready gravy base make the cooking much easier to control.

To make the Egg Patties

Eggs, Vegetables, and Protein

  • Eggs: Six large eggs make 6 medium patties, enough for 4 servings with rice and gravy.
  • Bean sprouts: One cup / about 70–85 g gives the patties classic crunch without crowding the eggs. Drain them well so the mixture stays scoopable. No sprouts? See the bean sprout substitutes.
  • Protein or tofu: Keep this to 115–140 g / 4–5 oz for the 6-egg version. Cooked shrimp, chicken, roast pork, or firm tofu all work as long as they are chopped small.
  • Vegetable-only version: Choose thin vegetables and keep the total filling within the ratio below. A quick sauté helps mushrooms, zucchini, or bell pepper settle into the eggs instead of loosening the mixture.
  • Onion: A small ¼ cup / about 35 g is enough once it is finely diced.
  • Cabbage or mushrooms: Use ⅓ to ½ cup / about 35–50 g finely shredded cabbage or thinly sliced mushrooms. Mushrooms should be pre-cooked if they seem watery.
  • Scallions / spring onions: Two scallions / about 15–20 g add freshness without making the mixture heavy.

Drain Bean Sprouts Before Mixing

Bean sprouts add the classic crunch, but they also carry water. Drain them before mixing so the egg can set cleanly around the filling.
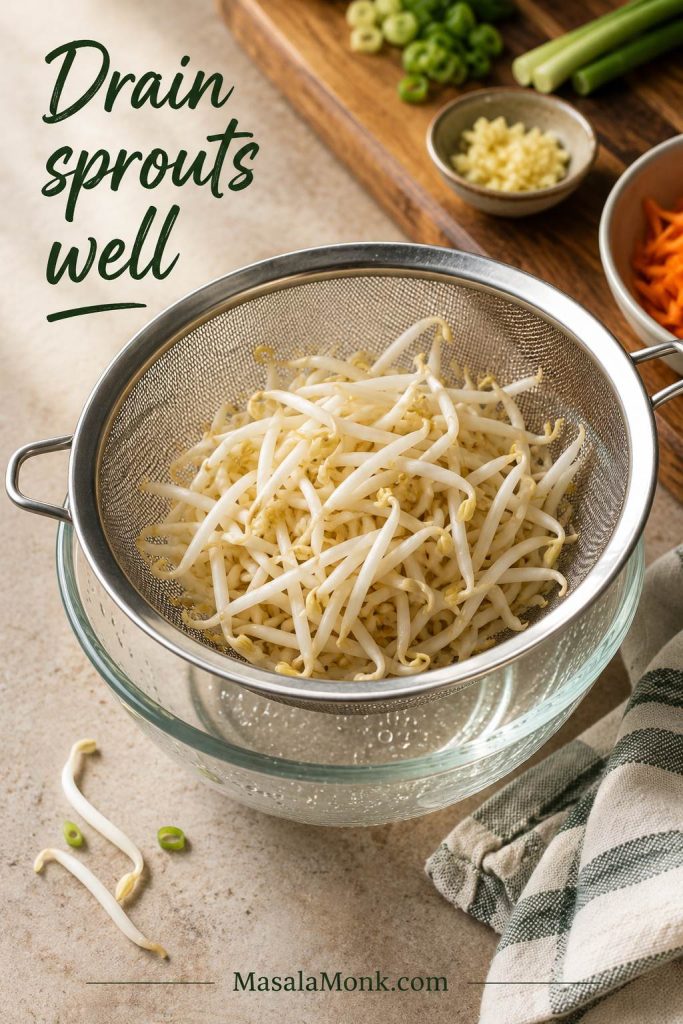
Fresh bean sprouts draining in a fine mesh strainer over a bowl on a kitchen counter.
Wet sprouts can loosen the egg mixture quickly, so draining them well gives the first patty a much better chance of holding together.

Seasoning, Structure, and Frying Oil

  • Cornstarch: Mix 1 teaspoon / about 3 g cornstarch with 1 tablespoon / 15 ml cold water before whisking it into the eggs.
  • Sesame oil: A small ½ teaspoon / 2.5 ml adds aroma. More can overpower the patties.
  • White pepper: A little white pepper gives the eggs and gravy that warm Chinese-restaurant note without making the dish spicy.
  • Neutral oil: Use just enough to coat the pan for tender patties, or about ¼ inch / 6 mm for puffier shallow-fried edges.

Egg-to-filling ratio: for 6 large eggs, keep the total filling around 2 to 2½ cups. That includes bean sprouts, onion, cabbage or mushrooms, scallions, and protein. Use the numbers as a guide, but trust the bowl too: the egg should still visibly surround the filling.
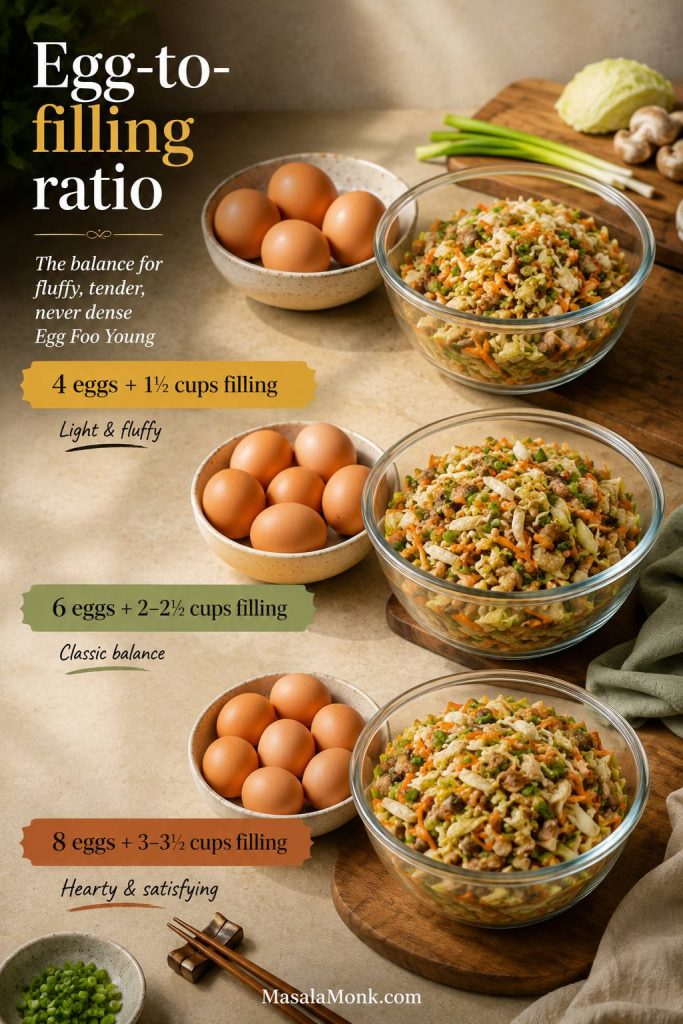
Egg Foo Young ratio guide showing bowls for 4 eggs, 6 eggs, and 8 eggs with measured amounts of vegetables and protein.
The egg-to-filling ratio is the reason the patties hold together. Too much filling makes them tear, while enough beaten egg helps everything set into a stable round.
EggsTotal FillingBest Yield
4 large eggsAbout 1½ cups4 small patties
6 large eggs2 to 2½ cups6 medium patties
8 large eggs3 to 3½ cups8 medium patties or 6 large patties

Ingredient Prep Matters

If you remember only one prep rule, make it this: the add-ins should help the egg set, not fight it. When vegetables are drained and cut small, the patties cook calmly instead of sputtering, tearing, or leaking in the pan.
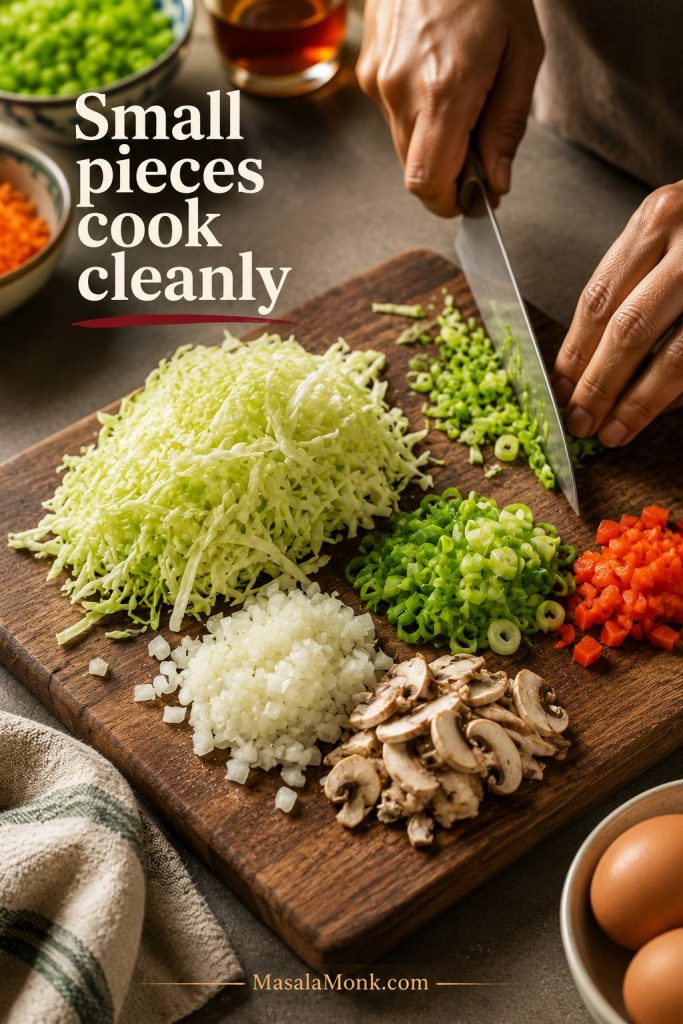
Hand slicing cabbage, scallions, onion, and mushrooms into small pieces on a cutting board for Egg Foo Young.
Small, thin vegetables cook more evenly inside the patties, so the egg can set around them instead of tearing around bulky pieces.

Cook Watery Vegetables First

Mushrooms, zucchini, bell pepper, and similar vegetables can release liquid as they cook. If you use more than ⅓ to ½ cup, sauté them briefly first, then let them cool before adding them to the eggs. Cooked shrimp, chicken, pork, or tofu should also be chopped small enough to stay tucked into the patty when you flip it.
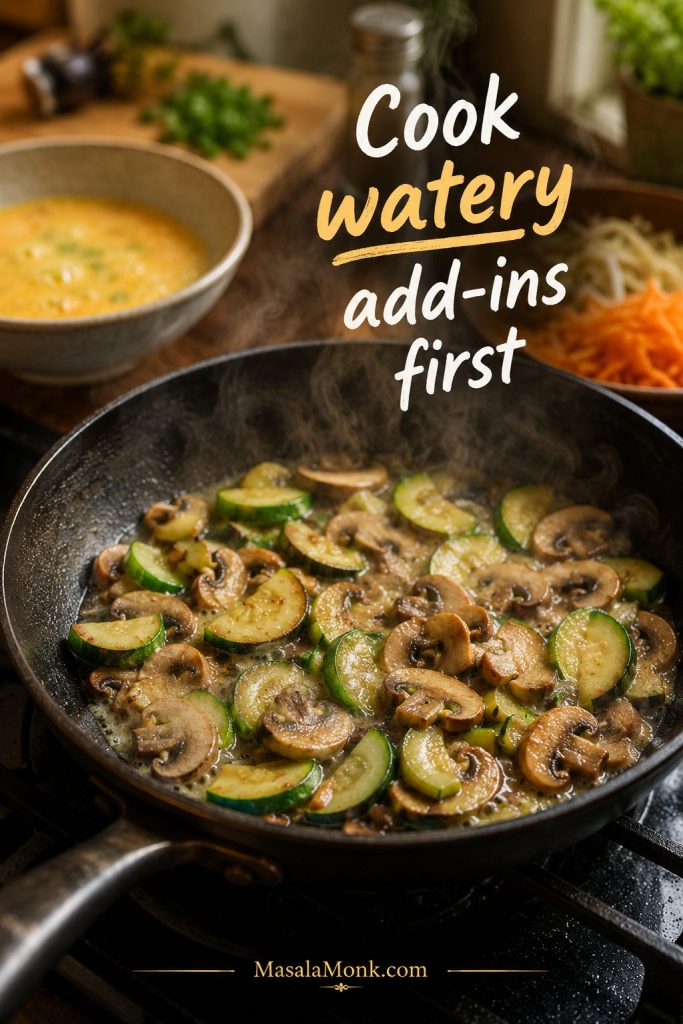
Mushrooms and zucchini being sautéed in a skillet before being added to Egg Foo Young batter.
A quick sauté lets mushrooms, zucchini, and other watery add-ins release steam before they weaken the Egg Foo Young batter.

What Goes Into Egg Foo Young Gravy

Some people call it Egg Foo Young sauce, but the takeout version eats more like a light brown gravy. It should taste rounded, not just salty: savory from stock and soy sauce, slightly rich from oyster sauce, and smooth enough to coat the eggs without weighing them down.
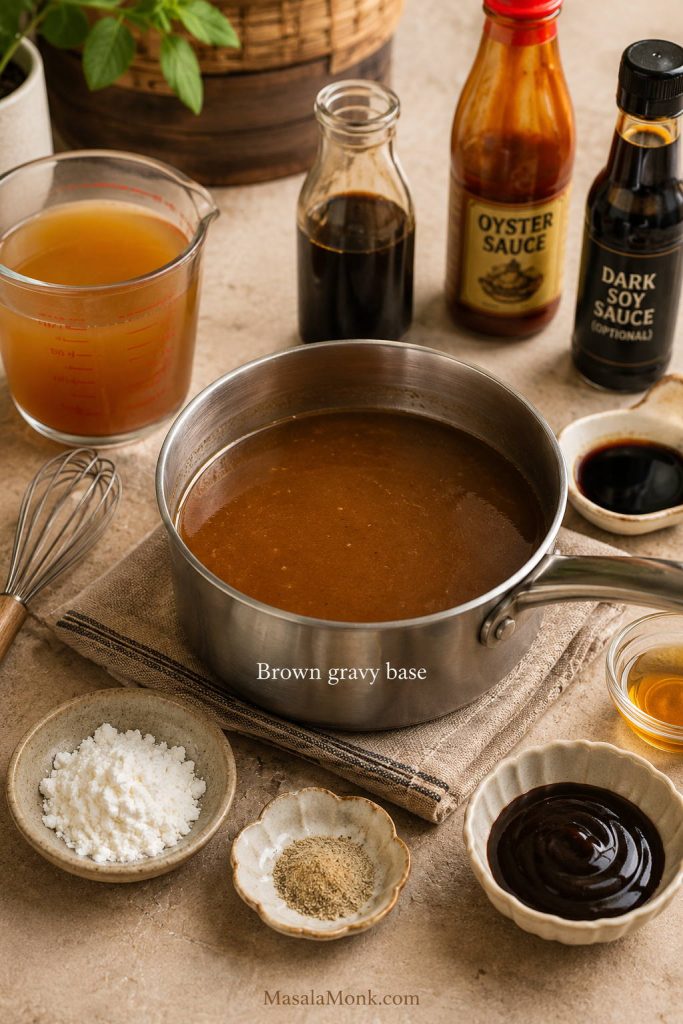
Saucepan with Egg Foo Young gravy ingredients including stock, soy sauce, oyster sauce, cornstarch, white pepper, sesame oil, and dark soy sauce.
Egg Foo Young gravy gets its flavor before it thickens, so build the base with stock, soy sauce, oyster sauce, white pepper, and sesame oil first.
  • Stock: Chicken stock gives the most familiar flavor; 2 cups / 480 ml is enough sauce for the patties and rice. Vegetable stock works for a meatless version.
  • Light soy sauce: 1½ tablespoons / about 22 ml seasons the gravy and adds umami.
  • Oyster sauce: 1 tablespoon / 15 ml gives the sauce body and a deeper restaurant-style flavor.
  • Dark soy sauce: ½ teaspoon / 2.5 ml is optional, but it gives the gravy a deeper brown color.
  • Sugar: 1–2 teaspoons / 4–8 g rounds out the salty sauces without making the gravy sweet.
  • White pepper: ¼ teaspoon adds gentle warmth.
  • Cornstarch slurry: 2 tablespoons / about 16 g cornstarch mixed with 3 tablespoons / 45 ml cold water thickens the gravy.
  • Sesame oil: ½ teaspoon / 2.5 ml goes in at the end so the aroma stays fresh.

Easy swaps: use vegetable stock for a meatless gravy, vegetarian oyster sauce or mushroom sauce instead of oyster sauce, and tamari only if every other ingredient is also gluten-free. Dark soy sauce is optional; the gravy will be lighter without it but still good.

Pan-Fried vs Restaurant-Style Egg Foo Young

There are two common versions of Egg Foo Young in people’s minds. One is an easy skillet patty with gravy. The other is the puffier, crisp-edged Chinese restaurant version cooked in more oil. Both can be delicious, but the oil level changes the texture.
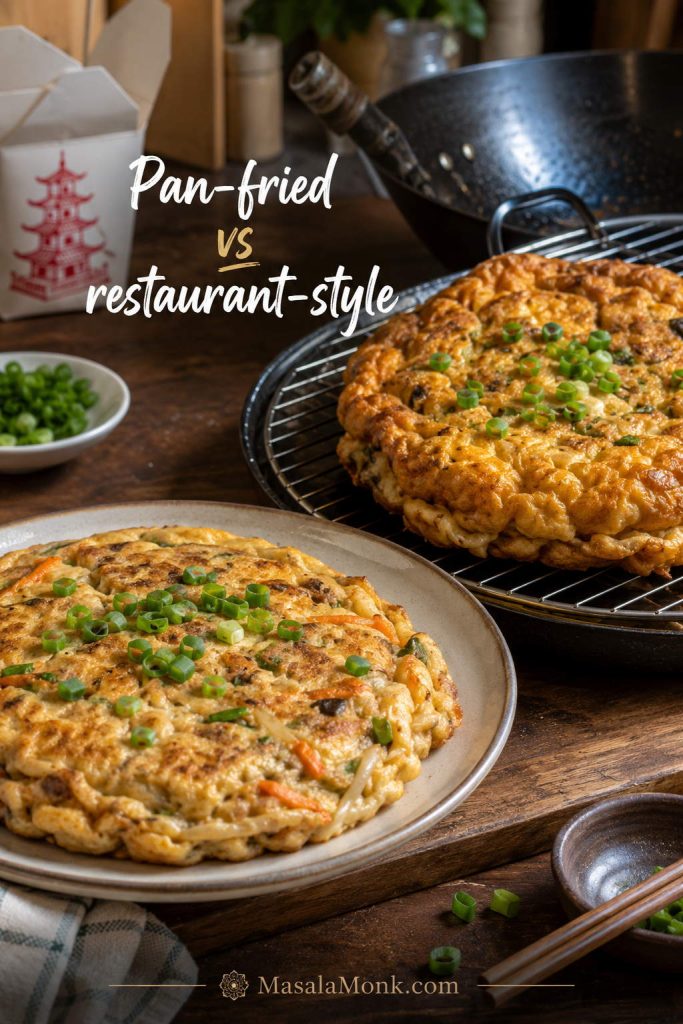
Pan-fried Egg Foo Young patty compared with a puffier restaurant-style patty near a wok and wire rack.
Pan-fried Egg Foo Young is easier at home; however, more oil creates puffier restaurant-style edges and a richer takeout texture.
MethodBest ForTextureNotes
Pan-friedEasy home cookingTender, lightly goldenUses the least oil and is easiest for beginners.
Shallow-friedBest home balanceGolden edges, slightly fuller centerUse about ¼ inch / 6 mm oil in a skillet or wok.
Deep-friedRestaurant-style puffPuffy, crisp-edged, richerUses more oil and needs temperature control.

Best setup for most home cooks: use a 10-inch nonstick skillet, a ½-cup measure, and a thin flexible spatula. Shallow-frying with about ¼ inch / 6 mm oil gives better browning than a barely oiled pan without the mess of deep-frying. Want the puffier version? Skip to the restaurant-style method.

How to Make Egg Foo Young

Once the filling is chopped, the gravy ingredients are measured, and your pan is ready, the recipe moves quickly. Keep the bowl close to the stove, cook in small batches, and adjust the heat after the first patty if you need to.

1. Prep the Filling

Drain the bean sprouts very well. Finely dice the onion, slice the scallions, and shred the cabbage or slice the mushrooms thinly. Chop your shrimp, chicken, pork, tofu, or vegetables into small pieces.

Cook chicken or pork first so the eggs can stay tender instead of waiting in the pan for meat to finish. Cooked shrimp, cooked chicken, roast pork, or tofu can go straight into the filling.

2. Make the Gravy Before Frying

Once the eggs hit the pan, things move quickly. Having the gravy ready means the patties can go straight from skillet to plate while they are still soft in the center and browned at the edges. If the sauce thickens while the patties cook, a splash of stock or water will bring it back.

3. Mix the Eggs

In a large bowl, whisk the eggs until the whites and yolks are fully combined. In a small bowl, mix 1 teaspoon cornstarch with 1 tablespoon cold water, then whisk that slurry into the eggs with sesame oil and white pepper.

Fold in the bean sprouts, onion, cabbage or mushrooms, scallions, and protein. The mixture should scoop easily: glossy egg around the filling, not soup and not a dry vegetable pile. Mix right before cooking so the vegetables keep their snap and the batter stays light.

4. Cook the Patties

Heat the Pan and Scoop the Batter

Heat a nonstick skillet, wok, or well-seasoned pan over medium to medium-high heat. Add enough neutral oil to coat the bottom for pan-frying, or about ¼ inch / 6 mm oil for a more shallow-fried texture.
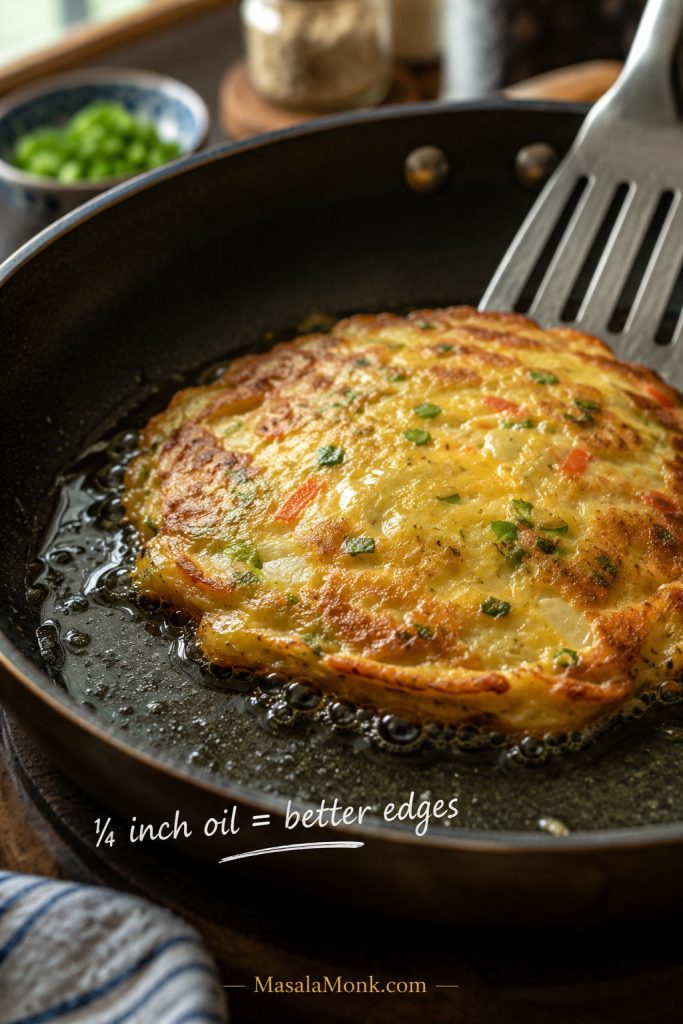
Egg Foo Young patty frying in shallow oil with bubbles around the golden edge and a spatula near the pan.
A shallow layer of oil helps the edge set before the center dries out, which makes the patty sturdier when it is time to flip.

Use a ½-cup measure for standard patties. Scoop the egg mixture into the pan, nudging the filling into a round shape. Cook until the edges are set and the bottom is golden, about 2 to 3 minutes. Flip carefully and cook the second side until the middle has no liquid egg, about 1½ to 2 minutes more.

Let It Set Before Flipping
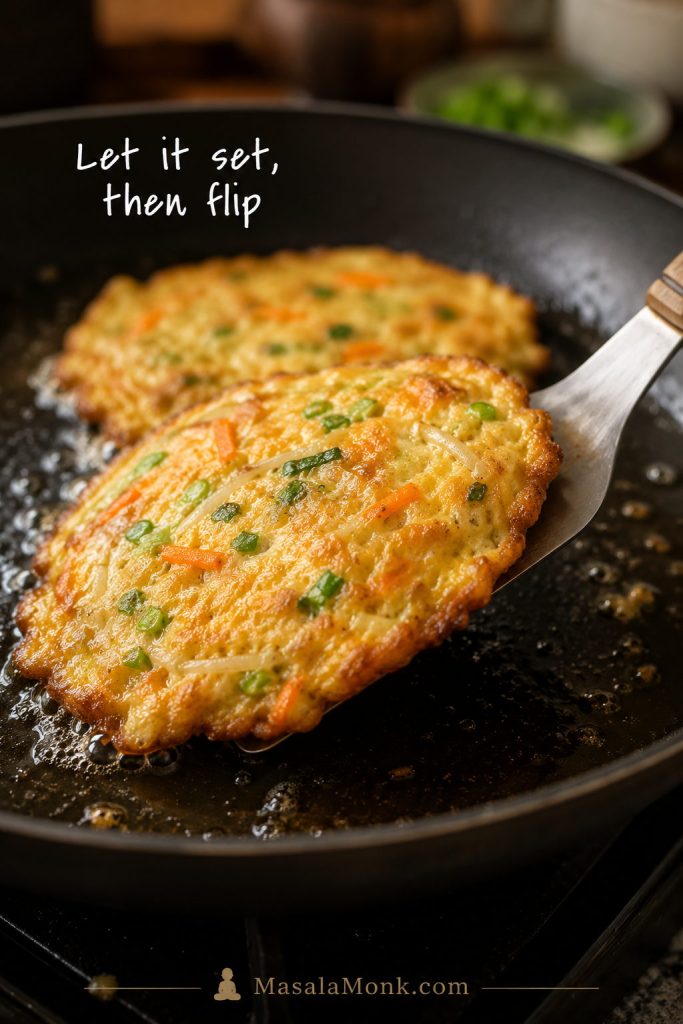
Egg Foo Young patty being lifted and flipped on a thin spatula in a skillet with shallow oil.
Wait until the first side feels stable on the spatula. Then flip once, gently, instead of moving the patty while the center is still loose.

Use the First Patty as Your Test

The first patty is often the test patty. If it browns too fast, lower the heat before the next batch; if it sticks or looks dry around the edges, add a little more oil. Look for a center that springs lightly and no loose egg running from the middle. After that first patty, the recipe usually relaxes: you know whether the pan wants less heat, more oil, or a smaller scoop. If the first one tears, browns too fast, or stays runny, do not guess; check the troubleshooting table before cooking the next batch.
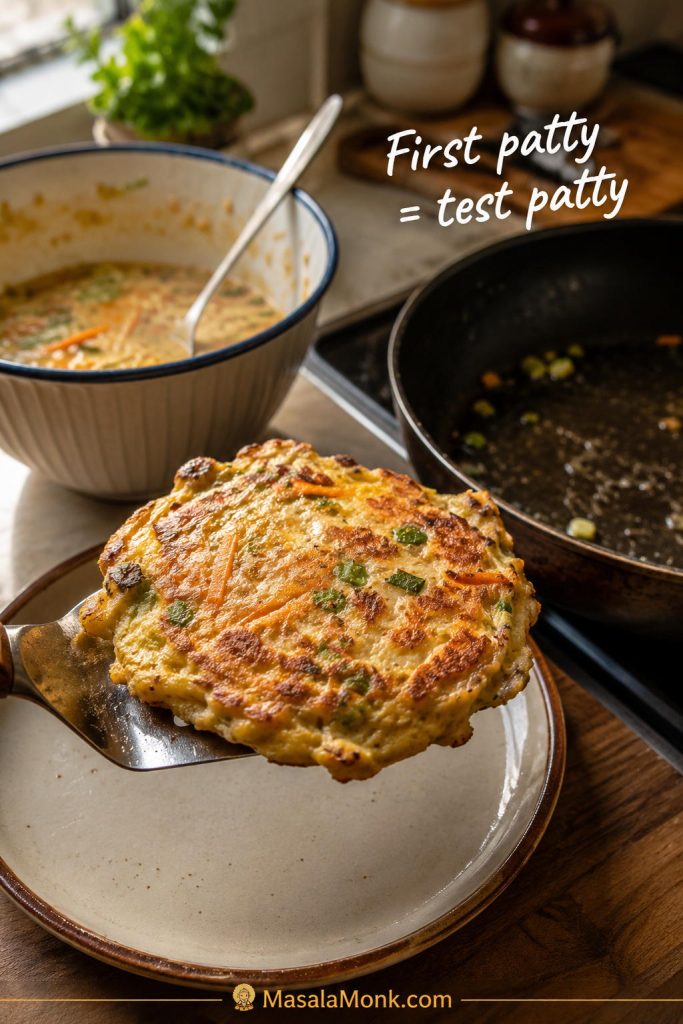
Slightly uneven first Egg Foo Young patty on a spatula beside a skillet and a bowl of batter.
One imperfect first patty can save the whole batch, because it shows whether the pan needs less heat, more oil, or a smaller scoop.

Scoop size guide: use ⅓-cup scoops for small beginner-friendly patties, ½-cup scoops for standard home patties, and ¾-cup scoops only if you are using more oil and feel confident flipping larger rounds.

How to Know the Patties Are Right
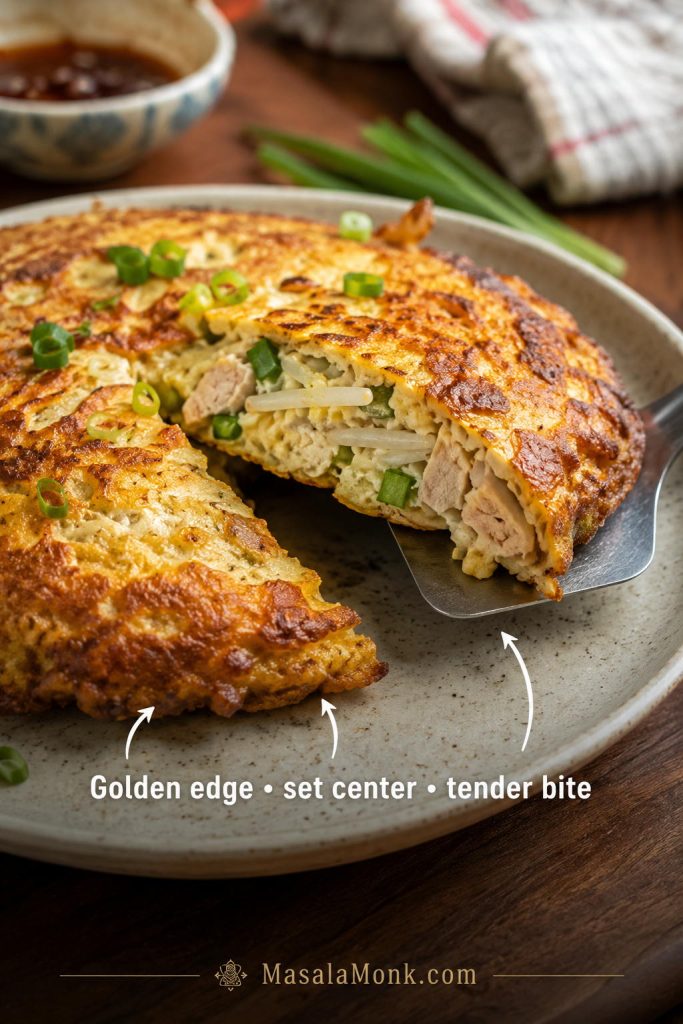
Cut-open Egg Foo Young patty with golden edges, a set center, bean sprouts, scallions, and visible filling.
The best doneness cue is texture: the center should be set, the edge should be browned, and the inside should still look tender rather than dry.

You nailed the patties when:

  • The edges are golden but not hard.
  • The center springs lightly when pressed.
  • No loose egg runs from the middle.
  • The patty lifts without tearing.
  • The sprouts still have a little snap.

Doneness cue: the egg should be set in the center, not wet or liquid. Shrimp should look opaque. Chicken and pork are safest and easiest when cooked before they go into the egg mixture. For exact food-safe temperatures for egg dishes and poultry, the USDA safe temperature chart is a useful reference.

5. Rest Briefly, Then Serve

Transfer the cooked patties to a wire rack or a plate lined with paper towel. Let them rest in a single layer so the edges stay better. Spoon hot gravy over the top right before serving so the eggs stay tender and the sauce softens the edges without making the plate soupy.

How to Make the Brown Gravy

Bad Egg Foo Young gravy usually goes watery or gluey. The sweet spot is smooth, savory, and spoon-coating, with enough body to cling to the patties but enough movement to sink into the rice. That is the difference between plain egg patties and the takeout-style plate people remember.

Once the slurry is smooth, the sauce is simple. Cornstarch must be mixed with cold water before it touches hot liquid; otherwise, it can clump almost instantly.
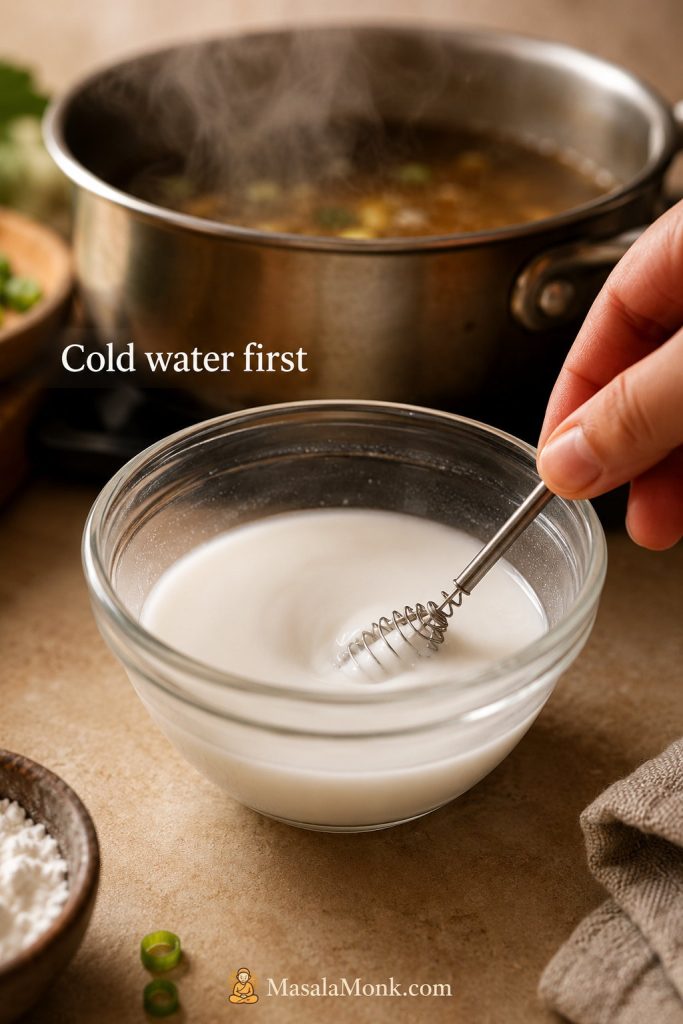
Cornstarch slurry being stirred with cold water in a small glass bowl for Egg Foo Young gravy.
A smooth slurry is the shortcut to smooth Egg Foo Young gravy; mix it cold first, then whisk it into the hot sauce gradually.
  1. Combine the base. In a small saucepan, combine stock, light soy sauce, oyster sauce, optional dark soy sauce, sugar, and white pepper.
  2. Bring to a simmer. Heat gently until the mixture is steaming and lightly bubbling.
  3. Make the slurry. In a small bowl, stir cornstarch with cold water until smooth.
  4. Thicken slowly. Whisk the slurry into the simmering gravy a little at a time.
  5. Simmer until shiny. Cook for 30 to 60 seconds, until the gravy coats the back of a spoon.
  6. Finish with sesame oil. Add sesame oil at the end so the aroma stays fresh.

Gravy texture cue: the gravy should look shiny, coat the back of a spoon, and still pour easily. If it sits heavily on the patty, thin it before serving. If it disappears through the rice like broth, give it a little more time or a little more slurry.
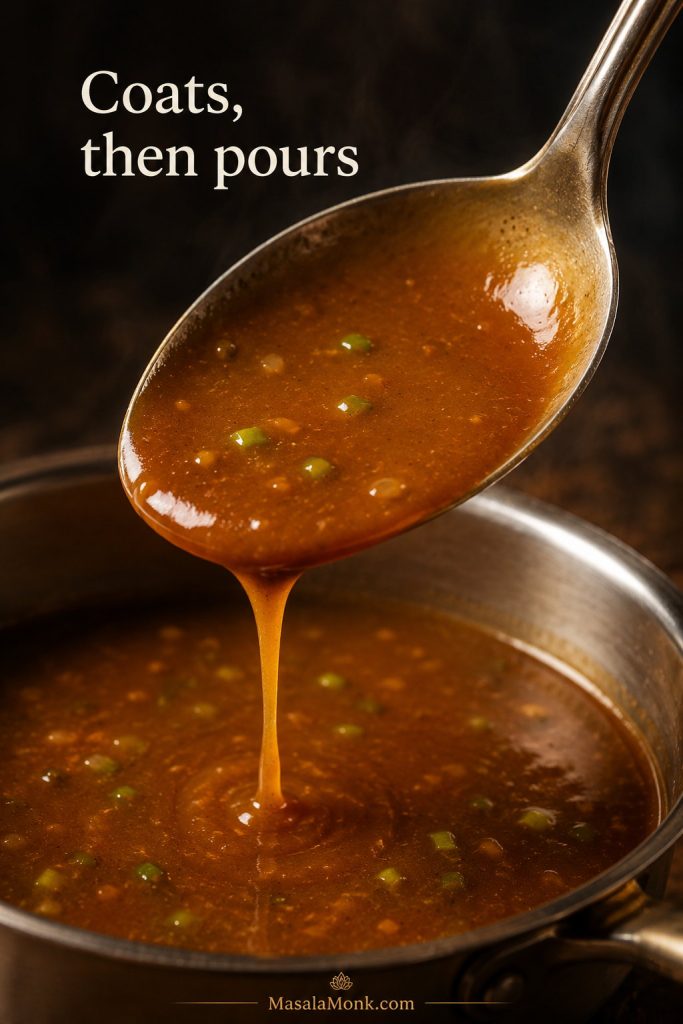
Glossy brown Egg Foo Young gravy coating the back of a spoon with a visible drip over a saucepan.
Once the gravy coats the spoon and drips slowly, it is ready: thick enough for the patties, but still loose enough to flow into the rice.

Cornstarch Gravy vs Roux Gravy

The main recipe uses cornstarch because it is fast, glossy, and easy to control. If you want a richer old-school body, start with a light roux and finish with a smaller amount of slurry.
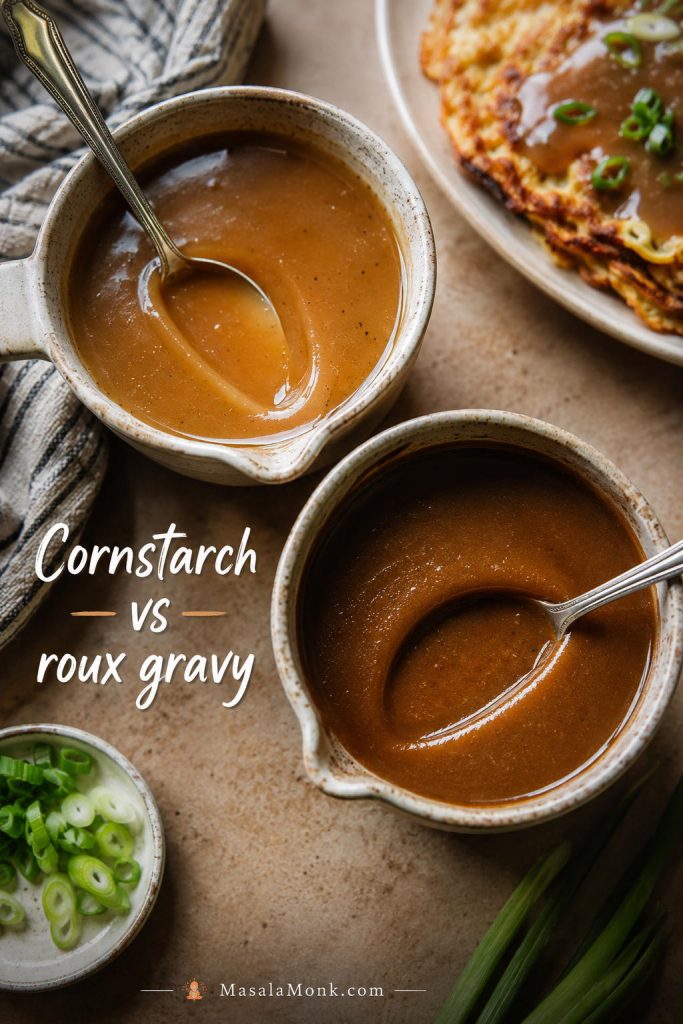
Two bowls of brown gravy showing a glossy cornstarch gravy and a thicker roux-style gravy with spoon trails.
Cornstarch gives Egg Foo Young gravy a glossy, lighter finish, while a roux adds a rounder restaurant-style body. Choose based on the texture you want.
StyleBest ForTexture
Cornstarch-only gravyFast weeknight Egg Foo YoungGlossy, light, pourable
Roux + cornstarch gravyMore old-school restaurant bodyRounder, richer, more gravy-like
Arrowroot gravyCorn-free adjustmentClearer and slightly slicker; avoid long boiling

For a roux version, cook 1 tablespoon neutral oil with 1 tablespoon flour for 1 to 2 minutes, then whisk in the stock and seasonings before finishing with a smaller amount of cornstarch slurry. Making the gravy gluten-free means checking every ingredient, not just swapping the soy sauce. Use tamari only if the stock, oyster sauce or vegetarian oyster sauce, and thickener are also gluten-free.

Restaurant-Style Egg Foo Young: How to Get Puffier Patties

Restaurant-style Egg Foo Young is not just “more oil.” Hotter oil sets the outside quickly, which helps the patty puff and brown before the center overcooks. That is why shallow-frying gives you a better home version than a barely oiled pan, and deeper oil gives you the most dramatic restaurant-style texture.

Oil Temperature for Restaurant-Style Puff

For puffier patties, use a wok or deep pot with 2–3 inches of neutral oil. Heat the oil to about 350°F / 175°C. When the egg mixture goes in, the oil temperature will drop. Letting the patties cook closer to 325°F / 160°C helps them puff and set without scorching.
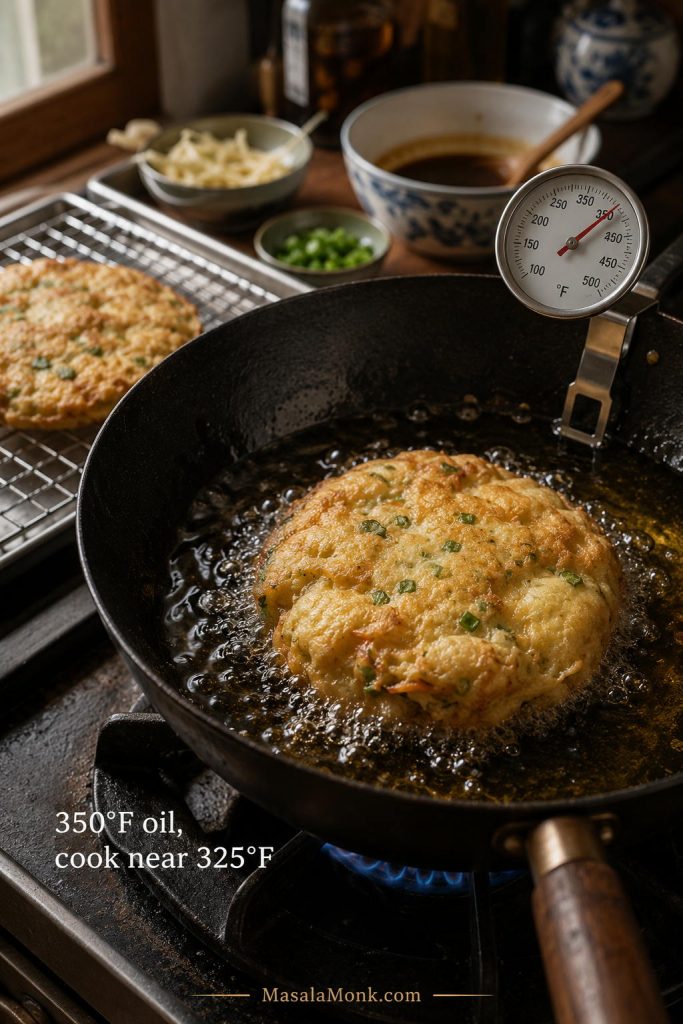
Restaurant-style Egg Foo Young patty puffing in hot oil with a thermometer clipped to a wok and a wire rack nearby.
For restaurant-style Egg Foo Young, hot oil sets the outside quickly. Meanwhile, the center stays tender because the patty puffs before it overcooks.
  • Use a ladle instead of pouring from the bowl.
  • Lower the egg mixture gently into the oil so it forms a round patty.
  • Let the first side set before moving it.
  • Flip once the edges look golden and the patty feels stable.
  • Drain on a wire rack, not a flat plate, so the edges stay crisp.
  • Give each patty room so the oil stays hot and the edges set quickly.

Egg Foo Young Variations

Choose the variation by what you want from the plate. Shrimp gives the most classic takeout feel, chicken is the easiest leftover dinner, pork or char siu brings deeper flavor, and tofu or vegetables make the lightest version. The rule stays the same for all of them: keep the pieces small, control watery add-ins, and let the egg remain the binder.

How to Prep Add-Ins

Before you choose shrimp, chicken, pork, tofu, or vegetables, check how much moisture and cooking time that add-in brings to the eggs.
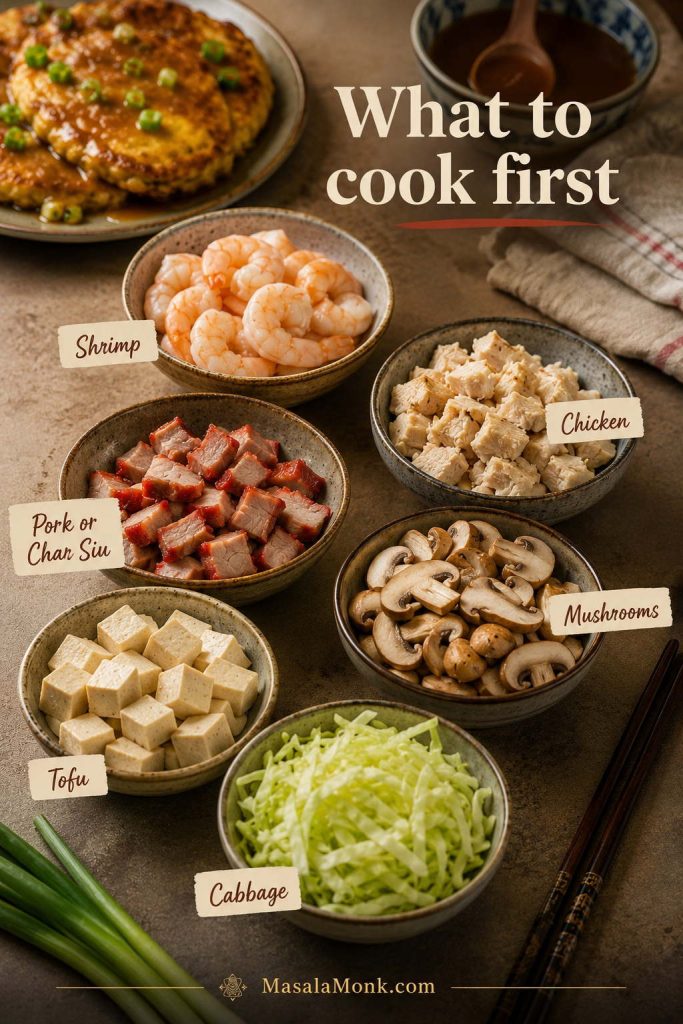
Prep bowls of shrimp, cooked chicken, pork or char siu, tofu, mushrooms, and cabbage for Egg Foo Young variations.
Different add-ins need different prep. Cooked meats are easiest, while mushrooms, tofu, and cabbage need the right size and moisture control.
Add-InCooked or Raw?Prep CueWatch-Out
ShrimpCooked easiest; raw okay if smallChop large shrimpRaw shrimp must turn opaque
ChickenCooked bestDice or shred smallRaw chicken can overcook the eggs
Pork / char siuCooked bestDice smallCan make the filling salty
Firm tofuUse pressed tofuPat dry and dice smallSoft tofu breaks down
MushroomsPre-cook if using more than a littleSlice thinReleases water
CabbageRaw okay if thinShred fineToo much makes patties loose

Shrimp Egg Foo Young

Shrimp is the most takeout-feeling version: sweet, quick-cooking, and easy to pair with brown gravy. Cooked small shrimp are easiest. If using raw shrimp, chop them small enough to turn opaque by the time the egg sets.
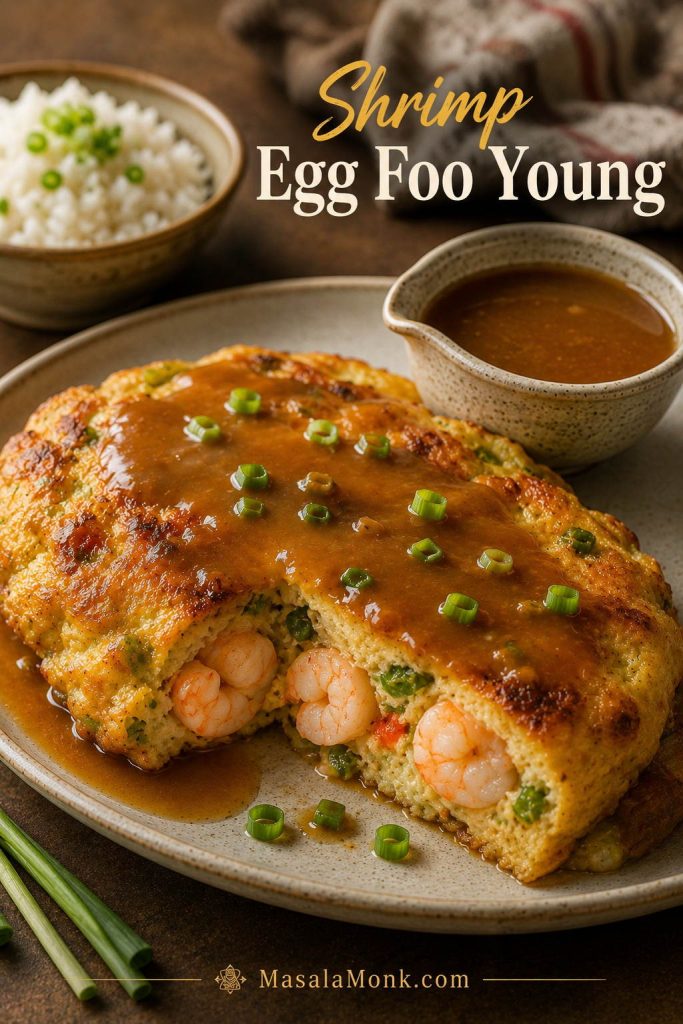
Shrimp Egg Foo Young patty cut open to show shrimp inside, served with brown gravy, scallions, and rice.
Shrimp Egg Foo Young gives the most classic takeout feel; for best results, chop large shrimp so the pieces stay tucked inside the patty.

Chicken Egg Foo Young

Chicken is the best leftover version. Use cooked chicken, chopped or shredded small, so the eggs can stay tender instead of waiting in the pan for raw meat to finish.
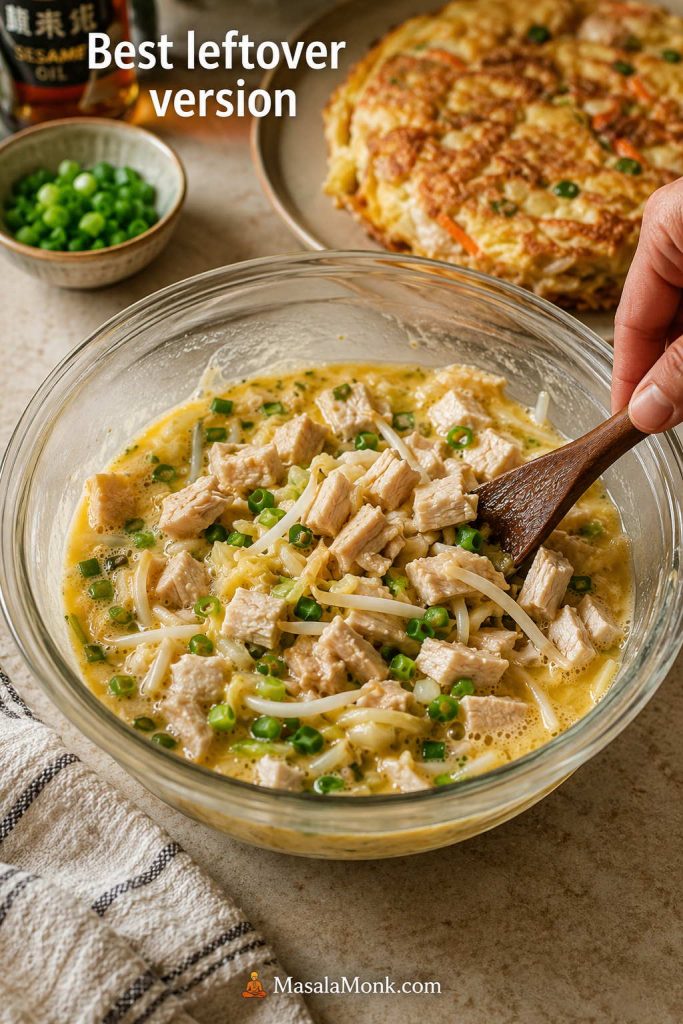
Cooked chopped chicken being folded into Egg Foo Young batter with bean sprouts, scallions, and vegetables in a glass bowl.
Chicken Egg Foo Young works best with cooked, chopped chicken because the eggs can set quickly instead of waiting for raw meat to cook through.

Pork Egg Foo Young

Pork, roast pork, or char siu gives the deepest old-school flavor. Dice it small and season the egg mixture lightly because cooked pork can bring plenty of salt on its own.
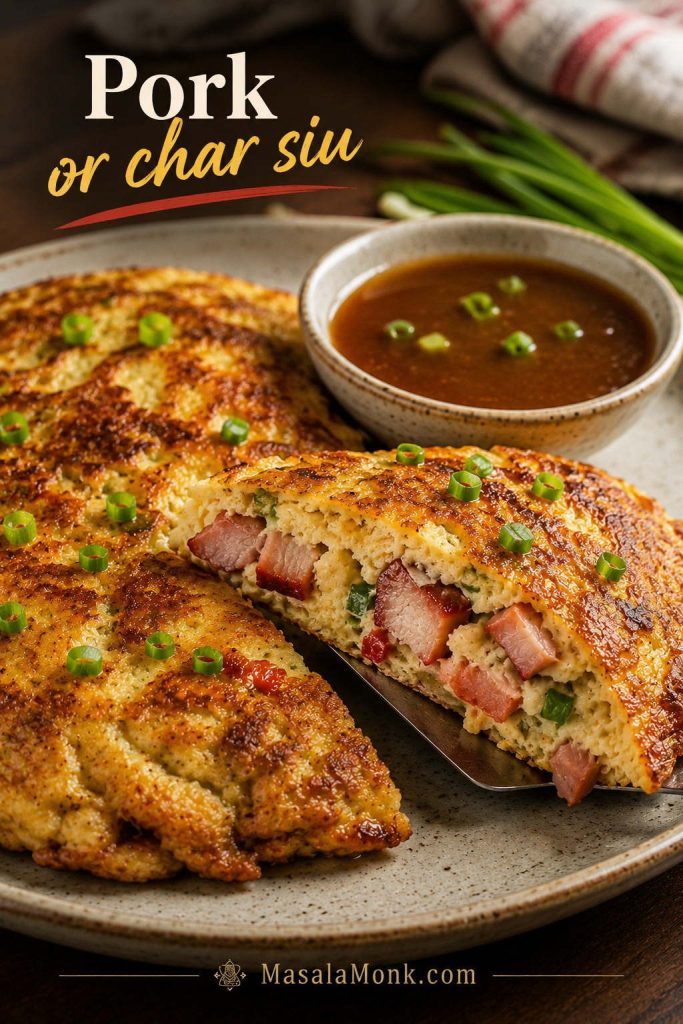
Pork Egg Foo Young patty cut open with diced char siu inside, scallions on top, and brown gravy in a bowl nearby.
Pork or char siu adds deeper flavor, but the pieces still need to be small enough for the egg to bind into a clean patty.

Vegetable Egg Foo Young

Vegetable Egg Foo Young works best when the vegetables are chosen for texture, not just volume. Thin cabbage, sprouts, scallions, and shredded carrot can usually go in raw; mushrooms, zucchini, bell pepper, and watery greens should be cooked briefly first.

Firm tofu works well if you want a meatless version with more body. Press it, pat it dry, and dice it small before adding it to the bowl. For vegetarian gravy, use vegetable stock and vegetarian oyster sauce or mushroom sauce.
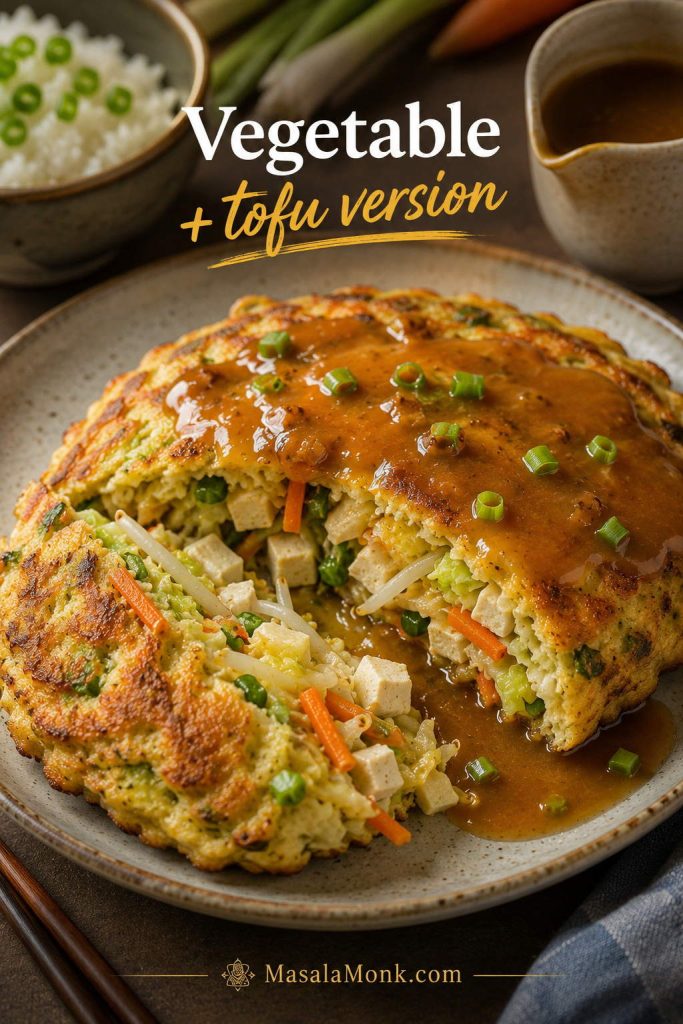
Vegetable and tofu Egg Foo Young patty cut open with tofu cubes, bean sprouts, cabbage, carrot, scallions, and brown gravy.
Vegetable Egg Foo Young works best when the filling is chosen for texture, not volume. Firm tofu, cabbage, sprouts, and scallions keep it light but satisfying.

No Bean Sprouts? Use These Instead

Bean sprouts give Egg Foo Young its classic crunch, but you can still make good patties without them. Choose the substitute by what the mixture needs.
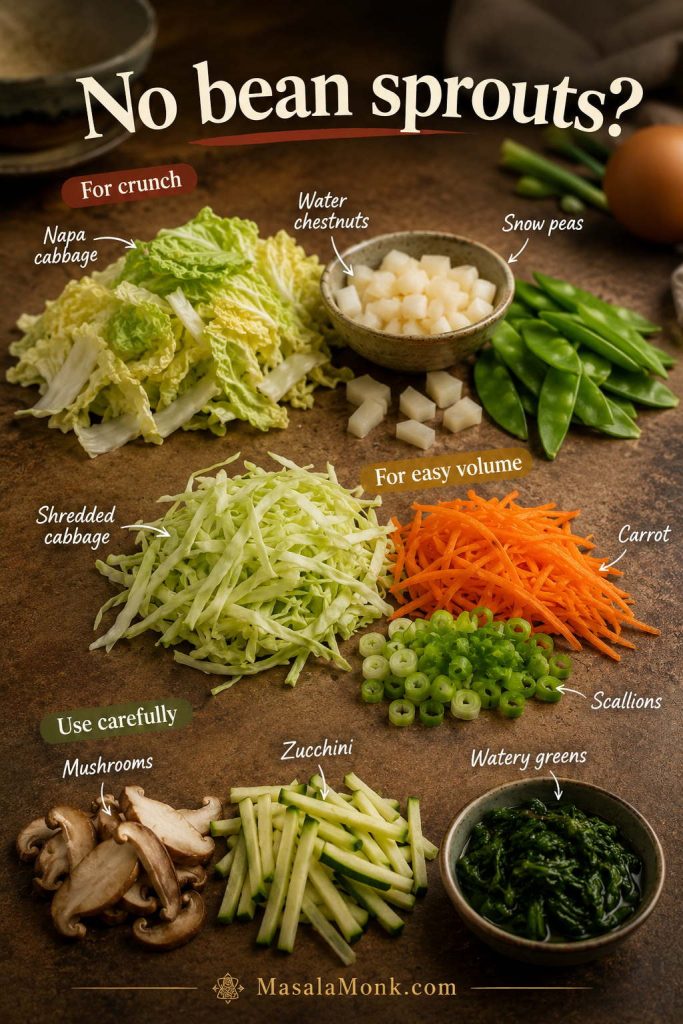
Bean sprout substitutes for Egg Foo Young including Napa cabbage, water chestnuts, snow peas, shredded cabbage, carrot, scallions, mushrooms, zucchini, and greens.
No bean sprouts? Use crisp substitutes like Napa cabbage, water chestnuts, or snow peas. Cook watery vegetables first so they do not loosen the batter.
  • For crunch: thin Napa cabbage, diced water chestnuts, or julienned snow peas.
  • For easy volume: finely shredded cabbage, shredded carrot, or extra scallions.
  • Use carefully: mushrooms, zucchini, and watery greens. Cook them briefly first, then cool before adding them to the eggs.

The substitute should support the egg, not take over the bowl. If the mixture starts looking like vegetables barely coated in egg, add another beaten egg or hold some filling back for the next batch.

Troubleshooting Egg Foo Young

Start with the First Patty

If your first patty is messy, do not panic. Egg Foo Young is easy to adjust batch by batch because you can change the scoop size, heat, oil, or mixture before the next patty goes in.

Most Egg Foo Young problems are batch-by-batch problems, not recipe-ending problems. Even restaurant-style Egg Foo Young is not about perfect circles; it is about tender eggs, enough filling, and a sauce that brings the plate together.
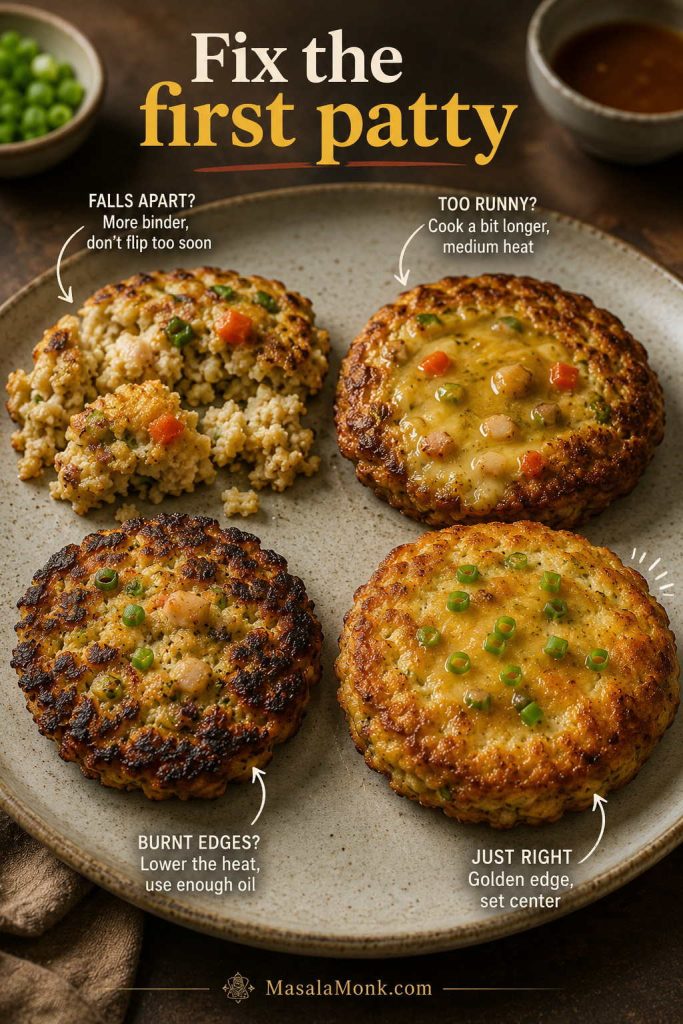
Egg Foo Young troubleshooting guide showing patties that fall apart, stay too runny, have burnt edges, and turn out just right.
One messy patty does not ruin Egg Foo Young; instead, use it to fix the mixture, heat, oil, or scoop size before the next round.

Common Problems and Quick Fixes

ProblemFix NowFix Next Time
Patties fall apartMake smaller patties and add 1 beaten egg to the remaining mixture if needed.Keep total filling to 2–2½ cups per 6 eggs.
Mixture looks waterySpoon off excess liquid before frying.Drain sprouts well and pre-cook vegetables that release liquid.
Center stays runnyLower heat slightly and cover the pan briefly.Use ½-cup scoops instead of oversized patties.
Edges burn before center setsReduce heat and add a little more oil if the pan is dry.Cook over medium to medium-high heat, not high heat.
Patties taste blandServe with hot gravy and garnish with scallions or white pepper.Use flavorful stock, white pepper, sesame oil, and a well-seasoned gravy.
Patties turn rubberyReheat gently and avoid cooking them further.Pull patties once the egg is set; do not cook until dry.
Gravy is too thinAdd a little more cornstarch slurry and simmer briefly.Bring the sauce to a simmer before adding slurry.
Gravy is too thickWhisk in stock or water, a splash at a time.Add slurry gradually instead of all at once.
Gravy is lumpyStrain it if needed, then whisk smooth.Mix cornstarch with cold water first and stream it in while whisking.
Leftovers become soggyReheat patties separately from the gravy.Store patties and gravy in separate containers.

What to Serve with Egg Foo Young

Plain steamed rice is the classic base because it catches the salty-silky finish and keeps the plate from feeling too rich. The rice is not just filler here; it is part of why the dish feels like dinner.

If you are making Egg Foo Young for brunch, keep the sides lighter with something crisp like this cucumber salad recipe. If you are building a Chinese restaurant-style dinner, pair it with fried rice, noodles, or stir-fried greens.

  • Steamed jasmine rice: the easiest and most classic base.
  • Spam fried rice: ideal when you want a full restaurant-style plate. You can also use the same cold-rice method with simpler add-ins.
  • Garlic noodles: richer, cozier, and good with extra gravy.
  • Stir-fried greens: bok choy, cabbage, green beans, broccoli, or snow peas all work well.
  • Cucumber salad: a cool, crisp contrast to the hot gravy.
  • Chili oil: add at the table if you want heat.
  • Extra scallions: a fresh finish that keeps the dish from feeling heavy.

Storage, Make-Ahead Tips, and Reheating

Egg Foo Young is at its best when the patties are hot and the gravy is freshly spooned over the top, but leftovers can still be very good if the sauce and eggs are stored separately. This keeps the patties from absorbing too much gravy and turning soft. For general leftover timing and storage safety, the USDA’s leftovers and food safety guidance is a useful reference.

  • Make the gravy ahead: prepare it up to 2 days ahead and refrigerate it separately. Reheat gently and thin with stock or water if needed.
  • Prep the vegetables ahead: chop them earlier in the day and keep them dry in the fridge. Mix them with the eggs only right before cooking.
  • Refrigerate: store cooked patties and gravy in separate airtight containers for up to 3–4 days.
  • Reheat patties: warm gently in a skillet over low to medium heat, or use an air fryer briefly if you want firmer edges.
  • Reheat gravy: warm in a saucepan, whisking in a splash of stock or water if it has thickened.
  • Microwave carefully: use short bursts because eggs can turn rubbery when overheated.
  • Freeze only if needed: freeze patties without gravy. The texture is better refrigerated than frozen.

FAQs

Is Egg Foo Young the same as an omelet?

It is omelet-like, but not exactly the same as a Western folded omelet. Egg Foo Young has the vegetables and protein mixed directly into the eggs, is usually cooked as separate patties, and is served with brown gravy.

What is Egg Foo Young gravy made of?

Most Egg Foo Young gravy is made with stock, soy sauce, oyster sauce, white pepper, sesame oil, and a cornstarch slurry. A roux can be added for a rounder, more old-school restaurant-style body.

Why does my Egg Foo Young fall apart?

Usually, the filling is too wet, too heavy, or the patties are too large. Keep the filling around 2 to 2½ cups for 6 eggs, drain vegetables well, and use ½-cup scoops.

Why is my Egg Foo Young not fluffy?

Flat Egg Foo Young usually comes from a dry pan, oversized patties, or watery filling. A barely oiled skillet makes the mixture behave like a flat omelet. A little more oil, smaller scoops, and controlled add-ins help the edges puff before the center dries out.

What meat is best for Egg Foo Young?

Shrimp gives the most classic takeout feel, chicken is easiest for leftovers, and roast pork or char siu gives deeper flavor. Whatever protein you choose, keep it small so the egg can hold it.

Can Egg Foo Young be made without bean sprouts?

Yes. Use thin Napa cabbage, shredded cabbage, water chestnuts, snow peas, shredded carrot, or extra scallions. Choose small, controlled substitutes so the egg patties still hold together.

Is Egg Foo Young Chinese or Chinese-American?

Egg Foo Young has roots in Chinese egg dishes, but the gravy-covered version many people order from takeout menus is strongly Chinese-American. This recipe is built around that restaurant-style plate: separate egg patties, vegetables, optional protein, rice, and brown gravy.

Can the gravy be vegetarian?

Yes. Use vegetable stock and vegetarian oyster sauce or mushroom sauce. Check the soy sauce and other condiments too if you need the whole dish to meet a specific dietary requirement.

How do I make Egg Foo Young taste like takeout?

The takeout flavor comes from three things working together: enough oil to brown the edges, small amounts of white pepper and sesame oil, and a brown gravy that tastes savory before it thickens. If the patties are dry and the gravy is flat, it will taste like an omelet with sauce, not Egg Foo Young.

Should the gravy go on before or after serving?

Spoon the gravy over the patties just before serving. If the patties sit in gravy too long, they soften and lose their best texture.

Can you bake or air-fry Egg Foo Young?

You can bake or air-fry the egg mixture in a small greased pan, but it will eat more like a baked omelet or mini frittata than classic Egg Foo Young. For browned edges and takeout-style texture, a skillet with enough oil is still the better method. For a baked egg texture, these egg muffin cups are a better fit.

Once the ratio clicks, Egg Foo Young stops feeling fussy. The first patty teaches you the heat, the sauce goes on at the end, and the rest becomes a flexible dinner you can make with shrimp, chicken, pork, tofu, or the vegetables already in the fridge.

Egg Foo Young Step by Step

Use this quick visual recap before the recipe card if you want the whole cooking flow in one place: prep the filling, mix the eggs, cook the patties, thicken the gravy, and serve hot.
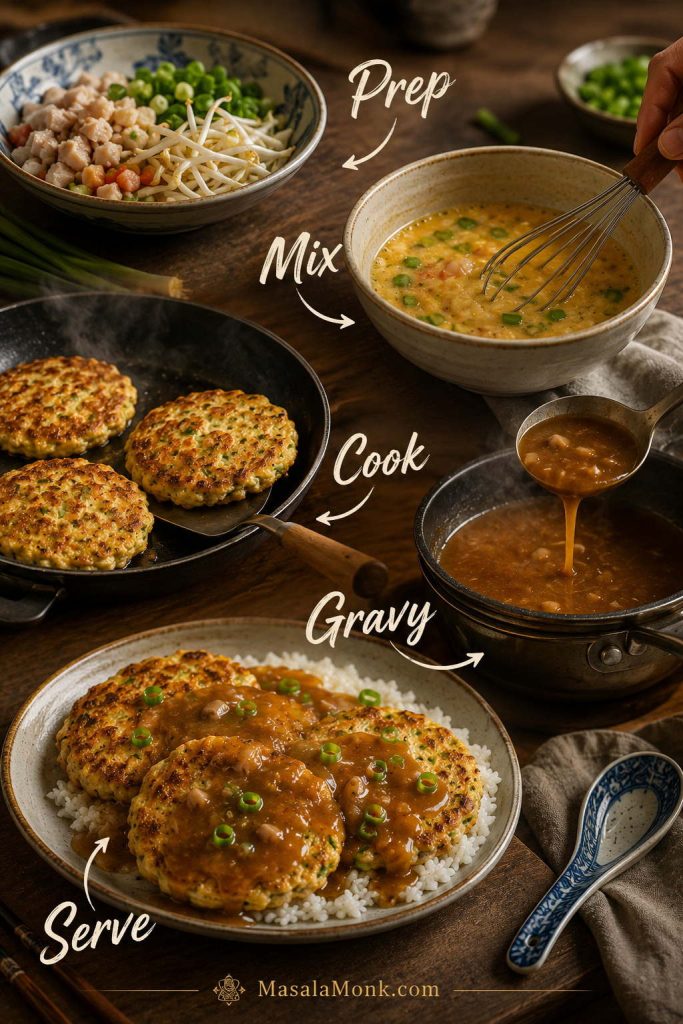
Step-by-step Egg Foo Young process showing filling prep, egg mixing, patty cooking, gravy thickening, and serving with rice.
This visual roadmap shows the whole flow: prep the filling, mix the eggs, cook the patties, thicken the gravy, then serve hot.

Recipe card

Egg Foo Young Recipe with Takeout-Style Gravy

Fluffy Chinese-American egg patties with crisp vegetables, your choice of shrimp, chicken, pork, tofu, or extra vegetables, and smooth brown gravy to spoon over rice.

Prep Time15 minutes
Cook Time20 minutes
Total Time35 minutes
Servings4

Yield: 6 medium patties

Method: Pan-fried / shallow-fried

Cuisine: Chinese-American

Course: Dinner, main dish, brunch

Ingredients

For the Egg Patties

  • 6 large eggs
  • 1 teaspoon / about 3 g cornstarch mixed with 1 tablespoon / 15 ml cold water
  • ½ teaspoon / 2.5 ml toasted sesame oil
  • ¼ teaspoon white pepper
  • 1 cup / about 70–85 g bean sprouts, rinsed and very well drained
  • 115–140 g / 4–5 oz chopped cooked shrimp, cooked chicken, roast pork, or firm tofu
  • ¼ cup / about 35 g finely diced onion
  • ⅓ to ½ cup / about 35–50 g finely shredded cabbage or thinly sliced mushrooms
  • 2 scallions / spring onions, thinly sliced
  • 2–4 tablespoons / 30–60 ml neutral oil for pan-frying, or more as needed for shallow-frying

For the Gravy

  • 2 cups / 480 ml chicken stock or vegetable stock
  • 1½ tablespoons / about 22 ml light soy sauce
  • 1 tablespoon / 15 ml oyster sauce or vegetarian oyster sauce
  • ½ teaspoon / 2.5 ml dark soy sauce, optional
  • 1–2 teaspoons / 4–8 g sugar, to taste
  • ¼ teaspoon white pepper
  • 2 tablespoons / about 16 g cornstarch
  • 3 tablespoons / 45 ml cold water
  • ½ teaspoon / 2.5 ml toasted sesame oil

For Serving

  • Steamed rice or fried rice
  • Extra sliced scallions
  • Chili oil, optional

Instructions

Make the Gravy

  1. Prep the filling. Drain the bean sprouts well. Dice the onion, slice the scallions, shred the cabbage or mushrooms, and chop the protein small. Pre-cook raw chicken, raw pork, mushrooms, or vegetables that release a lot of moisture.
  2. Start the gravy. In a small saucepan, combine the stock, soy sauce, oyster sauce, optional dark soy sauce, sugar, and white pepper. Bring to a gentle simmer.
  3. Thicken the gravy. Stir 2 tablespoons cornstarch with 3 tablespoons cold water until smooth. Whisk the slurry into the simmering gravy a little at a time. Simmer for 30 to 60 seconds, until smooth and spoon-coating. Stir in sesame oil and keep warm.

Mix and Cook the Patties

  1. Mix the eggs. In a large bowl, whisk the eggs. Stir 1 teaspoon cornstarch with 1 tablespoon cold water, then whisk it into the eggs with sesame oil and white pepper.
  2. Add the filling. Fold in the bean sprouts, protein, onion, cabbage or mushrooms, and scallions. The mixture should scoop easily: glossy egg around the filling, not soup and not a dry vegetable pile.
  3. Heat the pan. Heat a nonstick skillet or wok over medium to medium-high heat. Add enough oil to coat the bottom, or about ¼ inch / 6 mm oil for a shallow-fried texture.
  4. Cook the patties. Scoop about ½ cup egg mixture into the pan for each patty. Cook for 2 to 3 minutes, until the edges set and the bottom is golden. Flip carefully and cook for 1½ to 2 minutes more, until the middle has no liquid egg.
  5. Adjust after the first patty. If it browns too quickly, lower the heat. If it sticks or looks dry around the edges, add a little more oil before the next batch.

Rest and Serve

  1. Repeat and serve. Cook the remaining patties in batches. Transfer to a wire rack or paper towel-lined plate, let them rest in a single layer, and spoon hot gravy over the patties just before serving.

Notes

  • Keep total filling around 2 to 2½ cups for 6 eggs.
  • The mixture should look egg-forward: glossy egg around the filling, not vegetables barely coated in egg.
  • The first patty is your test patty. Adjust heat, oil, or scoop size before continuing.
  • Use ⅓-cup scoops for easier flipping or ½-cup scoops for standard patties.
  • Cook chicken or pork before adding it. Cooked shrimp is easiest; raw shrimp should be chopped small and cooked until opaque.
  • For puffier edges, shallow-fry with about ¼ inch / 6 mm oil.
  • For roux-style gravy, cook 1 tablespoon oil with 1 tablespoon flour for 1 to 2 minutes, whisk in the stock and seasonings, then finish with less slurry.
  • Spoon gravy over the patties just before serving, not far ahead.
  • Store patties and gravy separately.
Back to top

Posted on — 1 Comment

Pad Kra Pao Recipe: Thai Basil Chicken, Pork, or Beef: Thai Basil Chicken, Pork, or Beef

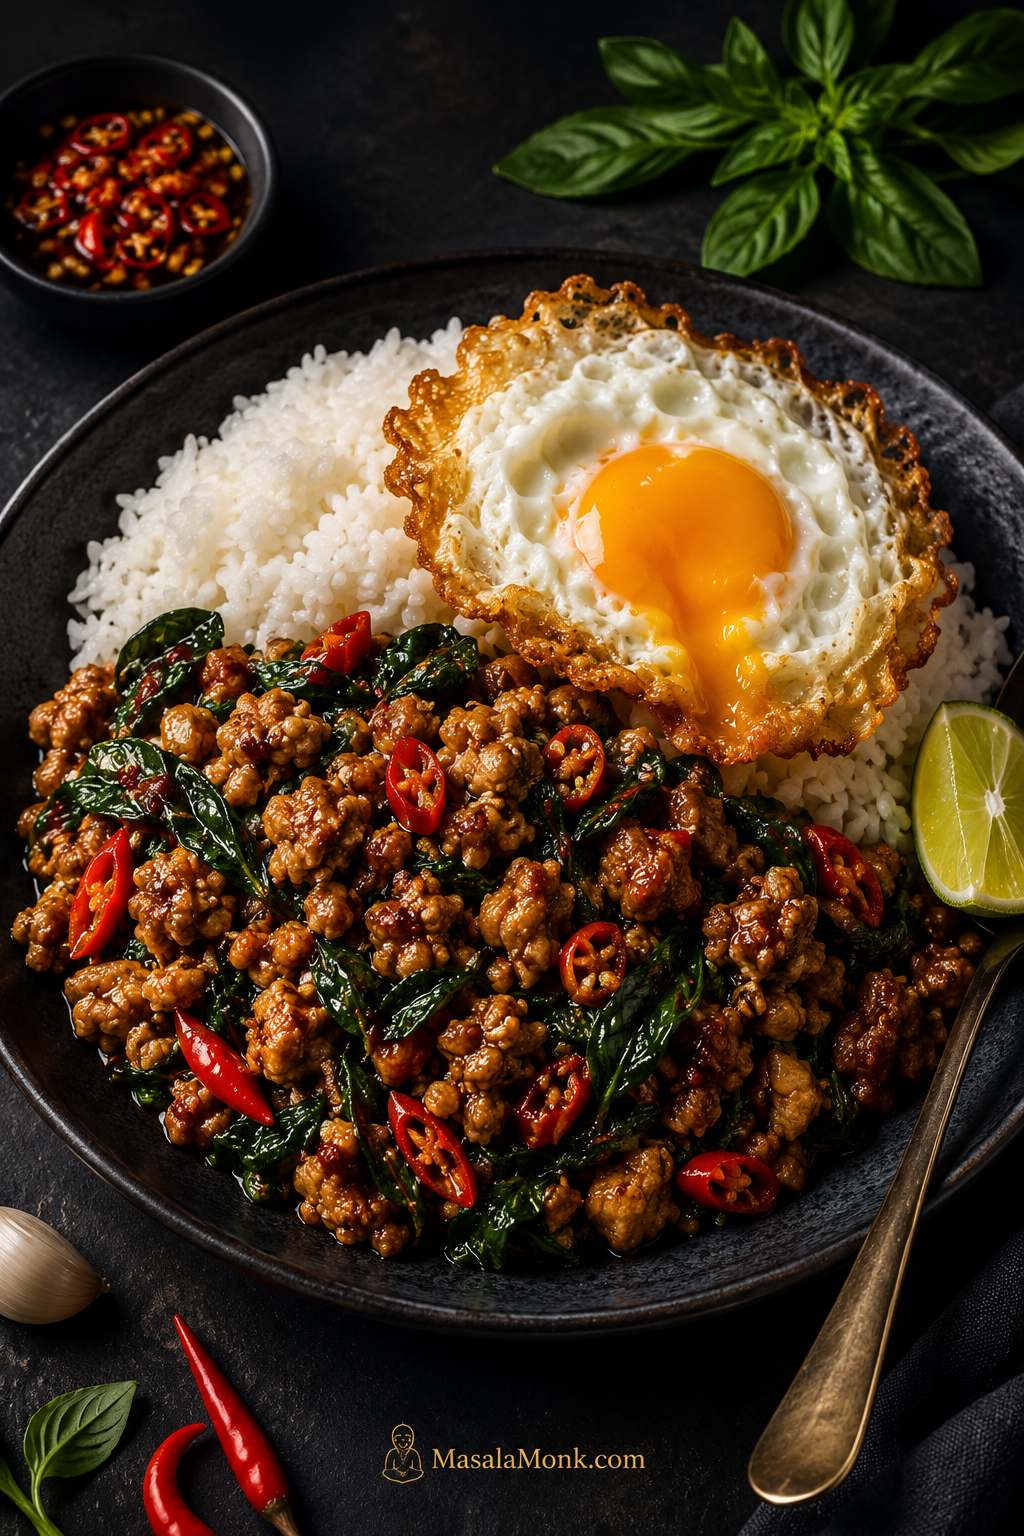
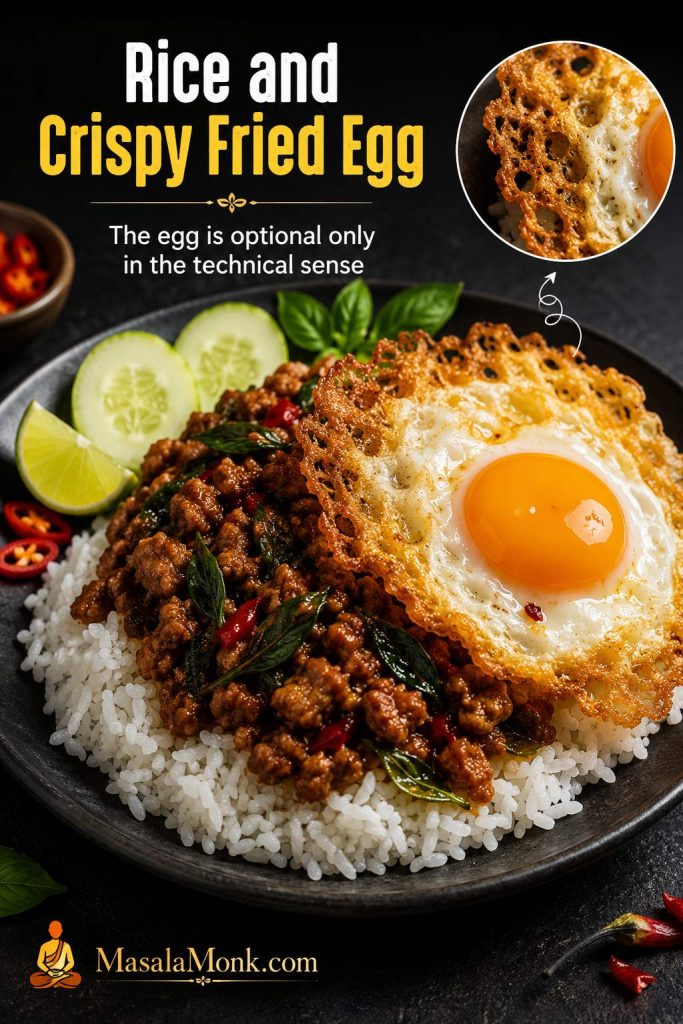
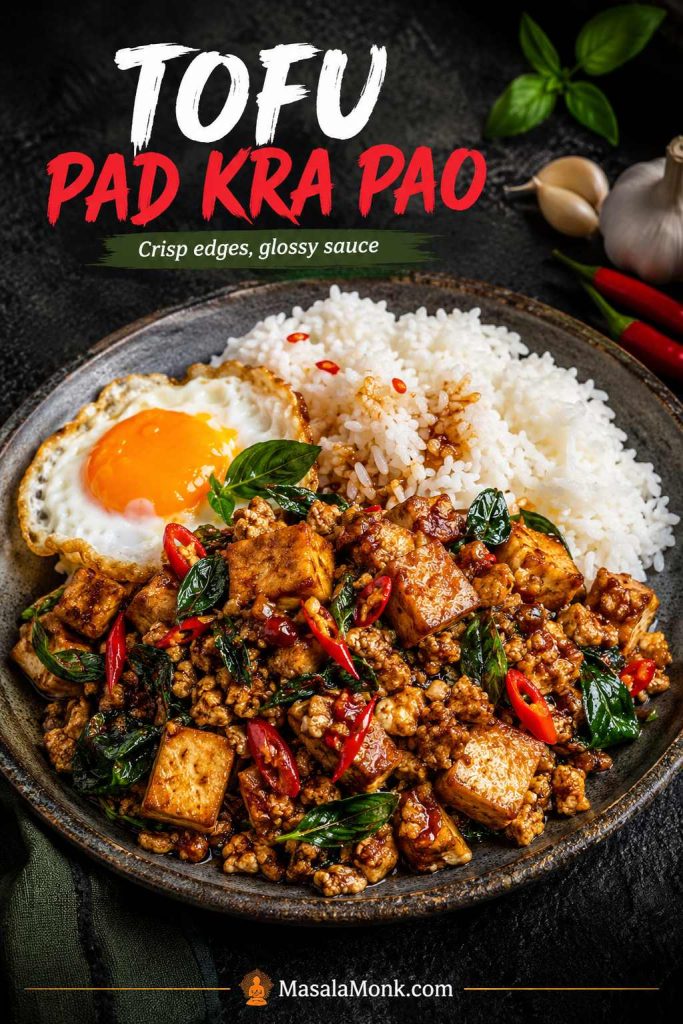
Finished Pad Kra Pao rice plate with glossy basil minced meat, red chilies, fluffy white rice, lime, and a crispy fried egg on a dark plate.

Pad Kra Pao is the Thai rice plate you want when dinner needs to be fast but still loud: garlic in hot oil, chilies, glossy minced meat, fresh basil, steamed rice, and a crispy fried egg that breaks into the sauce.

It is bold without being complicated. Once the rice is ready and the sauce is mixed, the stir-fry itself takes only a few minutes, which is why this dish works so well for weeknights, leftovers, and those “I want takeout, but I can cook” nights.

You may know this dish as Thai basil chicken, pad krapow, pad ka pow, kra pao, or holy basil chicken. The names and spellings vary, but the craving is usually the same: a spicy basil stir-fry that tastes fresh, savory, chili-hot, and glossy.

Here, you can make it with chicken, pork, or beef, then use the same base for tofu or eggplant. You will also see what to do if you only have Thai basil instead of holy basil, how to adjust the sauce, and how to fix the common problems that make homemade Pad Kra Pao taste flat, salty, or dry.

Quick Answer: What Is Pad Kra Pao?

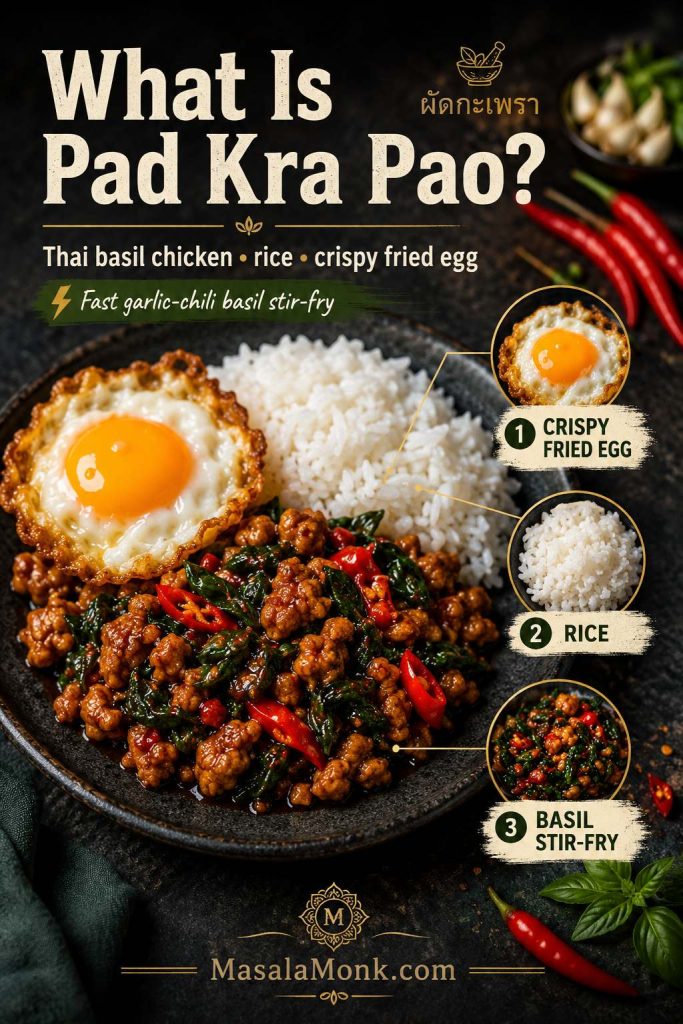
Pad Kra Pao is a Thai basil stir-fry made with garlic, chilies, meat or tofu, a salty-savory sauce, and basil. It is usually served over rice, often with a crispy fried egg on top.

If you came here looking for Thai basil chicken, this is the same dish family. Thai basil chicken is the version many people know from Thai restaurants: minced or chopped chicken stir-fried with garlic, chilies, basil, and sauce, then spooned over rice.

The most traditional version is made with holy basil, which has a sharper, peppery, clove-like aroma. Thai basil gives a different but still excellent home version: sweeter, more anise-like, and closer to many restaurant-style Thai basil chicken plates outside Thailand.

Best quick version: Use 450g / 1 lb ground chicken, pork, or beef; 5–8 garlic cloves; 3–6 chilies; 1½–2 cups basil leaves; and a sauce made with oyster sauce, fish sauce, soy sauce, dark soy, sugar, and a little water or stock. Stir-fry hot and fast, add basil at the end, and serve over rice with a crispy fried egg.

Need exact measurements? See the sauce ratio or jump to the recipe card.
Labeled Pad Kra Pao plate with basil stir-fry, white rice, and crispy fried egg callouts.
If you know this dish as Thai basil chicken, the idea is the same: a fast garlic-chili basil stir-fry made to land on rice, usually with a crispy fried egg on top.

Why This Pad Kra Pao Works

The flavor does not come from marinating or simmering. It comes from a hot pan, crushed garlic and chilies, meat that sizzles instead of steams, sauce that reduces until glossy, and basil added right at the end.

Keep those five things in place and the dish tastes bold even with practical substitutions. When it works, the pan smells sharp with garlic and chilies, the meat looks shiny instead of wet, and the basil hits at the end with a fresh, peppery lift.

That rhythm is the whole dish: hot, sharp, glossy, fresh.

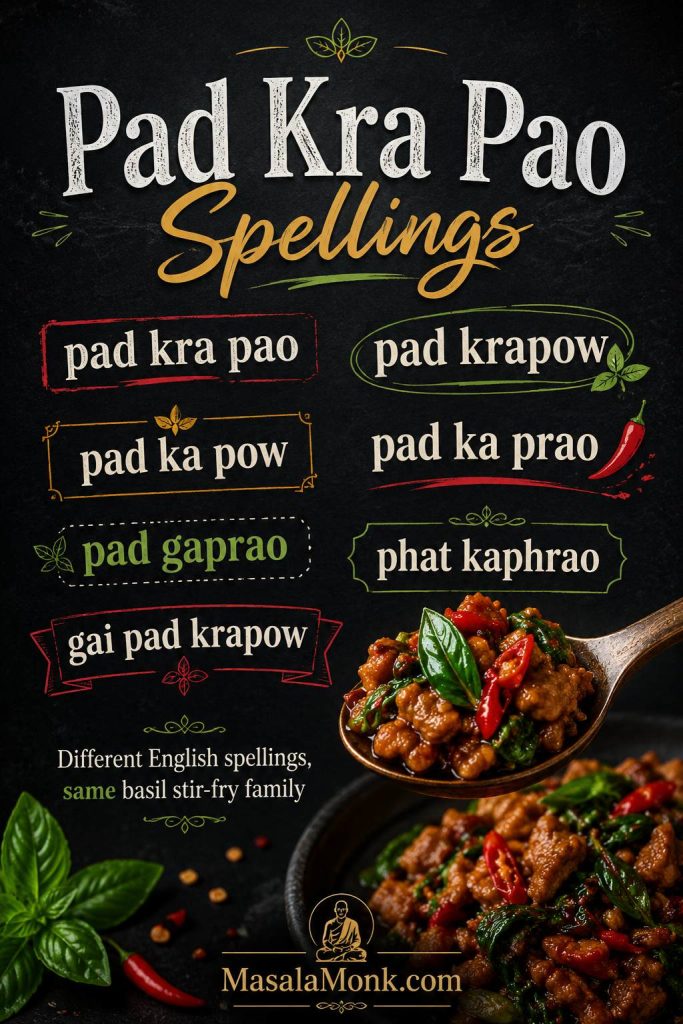
Pad Kra Pao, Pad Krapow, Pad Ka Pow: Why So Many Spellings?

You may see this dish written as pad kra pao, pad krapow, pad ka pow, pad ka prao, pad gaprao, phat kaphrao, kra pao, or gai pad krapow. These spellings come from different ways of transliterating Thai into English.

For a home cook, the idea is simpler than the name: a hot, fast basil stir-fry with garlic, chilies, sauce, rice, and usually a fried egg. Here, we’ll call it Pad Kra Pao for consistency, but if a menu uses another spelling, you are still in the right place.

Editorial spelling guide for Pad Kra Pao with terms pad krapow, pad ka pow, pad gaprao, and a small plated basil stir-fry.
Because Thai names are transliterated several ways, pad kra pao, pad krapow, pad ka pow, and pad gaprao usually lead readers to the same basil-heavy stir-fry family.

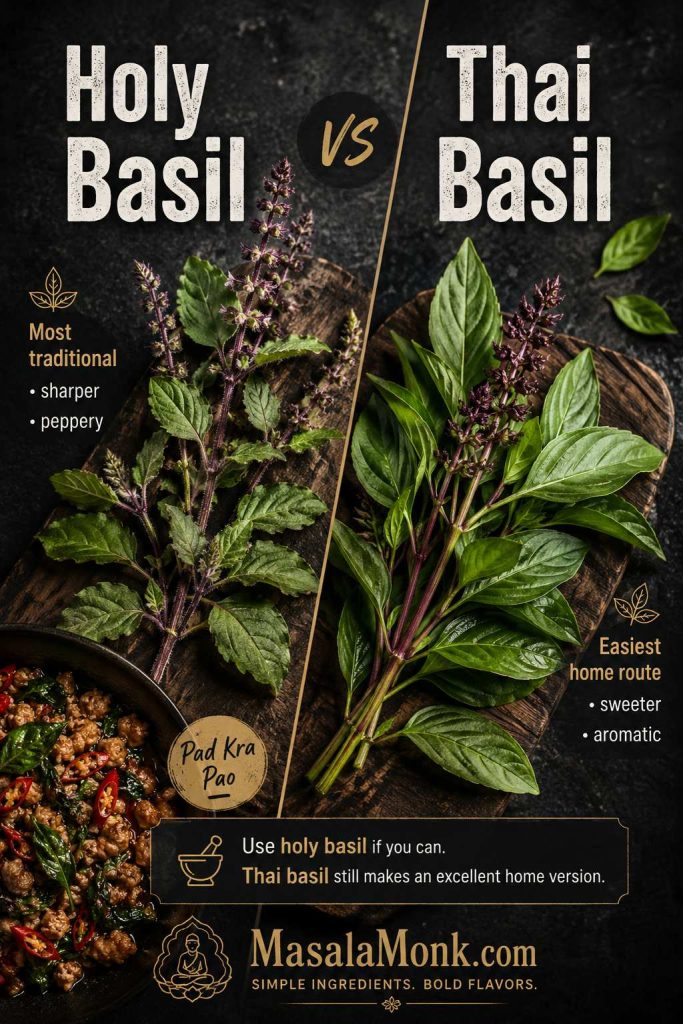
Holy Basil vs Thai Basil

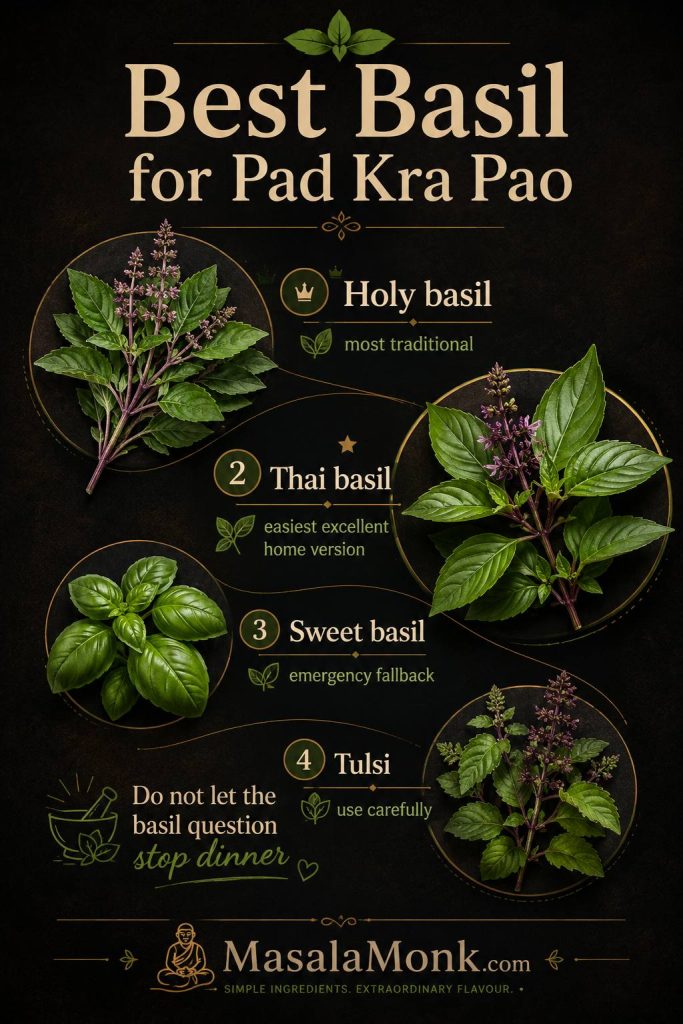
The basil question matters because it changes the flavor of the dish. It should not stop you from cooking, though.

Strictly speaking, holy basil is what gives Pad Kra Pao its name and sharper, peppery character. Thai basil is the easiest excellent home-cook route: not identical, but fresh, aromatic, easy to find, and deeply satisfying in this garlic-chili rice plate. For a deeper Thai cooking perspective on the dish, see this explanation from Hot Thai Kitchen.

Comparison board showing holy basil and Thai basil leaves with flavor notes beside a small Pad Kra Pao dish.
Holy basil gives Pad Kra Pao its sharper traditional bite; however, Thai basil is often the easiest excellent route for a home-style Thai basil chicken plate.

Holy Basil

Holy basil is the most traditional choice for Pad Kra Pao. It has a sharper, peppery, slightly clove-like flavor. If you can find Thai holy basil at an Asian grocery store, use it.

The leaves wilt quickly, so add them at the very end. Do not simmer them for several minutes or the aroma will fade.

Thai Basil

For most home cooks, Thai basil is the easiest reliable substitute. Its aroma is sweeter and more anise-like than holy basil, and it is easier to find in many places.

Many restaurant-style Thai basil chicken recipes use Thai basil, so the flavor will still feel familiar and satisfying. If you are cooking this on a normal weeknight, do not let the basil question stop dinner.

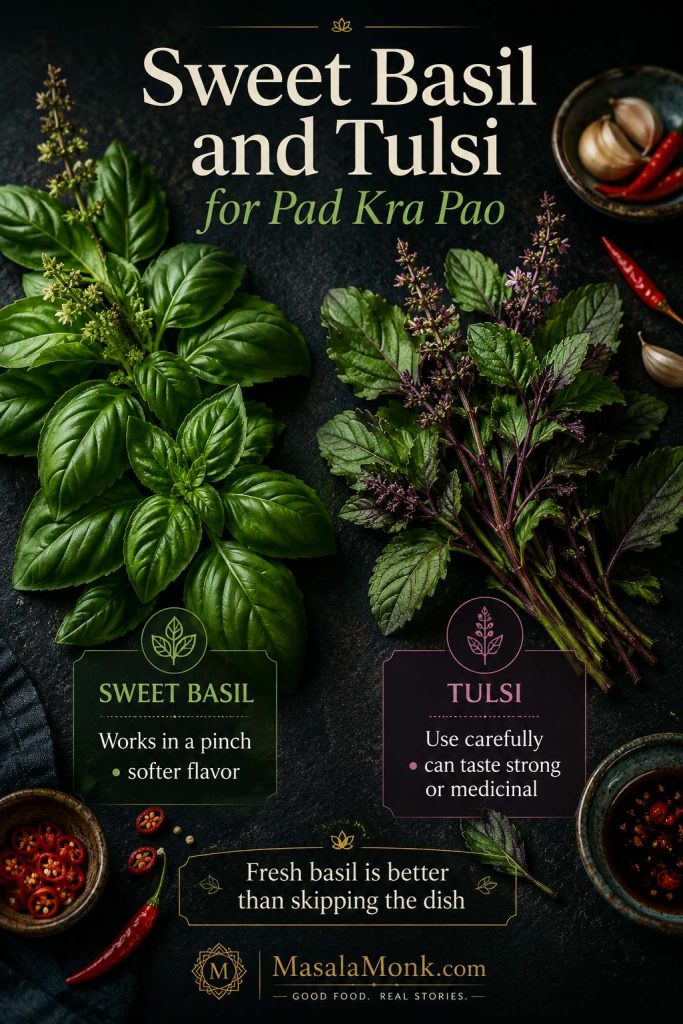
Sweet Basil

Sweet basil, also called Italian basil, will not taste the same as holy basil or Thai basil. Still, it can work when that is all you have.

The result will taste softer, sweeter, and less peppery. It may lean slightly toward a regular basil stir-fry rather than classic Pad Kra Pao, but it is better to make a good basil rice plate than to skip the dish completely.

Can You Use Tulsi?

Tulsi is related to holy basil, but it is not always a simple one-for-one replacement in cooking. Depending on the variety, it can taste medicinal, bitter, or very strong when used in large amounts.

If you want to try tulsi, use a smaller amount first and mix it with Thai basil or sweet basil if possible. Fresh basil in a hot pan is still better than waiting for the perfect herb and never cooking the dish.

Whatever basil you use, wash the leaves ahead of time and dry them well. Wet basil can splutter in the pan and add extra moisture right when you want the sauce to stay glossy.

Sweet basil and tulsi fallback herb board with notes about softer flavor and careful tulsi use.
When holy basil and Thai basil are not available, fresh herbs still help; sweet basil makes the dish softer, while tulsi should be used lightly because its flavor can turn strong.
Simple basil rule: use holy basil if you can get it, Thai basil when you want the easiest excellent home version, sweet basil only if that is what you have, and tulsi carefully.

Already know your basil choice? Go to the ingredients.
Decision board comparing holy basil, Thai basil, sweet basil, and tulsi for Pad Kra Pao.
Use the best basil you can find, but do not pause dinner over the herb question; the bigger win is keeping the garlic-chili-basil structure intact.

Ingredients You Need

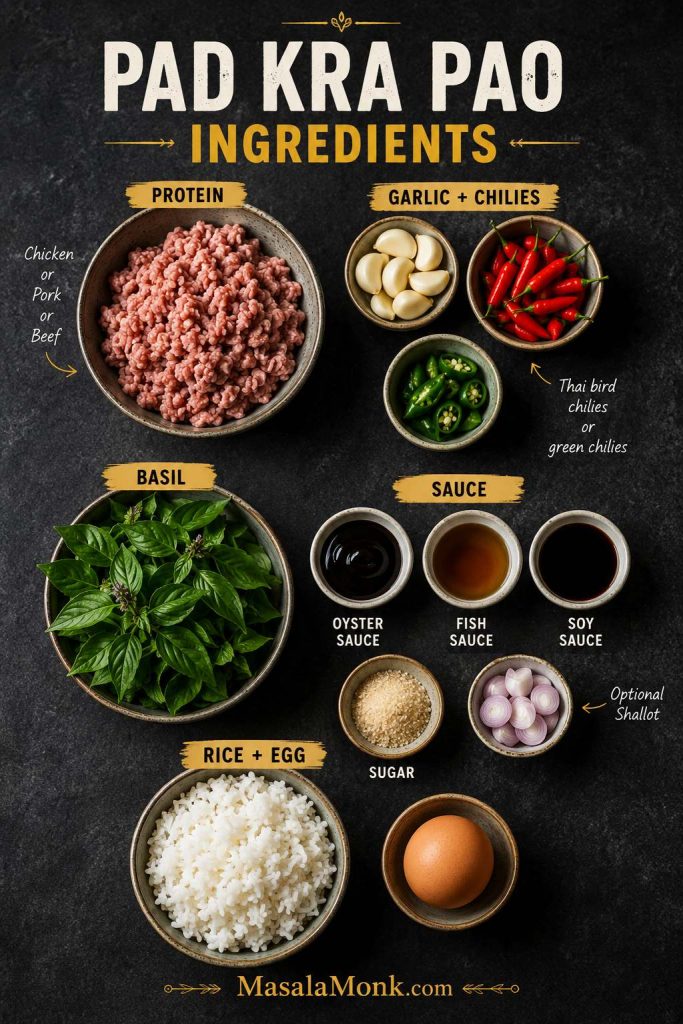
Pad Kra Pao is short on ingredients, but every ingredient has a job. Think of them in two groups: the loud things that wake up the pan — garlic, chilies, basil — and the salty-sweet sauce that makes the rice worth eating.

Overhead Pad Kra Pao ingredient map with protein, garlic, chilies, basil, sauce ingredients, rice, egg, and shallot.
The ingredients work in groups: protein catches the sauce, garlic and chilies wake up the pan, basil finishes fresh, and rice plus egg turn it into dinner.

Chicken, Pork, Beef, Tofu, or Eggplant

Ground meat is easiest because it cooks quickly and catches the sauce well. Use ground chicken, ground pork, ground beef, or finely chopped boneless meat. Hand-chopped chicken thigh gives a slightly chunkier, more restaurant-style bite.

For the main recipe, use 450g / 1 lb meat. If your pack is 500g, that is fine. You may need a small extra handful of basil or a splash more water, but do not automatically increase every sauce ingredient.

You do not need to marinate the meat. The flavor comes from the hot garlic-chili base, the sauce reducing onto the meat, and the basil added at the end.

Pork gives the juiciest, most classic-feeling version. Chicken is the version many people recognize from Thai restaurant menus. Beef gives a deeper, richer stir-fry.

Garlic and Chilies

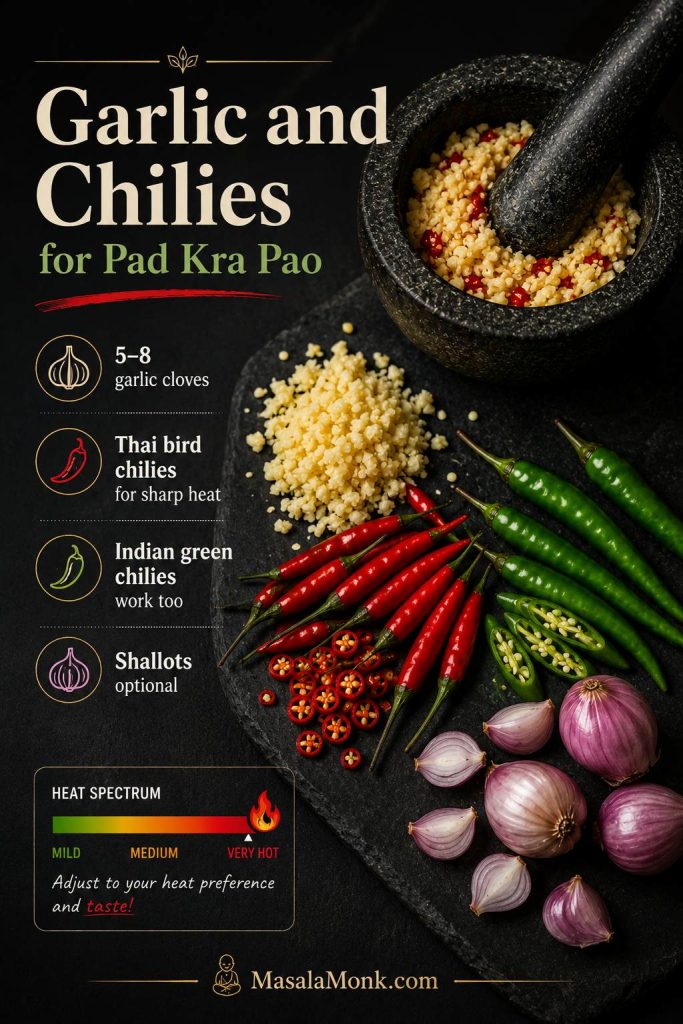
Do not be shy with garlic. Pad Kra Pao should taste bold.

Use 5–8 garlic cloves for 450g / 1 lb meat. For heat, use 3–6 Thai bird chilies, or use 2–4 Indian green chilies if that is what you have. For a mild family version, start with 1 Thai chili or 1 small green chili, then add extra chopped chilies at the table.

Shallots are optional. They add a little sweetness and body, but the dish still works without them.

A mortar and pestle gives the strongest aroma because it crushes the garlic and chilies instead of only cutting them. Finely chopping with a knife also works. The goal is rough, fragrant pieces, not a watery paste.

Garlic and chili guide with crushed garlic, Thai bird chilies, Indian green chilies, optional shallots, and a heat spectrum.
Garlic and chilies are not background flavor here; instead, they create the sharp first hit that keeps Pad Kra Pao from tasting like a regular soy-sauce stir-fry.

Sauce Ingredients

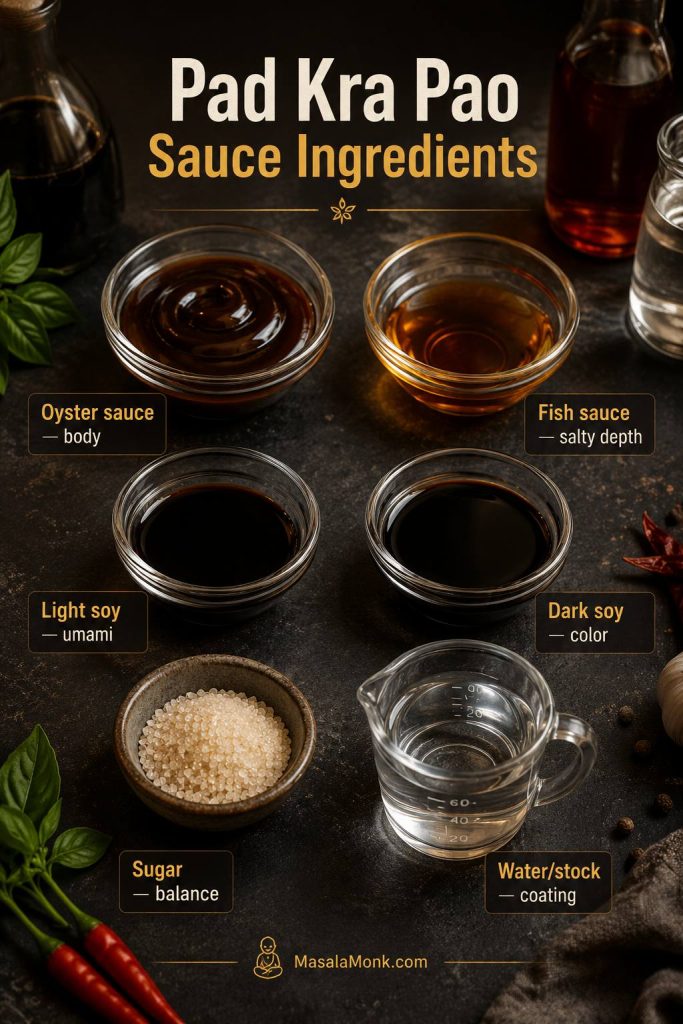
The sauce usually includes oyster sauce, fish sauce, light soy sauce, optional dark soy sauce, sugar, and a little water or stock.

Oyster sauce gives body and savory sweetness. Fish sauce gives salty depth. Light soy adds more salt and umami. Dark soy adds color, but the dish can still work without it. Sugar rounds the heat and salt.

For a vegetarian version, use vegetarian oyster sauce or mushroom sauce, replace fish sauce with light soy sauce, and keep the sugar modest because many mushroom sauces are already slightly sweet.

Pad Kra Pao sauce ingredients board with oyster sauce, fish sauce, light soy, dark soy, sugar, and water or stock role labels.
Oyster sauce gives body, fish sauce adds depth, soy brings umami, and a splash of water or stock helps the sauce coat instead of clump.

Rice and Crispy Fried Egg

Serve it over hot rice so the sauce has somewhere to land. Jasmine rice gives the most classic feel, but plain steamed rice, basmati, or even leftover rice will still do the job.

The crispy fried egg is optional only in the technical sense. In practice, it makes the plate feel complete. The runny yolk mixes with the salty basil stir-fry and rice, while the crisp edges add texture. If the egg yolk runs into the rice, that is not a problem. That is the point.

Pad Kra Pao rice plate with glossy basil meat, fluffy rice, a lacy crispy fried egg, and a close-up egg texture inset.
The crispy fried egg is more than garnish; once the yolk runs into hot rice, it softens the salty chili-basil stir-fry into a satisfying plate.

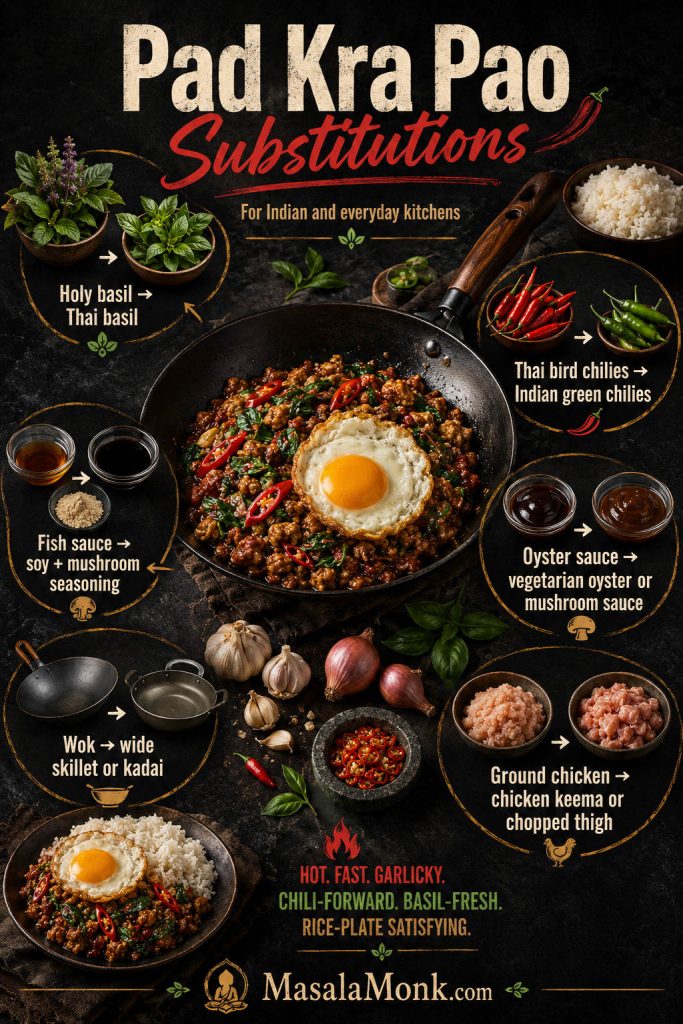
Easy Substitutions for Indian and Everyday Kitchens

Missing one bottle should not kill the dish. Losing the garlic-chili-basil structure will.

The goal is not to fake perfection. It is to keep the core of the dish intact with what you can actually buy.

Pad Kra Pao substitutions board for Indian kitchens with basil, green chilies, sauces, chicken keema, garlic, and a skillet or kadai cue.
Even with everyday swaps, keep the structure intact: fresh basil, sharp chilies, a salty-savory sauce, and a hot wide pan.
If You Do Not Have… Use This What Changes
Holy basil Thai basil Sweeter and more anise-like, but still excellent
Thai basil Sweet basil Softer and less peppery; still fresh and usable
Thai bird chilies Indian green chilies or serrano chilies Heat is less sharp, but the recipe still works
Dark soy sauce Skip it, or use a tiny extra splash of light soy Less dark color, but the flavor is still good
Fish sauce Light soy sauce plus a pinch of mushroom seasoning Less funky depth, but still savory
Oyster sauce Vegetarian oyster sauce or mushroom sauce Best vegetarian replacement for body and umami
Jasmine rice Plain steamed rice Less fragrant, but perfectly usable
Ground chicken Chicken keema or finely chopped boneless thigh Similar texture; chopped thigh stays juicier
Wok Wide skillet or wide kadai Works well if the pan is hot and not crowded

If your regular soy sauce is very dark and salty, use it like light soy sauce and skip the dark soy. Some supermarket soy sauces do not map neatly to “light soy” and “dark soy,” so taste and adjust gently.

The biggest substitution mistake is not using the “wrong” basil. It is crowding the pan and boiling the meat instead of stir-frying it. A hot, wide pan matters more than having every bottle exactly right.

Once your swaps are sorted, check the sauce ratio before you start cooking.

Best Pan and Equipment for Pad Kra Pao

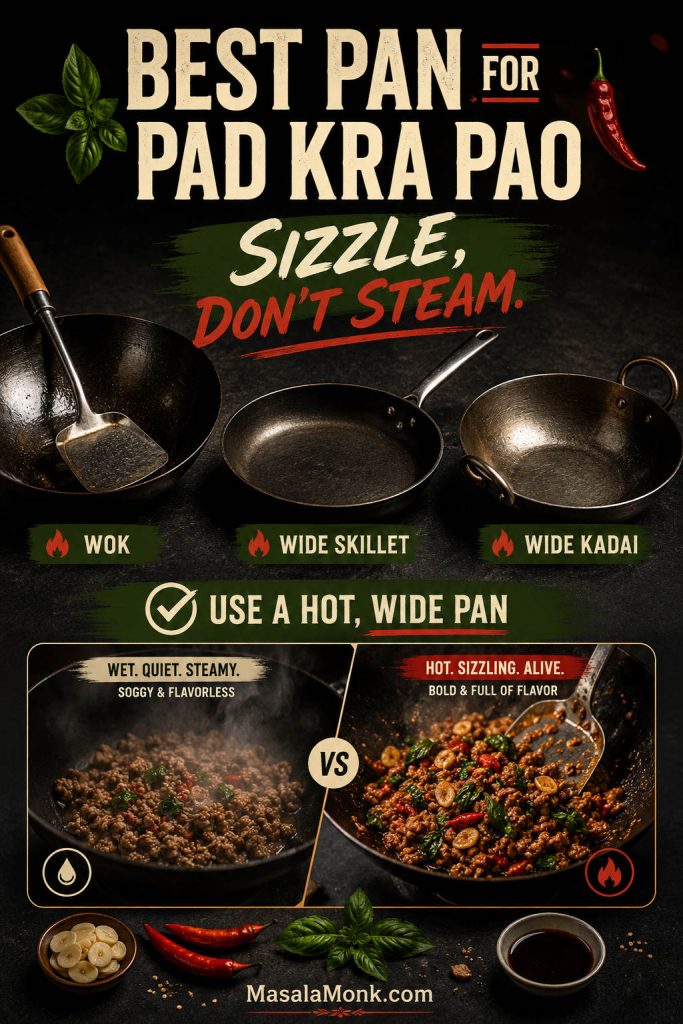
A wok gives you quick heat and fast evaporation, but a wide skillet works very well for home cooking.

Use a 12-inch / 30cm skillet if you do not have a wok. A wide kadai can also work if it gives the meat enough surface area. Avoid using a small deep pan for a full batch because the meat will steam and release liquid.

For nonstick pans, use medium-high heat instead of the highest possible heat. For a wok or stainless-steel skillet, high heat is fine as long as you keep the food moving.

You will also need a small bowl for the sauce, a knife or mortar and pestle for the garlic and chilies, and a small frying pan if you are making crispy eggs.

Pan rule: the meat should sizzle, not steam. If the pan sounds quiet and wet, it is not stir-frying yet.
Best pan guide showing wok, wide skillet, and wide kadai with a sizzle versus steam cue for Pad Kra Pao.
A wide hot pan is the difference between stir-fried and steamed meat; therefore, listen for a real sizzle before adding the sauce.

If your pan setup is ready, go straight to the method.

Pad Kra Pao Sauce Ratio

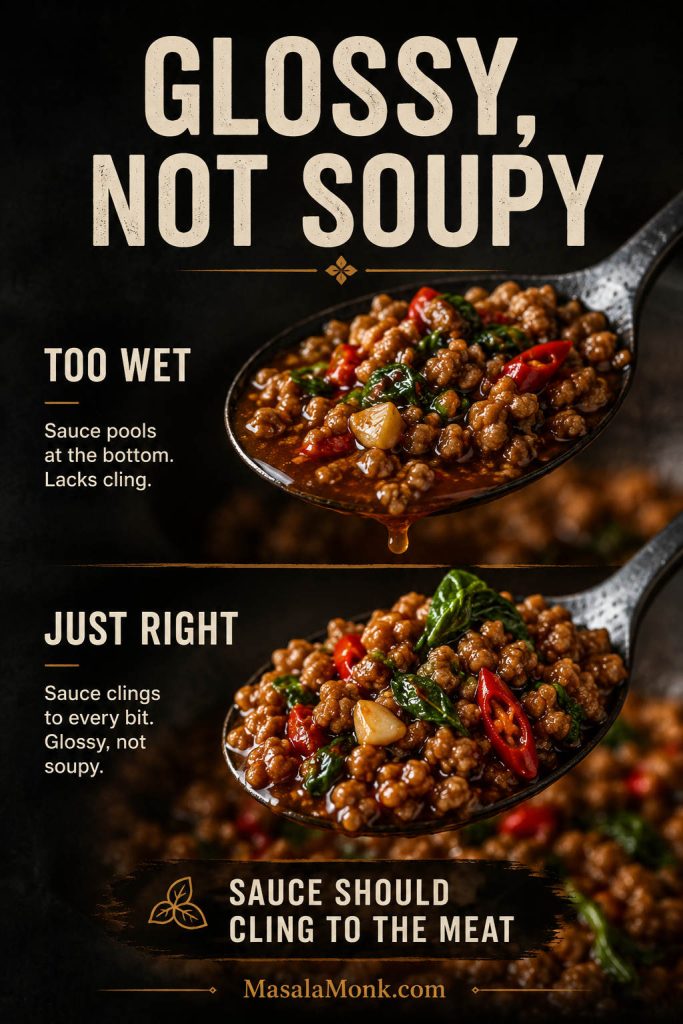
The sauce should cling to the meat first and season the rice second. It should look glossy, not soupy.

When the sauce hits the pan, it should bubble hard almost immediately. When it looks like the rice underneath will want a spoonful of it, but the pan is not swimming, you are in the right zone.

Texture comparison board showing too wet Pad Kra Pao versus just-right glossy meat with basil and chilies.
The best texture is glossy and spoonable, not soupy; once the sauce clings to the meat, it flavors the rice without flooding the plate.

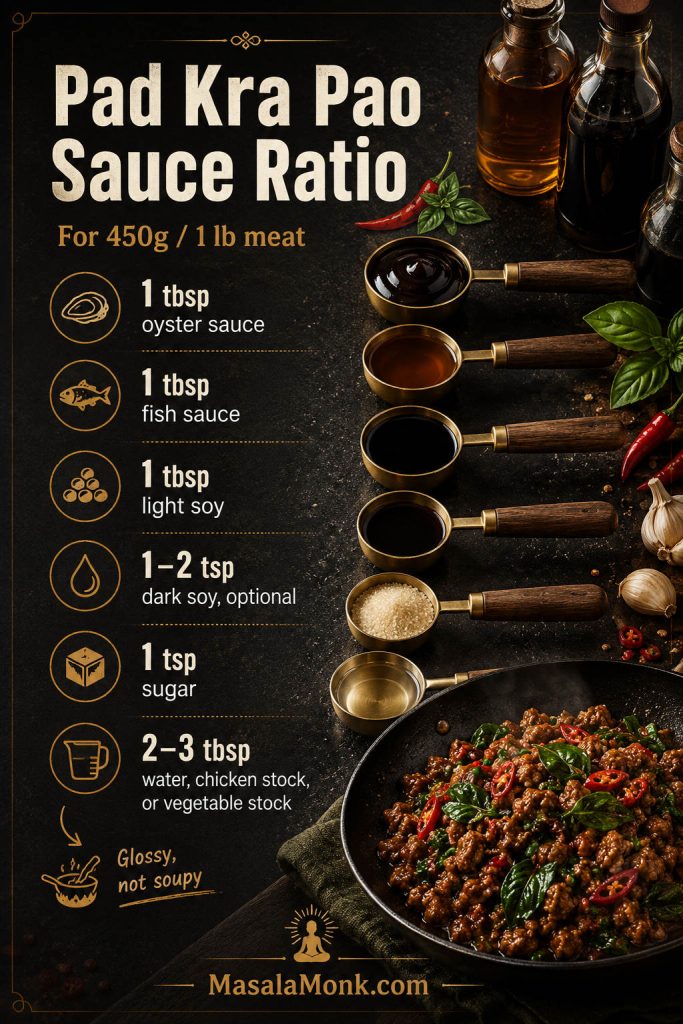
Balanced Sauce for 450g / 1 lb Meat

Ingredient Amount What It Does
Oyster sauce 1 tbsp / 15 ml Adds savory body and slight sweetness
Fish sauce 1 tbsp / 15 ml Gives salty, Thai-style depth
Light soy sauce 1 tbsp / 15 ml Adds salt and umami
Dark soy sauce 1–2 tsp / 5–10 ml, optional Adds color and deeper flavor
Sugar 1 tsp / about 4g Rounds the salt and chili heat
Water, chicken stock, or vegetable stock 2–3 tbsp / 30–45 ml Helps the sauce coat the meat
Saveable Pad Kra Pao sauce ratio card with measured oyster sauce, fish sauce, light soy, dark soy, sugar, and water or stock.
This Pad Kra Pao sauce ratio is built for 450g or 1 lb of meat, so the sauce should cling to the mince and lightly season the rice below.

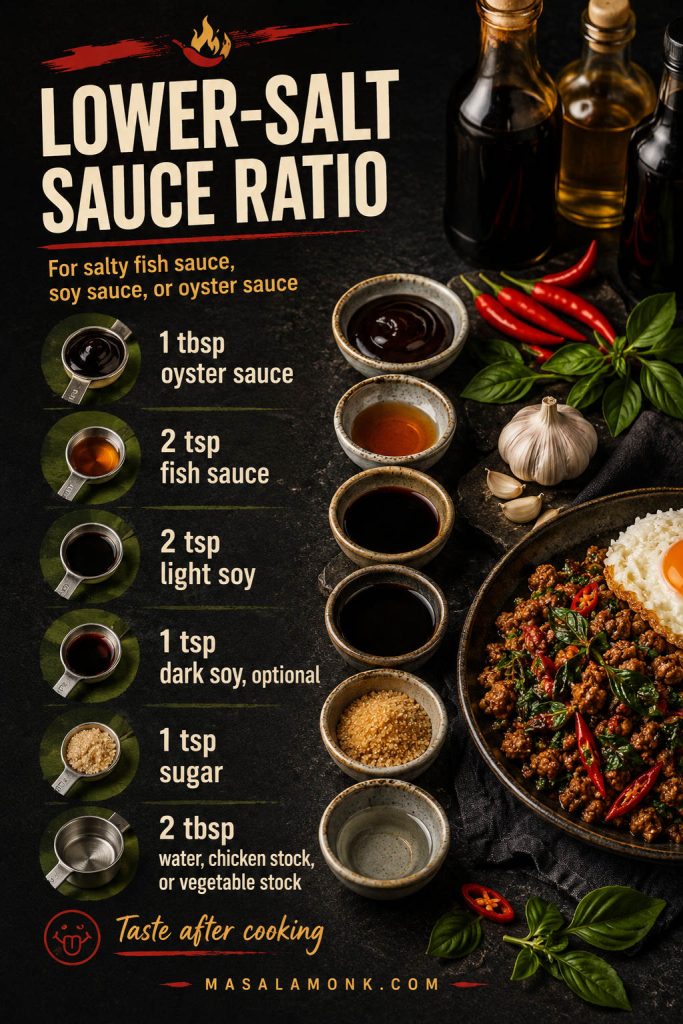
Lower-Salt Sauce Ratio

If your fish sauce, soy sauce, or oyster sauce tastes especially salty, use this version first.

Ingredient Amount
Oyster sauce 1 tbsp / 15 ml
Fish sauce 2 tsp / 10 ml
Light soy sauce 2 tsp / 10 ml
Dark soy sauce 1 tsp / 5 ml, optional
Sugar 1 tsp / about 4g
Water, chicken stock, or vegetable stock 2 tbsp / 30 ml
Lower-salt Pad Kra Pao sauce ratio card with smaller fish sauce and soy sauce amounts for salty sauce brands.
If your fish sauce or soy sauce tastes very salty, start lower; then, after cooking, balance the plate with rice, lime, or a small extra splash of sauce.

Sauce brands vary, especially oyster sauce and soy sauce. If yours tastes very salty or very sweet straight from the bottle, start with the lower-salt ratio and adjust after cooking.

Taste after cooking. If the stir-fry is too salty, serve it with more rice and reduce fish sauce next time. If it tastes flat, it may need more garlic, chili, basil, or a better salt-sugar balance.

Once the sauce is mixed, move to the cooking method.

How to Make Pad Kra Pao

Pad Kra Pao cooks quickly, so the method is more about timing than difficulty. Once everything is lined up, the cooking feels fast rather than stressful.

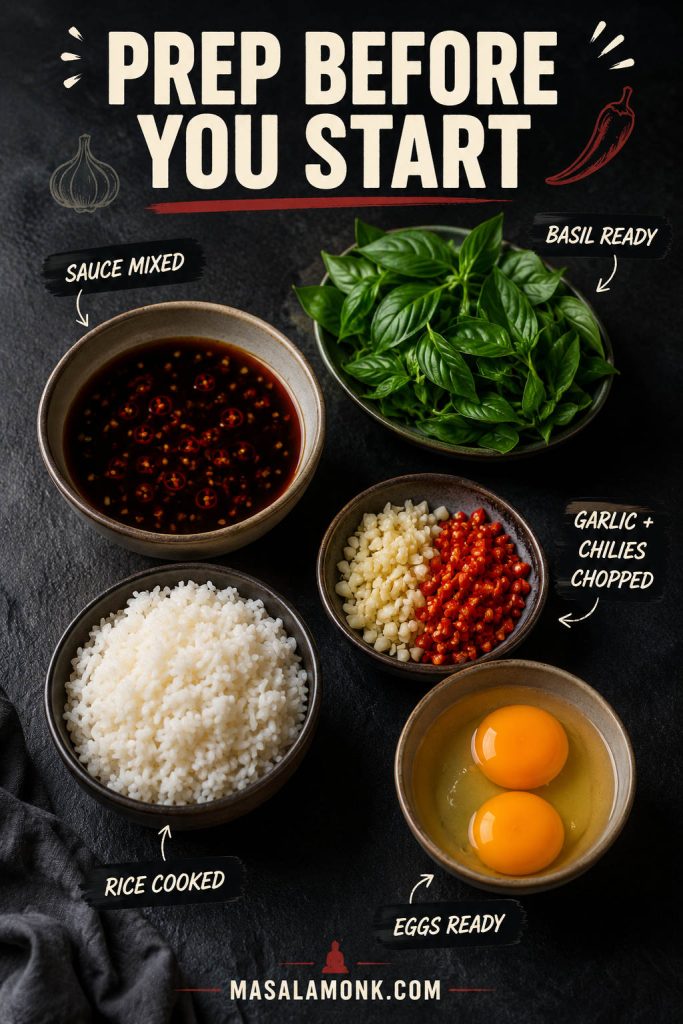
Before turning on the stove, have the sauce mixed, basil picked and dried, garlic and chilies chopped, rice cooked, and eggs ready to fry. Once the pan is hot, there is not much time to stop and measure.

Pad Kra Pao prep setup with mixed sauce, basil, chopped garlic and chilies, cooked rice, and eggs on a dark surface.
Because Pad Kra Pao moves fast, prep the sauce, basil, aromatics, rice, and eggs first; then the cooking feels quick instead of chaotic.

Cook the Rice First

Start the rice before you cook the stir-fry. Once the garlic and chilies hit the pan, the dish moves fast.

Jasmine rice is the classic choice, but any plain steamed rice will work. If rice timing or water ratios are the part that usually slows you down, MasalaMonk’s guide to cooking perfect rice can help you get the base ready before the stir-fry starts. Avoid heavily seasoned rice because the stir-fry already has plenty of salt, chili, garlic, and basil.

Mix the Sauce Before You Start

Stir the oyster sauce, fish sauce, soy sauces, sugar, and water or stock in a small bowl.

Measure the sauce first, because garlic can burn while you are still looking for bottles.

Pound or Chop Garlic and Chilies

For the strongest aroma, pound garlic and chilies together in a mortar and pestle until roughly crushed. You do not need a smooth paste.

If you do not have a mortar and pestle, finely chop everything with a knife. A mini chopper also works, but stop before the mixture turns wet and pasty.

Fry the Crispy Egg

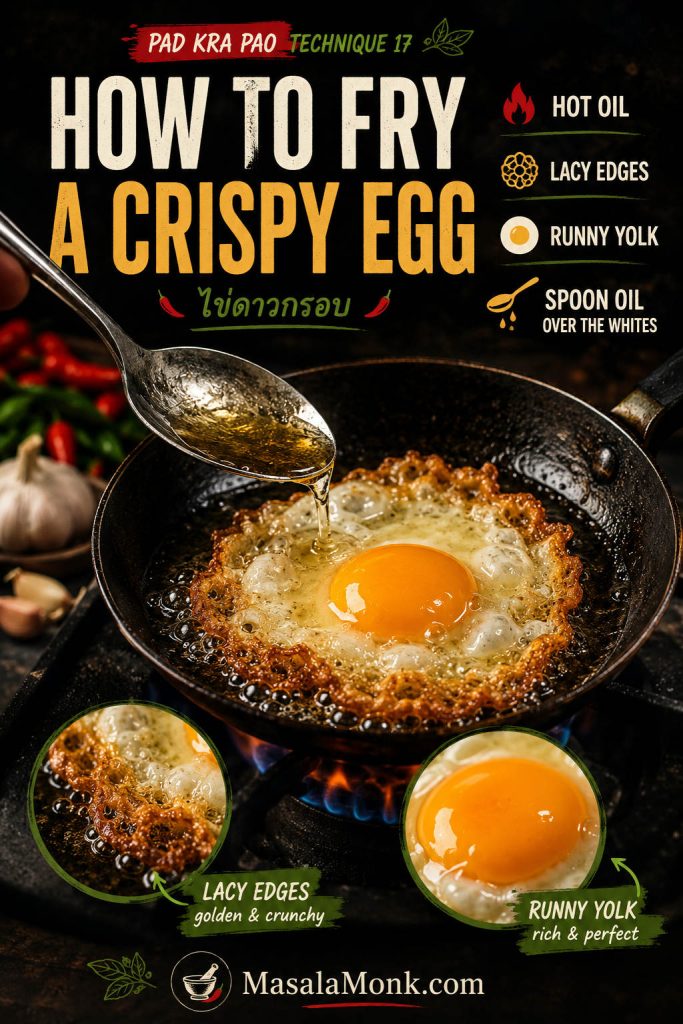
For each serving, use one egg. Heat 2–3 tablespoons of oil in a small pan, then fry the eggs one at a time or in batches. Add a little more oil between eggs only if the pan gets dry.

Crack in the egg and spoon hot oil over the whites until the edges are crisp and lacy. Keep the yolk runny if you like the classic rice-plate effect.

You can fry the eggs before the stir-fry and set them aside, or fry them right after the stir-fry if you prefer the egg hot from the pan.

Crispy fried egg technique board with hot oil, lacy golden edges, runny yolk, and spooning oil over the whites.
For a Thai-style crispy egg, hot oil matters; spoon it over the whites so the edges turn lacy while the yolk stays rich.

Stir-Fry the Meat Hot and Fast

Heat a wok over high heat, or use medium-high heat if you are cooking in a nonstick skillet. Add oil, then the garlic, chilies, and optional shallots.

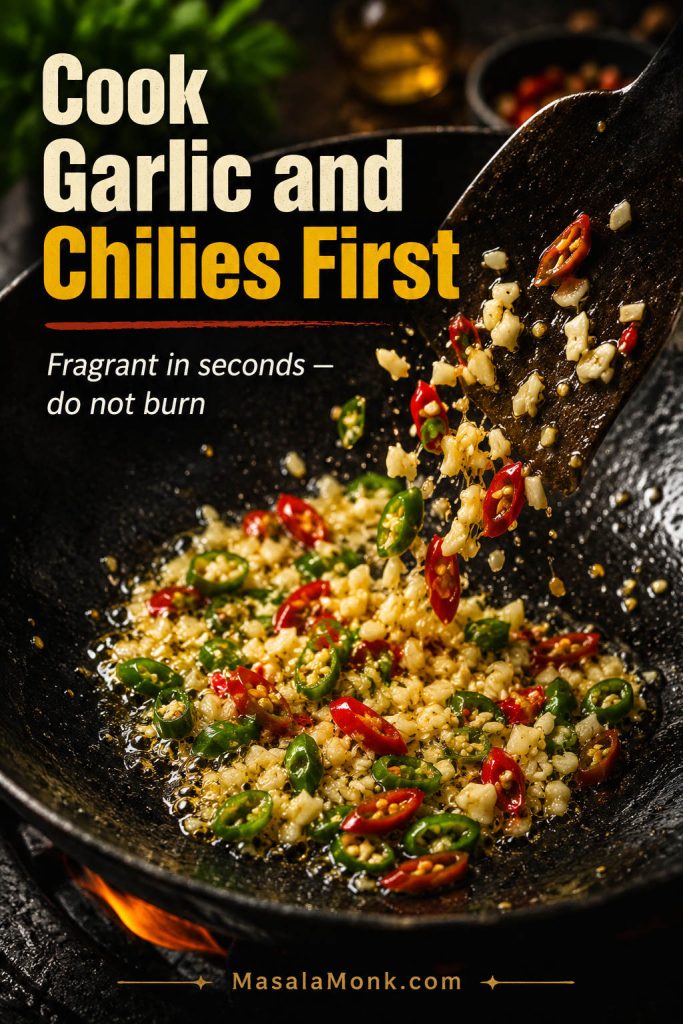
The garlic and chilies should become fragrant within seconds. Do not let the garlic turn dark brown. This is the point where the kitchen should smell sharp, garlicky, and a little wild.

Garlic and sliced red and green chilies sizzling in oil in a wok with a spatula.
This is the aroma stage, so move quickly: the garlic should smell sharp and toasty before it gets dark.

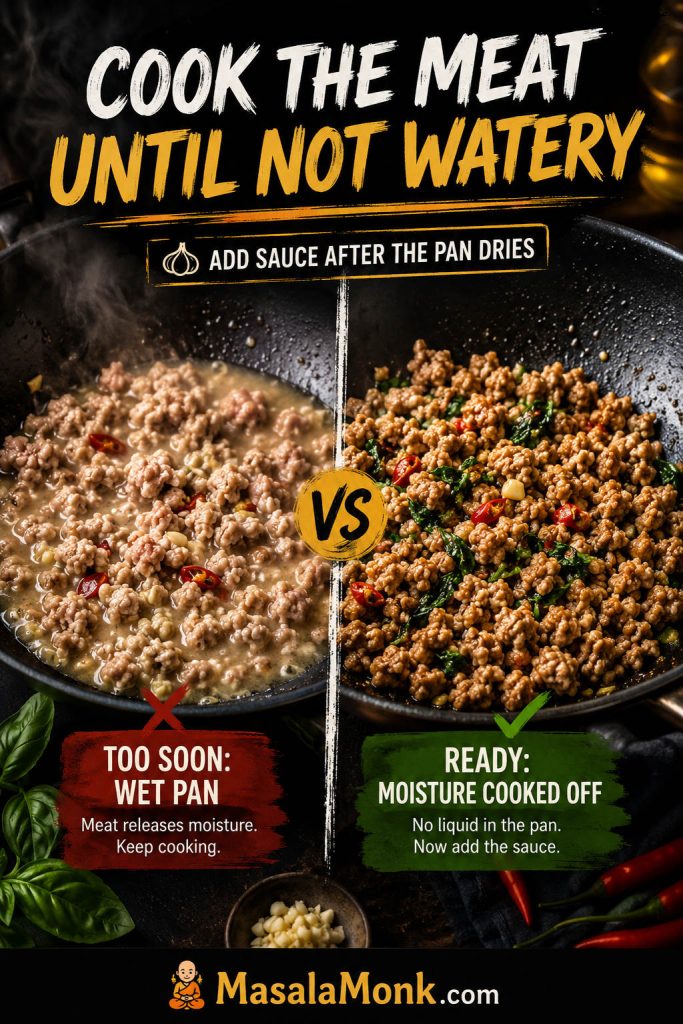
Add the meat and break it up as it cooks. It should sizzle, not sit in liquid. If it releases moisture, spread it across the pan and keep cooking until most of that moisture evaporates.

If you add the sauce while the pan is still watery, the finished dish can taste boiled instead of stir-fried.

Before-and-after pan comparison showing wet minced meat versus moisture-cooked-off meat ready for sauce.
Add sauce only after the released moisture cooks off; otherwise, Pad Kra Pao turns boiled and watery instead of glossy.

If your pan is already looking wet, jump to the troubleshooting guide before adding basil.

Add Sauce and Reduce Until Glossy

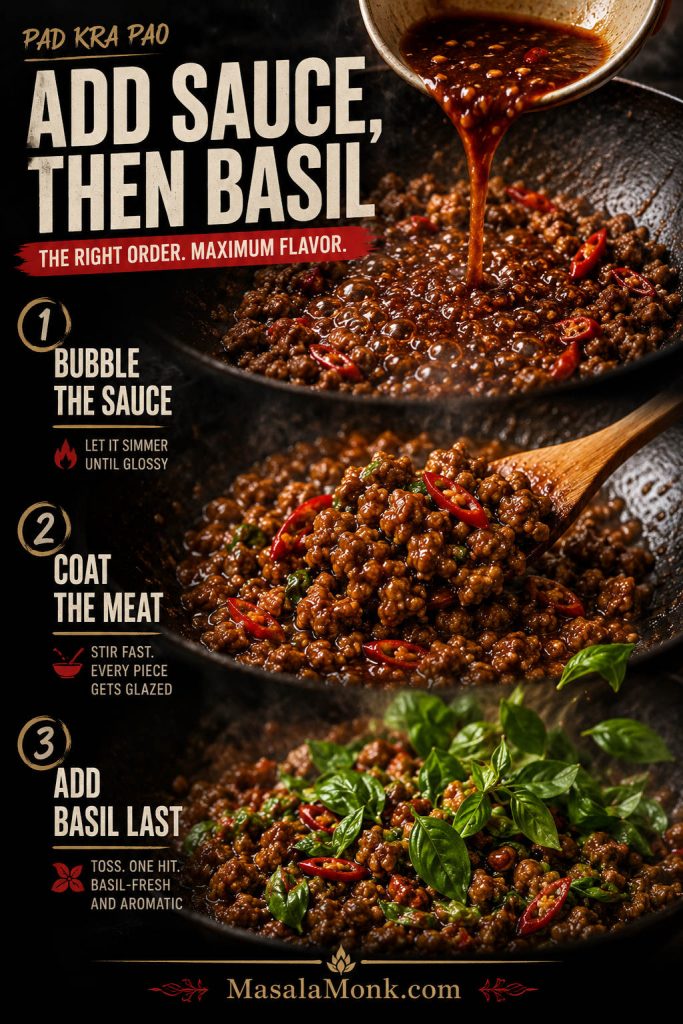
Pour in the sauce and toss well. It should bubble quickly, coat the meat, and tighten around the pieces instead of pooling underneath.

If the pan looks dry, add 1–2 tablespoons of water or stock. If the pan looks soupy, keep cooking over high heat for another minute before adding basil.

The finished meat should look shiny and loose, not wet or clumpy.

Add Basil at the End

Turn the heat down or off, then add the basil leaves. Toss just until wilted.

Once the basil hits the hot meat, the whole pan should wake up. Long cooking dulls that aroma, so let the leaves collapse into the stir-fry and stop there.

Sequential board showing sauce bubbling into minced meat, coating the meat, and fresh basil added last.
Sauce goes in before basil because it needs heat to reduce; meanwhile, basil should only wilt at the end so the aroma stays fresh.

Serve Immediately

Spoon the basil stir-fry over hot rice. Add a crispy fried egg, cucumber slices, and lime if you like.

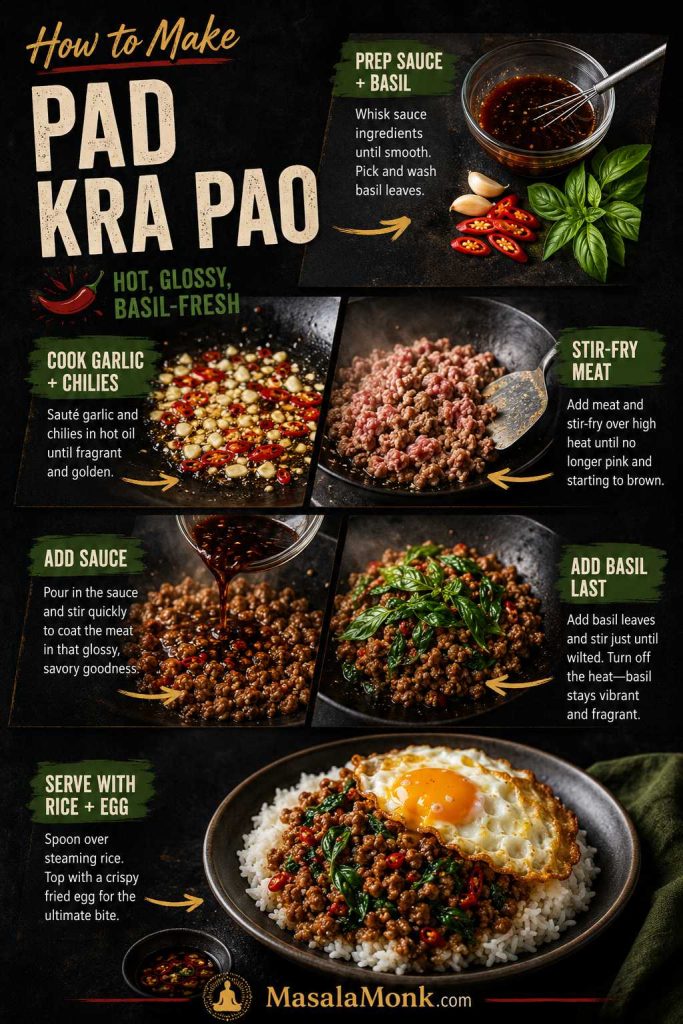
The first bite should be hot, salty, fresh, and softened by rice and yolk. This is not a dish that improves by sitting around, so serve it while the basil still smells alive.

Step-by-step Pad Kra Pao board with sauce, basil, garlic and chilies, stir-fried meat, sauce, basil, and a finished rice plate.
The method is simple when the order is clear: prep first, cook aromatics, brown the meat, reduce the sauce, then add basil right at the end.

Chicken, Pork, or Beef: Which Version Should You Make?

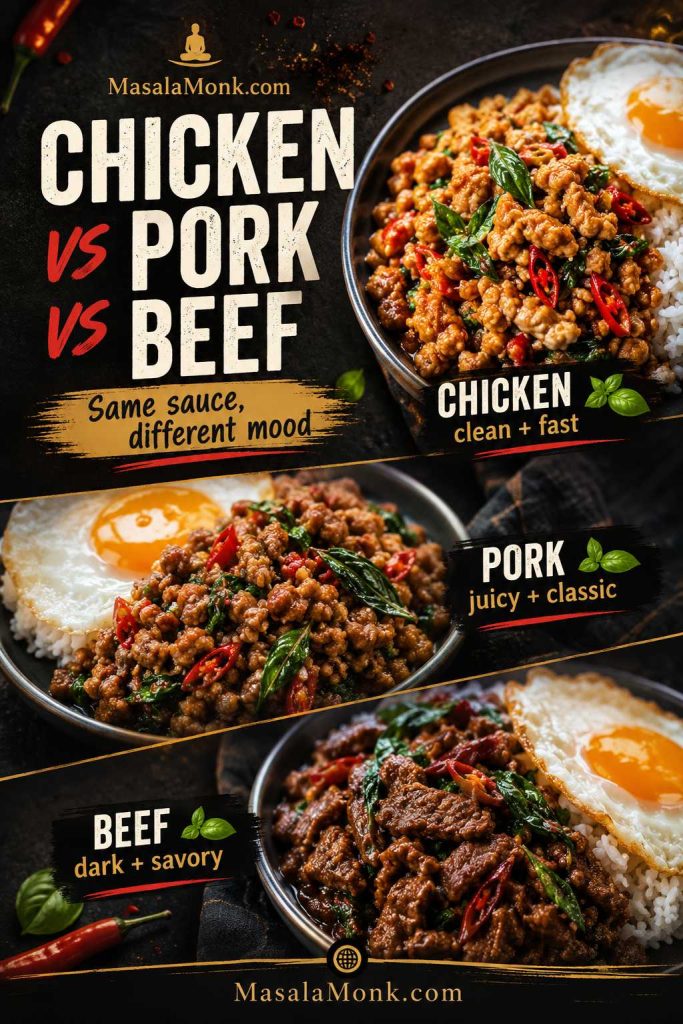
The same sauce and method work for chicken, pork, or beef, but each one gives the plate a different mood.

Choose chicken for the cleanest restaurant-style Thai basil chicken, pork for the juiciest street-food-style version, and beef for the darkest, most savory bowl.

Three-way Pad Kra Pao chooser board comparing chicken, pork, and beef rice plates with text labels.
The same sauce can lead to three moods: chicken is clean and fast, pork is juicy and classic, and beef is darker and more savory.

Once you choose the protein, use the recipe card for exact quantities and timing.

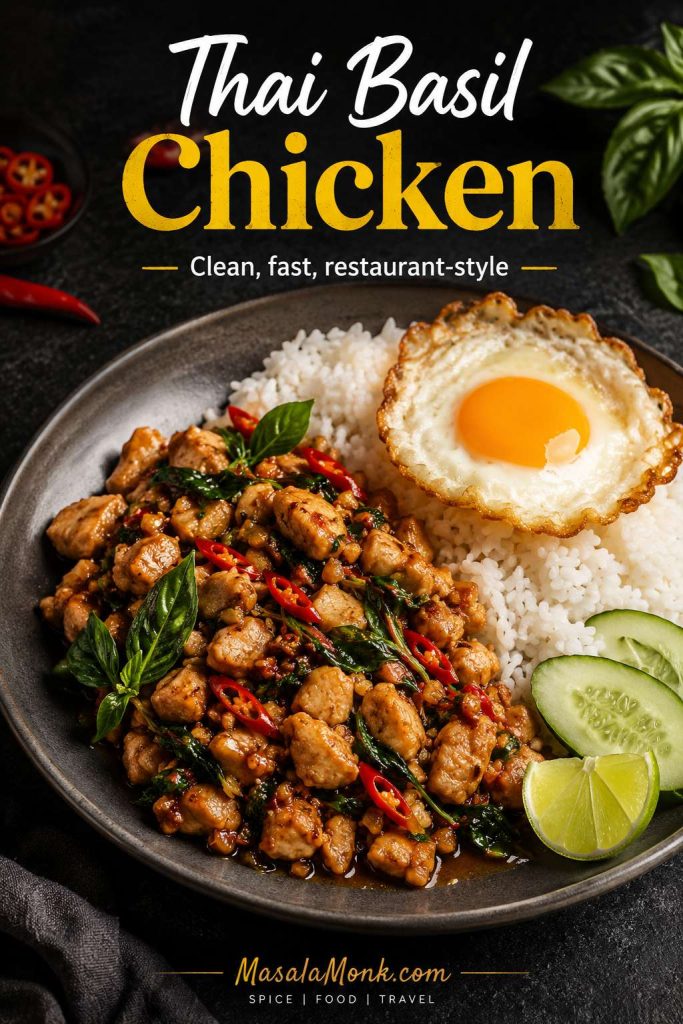
Thai Basil Chicken Version

For Thai basil chicken, use ground chicken, chicken keema, or finely chopped boneless chicken thigh.

Hand-chopped thigh gives little juicy pieces that catch the sauce, while ground chicken keeps the dish quick and familiar. Chicken breast works too, but it dries out faster, so chop it small and cook it quickly.

This is the lightest, fastest version and lets the basil come through clearly.

Thai basil chicken plate with glossy chicken pieces, red chilies, basil, rice, cucumber, lime, and crispy fried egg.
Thai basil chicken is the cleanest, fastest version; however, it still needs enough garlic, chilies, and basil to taste bold.

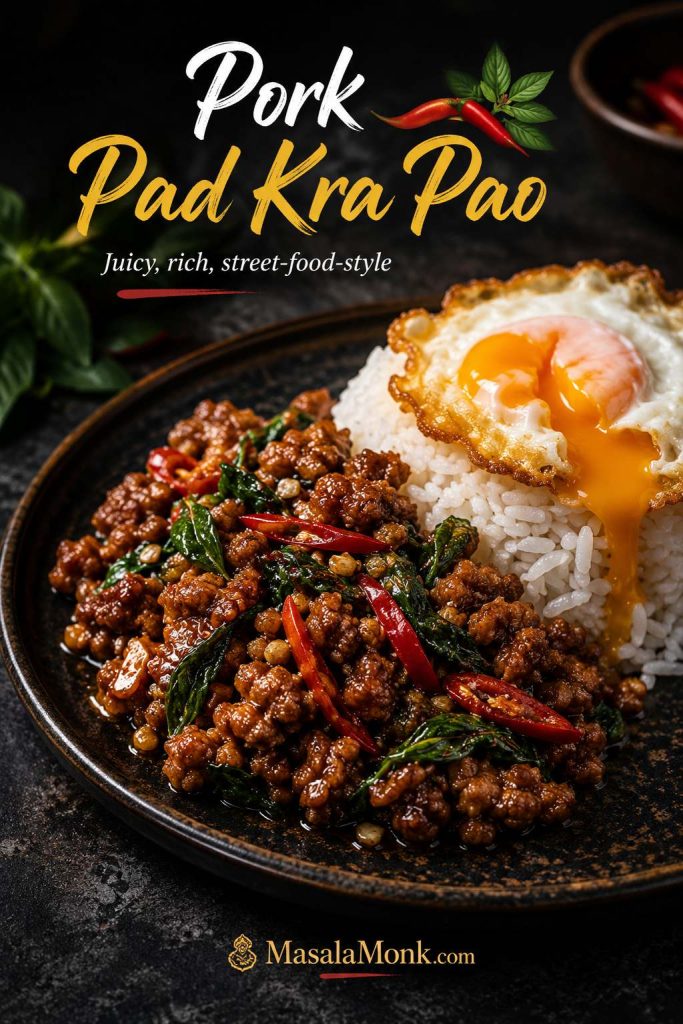
Pork Pad Kra Pao Version

Ground pork gives the richest, juiciest Pad Kra Pao. It is the version to make when you want the dish to feel more street-food-style and deeply satisfying.

Use 450g / 1 lb ground pork. If the pork is fatty, use slightly less oil and let some edges brown before adding the sauce. If it is very lean, keep the full 2 tablespoons of oil and avoid overcooking.

The fat carries the garlic and chili beautifully, especially if you can find holy basil.

Pork Pad Kra Pao plate with glossy browned pork mince, basil, red chilies, rice, and a crispy egg with runny yolk.
Pork gives the juiciest Pad Kra Pao because the fat carries garlic and chili especially well, while the egg makes the rice plate feel complete.

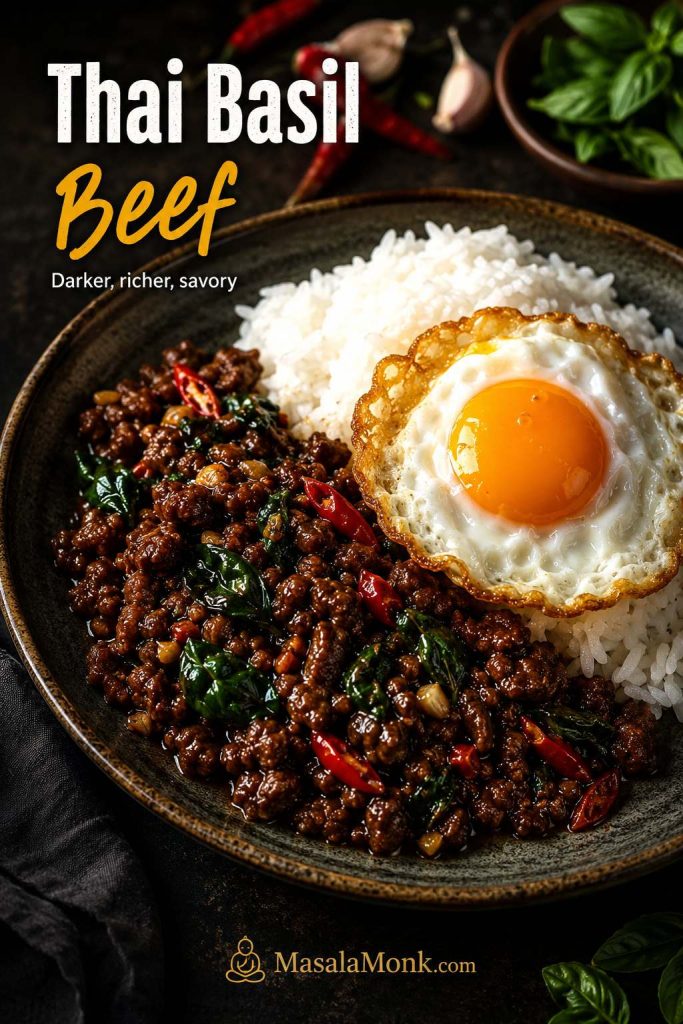
Thai Basil Beef Version

Thai basil beef gives the deepest, most savory bowl. Use ground beef, minced beef, or very thinly chopped steak.

Beef needs a hot, wide pan. If it steams instead of browns, the flavor turns flat. Cook in batches if needed, and use the higher end of the dark soy sauce range if you want a deeper color.

This is the version for a darker, richer rice plate with a strong garlic-chili base.

Thai basil beef rice plate with dark glossy beef, basil, red chilies, white rice, and crispy fried egg.
Thai basil beef should taste deeper and more savory than chicken, so keep the pan hot enough to brown without turning the basil dark.

Vegetarian, Tofu, and Eggplant Options

You can make a vegetarian Pad Kra Pao-style stir-fry with tofu, eggplant, mushrooms, or a mix of vegetables. These versions are not exactly the same as the classic meat rice plate, but the same garlic-chili-sauce-basil structure works well if you control moisture.

The best vegetarian version still needs the same attitude as the meat version: high heat, strong aromatics, and enough basil that the pan smells alive at the end.

For tofu, use firm or extra-firm tofu. Press it if it is very wet, then crumble it into small pieces. Cook it in a hot pan until the edges look lightly browned. The goal is the same as with meat: drive off moisture first, then let the sauce cling instead of slide off.

Tofu Pad Kra Pao plate with crisp glossy tofu, basil, red chilies, rice, and fried egg on a dark plate.
Tofu works best when it gets crisp edges first; after that, the sauce can cling instead of sliding off a wet surface.

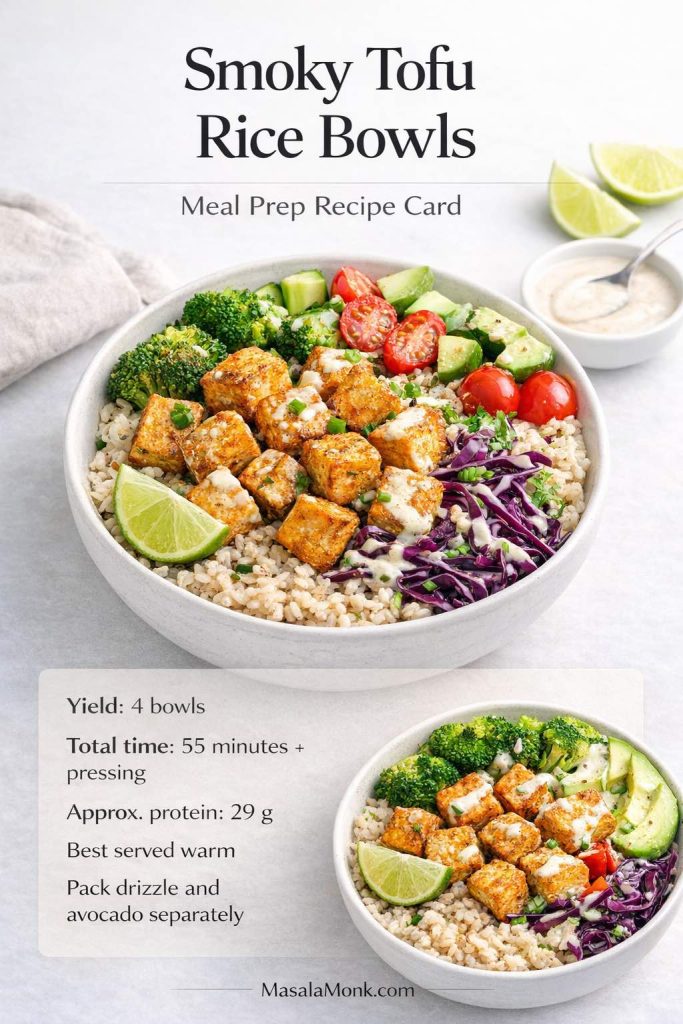
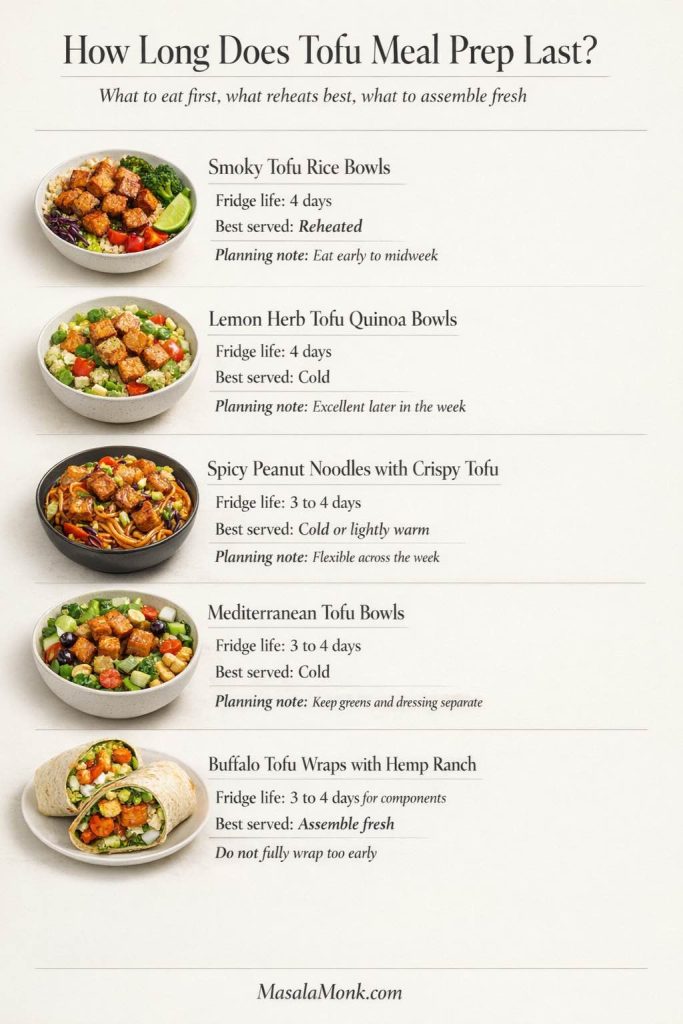
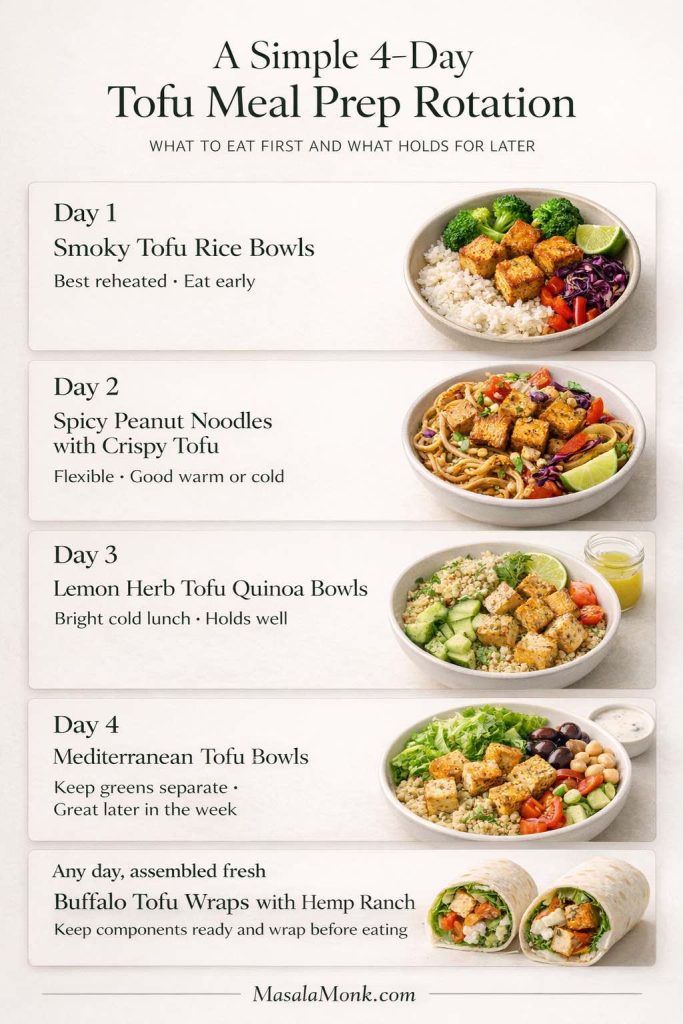
If tofu is your main protein more often than a one-time swap, MasalaMonk’s tofu meal prep ideas go deeper into pressing, browning, saucing, and building rice-box style meals that still taste good later.

For eggplant, cut it into small pieces and cook it until tender before adding the sauce. Eggplant absorbs oil, so use a wide pan and avoid stirring too aggressively once it softens.

For mushrooms, cook them until their liquid evaporates. Then add the garlic-chili base, sauce, and basil.

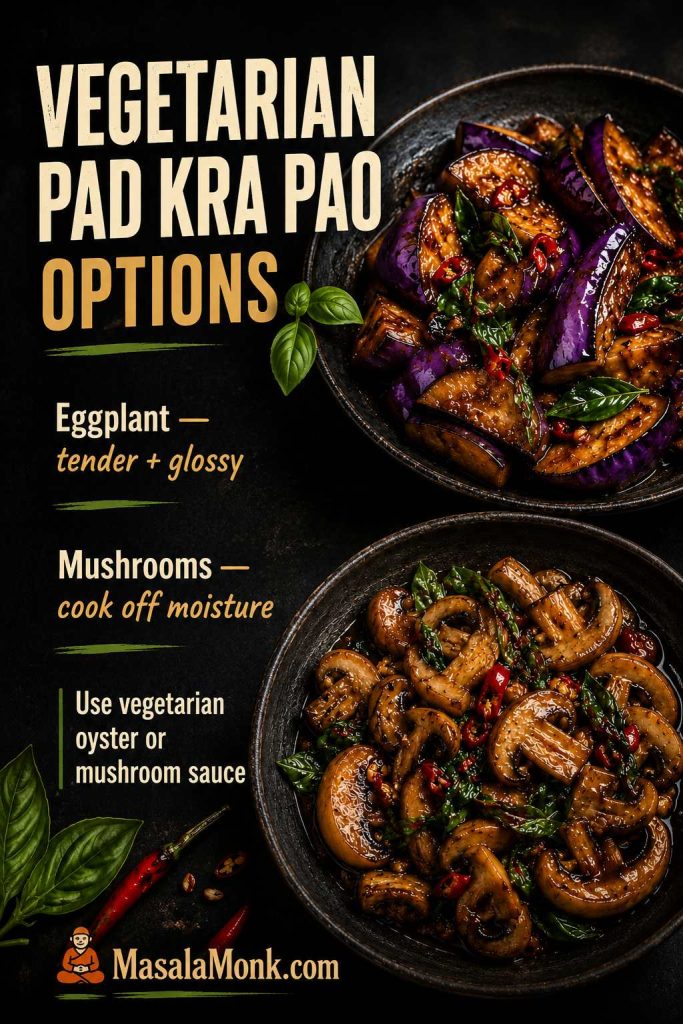
Vegetarian Pad Kra Pao options board with glossy eggplant bowl and browned mushroom bowl with basil and red chilies.
Eggplant should turn tender and glossy, while mushrooms need their moisture cooked off first; otherwise, the vegetarian version can taste watery.

Use vegetarian oyster sauce or mushroom sauce. Replace fish sauce with soy sauce and, if you have it, a small pinch of mushroom seasoning.

For vegetarian sauce swaps, use the substitution guide before cooking.

What to Serve With Pad Kra Pao

Pad Kra Pao is usually served as a rice plate, not as a saucy curry. Keep the sides simple so the basil, garlic, chilies, and fried egg stay in focus.

  • Steamed jasmine rice
  • Crispy fried egg
  • Cucumber slices
  • Lime wedges
  • Extra chopped chilies
  • Prik nam pla — chopped chilies in fish sauce and lime — or soy sauce and lime for a vegetarian plate
Serving spread for Pad Kra Pao with rice, crispy fried egg, cucumber, lime, extra chilies, and prik nam pla labels.
The best sides are simple on purpose: cucumber cools the heat, lime brightens the sauce, extra chilies add control, and prik nam pla sharpens the rice.

Cucumber is especially useful because it cools the heat and gives the plate a fresh crunch. If you want that cooling side to feel a little more complete, a simple cucumber salad works well beside the hot basil stir-fry.

For a brighter Thai-style side, you can also serve it with a small portion of vegan Som Tam raw papaya salad. The crunch, lime, chili, and freshness make sense next to the rich fried egg and savory basil meat.

For the table-side chili condiment, keep the spoonful small and bright rather than drowning the rice.

Prik nam pla condiment bowl with sliced red and green chilies in fish sauce and lime, plus a soy-lime vegetarian note.
Prik nam pla adds salty heat in tiny spoonfuls; for vegetarian plates, soy sauce with lime gives a similar bright table-side lift.

If you bought a large bunch of basil, use the extra leaves quickly in another fresh herb recipe rather than letting them wilt. This dish is best when the basil tastes alive, not tired.

How to Fix Pad Kra Pao

Most Pad Kra Pao problems come from heat, timing, or sauce balance. Fortunately, the fixes are usually simple once you know what happened.

Fast diagnosis: watery usually means crowding or low heat, bland usually means weak garlic-chili-basil energy, salty usually means the sauce needs more rice or a lower-salt ratio, and dull basil flavor usually means the basil cooked too long.
Seasoning troubleshooting board for Pad Kra Pao with rice, lime, chilies, garlic, basil, fish sauce, and a glossy stir-fry bowl.
Fix the plate before you panic: rice and lime soften salt, fresh chilies restore heat, and garlic, basil, or fish sauce can wake up flat flavor.

Too Watery

Watery Pad Kra Pao almost always means the meat steamed before it fried.

Keep cooking until the liquid evaporates before adding basil. Next time, use a wider pan, higher heat, and do not double the recipe in one skillet. For larger batches, cook the meat in rounds.

Troubleshooting board showing watery Pad Kra Pao from a crowded pan and low heat beside glossy fixed stir-fry.
Watery Pad Kra Pao usually starts before the sauce goes in, so use a wider pan and cook off moisture before adding basil.

Sauce Is Pooling Under the Meat

Pooling sauce usually means the sauce went in before the pan was ready.

Keep the pan on high heat and toss until the sauce clings to the meat. Next time, start with 2 tablespoons water or stock, then add more only if the pan looks dry.

Too Salty

Salty Pad Kra Pao is usually easiest to fix on the plate, not in the pan.

Serve it with more plain rice and add a squeeze of lime. Next time, use the lower-salt sauce ratio and reduce fish sauce and light soy before reducing oyster sauce, because oyster sauce also gives body.

Too Sweet

Too much sweetness usually comes from sweet oyster sauce, dark sweet soy, or too much sugar.

To balance the current batch, add a small splash of fish sauce or light soy and serve it with plain rice. Next time, keep the added sugar modest.

Too Dry

If the meat tastes plain and dry instead of glossy, the pan probably needed a small splash of liquid near the end.

Add 1–2 tablespoons of water or stock and toss briefly over heat. The meat should be glossy enough to season the rice, not dry like plain mince.

Not Spicy Enough

If the dish tastes warm but not lively, the chilies are probably too mild or too few.

Add more chopped fresh chili next time, or serve extra chilies on the side. Fresh chilies give sharper flavor and better aroma than chili flakes alone.

Tastes Like Generic Stir-Fry

If it tastes like a regular soy-sauce stir-fry, the sharp things have been muted: garlic, chili, fish sauce, basil, or heat.

Use enough fresh basil, add it at the end, and make sure the sauce reduces onto the meat instead of staying loose in the pan.

Not Enough Basil Flavor

Weak basil flavor usually means one of two things: too little basil, or basil added while the pan was still boiling.

Use 1½–2 cups basil leaves for 450g / 1 lb meat. Add them only at the end and toss just until wilted.

Basil Turned Dark or Lost Its Aroma

Basil turns dull when it cooks too long.

Add it after the sauce has reduced and the heat is low or off. The leaves should wilt into the meat, not simmer.

Garlic Tastes Burnt

Burnt garlic means the aromatics waited too long before the meat went in.

Next time, stir the garlic and chilies only until fragrant, then add the meat as soon as the garlic smells sharp and toasty.

Meat Turned Rubbery

Rubbery meat is usually an overcooking problem, especially with chicken breast or lean beef.

Stir-fry until just cooked, reduce the sauce quickly, then finish with basil.

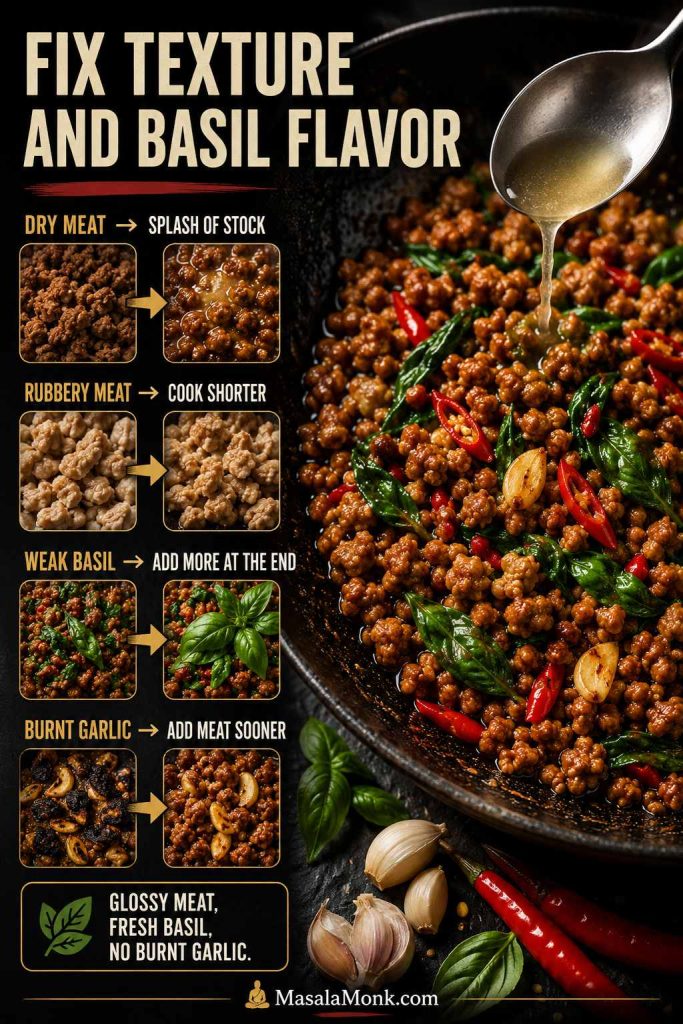
For texture and basil problems, focus on timing: keep the meat glossy, keep the garlic golden, and add basil only at the end.

Texture and basil troubleshooting board with dry meat, rubbery meat, weak basil, burnt garlic, glossy meat, basil leaves, and spooned stock.
Texture problems have small fixes: a splash of stock rescues dry meat, shorter cooking prevents rubbery meat, and basil belongs at the end.

Need to cook another batch instead? Return to the recipe card with the fixes in mind.

Storage and Reheating

Pad Kra Pao tastes best immediately, when the basil is fresh and the egg is crisp, but leftovers are still useful.

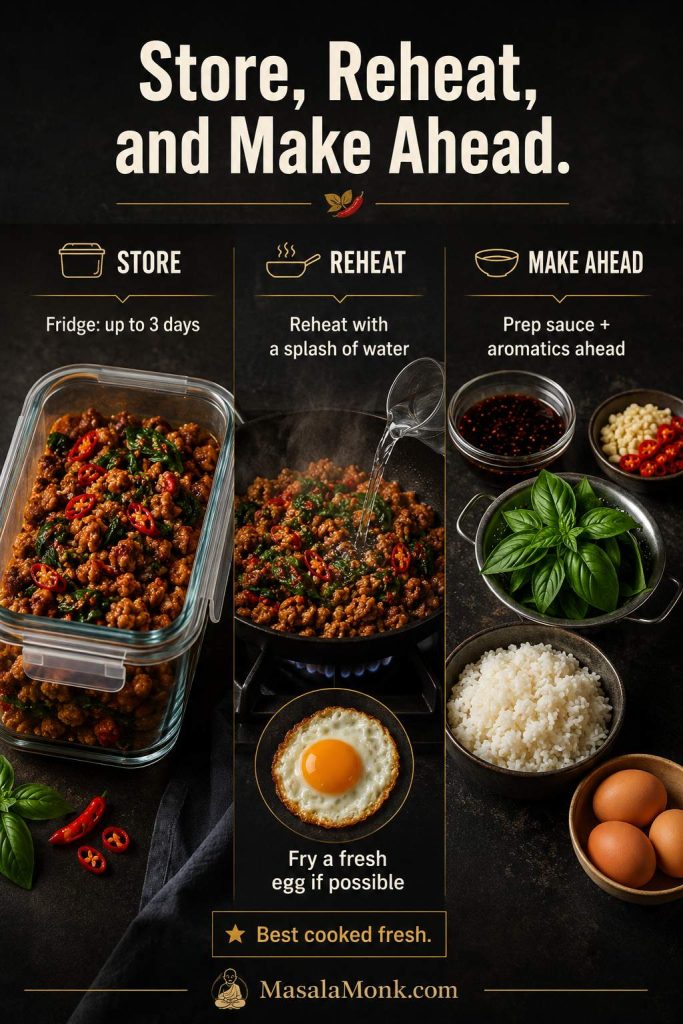
Store the cooked stir-fry in an airtight container in the fridge for up to 3 days. That sits within the USDA’s general 3–4 day guidance for refrigerated leftovers. Store rice separately if possible. Fried eggs are best cooked fresh, but you can skip the egg when reheating and fry a new one before serving.

To reheat, warm the stir-fry in a skillet with a splash of water. Heat just until hot. Do not cook it for too long or the basil flavor will fade further.

Leftovers will not have the same just-wilted basil aroma, but they still make a very good rice bowl the next day.

If you want to prep ahead, mix the sauce, chop the garlic and chilies, wash and dry the basil leaves, and cook the rice. Leave the actual stir-fry for right before eating.

Storage, reheating, and make-ahead board with cooked Pad Kra Pao in a glass container, reheating skillet, rice, eggs, sauce, basil, garlic, and chilies.
Pad Kra Pao is best fresh, but leftovers still work; reheat with a splash of water and fry a fresh egg if possible.

If you like salty-garlicky rice-plate dinners, MasalaMonk’s chicken adobo recipe is another strong one to cook next.

Pad Kra Pao Recipe Card

If this is your first time making it, start with the balanced sauce, use Thai basil if holy basil is hard to find, and keep the pan wide and hot. The first batch will quickly teach you your preferred salt, chili, and basil level.

Pad Kra Pao Recipe: Thai Basil Chicken, Pork, or Beef

This Pad Kra Pao recipe gives you a fast, garlicky Thai basil rice plate with chicken, pork, or beef, glossy sauce, and a crispy fried egg. Use holy basil if you can find it, or Thai basil for the easiest restaurant-style home version.

Prep Time 10 minutes
Cook Time 10–12 minutes
Total Time 20–22 minutes
Servings 4

Equipment

  • Wok or 12-inch / 30cm skillet
  • Small bowl for mixing the sauce
  • Mortar and pestle, knife, or mini chopper
  • Small frying pan for eggs
  • Spatula

Ingredients

For the Stir-Fry

  • 450g / 1 lb ground chicken, pork, or beef
  • 2 tbsp neutral oil, for the stir-fry
  • 5–8 garlic cloves, finely chopped or pounded
  • 3–6 Thai bird chilies, chopped, or 2–4 Indian green chilies
  • 1–2 shallots, thinly sliced, optional
  • 1½–2 cups holy basil or Thai basil leaves, about 30–60g depending on how tightly packed the leaves are
  • Steamed jasmine rice, for serving
  • 4 eggs
  • 2–3 tbsp neutral oil to start, plus more as needed for frying the eggs
  • Cucumber slices, optional
  • Lime wedges, optional

For the Sauce

  • 1 tbsp oyster sauce, 15 ml
  • 1 tbsp fish sauce, 15 ml
  • 1 tbsp light soy sauce, 15 ml
  • 1–2 tsp dark soy sauce, 5–10 ml, optional for deeper color
  • 1 tsp sugar, about 4g
  • 2–3 tbsp water, chicken stock, or vegetable stock, 30–45 ml

Instructions

  1. Cook the rice first. Pad Kra Pao cooks quickly, so have rice ready before you start the stir-fry.
  2. Mix the sauce. In a small bowl, stir together oyster sauce, fish sauce, light soy sauce, optional dark soy sauce, sugar, and water or stock.
  3. Prepare the aromatics. Pound or finely chop the garlic and chilies. Pick the basil leaves from the stems, wash them if needed, and dry them well.
  4. Fry the eggs. Heat 2–3 tablespoons oil in a small pan. Fry the eggs one at a time or in batches, spooning hot oil over the whites until the edges are crisp. Add more oil only if the pan gets dry. Set aside.
  5. Heat the pan. Heat a wok over high heat, or a wide nonstick skillet over medium-high heat.
  6. Cook the garlic and chilies. Add oil, then garlic, chilies, and optional shallots. Stir briefly until fragrant, without letting the garlic burn.
  7. Add the meat. Add ground chicken, pork, or beef. Break it up and stir-fry until cooked through and most moisture has evaporated.
  8. Add the sauce. Pour in the sauce and toss until the meat is glossy and coated. It should not be soupy.
  9. Add basil last. Turn the heat down or off, add basil, and toss just until wilted.
  10. Serve immediately. Spoon over rice and top each serving with a crispy fried egg. Add cucumber and lime if you like.

Notes

  • Holy basil gives the most traditional flavor; Thai basil is the easiest excellent home version.
  • Use neutral oil because olive oil or strongly flavored oils can fight the basil, garlic, and fish sauce.
  • You do not need to marinate the meat. The sauce and aromatics flavor it during the fast stir-fry.
  • If using 500g meat instead of 450g, keep the same sauce ratio first, then adjust only if needed.
  • For a less salty or milder version, reduce fish sauce and soy slightly, and start with 1 Thai chili or 1 small green chili.
  • If doubling the recipe, cook the meat in batches and add the basil only at the end.
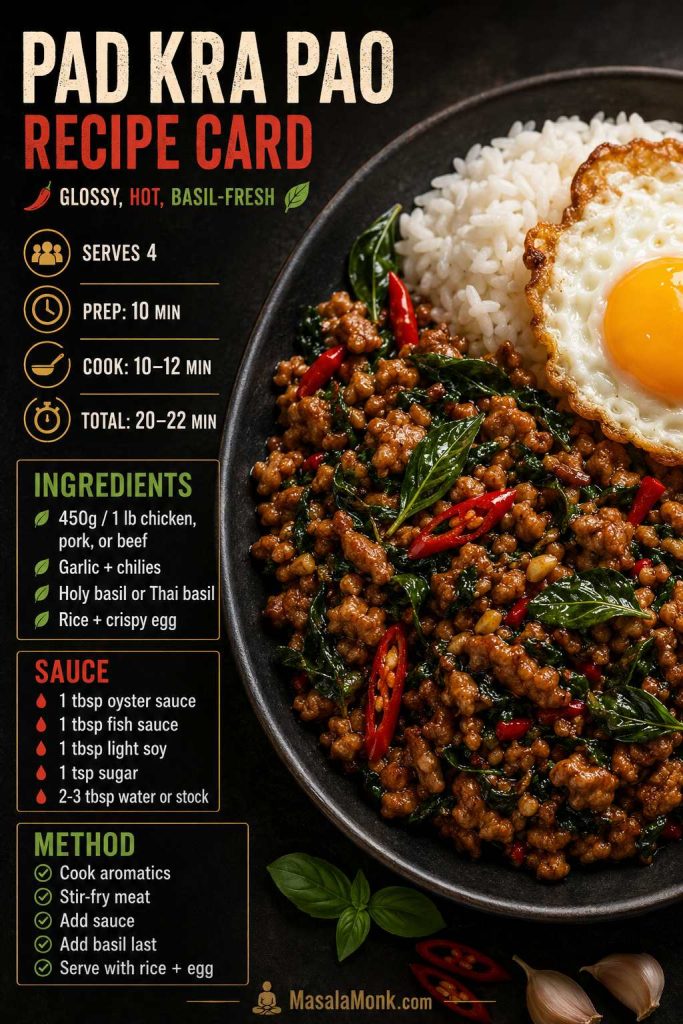
Pad Kra Pao recipe card with serving time, ingredients, sauce amounts, method bullets, and a plated basil stir-fry with rice and egg.
Keep this card for the core formula: 1 lb meat, bold aromatics, balanced sauce, basil at the end, and rice plus egg to serve.

By the time the rice, basil stir-fry, and egg come together, the plate should feel hot, glossy, and immediate.

Close-up final Pad Kra Pao serving with glossy basil meat, white rice, crispy fried egg, runny yolk, red chilies, basil leaves, and spoon.
A good final plate should feel immediate: glossy meat, fresh basil, hot rice, and a yolk that runs into everything.

FAQs

Is Pad Kra Pao the same as Thai basil chicken?

Thai basil chicken is usually the chicken version of Pad Kra Pao. Traditionally, the dish is made with holy basil, but many restaurant and home versions use Thai basil because it is easier to find.

What does Pad Kra Pao taste like?

Pad Kra Pao tastes garlicky, salty-savory, spicy, and fresh from the basil. It should feel bold and punchy, with just enough glossy sauce to season the rice without turning the plate into curry.

What basil is best for Pad Kra Pao?

Holy basil gives the most traditional sharp, peppery flavor. Thai basil is the best practical substitute for most home kitchens. Sweet basil works only in a pinch; it makes the dish softer and less like classic Pad Kra Pao.

Can I use dried basil?

Dried basil is not a good replacement because Pad Kra Pao depends on the fresh aroma of basil added at the end. If dried basil is all you have, you can still make a garlic-chili stir-fry, but it will not taste like Pad Kra Pao or a fresh Thai basil chicken-style stir-fry.

Is Pad Kra Pao supposed to be saucy?

No, it should be glossy rather than soupy. You want enough sauce to season the rice, but not so much that the meat swims. Think juicy rice plate, not curry.

Does Pad Kra Pao need a fried egg?

The fried egg is technically optional, but it is part of the pleasure of the plate. The crisp edges add texture, and the yolk softens the salty, spicy meat into the rice.

Chicken breast, sliced chicken, or ground chicken: which works best?

Ground chicken or chopped chicken thigh is easiest and juiciest. Sliced chicken works too if you cut it small and cook it quickly. Chicken breast is usable, but it dries out faster than thigh.

What can replace fish sauce?

Use light soy sauce with a small pinch of mushroom seasoning if you have it. The flavor will be less funky and less Thai-style, but still savory.

What can replace oyster sauce?

Vegetarian oyster sauce or mushroom sauce is the best replacement. If you do not have either, use soy sauce with a little sugar, but the sauce will be thinner and less rounded.

Why did my Pad Kra Pao turn watery?

Watery Pad Kra Pao usually means the meat steamed before it fried. Use a wider pan, higher heat, and cook off moisture before adding the sauce.

Can I make Pad Kra Pao ahead?

You can prep the sauce, garlic, chilies, basil, and rice ahead of time. For the best flavor, cook the stir-fry right before eating because basil tastes freshest when added at the end.

How long does Pad Kra Pao keep in the fridge?

The cooked stir-fry keeps for up to 3 days in an airtight container. Reheat it in a skillet with a splash of water. Fry a fresh egg when serving if possible.

Once this rhythm clicks, Pad Kra Pao becomes less like a strict recipe and more like a rice-plate formula you can repeat with chicken, pork, beef, tofu, or whatever needs cooking.

Back to top ↑

Posted on — Leave a comment

Beyond Chicken: 5 Hemp Seed High Protein Tofu Meal Prep Ideas

Beyond Chicken cover image showing five hemp seed high-protein tofu meal prep ideas, including a smoky chili tofu rice bowl, lemon herb quinoa box, spicy peanut tofu noodle prep, Mediterranean tofu bowl, and buffalo tofu wrap.

Tofu meal prep can be substantial, flavorful, and still worth opening on day four. That is exactly what this guide is built to deliver.

These lunches are designed for real weekday life. They are filling enough to count as proper lunch, varied enough to keep the week from feeling repetitive, and practical enough to prep ahead without sliding into bland tofu, soggy vegetables, or disappointing containers by midweek.

Just as importantly, the hemp seeds are doing real work throughout the lineup. Rather than sitting on top like a token healthy ingredient, they show up as a nutty crust, a creamy dressing base, a richer sauce builder, a fresh herby crunch, and a proper ranch-style finish that makes wraps feel complete instead of merely assembled.

If you want to build a broader plant-based lunch system beyond this page, MasalaMonk’s guide to plant-based protein sources for high-protein meal prep is a natural companion.

Quick answers before you cook

Can tofu be meal prepped? Yes. Tofu is one of the best meal-prep proteins because it roasts well, absorbs flavor, and works naturally in rice bowls, quinoa bowls, noodles, and wraps.

What tofu is best for meal prep? Extra-firm tofu is the easiest and most reliable option because it holds shape well and develops better edges after roasting. Firm tofu also works when you want a slightly softer bite.

How long does tofu meal prep last? Most tofu meal prep keeps well for 3 to 4 days in the fridge when sauces, watery vegetables, and crunchy toppings are packed separately.
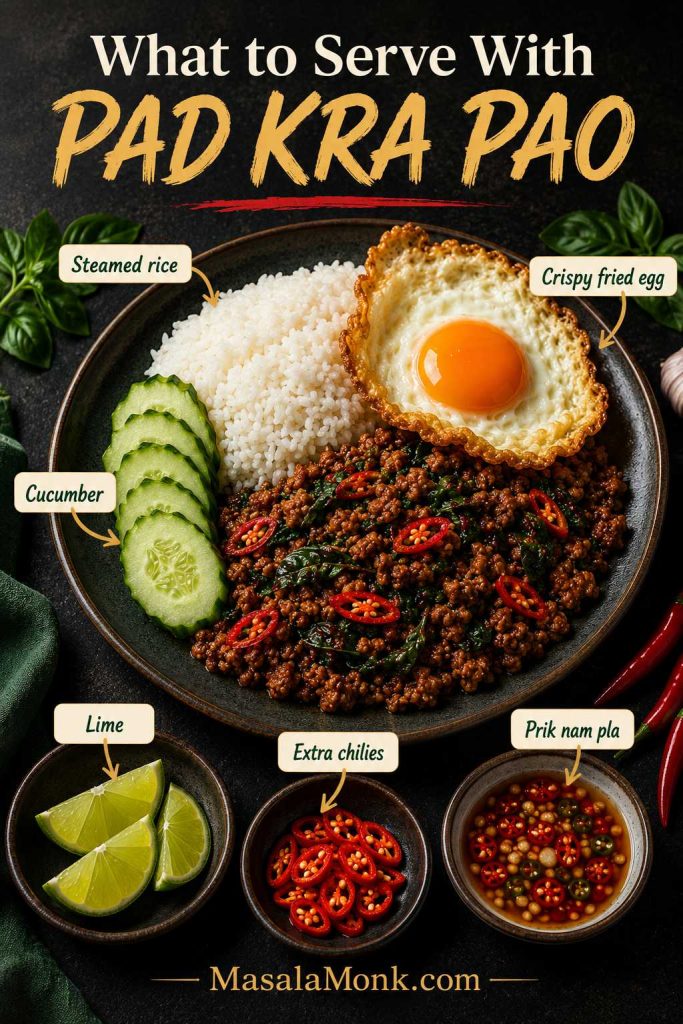
What is the biggest mistake? Packing hot tofu with wet vegetables or dressing too early. As a result, a good meal-prep container can turn soggy by day three.

What is the key rule for better tofu meal prep? Press well, roast until it has real color, cool before sealing, and keep wet and dry elements separate whenever texture matters.

Also Read: Easy English Scone Recipe

Tofu Meal Prep at a Glance

Use this as your fast decision guide before choosing a recipe. When you already know you want something warm, cold, craveable, or easy to eat on the go, this section makes the choice quicker. Better yet, it helps you match the right lunch to the right point in the week instead of rereading every recipe section once time is already tight.

Tofu meal prep comparison graphic showing five lunch ideas: smoky tofu rice bowls, lemon herb tofu quinoa bowls, spicy peanut noodles with crispy tofu, Mediterranean tofu bowls, and buffalo tofu wraps with hemp ranch.
Use this tofu meal prep at-a-glance guide to choose the right lunch for your week: smoky rice bowls for a familiar warm option, lemon herb quinoa bowls for cold lunches, spicy peanut noodles when you want something craveable, Mediterranean bowls for a fresher reset, and buffalo wraps for an easy hand-held meal.
  • Best beginner option: Smoky Tofu Rice Bowls
  • Best cold lunch: Lemon Herb Tofu Quinoa Bowls
  • Best reheated lunch: Smoky Tofu Rice Bowls
  • Best craveable lunch: Spicy Peanut Noodles with Crispy Tofu
  • Best fresh midweek reset: Mediterranean Tofu Bowls
  • Best hand-held option: Buffalo Tofu Wraps with Hemp Ranch
  • Best choice if you are tired of bowls: Buffalo Tofu Wraps with Hemp Ranch
  • Best day-three or day-four option: Lemon Herb Tofu Quinoa Bowls

New to tofu meal prep? Start with the smoky rice bowls. They are the clearest proof that tofu can feel just as satisfying as the classic protein-rice-and-vegetable lunch people usually build around chicken. From there, branching into the colder, fresher, or more sauce-driven options becomes much easier.

Why Tofu Meal Prep Often Disappoints by Day Three — and How This Guide Fixes It

Too often, tofu meal prep falls off by day three because moisture builds, texture softens, and the containers start tasting repetitive. Sometimes the tofu was never pressed or browned enough to begin with. In other cases, the real problem is packing hot ingredients with wet vegetables or dressing too early, which quietly sets everything up to turn soggy in the fridge.

This guide fixes that by treating texture and packing order as part of the recipe, not as an afterthought. Instead of stretching one baked-tofu method across several near-identical boxes, it gives you five genuinely different lunches with different textures, different flavor directions, and different kinds of lunch appeal. Consequently, the week feels less repetitive, while the food itself holds up better.

Hemp seeds make that system stronger. Here, they are not just included for nutrition. They help create a nutty crust, a creamier dressing, a fuller sauce, a brighter finishing crunch, and a better ranch-style spread. In practice, that means the recipes eat better as the week goes on instead of feeling like containers you are forcing yourself to finish.

Also Read: Sourdough English Muffins Recipe

Best Tofu for Meal Prep and How to Prep It

For these recipes, extra-firm tofu is the easiest place to start. It gives you stronger edges, cleaner pieces, and better structure after cooking. Firm tofu also works well, particularly when you want a slightly softer center or a more delicate bite in the finished meal. If you can get super-firm tofu, that is even better because it usually needs less pressing and holds its shape beautifully.

However, silken tofu is not the right fit here. It can be useful in sauces or creamy blends, but it is not built for bowls, noodles, and wraps like these. Even if it sounds convenient, it will not give you the kind of meal-prep texture that keeps well through the week.

Best tofu for meal prep guide comparing extra-firm, firm, and super-firm tofu, plus pressed vs unpressed tofu and pale vs browned tofu for better meal prep texture.
Extra-firm tofu gives the most reliable meal-prep texture, especially when it is pressed well, roasted until properly browned, and cooled before sealing so it stays firmer through the week.

The prep matters just as much as the type you choose. First, press the tofu until it no longer feels waterlogged when you cut it. Twenty to thirty minutes is a good minimum, and longer is even better if time allows. Then season it with more intention than just a splash of soy sauce and hope for the best. Tofu responds well to layered flavor: salt or soy, aromatics, acid, herbs, spices, and a finishing element.

Most importantly, cook for texture rather than mere doneness. Pale tofu rarely improves in the fridge. Instead, what you want is visible browning, firmer edges, and enough structure that the tofu can survive storage and reheating without collapsing into softness. Once cooked, let it cool before sealing it into containers. That pause protects more texture than most people expect.

If you like crisp, prep-friendly plant-based lunches in general, MasalaMonk’s high-protein vegan meal prep ideas using an air fryer are worth a look too.

How to Make Tofu Meal Prep More Filling Without Making It Heavy

One of the easiest ways to improve tofu meal prep is to make it more filling without turning it into a heavy lunch you stop looking forward to by Wednesday. The answer is not to pile in random extras until the meal feels joyless. Rather, build in staying power with a proper base, a good texture contrast, and a sauce or dressing that adds body without flooding the container.

In practice, that usually means tofu plus rice, quinoa, or noodles for structure; vegetables that either roast well or stay crisp; and hemp seeds, yogurt, tahini, or peanut-based sauces that make the lunch feel complete instead of sparse. That is where these recipes work especially well. Tofu carries the main protein role, while hemp seeds add richness, body, and texture in ways that improve the actual eating experience.

Guide to making tofu meal prep more filling without making it heavy, showing protein, structure, freshness, texture, and body with tofu, grains, vegetables, hemp seeds, and sauce.
A satisfying tofu lunch depends less on piling in more ingredients and more on balancing the right five roles: protein for staying power, a base for structure, vegetables for freshness, hemp seeds for texture, and sauce or dressing for body.

This matters because the best tofu meal prep recipes are the ones you actually want to repeat. A filling lunch should still feel bright, balanced, and easy to eat. That is precisely why these bowls, noodles, and wraps are designed to hold well in the fridge while still eating like lunch first and meal prep second.

For a grain-forward prep angle, MasalaMonk’s plant-based meal prep ideas using quinoa as a protein source pair especially well with the quinoa bowls below.

Also Read: White Russian Recipe: 7 Variants to Try, From Classic to Frozen

The 5 Tofu Meal Prep Recipes

The recipes below are built to cover different lunch moods across the week, from a warm rice bowl to a bright quinoa bowl, spicy noodles, a crisp Mediterranean option, and a hand-held buffalo wrap. Protein estimates are approximate and based on generic ingredient values, so they can vary slightly depending on the tofu, noodles, tortillas, and yogurt you use.

If you landed here mainly for the recipes, you can jump straight into the one that fits your week best. On the other hand, if you are still deciding, the short intros and quick snapshots will help you match the right lunch mood to the right container.

1) Smoky Tofu Rice Bowls

Choose this bowl when you want the most familiar lunch format in the post. If your idea of dependable tofu meal prep still looks like some version of protein, rice, and vegetables, this one gives you that same structure with much more character.

The tofu roasts into something smoky, toasty, and lightly nutty from the hemp crust, while roasted broccoli and bell peppers bring sweetness and body. Shredded cabbage keeps the bowl from feeling too soft, and a sharp lime yogurt drizzle wakes everything back up after reheating. For that reason, this is the easiest recipe here to trust on the first try.

Quick recipe snapshot

  • Best served: Warm, with cool toppings added after reheating
  • Fridge life: 4 days
  • Reheats well: Yes
  • Pack separately: Lime yogurt drizzle, avocado, and lime wedges
  • Best texture trait: Smoky, browned tofu with rough hemp-crusted edges
  • Approximate protein per serving: about 29 g

Yield: 4 bowls

Prep time: 25 minutes

Cook time: 30 minutes

Total time: 55 minutes, plus tofu pressing time

Ingredients

Hemp-crusted tofu

  • 2 (14-ounce / 396 g) blocks extra-firm tofu, pressed and cubed
  • 1 tablespoon soy sauce or tamari
  • 1 tablespoon olive oil
  • 1 tablespoon cornstarch
  • 1 teaspoon smoked paprika
  • 1 teaspoon chili powder
  • 1/2 teaspoon garlic powder
  • 1/2 teaspoon onion powder
  • 1/4 teaspoon black pepper
  • 1/3 cup hemp seeds

Rice bowl base

  • 4 cups cooked rice
  • 2 cups broccoli florets
  • 1 red bell pepper, sliced
  • 2 cups shredded cabbage
  • 1 avocado, sliced for serving
  • Lime wedges

Lime yogurt drizzle

  • 1/2 cup plain yogurt
  • 1 tablespoon lime juice
  • 1 teaspoon hot sauce
  • Pinch of salt

Method

  1. Heat the oven to 425°F and line two trays.
  2. Toss the tofu with soy sauce, olive oil, cornstarch, smoked paprika, chili powder, garlic powder, onion powder, and black pepper.
  3. Add the hemp seeds and toss again so they cling to the tofu.
  4. Spread the tofu on one tray in a single layer.
  5. Toss the broccoli and bell pepper with a little oil and salt and spread them on the second tray.
  6. Roast for 25 to 30 minutes, flipping the tofu once, until the tofu is browned at the edges and the hemp seeds smell lightly toasted.
  7. Stir together the yogurt, lime juice, hot sauce, and salt.
  8. Cool the hot ingredients slightly, then divide the rice, tofu, vegetables, and cabbage among containers.
  9. Pack the drizzle, avocado, and lime wedges separately.
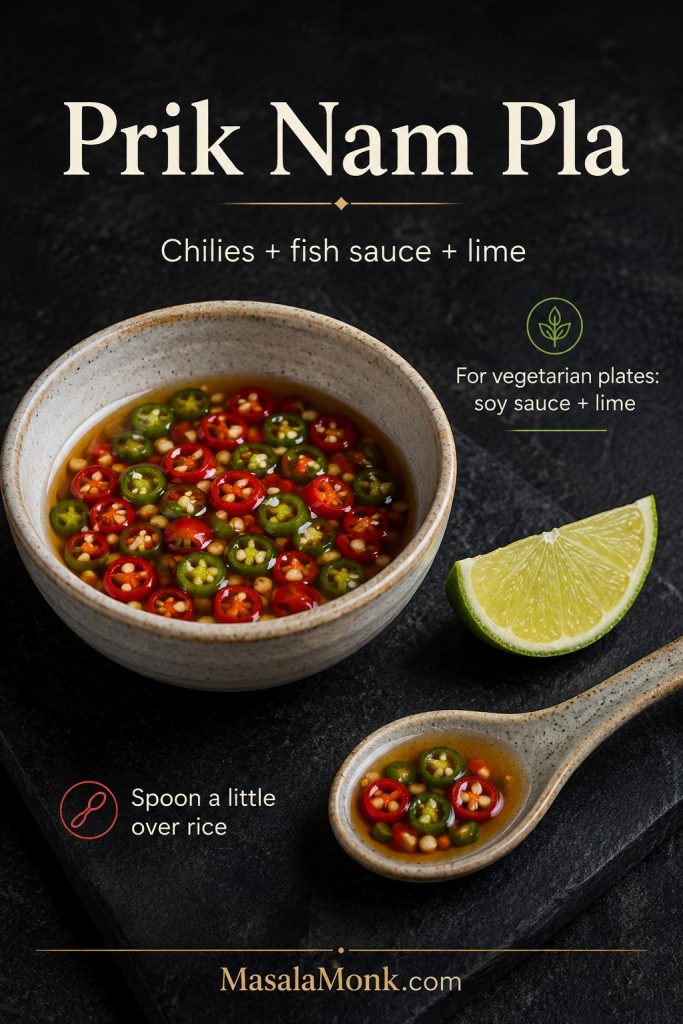
What you should notice

The tofu should have darkened corners, a lightly rough hemp crust, and a savory smoky aroma. Meanwhile, the cabbage and lime should keep the bowl from feeling too dense. Once you open the container later in the week, the bowl should still feel balanced rather than heavy.

Best storage tip

Keep the drizzle separate until serving. That one move helps the tofu keep more of its edge and keeps the cabbage crisp longer. In turn, the reheated bowl feels much closer to freshly built lunch rather than day-four leftovers.

Smoky tofu rice bowls recipe card showing browned tofu over rice with broccoli, cabbage, lime, and creamy drizzle for tofu meal prep.
Built for readers who want the most familiar place to start, this smoky tofu rice bowl turns a classic warm lunch format into something more interesting with browned tofu, rice, vegetables, and a limey creamy finish.

Also Read: Mango Sorbet Recipe: Healthy & Plant Based Dessert

2) Lemon Herb Tofu Quinoa Bowls

Reach for this bowl when you want a cold lunch that still feels full, bright, and properly satisfying instead of dry and dutiful. At the same time, it stays calm and clean enough to work especially well later in the week.

The tofu is seasoned simply so the lemon, herbs, and creamy hemp dressing can lead. Quinoa gives the bowl structure and extra staying power, while the fresh herbs keep the flavor from flattening in the fridge. As a result, this becomes one of the smartest later-week lunches in the lineup and one of the easiest to eat straight from the container.

Quick recipe snapshot

  • Best served: Cold
  • Fridge life: 4 days
  • Reheats well: Not necessary
  • Pack separately: Creamy hemp dressing
  • Best texture trait: Bright, herby, fresh-tasting quinoa bowl with creamy finish
  • Approximate protein per serving: about 31 g

Yield: 4 bowls

Prep time: 20 minutes

Cook time: 25 minutes

Total time: 45 minutes, plus tofu pressing time

Ingredients

Lemon-herb tofu

  • 2 (14-ounce / 396 g) blocks firm tofu, pressed and cubed
  • 1 tablespoon olive oil
  • 1 tablespoon lemon juice
  • 1 teaspoon dried oregano
  • 1 teaspoon garlic powder
  • 1/2 teaspoon salt
  • 1/4 teaspoon black pepper

Quinoa bowl base

  • 4 cups cooked quinoa
  • 1 cucumber, chopped
  • 1 1/2 cups cherry tomatoes, halved
  • 1/2 red onion, thinly sliced
  • 1 cup chopped parsley
  • 1/4 cup chopped dill or mint
  • 3 tablespoons hemp seeds, for topping

Creamy hemp dressing

  • 1/3 cup hemp seeds
  • 3 tablespoons plain yogurt
  • 2 tablespoons lemon juice
  • 1 tablespoon olive oil
  • 1 teaspoon Dijon mustard
  • 1 small garlic clove
  • 2 to 4 tablespoons water
  • Salt and pepper to taste

Method

  1. Heat the oven to 425°F.
  2. Toss the tofu with olive oil, lemon juice, oregano, garlic powder, salt, and black pepper.
  3. Roast for about 25 minutes, flipping once, until lightly golden and firm.
  4. Blend or whisk together the dressing ingredients until smooth and lightly creamy.
  5. Divide the quinoa among containers, then add the cucumber, tomatoes, red onion, herbs, and tofu.
  6. Sprinkle with hemp seeds.
  7. Pack the dressing separately and spoon it over just before eating.

What you should notice

When you open this bowl cold, it should smell lemony and herby right away. At the same time, the dressing should coat the quinoa and tofu without making the container loose or watery. Ideally, the whole bowl should feel bright first and creamy second, not the other way around.

Best storage tip

Do not toss everything with the dressing in advance unless you are eating it within a day. Keeping it separate makes the bowl feel fresher for longer. More importantly, it stops the herbs and vegetables from collapsing too early.

Lemon herb tofu quinoa bowls recipe card showing quinoa, golden tofu, cucumber, cherry tomatoes, red onion, herbs, and creamy lemon dressing for cold tofu meal prep.
Cold lunches hold up especially well when they stay bright and composed, and this lemon herb tofu quinoa bowl does exactly that with quinoa, fresh vegetables, herbs, and a creamy dressing packed separately.
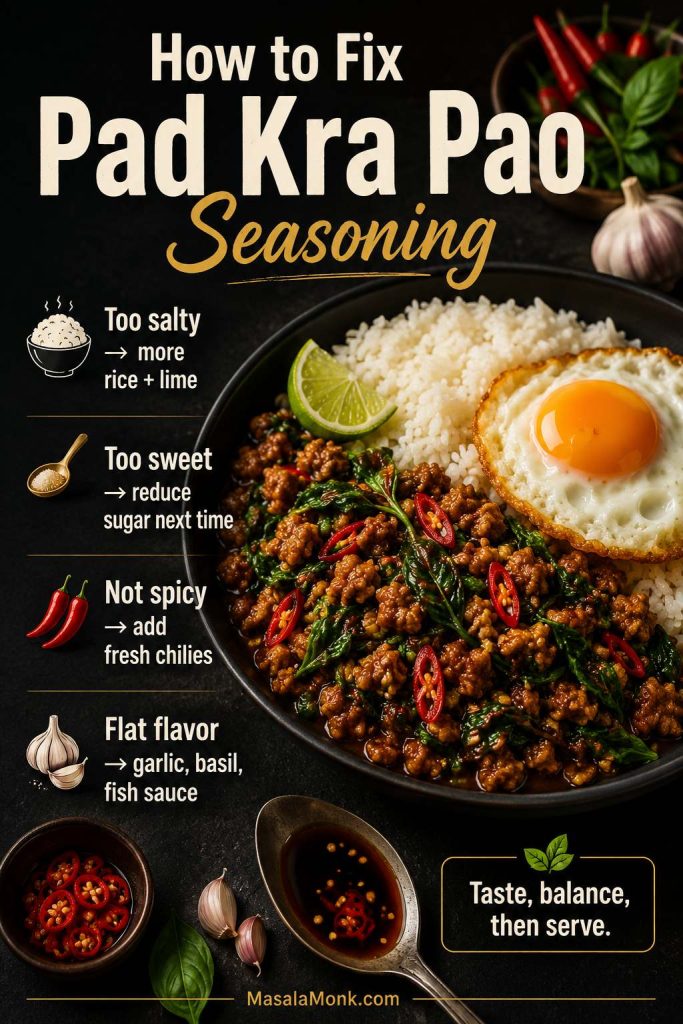
Also Read: Protein Ice Cream Recipe: 10 Creamy Homemade Recipes

3) Spicy Peanut Noodles with Crispy Tofu

Pick this one when you want the least “meal prep feeling” lunch in the lineup. Sometimes the smartest way to stay consistent with prep is to make at least one meal that feels saucy, bold, and a little indulgent.

Here, the sauce is the whole point. Peanut butter gives it body, the hemp seeds make it feel fuller and smoother, the tofu brings chew, and the noodles give the whole thing real comfort-food energy without turning it heavy or dull. Since it works cold, at room temperature, or lightly warm, it is also one of the most flexible containers in the entire post.

Quick recipe snapshot

  • Best served: Cold, room temperature, or gently warmed
  • Fridge life: 3 to 4 days
  • Reheats well: Lightly, but also good cold
  • Pack separately: Spicy peanut-hemp sauce
  • Best texture trait: Glossy noodles with crisp-edged tofu and rich clingy sauce
  • Approximate protein per serving: about 34 g

Yield: 4 containers

Prep time: 25 minutes

Cook time: 25 minutes

Total time: 50 minutes, plus tofu pressing time

Ingredients

Crispy tofu

  • 2 (14-ounce / 396 g) blocks extra-firm tofu, pressed and torn into chunks
  • 1 tablespoon soy sauce
  • 1 tablespoon neutral oil
  • 1 tablespoon cornstarch
  • 1 teaspoon garlic powder

Noodle base

  • 12 ounces dry noodles, such as wheat noodles or rice noodles
  • 2 cups shredded cabbage
  • 2 cups shredded carrots
  • 1 red bell pepper, thinly sliced
  • 3 green onions, sliced
  • Cilantro, optional

Spicy peanut-hemp sauce

  • 1/3 cup peanut butter
  • 2 tablespoons soy sauce
  • 1 tablespoon rice vinegar
  • 1 tablespoon maple syrup
  • 1 to 2 teaspoons sriracha
  • 1 teaspoon sesame oil
  • 1/4 cup hemp seeds
  • Warm water, as needed

Method

  1. Heat the oven to 425°F.
  2. Toss the tofu with soy sauce, oil, cornstarch, and garlic powder.
  3. Roast for about 25 minutes, flipping once, until crisp at the edges.
  4. Cook the noodles until just tender, then drain and cool slightly.
  5. Blend or whisk together the sauce ingredients, adding warm water until the sauce is smooth, glossy, and thick enough to cling.
  6. Divide the noodles and vegetables among containers, then add the tofu and green onions.
  7. Pack the sauce separately and toss through just before eating.
How to pack peanut noodles for meal prep guide showing noodles, crispy tofu, vegetables, and peanut sauce packed separately for better texture.
Packing spicy peanut noodles well matters almost as much as making them well, especially when you want the noodles to stay loose, the vegetables to keep some life, and the sauce to coat everything only when you are ready to eat.

What you should notice

The sauce should coat the back of a spoon. The tofu should have crisp edges and a slightly chewy center. Once everything is tossed together, the noodles should look glossy and coated, not soupy. Even so, the whole bowl should still feel lively because of the raw vegetables, not weighed down by the sauce.

Best storage tip

A tiny bit of oil on the noodles after draining helps keep them from clumping in the fridge. After that, keeping the sauce separate gives you much more control over texture when it is time to eat.

Spicy peanut noodles with crispy tofu recipe card showing glossy noodles, browned tofu, cabbage, carrots, bell pepper, green onion, and peanut sauce for tofu meal prep.
When tofu meal prep needs to feel more craveable than dutiful, spicy peanut noodles with crispy tofu bring the right kind of comfort: glossy sauce-coated noodles, browned tofu, and plenty of crunch, with the sauce packed separately so the texture stays under your control.

Also Read: Homemade Mango Ice Cream Recipe

4) Mediterranean Tofu Bowls

Go with this bowl when richer lunches start feeling repetitive. By the middle of the week, something brighter and sharper often sounds much more appealing.

The tofu is warmly spiced and roasted, but the real lift comes from the finish. A lemony herbed hemp crunch gives the bowl a clear texture role instead of hiding quietly in the background, while cucumbers, tomatoes, olives, and romaine keep everything crisp, savory, and bright. By contrast with the noodle prep, this lunch is not trying to comfort you. It is trying to refresh you, which is exactly why it works so well in the same lineup.

Quick recipe snapshot

  • Best served: Cold or cool room temperature
  • Fridge life: 3 to 4 days
  • Reheats well: Not ideal once assembled
  • Pack separately: Romaine, dressing, and herbed hemp crunch for best texture
  • Best texture trait: Crisp, briny, lemony contrast with nutty finishing crunch
  • Approximate protein per serving: about 33 g

Yield: 4 bowls

Prep time: 25 minutes

Cook time: 30 minutes

Total time: 55 minutes, plus tofu pressing time

Ingredients

Spiced tofu

  • 2 (14-ounce / 396 g) blocks firm tofu, pressed and cubed
  • 1 tablespoon olive oil
  • 1 tablespoon lemon juice
  • 1 teaspoon smoked paprika
  • 1 teaspoon ground cumin
  • 1/2 teaspoon garlic powder
  • 1/2 teaspoon salt
  • Black pepper to taste

Mediterranean bowl base

  • 4 cups cooked quinoa
  • 1 cucumber, chopped
  • 1 1/2 cups chopped tomatoes
  • 1/2 cup sliced olives
  • 1 cup shredded romaine
  • 1 cup roasted chickpeas

Creamy lemon dressing

  • 3 tablespoons tahini
  • 2 tablespoons lemon juice
  • 1 small garlic clove
  • 2 to 4 tablespoons water
  • Salt and pepper to taste

Herbed hemp crunch

  • 1/3 cup hemp seeds
  • 2 tablespoons chopped parsley
  • 1 tablespoon chopped dill
  • 1 teaspoon lemon zest
  • Pinch of salt
  • Black pepper

Method

  1. Roast the tofu at 425°F for 25 to 30 minutes until browned and firm.
  2. Whisk together the dressing ingredients.
  3. Stir together the hemp crunch ingredients in a small bowl.
  4. Divide the quinoa among containers and add the cucumber, tomatoes, olives, tofu, and roasted chickpeas.
  5. Pack the romaine, dressing, and hemp crunch separately when possible for the best texture.
  6. Add the fresh elements just before serving.

What you should notice

The hemp topping should smell lemony and fresh and add a real nutty bite. As a result, the finished bowl should feel crisp, bright, and layered rather than soft and one-note. Even on day three, it should still taste awake rather than tired.

Best storage tip

Store the romaine outside the main hot ingredients if you want the best texture on days three and four. In the same way, keeping the crunch and dressing separate protects the part of this bowl that makes it feel fresh in the first place.

Mediterranean tofu bowls recipe card showing quinoa, spiced tofu, roasted chickpeas, romaine, cucumber, tomatoes, olives, and creamy dressing for cold tofu meal prep.
Sharper, brinier lunches can be the difference between finishing your meal prep happily and getting bored by midweek, and this Mediterranean tofu bowl leans into that with spiced tofu, quinoa, crisp vegetables, olives, roasted chickpeas, and a lemony creamy finish.

Also Read: Cookie Pie Recipe: 10 Best Flavors, Fillings and Variations

5) Buffalo Tofu Wraps with Hemp Ranch

This is the lunch that breaks the bowl rhythm. After several container-style meals, that shift alone makes the lineup feel more useful.

Buffalo tofu brings heat and punch, the fresh vegetables add crunch and lift, and the hemp ranch gives the wrap its real identity by cooling the buffalo heat and adding creamy body. Using shredded or finely crumbled tofu also makes the filling feel more natural inside a wrap rather than like bowl tofu folded into a tortilla at the last second. That difference matters, because this lunch is supposed to feel packed on purpose.

Quick recipe snapshot

  • Best served: Cold, assembled fresh
  • Fridge life: 3 to 4 days for components
  • Reheats well: Not as a full wrap
  • Pack separately: Buffalo tofu, wrap vegetables, tortillas, and hemp ranch
  • Best texture trait: Sticky spicy tofu balanced by cool creamy ranch and fresh crunch
  • Approximate protein per serving: about 28 g

Yield: 4 wraps

Prep time: 20 minutes

Cook time: 20 minutes

Total time: 40 minutes, plus tofu pressing time

Ingredients

Buffalo tofu

  • 2 (14-ounce / 396 g) blocks extra-firm tofu, pressed and shredded or finely crumbled
  • 1 tablespoon olive oil
  • 1/2 teaspoon garlic powder
  • 1/2 teaspoon paprika
  • 1/2 teaspoon salt
  • Black pepper to taste
  • 1/3 cup buffalo sauce

Wrap filling

  • 4 large flour tortillas or wraps
  • 2 cups shredded lettuce
  • 1 cup shredded carrots
  • 1 cup finely chopped celery
  • 1/2 red onion, thinly sliced
  • 2 tablespoons hemp seeds, for sprinkling

Hemp ranch

  • 1/4 cup hemp seeds
  • 1/2 cup plain yogurt
  • 1 tablespoon lemon juice
  • 1 teaspoon Dijon mustard
  • 1 tablespoon chopped parsley or dill
  • Pinch of garlic powder
  • Salt and pepper to taste
  • Splash of water, if needed

Method

  1. Heat the oven to 425°F.
  2. Toss the shredded or finely crumbled tofu with olive oil, garlic powder, paprika, salt, and black pepper.
  3. Spread it out on a tray and roast for about 20 minutes, stirring once, until the edges are lightly browned.
  4. Toss the hot tofu with buffalo sauce and let it cool slightly.
  5. Blend or whisk together the hemp ranch ingredients until creamy and spreadable.
  6. For the best texture, store the wrap filling separately and assemble fresh before eating.
  7. To serve, spread hemp ranch on the wrap, then layer the lettuce, carrots, celery, onion, tofu, and a light sprinkle of hemp seeds before rolling tightly.
How to build buffalo tofu wraps guide showing hemp ranch spread on a tortilla, crunchy vegetables, buffalo tofu, and the finished wrap rolled tightly for meal prep.
Building the wrap in the right order makes the difference between a crisp, satisfying lunch and a soft one, which is why the ranch goes down first, the cool vegetables create the crunch, and the buffalo tofu gets added last before rolling everything tightly.

What you should notice

The tofu should look sticky and spicy at the edges, while the ranch should be thick enough to spread without making the wrap soggy. Once assembled, the wrap should feel cool, crisp, creamy, and sharp in the right order, not like a sauce-heavy bundle that falls flat after two bites.

Best storage tip

If you fully assemble these on day one, they soften much faster. Therefore, they are better when the components are prepped ahead and wrapped fresh. That way, you keep the convenience without giving up the texture that makes the wrap worth eating.

Buffalo tofu wraps with hemp ranch recipe card showing cut wraps filled with spicy tofu, lettuce, carrots, celery, red onion, and creamy ranch for tofu meal prep.
A meal-prep wrap only earns its place when it still feels crisp, creamy, and worth eating, and these buffalo tofu wraps do that by pairing punchy tofu with cool hemp ranch, crunchy vegetables, and fresh assembly right before lunch.

Also Read: Punjabi Mutton Bhuna – Amritsari Village-Style Gosht Recipe

Which Tofu Meal Prep Recipes Are Best Hot, Cold, or Build-Fresh?

The Smoky Tofu Rice Bowls reheat best because the rice and roasted vegetables are built for warmth, and the bowl can be refreshed with cool cabbage and lime yogurt drizzle afterward. So if you want the most classic microwave-friendly tofu meal prep option in the post, start there.

Meanwhile, the Spicy Peanut Noodles with Crispy Tofu work both ways. Some people prefer them cold or at room temperature, while others like them gently warmed before tossing with sauce. Because of that flexibility, they are one of the easiest lunches here to fit into different workday setups.

Tofu meal prep comparison guide showing which recipes are best reheated, best cold, best build-fresh, or flexible either way, including smoky tofu rice bowls, lemon herb tofu quinoa bowls, Mediterranean tofu bowls, buffalo tofu wraps, and spicy peanut noodles.
How you want to eat lunch changes which tofu meal prep recipe makes the most sense, and this guide helps you choose fast: smoky rice bowls for reheating, lemon herb and Mediterranean bowls for colder meals, buffalo wraps for fresh assembly, and spicy peanut noodles when you want the most flexibility.

For cold lunches, the Lemon Herb Tofu Quinoa Bowls are excellent. Likewise, the Mediterranean Tofu Bowls are at their best when the romaine, dressing, and herbed hemp crunch stay fresh until serving. In both cases, the freshness is the point, so there is no need to force reheating into the equation.

By contrast, the Buffalo Tofu Wraps with Hemp Ranch are best assembled from cold components just before eating. They can still be fully meal-prepped, of course. Even so, the smartest move is to treat them as a build-fresh lunch rather than a fully wrapped make-ahead one.

Also Read: Peach Cobbler with Canned Peaches (Dessert Recipe)

How to Meal Prep Tofu for the Week in Under 90 Minutes

You do not need to treat this like five separate cooking projects. Instead, the smarter move is to overlap the work so the whole prep session stays manageable.

Start by pressing all the tofu first. While that happens, get your grains cooking. Then preheat the oven and prep your vegetables. Once the tofu goes in, mix the sauces and dressings while everything roasts. Meanwhile, chop herbs and pack the fresh components during that same window. In practice, that overlap is what keeps a big prep session from turning into an all-afternoon chore.

A practical workflow looks like this:

Tofu meal prep workflow guide showing how to prep lunches in under 90 minutes by pressing tofu, cooking grains, chopping vegetables, roasting tofu, mixing sauces, cooling ingredients, packing containers, and labeling what to eat first.
A good tofu meal prep session runs better when the work overlaps, and this under-90-minute workflow shows the smartest order: press tofu first, cook grains while it presses, prep vegetables during that window, roast and cool the hot components, then pack and label everything with texture in mind.
  1. Press all the tofu first.
  2. Cook rice or quinoa while it presses.
  3. Preheat the oven and line your trays.
  4. Chop vegetables, herbs, and crunchy toppings.
  5. Season the tofu and roast it.
  6. Mix the hemp dressing, peanut sauce, tahini dressing, and hemp ranch while the oven is working.
  7. Cool the hot components before closing containers.
  8. Pack wet and dry elements separately wherever texture matters.
  9. Label the containers you want to eat first.

That kind of workflow keeps the prep manageable and makes the whole post more useful in real life. It also makes a big difference in texture, because cooling before packing is one of the easiest ways to avoid condensation and sogginess. Once you start overlapping the work instead of treating every recipe like a separate task, the whole system becomes much more realistic.

Also Read: Masterclass in Chai: How to Make the Perfect Masala Chai (Recipe)

Troubleshooting Tofu Meal Prep

Use this as a quick check before blaming tofu itself. In most cases, the problem is moisture, weak seasoning, or packing order.

Tofu meal prep packing guide showing which ingredients can be packed together and which should be packed separately, including dressings, greens, avocado, lime wedges, crunchy toppings, wraps, and fresh finishing elements.
Texture usually falls apart long before flavor does, so this tofu meal prep packing guide shows what can stay in the main container and what is better held back until serving, from dressings and greens to avocado, wraps, lime wedges, and crunchy toppings.

If tofu turns soggy

The most likely reason is too much moisture or sauce added too early. So press longer, roast longer, and sauce later. In many cases, the fix is not dramatic at all. It is simply a matter of letting the tofu get drier before you ask it to hold texture for several days.

If tofu tastes bland

The issue is usually weak seasoning or under-salted sauce. So use soy, acid, garlic, herbs, chili, and enough salt where needed. More specifically, do not expect one last-minute sauce to rescue tofu that never had enough flavor built into it from the start.

If the container turns watery

Wet vegetables were probably packed too early or against hot ingredients. Therefore, keep cucumbers, tomatoes, lettuce, and dressings separate whenever possible. Once the hot ingredients cool, you can combine more confidently without setting off that slow soggy slide in the fridge.

If reheated tofu turns rubbery

It was probably overcooked twice or reheated too aggressively. Instead, reheat more gently and stop once warm rather than blasting it until very hot. That small change alone usually keeps the texture much more pleasant.

If noodles clump

They were likely packed dry and cooled too tightly. In that case, toss them with a tiny bit of oil after draining and keep the sauce separate. Then, when it is time to eat, the noodles loosen more easily and the sauce coats them more evenly.

If wraps go soft too fast

They were assembled too early or loaded with too much wet sauce. So pack the filling and the wraps separately and build them fresh. That way, you still get the convenience of prep without sacrificing the crisp bite that makes the wrap work.

Also Read: Air Fryer Salmon Recipe (Time, Temp, and Tips for Perfect Fillets)

Tofu meal prep troubleshooting guide showing quick fixes for soggy tofu, bland tofu, watery containers, rubbery reheating, clumpy noodles, and soft wraps.
When tofu meal prep starts going wrong, the fix is usually more about handling than the recipe itself: press and roast tofu longer, season earlier, cool containers before sealing, keep sauce separate, reheat gently, and assemble wraps fresh instead of too far ahead.

How Long Does Tofu Meal Prep Last?

For both quality and practicality, these meals are best treated as a 3-to-4-day refrigerator plan. That way, the textures still feel intentional rather than tired. Meals like the quinoa bowls and Mediterranean bowls tend to hold especially well when the dressing stays separate. Meanwhile, the rice bowl and noodle prep also sit comfortably in that window. For wraps, the components are best prepped ahead and assembled fresh.

Tofu meal prep storage guide showing how long smoky tofu rice bowls, lemon herb tofu quinoa bowls, spicy peanut noodles, Mediterranean tofu bowls, and buffalo tofu wraps last in the fridge and how each is best served.
Planning the week gets easier when you know which lunches hold strongest: smoky rice bowls and lemon herb quinoa bowls can comfortably carry four days, peanut noodles stay flexible, Mediterranean bowls need greens and dressing held back, and buffalo wraps are best kept in components until you assemble them fresh.

Planning for a full five-day workweek? The easiest move is either to prep a smaller second batch midweek or to freeze part of the cooked tofu early and rotate it in later. That approach usually works better than asking one big Sunday prep to stay perfect longer than it really should. For general food-safety guidance on refrigerated leftovers, the USDA’s leftovers and food safety guidance is a useful reference point.

4-day tofu meal prep rotation guide showing a suggested order for smoky tofu rice bowls, spicy peanut noodles with crispy tofu, lemon herb tofu quinoa bowls, Mediterranean tofu bowls, and buffalo tofu wraps with hemp ranch.
A smart tofu meal prep week gets easier when the lunches are eaten in the right order, starting with the warm smoky rice bowls, moving through the more flexible peanut noodles, then into the colder quinoa and Mediterranean bowls, while the buffalo wraps stay best as fresh-built components on any day.

Final thoughts on tofu meal prep

These tofu meal prep ideas work because they treat tofu like a genuinely useful weekday protein instead of a backup option. Once the texture is handled properly, the sauces are built with intention, and the wet elements are packed separately where needed, tofu stops feeling like the compromise lunch and starts feeling like one of the smartest things you can prep for the week.

A practical place to start is the Smoky Tofu Rice Bowls, then follow with the Lemon Herb Tofu Quinoa Bowls or Mediterranean Tofu Bowls later in the week when colder, brighter lunches sound more appealing. Likewise, if you want a different flavor direction for the same weekday problem, these high-protein Indian meal prep ideas are worth bookmarking too. Above all, strong texture, smart packing, and enough variety to keep lunch interesting will take your tofu meal prep much further than novelty alone.

Also Read: Tapas Recipe With a Twist: 5 Indian-Inspired Small Plates

Tofu meal prep recap guide showing five lunch options and their moods: smoky tofu rice bowls, lemon herb tofu quinoa bowls, spicy peanut noodles with crispy tofu, Mediterranean tofu bowls, and buffalo tofu wraps with hemp ranch.
Some tofu lunches feel warm and dependable, others stay brightest cold, and a few are all about craveability or portability, so this quick recap helps you match each recipe to the kind of lunch mood you actually want that week.

Tofu Meal Prep FAQs

1. Is tofu meal prep good for high-protein lunches?

Yes. Tofu meal prep works well for high-protein lunches, especially when you pair tofu with ingredients like hemp seeds, quinoa, chickpeas, yogurt- or tahini-based sauces, or peanut sauce. More importantly, it can still feel like real food rather than a protein project when the texture and seasoning are handled properly.

2. What tofu is best for meal prep?

Extra-firm tofu is usually the best choice because it holds shape well and roasts into stronger edges. However, firm tofu also works well when you want a slightly softer bite. Silken tofu, by contrast, is not the right fit for bowls, noodles, and wraps like these.

3. How do I keep tofu from getting soggy in meal prep?

Press it well, avoid drowning it in marinade, roast it until it has real color, cool it before sealing, and keep sauces separate whenever crispness matters. Taken together, those steps solve most soggy tofu meal prep problems. In other words, the answer is usually better moisture control, not giving up on tofu.

4. Can I eat these tofu meal prep ideas cold?

Yes. Lemon Herb Tofu Quinoa Bowls and Mediterranean Tofu Bowls are especially good cold. Meanwhile, the noodle prep also works well cold or at room temperature. By contrast, rice bowls usually benefit most from reheating.

5. Do hemp seeds really help in meal prep, or are they just for nutrition?

They help with both. Hemp seeds add protein, but they also add creaminess, nuttiness, body, and texture. In this post, they matter most because they improve the actual eating experience, not just the nutrition label. That is precisely why they belong here.

6. Which recipe is best if I am new to tofu meal prep?

Start with the Smoky Tofu Rice Bowls. They feel the most familiar, reheat well, and give you the clearest sense of how satisfying tofu meal prep can be when the texture is right. After that, the other recipes make much more sense because you already trust the base ingredient.

Posted on — 1 Comment

Beyond Chicken: 5 Tofu Meal Prep Ideas for High-Protein Meals

Beyond Chicken cover image showing five tofu meal prep ideas, including crispy sesame tofu bowls, sticky soy garlic tofu, curried tofu salad, taco-style tofu crumbles, and red curry tofu as high-protein chicken-free meals.

If you want tofu meal prep ideas that can genuinely take the place of your usual chicken lunches, the problem usually is not tofu itself. More often, the tofu stays too wet, the seasoning lands too softly, or the finished box never feels as satisfying as the chicken version it is meant to replace.

This post is built to fix that.

Instead of offering another vague tofu roundup, it gives you five practical tofu meal prep ideas based on the chicken lunches people already repeat in real life: sesame bowls, taco bowls, sticky glazed rice boxes, creamy lunch salads, and curry meal prep. The goal is not to make tofu imitate chicken badly. The goal is to use tofu in the meal formats where it can replace chicken confidently, repeatedly, and with far better flavor.

Start with the tofu format that matches the chicken lunch you already rely on most. The sesame bowl is the strongest first move for anyone who wants crisp texture. Smoky tofu crumbles fit best when taco-bowl lunches are already part of the weekly routine. Sticky soy garlic tofu makes the most sense for takeout-style sweet-savory meal prep. Curried tofu salad is the most practical option for cold desk lunches. Coconut red curry tofu is the easiest fit for reheatable comfort food.

Why Most Tofu Meal Prep Fails

When tofu meal prep goes wrong, the pattern is usually predictable. Sometimes the tofu is barely pressed. Just as often, the seasoning is too timid. In other cases, sauce goes on too early, so the tofu steams instead of browning. Meanwhile, some lunch boxes fall flat because they have no crunch, no acid, and no real contrast.

Those same issues show up again and again across successful tofu recipes, whether the format is a sesame bowl, taco crumbles, or a curry box. In other words, the problem is usually not that tofu “cannot replace chicken.” The problem is that tofu needs better handling from the beginning.

Once moisture, seasoning, browning, and box structure improve, tofu meal prep stops feeling like a compromise. It starts feeling like one of the most flexible, economical, and repeatable proteins in a weekly lunch rotation.

Also Read: White Russian Recipe: 7 Variants to Try, From Classic to Frozen

What These Tofu Meal Prep Ideas Do Differently

The five recipes in this post were chosen for a reason. Each one maps onto a chicken meal-prep habit people already have, which makes the switch easier to trust.

  • Sesame chicken bowls → Crispy sesame tofu bowls → best for readers who want texture, roasted vegetables, and a sauce-driven rice bowl
  • Taco bowls or shredded chicken bowls → Smoky tofu crumbles taco bowls → best for bold seasoning, flexible leftovers, and burrito-style lunches
  • Honey garlic or soy-glazed chicken → Sticky soy garlic tofu meal prep → best for takeout-style sweet-savory rice boxes
  • Chicken salad lunches → Curried tofu salad meal prep → best for cold lunches, wraps, crackers, and desk lunches
  • Chicken curry meal prep → Coconut red curry tofu boxes → best for reheatable comfort food and sauce-first meal prep

That structure matters because it lets you begin with a lunch format you already trust instead of changing everything about meal prep at once. You are not asking tofu to win in a random role. You are choosing the lane where it naturally works.

Editorial infographic showing the best tofu meal prep swap for the chicken lunch you already love, including crispy sesame tofu bowls, smoky tofu crumbles, sticky soy garlic tofu, curried tofu salad, and coconut red curry tofu, with quick notes on why each option works and which lunch style each one suits best.
Start with the tofu lunch style that already matches how you like to meal prep. Crispy bowls, taco-style crumbles, sticky glazed rice boxes, cold curried salad lunches, and reheatable curry boxes all solve a different weekday need, so choosing the right format first makes tofu easier to enjoy and repeat. Save this guide for your next meal-prep session, and share it with someone trying to eat less chicken without giving up satisfying lunches.

There is a strong nutritional case for building more lunches this way as well. Harvard’s Nutrition Source notes that soy foods are nutrient-dense protein sources and are especially useful when they replace red and processed meat, which makes tofu a practical protein choice within a broader meal-prep routine. For that bigger-picture context, Harvard’s guide to soy as a nutrient-dense protein source is worth reading. Internally, MasalaMonk’s guide to plant-based protein sources for high-protein meal prep fits naturally alongside this post.

Why Tofu Works as a Chicken Meal Prep Replacement

Chicken usually does three jobs in meal prep: it brings protein, gives the box substance, and carries seasoning well. Tofu can do those same jobs. It simply gets there differently.

Tofu is not at its strongest when the exact meat-like bite is the whole point of the meal. It is strongest where bowls, sauces, spice blends, crunch, vegetables, and repeatable lunch structure do a lot of the work. That is why tofu becomes so convincing in crisp sesame bowls, smoky taco crumbles, sticky glazed rice boxes, creamy curried lunch salads, and reheatable curry meal prep.

The biggest mistake people make is trying to treat tofu exactly like chicken without changing the rest of the meal. If the whole lunch depends on the natural savoriness and bite of chicken, tofu will feel flat unless you compensate with better moisture control, stronger seasoning, and more thoughtful box building. Once that shift happens, tofu stops feeling like a backup plan and starts feeling deliberate.

For a broader vegetarian meal-prep perspective, MasalaMonk’s guide to high-protein Indian meal prep ideas is a strong internal companion.

How to Make Tofu Meal Prep Ideas Taste Good All Week

Choose the best tofu for meal prep

For most of the recipes below, firm or extra-firm tofu is the right choice. These styles hold shape better, brown more easily, and survive refrigeration more gracefully than softer tofu. Soft and silken tofu are far better suited to soups, sauces, smoothies, and desserts.

That distinction matters because beginner frustration often starts with the wrong tofu, not the wrong recipe. EatRight’s guidance on vegetarian protein foods makes the same basic point: firmer tofu works best in roasting, grilling, and sautéing applications, while softer tofu belongs in gentler preparations. Their article on vegetarian protein foods and tofu texture is a useful reader-friendly reference.

Why pressing tofu matters for meal prep texture

Pressing tofu is one of the simplest upgrades you can make. You do not need to remove every trace of moisture. You just need to remove enough excess water that the tofu can brown, crisp, and absorb seasoning without steaming itself into bland softness.

Wrap the tofu in a clean towel or paper towels, place it on a plate or board, and weigh it down for 20 to 30 minutes. In most cases, that is enough. The improvement in texture is immediate, especially in crisp bowls, tofu crumbles, and sticky glazed tofu.

Premium editorial tofu meal prep infographic showing four practical rules for better tofu lunches: press enough to remove excess moisture, coat tofu for crisp edges, brown first and sauce later, and build the whole lunch box with a base, vegetables, crunch, and contrast for better texture and flavor all week.
Better tofu meal prep starts long before the sauce goes on. Pressing properly, creating crisp edges, browning before glazing, and building a lunch box with texture, vegetables, and contrast are the small moves that make tofu taste more satisfying through the week. Save this post for your next prep day, and share it with someone who still thinks tofu meal prep has to be bland, soggy, or boring.

Brown tofu first, then add sauce

This is one of the most important rules in the entire article. Sauce added too early creates steam. Steam ruins browning. So tofu should be roasted, air-fried, or pan-browned before it is glazed or tossed.

That sequence matters most in crispy bowls and sticky tofu meal prep. The Kitchn’s method for making crispy tofu without deep-frying reinforces exactly why pressing, coating, and cooking before saucing works so reliably.

How to season tofu so it does not taste bland

Tofu rewards assertive seasoning. Salt helps, but it is rarely enough on its own. Soy sauce adds umami, vinegar or lime add lift, garlic and ginger add depth, chili brings edge, and a little sweetness often helps bring a glaze together. The best tofu meal prep ideas build flavor from several directions at once rather than relying on one sauce at the end.

Editorial tofu texture guide for meal prep showing four visual stages: too wet and under-pressed tofu, lightly browned tofu, crisp and ready tofu, and over-sauced tofu softening after glazing, with quick cues for when to keep cooking, when to sauce, and when tofu is ready to pack for the week.
Good tofu meal prep gets much easier once you know what to look for in the pan or on the tray. Pale tofu usually needs more time, lightly browned tofu still needs better edges, properly crisp tofu is the right point for glazing or packing, and over-sauced tofu loses the texture that makes lunch satisfying later in the week. Save this post for your next prep day, and share it with someone who keeps ending up with tofu that turns soft before the week is over.

Build the whole meal prep box, not just the protein

The best tofu meal prep ideas are not just tofu plus rice. They are tofu plus a base, vegetables, texture contrast, and a dressing or sauce that makes the meal feel complete.

Rice, quinoa, soba, wraps, chopped salads, and curry-style boxes all work well as foundations. Broccoli, cabbage, peppers, carrots, cucumbers, edamame, onions, herbs, seeds, and pickled elements keep the lunches from going flat. For more base-building inspiration, MasalaMonk’s guide to plant-based meal prep ideas using quinoa as a protein source fits naturally here.

Editorial tofu meal prep packing guide showing how to pack tofu lunches for better texture all week, including what to keep in the main box, which sauces and dressings to store separately, what fresh toppings to add later, and how crispy tofu and saucy tofu should be packed differently for the best meal prep results.
Packing matters just as much as cooking when you want tofu meal prep to hold up through the week. Keep grains, tofu, and sturdy vegetables in the main box, store sauces separately, and add fresh toppings like herbs, lime, avocado, or crunchy elements closer to eating so the lunch keeps more texture and contrast. Save this post for your next prep day, and share it with someone who keeps blaming tofu when the real problem is the packing.

How to pack tofu meal prep so it still tastes good on day three

Packing order matters more than many people expect.

  • Keep sauce separate for crispy meals whenever possible.
  • Let hot tofu, rice, and vegetables cool before sealing the containers.
  • Add wet toppings like salsa, cucumber, and avocado closer to serving time.
  • Refresh older meal prep with acid, herbs, chili, seeds, or crunch rather than assuming the tofu itself is the only issue.

That last point matters. Cold or reheated lunches naturally lose some brightness, so a squeeze of lime, a little vinegar, fresh spring onion, or a spoonful of crunchy topping can make day-three tofu meal prep taste far more alive.

Also Read: Mango Sorbet Recipe: Healthy & Plant Based Dessert

5 Tofu Meal Prep Ideas That Actually Make a Strong Replacement for Chicken

The five recipes below are arranged from the easiest texture-first tofu win to the most comfort-driven sauce-based lunch. Start with the one that matches your usual chicken habit most closely, then branch out once you find the format you actually want to repeat.

Premium editorial tofu meal prep style chooser infographic comparing five lunch formats: crispy sesame tofu bowls, smoky tofu crumbles, sticky soy garlic tofu, curried tofu salad, and coconut red curry tofu, with notes on texture, reheating style, and which type of lunch each option suits best.
The best tofu meal prep is usually the one that fits how you actually like to eat during the week. Crispy sesame bowls work well for texture-first lunches, smoky crumbles are great for taco bowls and wraps, sticky soy garlic tofu suits takeout-style cravings, curried tofu salad covers cold desk lunches, and coconut red curry tofu is the easiest fit for reheatable comfort food. Save this post for your next meal-prep session, and share it with someone who wants more variety without ending up with another week of boring lunches.

Crispy Sesame Tofu Meal Prep Bowls

Best tofu swap for sesame chicken bowls

If you usually prep sesame chicken, crispy stir-fry bowls, or takeout-style rice boxes, this is the strongest place to start. Crisp tofu gives you bite, structure, and sauce-holding power in a way soft cubes never will. Better still, the whole format still feels familiar, which makes the switch easier to trust.

Among all the tofu meal prep ideas in this post, this is one of the most beginner-friendly because it solves several problems at once: texture, strong sauce, roasted vegetables, and a dependable rice-bowl format. If someone thinks tofu always feels soggy or forgettable, this is the recipe most likely to change that opinion early.

Premium editorial guide showing how to build a crispy sesame tofu meal prep bowl with a grain base, crispy tofu, roasted vegetables, sesame ginger sauce, and a fresh finish like spring onion and sesame seeds for better texture, balance, and flavor all week.
A satisfying tofu meal prep bowl works best when every part has a job: a solid base for staying power, crispy tofu for bite, roasted vegetables for bulk and contrast, a bold sesame-style sauce for flavor, and a fresh finish to keep the lunch from tasting heavy by day three. Save this post for your next prep day, and share it with someone who wants high-protein lunches that feel balanced, flavorful, and worth repeating through the week.

Recipe Card: Crispy Sesame Tofu Meal Prep Bowls

Prep time: 25 minutes
Cook time: 30 minutes
Yield: 4 bowls
Approximate protein: about 18 to 22 grams per serving before rice and toppings, depending on tofu brand

Ingredients

For the tofu

  • 2 blocks extra-firm tofu
  • 1 tablespoon neutral oil
  • 1 tablespoon soy sauce
  • 2 tablespoons cornstarch
  • 1 teaspoon garlic powder
  • 1/2 teaspoon black pepper

For the sesame ginger sauce

  • 3 tablespoons soy sauce
  • 1 tablespoon rice vinegar
  • 1 tablespoon maple syrup or honey
  • 1 tablespoon toasted sesame oil
  • 1 tablespoon grated ginger
  • 2 garlic cloves, minced
  • 1 to 2 teaspoons chili crisp or chili flakes
  • 2 tablespoons water

And for the bowls

  • 3 cups cooked rice
  • 1 large head broccoli, cut into florets
  • 2 bell peppers, sliced
  • 2 carrots, sliced thin
  • 1 tablespoon neutral oil
  • 2 tablespoons sesame seeds
  • 3 spring onions, sliced

Method

  1. Press the tofu for 20 to 30 minutes, then cut it into cubes.
  2. Toss the tofu with oil, soy sauce, cornstarch, garlic powder, and pepper. The coating should look light and powdery rather than wet.
  3. Spread on a lined tray and roast at 220°C / 425°F for 25 to 30 minutes, turning once, until the edges look dry, browned, and lightly blistered.
  4. Toss broccoli, peppers, and carrots with a little oil and roast on a second tray until tender with some color.
  5. Whisk together the sauce ingredients and taste before using.
  6. Once the tofu is hot and crisp, toss it lightly in enough sauce to coat.
  7. Divide rice among four containers, then add vegetables and tofu.
  8. Finish with sesame seeds and spring onion.

Best texture checkpoint

The tofu is ready when the cubes release easily from the tray, the corners look browned rather than pale, and the exterior feels lightly firm instead of damp.

Why this recipe works

Crisp texture plus a sesame-ginger sauce gives tofu a role people already trust from chicken bowls. The sauce goes on after roasting, which protects the edges instead of destroying them. Roasted vegetables keep the bowl from tasting one-note, while rice gives the whole meal the same dependable structure that makes sesame chicken lunch prep so popular.

Do not mess this up

Do not pour all the sauce onto the tofu before roasting. It will steam instead of crisp. Also, do not under-roast it. Pale tofu softens too quickly once sauced and feels disappointing by day two.

Storage and reheating

Store for up to 4 days. For the best texture, keep extra sauce separate and add it after reheating. Microwave works fine for the rice and vegetables, but an air fryer or hot skillet is the best way to recover crispness in the tofu. For the best day-three texture, pack sauce in a small container and toss just before eating.

Easy swaps

  • use quinoa instead of rice
  • swap peppers for cabbage or snap peas
  • add edamame for more protein
  • finish with lime for more brightness

For another bowl direction later in the week, MasalaMonk’s Thai-style vegan bowl with peanut butter dressing works well as a follow-on internal read.

Smoky Tofu Crumbles Taco Bowls

Best tofu swap for shredded chicken taco bowls

If your usual lunch prep leans toward taco bowls, burrito bowls, or shredded chicken rice boxes, tofu crumbles are one of the smartest replacements you can make. Because the tofu is broken into small irregular pieces, it catches spice more evenly and feels closer to the structure of seasoned minced or shredded protein.

This is also one of the most believable chicken-to-tofu swaps in the post. Ease, strong seasoning, and leftover flexibility are exactly what make it so repeatable. Once you make a good batch of tofu crumbles, you are not limited to one kind of lunch box.

Editorial infographic showing multiple ways to use smoky tofu crumbles for meal prep, including taco bowls, wraps, burritos, tacos, quesadillas, and baked potatoes or lettuce cups, with notes on why this tofu crumble format works well for flexible high-protein lunches through the week.
One good batch of smoky tofu crumbles can carry much more than a single lunch. Use it for taco bowls early in the week, then turn the leftovers into wraps, burritos, tacos, quesadillas, or even baked potatoes when you want something different without starting from scratch again. Save this post for your next prep day, and share it with someone who wants more variety from one simple, high-protein tofu meal prep base.

Recipe Card: Smoky Tofu Crumbles Taco Bowls

Prep time: 20 minutes
Cook time: 25 minutes
Yield: 4 bowls
Approximate protein: about 20 to 24 grams per serving depending on tofu and beans used

Ingredients

  • 2 blocks firm or extra-firm tofu
  • 2 teaspoons olive oil
  • 1 tablespoon soy sauce
  • 1 tablespoon tomato paste
  • 2 teaspoons chili powder
  • 1 teaspoon smoked paprika
  • 1 teaspoon cumin
  • 1 teaspoon garlic powder
  • 1 teaspoon onion powder
  • 1/2 teaspoon black pepper
  • juice of 1 lime
  • 3 cups cooked rice
  • 1 can black beans, drained and rinsed
  • 1 cup corn
  • 2 cups shredded cabbage or lettuce
  • 1 cup salsa or pico de gallo
  • 1 avocado, sliced or mashed
  • coriander leaves for serving

Method

  1. Press the tofu well, then crumble it by hand into irregular pieces roughly the size of cooked ground meat rather than big chunks.
  2. Mix olive oil, soy sauce, tomato paste, chili powder, smoked paprika, cumin, garlic powder, onion powder, black pepper, and lime juice.
  3. Toss the tofu crumbles in the seasoning mixture until evenly coated.
  4. Spread on a baking tray and roast at 220°C / 425°F for 20 to 25 minutes, stirring once, until the tray looks mostly dry and the edges are browned.
  5. Divide rice among containers.
  6. Add black beans, corn, cabbage, and tofu crumbles.
  7. Pack salsa and avocado separately if possible.
  8. Finish with coriander and extra lime at serving time.

Best texture checkpoint

The crumbles are ready when the tray looks mostly dry, the edges have browned, and the mixture no longer gives off visible steam. They should look concentrated and lightly chewy at the edges rather than soft and damp.

Why this recipe works

Strong seasoning does a lot of the heavy lifting here. Even more importantly, the crumble texture makes tofu feel more integrated into the bowl, which helps a lot if someone is still skeptical about large tofu cubes. Beans, corn, cabbage, salsa, and avocado also create the kind of layered bowl that makes taco meal prep satisfying beyond the protein itself.

Do not mess this up

Do not stop cooking the crumbles too early. If they still look wet, they will taste flat and soften badly in storage. Do not crowd the tray either, or the mixture will steam. Also, do not skip the lime, because the acid helps the whole bowl feel brighter and less heavy.

Storage and serving

These bowls hold well for 3 to 4 days. Add avocado fresh if possible. If you want the crumbles darker and a little chewier, roast them 3 to 5 minutes longer after stirring.

Other ways to use the crumbles

  • spoon into wraps
  • roll into burritos
  • use in tacos
  • add to quesadillas
  • pile onto baked potatoes
  • turn into lettuce cups

Easy swaps

  • use quinoa instead of rice
  • add jalapeños or pickled onions
  • swap black beans for pinto beans
  • stir chipotle into the salsa for more smoke

Also Read: Protein Ice Cream Recipe: 10 Creamy Homemade Recipes

Sticky Soy Garlic Tofu Meal Prep

Best tofu swap for honey garlic or soy-glazed chicken bowls

If you like sticky, glossy, sweet-savory chicken bowls, this is the tofu version to try first. The key is simple: crisp the tofu first, then glaze it. That way you keep contrast instead of ending up with soft, saucy cubes.

This recipe works especially well for readers who love takeout-style lunches but want something they can batch at home without losing all the texture by the next day. The crisp shell gives the glaze something to cling to, while the garlic, ginger, soy, and a little sweetness create the familiar savory payoff many people usually chase in honey garlic chicken or soy-glazed bowls.

Premium editorial infographic showing a sticky soy garlic tofu meal prep box with glossy glazed tofu, rice, and greens, plus tips on crisping tofu first, coating with glaze at the end, pairing it with a balanced lunch box, reheating gently, and finishing with spring onion and sesame for better texture and flavor.
Sticky soy garlic tofu is the lunch to make when you want a meal-prep box that feels closer to takeout than another plain rice bowl. Crisping the tofu first, glazing it at the end, and pairing it with rice, greens, and a fresh finish keeps the box glossy, savory, and satisfying without turning everything soft too early. Save this post for your next prep day, and share it with someone who wants sweet-savory high-protein lunches that still taste good after reheating.

Recipe Card: Sticky Soy Garlic Tofu Meal Prep

Prep time: 20 minutes
Cook time: 30 minutes
Yield: 4 bowls
Approximate protein: about 18 to 22 grams per serving before rice, depending on tofu brand

Ingredients

For the tofu

  • 2 blocks extra-firm tofu
  • 1 tablespoon neutral oil
  • 2 tablespoons cornstarch
  • 1/2 teaspoon black pepper

For the glaze

  • 4 tablespoons soy sauce
  • 1 tablespoon rice vinegar
  • 1 tablespoon maple syrup or brown sugar
  • 1 tablespoon sesame oil
  • 4 garlic cloves, minced
  • 1 teaspoon grated ginger
  • 1 teaspoon chili flakes or chili crisp
  • 4 tablespoons water

And for the bowls

  • 3 cups cooked jasmine rice
  • 2 cups green beans or broccoli
  • 1 bell pepper, sliced
  • 2 spring onions, sliced
  • sesame seeds for garnish
  • shelled edamame, optional, for extra protein

Method

  1. Press the tofu and cut it into cubes.
  2. Toss with oil, cornstarch, and pepper.
  3. Roast or air-fry at 220°C / 425°F until crisp and golden, about 25 minutes.
  4. Roast or sauté the vegetables until just tender.
  5. In a saucepan, combine soy sauce, rice vinegar, maple or brown sugar, sesame oil, garlic, ginger, chili, and water. Simmer until glossy and lightly thickened.
  6. Toss the hot tofu gently in the glaze.
  7. Divide rice and vegetables into containers, then top with glazed tofu.
  8. Finish with spring onion and sesame seeds.

Best texture checkpoint

The tofu should be crisp and well browned before it ever touches the glaze. The glaze should look shiny and lightly syrupy, thick enough to coat the back of a spoon but not so reduced that it turns gummy after chilling.

Why this recipe works

The glaze gives tofu the familiar sticky, savory-sweet finish people often associate with takeout-style chicken bowls. Crisping first prevents the meal from turning heavy and soggy, while the rice and vegetables keep the lunch grounded in a familiar meal-prep structure. That balance between crispness and glaze is what makes the recipe satisfying rather than merely saucy.

Do not mess this up

Do not glaze the tofu before it is properly browned. Otherwise, you lose the contrast that makes the recipe worth making. Also, avoid reducing the glaze too far, or it can become overly sticky after chilling and reheating.

Storage and reheating

Store for up to 4 days. Reheat gently. For the best texture, toss only part of the tofu in glaze before packing and carry extra glaze separately to spoon over after reheating. Fresh spring onion or sesame added at the end helps restore contrast.

Easy swaps

  • use teriyaki instead of soy-garlic
  • swap in mushrooms, cabbage, or snap peas
  • add toasted peanuts for crunch
  • serve with brown rice if you prefer

MasalaMonk’s teriyaki sauce recipe is a natural internal link here if you want to vary the glaze later.

Curried Tofu Salad for High-Protein Lunch Meal Prep

Best tofu swap for curried chicken salad lunches

If you rely on creamy chicken salad for sandwiches, wraps, crackers, or desk lunches, this is the tofu format that replaces it most directly. Because the recipe depends on dressing, crunch, and mix-ins, tofu feels natural here rather than forced.

This is also one of the most practical tofu meal prep ideas for people who do not want to reheat lunch at work. It travels well, tastes good cold, and solves the problem of protein-forward desk lunches without relying on deli meat or another day of chicken.

Premium editorial infographic showing a curried tofu salad no-reheat lunch guide with serving ideas for lettuce cups, sandwich filling, wrap filling, crackers or cucumber slices, and toast or pita pockets, plus notes on easy packing, desk-lunch use, added crunch and acid, and meal-prep storage.
Curried tofu salad is one of the easiest ways to make tofu meal prep work for real weekday lunches because it packs well, tastes good cold, and fits more than one kind of meal. Use it in wraps, sandwiches, lettuce cups, snack-box lunches, or on toast when you want something high in protein without depending on a microwave. Save this post for your next prep day, and share it with someone who needs an easy no-reheat lunch that still feels flavorful, fresh, and worth repeating.

Recipe Card: Curried Tofu Salad Meal Prep

Prep time: 20 minutes
Cook time: optional 10 minutes if you lightly bake the tofu first
Yield: 4 lunches
Approximate protein: about 16 to 20 grams per serving, depending on tofu and dressing choices

Ingredients

  • 2 blocks firm tofu
  • 1/3 cup vegan mayo
  • 1 tablespoon lemon juice
  • 2 teaspoons curry powder
  • 1/4 teaspoon turmeric, optional
  • 1 teaspoon Dijon mustard
  • 2 celery stalks, finely chopped
  • 2 spring onions or 1/4 small red onion, finely chopped
  • 2 tablespoons chopped coriander or parsley
  • 2 tablespoons raisins or finely chopped apple, optional
  • 2 tablespoons toasted sunflower seeds or chopped cashews, optional
  • salt and black pepper to taste
  • greens, wraps, bread, or crackers for serving

Method

  1. Press the tofu lightly so it is not watery, then crumble or finely chop it.
  2. In a bowl, whisk together vegan mayo, lemon juice, curry powder, turmeric if using, Dijon, salt, and pepper.
  3. Fold in the tofu, celery, onion, herbs, and any optional raisins or apple.
  4. Taste and adjust with more lemon, salt, or curry powder.
  5. Chill for at least 20 to 30 minutes before packing.
  6. Portion into containers with greens, wraps, sandwich bread, crackers, or cucumber slices.

Best texture checkpoint

The salad should hold together lightly without looking wet or loose. Finely crumbled tofu gives a more classic chicken-salad feel, while a slightly chunkier chop gives more bite.

Why this recipe works

This recipe replaces the function of chicken salad directly. It is practical, portable, and easy to repeat without reheating. The crunch from celery and seeds, the acid from lemon, and the creaminess from the dressing help tofu feel deliberate rather than plain, which is exactly why this format works so well for cold lunches.

Do not mess this up

Do not leave the tofu too wet before mixing. Excess moisture dilutes the dressing and shortens the storage life. Also, do not overdo the mayo at the start, because the salad loosens slightly as it sits.

Storage

Keeps well for 3 to 4 days. Stir before serving if needed. Keep greens and breads separate until you are ready to eat.

Best ways to serve it

  • spoon into wraps
  • pack with crackers
  • turn into a sandwich filling
  • serve with cucumber slices
  • pile onto toast with tomato
  • use in pita pockets

Easy swaps

  • use a yogurt-style dressing for a lighter version
  • add chopped grapes instead of apple
  • spoon into lettuce cups
  • use as a pita filling
  • add more herbs for a fresher finish

If you keep the mayo-based version, MasalaMonk’s homemade mayo recipe is the cleanest internal fit here.

Coconut Red Curry Tofu Meal Prep Boxes

Best tofu swap for chicken curry meal prep

If your weekly lunches usually include chicken curry, this is the tofu version most likely to satisfy you. Sauce-driven meal prep is one of tofu’s strongest lanes, because the tofu absorbs flavor without needing to imitate the exact texture of chicken.

This is also the best option in the post for readers who care more about reheating performance than crispness. Curry already depends on sauce, aromatics, vegetables, and rice for a large part of its appeal. That means tofu does not have to behave like chicken to feel right. It only has to hold shape, carry flavor, and reheat well.

Premium editorial infographic showing a coconut red curry tofu meal prep box with reheating tips, including browning tofu before simmering, packing curry with rice, finishing with lime and herbs after reheating, and using sturdy vegetables for a sauce-forward tofu lunch that stays satisfying through the week.
Coconut red curry tofu is one of the easiest tofu meal prep ideas to trust when you want a warm lunch that still feels good after reheating. Browning the tofu first, using vegetables that hold up well, and finishing with fresh lime or herbs after heating keeps the box rich, comforting, and balanced instead of heavy. Save this post for your next prep day, and share it with someone who wants a reheatable high-protein lunch that still tastes vibrant later in the week.

Recipe Card: Coconut Red Curry Tofu Meal Prep Boxes

Prep time: 20 minutes
Cook time: 30 minutes
Yield: 4 servings
Approximate protein: about 18 to 22 grams per serving before rice, depending on tofu and any added edamame

Ingredients

  • 2 blocks firm tofu
  • 1 tablespoon neutral oil
  • 1 onion, sliced
  • 3 garlic cloves, minced
  • 1 tablespoon grated ginger
  • 2 to 3 tablespoons red curry paste
  • 1 can full-fat coconut milk
  • 1 tablespoon soy sauce or tamari
  • 1 teaspoon maple syrup or brown sugar, optional
  • 1 bell pepper, sliced
  • 2 carrots, sliced
  • 1 to 2 cups green beans or broccoli
  • juice of 1/2 lime
  • fresh basil or coriander
  • 3 cups cooked rice for serving
  • shelled edamame, optional, for more protein

Method

  1. Press the tofu and cut it into cubes.
  2. Brown the tofu in a skillet with a little oil or roast it until lightly golden, then set aside.
  3. In a large pan, cook the onion until softened.
  4. Add garlic and ginger and cook briefly.
  5. Stir in the red curry paste and cook until fragrant.
  6. Add coconut milk, soy sauce, and the optional maple or brown sugar, then bring to a gentle simmer.
  7. Add bell pepper, carrots, and green beans or broccoli. Simmer until just tender.
  8. Return the tofu to the curry and simmer gently for a few minutes.
  9. Finish with lime juice and herbs.
  10. Portion with cooked rice into containers.

Best texture checkpoint

The tofu should be lightly browned before it enters the sauce, and the vegetables should be tender but not collapsing. The finished curry should look rich and fluid rather than watery or aggressively boiled down.

Why this recipe works

Sauce-driven meal prep is one of tofu’s strongest lanes. In this case, the curry gives you depth, comfort, and leftovers that still taste good several days later. Browning the tofu first helps it hold its structure in the sauce and keeps the final meal from tasting flat.

Do not mess this up

Do not skip browning the tofu first. Even a light browning step makes the final curry taste fuller and less flat. Also, avoid boiling the curry too hard once the tofu goes back in, or the vegetables can over-soften and the sauce can separate.

Storage and reheating

Store for up to 4 days. Reheat gently in the microwave or on the stove. Pack rice separately if you want the curry to reheat more evenly and avoid over-soft rice by day three. Add fresh herbs or extra lime closer to serving time if possible.

Easy swaps

  • use green curry paste
  • add mushrooms, baby corn, or snap peas
  • add edamame for more protein
  • use more lime and herbs for a brighter finish

Also Read: Homemade Mango Ice Cream Recipe

How to Make These Tofu Meal Prep Ideas Even Higher in Protein

Tofu already gives these lunches a solid protein base, but the easiest way to make them more filling is to support the tofu intelligently.

  • add shelled edamame to sesame bowls, sticky bowls, and curry boxes
  • use quinoa instead of rice in some meals
  • pair tofu crumbles with beans or lentils
  • use higher-protein wraps for salad or crumble fillings
  • add roasted chickpeas, hemp hearts, or seeds for extra protein and texture
  • slightly increase the tofu portion in the meals you repeat most often

That kind of adjustment helps the “high-protein” promise feel more real in practice, not just in the title. It also lets you adapt the same tofu meal prep ideas to different hunger levels without reinventing the whole week.

Tofu Meal Prep Troubleshooting: How to Fix the Problems That Ruin the Week

Use this section as a quick check before blaming tofu itself. In most cases, the problem comes down to moisture, weak seasoning, or packing order.

Premium tofu meal prep troubleshooting infographic showing common tofu lunch problems and fixes, including soggy tofu, bland tofu, watery meal prep boxes, rubbery tofu on reheat, flat cold lunches, and tofu sticking to the tray, with clear cause-and-fix notes for better texture and flavor all week.
When tofu meal prep goes wrong, the problem is usually fixable. Too much moisture, weak seasoning, wet add-ins, harsh reheating, or not enough contrast can turn a good lunch into a disappointing one, but small adjustments make a big difference. Save this post for your next prep session, and share it with someone who wants tofu lunches that stay flavorful, balanced, and worth eating all week.
  • Tofu turns soggy: Too much moisture or sauce was added too early. Press longer, roast longer, and sauce later.
  • Tofu tastes bland: The seasoning is too weak or the glaze is under-salted. Use soy, acid, aromatics, chili, and enough salt.
  • Meal prep turns watery: Wet vegetables were packed too early. Store cucumbers, salsa, and similar add-ins separately.
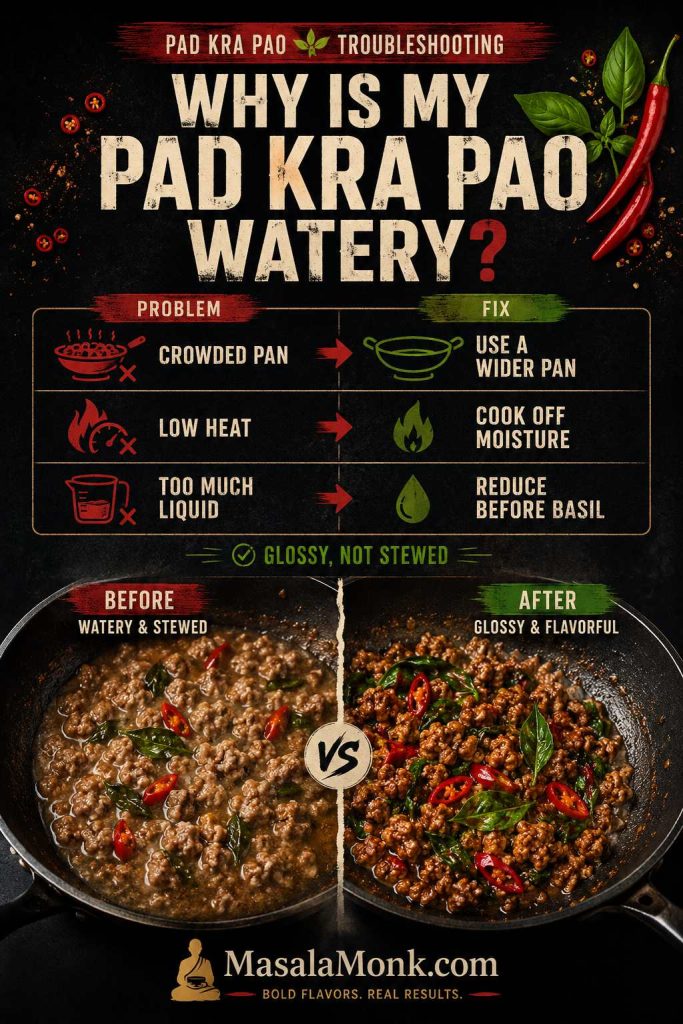
  • Tofu goes rubbery on reheat: It was either overcooked twice or reheated too harshly. Reheat gently and avoid over-reducing sauces.
  • Crispy tofu loses its edge by day three: It was fully dressed too early. Keep extra sauce separate until serving.
  • Salad-style tofu lunch tastes flat: It needs more crunch or acid. Add celery, herbs, lemon, seeds, or pickled elements.
  • Tofu sticks to the tray: There was not enough oil or no lining. Line the tray and let the tofu sit briefly before turning.
  • Tofu tastes watery even when seasoned: It was not pressed enough before cooking or mixing. Press longer and let the exterior dry slightly before seasoning.
  • Tofu falls apart in bowls: The cubes were too soft or handled too much after cooking. Use firm or extra-firm tofu and toss gently after browning.
  • Tofu tastes fine hot but disappointing cold: Cold food dulls flavor. Add more acid, herbs, crunch, or a sharper sauce when serving.

Also Read: Cookie Pie Recipe: 10 Best Flavors, Fillings and Variations

Tofu Meal Prep Ideas for Beginners: Batch-Cook Once and Eat All Week

How to batch-cook tofu meal prep in one session

The best tofu meal prep ideas often share the same foundation. Instead of cooking five unrelated lunches from scratch, cook components once and turn them in different directions.

A practical session looks like this:

  • press and cook 3 to 4 blocks of tofu in two different styles
  • cook a big batch of rice or quinoa
  • roast two trays of vegetables
  • mix one creamy dressing and one glaze
  • prep raw crunchy vegetables for cold lunches

A good order helps. Press the tofu first so it can drain while you start rice or quinoa. Roast one tray of tofu and one tray of vegetables together if your oven space allows. Mix sauces while everything cooks. Then cool components before packing, because steam trapped in containers shortens the life of the meal prep and softens textures faster than people expect.

Premium editorial infographic showing a 90-minute tofu meal prep game plan with six time blocks: press tofu and start grain, chop vegetables and mix sauces, roast tofu and vegetables, make curry or curried tofu salad, cool and portion containers, and pack sauces and add-ons for better lunches all week.
A good tofu meal prep session gets much easier when the work has a clear order. Start by pressing tofu and cooking your grain, move into chopping and sauces, roast tofu and vegetables together, then finish with one saucy option, portioning, and packed toppings so weekday lunches feel organized instead of repetitive. Save this post for your next prep day, and share it with someone who wants a simpler way to batch-cook better tofu lunches all week.

A sample 90-minute batch-cook plan

  • 0 to 10 minutes: press tofu and start rice or quinoa
  • 10 to 20 minutes: chop vegetables and mix sauces
  • 20 to 45 minutes: roast tofu and vegetables
  • 45 to 60 minutes: cook the curry or mix the curried tofu salad
  • 60 to 75 minutes: cool the hot components and portion containers
  • 75 to 90 minutes: label containers, portion sauces, and prep add-ons like herbs, lime, or crunchy toppings

That kind of system is what makes meal prep sustainable. Once the foundation is cooked, you are no longer building every lunch from zero.

How to mix and match these tofu meal prep ideas across the week

One tofu batch can cover more than one meal. Crispy tofu can become sesame bowls on Monday and sticky glazed tofu on Tuesday. Crumbles can go into taco bowls first, then wraps later. Curried tofu salad can cover desk lunches, while curry boxes handle dinners or heavier lunches.

That means the five recipes do not have to live in isolation. They can work as a system. Once you understand that, meal prep gets easier because you are no longer cooking from scratch every time. You are simply building new lunches from the same small set of components.

How long tofu meal prep lasts in the fridge

Most cooked tofu meal prep keeps well for 3 to 4 days. However, the storage method matters just as much as the recipe itself.

  • crispy tofu holds best when sauce is separate
  • salad-style prep holds best when watery vegetables are added later
  • curry and glazed tofu usually reheat well
  • avocado and fresh herbs are best added close to serving time

Even strong tofu meal prep ideas can disappoint if wet ingredients sit on everything for four days straight. Good packing is part of good cooking.

Also Read: Peach Cobbler with Canned Peaches (Dessert Recipe)

Final Thoughts on Using Tofu as a Chicken Replacement

Tofu does not replace chicken by copying it perfectly. It replaces chicken by working especially well in the meal formats where texture, sauce, seasoning, vegetables, and lunch structure matter more than one exact meat-like bite.

That is why these tofu meal prep ideas work. Crispy bowls give you bite. Crumbles give you familiarity. Sticky glazed tofu brings the takeout-style payoff many people want. Curried tofu salad solves cold lunches. Curry boxes bring reheatable comfort and strong leftovers.

If chicken has been your default meal-prep protein simply because it feels easy and dependable, start with the tofu format that matches the chicken lunch you already rely on most. That is usually the simplest way to make the switch actually stick. If you want another plant-based lunch lane after tofu, MasalaMonk’s guide to plant-based meal prep ideas using lentils instead of chicken is the cleanest next internal read.

Premium editorial infographic showing the best tofu meal prep for your workday, comparing crispy sesame tofu bowls, smoky tofu crumbles, sticky soy garlic tofu, curried tofu salad, and coconut red curry tofu by texture, reheating style, and the kind of weekday lunch each option suits best.
The best tofu meal prep is usually the one that fits your workday, not just the one that sounds good in theory. Crispy sesame tofu bowls suit texture-first lunches, smoky tofu crumbles work well for flexible leftovers, sticky soy garlic tofu covers takeout-style cravings, curried tofu salad makes a strong no-reheat desk lunch, and coconut red curry tofu is the easiest fit for warm, comforting meal prep. Save this post for your next prep day, and share it with someone who wants high-protein lunches that actually match the way they like to eat through the week.

FAQs About Tofu Meal Prep Ideas

1. What is the best type of tofu for meal prep?

For most tofu meal prep ideas, firm or extra-firm tofu is the best place to start. These styles hold their shape better, brown more easily, and stay more stable in the fridge than softer tofu. Soft and silken tofu are better suited to soups, sauces, smoothies, and gentler dishes.

2. Do you have to press tofu before meal prep?

Usually, yes. Pressing tofu removes excess surface moisture, which helps it brown better, hold seasoning more effectively, and resist turning soggy too quickly. That matters most for crispy tofu bowls, tofu crumbles, and sticky glazed tofu. Curry and salad-style tofu are a little more forgiving, but even there, lightly pressing the tofu improves the result.

3. How do you keep tofu meal prep from getting soggy?

Press the tofu, brown it properly, and add sauce later rather than earlier. It also helps to store wet ingredients like salsa, cucumbers, and extra dressing separately until serving. For crispy tofu meal prep in particular, packing the sauce on the side is one of the easiest ways to protect texture for several days.

4. How long does tofu meal prep last in the fridge?

Most tofu meal prep keeps well for about 3 to 4 days in the fridge when stored in airtight containers. Crispy tofu usually lasts best when the sauce is kept separate, while curry and salad-style tofu meal prep tend to hold especially well because they are already built around moisture and dressing.

5. Are tofu meal prep ideas actually high in protein?

They can be, especially when the recipes use firm or extra-firm tofu in generous portions and pair it with ingredients like edamame, beans, quinoa, lentils, or higher-protein wraps. The meals also feel more filling when the box includes a solid base, strong seasoning, and enough texture contrast.

6. What are the best tofu meal prep ideas for beginners?

For beginners, the easiest tofu meal prep ideas are usually crispy tofu bowls, sticky glazed tofu bowls, and tofu crumbles. Those formats are forgiving, flavorful, and easy to pair with rice, vegetables, wraps, or tacos. More importantly, they feel familiar if you are coming from sesame chicken bowls, taco bowls, or takeout-style rice boxes.

7. Why does tofu taste bland sometimes?

Tofu usually tastes bland when it is under-seasoned or when the meal around it is weak. Because tofu starts out mild, it needs more help from salt, umami, acid, aromatics, spice, and sauce than many people initially expect. Once the seasoning gets stronger and the meal includes more contrast, tofu becomes much more satisfying.

Posted on — 6 Comments

Vegan Mayo Recipe Guide: 5 Plant-Based Mayonnaise

Vegan mayo promotional cover for MasalaMonk.com: a stacked vegan burger and a small bowl of glossy vegan mayonnaise on a matte ceramic plate, with a hand dipping a French fry into the sauce, set against a sage and terracotta colour-block background with the text “Vegan Mayo, Reinvented – 5 Creamy Bases, Zero Eggs”.

If you love the way mayonnaise turns simple ingredients into something rich and satisfying, learning a good vegan mayo recipe might honestly change how you cook. You still get that silky texture, the comforting tang, and the way it pulls burgers, salads, and sandwiches together. Yet now everything is entirely plant-based, adaptable to allergies, and open to endless flavour experiments. Whether you tend to call it vegan mayo, vegan mayonnaise or simply egg-free mayo, the idea is the same: a rich, creamy, completely plant-based spread that behaves like classic mayo but fits vegan, dairy-free and egg-free diets.

Although store-bought vegan mayo is easy to find, homemade versions give you far more control. You decide the base, the oil, the flavour, the thickness, and even the level of richness. You can create a classic-style vegan mayonnaise recipe that tastes like the kind you grew up with, or you can build lighter, high-protein, cashew-based or avocado-based versions that fit a more whole-food approach.

In this guide, you’ll walk through:

  • What vegan mayo actually is and how it compares to regular mayonnaise
  • A classic soy milk vegan mayo recipe that behaves just like traditional mayo
  • A vegan mayo recipe with aquafaba (chickpea liquid) that feels airy and eggless
  • A tofu vegan mayo recipe for high-protein, lower-fat spreads
  • A cashew vegan mayo recipe for rich, gourmet-style creaminess
  • An avocado-based vegan mayo recipe for fresh, whole-food fat
  • Over fifteen variations and ways to twist each recipe of vegan mayo into new flavours
  • Practical ideas for using these vegan mayo recipes in real meals
  • Honest talk on whether vegan mayo is healthier than regular mayo
  • Storage, safety, and how long homemade vegan mayonnaise really lasts
  • Smart substitutes for days when you want a creamy element but not mayo at all

Along the way, you’ll see places where vegan mayo naturally plugs into other MasalaMonk recipes – such as eggless mayo, potato salad variations, spinach dips, vegan Som Tam salad, Thai-style vegan bowls, tzatziki and pesto variations.

A rustic bowl of creamy plant-based vegan mayo beside traditional mayonnaise, surrounded by soy milk, tofu, avocado, chickpeas and lemon on a wooden table.

Vegan Mayo Recipe Basics: What Exactly Is Vegan Mayonnaise?

How Classic Mayonnaise Works

Before you look at any detailed vegan mayo recipes, it really helps to understand what mayonnaise actually is. At its core, traditional mayonnaise is an emulsion: a stable mixture of oil and water-based liquid that normally don’t want to mix.

Tall glass jar showing oil and liquid mayo separating while an immersion blender sits inside, with lemon, egg yolk and mustard nearby to illustrate how a mayonnaise emulsion forms.
Seeing the layers of oil and liquid before they blend makes the idea of an emulsion real, which helps when you later switch to vegan mayo and rely on plant proteins instead of egg to hold everything together.

In regular mayo, egg yolk acts as the emulsifier. It keeps tiny droplets of oil suspended in water, which is what gives you that thick, creamy sauce that clings to a spoon.

Vegan Mayo Ingredients: What’s Really in Veg Mayonnaise?

Most vegan mayo ingredients lists look a lot like the classic ingredients of mayonnaise, just with plant-based swaps. When people look for veg mayonnaise ingredients, what they’re really asking is how to recreate that familiar mix of oil, acid, emulsifier and seasoning using soy milk, aquafaba, tofu, cashew cream or avocado instead of eggs.

To put it another way, classic mayo is basically:

  • Oil
  • A water-based liquid (often from the egg itself)
  • Acid (like lemon juice or vinegar)
  • An emulsifier (egg yolk)
  • Seasonings (salt, mustard, sometimes a touch of sugar)

When all of these elements are in balance, the mixture turns glossy and stable. However, if the ratio shifts or the oil is added too fast, the emulsion can split and turn greasy or watery.

A top-down view of vegan mayo ingredients in small bowls, including soy milk, chickpea water, tofu, cashews, avocado, lemon, white vinegar, Dijon mustard and salt arranged on a wooden surface.
These are the main building blocks you’ll mix and match for different vegan mayonnaise recipes—swap the base between soy milk, aquafaba, tofu, cashews or avocado, then keep the acid, mustard and seasoning similar to get the texture you like.

How a Vegan Mayo Recipe Recreates the Emulsion

In a vegan mayonnaise recipe, the egg disappears completely. Even so, you still need something to do the emulsifying work. Instead of egg yolk, the structure comes from plant-based ingredients such as:
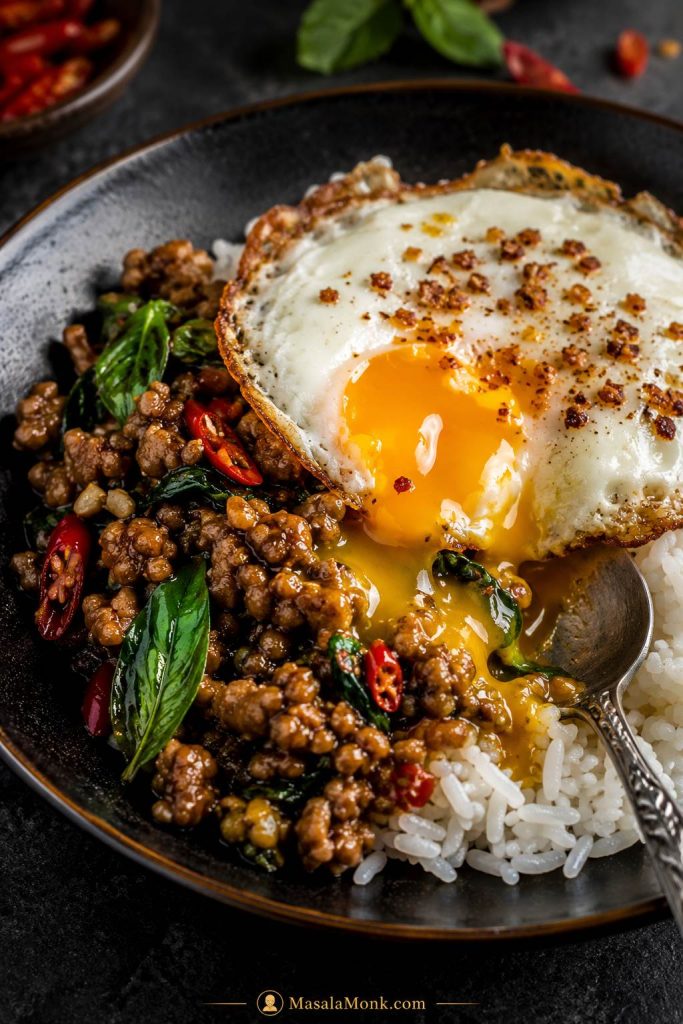
  • Proteins and lecithins in soy milk
  • Starches and proteins in aquafaba – the liquid from cooked or canned chickpeas
  • The soft protein and fat structure of silken tofu
  • The smooth fat and fibre mix of cashew cream
  • The natural oils and emulsifiers inside avocado

Because of this, a good vegan mayo recipe is not simply “regular mayo without eggs.” Rather, it becomes a fresh balance of:

  • Fat – usually oil, sometimes nuts or avocado
  • Water-based liquid – from soy milk, chickpea water, tofu or nuts
  • Acid – lemon juice, vinegar, or both
  • Emulsifying compounds – plant proteins, starches and natural lecithins
  • Seasonings – mustard, garlic, herbs, salt, pepper, and occasionally sugar

When these pieces work together, your sauce thickens and turns silky. If they drift out of balance, the mixture can separate or feel oily. Even then, vegan mayo is often easier to rescue than egg-based mayo, because you can simply blend the broken emulsion into a small amount of fresh base liquid and rebuild it.

Why Vegan Mayo Is Naturally Egg-Free and Dairy-Free

There’s also an important nutritional difference. Regular mayonnaise is technically dairy-free – it doesn’t contain milk – yet it does contain eggs and therefore cholesterol. As the breakdown on mayonnaise and whether it’s dairy from WebMD explains, most classic mayo is egg-based, not milk-based.

Vegan mayo, by contrast, relies only on plant ingredients. As a result, it is:

  • Naturally egg-free
  • Automatically cholesterol-free
  • Completely dairy-free
  • Often soy-optional, depending on which base you choose

In practice, that means a vegan mayonnaise recipe can slot easily into vegan, eggless and lactose-free diets, and even stand in for a more traditional vegetarian mayo wherever you’d usually use mayonnaise. If you need a soy free vegan mayo or a completely dairy and egg free mayo, the fix is simple: choose a base like aquafaba, cashew cream or avocado instead of soy milk. That way, your dairy free mayo recipe can be tweaked to suit soy-free, nut-free or multi-allergy households without losing the creamy, tangy feel.

Also Read: How to Make Eggless Mayo at Home (Egg Free Mayonnaise Recipe)


The Emulsion Blueprint Behind Every Vegan Mayo Recipe

Because recipes can sometimes feel overwhelming, it’s useful to build a mental blueprint first. You can think of almost every vegan mayo recipe as some variation of this formula:

Base liquid + Acid + Flavour + Oil = Vegan Mayo

Where:

  • The base liquid might be soy milk, aquafaba, blended tofu, or blended cashews.
  • The acid usually comes from lemon juice, white vinegar, apple cider vinegar, or rice vinegar.
  • The flavour comes from mustard, garlic, herbs, black pepper, nutritional yeast, or spices.
  • The oil is often a neutral vegetable oil (sunflower, canola, rice bran, grapeseed), or occasionally a mild olive oil.
A wooden board holding four glass bowls of base liquid, lemon wedges, chopped herbs and neutral oil in front of a jar of creamy vegan mayo, showing the simple formula behind vegan mayonnaise.
Seeing vegan mayo broken into base liquid, acid, flavour and oil makes it easier to swap soy milk for aquafaba, tofu, cashews or avocado and still end up with a thick, reliable vegan mayonnaise recipe.

You can also switch up the oil depending on what you keep in your kitchen. Some people enjoy using avocado oil because it gives a soft, buttery flavour, while others like the mild fruitiness of light olive oil. Both options blend into the emulsion easily, so you can make a batch with avocado oil or a gentle olive-oil version whenever you want something slightly more aromatic. Once you understand that, you suddenly realise you can adapt almost any recipe of vegan mayo to your own needs. For instance:

  • If soy is a problem, you simply use aquafaba or cashew cream as the base.
  • If you want to reduce fat, you switch some of the oil for silken tofu.
  • If you prefer whole-food fats, you choose cashews or avocado instead.

Because the structure is the same, you’re free to swap and experiment while still staying within the safe, stable emulsion framework.

Also Read: Upma Recipe: 10+ Easy Variations (Rava, Millet, Oats, Semiya & More)


Classic Soy Milk Vegan Mayo Recipe (Your Everyday Base)

Let’s start with the most familiar vegan mayo recipe – the soy milk version that behaves almost exactly like standard mayonnaise. This is the one to master first, because it’s an easy vegan mayo that many people end up treating as their best vegan mayo recipe: quick to blend, reliable, and neutral enough to work anywhere you’d use regular mayo.

If you don’t usually keep soy milk at home, you can make the same recipe with other plant milks too. Almond milk creates a slightly lighter version that still emulsifies well, and oat milk gives you a smooth, mellow flavour. Both work beautifully if you ever want to try a vegan mayo made with almond milk or an oat-milk version that stays completely dairy-free and egg-free. In fact you can make both Almond and Oat milk at home, do read our posts on How to make Almond Milk at Home & Easy Homemade Oats Milk with just One Ingredient- Non Slimy, at last.

Ingredients for the Classic Soy Milk Vegan Mayo

For about 1½ cups of mayonnaise:

  • ½ cup unsweetened soy milk
  • 1–2 tablespoons lemon juice or white vinegar
  • 1 teaspoon Dijon mustard or mild yellow mustard
  • ½–¾ teaspoon salt, plus more to taste
  • 1–2 teaspoons sugar (or a mild sweetener), optional but helpful for balance
  • 1–1¼ cups neutral oil (sunflower, canola, rice bran, or grapeseed)
  • 1 small clove garlic, smashed (optional)
  • A pinch of black pepper
Recipe card for a 5-minute soy milk vegan mayo showing a jar of creamy plant-based mayonnaise with metric ingredients, quick blender steps and a pro tip about using unsweetened room-temperature soy milk.
This card gives you the base ratio for a classic soy milk vegan mayo in ml and grams, so you can scale the recipe up or down, keep the texture consistent, and quickly see why unsweetened room-temperature soy milk is essential for a thick, stable emulsion.

Step-by-Step Vegan Mayonnaise with Soy Milk

First, make sure your soy milk and lemon juice are relatively close in temperature. They don’t need to be warm, however they shouldn’t be ice-cold if the oil is room temperature.

  1. Blend the soy milk base.
    Pour the soy milk, lemon juice, mustard, salt, sugar, garlic and pepper into a tall jar or blender jug. Then blend for 10–15 seconds. The mixture will look thin, yet you’ll notice it already feels slightly thicker than plain soy milk.
  2. Slowly add the oil.
    With the blender running on low, start to drizzle in the oil in a thin, steady stream. As you continue, the mixture will gradually lighten in colour. Eventually, it will suddenly thicken and cling to the sides of the container.
  3. Check thickness and adjust.
    Stop the blender and check the texture. If it is too thin, blend in a little more oil. If it’s thicker than you like, blend in a teaspoon or two of soy milk.
  4. Taste and refine.
    Dip in a spoon and taste. Perhaps it needs more acid; maybe it wants a little more salt. Keep adjusting in small increments until it tastes balanced.
  5. Chill before serving.
    Finally, transfer the soy milk vegan mayonnaise to a clean glass jar, seal it, and refrigerate for at least one hour. It will firm up slightly as it chills.

Because this is the most neutral vegan mayonnaise recipe, it’s your best starting point for sandwiches, burgers, salads and dips. If you want to explore egg-free yet not fully vegan mayo options with curd or condensed milk versions as well, you can cross-reference MasalaMonk’s detailed guide on how to make eggless mayo at home, which covers non-vegan but egg-free methods too.

Also Read: Double Chocolate Chip Cookies – Easy Recipe with 7 Variations


Aquafaba Vegan Mayo Recipe: Eggless, Light, and Zero-Waste

Next, let’s turn to aquafaba – the liquid from cooked or canned chickpeas. At first glance it looks like something you’d pour down the sink. Yet, as many home cooks have discovered, it behaves in surprisingly egg-like ways. It can whip into meringue, foam for cocktails, and emulsify sauces.

If you’d like a broader introduction, you can read about what aquafaba is and how it works on The Vegan Society, where they explain the science behind its foaming and binding properties in eggless recipes.

Ingredients for the Aquafaba Based Vegan Mayo

For around 1¼ cups of mayo:

  • ¼ cup aquafaba (from a can of chickpeas, ideally thickened slightly by gentle reduction)
  • 1–2 tablespoons lemon juice or apple cider vinegar
  • 1 teaspoon mustard
  • ½ teaspoon salt
  • 1–2 teaspoons sugar or maple syrup
  • 1 cup neutral oil
  • A pinch of black salt (kala namak), optional, for an “eggy” aroma
Recipe card for aquafaba vegan mayo showing a jar of creamy eggless mayonnaise with metric ingredients, quick blending steps and a pro tip about thickening chickpea water for better texture.
Using chickpea water instead of eggs gives you a light, eggless mayo that’s ideal for allergy-friendly cooking; this card shows the exact aquafaba-to-oil ratio and explains why reducing very thin aquafaba first makes the flavour cleaner and the texture fluffier.

Step-by-Step Recipe of Vegan Mayo Using Aquafaba

First, strain your chickpeas and catch the liquid. If it looks very thin, simmer it gently until it coats the back of a spoon, then let it cool fully.

  1. Blend the aquafaba base.
    Combine aquafaba, lemon juice, mustard, salt and sugar in a tall jar. Then blend until slightly frothy.
  2. Drizzle in the oil.
    With the blender running, add the oil in a thin stream. Eventually, the mixture will thicken and turn into a pale, fluffy vegan mayonnaise.
  3. Season and tweak.
    Taste carefully. If it feels a little beany, add a touch more acid and sugar. If you want that classic eggy note without any actual egg, sprinkle in a pinch of black salt.
  4. Chill and use.
    Store in a jar in the fridge. It will often thicken a bit further as it cools.

Because this vegan mayo recipe with aquafaba is naturally egg-free, dairy-free and nut-free, it’s incredibly useful if you’re cooking for people with multiple allergies. Furthermore, it feels great to use an ingredient that many people treat as waste. You can also use the chickpeas themselves to make salads, patties, or hummus, so nothing is wasted.

Also Read: One-Pot Chicken Bacon Ranch Pasta (Easy & Creamy Recipe)


Tofu Vegan Mayo Recipe: High-Protein and Lower-Oil

After you’ve tried classic and aquafaba-based versions, you might start craving a vegan mayo recipe that feels a little lighter. In those moments, a tofu vegan mayonnaise recipe is a smart move. It still tastes creamy and satisfying, but the fat content usually ends up lower, which makes it a great base for a low fat vegan mayo recipe or a generally healthy vegan mayo you can use more regularly.

Ingredients for a Tofu Vegan Mayonnaise

For roughly 1½–2 cups:

  • 200 g silken tofu, drained
  • 2–3 tablespoons neutral oil or mild olive oil
  • 2–3 tablespoons lemon juice
  • 1–2 teaspoons mustard
  • 1 small clove garlic, optional
  • ½–¾ teaspoon salt
  • 1–2 teaspoons nutritional yeast, optional
  • A bit of plant milk or water if necessary
A tofu vegan mayo recipe card showing a jar of smooth high-protein mayo with metric ingredients, step-by-step blending instructions and a pro tip about draining silken tofu for a lower-oil creamy spread.
This tofu-based mayo is the one to reach for when you want a high-protein vegan mayo or a lighter, low-fat vegan mayo recipe for grain bowls, wraps and salads—the card spells out the tofu-to-acid ratio so you can tweak the texture without losing creaminess.

Step-by-Step Vegan Mayonnaise Recipe with Tofu

First, pat the tofu dry. It doesn’t need to be perfectly dry, although removing excess water helps your vegan mayo recipe thicken more reliably.

  1. Add everything to the blender.
    Combine tofu, oil, lemon juice, mustard, garlic, salt and nutritional yeast in a blender.
  2. Blend until fully smooth.
    Blitz until the mixture looks silky with no visible tofu pieces. If it’s extremely thick, add a tablespoon of plant milk or water and blend again.
  3. Taste and balance.
    Because tofu is neutral, it can handle plenty of acidity and salt. Adjust until it tastes bright, slightly tangy and savoury.
  4. Chill to firm.
    After chilling, tofu vegan mayo will set and feel somewhere between a dip and classic mayonnaise. For salad dressings, you can always thin it a bit later.

This style of vegan mayo recipe is ideal for wraps, grain bowls and salads where you want a creamy element that also contributes protein. For instance, you can use tofu mayo to dress a bowl similar to the Thai-style vegan bowl with peanut butter dressing, either mixing it into the peanut sauce or drizzling it alongside.

Also Read: Katsu Curry Rice (Japanese Recipe, with Chicken Cutlet)


Cashew Vegan Mayo Recipe: Rich, Tangy and Dairy-Free

If you enjoy sauces that feel indulgent, a cashew vegan mayo recipe may become your favourite. Soaked cashews blend into an ultra-smooth cream, which you can then season to resemble mayonnaise. The result is thick, tangy, and deeply satisfying.

Ingredients for a Cashew Vegan Mayonnaise Recipe

For around 1½ cups:

  • 1 cup raw cashews, soaked in hot water for 20–30 minutes
  • ½ cup water (plus more if needed)
  • 3 tablespoons lemon juice
  • 1 tablespoon apple cider vinegar or white vinegar
  • 1–2 tablespoons oil (optional but adds silkiness)
  • 1 teaspoon mustard
  • 1 teaspoon salt
  • ½ teaspoon garlic powder or 1 small clove garlic
A cashew vegan mayo recipe card with a jar of thick, creamy mayo on a wooden surface, listing metric ingredients, simple blending steps and a pro tip for soaking cashews to make a rich, soy-free mayonnaise.
This cashew-based mayo is the “gourmet” option in your vegan mayo toolkit—naturally soy-free, very creamy and perfect for roasted vegetables, grain bowls and sandwiches when you want a richer plant-based mayonnaise.

Step-by-Step Cashew Vegan Mayo Recipe

First, soak the cashews. That step softens them so they blend smooth.

  1. Drain and rinse the cashews.
    After soaking, drain off the hot water and rinse the cashews in cold water.
  2. Blend the cashew base.
    Add cashews, water, lemon juice, vinegar, oil, mustard, salt and garlic to a high-speed blender. Blend until absolutely smooth, scraping down sides as needed.
  3. Adjust thickness.
    If it looks too thick, add a splash of water and blend again. If it feels thin, add a couple of extra cashews (or chill it to see if it sets).
  4. Taste and refine.
    Cashews love acid and salt. Therefore, don’t hesitate to sharpen the flavour with another small squeeze of lemon or a pinch of salt.

This cashew-based vegan mayonnaise recipe is naturally soy-free, so it’s a great option when you’re avoiding soy but still want something rich and creamy. It’s excellent as a topping for roasted vegetables and as a dressing for crunchy salads. It pairs especially well with bold, spicy dishes such as the vegan Som Tam raw papaya salad, where a cool cashew mayo drizzle provides contrast.

Also Read: Green Bean Casserole Recipe Ideas (Classic, Cheesy, Dairy-Free & More)


Avocado Vegan Mayo Recipe: Fresh, Green and Whole-Food Focused

Beyond all these emulsions, there is another kind of vegan mayo recipe that relies on whole-food fat: avocado. While it doesn’t behave exactly like classic mayo, it offers incredible creaminess, beneficial fats, and a bright flavour that feels perfect in many plant-based meals.

Ingredients for an Avocado based Vegan Mayonnaise

For about 1 cup:

  • 2 ripe avocados
  • 2–3 tablespoons lemon or lime juice
  • 1–2 tablespoons olive oil or water
  • ½ teaspoon salt
  • 1 small clove garlic, minced (optional)
  • A handful of fresh coriander or parsley, chopped (optional)
A recipe card for avocado vegan mayo showing a jar of bright green creamy mayo with metric ingredients, simple blending steps and a pro tip on storing avocado-based mayonnaise to slow browning.
This avocado mayo card gives readers a whole-food vegan mayo option that skips bottled oil altogether, with exact avocado-to-acid ratios and storage tips so the sauce stays bright and green for tacos, burgers, wraps and grain bowls.

Step-by-Step Vegan Mayo Recipe with Avocado

First, choose avocados that give slightly when pressed. They should be ripe but not mushy.

  1. Scoop and mash.
    Halve the avocados, remove the pits, and scoop the flesh into a bowl. Mash with a fork until mostly smooth.
  2. Blend with flavour and acid.
    Add lemon or lime juice, olive oil or water, salt and garlic. Then blend with a small blender or whisk well until smooth and creamy.
  3. Adjust to taste.
    Because avocados vary, keep tasting. Perhaps you need more lemon to brighten things or more salt to pop the flavour. If you like herbs, stir in coriander or parsley.
  4. Use promptly.
    Avocado-based sauces brown over time, even with acid. Therefore, try to make only as much as you’ll use within a day or two and store it tightly covered in the fridge.

This avocado-focused vegan mayo recipe suits burgers, wraps, tacos, and grain bowls, especially where other ingredients are fresh and crisp. It works particularly well in meals that already lean towards guacamole-style flavours.

Also Read: Crispy Homemade French Fries From Fresh Potatoes (Recipe Plus Variations)


Vegan Mayonnaise Variations: 15+ Flavours from Any Base

Once you’re comfortable with at least one recipe of vegan mayo, you can start treating it as a blank canvas. With a few extra ingredients, you can transform a plain vegan mayo recipe into many distinct sauces. Below, assume you’re starting with 1 cup of any base vegan mayo (soy, aquafaba, tofu, cashew or avocado, as appropriate).

1. Garlic Vegan Mayonnaise (Aioli Style)

  • 1 cup vegan mayo
  • 1–2 cloves garlic, finely grated or mashed
  • 1 tablespoon lemon juice
  • 1 tablespoon chopped parsley
  • Salt and pepper

This garlic version works beautifully as a dip for fries, roasted potatoes, steamed vegetables and crusty bread.

A garlic herb vegan mayo recipe card in an aioli style, showing a jar of creamy herb-speckled mayo with ingredients, simple steps and a tip about grating the garlic finely and chilling the sauce so the flavour turns mellow.
This garlic herb vegan mayo card gives readers an easy aioli-style dip for fries, burgers, roasted vegetables and snack boards, with the garlic-to-herb ratios laid out so the sauce tastes bright and savoury instead of harsh or overpowering.

2. Herb and Dill Vegan Mayo Recipe

  • 1 cup vegan mayo
  • 2–3 tablespoons mixed fresh herbs (dill, parsley, chives, coriander)
  • 1 tablespoon lemon juice or white wine vinegar
  • ½ teaspoon garlic powder
  • Salt and pepper

This version is perfect for potato salads, pasta salads and sandwiches. You can also thin it with a bit of water to create a pourable dressing inspired by the ideas in MasalaMonk’s potato salad recipes.

3. Spicy Vegan Mayonnaise Recipe with Sriracha or Peri-Peri

  • 1 cup vegan mayo
  • 1–2 tablespoons sriracha, peri-peri, or other chilli sauce
  • ½ teaspoon smoked paprika
  • A squeeze of lime

This spicy mayo, especially when made with sriracha, is excellent on burgers, in wraps, or drizzled over roasted cauliflower and crispy tofu. It also doubles as a simple vegan spicy mayo for sushi, giving you a quick vegan sushi mayo drizzle for poke bowls, rolls and rice bowls.

A spicy vegan mayo for sushi recipe card showing a jar of creamy orange chilli mayo with metric ingredients, simple mixing steps and a pro tip about using a thicker vegan mayo base so the sauce clings to rolls, poke bowls and fries.
This variation card turns any of your base vegan mayo recipes into a quick spicy mayo for sushi, poke bowls, burgers or fries, with the sriracha-to-mayo ratio laid out so you can nudge the heat level up or down without losing that thick, clingy texture.

4. Curry Vegan Mayonnaise

  • 1 cup vegan mayo
  • 1–2 teaspoons curry powder or garam masala
  • ½ teaspoon garlic powder
  • 1 tablespoon lemon juice
  • Pinch of sugar

You can use this with chickpea salads, roasted vegetables, or baked wedges. It also tastes great spread inside sandwiches with roasted potatoes or cauliflower.

5. Tahini Vegan Mayo

  • ¾ cup vegan mayo
  • ¼ cup tahini
  • 2 tablespoons lemon juice
  • 1 clove garlic, grated
  • Cold water to thin

This Tahini-based vegan mayo recipe works wonderfully with falafel, roasted vegetables, and grain bowls. It can easily form the creamy heart of a Mediterranean-style bowl.

6. Chipotle-Style Vegan Mayo (Smoky Chipotle Version)

  • 1 cup vegan mayo
  • 1–2 teaspoons chipotle paste or smoked chilli paste
  • 1 teaspoon tomato paste
  • Lime juice to taste

This smoky chipotle version is the kind of vegan mayo that instantly lifts tacos, quesadillas, nachos and grilled vegetables, giving you a bold, warm flavour without any effort.

Recipe card for chipotle vegan mayo showing a jar of smoky orange plant-based mayo with ingredients, simple steps and a pro tip about letting the chipotle and lime flavours develop in the fridge for tacos, bowls and burgers.
This chipotle vegan mayo variation gives you a smoky, spicy sauce you can build from any of the base vegan mayonnaise recipes, with the chipotle-to-mayo ratio and resting time spelled out so it tastes bold without overpowering your tacos, burrito bowls or burgers.

7. Japanese-Style Vegan Mayo Recipe

  • 1 cup soy-based vegan mayo
  • 1–1½ tablespoons rice vinegar
  • 1 teaspoon sugar
  • A small pinch of mustard powder

This Japanese-style twist is smooth, slightly sweet and tangy. You can drizzle it over sushi bowls, shredded cabbage salads or crispy tofu.

8. Ranch-Style Vegan Mayo Recipe

  • ½ cup tofu or cashew mayo
  • ½ cup thick plant-based yogurt
  • 2 tablespoons chopped dill and parsley
  • 1 tablespoon lemon juice
  • Garlic powder, onion powder, salt and pepper

This ranch-style vegan mayo is ideal for dipping vegetables and chips, or for dressing crunchy salads.

A ranch-style vegan mayo recipe card from MasalaMonk showing a jar of creamy herb-flecked dip with ingredients, simple steps and a pro tip about using thick plant yogurt for a rich dairy-free dressing.
This ranch-style vegan mayo card shows exactly how to turn your base vegan mayonnaise into a creamy, dairy-free dip or salad dressing, with the mayo-to-yogurt ratio dialled in so it coats potatoes, pasta and crunchy vegetables without going thin or watery.

9. Lemon-Pepper Vegan Mayo Recipe

  • 1 cup vegan mayo
  • Zest of 1 lemon
  • 1–2 tablespoons lemon juice
  • ½ teaspoon coarsely ground black pepper

This version feels bright, clean and elegant. You can serve it with steamed vegetables, asparagus, or oven-baked potato wedges.

10. Green “Chimichurri” Vegan Mayo

  • ½ cup vegan mayo
  • ½ cup finely chopped fresh herbs (parsley, coriander, a little oregano)
  • Garlic, chilli flakes and lemon juice

This herb-heavy version is a great spread for sandwiches and burgers, especially when you want a punch of fresh green flavour.

11. Harissa Vegan Mayo Recipe

  • 1 cup vegan mayo
  • 1–2 tablespoons harissa paste
  • Lemon juice to taste

This North African-style twist goes beautifully with roasted carrots, chickpeas, couscous and grilled flatbreads.

12. Pesto Vegan Mayo Recipe

  • ¾ cup vegan mayo
  • ¼ cup pesto

This is a brilliant way to stretch pesto further and make it sandwich-friendly. For more ideas on flavour, you can look at MasalaMonk’s pesto recipe variations.

13. Sweet Chilli Vegan Mayo Recipe

  • 1 cup vegan mayo
  • 2–3 tablespoons sweet chilli sauce
  • 1 tablespoon lime juice

This rings all the right bells next to spring rolls, grilled corn, and vegetable fritters.

14. Mustard-Pickle “Burger Sauce” Vegan Mayo Recipe

  • ½ cup vegan mayo
  • 2 tablespoons mustard
  • 2 tablespoons ketchup
  • 1 tablespoon chopped pickles
  • 1 tablespoon pickle brine

This burger-style vegan mayo works incredibly well on plant-based patties such as the lentil patties that are better than meat.

15. Garlic-Herb Spinach Vegan Mayo

  • 1 cup vegan mayo
  • 2 cloves garlic, grated
  • 2 tablespoons chopped fresh spinach (squeezed dry)
  • 2 tablespoons parsley

This variation becomes a natural base for spinach dips. If you want more ideas around textures and mix-ins, you can explore MasalaMonk’s spinach dip recipes.


How to Use Your Vegan Mayo in Everyday Meals

Once you’ve made a few jars of sauce, the most important question becomes simple: where do you actually use them? Thankfully, vegan mayo recipes fit into everyday meals in more ways than you might expect.

Burgers, Wraps and Sandwiches

First, consider burgers and wraps. A thin layer of vegan mayonnaise on the bread not only adds flavour, but also helps create a barrier against moisture.

  • For burgers, use garlic or burger-sauce-style vegan mayo, then layer in patties, lettuce, tomatoes and onions.
  • For wraps, spread herb mayo inside, then add roasted vegetables, beans and greens.
  • For sandwiches, choose a milder vegan mayonnaise recipe and let ingredients such as tomato and cucumber shine.

Because the sauce is vegan, you can use it confidently alongside plant-based burger patties, grilled tofu or lentil patties without any clash of flavour.

Potato Salad, Coleslaw and “Creamy” Classics

Next, think about classic creamy salads. Vegan mayonnaise can replace regular mayo one-to-one in most recipes.

  • Toss boiled potato cubes in a herb-heavy vegan mayonnaise recipe, plus a little extra vinegar and mustard, to create a comforting potato salad.
  • Fold vegan mayo into shredded cabbage, carrots and onions to make coleslaw.
  • Mix tofu or aquafaba mayo into chickpea, bean or pasta salads for easy meal prep.

For quick lunches, you can also mash chickpeas with spring onions, herbs and a few spoonfuls of mayo to make an easy vegan tuna mayo–style filling. Using aquafaba or tofu-based mayo turns it into a high-protein chickpea tuna mayo that works beautifully in sandwiches and wraps.

Moreover, if you want deeper guidance and variations, MasalaMonk’s potato salad recipe collection walks through multiple styles – classic, Russian, German and vegan – that you can easily adapt by swapping in your favourite vegan mayo.

Bowls and Meal Prep

Beyond salads, vegan mayo recipes shine in meal-prep bowls.

  • Stir a spoonful of cashew or tofu mayo into a peanut dressing to make it feel extra silky for something like the Thai-style vegan bowl.
  • Toss grains like quinoa or brown rice with a little vegan mayo, lemon, and herbs for a creamy grain salad.
  • Use spicy mayo as a drizzle over roasted vegetables and beans to build quick dinner bowls.

Because the sauce keeps well for a few days, you can add it at the last moment, just before eating, so your grains and vegetables don’t get soggy.

Snack Boards and Dips

Vegan mayonnaise also works brilliantly as a base for dips on party boards.

  • Combine garlic mayo with chopped spinach and herbs for a warm or cold spinach dip.
  • Serve several flavoured vegan mayo recipes – such as garlic, spicy, and herb – in small bowls for dipping bread, chips and vegetable sticks.
  • Mix vegan mayo into creamy dips inspired by MasalaMonk’s spinach dip recipes, replacing sour cream or regular mayo where necessary.

Because you can vary the base (soy, tofu, cashew), the same flavour profile can feel lighter or richer depending on the occasion.

Mayo-Free Contrasts

While vegan mayonnaise recipes are versatile, they are not the only creamy element in your toolkit. On days when you want something lighter or sharper, you might reach for:

Those mayo-free sides balance rich, creamy dishes very nicely.

Is a Vegan Mayo Really Healthier Than Regular Mayo?

Now that you have a whole collection of recipes, it’s fair to ask whether a vegan mayo recipe is “healthier” than traditional mayonnaise. The answer isn’t as simple as yes or no.

Regular mayonnaise is usually made from oil, egg yolk and acid. It is high in fat and it contains cholesterol from the egg yolk, although it usually has no milk and is technically dairy-free. As WebMD’s overview explains, the presence of eggs makes it non-vegan but still dairy-free.

Vegan mayonnaise recipes remove the egg yolk entirely. They typically use a plant-based emulsifier like soy milk or aquafaba plus oil. Therefore:
  • They are free from cholesterol, since cholesterol comes only from animal products.
  • They may still be high in calories and fat if oil is the main ingredient.
  • They can be lighter when built around tofu, aquafaba with less oil, or avocado.

If you look at nutrition data for commercial vegan mayos, many sit in the range of 50–100 calories per tablespoon, almost all from fat. Healthline’s guide to mayonnaise substitutes notes that vegan versions often have a similar calorie count but no cholesterol and sometimes healthier fat profiles. That means a vegan mayo recipe isn’t automatically a “diet food”.

Even so, the healthiest versions tend to be the ones built on tofu, aquafaba or avocado, because they rely less on added oil and more on whole ingredients. Richer cashew-based batches often end up being the best-tasting ones for special meals, while the lighter options are ideal for everyday cooking.

How to make Vegan Mayo healthy or lighter?

That said, you can nudge things in a lighter direction if you want something closer to a low calorie vegan mayo, an almost fat free vegan mayo, or an oil free vegan mayo for everyday use. And if you ever need something even simpler—both low-oil and soy-free—you can combine aquafaba with a splash of lemon and a tiny amount of oil for a very light version that keeps the texture without relying on soy. You can make it much more aligned with your goals by:
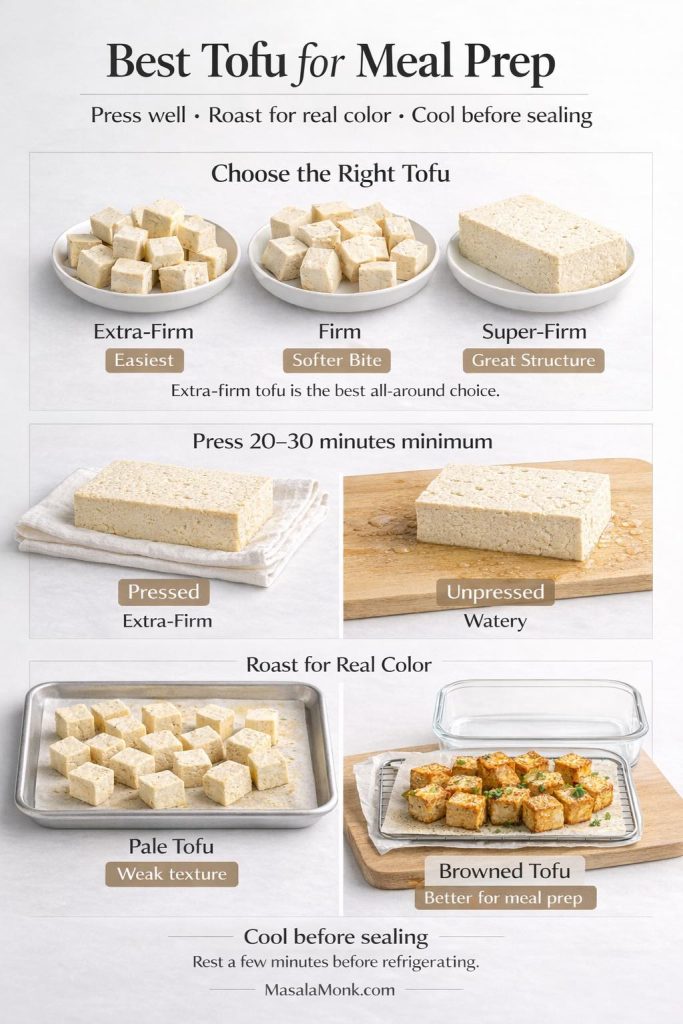
  • Choosing tofu or thick yogurt-style bases work well when you’re chasing a low fat vegan mayo recipe that still tastes rich.
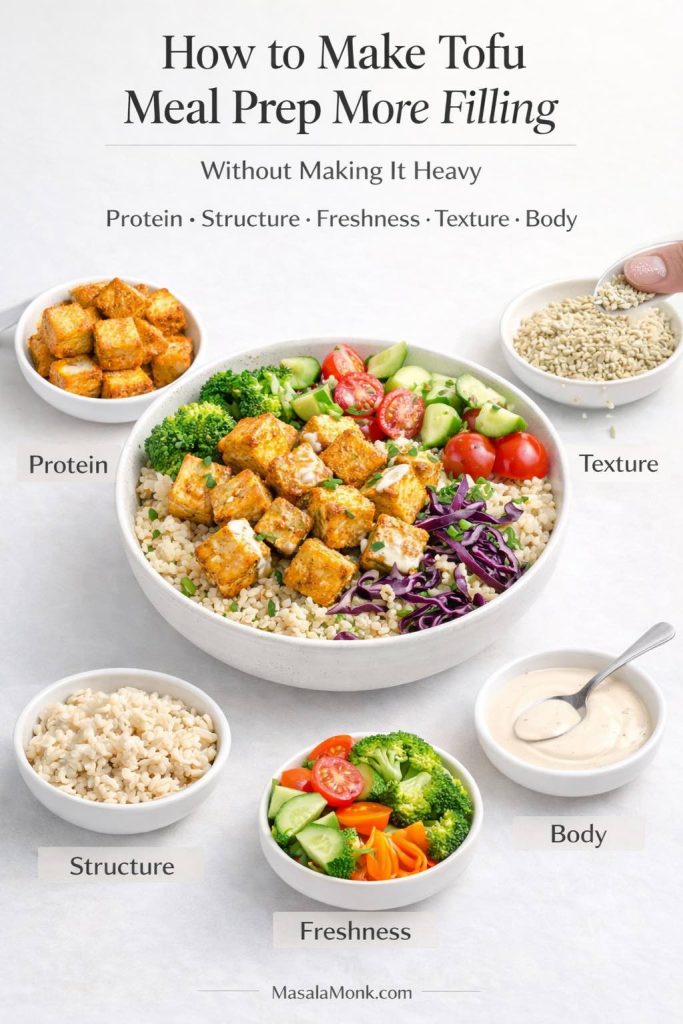
  • Using aquafaba with just a splash of oil gets you close to an oil free vegan mayonnaise.
  • Treating full-oil or cashew versions can be treated as more indulgent options for burgers and special dinners
  • Using mayonnaise as a flavour boost rather than as the main component of the meal.

If you’re following a particular way of eating, you can also adapt the base. A high-fat, low-carb blend with avocado or oil works well as a keto vegan mayo (a true vegan mayo keto option), while avocado-oil, egg-free versions without sugar can double as a paleo vegan mayo or even a vegan mayo Whole30 style sauce when you stick to compliant ingredients.

When you think about it that way, vegan mayo becomes one tool among many, rather than something you either avoid or overuse.

Also Read: What to Mix with Jim Beam: Best Mixers & Easy Cocktails


Storage, Safety and How Long Vegan Mayo Recipes Last

Even though these vegan mayo recipes are egg-free, they are still perishable. Because they contain water, plant proteins and sometimes fresh ingredients like garlic and herbs, they can spoil if left too long or stored badly.

“How Long Does Vegan Mayo Last?” storage graphic showing jars of soy, aquafaba, tofu, cashew and avocado mayo with fridge times and simple food safety tips about using clean spoons, keeping jars closed and discarding anything that smells off.
This fridge guide helps you see at a glance how long different homemade vegan mayo recipes really last—soy and aquafaba versions keep the longest, tofu and cashew sit in the middle, and avocado mayo is the one to enjoy within a day or two while it’s still fresh and bright.

How Long Is Vegan Mayo Good For in the Fridge?

Food safety advice for homemade mayonnaise made with eggs usually recommends using it within a few days if it’s kept refrigerated, since it can be a risk for food-borne illness if mishandled. In simple terms, if you’re wondering how long vegan mayo is good for or how long vegan mayo is good after opening, the answer is that it keeps surprisingly well when chilled, but it’s still a fresh, perishable sauce that deserves a bit of care.

Vegan mayo, missing raw egg, tends to be a little safer in that specific regard. However, it can still develop off flavours and microbial growth. Because of that, a cautious and practical guideline for your homemade vegan mayo recipes is:

  • 3–7 days in the refrigerator, in a tightly sealed jar
  • Shorter (3–4 days) for avocado-heavy or herb-heavy versions
  • Longer (up to a week) for plain soy or aquafaba-based versions using only dry spices

In addition, you should:

  • Always use a clean spoon to scoop mayo from the jar, never one that has touched other foods.
  • Keep jars in the coolest part of the fridge instead of the door.
  • Discard any mayo that smells sour, yeasty or odd, or that shows any sign of mould.

Because these sauces are relatively cheap and quick to blend up, it isn’t worth trying to “save” a jar that seems questionable.

Also Read: 10 Best Espresso Martini Recipe Variations (Bar-Tested)


When You Don’t Want Mayo: Creamy Vegan Alternatives

Even in a vegan mayo guide, there will be days when you’d rather skip mayonnaise completely. It’s useful then to have a go-to vegan replacement for mayo – a few creamy options that can act as a vegan mayo replacement in sandwiches, salads and bowls when you want the same comfort but a different flavour profile.

Infographic titled “Vegan Mayo Alternatives” showing hummus, mashed avocado, plant yogurt sauces, tahini dressings and herby pesto-style sauces as creamy vegan substitutes for mayo, with brief notes on when to use each.
This alternatives chart gives readers quick ideas for a vegan mayo substitute when they’d rather build creaminess from hummus, avocado, yogurt sauces, tahini or pesto, matching the spread to the dish instead of forcing mayonnaise into every recipe.

These options all work as easy replacements whenever you want a creamy spread or dressing without using mayonnaise at all.

For example:

  • Hummus delivers creaminess plus protein and fibre. It’s excellent on sandwiches, in wraps, and as a dip. Healthline’s list of mayonnaise substitutes highlights hummus as one of the best alternatives, especially when you want a more nutrient-dense spread.
  • Mashed avocado is perfect on toast or burgers. With a little lemon, salt and pepper, it often replaces mayonnaise completely in sandwiches.
  • Plant-based yogurt sauces bring tang and lightness. You can add garlic, herbs and spices to make them more complex.
  • Tahini dressings use sesame paste, lemon juice and water to produce a rich, nutty sauce. It behaves differently from mayo but plays a similar role in grain bowls and roasted vegetable dishes.
  • Tzatziki-style dips, like the variations in MasalaMonk’s Greek tzatziki master recipe, combine yogurt, cucumber and herbs to create a cooling, refreshing element that works beautifully with pita, grilled vegetables and salads.
  • Pesto-style sauces, such as those in the pesto recipe collection, give you intensely flavoured herb-based spreads that can stand in for mayonnaise in many sandwiches and bowls.

Having these alternatives in mind means you’re never forced to use mayo just because you want creaminess. Instead, you can match the sauce to the dish and your mood.

Also Read: Tres Leches – Mexican 3 Milk Cake Recipe


Bringing Your Vegan Mayo Recipe Collection Together

What You’ve Built So Far

By now, you’re holding far more than one vegan mayo recipe. In fact, you’ve built a small toolkit. You have:

  • A classic soy milk vegan mayonnaise recipe that behaves like the original
  • An aquafaba vegan mayo recipe that reuses chickpea liquid and stays eggless
  • A tofu vegan mayo recipe that leans high-protein and low-oil
  • A cashew vegan mayonnaise recipe that feels rich, tangy and gourmet
  • An avocado vegan mayo recipe that focuses on whole-food fats
Infographic titled “Which Vegan Mayo Base Should I Choose?” comparing soy milk mayo, aquafaba mayo, tofu mayo, cashew mayo and avocado mayo, with notes on which base is best for closest-to-regular flavour, egg-free and nut-free batches, higher protein, rich soy-free spreads or whole-food fats.
This comparison guide helps you quickly decide which vegan mayo base to use—soy for the closest classic flavour, aquafaba for egg-free and nut-free jars, tofu when you want higher protein and lower fat, cashew for rich soy-free spreads, and avocado when you’re chasing whole-food fats and fresh, same-day meals.

Beyond the bases, you’ve also created:

  • More than fifteen flavour variations you can apply to any recipe of vegan mayo
  • A clear picture of where vegan mayo recipes fit into real meals: burgers, wraps, salads, bowls, dips and snacks
  • A realistic sense of how vegan mayo compares nutritionally with regular mayo
  • Practical storage rules to keep your jars safe, fresh and tasty
  • Several non-mayo alternatives for days when you want creaminess from something else

At that point, it hardly matters whether you are looking for the best vegan mayonnaise, a simple vegan mayo for everyday sandwiches, or a detailed vegan mayonnaise recipe for a special occasion – you’ve built a set of bases and methods you can bend in whatever direction your week needs. Taken together, that’s not just one recipe – it’s an entire system you can lean on week after week.

Turning Your Vegan Mayo Recipes Into a Weekly Rhythm

From here, the easiest way to turn all of this from theory into daily cooking is to slide it into a simple rhythm. Instead of making vegan mayo at random, you can fold it into how you plan your meals.

For example, you might decide that each week you will:

  1. Choose one base – soy milk this week, tofu next week, cashew for a dinner party, or avocado when you want something especially fresh.
  2. Pick one or two flavours – perhaps garlic herb for everyday sandwiches, plus a spicy vegan mayo recipe for burgers, tacos or roasted potatoes.
  3. Plan two or three dishes around that batch – maybe lentil burgers with garlic mayo one night, a potato salad dressed with herb mayo the next, and a grain bowl finished with a drizzle of spicy vegan mayo later in the week.
  4. Make only as much as you’ll genuinely finish in a few days, then mix a fresh batch with a different twist the following week.

As you repeat this pattern, something subtle starts to happen. Gradually, you stop checking exact measurements for every vegan mayonnaise recipe. Instead, you begin to pour, taste, and adjust by instinct. You nudge the acid up when a sauce feels flat, ease the salt down when a dish already has salty elements, and tweak the thickness simply by feel.

Over time, vegan mayo stops feeling like a “special vegan product” you have to think about and starts behaving like what it truly is: a flexible, everyday, deeply useful part of how you cook – no eggs needed, and no stress attached.

Troubleshooting infographic titled “Fixing Split or Runny Vegan Mayo” from MasalaMonk, showing common problems like thin mayo, split emulsion, mayo not thickening and grainy tofu or cashew mayo, with simple fixes such as adding more oil, starting with fresh base liquid, matching temperatures and blending longer.
This quick troubleshooting sheet makes it easy to rescue a runny or split vegan mayo—whether the emulsion never thickened, curdled halfway or turned grainy with tofu or cashews, you can match the problem to a practical fix instead of throwing the whole batch away.

FAQs

1. What is a vegan mayo recipe?

A vegan mayo recipe is a method for making mayonnaise without eggs or dairy, using plant-based ingredients like soy milk, aquafaba, tofu, cashews or avocado. The basic vegan mayo ingredients are the same each time – a base liquid, oil, acid, seasoning and an emulsifier – but all of them come from plants. Instead of egg yolk, it relies on plant proteins and natural emulsifiers to thicken the sauce, so you still get a creamy, tangy spread that behaves very much like traditional mayonnaise.

2. How is vegan mayonnaise different from regular mayo?

Regular mayo uses egg yolks as the emulsifier, while vegan mayonnaise uses plant-based ingredients such as soy milk or aquafaba. As a result, vegan mayo is egg-free and usually cholesterol-free, yet it still has that familiar creamy texture. Even so, both versions can be rich in fat if they are oil-based.

3. Is vegan mayo healthier than regular mayonnaise?

Often, vegan mayo is free from cholesterol and may use healthier oils, which can be a plus for heart health. Even so, many vegan mayo recipes still contain a good amount of fat and calories, especially if they are oil-heavy. Therefore, the healthiest option is usually a lighter base like tofu, aquafaba, or avocado with moderate portions.

4. What ingredients do I need for a basic vegan mayo recipe?

Generally, you need a base liquid (such as unsweetened soy milk or aquafaba), a neutral oil, an acid like lemon juice or vinegar, mustard, salt and sometimes a touch of sugar. Those are the classic vegan mayo ingredients, and they mirror the usual ingredients of vegan mayonnaise, just without eggs. Together, they create a stable emulsion that tastes very close to classic mayo. Additionally, you can add garlic, herbs or spices for extra flavour.

5. Can I make vegan mayonnaise without soy?

Yes, you absolutely can make a soy free vegan mayo. Instead of soy milk, you can use aquafaba, cashew cream, silken tofu made from other legumes, or even avocado as the main base. All of these still emulsify beautifully when blended with oil and acid. Consequently, you get a vegan mayonnaise recipe that fits a soy-free diet without sacrificing texture or flavour.

6. How do I make an aquafaba vegan mayo recipe?

To make aquafaba mayo, you blend chickpea liquid with lemon juice, mustard, salt and a little sweetener until frothy. Then you gradually stream in oil while blending until the mixture thickens into a creamy vegan mayonnaise. Finally, you chill it so the texture sets and the flavours meld.

7. Why did my vegan mayo recipe split or stay runny?

Most of the time, vegan mayo splits because the oil was added too quickly or the ratio of oil to liquid was off. Sometimes, a big temperature difference between ingredients can also make the emulsion unstable. Instead of discarding it, you can often rescue it by starting with a spoon or two of fresh base liquid in a new jar and slowly blending the broken mixture into that.

8. How can I thicken a vegan mayo recipe that turned out too thin?

If your vegan mayonnaise recipe is too thin, you can blend in a little more oil slowly until it thickens. Alternatively, you can add more base ingredient, such as tofu or blended cashews, to give it more body. Afterwards, chilling the mayo in the fridge usually helps it firm up even more.

9. How long does homemade vegan mayonnaise last in the fridge?

Homemade vegan mayo is usually good for about 3–7 days in the fridge when stored in an airtight container. Shorter storage times make sense for avocado-based or fresh-herb-heavy versions, which spoil faster, while plain soy or aquafaba vegan mayo recipes can sometimes last closer to a week if handled carefully. In other words, if you’re wondering how long vegan mayo is good for after opening, treat it like any fresh sauce: keep it cold, use clean spoons only, and throw it out if the smell, taste or appearance seems off.

10. Can you freeze vegan mayo?

Freezing vegan mayo is not usually recommended, because the emulsion tends to break once it thaws. The texture often becomes grainy or watery, even if the flavour remains similar. Consequently, it’s better to make smaller batches of your favourite vegan mayonnaise recipe more frequently instead of freezing it.

11. Is vegan mayonnaise safe for people with egg allergies?

Yes, because a properly made vegan mayo recipe contains no egg at all, it is generally safe for people with egg allergies. Nevertheless, it is wise to check labels or recipe ingredients to make sure no egg-derived additives are used. In addition, cross-contamination in commercial kitchens can be an issue for very sensitive individuals.

12. Does vegan mayo taste like real mayonnaise?

A good vegan mayonnaise recipe can taste very close to regular mayo, especially when made with soy milk or aquafaba and seasoned well. Naturally, different bases bring slightly different flavours: tofu is neutral, cashews are a bit nutty, and avocado has its own distinct taste. Even so, once it’s inside a burger, salad or sandwich, most people find it just as satisfying.

13. What is the best oil to use for a vegan mayo recipe?

Neutral oils like sunflower, canola, rice bran or grapeseed work best because they let the other flavours shine. Occasionally, you can blend in a little light olive oil for aroma, although very strong olive oils may dominate the taste. Therefore, choosing a mild oil usually gives you the most versatile vegan mayonnaise recipe.

14. Can I make an oil-free vegan mayonnaise recipe?

Yes, you can create an oil-free vegan mayo recipe by relying on whole ingredients such as silken tofu, cashews or avocado instead of added oil. These ingredients provide natural fat and creaminess, so the sauce still feels rich. Of course, the texture may be slightly different from classic mayo, but many people enjoy the lighter feel.

15. How do I make a garlic vegan mayo recipe?

To make garlic mayo, you simply stir minced or grated garlic into a basic vegan mayo, along with a little extra lemon juice and perhaps some chopped herbs. Consequently, the flavour becomes bolder and more savoury, making it perfect for fries, burgers and roasted vegetables. For best results, let it sit for a while so the garlic softens and mellows.

16. Can I use vegan mayo in a potato salad recipe?

Absolutely, vegan mayo works beautifully in potato salad and other creamy salads. You just replace the regular mayonnaise with your chosen vegan mayo recipe in equal amounts, then adjust seasoning as needed. As a bonus, you can mix in herbs, mustard or pickles to match whatever style of potato salad you like.

17. How can I make a low-fat vegan mayo recipe?

To lower the fat content, you can use silken tofu or thick plant yogurt as most of the base and add only a small amount of oil. Alternatively, you can combine aquafaba with a modest splash of oil to keep calories in check. Over time, you can experiment with ratios until you find a lighter vegan mayonnaise recipe that still feels creamy enough.

18. Is vegan mayo gluten-free?

Most vegan mayo recipes are naturally gluten-free because they are based on oil, plant milks or legumes, plus acid and seasoning. Nonetheless, you should still check mustard, vinegars and any added flavourings in case they contain gluten or have been processed with gluten-containing ingredients. When in doubt, choosing certified gluten-free products keeps things safer.

19. How do I make a spicy vegan mayo recipe?

For a spicy vegan mayo recipe, you can mix chilli sauce, hot sauce, peri-peri, or sriracha into your base mayo. Additionally, you might add smoked paprika, cayenne pepper or chipotle paste for extra depth. Gradually increasing the heat lets you tailor the spice level to your own taste buds.

20. Can vegan mayo be used in baking?

Sometimes, vegan mayo can be used in baking to add moisture and richness, just like regular mayo in certain cake recipes. However, it’s best to choose a neutral-tasting vegan mayonnaise recipe so the flavour doesn’t overpower the dessert. As a guideline, start by replacing a portion of the fat or eggs in a recipe rather than all of them at once.

21. What is the difference between a vegan mayo recipe and an eggless mayo recipe?

An eggless mayo recipe may still include dairy products like milk or cream, while a vegan mayo recipe excludes all animal products completely. In other words, egg free mayonnaise isn’t always vegan, but vegan mayo is always both egg-free and dairy-free. As a result, vegan mayo is suitable for vegan and lactose-free diets, whereas eggless mayo might not be. Reading ingredient lists carefully helps you understand which category a recipe falls into.

22. How can I make a creamy vegan mayo recipe without nuts?

If you need a nut-free option, you can rely on soy milk, aquafaba or tofu as your base instead of cashews or other nuts. These ingredients still emulsify beautifully when blended with oil and acid. Therefore, you can enjoy a creamy vegan mayonnaise recipe that fits both nut-free and egg-free requirements.

23. Can I flavour vegan mayo with herbs and spices?

Yes, vegan mayo is a fantastic blank canvas for herbs and spices. You can fold in dill, parsley, coriander, basil, smoked paprika, curry powder, or garlic and onion powder to build any profile you like. Consequently, one basic vegan mayo recipe can become several different sauces without much extra work.

24. How do I make a lemon vegan mayo recipe for salads?

To make a lemon-focused vegan mayo recipe, you can increase the lemon juice, add some lemon zest, and keep the seasoning light and fresh. This style of mayo works particularly well on green salads, potato salads and grain bowls. In addition, you can thin it slightly with water or plant milk to turn it into a pourable dressing.

25. What equipment do I need for a vegan mayo recipe?

Usually, you just need a blender, immersion blender or small food processor, plus a tall jar or jug. You also need a measuring cup, a spoon, and a spatula for scraping the sides. Although you can whisk by hand, an electric tool makes the emulsion much easier and more consistent.

26. Can I make a vegan mayo recipe without mustard?

Yes, you can leave out mustard if you dislike it or are allergic, though the flavour and stability will change slightly. To compensate, you might add a bit more acid and salt, or a tiny pinch of garlic powder for complexity. Even without mustard, the vegan mayonnaise recipe can still work if the emulsion forms properly.

27. How can I make my vegan mayo recipe taste less “beany”?

If your aquafaba or tofu-based mayo tastes a bit beany, you can reduce that flavour by adding more lemon juice, a touch of sugar, and some garlic or herbs. Additionally, chilling the mayo overnight often softens any sharp notes. Over time, you can also experiment with different brands of chickpeas or tofu to find a milder base.

28. Is it possible to make a keto-friendly vegan mayo recipe?

Yes, it’s possible to create a keto-style vegan mayo recipe by focusing on high-fat, low-carb ingredients such as oil, avocado and certain nut or seed bases. However, you’ll want to avoid sugars and high-carb thickeners, using only low-carb flavourings instead. Consequently, you still get a rich, creamy sauce that fits within a keto framework.

29. Can I turn my vegan mayo into a dip or sauce for snacks?

Definitely, you can easily turn a plain vegan mayo recipe into a dip by adding garlic, herbs, roasted peppers, or caramelised onions. Then you can adjust the thickness: keep it thicker for dipping chips and veggies, or thin it slightly for drizzling over roasted potatoes and snack boards. In this way, one batch of vegan mayo can support several different snacks.

30. How do I know which vegan mayo recipe base is right for me?

Choosing a base depends on your taste, dietary needs and how you plan to use the mayo. If you want something closest to classic mayo, soy milk or aquafaba is a good starting point; if you prefer lighter or higher-protein options, tofu works well; if you enjoy richness, cashew or avocado is ideal. Eventually, trying each style once will show you which vegan mayonnaise recipe feels most at home in your own kitchen.