Slow Cooker Pulled Pork Recipe should give you tender, glossy shreds that hold sauce without drowning in it — the kind of pork that piles onto buns tonight, tucks into tacos tomorrow, and still feels like a plan when you pull a freezer portion out later. The trick is not adding more sauce or more liquid. It is choosing the right cut, seasoning it well, cooking it until the meat gives way, and finishing it after shredding.
What This Recipe Solves
This version is built for a marbled shoulder cut: pork shoulder, pork butt, or Boston butt. It also works as a Crock-Pot pulled pork recipe if Crock-Pot is the slow cooker brand you use at home. Because the liquid stays modest and the BBQ sauce goes in after shredding, the finished pork tastes seasoned all the way through instead of swimming in thin sauce.
Use it for pulled pork sandwiches with slaw, sliders, tacos, rice bowls, nachos, loaded baked potatoes, freezer meal prep, or a big BBQ-style dinner plate. Along the way, you will know exactly what to do with the real trouble spots: shoulder vs butt, low vs high, how much liquid, when to add BBQ sauce, what “done” should feel like, and how to fix pork that turns out dry, tough, watery, greasy, or bland.
It is the kind of slow-cooker main that works for a quiet dinner, a tray of sliders, or the kind of meal where everyone keeps coming back for just a little more.
Before you start, check the package. This recipe is designed for pork shoulder, pork butt, or Boston butt. If your package says pork loin or pork tenderloin, see the pork loin and tenderloin guidance below before you start. Those leaner cuts need different timing and moisture control. You can still make delicious pork with them, but they are not the right match for shoulder-style pulled pork. Instead, use one of the lean-cut guides linked below.
In This Guide
Make the Pork
Serve, Fix, Store
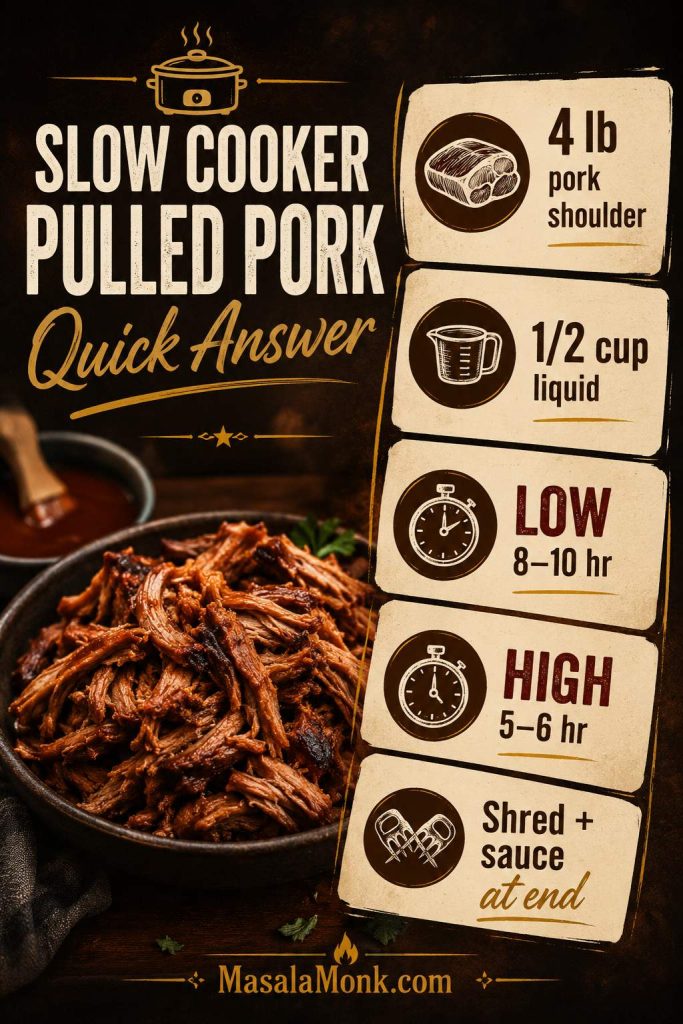
Quick Answer: Slow Cooker Pulled Pork
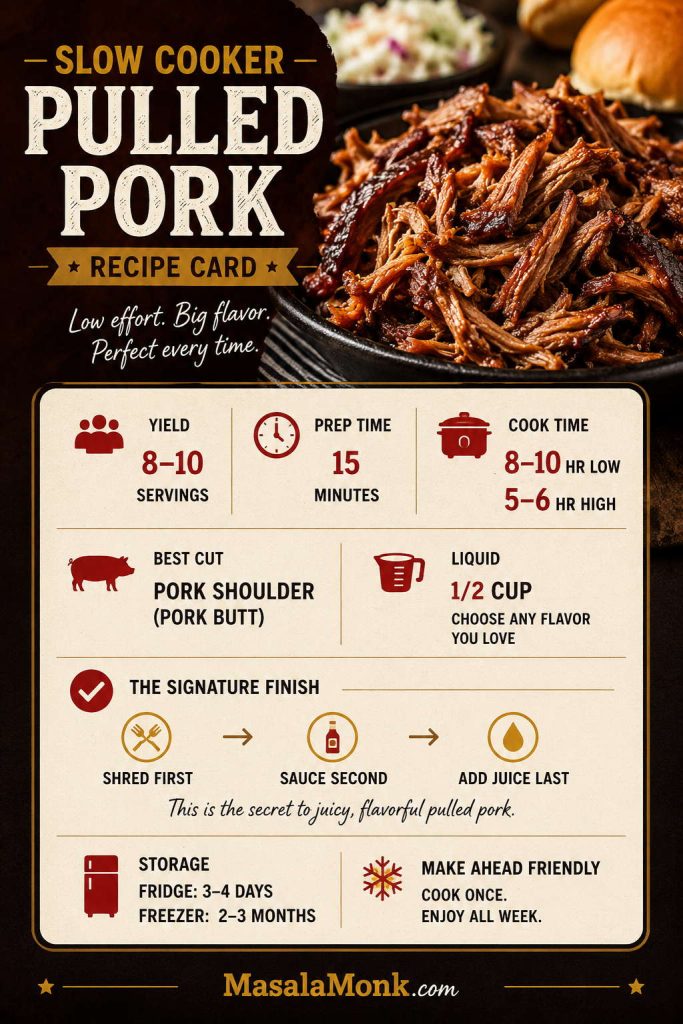
For juicy slow cooker pulled pork, use a 4 lb / 1.8 kg pork shoulder, pork butt, or Boston butt; add only 1/2 cup / 120 ml liquid; cook on LOW for 8–10 hours or HIGH for 5–6 hours; then shred and sauce at the end.
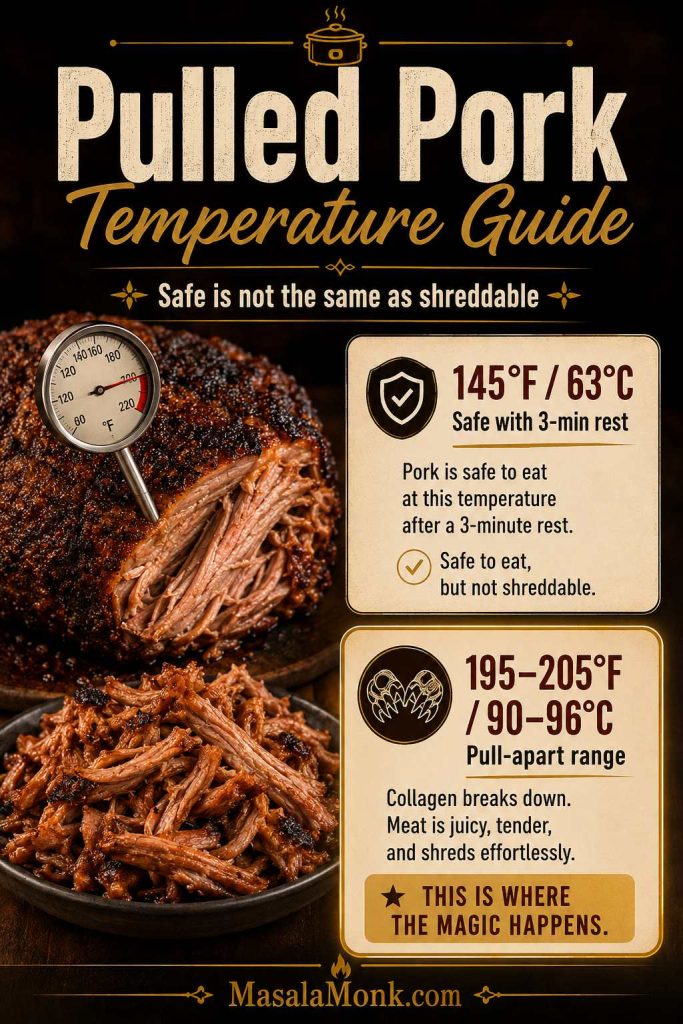
The pork is ready when it is tender enough to separate into strands, usually around 195–205°F / 90–96°C. Texture matters more than the exact number, so do not stop just because the timer ended.
Slow cooker and Crock-Pot pulled pork are the same method here. Crock-Pot is a common brand name for a slow cooker, so if you searched for a Crock-Pot pulled pork recipe, you are in the right place.
After cooking, remove the pork, shred it, skim or reduce the juices, and add BBQ sauce. The sauce stays bolder this way because it coats finished pork instead of thinning out during the long cook. Add back only enough cooking juice to make the pork moist and glossy. For the deeper comparison, see when to add BBQ sauce.
Shred First, Sauce Second, Add Juice Last

Why This Slow Cooker Pulled Pork Works
Slow cookers tenderize, but they do not concentrate flavor
A slow cooker is excellent at turning pork shoulder soft, but it does not brown meat or reduce sauce like an oven, smoker, or skillet. That is why pulled pork can come out tender but watery if you start with too much liquid or too much BBQ sauce.
The flavor control happens at the end
This method seasons the pork first, cooks it with modest liquid, then saves the BBQ sauce for after shredding. At that point, you can taste the meat, skim or reduce the juices, and add back only what the pork needs.
This is not trying to be smoked barbecue with bark, and it does not need to pretend to be. It is the dependable slow-cooker version: tender pork for sandwiches, sliders, tacos, nachos, and freezer meals without babysitting a grill all day.
The method prevents the common failures
- Watery pork: modest liquid and sauce after shredding.
- Bland pork: a full dry rub before cooking.
- Tough pork: cook until the meat pulls apart, not just until the timer ends.
- Greasy pork: skim the juices before adding them back.
- Flat flavor: finish with salt, vinegar, sauce, or reduced juices after shredding.
- Do not use pork tenderloin and cook it like pork shoulder.
- Do not cover the pork with liquid.
- Do not judge doneness by the clock alone.
Pulled Pork at a Glance
| Recommended cut | Pork shoulder, pork butt, or Boston butt |
|---|---|
| Default size | 4 lb / 1.8 kg |
| Slow cooker size | 6-quart slow cooker preferred |
| Most forgiving setting | LOW for 8–10 hours |
| Faster setting | HIGH for 5–6 hours |
| Texture target | Tender enough to pull apart, usually around 195–205°F / 90–96°C |
| Liquid | 1/2 cup / 120 ml cooking liquid, plus vinegar, Worcestershire, and mustard |
| Yield | About 8 generous sandwiches or 10 smaller servings |
| Finish | Shred first, then add BBQ sauce and just enough defatted cooking juices |
Best Cut for Pulled Pork
The best slow cooker pulled pork starts with a cut that can handle long cooking without turning dry or stringy. Pork shoulder, pork butt, and Boston butt have enough fat and connective tissue to become juicy and shreddable. Lean cuts can still taste good, but they do not behave the same way.

Pork Shoulder vs Pork Butt vs Boston Butt
Pork butt and Boston butt come from the upper shoulder area, not the rear of the pig. They are usually well-marbled and forgiving, which makes them the easiest choice for pulled pork. Pork shoulder is also excellent and gives rich cooking juices. Picnic shoulder can work too, though it may include more skin, bone, and uneven pieces.
| Cut | Use for pulled pork? | Notes |
|---|---|---|
| Pork butt / Boston butt | Best first choice | Rich, marbled, forgiving, and ideal for shredding. |
| Pork shoulder | Excellent | Classic slow-cooker choice with plenty of collagen and flavor. |
| Picnic shoulder | Works | Can include more skin and bone; trim as needed and cook until tender. |
| Pork loin | Not ideal for classic pulled pork | Lean and better for slices or a separate lean shredded style. |
| Pork tenderloin | Not ideal for classic pulled pork | Very lean and much faster-cooking than shoulder. |
Bone-In vs Boneless Pork Shoulder
Both bone-in and boneless pork shoulder work. Boneless is easier to trim, season, fit into the slow cooker, and shred. Meanwhile, bone-in can add flavor and often stays juicy, but it may need slightly longer and you will need to remove the bone before shredding.

For the simplest first version, use a boneless 4 lb / 1.8 kg pork butt or pork shoulder. For a bone-in roast, use the same method and cook until the bone pulls away easily and the meat separates without resistance.
Should the Fat Cap Face Up or Down?
If your pork shoulder has a visible fat cap, trim thick hard fat but do not remove every bit. In a slow cooker, fat-cap direction matters less than it does in a smoker because the pork cooks in a moist, enclosed environment. Still, placing the fat cap up or slightly to the side is a good default because some rendered fat can baste the meat as it cooks.
After cooking, remove large soft fat pieces before shredding. Then add back defatted cooking juices gradually so the pork tastes juicy, not greasy.
Can You Use Pork Loin or Pork Tenderloin?
You can shred lean pork, but pork loin and pork tenderloin are not the best cuts for classic pulled pork. They have much less fat and connective tissue than shoulder, so they can dry out if you cook them like pork butt.

If your package says pork loin, use this slow cooker pork loin recipe instead. It is written for the leaner roast that cooks best as tender slices rather than classic pulled pork.
If your package says pork tenderloin, switch to this slow cooker pork tenderloin guide. Tenderloin is smaller, narrower, and much faster-cooking than pork shoulder, so it needs a different timing window.
For an oven version of that leaner cut, use pork tenderloin in the oven. If you want smoke flavor but still have loin rather than shoulder, this smoked pork loin recipe is the better match.
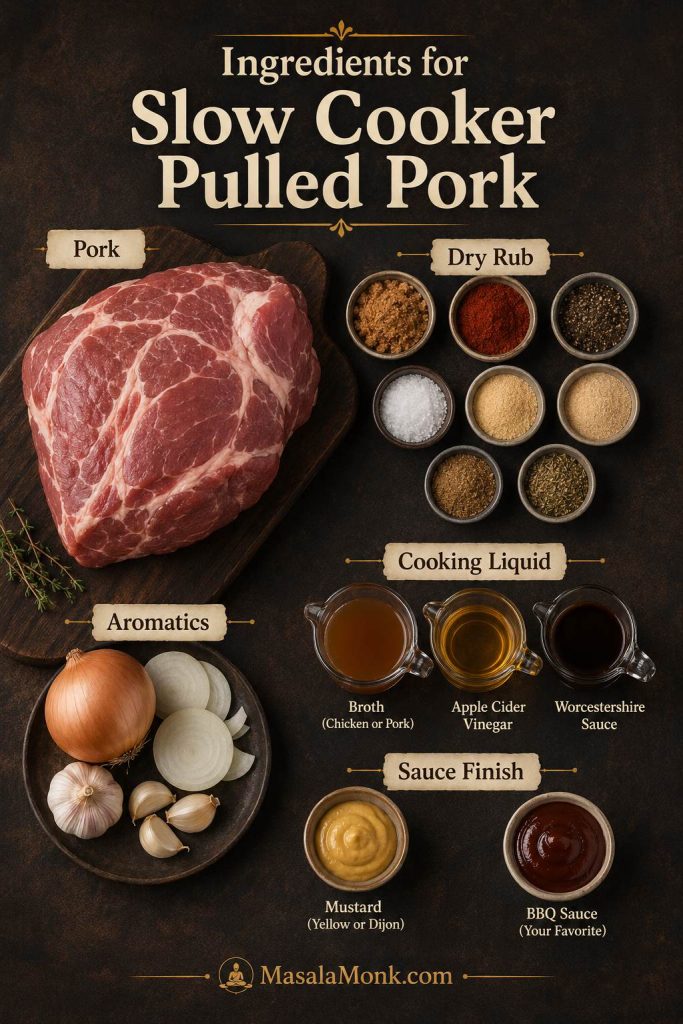
Ingredients and Why They Matter
Every ingredient here has a job: the rub seasons the meat, the aromatics build the cooking juices, and the vinegar, mustard, and Worcestershire keep the rich pork from tasting flat.
The Pork Cut
Start with 4 lb / 1.8 kg pork shoulder, pork butt, or Boston butt. Because this cut has enough fat and connective tissue, it can handle long cooking and still turn into juicy shreds. If you choose a bone-in roast, use the same method and cook until the bone pulls away easily.
Although the roast can stay whole when it fits comfortably, larger pieces cook more evenly when cut into 2–3 big chunks. Keep the pieces large; tiny cubes can dry at the edges before the center has time to soften.
Dry Rub for Slow Cooker Pulled Pork
The rub is what keeps this slow cooker pulled pork recipe from tasting like plain boiled meat. Mix the spices first, then coat the pork all over so every side gets seasoning.
- 2 tbsp / 25 g brown sugar
- 1 tbsp / about 7 g smoked paprika
- 1 tbsp Diamond Crystal kosher salt / about 9 g, or 2 tsp Morton kosher salt / about 10 g
- 1 tsp black pepper / about 2 g
- 1 tsp garlic powder / about 3 g
- 1 tsp onion powder / about 2–3 g
- 1 tsp mustard powder / about 2 g
- 1/2 tsp ground cumin / about 1 g
- 1/4–1/2 tsp cayenne or chili powder, optional
If your BBQ sauce is very sweet, reduce the brown sugar to 1 tbsp / about 12 g. On the other hand, if you are using a tangy vinegar-forward sauce, the full 2 tbsp keeps the pork balanced.
Aromatics and Cooking Liquid
Next, build a small flavorful base under the pork. These ingredients season the cooking juices without flooding the slow cooker.
- 1 large yellow onion / about 200 g, sliced
- 4 garlic cloves / about 12 g, smashed or minced
- 1/2 cup / 120 ml apple juice, apple cider, broth, beer, or water
- 2 tbsp / 30 ml apple cider vinegar
- 1 tbsp / 15 ml Worcestershire sauce
- 1 tbsp / 15 g yellow or Dijon mustard
- 1/2–1 tsp / 2.5–5 ml liquid smoke, optional
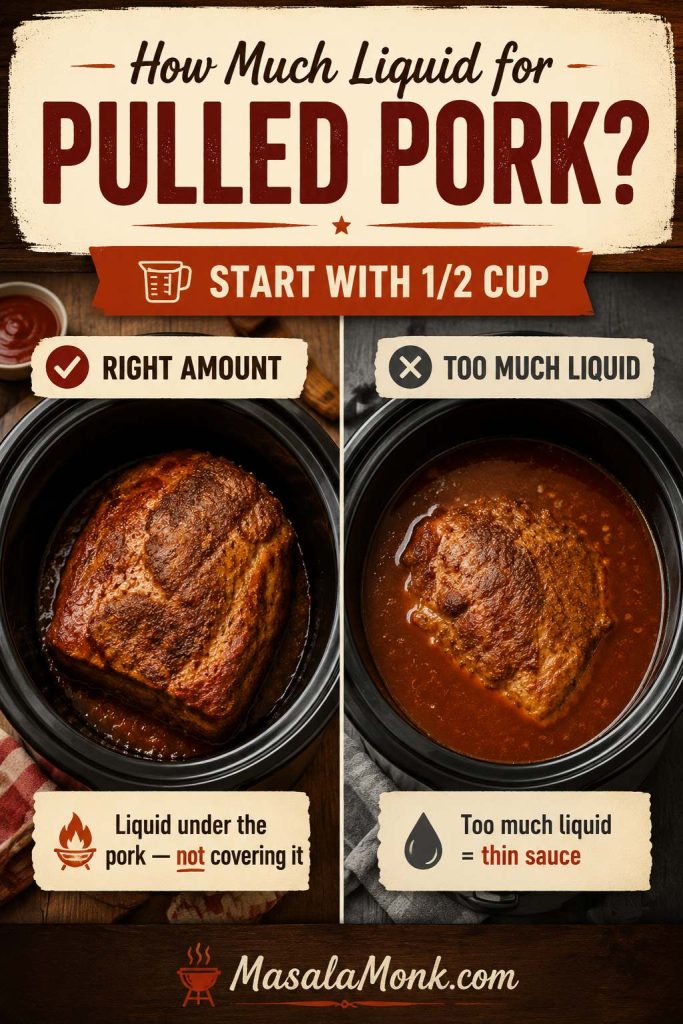
As the pork cooks, it will release more liquid, so begin with less than you think you need. The liquid should sit under and around the pork, not cover it.
BBQ Sauce and Finishers
Toss the shredded pork with 3/4–1 cup / 180–240 ml BBQ sauce, plus 1/4–1/2 cup / 60–120 ml defatted cooking juices as needed. Add these gradually, because the finished pork should look glossy and juicy rather than soupy.
Then taste and adjust. Add vinegar for brightness, salt for depth, hot sauce for heat, or a little more BBQ sauce if the pork needs a sweeter finish.
Best Liquid for Pulled Pork
Apple juice or cider gives a slightly sweet BBQ-friendly base. Broth keeps the pork more savory and flexible. Beer adds deeper flavor, while water works in a pinch if you plan to adjust with sauce, vinegar, or salt at the end.
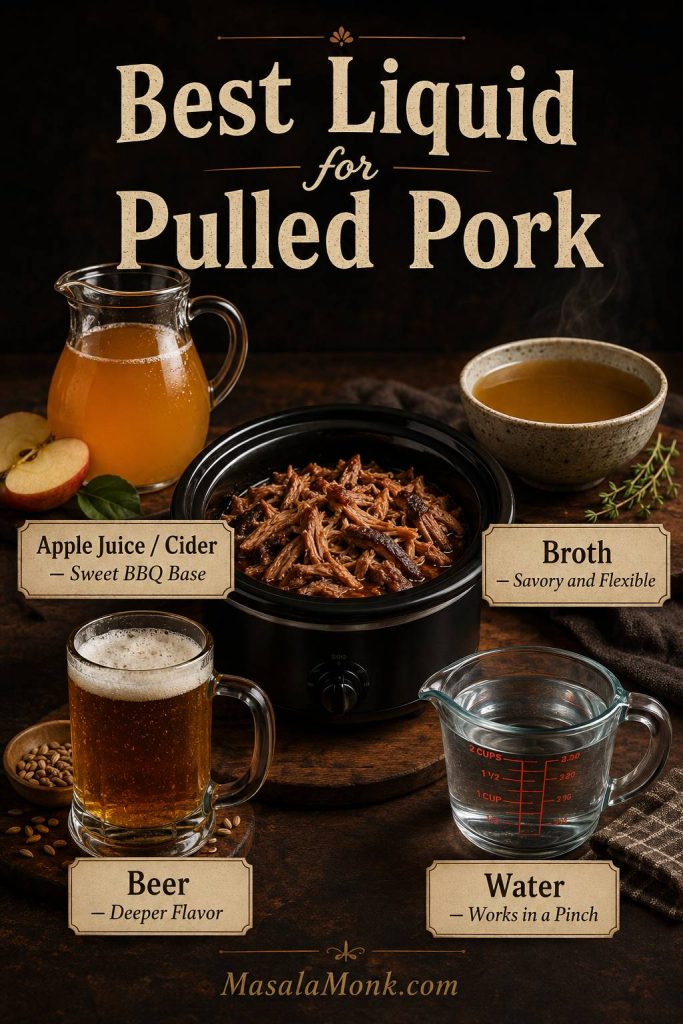
For the main recipe, use 1/2 cup / 120 ml. Use up to 1 cup / 240 ml only for a very large roast, a wide cooker, or a slow cooker that runs hot. The liquid should sit under and around the pork, not cover it.
If you are making a soda variation such as Dr Pepper, root beer, or Coca-Cola pulled pork, use the soda variation instructions later in the post.
How to Make Slow Cooker Pulled Pork
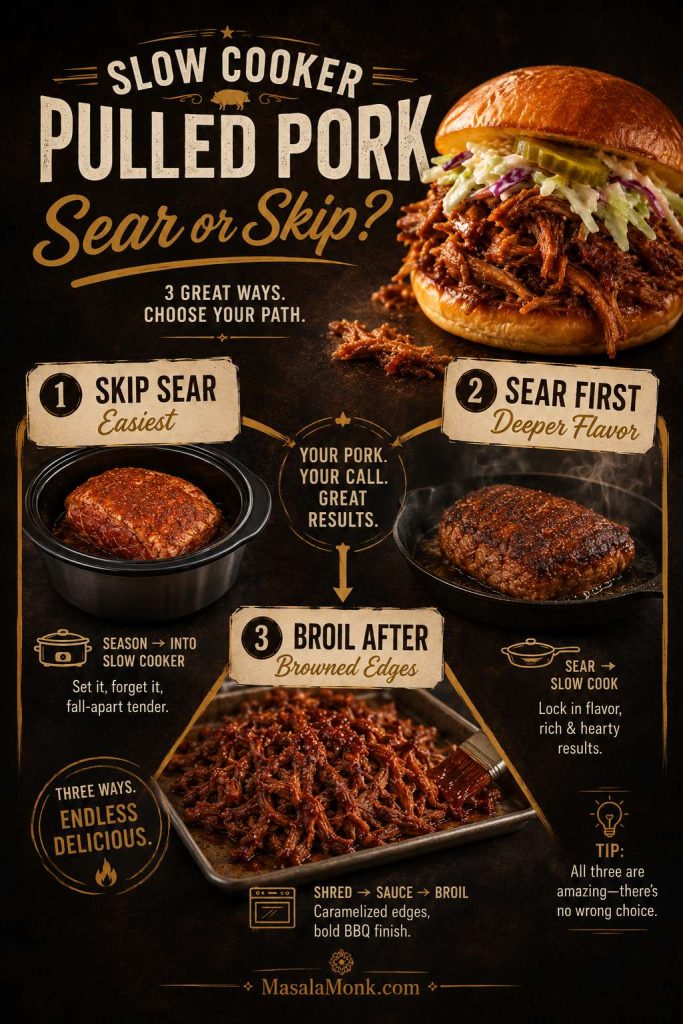
The easiest version is rub, layer, cook, shred, and sauce. Searing is optional. For deeper flavor, sear the pork before slow cooking or broil the shredded pork briefly at the end. For the lowest-effort version, skip the sear and let the slow cooker do the work.
Should You Sear the Pork First?
You do not have to sear pork shoulder before slow cooking. The recipe still works beautifully without it, which is why it is practical for busy days. Searing adds deeper roasted flavor, but it also adds a pan and a few extra minutes.
The easiest pulled pork skips the sear. For deeper flavor, sear the seasoned pork in a hot skillet with 1 tbsp / 15 ml neutral oil before adding it to the slow cooker. As a middle path, skip the sear at the beginning and broil some of the shredded pork at the end for browned edges.
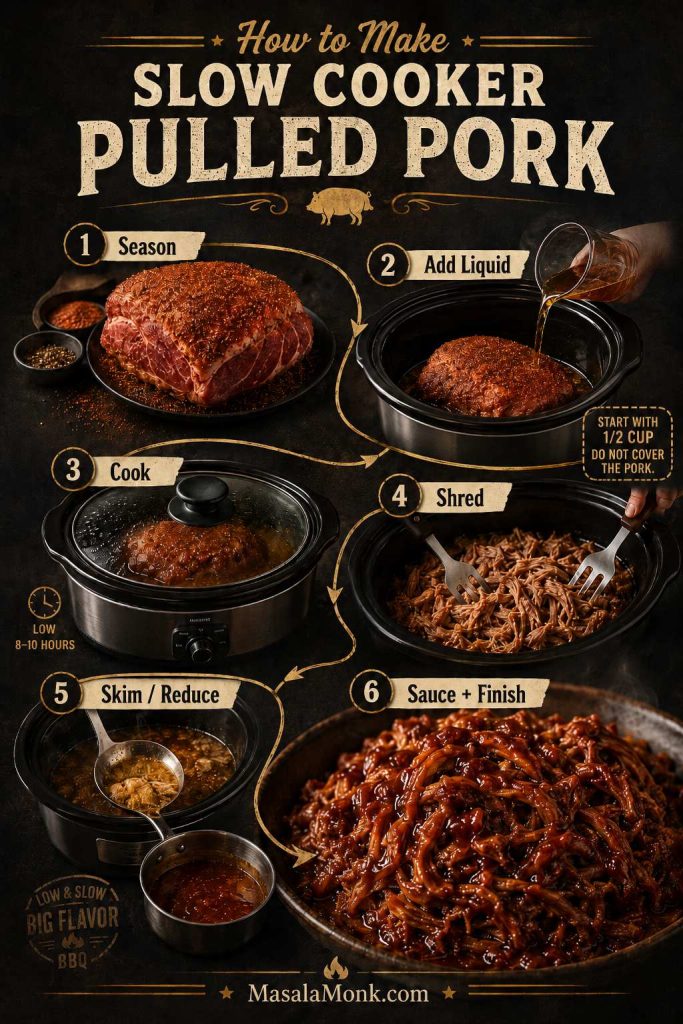
1. Trim and season the pork
Pat the pork dry. Trim away thick, hard surface fat, but leave some fat and marbling. Mix the brown sugar, smoked paprika, salt, pepper, garlic powder, onion powder, mustard powder, cumin, and cayenne or chili powder if using. Rub the seasoning all over the pork.
2. Add the onion, garlic, and liquid
Scatter the sliced onion and garlic in the bottom of a 6-quart slow cooker. Stir together the apple juice, cider, broth, beer, or water with the apple cider vinegar, Worcestershire, mustard, and optional liquid smoke. Pour this into the slow cooker.
The pork should not be covered in liquid. Start with 1/2 cup / 120 ml liquid because the meat will release more juice as it cooks.
3. Cook until tender enough to pull apart
Place the seasoned pork on top of the onion mixture. Then, cover and cook on LOW for 8–10 hours or HIGH for 5–6 hours. Although HIGH works when you are short on time, LOW gives the most even, forgiving texture, especially for larger roasts. For larger roasts, use the cook time by weight chart.
The pork is ready when it pulls apart without a fight. If it feels tight, rubbery, or hard to separate, it usually needs more time, not more force.
4. Remove, rest briefly, and shred
Transfer the pork to a rimmed sheet pan, large cutting board, or wide bowl. Rest for 10 minutes so it is easier to handle. Remove any bone, large fat pieces, or tough connective bits. Shred with two forks or meat claws.
5. Skim or reduce the juices
Pour the slow-cooker juices into a measuring cup or bowl, then skim off excess fat. If the juices taste thin, simmer them in a saucepan for 5–10 minutes until more concentrated. This step is optional, but it is the most reliable fix for watery pulled pork.
6. Add BBQ sauce after shredding
Return the shredded pork to the slow cooker or a large bowl. Toss with 3/4–1 cup / 180–240 ml BBQ sauce. Add 1/4–1/2 cup / 60–120 ml defatted cooking juices as needed, just until the pork is juicy and glossy. Taste, then adjust with salt, vinegar, hot sauce, or more BBQ sauce.
7. Optional: broil for browned edges
If you want crispier BBQ-style edges, spread some sauced pork on a foil-lined sheet pan and broil for 2–4 minutes. Watch closely. Then mix the browned edges back into the rest of the pork.
Slow Cooker Pulled Pork Cook Time
Cook time depends on pork weight, roast shape, bone-in vs boneless, slow cooker size, and how hot your appliance runs. Use the chart as a planning guide, then let texture decide when the pork is finished.
For parties, start earlier than you think. Pulled pork forgives extra holding time far better than it forgives being rushed, and nobody wants to be pulling at a stubborn roast while the buns and slaw are already on the table. For a 4–6 lb roast, cooking overnight or starting early in the morning is safer than trying to finish exactly at dinner time.
Low vs High Setting
LOW is the most forgiving setting for soft, even pulled pork. HIGH works when you are short on time, but it is less forgiving with large roasts. If the slow cooker is packed tightly, use LOW and give the pork more time.
Cook Time by Pork Weight
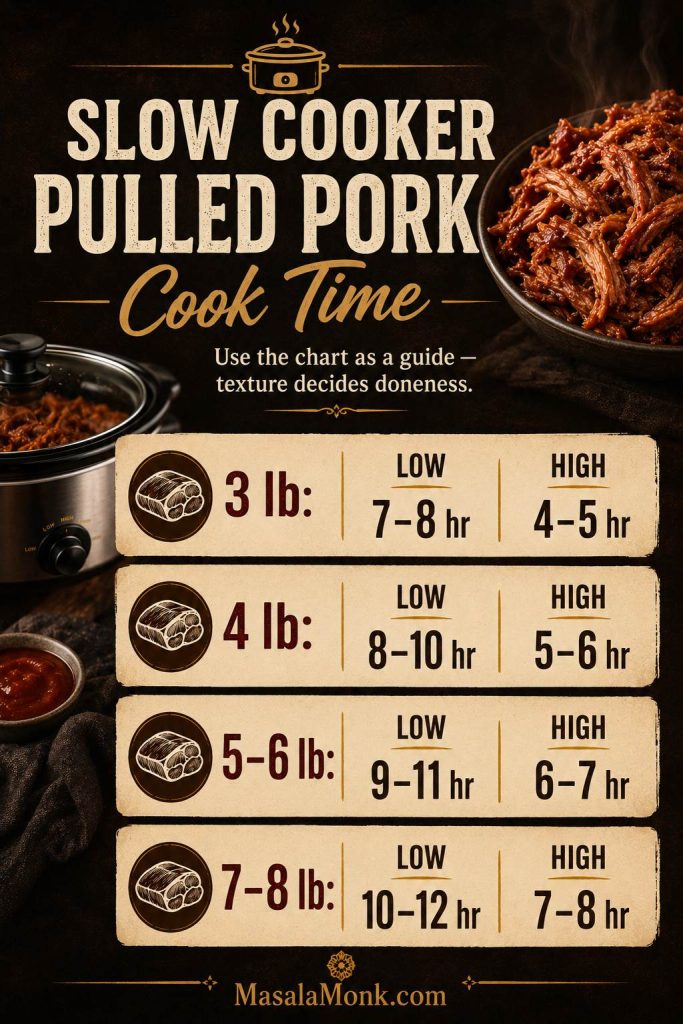
| Pork weight | LOW setting | HIGH setting | Notes |
|---|---|---|---|
| 3 lb / 1.35 kg | 7–8 hours | 4–5 hours | Good for smaller households. |
| 4 lb / 1.8 kg | 8–10 hours | 5–6 hours | Main recipe size. |
| 5–6 lb / 2.25–2.7 kg | 9–11 hours | 6–7 hours | Use a large slow cooker. |
| 7–8 lb / 3.2–3.6 kg | 10–12 hours | 7–8 hours | Only if the roast fits comfortably. |
| 9–10 lb / 4–4.5 kg | 11–12+ hours | Not ideal | Better to cut into large chunks or use two cookers. |
Internal Temperature for Pulled Pork
For pulled pork, temperature is about texture as much as safety. For official safety guidance, FoodSafety.gov lists pork roasts at 145°F / 63°C with a 3-minute rest. But pork shoulder will not shred beautifully at that point. For shoulder-style pulled pork, cook until the meat pulls apart easily, usually around 195–205°F / 90–96°C. Then confirm with the done texture cues before shredding.
If the thermometer says the pork is in that range but the meat still resists shredding, keep cooking. Texture wins. Check again in 30–60 minutes.
If dinner time is close and the pork is still firm, the answer is usually more time, not more force. Keep it covered and let the shoulder finish softening.
What Done Pulled Pork Looks and Feels Like
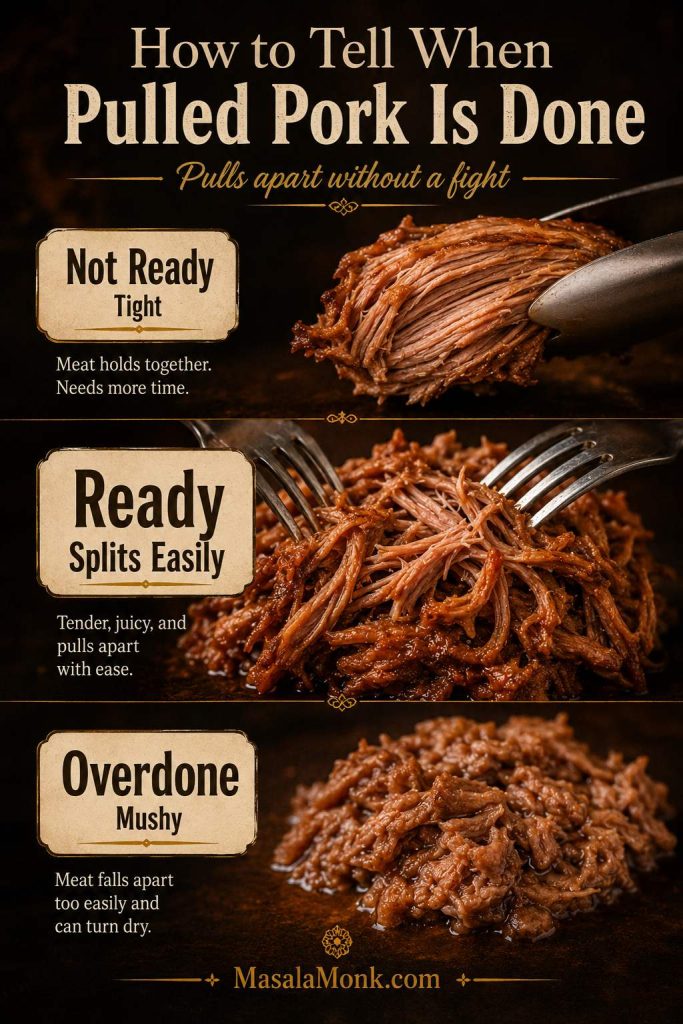
The pork should look relaxed and slightly collapsed, not firm and springy. When you lift it with tongs, it may start to split under its own weight. A fork should slide in easily, and the meat should separate into strands without hard pulling. If the pork is still fighting you, it is not ruined — it just needs more time.
| What you see | What it means | What to do |
|---|---|---|
| Firm, springy pork | Not ready | Keep cooking. |
| Fork slides in but meat resists | Close, but not done | Cook 30–60 minutes more. |
| Meat splits under tongs | Ready to shred | Rest briefly, then shred. |
| Pork collapses into mush | Overcooked or overmixed | Shred gently and avoid extra stirring. |
Can You Overcook Pulled Pork in a Slow Cooker?
Yes, but pork shoulder is forgiving. Overcooking is more likely if the roast is small, the slow cooker runs hot, there is too little moisture left, or the pork sits for hours after it has already become tender. Once the pork shreds easily, switch the slow cooker to WARM and keep the meat moist with a little cooking juice or sauce.
If your pork is already very soft, shred gently. Overmixing can turn tender pork into a mushy texture.
When to Add BBQ Sauce
Best Time to Add BBQ Sauce
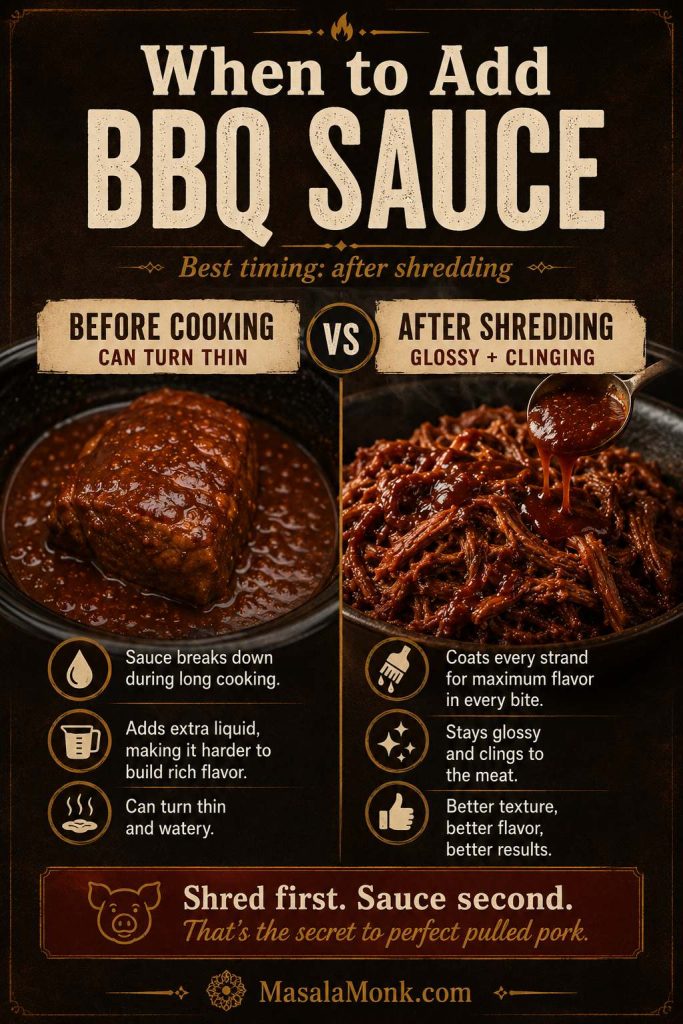
The best time to add most of the BBQ sauce is after shredding. A small amount can go in at the beginning if you love a cooked-in sauce flavor, but a full bottle of BBQ sauce early can turn thin because pork shoulder releases so much liquid.
For stronger flavor, cook the pork with rub, onion, garlic, vinegar, Worcestershire, mustard, and 1/2 cup / 120 ml liquid. After shredding, toss with BBQ sauce and only enough defatted cooking juices to make the pork juicy. If the juices taste weak or watery, reduce them in a saucepan first; then, add them back gradually.
How to Keep BBQ Sauce from Turning Thin
This is the whole trick: controlled liquid at the start, concentrated juices at the end, and BBQ sauce added when the shredded pork can actually hold it instead of sliding into a thin puddle.
Add sauce and juices gradually. The finished pork should look coated and glossy, with sauce clinging to the shreds instead of pooling at the bottom. If it looks dry, add a little more juice; if it looks loose, stop before the sauce turns thin.
| BBQ sauce method | What happens | Best use |
|---|---|---|
| Sauce before cooking | Softer, cooked-in flavor, but the sauce can thin out as pork releases juices. | Use only a small amount early if you like this style. |
| Sauce after shredding | Bolder BBQ flavor and better moisture control. | Best default for this recipe. |
| Small amount before, more after | Gives some cooked-in flavor while keeping the final sauce stronger. | Good middle path if you love a saucy slow cooker base. |
Should You Drain the Juices from Pulled Pork?
Do not blindly dump the juices, but do not pour all of them back either. The slow-cooker liquid contains flavor, fat, onion, garlic, seasoning, and pork juices. It can make shredded pork taste amazing — or greasy and watery — depending on how you use it.
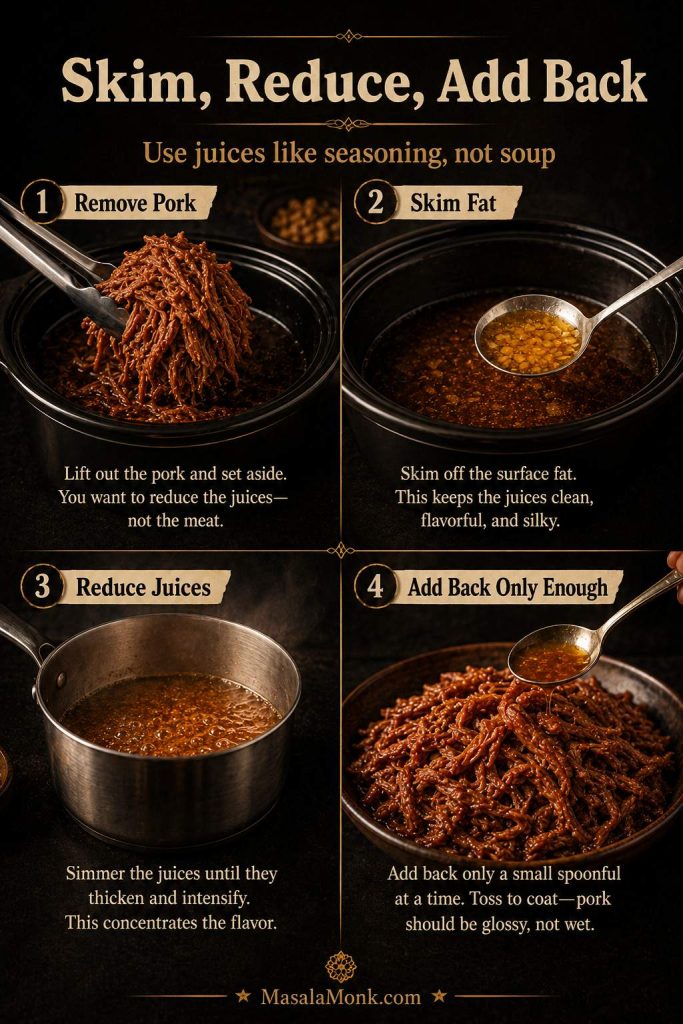
- Remove the cooked pork first.
- Pour the juices into a bowl or measuring cup.
- Skim or separate the fat.
- Strain out onion or garlic if you want a smoother finish.
- If the liquid tastes thin, reduce it in a saucepan for 5–10 minutes.
- Add back only 1/4–1/2 cup / 60–120 ml at first, then more if the pork needs it.
Treat the slow-cooker juices like seasoning, not soup. The goal is not dry pork and not soupy pork — just enough concentrated juice to make the shreds taste alive.
After shredding, taste the pork like you would taste a sauce. When it tastes flat, add salt. If it feels heavy, add vinegar. When the flavor seems thin, reduce the juices. If it tastes too sweet, add mustard, hot sauce, or more unsauced pork.
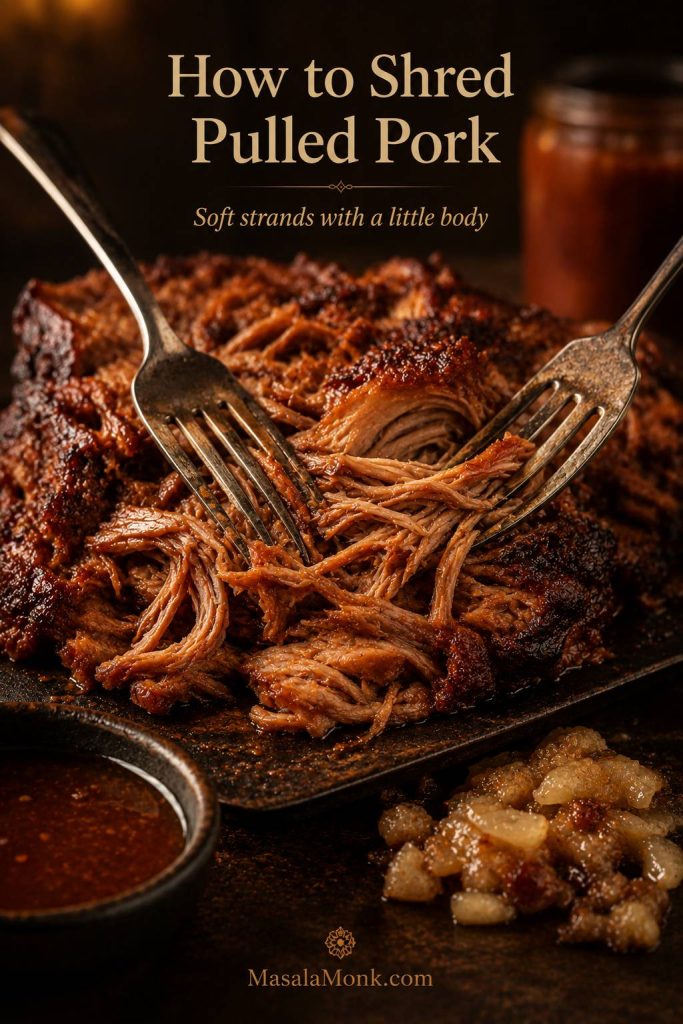
How to Shred Slow Cooker Pulled Pork
Shred the pork while it is still warm, once it is cool enough to handle. If it cools too much, the fat firms up and the meat is harder to pull cleanly. You want soft strands with a little body, not tiny overworked bits that disappear into the sauce.
- Remove the bone if using bone-in pork shoulder.
- Discard large pieces of fat, gristle, or tough connective tissue.
- Use two forks, meat claws, or clean gloved hands.
- Save some cooking juices so you can adjust moisture before serving.
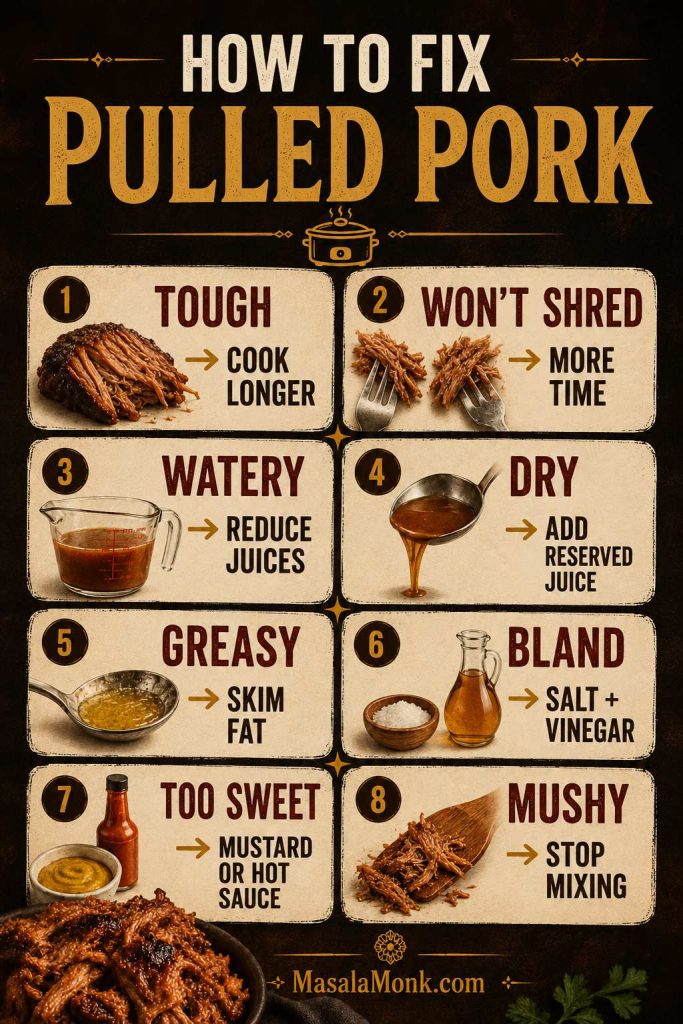
How to Fix Pulled Pork That Is Tough, Watery, Dry, or Bland
If the pork is not perfect when you open the lid, do not panic. Most slow cooker pulled pork problems are easy to fix after shredding. Tough usually means unfinished, watery usually means the juices need managing, and bland usually means the finish needs salt, vinegar, sauce, or heat.
| Problem | Likely cause | Fix |
|---|---|---|
| Pork is tough | It has not cooked long enough for the connective tissue to soften. | Cover and cook 30–60 minutes more, then check again. |
| Pork will not shred | The pork is safe but not pull-apart tender yet. | Keep cooking until it separates easily with forks. |
| Pulled pork is watery | Too much liquid, sauce added early, or lots of pork juices released. | Remove pork, strain and skim juices, reduce juices in a saucepan, then add back only what you need. |
| Pork tastes dry | Lean cut, not enough cooking juices mixed back in, or too little sauce. | Add reserved juices, BBQ sauce, broth, apple juice, or a splash of vinegar. |
| Pork is greasy | Too much rendered fat was mixed back into the shredded pork. | Separate the fat from the juices before adding them back. |
| Pork is bland | Under-seasoned rub or diluted cooking liquid. | Add salt, BBQ sauce, vinegar, hot sauce, mustard, or reduced juices. |
| Pork is too sweet | Sweet BBQ sauce, brown sugar, or soda variation. | Add apple cider vinegar, mustard, hot sauce, salt, or unsauced pork to balance. |
| Pork is too smoky | Too much liquid smoke. | Dilute with unsauced pork or add vinegar and BBQ sauce to balance. |
| Pork is mushy | It was cooked long after tender or shredded too aggressively. | Shred larger pieces gently and avoid overmixing with sauce. |
What to Serve with Slow Cooker Pulled Pork
Once the pork is shredded and sauced, the hard part is over. From there, it can go classic with buns and slaw, casual with nachos, or meal-prep friendly with rice bowls and potatoes. The best sides add contrast: crunch, acidity, freshness, or creaminess against the rich pork.
How Much Pulled Pork Per Person?
A 4 lb / 1.8 kg raw pork shoulder usually gives about 2.5–3 lb / 1.1–1.35 kg cooked pulled pork, depending on trimming, bone, and fat loss. That is enough for about 8 generous sandwiches or 10 smaller servings.

| Serving style | Cooked pulled pork per person | Notes |
|---|---|---|
| Sandwiches | 4–6 oz / 115–170 g | Use the higher end for large buns or hungry guests. |
| Sliders | 2–3 oz / 55–85 g | Good for parties, appetizers, and mixed spreads. |
| BBQ plate | 5–6 oz / 140–170 g | Use the higher end when pork is the main protein with sides. |
| Tacos | 3–4 oz / 85–115 g | Depends on tortilla size and toppings. |
| Bowls or nachos | 3–5 oz / 85–140 g | Use less if there are rice, beans, chips, cheese, or vegetables. |
Best Sides for Pulled Pork
Before you choose the exact serving style, think in contrasts: rich pork needs something creamy, something crisp, and something tangy beside it.

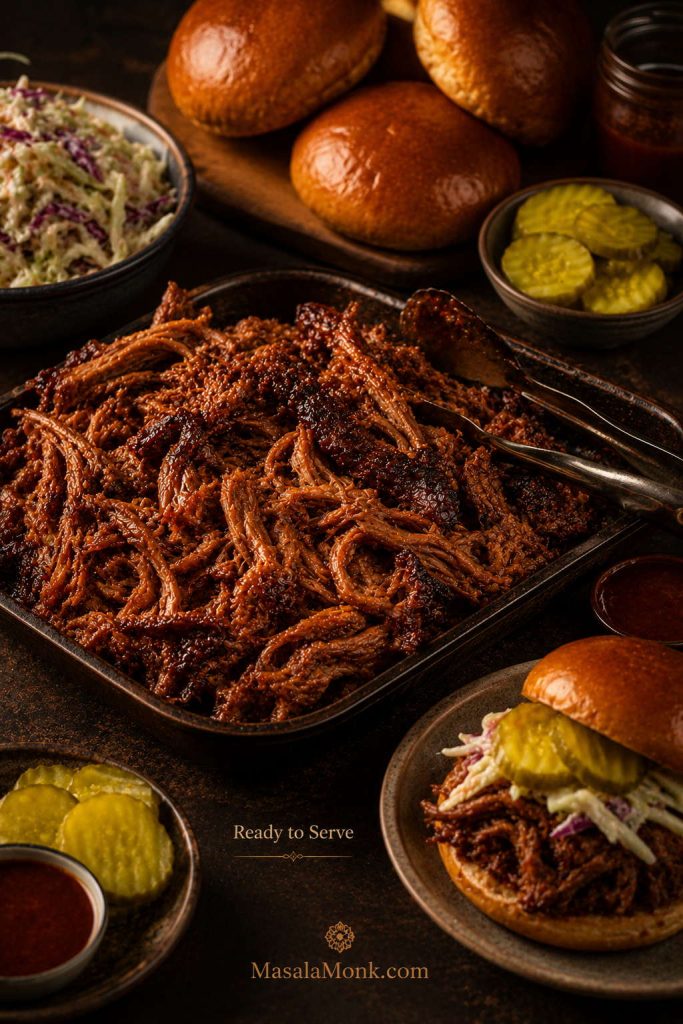
For Pulled Pork Sandwiches
For a better sandwich, use a soft bun, glossy pulled pork, crunchy slaw, pickles, and enough sauce to cling without soaking the bread. This coleslaw recipe is the natural side because it brings the crunch and acidity rich pork needs. The best bite is soft, juicy, crisp, tangy, and warm all at once.

For a BBQ Plate
For a BBQ plate, balance the rich pork with something creamy, something sharp, and something crisp. Potato salad or macaroni and cheese brings comfort, while pickles, slaw, roasted vegetables, or a vinegar-style cucumber salad keeps the plate fresh.
For Tacos, Bowls, and Nachos
For tacos and bowls, keep the pork a little less saucy so lime, salsa, cabbage, avocado, and pickled onions can do their job. The no-BBQ version is especially useful here. For bowls, start with warm, fluffy rice; this how to cook rice guide is useful if you want the base to stay separate instead of clumpy. For nachos, scatter the pork over chips with cheese, then finish with fresh toppings after baking.

Slow Cooker Pulled Pork Leftover Ideas
Leftover pulled pork is one of the best reasons to make a full batch. A good batch should feel like a gift to your future self, not a problem to use up. Store it with a little cooking juice or sauce so it stays moist, then use it for fast meals through the week. For safe timing and reheating, see storing, freezing, and reheating.
The best leftovers are stored with just enough juice that they reheat like fresh pork, not dry scraps.
- Pulled pork sandwiches: buns, slaw, pickles, and extra BBQ sauce.
- Pulled pork tacos: tortillas, cabbage, lime, salsa, and pickled onions.
- Loaded baked potatoes: split potatoes, pork, cheese, sour cream, scallions, and sauce. If you already have cooked potatoes, this leftover baked potatoes guide gives you more ways to turn them into a full meal.
- Pulled pork nachos: chips, cheese, pork, jalapeños, and fresh toppings. For a smoother drizzle, use homemade cheese sauce instead of only shredded cheese.
- Rice bowls: rice, pork, slaw, avocado, hot sauce, and lime.
- Breakfast hash: potatoes, onions, peppers, pork, and eggs.
- Mac and cheese topping: spoon hot pulled pork over creamy mac and cheese.
- Party popper filling: tuck a small spoonful into baked jalapeño poppers before adding the cheese filling.
- Freezer portions: pack 1–2 cup portions with a splash of juices for future meals. Freeze a few small portions before the tray disappears; future you will want tacos, bowls, or loaded potatoes.
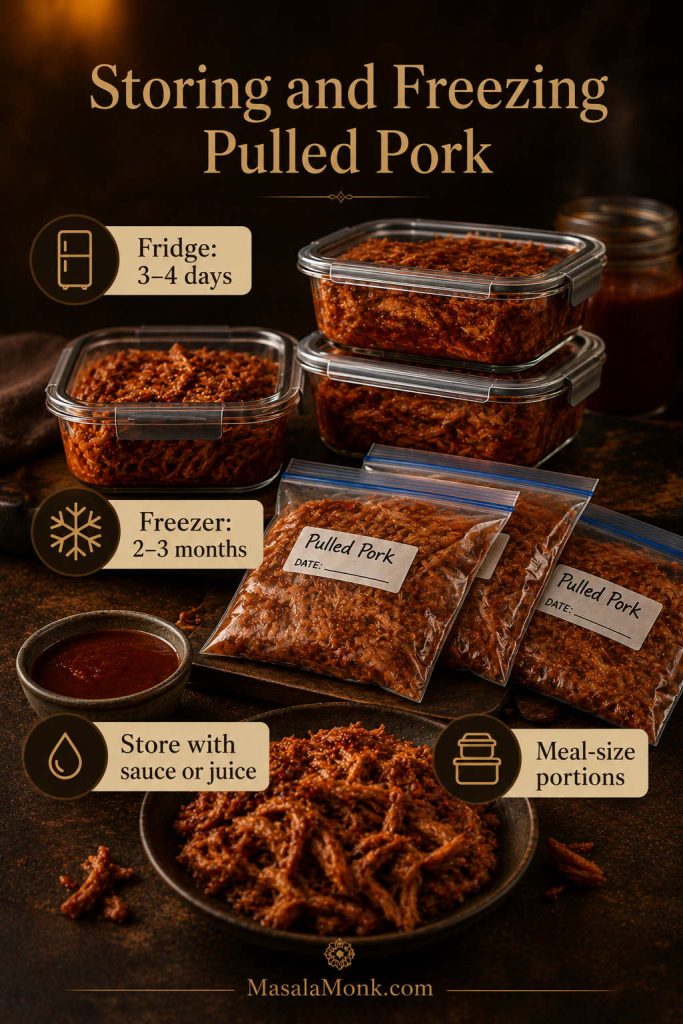
Storing, Freezing, and Reheating Slow Cooker Pulled Pork
Cool the pulled pork, then store it with some sauce or cooking juices. Dry leftover pork usually happens because the meat was stored without moisture or reheated too aggressively.
| Storage method | How long | Best practice |
|---|---|---|
| Refrigerator | 3–4 days | Store in an airtight container with sauce or cooking juices. |
| Freezer | 2–3 months for best quality | Freeze flat in bags or in meal-size portions with some moisture. |
| Reheating | Until hot throughout | Add broth, apple juice, cooking juices, or BBQ sauce and reheat gently. |
How to Reheat Pulled Pork
For the best texture, reheat pulled pork gently with a small splash of sauce, broth, apple juice, or reserved cooking juices. The goal is warm, moist pork, not dry strands or boiling liquid.
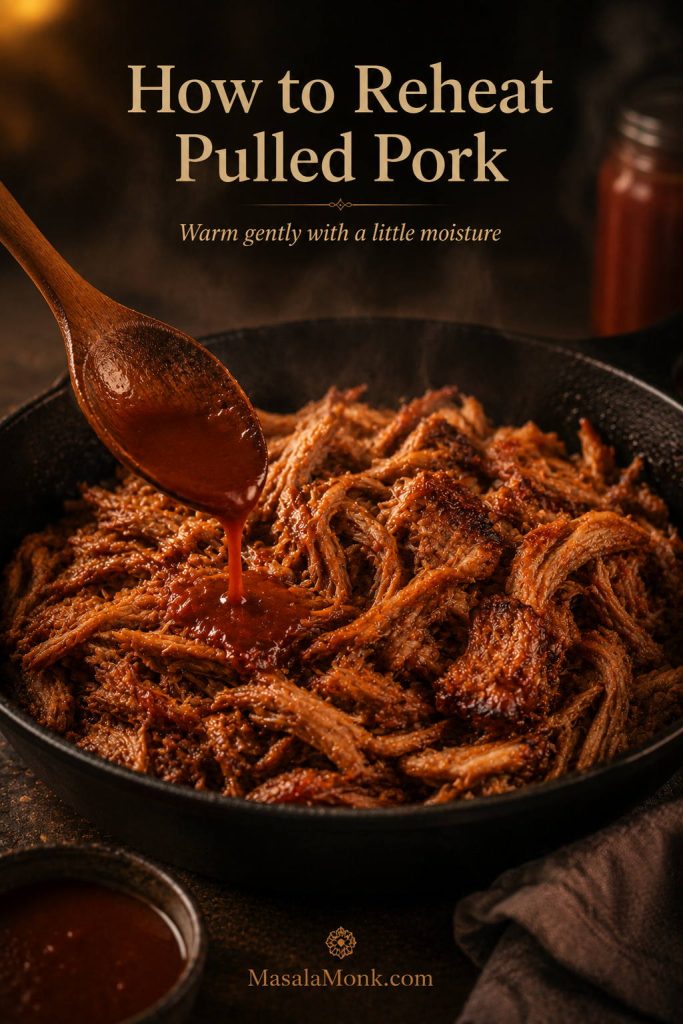
For official food-safety guidance, refrigerate leftovers promptly and reheat them to 165°F / 74°C. The USDA safe temperature chart is a useful reference for leftovers and reheating.
Slow Cooker Pulled Pork Variations
Once you understand the basic method, you can adjust the flavor easily. Keep the liquid controlled, cook until the pork shreds, and then finish with sauce or reduced juices after shredding.
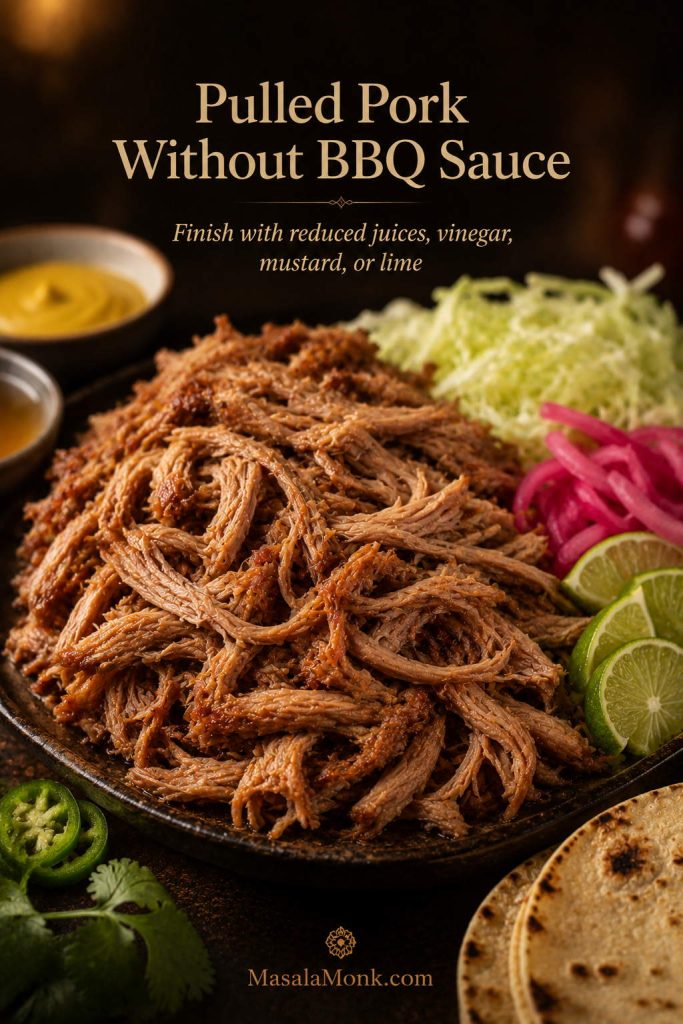
Pulled Pork Without BBQ Sauce
For pulled pork without BBQ sauce, use the same pork shoulder, rub, onion, garlic, vinegar, Worcestershire, mustard, and cooking liquid, but skip the bottled sauce at the end. After shredding, toss the pork with reduced cooking juices, then season to taste with salt, black pepper, apple cider vinegar, mustard, hot sauce, or a squeeze of lime.
This is the version to make when you want one batch of pork to go several directions during the week. It is especially useful for tacos, rice bowls, nachos, burritos, breakfast hash, loaded potatoes, and meal prep because it stays flexible. Later, you can add BBQ sauce, salsa, hot sauce, crema, or another sauce depending on the meal.
Soda-Based Pulled Pork Variations
For soda-based pulled pork, keep the same core method and treat the soda as the cooking liquid, not as a reason to flood the slow cooker. If your BBQ sauce is already sweet, reduce the brown sugar in the rub to 1 tbsp / about 12 g and finish with vinegar or hot sauce for balance.
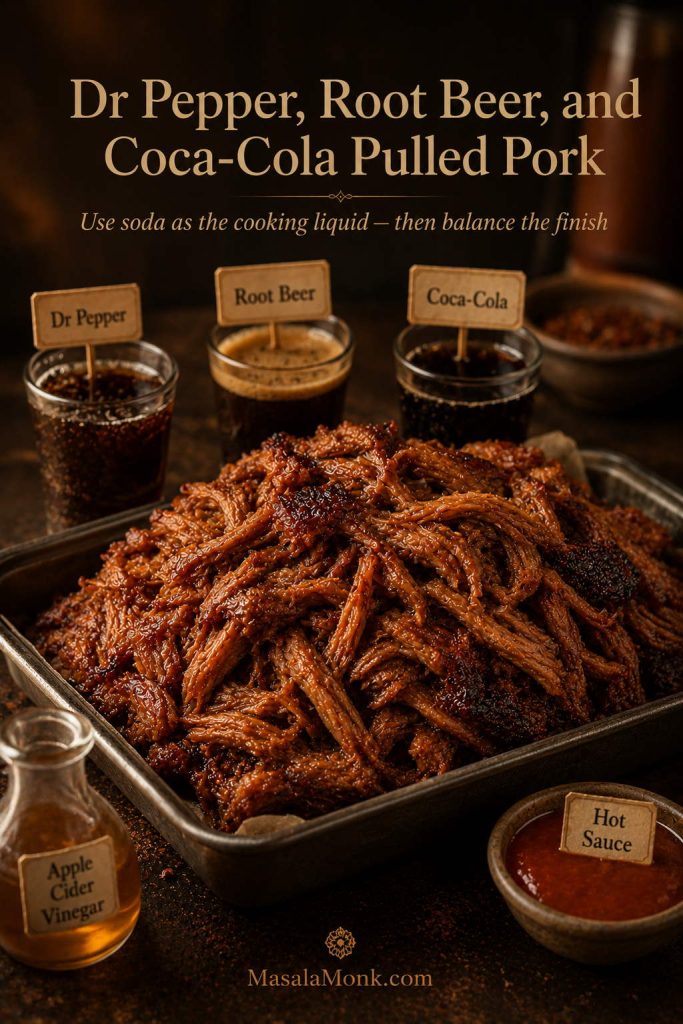
Dr Pepper Pulled Pork
Replace the 1/2 cup / 120 ml cooking liquid with 1 cup / 240 ml Dr Pepper. After shredding, add BBQ sauce gradually and balance with vinegar or hot sauce if needed.
Root Beer Pulled Pork
Use 1 cup / 240 ml root beer as the cooking liquid for a sweeter, rounder BBQ-style pulled pork. It works best with a tangier BBQ sauce or extra apple cider vinegar at the end.
Coca-Cola Pulled Pork
Use 1 cup / 240 ml Coca-Cola as the cooking liquid for a cola-braised version. Keep the finish balanced with BBQ sauce, vinegar, hot sauce, or reduced juices after shredding.
Spicy Pulled Pork
Add 1–2 tsp chili powder, 1/2 tsp cayenne, chopped chipotle in adobo, or hot sauce. For tacos, keep the BBQ sauce lighter and finish with lime. If you like building your own heat, this pepper sauce recipe guide gives you several hot, tangy directions to play with.
FAQs
Is pork shoulder or pork butt better for slow cooker pulled pork?
Pork butt or Boston butt is the easiest first choice because it is usually well-marbled and forgiving. Pork shoulder is also excellent. Both cuts are much better for classic pulled pork than pork loin or pork tenderloin.
Is Crock-Pot pulled pork the same as slow cooker pulled pork?
Yes. Crock-Pot is a popular slow cooker brand, so Crock-Pot pulled pork and slow cooker pulled pork refer to the same general cooking method. Use the same recipe, timing, and tenderness checks.
How long does pulled pork take in the slow cooker?
A 4 lb / 1.8 kg pork shoulder usually takes 8–10 hours on LOW or 5–6 hours on HIGH. Larger roasts need more time. The pork is finished when it separates easily, not just when the timer ends.
Should BBQ sauce go in before or after cooking?
Add most of the BBQ sauce after shredding. Sauce added at the beginning can become thin because pork releases a lot of liquid. For stronger flavor, cook with rub and modest liquid, then sauce the shredded pork at the end.
Why is my pulled pork watery?
Watery pulled pork usually comes from too much liquid, too much sauce added early, or natural pork juices collecting in the slow cooker. Remove the pork, strain and skim the juices, reduce them in a saucepan, then add back only enough to moisten the shredded pork.
Why is my pulled pork tough?
Tough pulled pork usually needs more time, not more force. Pork shoulder can be fully cooked but not yet tender enough to shred. Cover it and continue cooking for 30–60 minutes, then test again with forks.
How do I make pulled pork without BBQ sauce?
Use the rub, onion, garlic, vinegar, Worcestershire, mustard, and cooking liquid, then shred the pork with reduced cooking juices instead of BBQ sauce. This unsauced version is especially good for tacos, rice bowls, nachos, and meal prep.
What is the best way to make pulled pork ahead?
Cook and shred the pork, store it with some defatted juices, then reheat it gently the next day with BBQ sauce or extra cooking liquid. The flavor often gets even better after resting overnight.
How long can pulled pork stay warm for a party?
Once the pork is shredded and sauced, keep it on WARM for 1–2 hours, stirring occasionally and adding a splash of juices or sauce if it starts to dry out. For food safety, do not leave pulled pork sitting at room temperature for more than 2 hours.
Should I cut pork shoulder into chunks before slow cooking?
For a 4 lb / 1.8 kg roast, you can keep it whole if it fits comfortably. For a larger 7–10 lb roast, cut the pork into 2–3 large chunks so it fits better and cooks more evenly. Keep the pieces large so the pork stays juicy.
Should frozen pork shoulder go straight into the slow cooker?
No. Thaw pork shoulder fully in the refrigerator before slow cooking. Starting from frozen can make the pork heat unevenly and spend too long in an unsafe temperature range before the center warms through.
How much pulled pork do I need per person?
Plan on about 4–6 oz / 115–170 g cooked pulled pork per person for sandwiches or BBQ plates. For sliders, 2–3 oz / 55–85 g per person may be enough. A 4 lb / 1.8 kg raw pork shoulder usually gives about 8 generous sandwich servings.
What is the best way to freeze pulled pork?
Freeze pulled pork in meal-size portions with a little sauce or cooking juice. For best quality, use within 2–3 months. Thaw overnight in the refrigerator and reheat gently with extra moisture.
Slow Cooker Pulled Pork Recipe Card
Slow Cooker Pulled Pork Recipe
This slow cooker pulled pork recipe uses pork shoulder or pork butt, a smoky brown sugar rub, modest cooking liquid, and BBQ sauce added after shredding for juicy, glossy pork that holds sauce without turning soupy.
Ingredients
- 4 lb / 1.8 kg pork shoulder, pork butt, or Boston butt
- 1 large yellow onion / about 200 g, sliced
- 4 garlic cloves / about 12 g, smashed or minced
- 1/2 cup / 120 ml apple juice, apple cider, low-sodium chicken broth, beer, or water
- 2 tbsp / 30 ml apple cider vinegar
- 1 tbsp / 15 ml Worcestershire sauce
- 1 tbsp / 15 g yellow mustard or Dijon mustard
- 1/2–1 tsp / 2.5–5 ml liquid smoke, optional
- 3/4–1 cup / 180–240 ml BBQ sauce, plus more to serve
Dry Rub
- 2 tbsp / 25 g brown sugar
- 1 tbsp / about 7 g smoked paprika
- 1 tbsp Diamond Crystal kosher salt / about 9 g, or 2 tsp Morton kosher salt / about 10 g
- 1 tsp black pepper / about 2 g
- 1 tsp garlic powder / about 3 g
- 1 tsp onion powder / about 2–3 g
- 1 tsp mustard powder / about 2 g
- 1/2 tsp ground cumin / about 1 g
- 1/4–1/2 tsp cayenne or chili powder, optional
Instructions
- Trim the pork. Pat pork dry. Trim only thick, hard surface fat; leave some fat and marbling for moisture.
- Season. Mix all dry rub ingredients. Rub the seasoning all over the pork.
- Optional sear. For deeper flavor, sear the seasoned pork in 1 tbsp / 15 ml neutral oil before slow cooking. For the easiest version, skip this step.
- Build the slow cooker base. Add sliced onion and garlic to a 6-quart slow cooker. Stir together the cooking liquid, vinegar, Worcestershire, mustard, and liquid smoke if using. Pour into the cooker.
- Add the pork. Place the seasoned pork on top of the onion mixture. The pork should not be covered in liquid.
- Cook. Cover and cook on LOW for 8–10 hours or HIGH for 5–6 hours, until the pork pulls apart easily with forks.
- Shred. Transfer pork to a rimmed sheet pan, cutting board, or wide bowl. Rest 10 minutes, then remove bone, large fat pieces, and tough bits. Shred with two forks or meat claws.
- Handle the juices. Strain or skim the slow-cooker juices. If they taste thin, simmer in a saucepan for 5–10 minutes to concentrate.
- Sauce after shredding. Toss shredded pork with BBQ sauce and 1/4–1/2 cup / 60–120 ml defatted cooking juices, adding only enough to make it juicy.
- Adjust and serve. Taste and adjust with salt, vinegar, hot sauce, extra BBQ sauce, or more reduced juices. Serve on buns, sliders, tacos, bowls, nachos, baked potatoes, or BBQ plates.
Notes
- Best cut: pork butt, Boston butt, or pork shoulder.
- Most forgiving setting: LOW gives the most even texture.
- Texture target: tender enough to pull apart, usually around 195–205°F / 90–96°C.
- Liquid note: start with 1/2 cup / 120 ml and do not cover the pork.
- Finish: shred first, then add BBQ sauce and just enough defatted cooking juice.
- For crisp edges: broil sauced shredded pork for 2–4 minutes, watching closely.
- Storage: refrigerate 3–4 days or freeze 2–3 months with a little sauce or juice.
Final Tip
The best slow cooker pulled pork is won at the finish. Choose a marbled shoulder cut, give it enough time to soften, then treat the juices like seasoning instead of soup. Shred first, sauce second, and add back only enough defatted juice to make the pork glossy. That is how you get pulled pork that piles onto buns, holds up in tacos, and still tastes like a plan tomorrow.
If you try one of the variations, leave a comment with the cut you used — pork butt, pork shoulder, bone-in, or boneless — and whether you finished it with BBQ sauce, reduced juices, or both. Those details are often what separate a good batch from a great one.