Posted on 1 Comment

Kuzhi Vegetable Paniyarams Recipe

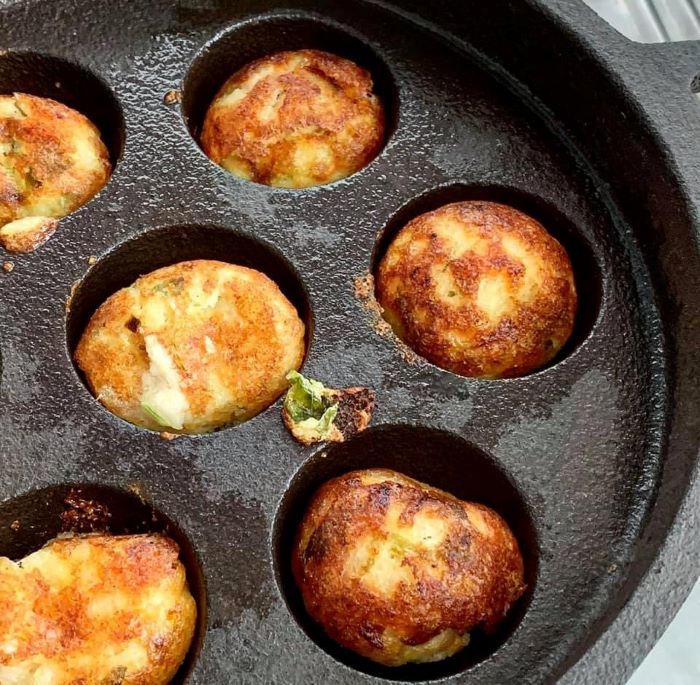
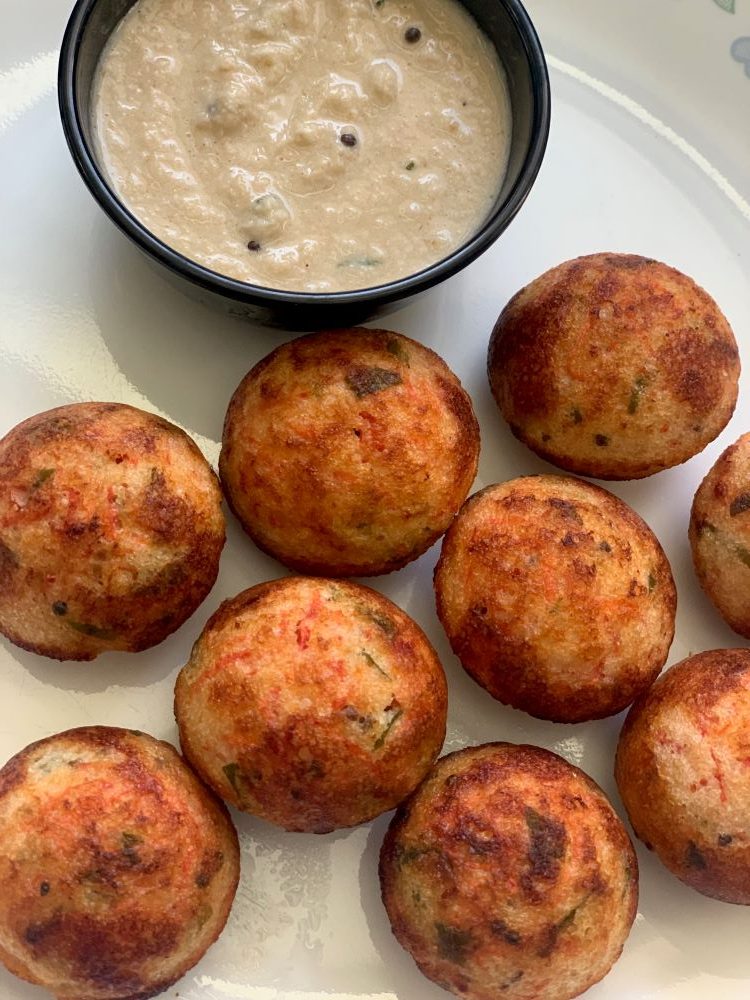
Vegetable Paniyaram or Appe/Appam as it is commonly known is a South Indian breakfast recipe made from idli/dosa batter and known as kuzhi Paniyaram in Tamil, Paddu in Kannada, and Gunta Ponugulu in Telugu. It’s the best way to use idli dosa batter if the batter has turned sour after a couple of days. It is perfect for kids too as it is extremely healthy, has a good dose of vegetables and looks colourful and attractive. My kid loves it and often asks for it especially in his school tiffin. He would take extra to school as requested by his friends. 🙂

Some years back my uncle gifted this cast iron Paniyaram pan (appe pan) to me and it has been my most treasured kitchen possessions. Since then my obsession with appe pan started and I make not only paniyarams in it but also fritters, little pancake balls, patties, bread rolls, falafel, kofte and dahi bhallas. Basically, anything that you need to shallow or deep fry can be made in appe pan with much less oil. 

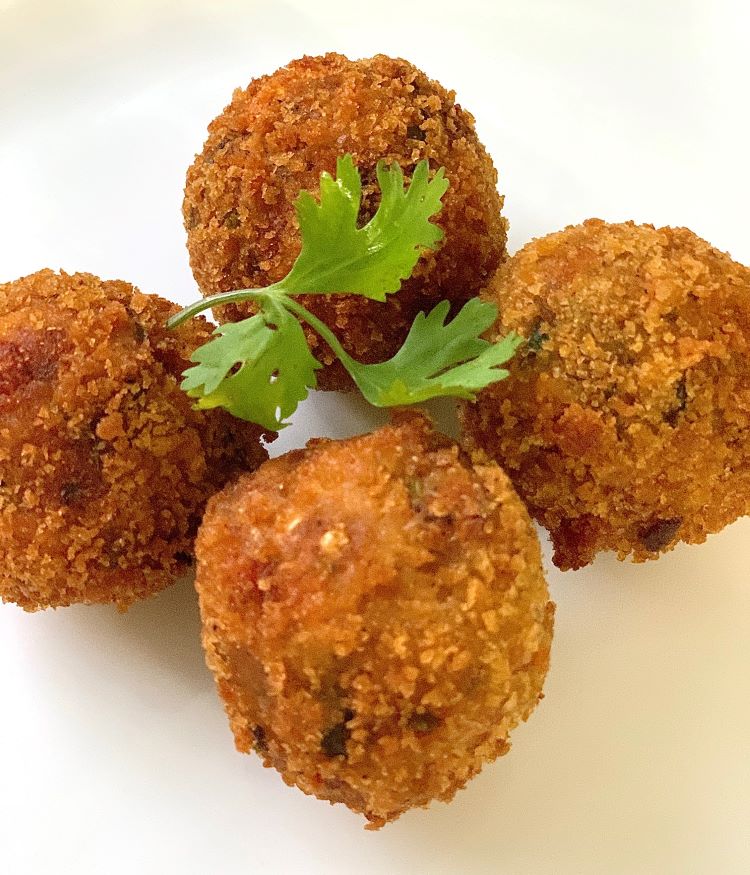
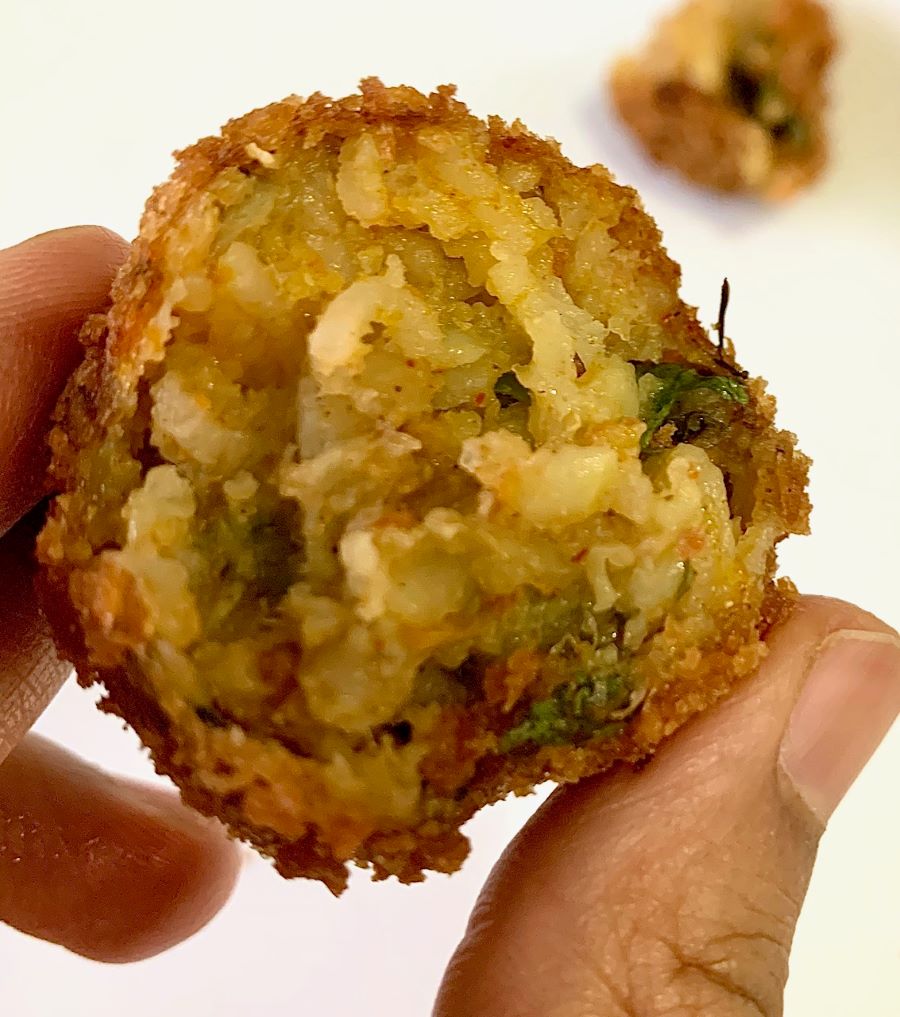
I like the instant version of Vegetable Paniyaram – it is quick to make with leftover idli/dosabatter. The last few cups of idli batter might not always yield soft idlis or make soggy dosas. I add mixed sautéed veggies with some spices into the leftover idli batter and it turns into flavourful paniyarams which I often serve with Coconut Chutney or Kara Chutney.  They are really crispy on the outside and soft on the inside.

Check out this recipe below. If you have leftover Idli batter you can use that. In the recipe below I’ll share with you the recipe of fresh batter

Recipe: makes 20-25 paniyarams 

Ingredients 

For the Batter

  1. White Split Urad Dal: 1/2 cup
  2. Bengal Gram/Channa Dal: 1/8th cup
  3. Fenugreek Seeds: 1 tsp
  4. Rice: 1 cup
  5. Flattened Rice/Poha: 1/4th cup
  6. Water as required for the batter
  7. Rock Salt: 1 tsp

For Paniyarams 

  1. Mixed Chopped or Grated Vegetables: 1 cup (I used onion, capsicum, carrot)
  2. Minced Ginger: 1 tsp
  3. Asafoetida/Hing: a pinch
  4. Mustard Seeds: 1 tsp
  5. Curry Leaves: Handful
  6. Oil/Ghee for Cooking
  7. Salt to taste
  8. Green chilies: 2 (optional)

Instructions 

  • Wash and soak urad dal, channa dal and 1 tsp of fenugreek seeds for 3-4 hours. 
  • Wash and soak rice and poha for 3-4 hours.
  • First grind the dals using water. Add water gradually to make a smooth thick but flowing consistency batter. 
  • Now grind rice and poha, again by adding little water at a time to make thick but flowing consistency batter.
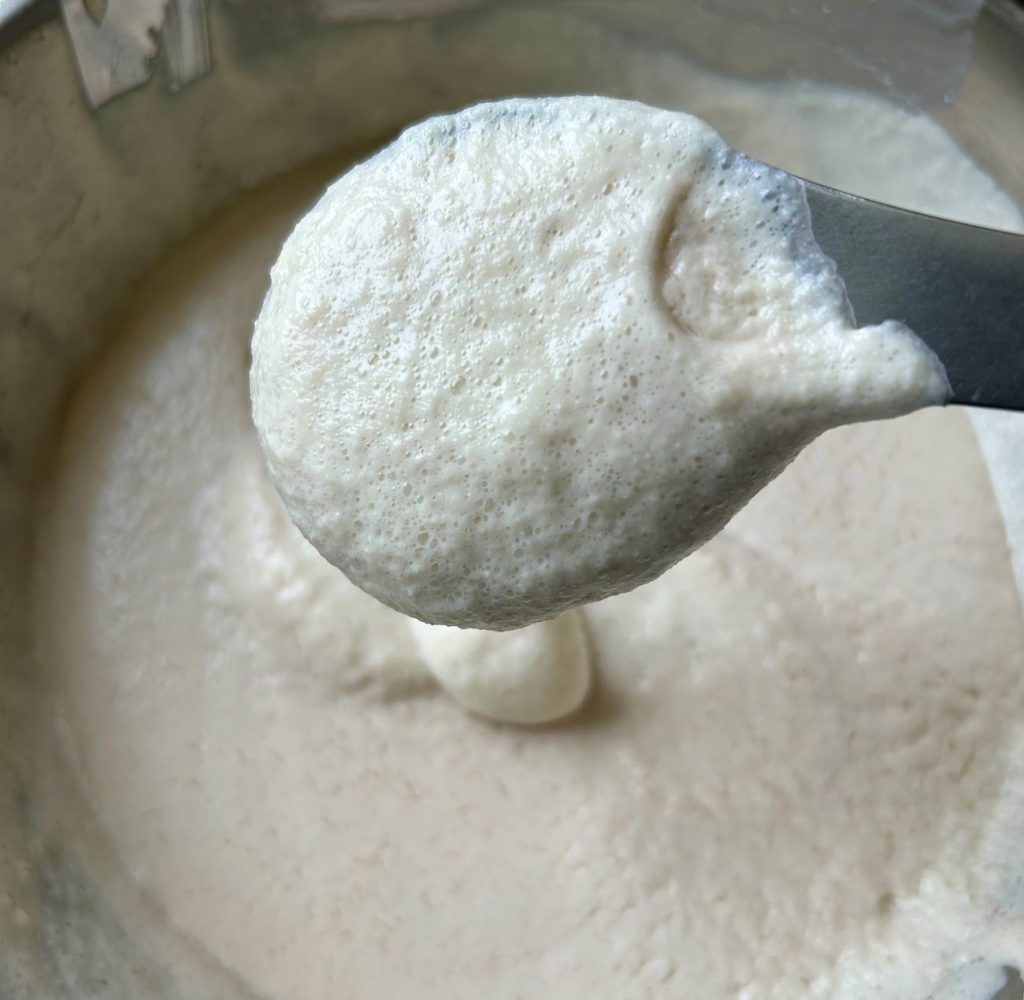
  • Mix both the batters in a steel or a glass bowl. Add rock salt. Mix well. Leave it for fermentation for atleast 8 hours or more at a warm place. The batter will rise and will become airy with tiny bubbles. If it hasn’t then leave for some more time. 
  • In a pan, add a tbsp of oil. Add some mustard seeds & hing. Let mustard seeds splutter. Now add some finely chopped green chilies if using, curry leaves and minced ginger. Cook for few seconds then add finely chopped vegetables of your choice.
  • Season it with some salt. Cook for 2 minutes on medium flame or till they soften a bit. Allow it to cool. Then add the sauteed vegetables to the fermented batter and mix gently.
  • Now your batter is ready. The consistency of the batter is similar to idli batter. If it’s thick, add a bit of water. Check for salt. Heat Paniyaram pan to medium heat. Brush it with ghee or oil in each cavity and fill it with batter. Leave some space for paniyarams to rise.
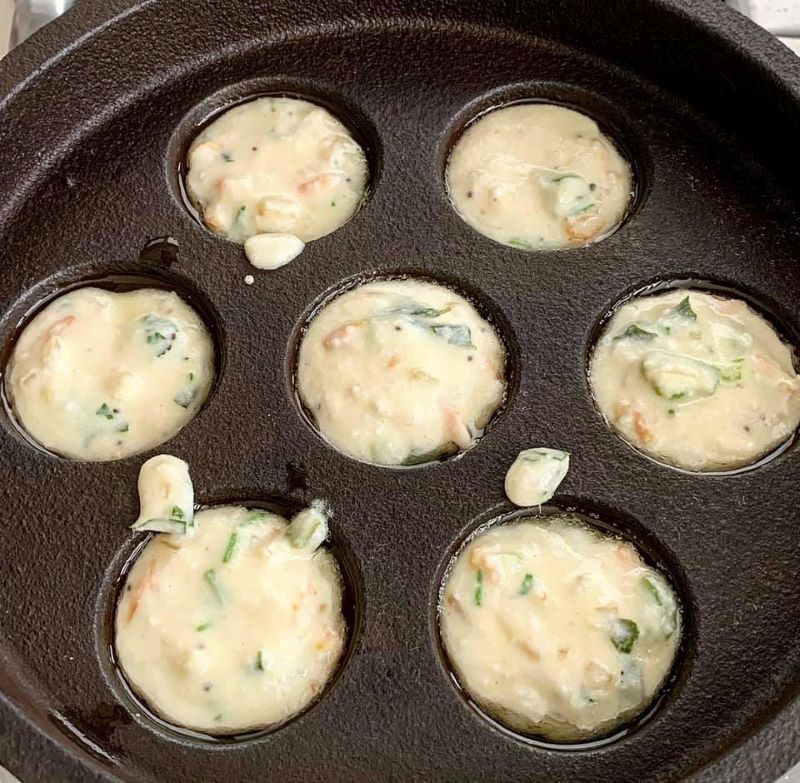
  • Cover with a lid and cook on medium to low flame for 3 minutes or when the top has set, and edges have browned.
  • Then with a help of a skewer or a knife flip the paniyarams and cook the other side for 2-3 minutes. 
  • Serve immediately with chutney of your choice. 

Tips:

  • Cook appe on low-medium heat or else you will end up with raw batter in the middle.
  • You may use any combination of veggies minced broccoli, cauliflower, cabbage, or greens like methi or drumstick leaves works too.
  • Use a paniyaram pan that has been seasoned well and used in the past. If not the paniyarams will stick to the pan.

Do give this recipe a shot. I am sure this will be your child’s and your family’s new favourite. If you try this recipe, do give us a shout out. Just click a picture and tag us on @masala.monk or use the hashtag #MasalaMonkRecipe and share on Instagram and Facebook. We would love to hear from you. 🙂

Posted on Leave a comment

How to turn Leftover Rice into Gourmet Arancini Balls

Arancini balls are Italian rice balls that are stuffed, coated with breadcrumbs and deep fried. These are gooey, cheesy rice balls with crispy golden crust. Need I say more! The Italians are a genius! Arancini balls are a Sicilian street food made of risotto and are absolutely delicious. It’s crispy on the outside and creamy on the inside. But they do take some effort to prepare. First you have to make risotto and allow it to cool. Then you have to make the balls and fry them. This sounds like quite a lengthy process. If you have the time, they are definitely worth the effort.

But if you don’t want to go that extra mile and still want to make delicious Arancini Balls, we have your back. I’ll show you how you can transform your leftover rice to these delightful little balls of pleasure that are truly pleasurable to nibble. They are perfect without any filling and are also a good way to use up other leftovers. These were gobbled in no time at my house. It took me just 10 minutes to prepare it and even less time for us to finish it. Even my 10 year old loves them. Italian herbs and cheeses make them taste like a cheesy pizza. Even if you don’t like fried food, I insist you give this one a try. Alternatively, you can bake these in the oven or can air fry them.

Recipe: Makes approx 12-14 balls

Ingredients 

  1. Leftover Rice or Pulao: 2 cups; cold is better
  2. Egg: 1 large; lightly beaten
  3. Mozzarella Cheese: 1/2 cup
  4. Fresh Basil Leaves: A handful
  5. Minced Garlic: 1 tsp
  6. Minced Ginger: 1 tsp
  7. Dried Oregano or Italian Seasoning: 1/2 tsp
  8. Chilli Flakes: 1/2 tsp or as required 
  9. Salt and Pepper to taste
  10. Breadcrumbs: 1/3 cup
  11. Oil for frying

Instructions 

  • In a bowl or a plate mash leftover rice or pulao. I have used leftover vegetable pulao here. Add basil leaves, mozzarella cheese, ginger-garlic, oregano, chilli flakes, salt, pepper and egg. Mix them all until well combined.
  • Form 12-14 balls equal sized balls and roll them in bread crumbs. 
  • Add frying pan to a wok or to a deep pan. Preheat the oil to medium high heat. 
  • Fry the arancini in batches until golden brown. Use a slotted spoon to remove the arancini from the hot oil and place them on a paper towel to drain the excess oil.
  • Serve hot with ketchup or marinara sauce

Variations: Any type of cheese can be used like cheddar, parmesan, and you can alternate the spices as well. Chopped veggies, such as mushrooms, zucchini, carrots or bell peppers can also be added.

Notes: 

  1. Always use cooked rice
  2. Use rice that is cold
  3. Add more breadcrumbs if the mixture is runny, it should be the consistency of a meatball mixture.

Do give this recipe a shot. It’s a perfect and a delicious way to upscale your leftovers. If you try this recipe, do give us a shout out. Just click a picture and tag us on @masala.monk or use the hashtag #MasalaMonkRecipe and share on Instagram and Facebook. We would love to hear from you. 🙂

Posted on Leave a comment

Know the right way of Consuming Turmeric Milk

We Indians are so well familiar with turmeric spice. Turmeric is so commonly used in India that you will find it in every spice box in a typical Indian household. Rarely you will find an Indian recipe prepared without a dash of turmeric, be it your vegetables or dal preparation. 

Growing up this spice used to be an answer to all our health and skin related issues in our grandmother’s book of wellness. Whenever you fell sick or got injured, your mother or grandmother was quick to force this liquid gold aka Haldi Dhood down your throat. Whether you had chronic cold, cough or stomach related problems, turmeric was antidote to everything. Now, as adults we do realize why our elders did what they did- the science behind their humble wisdom. What was once something our mothers and grandmothers coaxed us into gulping down, has become an international health phenomenon—and all the “golden milk” “turmeric latte” available in every cafe nowadays only reinforce the fact. 

This spice provides innumerable benefits by itself but mix it with milk, and its benefits are doubled. Turmeric mixed with milk is a perfect bedtime drink that helps to reduce inflammation, poor immunity  and disturbed sleep patterns.

Below are all the reasons as to why turmeric milk should be part of your health depository. 

  1. May help fight cancer: Studies indicate that turmeric may offer some protection against cancer.
  2. Strong Bones: Nutrients in turmeric milk contribute to a strong skeleton, reducing your risk of bone diseases, such as osteopenia and osteoporosis.
  3. Reduces inflammation and joint pains: There hero component in turmeric in curcumin. It has strong antioxidants properties which helps to reduce inflammation in the body. Inflammation is a root cause of all the diseases. Having anti-inflammatory foods such as turmeric regularly can greatly reduce that risk. Also, it can help ease joint pains. Hence, it is extremely useful for people suffering from arthritis. 
  4. Helps in Cough and Cold: Consuming a glass of turmeric milk at night is the norm for most growing Indian kids, as this concoction not only provides relief from sniffles and coughs, but also protects against further infections. In fact, turmeric milk has an immediate effect on colds and coughs, as it removes excess phlegm from the body. If you are experiencing a sinus headache, a cup of turmeric milk might provide relief, as it eases mucus flow and promotes sinus drainage.
  5. Skin Benefits: Curcumin in turmeric has anti-bacterial and anti-inflammatory properties which will help in acne and clarifying the complexion. Traditionally, a glass of turmeric milk was given to brides-to-be to add glow to their complexion. For long, turmeric has been a key ingredient in skin care DIY routine for radiant and glowing skin. Turmeric mixed with fresh cream when applied as a mask on face gives an instant glow. 
  6. Induces better sleep: Turmeric milk when combined with saffron was granny’s one of the many remedies to treat insomnia. Dairy foods contain tryptophan, magnesium and zinc, which are essential for serotonin and melatonin production but its bioavailability is limited. When combined with curcumin, it is a game changer. 

Let’s see the correct way of making Turmeric Milk

The main compound in turmeric is curcumin. It makes up about 5% of turmeric. Our liver gets rid of foreign substances by making them water-soluble so that they can be excreted. That is where the role of black pepper comes. Black pepper contains piperine, which naturally helps inhibit drug metabolism. So, when the liver excretes curcumin, piperine can inhibit this process so that curcumin is not excreted. This explains how piperine can help to make curcumin more bioavailable. Research has found that consuming just 20mg of piperine per 2g of turmeric can increase curcumin absorption by up to 2000%. Hence, if you want all the benefits of turmeric milk, do not forget to add black pepper to it.

Recipe: For 1 cup

Ingredients

  1. A2 Cow’s Milk- 1 cup
  2. Turmeric Root: 1/2 inch
  3. Black pepper corns: 2
  4. Cardamom: 1
  5. Saffron: few strands
  6. Jaggery: 1 tsp or as per taste

Instructions

  • In a mortar pestle, add turmeric root, black peppercorns and cardamom. Bruise it a little. 
  • Now in a pan add milk, saffron strands and turmeric mix. Allow the milk to boil. 
  • Then add jaggery powder and allow the milk to simmer for 2 minutes. Switch off the flame. 
  • Cover and let the milk rest for 5 minutes. Sieve and serve warm. 

Notes: 

  1. Cardamom is added because it helps in digestion. It also helps to induce sleep and relieve stress or anxiety. 
  2. Saffron is added to help boost immunity and memory. It also helps to improve sleep quality and protects against flu. 
  3. You can use natural sweetener of your choice. Mishri (rock sugar) or coconut sugar works well too.
  4. Go for A 2 raw cow’s milk instead of pasteurized milk that comes in a packet or a carton. You can boil the raw milk before using it in turmeric milk.
  5. You can add other spices too like ceylon cinnamon or dry ginger powder.

I hope this recipe and information helped you. Do let us know how haldi dhood is prepared at your home. If you have any questions do let us know in the comments. We would love to hear from you. Stay happy and healthy! 🙂

Posted on Leave a comment

Protein Rich Cherry Pancakes Recipe

Summer is here and cherries are in season. You have got to try this recipe before the cherry season runs out. These healthy fats pancakes are fluffy, delicious and a little addictive. Made with whole grains, milk and egg these come together in just 10 minutes. 

I normally make pancakes with different fruits like banana, apple, strawberries but never tried it with cherries. It was only when I had 2 boxes of cherries that I decided to give it a shot. I think this is the first time I have ever made anything with cherries. I just don’t eat it with anything else. Cherries are pretty perfect on their own. Also, cherries are super healthy too. They are loaded with antioxidants which have anti-inflammatory properties. If you have been exercising and have sore muscles have cherries daily. They are excellent to soothe sore muscles. 

With all the goodness of cherries, these pancakes are packed with protein too. Just 4 pancakes have approx. 25 grams of protein. So, it’s a win-win situation wherein cherries are helping to heal your sore muscles and you are getting quality protein from these pancakes.

  • 1/2 cup Buttermilk: 6 gms Protein
  • 1 egg: 6 gms Protein: 3/4th Wholewheat flour: 10-12 gms Protein
  • 1/2 cup rolled Oats: 5-6 gms Protein

I served this to my little one yesterday and guess what, he gave me 83,000 crore likes for these pancakes. That’s how he described it when I asked him how was the taste 😁

Main Ingredients you need and their Substitutes

Wholewheat Flour: I have made these pancakes using wholewheat flour. You can make this gluten free by using gluten free flour like millet flour. Buckwheat, barnyard millet, pearl millet or finger millet flour, they all go well.

Rolled Oats: I have also added rolled oats in combination to wholewheat flour. It gives a nice bite and texture to the pancakes. You can skip it if you like and just use wholewheat flour.

Jaggery Powder: Some form of sweetness helps to enhance the taste. Jaggery has its own distinct flavour and I think goes very well with earthy and nutty flavour of wholewheat flour. You can use any unprocessed sugar like palm sugar or coconut sugar.

Buttermilk: Buttermilk is an excellent ingredient in baked goods and pancakes because it helps create light and fluffy foods by encouraging carbon dioxide bubbles to form in the batter. Also, it gives a slightly tangy flavour which I love. If you don’t have buttermilk, you can use yogurt or milk. You can also make these vegan by using  Almond milk or Coconut milk. 

Eggs: Eggs are helpful in adding volume to the pancakes. They also provide moisture along with the oil. However, if you want to make these eggless, just take 1 tbsp of chia seeds or flaxseeds (coarsely ground), mix 4 tbsps of water. Keep aside for 15 minutes. The mixture will get a gel like texture. Use this in place of 1 egg. 

Coconut Oil: Coconut oil not only adds flavor but also nutrition. Pure coconut oil is anti-inflammatory and antioxidant in nature, that helps maintain heart health. Thanks to the good fats. You can substitute coconut oil with either butter or olive oil.

Now on to the process of making these cherry pancakes

Recipe: makes 4-5 pancakes

Ingredients:-

  1. Deseeded Cherries: 10-12
  2. Buttermilk: 1 cup
  3. Egg: 1 large
  4. Wholewheat Flour: 3/4th cup
  5. Rolled Oats: 1/2 cup
  6. Pure Vanilla extract: 1/2 tsp
  7. Jaggery Powder: 2 tsps
  8. Baking Soda: 1/2 tsp
  9. Salt: a generous pinch
  10. Coconut Oil: 1 tbsp
  11. Oil/Butter for cooking 

Instructions 

  • In a blender, add 8-9 deseeded cherries, buttermilk, egg, pure vanilla extract, coconut oil & jaggery powder. Blend till everything comes together. 
  • In a bowl, sieve wholewheat flour, baking soda and salt. Mix well. Now add rolled oats and mix again. 
  • Gradually add the wet ingredients to dry ingredients and make a thick flowing consistency batter. Gently mix till everything incorporates well but do not over mix the batter 
  • Now grease a non-stick pan with some butter or oil. When the pan is medium hot, add 1/3rd cup of batter or according to the size you prefer. Once the bubbles form and top sets, flip and cook both the sides till golden brown. 
  • Enjoy it as it is or serve with maple syrup or honey or toppings of your choice. 

If you are looking for more pancake recipes, then you must check out these recipes below-

Do let me know if you try out this recipe. If you try this recipe, you can also click a picture and tag us on @masala.monk or use the hashtag #MasalaMonkRecipe and share on Instagram or Facebook. We would love to hear from you. 🙂

Posted on Leave a comment

Tips and Recipes to Help your Child Recover from Diarrhoea

Diarrhoea (loose, watery bowel movements) is a common problem in young children. It rarely means a child has a serious illness. Three most common reason for loose watery stools are: –

  1. viral or bacterial infection
  2. drinking too much fruit juice
  3. starting a new medicine

The biggest risk of diarrhoea is dehydration which means losing body fluids and not having enough electrolytes for their body to function the right way. Your child NEEDS to stay hydrated at all times which means giving extra liquids in smaller amounts at regular intervals. 

I love summer season but with temperatures soaring comes a large variety of infections and stomach bug is one of most common infections in summers. Most of such cases don’t require any medication or medical attention and can be cured at home with few dietary changes. Mild diarrhoea is 2-4 watery bowel movements in a day which usually goes away on its own. 

When do you require medical attention?

  • If your child is below 18 months old, ALWAYS consult your pediatrician.
  • If diarrhoea lasts for more than 2 days

Now let’s come to the biggest question- WHAT TO FEED YOUR LITTLE ONE?

Yes, we all know the usual stuff that we Indians normally eat when we have an upset tummy like khichri (rice and lentil gruel) and curd rice. But we mothers are aware that our child gets extra fussy when sick and will need variety. As a mother of a 10 year old boy I can understand your plight. We are always in a fix when it comes to preparing the next meal for our child when he/she is sick. We want it to be nutritious, mild, wholesome and above everything else your child needs to find it tasty.

So yes! The biggest challenge is what healthy and tasty stuff can you give? So here I am to your rescue. I will share with you few tips and simple, healthy yet delicious tried and tested recipes which will help you sail through the infection.

Pro Tips

Diet rule for Diarrhoea is B.R.A.T.Y diet, i.e.: Banana, Rice, Applesauce, Toast and Yogurt

  • Include more of yogurt in your child’s diet. The probiotics in yogurt will soothe his/her digestive system.
  • Switch to fruits like apple and banana which helps in binding the stool and avoid all fruits starting with letter ‘P’ like peaches, plums, papaya, pear. Also avoid apricots and strawberries.
  • Give your child more food containing starch. Starchy foods like rice, pasta, potato, white bread (refined flour bread) are easily digested during diarrhea.
  • Avoid all green leafy vegetables like spinach, Broccoli 
  • Include more carrots in diet. Pectin in carrots soothes digestive tract and helps add bulk to the stool.
  • And most importantly, keep your child well hydrated at all times. Strictly avoid all kinds of juices, fresh or concentrated.

Now keeping the B.R.A.T.Y diet in mind, here are some simple and healthy recipes to feed your child

  • Banana Smoothie: Consuming bananas with a little curd/yogurt is a traditional combination which works wonders. Eating banana and yogurt can provide your child with potassium, electrolytes, probiotics and prebiotics which deplete during diarrhoea. Here’s how you can make it. 
  • Carrot Apple and Ginger Smoothie: Carrot are a must when a child is suffering from diarrhoea. Carrot contains pectin. When pectin enters the body, the intestine begins to swell and form a sticky gel, thereby reducing diarrhea. But remember to lightly cook carrots.
  • Potato Poha (Flattened Rice) Patties: Potatoes without the skin are easy on the stomach and contain potassium, an electrolyte lost through diarrhoea. Boiled potatoes are easy to digest and can provide a starchy source of energy when your child is feeling weak due to stomach issues. Poha is light, easily digestible and good source of carbohydrates. It’s also a great source of iron. The husk of rice from which poha is made helps to bind loose stools. Here’s how you can easily make these patties for your child. Remember to keep it low on spices. 
  • Aglio Olio Spaghetti: Pasta is every child’s favourite. This was my life saviour during these troublesome times. They are good sources of carbohydrates, which your child needs for energy, whether he/she is pooping prolifically or not. It can help to bind stools. Also, since pasta has less fibre than whole grains, it is easier on the gut. Check out the recipe
  • Herb Rice with Spring Onions: White rice is a great choice during episodes of upset tummy. It will help to add bulk to the stool and will also provide your child with energy. Since plain bland white rice is boring and children refuses it at times, I tried to spice it a little with black pepper, rosemary, garlic and star anise. All these spices and herbs aid digestion and are actually good for the gut. You can tweak the recipe as per your liking. This is just to give you an idea. 
  • Hung Curd Sandwich: Another great source of carbohydrates, protein and probiotics. Your child will love these sandwiches and will eat them without any fuss. I have also added boiled egg yolk in the hung curd spread. Eggs help slow down bowel movements and help the child recover faster from diarrhoea. You can of course add or remove the ingredients as per your liking. 
  • Chocolate Banana Pancakes: No child says no to pancakes. Ever! Atleast I haven’t seen any. I have added cacao powder instead of cocoa powder. Cocoa powder is more processed than cacao powder, hence cacao powder is a healthier choice. Keeping in mind the BRATY diet, I have added Maida (All Purpose Flour) and oats flour to this recipe with no leavening agents. Check out the recipe here.

Please note, that BRATY Diet and refined flour is recommended by pediatricians for only a short period of time. It helps to neutralise stomach acid and stop diarrhoea. It is to be followed only till diarrhoea is under control. Once the child recovers, please follow the usual diet with whole grains and all kinds of vegetables and fruits.

I hope these recipes help you. Please remember, not to force feed your child especially when the child is sick. Your child will let you know when he or she is ready for food. The most important thing is that your child should remain hydrated at all times. And in all this chaos remember to take a breather. Keep your sanity intact which is another most important thing. I promise it gets better. 🙂 Stay healthy!