Posted on Leave a comment

Smothered Pork Chops Recipe

Golden-brown smothered pork chops covered with onion gravy, served with mashed potatoes in a warm skillet-style setting.

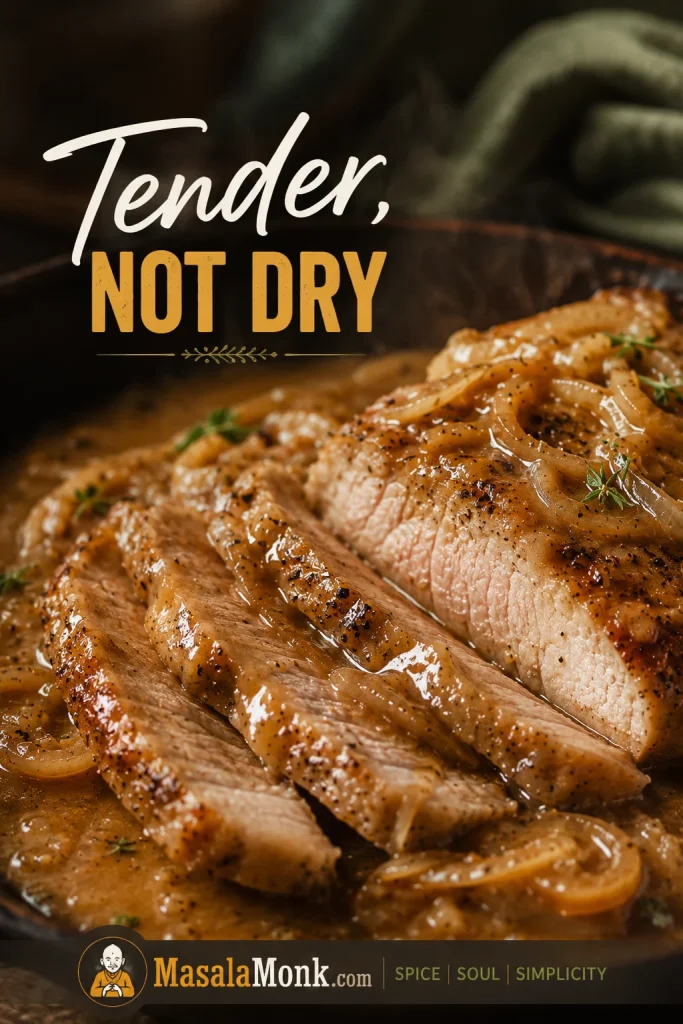
The gravy is not the hard part of smothered pork chops. The hard part is keeping the pork tender by the time the gravy is rich.

That is where many smothered pork chop recipes go wrong. The pork browns nicely, the onions soften, the gravy starts to thicken — and then the chops sit in the pan a few minutes too long. If you have ever made a beautiful pan of gravy and still ended up with tough pork, this method is built around that exact problem.

This smothered pork chops recipe is built to avoid that. The chops are browned for flavor, removed before they overcook, then finished gently in onion gravy until they reach the right internal temperature. The sauce tastes like it belongs to the pork because everything happens in the same skillet, but the meat does not have to suffer while the pan catches up.

This is the version to use when you want rich onion gravy, tender pork chops, and clear timing instead of guesswork. Whether you make the classic onion-gravy version or take the cream-of-mushroom shortcut, the goal is the same: juicy pork, a smooth sauce, and a plate where every spoonful has somewhere good to land — over buttery potatoes, fluffy rice, egg noodles, or a biscuit dragged through the gravy.

Sliced smothered pork chop with a moist interior, glossy onion gravy, and soft cooked onions on the plate.
A sliced smothered pork chop tells the truth quickly: the meat should look moist before the sauce does any work.

If mashed potatoes are the plan, these garlic mashed potatoes are the kind of soft, buttery base that makes onion gravy feel like the whole point of dinner.

Quick Answer

To make smothered pork chops, season and lightly dredge ¾- to 1-inch pork chops, brown them briefly in a skillet, then remove them before they cook through. Soften onions in the same pan, cook 2 tablespoons of clean reserved flour into the onions, whisk in stock, and return the chops to finish gently in the gravy until they reach 145°F / 63°C. Rest for 3 minutes before serving.

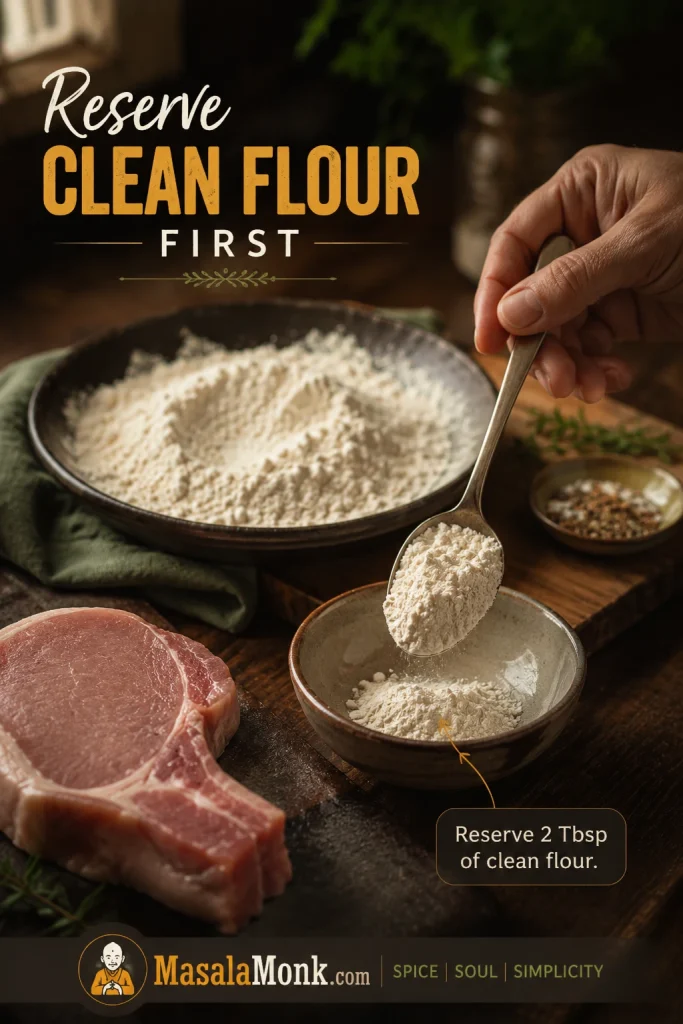
Before dredging, reserve 2 tablespoons of clean flour for the sauce, and remember that the timing is built around the pork, not the gravy — sauce can keep cooking, but pork cannot uncook.

Four-step visual guide showing dredged pork chops, skillet browning, onion gravy, and a 145 degree thermometer check.
Brown the chops first, build the onion gravy next, and then finish gently to 145°F so the pork stays tender.

If your pork chops are thinner or thicker than ¾ to 1 inch, check the pork chop thickness chart before you start.

Smothered Pork Chops at a Glance

Use this as the quick map before you start: choose the right chop thickness, brown for flavor, finish gently, and check temperature before the sauce makes you lose track of the pork.

Need to KnowBest Answer
Good pork chops to buyBone-in or boneless chops, ¾ to 1 inch thick
Main methodBrown first, make the sauce, then finish gently
Internal temperature145°F / 63°C, then rest 3 minutes
Gravy styleOnion gravy for the main recipe; mushroom gravy or cream of mushroom for alternate paths
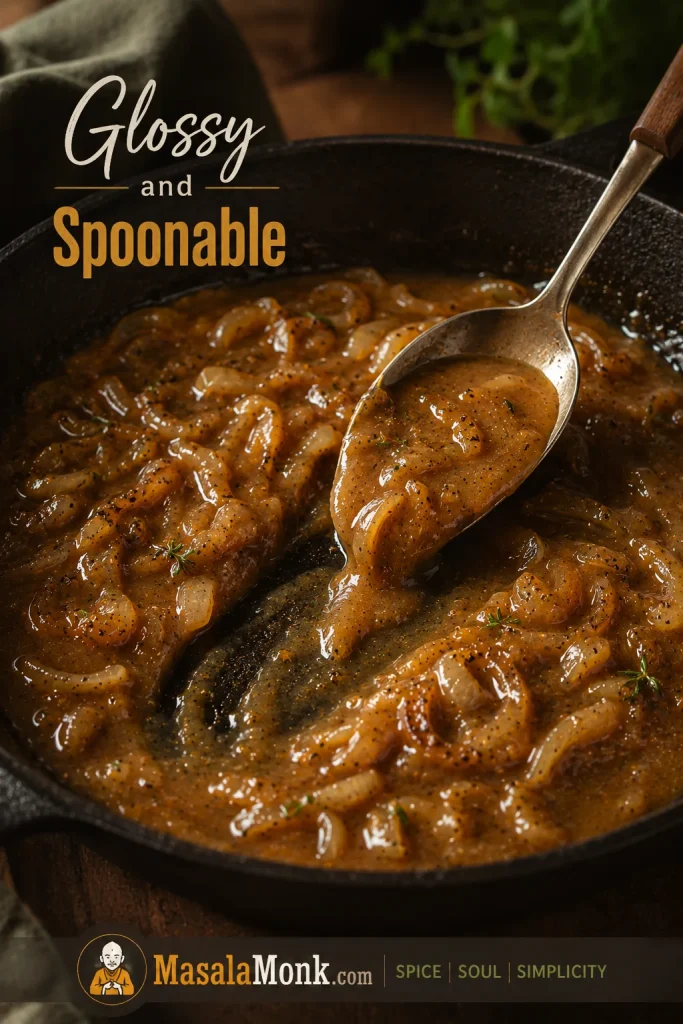
Texture targetGlossy and spoonable: thick enough to coat a spoon, loose enough to pool on potatoes or rice
Common mistakeBoiling the chops hard in the pan or treating thin chops like thick ones
Sides that workMashed potatoes, rice, egg noodles, biscuits, cornbread, green beans, collards

For the safest timing cue, use the doneness guide instead of judging only by gravy thickness.

Ingredients for smothered pork chops arranged on a prep surface, including pork chops, onions, garlic, flour, stock, cream, butter, and seasonings.
The ingredients are simple, but each one has a job: browning the chops, building the gravy, balancing salt, or finishing the sauce.

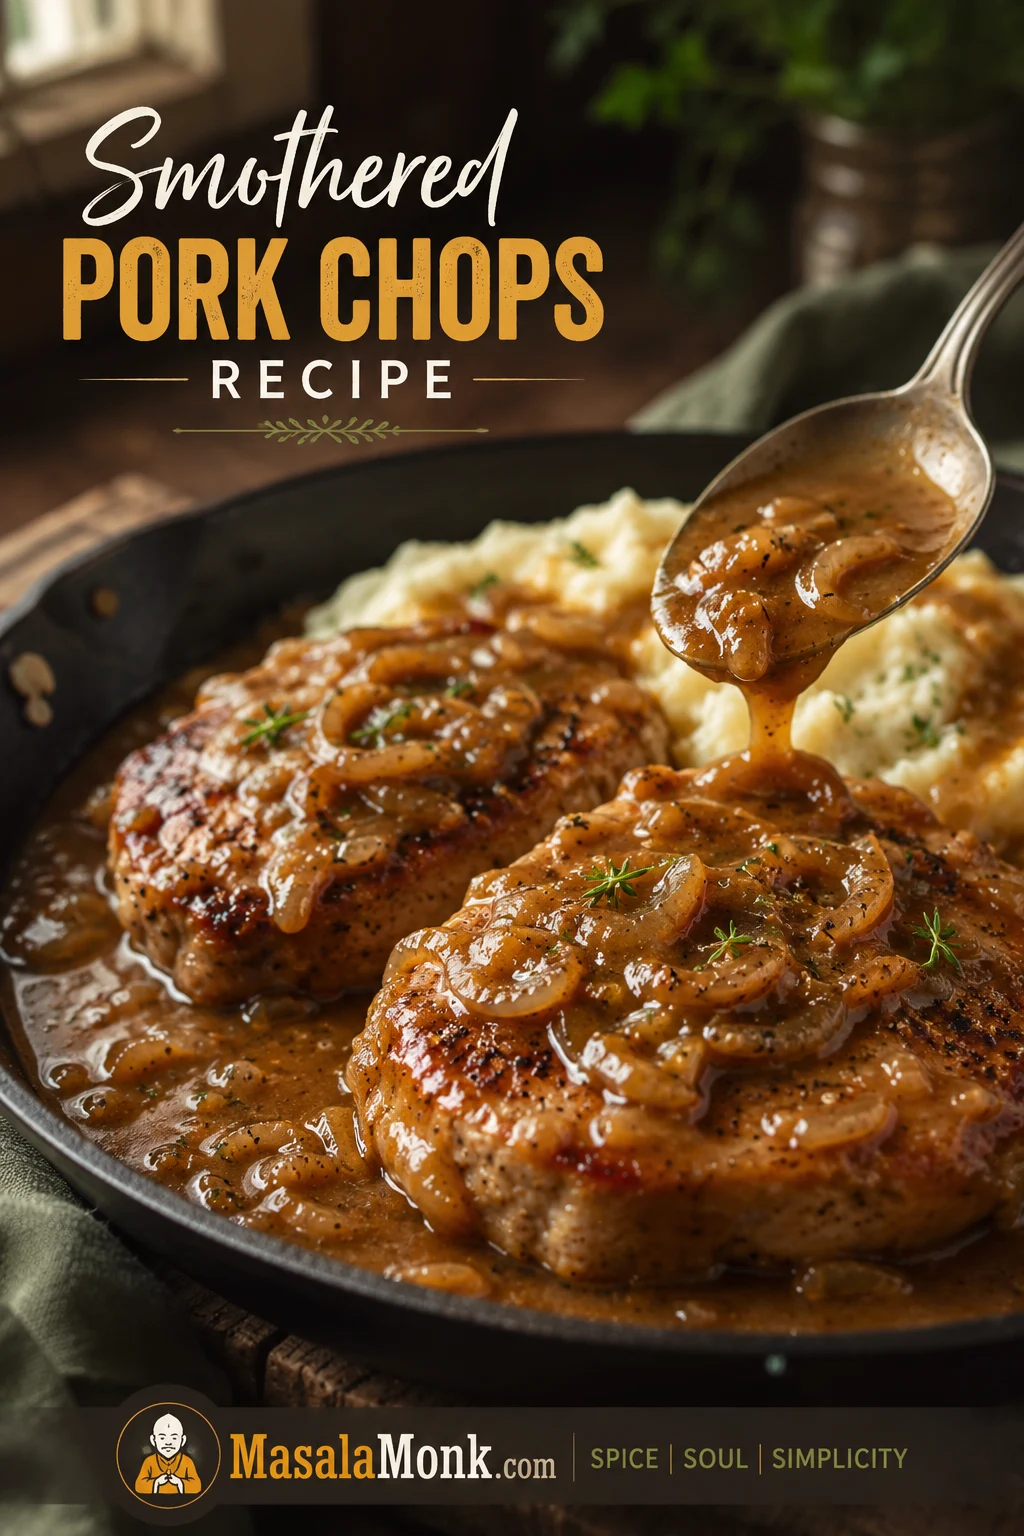
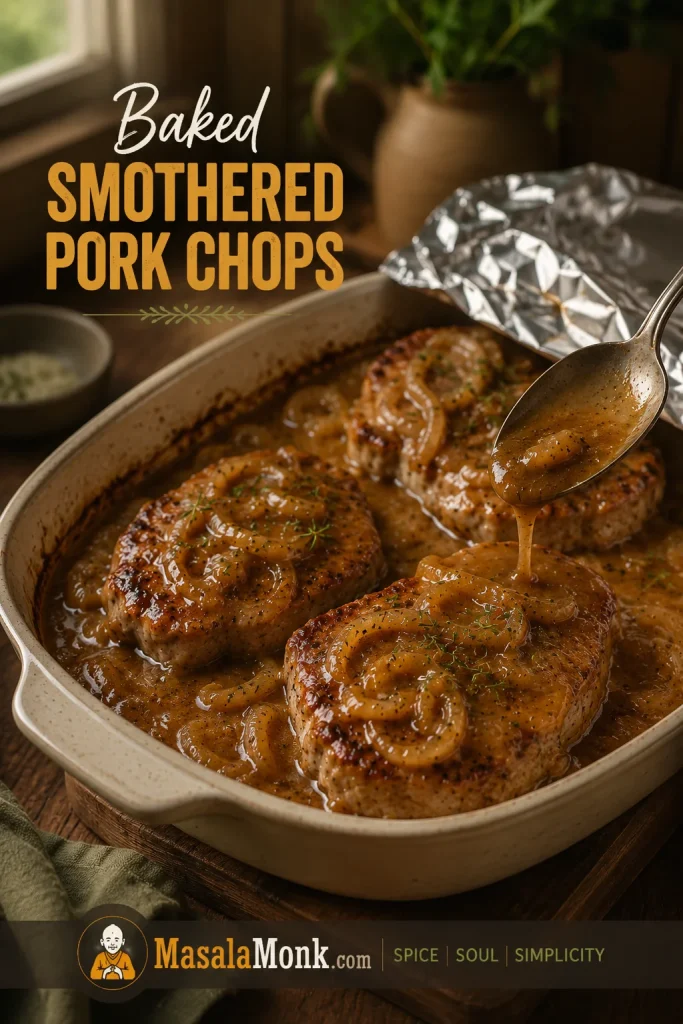
Smothered Pork Chops with Rich Onion Gravy

These smothered pork chops are browned in a skillet, finished gently in rich onion gravy, and served with enough sauce to soak into potatoes, rice, noodles, or biscuits without drowning the pork. Use bone-in or boneless chops, add mushrooms for a deeper gravy, or use the cream-of-mushroom shortcut when you want a thicker pantry-style dinner.

Prep Time
15 minutes
Cook Time
30 to 35 minutes
Total Time
45 to 50 minutes
Servings
4

Equipment: large 12-inch skillet, shallow dish, small bowl, tongs, whisk, instant-read thermometer

Ingredients

For the pork chops

  • 4 pork chops, bone-in or boneless, ¾ to 1 inch thick, about 1½ to 2 lb / 680 to 900 g total
  • 1 teaspoon kosher salt for the pork chops, or ¾ teaspoon fine salt, plus more only if needed for the gravy
  • ½ to 1 teaspoon black pepper, to taste
  • 1 teaspoon garlic powder
  • ½ teaspoon onion powder
  • ½ teaspoon smoked paprika, sweet paprika, or ground sage
  • ½ cup / 60 g all-purpose flour, reserving 2 tablespoons in a clean bowl before dredging
  • 2 tablespoons / 30 ml neutral oil
  • 2 tablespoons / 28 g butter

For the onion gravy

  • 1 large yellow onion, thinly sliced, about 180 to 220 g
  • 3 to 4 garlic cloves, minced
  • 2 cups / 480 ml low-sodium chicken stock or broth
  • ½ cup / 120 ml heavy cream or half-and-half
  • 1 teaspoon Worcestershire sauce, optional
  • 1 teaspoon fresh thyme leaves or ½ teaspoon dried thyme
  • Extra salt and black pepper, to taste
  • Chopped parsley, for serving

Salt note: Use the listed salt for the pork chops if you are making the homemade onion gravy with low-sodium stock. Use less salt if your stock is salted, or if you are making the cream-of-mushroom method. If you use condensed soup, onion soup mix, or a gravy packet, do not add extra salt until the very end.

Instructions

Brown the Pork Chops and Build the Gravy

  1. Dry and season the pork chops. Pat the pork chops dry with paper towels. Mix the salt, black pepper, garlic powder, onion powder, and paprika or sage. Season both sides. If time allows, rest the seasoned chops for 15 to 20 minutes before searing.
  2. Reserve clean flour for the sauce. Add the flour to a shallow dish, then remove 2 tablespoons to a small clean bowl before dredging. You will use that clean flour to thicken the sauce.
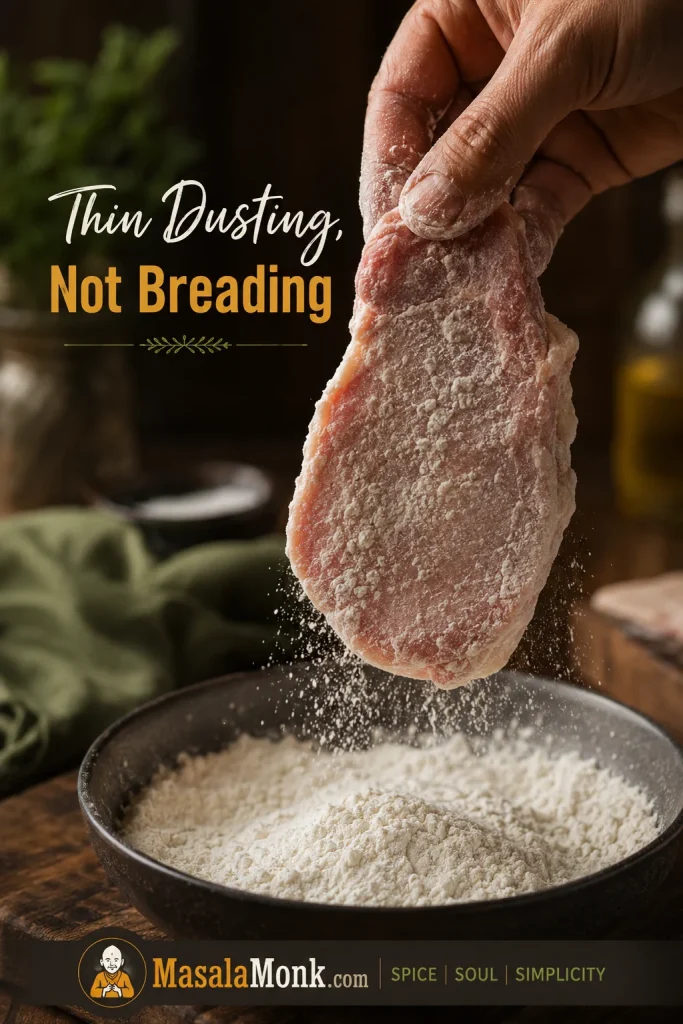
  3. Dredge lightly. Dredge each pork chop lightly in the flour left in the shallow dish, shaking off the excess. The coating should be thin, not heavy.
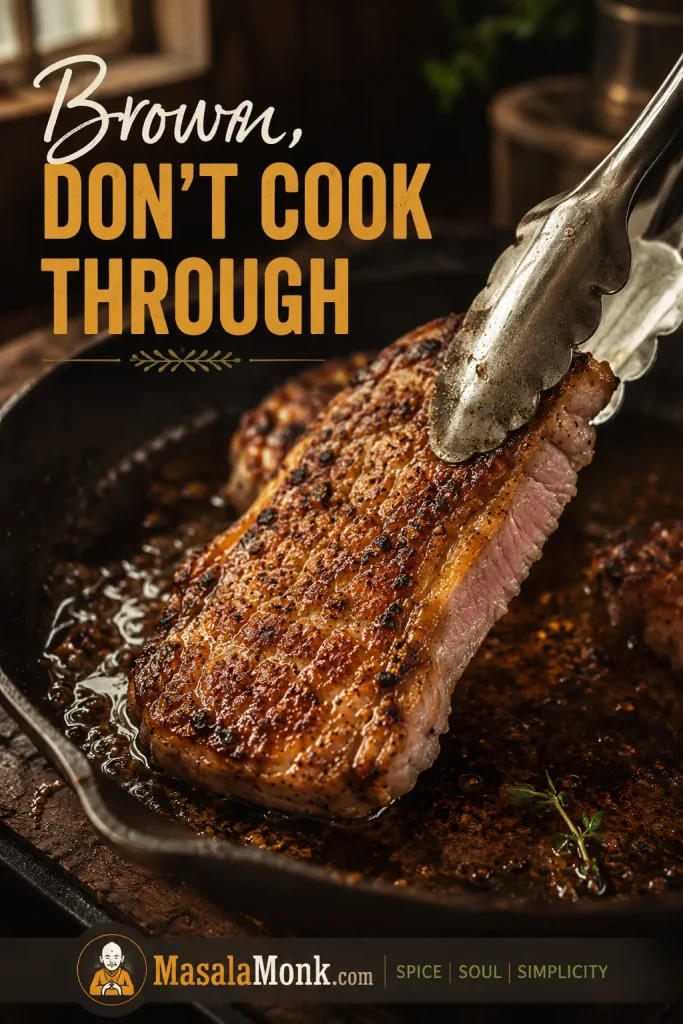
  4. Brown the chops. Heat the oil in a large skillet over medium-high heat. Add the pork chops in a single layer and brown for 3 to 4 minutes per side, just until golden. Do not cook them through. Transfer to a plate.
  5. Cook the onions. Reduce the heat to medium. Add the butter and sliced onion to the same skillet. Cook for 6 to 8 minutes, stirring often, until the onion softens, turns glossy, and begins to pick up golden edges. Add the garlic and cook for 30 seconds.
  6. Build the gravy. Sprinkle the reserved clean flour over the onions. Stir for 1 to 2 minutes so the flour loses its raw taste. Slowly whisk in the chicken stock, scraping up the browned bits from the bottom of the skillet. Add the Worcestershire sauce and thyme.

Finish the Pork Chops Gently

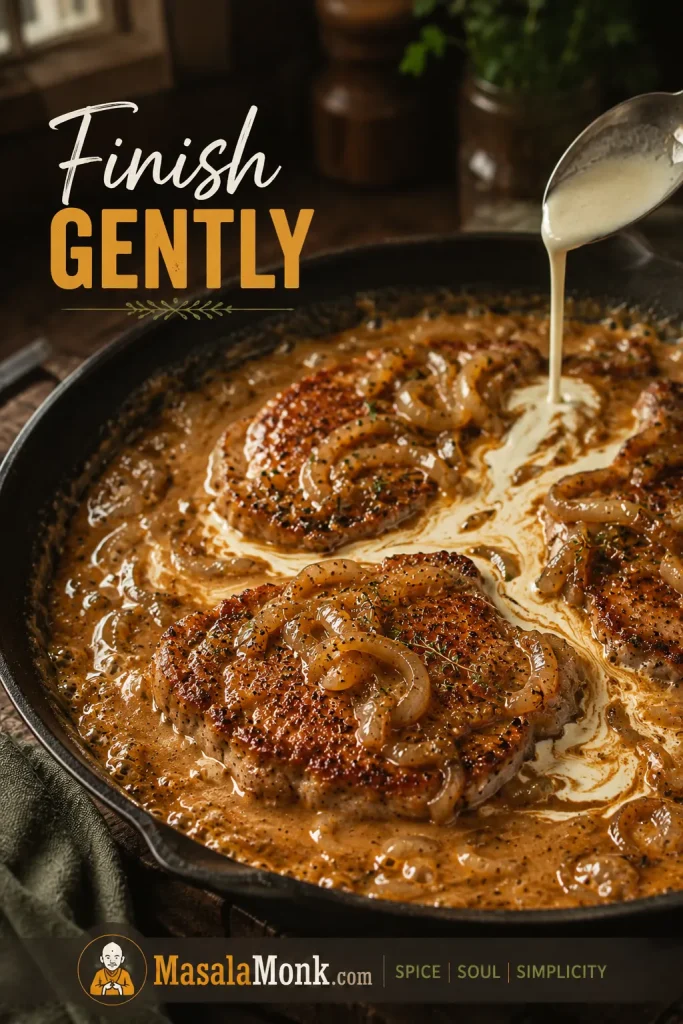
  1. Return the pork to the gravy. Add the pork chops and any plate juices back to the skillet. Reduce the heat to medium-low, cover partially, and cook until the thickest part reaches 140 to 143°F / 60 to 62°C, usually 4 to 7 minutes for ¾- to 1-inch chops.
  2. Add cream and bring the sauce together. Stir in the cream or half-and-half. Let the sauce barely bubble until glossy and the pork reaches 145°F / 63°C. If the pork gets there first, move it to a plate and finish the sauce separately.
  3. Rest and serve. Turn off the heat and let the pork chops rest for at least 3 minutes. Spoon the onion gravy over the chops and finish with parsley.

What Success Looks Like

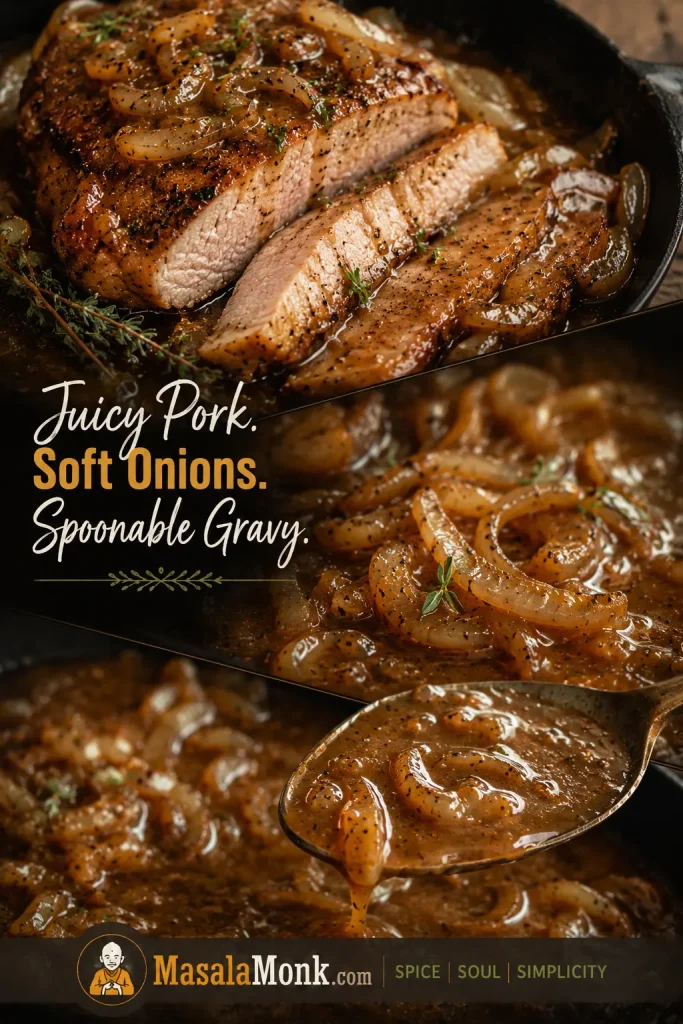
The pork slices cleanly and stays juicy, the onions soften enough to melt into the gravy, and the sauce coats a spoon without sitting like paste. This timing is written for ¾- to 1-inch chops in a large 12-inch skillet; thinner chops need less time, and thicker chops need a thermometer more than they need guesswork.

When it works, the gravy feels generous instead of necessary — the pork is still juicy enough to stand on its own, and the sauce makes the whole plate better.

Success guide showing sliced juicy pork, soft onions, and spoonable gravy for smothered pork chops.
The finished skillet should show three signs at once: juicy pork, softened onions, and gravy that is spoonable but not pasty.

If the pork is already done but the sauce is not right, go straight to the troubleshooting table.

Why This Smothered Pork Chops Recipe Works

The trick is letting the pork and gravy keep different schedules. The chops brown first for flavor, then leave the pan before they overcook. That gives the onion gravy time to develop without making the pork wait too long.

The sauce is built in the same skillet, so the onions, garlic, flour, stock, and cream pick up the browned bits from the pork. That makes the pan sauce taste connected to the chops instead of like something poured over them afterward.

The flour and cream are timed carefully. A little clean reserved flour gives the gravy body, while cream goes in near the end so the sauce turns glossy without boiling hard or turning heavy.

Ingredients for Smothered Pork Chops

The ingredient list is simple, which is exactly why the small choices matter: the right chop, patient onions, and stock that does not turn the gravy too salty.

Pork Chops to Use

For the most forgiving skillet version, choose pork chops that are ¾ to 1 inch thick. Bone-in chops are usually more forgiving because the bone slows the cooking slightly. Boneless chops also work well, especially for weeknights, but they cook faster and need closer attention.

Thin pork chops need a quick sear and a short finish. Thick chops can be excellent, but they need a thermometer because the outside can look ready before the center is done.

Different pork chop cuts on butcher paper, including bone-in chops, boneless chops, thin chops, and thick chops.
Start with the right pork chop cut and thickness, because thin chops and thick chops need different timing in the same gravy.
Pork Chop TypeUse It ForWhat to Watch
Bone-in pork chopsForgiving, flavorful skillet resultsCheck temperature near the center, away from the bone
Boneless pork chopsEasy weeknight cookingCook quickly, so check early
Thin pork chopsQuick skillet dinnersUse a short sear and very short sauce finish
Thick pork chopsJuicier dinner-plate chopsCheck the center, not the clock
Shoulder or blade chopsSlower cooking methodsMay need more time to become tender

If you are using shoulder chops, blade chops, or thicker marbled chops, the slow-cooker method may be the better fit.

Have pork tenderloin instead? Pork tenderloin is a different cut and cooks differently from pork chops. Use this pork tenderloin in oven guide if your package says tenderloin.

Onion Gravy Ingredients

The onion gravy starts with butter, sliced onion, garlic, flour, stock, thyme, and a small amount of cream. Cook the onion until it is soft and lightly golden, not just warmed through. That is what gives the sauce a sweeter, deeper base.

Use low-sodium chicken stock if you can. The pork is seasoned, the sauce reduces slightly, and Worcestershire sauce adds more savory saltiness. Starting with low-sodium stock lets you control the final flavor.

Heavy cream gives the richest finish. Half-and-half makes the gravy a little lighter. For a brown onion gravy, leave the dairy out and add a splash more stock.

Why Flour Matters

Flour helps the pork brown and gives the gravy body. The trick is to use it lightly: a thin dusting on the chops, plus 2 tablespoons of clean reserved flour cooked into the onions before the stock goes in.

That short cooking step keeps the sauce smooth instead of raw or pasty.

How to Make Smothered Pork Chops

Everything good starts in the skillet: browned pork, softened onions, and the little browned bits that dissolve into the gravy. As you cook, watch for these cues.

1. Season and Dredge the Pork Chops

Pat the pork chops dry before seasoning. Dry meat browns better. Wet meat steams, and steamed pork chops do not build the same flavor in the pan.

Reserve Clean Flour Before Dredging

Before any raw pork touches the flour, reserve 2 tablespoons in a clean bowl for the gravy. That small step keeps the thickener separate and helps the sauce stay smooth.

Spoonful of flour being reserved in a clean bowl before raw pork chops are dredged in the remaining flour.
Reserve clean flour before dredging so the gravy thickener stays separate from flour that has touched raw pork.

Then season both sides and dredge lightly in the remaining flour. Shake off the excess so the coating looks like a thin dusting, not a breaded crust.

Pork chop lifted from a flour dish with a thin, even dusting of flour on the surface.
A thin flour coating helps the pork brown and gives onion gravy body, while too much flour can make the surface heavy.

2. Brown the Pork Chops Without Cooking Them Through

Use a heavy skillet if you have one. Heat the oil until it shimmers, then brown the chops in a single layer. If the pan is crowded, cook in batches; crowding traps steam and softens the crust.

The goal is golden color, not doneness. Once the chops are browned on both sides, move them to a plate. They will finish later in the gravy.

Pork chop browning in a skillet with tongs lifting one edge to show a golden sear.
Browning creates the flavor base; after that, the chops should leave the skillet before they cook through.

3. Cook the Onions in the Same Skillet

Reduce the heat to medium, add butter and sliced onion, and cook until the onions look soft and glossy with a few golden edges. If the pan looks dry, add a small splash of stock to loosen the browned bits. Add the garlic near the end.

At this point, the skillet should smell sweet, savory, and browned rather than sharp with raw onion.

Sliced onions cooking in a skillet until soft, glossy, and lightly golden with browned bits in the pan.
Let the onions turn soft, glossy, and lightly golden before adding liquid; otherwise, the gravy misses its sweet-savory base.

4. Make the Onion Gravy

Sprinkle the reserved clean flour over the onions and stir for 1 to 2 minutes. Slowly whisk in the chicken stock, scraping the bottom of the skillet so the browned bits dissolve into the pan sauce.

The gravy should move lazily, not boil hard — more like a slow, steady bubble than a pan trying to rush dinner.

Spoon dragging through glossy golden-brown onion gravy with visible soft onions in a skillet.
Look for onion gravy that coats the spoon yet still moves, so it can settle around the pork instead of sitting stiffly on top.

5. Finish the Pork Chops in Gravy

Return the pork chops and any plate juices to the skillet. Keep the heat gentle. When the pork is nearly done, add the cream and let the sauce come together until glossy.

If the pork reaches 145°F / 63°C before the gravy looks ready, move the chops to a plate and finish the sauce separately. The pork wins.

Seared pork chops gently simmering in onion gravy with small bubbles around the edge of the skillet.
Keep the sauce at a gentle bubble while the pork finishes, because hard boiling is where juicy pork chops start to tighten.

6. Rest and Serve

Let the pork chops rest for at least 3 minutes, then spoon the onion gravy over the top. On the plate, the pork slices cleanly and the gravy settles around it instead of sitting in a stiff mound.

Pork Chop Thickness and Cook Time Chart

Thickness matters more than most recipes admit. That is why the same skillet can give one cook juicy chops and another cook dry ones.

Pork chop thickness comparison with measurement cues for thin, standard, and thick pork chops.
Before you trust the clock, check the thickness; it is one of the biggest reasons smothered pork chops turn tender or dry.
Pork Chop TypeBrown FirstFinish in GravyKey Note
Thin boneless, about ½ inch1 to 2 minutes per side2 to 4 minutesCheck early; dries fast
Standard ¾ to 1 inch3 to 4 minutes per side5 to 8 minutesMost forgiving for juicy weeknight chops
Thick 1 to 1½ inch4 to 5 minutes per side10 to 15 minutesUse a thermometer
Slow-cooker chopsOptional 2 to 3 minutes per side3 to 6 hours on LOW, depending on cutThicker, more marbled chops stay softer

How to Know When Smothered Pork Chops Are Done

The safest and most reliable way to know when smothered pork chops are done is to use an instant-read thermometer. Check the thickest part of the chop. If the chop is bone-in, avoid touching the bone with the thermometer probe.

Pork chops should reach 145°F / 63°C, followed by a 3-minute rest. At that temperature, the center may still have a slight blush. That is normal when the pork has reached the right temperature and rested properly. For official guidance, see the FoodSafety.gov safe minimum internal temperature chart.

Instant-read thermometer in a smothered pork chop showing 145°F.
A thermometer keeps the gravy from distracting you; pull the pork at 145°F and let the chops rest before serving.

Gravy thickness and cooking time can guide you, but they should not be the final judge. Temperature is the tie-breaker.

Once the pork is rested, the dish should feel like one skillet, not pork plus sauce: soft onions, gravy that tastes like the browned pan, and chops juicy enough that the sauce feels generous instead of necessary.

Which Smothered Pork Chops Version Should You Make?

The onion gravy is the main path; the other versions are there for the nights when your pork chop cut, pantry, or schedule makes the choice for you.

Pork Chop CutBest MethodWhy
¾–1 inch bone-in chopsStovetop onion gravyForgiving, flavorful, and ideal for the main recipe
¾–1 inch boneless chopsStovetop or cream-of-mushroom skilletFast and practical, but check early
Thin boneless chopsStovetop onlyA short finish keeps them from drying out
Thick bone-in chopsStovetop or bakedNeeds gentle cooking and a thermometer
Shoulder or blade chopsSlow cookerBetter suited to longer cooking

Add mushrooms when you want deeper flavor. For the fastest pantry dinner, use condensed cream of mushroom soup. A more Southern-style plate works best when the onion gravy stays central and the cream stays lighter. Choose the slow cooker only when the chops are thick or marbled enough to handle it.

If your goal is shredded pork rather than whole chops in gravy, pork shoulder or pork butt is the better cut. For that style of dinner, use this slow cooker pulled pork method instead.

Smothered Pork Chops with Mushroom Gravy

For mushroom gravy, add 8 to 10 oz / 225 to 280 g sliced mushrooms after the onions have softened. Use 8 oz for a balanced mushroom gravy, or closer to 10 oz if you want it mushroom-forward.

Smothered pork chops covered with darker mushroom gravy and browned sliced mushrooms.
Browned mushrooms add depth to smothered pork chops, while watery mushrooms can leave the gravy flat and thin.

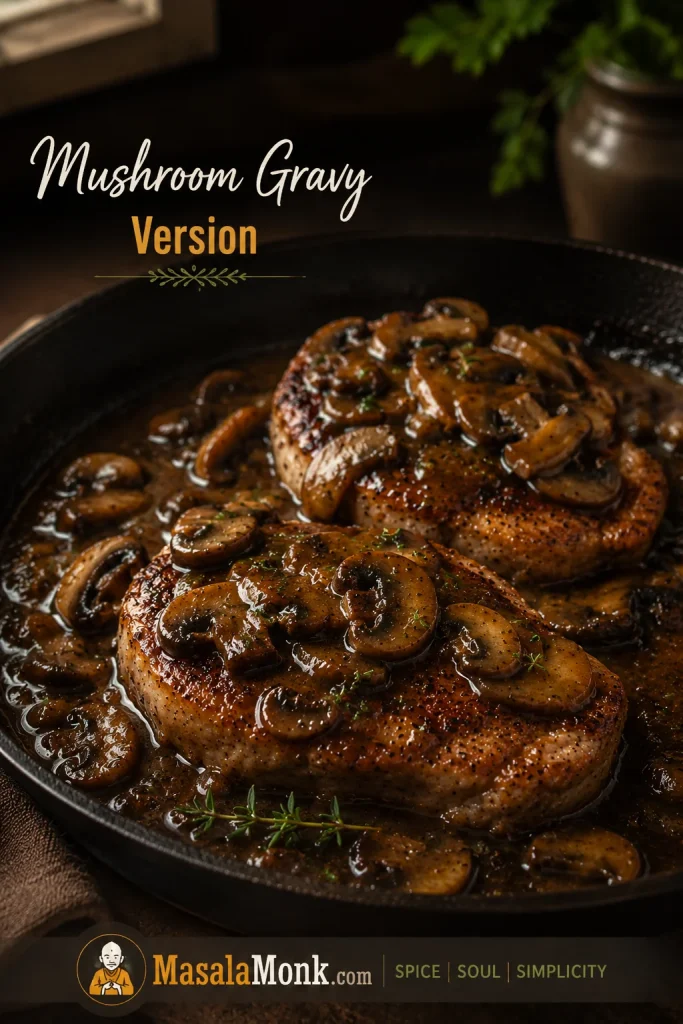
Cook the Mushrooms Until the Pan Looks Dry

Cook the mushrooms until the pan no longer looks wet. They should look browned in spots, not steamed. If you add flour and stock while the mushrooms are still wet, the sauce can taste thin and muted.

Comparison of wet mushrooms and browned mushrooms cooked until the pan looks mostly dry.
Cook mushrooms until the pan no longer looks wet; then the mushroom gravy can turn rich instead of diluted.

The mushroom version feels deeper and a little more steakhouse-style, with browned mushrooms giving the gravy extra savory weight — especially when the sauce lands on mashed potatoes or egg noodles.

Cream of Mushroom Smothered Pork Chops

Cream of mushroom smothered pork chops are the busy-night shortcut: creamy, pantry-friendly, nostalgic, and ready to spoon over rice or mashed potatoes. The method is forgiving as long as you control the salt and stop cooking the pork on time.

Pork chops in a creamy mushroom gravy with visible mushrooms and a thick beige sauce.
Cream of mushroom pork chops are the shortcut version, although they still need gentle heat so the pork stays tender.

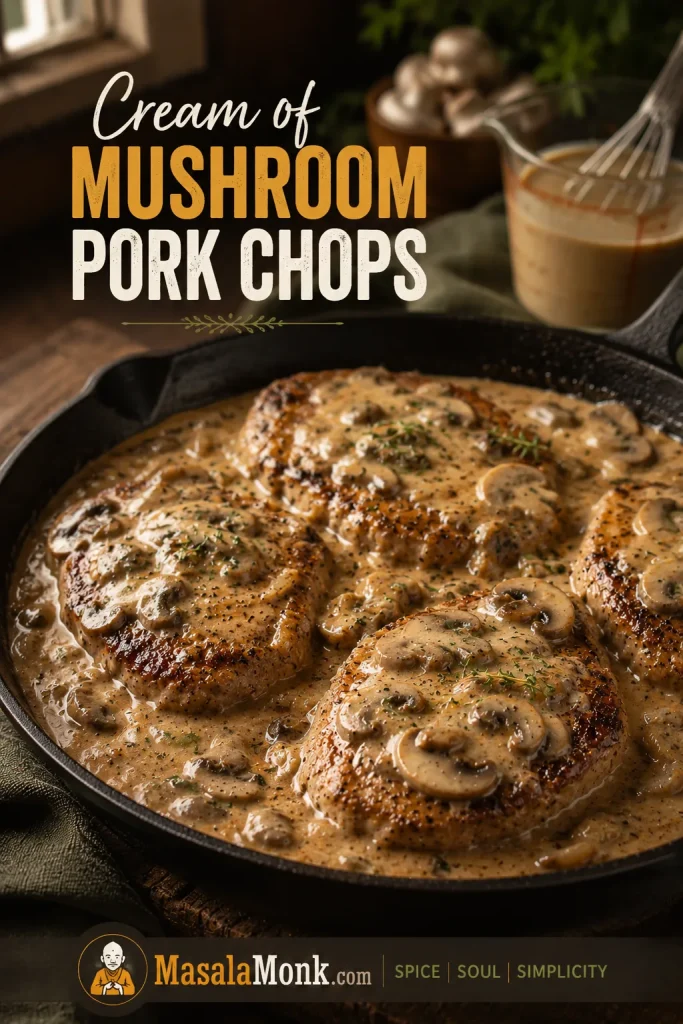
To make this method, season and brown the pork chops as written. Cook the onions and garlic in the skillet, then whisk together:

  • 1 can condensed cream of mushroom soup, 10.5 oz / about 298 g
  • ½ cup / 120 ml chicken stock, milk, or half-and-half
  • ½ teaspoon black pepper or dried thyme
  • Optional: ½ cup sliced mushrooms, cooked first

Use Condensed Soup, Not Ready-to-Serve Soup

Use condensed cream of mushroom soup, not ready-to-serve soup. Add the soup mixture to the skillet, return the pork chops, and cook over low, steady heat until the pork reaches temperature. Taste before adding salt because condensed soup, stock, seasoning packets, and the pork coating can all add up quickly.

Comparison of thick condensed cream of mushroom soup and thinner ready-to-serve mushroom soup in separate bowls.
Use condensed soup for cream of mushroom pork chops; ready-to-serve soup is already diluted and can make the sauce too loose.

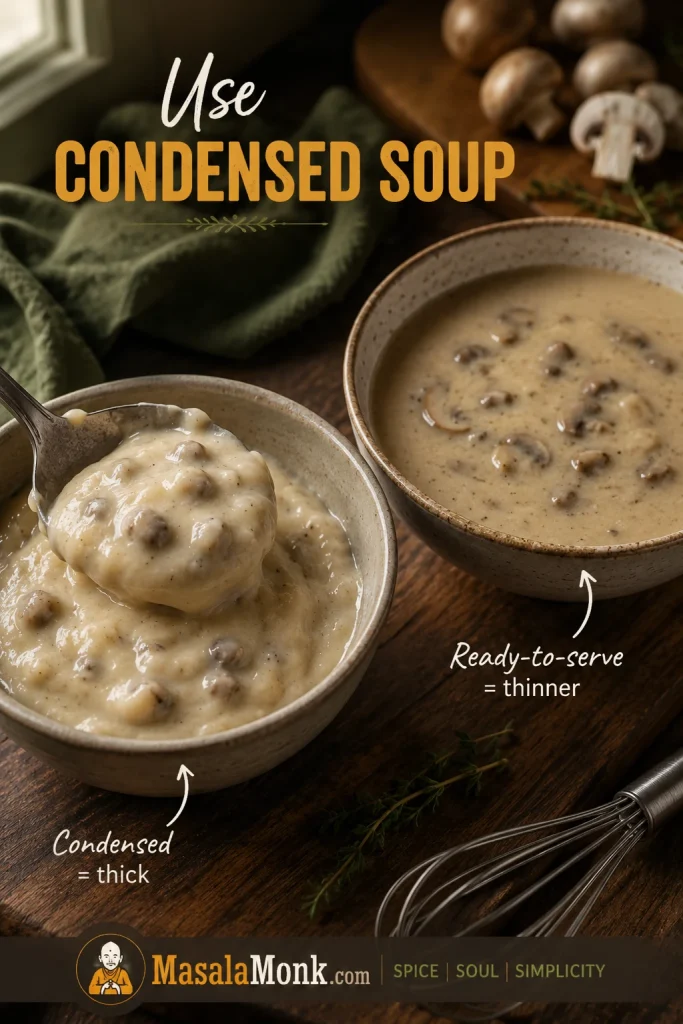
If the sauce is too thick, whisk in stock or milk a splash at a time. For a thin sauce, remove the pork chops once they are done and simmer the sauce uncovered for a few minutes.

If you are using the same canned-soup shortcut with chicken instead of pork, this cream of mushroom chicken recipe follows the same creamy comfort-dinner idea.

Southern-Style Smothered Pork Chops

For a Southern-style plate, lean into a flour-dredged chop, plenty of onion, a brown or lightly creamy gravy, and simple sides like rice, mashed potatoes, collard greens, green beans, biscuits, or cornbread.

Southern-style smothered pork chop with onion gravy, white rice, collard greens, and a piece of cornbread.
On a Southern-style plate, onion gravy belongs to everything: pork, rice, greens, and cornbread.

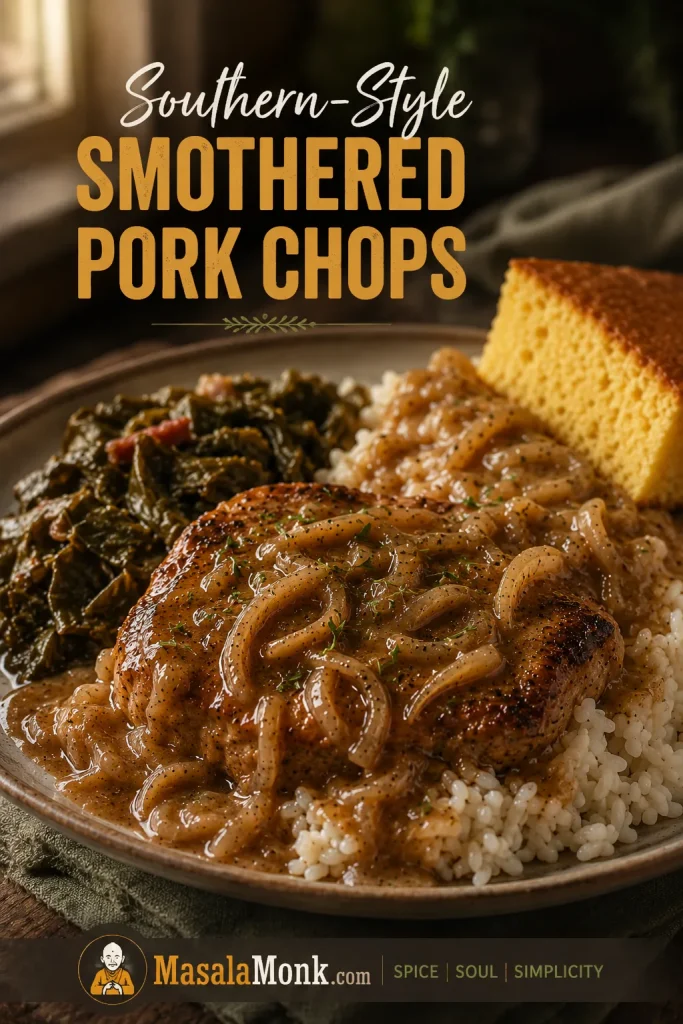
This is not a dainty sauce-on-the-side dinner. The gravy is part of the meal — it should run into the rice, soften the potatoes, or give a biscuit something to drag through.

To push this recipe in that direction, keep the onion gravy central and go lighter on the cream. Add a pinch of cayenne, a little Creole or Cajun seasoning, or a few dashes of hot sauce if you like heat. You can also add thinly sliced bell pepper with the onions for a sweeter, more old-school skillet flavor.

If you like this kind of rice-and-gravy comfort food, MasalaMonk’s red beans and rice recipe is another slow-simmered Southern-style dinner built around a saucy bowl.

If using a seasoned blend such as Creole seasoning, Cajun seasoning, seasoned salt, or an all-purpose spice mix, reduce the salt in the pork chop seasoning. Many blends are salty, and the gravy will concentrate that salt as it cooks.

Baked Smothered Pork Chops

Baked smothered pork chops are useful when your skillet is crowded or you want a gentler finish. The strongest baked version still starts on the stovetop: brown the chops first and make the gravy before baking, so the pork has flavor and moisture around it from the start.

Transfer the chops and gravy to a baking dish, cover tightly with foil or a lid, and bake at 350°F / 175°C until the pork reaches 145°F / 63°C.

Baked smothered pork chops in a ceramic dish with onion gravy, browned tops, and foil pulled back.
Baked smothered pork chops work best when the chops and gravy are browned first, then finished covered in the oven.
Chop ThicknessApproximate Covered Bake Time After SearingKey Check
Thin boneless chops, about ½ inch8 to 12 minutesCheck early
¾ to 1 inch chops15 to 20 minutesUse thermometer
1 to 1½ inch chops20 to 28 minutesCheck the center, not the clock

Keep the dish covered while the pork cooks. Uncover only at the end if the gravy is too loose, or remove the chops and reduce the gravy separately in a skillet.

Slow Cooker Smothered Pork Chops

The slow-cooker method is convenient and cozy, but it gives a softer, less browned result than the stovetop skillet version. Choose it when hands-off cooking matters more than crust, and use thicker, more forgiving chops so the pork stays tender.

Slow cooker filled with thick pork chops in creamy mushroom-onion gravy with a spoon lifting sauce.
Slow cooker smothered pork chops are most forgiving with thicker, more marbled chops that can handle longer cooking.

Best slow-cooker cuts: shoulder chops, blade chops, thick bone-in chops, or thicker marbled chops. Thin boneless loin chops are better on the stovetop.

Slow Cooker Sauce and Timing

For better flavor, brown the chops first. Then add sliced onions to a 5 to 6 quart slow cooker, place the chops on top, and pour the gravy mixture over them. Use a broth-and-cream-of-mushroom mixture for the easiest method, or use the homemade gravy base if you want more onion flavor.

For 4 thick chops, a simple slow-cooker sauce is 1 can condensed cream of mushroom soup, ½ cup / 120 ml low-sodium broth, ½ cup sliced onion, and 1 cup sliced mushrooms. For 6 to 8 chops, use 2 cans condensed soup and 1 to 1½ cups broth; start with the lower amount if your slow cooker tends to make watery sauces.

If the slow-cooker gravy is watery, remove the pork chops once they are done. Whisk 1 tablespoon cornstarch with 1 tablespoon cold water, stir the slurry into the slow cooker, and cook on HIGH for 10 to 20 minutes, or until the sauce thickens.

Have a larger pork roast instead of chops? Use a dedicated slow cooker pork loin method. A pork loin roast and individual pork chops do not cook on the same schedule.

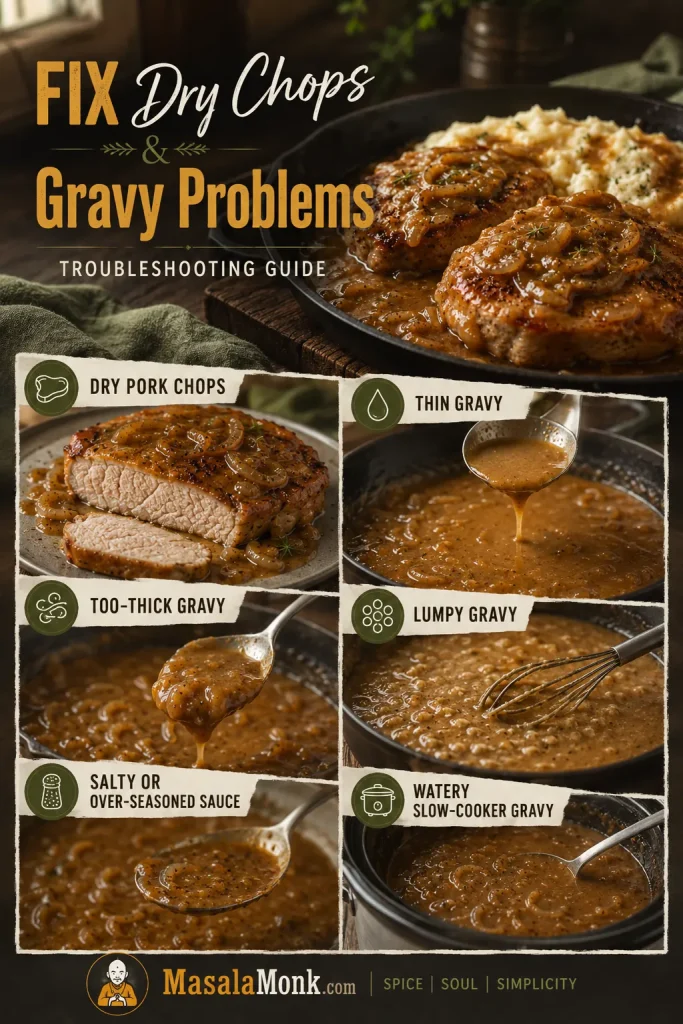
How to Fix Smothered Pork Chop Problems

Most smothered pork chop problems come from one of three places: the pork is overcooked, the gravy was rushed, or the salt level was not controlled. The good news is that most sauce problems can be fixed after the pork is safely moved to a plate.

Quick Fixes for Pork and Gravy

Troubleshooting guide for dry pork chops, thin gravy, thick gravy, lumpy gravy, salty sauce, and watery slow-cooker gravy.
Most pork chop and gravy problems are easier to fix after the cooked pork comes out of the pan.
ProblemDo This NowDo This Next Time
Dry pork chopsSlice the chops, cover with hot gravy, and rest off heat for a few minutesUse thicker chops, finish gently, and stop at 145°F / 63°C
Tough pork chopsIf lean, serve with gravy; if shoulder-style, cook gently a little longerTreat lean chops and shoulder-style chops differently
Pork chops did not brownKeep going; the sauce will still carry flavorPat chops dry, use enough heat, and avoid crowding the pan
Thin gravyRemove chops, simmer uncovered, or add a small slurryCook the flour briefly, then add liquid slowly
Too-thick gravyWhisk in warm stock, milk, or half-and-half a splash at a timeKeep the sauce slightly loose before the pork goes back in
Lumpy gravyWhisk hard over low heat or strain the gravyAdd stock slowly while stirring
Floury gravyCook gently for a few more minutesCook the flour with the onions before adding stock
Mushroom gravy is wateryRemove chops and simmer uncovered until thickerCook mushrooms until the pan looks nearly dry before adding flour
Gravy looks curdledLower heat and whisk in a splash of warm stock or creamAdd dairy near the end and avoid boiling hard
Salty gravyAdd cream, milk, or unsalted stock; serve over plain starchUse low-sodium stock and reduce salt with canned soup
Watery slow-cooker gravyRemove chops, add slurry, and cook sauce on HIGHStart with less liquid and thicken at the end

Gravy Texture Guide

For a visual sauce check, compare the gravy before you adjust it with stock, milk, cream, or slurry.

Three spoons comparing onion gravy textures: too thin, just right, and too thick.
Aim for gravy that coats the spoon and drips slowly; that texture will pool softly instead of running away or clumping.

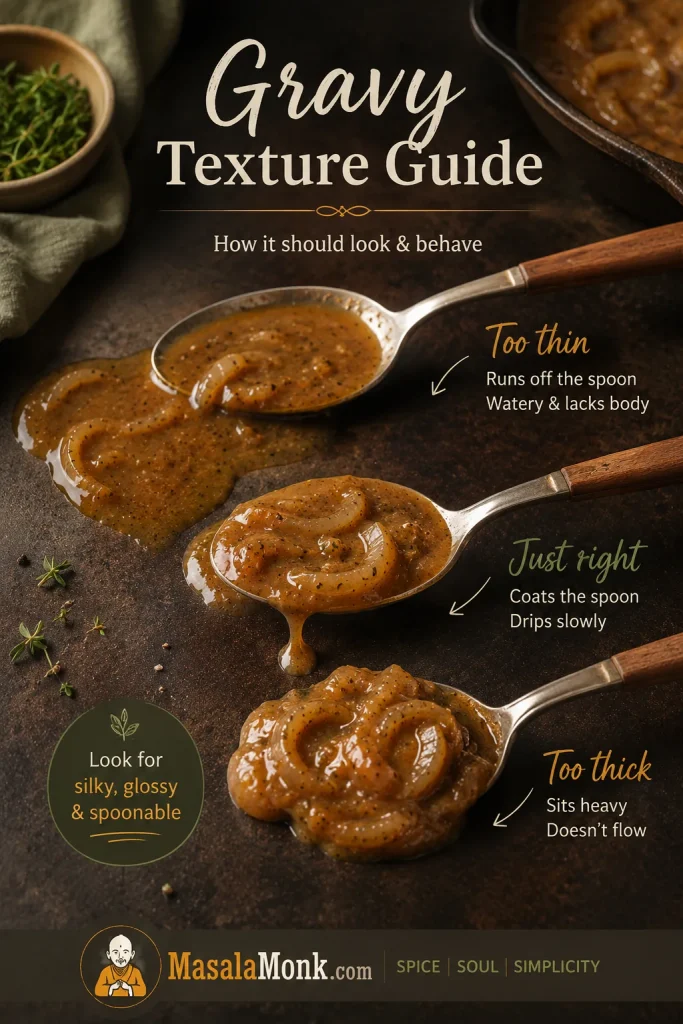
If the pork is already done, move it out first. Dry meat can be sliced and covered with hot gravy; thin, lumpy, salty, or separated sauce can be fixed separately over gentle heat without making the chops tougher.

What to Serve with Smothered Pork Chops

Smothered pork chops need a side that can catch the gravy, because the sauce is part of the meal.

The best plate is the one where the gravy has somewhere to go. It should sink into potatoes, run through rice, cling to noodles, or leave a biscuit with something to chase. That is when smothered pork chops stop feeling like pork with sauce and start feeling like a full comfort dinner.

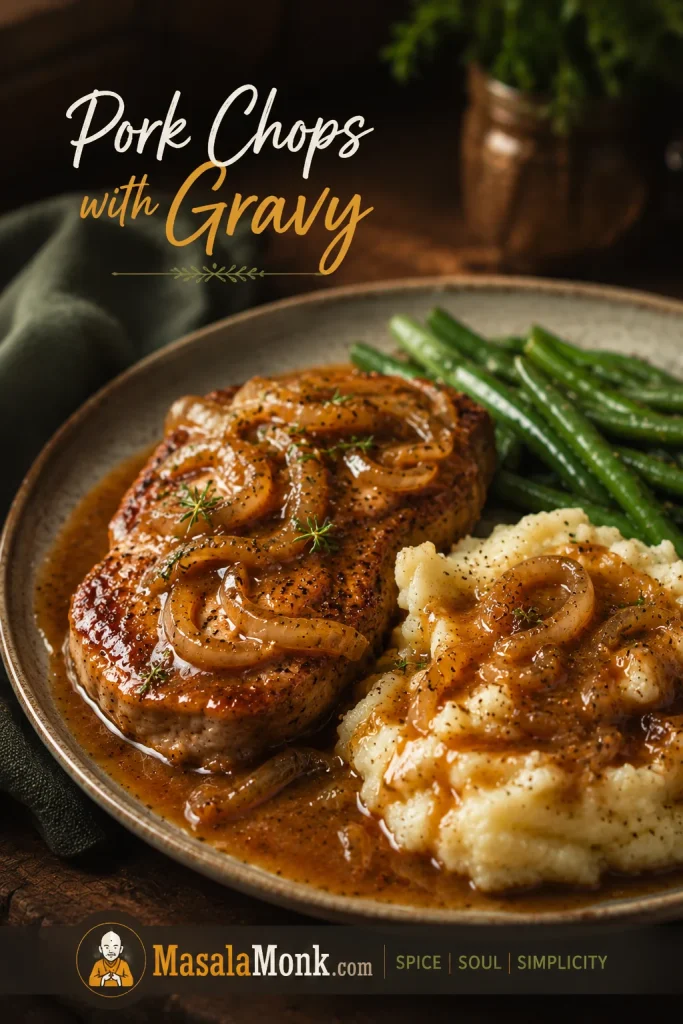
Smothered Pork Chops with Mashed Potatoes

For the classic comfort plate, spoon the onion gravy over mashed potatoes while the sauce is still loose enough to settle into the edges.

Smothered pork chop with onion gravy served beside mashed potatoes and green beans.
Mashed potatoes are the classic base for pork chops with gravy because they catch the sauce without competing with it.

Smothered Pork Chops with Rice

If you are serving the chops over rice, this how to cook rice guide helps keep the grains fluffy instead of gummy under the gravy.

Southern-style smothered pork chop with onion gravy served over white rice with collard greens and cornbread.
Rice works beautifully with Southern-style smothered pork chops when the onion gravy is loose enough to season the grains.
Side DishWhy It Works
Mashed potatoesThe classic base for onion gravy
White rice or brown riceSimple, filling, and good for extra sauce
Egg noodlesTurns the meal into a cozy skillet dinner
BiscuitsGood for scooping up thick gravy
Green beansFresh contrast to the rich sauce
Roasted carrotsSweetness balances the savory gravy
Collard greens or sautéed greensEarthy, slightly bitter balance
CornbreadComfort-food pairing with a little sweetness
Applesauce or sautéed applesSweet contrast for a rich pork dinner
Side dishes for smothered pork chops, including mashed potatoes, rice, noodles, biscuits, green beans, cornbread, and apples.
Choose sides that give the gravy somewhere useful to go: potatoes, rice, noodles, biscuits, greens, cornbread, or apples.

Easy Plate Combinations

  • Classic comfort plate: smothered pork chops, mashed potatoes, green beans.
  • Southern-style plate: smothered pork chops, rice, collard greens, cornbread.
  • Weeknight skillet plate: pork chops and gravy, egg noodles, peas.
  • Cream-of-mushroom plate: creamy pork chops, rice or buttered noodles, roasted carrots.
  • Slow-cooker plate: pork chops with gravy, mashed potatoes, simple steamed vegetables.

Planning for leftovers? See storage and reheating before you pack the pork away.

Storage, Reheating, and Leftovers

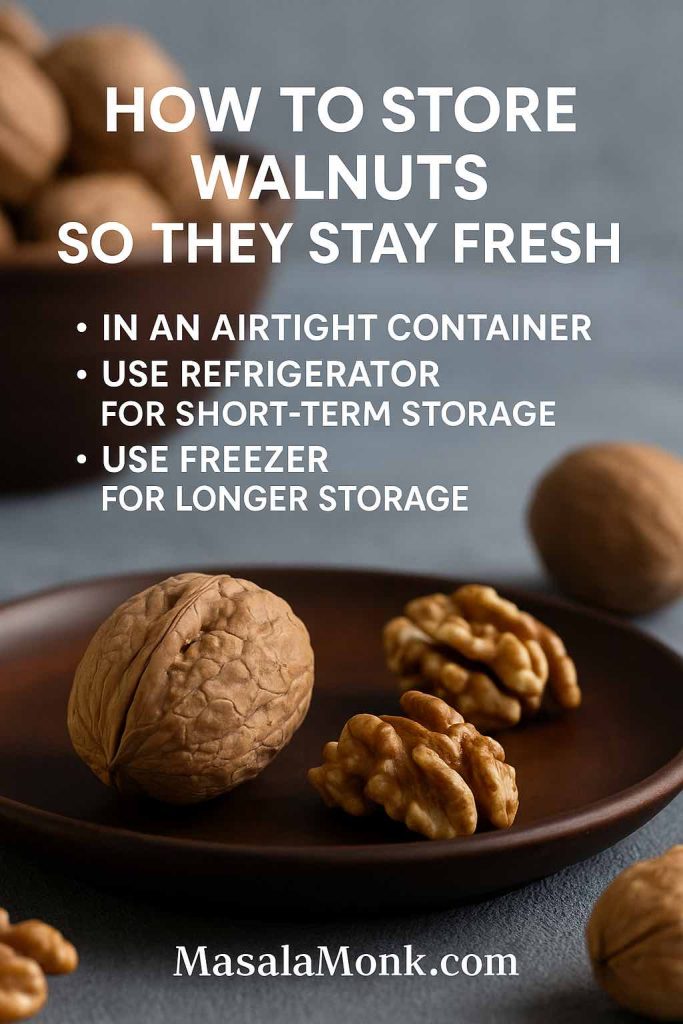
Store leftover pork chops with the gravy, not separately. The sauce protects the meat in the refrigerator and gives you a better chance of reheating it without drying it out. Use an airtight container and refrigerate for up to 3 to 4 days.

For the best texture, reheat gently on the stovetop over low heat. Add a splash of stock, milk, or water to loosen the gravy. Leftovers are best sliced into the gravy so each piece warms gently instead of sitting as one thick chop.

Smothered pork chops stored in gravy in a glass container and sliced leftovers reheating in a skillet with added liquid.
Store leftovers with the gravy, then reheat gently with a splash of stock or milk to help the pork stay moist.

You can freeze smothered pork chops, although cream-based gravy may look slightly separated after thawing. Reheat slowly and whisk the sauce as it warms; a splash of stock or milk usually brings it back together.

Made this recipe? Leave a comment with the pork chop thickness you used — thin, standard, or thick — and whether you made onion gravy, mushroom gravy, or the cream-of-mushroom version. That detail helps the next cook judge timing before their chops overcook.

FAQs

Bone-in or boneless pork chops: which is better?

Bone-in pork chops are usually more forgiving and flavorful, but boneless pork chops work well if they are not too thin. Boneless chops cook faster, so check them earlier.

What temperature should smothered pork chops reach?

Smothered pork chops should reach 145°F / 63°C in the thickest part, followed by at least a 3-minute rest. Use a thermometer instead of judging only by color.

Should the skillet be covered while the pork cooks?

Cover the skillet partially while the chops finish in the gravy. This helps them cook gently without reducing the sauce too fast. If the sauce is too thin near the end, uncover the pan and simmer briefly after the chops are done.

How do I use cream of mushroom soup?

Use one 10.5 oz / 298 g can of condensed cream of mushroom soup and thin it with ½ cup / 120 ml stock, milk, or half-and-half. Go lighter on added seasoning because canned soup already brings salt and body.

Can smothered pork chops be dairy-free or gluten-free?

For a dairy-free version, skip the cream and use extra stock. The gravy will be lighter, but still savory and spoonable. For gluten-free gravy, use a gluten-free all-purpose flour blend for a light dredge, or skip the dredge and thicken the sauce with a cornstarch slurry after the chops are cooked.

Why are my smothered pork chops dry?

Dry chops usually mean the pork cooked too long, the heat was too high, or the chops were very thin. Brown them briefly, keep the sauce at a gentle bubble, and stop cooking when the thickest part reaches 145°F / 63°C.

How do I make smothered pork chop gravy thicker?

Remove the pork chops once they are done, then simmer the gravy uncovered. If it is still thin, stir in a small slurry made from 1 teaspoon cornstarch and 1 tablespoon cold water, then cook for 1 to 2 minutes.

What changes if my pork chops are thin?

Thin pork chops need a quick sear and a short finish. Make the gravy without them in the pan, then return them only for the final few minutes so they warm through without drying out.

Are pork loin chops the same as regular pork chops?

Pork loin chops are a type of pork chop and work well as long as they are not sliced too thin. Because they are lean, give them a quick sear, finish them gently, and use a thermometer so they do not overshoot.

What is the best make-ahead method?

Store the chops in the gravy and reheat gently over low heat. Add a splash of stock or milk if the gravy thickens in the refrigerator. Pork chops are still best freshly cooked, but storing them with sauce helps protect the meat.

Can I make brown onion gravy instead of creamy gravy?

For brown onion gravy, leave out the cream and use a little extra chicken stock. The sauce will taste more like a classic onion pan gravy: lighter, savory, and less creamy.

However you make them — skillet, baked, creamy, mushroom-rich, or slow-cooked — the win is the same: tender pork, a gravy that tastes like the pan, and a plate that feels finished before it ever reaches the table.

Back to top ↑

Posted on 1 Comment

Natural Solutions for Erectile Dysfunction: Does Green Tea help in ED?

Close-up of male hands holding a glass cup of green tea, magazine-style portrait cover about green tea and erectile dysfunction.

When people type “green tea erectile dysfunction” into a search bar, they’re usually after two things: a straight answer and a practical plan. Fortunately, we can offer both. In brief, green tea isn’t a stand-alone cure for ED; nevertheless, it can support the underlying physiology that erections depend on—namely, vascular health and nitric-oxide signaling. As you’ll see, the science is strongest around blood-vessel function, and, when paired with sensible lifestyle steps, a consistent green-tea habit becomes a low-friction way to help the system that powers sexual performance.

Before anything else, it helps to remember what an erection actually is: a coordinated vascular event. Arteries must dilate on cue, endothelial cells need to produce nitric oxide in the moment, and smooth muscle has to relax so blood can enter and remain. Interestingly, green tea is rich in catechins (especially EGCG) that repeatedly show benefits for endothelial function—the same system. In fact, in a controlled study of smokers, two weeks of green tea increased flow-mediated dilation (FMD), a standard ultrasound measure of how well arteries expand; that improvement doesn’t prove a direct ED fix, yet it does strengthen the biologic plausibility behind green tea for ED as supportive care (green tea reversed endothelial dysfunction in smokers).

Does green tea help erectile dysfunction—or is that wishful thinking?

Put simply: yes, as vascular support; no, as a magic bullet. Mechanistically, catechins reduce oxidative stress, calm inflammatory signaling, and enhance eNOS activity to raise nitric-oxide availability. Crucially, those aren’t just test-tube effects. In tightly designed human studies, both acute and short-term green-tea intake improved FMD in groups with impaired endothelial function—again, the same pathway erections rely on (acute FMD improvement after green tea). Consequently, while no randomized trial shows green tea single-handedly “curing” ED, the physiologic alignment is real, relevant, and actionable.

Moreover, ED rarely has a single cause. Sleep debt, chronic stress, blood pressure, and metabolic health all push in either direction. Because of that, many readers pair daytime tea with evening routines that protect rest and dial down sympathetic overdrive. For complementary, lifestyle-friendly context you can integrate gently, see our on-site pieces like clove-infused tea for erectile dysfunction and the companion guide to enhancing intimacy with clove-infused massage. Those ideas don’t replace care; nevertheless, they often make a routine more human and sustainable.

Green tea for ED: where the signal is strongest—and where we should be cautious

First, the human vascular signal is consistent: brewed green tea improves FMD in settings of endothelial dysfunction, and that matters because endothelial health is upstream of erection quality. Second, preclinical data—for example, in diabetic or aged animals—often show EGCG preserving cavernosal smooth muscle and improving erectile physiology; informative, yes, though we should avoid over-extrapolating. Third, direct ED outcomes in humans after a green-tea intervention remain under-studied; hence, we position green tea as a supportive habit, not a replacement for guideline-based therapies.

Does green tea cause erectile dysfunction?

Short answer: there’s no evidence it does. If anything, broader caffeine research points the other way. In a large U.S. dataset, men consuming roughly 170–375 mg/day of caffeine had lower odds of prevalent ED than very-low consumers after adjusting for common confounders—an association, not proof, but reassuring nonetheless (NHANES analysis on caffeine and ED). Furthermore, more recent genetic work designed to probe causality has not supported a harmful link between habitual coffee/caffeine intake and ED risk. In other words, moderate caffeine—like what you’d get from a few cups of tea spread intelligently through the day—does not appear to be an ED villain.

Naturally, personal tolerance still matters. Overshooting your own caffeine ceiling can nudge anxiety up and sleep down; paradoxically, that will worsen performance for many people. Therefore, keeping most of your tea earlier in the day, then switching to calming, caffeine-free options in the evening, tends to balance the equation.

Matcha vs brewed tea in a green tea for erectile dysfunction routine

At first glance, the choice between matcha and brewed green tea seems cosmetic; however, it meaningfully changes catechin exposure. Because matcha is powdered whole leaf whisked into water, you ingest more of the plant per cup, often translating to higher catechin intake. That’s why some readers lean on matcha when focusing closely on green tea erectile dysfunction strategies. Nevertheless, matcha also delivers more caffeine per serving, which is terrific before a midday walk or workout but not ideal late at night.

Even so, there’s another wrinkle worth noting: several vascular studies that showed FMD improvements used brewed tea, not isolated EGCG capsules—suggesting the whole-tea matrix (minor polyphenols, L-theanine, and other constituents) may be important (overview of endothelial benefits with brewed tea). Consequently, there’s no need to chase megadoses or fancy extracts. A steady rhythm of well-brewed cups captures most of what you’re after.

Green tea in erectile dysfunction routine: timing, brewing, and iron-savvy habits

Adherence hinges on simplicity. Accordingly, try a routine that slides into ordinary life:

  • Morning: brew one cup with water around 75–85°C; steep 2–3 minutes, then taste and remove leaves. Use roughly 2 g tea leaves (about a teaspoon) per 250 ml cup. Because tea polyphenols can blunt non-heme iron absorption, drink your cup between meals, not with an iron-rich breakfast (classic research on tea and iron absorption).
  • Early afternoon: enjoy a second brewed cup—or whisk a small bowl of matcha—especially before a brisk walk or short resistance session. The slight stimulation often improves mood and training adherence, both of which indirectly benefit sexual health.
  • Evening: pivot to caffeine-free comfort so sleep can do its quiet work. For ideas that connect relaxation, scent, and touch (without stimulants), have a look at enhancing intimacy with clove-infused massage and the companion clove-infused tea piece. Both are gentle, sensory ways to reduce tension—the sort of context erections actually appreciate.

Just as importantly, build iron awareness into your habit. If you’re vegetarian, an endurance athlete, or someone with marginal ferritin, separate tea and main meals by an hour or two. When convenient, pair plant-based iron sources with vitamin C (think lemon over greens or a citrusy salad) to offset tea’s inhibitory effect. These small timing tweaks allow you to keep your green tea for ED routine without nudging iron status the wrong way.

Also Read: Iron Deficiency Anemia Symptoms: 15 Signs You Are Iron Deficient

Safety first: the nadolol interaction, plainly explained

Most people tolerate green tea well; still, one clinically documented interaction deserves a spotlight. In a carefully executed study, repeated green-tea intake caused an approximately 80% reduction in nadolol exposure, likely by inhibiting OATP1A2 transport in the gut—an effect that can blunt the drug’s blood-pressure benefits. If you take nadolol for hypertension or heart rhythm, don’t guess; speak with your clinician about tea timing and total intake to avoid under-treating your condition (green tea markedly lowers nadolol exposure). This is not theoretical; it’s been measured.

Beyond that, common-sense cautions apply: if caffeinated tea worsens reflux or sleep, dial the timing earlier; if you’re iron-deficient, prioritize recovery first, then re-introduce tea with smart spacing; and if you live with complex medical issues, a brief conversation with your care team is never wasted.

Green tea for erectile dysfunction meets the rest of your life: stacking gentle companions

Because ED is usually a multifactorial pattern rather than a single-switch problem, readers often stack tea with other low-risk, context-wise choices. We’ve written several practical, non-gimmicky pieces you can thread into your evenings or weekends:

  • For a warm, aromatic option that feels winter-friendly and ritual-rich, read our guide to clove-infused tea for erectile dysfunction.
  • To bring touch and presence back into the mix—without numbing creams or edgy supplements—try the step-by-step clove-infused massage for erectile dysfunction relief.
  • If you’re curious about botanicals with a longer cultural history, our roundup on saffron as an aphrodisiac explores dosing ranges used in research and, importantly, sets realistic expectations.
  • Meanwhile, for men who enjoy culinary-to-intimacy crossovers, the explainer on cardamom benefits for men connects circulation-leaning spices with daily habits in a balanced, non-hyped way.
  • And because sensual context matters as much as chemistry, our practical overview of best oils for erectile dysfunction (ED) translates scent, warmth, and massage into routines that couples actually keep—no unrealistic promises, just simple practices that lower friction and build momentum.

None of these are “musts.” Nevertheless, they make it easier to keep a routine going, which is usually what separates good intentions from tangible change.

Green tea erectile dysfunction: what about stamina, libido, and energy?

Here’s where nuance helps. People sometimes expect a single beverage to change stamina on contact. Realistically, indirect pathways matter more. Moderate caffeine can heighten alertness, smooth effort during workouts, and improve subjective energy—effects that compound across weeks into better mood, better fitness, and better blood-pressure control. Those are all upstream of better erections. At the same time, overshooting your personal tolerance invites a different story: racing thoughts, restless nights, and next-day irritability, none of which help. Thus, a smart green tea for ED pattern spreads cups earlier, keeps evenings quiet, and protects sleep as the ultimate performance enhancer.

Additionally, green tea’s L-theanine likely softens the feel of caffeine, producing a calmer focus than coffee for many people. That qualitative difference is hard to quantify in trials, but countless readers notice it. From a practical standpoint, if your mornings feel smoother on tea than coffee, lean into the thing you’ll actually sustain.

Brewing for benefits without getting precious

Although catechins deserve attention, brew method quietly decides whether you will enjoy your cup enough to drink it daily. Fortunately, you don’t need gadgets. Heat water just below a boil, aiming for 75–85°C; measure roughly 2 g of leaves per 250 ml cup; steep 2–3 minutes and taste. If you prefer matcha, whisk 1–2 g into hot (not boiling) water until lightly frothy, then sit for a moment—literally—before sipping. The brief pause isn’t fluff; slowing down cues your parasympathetic system, which blends seamlessly with the intimacy-supporting direction of everything else we’ve discussed.

As for timing, keep your iron guardrails in mind. Drinking tea between meals usually solves the absorption issue for most people, while a squeeze of lemon over greens or beans at lunch helps your body capture more plant-based iron despite tea’s polyphenols. With those small adjustments, your green tea erectile dysfunction routine becomes both safe and pleasantly habitual.

Bringing it all together—so you know exactly what to do next

Taken as a whole, the evidence points toward a grounded, hopeful conclusion: green tea supports the vascular foundation of erectile function, even though it does not—and should not be sold as—a cure for ED. Therefore, the smartest approach is both modest and consistent:

  1. Adopt a daily rhythm of 1–2 brewed cups earlier in the day; add a small matcha serving when you want an extra nudge.
  2. Brew well, not long: 75–85°C water, 2–3 minutes, then remove the leaves.
  3. Mind iron by separating tea from meals, especially if you’re vegetarian or have borderline ferritin.
  4. Protect sleep by switching to caffeine-free, sensory routines in the evening; for ideas that combine warmth, scent, and touch, explore clove-infused tea and clove-guided massage.
  5. Check medications, particularly nadolol, with your clinician so tea doesn’t undermine treatment (green tea–nadolol interaction explained).
  6. Give it weeks, not days; meanwhile, address the basics—movement, blood pressure, stress, and intimacy cues—because erections follow the health of your cardiovascular system.

Lastly, if you want to widen the lens without spinning into hype, our on-site resources round out the picture gracefully: browse the thoughtfully skeptical best oils for ED guide, skim the culinary-meets-intimacy angle in cardamom benefits for men, or, when you feel curious, dip into saffron as an aphrodisiac for a balanced take on a classic botanical. None of these pieces promise miracles; instead, they offer workable layers that play nicely with a daily green tea erectile dysfunction habit—precisely the sort of ecological approach that tends to produce steady, real-world gains.

FAQs

1) Does green tea help erectile dysfunction?

In brief, green tea can support erectile function by improving blood-vessel health and nitric-oxide availability; however, it isn’t a stand-alone ED cure. For most readers, making green tea for ED a steady habit works best alongside sleep, exercise, and medical advice when needed.

2) Is green tea good for ED on a daily basis?

On balance, yes—daily green tea for ED is reasonable. Moderate intake (2–3 cups earlier in the day) tends to aid vascular tone while keeping caffeine side effects in check.

3) Can green tea cause erectile dysfunction?

For clarity, there’s no solid evidence that green tea causes ED. Typically, moderate tea intake fits comfortably within a heart-healthy routine that supports erection pathways rather than harming them.

4) Does green tea make you last longer in bed?

In reality, no direct trials prove stamina benefits. Still, many find that better vascular function, improved mood, and consistent training—habits often paired with a green tea erectile dysfunction routine—can indirectly help performance.

5) Which tea is good for erectile dysfunction besides green tea?

Notably, some choose ginseng tea or pomegranate/hibiscus infusions as adjuncts. Even so, green tea for ED remains the most researched option for vascular support, so start there and layer others cautiously.

6) What’s the best way to brew green tea for ED benefits?

Importantly, use water around 75–85°C, steep 2–3 minutes, and taste before over-extracting. This preserves catechins while keeping bitterness low—making a green tea erectile dysfunction habit easier to sustain.

7) How much green tea should I drink for erectile function?

As a rule, 2–3 cups per day is a practical target. All told, consistency matters more than chasing high doses; let your body’s caffeine tolerance guide timing.

8) Is matcha better than regular green tea for ED?

By contrast, matcha often delivers more catechins per serving, which some people prefer for a focused matcha green tea erectile dysfunction plan. At the same time, matcha also contains more caffeine, so keep it earlier in the day.

9) Does green tea boost libido directly?

Ultimately, libido is multifactorial. Green tea for ED mainly supports circulation and may steady energy and mood; it doesn’t act as a classic aphrodisiac for everyone.

10) Can I drink green tea at night if I have ED?

For most, evening caffeine can disrupt sleep—an ED antagonist. Therefore, keep green tea erectile dysfunction cups earlier, and choose caffeine-free options later to protect recovery.

11) Will green tea interact with ED medications or heart drugs?

Crucially, green tea can reduce absorption of nadolol, a beta-blocker; discuss timing with your clinician. As needed, review all meds with a professional before locking in a green tea for ED routine.

12) Does green tea affect testosterone?

Meanwhile, typical intakes show no meaningful testosterone changes in healthy adults. The benefit of green tea for ED comes from vascular effects rather than hormone boosts.

13) Can green tea improve blood flow to help erections quickly?

Sometimes, yes—acute improvements in endothelial function have been observed after tea intake. Still, green tea erectile dysfunction routines work best over weeks, not hours.

14) What about side effects of green tea for ED?

Altogether, side effects are uncommon at moderate doses. That said, sensitive individuals may notice jitters, reflux, or sleep disruption; adjust timing—or choose lower-caffeine varieties—while keeping the green tea for ED plan intact.

15) Does tea reduce iron absorption and affect ED indirectly?

Indeed, polyphenols can inhibit non-heme iron absorption. To stay safe, drink green tea for ED between meals, particularly if you’re vegetarian or have low ferritin.

16) Is decaf green tea useful for erectile dysfunction?

Even without much caffeine, decaf green tea retains many catechins. Consequently, it can still complement a green tea erectile dysfunction approach—especially for evening cups.

17) How long until I notice benefits from a green tea ED routine?

Typically, readers report subtle changes within a few weeks as overall cardiovascular habits improve. Nevertheless, persistent ED warrants medical evaluation—tea is a helper, not a replacement.

18) Can I combine green tea for ED with exercise and weight management?

Absolutely. In practice, green tea erectile dysfunction strategies pair well with brisk walks, resistance training, and blood-pressure control—each reinforcing the others for better outcomes.

19) Are there specific foods to pair or avoid with green tea for ED?

Preferably, separate tea from iron-rich meals by an hour or two. Conversely, pair plant-based iron with vitamin C at mealtimes, then enjoy green tea for ED mid-morning or mid-afternoon.

20) What if anxiety contributes to my ED—will green tea help?

At times, yes: many find tea’s gentler caffeine-theanine profile less jangly than coffee. However, if anxiety remains high, shift green tea erectile dysfunction cups earlier and emphasize relaxation practices at night.

21) Is “tea for ED” different from “green tea for ED”?

Functionally, tea for ED is a broad phrase; nonetheless, green tea for ED is specific to catechin-rich Camellia sinensis. Start there, then evaluate other teas as supportive extras, not substitutes.

22) Can green tea improve morning erections?

Possibly, over time. As cardiovascular health settles, some notice stronger green tea and erection patterns in the morning. Even so, individual responses vary; keep expectations realistic.

23) Will switching from coffee to green tea help my ED?

Often, yes. Some feel steadier energy and better sleep quality after switching, which indirectly benefits erections. Try replacing one coffee with green tea for ED first, then reassess.

24) Is there a best time to drink green tea for ED results?

Preferably, earlier in the day—morning and early afternoon—so you gain vascular support without disturbing sleep. That timing keeps a green tea erectile dysfunction plan sustainable.

25) Should I choose loose-leaf or tea bags for ED support?

Either works if quality is high. Nevertheless, loose-leaf often tastes better and encourages proper brewing—making a green tea for ED habit easier to maintain day after day.

Posted on 3 Comments

Walnut Benefits for Brain Health: Memory, Cognitive Function, and Mental Well-Being

WALNUT Benefits for BRAIN HEALTH An honest guide-mood, reasoning, ALA omega-3

For generations, people have called walnuts “brain food.” The nickname sticks partly because a walnut looks like a tiny brain. More importantly, walnuts are rich in nutrients that matter for the nervous system, and researchers have tested their effects on mood, memory, and day-to-day performance. The data doesn’t promise miracles, and we shouldn’t expect a single food to transform cognition. Even so, the evidence points to a simple, practical story: a small daily serving of walnuts is a smart, tasty habit that supports overall brain health, especially when paired with a balanced lifestyle.

In this guide, you’ll find what the best studies actually show, how walnuts might work in the body, who stands to benefit most, and how to build an easy walnut habit without overdoing calories. You’ll also get straightforward tips for storage, safety, and cooking—so the advice is not only sound, but usable.

Also Read: Walnut (Akhrot) Benefits for Men: Heart, Brain, Fertility & Metabolic Health

Walnut half on marble with headline “A handful for your head”; note that 28 g walnuts provide ~2.6 g ALA plus antioxidants for brain-supporting nutrition.
One small handful (28–30 g ≈ 14 halves) delivers ~2.6 g ALA—the plant omega-3—plus antioxidants. Swap for lower-quality snacks to keep calories in check.

Walnut Benefits for Brain Health—Myth, Hype, or Science?

The “brain food” idea isn’t just folklore. Walnuts supply a mix of nutrients with plausible roles in brain function:

  • Alpha-linolenic acid (ALA), a plant-based omega-3 that helps maintain healthy cell membranes and inflammatory balance. A 28 g serving (about 14 halves) contains roughly 2.6 g of ALA, according to USDA-based data via MyFoodData. My Food Data
  • Polyphenols and other antioxidants that help counter oxidative stress—a driver of age-related decline.
  • Vitamin E and key minerals (magnesium, folate) that support nerve function and overall metabolism.
  • Melatonin and related phytochemicals naturally present in walnuts, which may influence sleep/circadian biology.

Together, that’s a nutrient profile you won’t quite find in other nuts. And while not every trial shows across-the-board improvements, several controlled studies and reviews suggest walnuts can nudge specific brain-related outcomes in the right direction.

Also Read: Nourishing the Mind: 7 Foods to Supercharge Your Memory and Brain Health


What Research Really Says About Walnut Benefits for Brain?

Are Walnuts Good for Your Brain? Evidence at a Glance

  • In healthy young adults, the big picture is no sweeping boost across all cognitive tests. However, one domain—inferential verbal reasoning—has shown a meaningful improvement with regular walnut intake (details just below). PubMed
  • For mood, a well-designed trial found benefits in young men when walnuts were consumed daily as part of a normal diet. PubMed
  • Over the long term in healthy older adults, the best randomized trial to date found no overall change in global cognition, though exploratory analyses hinted at potential benefits in higher-risk subgroups. PubMed

In short: walnuts appear to provide small, realistic support for certain outcomes—mood steadiness in some people, subtle gains in specific cognitive subdomains, and potential protection in at-risk groups—especially as part of an overall healthy pattern.

Also Read: The Gut-Brain Connection: Link Between Anxiety and Gut Health


Walnuts and Mood: A Practical Win for Some

A double-blind, randomized crossover trial in college students found that young men experienced a clear reduction in overall mood disturbance while eating walnuts daily compared with a matched control diet (PubMed). Women in the same study did not show the same effect, which raises interesting questions about sex-specific responses and points to the need for further research. The practical takeaway is simple: if you’re aiming for steadier energy and a calmer baseline, a small daily portion of walnuts is a low-risk experiment worth trying. PubMed

How to try it: Add a handful to breakfast or keep a small container at your desk. Give it two to eight weeks and note how you feel. If it helps, keep going; if not, you’ve still adopted a nutritious snack.

Also Read: High Cortisol in Women: 10 Symptoms, Causes, and How to Reduce It

Bowl of yogurt with walnuts, honey and pomegranate; headline “Steadier days start small,” referencing a trial showing mood steadiness in young men.
In a randomized crossover trial (Pribis 2016), young men reported lower overall mood disturbance during a walnut phase. Effects vary; best with a balanced diet.

Walnuts for Memory and Cognitive Performance: Where They Seem to Help

In a crossover study of healthy young adults, walnuts did not overhaul memory or non-verbal reasoning across the board. Even so, inferential verbal reasoning—the kind of thinking you use to connect ideas and draw conclusions—improved by about 11% during the walnut period compared with control (PubMed). Although that’s a single domain in a specific population, it’s a good example of where walnuts can matter: not as a cure-all, but as a small edge in tasks that require flexible thinking. PubMed

Where this is useful: Exam days, presentations, coding sprints—any situation where you need to stay sharp for a long block of time. For best results, combine walnuts with protein, fiber, and hydration.

Also Read: Fueling Focus and Energy: Top Foods for Enhanced Cognitive Performance

Walnut shell resembling a brain on blue background with text “Think in connections”; notes ~11% gain in inferential verbal reasoning in young adults.
Young adults showed ~11% improvement in inferential verbal reasoning during walnut intake in a crossover study (Pribis 2012). Domain-specific—not a cure-all.

Long-Term Walnut Benefits for Brain Health: The Big-Picture View

When researchers look beyond a single day or week, results become more nuanced. In the two-year WAHA trial following healthy elders, a walnut-supplemented diet did not improve global cognition overall. At the same time, brain imaging and post-hoc analyses hinted that walnuts might delay decline in subgroups at higher risk—interesting, but not definitive (PubMed). The right interpretation is neither hype nor dismissal: walnuts likely fit well inside broader dietary patterns that protect the brain, yet they do not transform test scores by themselves. PubMed

A broader review of human studies comes to a similar conclusion: walnuts contain nutrients that align with brain health, and associations are often positive, but the magnitude and consistency of benefits vary across trials and populations (Open-access review, 2021). This is how nutrition usually works—incremental gains that add up when you stack multiple good habits.

Also Read: Can I Eat Walnuts During Pregnancy?


How Might Walnut Benefits for Brain Actually Work?

Healthy Fats that Feed the Nervous System

Walnuts are exceptional among nuts for ALA omega-3 content. Cell membranes in the brain rely on a balanced mix of fatty acids, and ALA helps maintain that balance while participating in anti-inflammatory signaling. Although the body converts ALA to longer-chain omega-3s (EPA/DHA) only modestly, ALA itself supports membrane fluidity and neuron function. Practically, that means walnuts help you hit daily omega-3 targets—especially helpful for those who eat little or no fish.

Antioxidants that Counter Everyday Wear and Tear

Free radicals and oxidative stress can damage neurons and accelerate age-related decline. Walnuts provide polyphenols, vitamin E, and melatonin—a trio that works together to neutralize oxidative stress and may nudge the body’s own antioxidant defenses. Over time, that can translate into better cellular resilience, particularly in tissues rich in delicate polyunsaturated fats like the brain.

Inflammation, Blood Flow, and the Brain–Heart Connection

Chronic, low-grade inflammation and impaired vascular health correlate with cognitive decline. Walnuts have been linked to improved endothelial function in some contexts, and European regulators acknowledge a related claim on vasodilation. That doesn’t prove a direct cognitive effect, but it does strengthen the case for walnuts inside a cardio- and neuro-friendly diet (see EFSA’s opinion on walnuts and endothelium-dependent vasodilation). European Food Safety AuthorityEFSA Journal

The Gut–Brain Pathway

Polyphenols in walnuts interact with the gut microbiome, producing metabolites that influence inflammation and neural signaling. This area is still evolving, yet it offers a plausible route for how a daily walnut habit might gently shape mood and cognition over weeks to months.

If you’re aiming to get the most out of walnut-based omega-3s, this piece explains how soaking walnuts might enhance their nutritional availability, making them easier to digest and potentially more impactful.


Walnut Benefits for Brain Across Life Stages

Walnuts for Brain Development in Children & Teens

Growing brains demand quality fats, minerals, and antioxidants. While there aren’t definitive pediatric trials showing that walnuts alone boost grades, adding them to breakfast or snacks helps meet nutrient needs during intensive learning years. For households with allergies, safety comes first—see the notes below.

Easy wins: Stir crushed walnuts into porridge with banana, blitz a cocoa-banana-walnut smoothie, or tuck a homemade trail mix into lunchboxes (walnuts + roasted chana + a few raisins + dark chocolate shards).

Walnuts for Memory and Mental Clarity in Adults

Workdays stack meetings, deadlines, and context switching. Here’s where steady energy and attention matter. A simple bowl with oats, yogurt, berries, and walnuts delivers slow-release carbs, protein, fiber, and healthy fats—nutrients that support mental performance while keeping you satisfied. On long days, a walnut-inclusive breakfast or snack can help you sustain focus and avoid the mid-afternoon crash.

Practical ideas: Top Greek yogurt with walnuts and cinnamon; toss walnuts into a quinoa-vegetable bowl for lunch; carry a small container of lightly roasted walnuts to sidestep ultra-processed snacks.

Walnuts for Brain Health in Seniors

As we age, protecting vascular health, reducing inflammation, and maintaining nutrient sufficiency all matter. Even though the large WAHA trial didn’t show universal gains from walnuts alone, it sits comfortably within a larger pattern: Mediterranean-style eating—rich in plants, fish (if eaten), whole grains, and nuts—associates with slower decline. In that context, walnuts become a convenient way to hit omega-3 and antioxidant targets.

Practical ideas: Add walnuts to dal or sabzi for a soft crunch; blend into chutneys; combine with leafy greens and olive oil for a Mediterranean-style salad.


Walnuts Brain Food: Smart Ways to Work Them into Your Day

Breakfast (busy-morning friendly)

  • Oats + Walnut Crunch: Rolled oats simmered with milk or a plant alternative, finished with crushed walnuts, dates, and apple.
  • Creamy Smoothie: Banana, cocoa, yogurt, a spoon of soaked walnuts, and a splash of coffee if you like.
  • Savory Start: Eggs with spinach and cherry tomatoes; finish with toasted walnuts and a pinch of feta.

Midday & Snacks (focus without the crash)

  • Walnut Chutney Sandwich: Whole-grain bread with mint-walnut chutney, cucumber, and paneer.
  • Desk Bowl: Greek yogurt topped with walnuts, pomegranate arils, and a drizzle of honey.
  • Trail Mix That Works: Walnuts, roasted chana, a few raisins, dark chocolate shards.
Flat-lay of basil leaves, jar of green pesto, walnut halves, and whole-wheat pasta with the headline “Pesto upgrade—swap pine nuts for walnuts.”
Toast walnuts and blitz with basil, garlic, olive oil, lemon zest, and Parmesan for a budget-friendly pesto that adds plant omega-3 (ALA) and a rich, earthy flavor. Freeze leftovers in ice-cube trays for easy weeknights.

Dinner & Entertaining (family-friendly)

  • Walnut-Paneer Tikka: Skewer paneer and peppers; brush with yogurt-spice marinade and finish with a walnut crumble.
  • Pesto Upgrade: Swap pine nuts for walnuts in basil pesto and toss with whole-wheat pasta or zucchini noodles.
  • Stir-Fry Crunch: Add walnuts at the end of a veggie stir-fry for texture and healthy fats.

Also Read: Walnut Wonderland: 5 Wholesome Keto Meal Replacement Shakes Packed with Walnut Goodness


Walnut for Brain Development: Pairings that Make a Difference

Synergy matters. Combine walnuts with:

  • Berries (anthocyanins) for antioxidant teamwork.
  • Leafy greens (folate, magnesium) for nerve support.
  • Dark chocolate (flavanols) for blood-flow benefits.
  • Fermented foods (yogurt, kefir, dosa batter) to support the gut–brain axis.

These pairings build meals that are satisfying, nutrient-dense, and naturally supportive of cognitive function.

Flat-lay of walnuts with blueberries, spinach, yogurt and dark chocolate, highlighting smart pairings that support mood, blood flow and the gut–brain axis.
Synergy matters: berries (anthocyanins), leafy greens (folate & magnesium), fermented dairy (gut–brain), and a little dark chocolate (flavanols).

How Much Walnuts to Eat for Possible Brain Benefits?

A practical daily target is about 28–30 g—roughly one small handful (≈14 halves). That serving supplies ~2.6 g of ALA plus fiber and antioxidants (USDA-based: MyFoodData). If you’re replacing less healthy snacks, keep total calories steady by trimming sweets or refined snacks elsewhere. If you’re very active, plant-forward, or trying to improve diet quality, going a little higher on training days is reasonable. My Food Data

Dial it in:

  • Start with one handful daily for two to eight weeks and see how you feel.
  • Mix walnuts with almonds or pistachios for variety, while keeping walnuts as the anchor for their omega-3 content.
  • If weight management is a priority, replace, don’t simply add—use walnuts instead of lower-quality snacks.

Also Read: Unleashing the Power of Soaked Walnuts: Discover the Nutritional Benefits


Safety, Allergies, and Storage: Read This Before You Stock Up

Allergies and Sensitivities

Tree-nut allergies can be serious. If you or a family member has a known tree-nut allergy—or you’re introducing nuts to a child—speak with a qualified clinician first. Cross-contamination with other nuts or peanuts is common in processing environments; always check labels and follow medical guidance. For an expert public overview, see the AAAAI’s page on tree-nut allergy (AAAAI).

Watch-outs can include itching, hives, swelling, wheezing, or stomach upset soon after eating. Any severe reaction requires immediate medical attention.

Medication Considerations

Walnuts don’t typically interact with common medicines. Still, if you’re on a restricted diet or anticoagulants, discuss big diet changes with your healthcare provider—especially if you plan to increase overall vitamin E intake.

How to Store Walnuts So They Stay Fresh

Walnuts are rich in delicate unsaturated fats that can turn rancid if stored poorly. Keep shelled or in-shell walnuts in an airtight container; use the refrigerator if you’ll finish them within a few weeks, or the freezer for longer storage. Simple, evidence-based guidance is available from UC Davis Postharvest (UC Davis). UC Postharvest Center

If your walnuts smell paint-like or taste bitter, they’re past their prime—don’t use them.

Whole and halved walnuts on plate with overlay listing storage tips: airtight container, refrigerate short-term, freeze for longer storage.
Keep delicate fats from going rancid: airtight container; refrigerate for weeks, freeze for months. Discard if smell is paint-like or taste is bitter.

The Deeper Science: How Walnut Benefits for Brain Could Accrue Over Time

From ALA to Signaling Molecules

ALA integrates into cell membranes and supports fluidity, which influences how receptors and ion channels behave. Although conversion of ALA to longer-chain omega-3s (EPA/DHA) is limited, the body also uses ALA directly in anti-inflammatory pathways. In parallel, omega-3s help with neurotransmission and synaptic plasticity—processes central to learning and memory.

Oxidative Stress, Polyphenols, and Neurons

Neurons are metabolic overachievers; they generate more reactive oxygen species than many other cells. Walnut polyphenols, vitamin E, and melatonin help scavenge those oxidants and may up-regulate the body’s own antioxidant enzymes. Over time, that can limit cumulative wear—especially in tissues rich in polyunsaturated fats like the brain.

Vascular Function and the Brain–Heart Link

The brain depends on precise blood flow. Walnuts have been tied to improved endothelial function—the ability of blood vessels to relax properly. Better endothelial function supports steadier delivery of oxygen and glucose to neurons, particularly under stress. The EFSA recognizes a health claim related to walnut intake and endothelium-dependent vasodilation, which adds regulatory context (see EFSA’s published opinion). European Food Safety AuthorityEFSA Journal

Microbiome Metabolites and the Gut–Brain Axis

Walnut polyphenols can be transformed by gut bacteria into metabolites with systemic effects. While this area is still evolving, it offers a plausible route for how a daily walnut habit could gently shape mood and cognition over weeks to months.


Buying, Preparing, and Cooking: A Mini-Guide

  • Raw vs. Roasted: Lightly roast at home (low oven, 8–10 minutes) to enhance flavor without burning sensitive fats.
  • Soaking: Soak to soften for smoothies or chutneys; drain and refrigerate, using within 1–2 days.
  • Quality checks: Prefer sealed packaging. If buying from bulk bins, choose high-turnover shops and store promptly at home.
  • Flavor pairings: Walnuts love cinnamon, cocoa, berries, dates, citrus zest, leafy greens, beetroot, mushrooms, and tangy cheeses.

Quick Start: A One-Week Walnut Plan

Day 1–2: Add one handful to breakfast. Note appetite, focus, and energy by mid-morning.
Day 3–4: Swap an afternoon packaged snack for a yogurt-and-walnut bowl. Track mood and cravings toward evening.
Day 5–6: Cook one dinner that uses walnuts for texture (pesto, stir-fry, sabzi). Notice satiety and sleep quality.
Day 7: Reflect on what worked. Keep the breakfast habit if mornings felt clearer; keep the snack if afternoons felt steadier.


Are Walnuts Good for Your Brain? An Honest Bottom Line

Yes—with context. When you scan the full landscape of studies, walnuts emerge as a useful, nutrient-dense food that can support brain-adjacent outcomes like mood steadiness in some people and subtle improvements in specific cognitive tasks. Large, long-term trials in older adults haven’t confirmed broad gains on global cognitive batteries from walnuts alone; however, that’s not a let-down so much as a reminder that nutrition is cumulative. Walnuts fit beautifully inside a wider strategy that includes a plant-forward, Mediterranean-style diet, regular movement, good sleep, and stress management.

If you’re after a simple, realistic step that nudges brain health in the right direction, a daily handful of walnuts is about as easy—and as delicious—as it gets.


Key research

FAQs for Walnut benefits for brain.

1) Are walnuts really “brain food”?

Yes—though without the hype. Walnuts deliver ALA omega-3s, polyphenols, vitamin E, and minerals that support brain-adjacent functions. In short, walnut benefits for brain health are real but modest, working best alongside an overall healthy lifestyle.

2) What’s the simplest daily amount for brain support?

Aim for about 28–30 g (≈14 halves). This serving provides roughly ~2.6 g ALA, plus antioxidants. Moreover, if you’re watching calories, replace a lower-quality snack rather than simply adding walnuts.

3) Do walnuts improve mood?

They can—especially for some people. In a randomized crossover study, young men reported lower overall mood disturbance during a walnut phase. Nevertheless, responses vary, so try a small daily portion for 2–8 weeks and notice how you feel.

4) Do walnuts boost memory or reasoning?

Not across every test, but there’s a signal. For example, inferential verbal reasoning improved in young adults during a walnut period. Consequently, walnut benefits for brain performance tend to be domain-specific rather than sweeping.

5) How long until I notice anything?

Be patient. Because nutrition works cumulatively, give your walnut habit 2–8 weeks before judging mood or focus changes. Meanwhile, support the effort with sleep, movement, hydration, and balanced meals.

6) Are soaked or roasted walnuts better for brain benefits?

Either can fit. Light roasting enhances flavor; soaking softens texture and may aid comfort for some. However, the core nutrients tied to walnut benefits for brain—ALA and polyphenols—remain in both when you avoid high heat or lengthy storage after soaking.

7) What should I pair walnuts with for extra payoff?

Go for berries, leafy greens, fermented dairy (yogurt/kefir), and a little dark chocolate. These pairings add anthocyanins, folate/magnesium, helpful microbes, and flavanols—therefore reinforcing blood-flow, gut–brain, and antioxidant pathways.

8) Can I eat walnuts if I already take fish oil (EPA/DHA)?

Absolutely. ALA from walnuts complements fish-derived omega-3s. Moreover, for people who rarely eat fish, walnuts are a practical way to raise total omega-3 intake and still enjoy broader walnut benefits for brain health.

Also Read: Best Fish Oil Supplements on Amazon India

9) Are walnuts safe during pregnancy?

Generally, yes for those without nut allergies. They add fiber, healthy fats, and micronutrients. That said, always follow your clinician’s guidance and standard prenatal dietary advice.

10) What about kids and teens—do walnuts help with studying?

They can help meet nutrient needs during growth and heavy learning periods. While grades won’t jump overnight, a walnut-inclusive breakfast or snack supports steady energy and, consequently, better attention habits.

11) How should I store walnuts so the healthy fats stay fresh?

Because their fats are delicate, keep walnuts airtight; refrigerate for weeks and freeze for months. If they smell paint-like or taste bitter, they’re rancid—therefore discard them and restock.

12) Are other nuts just as good for the brain?

Many nuts are great, yet walnuts are unique for their high ALA content. Consequently, when your focus is walnut benefits for brain health, keeping walnuts as the “anchor” nut (and mixing others for variety) is a sensible strategy.

13) What’s one easy recipe that fits the science and the schedule?

Try a walnut pesto (swap pine nuts for walnuts) or a yogurt bowl with walnuts, berries, and honey. Both combine healthy fats, protein, and polyphenols—therefore practical, tasty ways to make the habit stick.

14) Bottom line—should I start?

Yes—if you enjoy them. A daily handful of walnuts is an easy, delicious step that can support mood steadiness and certain thinking tasks while nourishing long-term health. Nevertheless, remember: food is a team sport, and walnuts shine brightest as part of a balanced routine.

Posted on 2 Comments

Coconut Oil for Skin: Frequently Asked Questions

Coconut Oil for Skin Benefits & Precautions - Learn how to use coconut oil safely and effectively.

For generations, coconut oil has lived a double life—one part kitchen essential, one part beauty secret. In Indian homes it’s rubbed into the body after a bath; in the Pacific it’s long been used to shield skin from salty breezes and blazing sun. Today, coconut oil for skin pops up everywhere—creams, body washes, lotions, balms, and even makeup removers. It’s affordable, easy to find, and yes, wonderfully nostalgic.

Yet many people are torn. Some swear it delivers a baby-soft glow. Others complain it makes them greasy, clogs pores, or even fear it causes skin darkening. Meanwhile, there are bold claims—coconut oil sunscreen, coconut oil for scars, coconut oil for eczema—that muddy the waters further.

So, is this classic ingredient your complexion’s soulmate or a mismatched fling? In this guide we’ll walk through the real benefits, honest disadvantages, stubborn myths, and practical ways to use coconut oil—from body care to baby care—so you can decide what fits your skin and your life.


Why Coconut Oil Shows Up In So Many Routines

A thread of tradition

Across Ayurveda, coconut oil is considered cooling and nourishing, especially supportive for Pitta. Daily self-massage—abhyanga—with warm virgin coconut oil for skin is said to calm the nervous system and seal in moisture. In coastal communities, families have long relied on coconut oil as a simple, trusted skin protector. The ritual itself—slow, grounding, intentional—does half the healing. Read more about how this fits into daily dosha-balancing practices in Pitta Dosha: Characteristics and Balancing Practices.

The science beneath the ritual

Beyond tradition, there’s chemistry. Coconut oil is rich in medium-chain fatty acids, most notably lauric acid, plus capric and caprylic acids. These help soften skin, limit water loss, and support a comfortable, supple feel. There’s also naturally occurring vitamin E, an antioxidant that helps defend against everyday environmental stress.

In plain English: coconut oil works brilliantly as an occlusive—it locks in the water you already have in your skin. That’s why so many people find it transforms dull, tight skin into something bouncy and dewy. But—and there’s always a but—its very richness can be troublesome for faces that clog easily. That leads us to the good, the complicated, and the “please don’t do that” of coconut oil.

Clinical studies confirm this: a randomized trial published in PubMed found virgin coconut oil improved skin hydration and barrier function, comparable to mineral oil. A review in NIH/PMC also notes coconut oil reduces transepidermal water loss and enhances wound healing.


Benefits of Coconut Oil for Skin

Deep, lasting moisturization

If your body skin often feels dry or looks ashy, coconut oil can be a game-changer. Applied after a shower on damp skin, it creates a thin barrier that locks in hydration. Knees, elbows, shins, and heels—those chronically rough zones—usually respond quickly. Compared with many water-based lotions that evaporate, coconut oil’s richness lingers, keeping the skin comfortable for hours. According to Healthline, coconut oil use over 28 days increased hydration by nearly 25% and improved elasticity.

How to use: Warm a teaspoon between your palms and massage into slightly damp skin. If you prefer a lighter feel, mix it in your hands with a pump of your favorite unscented lotion—best of both worlds.

Woman applying coconut oil on arm showing skin hydration, barrier support, and soothing benefits.
Coconut oil provides hydration, protects the skin barrier, and soothes irritation naturally.

Comfort for dry, sensitive, or irritated patches

People dealing with dryness, seasonal irritation, or rough texture often find coconut oil soothing. Its emollient profile smooths tiny cracks in the skin’s surface and helps the skin barrier bounce back. Many also like it for hands that get stripped by frequent washing, or for legs after shaving.

Coconut oil for eczema & dermatitis (with care)

Coconut oil can help calm itchiness and dryness that accompany eczema or dermatitis by reducing water loss and softening scaling. Some individuals feel noticeably more comfortable when they apply a thin layer after bathing and before bed. Clinical research supports this: a randomized controlled trial on atopic dermatitis found that virgin coconut oil improved skin hydration and even reduced the presence of Staphylococcus aureus, a bacteria often linked with eczema flare-ups.

The National Eczema Association also notes coconut oil’s antimicrobial and anti-inflammatory properties, highlighting that many patients report symptom relief when it’s used as an emollient. More recently, a 2024 trial on an emollient containing coconut and sunflower esters showed significant improvements in itch, reduced topical steroid use, and decreased bacterial colonization on the skin.

Still, because eczema is complex, what helps one person can irritate another—patch test on a small area and introduce it slowly, especially if your skin is reactive. Also see our post on Foods to Embrace and Avoid for Eczema Relief for insights on soothing dietary and topical ingredients.

Coconut oil for psoriasis & scalp psoriasis (supportive care)

While it can’t treat the underlying condition, coconut oil may soften plaques and reduce scaling, particularly on elbows and knees. As a pre-shampoo scalp treatment, it can loosen flakes and make cleansing gentler. Massage a spoonful into the scalp, leave it on for 20–30 minutes, then shampoo thoroughly. If your hair is fine, follow with a light conditioner only on mid-lengths and ends to avoid residue.

The Cleveland Clinic recommends oils like coconut to loosen flakes before shampooing. WebMD notes it may ease symptoms, though not replace prescription treatments.

Our post Coconut Oil for Psoriasis throws more light on the subject. Also read Olive Oil and Psoriasis, Shea Butter for Scalp Psoriasis, and Castor Oil for Psoriasis for more insights.

A plumper look for fine lines

No, coconut oil won’t replace retinoids or firm skin overnight. However, hydrated skin looks smoother. By sealing in moisture, coconut oil can temporarily soften the look of fine lines and give a fresher bounce—especially on the body, neck, and décolleté where dryness shows first.

After-sun soothing (not protection)

After a day out, skin may feel tight or over-warm. A whisper-thin layer of coconut oil can ease that tightness and help with post-sun comfort. But keep this distinction crystal clear: it may soothe after exposure; it is not a sunscreen (we’ll debunk that myth soon).

Coconut oil may calm skin after sun exposure, but it is not a sunscreen. The American Academy of Dermatology warns oils do not provide adequate SPF, while Healthline confirms coconut oil’s SPF is far below recommended levels.

Everyday luxuries: massage, cuticles, and heels

Coconut oil is a fantastic massage oil—smooth glide, subtle scent, and easy clean-off. It also shines as a nightly cuticle softener and an overnight heel treatment: massage into heels, slip on cotton socks, and wake up to softer feet.


Disadvantages & Side Effects You Should Know

High comedogenic rating = higher clogging risk

Here’s the big caveat. Coconut oil has a relatively high comedogenic rating (often cited around 4 on a 0–5 scale), meaning it’s more likely to clog pores. If your skin is oily, acne-prone, or tends to form whiteheads/blackheads easily, using coconut oil as a face moisturizer can trigger breakouts. Many people do fine with it on the body yet struggle on the face—that’s common and completely okay. Curology lists it among the most pore-clogging oils, and Verywell Health advises acne-prone skin to avoid it.

A gentler alternative for faces: If you like the idea of oils but break out easily, consider lighter options such as squalane, hemp seed, rosehip, meadowfoam, or jojoba oil. They’re typically less occlusive and friendlier to congestion-prone skin.

For a broader look at face-friendly oils like squalane, jojoba, and shea butter, check out our guide on Natural Oils for Skin.

Woman touching face with skincare warning text about coconut oil clogging pores and acne-prone skin precautions.
Coconut oil can clog pores—avoid if you have acne-prone or oily skin. Always patch test first.

Coconut oil & milia (those tiny white bumps)

Because coconut oil is heavy and occlusive, some folks develop milia—small, firm white bumps—particularly around the eyes or on cheeks. Milia form when keratin gets trapped beneath the surface. If you’re prone to them, avoid using coconut oil on the face, especially near the eye area. Healthline also warns coconut oil can worsen breakouts or cause congestion.

Overnight face application: proceed thoughtfully

Leaving coconut oil on the face overnight divides the crowd. Dry skin types often wake up glowing. Others wake to new blemishes. If you experiment, try it no more than two or three nights a week, layer over a hydrating serum (not under), and change pillowcases frequently. If a few weeks bring new congestion, switch to a lighter oil or keep coconut oil strictly for the body.

Possible irritation or allergy

Coconut oil is generally well tolerated, but any ingredient can irritate someone. If you notice itching, redness, or a rash, stop and reassess. Always do a 24–48-hour patch test on the inner arm before introducing a new step to sensitive skin.

Not ideal for fungal-prone areas

If you struggle with malassezia-related issues (like certain dandruff or fungal acne patterns), rich saturated oils—including coconut oil—may be unhelpful. In those cases, stick with products and routines your dermatologist recommends, and keep coconut oil for hands, feet, and body zones that tolerate it well.


Myths & Misconceptions About Coconut Oil

“Coconut oil darkens skin.”

Coconut oil itself does not cause skin darkening. The confusion comes from people applying it as a tanning oil. Because it doesn’t block UV rays, it can make you tan faster when you’re in the sun. The oil isn’t darkening the skin chemically—the sun is. Used indoors or at night, coconut oil won’t change your skin tone.

“Coconut oil can remove tan overnight.”

A tan is your skin’s natural response to UV exposure. No topical product can erase it overnight. Coconut oil can help soothe tight, sun-exposed skin and may support a more even look as your skin naturally renews, but fading takes time and gentle exfoliation—not miracle quick fixes.

Comparison chart of coconut oil for skin myths versus facts highlighting SPF limits, hydration benefits, and pore-clogging risks.
Myths vs Facts: Coconut oil does not work as sunscreen or whiten skin but hydrates and restores glow.

“Coconut oil is a natural sunscreen.”

This one needs a hard stop. Coconut oil’s sun protection factor is very low—nowhere near the SPF 30+ dermatologists recommend. It may feel comforting after sun, but it is not a sunscreen. If you’re heading outdoors, apply a proper broad-spectrum SPF 30+ and reapply as directed. Consider coconut oil a post-sun comfort step, not a protective one.

“Coconut oil whitens skin.”

There’s no credible evidence that coconut oil whitens skin. What it can do is help restore radiance by improving moisture levels and texture. Healthy, hydrated skin reflects light better, which can look brighter—but that’s different from lightening your natural skin color.

“Natural equals safe for everyone.”

“Natural” is a lovely word, but it’s not a blanket guarantee. Poison ivy is natural, too! Coconut oil can be wonderful for some people and troublesome for others. The smartest approach is always personal: patch test, introduce slowly, and adjust if your skin speaks up.


Everyday Ways to Use Coconut Oil (That Actually Make Sense)

Coconut oil as a body moisturizer

This is where coconut oil shines. After a warm shower, pat your skin so it’s still a little damp, then massage a small amount of oil from shoulders to toes. It’s especially good in dry seasons or in air-conditioned rooms that parch skin. If you prefer a lotion feel, blend a pea-sized scoop of coconut oil with a pump of your fragrance-free moisturizer in your palm, then apply.

Coconut oil for shaving

For many, coconut oil makes an excellent shaving companion. It cushions the razor, reduces drag, and leaves skin softer afterward. Rinse the blade frequently so it doesn’t gunk up, and be careful—oily shower floors can be slippery.

Woman holding coconut oil jar with tips on best ways to use coconut oil safely for skin care.
Safest ways to use coconut oil: post-shower moisturizer, makeup remover, and lip balm. Avoid if acne-prone.

Coconut oil as makeup remover (double-cleanse is a must)

Coconut oil melts mascara, eyeliner, long-wear lipstick—no drama. Still, always, always follow with a gentle water-based cleanser. That second cleanse whisks away oil residues so pores don’t sit under a waxy film. If you’re acne-prone, consider using coconut oil to remove eye makeup only, and choose a lighter cleansing oil or micellar water for the rest of your face.

Coconut oil for scars, stretch marks & wrinkles

Massage with coconut oil may improve skin texture and elasticity, helping scars and stretch marks look a bit softer over time. It won’t erase deeper marks or change pigment, but better moisture can make them less noticeable. For wrinkles, think of coconut oil as a comfort step—great for dehydration lines, not a substitute for actives like retinoids or peptides.

Coconut oil for babies & newborn skin

Many families love coconut oil for baby massage, cradle cap softening, and occasional diaper-area dryness. Keep it simple: choose pure, virgin coconut oil, patch test on the ankle or forearm, and use a thin layer. If you’re addressing diaper rash, pair gentle cleansing, frequent diaper changes, and a pediatrician-approved barrier cream. Coconut oil can comfort, but it’s not a medical treatment. PubMed research confirms neonatal skin absorbs oils applied during massage, though use should always be cautious and pediatrician-approved.

Coconut oil for hands, feet & elbows

Hands that meet soap all day? Massage a tiny amount into damp hands at night, focusing on cuticles. For heels and elbows, layer coconut oil under a thicker plain cream and cover with cotton socks or a light wrap for an overnight softening boost.


Choosing The Best Coconut Oil For Your Skin

Virgin vs. refined: what’s the difference?

Virgin (unrefined) coconut oil is extracted from fresh coconut meat, typically without high heat or harsh chemicals. It tends to retain more of its natural aroma and antioxidants. Refined coconut oil is more processed, often milder in scent and sometimes lighter on the skin. For most people, virgin is the go-to for skincare; if you dislike the scent or want something subtler, a quality refined option can still serve you well on the body.

Fractionated coconut oil (MCT oil)

If the classic texture feels too heavy, try fractionated coconut oil. It remains liquid at room temperature, absorbs faster, and feels less greasy. It’s fantastic for massage, for diluting essential oils, and for anyone who wants a coconut-derived oil that’s less waxy.

What to look for on the label

  • Short ingredient list—ideally just “cocos nucifera (coconut) oil.”
  • Cold-pressed or expeller-pressed for minimal processing.
  • Organic if you prefer fewer agricultural chemicals.
  • Fresh scent—coconut should smell faintly sweet, never rancid or plasticky.

When selecting an oil, virgin and unrefined are typically preferred. An ACS Omega review highlights coconut oil’s antioxidant compounds, which are better preserved in virgin extraction compared to refined methods.

Storing your oil

Coconut oil solidifies in cool rooms and liquefies in warm ones—totally normal. Keep it in a clean, dry place, away from direct sunlight. Use clean fingers or a spatula to avoid introducing water or bacteria.


Smart Comparisons: When To Reach For Coconut Oil—and When Not To

Coconut oil vs. shea butter

Both are rich and comforting. Shea butter is often better for very sensitive or compromised skin because it’s emollient without being as pore-clogging as coconut oil can be. Still, many love blending the two: a shea base with a touch of coconut oil delivers slip and structure.

Coconut oil vs. jojoba or squalane (for faces)

If you want a face-friendly oil, jojoba (technically a wax) and squalane are classic picks. They tend to sit lighter, absorb more cleanly, and play nicer under makeup. Coconut oil for face can be okay on very dry, non-acne-prone skin—but if you’re on the fence, start with jojoba or squalane.

Suggested read: Jojoba Oil for Skin.

Coconut oil vs. olive or almond oil

Olive oil is beloved in Mediterranean skin rituals—nourishing and antioxidant-rich, but it can feel heavier and smell more savory. Sweet almond oil is silky and gentle; many prefer it for body massage or for pregnancy belly care. Coconut oil’s unique appeal is that cushiony, familiar texture and its nostalgic scent.

To know more other natural oils, check out our guide on Natural Oils for Skin.


DIY Coconut Oil Skincare (Simple, Sensible Recipes)

As always, patch test. Keep tools clean. Make small batches and store cool and dry.

1) Quick coconut body scrub

  • 2 tbsp coconut oil
  • 3 tbsp fine sugar (or fine coffee grounds for extra smoothness)
  • Optional: a drop of vanilla or lavender

Mix into a paste. In the shower, massage on damp skin in gentle circles. Rinse, pat dry, and enjoy gleam without tightness.

2) Whipped coconut body butter

  • 2 tbsp coconut oil
  • 1 tbsp shea butter
  • 1 tsp fractionated coconut oil (for slip)

Warm in a double boiler just until melted, then whip as it cools to a soft cream. Spoon into a clean jar. Use sparingly after bathing.

Also Read: Clove for Skin Health: Nourish, Soothe, and Rejuvenate with Nature’s Beauty Secret

3) Coconut cleansing balm (double-cleanse essential)

  • 1 tbsp coconut oil
  • 1 tbsp jojoba or squalane
  • A pea-sized amount of unscented balm base (optional for texture)

Melt together, cool to a thick balm. Massage over dry face to melt sunscreen and makeup, then follow with a gentle water-based cleanser.

Smiling woman holding coconut oil jar and lip balm with DIY skincare recipes for face mask, lip balm, and body oil.
Easy DIY skincare with coconut oil: face mask with honey/turmeric, lip balm with beeswax, and body oil with essential oils

4) After-sun comfort balm

  • 1 tbsp coconut oil
  • 1 tbsp aloe gel
  • 2–3 drops lavender (optional, if you tolerate essential oils)

Blend lightly; smooth a small amount over clean skin after sun exposure. Remember: this is comfort, not protection.

5) Pre-shampoo scalp oil (for flakes and dryness)

  • 2 tbsp coconut oil
  • 5 drops tea tree or neem oil (optional; skip if sensitive)

Massage into the scalp for 5–10 minutes. Leave on 20–30 minutes. Shampoo thoroughly. Repeat weekly as needed.


Sample Routines: Make Coconut Oil Work For You

A. Dry body, normal face

  • Morning: Shower → apply coconut oil on damp body skin; lightweight moisturizer on face; SPF 30+.
  • Evening: Quick rinse → a small amount of coconut oil on elbows, knees, heels. Face gets a regular night cream or squalane if needed.

B. Oily/acne-prone face, dry hands/feet

  • Morning: Gel cleanser → oil-free face moisturizer → SPF 30+. No coconut oil on face.
  • Evening: Double-cleanse if you wear makeup; use coconut oil only for hand/cuticle care and for heels (sock overnight).

C. Sensitive or eczema-prone body (patch test first)

  • Shower: Lukewarm water; non-foaming, fragrance-free wash.
  • After: On damp skin, thin layer of coconut oil; lock with a plain cream on top if you like (the “oil-then-cream sandwich”).
  • Flare days: Stick to what your doctor recommends; keep coconut oil as a comfort step only if it consistently helps you.

D. Scalp dryness or mild scaling

  • Weekly: Pre-shampoo coconut oil for scalp 20–30 minutes before washing; rinse well; keep conditioner off scalp if it weighs you down.

Do Read: Vitamin D Deficiency and Skin Health.


When To Skip Coconut Oil

  • Active acne or frequent clogged pores, especially on the face.
  • Milia-prone areas like eyelids and under-eyes.
  • Fungal-prone skin issues where your dermatologist has advised avoiding heavy saturated oils.
  • Fresh procedures/wounds your clinician told you to keep product-free.
  • Any irritation after patch testing—redness, itching, or stinging means it’s not a match.

Skipping it on the face but loving it on the body is completely valid. Your routine should serve you, not the other way around.

Also Read:Liquid Gold: 5 Benefits of Sesame Oil for Skin Care.


The Bottom Line

Coconut oil for skin is beloved for a reason. It’s simple, comforting, and remarkably effective at locking in moisture, making rough skin feel soft again, and adding a healthy sheen from shoulders to heels. It can support dryness, eczema comfort, and scalp flaking, and it’s a joy to use in massage or as a makeup remover—provided you double-cleanse.

At the same time, it’s not a universal hero. Its high comedogenic rating means many faces—especially oily or acne-prone—do better with lighter oils. It won’t whiten skin, it can’t remove tan overnight, and it certainly isn’t a sunscreen. Think of coconut oil as a bodycare staple and a targeted comfort step, not a cure-all.

In the end, the best routine is the one your skin actually enjoys. If coconut oil leaves you soft and glowing, keep it close. If it clogs or irritates, let it go without guilt. Skincare is personal, and there are plenty of beautiful paths to healthy, happy skin.

FAQs on Coconut Oil for Skin

1. Does coconut oil darken skin?

Coconut oil itself does not chemically darken skin. The confusion comes when people apply it as a tanning oil and then spend time in the sun. Because it does not block UV rays, it can accelerate tanning. Used indoors, at night, or in sun-safe routines, coconut oil will not change your natural skin tone. The AAD explains tanning comes from UV exposure, not the oil itself.


2. Can coconut oil remove tan overnight?

No natural product, including coconut oil, can erase a tan overnight. A tan is your skin’s natural defense against UV exposure. Coconut oil may soothe dryness or tightness after sun, but fading tan requires time, gentle exfoliation, and daily sun protection.


3. Is it safe to apply coconut oil on the body overnight?

For many people, yes — coconut oil overnight can leave skin soft and deeply moisturized. But there are downsides:

  • Pore clogging on acne-prone areas such as the back or chest.
  • Fabric stains from oil residue on sheets and clothes.
  • Greasy buildup in hot, humid weather.
    If you want to try it, start with drier zones like elbows, knees, or heels, and use old cotton sleepwear to avoid staining.

4. What are the disadvantages of coconut oil on the face?

Coconut oil is highly comedogenic (rating ~4/5), so it can clog pores and trigger breakouts in oily or acne-prone skin. Some people also experience milia (tiny white bumps), irritation, or allergic reactions. Patch test first, limit overnight use, and consider lighter oils such as jojoba or squalane if your skin reacts poorly.


5. How often should I use coconut oil on my face?

If your skin tolerates it, use coconut oil sparingly — one to three times per week — rather than daily. Very dry or mature skin types may benefit more often, while oily or acne-prone skin may do better keeping coconut oil for the body only.


6. Can coconut oil be used for sunburn?

Yes — coconut oil can comfort mild sunburn by locking in moisture and reducing tightness. Apply only after the initial heat has settled (usually 24–48 hours after exposure). For the acute phase, cool compresses and aloe vera are more soothing. And remember: coconut oil is not a sunscreen and should not be relied on for UV protection. As Healthline stresses it should not replace aloe vera or SPF.


7. Can coconut oil help with eczema, psoriasis, or dermatitis?

Coconut oil may ease dryness, scaling, and itch by sealing in hydration. Many people with eczema, dermatitis, or psoriasis find it calming on patches or as a pre-shampoo scalp treatment. Still, these conditions are complex, and what helps one person may irritate another. Always patch test and consult your dermatologist for long-term care.

As supported by the National Eczema Association and WebMD, though results vary and patch testing is essential.


8. Can coconut oil help with scars, stretch marks, or wrinkles?

Coconut oil can improve skin softness and elasticity, which may make scars and stretch marks look less noticeable over time. It can also plump fine lines by sealing in moisture. However, it won’t erase scars, remove pigmentation, or replace active anti-aging ingredients like retinoids.


9. Can coconut oil be used for newborn skin or diaper rash?

Virgin coconut oil is often used for gentle baby massage, cradle cap, or mild dryness. Some parents also apply it to soothe diaper-area skin, but it should not replace medical barrier creams if a rash is present. Always patch test on a small area of baby’s skin and consult your pediatrician if irritation develops.


10. What about coconut oil soap and body wash?

Coconut-derived soaps and body washes are widely available. Pure coconut oil soaps can be quite cleansing but sometimes too stripping for very dry or sensitive skin. Blended versions (with butters, oils, or moisturizers added) are usually gentler. If you like the idea of coconut oil in your cleansing routine, start with a moisturizing coconut body wash rather than pure soap.

References

To make this guide on coconut oil for skin both informative and reliable, we relied on peer-reviewed studies, dermatology associations, and trusted health publishers. Below are some key references you can explore for more details:

  1. PubMed Clinical Trial on Virgin Coconut Oil for Skin Hydration – A study published in PubMed compared virgin coconut oil with mineral oil, showing improvements in hydration and barrier function. This supports using coconut oil as a natural moisturizer.
  2. National Institutes of Health Review on Coconut Oil – A review on NIH/PMC explains how coconut oil reduces transepidermal water loss, aids wound healing, and strengthens the skin barrier.
  3. Coconut Oil for Eczema Relief – A randomized controlled trial in PubMed found coconut oil improved symptoms in eczema patients. The National Eczema Association also recommends it for soothing irritated skin.
  4. Coconut Oil and Psoriasis Care – The Cleveland Clinic highlights coconut oil’s role in softening scalp psoriasis plaques. WebMD also lists it as a natural option for easing scaling and dryness.
  5. Coconut Oil and Sun Protection Myths – According to the American Academy of Dermatology, coconut oil cannot replace sunscreen. Healthline further confirms that its SPF is too low for reliable UV protection, though it may soothe skin after sun exposure.
  6. Comedogenic Rating of Coconut OilCurology and Verywell Health both point out that coconut oil scores high on the comedogenic scale, making it risky for acne-prone or oily skin.
  7. Coconut Oil for Babies and Newborn SkinPubMed research shows coconut oil used in neonatal massage helps protect and hydrate newborn skin, though it should be applied under pediatric guidance.
  8. Virgin vs. Refined Coconut Oil – An ACS Omega review explains how virgin coconut oil retains more antioxidants compared to refined varieties, making it a better choice for skin care.
Posted on 1 Comment

Health Benefits of Watermelon Juice: Nutrition, Daily Uses & Side Effects

Fresh watermelon juice on ice, garnished with mint and a lime wedge; summer hydration drink to show its benefits.

When the summer sun beats down and you’re craving something that’s refreshing yet genuinely nourishing, few drinks feel as right as a tall glass of watermelon juice. Sweet and cooling with that ruby glow, it’s more than a seasonal indulgence. Watermelon juice delivers hydration, vitamins, minerals, and antioxidants in a form your body recognizes and loves. If you’ve wondered, “What are the benefits of watermelon juice—and is watermelon juice good for health?” this guide puts everything in one place: the nutrition, the daily uses, the gender-specific advantages, and the side effects you should know before making it a habit.

Watermelon has always had a practical role in hot climates. Traditionally, people turned to it to quench thirst, calm digestion, and revive tired muscles after fieldwork. Today, modern nutrition explains why that wisdom works: watermelon juice combines a very high water content with vitamin C, vitamin A (as beta-carotene), small amounts of B-vitamins, potassium and magnesium, plus two star compounds—lycopene and citrulline—that support circulation, recovery, and long-term wellness. That’s the head start. Now let’s translate it into everyday benefits you can actually feel.


Nutritional Benefits of Watermelon Juice

The real magic of watermelon juice begins with its impressive nutritional profile. While it may seem like a simple, water-rich fruit, each glass is loaded with compounds that nourish your body from the inside out. At breakfast, between meetings, after a walk in the heat—whenever the body whispers for fluids—this is a quick, easy yes. Here’s what makes it such a valuable drink:

Low in Calories, High in Hydration

One cup (about 240 ml) of fresh watermelon juice contains just 45 calories — far fewer than most packaged juices or sodas. At the same time, it’s made up of over 90% water, making it one of the best natural drinks for hydration. This is why many people choose it as a lighter alternative to energy drinks or sugary beverages. (MyFoodData)

Packed with Vitamins

Beyond the water, the vitamin C content is a quiet overachiever. In just one cup you cover over a fifth of your daily needs, enough to support immune function and help your skin look brighter. Vitamin A (from beta-carotene) works alongside it, aiding skin renewal and eye health. You also get a touch of vitamin B6, useful for energy metabolism and a steady mood.

  • Vitamin C: One cup provides more than 20% of your daily needs, supporting your immune system and helping your skin stay radiant.
  • Vitamin A (beta-carotene): Promotes healthy eyes and glowing skin.
  • Vitamin B6: Helps with energy metabolism and brain function.

These vitamins make the health benefits of drinking watermelon juice especially attractive if you want a natural way to support immunity and skin health.

Infographic summarizing watermelon juice per 1 cup: ~45 kcal, ~92% water, vitamins C & A, potassium, magnesium, lycopene, citrulline.
At a glance: calories, water %, vitamins, minerals, and key antioxidants in 1 cup (240 ml).

Rich in Minerals

Minerals round out the picture. Potassium helps maintain normal blood pressure and healthy muscle function, while magnesium supports nerves, recovery, and a calmer, steadier energy. These aren’t massive doses—but they add up, especially if you’re swapping watermelon juice for sugary sodas or heavy packaged juices.

  • Potassium: Regulates blood pressure and supports muscle function.
  • Magnesium: Important for nerve health, muscle recovery, and maintaining energy levels.

Because of these minerals, the advantages of watermelon juice go beyond hydration — it actually supports your heart and muscles, too.

Antioxidants That Heal and Protect

Then come the two heavy hitters. Lycopene, the red carotenoid that gives watermelon its color, is associated with a healthier heart and lower oxidative stress—think of it as part of your internal “rust protection.” Citrulline, a naturally occurring amino acid, is converted in the body to arginine and then to nitric oxide, which helps relax blood vessels and improve blood flow. For you, that often shows up as better circulation and less post-exercise soreness.

  • Lycopene: A carotenoid that gives watermelon its red color and is linked to heart health and reduced inflammation. Studies also suggest lycopene may play a role in protecting against certain cancers.
  • Citrulline: An amino acid that improves blood circulation and helps reduce muscle soreness after exercise.

These compounds give watermelon juice an edge over other fruit juices, especially for those interested in fitness, recovery, and long-term wellness.

A Quick Nutrition Snapshot (per 1 cup / 240 ml):

  • Calories: ~45
  • Water: ~92%
  • Vitamin A: 11% DV
  • Vitamin C: 21% DV
  • Vitamin B6: 5% DV
  • Potassium: 4% DV
  • Magnesium: 4% DV
  • Lycopene: ~6,500 mcg
  • Citrulline: 200–300 mg

This simple breakdown highlights why so many nutritionists recommend watermelon juice as part of a balanced diet. It’s light, nutrient-dense, and deeply hydrating — all the qualities you want in a natural health drink.

Read more about The Watermelon – Nutrition, Benefits, and 5 Practical Ways for Weight Loss.

From Nutrition to Daily Life

Knowing the nutrients is one thing, but understanding how they actually translate into real-world benefits is even more important. Whether you’re someone who works long hours outdoors, a gym enthusiast, or simply looking for a healthier drink to enjoy with meals, the uses of watermelon juice go far beyond quenching thirst.

In the next section, we’ll dive into the top health benefits of drinking watermelon juice, and explore how this sweet red fruit can boost your energy, support your heart, keep your skin radiant, and much more.


Top Health Benefits of Drinking Watermelon Juice

Now that we’ve seen just how nutrient-rich this fruit is, let’s talk about what it actually does for your body. The health benefits of watermelon juice are backed not just by tradition, but also by science. From keeping you hydrated to helping your muscles recover, here’s why this refreshing drink deserves a regular spot in your diet.

1. Boosts Hydration Naturally

One of the most obvious — and most powerful — benefits of watermelon juice is hydration. With more than 90% water content, it works almost like nature’s own sports drink. Unlike plain water, watermelon juice also contains potassium, magnesium, and natural sugars that help replenish electrolytes lost through sweat.

Because watermelon juice carries electrolytes along with water—particularly potassium and magnesium—it does more than slosh through the system. On a still, heavy afternoon, a chilled glass can lift that dull fatigue far better than a can of cola. After a sweaty commute or a quick run, it restores fluid balance without a synthetic aftertaste.

2. Supports Heart Health

Heart disease is one of the leading health concerns worldwide, and diet plays a huge role in prevention. The advantages of watermelon juice for cardiovascular health come mainly from lycopene and citrulline.

  • Lycopene, the antioxidant responsible for watermelon’s red color, has been linked to lower cholesterol levels and reduced oxidative stress — both key factors in heart health.
  • Citrulline helps relax blood vessels and improves circulation, which can reduce blood pressure levels over time.
  • Potassium supports healthy heart rhythms and prevents excess fluid retention. (American Heart Association)

Lycopene helps counter day-to-day oxidative stress, while citrulline supports the nitric-oxide pathway that relaxes blood vessels. Add in potassium’s role in fluid balance and healthy heart rhythm, and you have a gentle, food-first way to look after your cardiovascular system. It’s not a substitute for medication or lifestyle changes, of course, but as a daily habit alongside movement and a balanced plate, it’s smart.

3. Aids Digestion and Eases Bloating

Another lesser-known benefit of drinking watermelon juice daily is how gentle it is on digestion. While the juice itself is low in fiber, its high water content helps soften stools and keep the digestive system moving smoothly.

If you ever feel bloated after heavy or salty meals, watermelon juice can help. Its natural diuretic effect encourages your body to flush out excess water and sodium, reducing puffiness and discomfort. This makes it especially useful for people prone to water retention.

4. Improves Skin and Hair Health

Looking for a natural beauty booster? One of the sweetest health benefits of watermelon juice is how it nourishes your skin and hair from the inside out.

  • Vitamin C stimulates collagen production, which keeps skin firm and youthful.
  • Vitamin A helps repair skin cells and prevent dryness.
  • Hydration keeps your skin plump and glowing.
  • Antioxidants reduce oxidative stress, slowing down premature aging.

Many women swear by a glass of watermelon juice in their morning routine for that extra glow. Men also benefit — hydration and circulation improvements can reduce dullness and dryness caused by long days outdoors.

Hydration softens edges—tiredness shows less on your face; skin looks smoother. Vitamin C supports collagen formation; vitamin A helps with cell turnover; antioxidants mop up some of the stress your skin battles daily. The change isn’t dramatic overnight, but after a few weeks of consistent intake, many people notice a quiet, healthy glow.

5. Helps Muscle Recovery and Energy

If you’ve ever hit the gym hard or spent a long day doing physical work, you’ll know the pain of sore muscles. Here’s where watermelon juice really shines.

Thanks to citrulline, one of the key amino acids in watermelon, the juice has been shown to reduce muscle soreness and speed up recovery after workouts. Small human trials even suggest that athletes who drink watermelon juice before or after training report less fatigue, quicker rebound times, and less next-day muscle soreness. (J. Agric. Food Chem. – 2013)

Pair this with its natural sugars and minerals, and you’ve got a post-exercise drink that hydrates, energizes, and helps your body bounce back — no need for synthetic sports drinks. Find 5 Ways to Incorporate Watermelon into Your Summer Fitness Routine: Stay Refreshed and Reap the Benefits.

6. Boosts Immunity and Fights Inflammation

Beyond hydration and recovery, the nutritional benefits of watermelon juice extend to your immune system. Vitamin C, lycopene, and other antioxidants fight free radicals that can weaken immunity and contribute to chronic inflammation.

Regularly drinking watermelon juice may help your body fend off minor infections, speed up healing, and protect against long-term health risks caused by inflammation.

Putting the Benefits of Watermelon Juice Into Perspective

When you think about it, these benefits of watermelon juice aren’t isolated perks. They connect to everyday life:

  • Quenching your thirst on hot days.
  • Giving your heart and muscles the nutrients they need.
  • Supporting skin health for a natural glow.
  • Helping your body recover from stress or exercise.

That’s why so many people are turning to watermelon juice as a daily habit, not just a seasonal treat. And speaking of daily habits — let’s look closer at what happens when you make this juice a regular part of your routine.


Benefits of Drinking Watermelon Juice Daily

We’ve all heard the saying, “Consistency is key,” and when it comes to health, this couldn’t be more true. While an occasional glass of watermelon juice is refreshing, making it a part of your daily routine unlocks even greater rewards. Let’s explore the benefits of drinking watermelon juice daily and why it could be one of the easiest healthy habits to adopt.

A Morning Hydration Boost

After hours of sleep, your body wakes up slightly dehydrated. Instead of reaching immediately for coffee or tea, try starting your day with a small glass of fresh watermelon juice – maybe with a squeeze of lime. Its high water content rehydrates your body gently, while natural sugars and vitamins give you a light energy boost. You feel more alert without the jitter.

This habit not only makes mornings feel fresher but also ensures that your digestive system kicks into gear smoothly. Many people find that this practice reduces sluggishness and sets the tone for a more energized day.

Natural Support for Weight Management

If weight management is on your radar, this is a friendly ally. At ~45 calories per cup, it soothes a sweet tooth and heads off snack-ish impulses. Swap a mid-afternoon pastry for a chilled glass and watch the difference over a month. It’s not a trick; it’s simply easier to choose better when you’re hydrated and satisfied. For deeper tips, see our guide to watermelon for weight management (Nutrition + 5 Practical Ways).

One of the biggest advantages of watermelon juice for daily consumption is its role in weight control. Since it’s low in calories yet naturally sweet, it can replace sugary drinks without leaving you feeling deprived. Sipping a glass mid-morning or mid-afternoon can curb cravings and keep you from reaching for packaged snacks and other junk food.

Woman in sportswear drinking watermelon juice after workout for muscle recovery and hydration.
Watermelon juice for muscle recovery and natural hydration — a citrulline and potassium boost after workouts.

Better Post-Workout Recovery

If you exercise regularly, watermelon juice makes an excellent daily recovery drink. Its citrulline content reduces soreness, while potassium and magnesium help muscles relax and replenish. Drinking it after workouts can help your body bounce back faster, so you’re ready for the next session. (Tarazona-Díaz 2013. PubMed)

A Gentle Detox for Your Body

Thanks to its water and antioxidant content, watermelon juice acts as a natural detoxifier. Daily intake encourages your body to flush out toxins, reduce bloating, and maintain smoother digestion. Unlike harsh detox fads, this is a gentle, sustainable way to support your system.


Is Watermelon Juice Good on an Empty Stomach?

This is one of the most common questions people ask: “Can I drink watermelon juice on an empty stomach?” The answer is yes — and in many cases, it’s actually one of the best times to enjoy it.

Why It Works in the Morning

Drinking watermelon juice first thing in the morning hydrates your body after a night’s rest, delivers vitamins quickly, and provides a refreshing start without being too heavy. It’s especially beneficial in hot weather, when your body is prone to losing fluids quickly.

Things to Keep in Mind

However, moderation is important. For most people, a small to medium glass is ideal. Since watermelon juice contains natural sugars, consuming it in very large quantities on an empty stomach might cause a temporary spike in blood sugar. If you’re diabetic, insulin-resistant, managing blood sugar or tend to feel woozy with fruit first thing, simply pair your juice with a light breakfast—yogurt, eggs, a handful of nuts. You’ll still enjoy the benefits of watermelon juice on an empty stomach, but with a softer impact on glucose. (Harvard Health – GI vs GL)

Practical Tip

Try blending watermelon juice with a squeeze of lime in the morning. The lime adds a zesty twist and extra vitamin C, making the drink even more refreshing and digestion-friendly.


Daily Uses of Watermelon Juice

Think beyond “juice with breakfast.” Keep a bottle in the fridge and use it like a tool. A small glass before you head into the sun; a glass when the 4 p.m. slump hits; a splash at dinner instead of soda. Kids usually adore it (the color helps), and older family members—who are more vulnerable to dehydration—find it easier to sip regularly when it tastes this good. Fold it into your day wherever hydration would make the next hour better. Beyond mornings and workouts, there are many practical uses of watermelon juice in daily life:

Three glasses of watermelon juice shown at different hydration moments — breakfast with coffee, post-workout with water bottle, and afternoon desk with laptop.
Hydrate smart: start your morning, refuel post-workout, or beat the 4 PM slump with a glass of watermelon juice.
  • As a mid-day refresher: Keeps you hydrated when energy levels dip.
  • As a mealtime drink: A healthier alternative to sodas or artificially flavored juices.
  • As a family-friendly beverage: Kids love the natural sweetness, and it’s a safer option than sugary store-bought drinks.
  • As a skin-friendly routine: Regular intake provides hydration and nutrients that show up in your skin over time.

These everyday uses highlight why so many people now see watermelon juice not just as a seasonal treat, but as a daily health practice.

Moving on

So, whether you sip it first thing in the morning, after your workout, or simply as a refreshing break during the day, the benefits of drinking watermelon juice daily are undeniable. But daily routines can look different for everyone — which is why it’s helpful to also explore how watermelon juice may specifically support women and men in unique ways.


Watermelon Juice Benefits for Women

For many women, the advantages of watermelon juice show up as steadier energy and bloating relief during hormonal shifts. That mild diuretic effect can ease water retention, and the vitamin C + A combo is great for glow. Because it’s low in calories but naturally sweet, it also makes weight-management choices feel less punitive. If your routine includes yoga, runs, or strength classes, the potassium and magnesium help guard against cramps, and citrulline supports endurance and recovery—quietly, in the background, the way the best habits do.

Skin Glow and Anti-Aging Support

One of the biggest advantages of watermelon juice for women is its impact on skin. The mix of vitamin C, vitamin A, and lycopene works together to promote collagen production, reduce oxidative stress, and fight the early signs of aging. Women who drink watermelon juice regularly often notice healthier, more radiant skin without relying solely on expensive skincare products.

Know more about its benefits for skin and explore some exciting recipe in: Watermelon: The Hydration Hero for Your Skin – Benefits, Myths, and 5 Quenching Recipes for Dewy Skin

Smiling woman holding a glass of watermelon juice, highlighting skin benefits like hydration, vitamin C, and lycopene.
Drink your way to radiant, dewy skin — watermelon juice is rich in vitamin C, lycopene, and hydration.

Weight Management and Craving Control

Women juggling work, family, and self-care often struggle with snacking or sugary cravings. Watermelon juice provides natural sweetness without excess calories — just around 45 per cup. It’s filling, hydrating, and a much better alternative to sodas or packaged juices. Making it a daily ritual can help support weight management goals.

Relief from Bloating and Water Retention

Hormonal changes during menstrual cycles can sometimes cause bloating and puffiness. Because watermelon juice has mild diuretic properties, it helps the body release excess sodium and water, bringing a sense of lightness and comfort.

Nutrient Boost for Active Lifestyles

For active women — whether in fitness, yoga, or simply balancing busy days — watermelon juice provides potassium and magnesium that prevent fatigue and muscle cramps. The citrulline content also helps with endurance and recovery.

Watermelon Juice Benefits for Men

Men often notice the benefits of drinking watermelon juice daily in performance and recovery. Better circulation (that citrulline-to-nitric-oxide pathway again) can translate to improved stamina; the electrolyte + water mix reduces post-workout drag. For men working long hours in the heat or on physically demanding sites, it’s a practical hydration choice—quick relief without the syrupy sugar load of many “sports” drinks. Over the long run, antioxidants like lycopene matter for heart and prostate wellness; they’re not a cure-all, but they’re a wise daily bet. (Bailey 2016. PubMed)

Improved Circulation and Stamina

The amino acid citrulline found in watermelon juice supports nitric oxide production in the body, which helps relax blood vessels and improve circulation. This is not only beneficial for heart health but can also enhance stamina and physical performance.

Faster Post-Workout Recovery

Men who lift weights, run, or engage in sports can benefit from watermelon juice as a natural recovery drink. Citrulline reduces muscle soreness, while potassium helps prevent cramps. Its combination of hydration and antioxidants makes it one of the best post-training beverages.

Hydration for Outdoor and Active Jobs

For men working outdoors or in physically demanding roles, dehydration is a constant challenge. Watermelon juice provides quick relief by restoring fluids, electrolytes, and energy at the same time. It’s a practical choice for construction workers, athletes, or anyone exposed to long hours in the sun.

Heart and Prostate Support

Antioxidants like lycopene in watermelon juice are particularly important for men, as they have been linked to cardiovascular wellness and prostate health. Regular intake can support long-term vitality. (Vincellette 2021. PMC)


Is Watermelon Juice Good for Hydration?

If there’s one thing watermelon juice is famous for, it’s hydration. With over 90% water, plus a good balance of natural sugars and electrolytes, it’s one of the best drinks to keep your body refreshed. It won’t replace plain water, but it’s a superb companion—particularly when you’re sweating. Compared with water alone, watermelon juice offers quick energy and electrolytes; compared with many sports drinks, it offers the same hydration logic without loud colors or artificial flavors. It’s also family-friendly: children who resist plain water usually don’t resist watermelon. But let’s break down why the hydration benefits of watermelon juice go beyond plain water.

Better Than Plain Water in Some Cases

While nothing replaces clean drinking water, watermelon juice offers added perks. The natural sugars give you quick energy, while potassium and magnesium replenish electrolytes lost through sweat. This makes it especially useful on hot summer days, after workouts, or anytime you’re prone to dehydration.

How It Compares to Sports Drinks

Many sports drinks claim to restore electrolytes, but they often come loaded with artificial flavors, added sugars, or preservatives. A glass of fresh watermelon juice does the same job naturally, without any chemicals. If you’ve ever felt dizzy or drained after a run or yoga session, sipping watermelon juice can help restore balance quickly.

Hydration for All Ages

The advantages of watermelon juice for hydration aren’t limited to adults. Kids who refuse plain water often love the sweet taste of watermelon juice, making it an easy way to keep them hydrated during playtime. Seniors also benefit, since dehydration risk increases with age.


Side Effects of Drinking Too Much Watermelon Juice

Like most good things, watermelon juice works best in moderation. Every healthy habit has a sensible range. With watermelon juice, the sweet spot for most adults is 1–2 cups a day, ideally earlier in the day. While the health benefits of watermelon juice are undeniable, drinking too much can cause some discomfort. Here are a few possible side effects of watermelon juice to keep in mind:

Excess Sugar Intake

Even though it’s natural sugar, watermelon is still sweet. Drinking large amounts of watermelon juice daily may raise blood sugar levels — something diabetics need to monitor carefully.

Digestive Upset

Because watermelon is rich in water and has mild diuretic properties, overconsumption can lead to bloating, loose stools, or frequent trips to the bathroom.

Night-Time Discomfort

Many people enjoy a chilled glass of watermelon juice at night, but its diuretic effect can disrupt sleep with multiple bathroom breaks. It’s better to enjoy it earlier in the day.

Allergic Reactions (Rare)

While uncommon, some people may be sensitive to watermelon. If you experience itching, swelling, or discomfort after drinking it, consult a doctor.

Balancing Benefits and Precautions

When consumed in moderation — one to two cups a day for most healthy adults — the advantages of watermelon juice far outweigh the side effects. The key is to enjoy it as part of a varied diet, not as a replacement for other fruits, vegetables, or balanced meals.


What Does Watermelon Juice Do for the Body?

At this point, you might be asking: “Okay, but in simple terms, what are the real effects of watermelon juice on the body?” The short answer is — it hydrates, nourishes, and protects. The long answer is where things get exciting.

  • Hydration & Energy: Watermelon juice replenishes fluids faster than plain water, thanks to its balance of natural sugars and electrolytes. This makes you feel more alert and energized.
  • Heart & Circulation: Lycopene and citrulline in watermelon juice improve blood flow and support cardiovascular health.
  • Immunity & Repair: Vitamins A and C boost your body’s ability to fight infections and heal tissues.
  • Skin & Hair: Regular intake contributes to brighter, healthier-looking skin and stronger hair.
  • Muscle Support: For anyone active, citrulline helps muscles recover faster and reduces soreness.

So, in practical terms, the effects of watermelon juice can be felt in how hydrated you feel, how quickly you recover after activity, and even how your skin glows after a few weeks of making it a habit.


How to Make Fresh Watermelon Juice at Home

One of the biggest advantages of watermelon juice is how easy it is to make. Unlike complicated juices that need multiple ingredients, watermelon juice requires almost no effort.

Three-step guide to make fresh watermelon juice: chop seedless watermelon, blend until smooth, pour and serve.
Three steps: chop, blend (strain optional), serve chilled with a squeeze of lime.

Basic Fresh Watermelon Juice Recipe

Keep it simple. Add 2–3 cups of chilled, seedless watermelon cubes to a blender and blend until smooth. Strain if you prefer a silkier texture, or keep the pulp for body. Serve very cold.

  1. Take 2–3 cups of chilled watermelon cubes (seedless if possible).
  2. Blend until smooth.
  3. Strain if you prefer a thinner texture, though many enjoy it pulpy.
  4. Serve chilled.

That’s it — fresh, pure, and naturally sweet. This simple version already gives you all the nutritional benefits of watermelon juice without additives or preservatives.


Delicious Variations of Watermelon Juice

While pure watermelon juice is delightful on its own, you can easily upgrade it with a few simple ingredients to add flavor, enhance nutrition, or create variety in your daily routine.

If you enjoy variations, try a squeeze of lime (zesty, digestion-friendly), a handful of mint (cooling, bloating-relief), or a half-cup of cucumber (ultra-hydrating). For heavy-sweat days, blend with coconut water for a natural electrolyte boost. Need an iron-leaning, stamina-friendly version? Add a small beetroot chunk and a sliver of ginger. Prefer a picnic pitcher? Stir in lemon and a touch of honey for a bright watermelon lemonade that still feels grown-up.

Watermelon Lime Juice

Adding a splash of lime juice enhances flavor, boosts vitamin C, and aids digestion. It’s one of the most popular uses of watermelon juice in tropical regions.

Watermelon Mint Juice

A handful of fresh mint leaves blended with watermelon juice turns it into a refreshing cooler. Mint also aids digestion and reduces bloating. To explore more, have a look at 5 Fun and Refreshing Watermelon Mocktails for Summer Celebrations.

Watermelon Cucumber Juice

Perfect for summer detoxing, cucumber adds even more hydration and minerals. This combination is cooling, light, and excellent after workouts or yoga. Infact this one words very well with Mint as well, find it in Optimize Digestion with These 5 Fruit Juice Recipes.

Watermelon Coconut Water Drink

Blend watermelon with fresh coconut water for an electrolyte-packed energy drink. It’s a natural alternative to sports drinks, loved by athletes. Read more about Coconut and its precious water in our The Ultimate Guide to Coconut Water: Benefits, Nutrition, and How to Choose the Best One.

Watermelon Beetroot Juice

Adding beetroot enhances iron content and boosts stamina. Some people also mix in a touch of ginger for digestion and an immunity boost.

Watermelon Lemonade

For a tangy twist, combine watermelon juice with lemon and a touch of honey. It makes a great family-friendly drink and is a healthier alternative to packaged lemonades.

Four glasses of watermelon juice with mint, lime, cucumber, and coconut water variations on a white background.
Watermelon Juice in can be enjoyed in different refreshing ways for e.g. — with mint, lime, cucumber, and coconut water for a hydrating summer twist.

Why Fresh Watermelon Juice Is Best

While bottled juices are convenient, nothing beats the benefits of drinking fresh watermelon juice. Store-bought options may contain added sugar, preservatives, or concentrate that reduce nutritional value. Fresh juice, on the other hand, retains all the vitamins, antioxidants, and natural enzymes that your body thrives on.

If you’re short on time and buying, pick cold-pressed bottles labeled “100% watermelon juice” and “no added sugar.” The taste should be clean and the ingredient list short enough to memorize.


Conclusion

Refreshing, nutrient-rich, and incredibly versatile, watermelon juice is more than just a seasonal drink — it’s a natural health tonic you can enjoy year-round. From keeping you hydrated on hot days to supporting your heart, skin, and muscles, the benefits of watermelon juice are backed by both tradition and modern nutrition science.

Drinking it daily in moderation — whether first thing in the morning, after a workout, or as a mid-day refresher — can make a noticeable difference in your energy, digestion, and overall wellness. And with so many delicious variations, from lime and mint blends to cucumber and coconut water combinations, there’s no shortage of ways to keep things exciting.

At the same time, it’s important to remember that moderation matters. While the advantages of watermelon juice are many, drinking it in very large quantities can cause discomfort for some people. Think of it as part of a balanced lifestyle: one to two cups daily is usually perfect for most adults.

So, the next time you’re craving something that quenches thirst and nourishes the body, skip the packaged sodas and juices — and pour yourself a glass of fresh, homemade watermelon juice instead. Your body (and taste buds) will thank you.


Frequently Asked Questions About Watermelon Juice

What are the main benefits of watermelon juice?

The health benefits of watermelon juice include hydration, improved heart health, muscle recovery, better digestion, glowing skin, and stronger immunity. It’s also low in calories and naturally sweet, making it a healthier alternative to packaged drinks.

Is watermelon juice good for health?

Yes, watermelon juice is considered very healthy when consumed in moderation. It contains vitamins A, C, and B6, minerals like potassium and magnesium, and antioxidants such as lycopene and citrulline that support circulation, skin, and immunity.

Can I drink watermelon juice daily?

Absolutely. Drinking one to two cups of fresh watermelon juice daily can help with hydration, energy, and nutrient intake. Just avoid overconsumption, especially if you have diabetes, as it contains natural sugars.

Is watermelon juice good on an empty stomach?

Yes, drinking watermelon juice on an empty stomach — especially in the morning — is a great way to rehydrate after sleep and kickstart digestion. However, if you’re sensitive to natural sugars or prone to blood sugar spikes, pair it with a light breakfast.

Is watermelon juice good for hydration?

Yes. With over 90% water content, plus electrolytes like potassium and magnesium, watermelon juice is one of the best natural hydration drinks. It’s especially effective after workouts, in hot weather, or during long days outdoors.

What are the side effects of drinking too much watermelon juice?

Overconsumption may cause bloating, digestive upset, or frequent urination due to its diuretic effect. It can also raise blood sugar if consumed in large quantities, so people with diabetes should be cautious.

What does watermelon juice do for the body?

Watermelon juice hydrates the body, supports heart and muscle health, nourishes skin, and boosts immunity. Its nutrients and antioxidants provide energy and help reduce inflammation.

Is fresh watermelon juice better than bottled?

Yes. Fresh watermelon juice benefits are greater because it contains no added sugars or preservatives, and all vitamins, minerals, and antioxidants remain intact. Bottled or processed versions often lose nutrients during production.

What are the benefits of watermelon juice for women?

Women benefit from improved skin health, hydration, weight management support, and reduced bloating during hormonal cycles. Regular intake can also enhance energy levels and reduce fatigue.

What are the benefits of watermelon juice for men?

For men, the advantages of watermelon juice include faster muscle recovery, better circulation and stamina, hydration during physically demanding work, and antioxidants like lycopene that support prostate and heart health.