Posted on Leave a comment

Spanakopita Recipe: Greek Spinach Pie with Feta, Phyllo & Crispy Layers

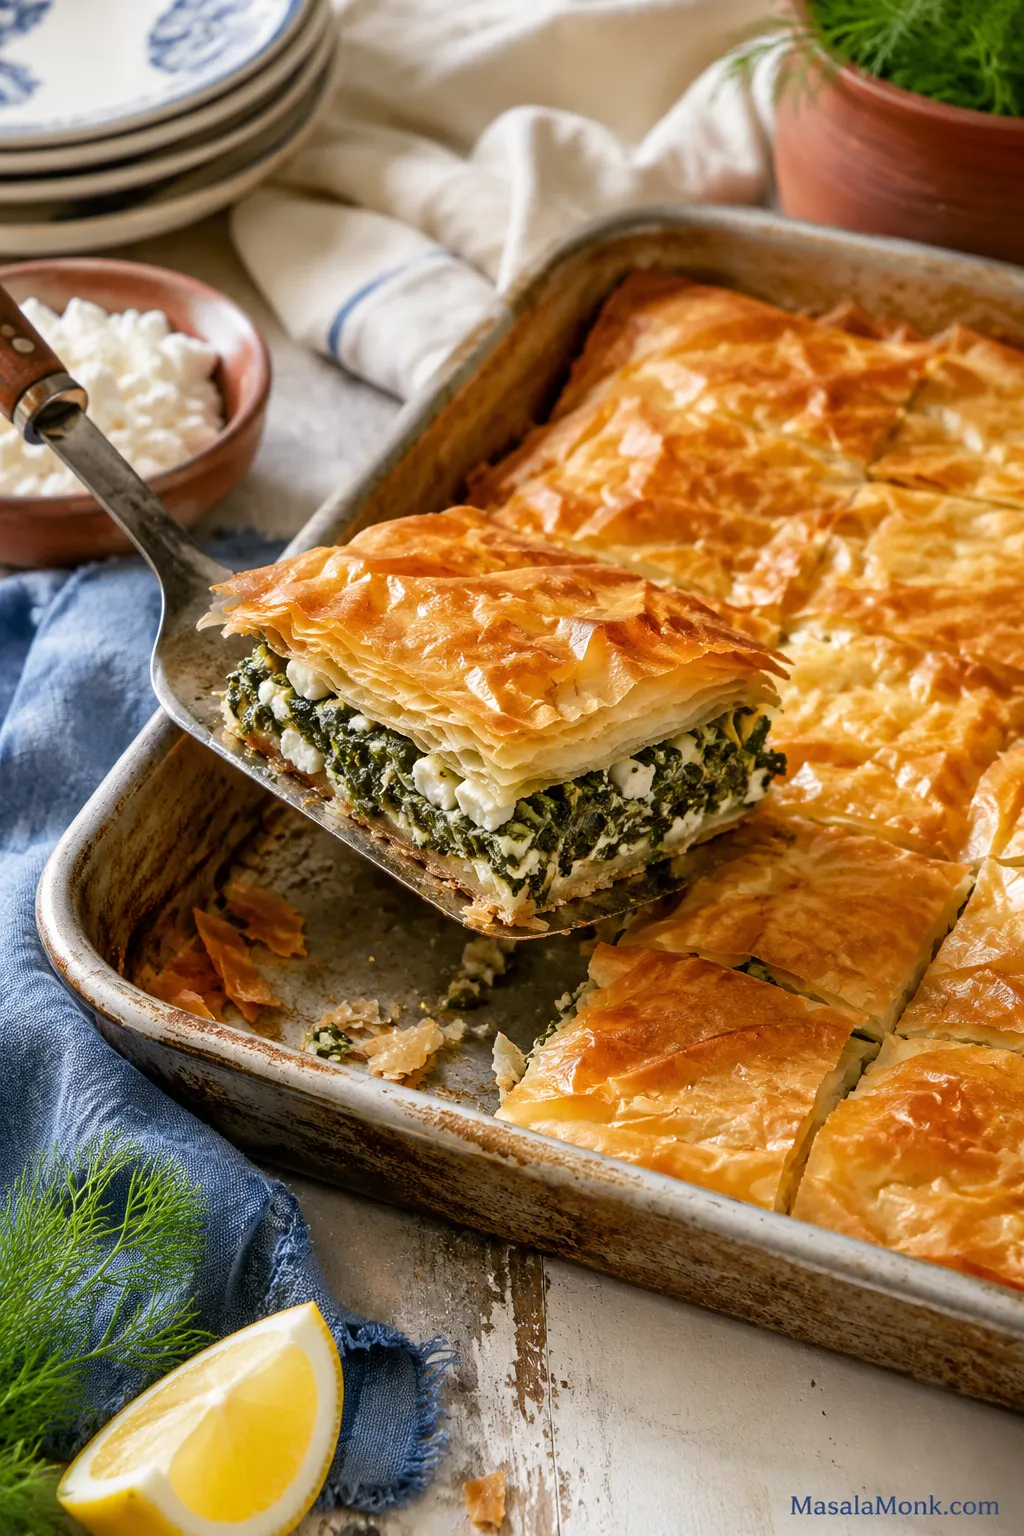
A spatula lifting a corner piece of baked spanakopita from a rectangular pan, showing golden phyllo layers and green spinach feta filling.

You know spanakopita is right when the knife crackles through the golden top and the first corner lifts cleanly from the pan. Under those flaky phyllo layers should be warm spinach, salty feta, fresh herbs, and enough structure to slice without the bottom turning wet.

This is a practical home-kitchen spanakopita: store-bought phyllo, a well-drained spinach-feta filling, clear success cues, and a crisp base that does not depend on perfect pastry work. You still get the drama of a flaky Greek spinach pie, but the process stays manageable: dry the greens, mix the filling, layer, bake, rest, and slice.

If phyllo makes you nervous, you are in good company. It tears, dries, and wrinkles, but this pie does not need perfect sheets. The hidden layers can be patchwork, the top can be a little rustic, and the tray will still bake into something golden, flaky, and shareable.
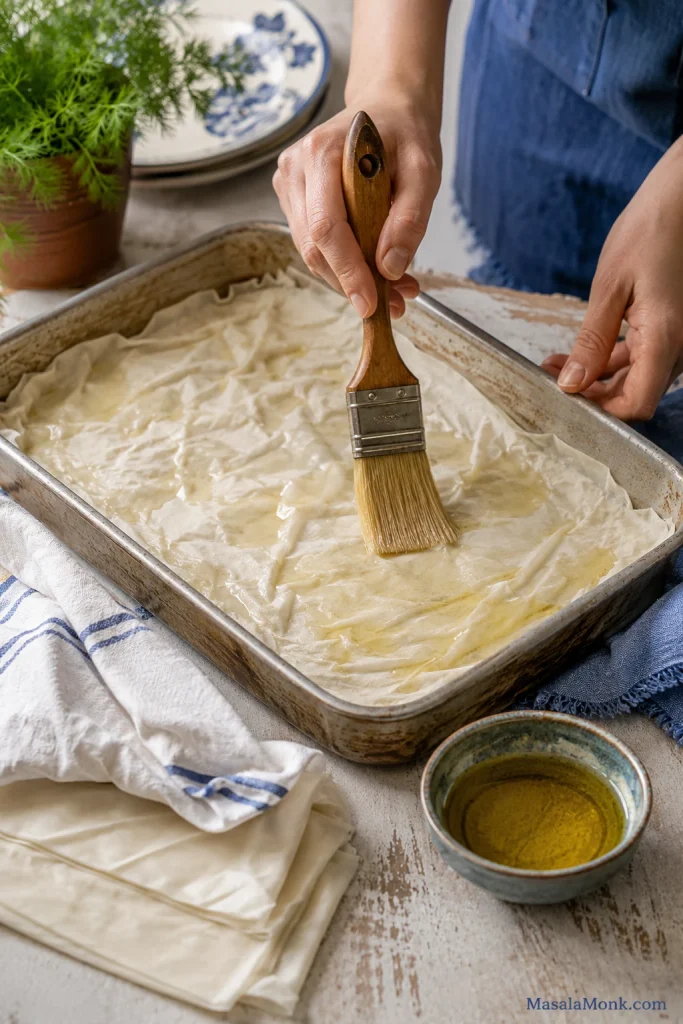
Hands brushing oil over a wrinkled sheet of phyllo pastry inside a rectangular baking pan.
Wrinkled phyllo is still usable phyllo. Once it is lightly brushed and layered, those folds become extra flaky edges instead of a problem to fix.

Fastest reliable path: use frozen spinach, block feta, 14 phyllo sheets, and a 9 x 13 inch pan. Fresh spinach works too, but frozen keeps the filling easier to control for a first tray.

This is the version for the cook who wants spanakopita to feel doable before it feels impressive.

Spanakopita Recipe Snapshot

Recipe typeGreek spinach pie / spinach and feta phyllo pie
Prep time35–45 minutes with frozen spinach; longer with fresh bunch spinach
Cook time45–55 minutes
Total time1 hour 20 minutes to 1 hour 40 minutes, not including phyllo thawing
Advance stepThaw frozen phyllo overnight in the refrigerator
Yield10–12 pieces
Pan size9 x 13 inch / 23 x 33 cm baking dish or pan
Oven temperature350°F / 180°C
Oven rackLower-middle rack
Spinach500 g / 16 oz frozen spinach or 700–900 g / 1½–2 lb fresh spinach
Resting time15–20 minutes, uncovered, before slicing

Jump to the full recipe, or keep reading for the spinach, phyllo, and crisp-bottom tips that make the tray work.

Table of Contents

Before we get into the details, this is the texture you are aiming for: crisp pastry outside, green spinach through the middle, and small feta pieces that stay visible after baking.
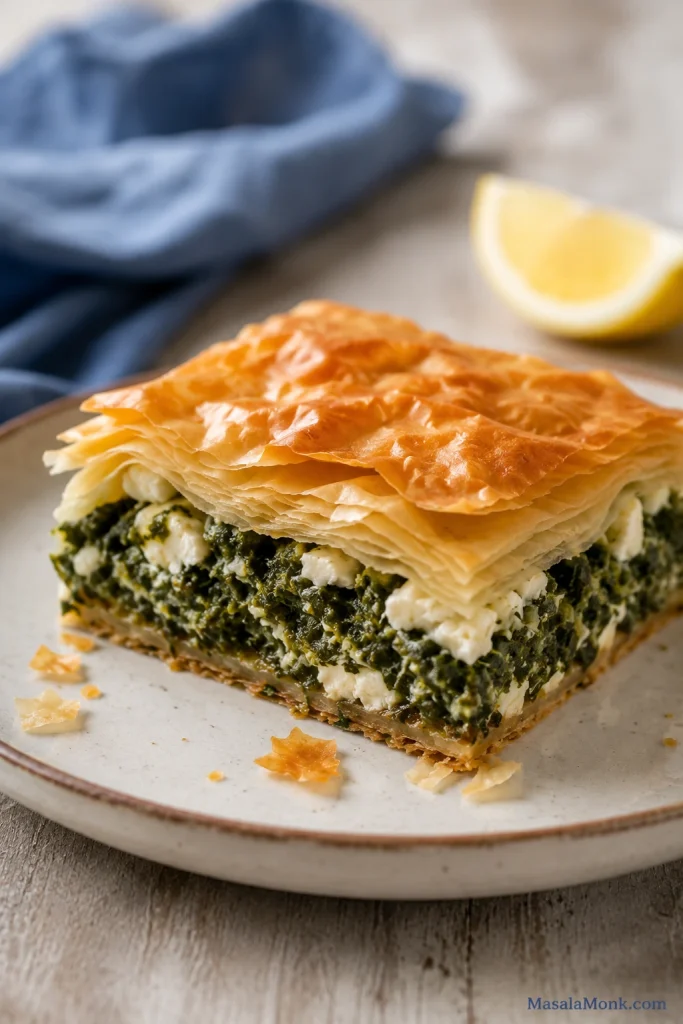
A plated slice of Greek spinach pie showing flaky phyllo layers, green spinach filling, and white feta pieces.
A good Greek spinach pie slice should show contrast: crisp pastry outside, herby spinach inside, and small feta pockets throughout. That uneven texture is part of what makes spanakopita feel homemade.

Why This Spanakopita Works

The goal here is not perfect pastry work. It is a tray that lifts cleanly, tastes generous, and gives you flaky layers without asking you to baby every sheet. Frozen spinach takes one variable off your hands, block feta gives better texture, seven bottom phyllo sheets create structure, and the lower-middle rack helps the base bake through before the top gets too dark.

This is the practical spanakopita setup: filling ingredients ready, phyllo still protected, and the pan waiting before assembly begins.
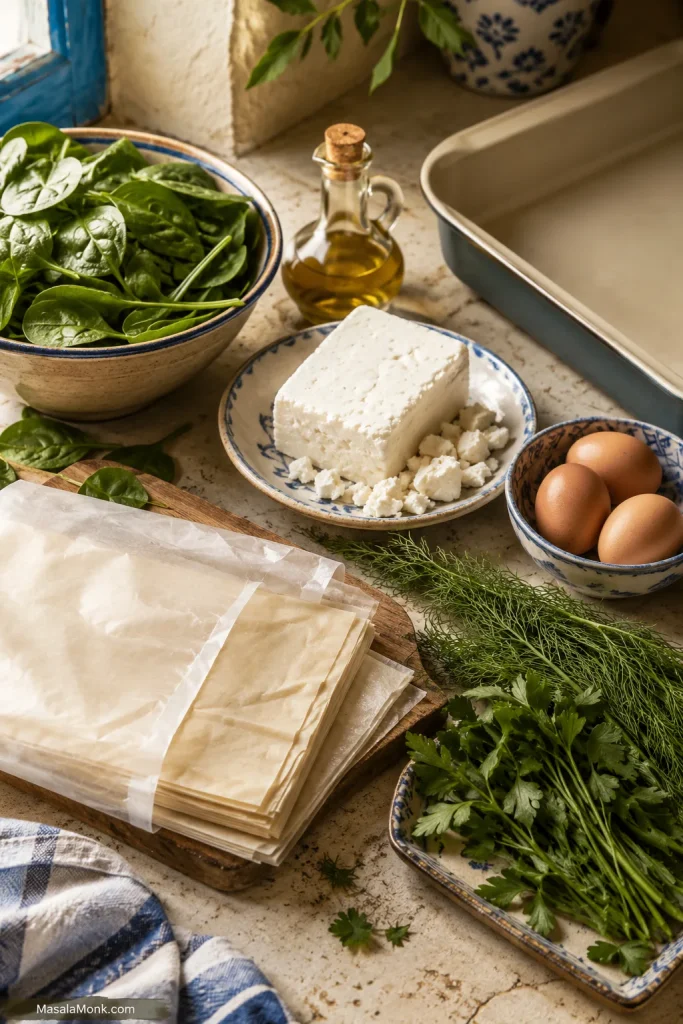
Spanakopita ingredients on a kitchen counter, including phyllo sheets, spinach, feta, herbs, eggs, olive oil, and a rectangular baking pan.
Set up the spanakopita station before opening the phyllo: spinach, feta, herbs, eggs, oil, brush, and pan. Then the delicate sheets spend less time drying on the counter.
  • Frozen spinach makes the filling easier to control. Fresh works too, but frozen is already wilted, so once it is pressed well, the tray becomes more predictable.
  • Block feta gives creamy, salty pockets. It tastes fuller than very dry pre-crumbled feta.
  • Seven bottom sheets support the filling. They help the pie slice cleanly.
  • The lower-middle rack helps the base cook. This is especially useful in glass or ceramic pans.
  • A short rest finishes the texture. The filling settles, the pastry stays flaky, and the pieces cut cleaner.

The tray format is forgiving in a way triangles are not. Torn sheets disappear inside, the filling spreads evenly, and the lower layers have enough time to firm up before slicing.

You still get the flavor of a classic Greek spinach pie, just with store-bought phyllo, a forgiving tray format, and enough structure that the first slice does not collapse.

What Is Spanakopita?

Spanakopita is a Greek spinach pie made with thin phyllo pastry and a savory filling of spinach, feta cheese, herbs, and often eggs.

You may see the pastry spelled as phyllo or filo. They are the same thing: paper-thin pastry sheets that bake into crisp, flaky layers when brushed with olive oil or melted butter.

Greek spinach pies vary by family and region. Some use leeks, some add more herbs, some use homemade phyllo, and some keep the filling very simple. Here, the spirit is classic — greens, feta, herbs, olive oil, and crisp phyllo — while the handling is modern and practical: store-bought pastry, clear texture cues, and a tray format that gives the filling room to settle.

For dinner and clean slices, the tray version is the easiest path; triangles are better when you want appetizers, lunch boxes, or party bites.
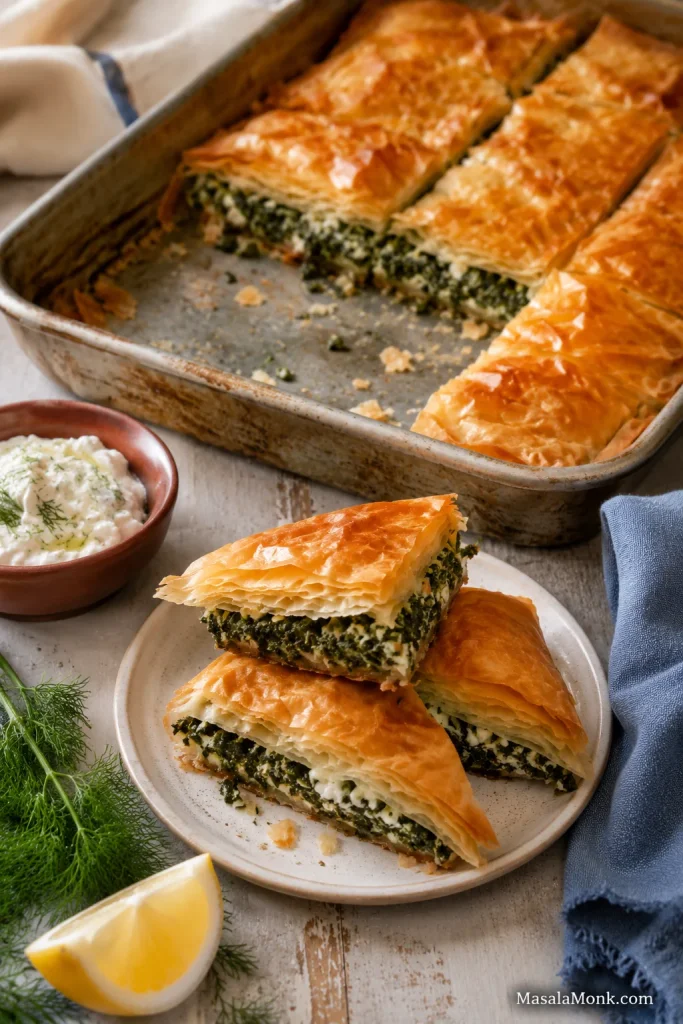
A tray of spanakopita in the background with baked spinach and feta phyllo triangles in the foreground.
The same spinach-feta filling can become a full tray or folded spanakopita triangles. Choose the tray for an easier family-style bake, or make triangles when you want appetizer-sized pieces.

Spanakopita is not meant to be creamy like spinach dip. The filling should be savory, herby, and moist enough to taste generous, but firm enough that the phyllo bakes into layers instead of steaming from underneath.

In either shape, the best pieces have contrast: brittle golden corners, soft salty feta tucked into the greens, and a herby filling that smells good before the tray even reaches the oven.

Ingredients and Substitutions

The filling is simple, which is why the details show up in the finished slice. Good feta gives salty pockets, fresh herbs keep the spinach lively, and well-prepared greens let the phyllo stay flaky instead of heavy. If spinach is your main question, jump to the fresh vs frozen spinach guide before mixing.

Spinach and feta are the two ingredients that matter most. Spinach controls texture; feta controls flavor. Loose spinach weakens the pastry, while bland feta makes the whole filling taste flat.

This amount gives a generous but sliceable filling: enough spinach and feta to taste full, but not so much that the lower layers steam. If you add extra greens, keep the final squeezed amount close to the recipe amount.

Spanakopita Ingredient Amounts

IngredientAmountNotes
Frozen chopped spinach500 g / 16 ozThaw fully and press well.
OR fresh spinach700–900 g / 1½–2 lbWilt in batches, cool, chop if needed, then squeeze well.
Feta cheese300 g / about 10½ ozBlock feta gives better flavor and texture than very dry pre-crumbled feta.
Large eggs2Help bind the filling so the pieces slice more cleanly.
Phyllo sheets14 sheetsUse 7 sheets on the bottom and 7 on top.
Olive oil, divided120 ml / ½ cup for brushing, plus 1–2 tablespoons for cookingYou may not use all of it. Sheets should look lightly glossy, not heavy.
Onion or scallions1 small onion or 4–6 scallionsAdds sweetness and depth.
Garlic1–2 cloves, minced, optionalAdds extra savory depth.
Dill, fresh¼ cup choppedClassic fresh herb flavor.
Parsley, fresh¼ cup choppedAdds brightness.
Mint, fresh1–2 tablespoons, optionalAdds a brighter, more aromatic note.
Lemon zest½ teaspoon, optionalAdds brightness if your feta is mild or the filling tastes flat.
Black pepperTo tasteUse generously if your feta is mild.
NutmegPinch, optionalWorks well with spinach and cheese.

Before the eggs go in, taste the filling so you can judge the feta’s saltiness. Some feta needs no added salt at all.

Feta Cheese

Most of the salt and tang comes from the feta, so it matters. Block feta is the better choice if you can get it. Crumble it yourself for a softer, creamier texture. Pre-crumbled feta works, but it can be drier.
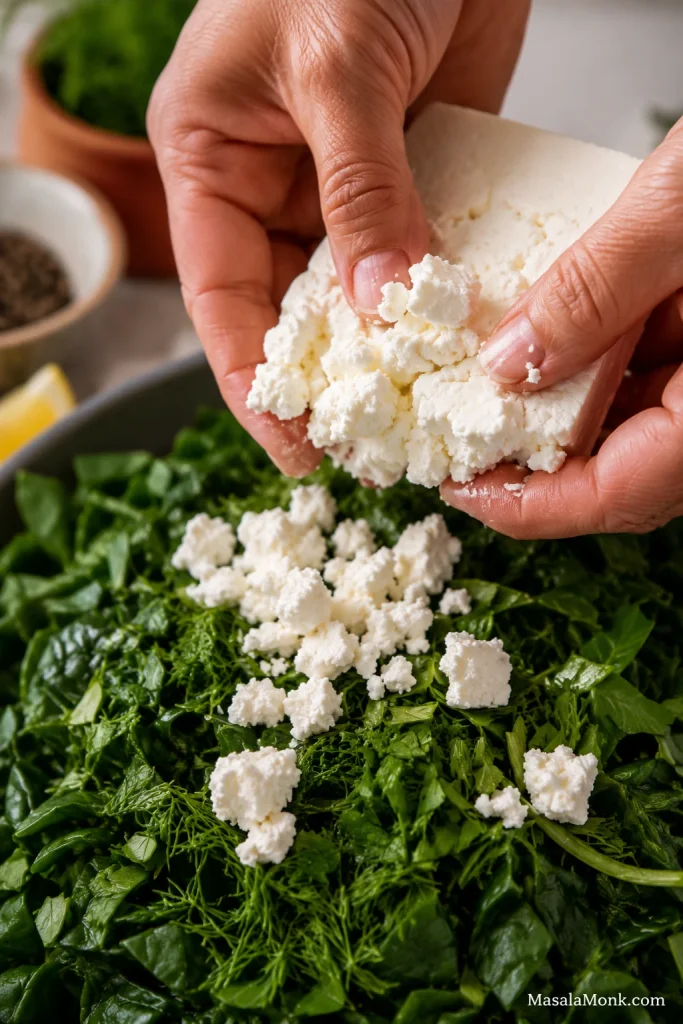
A hand crumbling block feta over chopped spinach and herbs for spanakopita filling.
Crumble block feta unevenly instead of mashing it smooth. Those small salty pockets give the filling better flavor and a more satisfying bite.

Use 300 g / about 10½ oz as the default. If your feta is very salty, use a little less and skip extra salt. If your feta is mild, lean on black pepper, herbs, and a little lemon zest before adding more salt.

Olive Oil or Butter?

Olive oil gives the pie a more classic Greek flavor. Melted butter makes the pastry richer and more golden. Both work, and you can also use half olive oil and half melted butter.

Brush lightly. The pastry needs enough fat to crisp, but it should not feel soaked or heavy.

Can You Add Ricotta, Cream Cheese, or Yogurt?

You can add a little ricotta, cream cheese, or Greek yogurt for a creamier filling, but use a light hand. Too much soft cheese makes the mixture wetter and heavier. It should mound softly on a spoon, not spread like dip. If what you really want is a creamy spinach appetizer, MasalaMonk’s spinach dip recipes are a better fit.

Fresh Herbs and Dried Herb Substitutes

Fresh dill and parsley give the filling its best flavor. If using dried dill, start with about 1 teaspoon dried dill for every 1 tablespoon fresh dill. Dried parsley is milder, so fresh parsley is better when possible. Dried mint can be strong, so use only a small pinch.

Leeks, Chard, and Other Greens

Leeks add sweetness and depth. Chard or silverbeet can replace part of the spinach, especially if you like a stronger green flavor. Kale, mushrooms, artichokes, and pine nuts can work too, but treat them as variations. For the cleanest first tray, keep the filling simple: spinach, feta, herbs, onion, and eggs.

Fresh or Frozen Spinach: Which Works Better?

Best spinach for spanakopita: frozen chopped spinach is the most reliable choice for a first tray because it is already wilted and easier to drain evenly. Fresh spinach gives brighter flavor, but it takes more prep and still needs to be cooked, cooled, chopped, and pressed before mixing.
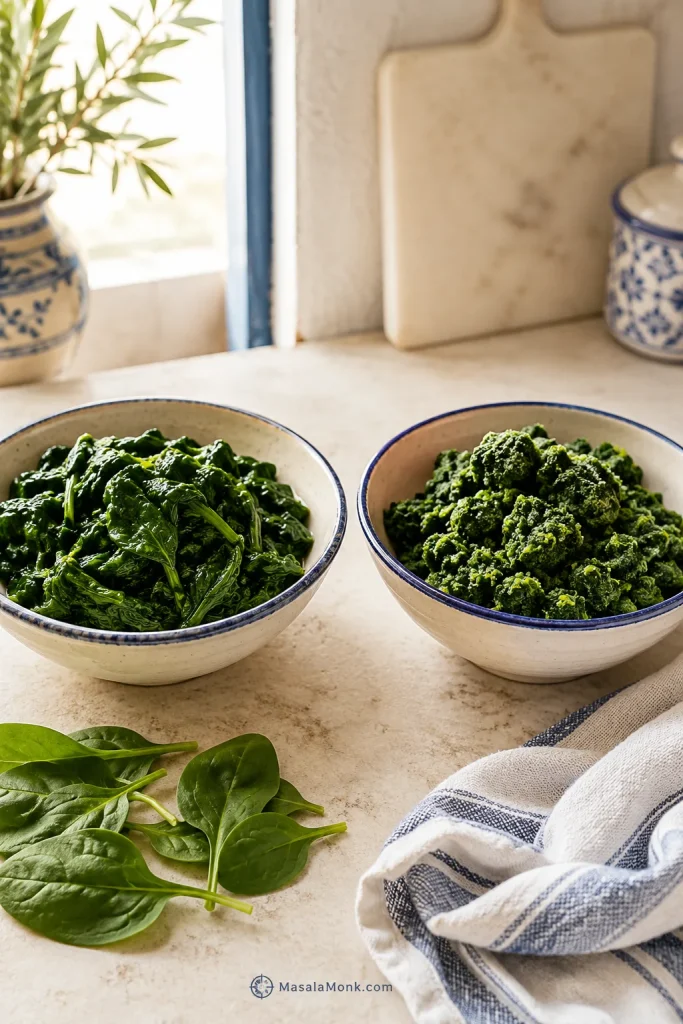
Two bowls showing wilted fresh spinach and thawed frozen spinach side by side, with a kitchen towel nearby.
Fresh spinach gives a brighter taste, while frozen spinach is easier and more predictable. Either way, the winning move is removing moisture before the filling touches the phyllo.
Use thisBest whenWatch out for
Frozen spinachYou want the most reliable first tray.It must be fully thawed and pressed well.
Fresh bunch spinachYou want brighter flavor and a more traditional fresh-greens feel.It takes longer and cooks down heavily.
Baby spinachYou want faster fresh spinach prep.The filling can be softer and milder.
Chard or silverbeetYou want a deeper greens flavor.Stems need chopping finely or removing.

Use about 700 g for tender baby spinach and closer to 900 g for mature bunch spinach with stems. After wilting and squeezing, you want roughly the same packed amount you would get from 500 g / 16 oz thawed frozen spinach.

Fresh spinach always looks like too much at first. Then it wilts down dramatically, which is exactly why the recipe starts with such a large amount.

Spinach Dryness Test

After squeezing, press the spinach with your hand or the back of a spoon. It should hold together in a soft mound, but the bowl should stay dry. If green liquid gathers at the bottom, squeeze again.
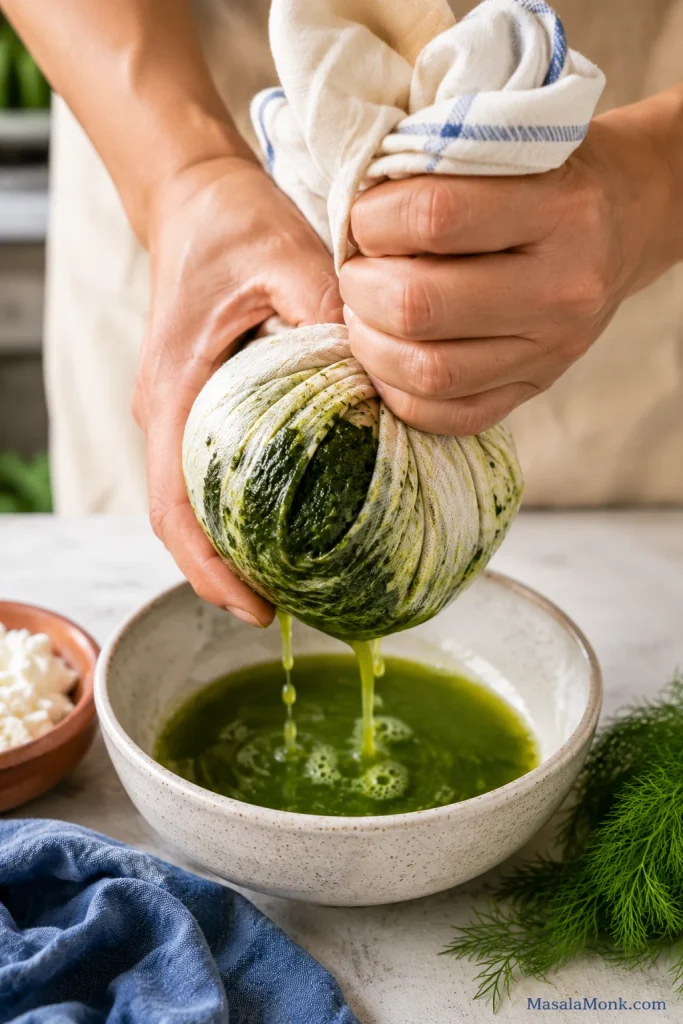
Hands squeezing spinach in a kitchen towel over a bowl to remove excess liquid.
First, squeeze out the hidden water. This one step does more for crisp spanakopita than almost any extra seasoning or topping.

For frozen spinach, squeeze it in a clean kitchen towel in small handfuls rather than one large mass; it is easier to remove more liquid that way.

The Dry-Bowl Cue

Here, the greens stop being watery and become a proper filling. Spanakopita can handle moist spinach. It cannot handle dripping spinach.
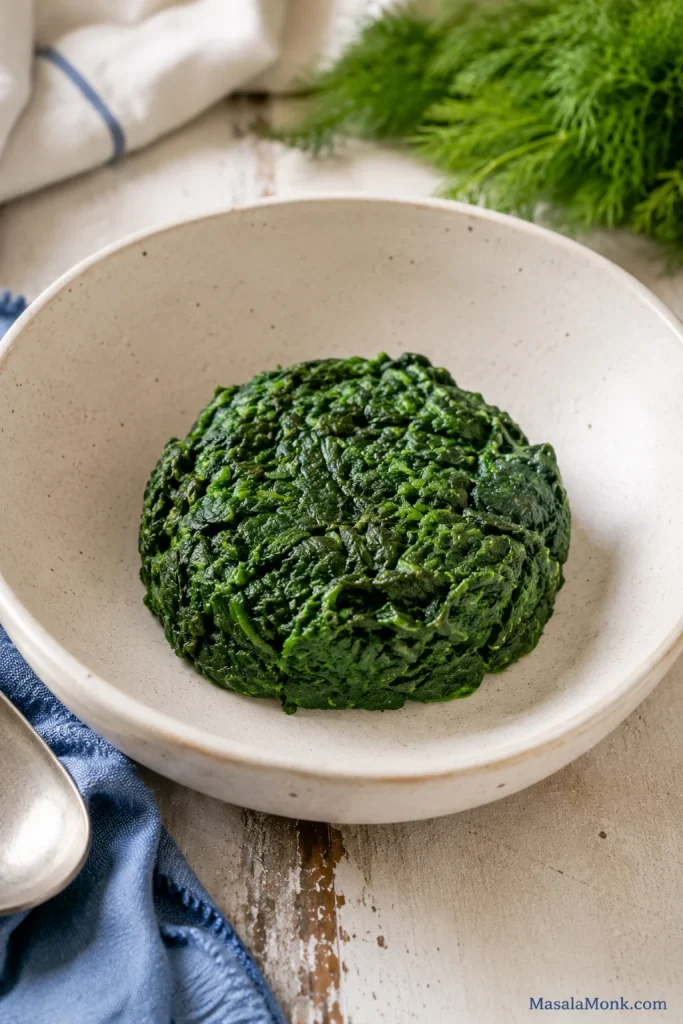
A compact mound of pressed spinach in a dry bowl with no visible liquid underneath.
After pressing, the spinach should sit in a compact mound with no liquid pooling below it. That dry-bowl cue tells you the filling is ready to mix.

How to Make Spanakopita

Once the spinach is ready and the filling tastes good, assembly is straightforward. The prep work is what makes the tray easy; now it comes together quickly. If the phyllo is the stressful part, the phyllo help section has the calmer fixes.

This method makes one large 9 x 13 inch / 23 x 33 cm Greek spinach pie. It is easier than folding triangles and gives you generous pieces with firm edges, flaky tops, and warm spinach-feta filling.

The tray may look a little untidy before baking. That is normal. Phyllo has a way of looking chaotic in the pan and beautiful after heat does its work.

Step 1: Thaw the Phyllo

Thaw frozen phyllo overnight in the refrigerator, or according to package directions. Before assembling, let the sealed package sit briefly at room temperature so the sheets are easier to unroll. Open the package only when the filling and pan are ready.

Step 2: Prepare the Spinach

For frozen spinach, thaw it completely and press out as much liquid as possible. For fresh spinach, wilt it in batches in a large pan, let it cool, chop it if the leaves are large, and squeeze well. If liquid gathers in the bowl after squeezing, press it again.

Step 3: Cook the Aromatics

Warm 1–2 tablespoons olive oil in a skillet. Add the onion or scallions and cook until softened. Add optional garlic and cook briefly until fragrant. Let the mixture cool slightly.

The onion should smell sweet and mellow, not sharp, before it goes into the spinach.
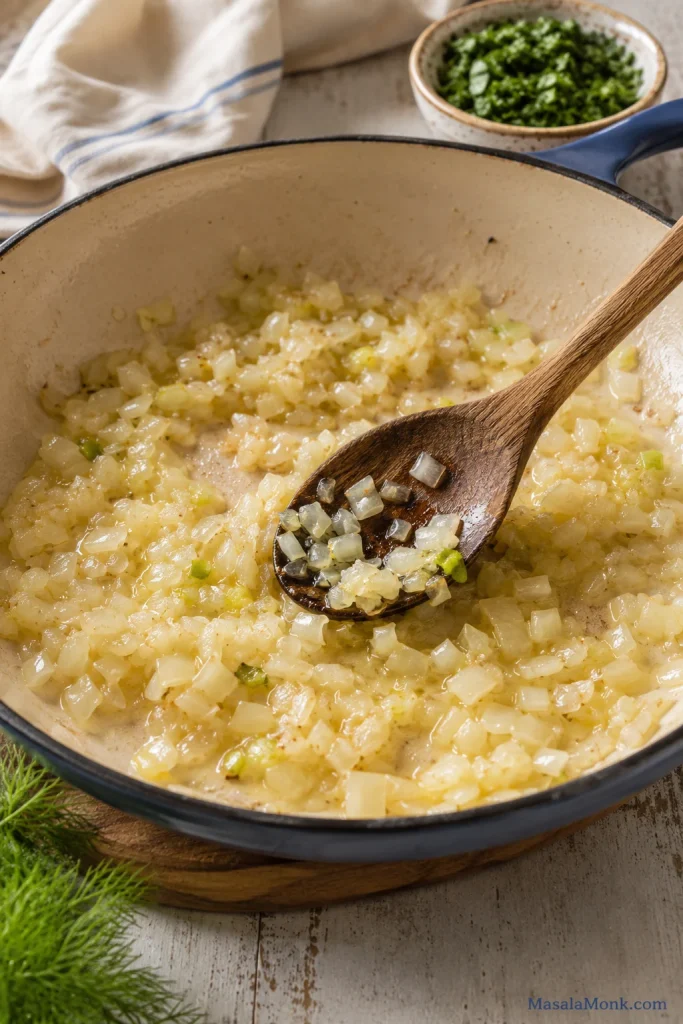
Softened onion, scallion, and garlic cooking in a skillet with a wooden spoon.
Let the aromatics soften until they smell mellow and sweet. This gives the spinach-feta filling depth without making the Greek spinach pie taste heavy.

Step 4: Mix and Taste the Filling Before Adding Eggs

In a large bowl, combine the squeezed spinach, cooked aromatics, crumbled feta, dill, parsley, black pepper, optional lemon zest, and any optional mint or nutmeg. Taste this mixture before adding salt, because feta can be very salty. Once the seasoning tastes right, mix in the eggs.
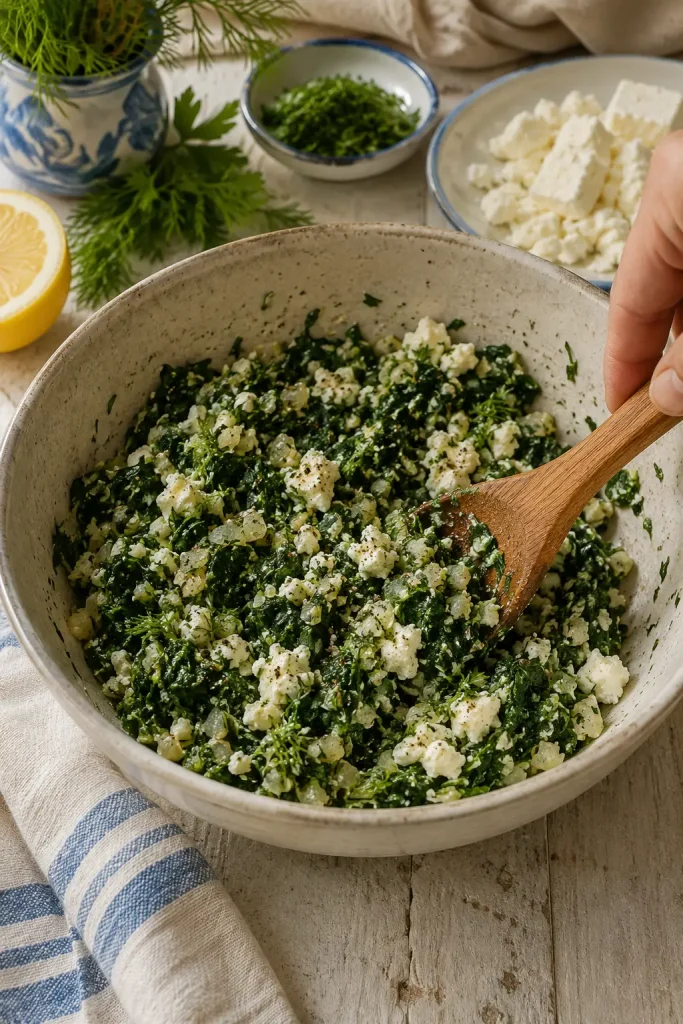
A bowl of spanakopita filling before eggs are added, with spinach, feta chunks, herbs, onion, and seasonings.
Before the eggs go in, the filling should look textured rather than creamy. Visible herbs, spinach, and feta pieces mean every slice will have better flavor contrast.

The Filling Texture Test

You should have a generous bowl of filling that looks clumpy and spoonable, with little white pieces of feta still visible in the greens. When you drag a spoon through it, it should not leave watery liquid behind.
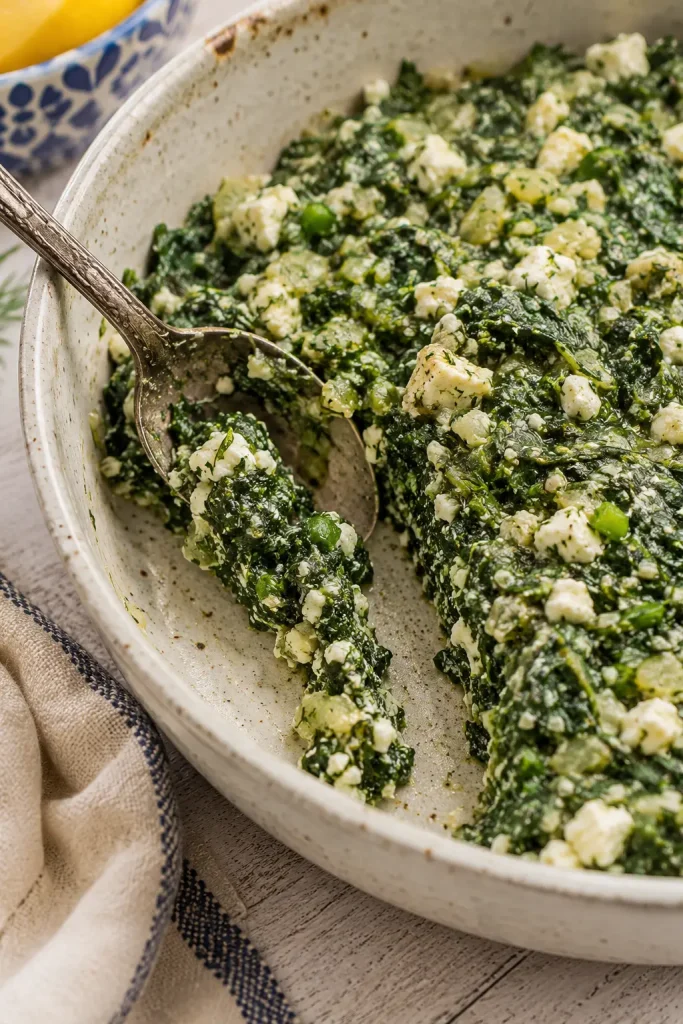
A spoon dragged through spinach and feta filling, leaving a visible trail with no liquid pooling in the bowl.
Use the spoon trail as a quick filling test. If water does not rush back into the line, the mixture is clumpy enough to protect the phyllo layers.

By this point, the bowl should already smell like the finished pie: salty feta, green herbs, softened onion, and clean spinach.

Step 5: Heat the Oven and Ready the Pan

Heat the oven to 350°F / 180°C and place a rack in the lower-middle position. Brush a 9 x 13 inch / 23 x 33 cm baking dish or pan with olive oil.

For a fan or convection oven, start around 170°C and check a little early, since the top may brown faster.

Step 6: Layer the Bottom Phyllo

Now comes the part that looks fancier than it is. Open the phyllo and keep the unused sheets covered with a barely damp towel. Place one sheet in the dish and brush lightly with olive oil. Repeat until you have 7 bottom sheets. Torn or wrinkled sheets can go here; save the neatest ones for the top.
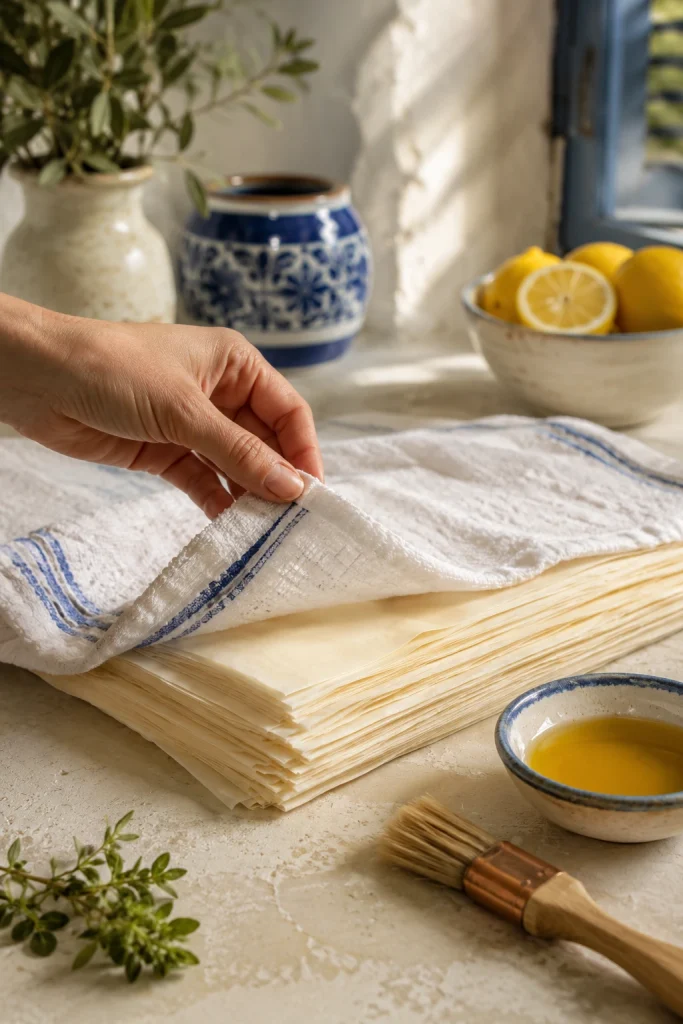
A hand lifting a striped towel to reveal stacked phyllo sheets beside a pastry brush and oil.
Cover the phyllo between layers, but keep the towel only barely damp. The goal is flexible sheets, not wet pastry.

Patchwork the Hidden Layers

Use torn or smaller phyllo pieces where they will be hidden. Overlapping the gaps gives the filling support without requiring perfect sheets.
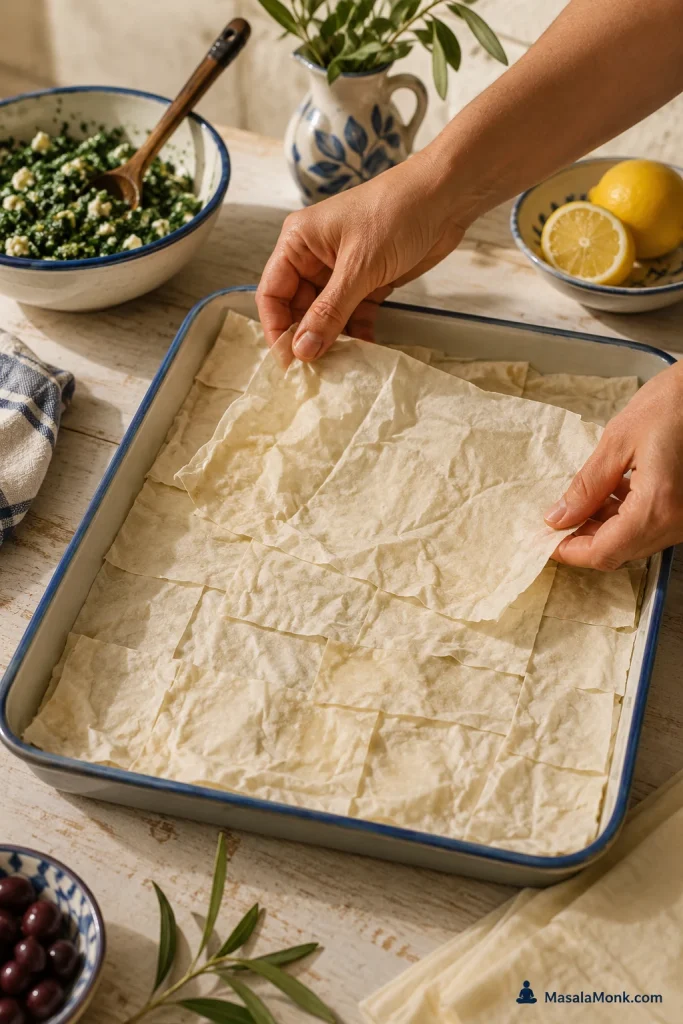
Hands layering torn and overlapping sheets of phyllo in the bottom of a rectangular baking pan.
Torn sheets belong in the bottom layers. Overlap them like patchwork, then keep building; the filling needs coverage and structure, not perfect rectangles.

Step 7: Add the Filling

Spread the spinach-feta filling evenly over the phyllo. Keep it loose and even rather than pressing it down hard. The filling should sit in a generous layer, not a compacted block.
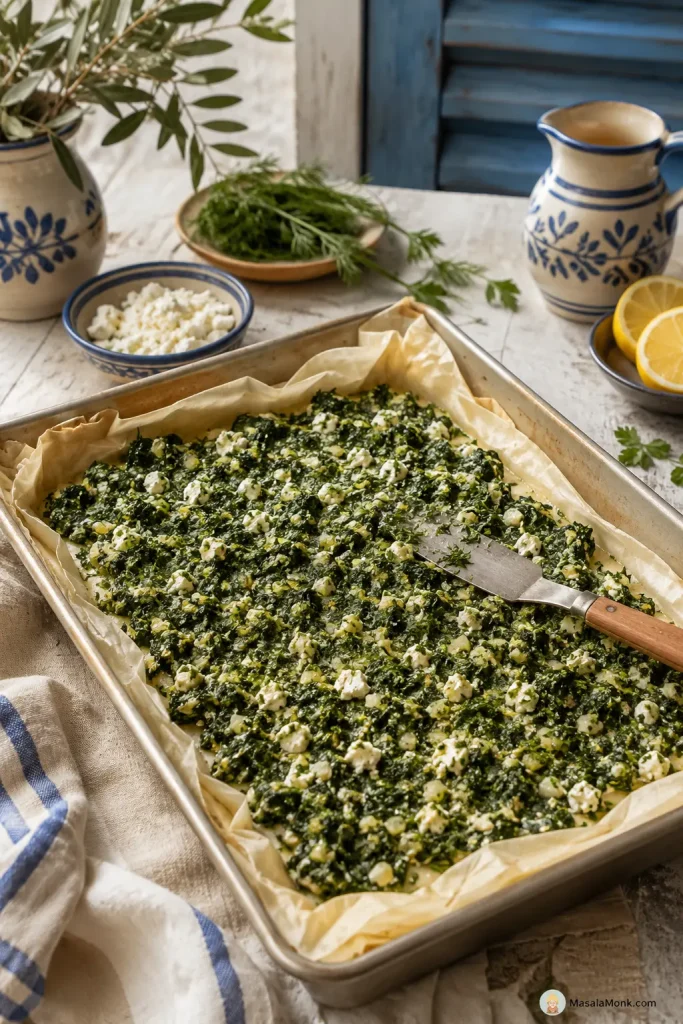
Spinach and feta filling being spread evenly over layered phyllo in a rectangular pan.
Spread the filling evenly, then stop. Pressing it down too hard can make the pie dense instead of giving you a lighter, layered spanakopita.

Step 8: Add the Top Phyllo

Layer 7 more phyllo sheets over the filling, brushing each sheet lightly with olive oil. Tuck or fold the edges into the pan. The sheets should look lightly glossy in spots. They do not need to shine like they are soaked.
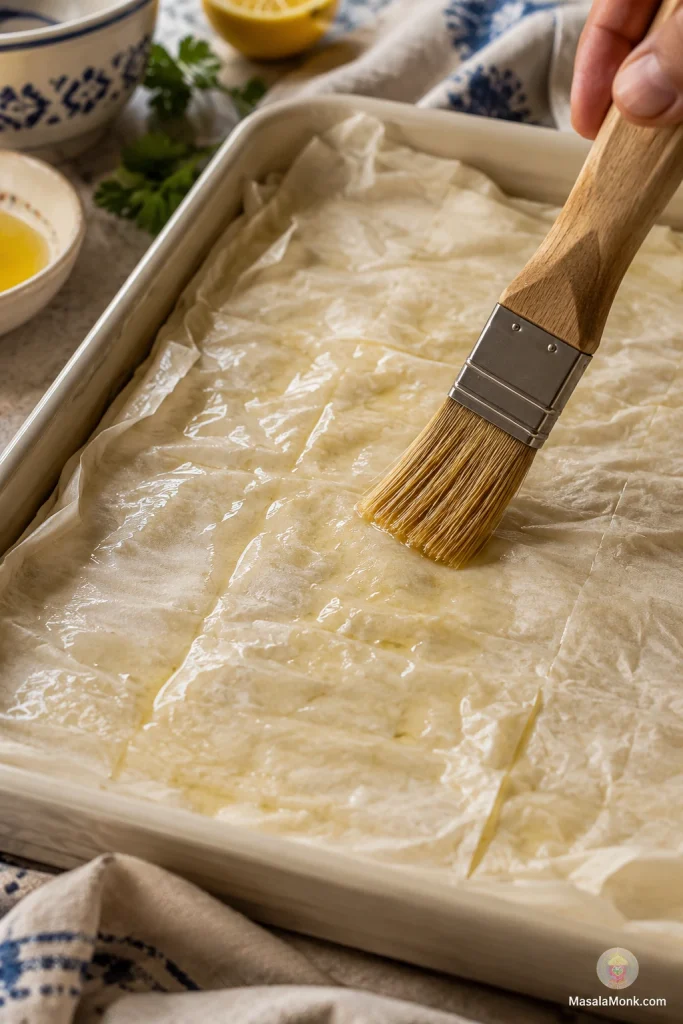
A pastry brush spreading a thin sheen of oil over wrinkled phyllo sheets in a baking pan.
Brush just enough oil to leave a light sheen. Too much fat can weigh down the phyllo, while a thin coat helps the layers crisp and separate.

Tuck the Top Edges

Fold the overhanging sheets inward so the top looks tidy and the corners have enough pastry to crisp.
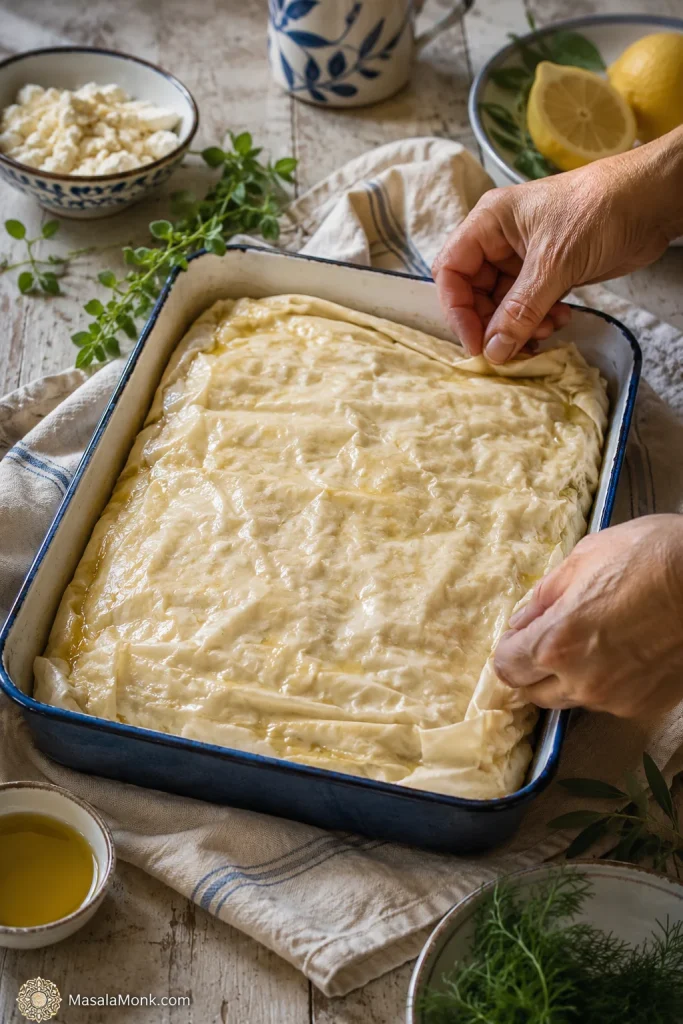
Hands folding and tucking the top phyllo edges into a rectangular pan before baking.
Tuck the top sheets inward for a tidy edge and better corner texture. Those folded bits often bake into the crispiest parts of the tray.

Step 9: Score the Top

Use a sharp knife to score the top layers into squares, rectangles, or diamonds. You do not need to cut all the way through the filling before baking. Scoring now makes the finished pie easier to slice without shattering the top.
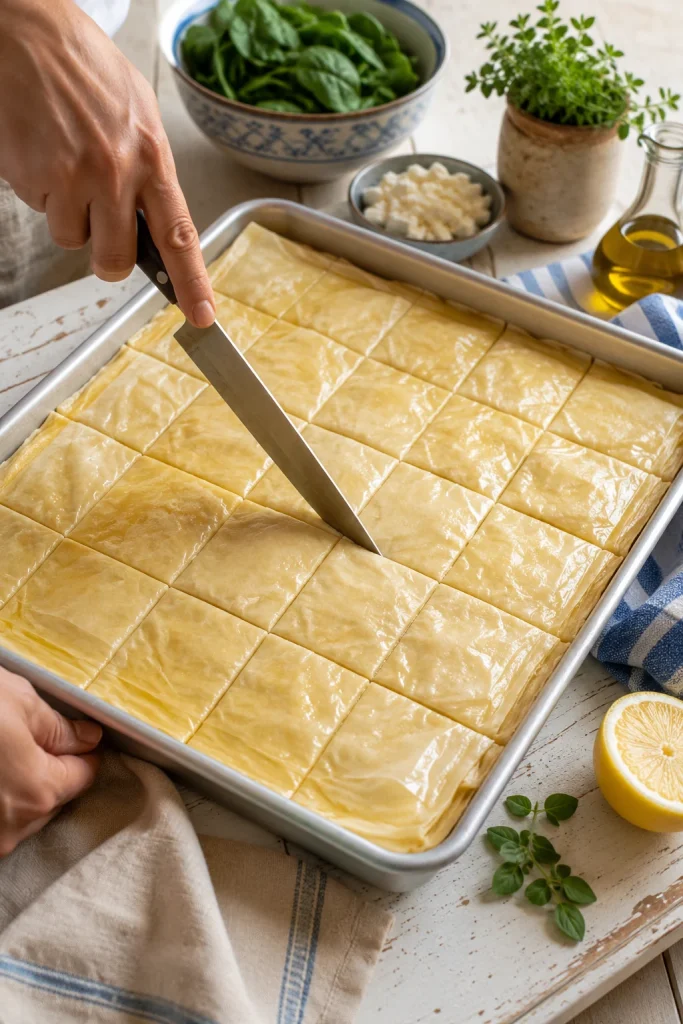
A knife scoring the top of an unbaked spanakopita tray into portions before baking.
Score before baking, while the phyllo is still soft enough to guide. Once crisp, those shallow lines help the knife move cleanly instead of crushing the top.

Squares are easiest for weeknights. Diamonds make the same tray look instantly party-ready once the golden top opens along the scored lines.

Step 10: Bake Until Golden-Brown and Crisp

Bake for 45–55 minutes, until the top is golden-brown, the edges are firm, and the filling is hot and set. Start checking at 45 minutes, but trust the pastry more than the clock. If the top browns too quickly, tent it loosely with foil and keep baking. Not sure yet? Compare it with the doneness cues before pulling the tray.

Step 11: Rest, Then Slice

Let the spanakopita rest uncovered for 15–20 minutes before cutting fully through the scored lines. The wait is annoying, but it is what turns a hot, loose filling into clean pieces with flaky tops and edges that hold.

If you only follow the method above, you can make a good tray. The next sections are for the moments that make cooks nervous: a soft base, fussy phyllo, loose filling, make-ahead timing, and slices that need to hold together.

How to Keep the Bottom Crisp

To keep spanakopita from getting soggy: remove excess spinach moisture, avoid loose or creamy filling, use enough bottom phyllo, bake until the pastry is fully golden, and rest the pie uncovered before slicing.

If the bottom turns soft, the pie is usually telling you one of two things: the filling was too wet, or the base needed more heat and time. For specific fixes, use the troubleshooting table.

What Actually Keeps the Bottom Crisp

  1. Moisture first: no liquid pooling in the filling.
  2. Structure second: enough bottom phyllo to support the greens and feta.
  3. Heat third: lower-middle rack so the base bakes before the top over-browns.
  4. Rest last: 15–20 minutes so the filling settles before slicing.

If the filling looks wet, drain off any visible liquid before layering. If the mixture still looks loose, stir in 1–2 tablespoons breadcrumbs, fine semolina, or crushed crackers to absorb extra moisture. This is a rescue trick, not something you should need every time.

Clean First Corner Lift

When the bottom is right, the first corner lifts cleanly instead of slumping, and that is the moment you know the tray worked.
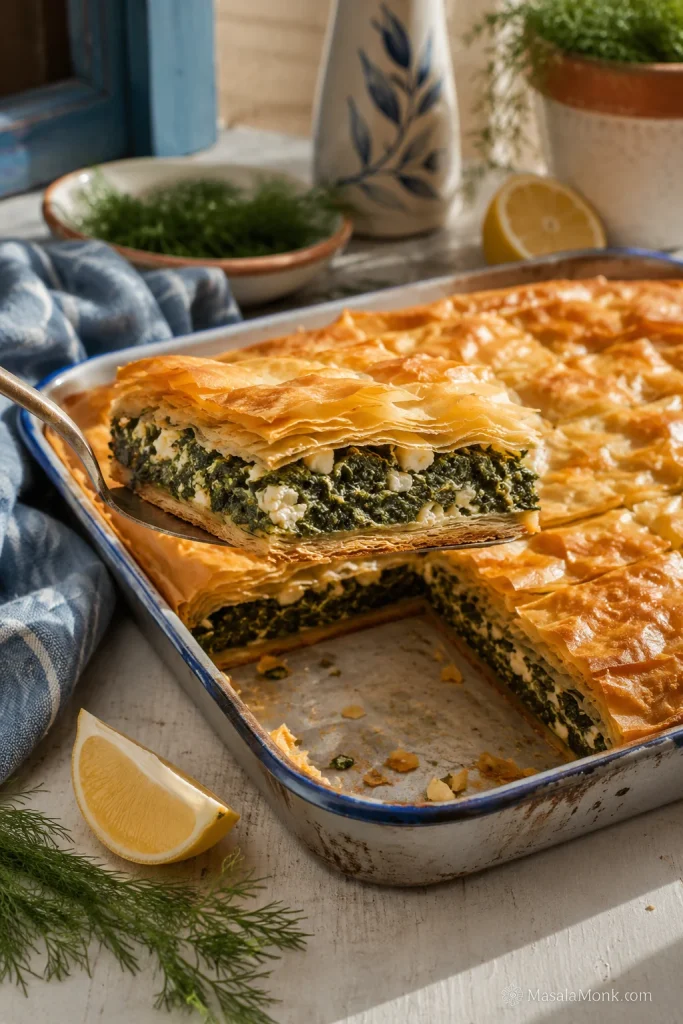
A lifted corner piece of baked spanakopita on a spatula, showing a firm bottom layer, green filling, and golden phyllo top.
The first lifted piece is the real test. If it holds shape on the spatula, the spinach was drained well and the bottom phyllo had enough time to crisp.

If Phyllo Makes You Nervous

The method above is enough for most cooks, but these small phyllo habits make the first tray feel calmer. Most of the fear disappears once you stop trying to keep every sheet perfect.

Thaw phyllo overnight in the refrigerator, then let the sealed package sit at room temperature until pliable. Rushing the thaw can make sheets crack, stick, or turn damp in patches. Once opened, keep unused sheets covered with a barely damp towel.

For this recipe, 14 sheets is the default: 7 on the bottom and 7 on top. Very thin brands can take up to 16 sheets.

Smaller phyllo sheets can be overlapped to make one layer. Larger sheets can climb the sides of the pan and fold inward. The goal is layered coverage, not perfect single-sheet geometry.

If a sheet tears, use it in the bottom or middle layers and overlap the gaps. If a sheet dries out, discard it or tuck it into the middle rather than forcing it across the top.

Think of the inner sheets as patchwork. Nobody will see them, and they still bake beautifully. Once the first few sheets are down, the rest feels much less precious.

Since phyllo brands vary, follow your package first. For a deeper handling reference, Athens Foods has a practical guide to phyllo storage, thawing, and handling.

How to Tell When Spanakopita Is Done

For a 9 x 13 inch / 23 x 33 cm tray, bake at 350°F / 180°C for 45–55 minutes. Your oven and pan matter, but the pastry will tell you when it is ready.

A pale top usually means the lower layers need more time too. A deeply golden top, dry scored lines, and a firm first corner matter more than hitting exactly 50 minutes.

Golden Tray Doneness

Look for a tray that reads crisp before you cut into it: browned edges, dry scoring lines, and a top that no longer looks soft or steamed.
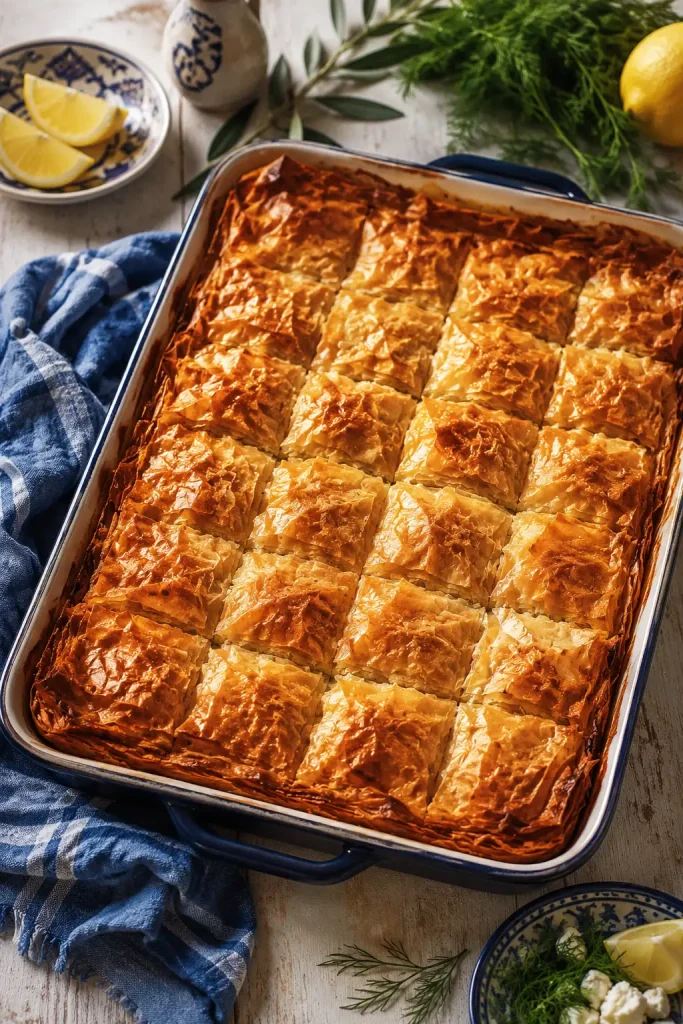
A whole baked tray of spanakopita with a golden phyllo top and dry scored lines.
Check more than color. A finished spanakopita tray should have browned edges, dry scored seams, and a top that looks crisp rather than steamed.
  • Top: deeply golden and crisp, not pale.
  • Edges: flaky, browned, and firm.
  • Scored lines: dry-looking, not wet.
  • Filling: hot and set, not leaking.
  • Bottom: firm enough that a corner lifts with a spatula instead of drooping back into the pan.

When the pie is close, the kitchen starts to smell like toasted pastry, herbs, and warm feta.

A metal pan gives the crispest bottom. Glass or ceramic works too; just give the base a few extra minutes if it still looks soft. If using a metal baking pan, setting it on a preheated sheet pan can help the bottom crisp. If using glass or ceramic, avoid sudden temperature changes, especially if the dish is cold from the refrigerator.

Spanakopita Success Cues

  • Before assembly: the filling smells herby and salty, with no liquid pooling in the bowl.
  • While layering: the phyllo looks lightly glossy, not wet or heavy.
  • Before baking: the top is scored and the edges are tucked into the pan.
  • After baking: the top is deeply golden and the scored lines look dry.
  • After resting: the first corner lifts cleanly instead of collapsing.

Crisp Flaky Phyllo Layers

Close up, the finished pastry should look brittle and layered, with small shards breaking away from the spinach-feta filling beneath.
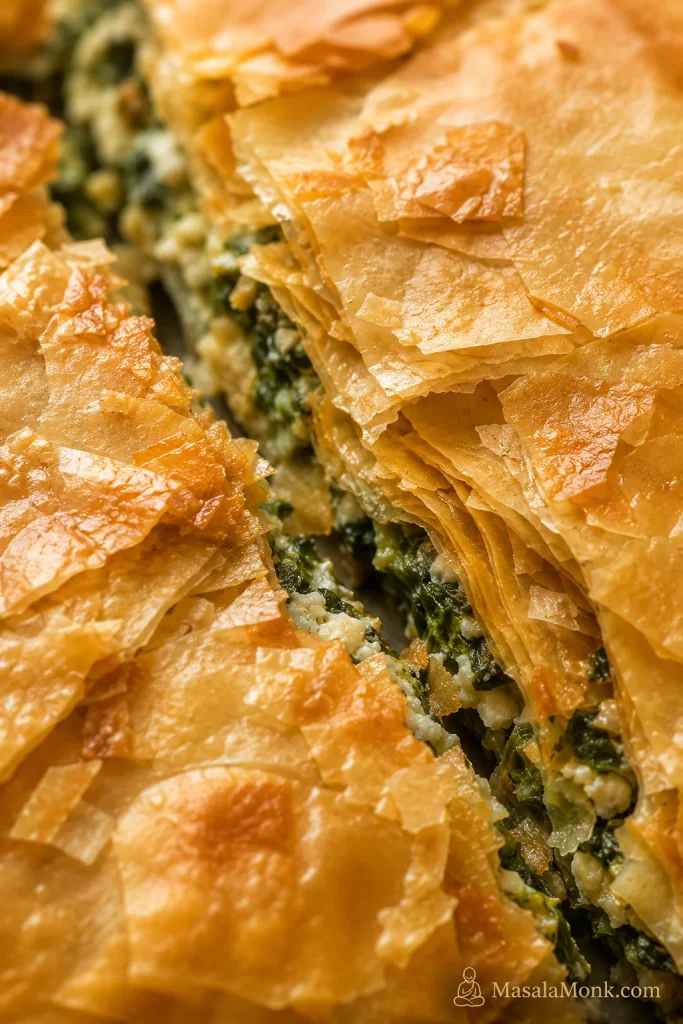
A close-up of crisp baked phyllo layers with flaky shards and a glimpse of green filling.
This close-up shows the payoff of careful layering: brittle phyllo on top, tender spinach-feta filling below, and flaky shards that break cleanly when cut.

Troubleshooting Spanakopita

Most spanakopita problems are not mysterious. A soggy bottom, leaking filling, or shattered top usually comes from one of three things: too much moisture, not enough baking time, or slicing before the filling has settled.

Correct Filling vs Loose Filling

Before assembly, compare the filling texture instead of guessing. A clumpy mixture protects the pastry; a loose mixture brings too much steam and moisture into the tray.
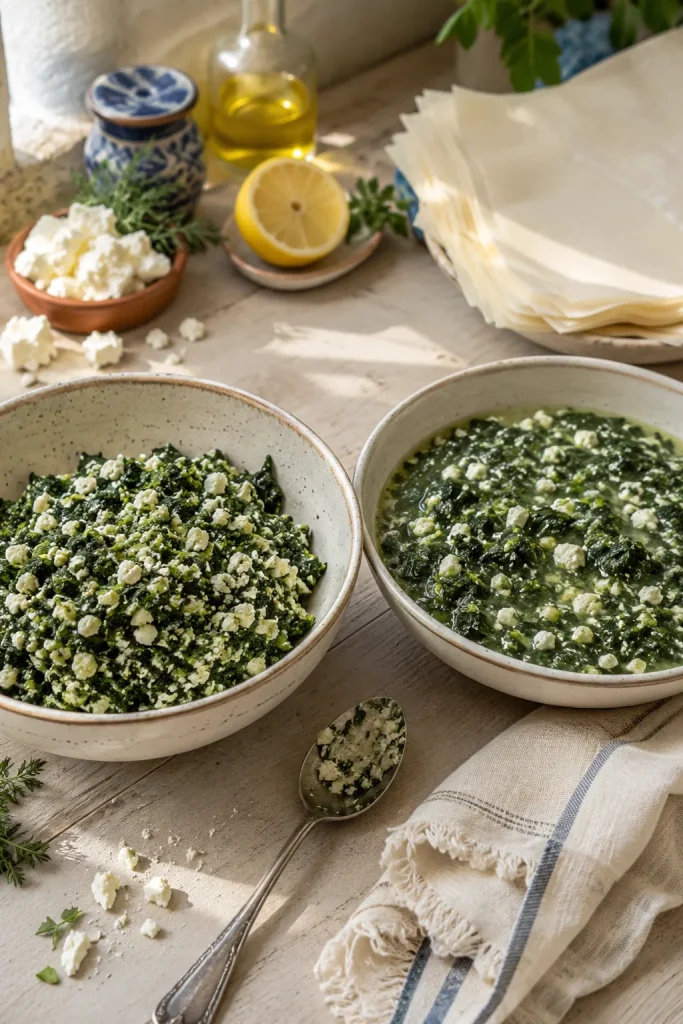
Two bowls of spanakopita filling, one thick and clumpy and the other looser with visible liquid.
For troubleshooting, compare the two textures before assembly. The thicker filling bakes into cleaner slices, while the loose mixture can soften the pastry and make cutting messier.
ProblemLikely causeFix
Soggy bottomWet filling or underbaked basePress more moisture from the spinach, bake longer, and use a lower rack.
Top browns too fastOven runs hot or tray is too highTent loosely with foil and continue baking.
Bottom is soft but top is doneWeak bottom heatMove lower and bake 10 more minutes with foil over the top.
Phyllo tearsSheets are dry, cold, or handled slowlyKeep covered and use torn sheets inside.
Leaking fillingToo much moisture or overfillingDrain the filling better and keep the layer even.
Bland fillingMild feta or not enough herbsAdd dill, parsley, black pepper, or a little lemon zest.
Too-salty fillingVery salty fetaAdd more spinach or herbs if available; serve with yogurt sauce or a lemony salad.
Dense fillingThe spinach layer was packed down too hardSpread loosely next time; do not compress the spinach layer.
Top shatters badly when slicingNot scored before baking or cut too soonScore before baking, rest 15–20 minutes, then cut through the same lines.
Slices fall apartCut too soon or filling too looseRest 15–20 minutes before slicing fully.
Pastry soft after storageFridge moisture or trapped steamReheat uncovered in the oven or air fryer.

Variations and Shortcuts

The large tray is the main recipe. Once you understand that filling and layering method, these variations become easy to judge.

Spanakopita Triangles

Once the filling is made, triangles are just a folding project. They are great for appetizers, mezze platters, lunch boxes, and party trays. The first triangle is usually the clumsiest. By the third or fourth, your hands understand the fold.
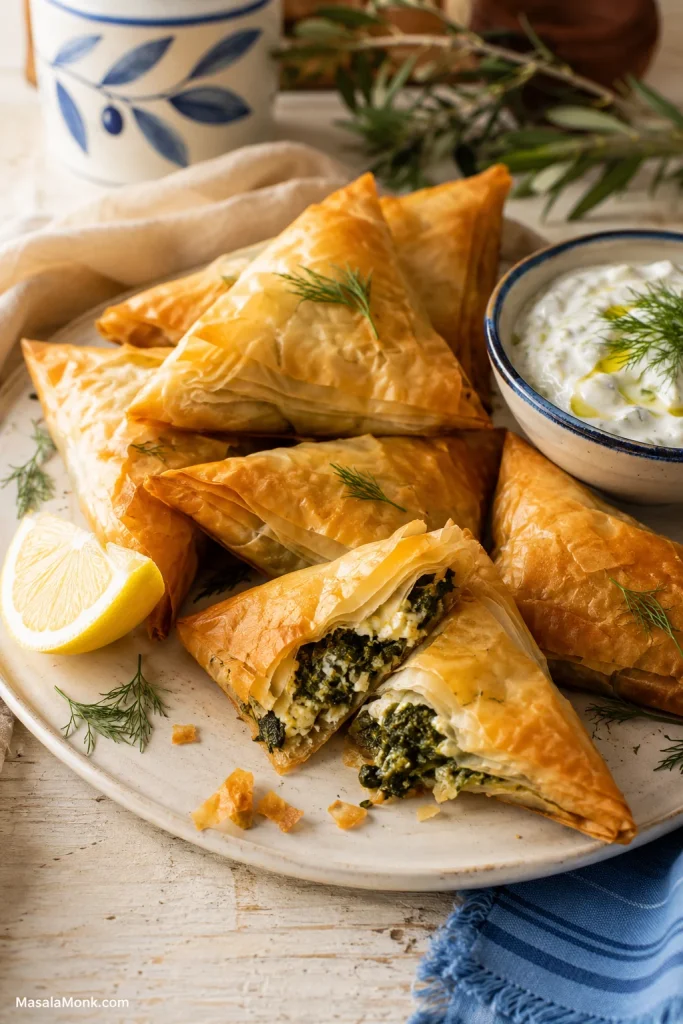
Baked spanakopita triangles on a plate with one broken open to show spinach and feta filling, served with tzatziki.
For appetizer-style spanakopita triangles, use less filling than you think. Snug folds and modest filling help the phyllo seal, brown, and crisp all the way around.

They are especially good with a bowl of Greek tzatziki sauce and crisp bites like homemade falafel.

  • Phyllo strip width: 2½–3 inches / 6–7.5 cm.
  • Layers: 2 phyllo sheets per strip.
  • Filling: ½–1 tablespoon per triangle.
  • Fold: like folding a flag.
  • Oven: 375°F / 190°C.
  • Small appetizer triangles: 15–18 minutes.
  • Medium triangles: 20–25 minutes.

If the filling squeezes out as you fold, use less. A neat triangle needs less filling than you think. The triangles are done when the seams look dry, the corners are golden, and the pastry feels crisp enough to pick up. For dips and sides, jump to the serving ideas.

Puff Pastry Shortcut

Puff pastry makes a delicious shortcut, though the texture is thicker and more buttery than classic phyllo. It is a good option when you want a spinach-feta pie without layering many thin sheets.

Puff pastry should be pliable but still cold; once it warms too much, it gets sticky and bakes less cleanly. Use the same filling, place one puff pastry sheet on the bottom, add the spinach mixture, cover with a second sheet, seal the edges, and cut a few slits in the top so steam can escape.

For a full puff pastry pie, start checking around 35 minutes and expect 40–50 minutes depending on the thickness of the filling and pastry. For small puff pastry parcels, start checking around 20–25 minutes.

Gluten-Free Spanakopita

Use gluten-free phyllo if available, or gluten-free puff pastry as a shortcut. If neither is available, make a crustless spinach-feta bake with the same filling flavors.

Vegan or Dairy-Free Spanakopita

Use olive oil for brushing and replace feta with a salty vegan feta or a firm tofu-cashew mixture. Keep the filling well-seasoned because feta normally provides both salt and tang.

Egg-Free Spanakopita

You can skip the eggs, but the slices will be looser. Keep the spinach very well pressed, avoid wet cheeses, and rest the pie before cutting.

Make It Ahead Without Losing the Crisp Layers

Spanakopita is one of those recipes you can do in pieces. For the best make-ahead texture, assemble it unbaked, refrigerate it for up to 24 hours, then bake until golden and crisp. For longer storage, freeze it unbaked.

  • Make the filling ahead: Prepare up to 1 day ahead and refrigerate. Drain off any liquid before assembling.
  • Assemble unbaked: Refrigerate the covered tray for up to 24 hours, then bake from chilled with a few extra minutes if needed.
  • Freeze unbaked: Score the top while the phyllo is still soft, wrap tightly, and freeze.
  • Bake from frozen: Add 15–25 minutes and cover loosely with foil if the top browns early.
  • Store leftovers: Cool fully, refrigerate for 3–4 days, and reheat uncovered in the oven or air fryer.

If making the filling ahead, check it again before assembling. Spinach can release more liquid in the fridge, so drain or squeeze off any liquid before layering it with phyllo. Use the filling texture comparison if it looks loose.

For a party, serve the pie warm after a 15–20 minute rest, or at room temperature on a mezze table. Let hot spanakopita breathe; trapped steam softens the pastry. Room temperature is fine for serving, but refrigerate leftovers rather than leaving them out for a long time.

This is the kind of dish that solves more than one meal: dinner tonight, brunch tomorrow, party squares on a platter, or a cold leftover piece eaten straight from the fridge.

Reheating Frozen or Leftover Spanakopita

Best way to reheat spanakopita: reheat pieces uncovered in the oven or air fryer. Dry heat helps the phyllo crisp again, while covered reheating traps steam and softens the pastry. The microwave is fast, but it will not bring back the flaky texture.

SituationMethodTime
Frozen spanakopita trianglesAir fryer at 350°F / 177°C8–12 minutes
Frozen spanakopitaOven at 400°F / 200°C17–20 minutes
Leftover homemade sliceOven at 350°F / 175°C8–13 minutes
Leftover homemade sliceAir fryer at 325–350°F / 160–177°C4–7 minutes
MicrowaveFastest, but softens pastryUse only if needed

For frozen or store-bought spanakopita, follow the package instructions first because sizes vary. If using a thermometer, the center should reach 165°F / 74°C. FoodSafety.gov gives the same 165°F / 74°C target for reheated leftovers in its safe minimum internal temperature chart.

These general notes can help with Costco, Trader Joe’s, Aldi, or other frozen spanakopita, but start checking early because every brand and size cooks differently.

What to Serve with Spanakopita

A good tray of spanakopita does not need much ceremony. Cut it warm, let the flaky shards fall where they want, and serve it with something cold and lemony.

It is the kind of food that does not need to be piping hot to be loved; even warm or room temperature, the salty filling and flaky edges still do their job.

For a full Greek-inspired spread, keep the sides cool, bright, and simple so they balance the rich phyllo instead of competing with it.
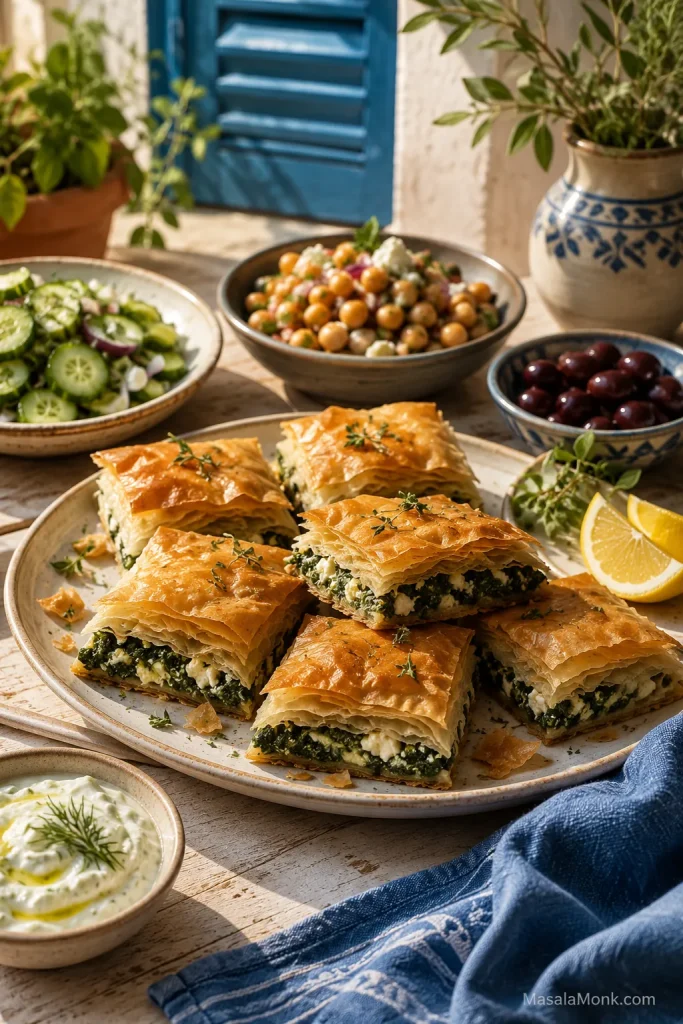
Spanakopita served on a table with tzatziki, cucumber salad, chickpea salad, olives, lemon wedges, and herbs.
Serve rich spanakopita with cool and bright sides. Tzatziki, cucumber salad, chickpeas, olives, lemon, and herbs balance the salty feta and crisp phyllo without distracting from the pie.

Greek-Inspired Dinner

Serve warm pieces with Greek salad, roasted potatoes, red lentil soup, baked chicken breast, fish, lamb, olives, and lemon wedges.

Vegetarian Mezze Table

Cut smaller pieces and serve with tzatziki, hummus, pita, roasted vegetables, olives, cucumber salad, and homemade falafel.

Brunch or Lunch Boxes

Room-temperature pieces are excellent with cucumber salad, chickpea salad, yogurt sauce, eggs, fresh fruit, or a tomato cucumber salad.

Tabbouleh is also a strong side because the lemon, parsley, mint, and tomato cut through the rich pastry.

Quick lemon-dill yogurt sauce: Mix Greek yogurt with lemon juice, minced garlic, chopped dill, a little olive oil, salt, and black pepper. It is especially good with warm triangles.

Full Spanakopita Recipe

This tray-style spanakopita gives you flaky top layers, a firm base, and a spinach-feta filling that settles into clean pieces after resting.

Recipe name: Spanakopita Recipe: Greek Spinach Pie with Feta and Phyllo

Description: A generous Greek spinach pie recipe with crisp golden phyllo, salty feta, fresh herbs, and a spinach filling that slices cleanly after resting.

Yield: 10–12 pieces

Prep time: 35–45 minutes with frozen spinach, longer with fresh bunch spinach. This does not include overnight phyllo thawing.

Cook time: 45–55 minutes

Total time: 1 hour 20 minutes to 1 hour 40 minutes, plus phyllo thawing

Equipment: 9 x 13 inch / 23 x 33 cm baking dish or pan, large skillet, mixing bowl, colander, clean kitchen towel or cheesecloth, pastry brush, sharp knife, barely damp towel for phyllo.

Before you start: Make sure the spinach is pressed well, the phyllo is fully thawed, and the filling is mixed before you open the phyllo package. Once phyllo is exposed to air, the recipe moves much faster.

Ingredients

  • 500 g / 16 oz frozen chopped spinach, thawed and squeezed well or 700–900 g / 1½–2 lb fresh spinach, wilted, cooled, and squeezed well
  • 300 g / about 10½ oz feta cheese, crumbled
  • 2 large eggs
  • 14 sheets phyllo pastry, thawed
  • Olive oil, divided: 120 ml / ½ cup for brushing, plus 1–2 tablespoons for cooking the onion
  • 1 small onion, finely chopped, or 4–6 scallions, sliced
  • 1–2 garlic cloves, minced, optional
  • ¼ cup chopped fresh dill
  • ¼ cup chopped fresh parsley
  • 1–2 tablespoons chopped fresh mint, optional
  • ½ teaspoon lemon zest, optional
  • Black pepper, to taste
  • Pinch of nutmeg, optional
  • Salt, only if needed after tasting the filling before adding eggs

Instructions

Prepare the Filling

  1. Thaw the phyllo. Thaw frozen phyllo overnight in the refrigerator, or according to package directions. Let the sealed package sit briefly at room temperature before opening. Open the phyllo only when the filling is mixed, the oil is ready, and the pan is brushed.
  2. Prepare the spinach. If using frozen spinach, thaw completely and press out as much liquid as possible. If using fresh spinach, wilt it in batches in a large pan, cool it, chop if needed, and squeeze well. The bowl should not show liquid pooling when pressed.
  3. Cook the aromatics. Heat 1–2 tablespoons olive oil in a skillet. Add onion or scallions and cook until softened. Add optional garlic and cook briefly until fragrant. Let cool slightly.
  4. Mix and taste before adding eggs. In a large bowl, mix spinach, cooked aromatics, feta, dill, parsley, optional mint, optional lemon zest, black pepper, and optional nutmeg. Taste and add salt only if needed. Then mix in the eggs. The filling should hold together without liquid pooling at the bottom of the bowl.

Layer the Spanakopita

  1. Prepare the pan and oven. Heat oven to 350°F / 180°C. Place a rack in the lower-middle position. Brush a 9 x 13 inch / 23 x 33 cm baking dish or pan with olive oil.
  2. Layer the bottom phyllo. Open the phyllo and cover unused sheets with a barely damp towel. Place one sheet in the dish and brush lightly with olive oil. Repeat until you have 7 bottom sheets. Use torn or wrinkled sheets here if needed.
  3. Add the filling. Spread the spinach-feta filling evenly over the phyllo. Keep it loose and even rather than pressing it down hard.
  4. Add the top phyllo. Layer 7 more sheets over the filling, brushing each sheet lightly with olive oil. Tuck or fold the edges into the pan. The sheets should look lightly glossy, not soaked.

Bake, Check, and Rest

  1. Score the top. Use a sharp knife to score the top layers into squares, rectangles, or diamonds. You do not need to cut all the way through the filling yet.
  2. Bake. Bake for 45–55 minutes, until the top is golden-brown, the edges are firm, and the filling is hot and set. If the top browns too quickly, tent loosely with foil and keep baking.
  3. Check for doneness. The top should be golden and crisp, the scored lines should look dry, and a corner should lift without sagging. If the top is brown but the bottom feels soft, cover loosely with foil and bake 5–10 minutes longer.
  4. Rest and slice. Let the spanakopita rest uncovered for 15–20 minutes. Cut fully through the scored lines and serve warm or at room temperature.

Recipe Notes

  • Block feta gives better flavor and texture. Use slightly less if it is very salty, or up to 340 g / 12 oz for a cheesier filling.
  • Lemon zest is optional but useful if your feta is mild or the filling tastes flat. Avoid adding much lemon juice because extra liquid can loosen the filling.
  • If your phyllo sheets are very thin, use up to 16 sheets total.
  • You may not use all the oil. The phyllo should look lightly glossy, not soaked.
  • A metal pan gives the crispest bottom. Glass or ceramic works too, but may need a few extra minutes.
  • For a fan/convection oven, start around 170°C and check a little early because the top can brown faster.
  • If the filling looks wet, drain visible liquid and mix in 1–2 tablespoons breadcrumbs, fine semolina, or crushed crackers.
  • Let hot spanakopita breathe. Steam softens the pastry if it is covered tightly.

Frequently Asked Questions

These are the questions that usually come up the first time you make spanakopita.

Spanakopita Basics

Is spanakopita the same as Greek spinach pie?

Yes. Spanakopita is Greek spinach pie made with phyllo pastry and a filling of spinach, feta, herbs, and often eggs.

Is it phyllo or filo?

Both spellings refer to the same thin pastry sheets. Phyllo is common in the US, while filo is common in the UK and other places.

Ingredients, Spinach, and Phyllo

Fresh spinach or frozen spinach: which is better for spanakopita?

Frozen spinach is easier and more predictable because it is already chopped and wilted. Fresh spinach gives brighter flavor, but it takes more prep and still needs to be pressed well before mixing.

Should fresh spinach be cooked before adding it to spanakopita?

Yes. Fresh spinach should be wilted, cooled, chopped if needed, and pressed well before mixing. Raw spinach releases too much moisture as it bakes and can make the filling loose.

How many phyllo layers should spanakopita have?

Use 14 sheets as a reliable default: 7 on the bottom and 7 on top. If your phyllo is very thin, you can use up to 16 sheets.

Do torn phyllo sheets matter?

No. Use torn sheets in the bottom or middle layers and save the neatest sheets for the top. Once baked, the inner patchwork still turns flaky.

Why did my spanakopita turn soggy?

The most common cause is excess spinach moisture or underbaking. Press the spinach well, keep the filling moundable instead of loose, and bake until the pastry is fully golden-brown.

What cheese can I use besides feta?

Feta gives spanakopita its classic salty tang, so keep it as the main cheese if possible. For a milder filling, replace a small portion with ricotta or cottage cheese, but keep the mixture firm and well-drained so the phyllo does not soften.

Make-Ahead, Freezing, and Reheating

How far ahead can I assemble spanakopita?

You can assemble it unbaked and refrigerate it for up to 24 hours. Check for released liquid before baking and add a few extra minutes if baking from chilled.

Does spanakopita freeze better baked or unbaked?

Unbaked usually gives the best texture because the phyllo crisps for the first time in the oven. Score the top before freezing while the sheets are still soft, wrap tightly, and bake from frozen with extra time. Baked leftovers can also be frozen, but the pastry is more likely to soften after reheating.

What is the best way to reheat spanakopita?

Reheat it uncovered in the oven or air fryer. Dry heat helps the phyllo crisp again. The microwave works for speed, but it softens the pastry.

Diet and Serving Questions

Should spanakopita be served hot or room temperature?

Spanakopita is good warm or at room temperature. Let it rest after baking so the filling settles and the pieces slice more cleanly.

Can spanakopita be made without eggs?

Yes, but the filling will be looser. Keep the spinach especially well pressed, avoid wet cheeses, and rest the pie before cutting.

Puff pastry or phyllo: which is better for spanakopita?

Phyllo is better for classic spanakopita because it bakes into thin, crisp, flaky layers. Puff pastry works as a shortcut, but it gives a thicker, buttery crust and a less traditional texture.

Is classic spanakopita gluten-free?

No. Classic spanakopita uses wheat-based phyllo, so it is not usually gluten-free. For a gluten-free version, use gluten-free phyllo if available, gluten-free puff pastry as a shortcut, or make a pastryless spinach-feta bake inspired by the same flavors.

If you make it, I would love to know which route you took: frozen spinach tray, fresh spinach tray, triangles, or puff pastry shortcut.

The first tray may look a little rustic before it goes into the oven, and that is part of the charm. Once the phyllo turns golden and the spinach-feta filling settles, you get the kind of pie people keep returning to, knife in hand, promising they are cutting “just one more” piece.
Posted on Leave a comment

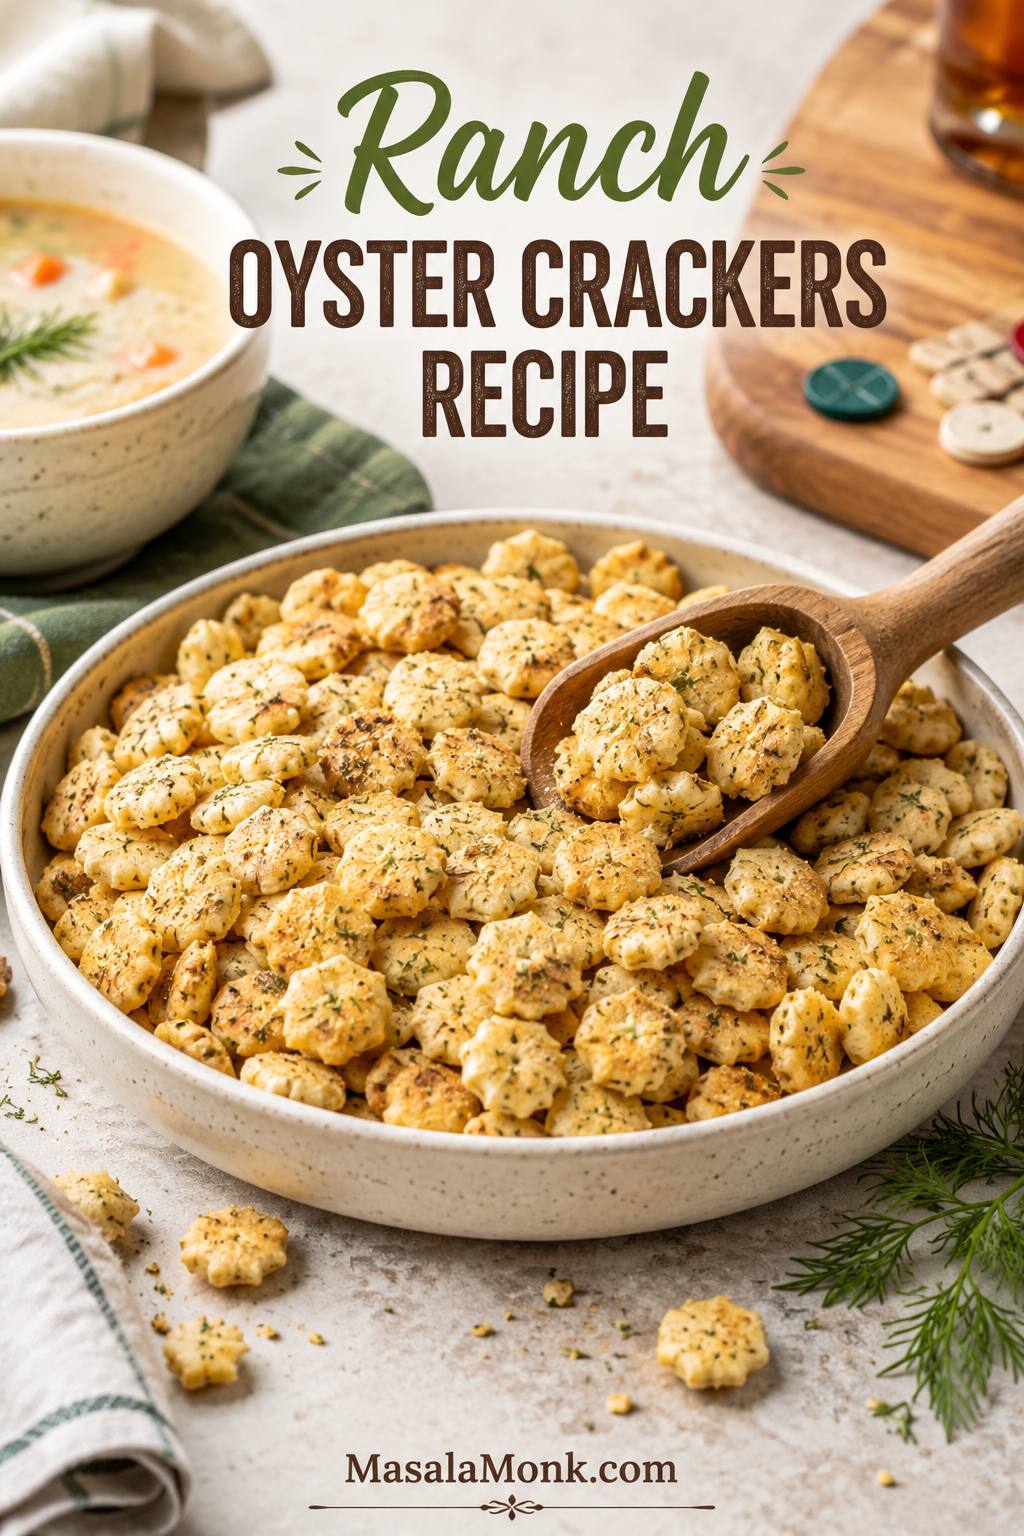
Ranch Oyster Crackers Recipe

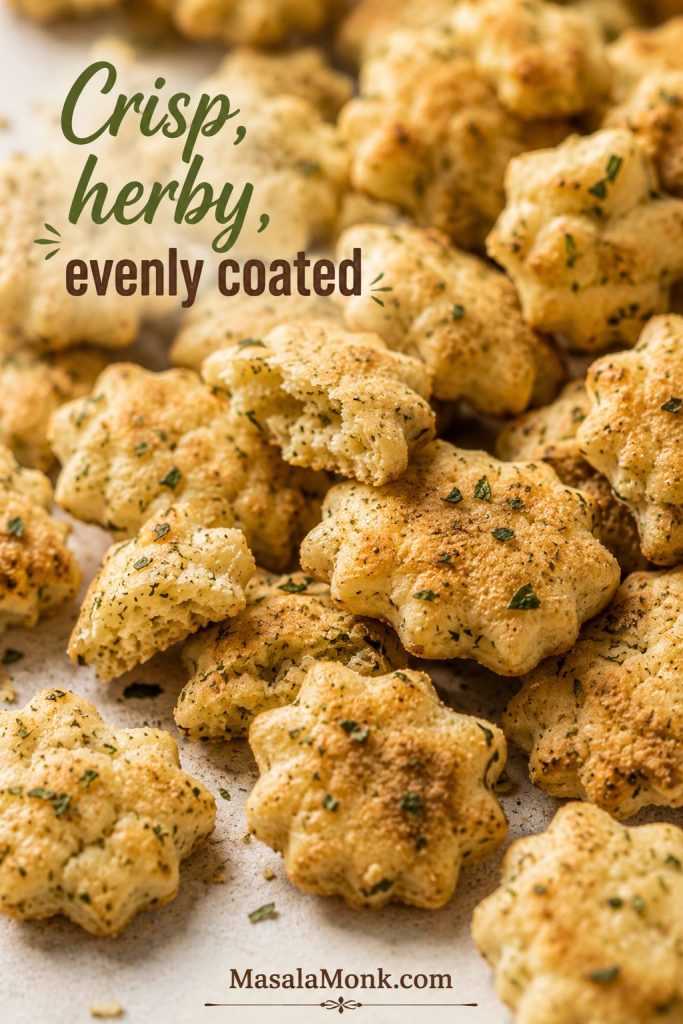
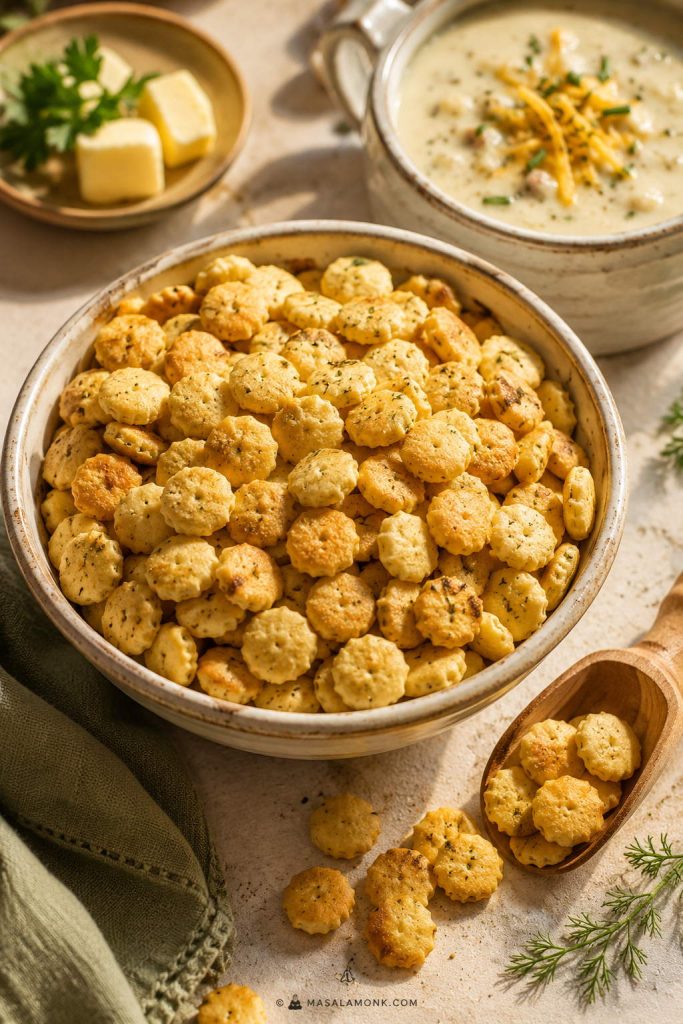
Bowl of golden ranch oyster crackers with herb flecks, scoop, and cozy snack-table sides.

Ranch oyster crackers are the kind of snack that disappears quietly. You set out a bowl before the game starts, beside a pot of soup, or on a holiday snack table, and somehow everyone keeps drifting back for another salty, herby handful. They are crisp, tiny, ranch-seasoned, and just rich enough to feel like a treat without asking much from you.

The recipe itself is easy. The confusing part is everything around it: whether “ranch dressing” means bottled dressing or the dry ranch packet, how much seasoning to use for a 9 oz, 12 oz, or 16 oz bag, whether oil or butter gives a better crunch, whether the crackers really need to be baked, and what to do if they turn out greasy, salty, or soft.

Once those little decisions are clear, the batch is easy to get right. The baked method gives the snappiest result, and the ratio table helps you adjust for whatever bag you have. From there, choose oil or butter, dill or no dill, a gentle ranch coating or a bolder party-snack bowl. The result should be bold but not harsh, coated but not oily, and crunchy enough that people keep reaching back into the bowl.

Quick Answer: The Best Ranch Oyster Crackers Formula

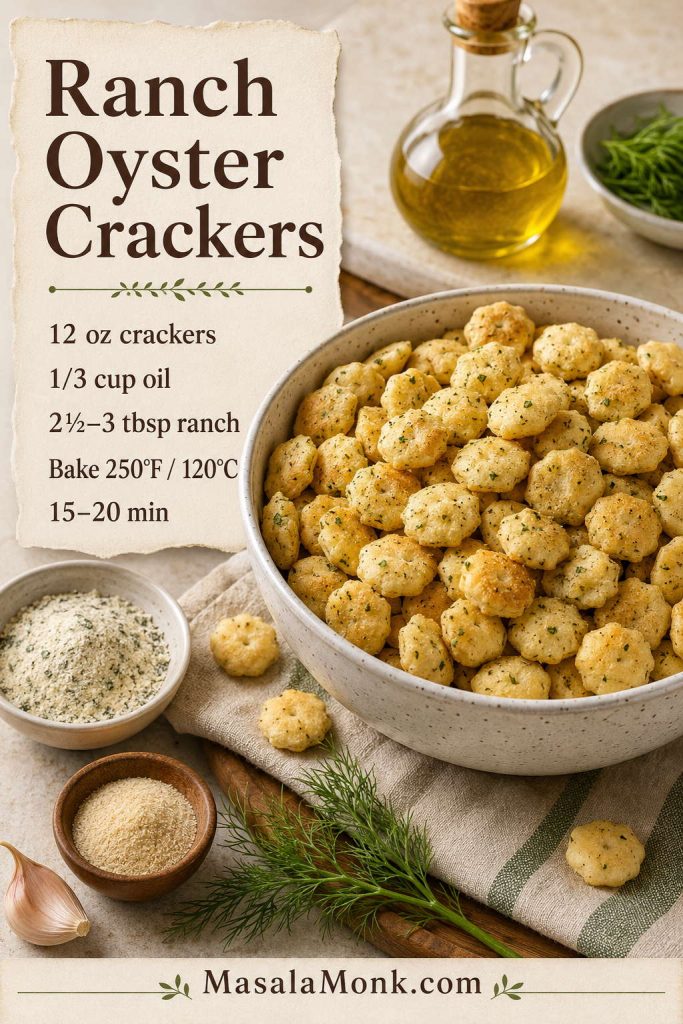
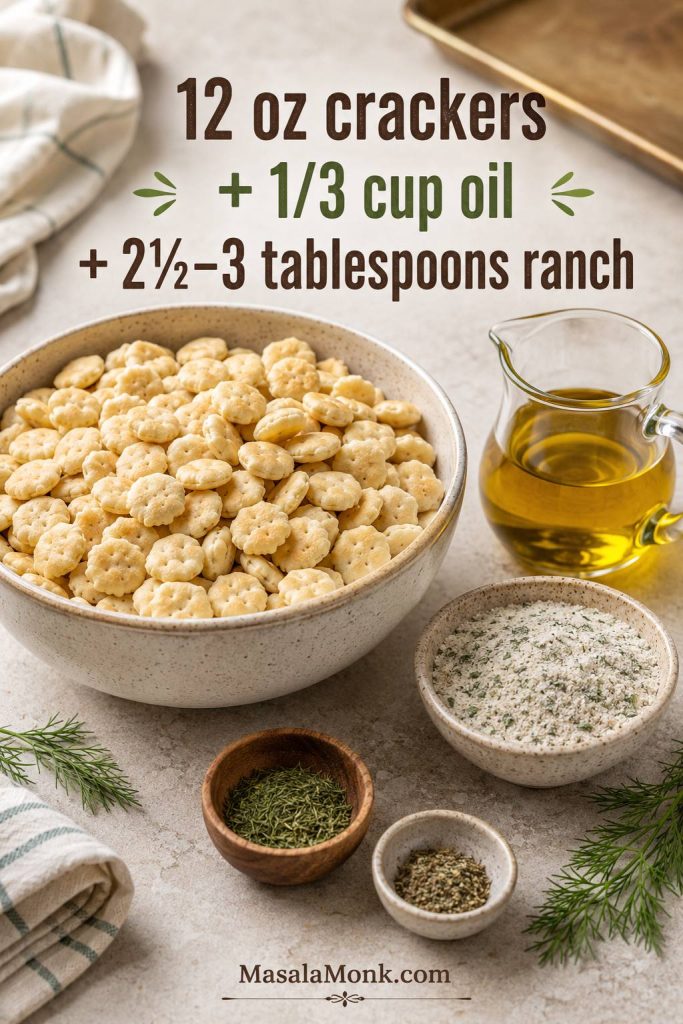
For 12 oz / 340 g oyster crackers, use ⅓ cup / 80 ml neutral oil, 2½ tablespoons dry ranch seasoning for a balanced batch or up to 3 tablespoons for a bolder batch, 1 teaspoon dried dill, ½ teaspoon garlic powder, and ½ to 1 teaspoon lemon pepper.

Toss well, spread on a rimmed baking sheet, bake at 250°F / 120°C for 18–22 minutes, stir once halfway, and cool fully before storing. The first handful should taste salty, herby, crisp, and evenly coated — never dusty in one bite and oily in the next.

Quick pick: Use neutral oil for the best crunch, melted butter for the richest flavor, the air fryer for the fastest small batch, the no-bake method when you want to skip the oven, and a 16 oz batch for parties, gifting, game day, or bigger soup nights.

If you are using a full 1 oz / 28 g ranch packet with a 12 oz bag, expect a bold, salty party-snack flavor. For a safer first batch, start with 2½ tablespoons, bake, taste, and dust the crackers with a little more seasoning while they are still warm on the tray.

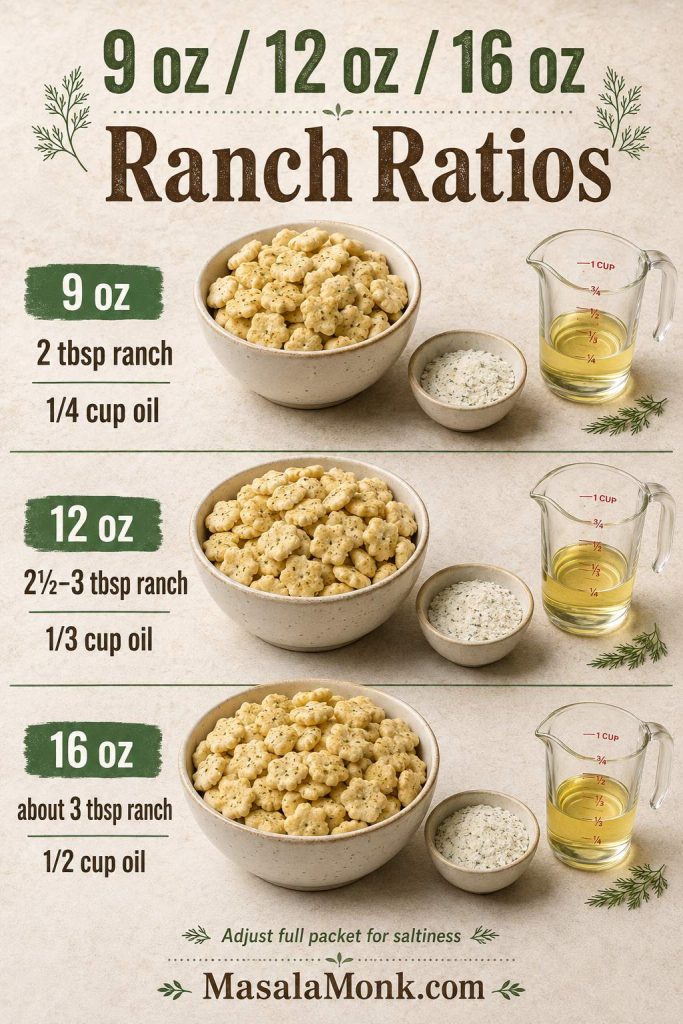
Using a 9 oz or 16 oz bag? Check the ranch seasoning ratios before mixing the coating.

Prep scene with oyster crackers, oil, dry ranch seasoning, dill, garlic powder, lemon pepper, and sheet pan.
Start with this 12-ounce ranch oyster crackers formula, then adjust the next batch toward bolder seasoning, richer butter, or more heat.

Why This Recipe Works

The best batches come out lightly toasted, evenly seasoned, and crisp after cooling. That does not happen by dumping ranch powder over crackers; it comes from the order, the ratio, and a little low-heat baking time.

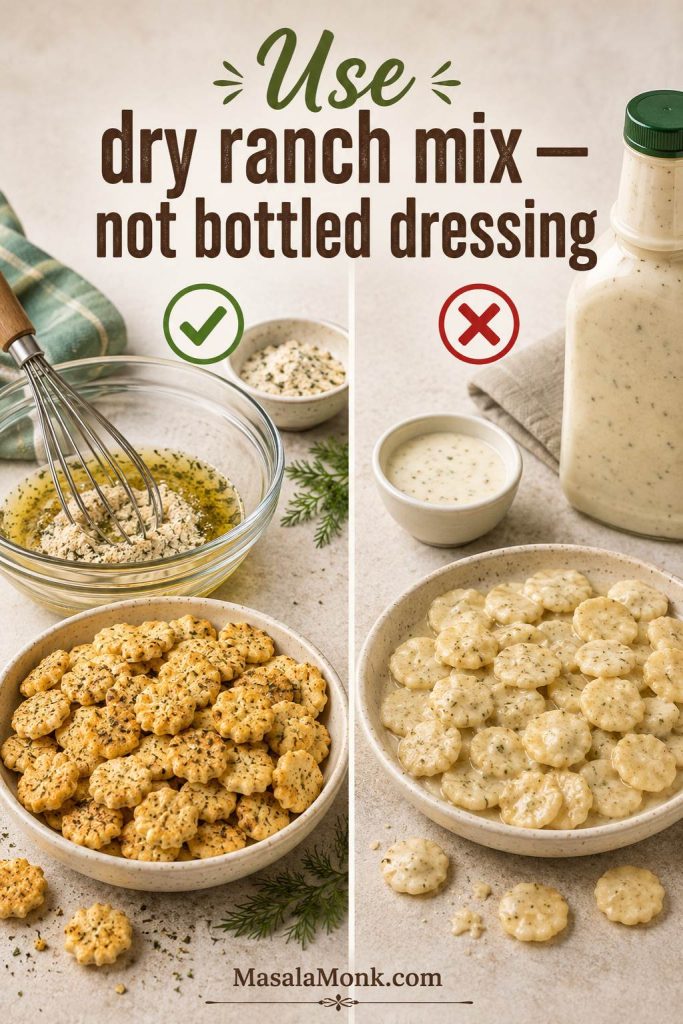
  • Dry ranch seasoning keeps the crackers crisp. Bottled dressing adds moisture, while dry mix gives flavor without making the crackers soggy.
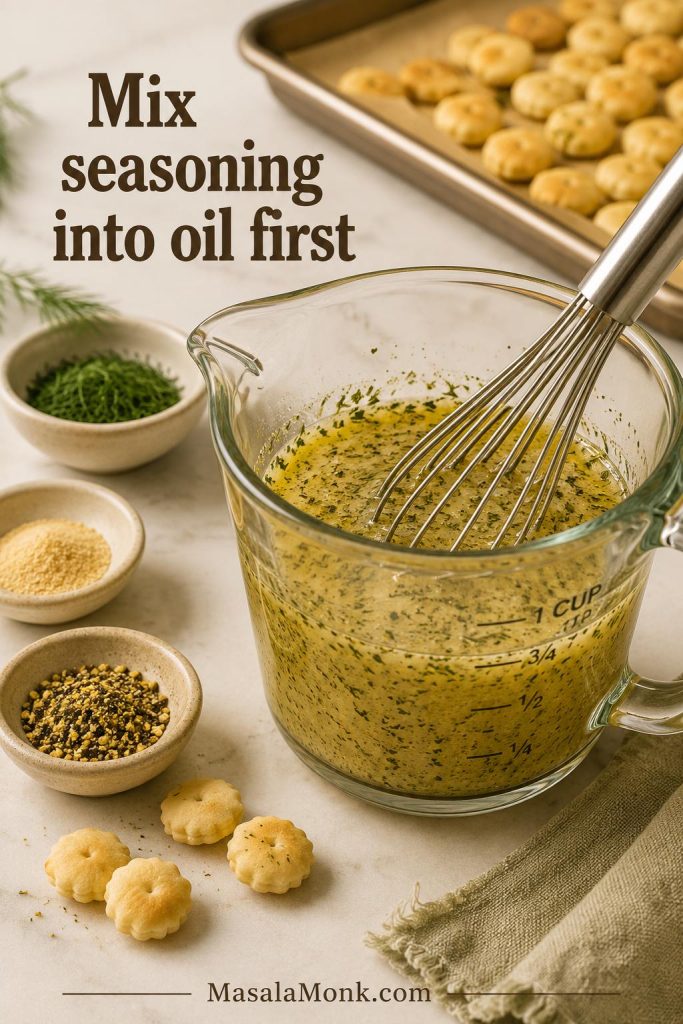
  • Whisking the seasoning into the oil first prevents clumps. The ranch powder, dill, garlic, and lemon pepper spread more evenly when they are suspended in oil before they touch the crackers.
  • A low oven sets the coating instead of scorching it. At 250°F / 120°C, the crackers have time to toast gently while the oil or butter settles into a clean, savory finish.
  • The ratio table protects the batch. Oyster cracker bags vary, and using the same seasoning amount for every bag can make one batch bland and another too salty.
  • Cooling on the tray finishes the texture. The crackers firm up as the seasoning settles into the surface.
The goal is simple: every handful should taste seasoned, not dusty in some bites and oily in others. Mix the coating first, bake low, and let the crackers cool on the pan, and the bowl lands crisp, salty, herby, and clean.

Close-up of crisp ranch oyster crackers with toasted edges, broken pieces, and green herb flecks.
Look for a matte, herby surface with lightly toasted edges; that finish tells you the seasoning has settled instead of sitting on the crackers as oil.

What Are Ranch Oyster Crackers?

Ranch oyster crackers are small oyster crackers tossed with dry ranch seasoning, oil or melted butter, and simple seasonings like dill, garlic powder, lemon pepper, and onion powder. They are usually baked at a low temperature until the seasoning clings and the crackers become crunchy again.

They are one of the most common versions of seasoned oyster crackers: the ranch packet gives the base flavor, while dill, garlic, lemon pepper, Parmesan, or heat can push the batch in different directions.

Despite the name, oyster crackers usually do not contain oysters. They are small soup crackers traditionally served with oyster stew, chowder, chili, and other soups. That soup-and-stew background is also why they make so much sense with creamy bowls and chili today. For a little more history, this history of oyster crackers explains where the name comes from.

Think of them as a snack mix shortcut. They are easier than Chex mix, less fussy than homemade crackers, and more interesting than plain soup crackers. Once baked and cooled on the pan, they are sturdy enough for snacking but still small enough to scatter over tomato soup, chili, chowder, salad, or a dip board.

Dry Ranch Seasoning vs Bottled Ranch Dressing

Use dry ranch seasoning here. It gives concentrated ranch flavor without the moisture that comes from bottled dressing. Creamy ranch dressing may sound tempting, but it can turn the crackers soft instead of snappy.
Split comparison of dry ranch seasoning mixed with oil and bottled ranch dressing with softer crackers.
Dry ranch mix seasons the crackers without adding water or cream, which is why it gives a cleaner crunch than bottled dressing.
Ranch productCan you use it?What to know
Dry ranch seasoning packetYes, best choiceClassic, easy, and bold. Use the packet weight and taste for saltiness.
Ranch seasoning shakerYesMeasure by tablespoons. Start with less if the blend is salty.
Dry ranch dip mixUsually yesCan be saltier or stronger than dressing mix. Start with a little less.
Bottled ranch dressingNot recommendedAdds moisture and can make the crackers soft.
Homemade ranch-style dry mixYesGood if you want more control over salt, dill, garlic, onion, and herbs.

Helpful rule: When people say “ranch dressing crackers,” they often mean crackers made with dry ranch dressing mix, not creamy dressing from a bottle.

Homemade Dry Ranch-Style Mix

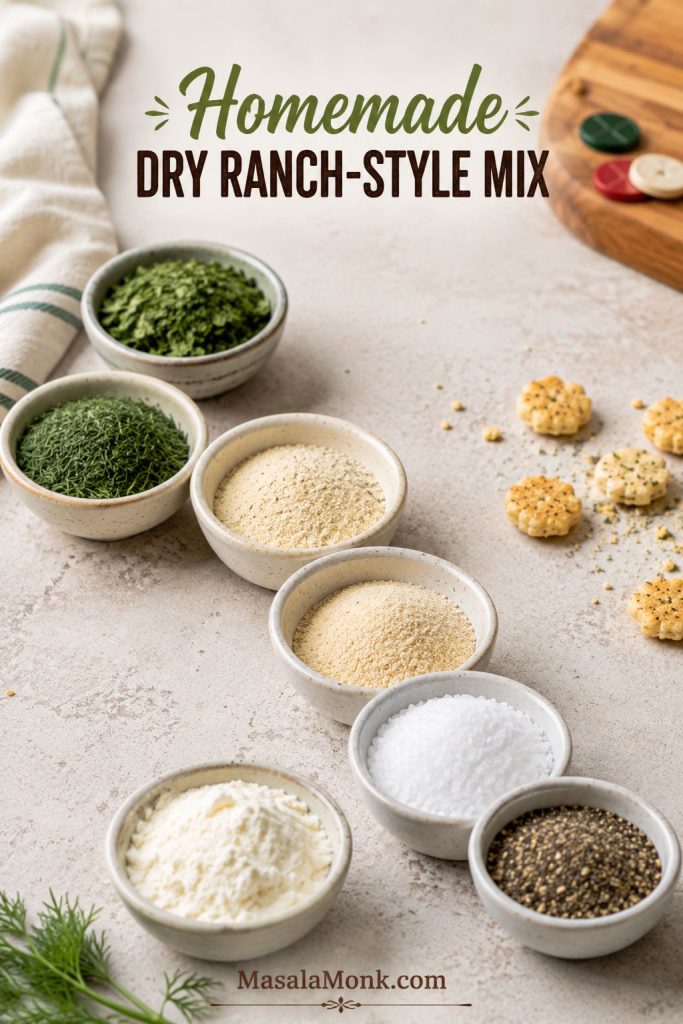
A homemade ranch-style dry mix can work too, especially if it includes parsley, dill, garlic powder, onion powder, salt, pepper, and optional buttermilk powder. Without buttermilk powder, the flavor will be more herby-garlicky than creamy-ranch, but it can still make a good seasoned cracker batch.

Small bowls of parsley, dill, garlic powder, onion powder, salt, pepper, and buttermilk powder for dry ranch mix.
A homemade dry ranch-style mix lets you control salt, herbs, and garlic, which is helpful when serving kids, low-salt guests, or lighter soup-night batches.

Ingredients and What Each One Does

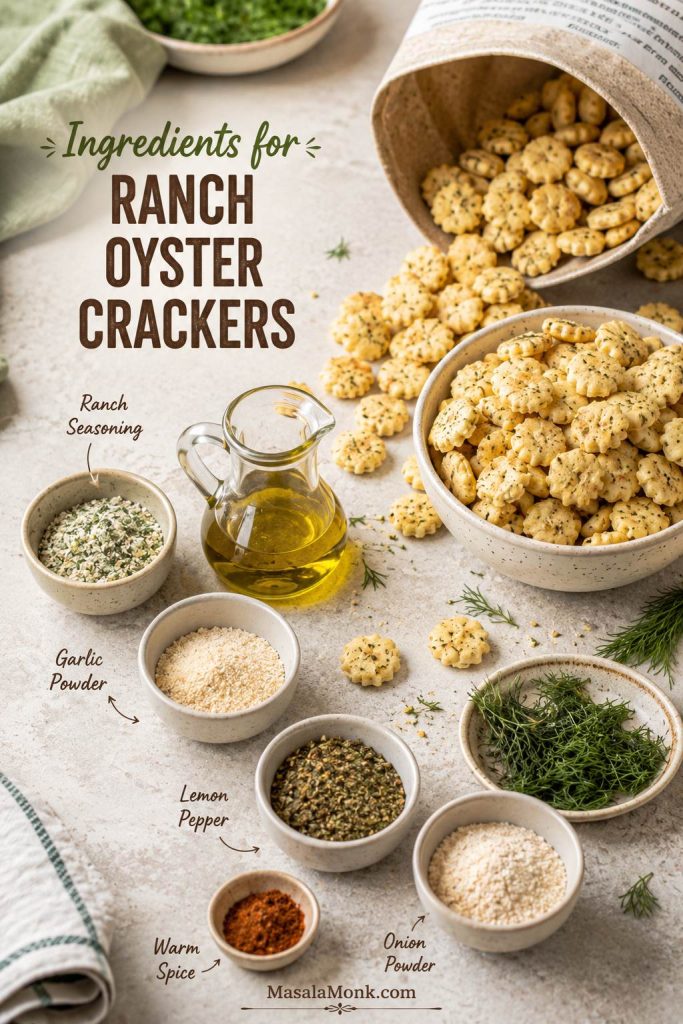
If you have oyster crackers, dry ranch mix, and a neutral oil, you are most of the way there. The crackers bring the crunch, the ranch mix brings the salty-herby flavor, and the oil or butter decides how light or rich the final batch feels.

Oyster crackers with oil, dry ranch seasoning, dill, garlic powder, lemon pepper, and onion powder in small bowls.
Every flavoring in this mix is dry, so the crackers can pick up ranch, dill, garlic, and lemon pepper while still baking into a snackable texture.

Oyster crackers

Use plain oyster crackers. Common bags are 9 oz / 255 g, 12 oz / 340 g, and 16 oz / 454 g. Cup counts vary by brand, but 9 oz is usually about 4–5 cups, 12 oz about 5½–6 cups, and 16 oz about 7–8 cups. Weight is more reliable than cups, so use the ratio table if your bag size is different.

Dry ranch seasoning

A standard dry ranch packet gives the classic flavor most people expect: tangy, salty, herby, garlicky, and slightly creamy-tasting even though there is no bottled dressing in the recipe. Store-brand ranch seasoning also works. The familiar green-label style packets are common, but the brand matters less than the salt level and packet size.

Dry ranch mix is useful beyond snack crackers too; it brings the same shortcut flavor to easy dinners like one-pot chicken bacon ranch pasta. Here, though, the seasoning needs to stay dry enough to cling to crackers instead of turning into a sauce.
Unsure how much of the packet to use? Jump to the ranch packet adjustment notes before you season the crackers.

Neutral oil or melted butter

Neutral oil gives the lightest, snappiest batch. Canola, vegetable, avocado, or another mild oil works well. Melted butter gives richer flavor and makes the kitchen smell more like party mix. Use unsalted butter if your ranch mix is already salty; if you only have salted butter, start with less seasoning.

Dried dill and other seasonings

Dill gives the crackers that old-school ranch snack-mix flavor. Garlic powder deepens the ranch flavor, lemon pepper adds lift, and onion powder rounds everything out. Cayenne, red pepper flakes, smoked paprika, Parmesan, parsley, taco seasoning, or Italian seasoning can all work too; add salty extras carefully because ranch packets already bring plenty of salt.

How Much Ranch Seasoning to Use for Oyster Crackers

The seasoning gets easier once you match it to the bag size. Some recipes use cups, some use ounces, some say one packet, and ranch packet sizes are not always identical. Use this table as the practical guide.
Ranch Ratios by Bag Size

Oyster crackersMetricRanch seasoningOil or butterBake time at 250°F / 120°C
9 oz255 g2 tbsp mild
2½–3 tbsp bold
¼ cup oil for lighter coating
⅓ cup oil or 5 tbsp butter for richer coating
15–20 min
12 oz340 g2½ tbsp balanced
3 tbsp bold
⅓ cup oil
up to ½ cup butter for richer coating
18–22 min
16 oz454 gAbout 3 tbsp
or most/all of a standard 1 oz / 28 g packet, adjusted for saltiness
½ cup oil or ½ cup melted butter20–25 min
2 × 16 oz908 gAbout 6 tbsp
or 2 standard 1 oz / 28 g packets, adjusted for saltiness
1 cup oilUse 2 sheet pans
Three ranch oyster cracker ratio sections for 9 ounce, 12 ounce, and 16 ounce batches with ranch and oil measurements.
Bag size matters: the same ranch packet can taste bold in a 12-ounce batch but more balanced in a larger 16-ounce party batch.

How to Adjust the Ranch Packet

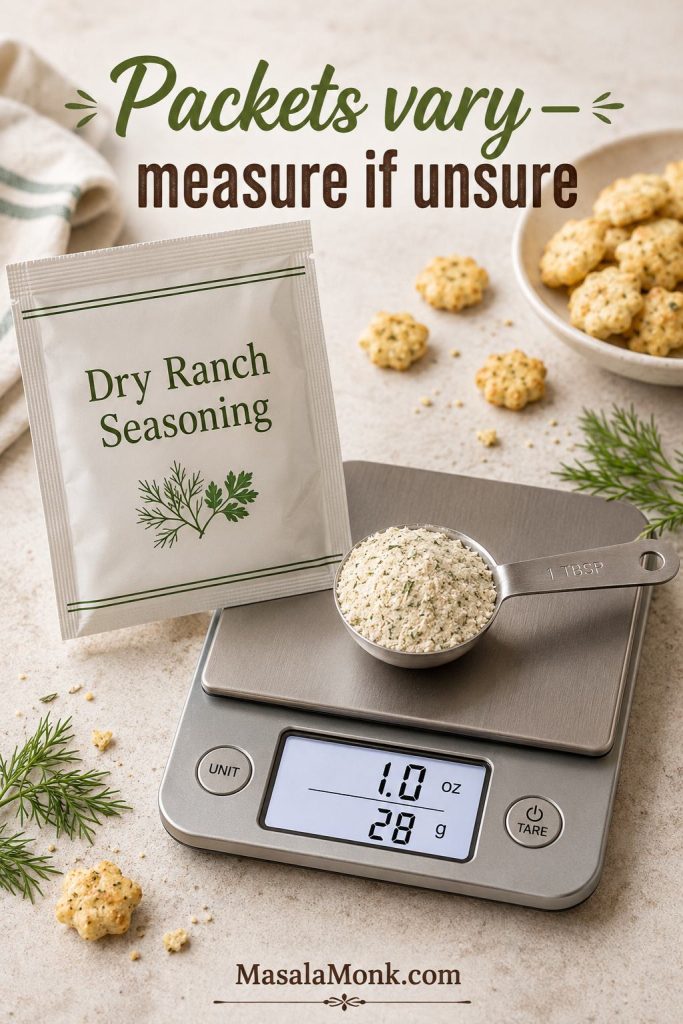
A ranch packet is sold by weight, not by tablespoons, and brands vary. The same 1 oz / 28 g packet can make a bold 12 oz batch or a more moderate 16 oz batch; it depends on how salty and intense you want the bowl.

Dry ranch seasoning packet, tablespoon measure, kitchen scale, and oyster crackers for checking packet weight.
Since ranch packets are sold by weight, measuring once helps you match the recipe instead of guessing from packet to packet.

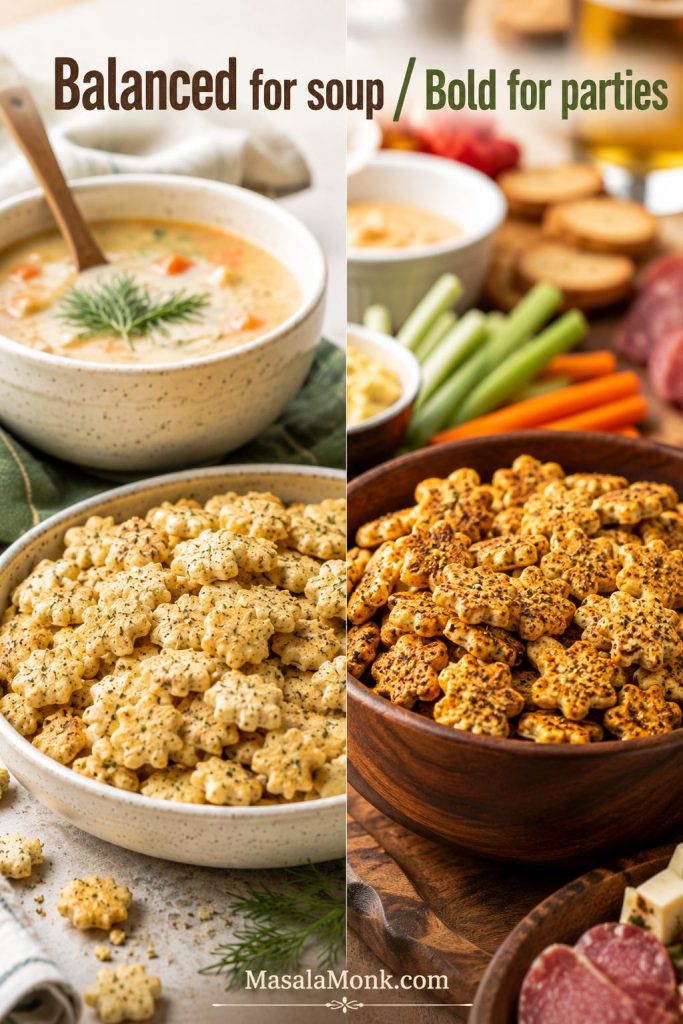
Balanced for Soup, Bold for Parties

Making these for soup? Stay closer to the balanced ranch amount so the crackers add crunch without taking over the bowl. Making them for a party snack? Go bolder, especially if the crackers will sit beside dips, wings, cheese, or other strong flavors.

Lighter ranch oyster crackers for soup beside a bolder seasoned batch for parties.
Keep the seasoning lighter for soup so it does not overpower the bowl; go bolder when the crackers need to stand beside dips, wings, and cheese.

Best starting point: For a 12 oz / 340 g bag, use ⅓ cup oil and 2½ tablespoons ranch seasoning. After that, adjust toward extra dill, more butter, or a bolder packet-style coating depending on how your house likes them.

For batch size, think of 9 oz as a small test batch, 12 oz as the one-pan standard, and 16 oz as the party or gifting size. If you double a 16 oz batch, use two sheet pans so the crackers have room to toast evenly.

Once the bag size and seasoning amount are clear, move to the baked method and mix the coating.

Oil vs Butter for Ranch Oyster Crackers

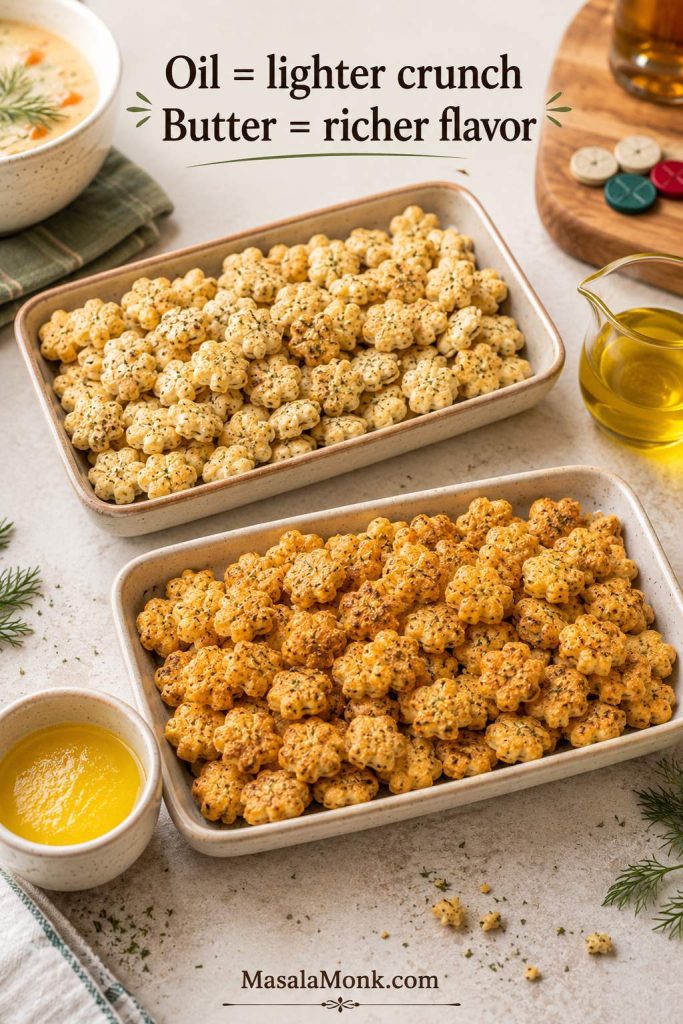
Neither oil nor butter is wrong; they just make different snack bowls. Oil gives you the light, crunchy version people keep grabbing from between sips of soup. Butter gives you the richer bowl that smells like party mix coming out of the oven.

Two ranch oyster cracker batches comparing a lighter oil-coated version with a richer butter-coated version.
Oil keeps the bite lighter and drier, whereas melted butter gives a deeper, party-mix flavor that feels richer while still warm.
ChoiceResultBest forWatch out for
Neutral oilSnappy, light, evenly coatedMain recipe, make-ahead snacks, soup toppingUse a measured amount so the crackers do not feel greasy
Melted butterRicher, more savory, slightly heavierParty bowls, warm snacking, buttery flavorUse unsalted if your ranch mix is salty
Half oil, half butterBalanced flavor and crunchBest compromiseGive it enough baking time for the coating to settle
Olive oilMore noticeable flavorSmall batches or herby versionsUse a mild one so it does not fight the ranch flavor
Popcorn oilOld-school snack flavorHeavier party mixTaste first because some brands are extra salty

For the main recipe, use oil if you want the cleanest crunch. Use melted butter for a richer snack, then give the crackers enough space and baking time so the coating settles instead of feeling heavy.

How to Make Ranch Oyster Crackers

Once you choose the fat, the method is simple: whisk the seasoning into the oil or butter first, toss the crackers gently, spread them in one layer, bake low, stir once, and let them sit on the tray. This is snack food, not pastry; the goal is seasoned, easy, and good by the handful.

If the coating looks a little uneven or the first batch tastes slightly light, you can usually fix it with a few more minutes in the oven or a small dusting of seasoning while the crackers are warm.

Step 1: Heat the oven

Heat the oven to 250°F / 120°C. This low temperature gives the seasoning time to settle onto the crackers without burning the ranch powder, dill, garlic, or lemon pepper.

Step 2: Mix the seasoning oil

In a small bowl or measuring cup, whisk together the oil, dry ranch seasoning, dried dill, garlic powder, lemon pepper, and any optional onion powder, smoked paprika, or cayenne. Mixing the seasonings into the oil first helps prevent salty clumps and bare patches.

Dry ranch seasoning, dill, garlic powder, and lemon pepper being whisked into oil in a glass bowl.
Mixing the ranch seasoning into the oil first helps the herbs and powders move evenly through the batch instead of clinging in salty clumps.

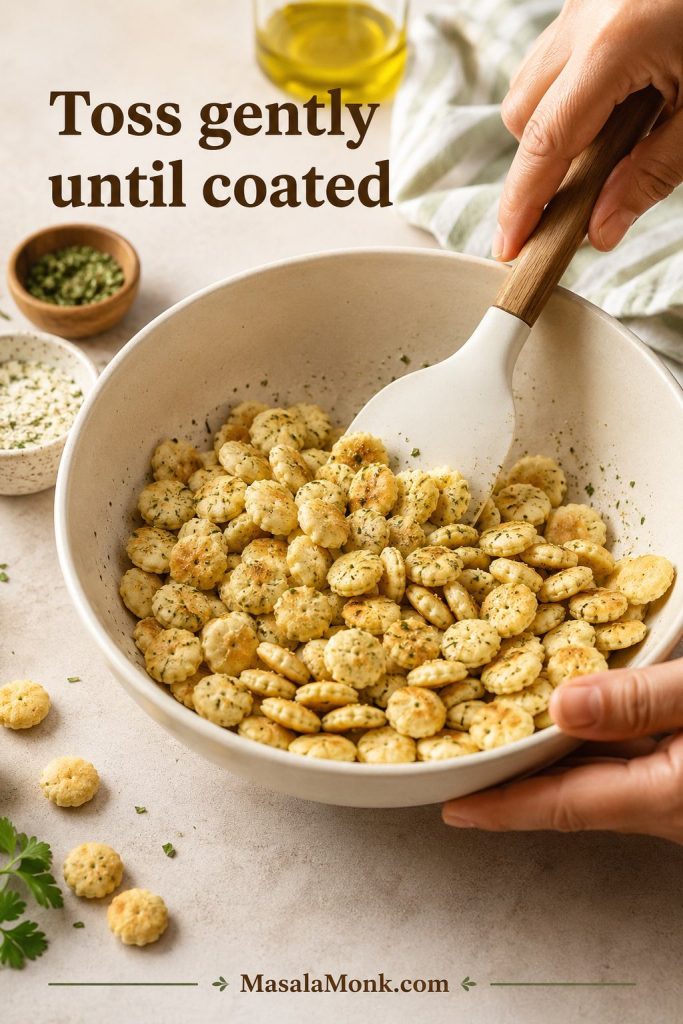
Step 3: Coat the crackers gently

Add the oyster crackers to a large mixing bowl or a gallon zip-top bag. Pour the seasoning oil over them and toss gently until the crackers look evenly coated. A bowl is gentler and reduces breakage. A zip-top bag is faster and less messy, but shake softly rather than crushing the crackers.

Hands gently tossing oyster crackers with ranch seasoning oil in a large cream mixing bowl.
Use a wide bowl and gentle folds so the oyster crackers pick up seasoning without breaking into too many crumbs.

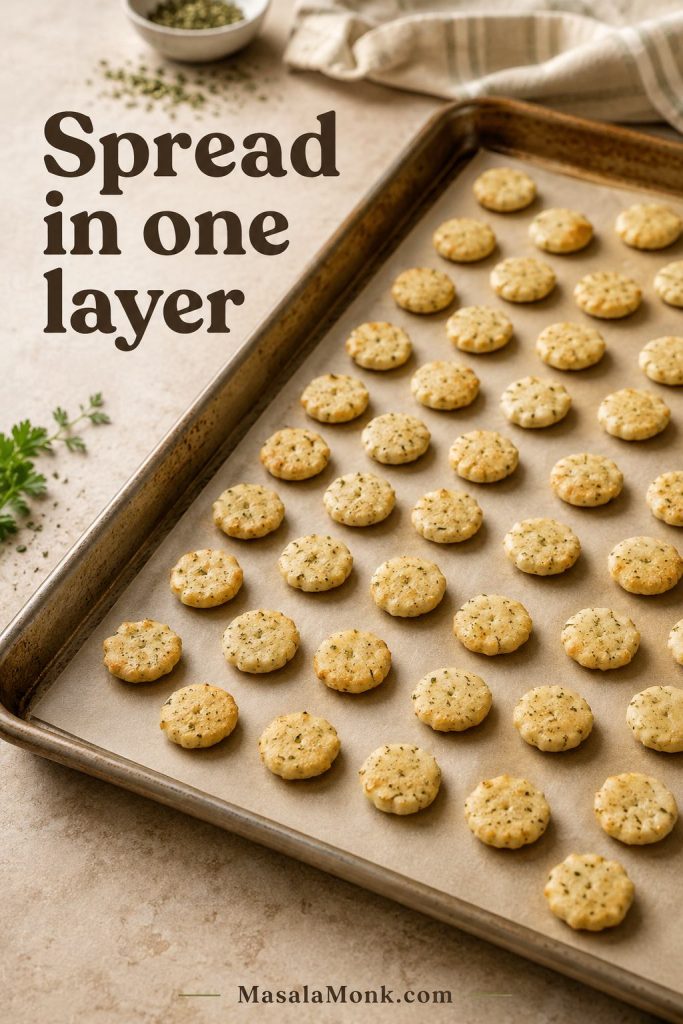
Step 4: Spread on a rimmed baking sheet

Spread the crackers on a rimmed baking sheet in as even a layer as possible. Parchment makes cleanup easier, and space on the pan helps the coating set evenly.

Ranch oyster crackers spread in a single layer on a parchment-lined rimmed baking sheet.
A single layer gives each cracker space to dry and toast, while crowded spots can stay heavy even after baking.

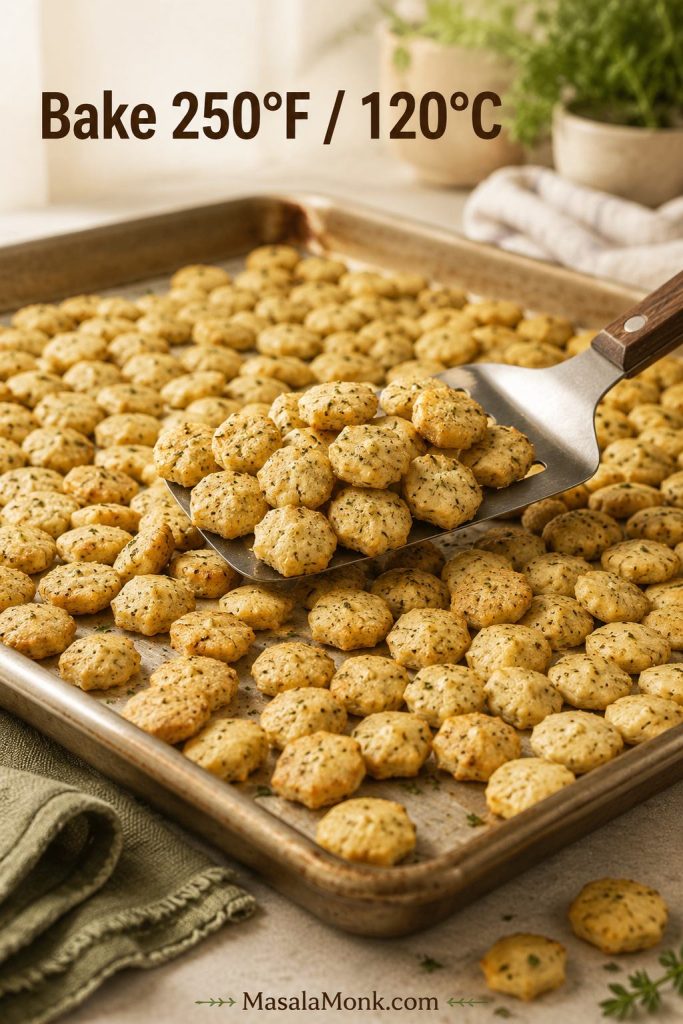
Step 5: Bake low and stir once

Bake for 18–22 minutes, stirring after about 10 minutes. A smaller or lightly coated batch may be ready closer to 15–18 minutes. A butter-heavy or 16 oz batch may need 20–25 minutes. The crackers should smell toasted and look set rather than wet or shiny.

Baked ranch oyster crackers on a sheet pan with toasted edges, herb flecks, and a spatula lifting some crackers.
The best doneness cue is not deep browning; instead, the crackers should smell toasted and look set, dry, and evenly speckled.

Step 6: Let the crackers cool on the pan

Leave the crackers on the pan until they are no longer warm. Once cooled, they should be evenly seasoned and ready to store.

Ranch oyster crackers cooling on a sheet pan beside an open glass storage container and lid.
Leave the crackers on the pan until the warmth fades, then move them into storage so the finished texture stays clean.

Texture cue: If the crackers still look glossy after baking, give them another 3–5 minutes at the same low temperature. They should look coated, not shiny with oil.

Equipment note: A large bowl is gentler, a zip-top bag coats faster, a rimmed baking sheet keeps the crackers contained, parchment helps cleanup, and a thin spatula makes stirring easier.

Want to skip the oven or use the air fryer instead? Compare the baked, no-bake, and air fryer methods before choosing.

Baked, No-Bake, and Air Fryer Methods

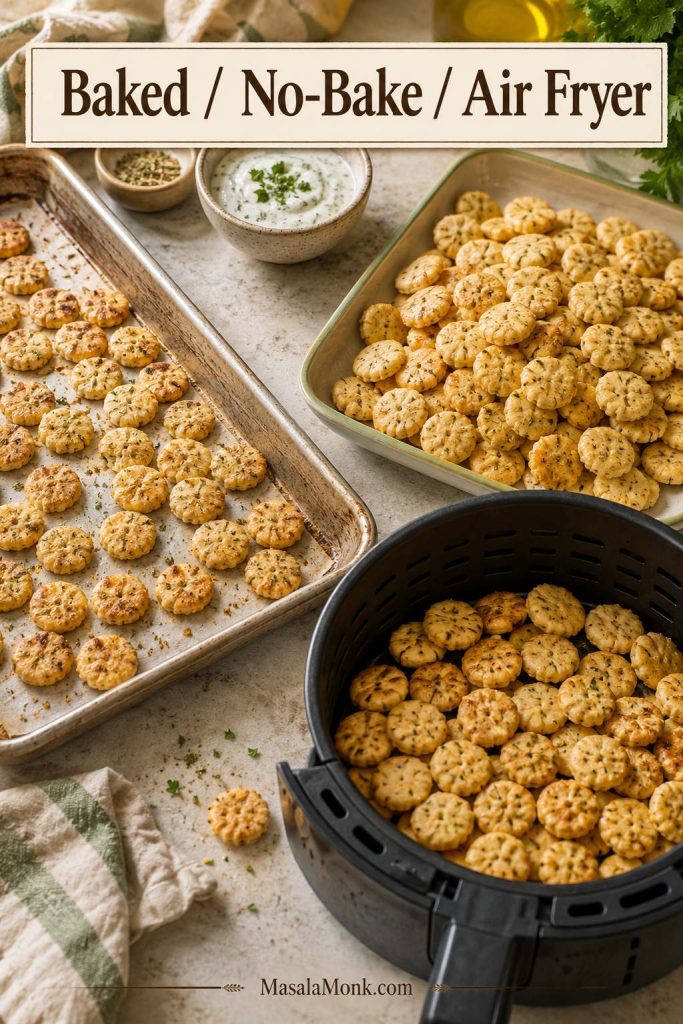
If you want the most reliable crunch, use the oven. No-bake and air-fryer versions are useful when you are short on time, avoiding the oven, or making a small batch. The microwave is included only as a backup.

Baked, no-bake, and air fryer ranch oyster crackers shown with a sheet pan, resting tray, and air fryer basket.
Pick the oven for an even full batch, the air fryer for speed, or the no-bake method when make-ahead ease matters more than maximum crunch.
MethodTimeTextureBest for
Baked18–22 minMost even and snappyMost reliable crunch
No-bake2–4 hours sitting timeGood, but slightly softerNo oven, prep-ahead snack
Air fryer7–10 minVery crisp, small batchesQuick small batch
Microwave backup2–3 minFast but less evenOnly when speed matters most

No-bake version

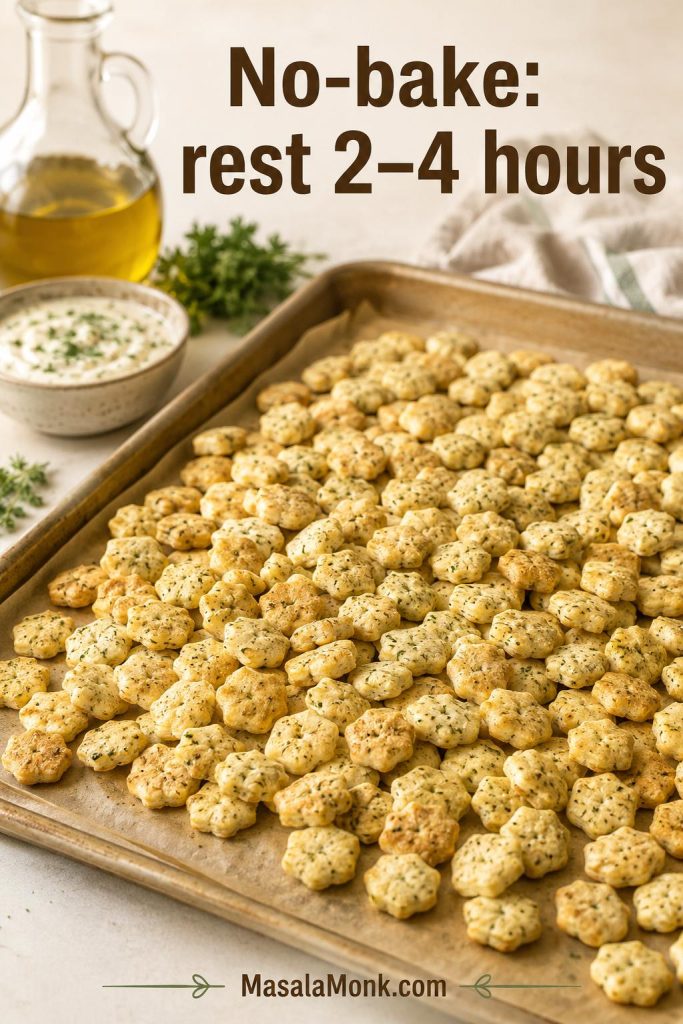
Choose this when you need the snack made ahead and do not mind a slightly softer crunch. Toss the oyster crackers with the seasoned oil, spread them on a sheet pan, and let them sit for 2–4 hours, stirring occasionally. They are ready when the surface no longer feels slick. Oil works better than butter here because it coats without setting up heavy as it cools.

No-bake ranch oyster crackers resting on a sheet pan with oil and seasoning nearby.
The no-bake method needs patience: spreading the crackers out gives the seasoned oil time to settle before serving.

Air fryer version

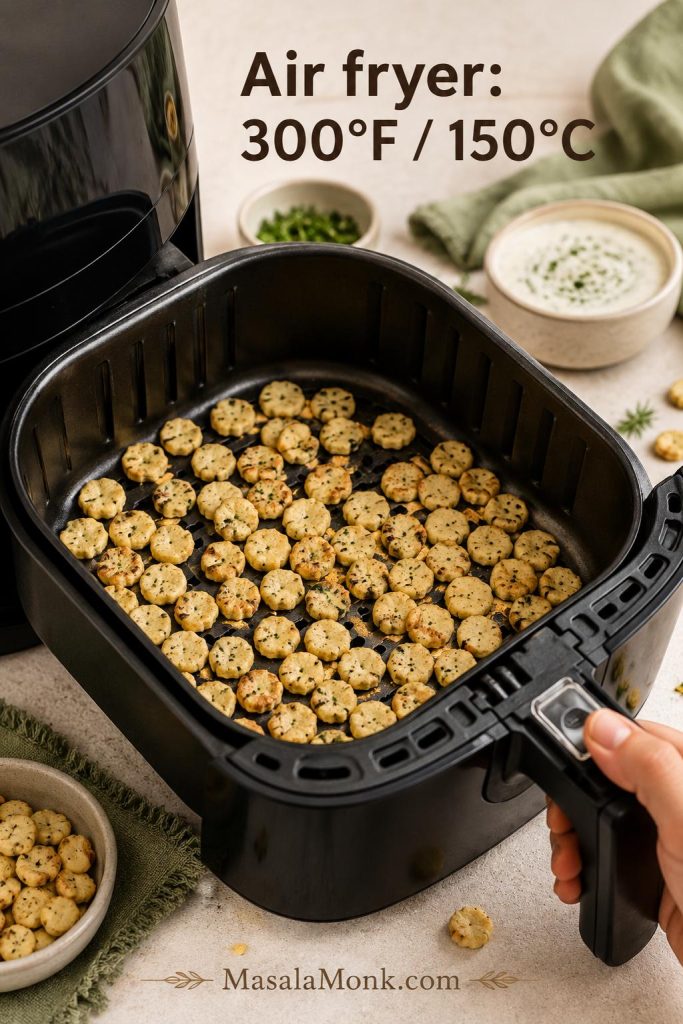
For the air fryer, cook small batches at 300°F / 150°C for 5 minutes, shake the basket, then cook another 2–5 minutes until set and lightly toasted. Air fry only 3–4 cups at a time unless you have a large basket. A little less oil usually works better in smaller baskets.

Ranch oyster crackers cooked in a thin layer inside an air fryer basket.
Keep air fryer batches shallow, because the crackers need moving air around them to toast rather than simply warm through.

If the air fryer is already out, you can keep the same snack-table rhythm going with air fryer chicken wings while the crackers cool.

Microwave backup

The microwave is the fastest backup, not the best texture method. Work in short bursts, then spread the crackers out afterward so steam does not soften them.

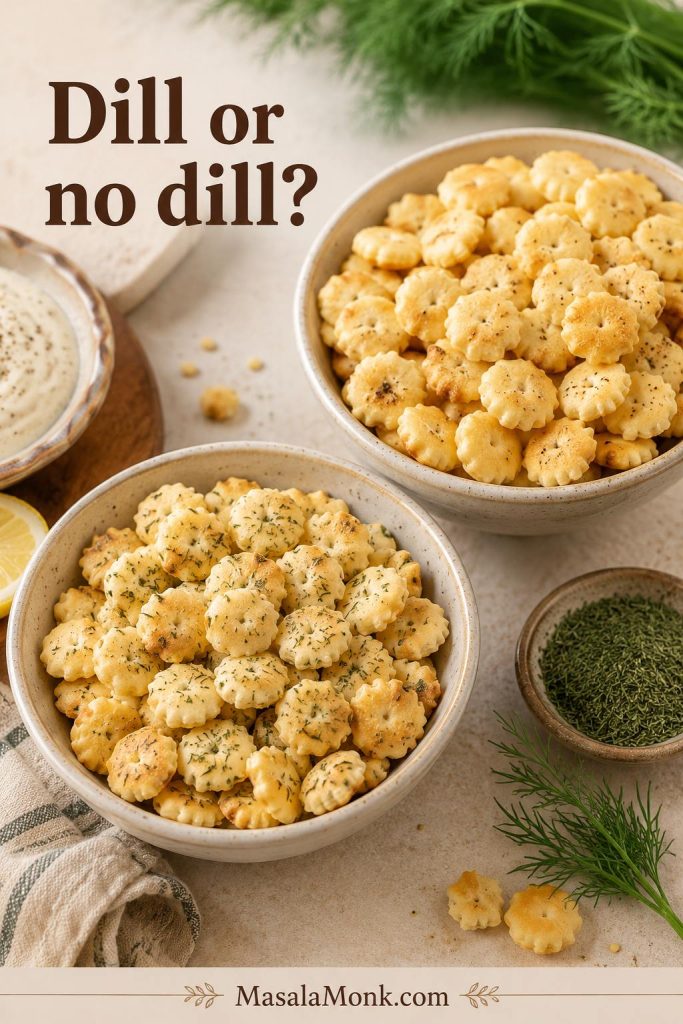
Dill or No Dill?

Dill is the old-school choice here. It gives these crackers their classic ranch snack-mix flavor, although the batch still works without it. For 9 oz / 255 g, use about ¾–1 teaspoon; for 12 oz / 340 g, use 1 teaspoon; for 16 oz / 454 g, use 1½–2 teaspoons. If you skip dill, replace it with dried parsley, chives, extra onion powder, or a little more lemon pepper.

Two bowls of ranch oyster crackers comparing a dill-speckled batch with a cleaner no-dill batch.
Dill gives the classic old-school ranch snack flavor, though parsley, chives, onion powder, or extra lemon pepper can still round out the batch.

Flavor Variations

Treat the base recipe like a blank snack mix. Keep the crackers, fat, and low oven steady; change the personality with the seasonings. This is where the batch starts to feel like yours.

Need the base formula first? Jump to the ranch oyster crackers recipe card, then come back and choose a variation.

Spicy Ranch Oyster Crackers, or Firecracker Style

Add ¼ teaspoon cayenne for mild heat, ½ teaspoon cayenne for a stronger kick, or 1 tablespoon red pepper flakes for a more obvious spicy snack. Classic firecracker oyster crackers are usually hotter, red-pepper-forward, and more heavily seasoned than regular ranch crackers, so keep them milder here unless you know your crowd wants heat.

For a hotter game-day table, pair the spicy crackers with a scoopable dish like buffalo chicken dip. The crackers are better for topping and nibbling, while sturdier chips or bread can handle the heaviest scoops.

Dry heat is easier than wet hot sauce. Cayenne, smoked paprika, chili powder, and red pepper flakes keep the batch punchy without adding extra moisture.

Spicy ranch firecracker oyster crackers with red pepper flakes, cayenne, and a buffalo-style dip nearby.
For firecracker-style oyster crackers, dry heat such as cayenne and red pepper flakes adds punch without softening the snack.

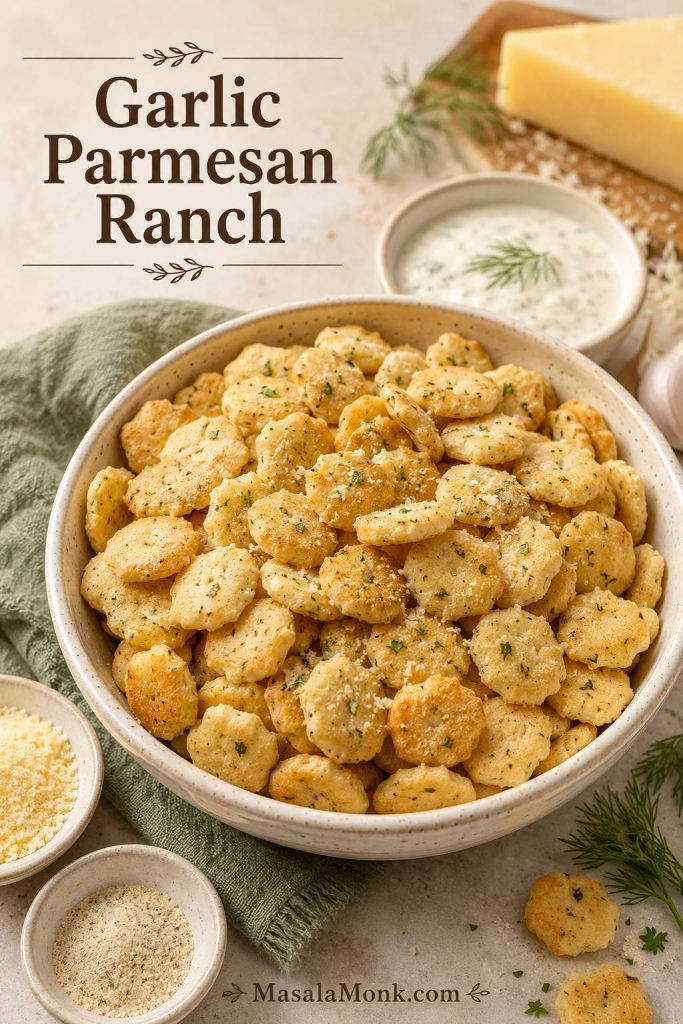
Garlic Parmesan ranch oyster crackers

Add a little extra garlic powder to the seasoning oil. After baking, while the crackers are still warm, toss with finely grated Parmesan and dried parsley. Adding Parmesan after baking keeps the cheese from scorching and gives the crackers a salty, savory finish.

Garlic Parmesan ranch oyster crackers in a bowl with grated Parmesan, garlic powder, parsley, and Parmesan wedge.
Add Parmesan after baking so the cheese stays savory and delicate instead of scorching on the sheet pan.

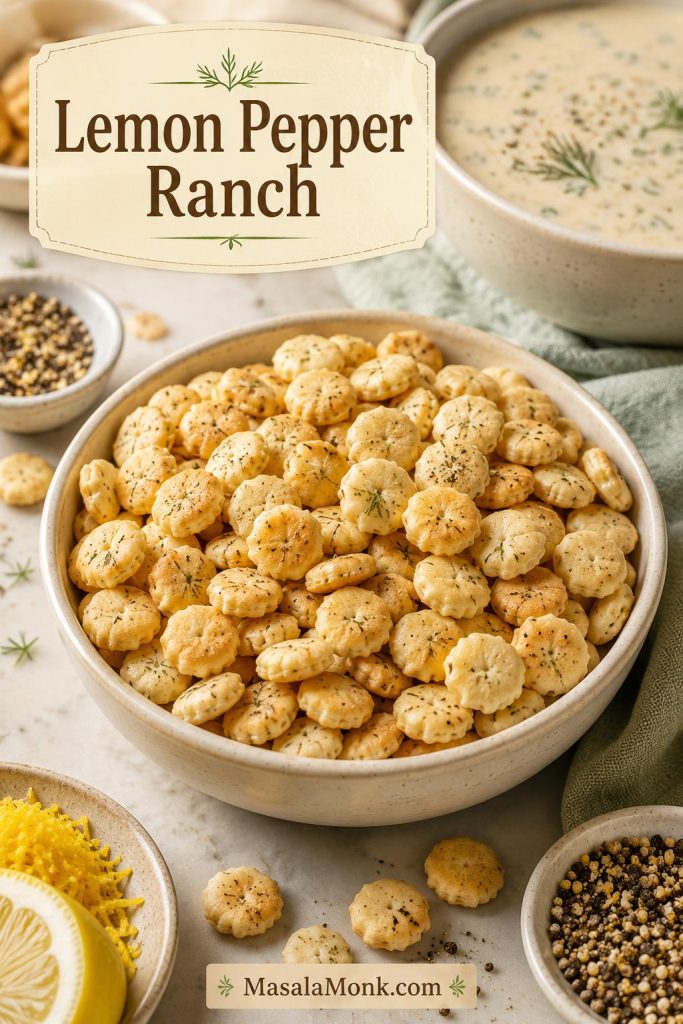
Lemon pepper ranch oyster crackers

Increase the lemon pepper to 1½ teaspoons for a 12 oz batch. This version is especially good as a soup topping because the citrusy pepper flavor cuts through creamy soups, chowder, and chili. If you like that bright, peppery flavor, it also makes a natural game-day pairing with lemon pepper chicken wings.

Lemon pepper ranch oyster crackers with lemon zest, lemon slice, pepper seasoning, and creamy soup in the background.
Lemon pepper lifts the ranch flavor, making this variation especially useful with creamy soups, chowders, and richer dips.

Taco ranch oyster crackers

Use ranch seasoning plus a small amount of taco seasoning, smoked paprika, and cayenne. Start lightly because taco seasoning can be salty. This version works well for movie-night bowls, game-day spreads, pretzels, corn chips, and roasted nuts.

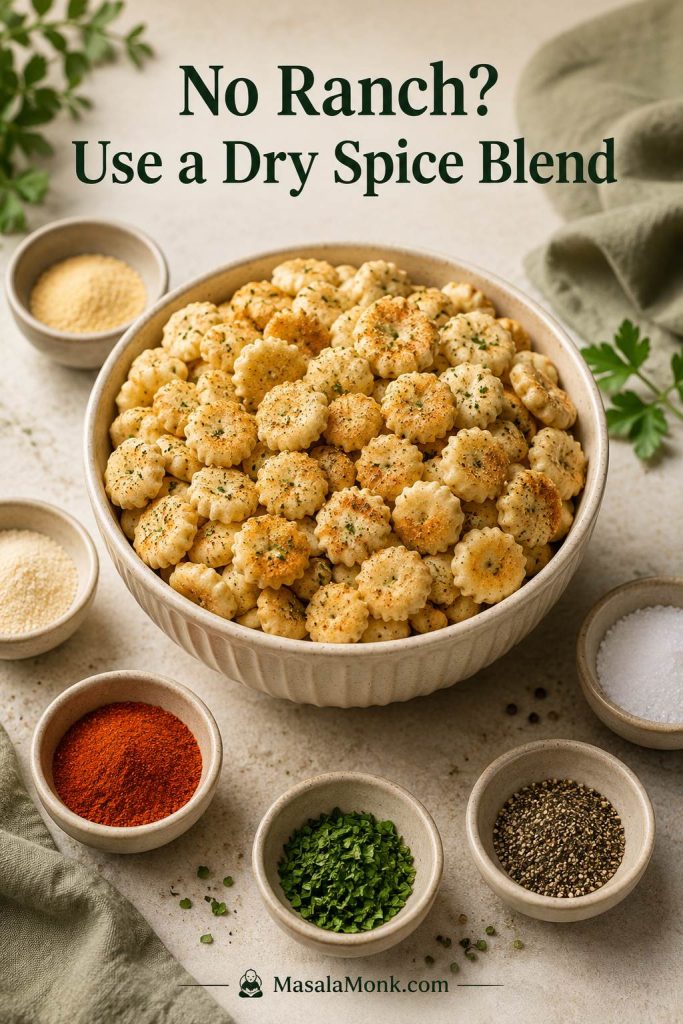
No-ranch seasoned oyster crackers

If you want a ranch-free seasoned oyster cracker batch, keep the same method and use a dry homemade seasoning blend. For 12 oz / 340 g oyster crackers, whisk together:

  • ⅓ cup / 80 ml neutral oil or melted butter
  • 1 teaspoon garlic powder
  • 1 teaspoon onion powder
  • 1 teaspoon dried parsley or Italian seasoning
  • ½ teaspoon dried dill, optional
  • ½ teaspoon smoked paprika or sweet paprika
  • ¼–½ teaspoon fine salt, depending on how salty your crackers are
  • ¼ teaspoon black pepper

Toss with the crackers and bake the same way. If you want a Parmesan version, add finely grated Parmesan after baking while the crackers are still warm.

Seasoned oyster crackers with bowls of paprika, parsley, black pepper, salt, garlic powder, and onion powder.
A ranch-free dry spice blend keeps the same easy method while giving readers a packet-free way to season oyster crackers.

Cinnamon sugar oyster crackers are a separate sweet snack direction. They usually use butter, sugar, cinnamon, and a slightly different baking rhythm, so treat that as its own snack bowl rather than folding it into this ranch version.

How to Serve Ranch Oyster Crackers

Ranch oyster crackers are easy to snack on straight from a bowl, but they are more useful than that. They can act like tiny croutons, party mix, soup crackers, or the salty crunch on a larger appetizer table.

Making them ahead for a party or snack table? Read the storage tips before you seal the batch.

Best Ways to Serve Them

UseHow to serve them
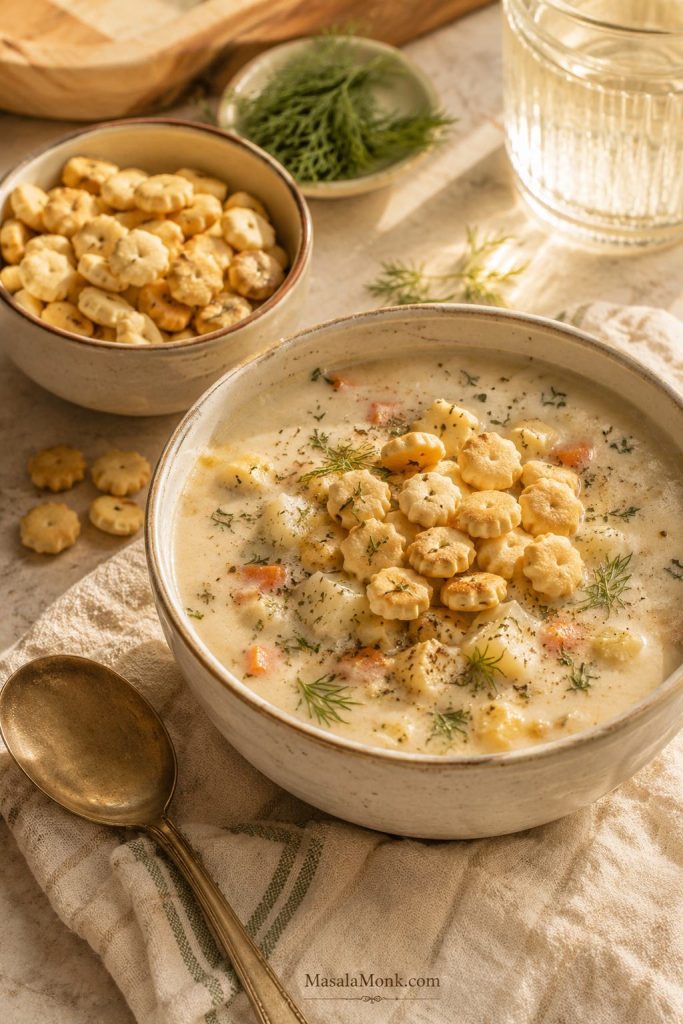
Soup toppingScatter over tomato soup, chowder, potato soup, chicken soup, or a cozy bowl like crock pot lasagna soup. Add them right before eating so the first spoonful is still crunchy.
Chili crunchUse instead of plain crackers for a salty ranch finish.
Party bowlServe in a big bowl with a small scoop or spoon so people can grab handfuls easily.
Snack mixCombine with pretzels, Chex, Goldfish-style crackers, roasted nuts, or mini saltines.
Dip boardUse as one crunchy element beside chips, vegetables, and bread pieces.
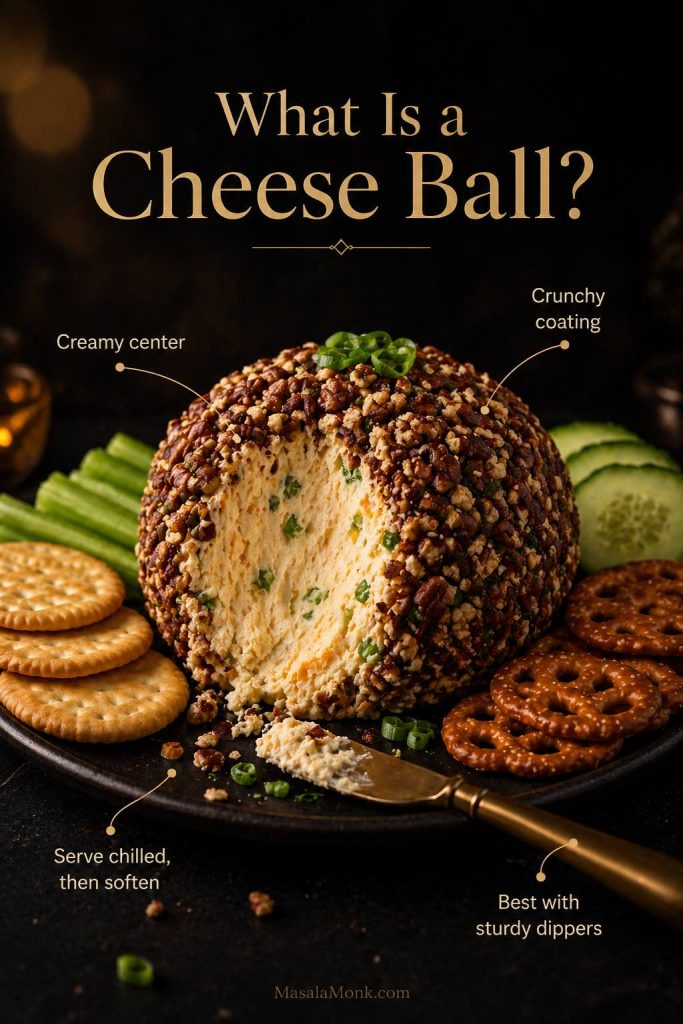
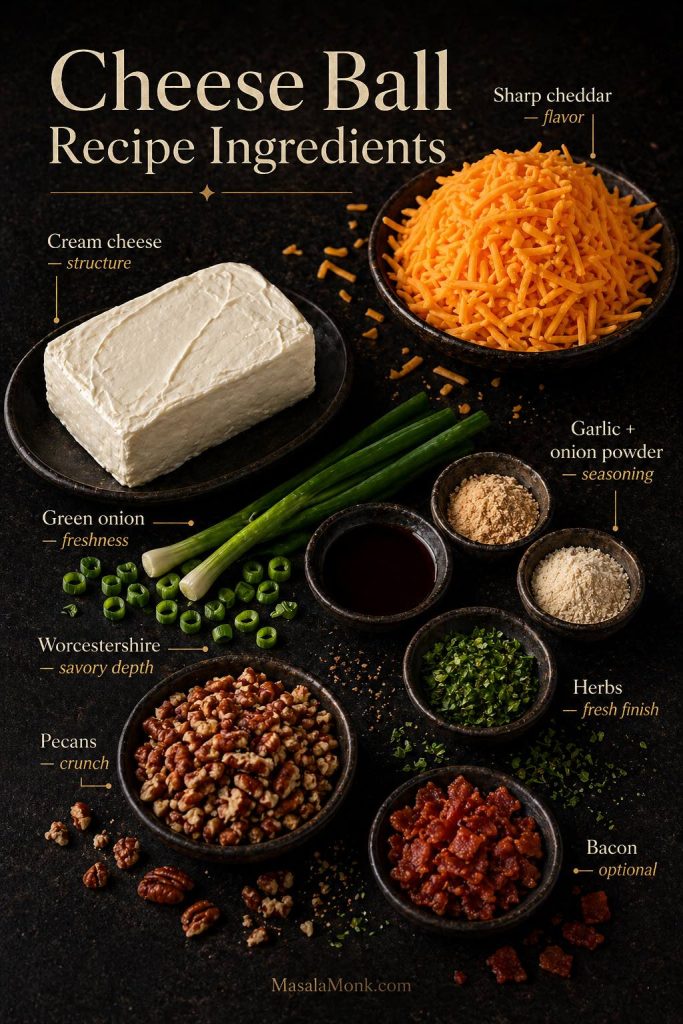
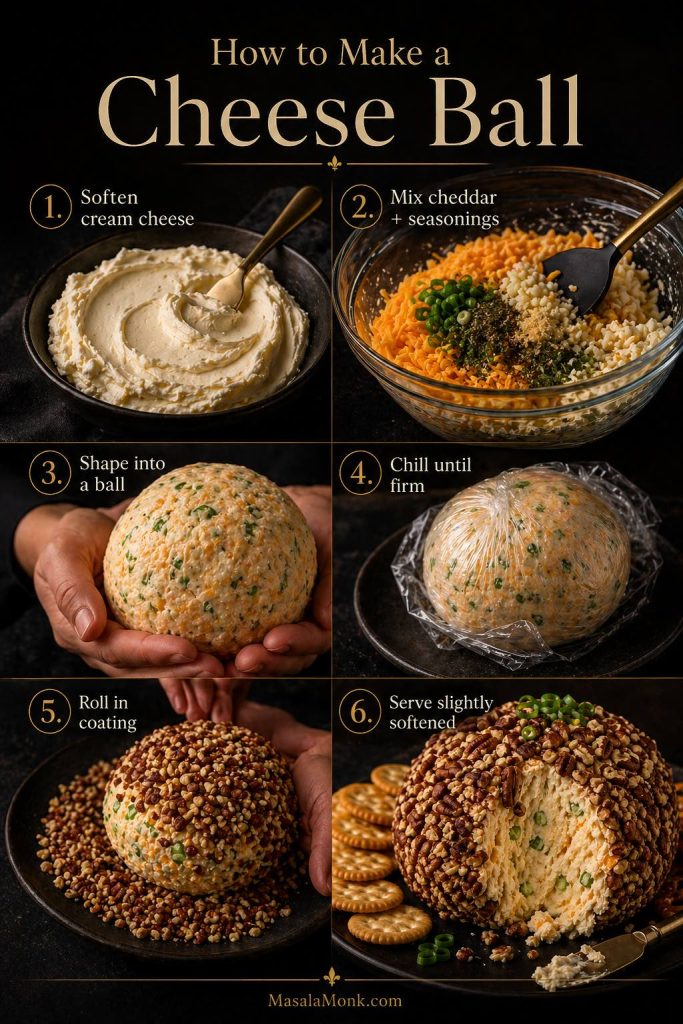
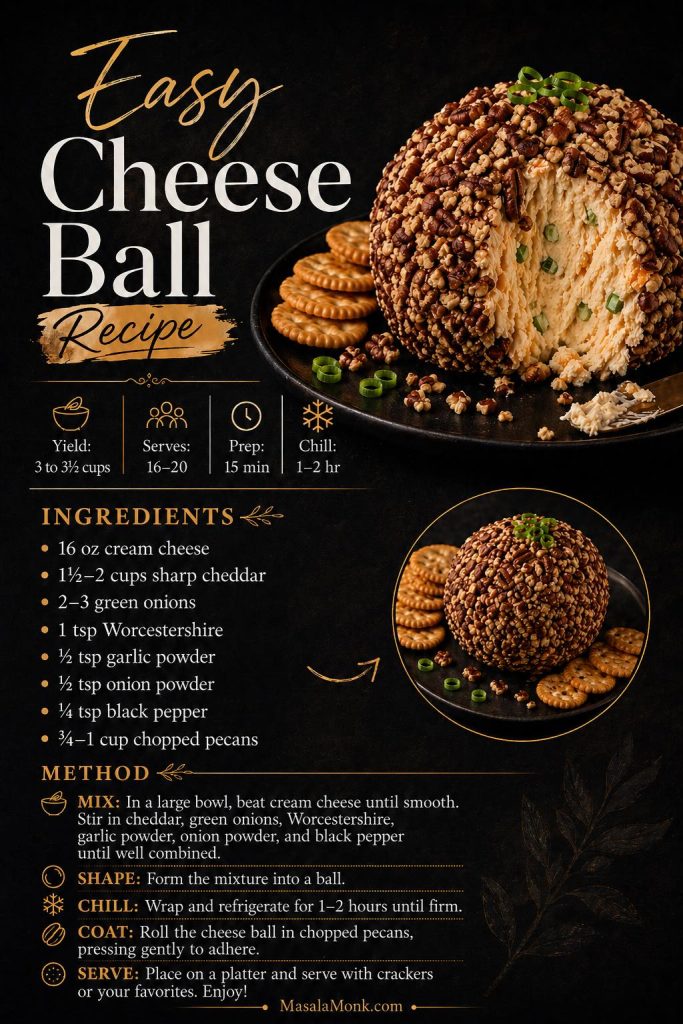
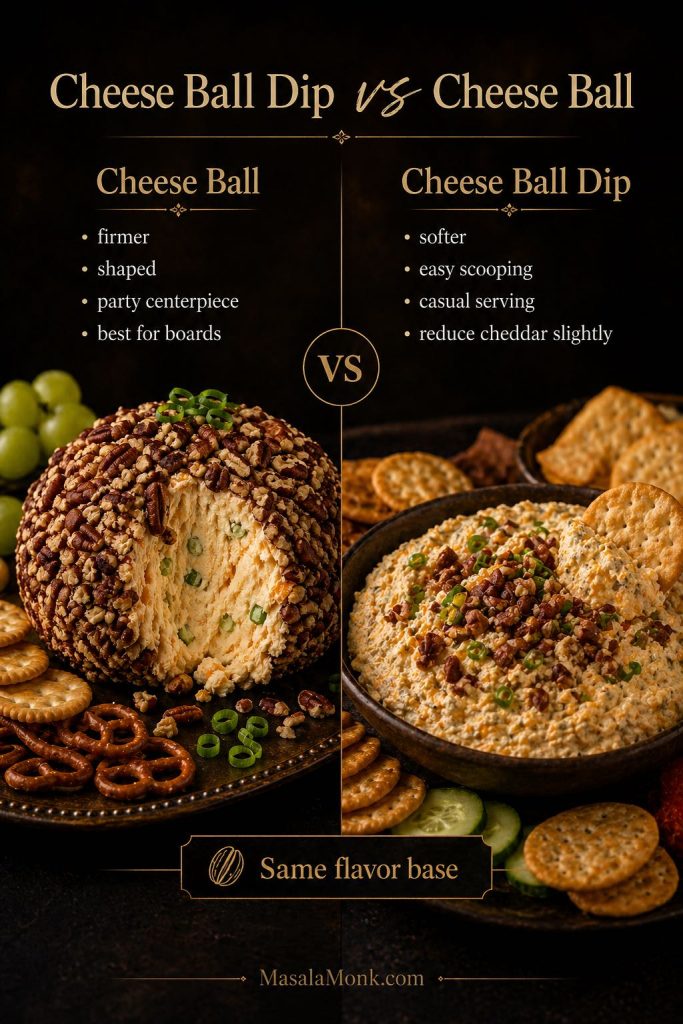
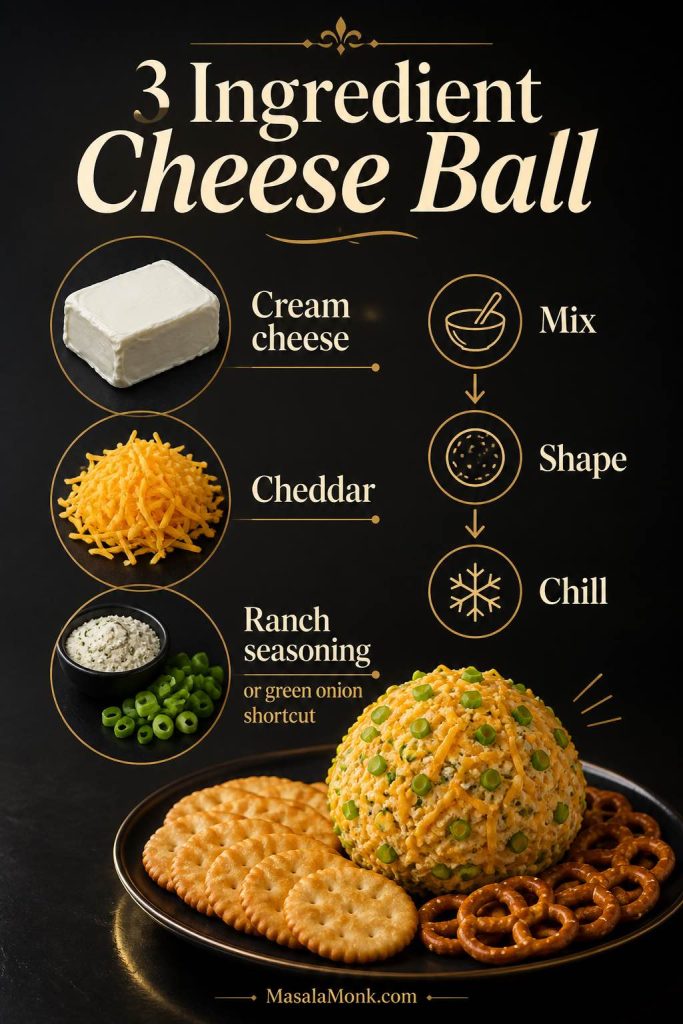
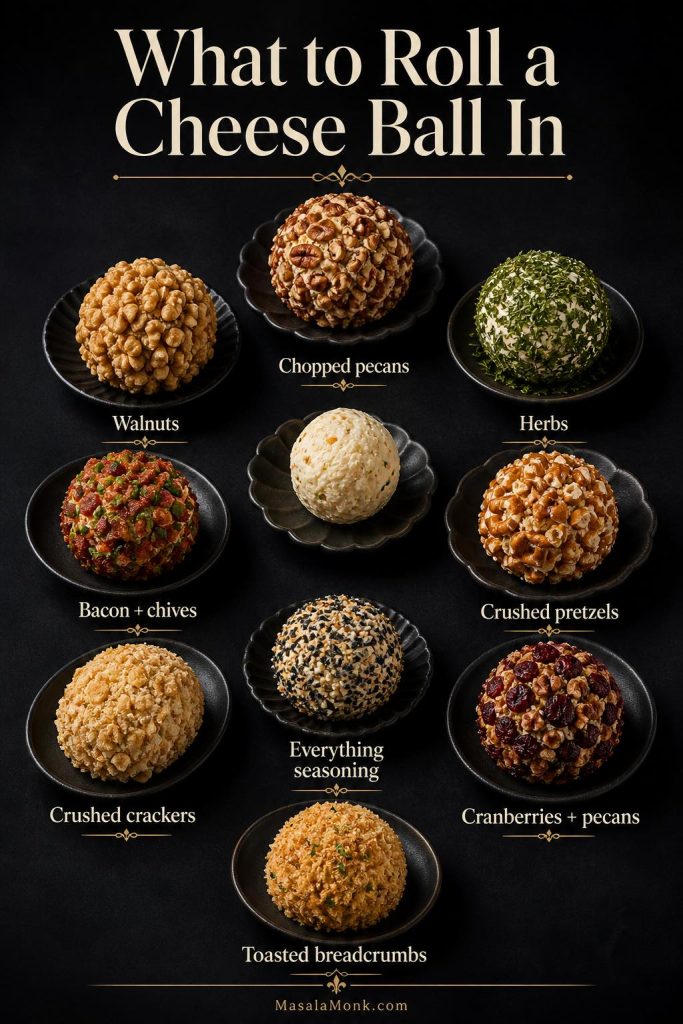
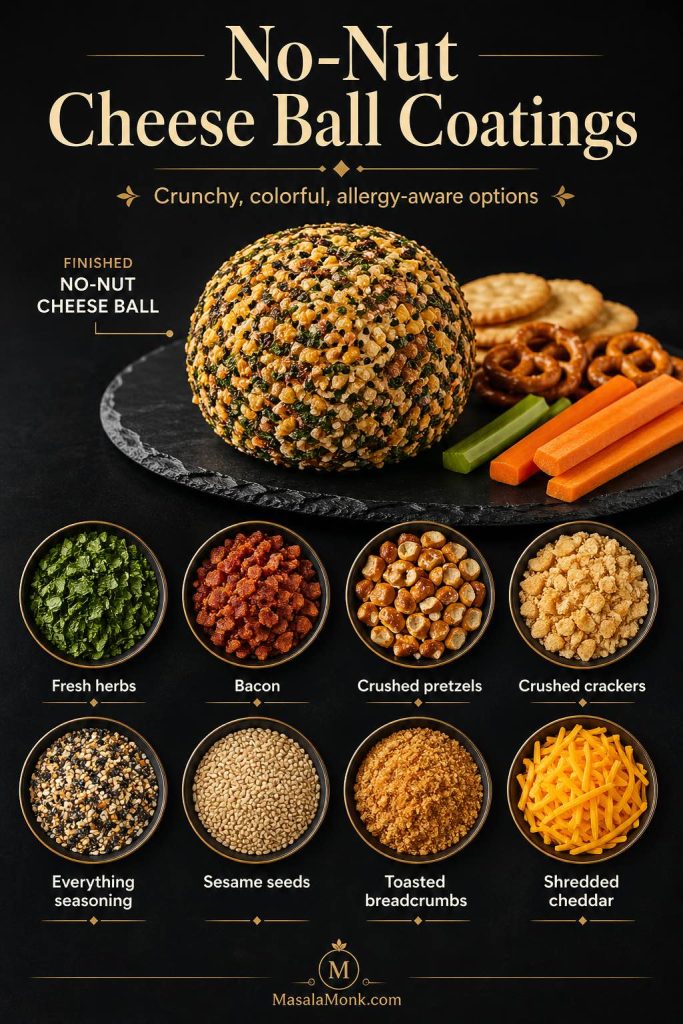
Cheese boardPair with a make-ahead cheese ball, cheddar cubes, soft cheese, pickles, and sliced vegetables.
Lunchbox snackPack only once the crackers are dry and no longer warm.
Road-trip snackStore in a zip-top bag or airtight snack container.
Holiday snack jarFill small jars or tins once the crackers have cooled and feel dry to the touch.

Use Ranch Oyster Crackers as a Soup Topping

For soup, add the crackers right before eating rather than letting them sit in the bowl. That keeps the first spoonful creamy underneath and crunchy on top.

Creamy soup topped with ranch oyster crackers, with extra crackers in a small bowl nearby.
Think of these as tiny ranch croutons: they work especially well on creamy soups where plain crackers can taste flat.

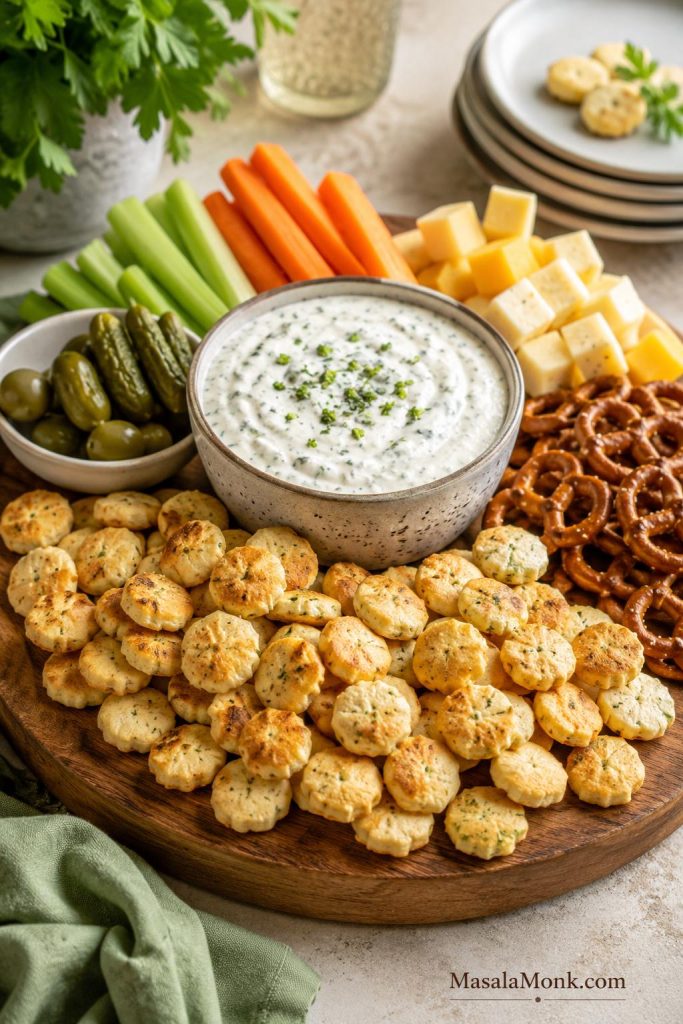
Dip Boards and Appetizer Tables

For a hot appetizer table, set a bowl of these crackers near a bubbling spinach artichoke dip. They are best for nibbling alongside it or sprinkling over individual scoops, while sturdier chips, bread, or vegetables can handle the heaviest dips.

Ranch oyster crackers served on an appetizer board with creamy dip, cheese cubes, carrots, celery, pretzels, pickles, and olives.
On an appetizer board, ranch oyster crackers shine as a nibble or topping, while sturdier chips, bread, and vegetables can handle heavy dips.

They also fit neatly into a larger snack board or casual charcuterie board, especially when you want one seasoned, crunchy element beside cheeses, pickles, fruit, nuts, and plain crackers.

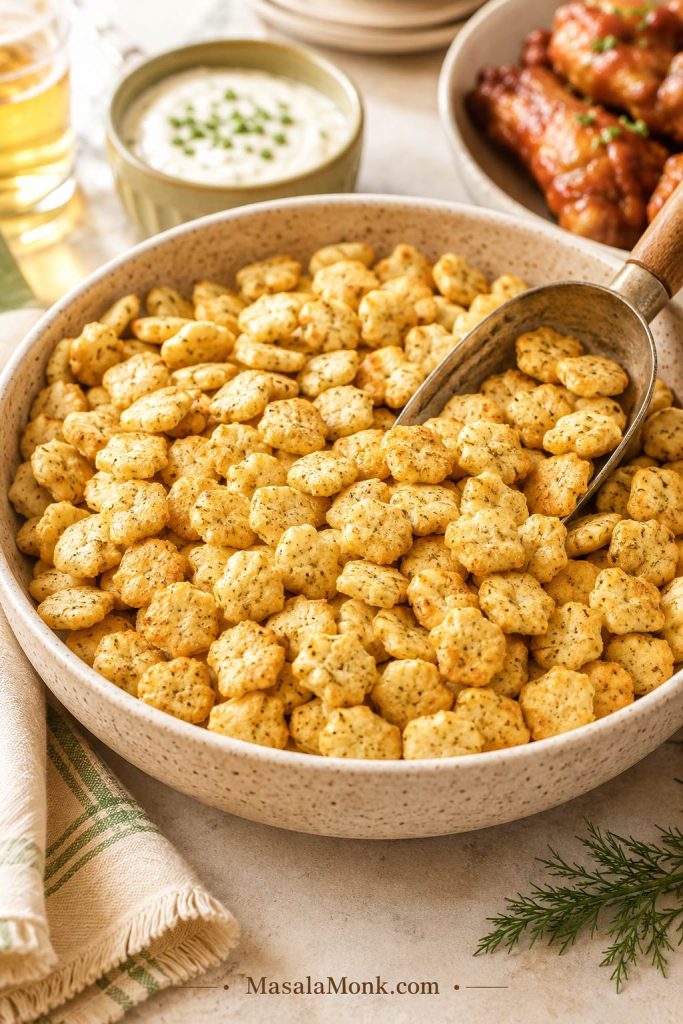
Party Bowl for Game Day and Snack Tables

If you are building a bigger game-day spread, serve them near wings, deviled eggs, cheese cubes, crunchy vegetables, and a few stronger crackers for heavier dips. Oyster crackers are excellent for sprinkling, topping, and casual snacking, but they are not always sturdy enough for very thick dips.

Large bowl of ranch oyster crackers with a scoop, dip, drinks, and party snacks in the background.
A small scoop keeps the party bowl cleaner and makes the crackers easier to serve beside dips, wings, and snack-board extras.

Storage and Make-Ahead Tips

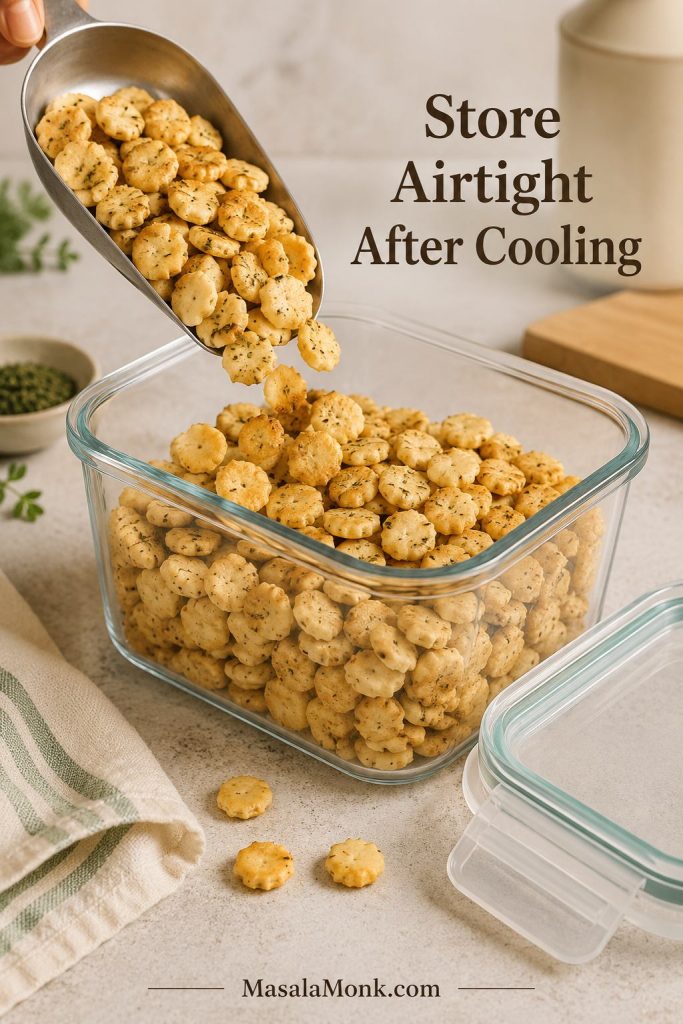
Ranch oyster crackers are a good make-ahead snack as long as they are cool before they go into a container. Once cooled, store them airtight at room temperature and use them within the first several days for the cleanest crunch.

Ranch oyster crackers being poured into an open airtight glass container with the lid nearby.
A wide, airtight container protects the seasoning better than a loose bag when you are making the snack a day ahead.
  • Best storage: Use a sealed container, jar, tin, or zip-top bag.
  • Room temperature only: The fridge can make crackers stale faster.
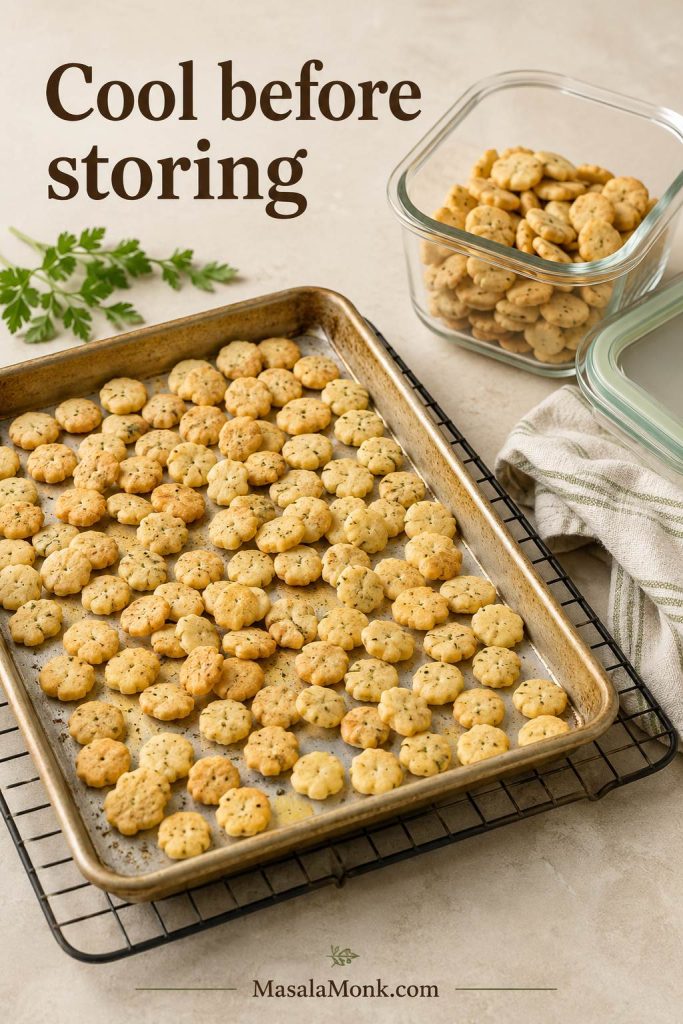
  • Longer storage: If baked dry and stored airtight, they usually keep about 1 week, depending on humidity and coating.
  • Gift jars: Use only crackers that feel dry to the touch, and never seal them warm.
  • Refresh if needed: Bake at 250°F / 120°C for 5–8 minutes, then cool on the pan again.
  • Freshness check: If they smell stale, taste flat, or feel soft even after refreshing, make a fresh batch.

Gift Jars

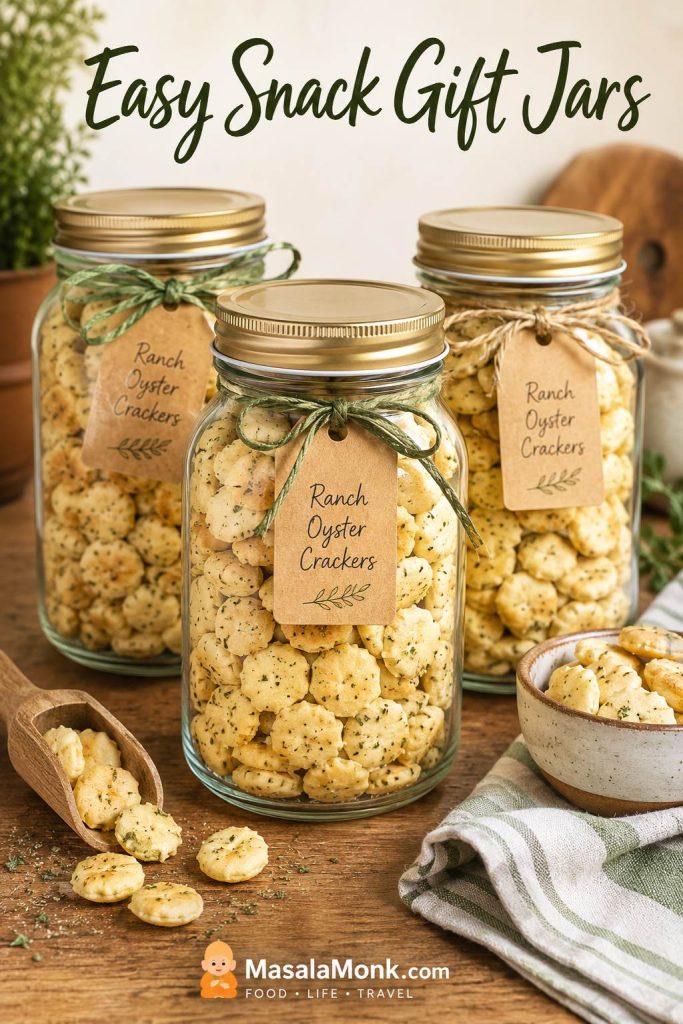
For gifting, pack only fully cooled crackers into clean jars or tins. A simple label and tight seal matter more than fancy packaging because the texture is the real gift.

Glass jars filled with ranch oyster crackers, kraft tags, ribbons, scoop, and small bowl of crackers.
For gift jars, leave a little headspace and use a tight lid so the crackers stay neat, crisp, and easy to pour.

They are especially useful because you can make them before people arrive, then put out a bowl when the table still feels like it needs one more salty, crunchy thing.

If you are making these for a party, prep one or two other make-ahead bites too. A tray of classic deviled eggs gives the table something creamy and tidy while the crackers bring the crunch.

Freezing is not worth it for most batches. The crackers can pick up moisture and lose their clean crunch, so make them a few days before the party and store them well instead.

If a stored batch turns soft or oily, use the troubleshooting guide before deciding it is a loss.

Troubleshooting the Batch

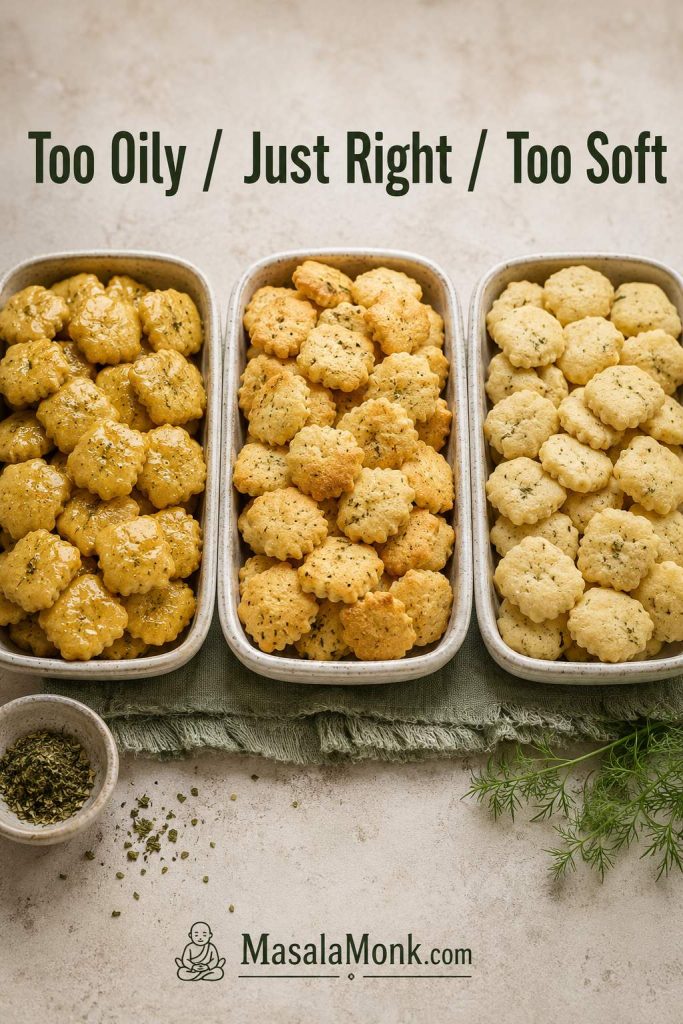
If a batch does not come out quite right, it is usually one of four things: too much fat, too much salt, not enough baking time, or uneven coating. The good news is that many batches can be saved, especially if the flavor is right but the texture is off.

Three trays of ranch oyster crackers showing too oily, just right, and too soft textures.
Use the texture as your guide: shiny crackers need more drying time, pale crackers may need better mixing, and the ideal batch looks evenly coated.

Common Problems and Fixes

ProblemWhy it happenedFix nowFix next time
Greasy crackersToo much oil or butter, or not baked long enoughSpread on a pan and bake 5–8 minutes more at 250°F / 120°CUse less fat and spread in one layer
Soggy crackersBottled ranch dressing, too much fat, or stored while warmBake low until dry, then let the tray coolUse dry ranch mix only and wait until the crackers are no longer warm before storing
Too saltyFull packet plus salty crackers, ranch dip mix, or salty add-insAdd more plain crackers and toss; if you do not have extra crackers, mix the batch into unsalted pretzels or plain cerealStart with ¾ packet or fewer salty extras
BlandToo many crackers or too little seasoningDust while warm on the tray, then let cool before storingUse the ratio table and taste your seasoning mix
Seasoning clumpedDry powder hit oily crackers unevenlyToss longer, break up clumps gently, and add a handful of plain crackers if some bites are too saltyWhisk seasoning into oil before adding to crackers
Burnt edgesOven too hot, thin pan, or not stirredRemove dark pieces before they flavor the batchUse 250°F / 120°C and stir halfway
Crackers brokeBag shaken too hard or crackers were fragileUse broken pieces as soup toppingToss in a bowl with a spatula instead of shaking hard
Soft after storageStored warm, humid room, or container not airtightRe-crisp at 250°F / 120°C for 5–8 minutesCool on the pan and store airtight

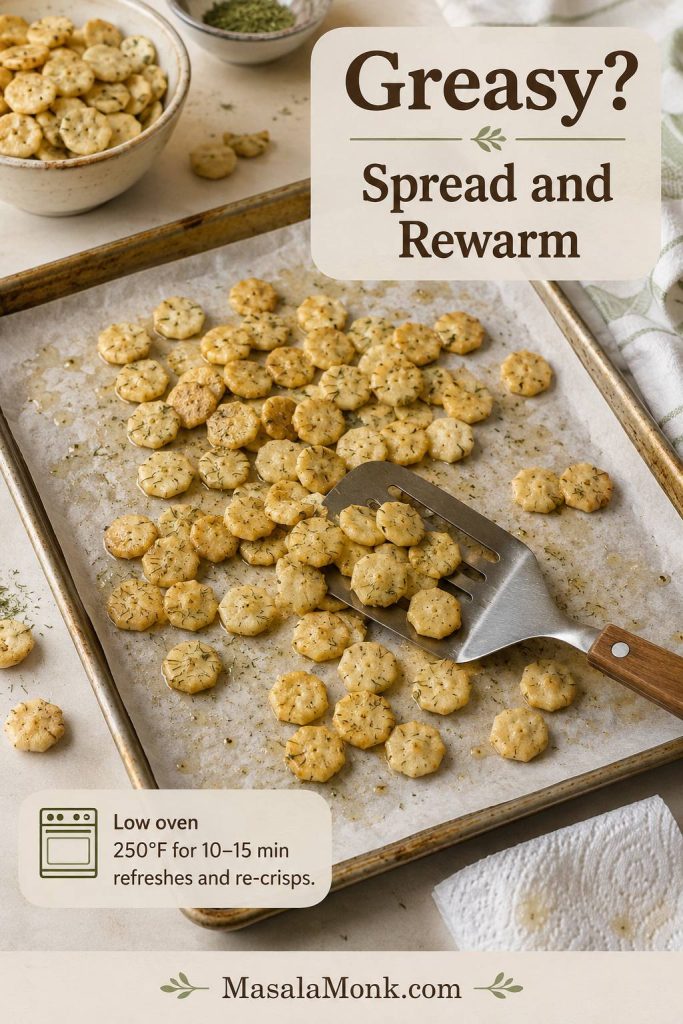
Fix Greasy Crackers

If the flavor is good but the crackers feel slick, spread them back onto a pan and warm them gently. This gives the extra coating a chance to settle instead of sitting on the surface.

Greasy ranch oyster crackers spread on a parchment-lined baking sheet with a spatula and paper towel nearby.
Use low heat for a greasy batch; the goal is to dry the surface gently, not brown the crackers further.

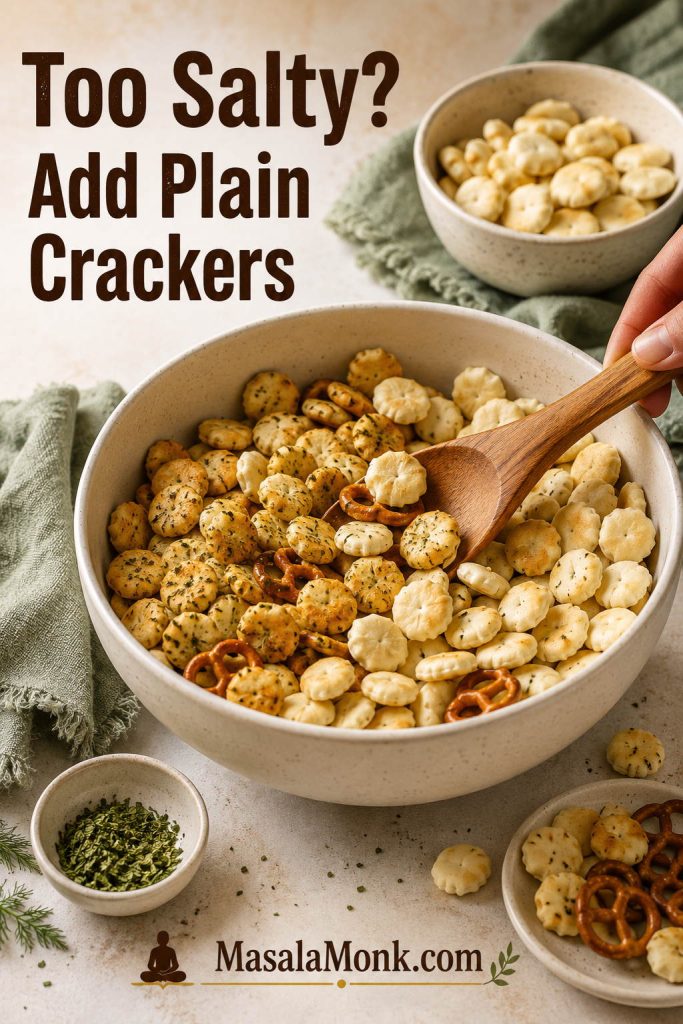
Too Salty? Stretch the Batch

If the seasoning tastes too strong, stretch the batch with plain crackers, pretzels, or unsalted cereal. Diluting the coating is usually better than trying to scrape seasoning off.

Seasoned ranch oyster crackers mixed with plain crackers and pretzels in a bowl to reduce saltiness.
When ranch oyster crackers taste too salty, stretch the seasoning with plain crackers, pretzels, or cereal instead of tossing the batch.

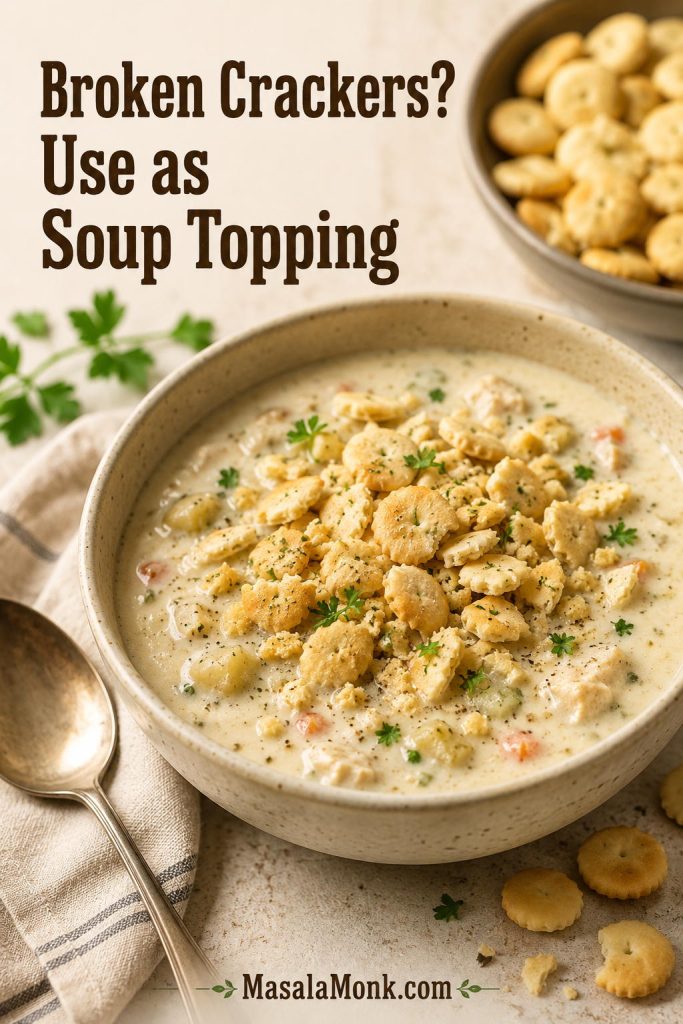
Use Broken Crackers as Soup Topping

The most reassuring part: even imperfect batches rarely go to waste. If the flavor is good, the broken, softer, or extra-seasoned crackers can still become excellent soup toppers.

Broken ranch oyster crackers sprinkled over creamy soup with whole crackers and a spoon nearby.
Broken pieces still bring crunch and ranch flavor, so save them for soup instead of reserving only the perfect whole crackers.

Ranch Oyster Crackers Recipe

These baked ranch oyster crackers make about 5½–6 cups of crisp, savory snack crackers for soup, parties, road trips, and make-ahead appetizer bowls.

Saveable recipe card with ranch oyster crackers, oil, dry ranch seasoning, garlic powder, dill, and bake time.
Use this base formula as your starting point, then adjust future batches with more dill, butter, heat, Parmesan, or a ranch-free spice blend.
Prep Time5 minutes
Cook Time18–22 minutes
Total Time25–30 minutes
YieldAbout 5½–6 cups / 8–10 snack servings

Equipment: Large bowl or gallon zip-top bag, small bowl or measuring cup, rimmed baking sheet, parchment paper, and a spatula.

Ingredients

  • 12 oz / 340 g oyster crackers, about 5½–6 cups depending on brand
  • ⅓ cup / 80 ml neutral oil, such as canola, vegetable, or avocado oil
  • 2½ tablespoons dry ranch seasoning for balanced flavor, or up to 3 tablespoons for a bolder batch
  • 1 teaspoon dried dill
  • ½ teaspoon garlic powder
  • ½–1 teaspoon lemon pepper
  • ½ teaspoon onion powder, optional
  • ¼ teaspoon smoked paprika or cayenne, optional

Instructions

  1. Heat the oven to 250°F / 120°C. Line a rimmed baking sheet with parchment if you want easier cleanup.
  2. In a small bowl or measuring cup, whisk together the oil, ranch seasoning, dried dill, garlic powder, lemon pepper, and any optional onion powder, smoked paprika, or cayenne.
  3. Add the oyster crackers to a large mixing bowl or gallon zip-top bag. Pour the seasoning oil over the crackers.
  4. Toss gently until the crackers are evenly coated.
  5. Spread the crackers in a single layer on the prepared baking sheet.
  6. Bake for 18–22 minutes, stirring after about 10 minutes, until the crackers smell toasted and look dry rather than glossy.
  7. Let the crackers cool on the pan before serving or storing.

Notes

  • For a 9 oz / 255 g bag, use 2 tablespoons ranch seasoning for mild flavor or 2½–3 tablespoons for bold flavor. Use ¼ cup oil for a lighter coating, or ⅓ cup oil / 5 tablespoons melted butter for a richer snack.
  • For a 16 oz / 454 g bag, use ½ cup oil and about 3 tablespoons ranch seasoning, or most/all of a standard 1 oz / 28 g packet adjusted for saltiness.
  • For a butter version, use up to ½ cup / 113 g melted unsalted butter instead of oil.
  • Dry ranch mix gives the crispest coating; bottled dressing softens the crackers.
  • If the crackers need more flavor, dust them while warm on the tray.

Ranch Oyster Crackers FAQs

Can I use bottled ranch dressing instead of dry ranch mix?

Skip bottled ranch for this recipe. Dry ranch mix gives you the ranch flavor without adding the moisture that makes crackers soften.

How much ranch seasoning is in one packet?

Many packets are about 1 oz / 28 g, but the tablespoon amount can vary. For a 12 oz bag, 2½ tablespoons is balanced and 3 tablespoons gives a bolder snack-bowl flavor.

Can I use ranch dip mix instead of ranch dressing mix?

Yes, with a light hand. Dip mix can taste saltier or stronger, so start with a little less and add more after baking if the crackers need it.

Do I have to use a specific brand?

No. Store-brand ranch seasoning, shaker seasoning, classic packets, or homemade dry ranch-style seasoning can all work. The salt level matters more than the label.

Do they have to be baked?

Not always. Baking gives the snappiest batch, but the no-bake method works when you have time to let the crackers sit for a few hours.

Can I skip the dill?

Yes. Dill gives the old-school ranch-snack flavor, but parsley, chives, onion powder, or extra lemon pepper can take its place.

Is butter better than oil?

Choose butter for richer flavor and oil for a lighter crunch. For make-ahead batches, oil is the safer default because it stays cleaner and less heavy.

Why are mine greasy?

They can usually be rescued. Spread them out and bake at 250°F / 120°C for another 5–8 minutes so the coating has time to settle.

How long do they stay fresh?

They are best in the first several days. If baked dry, cooled fully, and stored airtight, they usually keep about a week.

Can I make them in the air fryer?

Yes. Cook a small batch at 300°F / 150°C for 5 minutes, shake, then cook another 2–5 minutes. Give the crackers room in the basket so they toast evenly.

Can I turn them into snack mix?

Absolutely. Once the crackers are baked and cool, fold them into pretzels, Chex-style cereal, cheese crackers, roasted nuts, or mini saltines.

Can I use another cracker?

Yes — just watch the timing. Mini saltines, small pretzels, Chex-style cereal, cheese crackers, and Goldfish-style crackers can all brown or dry at different speeds.

Are oyster crackers made with oysters?

Usually, no. They are small soup crackers traditionally served with oyster stew and chowder. Always check the package if you have allergy concerns.

Can I make them ahead?

Yes. Make them a day or two ahead, cool them fully, and store airtight at room temperature. Re-crisp at 250°F / 120°C for 5–8 minutes if needed.

Final Bite

Once the ratio makes sense, this becomes one of those repeat snacks you barely need to think about. It can sit beside soup on a quiet night, fill the extra bowl on an appetizer table, travel in a road-trip bag, or turn into a holiday jar without much work.

Make them once as written, then adjust the next batch to fit your table: extra dill for the old-school version, cayenne for the spicy bowl, Parmesan for a savory finish, or a no-ranch blend when you want something more homemade. However you season them, the job is the same: give soup a little crunch, give the snack table one more reason to linger, and make sure the bowl empties before anyone quite notices.

Final serving bowl of ranch oyster crackers with a wooden scoop, creamy soup, butter, herbs, and soft green linen.
Serve the finished bowl near something creamy or soft, and the tiny crackers bring the salty crunch that makes the table feel complete.

Back to top

Posted on Leave a comment

Kiwi Smoothie Recipe

Creamy pale-green kiwi smoothie in a glass with sliced kiwi and banana on a breakfast counter.

This kiwi smoothie recipe is creamy, fresh, tangy-sweet, and easy to adjust with banana, yogurt, milk, strawberry, mango, or dairy-free swaps. It takes about 5 minutes, but it still gives you enough control to avoid the usual problems: a smoothie that tastes too sour, too thin, too watery, too seedy, or too bland.

Done right, it tastes bright and creamy at the same time — fresh enough for a warm morning, but filling enough to feel like breakfast.

The base is simple: ripe kiwi for brightness, frozen banana for creaminess, yogurt for body, and just enough liquid to help the blender move. From there, you can make it lighter with coconut water, fruitier with orange juice, thicker as a smoothie bowl, greener with spinach, or sweeter with mango and strawberries.

Start with the classic kiwi banana smoothie, then adjust it to fit what you have. If your kiwis are sharp, jump to the fixes section. If you want a no-yogurt smoothie, a no-banana version, or a kiwi shake-style drink, those options are built into the guide too.

Quick Answer: Best Kiwi Smoothie Recipe Ratio

The best kiwi smoothie ratio is 2 ripe kiwis + 1 frozen banana + ½ cup yogurt + ½ cup liquid. Choose milk for a creamier smoothie, coconut water for a lighter smoothie, or orange juice for a brighter fruitier version. Add honey only if your kiwis taste sharp.

Kiwi smoothie ratio guide with kiwis, frozen banana, yogurt, liquid, and a finished smoothie
Start with this base kiwi smoothie ratio first; then taste before adding more fruit, liquid, or sweetener.

Best First Version to Try

Use 2 ripe kiwis, 1 frozen banana, ½ cup plain Greek yogurt, and ½ cup milk or coconut water. This gives you the cleanest creamy-tangy balance before you start changing the fruit, liquid, or sweetness.
Finished kiwi smoothie with ripe kiwis, frozen banana, Greek yogurt, and milk or coconut water
This first blend is the safest place to start because it gives you a creamy-tangy balance before you try strawberry, mango, no-yogurt, or no-banana versions.

For one large smoothie, the base recipe usually means 2 peeled kiwis, 1 medium frozen banana, ½ cup Greek yogurt or plain yogurt, and ½ cup milk, water, coconut water, or orange juice. Blend until smooth, taste, then adjust before pouring.

The formula works because each ingredient has a job. Kiwi brings the bright fruit flavor, banana softens the tartness, yogurt gives body, and the liquid helps everything blend. Once that balance is right, the smoothie tastes fresh instead of sharp or watery.

If you already know what went wrong with your last smoothie, the troubleshooting table will help you adjust sourness, thickness, sweetness, and texture quickly.

How to Adjust the Ratio

Want your kiwi smoothie… Add or adjust this
Creamier Frozen banana, Greek yogurt, avocado, or a splash of milk.
Sweeter Ripe banana, mango, strawberries, or 1–2 teaspoons honey.
Brighter Orange juice as the liquid or a tiny squeeze of lime.
Lighter Coconut water, water, cucumber, or spinach.
Thicker Frozen banana, frozen mango, chia seeds, or less liquid.
Dairy-free Almond milk, oat milk, coconut water, plant yogurt, mango, or avocado.
Four kiwi smoothie glasses showing creamier, sweeter, brighter, and lighter adjustment options
Small adjustments change the whole drink, so correct one thing at a time: body, sweetness, brightness, or overall lightness.

From there, the rest of the recipe is mostly about control. If your kiwi is very sweet, you may not need honey. If it tastes sharp, banana, mango, or yogurt will smooth it out quickly without changing the whole recipe.

Ingredients for a Creamy Kiwi Smoothie

Kiwi smoothie ingredient guide with kiwi, banana, yogurt, liquid, mango, spinach, chia, oats, and avocado grouped by purpose
Each ingredient has a clear job: kiwi brings brightness, banana and yogurt add body, while the liquid decides whether the smoothie feels creamy, light, or bright.

A good smoothie recipe using kiwis needs balance. Kiwi gives the drink its bright, tangy flavor, but it needs something creamy or sweet beside it so the smoothie does not taste thin or harsh. The best version is not just about adding kiwi; it is about giving kiwi the right support.

Kiwi

Kiwi ripeness guide showing firm kiwi, ripe kiwi, and very soft kiwi for smoothies
Ripe kiwis usually make a smoother, sweeter smoothie; however, firm kiwis can taste grassy or harsh once blended.

Ripe kiwis make the best smoothie. They should give slightly when pressed and smell fresh, not fermented. Hard kiwis can taste grassy, sour, or harsh once blended, while overripe kiwis can make the smoothie taste dull.

For the smoothest texture, peel the kiwi before blending. Kiwi skin is edible, but it can make a smoothie feel fibrous or slightly fuzzy, especially if your blender is not very powerful.

Fresh or frozen kiwi? Fresh kiwi gives the brightest flavor. Frozen kiwi makes the smoothie colder and thicker, but it works best with banana, mango, yogurt, or another creamy ingredient so the drink does not turn icy.
Fresh kiwi slices compared with frozen kiwi chunks for smoothie making
Fresh kiwi gives the brightest flavor, while frozen kiwi helps chill and thicken the smoothie when it is paired with banana, mango, yogurt, or another creamy ingredient.

Green kiwi gives the classic tangy flavor. Golden kiwi is usually sweeter and softer, so it can work well if you want a milder smoothie with less added sweetener.

Green kiwi smoothie and golden kiwi smoothie shown side by side with matching fruit
Green kiwi gives the classic tangy smoothie flavor, whereas golden kiwi makes the drink softer, sweeter, and a little milder.

Banana

Banana is the easiest way to make the drink creamy, especially in a recipe where kiwis bring most of the tartness. A frozen banana works best because it chills and thickens the drink without needing lots of ice. For a less sweet smoothie, use half a banana and add more yogurt, mango, or avocado for body.

Yogurt

Plain Greek yogurt makes the smoothie thicker and more satisfying. Regular plain yogurt gives a softer, drinkable texture. For a dairy-free version, plant yogurt, almond milk, coconut water, avocado, chia, oats, and frozen mango can all help replace some of that body. The no-yogurt variation gives the easiest swaps.

Liquid

The liquid decides whether the smoothie tastes creamy, light, or bright. Milk makes it mellow, coconut water keeps it fresh, orange juice makes it fruitier, and water keeps it simple but thinner. Start with ½ cup and add more only if the blender needs help.

Optional Add-Ins

Spinach, mango, pineapple, chia seeds, oats, protein powder, avocado, mint, and lime can all work with kiwi. Add them with a purpose: mango for sweetness, avocado for creaminess, spinach for a green smoothie, chia or oats for thickness, and lime only when the smoothie needs a sharper finish.

How to Make a Kiwi Smoothie

Liquid being poured into a blender with kiwi, banana, yogurt, and a finished smoothie nearby
Add the liquid first, because it helps the blender catch the fruit more easily and keeps the smoothie from getting watered down later.

The method is simple, but the order matters when you are blending kiwis with frozen banana, yogurt, and liquid. Add the liquid first so the blender can catch the ingredients more easily, especially if you are using frozen mango, frozen strawberries, oats, or greens.

  1. Peel and chop the kiwis. Cut away the fuzzy skin for the smoothest drink.
  2. Add the liquid first. Pour milk, coconut water, orange juice, or water into the blender.
  3. Add yogurt and soft ingredients. This helps the blender move before the frozen fruit goes in.
  4. Add kiwi and banana. Break the frozen banana into chunks if needed.
  5. Add frozen fruit or ice last. Use ice only if your fruit is fresh and the smoothie needs chilling.
  6. Blend until smooth. Most versions take 30–60 seconds. Green or frozen-heavy smoothies may need 60–120 seconds.
  7. Taste before pouring. Adjust sweetness, thickness, or brightness while the smoothie is still in the blender. The fixes table below shows the quickest adjustments.
Blender tip: If the blender stalls, do not dump in a lot of liquid at once. Add 1 tablespoon at a time, blend again, and stop as soon as the smoothie moves smoothly.
Blender jar layered with liquid, yogurt, kiwi, banana, and frozen fruit for a smoothie
The right blender order matters: liquid first, creamy ingredients next, and frozen fruit last so the blades can move smoothly.

If you are using a regular blender, chop the frozen banana smaller and let very hard frozen fruit sit at room temperature for 3–5 minutes before blending. Also, add liquid first, then increase the liquid by tablespoons only if the blades stop moving.

Regular blender with kiwi smoothie ingredients and liquid being added slowly
Even a regular blender can make a creamy kiwi smoothie when the frozen fruit is chopped smaller and the liquid is added gradually.

Kiwi Smoothie Recipe Card

Kiwi smoothie recipe card with a finished smoothie and the base ingredient ratio
Save this base recipe first; once the ratio is familiar, it becomes much easier to troubleshoot texture and build variations confidently.

Kiwi Smoothie Recipe

This creamy kiwi smoothie recipe is made with ripe kiwi, frozen banana, yogurt, and your choice of milk, coconut water, orange juice, or water. It is bright, fresh, tangy-sweet, and easy to adjust.

Prep Time5 minutes
Cook Time0 minutes
Total Time5 minutes
YieldAbout 1 large 16–20 oz smoothie or 2 small 8–10 oz smoothies

Equipment

  • Blender or high-speed blender
  • Knife and cutting board
  • Measuring cups and spoons
  • Glass or jar for serving

Ingredients

  • 2 medium ripe kiwis, peeled and chopped, about 140–160 g flesh
  • 1 medium frozen banana, about 100–120 g
  • ½ cup plain Greek yogurt or regular plain yogurt, about 120 g
  • ½ cup milk, coconut water, orange juice, or water, 4 fl oz / 120 ml
  • 1–2 teaspoons honey or maple syrup, optional, 7–14 g
  • ½ cup frozen mango, strawberries, or pineapple, optional, about 70–90 g
  • ¼–½ cup ice, optional, only if your fruit is fresh and the smoothie needs chilling
  • 1 teaspoon lime or lemon juice, optional, 5 ml

Method

  1. Add the liquid to the blender first.
  2. Add the yogurt, peeled kiwi, frozen banana, and any optional frozen fruit.
  3. Blend for 30–60 seconds, or until smooth. If using greens, oats, chia, protein powder, or a lot of frozen fruit, blend for 60–120 seconds.
  4. Taste the smoothie. Add honey if it is too tart, more liquid if it is too thick, or more frozen banana/mango if it is too thin.
  5. Pour into one large glass or two small glasses and drink right away.

Notes

  • For the creamiest smoothie, use frozen banana instead of fresh banana.
  • For a dairy-free smoothie, use plant yogurt, almond milk, coconut water, mango, or avocado.
  • For a smoothie bowl, reduce the liquid to ¼ cup / 60 ml and use frozen banana or frozen mango.
  • Kiwi smoothies with milk or yogurt are best enjoyed fresh because kiwi can change the texture as it sits. See the milk, yogurt, and juice guide for more detail.
  • The final yield depends on how much frozen fruit or ice you add.

Kiwi Smoothie Variations

Five kiwi smoothie variations in different glasses with banana, strawberry, mango, spinach, and cucumber styles
A good base smoothie can move in several directions; however, changing one main ingredient at a time keeps the flavor balanced.

Once the base ratio tastes right, the fun part is choosing the direction. You can make it creamy and breakfast-like with banana, tropical with mango or pineapple, sharper with strawberries, greener with spinach, or lighter with cucumber and coconut water. Since kiwis bring most of the bright, tangy flavor, change one thing at a time so the blend stays balanced.

Banana Kiwi Smoothie

Creamy banana kiwi smoothie with banana slices and fresh kiwi garnish
Banana softens kiwi’s tartness and gives the smoothie a thicker breakfast-style texture without relying on extra ice.

This is the easiest and creamiest version. Make the base recipe with 2 ripe kiwis, 1 frozen banana, yogurt, and milk or coconut water. The banana softens kiwi’s tartness and gives the smoothie a smooth breakfast-style texture.

Strawberry Kiwi Smoothie

Strawberry kiwi smoothie with pink and green blended layers, kiwi, and strawberries
Strawberries make the drink brighter and more familiar, while kiwi keeps the smoothie fresh, tangy, and fruit-forward.

Strawberries make the smoothie taste brighter and more familiar, especially if you like a sweet-tart berry flavor. Add ½–1 cup frozen strawberries to the base recipe. Keep the banana if you want creaminess, or reduce it slightly if you want the strawberry and kiwi to taste sharper and fresher.

If you want to go deeper on the berry side, MasalaMonk also has a full strawberry smoothie guide with yogurt, no-yogurt, protein, and fruit variation ideas.

Kiwi Mango Smoothie

Golden-green kiwi mango smoothie with mango cubes and sliced kiwi
Mango is one of the best ways to soften sharp kiwi because it adds natural sweetness and body at the same time.

Mango is one of the easiest ways to tame sharp kiwi. It adds sweetness, body, and a tropical flavor without needing much extra sweetener. Blend ½–1 cup frozen mango with 2 kiwis, then use coconut water for a lighter drink or orange juice for a brighter one.

If mango is the fruit you use most often in smoothies, this mango smoothie recipe is a useful companion because it covers fresh mango, frozen mango, yogurt, milk, banana, no-banana, dairy-free, protein, and smoothie bowl versions.

Kiwi Pineapple Smoothie

Kiwi pineapple smoothie in a tall glass with pineapple and kiwi garnish
Pineapple pushes the smoothie in a brighter tropical direction; because it can also taste tart, banana, mango, or yogurt helps keep it balanced.

Pineapple pushes the smoothie in a sharper, juicier, more tropical direction. Frozen pineapple is especially good when you want a colder, thicker drink. Because both kiwi and pineapple can taste tart, balance this version with banana, yogurt, mango, or a small amount of honey.

Green Kiwi Smoothie With Spinach

Green kiwi smoothie with spinach, banana, mango, and kiwi garnish
Fresh spinach blends into a kiwi smoothie more gently than frozen spinach, especially when banana or mango stays in the mix for sweetness.

Fresh baby spinach blends into kiwi smoothies more gently than frozen spinach. Add 1 cup to the base recipe, then keep banana or mango in the mix so the smoothie still tastes sweet enough. The color becomes greener, but the flavor stays mild when the spinach is fresh and not packed too heavily.

For more smoothie ideas built around fruit, greens, and vitamin C pairings, see MasalaMonk’s high-iron smoothies and shakes guide.

Kiwi Cucumber Smoothie

Light kiwi cucumber smoothie with cucumber slices, mint, lime, and kiwi
For a lighter version, cucumber, mint, lime, and coconut water make the smoothie feel crisp without turning it into a heavy breakfast blend.

This cucumber version is lighter and fresher than the banana-yogurt blend. Blend kiwi with cucumber, mint, lime, and coconut water for a crisp, cooling drink. Add a little banana, mango, or Greek yogurt if you want it to feel more filling.

Kiwi Protein Smoothie

Greek yogurt is the simplest protein boost because it also improves texture. You can add one scoop of plain or vanilla protein powder, but keep banana, mango, or yogurt in the mix so the smoothie does not taste chalky.

For another simple way to add texture to smoothies, see this guide on using hemp seeds in smoothies.

Kiwi Smoothie Without Yogurt

Kiwi smoothie without yogurt shown with mango, avocado, oats, chia seeds, and plant milk
Without yogurt, the smoothie needs another source of body, so mango, avocado, oats, chia, or plant milk become more important.

A no-yogurt version still needs body because kiwis alone can make the recipe taste sharp and thin. Keep the frozen banana and use almond milk, oat milk, coconut water, or orange juice as the liquid. For a thicker texture, add frozen mango, avocado, chia seeds, oats, or plant-based yogurt.

Kiwi Smoothie Without Banana

Kiwi smoothie without banana shown with mango, avocado, pear, yogurt, and kiwi
Banana is easy, but not essential; instead, use mango for sweetness or avocado and pear when you want creaminess with a different flavor profile.

Banana is helpful, but it is not mandatory. Frozen mango is the best swap when you still want sweetness and thickness. Avocado gives creaminess without sweetness, Greek yogurt adds body, and pear gives a softer fruit flavor. Without one of these replacements, kiwi can taste sharper and the smoothie may feel thinner.

Kiwi Smoothie Bowl

Thick kiwi smoothie bowl with sliced kiwi, berries, granola, coconut, chia, and a spooned texture
A kiwi smoothie bowl needs less liquid than a drinkable smoothie; otherwise, the toppings sink and the base becomes too loose.

A smoothie bowl needs much less liquid than a drinkable smoothie. Reduce the liquid to ¼ cup / 60 ml and use frozen banana, frozen mango, or frozen pineapple. Blend thick, then top with sliced kiwi, granola, coconut, chia seeds, berries, or pumpkin seeds.

Kiwi Milkshake or Kiwi Shake

Kiwi smoothie and kiwi milkshake compared in two different glasses
A kiwi smoothie is usually lighter and fruit-based, while a kiwi shake becomes richer and sweeter with milk, banana, and ice cream.

A kiwi shake is the dessert-style cousin of this smoothie. Blend 2–3 peeled kiwis with milk, banana, and a scoop of vanilla ice cream for a colder, sweeter drink. It is richer than the main recipe, so serve it right away and treat it more like a milkshake than a breakfast smoothie.

Best Fruits to Pair With Kiwi in Smoothies

Fruit pairing guide for kiwi smoothies with banana, avocado, pear, berries, orange, mango, pineapple, cucumber, spinach, and apple
Kiwi pairs best with fruits that either soften its tangy edge or echo its bright flavor, so choose the pairing based on the smoothie you want.

Because kiwi has a naturally bright edge, it works best with fruits that either soften its tartness or echo that fresh flavor. Banana and mango make it creamier. Strawberry and raspberry keep it tangy. Pineapple and orange make it tropical. Apple, pear, cucumber, and spinach keep it lighter.

Fruit or add-in Why it works with kiwi Best smoothie style
Banana Softens tartness and thickens the drink. Creamy breakfast smoothie
Strawberry Gives a familiar sweet-tart berry flavor. Berry kiwi smoothie
Mango Adds tropical sweetness and body. No-yogurt or tropical smoothie
Pineapple Makes the smoothie bright and juicy. Refreshing summer smoothie
Orange Adds citrus sweetness and makes the drink fruitier. Juice-based smoothie
Apple Keeps the flavor mild and fresh. Light breakfast smoothie
Blueberry Adds deeper berry flavor and color. Purple fruit smoothie
Raspberry Keeps the smoothie sharp and tangy. Tart berry smoothie
Pear Adds gentle sweetness without dominating. No-banana smoothie
Avocado Makes the smoothie creamy without banana. No-banana creamy smoothie
Spinach Adds green color with mild flavor. Green kiwi smoothie
Cucumber Makes the smoothie lighter and fresher. Cooling smoothie

Kiwi Smoothie With Milk, Yogurt, or Juice

Liquid guide for kiwi smoothies showing milk, coconut water, orange juice, water, and plant milk
Liquid choice shapes the whole smoothie, so pick milk for creaminess, coconut water for lightness, orange juice for brightness, or water when the fruit already tastes sweet.

The liquid you choose changes the whole smoothie. There is no single correct option; the best one depends on whether you want the drink creamy, light, bright, dairy-free, or more filling.

Because the liquid changes the final texture so much, choose based on the smoothie you actually want instead of forcing one option.

Liquid Best use Watch-out
Milk Creamy, mellow smoothie. Best with banana or yogurt for balance.
Greek yogurt + water Thick texture without too much liquid. Can taste tangy if the kiwi is tart.
Almond milk or oat milk Dairy-free creaminess. Use unsweetened if you want more control.
Coconut water Light, refreshing, tropical-style smoothie. Thinner than milk or yogurt.
Orange juice Bright, fruity, tropical flavor. Can make a tart kiwi taste even sharper.
Water Cleanest and simplest option. Can taste thin unless you use banana or mango.
Canned coconut milk Rich tropical smoothie. Can get heavy fast; use a small amount.

Milk vs Coconut Water

Milk-based kiwi smoothie and coconut-water kiwi smoothie shown side by side
Choose milk when you want a softer, creamier breakfast smoothie; meanwhile, coconut water works better for a lighter, fresher finish.

If you like the lighter tropical finish of coconut water, MasalaMonk’s coconut water smoothie ideas can give you more combinations beyond kiwi.

Kiwi works with milk and yogurt, but dairy-based versions are best enjoyed soon after blending. Green kiwifruit contains actinidin, a natural protein-digesting enzyme, so a milk- or yogurt-heavy smoothie can thin or separate more noticeably as it sits.

Is a Kiwi Smoothie Good for Weight Loss?

A smoothie recipe with kiwis can fit into a lighter breakfast or snack, but it is not magic on its own. The overall blend matters more than the word “kiwi.” Use whole fruit, keep juice and sweeteners modest, and add protein or fiber if you want the smoothie to feel more satisfying. The protein smoothie variation is a good place to start if you want a more filling version.

For example, a more balanced version could use 2 kiwis, ½ frozen banana, Greek yogurt or unsweetened plant milk, spinach or cucumber, and chia seeds. On the other hand, too much honey, sweetened yogurt, fruit juice, or ice cream can quickly turn it into a dessert drink.

Harvard Health notes that smoothies can become calorie-heavy when they include added sugar, syrup, honey, sweetened yogurt, frozen yogurt, or large amounts of juice. That is why this recipe keeps sweetener optional and uses whole fruit as the main base.

How to Fix a Kiwi Smoothie

Kiwi smoothie troubleshooting scene with small glasses labeled sour, thin, thick, flat, and watery
A kiwi smoothie that tastes off rarely needs a full remake; instead, one small fix for flavor or texture usually brings it back quickly.

Most problems in a smoothie recipe with kiwis are easy to fix while the drink is still in the blender. Taste before pouring, then adjust one thing at a time. Small changes work better than adding a lot of liquid, sugar, or ice all at once.

Do not throw out a smoothie just because the first sip is not perfect. Kiwi can taste different from fruit to fruit, and one small adjustment in the blender can turn a sharp, flat, or watery smoothie into something balanced.

Fix the Flavor First

If the smoothie tastes sour, flat, bitter, or too sweet, fix the flavor before you change the texture. Usually, one small addition is enough: banana or mango for softness, yogurt for roundness, lime for brightness, or a tiny pinch of salt for a flat-tasting blend.

Kiwi smoothie fix guide with flavor ingredients on one side and texture ingredients on the other
Fix flavor before texture, because a smoothie that is sour or bland needs a different adjustment than one that is too thick or too thin.

Then Fix the Texture

Once the flavor tastes right, adjust the texture. Frozen fruit, banana, chia, oats, and avocado add body, while milk, coconut water, orange juice, or water loosen a thick smoothie. Add liquid slowly so the drink does not become watery.

Problem Best fix
Sour or sharp Blend in banana, mango, honey, maple syrup, or yogurt to soften the edge.
Thin texture Use frozen banana, frozen mango, chia seeds, oats, or avocado to bring back body. Next time, start with less liquid.
Overly thick Add milk, coconut water, orange juice, or water 1 tablespoon at a time until the blender moves smoothly.
Flat flavor A little more kiwi, a tiny squeeze of lime, orange juice, or even a small pinch of salt can wake it up.
Overly sweet Plain yogurt, cucumber, spinach, extra kiwi, or a little lemon/lime can pull the sweetness back into balance.
Seed-heavy texture Blend longer or use a high-speed blender. Kiwi seeds are edible, but a little texture is normal.
Watery smoothie Use frozen fruit instead of lots of ice, and keep the liquid lower at the start.
Bitter or harsh Use ripe, peeled kiwi. Hard kiwis and too much skin can make the drink taste rough.
Separation after sitting Shake or stir before drinking. For the next batch, use banana, yogurt, chia, or a less watery liquid.
Blender struggling Pour liquid in first, chop frozen fruit smaller, and add extra liquid by tablespoons instead of splashing in too much at once.

Kiwi Smoothie Thickness Guide

Kiwi smoothie texture guide showing too thin, just right, and too thick spoon textures
The sweet spot is thick enough to feel creamy, yet still loose enough to pour and sip comfortably without feeling heavy.

Make-Ahead, Freezing, and Storage Tips

Kiwi smoothie storage image with a fridge jar and freezer packs for kiwi banana, kiwi mango, kiwi strawberry, and kiwi spinach
Blended smoothies taste best fresh, but freezer packs make it easier to prep kiwi, banana, mango, berries, or spinach ahead of time.

This smoothie tastes best right after blending. The flavor is brighter, the texture is smoother, and dairy-based versions are less likely to thin out. If you need to make it ahead, keep it short and practical.

Storing a Kiwi Smoothie in the Fridge

For the best texture, drink it within 24 hours. Store it in a sealed jar or bottle, refrigerate it, and shake or stir before drinking. The smoothie may separate slightly, especially if it has water, coconut water, or juice instead of yogurt.

Freezing Kiwi for Smoothies

Frozen kiwi works well in smoothies. Peel and chop ripe kiwi, freeze the pieces on a tray, then transfer them to a freezer bag or container. However, frozen kiwi works best with banana, mango, strawberry, or yogurt because kiwi alone can become icy.

Making Kiwi Smoothie Packs

Smoothie packs are the easiest make-ahead option. Add peeled kiwi, banana, mango, strawberries, spinach, or pineapple to freezer bags. Freeze for up to 3 months. When ready to blend, add the frozen pack to the blender with yogurt and liquid.

Kiwi Nutrition Notes for Smoothies

Kiwi is often used in smoothies because it brings bright flavor, gentle natural sweetness, fiber from the whole fruit, and vitamin C. It pairs especially well with banana, mango, strawberry, spinach, and yogurt because those ingredients balance the tartness.

The USDA vitamin C table lists raw green kiwifruit as a high-vitamin-C fruit per cup, which makes kiwi a useful ingredient in fruit smoothies. You can also explore MasalaMonk’s broader guide to vitamin C rich foods for more everyday fruit and vegetable ideas.

For a deeper look at kiwi beyond smoothies, MasalaMonk has a guide to kiwi nutrition, benefits, and practical uses. For this recipe, though, the most important thing is simple: ripe fruit, the right liquid, and enough body to keep the smoothie enjoyable.

FAQs About Kiwi Smoothies

These quick answers cover the most common questions readers have before changing the base recipe: milk or no milk, yogurt or no yogurt, banana or no banana, fresh kiwi or frozen kiwi.

Can you put kiwi in a smoothie?

Kiwi works very well in smoothies because it adds bright, tangy fruit flavor. It tastes best with creamy or sweet ingredients like banana, yogurt, mango, strawberry, milk, or coconut water.

Do you peel kiwi before putting it in a smoothie?

For the smoothest kiwi smoothie, peel it first. Kiwi skin is edible, but it can add a fuzzy, fibrous texture. If you want to blend kiwi with the skin on, wash it very well and use a strong blender.

What fruit goes well with kiwi in smoothies?

Banana, strawberry, mango, pineapple, orange, apple, blueberry, raspberry, pear, and avocado all pair well with kiwi. Banana and mango are best for sweetness and creaminess, while strawberry and pineapple keep the flavor brighter.

Can I make a kiwi smoothie with milk?

Milk makes the drink creamy and mild, especially when paired with banana or yogurt. For the best texture, drink milk-based versions soon after blending.

Can I make a kiwi smoothie without yogurt?

For a no-yogurt version, replace yogurt with frozen banana, mango, avocado, plant milk, coconut water, chia seeds, oats, or plant-based yogurt. Without yogurt, the smoothie usually needs frozen fruit or banana to stay thick.

Can I make a kiwi smoothie without banana?

Mango, avocado, pear, Greek yogurt, frozen pineapple, or chia seeds can all replace banana. Mango is the best swap when you want sweetness and thickness without changing the flavor too much.

How do you make a kiwi smoothie less sour?

Start with ripe kiwis, then add banana or mango if the smoothie still tastes sharp. Milk or yogurt can also soften the flavor better than water. If needed, add 1–2 teaspoons honey or maple syrup, but avoid too much lime, lemon, pineapple, or orange juice when the kiwi is already tart.

Why did my kiwi smoothie turn watery?

It may have too much liquid, too much ice, or not enough creamy fruit. Frozen banana, frozen mango, yogurt, avocado, chia seeds, or oats will help thicken it. Also, the texture can thin slightly as it sits, so it is best fresh.

Can I use frozen kiwi in a smoothie?

Frozen kiwi works well, especially with banana, mango, strawberry, yogurt, or another creamy ingredient. On its own, frozen kiwi can make a smoothie taste icy or sharp.

What is the difference between a kiwi smoothie and a kiwi milkshake?

The smoothie version is usually fruit-based and often made with yogurt, milk, coconut water, or juice. A kiwi milkshake is dessert-style and usually includes milk, ice cream, or extra sweetener.

Final Tips for the Best Kiwi Smoothie

The first time you make it, start with 2 ripe kiwis, 1 frozen banana, ½ cup yogurt, and ½ cup liquid. Then, taste it before pouring. That one small pause is what helps you catch a sharp kiwi, a thin texture, or a smoothie that needs one more spoonful of yogurt.

After that, the recipe becomes easy to adapt. Banana makes it creamy, mango makes it tropical, strawberry makes it brighter, cucumber makes it lighter, and ice cream turns it into a kiwi shake. Once you make it once, note which direction you liked best: creamy banana, tropical mango, lighter coconut water, or sharper strawberry kiwi.

The best version is not always the sweetest one. It is the one where the kiwi still tastes fresh, the texture feels creamy, and nothing sharp, watery, or heavy takes over.

Finished creamy kiwi smoothie served in a glass with sliced kiwi in a warm breakfast setting
At its best, this smoothie stays bright, creamy, and fresh-tasting, so the kiwi still leads without turning the drink watery or harsh.
Posted on 1 Comment

Easy Cheese Ball Recipe

Close-up of a pecan-coated cheese ball on a dark plate with round crackers and a spreader, with a scoop taken out to show the creamy cheddar and green onion filling inside.

This easy cheese ball recipe is the classic no-cook party appetizer you want when you need something creamy, savory, make-ahead friendly, and reliable. It starts with cream cheese, sharp cheddar, green onion, simple seasonings, and a crunchy pecan coating, then chills into a firm but spreadable ball that works with crackers, pretzels, vegetables, holiday boards, game day snacks, and party platters.

A good cheese ball should not taste like plain cream cheese with nuts stuck to the outside. Instead, the filling should be creamy, savory, a little sharp from the cheddar, fresh from the green onion, and easy to scoop once it softens slightly on the platter. Since the base recipe is simple, you can also turn the same cheese mixture into a bacon ranch cheese ball, dried beef cheese ball, pineapple cheese ball, cranberry pecan cheese ball, mini cheese ball bites, cheese ball dip, or a no-nut version without starting over.

This is the chilled cream cheese appetizer, not the crispy fried snack. If you are looking for hot, fried cheese balls with an Indian-inspired flavor profile, MasalaMonk already has a guide to crispy Indian-inspired cheese balls. Here, we are making the classic cheese ball served with crackers, vegetables, and party boards.

Active prep is only about 15 minutes. The rest of the time is chilling, which makes this an easy make-ahead appetizer rather than a last-minute kitchen project.

Quick Answer: What Is a Cheese Ball?

A cheese ball is a chilled, spreadable appetizer made with cream cheese, shredded cheese, seasonings, and an outer coating such as chopped pecans, walnuts, herbs, bacon, crushed pretzels, or dried cranberries. Once the filling is mixed, it is shaped into a ball, chilled until firm, rolled in the coating, and served with crackers, vegetables, pretzels, crostini, or a party board.

Unlike fried cheese balls, this version is creamy, cold, and spreadable rather than hot, breaded, or crisp. First, the cream cheese makes it smooth. Then, the cheddar gives it sharper flavor, the seasonings keep it from tasting flat, and the coating adds crunch and color. After chilling, the ball should hold its shape on the platter; however, this recipe should still soften enough to spread after 15 to 20 minutes at room temperature.

Quick answer: Mix 16 oz / 450 g softened cream cheese with 1½ to 2 cups / 170 to 225 g shredded cheddar, green onion, Worcestershire sauce, garlic powder, onion powder, and black pepper. Then shape, chill for 1 to 2 hours, and roll in chopped pecans, herbs, bacon, pretzels, or another coating.
Annotated guide showing a finished cheese ball with crackers, celery, cucumber, pretzel crisps, and a spreader, with labels noting the creamy center, crunchy coating, chilled serving style, and sturdy dippers.
A cheese ball is a chilled, spreadable appetizer with a creamy center and a textured outer coating. Because it is easier to serve once slightly softened, sturdy dippers like crackers, pretzel crisps, and crisp vegetables work especially well.

Cheese Ball Ingredients at a Glance

If you only remember one thing, remember this: cream cheese gives the ball body, cheddar gives this recipe sharper flavor, seasonings make it taste complete, and the coating makes it party-ready. Once those jobs are clear, it becomes much easier to adjust the recipe without making the filling too soft, salty, or bland.

Ingredient What It Does Best Tip
Cream cheese Creamy base and structure Use softened block-style cream cheese, not melted cream cheese
Sharp cheddar Real cheese flavor Freshly shredded cheddar blends best, although pre-shredded works in a pinch
Green onion Freshness and mild onion bite Slice it finely so every bite gets a little
Worcestershire sauce Savory depth Start with 1 teaspoon / 5 ml, then taste before adding more
Garlic and onion powder Even seasoning Use powders because they spread smoothly through the cream cheese
Pecans, herbs, bacon, or pretzels Crunch, color, and finish Roll the cheese ball in crunchy coatings close to serving
Ingredient guide for a cheese ball recipe showing cream cheese, shredded sharp cheddar, green onions, Worcestershire sauce, garlic powder, onion powder, black pepper, chopped pecans, herbs, and optional bacon arranged on a dark background.
The base of a classic cheese ball recipe is simple, but each ingredient has a job. Cream cheese gives structure, sharp cheddar adds flavor, Worcestershire brings savory depth, and pecans or herbs finish the outside with crunch and contrast.

How to Make a Cheese Ball

The method is easy, but the order matters. First, beat the cream cheese until smooth. Next, mix in the flavorings, shape the filling before it gets too warm, chill until firm, and add the coating close enough to serving that it stays fresh. That way, the cheese ball recipe stays simple without turning soft, lumpy, or messy.

Six-step visual guide showing how to make a cheese ball: soften cream cheese, mix in cheddar and seasonings, shape into a ball, chill until firm, roll in coating, and serve with crackers.
How to make a cheese ball is easier than it looks: soften, mix, shape, chill, coat, and serve. Most important, do not skip the chilling step, because that is what helps the cheese ball hold its shape and coat cleanly.

Step 1: Soften the Cream Cheese

Start with softened cream cheese. Leave it at room temperature until it is easy to press with a spoon. If the cream cheese is too cold, it will not mix smoothly. If it is melted, the filling may become loose and harder to shape. For that reason, softened but still-cool cream cheese gives you the best balance.

Step 2: Mix the Filling

Beat the cream cheese until smooth. Then mix in shredded cheddar, green onion, Worcestershire sauce, garlic powder, onion powder, black pepper, and any add-ins. Scrape the bowl well so the seasoning is evenly spread through the filling.

Before shaping, taste the mixture. It should taste slightly bold because crackers and vegetables will soften the flavor. If it tastes flat, add a little more green onion, black pepper, garlic powder, onion powder, or Worcestershire sauce. At this stage, the recipe is easier to fix because the cheese has not yet been shaped into a ball.

Step 3: Shape and Chill

Spoon the filling onto a large piece of plastic wrap or parchment. Then, gather the wrap around the mixture and shape it into a ball. It does not need to be perfect yet because chilling will make it easier to smooth and coat. After the first chill, you can gently reshape it if needed.

Refrigerate for at least 1 hour. For a cleaner shape, chill for 2 hours. If you are making the cheese ball ahead, stop here and keep it wrapped until the day you plan to serve it.

Step 4: Roll in the Coating

Spread chopped pecans, herbs, bacon, pretzels, or your chosen coating on a plate. After that, unwrap the chilled cheese ball, then roll and press it gently into the coating until the outside is covered.

Nuts hold up better than most coatings. However, bacon, pretzels, crackers, and fresh herbs are best added closer to serving. That keeps the outside crisp, fresh, and more appetizing. The cheese ball also looks cleaner when the final coating is added after the recipe has had time to chill.

Step 5: Serve Slightly Softened

A cheese ball is usually too firm right from the refrigerator. So, let it sit for 15 to 20 minutes before serving so it becomes easier to spread. It should soften slightly, but it should not sit out for the entire party. Instead, serve it in a planned window and keep extra portions chilled if the gathering will last longer.

Texture target: Before chilling, the mixture should look thick, creamy, and scoopable. It should not be runny, greasy, or crumbly. After chilling, it should be firm enough to roll in coating, but it should still soften enough to spread after 15 to 20 minutes at room temperature. If it feels loose before chilling, add a little more cheddar; if it feels dry, let it rest briefly and mix again.

Easy Cheese Ball Recipe

Easy Cheese Ball Recipe with Cream Cheese

This classic cheese ball recipe is creamy, savory, make-ahead friendly, and perfect with crackers, vegetables, pretzels, and party boards.

YieldAbout 3 to 3½ cups
Servings16 to 20 appetizer servings
Prep Time15 minutes
Chill Time1 to 2 hours
Total Time1 hour 15 minutes to 2 hours 15 minutes
Cook Time0 minutes

Ingredients

  • 16 oz / 450 g cream cheese, softened
  • 1½ to 2 cups / about 170 to 225 g shredded sharp cheddar cheese
  • 2 to 3 green onions, finely sliced, about 20 to 30 g
  • 1 teaspoon / 5 ml Worcestershire sauce
  • ½ teaspoon garlic powder
  • ½ teaspoon onion powder
  • ¼ teaspoon black pepper
  • Pinch of salt, only if needed

For the Coating

  • ¾ to 1 cup / about 85 to 115 g finely chopped pecans or walnuts
  • 2 tablespoons chopped parsley, chives, or green onion
  • Optional: ¼ to ½ cup / about 25 to 50 g cooked crumbled bacon

Instructions

  1. Add softened cream cheese to a mixing bowl and beat until smooth
  2. Add shredded cheddar, green onion, Worcestershire sauce, garlic powder, onion powder, black pepper, and a small pinch of salt if needed
  3. Mix until evenly combined, then taste and adjust the seasoning before shaping
  4. Spoon the mixture onto plastic wrap or parchment and shape it into a ball
  5. Wrap tightly and refrigerate for at least 1 hour, or 2 hours for a firmer, cleaner shape
  6. Spread chopped pecans, herbs, and optional bacon on a plate
  7. Unwrap the chilled cheese ball and roll it in the coating, pressing gently so the outside is covered
  8. Let it sit for 15 to 20 minutes before serving with crackers, pretzels, vegetables, or crostini

Recipe Notes

  • Taste the filling before shaping. It should taste slightly bold because crackers, vegetables, and pretzels soften the flavor once served
  • For a softer spread, use 1½ cups / 170 g cheddar instead of 2 cups / 225 g
  • For a firmer cheese ball, chill longer or mix in a little more shredded cheddar
  • For a no-nut cheese ball, coat it with herbs, bacon, crushed pretzels, crushed crackers, everything seasoning, or toasted breadcrumbs
  • For mini cheese ball bites, chill the mixture, scoop into 1-tablespoon portions, roll each one in coating, and add pretzel sticks right before serving
Recipe card graphic for an easy cheese ball recipe with a photo of the finished cheese ball, yield and timing details, an ingredient list including cream cheese, sharp cheddar, green onions, Worcestershire, seasonings, and pecans, plus a short method.
This easy cheese ball recipe uses a classic formula: cream cheese, sharp cheddar, green onions, Worcestershire, simple seasonings, and chopped pecans. Since it is make-ahead friendly, it is a strong choice for holidays, parties, and snack boards.

Why This Cheese Ball Recipe Works

This cheese ball recipe works because it keeps the base firm, flavorful, and easy to spread. Instead of adding too many wet ingredients, it uses full-fat block cream cheese for structure, sharp cheddar for stronger cheese flavor, and dry seasonings that blend smoothly through the filling.

Also, the coating goes on after the ball has chilled. That timing matters because the outside stays cleaner, the nuts or herbs stick better, and the finished appetizer looks fresher on the platter. That way, the cheese ball stays make-ahead friendly without tasting flat or turning messy.

Recipe Choice Why It Helps
Full-fat block cream cheese Firms up enough to shape into a ball
Sharp cheddar Adds enough flavor to stand up to crackers and vegetables
Garlic powder and onion powder Season evenly without harsh raw pieces
Worcestershire sauce Adds savory depth so the filling does not taste one-note
Coating after chilling Keeps the outside fresher, cleaner, and crunchier
Explainer board showing why a cheese ball recipe works, with callouts for block cream cheese for structure, sharp cheddar for flavor, Worcestershire for savory depth, dry seasonings for even flavor, and coating after chilling for a cleaner finish.
A good cheese ball recipe works because the structure and flavor stay balanced. Block cream cheese keeps it firm, sharp cheddar keeps it from tasting flat, and coating the ball after chilling helps the outside stay cleaner and more defined.

That is what keeps the recipe flexible without making it vague. You can change the coating, the add-ins, or the serving style, while the cream cheese and cheddar base still keeps the ball structured enough to slice, scoop, and spread.

Cheese Ball Ingredient Notes

The base is simple, but each ingredient matters. Because the recipe is no-cook, the flavor comes from good cheese, proper seasoning, and the contrast between the creamy inside and the textured coating. That is why bland cheese, cold cream cheese, and watery add-ins can make the whole appetizer fall flat.

Cream Cheese

Use full-fat block-style cream cheese for the best structure. Because this is a chilled recipe, the cheese needs to firm up around the ball without turning stiff or crumbly. Block-style cream cheese softens smoothly, firms up well in the refrigerator, and gives the finished cheese ball a rich but spreadable texture. By contrast, whipped cream cheese can make the mixture looser, while cold cream cheese can leave small lumps in the filling.

Let the cream cheese soften at room temperature until it presses easily with a spoon. It should be soft enough to beat, but not melted or greasy. If it melts, the cheese mixture can become loose, and the ball may take much longer to firm up in the refrigerator. On the other hand, if it is too cold, the filling can stay lumpy even after mixing.

If your kitchen is cool, cream cheese may need 45 to 60 minutes to soften. If your kitchen is warm, check it sooner so it softens without turning greasy.

Sharp Cheddar

Sharp cheddar is the easiest choice because it brings more flavor than mild cheddar. Also, it balances the cream cheese, so the finished appetizer tastes like a proper cheddar cheese ball instead of a plain cream cheese spread. For this recipe, the cheese should be bold enough that the ball still tastes savory after it is spread onto crackers.

Whenever possible, shred the cheddar fresh because it blends more smoothly into the cream cheese base. Still, pre-shredded cheddar can work when convenience matters. If the mixture feels dry after using packaged shredded cheese, let it sit for a few minutes and mix again before shaping. In practice, the recipe is forgiving as long as the cheese tastes bold and the ball still holds together after chilling.

Best Cheese for a Cheese Ball

For most versions, sharp cheddar is the best first choice because it has enough flavor to balance the cream cheese. However, this recipe can move in different directions depending on the cheese you choose. If you want the ball to taste milder, sharper, smokier, or spicier, start with the guide below.

Cheese Best For How to Use It
Sharp cheddar Classic cheese ball recipe Main shredded cheese for the strongest everyday version
White cheddar Holiday boards Use like yellow cheddar for a sharper but cleaner-looking ball
Colby Jack Milder family-style cheese ball Use when you want a softer flavor
Pepper Jack Spicy cheese ball Use half pepper Jack and half cheddar
Smoked gouda Smoky party flavor Use a small amount with cheddar rather than replacing all the cheese
Blue cheese Bold retro appetizer Use a little because the flavor is strong
Goat cheese Tangier variation Use as a partial swap, but expect a softer ball
Chooser guide comparing cheeses for a cheese ball recipe, including sharp cheddar, white cheddar, Colby Jack, Pepper Jack, smoked gouda, blue cheese, and goat cheese, each labeled with its flavor style.
Sharp cheddar is the best first choice for a cheese ball because it gives strong flavor without making the filling complicated. However, white cheddar, Pepper Jack, smoked gouda, or even a little blue cheese can shift the recipe in a different direction.

When in doubt, start with sharp cheddar. After that, use the table as a flavor guide rather than a strict rule. For example, pepper Jack makes sense for a spicy cheese ball, while white cheddar looks cleaner on a holiday board.

Green Onion, Garlic, Onion, and Worcestershire

Green onion adds freshness, while garlic powder and onion powder season the filling evenly. Meanwhile, Worcestershire sauce adds a savory note that makes the cheese ball taste fuller and less one-dimensional. Together, they make the recipe taste seasoned without adding extra moisture.

Because crackers, pretzels, bacon, dried beef, and seasoning blends can all be salty, add salt carefully. Before shaping the ball, taste the cheese filling; then decide if the recipe needs even a small pinch.

Pecans, Walnuts, Herbs, Bacon, or Pretzels

Although chopped pecans are the classic coating, walnuts, herbs, bacon, and crushed pretzels can all work depending on the flavor you want. Pecans add crunch and a slightly sweet nuttiness, while herbs such as parsley, chives, and green onion make the outside fresher and brighter.

For a game-day cheese ball, add cooked crumbled bacon to the coating. For a no-nut cheese ball, use herbs, bacon, crushed pretzels, crushed crackers, everything seasoning, or toasted breadcrumbs instead.

Do You Need Sour Cream, Mayo, or Butter?

You do not need sour cream, mayo, or butter for this classic shaped cheese ball recipe. In fact, keeping them out makes the ball easier to shape because the filling stays thicker and cleaner. Full-fat cream cheese already gives the recipe enough richness, while cheddar and seasonings bring the flavor.

That said, sour cream or mayo can be useful if you are making cheese ball dip instead of a shaped appetizer. In that case, add only 1 to 2 tablespoons at first, then check the texture before adding more. Otherwise, the dip can move from creamy to loose very quickly.

Warm cheese option: If you want a pourable cheese dip instead of a chilled cream cheese appetizer, try MasalaMonk’s easy cheese sauce recipe for nachos, fries, broccoli, pasta, and dipping.

Equipment You Need

You do not need special equipment for this recipe, but a few basic tools make the cheese mixture smoother and the final ball easier to shape. If the cream cheese is properly softened, even a sturdy spatula can work. However, a hand mixer makes the filling smoother faster, especially when you are doubling the recipe.

Tool Why It Helps
Mixing bowl For beating the cream cheese and folding in cheddar
Hand mixer or sturdy spatula For a smoother filling
Box grater For freshly shredded cheddar
Plastic wrap or parchment For shaping the filling into a clean ball
Plate or shallow tray For rolling the chilled cheese ball in coating
Serving knife or spreader For easier spreading without breaking crackers

Common Mistakes to Avoid

Before you start mixing, it helps to know what can go wrong. Most cheese ball problems come from cream cheese that is too cold, add-ins that are too wet, or coatings that are added too early. Fortunately, each problem is easy to avoid if you build the recipe in the right order. More importantly, fixing the filling before shaping is much easier than fixing a finished ball after the coating is already on.

Mistake What Happens Better Move
Melting the cream cheese Loose or greasy filling Soften at room temperature instead
Using cold cream cheese Lumpy cheese ball mixture Let it soften until it presses easily
Adding wet pineapple, pickles, or jalapeños Soft or watery filling Drain and blot before mixing
Coating with pretzels or bacon too early Soft outside layer Add crunchy coatings closer to serving
Adding salt too soon Overly salty cheese ball Taste first, then salt only if needed
Serving straight from the fridge Firm texture and broken crackers Rest 15 to 20 minutes before serving
Mistake-and-fix guide for a cheese ball recipe showing six common problems: cream cheese too cold, cream cheese melted, wet add-ins, coating too early, too much salt, and serving straight from the fridge.
Most cheese ball recipe problems are easy to avoid once you know what to watch for. For example, cold cream cheese causes lumps, wet add-ins can loosen the mixture, and serving the ball straight from the fridge makes it harder to spread.

How Much Cheese Ball to Make

Because this cheese ball recipe is usually served as part of a snack table, the right amount depends on what else you are serving. If the ball is the main appetizer, plan more. However, if it sits on a board with dips, crackers, vegetables, fruit, and hot snacks, one batch can stretch further. In that case, variety matters more than making one oversized cheese ball.

Crowd Size Amount to Make Best Plan
6 to 8 people Half batch Smaller ball or full recipe as dip with leftovers planned
12 to 20 people 1 full cheese ball Crackers, vegetables, pretzels, and at least one fresh side
25 to 35 people 2 cheese balls Two flavors, such as classic pecan and bacon ranch
Large party board 1 cheese ball plus other appetizers Warm dip, crunchy snack, fruit, pickles, olives, and sturdy crackers
Individual portions 36 to 48 mini cheese ball bites 1-tablespoon portions with pretzel sticks added right before serving
Serving guide showing how much cheese ball to make for different group sizes, including half a batch for 6 to 8 people, one cheese ball for 12 to 20, two cheese balls for 25 to 35, one ball plus other appetizers for a large board, and mini bites as another option.
How much cheese ball to make depends on how you are serving it. If it is one appetizer among several, one batch goes further; however, for larger gatherings, two cheese balls or a tray of mini bites makes hosting much easier.

Cheese Ball Dip: How to Serve This Without Shaping It

If you want the flavor of a cheese ball without shaping it, turn the mixture into cheese ball dip. This is useful for casual parties, snack boards, and smaller gatherings where a bowl of spread is easier than a shaped appetizer. Instead of changing the whole recipe, you only need to adjust the cheese slightly so the ball mixture becomes softer and more scoopable.

To make cheese ball dip, use the same base recipe but reduce the cheddar to 1½ cups / about 170 g so the texture stays softer. Then, mix the filling, spoon it into a shallow serving bowl, smooth the top, and sprinkle the coating over the surface. Chill for 30 to 60 minutes if making it ahead; afterward, let it soften slightly before serving so you get the same flavor with less shaping and easier scooping.

For Cheese Ball Dip Use This Adjustment
Softer texture Use 1½ cups / 170 g cheddar instead of 2 cups / 225 g
Easy serving Spoon into a shallow bowl instead of shaping into a ball
Better topping Add pecans, herbs, bacon, or pretzels right before serving
Best dippers Crackers, pretzel crisps, celery, cucumber, bell pepper, crostini, or pita chips
Side-by-side comparison showing a shaped cheese ball on a platter and a bowl of cheese ball dip, with notes that the cheese ball is firmer and better for boards while the dip is softer and easier to scoop.
Cheese ball dip vs cheese ball comes down to texture and serving style. Both use a similar flavor base, yet the dip is softer and easier to scoop, while the shaped cheese ball feels more polished for a party platter or snack board.

3 Ingredient Cheese Ball

A 3 ingredient cheese ball is useful when you need the fastest possible appetizer. However, it will not have the same depth as the full recipe because garlic, onion, pepper, and Worcestershire add much of the savory background flavor. Still, when time is short, cream cheese, cheddar, and one strong seasoning can form a simple ball that works with crackers and pretzels.

Version Ingredients Best Use
Classic shortcut 16 oz / 450 g cream cheese + 1½ cups / 170 g cheddar + 1 packet / about 28 g ranch seasoning Fast game-day cheese ball
No-ranch shortcut 16 oz / 450 g cream cheese + 1½ cups / 170 g cheddar + 3 sliced green onions Milder cheese ball for simple crackers
Coated shortcut 16 oz / 450 g cream cheese + 1½ cups / 170 g cheddar + ¾ cup / 85 g chopped pecans Basic party cheese ball with crunch
Guide image for a 3 ingredient cheese ball showing cream cheese, shredded cheddar, ranch seasoning or green onion, plus a finished cheese ball served with crackers and pretzels, with the steps mix, shape, and chill.
A 3 ingredient cheese ball is the fastest shortcut version when you need a party appetizer quickly. However, the full cheese ball recipe gives you better depth because Worcestershire, garlic powder, onion powder, pepper, and green onion round out the flavor.

For the best flavor, though, use the full recipe. Worcestershire sauce, garlic powder, onion powder, black pepper, and green onion make the cheese ball taste more complete without making the method harder. Still, the shortcut version is useful when speed matters more than building the most layered flavor.

What to Roll a Cheese Ball In

The coating does more than make the cheese ball look finished. It adds texture, controls richness, and tells people what kind of flavor to expect. Although pecans are classic, there are plenty of good nut-free and holiday-friendly options. For example, this recipe can move from a classic cheese ball to a game-day ball or holiday cheese board centerpiece just by changing the outside layer.

Coating Best For Notes
Chopped pecans Classic cheese ball Toast lightly, then cool before using
Chopped walnuts Earthier flavor Chop finely so the pieces stick well
Parsley, chives, or green onion Fresh green finish Good for a lighter-looking or no-nut version
Bacon and chives Game day Add close to serving so the bacon stays crisp
Crushed pretzels No-nut crunch Add shortly before serving because pretzels soften
Crushed crackers Simple no-nut coating Use sturdy crackers and crush finely
Everything seasoning Bagel-style flavor Use lightly because it can be salty
Dried cranberries and pecans Holiday cheese ball Sweet, salty, colorful, and festive
Toasted breadcrumbs Nut-free coating Use dry crumbs and add close to serving
Coating guide showing cheese balls rolled in chopped pecans, walnuts, herbs, bacon and chives, crushed pretzels, crushed crackers, everything seasoning, cranberries and pecans, and toasted breadcrumbs.
What you roll a cheese ball in changes both texture and flavor. For example, pecans give the classic crunch, bacon and chives make it more savory, while crushed pretzels or crackers work well when you want a no-fuss party coating.

No-Nut Cheese Ball Coatings

For a cheese ball without nuts, use chopped herbs, cooked bacon, crushed pretzels, crushed crackers, everything seasoning, toasted breadcrumbs, sesame seeds, or a mix of herbs and shredded cheddar. If allergies are a concern, avoid using nut coatings anywhere near the same platter, utensils, or serving board. In that case, keep the whole platter nut-free rather than relying on separate corners of the same board.

No-nut cheese ball coating guide showing a finished no-nut cheese ball with coating options including fresh herbs, bacon, crushed pretzels, crushed crackers, everything seasoning, sesame seeds, toasted breadcrumbs, and shredded cheddar.
A no-nut cheese ball can still look colorful and taste crunchy. Instead of pecans or walnuts, use fresh herbs, bacon, crushed pretzels, cracker crumbs, sesame seeds, toasted breadcrumbs, or shredded cheddar for a safer party-board option.

What to Serve With a Cheese Ball

A cheese ball works best with dippers that can handle a creamy spread. So, put out a mix of crackers, vegetables, pretzels, and a few fresh or tangy sides so the platter does not feel too heavy. Since this recipe is rich, the best cheese board pairings usually include something crisp, something salty, and something fresh. That balance keeps guests coming back without making every bite feel the same.

Best Crackers for a Cheese Ball

Cracker or Dipper Why It Works Best Pairing
Buttery crackers Classic party flavor and easy crunch Classic pecan or cranberry pecan
Wheat crackers Sturdy, nutty, and less fragile Dried beef or bacon ranch
Seeded crackers More texture and grown-up flavor Herb or no-nut cheese ball
Water crackers Clean flavor that lets the cheese stand out Classic cheddar once slightly softened
Pretzel crisps Salty, crunchy, and strong enough for scooping Bacon ranch, jalapeño, or dill pickle
Crostini or baguette slices Strongest option for a firmer cheese ball Party boards and holiday platters
Celery, cucumber, and bell pepper Fresh, lighter, and crisp Rich cheese balls and game-day spreads
Apple slices and grapes Sweet and fresh against savory cheese Cranberry pecan, pineapple, or classic pecan
Serving guide showing a cheese ball with buttery crackers, wheat crackers, seeded crackers, water crackers, pretzel crisps, crostini, celery, cucumber, bell pepper, apple slices, and grapes.
The best crackers and dippers for a cheese ball are sturdy enough to scoop without breaking. Since the filling is rich, a mix of crackers, pretzel crisps, fresh vegetables, apple slices, and grapes keeps the platter balanced.

Because the cheese ball can be firm when it first comes out of the fridge, sturdy crackers work better than very thin ones. So let it soften for 15 to 20 minutes before serving, or include a small spreading knife on the platter.

For a low-carb platter, serve the cheese ball with celery, cucumber rounds, bell pepper strips, cheese crisps, pork rinds, or other sturdy options from MasalaMonk’s guide to keto chips for dips. This works especially well when the cheese ball is part of a heavier game-day table and you want a few lighter, crunchier options.

Turn It Into a Party Board

For a fuller spread, place the cheese ball on a board with crackers, pretzels, fruit, nuts, pickles, olives, cured meats, and a small bowl of jam or chutney. If you want a simple layout formula, MasalaMonk’s guide to charcuterie board ideas gives you an easy structure for building a balanced board. From there, add one crunchy item, one fresh item, and one sweet or tangy item around the cheese ball.

For a game-day table, pair this cheese ball with buffalo chicken dip, crispy mozzarella sticks, or a tray of potato appetizers. That gives guests a mix of cold, creamy, hot, crispy, salty, and fresh bites.

Close-up of a cheese ball party board with a nut-coated cheese ball surrounded by crackers, pretzels, grapes, apple slices, celery, cucumber slices, olives, and folded cured meat on a dark platter.
A cheese ball party board works best when it has contrast. Add salty crackers, crisp vegetables, fresh fruit, and a few briny sides so the creamy cheese ball feels like the centerpiece instead of the only thing on the platter.

Make Ahead, Storage, and Freezing

A cheese ball is one of the easiest make-ahead appetizers because chilling helps it firm up. In fact, the recipe often tastes better after a few hours because the cheese, onion, and seasonings have time to settle. The best approach is to make and shape the filling ahead, then add the coating closer to serving. That way, the inside gets time to develop flavor while the outside still tastes fresh.

Best make-ahead method: Mix and shape the cheese ball 1 day ahead, wrap tightly, and refrigerate. Then roll it in pecans, herbs, bacon, pretzels, or crumbs closer to serving so the outside stays fresh and crisp.

Make-Ahead Timeline

When You Are Serving What to Do Best Coating Timing
Same day Mix, shape, chill for 1 to 2 hours Coat after chilling
1 day ahead Mix, shape, wrap tightly, and refrigerate Coat the day you serve
2 to 3 days ahead Shape uncoated and keep tightly wrapped Coat shortly before serving
Freezer prep Freeze the shaped, uncoated cheese ball Thaw overnight, then coat fresh
Make-ahead storage and freezing guide for a cheese ball showing steps for same-day prep, making it 1 day ahead, keeping it uncoated for 2 to 3 days, freezing it uncoated, thawing overnight in the fridge, and coating fresh before serving.
For the cleanest make-ahead cheese ball, shape and chill the filling first, then add the coating close to serving. That way, the inside has time to firm up while the outside stays fresh, crisp, and party-ready.

How to Store a Cheese Ball

After shaping, wrap the cheese ball tightly in plastic wrap or store it in an airtight container in the refrigerator. If it has already been coated, use a container large enough that the outside does not get crushed.

For best texture, keep a shaped, uncoated cheese ball refrigerated for up to 3 days before serving. Once the cheese ball has been coated or served, store leftovers tightly covered in the refrigerator and use them within 3 to 4 days. For freezing, freeze the shaped, uncoated cheese ball for up to 1 month, then thaw it overnight in the refrigerator and coat it fresh before serving.

Keep the cheese ball refrigerated at 40°F / 4°C or colder. For the cleanest presentation, store the shaped cheese ball uncoated, then roll it in pecans, herbs, bacon, or crumbs shortly before serving.

Can You Freeze a Cheese Ball?

If you need to make it further ahead, freeze the cheese ball before adding the coating so the outside stays fresher after thawing. Wrap the shaped cheese ball tightly, place it in a freezer-safe bag or container, and freeze at 0°F / -18°C. Then thaw it overnight in the refrigerator and roll it in a fresh coating before serving.

Freezing works best with the plain cream cheese, cheddar, green onion, and seasoning base. Wet add-ins such as pineapple, pickles, or jalapeños can release moisture after thawing, so those versions are better made fresh or only 1 to 2 days ahead. After thawing, always add a fresh coating so the outside tastes crisp instead of stale or soft.

How Long Can a Cheese Ball Sit Out?

Because a cheese ball is made with cream cheese and shredded cheese, treat it like a perishable appetizer. According to USDA food safety guidance, perishable food should not be left out for more than 2 hours at room temperature, or more than 1 hour when the temperature is above 90°F / 32°C.

For a long party, serve a smaller cheese ball first and keep the backup chilled. Then, if the platter runs low, bring out a fresh one instead of letting the same ball sit for hours. If the cheese ball has been sitting out too long, do not wrap it back up for later. Instead, refrigerate safe leftovers promptly and discard anything that has been left out beyond the safe window.

Food safety guide showing a cheese ball platter with a clock and chilled backup container, explaining that a cheese ball can sit out up to 2 hours at room temperature or 1 hour above 90°F or 32°C.
A cheese ball should not sit out all day just because it is served chilled. For safer entertaining, serve a smaller portion first, keep the backup refrigerated, and replace the platter when needed instead of leaving one ball out for hours.

Cheese Ball Variations

Once the base recipe works, the variations are easy. Instead of rebuilding the appetizer from scratch, keep the cream cheese structure, then change the cheese, seasonings, add-ins, and coating. The formulas below are designed as practical starting points, so you do not have to guess how much bacon, dried beef, pineapple, jalapeño, or cranberry to add to each ball. After that, you can adjust salt, heat, sweetness, or crunch to match the occasion.

Which Cheese Ball Variation Should You Make?

Choose This Version Best For Flavor Direction
Classic pecan Safest party version Creamy, savory, nutty, familiar
Bacon ranch Game day Salty, herby, bold, snacky
Dried beef or chipped beef Old-school party flavor Salty, savory, retro
Cranberry pecan Thanksgiving or Christmas Sweet-salty, colorful, festive
Pineapple Retro sweet-savory spread Creamy, tangy, slightly sweet
Jalapeño Spicy snack table Cheesy, peppery, fresh heat
Mini bites Easy individual serving Party-friendly and mess-light
Variation guide showing eight cheese ball ideas: classic pecan, bacon ranch, dried beef, cranberry pecan, pineapple, jalapeño, dill pickle, and mini cheese ball bites with pretzel sticks.
Once the base cheese ball recipe is right, the variations are easy. Keep the cream cheese structure, then change the coating and add-ins for bacon ranch, dried beef, cranberry pecan, pineapple, jalapeño, dill pickle, or mini cheese ball bites.

Bacon Ranch Cheese Ball

For a bacon ranch cheese ball, use 16 oz / 450 g cream cheese, 1½ cups / 170 g shredded cheddar, 1 packet / about 28 g ranch seasoning, ½ cup / about 50 g cooked crumbled bacon, and 2 sliced green onions. Then roll the outside in more bacon, chopped chives, and pecans or crushed pretzels.

Because ranch seasoning and bacon are both salty, do not add extra salt until you taste the filling. If the cheese ball tastes strong on its own, serve it with celery, bell pepper strips, or unsalted crackers for balance. Otherwise, pretzel crisps, wheat crackers, and sturdy buttery crackers all work well.

Close-up of a bacon ranch cheese ball coated with chopped bacon, chives, and crunchy bits, served with pretzels, celery sticks, and crackers on a dark platter.
A bacon ranch cheese ball is ideal for game day because it is salty, creamy, and easy to serve with pretzels, celery, and sturdy crackers. Since bacon and ranch seasoning are already flavorful, taste before adding extra salt.

Dried Beef Cheese Ball or Chipped Beef Cheese Ball

For a dried beef cheese ball, use 16 oz / 450 g cream cheese, 1½ cups / 170 g shredded cheddar, 4 to 5 oz / 115 to 140 g finely chopped dried beef or chipped beef, 2 sliced green onions, 1 teaspoon / 5 ml Worcestershire sauce, ½ teaspoon onion powder, and ½ teaspoon garlic powder.

Because dried beef is already salty, skip the added salt. Then roll the outside in chopped pecans, herbs, more finely chopped dried beef, or a mix of all three. If you like a sharper old-school flavor, add 1 to 2 teaspoons prepared horseradish, but blot any extra moisture first.

Old-school party version: Since dried beef is salty, chop it very finely and reserve a little for the outside coating. That way, the cheese ball recipe gets flavor inside and a clear visual cue outside.
Close-up of a dried beef cheese ball, also called a chipped beef cheese ball, coated with finely chopped dried beef and green onion, with crackers and a scoop of the creamy filling visible.
A dried beef cheese ball brings an old-school party flavor into a modern appetizer board. Because dried beef is naturally salty, chop it finely, skip extra salt at first, and balance the cheese ball with crackers, green onion, and fresh dippers.

Cranberry Pecan Cheese Ball

For a cranberry pecan cheese ball, use the base recipe and mix in ½ cup / about 60 g chopped dried cranberries. Then roll the outside in ½ cup / 55 g chopped pecans, ¼ cup / 30 g chopped dried cranberries, and 2 tablespoons chopped parsley or chives.

A little orange zest makes this version brighter, especially for Thanksgiving or Christmas. Because this version already has sweetness from the cranberries, salty or buttery crackers usually work better than sweet dippers. For that reason, it is especially good with apple slices, grapes, and a small bowl of pepper jelly or chutney.

Cranberry pecan cheese ball with a creamy center, coated in chopped pecans, dried cranberries, and herbs, served with crackers, apple slices, grapes, and a small bowl of red chutney.
A cranberry pecan cheese ball is the best holiday-style variation when you want sweet, savory, creamy, and crunchy in one appetizer. Because the cranberries add sweetness, serve it with salty crackers, apple slices, grapes, or a tangy chutney for balance.

Jalapeño Cheese Ball

For a jalapeño cheese ball, add 1 to 2 finely chopped jalapeños to the base recipe. Fresh jalapeño tastes brighter, while pickled jalapeño adds tang. Either way, blot the pieces dry before mixing so the filling does not become watery.

Cheddar, bacon, smoked paprika, and chives all work well here. For more heat, add a pinch of cayenne instead of adding too much hot sauce, which can loosen the texture. If your crowd likes creamy heat, this jalapeño version also pairs well with baked jalapeño poppers on the same snack table. Meanwhile, celery and cucumber help cool the heat without making the platter boring.

Jalapeño cheese ball with a creamy filling, chopped jalapeños, green herbs, and cheddar flecks, served with pretzels, cucumber slices, celery sticks, and crackers.
A jalapeño cheese ball should taste creamy first and spicy second. Since fresh jalapeños can vary in heat, start with a modest amount, then add more only after tasting the filling so the cheese ball stays balanced.

Pineapple Cheese Ball

For a pineapple cheese ball, use 16 oz / 450 g cream cheese, 1 to 1½ cups / 115 to 170 g shredded cheddar, ¾ cup / about 180 g crushed pineapple that has been drained and blotted very well, 2 sliced green onions, and ½ cup / about 55 g chopped pecans.

The pineapple must be very dry before it goes into the filling. If it is watery, the cheese ball will turn soft and loose. Therefore, drain it well, press out extra juice, and blot it before mixing. Since this version is sweet-savory, it works especially well with salty crackers, pretzels, and toasted baguette slices.

Pineapple cheese ball coated with chopped pecans and green onion, with a creamy filling and pineapple pieces inside, served with crackers, pretzels, toasted bread slices, and a small bowl of pineapple.
A pineapple cheese ball works best when the pineapple is drained very well before mixing. Otherwise, the filling can turn loose; however, when the pineapple is dry, it adds a sweet-savory flavor that pairs beautifully with salty crackers and pretzels.

Dill Pickle Cheese Ball

For a dill pickle cheese ball, add ½ cup / about 75 g finely chopped pickles, 1 to 2 teaspoons dill, 1½ cups / 170 g cheddar, garlic powder, and green onion to the cream cheese base. Before mixing, blot the chopped pickles very well so the filling stays thick.

After chilling, roll the outside in chopped herbs, crushed pretzels, or a mix of herbs and shredded cheddar. Since pickles add both salt and moisture, taste before adding extra salt and serve this version with pretzel crisps, celery, cucumber rounds, and sturdy crackers.

Dill pickle cheese ball with chopped pickles, dill, herbs, and a creamy center, served with pretzels, cucumber slices, celery sticks, and seeded crackers.
A dill pickle cheese ball should taste tangy and fresh without becoming watery. For that reason, blot chopped pickles before mixing them into the cream cheese base, then serve the finished ball with pretzels, celery, cucumber, or sturdy crackers.

Mini Cheese Ball Bites

Mini cheese ball bites are ideal when you want individual party portions instead of one large cheese ball. After the filling chills until firm, scoop it into generous 1-tablespoon portions. A full batch usually makes about 36 to 48 mini cheese ball bites, depending on how generously you scoop and how much coating you use.

From there, roll each mini cheese ball in chopped pecans, herbs, bacon, crushed pretzels, or dried cranberries. Then add pretzel sticks right before serving so they stay crisp and do not soften in the cheese mixture. If you are making this recipe ahead, chill the coated bites without the sticks and add the pretzels only when the platter is ready.

Tray of mini cheese ball bites in different coatings, including herbs, bacon, pecans, crushed pretzels, and dried cranberries, with some bites topped with pretzel sticks.
Mini cheese ball bites are ideal when guests need an easy one-bite appetizer. Once the mixture is chilled, scoop it into 1-tablespoon portions, roll each bite in coating, and add pretzel sticks last so they stay crisp.

Christmas Cheese Ball

For a Christmas cheese ball, use the cranberry pecan version or roll the outside in a red-and-green mix of dried cranberries, pecans, parsley, and chives. You can keep it round, shape it into a wreath, or make a simple ornament-style cheese ball for a holiday board.

Still, flavor should come first. A simple round cheese ball with cranberries, pecans, herbs, crackers, grapes, and apple slices usually looks festive without needing a complicated shape. Plus, it is easier to chill, coat, transport, and serve.

Pumpkin Cheese Ball

For Halloween or Thanksgiving, shape the cheese ball into a pumpkin. After wrapping the cheese ball, use rubber bands or kitchen twine around the outside to create pumpkin-like ridges while it chills. Once firm, remove the wrap and add a bell pepper stem or pretzel rod on top.

For a more orange look, use a cheddar-heavy filling or press finely shredded cheddar onto the outside. Since this is mostly a shaping idea, keep the flavor familiar and serve it with crackers, pretzels, and vegetables for a seasonal appetizer board.

Holiday Cheese Ball Shapes

If you want the cheese ball to match a holiday or party theme, change the shape without changing the whole recipe. The easiest approach is to keep the same cream cheese base, chill it well, and shape the ball before adding the final coating. That way, the design changes but the flavor stays reliable.

Shape Best Season How to Do It
Pumpkin Halloween or Thanksgiving Wrap, tie with twine or rubber bands, chill, then add a pepper stem or pretzel rod
Christmas wreath Christmas Shape into a ring, chill, then coat with herbs, pecans, and dried cranberries
Ornament Christmas Keep round and use a cranberry-herb coating
Football Game day Shape into an oval, coat with bacon or nuts, then add thin cheese strips as laces
Mini bites Any party Scoop into 1-tablespoon balls and serve with pretzel sticks
Holiday cheese ball shapes guide showing a pumpkin-shaped cheese ball, Christmas wreath cheese ball, ornament cheese ball, football cheese ball, and mini cheese ball bites.
Holiday cheese ball shapes let you use the same base recipe in different party styles. For example, shape it into a pumpkin for fall, a wreath or ornament for Christmas, a football for game day, or mini cheese ball bites for easy serving.

How to Fix a Cheese Ball

Most cheese ball problems are easy to fix before the coating goes on. So, taste and adjust the filling first, then shape, chill, and roll it once the texture is right. If the recipe feels off after the ball is coated, the fix usually gets messier. Use the troubleshooting table as a quick check before the cheese ball goes on the platter.

Problem Why It Happened How to Fix It
Too soft Warm cream cheese, short chill, or wet add-ins Chill longer; if needed, mix in more shredded cheddar
Too firm Too much shredded cheese or very cold serving temperature Let it sit for 15 to 20 minutes before serving
Bland Not enough seasoning Add garlic powder, onion powder, Worcestershire, pepper, herbs, or sharper cheddar
Too salty Bacon, dried beef, ranch seasoning, or everything seasoning Add more cream cheese if possible and serve with unsalted crackers or vegetables
Coating falls off Outside too cold, dry, or loosely pressed Let the cheese ball soften slightly, then press the coating on gently
Nuts, pretzels, or crumbs get soft Coated too far ahead Roll in crunchy coatings closer to serving time
Lumpy filling Cream cheese was too cold Soften fully and beat smooth before adding cheddar
Watery filling Pineapple, pickles, or jalapeños were not drained enough Blot wet add-ins well, chill longer, and mix in more cheddar if needed
Troubleshooting guide for how to fix a cheese ball, showing a cut pecan-coated cheese ball with crackers and tips for fixing a cheese ball that is too soft, too firm, bland, too salty, lumpy, watery, or has coating that falls off.
Most cheese ball problems are easiest to fix before the coating goes on. Taste and adjust the filling first, then chill, shape, and roll it once the texture is right.

More Cheese Appetizers and Party Snacks

If you are building a larger party table, this chilled cheese ball can anchor the cold, creamy side while hot appetizers bring crunch. For more cheese-forward snacks, try MasalaMonk’s mozzarella sticks or Indian-inspired cheese balls. For a broader small-plates spread, add croquettes or build an Indian-inspired tapas night. Together, those options give the table contrast instead of making everything soft, cold, or cheese-heavy.

FAQs

What is a cheese ball made of?

A classic cheese ball is usually made with cream cheese, shredded cheese, seasonings, and an outer coating. In this recipe, cream cheese gives the ball structure, while sharp cheddar, green onion, Worcestershire sauce, garlic powder, onion powder, black pepper, and pecans add flavor and texture.

What cheese is best for a cheese ball?

Because sharp cheddar has strong flavor without making the recipe complicated, it is the best first choice. However, white cheddar, Colby Jack, pepper Jack, smoked gouda, blue cheese, or goat cheese can work if you want the cheese ball to taste milder, smokier, spicier, or tangier.

How long should a cheese ball chill?

At minimum, chill a cheese ball for 1 hour. However, 2 hours is better if you want a cleaner shape and easier coating. If you make it the night before, let it soften for 15 to 20 minutes before serving so crackers do not break as easily.

Can I make a cheese ball the night before?

Yes. For the freshest texture, shape and wrap the cheese ball the night before, then refrigerate it. After that, roll it in the coating closer to serving, especially if the coating includes bacon, pretzels, crackers, or herbs.

Can you freeze a cheese ball?

Yes, but freeze it before adding the coating. That way, the outside tastes fresher after thawing. Wrap the shaped cheese ball tightly, freeze it in a freezer-safe container, thaw it overnight in the refrigerator, and then roll it in a fresh coating before serving.

How long can a cheese ball sit out?

Because it is made with cream cheese and shredded cheese, a cheese ball should not sit out for more than 2 hours at room temperature. If the temperature is above 90°F / 32°C, keep that window to 1 hour. After that, refrigerate safe leftovers promptly or discard anything that has been sitting out too long.

What crackers are best for a cheese ball?

Because the cheese ball firms up in the fridge, sturdy crackers work better than very thin ones. Buttery crackers, wheat crackers, seeded crackers, pretzel crisps, pita chips, crostini, and baguette slices all work well. If the ball is still very firm, let it soften briefly or add a small spreading knife.

Can I make a cheese ball without nuts?

Yes. Instead of pecans or walnuts, use chopped herbs, bacon, crushed pretzels, crushed crackers, everything seasoning, sesame seeds, or toasted breadcrumbs. If allergies are a concern, keep the whole platter nut-free rather than using separate sections of the same board.

Do I need sour cream or mayo in a cheese ball?

No, not for a classic shaped cheese ball recipe. Sour cream and mayo can loosen the mixture, which makes the ball harder to shape. If you are making cheese ball dip, though, a small spoonful can help make the texture softer.

Why is my cheese ball too soft?

A cheese ball is usually too soft because the cream cheese was too warm, the mixture did not chill long enough, or there were too many wet add-ins. First, chill it longer. If it is still too loose, mix in more shredded cheddar before adding the coating.

Can I serve this as cheese ball dip?

Yes. If you want cheese ball dip, use slightly less cheddar for a softer texture, spoon the mixture into a shallow bowl, and add the coating on top instead of shaping it into a ball. This works especially well for casual parties where easy scooping matters more than presentation.

Is this the same as fried cheese balls?

No. This is a chilled cream cheese appetizer served with crackers and vegetables. Fried cheese balls are a different snack style, often made with potato, cheese, breadcrumbs, and frying or baking. So, if you want a hot crispy snack, use a fried cheese ball recipe instead.

Can I make mini cheese ball bites?

Yes. After the cheese mixture chills until firm, scoop it into 1-tablespoon portions, roll each one in coating, and add pretzel sticks right before serving. A full batch usually makes about 36 to 48 mini cheese ball bites.

A classic cheese ball recipe is simple, but the small details make it better. First, soften the cream cheese properly. Then, season the filling before shaping, chill it until firm, and add the coating at the right time. Once the base is right, you can keep it classic with pecans, make it festive with cranberries, turn it bold with bacon ranch, add old-school flavor with dried beef, or serve it as mini cheese ball bites for an easy party platter. In the end, the best version is the one that tastes good, spreads easily, and fits the way you are serving it.

Posted on 6 Comments

How to Make a Flax Egg (Recipe & Ratio for Vegan Baking)

Magazine-style cover for “How to Make a Flax Egg” showing the flax egg recipe and ratio for vegan baking, including 1–3 egg conversions, best uses for cookies, muffins, and pancakes, plus fixes if a flax egg won’t gel, with MasalaMonk.com in the footer.

You know the moment: you’re halfway through a cookie dough, you reach for the egg carton, and it’s empty. Alternatively, you’re baking for someone who avoids eggs—whether for vegan eating, allergies, or simply preference—and you want a solution that doesn’t feel like a compromise. That’s exactly where a flax egg comes in.

Once you learn how to make a flax egg, you’ll have a reliable, pantry-friendly answer for a huge range of recipes—especially the kind of everyday bakes most of us actually make: cookies, muffins, quick breads, pancakes, and waffles. Even better, it’s simple enough to memorize, yet flexible enough to scale for two eggs, three eggs, or more.

Ahead, you’ll get the classic flax egg ratio, easy flaxseed meal to egg conversion for bigger batches, and a few small adjustments that make the gel set reliably in real-world baking. You’ll also see what to use when you need a substitute for flax egg, plus when a different egg replacement makes more sense.


How to Make a Flax Egg (Step-by-Step)

At its core, a flax egg is just ground flaxseed mixed with water. After a short rest, it thickens into a gel. That gel helps bind ingredients together, which is why flaxseed is such a popular egg substitute in baking.

How to Make 1 Flax Egg (the classic flax egg recipe)

For one flax egg:

  • 1 tablespoon ground flaxseed (flax meal)
  • 3 tablespoons water
Photorealistic infographic showing how to make a flax egg: mix 1 tablespoon ground flaxseed with 3 tablespoons water, stir well, and rest 5–10 minutes until a glossy, spoonable gel forms. Includes flaxseed meal to egg conversion for 1, 2, and 3 eggs and notes best uses like cookies, muffins, quick breads, and pancakes.
How to make a flax egg at a glance: use the classic flax egg ratio (1 tbsp ground flaxseed + 3 tbsp water), rest 5–10 minutes until glossy and spoonable, then scale the same flaxseed meal to egg conversion for 2 or 3 eggs when you’re baking cookies, muffins, quick breads, or pancakes.

Stir them together until the mixture looks evenly combined. Then, set it aside for about 5–10 minutes. As it sits, it thickens into a gel-like texture. If it still looks watery after 10 minutes, jump to the troubleshooting section—usually it’s a grind or freshness issue, and it’s easy to fix.

The same simple method shows up in everyday baking advice for a reason: it works. If you’d like more practical ways to use ground flax—both as a flaxseed egg substitute and in everyday meals—see Benefits of Flax Seeds and How to Incorporate Them into the Indian Diet.

Now, if you’re thinking, “That’s it?”—yes, that’s basically it. However, the details matter, and those details are what separate “it sort of worked” from “I can swap this confidently.”

How to make a flax egg with ground flax (what actually matters)

Use ground flaxseed, not whole seeds. Whole flax often stays stubbornly seed-like, even after sitting, and the mixture won’t gel properly. Ground flaxseed (flax meal) hydrates more evenly, which is the whole point.

Vertical infographic titled “Flax Egg With Ground Flax (What Actually Matters)” showing a side-by-side comparison: whole flax seeds mixed with water labeled “weak gel” versus ground flax/flax meal mixed with water labeled “glossy gel,” with a spoon lift showing the gel texture. Three step cards explain: stir thoroughly so no dry pockets float on top, let it rest 5–10 minutes (cool kitchens need longer), and check texture—glossy and spoonable means ready. MasalaMonk.com footer.
If your flax egg won’t gel, the fix is usually simple: use ground flaxseed (flax meal), not whole seeds. This step-by-step guide shows the texture you’re aiming for—glossy and spoonable—plus the three things that actually matter in real baking: stir thoroughly, rest 5–10 minutes, and check the gel before adding it to your batter.

Ground flax is also the better pick nutritionally and practically, since whole seeds can pass through without breaking down much. Mayo Clinic explains why ground flax is generally preferred in Flaxseed: Is ground better than whole?.

Stir thoroughly. A quick swirl is rarely enough. Instead, stir until you don’t see dry pockets of flax floating on top.

Give it time. Some flax thickens in five minutes. Other batches need closer to ten, particularly if your kitchen is cool.

Check the texture. A ready flax egg should look glossy and slightly thick—somewhere between loose gel and a lightly thickened sauce. If it’s still watery, a couple quick tweaks usually thicken it up (see troubleshooting below).

Is a flax egg the right substitute for your recipe?

Now that you’ve got the flax egg ratio down, the next question is the one that actually saves batches: will it work in this recipe? The simplest way to decide is to think about what the egg was doing in the first place.

Photorealistic infographic titled “Is a Flax Egg Right for Your Recipe?” showing how to choose an egg substitute based on the egg’s job. It recommends a flax egg for binding and moisture (cookies, muffins, quick breads, pancakes), aquafaba or an egg-free recipe for lift/foam (sponge cakes, meringues), and a different strategy for emulsion or custard-style recipes (mayo, custardy desserts).
Not every egg substitute works the same way—this quick guide helps you decide when a flax egg substitute is the best choice for baking (binding + moisture), when aquafaba is better for lift and foam, and when you’ll want a different approach for emulsions or custard-style desserts.
  • Use a flax egg when the egg is mostly a binder. This is where flax shines: cookies, brownies, muffins, quick breads, pancakes, and waffles—recipes where you want the batter to hold together and stay pleasantly moist.
  • Skip flax when the egg is doing the heavy lifting for lift. If the recipe relies on whipped eggs or airy structure—think sponge cakes, angel-food style bakes, meringues, or anything “foam-based”—a seed gel won’t recreate that height.
  • Be cautious when the recipe calls for several eggs. Replacing one egg is usually straightforward. Replacing two can still work in sturdier bakes. However, once you’re replacing three or more, the texture can drift toward heavier and denser unless the recipe was designed for egg-free baking.
  • When in doubt, pick the more forgiving path. If you’re experimenting, start with cookie doughs and quick breads first. They’re easier to read and adjust, so you learn the “flax egg feel” without risking a fragile cake.

Also Read: Croquettes Recipe: One Master Method + 10 Popular Variations


Flax Egg Ratio (and the flax seed to egg ratio people actually use)

“Flax egg ratio” is one of the most common questions for a reason. Everyone wants a clean answer they can plug into any recipe.

So here it is:

  • 1 flax egg = 1 tablespoon ground flaxseed + 3 tablespoons water
Vertical infographic titled “Flax Egg Ratio” showing a tablespoon of ground flax, a small bowl of water, and a bowl labeled “Flax egg gel (flaxseed + water)” with a spoon lift. It states: 1 flax egg = 1 tbsp ground flax + 3 tbsp water, with steps “stir well, rest 5–10 minutes, ready when glossy and spoonable.” A quick scale table shows conversions for 2 eggs (2 tbsp flax + 6 tbsp water), 3 eggs (3 tbsp flax + 9 tbsp water), and 4 eggs (4 tbsp flax + 12 tbsp water). It notes “Best for: cookies, muffins, pancakes, brownies” and includes MasalaMonk.com branding.
Save this flax egg ratio for fast egg-free baking: 1 flax egg = 1 tablespoon ground flaxseed + 3 tablespoons water (rest until glossy and spoonable). The quick scale makes it easy to convert 2, 3, or 4 eggs in a recipe, and it’s most reliable in cookies, muffins, pancakes, and brownies where eggs are mainly binding.

That’s the standard flax seed egg substitute ratio you’ll see repeated across many reputable sources. Healthline, for example, describes using 1 tablespoon ground flaxseed (or chia) with 3 tablespoons water as a replacement for one egg in baking. You can see that ratio in the ground flax/chia section of 13 Effective Substitutes for Eggs.

Minimalist Baker also teaches the same basic approach for how to make flax eggs for baking—mix, rest, then use in place of one egg—while noting that it isn’t a perfect 1:1 match for every recipe. That nuance is important, and it’s explained well in this post here.

Even so, baking isn’t only about ratios; it’s also about what the recipe needs from the egg. That’s why, beyond the classic ratio, it helps to think about how “tight” or “loose” your flax egg should be.

A useful tweak: the “tight gel” vs “looser gel” approach

Most of the time, 1:3 works perfectly. Still, if you’re making something that already spreads easily—certain cookies, for example—you may prefer a slightly tighter gel. Meanwhile, for muffins and quick breads where moisture is welcome, the classic ratio is ideal.

Vertical infographic titled “Tight Gel vs Classic Gel” explaining flax egg consistency for baking. It shows three flax egg ratios: tight gel for cookies that spread (1 tbsp flax + 2½ tbsp water), classic gel for most baking (1 tbsp flax + 3 tbsp water), and a looser mix for very thick batter (1 tbsp flax + 3½ tbsp water). Includes texture cue “glossy, spoonable gel” and MasalaMonk.com branding.
If your flax egg substitute is throwing off cookie spread or batter thickness, adjust the water—not the whole recipe. Use the tight gel ratio for spread-prone cookies, stick with the classic flax egg ratio for most baking, and only loosen the mix when the batter is unusually thick. Aim for a glossy, spoonable gel every time.

You don’t need to overcomplicate this. Just remember the direction:

  • For spread-prone cookies, use a slightly tighter gel: 1 tablespoon flax meal + 2½ tablespoons water.
  • For muffins and quick breads, stick with the classic: 1 tablespoon flax meal + 3 tablespoons water.
  • If your batter is unusually thick, loosen it gently: 1 tablespoon flax meal + 3½ tablespoons water.

That small shift is often enough to reduce cookie spread or keep a loaf from feeling heavy. No matter which version you choose, the goal is the same: a cohesive, spoonable gel—never watery.

Also Read: Ravioli Recipe Reinvented: 5 Indian-Inspired Twists on the Italian Classic


Flaxseed Meal to Egg Conversion (1 egg, 2 eggs, 3 eggs)

Once you’re comfortable with one flax egg, scaling becomes easy. Because it’s linear, you can multiply it without a calculator.

Flaxseed meal to egg conversion: quick scale

  • For 1 egg: 1 tablespoon flax meal + 3 tablespoons water
  • For 2 eggs: 2 tablespoons flax meal + 6 tablespoons water
  • For 3 eggs: 3 tablespoons flax meal + 9 tablespoons water

This is the flax egg conversion you’ll rely on most.

Photorealistic infographic titled “Flaxseed Meal to Egg Conversion” showing flax egg ratios for baking: 1 egg = 1 tbsp ground flaxseed + 3 tbsp water, 2 eggs = 2 tbsp flax + 6 tbsp water, and 3 eggs = 3 tbsp flax + 9 tbsp water. Includes guidance on how many flax eggs to use before texture changes: 1 egg usually safe, 2 eggs often works in sturdy bakes, 3+ eggs may turn heavier/denser.
Scaling a flax egg substitute is simple: use the classic flax egg ratio (1 tbsp ground flaxseed + 3 tbsp water per egg) and multiply for 2 or 3 eggs. This conversion guide also shows when texture can shift—replacing 1 egg is usually easy, 2 often works in sturdy bakes, and 3+ eggs may turn heavier unless the recipe is designed to be egg-free.

However, there’s a practical caution: the more eggs you replace, the more your baked good may drift away from the original texture. King Arthur Baking is direct about this: some egg-heavy recipes simply won’t behave the same with substitutions, and even in everyday bakes, the results depend on what the eggs were doing in the original formula. Their breakdown in Guide for substituting eggs is a helpful reality check.

How many flax eggs can you use before texture changes?

Scaling the flaxseed meal to egg conversion is easy. Still, the results don’t always scale as neatly as the math. The more eggs you replace, the more likely the final texture shifts—especially in recipes where eggs were doing more than just binding.

Vertical infographic titled “How Many Flax Eggs Can You Use?” with a 1 vs 2 vs 3+ comparison before texture changes. It shows muffins on plates for each level: 1 flax egg is the sweet spot (usually blends in) supporting binding, moisture, and gentle structure; 2 flax eggs are often still OK (softer and more tender) best in sturdier bakes like muffins, snack loaves, and dense cookie doughs; 3+ flax eggs cause texture shifts (heavier or slightly gummy) especially in egg-forward recipes like tall cakes and airy bakes. A box suggests: choose egg-free recipes for structure, use aquafaba for whipped lift, and tofu for savory “egg” feel. “Seed gels bind — they don’t whip.” MasalaMonk.com footer.
Before you scale flax eggs, save this quick threshold guide. Replacing 1 egg with a flax egg is usually the sweet spot in cookies, muffins, quick breads, pancakes, and brownies. Two flax eggs often still work in sturdier bakes, but once you hit 3+ eggs, expect bigger texture changes—heavier or slightly gummy—because flax can bind and hold moisture, but it can’t replace lift and structure. For airy bakes, switch strategies (aquafaba for whipped lift, or choose an egg-free recipe built for that texture).
  • Replacing 1 egg: This is usually the sweet spot. In cookies, muffins, quick breads, pancakes, and brownies, one flax egg tends to blend in without drama.
  • Replacing 2 eggs: Often still successful in sturdier bakes, particularly muffins, snack cakes, and denser cookie doughs. The crumb may be a little more tender and moist, yet it should still feel “right” if the recipe isn’t egg-forward.
  • Replacing 3 eggs or more: This is where you’ll notice bigger changes. At that point, bakes can start to feel heavier or slightly gummy, not because flax is “bad,” but because it can’t replicate the lift and structure multiple eggs provide.

If a recipe calls for several eggs and the texture matters—think tall cakes or anything meant to be airy—your best bet is either choosing an egg-free recipe built for that style or switching to a different substitute that matches the job the eggs were doing.

Also Read: Oat Pancakes Recipe (Healthy Oatmeal Pancakes)


Using Flaxseed Instead of Eggs (what flax does well, and what it doesn’t)

The reason flax works as an egg substitute ground flaxseed method is simple: when hydrated, it becomes gel-like. That gel helps hold ingredients together and keeps moisture in the bake.

Vertical infographic titled “Using Flaxseed Instead of Eggs” with the subtitle “What flax does well — and what it doesn’t” and the line “Flax binds + moistens — it doesn’t whip.” It shows three photos: a bowl labeled “Binding + moisture,” a bowl of “Flax egg gel” with a spoon lift, and a cake slice labeled “Lift + airy structure.” Two cards explain: flax does well for binding, moisture retention, and gentle structure (best for cookies, muffins, quick breads, pancakes, brownies). Flax doesn’t do well for high lift/airy rise, whipped structure, or custardy set; use aquafaba for whipping, tofu for savory, or egg-free recipes built for that texture. MasalaMonk.com footer.
Using flaxseed instead of eggs works best when eggs are mainly acting as a binder. This quick guide shows the “egg jobs” flax can handle—binding and moisture retention—and what it can’t replicate, like airy lift, whipped structure, or a custardy set. When you need lift, switch to a better match (aquafaba for whipped bakes) or choose an egg-free recipe built for the texture you want.

Yet eggs are not just “one job.” Eggs can bind, emulsify, add moisture, contribute structure, and help with lift depending on the recipe. Consequently, no single substitute perfectly replaces every egg function in every context. Because of that, the best substitute changes from recipe to recipe. If you enjoy that practical way of thinking, Eater’s guide from vegan pastry chefs explains how to match substitutes to the job eggs were doing.

Now, here’s the practical translation:

  • Flax excels at binding and moisture
  • Flax is weaker at adding lift and airy structure

So, when you’re looking for a flaxseed egg substitute baking solution, flax is best in recipes where eggs are not the main source of volume.

Also Read: Keto Flour: Guide to Low-Carb Flours That Bakes Like the Real Thing


Baking With Flax Eggs (what works best, and why)

A flax egg can be surprisingly “invisible” in the right recipe. On the other hand, it can be noticeably dense or gummy in the wrong one. Let’s talk about where it usually performs beautifully.

Flax egg for cookies (one of the best use cases)

If you’re specifically wondering about a flax egg for cookies, you’re in luck. Cookies tend to benefit from binding and moisture; they don’t usually require eggs to create high lift.

Serious Eats tested multiple egg substitutes in cookies, muffins, and pancakes and found that flaxseed stood out particularly in cookies, delivering a chewy texture and a result that didn’t taste obviously “substituted.” That outcome is part of the testing roundup in Out of eggs? The best replacement might already be in your pantry.

Photorealistic vertical recipe-card infographic titled “Start Here: Flax Egg Cookies” showing chocolate chip cookies and a bowl of flax egg gel. It explains how to make 1 flax egg (1 tbsp ground flaxseed + 3 tbsp water, rest 5–10 minutes), use it in cookie dough, chill dough 20 minutes for better spread control, and bake until edges are set then cool on the tray. Includes tip: “spreading too much? try 2½ tbsp water” and MasalaMonk.com branding.
New to baking with flax eggs? Start with cookies—flax is an excellent egg substitute for binding and chew. Make 1 flax egg (1 tbsp ground flaxseed + 3 tbsp water), let it gel, then chill the dough briefly for better spread control. This quick guide shows the simplest way to get reliable flax egg cookies, plus a small tweak if your dough spreads too much.

If you want to see flax eggs at their best, start with cookies. In many doughs, the swap gives you a cohesive mix and a pleasantly chewy bite—without making the cookie taste “egg-free.” For a flexible base you can riff on, try Double Chocolate Chip Cookies Recipe – One Dough, 7 Ways and use a flax egg in place of one egg in the base dough.

As you bake cookies with flax eggs, a few patterns tend to show up:

  • The texture often leans chewier rather than ultra-crisp
  • The dough may feel slightly softer at first
  • The cookies can benefit from a brief rest so the flour hydrates

Instead of fighting those traits, work with them. If you want crispness, you can often adjust bake time, sugar ratios, or resting/chilling. Still, the easiest win is choosing cookie styles where chew is the goal.

Flax egg for muffins and quick breads (quietly reliable)

Muffins, banana-style quick breads, and snack loaves are where flax eggs often feel effortless. These bakes typically want moisture and cohesion, and flax provides both.

Vertical infographic titled “Flax Egg for Muffins & Quick Breads” with the subtitle “Quietly reliable — moisture + cohesion without drama.” It shows a bowl labeled “Flax egg gel” with a spoon, a plate with muffins (one cut open) labeled “Moist crumb,” and a bowl labeled “Muffin batter.” Three cards explain: why flax works (adds moisture, helps batter hold together, best when eggs aren’t the main lift); a batter check (if too thick add 1–2 tbsp milk or water, if too loose rest 5–10 minutes as flax hydrates); and a “quiet rule” (make the gel, watch the batter, adjust; mix just until flour disappears; bake until center is truly set). MasalaMonk.com footer.
Flax egg for muffins and quick breads is one of the easiest egg swaps because these bakes mainly need moisture and cohesion—not whipped lift. Use this batter-check guide right after mixing: if the batter feels too thick, add 1–2 tablespoons milk/water; if it feels loose, rest 5–10 minutes so the flax gel keeps hydrating. Then keep it simple—mix only until the flour disappears and bake until the center is truly set for a reliably tender, moist crumb.

Moreover, quick breads are usually forgiving. If your batter is slightly thicker than expected, you can add a splash of the recipe’s liquid. Conversely, if it’s looser, give it a minute—flax continues to hydrate, and batters often thicken slightly as they sit.

At this point, it’s worth repeating a helpful mindset: don’t treat flax eggs like a lab experiment. Make the gel, watch the batter, then adjust gently.

Flax egg for pancakes (and why timing matters)

Pancakes are another common destination for flax eggs. The gel helps bind, while the batter’s chemistry (baking powder or baking soda) still delivers lift. Even so, pancakes can swing from fluffy to dense depending on how they’re mixed and rested. So, if you’re using flaxseed instead of eggs, it helps to keep the batter calm:

  • Mix until just combined
  • Rest the batter briefly so the flour hydrates
  • Cook on a steady, medium heat
Vertical infographic titled “Flax Egg for Pancakes” with the subtitle “Timing matters — rest + gentle mixing = fluffy, not heavy.” It shows a bowl labeled “Flax egg gel,” a stack of pancakes with a slice removed labeled “Tender crumb,” and a bowl labeled “Pancake batter.” Three numbered cards say: 1) Mix just until combined (stop when flour disappears, lumps are OK; overmixing makes heavy pancakes). 2) Rest 8–10 minutes (flax hydrates and batter thickens slightly; leavening starts working; batter should be thick and pourable). 3) Cook on medium heat (wait for bubbles at edges; flip once, don’t press; steady heat gives better rise). Quick fixes note: too thick add 1–2 tbsp milk/water; too thin rest 5 minutes more. MasalaMonk.com footer.
Flax egg for pancakes works best when you treat it like a timing swap, not just an ingredient swap. Mix only until the flour disappears (lumps are fine), then rest the batter 8–10 minutes so the flax egg gel hydrates and the leavening starts working. Finally, cook on steady medium heat and flip once—no pressing—so you get a tender crumb that’s fluffy instead of heavy.

Once you’re comfortable swapping eggs in pancakes, it’s worth trying sturdier batters that benefit from extra binding. Millet-based pancakes, for instance, pair well with a flax egg because the gel helps the batter hold together while still cooking up tender. If you’d like a solid recipe to start with, make Healthy Millet Protein Packed Pancakes and replace the egg with a flax egg.

Flax eggs to real eggs (what to expect in texture)

Many people want flax eggs to behave exactly like eggs. Sometimes the match is close. Other times, the difference is obvious. Rather than promising perfection, it’s better to know what you’re trading.

Photorealistic infographic titled “Flax Eggs to Real Eggs (What to Expect in Texture)” comparing baking results. Left column shows flax egg outcome: more chewy and moist, less airy rise, and no custardy set. Right column shows real egg outcome: more crisp and light, more airy rise, and custardy set. Includes photos of muffins, cake, and custard-style desserts plus MasalaMonk.com branding.
A flax egg substitute doesn’t bake exactly like a real egg—and that’s okay once you know what to expect. This texture guide shows the most common differences: flax eggs tend to create a slightly chewier, moister crumb with less airy rise, while real eggs give lighter lift and can create a custardy set in certain desserts.

In general:

  • Flax eggs tend to give a slightly more tender, moist crumb
  • They can produce a bit more density than eggs in airy bakes
  • They rarely create the same “egg set” feel you get in custardy textures

Therefore, the best results come from using flax eggs in recipes where eggs are primarily binders, not the backbone.

Also Read: 10 Vegetarian And High Protein Meal Prep Ideas from Indian Cuisine


Flax eggs with different flours (why results vary)

Even with the right flax egg ratio, flour choice can change the outcome. That’s because some flours absorb more water, while others rely on extra binders for structure.

Photorealistic infographic titled “Flax Eggs with Different Flours (Quick Guide)” showing how flax eggs behave with common flours: all-purpose flour (most predictable), whole wheat or oat flour (heartier crumb), gluten-free blends (binder-heavy; replace 1 egg first and watch gumminess), and coconut flour (highly absorbent; best with recipes designed for it). Includes a bowl of flax egg gel and MasalaMonk.com branding.
Flax eggs don’t behave the same with every flour. Use this quick guide to choose the best flour match for a flax egg substitute—most predictable with all-purpose flour, a heartier crumb with whole wheat or oat flour, extra caution with binder-heavy gluten-free blends, and coconut flour only when the recipe is built for its high absorption.
  • All-purpose flour: Flax eggs are typically most predictable here, especially in cookies, muffins, and quick breads.
  • Whole wheat and oat flour: Expect a slightly heartier crumb. Flax usually still works well, yet you may notice a bit more density—especially if the recipe already leans “sturdy.”
  • Gluten-free blends: Many gluten-free mixes already include binders and starches. Adding flax can sometimes tip the texture toward heavier or a little gummy, so it’s smart to start by replacing only one egg and see how the batter behaves.
  • Coconut flour: This flour drinks liquid aggressively. A flax egg may not provide enough structure on its own, and the batter can swing from thick to dry quickly. For coconut-flour baking, you’ll usually get the best result from recipes designed specifically for that flour rather than trying a simple swap.

The takeaway is simple: when flours are highly absorbent or binder-heavy, flax eggs may need a lighter hand—or a recipe that’s already built for egg-free structure.

Also Read: Fish and Chips Reimagined: 5 Indian Twists (Recipe + Method)


Egg Substitute Ground Flaxseed: choosing the best flax meal (and why freshness matters)

A flax egg is easy, but the flax itself can make or break it.

Ground flax vs whole flax (and why it matters)

Ground flax hydrates quickly and forms the gel you need. Whole flax often doesn’t, at least not in a way that works as an egg replacer.

From a nutrition standpoint, Mayo Clinic recommends ground flax because it’s easier to digest; from a baking standpoint, ground flax is also what gives you reliable gelling. That point is covered succinctly in Flaxseed: Is ground better than whole?.

Storage is a real issue (because ground flax can go stale)

Ground flax has more exposed surface area, which means it can spoil faster than whole seeds. If your flax smells bitter, paint-like, or unpleasantly sharp, it’s not going to improve your cookies.

Photorealistic infographic titled “Store Flaxseed Meal for Better Flax Eggs” showing a jar and airtight container of ground flaxseed meal, a bowl of flax egg gel, measuring spoon, and cookies as a baking cue. It explains best storage (airtight container; fridge or freezer; keep away from heat and light), a freshness smell check (nutty/mild is good; bitter/paint-like/sharp means stale), and make-ahead flax egg tips (mix and let gel; cover and refrigerate; best used the same day). MasalaMonk.com branding.
Fresh flax makes a better flax egg substitute. Use this storage guide to keep ground flaxseed meal tasting clean and gelling reliably: store it airtight in the fridge (or freezer), use the quick smell test to spot stale flax, and if you prep a make-ahead flax egg, refrigerate it and use it the same day for the most consistent baking results—especially for cookies and quick breads.

Mayo Clinic Health System notes practical storage guidance for flaxseed meal—keeping it refrigerated in an airtight container to prevent spoiling—in Flaxseed is nutritionally powerful.

That’s not meant to scare you. It’s simply the difference between a flax egg that disappears into the bake and one that leaves a lingering bitter aftertaste.

Also Read: Dirty Martini Recipe (Classic, Extra Dirty, No Vermouth, Spicy, Blue Cheese, Tequila + Batched)


Flaxseed Egg Substitute Baking: why your results vary (and how to make them consistent)

If you’ve tried flax eggs once and felt underwhelmed, it usually comes down to one of three things:

  1. the flax didn’t gel properly
  2. the recipe needed lift rather than binding
  3. too many eggs were replaced in a recipe that depends on eggs for structure

Instead of guessing, you can diagnose your result and adjust.

Vertical infographic titled “Flax Egg Troubleshooting: Why results vary — and how to make them consistent.” It shows a bowl of glossy flax egg gel with a spoon lift, a measuring spoon of ground flax labeled “Ground flax (not whole),” and a plate with cookies and brownie pieces. A strip lists three causes: gel didn’t form, recipe needed lift, too many eggs replaced. Three cards provide fixes: “Won’t gel?” (use ground flax, rest 5–10 min, use fresh flax, add 1 tsp flax and rest again), “Turned gummy/heavy?” (too many eggs replaced, recipe needed lift, wet batters/other binders), and “Cookies spread too much?” (tighter gel 1 tbsp flax + 2½ tbsp water, chill dough 15–20 min, cool baking sheet, don’t over-cream). Footer reads MasalaMonk.com.
If flaxseed egg substitute baking ever goes sideways, this cheat sheet saves the batch. First, confirm you’re using ground flax (not whole seeds) and wait for a glossy, spoonable gel. Next, match the fix to the problem: thin gel usually needs more time (or fresher flax), gummy/heavy bakes often mean you replaced too many eggs or the recipe needed lift, and spreading cookies usually improve with a tighter flax egg ratio plus a short chill. Save this as your quick “diagnose → fix” guide for flax eggs.

If your flax egg won’t gel

This is common, yet fixable.

  • If you used whole seeds, grind them and try again.
  • If your flax is old, try a fresher bag.
  • If you didn’t wait long enough, give it a few more minutes.
  • If it’s still thin, stir in a little extra ground flax and rest again.

Even with the same flax egg ratio, the gel can vary depending on how finely the flax is ground. A finer meal thickens faster, while a coarser grind may need a little extra time to hydrate. If you’d like another baked example where flax swaps in smoothly, see Wholewheat Carrot Orange Tea Cake.

If your bake turned gummy

Gumminess often happens when flax is asked to do too much—especially when replacing multiple eggs or when the recipe already has other gel-formers (certain gluten-free blends, heavy starches, or very wet batters).

At that point, switching strategies is often wiser than forcing the swap. King Arthur’s substitution guide is helpful because it gives you multiple options and also explains when egg substitutions simply won’t deliver the intended results. That perspective is in Guide for substituting eggs.

Eater’s pastry-chef framing adds another layer: sometimes recipe reformulation makes more sense than substitution, because you can adjust leavening, acid, and structure intentionally rather than trying to mimic an egg in a context where eggs do too much. That discussion is in Of course you can bake without eggs. Vegan pastry chefs tell us how.

If your cookies spread too much

When cookies spread, most people assume they need more flour. Occasionally that’s true, although it’s not the only solution.

Instead, try these gentle adjustments:

  • Use a slightly tighter flax gel (a bit less water)
  • Chill the dough briefly
  • Ensure your baking sheet isn’t warm
  • Don’t over-cream fat and sugar if the recipe isn’t built for it

In other words, control the variables that affect spread before you start changing the recipe’s foundation.

Also Read: Keto Hot Chocolate Recipe (Sugar-Free Hot Cocoa) + Best Homemade Mix


Vegan Egg Substitute Flaxseed: when flax is the right choice—and when it isn’t

Flax is a strong vegan egg substitute because it’s easy, cheap, and consistent when used appropriately. Still, it isn’t the universal answer.

When flax is a great vegan egg substitute

Choose flax when the recipe needs:

  • binding
  • moisture retention
  • gentle structure

That’s why flax eggs are so popular for cookies, muffins, pancakes, and brownies.

Vertical infographic titled “Flax Egg: When It Works (And When It Doesn’t)” with the line “Seed gels bind — they don’t whip.” It shows three labeled bowls: flax egg gel, aquafaba (whips), and tofu (savory). Three cards explain: choose flax for binding, moisture retention, and gentle structure (best for cookies, muffins, pancakes, brownies); don’t choose flax for high lift/aeration, whipped structure, or custardy set; use aquafaba for lift and whipped texture, and tofu for savory egg-like scrambles. MasalaMonk.com footer.
Wondering when a flax egg is the right vegan egg substitute? Save this quick decision guide: flaxseed “eggs” are best when you need binding and moisture (cookies, muffins, pancakes, brownies), but they won’t create lift or whipped structure. For airy bakes, aquafaba is usually the better choice; for savory breakfast swaps, tofu gives a more satisfying egg-like texture.

When you should use a different egg substitute

Choose something else when the recipe needs:

  • high lift and aeration
  • whipped structure (like meringues)
  • a custardy set

If you want a fast way to remember this: seed gels bind, but they don’t whip.

When a recipe needs lift—think lighter cakes or anything that benefits from a whipped, airy structure—a seed gel won’t deliver the same result. In those cases, aquafaba (the liquid from cooked chickpeas or a can of chickpeas) is often the better option because it can be whipped and folded in like egg whites.

Flax eggs shine in baking-style mixtures—batters, doughs, and quick breads. On the other hand, if you’re craving a savory breakfast where you’d normally scramble eggs, tofu is usually the better choice because it can be seasoned and cooked into a satisfying egg-like texture. If you want ideas that go beyond baking, start with ‘Tofu’ Instead of ‘Eggs’: 5 High Protein Plant-Based Breakfast Ideas.

Also Read: Garlic & Paprika Cabbage Rolls (Keto-Friendly Recipes) – 5 Bold Savory Twists


Substitute for Flax Egg (when you don’t have flaxseed)

Eventually, you’ll run into the exact opposite problem: you want to bake egg-free, but the flax jar is empty. Luckily, you have options.

A close cousin: chia seed “egg”

Chia works in a similar way to flax because it gels when hydrated. However, it can behave differently in texture, sometimes creating denser or crunchier results depending on the recipe.

Serious Eats’ testing found chia produced denser outcomes in certain bakes compared to flax, which is a useful heads-up if you’re aiming for a soft crumb. That comparison appears in Out of eggs? The best replacement might already be in your pantry.

If you keep chia seeds around as well, they’re useful far beyond baking—think meal prep puddings, overnight oats, and quick add-ins for smoothies. For simple ideas that make chia easy to use week to week, check out The Power of Chia Seeds: 5 Plant-Based High-Protein Meal Prep Ideas.

Photorealistic infographic titled “Flax vs Chia vs Aquafaba” comparing vegan egg substitutes. It shows flax egg as best for binding and chew (cookies, muffins, quick breads), chia egg as best for binding with a slightly seedier texture (muffins, pancakes, hearty bakes), and aquafaba as best for lift and foam (airy cakes, meringue-style bakes). Includes a reminder to choose based on whether the recipe needs binding or lift and MasalaMonk.com branding.
Not sure what to use when you’re out of eggs—or when flax isn’t the best fit? This quick vegan egg substitute guide compares flax egg, chia egg, and aquafaba so you can choose the right egg replacement for baking: flax and chia for binding, and aquafaba when you need lift and foam.

When you’re not trying to be “neutral”: fruit purées and other options

Sometimes you don’t need an egg substitute that disappears. Instead, you want moisture + softness, and you’re totally fine if the swap brings a little personality with it. That’s where fruit purées shine.

Quick rule of thumb: what fruit purées actually replace

Fruit purées are best when the egg’s job is mostly moisture and tenderness, not lift. In other words, they can help keep bakes soft and cohesive, yet they won’t give you the same airy structure eggs can.

Fruit purées as egg replacements infographic showing applesauce, mashed banana, pumpkin purée, and yogurt-style substitute, plus when to use them for moisture and softness and when not to (lift, whipped structure, custardy set).
Out of eggs—or just not chasing “neutral”? This cheat-sheet shows when fruit purées make the best egg substitute (moisture + softness) and when they won’t work (lift, whipped structure, custardy set). Use it to choose between applesauce, banana, pumpkin purée, or a yogurt-style swap based on the bake you’re making.

Best picks (and what each one changes)

  • Applesauce: Mild flavor, adds moisture, keeps crumb tender. Great when you want the swap to stay relatively subtle.
  • Mashed banana: Stronger flavor and aroma, adds sweetness, can make bakes taste “banana-forward.” Use when that’s a plus.
  • Pumpkin purée: Moisture + gentle structure with a warm, earthy flavor. Works beautifully with spices, cocoa, and autumn-style bakes.
  • Yogurt-style substitutes: Creamy moisture and richness; tends to keep cakes and muffins soft. (If you’re keeping it vegan, use plant-based yogurt.)

Where they work best

Because they change flavor and sweetness, fruit purées are most reliable in bakes that welcome that shift: muffins, snack cakes, quick breads, brownies, pancakes, and spiced loaves.

On the other hand, if a recipe is meant to be light and airy—or the egg is doing major structure work—these swaps can turn the texture heavier than you wanted. In that case, flax egg, aquafaba, or an egg-free recipe designed for the result will usually be a better fit.

A practical alternative mindset: different substitutes for different “egg jobs”

Not every egg substitute behaves the same, so the best choice depends on the texture you’re trying to get. Sometimes they bind; other times they add moisture, help with lift, or create structure. That’s why one substitute can work beautifully in cookies yet fall flat in a sponge cake. If you like this recipe-by-recipe approach, Eater’s guide from vegan pastry chefs breaks down how to choose an egg substitute based on what the recipe actually needs.

How to Replace Egg With Flax (recipe-by-recipe instincts)

By now you know the method. Next, you want confidence. This section is about building instincts so you can look at a recipe and know whether flax is likely to work.

Cookies: usually yes

If the recipe calls for one egg in a batch of cookies, flax is usually a safe bet. If it calls for multiple eggs, you can still try, but your texture may drift more.

For a cookie recipe that’s easy to adapt, try Double Chocolate Chip Cookies Recipe – One Dough, 7 Ways. It’s a great place to swap in a flax egg because the dough is sturdy, forgiving, and designed for variations—so you can focus on texture and bake time without stressing about the structure.

Vertical “Cookie Swap Guide” infographic titled “Flax Egg in Cookies (Usually Yes)” with photorealistic chocolate chip cookies, a bowl of flax gel, and measuring spoons. It includes: Quick Flax Egg (1 tbsp ground flaxseed + 3 tbsp water; rest 5–10 minutes), Quick Batch Cookies recipe for 8 cookies (flour 1 cup, sugar 1/2 cup, butter/oil 1/3 cup, baking soda 1/2 tsp + salt, chips 1/2 cup; bake 10–12 min at 180°C/350°F), and 3 pro fixes for spreading, crisp edges, and cakey cookies. MasalaMonk.com footer.
This cookie swap guide makes baking with a flax egg simple: use the classic flax egg ratio (1 tbsp ground flaxseed + 3 tbsp water), then follow the quick 8-cookie mini recipe and the three pro fixes for common problems—spreading dough, soft cookies, or a cakey texture. Save it for the next time you need an egg substitute for cookies.

Muffins and quick breads: often yes

These bakes are where flax eggs feel effortless—especially when replacing one or two eggs. Because the recipe already contains baking powder or baking soda, you’re not depending on eggs for lift.

Vertical infographic titled “Flax Egg in Muffins & Quick Breads” labeled “Often Yes” with photoreal images of a blueberry muffin, sliced quick bread, and a bowl labeled “Flax egg gel (flaxseed + water).” It lists the flax egg ratio for 1 egg (1 tbsp ground flax + 3 tbsp water; rest 5–10 minutes until glossy), plus tips to mix gently until flour disappears and bake until the center is fully set. It notes best uses (banana bread, snack loaves, muffins) and says to use 1 flax egg per egg in most muffins and quick breads. MasalaMonk.com footer.
This “often yes” guide makes it easy to use a flax egg in muffins and quick breads. Follow the classic flax egg ratio (1 tbsp ground flaxseed + 3 tbsp water, rest until glossy), then mix gently and bake until the center is fully set. It’s a reliable egg substitute for banana bread, snack loaves, and muffins when eggs are mainly binding—not the main source of lift.

Pancakes: frequently yes, but mixing matters

Pancakes can be forgiving, although they’re sensitive to overmixing and batter thickness. If your pancakes feel heavy, rest the batter briefly and cook on steady heat.

Vertical infographic titled “Flax Egg in Pancakes” with a “Frequently Yes” label and photoreal stack of pancakes with butter and syrup. A bowl labeled “Flax egg gel (flaxseed + water)” sits beside the pancakes. The graphic lists the flax egg ratio (1 tbsp flax + 3 tbsp water) and three tips: mix until just combined (don’t overmix), rest batter 5–10 minutes for hydration and better texture, and cook on steady medium heat for an even set. It adds: if heavy, thin with 1–2 tbsp milk/water only if batter is too thick. MasalaMonk.com branding.
This flax egg pancake guide makes the swap easy: use the classic flax egg ratio (1 tbsp ground flaxseed + 3 tbsp water), then keep the batter gentle—mix just until combined, rest 5–10 minutes for better texture, and cook on steady medium heat for an even set. If pancakes feel heavy, thin the batter only slightly if it’s truly too thick.

If you want to try the flax-egg swap in a sturdier batter, Healthy Millet Protein Packed Pancakes is a satisfying option—the flax gel helps the pancakes hold together while keeping the inside tender.

Egg-heavy bakes: proceed carefully

Soufflés, quiche-like bakes, or anything where eggs are the main structure will not behave like the original with flax. This is exactly the limitation King Arthur points out in Guide for substituting eggs.

Vertical infographic titled “Can You Use a Flax Egg Here? (Quick Ranking)” with three sections: YES (Best) listing cookies, muffins/quick breads, pancakes, and brownies; MAYBE (Depends) listing moist snack cakes, waffles, and some brownies (1–2 eggs max); and NO (Avoid) listing sponge cake, soufflé, meringue, custards, and quiche-like bakes, noting “eggs are the structure.” Includes photoreal food images for each category and MasalaMonk.com branding.
Not every recipe wants the same thing from an egg. Use this flax egg ranking guide to choose the right swap fast: flax eggs work best as a binder in cookies, muffins/quick breads, pancakes, and brownies; they’re “maybe” for some moist cakes and waffles; and they’re not a good match for egg-structured bakes like sponge cake, soufflé, meringue, custards, or quiche-style recipes.

Instead of forcing a flax swap, choose an egg-free recipe that’s built for that texture.

Also Read: Crock Pot Chicken Breast Recipes: 10 Easy Slow Cooker Dinners (Juicy Every Time)


Flax meal as egg substitute: small upgrades that make a big difference

A flax egg is already simple. Still, a few small upgrades can make it more consistent, especially if you bake egg-free regularly.

Vertical infographic titled “Flax Egg Upgrades” showing a jar of ground flaxseed meal, a bowl of flax egg gel with a spoon, a timer, and measuring spoons on a clean background. Three tip cards explain: mix the flax egg first while prepping ingredients, use room-temperature water so it gels consistently, and don’t replace more eggs than needed (1–2 eggs is easiest; 3+ can turn heavy). Includes the reminder “Choose egg-free recipes built for the texture you want” and MasalaMonk.com branding.
These flax egg upgrades make baking with flax eggs more consistent: mix the flax egg first (so it has time to gel), use room-temperature water for a reliable set, and avoid replacing too many eggs in egg-heavy recipes. When you need a dependable egg substitute, these small tweaks help your muffins, quick breads, pancakes, and cookies turn out closer to what you expect.

Mix flax eggs first, then start your recipe

This is the easiest improvement. Make your flax and water mixture, stir, then set it aside. While it gels, measure your dry ingredients, prep your pan, and set up your mixing bowl.

By the time you’re ready to mix, the flax egg will be ready too. As a result, you’re not rushing or guessing.

Use room-temperature water (or at least not ice-cold)

Cold water can slow down gelling. Room-temperature water helps the gel form more consistently.

Don’t replace more eggs than you need to

If your goal is to avoid eggs entirely, flax eggs can get you far. Still, replacing three or four eggs in a recipe designed around eggs can lead to dense results. At that point, switching to a recipe designed to be egg-free is often the cleaner path.

Sometimes the best move is choosing an egg-free recipe built for the texture you want rather than forcing a swap into a formula that depends heavily on eggs. If you like this recipe-first approach, Eater’s guide explains why it often works better.

Also Read: Eggless Yorkshire Pudding (No Milk) Recipe


A short detour: flax beyond baking (because many people use it both ways)

Interestingly, ground flax tends to earn a permanent spot in the kitchen once you start baking with it. Beyond flax eggs, you can stir a spoonful into oats, blend it into smoothies, or mix it into yogurt bowls for an easy boost—without changing the flavor much. If you’d like more everyday ideas, Benefits of Flax Seeds and How to Incorporate Them into the Indian Diet walks through simple, practical ways to use flax regularly. Also, if you’re aiming for meals that are higher in protein and fiber, flax fits nicely into that routine too—How Does a High Protein, High Fiber Diet Support Weight Loss? explains why that combination can be helpful and where ingredients like seeds come in.


Troubleshooting: common flax egg problems and fixes

Even good bakers occasionally get weird results with flax eggs. Fortunately, the fixes are usually simple.

“My flax egg didn’t thicken”

Start with the obvious:

  • Was the flax ground?
  • Was it fresh enough to smell pleasantly nutty?
  • Did it sit long enough?
Vertical troubleshooting infographic titled “My Flax Egg Didn’t Thicken? Fix It Fast” showing a side-by-side comparison of a thin, watery flax and water mixture versus a proper glossy flax egg gel. A checklist explains quick fixes: use ground flax (not whole), wait 5–10 minutes, use fresh flax that smells mild/nutty, and if still thin add a pinch more flax and rest again. MasalaMonk.com branding.
If your flax egg won’t gel, you don’t need to scrap the bake—use this quick troubleshooting checklist. It shows the texture you’re aiming for (glossy, spoonable gel) and the fastest fixes: ground flaxseed, enough rest time, fresh flax meal, and a small pinch more flax if the mixture stays thin.

If everything looks right and it still seems thin, stir again and wait a little longer. If it remains watery, add a small pinch more flax meal and rest again.

Even when you follow the standard flax egg ratio, the gel can vary depending on how finely the flax is ground. A finer meal thickens faster, whereas a coarser grind may need a little more time to hydrate fully. For another egg-swap example that uses flax in a baked recipe, see Wholewheat Carrot Orange Tea Cake.

“My bake turned dense”

Density usually means the recipe needed lift, or the eggs were doing more structure work than flax can replicate.

Vertical infographic titled “My Bake Turned Dense? Here’s Why” showing a comparison of dense crumb versus lighter crumb muffins, with a bowl of flax gel in the background. It explains the likely cause: the recipe needed lift/structure more than binding. It lists fast fixes: don’t replace 3+ eggs, don’t overmix, and bake until fully set. It also suggests switching strategy when needed by using a lift-friendly substitute or choosing an egg-free recipe designed for that texture. MasalaMonk.com branding.
If your flax egg bake turned out dense, the problem is usually lift—not the flax egg ratio. This troubleshooting guide shows what’s happening (the recipe needed more structure than a binder can provide), the three fastest fixes (avoid replacing 3+ eggs, don’t overmix, bake until fully set), and when it’s smarter to switch to a lift-friendly substitute or an egg-free recipe built for a lighter crumb.

In that case, your best move is to choose a different substitute based on what the bake needs. King Arthur’s guide is useful for this because it outlines multiple options and also explains the limits of substitutions in egg-forward bakes. That’s in Guide for substituting eggs.

“My muffins are sinking”

If your muffins rise, then collapse as they cool, it’s usually not the flax egg alone. More often, the batter was either too wet or overmixed, so it couldn’t hold the structure once steam escaped.

Vertical troubleshooting infographic titled “My Muffins Are Sinking? Fix It Fast” showing a side-by-side comparison of a muffin with a sunken center versus a stable domed top, with a bowl of flax gel behind. It explains the most common cause (too wet or overmixed so the structure can’t hold once steam escapes) and lists fixes: use the classic flax gel (1 tbsp ground flaxseed + 3 tbsp water), mix only until flour disappears, and bake until the center is fully set. It adds that repeated sinking can mean the recipe relies on egg structure and an egg-free muffin recipe may work better. MasalaMonk.com branding.
If your flax-egg muffins rise and then collapse, it’s usually a batter and bake issue—not the flax egg itself. Use this quick fix guide: stick to the classic flax egg ratio, mix only until the flour disappears, and bake until the center is truly set. If sinking keeps happening, the recipe may rely more on egg structure than it seems, so an egg-free muffin recipe built for that texture can be the smarter move.

Start with these fixes:

  • Use the classic gel (1 tablespoon flax + 3 tablespoons water) instead of a looser mix, especially for fruity or very moist batters.
  • Mix only until the flour disappears—overmixing makes muffins tunnel and weaken.
  • Bake until the center is truly set. If the tops look done but the middles feel soft, give them a few more minutes; flax-based batters often need that “fully set” finish.

If sinking keeps happening, it’s a sign the recipe depends more on egg structure than it seems. In that case, an egg-free muffin recipe (built for the texture) often performs better than forcing a swap.

“My cookies came out soft when I wanted crisp”

Flax tends to hold moisture. So, rather than blaming the flax, adjust the cookie strategy:

  • bake a little longer (without burning)
  • cool fully on the tray before moving
  • aim for cookie recipes designed for crispness if that’s your priority
Vertical troubleshooting infographic titled “My Cookies Came Out Soft When I Wanted Crisp” showing two cookie textures labeled Soft/Chewy and Crisper, with a bowl of flax gel in the background. A ranked checklist says: (1) bake 1–2 minutes longer and cool fully on the tray, (2) control moisture by using a tighter flax gel if needed and not adding extra liquid, and (3) choose a crisp-style cookie recipe for ultra-crisp results. MasalaMonk.com branding.
Flax eggs hold moisture, so egg-free cookies often lean chewy unless you manage bake time and cooling. Use this step-by-step crispness fix guide: bake 1–2 minutes longer, cool fully on the tray, control moisture with a tighter flax gel (if needed), and choose crisp-style cookie recipes when you want true crunch.

If crispness is a must, you can still bake egg-free; it just may not be flax’s strongest lane.

“My cookies are too cakey”

Cakey cookies are usually a moisture-and-mix issue. Flax holds moisture, so if the dough is already soft, the final texture can tilt more “puffy” than “chewy.”

Vertical troubleshooting infographic titled “My Cookies Are Too Cakey” comparing a puffy/cakey cookie versus a flatter, chewier cookie. It provides a ranked fix list: (1) use a tighter flax gel by reducing water slightly, (2) chill the dough so it spreads predictably and bakes denser, and (3) stop mixing early to avoid a cake-like crumb. A note adds: if aiming for crisp cookies, use crisp-style recipes. MasalaMonk.com branding.
If your flax-egg cookies are turning puffy and cakey, it’s usually a moisture + mixing issue. Use this quick fix order: tighten the flax gel (slightly less water), chill the dough for more predictable spread, and stop mixing as soon as everything comes together. You’ll get a denser, chewier cookie texture without rewriting the whole recipe.

Try these small changes before you rewrite the recipe:

  • Use a slightly tighter flax gel (a little less water) so you’re not adding extra moisture.
  • Chill the dough briefly; colder dough spreads more predictably and bakes up denser rather than cakey.
  • Stop mixing as soon as everything comes together—overmixing encourages a more cake-like crumb.

If you’re aiming for crisp cookies, flax can still work, but it’s easier with cookie styles that are already designed for crispness rather than softness.

“The flavor feels off”

To keep flax meal tasting fresh, store it airtight in the fridge (or freezer if you use it slowly). Mayo Clinic Health System covers simple storage tips in Flaxseed is nutritionally powerful.

Vertical troubleshooting infographic titled “The Flavor Feels Off? Fix It Fast” showing a jar of ground flaxseed meal, a bowl of flax gel with a spoon, and an airtight container on a light background. It explains a quick smell test: GOOD flax smells mild/nutty, while STALE flax smells bitter/sharp/paint-like. It advises to replace stale flax and store flax meal airtight in the fridge or freezer for cleaner flavor and better gelling. MasalaMonk.com branding.
If your flax egg tastes bitter or “off,” it’s usually stale flaxseed meal. Use this quick smell test: fresh flax smells mild and nutty, while stale flax can smell sharp or paint-like. The fix is simple—replace the flax and store flax meal airtight in the fridge (or freezer) so your flax egg gels better and your baking tastes clean.

Sometimes, the fix is simply buying a fresh bag.

Also Read: Sourdough Starter Recipe: Make, Feed, Store & Fix Your Starter (Beginner Guide)


Bringing it all together: a simple, confident flax egg approach

If you want one clean routine you can follow every time, do this:

  1. Use ground flaxseed (flax meal)
  2. Mix 1 tablespoon flax meal with 3 tablespoons water for one egg
  3. Rest 5–10 minutes until gel-like
  4. Use it as your egg replacement in batter-based baking

Then, as you gain confidence, add the two “pro instincts”:

  • If the batter is already very loose, use a slightly tighter gel
  • If the recipe relies heavily on eggs for lift or structure, choose a different substitute or an egg-free recipe

That’s it. No drama, no panic, no wasted batch.

If you want flax eggs to feel effortless, use them in recipes you’ll repeat. Cookies are a straightforward place to begin—try Double Chocolate Chip Cookies Recipe – One Dough, 7 Ways for an easy batch that welcomes substitutions. For everyday, non-baking ways to use ground flax, Benefits of Flax Seeds and How to Incorporate Them into the Indian Diet is full of practical ideas. Then, whenever you want a savory, egg-free breakfast, ‘Tofu’ Instead of ‘Eggs’: 5 High Protein Plant-Based Breakfast Ideas is a great option.

Once you bake with flax eggs a few times, it stops feeling like a workaround. Instead, it just becomes another dependable method—one you can reach for whenever you need an egg substitute, whether it’s a single egg replacement or a batch conversion for two eggs or three.

Also Read: 19 Essential Kitchen Tools That Make Cooking Easier

Photorealistic infographic titled “Flax Egg Cheat Sheet (No-Fail Method)” showing the flax egg ratio: 1 tablespoon ground flaxseed plus 3 tablespoons water equals 1 egg, resting 5–10 minutes until a glossy, spoonable gel. It lists best uses (cookies, muffins, quick breads, pancakes), not-ideal uses (sponge cakes, meringues), a cookie spread tweak (2½ tbsp water), quick scale for 2 and 3 eggs, and a storage tip to keep ground flax airtight in the fridge. MasalaMonk.com branding.
Save this flax egg cheat sheet for fast, consistent baking: use the classic flax egg ratio (1 tbsp ground flaxseed + 3 tbsp water), let it gel until glossy and spoonable, then scale for 2–3 eggs when needed. It also shows where a flax egg substitute works best (cookies, muffins, quick breads, pancakes), when to avoid it for lift-heavy bakes, and a quick tweak if cookie dough spreads too much.

FAQs

1) How do I make a flax egg?

Combine 1 tablespoon ground flaxseed (flax meal) with 3 tablespoons water, stir well, and let it sit until it thickens into a gel—usually 5 to 10 minutes. Once it looks glossy and spoonable, use it right away as your egg replacement in baking.

2) How to make a flax egg with ground flaxseed (step-by-step)?

First, add ground flaxseed to a small bowl. Next, pour in water and whisk until no dry pockets remain. Then, rest the mixture briefly so it can gel. Finally, stir once more and add it to your batter where the egg would normally go.

3) What is the flax egg ratio for 1 egg?

The most common flax egg ratio for 1 egg is 1 tablespoon ground flaxseed to 3 tablespoons water. That’s the standard flax seed to egg ratio most bakers use for muffins, quick breads, pancakes, and many cookie recipes.

4) What is the flax egg ratio for 2 eggs?

For two eggs, double the base ratio: 2 tablespoons ground flaxseed plus 6 tablespoons water. After mixing, allow enough time for the gel to develop before adding it to the bowl with your other wet ingredients.

5) How do I make 3 flax eggs (or more) for a bigger batch?

Scale the flaxseed meal to egg conversion by multiplying the standard ratio. In other words, for three eggs, use 3 tablespoons ground flaxseed with 9 tablespoons water. For larger batches, mix thoroughly and give it a slightly longer rest so the gel thickens evenly.

6) How much flaxseed for egg substitute in baking if I’m using flax meal?

Use 1 tablespoon flax meal per egg, paired with 3 tablespoons water. Even so, if your batter is already very loose, slightly less water can help the texture stay balanced rather than overly soft.

7) Can I use whole flax seeds instead of ground flaxseed for an egg substitute?

Whole seeds usually don’t gel the same way because the water can’t fully hydrate the interior. Therefore, for the most reliable flaxseed egg replacement, use ground flaxseed or flax meal, not whole seeds.

8) My flax egg won’t gel—what should I do?

Start by waiting a few extra minutes, because some flax takes longer to hydrate. If it still looks watery, stir again and add a small pinch more ground flaxseed, then rest it a second time. Additionally, very old flax meal can perform poorly, so freshness matters more than people expect.

9) Can I make a flax egg ahead of time?

Yes, you can make a flax egg shortly ahead—often 30 to 60 minutes is fine—then cover and refrigerate it. However, for best consistency, many bakers prefer mixing it fresh right before baking, since the gel can thicken more as it sits.

10) How do I use flaxseed instead of eggs in recipes—do I add it with wet or dry ingredients?

Typically, add the prepared flax and water mixture with the wet ingredients. That way, it disperses smoothly and doesn’t clump. Meanwhile, keep the dry mix unchanged unless your batter looks noticeably too thick or too thin once everything is combined.

11) Is flaxseed meal to egg conversion always a 1:1 swap?

It’s a 1:1 swap in quantity (one flax egg replaces one egg), yet it’s not always a perfect swap in function. Since flax acts mainly as a binder and moisture holder, it works best when eggs aren’t the primary source of lift or structure.

12) When is a flax egg substitute for baking the best choice?

Flax eggs usually work best in cookies, brownies, muffins, quick breads, pancakes, and waffles—basically, recipes where binding matters more than a lofty rise. As a result, they’re a favorite vegan egg substitute for everyday baking.

13) Does a flax egg work for cookies?

Yes, a flax egg for cookies is often a strong match, especially for chewy styles. Still, if you want a very crisp cookie, you may need to tweak bake time or choose a cookie recipe designed to crisp up without relying on eggs.

14) Can I use flaxseed instead of eggs in cakes?

Sometimes, yes—particularly in moist, oil-based cakes and snack cakes. Nonetheless, in very airy sponge-style cakes, eggs provide lift that flax can’t replicate, so the result may be denser than the original.

15) What’s the difference between ground flax as egg substitute and chia as egg substitute?

Both form a gel with water, so both can replace eggs as binders. However, chia can feel slightly more “seedy” in texture depending on grind and soak time, whereas flax meal tends to blend in more smoothly.

16) What is a good substitute for flax egg if I don’t have flaxseed?

If you’re out of flax, you can often use a chia “egg” (chia seeds + water) as a close alternative. Otherwise, options like applesauce, mashed banana, yogurt-style substitutes, or commercial egg replacers can work depending on the recipe and whether you’re aiming for a vegan substitute.

17) How do I substitute flax for eggs without making the batter gummy?

Avoid replacing too many eggs in recipes that depend heavily on eggs for structure. Also, measure carefully, allow the gel to form, and don’t overmix the batter. If gumminess keeps happening, try a different egg replacement better suited to the recipe style.

18) Can I use flax eggs in gluten-free baking?

You can, although results vary because gluten-free batters often already rely on binders and starches. Consequently, flax may make some gluten-free bakes feel heavier. In that case, using a smaller amount, improving leavening, or choosing a different egg substitute can help.

19) Is flax seed as egg substitute the same as egg replacement flaxseed meal?

They’re used similarly, yet flaxseed meal (ground flaxseed) is the form that works most reliably for a flaxseed egg substitute baking method. Whole flax seeds can work only if they’re finely ground first.

20) How many flax eggs can I use in one recipe?

It depends on the recipe. Replacing one egg is usually straightforward; replacing two often works in muffins and cookies; replacing three or more can noticeably change texture, especially in cakes. If the original recipe is very egg-forward, consider an alternative to flax egg or an egg-free recipe built for that outcome.