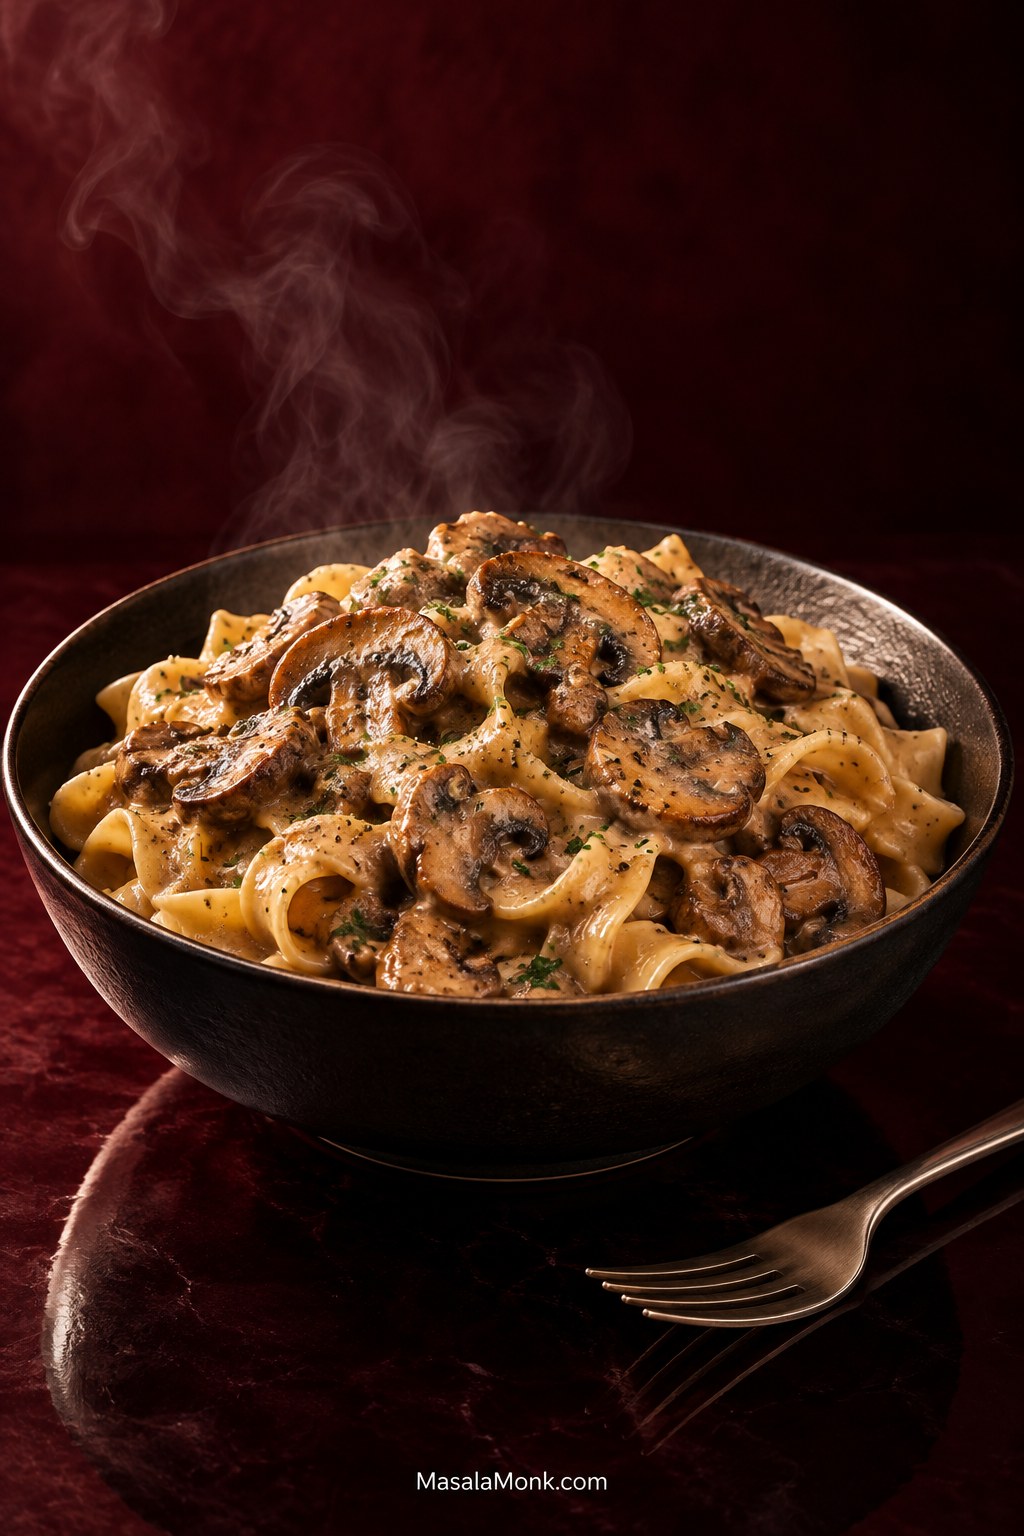
A good mushroom stroganoff recipe gets wetter before it gets better. Halfway through browning, the skillet can suddenly fill with mushroom water and look as though everything has gone wrong. It hasn’t. Keep cooking and the puddle disappears, the sharper frying sound comes back, and gray mushrooms begin picking up browned edges.
The goal is a mushroom-heavy stroganoff with browned pieces and silky sauce clinging to the noodles instead of pooling underneath them. It takes about 40–50 minutes for four servings, with most of the attention going to one worthwhile stage: letting the mushrooms cook through the water they release before the sauce begins.
This is the meatless counterpart to Beef Stroganoff, but the sauce still needs plenty of savory depth before the sour cream arrives. Wine, Dijon, tomato paste and a small umami boost do most of that work; the sour cream gives the finished sauce its familiar tang.
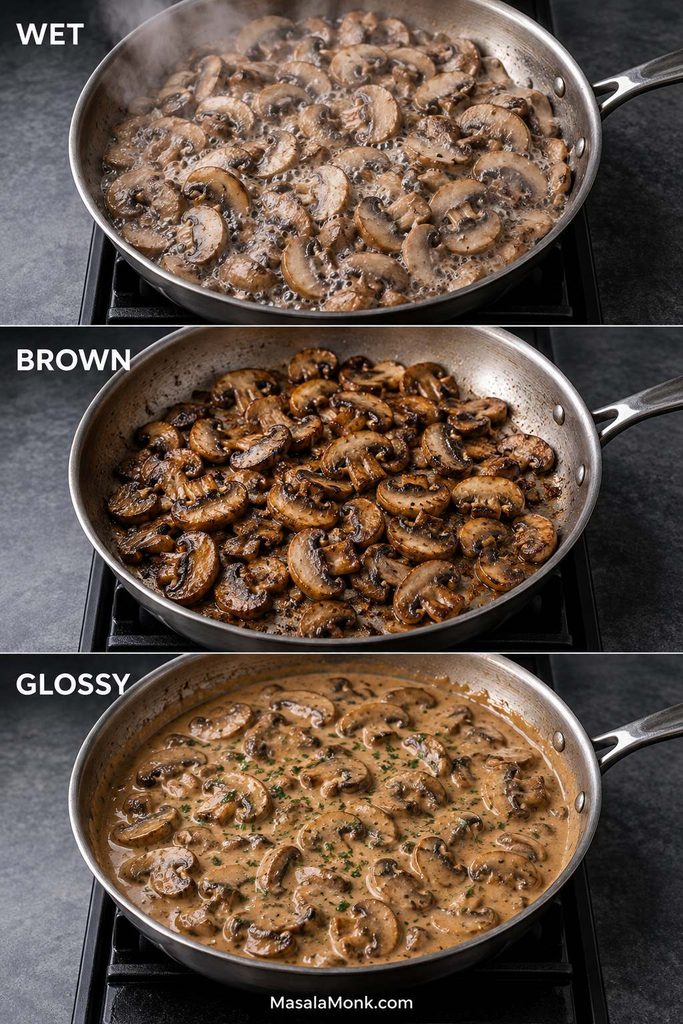
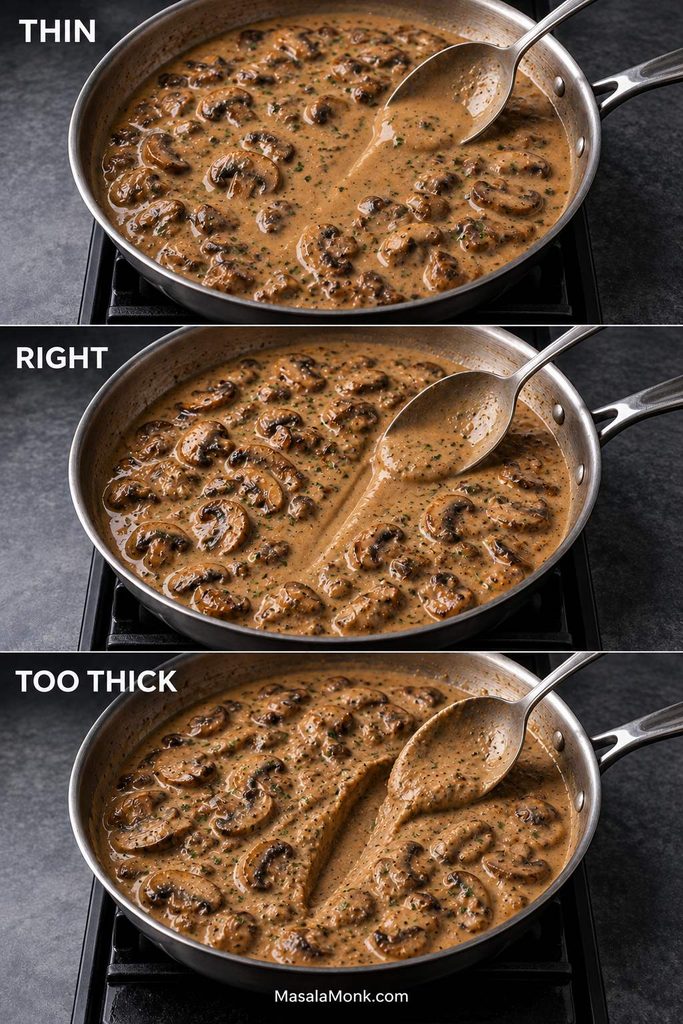
Quick answer: to know when mushroom stroganoff is going right, read the skillet as Wet → Brown → Glossy.
WET
The mushrooms have released water. Keep cooking; the sauce comes later.
BROWN
The water has mostly gone, frying resumes and real brown patches appear.
GLOSSY
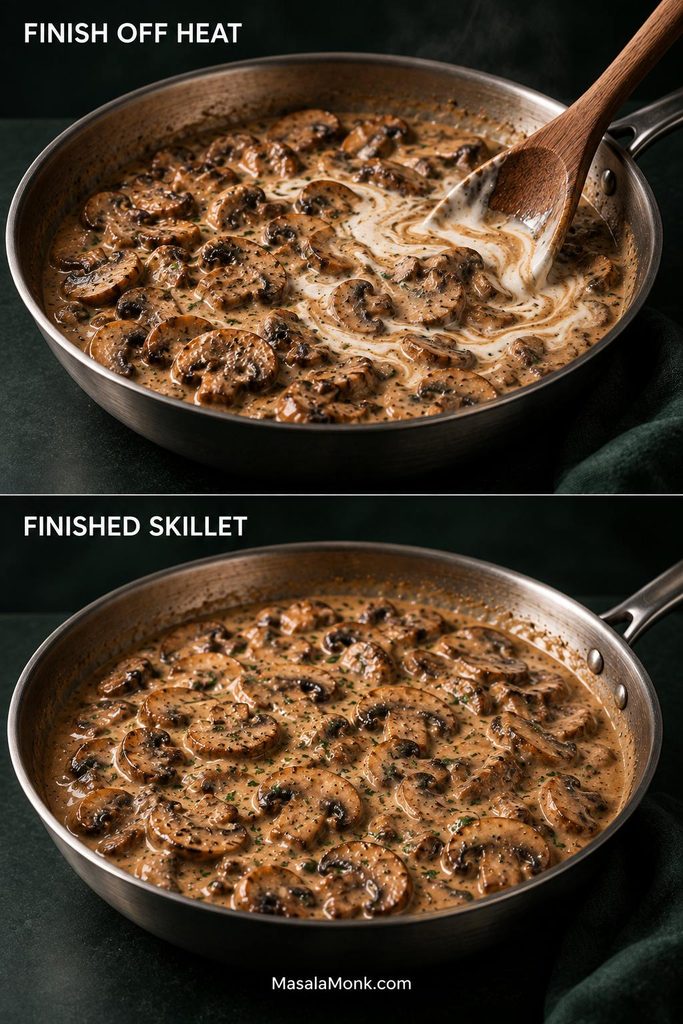
The sauce coats a spoon but still flows. Return the mushrooms and finish with sour cream off heat.
Mushroom Stroganoff Recipe
This recipe uses 20 oz / 570 g mushrooms for four servings, enough sauce to coat the noodles, and a little broth held back so you can loosen the sauce only if it needs it.
Serves
4
Prep
About 10–15 minutes
Cook
About 30–35 minutes
Total
About 40–50 minutes
Mushrooms
20 oz / 570 g
Main pan
12-inch / 30-cm wide skillet or sauté pan
Ingredients
20 oz / 570 g mushroomsUse cremini, brown or chestnut mushrooms, or replace up to about 6 oz / 170 g with shiitake or oyster mushrooms.
1 tbsp / 15 ml olive or neutral oil, divided
2 tbsp / 28 g / 1 oz butter, divided
1 medium yellow onion or 2 large shallots, about 5 oz / 140 g, finely chopped
3 garlic cloves, finely minced
1 tbsp tomato paste
½ cup / 4 fl oz / 120 ml dry white wineFor strict vegetarian or vegan cooking, use suitably labeled wine or replace it with broth.
2 tbsp / about 16 g all-purpose flour
1¼ cups / 10 fl oz / 300 ml low-sodium vegetable or mushroom brothFor the no-wine version, have 1¾ cups / 14 fl oz / 420 ml broth total available.
2 tsp Dijon mustard
2 tsp / 10 ml soy sauce, tamari or vegetarian Worcestershire sauceChoose one.
1 tsp sweet paprika
½ tsp dried thyme or 1–1½ tsp fresh thyme leaves
½ tsp fine salt for the mushrooms, plus more for the pasta water and final seasoning
½ tsp freshly ground black pepper, plus more to finish
½ cup / about 120 g full-fat sour cream
10 oz / about 280 g wide egg noodles
2 tbsp chopped parsley or dill, to finish
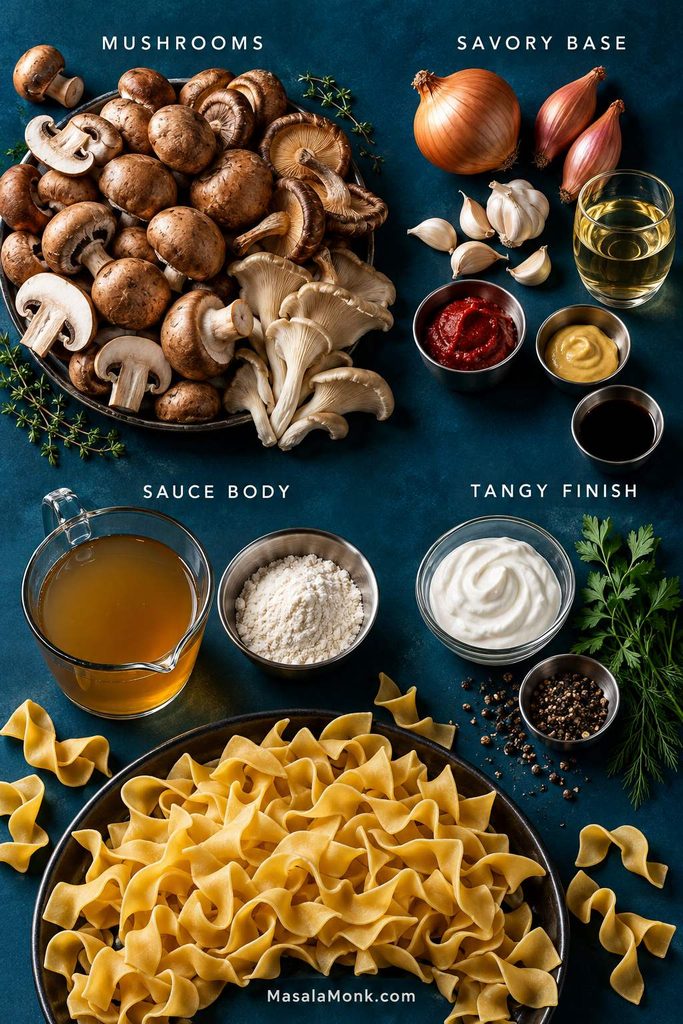
Mushroom stroganoff ingredients make more sense when read by function: mushrooms create the core flavor, aromatics and seasonings deepen it, broth and flour control body, while sour cream contributes cultured tang at the finish.
Method
1. Prep the Mushrooms
Slice cremini, brown, chestnut or white button mushrooms around ¼ inch / 6 mm thick. Tear oyster mushrooms into bite-size pieces and remove tough shiitake stems before slicing the caps. Chop the onion and garlic so everything is ready once the pan gets hot.
2. Brown the Mushrooms in Two Batches
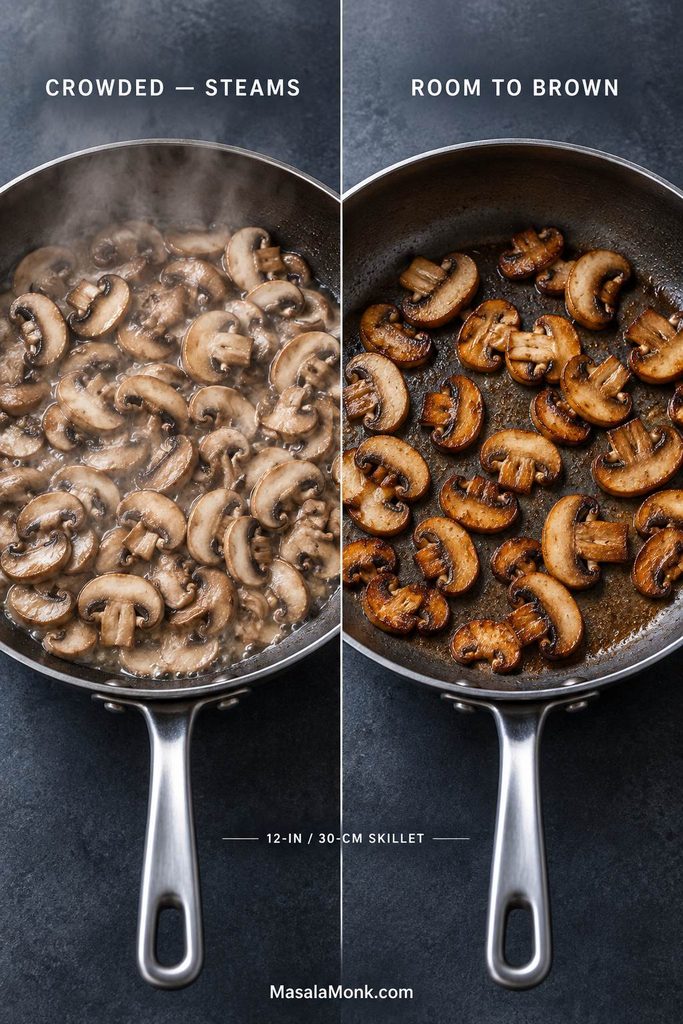
Heat a 12-inch / 30-cm wide skillet over medium-high heat. Add half the oil and about ½ tablespoon butter, then spread half the mushrooms across the skillet. Leave them alone for a couple of minutes before stirring.
The pan may suddenly look very wet. That’s normal. Keep it uncovered and let the moisture cook away. As the puddle disappears, listen for the pan to start sounding like it is frying again. Give the mushrooms another couple of minutes to develop real brown patches and a roasted smell.
You aren’t looking for perfect browning on every slice. Once the batch has good color across it, season with about ¼ teaspoon salt and transfer it to a plate. This often takes around 6–9 minutes, although a wetter batch can take longer.
Now put a large pot of water over high heat for the noodles. Add the remaining oil and another ½ tablespoon butter to the skillet, then repeat with the second half of the mushrooms. Season with the remaining ¼ teaspoon salt and move them to the plate.
Crowding is mainly a moisture-management problem. Because more exposed pan surface lets water escape faster, two smaller batches reach the frying stage sooner and spend less time steaming.
3. Build the Aromatic Base
Reduce the skillet heat to medium and add the remaining 1 tablespoon butter. Cook the onion or shallots for about 3–4 minutes, until soft and beginning to color.
Add the garlic for about 30 seconds, then stir in the tomato paste. Give the paste another minute against the hot skillet. It should darken slightly and lose its raw, sharp smell.
4. Deglaze, Reduce and Cook the Noodles
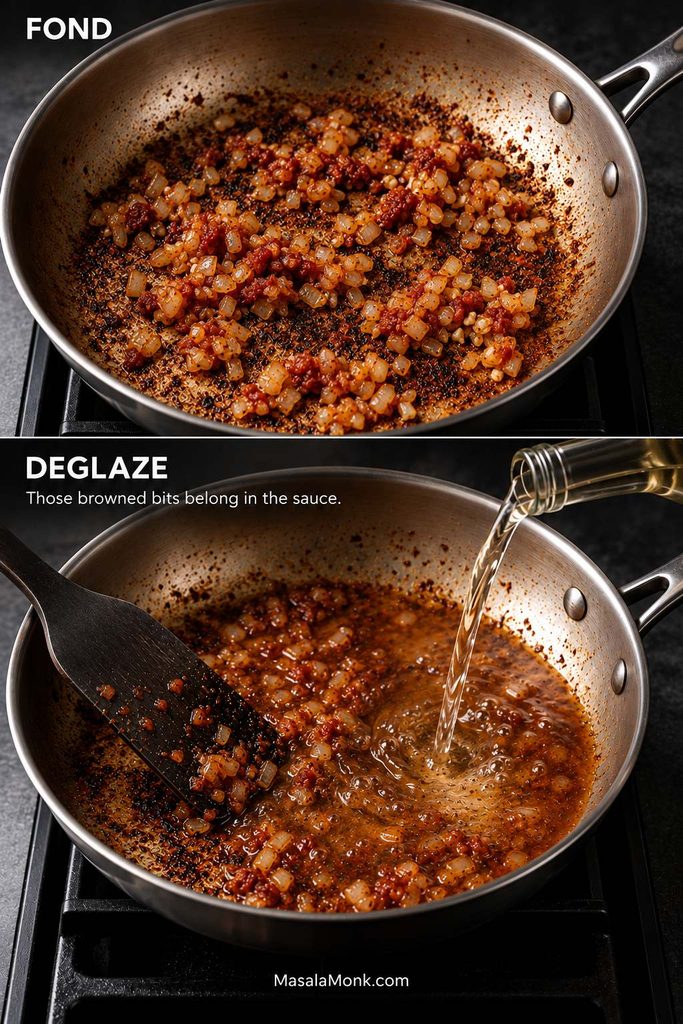
Pour in the ½ cup / 120 ml dry white wine and scrape up the browned bits from the skillet. Simmer for about 2–4 minutes. The sharp wine smell should fade and the liquid should reduce to a shallow, concentrated layer.
No wine? Use ½ cup / 120 ml extra low-sodium broth and reduce it to the same point.
Once the pasta water is boiling, salt it and add the 10 oz / 280 g egg noodles. Cook according to the package directions while you finish the sauce.
Fond is flavor already paid for: the browned layer left on the skillet after cooking. Once wine or broth loosens it, those concentrated mushroom and aromatic notes dissolve into the stroganoff sauce instead of staying stuck to the pan.
5. Thicken and Season the Sauce
Sprinkle the 2 tablespoons / 16 g flour over the onion mixture and stir for 30–60 seconds. Gradually pour in 1 cup / 240 ml broth, stirring or whisking until smooth. Hold back the final ¼ cup / 60 ml; you may not need it.
Add 2 teaspoons Dijon, then 2 teaspoons of one chosen savory seasoning: soy sauce, tamari or vegetarian Worcestershire. Stir in the paprika, thyme and black pepper.
Simmer gently for about 4–6 minutes. By now the sharp wine aroma should be gone and the pan should smell rounded, savory and distinctly mushroomy. A thin film of sauce should cling to the back of a spoon.
Gluten-free: skip the flour and use verified gluten-free broth plus tamari or another verified gluten-free savory seasoning. Once the broth is hot, whisk in a slurry of 1 tablespoon / about 8 g cornstarch mixed with 2 tablespoons / 30 ml cold reserved broth.
6. Taste Before the Sour Cream
Take a spoonful now. The sauce should already taste like dinner.
Start with salt when it tastes flat. A well-seasoned sauce that still seems washed out needs more concentration, not more seasoning, so reduce it another minute or two. Then check the Dijon. Extra soy, tamari or Worcestershire comes last.
7. Return the Mushrooms and Finish Off Heat
Return the mushrooms and any juices from the plate. Give them 1–2 minutes to warm through. You should still see plenty of actual mushroom pieces in the pan.
Switch off the burner and let vigorous bubbling settle. Refrigerator-cold sour cream can be loosened first with a spoonful of warm sauce. Fold in the ½ cup / 120 g full-fat sour cream.
Tilt the skillet. The sauce should cling to the mushrooms while still moving easily. Add reserved broth 1 tablespoon / 15 ml at a time if it has tightened too much; it will continue to thicken as it stands.
Get the reduction and seasoning right before the sour cream goes in. Off heat, the dairy should add tang and smoothness—not do the sauce-building for you.
Drain the noodles when tender. Spoon the stroganoff over them and finish with parsley or dill and freshly ground black pepper.
Pan-size rule: a 12-inch / 30-cm skillet handles this amount well in two batches. With a smaller skillet, use three. When doubling the recipe, more batches or a second skillet are worth the trouble.
Treat Wet → Brown → Glossy as checkpoints rather than timestamps. Stay in Wet until the water cooks away, move on once Brown develops, and stop reducing at Glossy before the mushroom stroganoff sauce loses its flow.
Mushrooms do not brown on a perfectly predictable clock. Freshness, storage, variety, slice thickness, pan material and burner strength all change how quickly their moisture cooks away. One batch may brown in six minutes. Another may need ten.
Wet: Let the Mushroom Water Cook Away
The skillet can look alarmingly wet for a while. If the mushrooms are still sitting in a puddle, don’t judge the browning yet. Leave the pan uncovered and give that water somewhere to go.
Still a puddle? Keep going.
Frozen mushrooms usually make an even wetter pan and need longer before browning begins. They work, but fresh mushrooms are the better choice here when texture matters.
Brown: Listen for the Frying Sound to Return
As the last puddles disappear, the soft wet hiss turns into a sharper sizzle. That’s the useful moment. The mushrooms are frying again, and the last couple of minutes are where much of their deeper flavor develops.
Don’t chase restaurant-perfect browning on every slice. Once you have real color across the batch and the mushrooms smell roasted instead of damp, you’re there.
Glossy: Stop While the Sauce Still Flows
Drag a spoon or spatula through the sauce. A brief trail should appear, then slowly fill back in. Sauce that races together immediately needs more reduction; a trail that stays sharply open means the pan is heading too thick.
There is some margin here. Slightly loose is easier to correct than a sauce that has already tightened too far.
Best Mushrooms for Stroganoff
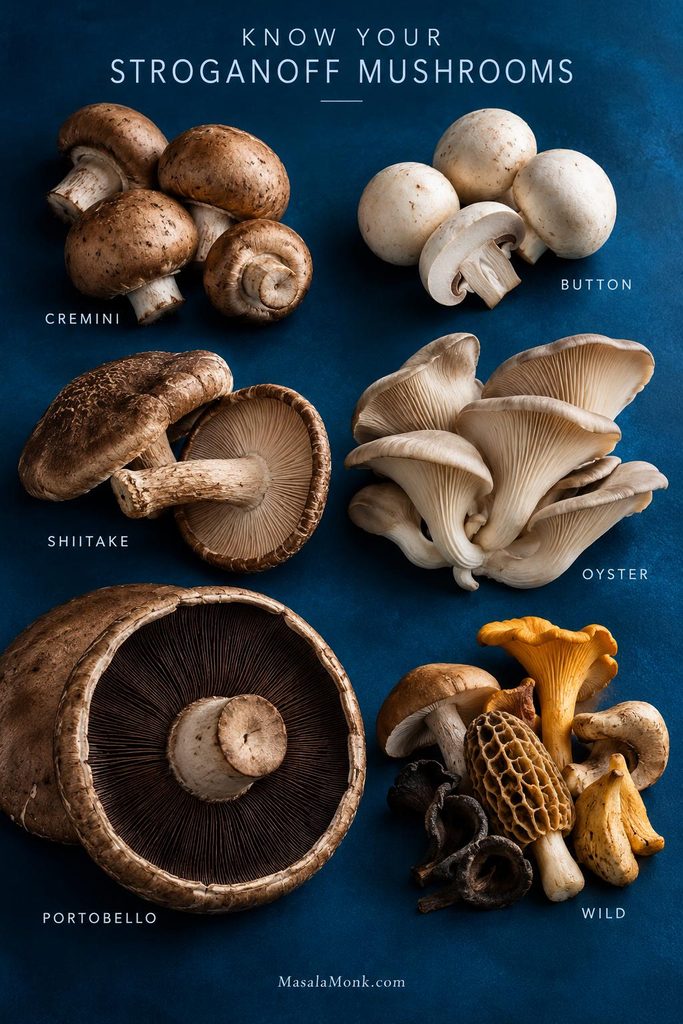
For an everyday stroganoff, start with cremini, brown or chestnut mushrooms. They have more earthy flavor than white button mushrooms, hold their shape well and brown reliably.
The best mushrooms for stroganoff are the ones you can brown well. All-cremini is not a compromise; use shiitake, oyster or wild mushrooms when you specifically want a deeper aroma or different texture.
If you want…
Use…
Why
Best everyday choice
Cremini, brown or chestnut
Good flavor, firm texture and dependable browning
A milder version
White button
Perfectly workable once well browned
Deeper aroma
Mostly cremini + some shiitake
Shiitake adds a stronger, woodier note
More textural contrast
Mostly cremini + some oyster
Oyster mushrooms give tender pieces and crisped edges
Meatier pieces
Portobello
Thicker slices keep more bite
A special batch
Fresh wild mushrooms
More aroma and variety, but not necessary
How Much to Use and How to Cut Them
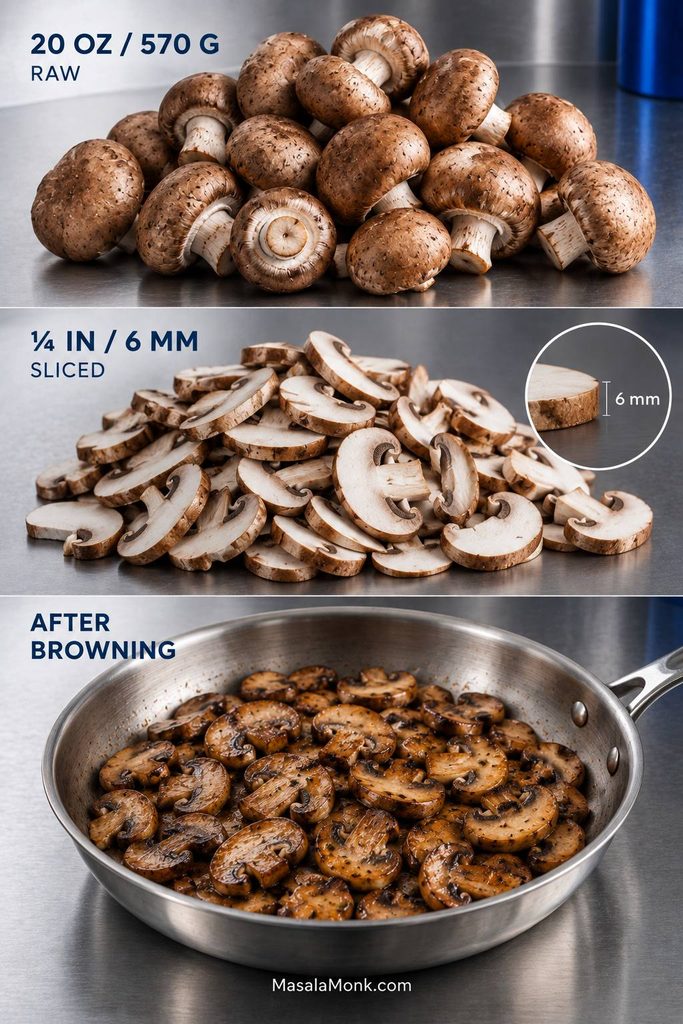
Uniformity matters more than ruler-perfect slices. Keeping most mushrooms near ¼ inch / 6 mm helps the batch shed moisture at roughly the same pace, so thin pieces do not overcook while thicker ones are still steaming.
20 oz / 570 g may look like a lot of mushrooms at the cutting board. It won’t once their water cooks away. That amount keeps the final bowl mushroom-heavy enough that the noodles never take over.
All cremini is completely fine. For more aroma, replace about 6 oz / 170 g with shiitake or oyster mushrooms; there is no need to build an expensive five-mushroom mix.
Slice cremini, button and shiitake caps around ¼ inch / 6 mm thick. Tear oyster mushrooms. Portobellos can stay closer to ⅜–½ inch / 10–12 mm. Very thin slices cook quickly, but they also lose more of the bite that makes the finished dish satisfying.
Cleaning mushrooms: a brief rinse is fine when they need it. Dry them well before they hit the skillet.
Once those mushrooms taste properly roasted, the sauce has a simpler job: deepen that flavor and carry it across the plate.
Build a Stroganoff Sauce That Tastes Savory Before It Tastes Creamy
Build the Savory Base
Cook the tomato paste briefly after the onions and garlic. Once it darkens, deglaze with wine and scrape up the browned bits left from the mushrooms. Reduce until the sharp alcohol smell has gone and only a concentrated layer remains in the skillet.
Dijon gives the sauce brightness. Choose one savory seasoning—soy sauce, tamari or vegetarian Worcestershire—to deepen the mushrooms. Many traditional Worcestershire sauces contain anchovy, so use a vegetarian-labeled version when that matters.
Flat flavor is easier to fix when you diagnose it in order: salt → concentration → brightness → extra umami. Salt cannot fix a diluted sauce, and soy sauce cannot replace proper reduction. By this point, the pan should smell rounder and more savory than it did a few minutes earlier.
How to Thicken Mushroom Stroganoff Sauce
Flour gives the broth a light gravy-like body. Cornstarch provides the thickening for the gluten-free version. In either case, keep part of the broth out of the pan until the sauce tells you it needs more.
You’re looking for enough body to coat a spoon without turning stiff. A slightly loose sauce is easier to correct, especially because sour cream and a few minutes of standing will thicken it further.
Judge stroganoff sauce while it is hot, not after it has sat on the plate. Because sour cream, cooling and an absorbent base all tighten the experience, the ideal skillet consistency should still have visible movement.
Finish With Sour Cream Without Splitting It
Once the mushrooms are back in the sauce, take the skillet off the heat and let hard bubbling stop. Then add the sour cream. Full-fat sour cream is the best overall choice here: enough tang to keep the sauce lively, but enough fat to stay smooth when handled gently.
Finish
Result
Verdict / adjustment
Full-fat sour cream
Classic creamy-tangy balance
Best overall choice
Crème fraîche
Richer and milder
Excellent substitute; may need more acidity
Full-fat Greek yogurt
Lighter and tangier
Best lighter option; always add off heat
Low/nonfat Greek yogurt
Leaner and less rich
Works, but is more prone to looking grainy
Heavy or double cream
Smooth and mild
Needs extra acidity to taste like stroganoff
Cream cheese
Thick, rich and mild
Possible, but not the closest substitute
Plant-based sour cream
Dairy-free finish
Useful for vegan versions; adjust by taste
If what you want is a broader cream-and-mushroom sauce without stroganoff’s tang, the Creamy Mushroom Sauce Recipe is the better fit.
Useful Substitutions and Variations
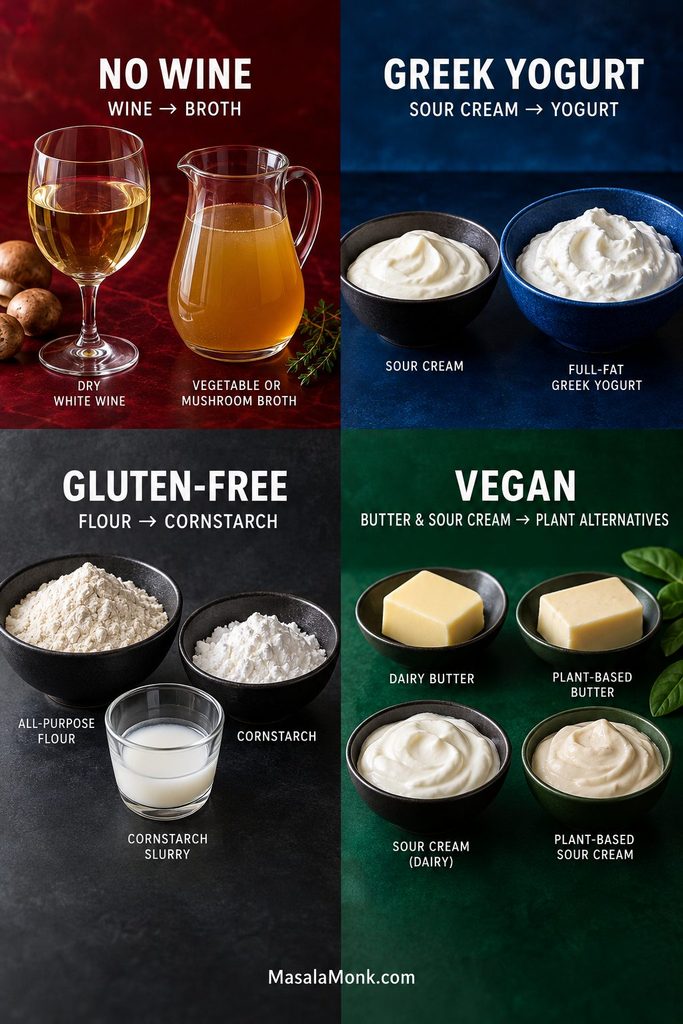
A mushroom stroganoff without wine, with Greek yogurt, gluten-free, or vegan can still behave like the original when each swap preserves function—liquid, tang, thickening or richness—rather than merely matching appearance.
Can I Make Mushroom Stroganoff Without Wine?
Yes. Use ½ cup / 120 ml extra low-sodium broth in place of the wine and reduce it well. Taste the finished sauce after the sour cream goes in before adding extra acid. When it still tastes heavy or dull, about 1 teaspoon / 5 ml lemon juice or white-wine vinegar is usually enough to wake it up.
Using Greek Yogurt Instead of Sour Cream
Use about ½ cup / 120 g full-fat Greek yogurt. Take the skillet off the heat first; refrigerator-cold yogurt benefits from a spoonful of warm sauce mixed into it before it reaches the pan. Because yogurt is already tangy, taste before adding more acid.
Gluten-Free or Vegan Stroganoff
For gluten-free stroganoff, use verified gluten-free broth, tamari or another verified gluten-free savory seasoning, gluten-free noodles and the cornstarch method given in the recipe.
To make the stroganoff vegan, use oil or plant butter, vegetable or mushroom broth, soy or tamari, suitably labeled wine or extra broth, plant-based sour cream and egg-free noodles. Plant-based sour creams vary more than dairy sour cream, so taste first and adjust the looseness or acidity only when needed.
Add Spinach Near the End
Add 4–5 oz / 115–140 g baby spinach once the sauce has thickened. Let it wilt, then take the skillet off the heat and add the sour cream. Earlier is not better here—the spinach only needs enough time to collapse into the sauce.
What to Serve With Mushroom Stroganoff
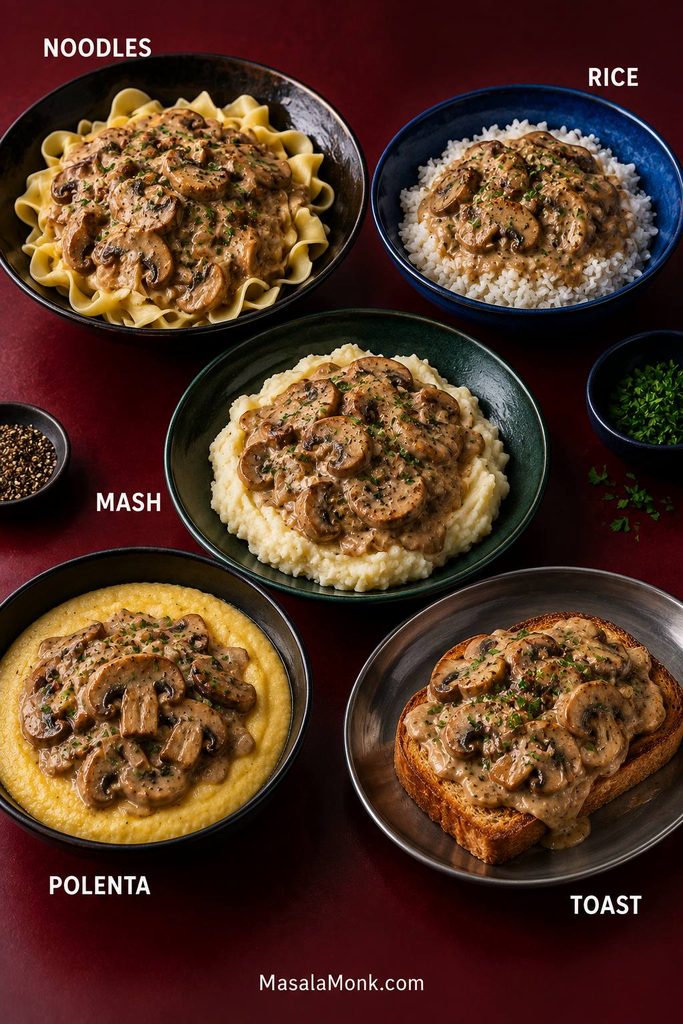
Best Bases: Noodles, Rice, Potatoes or Polenta
Wide egg noodles are the classic choice, but rice, mashed potatoes, polenta and toast all work. The base changes how quickly the sauce tightens on the plate, so something absorbent such as rice or mash benefits from a slightly looser stroganoff.
The more absorbent the base, the looser the sauce should be when it leaves the skillet.
Serve over
Keep the sauce…
Why
Wide egg noodles
Glossy and spoon-coating
Noodles catch sauce well but keep absorbing it
Rice
Slightly looser
Rice absorbs sauce quickly
Mashed potatoes
Loose and generous
Thick mash benefits from more flowing sauce
Polenta
Medium-loose
Keeps the bowl creamy without becoming stodgy
Toast
Slightly thicker
The sauce stays on top instead of soaking straight through
For four servings, use about 10 oz / 280 g wide egg noodles or 1–1¼ cups / 190–240 g uncooked rice. Tagliatelle, pappardelle and fettuccine are good pasta alternatives. Our guide to cooking rice covers stovetop ratios if rice is your base.
Mashed potatoes and soft polenta need no special ratio here—just enough on each plate to catch a generous spoonful of sauce. The Mashed Potatoes Recipe is particularly good when you want a richer dinner.
Side Dishes That Cut the Richness
A crisp green salad with sharp vinaigrette, cucumber-dill salad, green beans, asparagus, broccoli or simple crusty bread all work well. The useful principle is contrast: stroganoff is soft and creamy, so freshness, crunch or acidity keeps the plate lively.
Cornichons, crispy shallots or plenty of black pepper can create the same contrast without adding another side dish.
Troubleshooting: Read What Went Wrong
What you see or taste
Likely cause
What to do
Water around the mushrooms
They are still releasing moisture
Keep cooking uncovered before starting the sauce
Gray, pale mushrooms
They steamed before they could brown
Cook off the water completely; use smaller batches if needed
Thin finished sauce
Wine or broth did not reduce enough
Before dairy, simmer uncovered until the sauce clings lightly to a spoon
Thick or pasty sauce
Too much reduction or thickener
Add warm low-sodium broth 1 tbsp / 15 ml at a time
Bland sauce
Salt, concentration, brightness or umami is missing
Check them in that order
Tastes mainly of sour cream
The base was under-seasoned or too much dairy was added
A little Dijon or black pepper may rebalance it; next time strengthen the base before adding dairy
Too tangy
Very sour dairy or too much added acid
Soften with a little cream or butter if needed
Soft or soggy mushrooms
Thin slices, crowding or too much time simmering in sauce
They cannot fully crisp again; next time slice thicker, brown in batches and return them near the end
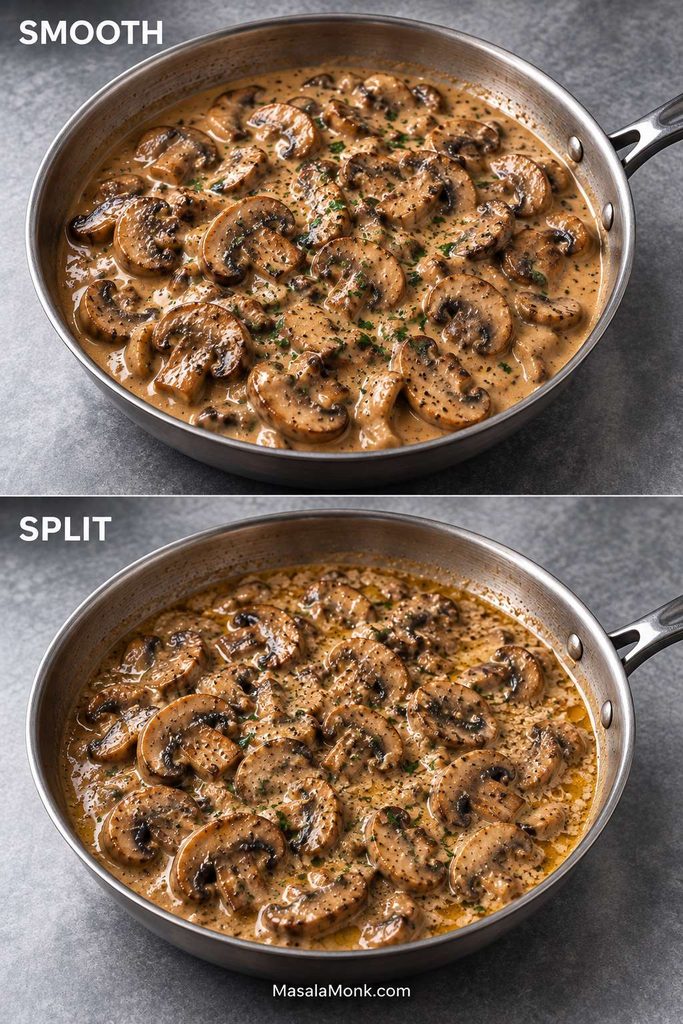
Split or grainy sauce
Sour cream or yogurt got too hot
Remove the skillet from heat and whisk gently
Too salty
Broth and savory seasonings compounded
Loosen carefully with unsalted liquid; use low-sodium broth and season later next time
Not mushroomy enough
Weak browning or very mild mushrooms
Better browning helps more than adding extra cream
Not enough sauce
Over-reduction or pasta was mixed into the sauce too early
Add warm low-sodium broth 1 tbsp / 15 ml at a time
Why Is My Mushroom Stroganoff Watery?
There are two different problems. Water pooling around the mushrooms means they have not finished releasing moisture. A thin sauce after browning means the wine or broth needs more reduction. Fix the stage you’re actually looking at.
What If the Sour Cream Split?
Take the skillet off the heat and whisk gently. A sauce that has only started separating may smooth out somewhat with a spoonful of cool cream or sour cream. Once the sauce is fully curdled, it may not become perfectly silky again, but it will usually still taste good.
Graininess is the first warning; visible fat means the emulsion has broken further. Pull the pan from aggressive heat as soon as separation begins.
How to Store, Reheat and Freeze Mushroom Stroganoff
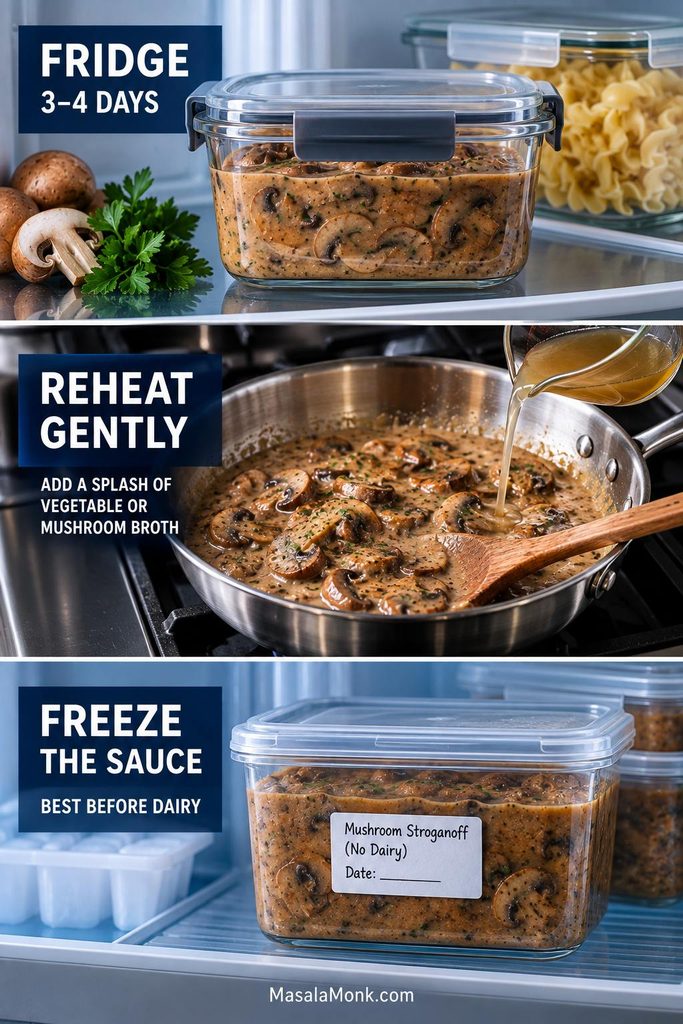
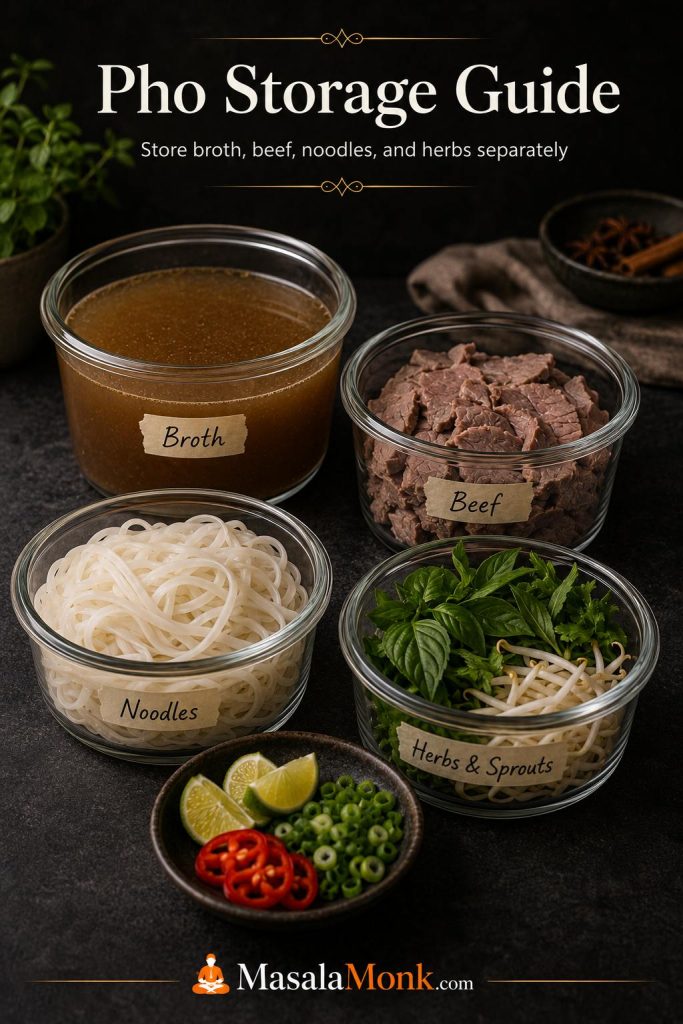
Refrigerate mushroom stroganoff for 3–4 days. Keep the noodles separate when practical because they continue soaking up sauce in the refrigerator.
Reheating
Warm the sauce gradually, stirring often. It commonly tightens overnight, so loosen it with a splash of broth or water when needed. Heat thoroughly, but once hot there is no advantage in keeping a sour-cream sauce at a hard boil.
For the smoothest result, freeze the mushroom sauce before adding sour cream and leave the noodles out. Thaw and reheat the base, adjust the consistency, then add fresh sour cream off heat.
Already finished the whole dish? Freeze it if you need to. Expect the noodles to soften and the dairy to look a little less silky after thawing.
For better leftovers, portion the sauce separately before chilling or freezing. That lets you loosen only what you reheat and keeps stored noodles from becoming increasingly soft.
Mushroom Stroganoff FAQ
1. Is Mushroom Stroganoff Vegetarian?
Yes. This mushroom stroganoff is vegetarian when made with vegetable or mushroom broth, vegetarian Worcestershire, soy sauce or tamari, and suitably labeled wine—or broth in place of the wine. Many traditional Worcestershire sauces contain anchovy.
2. Can I Make This Recipe in a Slow Cooker?
Not with these ratios. This recipe depends on uncovered skillet cooking to evaporate mushroom moisture and concentrate the sauce. A slow-cooker version needs different starting liquid and thickening; transferring these quantities directly is likely to produce a thinner stroganoff.
3. Can I Double This Mushroom Stroganoff Recipe?
Yes. Use 40 oz / about 1.1 kg mushrooms and double the main sauce ingredients, but brown the mushrooms in more batches or use a second skillet. Hold back the extra reserved broth until you know the larger batch needs it, and expect reduction to take a little longer.
4. Can I Make It Ahead?
Yes. Make the sauce ahead and keep it separate from the noodles. For the smoothest finish, stop before adding sour cream, reheat the sauce later, then stir in fresh sour cream off heat.
What the Finished Mushroom Stroganoff Should Look Like
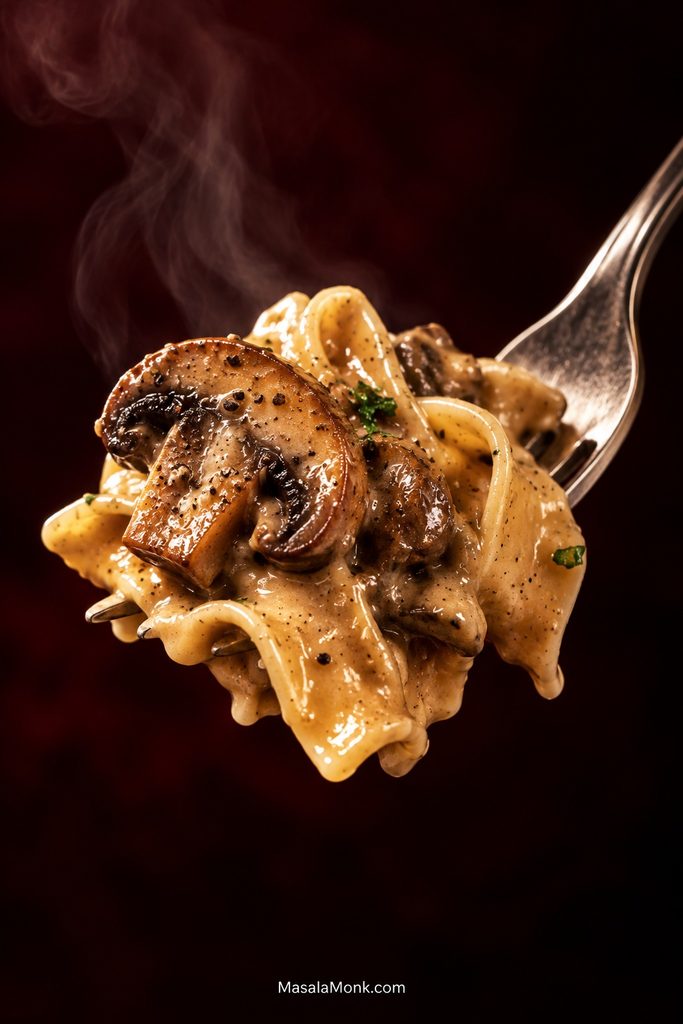
The recipe’s 20 oz mushrooms to 10 oz noodles ratio is deliberate. Even after the mushrooms release water and shrink, the finished forkful should still contain browned mushroom—not just pasta coated in cream.
Don’t chase perfection in every slice or spoonful. When the mushrooms taste roasted, the sauce still flows and the sour cream stays smooth, you’re there. You want mushrooms with some bite, silky sauce around the noodles, and enough tang and black pepper to keep the next forkful interesting.
Made it? Tell us which mushrooms you used and whether you served it over noodles, rice or potatoes. If your pan behaved differently from the cues above, that is useful to hear too.
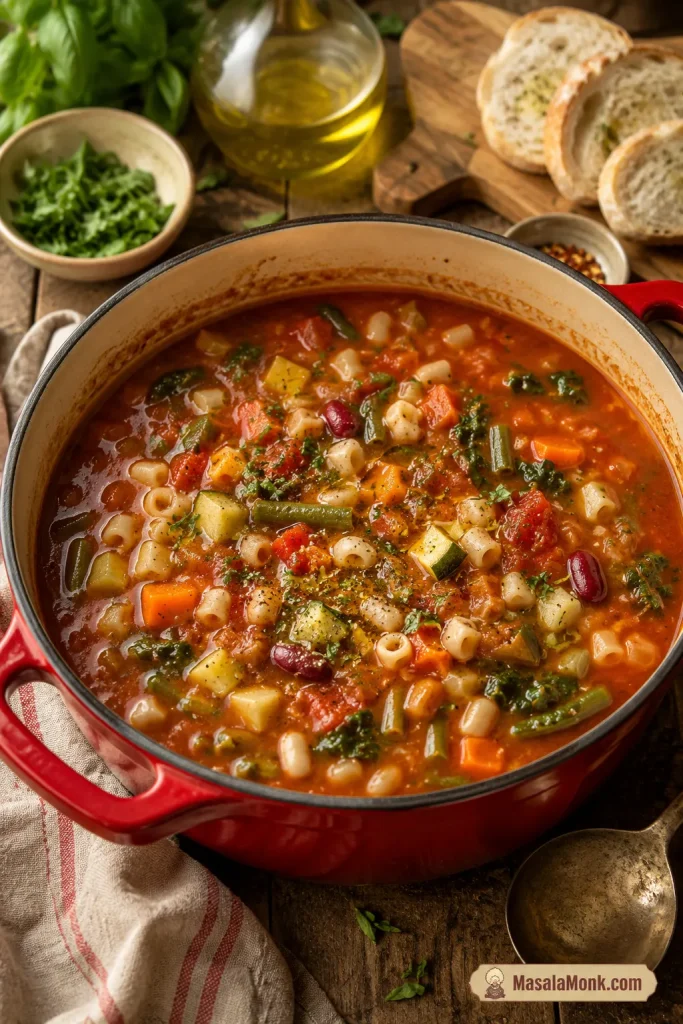
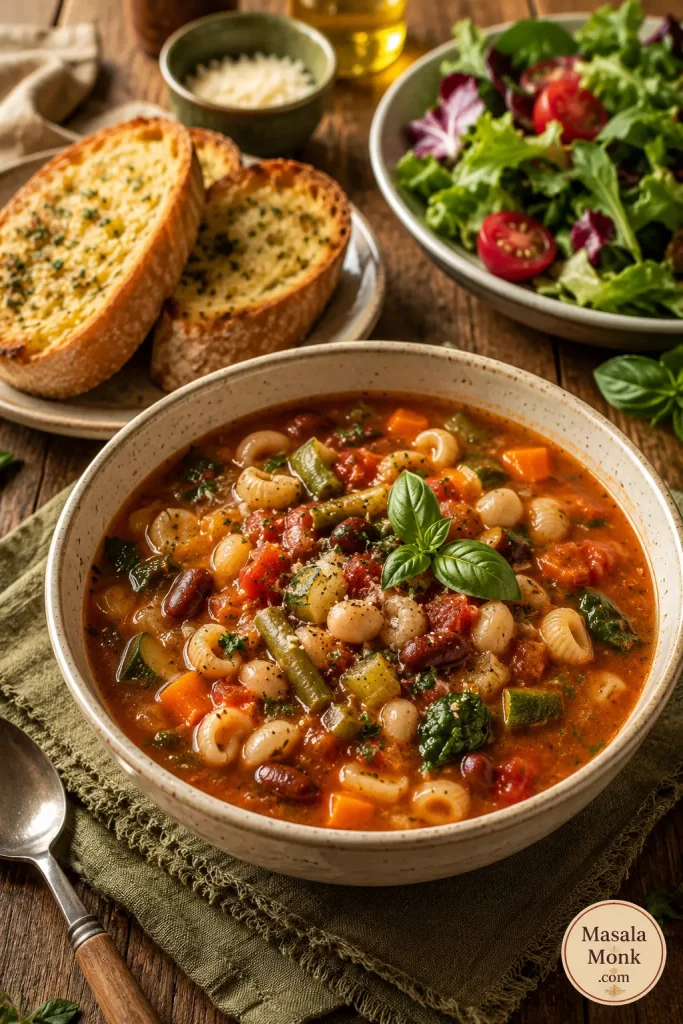
A good minestrone soup should look generous before you even take the first spoonful: tender vegetables, creamy beans, small pasta, herbs, and a tomato broth that tastes rich instead of watery. The first spoonful should catch a little of everything — a soft bean, a piece of pasta, sweet carrot, zucchini, greens, and enough tomato broth to pull it all together.
This pot works because it protects the three things that matter most in minestrone: rich tomato broth, vegetables with texture, and pasta that does not turn the leftovers into mush. Even a half-used zucchini, a tired carrot, two cans of beans, and the last handful of pasta can become a proper dinner.
Homemade minestrone also gives you something canned soup rarely does: better texture. The vegetables do not have to be overcooked, the pasta can stay tender, and you control the salt, broth, and finish.
Cooking now? Jump to the recipe card. The notes below help keep the broth rich, the vegetables tender, and the leftovers useful.
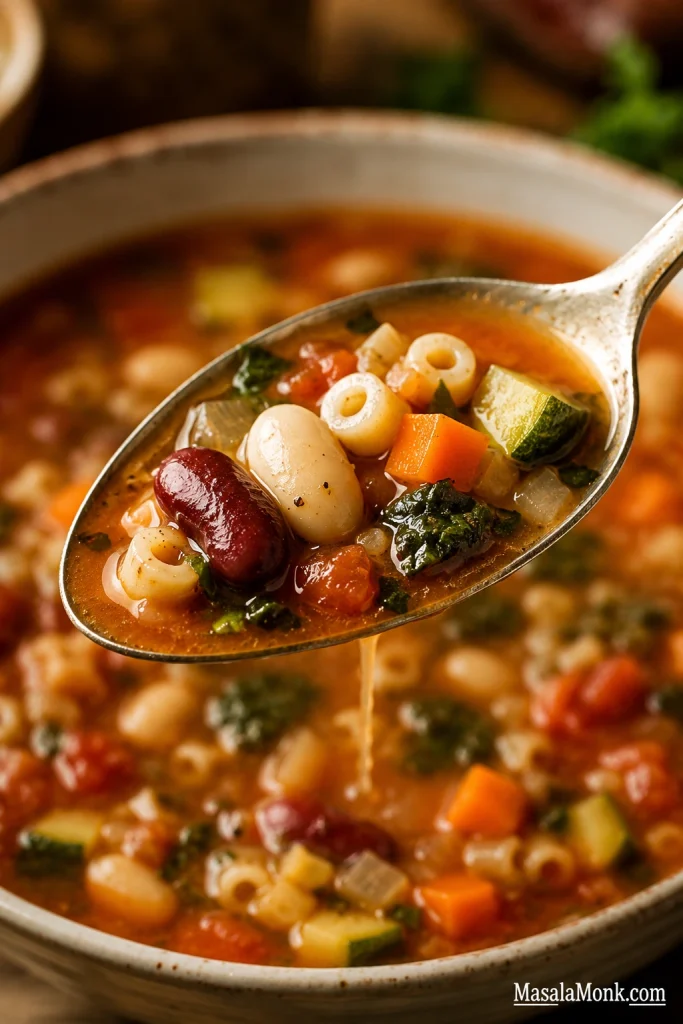
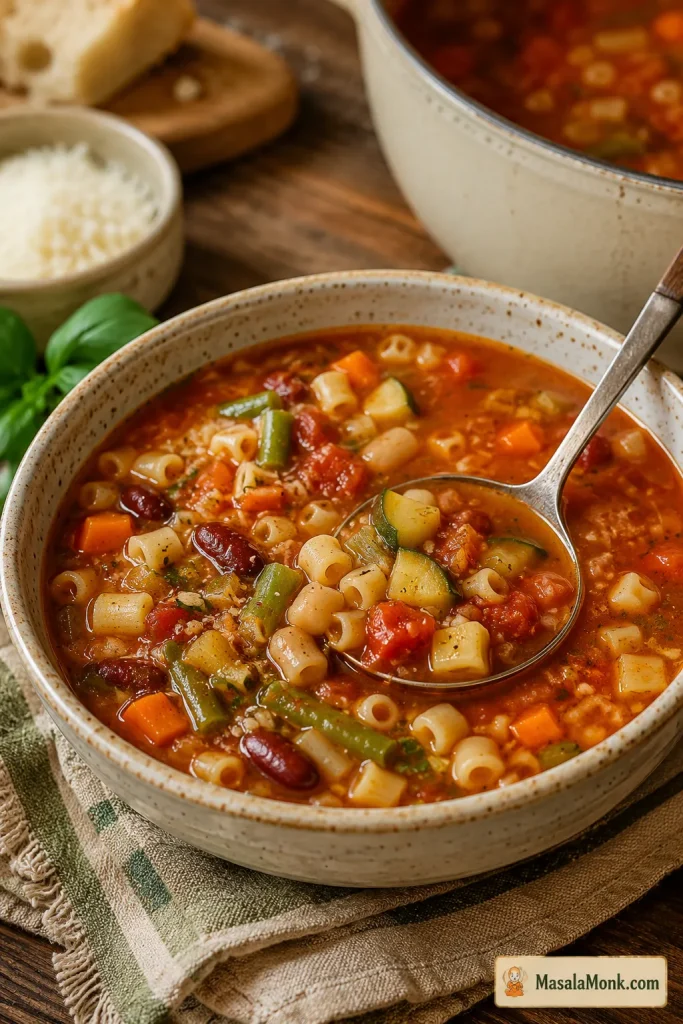
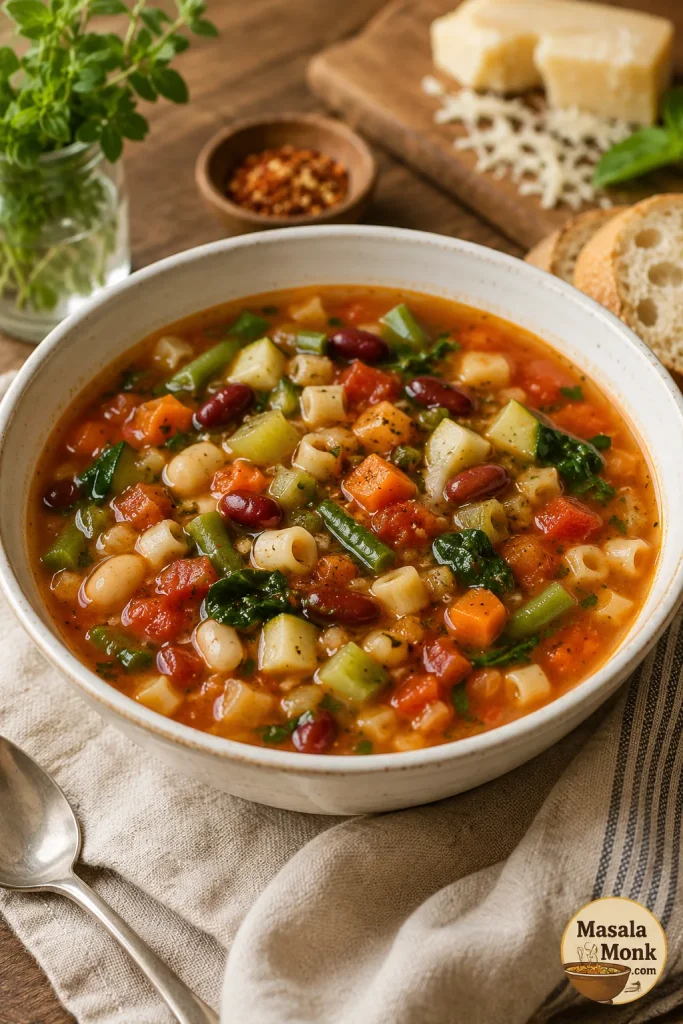
What a Good Minestrone Spoonful Should Show
Before you start, notice the target balance: beans, vegetables, pasta, greens, and tomato broth should all show up in the same spoonful.
This spoonful shows the balance you want: beans for body, vegetables for freshness, small pasta for comfort, and tomato broth tying everything together.
Recipe at a Glance
Prep time
20 minutes
Cook time
45 minutes
Total time
1 hour 5 minutes
Faster version
About 40 to 45 minutes with smaller diced vegetables, the full 6 cups broth, and a shorter 15 to 20 minute base simmer
Servings
6 generous bowls
Yield
About 11 to 13 cups soup
Method
Stovetop
Best pot
5 to 6 quart / 5 to 6 liter Dutch oven or heavy soup pot
Best for
Weeknight dinner, meal prep, and freezer-friendly soup base
Diet
Meatless when made with vegetable broth; vegan option
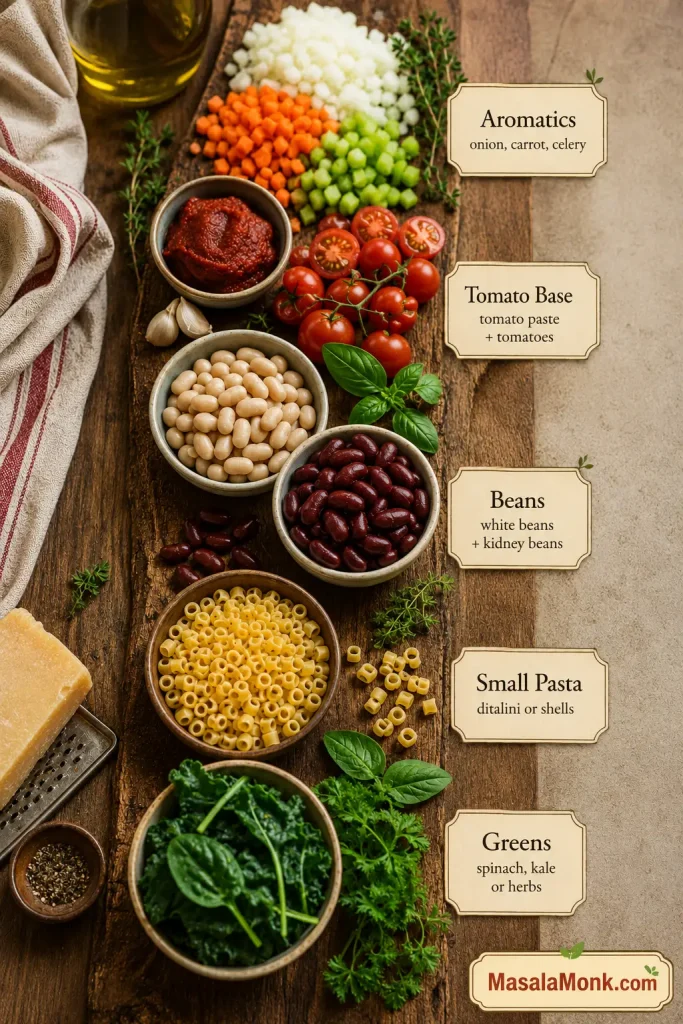
The Minestrone Rule of 5: soften the aromatics, build the tomato base, add beans for body, keep the pasta small, and save tender greens for the end. Vegetables can change; the rhythm is what keeps the pot balanced.
Why this works: tomato paste gives the soup depth, beans make it feel full, late-added vegetables keep their shape, and pasta goes in only when the broth already tastes good. That is what keeps the soup hearty without letting it turn heavy or dull.
The Minestrone Rule of 5
This visual is the memory hook for the whole recipe: keep the rhythm steady, even when the vegetables change.
Use the Minestrone Rule of 5 when you want the recipe to feel flexible: aromatics, tomato base, beans, small pasta, and greens are the core building blocks.
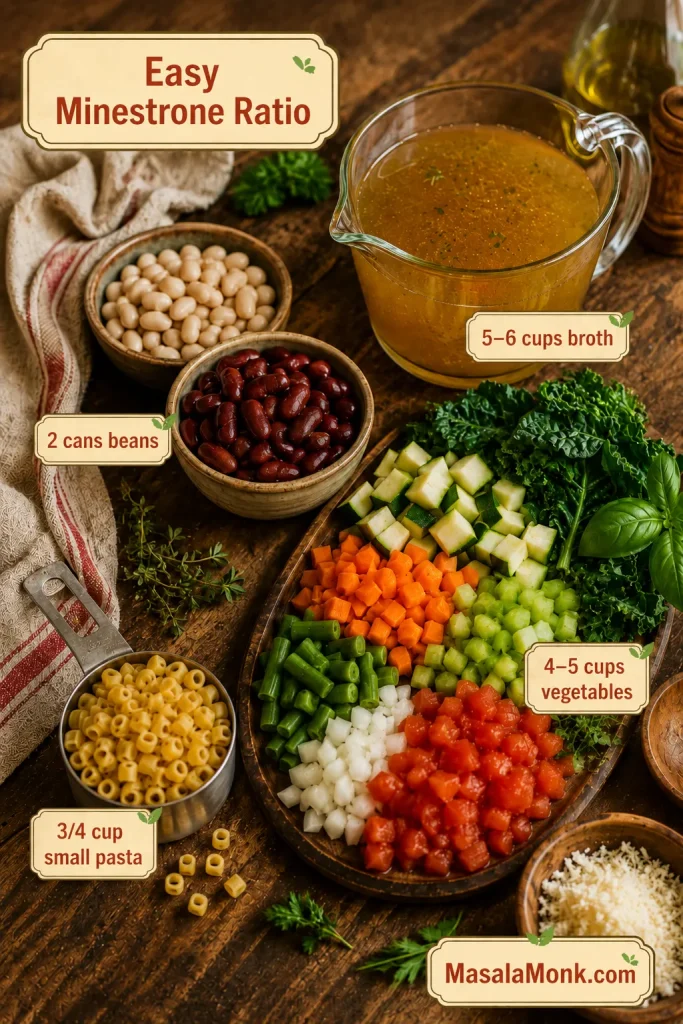
Easy minestrone ratio: for 6 bowls, use about 5 to 6 cups broth, 2 cans beans, 4 to 5 cups chopped vegetables, and 3/4 cup small pasta.
Short on time? Dice the vegetables smaller, use the full 6 cups broth, and simmer the soup base for 15 to 20 minutes before adding pasta and greens. The full cook gives deeper flavor, but the faster version still makes a good weeknight bowl.
Minestrone Soup Recipe Card
Description: A hearty minestrone soup with vegetables, beans, small pasta, and a rich tomato broth. It is meatless when made with vegetable broth, cozy without cream, and easy to adjust for leftovers or a thicker dinner-style bowl.
Equipment: 5 to 6 quart / 5 to 6 liter Dutch oven or heavy soup pot, knife, cutting board, can opener, colander, wooden spoon, and ladle.
Ingredients
Base
2 tablespoons olive oil, plus more for finishing, about 30 ml
1 medium yellow onion, diced, about 150 to 180 g
2 medium carrots, diced, about 130 to 160 g
2 celery ribs, diced, about 90 to 120 g
4 garlic cloves, minced
3 tablespoons tomato paste, about 45 g
Broth and Seasoning
1 can crushed or diced tomatoes, 28 oz / 794 g
5 to 6 cups vegetable broth, 1.2 to 1.4 liters
1 bay leaf
1 1/2 teaspoons Italian seasoning
1/2 teaspoon dried oregano, optional
1/4 teaspoon red pepper flakes, optional
1 teaspoon kosher salt or 3/4 teaspoon fine salt, plus more to taste; start with less if your broth is salted
1/2 teaspoon black pepper, plus more to taste
1 parmesan rind, optional; skip for vegan minestrone
Beans, Vegetables, and Pasta
1 can cannellini beans or white beans, 15 oz / 425 g, drained and rinsed
1 can kidney beans, 15 oz / 425 g, drained and rinsed
1 cup chopped green beans, about 100 to 125 g
1 medium zucchini, diced, about 180 to 220 g
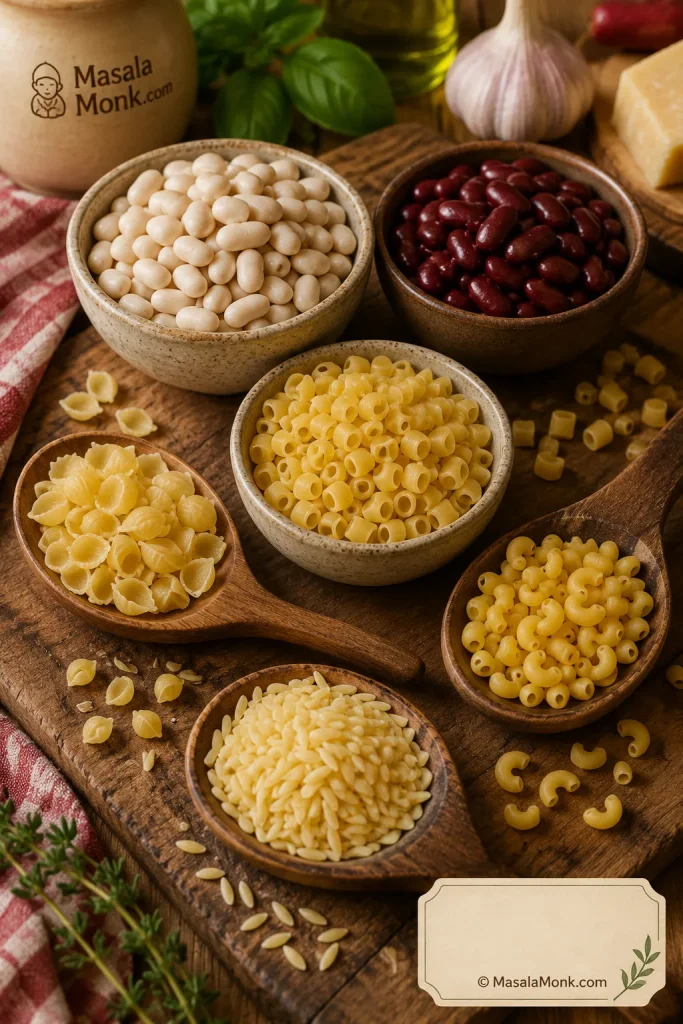
3/4 cup small pasta such as ditalini, small shells, elbows, or macaroni, about 75 to 90 g
2 cups packed spinach or chopped kale, about 60 to 80 g
Finish
1 to 2 teaspoons lemon juice or red wine vinegar, 5 to 10 ml
1/4 cup chopped parsley or basil, about 10 to 15 g
Extra olive oil, for finishing
Grated parmesan, optional, for serving
Instructions
Heat olive oil in a 5 to 6 quart / 5 to 6 liter Dutch oven or heavy soup pot over medium heat.
Add onion, carrot, celery, and salt. Cook for 7 to 10 minutes, stirring often, until softened and fragrant.
Add garlic and tomato paste. Cook for 1 to 2 minutes, stirring often, until the tomato paste darkens slightly.
Add crushed or diced tomatoes, vegetable broth, bay leaf, Italian seasoning, oregano if using, red pepper flakes if using, black pepper, and parmesan rind if using. Stir well and scrape the bottom of the pot.
Add the cannellini beans and kidney beans. Bring to a boil, then reduce to a gentle simmer.
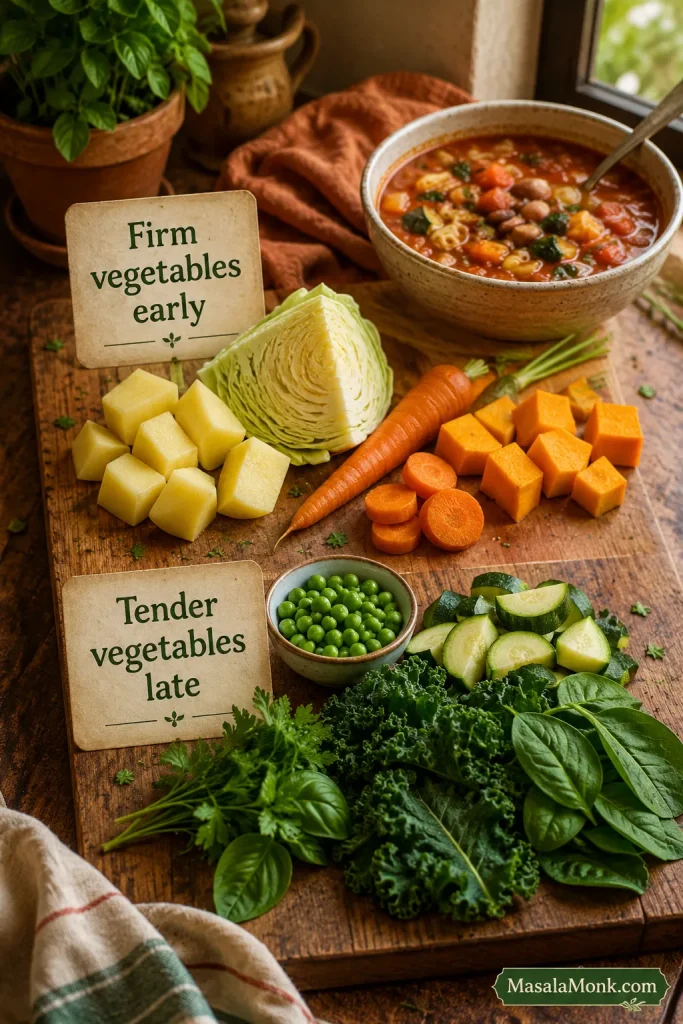
Simmer partly covered for 20 to 25 minutes, until the broth tastes developed. Add firm vegetables such as cabbage, potato, or squash during this simmer if using them.
Add green beans, zucchini, and pasta. Cook for 8 to 10 minutes, or until the pasta is just tender.
Stir in spinach or kale and cook for 1 to 3 minutes, just until wilted.
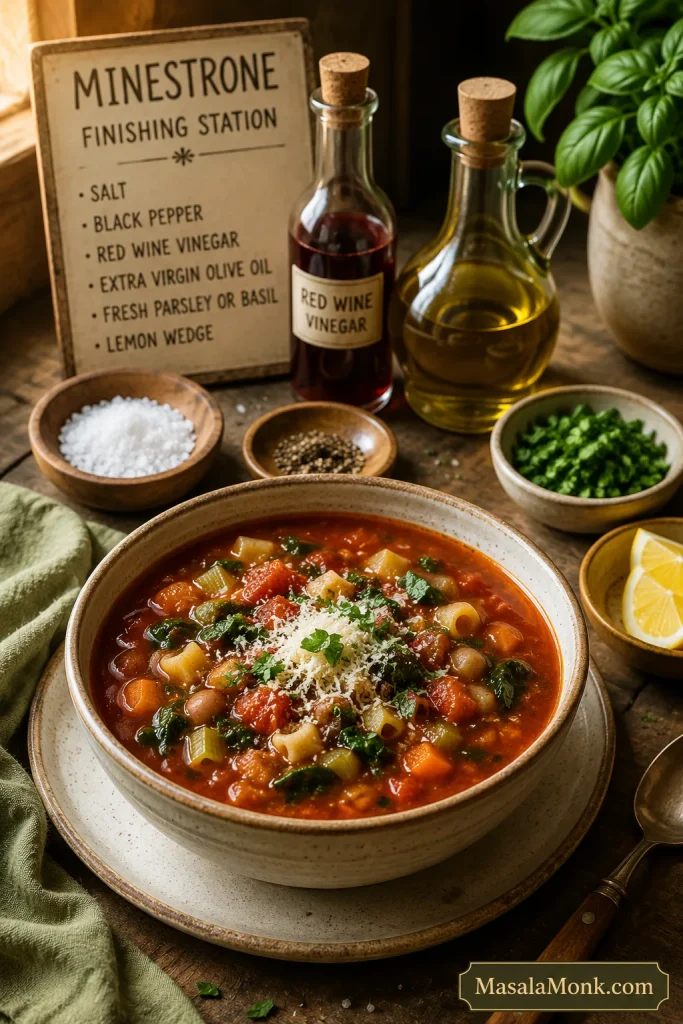
Remove the bay leaf and parmesan rind. Stir in lemon juice or red wine vinegar, parsley or basil, and a drizzle of olive oil.
Taste and adjust salt, pepper, and acidity. Let the soup rest for 5 minutes before serving.
Serve hot with parmesan, extra herbs, crusty bread, garlic bread, or a simple salad.
Recipe Notes
Brothier soup: use 3/4 cup pasta and the full 6 cups broth.
Thicker soup: use 1 cup pasta or mash 1/2 cup beans into the broth.
Firmer zucchini: add zucchini during the final 5 minutes instead of with the pasta.
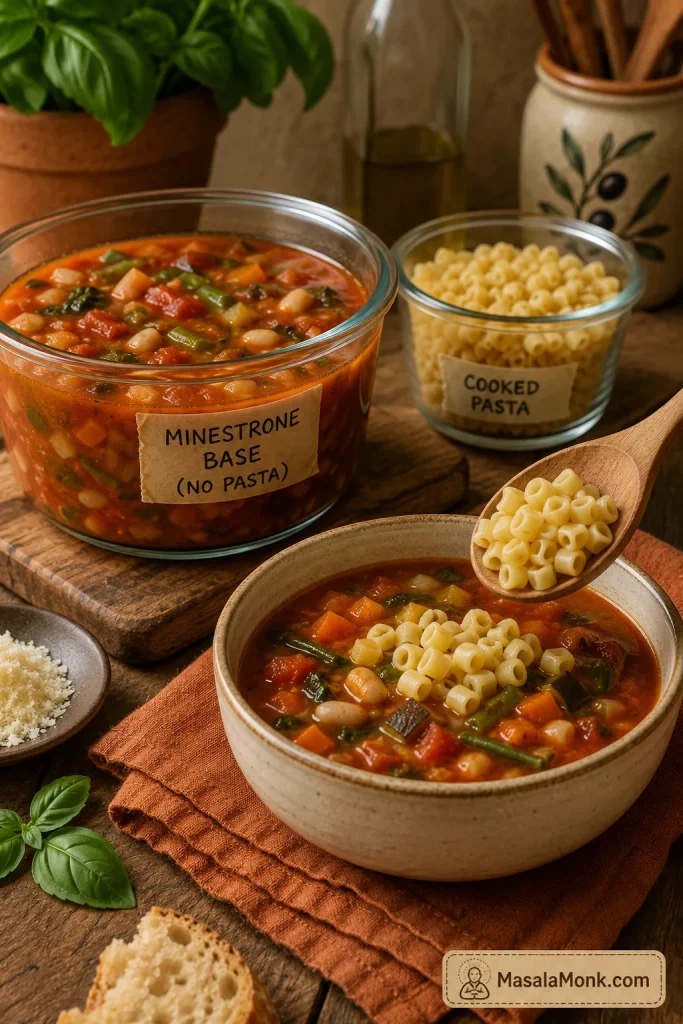
Better leftovers: cook pasta separately and add it to bowls.
Vegan version: use vegetable broth and skip parmesan rind and parmesan cheese.
Meal prep: toss separately cooked pasta with a tiny drizzle of olive oil after draining so it does not clump.
Gluten-free version: use gluten-free pasta or rice, preferably cooked separately.
Rice version: cooked rice is easiest. Add it near the end or directly to bowls because rice absorbs broth quickly.
Extra richness: simmer with a parmesan rind or finish with olive oil and herbs.
The recipe works on its own, but the notes below help you adjust the beans, pasta, vegetables, storage, and appliance methods without losing the minestrone feel. If leftovers matter, the storage and freezing notes are especially useful.
Before the deeper notes, this quick visual ratio gives you a flexible way to adjust the pot without losing the minestrone balance.
Easy Minestrone Ratio
Use this ratio when you want to adjust the recipe without losing the soup’s balance.
Instead of measuring every vegetable perfectly, follow the ratio: broth keeps it loose, beans make it filling, vegetables add bulk, and pasta should stay modest.
What Is Minestrone Soup?
Minestrone is an Italian vegetable soup made with vegetables, beans, tomatoes, broth, herbs, olive oil, and usually pasta or rice. Classic minestrone is not about one fixed vegetable list; it is about building a generous, seasonal soup with enough beans and starch to feel like a meal.
That is why one pot might have zucchini and green beans while another has cabbage, kale, potato, or squash. A good bowl should be crowded, not dry: enough vegetables and beans to make it feel like dinner, but enough tomato broth to keep it unmistakably soup.
Why You’ll Like This Recipe
The broth tastes built, not diluted. Tomato paste, sautéed aromatics, herbs, beans, and olive oil give it a rounded tomato flavor.
The vegetables keep their texture. Firm vegetables simmer first, while zucchini and greens go in later.
The pasta will not hijack the leftovers. Cook it in the soup when serving right away, or separately when you want better storage.
It starts meatless. Use vegetable broth, and the whole pot stays hearty without meat.
It gives you room to use what you have. Small shells, elbows, ditalini, zucchini, green beans, cabbage, kale, spinach, white beans, kidney beans, or chickpeas can all work.
It can be lighter or heartier. Use more greens and less pasta for a lighter bowl, or extra beans and a little more pasta for a thicker dinner-style soup.
Minestrone feels hearty without cream because beans, vegetables, pasta, and olive oil do the work. If you like cozy tomato-and-pasta dinners, this sits near the same comfort zone as baked ziti, but it is lighter, brothier, and packed with vegetables.
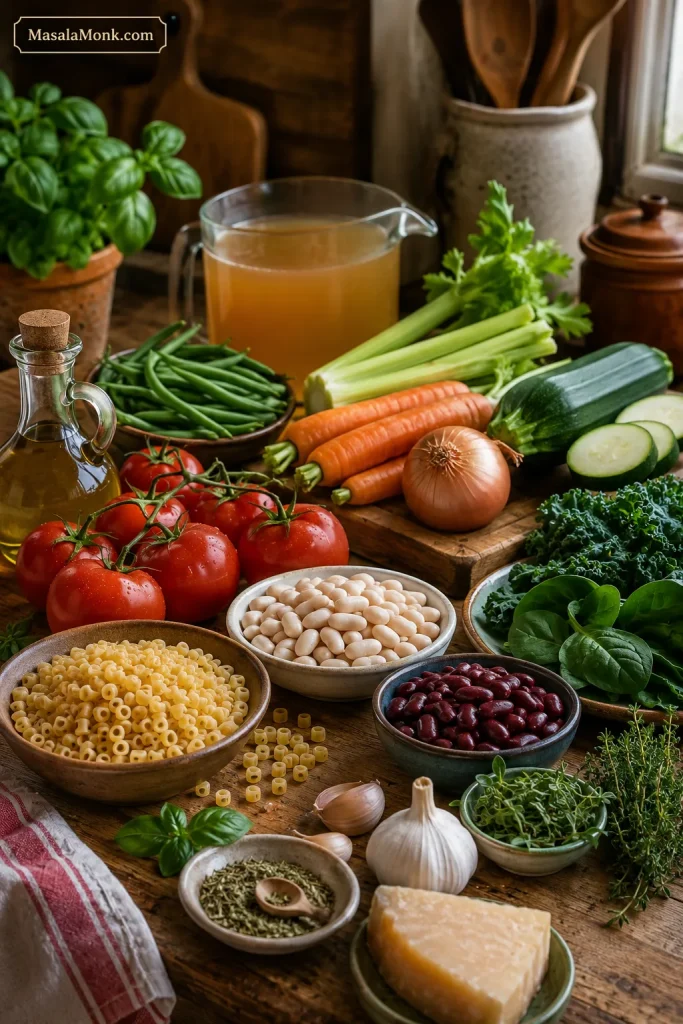
Minestrone Soup Ingredients
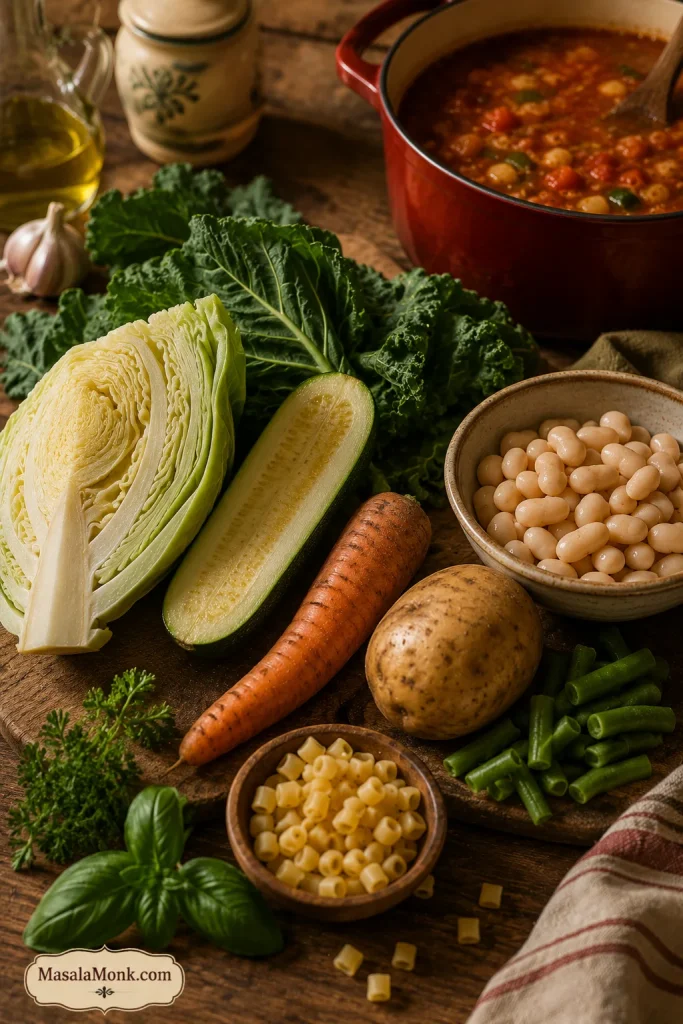
These ingredients follow the same Rule of 5: aromatics, tomato broth, beans, small pasta or rice, and tender greens at the end. Do not worry if you are missing one vegetable. Minestrone is forgiving as long as the base stays balanced.
If you are missing one vegetable or bean, check the easy minestrone swaps before changing the broth or pasta ratio.
Each minestrone ingredient has a role: aromatics create sweetness, tomatoes shape the broth, beans add substance, pasta brings comfort, and greens freshen the finish.
If you remember one thing: taste the broth before adding pasta. When it tastes thin or flat at that point, fix the broth first; pasta will not rescue a weak soup.
Build the Aromatic Base
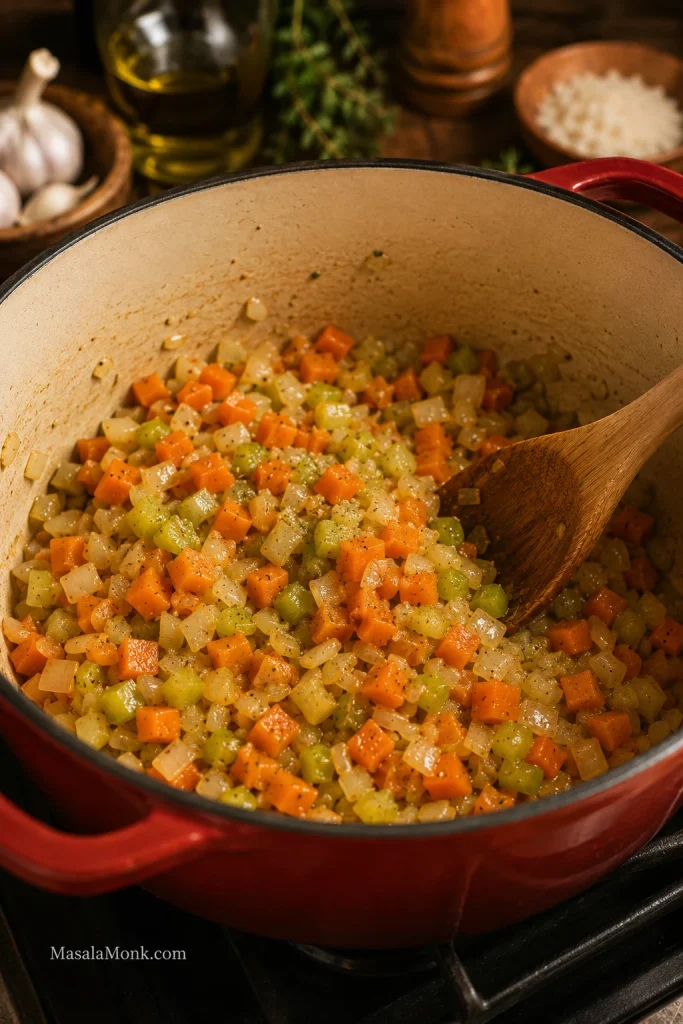
Onion, carrot, celery, garlic, and olive oil create the base. Cook the onion, carrot, and celery until the sharp onion smell softens and the pot starts smelling sweet. The onion should look translucent and the carrot edges should soften. This is the first moment the soup starts smelling like dinner instead of chopped vegetables.
First, cook the onion, carrot, and celery until they soften and smell sweet. This step gives homemade minestrone a deeper base before the tomatoes arrive.
Cook the Tomato Paste Before Broth
Tomato paste and a large can of crushed or diced tomatoes give the broth its color and flavor. Cook the tomato paste until it darkens slightly; it should leave orange-red streaks on the bottom of the pot, not black bits. Crushed tomatoes make a fuller, smoother broth, while diced tomatoes give a chunkier texture.
Next, let the tomato paste cook briefly with the aromatics. It deepens the soup base and helps the broth taste rich instead of thin.
Broth
Vegetable broth keeps the soup meatless and easy to make vegan. Chicken broth also works if you are not keeping the soup vegetarian. Low-sodium broth gives you more control because canned beans, tomatoes, pasta, and cheese can all add salt.
Beans
White beans and kidney beans are a strong everyday combination. The white beans soften into the tomato broth and make the soup feel fuller, almost as if it simmered longer than it did. Kidney beans add color, bite, and the familiar minestrone look. Rinse canned beans before adding them so the broth stays clean and balanced.
Pasta or Rice
Small pasta is what keeps minestrone easy to eat by the spoonful. Ditalini is classic, but small shells, elbows, macaroni, or orzo all work. Use 3/4 cup for a brothier soup and up to 1 cup for a thicker bowl. Cooked rice also works when you want a pasta-free version. If you are cooking for leftovers, see how to keep minestrone pasta from getting mushy before adding pasta directly to the pot.
Vegetables
Zucchini, green beans, spinach, kale, cabbage, potato, peas, squash, carrots, and celery can all work. Dense vegetables such as potato, squash, cabbage, and carrots need more time. Zucchini, peas, spinach, and tender greens should go in later so they keep some color and shape.
Minestrone is not a test of whether you bought the exact vegetables; it is a way to turn the vegetables you have into a balanced soup.
Herbs and Finishers
Italian seasoning, oregano, basil, thyme, bay leaf, black pepper, parsley, and fresh basil all fit well. A parmesan rind is optional for extra depth, but use vegetarian-style parmesan if that matters to you, or skip cheese completely for a vegan version.
A small splash of lemon juice or red wine vinegar wakes up the whole pot at the end, especially after the beans and pasta have softened the broth. A spoonful of pesto can make the finish taste brighter; these basil pesto variations are useful if you like that herby direction.
How to Make Minestrone Soup
The steps follow the same rhythm as the Rule of 5: sauté, deepen, simmer, add quick-cooking ingredients late, finish fresh.
1. Sauté the Onion, Carrot, and Celery
Heat olive oil in a large Dutch oven or heavy soup pot over medium heat. Add onion, carrot, celery, and salt. Cook for 7 to 10 minutes, stirring often, until the vegetables soften and the onion turns translucent. The pot should smell sweet and savory before you move on.
2. Add Garlic and Tomato Paste
Stir in the garlic and tomato paste. Cook for 1 to 2 minutes, stirring often. The tomato paste should darken slightly and smell richer, but it should not scorch. A watery minestrone usually means the base was rushed, so give this step its minute.
3. Build the Broth
Add crushed or diced tomatoes, broth, Italian seasoning, bay leaf, black pepper, and parmesan rind if using. Scrape the bottom of the pot so all the tomato paste and aromatics dissolve into the broth.
Let the tomato broth, beans, and firm vegetables simmer before adding pasta. As a result, the base tastes rounded instead of rushed.
4. Add Beans and Simmer Gently
Add the rinsed beans and any firm vegetables such as cabbage, potato, or squash. Bring the soup to a boil, then reduce it to a gentle simmer. You want small bubbles, not a rolling boil. Cook partly covered for 20 to 25 minutes, until the broth tastes fuller and the vegetables are tender.
Taste the broth before adding pasta. If it tastes thin or flat now, give it more simmering time, adjust the salt, or brighten it with a little lemon juice or vinegar. The broth should already taste good before the pasta goes in; if it still tastes weak, use the troubleshooting section before adding pasta.
Keep minestrone at a gentle simmer, not a hard boil. Small bubbles build flavor while helping the vegetables stay tender and intact.
5. Add Quick-Cooking Vegetables and Pasta
Add green beans, zucchini, and small pasta near the end. Cook for 8 to 10 minutes, or until the pasta is just tender. Stop while it still has a little structure, because it will keep softening in the hot broth.
Add pasta and greens near the end. This keeps the soup brighter, protects the greens, and helps prevent pasta from swelling in the pot.
6. Finish with Greens, Herbs, and Brightness
Stir in spinach or kale for the final 1 to 3 minutes. The greens only need to wilt; they do not need to cook down into the broth. Remove the bay leaf and parmesan rind. Finish with parsley or basil, a drizzle of olive oil, and lemon juice or red wine vinegar. Rest the soup for 5 minutes before serving so the broth settles and the flavors come together.
When the pot is ready, it should look colorful and ladle easily. If it feels crowded, loosen it with a splash of broth before serving.
Easy Minestrone Swaps
Once the base makes sense, the soup becomes forgiving. You do not need the exact same vegetables every time; you just need the right balance of broth, beans, pasta or rice, and timing.
Use What You Have
Use this section when the pot needs to adapt to the vegetables, beans, and pasta you already have.
Minestrone is made for flexible cooking. Therefore, zucchini, cabbage, kale, potato, beans, herbs, and small pasta can all work when you add them at the right time.
If you do not have
Use this instead
Cannellini beans
Navy beans, great northern beans, white beans, or chickpeas
Kidney beans
More white beans, borlotti beans, chickpeas, or lentils
Zucchini
Cabbage, green beans, peas, spinach, kale, or squash
Ditalini
Small shells, elbows, macaroni, or orzo
Vegetable broth
Water with extra tomato paste, herbs, olive oil, and careful seasoning
Fresh greens
Frozen spinach, frozen kale, or chopped cabbage added earlier
Parmesan rind
Skip it, or finish with olive oil, herbs, and a little lemon juice or vinegar
This is also where minestrone becomes personal. One cook adds cabbage, another adds potato, another uses chickpeas, and another keeps it brothy. The base stays the same, but the pot can still feel like yours. For more timing help, see the firm-early, tender-late vegetable guide.
What the Soup Should Look and Taste Like
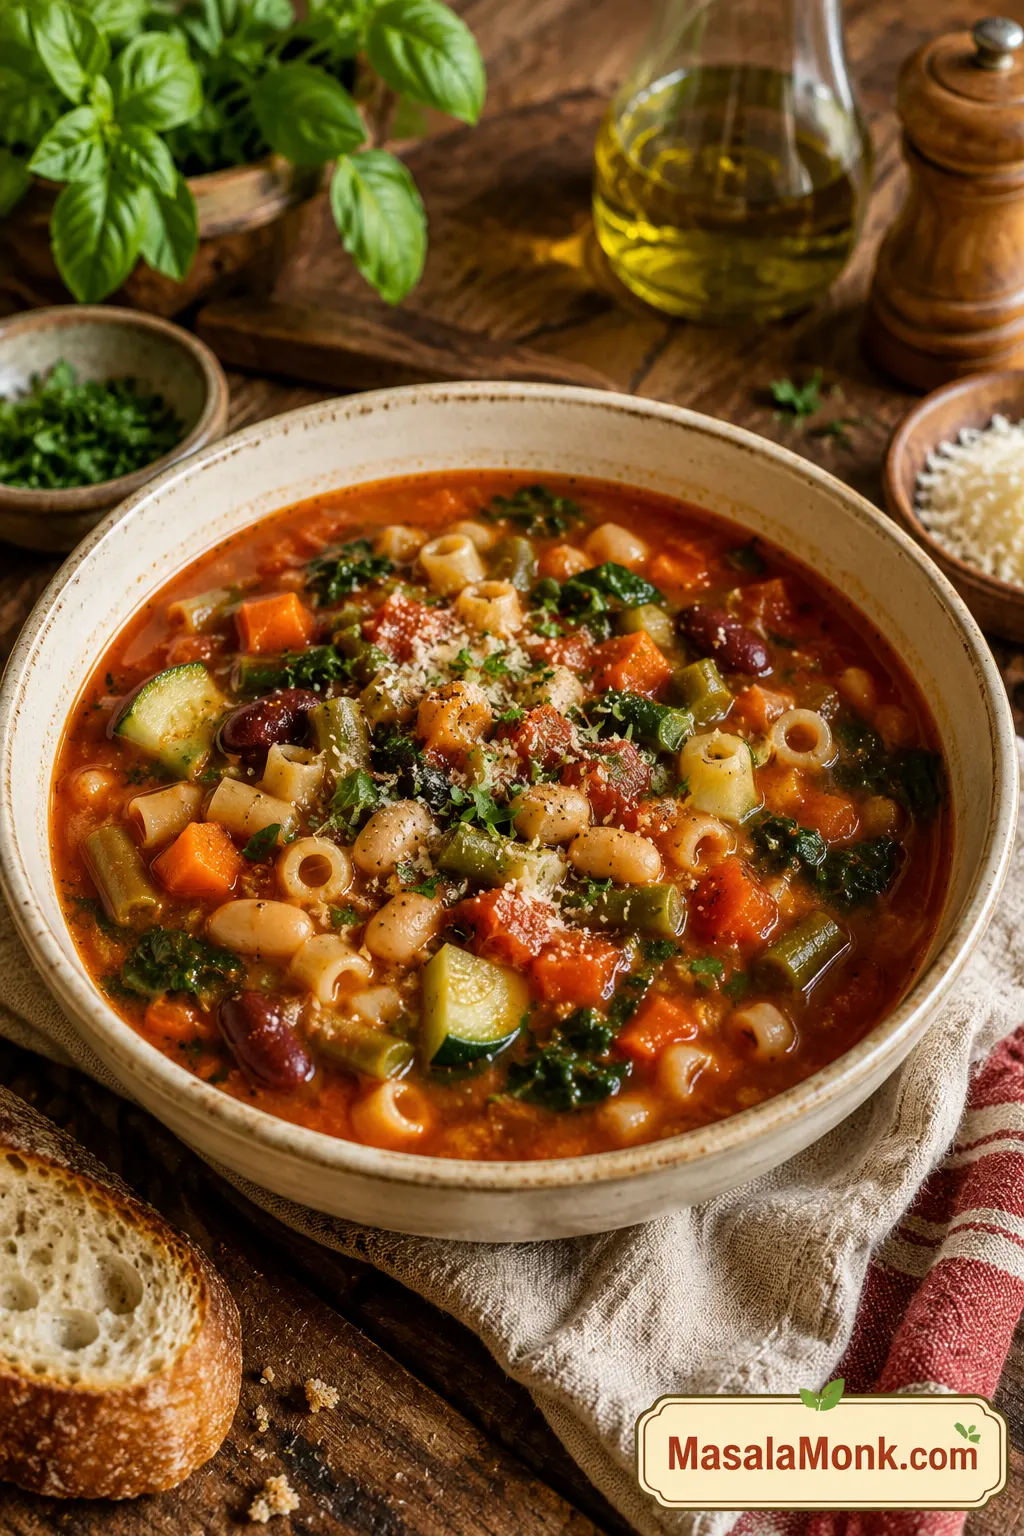
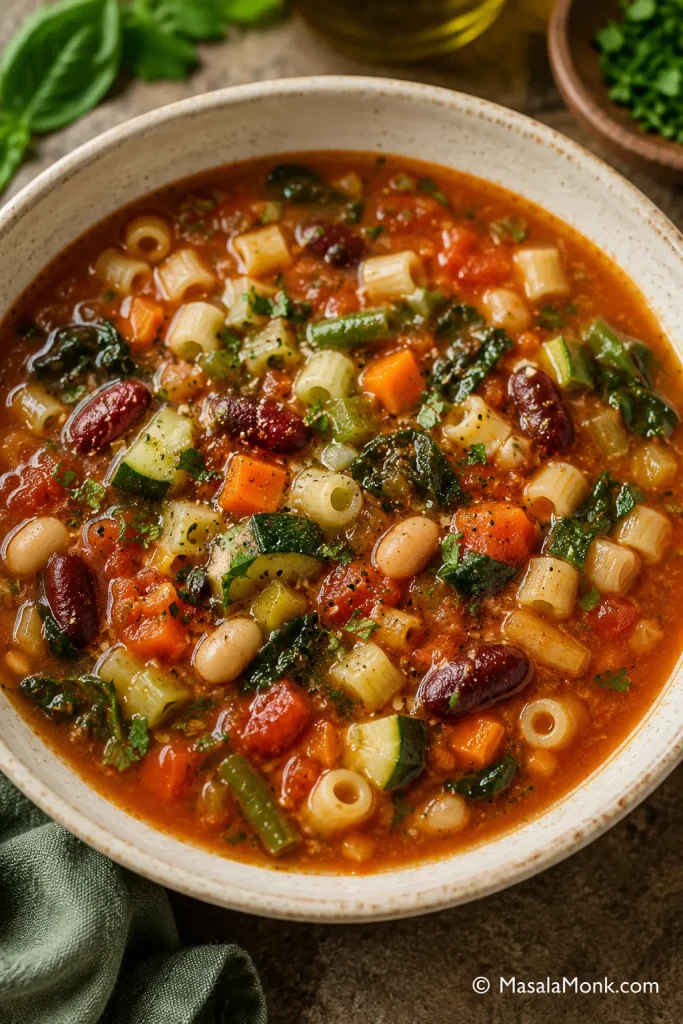
You are looking for a soup that is chunky but still brothy. The tomato broth should taste rounded rather than sharp or thin. Vegetables should be tender without collapsing, beans should stay creamy but mostly intact, and the pasta should be just tender, not swollen.
Finished Bowl Texture Check
Use the finished bowl as a quick check before serving: the soup should look full, but it should still move like soup.
Use the finished bowl as a texture check. The vegetables and beans should stand out clearly, while the tomato broth still fills the gaps around them.
Chunky but Still Soup
If the pot looks crowded but still has enough broth to move around the vegetables, you are in the right place. You should be able to drag the spoon through the bowl and see vegetables and beans settle back into the tomato broth, not sit in a dry pile. The final olive oil, herbs, and lemon juice or vinegar should make the bowl taste brighter, not sour.
Aim for chunky but not dry. The spoon should catch vegetables and beans, while the broth still makes the bowl feel like soup.
Best Beans, Pasta, and Vegetables for Minestrone
Beans, pasta, and vegetables are where minestrone becomes dinner. The choices do not need to be fancy; they just need to make sense together in the spoon.
Best Beans and Pasta for Minestrone
Start with spoon-friendly beans and small pasta shapes, then choose vegetables that match the season and cooking time.
Choose beans and pasta that fit easily on a spoon. Cannellini beans, kidney beans, ditalini, elbows, or small shells keep minestrone hearty without making it clumsy.
Best Beans
Cannellini or white beans: creamy, mild, and classic.
Kidney beans: firmer, colorful, and familiar in restaurant-style minestrone.
Borlotti beans: rustic and soft with a fuller bean flavor.
Chickpeas: nutty and firmer, good when you want more bite.
Lentils: useful for a thicker, higher-protein variation.
Best Pasta
Ditalini: classic and spoon-friendly.
Small shells: good for catching tomato broth.
Elbows or macaroni: easy pantry choice.
Orzo: soft and pleasant, but it thickens leftovers quickly.
Rice: useful if you do not want pasta. Cooked rice is easiest.
Once the beans and pasta are chosen, the vegetables are mostly about timing: firm ones early, tender ones late. That is what keeps the bowl generous without making it taste tired.
Firm Vegetables Early, Tender Vegetables Late
A good minestrone should never feel trapped by one vegetable list. Keep the tomato broth, aromatics, beans, herbs, and small pasta structure, then choose vegetables that fit the pot.
Summer: zucchini, green beans, fresh tomatoes, basil, spinach.
Add dense vegetables like potato, squash, cabbage, and carrots earlier. Add zucchini, peas, spinach, and tender greens near the end. Try not to overload the pot; minestrone should be hearty, but it should still have enough broth to feel like soup.
Vegetable timing matters more than a perfect shopping list. Add firm vegetables early, then save tender greens, zucchini, peas, and herbs for the final minutes.
How to Fix Minestrone Soup Problems
If your minestrone tastes bland, watery, too thick, too acidic, or overcooked, it can usually be fixed. Most problems come down to seasoning, simmering, pasta timing, vegetable timing, or broth balance.
Fix Bland Minestrone Soup
Before rebuilding the whole pot, taste for salt, acid, herbs, pepper, and olive oil; those small finishes often fix a flat bowl.
Bland minestrone often needs a finish, not a rebuild. Salt, lemon or vinegar, herbs, black pepper, and olive oil can wake up the whole pot.
Problem
Fix
Soup tastes flat
Add salt first, then a small splash of lemon juice or red wine vinegar.
Broth is too thin
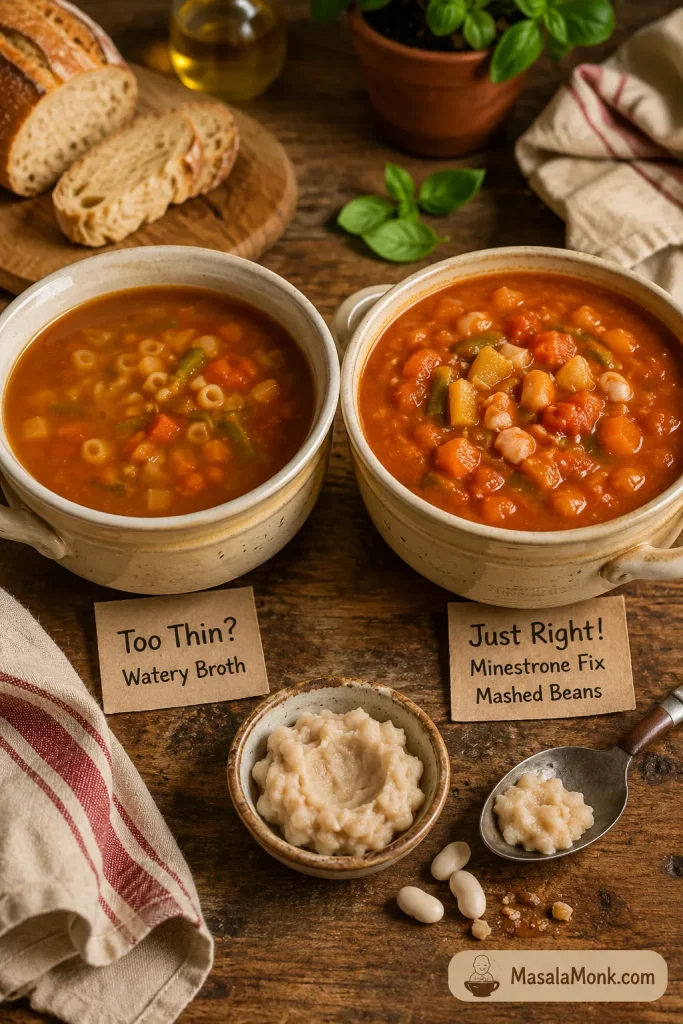
Simmer uncovered for a few minutes or mash 1/2 cup of beans into the broth.
Soup is too thick
Add broth or water until it becomes spoonable again.
Pasta is too soft
Add more broth, fresh herbs, and a little acidity. Next time, cook pasta separately.
Vegetables are overcooked
Freshen the bowl with herbs, olive oil, and extra broth. Next time, add zucchini and greens later.
Soup tastes too acidic
Add a drizzle of olive oil or a tiny pinch of sugar to round the tomato flavor.
Soup is too salty
Add unsalted broth, water, extra beans, or more vegetables.
Most of the time, the fix is smaller than you think. A little salt, a little acid, a splash of broth, or a few mashed beans can bring the pot back.
Fix Watery Minestrone Soup
When the broth looks thin, mashed white beans are the quickest natural thickener because they add body without changing the soup into cream sauce.
If the broth tastes watery, mash a few white beans into the soup and simmer briefly. This thickens minestrone naturally without cream or flour.
How to Make Minestrone Richer
Cook the onion, carrot, and celery until they soften and smell sweet.
Cook the tomato paste before adding broth.
Use crushed tomatoes for a fuller broth.
Add a parmesan rind if you are using cheese.
Mash some of the beans into the soup for natural body.
Simmer partly uncovered when the soup looks too thin.
Finish with olive oil, herbs, and a small splash of lemon juice or vinegar.
How to Keep Pasta from Getting Mushy
Minestrone pasta gets mushy when it sits in hot broth for too long or stays in the soup through storage. The safest method depends on how you plan to serve it.
Serving immediately: add dry pasta during the final 8 to 10 minutes.
Meal prep: cook pasta separately and add it to each bowl.
Freezing: freeze the soup without pasta and add fresh pasta later.
Thick leftovers: reheat with extra broth or water.
For better leftovers, store the soup base and pasta separately. Then add pasta to each serving so the next bowl stays fresh instead of soggy.
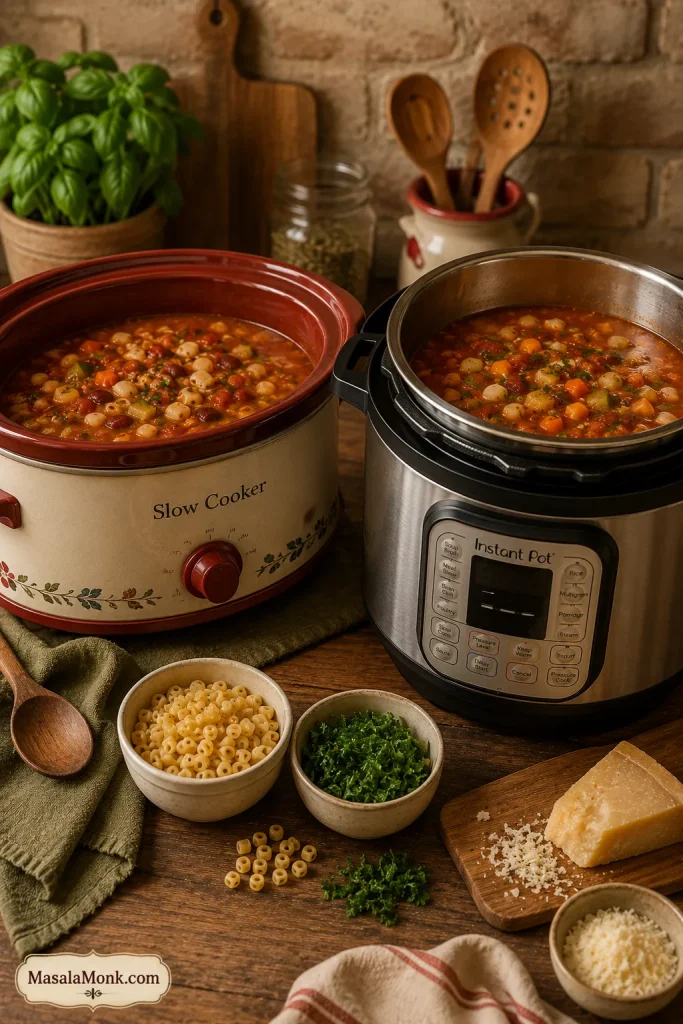
Slow Cooker and Instant Pot Minestrone
Slow Cooker vs Instant Pot Minestrone
For both appliance methods, the texture rule is the same: cook the base first and keep pasta and greens late. The pasta texture notes are especially useful for meal prep.
Whether you use a slow cooker or Instant Pot, cook the soup base first. Meanwhile, keep pasta and greens for the end so the texture stays better.
Slow Cooker Minestrone
Slow cooker minestrone is best for a hands-off soup base. Cook the broth, beans, aromatics, and firm vegetables first, then add zucchini, pasta, and greens near the end so they do not overcook.
Add onion, carrot, celery, garlic, tomato paste, tomatoes, broth, herbs, bay leaf, beans, and firm vegetables to the slow cooker.
Cook on low for 6 to 8 hours or high for 3 to 4 hours.
Add zucchini and green beans during the final 30 minutes.
Add pasta only during the final 20 to 30 minutes, or cook pasta separately.
Stir in spinach or kale at the end, then finish with herbs, olive oil, and lemon juice or vinegar.
Instant Pot Minestrone
Instant Pot minestrone is best for a fast soup base. Pressure cook the broth, beans, and firm vegetables, then add cooked pasta and greens at the end so the pasta does not turn soft under pressure.
Use sauté mode to cook onion, carrot, celery, and olive oil for 4 to 5 minutes.
Add garlic and tomato paste. Cook for 1 minute.
Add tomatoes, broth, herbs, bay leaf, beans, and firm vegetables.
Pressure cook on high for 4 to 5 minutes.
Let pressure release naturally for 5 to 10 minutes, then quick release carefully.
Stir in greens and cooked pasta, then finish with herbs, olive oil, and lemon juice or vinegar.
Olive Garden-Style Minestrone Soup
If you like Olive Garden’s lighter tomato-broth style, use these adjustments while keeping the main recipe homemade. Olive Garden describes its minestrone as vegetables, beans, and pasta in a light tomato broth, so this is a home version in that familiar direction, not the official recipe. You can see Olive Garden’s menu description for the style reference.
For Olive Garden-style minestrone at home, keep the broth lighter, the beans whole, the vegetables small, and the pasta modest.
Use diced tomatoes instead of crushed for a lighter restaurant-style texture.
Do not mash the beans into the broth.
Keep the pasta modest so the soup stays brothy.
Use kidney beans, white beans, zucchini, green beans, carrots, celery, and spinach.
Finish with herbs and acidity so the bowl tastes bright, not heavy.
Minestrone Soup Variations
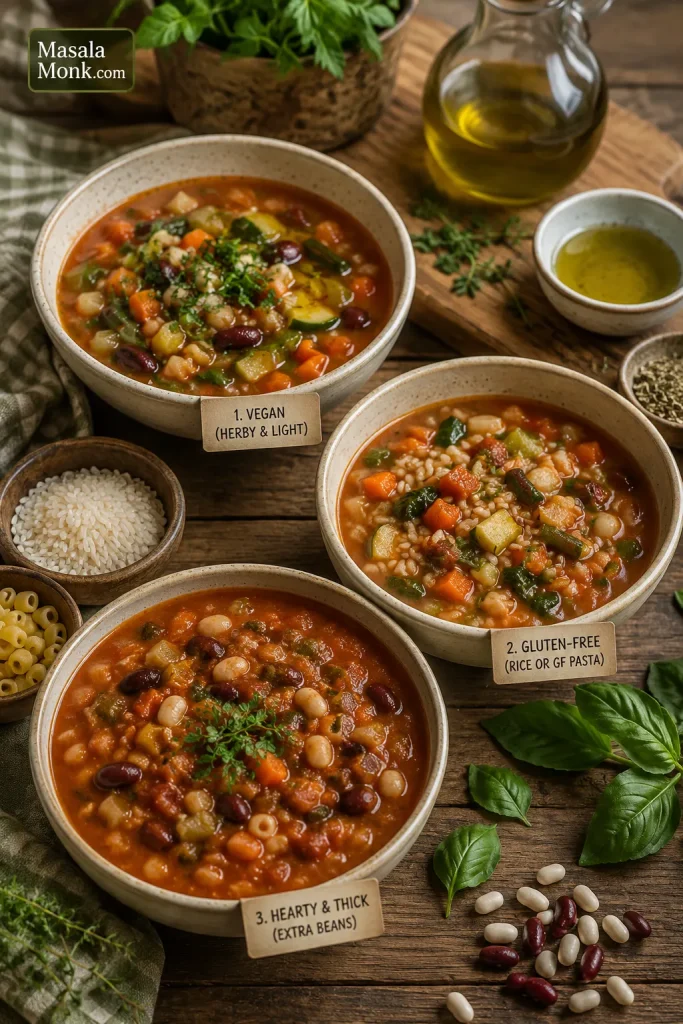
After the base tastes good, you can take the soup in a few different directions without losing the minestrone feel. Keep the tomato base, beans, vegetable timing, and small pasta structure in place, then adjust the bowl you want. For gluten-free, rice-based, or pasta-free versions, the storage section is useful if you plan to cook the starch separately.
Once the tomato-bean base tastes good, you can take minestrone in several directions: vegan, gluten-free, rice-based, or thicker and extra hearty.
Vegan minestrone: use vegetable broth and skip parmesan rind, parmesan cheese, meat, and egg pasta. Finish with olive oil, herbs, nutritional yeast, or vegan pesto.
Gluten-free minestrone: use gluten-free pasta or rice. Cook gluten-free pasta separately for the best texture. Do not use barley or farro.
Minestrone without pasta: skip the pasta and add extra beans, cabbage, zucchini, potato, kale, spinach, or cooked rice.
Thick and hearty minestrone: use crushed tomatoes, 1 cup pasta, extra white beans, and a small potato. Mash some beans into the broth.
Brothy minestrone: use 3/4 cup pasta, unmashed beans, and an extra cup of broth for a lighter, restaurant-style bowl.
Low-sodium minestrone: start with low-sodium broth, rinse canned beans well, and choose no-salt-added tomatoes if available. Use garlic, herbs, lemon juice, vinegar, and olive oil to build flavor.
Add meat: brown Italian sausage or ground beef before adding the aromatics, or stir in shredded cooked chicken near the end.
Think of these as directions, not separate recipes. The same pot can become lighter, heartier, vegan, gluten-free, or meatier without losing its minestrone backbone.
What to Serve with Minestrone Soup
Minestrone can stand alone as dinner, especially with beans and pasta, but a simple side makes the meal feel complete.
A lighter meal: serve minestrone with a crisp salad, roasted vegetables, or something bright like beet salad.
For a heartier dinner: add garlic bread, focaccia, grilled cheese, parmesan toast, or pesto toast.
Minestrone can stand alone, but the sides change the meal. Garlic bread makes it heartier, while a fresh salad keeps dinner lighter.
The best side is something that balances the tomato broth without making the meal feel heavy.
Make-Ahead, Storage, Freezing, and Reheating
Make-Ahead Plan
Yes, you can make minestrone ahead of time. For the best texture, make the soup base without pasta, refrigerate it, and add freshly cooked pasta when serving.
Chop the onion, carrot, celery, zucchini, and green beans up to 1 day ahead.
Drain and rinse the beans ahead of time.
Make the soup base without pasta up to 3 days ahead.
Add greens when reheating so they stay brighter.
Cook pasta fresh, or store cooked pasta separately with a tiny drizzle of olive oil.
Store and Freeze Minestrone with Pasta Separately
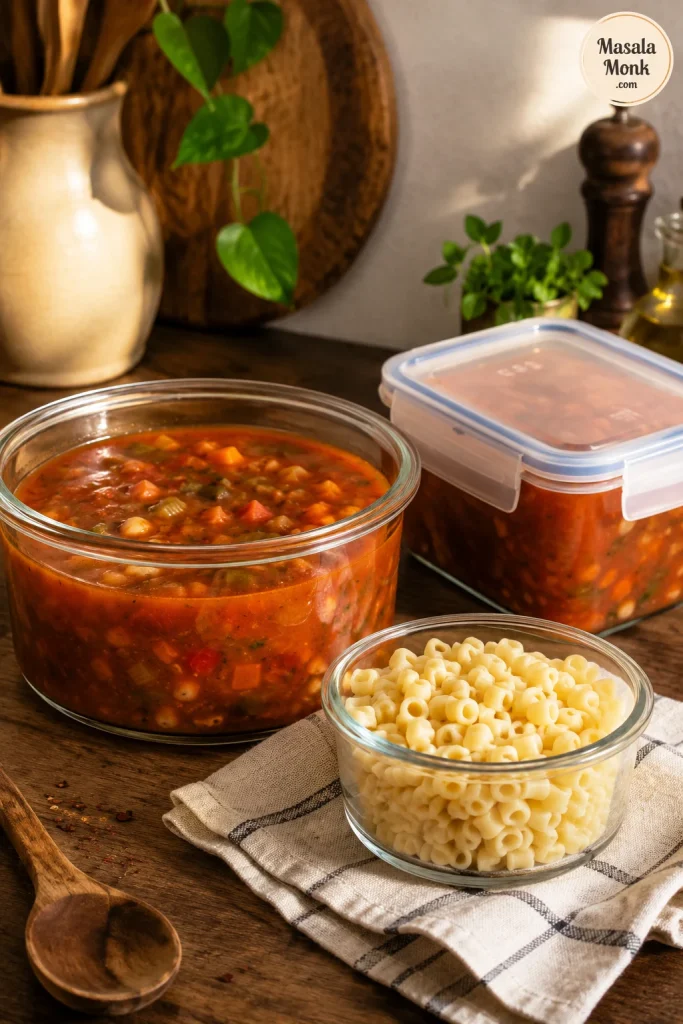
This storage setup keeps the soup base useful and protects the pasta from swelling before the next serving.
For freezing, leave pasta out of the soup base. This way, the broth, beans, and vegetables reheat well, and fresh pasta can be added later.
Fridge
Store minestrone soup in an airtight container in the fridge for 3 to 4 days, which matches the USDA’s general guidance for refrigerated leftovers. The next-day soup is often thicker and more flavorful. Loosen it with broth before reheating.
Freezer
Minestrone freezes best without pasta. Freeze the soup base for up to 3 months, then add freshly cooked pasta when reheating. If you freeze it with pasta, the flavor will still be good, but the pasta will become softer.
Reheating
Reheat gently on the stovetop over low to medium-low heat. Add broth or water to loosen the soup. After reheating, freshen the bowl with olive oil, herbs, lemon juice, vinegar, or parmesan. For the fastest fix when leftovers get thick, see the troubleshooting table.
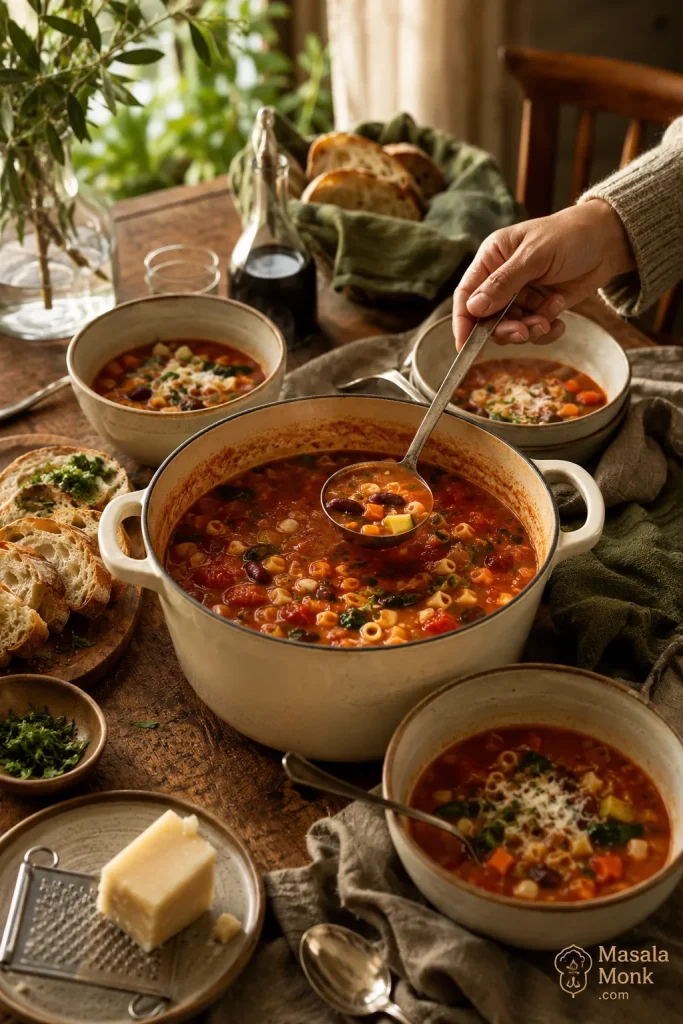
Serve Minestrone Family-Style
Serve minestrone family-style when you want the meal to feel relaxed and generous, with herbs, cheese, bread, or extra broth added at the table.
Once you have the rhythm down, minestrone becomes one of those soups you can make again and again without overthinking it. Keep the tomato broth, beans, small pasta, and vegetable timing in place, then let the pot change with the season.
The best minestrone is not the one with the longest ingredient list; it is the one where the broth, beans, vegetables, and pasta all still feel like they belong in the same spoonful.
Minestrone changes from kitchen to kitchen. If your pot had cabbage, potato, chickpeas, kale, extra zucchini, or a pasta shape that worked beautifully, tell us. Those small choices are often what help the next person make a better pot from what they already have.
Frequently Asked Questions
What is minestrone soup made of?
Minestrone soup is an Italian vegetable soup made with vegetables, beans, tomatoes, broth, herbs, olive oil, and usually pasta or rice. Common vegetables include onion, carrot, celery, zucchini, green beans, cabbage, spinach, kale, potato, and peas.
Is minestrone soup vegetarian?
Minestrone soup is vegetarian when it is made with vegetable broth and no meat. If you add parmesan, choose vegetarian-style parmesan if that matters to you.
Is minestrone soup vegan?
Minestrone soup is vegan when it is made with vegetable broth and no parmesan, parmesan rind, meat, or egg pasta. For a vegan finish, use olive oil, herbs, nutritional yeast, or vegan pesto.
What is the best pasta for minestrone?
Ditalini is one of the best pasta shapes for minestrone because it is small and spoon-friendly. Small shells, elbows, macaroni, and orzo also work.
What beans are best for minestrone?
Cannellini beans, white beans, and kidney beans are the best everyday beans for minestrone. Borlotti beans, navy beans, chickpeas, and lentils also work.
Why does my minestrone taste bland?
Bland minestrone usually needs salt, acidity, or more simmering time. Cook the aromatics well, cook the tomato paste until it darkens slightly, taste the broth before adding pasta, then finish with lemon juice or vinegar if the tomato flavor tastes flat.
How do you make minestrone less watery?
To make minestrone less watery, simmer it uncovered, mash some beans into the broth, use crushed tomatoes, or add a parmesan rind if you are using cheese. A watery soup often means the aromatics or tomato paste needed more time at the beginning.
How do you keep pasta from getting mushy in minestrone?
To keep pasta from getting mushy in minestrone, add it only near the end and stop when it is just tender. For leftovers, meal prep, or freezing, cook pasta separately and add it to each bowl.
Can you make minestrone soup ahead of time?
Yes, minestrone is a good make-ahead soup, especially if you make the soup base without pasta. Refrigerate the base for 3 to 4 days, then add freshly cooked pasta when serving.
Can you freeze minestrone soup?
Yes, minestrone soup freezes well, but it freezes best without pasta. Freeze the soup base for up to 3 months, then add freshly cooked pasta when serving.
What is the difference between minestrone and vegetable soup?
Minestrone is usually heartier than plain vegetable soup because it often includes beans, pasta or rice, tomatoes, Italian herbs, and olive oil. Vegetable soup can be any broth-based soup made with vegetables.
What is the difference between minestrone and pasta e fagioli?
Minestrone is a vegetable-heavy soup that often includes beans plus pasta or rice. Pasta e fagioli means pasta and beans, so it is more focused on those two ingredients and is often thicker and more bean-forward.
Can I make minestrone without pasta?
Yes, you can make minestrone without pasta. Add extra beans, cabbage, zucchini, potato, kale, spinach, or cooked rice instead.
Can I use frozen vegetables in minestrone?
Yes, frozen peas, green beans, spinach, kale, and mixed vegetables can work well in minestrone. Add quick-cooking frozen vegetables near the end unless they are dense vegetables. If frozen spinach releases too much water, squeeze it before adding.
Can I make minestrone with canned vegetables?
Yes, canned vegetables can work in minestrone when you need a pantry version. Drain them well and add them near the end because they are already cooked and can become too soft if simmered for a long time.
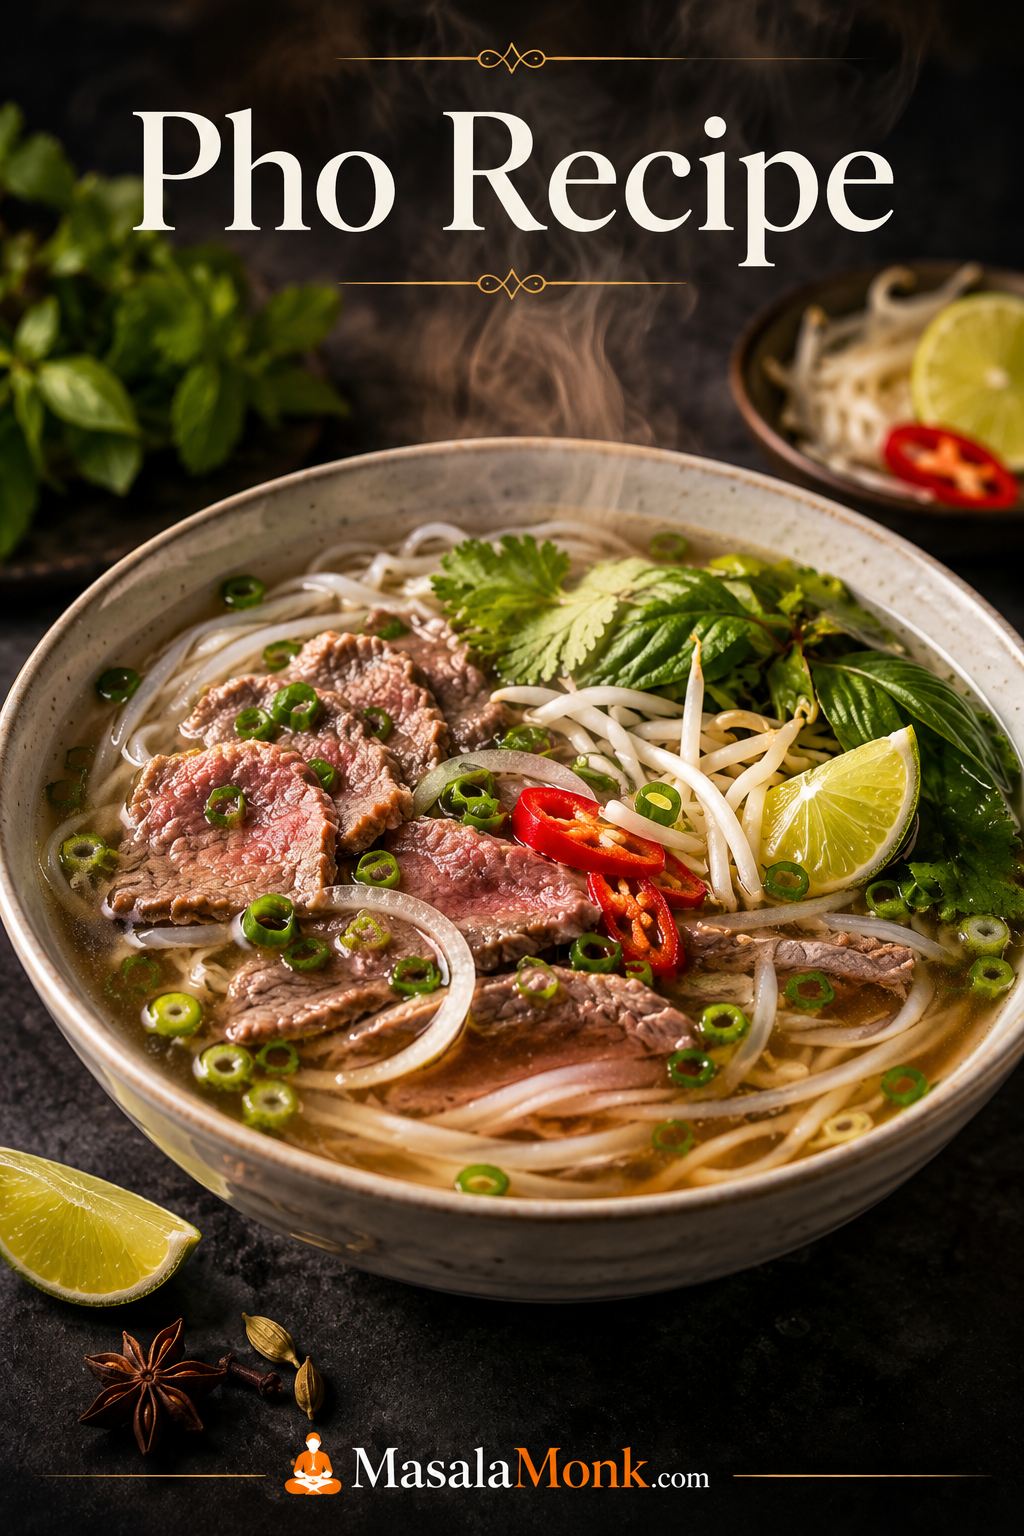
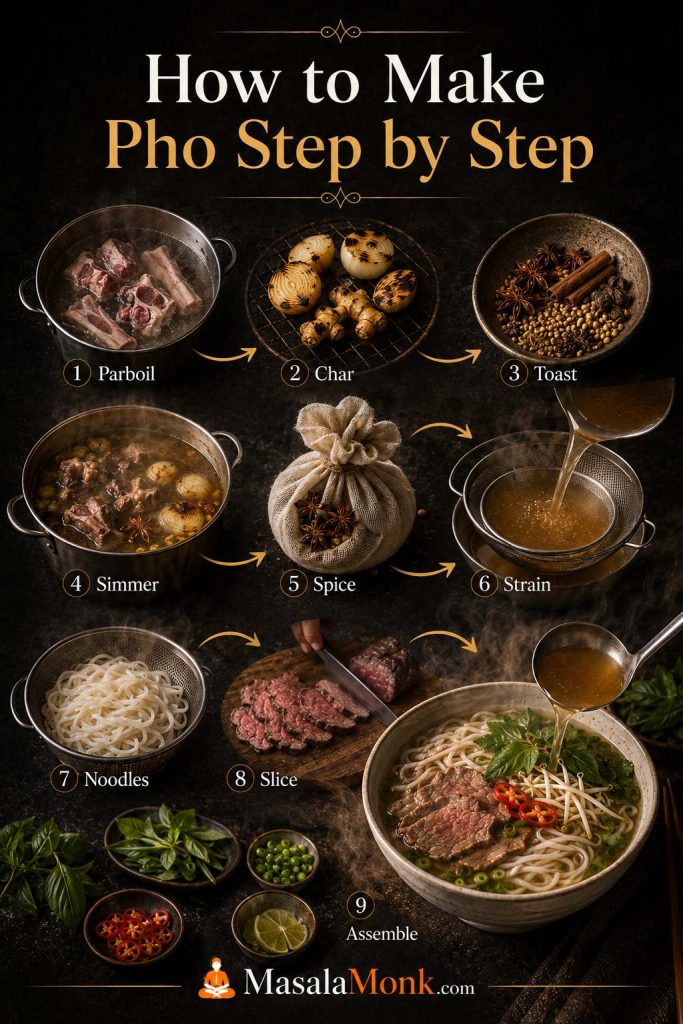
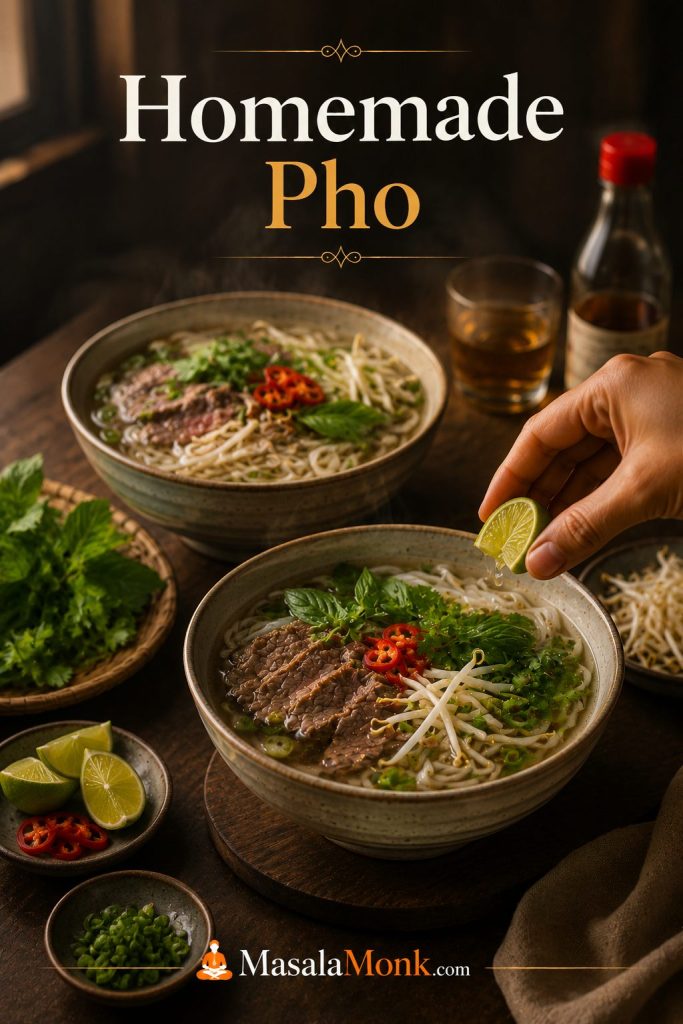
This pho recipe is for the day you want the comfort of a real Vietnamese noodle soup at home, but do not want to get lost in bones, spices, noodles, and conflicting broth advice. The process is easier once you stop treating pho as one giant task and start seeing it as four smaller jobs: build a clean aromatic broth, cook the noodles separately, prepare the beef and toppings, then assemble everything while the broth is steaming hot.
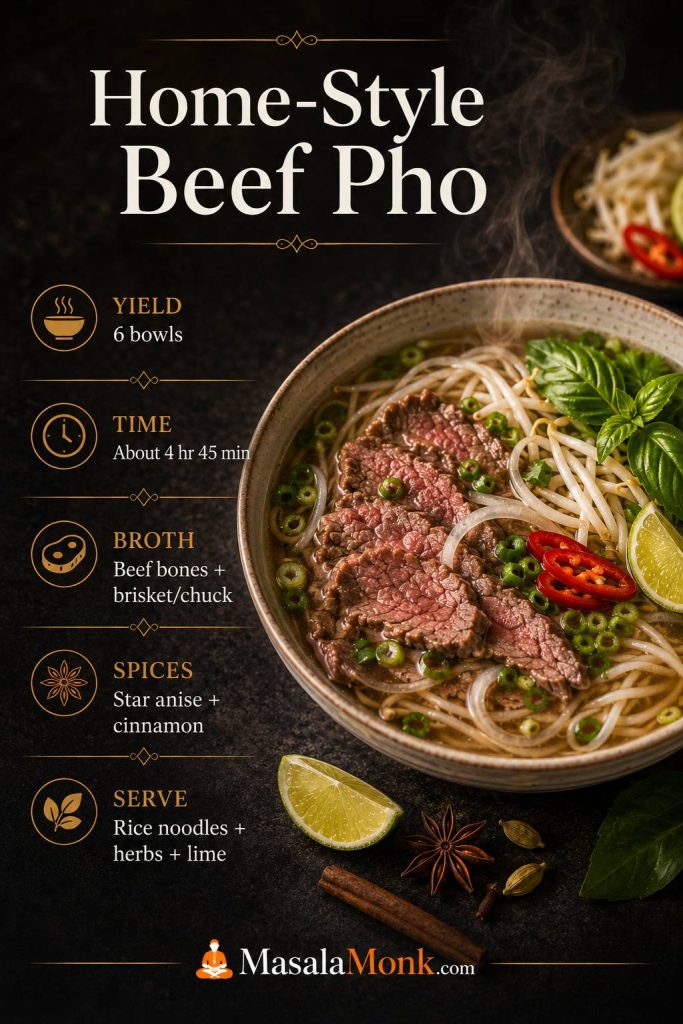
This is a home-style beef pho recipe built for a serious homemade pot, without pretending you need a restaurant setup. You get clear broth, real beef flavor, whole spices, proper rice noodles, and practical fixes for the mistakes that usually make pho taste flat.
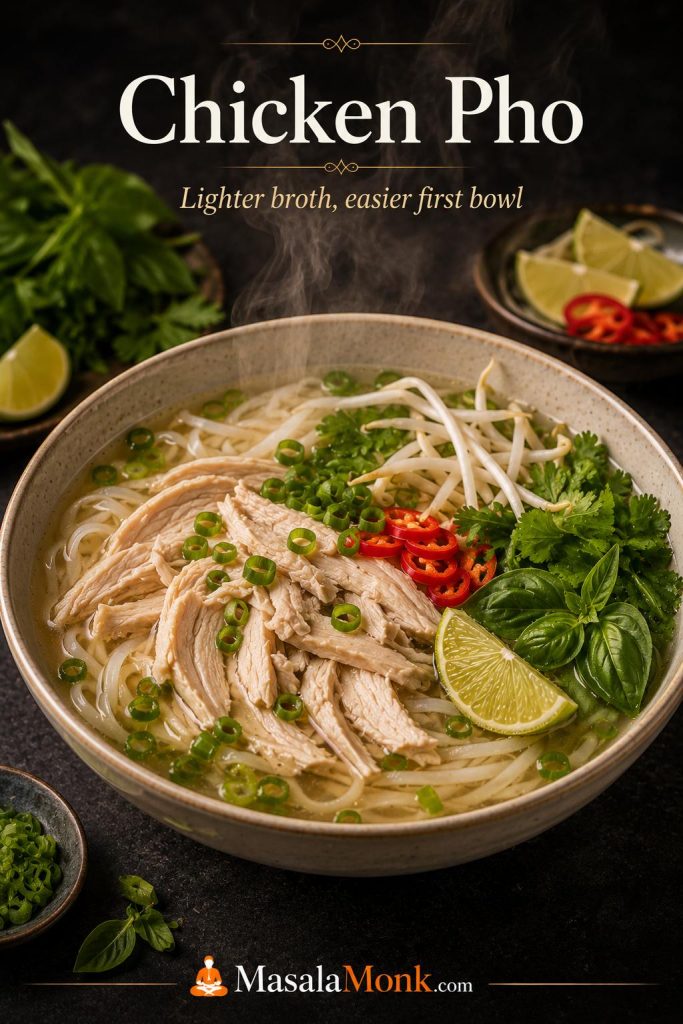
Use the full beef version when you want broth depth, the quick pho section when you want a weeknight bowl, and the chicken or vegan notes when those fit your kitchen better. The method changes, but the goal stays the same: clean aroma, balanced broth, separate noodles, fresh toppings, and hot assembly.
Start with the version that fits your day, then use the broth, noodle, topping, and troubleshooting sections to build a bowl that tastes clean, aromatic, and satisfying.
To make pho at home, start with a broth made from beef bones, a flavorful simmering cut such as brisket or chuck, browned onion, ginger, whole spices, fish sauce, salt, and a little rock sugar. Simmer it gently until the broth tastes deep and aromatic, then strain it and season it slightly stronger than a normal soup.
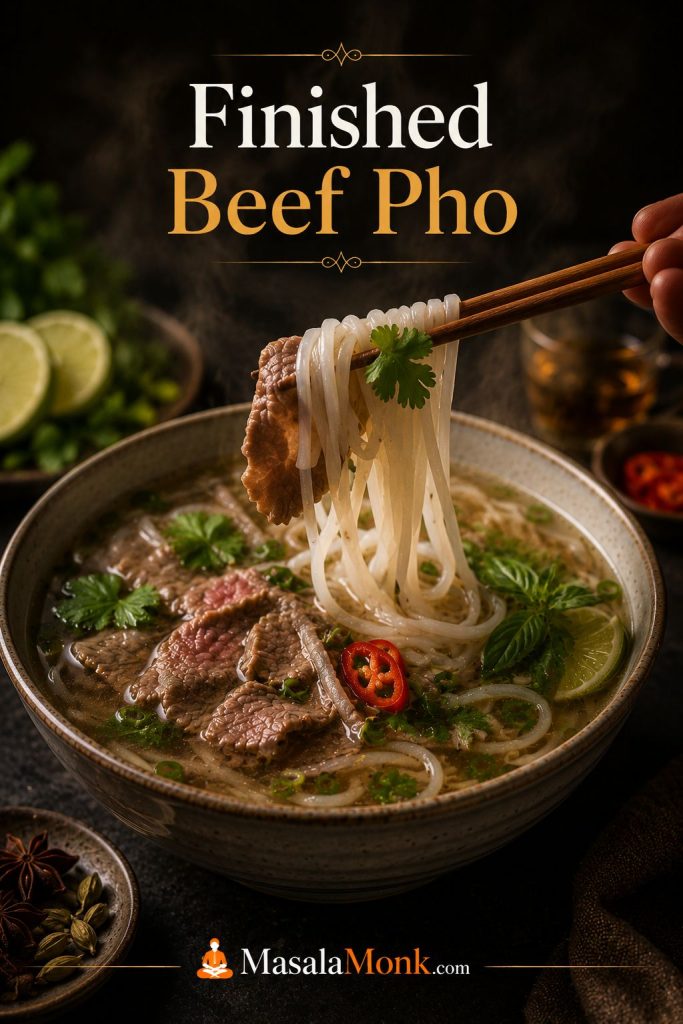
Next, cook the rice noodles separately, divide them into bowls, add sliced cooked beef and paper-thin raw beef if using, then ladle very hot broth over the top. Finish with herbs, bean sprouts, lime, chili, onion, scallions, and optional sauces on the side.
The two biggest mistakes are boiling the broth too hard and letting the noodles cook directly in the broth. Keep the broth at a gentle simmer while it cooks, then bring it back to a full boil only when you are ready to assemble the bowls.
Best first version: make the beef pho below if you want the clearest lesson in how pho works. Once you understand the broth, noodles, and bowl assembly, chicken pho, quick pho, and plant-based pho become much easier to adapt.
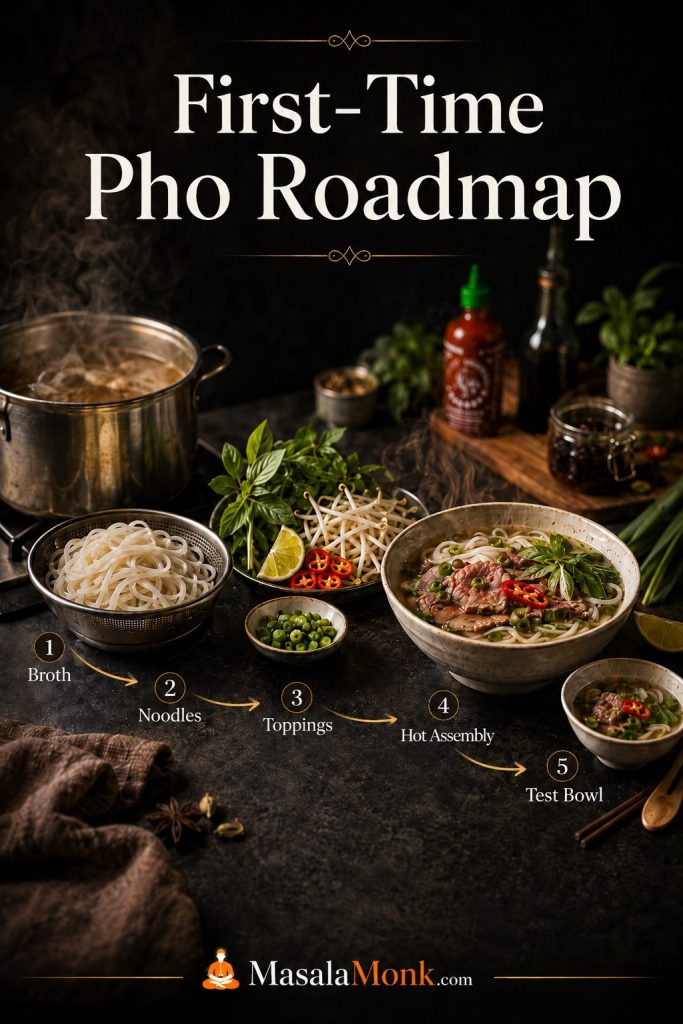
First-Time Pho Recipe Roadmap
If you are making the full beef version, give yourself a few unrushed hours. Homemade pho is not difficult, but it rewards calm timing. You do not want to be slicing beef, washing herbs, boiling noodles, and fixing broth seasoning all at the same time.
If pho feels overwhelming, divide it into four jobs instead: make the broth, prepare the noodles, set up the toppings, and assemble at the end. That rhythm keeps the recipe manageable.
Step
What to do
Why it helps
1
Make the broth on a day when you are not rushed.
The simmer is simple, but it needs time and attention.
2
Prepare noodles and toppings only when the broth is nearly ready.
Noodles stay better, herbs stay fresh, and the final bowl feels cleaner.
3
Taste the broth before assembly.
It should be a little bolder than sipping soup because noodles soften the flavor.
4
Bring the strained broth to a full boil only at serving.
The long simmer should be gentle, but the final pour should be hot.
5
Assemble one test bowl first.
If it tastes flat, you can fix the broth before serving the rest.
Choose Your Pho: Beef, Chicken, Quick, or Vegan
Pho does not have to mean the same thing every time. It can be a slow weekend broth, a lighter chicken soup, a practical shortcut, or a plant-based bowl with serious flavor. The trick is not to pretend every version is the same.
Beef pho gives the deepest flavor, chicken pho is lighter, quick pho suits busy nights, and vegan pho depends on mushroom depth. Pick the version that fits your day, not the one that sounds most ambitious.
Which Pho Recipe Should You Make?
Choose the path that fits your time and ingredients, then build the bowl with the same basic logic: aromatic broth, rice noodles added at the end, fresh toppings, and hot broth to bring everything together.
Version
Best for
What changes
Time expectation
Traditional beef pho
Deep broth, classic beef noodle soup flavor, weekend cooking
Uses beef bones, brisket or chuck, roasted aromatics, whole spices, and a long gentle simmer
About 4–5 hours
Chicken pho
An easier first pho, lighter broth, fewer hard-to-find ingredients
Uses chicken, chicken broth or a whole-chicken base, similar aromatics, and a shorter simmer
About 45–90 minutes
Quick pho
Weeknight cravings when you want a pho-style bowl without a full broth project
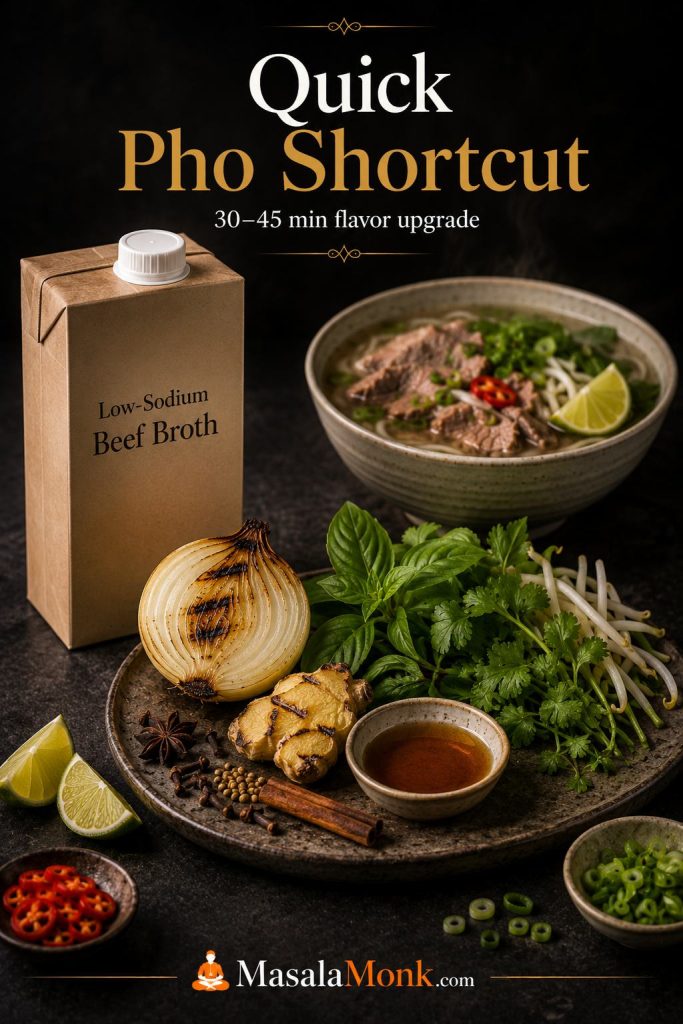
Uses good store-bought broth, roasted aromatics, warm spices, fish sauce, and fresh toppings
About 30–60 minutes
Vegetarian or vegan pho
Plant-based bowls that still need depth and aroma
Uses mushrooms, browned onion and ginger, whole spices, tamari or soy sauce, and tofu or vegetables
About 45–75 minutes
Instant Pot pho
Faster extraction from bones and meat
Uses pressure cooking, then careful straining, skimming, and final seasoning
About 2–3 hours with pressure release
The Best First Pho Recipe to Try
If you have the time, beef pho is the best version for understanding how pho gets its depth. If you are rushed, start with chicken pho or quick pho instead. A calm, well-seasoned shortcut bowl is better than a stressed full beef version.
After you understand the broth, noodles, and bowl assembly, the other versions are not confusing anymore. They are simply different ways of building aroma, body, salt, sweetness, freshness, and heat.
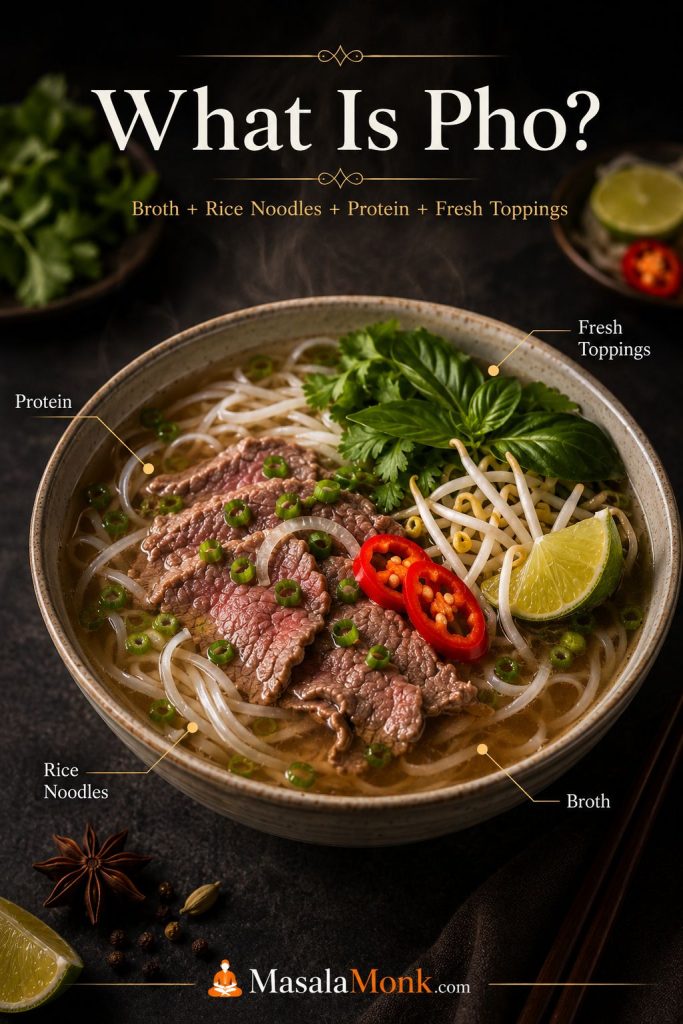
What Is Pho?
Pho, or phở, is a Vietnamese noodle soup built around aromatic broth, flat rice noodles, meat or another protein, and fresh toppings. Beef pho is often called phở bò, while chicken pho is called phở gà. A good bowl tastes savory, fragrant, lightly sweet in the background, and fresh from herbs and lime.
Pho works in layers: the broth carries the bowl, the flat noodles give it body, the protein adds substance, and herbs, lime, sprouts, and chili wake everything up at the table.
In every version, the broth does most of the work. Bones or chicken give body, onion and ginger bring warmth, whole spices create the unmistakable aroma, fish sauce and salt build savoriness, and fresh toppings brighten the finished bowl. If you want a light background read on pho’s place in Vietnamese food culture, Vietnam Travel has a useful overview of the story of Vietnamese pho.
A quick note on style: Pho varies by region, family, restaurant, and personal habit, so this is not the only “correct” way to make it. This version is a practical home-style beef pho built around the core moves that matter most: clean broth, roasted aromatics, whole spices, rice noodles, hot assembly, and fresh toppings.
Pho at a Glance
Recipe type
Home-style beef pho / Vietnamese noodle soup
Yield
6 large bowls
Starting water
4.5 L / 19 cups
Finished broth
About 3.5–4 L / 3.7–4.2 quarts, depending on evaporation
Prep time
45 minutes
Cook time
About 4 hours
Total time
About 4 hours 45 minutes
Pot size
9–10 L / 10-quart stockpot is ideal
Broth temperature while simmering
Gentle simmer, roughly 85–95°C / 185–203°F, not a rolling boil
Noodles per bowl
50–80 g dried banh pho noodles, or about 120 g fresh noodles
Broth per bowl
500–650 ml / 2–2¾ cups hot broth
The starting water is higher than the final broth yield because some liquid evaporates during the long simmer. If the pot reduces too far, add hot water near the end and adjust the seasoning before serving.
Why This Recipe Works
This pho recipe uses both beef bones and a flavorful simmering cut because bones and meat do different jobs. Bones give body, richness, and depth. Brisket, chuck, or shank makes the broth taste more rounded and gives you tender cooked beef for the bowls.
Parboiling keeps the broth cleaner. Browned onion and ginger add roasted aroma, while the toasted spice bundle gives the broth its pho fragrance without leaving grit behind. A gentle simmer keeps the broth clearer instead of greasy and muddy.
The broth is seasoned slightly stronger than a regular soup because rice noodles, herbs, sprouts, beef, and lime will soften the flavor once the bowl is assembled. That one detail is why a broth that tastes bold in the pot can taste balanced at the table.
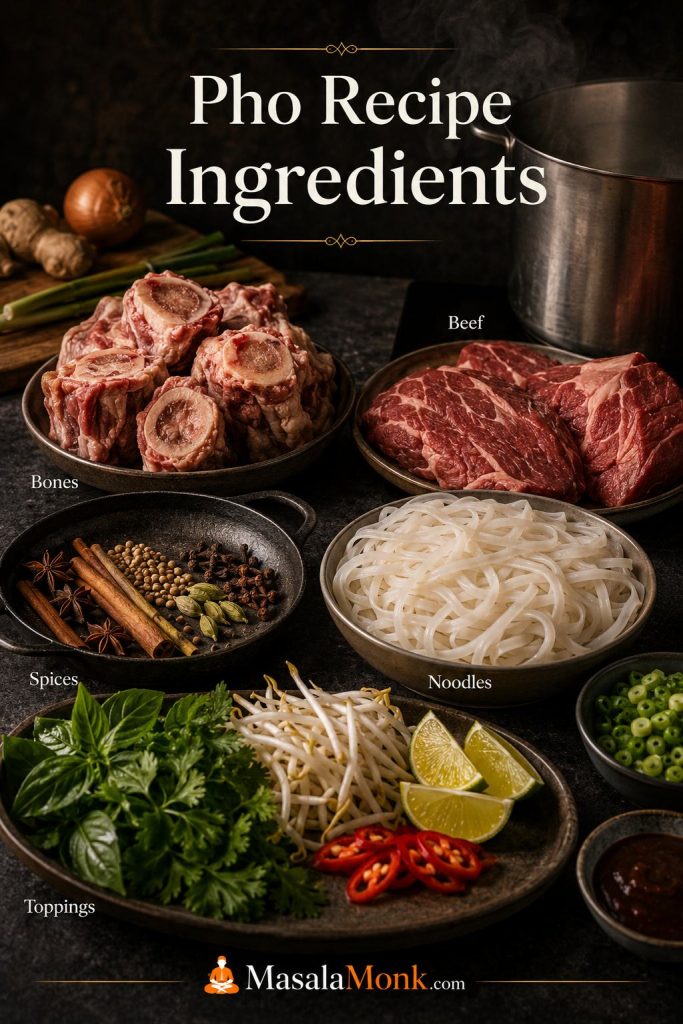
Pho Recipe Ingredients
Good pho does not need a huge list of fancy ingredients, but each ingredient has a job. The broth needs bones or chicken for body, meat for savoriness, onion and ginger for aroma, spices for warmth, fish sauce and salt for depth, sugar for balance, and noodles that stay silky after hot broth is poured over them.
The ingredient list looks long at first, yet each part has a clear job: bones add body, onion and ginger add warmth, spices build fragrance, and herbs and lime sharpen the final bowl.
Broth Ingredients
Beef bones: marrow, knuckle, leg, neck, oxtail, or meaty soup bones help build flavor and body.
Brisket, chuck, or shank: this seasons the broth and becomes the cooked sliced beef for serving.
Onion and ginger: browning them gives the broth a deeper, lightly smoky aroma.
Water: start with 4.5 L / 19 cups so you end with enough broth for 6 bowls after simmering.
Fish sauce: adds savory depth. Add it near the end so the final seasoning stays controlled.
Salt: seasons the broth itself, not just the toppings.
Rock sugar or regular sugar: rounds the broth without making it taste sugary.
Whole Spices
The classic pho aroma comes from whole spices, not powdered seasoning dumped into the pot. Star anise is the most recognizable note, while cinnamon, cloves, coriander, fennel, and black cardamom add warmth and depth.
Star anise: the signature sweet-spiced aroma.
Cinnamon: warm backbone. Use sticks, not ground cinnamon.
Cloves: powerful and easy to overdo, so use a small amount.
Coriander seeds: gentle citrusy lift.
Fennel seeds: optional, with a sweet herbal edge.
Black cardamom: optional, smoky, and strong. One pod is enough.
Pho Noodles
Use banh pho, the flat rice noodles made for pho. Dried noodles are easier to find and work very well when soaked or cooked separately. Fresh noodles need only a quick blanch. For a deeper noodle guide, Andrea Nguyen’s Viet World Kitchen has a helpful explanation of banh pho flat rice noodles.
If rice-based cooking often gives you texture trouble, MasalaMonk’s guide on how to cook rice perfectly is a useful companion for understanding rinsing, soaking, resting, and why starch control matters.
Beef, Chicken, or Plant-Based Protein
For beef pho, use two kinds of beef: one cut for simmering in the broth and one tender cut for the bowl. Brisket, chuck, or shank are good for simmering. Eye of round, sirloin, tenderloin, or flank can be sliced paper-thin and cooked by the hot broth in the bowl.
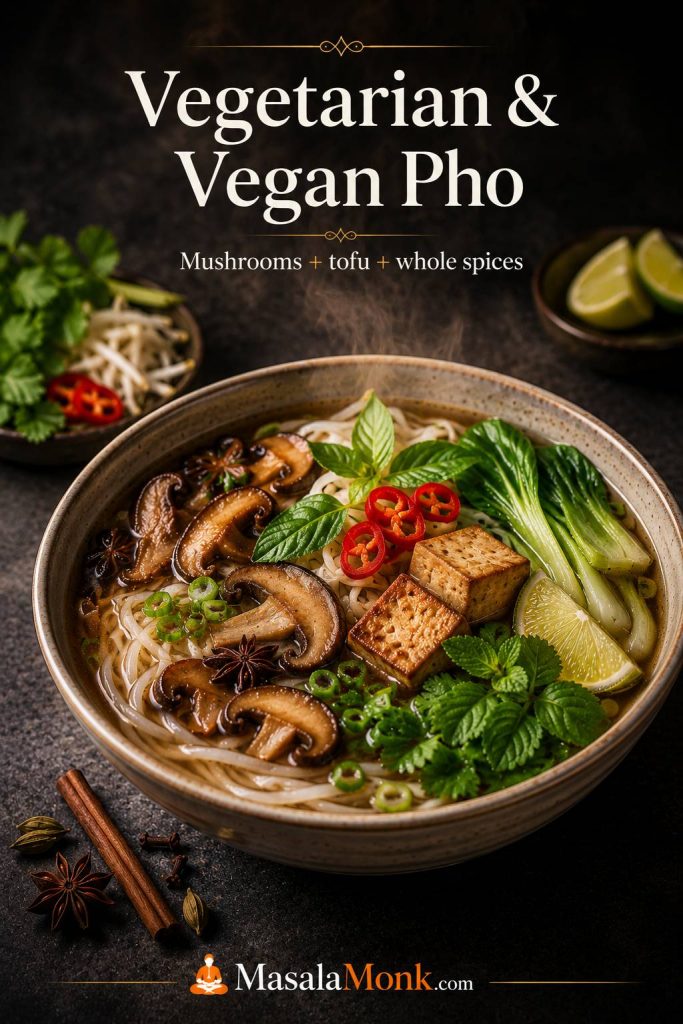
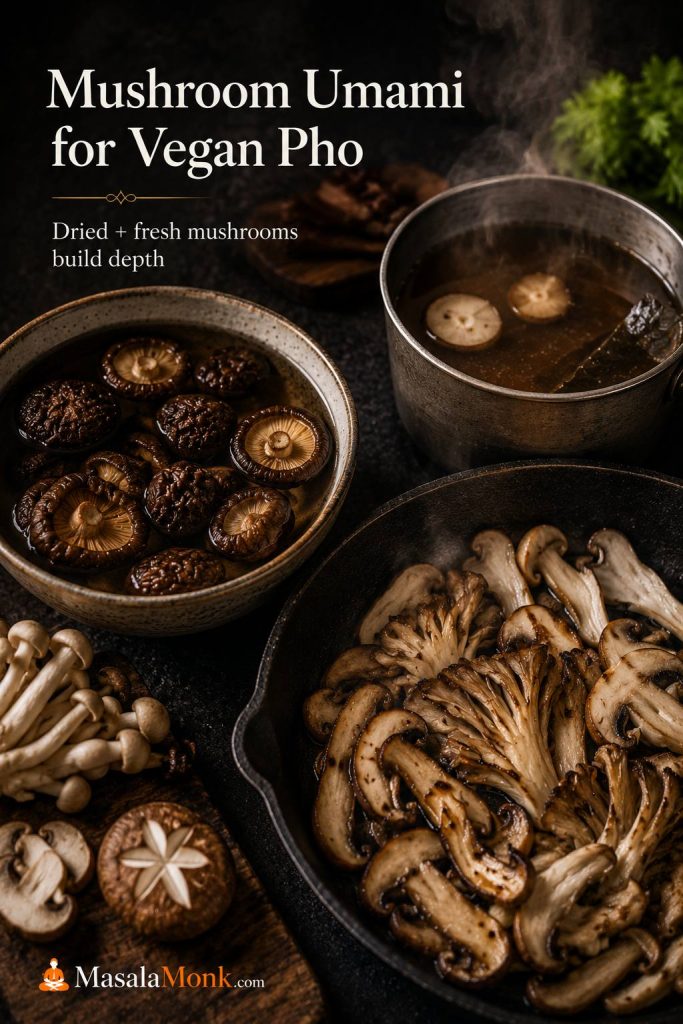
For chicken pho, use bone-in chicken, chicken thighs, or a whole-chicken base. For vegetarian or vegan pho, build body with mushrooms, roasted aromatics, whole spices, tamari or soy sauce, and tofu or vegetables.
Toppings, Herbs, and Condiments
Toppings should brighten the bowl, not cover up the broth. Bean sprouts add crunch, herbs add aroma, lime adds lift, chili adds heat, and sauces add sweetness or spice. Hoisin and sriracha are optional. To preserve the broth’s clean flavor, try sauces on the side for dipping meat instead of stirring a lot into the whole bowl.
Bean sprouts
Thai basil, mint, cilantro, or a mix
Lime wedges
Sliced chili or jalapeño
Thinly sliced onion
Scallions
Hoisin sauce, optional
Sriracha or chili sauce, optional
If you want something cool and crunchy on the side, this easy cucumber salad recipe has Asian-style and spicy cucumber variations that work well beside hot, aromatic noodle bowls.
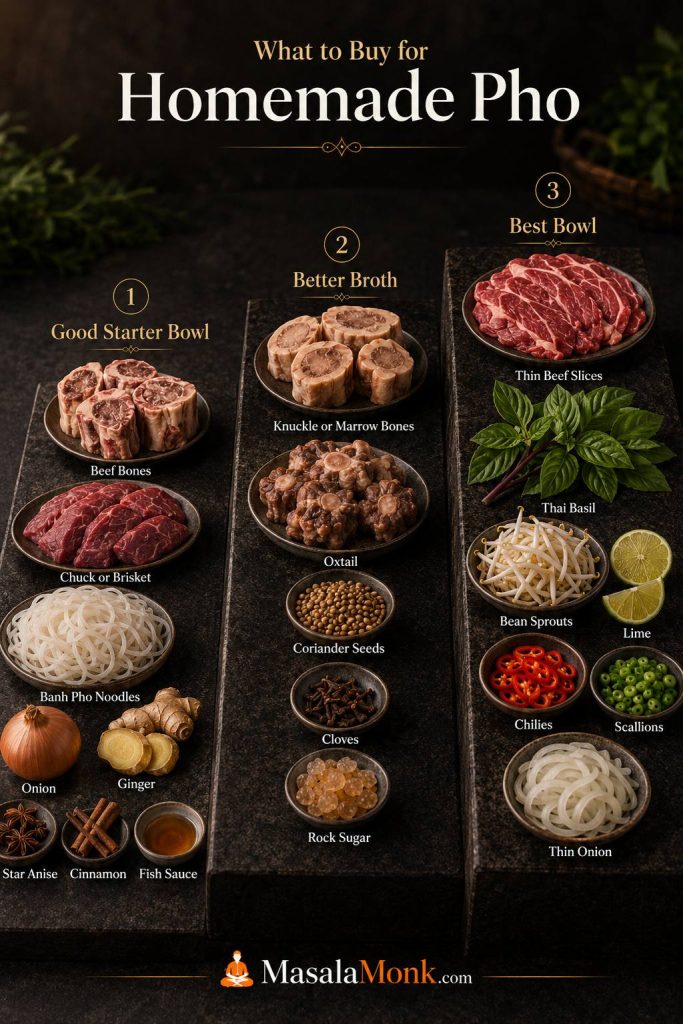
What to Buy for Homemade Pho
If this is your first time making pho, do not worry about buying every possible beef cut, herb, or spice. Focus on the ingredients that change the broth most: bones, one flavorful simmering cut, onion, ginger, whole spices, fish sauce, and proper flat rice noodles.
You do not need every possible cut or garnish to make good pho at home. Start with the essentials, then add better bones, deeper flavor builders, and more toppings when you want a fuller bowl.
Level
Buy this
What it gives you
Minimum good beef pho
Meaty beef bones, chuck or brisket, banh pho noodles, onion, ginger, star anise, cinnamon, fish sauce
A satisfying homemade bowl with real broth character
Better broth
Add knuckle bones, marrow bones, oxtail, coriander seed, cloves, and rock sugar
More body, deeper aroma, and better balance
Best topping setup
Add eye of round or sirloin, Thai basil, bean sprouts, lime, chilies, scallions, and thin onion
A fresher, more complete restaurant-style bowl
Shortcut version
Low-sodium broth, onion, ginger, whole spices, fish sauce, rice noodles, herbs, and lime
A good weeknight bowl, but not the same body as long-simmered beef pho
Think of the shopping list for this pho recipe as a ladder. The first level can still make good pho. The higher levels add body, aroma, and freshness, but they are not worth stressing over if they keep you from cooking.
Best Bones and Beef Cuts for Pho
Great beef pho usually needs both bones and meat. Bones bring body and depth, but meat makes the broth taste more rounded and satisfying. A pot made only with bones can taste thin or hollow, while a pot with only meat can lack the gelatin-rich texture that makes pho broth feel complete.
Good beef pho depends on using the right cut for the right purpose: bones bring body, simmering cuts add richness, and paper-thin beef gives the bowl its classic finishing touch.
Beef or bone
Best use
What it adds
Marrow bones
Broth base
Richness and beef flavor, though they can add fat that needs skimming
Knuckle or leg bones
Broth base
Gelatin and body
Neck bones or oxtail
Broth base
Meatiness and depth
Brisket
Simmered meat and topping
Classic cooked beef slices with rich flavor
Chuck
Simmered meat and topping
Beefy, affordable, and forgiving
Shank
Simmered meat and topping
Deep flavor and a slightly firmer texture
Eye of round, sirloin, tenderloin, or flank
Raw thin-sliced topping
Tender slices that cook in very hot broth
For the easiest home version, use a mix of meaty bones, marrow or knuckle bones, and brisket or chuck. If your butcher has oxtail or neck bones, they are excellent, but you do not need every cut to make a strong homemade bowl.
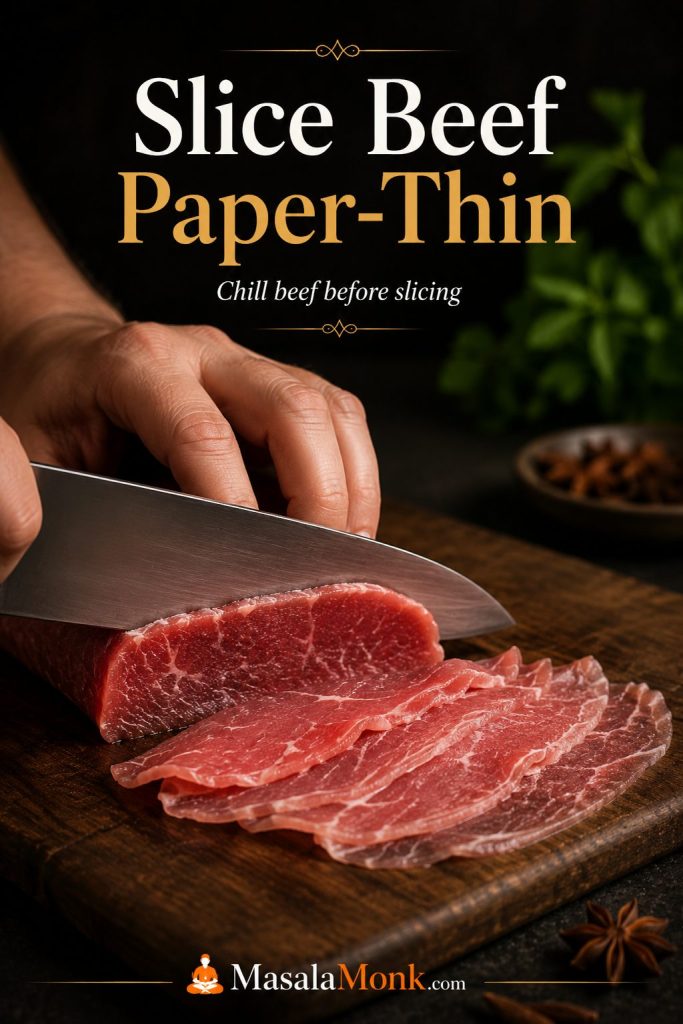
Thin beef tip: place the raw beef for topping in the freezer for 15–25 minutes before slicing. It should firm up, not freeze solid. This makes it much easier to cut paper-thin slices.
How Thin to Slice Beef for Pho
For raw beef topping, thickness matters more than the exact cut. The slices should be thin enough that hot broth can warm them quickly in the bowl. If the beef is cut too thick, it may stay cold or raw-looking even after the broth is poured.
Chill the beef briefly before slicing, then cut across the grain with a sharp knife. Aim for flexible, paper-thin slices rather than steak-like strips. For a fully cooked bowl, dip the slices into simmering broth first, then add them to the noodles.
Chilled beef slices far more cleanly than warm beef. As a result, it is easier to get the paper-thin slices that hot broth can quickly warm in the bowl.
Pho Spices and Spice Bag
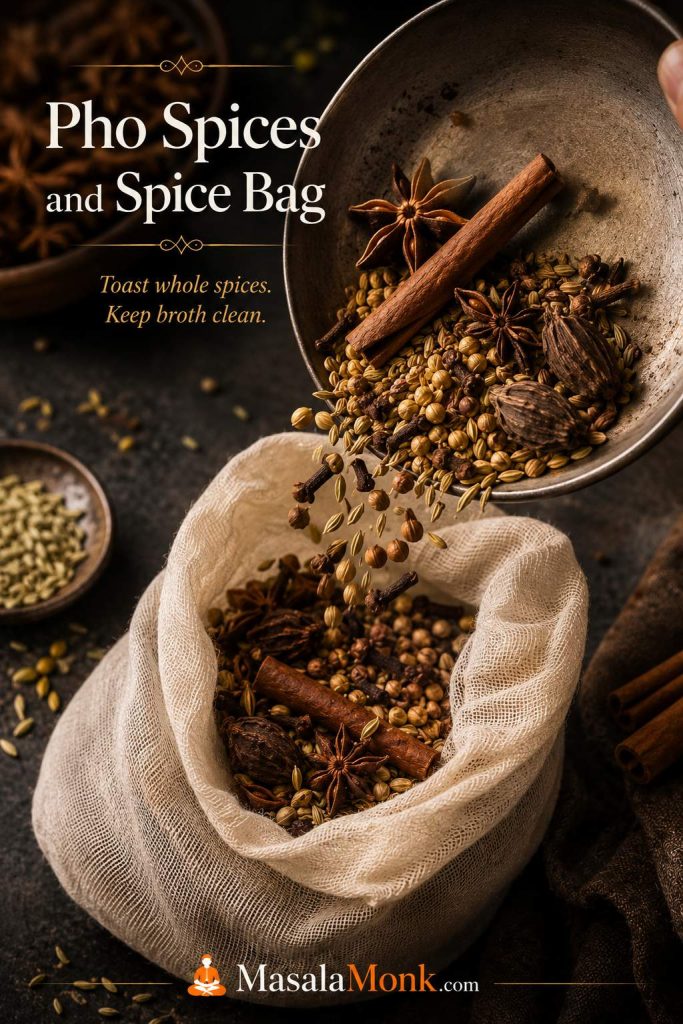
Use whole spices and toast them briefly before they go into the broth. Toasting wakes up the aroma, while a spice bag keeps the broth cleaner and makes it easier to remove the spices before they become too strong.
Whole spices should perfume the pot, not muddy it. A spice bag gives pho its signature fragrance while helping you control when the spices have given enough.
Ground spices are not ideal for the main broth because they can cloud the liquid and leave grit at the bottom of the bowl. If you only have ground spices, use them very sparingly in a shortcut broth, then strain carefully through a fine-mesh strainer lined with cheesecloth.
Spice
Amount for this recipe
Role
Star anise
6–8 pods
Signature pho aroma
Cinnamon sticks
1–2 sticks
Warmth and sweetness
Cloves
4–6 whole cloves
Deep spice; use carefully
Coriander seeds
1 tablespoon
Citrusy lift
Fennel seeds
1–2 teaspoons, optional
Sweet herbal note
Black cardamom
1 pod, optional
Smoky depth
Add the spice bag during the later part of simmering instead of leaving it in for the entire cook. If the broth starts smelling more like a spice cabinet than beef soup, remove the bag early. The spices should support the broth, not take over the bowl.
How to Make Clear Pho Broth
Clear broth comes from good preparation and gentle heat. The goal is not a weak broth; it is a broth that tastes deep but looks clean. Parboil the bones, rinse them well, brown the aromatics, simmer gently, skim when needed, and strain before serving.
The broth should smell warm from the spices, roasted from the onion and ginger, and savory before you ever add noodles. When it is right, it tastes bold on its own but not harsh, with enough salt and fish sauce to carry the plain rice noodles.
Why You Parboil the Bones First
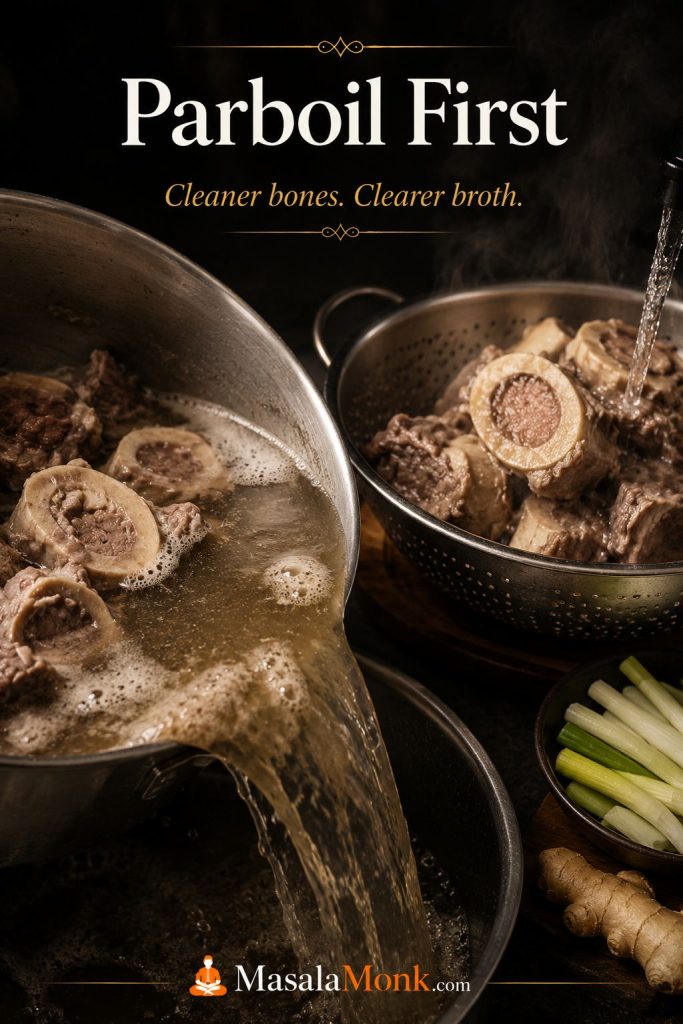
Parboiling removes surface impurities, blood, and loose proteins before the real broth begins. Add the bones and simmering beef to a pot, cover with water, bring to a hard boil for 5–10 minutes, then drain. Rinse the bones and meat under warm water and scrub the pot before starting the actual broth.
This step feels annoying, but it is one of the biggest differences between clear broth and a murky pot. You are not throwing away the good flavor. You are removing the material that would cloud the broth later.
Parboiling may feel like extra work; however, it is one of the best ways to improve pho broth clarity. Once the bones are rinsed and the pot is reset, the real simmer starts much cleaner.
Why You Char the Onion and Ginger
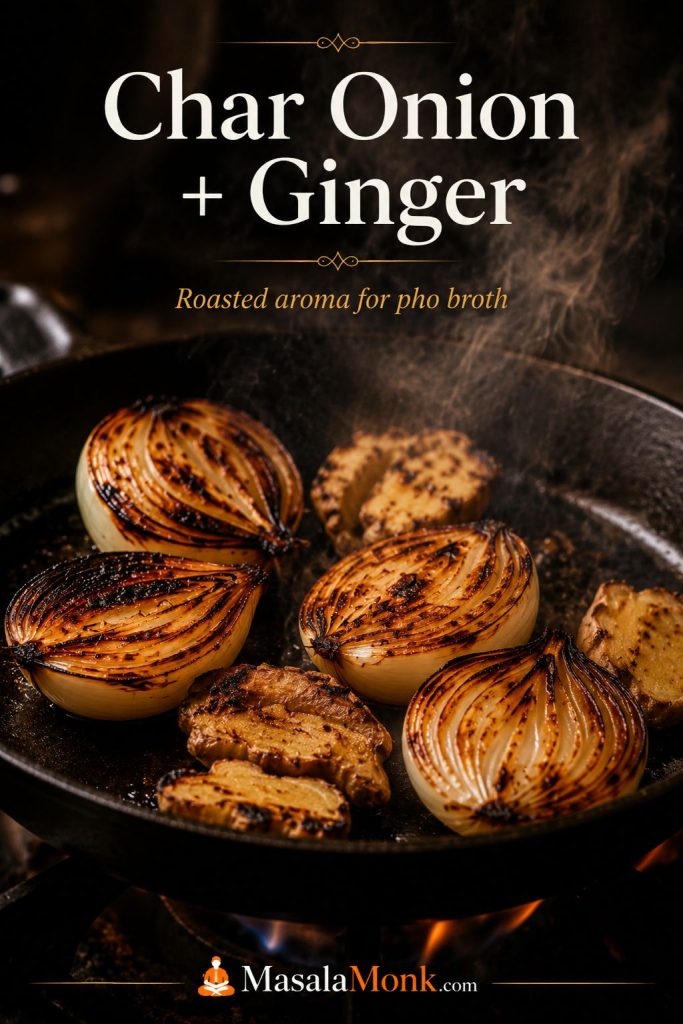
Charring onion and ginger gives pho broth a roasted, lightly smoky aroma. You can do this over a gas flame, in a dry skillet, under a broiler, or on a grill pan. The cut sides should be deeply browned in spots, not just lightly warmed.
Charred onion and ginger add roasted depth that plain raw aromatics cannot match. Because of that, the broth tastes warmer, rounder, and more like pho instead of generic beef soup.
Why You Toast the Spices
Toasting whole spices for 3–5 minutes makes them more fragrant. Use medium heat and keep them moving so they smell warm and aromatic, not burnt. After toasting, tie them in cheesecloth or place them in a spice bag.
Toasting wakes up the spices before they go into the broth. Even a short toast helps star anise, cinnamon, and coriander smell fuller and more alive in the finished pot.
How Long to Simmer Pho Broth
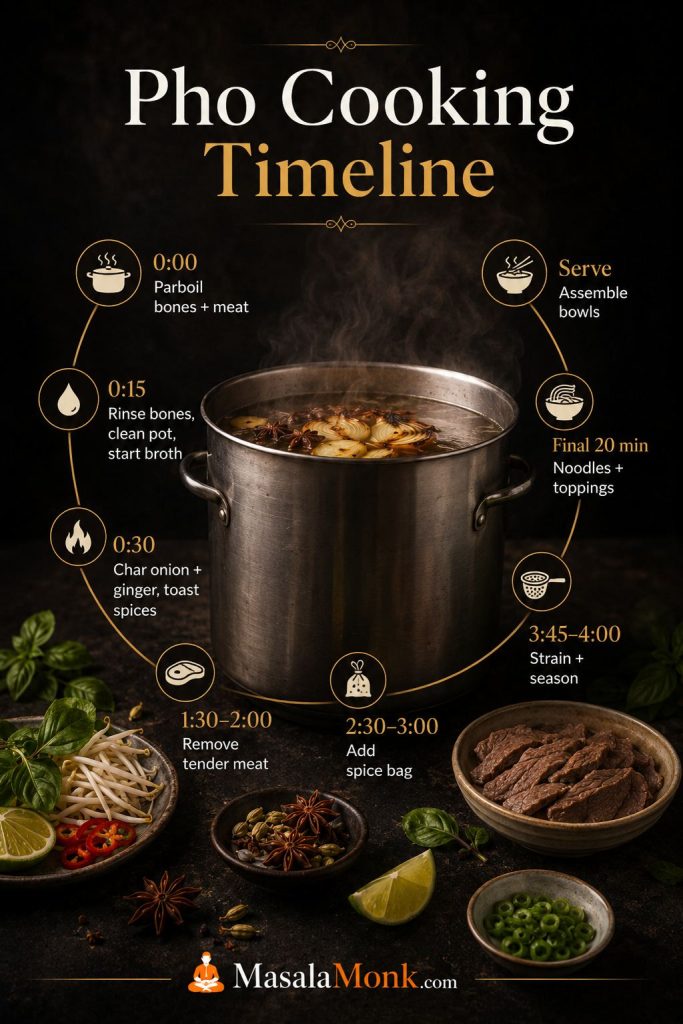
For this beef pho, plan on about 4 hours of gentle simmering after the parboil step. Keep the broth at a quiet simmer, roughly 85–95°C / 185–203°F. You should see small, steady bubbles and gentle movement, not a rolling boil that shakes the whole pot.
A rolling boil can pull fat and loose particles into the broth, which makes it cloudy and greasy. A calm simmer extracts flavor from the bones and meat while keeping the broth cleaner.
Small steady bubbles are the sweet spot for pho broth. The pot should look alive, not violent, so flavor develops without shaking fat and sediment through the liquid.
How to Season Pho Broth
Pho broth should taste slightly stronger than a normal sipping soup before it goes into the bowl. The noodles, meat, herbs, sprouts, and lime will soften the seasoning. If the broth tastes perfect in the pot, it may taste a little flat once the bowl is assembled.
Season near the end with fish sauce, salt, and a little rock sugar or sugar. Look for savory first, gentle sweetness in the background, warm spice in the aroma, and enough clarity that lime and herbs can brighten the bowl at the table.
When the broth is right, it should smell like roasted onion and warm spice first, then taste savory, clean, and slightly rounded. It should not taste like plain beef stock with noodles waiting nearby.
How Pho Broth Should Taste Before Serving
Before serving, taste the strained broth before it hits the bowl. It should feel a little too bold by itself: savory first, lightly sweet in the background, warm with spice, and strong enough to carry plain rice noodles. If it tastes perfect as a sipping soup, it may taste quiet once the noodles, beef, herbs, sprouts, and lime are added.
The broth for this pho recipe is on track when it smells roasted from onion and ginger, warm from star anise and cinnamon, and savory before any noodles are added. It should not smell muddy, greasy, burnt, or aggressively sweet.
Taste the broth before serving, not after the bowls are built. It should seem a little assertive on its own, or it may fade once the noodles and toppings go in.
What you taste
What it means
How to adjust
Thin or watery
The broth needs more concentration or seasoning
Simmer uncovered a little longer, or add fish sauce in small amounts
Salty but flat
It has salt, but not enough aroma or balance
Add a tiny pinch of sugar, more ginger aroma, or brighten later with lime
Sweet but weak
The sugar or onion is louder than the savory base
Add fish sauce or salt gradually
Too spiced
The spice bag stayed in too long
Remove the spices, dilute slightly, and simmer with onion or ginger
Good in the pot but weak in the bowl
The broth was seasoned like soup, not like pho broth
Season the next bowls slightly stronger before ladling
How to Fix Pho Broth Before Serving
Do the final broth check before you assemble the bowls, not after everyone has started eating. At this point, the broth should taste slightly stronger than a normal soup because plain noodles, beef, herbs, sprouts, and lime will soften the flavor once they land in the bowl.
Thin broth should be reduced briefly before you add more seasoning. For sweet but weak broth, add fish sauce or salt in small amounts. When the broth smells too spiced, remove the spice bag and dilute it slightly. Fixing the pot now is much easier than trying to rescue six finished bowls later.
The smartest time to fix pho broth is right before serving. Watery broth often needs reducing, sweet broth needs savory balance, and a quiet-tasting broth usually needs stronger seasoning.
Best Noodles for Pho
The best noodles for pho are banh pho, flat rice noodles. They may be sold dried or fresh. Dried noodles are usually easier to find, and they hold up well when soaked or cooked separately. Fresh noodles are softer and usually need only a quick blanch.
Banh pho, the classic flat rice noodle, gives pho the right texture. It stays tender and slippery without turning the bowl heavy or chewy like the wrong noodle can.
Dried vs Fresh Pho Noodles
Noodle type
Best use
How to handle
Dried banh pho
Most home cooks; easy to store and find
Soak or cook according to the package, drain well, and add to bowls just before serving
Fresh banh pho
Best texture when available
Blanch briefly to loosen and warm; do not boil aggressively
Very wide rice noodles
Better for stir-fry than classic pho bowls
Use only if that is what you have, but expect a heavier bowl
Rice vermicelli
Not ideal for pho
Save it for other Vietnamese noodle bowls rather than using it as the first choice here
What Width of Rice Noodles to Use
Small to medium flat rice noodles are best for pho soup. They should be wide enough to feel silky and satisfying, but not so wide that they dominate the bowl. Very wide noodles are more common in stir-fries and can make pho feel heavy.
How to Cook Pho Noodles Without Making Them Mushy
Cook pho noodles away from the broth. That one habit keeps the liquid clearer and gives the noodles a better texture in the finished bowl. The noodles should meet the broth only at the very end.
Keep the noodles out of the broth pot until serving. This one habit helps the soup stay cleaner and prevents the rice noodles from sitting too long and going soft.
Common mistake: adding noodles to the broth pot. Rice noodles release starch and keep absorbing liquid. Cook them separately, drain them well, and add them to bowls only when serving.
Do not simmer noodles in the broth. They release starch and make the broth cloudy.
Do not store noodles in broth. They keep absorbing liquid and turn mushy.
Do not cook them too early. Prepare them close to serving time when possible.
Use 50–80 g dried noodles per bowl. Use the lower end for lighter bowls and the higher end for noodle-heavy bowls.
Refresh clumped noodles with hot water. Drain again before adding them to bowls.
Pho Noodle Texture Guide
Noodle texture can make a good broth feel better or worse. The goal is not a soft pile of rice noodles that breaks apart, and it is not a stiff noodle that fights the broth. Good pho noodles should bend easily, feel slippery, and still hold their shape when lifted with chopsticks.
If the noodles feel too firm, give them a little more time or refresh them with hot water. If they are already tearing, clumping, or collapsing before they reach the bowl, they have gone too far. Cook them close to serving time whenever possible.
Pho noodles should bend easily and feel silky, yet they still need enough structure to hold their shape once the hot broth is poured over them.
The noodles should be soft and slippery, but still have enough bite that they do not collapse in the hot broth.
How to Assemble Pho Bowls
Once the broth is strained and seasoned, the rest of the recipe moves quickly. Have the noodles cooked, herbs washed, beef sliced, broth hot, and bowls ready before you start assembling.
Bring the final broth to a full boil when it goes into the bowl, especially if you are using raw thin-sliced beef. Keep the simmering stage gentle, but make the serving stage hot and fast.
The bowl is built in layers so each part keeps its texture. Noodles stay silky, beef gets the heat it needs, and herbs and lime stay fresh until the last second.
Add cooked rice noodles to each bowl.
Layer in slices of cooked brisket, chuck, or shank.
Tuck in paper-thin raw beef slices if using.
Ladle very hot broth directly over the beef and noodles.
Top with onion, scallions, herbs, sprouts, chili, and lime.
Serve immediately with optional hoisin and sriracha on the side.
Why the Final Broth Pour Must Be Hot
The long broth simmer should stay calm, but the final pour should be very hot. That last burst of heat warms the noodles, releases the aroma from the broth, and helps thin beef soften or cook in the bowl.
If the broth is only warm, the bowl can taste dull and the beef may not change texture properly. Bring the strained broth back to a full boil right before serving, then ladle it over the noodles and beef immediately.
Hot broth matters most at the final pour. If the liquid is not hot enough, the beef stays too raw and the whole bowl loses some of its aroma and lift.
Raw beef note: the topping beef must be very fresh, kept cold, sliced paper-thin, and covered with boiling-hot broth right away. For children, pregnant guests, older adults, immunocompromised guests, or anyone uncomfortable with rare beef, use cooked beef only or dip the slices directly into simmering broth until fully cooked before adding them to the bowl.
What a Finished Beef Pho Bowl Should Feel Like
A finished beef pho bowl should not feel heavy, muddy, or overloaded. It should taste balanced: savory broth first, then soft noodles, tender beef, fresh herbs, sharp lime, and a little crunch from sprouts or onion.
If the first bowl tastes flat, do not keep assembling the rest. Add more seasoning to the broth, brighten the bowl with lime, or bring the broth back to a stronger boil before serving the next one. One test bowl can save the whole pot.
A finished beef pho bowl should feel balanced rather than heavy: savory broth, tender beef, soft noodles, bright herbs, fresh lime, and just enough crunch from onion or sprouts.
Suggested Pho Cooking Timeline
This timeline keeps the long recipe from feeling chaotic. The exact minutes do not have to be perfect; use it as a rhythm for the pot.
A timeline turns pho from a guessing game into a sequence. Once the broth is underway, you can time the meat, spices, noodles, and toppings without crowding the final 20 minutes.
Time
What to do
0:00
Parboil bones and meat.
0:15
Rinse bones and meat, clean the pot, and start the fresh broth.
0:30
Char onion and ginger, then toast the spices.
1:30–2:00
Remove brisket, chuck, or shank once tender enough to slice later.
2:30–3:00
Add the spice bag for the final stretch of simmering.
Bring broth to a full boil and assemble bowls immediately.
How to Make Pho Step by Step
Every step protects either flavor, clarity, or texture. Parboiling cleans the base, charring builds aroma, straining refines the broth, and separate noodles keep the final bowl clean.
1. Parboil the Bones and Meat
Place the beef bones and brisket, chuck, or shank in a large pot. Cover with water, bring to a hard boil, and boil for 5–10 minutes. Drain everything, rinse the bones and meat under warm water, and scrub the pot clean.
2. Char the Onion and Ginger
Halve the onions and split the ginger lengthwise. Char them over a gas flame, in a dry skillet, under a broiler, or on a grill pan until the surfaces are browned and fragrant. This usually takes 8–12 minutes depending on your heat source.
3. Toast the Spices
Add the star anise, cinnamon, cloves, coriander, fennel, and black cardamom if using to a dry skillet. Toast over medium heat for 3–5 minutes, shaking the pan often. Transfer to a spice bag or wrap in cheesecloth.
4. Start the Broth
Return the rinsed bones and simmering beef to the clean pot. Add 4.5 L / 19 cups fresh water, the charred onion, charred ginger, salt, and rock sugar. Bring to a boil, then immediately lower to a gentle simmer.
5. Simmer Gently
Simmer gently for about 1½–2 hours, skimming the surface when needed. When the brisket, chuck, or shank is tender, remove it from the broth, cool slightly, wrap, and refrigerate until slicing. Continue simmering the bones, keeping them mostly submerged; add hot water if the broth reduces too aggressively.
6. Add the Spice Bag
Add the toasted spice bag for the final 60–90 minutes of simmering. This gives the broth a clear pho aroma without letting the spices become bitter or too dominant. Remove the spice bag early if the broth smells strong enough before the time is up.
7. Strain and Season
Strain the broth through a fine-mesh strainer. Skim excess fat. Season with fish sauce, more salt, and a little sugar if needed. The broth should taste slightly stronger than a normal soup because the noodles and toppings will soften it.
8. Cook the Noodles
Cook or soak the banh pho noodles according to the package directions. Drain well. If they are ready before the broth, rinse lightly and keep them separate, then refresh briefly with hot water before serving.
9. Slice the Beef and Prepare Toppings
Slice the cooked brisket, chuck, or shank against the grain. Thinly slice the raw beef topping if using. Wash the herbs, cut the lime, slice the chilies, and prepare sprouts, scallions, and onion.
10. Assemble and Serve
Bring the strained broth back to a full boil. Divide noodles among bowls, add cooked beef and raw beef slices, then ladle hot broth over the top. Add toppings and serve immediately.
Quick Pho Recipe Shortcut
Shortcut honesty: quick pho is best when you want the aroma and comfort of pho without a full stockpot project. It will not have the same body as long-simmered bone broth, so do not judge it by the same standard. Use it for weeknights; use the full beef version when broth depth matters most.
A quick pho shortcut can still make a good pho-style bowl if you build aroma properly. The key is to improve the broth instead of simply heating stock and adding noodles.
A quick pho shortcut still needs time to build character. Otherwise, it tastes like broth with noodles rather than a proper pho-style bowl with depth and aroma.
How to Upgrade Broth for Quick Pho
The shortcut version should still taste built, not rushed. Give the broth enough time with charred aromatics and whole spices before you season it, then use fresh herbs and lime at the end to make the bowl feel complete.
A fast pho recipe works best when you still give the broth 30–45 minutes with aromatics and spices. Simmer 1.5–2 L / 6–8 cups good low-sodium beef or chicken broth with 1 charred onion, a 2–3 inch piece of charred ginger, 2–3 star anise pods, 1 small cinnamon stick, 2 cloves, and 1 teaspoon coriander seeds. Strain, then season with fish sauce, salt, and a little sugar.
Shortcut pho should still smell like pho before it reaches the bowl. If it only tastes like boxed broth, give the onion, ginger, and spices more time.
Use good low-sodium broth so you can control the final seasoning.
Brown the onion and ginger instead of adding them raw.
Toast the spices before simmering.
Keep the simmer short but focused: 30–45 minutes is enough to perfume the broth.
Keep the noodles out of the broth until serving and finish with fresh herbs, lime, sprouts, and chili.
For a better shortcut beef pho, simmer a piece of brisket, chuck, or shank in store-bought broth for 1½–2½ hours with the aromatics and spices. It is still much faster than a full bone broth, but it gives the bowl more body and real beef flavor.
Chicken Pho Recipe Option
Chicken pho is often the easiest first pho to make at home. It needs less time than beef pho and does not require the same hunt for beef bones. The bowl should taste lighter, cleaner, and brighter than beef pho, not like a forced beef-style broth.
Chicken pho is often the easiest first version to make at home. It cooks faster than beef pho, yet it still rewards good broth, proper noodles, and bright finishing herbs.
For a simple chicken pho, simmer 1.5–2 L / 6–8 cups chicken broth with 1 charred onion, a 2–3 inch piece of charred ginger, 2–3 star anise pods, 1 small cinnamon stick, 2 cloves, and 1 teaspoon coriander seeds. Add 450–700 g / 1–1½ lb chicken thighs, chicken breasts, or bone-in chicken pieces and simmer gently until cooked through. This amount makes about 3–4 bowls, depending on how much broth you like in each bowl.
Remove the chicken, shred or slice it, strain the broth, and season with fish sauce, salt, and a small amount of sugar. Serve with banh pho noodles, herbs, sprouts, lime, chili, onion, and scallions. If you want a richer chicken version, use bone-in chicken and simmer closer to 75–90 minutes.
Vegetarian and Vegan Pho Recipe Options
Vegetarian pho and vegan pho need more than plain vegetable broth. Without bones, meat, or fish sauce, you need to build umami from mushrooms, roasted aromatics, whole spices, and a salty-savory seasoning such as tamari or soy sauce.
Vegetarian and vegan pho need real savory depth to feel satisfying. Mushrooms, tofu, roasted aromatics, and soy or tamari help the broth taste layered instead of thin.
Build a Vegan Pho Broth Base First
A plant-based broth needs extra umami, so start with 1.5–2 L / 6–8 cups vegetable broth or water, charred onion, charred ginger, toasted pho spices, 20–30 g dried shiitake or mixed dried mushrooms, and 225–300 g / 8–10 oz fresh mushrooms. Season with tamari or soy sauce, a little sugar, and salt to taste. Add tofu, bok choy, sautéed mushrooms, or other vegetables to the finished bowl.
Dried mushrooms deepen the broth, while fresh mushrooms improve the bite of the finished bowl. Using both gives vegan pho a fuller, more convincing flavor.
For another simple way to make mushrooms feel satisfying rather than watery, MasalaMonk’s skillet mushroom and zucchini stir fry is a useful side or topping-style idea; just cook the vegetables drier if you want to add them to a noodle bowl.
Flavor Fixes for Vegetarian and Vegan Pho
Use mushrooms: shiitake, cremini, oyster mushrooms, or dried mushrooms add depth.
Keep the charred onion and ginger: they still matter in plant-based pho.
Use whole spices: star anise, cinnamon, cloves, coriander, and fennel still create the pho aroma.
Replace fish sauce: use tamari, soy sauce, or a vegan fish sauce alternative.
Add protein: tofu, mushrooms, bok choy, or other vegetables work well.
Do not overdo sweetness: plant-based broth can become sweet quickly if the vegetables dominate.
Dried mushrooms are especially helpful because they add a deeper savory base and keep the broth from tasting like plain vegetable soup. Strain out the dried mushrooms if they are tough, or slice them thinly and return them to the bowl if they are tender enough to eat.
If soy sauce or tamari starts making the broth taste too salty, dilute gently and rebuild flavor with ginger, herbs, chili, and lime instead of adding more salt. Lower-sodium soy sauce or tamari gives you more room to adjust.
If you use miso or kombu, keep them subtle so the bowl still tastes like pho rather than a different noodle soup.
Pho Troubleshooting: Broth, Noodles, and Beef
Most pho problems come from one of four places: the broth boiled too hard, the seasoning was not balanced, the noodles were handled like pasta in soup, or the final broth was not hot enough for assembly.
Before fixing pho, identify what failed. Cloudy broth points to heat or starch, mushy noodles point to timing, and flat flavor usually points to under-seasoned broth.
Broth Problems in This Pho Recipe
Use this table to fix broth issues before they affect every bowl.
Clear pho broth does not mean weak broth. Instead, it usually means the bones were cleaned well, the simmer stayed gentle, and the noodles were kept out of the pot.
Problem
What probably happened
How to fix it
Cloudy broth
Bones were not parboiled, the pot boiled too hard, or noodles were cooked in the broth
Strain well, avoid stirring aggressively, and simmer gently next time. Cook noodles separately.
Weak broth
Too much water, not enough meat or bones, too short a simmer, or under-seasoning
Simmer longer, reduce slightly, and adjust with fish sauce, salt, and a little sugar.
Greasy broth
Fat from marrow or meat was not skimmed
Skim with a ladle, use a fat separator, or chill the broth and remove the solid fat.
Too salty
Too much fish sauce or salt, or broth reduced more than expected
Dilute with hot water or unsalted broth, then rebalance with aromatics and a tiny amount of sugar if needed.
Too sweet
Too much rock sugar or naturally sweet vegetables
Add fish sauce or salt in small amounts. Brighten the bowl with lime at serving.
Too spice-heavy
The spice bag stayed in too long or the spices were too strong
Remove the spice bag, dilute with broth or water, and simmer with extra onion or ginger if needed.
Noodle and Bowl Problems in This Pho Recipe
Use this table when the broth is good, but the final bowl still feels off.
Problem
What probably happened
How to fix it
Mushy noodles
Noodles were overcooked or sat in hot broth too long
Cook noodles separately and add them to bowls right before serving.
Noodles clumped
Cooked noodles sat too long after draining
Rinse or refresh briefly with hot water, loosen with chopsticks or tongs, then divide into bowls.
Raw beef did not cook in the bowl
Broth was not hot enough or beef slices were too thick
Bring broth to a full boil and slice beef paper-thin. Dip slices in simmering broth first if needed.
Broth tastes flat after assembling
The broth was seasoned perfectly in the pot but diluted by noodles and toppings
Season broth slightly stronger before serving. Add lime, herbs, fish sauce, or chili at the table.
Test One Bowl Before Serving the Pot
If your first bowl tastes flat, fix the broth before assembling the rest. One test bowl can save the whole pot.
The easiest way to avoid most of these issues is to keep the broth and noodles separate until the last moment. Store them separately, reheat them separately, and assemble only as many bowls as you plan to eat right away.
Make-Ahead, Storage, Freezing, and Reheating
Pho is one of the best make-ahead soups if you store the components separately. The broth can be made ahead, chilled, skimmed, and reheated. The noodles and herbs should be prepared close to serving.
Leftover pho works best when it is stored like separate parts, not one finished soup. Keep broth, beef, noodles, herbs, and sprouts apart so the next bowl still tastes fresh.
Broth: refrigerate for 3–4 days, or freeze for about 3 months for best quality.
Cooked beef: refrigerate separately and slice before serving.
Noodles: best cooked fresh. If needed, store separately and refresh with hot water.
Herbs and sprouts: wash and dry, but add only at serving.
Reheating: bring broth back to a boil before assembling bowls.
If the broth tastes too concentrated after refrigeration or reheating, add a little hot water and adjust the seasoning. Reheat only the amount you plan to serve, bring it back to a full boil for assembly, and keep the noodles, herbs, sprouts, and beef stored separately until you build fresh bowls.
Before You Start the Recipe Card
Before starting, read the broth timing, noodle timing, and raw beef note once. The recipe is easiest when the broth is treated as the main project and the noodles, toppings, and bowl assembly happen at the end.
Use this recipe card as a quick memory guide for the full beef pho method: long-simmered broth, whole spices, banh pho noodles, thin beef, fresh herbs, lime, and a hot final pour.
Home-Style Beef Pho Recipe Card
This beef pho recipe makes clear, aromatic Vietnamese-style noodle soup with beef bones, brisket or chuck, roasted onion and ginger, toasted whole spices, rice noodles, thin-sliced beef, herbs, and lime.
Yield6 large bowls
Prep Time45 minutes
Cook Time4 hours
Total Time4 hours 45 minutes
Equipment
9–10 L / 10-quart stockpot
Large skillet, broiler, grill pan, or gas flame for charring
Fine-mesh strainer
Cheesecloth, muslin, or spice bag
Ladle and tongs
Large serving bowls
Sharp knife
Optional: fat separator
Broth Ingredients
1 kg / 2 lb meaty beef bones, such as neck bones, oxtail, or meaty soup bones
1 kg / 2 lb marrow, knuckle, leg, or other beef bones
1.25–1.5 kg / 2¾–3⅓ lb beef brisket, chuck, or shank
4.5 L / 19 cups fresh water, plus more if needed
2 large onions, halved
150 g / 5 oz fresh ginger, split lengthwise
1 tablespoon salt, plus more to taste
25–40 g yellow rock sugar, or 1–2 tablespoons regular sugar
45–60 ml / 3–4 tablespoons fish sauce, plus more to taste
Spice Bag
6–8 star anise pods
1–2 cinnamon sticks
4–6 whole cloves
1 tablespoon coriander seeds
1–2 teaspoons fennel seeds, optional
1 black cardamom pod, optional
For Each Bowl
50–80 g dried banh pho rice noodles, or about 120 g fresh pho noodles
30–45 g / 1–1½ oz raw eye of round, sirloin, tenderloin, or flank, sliced paper-thin
A few slices cooked brisket, chuck, or shank
500–650 ml / 2–2¾ cups boiling-hot broth
Bean sprouts
Thai basil, mint, cilantro, or a mix
Lime wedges
Sliced chili or jalapeño
Thinly sliced onion and scallions
Hoisin and sriracha, optional
Instructions
Build the broth
Parboil the bones and meat. Place the beef bones and brisket, chuck, or shank in a large pot. Cover with water, bring to a hard boil, and boil for 5–10 minutes. Drain, rinse the bones and meat, and clean the pot.
Char the aromatics. Char the halved onions and split ginger over a gas flame, in a dry skillet, under a broiler, or on a grill pan until browned and fragrant.
Toast the spices. Toast the star anise, cinnamon, cloves, coriander, fennel, and black cardamom if using for 3–5 minutes over medium heat. Transfer to a spice bag or cheesecloth bundle.
Start the broth. Add the rinsed bones and meat back to the clean pot. Add 4.5 L / 19 cups fresh water, charred onion, charred ginger, salt, and rock sugar. Bring to a boil, then reduce to a gentle simmer.
Simmer gently. Simmer for 1½–2 hours, skimming as needed. Remove the brisket, chuck, or shank once tender, cool slightly, then refrigerate until slicing. Continue simmering the bones, keeping them mostly submerged; add hot water if the broth reduces too aggressively.
Add the spice bag. Add the toasted spice bag for the final 60–90 minutes of simmering. Remove it earlier if the broth smells strongly spiced.
Strain and season. Strain the broth through a fine-mesh strainer. Skim excess fat. Season with fish sauce, more salt, and a little sugar if needed. The broth should taste slightly stronger than a normal soup.
Finish the bowls
Cook the noodles separately. Cook or soak the banh pho noodles according to package directions. Drain well and keep separate from the broth.
Prepare the beef and toppings. Slice the cooked beef. Slice the raw beef paper-thin. Wash herbs, prepare sprouts, cut lime wedges, and slice onion, scallions, and chili.
Assemble the bowls. Bring the broth back to a full boil. Add noodles, cooked beef, and raw beef slices to bowls. Ladle boiling-hot broth over the top, then finish with herbs, sprouts, lime, chili, onion, scallions, and optional sauces.
Notes
Keep the broth at a gentle simmer, not a rolling boil, for a clearer finish.
Cook noodles separately. Do not simmer them in the broth.
For raw beef topping, slice the beef very thin and use boiling-hot broth. For a fully cooked option, use cooked beef only or dip the slices directly into simmering broth before serving.
Broth should taste slightly stronger in the pot because noodles and toppings dilute the seasoning.
Store broth, noodles, meat, and herbs separately for best leftovers.
Final Adjustments Before Serving Pho
The final adjustment is where homemade pho starts to feel personal. Once the bowl is built, taste it the way you will actually eat it: with noodles, beef, herbs, lime, sprouts, and hot broth together.
A quiet bowl may need more fish sauce or salt in the broth. When the flavor feels heavy, lime and herbs can lift it. Thin-tasting pho usually needs more broth concentration or a stronger simmer before the next bowl. This last check is what turns a good pot of pho into a bowl that tastes right to you.
The final adjustment is where homemade pho becomes personal. A little more lime, fish sauce, salt, or aroma can turn a good bowl into one that tastes exactly right to you.
FAQs
What Pho Tastes Like
Pho tastes savory, aromatic, lightly sweet, and fresh at the same time. The broth should be beefy or chicken-forward, with warm spice from star anise and cinnamon, brightness from herbs and lime, and a clean finish from rice noodles and fresh toppings.
How to Pronounce Pho
Pho is usually pronounced closer to “fuh” than “foe.” The written Vietnamese word is phở.
The Best Noodles for Pho
Flat rice noodles called banh pho are best. Use small or medium-width noodles for soup. Dried banh pho is easy to store and works well; fresh banh pho only needs a quick blanch before serving.
How to Make Pho Without Beef Bones
Use good low-sodium beef broth, charred onion and ginger, toasted pho spices, fish sauce, and a flavorful cut like brisket or chuck if you still want beef depth. The broth will be lighter than bone broth, but it can still make a satisfying shortcut bowl.
When a Pho Spice Packet Works
A whole-spice pho packet can work well, especially for a first batch. Toast the spices briefly if they are loose enough to toast, then simmer them in the broth inside the packet or a spice bag. Powdered seasoning packets are better treated as shortcut helpers, not the whole flavor base.
Why Pho Broth Turns Cloudy
Cloudy pho broth usually comes from skipping the parboil step, boiling the pot too aggressively, stirring too much, or cooking noodles directly in the broth. Parboil and rinse the bones, keep the broth at a gentle simmer, and cook noodles separately.
How Long This Pho Recipe Should Simmer
This pho recipe should simmer for about 4 hours after the parboil step. Some traditional-style beef pho recipes go longer, especially with large bones, while chicken pho and shortcut pho need less time.
The Spices That Give Pho Its Aroma
The most common pho spices are star anise, cinnamon, cloves, coriander seeds, and sometimes fennel seeds or black cardamom. Use whole spices, toast them briefly, and keep them in a spice bag for a cleaner broth.
How to Handle Raw Beef Topping Safely
The beef used as a topping should be very fresh, kept cold, sliced paper-thin, and covered with boiling-hot broth right before serving. For a fully cooked option, use cooked beef only or dip the slices directly into simmering broth until they are no longer raw, then add them to the bowl.
Why Pho Tastes Flat
Flat pho usually needs better seasoning or more balance. Add fish sauce or salt in small amounts, check for a little sweetness, and brighten the finished bowl with lime and herbs. If the finished bowl tastes quiet, the broth was probably seasoned for sipping rather than for noodles.
Where Hoisin and Sriracha Belong
Hoisin and sriracha are optional. They can be delicious with pho, but adding too much directly to the broth can cover the clean flavor you worked to build. Try using them on the side as dipping sauces for the meat.
Beef Pho vs Chicken Pho
Beef pho is usually deeper, richer, and built around beef bones and beef cuts. Chicken pho is lighter, faster, and often easier for a first homemade version. Both use aromatic broth, rice noodles, herbs, and fresh toppings.
The Best Way to Make Pho Ahead
Make the broth ahead, then store the broth, cooked beef, noodles, herbs, and sprouts separately. Chilling the broth also makes it easier to remove excess fat. Reheat the broth until very hot and assemble fresh bowls when ready to eat.
How to Store Pho Leftovers
Store the broth, noodles, beef, and herbs separately. Refrigerate broth for 3–4 days, or freeze it for about 3 months for best quality. Reheat the broth until hot, then assemble fresh bowls with noodles and toppings.
How to Keep Pho Gluten-Free
Pho is often easy to make gluten-free because the noodles are rice-based, but the sauces and packaged ingredients still need a label check. Check fish sauce, hoisin sauce, soy sauce, broth cartons, seasoning packets, and any store-bought sauces before using them.
• Recipe research and editorial by MasalaMonk.com.
Ravioli can be a quiet bowl of buttered pasta on a Tuesday or the dish you bring out when dinner deserves a little ceremony. Either way, a good ravioli recipe lives or dies on surprisingly small details: cook the pasta gently, keep the filling inside it, and use a sauce that coats rather than floods. This guide covers those basics first, then takes ravioli in a distinctly MasalaMonk direction with ghee, curry leaves, kasuri methi, paneer, keema and chutneys.
Making everything from scratch? Start with the egg dough, sealing guide and six filling ideas. Using refrigerated or frozen ravioli? Skip straight to the cooking times and sauces.
The five main twists move from butternut squash with brown ghee and curry leaves to mushroom malai, lobster with a curry-leaf tadka, makhani-style tomato cream and crisp toasted ravioli with Indian chutneys. None of them needs a long spice list. One or two well-chosen Indian flavors are enough when they make sense with the filling already inside.
The same approach runs through our Indian-inspired Alfredo pasta. For a brighter, herb-led pasta night, the pesto pasta guide is a useful companion—especially for the pasta-water and sauce-cling techniques that come up here too.
One thing is worth settling before the flour comes out: ravioli does not need to look factory-perfect. A slightly wonky edge is harmless. Trapped air, watery filling and a violent boil are the things that cause trouble. Get those under control and the rest becomes much more forgiving.
The package matters less than the water and the finish. Fresh ravioli needs the gentlest handling; frozen ravioli needs a little more time without a hard boil; refrigerated ravioli sits somewhere in between. In all three cases, have the sauce warm before the pasta is done. Filled pasta deteriorates quickly when it sits wet in a colander.
Use the clock as a starting point, not the finish line. Keep the water at a controlled simmer and check the wrapper and filling before lifting the ravioli into sauce.
Treat the timings below as check windows, not a stopwatch. Ravioli size, wrapper thickness and filling all change the final minute, so use the clock to know when to start checking and texture to decide when to stop.
For a second visual reference on rolling, filling and shaping handmade pasta, King Arthur’s ravioli guide is a useful companion. If you cook stuffed pasta often, our tortellini cooking guide covers the same fresh-versus-frozen timing problem in a different shape.
How to Cook Fresh Ravioli Without Bursting
Fresh ravioli is delicate enough that a wide pot helps. Salt the water, bring it to a boil, then ease it back to a lively simmer before the pasta goes in. You want small, steady bubbles moving the ravioli around—not a rolling boil that throws one piece into another.
A wide pot gives delicate seams room to move. Stir once, check 30–60 seconds after floating, then lift each piece with a slotted spoon.
Use this simple rhythm:
Bring water to a boil, then reduce to a lively simmer.
Drop ravioli in gently.
Stir once with a soft hand to prevent sticking.
When ravioli floats, give it another 30–60 seconds.
Lift out with a slotted spoon, not a colander.
Warm the sauce in a wide skillet before the ravioli is ready. Lift the pasta straight into that pan, add a spoonful of cooking water if the sauce needs loosening, and spoon the sauce over gently. Aggressive tossing is what stresses delicate seams; thirty to sixty seconds is usually enough to coat the surface.
Very delicate handmade ravioli is easier to manage in batches. The water temperature recovers faster, the pieces have room to move, and you can lift them out without fishing through a crowded pot.
How to Cook Frozen Ravioli So It Stays Tender
Cook frozen ravioli straight from the freezer. Thawing softens the wrapper before the filling is hot and makes sticking more likely. Once the pieces go into the pot, keep the water at a steady simmer and stir only enough to stop them settling on the bottom.
Frozen ravioli does better with steady heat than a hard boil. A spoonful of starchy water in the sauce helps it coat the pasta instead of collecting underneath.
Lift frozen ravioli directly into warm sauce and let it bubble there for 30–60 seconds. A tablespoon or two of starchy cooking water helps butter, tomato or cream sauce cling to the wet wrapper instead of pooling underneath. That brief pan finish does more for the bowl than an elaborate garnish.
If frozen ravioli splits, lower the heat first. A gentle swirl is often enough to prevent sticking, and a spider or slotted spoon is kinder than pouring the whole pot through a colander.
How to Cook Refrigerated Ravioli
Refrigerated ravioli is quick but usually sturdier than handmade pasta. Treat it much like fresh ravioli: salted water, a controlled simmer and an early check for doneness.
Three to five minutes is a useful check window for refrigerated ravioli. Finish it in warm sauce, then choose one accent—pepper, lemon, herbs or spiced ghee.
Once it reaches the sauce, choose one finishing note: black pepper for bite, lemon for acidity, toasted cumin for warmth, spiced ghee for aroma, or fresh herbs for lift. The filling is already seasoned; several accents at once usually blur it.
That small finish is often all a refrigerated packet needs to feel like a composed dinner.
Do not leave all the seasoning to the sauce. A mild cheese or spinach filling benefits from properly salted cooking water; otherwise the wrapper can taste flat even when the sauce is well balanced.
Homemade dough is worth doing when the making is part of the evening. On a busy night, wonton wrappers are a completely different—but useful—route. Whichever path you take, the same rules decide whether the ravioli survives: a dry-enough filling, clean edges, trapped air pressed out and a firm seal.
How to Seal Ravioli Without Leaks
Most leaks begin before the ravioli reaches the pot. Keep the border free of filling, press outward from the center to remove trapped air, and use a modest amount of filling so the dough is not stretched tight. A short 5–10 minute rest after shaping helps the seam settle before cooking.
Most leaks start before the pot. Keep filling off the rim, press air outward, crimp firmly and give the shaped pasta a short rest.
Classic Egg Ravioli Dough
By hand or in a mixer, the dough needs to become smooth enough to stretch without tearing and relaxed enough to roll thin. The 30–60 minute rest does more for easy rolling than adding extra water to a tight dough.
Ingredients
300 g flour (all-purpose works; 00 flour is lovely if you have it)
3 large eggs
1 egg yolk (for elasticity and richer color)
1/2 tsp fine salt
1 tsp olive oil (optional, helps handling)
1–2 tbsp water only if needed
The dough should feel smooth and elastic after kneading. Rest it for 30–60 minutes before rolling; a faint shadow of your hand through the sheet is a useful thickness cue.
Method
Make a mound of flour, create a well, add eggs, yolk, salt, and oil.
Whisk inside the well, slowly pulling flour inward until a shaggy dough forms.
Knead 8–10 minutes until smooth and elastic.
Wrap and rest 30–60 minutes.
During the rest, the flour finishes hydrating and the gluten relaxes. The dough should roll with much less spring-back afterward. Keep the sheets thin and the filling modest; thick pasta and overfilled centers are two common reasons homemade ravioli feels heavy.
The dough itself is covered in full here; use the sealing guide above when you start shaping so the filling stays away from the border.
A useful visual test: hold the sheet over your hand. You should be able to see a faint shadow through it, but the sheet should still lift without stretching under its own weight. If it feels leathery, keep rolling; if it looks translucent and fragile around the edges, stop.
Eggless Ravioli Dough
Eggless dough has less built-in elasticity, so hydration matters more. Add the warm water gradually and stop when the dough is smooth and pliable rather than sticky.
Add the water a little at a time and stop as soon as the dough turns pliable. Rest it well, then avoid stretching the wrapper around too much filling.
Ingredients
300 g all-purpose flour
1/2 tsp salt
2 tbsp olive oil
~140–160 ml warm water (add gradually)
Knead until smooth, rest 45–60 minutes, and roll thin. Eggless dough can be slightly less elastic, so seal carefully and avoid overstuffing.
Wonton-Wrapper Ravioli for a Faster Night
Wonton wrappers do not taste exactly like fresh pasta, but they solve the hardest part of homemade ravioli: getting thin, even sheets. They work best with a thick filling and a gentle simmer.
Wonton wrappers save the rolling step, but they soften faster than egg pasta. Keep the filling thick, seal carefully and serve soon after cooking.
For the cleanest seals:
Keep filling thick, not wet.
Seal with a thin smear of water, press out air, and crimp firmly.
Simmer gently—don’t boil hard.
Finish in sauce quickly; don’t let wrappers sit too long in water.
Expect a softer, slightly more delicate wrapper than classic pasta dough. That difference matters less once the ravioli is filled well and moved straight from the pot into sauce.
A thin brush of egg wash gives the seam a little more insurance, particularly with wetter fillings. Keep the water gentle and serve soon after cooking; wonton wrappers soften faster than egg-pasta sheets.
Twist 1: Butternut Squash Ravioli with Brown Ghee & Curry Leaves
Butternut squash is naturally sweet, so it needs nuttiness, aroma and a little acidity around it. Brown butter and sage do that beautifully. Here, ghee brings its own toasted, nutty character while curry leaves add a sharper, citrusy-herbal edge.
Sweet squash gets its contrast from fragrant ghee, crisp curry leaves, cumin and black pepper. Add lemon at the end only when the filling needs a brighter edge.
The result should still read as squash ravioli first. Here, “brown ghee” means ghee warmed until fragrant and slightly deeper in color—not butter browned with its milk solids, because finished ghee has already had most of those removed. Let the curry leaves splutter in the hot fat, add cumin and black pepper, and reach for lemon only if the filling needs a brighter edge.
Brown Ghee & Curry Leaf Sauce for Squash Ravioli
Use this finish with homemade or store-bought squash ravioli, and with pumpkin ravioli too. It is especially useful when the filling tastes sweeter than expected.
Warm the ghee until fragrant, let the curry leaves crackle, then add cumin and pepper. Toss the ravioli gently and adjust with lemon only if the squash reads too sweet.
Ingredients
3 tbsp ghee
10–15 curry leaves (fresh is best; dried works in a pinch)
1/2 tsp toasted cumin seeds or a pinch of ground cumin
Black pepper
Optional: pinch of nutmeg
Optional: lemon zest + a squeeze of lemon
Method
Warm ghee in a small pan until fragrant and slightly deeper in color; do not try to brown it like whole butter.
Add curry leaves. They’ll crackle and perfume the ghee.
Stir in cumin and black pepper.
Add nutmeg for a warmer, slightly sweet background note.
Toss cooked ravioli in the sauce and finish with lemon zest if the ravioli is very sweet.
Ghee already brings toasted, nutty flavor; blooming curry leaves and cumin in it adds aroma without turning the finish into a gravy. That is enough contrast for sweet squash, with lemon as an optional final correction.
Pumpkin Ravioli Variation
Pumpkin ravioli can take a small pinch of Kashmiri chili in the ghee. Use it for color and gentle warmth, not enough to turn the sauce hot.
A few roasted pistachios are optional but useful: the crunch gives very soft pumpkin ravioli some texture, and their nuttiness echoes the nutty ghee.
Butternut Squash & Cumin-Paneer Ravioli Filling
For homemade squash ravioli, the filling needs to sit in a mound rather than spread. Roasting concentrates the squash; a short cook after mashing removes more moisture; paneer adds body without making the center runny.
Yield: enough filling for roughly 24–30 standard ravioli.
A spoonful should stay where you put it. Roast the squash well, cook off excess moisture and use about 1–1½ teaspoons for each standard ravioli.
Ingredients
2 cups roasted butternut squash (roast cubes until caramelized, then mash)
1/2 cup paneer, finely crumbled (optional but excellent)
1 tbsp ghee
1/2 tsp cumin seeds
1/2 tsp ground coriander
1/4 tsp black pepper
1/4 tsp nutmeg (optional, but gorgeous with squash)
1/2 tsp salt (adjust)
1 tbsp finely chopped toasted nuts (optional)
1–2 tsp lemon juice (optional, for brightness)
Method
Roast squash until edges caramelize, then mash until smooth.
Heat ghee, add cumin seeds, let them sizzle briefly.
Stir in mashed squash and spices, cook 2–3 minutes to evaporate excess moisture.
Fold in paneer off heat so it stays creamy.
Let cool completely before filling ravioli.
Vegan swap: replace the paneer with a small amount of thick cashew cream, coconut cream or mashed white beans. Add only enough to bind; a loose filling is much harder to seal.
Assembly: use about 1 to 1½ teaspoons for a standard ravioli. It should look slightly underfilled before sealing. Press out the air and use the no-leak sealing method above.
For a tangier variation, replace part of the paneer with goat cheese. Keep the amount modest so the filling remains squash-forward and the curry-leaf ghee still has room to come through.
Twist 2: Mushroom Ravioli with a Peppery Malai-Style Sauce
Mushroom ravioli already carries plenty of earthiness, so the sauce does not need a large spice list. Brown more mushrooms, use black pepper generously and let a small pinch of kasuri methi sit in the background.
This one should taste mushroom-first. Brown the mushrooms well, keep the cream loose, and add kasuri methi near the end so it stays in the background.
This is closer to a peppery mushroom cream than a curry. Cream rounds the browned mushrooms, cumin adds warmth, and crushed kasuri methi gives the finish a dry, savory aroma that works unexpectedly well with ricotta or cheese-filled pasta.
Creamy Mushroom Malai Sauce
The sauce suits mushroom ravioli best, but it is also good with cheese or spinach-filled ravioli. Once the mushrooms are sliced, the sauce itself usually comes together in about 15 minutes; wetter mushrooms may need a little longer to give up their water and brown. For a more classic version without the Indian finish, see our creamy mushroom sauce guide.
Ingredients
2 tbsp butter or ghee
250–300 g mushrooms, sliced
2 cloves garlic, minced
1/2 tsp black pepper (more if you love peppery sauces)
Pinch of cumin (or a few cumin seeds toasted first)
1/2 cup cream (or cashew cream for a plant-based ravioli dinner)
1/4 tsp kasuri methi, crushed between your palms
Salt
A splash of pasta water
Watch the spoon: once the sauce coats it lightly, stop reducing. Pasta water can loosen the cream without muting the mushroom flavor.
Method
Sauté mushrooms in butter/ghee until they release water and start browning.
Add garlic and pepper; cook until fragrant.
Add a splash of pasta water to create a glossy base.
Stir in cream; simmer until thick enough to coat a spoon.
Finish with kasuri methi and adjust salt.
Crush the kasuri methi between your palms before adding it at the end. Heat softens its aroma quickly, so a late addition gives you the most character without making the sauce taste medicinal or dusty.
For a Darker, More Savory Mushroom Finish
For a darker, more savory finish, push the mushrooms further. Let them brown until their edges are dark, use a little more black pepper, and finish with butter or ghee and Parmesan.
Three small changes are enough:
Brown mushrooms harder for deeper savoriness.
Use more black pepper than you normally would.
Finish with a small gloss of butter/ghee and a sprinkle of Parmesan.
The sauce ends up darker, nuttier and more savory without one perfume dominating the bowl.
Because the sauce is rich, a bitter green salad or simply dressed vegetables make a better counterpoint than another creamy side. Keep the plate fairly spare and let the mushrooms do the work.
Mushroom Masala & Ricotta Ravioli Filling
Mushrooms can look ready while they are still steaming out water. Keep cooking until the pan stops looking wet and the chopped mushrooms begin to brown; only then cool them completely before folding in the ricotta.
The pan should look nearly dry before the ricotta goes in. Cool the mushrooms completely, then fold in the cheese until a spoonful holds its shape.
Ingredients
350–400 g mushrooms, finely chopped (a mix is best, but even one type works)
1 tbsp ghee or butter
1 small onion, finely chopped
2 cloves garlic, minced
1/2 tsp cumin seeds
1/2 tsp ground coriander
1/2 tsp black pepper
1/4 tsp chili flakes (optional)
1/2 tsp salt (adjust)
1/2 cup ricotta (or thick hung curd; ricotta is classic)
2 tbsp grated Parmesan (optional, but helps structure)
1 tbsp chopped herbs (parsley or cilantro—either works)
1 tsp lemon zest (optional)
Method
Heat ghee, toast cumin seeds briefly.
Add onion, cook until translucent, then add garlic.
Add mushrooms and cook until moisture evaporates and the mixture browns.
Stir in spices and salt, cook another minute.
Cool completely.
Fold in ricotta and Parmesan; mix until thick and scoopable.
Vegan option: use thick cashew cream, a spoonful of nutritional yeast and a little mashed tofu. Add them after the mushrooms cool, and stop as soon as the filling holds its shape.
Pair the filling with the mushroom malai sauce for a deep, earthy plate, or use a lighter butter-and-pepper finish when you want the filling to stand out more.
Twist 3: Lobster Ravioli with Butter-Garlic Cream & Curry Leaves
Lobster and crab ravioli need a lighter hand than meat or mushroom fillings. The seafood is delicate, the filling is usually already rich, and a heavy sauce can flatten both. Butter, garlic, cream and lemon make a familiar base; the Indian turn comes from a small curry-leaf and Kashmiri-chili tadka at the end.
Keep the cream sauce fluid enough to move when the pan tilts. Lemon lifts the seafood; the curry-leaf tadka belongs at the very end so its aroma stays vivid.
Keep the garlic pale; browned garlic becomes too assertive here. Use pasta water to loosen the cream until the sauce moves around the ravioli when the pan tilts instead of hiding the filling.
Butter-Garlic Cream Sauce for Lobster Ravioli
This sauce is deliberately short: butter, garlic, cream, pasta water, lemon and black pepper.
Ingredients
2 tbsp butter (or ghee)
2 cloves garlic, minced
1/2 cup cream
Lemon zest + a squeeze of lemon
Black pepper
A splash of pasta water
Method
Melt butter, sauté garlic gently (don’t brown it aggressively).
Stir in cream and a splash of pasta water.
Simmer until slightly thick and glossy.
Finish with lemon and pepper.
Make the tadka separately so the curry leaves stay crisp and aromatic.
Pale garlic gives a softer base than browned garlic here. Loosen the cream with pasta water, finish with lemon, then spoon the tadka over just before serving.
Curry Leaf & Kashmiri Chili Tadka
In a separate small pan:
Warm 1 tsp ghee.
Add a handful of curry leaves (they crackle instantly).
Add a pinch of Kashmiri chili.
Drizzle the tadka over the plated ravioli at the last moment. Simmering it into the cream dulls the curry-leaf aroma; the hot ghee should stay distinct while the chili adds color and mild warmth.
If you are preparing the seafood filling from scratch, keep cooked lobster or crab cold until you mix the filling and refrigerate shaped ravioli promptly. FoodSafety.gov’s fish and shellfish guidance is the external safety reference used for this section.
How to Balance a Butter-Garlic Ravioli Sauce
Butter and cream can make seafood ravioli taste dull if there is no acidity. Add lemon zest first, then a small squeeze of juice after the pan comes off the heat. Black pepper gives the sauce bite; pasta water keeps the fat and cream from feeling greasy.
The same base also works with cheese or spinach ravioli, although the curry-leaf tadka is especially good with lobster and crab.
Lobster or Crab Ravioli Filling
For homemade seafood ravioli, chop the cooked lobster or crab finely enough that the filling can be portioned cleanly. Ricotta or cream cheese binds the pieces and reduces free liquid; the short chill makes the mixture easier to seal.
Finely chopped seafood plus a little soft cheese makes a cohesive center. Chill the mixture for 20–30 minutes so it portions cleanly and stays away from the seams.
Ingredients
250 g cooked lobster meat (or crabmeat), finely chopped
2 tbsp butter
1 small shallot (or very finely chopped onion), sautéed until soft
1 clove garlic, minced (optional)
1/4 cup ricotta (or cream cheese for a firmer set)
2 tbsp grated Parmesan (optional)
1 tbsp chopped chives or cilantro
Zest of 1/2 lemon
Black pepper
Salt to taste
Method
Sauté shallot in butter until soft; add garlic briefly if using.
Cool slightly, then combine with chopped lobster/crab.
Stir in ricotta and Parmesan until the mixture holds together.
Add herbs, lemon zest, pepper, and salt.
Chill 20–30 minutes so it firms up before filling.
Texture check: the chilled filling should hold on a teaspoon without dripping. If it looks loose, chill it longer before adding more cheese or binder.
Twist 4: Makhani-Style Tomato-Cream Sauce for Ravioli
The tomato base should look dark and concentrated before the cream ever goes in. Cream then turns it glossy without washing out the tang, while kasuri methi arrives as a dry, savory aroma at the end; use garam masala only as a tiny background note.
Reduce the tomato base first; cream should enrich it, not rescue a watery sauce. Kasuri methi and garam masala belong in small amounts so tomato remains the lead flavor.
Tomato-Cream Sauce That Clings to Ravioli
A ravioli sauce should leave a thin coating on the pasta when you lift it from the pan. If tomato liquid runs straight back to the bottom, reduce it longer before adding cream.
Ingredients
2 tbsp butter or ghee
2 cloves garlic
2 tbsp tomato paste
1/2 cup crushed tomatoes or passata
1/2 cup cream (or cashew cream)
Pinch of kasuri methi
Pinch of garam masala (optional, keep it light)
Salt, pepper
Pasta water
Cling comes from reduction. Cook the tomato base until concentrated, stir in cream, and add pasta water only when the sauce needs loosening.
Method
Heat butter/ghee, sauté garlic.
Add tomato paste and cook it for a minute until it darkens slightly.
Add crushed tomatoes; simmer until thicker than you think it needs to be.
Add cream/cashew cream and a splash of pasta water to emulsify.
Finish with kasuri methi and, optionally, a tiny pinch of garam masala for a more distinctly makhani finish.
Use it with lobster, crab, cheese or meat-filled ravioli. A brighter homemade tomato base also works here; our fresh tomato sauce guide explains how to reduce tomatoes without losing their clean flavor.
Keep Tomato-Cream Sauce Rich but Balanced
When the sauce tastes heavy, adjust the edges before changing the whole recipe:
lemon zest
black pepper
a hint of heat
or simply more reduction before adding cream
Taste again after each adjustment. Often a little acid or pepper is enough to make the tomato and cream feel separate and clear rather than muddy.
For a dairy-free version, cashew cream gives the sauce body without introducing a strong coconut flavor. Add it after the tomato has reduced and keep the heat gentle once it is in the pan.
Keema Ravioli Filling
Keema makes a naturally good ravioli filling because minced meat can be cooked down until dry, finely textured and intensely seasoned. The important part is evaporating the tomato and meat juices before the mixture cools.
Yield: enough filling for roughly 24–30 standard ravioli.
Cook the keema until a spoon leaves a clear trail and no liquid pools back into the pan. Cool it completely before filling so the ravioli seals cleanly.
1 tbsp breadcrumbs or finely grated Parmesan (optional binder)
Method
Heat ghee, toast cumin seeds.
Add onion, cook until golden.
Add ginger-garlic, cook until fragrant.
Add meat, break it up, cook until browned.
Stir in spices, salt, and tomato paste; cook until the mixture looks dry and cohesive.
Add peas if using; cook briefly.
Cool completely; fold in cilantro and a binder if needed.
Texture check: drag a spoon through the pan. The path should stay visible and no liquid should run back into it. If the keema is dry but too crumbly, bind it with a spoonful of ricotta, cream or finely grated Parmesan.
Two sauces work particularly well:
butter-garlic cream with curry leaf tempering for a luxurious feel, or
tomato-cream makhani style for a warmer, more tomato-forward finish.
Twist 5: Toasted Ravioli with Chutney Dips
Toasted ravioli changes the texture completely: the wrapper becomes crisp, the filling stays soft, and suddenly a pasta dinner can be eaten with your fingers. Cheese, meat and mushroom fillings all work; very delicate seafood ravioli is better saved for a sauce.
The dips work because they do different jobs: coconut cools, kara chutney brings roasted chili depth, and thecha adds sharp garlic heat. Two contrasting dips are usually enough.
Marinara still works, but chutneys are what make this feel different from a standard toasted-ravioli plate; the detailed dip pairings come later.
For one batch
450 g / 1 lb ravioli (cheese, meat or mushroom; refrigerated or frozen)
1 tbsp neutral oil or cooking spray, plus more as needed
1 large egg, beaten (optional, for breading)
1 cup breadcrumbs or panko (optional, for breading)
Coconut chutney, kara chutney, thecha or marinara, for serving
For meat-filled ravioli, follow the package directions and make sure the filling is fully cooked before serving. The times below are crisping ranges; they are not a substitute for safely cooking a raw meat filling.
Air-Fryer Toasted Ravioli
Refrigerated ravioli is easiest to bread because the surface is pliable. Frozen ravioli can work too; if the coating will not adhere while it is rock-hard, thaw it only long enough to become easy to handle. Ravioli size and package directions still take priority.
Method
For a breaded crust, dip the ravioli in beaten egg, coat in breadcrumbs or panko and mist lightly with oil. For an unbreaded version, toss the ravioli with a thin film of oil.
Air fry in a single layer at 390°F / 200°C for 6–10 minutes, flipping halfway. Start checking at 6 minutes.
Remove the ravioli when the edges are deep golden and the shell feels crisp; serve while the coating is still dry and crunchy.
Air fryers vary in fan strength and basket size, so the range matters more than one exact minute. Small refrigerated ravioli may finish near the lower end; larger or frozen pieces can take longer.
Oven-Baked Toasted Ravioli
Heat the oven to 425°F / 220°C. A rack over a sheet pan keeps hot air moving around both sides; without a rack, flip the ravioli halfway so the underside does not steam against the tray.
Arrange breaded ravioli in a single layer on a lightly oiled rack or sheet pan and mist the tops with oil.
Bake for 10–15 minutes, flipping halfway if the ravioli sits directly on the tray.
Pull the tray when the crumb coating is dry, crisp and golden at the edges.
Quick comparison: toasted ravioli three ways. Air frying is the easiest small-batch option, the oven handles a tray with less fuss, and deep-frying gives the crispest shell.
For a starting point, air fry at 390°F / 200°C for 6–10 minutes, bake at 425°F / 220°C for 10–15 minutes, or deep-fry at 350°F / 175°C for about 2–4 minutes. Stop at deep-golden edges.
Deep-Fried Ravioli
Deep-frying gives the most even, brittle crust. Use a thermometer if you have one and give the oil time to return to temperature between batches; each new handful cools it quickly.
Heat about 2 inches / 5 cm neutral oil to 350°F / 175°C.
Fry in uncrowded batches for about 2–4 minutes, turning as needed, until the coating is evenly deep golden.
Lift to a wire rack and let the oil return to 350°F / 175°C before adding the next batch.
The rack matters because steam can escape from underneath; a flat paper-lined plate softens the crust more quickly.
Chutney Dips for Toasted Ravioli
Choose dips with different jobs—one cool, one tangy or roasted, and one hot:
For sharper garlic heat: thecha; serve a smaller spoonful because it can dominate a mild filling.
A platter works best when one dip cools, one brings acidity and one brings heat. That gives each bite somewhere different to go without burying the ravioli.
Palak-Paneer Ravioli Filling
Palak-paneer filling works because both components help with structure: squeezed spinach loses the water that causes leaks, while crumbly paneer absorbs moisture and keeps the center tender.
Yield: enough filling for roughly 24–30 standard ravioli.
Squeeze the spinach before it ever reaches the pan, then cook until no water remains. Paneer gives the filling body without making the center heavy.
Ingredients
250 g spinach (fresh or frozen)
1 tbsp ghee
1/2 tsp cumin seeds
2 cloves garlic, minced
1 small green chili (optional, adjust)
200 g paneer, crumbled finely
2 tbsp cream (optional, for richness; use only if the filling remains thick)
1/2 tsp salt (adjust)
Black pepper
Optional: pinch of kasuri methi
Method
Blanch spinach quickly, squeeze out moisture, then chop finely or blend.
Heat ghee, toast cumin seeds, add garlic and chili.
Add spinach and cook until thick and not watery.
Mix in paneer, salt, pepper and kasuri methi. Add cream only if wanted and the filling is still thick enough to hold its shape.
Cool completely before filling ravioli.
Squeezed spinach and crumbly paneer leave very little free liquid, which is why this filling seals so reliably. For softer homemade paneer, our homemade paneer guide explains how pressing time changes the texture.
It also holds up well in the baked ravioli casserole later in the post because the filling remains cohesive under longer heat.
Ravioli is a three-part construction: wrapper, filling and sauce. Change one of those and the other two need to carry a little more of the texture or flavor. That is the useful way to think about keto, vegan and gluten-free versions.
Keto Ravioli with a Cheese Wrapper
With a mozzarella wrapper, the filling has to do more of the structural work. Keep it compact and fairly dry, and work while the cheese is just pliable enough to fold without cracking.
Look for flexibility, not a full melt: the mozzarella should bend around a thick filling without cracking before you seal and crisp it.
How it goes
Use thin mozzarella slices as “sheets.”
Warm until pliable.
Add a thick filling, fold, and seal.
Crisp lightly in a pan or bake briefly.
Thick, strongly seasoned fillings work best:
palak-style spiced spinach
paneer-style seasoned cheese
keema-style spiced meat
A Lower-Carb Ravioli Plate
If you are lowering carbs without replacing the pasta wrapper, treat ravioli as a smaller part of the plate:
choose a richer sauce (butter-garlic cream, mushroom malai, tomato-cream)
add protein and vegetables on the side
serve fewer ravioli, but make each bite count
Vegan Ravioli Filling Ideas
Vegan fillings are easiest to seal when they are naturally thick:
lentil filling (dal-style, reduced until thick)
spiced mushroom-onion filling
coconut vegetable filling with mustard seeds and curry leaves
Pair lentil or mushroom fillings with tomato sauce for contrast, or use a coconut-based sauce when you want a softer, rounder finish.
Gluten-Free Ravioli
Gluten-free ravioli is more sensitive to hydration and handling than the egg dough above. Use a gluten-free pasta dough or wrapper formula designed for filled pasta rather than simply swapping flour cup-for-cup, then keep the filling thick and the simmer gentle.
The mechanics do not change: clean border, modest filling, trapped air pressed out, firm seal. Use the same sealing checklist and handle the gluten-free wrapper with less stretching.
Vegan Red Lentil Dal Ravioli Filling
Red lentils are unusually well suited to ravioli because they become cohesive as they cook down. The filling should mound on a spoon; if it spreads, keep reducing it.
Ingredients
1 cup red lentils
2 1/2 cups water
1 tbsp oil
1/2 tsp cumin seeds
1 small onion, finely chopped
1 tsp ginger-garlic paste
1 tsp ground coriander
1/2 tsp turmeric
1/2 tsp salt (adjust)
Lemon juice
Chopped cilantro
Cook the lentils past soft until they hold a mound on the spoon. Once cool, the filling should be easy to portion without spreading toward the dough edge.
Method
Cook lentils until soft; then cook down until thick.
In a separate pan, temper cumin in oil, sauté onion until golden.
Add ginger-garlic and spices, then stir into lentils.
Cook another few minutes until the mixture is scoopable.
Finish with lemon and cilantro, then cool.
Use a tomato-based sauce for acidity or a coconut-based sauce for a softer finish. Let the lentils provide the body rather than trying to mimic cheese.
How to Match Ravioli with the Right Sauce
There is no single best sauce because the filling has already done half the seasoning. Ask what it needs next: sweet squash likes nutty fat and acid, mushrooms like pepper and restrained cream, seafood wants brightness, and mild cheese is flexible.
Use the chart as a troubleshooting shortcut: sweet fillings often need acidity, earthy ones like pepper, and seafood usually benefits from the lightest finish.
Sauces for Cheese Ravioli
Mild cheese fillings are flexible. Good options include:
or a lighter butter sauce with lemon zest for balance
Taste the filling before deciding on the finish. Sweet fillings need brightness, rich fillings need acid or pepper, and mild fillings benefit from aroma. That small check prevents most sauce mismatches.
Once the ravioli and sauce are decided, the rest of dinner should get simpler. Rich or creamy bowls benefit from something sharp and green; crisp ravioli can stand on its own as a snack; and a crowd is usually easier to feed with a baked or slow-cooker version than with individual plates.
Use the graphic as a stop rule, not a shopping list: choose the filling, sauce and one finishing accent, then decide whether the meal needs a side at all.
Toasted ravioli with two contrasting chutneys is enough for a snack plate. Mushroom ravioli with the malai-style sauce needs little more than a bitter salad or green vegetable; squash or lobster ravioli can take a lemony salad when the sauce is rich.
When the job is feeding more people, move away from individual plating. The baked casserole and slow-cooker versions below trade delicacy for convenience and are much easier to serve at the table.
Baked Ravioli Casserole
Baked ravioli uses the filled pasta as both noodle and filling layer, which is why it comes together faster than lasagna. Frozen cheese or meat ravioli is the most forgiving choice. Keep the sauce thick enough to coat the layers, cover for most of the bake, then uncover only long enough to brown the top.
This is the crowd-friendly branch of ravioli night: assemble it earlier, refrigerate, then bake when you need it. Because each ravioli already carries a filling, the casserole stays simpler than lasagna.
Baked Ravioli Casserole Recipe
Ingredients
1 to 1.5 kg ravioli (frozen or refrigerated)
3–4 cups sauce (choose one below)
2 cups shredded mozzarella (or a mix of mozzarella + cheddar)
1/2 cup Parmesan (optional)
1 tbsp butter or ghee (for greasing)
Optional: sautéed mushrooms, spinach, or cooked keema as an extra layer
Simple marinara-style tomato sauce finished with curry leaf tempering (lighter, still special)
Layer sauce, ravioli, then sauce and cheese; repeat and bake at 375°F / 190°C. Keep the sauce thick so the casserole sets instead of turning soupy.
For meat-filled ravioli, use commercially prepared ravioli whose package directions allow this baking method, or make sure a homemade meat filling is fully cooked. The casserole times below are baking ranges, not a substitute for safely cooking a raw meat filling.
Method
Heat oven to 190°C / 375°F.
Grease a baking dish with butter/ghee.
Add a thin layer of sauce.
Layer ravioli in a single layer.
Spoon sauce over, then add cheese.
Repeat layers until you’re done, finishing with sauce and cheese.
Cover with foil and bake 25–30 minutes.
Uncover and bake another 10–15 minutes until bubbly and browned.
Make ahead: assemble the casserole earlier in the day, cover and refrigerate it, then bake when needed. A chilled casserole may take a little longer; use a hot, bubbling center and browned top as the final cues.
Each ravioli already contains a filling, so the casserole does not need a separate ricotta layer. For a fuller bake, add one thin layer of keema or browned mushrooms between the ravioli; too many extras make the layers heavy and wet.
Finish after baking, not before: a spoonful of curry-leaf ghee keeps its aroma, while crushed kasuri methi gives a tomato-cream casserole a drier, savory edge. If baked pasta is the format you cook most often, our baked ziti guide goes deeper on saucy layers and preventing a dry bake.
Baking Lobster Ravioli
Lobster ravioli needs enough sauce to stay moist in the oven. Use:
a gentle tomato-cream sauce
or a butter-cream sauce with lemon
Do not chase a dark crust with seafood-filled ravioli. Bake only until the center is hot and the sauce bubbles; prolonged heat can make the lobster or crab filling firm and dry.
Crock Pot Ravioli / Slow Cooker Ravioli Lasagna
Slow-cooker ravioli is essentially a shortcut lasagna: frozen ravioli, thick sauce and cheese layered directly in the crock pot. It is less precise than boiling ravioli to order, but useful when the meal needs to hold for a group.
A slow cooker traps more steam than an oven, so start with sauce that looks slightly too thick for stovetop pasta. That extra body helps the finished layers hold.
Crock Pot Ravioli Recipe
Ingredients
1 kg frozen ravioli (cheese ravioli is the easiest starting point)
4 cups sauce (thicker is better)
2 cups shredded mozzarella
1/2 cup Parmesan (optional)
Optional add-ins: cooked keema, sautéed mushrooms, spinach, or roasted vegetables
Method
Lightly grease the slow cooker.
Spread a thin layer of sauce on the bottom.
Add a layer of frozen ravioli.
Add sauce, then cheese.
Repeat layers.
Cook on LOW for 3–4 hours or HIGH for 1.5–2.5 hours, depending on your slow cooker.
Let it sit 10–15 minutes before serving so it sets.
Use a thick sauce. The slow cooker traps steam, so a loose sauce becomes thinner as the ravioli cooks. Start thicker than you would for stovetop pasta and let the finished dish rest before serving.
Layer sauce, frozen ravioli and cheese, then leave the finished dish alone for 10–15 minutes before serving. The rest is what turns bubbling layers into cleaner portions.
Indian-Inspired Slow Cooker Variations
Makhani-style: use the tomato-cream sauce and add a light kasuri methi finish at the end.
Keema ravioli lasagna: add the cooked keema filling as a thin layer between ravioli.
Palak-paneer: layer the spinach-paneer filling lightly between ravioli, or use spinach-and-cheese ravioli with a creamy sauce.
Skip seafood-filled ravioli in the slow cooker. Cheese, mushroom, spinach, squash and cooked-keema versions tolerate the longer holding time far better.
These five combinations work because the Indian element answers something the ravioli already needs:
Curry leaves take over sage’s aromatic role with squash, while ghee keeps the nutty richness that sweet fillings already like.
Mushrooms can handle kasuri methi because both lean earthy; cream keeps the combination familiar rather than turning it into a heavy curry.
Lobster gets the tadka at the very end, so aroma arrives on top of the butter-garlic sauce without burying the seafood.
Tomato and cream already sit close to makhani territory; a little dried fenugreek nudges the sauce in that direction without changing its basic identity.
Crisp ravioli needs contrast more than another heavy sauce, which is why coconut chutney, kara chutney and thecha work so well beside it.
Use the same logic beyond these recipes: identify whether the filling is sweet, earthy, rich or mild; choose a sauce with the right weight; then add one Indian accent only where it improves aroma, acidity or texture.
The common thread is restraint: use the Indian accent to solve a flavor problem already on the plate—more aroma, more depth, more brightness or sharper contrast.
That restraint is what keeps the crossover coherent. Curry leaves take over the aromatic job sage often does with squash. Kasuri methi deepens cream without taking over the sauce, and chutneys sit beside crisp ravioli because contrast is the point. The pasta should still taste like ravioli when you are done.
Ravioli FAQs
The full methods live above; these are the few questions that still benefit from a quick answer.
Cooking & Timing
1) How do you cook ravioli so it doesn’t fall apart?
Use a wide pot and keep the water at a lively simmer, not a rolling boil. Stir once, then lift cooked ravioli with a slotted spoon straight into warm sauce. Handmade ravioli also depends on clean seams and pressed-out air; see How to Seal Ravioli Without Leaks.
Dough & Sealing
2) What flour is best for ravioli dough?
All-purpose flour works well in most kitchens, while Italian “00” flour can give a silkier sheet. A little semolina can add chew, but good kneading and enough rest matter more than chasing one perfect flour.
3) How thin should ravioli dough be?
Thin enough that you can see a faint shadow of your hand through the sheet, but sturdy enough to lift without stretching or tearing. Thick dough makes the seams bulky; paper-thin dough is more likely to split around the filling.
Sauces & Fillings
4) What is the best sauce for ravioli?
Match the sauce to the filling: cheese is flexible, mushroom likes pepper and restrained cream, squash likes nutty fat and acidity, and seafood benefits from butter and lemon. Use the ravioli sauce chart for a quick match.
5) What makes a good homemade ravioli filling?
Flavor matters, but texture decides whether the ravioli survives. A good filling is cool, thick and scoopable with no loose liquid. The squash-paneer, mushroom-ricotta, lobster, keema, palak-paneer and red-lentil fillings in this guide all follow that rule.
Serving & Leftovers
6) Is ravioli healthy?
It depends on the wrapper, filling, sauce and portion. For a lighter plate, choose a vegetable or lean-protein filling, use a less-heavy sauce and serve a modest ravioli portion with vegetables or salad.
7) What is the best way to reheat ravioli?
For sauced ravioli, warm it gently in a covered skillet with a spoonful of water or extra sauce. For toasted ravioli, use the oven or air fryer so the coating crisps again. Avoid high microwave heat for long stretches; filled pasta dries at the edges quickly.
8) How should cooked ravioli be stored?
Cool leftovers promptly, refrigerate them in a covered container and keep enough sauce with the pasta to prevent the wrapper drying out. Seafood-filled ravioli deserves extra care with chilling and reheating; use the FoodSafety.gov seafood guidance linked in the lobster section for handling details.
Looking for low carb chia pudding recipes for weight loss? The most useful place to start is the pudding itself. Chia is not a fat burner, but a make-ahead serving can be easy to portion, simple to build with protein, and satisfying without relying on much added sugar. Here you can make it light with almond milk, thick and tangy with Greek yogurt, rich with coconut milk, chocolatey with protein powder, or completely smooth after blending.
Here for the thick Greek-yogurt chia pudding? Start with ¾ cup plain Greek yogurt + 3 tablespoons chia seeds + ¼ cup / 60 ml unsweetened almond milk or water. Stir again after 10 minutes, then chill for at least 2 hours. Jump to the full Greek yogurt chia pudding recipe ↓
All 10 chia pudding recipes at a glance—from thick Greek yogurt and keto coconut milk to chocolate protein pudding, fruit layers and smooth blended mousse.
You do not need to read this guide from top to bottom. Use the jumps above if you already know what you want, or use the table of contents to solve the ratio, liquid, protein, meal-prep, or troubleshooting question that brought you here.
Low Carb Chia Pudding for Weight Loss: What Actually Matters
Chia pudding is not a fat burner, and a jar does not cause weight loss by itself. What makes it useful in a weight-management routine is practical: chia is easy to portion ahead, it creates a substantial gel-like texture when hydrated, and it can be paired with protein-rich ingredients such as Greek yogurt or protein powder.
The rest of the jar matters just as much. Canned coconut milk, nut butter, nuts, granola, fruit, sweeteners, and large portions can quickly change both calories and carbohydrates. A chia pudding that replaces a less satisfying breakfast is a different situation from adding a rich pudding on top of everything else you already eat.
Start unsweetened: choose unsweetened almond milk, plain Greek yogurt, or an unsweetened coconut base when keeping added sugar low matters.
Add protein when the jar needs to function as a meal: Greek yogurt or a protein powder you already tolerate well are the easiest routes.
Measure calorie-dense toppings: nut butter, nuts, seeds, coconut and granola are easy to overserve.
Use fruit deliberately: berries are easy to portion; mango and apple work better as measured flavor accents when carbs matter.
Do not confuse “keto” or “low carb” with automatically low-calorie: coconut milk and nut butter can make an excellent low-carb pudding while still creating a very energy-dense jar.
That is the reason this guide includes several styles rather than one “perfect” weight-loss pudding: the best jar is the one whose portion, protein, texture, and toppings fit the rest of your day.
Why Chia Pudding Works So Well as a Breakfast
A good chia pudding does two practical things well: it gives you a breakfast you can prepare ahead, and it creates a thick, substantial texture from very little morning work. Chia seeds absorb liquid as they hydrate, while Greek yogurt, protein powder, nuts, or richer milks can make the finished jar feel more complete.
Chia supplies the pudding structure; protein and the rest of the ingredients determine whether the jar behaves more like a snack or a full breakfast.
Chia seeds are naturally rich in fiber and contain alpha-linolenic acid, a plant-based omega-3 fat. For a useful evidence-based overview rather than exaggerated claims, see the Harvard Nutrition Source guide to chia seeds.
Protein is the easiest way to make the jar feel more meal-like
Plain chia and milk can work perfectly well as a snack, but Greek yogurt or protein powder gives you another lever when you want the jar to function as breakfast. Greek yogurt also changes the texture immediately: instead of waiting for milk alone to become pudding-like, you start with a thick, creamy base.
Think of the jar in three layers: chia + liquid for structure, an optional protein source for a more substantial breakfast, then flavors you genuinely want to eat.
Low Carb Chia Pudding Ratio: The Base Recipe That Prevents Clumps
For a classic milk-based chia pudding, this is the dependable starting point:
3 tablespoons chia seeds (roughly 30–35 g, depending on how you measure)
1 cup / 240 ml liquid
Pinch of salt
½ teaspoon vanilla, optional
Sweetener to taste, optional
Start with 3 tablespoons chia to 1 cup / 240 ml liquid. Use a little less chia for a softer set, or keep the full amount and use a richer liquid for a denser pudding.
The exact result changes with your liquid. Thin almond milk gives a lighter pudding, while canned coconut milk sets much richer. Greek yogurt needs far less added liquid because the yogurt already provides most of the body.
The stir-rest-stir method
Whisk the liquid with vanilla, salt, sweetener, cocoa, protein powder, or other smooth flavorings first.
Add the chia and whisk vigorously for 20–30 seconds.
Let the mixture stand for 10 minutes.
Whisk or stir thoroughly a second time.
Cover and refrigerate for at least 2 hours; overnight gives the most settled texture.
The second stir is the important one: the seeds have started hydrating but have not fully set, so this is your chance to break up clusters before they become permanent.
Can you make quick chia pudding?
Yes, although “quick” still means giving chia time to hydrate. Follow the same method and chill for 30–45 minutes. The texture will be softer than an overnight jar. Greek yogurt is particularly useful when you want a thick pudding sooner because much of the thickness is already present before the chia sets.
Give the chia enough time to hydrate
Chia thickens because the seeds absorb liquid over time. For pudding, use them fully hydrated rather than judging the mixture immediately after stirring. If the texture still seems thin after 30 minutes, give it more time before adding extra seeds; the biggest change usually happens during the longer refrigerator rest.
Choosing Your Liquid: Almond Milk, Coconut Milk, Yogurt, Oat Milk & More
Your liquid controls far more than flavor. It changes thickness, richness, carbohydrate content, and how much additional chia you may need. Choose the liquid first, then fine-tune the jar.
Almond milk stays light, canned coconut milk gives the richest set, oat milk is creamy but usually higher in carbohydrate, and coconut water creates a lighter fruit-friendly chia gel.
Almond milk: light and versatile
Unsweetened almond milk is an easy low-carb base because its flavor stays out of the way. It works especially well with vanilla, chocolate, cinnamon, berries, matcha, and nut butter.
Canned coconut milk: richest and thickest
If you want a pudding that feels especially rich, canned coconut milk is hard to beat. Because brands vary in thickness, whisk in enough water to make the mixture comfortably pourable before adding chia. Very thick coconut milk can otherwise produce dense pockets before the seeds hydrate evenly.
Greek yogurt: thick before it even chills
Greek yogurt works differently from milk. Instead of using a full cup of liquid, start with yogurt and loosen it gradually. For our full high-protein version, ¾ cup Greek yogurt + ¼ cup / 60 ml water or unsweetened almond milk creates a creamy starting mixture before the chia goes in.
Oat milk produces a mild, familiar breakfast-pudding flavor. It can still be used with any of the methods in this guide, but check the nutrition label if keeping carbohydrates low is an important part of your goal.
Coconut water: light and fruit-friendly
Coconut water produces a much lighter gel than milk. It pairs particularly well with mango, lime and berries, but it will not taste as creamy unless you add a spoonful of Greek yogurt or coconut cream. If you would rather drink your chia than turn it into pudding, our Chia Seed Water guide uses a much lighter chia-to-liquid ratio and covers plain, lemon, coconut-water and overnight versions.
Dairy-Free Chia Pudding: The Easiest Swaps
Several recipes in this collection are naturally dairy-free when you use plant milk and skip optional Greek yogurt. Unsweetened almond milk is the lightest neutral base; canned coconut milk gives the richest dairy-free texture; and a lighter coconut-milk beverage works well for matcha, mango, apple-cinnamon, and gingerbread.
If you use protein powder in a dairy-free jar, check the ingredient label: whey and casein are dairy proteins, while many pea, soy, rice, and blended plant proteins are dairy-free.
High Protein Chia Pudding: Greek Yogurt, Protein Powder & Collagen
There are three straightforward ways to increase the protein in a chia jar. Greek yogurt gives you protein and immediate thickness. Protein powder can add more protein and flavor but needs to be dissolved well. Collagen peptides dissolve easily, although they do not thicken the pudding the way yogurt does. If collagen is part of your routine, Harvard Health has a measured overview of what collagen supplements can and cannot reasonably claim.
Greek yogurt changes both protein and texture; protein powder is a bigger flavor lever; collagen dissolves easily but contributes little to thickness.
How to add protein powder without a chalky texture
Do not dump dry protein powder into a finished chia pudding. Whisk it completely into the milk first, then add the chia. If your powder is stubborn, make a smooth paste with a small amount of liquid before gradually whisking in the rest.
Keep extra liquid nearby: protein powders absorb liquid very differently. After the 10-minute rest, add 2–4 tablespoons milk if the mixture has become unusually thick before it goes into the refrigerator.
For smooth protein chia pudding: dissolve the powder first, add the seeds second, then use the same 10-minute rest and second-stir method.
10 Low Carb Chia Pudding Recipes
Each recipe below makes roughly 2 small servings or 1 generous serving, depending on appetite and toppings. For meal prep, multiply the ingredients and portion the finished mixture into individual jars.
Low-carb vs keto: these recipes are not all equally low in carbohydrate. The unsweetened almond-milk, Greek-yogurt, chocolate, and coconut versions are the easiest to keep very low carb. Mango and apple are fruit-forward options; use the fruit as a measured accent if carbohydrate intake is a priority.
Start with the result you want: Greek yogurt for thick and protein-forward, chocolate protein for cocoa cravings, coconut milk for the richest keto texture, or blended mousse if whole chia seeds are the problem.
This is the easiest everyday low carb chia pudding to memorize. Vanilla keeps it neutral enough for berries, nuts, cocoa, cinnamon, or nut butter later.
Ingredients
3 tablespoons chia seeds
1 cup / 240 ml unsweetened almond milk
½ teaspoon vanilla extract
Pinch of salt
Optional low-carb sweetener, to taste
The almond-milk jar is the useful blank canvas of the collection: light enough for fruit, but easy to make richer with yogurt, nuts or nut butter.
Method
Whisk almond milk, vanilla, salt and sweetener, if using.
Add the chia and whisk vigorously for 20–30 seconds.
Rest 10 minutes, then whisk again.
Cover and refrigerate for at least 2 hours or overnight.
Easy variations: add ½ teaspoon cinnamon; stir in 1 tablespoon unsweetened shredded coconut; or add 1–2 tablespoons Greek yogurt at serving time for a creamier finish.
2) Chia Pudding with Greek Yogurt: High Protein & Ultra Creamy
If the chia pudding you want is thick, creamy and closer to cheesecake filling than a glass of soaked seeds, start here. Greek yogurt gives the jar body before the chia has even finished hydrating, while a small amount of liquid keeps the mixture creamy rather than pasty.
Ingredients
¾ cup plain Greek yogurt
3 tablespoons chia seeds
¼ cup / 60 ml unsweetened almond milk or water, plus 1–2 tablespoons more after chilling if needed
½ teaspoon vanilla extract
Pinch of salt
Optional sweetener, to taste
This is the thickest protein-forward version in the collection: tangy Greek yogurt, hydrated chia and enough added liquid to keep the pudding creamy rather than stiff.
Method
Whisk the Greek yogurt, vanilla, salt and ¼ cup / 60 ml water or almond milk until completely smooth.
Stir in the chia seeds until evenly distributed.
Rest for 10 minutes, then stir again so no dense chia pockets remain.
Refrigerate for at least 2 hours. Overnight is fine.
Stir before serving and add another 1–2 tablespoons liquid if you want it looser.
How thick should it look before chilling?
It should already be thick, but it should still move easily when stirred. If it looks like a stiff paste before going into the refrigerator, add another tablespoon or two of liquid. The chia will absorb more as it sits.
Can you use nonfat or regular yogurt?
Yes. Nonfat Greek yogurt works, although the finished pudding can taste a little sharper and less rich. Regular yogurt is thinner, so start with less added liquid and check the texture after hydration. Different yogurts vary enough that the final splash of liquid should be adjusted by texture rather than treated as an exact requirement.
Can you add protein powder too?
Yes. Whisk the protein powder into the yogurt and loosening liquid before adding chia. Protein powders absorb liquid differently, so expect to add another 1–3 tablespoons milk if the mixture becomes unusually stiff after the 10-minute rest.
Best toppings and variations
For a cheesecake-style jar, use vanilla, berries and a little lemon zest. For chocolate, whisk cocoa into the yogurt before adding chia. Peanut butter, chopped nuts, cacao nibs and a small berry layer all work well because they add contrast without turning the pudding watery.
If this thick, tangy, almost-cheesecake style is the chia pudding you actually want, keep going with our 10 Creative Chia Pudding Recipes. That collection branches into Greek-yogurt, cheesecake, chocolate, blueberry-lemon, mango and coconut-cream directions, so you can keep the texture you like and change the flavor.
3) Chocolate Protein Chia Pudding
This is the jar to make when you want chocolate flavor without turning breakfast into a sugar-heavy dessert. The important technique is dissolving the protein powder and cocoa before the chia goes in.
1 cup / 240 ml unsweetened almond milk or dairy milk
1 scoop chocolate protein powder, or vanilla protein plus extra cocoa
2 tablespoons cocoa or cacao powder
3 tablespoons chia seeds
Pinch of salt
Optional sweetener, to taste
Optional: 1 tablespoon Greek yogurt for extra creaminess
2–4 tablespoons extra milk, only if your protein powder makes the mixture unusually thick
Cocoa and protein powder make this the most direct chocolate-for-breakfast jar in the collection.
Whisk the milk, protein powder, cocoa, salt and sweetener until completely smooth.
Add chia and whisk again.
Rest 10 minutes, then stir thoroughly. If it already looks very thick, add 2–4 tablespoons extra milk.
Refrigerate for at least 2 hours; overnight gives the most settled texture.
If it tastes chalky: whisk the protein powder with a small amount of milk into a smooth paste first, then gradually add the rest of the milk.
4) Chocolate Peanut Butter Chia Pudding
Peanut butter supplies richness and makes chocolate taste fuller even when you keep the pudding only lightly sweetened.
1 cup / 240 ml almond milk or dairy milk
3 tablespoons chia seeds
1–2 tablespoons peanut butter
1 tablespoon cocoa powder
Pinch of salt
Optional sweetener
Chocolate and peanut butter create a richer dessert-style jar without needing much additional sweetness.
Whisk milk, cocoa, salt and sweetener until smooth.
Whisk in the peanut butter until evenly incorporated.
Add chia, rest 10 minutes and stir again.
Refrigerate for at least 2 hours.
A tiny splash of vanilla or pinch of cinnamon can make the cocoa taste deeper. Top with berries, roasted nuts or a few cacao nibs.
5) Matcha Chia Pudding
Matcha gives chia pudding a clean green-tea flavor that works especially well with vanilla and a small pinch of salt.
1 cup / 240 ml unsweetened almond milk or light coconut-milk beverage
3 tablespoons chia seeds
1–2 teaspoons matcha powder
½ teaspoon vanilla
Pinch of salt
Optional sweetener
Matcha creates a lighter, café-style change of pace between the richer chocolate and coconut puddings.
Whisk or sift matcha into the milk until smooth.
Add vanilla, salt and sweetener, if using.
Add chia, rest 10 minutes, stir again and refrigerate.
If your matcha clumps, whisk it first with 1–2 tablespoons warm water to form a smooth paste. Matcha contains caffeine, so use less or enjoy it earlier in the day if you are sensitive to it.
Mango gives you plenty of flavor from a relatively small amount of fruit. Lime and a pinch of salt help the mango taste brighter, so you do not need to turn the whole jar into mango puree.
1 cup / 240 ml almond milk or coconut-milk beverage
3 tablespoons chia seeds
⅓ cup mango puree or finely diced mango
Pinch of salt
Optional squeeze of lime
Layering the mango rather than mixing a large quantity through the whole jar gives you strong tropical flavor without overwhelming the chia base.
Make the chia base with milk, chia and salt.
Chill until set.
Fold in the mango just before eating, or layer the puree at the bottom of the jar.
Finish with lime, if using.
If the tropical-fruit direction is what you like, try our pineapple chia pudding next. It uses the same two-stir logic but goes deeper on pineapple, yogurt, texture, and how to keep the pudding spoonable rather than watery.
7) Apple Cinnamon Chia Pudding
This version gets most of its cozy character from cinnamon, vanilla and nutmeg, so the apple can stay a relatively small accent.
1 cup / 240 ml unsweetened almond milk
3 tablespoons chia seeds
½ teaspoon cinnamon
Pinch of salt
Optional: ⅓ cup grated apple
Optional: pinch of nutmeg
For the freshest texture, add grated apple shortly before serving rather than letting it sit in the pudding for several days.
Whisk milk, cinnamon, salt and nutmeg.
Add chia, rest 10 minutes, stir again and chill.
Fold in grated apple shortly before serving.
Stricter low-carb version: skip the apple and use cinnamon, vanilla and chopped pecans for a cinnamon-pecan jar.
8) Gingerbread Chia Pudding
Gingerbread chia pudding is about warm-spice flavor rather than a health halo: cinnamon, ginger and cloves turn the same neutral base into something that feels much more dessert-like.
1 cup / 240 ml almond milk or coconut-milk beverage
3 tablespoons chia seeds
½ teaspoon cinnamon
¼ teaspoon ground ginger
Pinch of cloves or allspice
Pinch of salt
Optional sweetener
Warm spices transform a basic chia-and-milk jar without needing a complicated ingredient list.
Whisk the spices, salt and sweetener into the milk.
Add chia, rest 10 minutes, stir again and refrigerate.
Serve with chopped nuts, Greek yogurt or coconut cream.
9) Keto Chia Pudding with Coconut Milk
This is the richest milk-based pudding in the collection. Canned coconut milk gives you much more body than almond milk, but thinning it slightly helps the chia hydrate evenly.
3 tablespoons chia seeds
¾ cup / 180 ml canned coconut milk
¼ cup / 60 ml water, plus more if needed
½ teaspoon vanilla
Pinch of salt
Optional sweetener
Canned coconut milk produces the densest, richest milk-based chia pudding in this collection.
Whisk coconut milk, water, vanilla, salt and sweetener until smooth.
Add chia, rest 10 minutes and stir again.
Refrigerate for at least 2 hours.
If it becomes extremely thick overnight, loosen it with a splash of water before serving.
10) Blended Chia Pudding: Smooth Chocolate Mousse
If the idea of chia appeals to you but the whole-seed texture does not, this is the recipe worth trying. Let the chia hydrate first, then blend the finished pudding until glossy and smooth.
1 cup / 240 ml almond milk or dairy milk
3 tablespoons chia seeds
1–2 tablespoons cocoa or cacao powder
Pinch of salt
Optional sweetener
Optional: 1 tablespoon peanut butter or 2 tablespoons Greek yogurt
Hydrate first and blend second: that is what changes chia from a seedy pudding into a much smoother mousse-like texture.
Make a standard chocolate chia pudding and refrigerate it for at least 2 hours.
Blend until completely smooth and glossy.
Add Greek yogurt or peanut butter if you want a richer finish.
Chill for another 10–15 minutes before serving.
If protein powder is part of the recipe, blending after the chia has set can also smooth out small powdery pockets.
Whichever flavor you choose, texture is the part most likely to need adjusting. The fixes below are designed so you can rescue the pudding you already made instead of starting over.
Chia Pudding Troubleshooting: Runny, Too Thick, Lumpy or Bland
Most disappointing chia pudding can be traced to the ratio, hydration time, stirring pattern, or the thickness of the liquid you started with. Fix the texture before abandoning the jar.
Problem
What probably happened
What to do now
Runny after 2+ hours
Too much liquid, too little chia, or very thin milk
Add 1 teaspoon chia at a time, stir well and chill another 30–60 minutes.
Too thick or pasty
Rich coconut milk, thick yogurt, extra protein powder, or too much chia
Stir in milk or water 1 tablespoon at a time until creamy.
Large chia clumps
The seeds settled together before fully hydrating
Break them up thoroughly; next time use the 10-minute second stir.
Seeds still crunchy
Not enough hydration time or liquid
Add a small splash of liquid and give the pudding more time.
Protein powder tastes chalky
Powder was added after the chia or not dissolved first
Blend the pudding, or next time dissolve powder completely before adding seeds.
Watery fruit layer
Juicy fruit sat in the jar too long
Keep berries and other watery toppings separate until serving.
Flavor is flat
Not enough salt, aroma, richness or acidity
Add a pinch of salt plus vanilla, cinnamon, cocoa, nut butter, citrus zest or berries.
You hate the seed texture
The pudding may be fine; the texture simply is not for you
One important correction: if a milk-based pudding is only slightly soft at the 30-minute mark, do not keep throwing chia into it. Give it the full two hours first. Chia continues absorbing liquid as it rests.
Chia Pudding Meal Prep & Storage
The easiest way to meal prep chia is to make one plain base and create several flavors from it rather than mixing four completely separate recipes.
Whisk the base in a bowl where you can easily break up clumps.
Do the 10-minute second stir.
Portion into three or four jars.
Flavor the jars in different directions—vanilla, cocoa, matcha, cinnamon, yogurt.
Keep crunchy toppings and watery fruit separate until serving.
One base, several flavors, toppings added later: this is much easier to repeat than making a completely different pudding every morning.
For quality, most chia puddings are best eaten within about 3–4 days when refrigerated. Yogurt- and milk-based versions should stay cold, and fruit is usually best added closer to serving. Follow normal refrigerated food-safety practices and discard anything that develops an unusual smell, appearance or signs of spoilage.
If what you really enjoy is the make-it-tonight, grab-it-tomorrow routine rather than chia specifically, our high protein overnight oats give you the same fridge-ready breakfast rhythm with oats, yogurt, protein-powder and dairy-free routes.
How to Make Chia Pudding Taste Better
If chia pudding tastes like a health chore, the problem is usually not the chia. A plain mixture of seeds and unsweetened milk needs flavor structure just like any other pudding.
Salt: a small pinch makes chocolate, vanilla, fruit and nut butter taste fuller.
Vanilla or warm spice: vanilla, cinnamon, ginger or nutmeg give the jar aroma without requiring much sweetness.
Depth: cocoa, cacao or matcha create a strong flavor identity.
Creaminess: Greek yogurt, canned coconut milk or nut butter changes both flavor and mouthfeel.
Contrast: berries, chopped nuts, toasted coconut and cacao nibs stop every spoonful feeling the same.
Acidity: lemon or lime zest can make fruit flavors brighter.
Good chia pudding needs the same things other desserts do: seasoning, aroma, richness and contrast.
If you are making chia pudding for the first time, a useful two-jar experiment is one vanilla almond-milk jar and one Greek-yogurt jar. You will immediately learn whether you prefer a lighter gel-style pudding or a thicker, tangier texture.
Frequently Asked Questions
1) What is the best chia pudding ratio?
For a milk-based pudding, start with 3 tablespoons chia seeds to 1 cup / 240 ml liquid. Use a little less chia for a softer pudding. Greek-yogurt chia pudding uses a different ratio because yogurt already supplies most of the thickness.
2) How long does chia pudding need to set?
Give it at least 2 hours for a dependable set. A 30–45 minute quick version is possible but softer. Overnight works especially well for meal prep.
3) Why is my chia pudding watery?
It may need more time, more chia, or a better second stir. If it is still runny after at least two hours, add about 1 teaspoon chia, stir thoroughly and chill for another 30–60 minutes.
4) Why is my chia pudding too thick?
Thick Greek yogurt, canned coconut milk, protein powder and slightly heavy chia measurements can all produce an unexpectedly dense pudding. Stir in water or milk a tablespoon at a time until it becomes creamy again.
5) How do I stop chia seeds clumping together?
Whisk immediately after adding the seeds, then stir or whisk again after about 10 minutes. That second stir redistributes the seeds just as they begin to gel.
6) Can I make chia pudding with Greek yogurt and no milk?
Yes. Use water instead of milk to loosen the yogurt. Start with ¾ cup Greek yogurt, 3 tablespoons chia and ¼ cup / 60 ml water, then add another tablespoon or two after chilling if the pudding is too stiff.
7) Is Greek yogurt better than regular yogurt for chia pudding?
Neither is inherently better, but they behave differently. Greek yogurt is thicker and generally higher in protein, so it gives a firmer pudding. Regular yogurt starts looser, meaning you may need less added liquid or slightly more chia.
8) Can I add protein powder to chia pudding?
Yes. For the smoothest texture, dissolve the protein powder in the milk or yogurt mixture before adding the chia seeds. Because powders absorb liquid differently, keep a little extra milk nearby and adjust after the 10-minute rest.
9) Can I make chia pudding with almond milk?
Yes. Unsweetened almond milk is one of the easiest bases for low carb chia pudding because its flavor is mild and it works well with vanilla, cocoa, cinnamon, berries, matcha and nut butter.
10) Can I make chia pudding with coconut milk?
Yes. Canned coconut milk makes an especially rich pudding. If the coconut milk is very thick, dilute it with a little water before adding chia so the seeds hydrate evenly.
11) Can I make chia pudding with oat milk?
Yes. Oat milk creates a mild, creamy pudding, although many oat milks contain substantially more carbohydrate than unsweetened almond milk, so check the label if low carb is your priority.
12) Can I make dairy-free chia pudding?
Yes. Use unsweetened almond milk, coconut milk, or another dairy-free milk you enjoy. If adding protein powder, check whether it contains whey or casein; those are dairy proteins.
13) Can I make blended chia pudding?
Yes, and it is one of the best solutions if you dislike whole chia seeds. Let the pudding hydrate first, then blend until smooth. Cocoa, peanut butter or Greek yogurt can make the result even more mousse-like.
14) What is the easiest three-ingredient chia pudding?
A simple version is chia seeds + unsweetened almond milk + vanilla. Another is chia + coconut milk + cocoa. Add a pinch of salt if possible; it makes a surprisingly large difference to the finished flavor.
15) Can I use frozen berries in chia pudding?
Yes. Thawed berries release juice, which can be useful as a swirl or compote-style layer. For meal prep, keep very juicy berries separate until serving if you do not want them loosening the pudding.
16) How can I sweeten chia pudding without much sugar?
Start by improving flavor before simply increasing sweetness. Vanilla, cinnamon, cocoa, nut butter, coconut milk, berries, citrus zest and a pinch of salt can all make the pudding taste more complete. If you use a low-carb sweetener, add only enough to suit your taste.
17) Is chia pudding keto-friendly?
It can fit many low-carb or ketogenic eating patterns when made with ingredients such as unsweetened almond milk or coconut milk and appropriate toppings. The final carbohydrate content depends on your milk, yogurt, fruit, sweetener and serving size, so check the ingredients you actually use rather than relying on the word “keto” alone.
18) How long does chia pudding last in the fridge?
For quality, aim to eat most homemade chia pudding within about 3–4 days, refrigerated. Keep toppings such as nuts separate for crunch and add juicy fruit later if you want the pudding to stay thick.