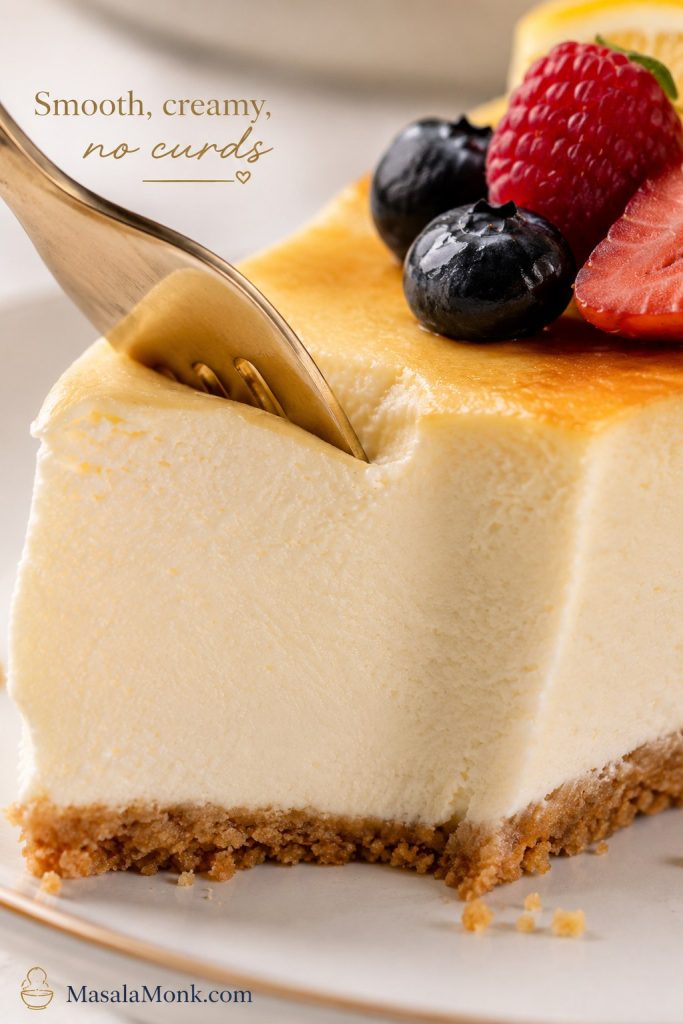
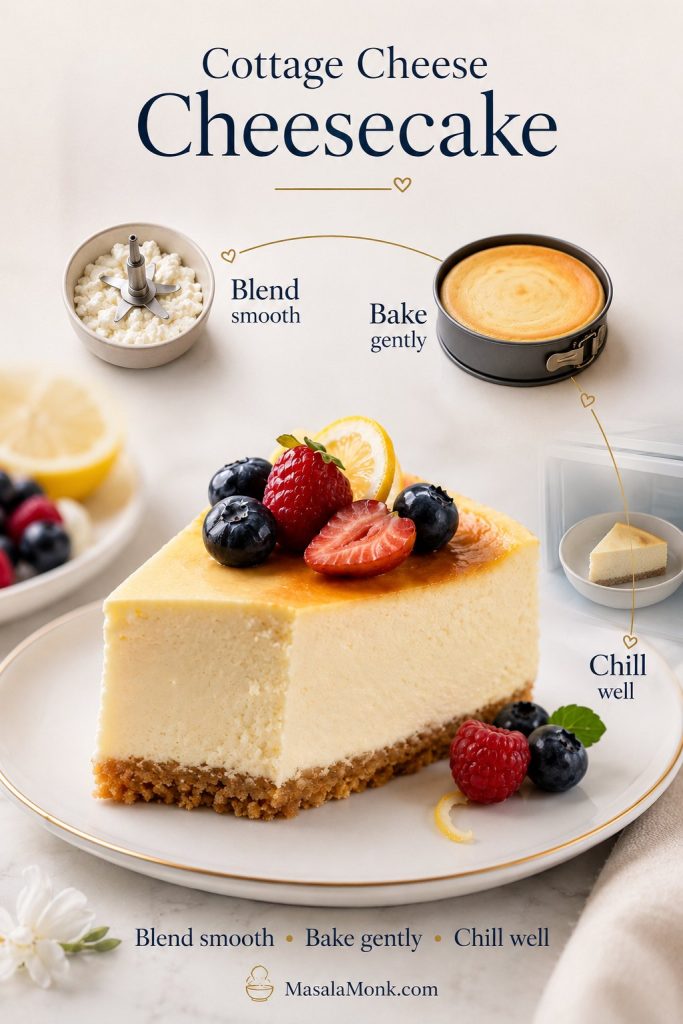
This cottage cheese cheesecake recipe is built for the two worries people usually have before they try it: grainy curds and a watery filling. The cottage cheese is blended until completely smooth, supported with thick Greek yogurt, eggs, vanilla, lemon, and a little cornstarch, then baked gently and chilled until creamy and sliceable.
It is lighter than a classic cream cheese cheesecake, but it still tastes like dessert. You can bake it with a buttery crumb crust, make it crustless, or add a little cream cheese when you want a richer, more traditional slice — no protein powder needed.
Quick Answer: Can You Make Cheesecake with Cottage Cheese?
Yes, you can make cheesecake with cottage cheese. The key is to blend the cottage cheese until smooth before baking it with eggs, Greek yogurt, vanilla, lemon, and a little cornstarch. Once baked and chilled, the filling becomes creamy, lightly tangy, and sliceable.
The best version should not remind you of eating cottage cheese from a tub. Once blended, baked, and chilled, the cottage cheese melts into the filling and gives the cheesecake body, tang, and a lighter feel than a cream cheese-only base.
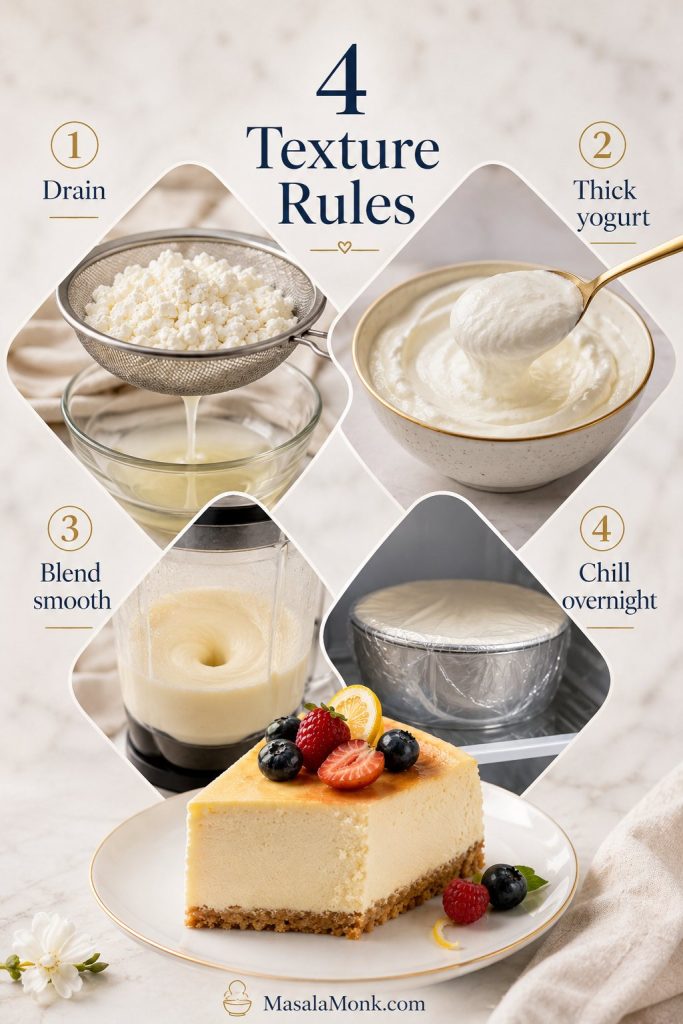
Before You Bake: Texture Rules and Timing
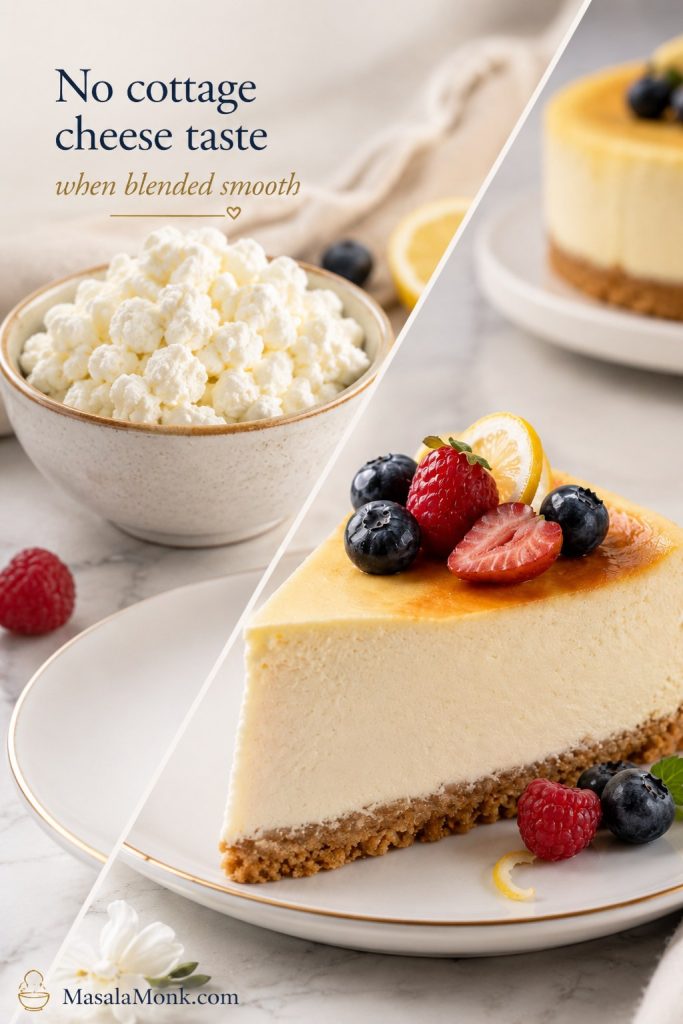
- It tastes like cheesecake, not cottage cheese. Blending smooths the curds into the filling.
- It is lighter but still dessert-like. Greek yogurt adds tang without making the slice feel flat.
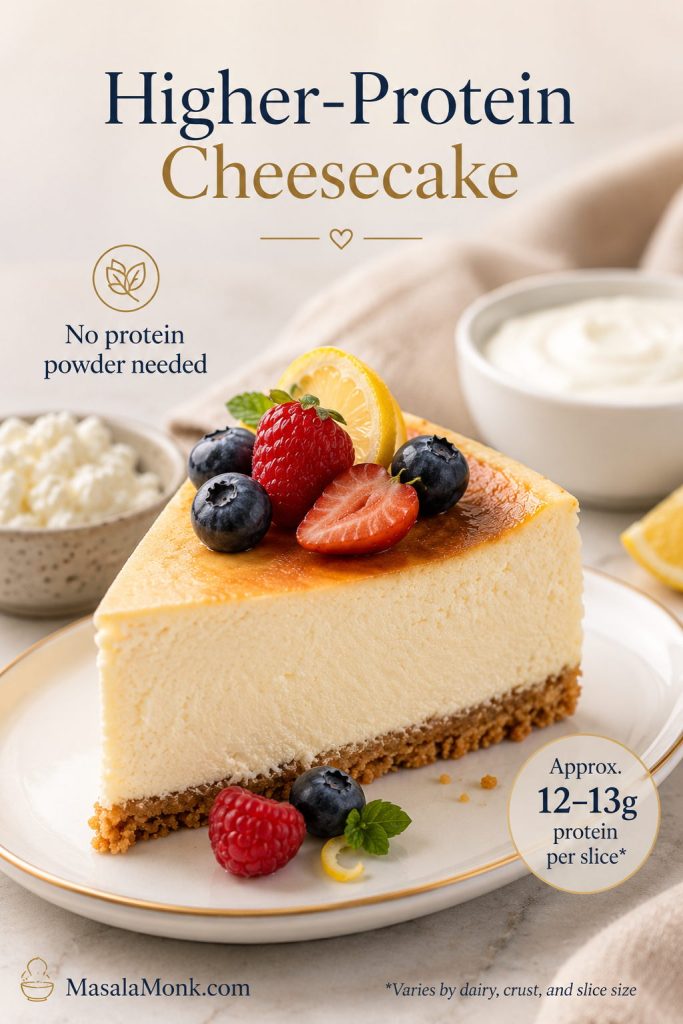
- No protein powder needed. Cottage cheese and Greek yogurt give the filling its protein-rich base without making the cheesecake taste chalky.
- It works with or without a crust. Make it classic, crustless, or low-carb.
- It is better the next day. Overnight chilling gives the cleanest, creamiest slices.
- Drain cottage cheese when it looks watery.
- Use thick Greek yogurt, not loose regular yogurt.
- Blend the dairy completely smooth before adding eggs.
- Chill the cheesecake overnight before judging the final texture.
Need the visual version? Jump to how to make the filling smooth or troubleshooting if your batter looks loose, grainy, or hard to slice.
Table of Contents
Start Here
What Does Cottage Cheese Cheesecake Taste Like?
A good cottage cheese cheesecake tastes creamy, lightly tangy, and familiar — closer to a lighter cheesecake than a cottage cheese dessert. The vanilla gives it warmth, the lemon adds classic cheesecake brightness, and the Greek yogurt rounds out the dairy flavor.
The texture is softer and a little lighter than a dense New York-style cheesecake, especially with the Greek yogurt version. The cream cheese variation makes it richer, denser, and closer to the classic slice many people expect.
The cottage cheese should not stand out. Once it is blended and chilled properly, it should support the cheesecake rather than announce itself.
For Cottage Cheese Skeptics
If the words cottage cheese cheesecake make you imagine curds in dessert, you are not alone. That is exactly what this recipe is designed to avoid. Once the filling is blended, baked, and chilled, the cottage cheese should disappear into the texture.
The goal is not a “healthy dessert” that tastes like a compromise. It should taste like a lighter, tangier cheesecake: cold, creamy, smooth, and familiar enough that nobody is thinking about cottage cheese curds.
Why This Cottage Cheese Cheesecake Works
Cottage cheese can make a beautiful cheesecake, but it needs the right support. This recipe is built around the two things that matter most: blending the curds completely smooth and keeping extra moisture under control.
The goal is not to hide cottage cheese under a pile of sugar. It is to make it behave like a cheesecake filling: smooth enough to slice, tangy enough to taste familiar, and rich enough that it still feels like dessert.
Cottage Cheese Adds Protein and Body
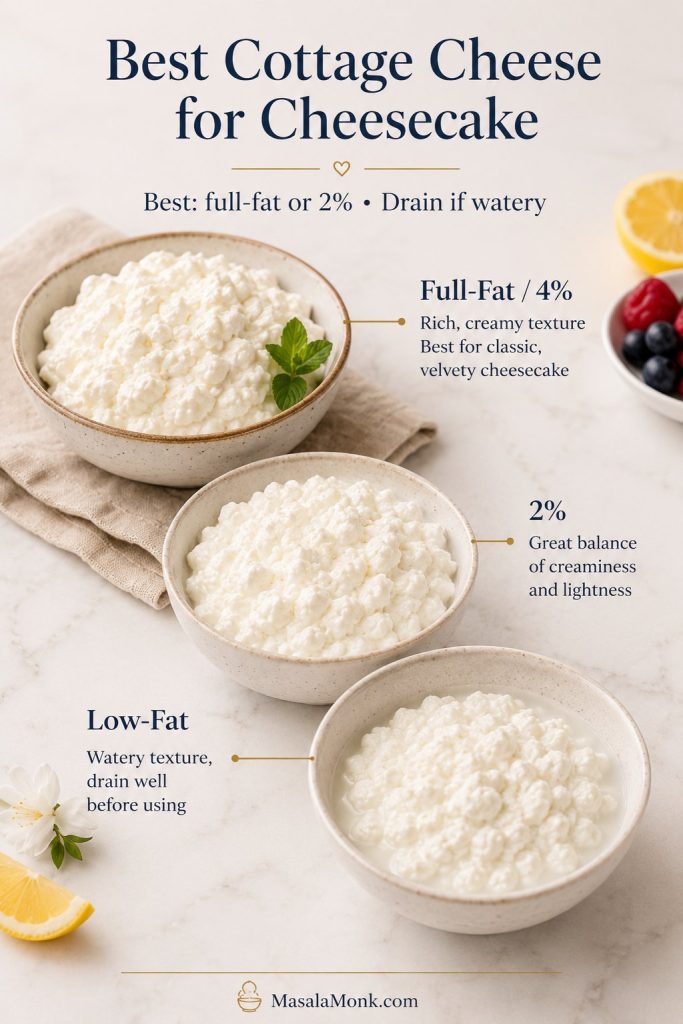
Cottage cheese gives the filling body, mild tang, and a naturally higher-protein foundation than a cream cheese-only filling. Full-fat cottage cheese gives the richest result, while 2% cottage cheese works well for a lighter slice that still tastes balanced.
Greek Yogurt Adds Tang and Creaminess
Greek yogurt keeps the filling from tasting flat. It brings the tang people expect from cheesecake, but it needs to be thick; loose yogurt can push the batter toward watery.
Eggs Help the Cheesecake Set
This version uses 4 large eggs for a reliable set. Add them last and blend briefly; too much air in the batter can make the cheesecake puff in the oven and crack as it cools.
Cornstarch Gives Extra Insurance
A small amount of cornstarch helps the filling hold together without making it heavy. It is especially useful when cottage cheese has a little extra liquid. All-purpose flour works too, but cornstarch keeps the texture softer and cleaner.
Low, Gentle Baking Prevents Cracks
This cheesecake bakes at 325°F / 160°C after the crust is pre-baked. The lower heat helps the filling set slowly, which reduces the chance of a cracked top, dry edges, or a firm, rubbery center.
How to Avoid Grainy or Watery Cottage Cheese Cheesecake
This recipe is built around moisture control. Cottage cheese and Greek yogurt both bring liquid to the filling, so the best texture comes from using thick dairy, adding enough egg structure, and including a small amount of cornstarch.
Granulated sugar keeps the batter more predictable than liquid sweeteners. Watery cottage cheese should be drained before measuring. Eggs should go in last so the batter does not become over-aerated. After baking, the cheesecake may look softer than expected, but the texture changes as it cools and chills.
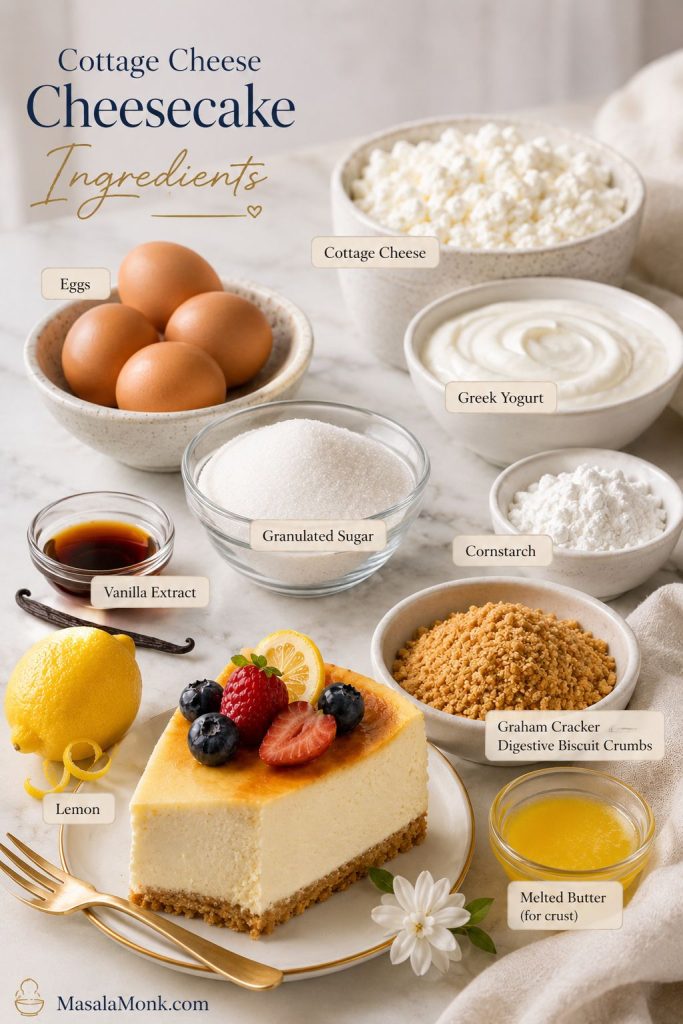
Ingredients for Cottage Cheese Cheesecake
This cottage cheese cheesecake uses familiar cheesecake ingredients, but the balance is slightly different from a classic cream cheese version. The goal is a filling that feels smooth and sliceable without losing the lighter character that makes cottage cheese useful in the first place.
Cottage Cheese
Use full-fat or 2% cottage cheese for the best balance of richness and structure. Small-curd cottage cheese is easiest to blend, but large-curd cottage cheese also works with a good blender or food processor.
Greek Yogurt
Plain Greek yogurt adds tang and keeps the cheesecake from tasting flat. Whole milk Greek yogurt gives the richest texture, while low-fat or nonfat Greek yogurt makes the cheesecake lighter. Avoid regular yogurt unless it has been strained until thick.
Eggs
Eggs help the filling set. Use room-temperature eggs so they blend evenly into the batter. The cheesecake should not taste eggy when it is baked gently and pulled while the center still has a soft wobble.
Sugar or Sweetener
Regular granulated sugar gives the cleanest cheesecake flavor. A cup-for-cup monk fruit blend or allulose can work for a lower-sugar version. For a fully low-carb cheesecake with a more classic structure, this keto cheesecake recipe goes deeper into almond flour crusts, sugar-free sweeteners, crustless cheesecake, and no-crack baking.
Cornstarch
Cornstarch helps the cottage cheese and yogurt filling bake into clean slices. Use 2 tablespoons of all-purpose flour instead when cornstarch is not available.
Vanilla and Lemon
Vanilla adds warmth. Lemon zest and a little lemon juice give the cheesecake its familiar brightness. The lemon does not need to make the cheesecake taste sharply lemony; it simply makes the dairy taste more like cheesecake.
Graham Cracker or Digestive Biscuit Crust
The crust is optional, but it makes the cheesecake feel more classic. Graham crackers, digestive biscuits, or similar plain sweet biscuits all work. Pre-baking the crust for a few minutes helps it hold together under the filling.
Best Cottage Cheese to Use
The cottage cheese you choose has a direct effect on texture. Since this is a blended cheesecake, you do not need perfect curds, but you do need cottage cheese that is not overly watery.
| Cottage Cheese Type | Result in Cheesecake | Best Use |
|---|---|---|
| Full-fat / 4% | Richest, most forgiving texture | Best overall choice |
| 2% | Still creamy, slightly lighter | Best balance for a lighter cheesecake |
| Low-fat | Can work, but may be thinner or tangier | Use only when thick; drain when watery |
| Fat-free | Least rich, more likely to taste tangy or thin | Use only for a very lean version |
| Small-curd | Blends easiest | Best default |
| Large-curd | Works when blended very well | Use a strong blender or food processor |
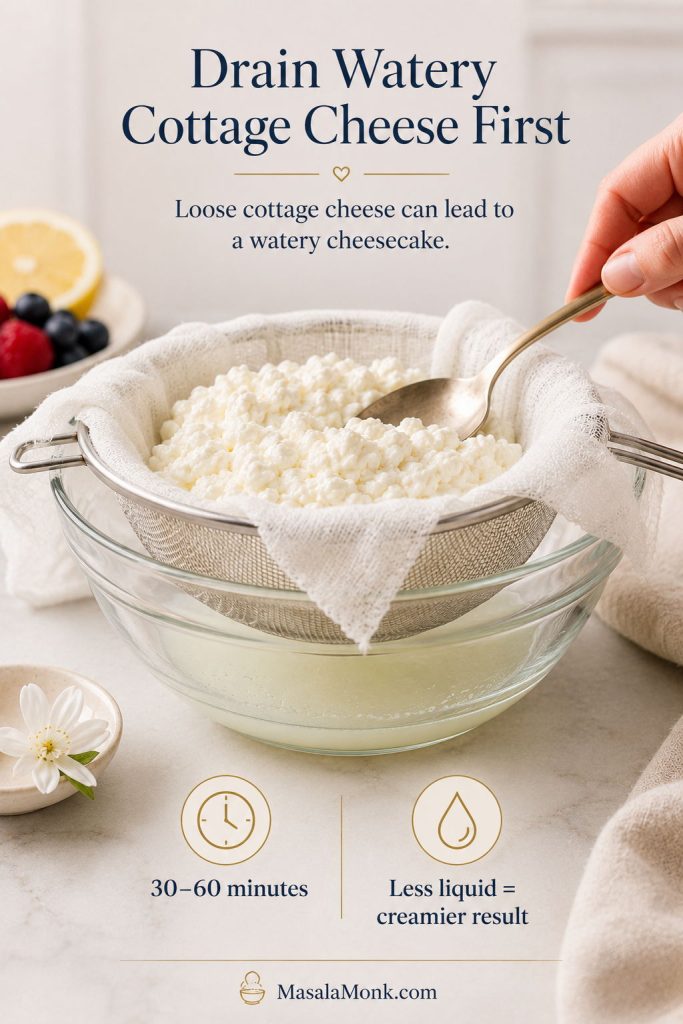
When to Drain Watery Cottage Cheese
When cottage cheese looks loose or has a lot of liquid in the container, drain it through a fine-mesh sieve before measuring. That one small step can prevent a watery cheesecake.
Once you know which cottage cheese to use, the next important step is blending it smooth before the eggs go in.
For official nutrient data on different cottage cheese varieties, you can check USDA FoodData Central cottage cheese data.
How to Make Cottage Cheese Cheesecake Smooth
Graininess is what can ruin the illusion, so the blender step matters more than anything else. The dairy should look glossy and smooth before the eggs go in.
Use a Blender or Food Processor
A high-speed blender gives the silkiest filling. A food processor also works, especially when you scrape down the sides once or twice. An immersion blender can work in a pinch, but the finished texture may not be quite as polished.
Blend the Dairy Before Adding Eggs
Add the cottage cheese, Greek yogurt, sugar, vanilla, lemon zest, lemon juice, salt, and cornstarch to the blender first. Blend until the mixture looks glossy and even. Add the eggs only after that base is smooth.

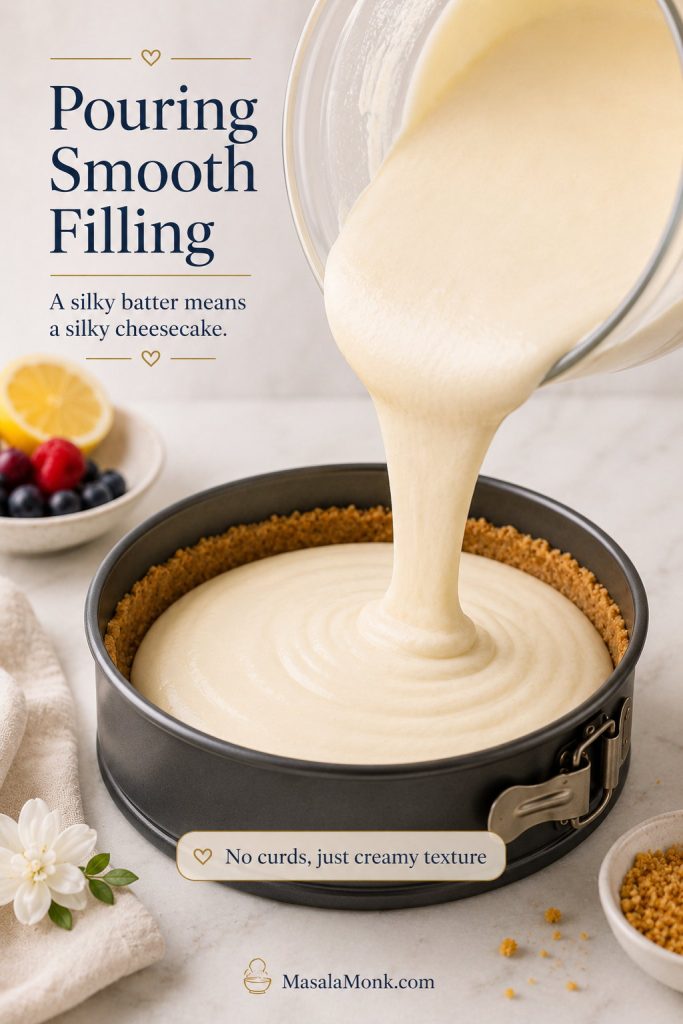
What the Batter Should Look Like
The batter should look glossy, smooth, and pourable before it goes into the crust. If it still looks grainy, blend again or strain it before baking.

Strain the Batter When Needed
When the blender is not very powerful and the batter still looks slightly grainy, pour it through a fine-mesh sieve before baking. It is an optional step, but it can rescue the texture.
After the batter looks glossy and pourable, move to the step-by-step method and then use the doneness cues before chilling.
How to Make Cottage Cheese Cheesecake
The method follows classic cheesecake logic: prepare the pan, pre-bake the crust, blend the filling, bake gently, cool slowly, and chill before slicing. Once the filling is smooth, the oven and refrigerator do most of the work.
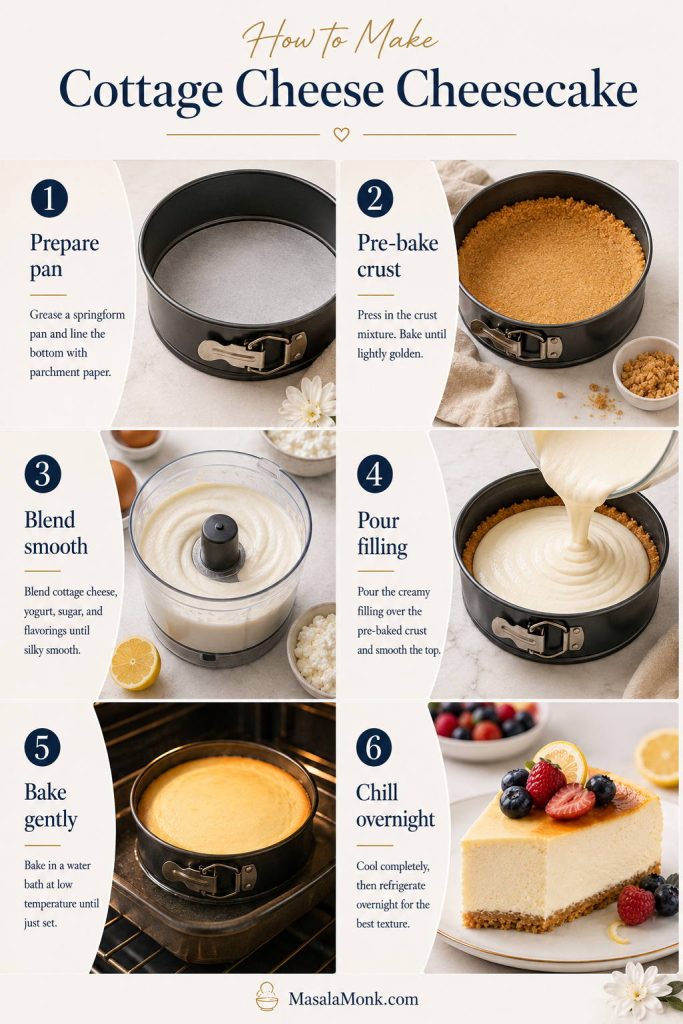
Step 1: Prepare the Pan
Line the bottom of an 8-inch / 20cm springform pan with parchment paper. Lightly grease the sides. For a water bath, wrap the outside of the pan with heavy-duty foil or place the springform pan inside a larger oven-safe bag before setting it in the roasting pan.
Step 2: Make and Bake the Crust
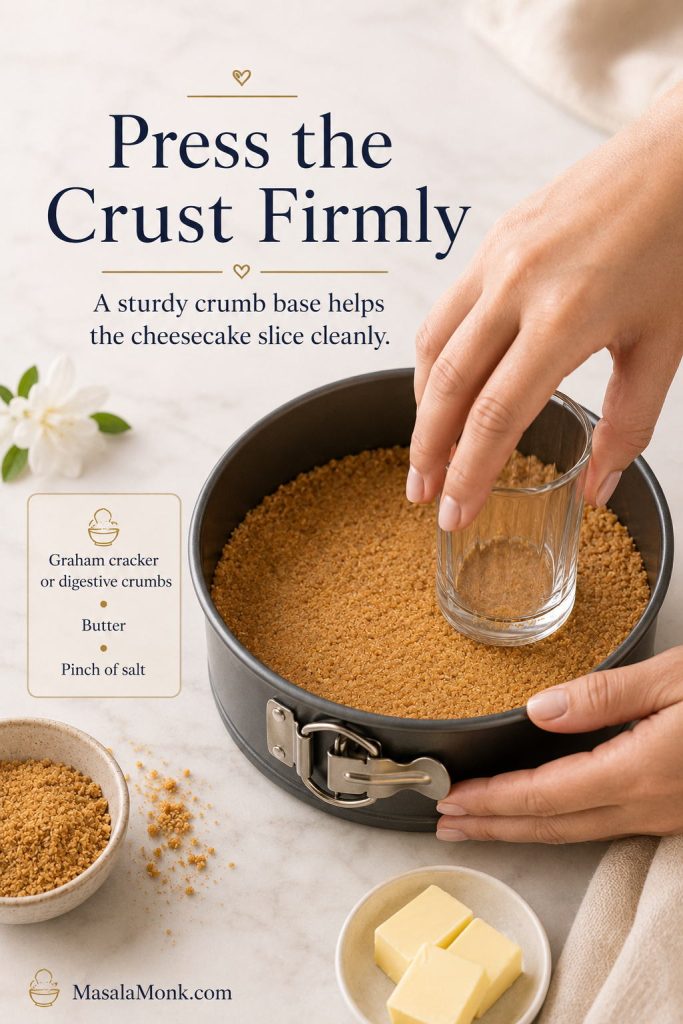
Mix the graham cracker or digestive biscuit crumbs with melted butter, sugar, and a pinch of salt. Press the mixture firmly into the bottom of the pan. Bake at 350°F / 177°C for 8 to 10 minutes, then lower the oven temperature to 325°F / 160°C.
Step 3: Blend the Filling
Blend the cottage cheese, Greek yogurt, sugar, cornstarch, vanilla, lemon zest, lemon juice, and salt until completely smooth. Scrape down the sides, then blend again. Add the eggs and blend briefly, just until the batter is even.
Step 4: Pour the Filling and Bake Low and Slow
Pour the filling over the crust and smooth the top. Bake at 325°F / 160°C for 55 to 70 minutes, or until the edges are set and the center still has a soft wobble. The center should jiggle gently, not slosh.
Step 5: Cool Gradually
Turn off the oven, crack the door open, and let the cheesecake sit inside for 30 to 45 minutes. This gradual cooling helps prevent cracks. Then move it to the counter and let it cool to room temperature.
Step 6: Chill Before Slicing
Refrigerate the cheesecake for at least 4 hours. Overnight is better. Do not panic if it looks soft when it first comes out of the oven. Warm cheesecake is supposed to look a little underdone; the refrigerator does the final work.
Do You Need a Water Bath?
A water bath is optional. Skip it for the easiest version; use it when you want the smoothest texture and the lowest chance of cracks.
To use one, wrap the springform pan well, set it in a roasting pan, and pour hot water around it until the water reaches about 1 inch up the side of the pan. Make sure the pan is protected so water cannot leak into the crust.
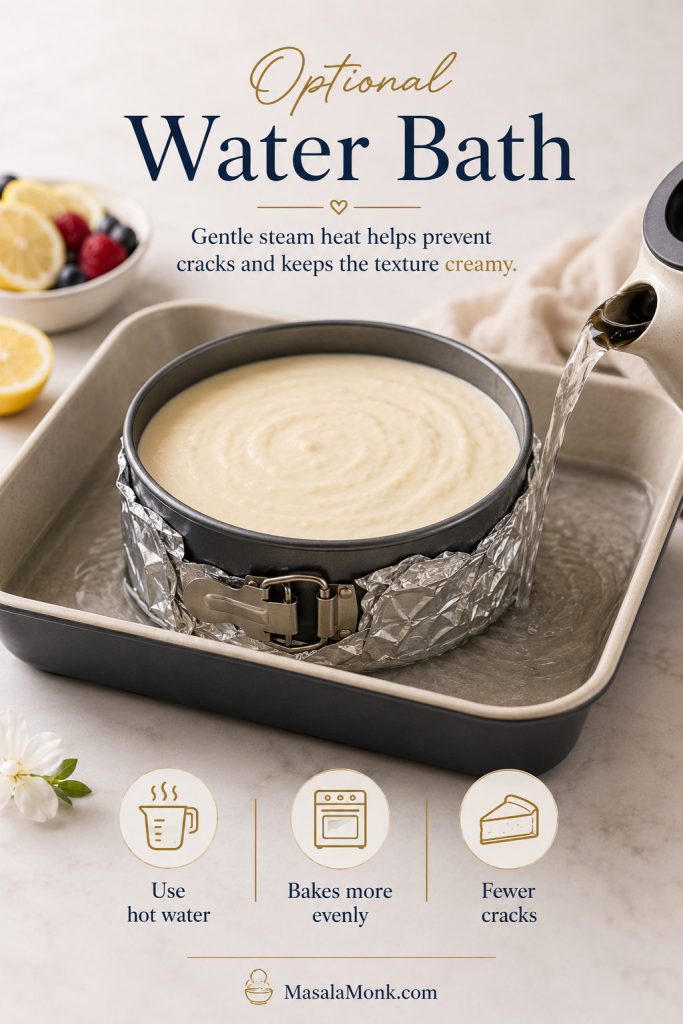
A water bath usually pushes the cheesecake toward the longer end of the bake time. The texture is worth it when you want a cleaner, more classic cheesecake finish.
For more general cheesecake guidance, including room-temperature ingredients, water bath baking, and crack prevention, King Arthur Baking has a helpful guide to cheesecake tips.
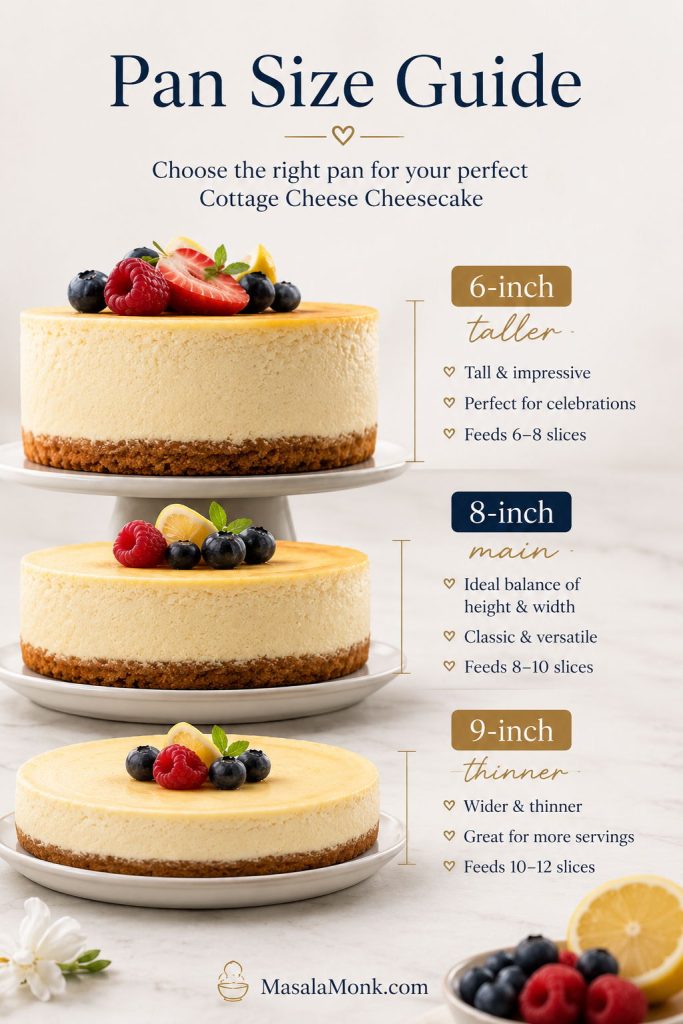
Pan Size and Bake Time Guide
Cottage cheese cheesecake recipes often use different pan sizes, which can make bake times confusing. A smaller pan makes a taller cheesecake and usually needs more time. A larger pan makes a thinner cheesecake and may finish sooner.
| Pan or Format | Best For | Bake Guidance |
|---|---|---|
| 6-inch springform | Small-batch, taller cheesecake | Use about two-thirds of the recipe or expect a deeper filling and longer bake time. |
| 8-inch springform | Main recipe | Bake 55–70 minutes at 325°F / 160°C. |
| 9-inch springform | Thinner full-size cheesecake | Start checking around 45–55 minutes. |
| Muffin tin | Mini cheesecakes | Bake about 16–22 minutes, depending on filling depth. |
| Ramekins | Single-serve cheesecakes | Bake about 20–30 minutes. |
Use the visual cues more than the clock. Cheesecake does not care what the timer says when the center is still loose or the edges are already firm. A thin cheesecake in a 9-inch pan may be done before the timer says so, while a deep 6-inch cheesecake may need longer.
Changing pan size also changes doneness timing, so use the set-edge and soft-wobble cues before relying on the clock alone.
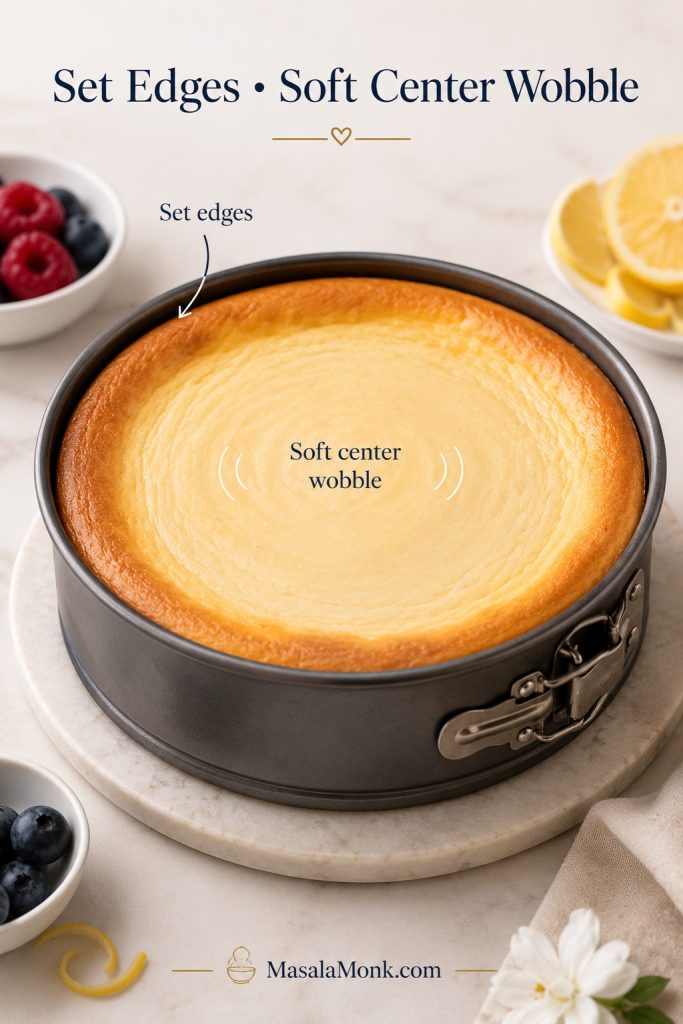
How to Know When Cottage Cheese Cheesecake Is Done
Cheesecake keeps setting after it leaves the oven. Baking until the center looks completely firm can leave you with a dry, cracked, or rubbery cheesecake after chilling.
The Edge Test
The outer 2 inches should look set. The edges may be slightly puffed, but they should not be deeply browned or pulling hard away from the pan.
The Center Wobble Test
Gently nudge the pan. The center should wobble softly like set custard. It should not ripple like liquid. A soft wobble is good; a loose slosh means it needs more time.
Internal Temperature
For extra precision, check the center with an instant-read thermometer. The center should be around 155–160°F / 68–71°C. Insert the thermometer gently so you do not tear the top.
Why It Still Looks Soft
A warm cheesecake is not supposed to look like a fully chilled cheesecake. The filling firms as it cools and then tightens further in the refrigerator. That is why chill time is part of the recipe, not an optional waiting period.
If you like baked cheesecakes with clean slices and a slow-chilled texture, this salted caramel cheesecake recipe uses similar doneness cues: set edges, a softly wobbly center, and enough chill time before slicing.
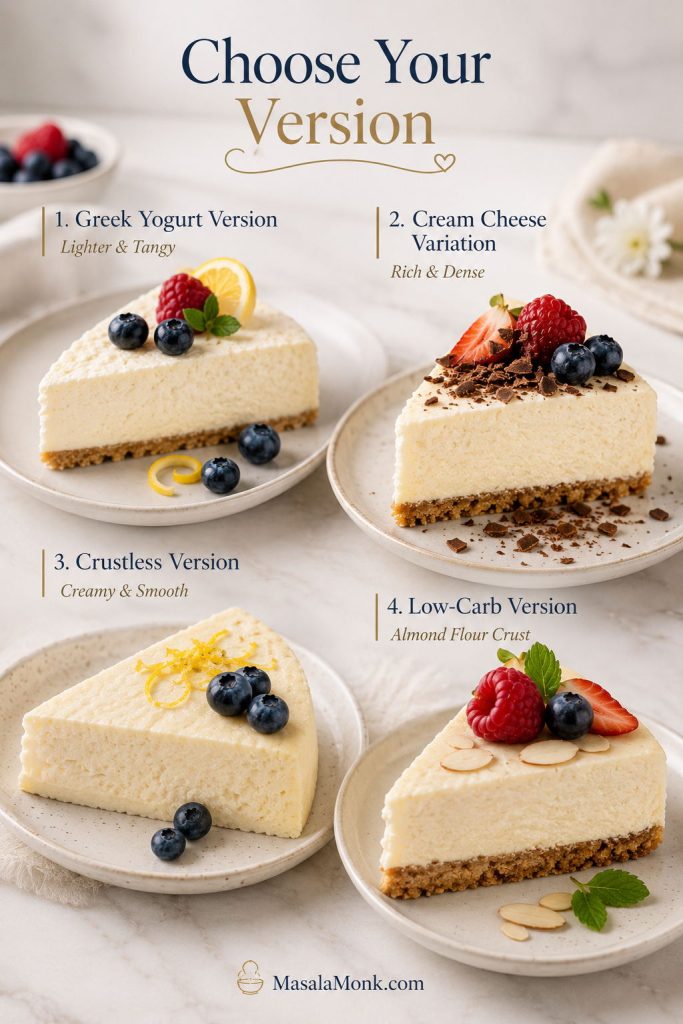
Which Cottage Cheese Cheesecake Version Should You Make?
The right version depends on who you are serving and how close you want the slice to feel to classic cheesecake. Use the Greek yogurt base for the lighter, higher-protein style. Add cream cheese for something richer. Skip the crust when you want the easiest version.
If you are serving cottage cheese skeptics, the cream cheese variation is the safest first choice. If you are making it for yourself as a lighter dessert, start with the Greek yogurt version.
| Craving or Need | Make This Version | Why It Works |
|---|---|---|
| The lightest higher-protein version | Cottage cheese + Greek yogurt | Best balance of protein, tang, and creamy texture. |
| The most classic cheesecake texture | Cottage cheese + cream cheese | Richer, denser, and closer to New York-style cheesecake. |
| The easiest version | Crustless cottage cheese cheesecake | No crumb crust, fewer steps, lighter slice. |
| The lowest-carb version | Almond flour crust or crustless + low-carb sweetener | Keeps the cheesecake closer to keto or low-carb needs. |
| The cleanest slices | Crumb crust + overnight chill | The crust gives structure and the long chill firms the filling. |
| The most dessert-like flavor | Full-fat cottage cheese + vanilla + lemon + berry topping | Richer dairy and bright toppings make it taste more like a classic dessert. |
After choosing your version, go straight to the recipe card for the base formula and notes for cream cheese, crustless, and low-carb changes.
Cottage Cheese + Greek Yogurt
This is the main version of the recipe. It is lighter than a cream cheese cheesecake, with a tangy, creamy filling and a higher-protein dairy base. Use thick plain Greek yogurt for the best texture.
Cottage Cheese + Cream Cheese
For a richer cottage cheese cheesecake with a more classic texture, replace 1 cup / 225g of the cottage cheese with 8 oz / 225g softened cream cheese. Blend the cottage cheese first until smooth, then add the cream cheese and blend again before adding the eggs.
Crustless Cottage Cheese Cheesecake
For a crustless version, skip the crumb crust, line the bottom of the pan with parchment, and grease the sides well. Bake the filling directly in the pan and start checking 5 to 10 minutes earlier. Chill fully before releasing the pan, because a warm crustless cheesecake is more delicate than one with a crumb base.
Low-Carb Cottage Cheese Cheesecake
For a low-carb version, use an almond flour crust or skip the crust, then use a cup-for-cup low-carb sweetener in the filling. For more low-carb baking help, especially when an almond flour crust turns crumbly or soft, this keto-friendly flour guide explains how almond flour behaves and how to fix texture problems.
How to Make the Crust
The classic version uses a simple graham cracker or digestive biscuit crust. It gives the cheesecake a buttery base, a little crunch, and the familiar contrast people expect from a chilled cheesecake slice.
Graham Cracker or Digestive Crust
This is the most classic option. Mix the crumbs with melted butter, a little sugar, and a pinch of salt, then press the mixture firmly into the bottom of the pan.
When to Pre-Bake the Crust
Pre-bake any crumb-style crust for 8 to 10 minutes before adding the filling. It helps the butter bind the crumbs and keeps the base from tasting raw. Let the crust cool slightly before pouring in the cottage cheese filling.
Is Cottage Cheese Cheesecake Healthy or High Protein?
This is still cheesecake, and that is the point. The goal is not to turn dessert into something joyless. It is to use cottage cheese and Greek yogurt in a way that gives you a cold, creamy, satisfying slice with a little more protein and a lighter feel.
You do not need protein powder for the main recipe. The higher-protein advantage comes from using cottage cheese and Greek yogurt as the main dairy base. If you already use vanilla whey and want a more macro-focused version, add one scoop and loosen the batter with 1 to 2 tablespoons of Greek yogurt or milk only if it becomes too thick.
The exact protein, calories, and carbs per slice will depend on your cottage cheese, Greek yogurt, crust, sweetener, and slice size. As a rough estimate, using full-fat or 2% cottage cheese, plain Greek yogurt, 4 eggs, and the crumb crust, a 10-slice cheesecake usually lands around 280–300 calories and 12–13g protein per slice. A crustless version will usually be lighter, while the cream cheese variation will be richer. For the most accurate number, calculate from the labels on your own ingredients.
For another higher-protein dessert, you may also like this protein ice cream recipe, which uses Greek yogurt, cottage cheese, and protein powder options without making the texture feel chalky.
The same idea works outside dessert, too: this high-protein oatmeal guide shows how simple add-ins like Greek yogurt and cottage cheese can make everyday recipes more filling.
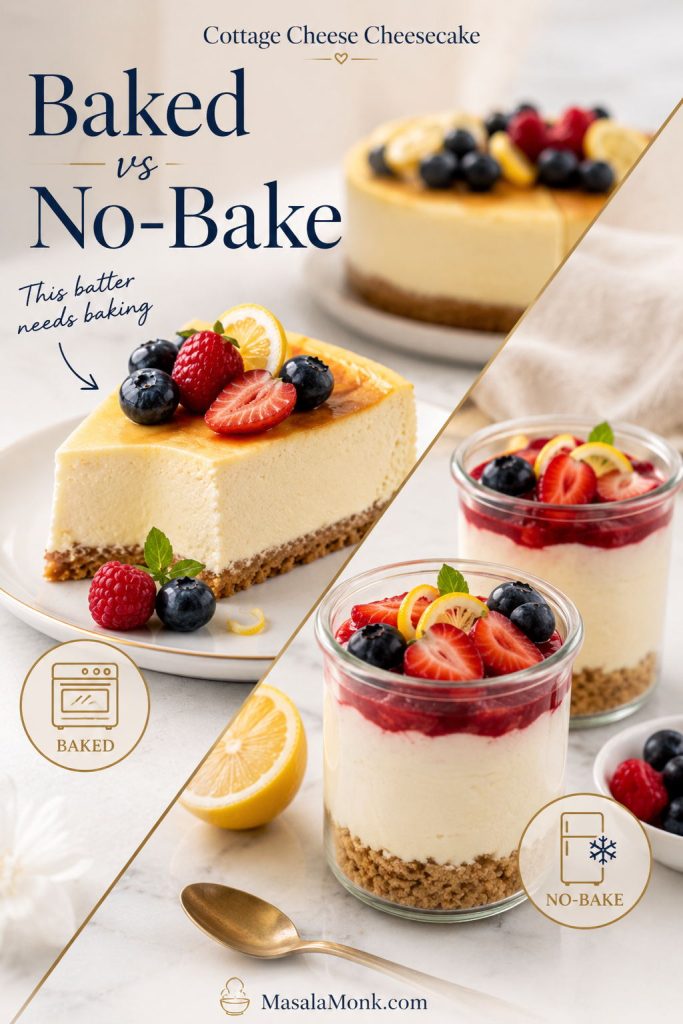
Baked vs No-Bake Cottage Cheese Cheesecake
This recipe is baked because baking gives cottage cheese cheesecake the cleanest slices and the most reliable set. Eggs and gentle heat help the filling turn into a creamy custard.
A no-bake cottage cheese cheesecake needs a different setting system — usually gelatin, whipped cream, cashews, melted chocolate, or a very thick dairy base. This baked filling is not meant to be poured into a crust and chilled without baking.
For an oven-free cheesecake, start with this no bake cheesecake recipe. The method is different, but the setting logic will help you understand why no-bake cheesecakes need enough fat, air, structure, and chill time.
Flavor Variations
Once the base recipe works, cottage cheese cheesecake is easy to adapt. Keep the basic structure the same, then adjust flavor carefully so the filling does not become too loose.
Pumpkin Cottage Cheese Cheesecake
Add pumpkin puree, pumpkin pie spice, and a little extra cornstarch to help absorb the added moisture. Start with 3/4 cup pumpkin puree, reduce the Greek yogurt to 1/2 cup, add 1 extra teaspoon cornstarch, and bake until the center has the same soft wobble as the original version.
Chocolate Cottage Cheese Cheesecake
Add unsweetened cocoa powder or melted dark chocolate to the blended filling. Cocoa powder thickens the batter, so you may need a spoonful or two of extra Greek yogurt. Melted chocolate gives a richer texture but makes the cheesecake less light.
Lemon Cottage Cheese Cheesecake
Increase the lemon zest and add a little extra lemon juice. Do not add too much liquid or the filling may need longer to set. Lemon works especially well with a graham cracker crust and fresh berries.
Berry-Topped Cottage Cheese Cheesecake
Keep the filling plain and add berries after chilling. Fresh strawberries, blueberries, raspberries, or a spoonable berry compote all work. Avoid adding too much watery fruit directly to the batter unless you are making a tested swirl version.
Mini Cottage Cheese Cheesecakes
Use a lined muffin tin and bake until the centers are just set. Mini cheesecakes chill faster and are easier for parties, lunchboxes, or portioned desserts.
How to Serve Cottage Cheese Cheesecake
Serve this cheesecake cold, when the filling is fully set and the flavor has had time to settle. A plain slice is creamy and tangy on its own, but toppings make it feel more finished.
- Fresh berries: Best when you want a lighter, brighter slice.
- Berry compote: Best when you want it to feel like a classic dessert-table cheesecake.
- Lemon zest: Best when you want more freshness and lift.
- Honey drizzle: Best for a simple, soft sweetness.
- Chocolate drizzle: Best with the cream cheese variation or a crustless slice.
For a dinner-party version, use the crumb crust and berry compote. For an everyday higher-protein dessert, keep it crustless and serve it with berries or a spoonful of Greek yogurt.
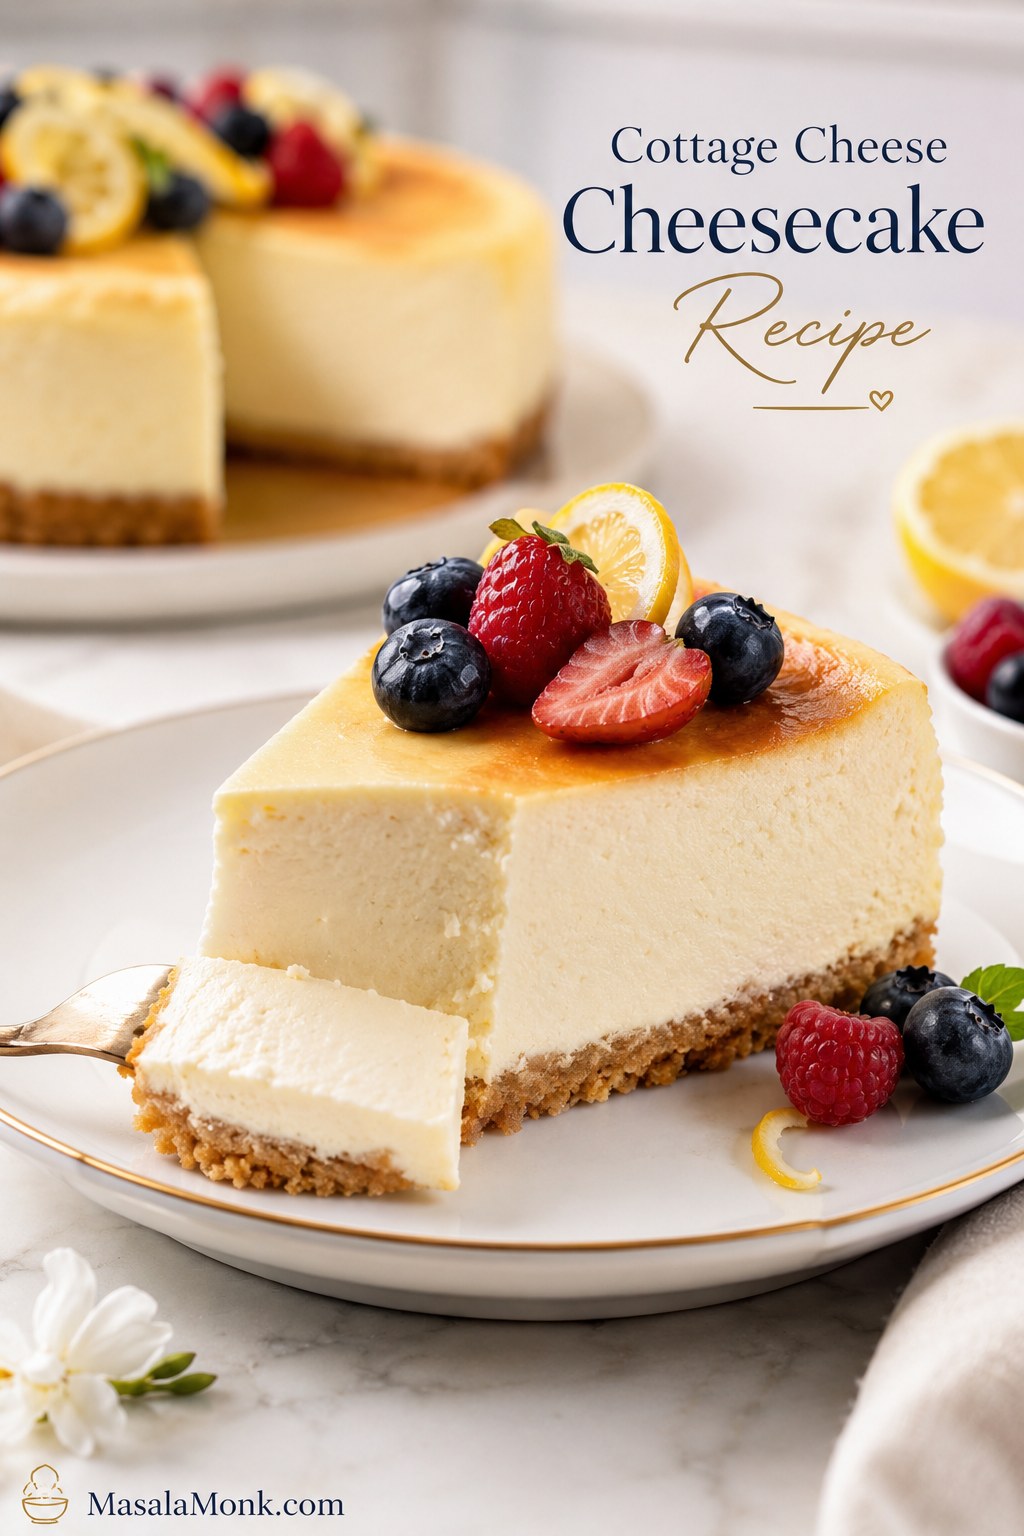
After a night in the refrigerator, the filling settles into a cold, creamy slice with a clean fork cut and a soft lemon-vanilla tang. The crumb crust adds contrast, but the filling should still be the point: smooth, cool, lightly tangy, and rich enough to feel like dessert.
Troubleshooting Cottage Cheese Cheesecake
Most cottage cheese cheesecake problems come from four things: watery dairy, not blending enough, overbaking, or cutting before the cheesecake has chilled.
| Problem | Likely Cause | Fix |
|---|---|---|
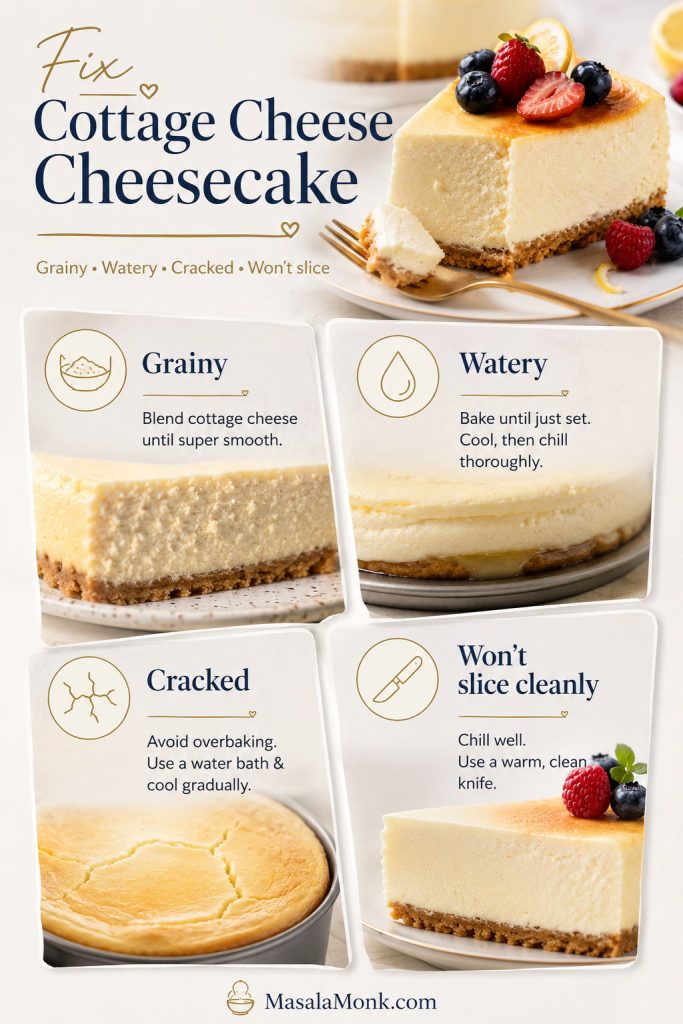
| Grainy texture | Cottage cheese was not blended fully. | Blend the dairy before adding eggs. Scrape down the sides. Strain the batter when needed. |
| Watery filling | Cottage cheese or yogurt was too loose, or the cheesecake was underbaked. | Drain watery cottage cheese, use thick Greek yogurt, bake until the edges are set, and chill overnight. |
| Cracked top | Overbaking, too much air in the batter, or cooling too quickly. | Add eggs last, do not over-blend, bake gently, and cool with the oven door cracked. |
| Rubbery texture | Too much high-speed blending after eggs were added, or baking too long. | Add eggs last, pulse briefly, and pull the cheesecake while the center still wobbles. |
| Tastes too much like cottage cheese | Very lean cottage cheese, not enough vanilla/lemon/sweetener, or not enough chill time. | Use 2% or full-fat cottage cheese, add lemon zest and vanilla, and chill overnight. |
| Soggy crust | Crust was not pre-baked, filling was too wet, or water bath leaked into the pan. | Pre-bake the crust and protect the pan well when using a water bath. |
| Won’t slice cleanly | The cheesecake has not chilled long enough. | Chill at least 4 hours. Overnight is best for clean slices. |
For prevention before the next bake, return to the 4 texture rules or check the doneness cues again.
How to Store and Freeze Cottage Cheese Cheesecake
Cottage cheese cheesecake is a make-ahead dessert. In fact, it tastes better after a full night in the refrigerator because the filling has time to firm up and the flavor settles.
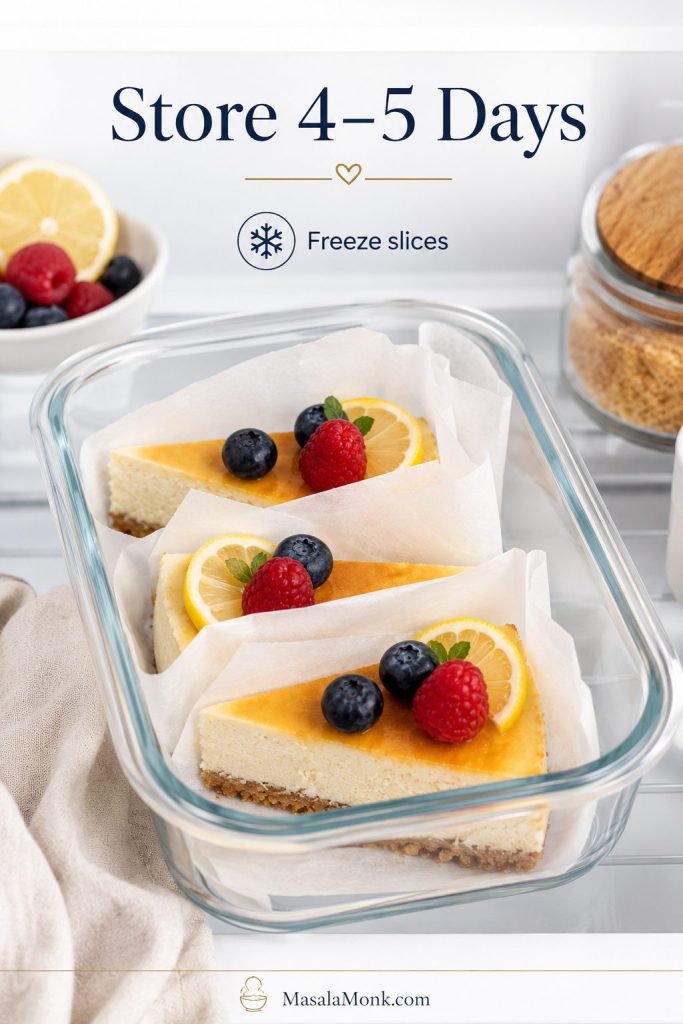
Refrigerating
Store the cheesecake covered in the refrigerator for 4 to 5 days. Chill it uncovered until fully cold first, then cover it so condensation does not drip onto the surface. Once the cheesecake has cooled to room temperature, move it to the refrigerator rather than leaving it out for hours.
Freezing
You can freeze cottage cheese cheesecake, but the texture may soften slightly after thawing. Freeze individual slices on a tray first, then wrap and store them in an airtight container.
Thawing
Thaw frozen slices overnight in the refrigerator. Avoid thawing at room temperature for long periods, because the dairy filling should stay cold.
Cottage Cheese Cake vs Cottage Cheese Cheesecake
Cottage cheese cake and cottage cheese cheesecake are sometimes used to describe similar desserts, but they are not always the same thing. A cottage cheese cheesecake is usually a blended dairy custard made with cottage cheese, eggs, vanilla, lemon, and sometimes yogurt or cream cheese. It bakes gently, chills, and slices like cheesecake.
Cottage cheese cake can mean something different. Some versions are closer to a flour-based cake or snacking cake, while others are simple cottage-cheese-based cakes that taste cheesecake-like but use fewer ingredients. This version is a true cheesecake: a blended dairy filling that bakes gently, cools slowly, and chills into clean, creamy slices.
Cottage Cheese Cheesecake Recipe
This cottage cheese cheesecake recipe bakes into a creamy, higher-protein cheesecake with Greek yogurt, vanilla, lemon, and an optional graham cracker or digestive biscuit crust. Blend the cottage cheese until silky, bake gently, cool slowly, and chill well before slicing.
Ingredients
For the crust
- 1 1/4 cups / 135g graham cracker or digestive biscuit crumbs
- 5 tbsp / 70g melted butter
- 1 1/2 tbsp / 18g sugar or sweetener
- Pinch of fine salt
For the filling
- 3 cups / 680g / 24 oz full-fat or 2% cottage cheese, drained first when watery
- 3/4 cup / 180g plain Greek yogurt
- 4 large eggs, room temperature
- 2/3 cup / 135g granulated sugar
- 2 tbsp / 16g cornstarch
- 2 tsp / 10ml vanilla extract
- 1–2 tsp lemon zest
- 1 tbsp / 15ml lemon juice
- 1/4 tsp fine salt
Instructions
Prepare the Pan, Crust, and Filling
- Prepare the pan. Line the bottom of an 8-inch / 20cm springform pan with parchment paper and lightly grease the sides.
- Heat the oven. Preheat the oven to 350°F / 177°C for the crust.
- Make the crust. Mix the crumbs, melted butter, sugar, and salt until evenly moistened. Press firmly into the bottom of the pan.
- Pre-bake the crust. Bake for 8 to 10 minutes. Remove from the oven and reduce the oven temperature to 325°F / 160°C.
- Blend the dairy. Add cottage cheese, Greek yogurt, sugar, cornstarch, vanilla, lemon zest, lemon juice, and salt to a blender or food processor. Blend until completely smooth, scraping down the sides once.
- Add the eggs. Add the eggs and blend briefly, just until combined. Do not over-blend after the eggs are added.
- Check the batter. It should look smooth and pourable, but not watery. If it looks thin because the cottage cheese was loose, let it sit for 5 minutes before pouring so the cornstarch can hydrate slightly.
Bake, Cool, Chill, and Slice
- Fill the pan. Pour the filling over the crust and smooth the top.
- Optional water bath. For the creamiest texture, place the wrapped springform pan in a roasting pan and pour hot water around it until the water reaches about 1 inch up the side of the pan. Make sure the pan is well protected so water cannot leak into the crust.
- Bake. Bake at 325°F / 160°C for 55 to 70 minutes, until the edges are set and the center still has a soft wobble. If using a thermometer, the center should be about 155–160°F / 68–71°C.
- Cool slowly. Turn off the oven, crack the door open, and let the cheesecake sit inside for 30 to 45 minutes. Then move it to the counter and cool to room temperature.
- Chill. Refrigerate for at least 4 hours, preferably overnight.
- Slice and serve. Run a thin knife around the edge before releasing the springform pan. Slice with a clean, warm knife for neat pieces.
Notes
- For a cream cheese version: Replace 1 cup / 225g cottage cheese with 8 oz / 225g softened cream cheese.
- For a crustless version: Skip the crust, line the pan well, and start checking 5 to 10 minutes earlier.
- For a low-carb version: Use an almond flour crust and a cup-for-cup low-carb sweetener.
- If your cottage cheese is watery: Drain it before measuring.
- With a water bath: Wrap the pan very well and expect the cheesecake to bake toward the longer end of the time range.
- Without a water bath: The cheesecake still works, but the top may look a little more rustic.
- For the smoothest filling: Blend the dairy fully before adding the eggs.
FAQs
Does cottage cheese cheesecake taste like cottage cheese?
Not when it is blended well and flavored properly. The finished cheesecake should taste creamy, tangy, lightly sweet, and cheesecake-like. Vanilla, lemon, sugar, and enough chill time help soften the cottage cheese flavor.
How do you make cottage cheese cheesecake smooth?
Blend the cottage cheese and Greek yogurt until glossy before adding the eggs. A high-speed blender gives the best texture, but a food processor can work if you scrape down the sides.
Why is my cottage cheese cheesecake watery?
Watery cheesecake usually comes from loose cottage cheese, thin yogurt, underbaking, or cutting before the cheesecake has chilled. Drain watery dairy, bake until the edges are set, and chill overnight.
Can I make cottage cheese cheesecake without cream cheese?
Yes. This main recipe uses cottage cheese and Greek yogurt without cream cheese. Add cream cheese only when you want a richer, more traditional cheesecake texture.
How much cream cheese should I add?
Replace 1 cup / 225g cottage cheese with 8 oz / 225g softened cream cheese for a richer version that tastes closer to classic cheesecake.
Can I make it crustless?
Yes. Line the pan with parchment, grease the sides well, skip the crumb crust, and bake the filling directly in the pan. Start checking a little earlier and chill fully before releasing it.
Is cottage cheese cheesecake high protein?
It is usually higher in protein than classic cream-cheese cheesecake because the main dairy base is cottage cheese and Greek yogurt. Exact protein depends on your brands, crust, and slice size.
Can I make it low carb or keto?
Use an almond flour crust or skip the crust, then replace the sugar with a low-carb sweetener such as allulose or a monk fruit blend. The final texture will depend on the sweetener and crust you choose.
How long should cottage cheese cheesecake chill?
Chill it for at least 4 hours. Overnight is best because the filling firms, the flavor settles, and the slices come out cleaner.
Can you freeze cottage cheese cheesecake?
Yes. Freeze it in slices, then thaw overnight in the refrigerator. The texture may be slightly softer after thawing, but it still works well for make-ahead servings.
Baked vs no-bake cottage cheese cheesecake: what changes?
A baked version sets with eggs and oven heat. A no-bake version needs a separate setting system, such as gelatin, whipped cream, cashews, melted chocolate, or a very thick dairy base.
Cottage cheese cake vs cottage cheese cheesecake: what is the difference?
A cottage cheese cheesecake is a blended dairy custard that bakes and chills like cheesecake. By contrast, cottage cheese cake is usually more cake-like, often made with flour, baking powder, and sometimes fruit.
The First Slice Is the Real Test
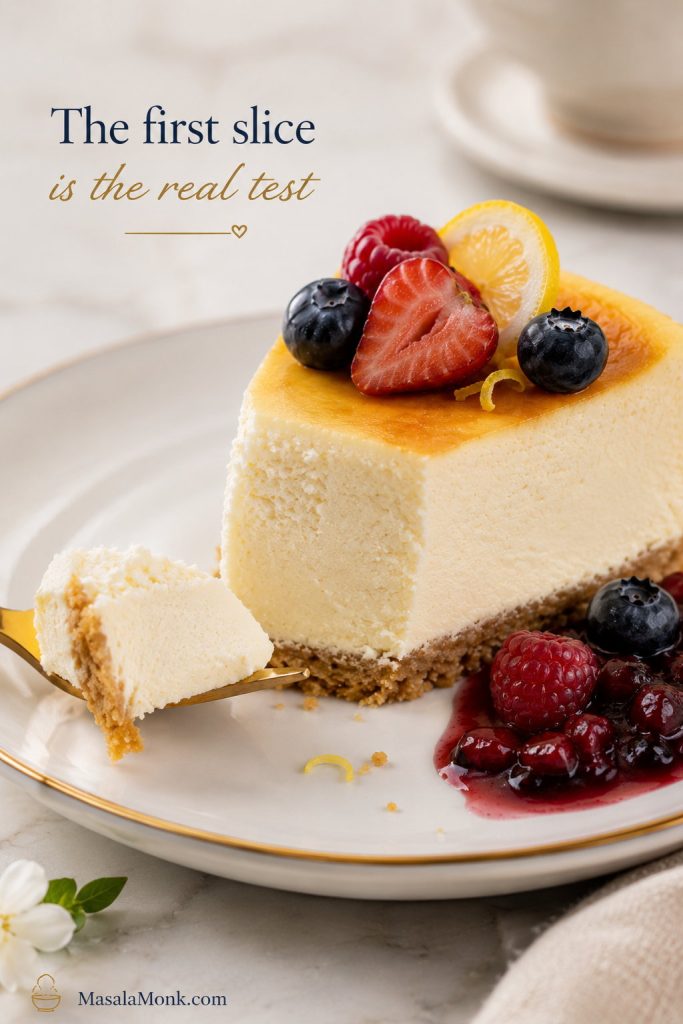
When the cheesecake is cold, creamy, and smooth enough that nobody stops to ask where the cottage cheese went, the recipe has done its job.
Try the Greek yogurt version first for a lighter cheesecake, and try the cream cheese variation when you want something closer to the classic. When you make it, I’d love to know which version won in your kitchen — the lighter Greek yogurt cheesecake, the cream cheese variation, the classic crust, or the crustless slice.