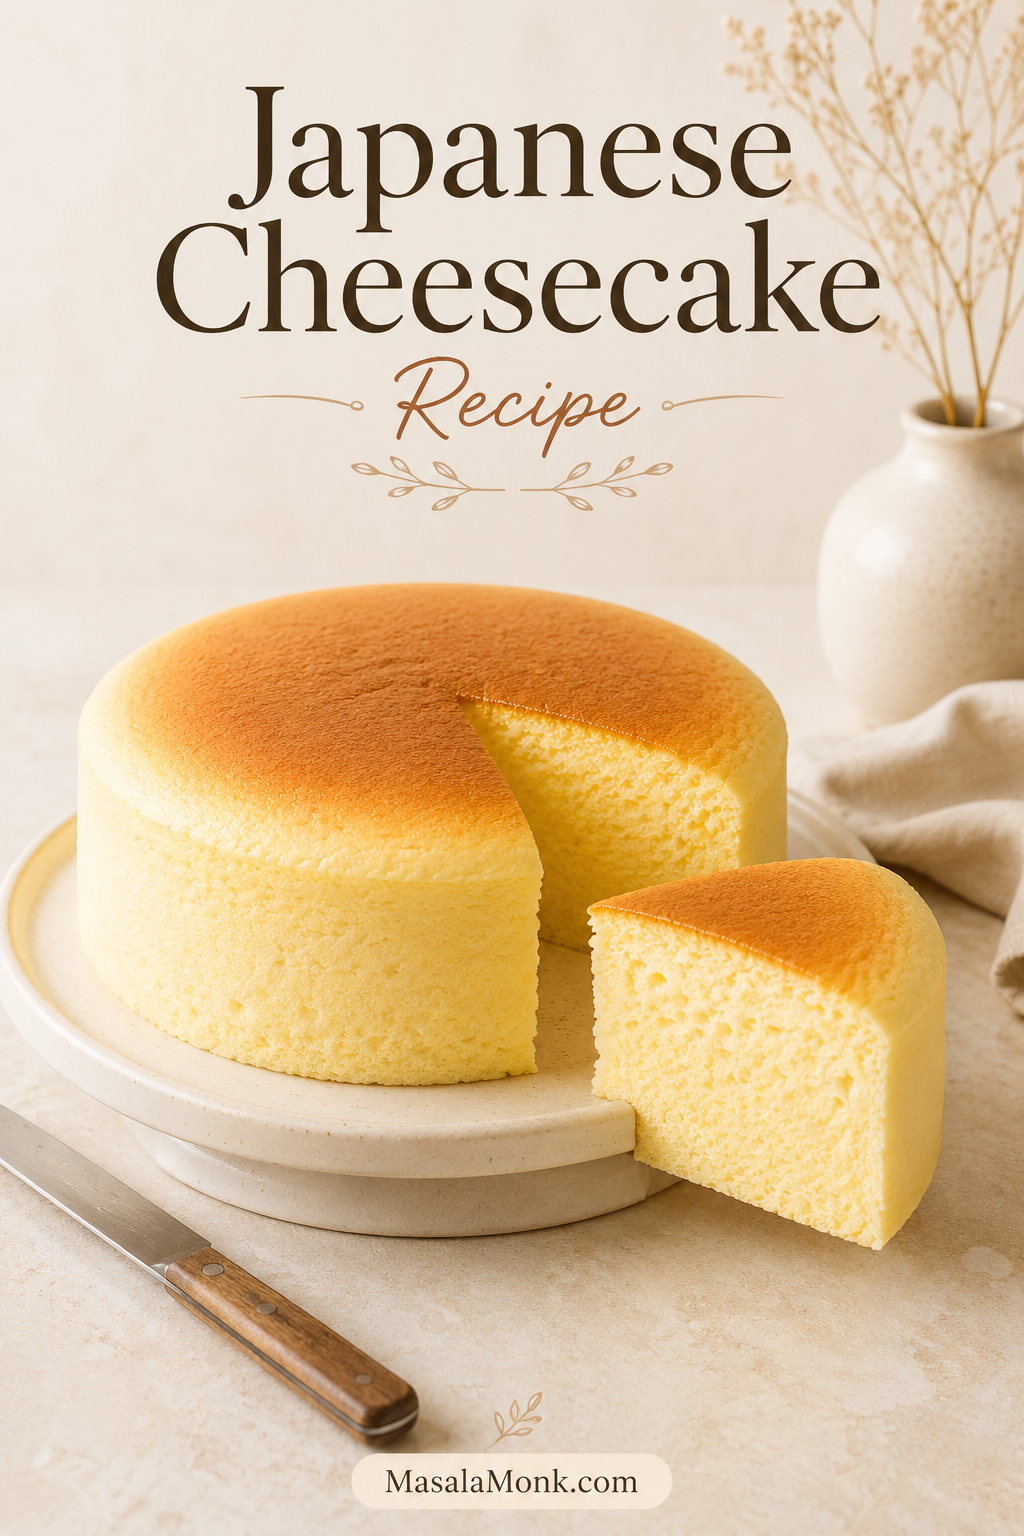
Japanese cheesecake looks soft, quiet, and almost weightless, but it asks you to care about a few details. The ingredients are simple. The technique is what gives the cake its height, wobble, and cotton-soft crumb.
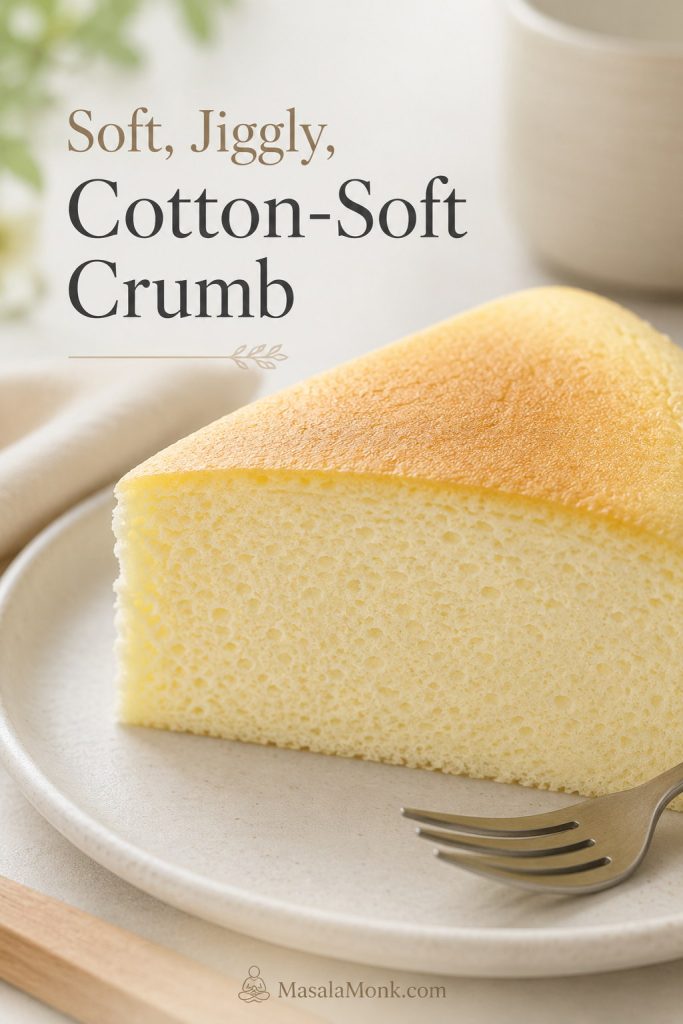
The goal here is a cake that sighs under the knife, springs back softly, and tastes like a lighter, airier cousin of classic cheesecake: soft but not fragile, creamy but not dense, gently jiggly, and clean enough to slice the next day.
This Japanese cheesecake recipe is built around cues rather than panic. You will learn what the meringue should look like, how full the pan should be, how the center should wobble, and why slow cooling matters. The result should feel delicate without being fragile, impressive without needing anything more than a small plate and a clean knife.
You may know this style as Japanese cotton cheesecake, Japanese soufflé cheesecake, jiggly cheesecake, fluffy Japanese cheesecake, or the bakery-style cake people associate with Uncle Tetsu and Rikuro. This is not an official bakery copycat. It is a carefully explained homemade version of the same broad style: bouncy, cloud-like, lightly creamy, and not too sweet.
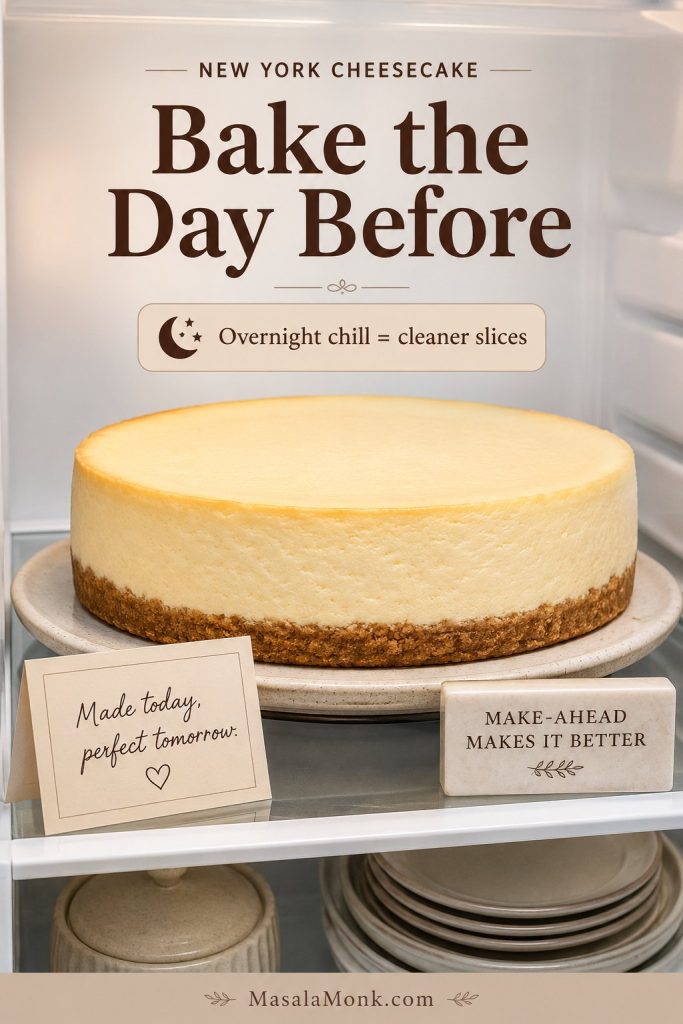
This is also a make-ahead dessert. The fresh-baked wobble is fun, but the cleanest slices and best flavor come after chilling. Bake it the day before if you can. The next day, the flavor is rounder, the slice is cleaner, and the texture feels more settled.
In This Japanese Cheesecake Guide
Make the Cake
Quick Answer: What Makes Japanese Cheesecake Jiggly and Cotton-Soft?
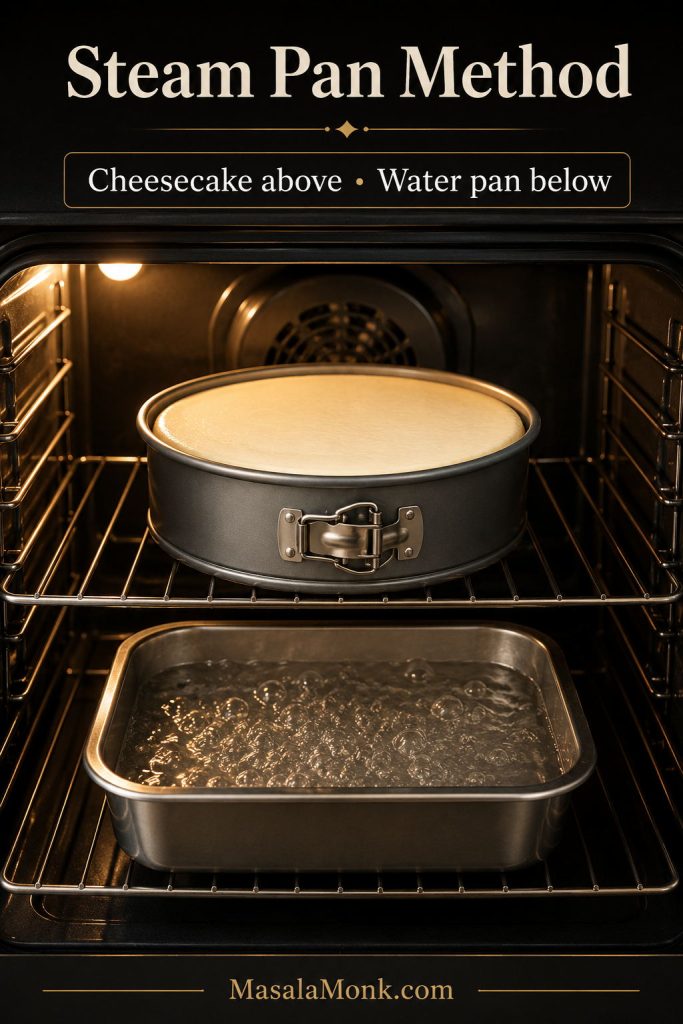
Japanese cheesecake gets its jiggly, cotton-soft texture from a smooth cream cheese base folded with whipped egg whites. The meringue gives lift, cake flour and cornstarch help the cake set softly, the water bath protects it from harsh heat, and slow cooling lets the structure settle instead of collapsing suddenly.
| Detail | This recipe |
|---|---|
| Pan | 8-inch x 3-inch round cake pan, fixed-base preferred |
| Texture | Jiggly, cotton-soft, airy, lightly creamy |
| Eggs | 6 large eggs, separated; about 180g whites and 100–110g yolks total |
| Cream cheese | 250g / 8.8 oz full-fat block cream cheese |
| Sugar | 130g total, divided: 30g in the base and 100g in the meringue |
| Bake | Preheat 180°C / 350°F, then bake at 160°C / 320°F and finish at 150°C / 300°F |
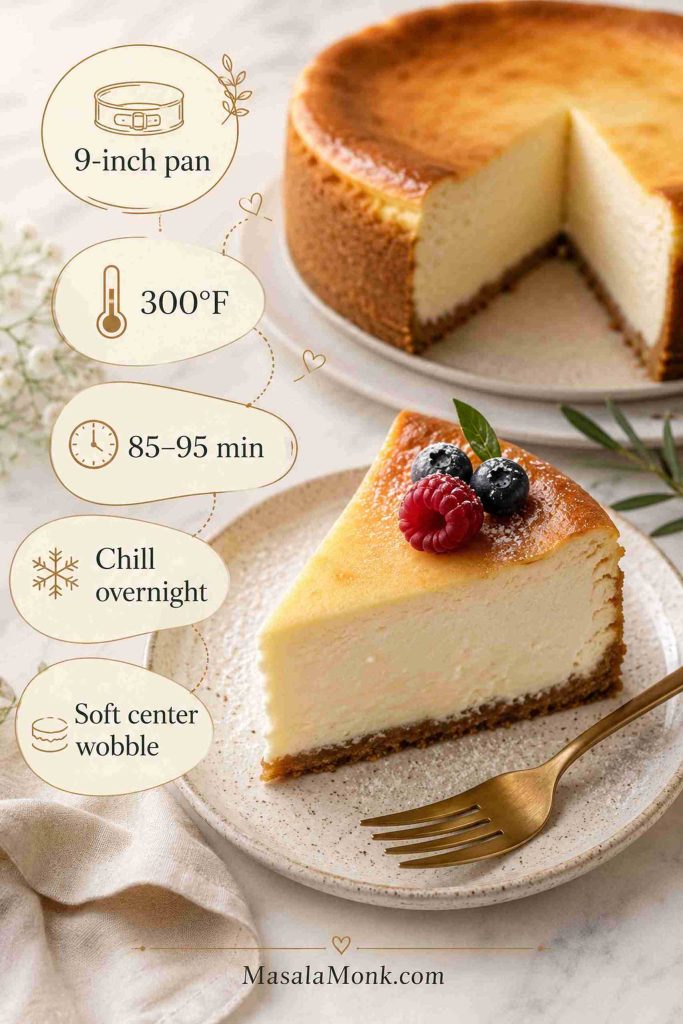
| Chill | 4–6 hours or overnight |
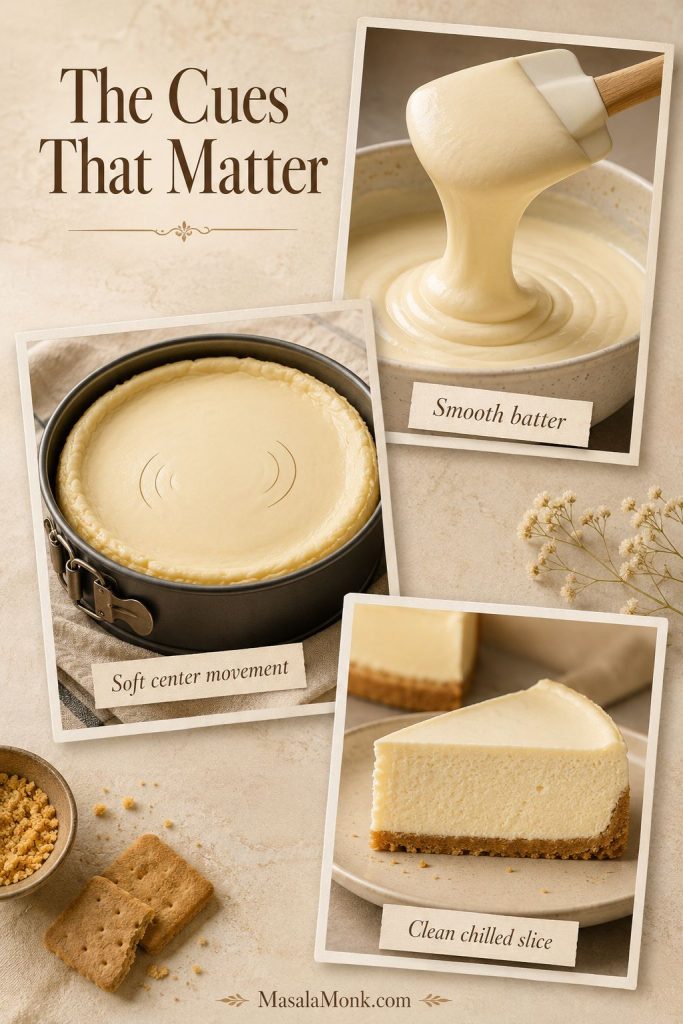
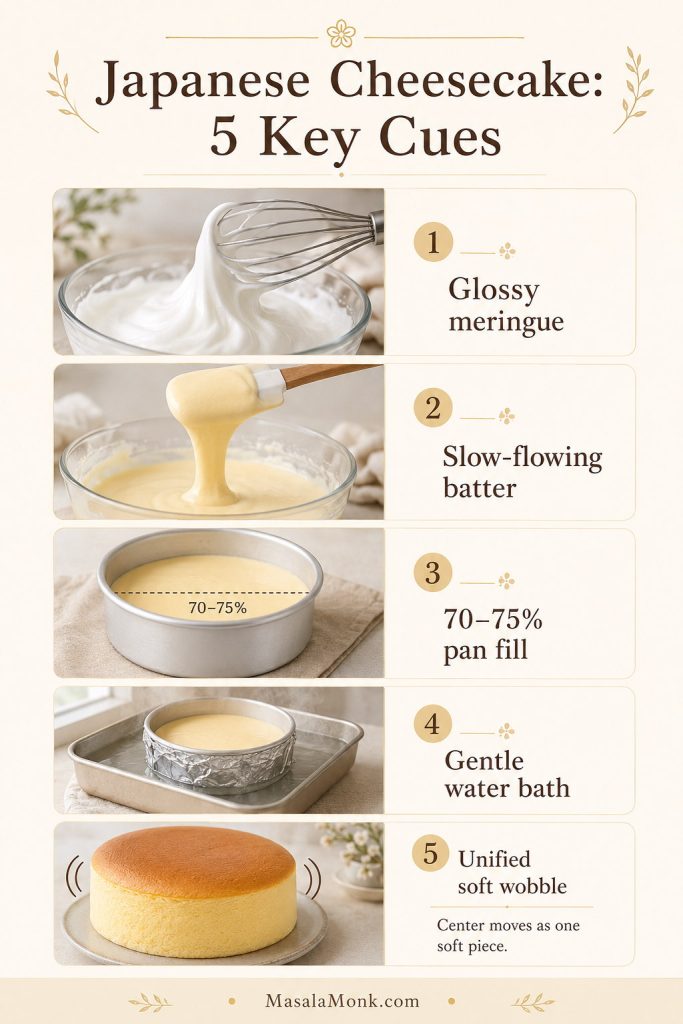
The 5 Cues That Matter Most
If the recipe starts to feel fussy, come back to these five cues. They are the simple checkpoints that keep Japanese cheesecake soft, jiggly, and properly set.
- Meringue: glossy medium-firm peaks with a small bend.
- Batter: smooth, light, slow-flowing, and airy.
- Pan: 8-inch x 3-inch pan, filled only 70–75% full.
- Bake: gentle water bath heat with steady, even color.
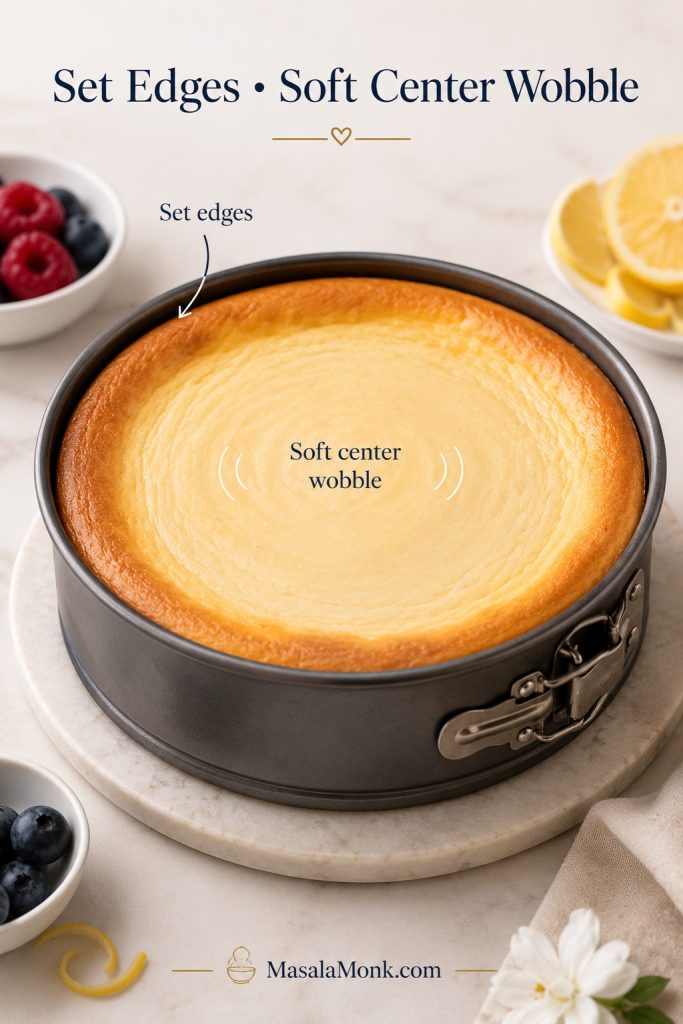
- Done: a unified soft wobble in the center.
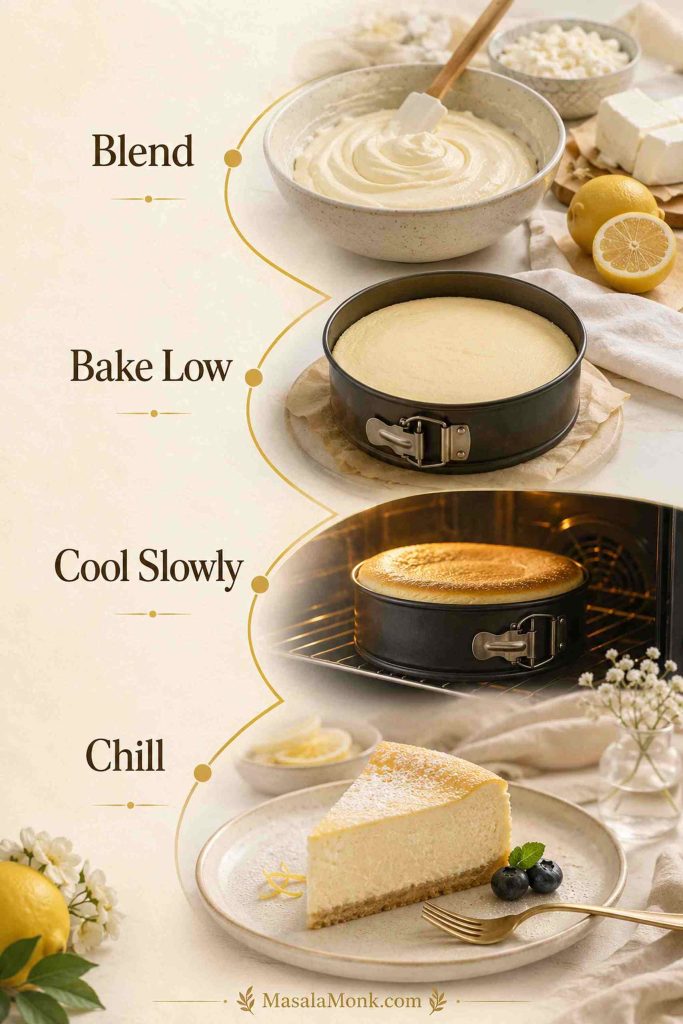
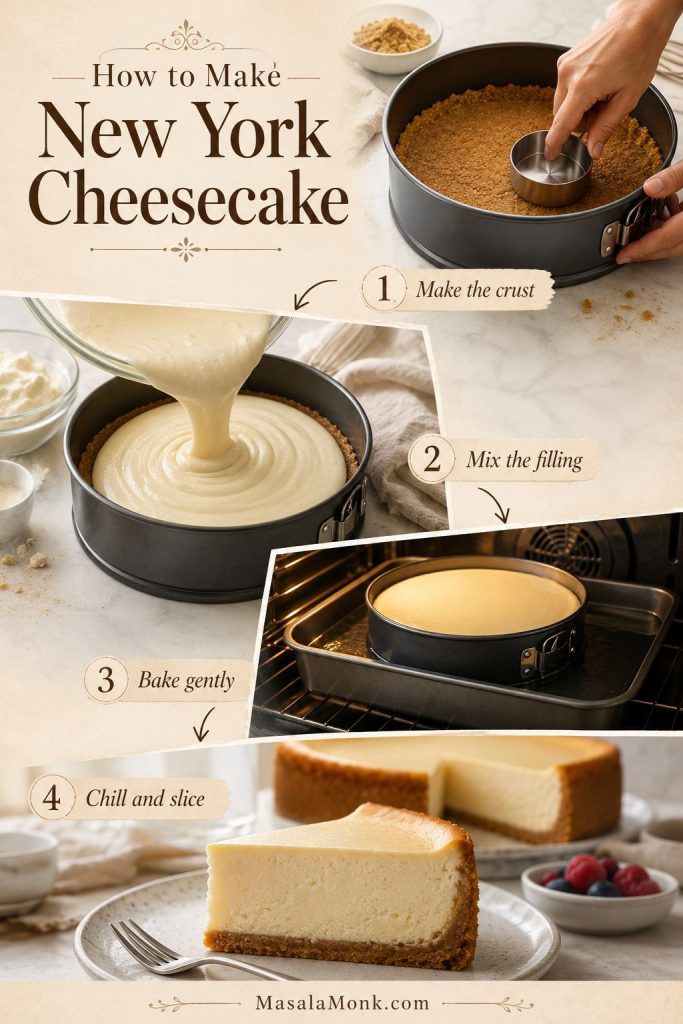
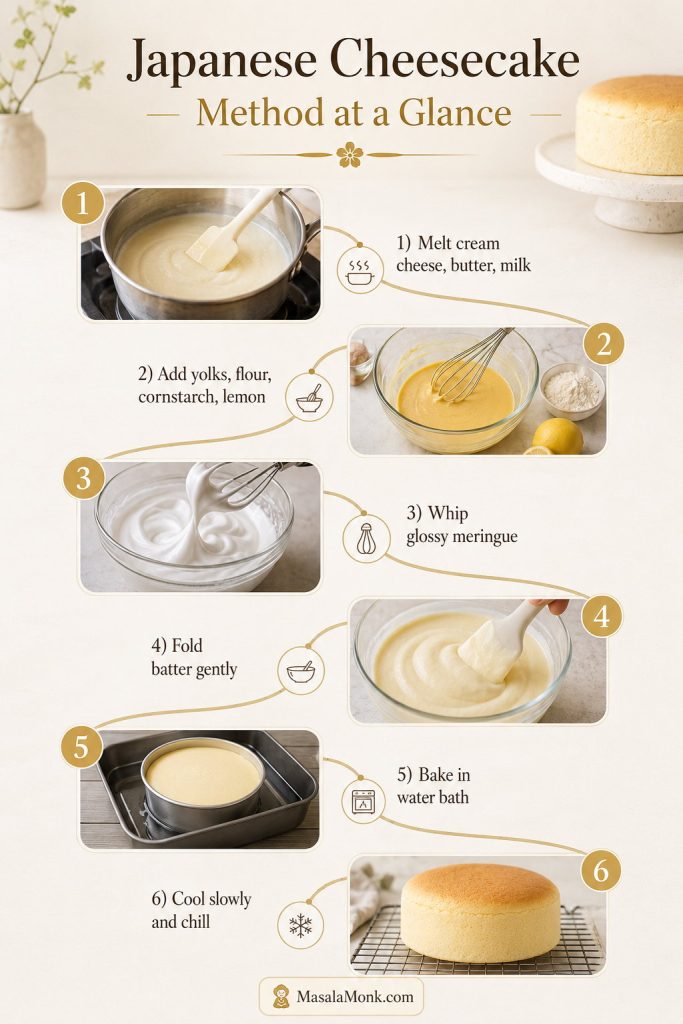
Japanese Cheesecake Method at a Glance
- Melt cream cheese, butter, and milk gently.
- Whisk in yolks, sugar, lemon, flour, and cornstarch.
- Whip egg whites to glossy medium-firm peaks.
- Fold the meringue into the base in three additions.
- Bake in a water bath with moderate heat.
- Cool slowly, then chill before slicing.
The full recipe card is below. For now, remember the path: smooth base, glossy meringue, gentle folding, water bath, slow cooling, and a chilled slice.
This method deliberately favors a steady set over a dramatic rise, because a cake that rises too fast is more likely to crack, wrinkle deeply, or collapse before the center catches up.
Why This Japanese Cheesecake Recipe Works
A good Japanese cheesecake is a balance of richness and air. The cream cheese wants to be creamy, the meringue wants to rise, and the oven needs to set both gently enough that the cake does not tear, collapse, or turn rubbery.
- 250g cream cheese keeps the cake creamy but not heavy. Too much cream cheese can make the batter dense and harder to lift.
- Six separated eggs provide the rise. The yolks enrich the base, while the whites become the meringue that makes the cake light and jiggly.
- Divided sugar protects both flavor and structure. A small amount sweetens the cream cheese base, while most of the sugar goes into the egg whites so the meringue stays glossy, stable, and easier to fold.
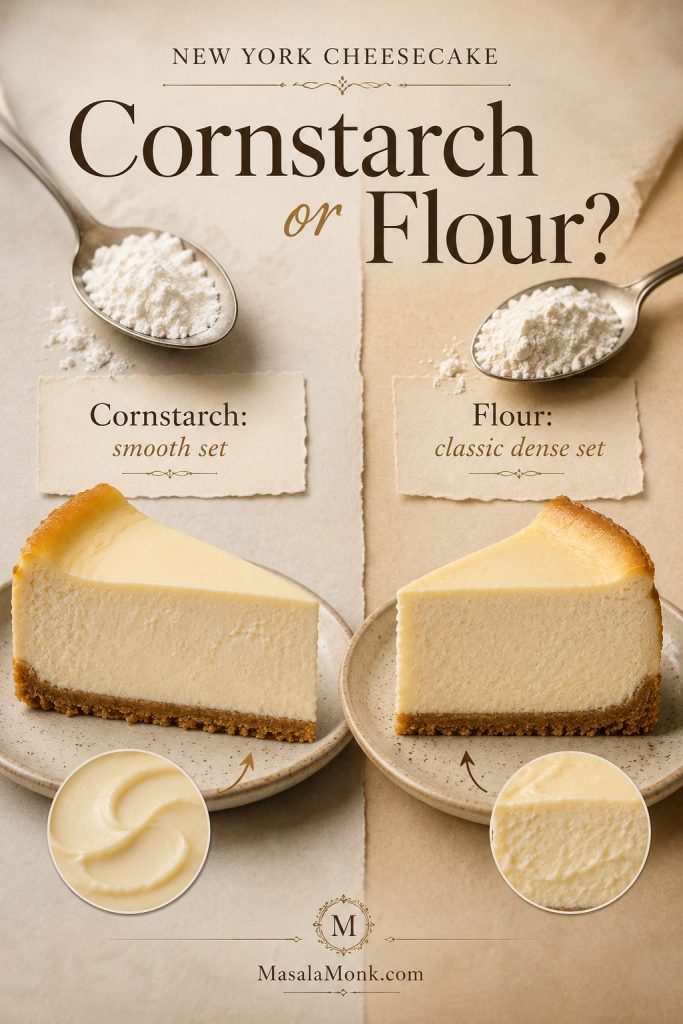
- Cake flour plus cornstarch supports the foam. This gives the cheesecake enough structure to slice without making it tough.
- A fixed-base pan lowers water bath risk. Springform pans can leak, so a solid pan gives the calmest first bake.
- Moderate heat reduces cracking and collapse. The cake rises more evenly when the outside is not forced to set before the center has time to catch up.
What Is Japanese Cheesecake?
Japanese cheesecake is a baked cheesecake lightened with meringue. A smooth cream cheese base is mixed with egg yolks, milk, butter, flour, and starch, then folded with whipped egg whites for an airy rise, soft wobble, and cotton-like crumb.
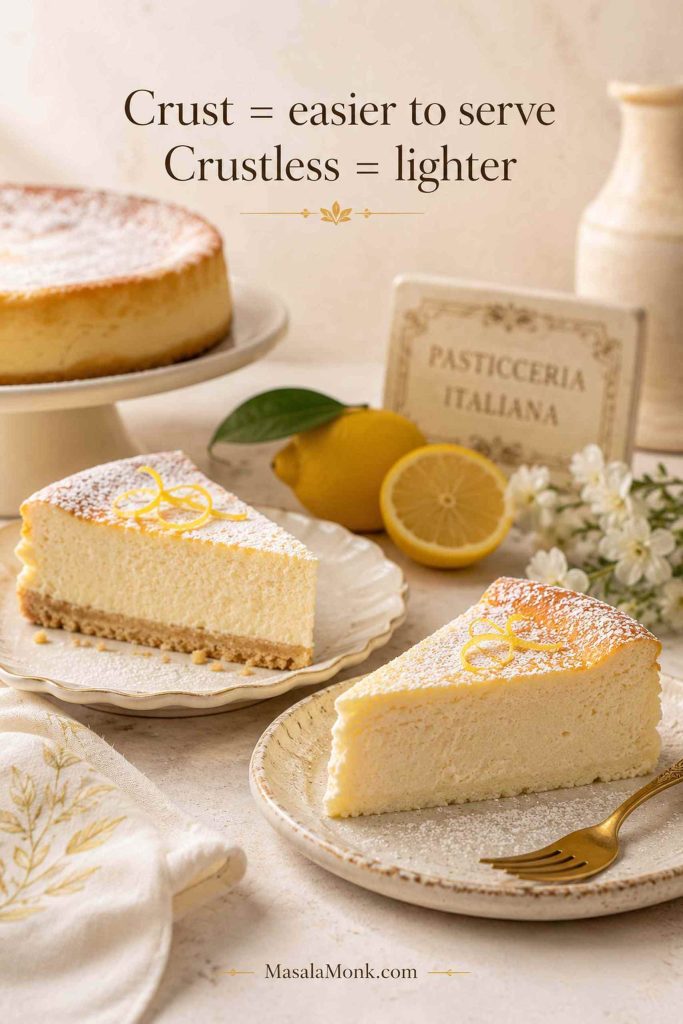
It is usually crustless, and the soft cake body is the focus. You may also see it called Japanese cotton cheesecake, Japanese soufflé cheesecake, jiggly cheesecake, or fluffy Japanese cheesecake.
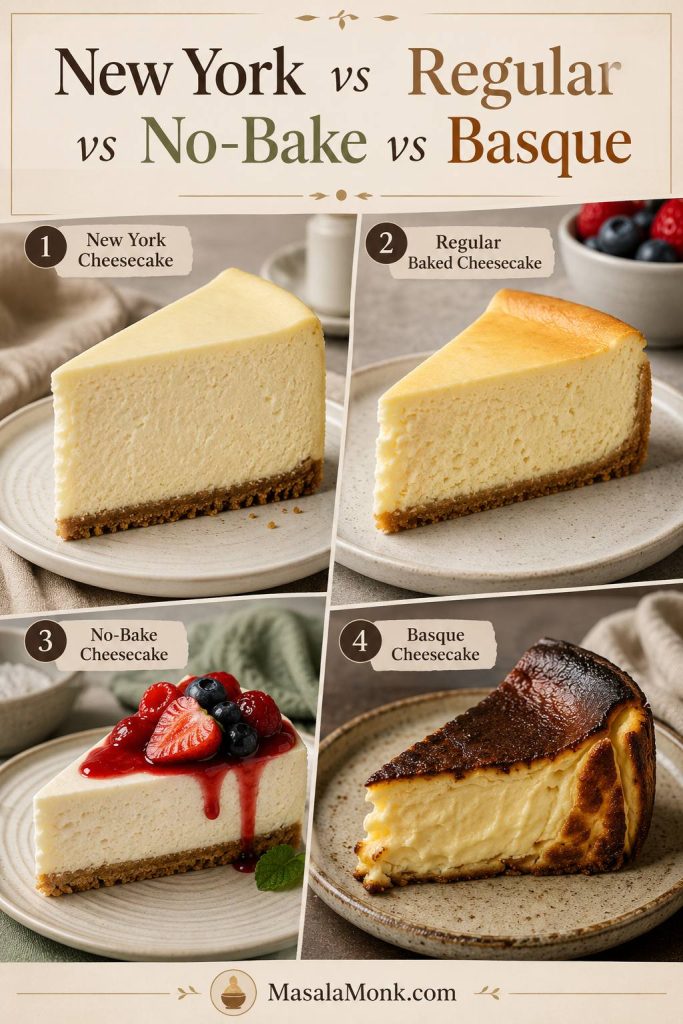
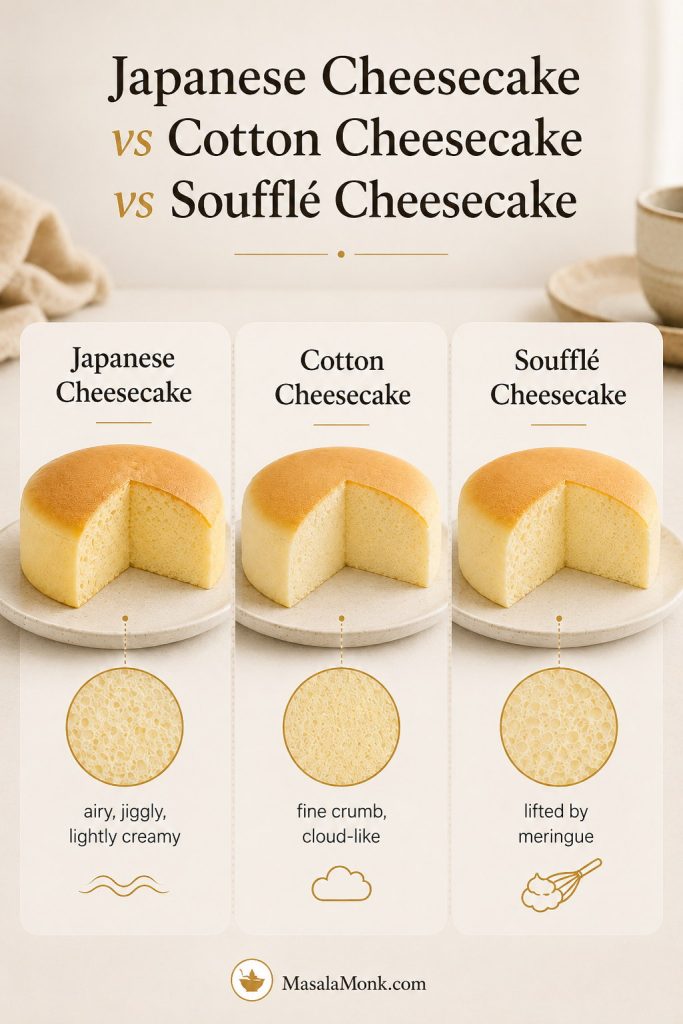
Japanese Cheesecake, Cotton Cheesecake, and Soufflé Cheesecake: Are They Different?
The names overlap, but the practical differences are simple.
| Dessert | Texture | Main difference |
|---|---|---|
| Japanese cheesecake | Airy, jiggly, cotton-soft, lightly creamy | Cream cheese batter folded with meringue and baked gently |
| Japanese cotton cheesecake | Soft, fine-crumbed, cloud-like | Another common name for the same broad style |
| Japanese soufflé cheesecake | Light, risen, delicate | Highlights the whipped egg-white structure |
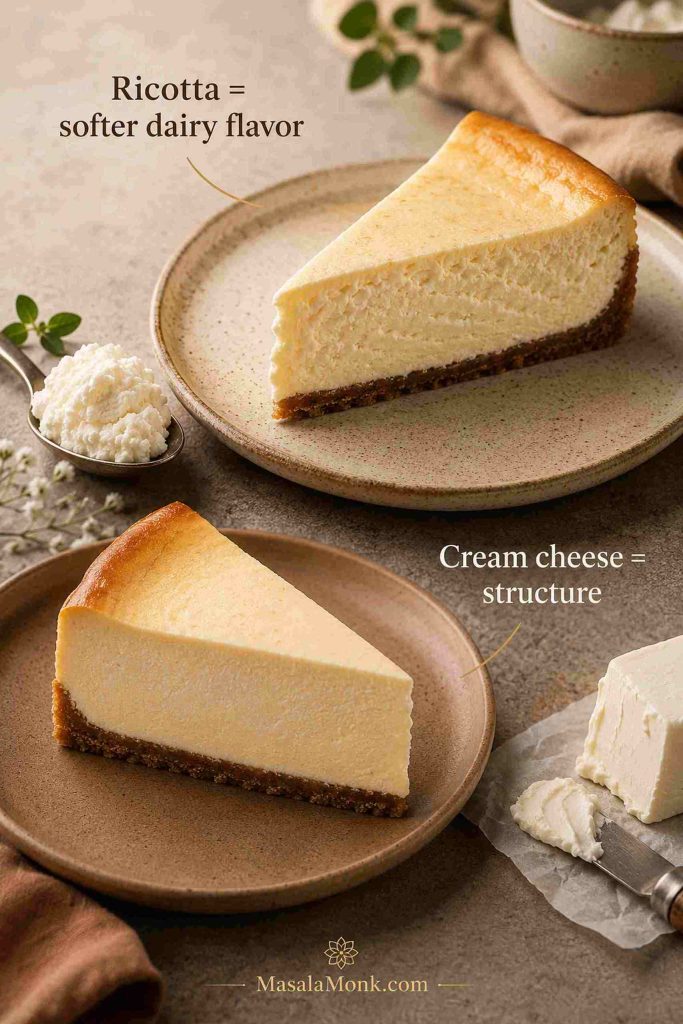
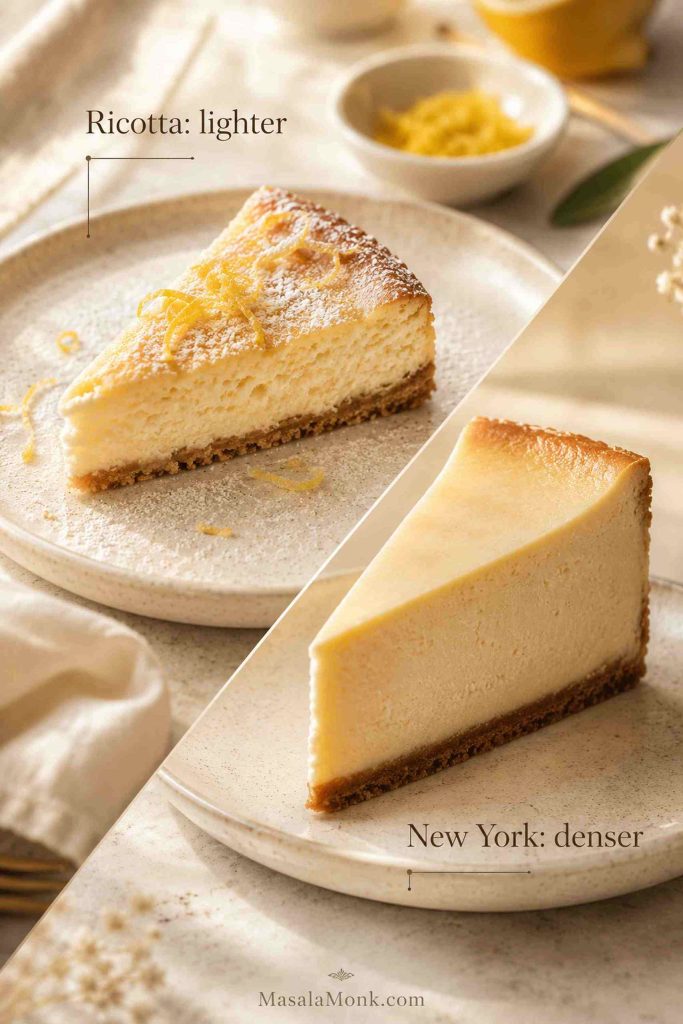
| New York cheesecake | Dense, rich, creamy, custardy | More cream cheese, no whipped meringue |
| Chiffon cake | Airy and sponge-like | Usually no cream cheese richness |
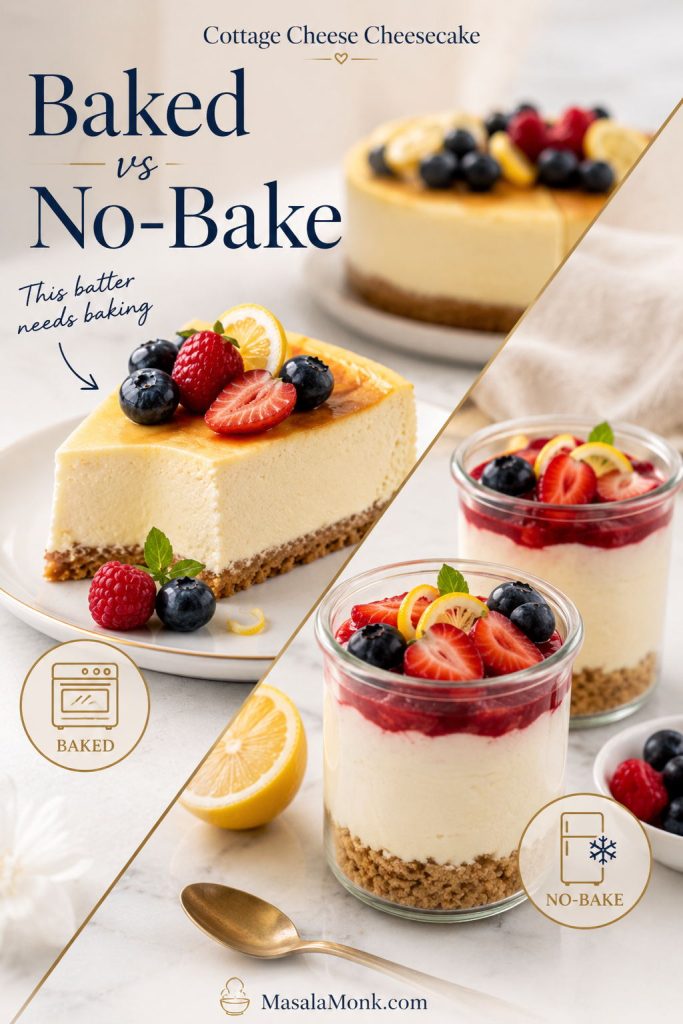
If you want a thick, creamy dessert that sets in the refrigerator instead, MasalaMonk’s no bake cheesecake recipe is the better match. This version is baked, lifted with meringue, and more dependent on oven technique.
For a richer baked cheesecake with a crumb crust and a denser creamy center, this baked salted caramel cheesecake is a useful contrast. Japanese cheesecake is crustless, lighter, and lifted with meringue rather than baked into a dense custard.
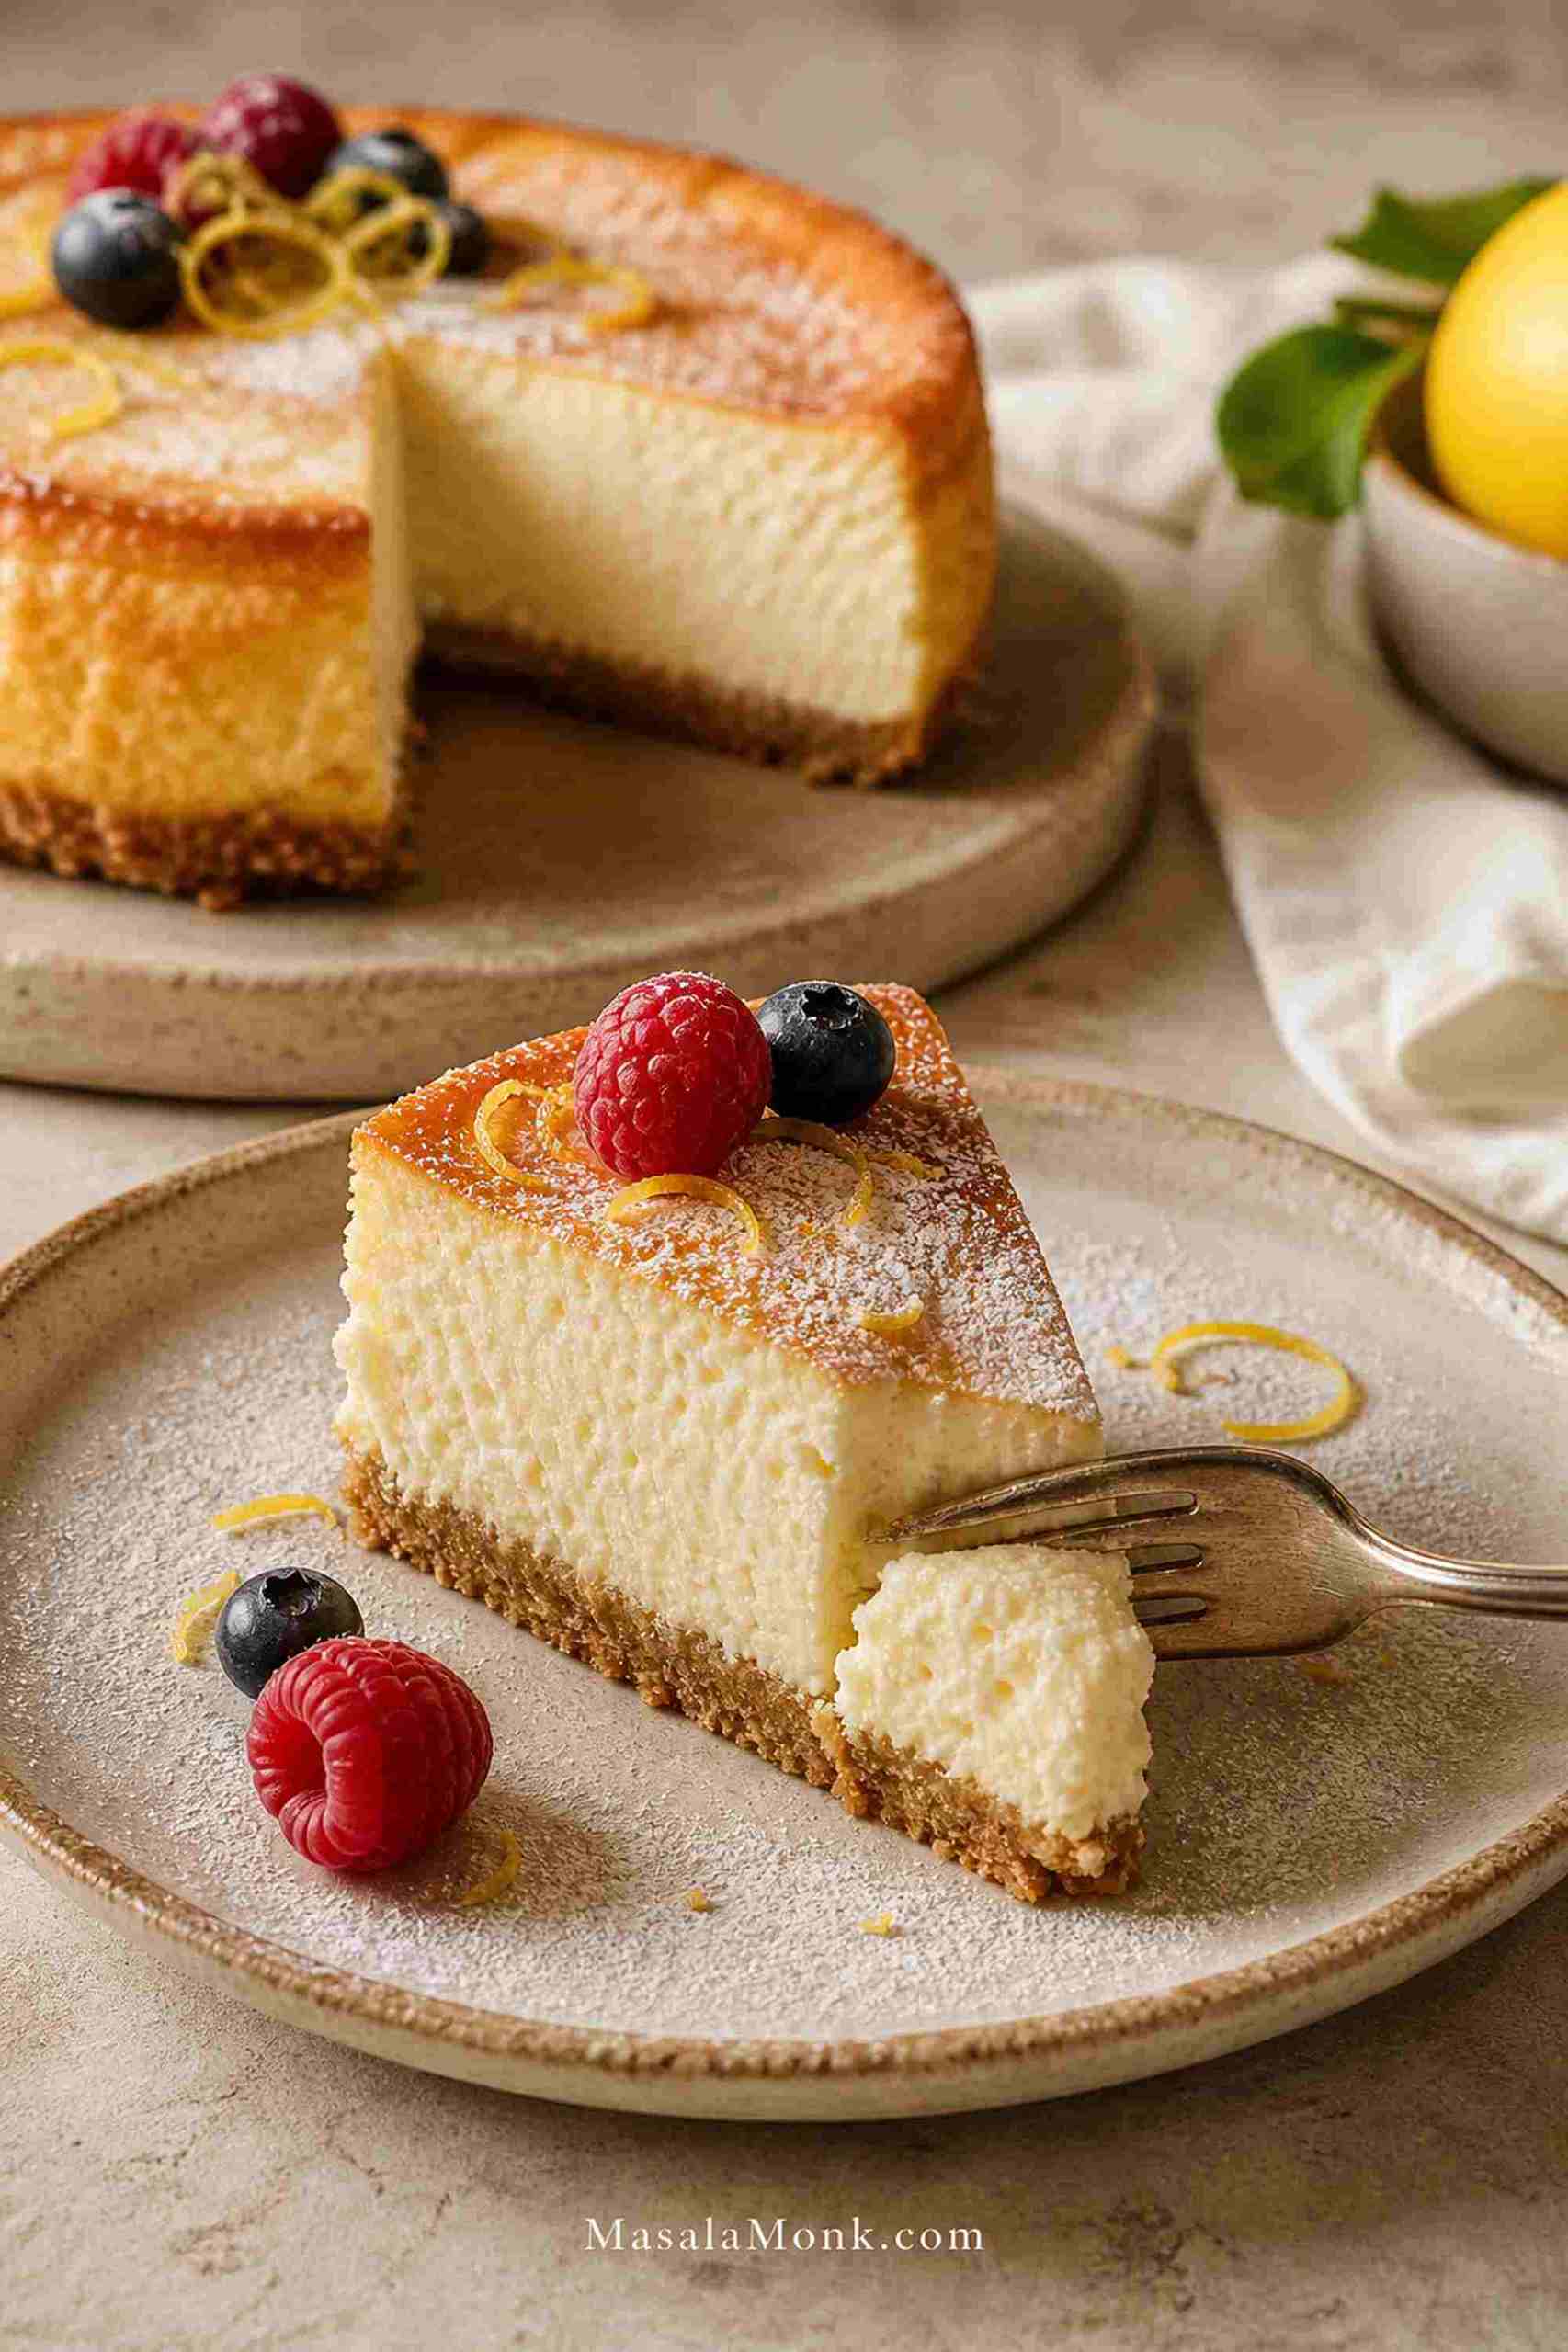
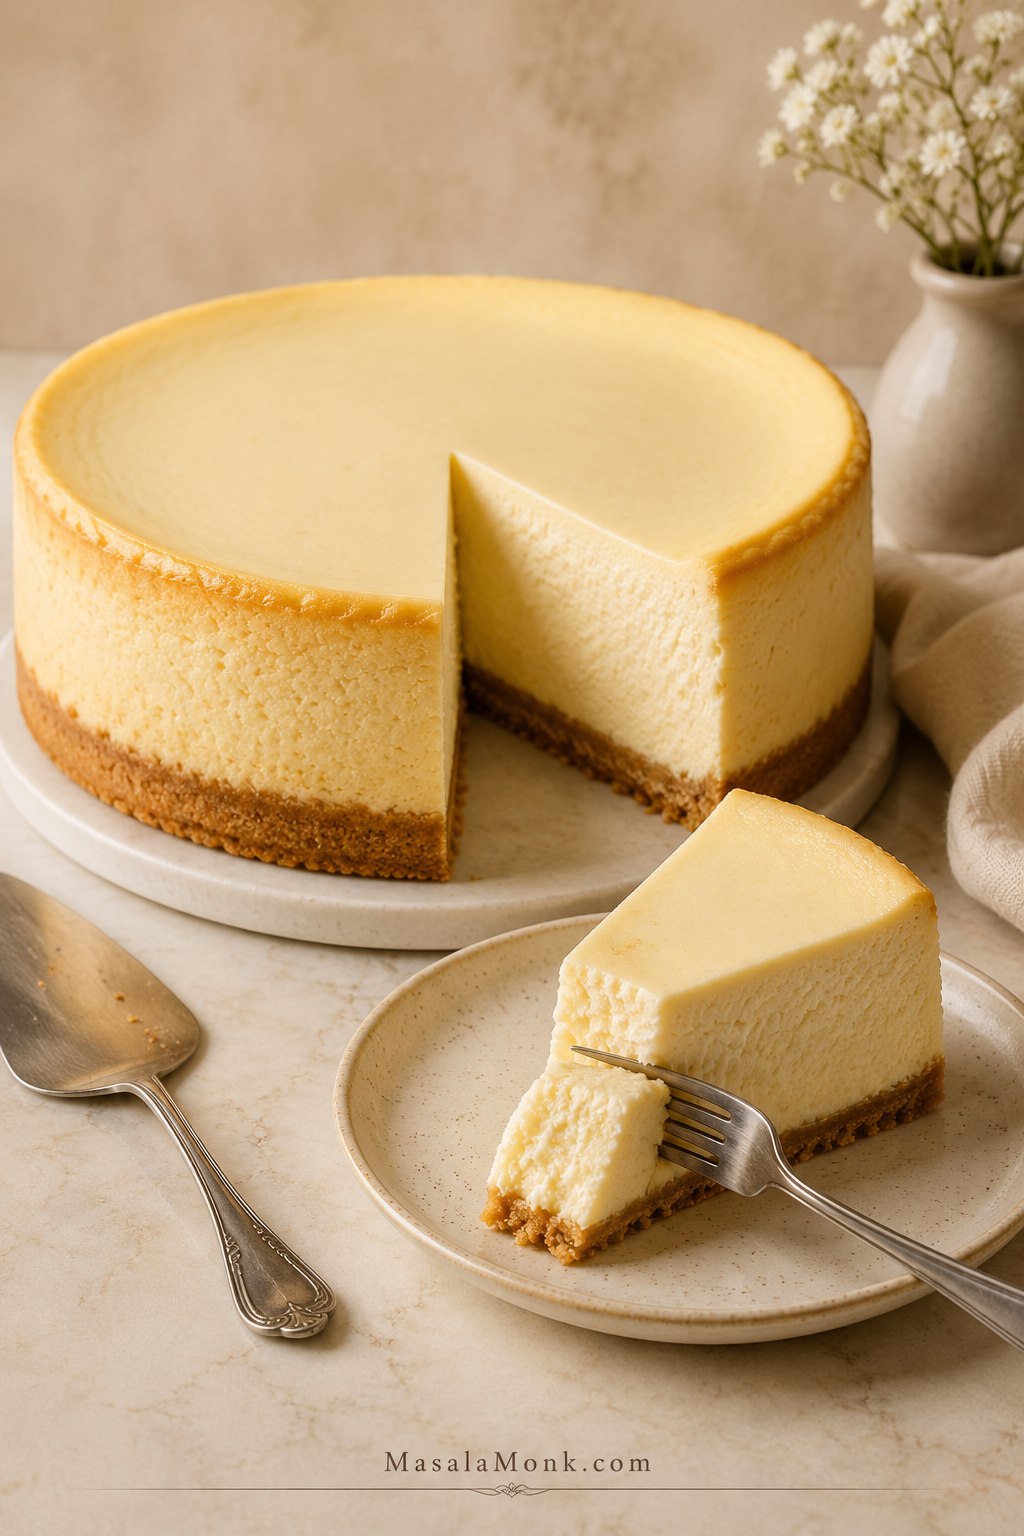
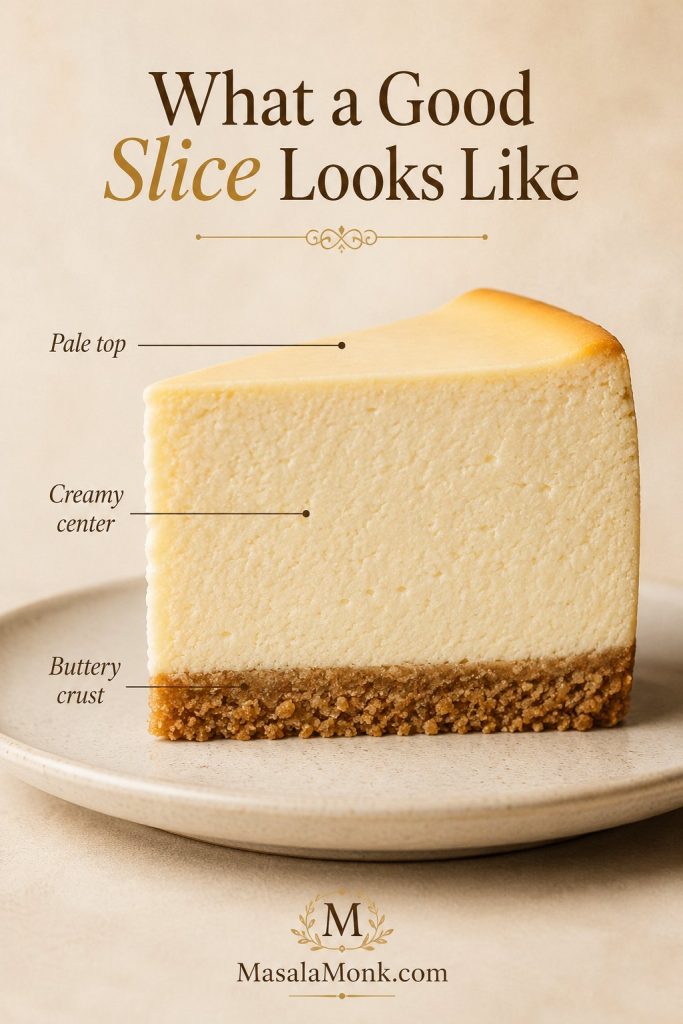
What a Successful Japanese Cheesecake Should Look Like
Before you start, it helps to know what success actually looks like. The cheesecake rises, sets, and then settles a little as it cools. Look for a softly golden top, a gentle center wobble, and a fine cottony crumb after chilling.
Success cue: Japanese cheesecake is not judged by a perfectly smooth top alone. A slight wrinkle with a tender, set center is a better result than a tall glossy cake that looks impressive but has not finished setting inside.
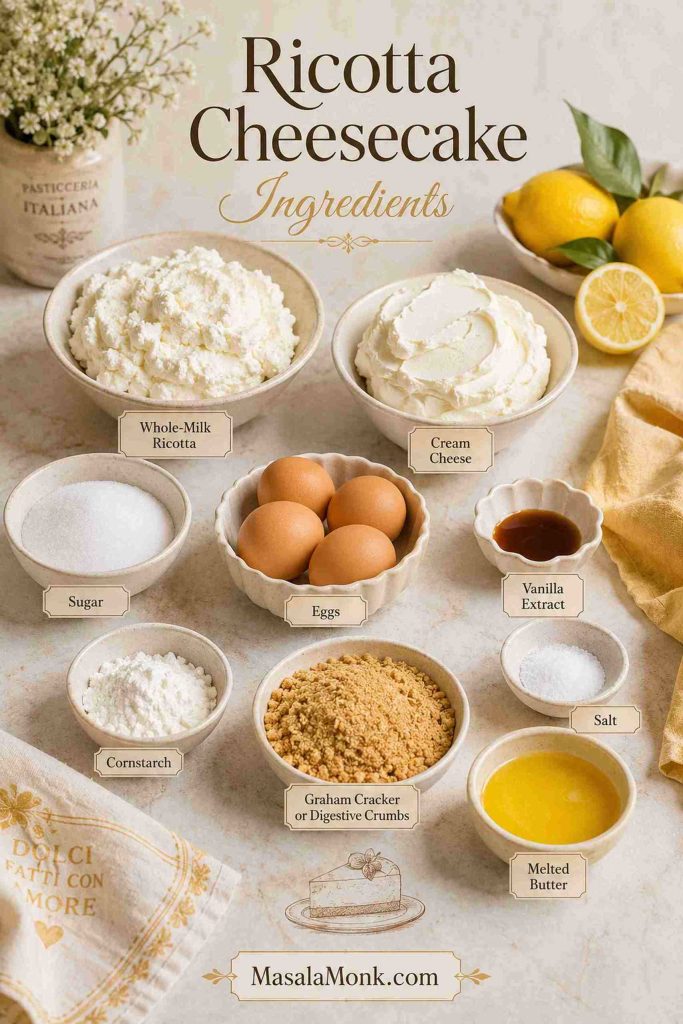
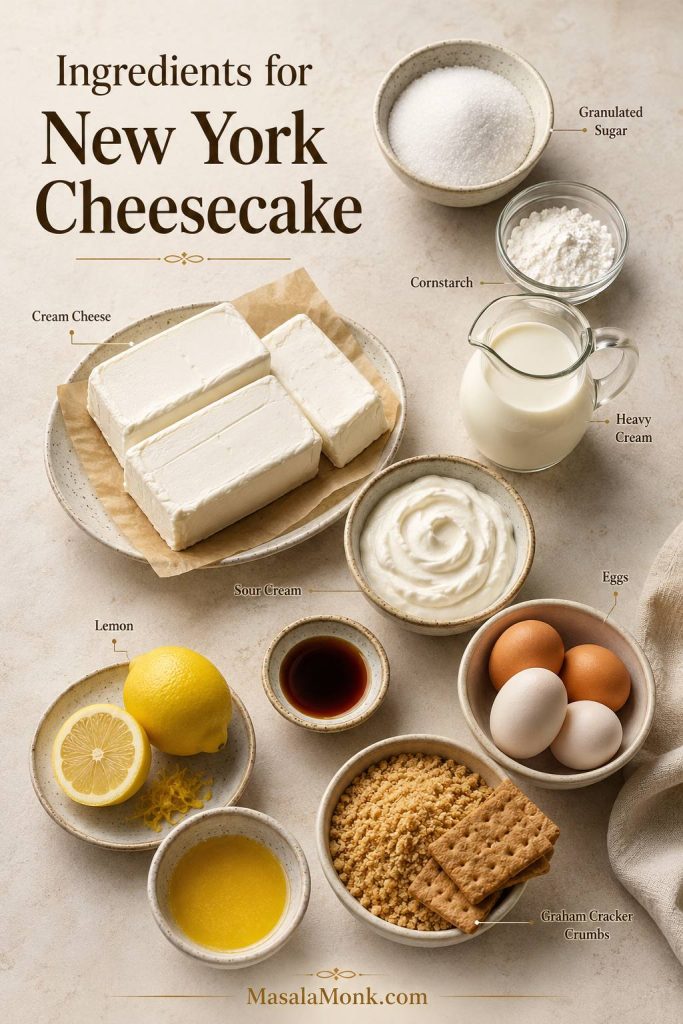
Ingredients for Japanese Cheesecake and Why They Matter
For Japanese cheesecake, a kitchen scale makes the recipe more reliable. Small differences in egg, flour, sugar, and cream cheese can affect the rise. The scale is not here to make the recipe fussy. It is here to make the cake repeatable, especially because this batter depends on foam, moisture, and gentle structure. Cup measurements are included as approximations, but the gram measurements are the ones to trust. King Arthur Baking’s ingredient weight chart is useful when you need a broader baking reference for common ingredient weights.
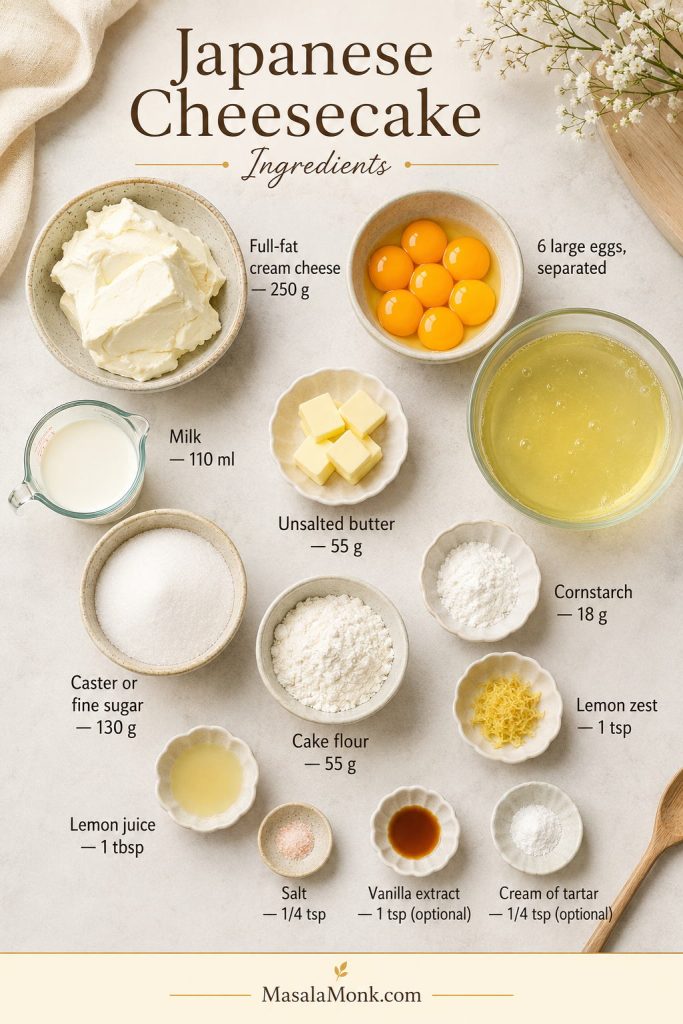
| Ingredient | Amount | Why it matters |
|---|---|---|
| Full-fat block cream cheese | 250g / 8.8 oz | Gives cheesecake flavor without making the cake too heavy |
| Unsalted butter | 55g / 2 oz / about 4 tbsp | Adds tenderness and richness |
| Whole milk | 110ml / scant ½ cup | Loosens the batter and keeps the crumb soft |
| Large eggs | 6, separated; about 180g whites and 100–110g yolks total | Yolks enrich the base; whites create lift through meringue |
| Caster sugar or fine granulated sugar | 130g / about ⅔ cup, divided | 30g flavors the base; 100g stabilizes the meringue |
| Cake flour | 55g / about ½ cup spooned and leveled | Gives soft structure without toughness |
| Cornstarch | 18g / about 2 tbsp | Helps stabilize the cake and gives a finer crumb |
| Lemon juice | 1 tbsp | Brightens the flavor and reduces egginess |
| Lemon zest | 1 tsp | Adds fresh aroma without making the cake sharp |
| Fine salt | ¼ tsp | Balances sweetness and cream cheese richness |
| Cream of tartar | ¼ tsp, optional | Helps stabilize the egg whites |
| Vanilla extract | 1 tsp, optional | Adds a soft bakery-style flavor |
Egg size matters
Use large eggs if possible. If your eggs are standard large eggs, you do not need to obsess over the weight. The weight cue is mainly for small, mixed-size, or inconsistent eggs: aim for about 180g egg whites and 100–110g egg yolks total.
Separate the eggs while cold because the yolks are less likely to break. Then let the whites stand for 15–20 minutes while you prepare the cream cheese base. Slightly cool-room-temperature whites whip more easily, but do not leave them out for too long in a hot kitchen.
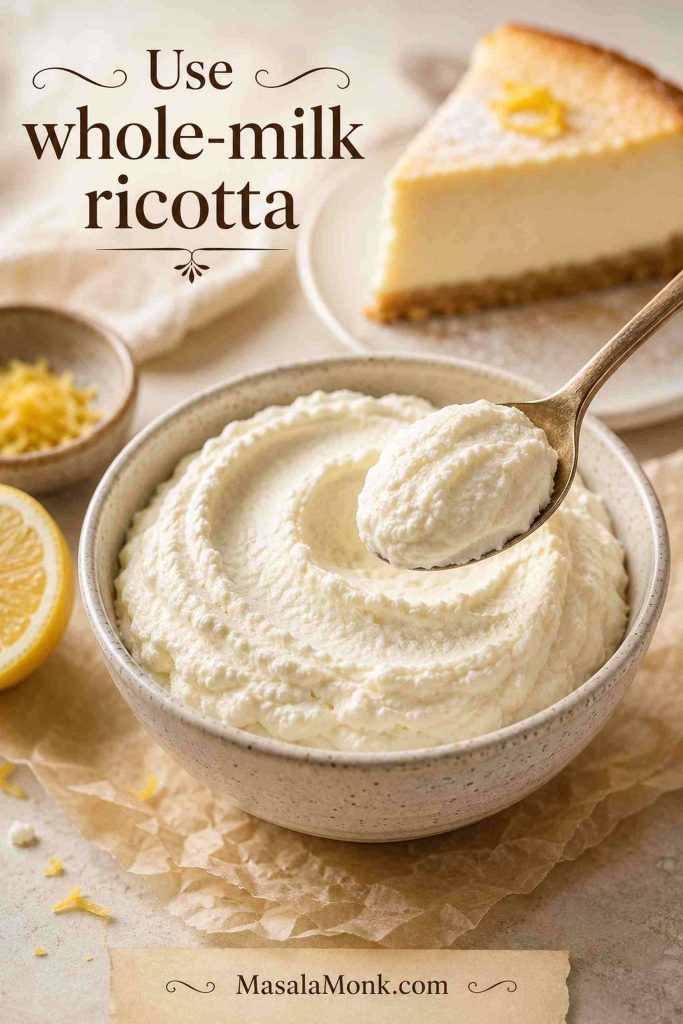
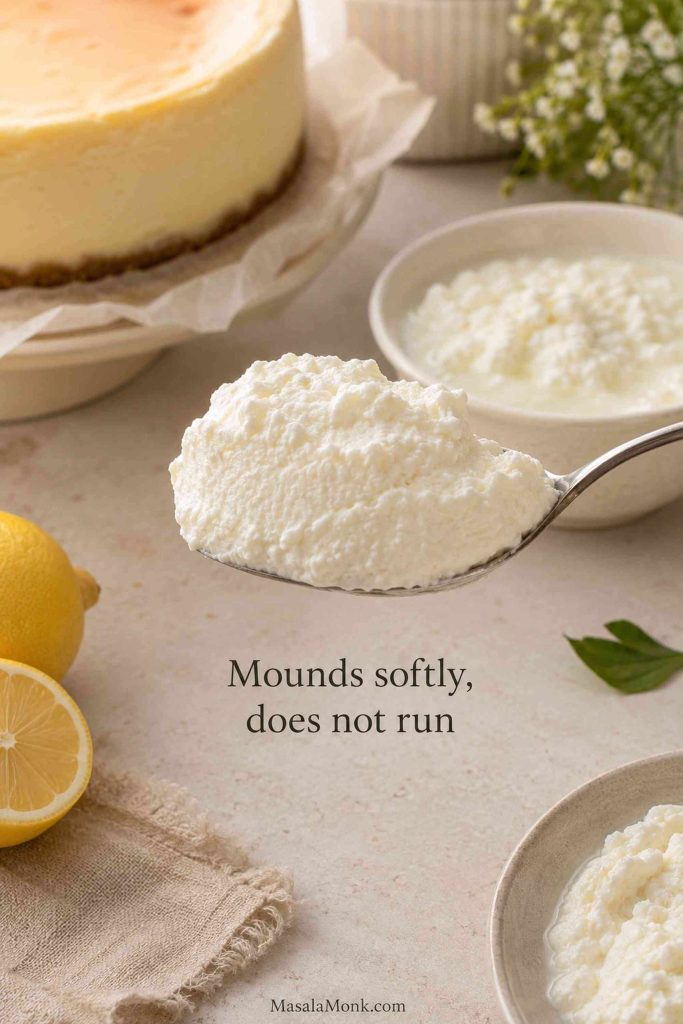
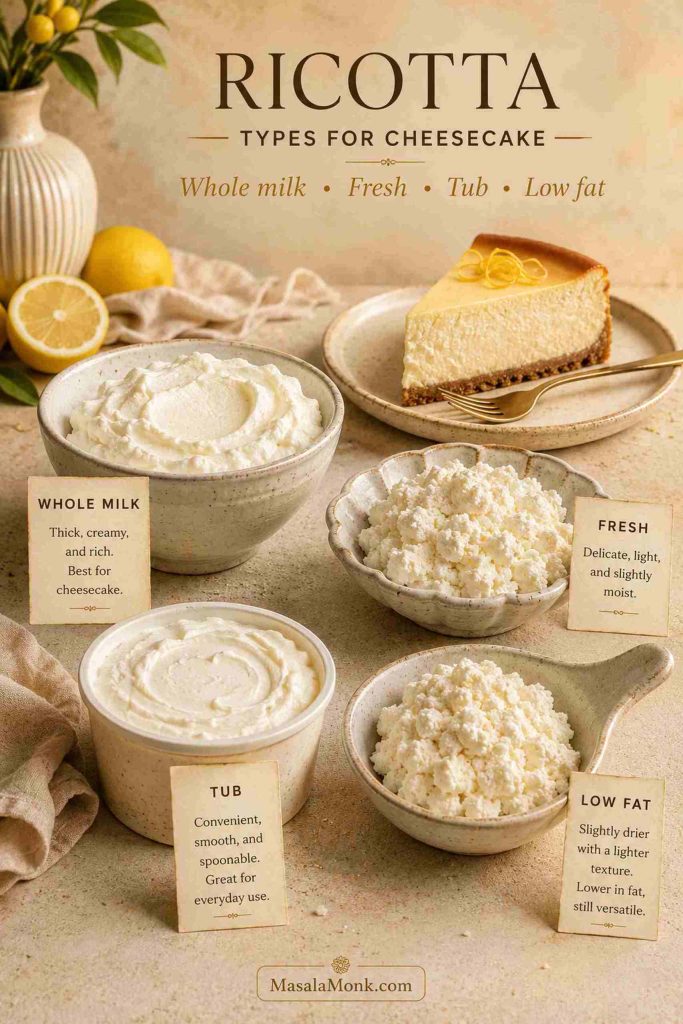
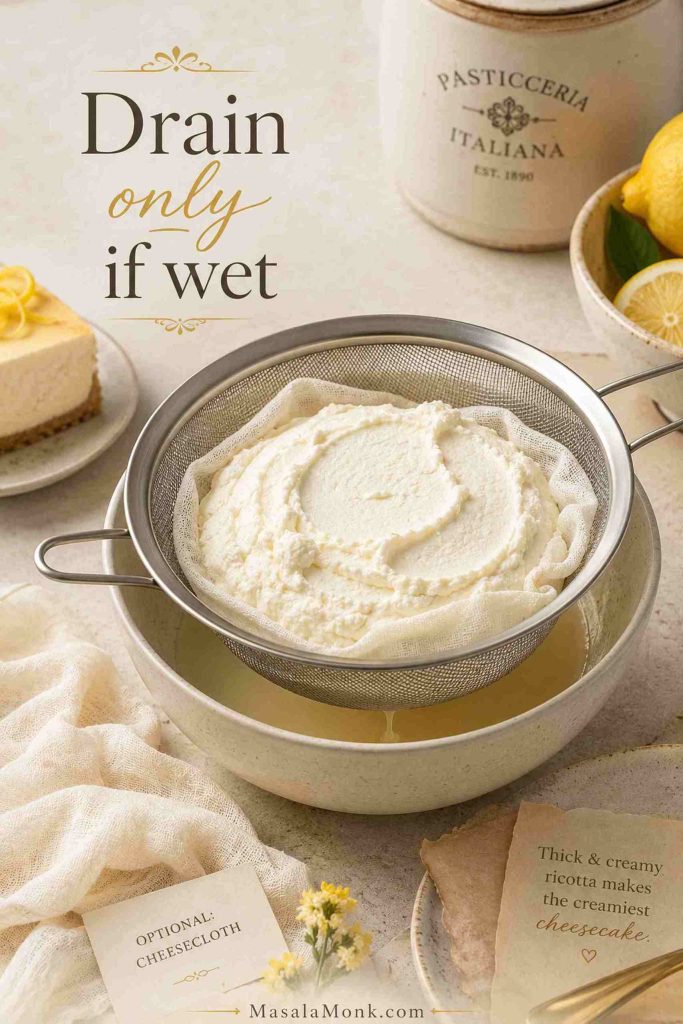
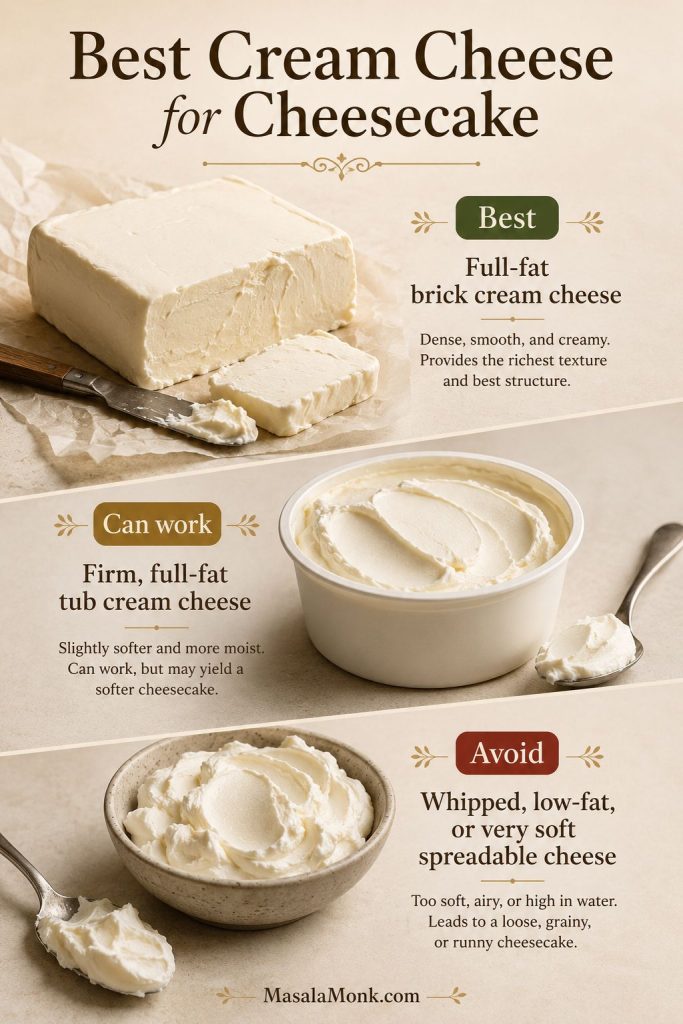
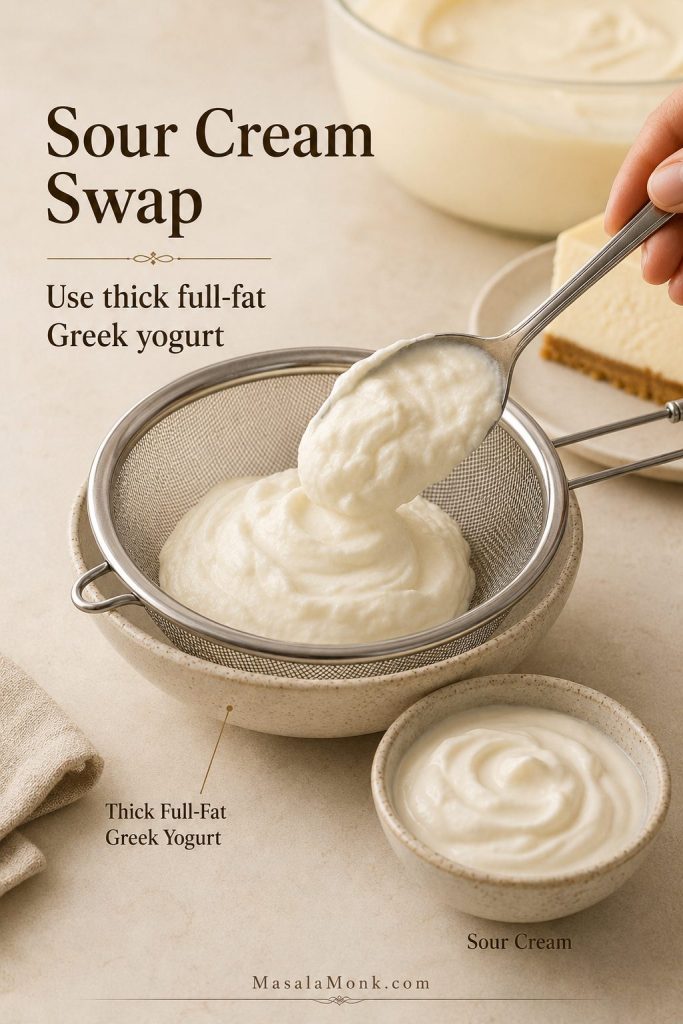
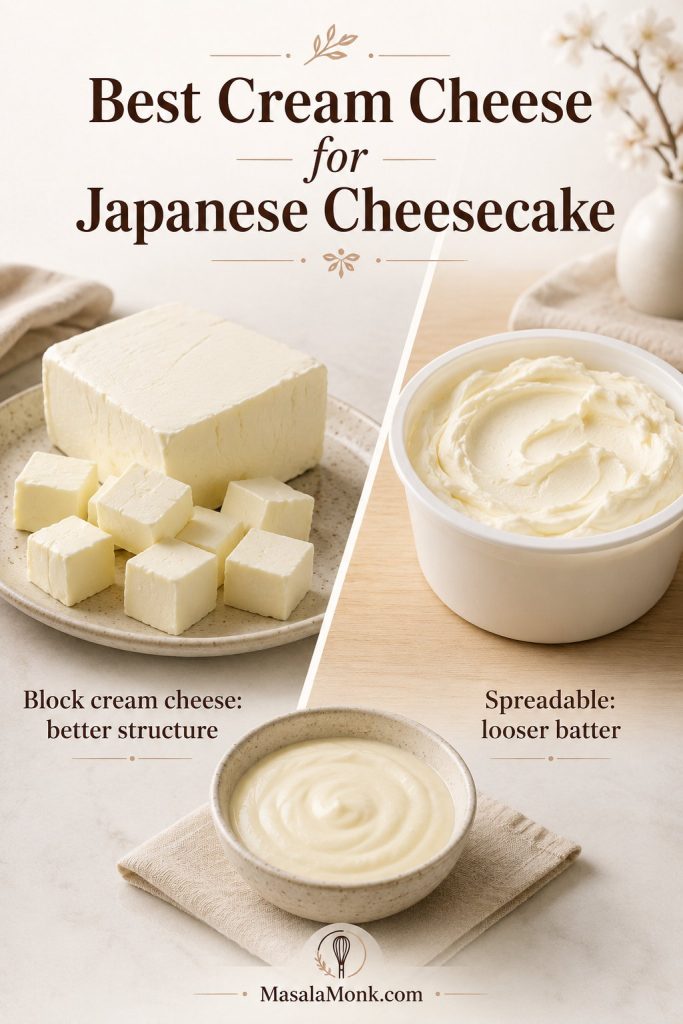
Use full-fat block cream cheese
For the most reliable texture, use full-fat block cream cheese rather than low-fat or spreadable cream cheese. Tub-style cream cheese often has more moisture and stabilizers, which can make the batter looser and less predictable. Full-fat block cream cheese gives the best structure, flavor, and slice.
Cake flour plus cornstarch gives a softer structure
Cake flour keeps the crumb tender, while cornstarch helps the cake set without becoming chewy. Together, they support the meringue so the finished cake can rise, jiggle, and still slice cleanly after chilling.
Lemon is strongly recommended
Vanilla is optional, but lemon is strongly recommended. A little lemon juice and zest make the cheesecake taste lighter and less eggy. The goal is not a lemon cheesecake; the lemon should sit quietly in the background and make the cream cheese taste fresher.
Ingredient Substitutions for Japanese Cheesecake
Gentle, tested swaps work best here. The cake can forgive a few changes, but it still needs its foam, moisture, and structure in balance.
Safe first-bake swaps
| Swap | Best answer |
|---|---|
| All-purpose flour, plain flour, or maida instead of cake flour | Yes. Use the same weight. The crumb may be slightly less delicate, but these are the closest practical substitutes when cake flour is unavailable. |
| Lower-fat milk | Whole milk is better, but lower-fat milk can work with slightly less richness. |
| Salted butter | Yes, but reduce or skip the added salt. |
| Skipping cream of tartar | Yes. Use an additional ½ tsp lemon juice in the egg whites instead, or skip it if your meringue technique is strong. |
| Reducing the sugar | A small reduction is possible, but do not cut it aggressively. Sugar helps stabilize the meringue. |
Save these for later testing
| Swap | Best answer |
|---|---|
| Skipping cornstarch | Keep it for this version. Cornstarch helps the cake set softly and gives the crumb a finer, lighter feel. |
| Cream cheese spread | Block cream cheese is the better choice. Spreadable cream cheese is usually looser and can make the batter less predictable. |
| Low-fat cream cheese | Save it for later testing. Full-fat cream cheese gives the cake better flavor, structure, and sliceability. |
| Cream instead of milk | It makes the cake richer and heavier. Use milk for the default cotton-soft version. |
| Powdered sugar | Fine granulated or caster sugar is better. Powdered sugar may contain starch and behaves differently. |
| Brown sugar, coconut sugar, or darker sugars | Use white sugar for this base version. Darker sugars add moisture, color, and stronger flavor, which can disturb the delicate texture. |
| Gluten-free flour blends | Possible, but it needs testing. Use this base recipe first, then test gluten-free blends separately because the foam and structure are delicate. |
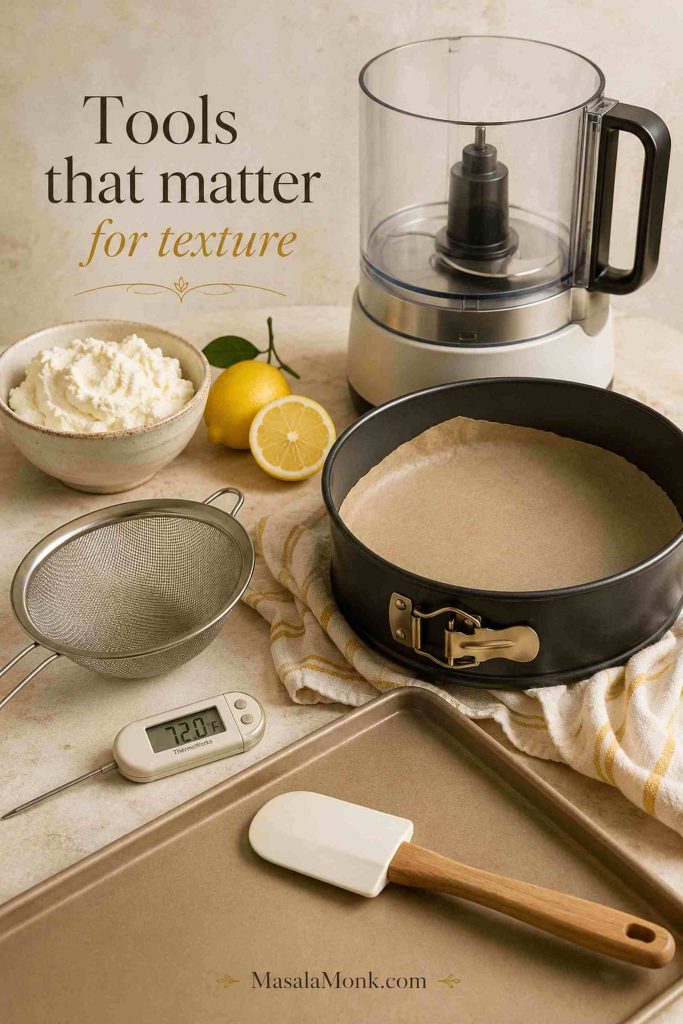
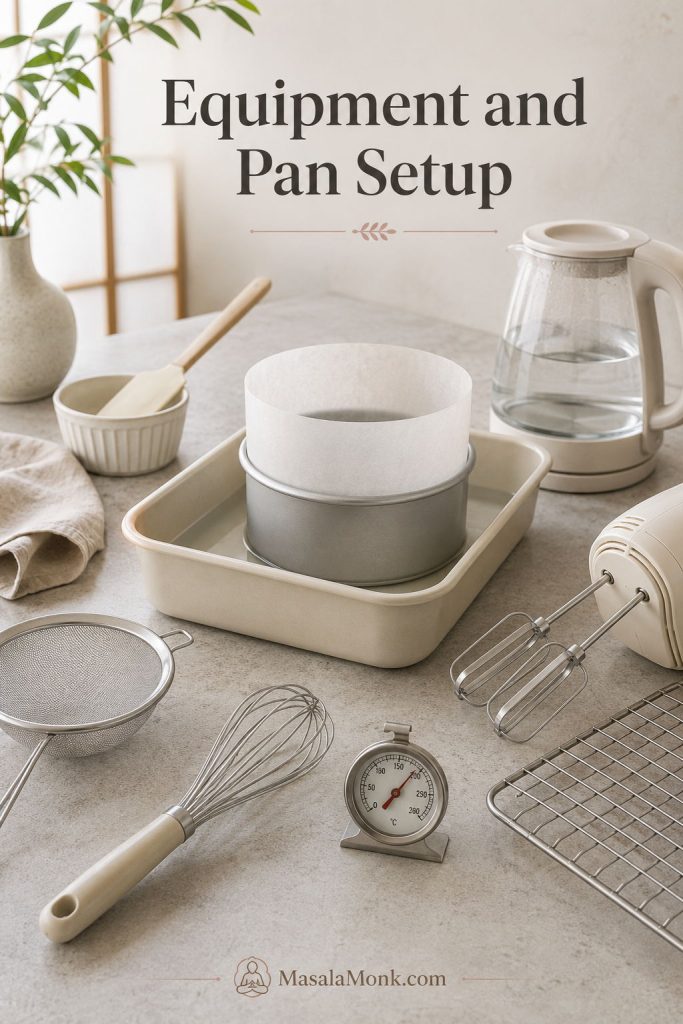
Equipment You Need Before You Start
You do not need specialty bakery gear, but a few pieces of equipment make this cake calmer to handle. The pan needs to be secure, the oven needs to be steady, and the water bath needs enough room to surround the cake gently.
- 8-inch x 3-inch round cake pan, preferably fixed-base
- Large roasting pan or deep baking tray for the water bath
- Parchment paper for the base and tall collar
- Wide aluminum foil, if using a springform pan
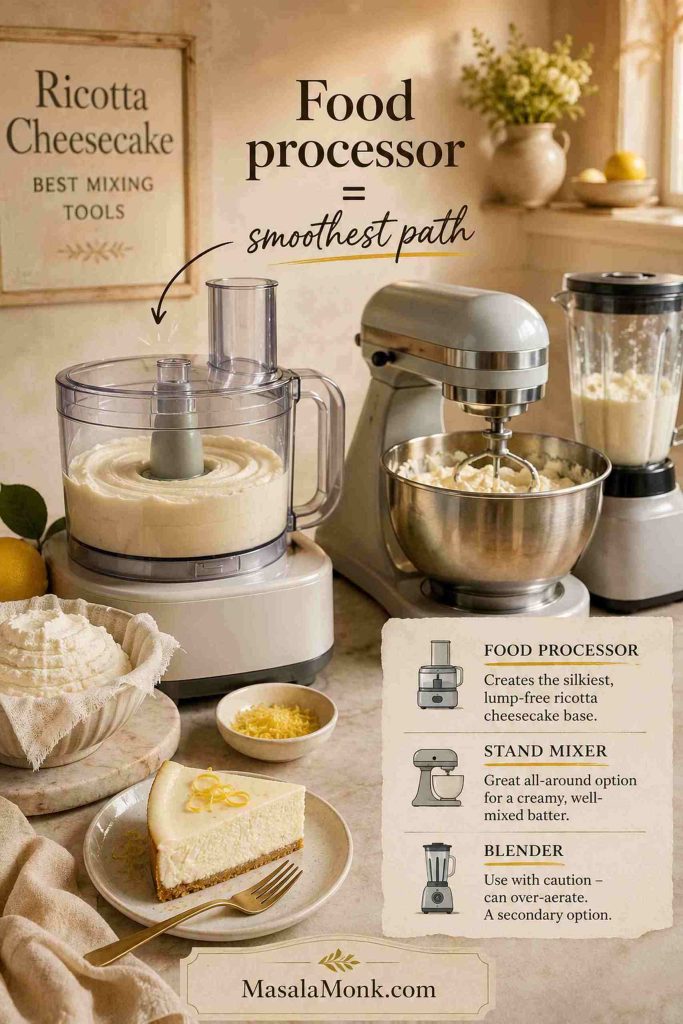
- Hand mixer or stand mixer
- Heatproof bowl
- Fine-mesh sieve
- Flexible spatula
- Kettle or jug for hot water
- Oven thermometer
- Cooling rack
- Two flat plates or cake boards for unmolding
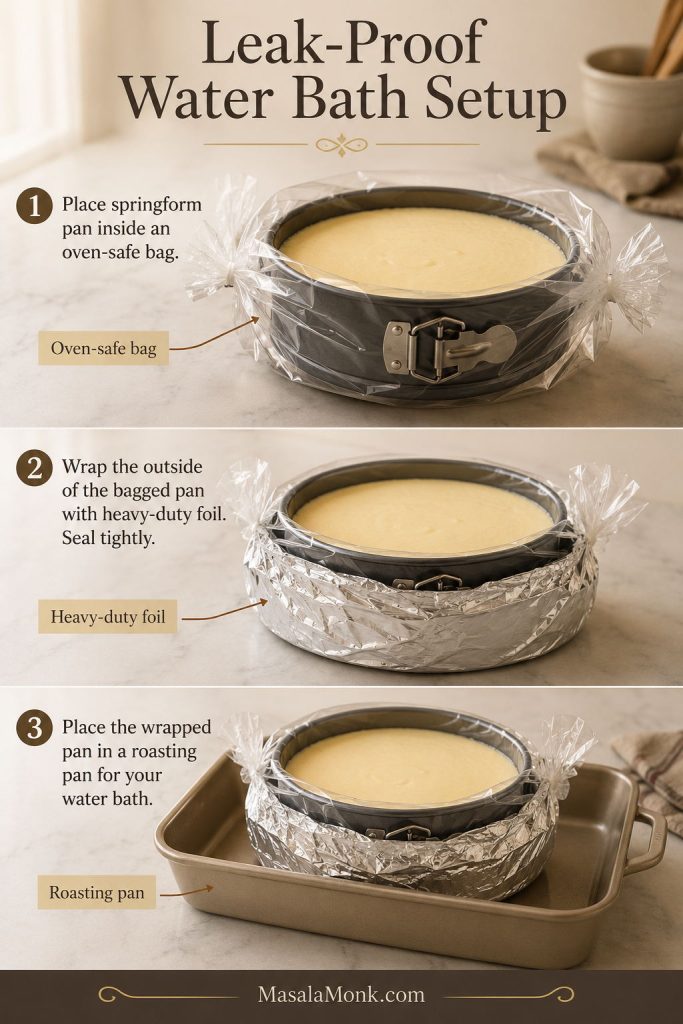
Best pan choice: use a regular fixed-base cake pan if you have one. A springform pan is convenient for unmolding, but it can leak in a water bath. If using springform, wrap it with two layers of wide foil or place it inside a slightly larger solid cake pan before setting it in the water bath. If your foil is narrow or has seams below the waterline, use the pan-inside-pan method instead of trusting foil alone.
A light greasing helps the parchment stay in place, but parchment is what gives this delicate cake the support it needs.
An oven thermometer is also worth using. Many home ovens run hotter or cooler than the display says, and the batter reacts quickly to harsh heat. If your bakes often brown too fast, crack, or stay wet in the center, your oven temperature may be part of the problem.
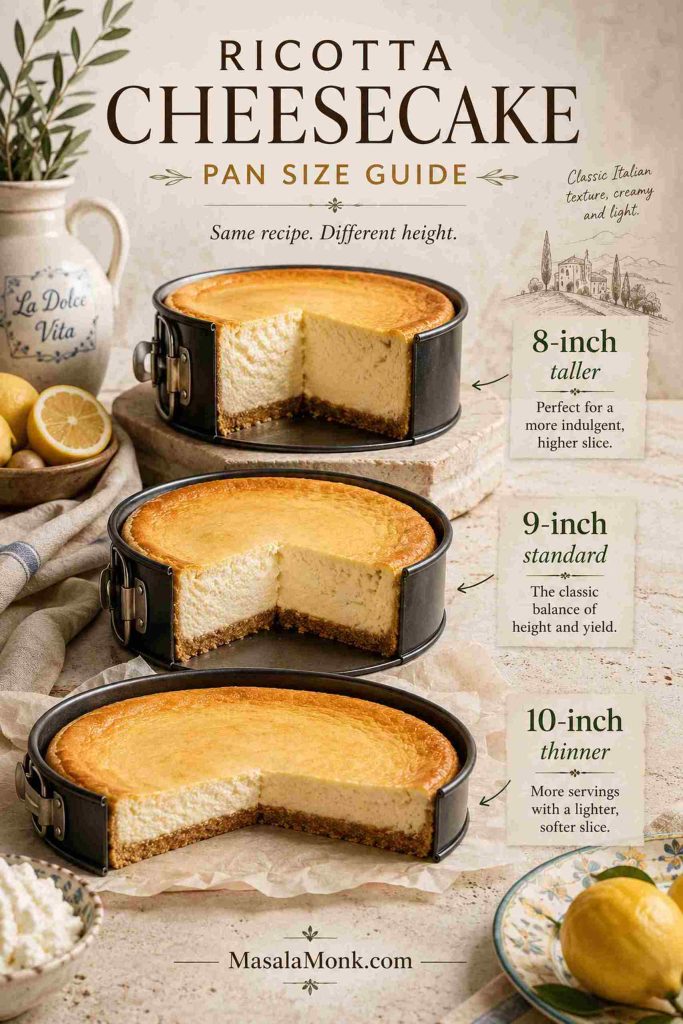
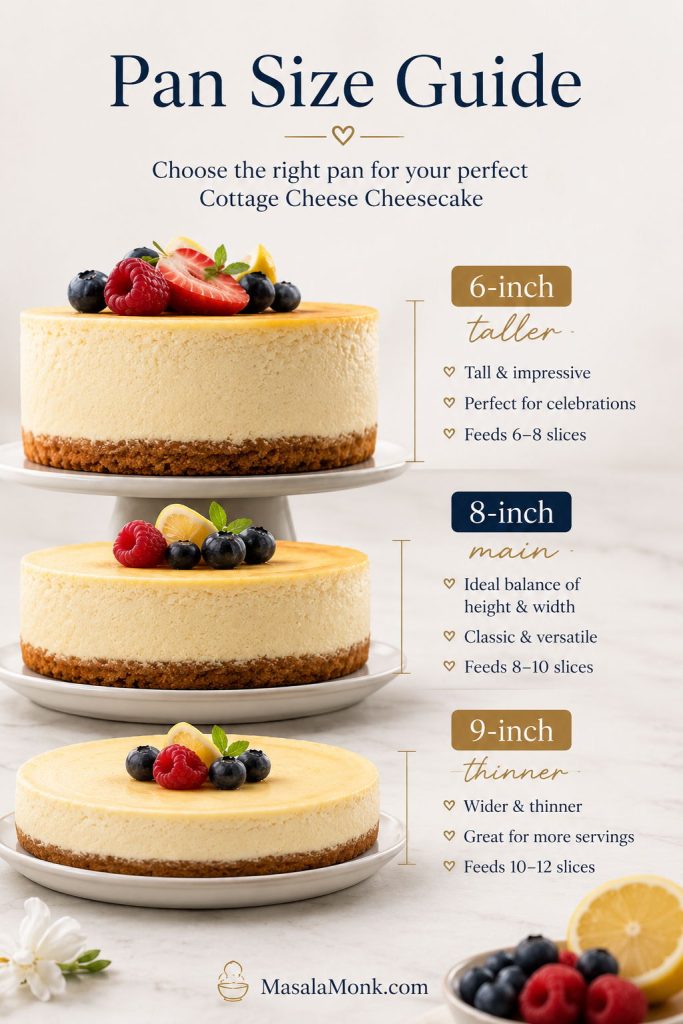
Pan Size Guide for Japanese Cheesecake
This recipe is developed for an 8-inch x 3-inch round pan. For a first attempt, stay with this 8-inch version. Pan changes need more than simple percentage scaling because the egg foam, batter height, and bake timing all change together.
Why pan depth matters
Pan depth matters as much as diameter. A 2-inch-deep pan is risky because the cheesecake rises before it settles. Use a 3-inch-deep pan or a tall parchment collar, and fill the pan only about 70–75% full.
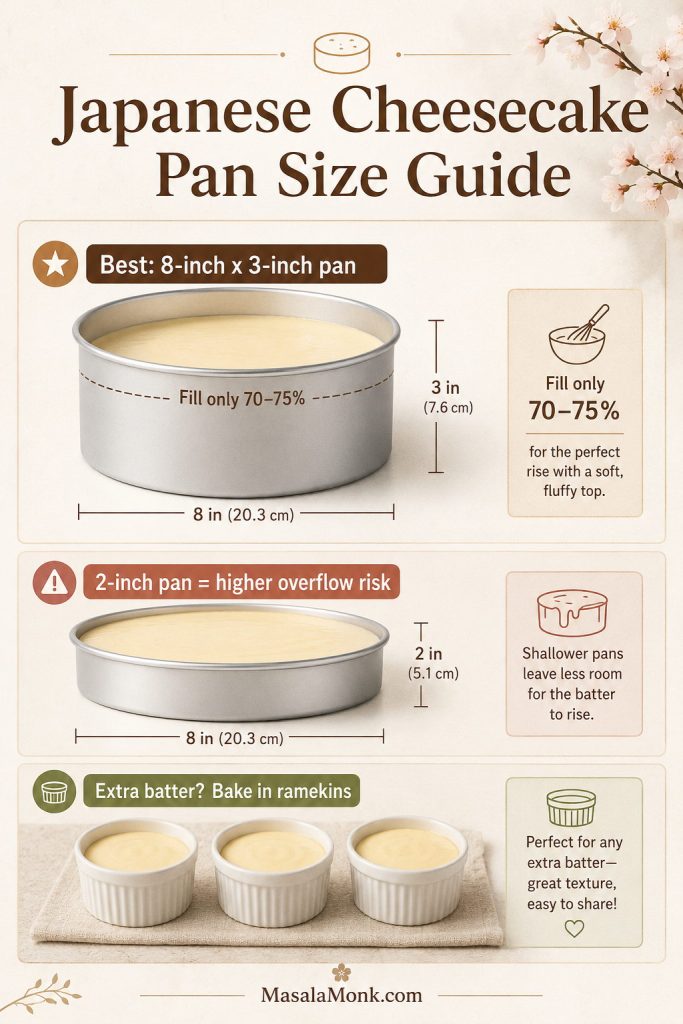
| Pan size | Recommendation | What changes |
|---|---|---|
| 6-inch x 3-inch | Use only if you are comfortable dividing extra batter | A smaller cake can be tall and dramatic, but scaling eggs and meringue is not simple |
| 7-inch x 3-inch | Use only if you are comfortable dividing extra batter | Egg ratio and bake timing still need rebalancing for a true small-batch version |
| 8-inch x 3-inch | Use this recipe | Best balance of height, jiggle, and reliability |
| 9-inch x 3-inch | Use this recipe only if you accept a lower cake | The cake will be wider, shorter, and may bake slightly faster |
What to do with extra batter
For the cleanest first bake, use the 8-inch pan. If you only have a 6-inch or 7-inch pan, do not pour all the batter in. Fill the pan only 70–75%, then bake the extra in ramekins as test cakes. Those small bakes are useful because they show you the texture before you cut the main cake.
If you only have a 9-inch pan, the recipe can still work, but it will not look as tall. Start checking a little earlier because a lower cake sets faster.
If you are using a springform pan or a tall parchment collar for the first time, check the water bath setup before you pour the batter.
The Meringue Cue That Matters Most
This is the part where the cheesecake starts becoming light. The cream cheese base gives flavor, but the meringue gives the cake its breath.
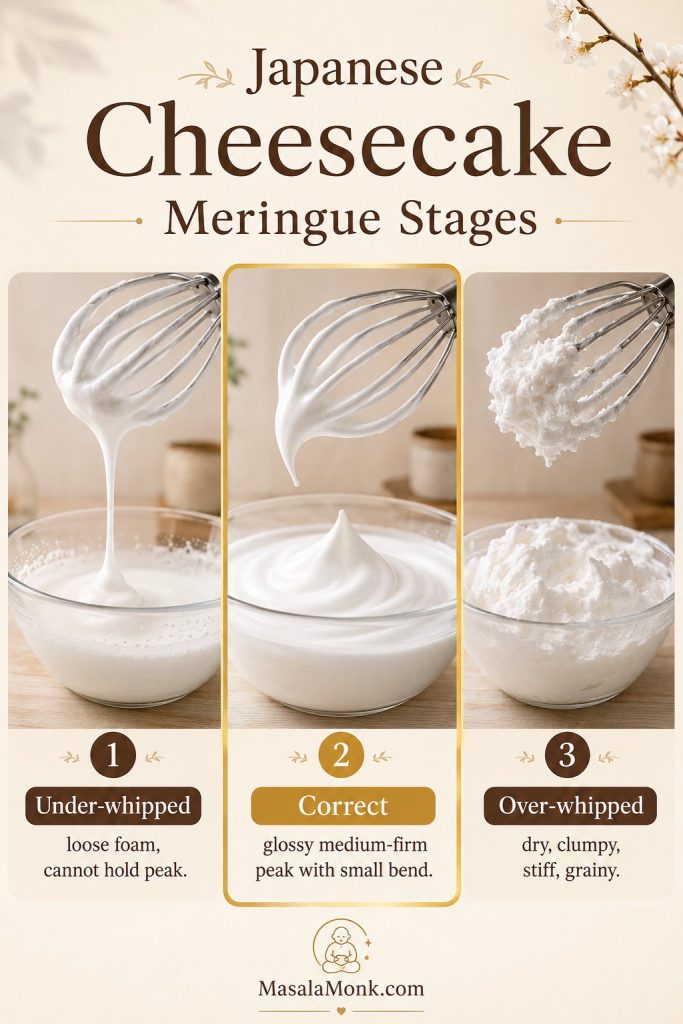
Aim for glossy medium-firm peaks with a small bend at the tip. The meringue should hold shape while still looking smooth, moist, and flexible. That flexibility is what makes it fold smoothly into the base.
| Meringue stage | What it looks like | What happens in the cake |
|---|---|---|
| Under-whipped | Loose, foamy, large bubbles, cannot hold shape | Cake may not rise well and can bake up dense |
| Correct | Glossy, medium-firm, fine bubbles, peak holds with a slight hook | Soft, even, cottony crumb with gentle lift |
| Over-whipped | Dry, grainy, clumpy, stiff chunks | Hard to fold; can create cracks, holes, or dense streaks |
How to whip the egg whites
Use a clean, dry, grease-free bowl. Make sure there is no egg yolk in the whites and no water sitting in the bowl. If you have a choice, use a metal or glass bowl rather than a plastic one, because plastic can hold onto grease.
Start beating the egg whites with cream of tartar until they look foamy. Begin adding the sugar only after the whites have formed bubbles. Add the sugar gradually, not all at once. Once the meringue reaches soft peaks, slow the mixer down for the final 30–60 seconds. This helps tighten the bubbles and gives you a smoother meringue that folds more evenly.
When you lift the whisk, the peak should stand up and curve slightly at the tip. At the right stage, the meringue looks shiny and elastic, almost like soft marshmallow cream. That shine is a better cue than the exact number of minutes on the mixer.
Remember this cue: glossy medium-firm peaks with a small bend — smooth, flexible, and easy to fold.
Once the meringue looks glossy and flexible, move gently into the folding cues; that is where the air you built needs the most care.
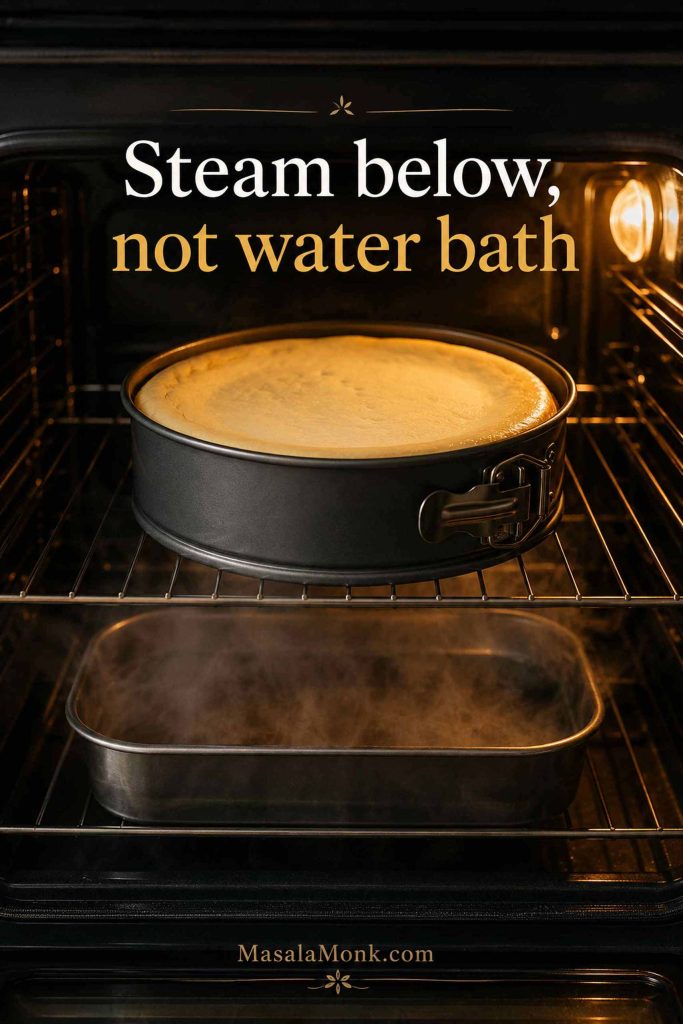
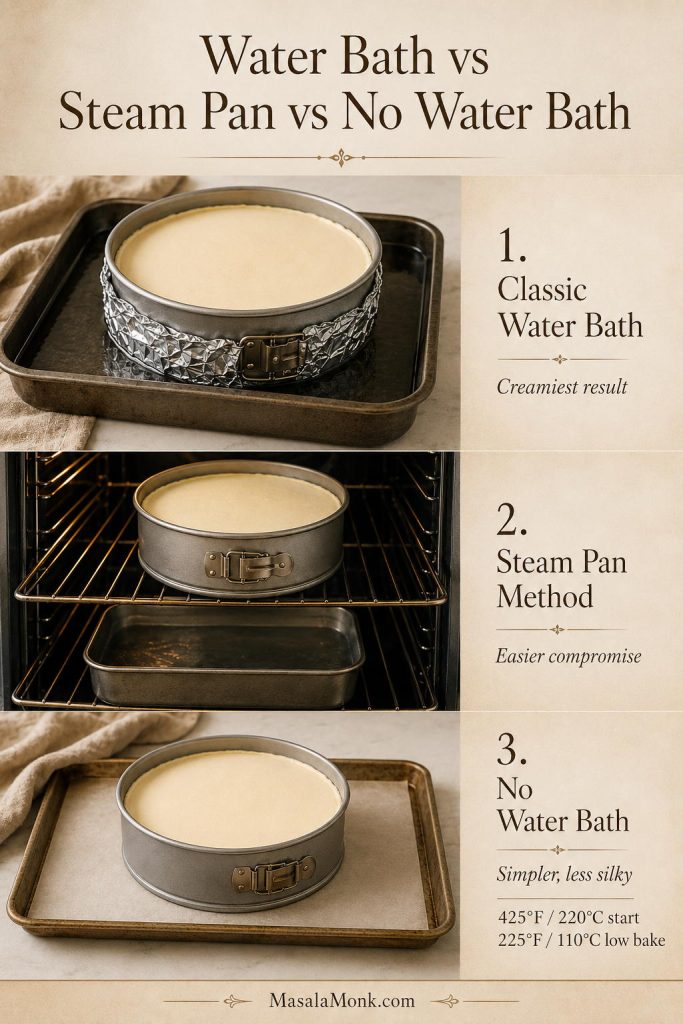
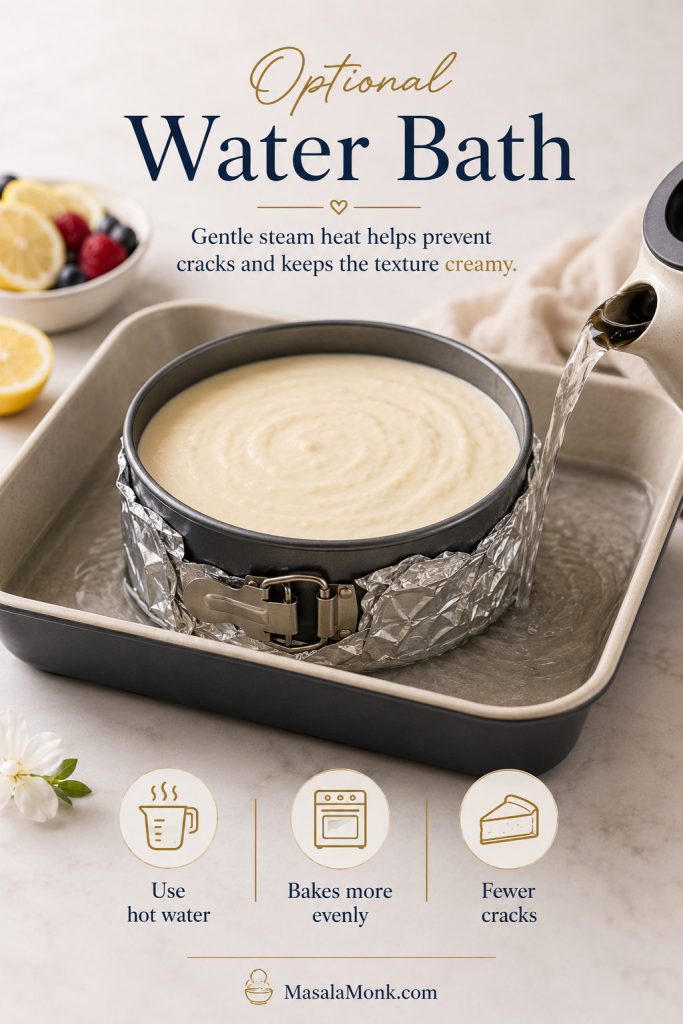
Water Bath Setup for Gentle, Even Baking
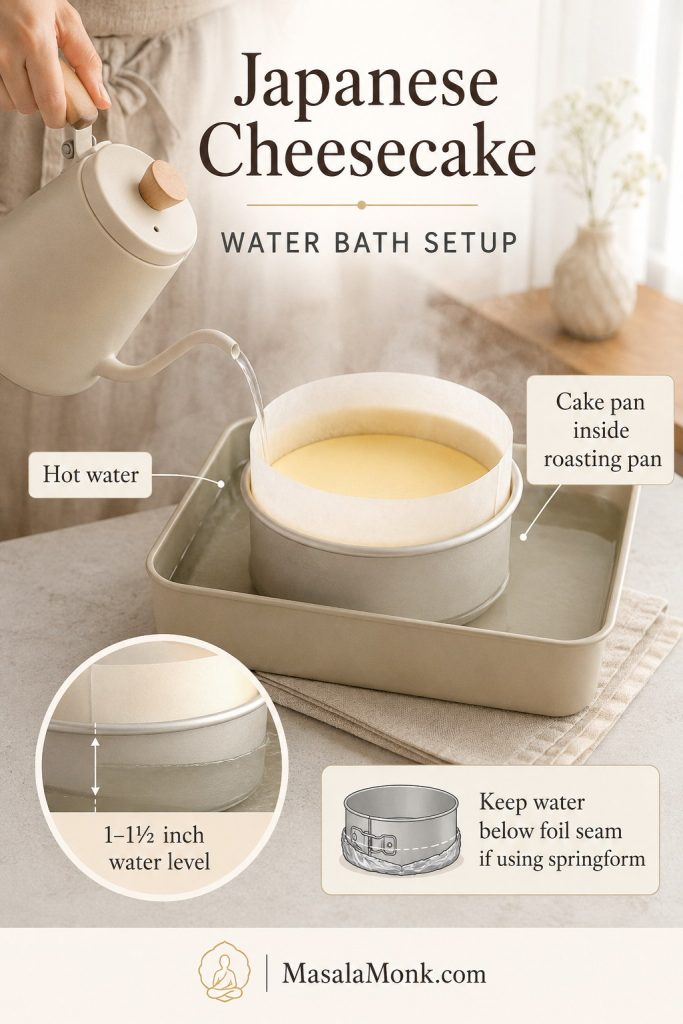
A water bath protects Japanese cheesecake from harsh oven heat. It keeps the baking environment moist, helps the cake rise gently, and reduces the chance of deep cracks. Without it, the outside can set too quickly while the center is still expanding.
How deep should the water be?
- Place the lined cake pan inside a larger roasting pan or deep tray.
- Use just-boiled water that has sat for about 1 minute, or very hot kettle water.
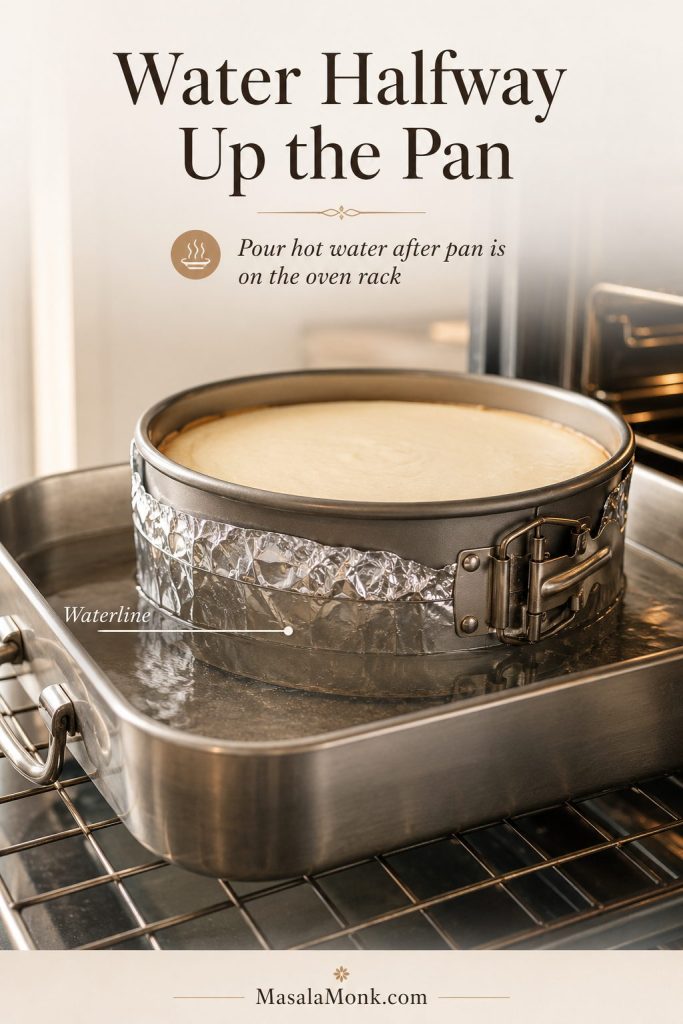
- Water should come about one-third to halfway up the cake pan, usually 1–1½ inches. For a very tall pan, up to 2 inches is fine as long as the water stays below any foil seam.
- If using a springform pan, keep the water below the foil seam.
- Add water after the pan is on the oven rack if the filled roasting pan is too heavy to move safely.
- Pour carefully so water does not splash into the batter.
- A silicone mat under the cake pan can soften direct heat from the roasting pan.
- If the water bath gets close to dry near the end of baking, add more hot water carefully. Avoid cold water because it drops the oven temperature.
Springform pan and water bath notes
If the idea of a water bath makes you nervous, use a fixed-base pan. Once the pan is solid and the water level is sensible, the water bath becomes the part that protects the cake.
Once the water bath is ready, follow one steady oven temperature schedule instead of mixing timings from different recipes.
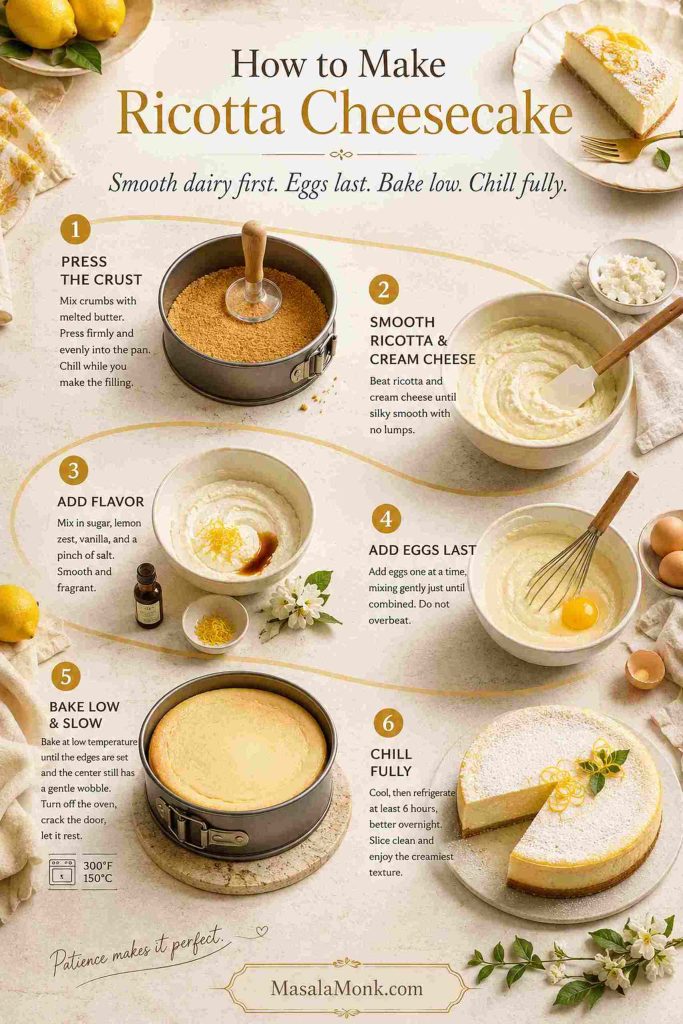
How to Make Japanese Cheesecake Step by Step
Read the method once before starting. Once the meringue is whipped, you do not want to stop and look for parchment, foil, hot water, or a roasting pan.
Once you understand the meringue and the oven, the rest is ordinary baking: mix gently, bake gently, cool gently.
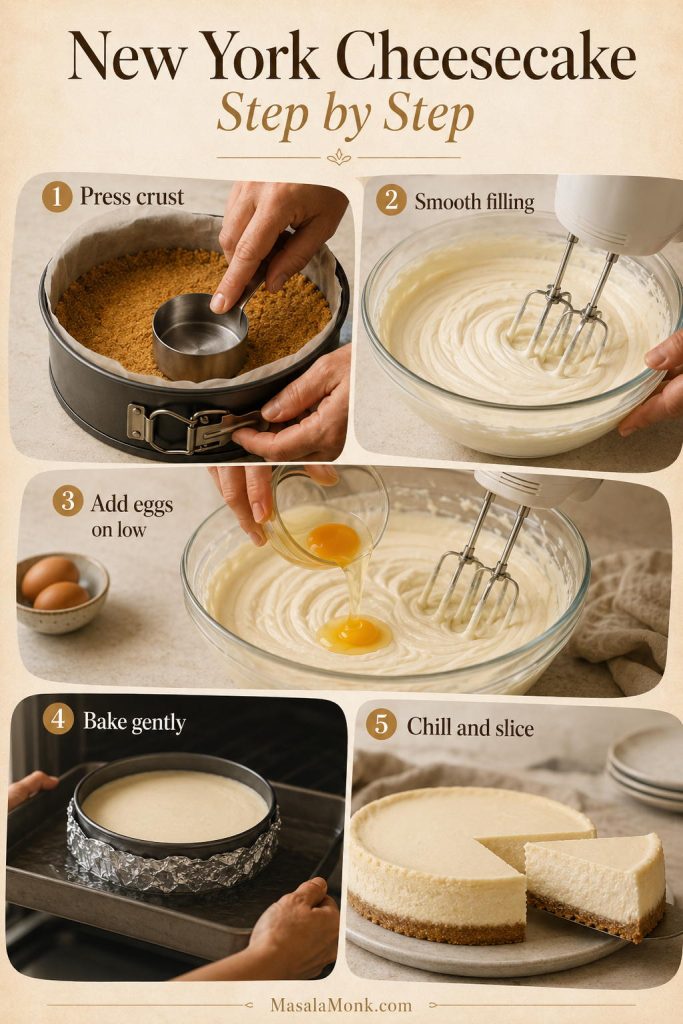
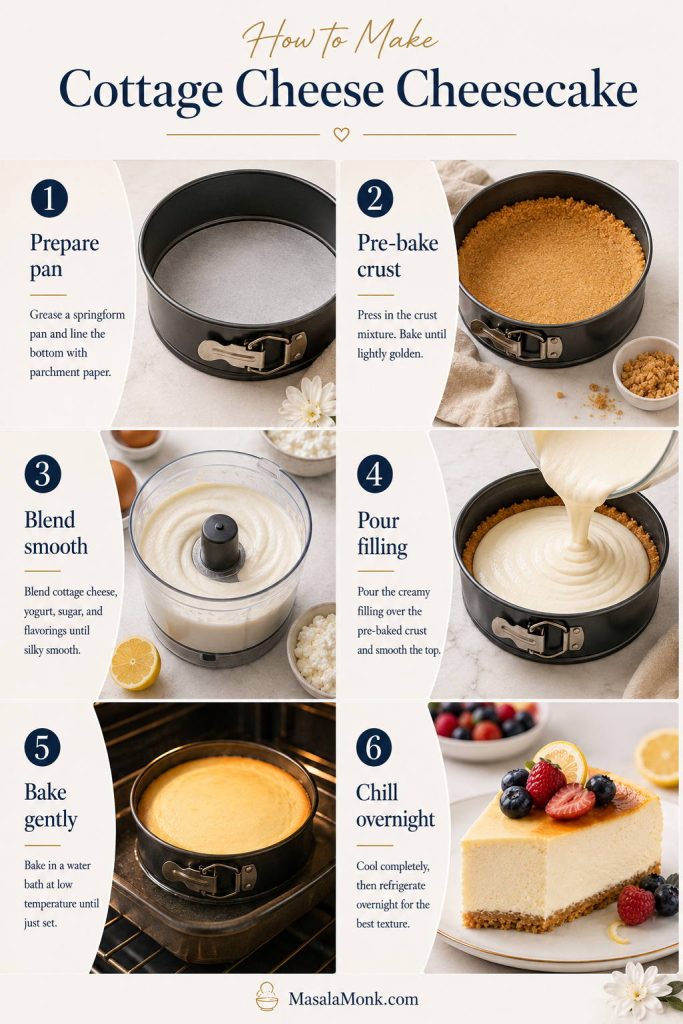
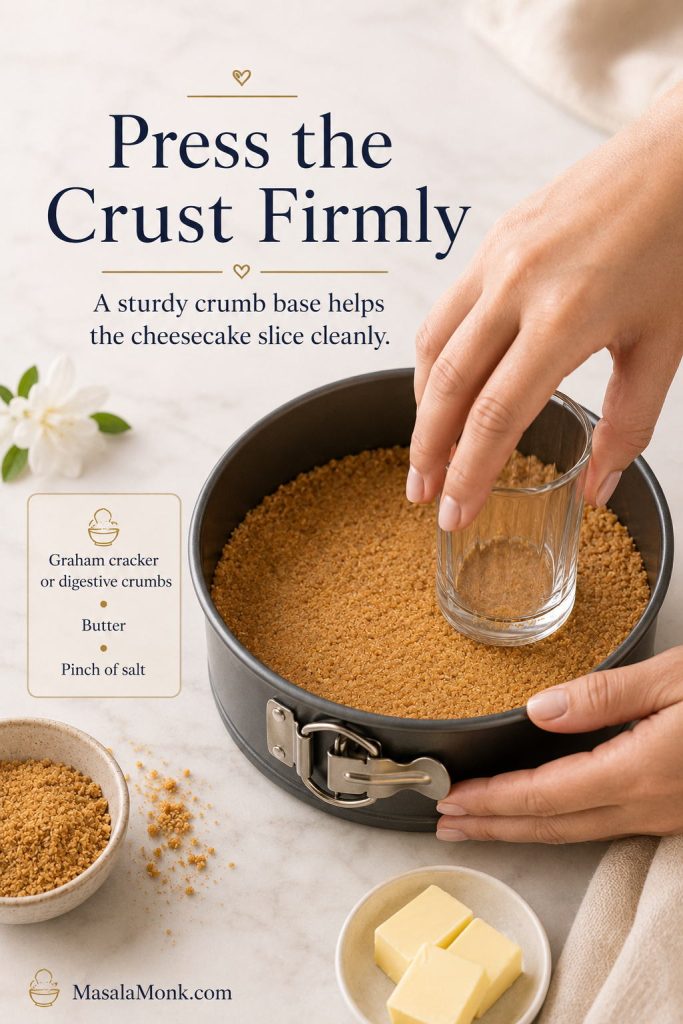
1. Prepare the pan and oven
Lightly grease an 8-inch x 3-inch cake pan so the parchment sticks. Line the base with parchment, then line the sides with a tall parchment collar that rises 1–2 inches above the rim. If using a springform pan, wrap the outside tightly with two layers of wide foil.
Preheat the oven to 180°C / 350°F for at least 20 minutes. The cake itself will bake at 160°C / 320°F, but the slightly higher preheat helps offset heat lost when you open the oven and place the water bath inside. Set out a large roasting pan or deep tray for the water bath.
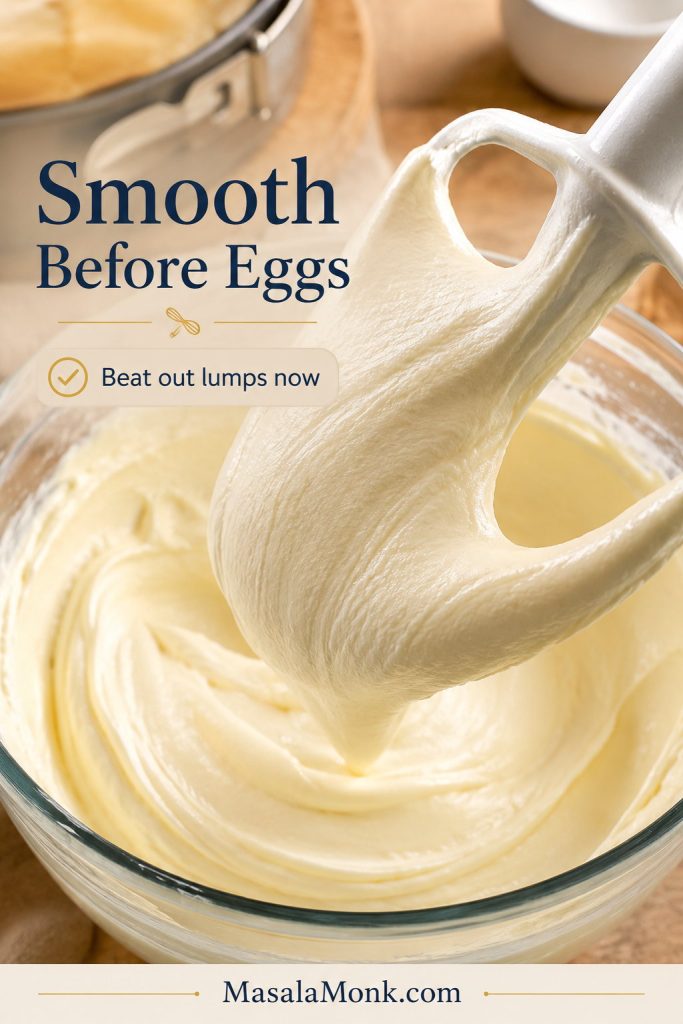
2. Melt the cream cheese base gently
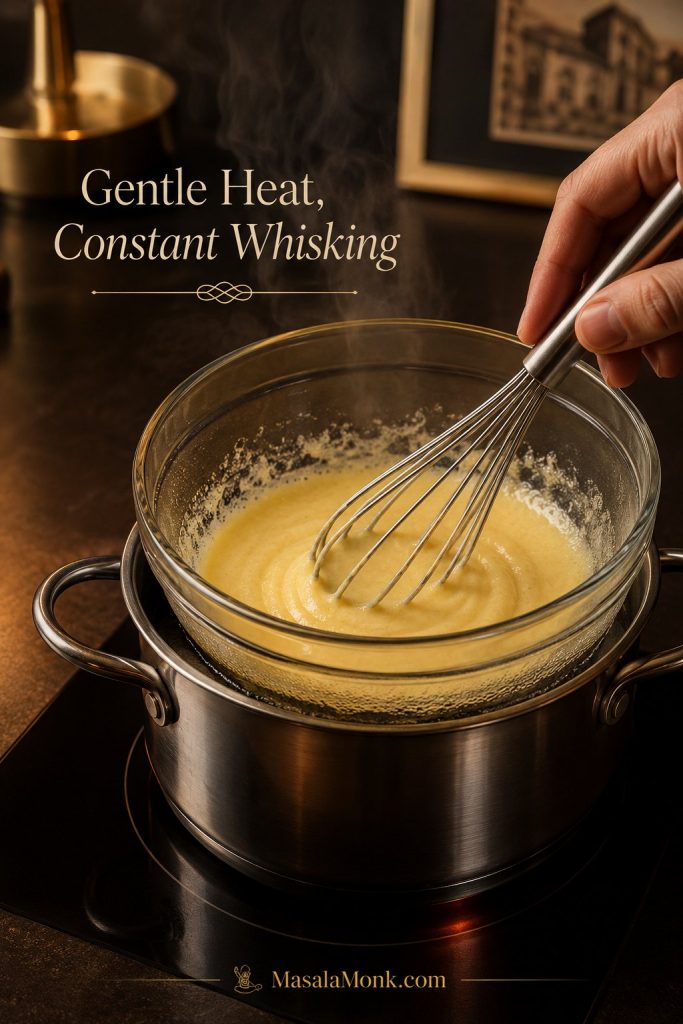
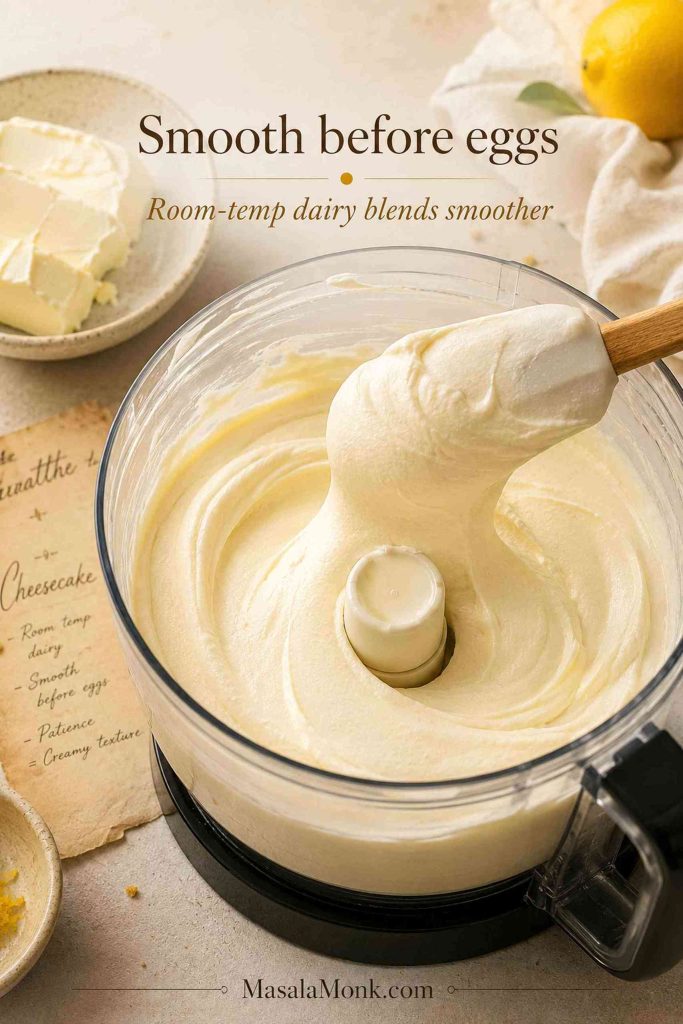
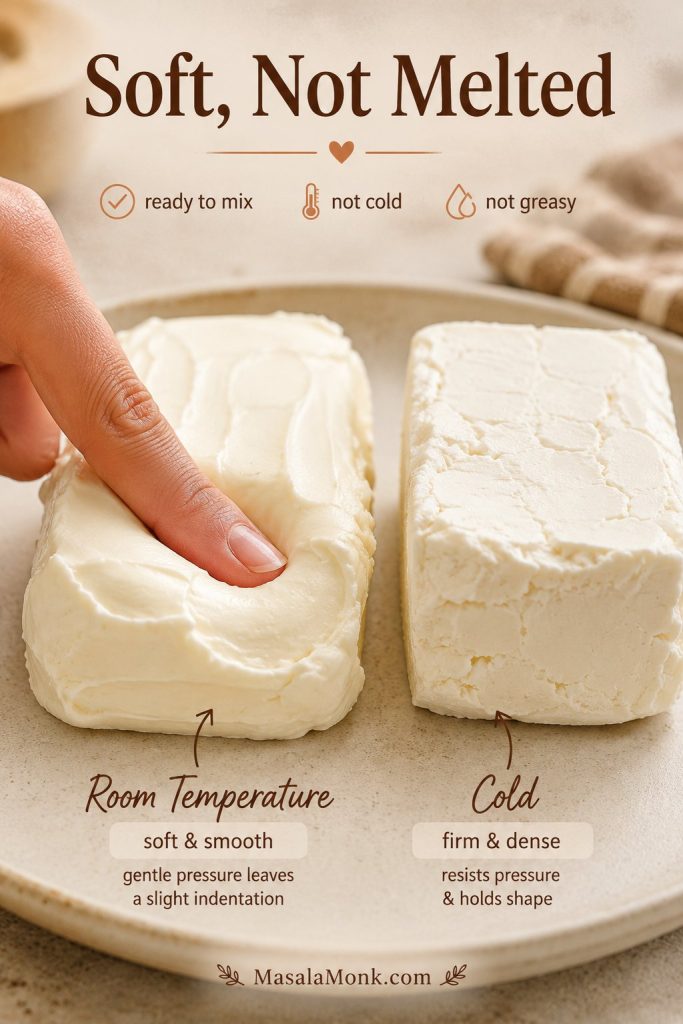
Combine the cream cheese, butter, and milk in a heatproof bowl. Warm gently over a pot of barely simmering water, whisking until smooth. The bottom of the bowl should not touch the water. Do not boil the mixture.
The mixture should be smooth and warm, not steaming hot. Around 40–45°C is ideal if you are using a thermometer. Without a thermometer, it should feel comfortably warm to the touch, not hot. If it is too warm, let it cool before adding the yolks.
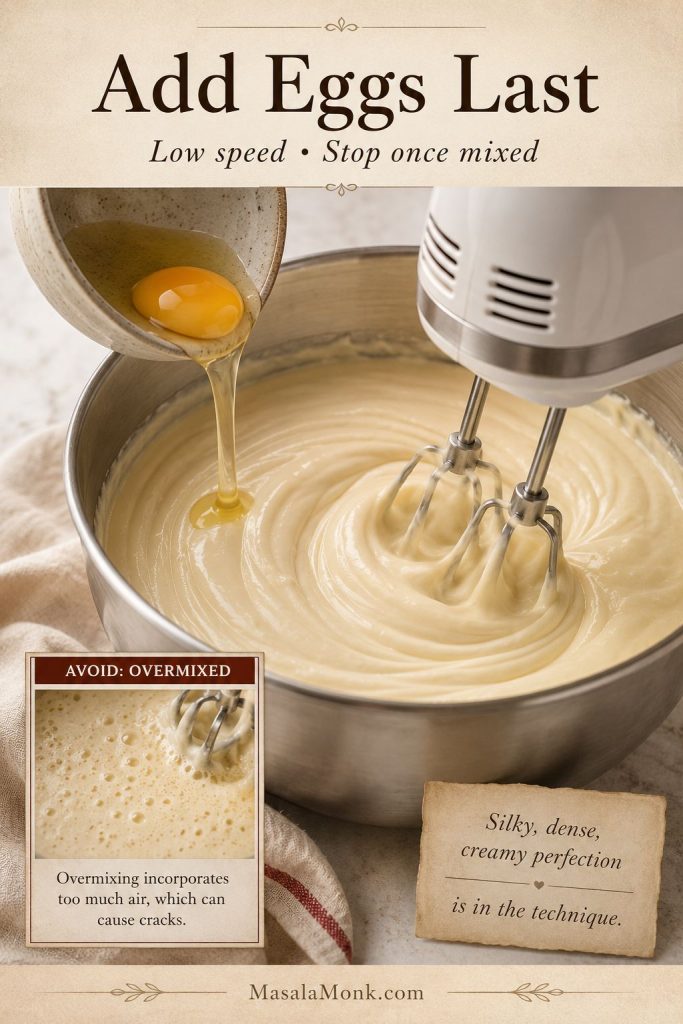
3. Add yolks, 30g sugar, lemon, flour, and starch
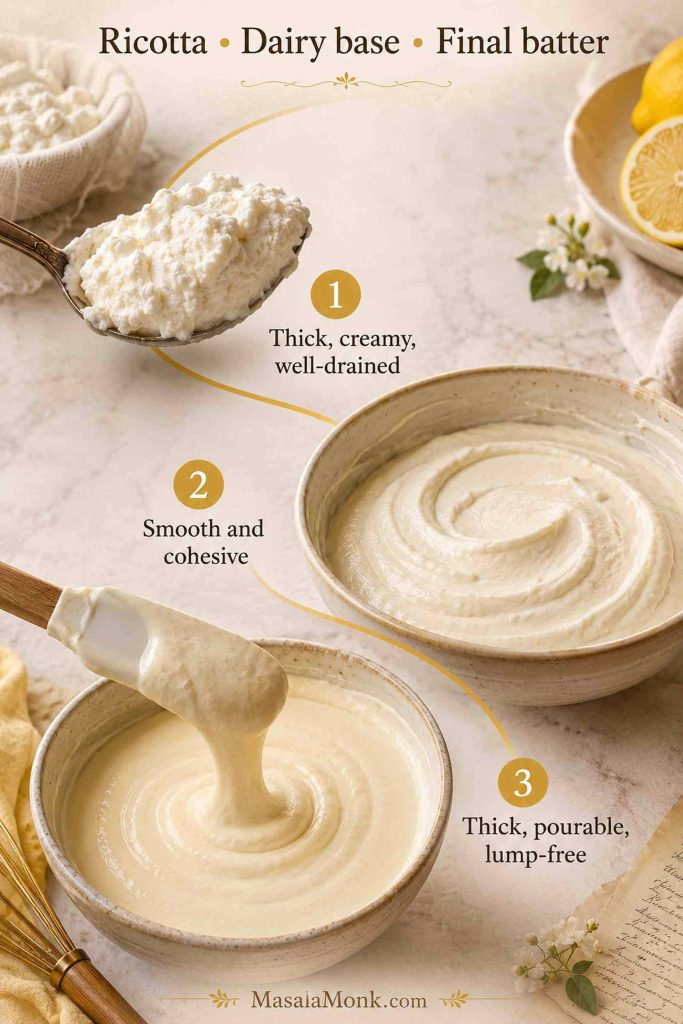
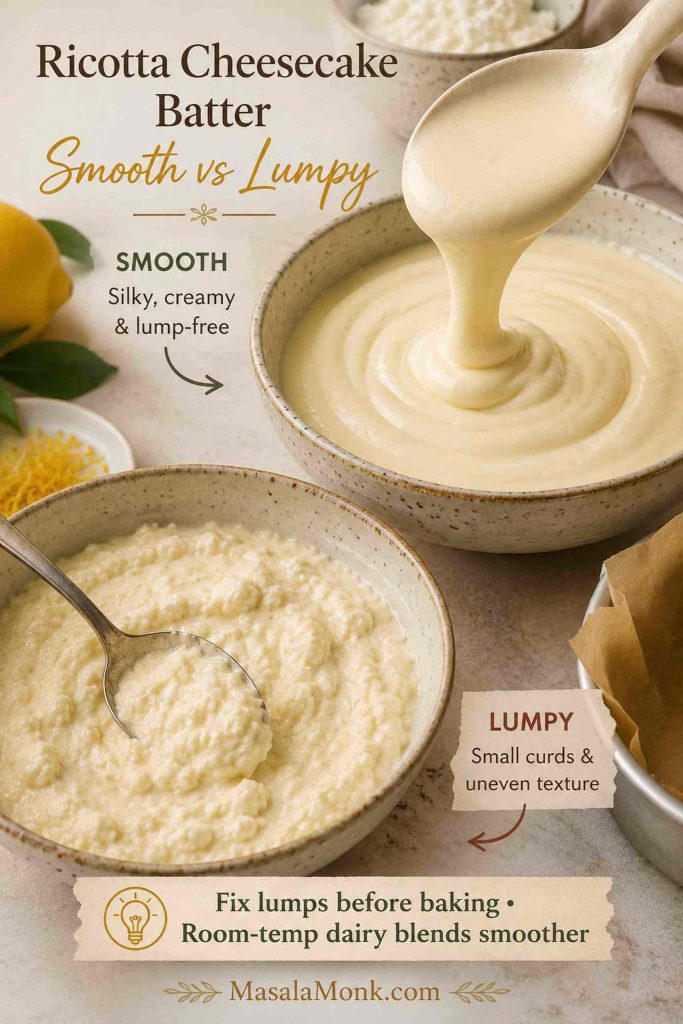
Whisk in the egg yolks one at a time. Add 30g of the sugar, lemon juice, lemon zest, vanilla if using, and salt. Sift in the cake flour and cornstarch, then whisk until smooth. The batter should be silky, pourable, and free of lumps.
If you see lumps, pass the batter through a fine-mesh sieve. This extra step gives the finished cake a finer, softer crumb.
4. Whip the meringue with the remaining 100g sugar
Beat the egg whites with cream of tartar until foamy. Add the remaining 100g sugar gradually, a spoonful or small stream at a time, while beating on medium speed. Continue until the meringue is glossy, flexible, and holds medium-firm peaks with a small bend at the tip.
Stay close at this stage. The difference between correct meringue and overbeaten meringue can be less than a minute, especially with a powerful mixer.
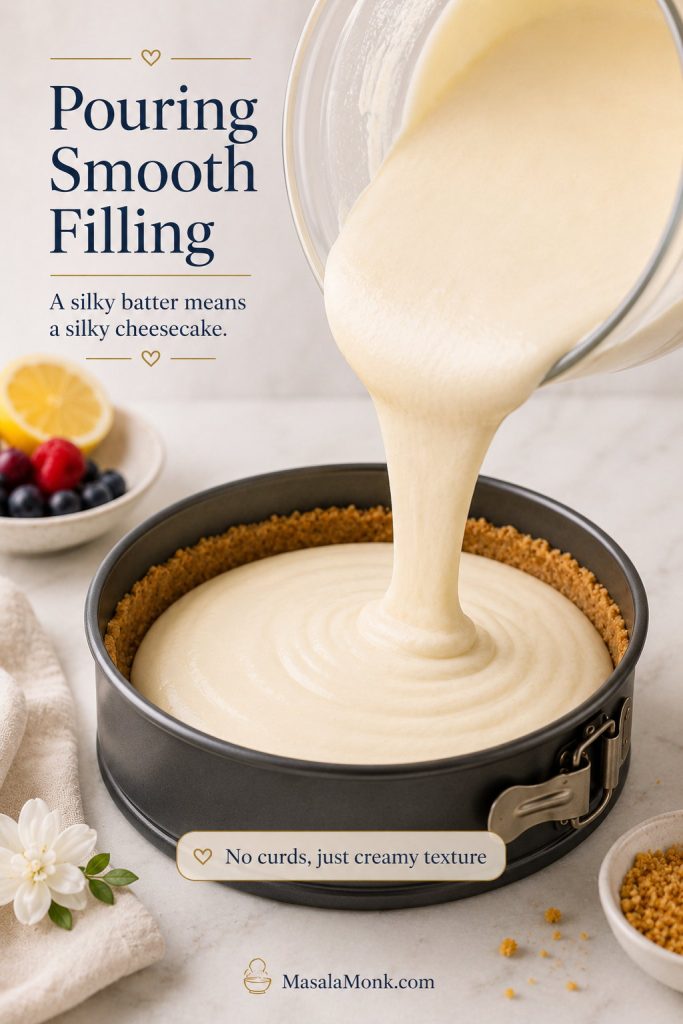
5. Fold without deflating the batter
Add one-third of the meringue to the cream cheese base and fold it in gently but confidently. This first addition lightens the base. Add the remaining meringue in two more additions, folding with a flexible spatula and scraping the bottom of the bowl each time.
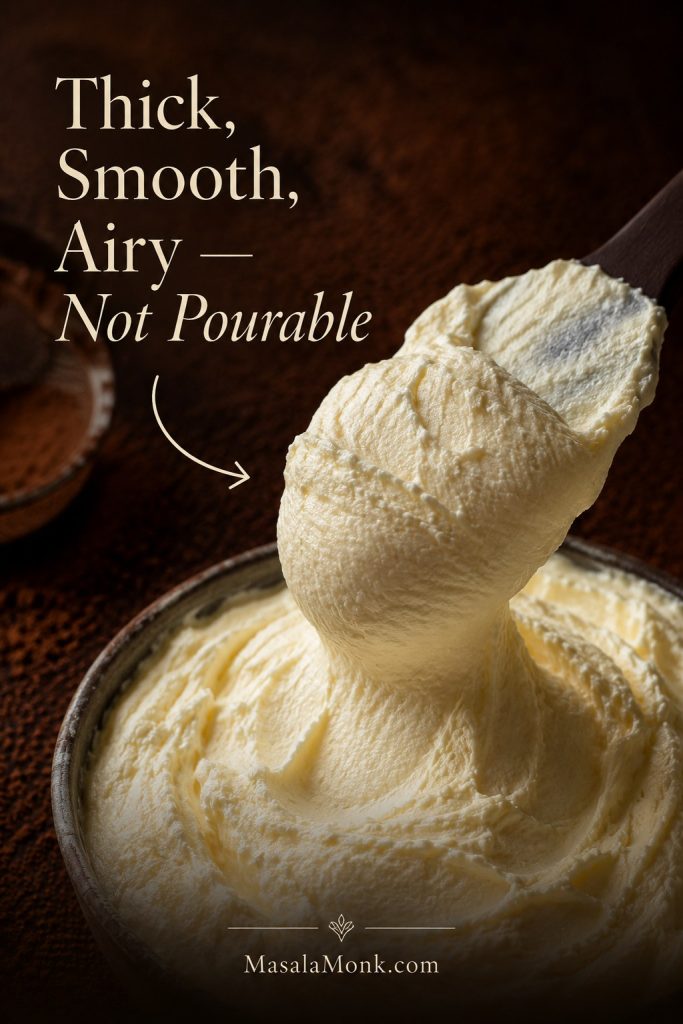
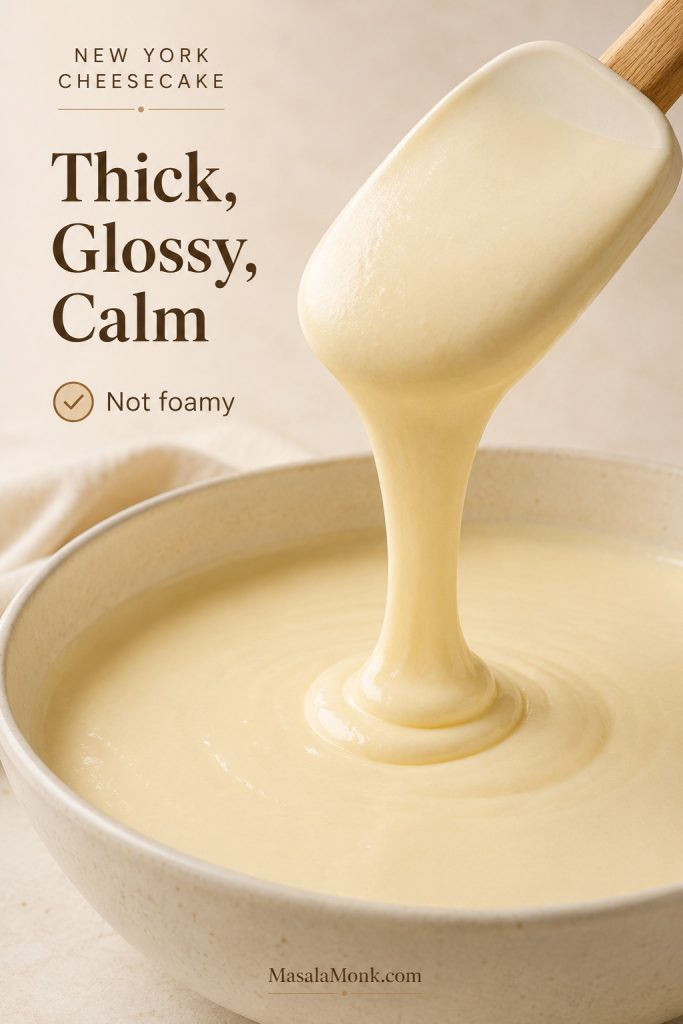
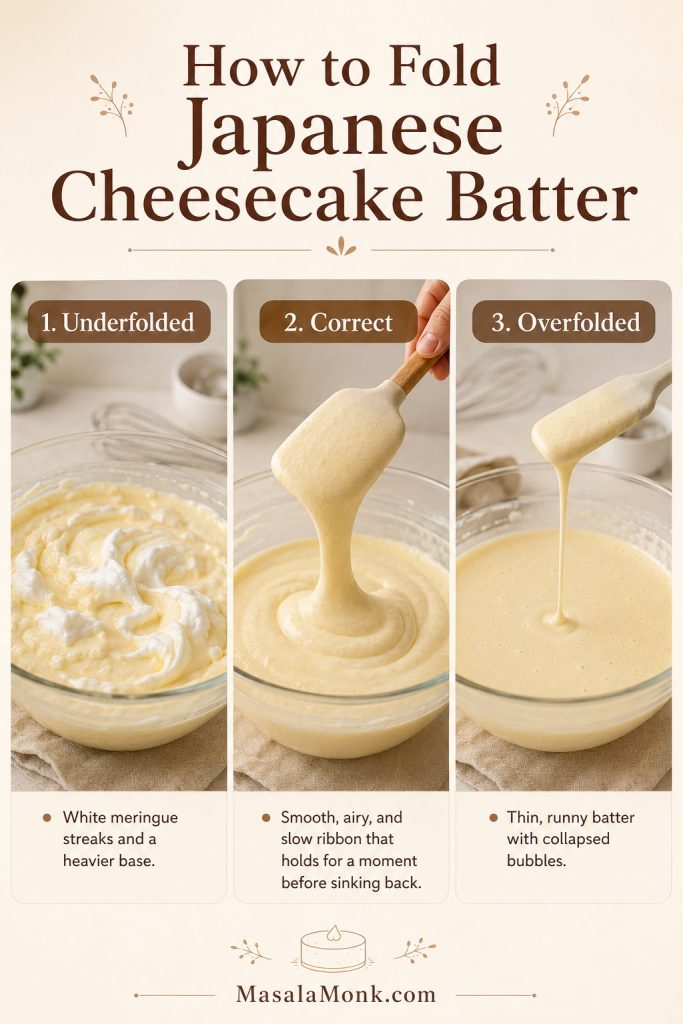
When the batter is right, it feels light on the spatula and falls back into the bowl in a slow ribbon. It should look airy and slow-flowing. The batter should feel lighter than the base you started with.
Folding Cues: Underfolded vs Correct vs Overfolded Batter
Folding is where the cream cheese base and meringue become one batter. Go too little and the cake bakes unevenly. Go too far and you knock out the air you worked so hard to build.
| Batter state | What it looks like | Likely result |
|---|---|---|
| Underfolded | White streaks, floating meringue patches, heavy batter at the bottom | Uneven rise, dense lower layer, patchy crumb |
| Correct | Smooth, light, slow-flowing, slightly ribboning | Even cotton-soft crumb and gentle rise |
| Overfolded | Thin, runny, bubbles disappearing quickly | Low rise, dense texture, less jiggle |
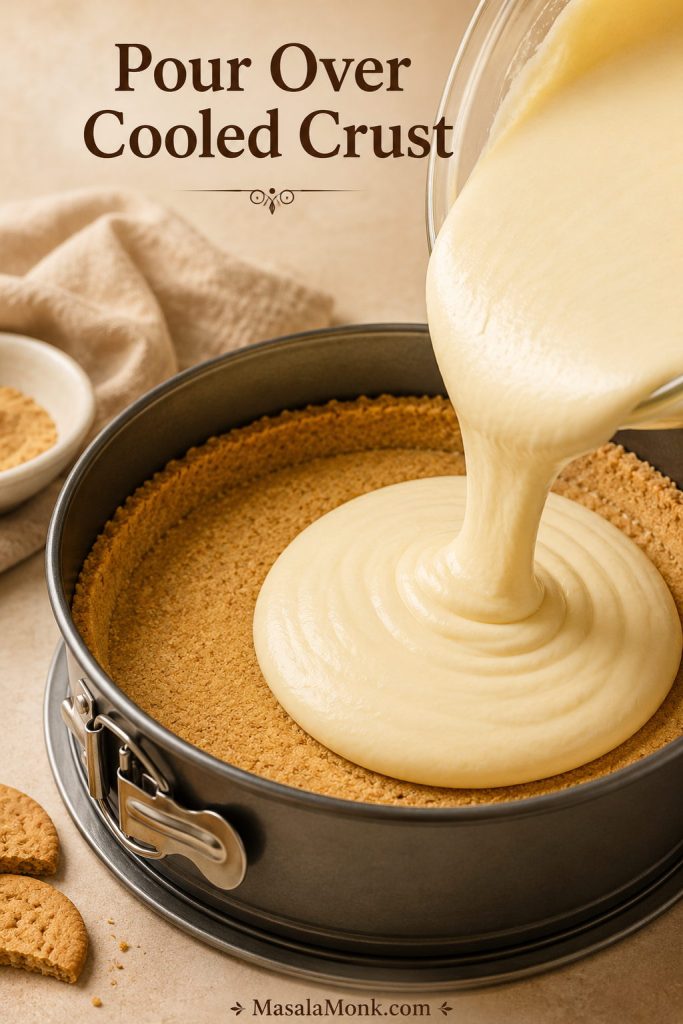
6. Fill the pan and bake in a water bath
Pour the batter into the prepared pan, stopping at about 70–75% full. If you have extra batter, bake it separately in a small ramekin rather than overfilling the pan.
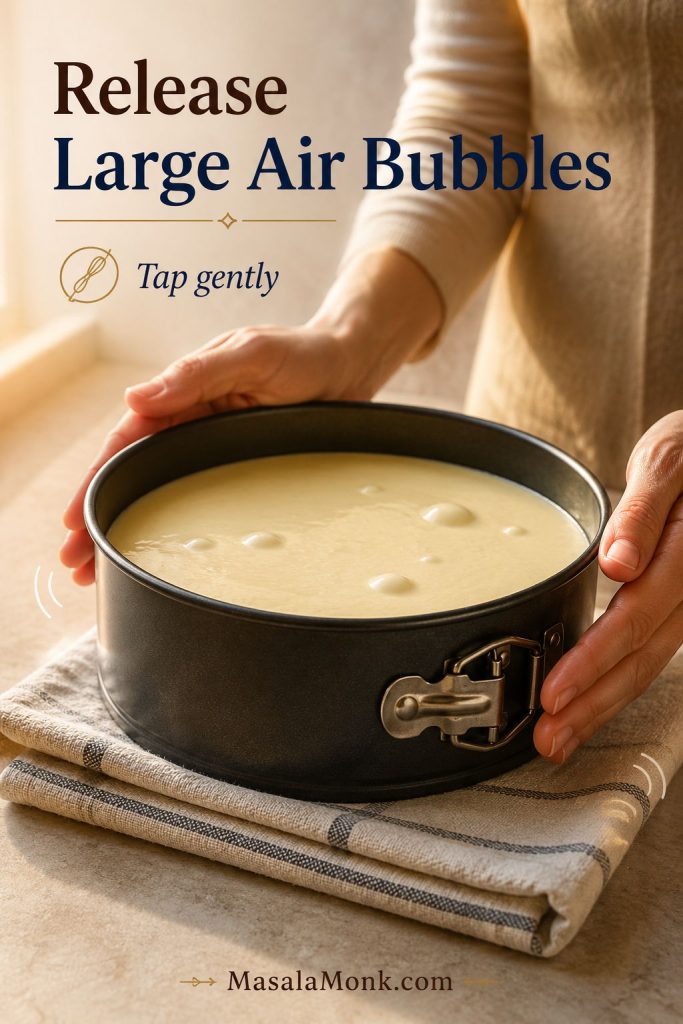
Run a skewer or chopstick through the batter once or twice to release hidden large air pockets, then tap the pan lightly once or twice. One or two gentle passes are enough; after that, leave the air in the batter alone.
Place the filled cake pan in the roasting pan, slide it onto the oven rack, pour in hot water carefully, close the oven door, and immediately reduce the oven to 160°C / 320°F.
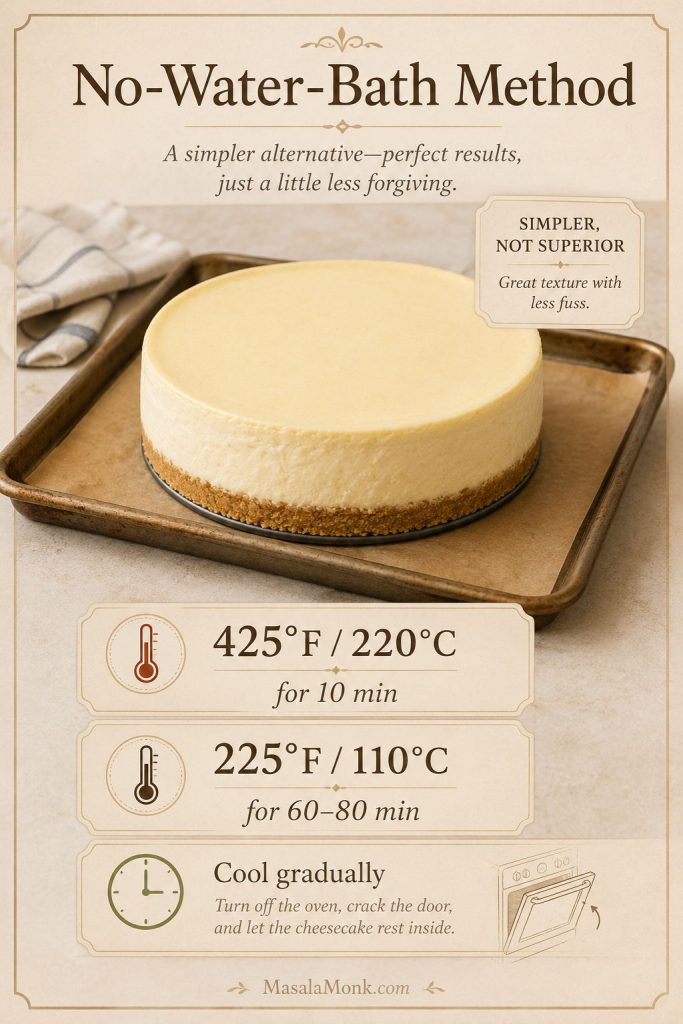
Oven Temperature Schedule for Japanese Cheesecake
Different recipes use different oven schedules because pans, ovens, and cake heights vary. Some use a hot start, some bake very low and slow, and some finish with higher heat for browning. This version uses a moderate, controlled bake because it is safer for most home bakers than an aggressive hot-start method.
Why this bake uses moderate heat
Pick one oven schedule and follow it through. Mixing the hot start from one recipe with the cooling method from another is one of the easiest ways to confuse the bake.
Your first bake is partly about learning your oven. If the top browns early, your oven may run hot near the top; if the center stays loose, it may need longer gentle heat.
When your oven needs adjustment
Home-oven adjustment: if the top browns early, lower the rack or tent loosely after the cake has risen and started to set. If the center still moves loosely, extend the 150°C / 300°F finish in 5–10 minute increments. If the cake rises fast and cracks, lower the main bake by 10°C next time.
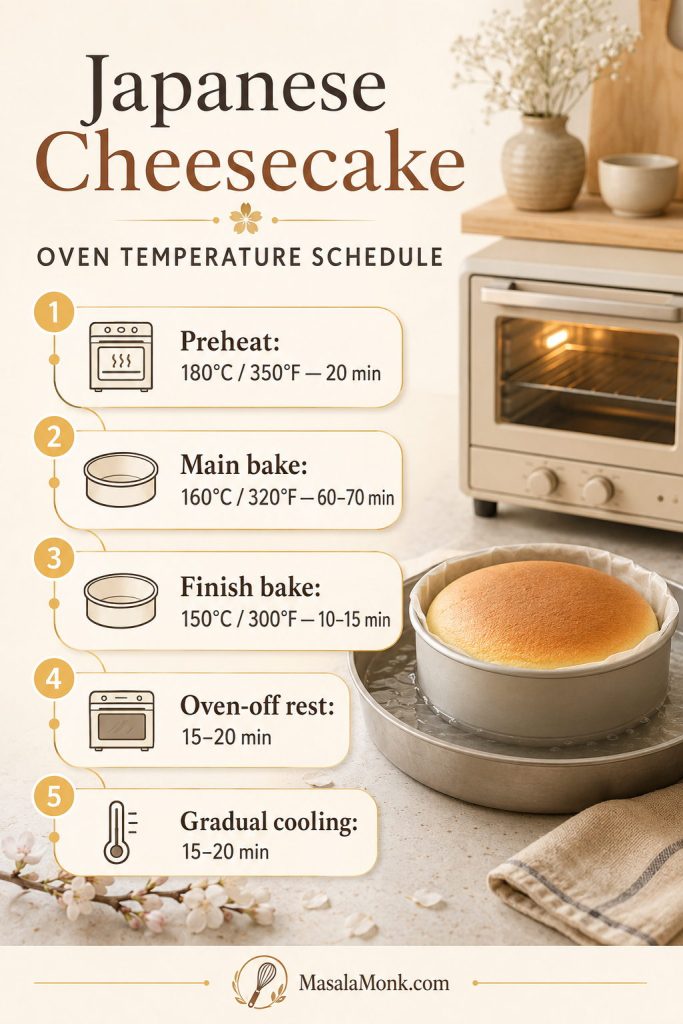
| Stage | Temperature | Time | What is happening |
|---|---|---|---|
| Preheat | 180°C / 350°F | At least 20 min | Stabilizes the oven before the water bath goes in |
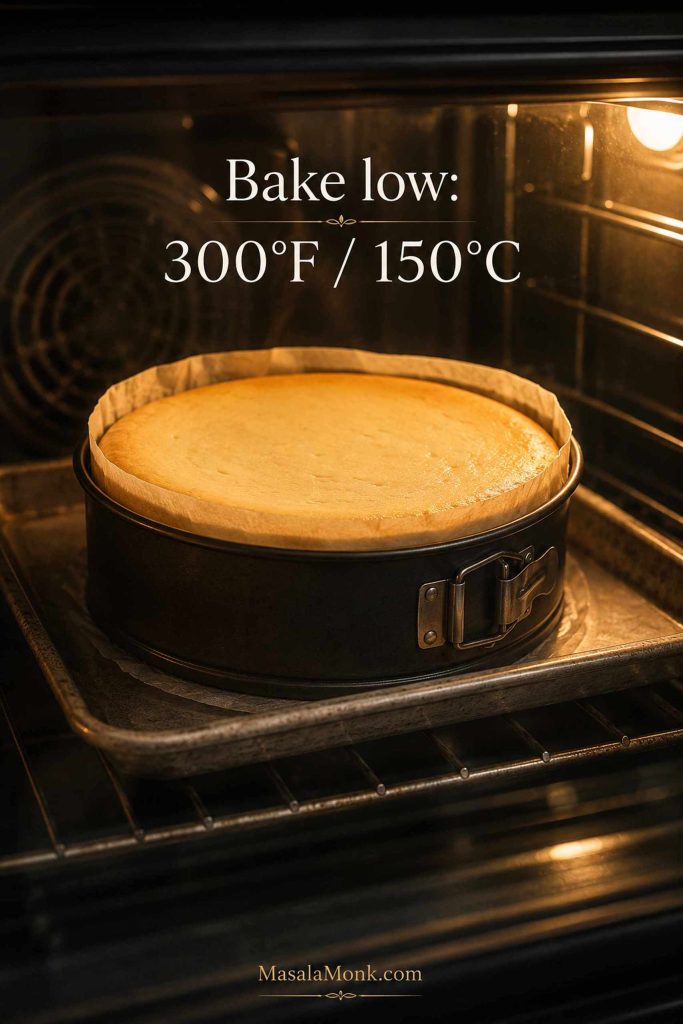
| Main bake | 160°C / 320°F | 60–70 min | Cake rises gently and sets without harsh heat |
| Finish bake | 150°C / 300°F | 10–15 min | Center finishes setting while the top stays controlled |
| Oven-off rest | Oven off, door barely cracked | 15–20 min | Lets the structure settle gradually |
| Gradual cooling | Door cracked wider or cake moved to a warm area | 15–20 min | Lets heat escape slowly |
Timing is a guide, but the final decision comes from the doneness cues, especially the unified soft wobble in the center.
Oven Notes for Convection, Countertop Ovens, and Small Home Ovens
Your oven becomes part of the recipe here. If it runs hot, the top usually tells you first; if it runs cool, the center usually tells you later. This matters even more in small ovens, countertop ovens, and convection ovens with strong top heat.
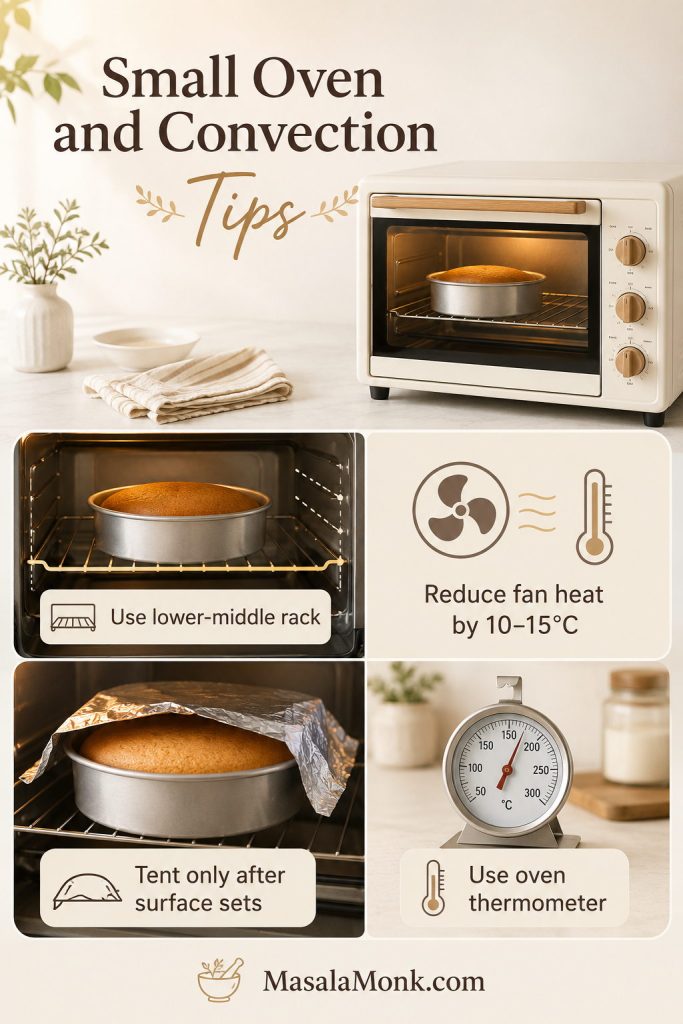
- Use top-bottom heat if available. This gives a gentler, more even bake than fan-forced heat.
- Avoid fan or convection mode if possible. Fan heat can dry and brown the top too quickly.
- If you must use convection, reduce the temperature by 10–15°C. For the main bake, that usually means about 145–150°C instead of 160°C.
- Use the lower-middle rack. This protects the top from direct heat while allowing the center to set.
- Preheat properly. Small ovens can swing in temperature, so give the oven time to stabilize.
- Use an oven thermometer. A displayed 160°C may not be a true 160°C.
- Keep the door closed as much as you can. Sudden temperature drops can weaken the rise.
- Use the water bath carefully. It is especially helpful in small ovens where heat can be harsh and direct.
Small-oven tip: if your oven has strong top heat, place the cake on the lower-middle rack and tent only after the cake has risen and the surface has started to set. Tenting too early can interfere with rise and browning.
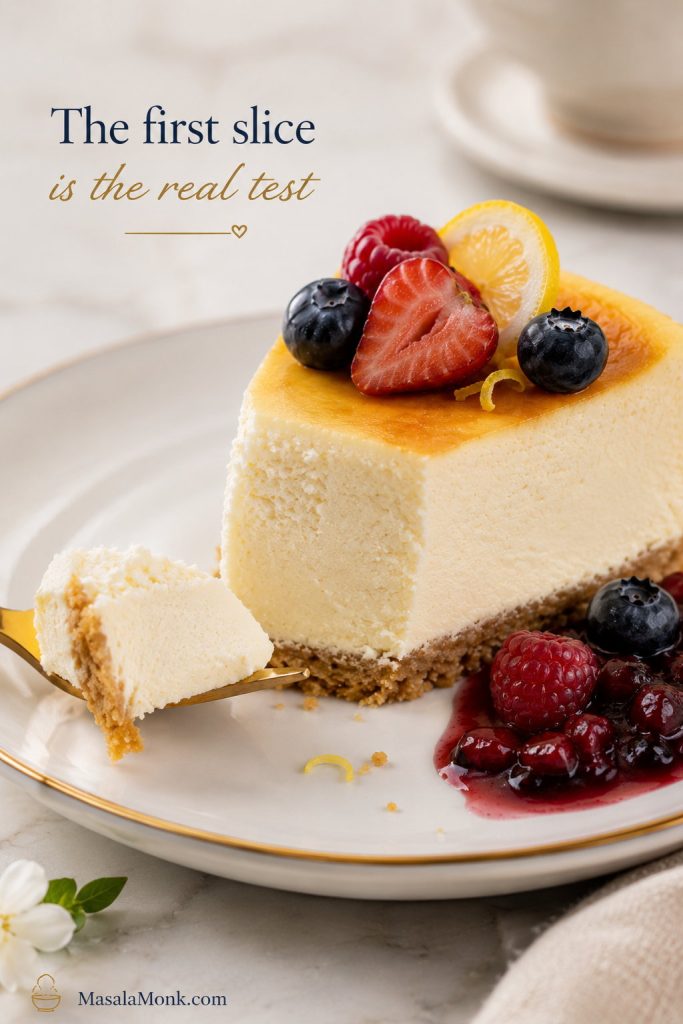
Warm Japanese cheesecake can look fragile and uncertain. The chilled slice is the real reveal, so do not judge the cake too early.
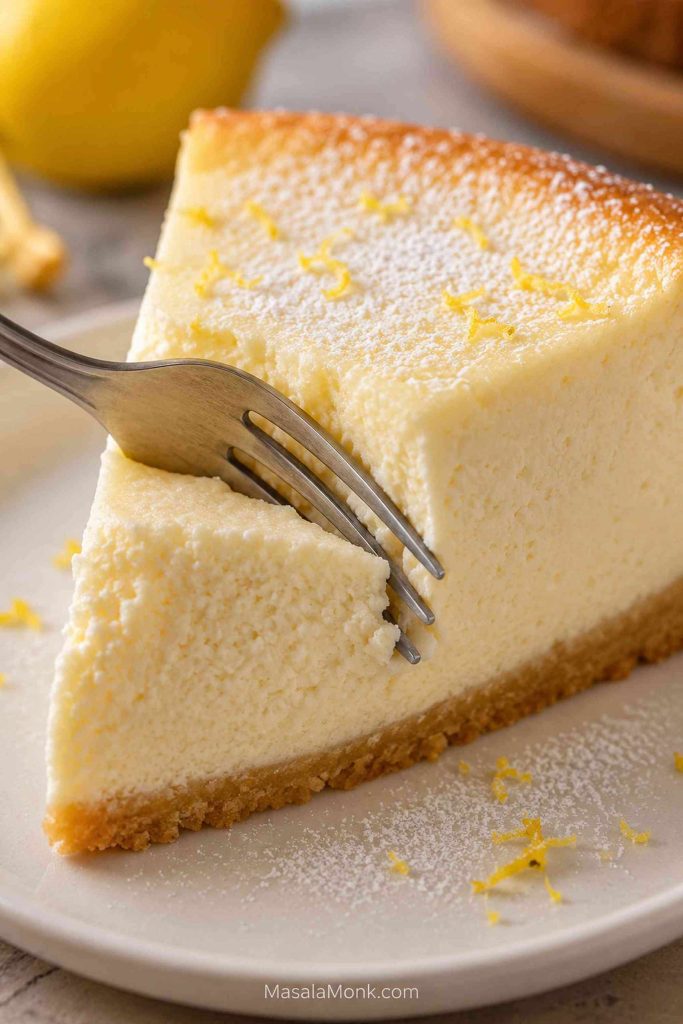
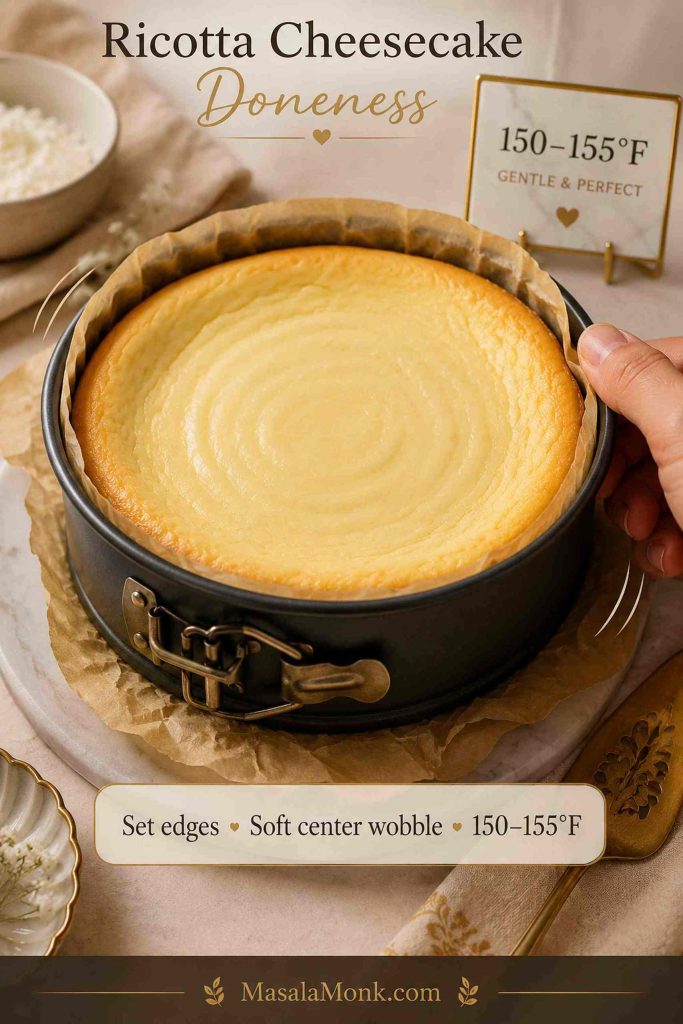
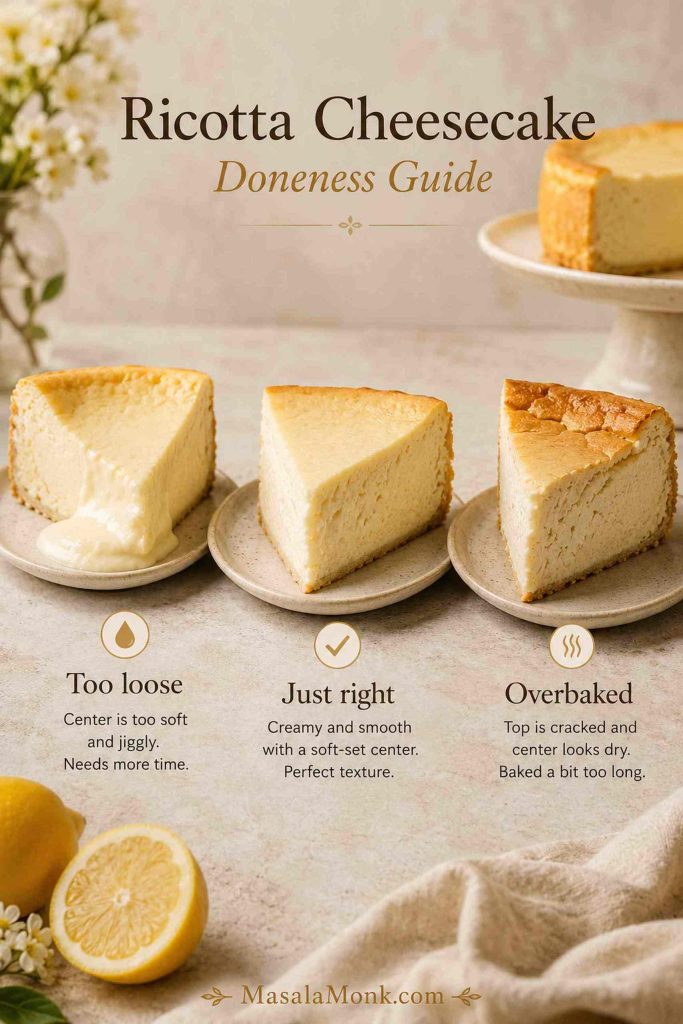
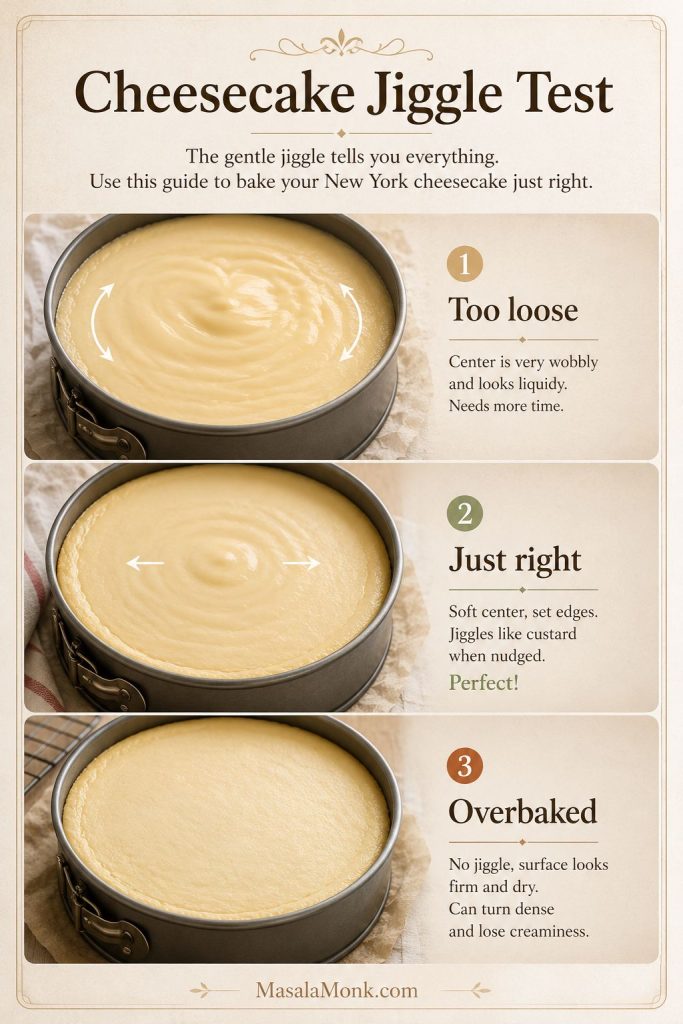
How to Know Japanese Cheesecake Is Done
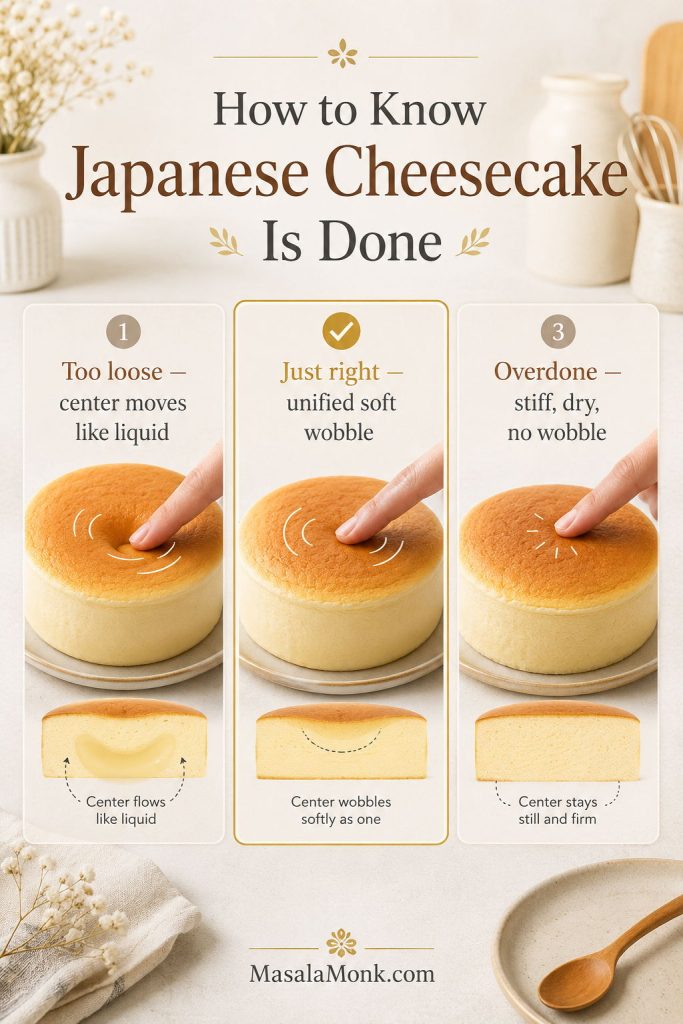
A Japanese cheesecake can look golden on top and still be wet inside, so do not judge by color alone. Use these cues together.
- Color: look for light golden color.
- Jiggle: the center should move as one soft set area.
- Touch: the top should spring back lightly when touched.
- Skewer: there should be no wet batter; a few moist crumbs are fine.
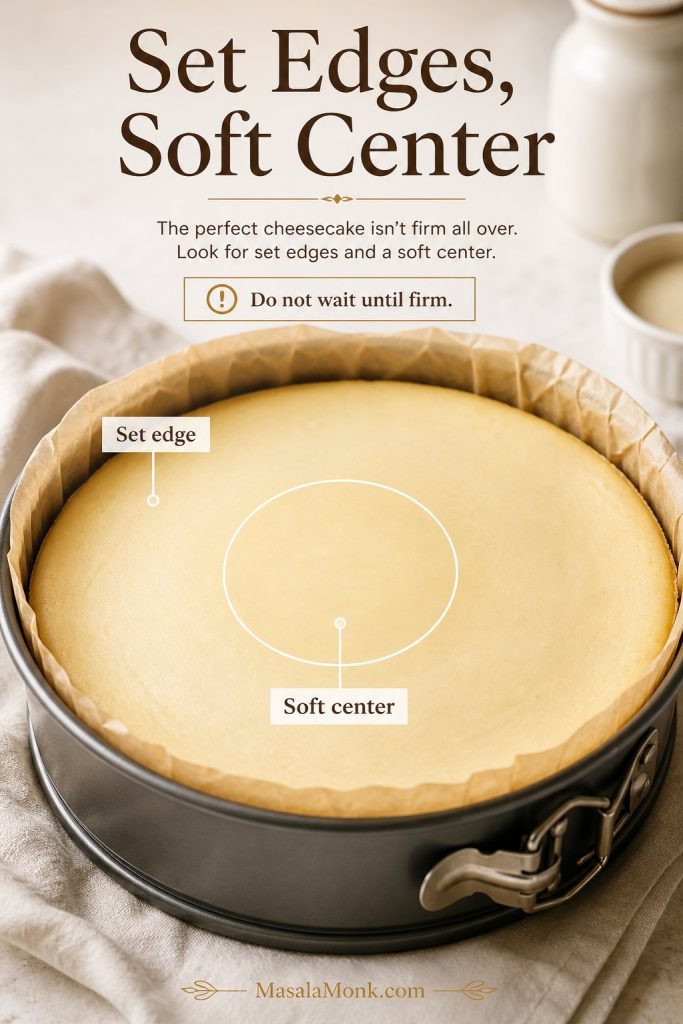
- Edges: the sides should look set but not dry or dramatically pulled away.
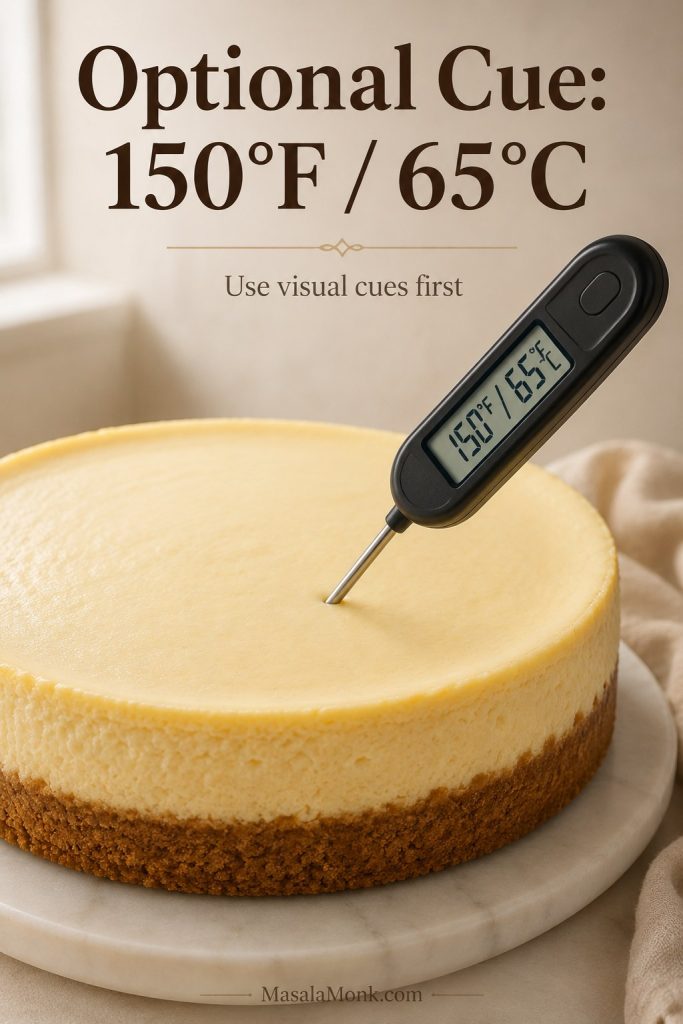
- Temperature, optional: around 70°C / 158°F in the center is a useful guide, but do not overbake just to chase a higher number.
The right wobble is soft and unified, like a set custard. If the middle moves separately like liquid, give it more gentle time. The top may look fragile, but the center should move as one soft piece.
When the center is softly set, the next important step is the cooling schedule; that slow rest helps protect the rise you just built.
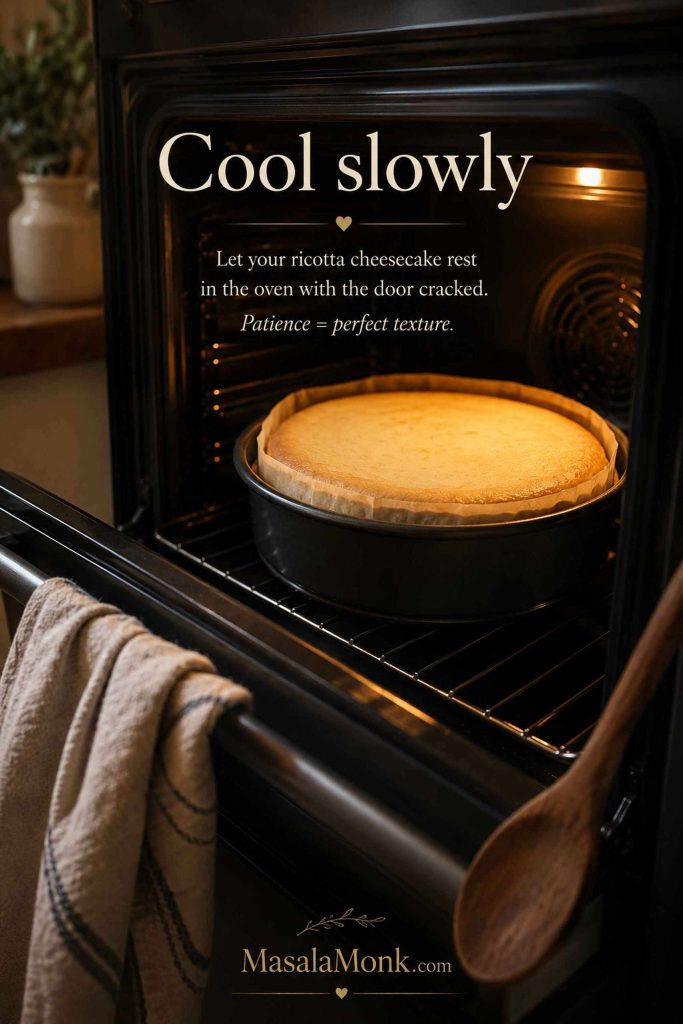
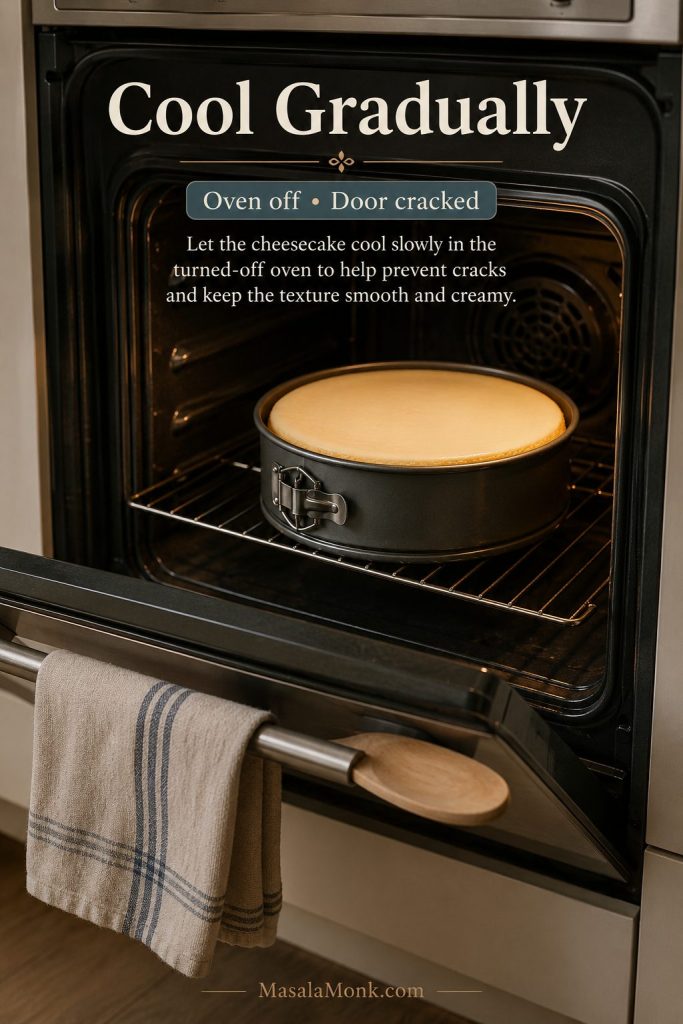
Cooling Schedule to Prevent Sinking
Cooling is not an afterthought. This cake rises because of air trapped in the meringue. If it goes from hot oven to cool room too quickly, that structure can contract suddenly and sink.
This is the quiet part of the recipe. The cake has done its rise; now it needs time to settle without shock.
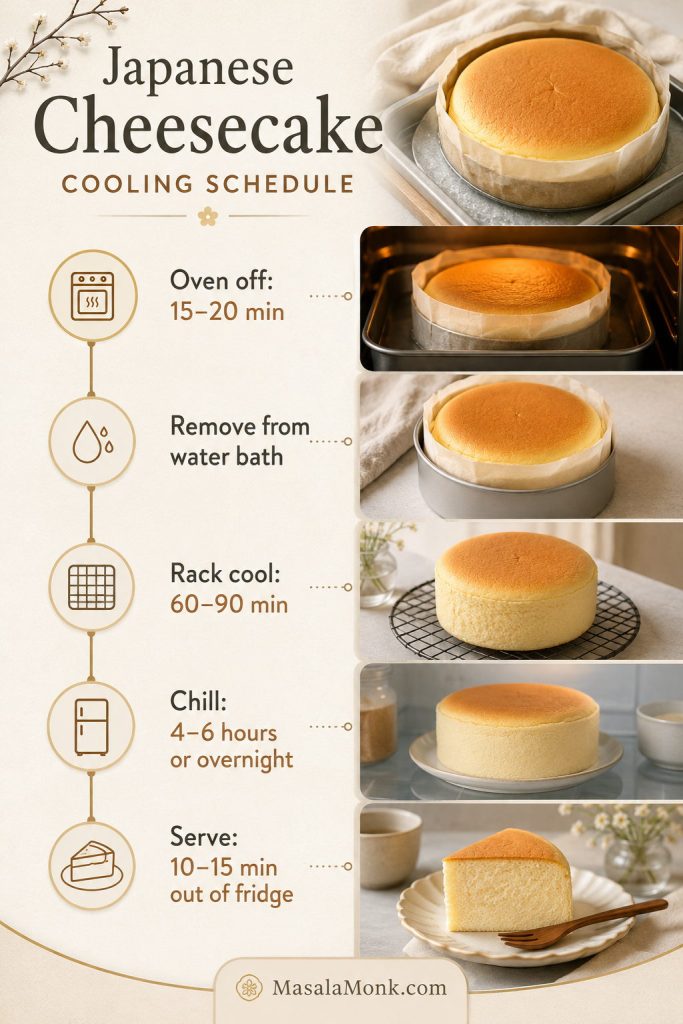
| Stage | Time | What to do |
|---|---|---|
| Oven off | 15–20 min | Turn oven off and leave cake inside in the water bath with the door barely cracked |
| Remove from water bath | After initial oven rest | Carefully lift the cake pan out so it stops cooking in hot water |
| Gradual cooling | 15–20 min | Leave the cake near the warm oven or inside the turned-off oven with the door open wider |
| Room temperature | 60–90 min | Cool on a rack until no longer warm |
| Chill | 4–6 hours or overnight | Set fully before slicing and unmolding |
| Serve | 10–15 min out of fridge | Texture becomes softer and more delicate |
This is the moment where many bakers worry, but a little settling is exactly what this cake does. Let it happen slowly before you judge the final texture.
Normal, not failure: a slight wrinkle, a little shrinkage, or a soft top after cooling is normal. What you want to avoid is a raw center, a sunken middle, or a heavy lower layer.
If your oven traps a lot of steam, keep the door slightly cracked during the oven-off rest so condensation does not drip heavily onto the top.
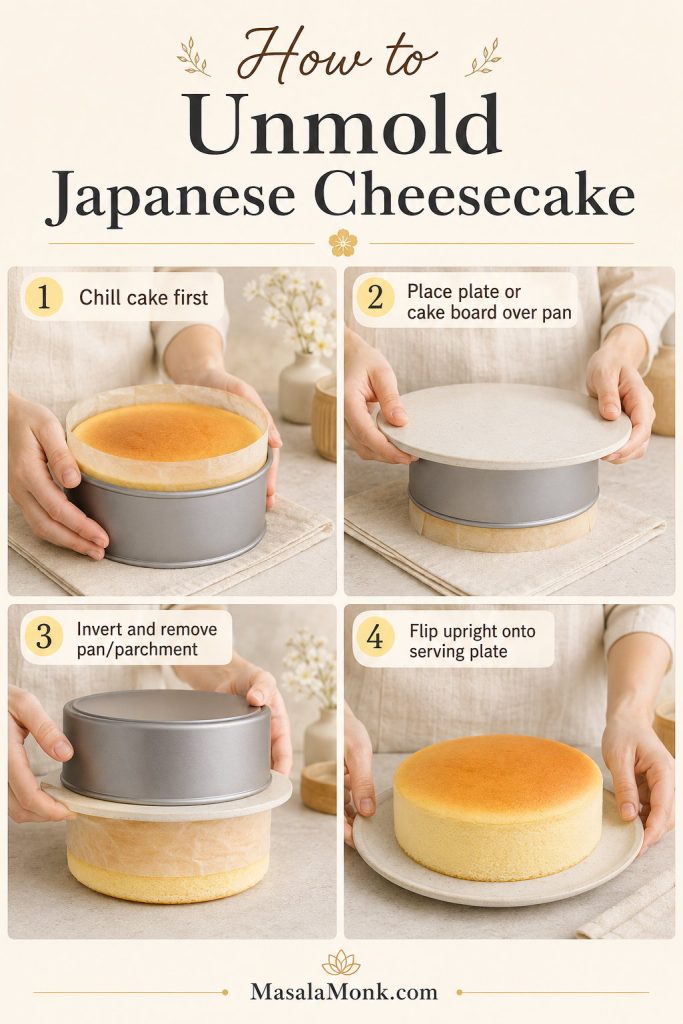
How to Unmold Japanese Cheesecake Without Breaking It
A fixed-base pan is safer for the water bath, but it means unmolding needs a little care. Chill the cheesecake first so the structure is set, then work gently.
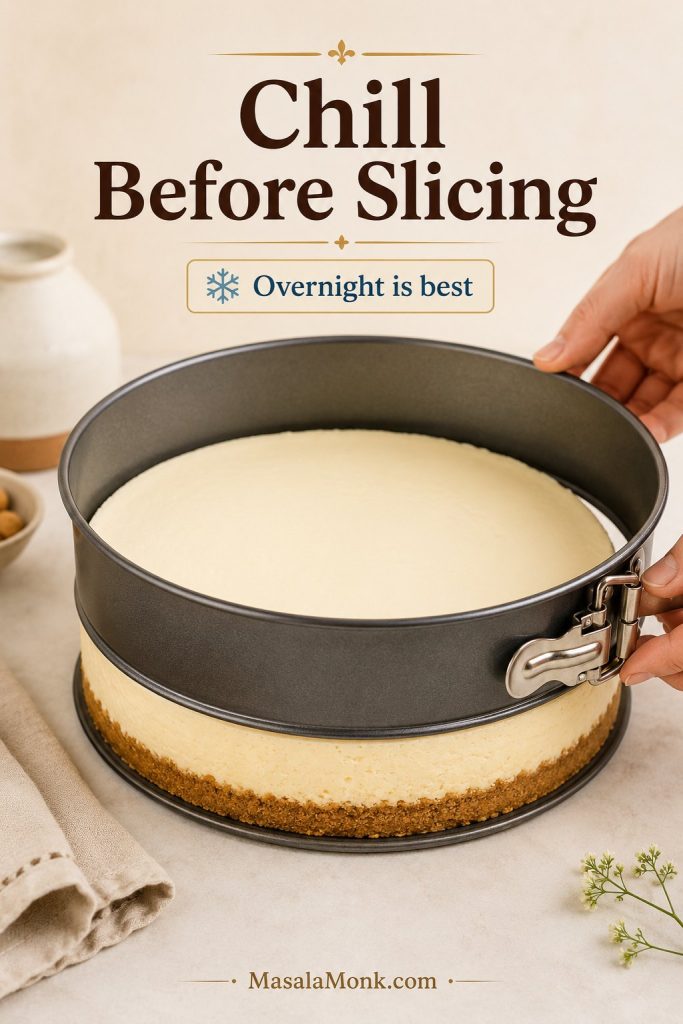
- Chill the cake for at least 4–6 hours, preferably overnight.
- Loosen the parchment around the side. If needed, run a thin knife gently between the parchment and pan.
- Place a parchment-lined flat plate or cake board over the top of the pan.
- Gently invert the cake onto the plate and lift off the pan.
- Peel away the bottom parchment.
- Place the serving plate over the base of the cake and invert again so the golden top faces upward.
The chilled cake is still delicate. If you are nervous, keep it on its parchment base and slice from there.
This is not a perfection-chasing recipe. It is a cue-based home-oven method: protect the meringue, bake gently, cool slowly, and judge the cake after chilling.
Japanese Cheesecake Recipe Card
The recipe card gives the full method. For a first bake, keep the 5 cues, oven schedule, doneness, and cooling notes nearby; those are the sections most useful to keep open while you bake.
Japanese Cheesecake Recipe
A calm, cue-based Japanese cheesecake recipe for home ovens, made with cream cheese, separated eggs, glossy meringue, water bath baking, and slow cooling. This version favors a steady set, clean slice, soft wobble, and cotton-soft crumb over a dramatic rise that collapses later.
Ingredients
- 250g / 8.8 oz full-fat block cream cheese, softened and cubed
- 55g / 2 oz / about 4 tbsp unsalted butter
- 110ml / scant ½ cup whole milk
- 6 large eggs, separated; ideally about 180g whites and 100–110g yolks total
- 130g / about ⅔ cup caster sugar or fine granulated sugar, divided into 30g and 100g
- 55g / about ½ cup cake flour, spooned and leveled if measuring by cup
- 18g / about 2 tbsp cornstarch
- 1 tbsp lemon juice
- 1 tsp lemon zest
- ¼ tsp fine salt
- ¼ tsp cream of tartar, optional but helpful
- 1 tsp vanilla extract, optional
- Hot water, for the water bath
Method
Prepare the pan and batter
- Prepare the pan. Lightly grease an 8-inch x 3-inch round cake pan so the parchment sticks. Line the base and sides with parchment, letting the side parchment rise 1–2 inches above the rim. If using springform, wrap the outside tightly with two layers of wide foil.
- Separate the eggs. Separate eggs while cold, then let the whites stand for 15–20 minutes while you prepare the base. Keep yolk out of the whites.
- Preheat the oven. Preheat to 180°C / 350°F for at least 20 minutes. Set out a large roasting pan or deep tray for the water bath.
- Melt the dairy base. In a heatproof bowl, combine cream cheese, butter, and milk. Warm gently over barely simmering water, whisking until smooth. Do not boil. The mixture should be warm, not steaming hot; about 40–45°C is ideal.
- Add yolks and dry ingredients. Whisk in egg yolks one at a time. Add 30g sugar, lemon juice, lemon zest, vanilla if using, and salt. Sift in cake flour and cornstarch, then whisk until smooth. Strain through a fine sieve if needed.
Whip, fold, and fill
- Whip the meringue. Beat egg whites and cream of tartar until foamy. Gradually add the remaining 100g sugar while beating on medium speed. Stop when the meringue is glossy, flexible, and holds medium-firm peaks with a slight bend at the tip.
- Fold the batter. Fold one-third of the meringue into the cream cheese base to lighten it. Fold in the remaining meringue in two additions, scraping the bottom of the bowl and keeping as much air as possible. The batter should be smooth, light, and slow-flowing, falling from the spatula in a soft ribbon rather than pouring like liquid.
- Fill the pan. Pour batter into the prepared pan, stopping at about 70–75% full. Run a skewer through the batter once or twice to release large hidden air pockets, then tap lightly once or twice. One or two gentle passes are enough.
Bake, cool, chill, and serve
- Set up the water bath. Place the filled cake pan inside the roasting pan, slide it onto the oven rack, then pour hot water into the roasting pan until it reaches 1–1½ inches up the side of the cake pan.
- Bake gently. Close the oven door and immediately lower oven temperature to 160°C / 320°F. The higher temperature is only for preheating; the cake itself bakes at 160°C. Bake for 60–70 minutes, then reduce to 150°C / 300°F and bake 10–15 minutes more, until the top is lightly golden, the center wobbles as one soft piece rather than sloshing, and a skewer shows no wet batter.
- Cool slowly. Turn off the oven and leave the cake inside in the water bath with the door barely cracked for 15–20 minutes.
- Remove from water bath. Carefully lift the cake pan out of the hot water. Let it cool near the warm oven or in the turned-off oven with the door open wider for another 15–20 minutes.
- Finish cooling and chill. Cool on a rack for 60–90 minutes, then chill for 4–6 hours or overnight before unmolding and slicing.
- Unmold gently. Once chilled, invert the cake onto a parchment-lined plate, remove the pan and bottom parchment, then invert again onto the serving plate so the golden top faces upward.
- Serve. Slice cold for the cleanest cuts, or let slices stand 10–15 minutes for a softer, fluffier bite.
Recipe Notes
- Use gram measurements for best results; cup measurements are approximate.
- If using a springform pan, use the pan-inside-pan method if foil seams sit below the water level.
- If your oven browns fast, bake on the lower-middle rack and start checking color around 45 minutes.
- If the center has not reached a unified soft wobble after the listed time, continue at 150°C / 300°F in 5–10 minute increments.
- Stop whipping the meringue while it is glossy, flexible, and medium-firm.
- Chill before unmolding; warm Japanese cheesecake breaks more easily.
- Some shrinkage is normal after baking.
If your cake comes out with a soft wobble, a pale-golden top, and a little settling as it cools, you are already in the right zone. Chill it before judging the final crumb; it often looks more fragile while warm than it feels after chilling.
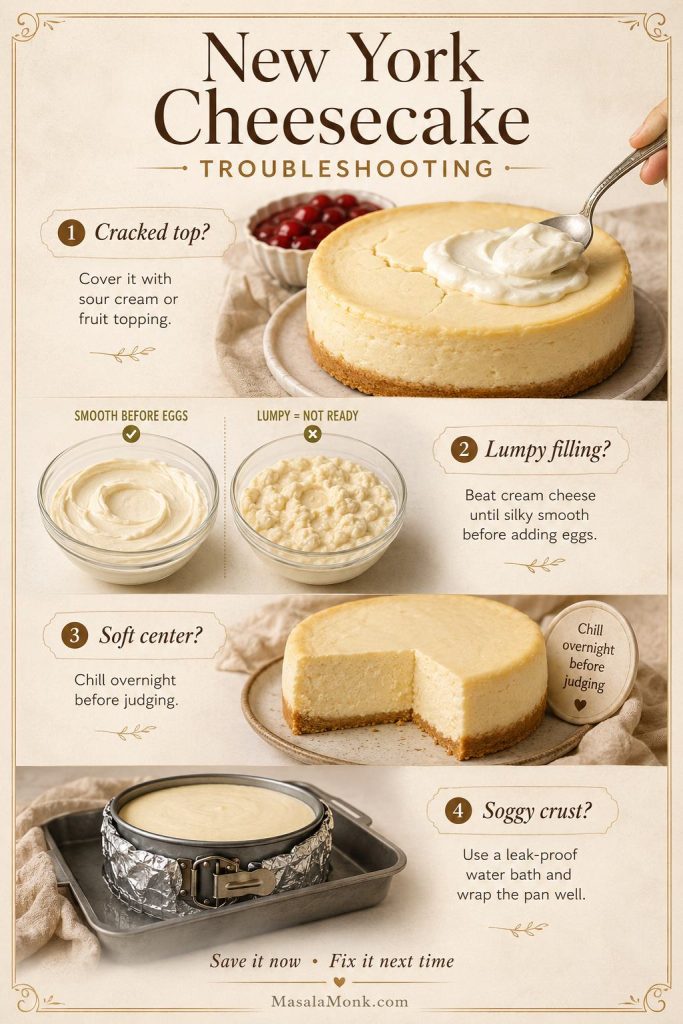
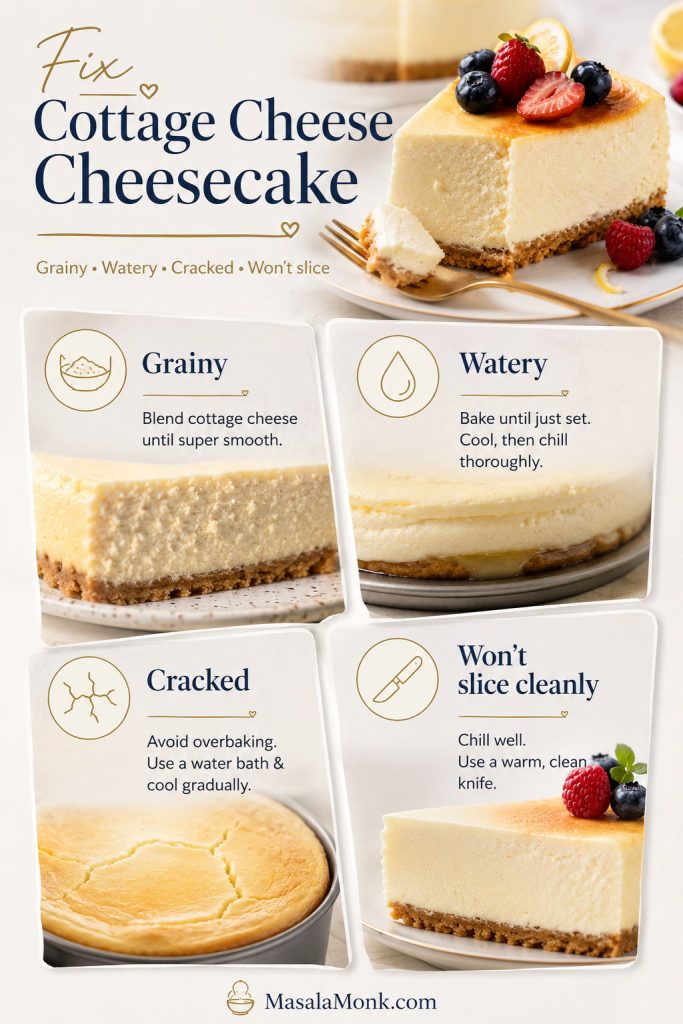
Japanese Cheesecake Troubleshooting
Most imperfect Japanese cheesecakes are still worth eating. Use this section only if something looked off, then trace the issue back to the meringue, oven heat, or cooling pace.
Appearance problems
| Problem | Likely cause | Fix now | Fix next time |
|---|---|---|---|
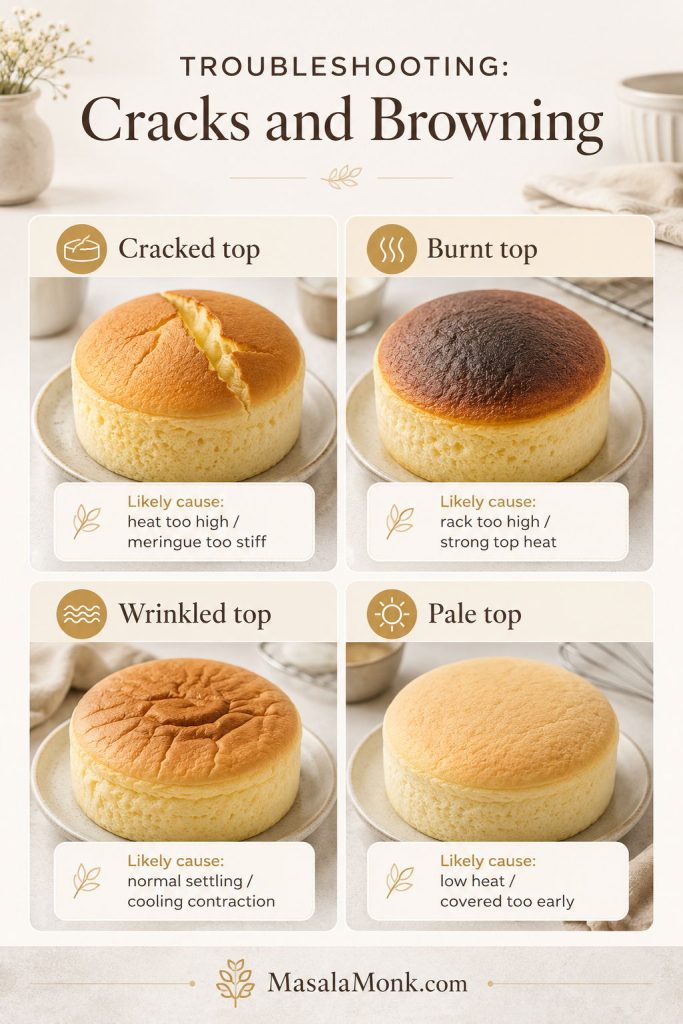
| Cracked top | Oven too hot, cake rose too fast, meringue too stiff | Cool slowly; dust with powdered sugar or glaze lightly | Lower heat, use an oven thermometer, stop meringue before it turns dry |
| Burnt top | Oven too hot, rack too high, fan heat too strong | Tent loosely with foil if caught after the cake has risen | Use lower-middle rack, avoid fan, confirm temperature |
| Top is pale but center is done | Low heat or covered too early | Accept it, or glaze lightly | Use correct rack position and avoid tenting too early |
| Wrinkled top | Normal shrinkage, moisture, cooling contraction | Accept it; flavor is usually fine | Cool slowly and avoid over-expanding the cake with high heat |
| Wet sides | Condensation, water bath splash, or springform leakage | Chill uncovered briefly in the fridge if only damp | Use a fixed-base pan and avoid splashing water into the pan |
| Water leaked into the pan | Springform pan not sealed well | Remove cake from wet base if possible; chill before slicing | Use fixed-base pan or the pan-inside-pan method |
Texture problems
If you are diagnosing a dense bottom or low rise, compare what happened with the meringue cue, folding cues, and oven schedule before changing the ingredient ratios.
| Problem | Likely cause | Fix now | Fix next time |
|---|---|---|---|
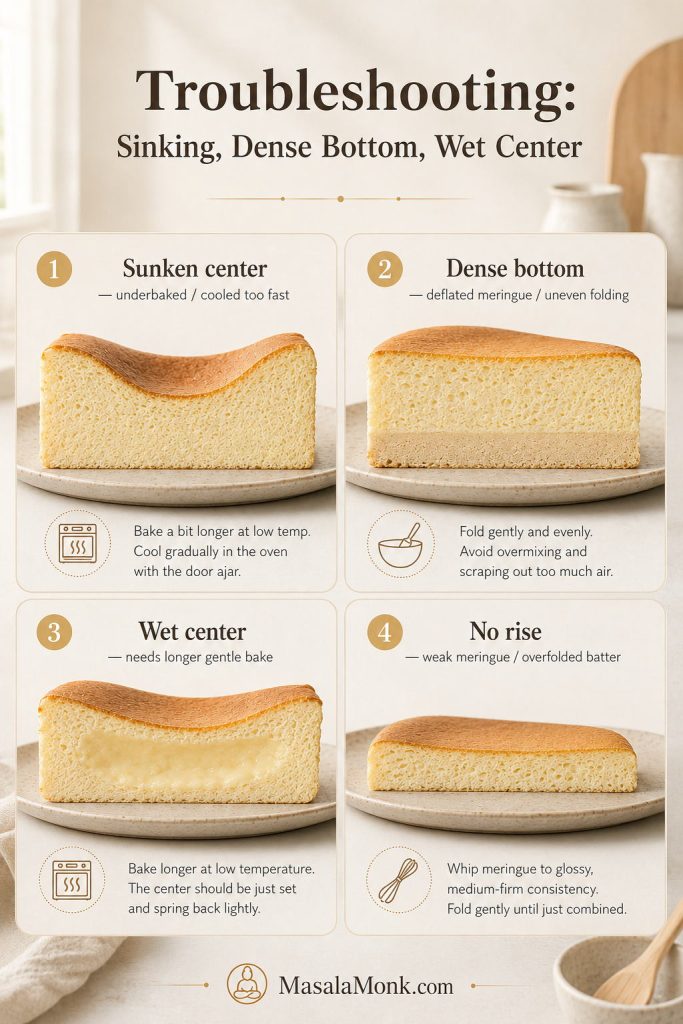
| Cake did not rise | Weak meringue, overfolded batter, oven too cool, old eggs | Chill and serve; texture may be denser but usable | Whip meringue to glossy medium-firm peaks, fold less aggressively, check oven temperature |
| Cake rose beautifully then sank | Underbaked center, fast cooling, unstable foam | Chill fully before slicing | Bake longer at gentle heat and cool more gradually |
| Collapsed center | Underbaked center, fast cooling, weak structure | Chill fully; serve in smaller slices if needed | Bake until the center has a unified soft wobble |
| Dense bottom layer | Meringue deflated, batter underfolded, heavy base sank | Serve chilled; texture may still taste good | Fold more evenly and scrape the bottom of the bowl |
| Wet or gummy center | Underbaked or sliced warm | If still warm and structurally intact, return to a 150°C / 300°F oven in the water bath; once fully cooled, rebaking usually makes texture worse | Extend bake time and check with skewer, jiggle, or thermometer |
| Large holes | Large air bubbles in meringue or batter | No full fix after baking | Finish meringue on lower speed, fold evenly, use a skewer, tap pan lightly |
| Eggy flavor | Too little lemon, overheated eggs, or overbaking | Serve chilled with fruit or a light sauce | Use lemon, gentle heat, and avoid overbaking |
| No jiggle | Overbaked, too dry, or served very cold | Let slices sit 10–15 minutes before serving | Bake until set but still gently wobbly |
Can You Make Japanese Cheesecake in a Rice Cooker?
Yes, but a rice cooker version behaves like a separate method rather than a simple swap. A cooker with a cake setting works more like a small enclosed steam oven; timing depends more on the appliance than the batter.
A multi-cooker or rice cooker with a cake setting is the best choice. A basic one-button rice cooker can be unpredictable because it may switch off before the cake is cooked through. Some versions need more than one cycle, and opening the lid too early can cause sinking.
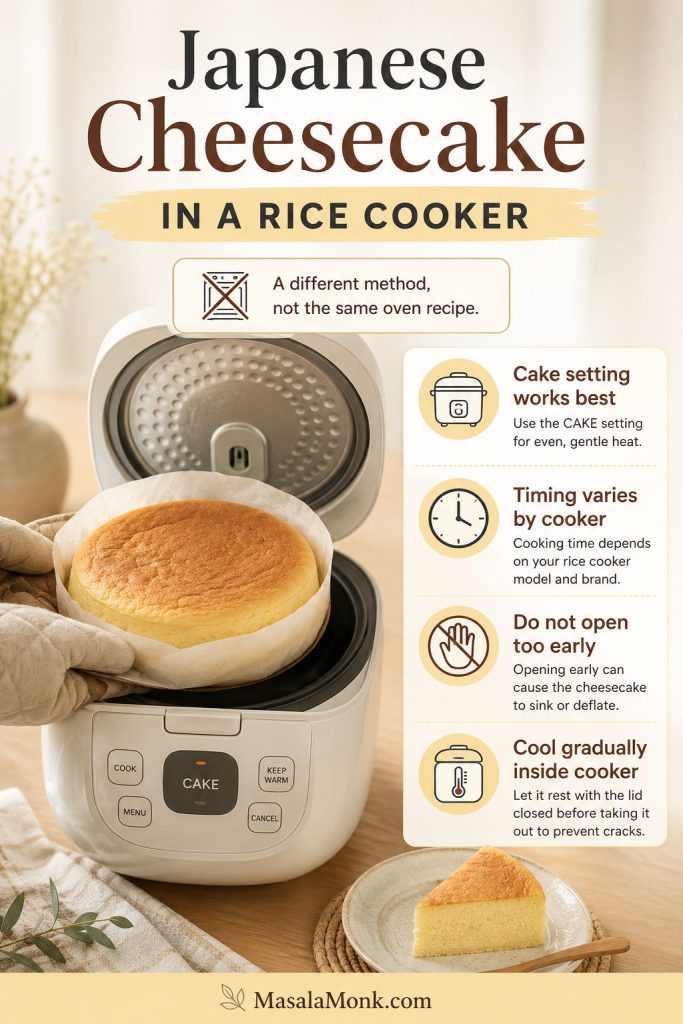
- Use a cooker with a cake, bake, or multi-cook setting if possible.
- Leave enough room in the inner pot for the cake to rise.
- Expect timing to vary by cooker model.
- Let the cake rest inside after cooking so it cools gradually.
- If the cake sinks badly, it may have been undercooked or cooled too quickly.
For this oven recipe, treat the rice cooker as a different version. Do not pour the full batter into a small cooker and expect the same bake time.
Is This Like Uncle Tetsu or Rikuro Japanese Cheesecake?
This homemade Japanese cheesecake is inspired by the same cotton-soft, lightly sweet style people associate with bakery cheesecakes such as Uncle Tetsu or Rikuro. However, it is not an official copycat recipe. For context, this short history of Japanese cheesecake gives useful background on Japan’s wobbly soufflé-style cheesecake culture and bakery-style versions.
Uncle Tetsu-style expectations are mostly about the warm, fluffy, lightly sweet, stamped cheesecake experience. Rikuro-style expectations often include the soft wobble plus raisins at the bottom. This homemade version borrows the broad texture idea, not the exact bakery formula.
Is Viral 2-Ingredient Japanese Cheesecake the Same Thing?
No. Viral shortcut versions made with yogurt, cookies, or other minimal ingredients can be fun, but they are not the same as classic Japanese soufflé cheesecake.
- Classic Japanese cheesecake: cream cheese, eggs, meringue, flour or starch, water bath baking, and a cotton-soft creamy texture.
- Viral shortcut cheesecake: yogurt, cookies, or very few ingredients, usually simpler and more variable.

That does not mean the shortcuts are bad. They are simply a different dessert. If you want the cotton-soft, jiggly, bakery-style texture, the meringue method is what creates it.
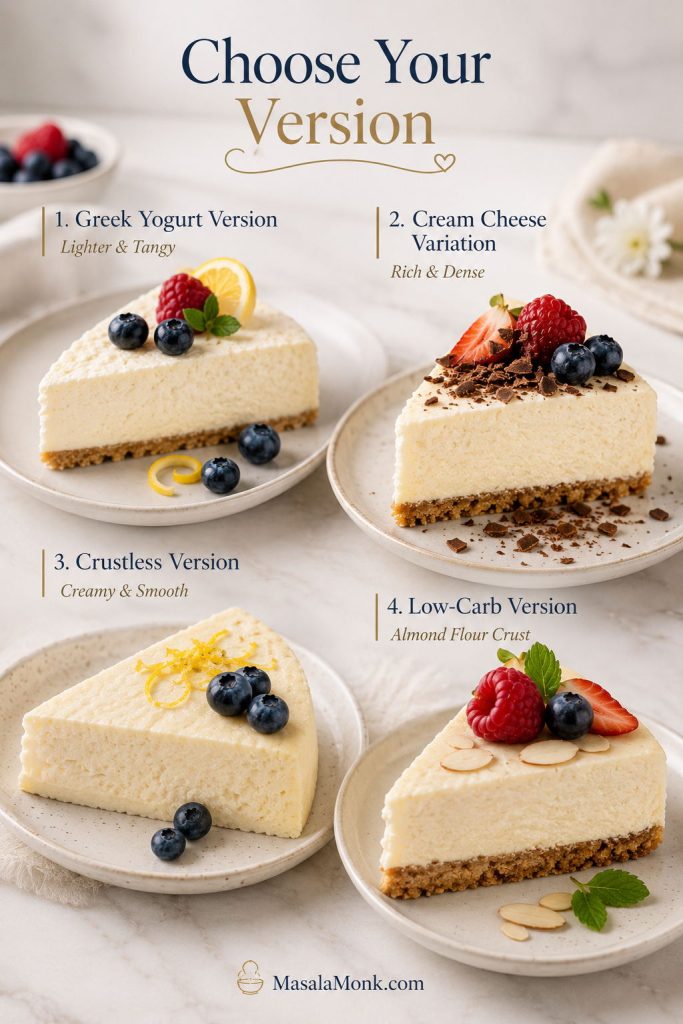
Japanese Cheesecake Variations
Once you understand the base method, you can adjust the flavor carefully. The batter relies on a delicate balance of moisture, fat, sugar, flour, and meringue, so small flavor changes work better than heavy add-ins.
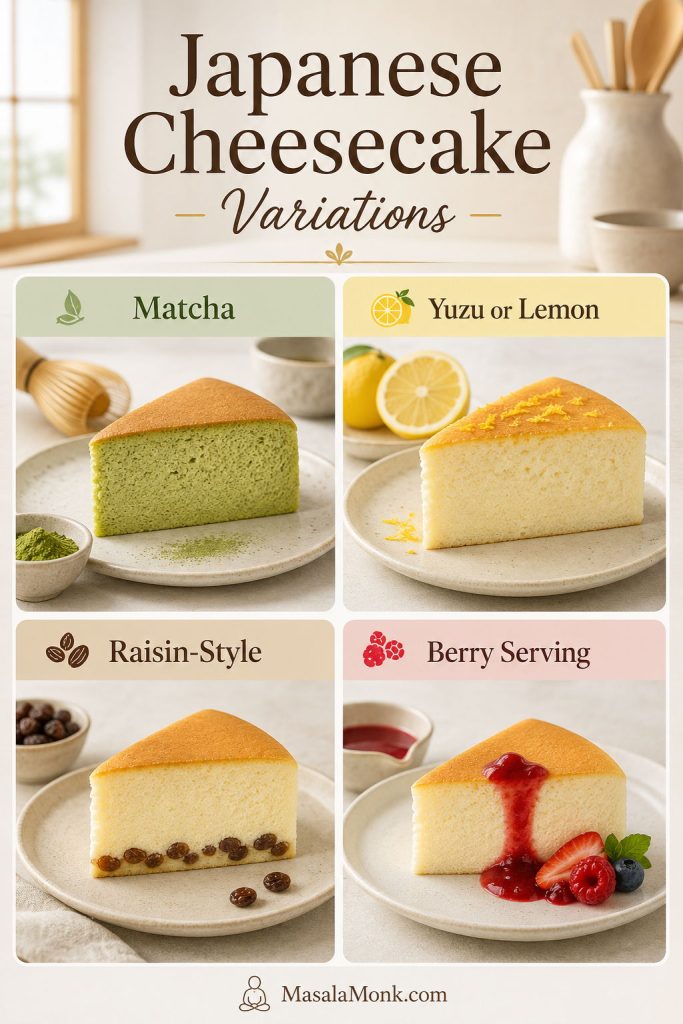
| Variation | Safe adjustment | Avoid |
|---|---|---|
| Matcha | Start with 1–2 tsp, sifted with flour and cornstarch | Too much matcha; bitterness and dryness |
| Yuzu or lemon | Replace some or all of the lemon juice/zest | Adding lots of extra liquid |
| Chocolate | Treat as a separate tested version | Casual cocoa or melted chocolate swaps |
| Raisin-style | Use a thin dry layer at the bottom | Heavy add-ins scattered through the foam |
| Strawberry | Use fresh fruit or a light sauce on the side | Wet, heavy topping that soaks the crumb |
For matcha, yuzu, raisin, or strawberry versions, keep the adjustment light and protect the foam. Chocolate needs more caution because cocoa and melted chocolate affect moisture, fat, sugar, and rise.
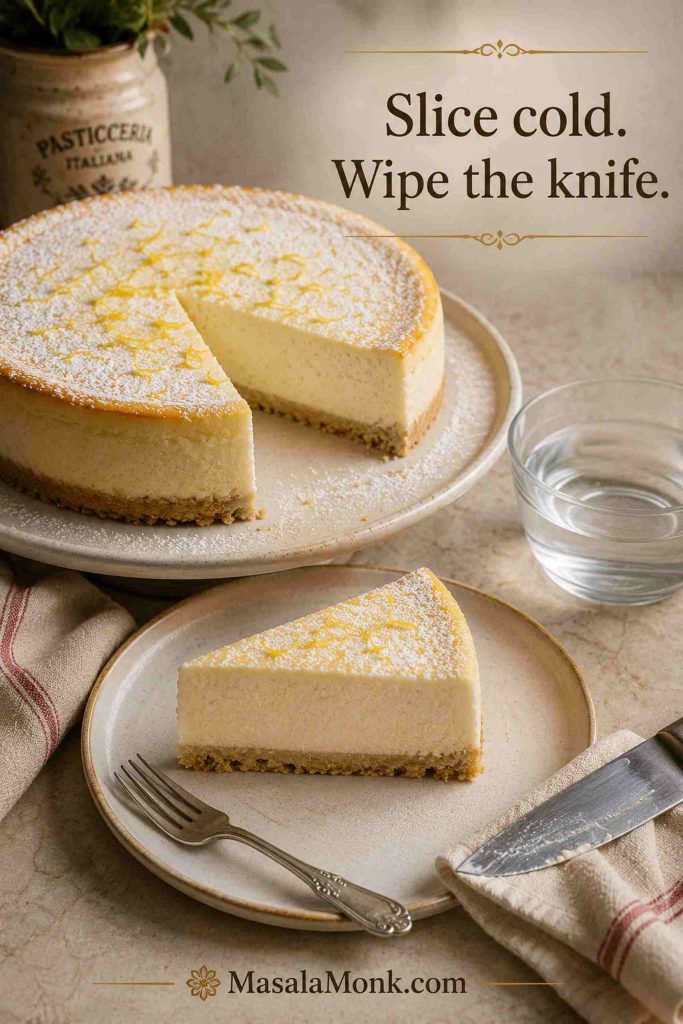
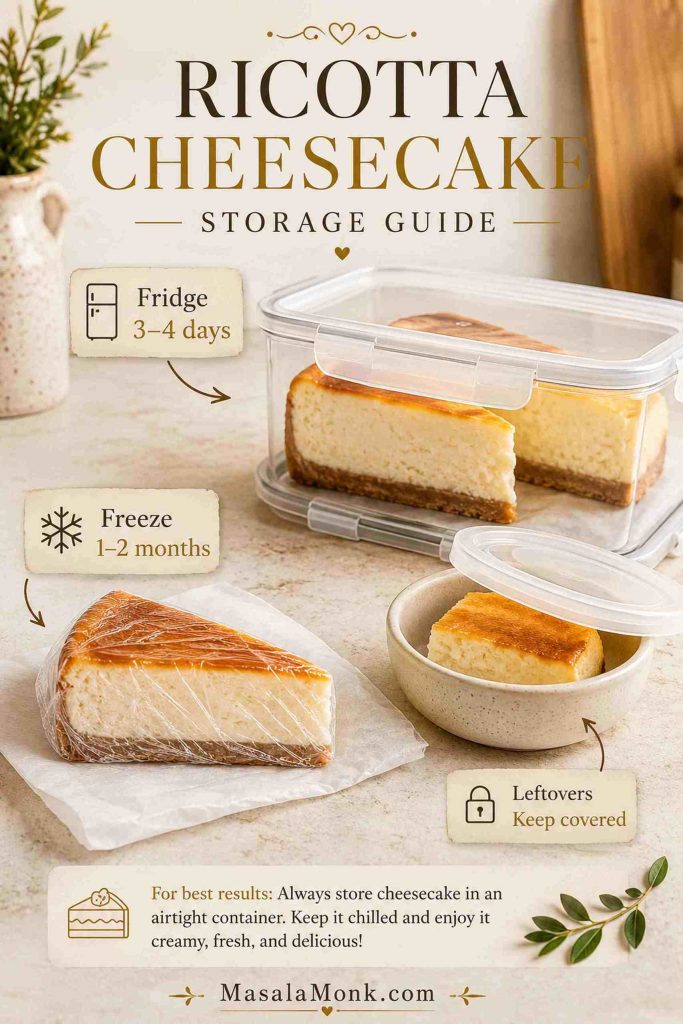
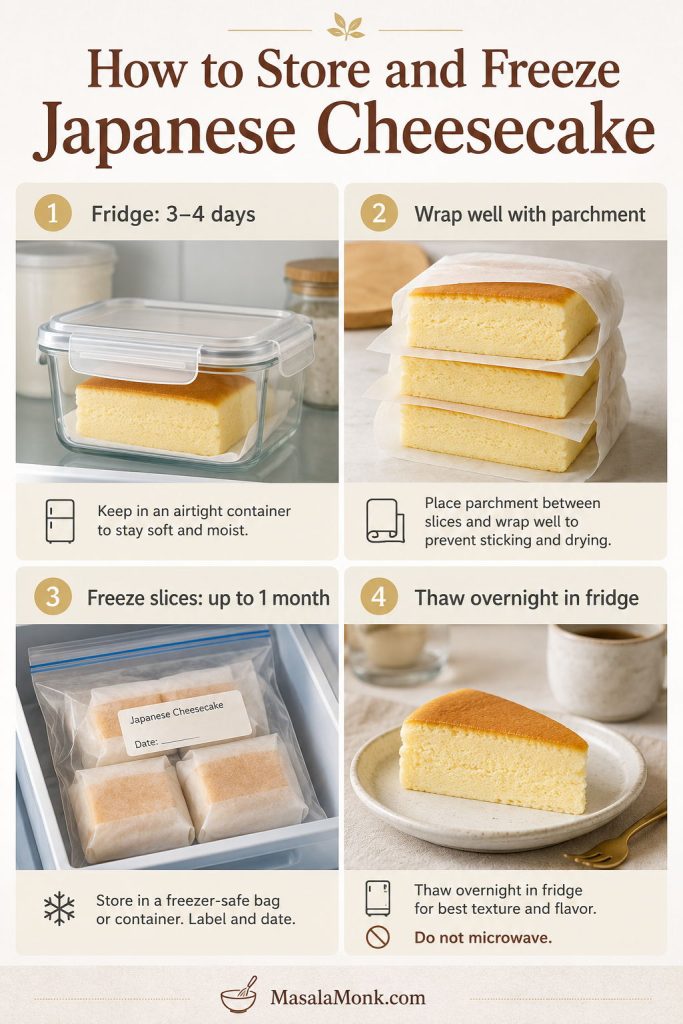
How to Chill, Slice, Store, and Serve Japanese Cheesecake
The fresh-baked wobble is fun, but the cake slices best after chilling. The flavor also becomes more balanced after a few hours in the fridge, which makes this a very good make-ahead dessert.
Cold gives you clean slices; 10 minutes at room temperature gives you the softer bite.
For the cleanest stored slices, let the cake complete the cooling and chilling schedule before wrapping.
- For clean slices: chill the cake for 4–6 hours or overnight.
- For softer texture: let slices stand at room temperature for 10–15 minutes before serving.
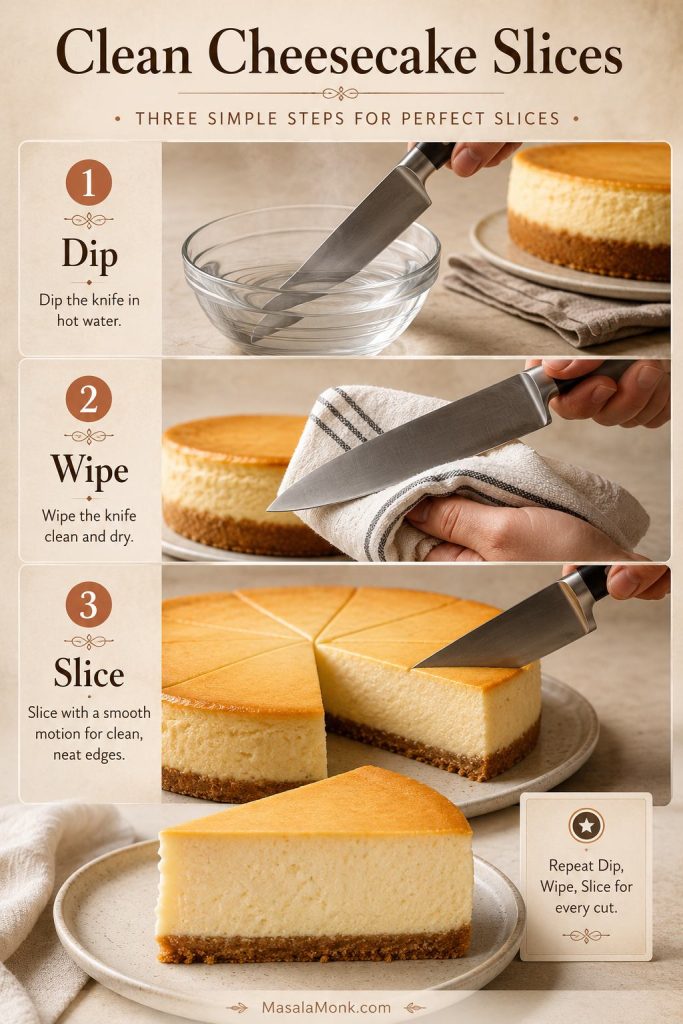
- For neat cuts: use a warm, clean knife and wipe between slices.
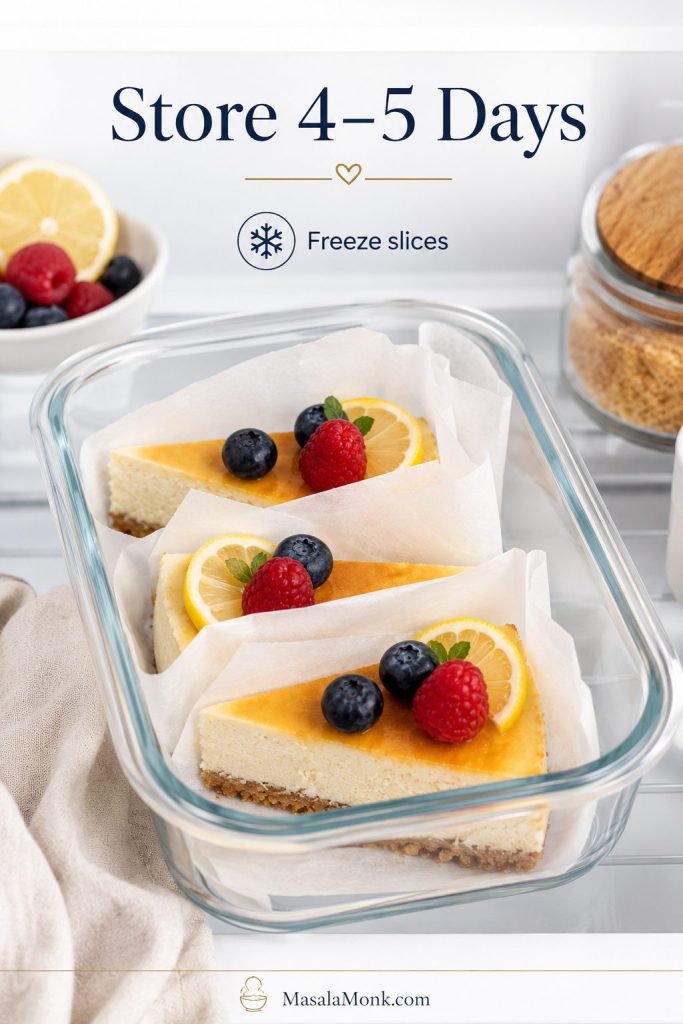
- For storage: refrigerate in an airtight container for 3–4 days.
- To avoid condensation: cool fully before covering. If the surface is damp, chill uncovered briefly before wrapping.
- For freezing: wrap slices well, with parchment between slices if stacking, and freeze for up to 1 month for best texture.
- To thaw: place frozen slices in the fridge overnight. Do not microwave; it can toughen the crumb.
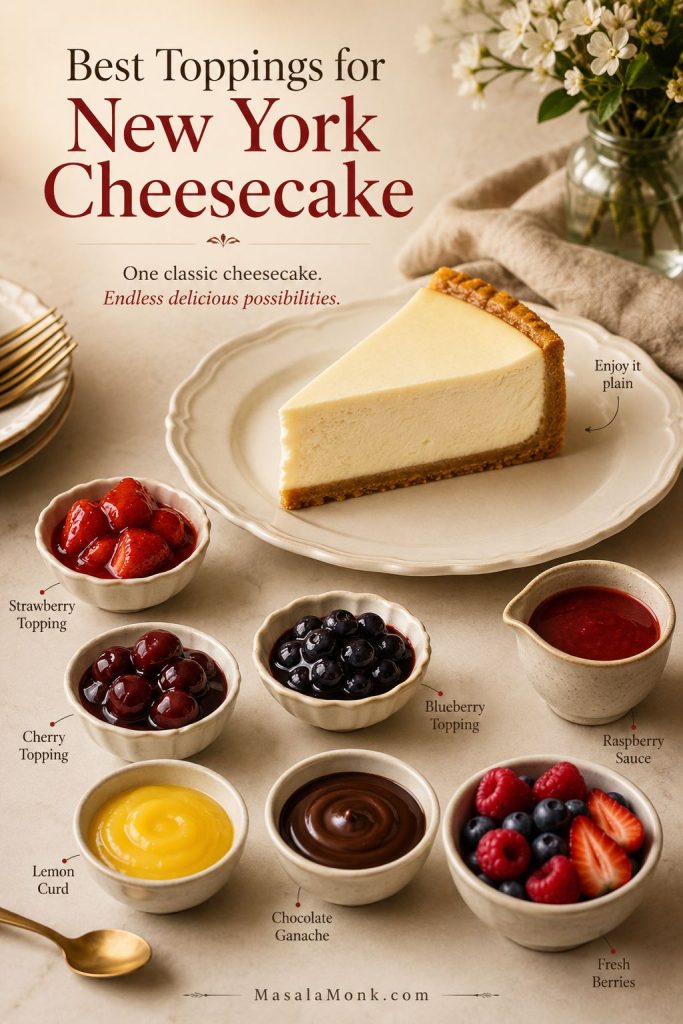
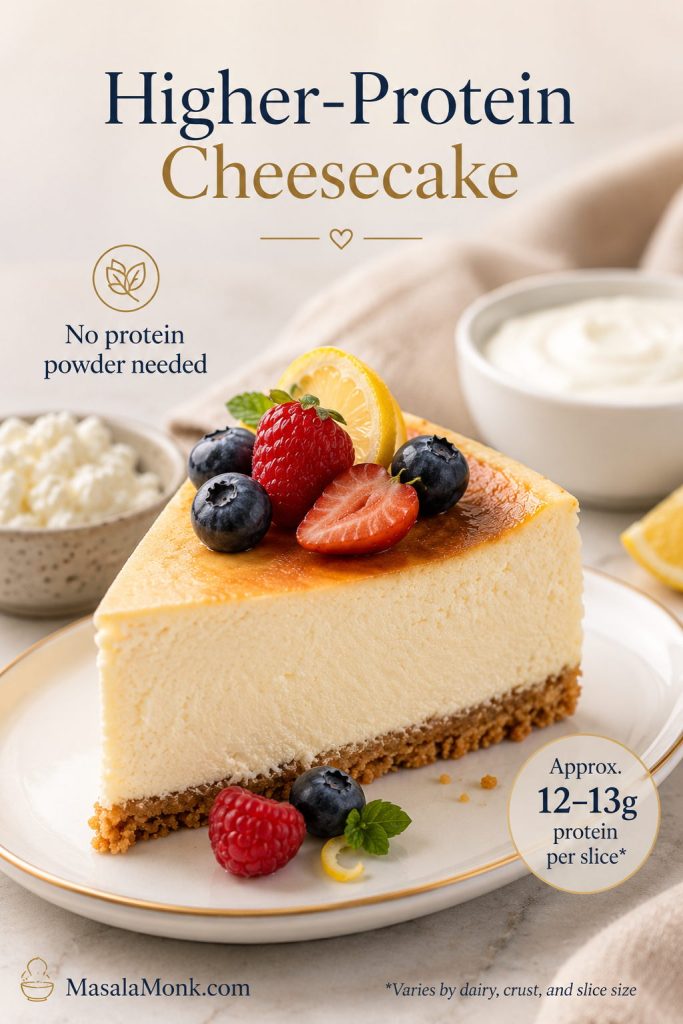
Serving ideas
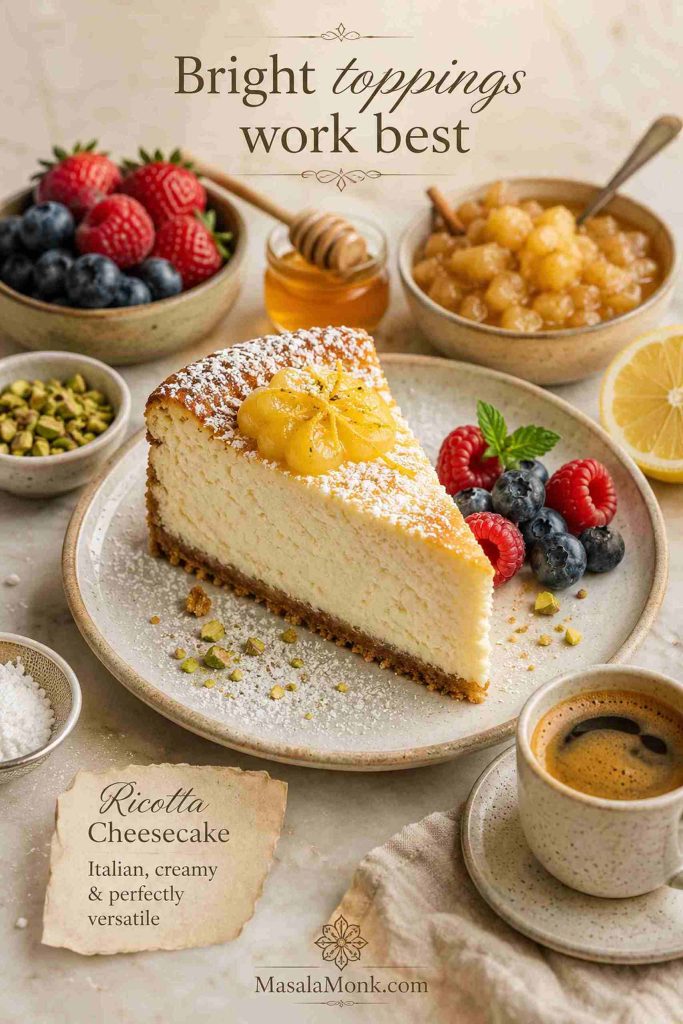
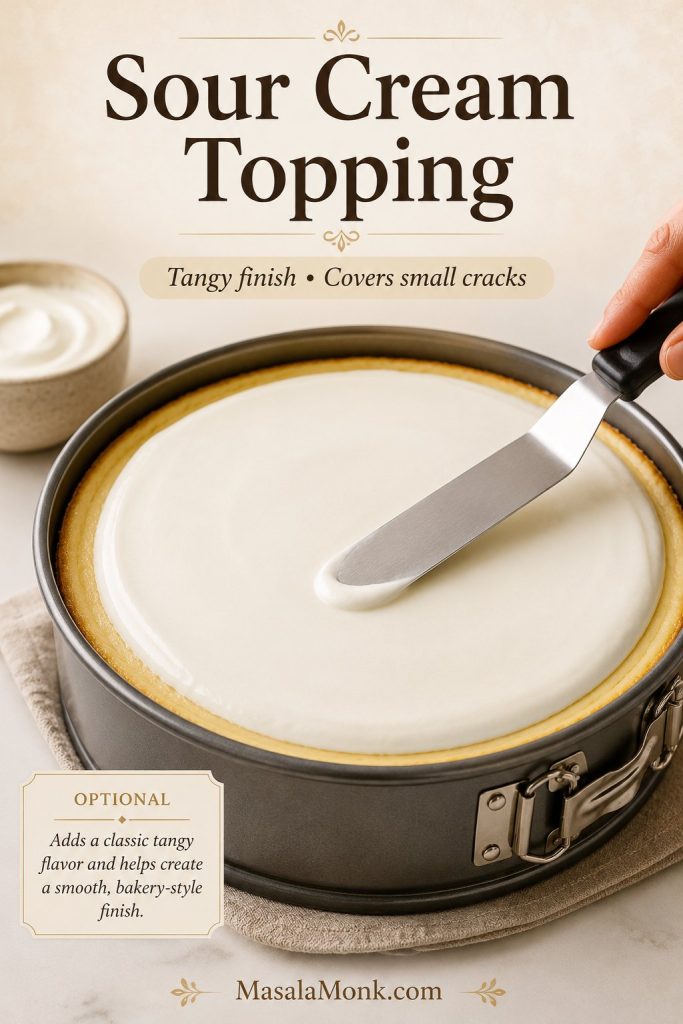
Serve Japanese cheesecake plain, with a light dusting of powdered sugar, a thin apricot glaze, fresh strawberries, a spoon of berry compote, or a small amount of yuzu or lemon curd. Keep toppings light. Heavy sauces can flatten the delicate texture.
If you want a topping, a small spoon of homemade whipped cream works better than heavy frosting because it does not crush the cake’s delicate crumb.
FAQs About Japanese Cheesecake
What makes Japanese cheesecake different?
Japanese cheesecake is lighter than dense baked cheesecake because whipped egg whites are folded into the batter. That meringue gives it a soft, airy, slightly bouncy texture.
Does Japanese cheesecake have a crust?
Usually, no. This style is typically crustless because the soft, airy cake body is the focus.
Why did my Japanese cheesecake crack?
The oven may have been too hot, the cake may have risen too quickly, or the meringue may have been too stiff. A small crack is cosmetic if the center is set and the crumb is soft.
Why did it sink after baking?
Some settling is normal. A deep sink usually means the center was underbaked, the meringue was unstable, or the cake cooled too quickly.
Why is the bottom dense?
A dense bottom usually means the meringue deflated or the batter was not folded evenly. Next time, scrape the bottom of the bowl while folding and stop before the batter turns runny.
Is a water bath necessary for Japanese cheesecake?
For this style, the water bath is strongly recommended. It gives gentle, moist heat and helps prevent cracks, dry edges, and harsh rising.
All-purpose flour, plain flour, or maida: will they work?
Yes. Use the same weight as cake flour. The crumb may be slightly less delicate, but all-purpose flour, plain flour, or maida is the closest practical substitute when cake flour is unavailable.
Should Japanese cheesecake be eaten warm or cold?
It can be tasted slightly warm, but it slices best after chilling. For the best balance, chill it fully, then let slices stand 10–15 minutes before serving.
Why does Japanese cheesecake taste eggy?
It should not taste strongly eggy. Lemon juice, lemon zest, gentle heat, and proper chilling help the cream cheese flavor feel fresher and more balanced.
Is Uncle Tetsu cheesecake the same as Japanese cheesecake?
Uncle Tetsu is a famous bakery style of Japanese cheesecake, but this recipe is not an official copycat. It borrows the broad cotton-soft, lightly sweet, jiggly texture idea for a homemade oven method.
Rice cooker Japanese cheesecake: does it work?
It can work in a cooker with a cake or bake setting, but it needs separate timing, batter quantity, and cooling guidance. Treat it as a different method, not a direct swap for this oven recipe.
Is an eggless Japanese cheesecake possible?
Not with this method. The cotton-soft rise comes from whipped egg whites, so an eggless version needs a separate tested formula.
How well does Japanese cheesecake freeze?
Yes. Wrap slices well and freeze for up to 1 month for best texture. Thaw overnight in the fridge and avoid microwaving, which can toughen the crumb.
Final Thoughts
A good Japanese cheesecake does not need a flawless top to feel special. It needs a tender center, a soft wobble, and enough patience to let the crumb settle.
Once you know the cues, the cake becomes less mysterious. The first bake teaches you your oven, and the next one usually feels calmer, softer, and more confident.