These pecan pie bars are for the moment when pecan pie sounds perfect, but rolling dough, lifting wedges, and hoping the center has set all feel like too much. You still get the glossy pecan top, the buttery base, and the soft caramel-like filling — just in a pan you can cool, lift, cut, and carry.
The promise here is simple: no rolling, no runny middle, no nervous first slice. A press-in shortbread crust makes the bars sturdy, while maple syrup and brown sugar bake into a warm, glossy pecan filling that stays gooey without turning into syrup on the plate.
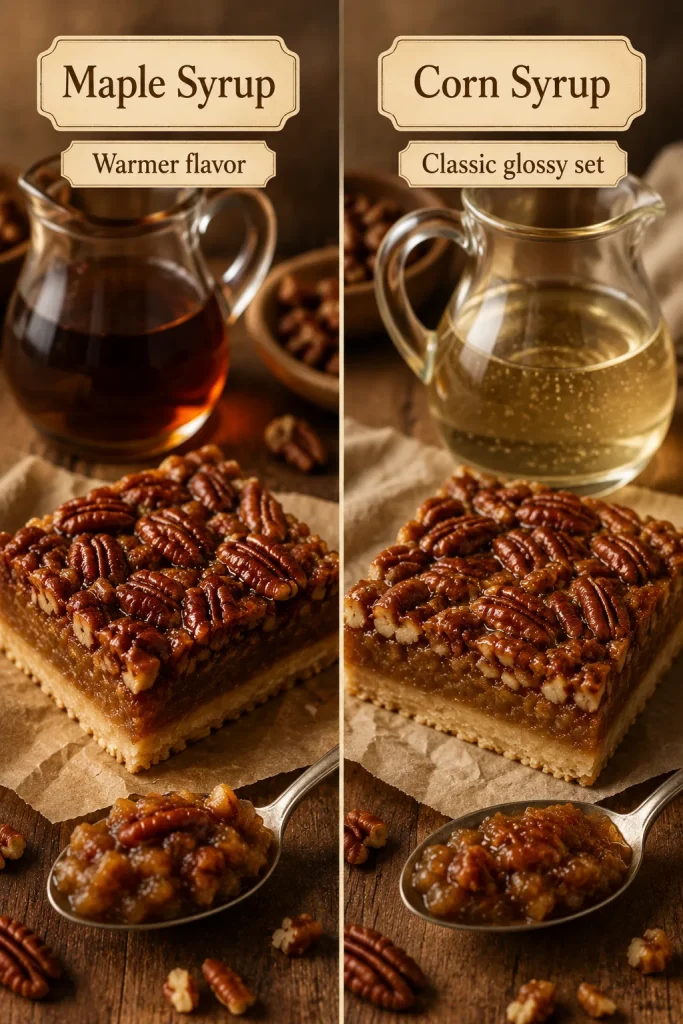
This version uses maple syrup, so it works for pecan pie bars without corn syrup. Prefer the classic glossy filling? Use light corn syrup instead. Either way, the method stays simple: prebake the crust, bake until the edges bubble and the center softly wobbles, then cool completely before slicing.
Quick Answer: What Are Pecan Pie Bars?
Pecan pie bars are dessert bars with a buttery crust and a gooey pecan pie-style filling baked on top. They taste like pecan pie, but they are easier to make, easier to slice, and easier to serve to a crowd. Instead of baking one round pie, you bake the recipe in a rectangular pan and cut it into squares.
A good pan comes down to three things: a firm crust, a filling that sets without turning hard, and enough cooling time before cutting. Prebaking protects the crust, bubbling edges show the filling got hot enough, and cooling turns the gooey layer into bars you can lift.
Pecan Pie Bars Recipe
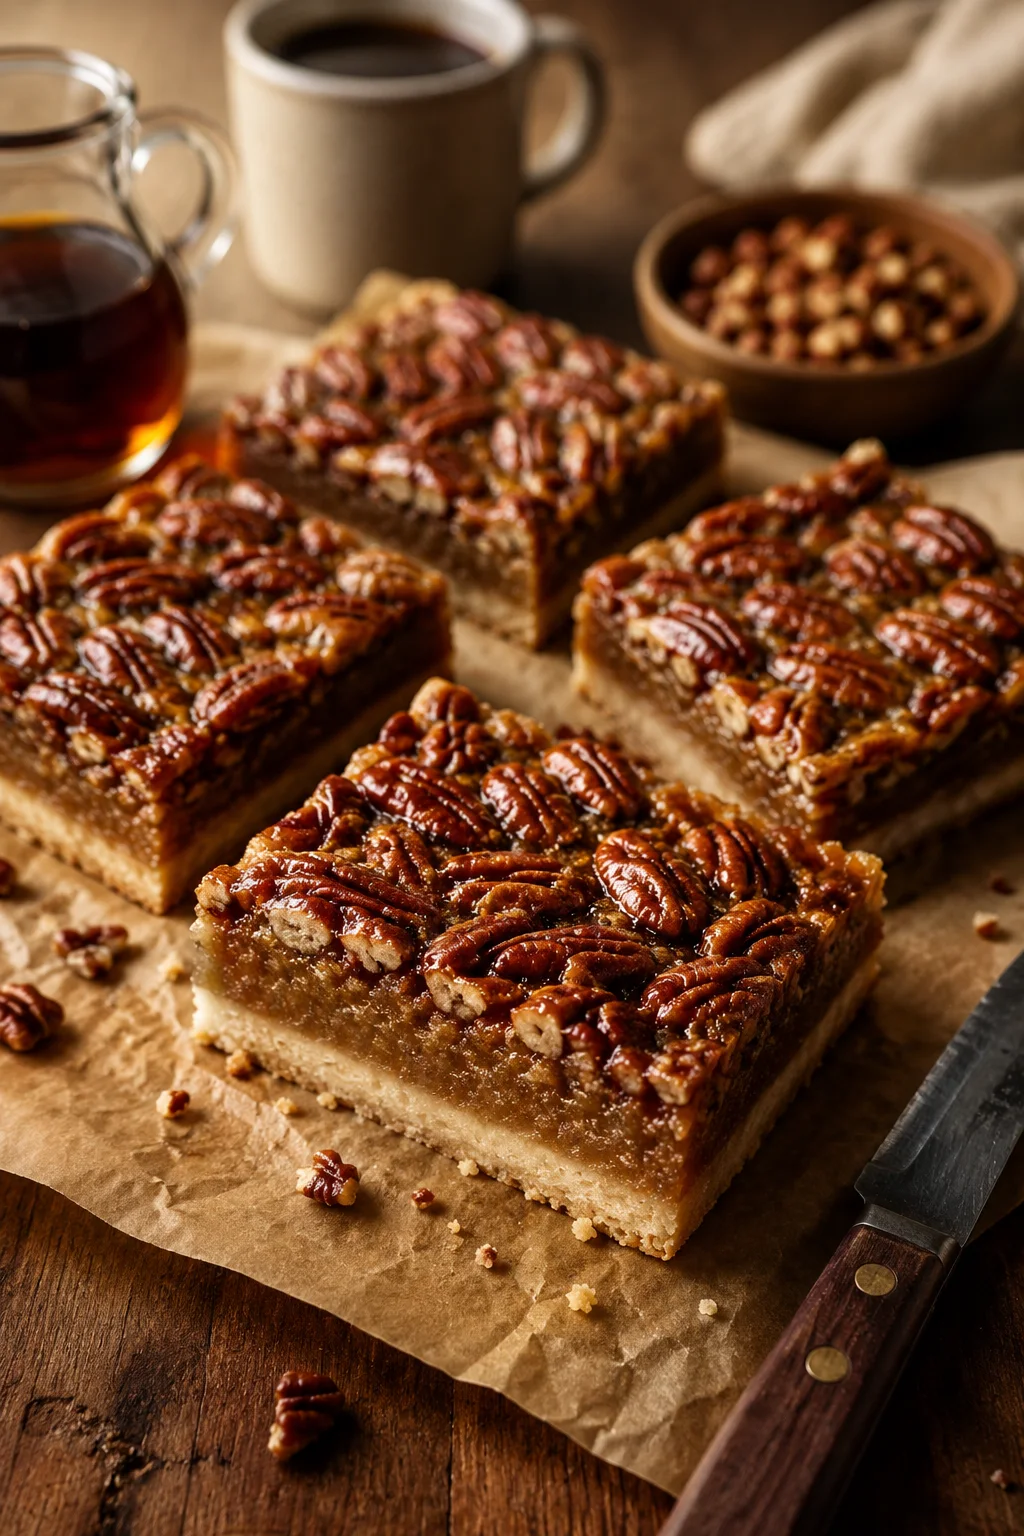
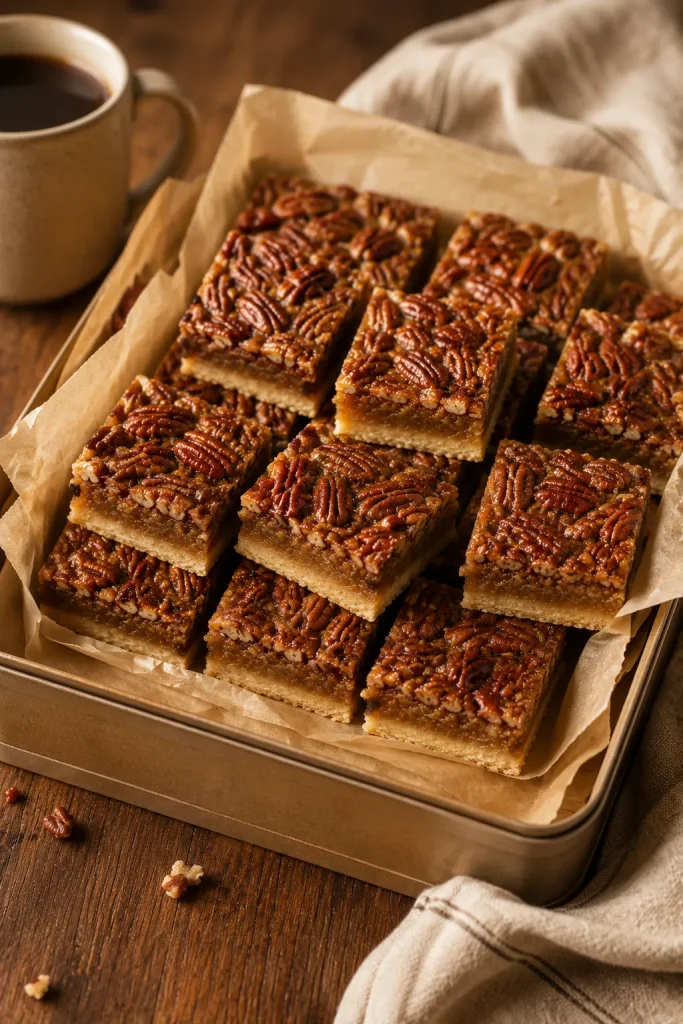
These pecan pie bars bake into a buttery shortbread base with a glossy maple-brown sugar pecan layer on top. One 9×13 pan gives you 24 rich bars or 36 smaller dessert-table squares.
What success looks like: the crust is pale golden at the edges, the pecan layer is glossy, the sides bubble before the pan comes out, and the center still has a soft wobble. After cooling, the bars should lift cleanly but bite like soft pecan pie filling, not syrup and not candy. One small square should feel satisfying, with a buttery bottom, sticky pecan top, and the best part of pecan pie in the middle.
Recipe Details
| Prep Time | 20 minutes |
| Crust Bake Time | 18 to 20 minutes |
| Filling Bake Time | 25 to 30 minutes |
| Cooling Time | At least 2 hours |
| Optional Chill Time | 30 to 60 minutes for sharper cuts |
| Total Time | About 3 hours 10 minutes, plus optional chilling |
| Oven Temperature | 350°F / 177°C |
| Pan Size | 9×13 inch / 23×33 cm |
| Yield | 24 rich bars or 36 small squares |
Equipment
- 9×13 inch / 23×33 cm baking pan
- Parchment paper
- Large mixing bowl
- Whisk
- Pastry cutter, fork, or food processor for the crust
- Rubber spatula
- Wire cooling rack
- Sharp knife
- Optional kitchen scale
- Optional oven thermometer
A metal pan is best for even browning and tidy edges. Glass works too, but it holds heat longer, so start checking a few minutes early near the end.
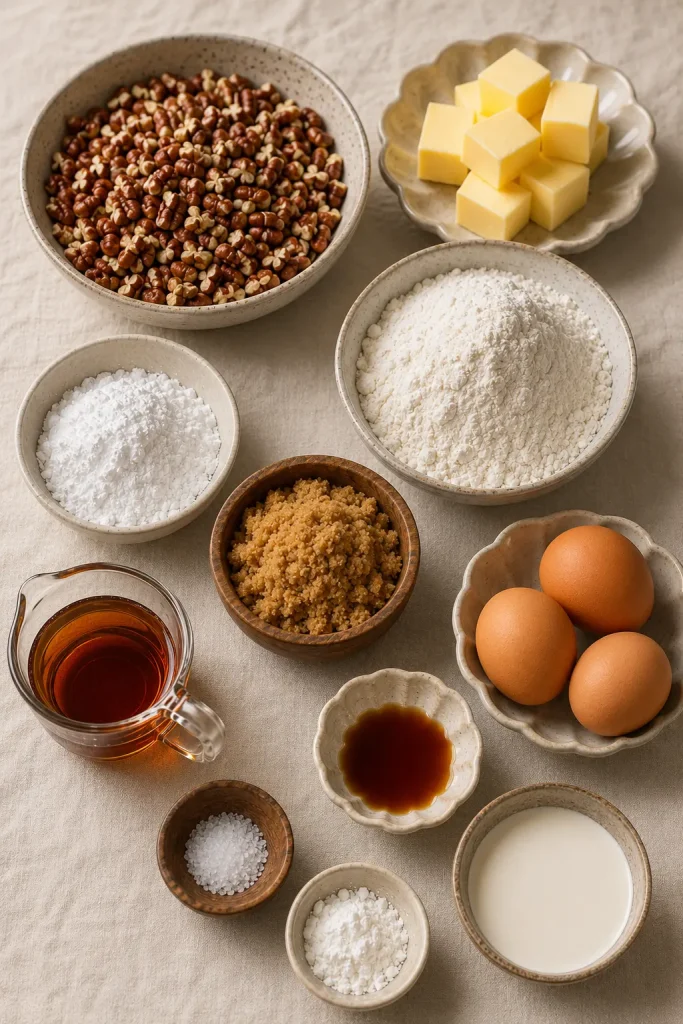
Ingredients
For the Shortbread Crust
- 2 cups all-purpose flour / 250 g
- 1/2 cup powdered sugar / 60 g
- 1 tablespoon cornstarch / 8 g, optional but helpful for tenderness
- 1/2 teaspoon fine salt
- 1 cup cold unsalted butter, cut into small cubes / 226 g / 8 oz
If measuring flour by cups, spoon it into the cup and level it instead of scooping directly from the bag. Too much flour can make the crust dry or crumbly.
For the Pecan Filling
- 3 cups chopped pecans / about 300 to 330 g / 10.5 to 12 oz
- 1 cup packed light brown sugar / 200 g
- 3/4 cup pure maple syrup / 180 ml, or light corn syrup for a classic version
- 1/2 cup unsalted butter, melted and slightly cooled / 113 g / 4 oz
- 3 large eggs, at room temperature / about 150 g without shells
- 2 tablespoons heavy cream / 30 ml
- 2 teaspoons vanilla extract / 10 ml
- 1/2 teaspoon fine salt
- Flaky salt, optional, for finishing
Chopped pecans are better than pecan halves here because they spread evenly and slice more easily. Pecan halves look pretty, but they can drag the knife through the topping.
Instructions
Make and Prebake the Crust
- Prepare the pan. Preheat the oven to 350°F / 177°C. Line a 9×13 inch / 23×33 cm baking pan with parchment paper, leaving overhang on the long sides so you can lift the bars out later.
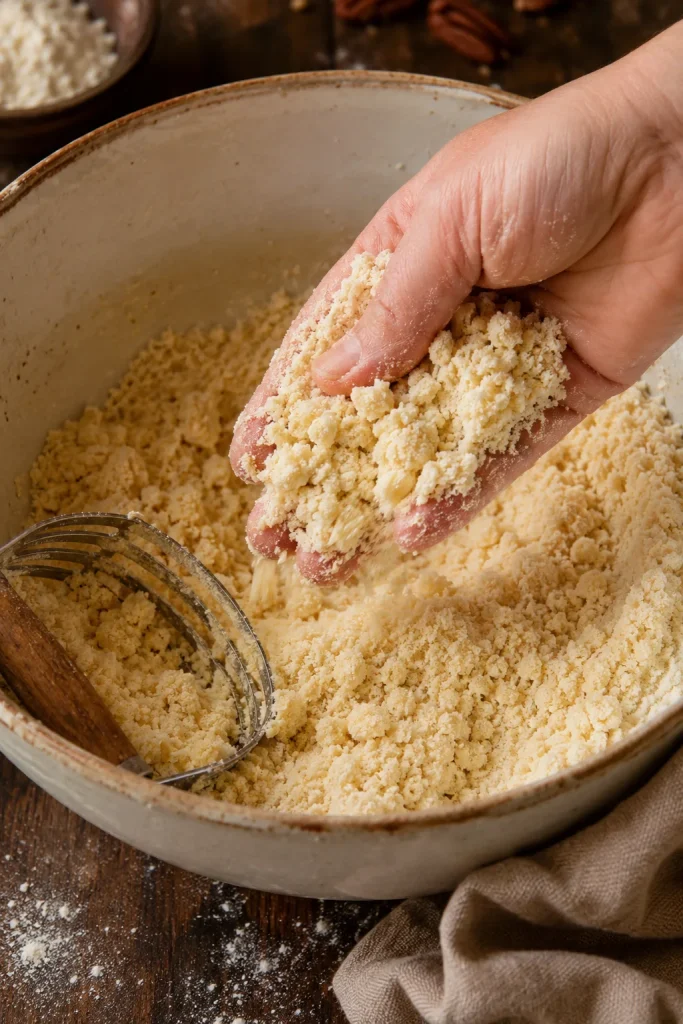
- Make the crust mixture. In a large bowl, whisk together the flour, powdered sugar, cornstarch if using, and salt. Add the cold cubed butter. Cut it into the flour mixture with a pastry cutter, fork, or your fingertips until it looks like damp crumbs and holds together when squeezed.
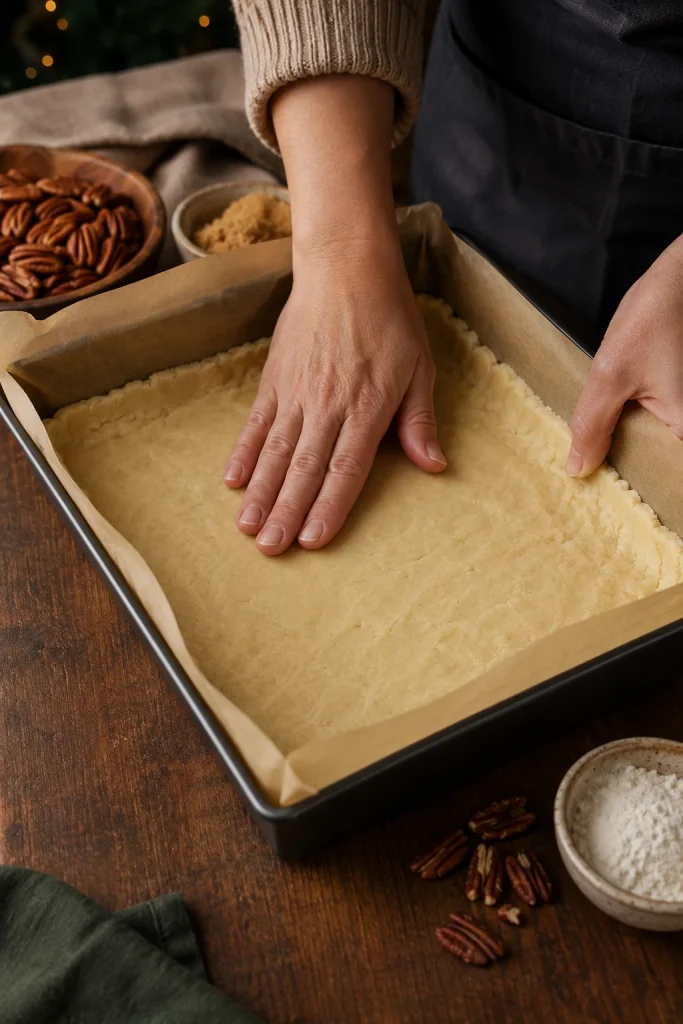
- Press the crust into the pan. Tip the crust mixture into the prepared pan. Press it firmly into an even layer, especially in the corners and along the edges.
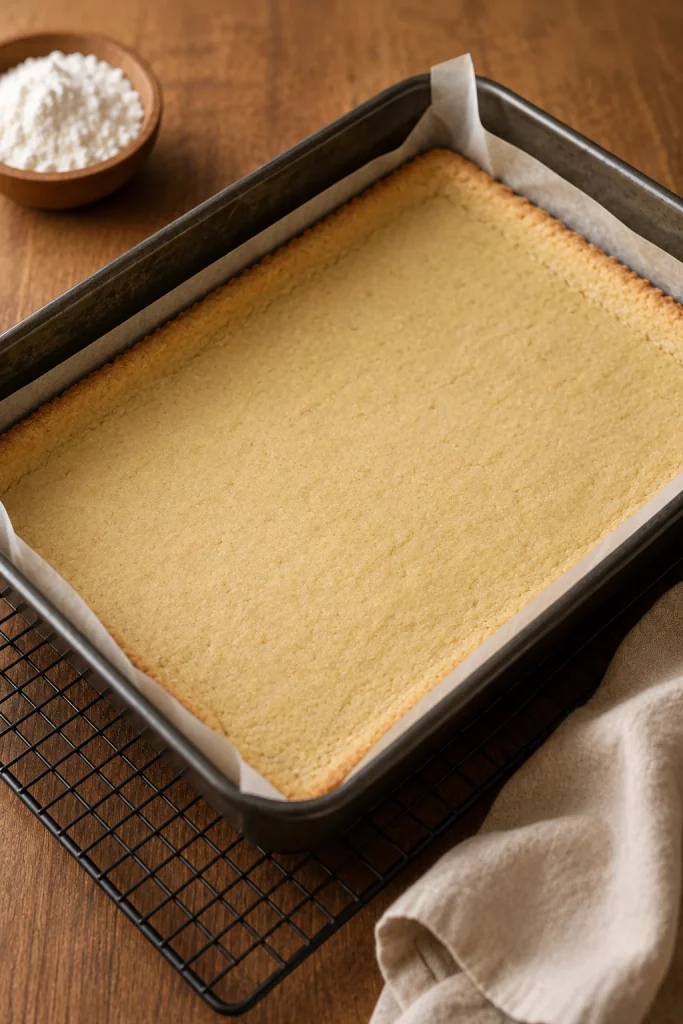
- Prebake the crust. Bake for 18 to 20 minutes, until the surface looks set and the edges are just beginning to turn pale golden.
Add the Filling, Bake, and Slice
- Make the filling. While the crust bakes, whisk the brown sugar, maple syrup, melted butter, eggs, heavy cream, vanilla, and salt until smooth and glossy. Stir in the chopped pecans.
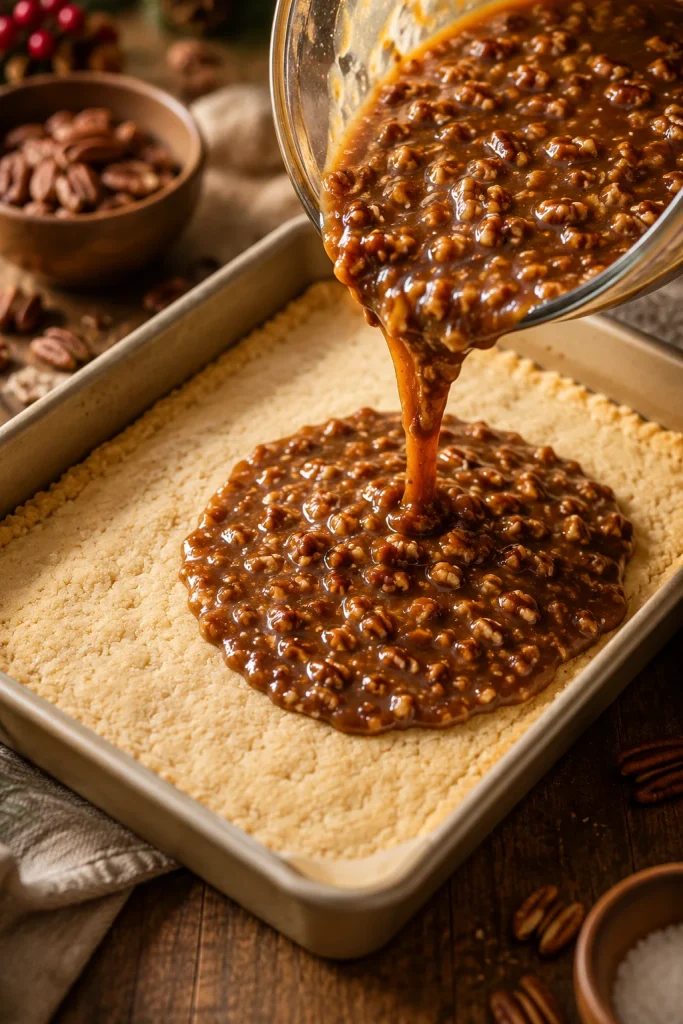
- Pour over the warm crust. Remove the crust from the oven and carefully pour the pecan filling over it. Spread the pecans evenly so every piece gets a good nutty layer.
- Bake the bars. Return the pan to the oven and bake for 25 to 30 minutes, until the edges bubble, the top looks glossy and set, and the center wobbles slightly like soft custard. It should not ripple like liquid.
- Cool completely. Place the pan on a wire rack and let the bars cool completely, at least 2 hours. Do not judge the final texture while the bars are hot; the filling will continue to set as it cools.
- Sharper cuts. Chill the cooled slab for 30 to 60 minutes before cutting if you want the neatest pieces.
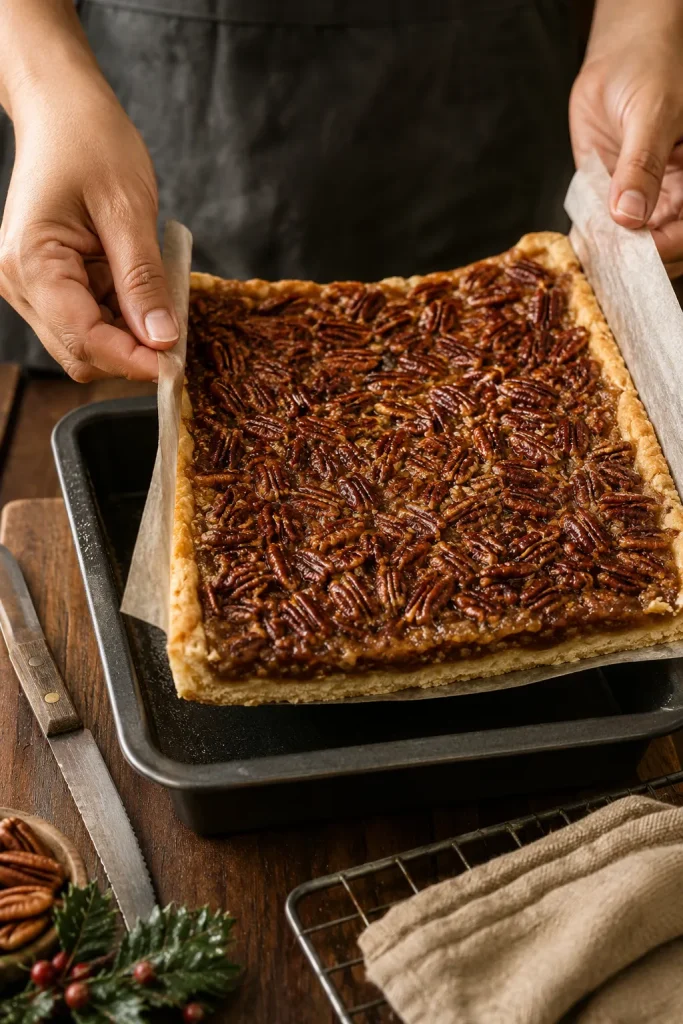
- Slice and serve. Use the parchment overhang to lift the slab out of the pan. Cut into 24 rich bars or 36 smaller squares with a sharp knife, wiping the blade between cuts.
Recipe Notes
- Classic pecan pie bars: replace the maple syrup with the same amount of light corn syrup. The filling will taste sweeter and look a little glossier.
- Stronger maple flavor: use dark maple syrup and finish the baked bars with a little flaky salt.
- Slightly firmer set: leave out the heavy cream. The cream gives the filling a softer, richer bite, but the bars still work without it.
- Deeper pecan flavor: lightly toast the pecans before adding them, but watch the final bake closely so the nuts do not over-brown.
- Sharper edges: cool completely, then chill before cutting.
- Better sweetness balance: cut smaller squares and use flaky salt instead of reducing the sugar heavily.
- Storage: cool uncovered first, then cover and refrigerate if you are not serving them the same day.
Need more visual help? See the step-by-step cues, doneness guide, or clean-cutting tips before you start.
The 5 Rules for Pecan Pie Bars That Slice Cleanly
These bars are simple, but they do ask for patience. Most problems come from skipping one of two things: giving the crust a head start, or giving the filling time to cool.
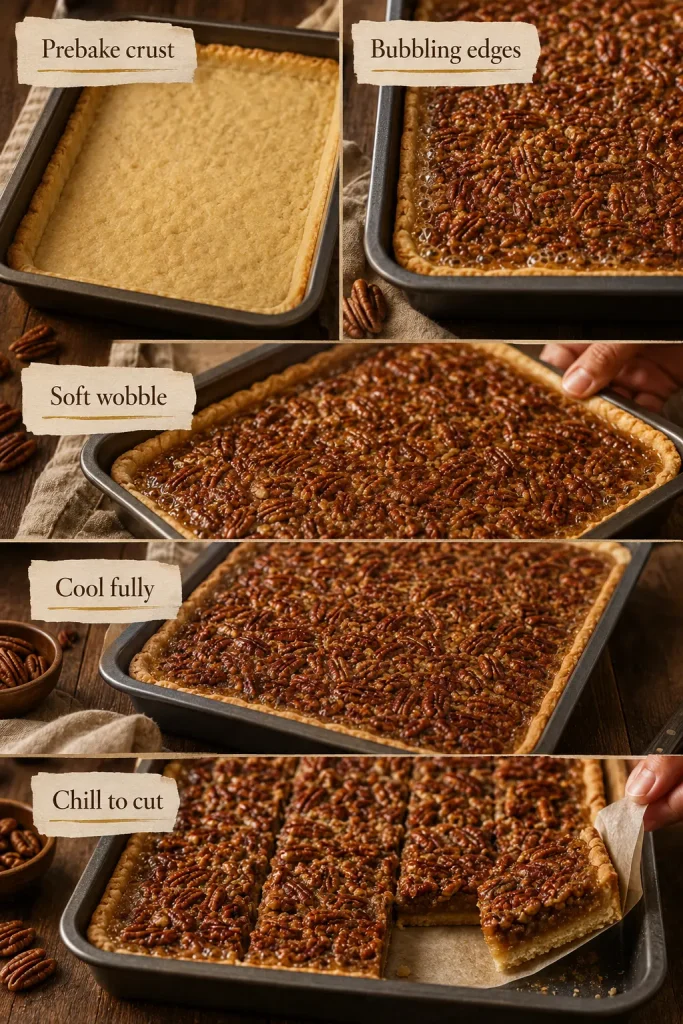
- Prebake the crust until it looks set, not brown. This gives the filling a dry, sturdy base to sit on.
- Look for bubbling edges. If the edges never bubble, the filling probably did not get hot enough to set.
- Trust a soft wobble, not a liquid ripple. A little movement is fine. Waves across the pan mean more oven time.
- Cool before judging. Hot pecan filling can fool you. The real texture shows after cooling.
- Chill before clean cuts. Room-temperature bars taste softer, but chilled bars slice better.
If you remember only one thing, remember this: judge the bars after cooling, not straight from the oven.
Make These When
These are the bars to make when the dessert table is crowded, the pie server is missing, and nobody wants to be responsible for the first messy slice. They feel festive without needing last-minute attention.
- Pecan pie flavor sounds good, but rolling pie crust does not.
- A Thanksgiving or Christmas dessert needs to serve a crowd.
- Make-ahead baking would make the meal feel calmer.
- The dessert has to travel well to a potluck or office party.
- Smaller squares would fit a cookie box or mixed dessert spread.
- Sturdy bars sound better than soft pie wedges.
- You have pecan pieces and want a dessert where they work better than perfect halves.
You can bake them the day before, chill them overnight, and stop worrying about dessert while the rest of the meal comes together. For a cozy fall table, they sit nicely beside soft bakes like apple cake. You can save the day-of baking energy for something fresh, like homemade cinnamon rolls.
More Help If You Need It
- Why This Recipe Works
- Ingredient Notes
- Step-by-Step Cues for Better Pecan Pie Bars
- How to Tell When Pecan Pie Bars Are Done, Not Runny
- How to Cool, Chill, and Cut Clean Squares
- How to Make Them Gooier, Firmer, or Cleaner-Cut
- Pan Size Guide
- Best Syrup for Pecan Pie Bars: Maple vs Corn Syrup
- Make-Ahead Holiday Timeline
- Troubleshooting
Why This Recipe Works
This recipe works because each part has a clear job. Prebaking helps the shortbread crust hold the sticky filling. Eggs and brown sugar give structure, not just sweetness. Chopped pecans spread through the pan so every square cuts cleanly.
Shortbread is sturdier than pie dough under a gooey pecan filling. It gives the bars a firm, buttery base without asking you to roll dough, chill dough, or worry about a fragile bottom crust. After cooling, the center should bite like soft caramel custard — not syrup, not candy.
Ingredient Notes
The ingredient list is simple, but the choices matter. Butter keeps the crust tender, while the filling needs enough structure to set after cooling.
Shortbread Crust
This shortbread crust is made with flour, powdered sugar, salt, cold butter, and a little cornstarch. When you squeeze a handful, the sandy mixture should clump like damp shortbread crumbs.
- All-purpose flour gives the crust structure.
- Powdered sugar keeps the crust tender and lightly sweet.
- Cornstarch is optional, but it helps make the crust a little more delicate.
- Cold butter creates a shortbread texture instead of a greasy base.
- Salt balances the sweet pecan filling.
For bars, shortbread has one big advantage over pie crust: it holds its shape when you lift and cut it. If you are comparing this with a traditional pastry base, MasalaMonk’s apple pie crust guide explains cold butter, chilling, and rolling — but for these bars, shortbread is the sturdier choice.
Pecan Filling
Most of the pecan pie character comes from the filling. It should be glossy and pourable before baking, with the pecans suspended through the mixture instead of sitting in one dry pile.
- Pecans: chopped pecans are easier to slice through than large halves.
- Brown sugar: gives the filling a deeper caramel flavor.
- Maple syrup: works as the main syrup for a no-corn-syrup-friendly version.
- Butter: adds richness and helps the filling taste rounded.
- Eggs: help the filling set as it bakes and cools.
- Heavy cream: gives a softer, richer bite. Leave it out if you want a slightly firmer set.
- Vanilla and salt: keep the flavor warm, balanced, and not flat.
You do not need perfect pecan halves for this recipe. Pecan pieces are often the smarter choice because the nuts need to be distributed through the filling rather than arranged on top of a pie.
Should You Toast the Pecans First?
You do not have to toast the pecans first because they will toast as the bars bake. Lightly toasting them before mixing can deepen the flavor, but keep an eye on the final bake so the nuts do not get too dark on top.
Step-by-Step Cues for Better Pecan Pie Bars
Use this section when the timer is not enough. These are the visual cues that tell you the crust, filling, and finished pan are on track.
1. Crust Mixture: Damp Crumbs, Not Smooth Dough
The crust mixture should look crumbly, not creamy. When you squeeze a small handful, it should hold together. If it stays powdery, the butter may not be worked in evenly.
2. Pressed Crust: Compact and Even
Press the crust firmly into the pan, especially in the corners and along the edges. Thin corners can overbake, while thick patches can stay soft.
3. Prebaked Crust: Set and Pale Golden
The crust does not need to turn deeply brown. It only needs to look set with pale golden edges. That head start keeps the sticky filling from sinking into a soft base.
4. Filling Pour: Glossy, Even, and Ready to Bake
Whisk the sugar, syrup, butter, eggs, cream, vanilla, and salt until smooth before the pecans go in. Once the pecans are stirred through, pour the filling over the warm crust and guide the nuts toward the corners.
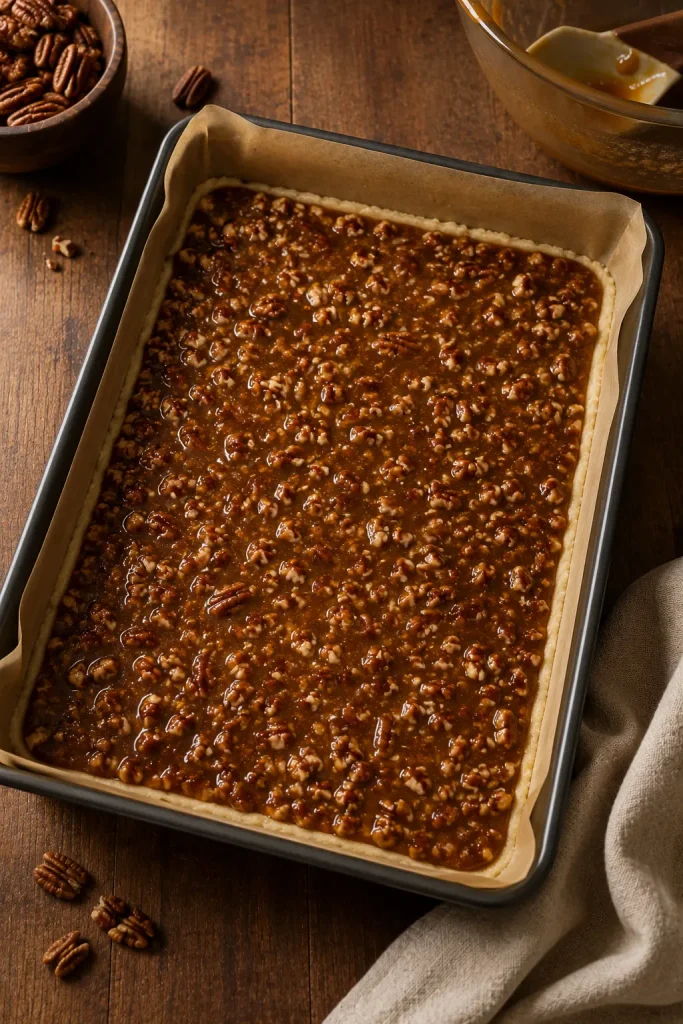
5. Before Baking: Even Pecan Coverage
Before the pan goes back into the oven, nudge the pecans into an even layer so the corners are not bare and the center does not bake as one thick nut pile.
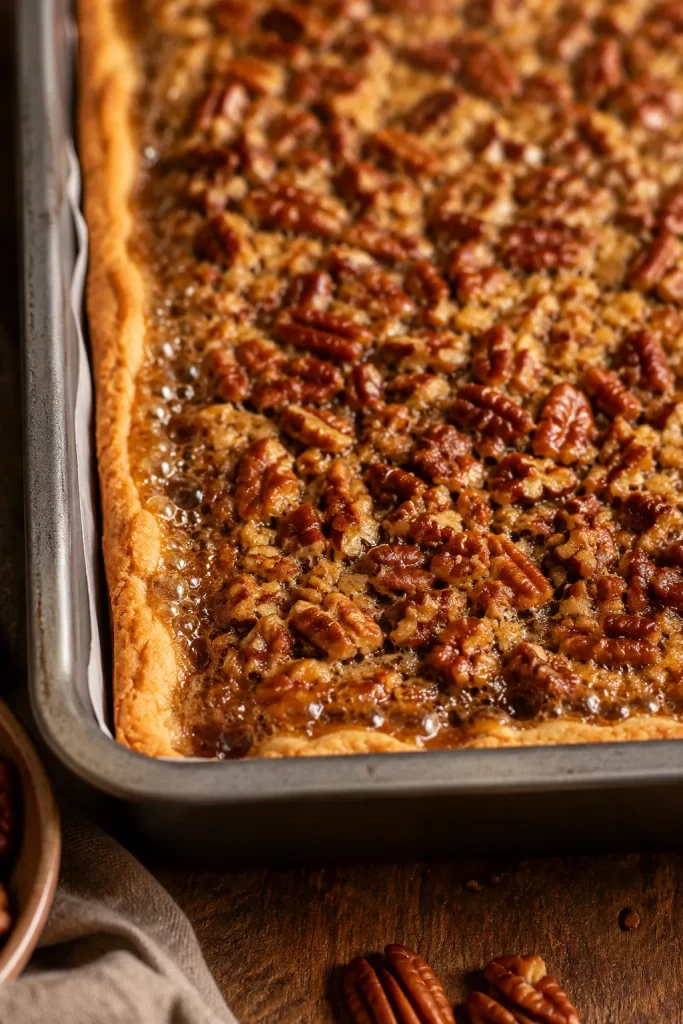
6. After Baking: Bubbling Edges and Soft Center Wobble
Edges should bubble before the pan comes out. A glossy, set-looking top is good, but the center should still move gently. Soft wobble is fine. Liquid ripple means more oven time.
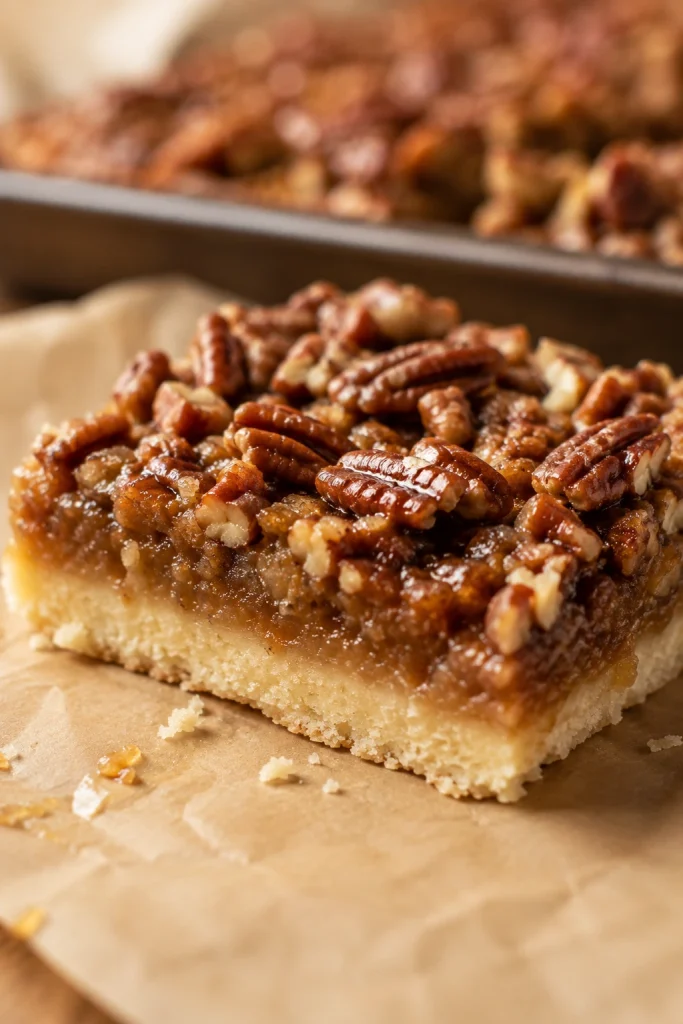
7. After Cooling: Liftable Slab, Soft Bite
Once cool, the bars should lift from the pan as one slab. The top may still be slightly tacky, but it should not look wet. Center texture should bite like soft pecan pie filling, not run like syrup.
Still worried about the filling? Go straight to the doneness guide, or return to the recipe card.
How to Tell When Pecan Pie Bars Are Done, Not Runny
This is the part where pecan pie bars make people nervous, because done does not mean stiff. You want gooey, not raw; soft, not sloshy; rich, not hard like candy.
Soft Wobble vs Liquid Ripple
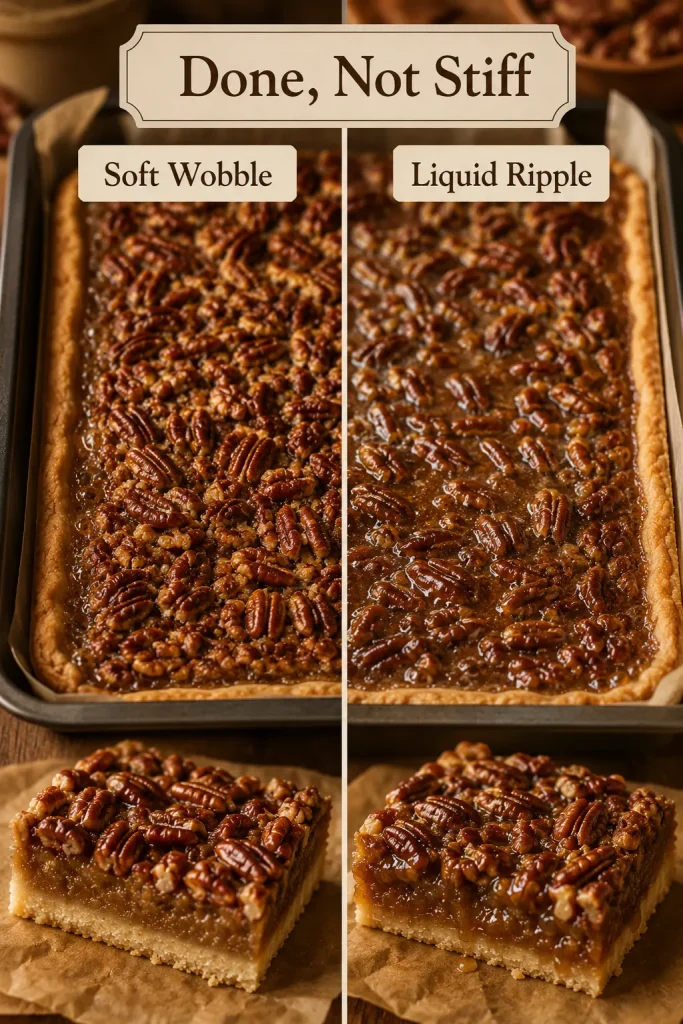
If you wait until the center looks completely firm in the oven, the filling can cool into something too hard or sticky-chewy. The edges matter more than the exact minute on the timer: look for bubbling sides, a glossy top, and a center that moves gently without sloshing.
Look for these signs before removing the pan from the oven:
- Edges are bubbling around the pan.
- A glossy, set-looking top covers the filling.
- Pecans look toasted, not burnt.
- Crust edges are lightly golden.
- The center has a slight custard-like wobble.
- Gentle pan movement does not create a liquid ripple or slosh.
- No wet or raw-looking patch remains in the middle.
Slight movement in the center is fine because the filling keeps setting as it cools. A liquid wave means the bars need more time. Add 3 to 5 minutes, then check again.
If using a thermometer, these bars are usually set around 185°F / 85°C in the center, but do not chase the number alone. The better test is the full set of cues: bubbling edges, a glossy top, and a center that wobbles softly without rippling like liquid.
That visual cue makes the pan much less intimidating.
After baking, the next move is cooling and cutting cleanly. If the pan looks off, use troubleshooting.
How to Cool, Chill, and Cut Clean Squares
This is where the recipe stops being about skill and starts being about patience. Hot bars smear. Cold bars slice.
- Cool the pan completely on a wire rack.
- Chill the slab for 30 to 60 minutes if you want sharper edges.
- Lift the bars out using the parchment overhang.
- Use a long, sharp knife.
- Wipe the knife between cuts.
- Trim the outer edges if you want a polished party platter.
- Cut 24 larger bars or 36 smaller squares.
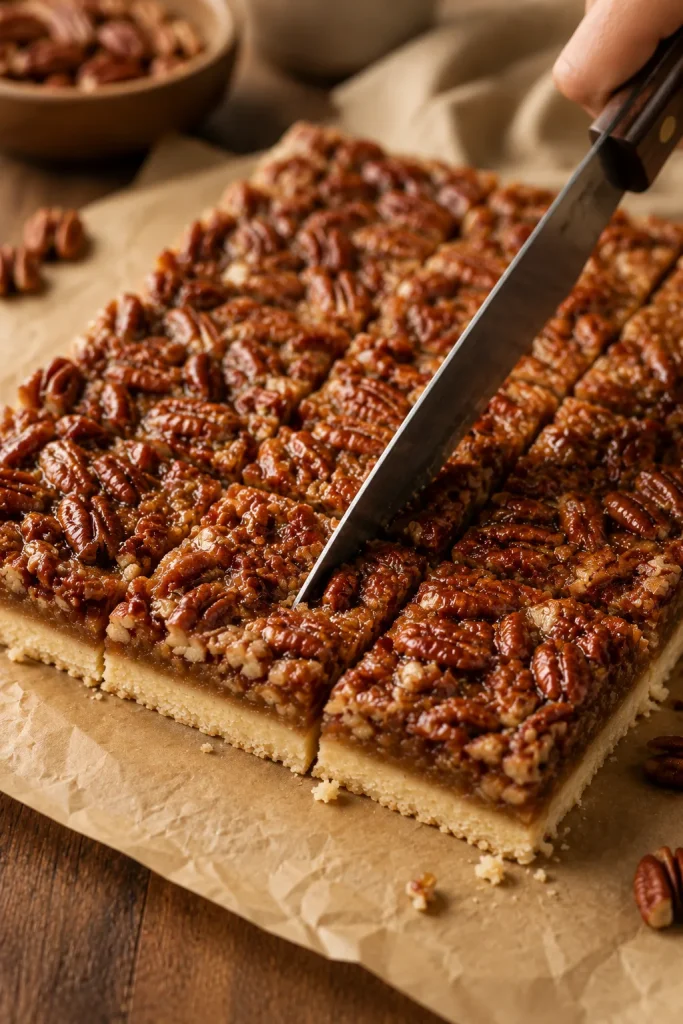
For the neatest look, cut the bars cold and then let them sit at room temperature before serving. A chilled slab is easier to cut than a room-temperature one, even if you plan to serve the bars softer.
For serving, smaller pieces usually work better than large ones because the bars are rich. Coffee, unsweetened tea, lightly sweetened homemade whipped cream, or a little flaky salt all help balance the sweetness.
That is the difference between a delicious pan and a dessert tray that looks intentional.
How to Make Them Gooier, Firmer, or Cleaner-Cut
Once the base recipe is clear, you can steer the bars a little softer, a little firmer, or cleaner-cut without changing the whole formula.
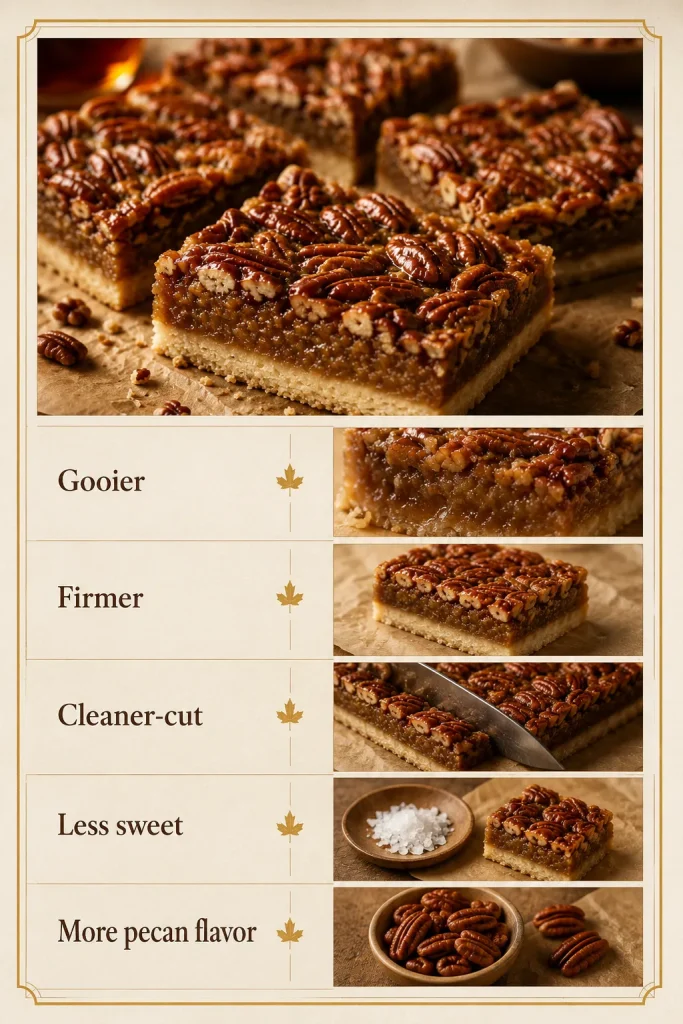
| Desired Result | What to Do |
|---|---|
| Gooier center | Use maple syrup as written, keep the cream, and do not overbake. |
| Firmer bars | Skip the cream and chill before slicing. |
| Cleaner cuts | Chill the slab, use a sharp knife, and wipe between cuts. |
| Less sweet feel | Cut smaller squares and finish with flaky salt. |
| Stronger pecan flavor | Lightly toast the pecans before adding them to the filling. |
You are not locked into one texture; you just need the right small adjustment. Do not reduce the sugar heavily to make the bars less sweet, because sugar helps the filling set. Better balance comes from smaller pieces, flaky salt, coffee, tea, or lightly sweetened cream.
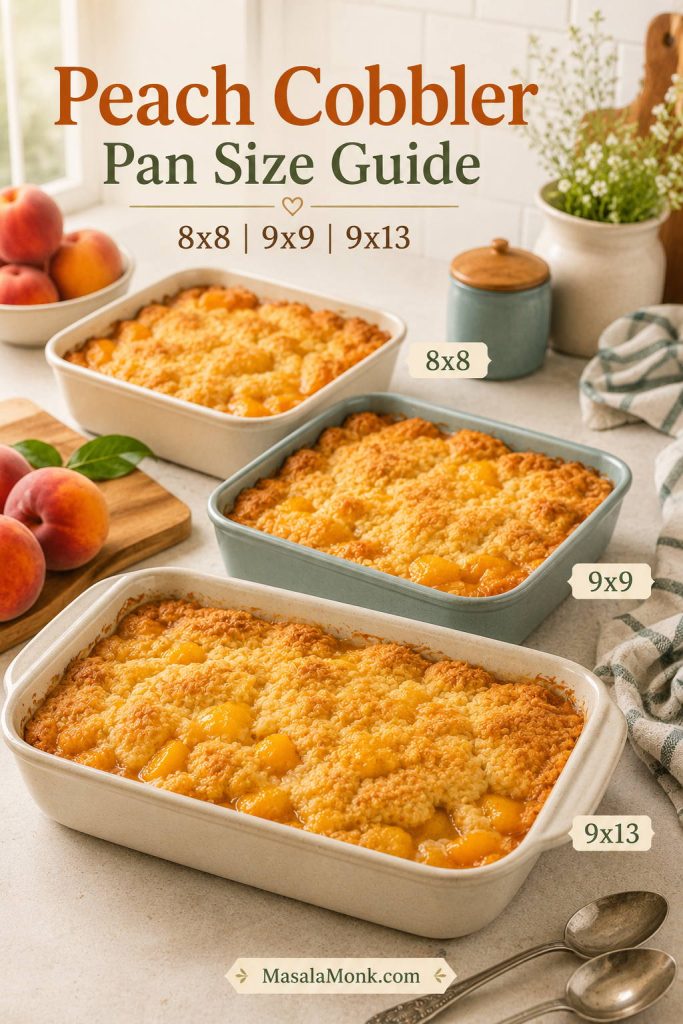
Pan Size Guide
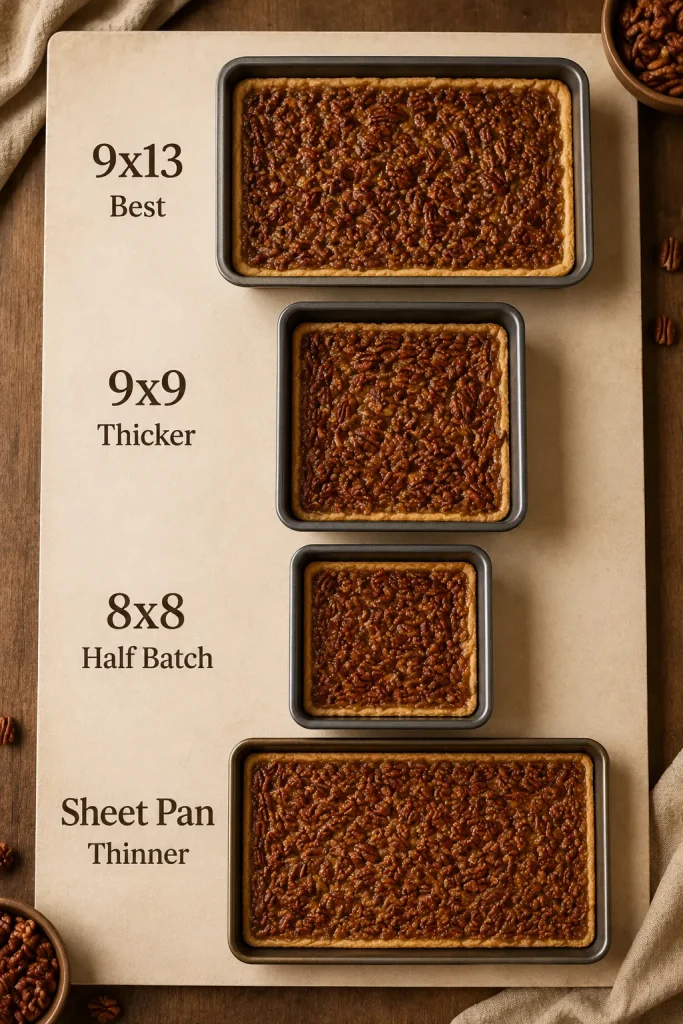
For holiday baking, a 9×13 inch pan is the calm choice. It gives you enough bars to share without making the filling so thick that the center struggles to set.
| Pan Size | Best For | What to Know |
|---|---|---|
| 9×13 inch / 23×33 cm | Holiday trays, potlucks, parties | Best default. Makes 24 rich bars or 36 smaller squares. |
| 9×9 inch | Smaller batch | Bars will be thicker. They may need a little more time to set. |
| 8×8 inch | Small batch | Use a scaled-down recipe rather than baking the full amount in this pan. |
| Jelly roll pan or sheet pan | Large thin bars | Not a direct swap. The bars will be thinner and may bake faster. |
| Metal baking pan | Clean edges and even browning | Best choice if available. |
| Glass baking dish | Home baking | Works, but glass holds heat longer. Check early near the end of baking. |
Can I Make a Smaller Batch?
Yes, but use a true half batch for an 8×8 pan rather than pouring the full 9×13 mixture into a smaller dish. The bake time will usually be shorter for a scaled-down batch, but use the same doneness cues: bubbling edges, glossy top, and a soft wobble in the center.
Best Syrup for Pecan Pie Bars: Maple vs Corn Syrup
Syrup changes both flavor and texture. Corn syrup gives the classic glossy sweetness; maple brings a warmer flavor and a slightly softer bite.
| Sweetener | Best For | Texture and Flavor |
|---|---|---|
| Maple syrup | No-corn-syrup pecan pie bars | Warm, deep, slightly caramel-like flavor. |
| Light corn syrup | Classic pecan pie bars | Glossy, sweet, familiar, and reliable. |
| Honey | Honey-forward bars | Sticky and floral, with a stronger flavor. |
| Golden syrup | Caramel-style sweetness | Rich, buttery, and slightly toasty. |
| Brown sugar only | Deeper caramel flavor | Not always a direct syrup replacement because syrup helps texture. |
Use the syrup listed in the recipe card for the most reliable result. Swapping sweeteners can change the sweetness, set, and sliceability.
Can You Make Pecan Pie Bars Without Corn Syrup?
Yes. These pecan pie bars can be made without corn syrup by using maple syrup. Maple brings more flavor and a slightly softer bite, so this recipe does not ask maple to do all the structural work alone. The eggs, brown sugar, bubbling edges, and full cooling time all help the filling set into bars instead of staying loose.
So yes, you can skip corn syrup here — just do not treat maple syrup like a magic swap. The bars still need the eggs, sugar, bake time, and cooling time to become sliceable.
For a more classic version, replace the maple syrup with the same amount of light corn syrup. Honey can work for a stronger natural-sweetener flavor, but it will taste noticeably like honey.
Make-Ahead Holiday Timeline
This is why these bars belong on a holiday table: they let you finish dessert before the kitchen gets chaotic. By the next day, the filling is settled, the cuts are cleaner, and one dessert is already off your list.
Best Plan for Thanksgiving or Christmas
- One day before serving: bake the bars, cool completely, cover, and refrigerate.
- Serving day: lift the slab from the pan and cut while chilled.
- Before serving: let the bars sit at room temperature briefly for a softer, gooier bite.
- Trays or boxes: place parchment between layers so the tops do not stick.
Thanksgiving plan: bake the bars on Wednesday, chill overnight, slice Thursday morning, and serve later in the day. On a busy holiday morning, already-cut bars feel much calmer than a pie that still needs a clean first slice.
How to Pack Them for a Party or Cookie Box
- Chill before packing so the pieces hold their shape.
- Cut smaller squares for dessert trays and cookie boxes.
- Use parchment between layers so the tops do not stick.
- Keep the top layer flat instead of pressing bars together.
- Do not pack warm bars; the filling needs to be fully cooled first.
- Add flaky salt after cutting if the tops are no longer tacky.
Picture the pan on a crowded Thanksgiving counter: bars already cut, parchment between layers, no pie server required. Small squares are often the smartest choice for a mixed dessert table because they feel generous without making the plate too heavy.
Storage and Freezing
Let the bars cool completely at room temperature so the filling can set. Leave them uncovered while they cool, then cover once they are no longer warm. The safest make-ahead approach is to treat them like pecan pie and refrigerate after cooling, especially because this version contains eggs and cream.
For a cautious storage approach, Iowa State University Extension and Outreach recommends refrigerating homemade pecan and pumpkin pies made with fresh ingredients after baking and cooling unless they are served within the safe room-temperature window.
They are also forgiving in the fridge, which is exactly what you want from a holiday dessert.
| Storage Method | How Long | Best Practice |
|---|---|---|
| Cooling after baking | About 2 hours, or until fully cooled | Cool uncovered so the filling can set before chilling or slicing. |
| Room-temperature serving | Up to 2 hours after cooling | Good for dessert tables, especially in a cool room. |
| Refrigerator | 3 to 4 days | Store airtight, with parchment between layers if stacked. |
| Freezer | Up to 3 months for best quality | Freeze sliced bars with parchment between layers. |
To freeze, cool the bars completely, cut them into squares, and freeze in an airtight container. Place parchment between layers so the tops do not stick. Thaw overnight in the refrigerator, then let them sit at room temperature briefly before serving if you want a softer texture.
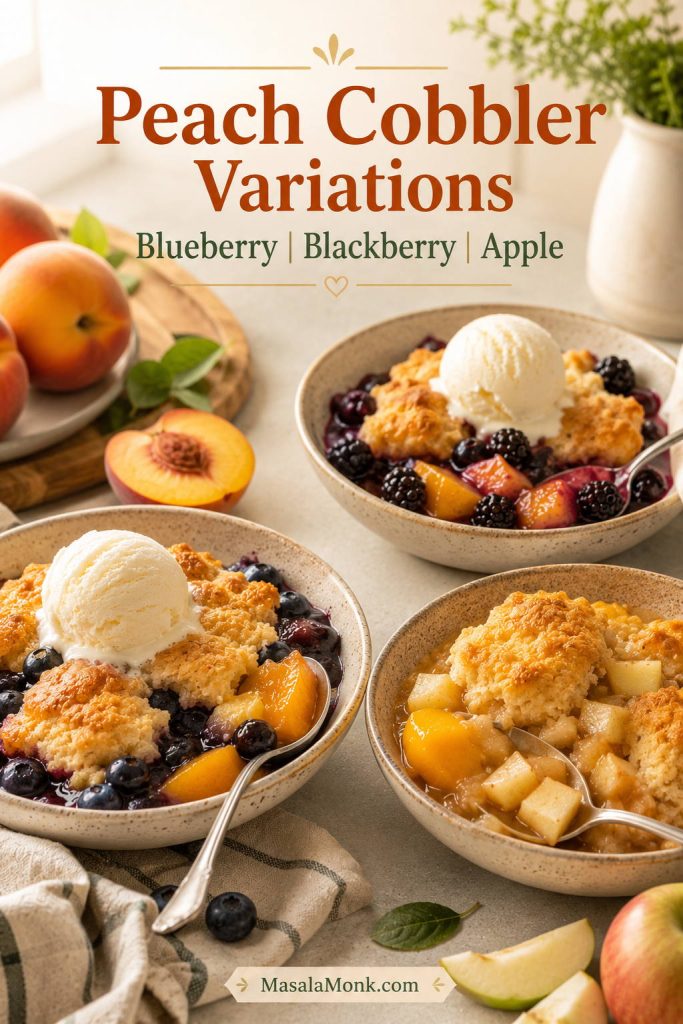
Variations
Some changes are easy because they only adjust flavor. Others change the structure of the filling, and that is where pecan pie bars stop being casual.
Easy Flavor Changes
- Chocolate pecan pie bars: sprinkle 1/2 to 3/4 cup chocolate chips over the crust before adding the filling, or drizzle melted chocolate over the cooled bars. For a true chocolate-square dessert instead, try fudgy brownies.
- Bourbon pecan pie bars: add 1 to 2 tablespoons bourbon to the filling. It works especially well with maple syrup and brown sugar.
- Salted pecan pie bars: finish the baked bars with flaky salt while the top is still slightly tacky.
- Brown butter pecan bars: brown the butter first, then cool it slightly before whisking it into the filling.
- Maple spice pecan bars: use maple syrup as written and add a small pinch of cinnamon or a little apple pie spice. Keep it light so the pecans, brown sugar, and maple stay in front.
Bigger Changes
- Pecan pie cheesecake bars: add a cheesecake layer only if you are using a version built for that extra layer.
- Pumpkin pecan pie bars: use a purpose-built pumpkin version because pumpkin changes the moisture, filling thickness, and bake time.
- Vegan pecan pie bars: use a recipe designed without eggs and butter rather than swapping them casually here.
- Keto or sugar-free pecan pie bars: use a dedicated low-carb version because sugar and syrup help this filling set.
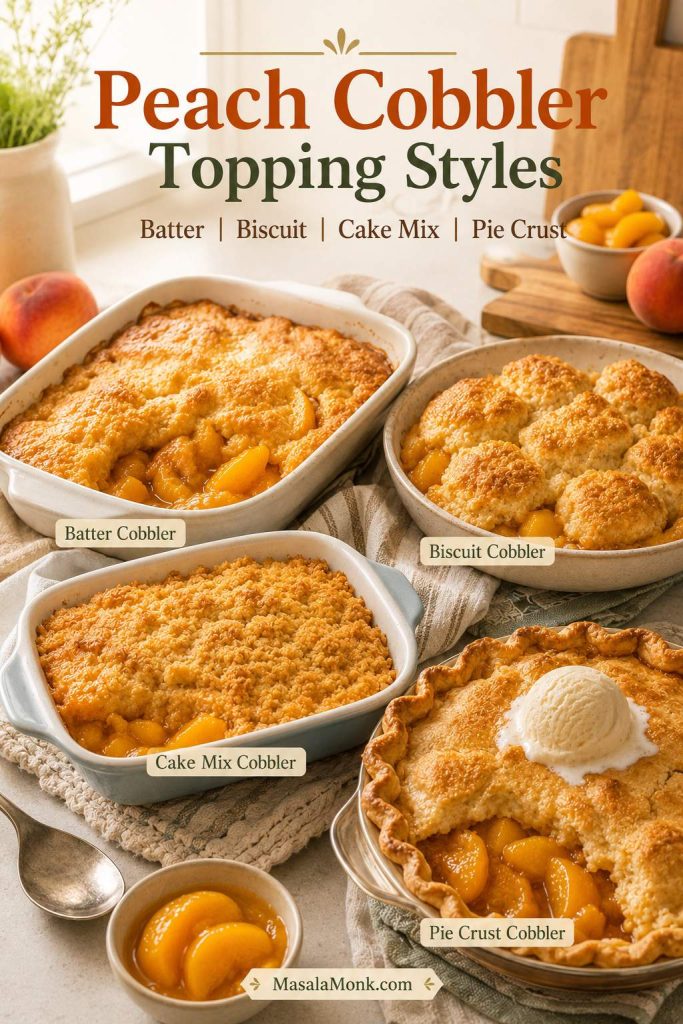
Can You Use Pie Crust, Cookie Dough, or Cake Mix?
The shortbread crust gives the best balance of buttery flavor, strength, and tidy slicing. Shortcuts can work, but they will change the final texture.
- Store-bought pie crust: softer and more pie-like, but less sturdy than shortbread.
- Sugar cookie dough: sweeter and softer, more like a cookie bar.
- Cake mix crust: cakier and less classic.
- Crescent roll dough: very soft and quick, but not traditional.
- Graham cracker crust: sweeter and more crumbly unless packed firmly.
Dietary Notes
These bars depend on butter, eggs, sugar, and syrup for structure, so small swaps are safer than big ones. A 1:1 gluten-free flour blend is the easiest likely swap for the crust, though the base may be more delicate. Vegan, keto, and sugar-free versions need separate formulas because they change how the filling sets. When the bars need to feel less sweet, cut smaller pieces and add flaky salt instead of reducing the sugar heavily.
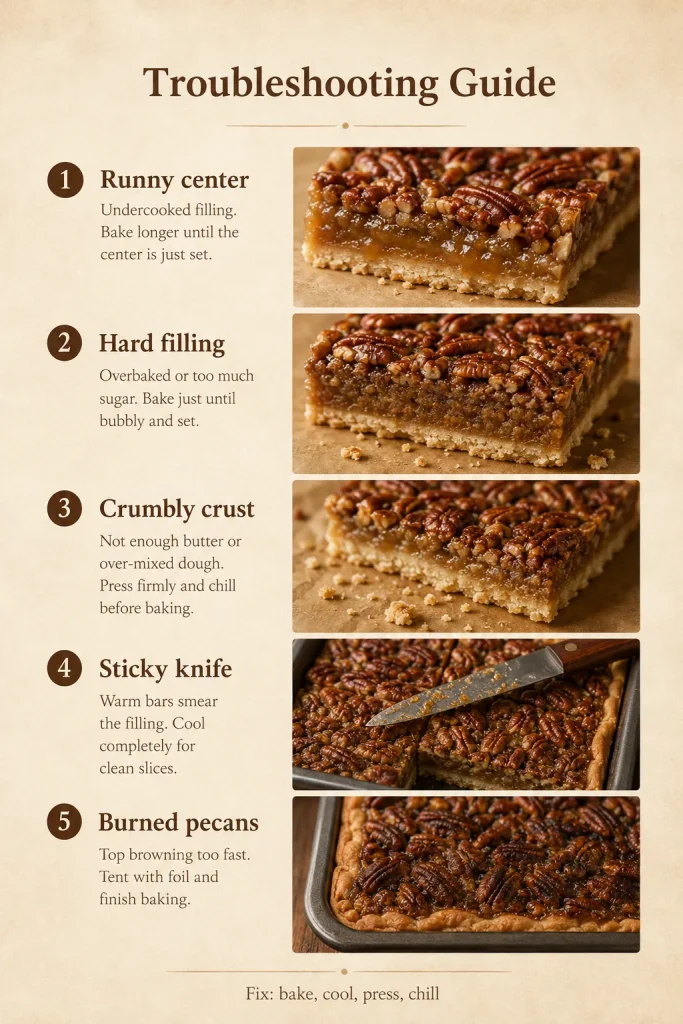
Troubleshooting Pecan Pie Bars
A pan that looks wrong is usually not a disaster. Most problems come from one of four places: bake time, cooling time, crust pressure, or filling changes.
Quick Fix Table
| Problem | Likely Cause | Fix |
|---|---|---|
| Bars are runny | Underbaked, cut too soon, or filling ratio changed | Bake until edges bubble and center is set with only a slight wobble. Cool completely before cutting. |
| Filling is too hard | Overbaked or baked too long after the filling was already set | Check earlier next time. Remove when the center is just set, not dry. |
| Crumbly crust | Crust was not pressed firmly enough or flour was overmeasured | Press the crust tightly into the pan and measure flour carefully. |
| Soggy crust | Crust was not prebaked enough | Prebake until set and lightly golden at the edges before adding filling. |
| Filling leaked under the crust | Crust had cracks or was pressed unevenly | Press the crust firmly and evenly, especially along the edges. |
| Pecans burned | Bars baked too long or oven runs hot | Check earlier and use an oven thermometer if needed. |
| Too sweet | Pecan pie filling is naturally rich | Cut smaller squares, add flaky salt, and serve with coffee or lightly sweetened whipped cream. |
| Sticky knife | Bars are too warm or the knife is sticky | Chill before cutting and wipe the knife between slices. |
| Falling apart when cut | Not cooled enough or crust too loose | Cool fully, chill briefly, and use a sharp knife. |
| Center still jiggles | Could be normal or underbaked depending on movement | A soft wobble is fine. A liquid ripple means it needs more time. |
Problem solved? Return to the recipe card, or review the doneness cues before your next batch.
FAQ
What is the difference between pecan pie and pecan pie bars?
Pecan pie is usually baked in a round pie crust and cut into wedges. By contrast, pecan pie bars are baked in a rectangular pan with crust on the bottom and pecan filling on top, then cut into squares. The flavor is similar, but bars are easier to serve, pack, and share.
Are pecan pie bars easier than pecan pie?
Yes. The crust is pressed instead of rolled, and the slab cuts into squares instead of fragile wedges.
Why did my pecan pie bars turn out runny?
Runny bars are usually underbaked, cut too early, or made with changed filling ratios. If the edges did not bubble before you removed the pan, the filling probably did not get hot enough to set.
How long should pecan pie bars cool before cutting?
Give them at least 2 hours, or until the pan is completely cool. For sharper cuts, chill the cooled slab for 30 to 60 minutes before slicing.
Do pecan pie bars need to be refrigerated?
Refrigeration is the safest choice after they cool, especially if you are making them ahead. Cool them uncovered first, then cover and store leftovers in an airtight container in the fridge.
Can pecan pie bars be frozen?
They freeze well once the filling has cooled and set. Slice before freezing, place parchment between layers, seal tightly, and freeze for up to 3 months. Thaw in the refrigerator before serving.
Can maple syrup replace corn syrup in pecan pie bars?
Maple syrup can replace corn syrup in this recipe. The flavor becomes deeper and slightly more caramel-like. Maple bars may be a little softer than classic corn syrup bars, so let them cool fully before cutting.
Should I use pecan halves or chopped pecans?
Chopped pecans work better because they spread evenly and do not drag the knife through the topping. Pecan halves look attractive, but they can make the top harder to slice neatly.
Can I make pecan pie bars ahead for Thanksgiving?
Yes. Bake them a day ahead, cool completely, chill overnight, slice cold, and bring them closer to room temperature before serving.
Final Thoughts
Pecan pie bars are the dessert to make when you want all the glossy, nutty comfort of pecan pie without the pressure of carving out the first fragile wedge. Give the crust its head start, let the filling bubble, and cool the pan completely. The reward is a quiet holiday win: buttery bars that cut cleanly, travel easily, and still taste like the center of a pecan pie.