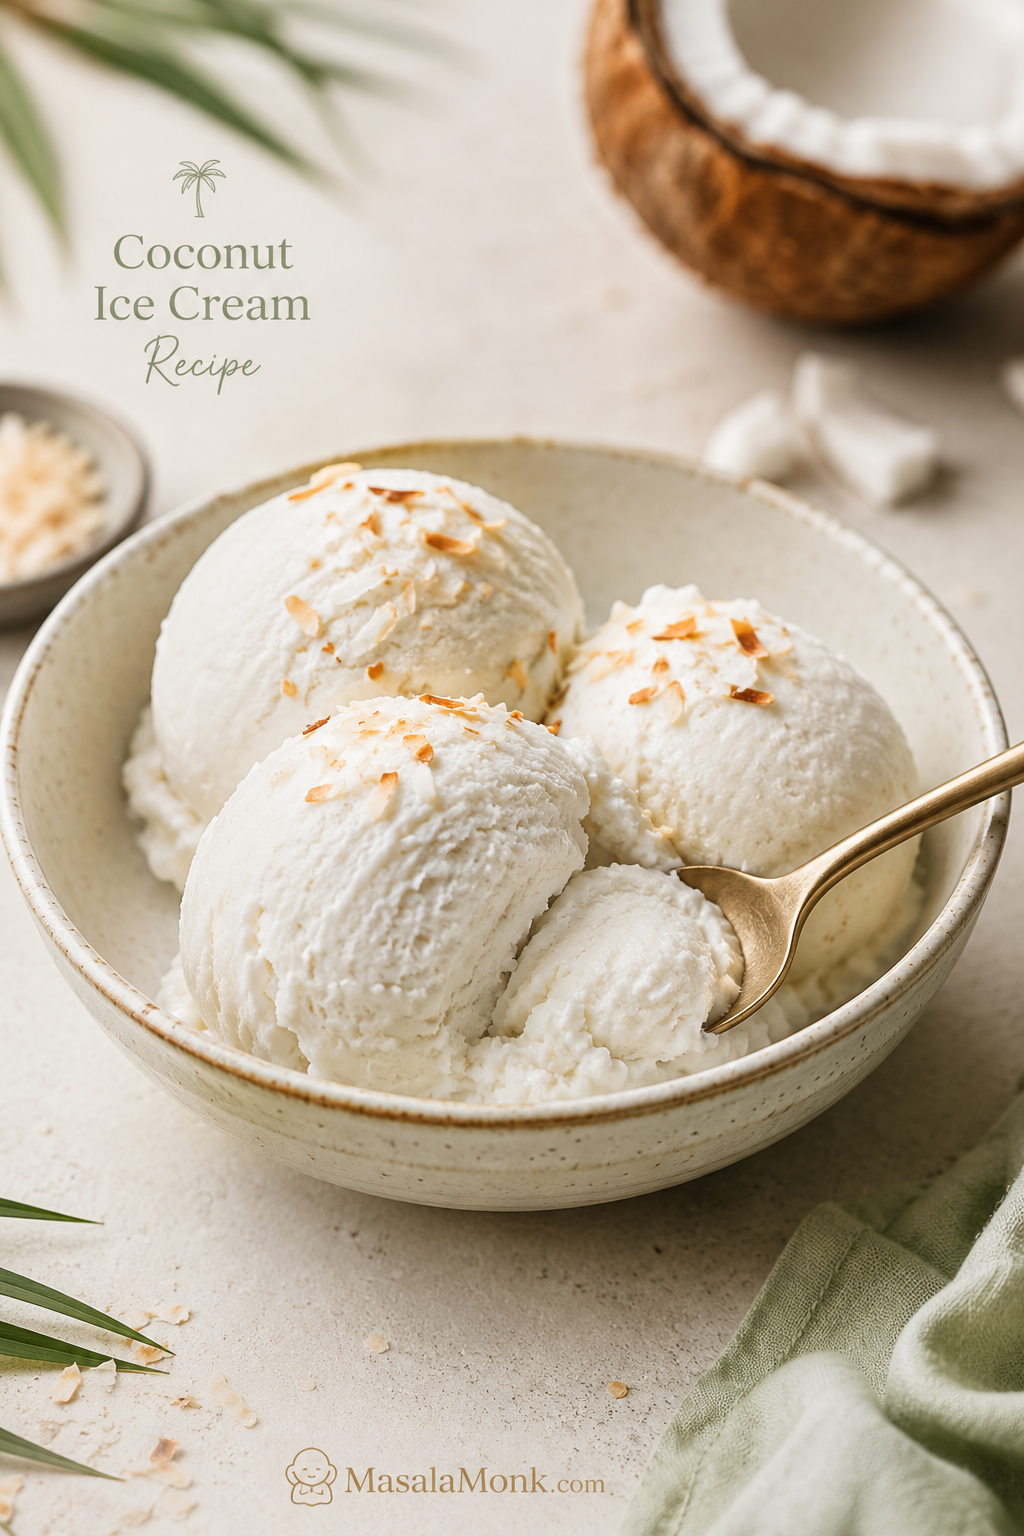
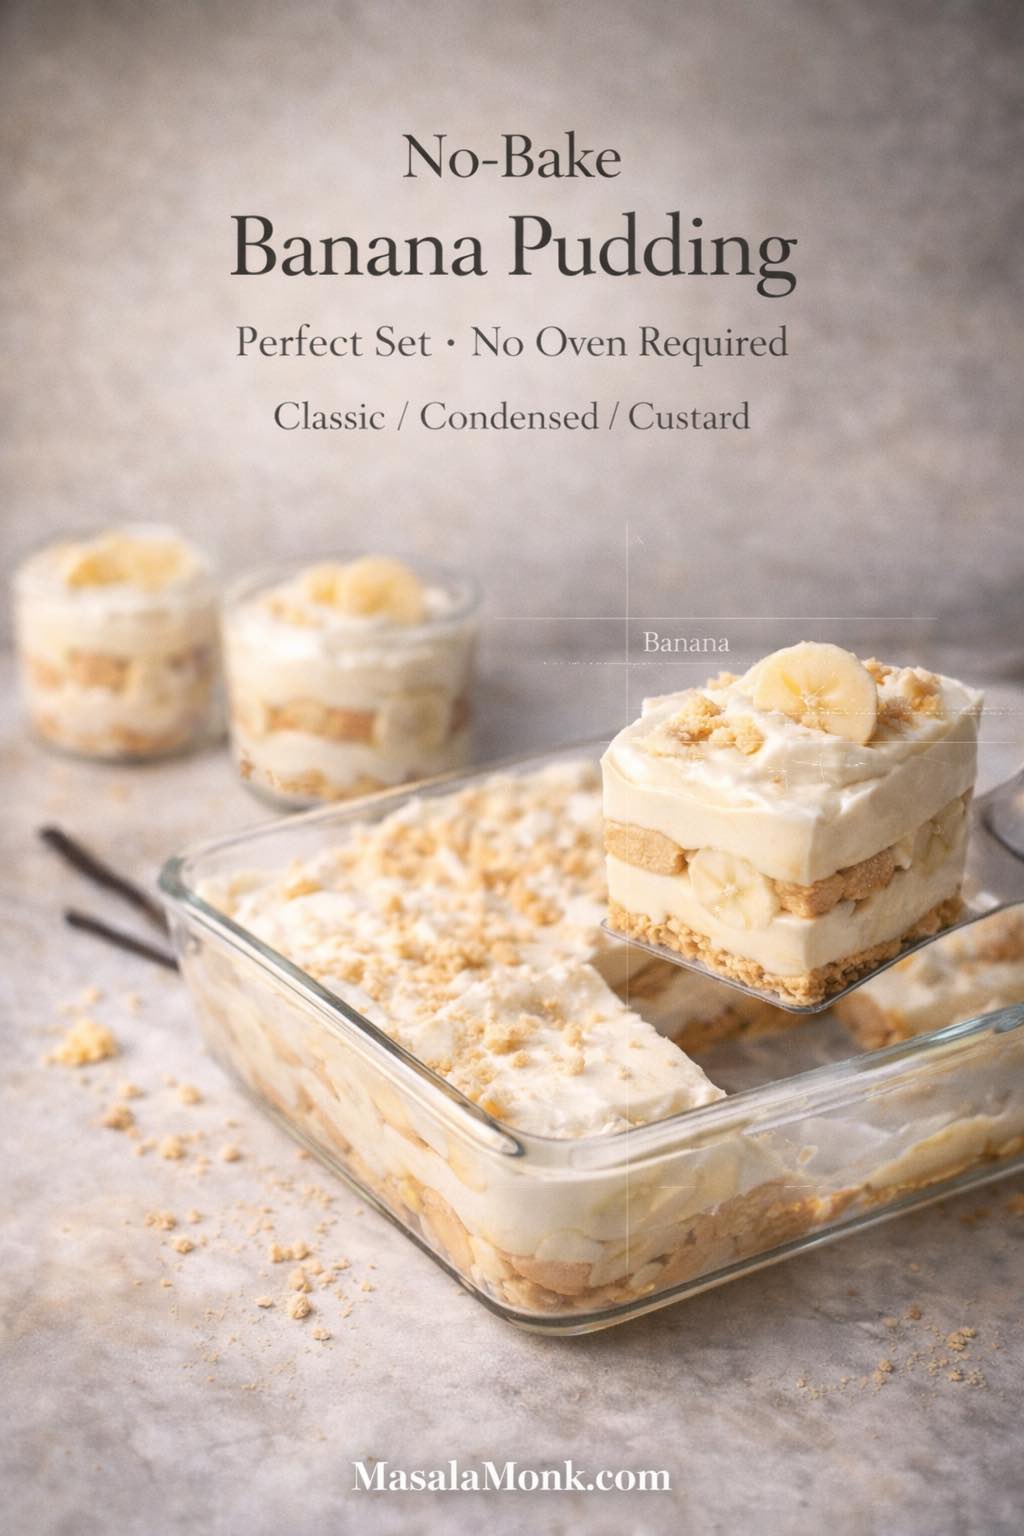
Strawberry Ice Cream Recipe sounds simple until the freezer gets involved. Sweet berries, cream, sugar, and vanilla should turn into something creamy and bright. Instead, homemade strawberry ice cream can come out icy, pale, too hard to scoop, or strangely bland after one night in the freezer.
If that has happened to you, it was probably not because you “failed” at ice cream. Strawberry is one of the easiest flavors to make taste good while the mixture is fresh, and one of the easiest to ruin after freezing. The berries bring the flavor, but they also bring water, and water is what turns into frozen crunch.
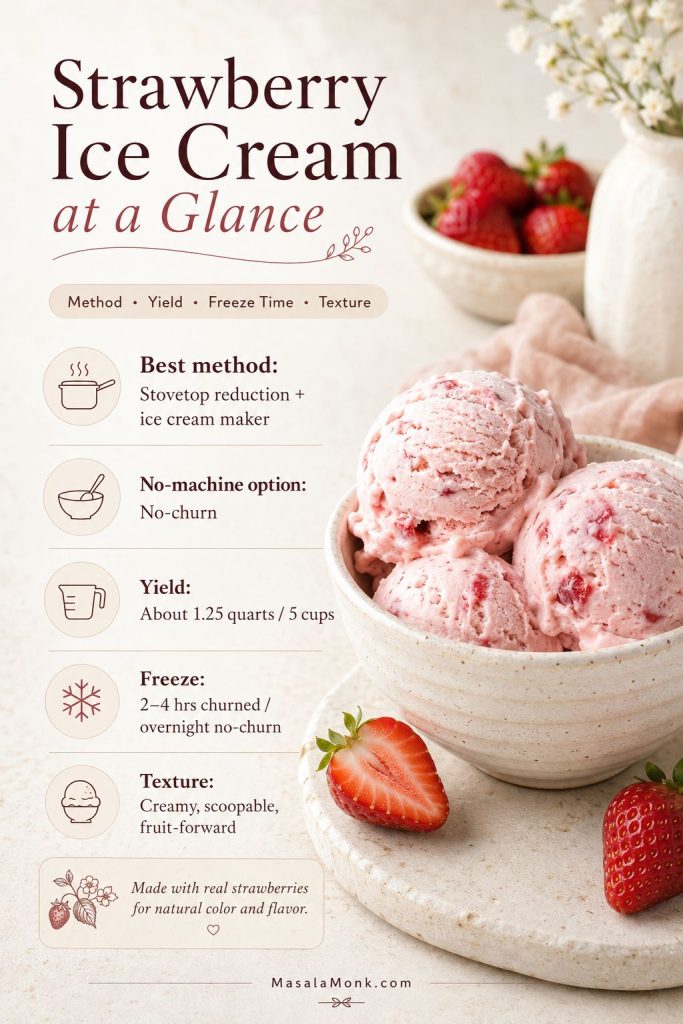
This recipe fixes that by concentrating the strawberries first, so the finished scoop tastes like ripe berries and cream instead of frozen pink milk. You can make it with an ice cream maker for a classic churned texture, or use the no-churn condensed milk method if you do not have a machine.
This is an eggless strawberry ice cream recipe, so the berry flavor stays bright instead of getting buried under a heavy custard.
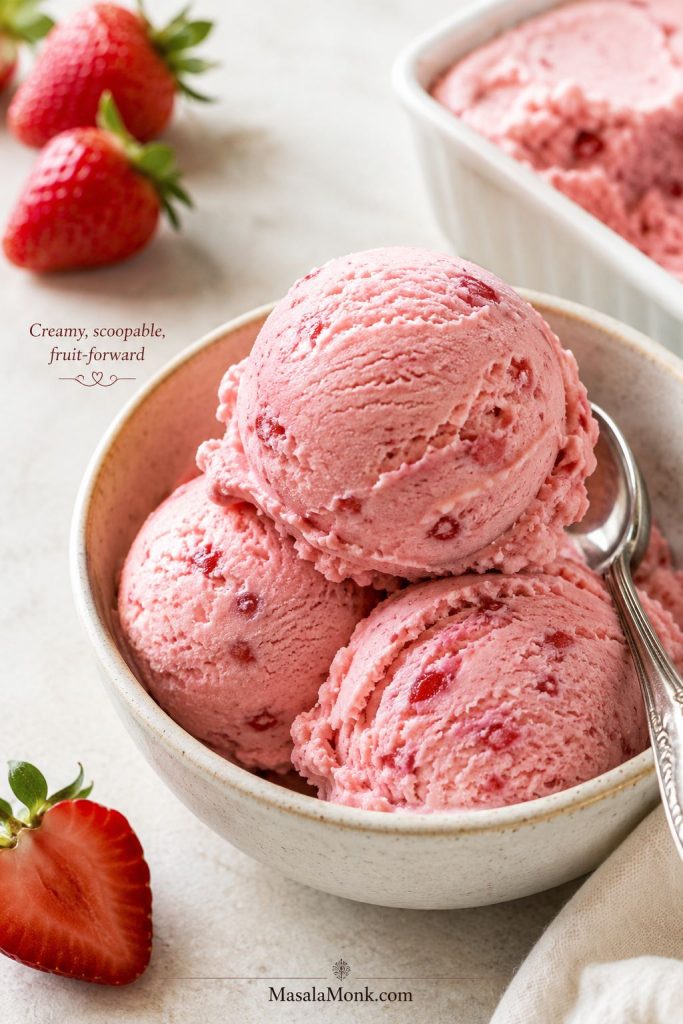
When it works, the first spoonful should feel creamy from the edge of the scoop, smell like strawberries before you even taste it, and leave you with that clean berries-and-cream flavor instead of a crunchy, icy finish. The color should be soft and natural, not neon, and the flavor should come from cooked-down berries rather than bottled strawberry flavoring.
On this page
Start with the quick answer and method chooser if you are deciding how to make it. Use the second group when you want texture fixes, storage tips, variations, and serving ideas.
Make the ice cream
Texture, fixes, and serving
Quick Answer: The Best Strawberry Ice Cream Recipe
The best strawberry ice cream recipe starts with ripe strawberries, heavy cream, whole milk or half-and-half, sugar, vanilla, lemon juice, and a small texture helper such as light corn syrup, glucose, or honey. For the creamiest result, cook off some of the berry juice first, until the strawberries become thick, glossy, and jammy rather than loose and watery.
For the best all-around version, use an ice cream maker with a stovetop strawberry reduction. No machine? Use the no-churn version with reduced strawberries, sweetened condensed milk, and whipped cream. In both cases, the strawberry reduction is what keeps the freezer from turning the fruit into a grainy, hard scoop.
The rule is simple: do not blend watery raw strawberries straight into cream and expect smooth ice cream. Make the berries freezer-ready first, chill the mixture well, and freeze it in a shallow airtight container.
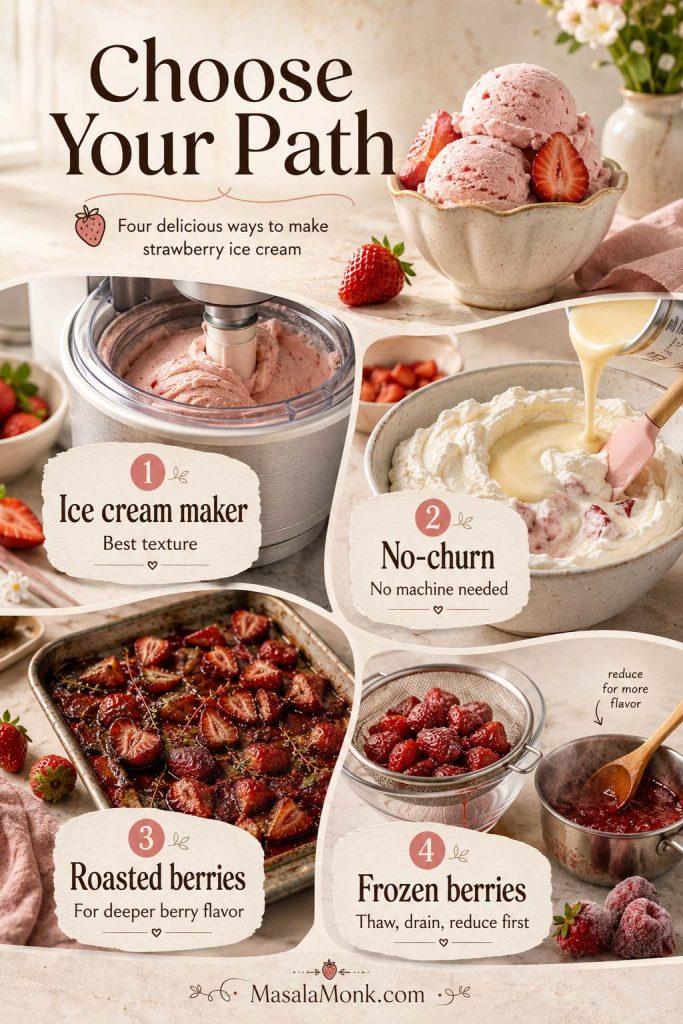
Best first batch: Make the stovetop strawberry reduction and churn it in an ice cream maker. Use the no-churn condensed milk method when you want the easiest freezer version without special equipment.
At a Glance
Choose Your Path
If you are standing in the kitchen with strawberries, cream, and a freezer container, this is the fastest way to decide what to do next.
Use this shortcut guide before you start
- Want the best texture? Use the ice cream maker version with stovetop strawberry reduction.
- No ice cream maker? Use the no-churn condensed milk version below.
- Berries smell flat? Roast them for deeper, jammy strawberry flavor.
- Using frozen strawberries? Thaw, drain, and reduce them before adding dairy.
- Want eggless strawberry ice cream? You are already in the right place; both versions are eggless.
- Hate seeds? Blend and strain the reduced purée before mixing the base.
Smell the strawberries before you decide. When they are sweet and floral, the stovetop reduction is enough. If they look red but smell quiet, roast them for deeper flavor. With frozen berries, thaw and drain them before they go anywhere near the cream.
| Choose this method | Best for | What to expect |
|---|---|---|
| Stovetop reduction + ice cream maker | Best all-around strawberry ice cream | Classic churned texture, strong berry flavor, reliable scoop |
| Roasted strawberries + ice cream maker | Deepest fruit flavor | Jammy, richer fruit taste; best when berries smell mild |
| Reduced strawberries + condensed milk + whipped cream | No-churn strawberry ice cream | Easy, creamy, no machine needed; freeze overnight |
| Frozen strawberries + reduction | Off-season batches | Works well if berries are thawed, drained, and cooked first |
| Raw purée shortcut | Fastest possible version | Fresh-tasting but more likely to freeze icy |
If you are not sure, start with the ice cream maker method and stovetop reduction. It is the most balanced route: not the longest, not the richest, and not the riskiest.
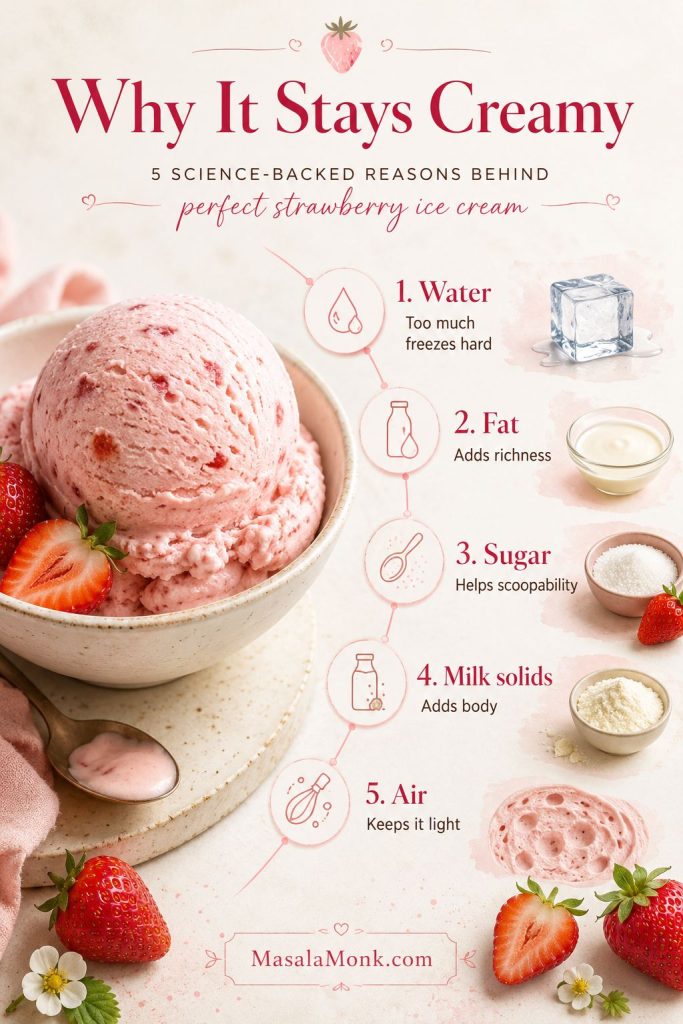
Why This Strawberry Ice Cream Stays Creamy
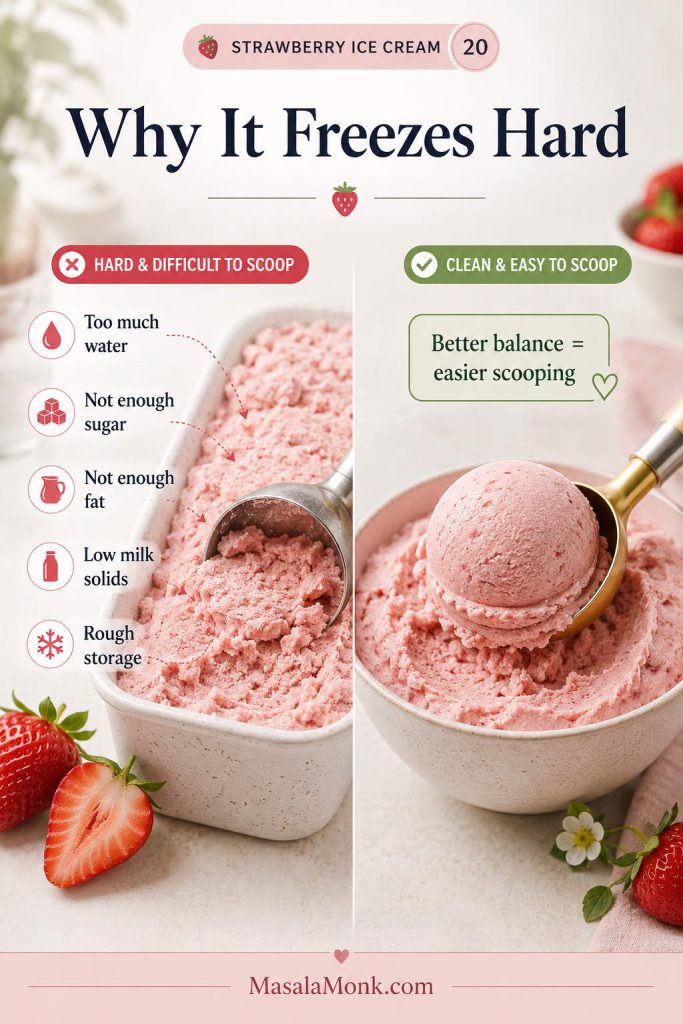
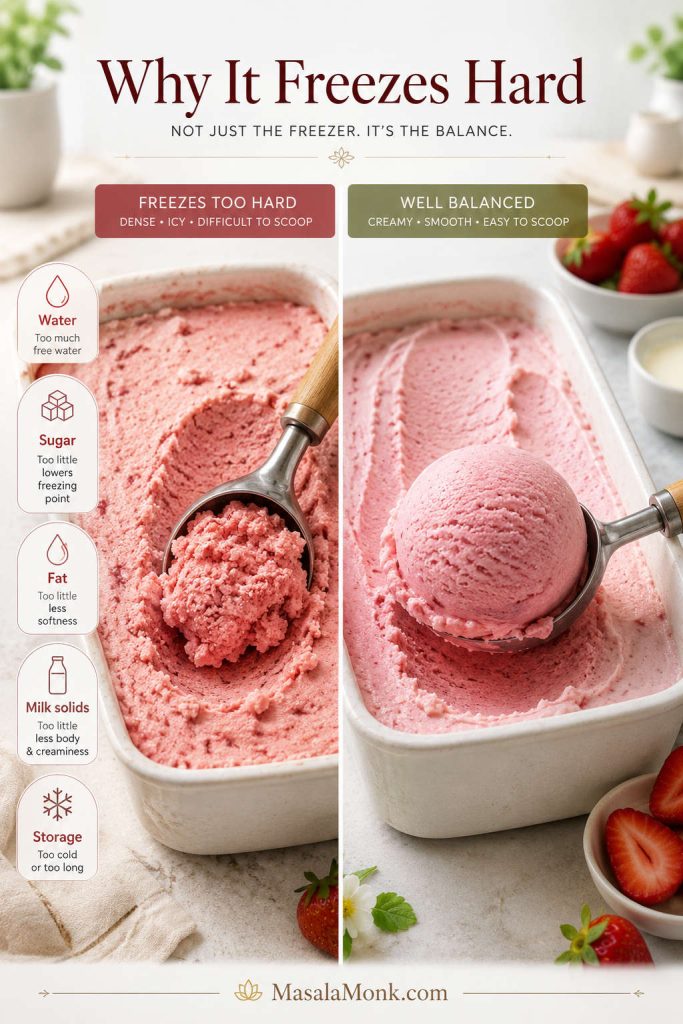
Creamy ice cream depends on five things working together: water, fat, sugar, milk solids, and air. Strawberries make that balance tricky because they bring flavor and water at the same time. Extra water freezes hard, low fat tastes thin, not enough sugar makes the scoop stiff, and too little air leaves it heavy instead of creamy.
This recipe fixes the balance before the mixture ever reaches the freezer. The strawberries are reduced or roasted, the dairy stays full-fat, the sugar is high enough to soften the freeze, and the base is chilled before churning. In the no-churn version, whipped cream brings the air while condensed milk brings sweetness and body.
The reduction is not a fussy extra step. It is the moment the strawberries stop being watery fruit and become ice-cream flavor.
Why Homemade Strawberry Ice Cream Turns Icy
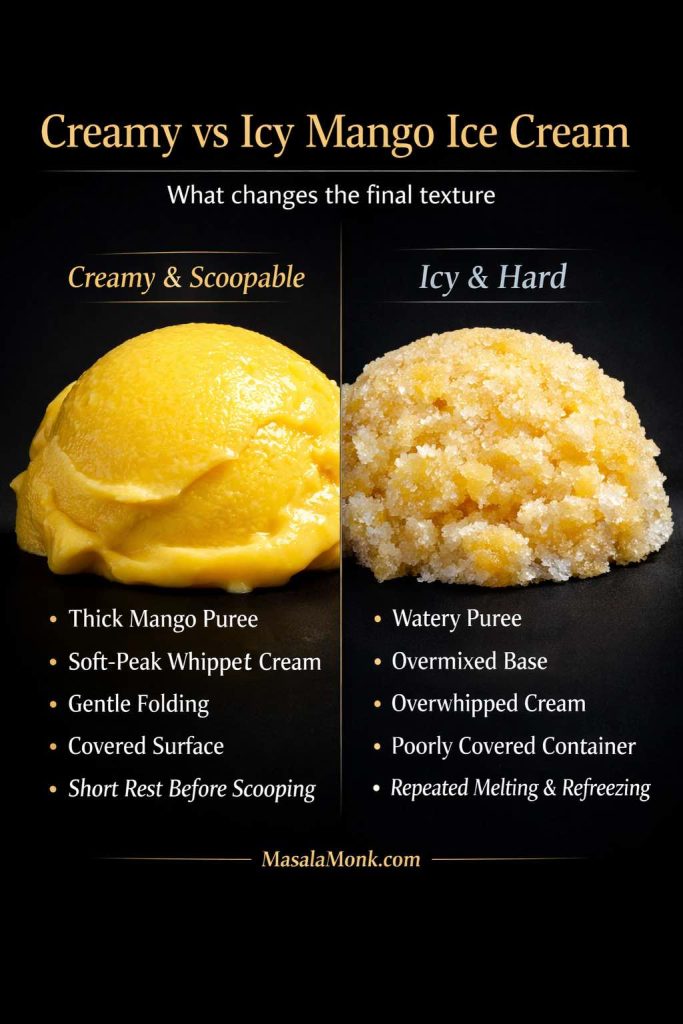
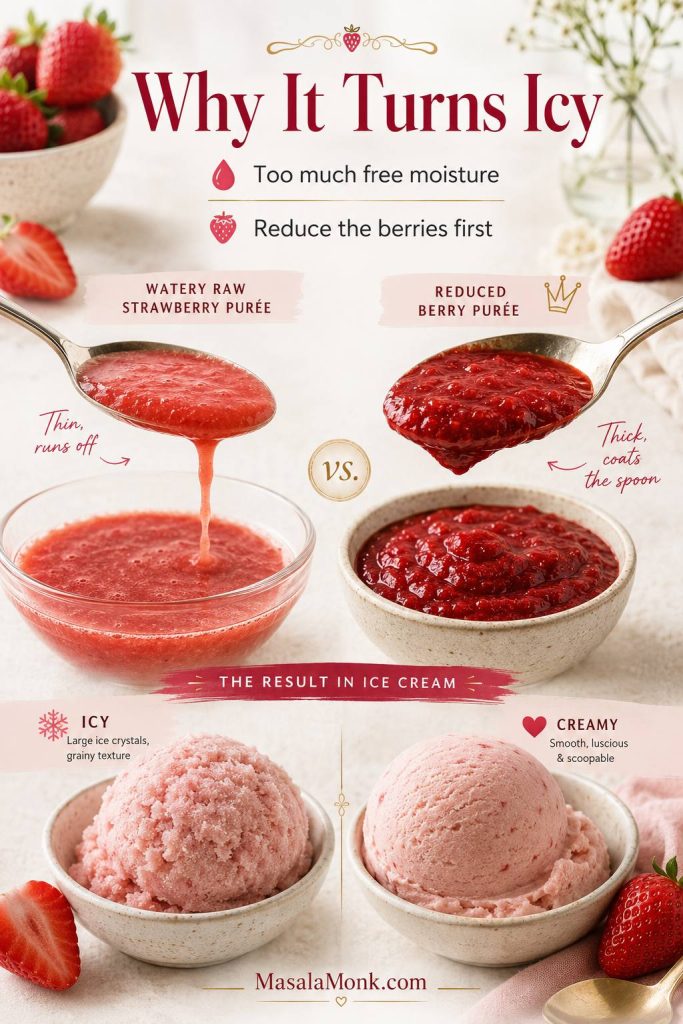
The freezer is where weak strawberry flavor goes to disappear. Fresh berries taste juicy and bright at room temperature, but that same juice becomes the problem once frozen. Too much free moisture in the mixture creates a crunchy, grainy texture instead of a creamy one.
The answer is not to use less fruit. Less fruit gives you pale, timid ice cream. The better fix is to turn loose berries into a thicker purée before they meet the dairy. Simmering or roasting drives off excess moisture while keeping the berry flavor. That gives you a scoop that still tastes like strawberries after a night in the freezer.
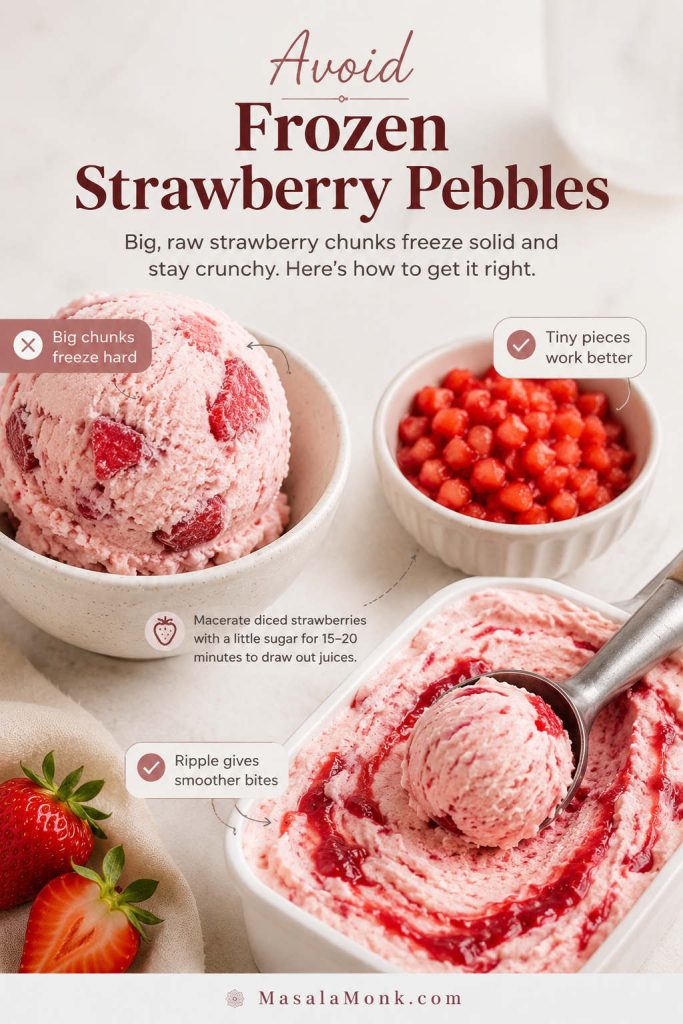
Large raw strawberry chunks cause another common disappointment. They look beautiful in the bowl, but they freeze harder than the creamy base around them. Tiny macerated pieces can work; big raw pieces often turn into frozen fruit pebbles. A smooth purée or thick strawberry ripple usually eats better.
If your last batch froze hard, tasted weak, or had icy fruit pieces, the troubleshooting section will help you match the problem to the fix.
Ingredients You Need
Think of the base as a balance: strawberries for flavor, cream for richness, milk for lightness, sugar for scoopability, and lemon, salt, and vanilla to keep the fruit from tasting flat once frozen.
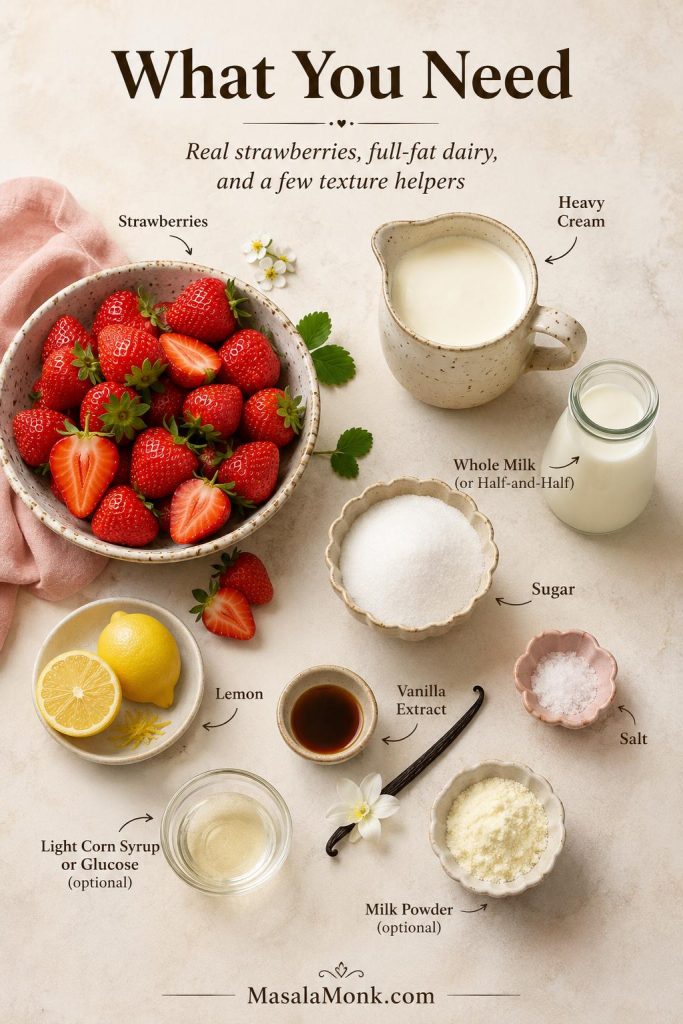
Strawberries
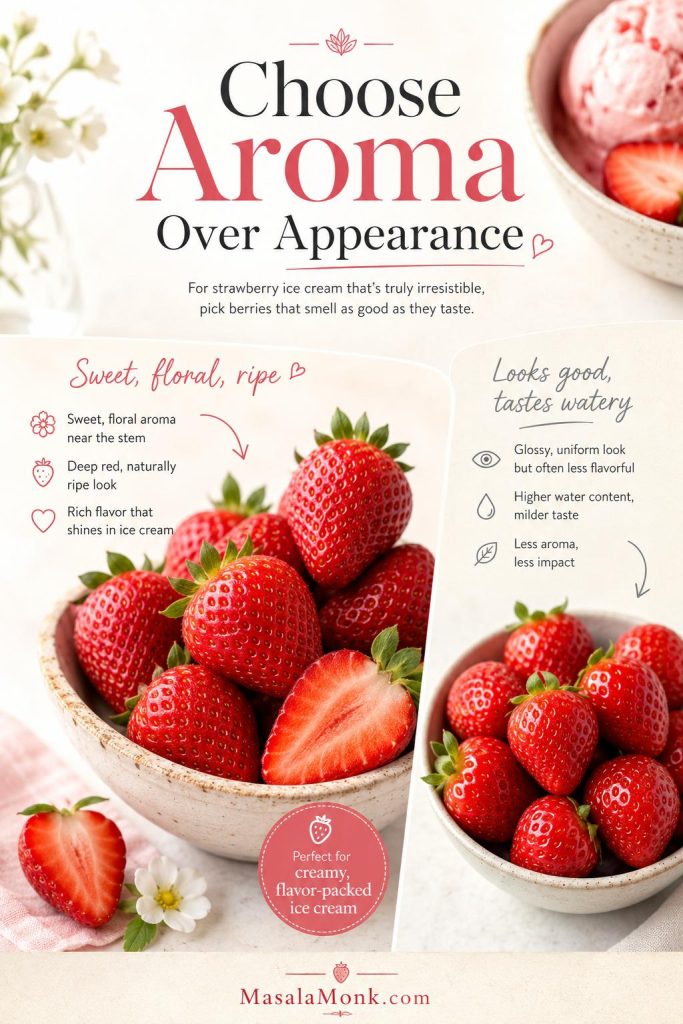
Use strawberries that smell sweet before you cut them. Aroma matters more than perfect color. Deep red berries are helpful, but a fragrant berry will give you better ice cream than a glossy berry that tastes watery.
The churned recipe uses 680g / 1 1/2 lb strawberries. After cooking, that fruit should reduce to about 1 1/4 to 1 1/2 cups of thick strawberry purée. The no-churn version uses closer to 900g to 1kg / about 2 lb because condensed milk and whipped cream can support a stronger fruit layer.
Cream and Milk
Heavy cream gives the scoop its plush, rounded texture, while whole milk or half-and-half keeps the bowl from feeling like frozen whipped cream. Low-fat milk makes fruit ice cream more likely to freeze hard and icy, so this is not the recipe where skim milk quietly behaves like cream.
For a richer batch, use heavy cream plus half-and-half. For a lighter but still creamy version, use heavy cream plus whole milk. Either way, keep the dairy full-fat enough to support the fruit.
Sugar, Glucose, Corn Syrup, or Honey
Sugar is doing more than sweetening the bowl. It helps decide whether the finished ice cream scoops cleanly or freezes into something too firm. A base that tastes just right before freezing may taste dull later because cold mutes flavor, so the unfrozen mixture should taste slightly sweeter and more intense than the final scoop you want.
For the smoothest texture, use 3 tablespoons light corn syrup or glucose in the churned version. Honey also works, but it brings its own flavor. The amount is small; it will not make the ice cream syrupy. It simply helps soften the freeze.
If you enjoy the technical side of homemade ice cream, King Arthur Baking’s strawberry ice cream formula is a useful reference for how corn syrup, optional xanthan gum, and careful chilling can support a smoother frozen texture.
Lemon, Vanilla, and Salt
Lemon juice should not announce itself. It is there to make the strawberries taste more awake. Vanilla rounds out the cream, while salt sharpens the fruit and stops the flavor from feeling flat. When berries are decent rather than spectacular, these small ingredients matter even more.
Optional Milk Powder Upgrade
Milk powder is the quiet upgrade here. A spoonful or two adds body without adding more liquid, which is exactly what a fruit-heavy ice cream needs. Use 1 to 2 tablespoons in the churned base, or 1 tablespoon in the no-churn version, for a creamier scoop.
A tiny pinch of xanthan gum can also help advanced batches, but it is optional. Too much can make ice cream feel gummy, so milk powder is the easier first upgrade.
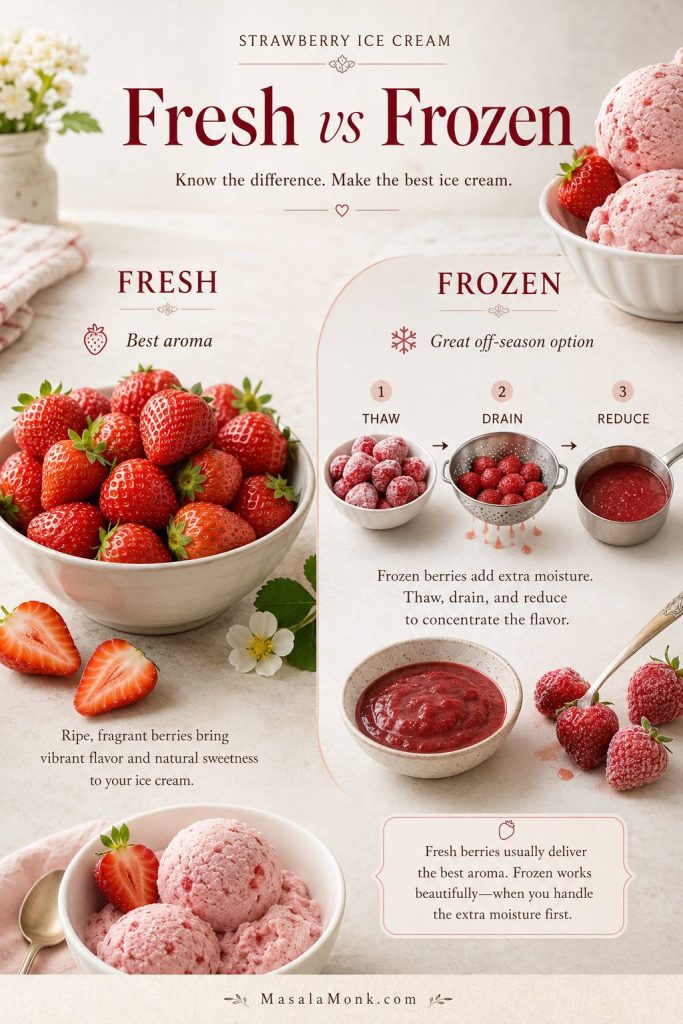
Fresh vs Frozen Strawberries for Strawberry Ice Cream
Fresh ripe strawberries give the best aroma. When they are truly in season, they make the ice cream taste bright before you add anything extra. Still, even fresh berries need concentration because juicy fruit still brings water into the base.
Frozen strawberries can make very good ice cream, but only if you treat them correctly. Thaw them first, drain off excess liquid, and then reduce the fruit on the stovetop. Pouring thawed strawberry water into cream is one of the fastest ways to make icy ice cream.
| Strawberry type | Best use | What to watch |
|---|---|---|
| Fresh ripe strawberries | Best flavor and aroma | Still reduce or roast them for the creamiest texture |
| Fresh but mild strawberries | Good with roasting | Need more flavor concentration, lemon, and salt |
| Frozen strawberries | Reliable off-season option | Thaw, drain, and reduce before adding to dairy |
| Raw chopped strawberries | Use only in tiny amounts | Large pieces freeze hard and icy |
If you already use frozen berries in smoothies, the difference here is texture. A smoothie can stay thick because it is blended and served right away. Ice cream has to freeze, sit, and scoop later. MasalaMonk’s strawberry smoothie recipe guide is useful for drink-style berry texture, while this recipe focuses on controlling water for a creamy frozen scoop.
Made it with frozen strawberries? The detail that helps other readers most is whether you thawed, drained, and reduced them first.
Ice Cream Maker Method
Use the ice cream maker when you want that classic churned scoop: smooth, creamy, and light enough to taste like berries instead of heavy frozen cream. The base is eggless, so the strawberry flavor stays clean and bright.
If your machine uses a freezer bowl, freeze the bowl completely before starting. Overnight is safest. A half-frozen bowl gives you slush, not ice cream. The base also needs to be cold before churning, so do not rush the chill time.
Every machine is a little different, so follow your model’s timing and capacity notes. Cuisinart’s official ice cream maker manuals are useful if you need to check whether your bowl needs longer freezing, how much base your model can hold, or when to add mix-ins.

Step 1: Macerate the Strawberries
Hull and chop the strawberries. Add them to a saucepan with half the sugar and the lemon juice, then let them sit for about 15 minutes. The sugar pulls juice from the berries and starts building the syrupy layer that will later cook down into stronger strawberry flavor.
Step 2: Reduce the Fruit
Cook the strawberries over medium heat, stirring often, for 15 to 20 minutes. Stop when the mixture looks glossy and thick, and a spatula dragged through the pan briefly leaves a trail. From 680g / 1 1/2 lb strawberries, you want roughly 1 1/4 to 1 1/2 cups of reduced strawberry mixture.
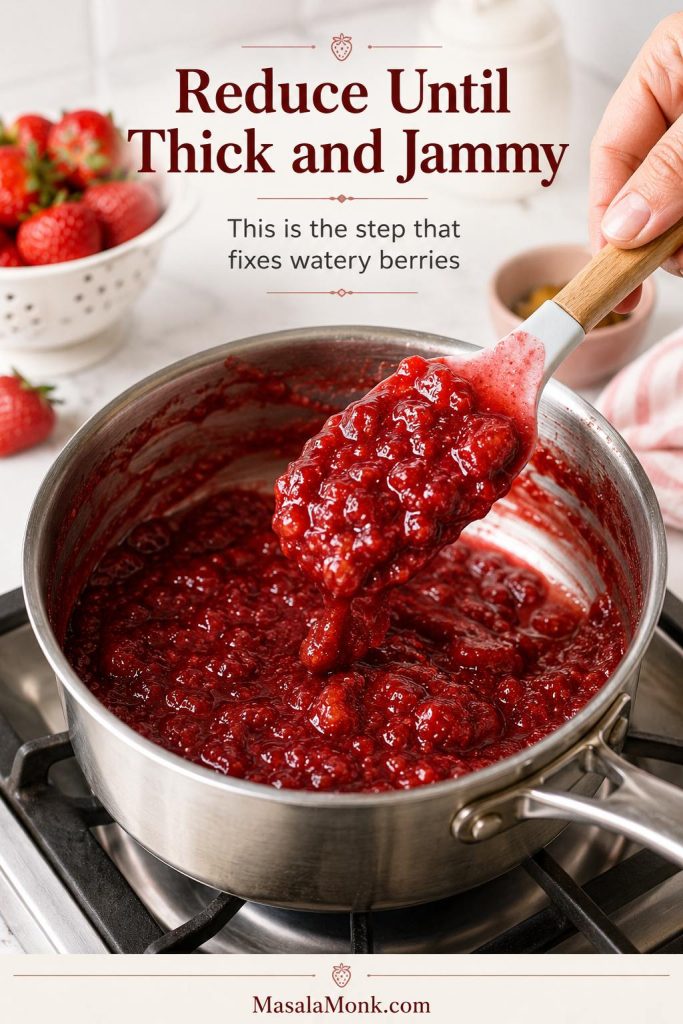
This is the moment the recipe starts smelling like dessert. The berries go from juicy and loose to glossy and almost jammy, and that concentrated fruit is what keeps the finished ice cream tasting alive after freezing.
The pan should smell like warm strawberry jam, and the purée should look rich enough to coat the spoon instead of running straight off it.
Step 3: Blend and Strain
Cool the reduced strawberries, then blend until smooth. For the silkiest texture, strain the purée through a fine-mesh sieve to remove seeds. Skipping the sieve is fine if you like a more rustic fruit texture, but the smooth version usually feels more polished.
Step 4: Mix and Chill the Base
Whisk the strawberry purée with heavy cream, whole milk or half-and-half, the remaining sugar, light corn syrup or glucose, vanilla, salt, and optional milk powder. Taste the base. It should taste slightly too sweet and very strawberry-forward because freezing will soften the flavor.
If the base tastes bold before it goes into the machine, you are on the right track.
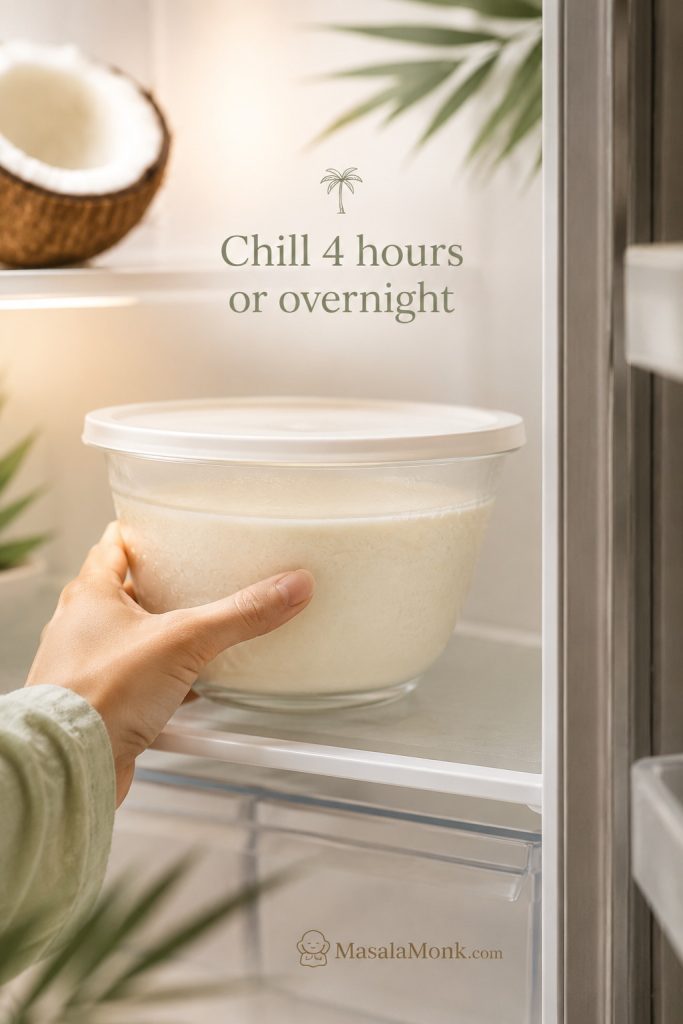
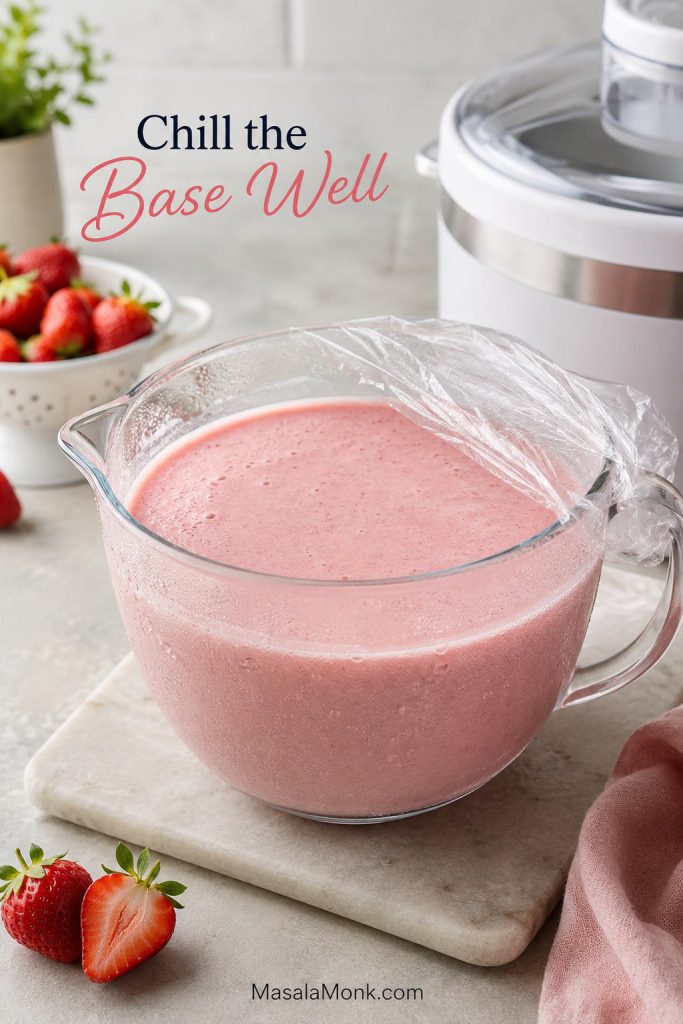
Cover and chill for at least 4 hours. Overnight is even better. A very cold base churns faster, forms smaller ice crystals, and gives a smoother texture.
Not sure whether it is ready to scoop after freezing? Use the texture guide before serving.
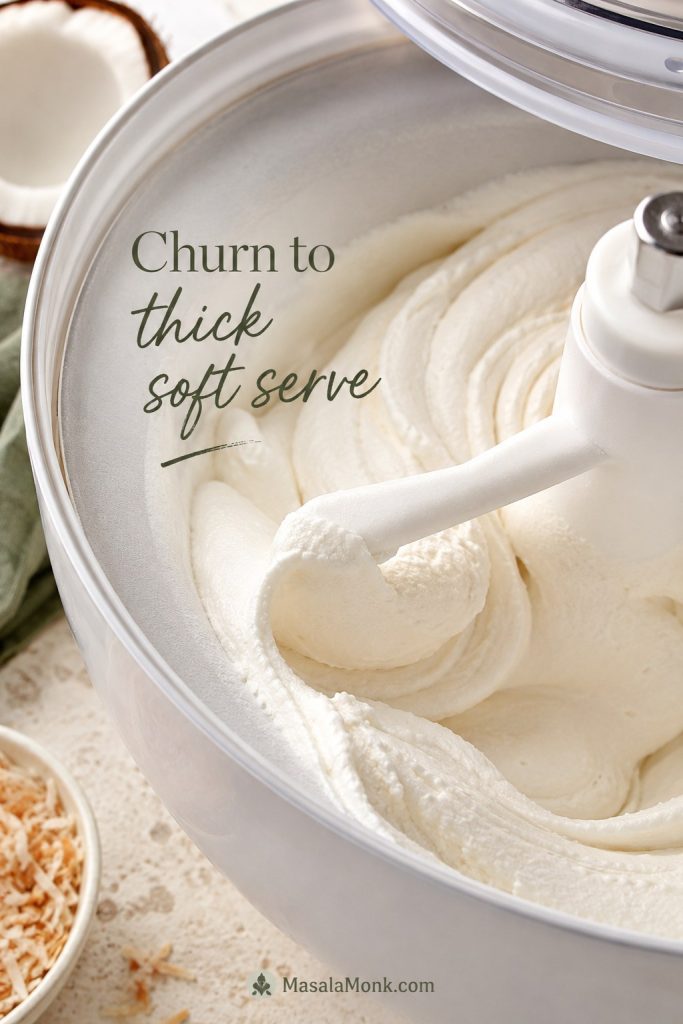
Step 5: Churn Until Thick
Pour the cold base into your ice cream maker and churn according to the machine instructions, usually 20 to 30 minutes. The ice cream should look like thick soft serve when it is ready. Stop there. Churning beyond that point can make the texture grainy, especially in a cream-rich base.
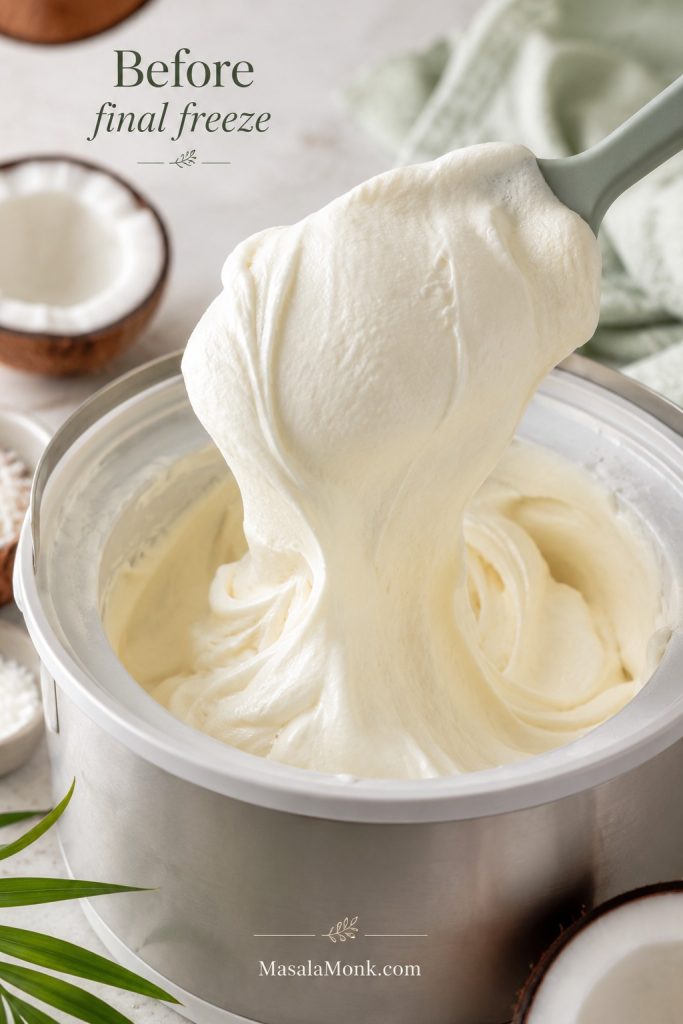
Step 6: Freeze Until Scoopable
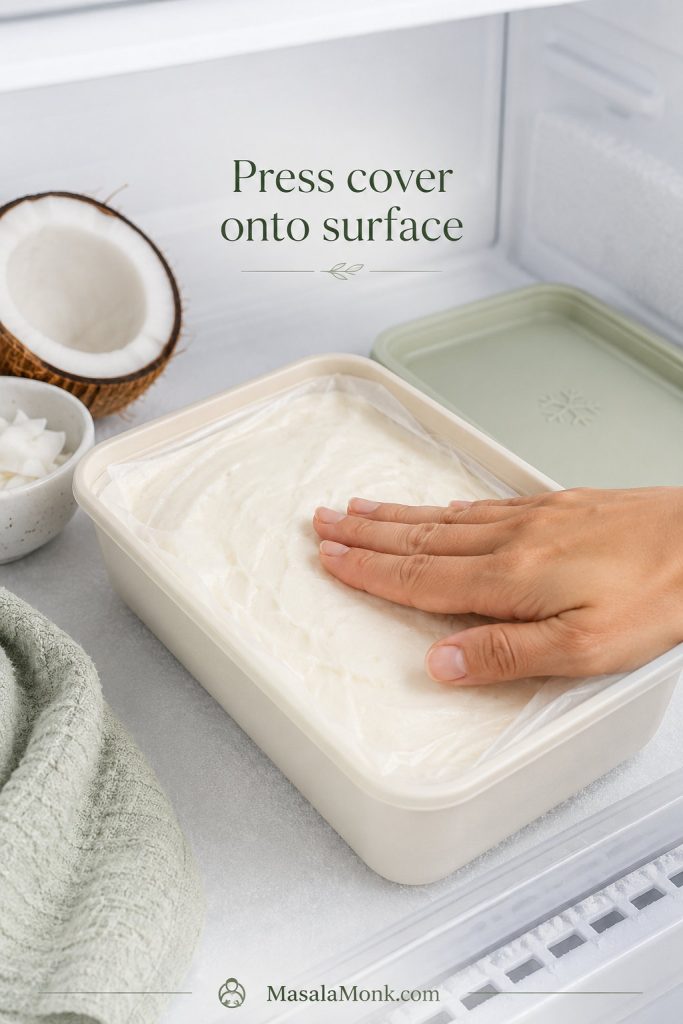
Freshly churned strawberry ice cream is soft and spoonable. For clean scoops, transfer it to a shallow freezer-safe container, press parchment or plastic wrap directly onto the surface, cover tightly, and freeze for 2 to 4 hours.
After an overnight freeze, let the container sit at room temperature for 5 to 10 minutes before scooping. You should not need to wait 30 minutes for dessert. If you do, the batch was likely too watery, too low in sugar, or too low in fat.
No-Churn Strawberry Ice Cream Without an Ice Cream Maker
Why No-Churn Needs a Different Structure
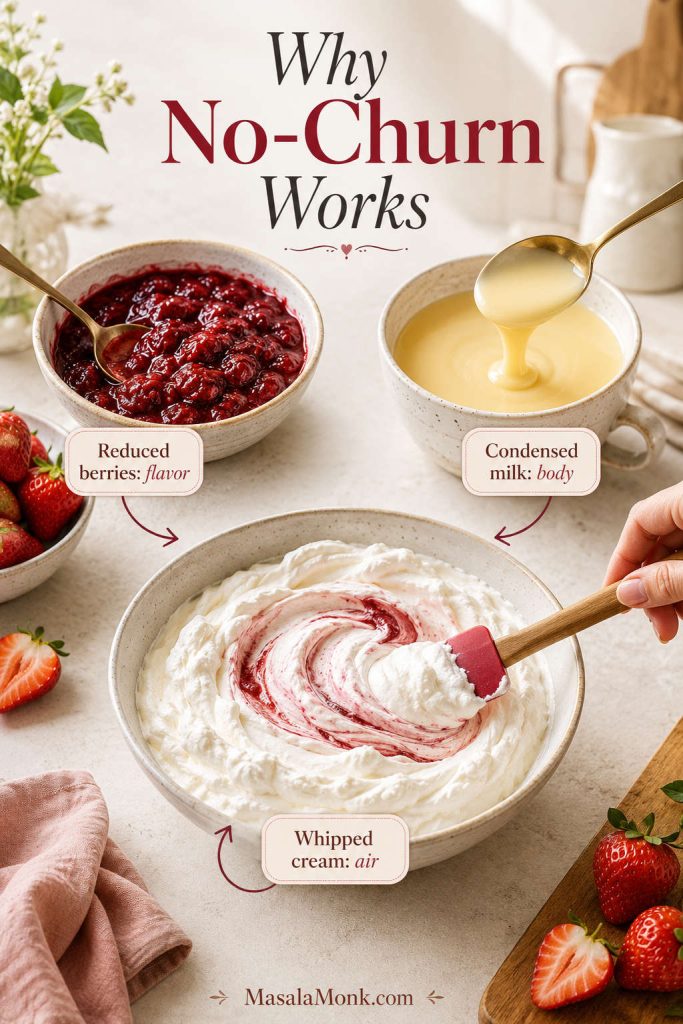
No-churn strawberry ice cream can be excellent, but it needs a different kind of structure. Since there is no machine to churn in air, whipped cream has to do that job, while condensed milk brings sweetness, milk solids, and body. The strawberries still need to be reduced first; condensed milk can make the base creamy, but it cannot erase watery fruit.
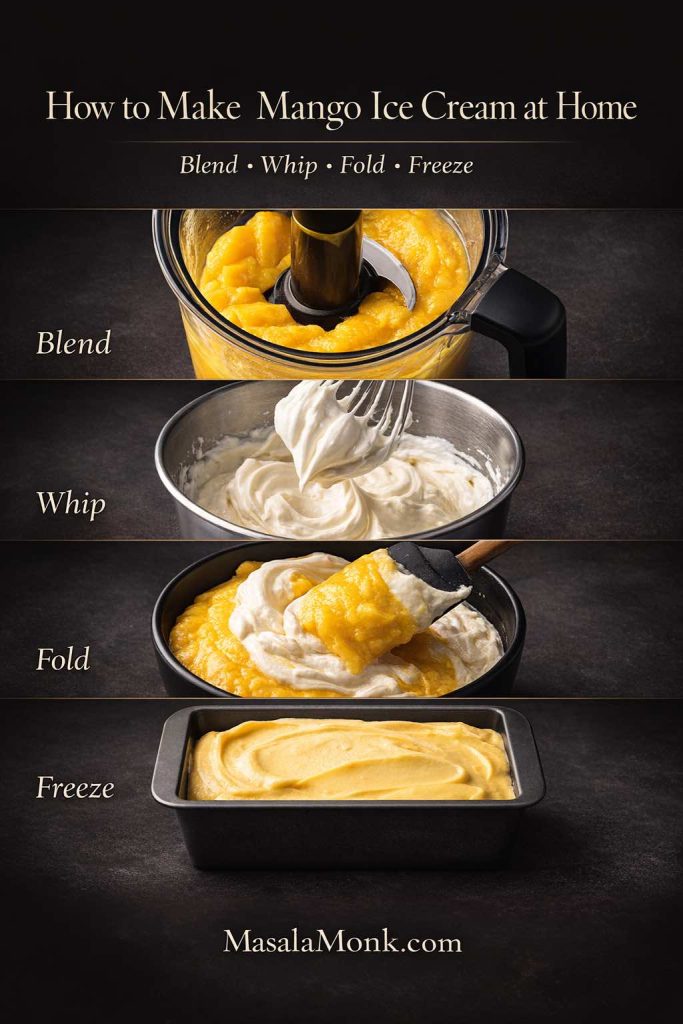
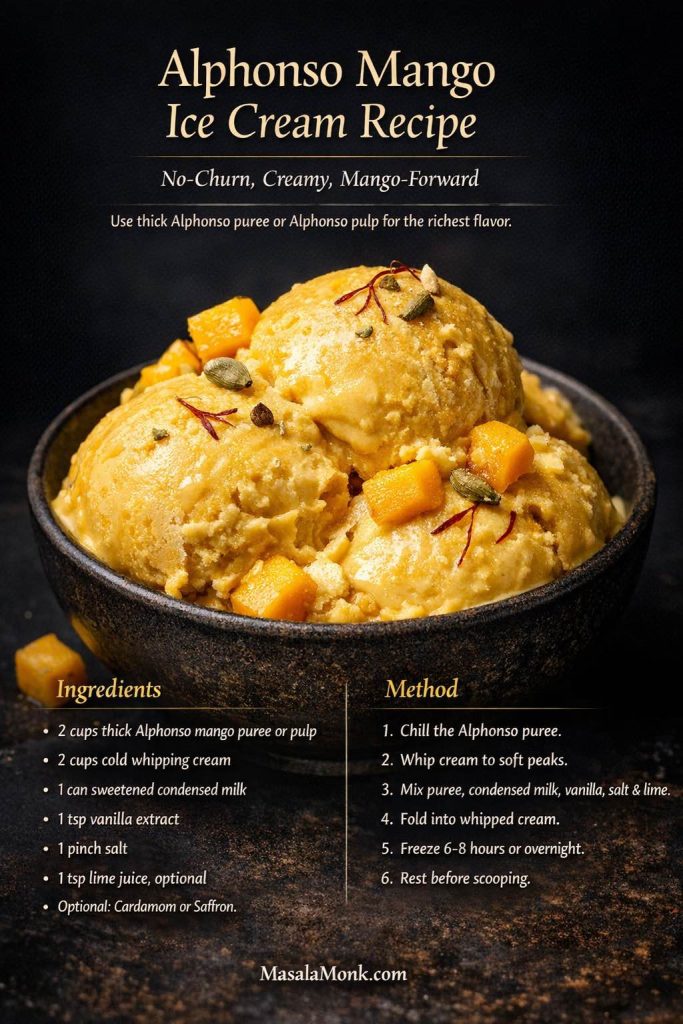
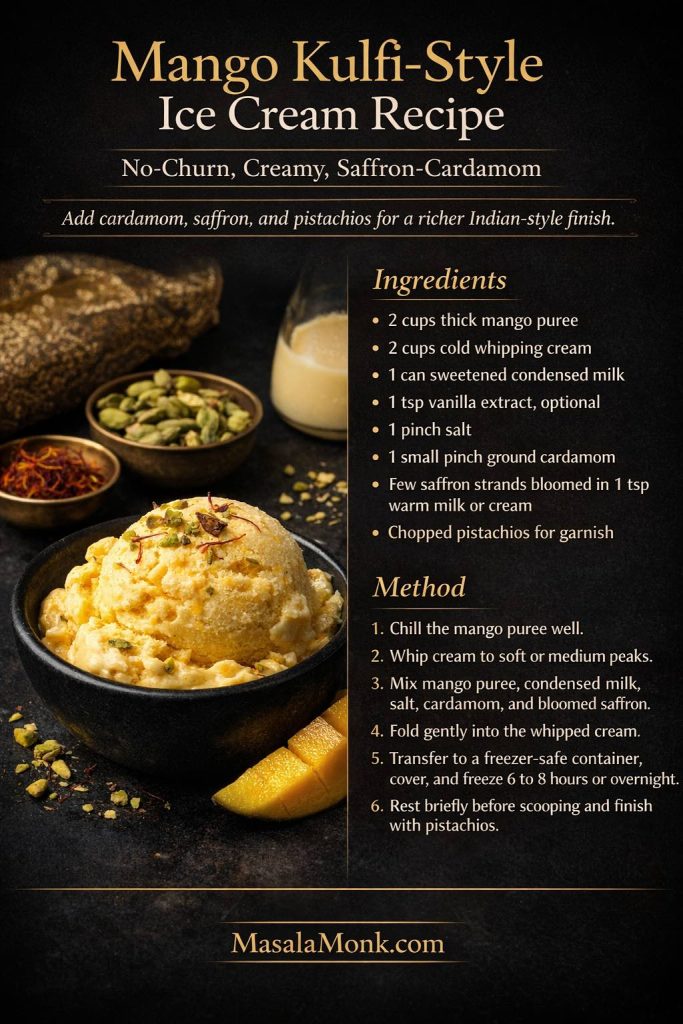
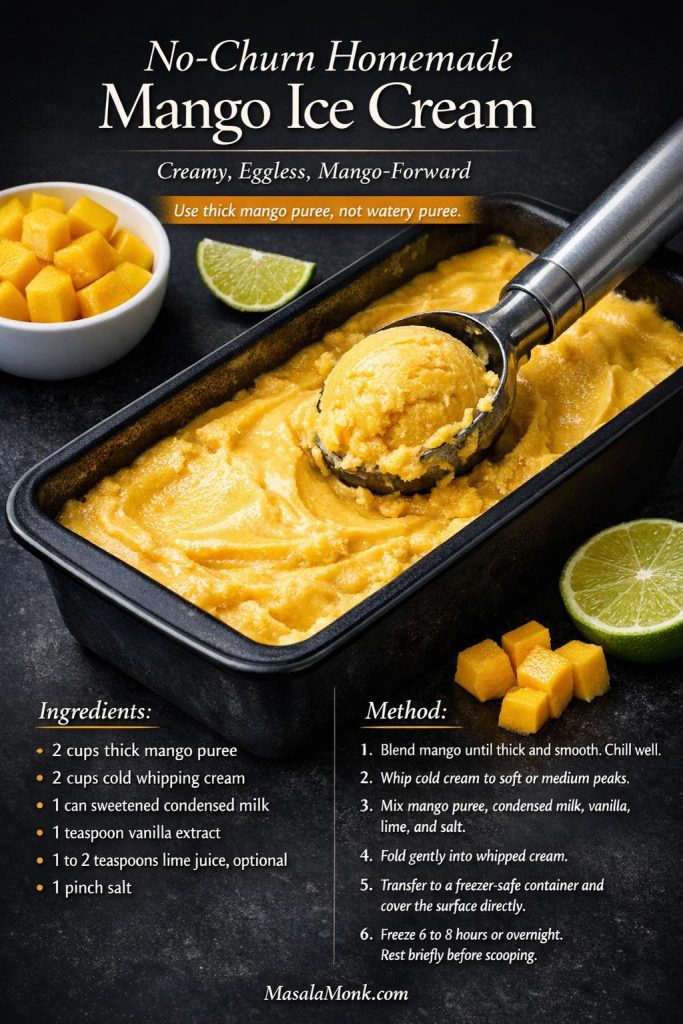
If you want to see the same no-churn logic in another fruit dessert, MasalaMonk’s homemade mango ice cream recipe shows how thick fruit purée, whipped cream, and condensed milk work together for a creamy freezer scoop.
The Simple No-Churn Formula
The simplest reliable formula is this: reduce 2 lb strawberries, stir the cooled fruit into 14 oz condensed milk, fold in 2 cups whipped cream, and freeze overnight. That is the no-churn version worth making.
For the no-churn version, 2 lb strawberries usually gives about 3 to 3 1/2 cups purée; reduce it to about 1 1/2 to 1 3/4 cups before cooling. That smaller, thicker amount gives the whipped cream and condensed milk a better chance of freezing creamy instead of icy.
The finished scoop is richer than the churned version, but when the fruit is cooked down properly, it still tastes like strawberries rather than just condensed milk and cream.
When it is ready, the scoop should feel rich and soft-set, with the cooked strawberry flavor cutting through the condensed milk instead of getting buried under it.
If you are making this for guests, make the no-churn version the night before. It needs time to settle into a clean scoop, and rushing it is the fastest way to end up with soft edges and a frozen center.
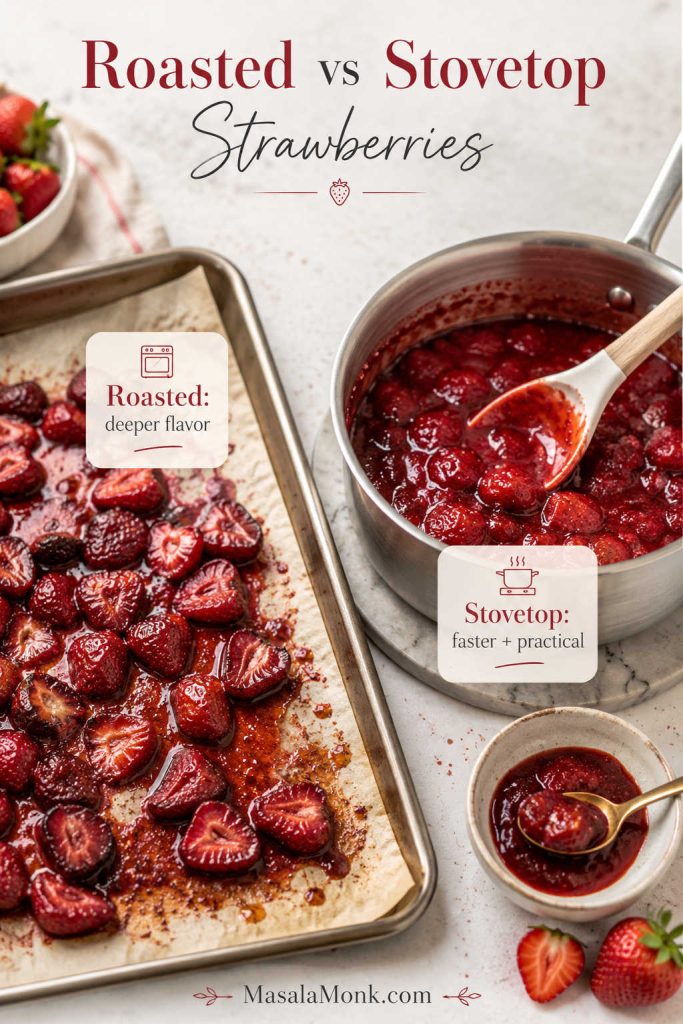
Roasted Strawberry Method
Roasting gives the deepest strawberry flavor. Toss hulled strawberries with 1 to 2 tablespoons sugar, spread them on a parchment-lined tray, and roast at 160°C / 320°F until the berries collapse and the juices thicken. This usually takes 45 to 60 minutes.
Use this route when your berries are good but not wildly fragrant. The oven concentrates their flavor and gives the ice cream a richer, almost strawberry-jam taste.
Stovetop Strawberry Reduction Method
The saucepan is the practical way to get there on an ordinary day. Chop or blend the berries, simmer them with a little sugar, and stop when the mixture looks thick, glossy, and jammy rather than loose.
This is the better choice when you want homemade strawberry ice cream today without keeping the oven on for an hour. It is also the best way to handle frozen strawberries because it lets you cook off the extra thawed liquid.
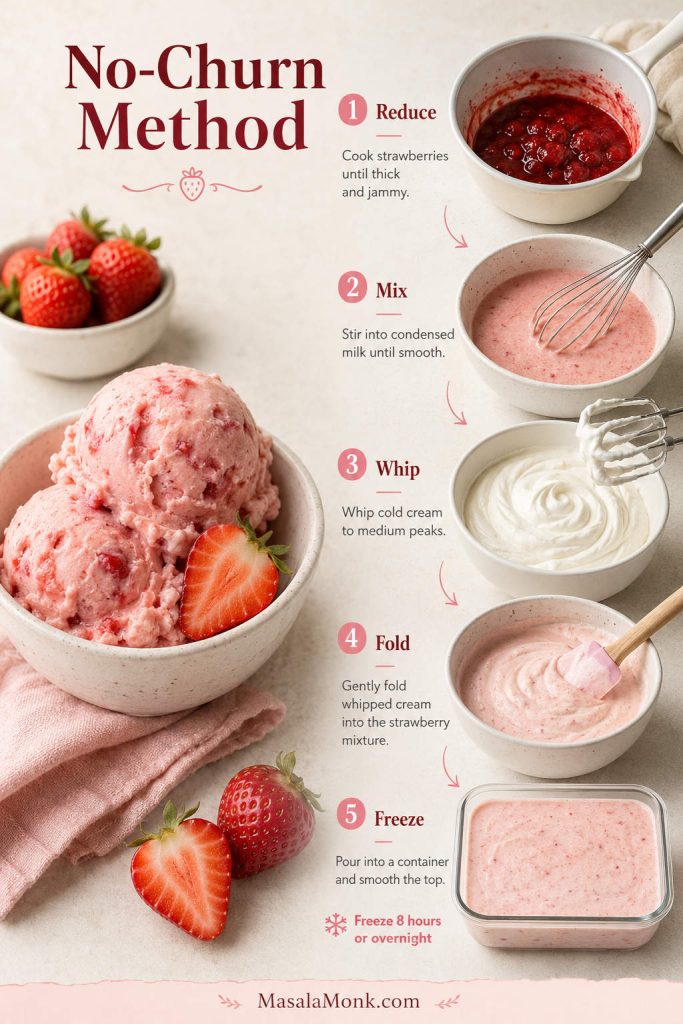
How to Assemble the No-Churn Version
- Make the roasted or reduced strawberry purée and cool it completely.
- Stir the cooled purée into sweetened condensed milk with vanilla, lemon juice, and salt.
- Whip cold heavy cream to medium peaks. It should hold shape but still look smooth.
- Fold the whipped cream into the strawberry condensed milk mixture in two or three additions.
- Transfer to a shallow freezer-safe container.
- Press parchment or plastic wrap onto the surface, cover tightly, and freeze for 8 hours or overnight.
Do not over-whip the cream, and do not beat the folded mixture aggressively. No-churn ice cream depends on trapped air. Knock out too much air and the finished texture becomes dense.
Shortcut that still works: Use the stovetop reduction instead of roasting. It is faster, easier to measure, and still removes enough water to keep the no-churn version creamy.
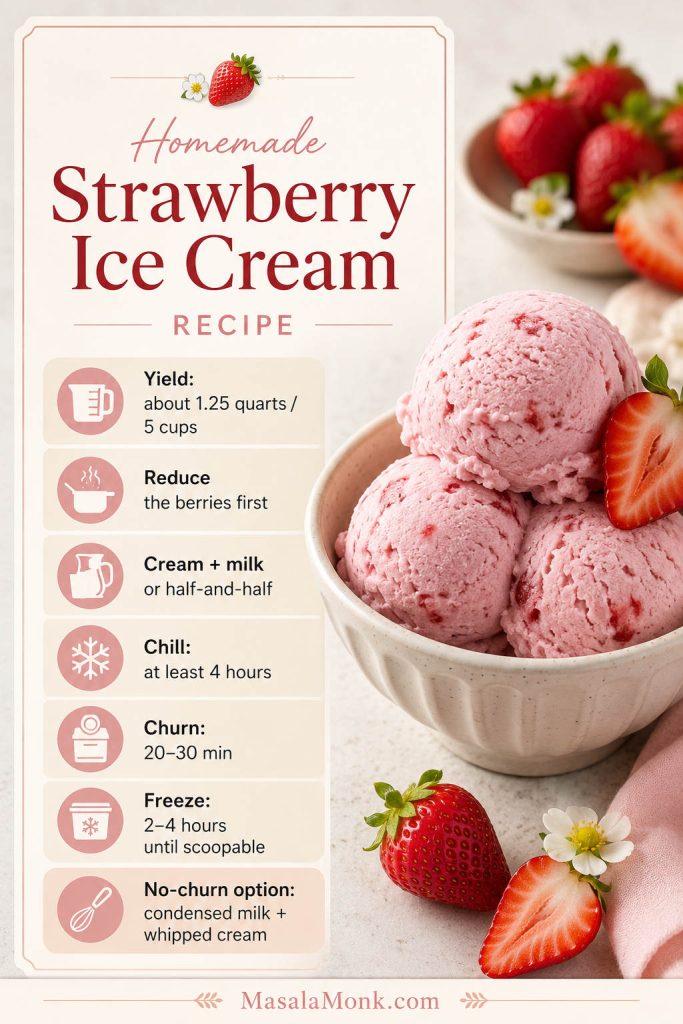
Recipe Card: Creamy Strawberry Ice Cream
This card gives you two clear paths: the main ice cream maker version first, then a no-churn version for anyone working without a machine. Both start with concentrated strawberries so the finished ice cream tastes bright instead of icy.
Equipment
- Ice cream maker
- Medium saucepan
- Blender or food processor
- Fine-mesh sieve, optional
- Mixing bowl
- Whisk
- Freezer-safe shallow container or loaf pan
- Parchment paper or plastic wrap for the surface
Ingredients: Ice Cream Maker Version
- 680g / 1 1/2 lb ripe strawberries, hulled and chopped
- 150g / 3/4 cup granulated sugar, divided
- 1 tablespoon lemon juice, plus more to taste
- 360 ml / 1 1/2 cups heavy cream
- 240 ml / 1 cup whole milk or half-and-half
- 3 tablespoons light corn syrup or glucose, or honey if preferred
- 1 teaspoon vanilla extract
- 1/4 teaspoon fine salt
- Optional: 1 to 2 tablespoons milk powder for extra body
- Optional: 1 tablespoon vodka or orange liqueur for a slightly softer adult version
Method: Ice Cream Maker Version
- Macerate the berries. Add the chopped strawberries to a saucepan with 75g / about 6 tablespoons of the sugar and the lemon juice. Let sit for 15 minutes.
- Reduce the strawberries. Cook over medium heat, stirring often, for 15 to 20 minutes. Stop when the fruit looks glossy and thick, and has reduced to about 1 1/4 to 1 1/2 cups.
- Cool and blend. Let the strawberry mixture cool, then blend until smooth. Strain through a fine-mesh sieve if you want a silky texture.
- Mix the base. Whisk the strawberry purée with heavy cream, whole milk or half-and-half, remaining sugar, corn syrup or glucose, vanilla, salt, and optional milk powder.
- Taste and adjust. The base should taste slightly sweeter and more intense than the final ice cream. Add a little more lemon juice if the strawberries taste flat.
- Chill thoroughly. Cover and refrigerate for at least 4 hours, or overnight for the smoothest churn.
- Churn. Pour the cold base into a prepared ice cream maker and churn according to the machine instructions, usually 20 to 30 minutes, until thick and soft-serve-like.
- Freeze until scoopable. Transfer to a shallow freezer-safe container. Press parchment or plastic wrap directly onto the surface, cover tightly, and freeze for 2 to 4 hours.
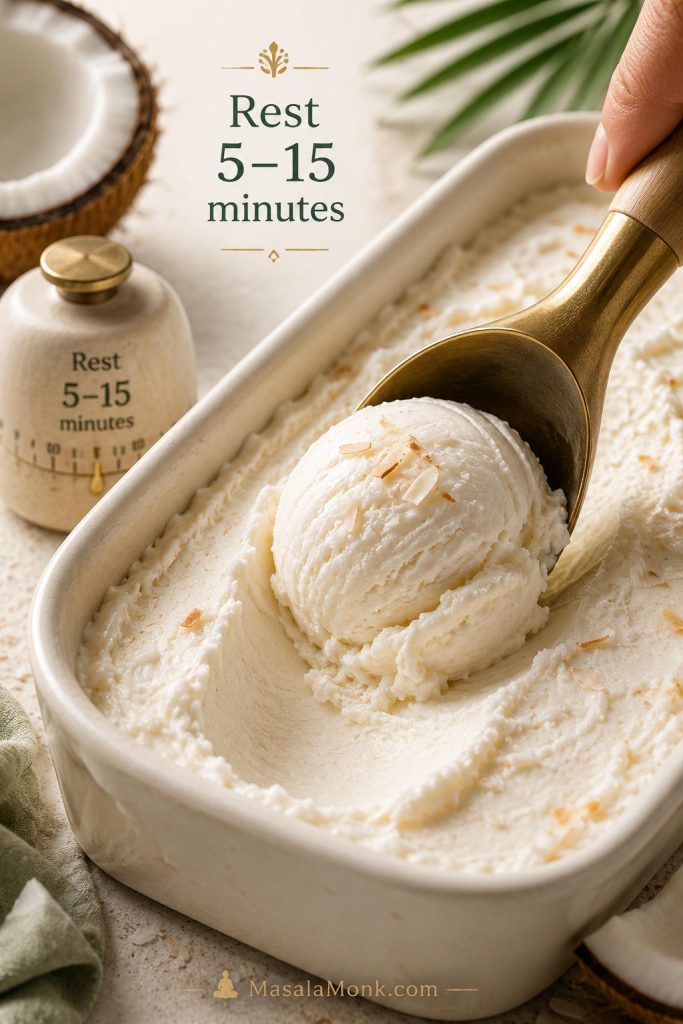
- Serve. Let the ice cream stand for 5 to 10 minutes after an overnight freeze, then scoop.
Ingredients: No-Churn Version
- 900g to 1kg / about 2 lb strawberries, hulled
- 1 to 2 tablespoons sugar
- 395g to 400g / 13 to 14 oz sweetened condensed milk
- 480 ml / 2 cups cold heavy whipping cream
- 1 teaspoon vanilla extract
- 1 to 2 teaspoons lemon juice
- Pinch of fine salt
- Optional: 1 tablespoon milk powder for extra body
Method: No-Churn Version
- Concentrate the strawberries. Roast the berries with sugar at 160°C / 320°F for 45 to 60 minutes, or simmer them on the stovetop until reduced by about half. Cool completely.
- Blend. Blend the cooled strawberries into a thick purée.
- Mix with condensed milk. Stir the strawberry purée into the condensed milk with vanilla, lemon juice, salt, and optional milk powder.
- Whip the cream. Beat cold heavy cream to medium peaks.
- Fold gently. Fold the whipped cream into the strawberry condensed milk mixture in two or three additions.
- Freeze. Transfer to a shallow freezer-safe container, press parchment or plastic wrap against the surface, cover tightly, and freeze for 8 hours or overnight.
- Scoop. Rest for 5 to 15 minutes before scooping, depending on your freezer.
Recipe Notes
- Use ripe strawberries for the best flavor.
- Frozen strawberries work if thawed, drained, and reduced first.
- Do not add large raw strawberry chunks unless you like icy fruit pieces.
- The base should taste slightly too sweet before freezing because cold mutes flavor.
- Homemade strawberry ice cream is best within the first week.
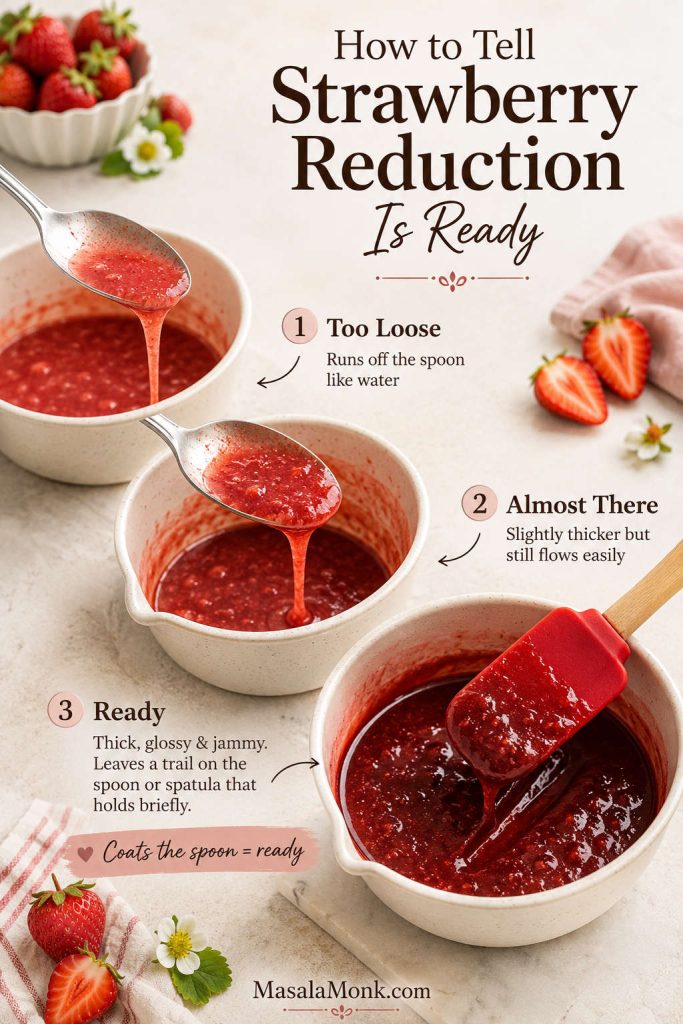
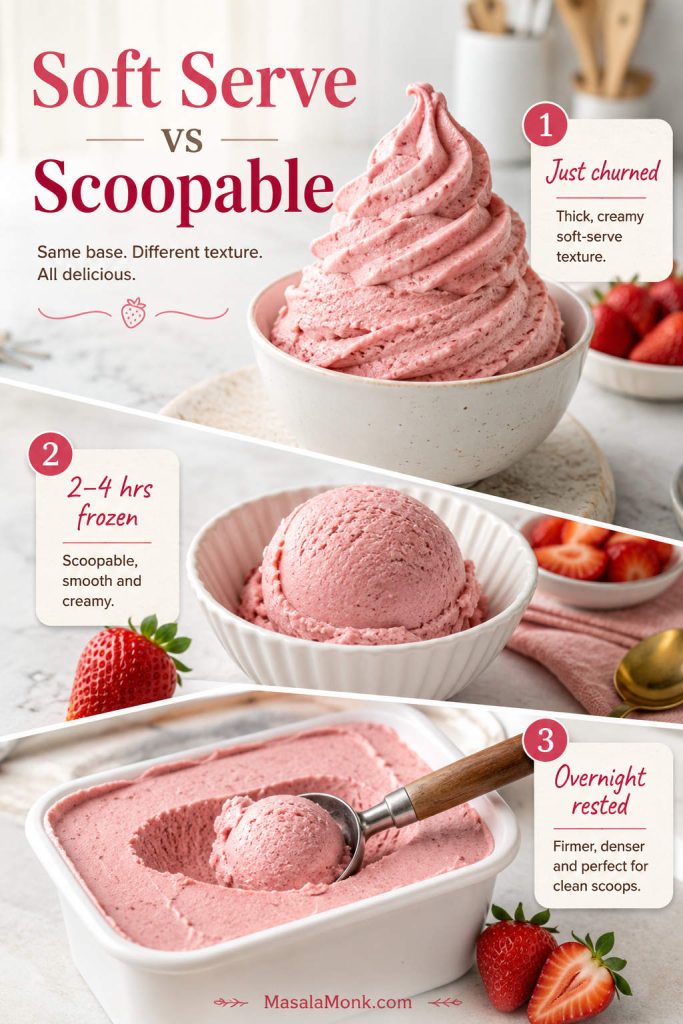
Texture Guide: Soft Serve vs Scoopable
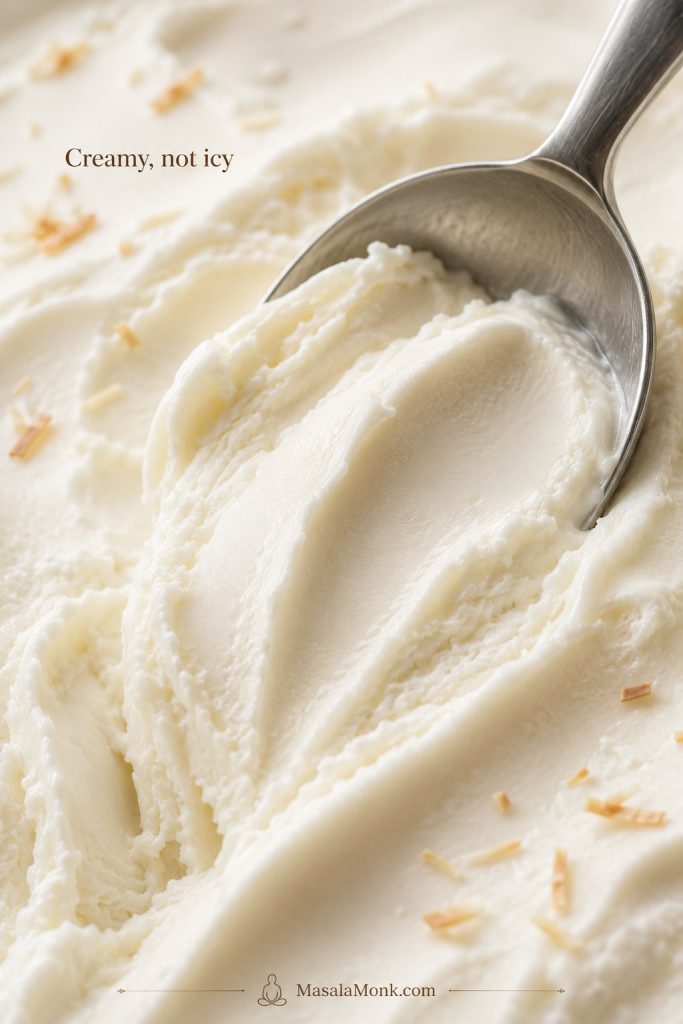
Freshly churned strawberry ice cream should look like thick soft serve. It will taste good immediately, but it will not hold round scoops yet. After 2 to 4 hours in the freezer, it becomes firmer and easier to serve in bowls or cones.
No-churn strawberry ice cream needs more time because it is not partially frozen in a machine. Give it 8 hours if possible. Overnight is better. The surface should feel firm, but after a short rest at room temperature, a scoop should move through without a fight.
| Stage | What it looks like | Best use |
|---|---|---|
| Just churned | Thick, smooth, soft-serve texture | Eat right away or freeze for scoops |
| 2–4 hours frozen | Firm enough to scoop cleanly | Best window for bowls and cones |
| Overnight frozen | Firm but scoopable after a short rest | Let stand 5–10 minutes first |
| Several days later | May be firmer | Rest longer and use a warm scoop |
A short rest before scooping is normal. A long thaw is not. If strawberry ice cream needs 30 minutes on the counter every time, the mixture likely carried too much water or did not have enough sugar, fat, or milk solids to stay soft enough to serve.
Notice how long your container needed to sit before scooping. Five minutes means the balance was close; 25 minutes usually means the batch carried too much water or not enough sugar.
Troubleshooting: Icy, Hard, or Weak Flavor
Most strawberry ice cream problems show up when you open the freezer, but the mistake usually happened much earlier. If your last batch looked promising when it went into the freezer and came out hard or crunchy the next day, you are not alone. Strawberry ice cream is one of the easiest flavors to make taste good fresh and one of the easiest to ruin after freezing.
Use this quick diagnosis first, then read the details below if you want the full fix.
| Problem | Most likely cause | Fix next batch |
|---|---|---|
| Icy texture | Too much water from strawberries | Reduce or roast the berries before mixing |
| Rock-hard scoop | Not enough sugar, fat, or milk solids | Use full-fat dairy and add glucose, corn syrup, or milk powder |
| Weak strawberry flavor | Fruit was not concentrated enough | Reduce berries more, then brighten with lemon and salt |
| Dense no-churn texture | Whipped cream lost too much air | Whip to medium peaks and fold gently |
| Frozen fruit pebbles | Large raw strawberry chunks | Use smooth purée, a ripple, or tiny macerated pieces |
Once you know the likely cause, check the storage and scooping tips too, because freezer storage can make a good batch feel harder than it should.
Why Is My Strawberry Ice Cream Icy?
Too much water is the usual reason. Raw purée, thawed frozen berries, low-fat milk, or not enough sugar can all create a crunchy frozen texture. Next time, reduce or roast the strawberries first, use full-fat dairy, and avoid adding watery fruit directly to the cream mixture.
When the Scoop Is Rock Hard
The formula may need more softness. Sugar, glucose, corn syrup, honey, condensed milk, cream, and milk powder all help. Storage matters too. A shallow airtight container with parchment pressed onto the surface protects the texture better than a half-empty tub with air sitting above the ice cream.
When the Strawberry Flavor Disappears After Freezing
Cold dulls flavor. If the finished scoop tastes faint, the chilled mixture probably did not taste intense enough before freezing. Reduce the strawberries more next time, add a little lemon juice, use the full amount of salt, and taste before it goes into the fridge.
How to Avoid Frozen Strawberry Pebbles
Large pieces of raw fruit freeze harder than the ice cream around them. Chop them very small, macerate them with sugar first, or skip chunks and use a thick strawberry ripple. A smooth strawberry cream usually gives a better bite than frozen fruit pieces.
Why No-Churn Ice Cream Turns Dense
The whipped cream may have been overmixed, underwhipped, or folded too aggressively. Whip to medium peaks, then fold gently. The mixture should look airy and smooth before freezing, not deflated or stiff.
Grainy Texture After Churning
Graininess can come from over-churning, a warm base, or cream that starts turning buttery. Chill the mixture thoroughly and stop churning once the ice cream reaches thick soft-serve consistency.
When the Ice Cream Tastes Too Sweet
The base needs to taste a little sweeter before freezing, but it should not taste cloying. If the finished ice cream is too sweet, add more lemon juice to the strawberry reduction next time, reduce the sugar slightly, or serve it with fresh berries for contrast.
Strawberry Ice Cream Variations
Once the core scoop is creamy, the variations become much easier. The rule stays the same: bring in flavor, not extra water.
If you have not made the base yet, start with the recipe card first, then come back here once you know whether you are making the churned or no-churn version.
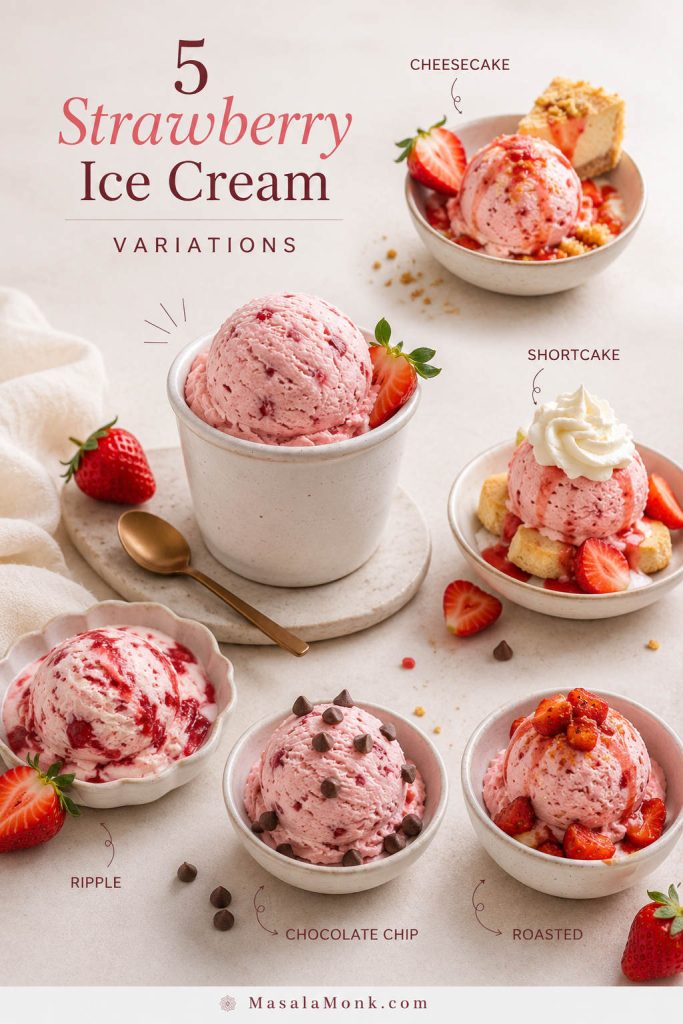
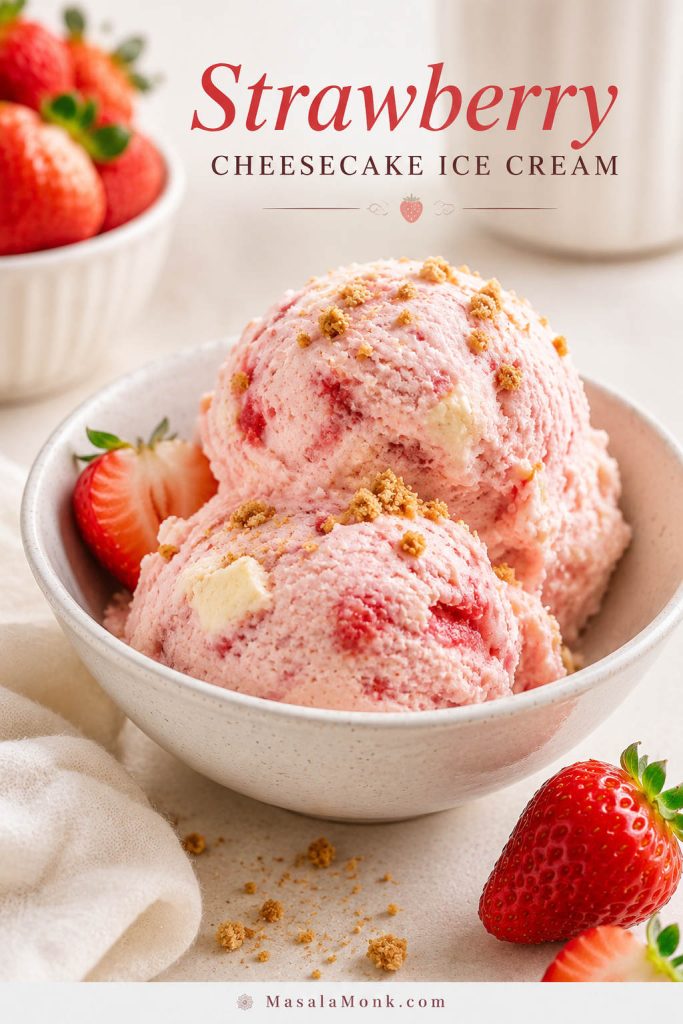
Strawberry Cheesecake Ice Cream
This is the richest variation, especially if you want the tang of cheesecake without making a full dessert. Beat 85g / 3 oz softened cream cheese until smooth, then whisk it into the dairy base before chilling. Layer in small graham cracker crumbs as you pack the churned ice cream into the container.
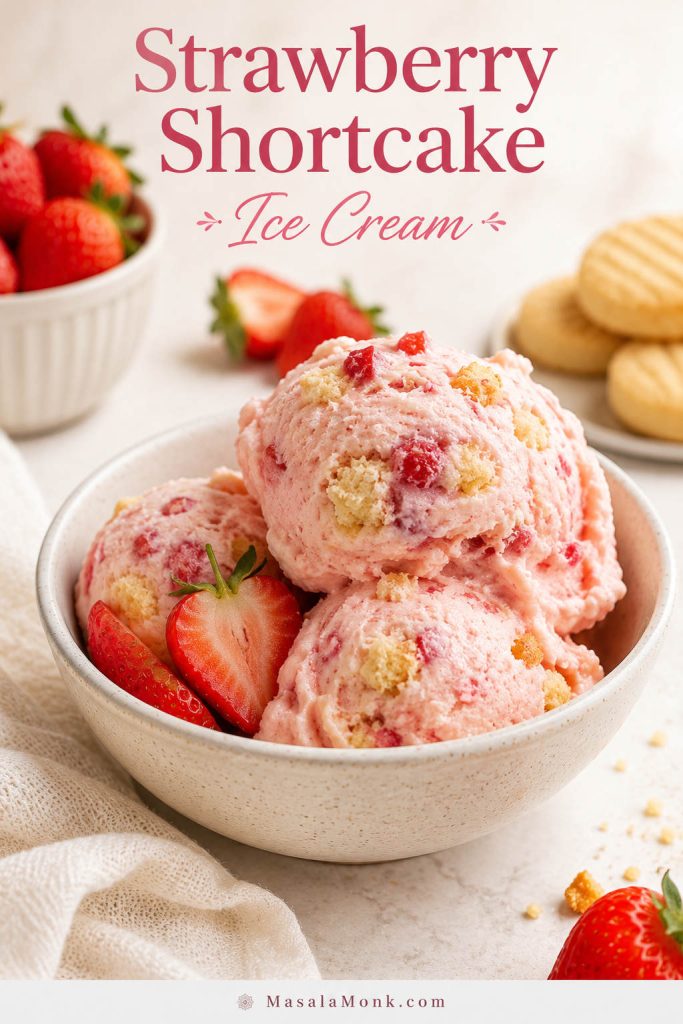
Strawberry Shortcake Ice Cream
This is the one to make when you want strawberry ice cream to feel like a summer dessert bowl, not just a scoop. Layer the finished ice cream with small pieces of shortbread, pound cake crumbs, or vanilla cookie crumbs. Add them while transferring the ice cream to the freezer container so they keep some texture.
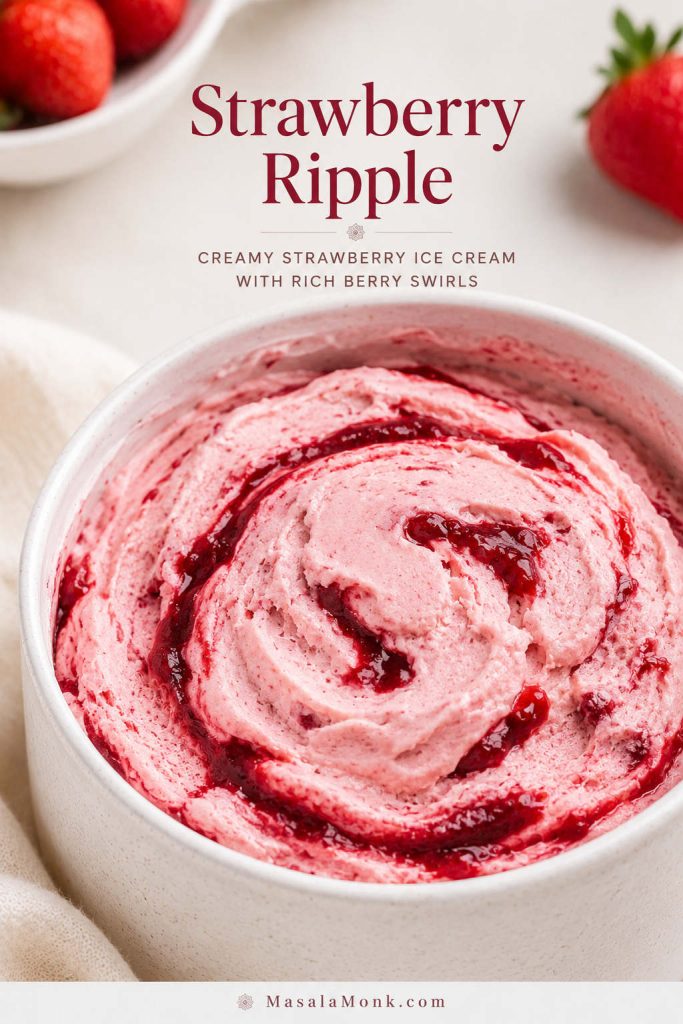
Strawberry Ripple Ice Cream
Reserve a few tablespoons of thick strawberry reduction and swirl it through the ice cream as you pack it into the container. Do not fully mix it in. Those streaks give you pockets of stronger fruit flavor without watering down the whole base.
Strawberry Chocolate Chip Ice Cream
Add finely chopped dark chocolate or mini chocolate chips near the end of churning. Small pieces are better than large chunks because frozen chocolate gets very firm.
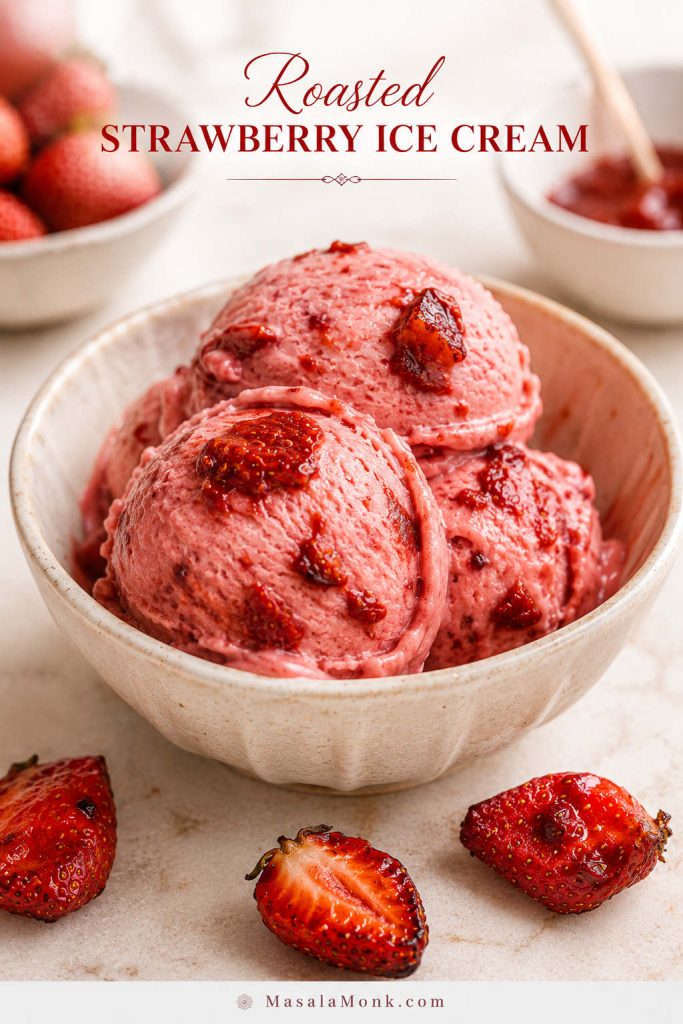
Roasted Strawberry Ice Cream
Roast the berries instead of simmering them when you want deeper fruit flavor. This is the variation to use when strawberries look good but taste a little quiet; the oven makes them darker, jammy, and more intense.
Strawberry Protein Ice Cream Direction
Protein ice cream needs a different formula because protein powder can make frozen desserts chalky or firm. If that is the direction you want, start with MasalaMonk’s protein ice cream recipe and use the strawberry lessons here: concentrate the fruit, keep the mixture smooth, and avoid watery berries.
Tried the cheesecake, shortcake, ripple, or chocolate chip version? Mention which one you made, because mix-ins can change the texture more than people expect.
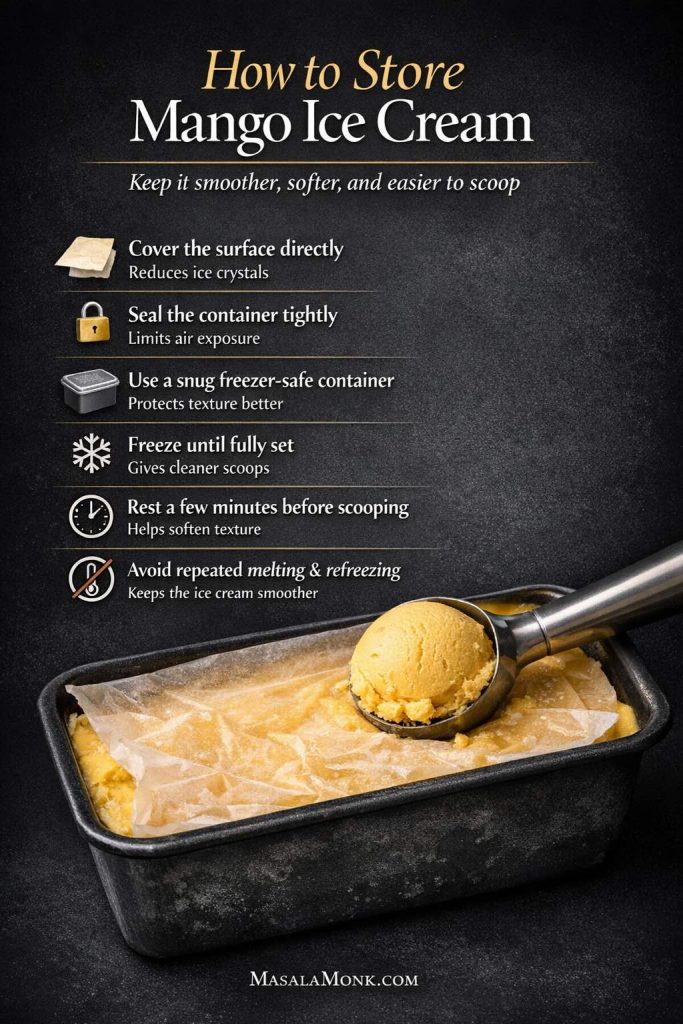
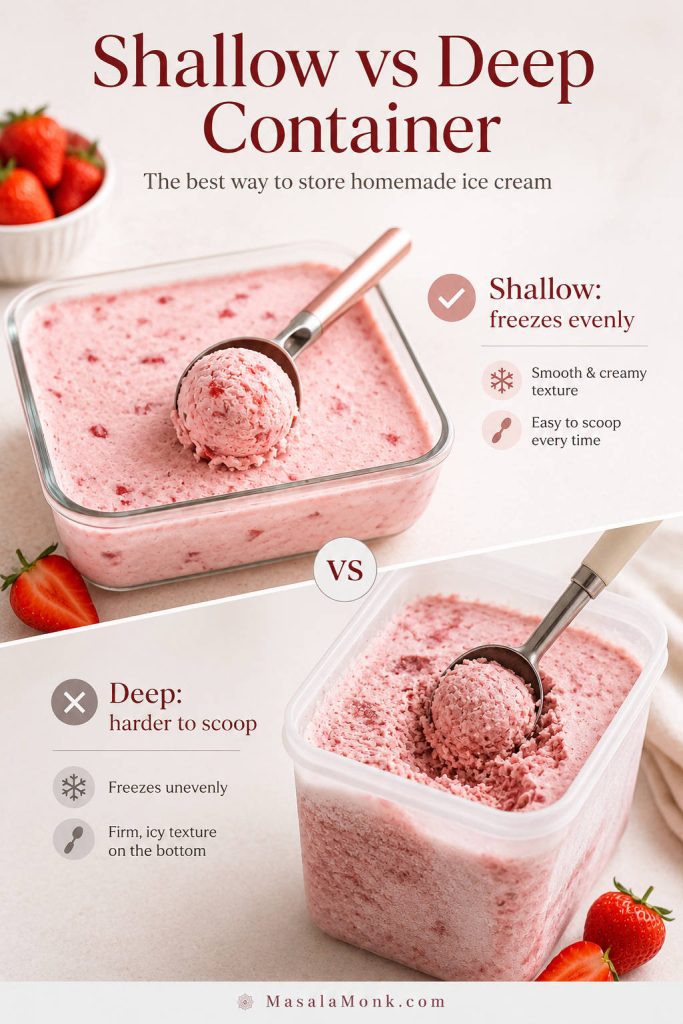
Storage and Scooping Tips
Homemade strawberry ice cream is at its best in the first few days, when the berry flavor still tastes fresh and the texture has not picked up freezer burn. It can keep longer, but the first week is the sweet spot.
- Use a shallow airtight freezer-safe container.
- Press parchment paper or plastic wrap directly onto the surface before adding the lid.
- Store the container toward the back of the freezer, where the temperature is steadier.
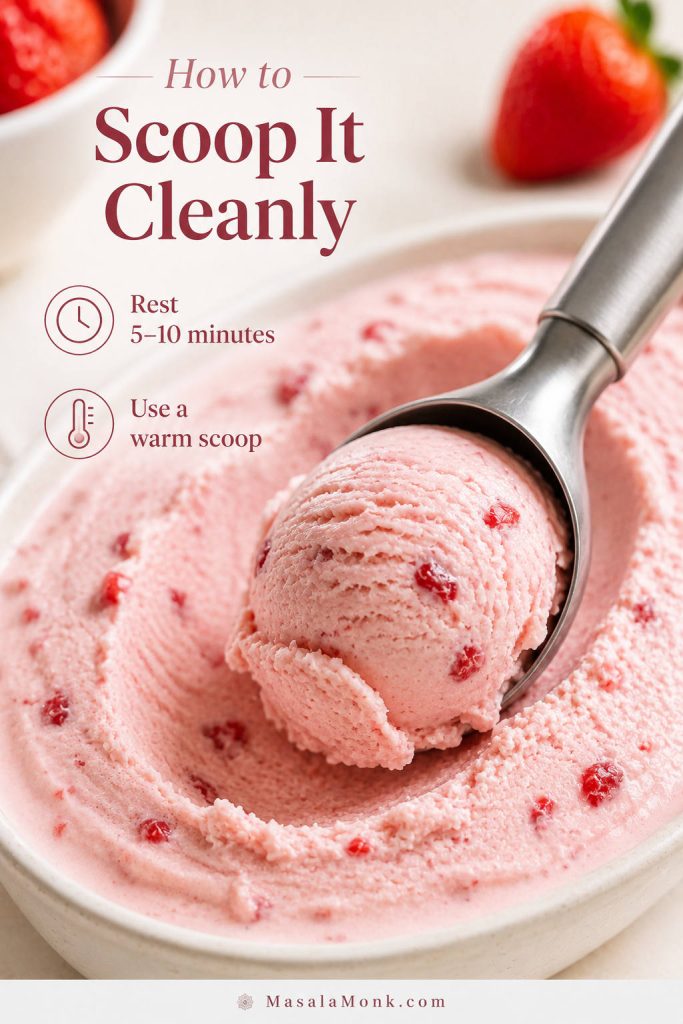
- Let the ice cream rest for 5 to 10 minutes before scooping after an overnight freeze.
- Use a warm scoop for cleaner portions.
- Return the container to the freezer quickly after serving.

A wide, shallow container freezes faster and scoops more evenly than a deep narrow tub. Every long thaw and refreeze makes the next scoop a little rougher, so scoop what you need, smooth the surface, cover it again, and freeze it quickly.
If the container still needs a long thaw every time, compare your batch with the troubleshooting guide; the issue may be water, sugar, fat, or milk solids rather than storage alone.
When you are ready to serve, let the container rest briefly and warm the scoop under hot water, then dry it before scooping. That small step helps the scoop glide through the ice cream instead of tearing it into rough shards.
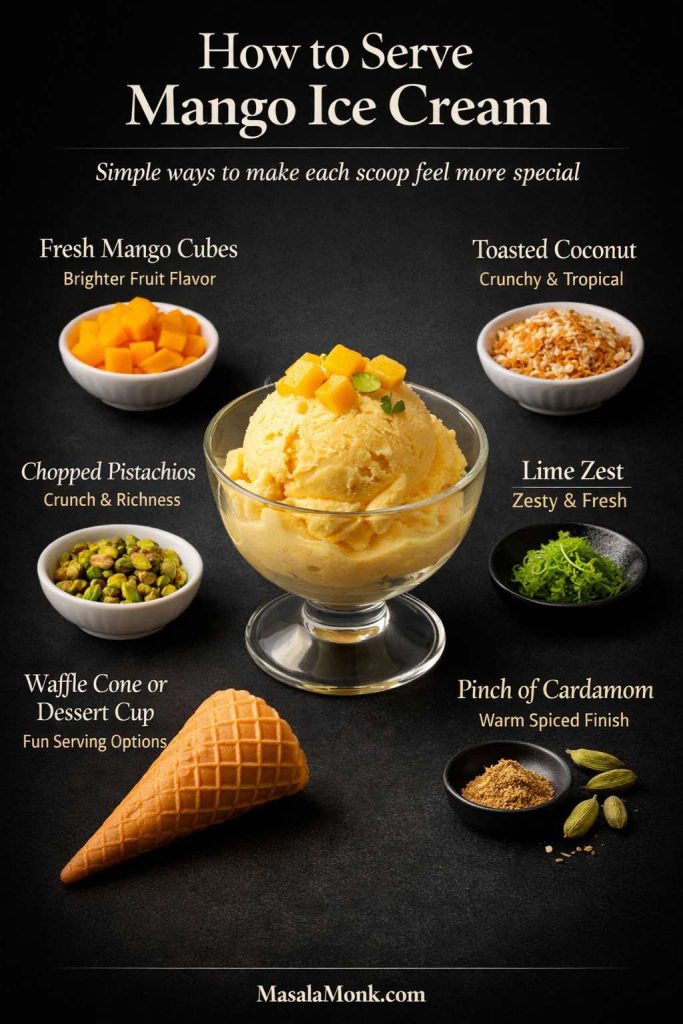
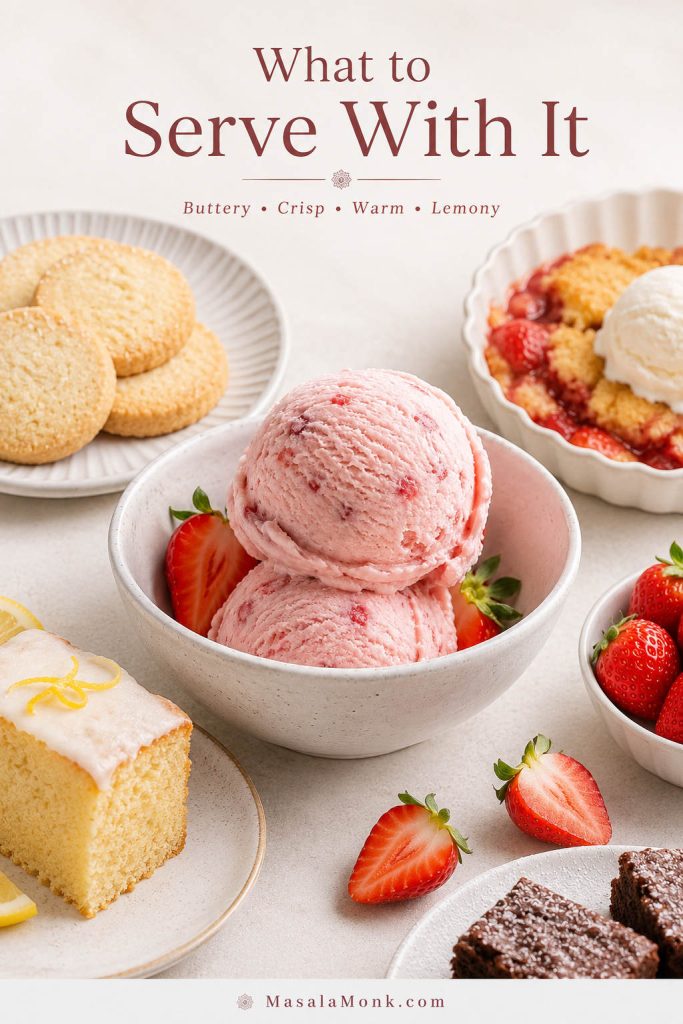
What to Serve with Strawberry Ice Cream
Strawberry ice cream is bright enough to serve on its own, especially when the fruit has been reduced properly. The best pairings either echo the berries or give the scoop contrast: buttery shortbread, lemon cake, brownies, waffles, crumbles, fresh strawberries, or a spoonful of thick strawberry sauce.
A warm fruit dessert works beautifully too. Serve it with MasalaMonk’s peach cobbler with canned peaches, where the cold scoop melts into the buttery topping and warm fruit.
On a summer dessert table, pair it with vanilla cookies, pound cake, crisp wafers, or a fresh berry platter. The contrast works because the ice cream is creamy and cold while the sides bring crunch, warmth, or sharper fruit flavor.
For a frozen strawberry drink instead of dessert, MasalaMonk’s frozen strawberry daiquiri recipe uses berries in a completely different way: frozen for slushy texture rather than concentrated for a scoopable ice cream base.
FAQs
Fresh or frozen strawberries: which makes better ice cream?
Fresh ripe strawberries usually give the best aroma and flavor. Frozen strawberries can still work well, but they should be thawed, drained, and reduced before being added to the base. Watery thawed berries are one of the main reasons homemade strawberry ice cream turns icy.
What if I do not have an ice cream maker?
Use the no-churn method with reduced strawberries, sweetened condensed milk, and whipped cream. The churned version is cleaner and lighter; the no-churn version is easier and still creamy when the strawberries are concentrated first.
Is this strawberry ice cream recipe eggless?
Yes. This recipe is eggless. Eggs can make ice cream rich, but they are not required for a creamy strawberry scoop. In fact, an eggless base often lets the berry flavor taste brighter and fresher.
Why does homemade strawberry ice cream freeze so hard?
Hard texture usually comes from too much water, too little sugar, too little fat, or not enough milk solids. Strawberry ice cream is especially sensitive because the fruit brings extra water. Reducing the berries first and using full-fat dairy helps the scoop stay softer.
Where condensed milk helps most in no-churn strawberry ice cream
Condensed milk is most useful in no-churn strawberry ice cream. It adds sweetness, body, and milk solids without adding as much water as regular milk. It is less necessary in the ice cream maker version because churning helps build texture.
Roasted vs stovetop strawberries: which gives better flavor?
Roasting gives deeper, more jammy strawberry flavor, especially when the berries smell mild. Simmering on the stovetop is faster and works very well. The important part is concentration: do not add watery raw fruit to the base if you want the creamiest result.
What is the best way to add strawberry pieces without icy chunks?
Keep the pieces tiny and macerate them with sugar first. Large raw strawberry pieces freeze hard. A smooth purée or thick strawberry ripple usually gives a better eating experience than big frozen chunks.
How long does homemade strawberry ice cream last?
It tastes best within the first week. It can keep longer in an airtight container, especially with parchment or plastic wrap pressed against the surface, but homemade ice cream gradually becomes firmer and icier over time.
Final Scoop
A good strawberry ice cream recipe should taste like strawberries first. Not pink milk. Not frozen cream with a hint of berry. The difference comes from one decision: concentrate the fruit before freezing it.
Once the strawberries are thick and flavorful, the rest of the recipe becomes much easier. Chill the base well, use enough cream and sugar to support the texture, churn until soft-serve thick, and freeze it in a shallow covered container. The result is creamy, bright, scoopable strawberry ice cream that still tastes like real fruit when you open the freezer tomorrow.
If you try it, the most useful note to leave is which path you used: churned, no-churn, roasted berries, or stovetop reduction. That helps other readers choose their first batch too.