Posted on Leave a comment

French Onion Soup Recipe: Classic, Vegetarian, Slow Cooker & No-Wine Options

Classic French onion soup in a ceramic bowl with bubbling browned cheese, toasted bread, and dark onion broth.

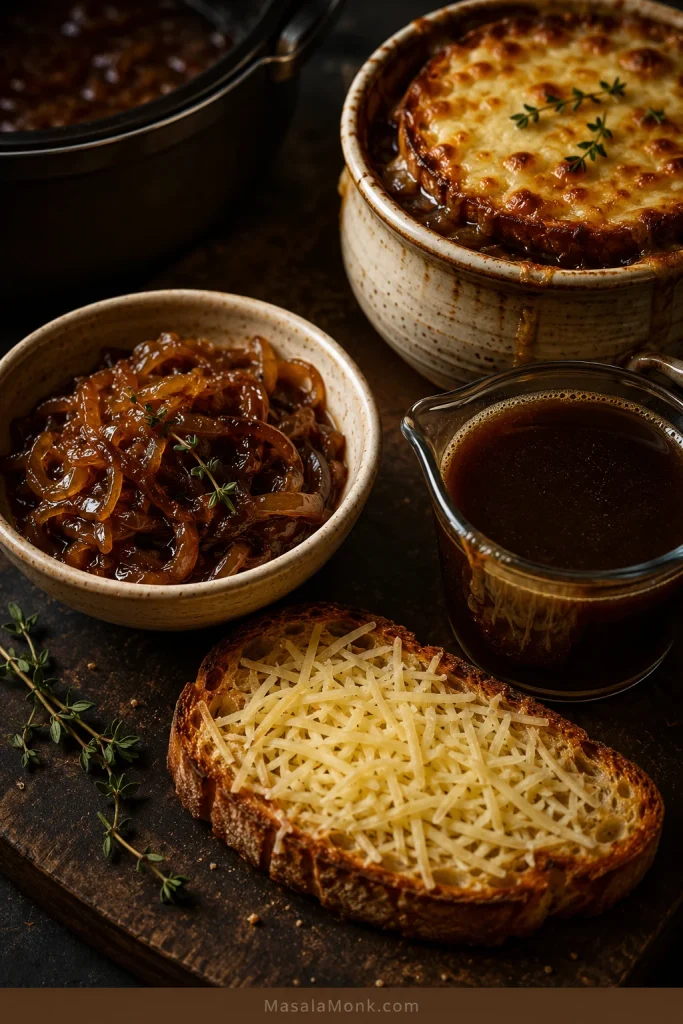
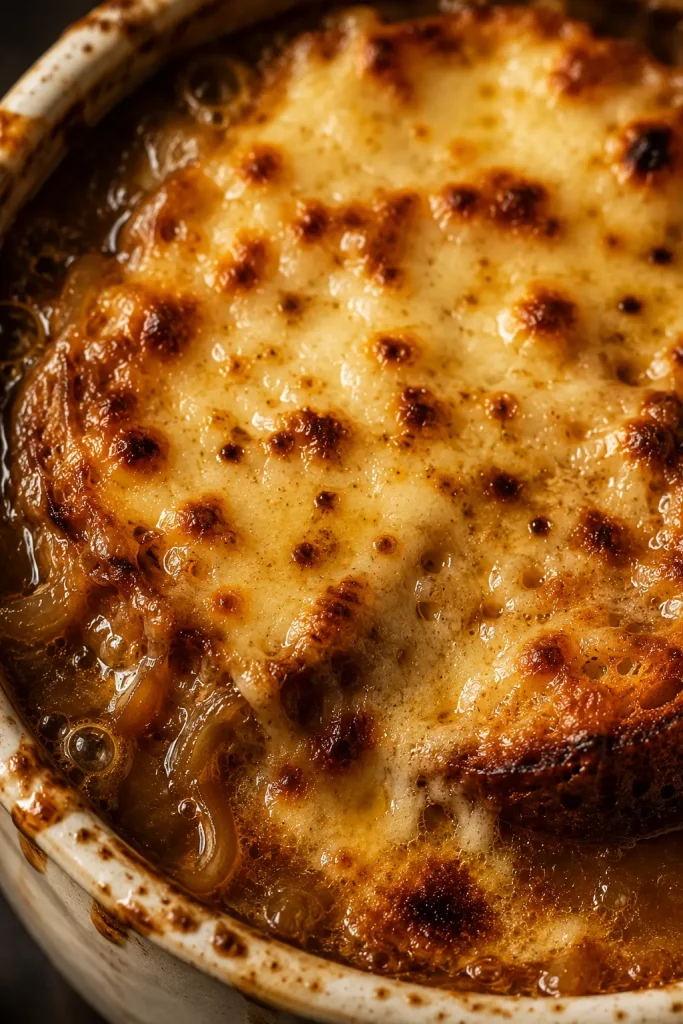
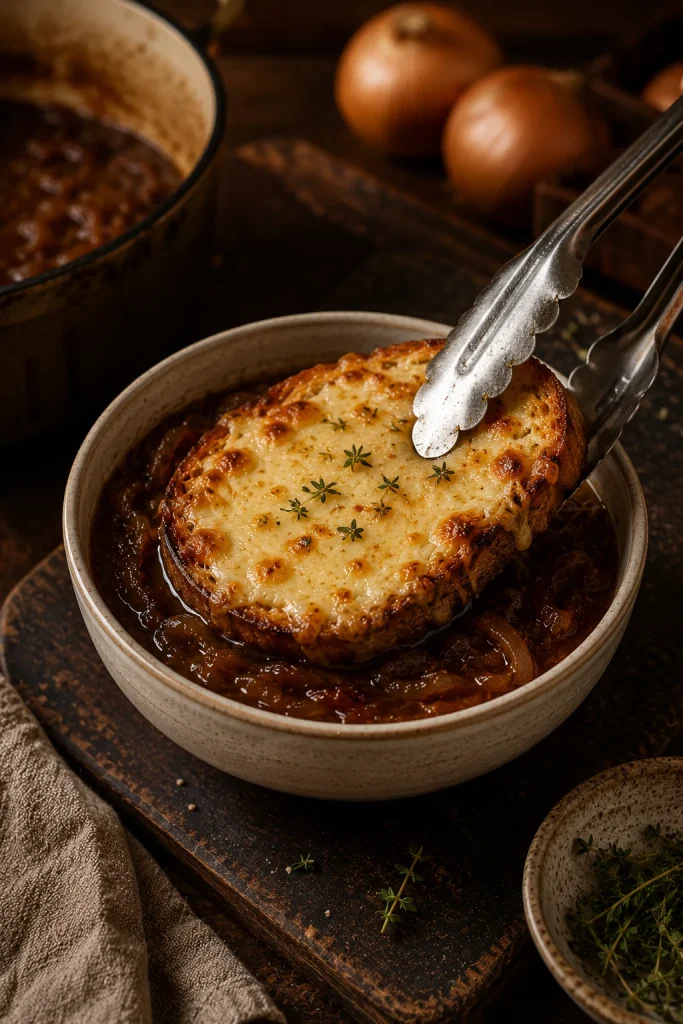
This is the kind of soup that rewards the cook who lets the kitchen slow down for a little while. A mountain of sharp raw onions softens in butter, collapses into the pot, turns golden, and slowly becomes mellow, savory, and almost jammy. Then the broth goes in, the bread gets toasted, and the cheese melts over the top until every spoonful breaks through something crisp, bubbling, and deeply comforting.

The best part is that first spoonful: the cheese stretches, the toast softens at the edges, and the broth underneath tastes darker and fuller than the simple ingredient list suggests.

This recipe is built around the three places French onion soup usually fails: pale onions, weak broth, and a risky cheese finish.

This version starts with the classic bistro-style bowl: beef broth, wine or sherry, toasted bread, and Gruyère. The main path is simple — caramelize the onions, deglaze the pot, simmer with broth, toast the bread, and melt the cheese — and every variation in this guide follows that same path.

It is not a weeknight-speed soup. It is the kind of recipe you make when you want a few ordinary onions to slowly turn into something that feels like dinner out, only warmer.

Make It Now

  • Total time: About 1 hour 45 minutes to 2 hours
  • Onion time: 45 to 70 minutes for proper caramelization
  • Best broth: Beef broth for classic; mushroom broth or dark vegetable stock for vegetarian
  • Best cheese: Gruyère, Swiss, or a melty cheese blend
  • No crocks: Broil the cheesy toast separately, then place it on the soup
  • Ready to cook? Jump to the classic recipe

The 3 Things That Make This Soup Work

  1. Cook the onions until deep golden and jammy, not just soft.
  2. Use broth that tastes savory before it goes in.
  3. Toast the bread firmly so the cheese has somewhere to land.

Keep these three foundations in mind as you cook.

Caramelized onions, dark broth, toasted bread, cheese, and French onion soup arranged on a rustic table.
Before assembling the bowl, get the three foundations right: deeply browned onions, broth with real depth, and a cheese finish your kitchen setup can handle safely.

Jump to

Quick Answer

French onion soup is onion soup built around slowly caramelized onions, savory broth, toasted bread, and melted cheese. The cheese-topped version is what most people mean by classic bistro-style French onion soup.

You do not have to use wine or beef broth. For no-wine soup, deglaze with broth and finish with a small splash of vinegar or lemon after simmering. For vegetarian French onion soup, use mushroom broth or dark vegetable stock, then add one savory booster such as vegetarian Worcestershire, tamari, or browned mushrooms.

Need the swaps first? Jump to the vegetarian and no-wine options.

Choose Your French Onion Soup Version

Start with the classic path, then adjust only what your kitchen needs. The onions stay at the center; the broth, wine, cheese, and finishing method can move around them.

Make this when you want a bowl that feels special without needing expensive ingredients. Most of the flavor comes from time, not fuss.

What you wantBest versionRemember
Classic bistro flavorBeef broth, wine or sherry, GruyèreReduce wine before adding broth.
No beef, still savoryDark vegetable stock or mushroom brothAdd one savory booster.
No wine, still balancedDeglaze with brothReplace wine’s acid and fond-loosening job.
Vegetarian, not thinVegetable or mushroom broth plus acid and umamiDo not add every booster at once.
Less stove-watchingSlow cooker onions, then stovetop finish if possibleConvenience improves; browning still matters.
No crocks, no riskBroil cheesy toasts separatelyTop hot soup just before serving.

Classic French Onion Soup Recipe

Start with this stovetop version for the most classic bowl. It looks like restaurant soup, but the actual work is simple: slice onions, cook them slowly, simmer, toast, and melt cheese.

French Onion Soup

Servings: 4 main-course bowls or 6 starter bowls
Prep time: 20 minutes
Cook time: 1 hour 25 minutes to 1 hour 40 minutes
Total time: About 1 hour 45 minutes to 2 hours
Equipment: Large heavy pot or Dutch oven, wooden spoon, baking sheet, broiler-safe crocks or regular bowls plus the separate cheesy-toast method

The timing is flexible because onions vary. Trust the color, smell, and texture more than the clock.

Ingredients

  • 3 lb / 1.35 kg yellow onions, thinly sliced, about 1/8 inch / 3 mm thick
  • 3 tablespoons unsalted butter
  • 1 tablespoon olive oil or neutral oil
  • 1/2 teaspoon fine salt, plus more to taste after simmering
  • 1/2 teaspoon sugar, optional, only if your onions need help browning
  • 3 cloves garlic, minced
  • 1 tablespoon all-purpose flour, optional, for light body
  • 1/2 cup / 120 ml dry white wine or dry sherry, or 1/2 cup / 120 ml extra broth for no-wine soup
  • 6 cups / 1.4 liters beef broth or stock, or up to 7 cups / 1.65 liters for a brothier soup
  • 2 fresh thyme sprigs or 1/2 teaspoon dried thyme
  • 1 bay leaf
  • 1 teaspoon Worcestershire sauce, or vegetarian Worcestershire/tamari for vegetarian soup
  • 1 to 2 teaspoons apple cider vinegar, sherry vinegar, balsamic vinegar, or lemon juice, as needed after simmering
  • Black pepper, to taste
  • 4 to 6 slices baguette, sourdough, or sturdy crusty bread
  • 1 1/2 to 2 cups / 170 to 225 g grated Gruyère, Swiss, provolone, mozzarella, or a mix
  • 2 tablespoons grated Parmesan, optional, for extra savory flavor

Quick notes before you cook: Start light on salt because broth, cheese, Worcestershire, and Parmesan can all be salty. Skip the sugar if your onions brown well. Use 6 cups broth for a thicker bowl, or 7 cups for a brothier one.

Method

Cook the onions

  1. Slice the onions evenly. Aim for about 1/8 inch / 3 mm. Thin, even slices cook more predictably. Too thick and they take much longer; too thin and they can break down or burn at the edges.
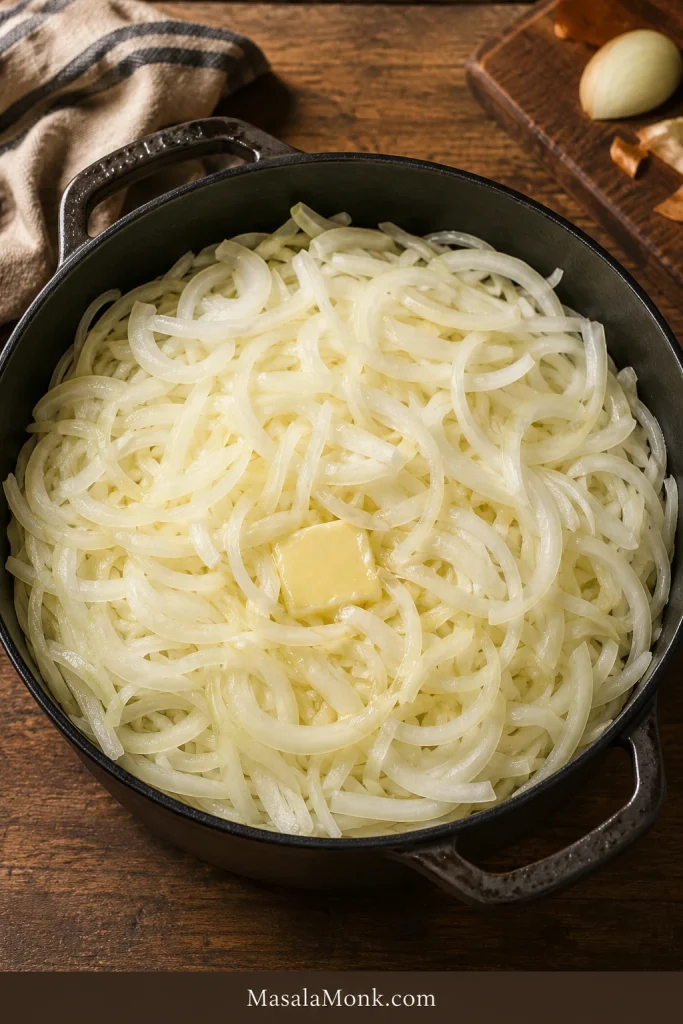
  2. Start the onions. Set a large heavy pot or Dutch oven over medium heat. Add the butter and oil. When the butter melts, add the onions and 1/2 teaspoon salt. Stir until coated.
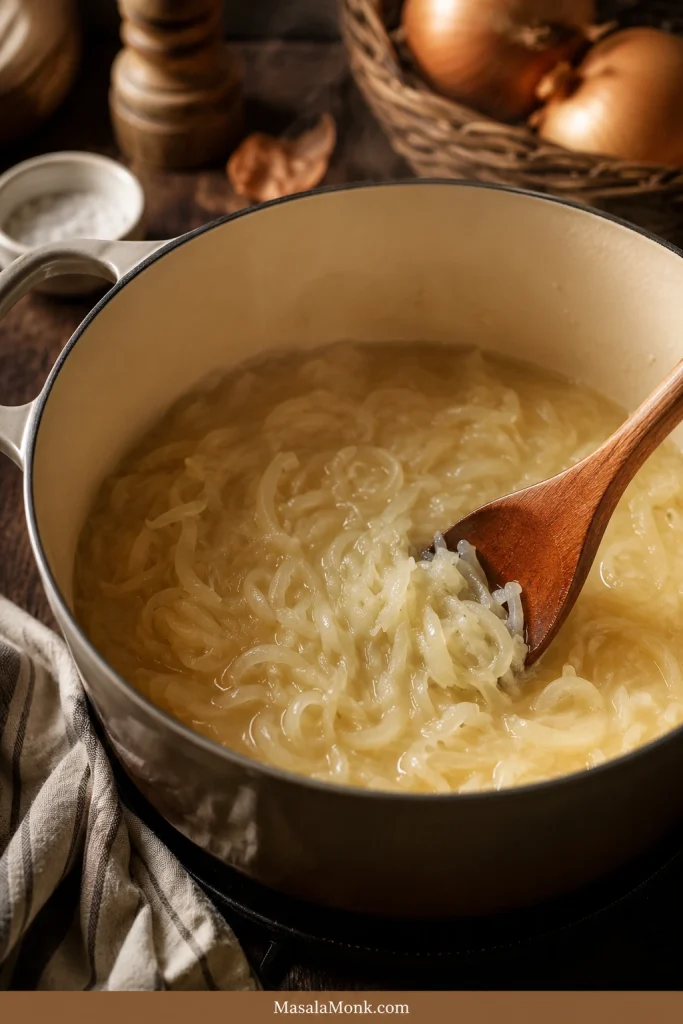
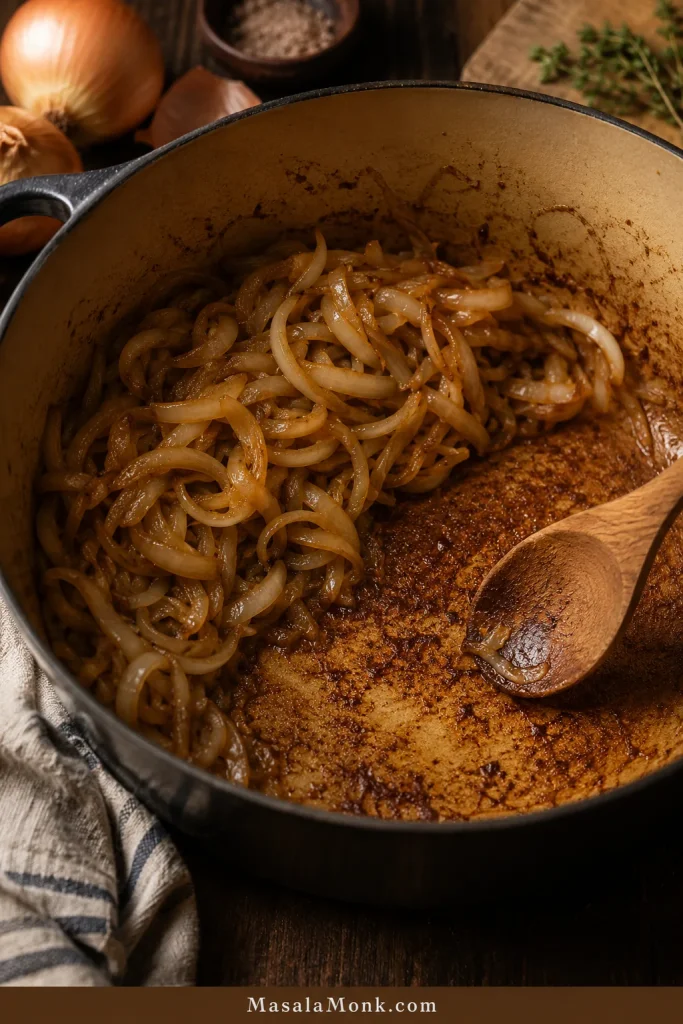
  3. Soften and collapse. Cook for 10 to 15 minutes, stirring often, until the onions release water and shrink down. Do not panic when the pot looks watery at first. That moisture has to cook off before browning can begin.
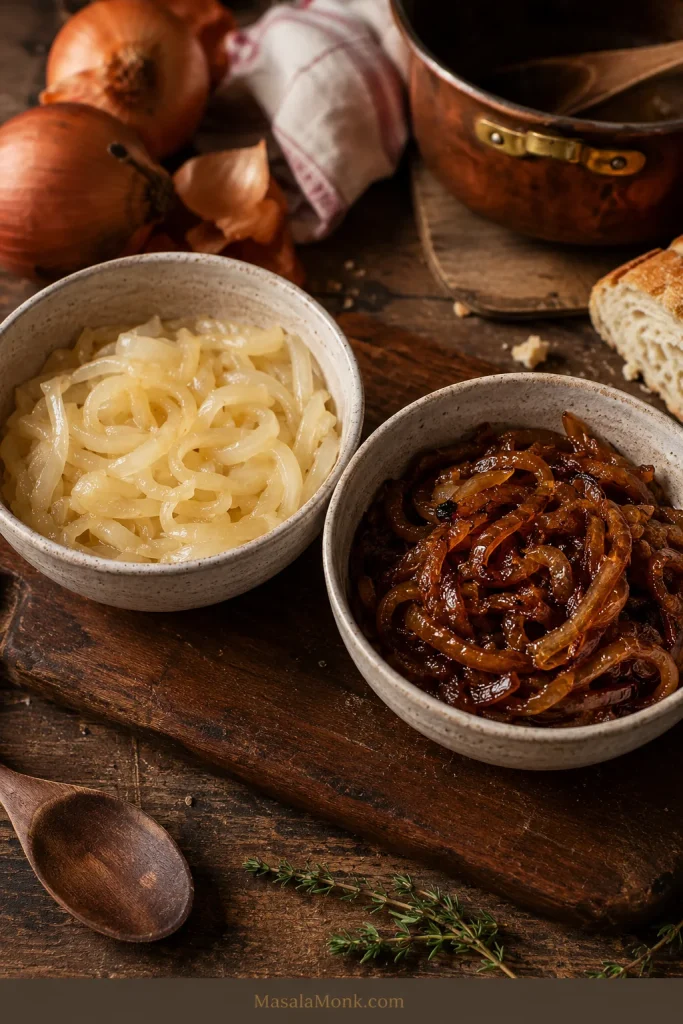
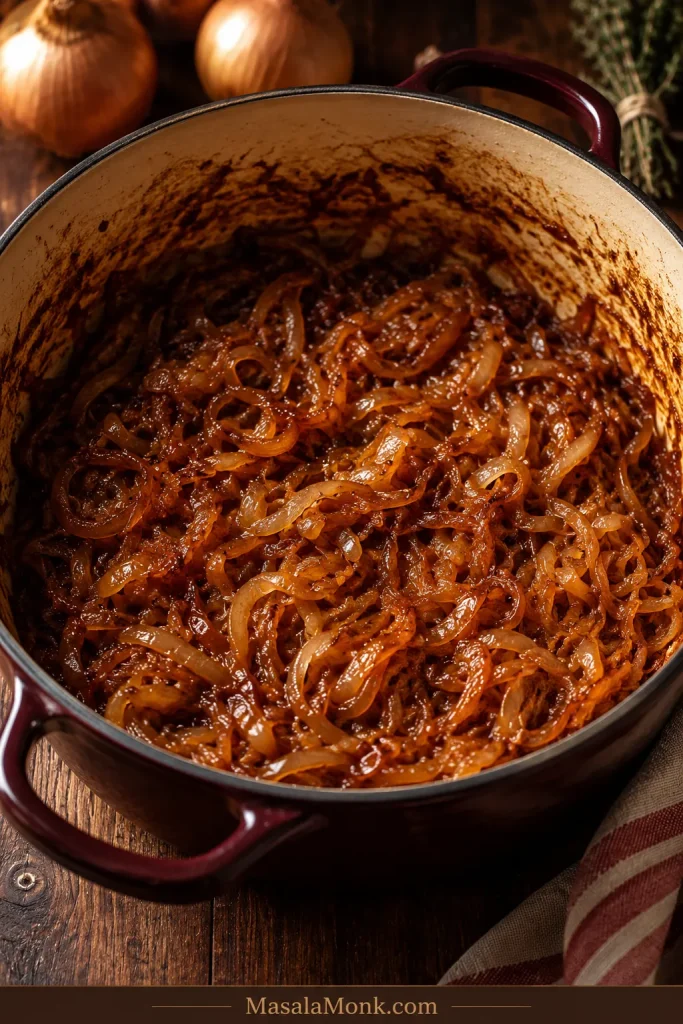
  4. Caramelize slowly. Lower the heat to medium-low and cook for 35 to 55 minutes more, stirring every few minutes. The onions should turn golden, then deep golden brown, and become soft and jammy. If they hiss loudly, stick hard, or darken too quickly, lower the heat. If the pot gets dry, add a splash of water or broth and scrape the golden browned bits into the onions.
  5. Check before adding liquid. The onion base should already smell like dinner. Look for soft strands, deep golden color, glossy texture, sweet roasted aroma, and browned—not black—bits on the bottom of the pot. If the onions are pale and wet, keep cooking. If the pot smells acrid or the bits are black, do not scrape those burnt spots into the soup.

Build and simmer the base

  1. Add garlic and flour. Stir in the garlic and cook for 30 seconds. If using flour, sprinkle it over the onions and cook for 1 minute, stirring well. The flour should disappear into the onions, not sit in dry clumps.
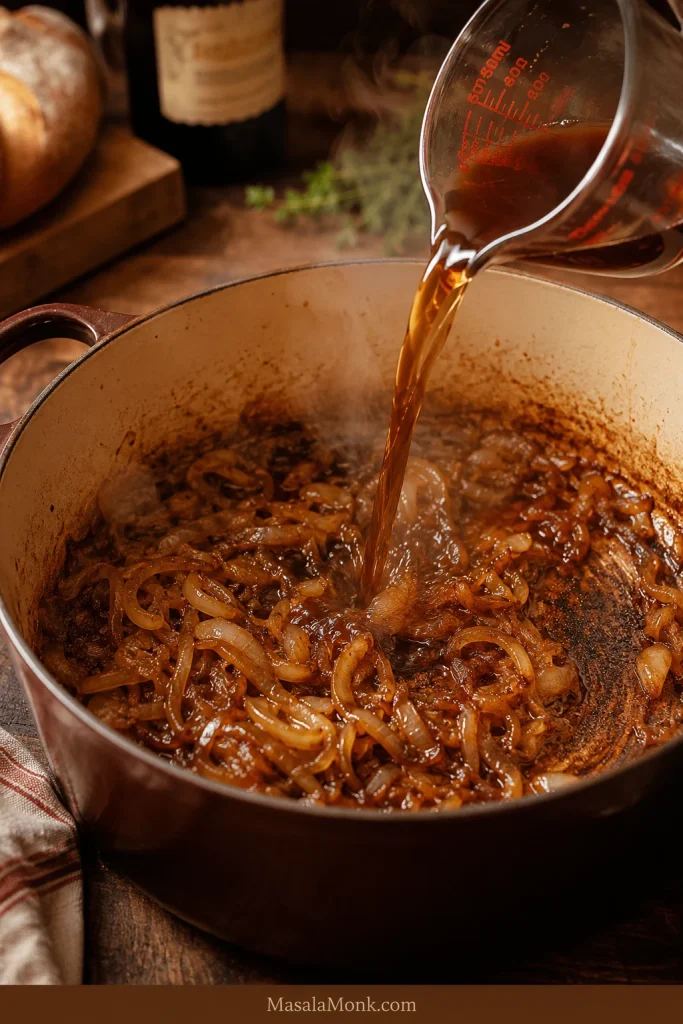
  2. Deglaze. Add wine or sherry, if using. Scrape the bottom of the pot and simmer until the liquid reduces and no longer smells sharp, about 5 to 8 minutes. The onions should look glossy again. For no-wine soup, use 1/2 cup broth instead.
  3. Add broth and herbs. Pour in 6 cups broth for a thicker onion-forward soup, or up to 7 cups for a brothier bowl. Add thyme, bay leaf, Worcestershire if using, and black pepper. Bring to a simmer.
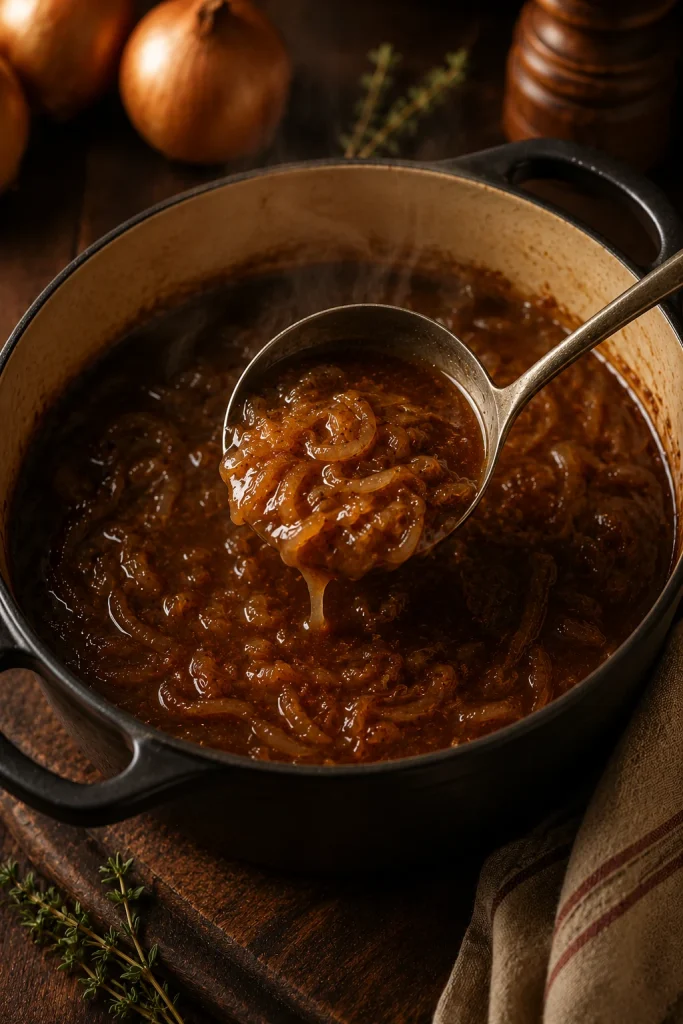
  4. Simmer and taste. Simmer gently for 20 to 30 minutes. Taste and adjust salt. If the soup tastes too sweet or flat, add 1 teaspoon vinegar or lemon juice, then taste again before adding more. The base should taste savory before the bread and cheese go on. Cheese hides many things, but it will not fix weak broth.

Toast, broil, and serve

  1. Toast the bread. While the soup simmers, toast the bread until dry and crisp. Use a 400°F / 205°C oven for 6 to 10 minutes, or toast it in a skillet or toaster. Cut the bread so it sits just inside the bowl or crock.
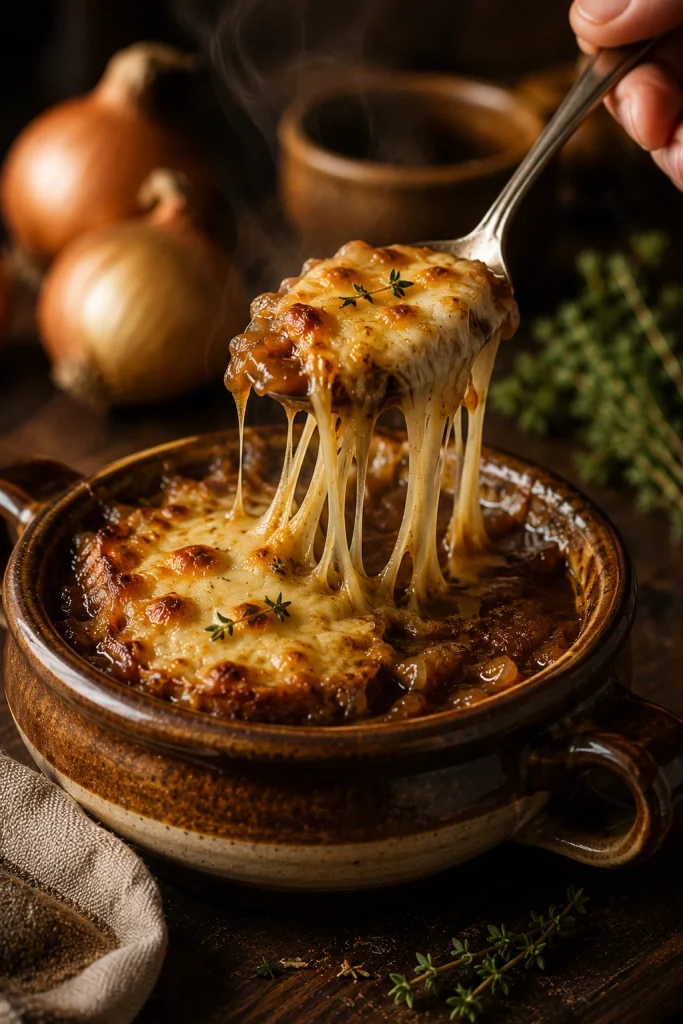
  2. Finish with cheese. Ladle hot soup into broiler-safe crocks or bowls. Place toasted bread on top, cover with cheese, and broil for 2 to 5 minutes, watching closely, until melted and browned. Without broiler-safe bowls, broil the cheesy toasts separately on a baking sheet and place them on top of the soup.
  3. Serve hot. Let the bowls sit for a minute before serving. The cheese and soup will be very hot.

Short Recipe Notes

  • Vegetarian: Use mushroom broth or dark vegetable stock, plus one savory booster such as tamari, vegetarian Worcestershire, or browned mushrooms.
  • No wine: Deglaze with broth, then add a small splash of vinegar or lemon after simmering to keep the onion sweetness in check.
  • Slow cooker: Cook onions with butter/oil and salt on LOW for 8 to 10 hours, then finish in a pot on the stove for 10 to 15 minutes for better color.
  • Cheese: Gruyère is classic, but Swiss, provolone, mozzarella with Parmesan, or aged cheddar can work.
  • Broiler safety: Only broil in bowls marked broiler-safe. When in doubt, broil the toast, not the bowl.

Why This Recipe Works

The magic is not in a long ingredient list. It is in what happens when onions are given enough time. They lose their sharpness, release their moisture, brown slowly, and turn into the kind of base that makes the whole pot taste more satisfying than it should.

This is the part where the kitchen starts smelling like dinner is worth waiting for.

The broth matters too, but it should not have to do all the work. Beef broth gives the classic bistro flavor. Mushroom broth or dark vegetable stock can still make a satisfying vegetarian version when the onions are cooked well and the seasoning has a little lift.

That final lift is important because caramelized onions are naturally sweet. Wine, sherry, vinegar, lemon juice, Worcestershire, tamari, or a well-seasoned broth can wake up the pot just enough so the bowl tastes savory instead of syrupy.

Toasted bread gives the melted cheese structure, so it can sit on top instead of disappearing into the soup. That final bubbling layer turns a humble onion soup into the bowl people remember.

Back to top

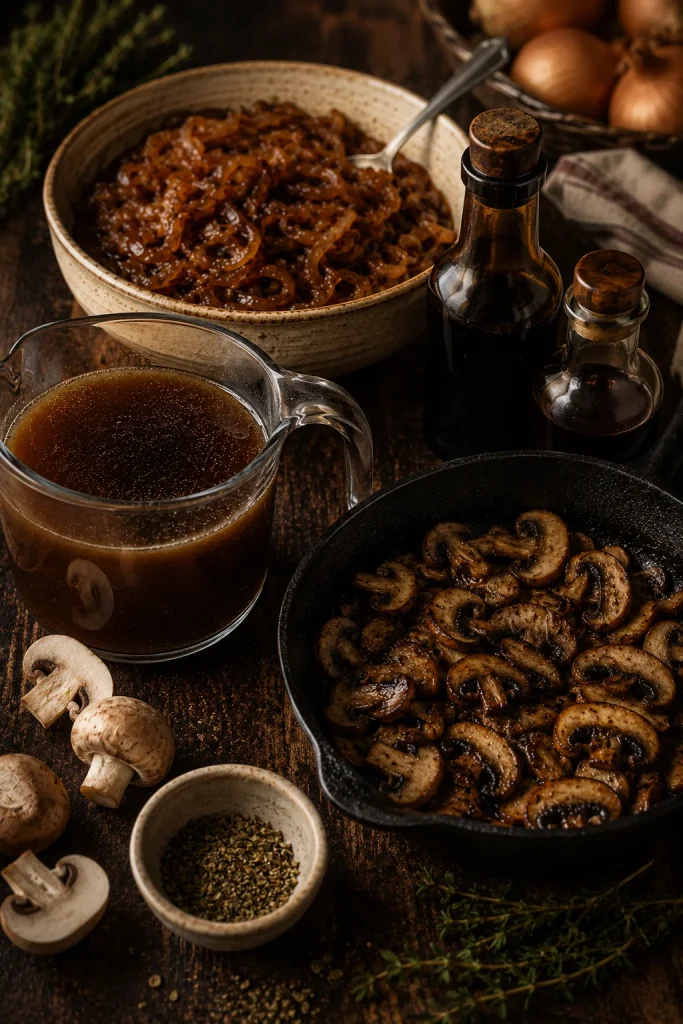
Ingredients and Onion Tips

You do not need rare ingredients, but each one has a job. The onions bring sweetness, the broth brings backbone, the bread supports the topping, and the cheese makes the bowl feel finished.

How to Choose the Ingredients

Onions: Yellow onions are the safest all-purpose choice. They become sweet without making the soup sugary, and they give the broth a savory backbone. Sweet onions work too, but the finished bowl can taste noticeably sweeter. Red onions make a darker soup with a slightly sharper flavor.

Butter and oil: Butter is where the soup starts to smell like something is happening. A little oil helps keep the butter from scorching during the long cook. All butter is fine too, but keep the heat gentle and watch the bottom of the pot.

Broth, Wine, and Seasoning Choices

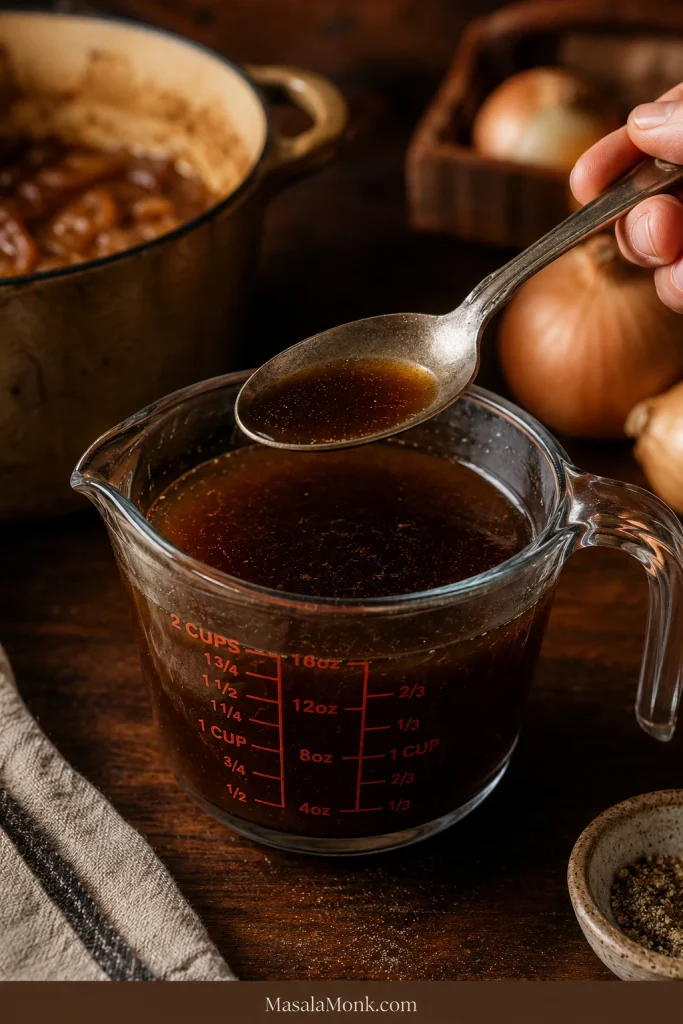
Taste the Broth Before It Goes In

If the broth tastes watery now, it will taste watery later. Use better stock, simmer weak broth for a few minutes to concentrate it, or add one savory booster before relying on cheese to rescue the bowl.

Dark broth in a measuring cup with a spoon for tasting before making French onion soup.
Taste the broth before it joins the onions. If it tastes weak by itself, add savory support now instead of hoping cheese will fix it later.

If the broth tastes flat or the onions seem too sweet, jump to troubleshooting before adding cheese.

Broth or stock: Classic French onion soup usually uses beef broth or beef stock. For a vegetarian version, use dark vegetable stock or mushroom broth. The broth should taste good before it meets the onions, because a pale base and thin broth will not become deeply savory just because cheese goes on top.

Wine, sherry, or no wine: Dry white wine or dry sherry adds character and helps keep the onion sweetness in check. It is helpful, but not mandatory. In a no-wine version, broth loosens the browned bits and vinegar or lemon replaces the brightness wine would have added.

Flour: Flour is optional, but a small spoonful gives the broth just enough body to cling to the onions. It should not turn the soup into gravy. Skip it for a thinner, clearer broth. When using flour, cook it briefly with the onions before adding liquid so it does not taste raw.

Herbs and seasoning: Thyme and bay leaf should stay in the background. You want people to taste onion first. Garlic helps, but it should not dominate. Worcestershire, tamari, soy sauce, or a small splash of vinegar can round out the pot, especially in no-wine or vegetarian versions. For vegetarian soup, use vegetarian Worcestershire, tamari, or soy sauce instead of regular Worcestershire.

Best Onions for French Onion Soup

The best onions for French onion soup are usually yellow onions. They are savory, reliable, and easy to find. They caramelize well without making the soup taste too sweet.

  • Yellow onions: balanced, savory, gently sweet, and the best everyday choice.
  • Sweet onions: softer and sweeter; good for a sweeter soup, but even better mixed with yellow onions.
  • Red onions: sharper, darker, and slightly fruitier; useful for variation, but they change the color and flavor.
  • White onions: cleaner and sharper; best used with yellow onions instead of alone.
  • Shallots: delicate and sweet; lovely as part of a mix, but expensive for the whole pot.

The slicing matters almost as much as the onion type. Aim for slices about 1/8 inch / 3 mm thick. Very thick slices take longer to soften. Paper-thin slices can break down too much or burn at the edges before the rest of the pot is ready.

Thinly sliced yellow onions piled high in a Dutch oven before cooking French onion soup.
Do not panic when the pot looks crowded. A mountain of sliced onions will shrink down before it ever starts to caramelize.

How to Caramelize Onions Properly

When it feels like nothing is happening for the first 20 minutes, you are probably doing it right. The onions soften before they brown. The waiting is part of the recipe, not a sign that something has gone wrong. Once the onions are glossy and deep gold, the soup starts doing some of the work for you.

Softened sliced onions with visible moisture in a pot during the early stage of French onion soup.
The onions soften and release water before they begin to brown. Keep cooking past this steamy stage so the flavor can move from raw and sharp to sweet.

Read the Onion Stages

StageWhat you seeWhat to do
Wet and paleSteamy, crowded onionsKeep cooking
Soft and glossySharp smell fadesKeep cooking
GoldenFond starts formingStir and scrape gently
Deep golden and jammySweet roasted smell, soft strandsReady for liquid
Black or acridBurnt smell, black bitsDo not scrape burnt fond into the soup

If the pot looks boring for a while, that is normal. The reward comes late: first the sharp smell fades, then the onions turn glossy, and only near the end does the soup begin to smell deep and savory.

Pale softened onions beside deep golden caramelized onions for French onion soup comparison.
This is the color difference that changes the whole pot. Pale onions give you a lighter soup; deep golden onions give you classic French onion soup flavor.

Control Heat and Fond

Use a heavy pot if possible. A Dutch oven, heavy stainless steel pot, or heavy-bottomed saucepan gives the onions time to brown without scorching too quickly. A thin pot can create hot spots, which makes some onions burn while others stay pale.

Golden onions with browned fond forming on the bottom of a pot while cooking French onion soup.
As the onions turn golden, the brown film on the pot becomes part of the flavor. Scrape it in early, while it tastes toasted instead of burnt.

Keep the heat moderate. When the onions are not browning after a long time, raise the heat slightly. When they are sticking hard or the bottom of the pot is getting too dark, add a splash of water or broth and scrape the browned bits into the onions. Golden brown fond is flavor. Black scorched fond is bitterness.

Brown fond and black scorched bits on the bottom of a pot during onion cooking.
Brown bits can enrich the broth, but black scorch can make it bitter. Deglaze before the bottom of the pot crosses that line.

When the fond stays brown and the onions turn glossy, soft, and deep golden, you have the flavor base the soup needs. This is the success state before adding liquid.

Deep golden jammy caramelized onions in a pot, ready for broth in French onion soup.
The target is glossy, soft, and deep golden. Pale onions need more time before they can carry the soup.

For a deeper look at onion color, Serious Eats has a helpful French onion soup guide that explains why rich golden brown is better than burnt-dark.

A small pinch of sugar can help stubborn onions brown, but do not rely on sugar to replace time. This soup should taste like slowly cooked onions, not sweet onion syrup.

Back to top

How the Stovetop Method Works

The stovetop method gives you the most control. Once you understand what each stage is doing, the recipe feels much less mysterious.

On the stove, the onions release water, collapse, and slowly move from pale to golden to deep golden brown. Wine, sherry, or broth lifts the browned bits from the pot, and the final simmer lets the onion base and broth become one soup.

Broth being poured into caramelized onions in a pot to deglaze for French onion soup.
Deglazing turns the browned bits into soup flavor. Wine, sherry, or broth can all loosen the fond and pull it back into the base.

Taste near the end, before the bread and cheese go on. A little salt, acid, or umami can wake up the pot while you can still adjust it easily.

Finished French onion soup base with caramelized onions and dark broth in a pot before adding bread and cheese.
Before any toast or cheese is added, the soup base should already taste complete: onion-rich, savory, gently sweet, and balanced.

Once the stovetop method makes sense, every variation becomes easier. You are not learning four different soups. You are keeping the onions strong, then changing the broth, deglazing liquid, or finishing method to fit your kitchen.

No broiler-safe bowls? Jump to the no-crock cheese method before you finish the topping.

Back to top

Vegetarian and No-Wine Options

Vegetarian French Onion Soup

Vegetarian French onion soup should not taste like onions floating in weak vegetable broth. The stock needs to be dark, savory, and strong enough to support the caramelized onions.

Use mushroom broth or dark vegetable stock when available. Mushroom broth works especially well because it brings earthy savoriness that helps replace some of the depth people expect from beef broth.

Mushroom broth, browned mushrooms, tamari, and caramelized onions for vegetarian French onion soup.
For vegetarian French onion soup, do not rely on plain vegetable stock alone. Mushroom broth, browned mushrooms, tamari, or vegetarian Worcestershire add the missing savory depth.

For the cleanest vegetarian version, choose one savory booster and one brightener. That keeps the soup controlled instead of turning it into a pantry experiment.

NeedUse one of these
More savory depthMushroom broth, browned mushrooms, tamari, vegetarian Worcestershire
More brightnessSherry vinegar, apple cider vinegar, lemon juice
More bodyLonger simmer, stronger stock, slightly more onions

A vegetarian bowl should still feel complete, not like a compromise. When the stock is dark, the onions are properly browned, and the finish has a little brightness, the soup keeps its cozy bistro feel.

  • Replace beef broth: use mushroom broth or dark vegetable stock.
  • Swap regular Worcestershire: use vegetarian Worcestershire, tamari, or soy sauce.
  • Skip the wine: deglaze with broth, then add vinegar or lemon after simmering.
  • For the cheese topping: use Gruyère, Swiss, provolone, mozzarella, or a vegetarian cheese that melts well.

Cheese eaters can finish the soup with Gruyère, Swiss, provolone, mozzarella, or a mix. For strictly vegetarian soup, check the cheese label because some cheeses use animal rennet. For a vegan version, use olive oil instead of butter, vegan Worcestershire or tamari, and your preferred vegan cheese or cheesy toast alternative.

Skipping wine too? Jump to the no-wine method for deglazing and acid balance.

No-Wine French Onion Soup

No-wine French onion soup can still taste deep and complete. You only need to replace wine’s two jobs: loosening the browned bits from the pot and balancing the natural sweetness of the onions.

Broth, vinegar, lemon, and caramelized onions arranged for no-wine French onion soup.
For a no-wine version, use broth to loosen the fond, then add a tiny splash of vinegar or lemon to balance the onions’ sweetness.

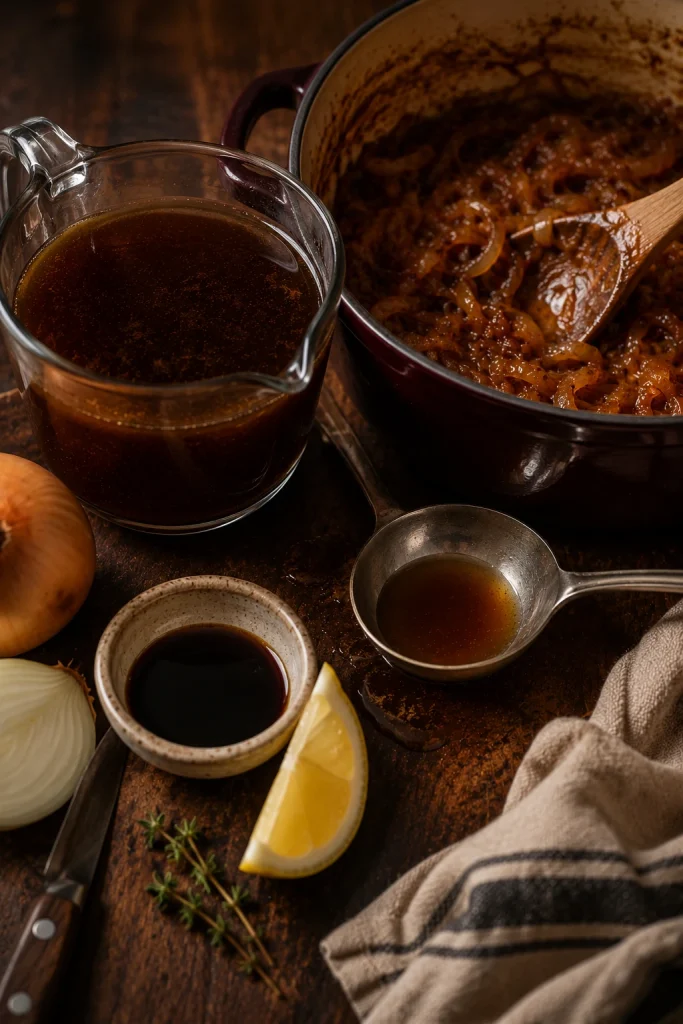
For a no-wine version, deglaze with broth instead of wine. Scrape up the browned bits, then simmer as usual. After the soup has simmered, taste it and add a small balancing ingredient if needed. Start with 1 teaspoon, taste, and stop as soon as the bowl feels brighter.

  • Apple cider vinegar: gently brightens the soup.
  • Balsamic vinegar: adds roundness and a little sweetness.
  • Lemon juice: lifts heavy flavors.
  • Worcestershire sauce: adds savory weight.
  • Vegetarian Worcestershire: adds weight without meat-based ingredients.
  • Tamari or soy sauce: adds umami and saltiness, so use carefully.

The point is not to make the soup sour. The point is to wake up the sweetness of the onions so the bowl tastes rounded instead of heavy.

Making it vegetarian as well? Jump back to the vegetarian broth tips and choose one savory booster.

Back to top

Slow Cooker Option, Plus an Instant Pot Note

Slow Cooker French Onion Soup

The slow cooker does not make the soup faster; it makes the waiting easier. It can handle the long onion softening while you do something else. A short stovetop finish is only there if you want deeper color and a more developed base.

Soft onions cooked down in a slow cooker for French onion soup.
Slow cooker onions save attention, not time. For deeper flavor, give pale or wet onions a quick stovetop finish before adding broth.

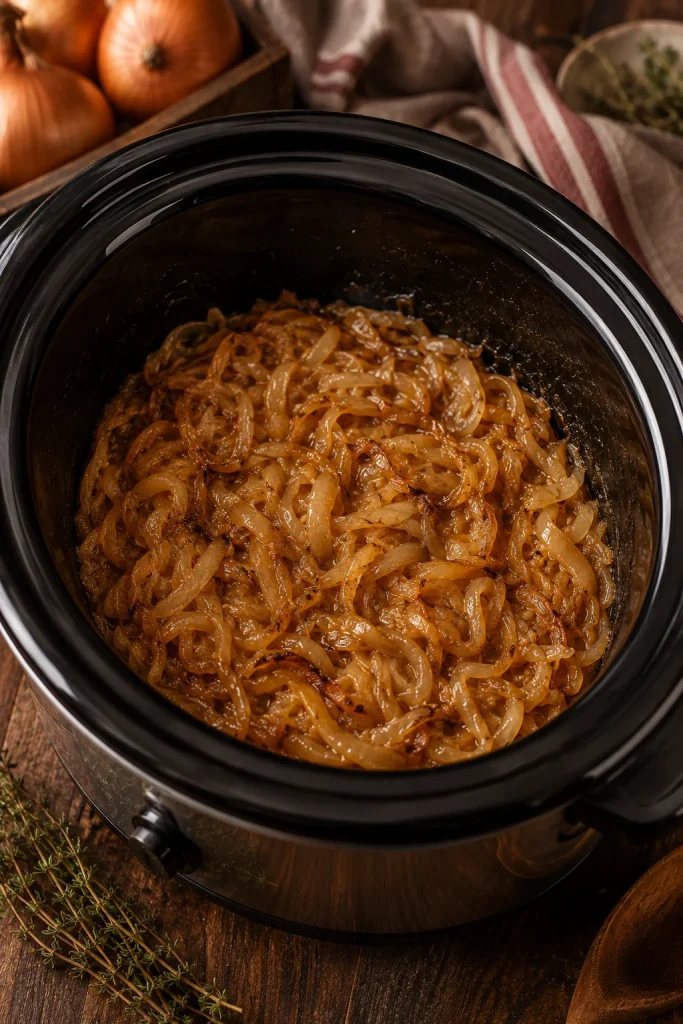
For the easiest version, add sliced onions, butter or oil, and salt to a 5-quart or larger slow cooker. Cook on LOW for 8 to 10 hours, until the onions are very soft and browned around the edges. If they look pale and wet, transfer them to a pot and cook for 10 to 15 minutes to concentrate the color and flavor.

Slow cooker baseAmount
Sliced onions3 lb / 1.35 kg
Butter and oil3 tablespoons butter + 1 tablespoon oil
Salt1/2 teaspoon to start
Slow cooker time8 to 10 hours on LOW
Best flavor finish10 to 15 minutes on the stove
Broth simmer20 to 30 minutes on the stove, or 1 to 2 hours more in the slow cooker

Using pressure cooking instead? Jump to the Instant Pot note.

After the onions are ready, add broth, thyme, bay leaf, and seasoning, then simmer until the soup tastes rounded. Finish with toasted bread and cheese.

If you like cozy slow cooker dinners built around French onion flavor, this Slow Cooker French Onion Chicken is another easy comfort-food option.
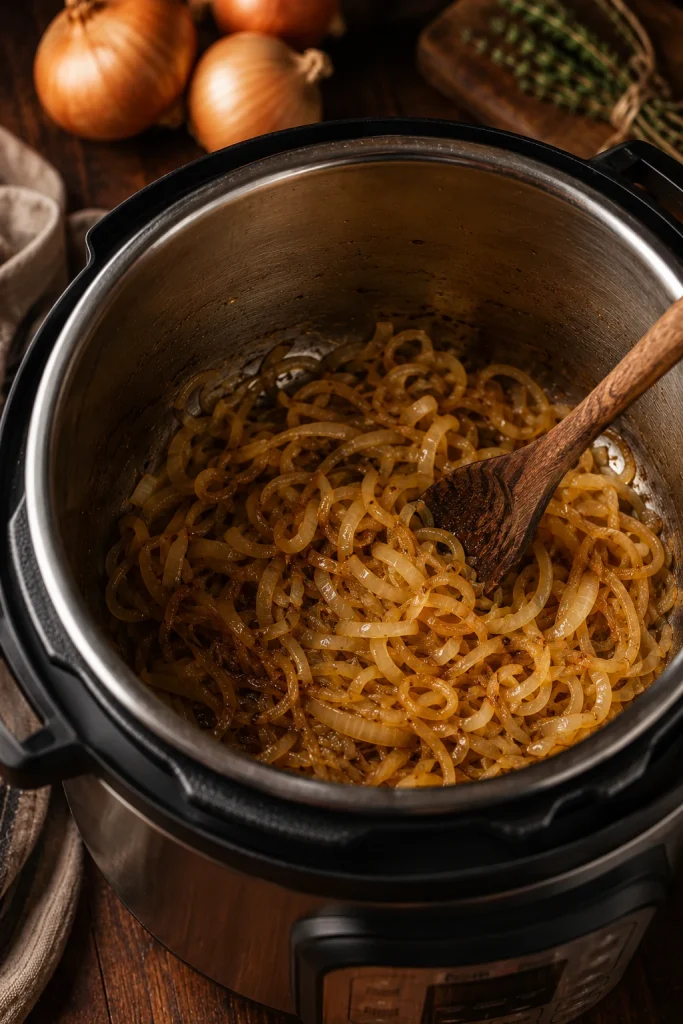
Instant Pot Note

You can make the soup in an Instant Pot, but pressure cooking does not replace caramelization. Use sauté mode first, give the onions 20 to 30 minutes to soften and brown, then add broth and seasonings. Pressure cook for 5 to 6 minutes, release pressure carefully, taste and adjust, then finish with toasted bread and cheese. If the onions are pale before pressure cooking, the finished soup will taste less developed.

Onions browning on sauté mode inside an Instant Pot for French onion soup.
In an Instant Pot, sauté first and pressure cook second. The onion color has to develop before the broth goes in.

Back to top

Cheese, Bread, and Bowls

Best Cheese for French Onion Soup

Gruyère is the classic choice because it melts smoothly and has a nutty, savory flavor that suits the sweet onions. The best topping melts well, browns in spots, and still tastes good once it stretches.

Close-up of bubbling browned cheese on top of French onion soup after broiling.
Broil just until the cheese bubbles and browns in patches. Pull it before the golden spots turn black.
  • Gruyère: the classic choice; nutty, rich, and beautifully melty.
  • Swiss: mild, melty, and a good substitute for Gruyère.
  • Provolone: smooth, stretchy, and mild.
  • Mozzarella: excellent for cheese pull, but mild in flavor.
  • Parmesan: salty and savory; best mixed with another cheese.
  • Aged cheddar: not classic, but flavorful and practical.
  • Processed cheese: melts easily, but can make the soup taste saltier and more snack-like.

If Gruyère is too expensive or hard to find, use mozzarella for melt and add Parmesan, aged cheddar, or a sharper cheese for flavor. Mostly mozzarella needs a small amount of Parmesan or sharp cheddar so the topping has flavor, not just stretch.

Spoon lifting French onion soup with melted cheese stretching from toasted bread.
When the bread is sturdy and the cheese melts properly, each spoonful catches the best parts: broth, onions, toast, and a satisfying cheese pull.

Best Bread for French Onion Soup

The toast keeps the cheese from sinking straight into the soup. It should be crisp enough to hold, but porous enough to soften at the edges. Baguette is classic because it is sturdy and easy to slice into rounds, but you have options.

Firm toasted bread held above a bowl of French onion soup base to show size and texture.
Toast the bread until it feels dry and firm. That structure helps it support melted cheese without disappearing into the broth.
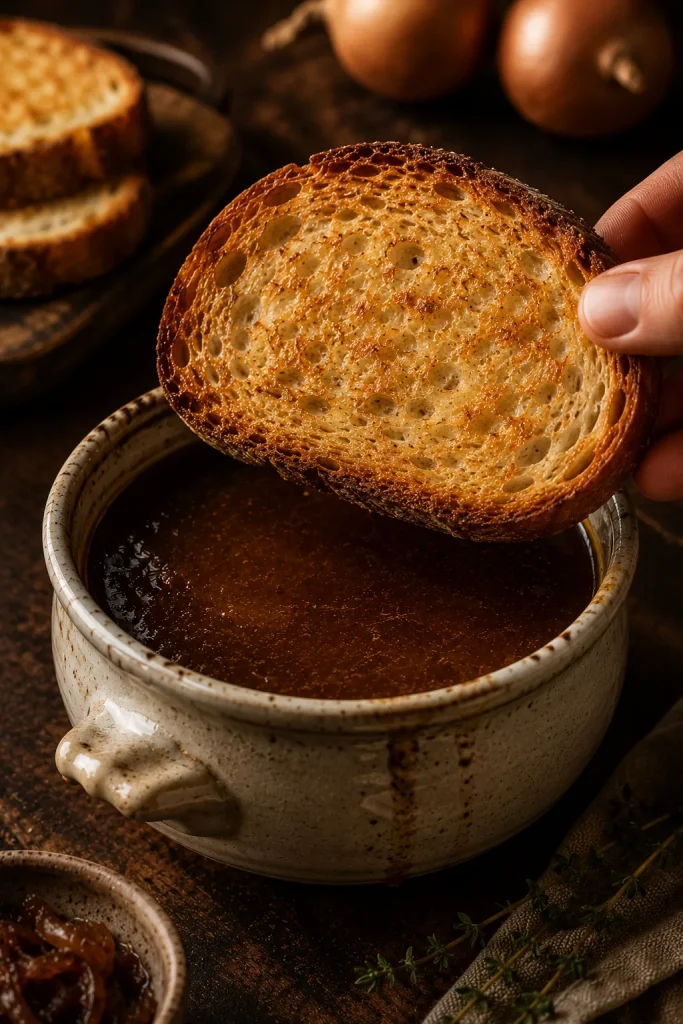
  • Baguette: classic, sturdy, and ideal for individual bowls.
  • Sourdough: flavorful and strong enough for soup.
  • Country bread: good for larger bowls if cut to fit.
  • Crusty rolls: useful when baguette is not available.
  • Regular sandwich bread: only use if toasted very firm; otherwise it gets soggy quickly.

Cut the bread so it sits just inside the bowl or crock. It should cover much of the surface without forcing you to wrestle with it. Toast it before adding cheese. Soft bread under melted cheese may look good for a moment, but it sinks and turns mushy quickly.

If your cheese sinks or the bread turns soggy, jump to troubleshooting before serving.

For a homemade bread side on another soup night, this Homemade Garlic Bread Loaf can be torn, toasted, or served beside a cheesy bowl.

No Broiler-Safe Crocks? Broil the Toast, Not the Bowl

French onion soup is often served in handled crocks because they can go under the broiler and hold heat well. But you do not need special crocks, and you should not risk a favorite bowl just for melted cheese.

Bowls marked only oven-safe are not automatically safe under the broiler. Broilers use intense direct heat, and some ceramic, stoneware, or glass dishes can crack or break if they are not made for it. For cookware safety, Southern Living’s guide on oven-safe versus broiler-safe dishes is worth checking before putting bowls under direct heat.
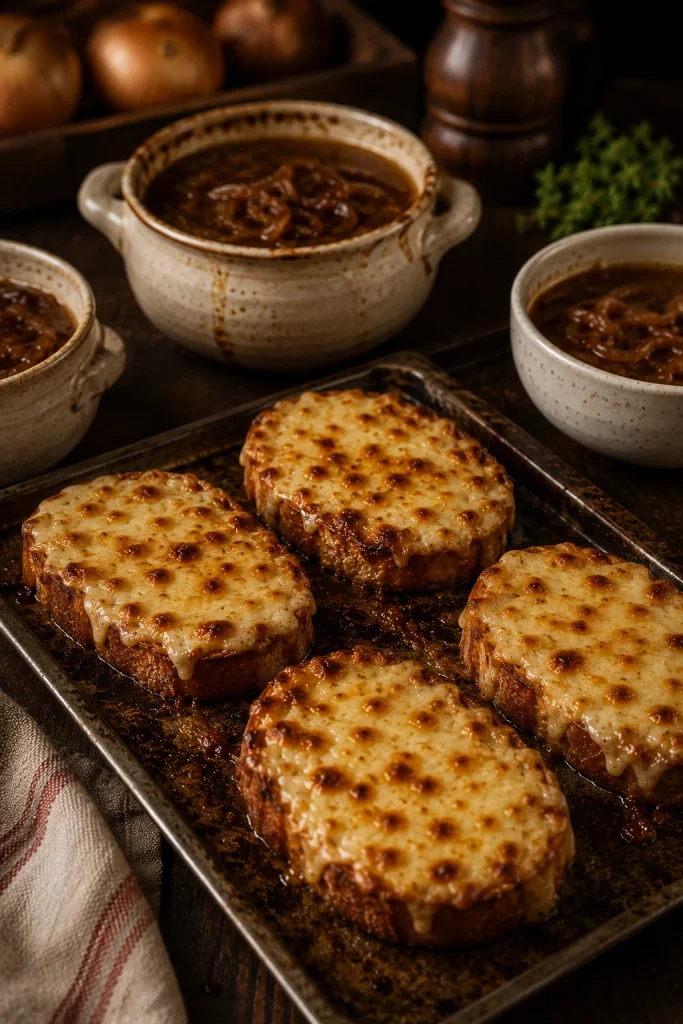
Cheesy toasts broiled on a sheet pan with bowls of French onion soup nearby.
Instead of putting regular bowls under intense heat, melt the cheese on toast separately. You still get the browned French onion soup topping without risking cracked dishes.

No-Crock Method

  1. Toast the bread until dry and crisp.
  2. Add cheese on top of the toast.
  3. Broil the cheesy toasts on a baking sheet until melted and browned.
  4. Ladle hot soup into regular bowls.
  5. Place the cheesy toast on top just before serving.

This gives you the same bubbling, browned cheese moment without guessing whether your bowls can handle the heat.

Broiled cheesy toast being placed with tongs on top of French onion soup in a regular bowl.
After broiling, move the cheesy toast onto the hot soup right before serving. The edges stay crisp while the center softens into the onion broth.

Back to top

Troubleshooting French Onion Soup

Most problems show up before the bowls reach the table, which is good news. Taste the pot while you can still fix it.

Scan the row that matches your pot; you do not need to read the whole table before cooking.

ProblemLikely causeHow to fix it
Soup tastes too sweetSweet onions, sugar, or not enough acidAdd a small splash of vinegar, lemon juice, Worcestershire, or tamari. Next time, use yellow onions and skip the sugar.
Soup tastes bitterBurnt onions or blackened fondDo not scrape black bits into the pot. Lower the heat next time and deglaze earlier.
Soup tastes like wineWine was not reduced enoughSimmer longer so the sharp wine flavor cooks off. Next time, reduce wine until the onions look glossy and jammy again.
Soup is too saltySalty broth, bouillon, Worcestershire, cheese, or reduced liquidDilute with unsalted broth or water. Add a small splash of acid to balance. Be careful adding more cheese.
Soup tastes wateryWeak stock or rushed onionsSimmer longer, use better stock, or add a small umami boost like Worcestershire, tamari, or mushroom broth.
Soup tastes flatNot enough salt, acid, or savory weightAdd salt carefully, then a tiny splash of vinegar or lemon. For vegetarian soup, add tamari or vegetarian Worcestershire.
Cheese sinksBread was too soft or too thinUse sturdier bread and toast it until crisp before adding cheese.
Bread turns soggy immediatelyBread was not toasted enoughToast bread until dry and firm. Add it right before serving.
No safe bowls for broilingBowls are not broiler-safeBroil cheesy toasts separately on a baking sheet and place them on top of the soup.

Back to top

Shortcuts and Lighter Options

Shortcut Reality Check

Shortcuts can help on a busy night, but they cannot replace the slow onion flavor that makes the bowl taste homemade.

  • French onion soup mix: seasoning, not a real soup base. Use it for dips, casseroles, and quick pantry meals.
  • Canned, condensed, or frozen soup: convenient, but better with extra caramelized onions, black pepper, thyme, toasted bread, and better cheese.
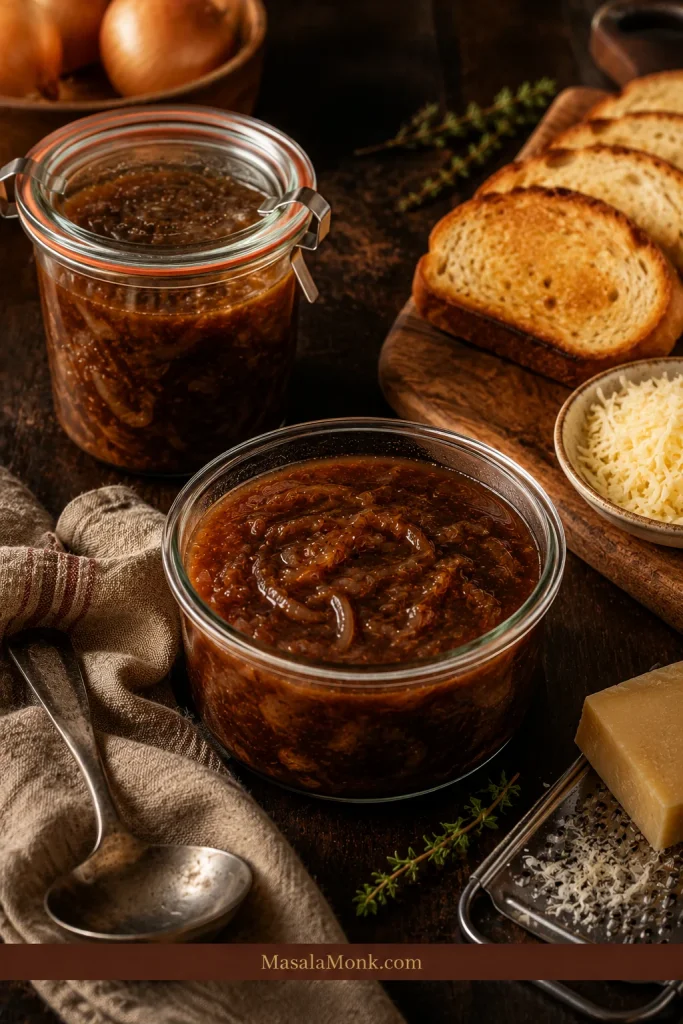
  • Best homemade shortcut: caramelize the onions ahead, store the base, and finish the soup fresh later.

For less stovetop attention, you can also caramelize onions in a covered Dutch oven in the oven, stirring occasionally, then finish the soup on the stove. It still takes time, but it needs less watching.

Lighter and Special-Diet Options

Once the classic bowl is understood, you can lighten it without losing the point of the soup. The onions still need time, and the broth still needs flavor.

  • Lower sodium: use low-sodium or unsalted broth, start with less salt, and season at the end. Remember that cheese, Worcestershire, bouillon, and Parmesan can all add salt.
  • Lower carb: use a smaller piece of toast or make cheese toasts separately and use less bread. The onions still contain natural carbohydrates, so this is lower-carb, not zero-carb.
  • Gluten-free soup: skip the flour, use gluten-free bread, and check broth, Worcestershire, and tamari labels.
  • Lighter bowl: use less cheese and a slightly brothier ratio, but do not rush the onion caramelization.
  • Lighter vegetarian version: use vegetable or mushroom broth and moderate the cheese, but avoid weak stock or the soup will taste watery.

For a broader look at onions in lower-carb eating, see MasalaMonk’s guide to whether onions are suitable for a keto diet.

Back to top

Storage, Reheating, and Serving

Storage, Freezing, and Reheating

The soup stores best before the bread and cheese are added. Keep the soup base separate, then finish each bowl fresh when you are ready to eat.

French onion soup base stored in glass containers with toasted bread and cheese kept separate.
For the best make-ahead texture, store only the onion soup base. Add fresh toast and cheese after reheating, not before storage.
  • Refrigerator: Store the soup base in an airtight container for 3 to 5 days.
  • Freezer: Freeze the soup base for up to 3 months.
  • Reheating: Reheat gently on the stove until hot. Taste again because salt and sweetness can feel stronger after storage.
  • Bread and cheese: Add fresh toast and cheese after reheating. Do not freeze fully assembled soup with bread and cheese if you care about texture.

If the soup thickens in the fridge, loosen it with a splash of broth or water while reheating. If it tastes flat after reheating, a few drops of vinegar or lemon juice can bring it back.

What to Serve with French Onion Soup

Serve it in small bowls as a starter, or make it the whole dinner with extra toast and a sharp salad. Because the soup is rich, salty, sweet, and cheesy, it pairs best with something fresh, crisp, or simple.

  • A crisp green salad with vinaigrette
  • Roast chicken
  • Steak or simple grilled meat
  • Roasted vegetables
  • Grilled cheese or cheese toast
  • Crusty bread and butter
  • A simple pasta or baked potato on the side

For a crisp, steakhouse-style side, MasalaMonk’s Wedge Salad Recipe works well beside a cheesy bowl because the cold lettuce and sharp dressing cut through the sweetness of the onions.

If you are planning a soup night with more vegetables, beans, and pasta, MasalaMonk’s Minestrone Soup Recipe is a lighter, hearty bowl to keep in rotation.

Give the onions time, finish the bread and cheese safely, and the bowl gives you everything French onion soup is supposed to give: sweet onions, savory broth, crisp toast, bubbling cheese, and that first spoonful that makes the wait feel sensible.

Back to top

FAQs

What are the best onions for French onion soup?

Yellow onions are the best all-purpose choice. They caramelize well and give the soup a rounded, savory-sweet flavor without making it too sweet.

How long should onions caramelize for French onion soup?

Plan on 45 to 70 minutes. The onions should be soft, deep golden brown, and jammy, not pale and not blackened.

Do you need beef broth for French onion soup?

No. Beef broth is classic, but mushroom broth or dark vegetable stock can also work. Taste the broth first; if it tastes weak before simmering, the soup will need help.

How do you make vegetarian French onion soup taste rich?

Use mushroom broth or dark vegetable stock, then add one savory booster such as vegetarian Worcestershire, tamari, or browned mushrooms.

What can replace wine in French onion soup?

Use broth to deglaze the pot, then add 1 teaspoon vinegar or lemon juice near the end. The goal is balance, not sourness.

Which cheese melts best on French onion soup?

Gruyère is classic because it melts smoothly and tastes nutty. Swiss, provolone, mozzarella, and aged cheddar can also work; if using mostly mozzarella, add Parmesan or a sharper cheese for flavor.

What bread works best for French onion soup?

Baguette is classic, but sourdough, country bread, crusty rolls, or any sturdy toasted bread can work. Toast it until dry and firm.

Do you need oven-safe crocks?

No. Without broiler-safe crocks, broil the cheesy toasts separately on a baking sheet and place them on top of the hot soup.

Is slow cooker French onion soup as good as stovetop?

It can be very good, but the flavor is usually deeper when the onions get a short stovetop finish before the broth goes in.

Is French onion soup mix the same as French onion soup?

No. French onion soup mix is a dry seasoning blend; it does not replace the flavor of slowly caramelized onions.

Why is my French onion soup too sweet?

Very sweet onions, extra sugar, or too little acid can make the soup taste sweet. Add a small splash of vinegar or lemon juice to balance it.

Why does French onion soup taste bitter?

Bitterness usually comes from burnt onions or blackened bits scraped from the pot. Brown fond is good; do not scrape black scorched bits into the soup.

Can French onion soup be frozen?

Yes. Freeze the soup base without bread and cheese for up to 3 months, then reheat and finish with fresh toast and cheese.

Back to top

Posted on 1 Comment

Black Pepper and Honey for Cough: Remedies, Benefits, and How to Use

Photorealistic image of a bowl of honey with a honey dipper and scattered black peppercorns on a rustic wooden table, styled like a luxury food magazine, with overlay text about cough relief. MasalaMonk.com watermark.

When a cough lingers, keeping you awake at night or making your throat feel raw, many people instinctively turn not to over-the-counter syrups but to something far simpler — the kitchen spice jar and honey pot. Among the oldest and most trusted remedies is honey mixed with black pepper.

Honey is naturally soothing, coating the throat and calming irritation. Black pepper, on the other hand, adds gentle warmth and has been valued for centuries in Ayurveda and other traditional systems as a way to clear mucus and boost circulation. Together, they make a remedy that is both comforting and intriguing: one part sweet, one part sharp, and entirely natural.

Modern science has started to validate at least half of this duo. A 2021 meta-analysis in BMJ Evidence-Based Medicine found that honey outperformed standard care in reducing cough frequency and severity in people with upper respiratory tract infections (PubMed). Another systematic review in children confirmed that honey helps kids over 1 year sleep better and cough less (PMC). For black pepper, the evidence is still developing — but centuries of traditional use give it credibility worth exploring.

For even more ideas, check out our roundup of 14 effective home remedies for cough.

Disclaimer: This article shares traditional and home-based remedies for cough. They are meant for general wellness support and not as a substitute for professional medical advice. If your symptoms persist or worsen, please consult a qualified healthcare provider.


Why Black Pepper Has Been Used for Cough

Black pepper (Piper nigrum), known in Ayurveda as Maricha, is not only a culinary spice but also a medicinal one. In classical Ayurvedic texts, it is considered part of Trikatu (alongside ginger and long pepper), a formula used to kindle digestion, reduce phlegm (Kapha), and support the respiratory system. Another preparation, Talisadi Churna, includes black pepper as a core ingredient and is still prescribed for chronic cough and bronchitis in Ayurvedic practice.

From a scientific perspective, black pepper’s active compound, piperine, has drawn attention for its anti-inflammatory, antioxidant, and expectorant-like properties. These properties may explain why pepper is so often included in remedies for colds and coughs. However, unlike honey, there are fewer modern clinical trials directly testing black pepper for respiratory symptoms. What we do know is that traditional healers weren’t imagining its effects — pepper’s sharp pungency really does stimulate the airways and circulation.

Explore more science and research backed remedies in DIY Natural Cough Syrups and Home Remedies (Dry & Wet Cough Relief).


The Honey and Black Pepper Combination

So what happens when we bring these two together? Honey provides the soothing, cough-suppressing action; black pepper adds warmth and helps loosen phlegm.

Anecdotal reports and traditional recipes consistently recommend this pairing, and while direct clinical evidence is scarce, the logic makes sense: the sweet balances the sharp, the soothing balances the stimulating. Even without a large body of randomized trials, it remains one of the most popular and accessible home remedies for cough.

Photorealistic image of a teaspoon filled with golden honey sprinkled with ground black pepper on a rustic wooden background, styled like a luxury food magazine, with overlay text showing dosage for cough relief. MasalaMonk.com watermark.
Classic cough remedy made with honey and black pepper — simple, soothing, and effective.

How to Try the Classic Remedy

  • Mix ¼ teaspoon finely ground black pepper with ½ teaspoon raw honey.
  • Take slowly, letting it coat the throat.
  • Repeat up to 2–3 times a day when symptoms are bothersome.

This blend works best for dry or tickly coughs, but some people also use it for chesty coughs to help clear mucus.


Honey and Black Pepper with Other Natural Remedies

Of course, few remedies exist in isolation. Across India and beyond, families have passed down their own variations — often adding other common kitchen healers. Here are some of the most beloved, each with its own rationale and charm.

1. Honey, Ginger, and Black Pepper for Cough

When your cough is chesty or phlegmy, ginger is your best friend. It’s naturally anti-inflammatory and can help clear the airways. Adding honey and black pepper makes this remedy both soothing and stimulating.

How to make it:

  • Boil 1 cup of water with ½ teaspoon of grated fresh ginger.
  • Add ¼ teaspoon black pepper powder.
  • Simmer for 2–3 minutes, then strain.
  • Stir in 1 teaspoon honey once the tea cools slightly.

Sip this warm, spicy tea twice a day to loosen mucus and ease coughing.

Read more about Ginger And Its Stunning Health Benefits.

2. Honey, Turmeric, and Black Pepper “Golden Milk”

Turmeric is a classic healing spice, and when combined with black pepper, its active compound curcumin is absorbed much better. Honey rounds out the mix with a naturally sweet, throat-soothing touch.

How to make it:

  • Warm 1 cup milk (dairy or plant-based).
  • Add ½ teaspoon turmeric powder and a pinch of black pepper.
  • Stir well, then let it cool slightly.
  • Add 1 teaspoon honey before drinking.

Best taken before bed for a calming night-time cough remedy.

Read more about Side Effects of Turmeric – 10 Risks of Powder, Tea & Supplements.

3. Honey, Lemon, and Black Pepper Drink

Lemon adds a burst of vitamin C and a refreshing tang, making this remedy especially nice for daytime use.

How to make it:

  • Warm 1 cup of water.
  • Add juice of half a lemon, ¼ teaspoon black pepper, and 1 teaspoon honey.
  • Stir well and sip slowly.

This drink helps soothe a sore throat while also boosting hydration.

Learn more about Benefits of Lemon and Lime Water: Refreshing Hydration with a Citrus Twist.

4. Honey, Tulsi (Holy Basil), and Black Pepper

Tulsi, or holy basil, is a cornerstone of Ayurvedic medicine for cough and cold. Paired with black pepper and honey, it becomes a gentle yet effective home remedy.

How to make it:

  • Boil 5–6 fresh tulsi leaves in 1 cup water for 5 minutes.
  • Add ¼ teaspoon crushed black pepper.
  • Strain and let it cool slightly.
  • Sweeten with 1 teaspoon honey.

Perfect for stubborn coughs with congestion.

Explore 5 Herbal Teas & Brews That Help Lower Cortisol Naturally.

5. Honey, Garlic, and Black Pepper Paste

This one might sound strong, but garlic has natural antimicrobial properties that make it a powerful ally during cough and cold.

How to make it:

  • Crush 1 small garlic clove into a paste.
  • Mix with ¼ teaspoon black pepper powder.
  • Blend in 1 teaspoon honey to soften the flavor.

Take it once daily for a short burst of immune support.

You can also explore fermented garlic honey, another age-old immunity booster with a similar base.


🍯 Honey & Black Pepper Remedies at a Glance

RemedyIngredientsHow to MakeBest Time to Take
Classic Honey + Black Pepper¼ tsp black pepper + ½ tsp raw honeyMix and take slowly, 2–3 times/dayAnytime during cough flare-ups
Ginger, Honey & Pepper Tea1 cup water, ½ tsp grated ginger, ¼ tsp pepper, 1 tsp honeyBoil ginger + pepper, strain, add honeyMorning & evening for chesty/phlegmy cough
Turmeric Golden Milk1 cup milk, ½ tsp turmeric, pinch of pepper, 1 tsp honeyWarm milk with turmeric + pepper, add honey after cooling slightlyBefore bed, for night-time cough
Lemon, Honey & Pepper Drink1 cup warm water, juice of ½ lemon, ¼ tsp pepper, 1 tsp honeyMix all ingredients and sip slowlyDaytime, for sore throat + hydration
Tulsi (Holy Basil) Tea1 cup water, 5–6 tulsi leaves, ¼ tsp pepper, 1 tsp honeyBoil tulsi + pepper, strain, add honeyDuring congestion or stubborn cough
Garlic, Honey & Pepper Paste1 small garlic clove, ¼ tsp pepper, 1 tsp honeyCrush garlic, mix with pepper + honeyOnce daily in the morning, for immune boost
Table showing Honey & Black Pepper Remedies.

Pro Tips:

  • Always let hot liquids cool a little before adding honey — high heat can reduce its natural benefits.
  • Start with smaller amounts of pepper if you’re not used to its sharpness.
  • Raw, unprocessed honey works best for soothing cough.

Some families even swap honey for mishri (rock sugar), pairing it with pepper to soothe cough naturally.


Black Pepper Remedies Without Honey

Not everyone wants to use honey — whether for dietary reasons, personal preference. Fortunately, pepper can be used in other ways.

1. Pepper Rasam for Cold and Cough

If you’ve ever had South Indian rasam, you’ll know how comforting and clearing it feels. This light, peppery broth is often used as a natural cold and cough soother.

How to make it:

  • In a small pot, boil 2 cups water with a marble-sized ball of tamarind (or 1 tsp paste).
  • Add 1 teaspoon coarsely crushed black pepper and ½ teaspoon cumin seeds.
  • Throw in a few curry leaves and a clove of garlic (optional).
  • Simmer for 10 minutes, then season with salt.

Sip hot like a soup — it warms the chest, eases congestion, and clears nasal passages.

This tangy soup does more than warm you up — it’s one of India’s most loved natural remedies to ease mucus and congestion. If you want to explore more traditional and home based remedies that might help with mucus, do read Is Thick Mucus Troubling You? 7 Foods and Home Remedies to break down Excess Mucus.

2. Black Pepper Gargle for Sore Throat

Sometimes a quick gargle is all you need to calm a raw throat. Adding a pinch of pepper to warm salt water gives an extra circulation boost.

How to make it:

  • Mix ½ teaspoon salt and ¼ teaspoon crushed black pepper in 1 cup warm water.
  • Gargle for 20–30 seconds, then spit it out.
  • Repeat twice a day during sore-throat flare-ups.

This helps reduce irritation and may speed up recovery.

3. Chewing Black Pepper for Cough — Does It Work?

Some traditions recommend chewing a few whole peppercorns for dry cough. While the heat may trigger more coughing at first, the warming oils can stimulate saliva and soothe throat tickle afterwards.

How to try it:

  • Take 1–2 whole peppercorns and chew slowly.
  • Allow the juices to mix with saliva before swallowing.

👉 Not everyone finds this comfortable, so start small and avoid if it irritates your throat.


🌿 Black Pepper Remedies Without Honey

RemedyIngredientsHow to MakeWhen to Use
Pepper Rasam2 cups water, tamarind (or 1 tsp paste), 1 tsp crushed pepper, ½ tsp cumin, curry leaves, garlic (optional), saltBoil everything 10 min, season, sip hot like soupDuring colds or chest congestion; as a light meal
Pepper Gargle1 cup warm water, ½ tsp salt, ¼ tsp crushed pepperMix and gargle for 20–30 sec, then spit out2× daily for sore throat relief
Chewing Peppercorns1–2 whole peppercornsChew slowly, let oils release before swallowingFor quick relief of tickly, dry cough (try cautiously)
Table showing Black Pepper Remedies Without Honey

Pro Tips:

  • Rasam is light and hydrating — perfect if you don’t feel like eating much when sick.
  • Skip pepper gargle if your throat is extremely raw or ulcerated.
  • Chewing peppercorns can feel intense — sip warm water afterward if it’s too strong.

Safety, Interactions, and Precautions

While honey and black pepper are safe in culinary amounts, there are a few things to keep in mind:

  • Honey for children: Safe only for kids over 1 year. Infants must not be given honey due to the risk of botulism (PMC).
  • Stomach irritation: If you have ulcers, gastritis, or reflux, too much pepper may worsen symptoms.
  • Drug interactions: Piperine, the compound in pepper, can interfere with how the body metabolizes certain medicines. Research shows it inhibits enzymes like CYP3A4 and P-glycoprotein, potentially changing how drugs are absorbed (PMC, JPET abstract). If you are on long-term medication, check with your doctor before taking pepper remedies regularly.
  • Inhalation warning: Pepper is best ingested, not inhaled. Studies show that airway exposure to compounds like capsaicin — a TRPV1 agonist similar in pungency to pepper — actually provokes cough, not relieves it (Pharmaceutical Journal).
Photorealistic image of a rustic wooden table with a jar of honey and a black pepper grinder, styled like a luxury food magazine. Overlay text highlights safety tips for using honey and black pepper as a cough remedy. MasalaMonk.com watermark.
Safety reminders when using honey and black pepper for cough: not for infants under 1 year, avoid excess pepper with stomach issues, and check medication interactions.

When to see a doctor

While home remedies are helpful for mild coughs and colds, don’t ignore warning signs. Seek medical advice if you have:

  • A cough lasting longer than 3 weeks
  • High fever, chest pain, or shortness of breath
  • Blood in phlegm or worsening symptoms
  • Severe sore throat with difficulty swallowing

Note: While honey and black pepper are safe for most people in small amounts, they are not a cure-all. Everyone’s body reacts differently, and medical conditions or medications may change how safe these remedies are for you. Always check with your doctor if you are pregnant, nursing, giving remedies to children, or on regular medication.


Traditional Uses of Black Pepper for Cough

Ayurveda

In Ayurveda, black pepper is called Maricha and is one of the famous Trikatu herbs (along with dry ginger and long pepper). It’s traditionally used to balance excess Kapha, the dosha linked with phlegm, colds, and cough. Classic Ayurvedic formulations such as Talisadi Churna and Trikatu Churna include black pepper and are prescribed for Kāsa (cough) and Śvāsa (breathlessness/asthma). A common household remedy is simply Maricha powder mixed with honey, taken to soothe dry cough.

Unani

In the Unani system, black pepper (known as Filfil Siyāh) is considered an expectorant and warming spice. It is traditionally given with honey to clear mucus, relieve throat irritation, and ease breathing difficulties. Honey and pepper together are still widely used in Unani-inspired home remedies for cough and cold.

Traditional Chinese Medicine (TCM)

In TCM, black pepper is called Hú Jiāo. It is classified as hot and acrid, and its role is to “warm the middle” and help disperse cold. While it’s not a frontline herb for cough (compared to others like zi wan or bai bu), it can be included in formulas when cough is linked with cold and phlegm. It’s usually combined with other herbs, not used alone.

For a wider view of how Indian kitchens blend tradition with wellness, see our piece on the holistic health benefits of Indian cuisine.


Bringing It All Together

What makes honey and black pepper such a beloved remedy isn’t just the science — though honey in particular has solid clinical support. It’s the combination of tradition, taste, and accessibility. Ayurveda, Unani, and folk medicine all recognize black pepper’s value for cough, and now modern pharmacology is revealing its active compound piperine’s many effects.

For honey, the evidence is clear: meta-analyses and systematic reviews confirm its role in easing cough and improving sleep. For pepper, much of the knowledge comes from tradition, supported by emerging mechanistic studies and safety reviews. Together, they make a duo that bridges old wisdom and new science.

The next time you feel a cough tickling your throat, try reaching for what you already have in your kitchen. A spoonful of honey, a pinch of black pepper, and a little patience might bring just the relief you need.

Friendly reminder: Home remedies like honey and black pepper can soothe mild coughs, but they are not a replacement for medical care. If you have a cough that lingers more than three weeks, comes with high fever, chest pain, or blood in phlegm, please seek medical attention promptly.


❓ Frequently Asked Questions

1. Is honey and black pepper really good for cough?

Yes — honey has solid scientific backing for cough relief, and black pepper adds gentle warmth that can help loosen mucus. Together, they make a soothing, time-tested home remedy for mild coughs.

2. How often can I take honey and black pepper for cough?

You can safely take the mix 2–3 times a day in small amounts. A common recipe is ¼ teaspoon ground black pepper mixed with ½ teaspoon raw honey. Always listen to your body and avoid overdoing it.

3. Can I give honey and black pepper to my child?

Honey is safe only for children over 1 year old. For little ones above that age, you can try small amounts, but always start gently since pepper can feel spicy for kids. Never give honey to infants under 1 year.

4. Does black pepper cure cough completely?

No single remedy can guarantee a complete cure, especially if the cough is caused by infection, allergies, or asthma. Black pepper helps manage mild coughs and throat irritation, but if symptoms persist, consult a doctor.

5. Can I use whole peppercorns instead of ground pepper?

Yes, but chewing whole peppercorns can feel quite intense. Ground pepper mixed with honey is gentler and coats the throat more effectively. If you do try peppercorns, start with just one.

6. What’s the best time to take honey and black pepper for cough?

Evenings are great because honey soothes the throat and helps with sleep. But you can also take it in the morning or afternoon if your cough feels bothersome then. There’s no strict rule — go with what feels best.

7. Can pregnant women use honey and black pepper for cough?

Yes, in normal culinary amounts it’s usually safe. However, during pregnancy it’s always wise to check with your doctor before trying home remedies, especially if you have heartburn or are taking medications.

Curious about using pepper during pregnancy? We’ve covered 6 benefits of black pepper for pregnancy, along with key safety tips.

8. Are there any side effects of black pepper and honey?

In moderation, they’re safe for most people. But too much pepper may irritate the stomach or throat. And since pepper’s active compound, piperine, can affect how your body absorbs certain drugs, talk to your doctor if you take daily medication.

9. Does honey and black pepper help with sore throat as well?

Absolutely. Honey coats the throat and eases irritation, while pepper adds circulation-boosting warmth. Many people use this combo for both cough and sore throat.

10. What if my cough doesn’t improve with honey and black pepper?

If your cough lasts more than three weeks, or you notice red flags like fever, chest pain, wheezing, or blood in phlegm, seek medical help. Home remedies are supportive, but they’re not a replacement for professional care when symptoms are severe.

Posted on 2 Comments

Fermented Garlic Honey: Benefits, Safety, and How to Use This Ancient Remedy

Fermented garlic honey in a glass jar with garlic cloves, natural remedy for immunity, cough relief, and heart health.

Introduction: The Jar That Keeps Showing Up

A jar of fermented garlic honey doesn’t look like much at first glance. Cloves of garlic float in amber syrup, shifting slowly as bubbles rise to the surface. Yet this unassuming mixture has traveled through centuries and across cultures, passed quietly from healer to healer, grandmother to grandchild.

Today, it sits in two worlds at once: the old one, where food was medicine by default, and the new, where wellness trends sweep through TikTok and Instagram. People keep jars on countertops not only because they’re beautiful to watch — garlic softening into translucence, honey loosening into liquid gold — but because they work. A spoonful eases coughs, a clove softens a sore throat, and the flavor itself can transform a recipe.

It is more than a honey garlic remedy. It is survival wisdom, dressed in sweetness.


What Is Fermented Garlic Honey?

At heart, fermented garlic honey is just two ingredients: raw garlic and raw honey. But when you leave them together, something extraordinary happens. Honey draws water from the garlic, lowering its thickness just enough to allow fermentation. Slowly, day by day, the mixture becomes alive.

  • Garlic sheds its sharp edge, turning mellow and almost buttery.
  • Honey loosens, fizzing gently, and develops a tangy, savory undertone.
  • The jar itself begins to smell like a conversation between opposites — sweet, pungent, earthy, floral.

Unlike kombucha or sourdough, there’s no starter to maintain, no strict temperature to hold. You don’t need to be an expert fermenter. Instead, you need patience, curiosity, and the willingness to let nature do its quiet work.

And although the name sounds modern, the practice is ancient. Egyptians gave garlic to laborers for stamina. Greeks trusted it before athletic competitions. Chinese medicine prescribed it for clearing phlegm. Honey, meanwhile, was wound healer, throat soother, energy restorer. Inevitably, the two were combined. What we call “fermented garlic honey” today is simply a rediscovery of something humans have always known: these ingredients are stronger together.


The Benefits of Fermented Garlic Honey

The magic of fermented garlic honey lies not only in what it does inside the body, but also in how it fits into daily life. It is remedy and ritual, food and comfort. Below are the layers of benefit — scientific, practical, and cultural.

Fermented Garlic Honey as a Winter Shield

When cold winds arrive and the first sniffles spread, people reach instinctively for jars like this one. Garlic contributes compounds with antimicrobial properties, while honey brings soothing sweetness and antibacterial enzymes. In India, home remedies like honey-infused garlic (Recipe) are still trusted to ease coughs and boost immunity. Together, they feel like a shield during cold and flu season — a point echoed in MasalaMonk’s guide to garlic and honey as a dynamic duo for health.

Research backs this up. In fact, both garlic and honey show strong antibacterial activity on their own, and lab studies suggest the combination may inhibit pathogens like Streptococcus pneumoniae and Staphylococcus aureus even more effectively (Healthline, Taste of Home).

But immunity isn’t just chemistry. There’s also the ritual: stirring a spoonful of garlic in raw honey into warm lemon water on a frosty morning, or swallowing a clove when you feel a tickle in your throat. It’s a habit that makes the body feel protected and the mind reassured.

  • Garlic: antimicrobial compounds.
  • Honey: enzymes + soothing sweetness.
  • Together: a ritual that feels protective.

A Honey Garlic Remedy for Coughs and Sore Throats

Modern studies have shown honey to be more effective than many over-the-counter cough syrups. Add garlic, softened by weeks of fermentation, and you have a remedy that soothes in two ways: sweetness coating the throat, savory warmth lingering after.

The Cleveland Clinic notes, however, that while honey and garlic are each well-studied, there’s little direct research on fermented garlic honey itself — meaning most evidence comes from their individual benefits (Cleveland Clinic).

Parents especially prize this approach. It feels safer than chemical syrups and connects them to generations of tradition.

  • A spoonful before bed → calm nights.
  • A clove stirred into tea → warmth with depth.
  • Gentle enough for children (over one year old).
A spoonful of fermented garlic honey stirred into lemon tea for cough and cold relief.
Fermented garlic honey offers gentle cough and sore throat relief when stirred into warm lemon water.

Antioxidant and Anti-Inflammatory Support

Science tells us garlic and honey carry antioxidants — compounds that protect cells from damage — and anti-inflammatory agents that reduce internal stress. Tradition tells us the same story in different words: garlic as a cleanser, honey as a balancer.

What matters most is how people feel. Some notice easier digestion; others say seasonal allergies feel lighter. For many, it’s simply the steadying comfort of a daily dose that tastes good and feels good.

A 2020 review in the Journal of Nutrition linked garlic consumption to reduced risks of atherosclerosis, hypertension, and diabetes, crediting its antioxidant and anti-inflammatory power (PMC Review).

Garlic bulb and honey drop with molecular graphics representing antioxidants and antimicrobial benefits.
Science confirms fermented garlic honey carries antioxidants, antimicrobials, and heart-health benefits.

Fermented Garlic and Honey Benefits for the Heart

Garlic’s role in supporting circulation is centuries old. Modern studies link it to cholesterol and blood pressure benefits. A related MasalaMonk feature on garlic water benefits for high blood pressure shows just how potent these compounds can be, even in simple preparations. Honey contributes minerals like potassium and magnesium and is kinder to blood sugar than refined sweeteners.

The result isn’t a miracle cure — instead, it’s a daily nudge toward balance, a quiet support for cardiovascular health woven into the diet.

Recent clinical work goes further: a 2022 randomized controlled trial found that fermented garlic extract improved blood flow, nitric oxide levels, and blood pressure markers in healthy adults (PubMed Study).


A Daily Tonic That’s Actually a Pleasure

Unlike raw garlic swallowed whole or pungent herbal tonics forced down, fermented garlic honey is something people want to take. Its flavor makes consistency possible. And in wellness, consistency is everything.


Rooted in Tradition, Resonating Today

Ayurvedic practitioners called garlic warming and honey harmonizing. In Traditional Chinese Medicine, garlic moved stagnant qi while honey nourished the lungs. In Egypt, honey sealed wounds while garlic gave strength to workers.

These weren’t separate threads — they were part of a global recognition that some ingredients belong together. Today, when someone posts a jar of fermented honey and garlic on TikTok, they’re unknowingly participating in that long lineage.


Fermented Garlic Honey Safety: Clearing the Botulism Myth

Every time fermented garlic honey trends online, so does a wave of worry. The word botulism pops up in comments, often shouted louder than the remedy itself. Fear spreads faster than facts — so let’s pause and examine safety with clarity.

Botulism is a serious illness caused by the bacterium Clostridium botulinum. It thrives in low-acid, oxygen-poor environments. On paper, garlic and honey in a jar might look like an invitation. Yet reality is more nuanced.

Nutritionists interviewed by Parents.com acknowledge the popularity of fermented garlic honey online but emphasize that while the risk of botulism is extremely low, it has not been formally studied in depth. Their advice: enjoy it safely, but don’t use it as a replacement for medical treatment if symptoms are severe (Parents.com).

  • Honey is naturally low in water and highly resistant to botulism spores.
  • Garlic does introduce moisture, but fermentation gradually increases acidity, creating conditions that are unfriendly to harmful bacteria.
  • Generations of practice back this up: herbalists, homesteaders, and healers across cultures have kept jars of garlic in honey safely for centuries.
Jar of fermented garlic honey stored safely in a pantry, illustrating botulism myth explained.
Fermented garlic honey is safe when prepared correctly — follow simple best practices for storage and fermentation.

Ultimately, a jar of fermented honey and garlic is a living system. It doesn’t need fussing, but it does need attention — the same way you’d watch a sourdough starter or sauerkraut crock.

Best Practices for Safe Fermentation

To keep your jar both effective and safe, follow these common-sense guidelines:

  • Use raw honey → pasteurized honey won’t ferment.
  • Choose fresh garlic → firm cloves, free of mold or sprouts.
  • Keep garlic submerged → honey should always cover the cloves.
  • Release gas in the first week → burp the jar daily to avoid pressure buildup.
  • Store cool and dark → a pantry is better than a sunny counter.
  • Trust your senses → if you ever see mold or smell something unpleasant, discard and start again.

And one final note: no honey, fermented or not, should ever be given to infants under one year of age. Their immune systems aren’t ready.

Handled with this ordinary care, fermented garlic honey is considered safe for healthy adults. The risks are no greater than those of any kitchen ferment — and the benefits are far more rewarding.

If you prefer quicker remedies, MasalaMonk shares DIY natural cough syrups that deliver some of the same benefits in just a few days.


How to Make Fermented Garlic Honey at Home

There is a quiet pleasure in making your own jar. The process is simple, but the act itself feels almost ceremonial.

Picture a small pile of garlic cloves on the counter. You peel them one by one, skins flaking like paper. Each clove gets a light crush, just enough to release its juices. You drop them into a glass jar, where they clink softly against the glass.

Then comes the honey. Thick and golden, it pours slowly, folding over the garlic, trapping tiny air bubbles that shimmer before rising. You tilt the jar, making sure every clove is coated, suspended in amber.

The lid goes on — loose, not tight — because this jar will breathe. Over the first week, you’ll notice bubbles form. You’ll open it daily, just briefly, to let the gases sigh out. Slowly the honey thins, the garlic turns translucent, and the aroma becomes layered: sweet, tangy, savory.

There’s no single day when it’s “done.” Some people taste after three weeks, others wait six. Each jar is slightly different, and that’s part of the beauty. You’re not following strict steps so much as entering a relationship with garlic, honey, and time.

Fermented garlic honey recipe showing jars on Day 1 and after 3 weeks, garlic cloves turning translucent and honey bubbling.
Fermentation transforms garlic and honey from pungent to mellow, bubbly, and tangy.

Wellness experts like Joy Bauer have shared approachable versions of this recipe, sometimes suggesting a splash of vinegar to increase acidity for extra safety assurance (EatingWell).

The Process in Brief

  • Peel and lightly crush fresh garlic cloves.
  • Place them in a clean glass jar.
  • Pour raw honey until the cloves are submerged.
  • Cover loosely and leave at room temperature.
  • Burp the jar daily during the first week.
  • Taste after 3–4 weeks; let it age longer for deeper flavor.

The result is not just food, not just medicine. It is a jar that connects you to tradition, patience, and the quiet transformation of simple things.


How to Use Fermented Garlic Honey

The real magic of fermented garlic honey is its versatility. A single jar can live in the medicine cabinet, the kitchen, and the morning wellness ritual — shifting roles as easily as honey itself slips from spoon to cup.

As a Natural Remedy

It’s midnight, and a cough won’t let you sleep. Instead of reaching for a neon-colored syrup, you open a jar and let a spoonful of garlic-rich honey coat your throat. The sweetness soothes instantly; the mellow garlic heat lingers like a quiet ember.

Parents especially appreciate this gentle approach. It feels safer than chemical syrups, ties them to tradition, and tastes good enough that children over one year old will accept it without fuss.

Quick ways to use it as a remedy:

  • A teaspoon swallowed slowly for sore throats.
  • Stirred into warm lemon water for cough relief.
  • A daily spoonful in winter as an immune-support ritual.

In the Kitchen

Cooks have embraced fermented honey and garlic for its culinary depth. A chef might brush it over salmon before roasting, where it caramelizes into a glaze both sweet and savory. Another drizzles it across roasted carrots, where earthy roots meet golden tang.

At home, it appears on cheese boards, spooned over goat cheese and bread, transforming a simple snack into something elegant. Guests pause, surprised: “What is this?” It’s both familiar and entirely new.

Chef brushing fermented garlic honey glaze onto salmon fillets before roasting.
Fermented garlic honey caramelizes beautifully when used as a glaze for salmon, chicken, or roasted vegetables.

Culinary inspirations:

  • Glaze for chicken, salmon, or roasted vegetables.
  • Drizzle over cheeses, breads, or flatbreads.
  • Whisk into vinaigrettes or marinades.
  • Blend into sauces for shrimp, tofu, or grilled meats.

As a Daily Wellness Ritual

Morning routines are personal — some brew coffee, others meditate. For many, a teaspoon of fermented garlic honey stirred into warm lemon water has become a ritual. Others take it further, blending it into immunity shots like this Flu Bomb recipe with ginger, lemon, and apple cider vinegar. Paired with apple cider vinegar, it creates a bracing tonic that wakes the body gently.

Some prefer it at night: a spoonful before bed, a comfort that signals the day’s end. It is both small and profound — the kind of act that keeps wellness woven into ordinary life.

Ideas for daily practice:

  • Morning tonic: garlic honey + lemon + apple cider vinegar.
  • Evening comfort: a spoonful straight from the jar.
  • Seasonal support: daily teaspoon during flu season.

Why Fermented Garlic Honey Resonates Today

Why now? Why does this simple jar of garlic in raw honey capture imaginations in 2025 as much as it did centuries ago?

Part of the answer is trust. People are weary of pills, syrups, and supplements wrapped in marketing. A jar you make yourself feels tangible, honest. You can see the garlic, taste the honey, watch the bubbles rise. Wellness becomes something visible and real.

It also resonates because it belongs to two worlds at once:

  • Ancient: Egyptians feeding garlic to workers, Ayurveda blending honey into tonics, Chinese medicine using both to balance the body.
  • Modern: wellness influencers filming bubbling jars, chefs experimenting with glazes, scientists publishing studies on antioxidants and allicin.

Even mainstream lifestyle outlets like Vogue have covered its rise, noting that while science is still catching up, the cultural appeal of a jar you can make yourself — and actually enjoy taking — is undeniable (Vogue).

We crave stories, and fermented garlic honey gives us one. Watching a jar transform over weeks is an antidote to instant gratification. Sharing it with a friend or online community turns food into connection. Even its quiet fizzing is a reminder that life is always in motion, even in something as humble as garlic and honey.

Beyond the kitchen, MasalaMonk even explores garlic’s benefits for skin, showing how versatile this ingredient has always been.


Conclusion: A Golden Habit Worth Keeping

Fermented garlic honey is not a miracle cure. It won’t erase every cough or guarantee immunity. But it doesn’t need to. Its value lies in something deeper: the way it makes caring for yourself feel nourishing, simple, and connected to tradition.

One spoonful soothes a sore throat. Another brightens a recipe. A clove shared connects you to generations who trusted the same golden mixture.

So peel the cloves. Pour the honey. Let the jar sit and change. What you’ll have is more than a remedy or an ingredient — it’s a golden companion, alive with sweetness, savor, and the quiet reassurance that sometimes the oldest wisdom is still the best.

Jar of fermented garlic honey on rustic table with bread and cheese, daily wellness habit.
A golden habit worth keeping — fermented garlic honey for both wellness and the kitchen table.

FAQs

1. What is fermented garlic honey?

Fermented garlic honey is made by submerging fresh garlic cloves in raw honey and allowing them to ferment naturally. The honey becomes thinner and tangy, while the garlic softens and sweetens, creating a living remedy that doubles as a versatile kitchen ingredient.


2. How long does fermented garlic honey take to make?

It usually takes 3–4 weeks before it’s ready to taste. By then, the honey loosens and bubbles appear. The flavor deepens over time, so some people enjoy it young and mild, while others prefer letting it ferment for several months.


3. Is fermented garlic honey safe?

Yes — when prepared correctly, fermented garlic honey is safe for healthy adults. Use raw honey, fresh garlic, and make sure the cloves stay submerged. Burp the jar during the first week to release gases. The main caution: never give honey, fermented or not, to infants under one year old.


4. What are the health benefits of fermented garlic honey?

The combination offers:

  • Immune support during cold and flu season.
  • Cough and sore throat relief, thanks to honey’s soothing effect.
  • Antioxidants and anti-inflammatory compounds that support overall health.
  • Cardiovascular benefits, as garlic may help with circulation and cholesterol.

5. How should I use fermented garlic honey?

There are countless ways to enjoy it:

  • Take a teaspoon daily as a tonic.
  • Stir into warm tea or lemon water.
  • Brush onto salmon, chicken, or roasted vegetables.
  • Drizzle over cheeses, breads, or flatbreads.

6. Can I make fermented garlic honey with store-bought honey?

Only if the honey is raw and unpasteurized. Most supermarket honey is pasteurized, which kills the enzymes and microbes needed for fermentation. Look for raw honey from local beekeepers or natural food stores.


7. How long does fermented garlic honey last?

When stored in a sealed jar in a cool, dark place, it can last for many months — even over a year. Its flavor evolves over time but generally stays safe as long as there’s no mold or off odors.


8. Should fermented garlic honey be refrigerated?

No, it doesn’t need refrigeration. In fact, cold temperatures may slow or halt fermentation. A pantry or cupboard is ideal, away from direct sunlight and heat sources.


9. What if my garlic turns green or blue?

Sometimes garlic develops a blue or green tint during fermentation. This is a natural reaction between garlic’s sulfur compounds and trace minerals. It looks surprising but is safe to eat.


10. Do I eat the garlic cloves or just the honey?

Both! The cloves become soft, mellow, and slightly sweet, while the honey is rich and tangy. Many people eat the cloves whole as medicine or chop them into dishes, while using the honey as a syrup or glaze.


11. Can fermented garlic honey cause botulism?

The risk is extremely low when made properly. Honey itself is inhospitable to botulism spores, and fermentation increases acidity, which makes conditions even less favorable. Following best practices — raw honey, fresh garlic, full submersion, and regular burping — keeps your jar safe.


12. Can I cook with fermented garlic honey?

Yes. Cooking will destroy some probiotic activity, but the flavor remains incredible. It’s excellent in marinades, glazes, stir-fries, and salad dressings. Many people keep one jar for remedies and another for cooking.


13. Can I add other ingredients to fermented garlic honey?

Yes. Ginger, lemon peel, chili peppers, and apple cider vinegar are popular additions. Each creates a new variation — spicy, citrusy, or more medicinal. Just make sure added ingredients are fresh and fully covered in honey.


14. Why is my honey crystallizing?

Raw honey naturally crystallizes over time. This doesn’t mean it’s spoiled. You can gently warm the jar in your hands or place it in warm (not boiling) water to re-liquify it without harming the ferment.


15. Can children take fermented garlic honey?

Yes — but only if they are over one year old. Children under twelve months should never be given honey due to the risk of infant botulism. For older children, a small spoonful can be a safe and soothing remedy.

Posted on 1 Comment

Vitamin B12 Rich Foods: Sources, Benefits, and Supplements

Smiling woman holding a bowl with salmon and vegetables highlighting Vitamin B12 rich foods for energy and brain health.

Introduction: Why Vitamin B12 Matters

Have you ever felt unusually tired, low in energy, or struggled with brain fog even after getting a full night’s sleep? Many people immediately think of stress, busy schedules, or poor sleep habits as the culprit. But sometimes, the real issue is hidden deep within your diet — a lack of Vitamin B12 and foods rich in the same.

Vitamin B12, also known as cobalamin, is one of those nutrients that doesn’t always get the spotlight, but it quietly powers some of the most important functions in your body. From supporting your nervous system to fueling your red blood cells, it’s like the behind-the-scenes engine that keeps everything running smoothly (NIH Vitamin B12 fact sheet).

The problem? Your body cannot make Vitamin B12 on its own. That means every ounce of this essential vitamin has to come from the foods you eat or supplements you take. And here’s another twist: if you’re vegetarian, vegan, or even over the age of 50, your risk of being low in Vitamin B12 is much higher. To see the bigger picture, here’s a guide to understanding micronutrients and vitamins in your diet.

That’s why this guide is here: to help you confidently understand where to find foods high in Vitamin B12, how to add them into your daily routine, and when to consider supplements. We’ll look at rich animal-based sources, vegetarian and vegan options, the reality of B12 in fruits and vegetables, and how this vitamin works in harmony with other nutrients like folate and iron. And since practicality matters, you’ll also get a Vitamin B12 foods chart to quickly reference whenever you’re planning meals.

So let’s dive in — starting with what makes this nutrient so special in the first place.


What is Vitamin B12 and Why Is It Essential?

Vitamin B12, or cobalamin, belongs to the family of B vitamins, which are often described as “energy vitamins.” While each B vitamin has its own role, B12 is unique because it contains a trace element called cobalt — that’s actually where the “cobalamin” name comes from.

But what makes Vitamin B12 truly remarkable is the sheer range of critical tasks it performs in your body:

  • Energy production → Without B12, your body struggles to convert food into usable energy. That’s why fatigue is one of the earliest signs of deficiency.
  • Red blood cell formation → B12 works with folate to make healthy red blood cells. Low B12 leads to fewer but larger blood cells, a condition known as megaloblastic anemia.
  • Nervous system health → B12 helps form the protective covering around your nerves called myelin. Without it, nerve signals slow down, leading to tingling, numbness, or even memory problems.
  • DNA synthesis → Every cell in your body relies on DNA. B12 plays a role in building and repairing this genetic material.

Here you might want to read Fueling Your Energy with Vitamin B12: Boost Your Vitality Naturally

Split portrait showing fatigue from Vitamin B12 deficiency on one side and energy from B12 rich foods on the other.
Low Vitamin B12 leads to fatigue, brain fog, and mood swings, while getting enough B12 restores energy and clarity.

And here’s the kicker: Vitamin B12 is water-soluble, which means it doesn’t get stored in your body the same way fat-soluble vitamins (like A, D, E, and K) do. Instead, it’s stored mainly in your liver, but you need a regular supply from food to keep levels steady.


Signs You Might Be Low in Vitamin B12

Before we move into the foods, it helps to understand what deficiency looks like. Some of the most common symptoms include:

  • Constant tiredness and weakness
  • Pale skin or feeling lightheaded
  • Tingling or numbness in hands and feet
  • Mood swings, irritability, or depression
  • Difficulty concentrating or memory lapses
  • Loss of appetite or unexplained weight loss

These symptoms can creep in gradually, making them easy to dismiss at first. But left unchecked, B12 deficiency can lead to serious neurological issues and chronic anemia. Do read more on Symptoms of Vitamin B12 Deficiency.

This is why regularly eating Vitamin B12 rich foods — or taking the right supplements — is one of the best gifts you can give your body.

Foods High in Vitamin B12: Best Animal-Based Sources

Now that you know why Vitamin B12 is so vital, the next question is simple: where do you actually get it? The richest and most natural sources of Vitamin B12 come from animal-based foods.

Unlike some nutrients that can be found in a wide range of fruits, vegetables, and grains, Vitamin B12 is almost exclusively stored in animal tissues. That means seafood, meat, poultry, dairy, and eggs are where you’ll find the most concentrated amounts.

Let’s walk through these categories one by one, so you can see exactly which foods deliver the biggest B12 boost.


Seafood Rich in Vitamin B12: Fish and Shellfish Sources

When it comes to Vitamin B12, seafood wears the crown. In fact, some shellfish contain more than 3,000% of your daily requirement in just a single serving. Seafood like clams, sardines, and trout are among the top foods high in Vitamin B12 (Healthline; Harvard Health).

SeafoodServing SizeVitamin B12 (mcg)% Daily Value*
Clams3 oz (cooked)84 mcg3,500%
Sardines3 oz (canned)8.2 mcg340%
Trout3 oz (cooked)5.4 mcg225%
Salmon3 oz (cooked)4.8 mcg200%
Tuna3 oz (cooked)2.5 mcg104%
Seafood High in Vitamin B12: Clams, Salmon, Trout, Sardines, and Tuna as Rich Sources of B12

*Based on 2.4 mcg daily recommended intake.

Plate of clams, salmon, and sardines showing seafood as top Vitamin B12 rich foods.
Seafood like clams, salmon, and sardines are the richest natural sources of Vitamin B12 for daily nutrition.

What’s beautiful about seafood is that it’s not just about B12. Alongside this powerful vitamin, you also get high-quality protein, omega-3 fatty acids, and vitamin D — a nutrient trio that supports your brain, heart, and immune system.

👉 Imagine this: enjoying a simple dinner of grilled salmon with roasted vegetables doesn’t just taste good — it gives you almost double your daily Vitamin B12 needs without even trying.


Meat and Poultry: Reliable Vitamin B12 Rich Food Sources

If seafood isn’t your favorite, meat and poultry are still strong players in the Vitamin B12 game. Organ meats, in particular, are like nature’s multivitamins.

Meat & PoultryServing SizeVitamin B12 (mcg)% Daily Value
Beef Liver100 g83 mcg3,450%
Beef (lean cuts)3 oz (cooked)1.3 mcg54%
Chicken3 oz (cooked)0.3 mcg13%
Turkey3 oz (cooked)0.5 mcg21%
Meat and Poultry Rich in Vitamin B12: Beef Liver, Lean Beef, Chicken, and Turkey for Daily B12 Needs
Roast chicken and beef liver displayed as top meat and poultry Vitamin B12 rich foods.
Beef liver, lean beef, and turkey are excellent meat and poultry sources of Vitamin B12.

Beef liver is the undisputed superstar, packing more than 3,000% of your daily needs in just 100 grams. But even lean cuts of beef give you a decent boost, and adding turkey or chicken to your diet can help diversify your protein sources while still contributing to your B12 intake.

👉 If you enjoy traditional dishes like liver and onions, you’re not just indulging in comfort food — you’re giving your body one of the most nutrient-dense meals on earth.


Dairy Foods Rich in Vitamin B12: Milk, Cheese, Yogurt

For those who enjoy milk, cheese, or yogurt, dairy foods offer a gentle but steady stream of Vitamin B12. They may not be as concentrated as seafood or liver, but because they’re easy to include daily, they add up. Interestingly, B12 from dairy may be more bioavailable than from meat (NIH Fact Sheet).

DairyServing SizeVitamin B12 (mcg)% Daily Value
Milk (whole)1 cup1.2 mcg50%
Yogurt (plain)1 cup1.1 mcg46%
Cheddar Cheese1 oz0.9 mcg38%
Dairy Foods High in Vitamin B12: Milk, Yogurt, and Cheese as Everyday B12 Sources

👉 Think of your morning latte, a serving of Greek yogurt with fruit, or a slice of cheese with whole grain bread — each of these little moments is a small but meaningful contribution to your daily B12 needs.


Eggs as a Food Source Rich in Vitamin B12

Eggs might be small, but they carry a surprising punch of nutrition. Most of the B12 is concentrated in the yolk, so if you’re eating only egg whites, you’re missing out on this vital nutrient.

FoodServing SizeVitamin B12 (mcg)% Daily Value
Egg (whole)1 large0.6 mcg25%
Eggs as a Source of Vitamin B12: Nutrition Benefits and B12 Content per Serving

👉 A two-egg omelet at breakfast could cover half of your daily B12 requirement while also giving you protein, healthy fats, and choline — another nutrient that supports brain health.

Breakfast table with yogurt, milk, and eggs as everyday Vitamin B12 food sources.
Daily staples like milk, yogurt, and eggs provide steady Vitamin B12 for healthy energy levels.

Now that we’ve looked at the most powerful animal-based Vitamin B12 rich foods — from clams and salmon to liver and eggs — you might be wondering: what about those who don’t eat meat or fish?

This is where it gets tricky, because plant-based sources are far more limited. But don’t worry — the good news is that food manufacturers and nutrition science have created reliable ways for vegetarians and vegans to get enough B12.

Let’s explore those next.

Vitamin B12 Rich Vegetarian and Vegan Foods

Now that we’ve explored seafood, meat, and dairy, let’s pause for a moment. What if you don’t eat these foods? Maybe you’re vegetarian, vegan, or simply cutting back on animal products for health or ethical reasons. Does that mean Vitamin B12 deficiency is inevitable?

The answer is no — but it does mean you need to be more intentional. Unlike protein or iron, which can be found in a wide range of plant-based foods, Vitamin B12 doesn’t naturally occur in plants in meaningful amounts. That;s why fortified cereals, plant-based milks, and nutritional yeast are excellent vegetarian and vegan sources (Medical News Today; Vegan Society).

Let’s look at the best plant-friendly ways to get your daily dose of B12.


Fortified Cereals as Foods Rich in Vitamin B12

If you start your morning with a bowl of cereal, you may already be getting a solid dose of B12 without realizing it. Many breakfast cereals are fortified, meaning Vitamin B12 is added during processing.

FoodServing SizeVitamin B12 (mcg)Notes
Fortified Cereal1 cup~6.0 mcgOften 100% of daily value
Fortified Cereal is Vitamin B12 Rich Food

👉 Imagine this: a bowl of fortified cereal topped with almond milk can give you your entire day’s worth of B12 before you’ve even finished breakfast. It’s quick, convenient, and especially helpful for kids, busy adults, and anyone who struggles to remember supplements.


Fortified Plant Milks are Rich Food Sources of Vitamin B12

With more people choosing dairy-free lifestyles, fortified plant milks have become one of the easiest and most reliable vegetarian-friendly sources of Vitamin B12.

FoodServing SizeVitamin B12 (mcg)Notes
Soy Milk (fortified)1 cup2.6 mcgExcellent vegan choice
Almond Milk (fortified)1 cup2.5 mcgDairy-free alternative
Oat Milk (fortified)1 cup2.3 mcgCreamy, versatile option
Plant-Based Milks Fortified with Vitamin B12 are a Good Source.

👉 Whether you use them in coffee, smoothies, or cooking, these plant-based milks can easily cover 30–50% of your daily B12 needs per cup.

Bowl of fortified cereal, almond milk, and nutritional yeast for vegetarian and vegan Vitamin B12 intake.
Fortified cereals, almond milk, soy milk, and nutritional yeast are key vegetarian and vegan Vitamin B12 sources.

Nutritional Yeast Fortified with Vitamin B12

If you’ve ever heard a vegan friend rave about “nooch,” they’re talking about nutritional yeast. It’s a deactivated yeast that has a nutty, cheesy flavor and is often fortified with Vitamin B12.

FoodServing SizeVitamin B12 (mcg)Notes
Nutritional Yeast (fortified)2 tbsp4.0 mcgAdds cheesy flavor to dishes
Nutritional Yeast is Vitamin B12 Rich Food for Vegans

👉 Sprinkle it on popcorn, mix it into pasta, or blend it into sauces — not only does it taste amazing, but just two tablespoons can give you more than 150% of your daily B12.


Yeast Extract Spreads: Marmite and Vegemite

These savory spreads are popular in the UK, Australia, and beyond, and they’re often fortified with Vitamin B12.

FoodServing SizeVitamin B12 (mcg)Notes
Marmite / Vegemite (fortified)1 tsp0.5–1.0 mcgStrong taste, used sparingly
Marmite / Vegemite has some B12.

👉 Just a teaspoon on toast may not seem like much, but it adds a steady B12 boost to your diet.


Putting It All Together: A Plant-Based Day of B12

To see how easy it can be, imagine this plant-based menu:

  • Breakfast → Fortified cereal + soy milk (8.6 mcg B12)
  • Lunch → Avocado toast with a thin layer of Marmite (1 mcg B12)
  • Dinner → Vegan mac and cheese with nutritional yeast (4 mcg B12)

That’s a total of 13+ mcg of Vitamin B12 in one day — more than 5 times the recommended daily intake — all without animal products.

As you can see, even if you’re vegetarian or vegan, you don’t have to miss out on Vitamin B12. Fortified foods like cereals, plant milks, and nutritional yeast make it surprisingly simple to meet your needs.

But what about the idea of getting Vitamin B12 directly from fruits and vegetables? You might have heard claims about mushrooms, seaweed, or even algae being good sources. Let’s unpack that next, because the truth is a little more complicated.

Are there any Fruits and Vegetables as Vitamin B12 Rich Foods?

At this point, you might be wondering: “Can’t I just eat more fruits and vegetables to get my Vitamin B12?” After all, they’re packed with vitamins, minerals, and fiber. But here’s the reality: most fruits and vegetables contain little to no Vitamin B12 since plants don’t naturally produce it (NIH).

That might sound surprising, but it makes sense once you understand where B12 comes from. This vitamin is made by bacteria found in soil and in the digestive tracts of animals. Over time, animals store it in their tissues, which is why seafood, meat, dairy, and eggs are so rich in B12. Plants, on the other hand, don’t naturally produce or store Vitamin B12 in significant amounts.

So does that mean fruits and vegetables are completely useless for B12? Not exactly. There are a few exceptions and special cases worth knowing about.


Mushrooms: Trace Amounts of B12

Some mushrooms, particularly shiitake mushrooms, have been found to contain small amounts of Vitamin B12.

FoodServing SizeVitamin B12 (mcg)Notes
Shiitake Mushrooms100 g (cooked)~1.5 mcgAbsorption may vary
Mushrooms have a some amount of Vitamin B12.

While this is a fascinating discovery, it’s not enough to rely on mushrooms alone for your daily B12 needs. You’d need to eat large amounts every single day just to meet the minimum requirement. As Medical News Today notes, these provide only trace amounts and can’t replace fortified foods or supplements.

👉 Still, if you love stir-fries or soups with mushrooms, think of them as a little bonus boost on top of fortified foods or supplements.


Seaweed: Nori and Other Algae can be Rich Sources of Vitamin B12

You may have heard claims that seaweed, spirulina, or chlorella are “superfoods” rich in Vitamin B12. There’s some truth to this, but it comes with important caveats. Again as Medical News Today notes, these provide only trace amounts and can’t replace fortified foods or supplements.

FoodServing SizeVitamin B12 (mcg)Notes
Nori (dried seaweed)4 g2.4 mcgSome studies show good absorption
Chlorella (algae supplement)3 g1.0–2.0 mcgOften used as powder/tablet
Spirulina (algae)Contains “B12 analogs”Not usable by the body
Seaweed and Algae as Vitamin B12 Sources: Nori, Chlorella, and Spirulina Compared

👉 While nori and chlorella may offer some usable B12, spirulina mostly contains “pseudo-B12” — a form your body cannot absorb. That means relying on spirulina could actually make deficiency worse by giving a false sense of security of consuming Vitamin B12 Rich Food.


Fortified Fruit Juices as a Food High in Vitamin B12

Some brands of orange juice and other fruit juices are fortified with Vitamin B12.

FoodServing SizeVitamin B12 (mcg)Notes
Fortified Orange Juice1 cup1.0–2.0 mcgOnly fortified versions
Fortified Fruit Juices with Vitamin B12: Easy Vegan-Friendly B12 Options

This can be a convenient way to sneak in extra B12, especially for children or people who don’t like taking supplements. But as always, it’s important to read the nutrition label — not all juices are fortified.


Fruits and Vegetables: The Honest Truth

Apart from these rare cases, the average fruits and vegetables you find in the produce aisle — apples, bananas, carrots, spinach, and so on — simply do not contain meaningful amounts of Vitamin B12.

👉 This is why vegetarians and vegans are encouraged to focus on fortified foods and supplements instead of relying on fresh produce alone.

Split image of fruits and vegetables contrasted with nori and mushrooms for Vitamin B12 content myths vs reality.
Most fruits and vegetables contain zero Vitamin B12, but nori seaweed, chlorella, and mushrooms provide small amounts.

Fruits and vegetables will always be cornerstones of a healthy diet. They give us vitamins, minerals, antioxidants, and fiber. But when it comes to Vitamin B12, they play only a supporting role.

Now that we’ve sorted out the plant-based confusion, let’s move on to something just as important: the nutrient partnerships. Did you know Vitamin B12 works hand in hand with folate and iron to keep your blood healthy? In the next section, we’ll explore which foods provide this powerful trio together, so you can plan meals that do double — even triple — duty for your health.

Foods High in Vitamin B12 and Iron/Folate

By now, we’ve seen how Vitamin B12 keeps your nerves sharp and your energy steady. But here’s something many people don’t realize: B12 doesn’t work alone. It has a few trusted “teammates” that it partners with to keep your body thriving — especially your blood and brain.

The most important partners are folate (Vitamin B9) and iron. Together, these three nutrients are like the ultimate trio for healthy red blood cells and oxygen transport. Without them, your blood can’t deliver enough oxygen to your tissues, leaving you feeling weak, pale, or out of breath. That’s why foods rich in both B12 and iron/folate are so powerful (NHS Resource).

So instead of thinking of B12 in isolation, it helps to focus on meals and foods that bring these nutrients together naturally. Let’s look at some of the best examples.

Plate of salmon, spinach, and quinoa showing Vitamin B12, iron, and folate synergy for blood health.
Combining Vitamin B12 with iron and folate foods like salmon, spinach, and quinoa supports healthy blood and energy.

Salmon: Omega-3s Plus B12 and Folate

Salmon is already a superstar when it comes to Vitamin B12 — one fillet can give you nearly 200% of your daily needs. But here’s the bonus: salmon also provides folate and omega-3 fatty acids, which support brain function, reduce inflammation, and keep your heart healthy.

👉 Picture this: a dinner of baked salmon with a side of leafy greens (rich in folate) and quinoa (packed with iron) creates a meal that delivers a perfect blend of B12, folate, and iron.


Eggs: The Everyday Multitaskers

Eggs are one of the most versatile foods out there. Beyond being a steady source of Vitamin B12, they also contain folate, choline (important for brain health), and high-quality protein.

FoodServing SizeNutrients
Eggs (whole)2 largeB12, Folate, Protein, Choline
Besides Vitamin B12, Eggs also contain folate, choline

👉 Starting your day with scrambled eggs and spinach (a folate-rich green) is a quick way to give your body this powerful nutrient combo.


Spinach with Fortified Cereal: A Plant-Based Power Pair

On their own, spinach is rich in folate and iron but lacks Vitamin B12. Fortified cereals, on the other hand, often contain 100% of your daily B12. Pair them together, and you have a nutrient-packed meal that supports your blood health, even if you don’t eat meat.

👉 Imagine a spinach smoothie paired with a bowl of fortified cereal and soy milk — a fully plant-based breakfast that still covers all three nutrients.


Lean Beef: B12 Meets Iron

Beef is often highlighted as a source of iron, but it’s also a good source of Vitamin B12. Together, these nutrients help produce red blood cells and prevent anemia.

FoodServing SizeVitamin B12 (mcg)Iron (mg)
Lean Beef3 oz (cooked)1.3 mcg2.7 mg
Lean Beef is a Dual Source of B12 and Iron

👉 A small portion of lean beef, served with a lentil salad (for extra folate and plant-based iron), creates a meal that ticks all the boxes.


Lentils with Yogurt: A Vegetarian-Friendly Combo

For vegetarians, pairing foods is key. Lentils provide iron and folate, while yogurt adds Vitamin B12 and protein. Combined, they create a balanced and satisfying meal.

👉 A warm bowl of lentil curry served with a side of plain yogurt not only tastes comforting but also delivers a blend of nutrients that work beautifully together.

When you think of nutrition this way — in combinations instead of single nutrients — it becomes much easier to build meals that truly support your health. Whether it’s salmon with greens, eggs with spinach, or lentils with yogurt, these pairings bring B12, folate, and iron together in delicious ways.

Now that we’ve explored the power of food combinations, let’s turn to another important question: what if diet alone isn’t enough? For many people, especially seniors, vegans, or those with absorption issues, food isn’t the whole story. This is where Vitamin B12 supplements come in — and choosing the right one can make all the difference.

Best Vitamin B12 Supplements: Choosing the Right One for Your Needs

So far, we’ve looked at how to get Vitamin B12 through food. But what if that isn’t enough? Some people — especially vegans, seniors, and those with absorption problems — need supplements. That’s because Vitamin B12 deficiency is often caused by malabsorption, not just poor diet (Times of India).

Certain groups are more likely to need extra help:

  • Vegans and vegetarians → because plant foods don’t naturally contain B12.
  • Seniors → since absorption decreases with age.
  • People with digestive conditions → such as celiac, Crohn’s disease, or low stomach acid.
  • Those recovering from anemia or chronic fatigue → where higher doses are needed to restore levels.
Flat lay of Vitamin B12 supplements including sprays, tablets, and B-complex capsules.
Vitamin B12 supplements include methylcobalamin for absorption, cyanocobalamin as a budget-friendly option, and hydroxocobalamin for deficiencies.

The good news? There’s no shortage of options when it comes to Vitamin B12 supplements. But not all forms are created equal. Let’s walk through the most common types and when to use them.

However before you get into supplementation, it’s important to consider the risks, which we talk about in Vitamin B12 Side Effects and Vitamin Supplements and Cancer Risk: What You Should Know.


Methylcobalamin: The Most Natural Form

Methylcobalamin is often considered the gold standard of B12 supplements. It’s the form your body naturally uses, which means it’s highly bioavailable and easy to absorb.

  • Best for: Most people looking for a daily boost.
  • Why choose it: It supports energy, nerve health, and cognitive function.
  • Common forms: Tablets, lozenges, sprays.

👉 Imagine you’re a busy professional struggling with fatigue — a daily methylcobalamin lozenge under the tongue could help restore your energy levels without needing complicated routines.


Adenosylcobalamin: Energy and Mitochondrial Support

Adenosylcobalamin is another bioactive form of Vitamin B12, working deep in the mitochondria — the “powerhouses” of your cells.

  • Best for: People needing extra energy support.
  • Why choose it: Helps with cellular energy production and muscle function.
  • Common forms: Capsules, sublingual drops.

👉 Athletes or those recovering from fatigue often find adenosylcobalamin gives them that extra edge for stamina and performance.


Cyanocobalamin: Affordable and Reliable

Cyanocobalamin is a synthetic form of Vitamin B12. It’s widely available, inexpensive, and effective for most people. The body converts it into active forms (methylcobalamin and adenosylcobalamin) once ingested.

  • Best for: Budget-friendly supplementation.
  • Why choose it: Cost-effective, stable, and easy to find in multivitamins.
  • Common forms: Tablets, capsules, gummies.

👉 If you’re just starting with supplements and want a simple option, cyanocobalamin is a great first step.


Hydroxocobalamin: Long-Lasting Option

Hydroxocobalamin is typically used in medical settings, especially for treating severe B12 deficiencies. It lasts longer in the body, which makes it especially useful for injections.

  • Best for: Severe deficiencies, under medical supervision.
  • Why choose it: Longer storage in the body; effective for injections.
  • Common forms: Intramuscular injections prescribed by doctors.

👉 For someone with advanced B12 deficiency symptoms like numbness or severe fatigue, hydroxocobalamin injections can make a dramatic difference.


Best Vitamin B12 Supplements by Situation

  • For absorption issues (seniors, digestive problems): Sublingual methylcobalamin or adenosylcobalamin.
  • For anemia: Hydroxocobalamin injections or high-dose oral supplements (doctor guided).
  • For vegans and vegetarians: Daily methylcobalamin tablets, sprays, or fortified foods.
  • For budget-conscious users: Cyanocobalamin tablets or multivitamins.
  • For all-round coverage: B-complex supplements containing B12, folate, and B6.

Supplements can be life-changing, but they’re not a one-size-fits-all solution. The right choice depends on your lifestyle, your health status, and even how your body absorbs nutrients.

Now that we’ve covered the best supplements, let’s step back and look at the bigger picture. Vitamin B12 doesn’t work in isolation — it’s part of a family of B vitamins that support one another. In the next section, we’ll explore how B12 teams up with vitamins like B6 and folate to boost your energy, mood, and overall well-being.


How Vitamin B12 Works with Other B Vitamins

By now, you’ve seen how important Vitamin B12 is on its own. But here’s something fascinating: B12 rarely acts alone in the body. It’s part of a larger family — the B vitamins — that work together like a team. When one is missing, the others can’t perform at their best.

Think of them as musicians in an orchestra. Each plays a different instrument, but together, they create harmony. In the same way, Vitamin B12 partners with vitamins like B6, folate (B9), and even B1, B2, and B3 to keep your body energized, your nerves calm, and your blood healthy.

Let’s explore how these partnerships work in practice.


Vitamin B6 and Vitamin B12: Partners in Energy and Nerve Health

Vitamin B6 (pyridoxine) and Vitamin B12 (cobalamin) are both deeply involved in your nervous system and metabolism.

  • B6 helps the body make neurotransmitters like serotonin and dopamine, which regulate mood.
  • B12 supports the protective myelin sheath around your nerves.

Together, they help convert food into glucose, stabilize your mood, and keep your nervous system strong.

👉 Example: A meal of grilled salmon (rich in both B6 and B12) with roasted potatoes (a good source of B6) is not just satisfying — it’s a perfect example of nutrient teamwork. (Find more about Vitamin B6 in Foods)


Folate (Vitamin B9) and Vitamin B12: Essential for Blood and DNA

Folate (also known as folic acid in supplement form) and B12 are inseparable partners when it comes to blood and DNA health.

  • B9 and B12 together help produce red blood cells and prevent anemia.
  • They also support DNA synthesis and repair — critical for growth, fertility, and pregnancy health.

👉 Example: A breakfast of scrambled eggs (B12) with avocado toast (folate) shows how easy it is to combine these nutrients in everyday meals.


The Broader B Vitamin Family: B1, B2, B3, B5 with B12

While B6 and folate are the closest partners, other B vitamins also play a role alongside B12:

  • Vitamin B1 (Thiamine): Supports energy metabolism and nerve function.
  • Vitamin B2 (Riboflavin): Helps release energy from food and supports eye health.
  • Vitamin B3 (Niacin): Important for brain health and cholesterol balance.
  • Vitamin B5 (Pantothenic Acid): Supports hormone production and energy release.

Together with Vitamin B12, these nutrients turn food into energy, maintain a healthy nervous system, and keep your brain sharp.


B-Complex Supplements: A Balanced Approach

Because B vitamins are so interconnected, many people choose to take a B-complex supplement, which contains all eight B vitamins in one capsule or tablet.

  • Best for: People with restricted diets, chronic stress, or increased energy needs.
  • Why it helps: Ensures you’re not missing one vitamin that could throw off the balance of the others.

👉 Think of it like having the whole orchestra in tune. With a B-complex, you’re not just supporting B12 — you’re supporting the entire family.

Understanding how Vitamin B12 works with its fellow B vitamins helps you see the bigger picture: nutrition is about synergy, not isolation. When you eat balanced meals that combine these nutrients, you get more energy, better focus, and stronger overall health.

Now that we’ve explored the teamwork of the B vitamins, let’s bring everything together. In the final section, we’ll look at how to incorporate Vitamin B12 into your daily life, with simple strategies and practical meal ideas you can start using right away.

Adding Vitamin B12 to Life: Foods, Supplements, and Lifestyle Tips

Learning about Vitamin B12 rich foods is one thing — but the real power comes when you put that knowledge into action. The good news is that weaving B12 into your everyday meals doesn’t need to be complicated. With a little planning, you can create a diet that supports your energy, memory, mood, and long-term health.

Family cooking together, highlighting the importance of Vitamin B12 for energy and brain health.
Eating balanced diet daily, including b12 foods – fuels energy, protects brain function, and supports long-term vitality.

Here are some simple strategies to make Vitamin B12 a natural part of your lifestyle.


Build a Balanced Plate

Instead of obsessing over one “superfood,” think about balance. Each meal is an opportunity to combine sources of Vitamin B12 with other nutrients your body needs.

  • Seafood lovers: Try salmon with quinoa and roasted vegetables.
  • Meat eaters: Enjoy lean beef with lentil salad for B12 + iron + folate.
  • Vegetarians: Scrambled eggs with spinach and whole grain toast.
  • Vegans: A bowl of fortified cereal with soy milk and a sprinkle of nutritional yeast.

👉 Over time, these small, consistent choices add up to a big impact on your energy and well-being.


Use Fortified Foods Wisely

If you’re vegetarian or vegan, fortified foods can be your best friend. Fortified cereals, plant milks, and nutritional yeast are not only practical but also versatile.

  • Add fortified almond milk to smoothies.
  • Sprinkle nutritional yeast on popcorn or pasta.
  • Choose cereals that list Vitamin B12 on the label.

👉 This way, you can easily meet your daily B12 needs without overthinking it.


Consider Supplements When Needed

Sometimes food isn’t enough — and that’s perfectly okay. For seniors, people with absorption issues, or anyone following a fully plant-based diet, B12 supplements are a safe and reliable choice.

  • Daily sublingual tablets or sprays work well for most people.
  • Injections may be necessary for severe deficiencies (doctor guided).
  • B-complex supplements can ensure you’re covering all bases.

👉 Remember: supplements aren’t a weakness — they’re a smart tool to protect your health.

Just a reminder : Before you get into supplementation, it’s important to consider the risks, which we talk about in Vitamin B12 Side Effects and Vitamin Supplements and Cancer Risk: What You Should Know.


Pay Attention to Your Body

Your body often sends signals when something is off. If you’re feeling unusually tired, weak, or forgetful, it could be your way of saying: “I need more B12.” Read more on Symptoms of Vitamin B12 Deficiency.

👉 Regular check-ups and simple blood tests can confirm your B12 status. Catching a deficiency early means you can correct it before it leads to bigger problems like anemia or neurological symptoms.


Lifestyle Tips to Maximize B12

Beyond just diet, here are a few extra habits that support healthy B12 levels:

  • Cook smart: Steaming or grilling retains more nutrients than boiling.
  • Plan variety: Rotate between fish, dairy, eggs, or fortified foods to avoid monotony.
  • Stay consistent: Aim for daily intake — your body absorbs B12 better in smaller, regular amounts.

Vitamin B12 Rich Foods Chart: Quick Reference

CategoryTop Foods Rich in Vitamin B12
SeafoodClams, Trout, Salmon, Sardines, Tuna
Meat & PoultryBeef liver, Lean beef, Chicken, Turkey
Dairy & EggsMilk, Yogurt, Cheese, Eggs
Vegetarian OptionsFortified cereals, Fortified soy/almond/oat milk
Vegan-FriendlyNutritional yeast, Marmite/Vegemite, Fortified juices
Fruits/Vegetables (limited)Shiitake mushrooms, Nori, Chlorella
Vitamin B12 Rich Foods Chart: Best Sources of B12 for Meat Eaters, Vegetarians, and Vegans

Conclusion: Nourish Your Body, Protect Your Energy

At the end of the day, Vitamin B12 is more than just a nutrient — it’s the spark that keeps your body’s engine running. As Vogue highlights, modern diets can absolutely support your B12 needs — whether through animal foods, fortified vegan options, or supplements. From protecting your nerves to producing healthy red blood cells, from boosting your memory to supporting your mood, this vitamin touches nearly every corner of your health.

The best part? Getting enough B12 is absolutely doable, no matter what kind of diet you follow. Whether it’s through seafood and dairy, vegetarian staples like eggs and cheese, or vegan-friendly fortified foods and supplements, you have plenty of Vitamin B12 Rich Foods to choose from.

👉 Think of B12 not as a chore, but as a daily act of self-care. With every meal, you have a chance to fuel your body with energy, protect your brain, and safeguard your future health.

So, the next time you enjoy a plate of salmon, a bowl of fortified cereal, or even just sprinkle a little nutritional yeast on your dinner, remember: you’re not just eating — you’re investing in your energy, your vitality, and your well-being.

FAQs on Vitamin B12 Rich Foods

1. What are the top foods rich in Vitamin B12?

The richest natural sources of Vitamin B12 are clams, liver, salmon, trout, tuna, sardines, milk, yogurt, cheese, and eggs. These foods provide far more than your daily needs in small portions, making them easy to include in your weekly diet.

2. Which vegetarian foods contain Vitamin B12?

Since plant foods don’t naturally provide B12, vegetarians can rely on eggs, dairy products (milk, cheese, yogurt), and fortified foods like cereals or nutritional yeast. Together, these offer a reliable way to prevent deficiency without eating meat.

3. Are there vegan foods high in Vitamin B12?

Naturally, very few plant-based foods contain B12. However, fortified cereals, plant milks (soy, almond, oat), nutritional yeast, and fortified juices are vegan-friendly sources that can help meet your needs.

4. Do fruits contain Vitamin B12?

Most fruits do not naturally contain Vitamin B12. However, fortified fruit juices, such as some brands of orange juice, may provide B12 if added during processing. Always check the label to be sure.

5. Can vegetables be a good source of Vitamin B12?

Not really. Most vegetables contain no usable Vitamin B12. Exceptions include shiitake mushrooms and seaweed (nori, chlorella), which have small amounts. However, relying on vegetables alone is not enough to meet your daily B12 needs.

6. Which fish are the best sources of Vitamin B12?

Fish like salmon, trout, sardines, and tuna are excellent choices. Not only are they high in B12, but they also provide omega-3 fatty acids and protein, making them one of the healthiest all-in-one foods.

7. What are the best Vitamin B12 rich foods for anemia?

If you are managing anemia, foods like beef liver, clams, salmon, eggs, fortified cereals, and lean beef are particularly helpful. They supply both Vitamin B12 and iron, which work together to support healthy red blood cell production.

8. Can Vitamin B12 deficiency be reversed with food alone?

In mild cases, yes — eating B12 rich foods daily can correct low levels. But in more serious deficiencies (especially with neurological symptoms), you may need supplements or injections prescribed by a doctor.

9. What is the daily requirement of Vitamin B12?

Most adults need 2.4 mcg per day. Pregnant or breastfeeding women may need more. To put this in perspective: one serving of clams or beef liver provides more than 1000% of your daily requirement, while a cup of milk covers about half. Know more about What are Methylated Prenatal Vitamins?

10. Should I take a Vitamin B12 supplement if I eat B12 rich foods?

Not always. If you regularly eat animal-based foods, you likely get enough naturally. However, vegans, vegetarians, seniors, or people with absorption issues often benefit from B12 supplements to stay healthy.

Posted on 1 Comment

Potential Side Effects of Lion’s Mane Mushroom

Lion's Mane Side Effects

Lion’s Mane (Hericium erinaceus) has rapidly gained popularity for its reputed benefits on brain health, cognition, mood, and even nerve regeneration. But as interest surges, so do questions about its safety profile: Does Lion’s Mane have side effects? Are Lion’s Mane supplements safe? Can Lion’s Mane cause digestive issues, headaches, or anxiety? In this comprehensive guide, we’ll explore what both science and real users report about Lion’s Mane side effects.


What Is Lion’s Mane?

Lion’s Mane is a medicinal mushroom traditionally used in East Asian medicine. Its active compounds—including hericenones and erinacines—are believed to stimulate the growth of nerve growth factor (NGF), which plays a vital role in maintaining neurons. Modern research is investigating its potential for neuroprotection, cognitive enhancement, and mood stabilization.


Documented Side Effects in Scientific Studies

1. Gastrointestinal Disturbances

Clinical trials show that mild gastrointestinal issues are the most commonly reported side effects of Lion’s Mane supplementation. Symptoms may include:

  • Nausea
  • Diarrhea
  • Abdominal discomfort
  • Bloating

These effects typically occur in less than 10% of users and often resolve without discontinuation.

2. Allergic Reactions

Though rare, some individuals report allergic responses including:

  • Skin rashes
  • Itchy skin
  • Respiratory distress (extremely rare)

These symptoms may result from mushroom sensitivities and should prompt immediate medical attention if severe.

3. Metabolic Considerations

Lion’s Mane has been shown to potentially lower blood sugar levels, making it necessary for diabetics or individuals on glucose-lowering medications to monitor their blood sugar closely.

4. Blood Clotting and Coagulation

Some animal studies suggest that Lion’s Mane may have mild anticoagulant properties. If you’re taking blood thinners or have clotting disorders, consult your healthcare provider before starting supplementation.

5. Pregnancy and Breastfeeding

Currently, there is insufficient research to guarantee safety for pregnant or breastfeeding individuals. Avoid use unless advised by a qualified healthcare professional.


Real User Experiences: Insights from the Community

While clinical studies offer controlled data, anecdotal reports provide a window into how Lion’s Mane affects people in everyday life. Let’s examine what users are saying on forums like Reddit, WebMD, and other platforms.

1. Digestive Issues: Beyond the Clinical Data

One WebMD user shared:

“After a few days, my mom puked and was bleeding from her colon while my sister had diarrhea.”

While severe digestive issues are rare, some individuals may experience significant GI upset, especially if starting at high doses or if sensitive to mushrooms.

2. Anxiety and Mood Changes

In forums like r/mycology, multiple users reported heightened anxiety and even panic attacks:

“Many users have been experiencing negative side effects such as panic attacks, severe anxiety, and depression after starting Lion’s Mane.”

These effects seem to be highly individual. Some users experience improved mood and reduced anxiety, while others report worsening symptoms.

3. Headaches and Cognitive Symptoms

On r/ADHDUK, one user noted:

“Upon taking it, I had a massive headache. Then one day I forgot to take it, and it was an absolutely awful day.”

Headaches may occur initially, possibly related to neurochemical changes. Some users also report withdrawal-like symptoms upon discontinuation.

4. Skin Reactions and Itchiness

A contributor to Gene Food shared:

“I experienced a brief racing feeling and itchy skin after a small dose via tincture.”

This suggests a possible histamine reaction in sensitive individuals.

5. Skeptical Perspectives

Not all users are convinced of Lion’s Mane’s benefits:

“Lion’s Mane supplementation is not going to give you any noticeable benefits outside of a lighter wallet.”

While some report transformative cognitive improvements, others experience no noticeable benefits.


The Science Behind the Side Effects

Lion’s Mane contains several bioactive compounds that influence the nervous system and immune function:

  • Hericenones and Erinacines: Promote NGF production, potentially influencing mood, cognition, and neuroplasticity.
  • Beta-glucans: Support immune modulation, but may also trigger allergic responses in sensitive individuals.
  • Polysaccharides: Could influence gut flora and digestive processes, sometimes causing GI disturbances.

Who Should Be Cautious?

GroupReason for Caution
Pregnant/BreastfeedingInsufficient research
DiabeticsPotential blood sugar effects
Blood Thinner UsersPossible anticoagulant effect
Allergy-Prone IndividualsRisk of allergic reaction
Individuals with Anxiety DisordersPotential for mood disturbances

🧩 Patterns & Considerations

Side EffectNatureFrequency
GI upset (nausea, diarrhea)Mild to severe (rare)<10%, anecdotal outliers
Headaches/migrainesOccasionally reportedSingle case in ADHD context
Anxiety/panicRare but possibleReddit anecdotes
Skin itch/rash, histamineMild allergic reactionsRare, environment-linked
Mood disturbancesConflicting—both worsening and improvingAnecdotal

How to Safely Use Lion’s Mane

1. Start Low and Go Slow

Begin with a small dose (e.g., 250-500 mg per day) and monitor how your body reacts. Gradually increase if well-tolerated.

2. Choose Reputable Brands

Select high-quality supplements that use fruiting body extracts rather than mycelium grown on grain. Look for third-party testing and transparent sourcing.

3. Monitor Symptoms

Keep a journal to track any side effects, mood changes, or digestive symptoms, especially during the first few weeks.

4. Consult a Healthcare Provider

If you have existing health conditions or take medications, always consult a healthcare professional before starting Lion’s Mane.


The Bottom Line

Lion’s Mane (Hericium erinaceus) is generally well-tolerated by most individuals and offers promising benefits for cognitive and neurological health. However, side effects can occur, ranging from mild digestive discomfort to rare allergic or mood-related issues.

The key is personalization: monitor your body’s responses, start with a low dose, and always prioritize quality when selecting a supplement. With informed use, many people find Lion’s Mane to be a valuable addition to their wellness regimen.


Disclaimer: This article is for informational purposes only and does not substitute for medical advice. Always consult a qualified healthcare professional before starting any new supplement.

Frequently Asked Questions (FAQs)

1. Does Lion’s Mane have side effects?

Yes, while generally well-tolerated, some users experience mild side effects like digestive upset (nausea, diarrhea, bloating), headaches, skin itchiness, and rarely, mood changes such as anxiety or panic. Severe reactions are uncommon but possible.

2. Can Lion’s Mane cause digestive issues?

Digestive disturbances are among the most frequently reported side effects. Symptoms may include stomach cramps, nausea, bloating, and diarrhea, especially when starting at high doses.

3. Can Lion’s Mane cause anxiety or panic attacks?

Although many people report improved mood and reduced anxiety, some users have experienced heightened anxiety, panic attacks, or mood disturbances. These effects seem highly individual and may depend on dosage and personal sensitivity.

4. Does Lion’s Mane cause headaches?

Some users report headaches, especially during the initial days of supplementation. This may be due to changes in neurochemical activity related to nerve growth factor stimulation.

5. Is Lion’s Mane safe during pregnancy or breastfeeding?

There is not enough scientific data to confirm its safety for pregnant or breastfeeding individuals. It’s best to avoid use during these periods unless approved by a healthcare professional.

6. Can Lion’s Mane affect blood sugar levels?

Yes. Lion’s Mane may lower blood sugar, so individuals on diabetes medication or those prone to hypoglycemia should monitor their blood sugar closely and consult a healthcare provider before use.

7. Does Lion’s Mane interact with medications?

Potential interactions exist with medications affecting blood sugar, blood clotting, or the immune system. Always consult a healthcare provider if you’re on prescription medications before starting Lion’s Mane.

8. How long does it take to see benefits from Lion’s Mane?

Some users report cognitive or mood benefits within days, while others may require several weeks of consistent use. Response time varies greatly between individuals.

9. What is the safest Lion’s Mane dosage to start with?

Begin with 250–500 mg daily to assess tolerance. If well-tolerated, the dose can be gradually increased based on product guidelines and individual goals.

10. How do I choose a high-quality Lion’s Mane supplement?

Look for products using fruiting body extracts (not just mycelium), with clear labeling, third-party testing, and certifications for purity and potency. Avoid unverified brands or products with proprietary blends lacking transparency.