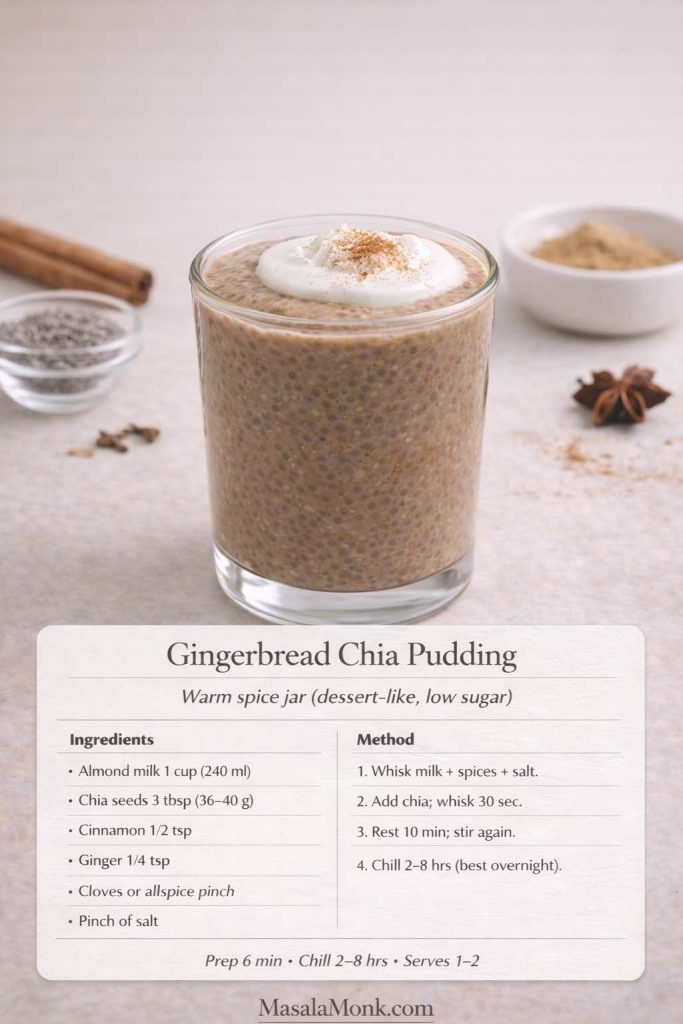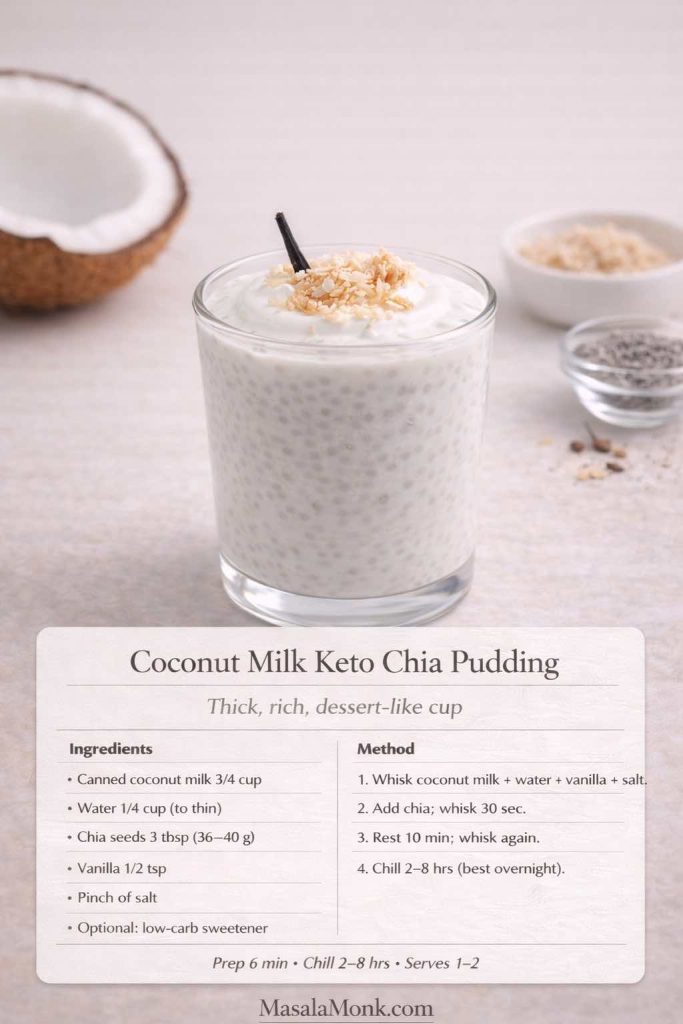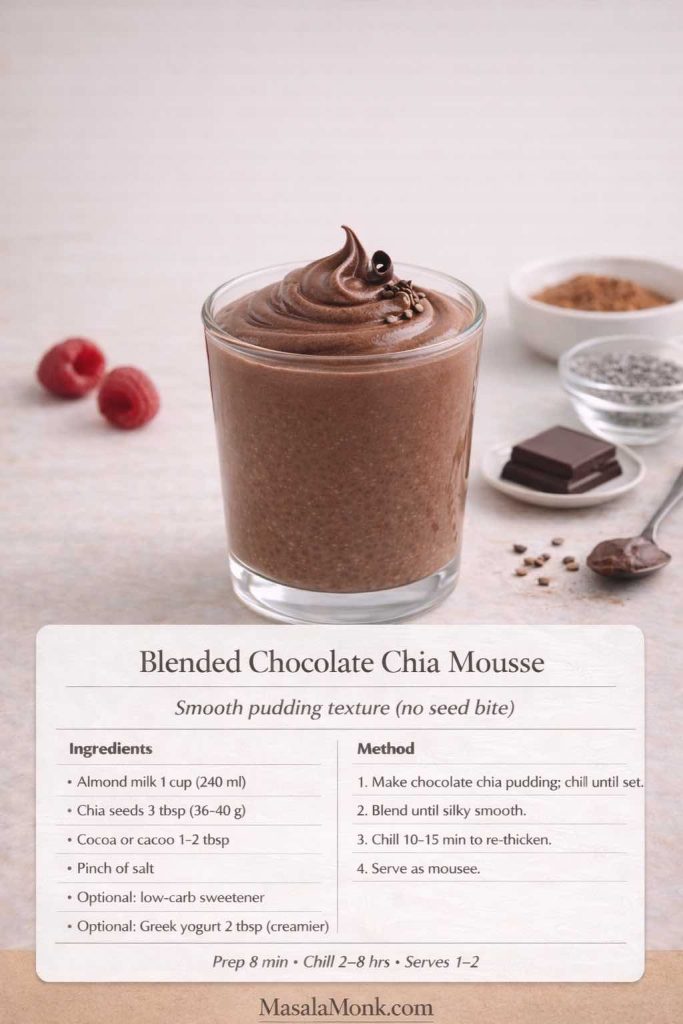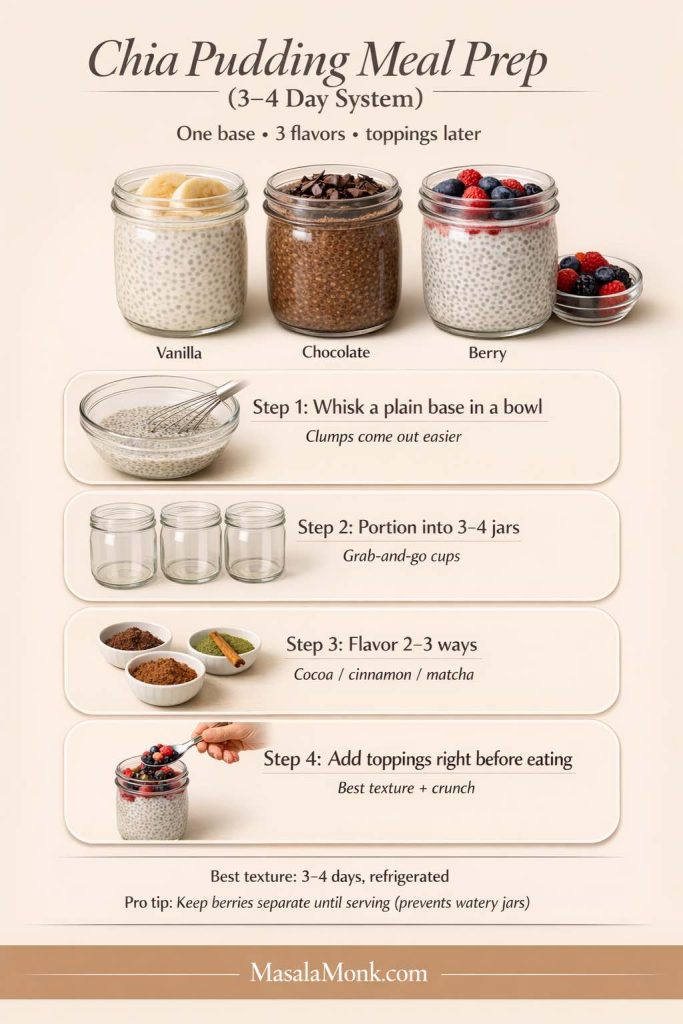
Posted on Leave a comment

Beet Juice Recipe

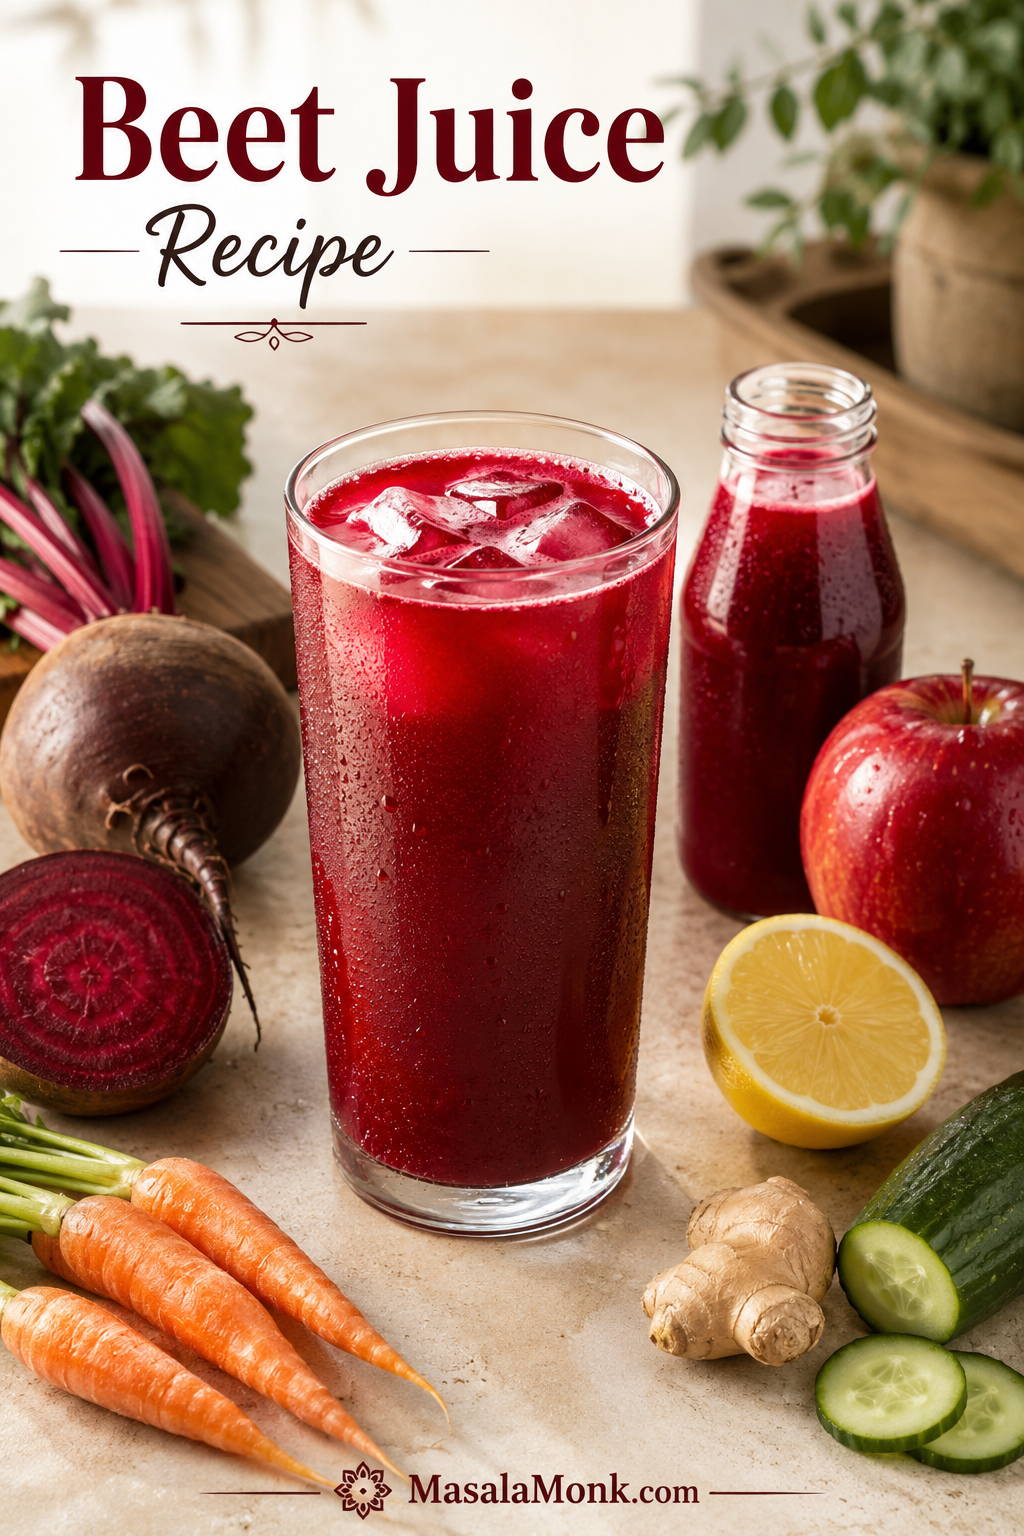
Chilled glass of ruby-red homemade beet juice with ice, a small bottle of juice, and fresh beetroot, carrots, apple, lemon, ginger, and cucumber on a light kitchen surface.

Beet juice can go one of two ways. Made carelessly, it tastes earthy, heavy, and a little too close to drinking a glass of soil. Made with the right balance, it turns into a chilled, ruby-red juice that tastes lively, lightly sweet, tart, and just spicy enough from ginger.

This beet juice recipe is for that second version. It uses raw beetroot for color and depth, carrot and apple for natural sweetness, lemon for brightness, ginger for lift, and optional cucumber to make the whole glass easier to sip. The first taste should feel clear and awake, not muddy.

This is not straight beetroot juice. It is a balanced beet-carrot-apple juice designed to taste cool, tart, lightly sweet, and easy to finish.

You can make this beetroot juice recipe in a juicer for the smoothest texture, or in a blender if you do not own a juicer. The blender version needs water and proper straining, but it still works beautifully when you know what the mixture should look and feel like. It is especially helpful if you are making it for the first time, dislike plain beetroot juice, or want a balanced glass without added sugar.

No juicer at home? Skip to the blender method. Already ready to make it? Jump to the full recipe card.

Start with the quick recipe, then come back to the sections below when you want to adjust the flavor, make it without a juicer, store it safely, or understand what the health claims actually mean.

Beet Juice Recipe Guide

Use this as a quick recipe first, then as a troubleshooting guide whenever you want a smoother blender batch, a less earthy glass, or a safer way to store leftovers.

Quick Answer: How to Make Beet Juice

To make beet juice, juice or blend raw beetroot with carrot, apple, lemon, ginger, and optional cucumber. If using a juicer, feed the produce through the machine, then stir in the lemon juice and serve over ice. If using a blender, add cold water, blend until smooth, then strain through a nut milk bag, cheesecloth, or fine mesh strainer.

This beetroot juice recipe makes about 16–18 oz / 475–530 ml, enough for 2 standard 8 oz / 240 ml glasses or 3 smaller 5 oz / 150 ml servings. It takes about 10 minutes, uses no added sugar, and tastes brightest right after making. Here, beet juice and beetroot juice mean fresh juice made from raw red beetroot, not pickled beet brine, canned beet liquid, or beet powder mixed into water.
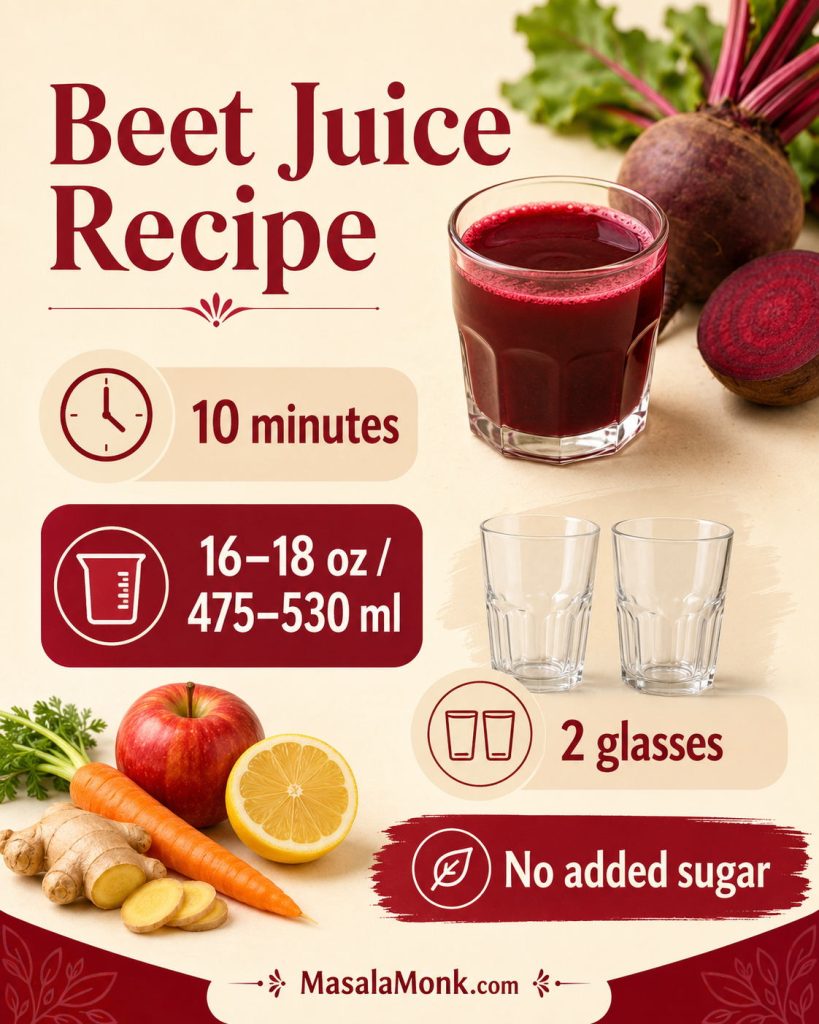
At-a-glance beet juice recipe graphic showing a glass of beet juice, 10 minutes, 16–18 ounces, two glasses, and no added sugar.
Since this fresh beet juice takes about 10 minutes and makes two glasses, it works best as a quick just-made drink rather than a big storage batch.

Easiest first glass: if your first memory of beet juice is something thick, muddy, or aggressively earthy, do not start with straight beetroot. Make the apple-beet-carrot version first, serve it over ice, then adjust lemon, cucumber, or ginger after tasting.
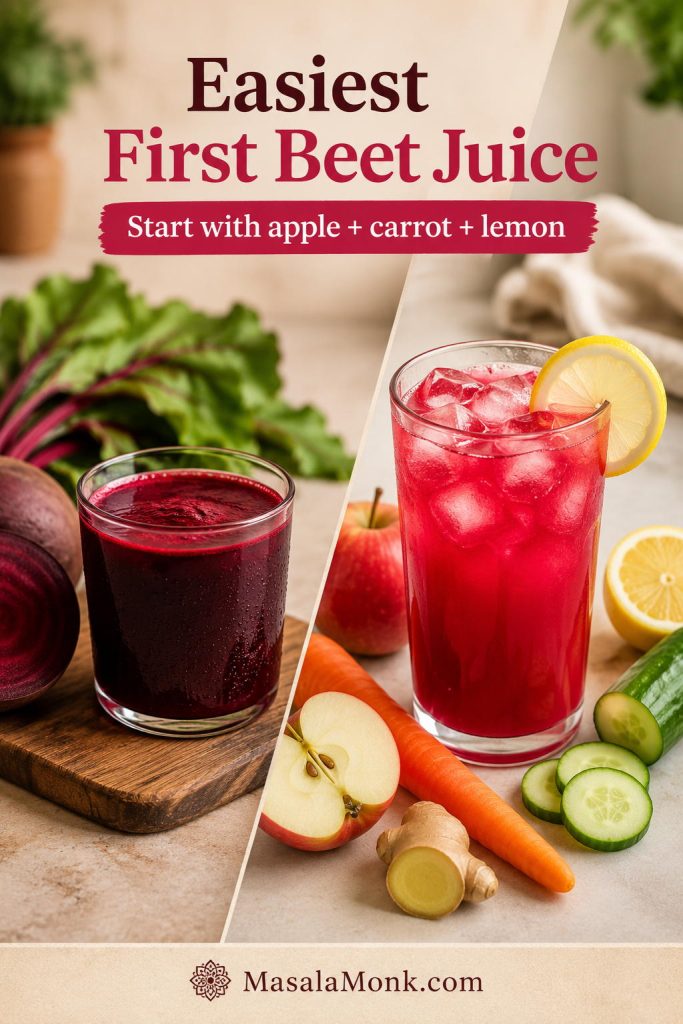
Split image comparing a darker straight beetroot juice with a brighter beginner-friendly apple, beet, carrot, lemon, ginger, and cucumber juice over ice.
When plain beetroot juice tastes too earthy, apple and carrot make the first glass gentler; then lemon, ginger, cucumber, and ice help it feel refreshing.

Still worried about the earthy flavor? See the taste fixes before you make your first batch.

Quick Beet Juice Formula

  • Base: 1 medium-large beetroot or 2 small beets, about 225–250 g / 8–9 oz
  • Balance: 2 carrots and 1 large apple for natural sweetness
  • Brightness: ½ lemon, about 15–20 ml juice
  • Lift: ½–1 inch fresh ginger, about 5–10 g
  • Lightness: ½ cucumber, optional, about 75–100 g / 3–4 oz
  • Blender only: ½–1 cup / 120–240 ml cold water
  • Serve: over ice, right after making

The 10-Minute Version

Juice or blend 1 beetroot, 2 carrots, 1 apple, ½ lemon, ½–1 inch ginger, and optional cucumber. If blending, add ½ cup / 120 ml cold water, blend for 45–60 seconds, strain well, and serve over ice. Add more water only if the blender needs help.

Serve it with breakfast, as an afternoon caffeine-free drink, or as a small pre-workout glass after you know how your body handles it.

Why This Beet Juice Recipe Works

The trick is not hiding the beetroot. It is balancing it. Beetroot gives the drink its deep color, earthy sweetness, and unmistakable flavor, but it needs the right supporting ingredients so the glass does not taste flat or muddy.

Carrot is the quiet helper here: it softens beetroot’s rooty edge without making the glass taste like fruit punch. Apple makes the drink more beginner-friendly. Lemon is the difference between a dull beet juice and one that tastes like it belongs in a glass with ice. Ginger adds a bright, spicy finish. Cucumber is the ingredient to add when the juice feels a little too serious, dense, or beet-forward.

For a beginner-friendly glass, keep beetroot to roughly one-third of the total produce volume and let carrot, apple, cucumber, and citrus do the balancing. If your batch tastes too rooty or heavy, it usually does not need sugar first. It needs acid, coldness, dilution, or a better mix.

Temperature matters too. Room-temperature juice tastes flatter and heavier than a chilled glass, so use refrigerated produce when possible or serve the finished glass over plenty of ice. The final drink should pour easily, taste lightly sweet and tart, and finish with gentle ginger warmth.

What Does Beet Juice Taste Like?

The drink tastes earthy, lightly sweet, mineral-like, and bold. That rooty note is the part people either love or struggle with. Straight beetroot juice can feel intense, especially if you are new to it.

The first sip of this version should be cool and lightly tart, with apple-carrot sweetness in the middle and gentle ginger warmth at the end. Juicer beet juice will feel thinner and clearer. The blender version, even after straining, may feel slightly fuller. Both should still pour like juice, not spoon like a smoothie.

Best beginner version: Use 1 small beet, 2 carrots, 1 apple, ½ lemon, ½ inch ginger, and ½ cucumber. This keeps the beet flavor present but not overpowering.

Once you like the base, adjust one thing at a time: more lemon for tartness, more apple for sweetness, more cucumber for lightness, or more ginger for heat.

Ingredients for the Best Beet Juice

The best glass needs contrast. You want enough beetroot for color and flavor, enough natural sweetness to soften the mineral notes, enough citrus to keep it crisp, and enough chill or cucumber to make it easy to sip.
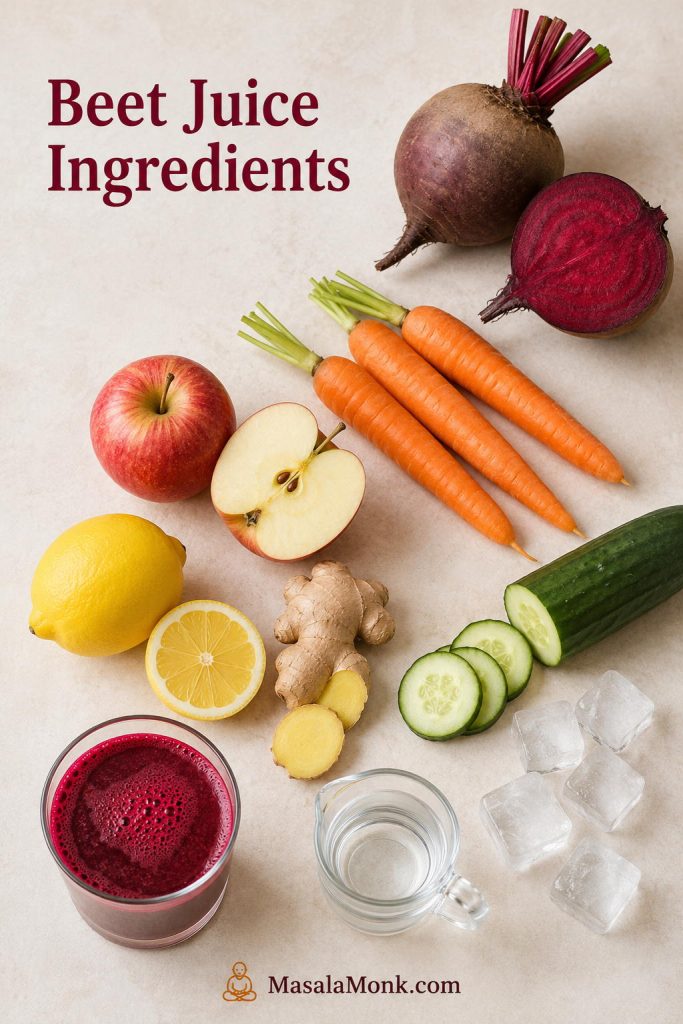
Overhead layout of beet juice ingredients including cut beetroot, carrots, apple, lemon, ginger, cucumber, ice, and water for the blender method.
Each ingredient has a purpose: beetroot adds depth, carrot and apple soften the flavor, lemon lifts it, and ginger gives the juice a cleaner finish.
IngredientAmountWhy it matters
Raw red beetroot1 medium-large or 2 small beets, about 225–250 g / 8–9 ozThe base of the juice; gives color, earthy sweetness, and the classic beet flavor.
Carrots2 medium, about 120–150 g / 4–5 ozAdds natural sweetness and helps round out beetroot’s deeper edge.
Apple1 large, about 170–200 g / 6–7 ozMakes the juice more beginner-friendly and naturally sweet without added sugar.
Lemon½ lemon, about 15–20 ml juiceBrightens the juice and keeps the beet flavor from tasting flat.
Fresh ginger½–1 inch, about 5–10 gAdds warmth, sharpness, and a lively finish.
Cucumber, optional½ small cucumber, about 75–100 g / 3–4 ozLightens the flavor and makes the juice more refreshing.
Cold water½–1 cup / 120–240 ml, blender method onlyHelps the blender move and controls thickness. Do not add it when using a juicer.
IceAs neededMakes the finished glass more refreshing.

Juice yield varies by beet size, carrot freshness, apple variety, juicer type, and how firmly you press the pulp in the blender method. The amounts above usually make about 16–18 oz / 475–530 ml strained juice. A juicer usually gives the clearest yield without added water, while the blender version may make a little more volume because of the water, but with a slightly softer flavor.

Beetroot

Use raw red beets for the brightest color and crispest flavor. Scrub them well because beets grow in soil and often carry grit around the root end. Peeling is optional if the beets are tender-skinned and scrubbed well, but peel them if the skin is rough, bitter, waxed, or hard to clean.

How to Choose Beets for Juice

Choose firm, heavy beets with smooth skin and no soft, wrinkled, moldy, or badly bruised spots. Small to medium beets often taste sweeter and less woody than very large ones. If the beets come with greens attached, trim the greens off before storing, then scrub the roots well before peeling or cutting.
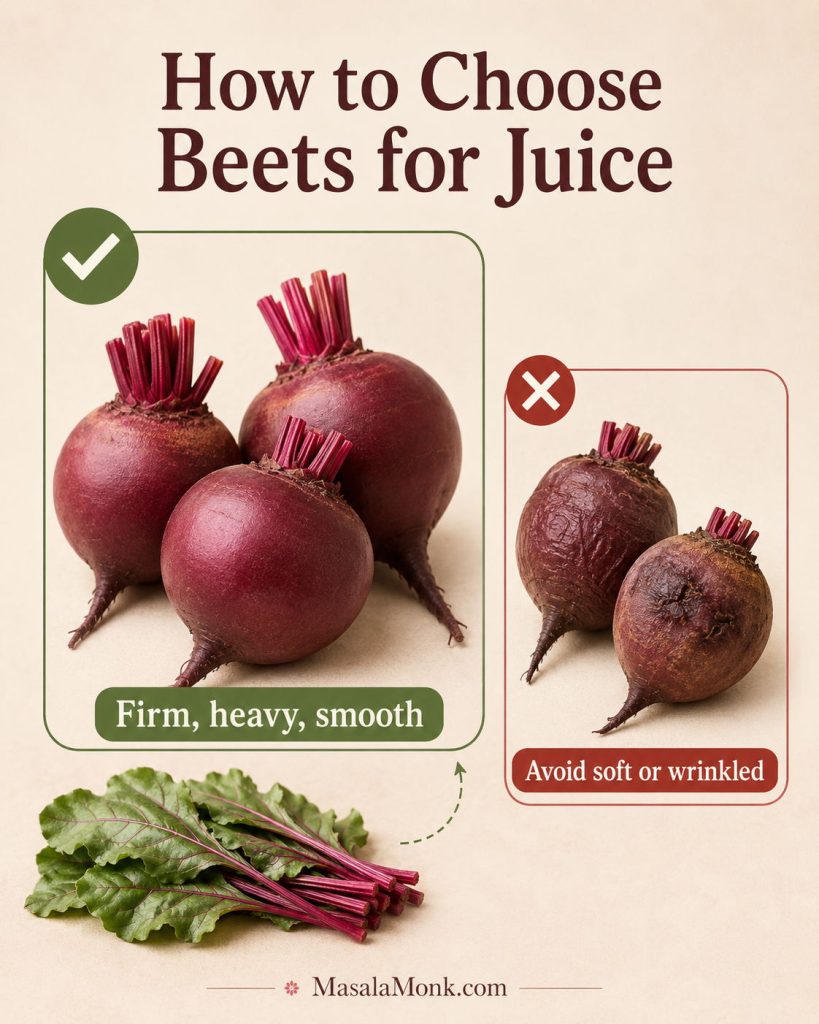
Produce guide showing firm fresh beets for juicing next to softer or wrinkled beets to avoid, with beet greens trimmed nearby.
Better beetroot juice starts before you juice anything, so choose firm, heavy, smooth roots and skip soft or wrinkled beets that can taste woody.

If your beets come with greens, save the tender leaves for cooking rather than adding a large handful to this juice. Beet greens can make the drink taste more grassy and bitter.

Carrot

Carrot is one of the easiest ways to make this drink taste better. It brings mellow sweetness without turning the glass into a fruit-heavy juice, and it also works beautifully in apple beet carrot juice, often called ABC juice. MasalaMonk’s guide to vitamins in carrots goes deeper into carrot juice, raw carrots, cooked carrots, and their key nutrients.

Apple

A crisp sweet-tart apple is ideal. Gala, Fuji, Honeycrisp, Pink Lady, or any good eating apple will work. Green apple gives a sharper, less sweet result. Red apple gives a softer, sweeter glass.

Lemon or Lime

Citrus makes the beet taste awake. Stir lemon juice in at the end if you are using a juicer, or peel the lemon and blend it with the produce if you are using a blender. Avoid blending too much white pith because it can make the drink bitter.

Ginger

Fresh ginger makes the flavor lighter and less heavy. Start with ½ inch if you are sensitive to heat. Use the full inch if you want a stronger beet ginger juice with a spicy finish.

Cucumber or Celery

Cucumber is optional, but it is one of the most useful ways to make the glass easier to drink. It increases the yield, cools the flavor, and gives the juice a more refreshing finish. Celery works too, though it tastes more savory and slightly salty. If you like the cucumber-lemon-ginger side of this recipe but want something lighter than juice, MasalaMonk’s guide to cucumber, lemon, and ginger water is a good companion.

Raw Beets vs Cooked Beets for Juice

Use raw beets for the most refreshing beet juice. Raw beetroot gives the drink a crisp, earthy-sweet flavor. Cooked beets are softer and sweeter, but they make the drink taste more like cooked beet puree than just-made juice.
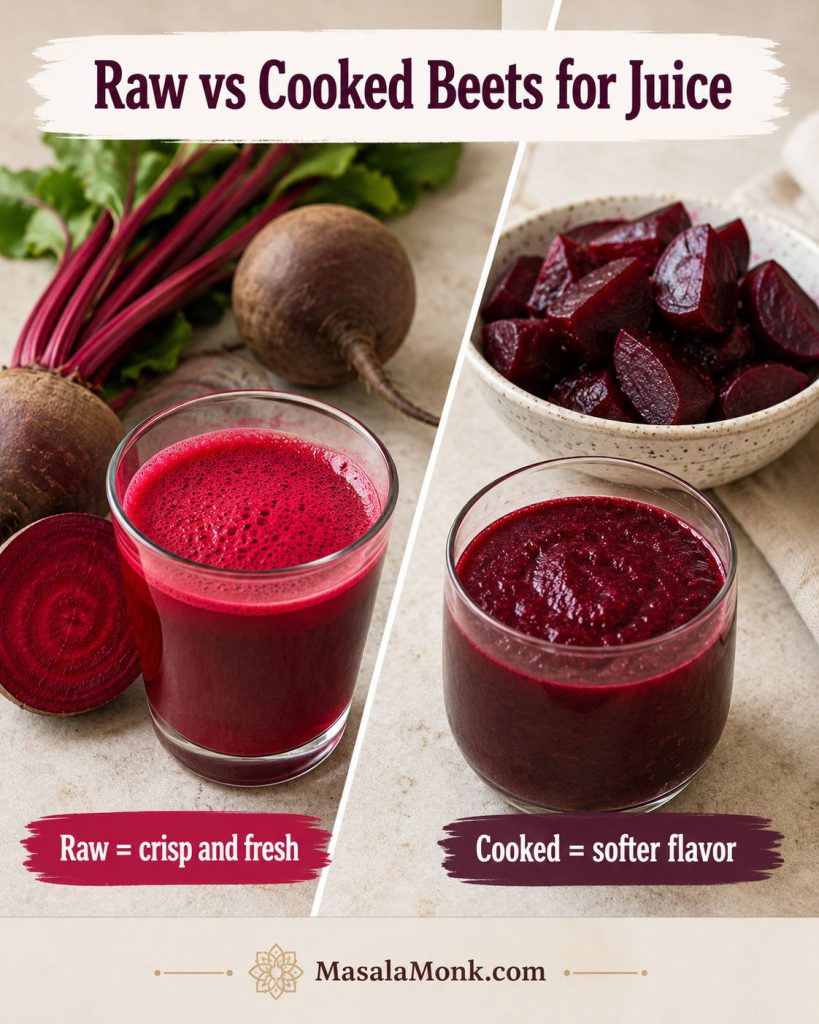
Comparison image showing raw beets with bright beet juice and cooked beets with a softer, thicker blended beet drink.
Raw beets make the crispest beet juice, whereas cooked beets create a softer blended drink that tastes closer to beet puree.

If you only have cooked beets, you can blend them with apple, lemon, ginger, and cold water, then strain the mixture. However, cooked beets do not work well in most juicers, and they will not give the same lively flavor as raw beetroot.

Avoid pickled beets for this recipe unless you specifically want a vinegar-heavy drink. Pickled beet juice has a completely different flavor profile because it usually contains vinegar, salt, and sometimes sugar.

How to Make Beet Juice in a Juicer

The juicer method is the fastest way to make a smooth, clear glass. It gives you the crispest flavor because you do not need to dilute the produce with water.
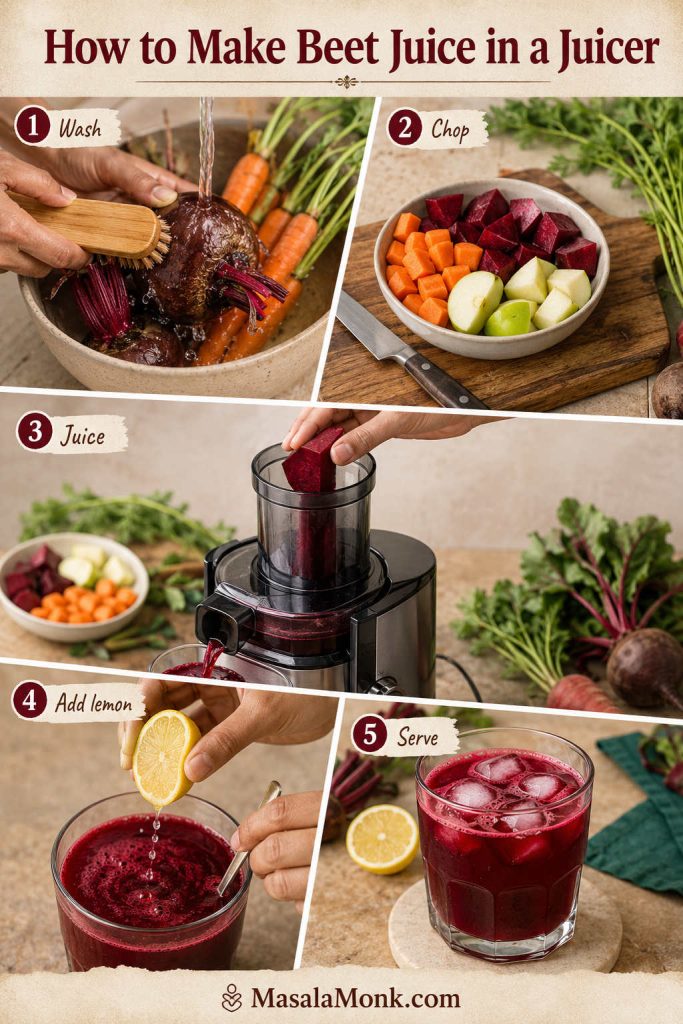
Step-by-step juicer method showing beets and carrots being washed, chopped produce, beetroot going into a juicer, lemon added to juice, and beet juice served over ice.
Because the juicer presses the produce directly, this method gives a smoother, more concentrated glass without needing blender water.
  1. Wash and scrub the produce. Pay special attention to the beetroot and carrots.
  2. Trim the beetroot. Cut off the root end and any rough top area.
  3. Peel if needed. Peeling is optional for tender-skinned beets that have been scrubbed well. Peel rough, waxed, or dirty beets.
  4. Cut everything to fit the juicer chute. Do not force oversized beet chunks through the machine.
  5. Juice the beet, carrots, apple, cucumber, and ginger. Alternate hard and softer produce so the juicer runs smoothly.
  6. Stir in lemon juice. Adding lemon at the end keeps the citrus flavor lively.
  7. Serve over ice. Drink right away for the brightest taste.

The finished juice should pour easily and look deep ruby-red, not thick like puree. Fresh juice naturally separates as it sits, so stir or shake it before drinking. If the flavor tastes flat, add a little more lemon. If it feels too heavy, pour it over extra ice or add cucumber next time.

How to Make Beet Juice in a Blender Without a Juicer

If you came here wondering how to make beetroot juice without a juicer, the blender method is the easiest place to start. It asks for one extra step — straining — but that step is what turns a thick beet puree into something you actually want to sip.
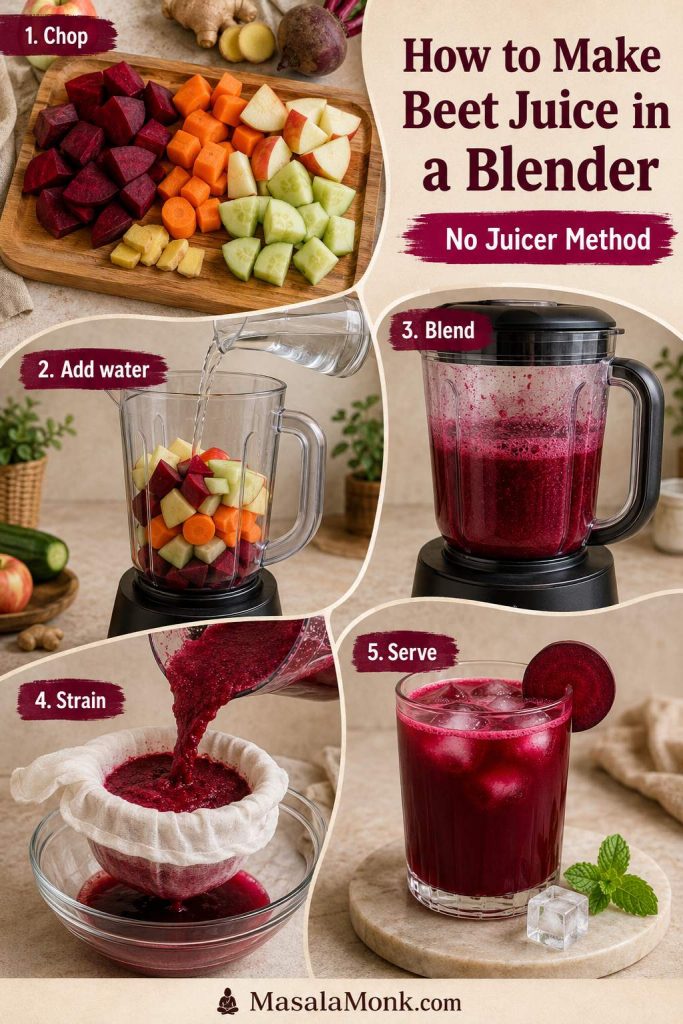
Step-by-step blender method showing chopped beetroot, carrot, apple, cucumber, and ginger, water added to a blender, blended beet puree, straining, and a final glass of juice.
For the no-juicer method, the goal is not a thick smoothie; use just enough water to blend, then strain until the juice pours cleanly.

Still deciding between tools? Compare juicer vs blender beet juice before choosing your method.

  1. Chop the produce smaller than you would for a juicer. Dice the beetroot, carrot, apple, cucumber, and ginger so the blender can handle them.
  2. Add ½ cup / 120 ml cold water first. This helps the blades move without making the juice weak.
  3. Blend on high for 45–60 seconds. The mixture should look like a smooth, thick ruby puree.
  4. Add more water only if needed. If the blender stalls or groans, pause, scrape down the sides, and add water 2 tablespoons / 30 ml at a time, up to 1 cup / 240 ml total.
  5. Strain the mixture. Pour it into a nut milk bag, cheesecloth-lined strainer, or fine mesh strainer set over a bowl or jug.
  6. Let it sit briefly, then squeeze. Give it 2–5 minutes to drain, then press or squeeze to extract as much juice as possible.
  7. Serve over ice. Drink while the flavor is still lively.

How to Strain Beet Juice Smoothly

For blender beet juice, the straining step is where the texture changes from thick puree to a lighter drink. Give the pulp a few minutes to drain before squeezing, especially if you are using a nut milk bag.
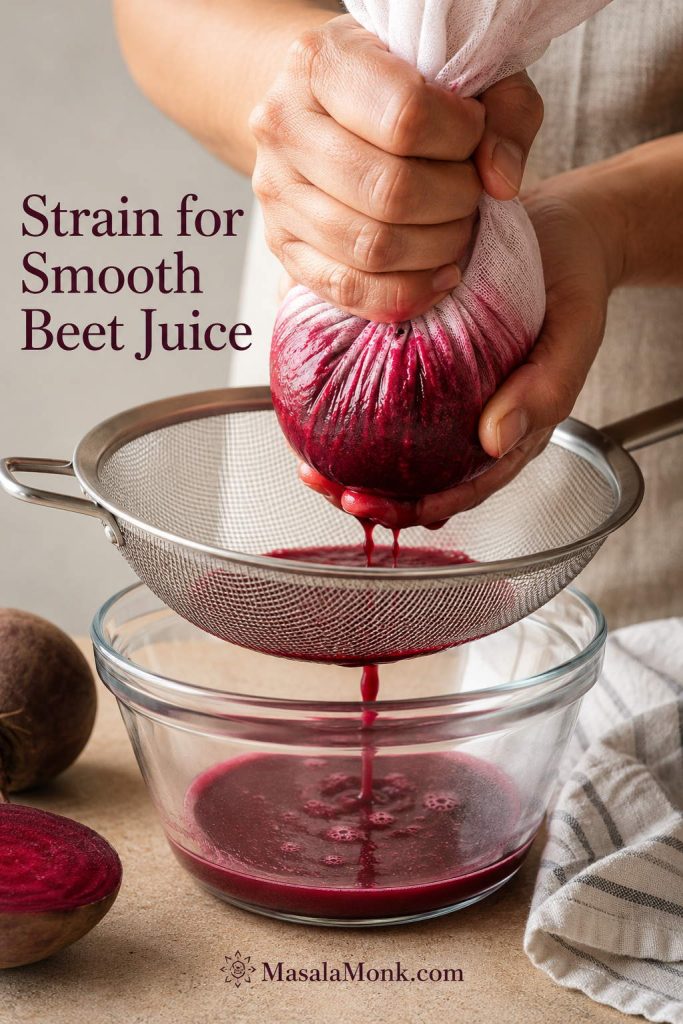
Close-up of hands straining blended beet juice through a nut milk bag or fine mesh strainer into a bowl.
Straining is the step that turns blended beet puree into a lighter, smoother glass of drinkable beet juice.

Blender note: If your first batch looks more like a thick smoothie than juice, you have not failed. It just needs better straining, smaller beet pieces, or a little more patience while the pulp drains. If your blender is not very powerful, use the full 1 cup / 240 ml water and blend in two rounds if needed.

For a little more yield, add 2–3 tablespoons / 30–45 ml cold water to the squeezed pulp, stir or briefly blend again, then strain once more. Skip this second press if you want the strongest flavor.

If your batch is already too thick, watery, or sharp, jump to the troubleshooting guide.

Equipment Needed

Beet juice is simple, but it is not tidy. A little setup saves you from pink fingers, stained towels, and a blender that refuses to move. A juicer gives the smoothest glass, while a blender works well as long as you give it enough liquid and strain properly.
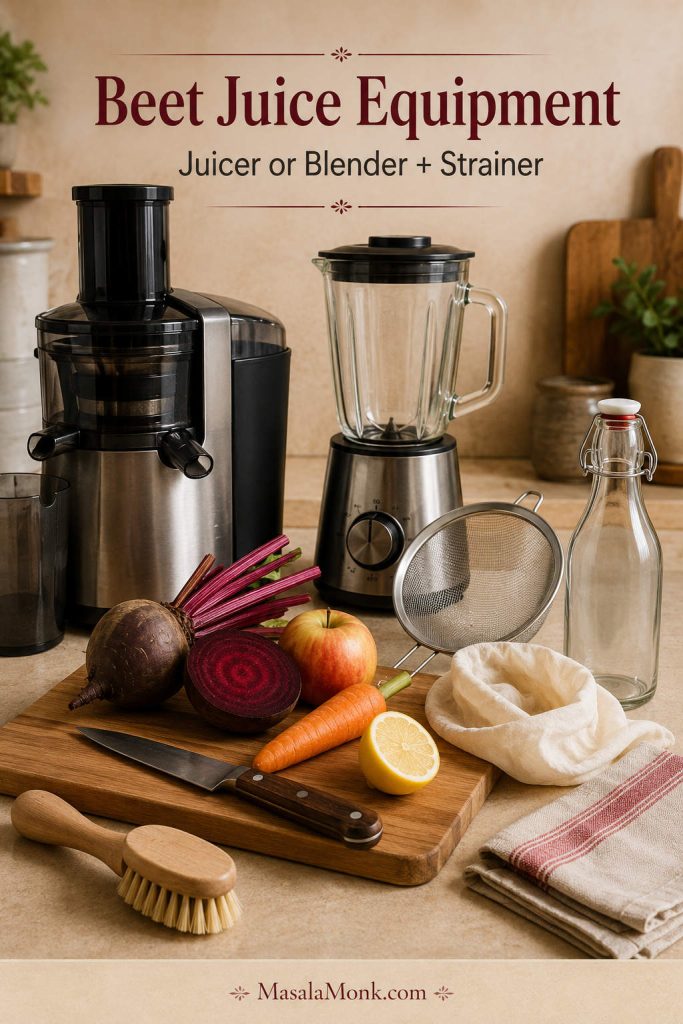
Kitchen counter with beet juice equipment including a juicer, blender, strainer, knife, cutting board, vegetable brush, glass bottle, towel, and fresh produce.
Set up the juicer or blender, strainer, cutting board, and bottle before you start; as a result, beet juice prep stays cleaner and faster.
  • Juicer: best for thin, smooth juice with no added water.
  • Blender: useful if you do not own a juicer; you will need water and a strainer.
  • Nut milk bag, cheesecloth, or fine mesh strainer: needed for the blender method.
  • Vegetable brush: helpful for scrubbing raw beets and carrots.
  • Washable cutting board and knife: important because beet juice stains.
  • Glass bottle or jar: useful if refrigerating leftovers.

Stain warning: Beet juice is beautiful in the glass and ruthless on white towels. Wipe spills quickly, rinse tools right away, and use gloves if you do not want pink fingers.

Juicer vs Blender: Which Method Is Better?

Both methods work, but they do not produce exactly the same drink. A juicer gives you a clearer, lighter result. A blender gives you more flexibility if you do not own a juicer, but you need water and straining.
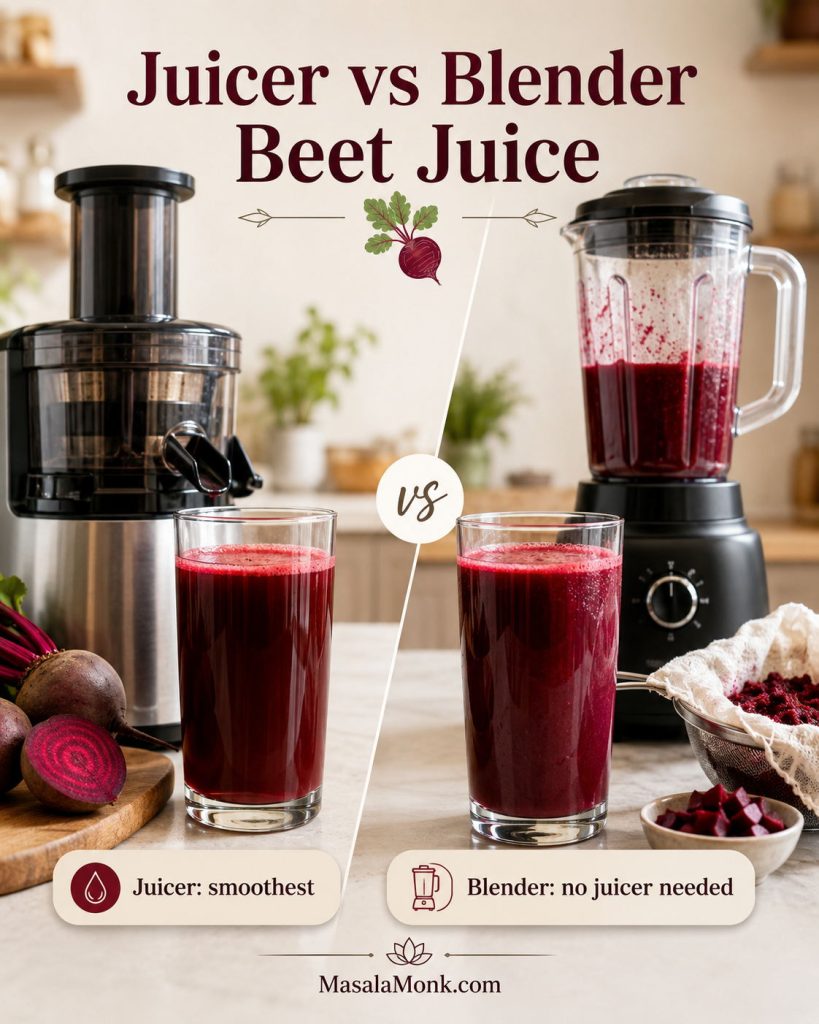
Side-by-side comparison of beet juice made in a juicer and beet juice made in a blender with a strainer nearby.
Choose the juicer when you want the clearest texture, or use the blender when accessibility matters more than a perfectly light finish.
MethodBest forTextureProsCons
JuicerSmooth beet juiceThin, smooth, brightFast, no added water, smoothest juice textureRequires a juicer
Blender + strainerNo-juicer homesSlightly thicker but still juice-likeAccessible, flexible, works with common equipmentNeeds water and straining
Blender, unstrainedThicker blended drinkPulpy, smoothie-likeKeeps more fiber, less wasteNot a true clear juice
Beet powderConvenienceDepends on brand and mixingFast, shelf-stableNot the same flavor or texture as fresh beet juice

If you are deciding whether to buy a juicer, a cold press juicer is often preferred for fresh juice quality, while centrifugal juicers are usually faster and more affordable. MasalaMonk’s guide to cold press vs centrifugal juicers explains the difference in more detail.

Common Beet Juice Mistakes to Avoid

Most disappointing batches come from a few simple mistakes. Before you start, avoid these and the drink becomes much easier to love.
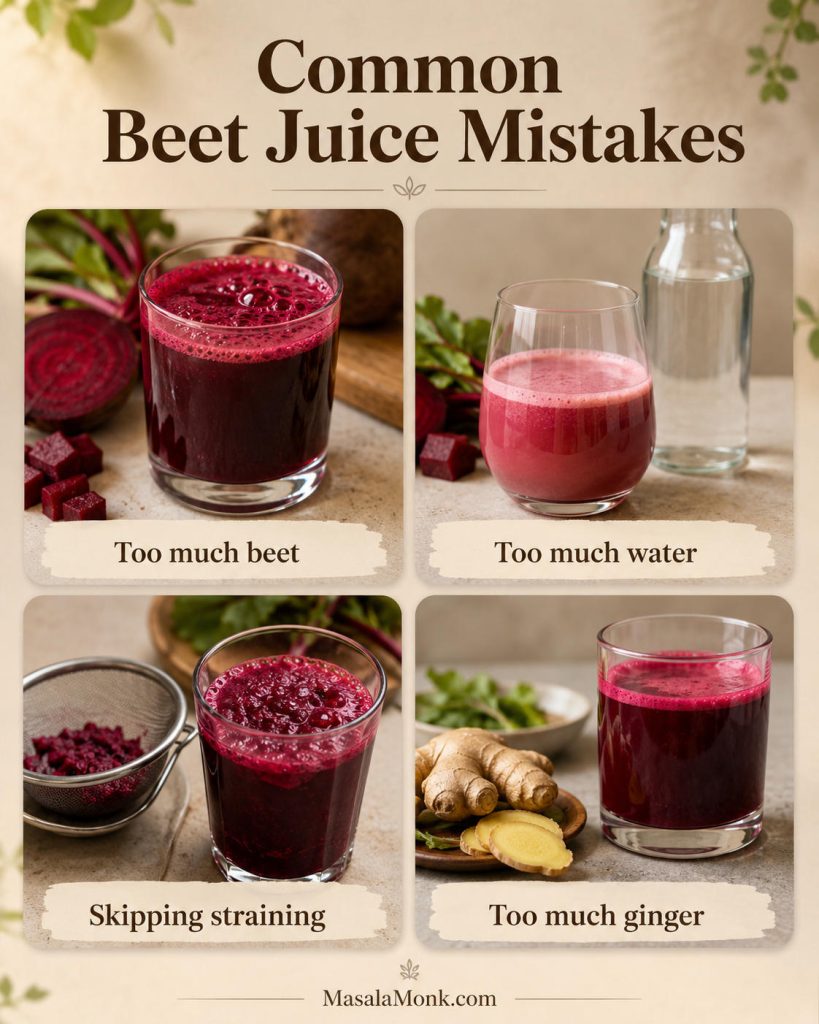
Four-panel beet juice mistakes graphic showing too much beet, too much water, skipping straining, and too much ginger.
Most disappointing batches come from balance issues: too much beet, water, pulp, or ginger can make the glass taste heavy, weak, thick, or harsh.
  • Using only beetroot as a beginner: a pure beetroot batch can taste too intense. Start with apple, carrot, lemon, and ginger.
  • Adding too much blender water: begin with ½ cup / 120 ml and add more only if the blender needs help.
  • Skipping the strainer: unstrained blender juice will be thick and pulpy, closer to a smoothie.
  • Overdoing sharp ingredients: too much ginger or citrus pith can make the juice harsh or bitter, so start small and use lemon juice or peeled citrus.

How to Make Beet Juice Taste Better

The main reason people give up on this drink is not the color or the effort. It is the taste. Beetroot is naturally earthy, so it needs brightness, sweetness, chill, or dilution to feel balanced.
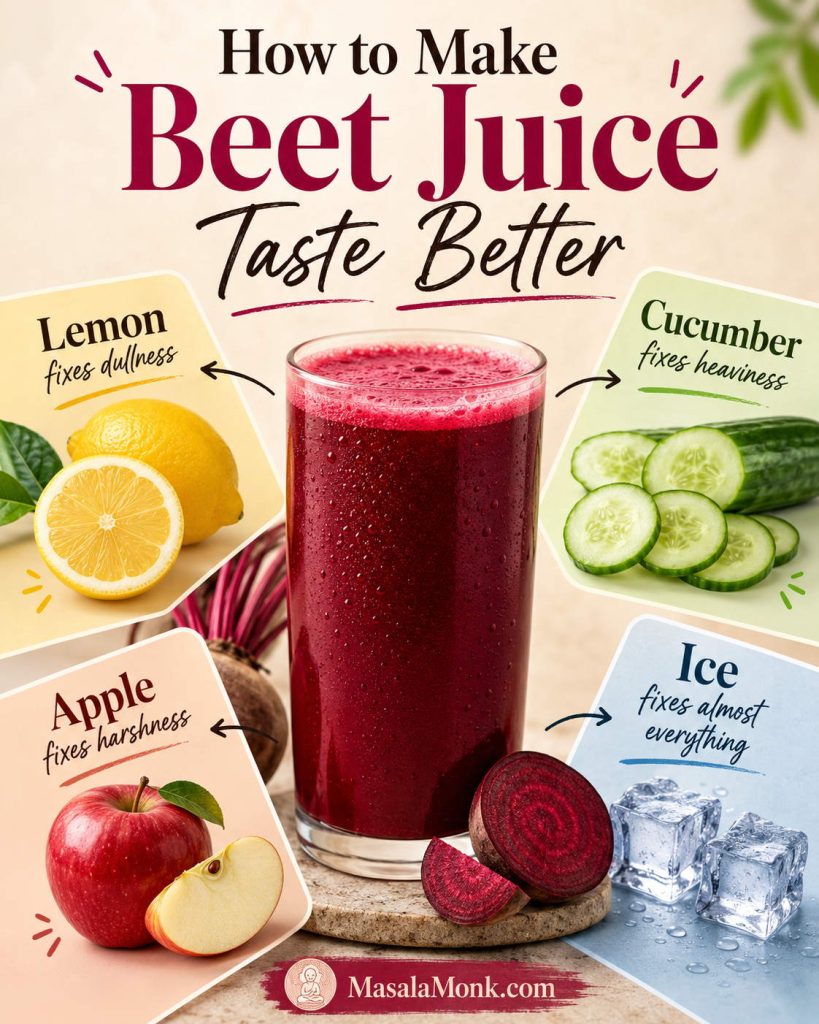
Beet juice taste-fix graphic with lemon, cucumber, apple, and ice around a glass of beet juice.
A strong beet flavor usually needs contrast, not sugar; citrus, cucumber, apple, or ice can shift the drink from heavy to refreshing.
ProblemFix
Too earthyAdd more apple, orange, lemon, cucumber, or carrot.
Too sweetAdd lemon or lime, cucumber, celery, or a little extra ginger.
Too sharp from gingerUse ½ inch ginger instead of 1 inch next time. Dilute this batch with more apple, carrot, or cucumber juice.
Too thickUse a nut milk bag or cheesecloth and squeeze well. Add a little cold water if needed.
Too wateryUse less water next time. Start with ½ cup / 120 ml for blender juice and add only as needed.
Too bitterPeel citrus fully and avoid blending too much white pith.
Too strong for beginnersUse half a beet and increase the carrot or apple.
Not refreshingServe over ice or chill the juice before drinking.

The easiest beginner version is beetroot with both apple and carrot. The crispest version adds cucumber and lemon. The punchiest version leans on ginger and citrus. If the glass tastes flat, it almost always needs lemon. If it tastes heavy, it needs cucumber, ice, or less beet next time.

Remember this flavor rule: lemon fixes dullness, cucumber fixes heaviness, apple fixes harshness, and ice fixes almost everything.

Once the basic glass tastes right, the variations become much easier. You are not guessing anymore; you are choosing whether you want the drink sweeter, sharper, lighter, or stronger.

For the gentlest first variation, try the apple beet carrot juice version.

Best Beet Juice Variations

Once you know the base formula, this juice is easy to adjust. Use these variations as mini-recipes. The juicer method works as written. For the blender method, add ½–1 cup / 120–240 ml cold water and strain unless the variation says it is a smoothie.

Easy Beet Juice Combinations

VariationMini formulaBest for
Apple Beet Carrot Juice / ABC Juice1 beet + 1 apple + 2 carrots + ½ lemon + optional ½ inch gingerBeginner-friendly sweetness and a softer beet flavor
Beet Ginger Lemon Juice1 beet + 1 apple + ½ lemon + 5–10 g ginger + optional cucumberA sharper, livelier juice
Beet Orange Juice1 beet + 1 peeled orange + 1 carrot + 5 g gingerA citrusy breakfast-style glass
Beet Pineapple Juice1 beet + 1 cup pineapple chunks + ½ cucumber + ½ lemonA sweeter tropical version
Beet Pomegranate Juice1 beet + ½–¾ cup unsweetened pomegranate juice + ½ lemonA tart, deep red juice
Low-Sugar Beet Juice½–1 beet + ½ cucumber + 1 celery stalk + ½ lemon + ½ inch gingerA lighter vegetable-forward version
Beet Turmeric Ginger Juice1 beet + ½ inch ginger + small piece fresh turmeric or ¼ tsp ground turmeric + ½ lemonA strong, spicy flavor
Beet Juice ShotBeet + lemon + ginger + small apple piece if neededSmall 2–3 oz / 60–90 ml servings
Beet Juice SmoothieBeet juice or blended beet + banana or berries + yogurt or plant milkA thicker, more filling drink

Apple Beet Carrot Juice / ABC Juice

This is the safest first version if beetroot usually tastes too strong to you. Use a sweet apple for a softer drink or green apple for a sharper one. The carrot keeps the juice mellow, so the beet still shows up without taking over the glass. For more beetroot drink ideas, including beet-ginger-turmeric and ABC-style combinations, see MasalaMonk’s guide to the power of beetroot and beet juice.
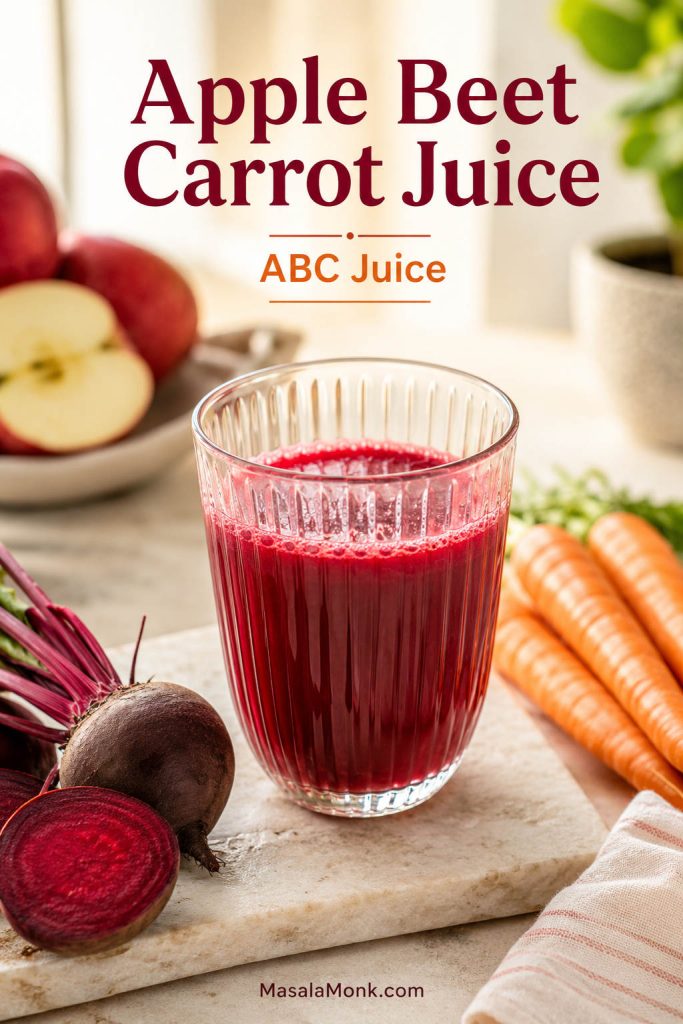
Glass of apple beet carrot juice with fresh apple, beetroot, and carrots on a bright breakfast-style kitchen surface.
Apple beet carrot juice, often called ABC juice, is the gentlest variation because carrot and apple mellow beetroot’s earthy edge.

Beet Ginger Lemon Juice

This version is sharper and less sweet. It is the one to make when you want beet ginger juice with a brighter, spicier finish. Start with less ginger unless you already know you like the heat.
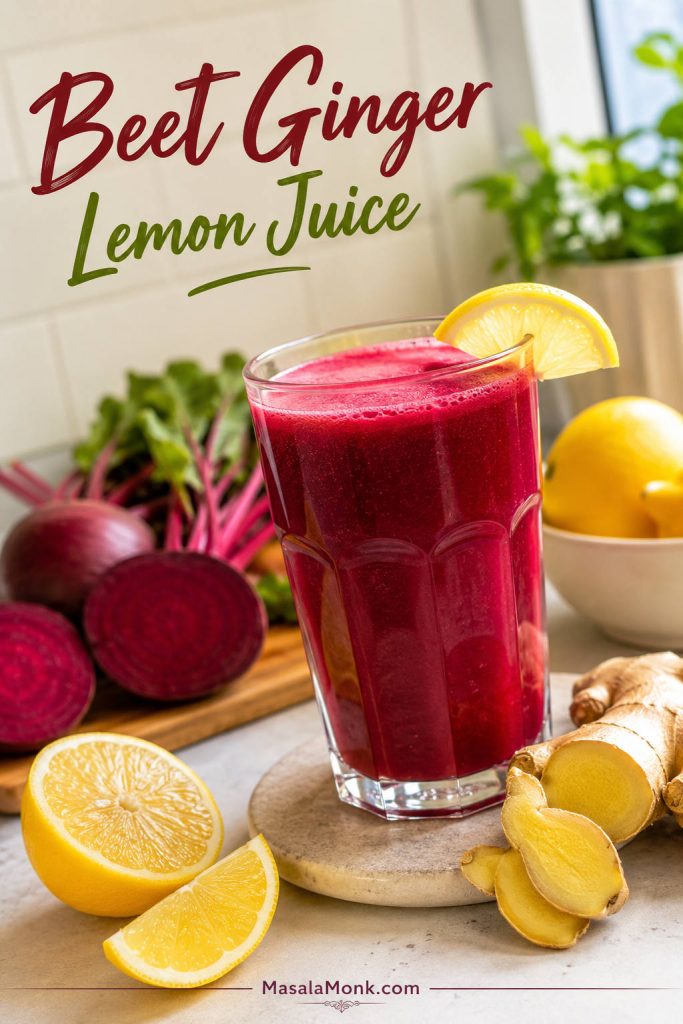
Glass of beet ginger lemon juice with fresh lemon wedges, lemon half, ginger slices, and beetroot nearby.
Beet ginger lemon juice is the sharper variation, so it works well when you want more citrus brightness and a warmer ginger finish.

Beet Orange Juice

Orange makes the drink rounder and more breakfast-friendly. Peel the orange well so the white pith does not make it bitter. This is a good choice when you want something sweeter than lemon but brighter than apple alone.

Beet Pineapple Juice

Pineapple gives this variation tropical sweetness that helps soften the deep beet flavor. Cucumber keeps the drink from becoming too syrupy. This is especially useful when you want the juice to taste more fruity and less vegetable-heavy.

Beet Pomegranate Juice

Pomegranate makes the juice tart, deep, and bold. For the easiest version, use unsweetened pomegranate juice. If using fresh pomegranate arils, blend gently and strain very well, or juice them only if your juicer handles pomegranate arils cleanly.

Low-Sugar Beet Juice

This version skips most of the fruit and uses cucumber, celery, lemon, and ginger for a cleaner vegetable-forward flavor. It will not taste as sweet as the apple-carrot version, but it is lighter and more refreshing.
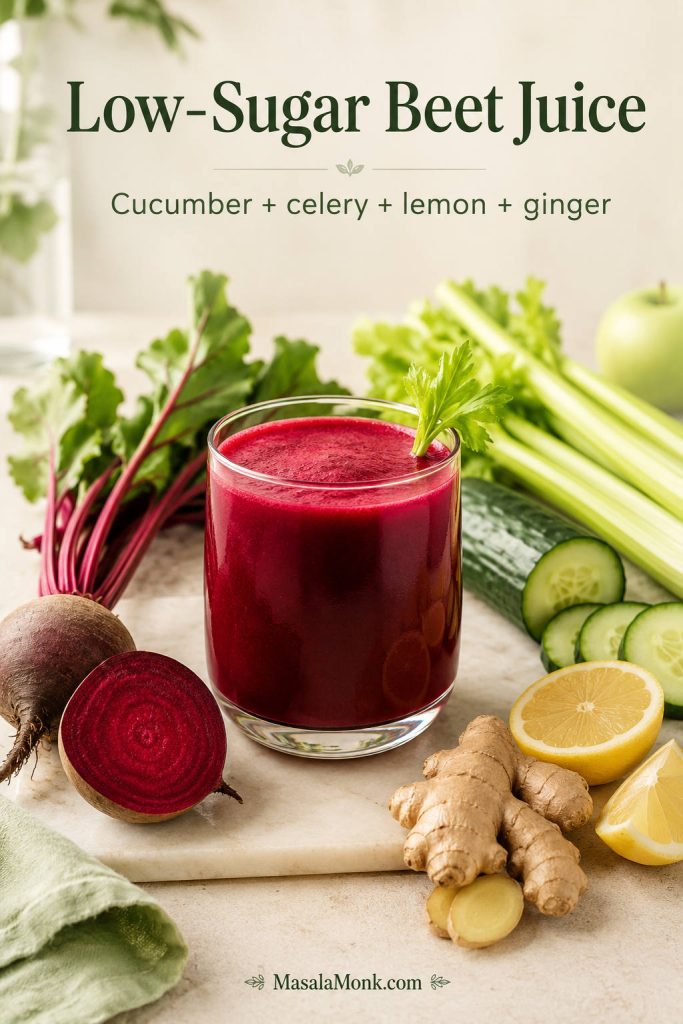
Glass of low-sugar beet juice with beetroot, cucumber, celery, lemon, ginger, and a small green apple in a light kitchen scene.
For low-sugar beet juice, lean on cucumber, celery, lemon, and ginger; that way, the drink stays vegetable-forward without tasting flat.

Beet Turmeric Ginger Juice

This has a strong, spicy flavor. Use turmeric carefully because it can dominate the drink. Add black pepper only if you already like that taste; it is not needed for the recipe to work.

Beet Juice Shot

A beet shot is stronger and smaller than a full glass. Keep the beet, lemon, and ginger more concentrated, then use just enough apple to soften the edge if needed. Serve 2–3 oz / 60–90 ml at a time.

Beet Juice Smoothie

To turn this into a smoothie, do not strain the blended mixture. Add banana, berries, yogurt or plant milk, and a little ginger. A smoothie keeps more pulp and fiber, so it will be thicker and more filling than strained beet juice. For more smoothie-style ideas, MasalaMonk’s guide to high-iron smoothies and shakes includes beetroot-friendly combinations that lean more filling than juiced.

Flavor comes first. Once the drink is something you actually enjoy, then it makes sense to talk about where it fits in a routine.

Beet Juice Benefits, Without the Hype

Once the flavor is right, the next question is usually what this drink actually does for you. The honest answer is that beet juice can be useful, but it works best when you treat it as food, not as a miracle shot.

Think of this as a bright vegetable drink with a few smart use cases: a small pre-workout serving, a lower-sugar vegetable-forward version, or an occasional way to enjoy beets when you do not feel like eating them.
Calm beet juice benefits graphic with a glass of beet juice, beetroot, and cards reading food-first, no miracle shot, and start small.
Beet juice can fit into a healthy routine, although it is still best treated as a food-first drink rather than a miracle wellness shortcut.

Planning to drink it often? Read the safety notes before making beet juice a daily habit.

Beetroot is naturally colorful, plant-rich, and known for dietary nitrates. Much of the research interest comes from those nitrates and their possible effects on cardiovascular markers. You can read more about that research background on PubMed.

At the same time, juice is not the same as eating whole beets. When you juice and strain beets, carrots, and apples, you remove much of the fiber. That makes the drink lighter and easier to sip, but it also means it is less filling than whole vegetables or a smoothie.

If you care about…Best way to use this juice
Blood pressure interestKeep servings moderate and check with a qualified professional if you take medication or tend to run low.
Workout useTry a small strained serving first, not a huge pulpy glass right before training.
Weight-conscious drinkingUse cucumber, celery, lemon, ginger, less fruit, and no added sugar.
Daily nutritionRotate it with whole vegetables, smoothies, meals, and other drinks instead of making it your only “healthy” habit.
Detox-style flavorUse cucumber, celery, lemon, and ginger for a crisp, light glass without treating it as a cleanse.

For a broader look at whole beets beyond juice, MasalaMonk’s guide to what beets are good for covers beetroot as a food, not just as a drink.

Is Beet Juice Good for Weight Loss?

For weight-conscious readers, the most useful approach is a moderate, vegetable-forward drink — especially when you keep fruit lower and skip added sugar. It is not a fat-loss shortcut, but it can fit into a balanced routine when the portion and ingredients make sense.

The same idea applies to other “weight loss drink” combinations too. MasalaMonk’s article on pineapple, cucumber, and ginger for weight loss separates useful habits from miracle claims without treating the drink as a shortcut.

Lighter Beet Juice Formula

  • ½–1 beetroot
  • ½ cucumber
  • 1 celery stalk
  • ½ lemon
  • ½ inch ginger
  • Optional: ½ green apple if you need a little sweetness

This version is less sweet and more vegetable-forward. For more fullness, choose an unstrained beet smoothie instead of strained juice because the smoothie keeps more fiber.

Beet Juice and Blood Pressure

Beetroot contains dietary nitrates, which is why this drink often comes up in blood pressure conversations. Still, drinking it once in a while is different from turning it into a daily habit; regular use matters more if you already take medication or tend to run low.

Beetroot’s dietary nitrates can be converted in the body into nitric oxide, a compound involved in blood-vessel relaxation and blood flow, which is why beet juice appears in blood pressure research.
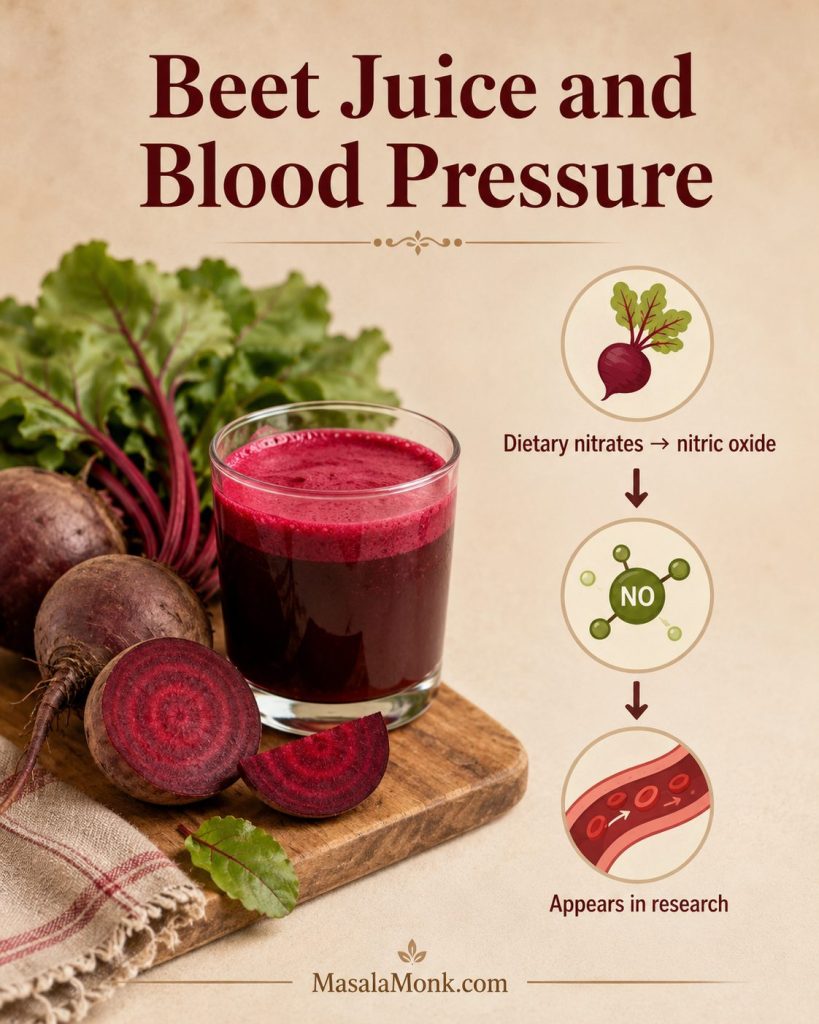
Educational graphic showing beet juice, beetroot, dietary nitrates converting to nitric oxide, and a simple blood-flow research cue.
The blood-pressure conversation around beetroot juice starts with dietary nitrates, so this is a research-aware food habit rather than a cure claim.

Any blood-pressure effect can vary by person, serving size, timing, and overall diet, so treat this as a food habit to discuss if it overlaps with medication or a medical condition.

If you have low blood pressure, take blood pressure medication, have kidney concerns, or manage a medical condition, treat regular beet juice as something to discuss with your healthcare professional rather than a casual daily habit.

For the broader caution list, see side effects and safety notes.

MasalaMonk has a deeper article on beets and blood pressure if you want a more focused discussion of fresh, canned, pickled, and juiced beets.

Is Beet Juice a Detox or Liver Cleanse?

If you like the word “detox” because you mean light, cold, vegetable-forward, and refreshing, beet juice can fit that mood. If you mean a drink that cleanses the liver, flushes toxins, or resets the body, it does not work that way.

Your liver and kidneys already do the work of filtering and processing waste. A glass of beet juice can be colorful and refreshing, but it should not be treated as a liver cleanse or cure.

For a detox-style flavor without the misleading promise, use beetroot, cucumber, celery, lemon, and ginger. It will taste crisp and clean, but it is still just a drink.

Beet Juice for Energy or Pre-Workout

Runners, cyclists, and workout-focused readers often pay attention to beet juice because of beetroot’s natural nitrate content. If you want to try it before exercise, start with a small serving first. Some people tolerate it easily; others find that a large or pulpy drink feels too heavy before movement.
Small glass of beet juice near running shoes, a water bottle, a workout mat, and fresh beetroot in natural morning light.
Before using beet juice as a pre-workout drink, try a small strained serving first so you can see how your stomach handles it.

For a pre-workout style version, keep the flavor bright and the texture light: beetroot, orange or apple, lemon, and ginger works well. If you are using the blender method, strain it thoroughly so the drink is easier to sip before exercise.

For performance use, many beetroot juice studies focus on nitrate dose and timing rather than casual sipping, so treat a small pre-workout glass as an experiment, not a guaranteed effect.

When to Drink Beet Juice and How Much to Start With

There is no single perfect time to drink beet juice. Choose the moment that fits how you want to use it and how your body responds. If you are new to this drink, start with a smaller serving because the flavor, color, and digestive effect can surprise people, especially if the glass is strong or ginger-heavy.
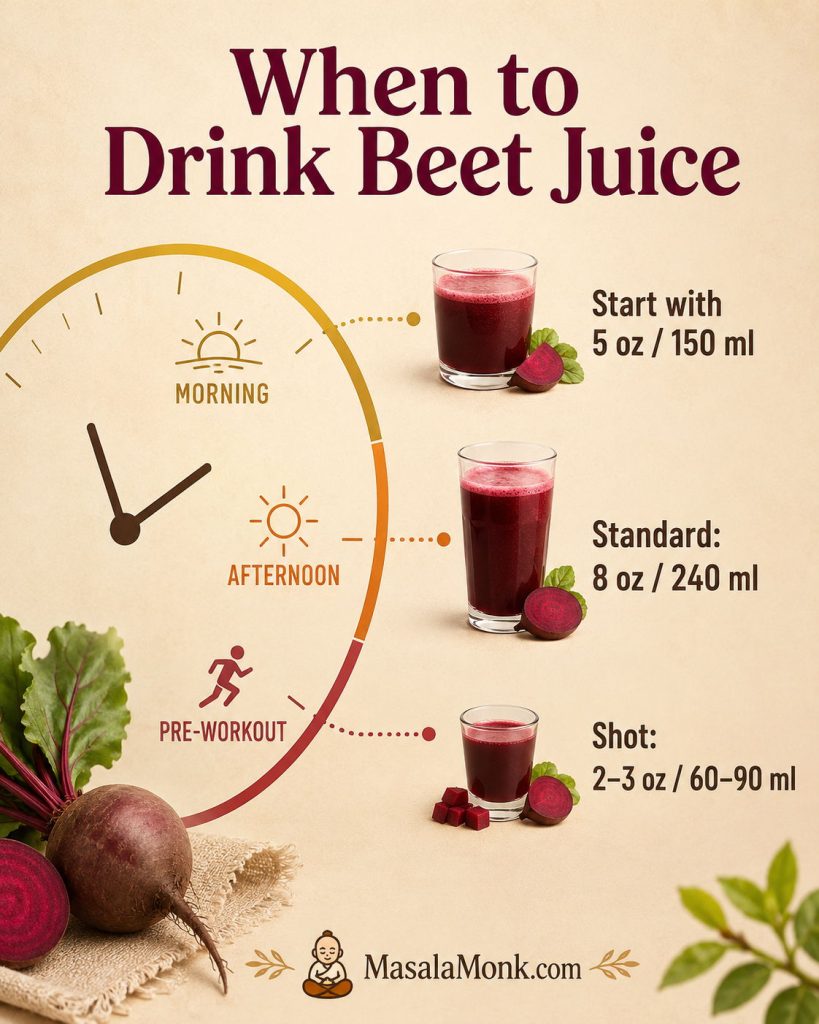
Timing and serving-size guide for beet juice with morning, afternoon, pre-workout cues and 5 ounce, 8 ounce, and 2–3 ounce serving sizes.
Start with 5 oz of beet juice, then adjust the timing and portion based on your routine, taste, digestion, and reason for drinking it.
  • Morning: a simple option with or after breakfast, especially if raw juice bothers your stomach on its own.
  • Afternoon: useful when you want something cool, colorful, and caffeine-free.
  • Before a workout: try a small strained serving first; avoid a large pulpy glass right before training.
  • Night: fine for many people, but skip it late if it bothers your digestion or makes you wake up to use the bathroom.
  • Daily: keep portions reasonable and rotate with whole vegetables, fruits, smoothies, meals, and other drinks.
  • Small serving: 5 oz / 150 ml
  • Standard serving: 8 oz / 240 ml
  • This recipe yield: about 16–18 oz / 475–530 ml
  • Beet shot: 2–3 oz / 60–90 ml

You do not need to turn beet juice into a daily project to enjoy it; a good glass now and then still counts. Occasional beet juice and daily beet juice are not the same decision, especially if you have blood pressure, kidney-stone, digestive, or blood sugar concerns.

After drinking beet juice, some people notice pink or red urine or stool. This is often called beeturia and can happen after eating or drinking beets. It is usually harmless, but if you are unsure whether the color is from beets or something else, or if you have pain or unusual symptoms, seek medical advice.

The sections below cover storage and safety because homemade beet juice is raw, deeply pigmented, and more concentrated than eating a few slices of beetroot.

Fresh Beets vs Canned Beets vs Beet Powder

Fresh raw beetroot gives the best glass: brighter color, clearer flavor, and a more refreshing finish. Canned, cooked, pickled, and powdered beets can help in a pinch, but they each move the drink away from that just-made taste.
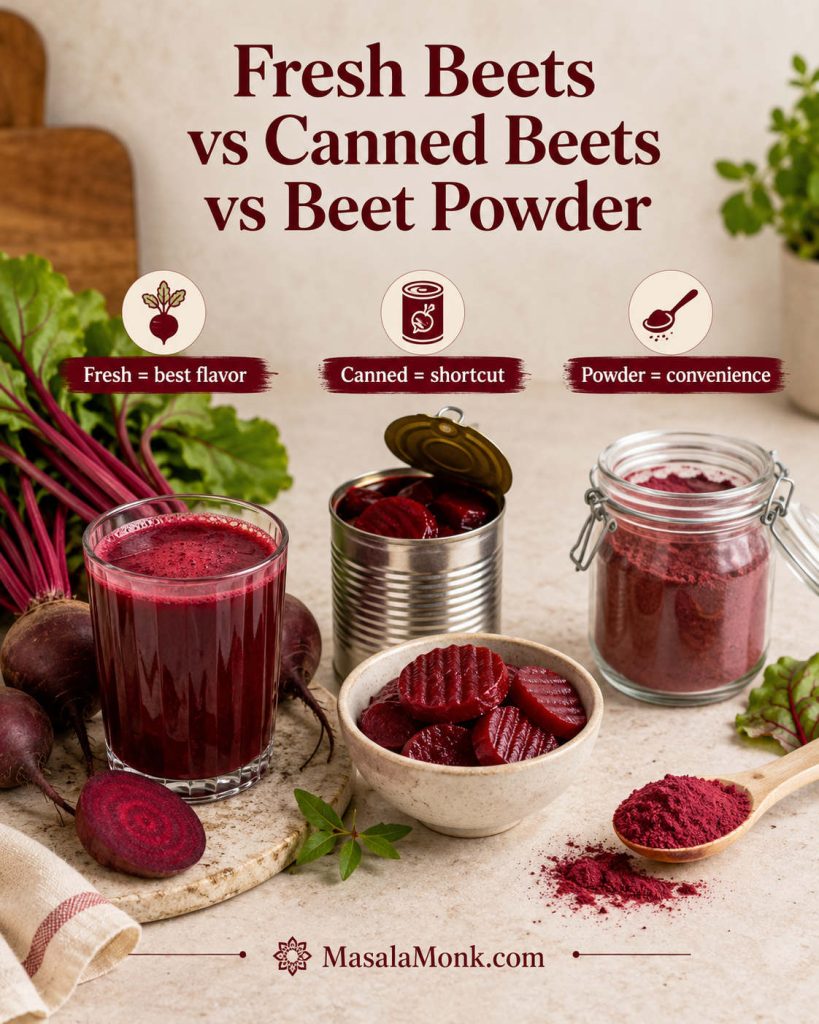
Comparison of fresh beets with beet juice, canned beets in a can and bowl, and beet powder in a jar and wooden spoon.
Fresh beets give homemade beet juice the brightest flavor; however, canned beets and beet powder can still work when convenience matters more.
OptionCan you use it?Best use
Fresh raw beetsYes, best choiceMain beet juice recipe
Cooked beetsYes, blender onlyEmergency shortcut, softer flavor
Canned beetsPossibleBlended shortcut; check salt, sugar, and additives
Pickled beetsNot idealOnly if you want a vinegar-style drink
Beet powderDifferent productConvenience drink, not the same as fresh juice

If you use canned beets, drain them well and check the label. Some canned beets contain added salt or sugar, and pickled beets contain vinegar that will completely change the flavor. If you use beet powder, treat it as a separate convenience drink rather than a true fresh beet juice recipe.

What to Do With Beet Juice Pulp

Beet pulp is not glamorous, but it does not have to go straight into the bin. If you use a juicer or strain the blender mixture, you will have pulp left behind. It is fibrous and deeply colored, so use it in small amounts where the color and earthiness make sense. Think of it as a small add-in, not the main event.

  • Add small amounts to veggie patties or fritters.
  • Stir into soups or stews where the color makes sense.
  • Mix into muffins, quick breads, or pancakes.
  • Blend into hummus or bean dips.
  • Freeze in small portions for later cooking.
  • Compost it if you do not want to cook with it.

Remember that beet pulp stains. If the pulp includes ginger and lemon, use it in recipes where those flavors will not feel out of place.

How to Store Beet Juice

Just-made beet juice loses its sparkle quickly, so treat leftovers gently. It tastes best right after making, when the lemon is sharp, the ginger still tastes lively, and the beet flavor has not dulled. Because homemade raw juice is not pasteurized, it also needs careful storage if you are not drinking it right away.
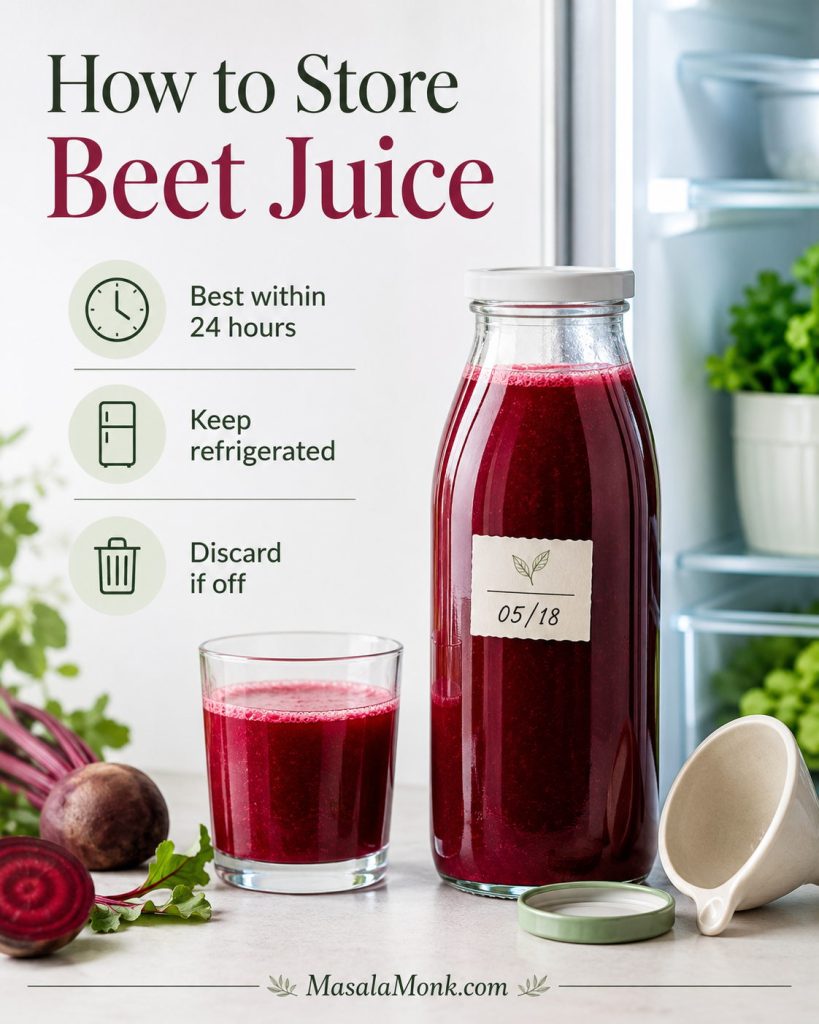
Storage guide showing beet juice in a sealed glass bottle with a date label beside a glass of juice near an open refrigerator.
Since homemade raw juice is not pasteurized, the safest flavor window is short: chill it quickly, seal it well, and drink it soon.
  • Best flavor: drink immediately.
  • Best refrigerated quality: within 24 hours.
  • Maximum practical home storage: 24–48 hours in a clean airtight glass bottle in the refrigerator.
  • Room temperature: do not leave fresh juice out for more than 2 hours.
  • Refrigerator temperature: keep chilled at 40°F / 4°C or colder.
  • Serving after storage: shake or stir before drinking.
  • Discard if: it smells sour, fizzy, fermented, moldy, or off.

You can wash and chop the beetroot, carrot, apple, and cucumber a few hours ahead and refrigerate them in a covered container. Juice or blend just before serving for the liveliest flavor.

The FDA has a useful overview of fresh juice safety, especially because homemade raw juice is not pasteurized.

You can freeze beet juice in ice cube trays or small containers, but the flavor and texture will be less crisp after thawing. Frozen beet juice cubes are better for smoothies than for drinking plain.

Side Effects and Who Should Be Careful

For most people, a moderate glass is simply a colorful way to enjoy beetroot. Still, start small the first time, especially if you plan to drink it often. Beet juice has a strong color, strong flavor, and for some people, a strong digestive effect too.
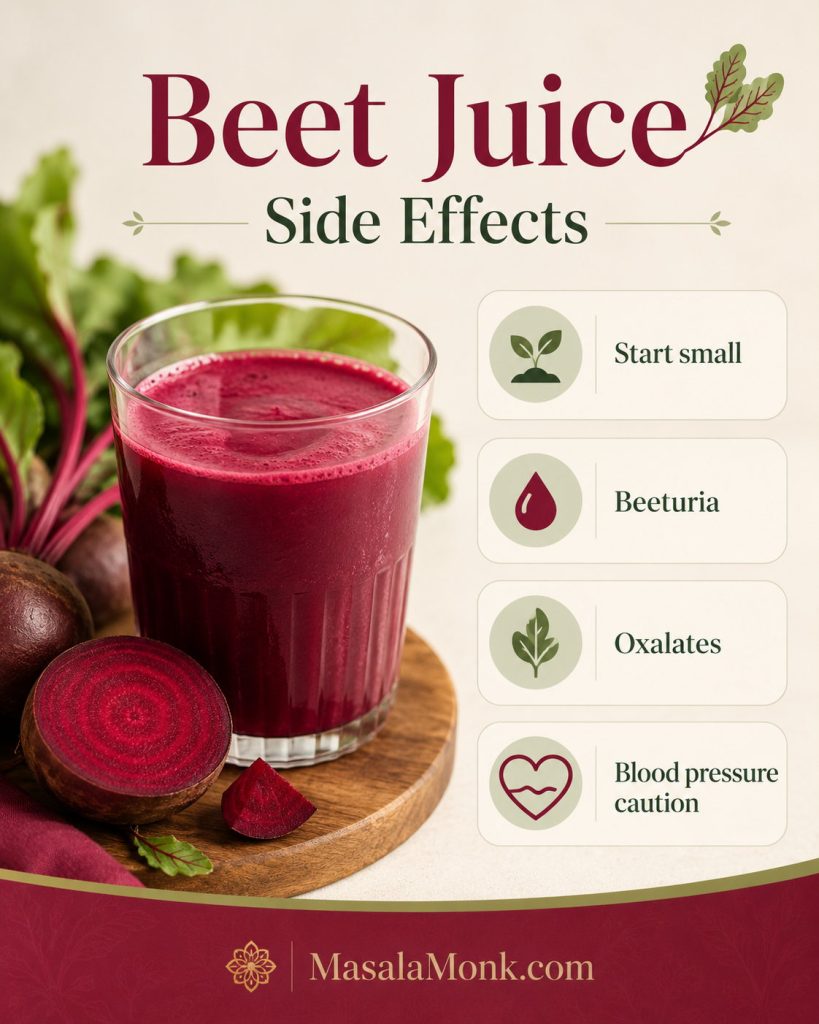
Beet juice side effects graphic with a glass of beet juice and safety cards for start small, beeturia, oxalates, and blood pressure caution.
Start with a modest serving if beet juice is new to you, especially if oxalates, digestion, beeturia, or blood pressure changes are concerns.
  • Red or pink urine/stool: Beet juice can cause beeturia, a temporary red or pink color change after eating or drinking beets.
  • Kidney-stone concerns: Beets contain oxalates, so people prone to certain kidney stones should be cautious.
  • Low blood pressure or medication: If you take blood pressure medication or have low blood pressure, ask a healthcare professional before drinking beet juice regularly.
  • Digestive sensitivity: Start with a smaller serving if raw juices bother your stomach.
  • Blood sugar management: If you manage blood sugar, fruit-heavy beet juices may need smaller portions or more vegetable-forward formulas.

For more detail on oxalates and beetroot, see MasalaMonk’s guide to beetroot and kidney health.

Beet Juice Troubleshooting

Beet juice is forgiving if you know what to adjust. If the batch did not taste the way you expected, do not throw it out yet. Most problems are fixable with lemon, cucumber, ice, apple, or another pass through the strainer.
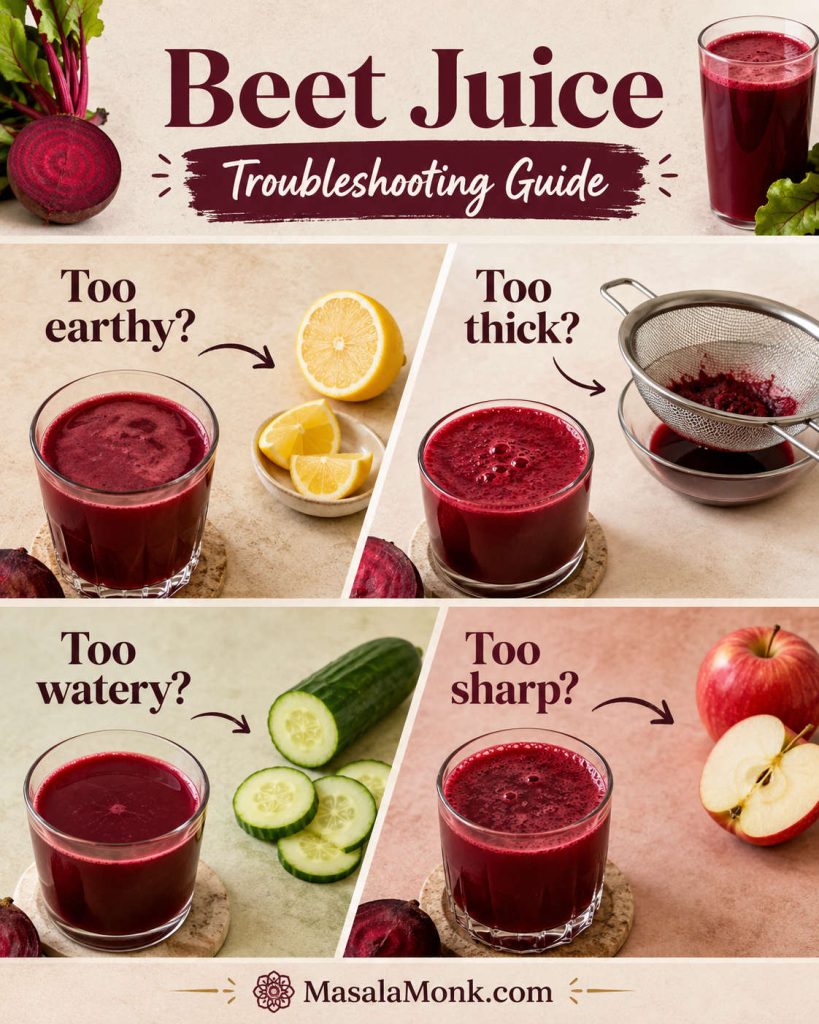
Troubleshooting guide for beet juice with panels for too earthy, too thick, too watery, and too sharp, plus lemon, cucumber, apple, and strainer cues.
A failed batch is usually adjustable: sharpen a dull glass, lighten a heavy one, dilute harsh ginger, or strain again for smoother texture.
IssueWhy it happenedFix nowFix next time
Too earthyToo much beet or not enough acid/sweetnessAdd lemon, orange, apple, or cucumber juiceUse less beet and more carrot/apple
Too thickBlender juice was not strained enoughStrain again through cheesecloth or a nut milk bagChop smaller, blend smoother, and squeeze pulp well
Too wateryToo much water in the blenderAdd lemon, ginger, or a little more fresh juiceStart with ½ cup / 120 ml water only
Too sharpToo much ginger or lemonDilute with apple, carrot, cucumber, or iceStart with ½ inch ginger
Too sweetToo much apple, orange, pineapple, or pomegranateAdd lemon, cucumber, celery, or gingerUse the low-sugar variation
Separates in the glassFresh juice naturally separatesStir or shakeThis is normal

FAQs About Beet Juice

These are the small questions that usually come up after the first batch.

Juicer or blender: which is better for beet juice?

A juicer makes lighter, smoother juice without added water. A blender works well if you do not own a juicer, but the juice needs water and straining.

How much water do you add when making beet juice in a blender?

Start with ½ cup / 120 ml cold water. Add more only if the blender needs help, up to 1 cup / 240 ml total. Too much water makes the juice taste thin.

How do you make beet juice without a juicer?

Blend chopped beetroot, carrot, apple, lemon, ginger, and cold water until smooth. Then strain through a nut milk bag, cheesecloth, or fine mesh strainer and squeeze the pulp well.

Should you use raw or cooked beets for juice?

Raw beets are best for fresh juice. Cooked beets can be blended in a pinch, but they taste softer and less crisp. They are not ideal for juicing.

Do you need to peel beetroot before juicing?

Peeling is optional if the beetroot is fresh, tender-skinned, and scrubbed very well. Peel it if the skin is rough, dirty, waxed, or bitter.

How many beets make one glass of juice?

One medium-large beet, about 225–250 g / 8–9 oz, combined with carrot, apple, lemon, and ginger usually makes about two standard glasses of mixed beet juice. A medium beet on its own may give roughly ⅓–½ cup juice in many home juicers, though freshness, size, and machine efficiency can change that noticeably.

Why does beet juice taste earthy?

Beetroot naturally has an earthy, mineral-like flavor. Apple, carrot, lemon, ginger, cucumber, orange, and pineapple all help balance that flavor.

How do you make beet juice sweeter without sugar?

Add apple, carrot, orange, pineapple, or pomegranate. Apple and carrot are the easiest everyday choices because they sweeten the drink without overpowering the beetroot.

Is it okay to drink beet juice every day?

You can drink it regularly if it suits you, but you do not need to make it a daily habit to enjoy the recipe. Keep portions moderate, especially if you have kidney-stone risk, low blood pressure, digestive sensitivity, blood sugar concerns, or take blood pressure medication.

What is the best time to drink beet juice?

Morning is simple, afternoon works when you want something cool and caffeine-free, and pre-workout use is best tested with a small strained serving before you make it a routine.

Why does beet juice turn urine or stool red?

Beets can turn urine or stool pink or red. This is common after eating or drinking beetroot. If you are unsure whether the color is from beets, or if you have pain or unusual symptoms, seek medical advice.

What should you know about beet juice and blood pressure?

Beetroot contains dietary nitrates, so occasional juice is one thing; a daily habit is worth discussing with your healthcare professional if you take blood pressure medication or tend to run low.

How long does homemade beet juice keep?

Homemade beet juice tastes best immediately. Refrigerate it in a clean airtight bottle and drink within 24 hours for best flavor, or within 24–48 hours at most.

Can you use canned beets in beet juice?

You can blend canned beets with water, apple, lemon, and ginger in a pinch, but the flavor will be softer and less fresh than raw beetroot. Check the can for added salt, sugar, or vinegar.

How do you turn this recipe into a beet juice shot?

For a beet shot, use less apple and cucumber, keep the beet, lemon, and ginger more concentrated, and serve just 2–3 oz / 60–90 ml at a time. Beet shots are intense, so start small.

Tried it with apple, orange, cucumber, or ginger? Share which version finally made beet juice work for you — the best fixes often come from small adjustments.

Beet Juice Recipe

This is the balanced base version: beetroot for color, carrot and apple for sweetness, lemon for brightness, ginger for lift, and cucumber if you want a cooler, easier sip.

Make it in a juicer for crisp, smooth juice, or use a blender and strain it. Once you like the base, adjust lemon, apple, cucumber, or ginger to make the glass sharper, sweeter, lighter, or spicier.

The finished juice should pour easily, taste sweet-earthy and tart, and finish with gentle ginger warmth.
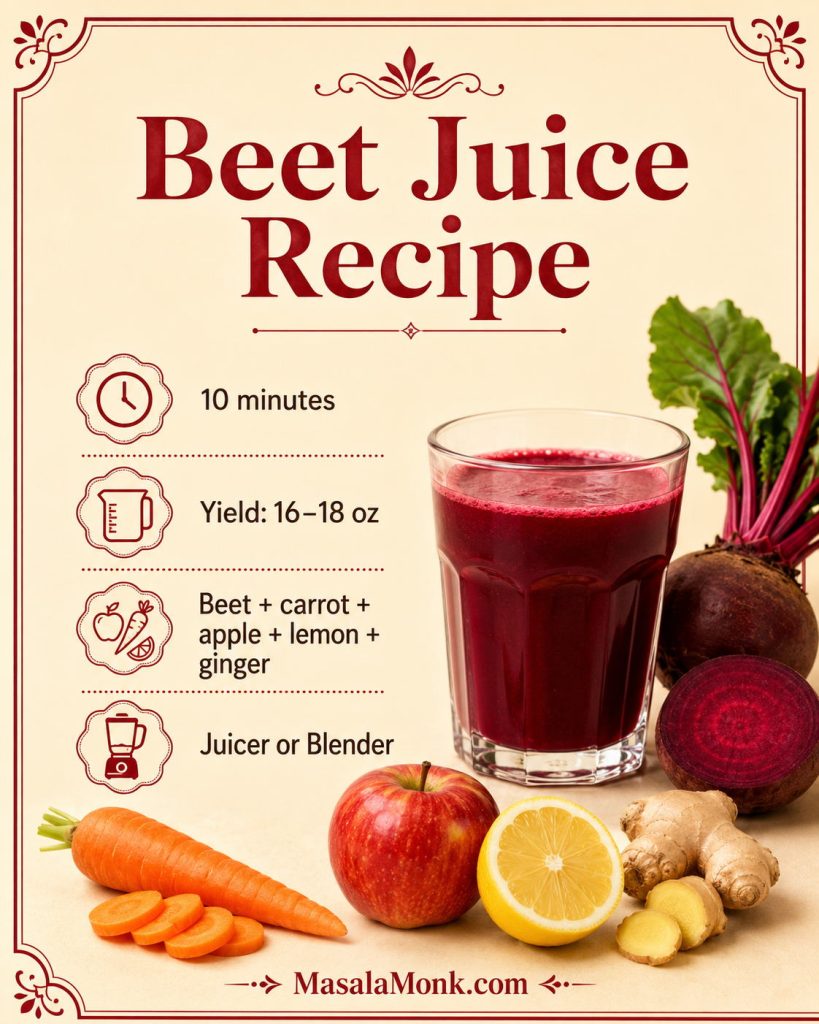
Saveable beet juice recipe card with a glass of beet juice, beetroot, carrot, apple, lemon, ginger, 10 minutes, 16–18 ounce yield, and juicer or blender method.
Save this beet juice recipe formula for the essentials: beetroot, carrot, apple, lemon, and ginger, made in either a juicer or a blender.
Prep Time10 minutes
Total Time10 minutes
Servings2 glasses
YieldAbout 16–18 oz / 475–530 ml

Estimated nutrition: One 8 oz / 240 ml serving is roughly 135–150 calories, with about 32–36 g carbohydrates depending on produce size and juicing method. Most sweetness comes naturally from the apple, carrot, and beetroot. Strained juice has much less fiber than whole produce or an unstrained smoothie.

Equipment: juicer or blender, fine mesh strainer or nut milk bag, knife, cutting board, and a clean bottle or jar if storing.

Ingredients

  • 1 medium-large raw beetroot or 2 small beets, about 225–250 g / 8–9 oz
  • 2 medium carrots, about 120–150 g / 4–5 oz
  • 1 large apple, about 170–200 g / 6–7 oz
  • ½ lemon, about 15–20 ml juice
  • ½–1 inch fresh ginger, about 5–10 g
  • ½ small cucumber, optional, about 75–100 g / 3–4 oz
  • ½–1 cup cold water, blender method only, 120–240 ml
  • Ice, to serve

Juicer Method

  1. Wash and scrub the beetroot, carrots, apple, cucumber, lemon, and ginger.
  2. Trim the beetroot and peel it if the skin is rough, waxed, or not fully clean.
  3. Cut the beetroot, carrots, apple, cucumber, and ginger to fit your juicer chute.
  4. Juice the beetroot, carrots, apple, cucumber, and ginger, alternating hard and soft produce as needed.
  5. Stir in the lemon juice.
  6. Pour over ice and drink immediately.

Blender Method

  1. Chop the beetroot, carrots, apple, cucumber, and ginger into small pieces.
  2. Add them to a blender with ½ cup / 120 ml cold water and the lemon juice.
  3. Blend on high for 45–60 seconds, until smooth. Add more water only if needed, up to 1 cup / 240 ml total.
  4. Pour the mixture through a nut milk bag, cheesecloth-lined strainer, or fine mesh strainer.
  5. Let it drain for 2–5 minutes, then press or squeeze the pulp to extract the juice.
  6. Optional: add 2–3 tablespoons / 30–45 ml cold water to the squeezed pulp, stir or briefly blend, then strain once more for a little extra yield.
  7. Serve over ice.

Notes

  • For a milder glass, use half a beet and increase the apple or carrot.
  • Use green apple for a sharper juice or red apple for a sweeter one.
  • For a lighter flavor, add cucumber.
  • For a sharper flavor, use the full inch of ginger and extra lemon.
  • If using a blender, strain the mixture for true beet juice. Unstrained beet juice will be thicker and smoothie-like.
  • Drink immediately for best flavor, or refrigerate in a clean airtight glass bottle for 24–48 hours.
  • For regular use or medical concerns, read the safety section above.

Once the recipe is made, serve the juice cold, taste before adjusting, and keep the glass balanced enough that it feels like a drink you chose — not a health chore.
Hand placing a glass of homemade beet juice on a kitchen counter with a bottle of juice, beetroot, apple slices, ginger, and herbs nearby.
A good homemade beet juice should taste balanced enough to sip slowly, not like something you have to force down for health reasons.

Back to top

Posted on 7 Comments

10 Low Carb Chia Pudding Recipes for Weight Loss (Keto, High-Protein, Dairy-Free)

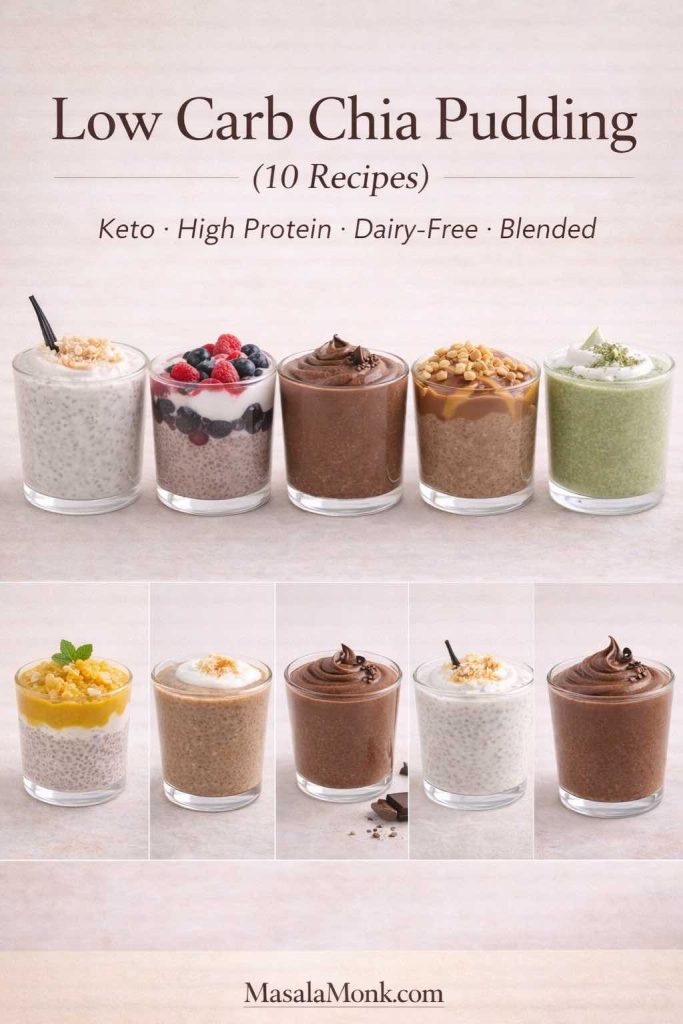
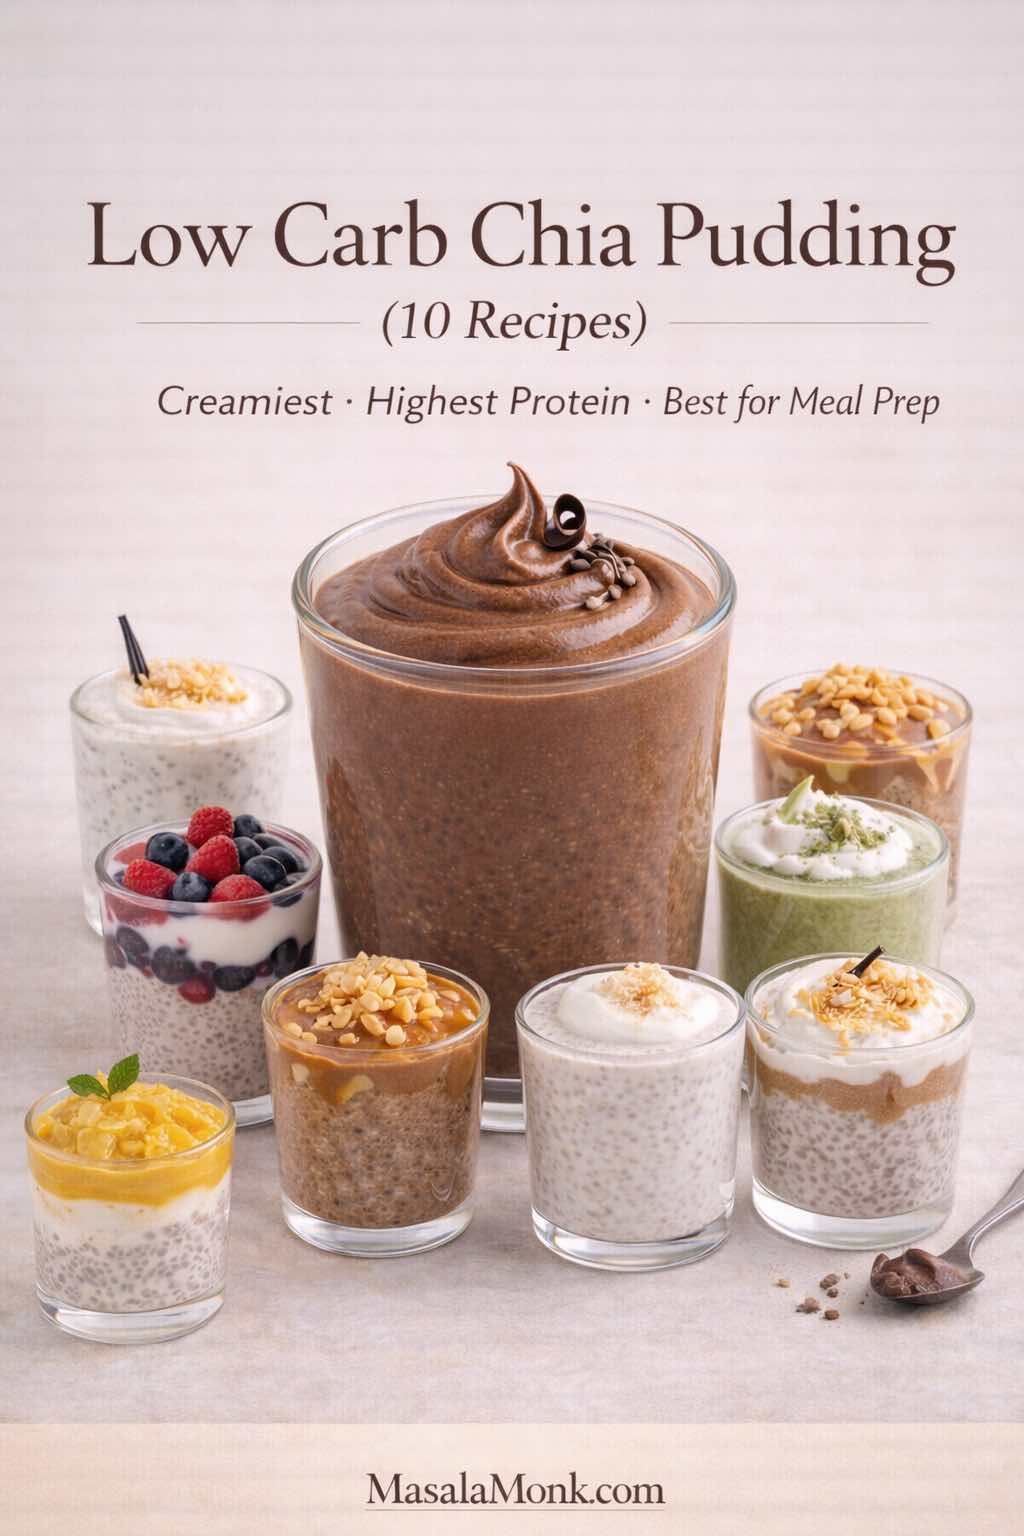
Cover image showing a premium glass jar of low carb chia pudding with a smooth whipped topping on a warm-cream seamless background. Editorial food photography style for “Low Carb Chia Pudding” featuring 10 recipes including keto, high protein, dairy-free, and blended options, with MasalaMonk.com branding.

Chia pudding has a way of sneaking into your routine and then refusing to leave. At first, it feels like a clever trick—stir a few spoonfuls of tiny seeds into milk, refrigerate, and wake up to a spoonable pudding. Before long, though, you realize a simple jar of low carb chia pudding can be more than a trend: it’s a dependable breakfast that doesn’t demand morning effort, a snack that travels well, and a dessert-like bowl that still fits a lighter day.

Why chia pudding works as breakfast, snack, and “healthy dessert”

What makes it especially useful is how easily you can shape it around your cravings. Some mornings you’ll want something light and clean—pudding with almond milk, a little vanilla, and berries. Other times, you’ll prefer a thick, creamy version that leans on Greek yogurt and tastes closer to cheesecake filling. And when your sweet tooth shows up, chocolate chia pudding, cacao chia pudding, or chocolate peanut butter chia seed pudding can feel genuinely comforting without tipping into a sugar spiral.

Collage-style image showing ten low carb chia pudding cups in a clean grid with the heading “Low Carb Chia Pudding (10 Recipes)” and the line “Keto • High Protein • Dairy-Free • Blended.” Features a variety of flavors including vanilla, berry, chocolate, peanut butter, matcha, mango, and mousse, with MasalaMonk.com in the footer.
All 10 low carb chia pudding recipes featured in this post at a glance—creamy keto cups, high protein Greek yogurt jars, dairy-free options, fruit layers, and blended mousse for a smooth pudding texture.

Equally important, chia pudding adapts to different eating styles without forcing you into one “right” way. If you’re leaning keto, coconut milk makes a rich keto pudding base while sweetness stays minimal. If you’re aiming for a paleo-friendly bowl, you can skip dairy and still get a creamy texture with coconut milk or almond milk plus nut butter. Meanwhile, if you’re chasing a higher-protein breakfast, chia pudding with protein powder—or a low carb chia pudding with Greek yogurt—turns the jar into something that feels like a real meal.

If you want a deeper foundation on how chia fits into weight-loss habits—portions, consistency, and simple ways to keep it effortless—this companion guide is worth a read: The Ultimate Guide to Chia Pudding for Weight Loss.

Now, before we jump into the ten best variations, let’s lock in the base. Once you get the ratio and texture right, every flavor becomes easier, smoother, and more repeatable.

Also Read: Garlic & Paprika Cabbage Rolls (Keto-Friendly Recipes) – 5 Bold Savory Twists


Low Carb Chia Pudding for Weight Loss: Why It Works So Well

For weight loss, the best breakfasts explain themselves later—when you realize you didn’t spend the whole morning thinking about snacks. That’s exactly where low carb chia pudding shines: it’s simple, satisfying, and surprisingly good at keeping your appetite calm between meals.

Why chia pudding keeps you full longer

Chia helps in a very practical way: when it hydrates, it turns your milk into a thick, spoonable gel. Because of that texture, you naturally eat more slowly, and the jar tends to feel more substantial than it looks—especially compared to breakfasts that disappear in three bites.

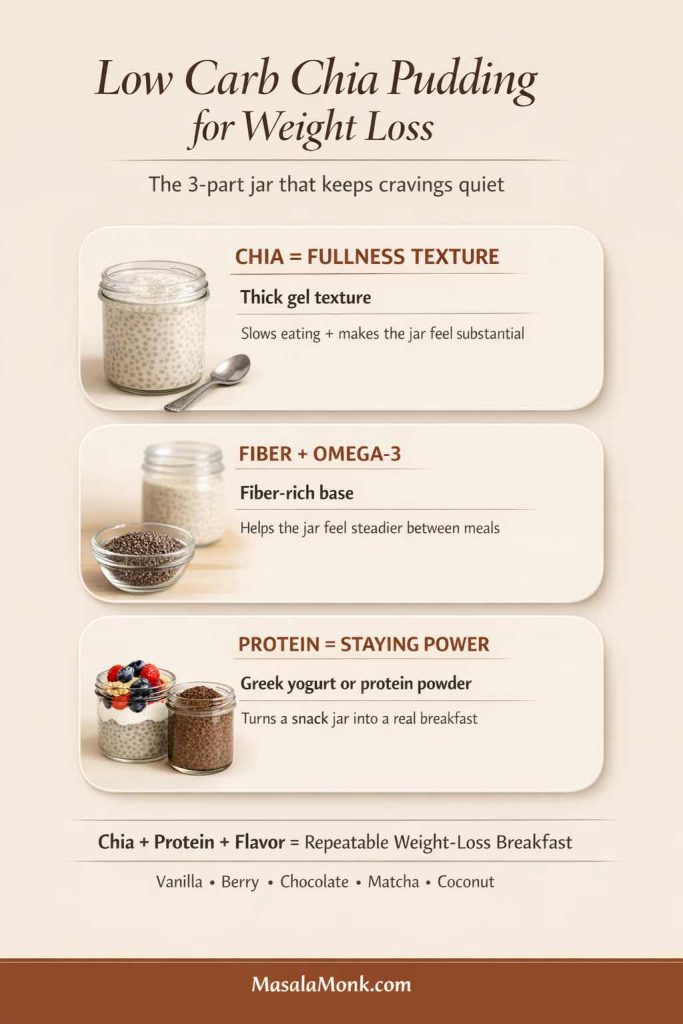
Infographic titled “Low Carb Chia Pudding for Weight Loss” explaining why it works: chia creates thick gel texture that slows eating, chia provides fiber + omega-3, and adding protein (Greek yogurt or protein powder) boosts staying power. Includes takeaway “Chia + Protein + Flavor = repeatable weight-loss breakfast” and MasalaMonk.com in the footer.
Why low carb chia pudding works so well: the gel texture slows eating, fiber helps the jar feel steadier between meals, and protein (Greek yogurt or protein powder) is the upgrade that turns it into a true breakfast—not just a snack.

At the same time, chia is naturally fiber-rich and contains omega-3 fats, which is part of why it’s such a popular base for a steady “grab-and-go” breakfast. If you want a clean, evidence-based overview, Harvard’s Nutrition Source has a helpful summary on chia seeds nutrition (fiber + omega-3). Then, if you like checking calories, macros, or serving-size details, you can cross-reference with the USDA chia seed nutrition data.

The real upgrade is protein

Still, satisfaction isn’t only about chia. Protein is the piece that makes a jar feel like a meal—which is why “pudding and Greek yogurt,” “chia seed and Greek yogurt pudding,” and “chia pudding with protein powder” are such common staples. When your breakfast includes a solid protein anchor, it tends to feel steadier and more complete, so you’re less likely to start grazing out of habit.

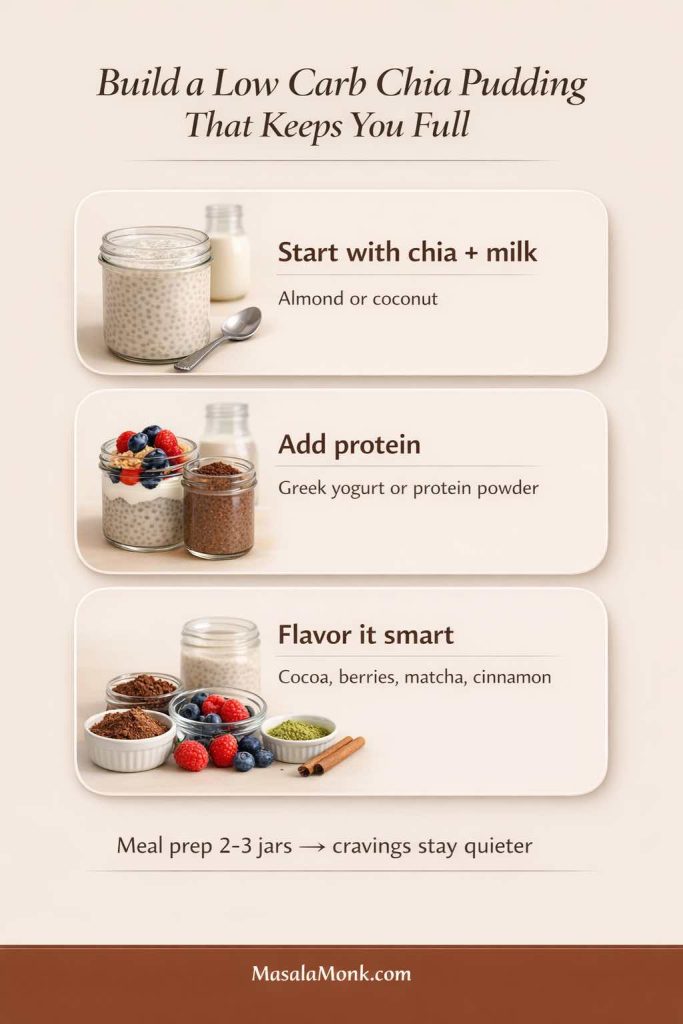
Three-step infographic showing how to build a low carb chia pudding that keeps you full. Step 1: start with chia + milk (almond or coconut). Step 2: add protein (Greek yogurt or protein powder). Step 3: flavor it smart (cocoa, berries, matcha, cinnamon). Includes note “Meal prep 2–3 jars → cravings stay quieter” and MasalaMonk.com in the footer.
Use this quick builder to make low carb chia pudding feel “meal-level”: start with chia + milk, add protein (Greek yogurt or protein powder), then flavor it with cocoa, berries, matcha, or cinnamon. Prep 2–3 jars at once and you’ve got a simple routine that stays satisfying all week.

If your mornings often end with cravings, switching to a high protein & low carb chia pudding is one of the easiest upgrades: keep the chia base, then build in protein with Greek yogurt (thick and creamy) or protein powder (especially in chocolate versions). For a broader framework that pairs perfectly with a chia routine, this guide is a strong companion: how to eat 100 grams of protein a day.

So yes—chia helps. Even better, the best results usually come from the combination: chia for texture and fiber, protein for staying power, and flavor choices you genuinely look forward to eating.

Also Read: Eggless Yorkshire Pudding (No Milk) Recipe


Low Carb Chia Pudding Base Recipe (Perfect Ratio, No Clumps)

Everything starts here. Whether you’re making keto chia pudding, chia pudding paleo, dairy free chia pudding, or a blended chia pudding mousse, the base method stays the same.

The basic chia pudding ratio (and how to adjust it)

For a classic, spoonable base:

  • 3 tablespoons chia seeds (about 36–40 g)
  • 1 cup / 240 ml liquid (almond milk, coconut milk, dairy milk, oat milk, etc.)
  • A pinch of salt
  • Optional: ½ teaspoon vanilla
  • Optional: sweetener to taste
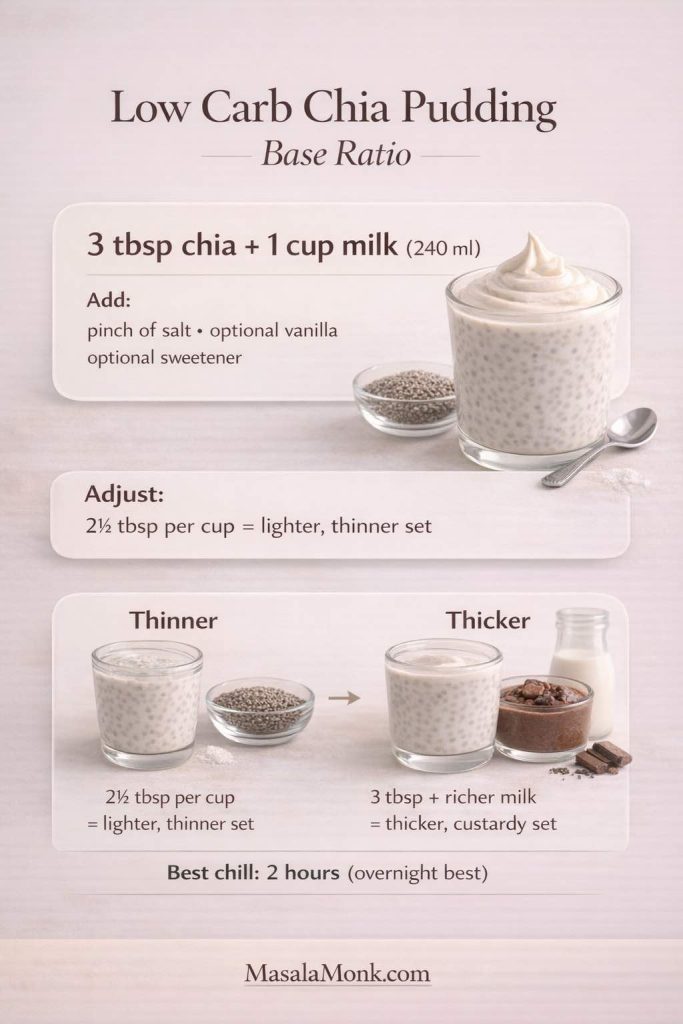
Infographic showing the low carb chia pudding base ratio: 3 tbsp chia seeds + 1 cup milk (240 ml), with add-ins (pinch of salt, optional vanilla, optional sweetener). It also shows how to adjust thickness: 2½ tbsp per cup for a lighter thinner set, or 3 tbsp plus richer milk for a thicker custardy set. Includes “Best chill: 2 hours (overnight best)” and MasalaMonk.com footer.
Here’s the dependable low carb chia pudding base ratio: 3 tablespoons chia to 1 cup milk (240 ml). Use 2½ tablespoons for a lighter set, or keep 3 tablespoons and switch to a richer milk (like canned coconut milk) for a thicker, custardy chia pudding—then chill at least 2 hours (overnight is best).

That ratio gives you a thick, pudding-like texture—great for low carb chia pudding cups, a chia pudding glass, or a single serve chia pudding jar. If you prefer it thinner, drop to 2½ tablespoons chia per cup of liquid. Conversely, if you like a dense, custardy texture, keep 3 tablespoons and use a richer liquid like canned coconut milk.

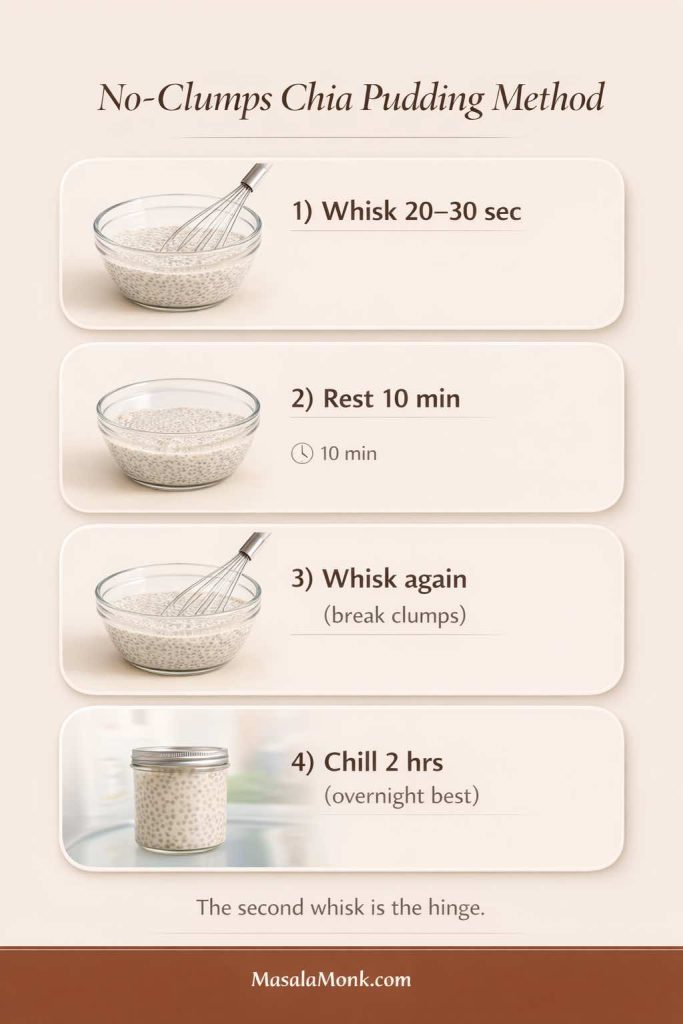
The mixing pattern that prevents clumps

This is the method that makes the difference between “silky” and “why is it lumpy?”

  1. Add chia seeds to the liquid, plus salt and vanilla (and sweetener, if using).
  2. Whisk vigorously for 20–30 seconds.
  3. Let it sit for 10 minutes.
  4. Whisk again, thoroughly.
  5. Cover and refrigerate at least 2 hours; overnight is even better.

That second whisk is the hinge. It’s the moment when the seeds have started to hydrate but haven’t fully set yet, which means you can break up clumps before they lock in.

Step-by-step infographic titled “No-Clumps Chia Pudding Method” showing four steps: 1) whisk 20–30 seconds, 2) rest 10 minutes, 3) whisk again to break clumps, and 4) chill 2 hours (overnight best). Includes a bowl-and-whisk visual sequence, a jar chilling in the fridge, and the note “The second whisk is the hinge,” with MasalaMonk.com in the footer.
If your chia pudding turns lumpy, this is the fix: whisk well, rest 10 minutes, then whisk again before chilling. That second whisk breaks clumps right when the seeds start hydrating—so your low carb chia pudding sets smooth, thick, and spoonable instead of bumpy.

Quick chia pudding vs “instant” chia pudding

Chia needs time to hydrate, so it’s never truly instant in the way instant oats are. Still, you can make a quick low carb chia seed pudding when you’re pressed for time.

Use the same ratio, whisk well, do the 10-minute stir, and refrigerate for 30–45 minutes. It will be softer than overnight, yet it’s still spoonable—especially if you make it as chia pudding with yogurt or add protein powder.

Why soaking matters

Chia expands dramatically when it absorbs liquid. Because of that, it’s best eaten soaked rather than dry. If you want the reason in plain terms, this clinical case report shows what can happen when dry chia is swallowed without enough liquid: why chia should be soaked first.

Also Read: Crock Pot Chicken Breast Recipes: 10 Easy Slow Cooker Dinners (Juicy Every Time)


Choosing Your Liquid: Almond Milk, Coconut Milk, Oat Milk, and More

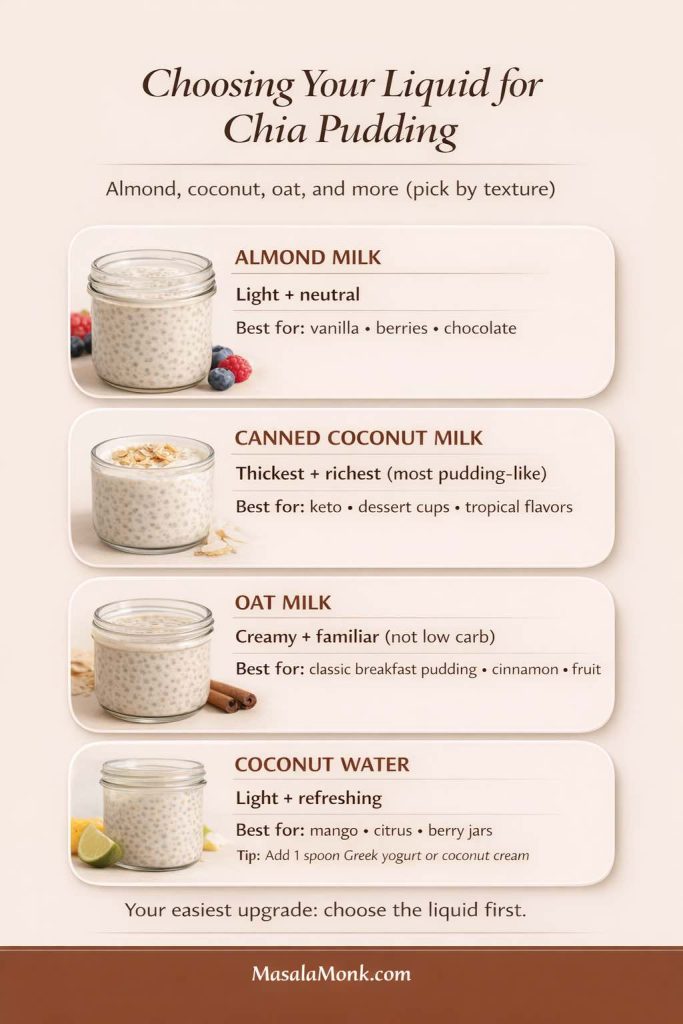
Liquid is the secret “ingredient” that decides whether your pudding tastes light, rich, tropical, or dairy-creamy. It’s also the easiest lever to pull depending on whether you’re going for keto pudding, paleo chia seed pudding, or a more classic breakfast pudding recipe.

Infographic titled “Choosing Your Liquid for Chia Pudding” showing four options with texture notes and best uses: almond milk (light + neutral), canned coconut milk (thickest + richest), oat milk (creamy + familiar, not low carb), and coconut water (light + refreshing) with a tip to add Greek yogurt or coconut cream. Includes “Your easiest upgrade: choose the liquid first” and MasalaMonk.com in the footer.
Your chia pudding texture is mostly decided by the liquid. Almond milk keeps it light and versatile, canned coconut milk makes the richest pudding-like set, oat milk gives a classic creamy breakfast feel (not low carb), and coconut water stays light and fruit-friendly—especially with a spoon of Greek yogurt or coconut cream.

Pudding with almond milk (clean, light, versatile)

Chia pudding with almond milk is a classic because it’s neutral and easy to customize. It’s also a natural base for low carb chia pudding and many keto-friendly variations. If you want a dedicated keto version built around almond milk, this is a strong reference recipe: keto chia pudding with almond milk.

Coconut milk for chia pudding (thickest texture, richest feel)

If you want your chia pudding to taste like real pudding, use canned coconut milk. It’s also a favorite for keto chia pudding coconut milk versions because the fat content naturally boosts satisfaction. For a paleo chia seed pudding approach, coconut milk is equally useful.

A small detail helps a lot here: canned coconut milk varies. Some are thin; others are thick. If yours pours like cream, whisk in a little water so it hydrates evenly. That way you avoid dense, under-hydrated pockets.

Oat milk chia pudding (not keto, but creamy and familiar)

Oat milk makes a gentle, classic pudding flavor. It’s not low carb, so it’s best as an optional variation for non-keto readers who still want a healthy breakfast pudding.

Chia pudding with coconut water (light, refreshing, fruit-friendly)

Coconut water makes a lighter gel. It’s lovely with mango, citrus, and berries; however, it won’t feel as creamy. For a richer texture, add a spoon of Greek yogurt or a spoon of coconut cream before serving.

Also Read: Mozzarella Sticks Recipe (Air Fryer, Oven, or Fried): String Cheese, Shredded Cheese, and Every Crunchy Variation


Homemade vs Premade Chia Pudding (Cups, Mixes, and Convenience Options)

Sometimes you want the easiest option. That’s why premade chia pudding and premade chia seed pudding cups have become common grab-and-go items. A chia pudding cup can be a decent choice, especially if it keeps your day from derailing into ultra-processed snacks.

Infographic titled “Buying Premade Chia Pudding Cups” with a checklist: low added sugar, protein that fits breakfast, short ingredient list, real fats (not fillers), and texture you’ll enjoy. Photoreal scene shows unbranded chia pudding cups on a smooth counter with a spoon and a small bowl of chia seeds, plus the line “A good cup beats a random snack” and MasalaMonk.com in the footer.
If you’re buying premade chia pudding cups, a quick label check makes all the difference: keep added sugar low, choose a protein amount that works for breakfast, aim for a short ingredient list, and skip filler-heavy cups. Most importantly, pick a texture you’ll actually enjoy—because the best chia pudding cup is the one you’ll happily grab again.

If you’re choosing store-bought chia seed pudding cups, prioritize:

  • low or no added sugar,
  • a protein amount that makes sense for breakfast (if you want it to act like breakfast),
  • a short ingredient list,
  • and a texture you actually enjoy.

If you prefer to keep things homemade but fast, a chia pudding mix can work too. Some mixes are simply chia plus flavoring; others include sweeteners and thickeners. Even then, the most repeatable path is often a simple base batch plus flavor add-ins—cocoa, cinnamon, matcha, vanilla, fruit—so you can make multiple chia seed pudding cups in one go.

Also Read: Sourdough Starter Recipe: Make, Feed, Store & Fix Your Starter (Beginner Guide)


High Protein Chia Pudding: Greek Yogurt, Protein Powder, and Collagen

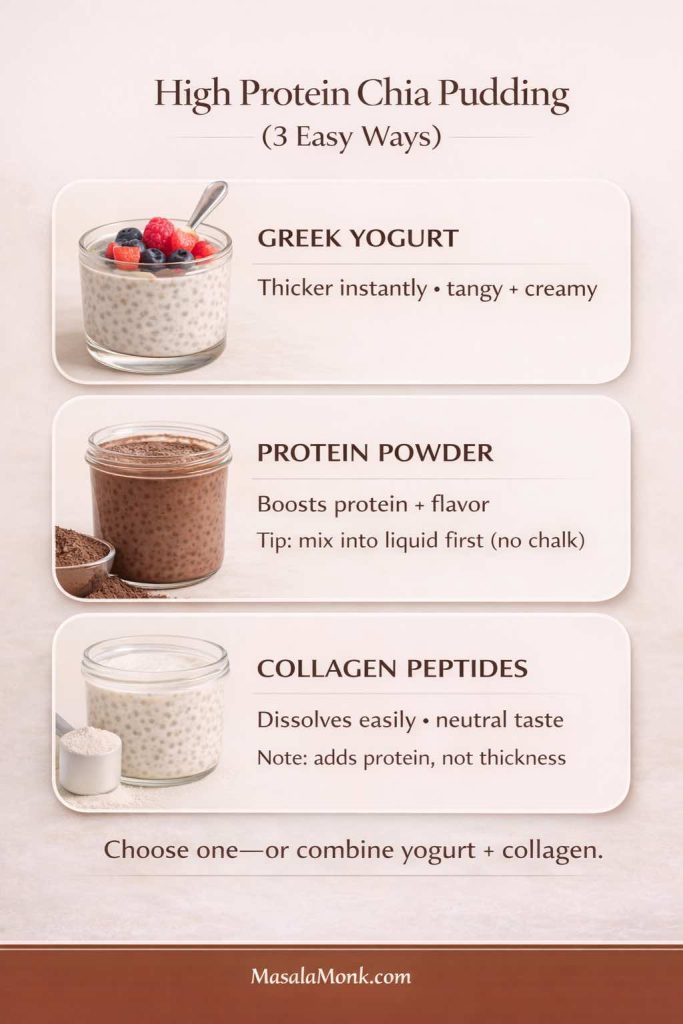
When people talk about protein chia pudding, they usually mean one of three styles:

  1. chia pudding with Greek yogurt
  2. chia pudding with protein powder
  3. chia collagen add-ins (often paired with yogurt)
Infographic titled “High Protein Chia Pudding (3 Easy Ways)” showing three options with photoreal jars: Greek yogurt (thicker instantly, tangy + creamy), protein powder (boosts protein + flavor with tip to mix into liquid first), and collagen peptides (dissolves easily, neutral taste; adds protein not thickness). Includes the line “Choose one—or combine yogurt + collagen” and MasalaMonk.com in the footer.
When you want high protein chia pudding, you’ve got three reliable routes: Greek yogurt for instant thickness and a creamy tang, protein powder for a bigger protein boost (best mixed into the liquid first so it stays smooth), or collagen peptides for an easy add-in that dissolves fast without changing flavor. Pick one—or combine yogurt + collagen for the most “meal-level” jar.
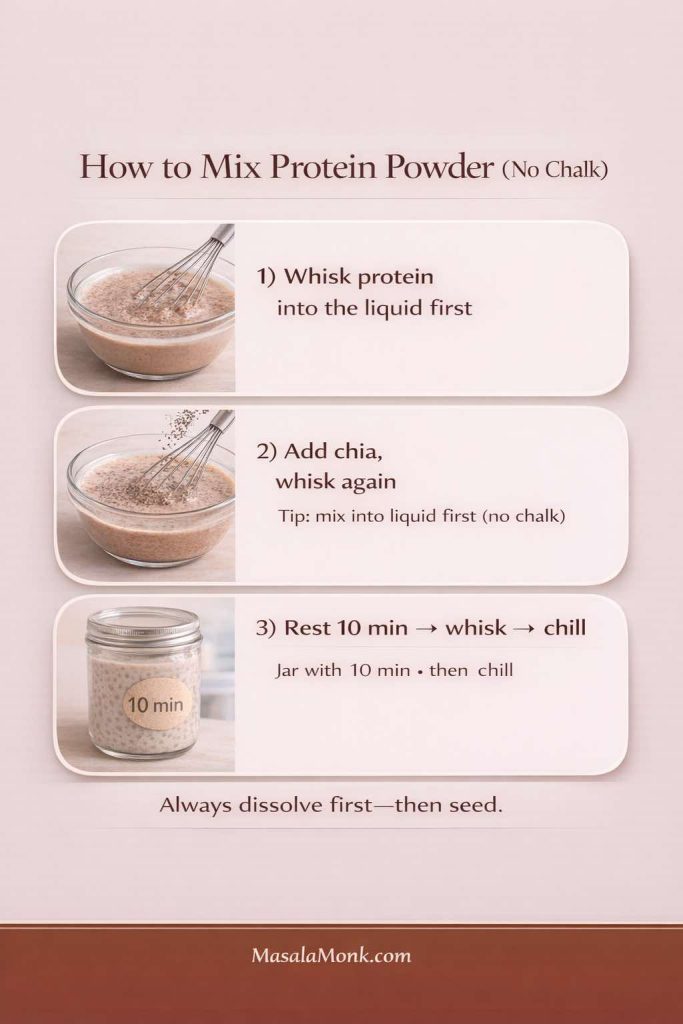
Step-by-step infographic titled “How to Mix Protein Powder (No Chalk)” showing three steps for smooth protein chia pudding: 1) whisk protein powder into the liquid first, 2) add chia seeds and whisk again, 3) rest 10 minutes, whisk, then chill. Includes the takeaway “Always dissolve first—then seed” and MasalaMonk.com in the footer.
The easiest way to avoid chalky protein chia pudding is to dissolve protein powder in the liquid first, then add chia and whisk again. After a 10-minute rest, give it one more whisk before chilling—this keeps the jar smooth, thick, and spoonable instead of gritty.

Greek yogurt thickens pudding instantly and adds a tang that makes chocolate, berries, vanilla, and peanut butter taste richer. Protein powder boosts protein and flavor, but it can turn chalky if it isn’t mixed properly. Collagen peptides dissolve easily and tend to be neutral, although they don’t thicken the same way chia does.

If you like a measured, realistic overview of collagen claims, this one is balanced: what collagen supplements can (and can’t) do.

If you want a complementary “drinkable breakfast” option that fits the same protein-forward routine, this is a natural companion: Greek yogurt shake recipes for a protein-packed breakfast.


10 Low Carb Chia Pudding Recipes (Keto, Paleo, Protein, Blended, Fruit)

Each recipe below makes 1–2 servings depending on appetite. For meal prep, multiply ingredients, then portion into chia pudding cups or jars. Meanwhile, if you’re building variety without extra work, make two or three bases at once: one almond milk jar, one coconut milk jar, and one Greek yogurt jar. That way, you’re never stuck eating the same flavor five days in a row.

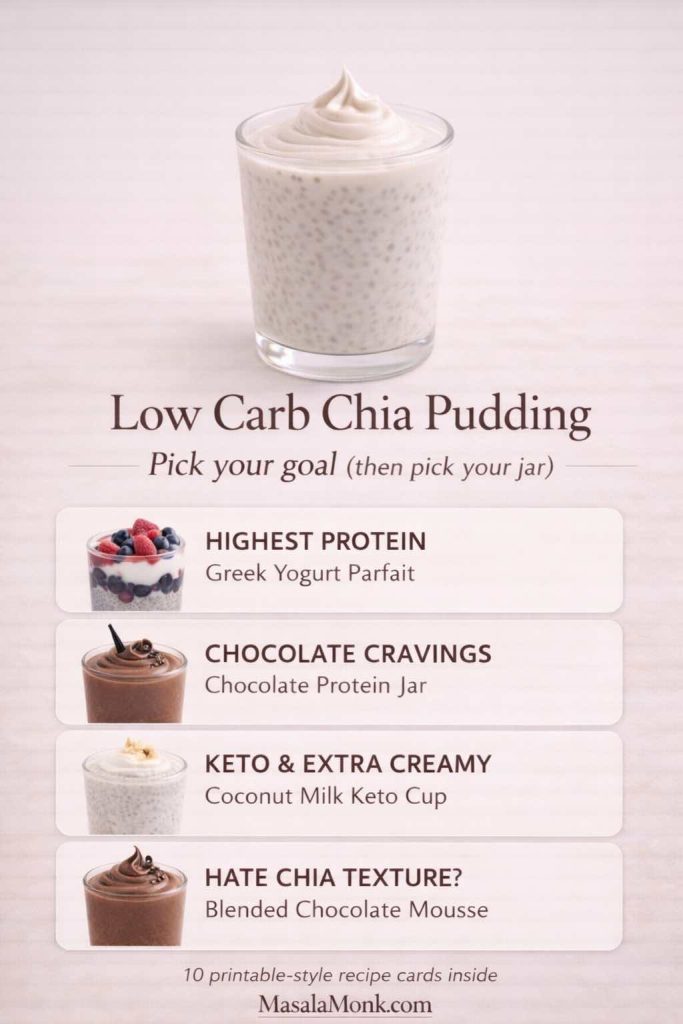
Goal-based chooser graphic for low carb chia pudding with a hero jar at the top and four labeled choices: “Highest Protein – Greek Yogurt Parfait,” “Chocolate Cravings – Chocolate Protein Jar,” “Keto & Extra Creamy – Coconut Milk Keto Cup,” and “Hate Chia Texture? – Blended Chocolate Mousse.” Clean editorial layout with MasalaMonk.com in the footer.
Not sure which jar to make first? Start with your goal: highest protein, chocolate cravings, extra-creamy keto, or blended mousse if you don’t like chia texture—then jump into the matching recipe below.

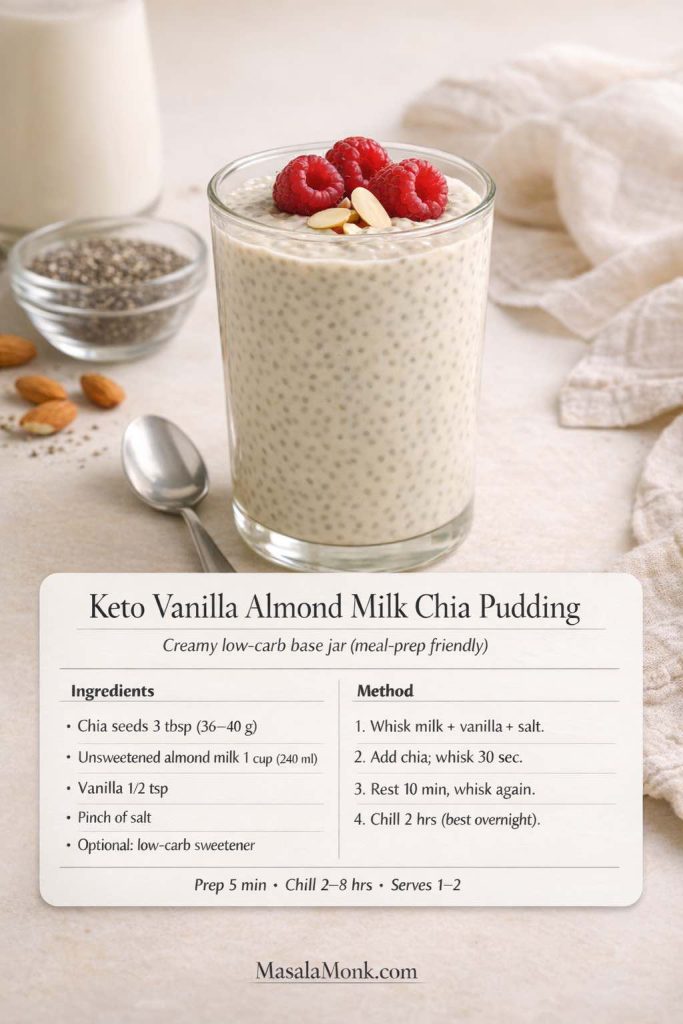
1) Keto Chia Pudding with Almond Milk (Vanilla Base That Never Fails)

This is the everyday low carb chia pudding that works as breakfast, snack, or a simple dessert. It’s also the best “starter” jar because it takes flavors well.

Ingredients (1–2 servings)

  • 3 tablespoons chia seeds
  • 1 cup unsweetened almond milk
  • ½ teaspoon vanilla extract
  • Pinch of salt
  • Optional sweetener: monk fruit/erythritol/stevia, to taste
Recipe card image of keto vanilla almond milk chia pudding in a glass topped with raspberries and sliced almonds, with ingredients and steps for a low carb chia pudding base. Includes chia-to-milk ratio, quick stir method, and prep/chill times, styled as a meal-prep friendly high-protein breakfast.
This keto vanilla almond milk chia pudding is the “base jar” you’ll use all week—creamy, low carb, and easy to meal prep. Make it overnight for the smoothest texture, then customize it after training with Greek yogurt or a scoop of protein powder, or keep it simple with berries and nuts for a quick fitness-friendly breakfast that actually satisfies.

Method

  1. In a bowl or jar, whisk almond milk, vanilla, salt, and sweetener (if using).
  2. Stir in chia seeds and whisk vigorously for 20–30 seconds.
  3. Let it rest 10 minutes, then whisk again until no clumps remain.
  4. Cover and refrigerate 2 hours or overnight.

Flavor variations

  • Add ½ teaspoon cinnamon for a warm “vanilla-cinnamon pudding” base.
  • Add a tablespoon of shredded coconut for coconut puddings recipes energy without needing extra sweetness.
  • Stir in 1–2 tablespoons of Greek yogurt right before serving for a creamier finish.

Toppings that keep it low carb
Chopped nuts, cacao nibs, a small handful of berries, or a spoon of nut butter.

If you want a dedicated keto version with extra detail, this internal recipe fits perfectly: keto chia pudding with almond milk.


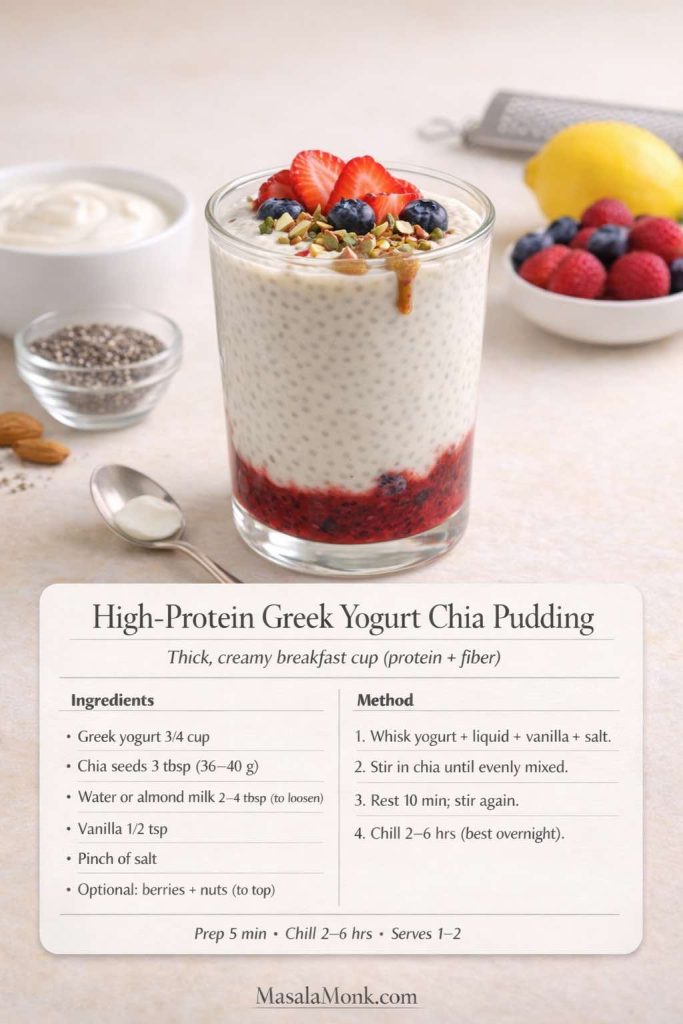
2) Chia Pudding with Greek Yogurt (High Protein, Ultra Creamy)

If you like pudding with Greek yogurt, this version can feel like cheesecake in a jar. It also adapts well: vanilla, chocolate, berry, citrus, even coffee flavors.

Ingredients (1–2 servings)

  • ¾ cup Greek yogurt (plain works best)
  • 3 tablespoons chia seeds
  • 2–4 tablespoons water or almond milk (to loosen)
  • ½ teaspoon vanilla
  • Pinch of salt
  • Optional sweetener, to taste
Recipe card image of high-protein Greek yogurt chia pudding in a glass with a berry compote layer, topped with strawberries, blueberries, chopped nuts, and a light nut-butter drizzle. The card lists ingredients and steps for a thick chia pudding with Greek yogurt, including the stir-twice method and chill time, styled as a meal-prep breakfast cup.
This high-protein Greek yogurt chia pudding is the thick, creamy option when you want a breakfast that holds you steady—especially after a workout. The berry layer makes it feel like a parfait, while the chia-to-yogurt base keeps it filling and meal-prep friendly. Make two cups at once and rotate toppings through the week for an easy high protein chia pudding routine.

Method

  1. Whisk Greek yogurt, vanilla, salt, and 2 tablespoons water (or almond milk) until smooth.
  2. Stir in chia seeds and mix thoroughly.
  3. Rest 10 minutes, then stir again to redistribute the seeds evenly.
  4. Refrigerate at least 2 hours.

Texture tuning

  • Too thick? Add a splash of water or almond milk and stir.
  • Too thin? Add 1 tablespoon chia, stir, and chill 30–60 minutes.

Toppings that make it feel like dessert
Berries, chopped nuts, cocoa powder dusted on top, or a spoon of peanut butter.

If you want a similar high-protein breakfast base that isn’t yogurt, this link fits naturally as an alternative: cottage cheese for breakfast.


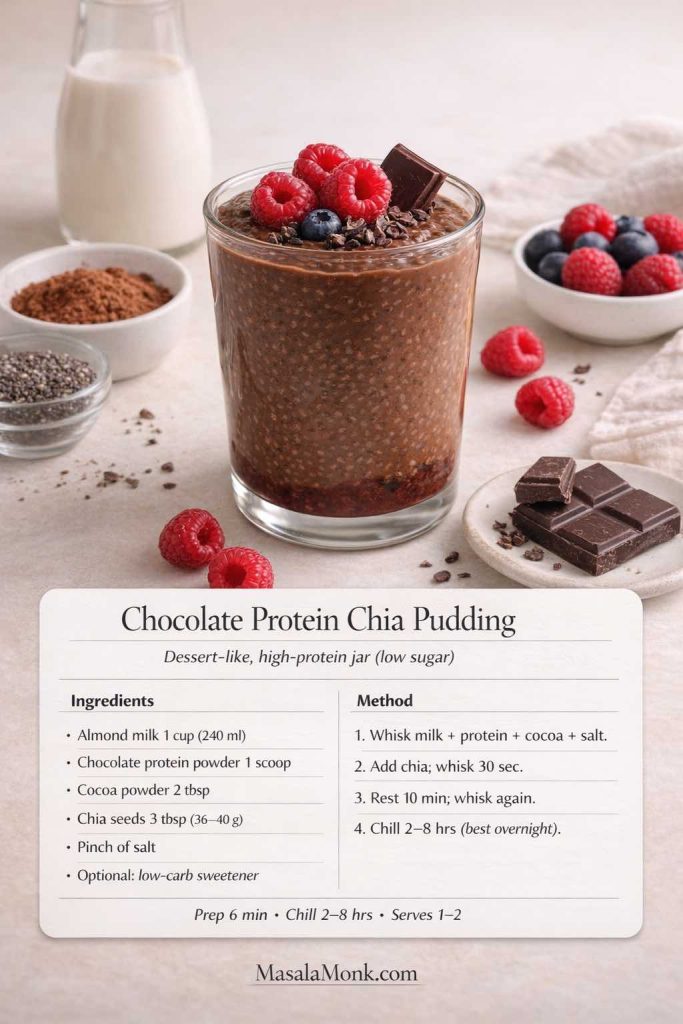
3) Chocolate Protein Chia Pudding (Protein Powder + Cocoa)

This jar is for the days you want pudding chia chocolate flavor without the “diet” vibe. Done right, it tastes like a rich chocolate pudding.

Ingredients (1–2 servings)

  • 1 cup unsweetened almond milk (or dairy milk)
  • 1 scoop protein powder (chocolate, or vanilla plus cocoa)
  • 2 tablespoons cocoa powder or cacao powder
  • 3 tablespoons chia seeds
  • Pinch of salt
  • Optional sweetener, to taste
  • Optional: 1 tablespoon Greek yogurt (for extra creaminess)
Recipe card image of chocolate protein chia pudding in a clear glass topped with raspberries, cacao nibs, and dark chocolate. The card shows ingredients and steps for a low carb chia pudding made with almond milk, cocoa powder, and chocolate protein powder, including the stir-twice method and chill time, styled as a dessert-like high-protein snack or breakfast.
When cravings hit, this chocolate protein chia pudding is the “dessert that behaves.” Cocoa and a scoop of protein turn a simple jar into a rich, low sugar treat that still fits a low carb day—perfect after training, as an afternoon snack, or whenever you want something chocolatey that keeps you satisfied.

Method

  1. Whisk almond milk, protein powder, cocoa/cacao, salt, and sweetener until completely smooth.
  2. Stir in chia seeds and whisk again.
  3. Rest 10 minutes; whisk a second time to prevent clumps.
  4. Refrigerate overnight for the best set.

How to keep it smooth
If your protein powder tends to clump, whisk it into a small amount of milk first to make a smooth paste, then add the rest of the milk.

Topping ideas
A spoon of whipped Greek yogurt, crushed nuts, cacao nibs, or a few berries.

Also Read: How to make No-Bake Banana Pudding: No Oven Required Recipe


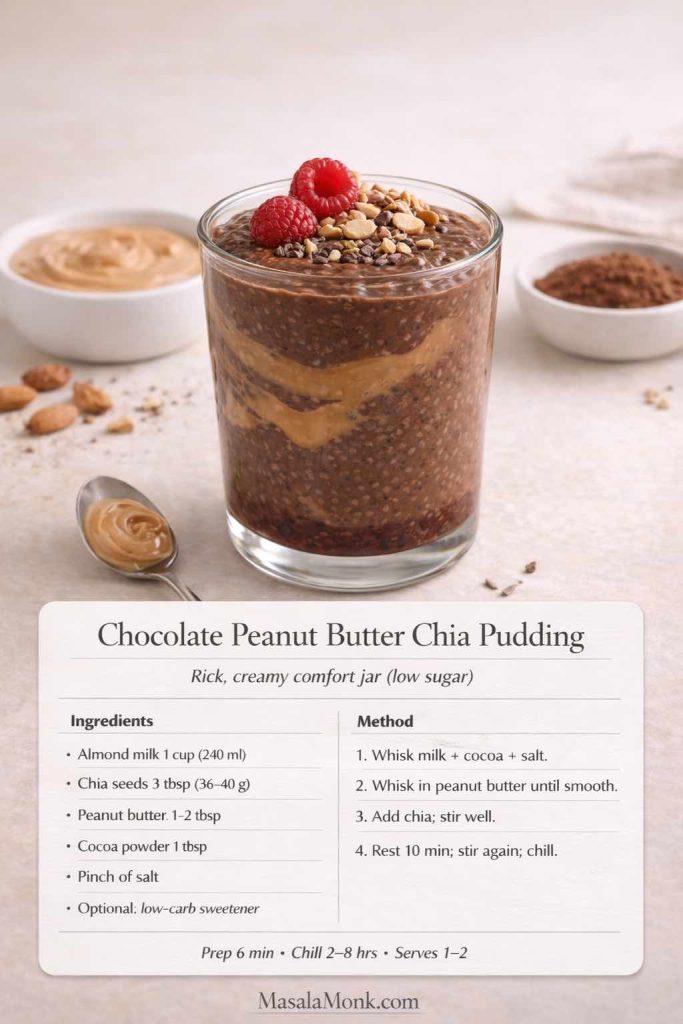
4) Chocolate Peanut Butter Chia Seed Pudding (Classic, Comforting, Satisfying)

This is the jar that feels like a treat. Chocolate and peanut butter do most of the work, so you can keep sweetness low and still love it.

Ingredients (1–2 servings)

  • 1 cup almond milk (or dairy milk)
  • 3 tablespoons chia seeds
  • 1–2 tablespoons peanut butter
  • 1 tablespoon cocoa powder
  • Pinch of salt
  • Optional sweetener
Recipe card image of chocolate peanut butter chia pudding in a clear glass with a peanut butter swirl, topped with raspberries, chopped peanuts, and cacao nibs. The card lists ingredients and steps for a low carb chia pudding made with almond milk, cocoa powder, chia seeds, and peanut butter, including the stir-rest-stir method and chill time, with MasalaMonk.com in the footer.
Chocolate peanut butter chia pudding is the comfort-jar that still plays nicely with a low carb day—rich cocoa flavor, a creamy peanut butter swirl, and a thick spoonable set that’s perfect for cravings. Prep it the night before, then top with berries and nuts for a keto-friendly dessert vibe that also works as a high-protein snack.

Method

  1. Whisk milk, cocoa, salt, and sweetener until smooth.
  2. Whisk in peanut butter until fully dissolved.
  3. Stir in chia seeds, rest 10 minutes, stir again, then refrigerate.

Make it even better
Add a tiny splash of vanilla, or a pinch of cinnamon. Surprisingly, cinnamon makes chocolate taste deeper.

Topping ideas
Strawberries, raspberries, chopped roasted nuts, or a light sprinkle of shredded coconut.

Also Read: Chicken Adobo — Step-by-Step Recipe — Classic Filipino Adobong Manok


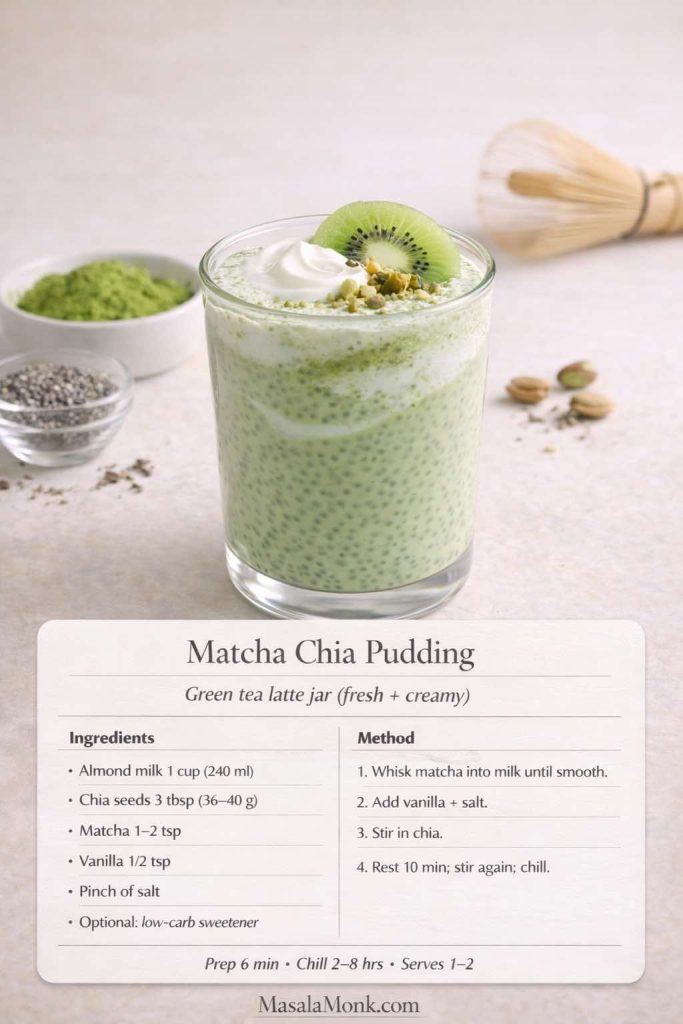
5) Matcha Chia Pudding (Green Tea Latte Style)

Matcha and chia seeds are a surprisingly good match. The flavor is clean and slightly bitter, which is exactly why a touch of vanilla and a pinch of salt can make it taste more rounded.

Ingredients (1–2 servings)

  • 1 cup almond milk (or a light coconut milk beverage)
  • 3 tablespoons chia seeds
  • 1–2 teaspoons matcha powder
  • ½ teaspoon vanilla
  • Pinch of salt
  • Optional sweetener
Recipe card image of matcha chia pudding in a clear glass with a creamy pale green set, topped with a kiwi slice, pistachio pieces, and a small dollop of yogurt. The card lists ingredients and steps for a green tea latte style chia seed pudding made with almond milk, matcha, vanilla, and chia seeds, including the stir-rest-stir method and chill time, with MasalaMonk.com in the footer.
This matcha chia pudding tastes like a green tea latte in a jar—fresh, creamy, and surprisingly satisfying. It’s a great low carb breakfast when you want something lighter than chocolate but still crave a dessert-style texture. Prep it overnight, then top with fruit and nuts for a café-style chia pudding cup that’s easy to meal prep and fun to switch up.

Method

  1. Sift matcha into the milk (or whisk it in slowly) until smooth.
  2. Add vanilla, salt, and sweetener if using.
  3. Stir in chia, rest 10 minutes, stir again, then refrigerate.

How to avoid matcha clumps
If matcha is stubborn, whisk it with 1–2 tablespoons warm water first to create a smooth paste, then whisk that into the milk.

Caffeine note
If you’re sensitive to caffeine, keep matcha closer to 1 teaspoon and enjoy earlier in the day. For general guidance, Mayo Clinic’s overview is useful: daily caffeine guidance.

If you like matcha as part of a calmer routine, this supportive read fits naturally: tea and cortisol.


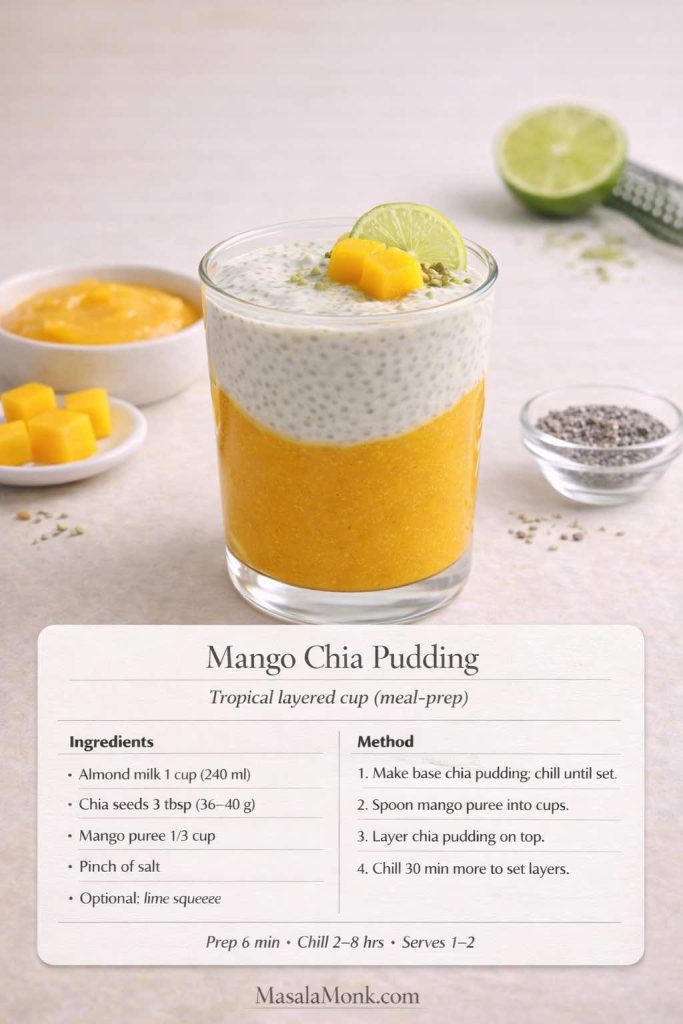
6) Mango Chia Pudding (Bright, Tropical, Meal Prep Friendly)

Mango chia pudding tastes like a dessert jar, yet you can keep it controlled by using a smaller mango portion and leaning on lime and salt to amplify flavor.

Ingredients (1–2 servings)

  • 1 cup almond milk or coconut milk beverage
  • 3 tablespoons chia seeds
  • ⅓ cup mango puree (or finely diced mango)
  • Pinch of salt
  • Optional: squeeze of lime
Recipe card image of mango chia pudding in a clear glass with a bright mango puree base and a creamy chia pudding layer on top, garnished with a lime slice and mango cubes. The card lists ingredients and steps for a layered chia seed pudding made with almond milk, chia seeds, mango puree, and optional lime, including chill time and servings, with MasalaMonk.com in the footer.
This mango chia pudding is the “sunrise cup” that makes meal prep feel like dessert—sweet-tropical flavor, a creamy chia layer, and a bright mango base finished with a squeeze of lime. It’s perfect when you want a lighter low carb chia pudding that still feels fun, especially as a grab-and-go breakfast or a mid-afternoon snack.

Method

  1. Make a plain chia base with milk, chia, and salt.
  2. Chill until set.
  3. Fold in mango puree right before eating, or layer mango at the bottom of your cup and spoon chia on top.

How to keep it low carb
Use mango as a flavor accent rather than the entire bowl. You’ll still get the tropical hit, especially with lime.

More mango inspiration
These fit beautifully as follow-ons: How to Make Mango Chia Pudding: 5 Creative Ideas and Chia Pudding for Lunch: 5 Ways to Add More Mango to It.


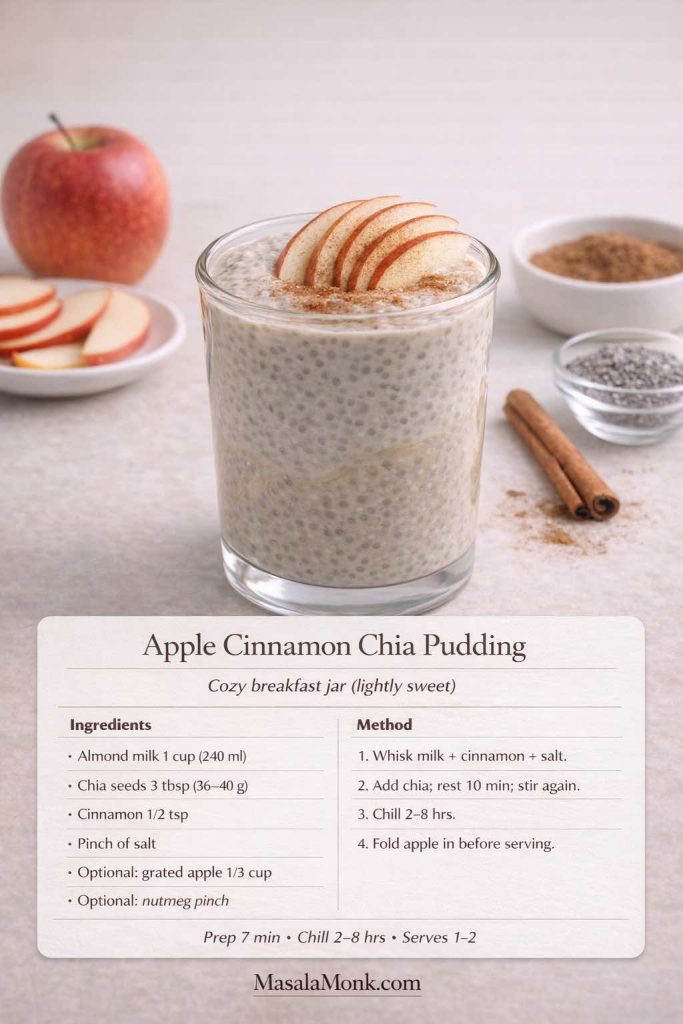
7) Apple Cinnamon Chia Pudding (Cozy, Filling, Great for Breakfast)

Apple cinnamon chia pudding is comfort in a jar. Depending on how strict your carbs are, you can either use a small amount of apple or skip it and let cinnamon do the heavy lifting.

Ingredients (1–2 servings)

  • 1 cup unsweetened almond milk
  • 3 tablespoons chia seeds
  • ½ teaspoon cinnamon
  • Pinch of salt
  • Optional: ⅓ cup grated apple
  • Optional: pinch of nutmeg
Recipe card image of apple cinnamon chia pudding in a clear glass, topped with a thin apple fan and a light cinnamon dusting. The card shows ingredients and step-by-step method for a low carb chia pudding made with almond milk, chia seeds, cinnamon, salt, and optional grated apple, plus prep and chill time, with MasalaMonk.com in the footer.
Apple cinnamon chia pudding is the cozy breakfast jar that feels like dessert without being heavy—creamy chia, warm spice, and a bright apple finish. Prep it the night before, then fold in grated apple right before eating for the freshest flavor and a thick, spoonable low carb chia pudding you’ll want on repeat.

Method

  1. Whisk milk, cinnamon, salt, and nutmeg if using.
  2. Stir in chia, rest 10 minutes, stir again, then chill.
  3. Fold in grated apple right before serving (it stays fresher that way).

Keto-friendly variation
Skip apple. Add chopped pecans and a drop of vanilla instead for a low carb cinnamon-pecan pudding.

Also Read: Sweetened Condensed Milk Fudge: 10 Easy Recipes


8) Gingerbread Chia Pudding (Warm Spices, Dessert Energy)

This gingerbread chia pudding is perfect when you want something cozy without needing a baked dessert. It also fits nicely under a broader “anti inflammatory” vibe because of the warming spices—without turning into a medical lecture.

Ingredients (1–2 servings)

  • 1 cup almond milk or coconut milk beverage
  • 3 tablespoons chia seeds
  • ½ teaspoon cinnamon
  • ¼ teaspoon ginger
  • Pinch of cloves or allspice
  • Pinch of salt
  • Optional sweetener
Recipe card image of gingerbread chia pudding in a clear glass, topped with a dollop of yogurt and a light cinnamon sprinkle. The card shows ingredients and steps for a warm-spice chia seed pudding made with almond milk, chia seeds, cinnamon, ginger, cloves or allspice, and salt, including the stir-rest-stir method and chill time, with MasalaMonk.com in the footer.
This gingerbread chia pudding brings cozy dessert flavor to a simple low carb chia pudding routine—warm spices, creamy texture, and a thick set that’s perfect for meal prep. Make it overnight, then finish with a spoon of yogurt (or coconut cream) for a rich, satisfying breakfast cup that feels like a treat.

Method

  1. Whisk spices, salt, and sweetener into the milk.
  2. Stir in chia, rest 10 minutes, stir again, then refrigerate.
  3. Serve with crushed nuts or a spoon of yogurt.

Dessert bridge
If you want more warm-spice keto dessert ideas, this fits naturally: keto vegan dessert recipes with ginger.


9) Keto Chia Pudding with Coconut Milk (Ultra Creamy)

This is the thickest, most “real pudding” keto chia pudding option. If you’ve ever felt chia was too watery, this changes everything.

Ingredients (1–2 servings)

  • 3 tablespoons chia seeds
  • ¾ cup canned coconut milk
  • ¼ cup water (adjust to pourable)
  • Pinch of salt
  • ½ teaspoon vanilla
  • Optional sweetener
Recipe card image of coconut milk keto chia pudding in a clear glass with a creamy white set, topped with toasted coconut flakes and a vanilla bean. The card shows ingredients and step-by-step method using canned coconut milk, water, chia seeds, vanilla, and salt, plus prep and chill time for a thick low carb chia pudding, with MasalaMonk.com in the footer.
If you want the thickest, most dessert-like low carb chia pudding, this coconut milk keto chia pudding is the one. Canned coconut milk gives it that rich, spoonable set, while vanilla and toasted coconut make it feel like a treat you’d pay for. Prep it overnight, then add berries or chopped nuts for a simple, satisfying breakfast cup.

Method

  1. Whisk coconut milk, water, vanilla, salt, and sweetener until smooth.
  2. Stir in chia, rest 10 minutes, stir again, then refrigerate.

Texture tip
If it sets extremely thick overnight, loosen with a splash of water before serving and stir well.

If you love mango + coconut together, this is a nice complementary read: mango with coconut milk.


10) Blended Chia Pudding (Smooth Chocolate Mousse)

Blended chia pudding is for anyone who dislikes the “seed” texture. Once blended, it becomes silky—almost like a classic pudding cup.

Ingredients (1–2 servings)

  • 1 cup almond milk (or dairy milk)
  • 3 tablespoons chia seeds
  • 1–2 tablespoons cocoa powder or cacao powder
  • Pinch of salt
  • Optional sweetener
  • Optional: 1 tablespoon peanut butter or 2 tablespoons Greek yogurt
Recipe card image of blended chocolate chia mousse in a clear glass with a piped swirl top, garnished with a dark chocolate curl and cacao nibs. The card lists ingredients and steps for a smooth blended chia pudding made with almond milk, chia seeds, cocoa or cacao, salt, and optional sweetener or Greek yogurt, plus prep and chill time, with MasalaMonk.com in the footer.
If you love chocolate but don’t love the texture of chia seeds, this blended chocolate chia mousse is your best jar. You get the same thick, satisfying low carb chia pudding base, then a quick blend turns it silky and spoonable—more like a classic pudding cup. Keep it simple with cocoa and almond milk, or stir in a little Greek yogurt for an even creamier, high-protein finish.

Method

  1. Make a standard chocolate chia pudding and refrigerate until set (2+ hours).
  2. Blend until completely smooth and glossy.
  3. Chill 10–15 minutes so it thickens again.

Why it’s worth doing
This is one of the best ways to create a creamy chia pudding texture without the “frog egg” feel. It’s also a smart method for protein powder: blend it in after setting to avoid chalky pockets.

Also Read: Sourdough Recipe: 10 Easy Bread Bakes (Loaves, Rolls & Bagels)


Making Chia Pudding Easy to Keep Up With (Meal Prep + Storage)

If you’re making chia seed pudding cups for the week, a simple rhythm helps:

  • Make a plain base batch in a bowl so you can whisk clumps out easily.
  • Portion into jars or cups.
  • Flavor them in two or three different directions so you don’t get bored.
  • Add fresh toppings right before eating.
Infographic titled “Chia Pudding Meal Prep (3–4 Day System)” showing three jar flavors (vanilla, chocolate, berry) and four steps: whisk a plain base in a bowl, portion into 3–4 jars, flavor 2–3 ways (cocoa/cinnamon/matcha), and add toppings right before eating for best texture and crunch. Includes storage note “Best texture: 3–4 days, refrigerated” and tip to keep berries separate until serving, with MasalaMonk.com in the footer.
This is the easiest chia pudding routine to stick with: whisk one plain base, portion into 3–4 jars, flavor a few different ways (vanilla, chocolate, berry), and add toppings right before eating so the texture stays thick and fresh. For meal prep, most jars taste best within 3–4 days—especially if you keep berries separate until serving.

For storage time, most people prefer the taste and texture within three to four days. And for general refrigerated leftovers guidance, USDA FSIS is the standard reference: leftovers food-safety storage times.

One subtle trick: if you’re using fruit, especially berries, keep it separate until serving. That way your “chia pudding cups” don’t turn watery, and the flavors stay bright.

Also Read: Peanut Butter Fudge: Recipes & Guide (8 Methods + Easy Variations)


A simple note on keto and chia

Chia can fit into many keto and low carb patterns because it’s easy to portion and pairs well with higher-fat liquids like coconut milk. That’s part of why keto chia seed pudding recipe variations are so common—especially when combined with Greek yogurt or protein powder. If you want a deeper internal explainer focused on chia and keto specifically, this is a natural follow-on: Chia Seeds and the Ketogenic Diet.


The best way to make chia pudding taste like something you crave

A lot of people try chia once, don’t love it, and assume they’re not a “chia person.” Most of the time, it’s not the chia. It’s the flavor balance.

Here’s what tends to make a jar of low carb chia pudding feel genuinely delicious:

  • A pinch of salt, always
  • Vanilla or cinnamon to round out the flavor
  • Cocoa powder when you want depth
  • Something creamy (Greek yogurt, coconut milk, or a spoon of nut butter)
  • A topping that adds contrast—berries, chopped nuts, cacao nibs
Infographic titled “Make Chia Pudding Taste Craveable” showing a central jar of chia pudding with callouts for flavor balance: pinch of salt, vanilla or cinnamon, cocoa powder, something creamy (Greek yogurt/coconut milk/nut butter), and a contrast topping (berries/nuts/cacao nibs). Bottom note suggests starting with two jars: vanilla almond milk and Greek yogurt high-protein. MasalaMonk.com is in the footer.
If low carb chia pudding tastes “meh,” it’s usually not the chia—it’s the balance. Start with a pinch of salt, add vanilla or cinnamon, bring depth with cocoa powder, then make it creamy with Greek yogurt, coconut milk, or a spoon of nut butter. Finish with a contrast topping like berries, chopped nuts, or cacao nibs, and the jar suddenly feels like a treat you’ll actually crave.

Once you dial that in, low carb chia pudding becomes less of a “health chore” and more of a flexible treat you can keep in rotation. Some weeks you’ll lean into matcha and coconut milk. Other weeks you’ll be in a chocolate peanut butter phase. Then, when you want brightness, mango or berries bring everything to life.

If you make one of these this week, start with two jars: one vanilla almond milk base and one high-protein Greek yogurt version. That way you get variety immediately—light and clean on one side, thick and filling on the other—without creating extra work.

And if you want even more structure for turning chia into a consistent weight-loss habit, revisit the companion guide here: chia pudding for weight loss tips, benefits, and recipes.


FAQs

1) What’s the best low carb chia pudding ratio?

A reliable starting point is 3 tablespoons chia seeds to 1 cup liquid for a thick, spoonable chia seed pudding. If you prefer a lighter texture, use 2½ tablespoons per cup. Conversely, if you want a denser keto pudding feel, keep 3 tablespoons and choose a richer liquid like coconut milk.

2) How long does chia pudding need in the fridge?

Most jars set well in 2–3 hours, although overnight chia pudding usually turns out smoother and more consistent. If you’re meal-prepping chia seed pudding cups, overnight is often the easiest path because the texture stabilizes by morning.

3) Why is my chia seed pudding watery or runny?

Typically, runny chia pudding comes from one of three things: too much liquid, not enough time, or not stirring twice early on. Add 1 teaspoon chia at a time, stir, then refrigerate 30–60 minutes. Also, do a second stir around the 10-minute mark to prevent clumps and uneven hydration.

4) Why did my chia pudding turn too thick?

This happens when chia absorbs more than expected—especially with thick liquids like canned coconut milk. To fix it, stir in a splash of water, almond milk, or coconut milk until it loosens into a creamy chia pudding consistency.

5) Can I make instant chia pudding or quick chia pudding?

You can make a quick chia pudding by whisking thoroughly, stirring again after 10 minutes, and chilling 30–45 minutes. Even so, the best chia pudding texture usually comes from a longer chill. If time is tight, adding Greek yogurt can help it feel thicker sooner.

6) Is chia pudding keto-friendly?

Chia seeds can fit many keto approaches because they’re portionable and pair well with higher-fat liquids. For keto chia pudding, use unsweetened almond milk or coconut milk, keep sweeteners minimal, and choose toppings like nuts, cacao nibs, or unsweetened coconut.

7) What are the best chia seeds for keto or low carb chia pudding?

Both black and white chia seeds work similarly for chia seed pudding low carb recipes. What matters more is freshness and how you store them. If the seeds smell stale or oily, the pudding can taste “off,” even if your recipe is perfect.

8) Can I make chia pudding with almond milk?

Yes—chia pudding with almond milk is one of the most common bases because the flavor is neutral and the texture sets reliably. For extra creaminess, add a spoon of Greek yogurt, coconut cream, or nut butter once it’s set.

9) Can I make chia pudding with coconut milk?

Absolutely. Chia pudding coconut milk versions are often the creamiest and feel closest to a traditional pudding. If you’re using canned coconut milk, thin it slightly with water so the chia hydrates evenly.

10) Can I make chia pudding with oat milk?

Yes, chia pudding with oat milk is popular because it tastes mild and comforting. However, oat milk is not typically low carb, so it’s better for a general “healthy pudding” routine rather than a strict keto plan.

11) Can I make chia pudding with yogurt instead of milk?

You can, and it’s a great way to create a high protein chia pudding. For chia pudding with yogurt no milk, whisk yogurt with a little water to loosen it, then stir in chia. The result is thick, tangy, and very filling.

12) What’s the difference between chia pudding with Greek yogurt vs regular yogurt?

Greek yogurt is thicker and higher in protein, so chia pudding Greek yogurt versions tend to set firmer and feel more like a meal. Regular yogurt can work too, although you may need a bit more chia or a longer chill to reach the same texture.

13) Can I add protein powder to chia pudding?

Yes—chia pudding with protein powder is an easy way to boost protein. For the smoothest result, dissolve the protein powder into the milk first, then add chia. If you add powder directly to a set pudding, it can clump.

14) How do I make chocolate chia protein pudding taste better?

Use cocoa or cacao plus a pinch of salt to deepen the flavor. Then, choose a chocolate protein powder you actually enjoy. A small spoon of peanut butter or Greek yogurt can also make chocolate protein chia pudding taste richer and less “thin.”

15) Can I make blended chia pudding?

Yes. Blended chia pudding is ideal if you dislike the texture of whole chia seeds. First, let the pudding set; afterward, blend until smooth. You’ll get a creamy chia pudding that feels like mousse, especially with cocoa or nut butter.

16) Can I grind or blend chia seeds before soaking?

You can, but it changes the texture quickly and may thicken faster. Ground chia pudding tends to set more like a gel. If you prefer a smoother mouthfeel, blending after soaking often tastes better than blending dry seeds first.

17) What’s the best way to sweeten chia pudding without sugar?

Many people keep it simple with vanilla, cinnamon, cocoa, or fruit. If you want sweetener, choose an option you tolerate well and use a small amount. Often, adding a spoon of peanut butter or coconut milk richness reduces how much sweetness you need.

18) Is chia pudding paleo?

Chia pudding paleo versions usually use almond milk, coconut milk, or coconut water instead of dairy. For a richer bowl, add nut butter, coconut cream, or fruit. If you use yogurt, choose a version that matches your approach.

19) What is anti inflammatory chia pudding?

In practice, it’s chia pudding flavored with ingredients often used in “anti-inflammatory” eating patterns—ginger, cinnamon, cacao, berries, and sometimes turmeric. A ginger chia pudding or gingerbread chia pudding can fit this style while still tasting like dessert.

20) Can I add collagen to chia pudding?

Yes. Chia collagen add-ins are usually easiest because collagen peptides dissolve smoothly. Since collagen doesn’t thicken much, you’ll still rely on chia (and optionally yogurt) for the pudding texture.

21) What toppings work best for chia pudding for weight loss?

For a more weight-loss friendly bowl, focus on toppings that add texture without a big sugar hit: nuts, seeds, unsweetened coconut, cacao nibs, and a measured amount of berries. If you want fruit-forward flavors like mango chia pudding, keep the portion modest and balance it with protein.

22) How do I make strawberry chia seed pudding or berry chia pudding?

Make a plain base first, then fold in mashed strawberries or mixed berries after it sets. Alternatively, layer berries at the bottom of the cup for a “chia pudding with strawberries” effect. If you add watery fruit too early, the pudding can loosen.

23) How do I make mango chia pudding without making it too sweet?

Use mango as a flavor accent: a few tablespoons of puree can be enough. Add lime and a pinch of salt to amplify the tropical flavor, then keep the base unsweetened so the mango stands out naturally.

24) How do I make apple cinnamon chia pudding taste like dessert?

Use cinnamon, vanilla, and a pinch of salt as the backbone. If you’re not strict keto, a small amount of grated apple adds aroma and sweetness. Otherwise, chopped pecans plus cinnamon can mimic an apple-pie vibe without the fruit.

25) How long does chia seed pudding last, and can I meal prep it?

Chia pudding is popular for meal prep because it holds well in the fridge. Many people prep single serve chia pudding cups for several days at a time. For the best texture, keep toppings separate and stir before eating.

26) Why does my chia pudding taste bland?

Usually it needs salt, vanilla, or a stronger flavor base. Cocoa, matcha, cinnamon, and nut butter all make a big difference. Also, richer liquids—like coconut milk—often improve flavor even when sweetness is minimal.

27) What’s the easiest 3 ingredient chia pudding?

A classic 3 ingredient chia pudding is chia seeds + almond milk + vanilla (or chia + coconut milk + cocoa). If you want it sweeter, add a fourth ingredient: your preferred sweetener or a small amount of fruit.

28) Can I make chia seed pudding with regular milk or whole milk?

Yes. Chia seed pudding with milk (including whole milk) sets well and tastes creamy. If your goal is low carb chia pudding, watch the carbs from dairy milk and adjust based on your overall plan.

29) What’s better: chia pudding in a jar, glass, or cups?

Any container works. Chia pudding cups are great for grab-and-go; a chia pudding glass looks nice for serving; a jar is convenient for shaking and stirring. What matters most is leaving enough room to stir well before it sets.

30) Are premade chia pudding cups worth it?

They can be convenient, especially when you need a ready-to-eat snack. Still, homemade lets you control sweetness, protein, and texture. If you like the convenience of premade chia pudding, you can mimic it by prepping chia seed pudding cups in advance with two or three flavors.

Posted on 9 Comments

Coconut Milk Nutrition Facts & Glycemic Index Impact

Unsweetened coconut milk poured into iced coffee with coconuts and a carton, showing coconut milk nutrition—calories, carbs and GI.

Creamy, fragrant, and endlessly versatile, coconut milk slips into curries, smoothies, porridges, and even coffee. Yet despite its popularity, confusion persists about coconut milk nutrition because “coconut milk” refers to two very different products. On one hand, there’s the canned cooking milk—thick, rich, and energy-dense. On the other, you’ll find the carton coconutmilk beverage—lighter, splashable, and typically fortified. Understanding which one you’re buying is half the battle; everything from calories to glycemic impact hinges on that distinction.

If blood sugar response is high on your list, you may also want a quick refresher on the difference between glycemic index and glycemic load; our short guide on GI vs GL explained shows why GL—carbs × portion—often matters more than a single “GI” number in everyday meals.


What “coconut milk” really means (and why labels matter)

Before we talk numbers, definitions. In grocery aisles, coconutmilk beverages in cartons are mostly water with a small amount of coconut plus stabilizers, emulsifiers, and—helpfully—fortified vitamins and minerals. They’re designed for pouring, much like almond or oat beverages. Meanwhile, the canned version is essentially coconut cream + water, intended for cooking and far more concentrated.

For anyone who wants a factual, impartial primer that distinguishes beverage from cooking milk, the UF/IFAS overview of plant-based coconut milks is refreshingly clear about composition and additives as well as where each style fits in your kitchen.

Because these products behave so differently, coconut milk nutrition can look wildly inconsistent online. Therefore, when you’re evaluating a recipe or planning your macros, always check the package type, then glance at the serving size and the “added sugars” line. That thirty seconds of diligence prevents most mistakes.

Coconut Milk Nutrition per 100 ml
Type Calories Fat Saturated Fat Carbs Sugars Fiber Protein
Canned coconut milk (regular) ~197–230 kcal 21–24 g ~21 g ~6–8 g ~3 g ~2 g ~2–3 g
Canned coconut milk (light) ~60–120 kcal 6–12 g ~6–11 g ~2–4 g ~1–2 g ~1 g ~1–2 g
Carton coconutmilk beverage (unsweetened) ~19–21 kcal ~1.7–2.0 g ~1.7–2.0 g ~0.4–1.0 g 0 g added 0–0.4 g 0–0.4 g

Sources: see USDA FoodData Central for canned entries; brand labels for carton beverages such as Silk Unsweetened Coconutmilk and So Delicious Unsweetened Coconutmilk. Values vary by brand; check your label.

Coconut Milk Nutrition per 1 Cup (240 ml)
Type Calories Fat Saturated Fat Carbs Sugars Fiber Protein
Carton coconutmilk beverage (unsweetened) ~40–45 kcal ~4–4.5 g ~4 g ~1–2 g 0 g added 0–0.5 g 0–1 g
Canned coconut milk (regular) ~445–552 kcal ~48–57 g ~42–50 g ~12–14 g ~6–8 g ~2–5 g ~5 g
Canned coconut milk (light) ~140–280 kcal ~14–28 g ~12–24 g ~4–9 g ~2–5 g ~1–3 g ~2–4 g

Sources: verify ranges via USDA FoodData Central (canned, regular & light). For unsweetened beverage, see labels like Silk Unsweetened Coconutmilk and So Delicious Unsweetened Coconutmilk.


Unsweetened carton coconutmilk: light, splashable, and low-carb

For people seeking creaminess without many calories or carbs, unsweetened carton coconutmilk is an easy win. Labels from major brands commonly land around 40–45 kcal per cup (240 ml) with ~2 g carbs, 0 g added sugars, and ~4 g fat. As a concrete reference, the facts panel on Silk Unsweetened Coconutmilk lists 40 kcal, 2 g total carbohydrate, 0 g total sugars, and 4 g fat, along with noteworthy fortification (e.g., roughly 35% DV calcium per cup).

Likewise, So Delicious Organic Unsweetened Coconutmilk reports similar values on its nutrition panel. In short, for daily splashes in coffee, tea, or shakes, the carton beverage gives you the “coconut” flavor profile with minimal carbohydrate exposure.

From a glycemic lens, that matters: tiny carb counts per cup translate to a very low glycemic load, which is the practical reason unsweetened coconutmilk beverage tends to have a negligible effect on blood glucose when used as a drink base or splash. To understand the broader context, you can also explore the GI Foundation’s database and their educational hub on Glycemic Index—useful resources when comparing beverages.

Because this beverage is comparatively thin, you might still want more body in warm drinks or smoothies. In that case, a tablespoon of chia seeds, a scoop of protein, or some oats will thicken things up while also adding fiber or protein for better satiety. For inspiration, check our simple chia pudding variations and oats smoothie ideas and keep sweeteners light to preserve that low GL advantage.


Canned coconut milk: rich, concentrated, and calorie-dense

Conversely, canned coconut milk is the workhorse of curries and desserts precisely because it’s concentrated. Per cup, many entries in public nutrition databases land roughly around ~445 to 552 kcal, driven by fat content; per 100 g, values near ~197–230 kcal are common. For authoritative lookups, have a look at Coconut, milk, canned, reduced fat – listing we found on Australian Food Composition Database, courtesy Food Standards Australia New Zealand.

Those calories deliver silky mouthfeel and a beautiful sheen—but they add up quickly. In practice, a curry that uses one full can will often be portioned among several servings, which softens the per-plate impact. Nevertheless, if you’re tracking intake, measuring by tablespoons or weighing out 100 ml at a time keeps the totals realistic. For a balanced bowl, combine canned coconut milk with plenty of non-starchy vegetables and a meaningful protein; the fat will carry flavors while the rest of the plate ensures satiety without runaway energy intake.

If you’re curious about health perspectives beyond the numbers, Verywell Health’s overview on coconut milk summarizes both potential benefits (e.g., MCTs, phenolics) and saturated fat concerns, while reiterating something we emphasize as well: the nutrition depends on the exact product, so label-reading is non-negotiable.


Coconut milk nutrition and blood sugar: GI vs GL in real life

Because the internet loves single numbers, people often ask: “What is the glycemic index of coconut milk?” The honest answer: there isn’t one universal GI value for “coconut milk.” Formulas vary, ingredients differ, and testing methods aren’t always consistent. The GI Foundation even showcases beverage examples that include blends—say, a coconut beverage with added rice components—reporting higher GI values in those particular cases. That variability isn’t a bug; it’s a reminder that product composition drives outcomes.

Therefore, in day-to-day decisions, glycemic load is the more useful compass. Because unsweetened carton coconut milk has ~1–2 g carbs per cup, its GL is very low, and its impact on blood glucose tends to be minimal. Meanwhile, the canned version contributes far more fat and calories than carbohydrates; blood-sugar changes will be influenced more by what else is on the plate (rice, noodles, breads, fruit) than by the coconut milk itself.

Moreover, café drinks marketed with “coconut milk” can swing wildly in sugar content depending on syrups and bases. As a sanity check, peek at a representative nutrition page, such as a cold milk or coconut milk beverage on Starbucks’ nutrition, then always open the exact drink you plan to order. The takeaway is straightforward: the carton beverage at home is typically unsweetened and very low in carbs; café builds often are not.

If you’d like a concise framework to apply beyond coconut milk, loop back to our guide on GI vs GL explained—it lays out how to assess both number and portion at a glance.


Coconut milk nutrition, clearly applied: how to choose for your goals

Because coconut milk nutrition varies by format, choose with the end use in mind:

When you want a low-calorie splash
Reach for an unsweetened carton. It brings pleasant coconut notes while keeping energy intake and carbs modest. As an added bonus, many cartons are fortified—Silk, for instance, lists roughly 35% DV calcium per cup—which can help when you’re replacing dairy. See the specifics on Silk Unsweetened Coconutmilk or another brand’s facts panel before you add to cart.

When you need luscious body in hot dishes
Use canned coconut milk. A moderate ladle transforms sauces and soups with almost no effort. However, because it’s energy-dense, portioning is your friend. A common rhythm is to stir in half a can, simmer, taste, then decide if you need more—often you won’t. For reality-checked numbers, verify entries in USDA FoodData Central as you plan recipes.

When clean labels matter
If additives aren’t your thing, you can make coconut milk at home with just coconut and water, then dilute to the texture you want. Practically speaking, homemade milk lands nutritionally closer to canned (pre-dilution) but lets you control thickness.

When you’re managing blood sugar
As a beverage, unsweetened carton coconut milk is usually a low-GL swap. In cooked dishes, your rice/bread/fruit choices drive the glycemic impact more than the coconut milk itself. For a quick contrast with another coconut product often confused with milk, skim our short primer on coconut water nutrition so you don’t mix up their carb profiles.


Label cues that make or break coconut milk nutrition

Even among similar-looking cartons, the nutrition can differ noticeably. Because of that, a few quick label checks save headaches later.

Unsweetened vs flavored
Look specifically for “unsweetened” and confirm 0 g added sugars. While standard unsweetened options like Silk Unsweetened Coconutmilk list 0 g added sugars, flavored or barista-style versions may climb. When in doubt, read the panel rather than trusting the front.

Fortification
If you rely on plant beverages regularly, fortification helps fill gaps. Many unsweetened coconut milk beverages carry meaningful amounts of calcium and vitamins A/D/B12. For instance, Silk’s facts panel shows ~35% DV calcium and modest vitamin D per cup. Checking this once per brand avoids surprises.

Serving size
With canned coconut milk, a “serving” might be listed as a fraction of a cup—sometimes 60 ml or 80 ml. That can make the numbers look deceptively modest until you scale up to the actual amount used. To sanity-check, you can cross-reference typical per-100 g and per-cup entries in different databases online.

Ingredient lists
For cartons, small amounts of gums or lecithins stabilize texture; that’s normal. The UF/IFAS explainer on plant-based coconut milks briefly outlines why these show up and what they do. If you’d rather skip them entirely, homemade is your answer.


Coconut milk nutrition in popular contexts (and smart tweaks)

Because food is culture as much as chemistry, it helps to picture common use-cases and simple adjustments that keep your goals intact.

Curries and stews
A tablespoon or two of canned coconut milk can mellow heat and carry aromatics without turning your bowl into a calorie bomb. As a rule of thumb, bloom spices in oil, add aromatics, then whisk in a modest dose of coconut milk at the end—taste first, add more only if needed. Serve with non-starchy sides (cauliflower, green beans, leafy greens) when you want to nudge the meal’s glycemic load down.

Smoothies and shakes
For creaminess without calories, start with unsweetened carton coconutmilk, then add fiber (chia, flax, oats) or protein powder to build body. The beverage’s low carbohydrate base makes it forgiving—just be judicious with bananas, dates, or syrups so the sugar doesn’t creep up. For ideas, browse a handful of our chia pudding riffs and adapt the flavors to a drinkable format.

Coffee and tea
Carton coconut milk won’t foam like dairy, but it gives a rounded, tropical note in iced lattes and cold brew. If you want extra texture, whisk in a small spoon of canned coconut milk—yes, a hybrid approach—then cut it with the carton beverage to keep calories predictable.

Baking and desserts
Canned coconut milk excels in custards, panna cottas, and ganache-style toppings. For a lighter dessert, swap half the canned quantity for carton coconutmilk and test the set; often, you’ll get the best of both worlds.

Savory sauces
When a sauce risks splitting or tasting thin, a small swirl of canned coconut milk emulsifies the texture. Use a silicone spatula and gentle heat to fold it in at the end; avoid a rolling boil once coconut milk is added, which can dull aromas and alter mouthfeel.


Coconut milk vs coconut water, flour, and “other coconut things”

It’s astonishing how often these get conflated. In brief:

  • Coconut water is the clear liquid from young coconuts; it contains natural sugars and electrolytes and behaves nothing like coconut milk in recipes. If you’re juggling “hydration vs calories,” our short read on coconut water nutrition keeps the comparisons straight.
  • Coconut flour is a high-fiber baking ingredient; nutrition and glycemic behavior differ substantially from both milk and water. When you’re exploring low-GI swaps in baking, consider pairing coconut flour with eggs or plant proteins for structure and satiety.
  • Sprouted coconut and fresh coconut meat have their own macros; delicious as they are, they aren’t interchangeable with coconut milk beverage or canned cooking milk. If your goal is a smoother relationship with blood glucose, prioritize portion control and pair coconut foods with protein and non-starchy vegetables.

If you like control, make it yourself

Store-bought convenience is great, yet there’s something satisfying about pulling off your own. With a blender, warm water, and dried coconut, you can make coconut milk at home in minutes. Strain for a silky beverage, or leave a little fiber in if you like body. Because homemade starts richer, you can dilute to the exact thickness you want—effectively choosing your point along the spectrum between “canned” and “carton” styles.

When you do make it yourself, keep in mind that nutrition will reflect your ratio and coconut quality. If you need precise macros, log a test batch by weight and portion from there; if you just need consistency, use measuring cups for the coconut and water, note your blend time, and repeat the process the same way next week.


Putting coconut milk nutrition into practice (quick guide)

Plan the role
Decide whether coconut milk is the main source of richness or merely a supporting note. When it’s center stage—say, in a laksa or korma—balance it with lean protein and plenty of vegetables. When it’s a whisper in coffee, the carton beverage is perfect.

Read the panel
A thirty-second scan for “unsweetened,” “added sugars = 0 g,” and fortification details pays off for months. Labels spell out the essentials clearly; verifying once can save you from buying a sweetened version by accident.

Cross-check when cooking
If you’re scaling recipes or logging macros, double-check typical ranges for canned coconut milk per 100 g and per cup. Because brands vary, this reference protects you from small surprises.

Treat café drinks differently
At home, your carton is likely unsweetened; on menus, syrups and bases do the heavy lifting. Open the specific nutrition page for your drink and you’ll see how sugar shifts with sizes and flavors. Adjust requests accordingly (unsweetened, fewer pumps, or smaller size) and you’ll stay aligned with your plan.

Focus on GL for real-world control
When someone quotes a single GI for “coconut milk,” remember that formulations differ and results vary. The GI database is invaluable, but translating that into daily choices means zooming out to glycemic load and portion size. That’s where unsweetened carton coconut milk shines—it gives creaminess with barely any carbs.


Want more ways to use it?

For comfort-food bowls that still feel balanced, use canned coconut milk in modest amounts and structure the rest of the plate with vegetables and protein. For lower-calorie sips, lean on unsweetened carton coconutmilk and thicken with fiber-forward additions like chia. If you’re exploring broader benefits—from culinary versatility to potential nutrient angles—our overview on the benefits of coconut milk collects practical ideas and tips.

And finally, when curiosity strikes and you want the raw data behind any claim, don’t hesitate to browse USDA FoodData Central for canned entries, compare fortified unsweetened beverage labels like Silk or So Delicious, and sanity-check glycemic concepts through the GI Foundation’s database. With those tools and a bit of label literacy, coconut milk nutrition becomes simple to navigate—one intentional choice at a time.

FAQs

1) What is coconut milk nutrition in simple terms?

Coconut milk nutrition varies by product. Unsweetened carton coconutmilk (the drink) is low in calories and carbs per cup, while canned coconut milk (for cooking) is much richer, higher in fat, and far more calorie-dense.

2) How many calories are in 1 cup of coconut milk?

For the beverage, expect roughly 40–45 kcal per 240 ml. For canned, anticipate about 445–552 kcal per cup depending on regular vs light styles.

3) What are the calories per 100 ml?

Typically ~19–21 kcal for the unsweetened beverage and ~190–230 kcal for regular canned coconut milk. Light canned versions land lower, depending on dilution.

4) How many carbs are in coconut milk per cup?

Carton unsweetened usually delivers ~1–2 g carbohydrates per cup. Canned generally provides ~12–14 g carbs per cup, with light versions trending a bit lower.

5) What about carbs per 100 ml?

Approximately ~0.4–1.0 g for the beverage; ~6–8 g for regular canned; light canned often ranges ~2–4 g per 100 ml.

6) Does coconut milk contain sugar?

Unsweetened beverage typically lists 0 g added sugar and negligible total sugars. Canned coconut milk contains small natural sugars; sweetened or flavored products add more—check labels.

7) Is coconut milk high in fat?

Canned coconut milk is high in fat (about ~48–57 g per cup for regular). In contrast, the beverage has ~4–4.5 g per cup. Light canned options reduce fat noticeably.

8) How much saturated fat does it have?

Regular canned coconut milk carries a substantial amount of saturated fat per cup, whereas unsweetened beverage has a modest ~4 g per cup. Light canned cuts this down but remains higher than the beverage.

9) Is coconut milk good for people with diabetes?

For beverages, unsweetened carton coconutmilk has very low carbs per cup, so its glycemic load is very low. For cooking, canned versions influence calories and fat more than carbs; overall impact depends on the entire meal.

10) What is the glycemic index of coconut milk?

There isn’t a single definitive GI because formulations differ. A more useful metric is glycemic load: the unsweetened beverage has very low GL per serving due to minimal carbs.

11) Is coconut milk low-carb or keto friendly?

The unsweetened beverage generally fits low-carb and many keto approaches thanks to ~1–2 g carbs per cup. Canned is also low in carbs per serving of a dish but is calorie-dense, so portion control is key.

12) Which is better for weight management: carton or canned?

For everyday drinks, the unsweetened beverage is lighter (fewer calories) and easier to track. Canned provides indulgent texture for recipes; however, using smaller amounts or light varieties helps manage total calories.

13) How does coconut milk nutrition compare to dairy milk?

Compared per cup, unsweetened coconutmilk beverage is much lower in calories, carbs, and protein than dairy. Canned coconut milk is not a dairy substitute for protein—its strength is richness, not protein content.

14) How much protein is in coconut milk?

Protein is minimal in the beverage (often 0–1 g per cup). Canned has a bit more (~2–5 g per cup), but neither is a meaningful protein source.

15) Is there any fiber in coconut milk?

Canned coconut milk contains some fiber (commonly ~2–5 g per cup). The beverage usually has little to none per serving.

16) What’s the difference between regular and light canned coconut milk?

Light versions are diluted to reduce calories and fat while retaining coconut flavor. They’re useful when you want creaminess with fewer calories than regular canned.

17) How should I use each type in recipes?

Use the beverage for coffee, cereal, smoothies, or cold drinks. Reserve canned for curries, sauces, and desserts when you need body and silkiness. Light canned can split the difference for soups and lighter curries.

18) Does coconut milk spike blood sugar?

Unsweetened beverage: unlikely, because carbs per cup are very low. Canned used in cooking shifts a dish’s macros toward fat and calories; blood-sugar response then depends more on accompanying carbs like rice or bread.

19) How can I keep coconut milk dishes balanced?

Pair canned coconut milk with plenty of non-starchy vegetables and a solid protein, and keep portions moderate. Alternatively, thin canned with water or use light canned to reduce energy density.

20) What should I look for on the label?

Prioritize “unsweetened,” confirm 0 g added sugars, note serving size, and scan fat and calorie totals. Fortification (calcium, vitamins A/D/B12) in beverages can be a helpful bonus.

21) Can I make coconut milk at home to control coconut milk nutrition?

Yes. Blending coconut with warm water and straining lets you choose thickness—and therefore calories and fat. Diluting further yields a beverage-like profile; using it richer mimics canned.

22) Is coconut milk suitable for lactose-free or vegan diets?

Indeed. Coconut milk (beverage or canned) is dairy-free and typically vegan. Nevertheless, always check ingredient lists for additives if you have specific preferences.

23) How does coconut milk nutrition compare to coconut water?

They’re different products. Coconut water contains natural sugars and electrolytes; coconut milk is made from coconut flesh and water, resulting in vastly different calories, fat, and carb profiles.

24) What are typical micronutrients in the beverage?

Many unsweetened beverages are fortified—commonly calcium and vitamin D, sometimes B12 and vitamin A. The exact amounts vary, so review the facts panel for precise percentages.

25) Does “barista” or flavored coconutmilk change the numbers?

Often yes. Barista and flavored versions can add sugars or change fat levels. Consequently, verify total sugars, added sugars, and serving size to keep macros aligned.

26) Is coconut milk appropriate for children?

As part of meals, it can add flavor and texture. However, because the beverage is low in protein, it shouldn’t replace primary protein sources; balance with legumes, eggs, dairy (if used), or other proteins.

27) Will heating coconut milk alter coconut milk nutrition?

Cooking won’t meaningfully change core macros, but reducing sauces concentrates calories per spoonful. Gentle heat preserves flavor and texture better than vigorous boiling once coconut milk is added.

28) How can I store leftover coconut milk properly?

Refrigerate opened beverage cartons and use within a few days. For canned, transfer leftovers to a sealed container, refrigerate, and use within several days; freezing in small portions works well for cooking.

29) Why do numbers differ across brands?

Water content, processing, and fortification vary. Consequently, always rely on the exact panel of the product you’re using, especially when tracking calories or carbs closely.

30) Bottom line: how do I pick the right option?

Choose the unsweetened beverage for everyday low-calorie, low-carb drinks, and choose canned for recipes needing lush texture. With that simple rule—and a quick label check—you’ll keep coconut milk nutrition working for your goals.

Posted on 2 Comments

Apple Cider Vinegar & Lemon Juice for Weight Loss

Woman stirring a glass of diluted apple cider vinegar and lemon water in a sunlit kitchen; overlaid text shows the safe recipe and enamel-care tips.

People love simple rituals. A tall glass of water. A splash of vinegar. A squeeze of lemon. The routine feels clean and doable, which is part of its charm. Still, it helps to be honest. Apple cider vinegar and lemon juice for weight loss can support better choices for some people, mostly because it makes water more appealing and may help a few folks feel fuller. Even so, it’s not a switch you flip to change your body overnight. Progress still leans on ordinary decisions repeated often: meals anchored by protein and plants, everyday movement, and decent sleep.

Rather than pitching another miracle, let’s slow down and explore the drink in a realistic way—what research actually says, how lemon genuinely helps, what safety looks like in real life, and the gentlest way to try the ritual if you’re curious. Along the way, you’ll find straightforward resources from trusted health publishers and several MasalaMonk reads to make the journey tastier and easier to keep.

Also Read: Lentil Pasta for Weight Loss: Nutrition, Best Brands & 5 Healthy Recipes.


What apple cider vinegar and lemon juice for weight loss can and can’t do

To begin with, expectations matter. The Mayo Clinic puts it plainly: vinegar alone is unlikely to drive significant weight loss, and the evidence just isn’t strong enough to promise big results. Their concise guidance on apple cider vinegar is a useful reset if you’re sorting through bold claims you’ve seen online (Mayo Clinic’s guidance on ACV for weight loss).

That said, there are reasons the habit keeps getting attention. Some small studies and reviews report that vinegar can blunt post-meal blood-sugar rises and slow gastric emptying. In plain language, digestion may take a touch longer, and energy swings may feel steadier. For some, that translates into modest appetite control. However—and this is important—the effect tends to be small, short-term, and heavily dependent on your overall pattern. For a measured, readable overview that balances interest with caution, Harvard Health’s discussion of the “ACV diet” is worth a skim (Harvard Health’s overview). Likewise, Health.com has a recent explainer that lands in the same place: there might be a small nudge when ACV is used alongside a calorie deficit, but robust proof is limited (Health.com’s explainer).

Stepping back, the pattern is consistent: apple cider vinegar and lemon juice for weight loss might be a possible nudge, not a cure-all. If you enjoy the taste and you use the drink to replace a sweetened beverage, it may tilt the day in your favor. If you dislike it or it bothers your stomach, you can safely skip it—plenty of people reach their goals without ever sipping vinegar.

Also Read: Chia Seed Water: Benefits, Recipes & Best Time to Drink for Weight Loss


Where lemon genuinely helps—and where it doesn’t

Lemon earns its place here for reasons that are refreshingly down-to-earth. It brightens water, adds a familiar aroma, and turns hydration into a habit you might actually look forward to. That alone can change a day. A squeeze of juice offers a little vitamin C and makes the ritual feel fresh. However, honest evidence that lemon juice directly drives fat loss in humans is thin. Consider it flavor and hydration support, not a fat-burning trigger.

If citrus rituals appeal to you, two simple MasalaMonk companions can help you fine-tune the vibe you enjoy: the cozy routine of warm lemon water in the morning and the crisp refreshment of cold lemon water. Pick the version you’ll actually repeat.


Safety first: protect teeth, throat, and stomach

Because vinegar is acidic, the biggest long-term concerns with sloppy use aren’t your waistline—they’re your teeth and comfort. Enamel erosion creeps up slowly; throat irritation can turn a once-pleasant ritual into something you avoid. In addition, vinegar slows stomach emptying. Some people like the lingering fullness; others, especially those with reflux or delayed gastric emptying, find it uncomfortable. For a clear consumer-level rundown of common pitfalls—enamel wear, low potassium with heavy long-term intakes, and potential interactions with medications—see Verywell Health’s side-effects summary (Verywell Health on ACV side effects). Harvard also underscores two evergreen rules: dilute thoroughly and prefer food-first uses over “shots” (Harvard Health’s overview).

Practical steps you can trust:

  • Always dilute ACV in plenty of water.
  • Sip through a straw, then rinse your mouth with plain water.
  • Give enamel ~30 minutes before brushing.
  • Pair the drink with food if you’re prone to heartburn or queasiness.
  • Check with your clinician first if you live with diabetes and gastroparesis, significant reflux/ulcer symptoms, kidney disease, or if you take insulin, digoxin, or certain diuretics.

These guardrails keep a small habit from becoming a big problem.

Also Read: Apple Cider Vinegar for Arthritis & Joint Pain: Myths vs Facts


How to make apple cider vinegar and lemon juice for weight loss (gentle method)

Let’s keep the method simple, the taste pleasant, and the dose sensible.

One-glass method (1 serving):

  • Apple cider vinegar: start with 1–2 teaspoons; only increase if you feel fine. Most people don’t need more than 1 tablespoon per serving.
  • Water: 250–300 ml (room temperature or warm).
  • Lemon juice: 1–2 teaspoons (optional).
  • Optional flavor: a slice of fresh ginger, or ½ teaspoon honey (remember honey adds calories).

How to:
Stir the vinegar into the water, add lemon, sip through a straw, then rinse with plain water.

When to drink:
With a meal or just before your most carbohydrate-heavy meal. There’s no proven “best time,” so choose a moment you’ll remember. The Mayo guidance emphasizes dilution and moderation above timing or brand (Mayo Clinic on ACV basics).

Daily ceiling:
Without medical advice, keep total intake around 15–30 ml (1–2 tablespoons) per day, always well diluted.

Brand note:
Choose a pasteurized vinegar you like and can find easily. There’s nothing magical about a label; dilution and habits matter more than logos.

Also Read: Best Nuts and Seeds for Weight Loss (Chia, Flax, Almonds & More)


Prefer not to sip? Put vinegar in food and smile

You do not have to drink acid to get the flavor benefits. In fact, using vinegar in meals may be the smarter path for your teeth and your tastebuds. A simple vinaigrette over crisp greens gives you the same acetic-acid experience while bundling it with fiber, protein, and healthy fats. If you’d like enamel-friendlier ideas that still feel indulgent, browse MasalaMonk’s safe apple cider vinegar salad dressing and a set of ACV dressing recipes. Use those approaches broadly—not only during pregnancy.

As you experiment, lean into texture and contrast: peppery greens, toasted seeds, juicy tomatoes, and a vinaigrette that makes you crave the next bite. When a salad becomes the part of lunch you anticipate, you’ve shifted the whole day in your favor without feeling deprived.


Morning or empty stomach: is it necessary?

Plenty of people adore a morning ritual; it feels like a reset. Nevertheless, there isn’t convincing evidence that sunrise timing or an empty stomach makes vinegar more effective for fat loss. If an empty stomach leaves you queasy, place the drink with breakfast. If you prefer an even gentler start, consider warm lemon water on its own and then use ACV later in the day inside food. For tuning your routine to your taste, the MasalaMonk guide to warm lemon water in the morning is a friendly read.


Variations of apple cider vinegar and lemon juice for weight loss

Because taste keeps habits alive, it’s worth exploring small tweaks.

  • Honey: A drizzle rounds off sharp edges and makes the ritual feel softer. Just remember that sweetness brings energy; a half teaspoon adds roughly 20–25 calories. That’s easy to fit into your day when you plan for it.
  • Ginger: Grated ginger adds warmth without much energy cost and can make the drink feel cozier. For more zesty, hydrating ideas, MasalaMonk’s cucumber, lemon, and ginger water has crisp combinations you can borrow.
  • Spices: A pinch of black pepper brings a gentle kick. If you enjoy playful seasonings that don’t sneak in calories, lemon and black pepper offers easy variations.

Finally, some readers ask whether one famous ACV brand matters. It doesn’t, assuming you choose a pasteurized product and keep the dose modest. The basics—dilution, consistency, and an overall balanced plate—do the heavy lifting.


Tiny habit upgrades that compound over time

Instead of asking, “Will this drink make me lose weight?”, consider, “How can this ritual help me show up for myself the rest of the day?” A single glass won’t change your life. A small cascade of better choices might.

  • Pair it with protein. Aiming for ~25–35 g of protein at meals steadies appetite and protects lean mass as you lose fat.
  • Swap, don’t stack. Let the drink replace a sweetened beverage rather than adding on top of your usual routine.
  • Front-load plants. Start lunch or dinner with a generous salad dressed in a light ACV vinaigrette.
  • Walk after meals. Even a short stroll can steady post-meal blood sugar and clear your head.
  • Guard your bedtime. Hunger and cravings improve when sleep is consistent.

If you like myth-free fundamentals, the Mayo Clinic’s weight-loss basics is calm and useful (weight-loss basics). And for perspective from dietitians who see the ACV trend often, EatingWell recently summarized their take: interesting, but far from magical (dietitians’ view at EatingWell).

Also Read: How Does a High Protein, High Fiber Diet Support Weight Loss?


A seven-day starter plan using apple cider vinegar and lemon juice for weight loss

Trying something new is easier with a script. Use this as a soft landing and adjust freely.

Days 1–2
Stir 1 teaspoon ACV into 300 ml water. Add a little lemon. Drink with lunch. Rinse your mouth after.

Days 3–4
Increase to 2 teaspoons if you feel fine. Keep the same dilution. Stay with meals so your stomach has company.

Days 5–7
Try 1 tablespoon once per day, or split across two smaller servings. Keep your daily total within 1–2 tablespoons. If you notice throat irritation, reflux, or tooth sensitivity, switch to food-first uses and reassess later.

Alongside the drink, build a plate you enjoy: a protein you actually like, plenty of vegetables, and a starch that suits the day. If you need citrus refreshers between meals, cold lemon water is a bright companion to keep you sipping without added sugar (cold lemon water ideas).


What results feel like with apple cider vinegar and lemon juice for weight loss

Outcomes vary—and that’s completely normal. One person feels fewer afternoon cravings. Another feels no change. Someone else decides the drink isn’t for them and keeps vinegar strictly in dressings. None of these experiences are wrong; they simply reflect biology and preference.

If you enjoy the ritual and it helps you replace a sugary beverage, you may notice slow, steady benefits. If you dislike it, you won’t miss anything by skipping. A bright salad often delivers the same nudge with fewer dental worries. For a realistic, dietitian-led take, EatingWell sums it up neatly: evidence is limited; any help is likely small; food-first habits do the heavy lifting (dietitians’ view). Meanwhile, Health.com’s recent explainer lands in the same place, with a simple reminder to dilute and keep expectations modest (Health.com explainer).

Also Read: Guide to Body Fat Percentage


A kind closing thought on apple cider vinegar and lemon juice for weight loss

Choose the version of this habit that fits your life. If you enjoy the taste, keep it well diluted and pair it with meals. If you prefer food-first, whisk a quick vinaigrette and enjoy a generous salad. Both paths can support a calmer appetite and better choices—the quiet way real change happens. If questions about safety linger, the Verywell Health side-effects overview is clear and practical, and the Harvard Health pieces add helpful context without sensationalism (Verywell Health side-effects; Harvard Health overview).

Finally, a quick note to keep you safe: because vinegar can interact with certain conditions and medications, and because tolerance varies, it’s wise to speak with your clinician if you have diabetes (especially with gastroparesis), kidney disease, or chronic reflux, or if you take insulin, digoxin, or particular diuretics. A short conversation now is worth more than a long detour later.

FAQs

1. Can I mix lemon juice with apple cider vinegar?

First, yes—you can mix them. Apple cider vinegar and lemon juice for weight loss is mostly about taste and a simple ritual; the combo can make water more appealing while you aim for balanced meals and steady movement.

2. Does apple cider vinegar and lemon juice in the morning work better?

Next, timing isn’t magic. Morning feels motivating for many, yet the gentle benefits are similar whether you drink it with breakfast, lunch, or another meal you’ll remember.

3. Should I drink it on an empty stomach?

Also, not everyone tolerates acid well on an empty stomach. Pairing the drink with food often feels easier on the throat and may reduce reflux or queasiness.

4. How much should I drink daily?

Meanwhile, start small—1–2 teaspoons of apple cider vinegar in 250–300 ml water—with a squeeze of lemon if you like; if it sits well, you can work up to 1 tablespoon per serving and keep your daily total near 1–2 tablespoons.

5. Is apple cider vinegar and lemon juice good for weight loss?

Still, consider expectations. Apple cider vinegar and lemon juice for weight loss may help you feel a little fuller and swap out sugary drinks, yet the real progress comes from your overall eating pattern, steps, and sleep.

6. What are the benefits and risks?

That said, potential upsides include a more satisfying beverage habit and, for some, steadier appetite; possible downsides include enamel wear, throat irritation, delayed stomach emptying, and interactions if you have certain conditions or take specific medications.

7. Is there a simple recipe I can follow?

However, keep it basic: 1–2 teaspoons ACV + 250–300 ml water + 1–2 teaspoons lemon juice; sip through a straw and rinse your mouth with plain water afterward; adjust tartness to taste.

8. Can I add honey or ginger?

Moreover, tiny tweaks help adherence—½ teaspoon honey softens sharpness (remember the calories), while a slice of fresh ginger adds warmth without much energy.

9. Is warm water better than cold?

Additionally, temperature is personal. Warm water can feel soothing, cold water can feel refreshing; choose whichever helps you repeat the habit comfortably.

10. Is apple cider vinegar better than lemon juice alone?

On balance, vinegar has the stronger tradition of modest effects; lemon mainly brightens flavor and supports hydration, which can indirectly help you stick to your plan.

11. How long before I notice changes?

Practically speaking, give any routine a few weeks while you also stack fundamentals—protein-forward meals, vegetables, walking—so any small nudge from the drink has room to matter.

12. Who should avoid this drink?

Generally, skip or speak with your clinician first if you have diabetes with gastroparesis, chronic reflux or ulcers, kidney issues, low potassium history, or if you take insulin, digoxin, or certain diuretics.

13. Can I use apple cider vinegar and lemon juice for weight loss at night?

Typically, evenings are fine if you tolerate acid well; if nighttime triggers reflux, place the drink earlier in the day or use vinegar in a salad dressing instead.

14. Does it target belly fat?

Ultimately, no single drink targets fat from one area. Apple cider vinegar and lemon juice for weight loss may support better choices, but body fat reduces overall when your daily pattern creates a gentle calorie deficit.

Posted on 2 Comments

Benefits of Drinking Warm Lemon Water Every Morning

Infographic on warm lemon water in the morning—benefits, safe recipe, enamel tips, myth vs facts—MasalaMonk.com footer.

Before messages and meetings, before the day picks up speed, there’s a small decision that can soften the edges: a warm mug, a squeeze of lemon, and a quiet minute that belongs only to you. Warm lemon water in the morning won’t transform life in a single sip—and thankfully it doesn’t pretend to. What it offers is gentler: an easy way to hydrate first, a clean citrus lift, and a calmer shape to your morning. That little bit of steadiness is often what sets the tone for better choices through the next twelve hours.

This isn’t a sales pitch for miracles. It’s a simple ritual explained plainly: what helps, what doesn’t, how to protect your teeth, when to adjust for your body, and how to make it a habit that lasts.

Why warm lemon water in the morning helps

You actually drink it

Most people wake slightly dehydrated. A warm, lightly flavored drink is simply easier to finish than a tall glass of cold water; that first 200–250 ml goes down without much effort, and as a result the morning feels less jagged. If this mug nudges you to skip a sweetened beverage, that’s a quiet win for energy and long-term health. If you like receipts, the public-health team at Harvard has a clear, readable overview of sugary drinks and risk that explains why replacing sugar-sweetened drinks is one of the most useful everyday changes.

Of course, routines shift with seasons. On hot afternoons, a cooler glass may feel more inviting. When the weather turns that way, it’s easy to slide toward your own take on cold citrus hydration—our deep dive on benefits of cold lemon water compares the experiences without the hype.

A modest vitamin C nudge

Half a lemon won’t replace a bowl of fruit, yet it still adds a small but useful vitamin C top-up—especially on coffee-and-toast mornings. If you’re the kind of reader who enjoys the details, you can check citrus values in USDA FoodData Central and skim the NIH vitamin C fact sheet for sensible ranges. If you’d rather stay in our kitchen, stroll through lemon varieties around the world and their health benefits to see how flavor and nutrition dance across different cultivars.

For some, a citrate assist

If you’ve dealt with certain calcium kidney stones, citrus citrate can help—when overall hydration is on point. It’s not a cure; it’s an assist. The National Kidney Foundation notes that lemon juice diluted in water can raise urinary citrate (be mindful of sugar if you’re turning it into lemonade). Prefer to compare citrus side by side? Our guide to lemon vs. lime water offers a simple, practical look.

What the ritual doesn’t do (and what does)

Let’s be honest. Lemon water doesn’t detox your liver, alkalize your blood, or burn belly fat. Your body handles detox, your blood’s pH isn’t pushed around by a wedge of fruit, and fat loss comes from overall balance—not a single ingredient. Still, warm lemon water in the morning can influence the day in a way that matters: hydrate early, and breakfast tends to calm down; skip one sugary drink, and the afternoon is steadier. If you’re exploring weight topics with nuance, lemon and black pepper for weight loss frames lemon as a helpful nudge rather than a magic trick.

Warm vs. hot vs. cold Lemon Water in the Morning

Warm usually wins at sunrise: soothing, easy on an empty stomach, and inviting enough that you finish the mug. Very hot water doesn’t add benefits and can irritate. Cold is lovely later in the day—especially after a walk or when the weather leans tropical. None of this needs to become a doctrine. The best temperature is the one you’ll actually drink, consistently.

When to drink it

Morning works because it stacks neatly with things you already do—open the curtains, put on the kettle, squeeze lemon, sip. If evenings are gentler in your world, shift the ritual there and keep everything else the same. The effect comes from showing up for the habit, not from the clock.

Protecting your teeth while you sip

Lemon is acidic. You don’t have to avoid it; you just have to be kind to enamel.

  • Use warm, not boiling water—comfortable to sip.
  • Sip rather than swish; if you like to linger over your mug, a straw helps limit contact.
  • Rinse with plain water right after.
  • Wait 30–60 minutes before brushing so saliva can rebalance and the enamel surface can re-harden. Mayo Clinic explains the timing clearly; for a friendly recap, Verywell Health’s explainer says the same in gentler language.

Prefer the reminder in our own voice? The pros-and-cons note in lemon water in morning: 5 benefits and drawbacks keeps the guidance practical without the scare tactics.

The recipe (and variations that respect the ritual)

The simple version (two minutes)

  1. Warm 200–250 ml water until it’s comfortable to sip.
  2. Squeeze ½ fresh lemon (or 1–2 tablespoons bottled juice).
  3. Stir, sip, and rinse with plain water afterward.

That’s enough. The ritual works because it’s simple and repeatable. But on days when you want a little more character, small additions help without turning your kitchen into a lab.

Small upgrades, still simple

  • Ginger: a thin slice brings subtle heat and clears the morning cobwebs.
  • Cinnamon: a pinch softens the edges and suits cooler weather.
  • Mint: a few leaves brighten the cup without adding acidity.
  • Cucumber: when afternoons run hot, keep the hydration theme rolling with cucumber, lemon, and ginger water or dip into cooling cucumber electrolyte quenchers to make “drink more water” feel like pleasure instead of duty.

Honey, used thoughtfully

If a touch of sweetness keeps the habit alive, add ½–1 teaspoon honey. It softens the citrus, which, in turn, makes the ritual easier to keep. It does add calories and the drink is still acidic, so keep the enamel tips. Curious about choosing better honey—raw or filtered, floral varietals and all the rest? Wander through Raw Honey: The Sweet Superfood, or pair the conversation with a measured look at ginger and honey for weight.

Making the habit of Warm Lemon Water in the Morning stick

Habits don’t survive on motivation; they survive on logistics. Reduce friction until the ritual is almost automatic.

  • Pair it with something you already do: kettle on → squeeze lemon → two easy stretches → coffee.
  • Keep a small “lemon station”—knife, board, mug—in one dependable spot.
  • If mornings are chaotic, pre-cut wedges at night.
  • Use the kettle’s timer if it has one and let the machine do the reminding.
  • Track a short two-week streak; once it feels natural, drop the tracker and trust the routine.

The next steps matter too. After warm lemon water in the morning, breakfast tends to tilt toward balance: yogurt and fruit instead of a hurried pastry; an omelet instead of a sugar crash. For practical ideas you can use tomorrow, our quick hydration-forward breakfasts live neatly alongside health benefits of cucumber and lemon water and refreshing lemon cucumber water—ignore the word “detox”; keep the parts that make drinking water easier.

When to soften, switch, or skip

Sensitive stomachs and reflux

Citrus can aggravate symptoms for some people with GERD. That doesn’t automatically rule out the ritual. Try less lemon in more water, sip after a small bite of food, or keep the habit with warm plain water in the morning and enjoy citrus later in the day. The Cleveland Clinic’s GERD diet guide is a straightforward, no-drama reference if you need it.

Also Read: 21 Remedies for Acid Reflux, Heartburn, and GERD: Natural and Ayurvedic Solutions.

Enamel concerns

If enamel is already compromised, keep the practical steps—warm water, brief contact, a rinse after, and a pause before brushing—and keep regular dental check-ins. The short Mayo Clinic piece above is the cleanest summary if anyone in your house likes to know “why” before they change a routine.

Travel days

Rituals wobble when you’re away from your kitchen. A tiny bottle of lemon juice in your bag is a quick fix; if that’s not your style, switch to warm plain water while traveling and return to lemon at home. No guilt necessary; the habit’s shape matters more than its exact ingredients for a week or two.

Small science, plain English

  • Hydration is the clearest benefit. Flavors you enjoy increase intake; better intake supports digestion, cognition, and energy. For context on why swapping out sugary beverages matters, the Harvard sugary-drinks pages make a crisp case without sensationalism.
  • Vitamin C: lemons help, modestly; bigger wins come from the overall pattern—daily fruit and vegetables, not a single mug. Exact values and reasonable limits live in USDA FoodData Central and the NIH fact sheet.
  • Citrate & stones: relevant for a subset of people; hydration is the main lever and lemon can assist. The National Kidney Foundation lays out practical steps without hype.
  • Weight: there’s no fat-burning shortcut in a cup. The value is in replacing a sugary drink and building a low-friction morning that keeps you steady. When you want a grounded follow-up, lemon and black pepper for weight loss keeps expectations realistic.

Putting it together

Begin with warm lemon water in the morning because it’s easy and kind. Protect your teeth with simple steps. Adjust the lemon or the timing if your body asks for it. Keep the ritual because it helps you drink water—and because it says something about how you want the day to feel: less noise, more intention. The benefits aren’t flashy; they accrue in the background while you get on with living.

FAQs about Warm Lemon Water in the Morning

1) What are the benefits of warm lemon water in the morning?

It’s a gentle way to hydrate first thing, which often steadies energy and digestion. Plus, you’ll get a small vitamin C nudge from the lemon. While it won’t “detox” or melt fat, it can help you replace sugary morning drinks—and that shift matters over time.

2) Is warm lemon water better than hot lemon water in the morning?

Yes—generally. Warm is kinder on the throat and teeth, and, importantly, you’re more likely to sip it comfortably and consistently. Meanwhile, very hot water doesn’t increase benefits and can feel harsh.

3) What’s the difference between warm lemon water and hot lemon water benefits?

Practically speaking, the benefits are similar—hydration plus a little vitamin C. However, warm wins for comfort and tooth-friendliness, so it’s usually the better everyday choice.

4) Does adding honey change the benefits of warm lemon water?

Not much nutritionally—honey adds flavor (and a few calories). However, if a touch of honey helps you stick to the habit, that consistency is the real win. Just keep the same enamel-care tips in mind.

5) Can warm lemon water help with weight loss?

Indirectly, yes. Although it doesn’t burn fat, it can replace higher-calorie beverages and set a steadier tone for breakfast choices. Over weeks, that routine can support a healthier overall pattern.

6) Is it good to drink warm lemon water on an empty stomach in the morning?

Usually, yes. Starting the day with a warm, mild drink is comfortable for many people. That said, if you have a sensitive stomach, try less lemon in more water—or sip after a small bite of food.

7) How much lemon should I use for morning warm water with lemon?

A simple, sustainable ratio is ½ fresh lemon (or 1–2 tablespoons juice) in 200–250 ml of warm water. It’s enough for flavor without overwhelming acidity.

8) How hot should the water be—warm, hot, or lukewarm?

Aim for pleasantly warm—comfortable to sip, not steaming. In other words, think “cozy tea” rather than “fresh-off-the-boil.”

9) Are there benefits of drinking warm water and lemon in the morning with honey?

Mainly taste and habit-keeping. Honey can make the flavor softer, which, in turn, makes the routine easier to repeat. nutritionally, the core benefits still come from hydration and the lemon’s citrus notes.

10) What are the early morning lemon water benefits vs. drinking it later?

The main benefits don’t depend on the clock; consistency does. Even so, many people find morning easiest because it stacks neatly with existing routines—and that makes the habit stick.

11) Is warm lemon water safe to drink every day?

For most people, yes. Just be enamel-smart: sip (don’t swish), rinse with plain water afterward, and wait a bit before brushing. If citrus bothers your stomach, dilute it more—or drink it later in the day.

12) Can warm lemon water affect teeth or enamel?

Lemon is acidic, so a little care helps. Therefore, use warm (not hot) water, minimize mouth contact (a straw can help), rinse after, and wait 30–60 minutes before brushing. With those steps, most people do fine.

13) Is there a difference between benefits of warm water with lemon in morning and at night?

Not really; timing is personal. Morning encourages routine and replaces sugary a.m. drinks, while night can be calming. Choose the moment that helps you keep the habit comfortably.

14) Does warm lemon water help with digestion or bloating?

It can, gently. Warm fluids tend to feel soothing, and beginning hydrated often makes the rest of breakfast sit better. However, if you have persistent digestive issues, it’s wise to notice patterns and adjust.

15) What about GERD or acid reflux—should I avoid lemon water in the morning?

Because citrus can trigger symptoms for some, start mild: less juice, more water, and slow sips. Alternatively, keep the ritual with warm plain water and save lemon for later if mornings are sensitive.

16) Are there benefits of hot lemon water in the morning specifically?

Beyond comfort, not especially—“hot” isn’t more effective. In fact, very hot water can feel irritating. Warm remains the sweet spot.

17) Does lukewarm water with lemon in morning work as well?

Absolutely. Lukewarm sits in the same comfort zone as warm—easy to drink, easy to keep. And consistency, again, is the real advantage.

18) Should I drink warm lemon water before or after breakfast?

Either is fine. Before breakfast is popular because it creates a clean, calm start and helps you hydrate early. Still, if after-breakfast feels better for you, stick with that.

19) Can I add ginger, cinnamon, or mint to morning lemon water?

Yes—small add-ins can make the ritual more enjoyable without complicating it. A thin slice of ginger, a pinch of cinnamon, or a few mint leaves keeps the flavor interesting while you keep the habit.

20) How many times should I drink warm lemon water in a day?

Once daily is a simple, sustainable baseline. If you enjoy a second cup later—perhaps without lemon or with a milder squeeze—that’s fine too. As always, let comfort and enamel care guide you.

21) Is there any benefit to warm lemon water with honey at night instead of morning?

It’s mostly about preference. Night can feel soothing and can help you wind down; morning anchors your day. Choose the moment that you’ll actually keep—because the habit you enjoy is the one that lasts.

22) Can warm lemon water help with skin or immunity?

Indirectly. Better hydration and a modest vitamin C bump support overall wellness, which can reflect in skin and seasonal resilience. But, to be clear, the mug is a helper—not a cure-all.

23) Are there benefits of drinking warm lemon water with honey for weight loss?

Only indirectly through habit change and beverage swaps. Honey adds calories, so keep it light; the goal is a routine that nudges you toward steadier choices throughout the day.

24) Any quick tips to make the morning habit stick?

Yes—pair it with something you already do (kettle on, lemon squeezed, two easy stretches, then coffee), keep a small “lemon station” ready, and prep wedges if mornings are rushed. Small frictions removed; habit secured.