Posted on Leave a comment

Beet Juice Recipe

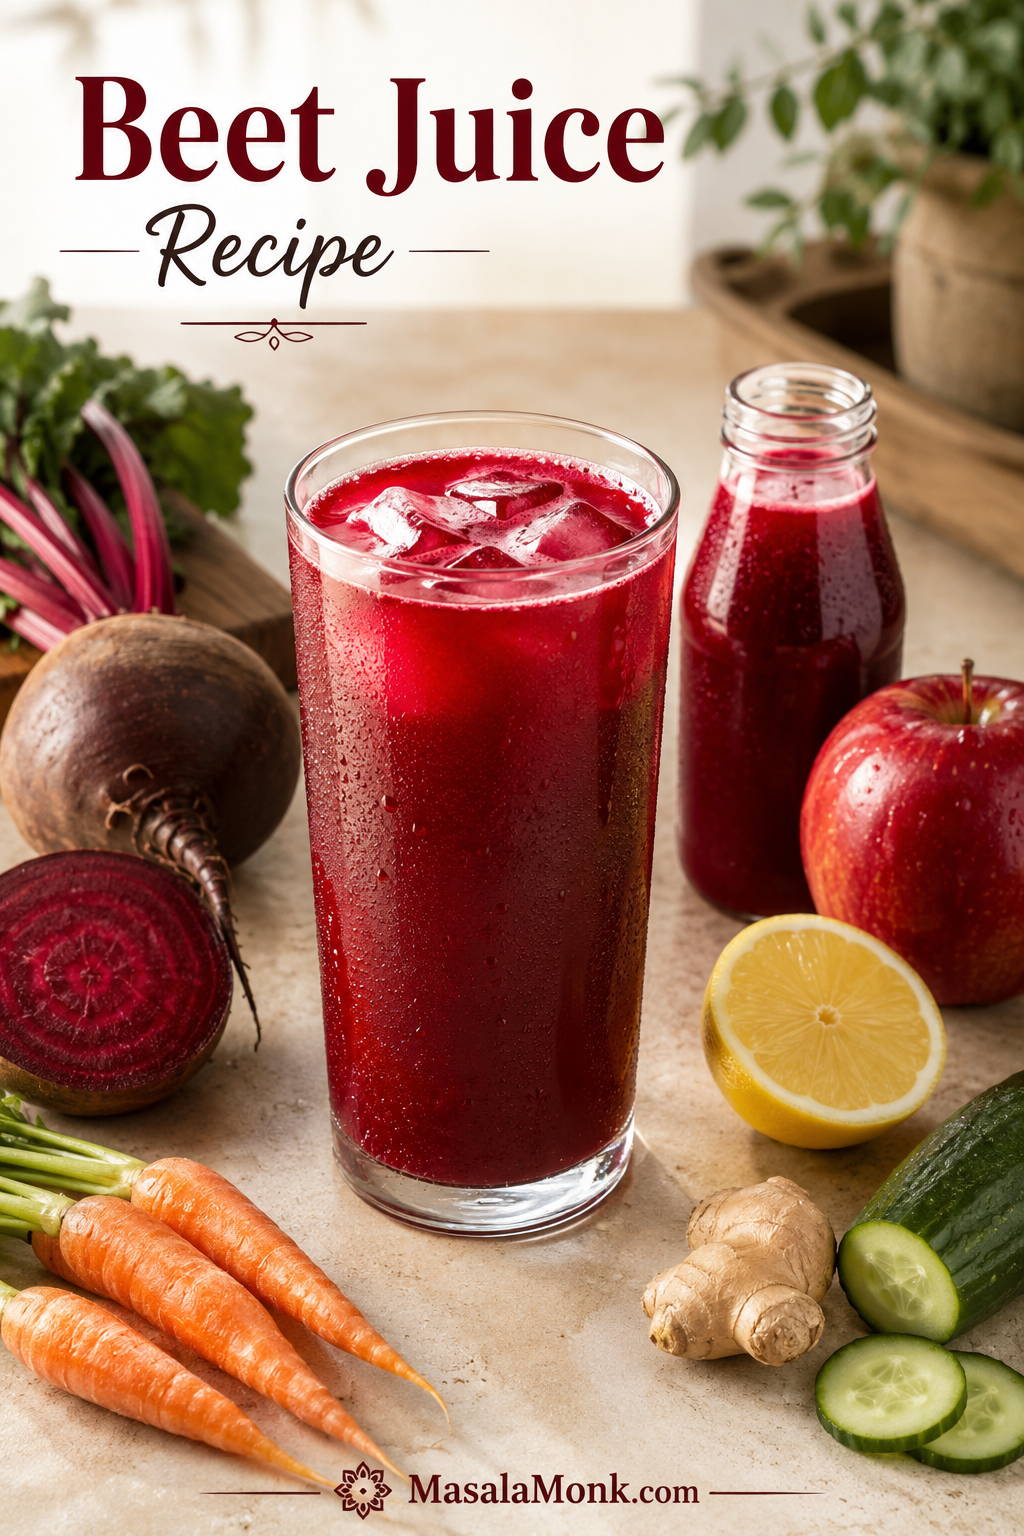
Chilled glass of ruby-red homemade beet juice with ice, a small bottle of juice, and fresh beetroot, carrots, apple, lemon, ginger, and cucumber on a light kitchen surface.

Beet juice can go one of two ways. Made carelessly, it tastes earthy, heavy, and a little too close to drinking a glass of soil. Made with the right balance, it turns into a chilled, ruby-red juice that tastes lively, lightly sweet, tart, and just spicy enough from ginger.

This beet juice recipe is for that second version. It uses raw beetroot for color and depth, carrot and apple for natural sweetness, lemon for brightness, ginger for lift, and optional cucumber to make the whole glass easier to sip. The first taste should feel clear and awake, not muddy.

This is not straight beetroot juice. It is a balanced beet-carrot-apple juice designed to taste cool, tart, lightly sweet, and easy to finish.

You can make this beetroot juice recipe in a juicer for the smoothest texture, or in a blender if you do not own a juicer. The blender version needs water and proper straining, but it still works beautifully when you know what the mixture should look and feel like. It is especially helpful if you are making it for the first time, dislike plain beetroot juice, or want a balanced glass without added sugar.

No juicer at home? Skip to the blender method. Already ready to make it? Jump to the full recipe card.

Start with the quick recipe, then come back to the sections below when you want to adjust the flavor, make it without a juicer, store it safely, or understand what the health claims actually mean.

Beet Juice Recipe Guide

Use this as a quick recipe first, then as a troubleshooting guide whenever you want a smoother blender batch, a less earthy glass, or a safer way to store leftovers.

Quick Answer: How to Make Beet Juice

To make beet juice, juice or blend raw beetroot with carrot, apple, lemon, ginger, and optional cucumber. If using a juicer, feed the produce through the machine, then stir in the lemon juice and serve over ice. If using a blender, add cold water, blend until smooth, then strain through a nut milk bag, cheesecloth, or fine mesh strainer.

This beetroot juice recipe makes about 16–18 oz / 475–530 ml, enough for 2 standard 8 oz / 240 ml glasses or 3 smaller 5 oz / 150 ml servings. It takes about 10 minutes, uses no added sugar, and tastes brightest right after making. Here, beet juice and beetroot juice mean fresh juice made from raw red beetroot, not pickled beet brine, canned beet liquid, or beet powder mixed into water.
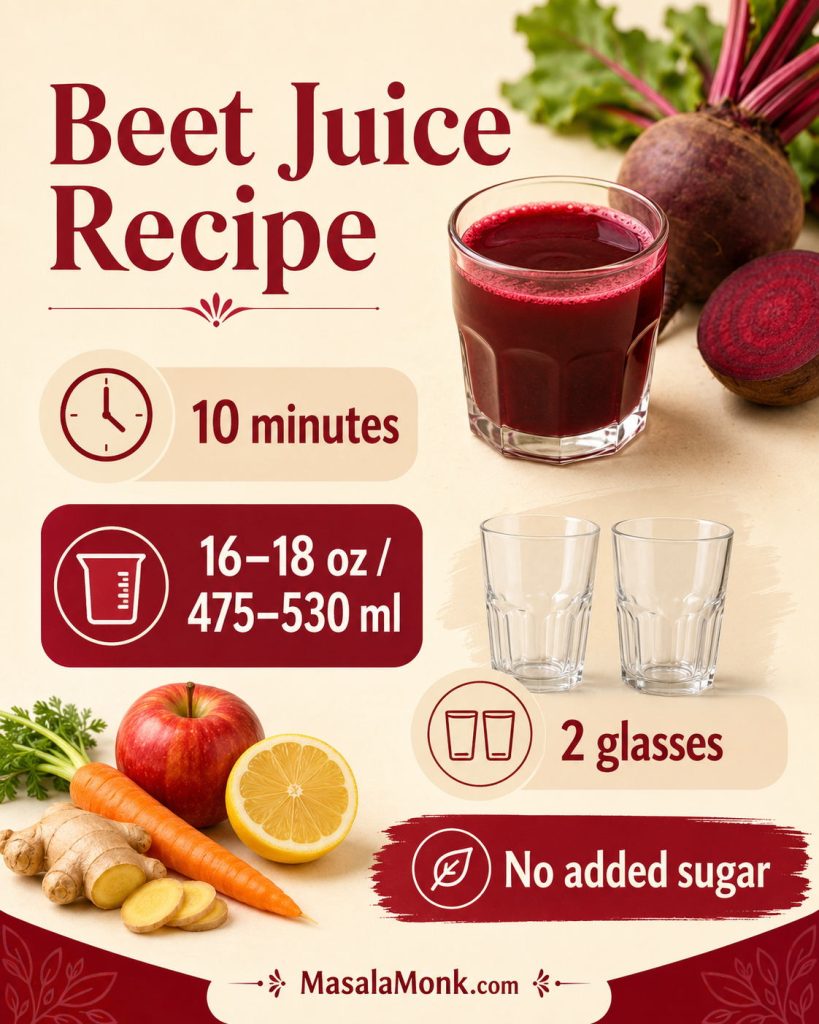
At-a-glance beet juice recipe graphic showing a glass of beet juice, 10 minutes, 16–18 ounces, two glasses, and no added sugar.
Since this fresh beet juice takes about 10 minutes and makes two glasses, it works best as a quick just-made drink rather than a big storage batch.

Easiest first glass: if your first memory of beet juice is something thick, muddy, or aggressively earthy, do not start with straight beetroot. Make the apple-beet-carrot version first, serve it over ice, then adjust lemon, cucumber, or ginger after tasting.
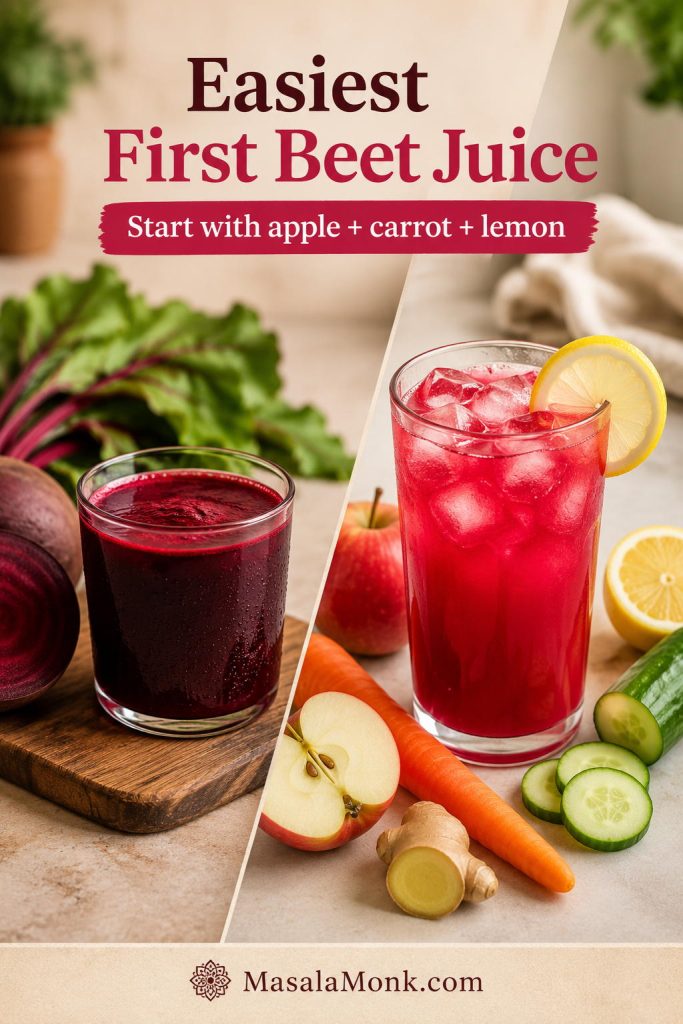
Split image comparing a darker straight beetroot juice with a brighter beginner-friendly apple, beet, carrot, lemon, ginger, and cucumber juice over ice.
When plain beetroot juice tastes too earthy, apple and carrot make the first glass gentler; then lemon, ginger, cucumber, and ice help it feel refreshing.

Still worried about the earthy flavor? See the taste fixes before you make your first batch.

Quick Beet Juice Formula

  • Base: 1 medium-large beetroot or 2 small beets, about 225–250 g / 8–9 oz
  • Balance: 2 carrots and 1 large apple for natural sweetness
  • Brightness: ½ lemon, about 15–20 ml juice
  • Lift: ½–1 inch fresh ginger, about 5–10 g
  • Lightness: ½ cucumber, optional, about 75–100 g / 3–4 oz
  • Blender only: ½–1 cup / 120–240 ml cold water
  • Serve: over ice, right after making

The 10-Minute Version

Juice or blend 1 beetroot, 2 carrots, 1 apple, ½ lemon, ½–1 inch ginger, and optional cucumber. If blending, add ½ cup / 120 ml cold water, blend for 45–60 seconds, strain well, and serve over ice. Add more water only if the blender needs help.

Serve it with breakfast, as an afternoon caffeine-free drink, or as a small pre-workout glass after you know how your body handles it.

Why This Beet Juice Recipe Works

The trick is not hiding the beetroot. It is balancing it. Beetroot gives the drink its deep color, earthy sweetness, and unmistakable flavor, but it needs the right supporting ingredients so the glass does not taste flat or muddy.

Carrot is the quiet helper here: it softens beetroot’s rooty edge without making the glass taste like fruit punch. Apple makes the drink more beginner-friendly. Lemon is the difference between a dull beet juice and one that tastes like it belongs in a glass with ice. Ginger adds a bright, spicy finish. Cucumber is the ingredient to add when the juice feels a little too serious, dense, or beet-forward.

For a beginner-friendly glass, keep beetroot to roughly one-third of the total produce volume and let carrot, apple, cucumber, and citrus do the balancing. If your batch tastes too rooty or heavy, it usually does not need sugar first. It needs acid, coldness, dilution, or a better mix.

Temperature matters too. Room-temperature juice tastes flatter and heavier than a chilled glass, so use refrigerated produce when possible or serve the finished glass over plenty of ice. The final drink should pour easily, taste lightly sweet and tart, and finish with gentle ginger warmth.

What Does Beet Juice Taste Like?

The drink tastes earthy, lightly sweet, mineral-like, and bold. That rooty note is the part people either love or struggle with. Straight beetroot juice can feel intense, especially if you are new to it.

The first sip of this version should be cool and lightly tart, with apple-carrot sweetness in the middle and gentle ginger warmth at the end. Juicer beet juice will feel thinner and clearer. The blender version, even after straining, may feel slightly fuller. Both should still pour like juice, not spoon like a smoothie.

Best beginner version: Use 1 small beet, 2 carrots, 1 apple, ½ lemon, ½ inch ginger, and ½ cucumber. This keeps the beet flavor present but not overpowering.

Once you like the base, adjust one thing at a time: more lemon for tartness, more apple for sweetness, more cucumber for lightness, or more ginger for heat.

Ingredients for the Best Beet Juice

The best glass needs contrast. You want enough beetroot for color and flavor, enough natural sweetness to soften the mineral notes, enough citrus to keep it crisp, and enough chill or cucumber to make it easy to sip.
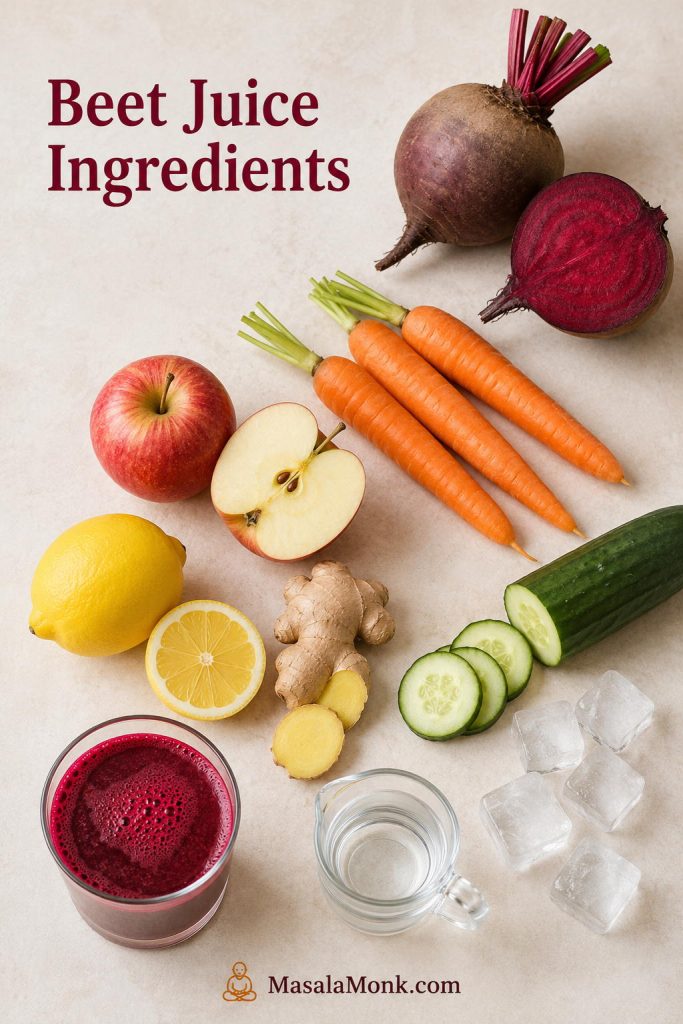
Overhead layout of beet juice ingredients including cut beetroot, carrots, apple, lemon, ginger, cucumber, ice, and water for the blender method.
Each ingredient has a purpose: beetroot adds depth, carrot and apple soften the flavor, lemon lifts it, and ginger gives the juice a cleaner finish.
IngredientAmountWhy it matters
Raw red beetroot1 medium-large or 2 small beets, about 225–250 g / 8–9 ozThe base of the juice; gives color, earthy sweetness, and the classic beet flavor.
Carrots2 medium, about 120–150 g / 4–5 ozAdds natural sweetness and helps round out beetroot’s deeper edge.
Apple1 large, about 170–200 g / 6–7 ozMakes the juice more beginner-friendly and naturally sweet without added sugar.
Lemon½ lemon, about 15–20 ml juiceBrightens the juice and keeps the beet flavor from tasting flat.
Fresh ginger½–1 inch, about 5–10 gAdds warmth, sharpness, and a lively finish.
Cucumber, optional½ small cucumber, about 75–100 g / 3–4 ozLightens the flavor and makes the juice more refreshing.
Cold water½–1 cup / 120–240 ml, blender method onlyHelps the blender move and controls thickness. Do not add it when using a juicer.
IceAs neededMakes the finished glass more refreshing.

Juice yield varies by beet size, carrot freshness, apple variety, juicer type, and how firmly you press the pulp in the blender method. The amounts above usually make about 16–18 oz / 475–530 ml strained juice. A juicer usually gives the clearest yield without added water, while the blender version may make a little more volume because of the water, but with a slightly softer flavor.

Beetroot

Use raw red beets for the brightest color and crispest flavor. Scrub them well because beets grow in soil and often carry grit around the root end. Peeling is optional if the beets are tender-skinned and scrubbed well, but peel them if the skin is rough, bitter, waxed, or hard to clean.

How to Choose Beets for Juice

Choose firm, heavy beets with smooth skin and no soft, wrinkled, moldy, or badly bruised spots. Small to medium beets often taste sweeter and less woody than very large ones. If the beets come with greens attached, trim the greens off before storing, then scrub the roots well before peeling or cutting.
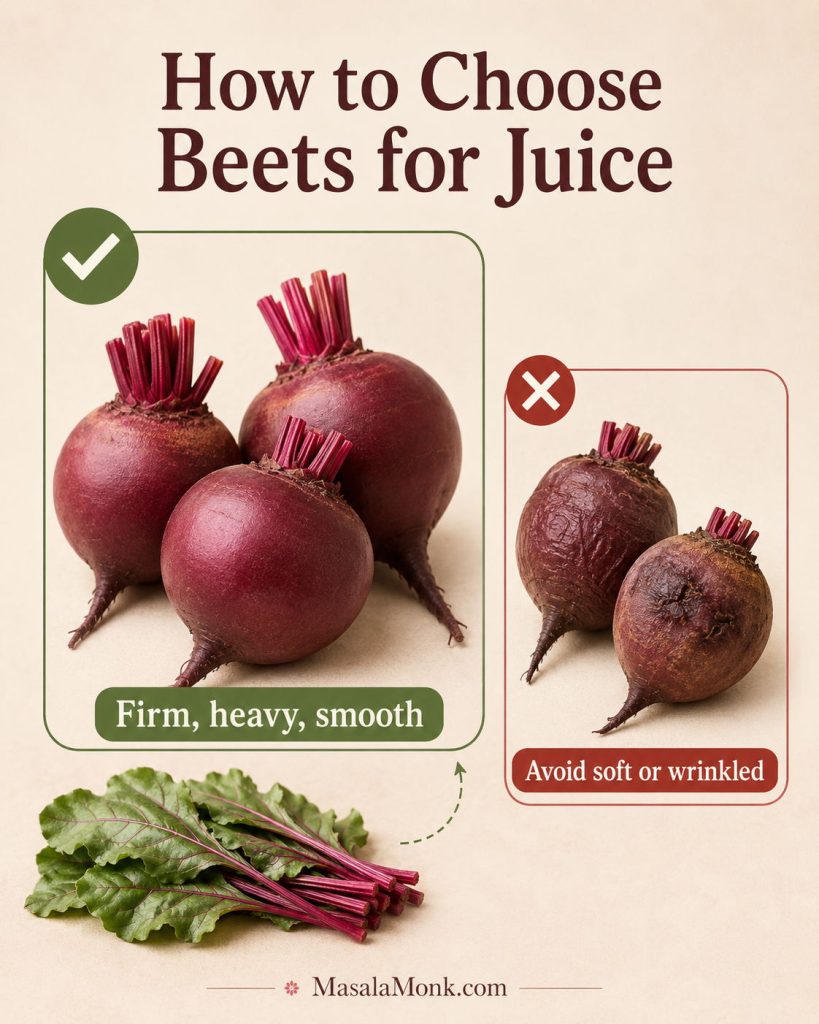
Produce guide showing firm fresh beets for juicing next to softer or wrinkled beets to avoid, with beet greens trimmed nearby.
Better beetroot juice starts before you juice anything, so choose firm, heavy, smooth roots and skip soft or wrinkled beets that can taste woody.

If your beets come with greens, save the tender leaves for cooking rather than adding a large handful to this juice. Beet greens can make the drink taste more grassy and bitter.

Carrot

Carrot is one of the easiest ways to make this drink taste better. It brings mellow sweetness without turning the glass into a fruit-heavy juice, and it also works beautifully in apple beet carrot juice, often called ABC juice. MasalaMonk’s guide to vitamins in carrots goes deeper into carrot juice, raw carrots, cooked carrots, and their key nutrients.

Apple

A crisp sweet-tart apple is ideal. Gala, Fuji, Honeycrisp, Pink Lady, or any good eating apple will work. Green apple gives a sharper, less sweet result. Red apple gives a softer, sweeter glass.

Lemon or Lime

Citrus makes the beet taste awake. Stir lemon juice in at the end if you are using a juicer, or peel the lemon and blend it with the produce if you are using a blender. Avoid blending too much white pith because it can make the drink bitter.

Ginger

Fresh ginger makes the flavor lighter and less heavy. Start with ½ inch if you are sensitive to heat. Use the full inch if you want a stronger beet ginger juice with a spicy finish.

Cucumber or Celery

Cucumber is optional, but it is one of the most useful ways to make the glass easier to drink. It increases the yield, cools the flavor, and gives the juice a more refreshing finish. Celery works too, though it tastes more savory and slightly salty. If you like the cucumber-lemon-ginger side of this recipe but want something lighter than juice, MasalaMonk’s guide to cucumber, lemon, and ginger water is a good companion.

Raw Beets vs Cooked Beets for Juice

Use raw beets for the most refreshing beet juice. Raw beetroot gives the drink a crisp, earthy-sweet flavor. Cooked beets are softer and sweeter, but they make the drink taste more like cooked beet puree than just-made juice.
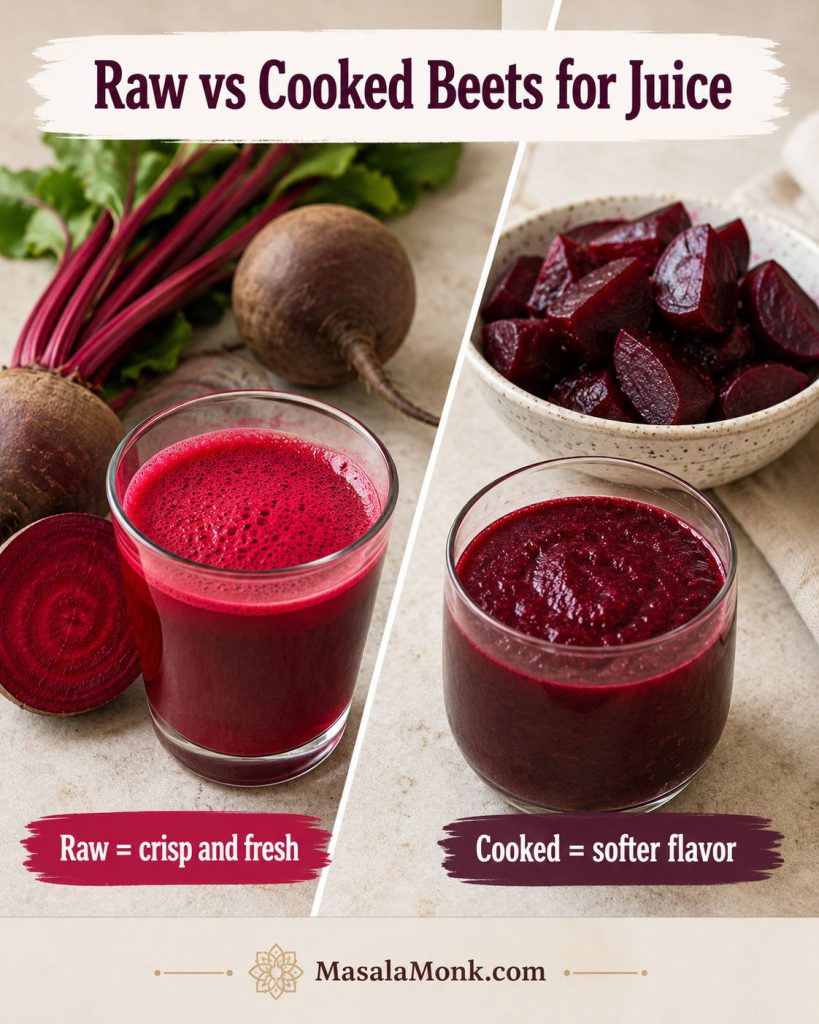
Comparison image showing raw beets with bright beet juice and cooked beets with a softer, thicker blended beet drink.
Raw beets make the crispest beet juice, whereas cooked beets create a softer blended drink that tastes closer to beet puree.

If you only have cooked beets, you can blend them with apple, lemon, ginger, and cold water, then strain the mixture. However, cooked beets do not work well in most juicers, and they will not give the same lively flavor as raw beetroot.

Avoid pickled beets for this recipe unless you specifically want a vinegar-heavy drink. Pickled beet juice has a completely different flavor profile because it usually contains vinegar, salt, and sometimes sugar.

How to Make Beet Juice in a Juicer

The juicer method is the fastest way to make a smooth, clear glass. It gives you the crispest flavor because you do not need to dilute the produce with water.
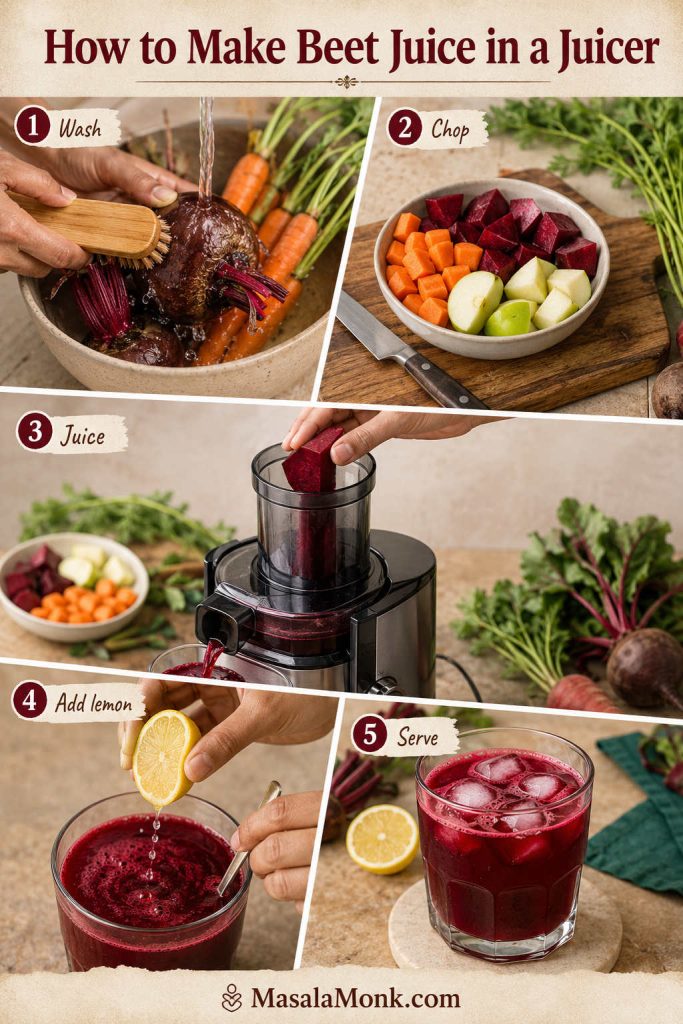
Step-by-step juicer method showing beets and carrots being washed, chopped produce, beetroot going into a juicer, lemon added to juice, and beet juice served over ice.
Because the juicer presses the produce directly, this method gives a smoother, more concentrated glass without needing blender water.
  1. Wash and scrub the produce. Pay special attention to the beetroot and carrots.
  2. Trim the beetroot. Cut off the root end and any rough top area.
  3. Peel if needed. Peeling is optional for tender-skinned beets that have been scrubbed well. Peel rough, waxed, or dirty beets.
  4. Cut everything to fit the juicer chute. Do not force oversized beet chunks through the machine.
  5. Juice the beet, carrots, apple, cucumber, and ginger. Alternate hard and softer produce so the juicer runs smoothly.
  6. Stir in lemon juice. Adding lemon at the end keeps the citrus flavor lively.
  7. Serve over ice. Drink right away for the brightest taste.

The finished juice should pour easily and look deep ruby-red, not thick like puree. Fresh juice naturally separates as it sits, so stir or shake it before drinking. If the flavor tastes flat, add a little more lemon. If it feels too heavy, pour it over extra ice or add cucumber next time.

How to Make Beet Juice in a Blender Without a Juicer

If you came here wondering how to make beetroot juice without a juicer, the blender method is the easiest place to start. It asks for one extra step — straining — but that step is what turns a thick beet puree into something you actually want to sip.
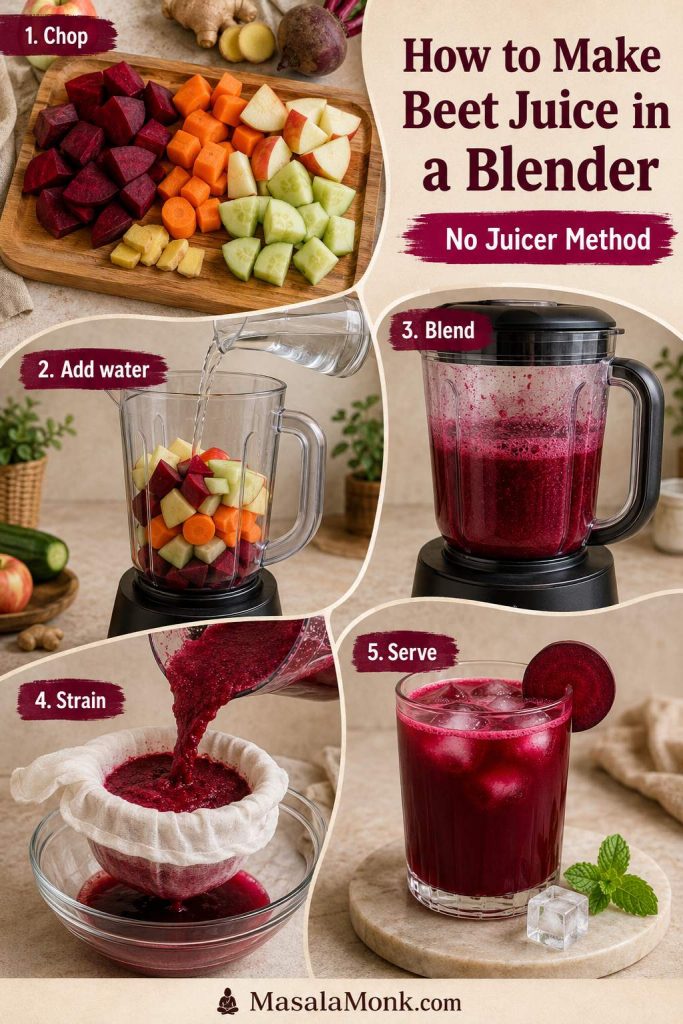
Step-by-step blender method showing chopped beetroot, carrot, apple, cucumber, and ginger, water added to a blender, blended beet puree, straining, and a final glass of juice.
For the no-juicer method, the goal is not a thick smoothie; use just enough water to blend, then strain until the juice pours cleanly.

Still deciding between tools? Compare juicer vs blender beet juice before choosing your method.

  1. Chop the produce smaller than you would for a juicer. Dice the beetroot, carrot, apple, cucumber, and ginger so the blender can handle them.
  2. Add ½ cup / 120 ml cold water first. This helps the blades move without making the juice weak.
  3. Blend on high for 45–60 seconds. The mixture should look like a smooth, thick ruby puree.
  4. Add more water only if needed. If the blender stalls or groans, pause, scrape down the sides, and add water 2 tablespoons / 30 ml at a time, up to 1 cup / 240 ml total.
  5. Strain the mixture. Pour it into a nut milk bag, cheesecloth-lined strainer, or fine mesh strainer set over a bowl or jug.
  6. Let it sit briefly, then squeeze. Give it 2–5 minutes to drain, then press or squeeze to extract as much juice as possible.
  7. Serve over ice. Drink while the flavor is still lively.

How to Strain Beet Juice Smoothly

For blender beet juice, the straining step is where the texture changes from thick puree to a lighter drink. Give the pulp a few minutes to drain before squeezing, especially if you are using a nut milk bag.
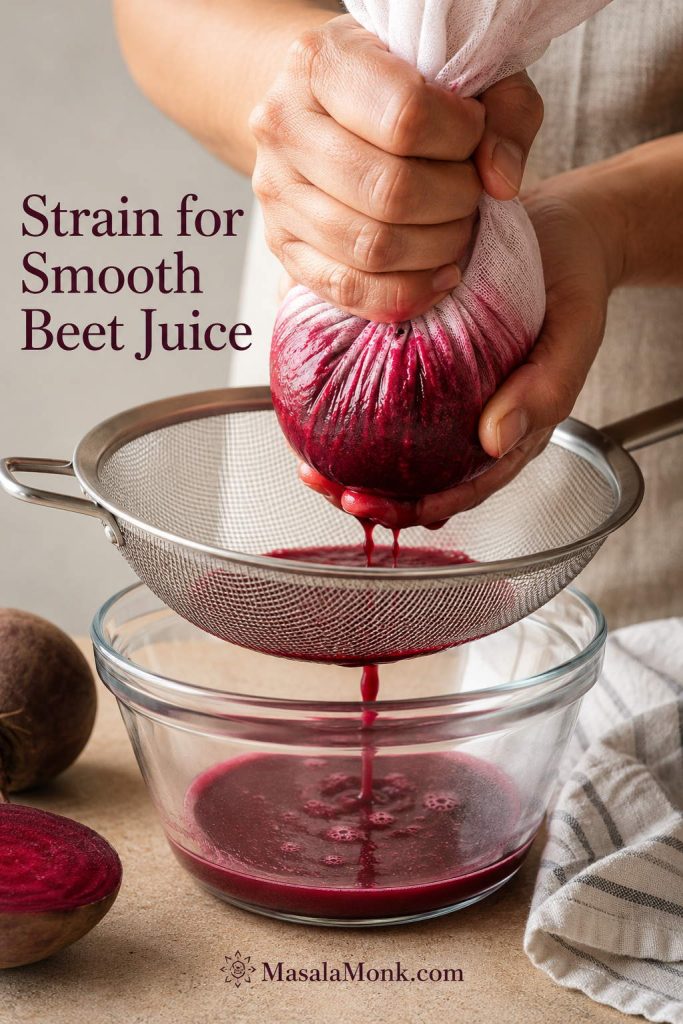
Close-up of hands straining blended beet juice through a nut milk bag or fine mesh strainer into a bowl.
Straining is the step that turns blended beet puree into a lighter, smoother glass of drinkable beet juice.

Blender note: If your first batch looks more like a thick smoothie than juice, you have not failed. It just needs better straining, smaller beet pieces, or a little more patience while the pulp drains. If your blender is not very powerful, use the full 1 cup / 240 ml water and blend in two rounds if needed.

For a little more yield, add 2–3 tablespoons / 30–45 ml cold water to the squeezed pulp, stir or briefly blend again, then strain once more. Skip this second press if you want the strongest flavor.

If your batch is already too thick, watery, or sharp, jump to the troubleshooting guide.

Equipment Needed

Beet juice is simple, but it is not tidy. A little setup saves you from pink fingers, stained towels, and a blender that refuses to move. A juicer gives the smoothest glass, while a blender works well as long as you give it enough liquid and strain properly.
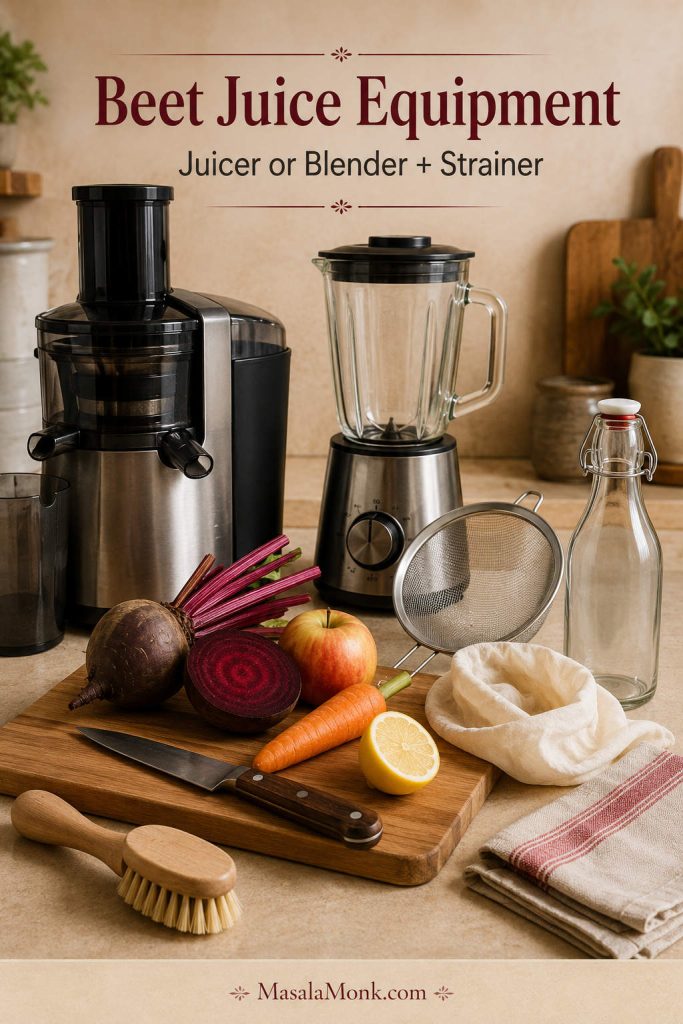
Kitchen counter with beet juice equipment including a juicer, blender, strainer, knife, cutting board, vegetable brush, glass bottle, towel, and fresh produce.
Set up the juicer or blender, strainer, cutting board, and bottle before you start; as a result, beet juice prep stays cleaner and faster.
  • Juicer: best for thin, smooth juice with no added water.
  • Blender: useful if you do not own a juicer; you will need water and a strainer.
  • Nut milk bag, cheesecloth, or fine mesh strainer: needed for the blender method.
  • Vegetable brush: helpful for scrubbing raw beets and carrots.
  • Washable cutting board and knife: important because beet juice stains.
  • Glass bottle or jar: useful if refrigerating leftovers.

Stain warning: Beet juice is beautiful in the glass and ruthless on white towels. Wipe spills quickly, rinse tools right away, and use gloves if you do not want pink fingers.

Juicer vs Blender: Which Method Is Better?

Both methods work, but they do not produce exactly the same drink. A juicer gives you a clearer, lighter result. A blender gives you more flexibility if you do not own a juicer, but you need water and straining.
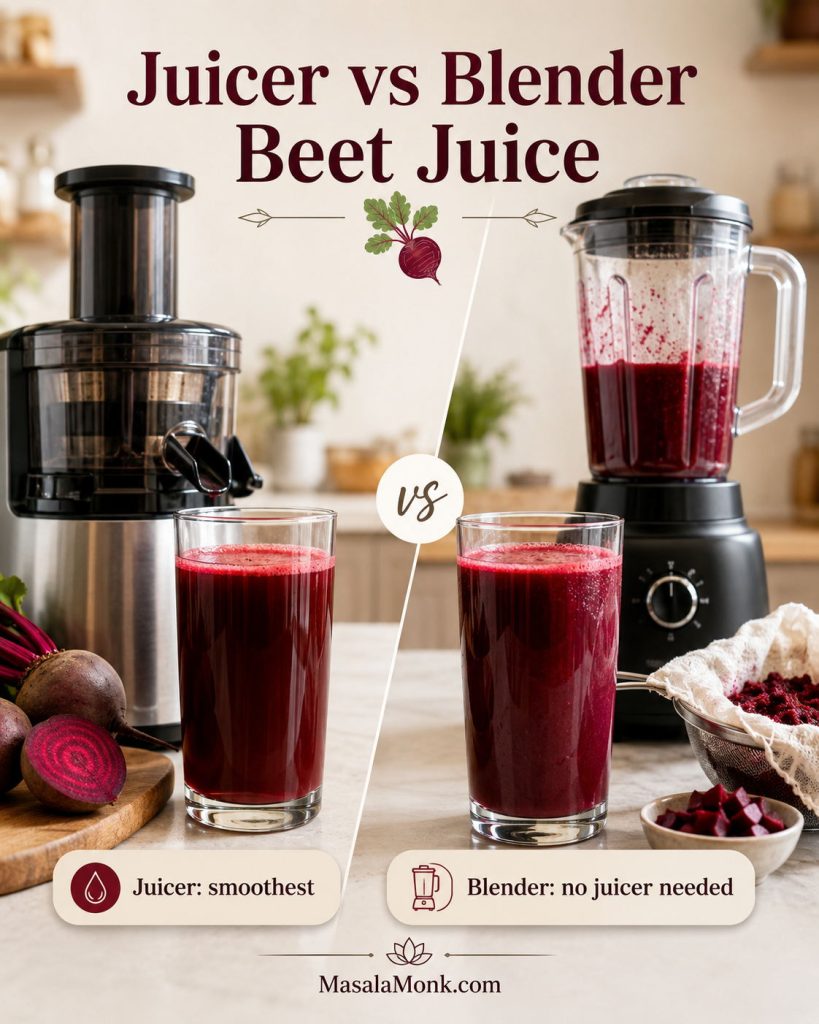
Side-by-side comparison of beet juice made in a juicer and beet juice made in a blender with a strainer nearby.
Choose the juicer when you want the clearest texture, or use the blender when accessibility matters more than a perfectly light finish.
MethodBest forTextureProsCons
JuicerSmooth beet juiceThin, smooth, brightFast, no added water, smoothest juice textureRequires a juicer
Blender + strainerNo-juicer homesSlightly thicker but still juice-likeAccessible, flexible, works with common equipmentNeeds water and straining
Blender, unstrainedThicker blended drinkPulpy, smoothie-likeKeeps more fiber, less wasteNot a true clear juice
Beet powderConvenienceDepends on brand and mixingFast, shelf-stableNot the same flavor or texture as fresh beet juice

If you are deciding whether to buy a juicer, a cold press juicer is often preferred for fresh juice quality, while centrifugal juicers are usually faster and more affordable. MasalaMonk’s guide to cold press vs centrifugal juicers explains the difference in more detail.

Common Beet Juice Mistakes to Avoid

Most disappointing batches come from a few simple mistakes. Before you start, avoid these and the drink becomes much easier to love.
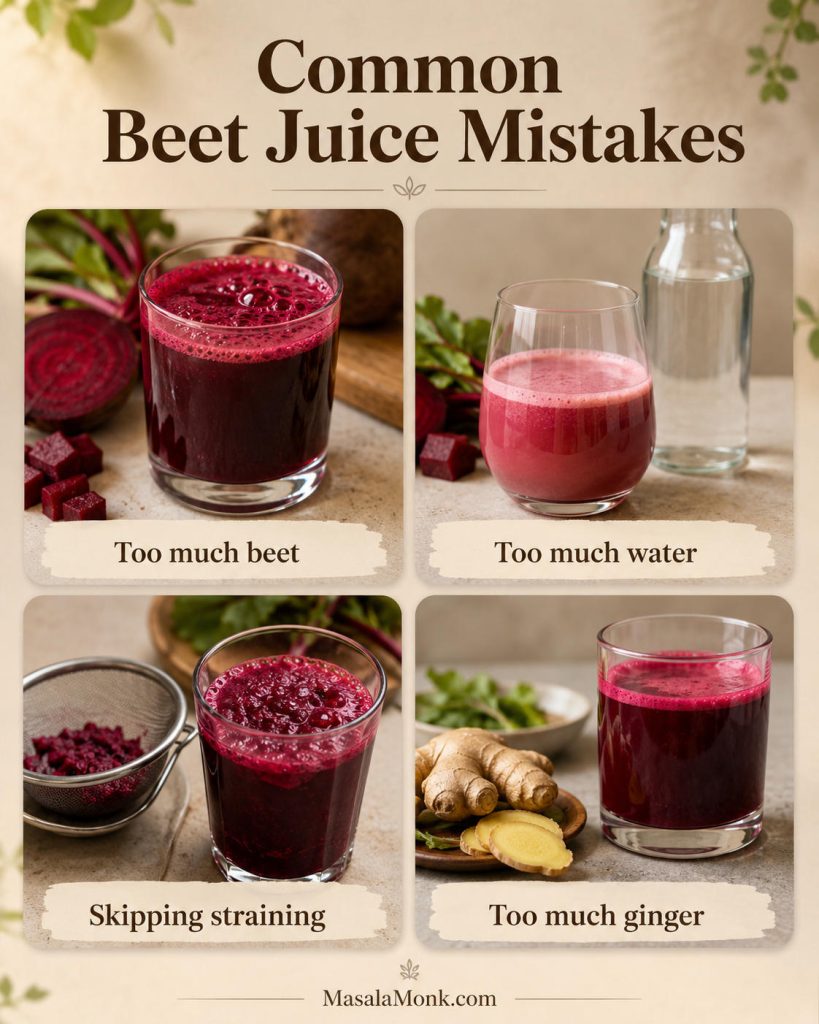
Four-panel beet juice mistakes graphic showing too much beet, too much water, skipping straining, and too much ginger.
Most disappointing batches come from balance issues: too much beet, water, pulp, or ginger can make the glass taste heavy, weak, thick, or harsh.
  • Using only beetroot as a beginner: a pure beetroot batch can taste too intense. Start with apple, carrot, lemon, and ginger.
  • Adding too much blender water: begin with ½ cup / 120 ml and add more only if the blender needs help.
  • Skipping the strainer: unstrained blender juice will be thick and pulpy, closer to a smoothie.
  • Overdoing sharp ingredients: too much ginger or citrus pith can make the juice harsh or bitter, so start small and use lemon juice or peeled citrus.

How to Make Beet Juice Taste Better

The main reason people give up on this drink is not the color or the effort. It is the taste. Beetroot is naturally earthy, so it needs brightness, sweetness, chill, or dilution to feel balanced.
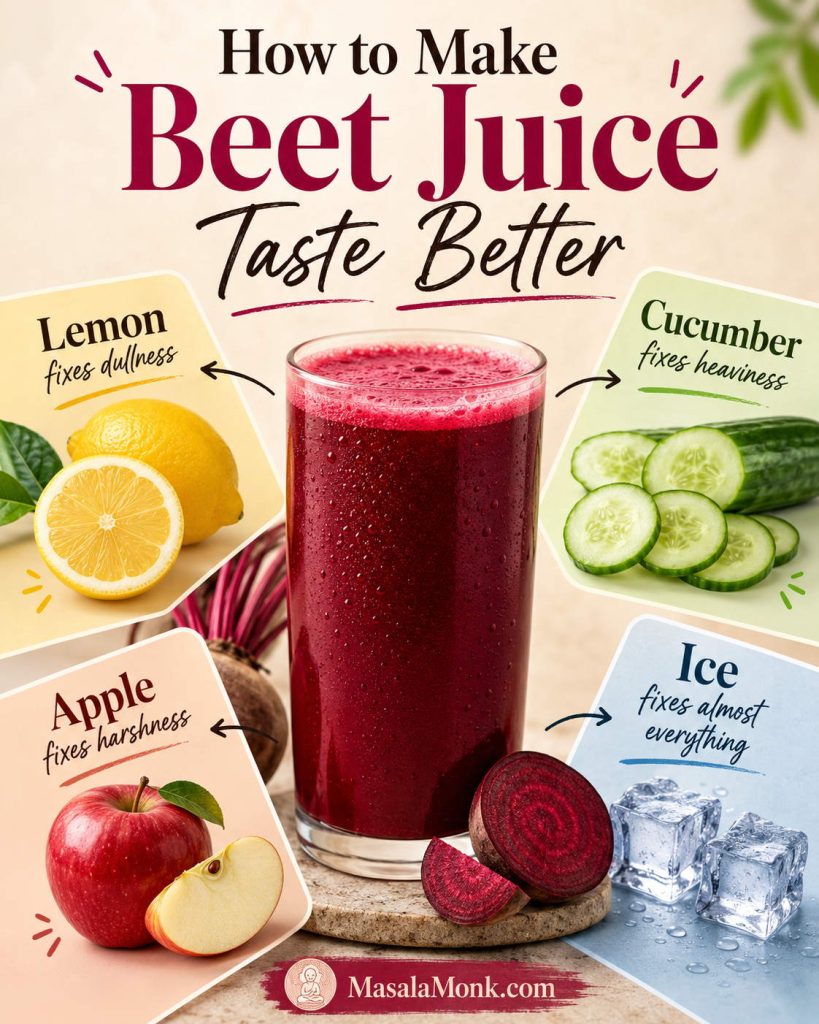
Beet juice taste-fix graphic with lemon, cucumber, apple, and ice around a glass of beet juice.
A strong beet flavor usually needs contrast, not sugar; citrus, cucumber, apple, or ice can shift the drink from heavy to refreshing.
ProblemFix
Too earthyAdd more apple, orange, lemon, cucumber, or carrot.
Too sweetAdd lemon or lime, cucumber, celery, or a little extra ginger.
Too sharp from gingerUse ½ inch ginger instead of 1 inch next time. Dilute this batch with more apple, carrot, or cucumber juice.
Too thickUse a nut milk bag or cheesecloth and squeeze well. Add a little cold water if needed.
Too wateryUse less water next time. Start with ½ cup / 120 ml for blender juice and add only as needed.
Too bitterPeel citrus fully and avoid blending too much white pith.
Too strong for beginnersUse half a beet and increase the carrot or apple.
Not refreshingServe over ice or chill the juice before drinking.

The easiest beginner version is beetroot with both apple and carrot. The crispest version adds cucumber and lemon. The punchiest version leans on ginger and citrus. If the glass tastes flat, it almost always needs lemon. If it tastes heavy, it needs cucumber, ice, or less beet next time.

Remember this flavor rule: lemon fixes dullness, cucumber fixes heaviness, apple fixes harshness, and ice fixes almost everything.

Once the basic glass tastes right, the variations become much easier. You are not guessing anymore; you are choosing whether you want the drink sweeter, sharper, lighter, or stronger.

For the gentlest first variation, try the apple beet carrot juice version.

Best Beet Juice Variations

Once you know the base formula, this juice is easy to adjust. Use these variations as mini-recipes. The juicer method works as written. For the blender method, add ½–1 cup / 120–240 ml cold water and strain unless the variation says it is a smoothie.

Easy Beet Juice Combinations

VariationMini formulaBest for
Apple Beet Carrot Juice / ABC Juice1 beet + 1 apple + 2 carrots + ½ lemon + optional ½ inch gingerBeginner-friendly sweetness and a softer beet flavor
Beet Ginger Lemon Juice1 beet + 1 apple + ½ lemon + 5–10 g ginger + optional cucumberA sharper, livelier juice
Beet Orange Juice1 beet + 1 peeled orange + 1 carrot + 5 g gingerA citrusy breakfast-style glass
Beet Pineapple Juice1 beet + 1 cup pineapple chunks + ½ cucumber + ½ lemonA sweeter tropical version
Beet Pomegranate Juice1 beet + ½–¾ cup unsweetened pomegranate juice + ½ lemonA tart, deep red juice
Low-Sugar Beet Juice½–1 beet + ½ cucumber + 1 celery stalk + ½ lemon + ½ inch gingerA lighter vegetable-forward version
Beet Turmeric Ginger Juice1 beet + ½ inch ginger + small piece fresh turmeric or ¼ tsp ground turmeric + ½ lemonA strong, spicy flavor
Beet Juice ShotBeet + lemon + ginger + small apple piece if neededSmall 2–3 oz / 60–90 ml servings
Beet Juice SmoothieBeet juice or blended beet + banana or berries + yogurt or plant milkA thicker, more filling drink

Apple Beet Carrot Juice / ABC Juice

This is the safest first version if beetroot usually tastes too strong to you. Use a sweet apple for a softer drink or green apple for a sharper one. The carrot keeps the juice mellow, so the beet still shows up without taking over the glass. For more beetroot drink ideas, including beet-ginger-turmeric and ABC-style combinations, see MasalaMonk’s guide to the power of beetroot and beet juice.
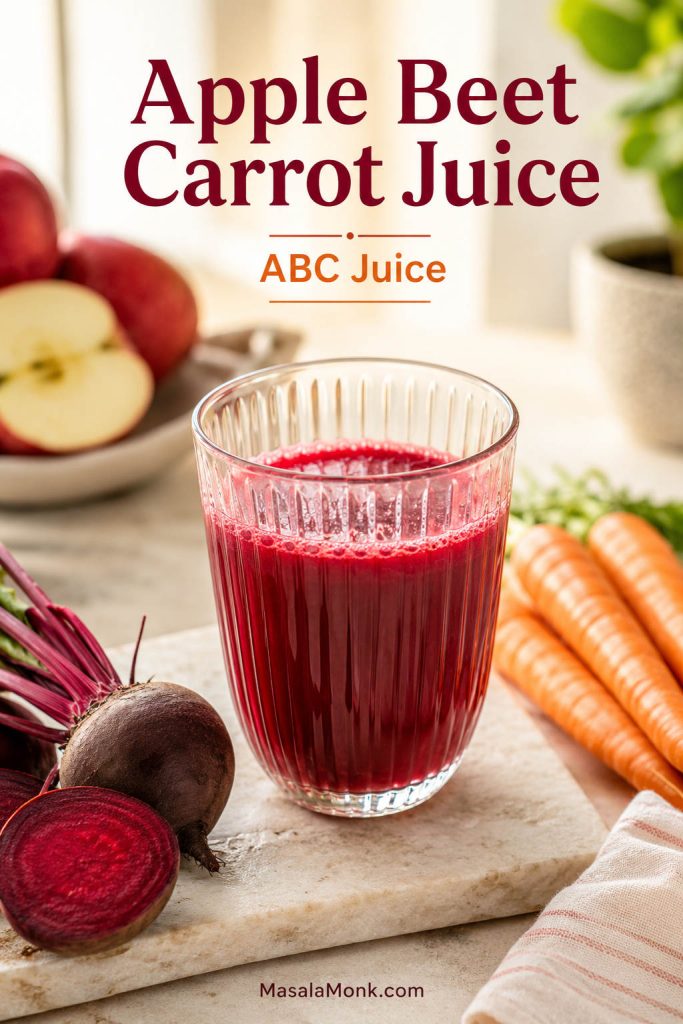
Glass of apple beet carrot juice with fresh apple, beetroot, and carrots on a bright breakfast-style kitchen surface.
Apple beet carrot juice, often called ABC juice, is the gentlest variation because carrot and apple mellow beetroot’s earthy edge.

Beet Ginger Lemon Juice

This version is sharper and less sweet. It is the one to make when you want beet ginger juice with a brighter, spicier finish. Start with less ginger unless you already know you like the heat.
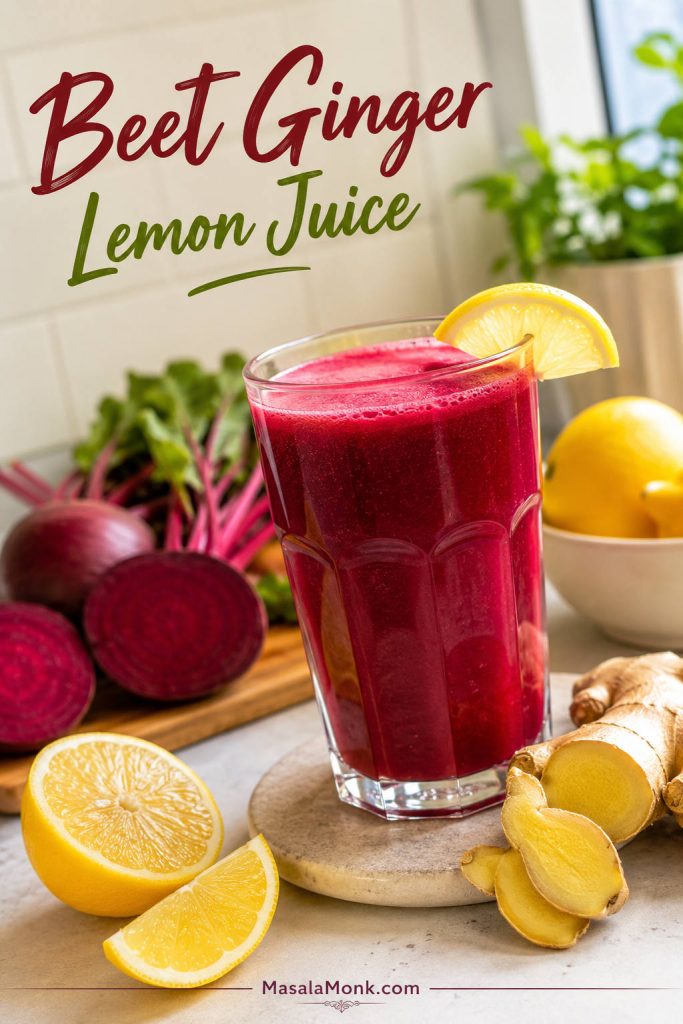
Glass of beet ginger lemon juice with fresh lemon wedges, lemon half, ginger slices, and beetroot nearby.
Beet ginger lemon juice is the sharper variation, so it works well when you want more citrus brightness and a warmer ginger finish.

Beet Orange Juice

Orange makes the drink rounder and more breakfast-friendly. Peel the orange well so the white pith does not make it bitter. This is a good choice when you want something sweeter than lemon but brighter than apple alone.

Beet Pineapple Juice

Pineapple gives this variation tropical sweetness that helps soften the deep beet flavor. Cucumber keeps the drink from becoming too syrupy. This is especially useful when you want the juice to taste more fruity and less vegetable-heavy.

Beet Pomegranate Juice

Pomegranate makes the juice tart, deep, and bold. For the easiest version, use unsweetened pomegranate juice. If using fresh pomegranate arils, blend gently and strain very well, or juice them only if your juicer handles pomegranate arils cleanly.

Low-Sugar Beet Juice

This version skips most of the fruit and uses cucumber, celery, lemon, and ginger for a cleaner vegetable-forward flavor. It will not taste as sweet as the apple-carrot version, but it is lighter and more refreshing.
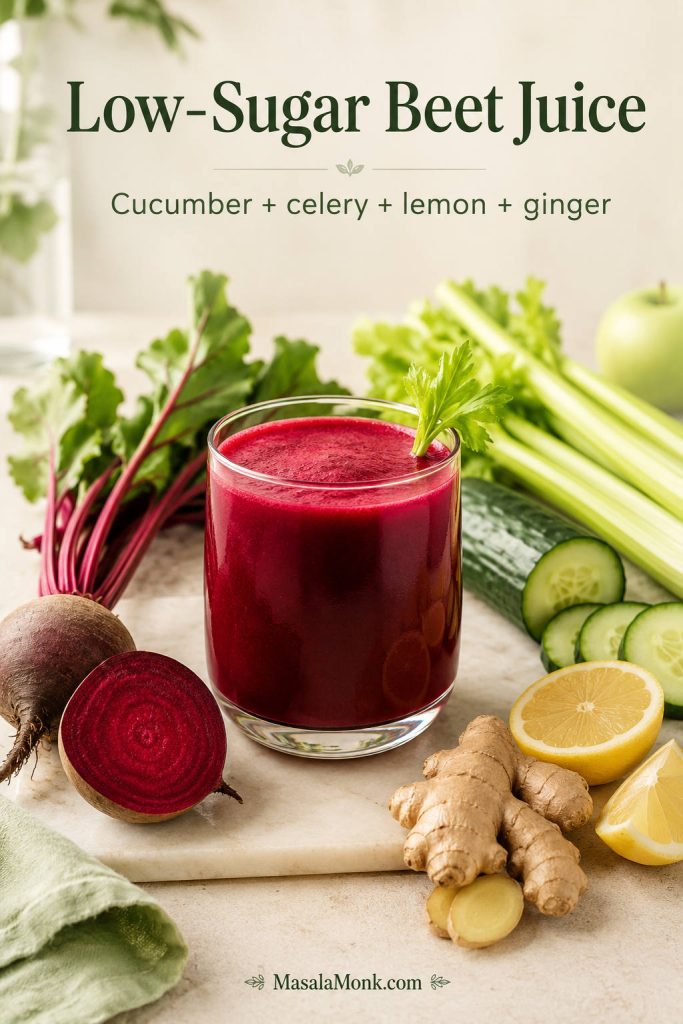
Glass of low-sugar beet juice with beetroot, cucumber, celery, lemon, ginger, and a small green apple in a light kitchen scene.
For low-sugar beet juice, lean on cucumber, celery, lemon, and ginger; that way, the drink stays vegetable-forward without tasting flat.

Beet Turmeric Ginger Juice

This has a strong, spicy flavor. Use turmeric carefully because it can dominate the drink. Add black pepper only if you already like that taste; it is not needed for the recipe to work.

Beet Juice Shot

A beet shot is stronger and smaller than a full glass. Keep the beet, lemon, and ginger more concentrated, then use just enough apple to soften the edge if needed. Serve 2–3 oz / 60–90 ml at a time.

Beet Juice Smoothie

To turn this into a smoothie, do not strain the blended mixture. Add banana, berries, yogurt or plant milk, and a little ginger. A smoothie keeps more pulp and fiber, so it will be thicker and more filling than strained beet juice. For more smoothie-style ideas, MasalaMonk’s guide to high-iron smoothies and shakes includes beetroot-friendly combinations that lean more filling than juiced.

Flavor comes first. Once the drink is something you actually enjoy, then it makes sense to talk about where it fits in a routine.

Beet Juice Benefits, Without the Hype

Once the flavor is right, the next question is usually what this drink actually does for you. The honest answer is that beet juice can be useful, but it works best when you treat it as food, not as a miracle shot.

Think of this as a bright vegetable drink with a few smart use cases: a small pre-workout serving, a lower-sugar vegetable-forward version, or an occasional way to enjoy beets when you do not feel like eating them.
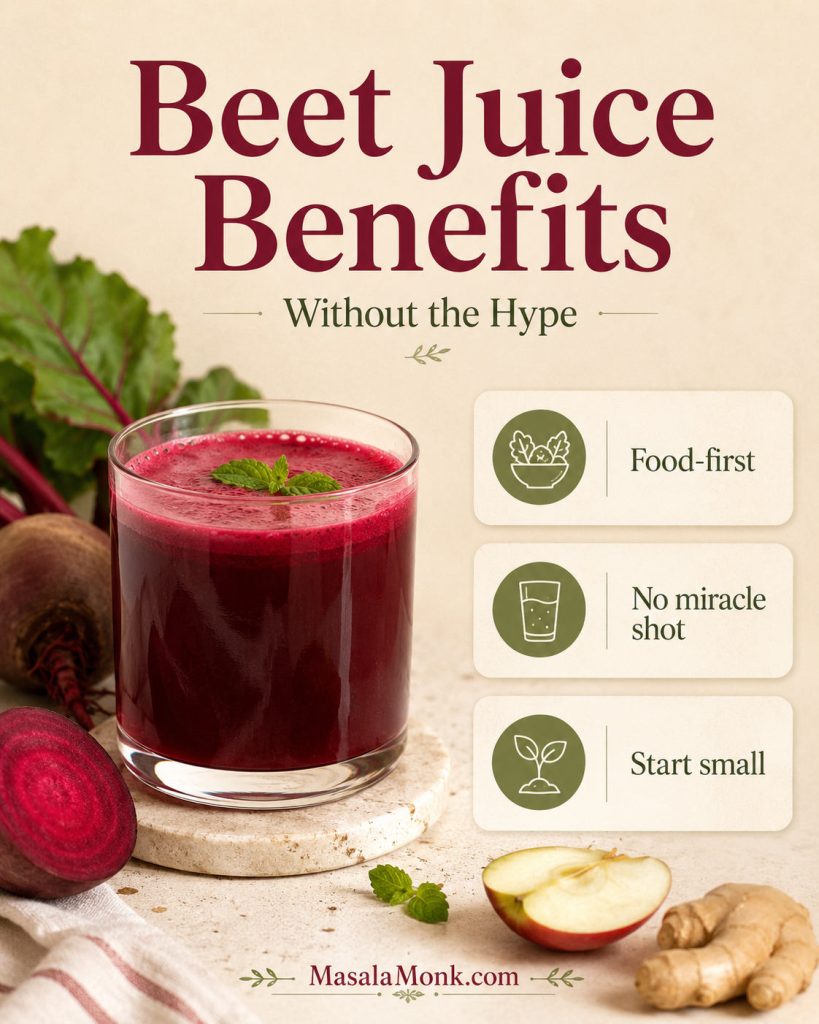
Calm beet juice benefits graphic with a glass of beet juice, beetroot, and cards reading food-first, no miracle shot, and start small.
Beet juice can fit into a healthy routine, although it is still best treated as a food-first drink rather than a miracle wellness shortcut.

Planning to drink it often? Read the safety notes before making beet juice a daily habit.

Beetroot is naturally colorful, plant-rich, and known for dietary nitrates. Much of the research interest comes from those nitrates and their possible effects on cardiovascular markers. You can read more about that research background on PubMed.

At the same time, juice is not the same as eating whole beets. When you juice and strain beets, carrots, and apples, you remove much of the fiber. That makes the drink lighter and easier to sip, but it also means it is less filling than whole vegetables or a smoothie.

If you care about…Best way to use this juice
Blood pressure interestKeep servings moderate and check with a qualified professional if you take medication or tend to run low.
Workout useTry a small strained serving first, not a huge pulpy glass right before training.
Weight-conscious drinkingUse cucumber, celery, lemon, ginger, less fruit, and no added sugar.
Daily nutritionRotate it with whole vegetables, smoothies, meals, and other drinks instead of making it your only “healthy” habit.
Detox-style flavorUse cucumber, celery, lemon, and ginger for a crisp, light glass without treating it as a cleanse.

For a broader look at whole beets beyond juice, MasalaMonk’s guide to what beets are good for covers beetroot as a food, not just as a drink.

Is Beet Juice Good for Weight Loss?

For weight-conscious readers, the most useful approach is a moderate, vegetable-forward drink — especially when you keep fruit lower and skip added sugar. It is not a fat-loss shortcut, but it can fit into a balanced routine when the portion and ingredients make sense.

The same idea applies to other “weight loss drink” combinations too. MasalaMonk’s article on pineapple, cucumber, and ginger for weight loss separates useful habits from miracle claims without treating the drink as a shortcut.

Lighter Beet Juice Formula

  • ½–1 beetroot
  • ½ cucumber
  • 1 celery stalk
  • ½ lemon
  • ½ inch ginger
  • Optional: ½ green apple if you need a little sweetness

This version is less sweet and more vegetable-forward. For more fullness, choose an unstrained beet smoothie instead of strained juice because the smoothie keeps more fiber.

Beet Juice and Blood Pressure

Beetroot contains dietary nitrates, which is why this drink often comes up in blood pressure conversations. Still, drinking it once in a while is different from turning it into a daily habit; regular use matters more if you already take medication or tend to run low.

Beetroot’s dietary nitrates can be converted in the body into nitric oxide, a compound involved in blood-vessel relaxation and blood flow, which is why beet juice appears in blood pressure research.
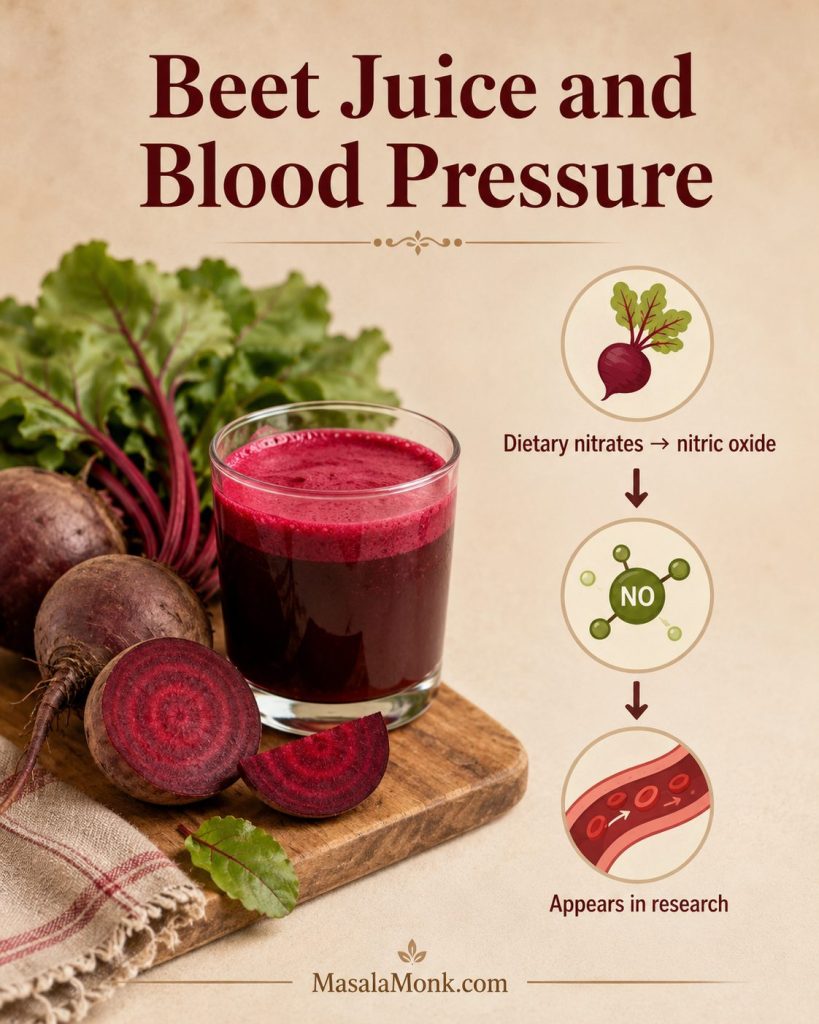
Educational graphic showing beet juice, beetroot, dietary nitrates converting to nitric oxide, and a simple blood-flow research cue.
The blood-pressure conversation around beetroot juice starts with dietary nitrates, so this is a research-aware food habit rather than a cure claim.

Any blood-pressure effect can vary by person, serving size, timing, and overall diet, so treat this as a food habit to discuss if it overlaps with medication or a medical condition.

If you have low blood pressure, take blood pressure medication, have kidney concerns, or manage a medical condition, treat regular beet juice as something to discuss with your healthcare professional rather than a casual daily habit.

For the broader caution list, see side effects and safety notes.

MasalaMonk has a deeper article on beets and blood pressure if you want a more focused discussion of fresh, canned, pickled, and juiced beets.

Is Beet Juice a Detox or Liver Cleanse?

If you like the word “detox” because you mean light, cold, vegetable-forward, and refreshing, beet juice can fit that mood. If you mean a drink that cleanses the liver, flushes toxins, or resets the body, it does not work that way.

Your liver and kidneys already do the work of filtering and processing waste. A glass of beet juice can be colorful and refreshing, but it should not be treated as a liver cleanse or cure.

For a detox-style flavor without the misleading promise, use beetroot, cucumber, celery, lemon, and ginger. It will taste crisp and clean, but it is still just a drink.

Beet Juice for Energy or Pre-Workout

Runners, cyclists, and workout-focused readers often pay attention to beet juice because of beetroot’s natural nitrate content. If you want to try it before exercise, start with a small serving first. Some people tolerate it easily; others find that a large or pulpy drink feels too heavy before movement.
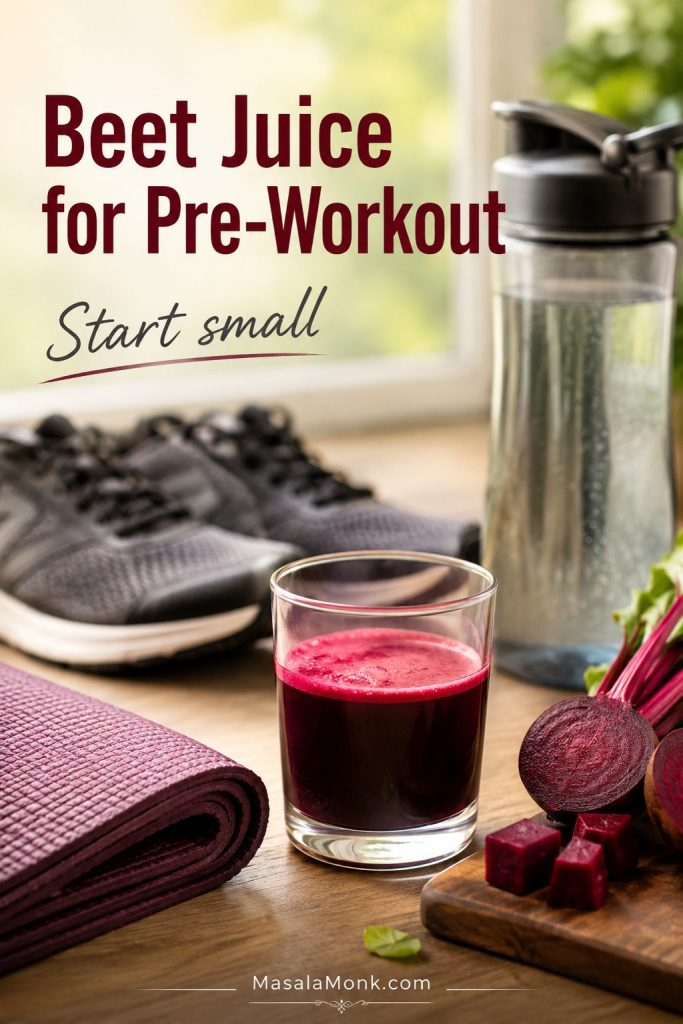
Small glass of beet juice near running shoes, a water bottle, a workout mat, and fresh beetroot in natural morning light.
Before using beet juice as a pre-workout drink, try a small strained serving first so you can see how your stomach handles it.

For a pre-workout style version, keep the flavor bright and the texture light: beetroot, orange or apple, lemon, and ginger works well. If you are using the blender method, strain it thoroughly so the drink is easier to sip before exercise.

For performance use, many beetroot juice studies focus on nitrate dose and timing rather than casual sipping, so treat a small pre-workout glass as an experiment, not a guaranteed effect.

When to Drink Beet Juice and How Much to Start With

There is no single perfect time to drink beet juice. Choose the moment that fits how you want to use it and how your body responds. If you are new to this drink, start with a smaller serving because the flavor, color, and digestive effect can surprise people, especially if the glass is strong or ginger-heavy.
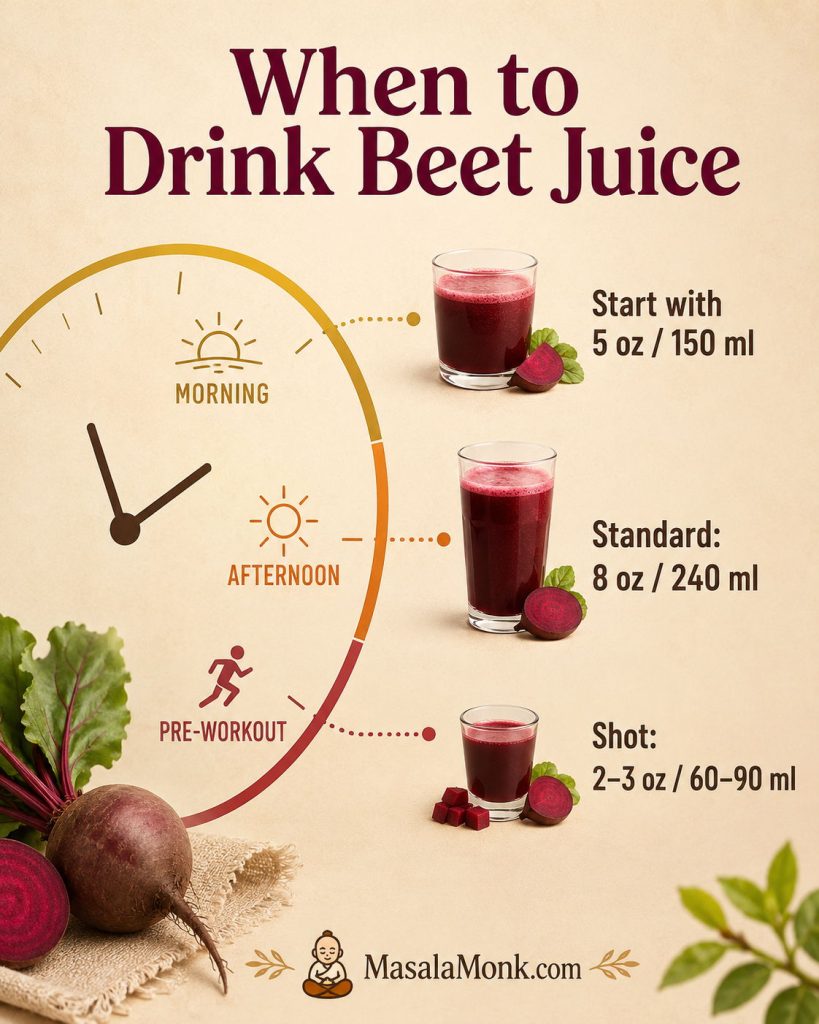
Timing and serving-size guide for beet juice with morning, afternoon, pre-workout cues and 5 ounce, 8 ounce, and 2–3 ounce serving sizes.
Start with 5 oz of beet juice, then adjust the timing and portion based on your routine, taste, digestion, and reason for drinking it.
  • Morning: a simple option with or after breakfast, especially if raw juice bothers your stomach on its own.
  • Afternoon: useful when you want something cool, colorful, and caffeine-free.
  • Before a workout: try a small strained serving first; avoid a large pulpy glass right before training.
  • Night: fine for many people, but skip it late if it bothers your digestion or makes you wake up to use the bathroom.
  • Daily: keep portions reasonable and rotate with whole vegetables, fruits, smoothies, meals, and other drinks.
  • Small serving: 5 oz / 150 ml
  • Standard serving: 8 oz / 240 ml
  • This recipe yield: about 16–18 oz / 475–530 ml
  • Beet shot: 2–3 oz / 60–90 ml

You do not need to turn beet juice into a daily project to enjoy it; a good glass now and then still counts. Occasional beet juice and daily beet juice are not the same decision, especially if you have blood pressure, kidney-stone, digestive, or blood sugar concerns.

After drinking beet juice, some people notice pink or red urine or stool. This is often called beeturia and can happen after eating or drinking beets. It is usually harmless, but if you are unsure whether the color is from beets or something else, or if you have pain or unusual symptoms, seek medical advice.

The sections below cover storage and safety because homemade beet juice is raw, deeply pigmented, and more concentrated than eating a few slices of beetroot.

Fresh Beets vs Canned Beets vs Beet Powder

Fresh raw beetroot gives the best glass: brighter color, clearer flavor, and a more refreshing finish. Canned, cooked, pickled, and powdered beets can help in a pinch, but they each move the drink away from that just-made taste.
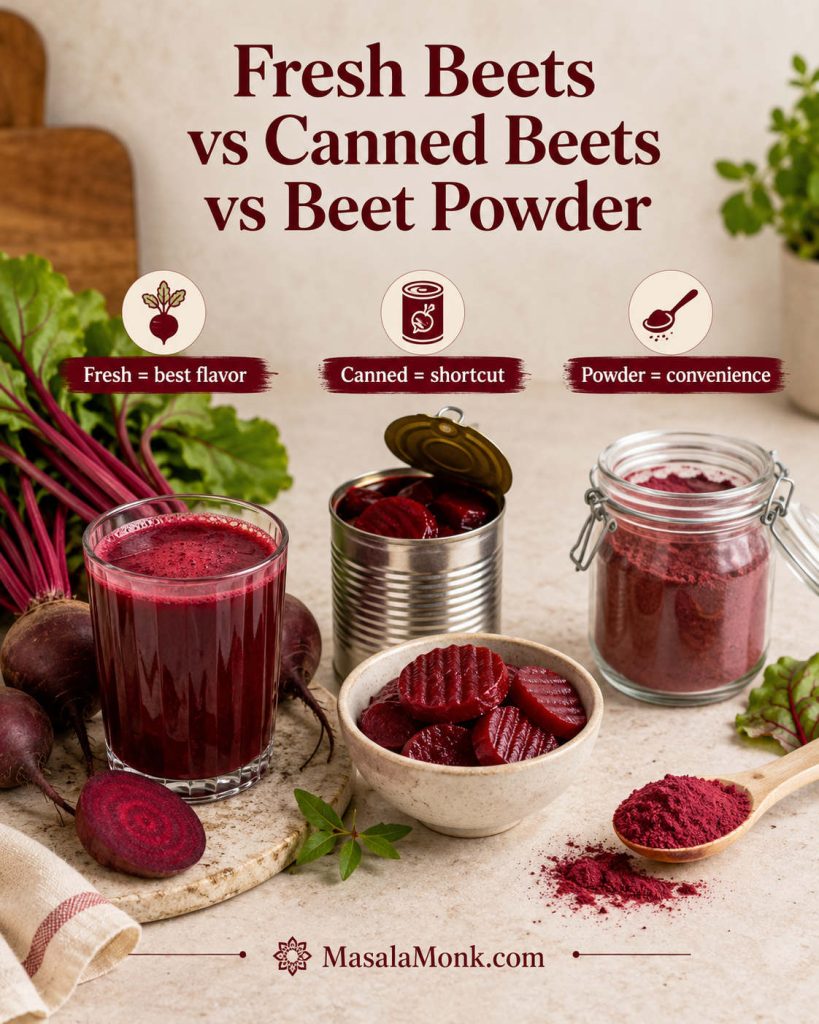
Comparison of fresh beets with beet juice, canned beets in a can and bowl, and beet powder in a jar and wooden spoon.
Fresh beets give homemade beet juice the brightest flavor; however, canned beets and beet powder can still work when convenience matters more.
OptionCan you use it?Best use
Fresh raw beetsYes, best choiceMain beet juice recipe
Cooked beetsYes, blender onlyEmergency shortcut, softer flavor
Canned beetsPossibleBlended shortcut; check salt, sugar, and additives
Pickled beetsNot idealOnly if you want a vinegar-style drink
Beet powderDifferent productConvenience drink, not the same as fresh juice

If you use canned beets, drain them well and check the label. Some canned beets contain added salt or sugar, and pickled beets contain vinegar that will completely change the flavor. If you use beet powder, treat it as a separate convenience drink rather than a true fresh beet juice recipe.

What to Do With Beet Juice Pulp

Beet pulp is not glamorous, but it does not have to go straight into the bin. If you use a juicer or strain the blender mixture, you will have pulp left behind. It is fibrous and deeply colored, so use it in small amounts where the color and earthiness make sense. Think of it as a small add-in, not the main event.

  • Add small amounts to veggie patties or fritters.
  • Stir into soups or stews where the color makes sense.
  • Mix into muffins, quick breads, or pancakes.
  • Blend into hummus or bean dips.
  • Freeze in small portions for later cooking.
  • Compost it if you do not want to cook with it.

Remember that beet pulp stains. If the pulp includes ginger and lemon, use it in recipes where those flavors will not feel out of place.

How to Store Beet Juice

Just-made beet juice loses its sparkle quickly, so treat leftovers gently. It tastes best right after making, when the lemon is sharp, the ginger still tastes lively, and the beet flavor has not dulled. Because homemade raw juice is not pasteurized, it also needs careful storage if you are not drinking it right away.
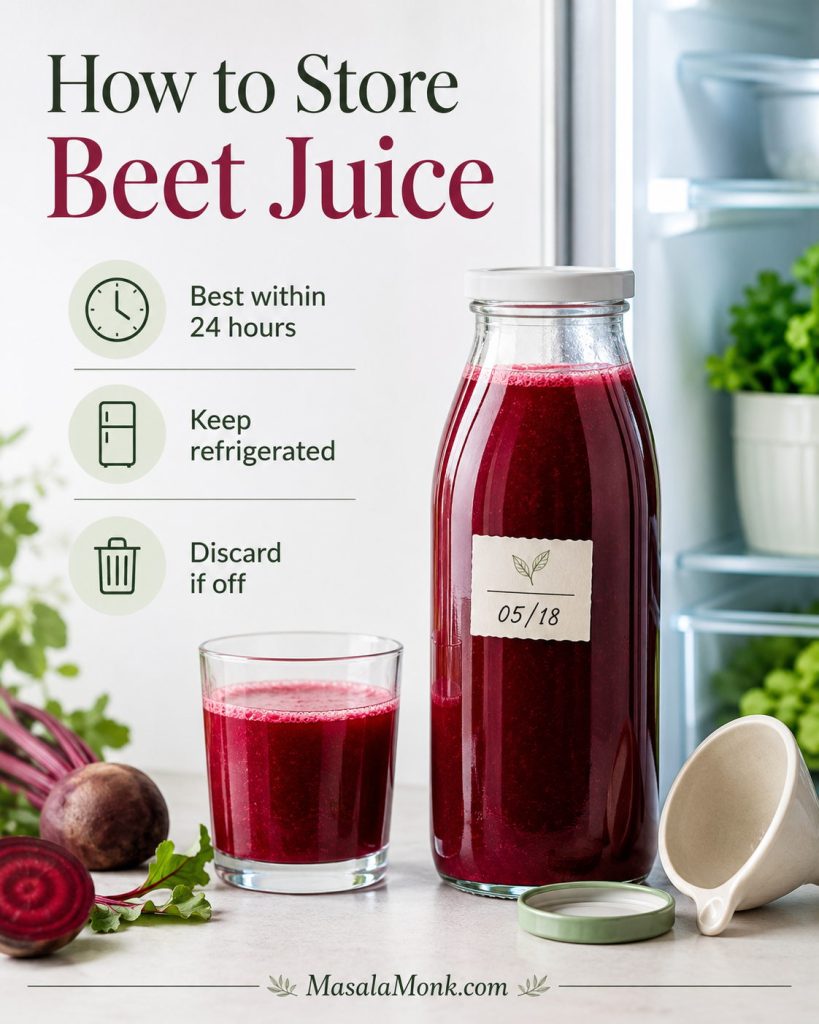
Storage guide showing beet juice in a sealed glass bottle with a date label beside a glass of juice near an open refrigerator.
Since homemade raw juice is not pasteurized, the safest flavor window is short: chill it quickly, seal it well, and drink it soon.
  • Best flavor: drink immediately.
  • Best refrigerated quality: within 24 hours.
  • Maximum practical home storage: 24–48 hours in a clean airtight glass bottle in the refrigerator.
  • Room temperature: do not leave fresh juice out for more than 2 hours.
  • Refrigerator temperature: keep chilled at 40°F / 4°C or colder.
  • Serving after storage: shake or stir before drinking.
  • Discard if: it smells sour, fizzy, fermented, moldy, or off.

You can wash and chop the beetroot, carrot, apple, and cucumber a few hours ahead and refrigerate them in a covered container. Juice or blend just before serving for the liveliest flavor.

The FDA has a useful overview of fresh juice safety, especially because homemade raw juice is not pasteurized.

You can freeze beet juice in ice cube trays or small containers, but the flavor and texture will be less crisp after thawing. Frozen beet juice cubes are better for smoothies than for drinking plain.

Side Effects and Who Should Be Careful

For most people, a moderate glass is simply a colorful way to enjoy beetroot. Still, start small the first time, especially if you plan to drink it often. Beet juice has a strong color, strong flavor, and for some people, a strong digestive effect too.
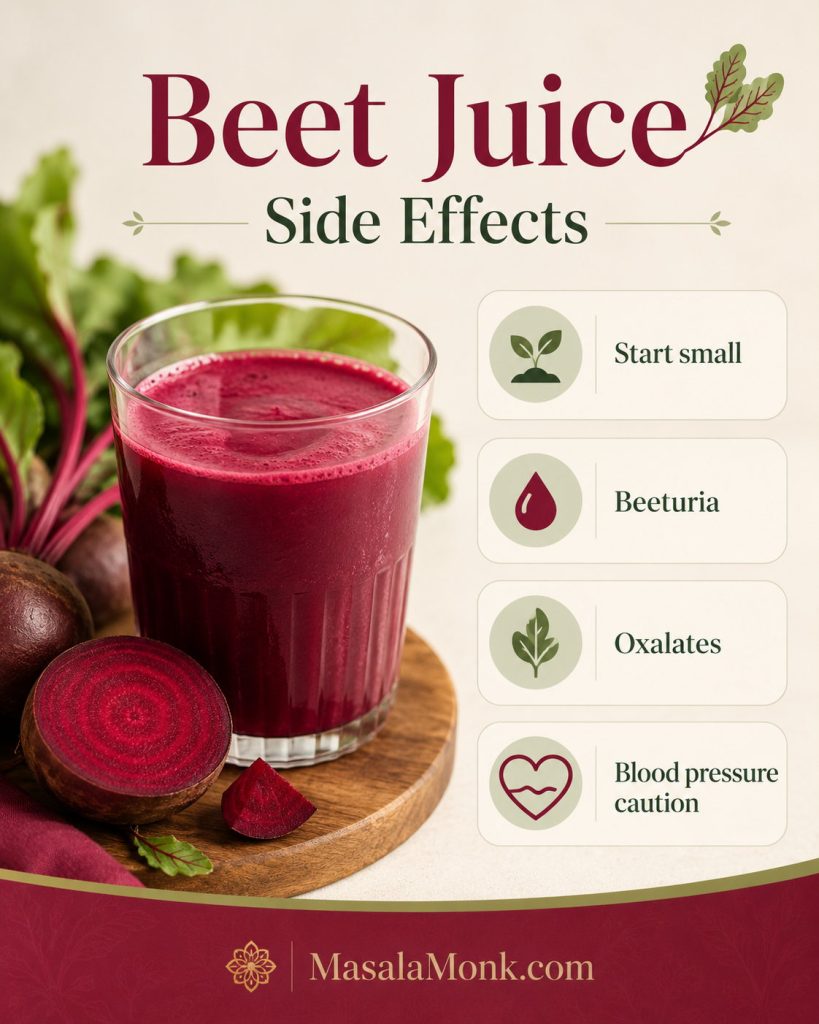
Beet juice side effects graphic with a glass of beet juice and safety cards for start small, beeturia, oxalates, and blood pressure caution.
Start with a modest serving if beet juice is new to you, especially if oxalates, digestion, beeturia, or blood pressure changes are concerns.
  • Red or pink urine/stool: Beet juice can cause beeturia, a temporary red or pink color change after eating or drinking beets.
  • Kidney-stone concerns: Beets contain oxalates, so people prone to certain kidney stones should be cautious.
  • Low blood pressure or medication: If you take blood pressure medication or have low blood pressure, ask a healthcare professional before drinking beet juice regularly.
  • Digestive sensitivity: Start with a smaller serving if raw juices bother your stomach.
  • Blood sugar management: If you manage blood sugar, fruit-heavy beet juices may need smaller portions or more vegetable-forward formulas.

For more detail on oxalates and beetroot, see MasalaMonk’s guide to beetroot and kidney health.

Beet Juice Troubleshooting

Beet juice is forgiving if you know what to adjust. If the batch did not taste the way you expected, do not throw it out yet. Most problems are fixable with lemon, cucumber, ice, apple, or another pass through the strainer.
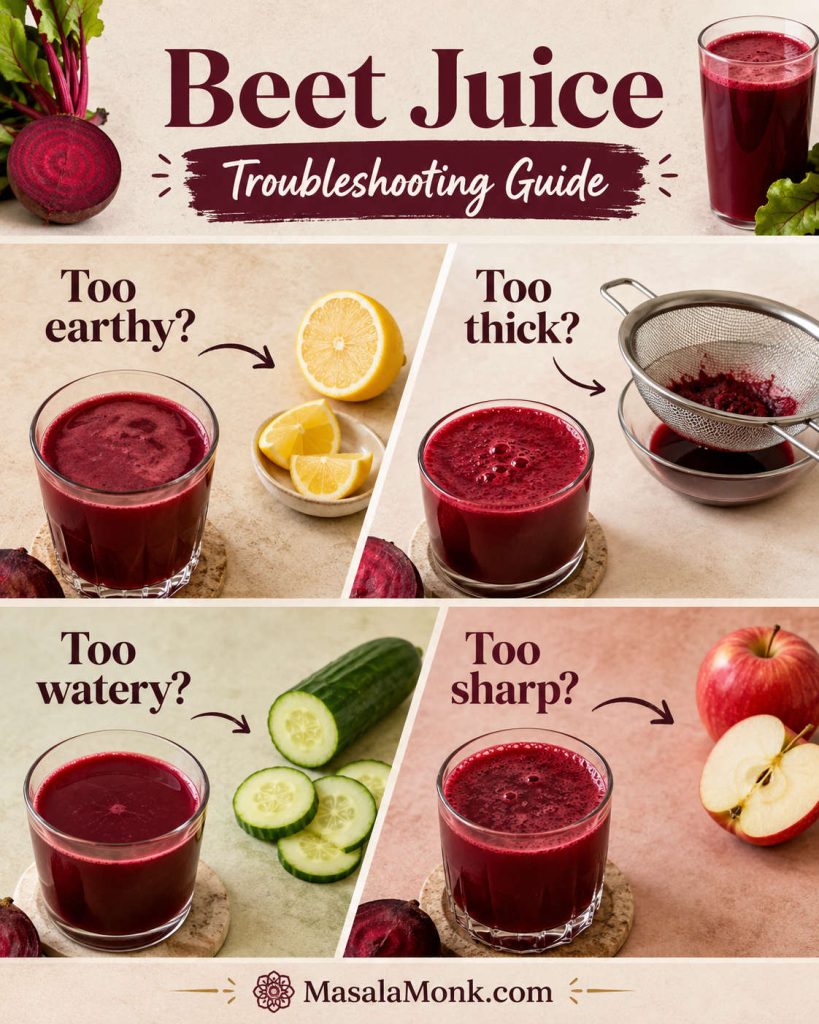
Troubleshooting guide for beet juice with panels for too earthy, too thick, too watery, and too sharp, plus lemon, cucumber, apple, and strainer cues.
A failed batch is usually adjustable: sharpen a dull glass, lighten a heavy one, dilute harsh ginger, or strain again for smoother texture.
IssueWhy it happenedFix nowFix next time
Too earthyToo much beet or not enough acid/sweetnessAdd lemon, orange, apple, or cucumber juiceUse less beet and more carrot/apple
Too thickBlender juice was not strained enoughStrain again through cheesecloth or a nut milk bagChop smaller, blend smoother, and squeeze pulp well
Too wateryToo much water in the blenderAdd lemon, ginger, or a little more fresh juiceStart with ½ cup / 120 ml water only
Too sharpToo much ginger or lemonDilute with apple, carrot, cucumber, or iceStart with ½ inch ginger
Too sweetToo much apple, orange, pineapple, or pomegranateAdd lemon, cucumber, celery, or gingerUse the low-sugar variation
Separates in the glassFresh juice naturally separatesStir or shakeThis is normal

FAQs About Beet Juice

These are the small questions that usually come up after the first batch.

Juicer or blender: which is better for beet juice?

A juicer makes lighter, smoother juice without added water. A blender works well if you do not own a juicer, but the juice needs water and straining.

How much water do you add when making beet juice in a blender?

Start with ½ cup / 120 ml cold water. Add more only if the blender needs help, up to 1 cup / 240 ml total. Too much water makes the juice taste thin.

How do you make beet juice without a juicer?

Blend chopped beetroot, carrot, apple, lemon, ginger, and cold water until smooth. Then strain through a nut milk bag, cheesecloth, or fine mesh strainer and squeeze the pulp well.

Should you use raw or cooked beets for juice?

Raw beets are best for fresh juice. Cooked beets can be blended in a pinch, but they taste softer and less crisp. They are not ideal for juicing.

Do you need to peel beetroot before juicing?

Peeling is optional if the beetroot is fresh, tender-skinned, and scrubbed very well. Peel it if the skin is rough, dirty, waxed, or bitter.

How many beets make one glass of juice?

One medium-large beet, about 225–250 g / 8–9 oz, combined with carrot, apple, lemon, and ginger usually makes about two standard glasses of mixed beet juice. A medium beet on its own may give roughly ⅓–½ cup juice in many home juicers, though freshness, size, and machine efficiency can change that noticeably.

Why does beet juice taste earthy?

Beetroot naturally has an earthy, mineral-like flavor. Apple, carrot, lemon, ginger, cucumber, orange, and pineapple all help balance that flavor.

How do you make beet juice sweeter without sugar?

Add apple, carrot, orange, pineapple, or pomegranate. Apple and carrot are the easiest everyday choices because they sweeten the drink without overpowering the beetroot.

Is it okay to drink beet juice every day?

You can drink it regularly if it suits you, but you do not need to make it a daily habit to enjoy the recipe. Keep portions moderate, especially if you have kidney-stone risk, low blood pressure, digestive sensitivity, blood sugar concerns, or take blood pressure medication.

What is the best time to drink beet juice?

Morning is simple, afternoon works when you want something cool and caffeine-free, and pre-workout use is best tested with a small strained serving before you make it a routine.

Why does beet juice turn urine or stool red?

Beets can turn urine or stool pink or red. This is common after eating or drinking beetroot. If you are unsure whether the color is from beets, or if you have pain or unusual symptoms, seek medical advice.

What should you know about beet juice and blood pressure?

Beetroot contains dietary nitrates, so occasional juice is one thing; a daily habit is worth discussing with your healthcare professional if you take blood pressure medication or tend to run low.

How long does homemade beet juice keep?

Homemade beet juice tastes best immediately. Refrigerate it in a clean airtight bottle and drink within 24 hours for best flavor, or within 24–48 hours at most.

Can you use canned beets in beet juice?

You can blend canned beets with water, apple, lemon, and ginger in a pinch, but the flavor will be softer and less fresh than raw beetroot. Check the can for added salt, sugar, or vinegar.

How do you turn this recipe into a beet juice shot?

For a beet shot, use less apple and cucumber, keep the beet, lemon, and ginger more concentrated, and serve just 2–3 oz / 60–90 ml at a time. Beet shots are intense, so start small.

Tried it with apple, orange, cucumber, or ginger? Share which version finally made beet juice work for you — the best fixes often come from small adjustments.

Beet Juice Recipe

This is the balanced base version: beetroot for color, carrot and apple for sweetness, lemon for brightness, ginger for lift, and cucumber if you want a cooler, easier sip.

Make it in a juicer for crisp, smooth juice, or use a blender and strain it. Once you like the base, adjust lemon, apple, cucumber, or ginger to make the glass sharper, sweeter, lighter, or spicier.

The finished juice should pour easily, taste sweet-earthy and tart, and finish with gentle ginger warmth.
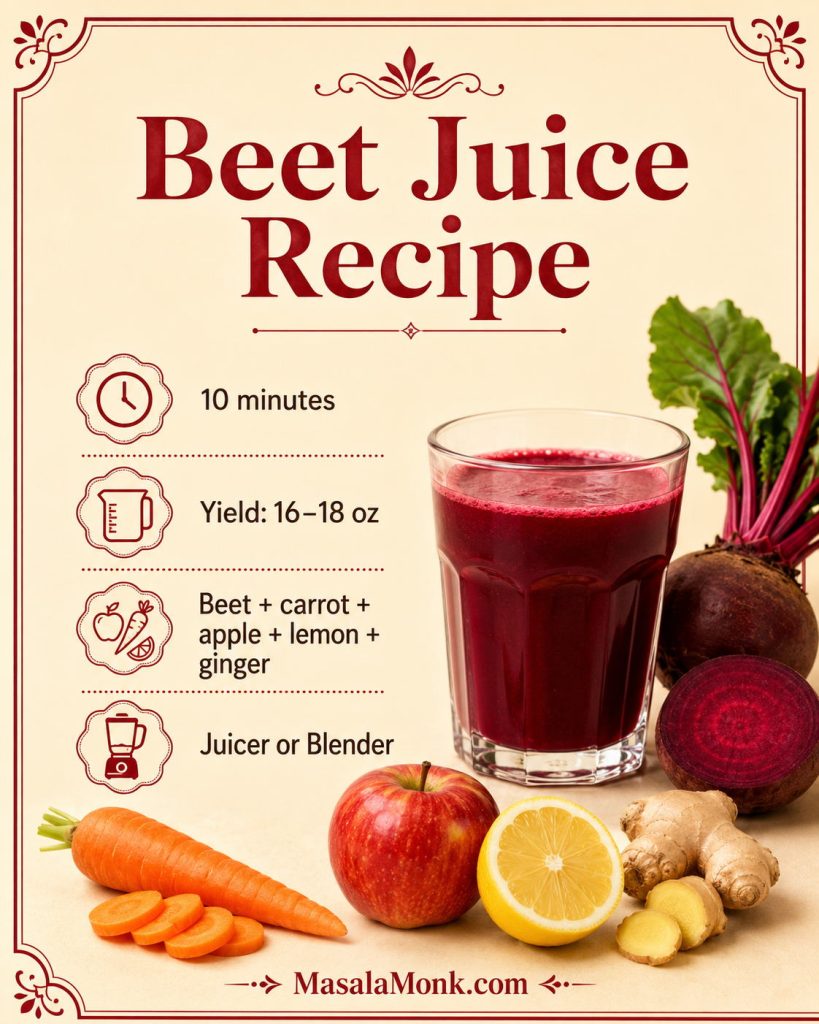
Saveable beet juice recipe card with a glass of beet juice, beetroot, carrot, apple, lemon, ginger, 10 minutes, 16–18 ounce yield, and juicer or blender method.
Save this beet juice recipe formula for the essentials: beetroot, carrot, apple, lemon, and ginger, made in either a juicer or a blender.
Prep Time10 minutes
Total Time10 minutes
Servings2 glasses
YieldAbout 16–18 oz / 475–530 ml

Estimated nutrition: One 8 oz / 240 ml serving is roughly 135–150 calories, with about 32–36 g carbohydrates depending on produce size and juicing method. Most sweetness comes naturally from the apple, carrot, and beetroot. Strained juice has much less fiber than whole produce or an unstrained smoothie.

Equipment: juicer or blender, fine mesh strainer or nut milk bag, knife, cutting board, and a clean bottle or jar if storing.

Ingredients

  • 1 medium-large raw beetroot or 2 small beets, about 225–250 g / 8–9 oz
  • 2 medium carrots, about 120–150 g / 4–5 oz
  • 1 large apple, about 170–200 g / 6–7 oz
  • ½ lemon, about 15–20 ml juice
  • ½–1 inch fresh ginger, about 5–10 g
  • ½ small cucumber, optional, about 75–100 g / 3–4 oz
  • ½–1 cup cold water, blender method only, 120–240 ml
  • Ice, to serve

Juicer Method

  1. Wash and scrub the beetroot, carrots, apple, cucumber, lemon, and ginger.
  2. Trim the beetroot and peel it if the skin is rough, waxed, or not fully clean.
  3. Cut the beetroot, carrots, apple, cucumber, and ginger to fit your juicer chute.
  4. Juice the beetroot, carrots, apple, cucumber, and ginger, alternating hard and soft produce as needed.
  5. Stir in the lemon juice.
  6. Pour over ice and drink immediately.

Blender Method

  1. Chop the beetroot, carrots, apple, cucumber, and ginger into small pieces.
  2. Add them to a blender with ½ cup / 120 ml cold water and the lemon juice.
  3. Blend on high for 45–60 seconds, until smooth. Add more water only if needed, up to 1 cup / 240 ml total.
  4. Pour the mixture through a nut milk bag, cheesecloth-lined strainer, or fine mesh strainer.
  5. Let it drain for 2–5 minutes, then press or squeeze the pulp to extract the juice.
  6. Optional: add 2–3 tablespoons / 30–45 ml cold water to the squeezed pulp, stir or briefly blend, then strain once more for a little extra yield.
  7. Serve over ice.

Notes

  • For a milder glass, use half a beet and increase the apple or carrot.
  • Use green apple for a sharper juice or red apple for a sweeter one.
  • For a lighter flavor, add cucumber.
  • For a sharper flavor, use the full inch of ginger and extra lemon.
  • If using a blender, strain the mixture for true beet juice. Unstrained beet juice will be thicker and smoothie-like.
  • Drink immediately for best flavor, or refrigerate in a clean airtight glass bottle for 24–48 hours.
  • For regular use or medical concerns, read the safety section above.

Once the recipe is made, serve the juice cold, taste before adjusting, and keep the glass balanced enough that it feels like a drink you chose — not a health chore.
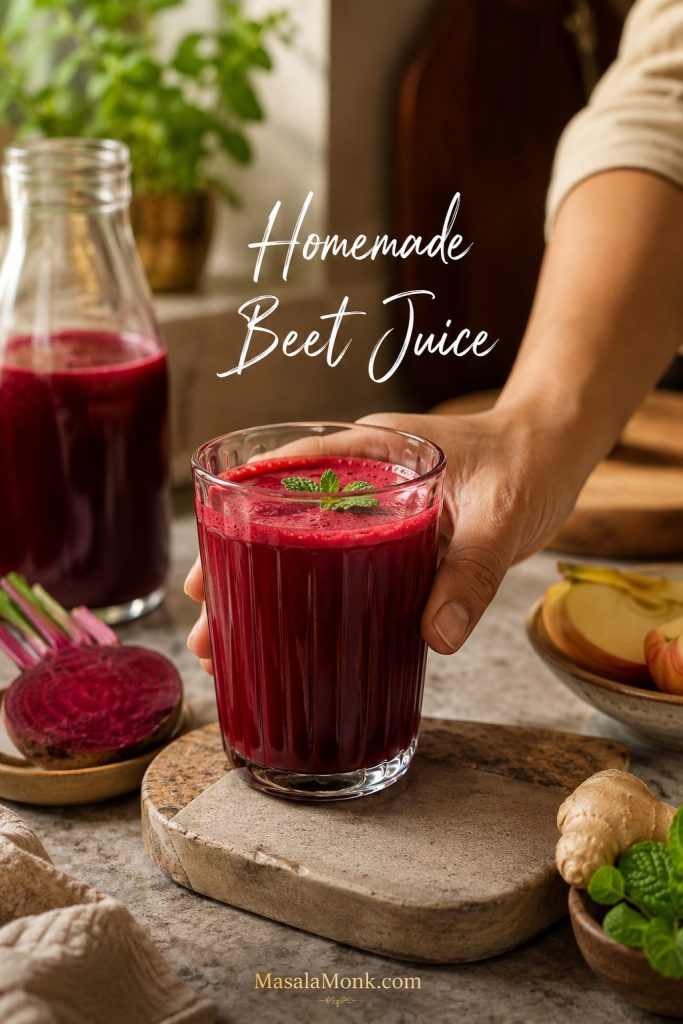
Hand placing a glass of homemade beet juice on a kitchen counter with a bottle of juice, beetroot, apple slices, ginger, and herbs nearby.
A good homemade beet juice should taste balanced enough to sip slowly, not like something you have to force down for health reasons.

Back to top

Posted on 1 Comment

Beyond Chicken: 5 Tofu Meal Prep Ideas for High-Protein Meals

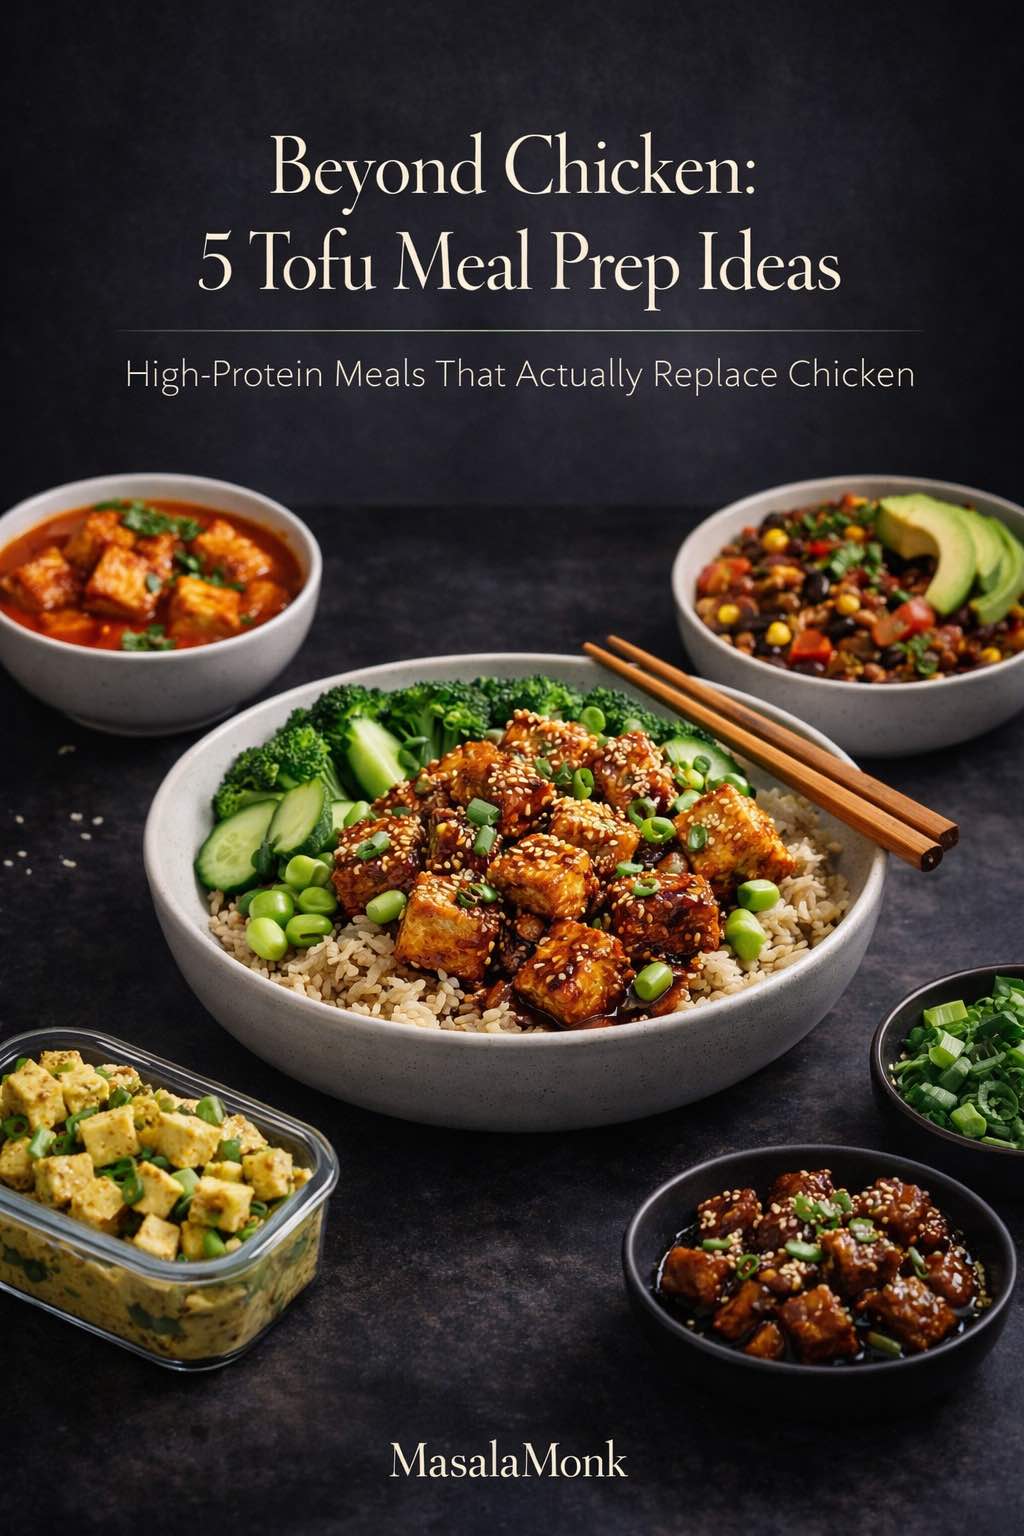
Beyond Chicken cover image showing five tofu meal prep ideas, including crispy sesame tofu bowls, sticky soy garlic tofu, curried tofu salad, taco-style tofu crumbles, and red curry tofu as high-protein chicken-free meals.

If you want tofu meal prep ideas that can genuinely take the place of your usual chicken lunches, the problem usually is not tofu itself. More often, the tofu stays too wet, the seasoning lands too softly, or the finished box never feels as satisfying as the chicken version it is meant to replace.

This post is built to fix that.

Instead of offering another vague tofu roundup, it gives you five practical tofu meal prep ideas based on the chicken lunches people already repeat in real life: sesame bowls, taco bowls, sticky glazed rice boxes, creamy lunch salads, and curry meal prep. The goal is not to make tofu imitate chicken badly. The goal is to use tofu in the meal formats where it can replace chicken confidently, repeatedly, and with far better flavor.

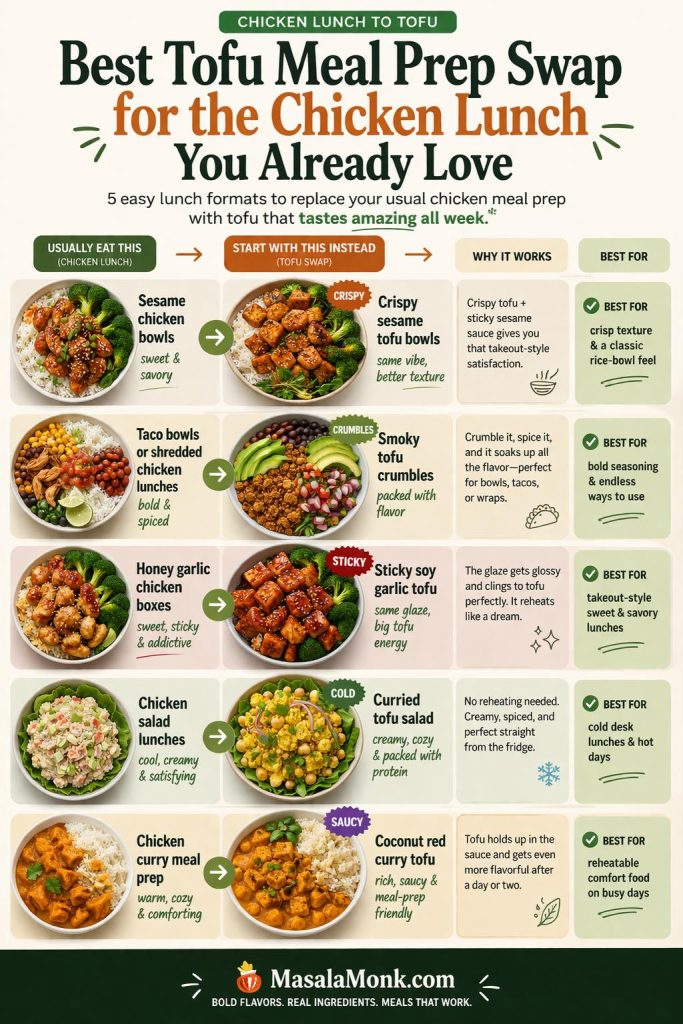
Start with the tofu format that matches the chicken lunch you already rely on most. The sesame bowl is the strongest first move for anyone who wants crisp texture. Smoky tofu crumbles fit best when taco-bowl lunches are already part of the weekly routine. Sticky soy garlic tofu makes the most sense for takeout-style sweet-savory meal prep. Curried tofu salad is the most practical option for cold desk lunches. Coconut red curry tofu is the easiest fit for reheatable comfort food.

Why Most Tofu Meal Prep Fails

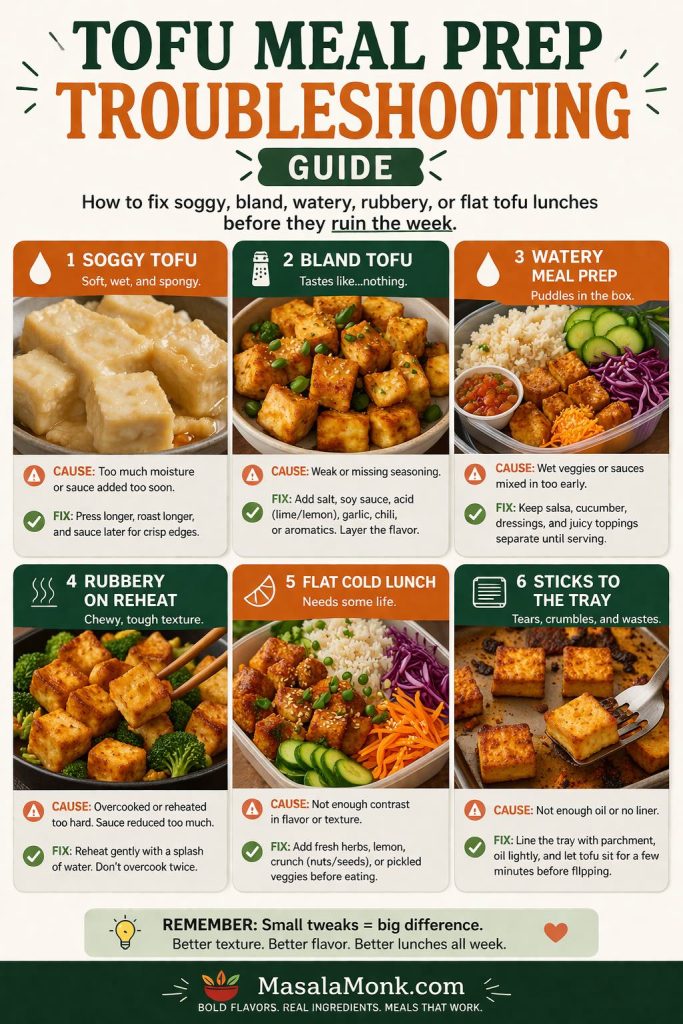
When tofu meal prep goes wrong, the pattern is usually predictable. Sometimes the tofu is barely pressed. Just as often, the seasoning is too timid. In other cases, sauce goes on too early, so the tofu steams instead of browning. Meanwhile, some lunch boxes fall flat because they have no crunch, no acid, and no real contrast.

Those same issues show up again and again across successful tofu recipes, whether the format is a sesame bowl, taco crumbles, or a curry box. In other words, the problem is usually not that tofu “cannot replace chicken.” The problem is that tofu needs better handling from the beginning.

Once moisture, seasoning, browning, and box structure improve, tofu meal prep stops feeling like a compromise. It starts feeling like one of the most flexible, economical, and repeatable proteins in a weekly lunch rotation.

Also Read: White Russian Recipe: 7 Variants to Try, From Classic to Frozen

What These Tofu Meal Prep Ideas Do Differently

The five recipes in this post were chosen for a reason. Each one maps onto a chicken meal-prep habit people already have, which makes the switch easier to trust.

  • Sesame chicken bowls → Crispy sesame tofu bowls → best for readers who want texture, roasted vegetables, and a sauce-driven rice bowl
  • Taco bowls or shredded chicken bowls → Smoky tofu crumbles taco bowls → best for bold seasoning, flexible leftovers, and burrito-style lunches
  • Honey garlic or soy-glazed chicken → Sticky soy garlic tofu meal prep → best for takeout-style sweet-savory rice boxes
  • Chicken salad lunches → Curried tofu salad meal prep → best for cold lunches, wraps, crackers, and desk lunches
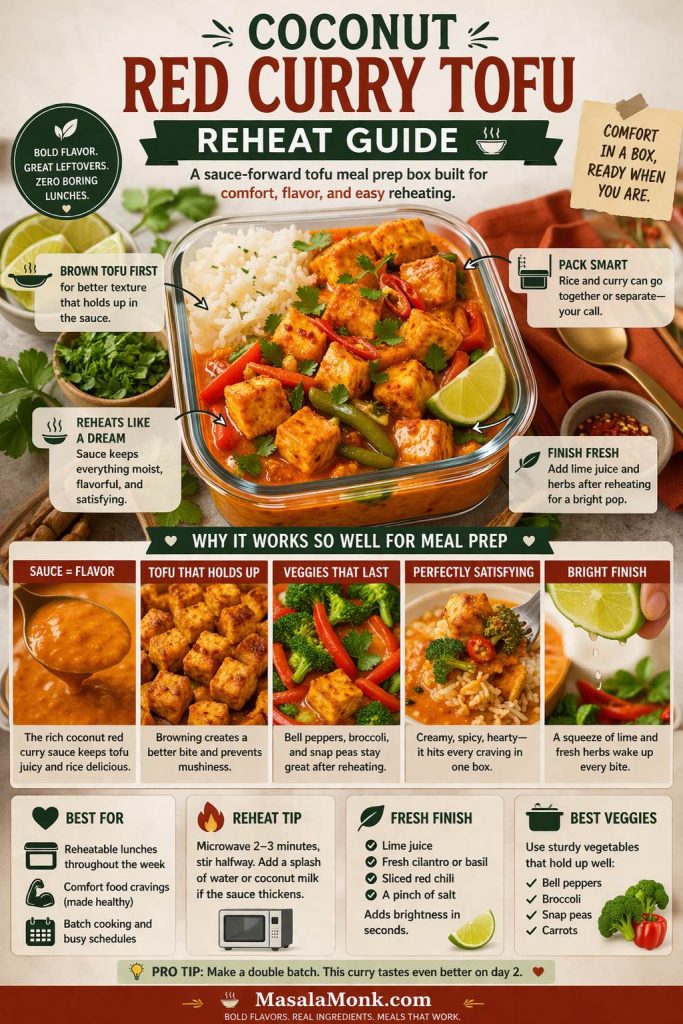
  • Chicken curry meal prep → Coconut red curry tofu boxes → best for reheatable comfort food and sauce-first meal prep

That structure matters because it lets you begin with a lunch format you already trust instead of changing everything about meal prep at once. You are not asking tofu to win in a random role. You are choosing the lane where it naturally works.

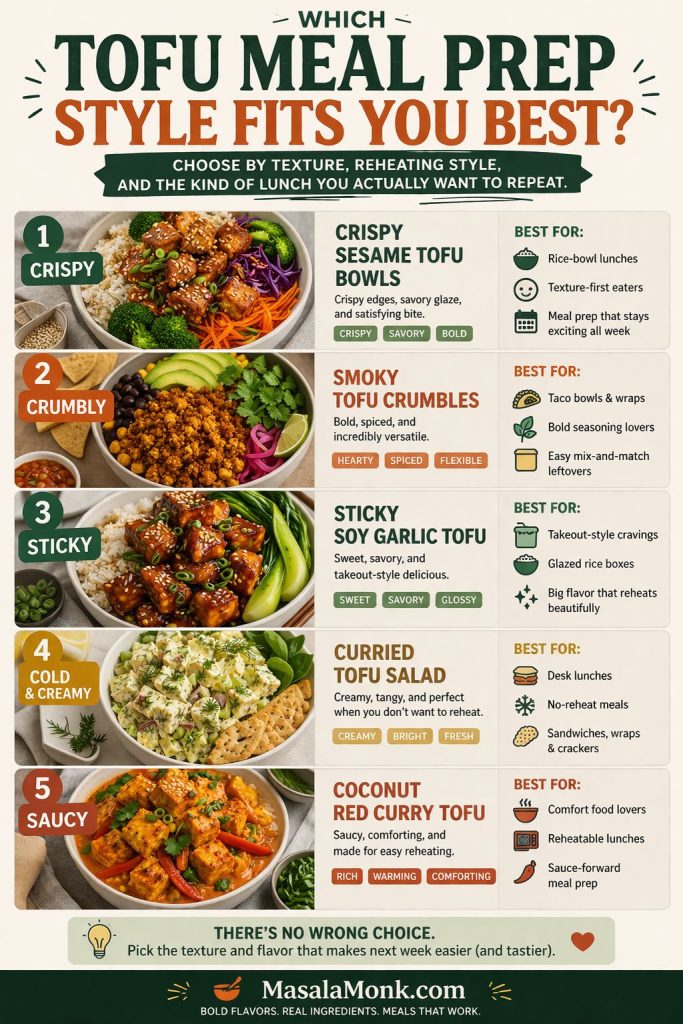
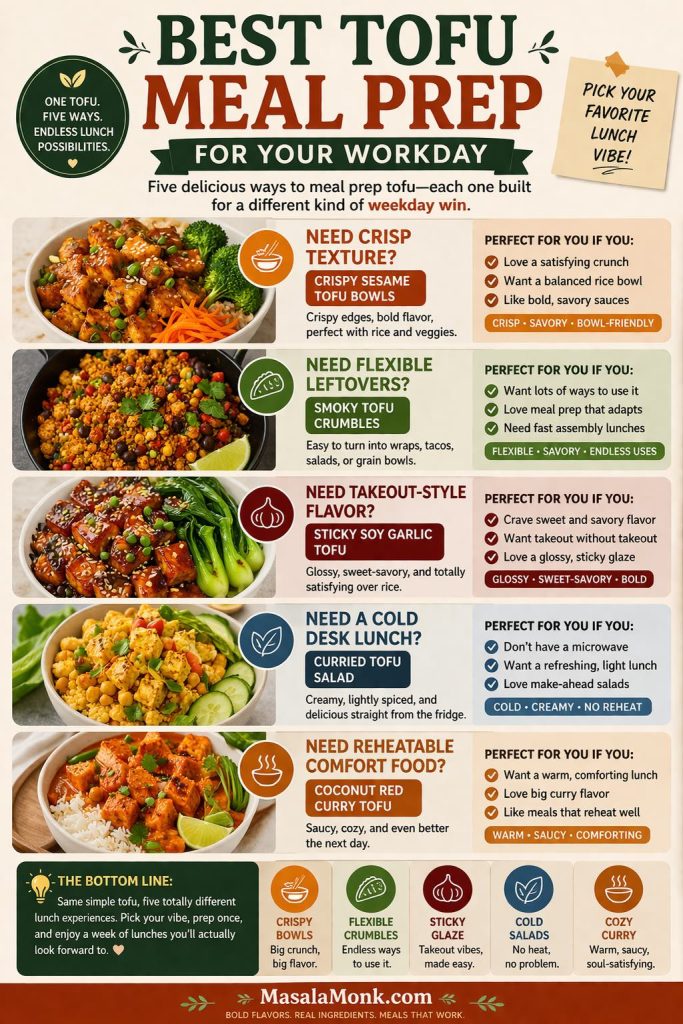
Editorial infographic showing the best tofu meal prep swap for the chicken lunch you already love, including crispy sesame tofu bowls, smoky tofu crumbles, sticky soy garlic tofu, curried tofu salad, and coconut red curry tofu, with quick notes on why each option works and which lunch style each one suits best.
Start with the tofu lunch style that already matches how you like to meal prep. Crispy bowls, taco-style crumbles, sticky glazed rice boxes, cold curried salad lunches, and reheatable curry boxes all solve a different weekday need, so choosing the right format first makes tofu easier to enjoy and repeat. Save this guide for your next meal-prep session, and share it with someone trying to eat less chicken without giving up satisfying lunches.

There is a strong nutritional case for building more lunches this way as well. Harvard’s Nutrition Source notes that soy foods are nutrient-dense protein sources and are especially useful when they replace red and processed meat, which makes tofu a practical protein choice within a broader meal-prep routine. For that bigger-picture context, Harvard’s guide to soy as a nutrient-dense protein source is worth reading. Internally, MasalaMonk’s guide to plant-based protein sources for high-protein meal prep fits naturally alongside this post.

Why Tofu Works as a Chicken Meal Prep Replacement

Chicken usually does three jobs in meal prep: it brings protein, gives the box substance, and carries seasoning well. Tofu can do those same jobs. It simply gets there differently.

Tofu is not at its strongest when the exact meat-like bite is the whole point of the meal. It is strongest where bowls, sauces, spice blends, crunch, vegetables, and repeatable lunch structure do a lot of the work. That is why tofu becomes so convincing in crisp sesame bowls, smoky taco crumbles, sticky glazed rice boxes, creamy curried lunch salads, and reheatable curry meal prep.

The biggest mistake people make is trying to treat tofu exactly like chicken without changing the rest of the meal. If the whole lunch depends on the natural savoriness and bite of chicken, tofu will feel flat unless you compensate with better moisture control, stronger seasoning, and more thoughtful box building. Once that shift happens, tofu stops feeling like a backup plan and starts feeling deliberate.

For a broader vegetarian meal-prep perspective, MasalaMonk’s guide to high-protein Indian meal prep ideas is a strong internal companion.

How to Make Tofu Meal Prep Ideas Taste Good All Week

Choose the best tofu for meal prep

For most of the recipes below, firm or extra-firm tofu is the right choice. These styles hold shape better, brown more easily, and survive refrigeration more gracefully than softer tofu. Soft and silken tofu are far better suited to soups, sauces, smoothies, and desserts.

That distinction matters because beginner frustration often starts with the wrong tofu, not the wrong recipe. EatRight’s guidance on vegetarian protein foods makes the same basic point: firmer tofu works best in roasting, grilling, and sautéing applications, while softer tofu belongs in gentler preparations. Their article on vegetarian protein foods and tofu texture is a useful reader-friendly reference.

Why pressing tofu matters for meal prep texture

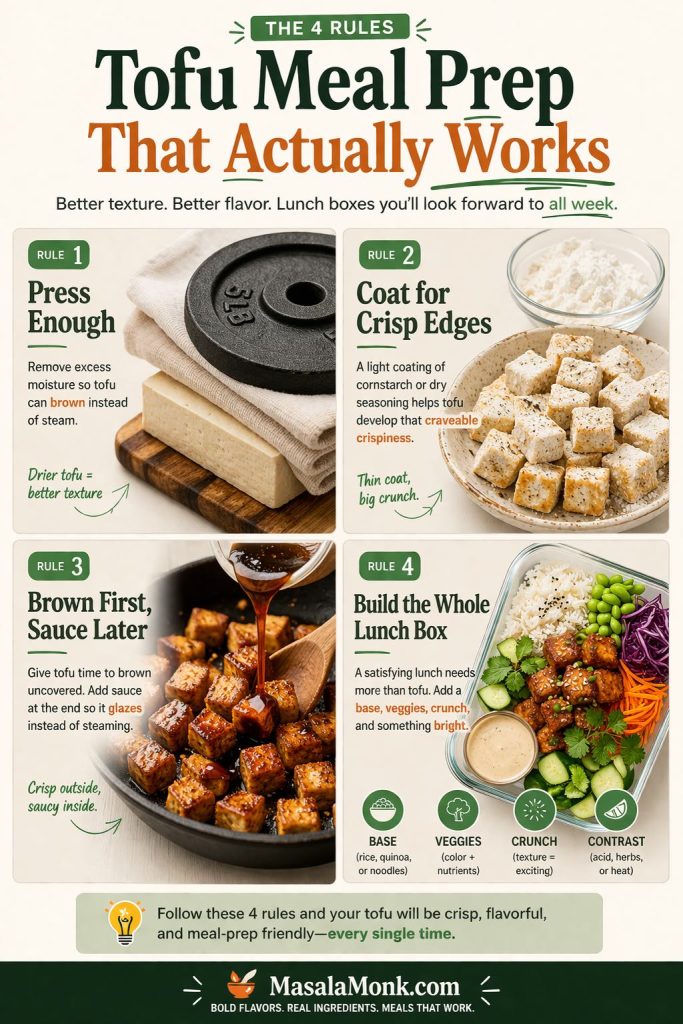
Pressing tofu is one of the simplest upgrades you can make. You do not need to remove every trace of moisture. You just need to remove enough excess water that the tofu can brown, crisp, and absorb seasoning without steaming itself into bland softness.

Wrap the tofu in a clean towel or paper towels, place it on a plate or board, and weigh it down for 20 to 30 minutes. In most cases, that is enough. The improvement in texture is immediate, especially in crisp bowls, tofu crumbles, and sticky glazed tofu.

Premium editorial tofu meal prep infographic showing four practical rules for better tofu lunches: press enough to remove excess moisture, coat tofu for crisp edges, brown first and sauce later, and build the whole lunch box with a base, vegetables, crunch, and contrast for better texture and flavor all week.
Better tofu meal prep starts long before the sauce goes on. Pressing properly, creating crisp edges, browning before glazing, and building a lunch box with texture, vegetables, and contrast are the small moves that make tofu taste more satisfying through the week. Save this post for your next prep day, and share it with someone who still thinks tofu meal prep has to be bland, soggy, or boring.

Brown tofu first, then add sauce

This is one of the most important rules in the entire article. Sauce added too early creates steam. Steam ruins browning. So tofu should be roasted, air-fried, or pan-browned before it is glazed or tossed.

That sequence matters most in crispy bowls and sticky tofu meal prep. The Kitchn’s method for making crispy tofu without deep-frying reinforces exactly why pressing, coating, and cooking before saucing works so reliably.

How to season tofu so it does not taste bland

Tofu rewards assertive seasoning. Salt helps, but it is rarely enough on its own. Soy sauce adds umami, vinegar or lime add lift, garlic and ginger add depth, chili brings edge, and a little sweetness often helps bring a glaze together. The best tofu meal prep ideas build flavor from several directions at once rather than relying on one sauce at the end.

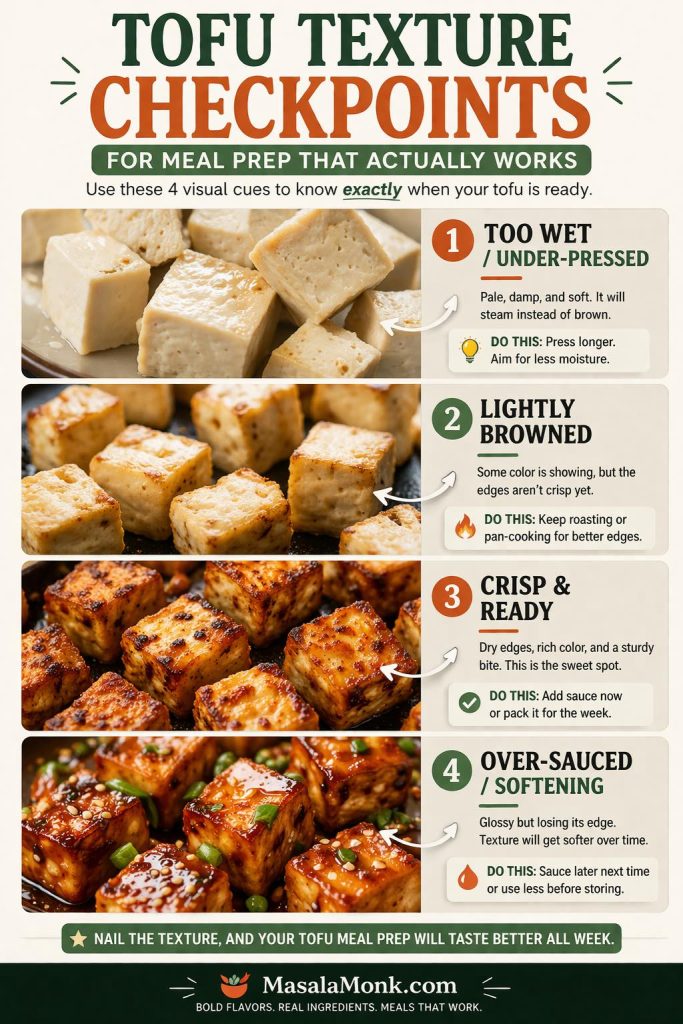
Editorial tofu texture guide for meal prep showing four visual stages: too wet and under-pressed tofu, lightly browned tofu, crisp and ready tofu, and over-sauced tofu softening after glazing, with quick cues for when to keep cooking, when to sauce, and when tofu is ready to pack for the week.
Good tofu meal prep gets much easier once you know what to look for in the pan or on the tray. Pale tofu usually needs more time, lightly browned tofu still needs better edges, properly crisp tofu is the right point for glazing or packing, and over-sauced tofu loses the texture that makes lunch satisfying later in the week. Save this post for your next prep day, and share it with someone who keeps ending up with tofu that turns soft before the week is over.

Build the whole meal prep box, not just the protein

The best tofu meal prep ideas are not just tofu plus rice. They are tofu plus a base, vegetables, texture contrast, and a dressing or sauce that makes the meal feel complete.

Rice, quinoa, soba, wraps, chopped salads, and curry-style boxes all work well as foundations. Broccoli, cabbage, peppers, carrots, cucumbers, edamame, onions, herbs, seeds, and pickled elements keep the lunches from going flat. For more base-building inspiration, MasalaMonk’s guide to plant-based meal prep ideas using quinoa as a protein source fits naturally here.

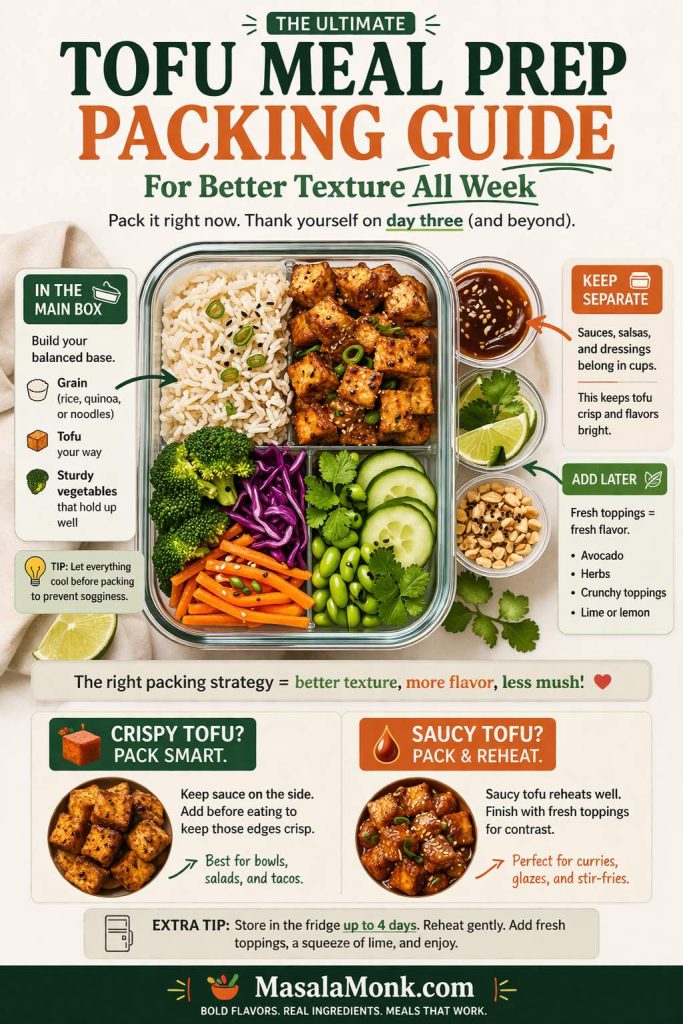
Editorial tofu meal prep packing guide showing how to pack tofu lunches for better texture all week, including what to keep in the main box, which sauces and dressings to store separately, what fresh toppings to add later, and how crispy tofu and saucy tofu should be packed differently for the best meal prep results.
Packing matters just as much as cooking when you want tofu meal prep to hold up through the week. Keep grains, tofu, and sturdy vegetables in the main box, store sauces separately, and add fresh toppings like herbs, lime, avocado, or crunchy elements closer to eating so the lunch keeps more texture and contrast. Save this post for your next prep day, and share it with someone who keeps blaming tofu when the real problem is the packing.

How to pack tofu meal prep so it still tastes good on day three

Packing order matters more than many people expect.

  • Keep sauce separate for crispy meals whenever possible.
  • Let hot tofu, rice, and vegetables cool before sealing the containers.
  • Add wet toppings like salsa, cucumber, and avocado closer to serving time.
  • Refresh older meal prep with acid, herbs, chili, seeds, or crunch rather than assuming the tofu itself is the only issue.

That last point matters. Cold or reheated lunches naturally lose some brightness, so a squeeze of lime, a little vinegar, fresh spring onion, or a spoonful of crunchy topping can make day-three tofu meal prep taste far more alive.

Also Read: Mango Sorbet Recipe: Healthy & Plant Based Dessert

5 Tofu Meal Prep Ideas That Actually Make a Strong Replacement for Chicken

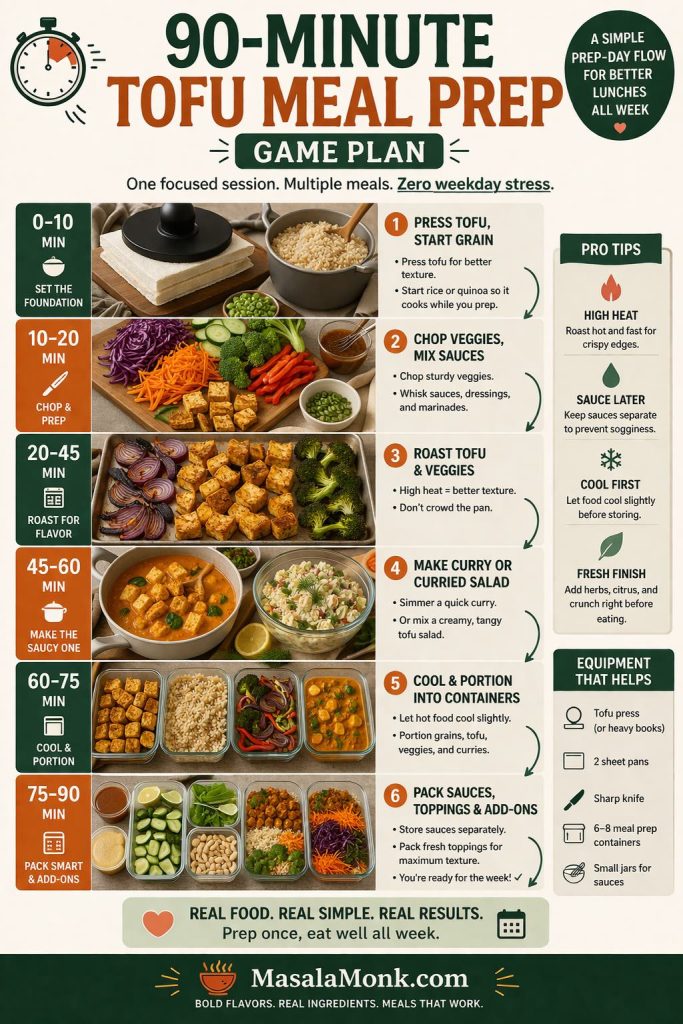
The five recipes below are arranged from the easiest texture-first tofu win to the most comfort-driven sauce-based lunch. Start with the one that matches your usual chicken habit most closely, then branch out once you find the format you actually want to repeat.

Premium editorial tofu meal prep style chooser infographic comparing five lunch formats: crispy sesame tofu bowls, smoky tofu crumbles, sticky soy garlic tofu, curried tofu salad, and coconut red curry tofu, with notes on texture, reheating style, and which type of lunch each option suits best.
The best tofu meal prep is usually the one that fits how you actually like to eat during the week. Crispy sesame bowls work well for texture-first lunches, smoky crumbles are great for taco bowls and wraps, sticky soy garlic tofu suits takeout-style cravings, curried tofu salad covers cold desk lunches, and coconut red curry tofu is the easiest fit for reheatable comfort food. Save this post for your next meal-prep session, and share it with someone who wants more variety without ending up with another week of boring lunches.

Crispy Sesame Tofu Meal Prep Bowls

Best tofu swap for sesame chicken bowls

If you usually prep sesame chicken, crispy stir-fry bowls, or takeout-style rice boxes, this is the strongest place to start. Crisp tofu gives you bite, structure, and sauce-holding power in a way soft cubes never will. Better still, the whole format still feels familiar, which makes the switch easier to trust.

Among all the tofu meal prep ideas in this post, this is one of the most beginner-friendly because it solves several problems at once: texture, strong sauce, roasted vegetables, and a dependable rice-bowl format. If someone thinks tofu always feels soggy or forgettable, this is the recipe most likely to change that opinion early.

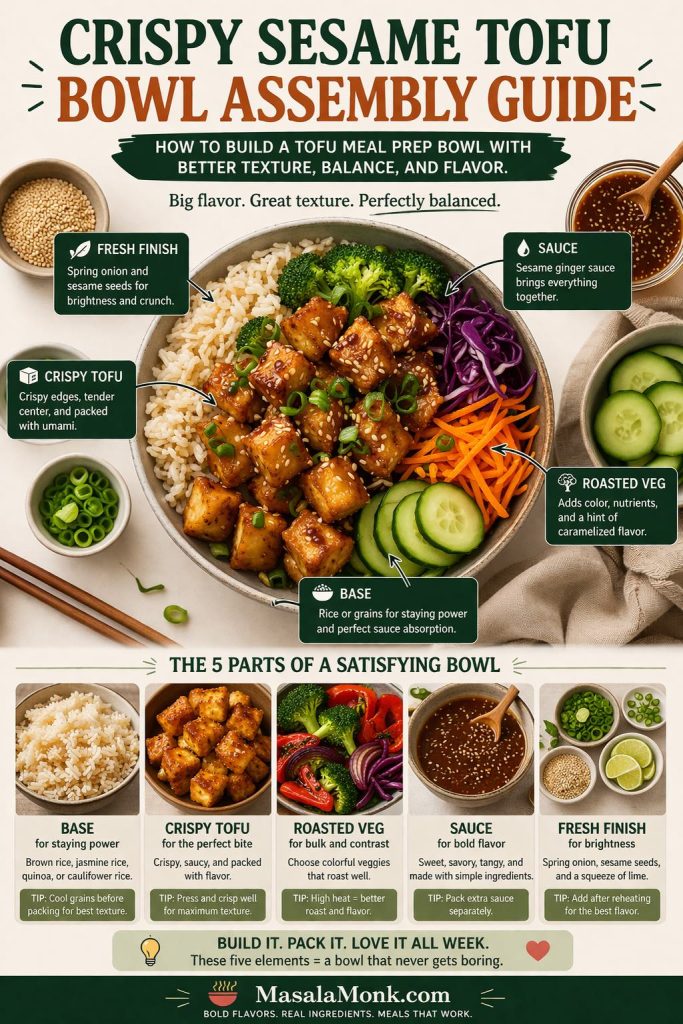
Premium editorial guide showing how to build a crispy sesame tofu meal prep bowl with a grain base, crispy tofu, roasted vegetables, sesame ginger sauce, and a fresh finish like spring onion and sesame seeds for better texture, balance, and flavor all week.
A satisfying tofu meal prep bowl works best when every part has a job: a solid base for staying power, crispy tofu for bite, roasted vegetables for bulk and contrast, a bold sesame-style sauce for flavor, and a fresh finish to keep the lunch from tasting heavy by day three. Save this post for your next prep day, and share it with someone who wants high-protein lunches that feel balanced, flavorful, and worth repeating through the week.

Recipe Card: Crispy Sesame Tofu Meal Prep Bowls

Prep time: 25 minutes
Cook time: 30 minutes
Yield: 4 bowls
Approximate protein: about 18 to 22 grams per serving before rice and toppings, depending on tofu brand

Ingredients

For the tofu

  • 2 blocks extra-firm tofu
  • 1 tablespoon neutral oil
  • 1 tablespoon soy sauce
  • 2 tablespoons cornstarch
  • 1 teaspoon garlic powder
  • 1/2 teaspoon black pepper

For the sesame ginger sauce

  • 3 tablespoons soy sauce
  • 1 tablespoon rice vinegar
  • 1 tablespoon maple syrup or honey
  • 1 tablespoon toasted sesame oil
  • 1 tablespoon grated ginger
  • 2 garlic cloves, minced
  • 1 to 2 teaspoons chili crisp or chili flakes
  • 2 tablespoons water

And for the bowls

  • 3 cups cooked rice
  • 1 large head broccoli, cut into florets
  • 2 bell peppers, sliced
  • 2 carrots, sliced thin
  • 1 tablespoon neutral oil
  • 2 tablespoons sesame seeds
  • 3 spring onions, sliced

Method

  1. Press the tofu for 20 to 30 minutes, then cut it into cubes.
  2. Toss the tofu with oil, soy sauce, cornstarch, garlic powder, and pepper. The coating should look light and powdery rather than wet.
  3. Spread on a lined tray and roast at 220°C / 425°F for 25 to 30 minutes, turning once, until the edges look dry, browned, and lightly blistered.
  4. Toss broccoli, peppers, and carrots with a little oil and roast on a second tray until tender with some color.
  5. Whisk together the sauce ingredients and taste before using.
  6. Once the tofu is hot and crisp, toss it lightly in enough sauce to coat.
  7. Divide rice among four containers, then add vegetables and tofu.
  8. Finish with sesame seeds and spring onion.

Best texture checkpoint

The tofu is ready when the cubes release easily from the tray, the corners look browned rather than pale, and the exterior feels lightly firm instead of damp.

Why this recipe works

Crisp texture plus a sesame-ginger sauce gives tofu a role people already trust from chicken bowls. The sauce goes on after roasting, which protects the edges instead of destroying them. Roasted vegetables keep the bowl from tasting one-note, while rice gives the whole meal the same dependable structure that makes sesame chicken lunch prep so popular.

Do not mess this up

Do not pour all the sauce onto the tofu before roasting. It will steam instead of crisp. Also, do not under-roast it. Pale tofu softens too quickly once sauced and feels disappointing by day two.

Storage and reheating

Store for up to 4 days. For the best texture, keep extra sauce separate and add it after reheating. Microwave works fine for the rice and vegetables, but an air fryer or hot skillet is the best way to recover crispness in the tofu. For the best day-three texture, pack sauce in a small container and toss just before eating.

Easy swaps

  • use quinoa instead of rice
  • swap peppers for cabbage or snap peas
  • add edamame for more protein
  • finish with lime for more brightness

For another bowl direction later in the week, MasalaMonk’s Thai-style vegan bowl with peanut butter dressing works well as a follow-on internal read.

Smoky Tofu Crumbles Taco Bowls

Best tofu swap for shredded chicken taco bowls

If your usual lunch prep leans toward taco bowls, burrito bowls, or shredded chicken rice boxes, tofu crumbles are one of the smartest replacements you can make. Because the tofu is broken into small irregular pieces, it catches spice more evenly and feels closer to the structure of seasoned minced or shredded protein.

This is also one of the most believable chicken-to-tofu swaps in the post. Ease, strong seasoning, and leftover flexibility are exactly what make it so repeatable. Once you make a good batch of tofu crumbles, you are not limited to one kind of lunch box.

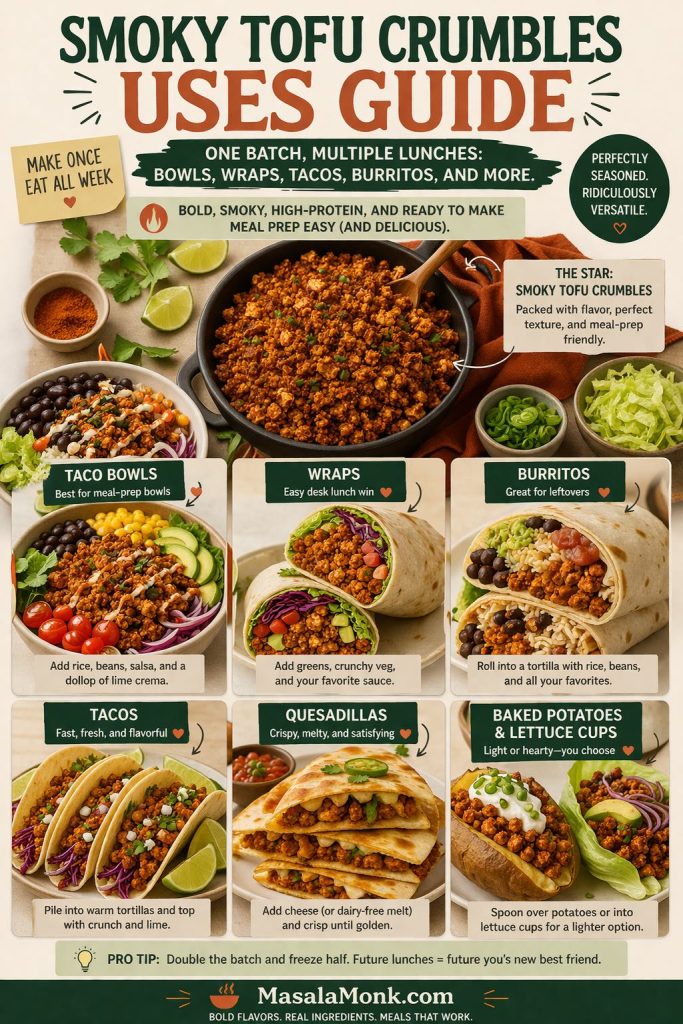
Editorial infographic showing multiple ways to use smoky tofu crumbles for meal prep, including taco bowls, wraps, burritos, tacos, quesadillas, and baked potatoes or lettuce cups, with notes on why this tofu crumble format works well for flexible high-protein lunches through the week.
One good batch of smoky tofu crumbles can carry much more than a single lunch. Use it for taco bowls early in the week, then turn the leftovers into wraps, burritos, tacos, quesadillas, or even baked potatoes when you want something different without starting from scratch again. Save this post for your next prep day, and share it with someone who wants more variety from one simple, high-protein tofu meal prep base.

Recipe Card: Smoky Tofu Crumbles Taco Bowls

Prep time: 20 minutes
Cook time: 25 minutes
Yield: 4 bowls
Approximate protein: about 20 to 24 grams per serving depending on tofu and beans used

Ingredients

  • 2 blocks firm or extra-firm tofu
  • 2 teaspoons olive oil
  • 1 tablespoon soy sauce
  • 1 tablespoon tomato paste
  • 2 teaspoons chili powder
  • 1 teaspoon smoked paprika
  • 1 teaspoon cumin
  • 1 teaspoon garlic powder
  • 1 teaspoon onion powder
  • 1/2 teaspoon black pepper
  • juice of 1 lime
  • 3 cups cooked rice
  • 1 can black beans, drained and rinsed
  • 1 cup corn
  • 2 cups shredded cabbage or lettuce
  • 1 cup salsa or pico de gallo
  • 1 avocado, sliced or mashed
  • coriander leaves for serving

Method

  1. Press the tofu well, then crumble it by hand into irregular pieces roughly the size of cooked ground meat rather than big chunks.
  2. Mix olive oil, soy sauce, tomato paste, chili powder, smoked paprika, cumin, garlic powder, onion powder, black pepper, and lime juice.
  3. Toss the tofu crumbles in the seasoning mixture until evenly coated.
  4. Spread on a baking tray and roast at 220°C / 425°F for 20 to 25 minutes, stirring once, until the tray looks mostly dry and the edges are browned.
  5. Divide rice among containers.
  6. Add black beans, corn, cabbage, and tofu crumbles.
  7. Pack salsa and avocado separately if possible.
  8. Finish with coriander and extra lime at serving time.

Best texture checkpoint

The crumbles are ready when the tray looks mostly dry, the edges have browned, and the mixture no longer gives off visible steam. They should look concentrated and lightly chewy at the edges rather than soft and damp.

Why this recipe works

Strong seasoning does a lot of the heavy lifting here. Even more importantly, the crumble texture makes tofu feel more integrated into the bowl, which helps a lot if someone is still skeptical about large tofu cubes. Beans, corn, cabbage, salsa, and avocado also create the kind of layered bowl that makes taco meal prep satisfying beyond the protein itself.

Do not mess this up

Do not stop cooking the crumbles too early. If they still look wet, they will taste flat and soften badly in storage. Do not crowd the tray either, or the mixture will steam. Also, do not skip the lime, because the acid helps the whole bowl feel brighter and less heavy.

Storage and serving

These bowls hold well for 3 to 4 days. Add avocado fresh if possible. If you want the crumbles darker and a little chewier, roast them 3 to 5 minutes longer after stirring.

Other ways to use the crumbles

  • spoon into wraps
  • roll into burritos
  • use in tacos
  • add to quesadillas
  • pile onto baked potatoes
  • turn into lettuce cups

Easy swaps

  • use quinoa instead of rice
  • add jalapeños or pickled onions
  • swap black beans for pinto beans
  • stir chipotle into the salsa for more smoke

Also Read: Protein Ice Cream Recipe: 10 Creamy Homemade Recipes

Sticky Soy Garlic Tofu Meal Prep

Best tofu swap for honey garlic or soy-glazed chicken bowls

If you like sticky, glossy, sweet-savory chicken bowls, this is the tofu version to try first. The key is simple: crisp the tofu first, then glaze it. That way you keep contrast instead of ending up with soft, saucy cubes.

This recipe works especially well for readers who love takeout-style lunches but want something they can batch at home without losing all the texture by the next day. The crisp shell gives the glaze something to cling to, while the garlic, ginger, soy, and a little sweetness create the familiar savory payoff many people usually chase in honey garlic chicken or soy-glazed bowls.

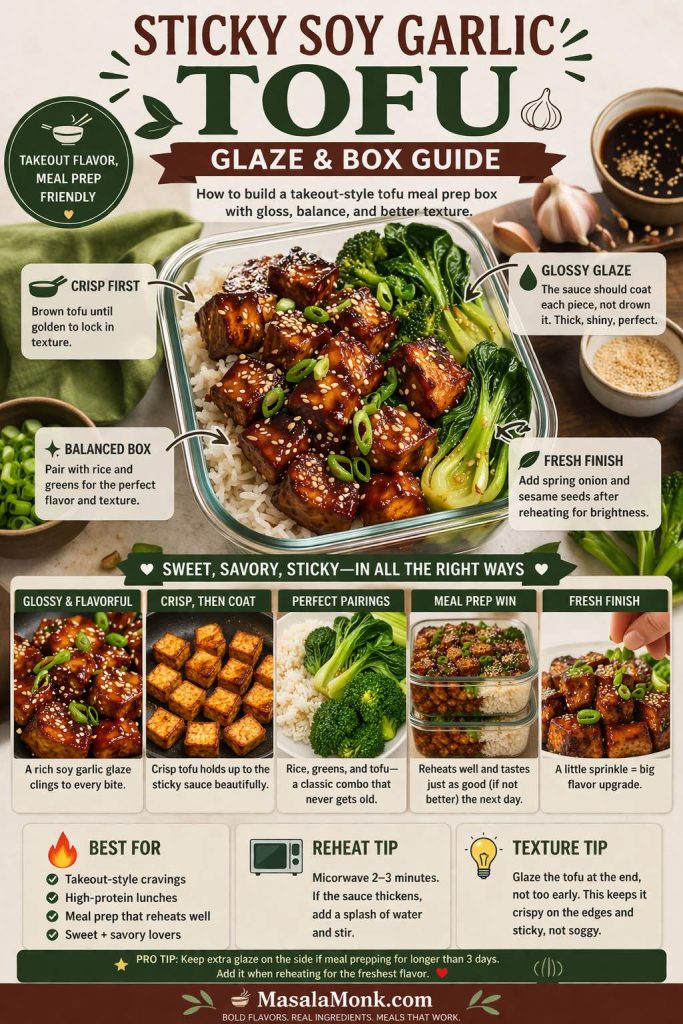
Premium editorial infographic showing a sticky soy garlic tofu meal prep box with glossy glazed tofu, rice, and greens, plus tips on crisping tofu first, coating with glaze at the end, pairing it with a balanced lunch box, reheating gently, and finishing with spring onion and sesame for better texture and flavor.
Sticky soy garlic tofu is the lunch to make when you want a meal-prep box that feels closer to takeout than another plain rice bowl. Crisping the tofu first, glazing it at the end, and pairing it with rice, greens, and a fresh finish keeps the box glossy, savory, and satisfying without turning everything soft too early. Save this post for your next prep day, and share it with someone who wants sweet-savory high-protein lunches that still taste good after reheating.

Recipe Card: Sticky Soy Garlic Tofu Meal Prep

Prep time: 20 minutes
Cook time: 30 minutes
Yield: 4 bowls
Approximate protein: about 18 to 22 grams per serving before rice, depending on tofu brand

Ingredients

For the tofu

  • 2 blocks extra-firm tofu
  • 1 tablespoon neutral oil
  • 2 tablespoons cornstarch
  • 1/2 teaspoon black pepper

For the glaze

  • 4 tablespoons soy sauce
  • 1 tablespoon rice vinegar
  • 1 tablespoon maple syrup or brown sugar
  • 1 tablespoon sesame oil
  • 4 garlic cloves, minced
  • 1 teaspoon grated ginger
  • 1 teaspoon chili flakes or chili crisp
  • 4 tablespoons water

And for the bowls

  • 3 cups cooked jasmine rice
  • 2 cups green beans or broccoli
  • 1 bell pepper, sliced
  • 2 spring onions, sliced
  • sesame seeds for garnish
  • shelled edamame, optional, for extra protein

Method

  1. Press the tofu and cut it into cubes.
  2. Toss with oil, cornstarch, and pepper.
  3. Roast or air-fry at 220°C / 425°F until crisp and golden, about 25 minutes.
  4. Roast or sauté the vegetables until just tender.
  5. In a saucepan, combine soy sauce, rice vinegar, maple or brown sugar, sesame oil, garlic, ginger, chili, and water. Simmer until glossy and lightly thickened.
  6. Toss the hot tofu gently in the glaze.
  7. Divide rice and vegetables into containers, then top with glazed tofu.
  8. Finish with spring onion and sesame seeds.

Best texture checkpoint

The tofu should be crisp and well browned before it ever touches the glaze. The glaze should look shiny and lightly syrupy, thick enough to coat the back of a spoon but not so reduced that it turns gummy after chilling.

Why this recipe works

The glaze gives tofu the familiar sticky, savory-sweet finish people often associate with takeout-style chicken bowls. Crisping first prevents the meal from turning heavy and soggy, while the rice and vegetables keep the lunch grounded in a familiar meal-prep structure. That balance between crispness and glaze is what makes the recipe satisfying rather than merely saucy.

Do not mess this up

Do not glaze the tofu before it is properly browned. Otherwise, you lose the contrast that makes the recipe worth making. Also, avoid reducing the glaze too far, or it can become overly sticky after chilling and reheating.

Storage and reheating

Store for up to 4 days. Reheat gently. For the best texture, toss only part of the tofu in glaze before packing and carry extra glaze separately to spoon over after reheating. Fresh spring onion or sesame added at the end helps restore contrast.

Easy swaps

  • use teriyaki instead of soy-garlic
  • swap in mushrooms, cabbage, or snap peas
  • add toasted peanuts for crunch
  • serve with brown rice if you prefer

MasalaMonk’s teriyaki sauce recipe is a natural internal link here if you want to vary the glaze later.

Curried Tofu Salad for High-Protein Lunch Meal Prep

Best tofu swap for curried chicken salad lunches

If you rely on creamy chicken salad for sandwiches, wraps, crackers, or desk lunches, this is the tofu format that replaces it most directly. Because the recipe depends on dressing, crunch, and mix-ins, tofu feels natural here rather than forced.

This is also one of the most practical tofu meal prep ideas for people who do not want to reheat lunch at work. It travels well, tastes good cold, and solves the problem of protein-forward desk lunches without relying on deli meat or another day of chicken.

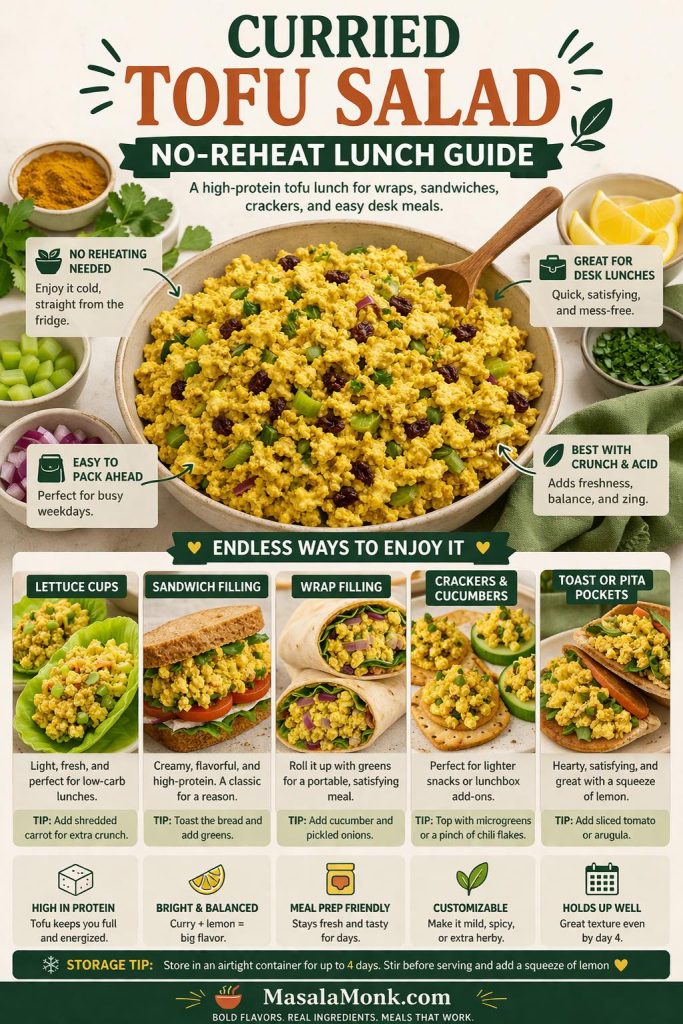
Premium editorial infographic showing a curried tofu salad no-reheat lunch guide with serving ideas for lettuce cups, sandwich filling, wrap filling, crackers or cucumber slices, and toast or pita pockets, plus notes on easy packing, desk-lunch use, added crunch and acid, and meal-prep storage.
Curried tofu salad is one of the easiest ways to make tofu meal prep work for real weekday lunches because it packs well, tastes good cold, and fits more than one kind of meal. Use it in wraps, sandwiches, lettuce cups, snack-box lunches, or on toast when you want something high in protein without depending on a microwave. Save this post for your next prep day, and share it with someone who needs an easy no-reheat lunch that still feels flavorful, fresh, and worth repeating.

Recipe Card: Curried Tofu Salad Meal Prep

Prep time: 20 minutes
Cook time: optional 10 minutes if you lightly bake the tofu first
Yield: 4 lunches
Approximate protein: about 16 to 20 grams per serving, depending on tofu and dressing choices

Ingredients

  • 2 blocks firm tofu
  • 1/3 cup vegan mayo
  • 1 tablespoon lemon juice
  • 2 teaspoons curry powder
  • 1/4 teaspoon turmeric, optional
  • 1 teaspoon Dijon mustard
  • 2 celery stalks, finely chopped
  • 2 spring onions or 1/4 small red onion, finely chopped
  • 2 tablespoons chopped coriander or parsley
  • 2 tablespoons raisins or finely chopped apple, optional
  • 2 tablespoons toasted sunflower seeds or chopped cashews, optional
  • salt and black pepper to taste
  • greens, wraps, bread, or crackers for serving

Method

  1. Press the tofu lightly so it is not watery, then crumble or finely chop it.
  2. In a bowl, whisk together vegan mayo, lemon juice, curry powder, turmeric if using, Dijon, salt, and pepper.
  3. Fold in the tofu, celery, onion, herbs, and any optional raisins or apple.
  4. Taste and adjust with more lemon, salt, or curry powder.
  5. Chill for at least 20 to 30 minutes before packing.
  6. Portion into containers with greens, wraps, sandwich bread, crackers, or cucumber slices.

Best texture checkpoint

The salad should hold together lightly without looking wet or loose. Finely crumbled tofu gives a more classic chicken-salad feel, while a slightly chunkier chop gives more bite.

Why this recipe works

This recipe replaces the function of chicken salad directly. It is practical, portable, and easy to repeat without reheating. The crunch from celery and seeds, the acid from lemon, and the creaminess from the dressing help tofu feel deliberate rather than plain, which is exactly why this format works so well for cold lunches.

Do not mess this up

Do not leave the tofu too wet before mixing. Excess moisture dilutes the dressing and shortens the storage life. Also, do not overdo the mayo at the start, because the salad loosens slightly as it sits.

Storage

Keeps well for 3 to 4 days. Stir before serving if needed. Keep greens and breads separate until you are ready to eat.

Best ways to serve it

  • spoon into wraps
  • pack with crackers
  • turn into a sandwich filling
  • serve with cucumber slices
  • pile onto toast with tomato
  • use in pita pockets

Easy swaps

  • use a yogurt-style dressing for a lighter version
  • add chopped grapes instead of apple
  • spoon into lettuce cups
  • use as a pita filling
  • add more herbs for a fresher finish

If you keep the mayo-based version, MasalaMonk’s homemade mayo recipe is the cleanest internal fit here.

Coconut Red Curry Tofu Meal Prep Boxes

Best tofu swap for chicken curry meal prep

If your weekly lunches usually include chicken curry, this is the tofu version most likely to satisfy you. Sauce-driven meal prep is one of tofu’s strongest lanes, because the tofu absorbs flavor without needing to imitate the exact texture of chicken.

This is also the best option in the post for readers who care more about reheating performance than crispness. Curry already depends on sauce, aromatics, vegetables, and rice for a large part of its appeal. That means tofu does not have to behave like chicken to feel right. It only has to hold shape, carry flavor, and reheat well.

Premium editorial infographic showing a coconut red curry tofu meal prep box with reheating tips, including browning tofu before simmering, packing curry with rice, finishing with lime and herbs after reheating, and using sturdy vegetables for a sauce-forward tofu lunch that stays satisfying through the week.
Coconut red curry tofu is one of the easiest tofu meal prep ideas to trust when you want a warm lunch that still feels good after reheating. Browning the tofu first, using vegetables that hold up well, and finishing with fresh lime or herbs after heating keeps the box rich, comforting, and balanced instead of heavy. Save this post for your next prep day, and share it with someone who wants a reheatable high-protein lunch that still tastes vibrant later in the week.

Recipe Card: Coconut Red Curry Tofu Meal Prep Boxes

Prep time: 20 minutes
Cook time: 30 minutes
Yield: 4 servings
Approximate protein: about 18 to 22 grams per serving before rice, depending on tofu and any added edamame

Ingredients

  • 2 blocks firm tofu
  • 1 tablespoon neutral oil
  • 1 onion, sliced
  • 3 garlic cloves, minced
  • 1 tablespoon grated ginger
  • 2 to 3 tablespoons red curry paste
  • 1 can full-fat coconut milk
  • 1 tablespoon soy sauce or tamari
  • 1 teaspoon maple syrup or brown sugar, optional
  • 1 bell pepper, sliced
  • 2 carrots, sliced
  • 1 to 2 cups green beans or broccoli
  • juice of 1/2 lime
  • fresh basil or coriander
  • 3 cups cooked rice for serving
  • shelled edamame, optional, for more protein

Method

  1. Press the tofu and cut it into cubes.
  2. Brown the tofu in a skillet with a little oil or roast it until lightly golden, then set aside.
  3. In a large pan, cook the onion until softened.
  4. Add garlic and ginger and cook briefly.
  5. Stir in the red curry paste and cook until fragrant.
  6. Add coconut milk, soy sauce, and the optional maple or brown sugar, then bring to a gentle simmer.
  7. Add bell pepper, carrots, and green beans or broccoli. Simmer until just tender.
  8. Return the tofu to the curry and simmer gently for a few minutes.
  9. Finish with lime juice and herbs.
  10. Portion with cooked rice into containers.

Best texture checkpoint

The tofu should be lightly browned before it enters the sauce, and the vegetables should be tender but not collapsing. The finished curry should look rich and fluid rather than watery or aggressively boiled down.

Why this recipe works

Sauce-driven meal prep is one of tofu’s strongest lanes. In this case, the curry gives you depth, comfort, and leftovers that still taste good several days later. Browning the tofu first helps it hold its structure in the sauce and keeps the final meal from tasting flat.

Do not mess this up

Do not skip browning the tofu first. Even a light browning step makes the final curry taste fuller and less flat. Also, avoid boiling the curry too hard once the tofu goes back in, or the vegetables can over-soften and the sauce can separate.

Storage and reheating

Store for up to 4 days. Reheat gently in the microwave or on the stove. Pack rice separately if you want the curry to reheat more evenly and avoid over-soft rice by day three. Add fresh herbs or extra lime closer to serving time if possible.

Easy swaps

  • use green curry paste
  • add mushrooms, baby corn, or snap peas
  • add edamame for more protein
  • use more lime and herbs for a brighter finish

Also Read: Homemade Mango Ice Cream Recipe

How to Make These Tofu Meal Prep Ideas Even Higher in Protein

Tofu already gives these lunches a solid protein base, but the easiest way to make them more filling is to support the tofu intelligently.

  • add shelled edamame to sesame bowls, sticky bowls, and curry boxes
  • use quinoa instead of rice in some meals
  • pair tofu crumbles with beans or lentils
  • use higher-protein wraps for salad or crumble fillings
  • add roasted chickpeas, hemp hearts, or seeds for extra protein and texture
  • slightly increase the tofu portion in the meals you repeat most often

That kind of adjustment helps the “high-protein” promise feel more real in practice, not just in the title. It also lets you adapt the same tofu meal prep ideas to different hunger levels without reinventing the whole week.

Tofu Meal Prep Troubleshooting: How to Fix the Problems That Ruin the Week

Use this section as a quick check before blaming tofu itself. In most cases, the problem comes down to moisture, weak seasoning, or packing order.

Premium tofu meal prep troubleshooting infographic showing common tofu lunch problems and fixes, including soggy tofu, bland tofu, watery meal prep boxes, rubbery tofu on reheat, flat cold lunches, and tofu sticking to the tray, with clear cause-and-fix notes for better texture and flavor all week.
When tofu meal prep goes wrong, the problem is usually fixable. Too much moisture, weak seasoning, wet add-ins, harsh reheating, or not enough contrast can turn a good lunch into a disappointing one, but small adjustments make a big difference. Save this post for your next prep session, and share it with someone who wants tofu lunches that stay flavorful, balanced, and worth eating all week.
  • Tofu turns soggy: Too much moisture or sauce was added too early. Press longer, roast longer, and sauce later.
  • Tofu tastes bland: The seasoning is too weak or the glaze is under-salted. Use soy, acid, aromatics, chili, and enough salt.
  • Meal prep turns watery: Wet vegetables were packed too early. Store cucumbers, salsa, and similar add-ins separately.
  • Tofu goes rubbery on reheat: It was either overcooked twice or reheated too harshly. Reheat gently and avoid over-reducing sauces.
  • Crispy tofu loses its edge by day three: It was fully dressed too early. Keep extra sauce separate until serving.
  • Salad-style tofu lunch tastes flat: It needs more crunch or acid. Add celery, herbs, lemon, seeds, or pickled elements.
  • Tofu sticks to the tray: There was not enough oil or no lining. Line the tray and let the tofu sit briefly before turning.
  • Tofu tastes watery even when seasoned: It was not pressed enough before cooking or mixing. Press longer and let the exterior dry slightly before seasoning.
  • Tofu falls apart in bowls: The cubes were too soft or handled too much after cooking. Use firm or extra-firm tofu and toss gently after browning.
  • Tofu tastes fine hot but disappointing cold: Cold food dulls flavor. Add more acid, herbs, crunch, or a sharper sauce when serving.

Also Read: Cookie Pie Recipe: 10 Best Flavors, Fillings and Variations

Tofu Meal Prep Ideas for Beginners: Batch-Cook Once and Eat All Week

How to batch-cook tofu meal prep in one session

The best tofu meal prep ideas often share the same foundation. Instead of cooking five unrelated lunches from scratch, cook components once and turn them in different directions.

A practical session looks like this:

  • press and cook 3 to 4 blocks of tofu in two different styles
  • cook a big batch of rice or quinoa
  • roast two trays of vegetables
  • mix one creamy dressing and one glaze
  • prep raw crunchy vegetables for cold lunches

A good order helps. Press the tofu first so it can drain while you start rice or quinoa. Roast one tray of tofu and one tray of vegetables together if your oven space allows. Mix sauces while everything cooks. Then cool components before packing, because steam trapped in containers shortens the life of the meal prep and softens textures faster than people expect.

Premium editorial infographic showing a 90-minute tofu meal prep game plan with six time blocks: press tofu and start grain, chop vegetables and mix sauces, roast tofu and vegetables, make curry or curried tofu salad, cool and portion containers, and pack sauces and add-ons for better lunches all week.
A good tofu meal prep session gets much easier when the work has a clear order. Start by pressing tofu and cooking your grain, move into chopping and sauces, roast tofu and vegetables together, then finish with one saucy option, portioning, and packed toppings so weekday lunches feel organized instead of repetitive. Save this post for your next prep day, and share it with someone who wants a simpler way to batch-cook better tofu lunches all week.

A sample 90-minute batch-cook plan

  • 0 to 10 minutes: press tofu and start rice or quinoa
  • 10 to 20 minutes: chop vegetables and mix sauces
  • 20 to 45 minutes: roast tofu and vegetables
  • 45 to 60 minutes: cook the curry or mix the curried tofu salad
  • 60 to 75 minutes: cool the hot components and portion containers
  • 75 to 90 minutes: label containers, portion sauces, and prep add-ons like herbs, lime, or crunchy toppings

That kind of system is what makes meal prep sustainable. Once the foundation is cooked, you are no longer building every lunch from zero.

How to mix and match these tofu meal prep ideas across the week

One tofu batch can cover more than one meal. Crispy tofu can become sesame bowls on Monday and sticky glazed tofu on Tuesday. Crumbles can go into taco bowls first, then wraps later. Curried tofu salad can cover desk lunches, while curry boxes handle dinners or heavier lunches.

That means the five recipes do not have to live in isolation. They can work as a system. Once you understand that, meal prep gets easier because you are no longer cooking from scratch every time. You are simply building new lunches from the same small set of components.

How long tofu meal prep lasts in the fridge

Most cooked tofu meal prep keeps well for 3 to 4 days. However, the storage method matters just as much as the recipe itself.

  • crispy tofu holds best when sauce is separate
  • salad-style prep holds best when watery vegetables are added later
  • curry and glazed tofu usually reheat well
  • avocado and fresh herbs are best added close to serving time

Even strong tofu meal prep ideas can disappoint if wet ingredients sit on everything for four days straight. Good packing is part of good cooking.

Also Read: Peach Cobbler with Canned Peaches (Dessert Recipe)

Final Thoughts on Using Tofu as a Chicken Replacement

Tofu does not replace chicken by copying it perfectly. It replaces chicken by working especially well in the meal formats where texture, sauce, seasoning, vegetables, and lunch structure matter more than one exact meat-like bite.

That is why these tofu meal prep ideas work. Crispy bowls give you bite. Crumbles give you familiarity. Sticky glazed tofu brings the takeout-style payoff many people want. Curried tofu salad solves cold lunches. Curry boxes bring reheatable comfort and strong leftovers.

If chicken has been your default meal-prep protein simply because it feels easy and dependable, start with the tofu format that matches the chicken lunch you already rely on most. That is usually the simplest way to make the switch actually stick. If you want another plant-based lunch lane after tofu, MasalaMonk’s guide to plant-based meal prep ideas using lentils instead of chicken is the cleanest next internal read.

Premium editorial infographic showing the best tofu meal prep for your workday, comparing crispy sesame tofu bowls, smoky tofu crumbles, sticky soy garlic tofu, curried tofu salad, and coconut red curry tofu by texture, reheating style, and the kind of weekday lunch each option suits best.
The best tofu meal prep is usually the one that fits your workday, not just the one that sounds good in theory. Crispy sesame tofu bowls suit texture-first lunches, smoky tofu crumbles work well for flexible leftovers, sticky soy garlic tofu covers takeout-style cravings, curried tofu salad makes a strong no-reheat desk lunch, and coconut red curry tofu is the easiest fit for warm, comforting meal prep. Save this post for your next prep day, and share it with someone who wants high-protein lunches that actually match the way they like to eat through the week.

FAQs About Tofu Meal Prep Ideas

1. What is the best type of tofu for meal prep?

For most tofu meal prep ideas, firm or extra-firm tofu is the best place to start. These styles hold their shape better, brown more easily, and stay more stable in the fridge than softer tofu. Soft and silken tofu are better suited to soups, sauces, smoothies, and gentler dishes.

2. Do you have to press tofu before meal prep?

Usually, yes. Pressing tofu removes excess surface moisture, which helps it brown better, hold seasoning more effectively, and resist turning soggy too quickly. That matters most for crispy tofu bowls, tofu crumbles, and sticky glazed tofu. Curry and salad-style tofu are a little more forgiving, but even there, lightly pressing the tofu improves the result.

3. How do you keep tofu meal prep from getting soggy?

Press the tofu, brown it properly, and add sauce later rather than earlier. It also helps to store wet ingredients like salsa, cucumbers, and extra dressing separately until serving. For crispy tofu meal prep in particular, packing the sauce on the side is one of the easiest ways to protect texture for several days.

4. How long does tofu meal prep last in the fridge?

Most tofu meal prep keeps well for about 3 to 4 days in the fridge when stored in airtight containers. Crispy tofu usually lasts best when the sauce is kept separate, while curry and salad-style tofu meal prep tend to hold especially well because they are already built around moisture and dressing.

5. Are tofu meal prep ideas actually high in protein?

They can be, especially when the recipes use firm or extra-firm tofu in generous portions and pair it with ingredients like edamame, beans, quinoa, lentils, or higher-protein wraps. The meals also feel more filling when the box includes a solid base, strong seasoning, and enough texture contrast.

6. What are the best tofu meal prep ideas for beginners?

For beginners, the easiest tofu meal prep ideas are usually crispy tofu bowls, sticky glazed tofu bowls, and tofu crumbles. Those formats are forgiving, flavorful, and easy to pair with rice, vegetables, wraps, or tacos. More importantly, they feel familiar if you are coming from sesame chicken bowls, taco bowls, or takeout-style rice boxes.

7. Why does tofu taste bland sometimes?

Tofu usually tastes bland when it is under-seasoned or when the meal around it is weak. Because tofu starts out mild, it needs more help from salt, umami, acid, aromatics, spice, and sauce than many people initially expect. Once the seasoning gets stronger and the meal includes more contrast, tofu becomes much more satisfying.

Posted on 4 Comments

Garlic & Paprika Cabbage Rolls (Keto-Friendly Recipes) – 5 Bold Savory Twists

Moody close-up of a keto cabbage roll cut open to show a savory meat filling, sitting in a glossy garlic-paprika tomato sauce in a dark bowl, with a fork on the side and “Keto Cabbage Rolls” text overlay plus MasalaMonk.com at the bottom.

Stuffed cabbage rolls, keto or not keto – have a way of making a kitchen feel calm. Even before the oven is hot, the process itself—softening cabbage leaves, mixing a savory filling, rolling everything into neat parcels—turns dinner into something deliberate. Once the sauce bubbles and the cabbage goes silky at the edges, the whole dish tastes like it belongs on a table where people linger.

The classic version is famous for a reason. It’s hearty, tender, and deeply satisfying. It’s also often built around rice, which is exactly why cabbage rolls can feel tricky on a low carb diet. Still, the comfort isn’t coming from rice alone. It’s coming from the structure—cabbage wrapped around seasoned meat—plus a sauce that sinks into every fold and seam.

Keto Cabbage Rolls

That’s where these keto cabbage rolls shine. They keep everything that matters: the cozy, homey feel; the fork-tender cabbage; the rich tomato-forward sauce; the filling that tastes better the next day. The only difference is that instead of rice, the filling uses lower-carb “bulk” that still holds moisture and texture. More importantly, the flavor leans hard into garlic and paprika, so the rolls never feel like a compromise.

This is also not a one-note recipe. Cabbage rolls are a template, and once you have the core method, you can push them in completely different directions—smoky and deep, tangy with sauerkraut, bright and herb-forward, spicy, or Mediterranean-leaning. Each twist still tastes like cabbage rolls, yet each one feels like its own dinner.

Keto cabbage rolls in garlic-paprika tomato sauce with “5 savory twists” flavor picker: smoky paprika, spicy chilies, sauerkraut & caraway, Mediterranean herb & lemon, and herb oil, arranged around one cabbage roll on a light background.
Not sure which version to make tonight? Use this “pick your flavor” guide for keto cabbage rolls—same easy roll-and-bake base, five garlic-paprika twists (smoky, spicy, sauerkraut + caraway, Mediterranean herb + lemon, and herb oil). It helps readers choose a direction fast, keeps the recipe flexible, and makes meal prep easier when you’re cooking for different taste buds.

If you’re easing into keto or simply trying to eat fewer carbs without feeling deprived, it can help to understand the bigger picture of how low-carb swaps work. MasalaMonk’s guide to keto for beginners lays out the basics in a simple way. Even if you’re already comfortable with low carb eating, it’s a useful reminder that sustainable dinners come from repeatable patterns—structure, flavor, and satisfaction—rather than strict perfection.


Why cabbage rolls work so well when you’re keeping it low carb

Cabbage is one of those ingredients that behaves like a built-in plan. It gives you volume without heaviness, structure without flour, and a gentle sweetness that plays well with savory seasonings. Because it’s naturally sturdy, it holds up to long cooking times, which is why old-fashioned cabbage rolls show up across cuisines—Polish gołąbki (often spelled golabki), Ukrainian-style cabbage rolls, Hungarian cabbage roll recipes, Jewish stuffed cabbage, German cabbage rolls (including kohlrouladen), and Balkan sarma rolls.

Keto cabbage rolls in a rich tomato garlic paprika sauce, one roll sliced open to show the meat filling. Text overlay reads “Why Cabbage Rolls Work on Keto” with bullets: volume + fiber = more filling, leaf wrapper = no flour needed, comfort = meat + sauce, portions + reheat = meal-prep win. MasalaMonk.com at bottom.
Why cabbage rolls work so well on keto: cabbage gives you volume + fiber without flour, and the “real comfort” still comes from meat + sauce. Use this quick cheat sheet when you’re deciding what to cook for the week—cabbage rolls portion cleanly, reheat beautifully, and stay satisfying even without rice.

Why the format stays satisfying even without rice

Even when spice blends change, the concept stays consistent: cabbage leaves stuffed with something rich, then cooked in a flavorful sauce until everything melds. That’s exactly the kind of dish that adapts beautifully to keto-friendly cooking, because the original structure doesn’t rely on breading or flour. Instead, you’re mostly adjusting the filling and the sauce while keeping the comfort intact.

From a nutrition standpoint, cabbage is also a practical base. It’s low calorie and fiber-rich, and it tends to make meals feel more filling—useful if you’re aiming for weight loss without feeling like you’re eating tiny portions. Cleveland Clinic’s overview of cabbage highlights its fiber and nutrient profile and explains why it can support a healthier eating pattern when used in satisfying meals: the health benefits of cabbage.

Meanwhile, cabbage rolls also make sense for meal prep. They portion cleanly, reheat well, and often taste even better after a rest. If you’re the kind of person who does better with a plan, they’re the sort of anchor dinner that makes the rest of the week easier.

Cabbage is one of the easiest low-carb staples to build meals around, and it does more than just “fill space.” If you want to go deeper on the nutrition side—fiber, nutrients, and why it works so well in everyday keto cooking—here’s a fuller guide on why cabbage is a staple in the keto kitchen.

Also Read: Eggless Yorkshire Pudding (No Milk) Recipe


Keto cabbage rolls versus cabbage rolls with rice: the swap that keeps the comfort

Traditional stuffed cabbage rolls with rice are built around a familiar equation: meat + rice + seasonings + cabbage + tomato sauce. Sometimes the rice goes in uncooked, sometimes it’s partially cooked first. Either way, rice is there for bulk and to absorb juices.

However, rice is not the heart of cabbage rolls. The heart is the combination of tender cabbage and savory filling, plus the sauce that soaks into everything. So the strategy here is simple: keep what matters, replace what doesn’t.

To be clear, there’s nothing wrong with classic stuffed cabbage rolls with ground beef and rice if that’s how you cook. They’re a classic stuffed cabbage recipe for a reason. Yet if you want cabbage rolls that are keto compatible, you’re looking for a filling that stays moist, holds together, and doesn’t taste “substitution-y.”

Side-by-side photo of two bowls of stuffed cabbage roll filling. Left bowl labeled “Classic: Rice” shows ground beef mixed with rice, onion, and herbs. Right bowl labeled “Keto: No Rice” shows ground beef with cauliflower rice, mushrooms, and parmesan. Text overlay says “Keto vs. Classic Stuffed Cabbage (Rice) — Swap Snapshot” with tips: bulk (cauli rice, mushrooms), binder (egg + parmesan optional), and keep it firm (squeeze cauliflower rice). MasalaMonk.com footer.
If you grew up on stuffed cabbage rolls with ground beef and rice, this is the exact swap that keeps the comfort: replace rice with squeezed cauliflower rice + finely chopped mushrooms for bulk and moisture, and use egg + parmesan (optional) when you want the filling extra tight. It tastes like the classic version—just lighter, lower carb, and less likely to turn watery in the pan.

What replaces rice in keto-friendly cabbage rolls?

You have a few excellent options, and you can mix them depending on what you like:

  • Cauliflower rice is the closest texture match. It bulks the filling without bringing carbs, and it disappears into the meat once baked.
  • Finely chopped mushrooms bring moisture and umami. They make the filling taste deeper, almost like it simmered longer.
  • Riced broccoli or finely shredded zucchini can work too, although zucchini needs to be squeezed well so it doesn’t water out the filling.
  • A small amount of grated parmesan or other hard cheese adds richness and helps bind.

Rice is mostly there for bulk and to soak up juices, not because it’s the “main flavor.” If you want a clearer sense of how rice compares to other options—and why swapping it out doesn’t change the comfort of the dish—this quick breakdown of quinoa vs rice and lower-carb alternatives

The point isn’t to mimic rice perfectly. Instead, it’s to build a filling that feels right: juicy, savory, substantial, and not crumbly. Once you do that, you’re no longer “making keto cabbage rolls.” You’re simply making cabbage rolls—ones that happen to be low carb.

Also Read: Crock Pot Chicken Breast Recipes: 10 Easy Slow Cooker Dinners (Juicy Every Time)


Ingredients for tender, flavorful keto-friendly cabbage rolls

Before the steps, it helps to understand what each ingredient is doing. That’s what makes these rolls reliable, even if you swap meats or choose a different twist.

The cabbage (and the best cabbage for cabbage rolls)

Most cabbage roll recipes start with green cabbage, and it’s still the most forgiving choice.

Infographic titled “Cabbage Types for Cabbage Rolls: Green vs Savoy vs Napa.” Three photos show green cabbage, savoy cabbage, and napa cabbage. Labels say: Green—best for tight rolls and easiest; Savoy—most flexible and least tearing; Napa—best for light fillings and vegan friendly. Bottom tips say: if leaves tear choose Savoy; for sturdy structure choose Green; for tender wraps choose Napa. MasalaMonk.com at bottom.
Choosing the right cabbage makes rolling feel easy. Use this quick picker: Green cabbage is the sturdy classic for tight rolls, Savoy is the most flexible (best if your leaves tear), and Napa is tender and great for lighter or vegan fillings. Pick the leaf first—then the rest of the recipe becomes simple.
  • Green cabbage: sturdy leaves, easy to roll, holds up well in oven or slow cooker.
  • Savoy cabbage: softer leaves that bend easily; it’s great if you want less wrestling while rolling.
  • Napa cabbage: thinner and more delicate; it’s especially good for vegan cabbage rolls or lighter fillings, though it can tear if overcooked.

If you’ve ever been frustrated by cabbage leaves splitting, savoy is often the answer. On the other hand, if you want maximum structure for a pan of stuffed cabbage in a thick sauce, green cabbage is the steady classic.

The filling (protein and flavor)

This recipe works with different meats, and each one gives a slightly different result:

  • Ground beef: richest flavor, most forgiving texture, classic “stuffed cabbage” taste.
  • Ground turkey: lighter but still satisfying; it benefits from extra fat and bold seasoning.
  • Ground pork: juicy and savory; paprika and garlic love pork.
  • Beef + pork blend: especially good for a more traditional European feel.
Infographic titled “Keto Cabbage Rolls Filling Formula (No Rice)” showing a mix-and-match chart: choose 1 protein (ground chicken, turkey, or beef), choose 1 no-rice bulk (riced cauliflower squeezed dry, chopped mushrooms, or finely shredded cabbage), and choose 1 binder (egg + parmesan, psyllium husk, or almond flour). Includes “Too wet? Fix fast” tips and a serving photo of cabbage rolls in tomato sauce.
This “no-rice” filling formula makes keto cabbage rolls that stay juicy without turning watery. Pick your protein, pick your bulk (cauli rice, mushrooms, or extra cabbage), then lock it together with the right binder (egg + parmesan, psyllium, or almond flour). Use the quick “too wet” fixes before you roll—so the cabbage wraps bake up neat, tender, and saucy every time.

To keep the filling cohesive without rice, you’ll use:

  • Egg as a binder (optional but helpful)
  • Cauliflower rice and/or chopped mushrooms for bulk
  • Garlic and paprika as the core flavor signature
  • Salt and pepper for structure (salt does more than people think here)

Meat choice changes the whole feel of cabbage rolls. Beef and pork tend to stay richer and more satisfying, while turkey usually needs a little extra fat and bold seasoning to keep the filling juicy. If you’ve noticed fattier meats keep you full longer, there’s a real reason for that—here’s a deeper look at beef and the keto diet.

The sauce (tomato comfort without the sugar reliance)

Many classic cabbage rolls rely on a sweet-leaning tomato sauce. On keto, you can still use tomatoes; the trick is building depth with garlic, paprika, broth, and fat rather than sugar. When done well, the sauce tastes like the cozy “cabbage rolls in tomato soup” style people love—round, mellow, and comforting.

Also Read: Sourdough Starter Recipe: Make, Feed, Store & Fix Your Starter (Beginner Guide)


How to soften cabbage leaves: three practical methods

This is where cabbage rolls either feel easy or feel impossible. The truth is that softening cabbage leaves is straightforward once you choose the method that fits your life.

Infographic showing three ways to soften cabbage leaves for cabbage rolls: boiling (8–12 minutes), freeze–thaw method (freeze whole head, thaw to make leaves rollable), and microwave method (wrap in a damp towel and heat in short rounds). Includes quick fixes for torn leaves, stiff leaves, and overly soft leaves.
Soft cabbage leaves = rolls that don’t tear. Use this quick method picker to choose the best way to prep cabbage for cabbage rolls: boil (classic + reliable), freeze–thaw (quietly the easiest), or microwave (fastest for small batches). The “quick fix” line at the bottom saves you when leaves rip or feel stiff—so rolling stays calm and the pan bakes up neat.

Method 1: Boiling (the classic approach)

Bring a large pot of water to a gentle boil. Core the cabbage, then lower the whole head into the water. After a few minutes, the outer leaves will loosen. Use tongs to peel them off as they soften.

Once you have enough leaves, trim the thick rib at the base of each leaf. Rather than cutting it out completely (which can weaken the leaf), slice it down so the leaf lies flatter and rolls more easily.

Boiling is reliable, and it works with any cabbage variety. Still, it requires a big pot and a little patience.

Method 2: Freeze and thaw (quietly the easiest way to make cabbage rolls)

If you want the easiest way to make cabbage rolls without boiling water, freeze the whole head of cabbage overnight, then thaw it in the fridge. The freezing breaks down cell walls, which means the leaves become flexible and rollable once thawed.

This method is also excellent if you’re doing cabbage rolls for freezing later, because you’re already in a meal prep mindset. It feels like a small trick, yet it changes everything: the leaves soften without a pot of water, and you can prep when you have time rather than when you’re hungry.

Method 3: Microwave (the fastest shortcut)

Core the cabbage, wrap it in a damp towel, and microwave for a few minutes. Peel off softened leaves, then repeat until you have enough.

Microwave softening is quick and surprisingly effective. It’s also helpful if you’re making a small batch and don’t want to boil a huge pot of water.

If you’re newer to low carb cooking and want quick clarity on what counts as keto-friendly (and what doesn’t), these keto diet FAQs

Also Read: How to make No-Bake Banana Pudding: No Oven Required Recipe


The base keto cabbage rolls recipe (oven baked)

This is the core method. After you make it once, the twists become easy, because you’re no longer learning how to roll—you’re simply changing the flavor.

Roll-and-bake keto cabbage rolls, made simple: soften the leaves, mix a tight (not wet) filling, roll and tuck, then bake covered and finish uncovered for the best texture. This quick visual is the “don’t-mess-it-up” guide for sturdy rolls that hold together—especially if you’re meal-prepping or freezing a batch.

Ingredients (base)

For the cabbage rolls

  • 1 large green cabbage (or savoy)
  • 680 g / 1.5 lb ground beef (or turkey or pork)
  • 3–5 cloves garlic, finely minced or grated
  • 2 teaspoons paprika (sweet or smoked)
  • 1 teaspoon salt, plus more as needed
  • 1/2 teaspoon black pepper
  • 1 1/2 cups cauliflower rice (fresh, or thawed and squeezed dry)
  • 1/2 cup finely chopped mushrooms (optional but recommended for juiciness)
  • 1 egg (optional binder)
  • 1/3 cup grated parmesan (optional, helps bind and adds richness)
  • 2 tablespoons chopped parsley (optional)

For the sauce

  • 2 cups crushed tomatoes or tomato passata
  • 1 cup broth (beef or chicken)
  • 1 tablespoon tomato paste (optional, for deeper tomato flavor)
  • 1–2 tablespoons olive oil or butter
  • 1 teaspoon paprika
  • 1/2–1 teaspoon garlic powder (or another clove of garlic, minced)
  • Salt and pepper to taste
  • Optional: a splash of vinegar for balance

Step 1: Prep the cabbage leaves

Use one of the softening methods above. Once the leaves are pliable, trim the thick rib near the base so each leaf rolls without cracking.

Set leaves aside while you make the filling.

Step 2: Make the filling

In a large bowl, combine ground meat, garlic, paprika, salt, pepper, cauliflower rice, mushrooms (if using), egg (if using), and parmesan (if using). Mix gently until combined.

Mixing too aggressively can make the filling dense. Instead, fold everything together until it looks even, then stop.

Step 3: Roll

Lay a cabbage leaf flat. Place a portion of filling near the base. Fold the sides in, then roll up tightly. Place seam-side down in a baking dish.

Continue until you’ve used your leaves and filling. If you have extra small or torn leaves, tuck them around the rolls in the dish—those bits often become the best parts after baking.

Step 4: Make the sauce

In a bowl or measuring jug, whisk crushed tomatoes, broth, tomato paste, olive oil or butter, paprika, garlic, salt, and pepper. Taste it. You want it slightly stronger than you think you need, because it will mellow as it cooks.

Pour sauce over the rolls. Cover the dish tightly with foil.

Step 5: Bake

Bake at 190°C / 375°F until the cabbage is tender and the filling is cooked through. The time will vary based on roll size and meat choice, but 55–75 minutes is common for oven cabbage rolls.

For a thicker sauce, uncover the dish for the last 10–15 minutes to let it reduce slightly.

Food safety, written in a way that doesn’t interrupt dinner

Because these are rolls made with ground meat, safe internal temperature matters. USDA guidance for ground beef food safety recommends cooking ground beef to 160°F / 71°C. For ground turkey and other poultry, USDA’s turkey safe cooking guidance points to 165°F / 74°C. A thermometer makes this effortless, and it removes the guesswork.

If you’re cooking once and reheating during the week, USDA’s notes on leftovers and food safety reinforce reheating leftovers to 165°F / 74°C. That’s especially useful for soup and casserole versions, where it’s easy to assume the middle is hot when it isn’t.

Also Read: Chicken Adobo — Step-by-Step Recipe — Classic Filipino Adobong Manok


The sauce that tastes like “tomato soup” cabbage rolls—without leaning on sugar

Some cabbage roll casseroles and soups are famous for tasting like tomato soup, even when they’re not made with canned soup. That flavor comes from a few details working together: enough tomato concentration, a savory broth backbone, paprika’s gentle sweetness, and fat to round out acidity.

If your sauce tastes too sharp, a small splash of vinegar can actually help, because it adds a clean acidity that makes tomato taste more “complete.” Meanwhile, finishing with olive oil or a little butter can soften everything so the sauce tastes rich rather than harsh.

Tomato-soup style cabbage roll sauce in a small pot on a cream background with paprika, tomato paste, broth, and olive oil nearby. Text overlay lists the formula: passata + paste, broth for savory depth, paprika for “sweetness,” finish with olive oil or butter, and optional vinegar to brighten if the sauce tastes flat.
Want that cozy “tomato soup” cabbage-roll sauce without adding sugar? This visual nails the formula: concentrate the tomato base (passata + a spoon of paste), use broth for depth, lean on paprika for gentle warmth, then finish with olive oil or butter to round the acidity. If it tastes sharp or flat, add fat first—then a tiny vinegar splash to brighten.

If you want a credible external reference on why olive oil is often considered a strong everyday fat choice, Harvard Health’s article on extra-virgin olive oil offers a balanced take. For a broader “what fats matter most” reference, Harvard’s Nutrition Source overview of types of dietary fats is a solid citation that avoids fad language while still supporting a keto-friendly approach that focuses on quality.

When you’re serving cabbage rolls, something crunchy on the side is always welcome. A quick slaw is a natural pairing, and if you want a creamy base without fuss, MasalaMonk’s eggless mayonnaise makes a useful recipe – if you want want a simple dressing foundation and if you are not avoiding eggs, then have a look at Mayo Recipe: 15+ Homemade Mayonnaise Variations.


Five savory garlic and paprika twists (same method, different dinner)

Now for the fun part. Each of these twists starts from the base keto-friendly cabbage rolls recipe above. In other words, you’re not learning five different recipes. You’re choosing one flavor direction, then making small changes to the filling and sauce.

Because the base is already bold, the twists don’t need many extra ingredients. The goal is to keep the dish cohesive: cabbage, savory filling, tomato-based sauce, and one clear flavor identity.

Twist 1: Smoky garlic and paprika (deep, cozy, and bold)

If you like cabbage rolls that taste almost grilled—dark, savory, and rich—this is the direction.

Best meat choice: ground beef or ground pork
Add to the filling:

  • 1 teaspoon smoked paprika (in addition to the base paprika)
  • 1/2 teaspoon cumin
  • Optional: 1 teaspoon mustard (Dijon works well)
Smoky garlic–paprika keto cabbage rolls in rich tomato sauce, shown as two rolls on a plate (one cut open). Text overlay lists the twist: add 1 tsp smoked paprika, 1/2 tsp cumin, optional 1 tsp Dijon to the filling; sauce tweak adds 1/2 tsp smoked paprika and a small vinegar splash; best meat: beef or pork. MasalaMonk.com footer.
Twist #1 (Smoky): Want cabbage rolls that taste almost “grilled”? Add smoked paprika + a touch of cumin to the filling (optional Dijon for depth), then finish the sauce with an extra pinch of smoked paprika + a tiny vinegar splash. It keeps the rolls bold and cozy—and they taste even better on day two.

Adjust the sauce:

  • Add another 1/2 teaspoon smoked paprika
  • Finish with a small splash of vinegar

Smoked paprika adds a “slow-cooked” illusion. Meanwhile, vinegar keeps the sauce from feeling heavy. This twist is particularly good if you’re someone who likes robust flavors and wants a dish that still tastes exciting on day three.

If you’re in the mood for more hearty, high-protein keto dinners that reheat well, you’ll probably like these beef recipes for a weight loss keto plan.

Twist 2: Tangy sauerkraut garlic paprika rolls (a nod to Polish comfort)

Sauerkraut turns cabbage rolls into a different kind of comfort—bright, tangy, and deeply savory. This twist is inspired by the flavors people love in cabbage rolls with sauerkraut, stuffed cabbage and sauerkraut bakes, and many traditional Polish-style cabbage rolls, without trying to claim one strict “authentic” blueprint.

Best meat choice: beef + pork blend, or pork alone
Add to the baking dish:

  • 1 to 1 1/2 cups sauerkraut, rinsed and squeezed dry
  • Optional: a pinch of caraway seed
Tangy sauerkraut keto cabbage rolls in rich tomato sauce on a plate, shown with a side of sauerkraut plus small bowls of caraway seeds and sauerkraut brine. Text overlay reads “Tangy Sauerkraut Twist” with notes: add 1–1½ cups rinsed, squeezed sauerkraut; optional pinch of caraway; use broth (not water) and add a splash of brine.
Want the Polish-comfort vibe without changing the base method? This tangy sauerkraut twist shows exactly what to add: 1–1½ cups rinsed + squeezed sauerkraut, an optional pinch of caraway, and a broth-based sauce with a small brine splash for brighter, deeper flavor—without turning the pan watery.

Adjust the sauce:

  • Use broth rather than water so the tang stays balanced
  • Add a splash of sauerkraut brine for more bite, if you like

Sauerkraut makes the whole dish taste brighter. It’s also a smart trick if someone in your house thinks cabbage rolls can taste “one-note.” This version is anything but.

Twist 3: Sour cabbage leaves and “sarma-inspired” flavor (bright, savory, addictive)

Sarma rolls often use sour cabbage leaves, which brings a tang that feels uniquely satisfying with meat. If you can find sour cabbage leaves, use them. If not, you can mimic the effect by brushing softened cabbage leaves with a little vinegar and salt, then letting them rest briefly before filling.

Best meat choice: pork or turkey
Add to the filling:

  • Extra garlic (one more clove)
  • Optional: dried dill, mint, or parsley
Sarma-inspired keto cabbage rolls on a light plate in rich tomato sauce, topped with herbs, with a lemon wedge and small bowls of vinegar and salt beside them. Text overlay highlights the “sour-leaf” trick: brush cabbage leaves with vinegar + salt and rest briefly, plus optional extra garlic and dill.
Sarma-inspired sour-leaf twist: If you can’t find sour cabbage leaves, this is the clean workaround—brush softened leaves with vinegar + salt, rest 5 minutes, then roll as usual. The result tastes brighter and more addictive, without changing the base method.

Adjust the sauce:

  • Keep the sauce slightly looser; it will reduce as it bakes
  • Finish with a small squeeze of lemon if you want a brighter edge

The result is tangy without being sharp. It also feels lighter than a pure beef version, which makes it a strong option if you want keto cabbage rolls that don’t sit too heavy.

Twist 4: Spicy garlic paprika rolls (for heat lovers)

If your goal is to make cabbage rolls that feel energizing rather than sleepy, add heat. Spicy cabbage rolls can still be comforting; they just also happen to be exciting.

Best meat choice: beef or turkey
Add to the filling:

  • 1/2 to 1 teaspoon cayenne (start small)
  • 1 teaspoon chili flakes
“Two keto cabbage rolls in rich tomato sauce on a light background with chili flakes and parsley; text overlay reads ‘Spicy Garlic–Paprika Twist’ with tips: add 1/2–1 tsp cayenne (start small) + 1 tsp chili flakes, sauce tweak with chili flakes or chili oil, and optional balance with sour cream/yogurt; MasalaMonk.com footer.”
Spicy Garlic–Paprika Twist: Turn the base keto cabbage rolls into a heat-lover’s version by adding cayenne + chili flakes to the filling, then finishing the sauce with a little chili oil if you want extra punch. The “optional balance” tip (a spoon of sour cream/yogurt) is the fastest way to keep the sauce tasting rich—not harsh—while the rolls stay bold and satisfying.

Adjust the sauce:

  • Add chili flakes or a little chili oil
  • Keep garlic forward

This variation is also useful when you’re eating low carb and you miss “snacky” flavors. Heat and spice create the kind of satisfaction that helps you forget you’re even thinking about carbs.

Twist 5: Mediterranean herb garlic paprika rolls (fresh, fragrant, still cozy)

This twist leans into herbs rather than tang or smoke. It’s still tomato-based and still boldly seasoned, but the finish feels brighter and more fragrant.

Best meat choice: ground turkey (or lean beef)
Add to the filling:

  • 2 teaspoons oregano
  • 1 teaspoon thyme
  • Optional: lemon zest
Mediterranean herb garlic-paprika keto cabbage rolls in rich tomato sauce, topped with chopped herbs and olive oil. Text overlay lists: add oregano, thyme, optional lemon zest; finish with olive oil and herbs; serve with chimichurri or pesto. MasalaMonk.com footer.
Mediterranean Herb Twist (fresh, fragrant, still cozy): Add oregano + thyme (and optional lemon zest) to the base garlic-paprika filling, then finish the baked rolls with a drizzle of olive oil + chopped herbs. The little bowl of chimichurri (or pesto) is the “dinner-party” shortcut—bright, garlicky, and perfect with tomato sauce. (Save/Pin this twist so you can swap flavors without relearning the recipe.)

Adjust the sauce:

  • Finish with a drizzle of olive oil and chopped herbs

For a punchy finishing sauce that fits perfectly here, a spoon of chimichurri on the side is almost unfairly good—garlic, herbs, acidity, and brightness, all in one. It’s especially helpful if you want the rolls to feel a bit more “dinner party” without changing the main recipe.

Herb-forward sauces are especially good with this version. If you like that kind of bright, garlicky finish, these pesto recipes are a great match alongside cabbage rolls.

Also Read: Sourdough Recipe: 10 Easy Bread Bakes (Loaves, Rolls & Bagels)


Cabbage roll soup and unstuffed cabbage roll soup (same flavors, easier weeknights)

Some nights, rolling feels like therapy. Other nights, it feels like too much. That’s where the soup version steps in.

Unstuffed cabbage roll soup—sometimes called unrolled cabbage soup, stuffed cabbage roll soup, or simply cabbage roll soup—is essentially the same recipe expressed differently. You still get garlic, paprika, tomato, tender cabbage, and savory meat. You’re just skipping the wrapping.

A bowl of unstuffed cabbage roll soup with ground beef, tender cabbage, tomatoes, and herbs in a tomato broth. Text overlay reads “Unstuffed Cabbage Roll Soup (Keto + One Pot)” plus a quick recipe card showing ingredients, 5 steps (brown beef with garlic and paprika, add cabbage, add tomatoes and broth, simmer, stir in cauliflower rice at end), and meal prep notes (fridge 4 days, freeze 3 months).
Want cabbage roll comfort without rolling? This unstuffed cabbage roll soup is the one-pot shortcut: ground beef + cabbage + tomato broth + garlic + paprika, finished with cauliflower rice at the end so it stays pleasantly textured. Save this card for busy nights—then scroll for baked rolls, casserole, skillet, and slow cooker versions in the same flavor family.

Unstuffed cabbage roll soup (keto-friendly method)

What you’ll do:

  1. Brown ground beef, turkey, or pork in a pot with garlic, paprika, salt, and pepper.
  2. Add chopped cabbage and stir until it begins to soften.
  3. Pour in crushed tomatoes and broth.
  4. Simmer until the cabbage is tender.
  5. Stir in cauliflower rice near the end, so it stays pleasantly textured rather than mushy.

Because this is a soup roll in spirit—cabbage roll flavors in a bowl—it works beautifully as a high-protein meal prep option. It also freezes well.

If you like cooking once and coasting for a few days, you might also enjoy these crock pot chicken breast recipes.

When you store soup for the week, safe reheating matters. FoodSafety.gov’s chart of safe minimum internal temperatures supports the common recommendation to reheat leftovers to 165°F / 74°C, which is especially relevant for meat-based soups.

Also Read: Peanut Butter Fudge: Recipes & Guide (8 Methods + Easy Variations)


Cabbage roll casserole: deconstructed, layered, and effortless

Cabbage roll casserole is the lazy cousin of stuffed cabbage rolls, and it’s a gift. It gives you the same taste profile without the rolling step. That’s why you’ll see it described as unrolled cabbage casserole, deconstructed cabbage roll casserole, or even “cabbage roll in a pan.”

This is also the format that best captures cravings for “easy cabbage casserole recipes” and “cabbage casserole with hamburger meat,” while staying firmly in keto-friendly territory.

Photoreal cabbage roll casserole in a glass baking dish with saucy ground beef, tomatoes, and tender cabbage, topped with melted golden cheese. Text overlay reads “Cabbage Roll Casserole (Unrolled) — Layer + Bake” and shows quick cards: layer order (cabbage → meat → sauce → repeat), bake at 190°C/375°F covered 45–55 minutes then uncover 10–15 minutes, and “keep it thick” tips (squeeze cauliflower rice, add tomato paste). MasalaMonk.com footer.
If you want stuffed cabbage flavor without rolling, this cabbage roll casserole (unrolled) is the lazy-night win: layer cabbage + meat filling + sauce, bake covered until tender, then uncover briefly to thicken. The “keep it thick” tips prevent the #1 casserole problem (watery sauce), so you get a rich, spoonable result that reheats beautifully.

Keto cabbage roll casserole method (unrolled)

  1. Brown your ground meat with garlic, paprika, salt, and pepper.
  2. Stir in cauliflower rice and mushrooms (if using).
  3. In a baking dish, layer chopped cabbage and the meat mixture.
  4. Pour sauce over the top.
  5. Cover and bake until the cabbage is tender.
  6. Uncover near the end so the sauce thickens.

If you love a richer casserole, you can add cheese on top for a “cabbage rolls with cheese” feel—still very much in the spirit of cheese stuffed cabbage rolls, just without the fiddly wrapping.

Also Read: Best Vermouth for a Negroni Cocktail Drink Recipe


Skillet cabbage rolls and “cabbage roll in a bowl” (fast comfort)

Sometimes you want “stuffed cabbage” flavor in under 30 minutes. Skillet cabbage rolls—also described as cabbage roll in a skillet, cabbage roll skillet recipe, or cabbage roll in a bowl—deliver exactly that.

Skillet filled with “cabbage roll in a bowl” mixture: ground beef, tender cabbage, tomatoes, and herbs in a saucy garlic-paprika tomato base. Text overlay reads “Skillet Cabbage Rolls (In a Bowl) — 25 minutes • One pan” and includes quick steps: brown beef with garlic and paprika, add cabbage, add tomato + broth and simmer, finish with olive oil/sour cream/parmesan. Note says cauliflower rice is optional—add in the last 3 minutes. MasalaMonk.com footer.
When you want stuffed cabbage flavor fast, this skillet cabbage roll in a bowl hits the same comfort notes in one pan—garlic, paprika, tomato, tender cabbage, and savory beef—without rolling or baking. Keep this visual handy for weeknights, then use the rest of the post to choose your “format”: baked rolls, soup, casserole, slow cooker, and freezer-friendly prep.

The method is simple: brown meat with garlic and paprika, add shredded cabbage, pour in tomato and broth, then simmer until everything turns saucy and tender. You can finish with olive oil, sour cream, or parmesan, depending on your mood.

This is also one of the most forgiving versions if you’re using lean meat. Because the dish is saucy, you can adjust richness right at the end.

Also Read: Keto Flour: Guide to Low-Carb Flours That Bakes Like the Real Thing


Slow cooker cabbage rolls and crock pot cabbage roll casserole

Cabbage rolls in a slow cooker feel like a different kind of comfort. The cabbage becomes extra tender, the sauce sinks deeper into the filling, and the whole dish tastes like it spent the day becoming itself.

If you’re making cabbage roll crock pot style, the main difference is liquid management. Slow cookers trap moisture, so sauces tend to thin out unless they start thicker.

Photoreal slow cooker filled with cabbage rolls in rich tomato sauce, sprinkled with herbs, with steam rising. Text overlay reads “Slow Cooker Cabbage Rolls — No watery sauce” and shows three tip boxes: layering (sauce bottom → rolls → sauce top), start thicker (less broth + tomato paste), and finish to thicken (crack lid last 30–45 min to reduce). A thermometer icon notes safe internal temperature for ground meat. MasalaMonk.com footer.
Slow cooker cabbage rolls are effortless—until the sauce turns thin. Use this quick guide to keep crock pot stuffed cabbage rich and spoonable: layer sauce on the bottom and top, start with a thicker tomato base, and crack the lid near the end to reduce. It’s the easiest way to get slow-cooked tenderness without the “watery soup” problem.

Slow cooker stuffed cabbage rolls (keto-friendly)

  • Make and roll the cabbage rolls as usual.
  • Layer sauce on the bottom, then rolls, then more sauce.
  • Cook on low until the cabbage is very tender and the filling is safely cooked through.

Crock pot cabbage roll casserole (unstuffed)

  • Layer chopped cabbage, browned filling, and sauce in the slow cooker.
  • Cook on low until tender.
  • If the sauce is too thin, crack the lid for the final stretch or stir in a small amount of tomato paste near the end.

Again, safe internal temperature guidance matters, especially when cooking ground meat. USDA’s references for ground beef and poultry/ground turkey are good citations to keep the recipe grounded.

Also Read: Whole Chicken in Crock Pot Recipe (Slow Cooker “Roast” Chicken with Veggies)


Freezing cabbage rolls, freezing cabbage for cabbage rolls, and meal prep that actually works

Cabbage rolls are one of the best “cook once, eat twice” dinners. They’re also one of the best “cook once, eat six times” dinners if you freeze them.

That matters, because meal prep is often where a low carb diet either becomes easy or becomes exhausting. When you have a freezer-friendly high-protein option that you genuinely enjoy, it’s much easier to stay consistent.

Infographic titled “Keto Cabbage Rolls: Freeze • Bake • Reheat” showing three steps: freeze unbaked rolls (cool filling, roll tight, tray-freeze 45–60 minutes, layer with parchment), bake from frozen (covered at 190°C/375°F for 40–45 minutes then uncover 10–15), and reheat options (oven, stovetop simmer, microwave last resort). Photos show unbaked rolls in a container and baked rolls in sauce.
Freezer-friendly keto cabbage rolls made easy: freeze unbaked, bake from frozen, then reheat without drying out. Use this quick chart to get the timing right, keep the rolls intact, and make meal-prep weeks feel effortless—no rice needed, just big comfort. (Perfect to save/print and great for batch cooking.)
Infographic photo showing two glass meal-prep containers of cabbage rolls: left is “Freeze Uncooked (Best texture)” with raw cabbage rolls and a cup of sauce; right is “Freeze Cooked (Fastest)” with baked cabbage rolls in tomato sauce. Text overlay includes: “Bake from frozen: covered 190°C/375°F 40–45 min + uncover 10–15,” “Prevent watery: squeeze cauliflower rice + cool before freezing,” and “Reheat: oven covered or gentle simmer (keeps juicy).” MasalaMonk.com at bottom.
Freezing cabbage rolls is the difference between “I’ll cook later” and actually having dinner ready. This quick visual shows the two best options: freeze uncooked for the best texture or freeze cooked for the fastest reheat, plus the exact bake-from-frozen timing. The “prevent watery” note is the big one—squeeze cauliflower rice and cool before freezing so your rolls stay firm, saucy, and satisfying.

Freeze the cabbage (a simple prep trick)

If you haven’t tried it, freezing cabbage for cabbage rolls is one of the easiest prep hacks available. Freeze the whole head, thaw it, and the leaves become pliable. You can prep leaves on a calm day, then roll and cook later when you’re busy.

Freezing stuffed cabbage rolls (uncooked)

Freezing uncooked rolls often gives the best texture because everything cooks fresh later.

  • Assemble the rolls in a freezer-safe dish.
  • Pour sauce over.
  • Wrap tightly.
  • Freeze.

When you bake, you can cook from frozen, simply allowing extra time. Keep the dish covered so the sauce doesn’t evaporate too quickly before the center heats.

Freezing cabbage rolls (cooked)

Freezing cooked cabbage rolls is the convenience route:

  • Let rolls cool fully.
  • Portion with sauce.
  • Freeze in containers.

To reheat, warm gently so the filling stays juicy rather than drying out. USDA’s guidance on leftovers and food safety and FoodSafety.gov’s temperature chart both support reheating leftovers to 165°F / 74°C for safety.

Also Read: Frozen Chicken Wings in Air Fryer (No Thaw) — Crispy From Frozen + Time & Temp


Vegan cabbage rolls, vegetarian cabbage rolls, and meatless stuffed cabbage that still feels hearty

Even though this post is built around keto cabbage rolls, it’s useful to include an option for households that mix diets. Maybe you’re eating low carb, while someone else wants a meatless version. Maybe you want a “lighter day” dinner that still has cabbage-roll comfort.

Vegan cabbage rolls and vegetarian cabbage rolls work especially well with napa cabbage or savoy cabbage, because the leaves are tender and the filling can be softer.

Vegan cabbage rolls in a rich tomato sauce on a white plate; one roll is cut open to show a hearty filling of crumbled tofu, mushrooms, and cauliflower rice. Text overlay reads “Vegan Cabbage Rolls (Still Hearty)” with notes: “Mushrooms = depth,” “Tofu = protein,” “Cauli rice = bulk,” and “Best leaves: Savoy (flexible) • Napa (tender).” MasalaMonk.com footer.
Vegan cabbage rolls that still eat like comfort food: tofu brings protein, mushrooms add deep savory flavor, and cauliflower rice gives that “bulk” without heaviness. If you’re cooking for a mixed table (keto + vegetarian/vegan), this is the easiest way to keep the cabbage-roll vibe consistent—same sauce, same cozy payoff, just a different filling.

A vegan, cabbage-roll-style filling that works

For a plant-forward approach, the goal is to create a filling that’s savory and satisfying:

  • Finely chopped mushrooms (for depth)
  • Crumbled tofu (for protein)
  • Cauliflower rice (for bulk)
  • Garlic and paprika (for continuity with the main recipe)
  • A binder such as ground flax mixed with water, if needed

You can bake these the same way, using the tomato sauce method above.

If you’re trying to keep a few plant-based, high-protein options in rotation, this list of plant-based protein sources for high-protein meal prep is full of practical ideas.

Also Read: Innovate Your Vegan Keto Breakfast: 5 Pistachio and Sunflower Seed Smoothie Recipes for Meal Replacement


Cabbage wraps, cabbage roll ups, and “cabbage wrap meat” shortcuts

Not everyone wants full baked cabbage rolls. Sometimes you want something quicker—something closer to a cabbage wrap recipe than a casserole. That’s where cabbage wraps come in.

You can think of cabbage wraps as a lighter, fresher cousin to baked cabbage rolls. Instead of cooking the rolls in sauce for an hour, you’re wrapping a cooked filling in softened leaves, then serving with a spoonable sauce.

Top-down food graphic titled “Cabbage Wraps (Keto) — No Bake Shortcut.” It shows a plate with two cabbage wraps filled with seasoned ground meat and topped with tomato sauce. On the side are softened cabbage leaves on a board, plus step labels: “Brown filling,” “Soften leaves,” “Wrap + spoon sauce,” and “Serve (or pack for lunch).” MasalaMonk.com appears at the bottom.
When you want stuffed cabbage roll flavor without baking, these keto cabbage wraps are the fastest move: brown the garlic-paprika filling, soften a few leaves, wrap, and spoon sauce over top. The 4-step strip makes this a true weeknight shortcut—and it doubles as a lunch idea when you pack wraps with a little sauce cup on the side.

Quick cabbage wraps (keto-friendly)

  1. Brown ground beef with garlic and paprika.
  2. Make a quick sauce in the same pan (tomato + broth + paprika + olive oil).
  3. Spoon filling into softened cabbage leaves.
  4. Wrap and serve with sauce over top.

This gives you the comfort without committing to a baking dish. It’s also a great lunch format because the wraps hold together well in containers.

Also Read: Keto Fiesta: Spicing up Your Meals with Flavorful Taco Pie and Creative Toppings!


A note on “cabbage balls” and stuffed cabbage balls (when you want bite-sized comfort)

Cabbage balls show up in a few different traditions, and they’re essentially cabbage roll filling expressed as a small ball, sometimes wrapped partially in cabbage or simmered in sauce.

For a keto-friendly cabbage balls recipe approach, you can do this:

  • Make the same garlic paprika filling.
  • Roll it into small balls.
  • Brown them quickly, then simmer in the tomato sauce until cooked through.

It’s the same flavor story, just a different shape. The advantage is speed: no leaf-by-leaf rolling. The tradeoff is that you lose some of the classic cabbage roll structure. Still, if someone loves the filling more than the wrap, cabbage balls can be a satisfying variation.

Also Read: Air Fryer Hard-Boiled Eggs (No Water, Easy Peel Recipe)


Making cabbage rolls taste “traditional” without being stuck in one tradition

Cabbage rolls are one of those foods where families are fiercely loyal to what they grew up with. One home might swear by sweet-and-sour Jewish stuffed cabbage. Another might prefer a paprika-forward Hungarian stuffed cabbage rolls recipe. Someone else might love sauerkraut-heavy Polish cabbage rolls. Meanwhile, German cabbage rolls and kohlrouladen recipes often lean into deeper, darker savory notes.

Keto cabbage balls (no-rice) simmering in chunky garlic-paprika tomato sauce in a cast-iron skillet, with a small bowl of sour cream on the side. Text overlay reads ‘Keto Cabbage Balls (No-Rice)’, ‘Same filling, faster shape’, ‘Roll • Sear • Simmer’, ‘20 minutes’, and ‘Keep it firm: squeeze cauliflower rice’. MasalaMonk.com at bottom.
Keto cabbage balls are the “same filling, faster shape” version of cabbage rolls: roll the no-rice mix into balls, sear for crust, then simmer in the tomato sauce until juicy. The one tip that prevents mushy meatballs is right here—squeeze cauliflower rice dry before mixing.

This garlic and paprika foundation sits comfortably in that broader family of flavors. Garlic shows up everywhere. Paprika bridges sweet and smoky. Tomato sauce ties the whole dish to the “stuffed cabbage” comfort zone.

So if you’ve been chasing a version that feels familiar—old fashioned cabbage rolls, traditional stuffed cabbage, classic cabbage roll recipe—this approach can scratch the same itch. It doesn’t claim to replace any one grandmother’s method. Instead, it gives you a dependable base with enough flexibility to feel personal.

Also Read: Baked Jalapeño Poppers (Oven) — Time, Temp & Bacon Tips


Serving ideas that keep cabbage rolls satisfying (and keto-friendly)

A pan of cabbage rolls is already a complete meal, yet the right side can elevate it:

  • A crunchy slaw with a creamy dressing (again, eggless mayonnaise is handy as a base)
  • A spoon of herb sauce like chimichurri for brightness
  • A drizzle of olive oil and fresh herbs for the Mediterranean twist
  • A sprinkle of parmesan or feta for richness

Keeping one good red sauce around makes weeknight dinners easier—cabbage rolls, skillet cabbage, meatballs, and more. If you like having options ready in the fridge, these pizza sauce recipes are worth saving.

Troubleshooting Cabbage Rolls that are Keto Friendly

Even with a solid recipe, cabbage rolls can go sideways if a few details are off. The fixes are straightforward, though, and once you know them, you rarely run into the same problem twice.

Troubleshooting infographic for keto cabbage rolls in a glass baking dish with tomato-garlic sauce and parsley. Callouts list fixes: leaves tear (trim rib, don’t overboil, use savoy), watery filling (squeeze cauliflower rice, chop mushrooms fine), rolls fall apart (egg binder, roll tight, seam down), sauce too acidic (finish with olive oil or butter, tiny vinegar), tastes bland (salt filling and sauce separately). MasalaMonk.com footer.
Keto cabbage rolls going sideways? Save this troubleshooting visual. It covers the most common problems—torn leaves, watery “no-rice” filling, rolls that fall apart, sharp tomato sauce, and bland flavor—plus quick fixes that work fast (like squeezing cauliflower rice dry, rolling seam-side down, and balancing acidity with a little fat). Keep it right above the troubleshooting section so readers can scan, fix, and keep cooking.

If your cabbage leaves tear

The rib is usually the culprit. Trim it thinner so the leaf lies flat. Also, don’t overboil; overcooked leaves tear easily. If tearing keeps happening, switch to savoy cabbage, which folds more gently.

If your filling turns watery

Frozen cauliflower rice often holds water. Thaw and squeeze it dry. Mushrooms can also release liquid, so chop them finely and mix them with the meat so they cook evenly inside the roll.

If your rolls fall apart

Use an egg binder, roll tightly, and always place seam-side down. If you’re making a casserole or soup version, this is less of a concern, which is one reason unstuffed cabbage roll casserole is so forgiving.

If the sauce tastes too acidic

Finish with olive oil or butter, and consider a small splash of vinegar to balance. It sounds counterintuitive, yet it often makes tomato taste smoother rather than sharper. If you want a citation that supports the choice of olive oil as a staple fat, Harvard Health’s piece on extra-virgin olive oil is a useful reference.

If the dish tastes bland

Salt is not optional here. Cabbage is mild, and meat needs seasoning to taste “finished.” Season the filling well, then season the sauce separately. Paprika also needs enough salt to taste like something rather than like colored dust.
Also Read: Keto Mocktails: 10 Low-Carb Recipes for Guilt-Free Happy Hour Indulgence


Bringing it all together: one template, many dinners

Once you’ve made the base recipe, you’ve effectively unlocked multiple meals:

  • Oven baked keto cabbage rolls with garlic and paprika
  • Unstuffed cabbage roll soup for weeknights
  • Deconstructed cabbage roll casserole when you want comfort without rolling
  • Skillet cabbage rolls when time is short
  • Slow cooker cabbage rolls when you want hands-off cooking
  • Freezer-friendly cabbage rolls for meal prep
  • A vegan or vegetarian cabbage roll variation for mixed-diet households
  • Sauerkraut and sour cabbage leaf styles when you want tang
  • Spicy cabbage rolls when you want heat
  • Mediterranean cabbage rolls when you want herbs and brightness

That’s the hidden power of this dish. It isn’t just a recipe for stuffed cabbage rolls; it’s a repeatable system. You’re learning how to cook cabbage leaves, how to build a filling that stays juicy without rice, and how to make a tomato sauce that tastes like comfort without relying on sweetness.

And because these rolls are so satisfying, they also make it easier to stick with low carb eating without feeling like you’re losing your favorite foods.

If you want to keep building a keto dinner rhythm after this, it can feel natural to explore other high-protein, low carb anchors—MasalaMonk’s beef recipes for a weight loss keto plan is a solid next stop, especially if you like dinners that reheat well and feel filling without being complicated.

Also Read: Keto pancakes that actually taste like pancakes


Full printable-style recipe (base + quick twist guide)

Garlic & Paprika Keto Cabbage Rolls (Base Recipe)

Serves: 6–8
Prep time: 30–45 minutes (depending on cabbage method)
Cook time: 55–75 minutes

Ingredients

  • 1 large green cabbage (or savoy)
  • 680 g / 1.5 lb ground beef (or turkey or pork)
  • 3–5 cloves garlic, minced or grated
  • 2 teaspoons paprika
  • 1 teaspoon salt
  • 1/2 teaspoon black pepper
  • 1 1/2 cups cauliflower rice (squeezed dry if previously frozen)
  • 1/2 cup finely chopped mushrooms (optional)
  • 1 egg (optional)
  • 1/3 cup grated parmesan (optional)

Sauce

  • 2 cups crushed tomatoes or passata
  • 1 cup broth
  • 1 tablespoon tomato paste (optional)
  • 1–2 tablespoons olive oil or butter
  • 1 teaspoon paprika
  • Garlic powder or an extra clove of garlic
  • Salt and pepper
  • Optional: splash of vinegar

Method

  1. Soften cabbage leaves using boiling, freeze-thaw, or microwave. Trim ribs so leaves fold easily.
  2. Mix filling ingredients gently until combined.
  3. Roll filling in leaves; place seam-side down in a baking dish.
  4. Whisk sauce and pour over rolls. Cover tightly.
  5. Bake at 190°C / 375°F until tender and cooked through. Uncover at the end for a thicker sauce, if desired.
  6. Rest briefly before serving so the rolls hold together better.

Safety note: USDA guidance recommends cooking ground beef to 160°F / 71°C and poultry/ground turkey to 165°F / 74°C—see USDA ground beef safety and USDA poultry safety. Leftovers should be reheated to 165°F / 74°C as referenced in USDA’s leftovers guidance and FoodSafety.gov’s temperature chart.

Quick twist guide (additions only)

  • Smoky: add smoked paprika + cumin; finish sauce with vinegar
  • Sauerkraut: layer rinsed, squeezed sauerkraut in the dish; optional caraway
  • Sour-leaf style: brush leaves lightly with vinegar + salt; add dill or mint
  • Spicy: add chili flakes + cayenne; finish with chili oil
  • Mediterranean: add oregano + thyme; finish with olive oil, herbs, and optionally chimichurri or pesto

Also Read: How to Make Churros (Authentic + Easy Recipe)


FAQs

1) What are keto cabbage rolls?

Keto cabbage rolls are stuffed cabbage rolls made without rice or other high-carb fillers. Instead, the filling relies on meat, seasonings, and low-carb “bulk” like cauliflower rice or mushrooms, then everything bakes or simmers in a savory sauce until the cabbage turns tender and the filling stays juicy.

2) Can cabbage rolls be keto friendly even with tomato sauce?

Yes. Tomato-based sauce can still work for cabbage rolls that are keto compatible, especially when the flavor comes from garlic, paprika, broth, and fat—not added sugar. In practice, the sauce tastes comforting and rich without needing sweetness to feel complete.

3) What replaces rice in keto-friendly cabbage rolls?

Cauliflower rice is the closest stand-in for the texture of rice stuffed cabbage rolls. Meanwhile, finely chopped mushrooms add moisture and depth, almost like the filling simmered longer. Additionally, riced broccoli can work, and shredded zucchini can too—just squeeze it well so it doesn’t water out the filling.

4) Can I make cabbage rolls with uncooked rice on keto?

Not really. Cabbage rolls with uncooked rice (or cooked rice) are typically not low carb. If you love the “classic stuffed cabbage rolls with ground beef and rice” style, the keto approach is to keep the same seasonings and sauce while swapping rice for cauliflower rice or mushrooms.

5) Which meat works best for keto cabbage rolls: ground beef, turkey, or pork?

Ground beef gives the richest, most classic stuffed cabbage flavor and stays forgiving when baked. Ground pork turns especially juicy and savory, and paprika loves it. And then ground turkey is lighter, yet it usually benefits from extra fat and bolder seasoning so the filling doesn’t taste dry.

6) How do I keep keto cabbage rolls from falling apart?

First, roll tightly and place the rolls seam-side down. Next, trim the thick cabbage rib so the leaf folds smoothly. Also, using an egg binder can help, particularly if your filling is very lean or you’re using extra vegetables like mushrooms or zucchini.

7) What’s the easiest way to soften cabbage leaves for cabbage rolls?

Freeze-and-thaw is quietly one of the easiest methods: freeze the whole cabbage head, thaw it, and the leaves become pliable. Otherwise, boiling works reliably, and the microwave method is fast for smaller batches. Either way, trimming the rib makes rolling far easier.

8) Can I make cabbage rolls with frozen cabbage?

Yes. Cabbage rolls with frozen cabbage work well if the cabbage is thawed fully and the leaves are handled gently. In fact, freezing cabbage for cabbage rolls is a common prep trick because it softens the leaves without a big pot of water.

9) Are cabbage rolls healthy?

They can be, especially when the filling is high-protein and the sauce is balanced. Cabbage rolls healthy versions often focus on leaner meat, more vegetables, and a sauce that isn’t sugar-heavy. Even so, richer versions can still fit well in a low carb or keto diet when portions are sensible.

10) How long do cabbage rolls cook in the oven?

Cabbage rolls in oven typically take around 55 to 75 minutes at 375°F / 190°C, depending on roll size, cabbage thickness, and the meat used. If you make smaller rolls or use thinner leaves, they may finish sooner.

11) Can I make stuffed cabbage rolls in the oven ahead of time?

Absolutely. Assemble the rolls, cover tightly, and refrigerate. Then bake when needed. Because the flavors deepen after resting, homemade stuffed cabbage rolls often taste even better the next day.

12) What is unstuffed cabbage roll soup?

Unstuffed cabbage roll soup is the same comfort flavor—cabbage, meat, garlic, paprika, and tomato—without rolling. It’s also called stuffed cabbage roll soup, cabbage roll soup recipe, unrolled cabbage soup, or simply cabbage roll soup, depending on how people describe it.

13) How do I make easy cabbage roll soup recipe style but keto-friendly?

Brown ground meat with garlic and paprika, add chopped cabbage, then pour in crushed tomatoes and broth. Simmer until tender. Finally, stir in cauliflower rice near the end so it keeps a pleasant bite instead of turning mushy.

14) What is a cabbage roll casserole?

Cabbage roll casserole is a deconstructed version of stuffed cabbage—everything layered or mixed in one dish. You’ll also see it called unrolled cabbage casserole, stuffed cabbage roll casserole recipe, cabbage rolls casserole layered, or deconstructed cabbage roll casserole.

15) Can I make cabbage roll casserole crock pot style?

Yes. Slow cooker stuffed cabbage casserole is a popular option because it’s hands-off. Brown the meat first for better flavor, then layer cabbage, filling, and sauce in the crock pot. Since slow cookers trap moisture, start with a slightly thicker sauce.

16) What’s the fastest “cabbage roll in a bowl” method?

Skillet cabbage rolls—often called cabbage roll in a skillet or cabbage roll in a bowl—are the quick route. Brown meat with garlic and paprika, add shredded cabbage, stir in tomato and broth, then simmer until everything becomes saucy and tender.

17) Can I freeze cabbage rolls for meal prep?

Yes, cabbage rolls for freezing are one of the best meal-prep moves. You can freeze them cooked or uncooked. Cooked rolls are convenient for quick reheating, whereas uncooked rolls often give the best texture after baking.

18) How do I freeze stuffed cabbage rolls without getting watery?

Squeeze moisture from cauliflower rice and any watery vegetables like zucchini. Cool cooked rolls fully before freezing. Also, freeze portions with sauce so the filling stays juicy instead of drying out.

19) Can I cook frozen cabbage rolls without thawing?

Yes. Frozen cabbage rolls can bake from frozen; they simply need extra time. Keep them covered so the sauce doesn’t reduce too quickly before the center heats through.

20) What are cabbage balls, and are they keto friendly?

Cabbage balls are basically stuffed cabbage filling shaped into bite-sized portions, then simmered or baked in sauce. For a keto-friendly cabbage balls recipe, keep the same garlic-paprika filling and skip rice, using cauliflower rice or mushrooms for bulk instead.

21) Are there vegetarian cabbage rolls or vegan cabbage rolls that still feel hearty?

Yes. Vegetarian cabbage rolls and cabbage rolls vegan versions often use mushrooms for depth, cauliflower rice for bulk, and a protein base like tofu or a mix of nuts and seeds. The sauce and seasonings do a lot of the “comfort” work, so the result can still feel satisfying.

22) What’s the difference between sarma rolls, gołąbki, and galumpkis?

They’re all cabbage roll traditions with regional differences. Sarma rolls often use sour cabbage leaves and can have a tangier profile. Gołąbki refers to Polish cabbage rolls, commonly with meat and rice. Galumpkis is another name used for Polish-style stuffed cabbage rolls, especially in North American kitchens.

23) What are German cabbage rolls and kohlrouladen?

German cabbage roll recipes often lean savory and rich, and the term kohlrouladen usually refers to cabbage leaves stuffed with meat, then braised until tender. Even when the seasoning style differs, the method overlaps closely with classic stuffed cabbage.

24) What makes “old fashioned cabbage rolls” taste like the classic version?

Classic cabbage roll recipes usually rely on well-seasoned meat, tender cabbage, and a sauce that simmers long enough to meld everything. Even when you remove rice for keto-friendly cabbage rolls, keeping the same garlic, paprika, onion, and tomato comfort notes preserves that traditional feel.

25) Why do some cabbage roll recipes taste like tomato soup?

That “cabbage rolls in tomato soup” flavor happens when tomato, broth, and fat balance each other. Tomato gives sweetness and acidity, broth adds savory backbone, and fat rounds off sharpness so the sauce tastes smooth and comforting.

26) How do I make cabbage wraps instead of baked cabbage rolls?

Cabbage wraps are a quicker approach: cook the filling first, soften leaves, then wrap and serve with sauce spooned over top. It’s a useful shortcut when you want cabbage wrap meat style comfort without a long bake.

27) What’s the best cabbage for stuffed cabbage rolls?

Green cabbage is the most forgiving and sturdy for rolling. Savoy cabbage is more flexible and easier to fold, which helps if tearing is a problem. Napa cabbage is tender and great for vegan cabbage rolls, although it can be more delicate.

28) Why are my cabbage rolls bland, even with paprika?

Cabbage is mild, so seasoning has to be strong enough to carry through. Salt matters more than most people expect, and paprika needs salt to taste like something rather than just color. Also, season both the filling and the sauce separately for the best result.

29) Can I make “best cabbage roll recipe ever” style flavor on keto?

Yes—because “best stuffed cabbage recipe ever” usually means juicy filling, tender cabbage, and a sauce that tastes deep and balanced. You can keep that same goal while swapping rice for low-carb bulk and leaning into garlic and paprika for bold flavor.

30) How do I make keto cabbage rolls feel more filling for weight loss?

Prioritize protein, include enough fat to keep the filling satisfying, and don’t skimp on sauce because it prevents dryness. Also, pairing cabbage rolls with a crunchy low-carb side (like slaw) can make the meal feel larger without adding many carbs.

Posted on 15 Comments

Moscow Mule Recipe (Vodka Mule): The Master Formula + 9 Variations

Photo-realistic Moscow Mule recipe cover showing a copper mug with ice, lime and mint, featuring the text “Moscow Mule – A master recipe, refined – The Perfect Ratio + 9 Variations” and MasalaMonk.com.

A moscow mule recipe can look almost too easy to be memorable: vodka, lime, ginger fizz, ice. And yet, when it’s built well, it tastes like clarity—cold, bright, and sharply refreshing, with ginger heat that arrives just after the sip. Still, because it’s so simple, it can also fall apart fast. If the lime is dull, the ginger is warm, or the ice is stingy, the whole thing turns flat or sweet or watery. Fortunately, once you understand the structure behind a dependable moscow mule recipe, you can make it confidently, adjust it on the fly, and branch into variations without learning a new cocktail every time.

This guide gives you one master formula first. Then, step by step, it takes you through the versions people keep coming back to at home: Mexican Mule, Kentucky Mule, Irish Mule, Gin Mule, Italian Mule, Cranberry Moscow Mule, Apple Mule, a Ginger-forward Mule, and a Tropical Mule with coconut water that feels especially at home on MasalaMonk. Along the way, you’ll also learn what to do when you only have ginger ale, how to make a Moscow Mule without ginger beer, how to build a quick make-ahead base, and how to serve a crowd without losing fizz.

For classic reference points, the backbone of this drink shows up consistently across trusted cocktail sources such as Serious Eats’ Moscow Mule and Liquor.com’s Moscow Mule cocktail recipe. However, the most useful thing isn’t memorizing any single set of numbers. Instead, it’s learning the “why” behind the balance so the drink works with the ginger fizz you have, the bottle you have, and the mood you’re in.


Moscow mule recipe: the master ratio that makes everything easy

Before measurements, think in parts. A reliable moscow mule recipe is simply a long, fizzy highball built from four ideas:

  1. a clean spirit foundation
  2. a bright citrus snap
  3. a spicy ginger lift
  4. a cold temperature and controlled dilution
Moscow Mule recipe ratio card showing a copper mug with ice, lime and mint, with the text “Moscow Mule Recipe” and the ratio 1 vodka, ½ lime, 2–3 ginger beer.
Moscow Mule recipe made simple: follow the classic ratio—1 vodka : ½ lime : 2–3 ginger beer—then build it over plenty of ice for a crisp, gingery, lime-bright mule every time.

So, the master ratio is:

  • 1 part vodka
  • ½ part fresh lime
  • 2–3 parts ginger beer
  • a lot of ice

Because ginger beers vary wildly in sweetness and spice, that 2–3 parts range matters. Consequently, you’re not “failing the recipe” if you pour a little more or less—rather, you’re tailoring it to the fizz in your fridge.

Moscow mule recipe (single-serve master build)

Ingredients

  • 60 ml vodka
  • 20–25 ml fresh lime juice
  • 120–180 ml chilled ginger beer
  • plenty of ice
  • lime wheel or wedge (mint optional)
Moscow Mule recipe card showing a copper mug with ice, lime and mint, plus overlay text with measurements (60 ml vodka, 20–25 ml lime, top with ginger beer) and quick build steps.
Classic Moscow Mule recipe card: squeeze fresh lime, add 60 ml vodka, then top with ginger beer over plenty of ice—stir gently for a crisp, gingery, lime-bright Moscow Mule that stays fizzy.

Method

  1. Chill your mug or glass briefly if possible; even a few minutes helps.
  2. Fill it completely with ice.
  3. Add vodka and lime juice.
  4. Top with cold ginger beer.
  5. Stir gently once or twice—just enough to combine.
  6. Garnish and serve immediately.

That’s the core moscow mule recipe, and it’s the one you’ll return to. From here, everything is just a variation on the same theme.

Also Read: Vodka Pasta (Penne alla Vodka) + Spicy Rigatoni, Chicken, and Gigi Recipes


Moscow mule ingredients: the few details that change the whole drink

Because the ingredient list is short, each piece has an oversized role. Therefore, small upgrades matter more here than they do in a complicated cocktail.

Moscow Mule ingredients infographic showing vodka, fresh lime, ginger beer and ice tips, plus “fix it fast” adjustments and optional accents like bitters, mint, syrup and salt for a better Moscow Mule recipe.
Moscow Mule ingredients that change everything: choose a clean vodka, squeeze fresh lime, pick a ginger beer that matches your taste (spicy or sweet), and use a full glass of ice—then fix the balance fast with more ginger beer (too strong) or more lime (too sweet).

Vodka: keep it clean, keep it quiet

In a classic moscow mule recipe, vodka is the support beam, not the decoration. It should taste neutral enough that ginger and lime stay in front. That said, you don’t need a luxury bottle. Instead, choose a vodka you find reasonably smooth in a simple soda-and-lime.

If your vodka tastes sharp, you can still make a great Mule. However, you’ll likely prefer:

  • slightly more ginger beer to lengthen the drink
  • slightly more lime to brighten the finish
  • plenty of ice to keep the alcohol from feeling loud

Lime: freshness is everything

Fresh lime gives both acidity and aroma. Meanwhile, bottled lime can taste muted or “cooked,” which makes the drink feel less alive. If you only upgrade one thing in your moscow mule recipe, make it fresh lime.

Also, lime quantity isn’t fixed in stone. If your ginger beer is sweeter, you can use more lime. Conversely, if your ginger beer is very dry and spicy, you may prefer slightly less lime so the drink doesn’t feel sharp.

Ginger beer: the defining character

Ginger beer is the “spark” that makes this drink feel special. Moreover, different ginger beers produce noticeably different Mules:

  • spicy, peppery ginger beer → crisp, punchy Mule
  • sweet, mild ginger beer → softer, rounder Mule
  • very carbonated ginger beer → bright and lively, with more lift

If you’re curious about how ginger beer differs from ginger ale in practical terms, this quick explainer is useful: ginger beer vs. ginger ale. The short version is that ginger ale is often sweeter and gentler, while ginger beer tends to be bolder and more ginger-forward.

Ice: more ice usually means less dilution

It sounds backwards, yet it’s true: a glass packed with ice often dilutes more slowly than a glass with a few cubes. Consequently, a Mule built with “a mountain of ice” stays balanced longer. On the other hand, a Mule built with minimal ice warms fast and becomes watery.

Optional accents: only when they solve a specific problem

A Mule doesn’t need much else. Still, these small accents can help:

  • Simple syrup (tiny amount): only if your ginger beer is extremely dry and you want a rounder sip
  • Aromatic bitters: especially helpful in bourbon or whiskey versions for depth
  • Mint: adds aroma and freshness, especially in gin mules
  • A pinch of salt: surprisingly useful when your ginger fizz makes the drink taste too sweet

If you enjoy the ginger side of this drink beyond cocktails, you might also like MasalaMonk’s ingredient-focused read: Ginger And Its Stunning Health Benefits. It’s not a cocktail guide, but it does deepen appreciation for ginger’s role in drinks.

Also Read: French 75 Cocktail Recipe: 7 Easy Variations


How to make a Moscow mule recipe that stays crisp to the last sip

A Mule’s charm is how quickly it comes together. Nevertheless, a few habits separate a bright, snappy drink from a flat one.

Step 1: Chill what you can, because temperature matters

If the ginger beer is cold, carbonation feels sharper. If it’s warm, the drink tastes softer and flatter. So, chill your ginger beer and chill your glass when possible.

How to make a Moscow mule recipe (Step 1): pack the mug with plenty of ice—more ice melts slower, so your Moscow Mule stays colder, crisper, and less watery to the last sip.

Step 2: Pack the ice, then build quickly

A packed ice bed keeps everything cold. Moreover, it slows down dilution. Build the drink swiftly so the ice doesn’t melt while you’re hunting for garnish.

How to make a Moscow Mule step 2: measuring 60 ml vodka into a jigger and squeezing fresh lime into an iced copper mug, showing the classic Moscow mule recipe proportions.
How to make a Moscow mule recipe (Step 2): measure 60 ml vodka and add 20–25 ml fresh lime—this is where the drink gets its clean backbone and bright citrus snap before the ginger fizz goes in.

Step 3: Add ginger beer last, then stir gently

Because ginger beer is carbonated, it loses sparkle when it’s shaken or stirred aggressively. Therefore, stir just once or twice, gently.

How to make a Moscow Mule step 3: pouring chilled ginger beer into a copper mug with ice, lime and mint, with a gentle stir to keep the Moscow mule recipe fizzy.
How to make a Moscow mule recipe (Step 3): top with well-chilled ginger beer, stir gently once or twice, and serve immediately—this keeps the Mule crisp, bubbly, and ginger-bright instead of flat.

This is why the classic method in sources like Liquor.com’s Moscow Mule and Serious Eats’ Moscow Mule keeps things simple: build in the glass, top with ginger beer, and don’t overwork it.

Also Read: Negroni Recipe: Classic Cocktail & Its Variation Drinks


Moscow mule recipe with ginger beer vs ginger ale: how to balance either one

Sometimes you have ginger beer. Sometimes you have ginger ale. Either way, you can make a refreshing drink. Still, because the sweetness and spice differ, the balancing approach changes.

Ginger beer vs ginger ale comparison for a Moscow Mule recipe, showing a copper mule mug with lime and mint alongside bottles of ginger beer and ginger ale, plus a tip to add extra lime when using ginger ale.
Ginger beer vs ginger ale for a Moscow Mule recipe: ginger beer makes a spicier, sharper mule, while ginger ale creates a softer, sweeter drink—so add extra lime when you use ginger ale to keep your Moscow Mule crisp and balanced.

When ginger beer is spicy and dry

In that case, the moscow mule recipe can stay very clean:

  • vodka at 60 ml
  • lime around 20–25 ml
  • ginger beer to lengthen as you like

Because the ginger has bite, the drink tastes lively even without extra tricks.

When ginger beer is sweet and mild

Then you’ll often want:

  • slightly more lime
  • slightly less ginger beer at first
  • no additional sugar

Otherwise, the drink can drift into soda territory.

Moscow mule recipe with ginger ale (the version that still tastes “right”)

Ginger ale tends to be milder and sweeter. Consequently, the best approach is to push brightness and keep sugar out.

Try this structure:

  • 60 ml vodka
  • 25–30 ml lime juice
  • chilled ginger ale to top
  • plenty of ice

If it tastes too sweet, you have two easy levers:

  • increase lime slightly
  • add a tiny pinch of salt (it doesn’t taste salty; it tastes more balanced)

For a non-alcoholic detour with similar “fizz + fruit + citrus” logic, MasalaMonk’s Apple Juice Mocktails are a great companion. Even though those drinks aren’t Mules, the balancing instincts are surprisingly transferable.

Moscow mule recipe without ginger beer (still bright, still refreshing)

If you don’t have ginger beer and you don’t want to rely only on ginger ale, you can still build something close to the Mule experience.

Moscow Mule recipe without ginger beer substitution card showing a copper mule mug with lime and mint, plus ginger ale, soda water, ginger syrup and fresh ginger, with tips for making a mule when ginger beer isn’t available.
No ginger beer? You can still make a Moscow Mule: use ginger ale with extra lime for a quick fix, or combine soda water with ginger syrup for a cleaner, sharper mule-style fizz—always serve ice-cold and stir gently.

Approach A: Ginger ale + fresh ginger boost
Build vodka + lime over ice, top with ginger ale, then add:

  • a thin slice of fresh ginger, lightly muddled, or
  • a small splash of ginger syrup

Because fresh ginger adds bite, the drink feels more Mule-like.

Approach B: Soda water + lime + ginger syrup
This becomes a ginger-lime highball. It’s not identical to the classic moscow mule recipe, yet it delivers the same cold, zippy satisfaction.

Either way, chill everything and keep the stir gentle.

Also Read: 10 Best Espresso Martini Recipe Variations (Bar-Tested)


Moscow mule recipe adjustments: fix the drink in the glass

Even a good moscow mule recipe can taste “off” because ginger fizz varies, limes vary, and ice varies. Fortunately, you can fix most issues fast.

If it tastes too sweet

First, add more lime. Then, if it still feels candy-like, add a tiny pinch of salt. Next time, choose a spicier ginger beer or start with a smaller pour and top up slowly.

If it tastes too strong

Instead of adding more ice, add more ginger beer. That lengthens the drink while keeping it lively. Meanwhile, keep lime steady so it stays bright.

If it tastes flat

Usually, one of these happened:

  • the ginger fizz wasn’t cold
  • the bottle was opened long ago
  • the drink was stirred too hard
  • the drink sat too long before serving

Next time, chill harder and add ginger beer at the last second.

If it tastes watery

This is almost always an ice problem. Use more ice and build quickly. Also, don’t let the drink sit around before it’s served.

Also Read: Whiskey Sour Recipe: Classic Cocktail, Best Whiskey & Easy Twists


Moscow mule recipe variations: one template, many personalities

The Mule works because it’s a template: spirit + lime + ginger fizz. Consequently, swapping the spirit changes the character without requiring new technique. That “template” idea is reflected even in mainstream recipe sources like Epicurious’ Moscow Mule, which notes how naturally it spins into different versions.

Moscow Mule variations selector card showing four options—Mexican Mule (tequila), Kentucky Mule (bourbon), Cranberry Mule, and Tropical Mule (coconut water)—with copper mule mugs and ingredients like lime, mint, cranberries, and orange peel.
Moscow Mule variations made easy: start with the classic Moscow Mule recipe, then pick your mood—Mexican Mule with tequila for bright citrus, Kentucky Mule with bourbon for cozy warmth, Cranberry Mule for a festive twist, or Tropical Mule with coconut water for a lighter summer sip.

Below are the variations that truly earn their place. Each one starts from the same master build, then shifts one major element.


Mexican mule recipe: tequila mule with bright, bold energy

A Mexican Mule is often the first variation people fall for, because tequila and ginger are natural friends. Moreover, tequila’s agave character makes the drink feel sunny and lively.

For a classic reference, see Difford’s Mexican Mule.

Mexican mule recipe (classic build)

  • 60 ml tequila (blanco for crispness, reposado for warmth)
  • 20–25 ml lime
  • ginger beer to top (chilled)
  • optional: a small spoon of syrup if your ginger beer is very dry
Mexican Mule recipe card (tequila mule) showing a copper mug with ice, lime and mint, plus text with measurements (60 ml tequila, 20–25 ml lime, top with ginger beer) and an optional chaat and black salt rim.
Mexican Mule recipe (tequila mule): swap vodka for tequila, keep fresh lime bright, and top with chilled ginger beer—then, if you want a MasalaMonk-style kick, rim the mug with a little chaat masala and black salt for a bold, snack-friendly finish.

A MasalaMonk-style twist: a chaat rim that makes sense

Instead of treating garnish like decoration, use it like seasoning. Rim half the glass with:

  • a pinch of chaat masala
  • a pinch of black salt

Suddenly, the drink feels like it belongs next to street snacks. Consequently, the Mexican mule recipe becomes more than a cocktail; it becomes a pairing.

If you want an easy, satisfying snack partner, Homemade French Fries are an obvious win—especially with a chili-lime dust. Meanwhile, for something herby and tangy, Falafel with Indian twists fits beautifully.


Kentucky mule recipe: bourbon mule that’s warm, spicy, and comforting

A Kentucky Mule takes the moscow mule recipe structure and makes it richer. Bourbon brings vanilla and caramel notes; ginger keeps the finish snappy. Therefore, it feels cozy without becoming heavy.

For a whiskey-mixer perspective that aligns with this logic, MasalaMonk’s What to Mix with Jim Beam is a helpful companion.

Kentucky Mule recipe card (bourbon mule) showing a copper mug with crushed ice, mint and orange peel, plus text with measurements (60 ml bourbon, 20 ml lime, top with ginger beer) and optional bitters, with MasalaMonk.com branding.
Kentucky mule recipe (bourbon mule): build 60 ml bourbon and 20 ml fresh lime over plenty of ice, top with chilled ginger beer, then finish with orange peel and a dash or two of bitters for a warmer, deeper mule that still drinks crisp.

Kentucky mule recipe (easy build)

  • 60 ml bourbon
  • 20 ml lime
  • ginger beer to top
  • optional: 1–2 dashes aromatic bitters
  • garnish: lime or orange peel

A small shift that makes it feel “bar-quality”

Instead of changing ingredients, change emphasis:

  • choose a spicier ginger beer
  • keep lime slightly lower if your bourbon is delicate
  • add bitters if you want depth without sugar

As a result, the drink tastes layered rather than sweet.

Also Read: Daiquiri Recipe (Classic, Strawberry & Frozen Cocktails)


Irish mule recipe: smooth, bright, and quietly addictive

An Irish Mule often feels gentler than a bourbon version, because Irish whiskey can be lighter and less oaky. Consequently, ginger and lime remain front and center.

Irish mule recipe: pour 60 ml Irish whiskey over plenty of ice, add 20–25 ml fresh lime, then top with chilled ginger beer—finish with mint or extra lime for a smooth, bright mule that stays crisp and easy to sip.

Irish mule recipe (simple build)

  • 60 ml Irish whiskey
  • 20–25 ml lime
  • ginger beer to top
  • garnish: mint or lime

Because this version is so approachable, it works well as a “welcome drink” when friends arrive. Meanwhile, if you want it even fresher, mint adds aroma without changing the structure.

Also Read: Simple Bloody Mary Recipe – Classic, Bloody Maria, Virgin & More


Gin mule recipe: botanical freshness with ginger lift

Gin changes the Mule’s personality immediately. Instead of “clean and crisp,” the drink becomes aromatic and herbal. Moreover, cucumber and mint fit naturally.

A closely related drink, the Gin-Gin Mule, leans into mint; see The Spruce Eats’ Gin-Gin Mule for a reference build.

Gin mule recipe: build 45–60 ml gin and 20 ml fresh lime over plenty of ice, top with chilled ginger beer, then finish with mint and a cucumber ribbon for a mule that tastes extra bright, botanical, and refreshing.

Gin mule recipe (everyday build)

  • 45–60 ml gin
  • 20 ml lime
  • ginger beer to top
  • mint garnish
  • optional: cucumber slice

Because gin mules feel lighter, they pair especially well with tangy, herby foods. Therefore, Falafel with Indian twists makes a lot of sense here, particularly if you serve it with a bright sauce.

Also Read: Bolognese Sauce Recipe: Real Ragù & Easy Spag Bol


Italian mule recipe: aperitivo bitterness meets ginger fizz

An Italian Mule adds gentle bitterness—often through Aperol or a light amaro. As a result, the drink tastes more layered and “menu-worthy,” even though it’s just as easy to build.

Italian Mule recipe card (Aperol Mule) showing a tall cocktail with ice, orange slice and mint, with measurements (45 ml vodka, 15 ml Aperol, 20 ml lime) topped with ginger beer, on MasalaMonk.com.
Italian mule recipe (Aperol mule): add 45 ml vodka, 15 ml Aperol, and 20 ml fresh lime over ice, then top with chilled ginger beer—finish with an orange slice for a lightly bitter, citrusy mule that stays bright instead of sweet.

Italian mule recipe (aperitivo build)

  • 45 ml vodka
  • 15 ml Aperol (or a light amaro)
  • 20 ml lime
  • ginger beer to top
  • garnish: orange slice

This version is especially useful when your ginger beer runs sweet. Consequently, bitterness keeps the drink from feeling like orange soda.

Also Read: Blueberry Pancakes (6 Recipes) + Homemade Pancake Mix


Cranberry Moscow mule recipe: tart, festive, and easy to love

A cranberry Moscow mule feels celebratory without being heavy. Moreover, it’s a crowd-pleaser because it tastes fruity while staying sharp.

For a close external reference, see Liquor.com’s Apple Cranberry Moscow Mule. Even if you don’t add apple, the balancing logic is similar.

Cranberry Moscow Mule recipe: add 60 ml vodka and 20 ml fresh lime over plenty of ice, splash in 15–30 ml cranberry, then top with chilled ginger beer—garnish with cranberries and lime for a festive mule that stays tart, bright, and fizzy.

Cranberry Moscow mule recipe (balanced build)

  • 60 ml vodka
  • 15–30 ml cranberry juice (start small)
  • 20 ml lime
  • ginger beer to top

A tangy detour for readers who enjoy “bright” drinks

If you like cranberry’s sharpness, you might also enjoy a zero-proof cousin with similar flavors. MasalaMonk’s ACV and cranberry drink ideas fit naturally as a companion read because the taste family overlaps: tart, refreshing, and a little zippy.

Dessert pairing that fits the mood

Because cranberry loves spice, a warm, fragrant dessert works beautifully alongside it. For an indulgent but on-brand option, Churros with Indian-inspired variations can turn a simple drink night into something that feels planned.


Apple mule recipe and cinnamon-apple mule recipe: crisp, cozy, and surprisingly elegant

Apple and ginger are a natural pairing: apple brings sweetness and aroma, while ginger adds bite. Therefore, this variation works year-round—light in summer, cozy in cooler months.

Apple Mule recipe card showing a highball with ice, apple slices, lime and mint, with measurements (60 ml vodka, 30–60 ml apple juice/cider, 15–20 ml lime) topped with ginger beer and MasalaMonk.com branding.
Apple mule recipe: combine 60 ml vodka with 30–60 ml apple juice (or cider) and 15–20 ml fresh lime over plenty of ice, then top with chilled ginger beer—garnish with an apple slice for a crisp mule that turns cozy with a cinnamon stick.

Apple mule recipe (crisp build)

  • 60 ml vodka (or bourbon for a warmer version)
  • 30–60 ml apple juice or cider
  • 15–20 ml lime
  • ginger beer to top
  • garnish: apple slice
Cinnamon Apple Mule recipe card showing a highball with ice, apple slices, lime and mint, plus a cinnamon stick, with measurements (60 ml vodka, 30–60 ml apple, 15–20 ml lime) topped with ginger beer on MasalaMonk.com.
Cinnamon apple mule recipe: combine vodka, apple juice (or cider), and fresh lime over plenty of ice, then top with chilled ginger beer—finish with a cinnamon stick for a cozy, spiced mule that still tastes crisp and bright.

Cinnamon-apple mule recipe (cozy twist)

Use the Apple Mule build, then add:

  • a cinnamon stick garnish, or
  • a tiny pinch of cinnamon

Keep it subtle, because cinnamon can dominate if you’re heavy-handed.

For a non-alcoholic sibling that still captures the “apple + citrus + fizz” vibe, MasalaMonk’s Apple Juice Mocktails are a lovely companion link.


Ginger mule recipe: when you want more bite and less sweetness

Sometimes you don’t want a longer drink—you want the ginger to lead. In that case, choose a spicier ginger beer, keep lime bright, and avoid extra sugar.

Ginger Mule recipe card showing a tall mule-style cocktail with ice, lime and mint plus fresh ginger root, with text for an extra-ginger, less-sweet mule (60 ml vodka, 25 ml lime, top with spicy ginger beer) and MasalaMonk.com branding.
Ginger mule recipe (extra ginger, less sweet): build 60 ml vodka and 25 ml fresh lime over plenty of ice, top with a spicy ginger beer, and add a thin slice of fresh ginger for more bite—crisp, bright, and boldly ginger-forward.

Ginger mule recipe (extra-ginger build)

  • 60 ml vodka
  • 25 ml lime
  • ginger beer to top (start modest; add if needed)
  • optional: fresh ginger slice, lightly muddled
  • skip syrup unless your ginger beer is extremely dry

If you enjoy ginger beyond cocktails, MasalaMonk’s Ginger And Its Stunning Health Benefits is a natural internal link here because it keeps the reader in the same ingredient universe.

Also Read: One-Pot Chicken Bacon Ranch Pasta (Easy & Creamy Recipe)


Tropical mule recipe: coconut water, lime, and ginger fizz for hot evenings

A Tropical Mule feels like summer logic. Coconut water softens the edges, lime keeps it bright, and ginger adds the signature snap. Consequently, it’s an easy “conversion” drink for people who usually avoid cocktails.

MasalaMonk already plays in this space with Tropic Like It’s Hot: Coconut Water Cocktails, which includes Mule-style ideas that fit perfectly as a variation.

Tropical Mule recipe card showing a coconut water mule in a highball glass with ice, lime and mint, plus coconut water and coconut props, with measurements (60 ml vodka, 20 ml lime, 60–90 ml coconut water) topped with ginger beer.
Tropical mule recipe (coconut water mule): add vodka and fresh lime over plenty of ice, pour in chilled coconut water, then top with ginger beer—use slightly less ginger beer so the coconut stays light while the mule still finishes crisp and fizzy.

Tropical mule recipe (quick build)

  • 60 ml vodka
  • 20 ml lime
  • 60–90 ml chilled coconut water
  • ginger beer to top (slightly less than usual so ginger stays present)

Because coconut water adds volume, the slightly smaller ginger beer pour keeps the drink from becoming too diluted.

Also Read: French Toast Sticks (Air Fryer + Oven Recipe) — Crispy Outside, Custardy Inside


Moscow mule recipe with the bottle you already have: keeping balance without overthinking

Sometimes the only decision you’ve already made is the bottle sitting on your counter. Fortunately, the Mule is forgiving: you don’t need a brand-specific recipe; you just adjust balance.

  • If your vodka tastes very clean and neutral, the Mule will feel crisp and classic, so you can push lime slightly higher if you enjoy sharpness.
  • If your vodka tastes rounder or softer, a spicier ginger beer keeps the finish lively.
  • If your vodka is exceptionally smooth, adding a touch more ginger bite (or a ginger garnish) keeps the drink from feeling muted.

The same logic applies to whiskey versions. Irish whiskey tends to make a brighter, gentler drink; bourbon tends to make a warmer, richer one. Consequently, once you know the master moscow mule recipe structure, you can adapt it without stress.

Also Read: Whole Chicken in Crock Pot Recipe (Slow Cooker “Roast” Chicken with Veggies)


Moscow mule recipe as a make-ahead base: fast drinks without losing fizz

Sometimes you want a Mule to be effortless—something you can make in under a minute while still tasting fresh. That’s where a make-ahead base helps. However, the trick is to keep carbonation separate until the last moment.

Make-ahead Moscow Mule base: mix vodka + fresh lime (no bubbles), chill it hard, then pour over ice and add ginger beer only when serving—so every Moscow Mule stays bright, cold, and properly fizzy.

Make-ahead base (still ingredients only)

Combine:

  • vodka
  • lime juice
  • optional: a very small amount of syrup (only if needed)

Chill the base. Then, when serving, pour it over ice and top with ginger beer. As a result, you get the convenience of a “mix” without sacrificing sparkle.

What you don’t want to do is pre-mix ginger beer and let it sit. Carbonation fades, and the drink loses its lift.

Also Read: Authentic Louisiana Red Beans and Rice Recipe (Best Ever)


Batch Moscow mule recipe for a party: keep it bright, keep it fizzy

A pitcher Mule sounds perfect until the last glass is flat. Nevertheless, batching can work beautifully if you respect the order of operations: still ingredients first, carbonation last.

For a clear, practical guide to cocktail batching principles, see Serious Eats’ how to batch cocktails. The key idea is simple: chill the base hard, then add bubbly components right before serving.

If you enjoy entertaining, it’s also helpful to see how party-friendly prep works in other drink formats. MasalaMonk’s Punch recipes with pineapple juice offer a nice internal companion link because they live in the same hosting universe: big flavors, smart dilution, and last-minute fizz.

Batch Moscow Mules (stay fizzy) recipe card showing a vodka and lime base bottle, chilled ginger beer, ice bucket, limes, and tools, with steps to mix ahead, chill hard, and add ginger beer when serving.
Batch Moscow mules for a party without losing sparkle: mix the vodka + lime base ahead, chill it hard, then add ginger beer only when you’re ready to pour—ice first, pour fast, and stir gently for a crisp Moscow Mule every time.

A party setup that prevents flat drinks

Instead of one giant pitcher, set up a quick build station:

  • chilled base (vodka + lime, optional syrup)
  • plenty of ice
  • ginger beer on the side
  • lime wedges
  • optional garnishes (mint, orange slices, apple slices)

Then, guests can build classic Mules or variations. Meanwhile, you avoid the “sad final glass” problem entirely.

Also Read: Pepper Sauce Recipe Guide: Classic Vinegar Heat to Chipotle, Ají & Peppercorn


Moscow mule recipe and copper mugs: iconic style, plus one calm safety note

Copper mugs are part of the Mule’s identity: they look great, they stay cold, and they make the drink feel special. If you want the story in a quick read, why Moscow mules are served in copper mugs is a good explainer.

At the same time, lime juice is acidic, and unlined copper isn’t ideal for acidic drinks. For an official reference point, the FDA Food Code discusses copper use limitations for acidic foods and beverages here: FDA Food Code (Food Code 2022).

Copper mugs for Moscow mules guide card showing a lined copper mug with lime, explaining to choose lined mugs, avoid storing citrus in copper, and serve immediately.
Copper mugs make a Moscow Mule feel extra cold and special—just choose a lined mug, don’t store lime juice in copper, and serve the drink right after you build it for the freshest, fizziest mule.

In practical terms, it’s simple:

  • choose lined copper mugs if you’re buying
  • don’t store citrus drinks in copper
  • use a glass when you’re unsure

Either way, the moscow mule recipe still tastes fantastic.

Also Read: Baked Jalapeño Poppers (Oven) — Time, Temp & Bacon Tips


What to serve with a Moscow mule recipe: snacks, food, and desserts that match

A Mule tastes bright, gingery, and lime-forward. Therefore, it loves foods that are salty, crispy, tangy, or gently spiced. When you pair it thoughtfully, the drink seems even brighter.

What to serve with a Moscow mule: lean into snacks that echo the drink’s bright lime and ginger bite—crispy fries for salt and crunch, falafel for tangy-herby balance, and churros for a warm spiced finish that still plays nicely with a fizzy Moscow Mule.
What to serve with a Moscow Mule pairing card featuring fries, falafel and churros with lime and mint, suggesting crispy, tangy and spiced snacks that match a Moscow mule recipe.

Crispy, salty comfort (easy and satisfying)

Fries are a classic pairing for a reason: salt amplifies ginger, while lime keeps everything from feeling heavy. For a great home version, MasalaMonk’s Homemade French Fries are perfect—especially if you finish them with a spice dust.

This pairing works across variations. For example, it’s excellent with a Mexican Mule because tequila and chili-lime seasoning are natural friends. Similarly, it’s great with a Kentucky Mule because ginger cuts through bourbon warmth.

Tangy, herby bites (lighter, brighter)

Falafel is a surprisingly good companion for Mules: crisp outside, tender inside, and often served with sauces that echo the drink’s citrus. For an Indian-leaning take that fits MasalaMonk’s style, Falafel with Indian twists is an easy internal link that feels genuinely relevant.

This pairing shines with gin mules and Irish mules, because those drinks lean refreshing and aromatic. Consequently, the whole table feels light rather than heavy.

Desserts that don’t fight the drink

Because Mules are zippy, desserts that lean into spice and warmth match beautifully. A cinnamon-apple mule, for instance, practically begs for something fragrant. Meanwhile, a cranberry Moscow mule loves festive spice.

For a sweet companion that still feels on-brand, Churros with Indian-inspired variations can turn “just drinks” into a full evening.


The simple reason this Moscow mule recipe keeps working

The Mule lasts because it solves a craving: cold, bright, fizzy, and ginger-spiced. Moreover, it’s flexible without becoming complicated. Once you learn the master moscow mule recipe, you can keep the structure and shift the personality depending on season and mood.

On a warm evening, the Tropical Mule makes sense. On a festive night, the cranberry Moscow mule feels right. When you want comfort, the Kentucky mule recipe is the move. When you want something sharper and louder, the Mexican mule recipe delivers. Meanwhile, when you want fragrance and lift, a gin mule recipe changes the whole atmosphere of the drink.

So start with the master build, keep everything cold, let lime and ginger do their job, and adjust with confidence. After all, the best moscow mule recipe is the one you’ll actually make again—and this one is designed to earn that repeat.

Also Read: Vegan Mayo Recipe Guide: 5 Plant-Based Mayonnaise

FAQs

1) What is the best Moscow mule recipe for beginners?

If you’re just starting, the best Moscow mule recipe is the classic build: vodka, fresh lime juice, and chilled ginger beer over plenty of ice. To begin with, use 60 ml vodka, 20–25 ml lime, then top with ginger beer. After that, adjust the ginger beer amount based on how strong or light you want the drink.

2) What are the essential Moscow mule ingredients?

At minimum, Moscow mule ingredients include vodka, fresh lime juice, ginger beer, and ice. Additionally, a lime wedge is the most common garnish. Occasionally, mint or bitters are added, although the core Moscow mule recipe doesn’t require them.

3) How do I make a Moscow Mule that doesn’t taste watery?

Primarily, pack the glass completely with ice and use well-chilled ginger beer. Next, build the drink quickly so the ice doesn’t melt while you measure. Finally, stir only once or twice; otherwise, you’ll speed up dilution and flatten the fizz.

4) How to make a Moscow mule at home without a copper mug?

Simply make the Moscow mule recipe in a highball or any sturdy glass. Even so, the most important part is keeping everything cold. In fact, glassware matters far less than fresh lime, cold ginger fizz, and plenty of ice.

5) Why are Moscow mules served in copper mugs?

Traditionally, copper mugs became associated with the drink because they look distinctive and feel colder in the hand. Still, you can enjoy the same Moscow mule cocktail flavor from any glass, so it’s more about experience than necessity.

6) Can I make a Moscow mule with ginger ale instead of ginger beer?

Yes. Instead of ginger beer, use ginger ale and increase lime slightly so the drink stays bright. Also, skip extra sweeteners, since ginger ale is often sweeter. As a result, the Moscow mule with ginger ale stays balanced rather than tasting like soda.

7) How do I make a Moscow mule without ginger beer?

If you don’t have ginger beer, you can use ginger ale plus a small boost of fresh ginger or ginger syrup. Alternatively, you can combine soda water with lime and ginger syrup for a similar ginger-lime highball feel. Either way, keep everything cold so the drink remains crisp.

8) What’s the difference between a vodka Moscow mule and a vodka mule drink?

Practically speaking, they’re the same drink. In other words, “vodka mule drink” is simply another way of referring to the classic Moscow mule recipe built with vodka, lime, and ginger beer.

9) What is the best vodka for a Moscow mule?

Generally, the best vodka for a Moscow mule is clean and neutral, because the Moscow mule cocktail is meant to highlight ginger and lime. If your vodka tastes sharper, add a touch more ginger beer; conversely, if it’s very smooth, choose a spicier ginger beer to keep the finish lively.

10) How much alcohol is in a Moscow Mule?

Typically, a standard Moscow mule recipe uses a single 60 ml pour of vodka, then gets lengthened by ginger beer and ice. Consequently, it often drinks lighter than a straight spirit, even though it can still be strong. If you want a lower-alcohol mule drink, reduce the vodka slightly and top with more ginger beer.

11) How many calories are in a Moscow Mule?

Calories depend mostly on the vodka pour and the sweetness of the ginger beer. For example, a sweeter ginger beer raises calories noticeably, whereas a drier ginger beer keeps them lower. Therefore, if calories matter, pick a less-sweet ginger fizz and avoid added syrup.

12) What is a Mexican mule, and how is it different from a Moscow Mule?

A Mexican mule replaces vodka with tequila while keeping lime and ginger beer. As a result, it tastes brighter and more “agave-citrus” than the classic. If you like the Moscow mule recipe but want a bolder twist, the Mexican mule is usually the easiest upgrade.

13) What is a Kentucky mule recipe?

A Kentucky mule recipe swaps vodka for bourbon. Because bourbon is warmer and sweeter, the drink feels more comforting, while ginger keeps it snappy. Additionally, a dash of bitters can add depth without adding sugar.

14) What is an Irish mule?

An Irish mule uses Irish whiskey instead of vodka. Compared with a bourbon mule, it often tastes lighter and smoother. Consequently, it’s a great option when you want a whiskey mule that still feels bright and refreshing.

15) What is a gin mule recipe?

A gin mule recipe replaces vodka with gin, creating a more aromatic, botanical version. Furthermore, mint or cucumber can fit naturally here, although the core formula—spirit, lime, ginger beer—stays the same.

16) What is an Italian mule cocktail?

An Italian mule cocktail usually adds an aperitivo element (like a light bitter orange spirit) alongside vodka, lime, and ginger beer. Therefore, it often tastes slightly more complex and less sweet, especially when your ginger beer is mild.

17) How do I make a cranberry Moscow mule recipe?

A cranberry Moscow mule recipe adds a small amount of cranberry juice to the classic Moscow mule ingredients. Start with a modest splash so it stays tangy rather than sugary, then top with ginger beer. Similarly, keep lime present; otherwise, cranberry can take over.

18) How do I make an apple mule drink?

An apple mule drink adds apple juice or cider to the Mule template. Next, keep lime in the mix so it remains bright, then top with ginger beer. If you want a cozier version, add a cinnamon stick garnish for a cinnamon-apple mule feel.

19) What is a ginger mule, and how do I make it less sweet?

A ginger mule is simply a Mule where ginger leads. To achieve that, choose a spicier ginger beer, increase lime slightly, and avoid syrup. Additionally, a thin slice of fresh ginger can intensify bite without adding sweetness.

20) Can I make a Moscow mule mix ahead of time?

Yes, but only the still parts. First, combine vodka and lime juice (and optional syrup if needed), then chill. Right before serving, pour over ice and top with ginger beer. Otherwise, if you add ginger beer early, the bubbles fade and the mule drink loses its lift.

21) How do I batch Moscow mules for a party?

For batching, pre-mix vodka and lime, chill the mixture thoroughly, and set up ginger beer separately. Then, when guests are ready, build each Moscow mule recipe over ice and top with ginger beer. Consequently, every glass stays fizzy instead of going flat in a pitcher.

22) What’s the best garnish for a Moscow Mule?

Most commonly, a lime wedge or wheel is ideal, because it reinforces the citrus aroma. Alternatively, mint adds freshness, and orange peel pairs nicely with whiskey or Italian mule variations. Either way, keep garnish simple so it supports the Moscow mule cocktail instead of distracting from it.

23) How do I make a Moscow Mule less sweet without changing the whole recipe?

First, add a bit more lime. Next, reduce the ginger beer pour slightly and choose a drier ginger beer if available. In addition, a tiny pinch of salt can sharpen the drink’s profile, so sweetness feels calmer rather than loud.

24) How do I make a Moscow Mule stronger or lighter?

To make it stronger, reduce ginger beer slightly while keeping lime steady. On the other hand, to make it lighter, add more ginger beer and keep plenty of ice. As a result, you can shift strength without breaking the Moscow mule recipe balance.

Posted on 10 Comments

Healthy Tuna Salad – 10 Easy Recipes (Avocado, Mediterranean, No Mayo & More)

Person holding a fork over a large bowl of healthy tuna salad with eggs, avocado, potatoes, beans and greens, with the text Healthy Tuna Salad, 10 Ways and MasalaMonk.com

Healthy tuna salad is one of those quiet workhorse recipes that can shape-shift into almost anything you need. Some days it’s a classic deli tuna salad sandwich on soft bread; on others it becomes a bright Mediterranean tuna salad with beans and olives, or a quick avocado tuna salad piled onto toast. When you want comfort, there’s tuna macaroni salad. When you want light and fresh, there’s tuna salad on salad with crunchy cucumber and apple. And when you’re skipping fish entirely, a vegan “tuna” made from chickpeas steps in without anyone feeling short-changed.

At the same time, tuna brings a lot of nutrition to the table. It’s naturally rich in protein and provides omega-3 fats that support heart and brain health when eaten in reasonable amounts. The FDA’s own advice about eating fish puts canned light tuna in the “Best Choices” group and suggests that most adults, including many who are pregnant, can safely enjoy it two to three times per week as part of a mixed seafood pattern, as long as they keep overall portions within the limits they outline. When you combine tuna with vegetables, beans, whole grains and lighter dressings, you end up with meals that feel like comfort food but behave more like smart nutrition.

This guide pulls together ten different healthy tuna salad recipes and all their useful cousins: no-mayo Greek yogurt tuna salad, avocado tuna salad, Mediterranean tuna and bean salad, Italian tuna with chickpeas, tuna Niçoise salad, tuna pasta salad and tuna mac, tuna and egg salad, crunchy apple and cucumber tuna salad, and finally a vegan tuna salad built from chickpeas. You can treat these as ten discrete recipes or as ten patterns you customise with whatever you’ve got in your kitchen.


1. Light Deli-Style Healthy Tuna Salad (Your Everyday Base)

Most people’s mental picture of tuna salad is the classic deli tuna fish salad: creamy, a little tangy, speckled with celery and onion, sometimes a touch sweet from relish. Instead of banishing that flavour in the name of health, it’s much more satisfying to keep the same general profile and simply rebalance the dressing so it becomes a genuinely healthy tuna salad you can eat more often.

Light deli-style healthy tuna salad made with tuna, celery, red onion and a Greek yogurt dressing in a bowl with bread and lemon.
Light deli-style healthy tuna salad made lighter with Greek yogurt instead of loads of mayo – perfect for sandwiches, wraps or spooned over a crunchy green salad.

Ingredients (2–3 servings)

  • 2 cans light tuna in water, well drained
  • 3–4 tablespoons plain Greek yogurt
  • 2–3 tablespoons mayonnaise
  • 1–2 ribs celery, finely chopped
  • 2 tablespoons red onion, very finely minced
  • 1–2 tablespoons sweet relish or finely chopped pickles
  • 1 teaspoon Dijon mustard
  • Juice of half a lemon
  • 1–2 tablespoons chopped fresh dill or parsley
  • Salt and freshly ground black pepper

Greek yogurt stands in for a chunk of the mayonnaise here. Compared with mayo, Greek yogurt is naturally higher in protein and significantly lower in calories and saturated fat, yet it has enough body to keep the dressing thick and satisfying. That little swap moves this toward a low fat tuna salad without making it taste “diet”.

How to make it

  1. Tip the drained tuna into a medium bowl and flake it with a fork so there are no large clumps.
  2. In a separate bowl, whisk the Greek yogurt, mayonnaise, mustard, lemon juice, herbs, salt and pepper until smooth.
  3. Stir celery, onion and relish into the dressing so all the crunchy bits are lightly coated.
  4. Fold the dressing mixture into the tuna and stir until everything looks evenly combined.
  5. Taste and adjust; a splash more lemon brightens everything, while a spoon of relish sweetens and softens the edges.
  6. Let the bowl chill for at least 15–20 minutes if you have the patience. It’s even better the next day.

Once you’ve got this base healthy tuna salad, you can spin it in several directions:

  • Pile it onto toast with lettuce and tomato for a quick tuna salad sandwich.
  • Spoon it over mixed greens for an easy salad and tuna combo.
  • Stuff it into a croissant and suddenly you’ve got a croissant tuna sandwich that feels like café food.
  • Serve it with crackers and sliced veggies as a tuna lunch on the go.

If you’re curious how bowls like this fit into a more general “eat more plants” direction, you might enjoy MasalaMonk’s piece on the perks of eating salads everyday, which talks through fibre, micronutrients and why salad isn’t a throwaway side dish at all.

Treat this bowl as your basic tuna salad recipe, everything else is a tweak.

Also Read: Upma Recipe: 10+ Easy Variations (Rava, Millet, Oats, Semiya & More)


2. No-Mayo Greek Yogurt Healthy Tuna Salad Recipe

There are days when “lighter” still isn’t quite what you’re after; you want a tuna salad without mayo altogether. Maybe you’re chasing a low calorie tuna salad recipe, perhaps you simply prefer the clean tang of yogurt. In either case, a Greek yogurt tuna salad steps up nicely.

Why Greek yogurt works so well

Greek yogurt is strained, so it ends up thicker and creamier than regular yogurt while packing more protein per spoonful. At the same time, it typically has fewer calories and less fat, particularly if you choose a lower-fat version. Paired against mayonnaise, the difference is stark: Greek yogurt contains a fraction of the calories and dramatically less saturated fat, while bringing its own dose of protein and calcium. Used as the main base for tuna salad, it turns a standard tuna fish salad into a high protein tuna salad with far fewer calories than a traditional mayo-heavy version.

No-mayo Greek yogurt tuna salad with tuna, cucumber and celery in a white bowl, garnished with dill, with extra yogurt and cucumber slices on the side.
Creamy Greek yogurt tuna salad made with zero mayonnaise, extra crunch from cucumber and celery, and enough protein to work for light lunches or high-protein meal prep.

Ingredients

  • 2 cans light tuna, well drained
  • ½ cup plain Greek yogurt
  • 1 rib celery, finely diced
  • 2 tablespoons cucumber, seeded and chopped
  • 1–2 tablespoons red onion, minced
  • 1 teaspoon Dijon mustard
  • Juice of half a lemon
  • 1 tablespoon chopped fresh dill, chives or parsley
  • Salt and pepper

Method

  1. Whisk Greek yogurt, lemon juice, mustard, herbs, salt and pepper together in a bowl until smooth.
  2. Stir in celery, cucumber and onion so the vegetables are lightly coated.
  3. Fold in the tuna, breaking up any remaining chunks, and mix gently until everything comes together.
  4. Taste and adjust seasoning. A little extra lemon juice or a pinch more salt can make the flavours pop.
  5. Chill briefly before serving.

This is the bowl that naturally satisfies all the no mayo or tuna fish salad recipe without mayonnaise needs. Moreover, because the dressing is so light, it fits neatly into days when you’re focused on weight management without feeling like a punishment.

Cottage cheese tuna salad variation

If you’d like to push the protein even higher, you can replace a couple of tablespoons of the yogurt with cottage cheese. The result is a cottage cheese and tuna salad that still feels creamy but loads up the protein even more. On days when you’re aiming for big protein numbers, that sort of mix can easily become part of a 100-grams-of-protein plan. If you’re curious how to sketch an entire day’s meals around that target, MasalaMonk’s guide on how to eat 100 grams of protein a day lays out practical examples.

Also Read: Double Chocolate Chip Cookies – Easy Recipe with 7 Variations


3. Avocado Tuna Salad, From Three Ingredients to Fully Loaded

As soon as avocado walks into the room, the tuna salad world shifts. Bringing avocado into the mix and your healthy tuna salad suddenly starts feeling like café food. It’s creamy, naturally dairy-free and works whether you’re in a hurry or feeling like layering flavours.

Two bowls of avocado tuna salad, one simple 3-ingredient version and one loaded with egg and herbs, served with toasted bread and lemon on a wooden table.
Avocado-based, no-mayo tuna salad shown two ways: a quick 3-ingredient base and a loaded version with egg, herbs and crunch, perfect for tunacado toast, wraps or low-carb lunch bowls.

Ultra-simple three-ingredient avocado tuna salad Recipe

When you want something you can stir together while the kettle boils, this is the one:

  • 1 ripe avocado
  • 1 can light tuna, drained
  • Juice of half a lemon (or lime)
  • Salt and pepper

Mash the avocado with the lemon, salt and pepper until it’s smooth but not totally pureed. Fold in the tuna, taste and tweak the seasoning. That’s really all there is to it.

You can:

  • Spoon it into lettuce cups for a low-carb tuna lunch.
  • Spread it over toast for a quick tunacado-style open sandwich.
  • Serve it with sliced cucumber and carrots as an easy tuna lunch idea when you don’t want bread.

Despite the tiny ingredient list, this still satisfies the search for a 3 ingredient tuna avocado salad and does it with zero mayo.

Loaded avocado and tuna salad recipe

On other days, you might want something closer to a full healthy tuna salad recipe built on avocado rather than yogurt or mayo.

Start with:

  • The three-ingredient base above

Then add:

  • 1–2 boiled eggs, chopped (for an avocado and tuna egg salad spin)
  • 1 rib celery, finely chopped
  • 2 tablespoons red onion
  • Optional: ¼ of a crisp apple, finely diced, for sweetness and crunch
  • A handful of chopped parsley, coriander or chives

Fold all of that through the avocado and tuna mix. The eggs make it especially satisfying, so this bowl covers everything from tuna and egg salad for weight loss days to avocado tuna salad wraps for hungrier ones.

Because both tuna and avocado show up regularly in pregnancy diets, this style of salad can sit happily in a pregnancy meal rotation as long as you pay attention to overall fish portions and choose lower-mercury tuna. For more context on that, MasalaMonk has a detailed guide on eating tuna while pregnant plus a recipe-focused piece, Motherhood and Meals: 5 Omega-3 Rich Seafood Recipes for Pregnancy, which includes a quick tuna–avocado idea.

Also Read: Carbonara Recipe: Italian Pasta (Creamy, Veggie, Chicken, Shrimp, Tuna & Keto)


4. Mediterranean Tuna and White Bean Salad Recipe

If your taste buds wander toward olives, beans, herbs and lemon, you’re firmly in Mediterranean tuna territory. Next up: a Mediterranean tuna salad recipe that combines tuna, white beans, vegetables, olive oil and herbs. This style of salad is filling, colourful and very meal-prep friendly. Fortunately, it’s one of the easiest and most nutritious patterns to build.

Why this style is such a win

Mediterranean-style eating, which emphasises fish, olive oil, vegetables, legumes and whole grains, has been repeatedly associated with better heart health and long-term disease prevention. Tuna and white beans together give you a double hit of protein plus plenty of fibre and complex carbohydrates from the beans, while olive oil supplies heart-friendly fats.

Mediterranean tuna and white bean salad with cherry tomatoes, olives, cucumber and herbs in a white bowl, served with olive oil and lemon on a stone background.
Mediterranean-style tuna and white bean salad with olives, tomatoes and lemony olive oil – a protein- and fibre-rich bowl that works for meal prep, warm pitas or simple lunch bowls.

Ingredients

  • 2 cans tuna (light tuna in water works, or tuna in olive oil for a richer version)
  • 1½–2 cups cooked white beans (cannellini, navy or a mix)
  • 1 cup cherry tomatoes, halved
  • 1 small cucumber, diced
  • ¼ red onion, very thinly sliced
  • A handful of olives
  • Fresh parsley and/or basil

For the dressing

  • 3–4 tablespoons extra-virgin olive oil
  • 1½–2 tablespoons lemon juice
  • 1 teaspoon Dijon mustard
  • 1 clove garlic, finely minced or grated
  • ½ teaspoon dried oregano
  • Salt and pepper

How to make this Mediterranean tuna salad recipe

  1. In a large bowl, whisk together olive oil, lemon juice, mustard, garlic, oregano, salt and pepper.
  2. Add the beans, tuna, tomatoes, cucumber, onion and olives.
  3. Toss gently, trying not to mash the tuna too much.
  4. Sprinkle over herbs and toss once more.
  5. Taste and adjust seasoning.

You can serve this Mediterranean tuna salad over mixed greens, spooned onto crunchy toast, or tucked into a warm pita with a bit of lettuce. It keeps well for several days in the fridge, which makes it perfect for meal prep if you like to batch healthy tuna salad lunches ahead of time.

Beans bring plenty of fibre and minerals along with their plant protein, so they help this salad feel more filling and support gut health and blood sugar control at the same time. If you’d like more ideas for gut-friendly meals that use the same logic, you can have a look at Top 10 Foods for Gut Health and Boosting Your Fiber Intake with Sandwiches. Both pieces show how salad-style ingredients can slip into everyday meals without a lot of fuss.

Also Read: Carbonara Recipe: Italian Pasta (Creamy, Veggie, Chicken, Shrimp, Tuna & Keto)


5. Italian Tuna Salad with Chickpeas Recipe

Slide a little further around the Mediterranean map and you arrive at Italian tuna salad territory. This Italian-leaning salad recipe shifts away from creaminess and toward bright, briny flavours: roasted red peppers, capers, herbs and chickpeas. It’s essentially a pantry-friendly tuna salad that just happens to be very high in fibre.

Italian tuna salad with chickpeas, roasted red peppers, capers and red onion in a white bowl, garnished with parsley, with olive oil and bread on a rustic surface.
Italian-style tuna salad made with tuna in olive oil, chickpeas, roasted peppers and capers – a hearty chickpea tuna salad that’s perfect over rocket, in crusty rolls or spooned onto warm couscous.

Ingredients

  • 2 cans tuna, ideally in olive oil
  • 1½ cups cooked chickpeas, rinsed and drained
  • ½ cup roasted red peppers, sliced into strips
  • ¼ cup red onion, thinly sliced
  • 2 tablespoons capers, rinsed and drained
  • A good handful of chopped fresh parsley

Dressing

  • 3 tablespoons olive oil (use some of the oil from the tuna cans if they’re packed in oil)
  • 1½ tablespoons red wine vinegar or lemon juice
  • 1 small clove garlic, very finely grated
  • ½ teaspoon dried oregano
  • Salt and pepper

Method

  1. Add tuna, chickpeas, roasted peppers, onion, capers and parsley to a large bowl.
  2. In a small jug or bowl, whisk together olive oil, vinegar or lemon, garlic, oregano, salt and pepper until slightly thickened.
  3. Pour the dressing over the salad ingredients.
  4. Toss gently, folding rather than stirring roughly, so the tuna stays in nice bite-sized pieces.

This version of tuna salad is lovely over rocket or baby spinach, and it’s equally happy spooned into a crusty roll for a more substantial lunch. If you like couscous, you can serve it over a bed of warm couscous to create a rio mare couscous-style dish using pantry ingredients.

Chickpeas deserve a bit of attention in their own right here. They’re high in fibre and plant protein and have been linked to better satiety, improved cholesterol and improved blood sugar control when they show up regularly in place of more refined starches. If you enjoy this way of cooking, MasalaMonk’s pieces on using chickpeas instead of sardines and using seitan instead of tuna are packed with similar high-protein, Mediterranean-leaning meal prep ideas.

Also Read: Authentic Louisiana Red Beans and Rice Recipe (Best Ever)


6. Tuna Niçoise Salad (Everyday and Occasion-Ready)

Every now and then, a simple bowl isn’t enough, and you want a full tuna Niçoise salad laid out on a big platter. The same tuna, eggs and vegetables, but laid out on a platter with potatoes, beans and olives so it looks like something you’d order in a bistro.

Tuna Niçoise salad platter with baby potatoes, green beans, cherry tomatoes, olives, hard-boiled eggs and tuna arranged on lettuce on a large plate.
Classic tuna Niçoise salad with baby potatoes, green beans, cherry tomatoes, olives, eggs and tuna arranged on greens, then finished with a 3:1 olive oil to lemon garlic vinaigrette for a full dinner salad.

What you’ll need

  • Mixed lettuce or baby greens
  • 8–10 small new potatoes, boiled until just tender and halved
  • A couple of handfuls of green beans, trimmed and blanched
  • 1 cup cherry tomatoes, halved
  • 3–4 hard-boiled eggs, cut into halves or quarters
  • A handful of olives
  • 2 cans tuna in olive oil, or seared fresh tuna steaks sliced thickly

For the Niçoise dressing

  • 3 tablespoons olive oil
  • 1½ tablespoons red wine vinegar or lemon juice
  • 1 teaspoon Dijon mustard
  • 1 clove garlic, finely grated
  • A pinch of dried thyme or oregano
  • Salt and pepper

Method

  1. Arrange the lettuce over a large serving platter.
  2. Nestle the potatoes, green beans, tomatoes, eggs, olives and tuna on top in little piles or rows so you get that classic composed look.
  3. Whisk together the olive oil, vinegar or lemon, mustard, garlic, herbs, salt and pepper until emulsified.
  4. Taste the dressing and adjust the acid and salt until it feels bright but balanced.
  5. Drizzle the dressing over everything just before you bring the platter to the table.

Because this salad leans so heavily on vegetables, olive oil, legumes and fish, it fits beautifully into the Mediterranean diet pattern that many large studies have associated with reduced risk of heart disease and other chronic illnesses. It’s also a neat answer for all the tuna nicoise salad, salade nicoise recipe and dressing for tuna nicoise searches that pop up whenever the weather warms up and people start craving big bowls.

Also Read: One-Pot Chicken Bacon Ranch Pasta (Easy & Creamy Recipe)


7. Healthy Tuna Pasta Salad and Old-School Tuna Macaroni Salad

Comfort food time. A tuna pasta salad recipe can easily turn into a calorie bomb, but a few tweaks give you the same creamy vibe in a more balanced way. Then, when nostalgia hits, you can slide back toward the classic tuna macaroni salad version by adjusting the dressing.

The trick is that you can make it as light or as old-school as you like just by sliding the dressing along the Greek yogurt ↔ mayo spectrum.

Large bowl of creamy tuna pasta salad with peas, with small bowls of Greek yogurt dressing and mayo-rich tuna mac on a light background.
Healthy tuna pasta salad made with al dente short pasta, tuna and peas plus a 50:50 Greek yogurt–mayo dressing, with a more nostalgic, mayo-rich tuna mac option shown on the side so you can slide between lighter and old-fashioned versions.

Lighter, creamy tuna pasta salad recipe

For a bowl that feels indulgent but still sits in the healthy tuna salad camp:

  • 3 cups cooked short pasta (elbow macaroni, shells or fusilli)
  • 2 cans tuna, drained
  • 1 cup peas or sweetcorn (frozen is fine; just thaw and drain)
  • ½ cup finely chopped celery
  • ¼ cup finely chopped red onion

Dressing

  • ½ cup Greek yogurt
  • 2–3 tablespoons mayonnaise
  • 1–2 teaspoons Dijon mustard
  • Juice of half a lemon
  • 2 tablespoons chopped fresh dill or parsley
  • Salt and pepper

How to make it

  1. Stir together yogurt, mayonnaise, mustard, lemon, herbs, salt and pepper until smooth.
  2. Combine pasta, tuna, peas, celery and onion in a large bowl.
  3. Pour the dressing over the top and toss until everything is well coated.
  4. Chill for at least 30 minutes before serving.

Old-fashioned recipe for macaroni salad with tuna

If your heart belongs to old fashioned macaroni salad with tuna, you can easily nudge the dressing in that direction:

  • Increase the mayonnaise and reduce or omit the yogurt.
  • Add 2–3 chopped hard-boiled eggs to the salad.
  • Stir in a generous amount of sweet relish.
  • Throw in diced bell peppers and grated carrot for colour.

Now you’ve got a tuna mac salad that mirrors the macaroni salad with tuna fish many of us grew up with, while still giving you the option to sneak in more vegetables. That’s the version that belongs next to barbecues and potluck tables, the “best tuna mac salad recipe” in your head.

How to cook the pasta for this recipe

For cold pasta salads, slightly undercooked pasta that still has some bite tends to hold up better. Cook the pasta just to al dente, rinse briefly under cold water to stop the cooking and remove excess starch, then drain very well before combining it with the tuna and dressing.

Potato and tuna salad spin-off

For days when potato salad tuna feels more appealing than pasta, it’s simple to swap some or all of the noodles for boiled baby potatoes or cubes of sweet potato. Both can be part of a healthy plate when paired with lean protein and vegetables. If you’re wondering how sweet potatoes compare with white potatoes in terms of calories, glycaemic index and suitability for weight-focused or diabetes-friendly eating, MasalaMonk breaks it down in Sweet Potato Nutrition Facts and The Potato Debate: White vs Sweet. For even more potato inspiration, their collection of potato salad recipes walks through classic, German, Russian and vegan potato salads you can easily adapt with tuna.


8. Tuna and Egg Salad (For Bowls, Sandwiches and Breakfast)

Another very popular direction involves eggs. Merging tuna salad and egg salad into one bowl gives you something that feels almost decadent despite being very straightforward. It’s rich, savoury and incredibly satisfying.

Bowl of creamy tuna and egg salad with peas and diced vegetables, topped with a halved hard-boiled egg, served beside whole eggs, toasted bagel slices and a small dish of dressing.
Creamy tuna and egg salad made with Greek yogurt, a little mayo, mustard and lemon, folded with chopped eggs, peas and crunchy veg – ideal for high-protein bowls, sandwiches or a savoury breakfast on toasted bagels.

How to make Basic tuna and egg salad

  • 2 cans tuna, well drained
  • 3 hard-boiled eggs, chopped
  • ¼ cup Greek yogurt
  • 2–3 tablespoons mayonnaise
  • 1 rib celery, finely chopped
  • 2 tablespoons onion, finely minced
  • 1–2 tablespoons relish or chopped pickles
  • 1 teaspoon mustard
  • Juice of half a lemon
  • Salt and pepper

Mix the yogurt, mayonnaise, mustard, lemon juice, salt and pepper into a smooth dressing. Stir in the celery, onion and relish, then fold in the tuna and chopped eggs.

How to serve this recipe

You can scoop this mixture:

  • Over lettuce for a boiled egg and tuna salad bowl
  • Into sandwiches as a tuna and egg salad sandwich filling
  • Onto toasted bagels or English muffins when you want something that covers tuna breakfast ideas as well as lunch

Because tuna and eggs are both rich in protein, this salad fits especially well into high-protein days. To keep the rest of your day balanced, you might pair it with something like Protein Oatmeal or a jar of High Protein Overnight Oats in the morning so that you hit your protein targets with real meals rather than relying entirely on supplements. For egg-cooking perfection, aim for 9–11 minutes in gently boiling water for hard-boiled eggs, followed by an ice bath. That timing usually gives firm whites and yolks without the grey ring.

Also Read: Sheet Pan Chicken Fajitas Recipe (Easy One-Pan Oven Fajitas)


9. Crunchy Apple and Cucumber Healthy Tuna Salad

Not all healthy tuna salad recipes revolve around what you swap into the dressing. Sometimes the biggest difference comes from loading the bowl with fruit and vegetables so each bite feels fresher and more textured. That’s exactly what’s happening in the apple and cucumber corner of tuna fish salad: you can make this with both apples and cucumber or you can just do apples or cucumbers – both rely on the same idea.

Apple and cucumber healthy tuna salad in a white bowl with diced apple, cucumber, peas and celery, surrounded by apple slices, cucumber rounds and lettuce on a light background.
Lightly creamy tuna salad packed with diced apple, cucumber, celery and peas for sweetness and crunch – a fibre-rich option you can spoon over greens, tuck into pita pockets or roll into wraps for fresh, portable lunches.

Ingredients

  • 2 cans tuna, drained
  • ½ a crisp apple (Granny Smith, Pink Lady or similar), finely diced
  • ½ cup diced cucumber
  • 1 rib celery, finely chopped
  • ¼ cup Greek yogurt
  • 1–2 tablespoons mayonnaise or sour cream (optional, for richness)
  • 1–2 teaspoons lemon juice
  • 1 teaspoon honey or maple syrup (optional, to balance the lemon)
  • 1 tablespoon chopped fresh dill
  • Salt and pepper

Method

  1. In a small bowl, whisk the Greek yogurt, mayonnaise or sour cream (if using), lemon juice, honey, dill, salt and pepper until smooth.
  2. Add the tuna, apple, cucumber and celery to a larger bowl.
  3. Pour the dressing over the top and fold gently until everything is lightly coated.
  4. Taste and adjust with extra lemon or a tiny bit more honey to find your perfect sweet-tart balance.

Where this recipe shines

  • As a salad topping over mixed leaves.
  • Stuffed into pita or wraps for a bit of crunch in every bite.
  • As a side dish next to grilled chicken or roasted vegetables.

Apples and cucumbers add not only texture but also hydration and fibre. Verywell Health’s list of high-fibre foods is a good reminder of how simple ingredients like apples can quietly support digestion and blood sugar balance when they show up regularly.

If you want to make your everyday sandwiches and salad recipes more fibre-rich in general, MasalaMonk’s blog post on boosting fibre with sandwiches has lots of real-world combinations.

Also Read: Negroni Recipe: Classic Cocktail & Its Variation Drinks


10. Vegan “Tuna” Chickpea Salad Recipe

Finally, even in a tuna-focused world, there’s a big audience for vegan tuna salad, tuna vegan, tuna vegetarian and vegetarian tuna salad. Many of them still want a tuna salad sandwich experience; they simply don’t want fish in it. Chickpeas are perfect for this because they mimic the slightly chunky, creamy texture and bring plenty of nutrition of their own.

Why chickpeas are such a strong base

Chickpeas provide a mix of complex carbohydrates, protein and fibre plus micronutrients like folate, iron and manganese. When they replace refined grains or processed meats in the diet, they’ve been linked with better blood sugar control, improved satiety and lower cholesterol. All of that makes them a natural fit for anyone who wants their vegan tuna salad to feel like more than a compromise.

Bowl of vegan chickpea ‘tuna’ salad with herbs and diced vegetables, surrounded by toast topped with the salad, a small bowl of chickpeas, vegan mayo and lemon wedges on a light background.
Chunky chickpea “tuna” salad made with lightly mashed chickpeas, vegan mayo or tahini, celery, red onion and herbs – an easy plant-based filling for sandwiches, wraps or lettuce cups when you want a high-fibre alternative to tuna.

Vegan tuna salad with chickpeas

  • 2 cups cooked chickpeas, drained and rinsed
  • ¼–⅓ cup vegan mayonnaise, or a mix of tahini and lemon juice
  • 1 rib celery, finely chopped
  • 2 tablespoons red onion, finely diced
  • 1–2 tablespoons chopped pickles or capers
  • 1 teaspoon mustard
  • Juice of half a lemon
  • A pinch of nori flakes or other dried seaweed (optional)
  • Salt, pepper, dill or parsley

Mash the chickpeas with a fork or potato masher until they’re mostly broken down but still have some texture. Stir in vegan mayo (or tahini and extra lemon), mustard, salt, pepper and herbs. Fold through celery, onion and pickles and taste.

Serve this vegan tuna salad in sandwiches with lettuce and tomato, spooned into lettuce cups, or over a bowl of mixed greens with chickpeas instead of tuna carrying the protein load.

If you’d like more ways to keep your week high in protein without leaning on animal foods, MasalaMonk has plenty of ideas, including Chickpeas Instead of Sardines and plant-based high-protein meal prep ideas using lentils instead of chicken. Between those and this chickpea tuna salad, you can cover a surprising number of “tuna-style” cravings with zero actual tuna.

Also Read: Whole Chicken in Crock Pot Recipe (Slow Cooker “Roast” Chicken with Veggies)


A Few Extra Ways to Play with Healthy Tuna Salad

By now you’ve got ten distinct healthy tuna salad recipes and at least as many ways to serve them. However, once you get comfortable with the basic patterns, it becomes easy to create your own riffs that still sit inside a healthy tuna salad framework.

A few ideas to keep exploring:

  • Use Greek yogurt, sour cream or hung curd in place of most mayo for a lighter sour cream tuna salad, or mix yogurt and mayo for a balanced, creamy sauce that doesn’t overload calories.
  • Swap part of the tuna for extra beans, chickpeas or lentils when you want a high-fibre, higher-bulk salad that stretches a single can further.
  • Lean into herbs like dill in tuna salad, parsley in Italian versions, or oregano in Mediterranean tuna recipes to change the flavour without adding heaviness.
  • Play with serving formats: croissant tuna sandwiches for brunch, bagel tuna melts, tuna with crackers on a snack board, or even a tunacado sandwich layered with avocado, tuna and greens.
  • When you’re eating tuna more than once a week, keep an eye on variety and portion size, and lean more often on canned light tuna rather than big predatory species to respect mercury guidance.

If you like the feeling of having a set of “templates” rather than memorising dozens of separate recipes, you can think of these ten as your master pattern library.

Also Read: Cheesy Chicken Broccoli Rice – 4 Ways Recipe (One Pot, Casserole, Crockpot & Instant Pot)


Putting It All Together

Taken as a whole, these ten recipes give you a full toolkit for turning a can of tuna—or a bowl of chickpeas—into exactly the sort of meal you’re in the mood for.

On a busy weekday, you might stick with the light deli-style healthy tuna salad recipe and turn it into simple tuna sandwiches for everyone. Later in the week, when you crave something more vibrant, the Mediterranean tuna and white bean salad or Italian tuna with chickpeas will happily take over. When comfort is the priority, the healthy tuna pasta salad and the more nostalgic tuna mac salad version step up. On hotter days, crunchy apple and cucumber tuna salad or a big tuna Niçoise platter feel right, while avocado tuna salad is there for every rushed lunch when the only things you can manage to mash together are tuna, avocado and lemon.

Alongside these fish-based bowls, you’ve got the option of skipping tuna completely and relying on a vegan tuna salad built on chickpeas instead. As long as you pay attention to overall fish intake and choose lower-mercury options such as canned light tuna most of the time, salads like these can sit comfortably in a week that’s trying to balance health, flavour and real-life constraints. Between the recipes here and the extra reading on salad benefits, gut-friendly foods, seafood and pregnancy and high-protein meal planning, you’ve got more than enough to keep your healthy tuna salad rotation interesting for a very long time.

And if all else fails, you can always fall back on that three-ingredient tuna avocado salad, because sometimes the best healthy tuna salad is simply the one you can make in the two minutes between meetings.

Also Read: Crispy Homemade French Fries From Fresh Potatoes (Recipe Plus Variations)

FAQs

1. Is tuna salad healthy?

Often yes, tuna salad can be very healthy, especially when you treat tuna as lean protein and not just a vehicle for mayonnaise. When you build a healthy tuna salad with light tuna, Greek yogurt or avocado, plenty of crunchy vegetables and sensible portions, you get a high protein, nutrient-dense meal. On the other hand, a tuna salad recipe loaded with only mayo and no veg will lean more heavy than wholesome.


2. What is a good basic healthy tuna salad recipe?

To put it simply, a solid healthy tuna salad recipe starts with drained light tuna, Greek yogurt, a spoon or two of mayo, lemon juice, mustard, salt and pepper. After that, you fold in celery, onion and maybe a little relish or pickles for deli-style flavour. This kind of bowl covers “tuna salad recipe healthy” and works just as well in a tuna salad sandwich as it does over a green salad.


3. How do I make tuna salad without mayo?

If you want a tuna salad without mayo, Greek yogurt is the easiest swap. You mix tuna with plain Greek yogurt, lemon, mustard, herbs, salt and pepper, then add celery, cucumber and onion for texture. Alternatively, you can make a no mayo tuna salad with mashed avocado or a simple olive oil and lemon dressing if you prefer a lighter, Mediterranean feel.


4. What can I use instead of mayonnaise in tuna salad?

There are several tasty options. Greek yogurt gives you a creamy, tangy base for Greek yogurt tuna salad, while avocado creates a rich avocado tuna salad without any dairy. In addition, cottage cheese, hummus or a vinaigrette made from olive oil and lemon all work as alternative dressings, especially in Mediterranean tuna salad or tuna and bean salad recipes.


5. Which type of tuna is best for a healthy tuna salad?

Generally, light canned tuna in water is the most practical choice for a healthy tuna salad recipe because it’s lean and mild in flavour. Nevertheless, tuna packed in olive oil is lovely when you’re making Italian tuna salad or tuna nicoise salad, since the oil adds richness. For everyday healthy tuna, most people stick to light tuna and then adjust the dressing to suit their goals.


6. Can tuna salad help with weight loss?

In many cases, yes, especially when you build a healthy tuna salad that’s high in protein and full of vegetables. Because tuna and Greek yogurt or egg keep you satisfied, you’re less likely to overeat later. However, if your tuna salad recipe is mostly mayonnaise with very little tuna or veg, it can quickly become too calorie-dense for weight-loss plans.


7. How much protein is usually in a serving of tuna salad?

As a rough guide, a small can of tuna alone often provides around 25–30 grams of protein. Once you stir in Greek yogurt, cottage cheese or egg, a generous serving of high protein tuna salad can easily deliver 20–30 grams of protein. Consequently, recipes like tuna and egg salad, cottage cheese tuna salad or avocado tuna salad fit very neatly into high-protein meal plans.


8. How often can I eat tuna salad each week?

Typically, having tuna salad a couple of times per week is reasonable for most people, especially when you choose light tuna and vary your other protein sources. In practice, lots of people rotate healthy tuna salad lunches with chickpea salads, lentil dishes, chicken or vegan tuna salad to keep variety high. If you have pregnancy or medical concerns, it’s wise to keep portions moderate and mix in more plant-based recipes.


9. How long does homemade tuna salad keep in the fridge?

As a rule of thumb, homemade tuna salad keeps well for about 2–3 days in the fridge in a sealed container. After that, the texture of the dressing and vegetables usually starts to deteriorate. To keep things fresher, you can store lettuce, cucumber and tomato separately and add them to your tuna salad sandwich or salad bowl just before eating.


10. Can I freeze tuna salad?

Technically you can, but it isn’t ideal. Once thawed, the dressing often separates, and crunchy ingredients like celery, cucumber or apple lose their texture. Instead, a better approach is to freeze plain canned tuna portions and then mix a fresh healthy tuna salad recipe with yogurt, avocado or mayo on the day you plan to eat it.


11. How do I make a healthy tuna pasta salad?

For a healthier tuna pasta salad, you start with short pasta cooked al dente, then add tuna, peas or sweetcorn, celery and onion. After that, make a dressing that’s mostly Greek yogurt with just a little mayonnaise, plus lemon juice, mustard, salt, pepper and dill. This way, your healthy tuna pasta salad recipe stays creamy but lighter than a traditional tuna macaroni salad.


12. How can I lighten an old fashioned macaroni salad with tuna?

If you love old fashioned macaroni salad with tuna but want it less heavy, there are several simple tweaks. Firstly, swap part of the mayo for Greek yogurt to cut calories and add more protein. Secondly, stir in extra vegetables like celery, bell pepper and grated carrot so your tuna mac salad has more bulk from low-calorie ingredients. Finally, serve sensible portions and pair it with a green salad to balance the plate.


13. What can I add for extra crunch in tuna salad?

There are plenty of choices. Celery and cucumber are classic, while finely chopped bell peppers, red onion and radishes also add bite. Moreover, diced apple or pickles give you both crunch and contrast, so an apple and tuna salad or cucumber tuna salad feels fresh even when the dressing is creamy.


14. How do I make a Mediterranean tuna salad?

To create a Mediterranean tuna salad, mix tuna with white beans or chickpeas, cherry tomatoes, cucumber, olives and red onion. Then, dress it all with olive oil, lemon juice, garlic, oregano, salt and pepper. This kind of tuna and beans salad is naturally high in fibre and fits beautifully into “tuna recipes healthy” searches.


15. What goes into an Italian tuna salad?

An Italian tuna salad usually leans on tuna in olive oil, roasted red peppers, capers, red onion and fresh herbs like parsley. You then toss everything with a sharp red wine vinegar or lemon dressing and sometimes add chickpeas or cannellini beans. As a result, you get an Italian tuna salad that’s bold, savoury and perfect over greens or in a hearty sandwich.


16. How is tuna nicoise salad different from regular tuna salad?

Tuna nicoise salad is more of a composed meal than a simple spread. It usually includes lettuce, boiled potatoes, green beans, tomatoes, olives, hard-boiled eggs and tuna, all dressed with a garlicky vinaigrette. By contrast, a basic tuna salad recipe tends to be a mixed bowl used for tuna salad sandwiches or wraps, rather than a full platter.


17. Can I use fresh tuna instead of canned tuna in salad?

Yes, absolutely. You can sear fresh tuna steaks quickly so they stay pink inside, then slice or flake them into a salad with your usual dressing. Fresh tuna works especially well in tuna nicoise salad, Italian tuna salad or a gourmet healthy tuna salad recipe, though canned tuna remains more convenient for everyday use.


18. How do I make avocado tuna salad?

To put it briefly, avocado tuna salad starts with mashing a ripe avocado with lemon, salt and pepper, then folding in flaked tuna. Afterward, you can add celery, red onion, herbs and even chopped egg or apple for extra interest. Whether you keep it as a 3 ingredient tuna avocado salad or turn it into a loaded avocado and tuna salad recipe, it’s a great no-mayo option.


19. What can I add to make a high protein tuna salad?

Beyond tuna itself, there are several high-protein add-ins. Greek yogurt, cottage cheese, boiled eggs and chickpeas all boost protein levels, so bowls like tuna and egg salad, cottage cheese tuna salad or chickpea tuna salad are naturally more filling. Additionally, serving your healthy tuna salad alongside a protein-rich soup or bean salad turns the whole meal into a serious protein hit.


20. Is tuna salad suitable for breakfast?

Surprisingly, yes. A small portion of tuna and egg salad on toast, a tuna breakfast wrap with avocado, or a lighter healthy tuna salad on rye bread can make a savoury, protein-rich breakfast. Granted, it’s not everyone’s first thought, yet on busy days it’s a quick way to get protein in early without resorting to sugary options.


21. How do I build a healthier tuna salad sandwich?

Start with wholegrain or seeded bread for more fibre. Next, use a healthy tuna salad recipe based on Greek yogurt or avocado instead of just mayo, and layer in lettuce, tomato and cucumber. In addition, keeping an eye on portion sizes and pairing the tuna sandwich with a simple side salad rather than fries keeps the whole meal in the “tuna sandwich recipe healthy” category.


22. How can I stop tuna salad sandwiches from going soggy?

One simple approach is to create a barrier between the bread and the filling. You can line the bread with lettuce, cheese slices or even a thin layer of hummus before adding your tuna salad sandwich filling. Alternatively, pack the bread and tuna fish salad separately for lunch and assemble the sandwich when you’re ready to eat.


23. What are some quick tuna lunch ideas besides sandwiches?

There are plenty of easy options. For instance, you can spoon healthy tuna salad onto a big bowl of greens, tuck it into lettuce wraps, mix it with warm rice or quinoa, or stir it through pasta for a quick tuna noodle salad. Likewise, a simple tuna and bean salad with olive oil and lemon makes a fast high-protein lunch that travels well.


24. How can I make vegan tuna salad?

For a vegan tuna salad, mash cooked chickpeas until partly broken down, then mix them with vegan mayo or a tahini-lemon dressing. After that, add celery, onion, pickles, mustard and herbs so it resembles classic tuna salad in flavour and texture. This kind of tuna vegan recipe works brilliantly in sandwiches, wraps and salad bowls when you want a vegetarian tuna salad stand-in.


25. Is tuna salad good for meal prep?

Yes, tuna salad can be a useful meal prep option, particularly for lunches. You can prepare a batch of healthy tuna salad, divide it into containers and store it in the fridge for two or three days. Even so, it’s better to add delicate ingredients like lettuce, tomato or cucumber just before serving, so they stay crisp.


26. How do I make tuna salad more kid-friendly?

Generally, kids prefer simpler flavours and softer textures. So, keep the seasonings gentle, use a smoother dressing, and chop vegetables very finely. You might also try adding sweetcorn or a little grated cheese and serving the tuna fish salad sandwich on soft bread or as small tuna mac salad portions to make it more familiar.


27. How can I turn tuna salad into a full dinner?

One straightforward way is to build a large salad bowl or platter. Place your healthy tuna salad on top of greens, roasted vegetables, potatoes, beans or pasta to create a more substantial tuna casserole salad or tuna nicoise-style meal. Alternatively, bake a tuna salad casserole with wholegrain pasta and vegetables for a warm dinner version.


28. Which herbs and spices go best in tuna salad?

Dill, parsley, chives and coriander are classic herbs for a healthy tuna salad recipe. Meanwhile, dried oregano and thyme work well in Mediterranean tuna salad, and paprika, black pepper or a pinch of chilli flakes add depth. Ultimately, a squeeze of lemon and a little mustard tie everything together without overpowering the tuna.


29. How can I cut calories in tuna pasta salad or tuna mac?

To start, use more Greek yogurt and less mayonnaise in the dressing. Then, add plenty of vegetables—peas, celery, peppers, cucumber—so your healthy tuna macaroni salad feels generous without relying on huge amounts of pasta. Finally, serving smaller portions alongside a green salad lets you enjoy tuna mac salad without overdoing calories.


30. What are some creative healthy tuna salad ideas beyond the basics?

Besides the usual deli-style bowl, you can experiment with tuna and avocado salad wraps, Mediterranean tuna and white bean salad jars, Italian tuna and chickpea salad over couscous, or crunchy apple and tuna salad pitas. You could also explore vegan tuna salad made from chickpeas on some days and high protein tuna salad with egg or cottage cheese on others. In the end, rotating these ideas keeps “healthy tuna salad” interesting instead of repetitive.