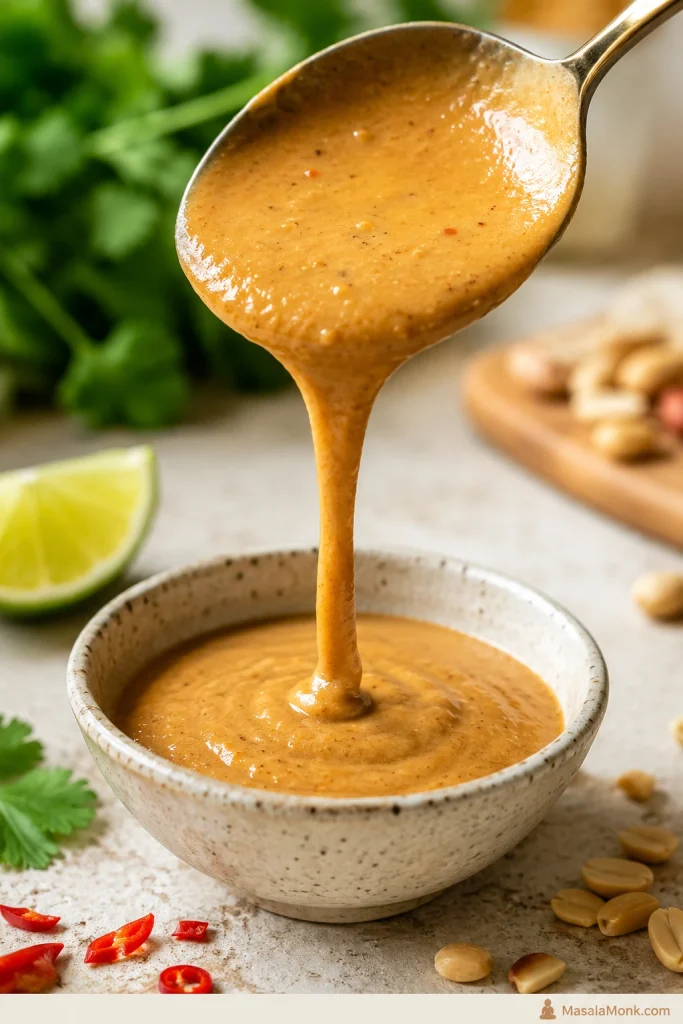
This is the peanut sauce you make when dinner is almost there but needs one creamy, salty-sweet thing to pull it together. It is rich from peanut butter, bright with lime and rice vinegar, warm with ginger and garlic, and easy to adjust depending on what is on the plate.
The promise is simple: one 5-minute peanut sauce, adjusted by texture. Make it easy to dip with spring rolls, warmer and richer for satay-style chicken or tofu skewers, looser for noodles, and brighter for salads or slaw.
Once you understand how the sauce should behave, the recipe becomes more than a dip. It becomes the jar that helps fresh rolls, plain noodles, grilled chicken, crispy tofu, rice bowls, vegetables, and leftovers feel like dinner. This is the kind of sauce that makes you feel like you planned dinner, even when you mostly assembled it.
Quick Answer: How to Make Peanut Sauce
To make peanut sauce, whisk the soy sauce or tamari, rice vinegar, lime juice, sweetener, chili sauce, ginger, garlic, and sesame oil first, then whisk in peanut butter and water until the sauce comes together. Start with less liquid, then add more until the sauce matches the food you are serving.
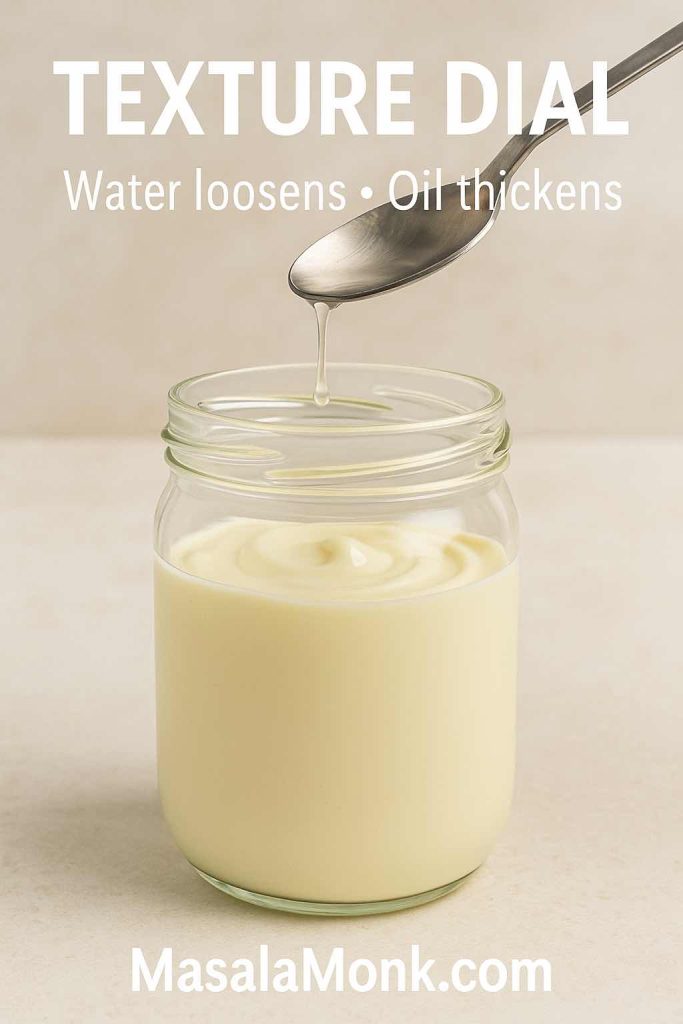
Rule one: fix texture before flavor. A thick peanut sauce can taste saltier, sweeter, and heavier than it really is, so get it close to the right consistency first. Then adjust with lime, soy sauce, sweetener, or chili.
Once the base comes together, the question is not only “is it smooth?” but “will it behave on the food?” If you are unsure, use the texture guide before adding all the liquid.
Jump to
- 5-Minute Peanut Sauce Recipe
- Texture Guide
- Spring Roll Peanut Sauce
- Satay-Style Peanut Sauce
- Peanut Sauce for Noodles
- Chicken, Tofu and Bowls
- Peanut Dressing
- How to Fix Peanut Sauce
- Storage and Make-Ahead
- FAQ
5-Minute Peanut Sauce Recipe
Recipe name: Peanut Sauce Recipe
Prep time: 5 minutes
Cook time: 0 minutes
Total time: 5 minutes
Yield: About 1 to 1¼ cups / 240 to 300 ml, depending on how much water you add
Servings: 8 to 10
Serving size: About 2 tablespoons / 30 ml
Best as a dip: spring rolls, satay, lettuce wraps, dumplings, rice paper rolls
Best as a sauce: noodles, chicken, tofu, salads, rice bowls, roasted vegetables, slaw
Equipment: bowl and whisk or fork. Optional: jar for storage, grater for fresh ginger and garlic, small saucepan for the satay-style variation.
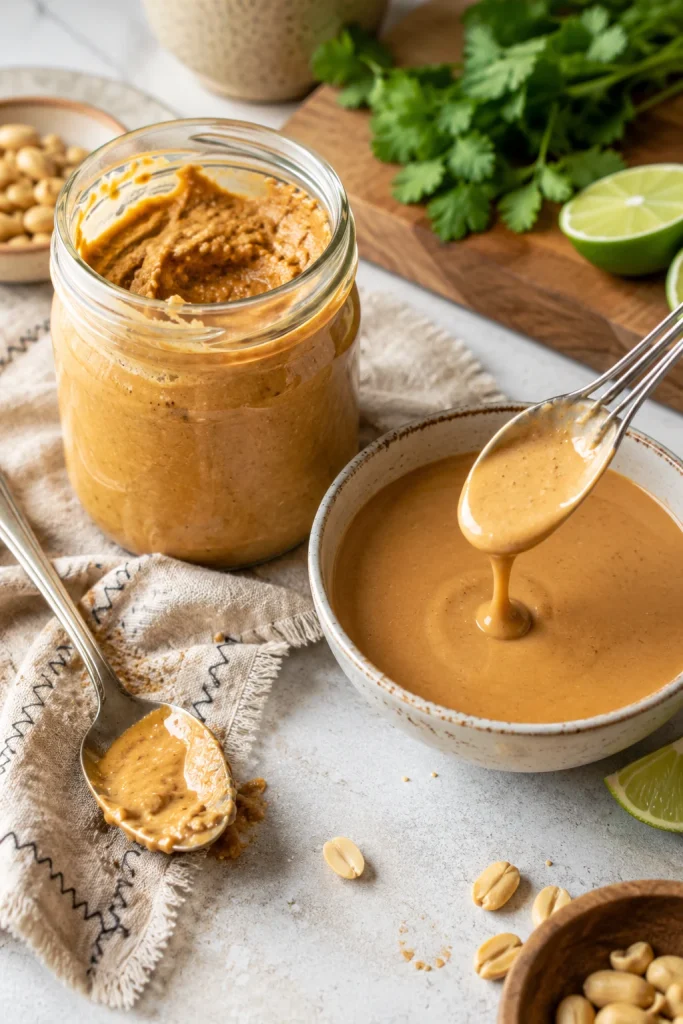
Ingredients
Line up the peanut sauce ingredients before you start so the balance is clear: nutty body, salty depth, tang, heat and just enough sweetness.
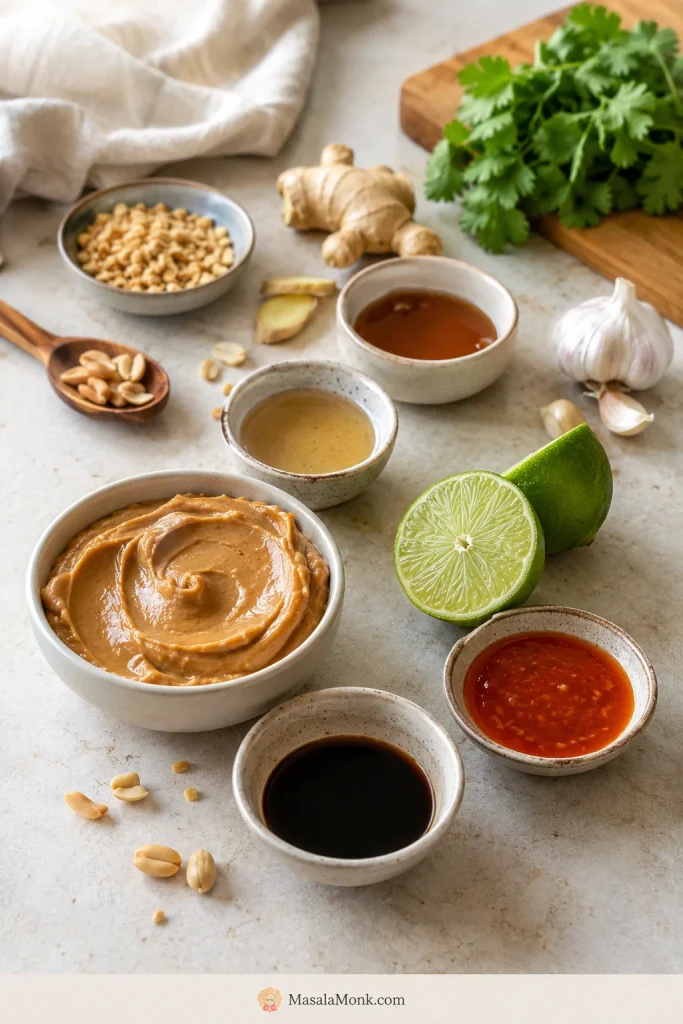
| Ingredient | Amount |
|---|---|
| Creamy natural peanut butter | ½ cup / about 128 g |
| Low-sodium soy sauce or tamari | 2 tablespoons / 30 ml |
| Rice vinegar | 1 tablespoon / 15 ml |
| Fresh lime juice | 1 tablespoon / 15 ml |
| Maple syrup or honey | 1 to 2 tablespoons / 15 to 30 ml |
| Brown sugar, if using instead | 1 to 2 tablespoons / about 12 to 25 g |
| Sriracha or chili garlic sauce | 1 to 2 teaspoons / 5 to 10 ml |
| Fresh grated ginger | 1 teaspoon / about 2 g |
| Garlic | 1 small clove, finely grated, about 3 g |
| Toasted sesame oil, optional | 1 teaspoon / 5 ml |
| Warm water | 3 to 6 tablespoons / 45 to 90 ml, plus more as needed |
Instructions
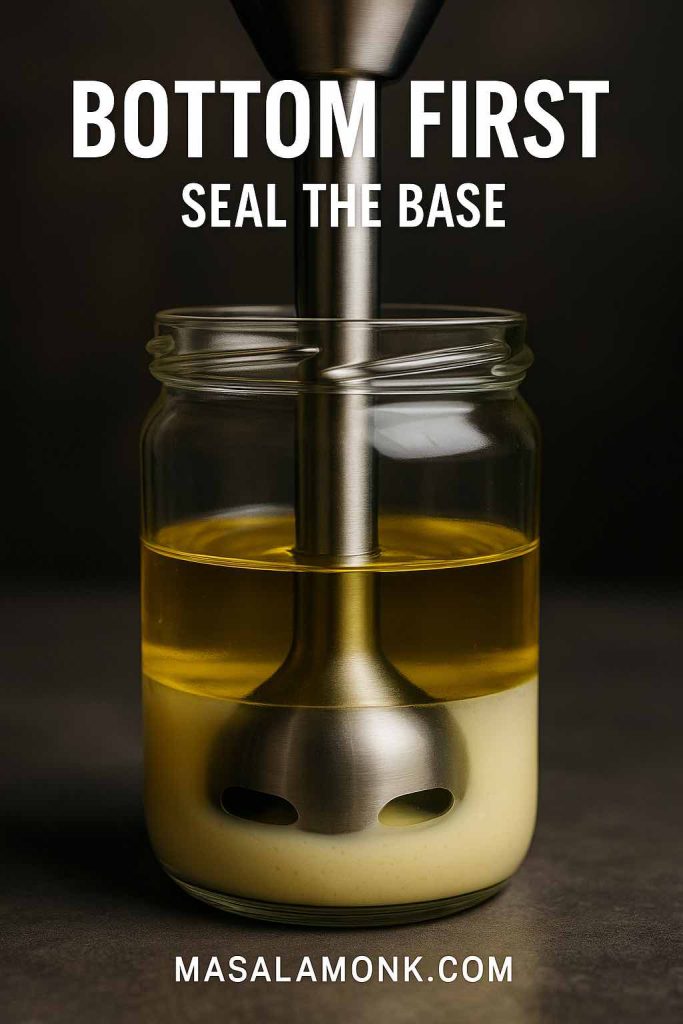
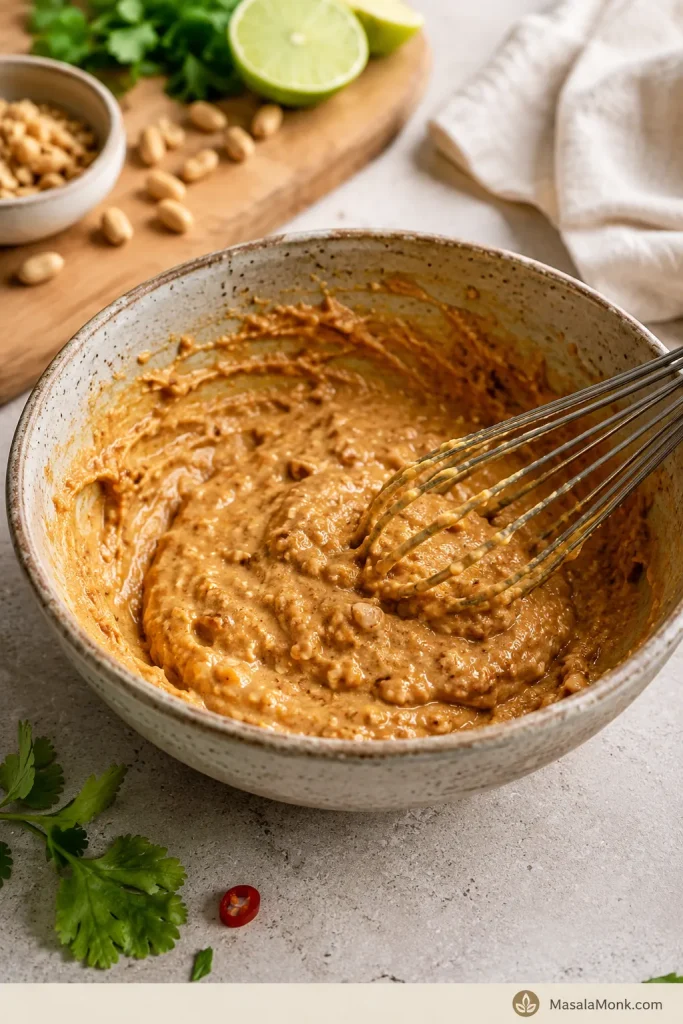
Start the peanut sauce by mixing the salty, tangy and spicy ingredients before the peanut butter goes in.

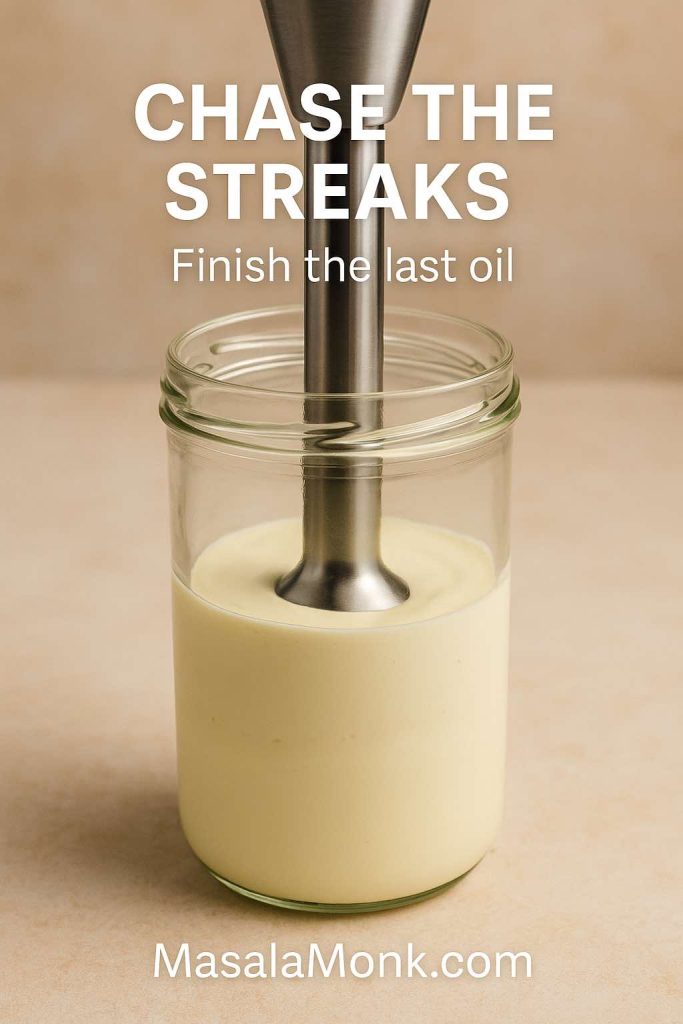
- Add the soy sauce or tamari, rice vinegar, lime juice, sweetener, chili sauce, ginger, garlic, and sesame oil to a medium bowl. Whisk briefly so the salty, tangy, spicy ingredients come together first.
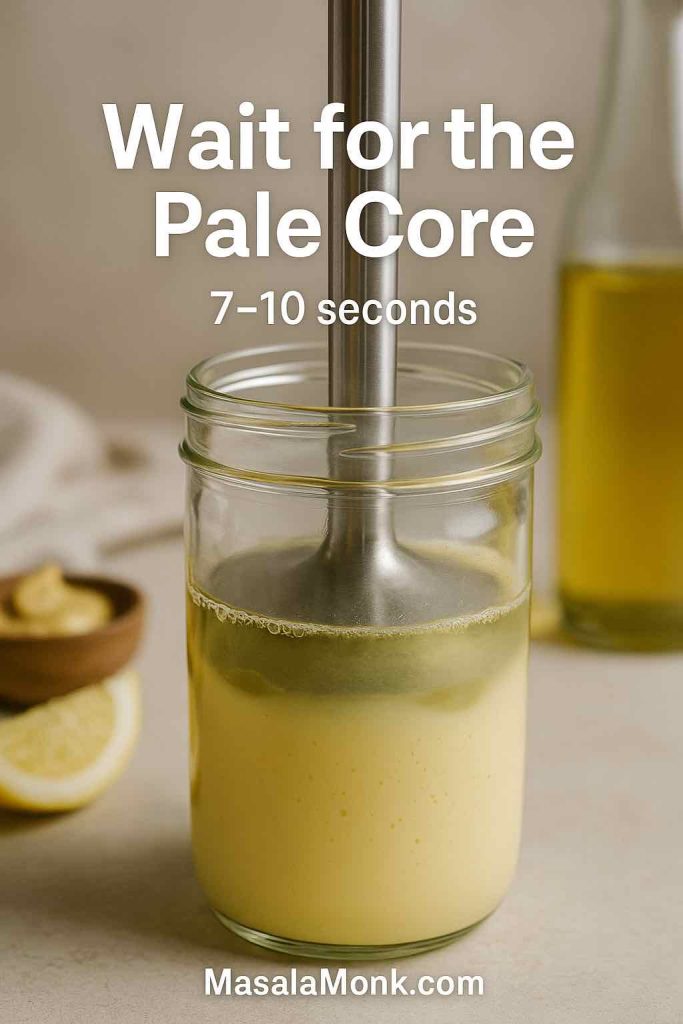
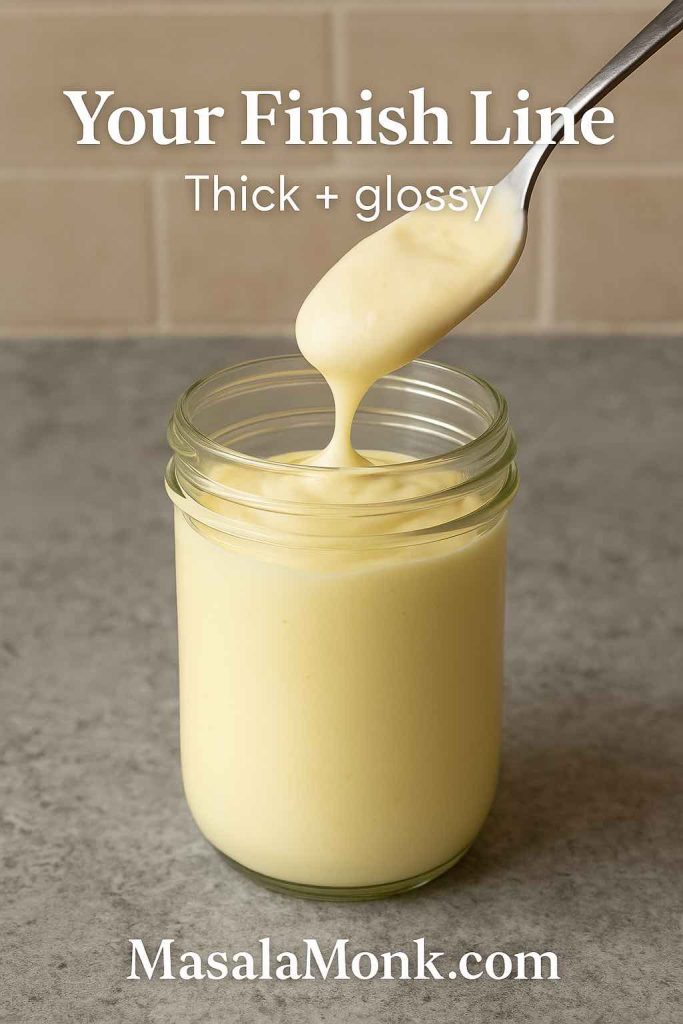
- Add the peanut butter and whisk until the mixture looks thick, dark, and mostly combined. It may look stubborn before it turns silky.
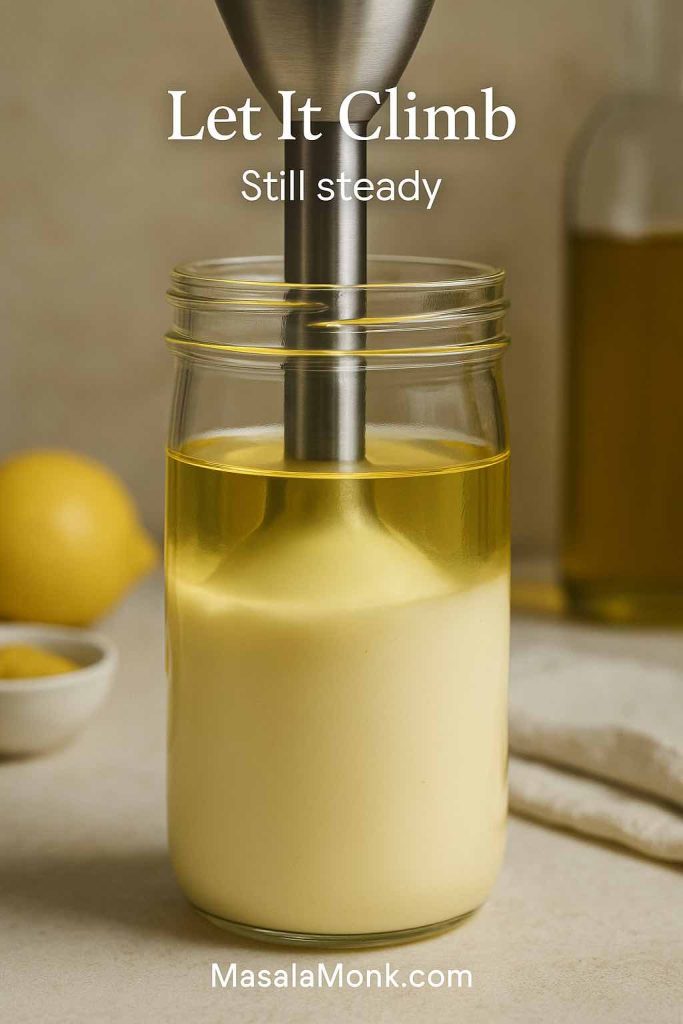
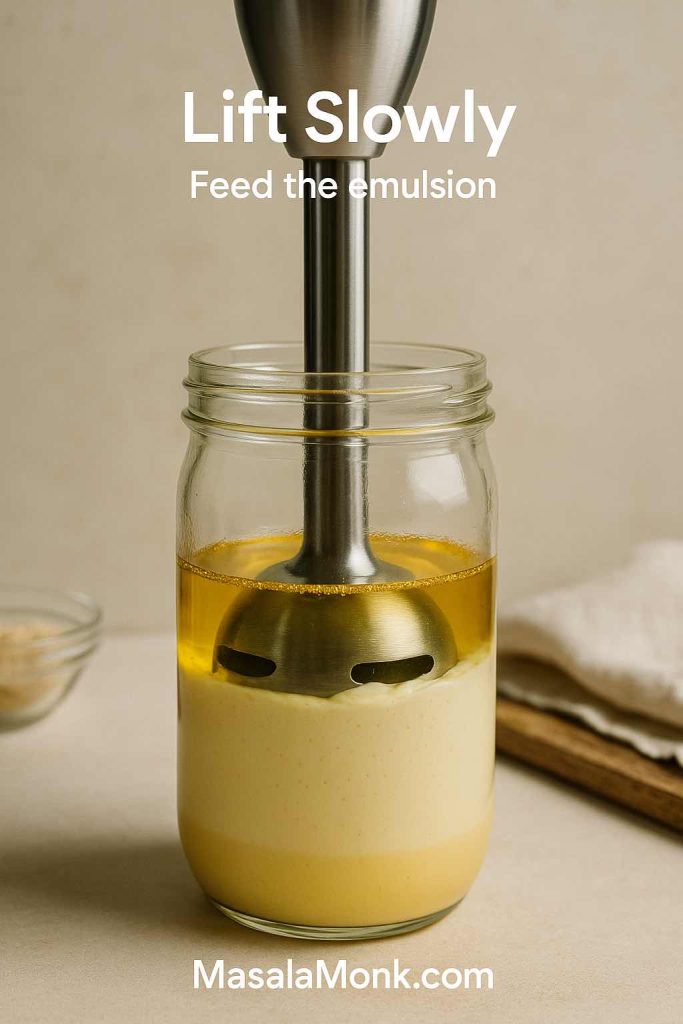
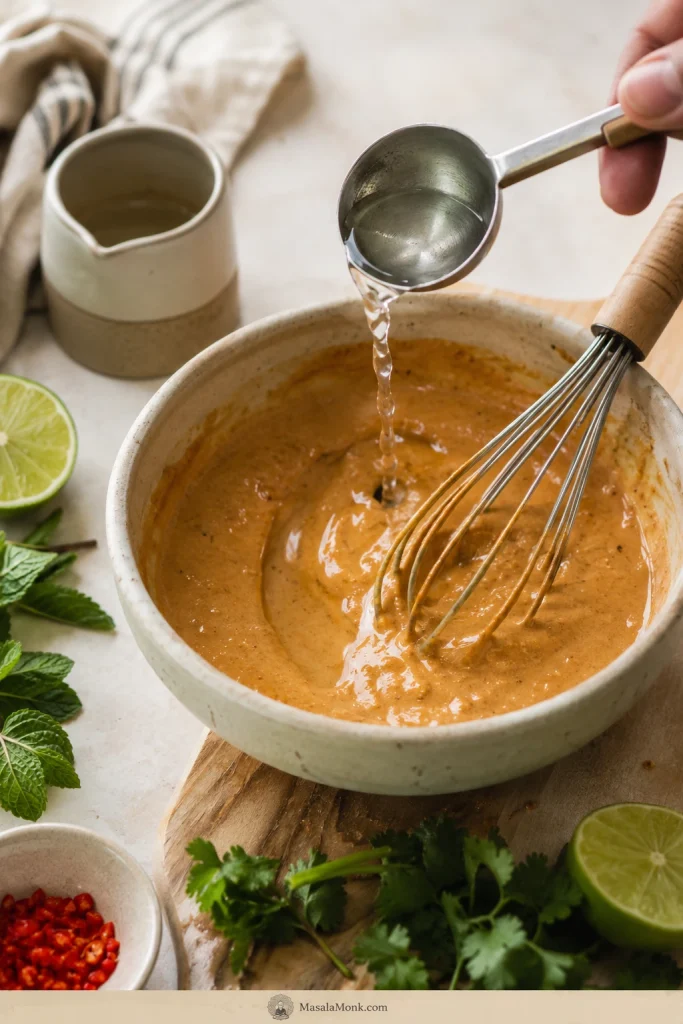
- Add warm water or another thinning liquid 1 tablespoon at a time, whisking well after each addition.
- Stop when the texture matches the food you are serving. Satay can stay thicker, spring roll dip should glide, and noodles or salad dressing need more flow.
- Taste and adjust. More lime or vinegar helps if it tastes heavy, soy sauce or tamari helps if it tastes flat, sweetener softens sharpness, and chili adds heat.
- Serve right away, or store in an airtight jar in the fridge and re-whisk with a splash of water before using.
Recipe Notes
- The 3 to 6 tablespoons water gives you a standard dip or drizzle. Noodles and salad dressing usually need more.
- Warm liquid helps peanut butter loosen faster than cold liquid.
- Natural peanut butter often needs more patience because it can start thicker, stiffer, or more separated than regular creamy peanut butter.
- Regular sweetened peanut butter works, but start with less sweetener. The sauce should taste like peanut butter went to dinner, not dessert.
- The sauce thickens as it sits, especially after refrigeration. If it has already thickened, jump to storage and make-ahead before changing the flavor.
- For chicken, use this as a dip, drizzle, or finishing sauce. Keep any sauce that touches raw chicken separate from the serving sauce, and cook chicken to 165°F / 74°C.
- Since this is peanut-based, check for peanut allergies before serving it to guests and read labels on bottled sauces if allergies are a concern.
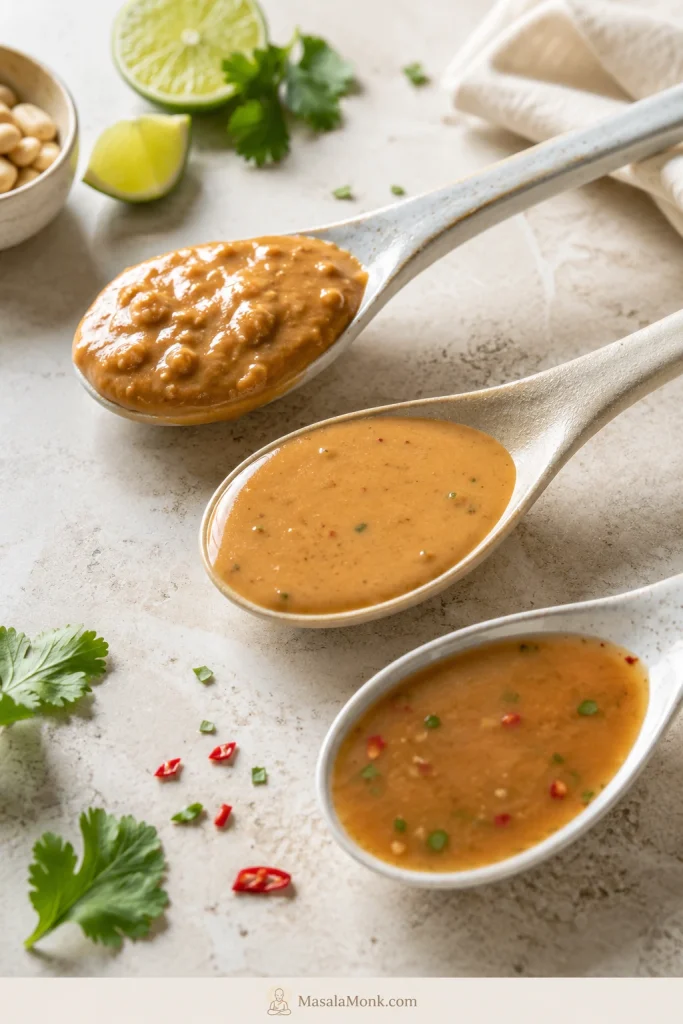
Texture Guide for Spring Rolls, Satay, Noodles and More
If your sauce looks clumpy, tastes too heavy, or turns noodles sticky, you probably have not ruined anything. Peanut sauce is usually a texture problem before it is a flavor problem.
Clumps usually mean the sauce needs liquid and whisking, not a full restart.
The mistake most people make is stopping when the sauce looks smooth. Peanut sauce is not done until it behaves right on the food. A spring roll dip should glide, satay sauce should cling, noodle sauce should fall from the spoon in a loose stream, and dressing should pour easily.
How to Read the Sauce Texture
Thin the sauce gradually so you can stop at dip, drizzle, noodle sauce or dressing instead of overshooting the texture.
| Use | Sauce Should Look Like | Add This Much Liquid | Serve It |
|---|---|---|---|
| Spring rolls | Soft sheen, easy to dip, clings lightly to rice paper | About 4 to 6 tablespoons water total | Room temperature or slightly chilled |
| Satay | Thicker, warm, spoonable, not mounded like paste | About 2 to 4 tablespoons water, or use the coconut milk variation | Warm |
| Noodles | Loose stream from the spoon, easy to toss | About 6 to 8 tablespoons hot water or noodle water | Warm or opened up with hot water |
| Salad dressing | Pourable, bright, thinner than dipping sauce | Extra water plus more lime juice or rice vinegar | Chilled or room temperature |
| Chicken | Medium-thick dip or drizzle | Keep it savory and not too sweet | Room temperature or warm |
| Tofu | Thicker for coating, thinner for bowls | Add extra chili and lime for punch | Room temperature or warm |
| Rice bowls | Slow drizzle, not watery | Thin slightly and re-whisk before serving | Room temperature |
Use this visual guide when you are deciding whether the sauce should cling, glide, coat or pour.
Before you taste, fix the texture: peanut butter can look clumpy or slightly broken before it turns silky. Keep whisking, add liquid slowly, and taste only after the sauce is close to the consistency you want. A sauce that is too thick will taste saltier, sweeter, and heavier than it really is.
When in doubt, keep it a little thicker at first. You can always add a splash more liquid, but it takes extra peanut butter to fix a sauce that has gone too thin.
Why This Peanut Sauce Works
The finished sauce should not taste like sweet peanut butter. It should taste nutty first, then salty, tangy, lightly sweet, and gently spicy at the end.
Peanut butter gives body and nutty richness. Soy sauce or tamari gives dinner-level savoriness. Lime juice and rice vinegar cut the heaviness. Sweetener rounds the sharp edges. Ginger, garlic, and chili keep the sauce lively instead of flat.
Water is not filler here. It is the texture tool. A little gives the sauce enough body for dipping; more turns it into a noodle sauce or dressing. That is why the same bowl can taste right with cool rolls, hot noodles, grilled chicken, tofu, or a pile of vegetables. If the sauce already tastes off, check the troubleshooting table before adding more soy sauce, sugar or lime.
If the sauce tastes like peanut butter first and dinner second, it usually needs salt, acid, or chili before it needs more sweetness.
Ingredients and Smart Swaps
Peanut Butter
Creamy natural peanut butter gives the cleanest peanut flavor. If your jar has separated, stir it well before measuring. Homemade peanut butter also works well if you want more control over roast, salt, and texture.
Regular creamy peanut butter works too, but it is usually sweeter, so start with less sweetener. Crunchy peanut butter is fine if you like texture, especially for satay-style sauce or rice bowls.
Soy Sauce or Tamari
Low-sodium soy sauce keeps the sauce savory without pushing it too salty. Tamari is the best swap for gluten-free peanut sauce, as long as the label says gluten-free. Coconut aminos can work for a soy-free version, but it is sweeter and less salty, so adjust with salt and lime at the end.
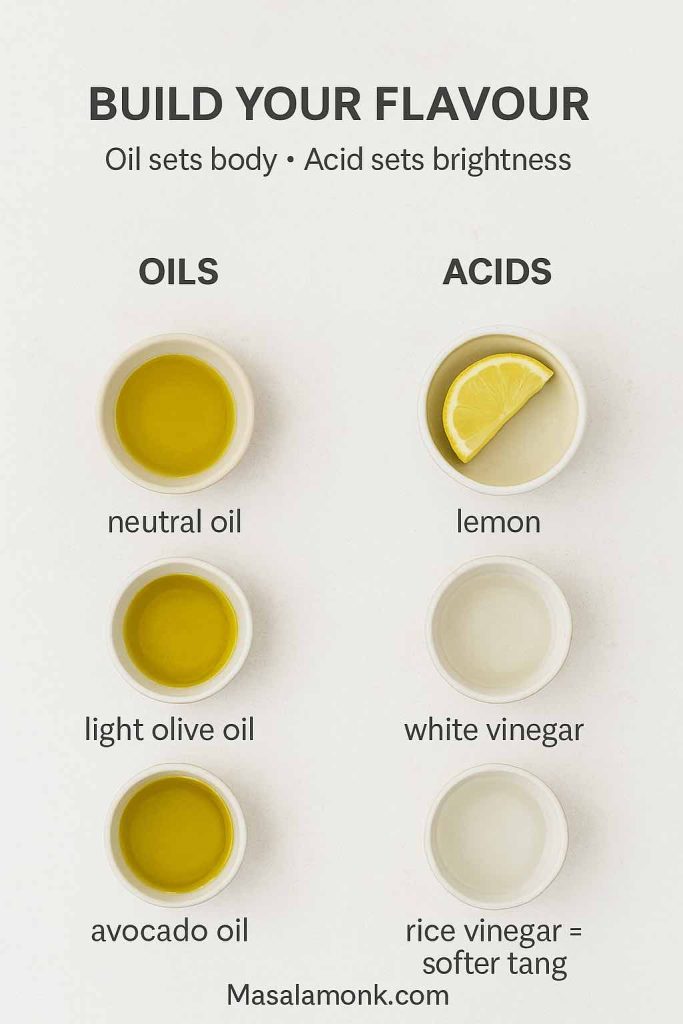
Rice Vinegar and Lime Juice
Rice vinegar gives a clean tang; lime makes the sauce taste fresher. Together, they keep peanut butter from feeling heavy. Apple cider vinegar or white vinegar can work in a pinch, especially for a satay-style version.
Sweetener
Maple syrup keeps the sauce vegan and blends easily. Honey gives rounder sweetness. Brown sugar adds deeper flavor, especially in satay-style peanut sauce. When your peanut butter is already sweet, let the lime and soy sauce lead before adding more sugar.
Chili Sauce
Sriracha, chili garlic sauce, sambal, or chili crisp can all work. One teaspoon keeps the heat mild; two or more pushes it into spicy peanut sauce territory. For the satay-style variation, red curry paste adds better depth than sriracha alone.
Garlic and Ginger
Fresh grated garlic and ginger make the sauce taste alive. Grating them finely helps them disappear into the sauce instead of leaving sharp pieces. If raw garlic is too strong for you, use half a clove or a small pinch of garlic powder.
Sesame Oil
Toasted sesame oil is optional, but a small amount gives the sauce a deeper, nuttier flavor. Use it lightly because peanut butter is already rich.
Coconut Milk
Coconut milk is not required for the 5-minute sauce. Water keeps it quick, bright, and flexible.
Coconut milk is what makes the satay-style version feel rounder and warmer. Use it for skewers, grilled chicken, tofu satay, or roasted vegetables. Coconut cream makes the sauce thicker and more luxurious, while regular coconut milk keeps it smoother and more pourable. Making skewers? Jump to the satay-style peanut sauce variation. If you like that coconut-curry direction, the same balance shows up in Chicken Panang Curry, where peanut stays in the background instead of taking over like satay sauce.
Hoisin Sauce
Hoisin is not part of the main sauce, but it is very useful for a Vietnamese-style spring roll dip. It adds sweetness, body, and a deeper savory flavor that works beautifully with rice paper rolls, shrimp rolls, and fresh vegetable rolls.
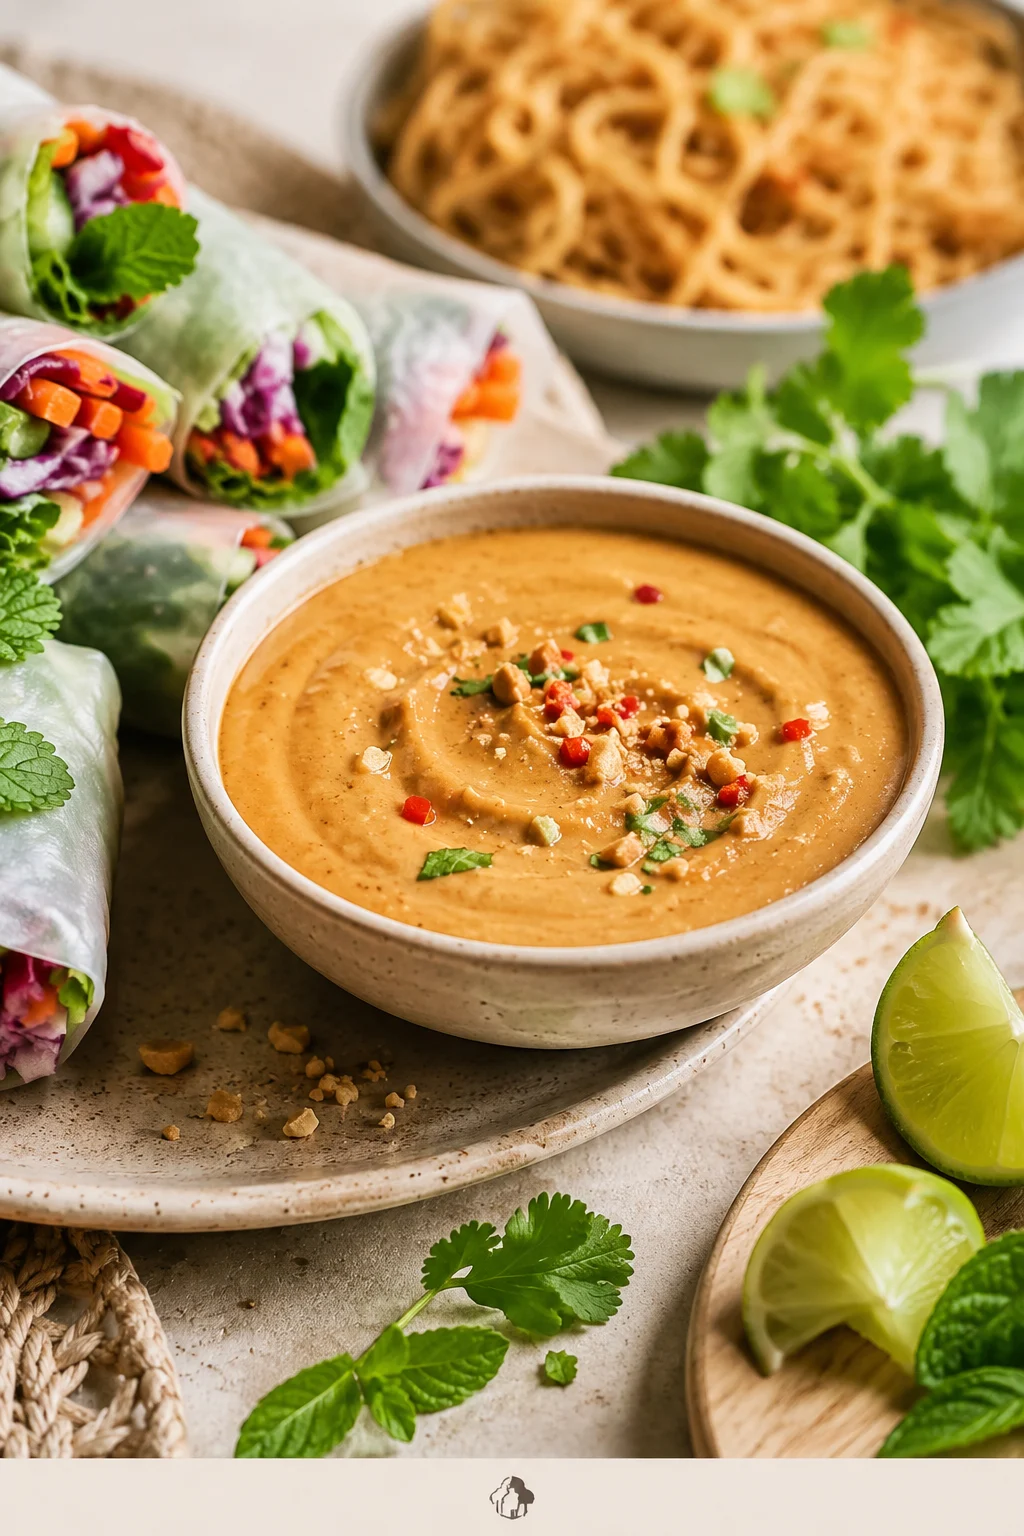
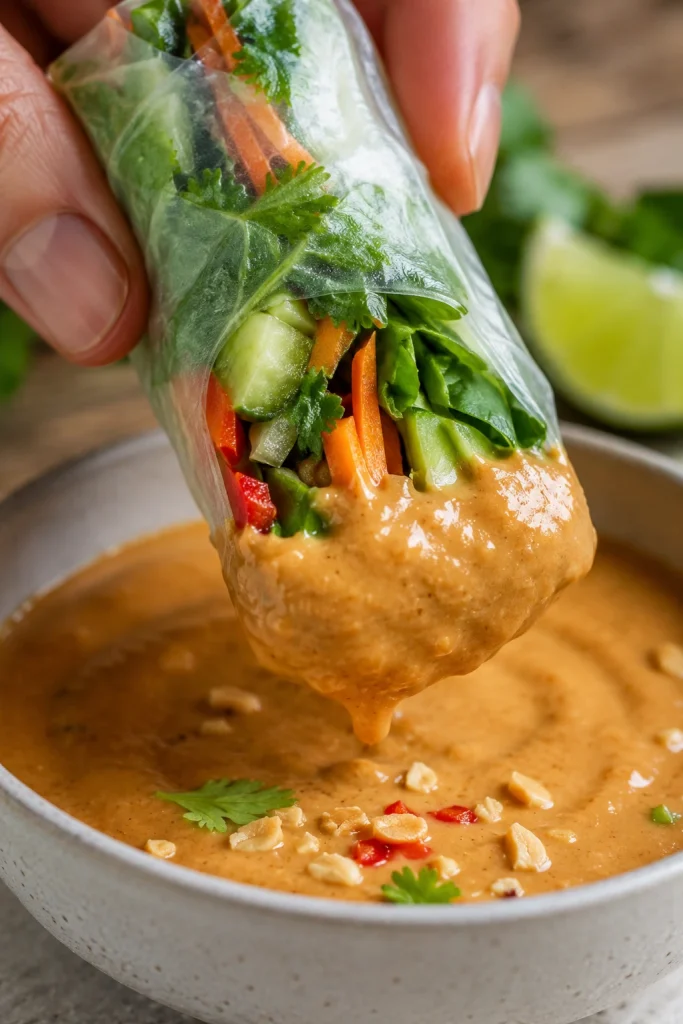
Peanut Sauce for Spring Rolls
For spring rolls, fresh rolls, summer rolls, and rice paper rolls, the dip should be smooth enough for dipping but thick enough to cling. When it sits on the roll like paste, it needs more liquid. When it runs off immediately, it needs more peanut butter.
Start with the sauce as written and add liquid until it becomes easy to dip. A little extra lime juice or rice vinegar also helps because fresh rolls are usually full of cool vegetables, herbs, shrimp, tofu, or noodles. A good spring roll dip should catch on the rice paper, slide over the herbs and vegetables, and leave a little peanut richness behind.
Use fresh spring rolls as a texture check: the dip should feel light around herbs and vegetables while still leaving a creamy coat.

How to Adjust the Sauce for Spring Rolls
- Vegetable-heavy rolls taste better with a little extra lime juice or rice vinegar.
- Shrimp rolls can handle a slightly sweeter dip, which is where the hoisin variation works especially well.
- Tofu rolls benefit from chili crisp, extra ginger, or crushed peanuts for more punch.
- A dip that drags across rice paper needs a small splash of water until it glides.
- A dip that slides off the roll needs a small spoon of peanut butter to bring back body.
Before moving to the hoisin variation, check the basic spring roll texture: the dip should coat rice paper without dragging.
Vietnamese-Style Hoisin Peanut Sauce for Rice Paper Rolls
Use this version when spring rolls are the main event. Hoisin gives the dip the darker, sweeter body people often expect with rice paper rolls, while peanut butter keeps it creamy and rich.
The hoisin version should look darker and glossier than the everyday peanut sauce, especially for rice paper rolls.
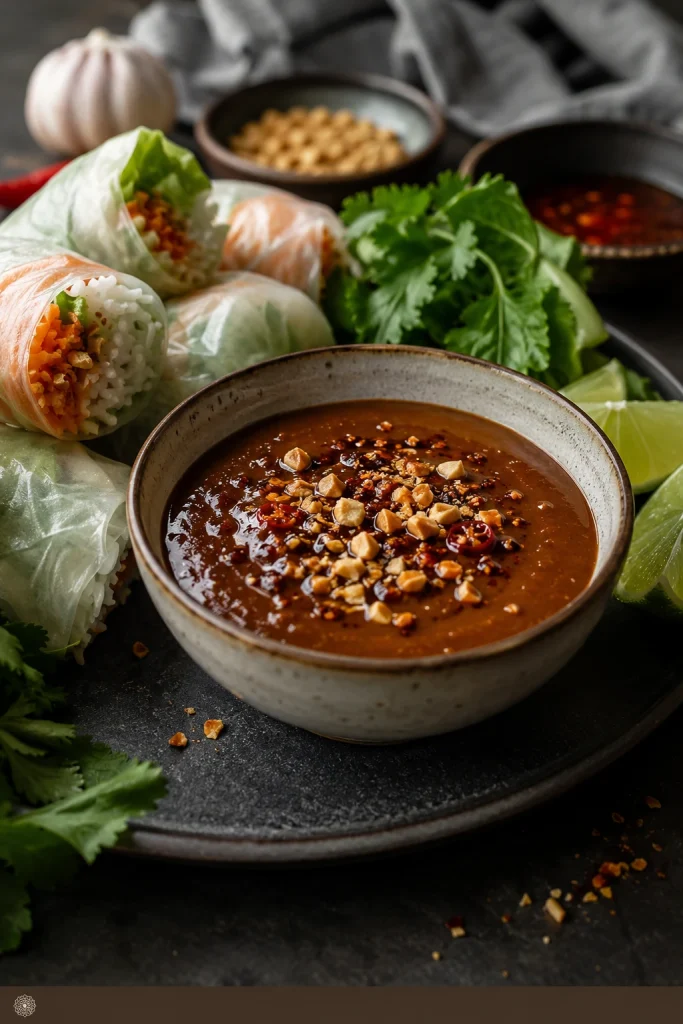
Use this quick formula:
- ½ cup peanut sauce
- 1 tablespoon hoisin for lighter sweetness, or 2 tablespoons for a deeper dip
- 1 to 3 tablespoons water, milk, or coconut milk, as needed
- ½ teaspoon chili garlic sauce, optional
- Crushed peanuts, optional, for finishing
Whisk until the dip has a soft sheen. It should be looser than satay sauce but thicker than salad dressing. Too sweet? Add lime juice or rice vinegar. Too thick? Add liquid a spoonful at a time.
This is the variation to reach for when the meal is built around fresh rolls, shrimp rolls, or rice paper rolls and you want a dip that feels complete on its own.
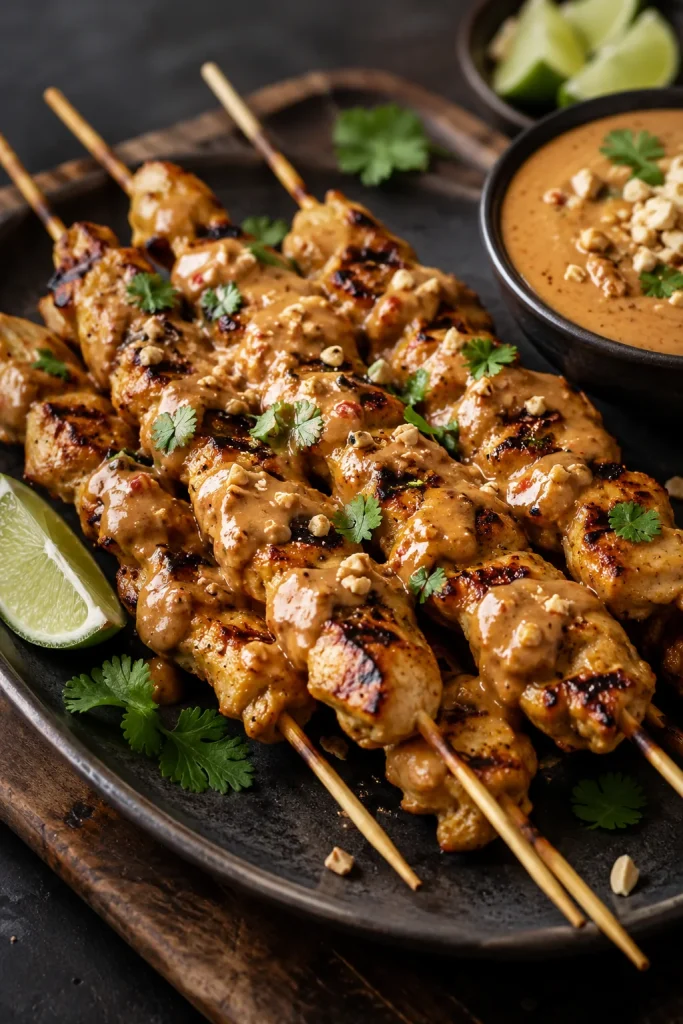
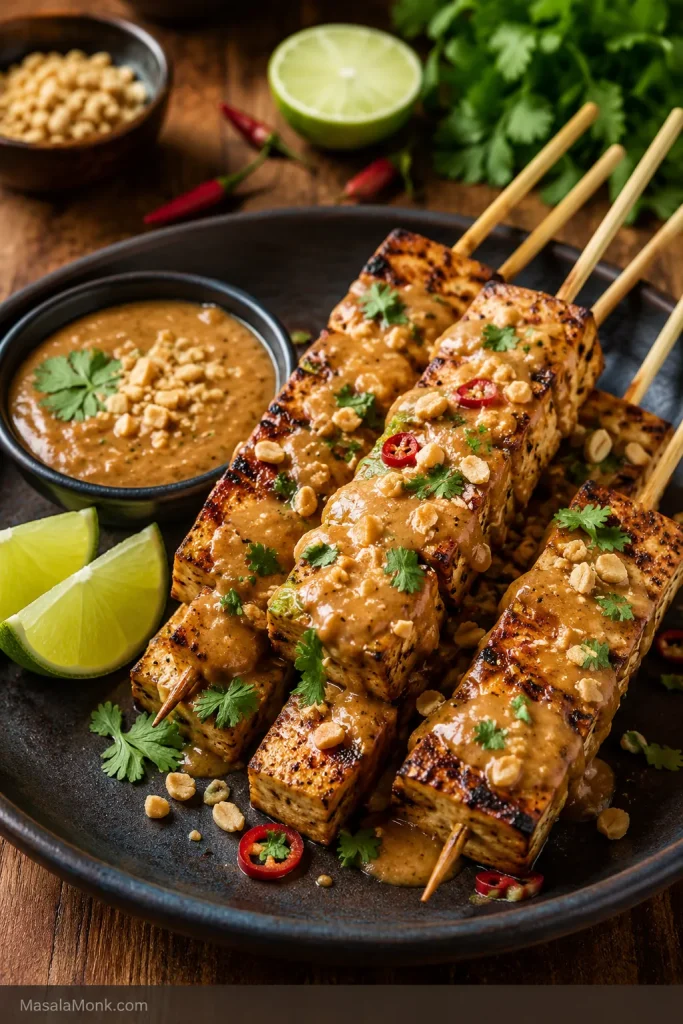
Satay-Style Peanut Sauce
Satay sauce is usually richer, warmer, and thicker than a quick peanut dipping sauce. Depending on the region and recipe, more traditional versions may use roasted peanuts, coconut milk, curry paste, tamarind, palm sugar, fish sauce, or other aromatics.
Think of this as the weeknight bridge between a quick peanut dip and a fuller satay sauce. Start with the 5-minute base, then add coconut milk and curry paste for depth. Warmth changes everything here: the sauce softens, the curry paste blooms, and the peanut flavor feels rounder before it ever reaches the skewers.
Use this as a satay-style shortcut, not as a claim that all satay sauces are the same. It works well with chicken satay, tofu satay, grilled paneer, roasted vegetables, and rice bowls because it clings well and tastes more complete with grilled food.
Satay-Style Peanut Sauce Variation
Coconut milk and curry paste turn the quick peanut sauce into a warmer satay-style sauce for skewers and grilled food.

- ½ cup peanut sauce
- ¼ cup coconut milk or coconut cream
- 1 to 2 teaspoons red curry paste
- 1 teaspoon brown sugar, optional
- ½ teaspoon fish sauce, optional
- 1 to 2 tablespoons crushed roasted peanuts, optional
Warm everything in a small saucepan over medium-low heat for 3 to 5 minutes, stirring often. Do not hard-boil the sauce. The goal is to warm it, not reduce it into paste. It should be thick, warm, and spoonable, but still loose enough to drizzle over skewers.
If it tightens too much, add water or coconut milk, a spoonful at a time. A squeeze of lime or splash of rice vinegar helps when the sauce tastes too rich.
For chicken satay, the sauce should be warm, spoonable and thick enough to cling to grilled edges.
Because tofu starts mild, give the satay-style sauce more contrast with lime, chili and crunch.
Is Peanut Sauce the Same as Satay Sauce?
Not always. Peanut sauce is a broad term for sauces made with peanuts or peanut butter. Satay sauce usually refers to the peanut-based sauce served with satay skewers, and it is often warmer, richer, and more deeply seasoned.
For everyday cooking, this sauce can move in a satay-style direction with coconut milk, curry paste, and gentle heat. A very specific Thai, Indonesian, Malaysian, or Singaporean satay sauce may need a more traditional recipe built around that cuisine.
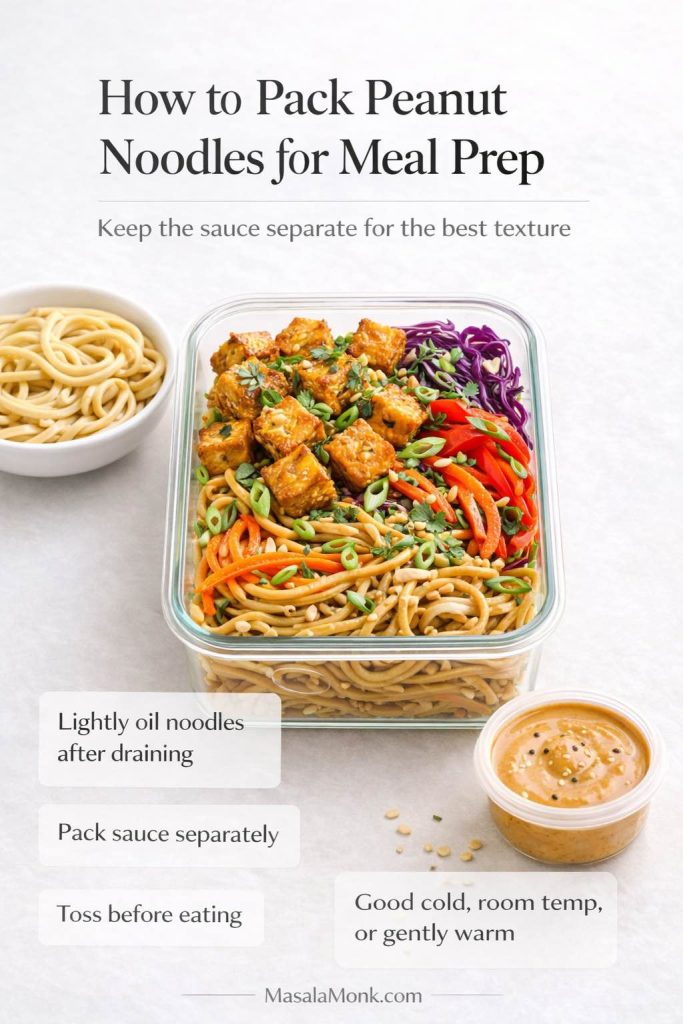
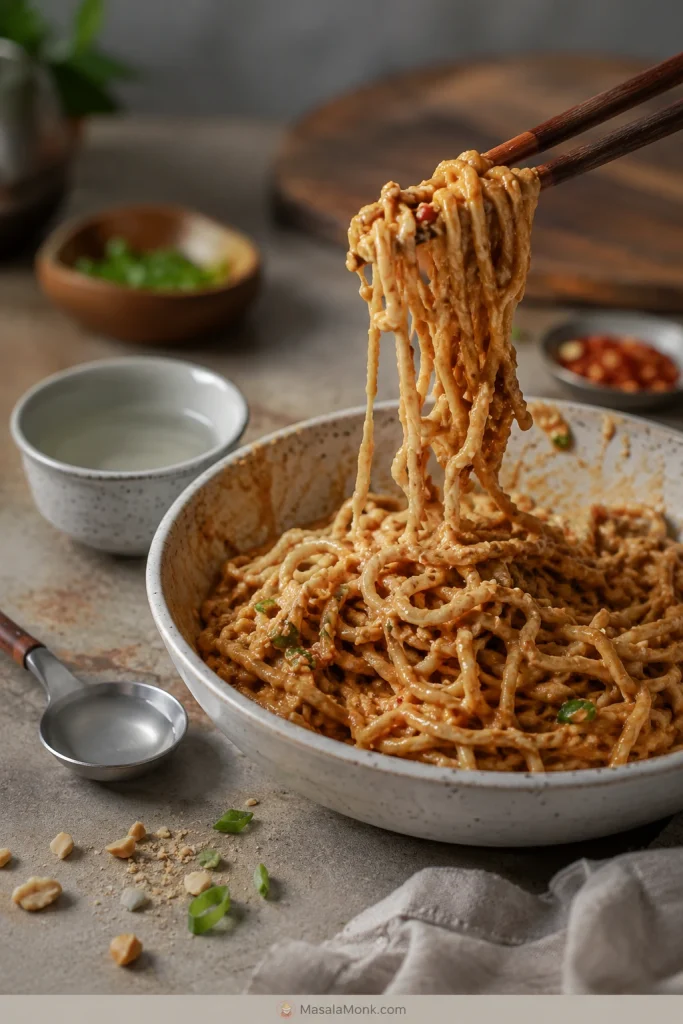
Peanut Sauce for Noodles
This is where the sauce becomes dinner, not just a dip. Noodles need a looser peanut sauce than spring rolls or satay. Peanut butter thickens quickly when it hits warm noodles, and a mixture that looks pourable in the bowl can turn sticky once tossed.
For 2 servings, start with about ½ cup peanut sauce and add 2 to 4 tablespoons hot water or noodle cooking water before tossing. For 8 ounces / 225 g noodles, use ½ to ¾ cup sauce, depending on how saucy you like your noodles.
Before sauce meets noodles, it should already move in a loose stream from the spoon.
The idea is similar to glossy pasta sauces: loosen first, then toss. The same idea shows up in pesto pasta, where pasta water keeps the sauce glossy instead of oily or dry.
Pour the peanut sauce over noodles only after it has enough movement to coat the strands evenly.
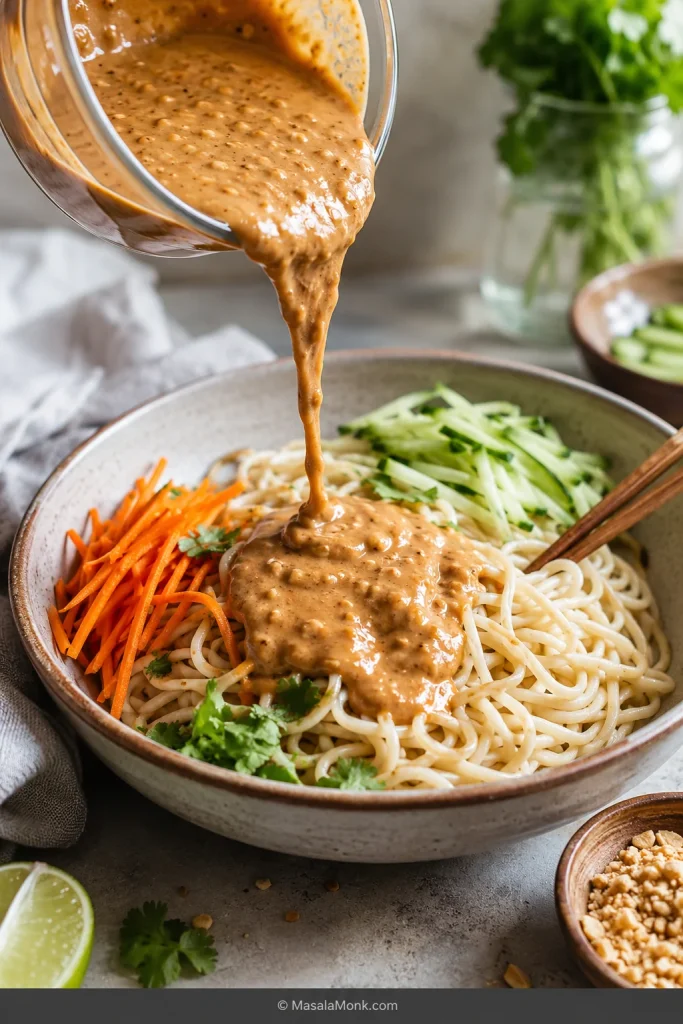
Sometimes the bowl looks perfect, then tightens while you are setting the table. Do not panic. Add hot water or noodle water, a spoonful at a time, and toss again until the sauce relaxes around the noodles instead of grabbing them. If it keeps clumping, jump to how to fix peanut sauce.
Tips for Peanut Noodles
- Hot water or noodle water helps the sauce loosen cleanly; cold water can make it tighten.
- Make the sauce looser before adding it to the noodles.
- Toss gradually instead of dumping everything in at once.
- Lime juice or rice vinegar helps when the noodles taste heavy.
- Soy sauce or tamari helps when the noodles taste flat.
- Cold peanut noodles need a looser sauce because it thickens as it chills.
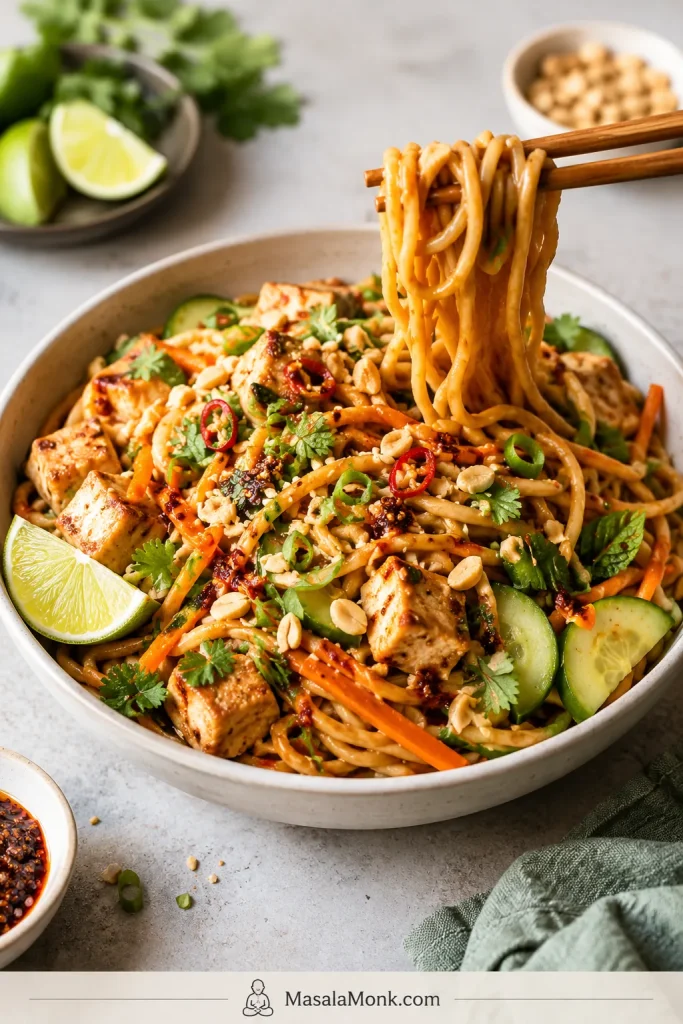
Toss it with rice noodles, spaghetti, ramen, soba, udon, or egg noodles. Add cucumber, carrots, cabbage, scallions, cilantro, mint, edamame, tofu, chicken, shrimp, or a fried egg to turn it into a full meal.
Once the sauce is coating properly, fresh toppings finish the noodle bowl and keep it from tasting heavy.
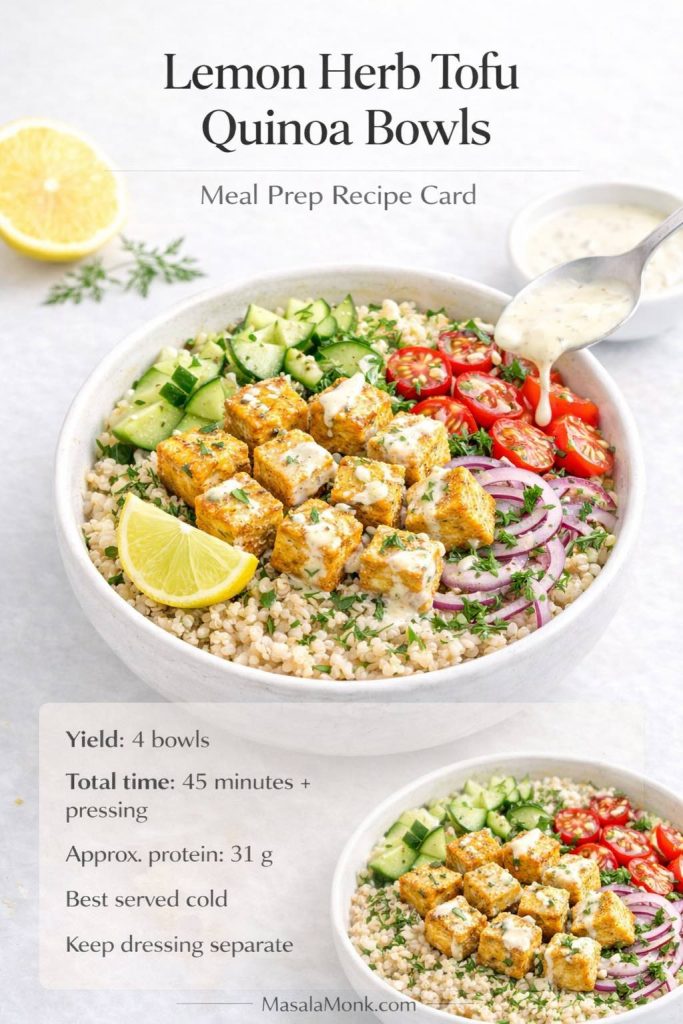
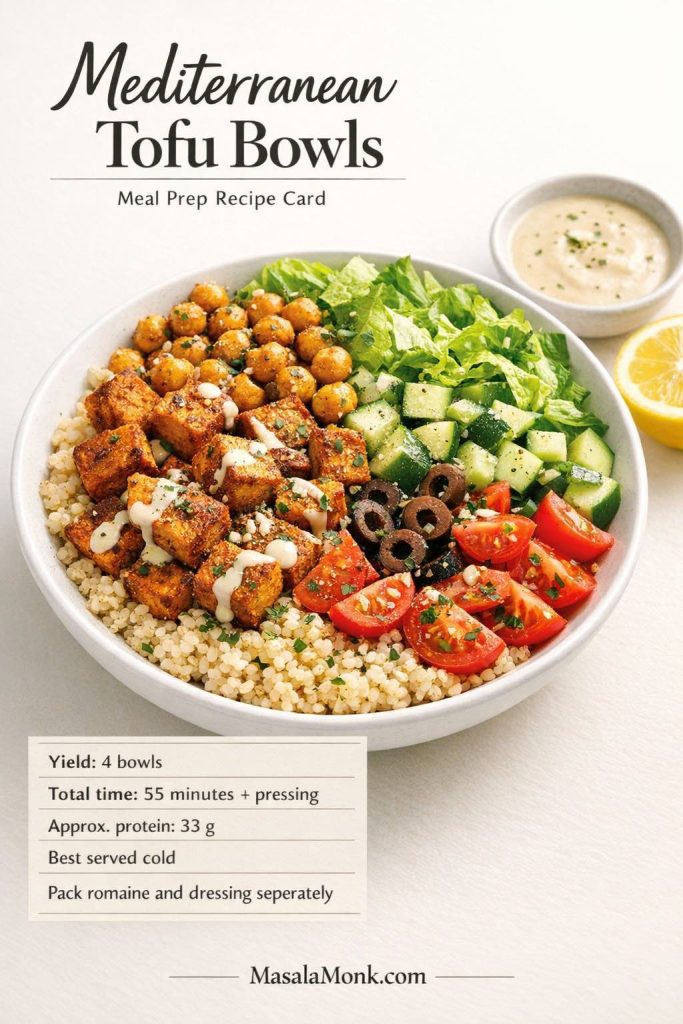
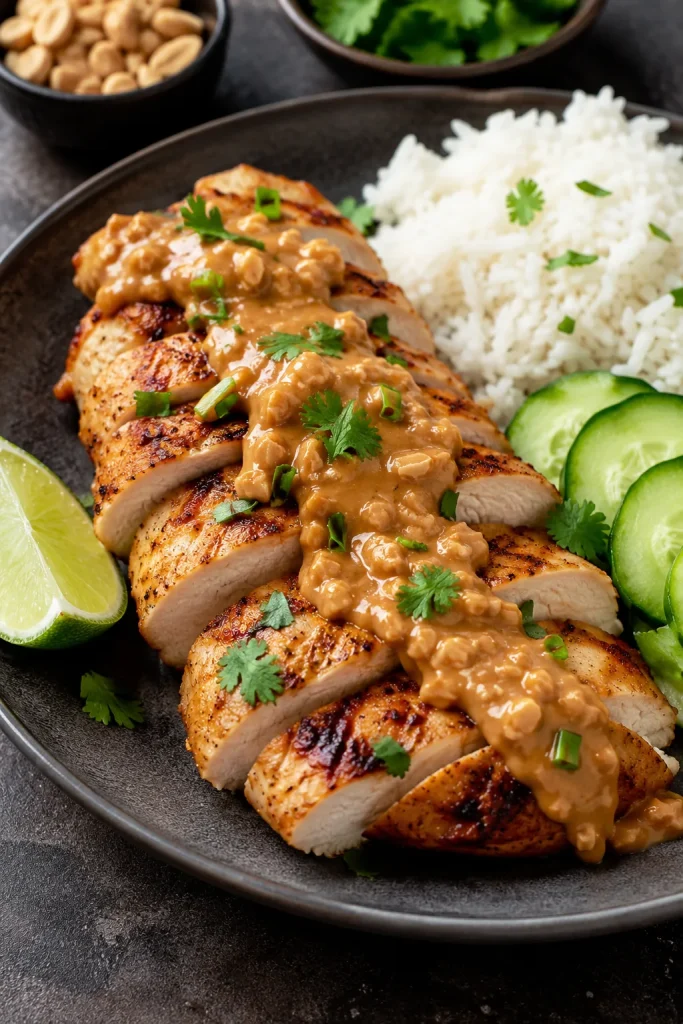
Peanut Sauce for Chicken, Tofu and Bowls
This is where peanut sauce earns its place in the fridge: plain chicken, tofu, rice, and vegetables suddenly taste like a planned meal. The trick is matching the texture to the job, not pouring the same thickness over everything.
| Use | Best Texture | Best Adjustment |
|---|---|---|
| Grilled chicken | Medium-thick drizzle | Add lime after cooking so the sauce tastes bright, not heavy |
| Chicken rice bowls | Slow drizzle | Keep it savory enough to season the rice |
| Peanut chicken noodles | Loose, tossable sauce | Use hot water or noodle water before tossing |
| Crispy tofu | Thicker coating sauce | Add chili crisp, extra ginger, or crushed peanuts |
| Tofu bowls | Drizzle-able but not watery | Add lime and tamari so the tofu does not taste flat |
| Lettuce wraps | Easy dip with body | Add lime and herbs for freshness |
Chicken
Spoon it over cooked chicken, serve it as a dip for grilled chicken, or use the warm satay-style version with skewers. Plain baked chicken works well here because the sauce brings most of the flavor. Once the chicken is cooked, you can slice it into bowls, tuck it into lettuce wraps, or serve it beside spring rolls and cucumber salad.
Everyday chicken needs a peanut sauce that drizzles cleanly and seasons the plate without turning sweet.
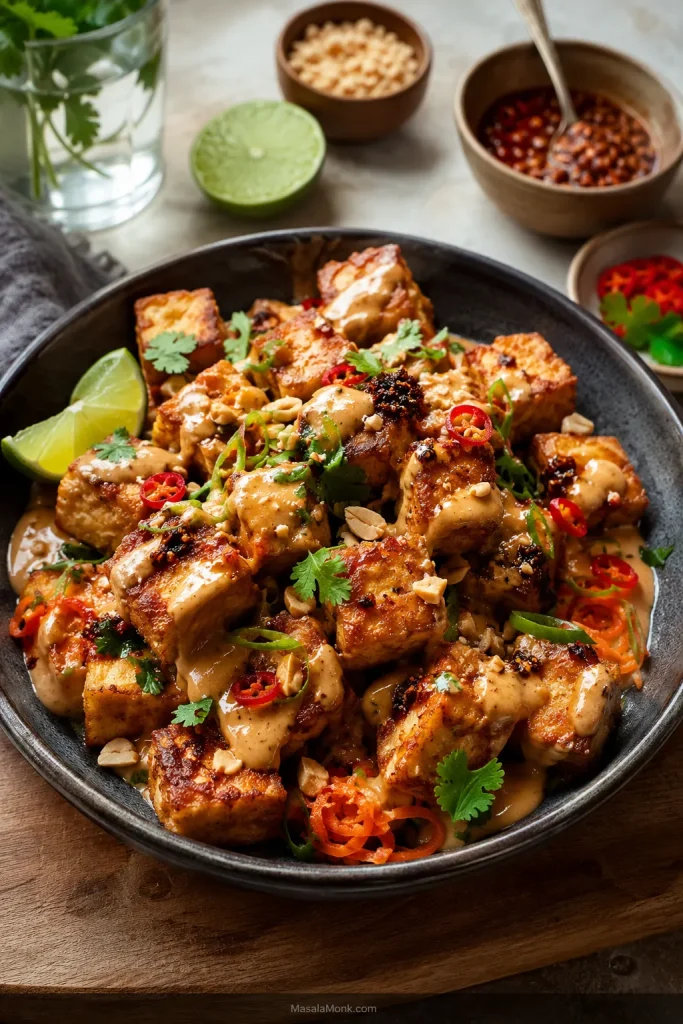
Tofu
Tofu can take this sauce in two directions. Keep it thicker if you want to coat crispy tofu, or make it slightly looser if you want to drizzle it over a tofu bowl. Tofu loves a bolder sauce because it gives the peanut, lime, chili, and ginger room to show up.
For crispy tofu, keep the sauce thick enough to coat without covering every crunchy edge.
For a vegan version, maple syrup or brown sugar keeps the sweetness simple. Gluten-free bowls work best with tamari for the same savory depth. When you need a soy-free version, use coconut aminos and adjust with salt and lime at the end.
Rice Bowls and Meal Prep
In rice bowls, aim for a slow drizzle, not a watery pour. It should settle into the rice, vegetables, and protein without disappearing. Fluffy rice matters because it can hold the sauce without turning gummy.
Rice bowls need a slow drizzle that settles into the grains and makes leftovers feel intentional.
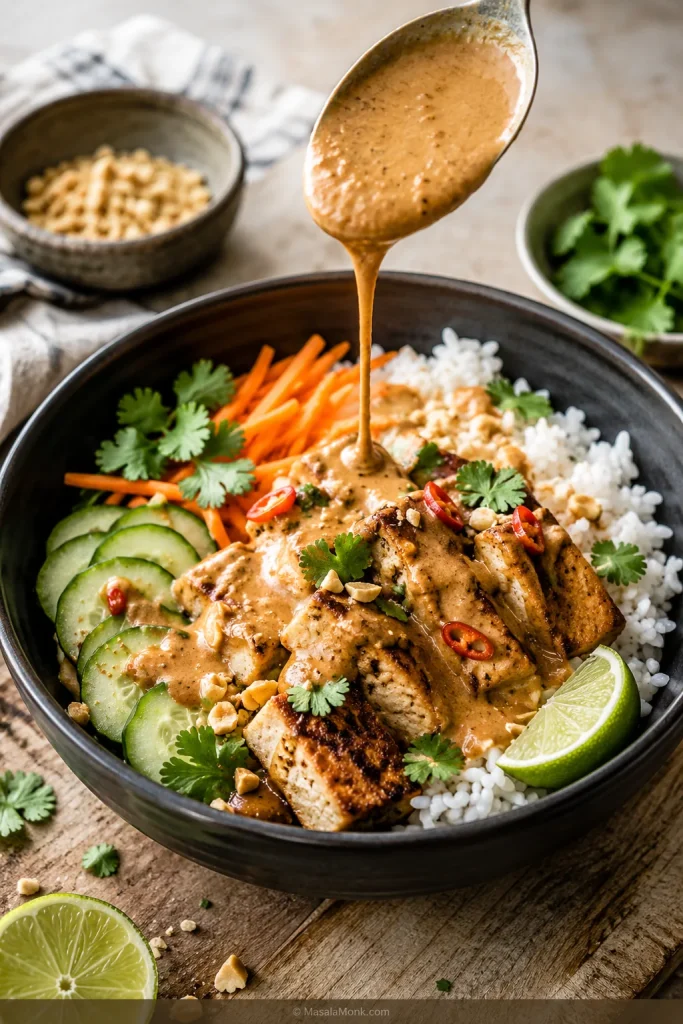
When meal prepping, store the sauce separately. It will thicken in the fridge, so re-whisk it with a splash before adding it to bowls, noodles, or salads. A jar of peanut sauce can make leftover rice, roasted vegetables, cooked chicken, tofu, or even plain cucumber feel intentional.
For a full bowl meal, the same creamy-salty idea works beautifully in a Thai-style vegan bowl with peanut butter dressing.
Peanut Dressing for Salads, Slaw and Bowls
To make peanut dressing for salad, slaw, or cold noodle salad, use more liquid than you would for dipping. It should pour easily from a spoon and taste brighter than satay sauce.
Start with ½ cup peanut sauce, then whisk in 2 to 4 tablespoons water. Add 1 to 2 teaspoons extra lime juice or rice vinegar if the dressing tastes heavy. A good peanut dressing should taste a little brighter than you think, because raw vegetables soften its sharpness once everything is tossed.
For salad and slaw, the sauce has to pour easily and taste brighter than it would as a dip.

Once it hits cabbage, cucumber, herbs, or shredded carrots, that extra brightness settles into balance. Use it on cabbage slaw, Thai peanut salad, cold noodle salad, lettuce wraps, grilled vegetables, or shredded chicken salad. It also works beautifully beside a crisp cucumber salad, especially when the meal has satay-style chicken, tofu, noodles, or grilled vegetables.
Rich toppings like avocado, fried tofu, or chicken need more lime. Mostly raw vegetables can handle a dressing that is a little sweeter and saltier.
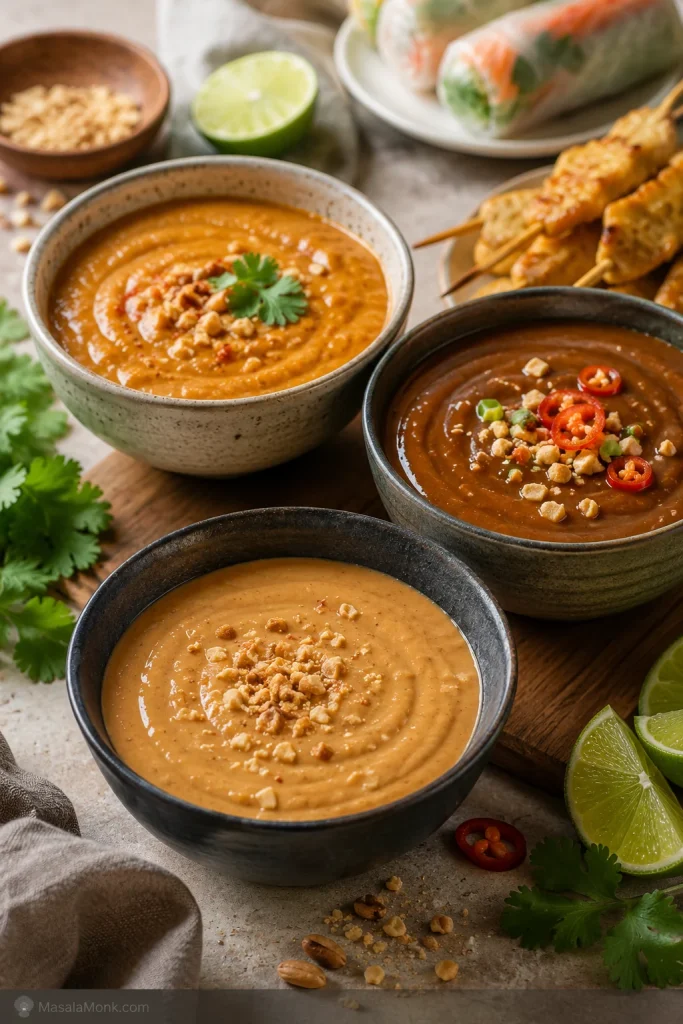
Everyday Peanut Sauce, Vietnamese-Style Hoisin Dip and Satay-Style Sauce
Peanut sauce can mean different things depending on the dish. This recipe is an everyday peanut-butter sauce for home cooking, not a claim that all peanut sauces are the same. Traditional and regional versions may use roasted peanuts, tamarind, palm sugar, fish sauce, coconut milk, hoisin, curry paste, or other aromatics depending on the cuisine and dish.
Use the color and thickness of the sauce to understand which direction it has moved: everyday dip, hoisin dip or satay-style sauce.
- Thai-inspired home-cooking peanut sauce: often a flexible peanut butter sauce with soy or tamari, lime, rice vinegar, chili, ginger, garlic, and water. Use it for dipping, noodles, chicken, tofu, bowls, and salads.
- Vietnamese-style spring roll sauce: often brings in hoisin with peanut butter, garlic, and water, milk, or coconut milk. Use it for fresh spring rolls, rice paper rolls, shrimp rolls, and summer rolls.
- Satay-style peanut sauce: usually richer, thicker, and often warm, sometimes with coconut milk, curry paste, fish sauce, or crushed peanuts. Use it for chicken satay, tofu satay, skewers, and grilled vegetables.
The main sauce here is flexible and quick. Add hoisin, and it moves toward a Vietnamese-style spring roll dip. Stir in coconut milk and curry paste, and it becomes warmer, richer and closer to a satay-style sauce.
Substitutions and Variations
This is where peanut sauce is forgiving, but not automatic: every swap changes the balance a little. Use the table as a starting point, then taste again once the texture is right.
| Need | Use | Watch Out For |
|---|---|---|
| Gluten-free peanut sauce | Tamari or certified gluten-free soy sauce | Check labels on hoisin, chili sauce, and curry paste |
| Soy-free peanut sauce | Coconut aminos | Add salt and lime because coconut aminos are sweeter and less salty |
| Vegan peanut sauce | Maple syrup or brown sugar instead of honey | Skip fish sauce in the satay-style variation |
| Richer satay-style sauce | Coconut milk or coconut cream | Add lime or vinegar if it tastes too heavy |
| Vietnamese-style dip | Hoisin added to the base sauce | Add lime or vinegar if it tastes too sweet |
| Spicy peanut sauce | Sriracha, chili garlic sauce, sambal, chili crisp, or red pepper flakes | Add heat slowly; peanut butter can hide spice at first |
| Mild peanut sauce | Skip chili sauce or use a tiny pinch of chili flakes | Add extra ginger or lime so it does not taste flat |
| More texture | Crushed roasted peanuts or blended roasted peanuts | Add extra liquid if the sauce thickens |
Emergency 3-Ingredient Peanut Sauce
If you do not have all the ingredients, you can still make a quick peanut sauce. It will not taste as layered as the full version, but it works for noodles, dipping, wraps, or a fast bowl sauce.
Simple Version
- 3 tablespoons peanut butter
- 1 tablespoon soy sauce or tamari
- 1 to 3 tablespoons warm water
Whisk everything together until smooth. Add lime juice, rice vinegar, chili sauce, garlic, or sweetener if you have them.
Better 3-Ingredient Version
- 3 tablespoons peanut butter
- 1 tablespoon soy sauce or tamari
- 1 tablespoon lime juice or rice vinegar
Whisk with enough liquid until the sauce reaches the texture you need. This version tastes more balanced because the acid cuts through the peanut butter.
How to Fix Peanut Sauce
Most peanut sauce problems are not recipe failures; they are texture problems. Too thick, too salty, too heavy, grainy, separated, or sticky on noodles usually means the sauce needs one small adjustment, not a full restart.
Rule one still applies: fix texture first, then salt, then acid, then sweetness, then heat. If the problem happened after chilling, the storage and make-ahead fix may be all you need.
Fix Texture First, Then Flavor
If the noodles clump, treat it as a sauce-texture problem before you change the flavor.
| Problem | Why It Happened | Fix |
|---|---|---|
| Too thick | Peanut butter seized, not enough water, or sauce chilled | Whisk in warm water 1 tablespoon at a time |
| Too thin | Too much liquid was added | Add peanut butter 1 tablespoon at a time |
| Too salty | Too much soy sauce, tamari, or fish sauce | Add peanut butter, lime juice, sweetener, or water |
| Too sweet | Too much sugar, honey, maple syrup, or hoisin | Add lime juice, rice vinegar, chili, or soy sauce |
| Too spicy | Too much chili sauce or curry paste | Add peanut butter, coconut milk, sweetener, or water |
| Grainy | Natural peanut butter, cold liquid, or poor mixing | Use warm water and whisk hard, or blend briefly |
| Oily or separated | Peanut butter separated, sauce chilled, or sauce overheated | Rewarm gently and whisk in warm water |
| Bland | Needs salt, acid, heat, or aromatics | Add soy sauce or tamari, lime, vinegar, ginger, garlic, or chili |
| Too heavy | Too much peanut butter or not enough acid | Add lime juice, rice vinegar, water, and fresh herbs |
| Noodles turned sticky | The sauce thickened after tossing | Add hot water or noodle water and toss again |
Noodles need the loosest sauce. Satay can stay thicker and warmer. Spring rolls need a dip that coats the rice paper but still feels easy to bite through.
Storage and Make-Ahead
Store peanut sauce in an airtight jar or container in the fridge for up to 1 week. It will thicken as it chills, so do not judge the texture straight from the fridge.
Straight from the fridge, peanut sauce can look hopeless, but it is not broken; it is just waiting for a splash of water and a firm whisk. Let it sit for a few minutes before adding too much liquid, because the sauce often softens as it warms slightly.
A short rest and a firm whisk are usually enough to bring refrigerated peanut sauce back.
Noodles usually need more liquid than you expect. Spring roll dip only needs enough water to flow again. Satay-style sauce is best rewarmed gently, then loosened with water or coconut milk.
You can freeze peanut sauce if needed, but the texture may change after thawing. Thaw it in the fridge, then whisk or blend it with a splash of warm water until smooth.
What to Serve with Peanut Sauce
Once the sauce is in the fridge, the question becomes less “what recipe am I making?” and more “what needs help tonight?” Use it where you want something fresh and cool, warm and grilled, dinner-like, or snacky and dippable.
| Mood | Serve It With |
|---|---|
| Fresh and cool | Fresh spring rolls, rice paper rolls, summer rolls, shrimp rolls, cabbage slaw, cucumber salad, Vegan Som Tam / Thai raw papaya salad |
| Warm and grilled | Chicken satay, tofu satay, grilled chicken, grilled paneer or tofu skewers, roasted shrimp, roasted vegetables |
| Full dinner | Peanut noodles, rice noodles, cold noodle salad, rice bowls, chicken bowls, tofu bowls, roasted vegetable bowls |
| Snacky and dippable | Lettuce wraps, dumplings, potstickers, fresh vegetables, crispy tofu bites |
If the sauce is going over something rich, add more lime or vinegar. If it is going over plain rice, noodles, or vegetables, keep it a little saltier and spicier so it can carry the whole bowl. For a thicker Indian peanut condiment rather than a pourable sauce, try peanut chutney.
FAQ
What is peanut sauce made of?
Peanut sauce is usually made with peanut butter or ground peanuts, soy sauce or tamari, vinegar or lime juice, sweetener, chili, garlic, ginger, and water. Some satay-style versions also use coconut milk, curry paste, fish sauce, tamarind, or crushed roasted peanuts.
Is peanut sauce the same as satay sauce?
Not exactly. Peanut sauce is broad; satay sauce usually means the richer peanut-based sauce served with satay skewers.
Do you serve peanut sauce warm or cold?
Serve it room temperature or slightly chilled for spring rolls, warm for satay, and loosened with hot water for noodles. For salad dressing, chilled or room temperature both work.
How do you thin peanut sauce for spring rolls?
Add water 1 tablespoon at a time until the sauce is easy to dip. It should cling lightly to the spring roll without feeling pasty or running off immediately.
Why did my peanut sauce get so thick?
It thickens because peanut butter absorbs liquid and firms up as it sits, especially in the fridge. Whisk in a splash of water at a time until it relaxes again.
What peanut butter works best for peanut sauce?
Creamy natural peanut butter gives the cleanest peanut flavor. Regular creamy peanut butter also works, but it is usually sweeter, so start with less sweetener. Crunchy peanut butter works if you do not mind a textured sauce.
How long does peanut sauce last in the fridge?
It keeps well in an airtight jar in the fridge for up to 1 week. It will thicken as it chills, so whisk in a splash of water before serving.
Is peanut sauce gluten-free?
It can be gluten-free if you use tamari or certified gluten-free soy sauce. Check labels on hoisin, chili sauce, curry paste, and any bottled ingredients because they can vary.
How do you make peanut sauce vegan?
Use maple syrup or brown sugar instead of honey, and skip fish sauce in the satay-style variation. The 5-minute sauce is easy to keep vegan with peanut butter, tamari or soy sauce, lime, vinegar, chili, garlic, ginger, and water.
Can you make peanut sauce without peanut butter?
Yes, but it becomes a different sauce. For a similar creamy dip, use tahini, almond butter, cashew butter, or sunflower seed butter, then adjust salt, acid, sweetness, and liquid to taste. For peanut allergies, do not call it peanut sauce when serving guests; label it clearly.
How much peanut sauce do you need for noodles?
For 2 servings of noodles, start with about ½ cup peanut sauce and thin it with 2 to 4 tablespoons hot water or noodle water before tossing. For 8 ounces / 225 g noodles, use about ½ to ¾ cup sauce depending on how saucy you want them.
Make It Your House Sauce
Make it once, then keep adjusting it by feel. One night, it is a dip for fresh rolls. Another night, it saves plain noodles. Later in the week, it can turn leftover rice, tofu, chicken, or vegetables into a meal you actually meant to make. That is when peanut sauce becomes the jar you are glad to have waiting in the fridge.
If you try it, I would love to know where it landed first: spring rolls, noodles, satay, tofu, or a fridge-cleanout bowl. That is usually the version worth saving and making again.