Posted on Leave a comment

Ayurvedic Electrolyte Elixir: Harness the Power of Cloves, Turmeric, and Chia Seeds

CLOVES, TURMERIC, AND CHIA SEEDS for Electrolytes

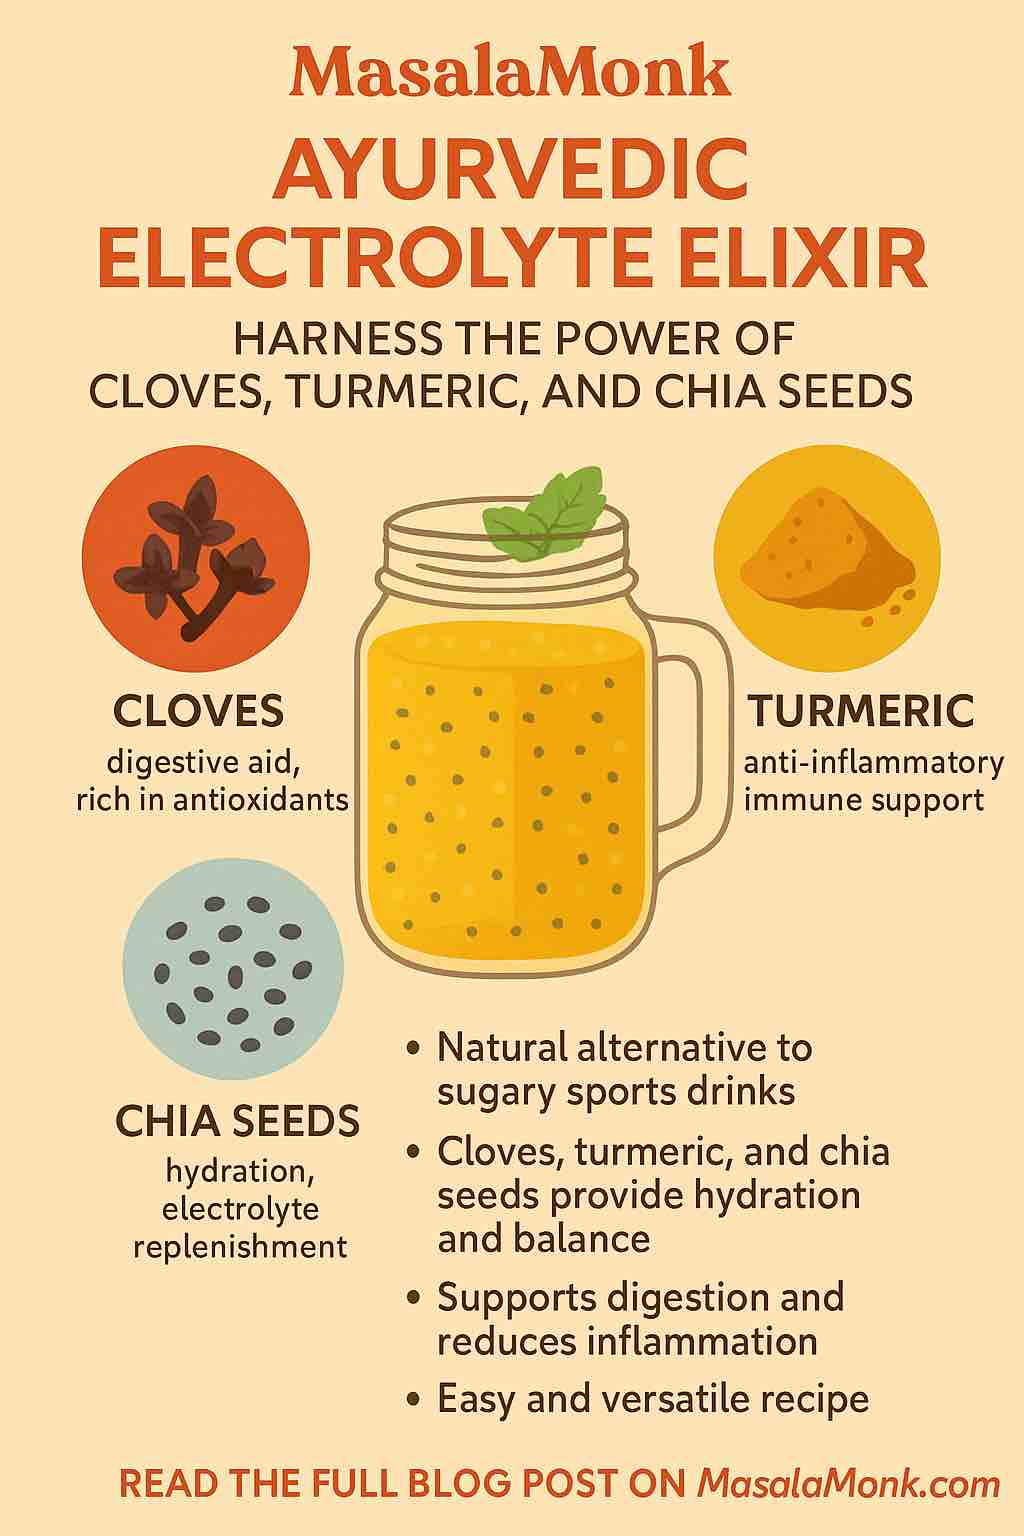
Tired of reaching for artificial sports drinks every time you feel dehydrated or drained? There’s a better way—a recipe that blends the wisdom of Ayurveda with modern science, featuring the remarkable trio of cloves, turmeric, and chia seeds.

Whether you’re sweating it out at the gym, recovering from an illness, or just looking to supercharge your daily hydration, this elixir offers more than just a thirst-quencher. Let’s dive deep into how these ingredients work together, why science backs their synergy, and how you can start sipping today.


What’s an Electrolyte Elixir—And Why Ayurveda?

Electrolytes—like sodium, potassium, magnesium, and calcium—are vital minerals that maintain your body’s fluid balance, nerve function, and muscle health. Lose too many through sweat, exercise, illness, or heat, and you’ll feel the difference: think headaches, cramps, fatigue, or even dizziness.

Modern sports drinks try to replace these, but often contain artificial colors, flavors, and loads of sugar. Ayurveda, India’s ancient system of medicine, offers natural alternatives using kitchen spices and seeds. An elixir in Ayurveda isn’t just about hydration; it’s about balance—nourishing your body, mind, and even your mood.


Meet the Power Trio

1. Chia Seeds: Nature’s Hydration Hack

Chia seeds might not be traditional to Ayurveda, but they fit right in with its principles of holistic hydration:

  • Electrolyte-rich: Chia is high in magnesium, calcium, and potassium.
  • Gel-forming: Soaked chia swells to form a gel that releases water slowly, keeping you hydrated longer.
  • Fiber & Omega-3s: These promote gut health and stable energy.
  • Modern science: Studies show chia seeds support sustained hydration and electrolyte balance (PubMed).

2. Turmeric: The Golden Healer

Turmeric (Haridra in Ayurveda) is famed for:

  • Anti-inflammatory & antioxidant power (thanks to curcumin)
  • Support for liver and digestive health
  • Tridoshic action: Suitable for all body types, balances excess heat and toxins
  • Immunity boost: Recent studies (2024–2025) reinforce turmeric’s immune-modulating effects and support for gut health

3. Cloves: Digestive Dynamo

Cloves (Lavanga) aren’t just for chai! They offer:

  • Warming and digestive properties: Stimulate the “agni” or digestive fire
  • Antimicrobial and antioxidant activity (due to eugenol)
  • Relief from bloating and nausea
  • Science-backed: Modern research validates cloves for gut comfort and immune support

Why This Combo Works: The Science of Synergy

  • Electrolyte Restoration: Chia delivers minerals; a pinch of Himalayan salt adds sodium for full-spectrum balance.
  • Digestive Harmony: Turmeric and cloves prevent digestive heaviness or discomfort often caused by regular electrolyte drinks.
  • Sustained Hydration: The gel from soaked chia means your cells get water slowly and steadily—ideal after a workout, in hot weather, or even during fasting.
  • Anti-inflammatory & Antioxidant Shield: Turmeric and cloves guard against inflammation, support recovery, and help your immune system function optimally.
  • Improved Nutrient Absorption: Black pepper (optional) can be added to boost curcumin absorption; a little fat (like coconut oil or ghee) increases bioavailability even more.

How to Make Your Ayurvedic Electrolyte Elixir

You’ll need:

  • 1 cup filtered or coconut water (for extra potassium)
  • 1 tablespoon chia seeds (soaked 10–15 minutes)
  • 1/4 teaspoon turmeric powder (organic preferred)
  • 1–2 whole cloves (lightly crushed) or 1/8 teaspoon clove powder
  • Pinch of black pepper (optional)
  • Pinch of Himalayan pink salt or rock salt
  • 1 teaspoon raw honey or jaggery (optional, to taste)
  • Juice of half a lemon (for vitamin C and flavor)

Instructions:

  1. Soak the chia seeds in water (or coconut water) for at least 10 minutes, until a gel forms.
  2. Add the turmeric, cloves, black pepper, salt, and sweetener. Mix thoroughly.
  3. Squeeze in fresh lemon juice just before drinking.
  4. Stir well and enjoy—preferably at room temperature or slightly warm (especially good for Vata types).

Dosha-Friendly Customizations

  • Vata (dry/cold): Use warm water, add a touch of ghee or coconut oil for grounding.
  • Pitta (hot/intense): Use more coconut water and less black pepper; focus on the cooling effects of chia.
  • Kapha (slow/damp): Amp up the cloves and turmeric, minimize the sweetener.

When & How to Use

  • Post-workout: Rehydrate and restore lost minerals.
  • Hot days: Keep your system cool and balanced.
  • During illness: Especially if you have fever, diarrhea, or dehydration—sip slowly for maximum absorption.
  • As a daily ritual: Start your morning or break your fast with this elixir for sustained energy and hydration.

Pro Tips for the Best Results

  • Always soak chia before consuming to avoid digestive discomfort.
  • Go easy on the cloves—a little goes a long way!
  • Choose organic turmeric for better taste and potency.
  • Use honey/jaggery only if needed—don’t over-sweeten; let the spices shine.
  • Batch prep: Soak chia ahead of time and keep it in the fridge for a few days’ worth of drinks.

What Does the Latest Science Say?

Turmeric: Bibliometric reviews from 2024–25 show explosive growth in studies confirming curcumin’s role in reducing inflammation, improving immunity, and supporting gut health.
Chia Seeds: 2025 wellness guides (and even TikTok trends) recognize chia’s role in electrolyte balance and long-lasting hydration for athletes, office workers, and everyone in between.
Cloves: Modern analyses reaffirm clove’s ancient reputation for supporting digestion, fighting bacteria, and providing antioxidants.

While there’s still a need for large-scale clinical trials on this exact combination, the science behind each ingredient is strong and continues to grow.


Frequently Asked Questions

1. Can I prepare the Ayurvedic Electrolyte Elixir in advance?
Yes, you can soak chia seeds in advance and refrigerate the gel for up to 3 days. For the freshest flavor and maximum potency, add turmeric, cloves, lemon, and salt just before drinking.


2. Is this elixir safe for people with medical conditions?
Generally, it’s safe for most, but if you have allergies, take blood thinners (due to turmeric), or have kidney issues (because of minerals), consult your healthcare provider first.


3. Can I substitute ingredients if I don’t have all three?
Yes! You can use just one or two of the core ingredients. For example, swap chia for soaked basil seeds (sabja) or use ginger instead of cloves if you prefer.


4. Does this drink actually replenish electrolytes like commercial sports drinks?
It provides magnesium, potassium, calcium (from chia), sodium (from salt), and trace minerals. For extreme fluid loss (e.g., heavy sweating, illness), you may need to increase the salt slightly for adequate sodium.


5. Is the elixir suitable for children and seniors?
Yes, but use mild amounts of turmeric and cloves for kids. Skip honey for children under 1 year. For seniors, this elixir is gentle and hydrating, but always check for potential interactions with medications.


6. Can I drink it during fasting or intermittent fasting?
Absolutely. It’s low in calories, supports hydration, and won’t break a fast if you skip sweeteners. The electrolytes and fiber also help prevent dehydration and energy dips.


7. Does it have to be served warm or cold?
Either works! Ayurveda often recommends room temperature or slightly warm drinks for digestion, but on hot days, cold (not iced) is refreshing and effective.


8. What’s the best time to consume this elixir?
Morning is ideal for starting your hydration, after workouts for recovery, or anytime you feel depleted or overheated. It can also help after mild illness.


9. Will turmeric stain my teeth or containers?
Turmeric can stain plastic and some porous surfaces, so use glass containers and rinse promptly. For teeth, regular brushing prevents noticeable staining.


10. Can I add other flavors or herbs?
Definitely! Mint, ginger, cardamom, or rosewater can be added for flavor and extra benefits. Just keep the base ingredients to maintain electrolyte balance.


Final Thoughts

This Ayurvedic Electrolyte Elixir is more than a drink—it’s a ritual of nourishment and self-care. It bridges the wisdom of the ancients with the discoveries of modern wellness science. Next time you’re tempted by a bottle of neon-colored sports drink, try this instead. Your body—and your taste buds—will thank you.


Ready to try it? Share your variations, tips, or experiences in the comments below!
Curious about the science? Check the references for the latest research and deep dives on each ingredient.

Stay hydrated, stay balanced, and embrace the best of both worlds—naturally.

Posted on Leave a comment

Homemade Salami: Minimal Processing, Maximum Flavor

low sodium salami spicy salami salami for charcuterie board dry cured salami uncured salami salami for charcuterie

A Complete Guide for Food Lovers, Health Seekers, and DIY Cooks


Salami—the word conjures up visions of rustic Italian kitchens, spicy aromas, and mouthwatering slices enjoyed with cheese or olives. But if you care about health, clean eating, or just want to avoid additives, the question is: Can you make healthy, minimally processed salami at home?

The answer is YES—and it’s easier than you might think.

This post covers the what, why, and how of homemade salami, along with several practical, delicious recipes for any kitchen. Let’s dive in!


What is Salami, Really?

Salami is a family of cured sausages made by fermenting and air-drying meat, usually pork or beef, with spices and salt. Traditionally, salami was made to preserve meat for long periods without refrigeration.

Why make it yourself?

  • Control every ingredient: Choose your own meat, salt, and spices.
  • Skip preservatives: No unnecessary nitrates, nitrites, or chemical flavors.
  • Customize for health: Go leaner, lower-sodium, or even plant-based!

The Basics: How is Salami Made?

  1. Meat Selection
    Start with fresh, high-quality meat—pork, beef, chicken, or even game. For classic salami, a bit of fat (about 20%) is ideal for flavor and texture.
  2. Seasoning
    Salt, black pepper, garlic, wine, fennel seeds, or chili are common. Use what you love.
  3. Curing or Cooking
    Traditional salami is cured—fermented and air-dried for weeks or months. But home cooks can make oven-baked, steamed, or even instant “semi-cured” versions for speed and safety.
  4. Casing
    Either use natural/edible casings (from the butcher), plastic wrap, or simply foil for no-casing versions.

Is Homemade Salami Healthier?

It can be—IF you control the process:

  • Use leaner meats, fresh spices, and skip artificial preservatives.
  • Control salt levels.
  • Choose oven-baked or steamed versions if you want to avoid nitrites or worry about curing at home.
  • Add extra flavor and nutrition with herbs, veggies, or even plant-based swaps.

4 Healthy, Easy Salami Recipes for Home

1. Simple Oven-Baked Beef Salami

Best for: Fast, fuss-free, high-protein snacking
No fermentation, no casing, no preservatives!

You’ll need:

  • 500g (1 lb) lean ground beef (or chicken/turkey)
  • 1.5 tsp salt
  • 1 tsp black pepper
  • 1 tsp garlic powder
  • 1 tsp mustard seeds
  • ½ tsp smoked paprika or a few drops liquid smoke (optional)
  • Pinch of sugar or honey (optional, helps flavor—not needed for keto)

Steps:

  1. Mix everything very well in a bowl (knead with hands for best texture).
  2. Shape into a thick log.
  3. Wrap tightly in plastic wrap, then foil.
  4. Chill in fridge 24 hours for flavors to meld.
  5. Remove wrap, place on rack in baking tray. Bake at 160°C (325°F) until internal temp is 70°C (160°F), about 45–60 mins.
  6. Cool fully before slicing thin.

Why it’s healthy:

  • No chemicals, minimal salt, your meat and your flavors!

2. Preservative-Free Chicken Salami

Best for: Lean protein, lower fat, quick lunchboxes

You’ll need:

  • 500g ground chicken
  • 1 tsp salt
  • 1 tsp black pepper
  • 1 tsp red chili flakes
  • 1 tsp garlic powder
  • ½ tsp ground coriander
  • 1 tbsp finely chopped bell pepper (optional for color)

Steps:

  1. Mix ingredients well.
  2. Shape into log, wrap tightly in baking paper and then foil.
  3. Steam for 25–30 mins or until cooked through, or bake at 160°C for 40 mins.
  4. Cool, unwrap, and chill before slicing.

Why it’s healthy:

  • No nitrites or additives, high in protein, lower in fat.

3. Traditional-Style “Milano” Semi-Cured Salami (Short Ferment)

Best for: Classic salami fans with some patience, probiotic benefits

You’ll need:

  • 400g pork shoulder (finely minced)
  • 100g pork fat
  • 2 tsp salt
  • 1 tsp black pepper
  • ½ tsp garlic powder
  • 1 tbsp red wine
  • Natural casing (from butcher)
  • Optional: 1/4 tsp starter culture (for safe fermentation, see butchers or online)

Steps:

  1. Mix meat, fat, salt, pepper, garlic, wine. Add starter culture if using.
  2. Stuff tightly into soaked casing.
  3. Hang in cool, humid place (15–20°C, 80–90% humidity) for 3 days to ferment.
  4. Move to cooler, less humid area to dry for 2–4 weeks until firm.
  5. Slice thin and enjoy.

Note: Always follow food safety for curing (see trusted online guides).

Why it’s healthy:

  • No commercial chemicals, natural fermentation for gut health, real ingredients.

4. Spicy Vegan “Salami” (No Meat, All Flavor)

Best for: Plant-based eaters, anyone avoiding meat or preservatives

You’ll need:

  • 1 cup vital wheat gluten
  • 1 tbsp chickpea flour
  • 2 tbsp tomato paste
  • 1 tbsp olive oil
  • 2 tbsp nutritional yeast
  • 1 tsp smoked paprika
  • ½ tsp garlic powder
  • ½ tsp onion powder
  • 1 tsp black pepper
  • 1 tbsp soy sauce or tamari
  • 1 tsp miso paste (optional)
  • ¾ cup water

Steps:

  1. Mix all dry ingredients.
  2. Whisk wet ingredients separately, then combine.
  3. Knead into a dough, shape into log, wrap tightly in foil.
  4. Steam for 40–50 mins.
  5. Cool and slice thin.

Why it’s healthy:

  • No nitrates, cholesterol, or processed meat—just plant power and fiber!

Tips for Success & Safety

  • Oven-baked/steamed salami is safest for beginners—no risk of unsafe fermentation.
  • If curing, use a starter culture for reliable results.
  • Cool and chill before slicing for best texture.
  • Experiment! Add herbs, seeds, or chopped nuts for variety.

Final Thoughts

Homemade salami gives you real control, flavor, and nutrition with minimal fuss. Whether you want classic beef or chicken, probiotic-rich “semi-cured,” or a plant-powered version, there’s a healthy salami for every kitchen.

Why settle for store-bought with additives when you can make your own—clean, tasty, and tailored to your health goals?


Hungry for More?

Want step-by-step photos, video tutorials, or a printable recipe card? Or are you ready for an in-depth guide to fermentation safety and flavor mastery?
Let us know in the comments or read more on MasalaMonk.com!


Ready to slice into your own homemade salami? Try a recipe and share your creations—tag us @MasalaMonk!

10 FAQs for Healthy Homemade Salami

1. Is it safe to make salami at home?
Yes, if you follow proper recipes, hygiene, and temperature guidelines. Oven-baked or steamed salami is safest for beginners, while fermentation or curing requires more care and experience.

2. Do I need curing salts (nitrates/nitrites) for homemade salami?
For oven-baked or steamed salami, you can skip curing salts. For dry-cured or fermented salami, curing salts are recommended to prevent harmful bacteria—unless you’re very experienced with safe fermentation.

3. What meats can I use for healthy homemade salami?
Lean beef, chicken, turkey, pork, and even wild game. For healthier versions, choose lean cuts and trim excess fat.

4. Can I make salami without any preservatives or additives?
Yes! Use only meat, salt, herbs, and spices for oven or steamed salami. For dry-cured types, the process itself preserves the meat with salt, but food safety is essential.

5. How long does homemade salami last?
Oven-baked or steamed salami lasts up to 7–10 days in the fridge. Dry-cured salami can last several weeks or even months if stored properly.

6. Is homemade salami healthier than store-bought?
Usually, yes. You control the meat quality, salt, and spices, and avoid commercial additives, preservatives, and excess sodium.

7. Are there plant-based or vegan salami options?
Absolutely! You can make vegan salami using vital wheat gluten, spices, tomato paste, and olive oil, steamed or baked for firm texture.

8. Can I customize the flavor of my homemade salami?
Definitely. Add any herbs, spices, seeds, chili flakes, or even chopped nuts to suit your taste preferences.

9. What’s the easiest salami to make at home for beginners?
Oven-baked or steamed chicken or beef salami—no casing, no fermentation, just mix, shape, cook, and slice.

10. Do I need special equipment to make salami at home?
No special tools are required for oven or steamed recipes. For traditional cured salami, you’ll need casings and a cool, humid place for drying.

Posted on Leave a comment

The Best Greens for Gut Health and Digestive Wellness

GREENS FOR GUT HEALTH & DIGESTIVE WELLNESS

Gut health is having a moment—and for good reason. The human gut isn’t just where food is digested; it’s the command center for immunity, mood, metabolism, and long-term disease prevention. The star of the show? Your gut microbiome, a vibrant ecosystem of trillions of bacteria, yeasts, and other microorganisms. And what you eat is the single biggest factor influencing your microbiome’s balance.

Of all the foods available, greens—from leafy vegetables to edible seaweeds—stand out for their prebiotic fibers, unique plant compounds, and ability to support digestive wellness. In this post, you’ll discover which greens science says are best for your gut, the reasons why, and exactly how to get more of them on your plate.


Section 1: The Science—How Greens Feed Your Gut

1.1. Fiber: Fuel for Friendly Bacteria

Greens are loaded with dietary fiber, but not all fiber is the same. The fibers in greens act as prebiotics—special food for beneficial bacteria like Bifidobacteria and Lactobacillus. As these bacteria feast on fiber, they create short-chain fatty acids (SCFAs), especially butyrate, which soothes inflammation, strengthens your gut lining, and may lower your risk of diseases ranging from IBS to colon cancer.

1.2. Unique Plant Compounds

Beyond fiber, greens contain:

  • Sulfoquinovose (in leafy greens like spinach & kale): a rare sugar that feeds gut bacteria and increases microbial diversity.
  • Glucosinolates (in cruciferous greens like kale): plant chemicals broken down into anti-inflammatory molecules.
  • Inulin & Oligofructans (especially in dandelion greens): powerful prebiotic fibers that have been shown to significantly boost beneficial bacteria.
  • Polyphenols (found in microgreens and seaweed): antioxidants that encourage good bacteria and inhibit bad ones.

1.3. Seaweed: The Next-Gen Gut Food

Edible seaweeds like nori, wakame, and brown seaweed contain unique fibers—alginates, carrageenans, ulvans—that most land vegetables simply don’t have. These fibers support rare gut bacteria and are linked to improved gut barrier function and a stronger immune system. Brand new research (2025) even shows certain seaweeds can increase SCFA-producing bacteria and may protect against colon cancer in animal models.


Section 2: The Best Greens for Gut Health—What’s Backed by Research?

2.1. Dandelion Greens

  • Star compound: Inulin
  • Gut benefit: Massive prebiotic boost—one of the highest inulin concentrations of any green. Studies show dandelion inulin increases Bifidobacteria, improves regularity, and supports gut lining repair.
  • How to eat: Raw in salads, sautéed, or blended in smoothies. If the flavor is too strong, mix with milder greens.

2.2. Kale & Spinach

  • Star compounds: Fiber, sulfoquinovose, glucosinolates (kale)
  • Gut benefit: Kale and spinach increase SCFA production, enhance microbial diversity, and support anti-inflammatory gut bacteria. Kale also helps the liver detoxify and may reduce colon inflammation.
  • How to eat: Raw, steamed, massaged with olive oil, or baked as chips. Add to soups, omelets, and grain bowls.

2.3. Swiss Chard & Collard Greens

  • Star compounds: Soluble and insoluble fiber, polyphenols
  • Gut benefit: Feed both major groups of gut bacteria; polyphenols have antioxidant and anti-inflammatory effects.
  • How to eat: Sautéed with garlic, in wraps, or chopped into stews.

2.4. Microgreens (Broccoli, Mustard, Radish)

  • Star compounds: Concentrated vitamins, polyphenols
  • Gut benefit: Microgreens can have up to 40x more nutrients than mature plants. Their polyphenols support good gut bacteria and may reduce inflammation.
  • How to eat: On salads, sandwiches, in smoothies, or as a garnish.

2.5. Seaweed (Nori, Wakame, Dulse, Brown Seaweed)

  • Star compounds: Alginates, fucoidan, ulvans, unique polyphenols
  • Gut benefit: Human clinical trials (2024-2025) show brown seaweed increases SCFA-producing bacteria and can even lower markers of inflammation. Seaweed fibers help “train” the microbiome in ways land veggies cannot.
  • How to eat: Sprinkle nori flakes on rice, add wakame to soups, or blend seaweed into smoothies. Opt for food-grade, tested seaweed to avoid contaminants.

Section 3: Practical Tips—How to Eat More Greens for Gut Health

3.1. Rotate Your Greens

Different greens feed different bacteria. Variety matters! Rotate between dandelion, kale, spinach, microgreens, chard, and seaweed to support a broad spectrum of microbes.

3.2. Pair with Healthy Fats

Many green nutrients (like vitamins A, E, K) are fat-soluble. Drizzle with olive oil or toss with avocado for better absorption—and a more satisfying meal.

3.3. Start Low, Go Slow

If you’re new to fiber-rich greens, introduce them gradually. This gives your gut time to adjust, reducing the risk of bloating or gas.

3.4. Try Fermented Greens

Fermenting greens (like kimchi or sauerkraut) adds a probiotic boost, delivering live bacteria alongside the prebiotic fiber.

3.5. Be Cautious with Wild Seaweed

Some wild seaweed can harbor bacteria like Vibrio. Always choose tested, food-grade products (usually labeled as such in health stores or from reputable online suppliers).


Section 4: Real-World Meal Ideas

Breakfast:

  • Green smoothie (spinach, microgreens, avocado, banana, oat milk, chia seeds)
  • Omelet with sautéed kale, dandelion greens, and feta

Lunch:

  • Massaged kale salad with olive oil, lemon, walnuts, and roasted sweet potatoes
  • Collard green wraps stuffed with hummus, carrots, and microgreens

Snack:

  • Nori seaweed snacks
  • Swiss chard chips (baked with olive oil)

Dinner:

  • Stir-fry with dandelion greens, tofu, and brown rice
  • Miso soup with wakame seaweed and tofu

Section 5: Frequently Asked Questions

1. Which green is the single best for gut health?
Dandelion greens are considered one of the best for gut health due to their high inulin content, a prebiotic fiber that specifically nourishes beneficial gut bacteria.


2. Can I eat greens raw, or should they be cooked for gut health?
Both raw and cooked greens are valuable. Raw greens retain more enzymes and vitamin C, while cooking can increase bioavailability of some nutrients and make fibers easier to digest for sensitive guts. Try to include a mix of both in your diet.


3. Is seaweed safe to eat every day?
Food-grade, tested seaweed is generally safe in moderate amounts. However, excessive consumption can lead to high iodine intake. Most health authorities recommend 2–3 servings per week for adults.


4. Are green powders or supplements as good as fresh greens?
While green powders can supplement your diet, they lack the water and full fiber content of fresh greens. Use them as a backup, not a replacement for whole foods.


5. What if I experience bloating when increasing greens?
This is common when introducing more fiber. Increase your intake gradually, drink plenty of water, and consider lightly cooking greens to reduce bloating. If symptoms persist, consult a healthcare provider.


6. What are the best greens for people with sensitive digestion or IBS?
Spinach, romaine lettuce, and cooked Swiss chard are typically well-tolerated. If you’re sensitive to FODMAPs, introduce inulin-rich greens like dandelion very slowly and monitor your response.


7. Can children and seniors benefit from eating more greens for gut health?
Yes! Greens support gut health at all ages. Just ensure the greens are prepared in an age-appropriate way—chopped small for kids, cooked soft for seniors.


8. How can I add more greens to my diet if I don’t like the taste?
Blend greens into smoothies with fruit, add them to sauces or soups, or bake them as chips. Combining greens with flavorful dressings or spices can make them more palatable.


9. Are fermented greens better for gut health?
Fermented greens (like sauerkraut and kimchi) provide both prebiotics (fiber) and probiotics (live beneficial bacteria), making them an excellent choice for gut health.


10. Do I need to wash store-bought greens and seaweed?
Yes. Even pre-washed greens should be rinsed before eating. For seaweed, buy food-grade, certified products and follow any preparation instructions on the packaging.


Section 6: The Future—Greens, Seaweed, and Microbiome Medicine

The research is moving fast. Human trials now show seaweed and diverse greens can:

  • Increase the abundance of beneficial SCFA-producing bacteria
  • Reduce inflammation
  • Support colon health, even lowering markers of cancer risk in preliminary studies

The bottom line? A daily habit of rotating leafy greens and adding a few servings of safe, food-grade seaweed could be one of the simplest ways to support lifelong gut health and wellness.


Conclusion: Simple Steps for a Happier Gut

  1. Eat greens daily, and rotate types for max benefit
  2. Try adding food-grade seaweed to your diet weekly
  3. Pair with healthy fats for better absorption
  4. Start slow, listen to your body, and enjoy the journey!

Your gut—and the rest of your body—will thank you.


What are your favorite greens—or questions about gut health? Drop them in the comments!

Posted on Leave a comment

Fruits and Ulcerative Colitis: Navigating the Nutritional Landscape

Ulcerative Colitis (UC) is a chronic inflammatory bowel disease that affects millions worldwide, causing symptoms like abdominal pain, diarrhea, and fatigue. While medications remain the cornerstone of UC management, growing research highlights the essential role of nutrition, especially fruit intake, in symptom control and long-term gut health. But for many with UC, the simple act of eating an apple can be fraught with questions:
Which fruits are safe? Are some harmful? How do I balance nutrition and comfort?
Let’s break down the latest science and offer actionable guidance.


1. Why Fruits Matter in Ulcerative Colitis

Fruits are nutritional powerhouses:

  • Vitamins and Minerals (vitamin C, potassium, folate)
  • Antioxidants and Phytonutrients (anthocyanins, flavonoids)
  • Fiber (soluble and insoluble)
  • Prebiotics (nourish beneficial gut bacteria)

These nutrients collectively help repair tissues, reduce inflammation, and support overall well-being. In fact, population studies consistently show that diets rich in fruits and vegetables are associated with a lower risk of developing UC.


2. Fruit Intake and UC: What Does the Latest Research Say?

Population Insights:

  • A recent meta-analysis found that people with higher fruit intake had a 31% reduced risk of UC compared to those with the lowest intake.
  • Dried fruits and antioxidant-rich varieties (berries, cherries) show particularly promising effects in reducing risk (MDPI, 2024).

New Clinical Trials:

  • Montmorency Tart Cherry Juice: In a groundbreaking human trial (2025), UC patients who consumed tart cherry juice daily for six weeks saw a 40% decrease in gut inflammation (measured by fecal calprotectin) and improved quality of life.
    However, sugar content and small sample size mean it’s not a stand-alone solution.
  • Plant-Based Diets: Large cohort studies confirm an 8% lower risk of UC among people eating the most fruits and vegetables.
  • Potatoes: Unexpectedly, recent UK research found that high potato intake correlated with a 51% higher risk of UC—suggesting not all plant foods are equal.

Emerging Science:

  • Animal studies with jujube and strawberry tree fruits show they may protect against colitis, but these benefits are not yet proven in humans.

3. Understanding the Fiber Factor: Soluble vs. Insoluble

Fiber is central to how fruits impact UC.

  • Insoluble fiber (skins, seeds, peels) can be irritating during flares, leading to gas, bloating, or diarrhea.
  • Soluble fiber (flesh of apples, bananas, pears when peeled) is generally gentler, absorbs water, and can help bulk stools.

Key tip: Focus on soluble fiber sources during active symptoms and flares.


4. Practical Tips: Choosing and Preparing Fruits with UC

During Flare-Ups:

  • Opt for low-fiber, gentle fruits: peeled apples, ripe bananas, canned peaches or pears (in juice, not syrup), well-cooked or poached fruits.
  • Avoid: raw fruit skins, seeds, tough peels, dried fruit (unless you know you tolerate it), and high-insoluble-fiber options like berries or grapes.

In Remission:

  • Gradually reintroduce a wider variety of fruits, including soft berries and dried fruits, in small amounts.
  • Try blending fruits (smoothies) or cooking (compotes, applesauce) to improve tolerance.

General Guidelines:

  • Listen to your gut: Everyone’s triggers are different. Keep a food and symptom diary to track reactions.
  • Go slow: Reintroduce new fruits one at a time.
  • Mind the juice: Fruit juices, even tart cherry, can be high in sugar and lack fiber—moderate your intake and dilute when possible.
  • Stay hydrated: Especially if your fruit intake increases stool output.

5. Best Fruits for People with UC (Based on Current Evidence and Practicality)

FruitWhen Best ToleratedHow to Prepare/ServePotential Benefits
Ripe BananasFlares, remissionRaw, mashed, in smoothiesSoluble fiber, potassium
Peeled ApplesFlares, remissionSteamed, applesauce, bakedAntioxidants, soluble fiber
Canned Peaches/PearsFlaresCanned in juice, drainedEasy to digest, low fiber
Tart CherriesRemissionJuice (diluted), dried (small amounts)Anti-inflammatory polyphenols
Papaya/MangoRemission, mild flaresPeeled, cubedEnzymes, vitamins A & C
Blueberries (cooked)RemissionStewed, in oatmealAntioxidants
Watermelon (seedless)RemissionChilled, cubedHydration, vitamins

6. Fruits to Approach with Caution (Especially During Flares)

  • Raw apples, pears (with skin)
  • Berries with seeds (strawberries, raspberries, blackberries)
  • Grapes (due to skin/seeds)
  • Dried fruits (unless very well tolerated)
  • Citrus fruits (oranges, grapefruits; may irritate in some)
  • Pineapple (can be tough and fibrous)

7. Frequently Asked Questions

1. Can I eat fruit during a UC flare-up?
Yes, but stick to low-fiber options like peeled apples, ripe bananas, and canned pears or peaches. Avoid raw skins, seeds, and tough or dried fruits, which can aggravate symptoms.


2. Which fruits are safest for UC patients?
Safest choices include peeled apples, ripe bananas, canned peaches/pears (in juice), and well-cooked fruits. These are easier to digest and less likely to irritate the gut.


3. Are there fruits I should avoid completely with UC?
Avoid fruits with tough skins or seeds (e.g., raw apples, berries, grapes) during active flares. Citrus fruits, dried fruits, and pineapple can also be triggers for some people.


4. Is fruit juice a healthy choice for UC?
Most fruit juices are high in sugar and lack fiber. If you use juice (e.g., tart cherry juice, which shows potential benefits), drink it diluted and in moderation, and monitor your tolerance.


5. How does fiber in fruit affect UC symptoms?
Insoluble fiber (skins, seeds) can irritate during flares. Soluble fiber (found in peeled apples, bananas) is gentler. Adjust your intake based on your symptoms.


6. Does eating fruit increase the risk of a UC flare?
No strong evidence suggests fruit itself triggers flares. Triggers are individual—track your reactions, and avoid fruits that consistently cause symptoms.


7. Can dried fruits be included in a UC diet?
Dried fruit is linked to a lower risk of UC in some studies, but it’s high in sugar and fiber. Start with small amounts, and only if you tolerate them well.


8. Should I remove the skins from all fruits?
During flares or if you’re sensitive, it’s best to remove skins and seeds. In remission, you may try reintroducing them slowly and see how your body reacts.


9. How can I safely reintroduce fruits after a flare?
Start with gentle, peeled, or cooked fruits. Add new types one at a time, monitor your body’s response, and increase variety as tolerated.


10. Are there any fruits with special benefits for UC?
Recent research suggests tart cherry juice may help lower gut inflammation, but moderation is key due to sugar content. All fruits have unique nutrients—variety and preparation are more important than any single “superfruit.”

8. Personalizing Your Fruit Journey: How to Find Your Sweet Spot

  • Track: Keep a food/symptom journal for at least two weeks.
  • Experiment: Try different preparations—raw, cooked, blended, peeled.
  • Consult: Work with a dietitian experienced in IBD for tailored advice.
  • Balance: Combine fruits with protein or healthy fats (e.g., yogurt, nut butter) to slow digestion and avoid sugar spikes.

9. Looking Ahead: The Future of Fruit & UC

Research is ongoing, and while promising results from tart cherry juice and plant-based diets are encouraging, there’s no universal “superfruit” for UC. Individual responses vary, and moderation is key.

Stay tuned for larger studies on fruit extracts, the microbiome, and how food can complement medication in managing UC. As science evolves, so will our understanding of which fruits heal, which to limit, and how to make eating both pleasurable and safe.


Final Thoughts:

Fruits, when chosen and prepared with care, can be an ally for people with ulcerative colitis. The key is to individualize your choices, listen to your body, and adapt your diet as your condition changes. With knowledge, experimentation, and guidance, you can find a fruit-filled approach that supports your gut health—one bite at a time.

Posted on Leave a comment

Crafting Probiotic Richness: The Art of Fermenting Carrots

FERMENTING CARROTS

Fermentation is both a tradition and a modern wellness trend. Among the vibrant world of pickles and krauts, fermented carrots stand out: sweet, crunchy, quick to make, and loaded with probiotic benefits.

But this isn’t just another “old-world” practice revived for social media—recent research (2022–2025) is shining new light on why fermented carrots matter for your gut, your brain, and even your sleep. Whether you’re a home cook, a health geek, or just carrot-curious, this is your practical deep-dive guide to fermenting carrots.


The Science: Probiotics, Gut Health & Beyond

Fermenting carrots unlocks something remarkable. Through lacto-fermentation, beneficial bacteria (mainly Lactobacillus species) convert carrot sugars into lactic acid and a suite of health-boosting metabolites. Here’s what the latest research reveals:

  • Probiotic Powerhouses: Recent studies confirm that fermented carrots can contain Lactobacillus brevis and other probiotics, supporting digestion and immunity.
  • Gut–Brain Connection: Exciting 2025 research shows fermented vegetables can act as “psychobiotics,” influencing mood and sleep via the gut–brain axis—thanks to compounds like GABA and serotonin precursors.
  • Bioactive Compounds: LAB fermentation increases short-chain fatty acids (SCFAs), B vitamins, and bioavailability of micronutrients.
  • Sleep Support: New animal studies suggest fermented carrot juice may improve sleep quality, opening doors for human trials.
  • Metabolic Diversity: Regularly eating lacto-fermented veggies increases the diversity of metabolites in the gut—linked to lower risk of chronic disease.

If you want a snack that’s easy, delicious, and could help your microbiome and mind—fermented carrots are a stellar choice.


Getting Started: Ingredients & Tools

You don’t need fancy equipment. Here’s what you’ll need for classic fermented carrot sticks:

Ingredients:

  • Fresh carrots (organic if possible)
  • Non-iodized sea salt (or kosher salt, no additives)
  • Filtered water (chlorine can inhibit fermentation)
  • Optional flavorings: garlic cloves, ginger, dill, mustard seed, peppercorns, bay leaves

Equipment:

  • Clean glass jar (wide-mouth quart Mason jar is ideal)
  • Fermentation weight (glass weight, small jar, or cabbage leaf)
  • Fermentation lid or loose jar lid (to allow CO₂ to escape)
  • Clean hands, cutting board, knife

Step-by-Step: The Fermentation Process

1. Prep the Carrots

  • Wash and peel carrots. Slice into sticks or rounds for best texture and even fermentation.
  • Aim for uniform sizes so all pieces ferment at the same rate.

2. Mix the Brine

  • Dissolve 1 tablespoon (about 19g) salt per 1 quart (about 1 liter) filtered water.
  • Stir until the salt is completely dissolved.

3. Pack the Jar

  • Layer flavorings (garlic, dill, etc.) at the bottom.
  • Tightly pack carrot sticks upright. Pack them firmly—they’ll shrink slightly as they ferment.
  • Pour in brine, ensuring all carrots are completely submerged. Leave about 1–2 inches of headspace at the top.

4. Weigh Down and Cover

  • Use a glass weight, smaller jar, or even a folded cabbage leaf to keep carrots below the brine line (oxygen is the enemy here!).
  • Loosely cap with a fermentation lid or regular jar lid (not tightly, so gas can escape). An airlock lid is ideal for beginners.

5. Ferment

  • Set the jar out of direct sunlight at room temperature (ideally 68–72°F/20–22°C).
  • Fermentation is usually active within 24–48 hours (bubbles, cloudiness = good signs).
  • Start tasting at day 3. Most prefer 5–7 days; the longer you wait, the tangier and softer they get.

6. Finish and Store

  • Once you love the taste and texture, remove the weight, tighten the lid, and refrigerate.
  • Fermented carrots will keep for months in the fridge, their flavor deepening over time.

Advanced Tips & Troubleshooting

Want Carrots Crispier?

  • Add a grape or oak leaf (tannin slows softening).
  • Use small, fresh carrots—older ones soften faster.

Brine Turning Cloudy?

  • Totally normal; this means fermentation is active.

Worried About Mold?

  • White surface yeast (“kahm yeast”) is harmless but should be removed.
  • Pink, black, or fuzzy mold? Discard the batch and scrub equipment thoroughly.

Carrots Too Salty or Bland?

  • Adjust salt in future batches—stick to the 2–3.5% range.
  • Add more or less garlic/spices next time to suit your taste.

Flavor Variations: Personalize Your Carrots

Fermentation is a playground. Try these twists:

  • Ginger–Carrot Sticks: Add 2–3 slices fresh ginger.
  • Spicy Carrots: Add a whole dried chili or a few peppercorns.
  • Curry Carrots: Sprinkle in mustard and cumin seeds.
  • Mixed Veggies: Ferment carrot sticks with sliced radish, cauliflower, or bell pepper for color and crunch.

How to Use Fermented Carrots

  • Snack straight from the jar (the crunch is addictive!).
  • Slice onto salads, grain bowls, or in sandwiches for tangy brightness.
  • Serve alongside cheese and charcuterie boards.
  • Dice into slaws for an extra probiotic punch.
  • Drink the brine—it’s full of probiotics (great for salad dressings).

Beyond the Kitchen: The Big Picture

Fermenting carrots is about more than flavor. It’s:

  • A simple way to support gut and brain health
  • A powerful tool for reducing food waste (preserve garden carrots for months)
  • An endlessly customizable, creative process—no two batches are exactly alike

And now, cutting-edge research is showing us that these humble jars of fermented veggies might just be part of a holistic, science-backed path to better sleep, mood, and long-term wellness.


Final Thoughts: Start Your Fermentation Journey

If you’ve never tried fermentation before, carrots are the perfect place to start—quick, easy, low-risk, and always rewarding.

Experiment, play, and share your creations! Your gut (and maybe your mind) will thank you.


Have you tried fermenting carrots? Share your favorite variations or ask your fermentation questions in the comments below!


Frequently Asked Questions (FAQs)

1. How long do fermented carrots last in the fridge?
Fermented carrots, once the desired tang is reached and they’re refrigerated, can last 3–6 months (or even longer) if kept submerged in brine and stored in a clean, airtight jar. Always check for off-odors, sliminess, or mold before consuming.


2. How do I know if my carrots have fermented correctly?
Look for signs like bubbles in the brine, a pleasantly tangy/sour aroma, and a cloudy liquid. The carrots should remain crisp, not slimy. Any pink, black, or fuzzy mold is a sign to discard the batch.


3. Can I use table salt for fermentation?
It’s best to use non-iodized, additive-free salt like sea salt or kosher salt. Table salt with iodine or anti-caking agents can interfere with fermentation or produce undesirable flavors.


4. What if my carrots float above the brine?
Carrots must stay fully submerged to avoid spoilage and mold. Use a fermentation weight, a small clean jar, or a folded cabbage leaf to hold them down.


5. Are fermented carrots safe for kids?
Yes! Fermented carrots are generally safe and nutritious for kids, though introduce them in small amounts to avoid digestive discomfort as their gut adapts to probiotics.


6. Can I ferment carrots with other vegetables?
Absolutely! Carrots ferment well with cauliflower, radishes, peppers, beets, and more. Just be sure to cut everything to similar sizes for even fermentation.


7. My brine is cloudy—is this normal?
Yes, cloudy brine is a positive sign of active fermentation. This is caused by lactic acid bacteria and beneficial metabolites.


8. Why do my fermented carrots taste too salty?
This can result from a high salt concentration or not enough vegetables relative to brine. For future batches, adjust the salt to a 2–3.5% ratio and taste your brine before fermenting.


9. Can I use tap water for the brine?
If your tap water contains chlorine or chloramine, it’s better to use filtered or dechlorinated water. Chlorine can slow or halt fermentation by killing beneficial bacteria.


10. What are the health benefits of eating fermented carrots?
Fermented carrots provide probiotics (like Lactobacillus), enhanced vitamin bioavailability, and gut-healthy metabolites (SCFAs). Emerging research suggests benefits for digestion, immune support, mental health, and even sleep.