This post was last updated on:
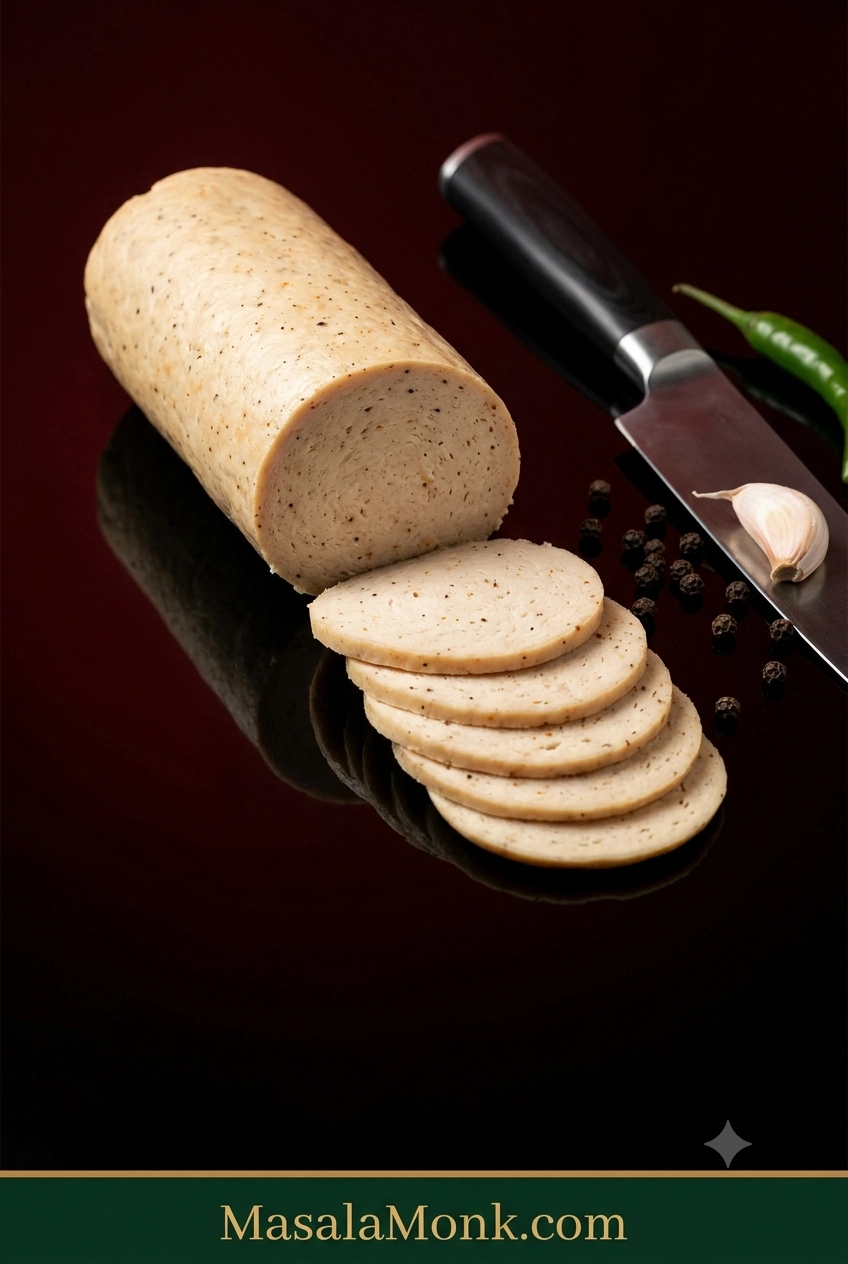
Cold from the fridge, a good slice of homemade chicken salami should bend a little before it breaks: fine-textured, juicy without being wet, peppery and garlicky, firm enough for a sandwich but nowhere near rubbery.
Thin slices sit neatly in toast or a roti wrap without crumbling through the filling, and the rest of the log waits in the fridge for breakfast or lunch tomorrow. Because you season the batch yourself, you decide whether it leans garlicky, peppery, smoky or hot with green chilli.
The ingredients are the easy part. Texture is where homemade chicken salami can get frustrating. The chicken stays loose instead of turning sticky, an ultra-lean batch dries out, air gets trapped through the middle, or the log gets sliced while it is still warm and seems much softer than expected.
For this cooked deli-style version, a handful of details control almost everything: start with cold chicken, process it until sticky, pack the log tightly, cook it to temperature, and give it time to chill before slicing.
What we’re making: fully cooked, deli-style chicken salami—the soft sliced cold cut commonly used for sandwiches, breakfasts and wraps in India and across South Asia. It uses ordinary salt and spices, with no curing salt or separate preservative system, so it must stay refrigerated and has a short storage life. You won’t need a sausage casing, stuffer, grinder or curing chamber.
Quick Answer: Homemade Chicken Salami
For one batch, use 500 g / 17.6 oz / about 1.1 lb cold chicken. A combination of breast and thigh gives you the mild flavour of breast with enough natural fat to help the salami stay tender.
Process the chicken with 8 g salt, garlic, black pepper and spices. Start with 15 ml / 1 tbsp ice-cold water, adding more only if needed, until the chicken changes from mince into a fine, sticky paste that clings to itself.
Shape two compact logs around 5 cm / 2 inches in diameter, wrap the chicken in baking parchment and then foil, and steam until the centre reaches 165°F / 74°C. Chill for at least 4 hours; overnight gives the cleanest slices.
Homemade Chicken Salami Recipe
Make the simple version first. Fresh vegetables, sauces and other wet additions are much easier to judge once you’ve seen what the chicken should look and feel like when it is ready to shape.
| Prep | About 20 minutes |
|---|---|
| Cook | Typically 30–45 minutes for 5 cm / 2-inch logs; finish by temperature |
| Chill | 4 hours minimum; overnight best |
| Total | About 5 hours minimum, mostly chilling; overnight is easiest |
| Yield | 2 short logs; roughly 4–6 servings depending on use |
Equipment
- Food processor or powerful food chopper
- Digital kitchen scale
- Silicone or rubber spatula
- Baking parchment / parchment paper
- Aluminium foil for the outer wrapper
- Steamer, or a large covered pot with a rack
- Digital food thermometer
- Sharp slicing knife
Ingredients
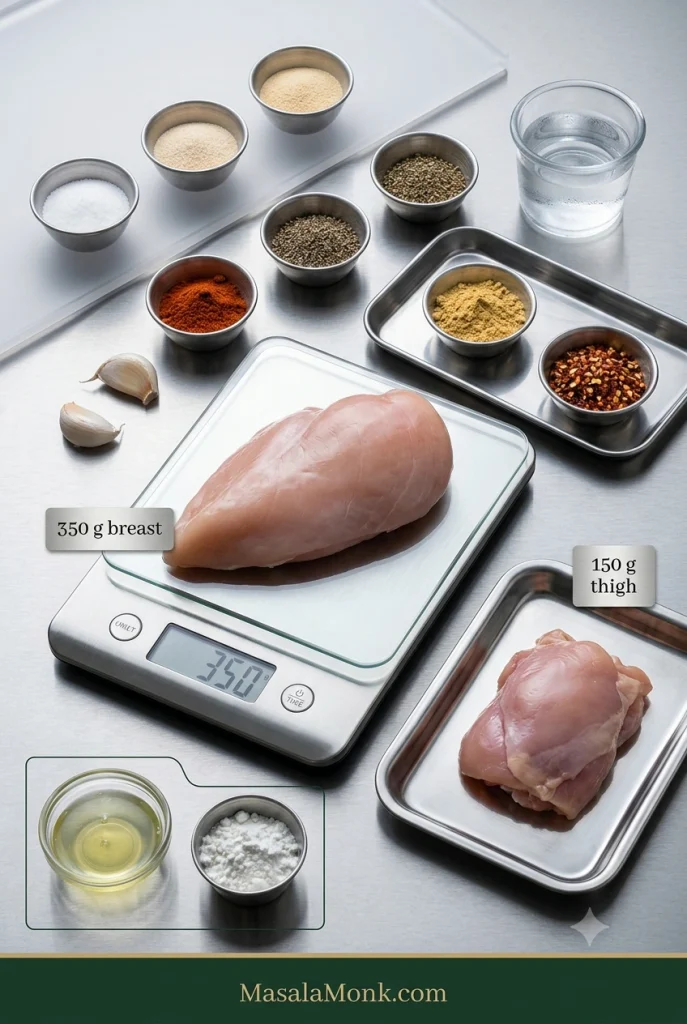
- 350 g / 12.3 oz boneless, skinless chicken breast, very cold
- 150 g / 5.3 oz boneless, skinless chicken thigh, very cold
- 8 g fine salt — about 1⅓ tsp fine table salt; weighing is strongly preferred because different salts fill a spoon differently
- 6 g garlic, about 2 medium cloves, finely grated or crushed
- Onion powder — 1 tsp
- Freshly ground black pepper — 1 tsp
- Sweet or smoked paprika — 1 tsp
- Mustard powder — ½ tsp
- Red chilli flakes — ¼–½ tsp, optional
- 15–30 ml / 1–2 tbsp ice-cold water — start with 1 tbsp and add more only as needed
Optional binder
- 8 g / about 1 tbsp cornstarch (often called cornflour in India and the UK), or
- 1 large egg white
The base recipe works without either. Egg white gives a firmer, slightly springier slice; cornstarch adds a little extra structure without egg. If using egg white, begin without added water and add ice water a teaspoon at a time only if the processor needs it.
Raw-chicken note: there is no need to rinse chicken before processing it. Rinsing can splash raw poultry juices around the sink and nearby surfaces. Keep raw chicken and its utensils away from ready-to-eat foods, wash your hands well, and clean the processor parts, knife, board and work surface thoroughly afterwards.
Instructions
1. Get the chicken fridge-cold
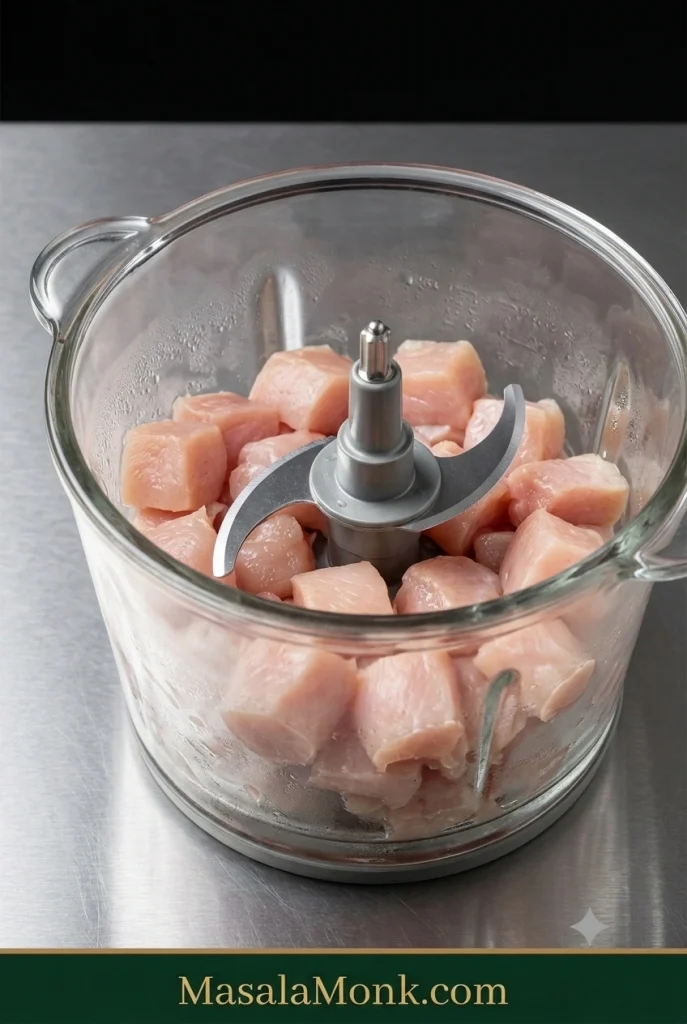
Cut the breast and thigh into roughly 2–3 cm / 1-inch pieces. Meat that has warmed while you gathered everything else can go back into the refrigerator for 15–20 minutes. In a hot kitchen, chilling the processor bowl and blade helps too.
A small processor is better handled in two batches. Keep the first batch chilled while you process the second, then combine them briefly at the end. Crowding the bowl makes the chicken process less evenly and gives it more time to warm up.
2. Start the sticky bind
Add the cold chicken and 8 g salt to the processor. Pulse until the larger pieces have broken down, then process briefly until the meat becomes finer.
Add the garlic, onion powder, black pepper, paprika, mustard and chilli flakes, along with the optional cornstarch or egg white if using.
3. Add the ice water gradually
Start with 1 tbsp / 15 ml ice-cold water and process in short bursts. A stiff mixture that the processor is struggling to move can take a little more, added a teaspoon at a time, up to another tablespoon.
The chicken should look moist and workable. A loose or runny paste has gone too far in the other direction.
4. Let the texture tell you when to stop
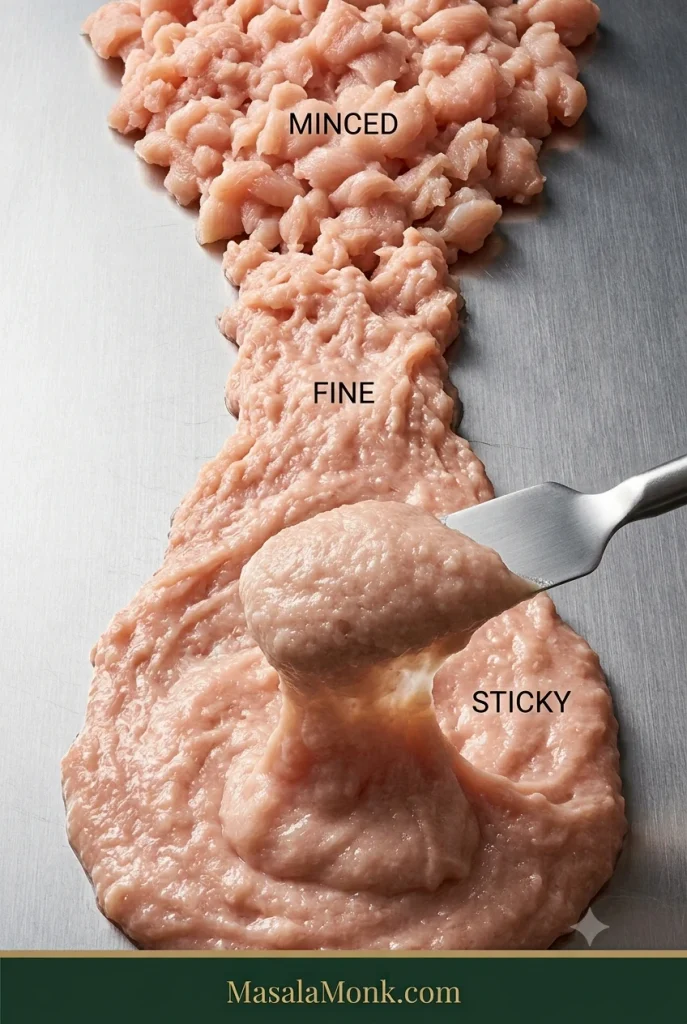
At first you have chopped chicken, then fine mince. Keep going and the texture changes again: the meat begins pulling together into one tacky mass instead of behaving like hundreds of separate grains.
Press a little against a spoon or clean palm. It should cling. Lift some with the spatula and the rest of the meat paste should tug along with it.
Fine, sticky and holding together as one mass is the endpoint. If the bowl starts getting warm before you reach that stage, stop and refrigerate the chicken for 10–15 minutes. Once the mixture is already fine and tacky, stop processing and move on.
5. Cook a tiny seasoning test
Fry about a teaspoon of the mixture in a small pan until completely cooked, then taste it. The garlic, pepper, chilli and paprika should come through clearly. Cold food mutes aroma and spice a little, so the hot test piece can taste a touch bolder than you want the final chilled slice without becoming aggressively salty.
Adjust the seasoning now. Use this little patty for flavour rather than texture; a hot fried spoonful and an overnight-chilled steamed log will feel very different.
6. Shape two tight logs
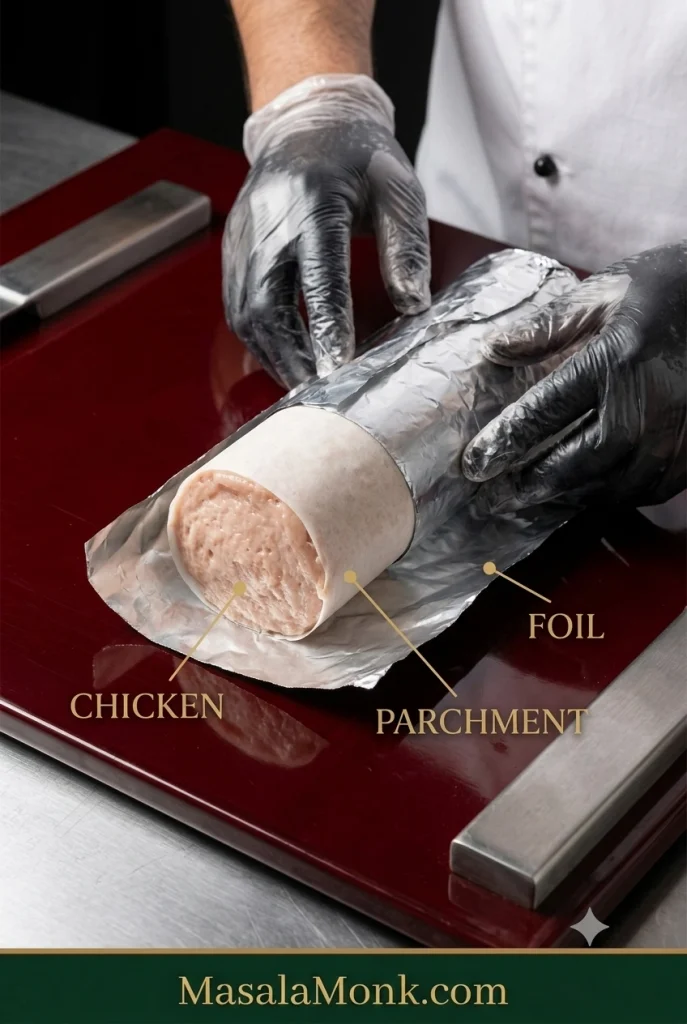
Divide the chicken between two sheets of baking parchment and compact each portion into a cylinder around 5 cm / 2 inches in diameter. Press firmly as you shape and work obvious pockets of air toward the ends. A ruler-straight cylinder is unnecessary; reasonably even thickness and a snugly packed centre are enough.
Roll the parchment around the chicken and twist or fold the ends closed. Wrap each parchment-covered log in foil. The parchment stays between the meat and the aluminium.
7. Steam to 165°F / 74°C
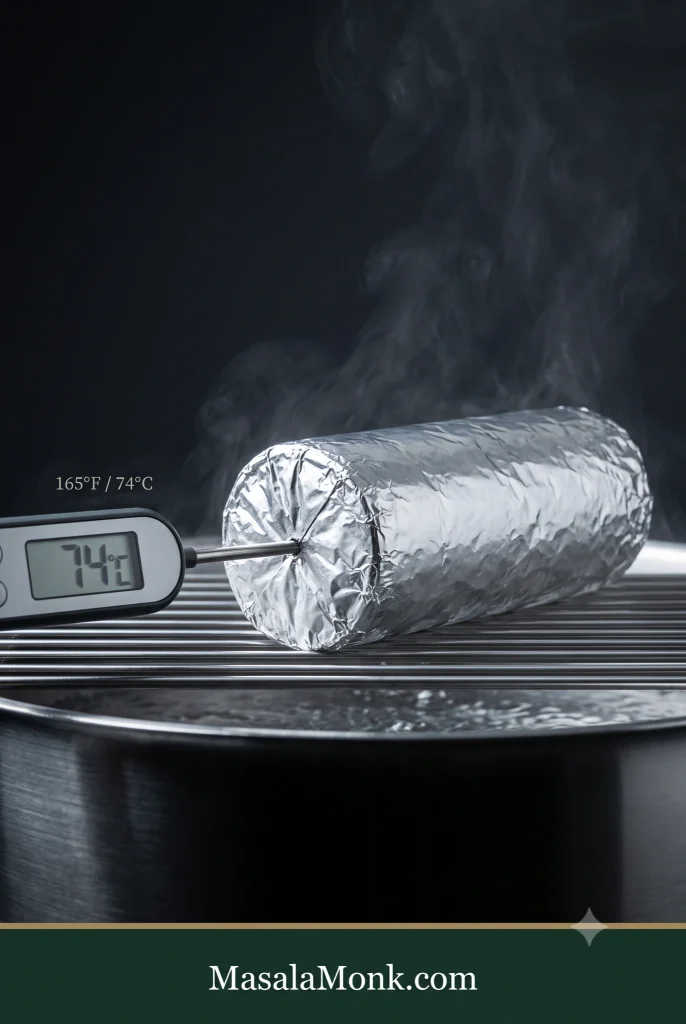
Bring the water in a steamer or covered pot to a steady simmer. Place the logs above the water and cover.
For logs around 5 cm / 2 inches thick, begin checking at about 25–30 minutes. Many batches take roughly 30–45 minutes, but diameter, starting temperature and the steaming setup all affect the timing.
Slide the thermometer probe through one end of the log and aim for the centre. Ground poultry should reach 165°F / 74°C according to USDA safe-temperature guidance. Remove the log once the centre reaches that temperature.
8. Let the steam escape, then refrigerate
Leave the cooked logs for about 10–15 minutes, then carefully loosen the wrapper enough to release the heavy steam. Blot away obvious surface moisture.
Move the salami to the refrigerator promptly. Keep the total time at room temperature under 2 hours—or under 1 hour if the room is hotter than 90°F / 32°C.
9. Chill, unwrap and slice
Refrigerate the salami for at least 4 hours. Overnight gives the neatest texture. A freshly cooked log can feel surprisingly soft, so wait until it is completely cold before deciding how the final texture turned out.
Unwrap the chilled log. Pat the surface dry if needed, then cut with a sharp knife. Rewrap the unsliced portion or move it to an airtight container straight away.
What Good Homemade Chicken Salami Looks Like
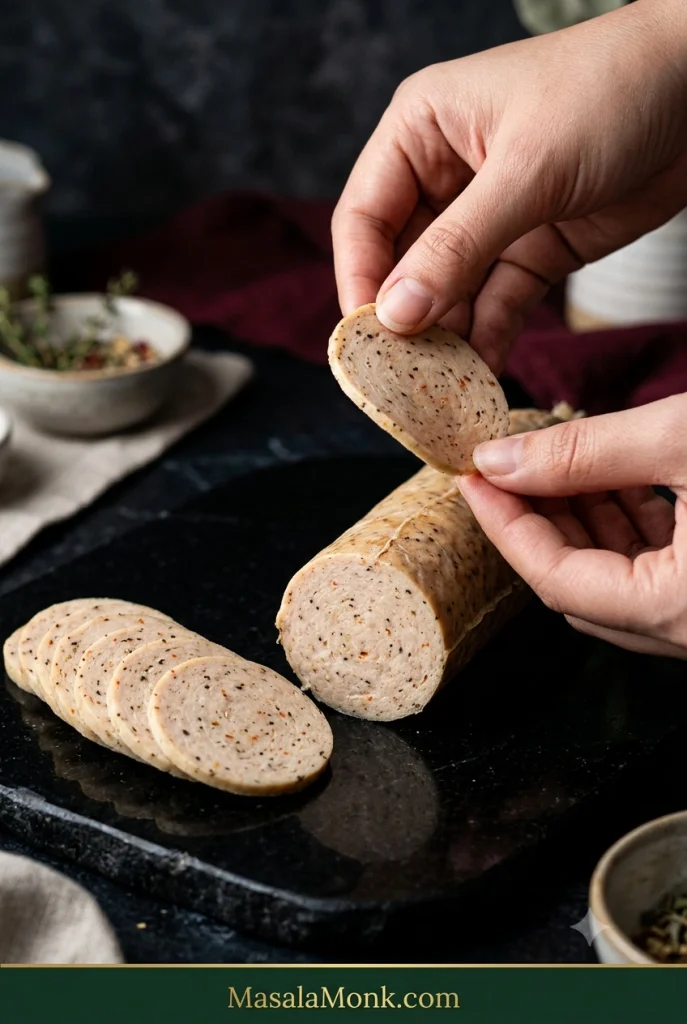
Before worrying about whether your salami looks exactly like a packet from the supermarket, cut one cold slice and look at what it actually does.
- Texture: fine and even rather than visibly granular like a burger.
- Slice: sturdy enough to pick up cold, with a little tenderness and bend.
- Moisture: juicy without large watery or oily pockets.
- Interior: fairly even, with no large tunnels from trapped air.
- Colour: naturally beige, pale brown or faintly rosy depending on the chicken and spices.
- Flavour: savoury and aromatic enough to remain interesting straight from the refrigerator.
Packet chicken salami can be exceptionally smooth and springy because commercial producers can control particle size, mixing and temperature very precisely and may also use starches, fibres or proteins to shape the texture. A home batch can feel a little more meat-like and still slice beautifully.
For straightforward chilled chicken without the fine salami texture, the simpler baked chicken breast recipe may suit you better.
The Texture Rule: Cold → Sticky → Tight → Cooked → Chilled
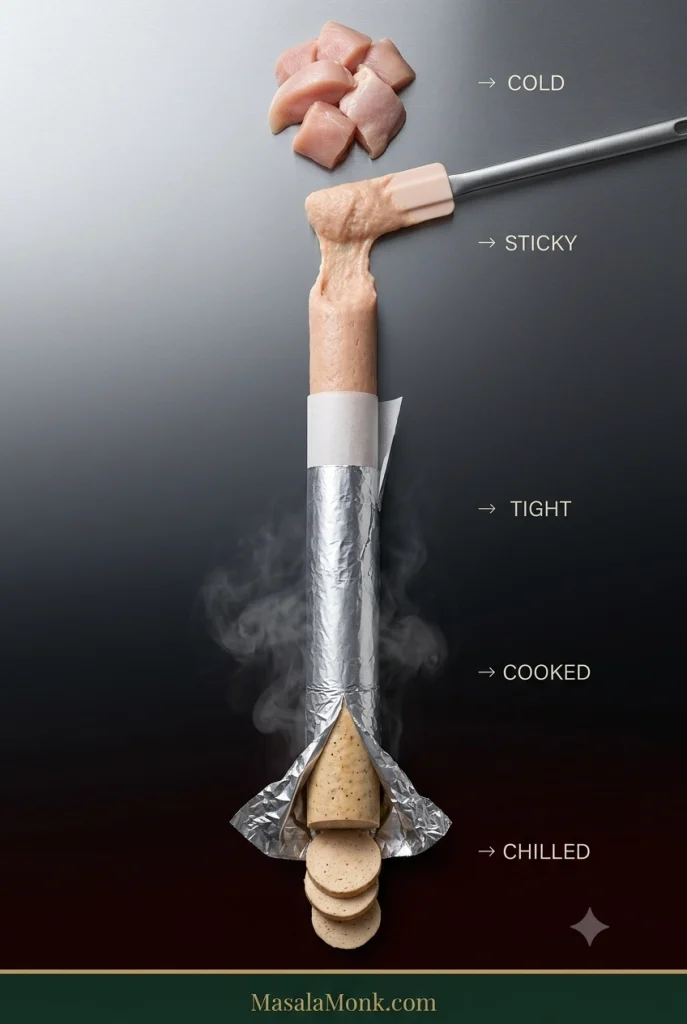
The recipe tells you what to do. This is the bit that explains why it works.
Salt and mixing draw out muscle proteins that make the chicken tacky. That stickiness helps the meat hold moisture and natural fat more evenly as it cooks, which is why a properly processed paste slices so differently from simply seasoned mince.
This recipe also takes the chicken finer than you would for a coarse fresh sausage. Here the goal is a smooth deli-style slice, so visible chunks of mince aren’t what you’re aiming for. Advice to stop grinding early can make perfect sense for another sausage and still give you the wrong texture here.
What each stage controls
Cold. A food processor creates heat quickly. Fridge-cold chicken gives you more working time, and a bowl beginning to feel warm belongs back in the refrigerator for a few minutes.
Sticky. Watch the bowl instead of the clock: loose mince → fine mixture → sticky paste that clings to itself. Stop at loose mince and the chilled salami may crumble. Once the meat is already tacky, extra processing mostly gives it more time to warm.
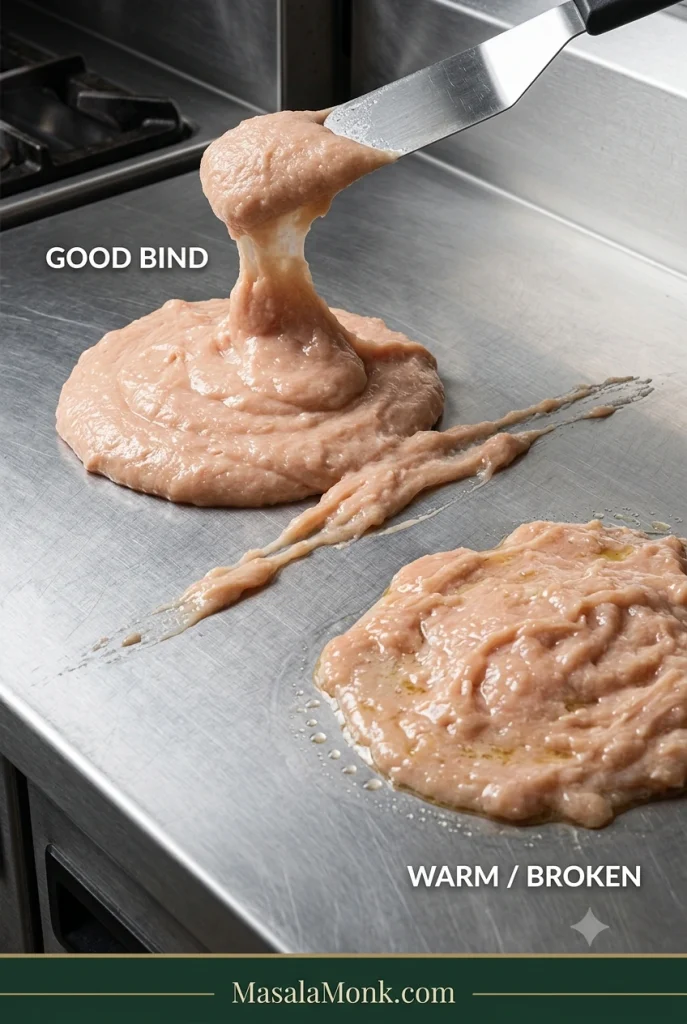
Tight. Compact the paste firmly enough to push out obvious pockets of air. Tiny bubbles in an otherwise good slice aren’t worth worrying about; large tunnels mean the next log needs tighter packing.
Cooked. A thick log simply needs longer than a thin one. Keeping the diameter around 5 cm / 2 inches makes the timing more predictable, while the thermometer takes the guesswork out of the centre.
Chilled. Cooking sets the log; refrigeration firms it. The cold slice should stay in one piece when you lift it, even if it still bends a little between your fingers.
Breast or thigh?
| Chicken | What it gives you | Watch for |
|---|---|---|
| Breast only | Lean, mild, pale | Dries out most easily if cooked too far |
| Thigh only | Juicier and richer | Stronger chicken flavour and naturally more fat |
| Breast + thigh | Balanced flavour, juiciness and structure | Easiest place to start |
| Ground chicken | Convenient and already minced | Results depend on how lean the mince is |
The 350 g breast + 150 g thigh mix gives a first batch some protection against dryness while keeping the flavour mild and chicken-forward. Fresh ground chicken works too; use 500 g as-is when it contains both light and dark meat.
Very lean breast mince needs closer temperature control and can benefit from the optional egg white or cornstarch. If an all-breast batch feels too lean, increasing the proportion of thigh is usually simpler than trying to rescue it with melted butter or oil. That little bit of dark meat is especially noticeable once the salami is cold, when dryness has nowhere to hide.
Egg, cornstarch—or neither?
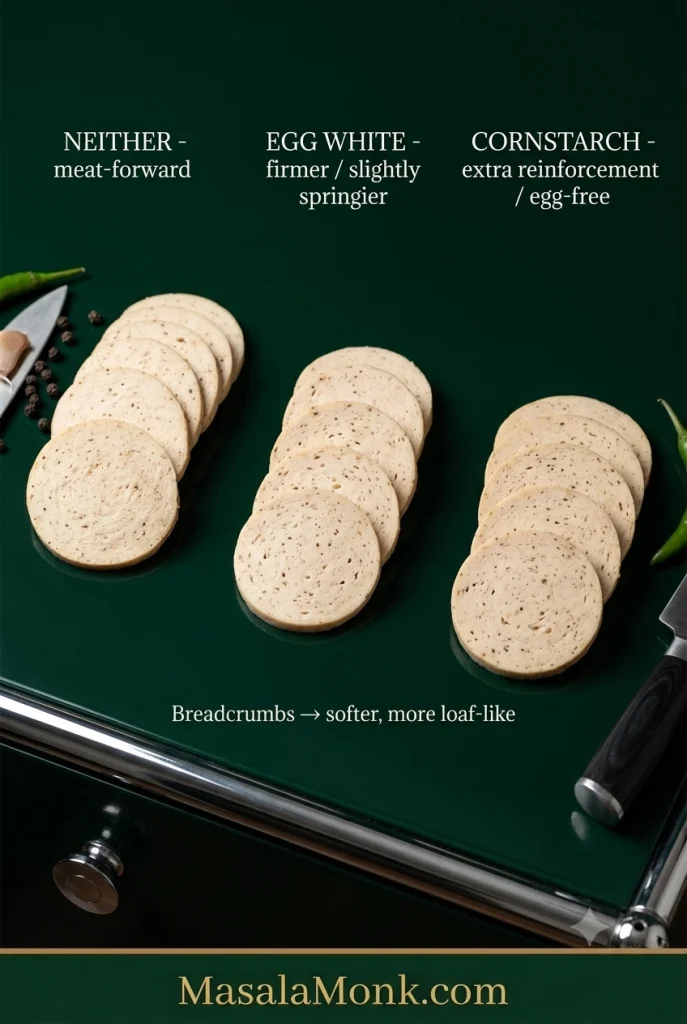
The chicken can hold together without an added binder. Cold meat, enough salt and enough mixing to reach the sticky stage matter more.
- No added binder: the most meat-forward result and a good fit for the breast-thigh mixture once you’ve developed a strong sticky texture.
- Egg white: gives a firmer, slightly springier slice and can be helpful with very lean chicken.
- Cornstarch: adds a little extra reinforcement and is the obvious egg-free option.
- Breadcrumbs: work, but move the texture toward a softer sausage loaf or meatloaf rather than a fine deli-style slice.
Egg or starch can help with firmness and moisture retention. If the mixture never became sticky, fix that before changing the recipe. Gelatin belongs to a different luncheon-meat method in which cooked meat and liquid are moulded and set as they chill.
Mixture still refusing to hold together? Jump to chicken salami troubleshooting →
Shaping the log
For familiar round slices, put parchment directly against the chicken and use foil on the outside to reinforce the cylinder. Twist or fold the parchment ends firmly. Reasonably even thickness and a tightly packed centre matter more than a machine-perfect shape.
Don’t want to roll a cylinder? Pack the chicken firmly into a lightly oiled or appropriately lined heatproof mould, cover it and cook to the same internal temperature. The slices will be square or rectangular, which happens to fit sandwich bread rather nicely.
Once the paste is cold, sticky and tightly packed, most of the texture work is already done. From here, the cooking method matters less than keeping the heat sensible and stopping when the centre reaches the right temperature.
Steamer, Covered Pot, Oven or Air Fryer?
Steaming is still the easiest first choice for the soft, even deli-style texture we’re after. A covered pot can do essentially the same job, while the oven and air fryer are useful when that’s what you already have.
| Method | Starting point | What to expect |
|---|---|---|
| Steam | Begin checking around 25–30 min | Soft, even deli-style texture; best first method |
| Covered pot + rack | Same general timing as steaming | Nearly the same result without a dedicated steamer |
| Oven | 330°F / 165°C; begin checking around 30 min | Slightly firmer exterior |
| Air fryer | About 330°F / 165°C to start | More dry heat around the outside; easier with smaller logs |
No steamer?

Add a few centimetres of water to a large pot and set a rack, trivet or sturdy heatproof inverted bowl above the waterline. Put the wrapped logs on top, cover tightly and keep the water at a steady simmer. The chicken should sit in steam rather than in the water.
Some home recipes simmer a tightly wrapped log directly in hot water. Keeping this version above the waterline reduces the chance of water finding its way into the parcel, so steaming is the baseline method here.
Oven method
Place the parchment-and-foil-wrapped logs on a baking tray and bake at 330°F / 165°C. Begin checking the centre around 30 minutes and remove the salami when it reaches 165°F / 74°C.
Air fryer method
Smaller logs are easier to manage in an air fryer. Start around 330°F / 165°C, follow your appliance guidance for foil or wrapped foods, and cook to the same internal temperature instead of relying on one universal time.
After Cooking: Colour, Chilling & Clean Slices
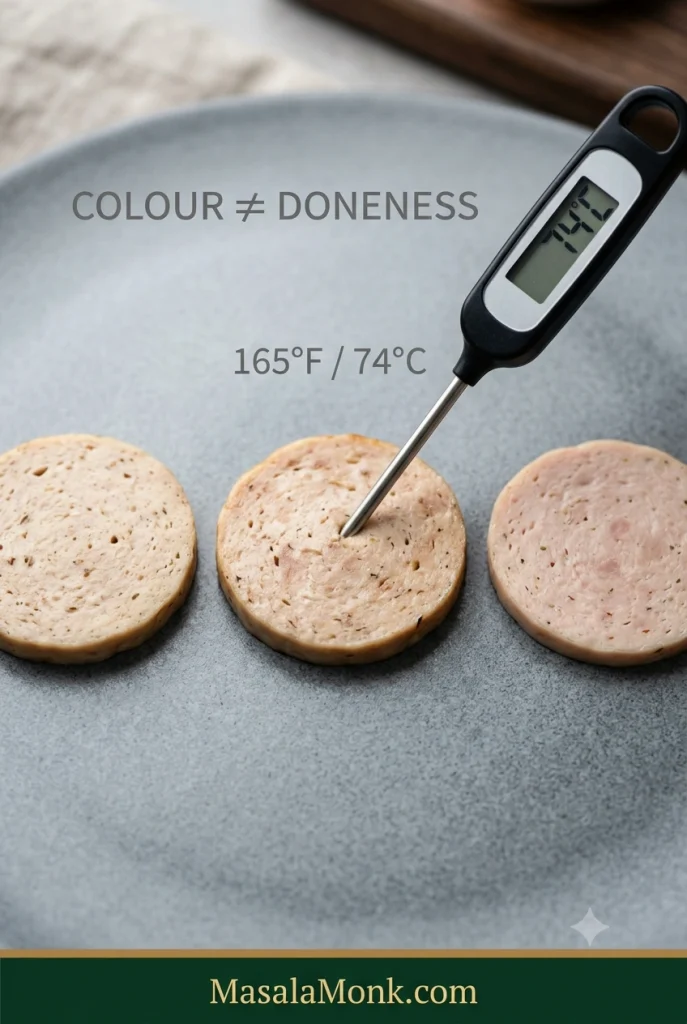
Use the thermometer for doneness rather than trying to read the colour. This is uncured cooked chicken, so the inside may be beige, pale brown or faintly rosy. It does not need the even pink colour associated with many commercial cured cold cuts.
If you simply prefer a rosier appearance, a little beetroot juice can tint the meat. Replace some of the recipe’s ice water with the same amount of beet juice so the total liquid stays under control. It changes the colour and adds a faint earthy note; it does not change the cooking temperature or preserve the salami.
For thin deli-style slices, chill first
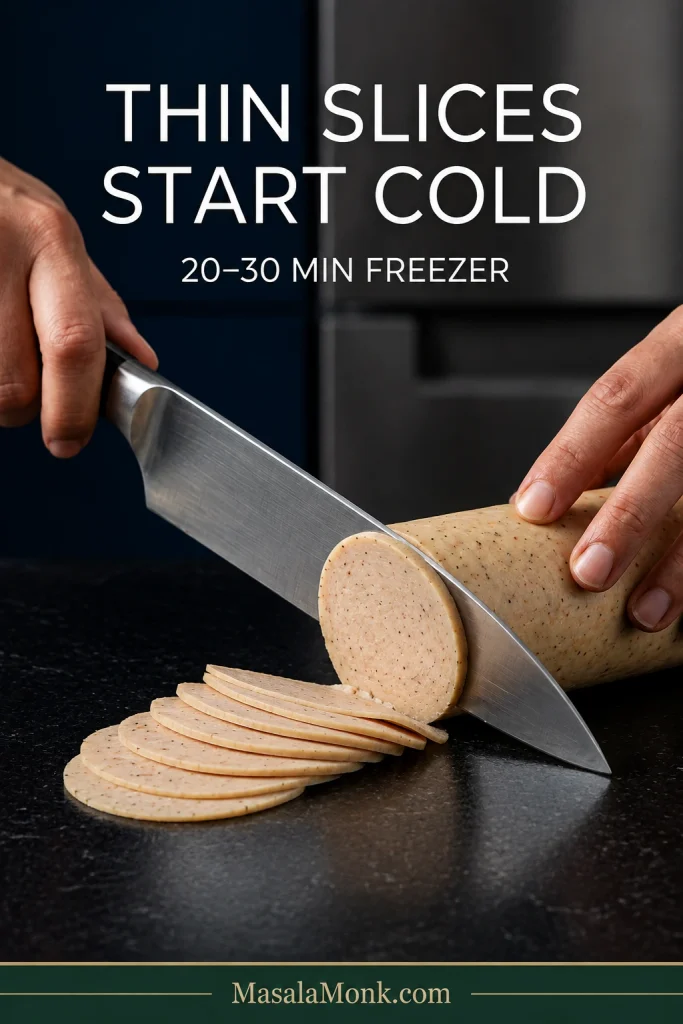
Start with completely cold salami and a sharp knife. Overnight refrigeration gives the easiest slicing. For finer rounds, put the chilled log in the freezer for 20–30 minutes so it firms up without freezing solid.
Don’t worry if the first few slices are thicker than deli-counter cuts. A clean slice that lifts intact matters more than getting it paper-thin.
Those thin slices are particularly good with egg and cheese; MasalaMonk’s breakfast sandwich guide has more ideas for breads, eggs, cheeses and sauces around them.
Chicken Salami Troubleshooting
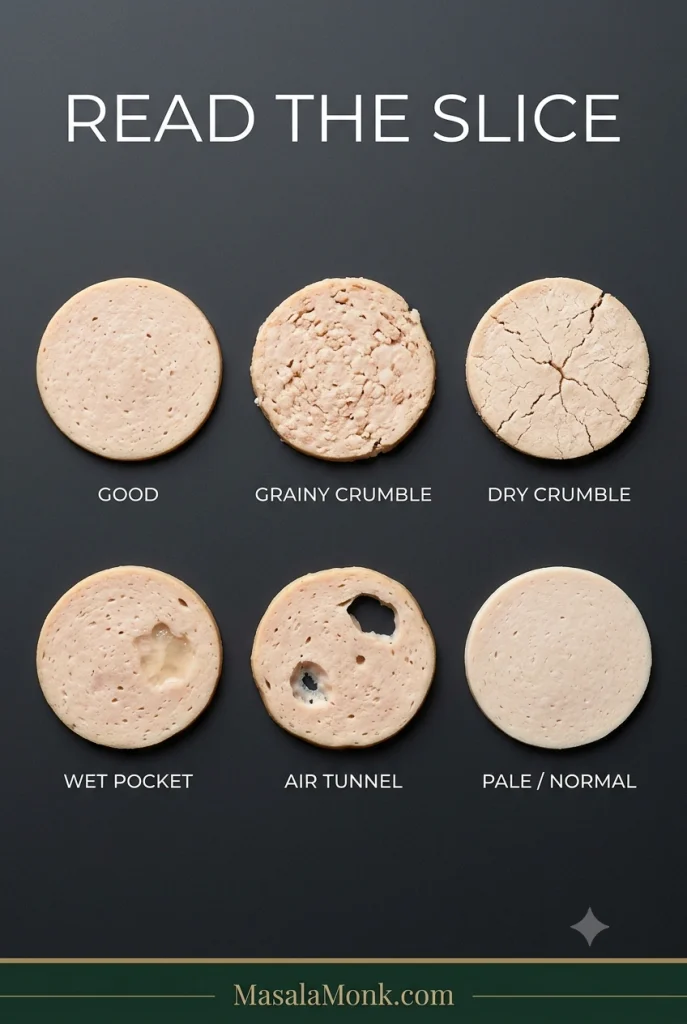
“Crumbly” can mean several different things. Look at the cold slice first; it usually tells you more than automatically adding extra egg, starch or water to the next batch.
| What you see | First thing to try |
|---|---|
| Cold slices crumble into meat grains | Keep the chicken colder and process until genuinely sticky |
| Dry, crumbly slices | Use some thigh and stop cooking at 165°F / 74°C |
| Greasy puddle around the log | Keep the mixture colder and avoid large amounts of rendered fat |
| Wet or jelly-like pockets | Reduce free liquid and squeeze wet aromatics |
| Large holes through the slices | Pack the log more firmly |
| Pale or greyish interior | Usually normal for uncured chicken; check temperature, not colour |
The cold slice crumbles into little pieces
Think back to the processor. Did the chicken ever reach the point where it clung to the spatula and pulled together as one mass? If it never did, start there rather than immediately increasing the binder.
Warm meat, very coarse processing, dramatically reduced salt or a generous amount of onion juice or sauce can all weaken the structure. Egg white or cornstarch can offer extra support, but they work best after the chicken itself has reached that sticky stage.
It is dry, mealy or strangely bouncy
All-breast chicken is easier to dry out, particularly when it cooks far beyond the safe endpoint. Thigh gives you more natural fat and moisture to work with.
A mealy or almost tofu-like bite can also turn up in a very lean, unstable mixture. At the opposite extreme, lots of processing and binder can push the texture toward an overly springy bounce. Think back to the earlier target: cold, cohesive and tacky—not warm and greasy.
There is grease, water or empty space inside
A teaspoon or two of cooking juice around the salami is ordinary. By contrast, a noticeable puddle of grease suggests that fat separated somewhere along the way, often because the chicken warmed up before its structure was properly developed.
Wet pockets point more toward excess free liquid. Start with less ice water next time and remember that fresh onion, sauces, yogurt and citrus juice all count toward the moisture in the bowl. Vinegar and generous amounts of lemon juice need care too: enough acid in the raw mixture can work against the sticky texture you’re trying to build. Add that sharpness later with chutney, mustard, pickles or a squeeze of citrus at the table.
Large air tunnels are simpler. Pack the next log more firmly. Tiny bubbles in an otherwise good slice aren’t worth worrying about.
← Back to the chicken salami recipe Back to the quick answer ↑
Three Easy Ways to Change the Flavour
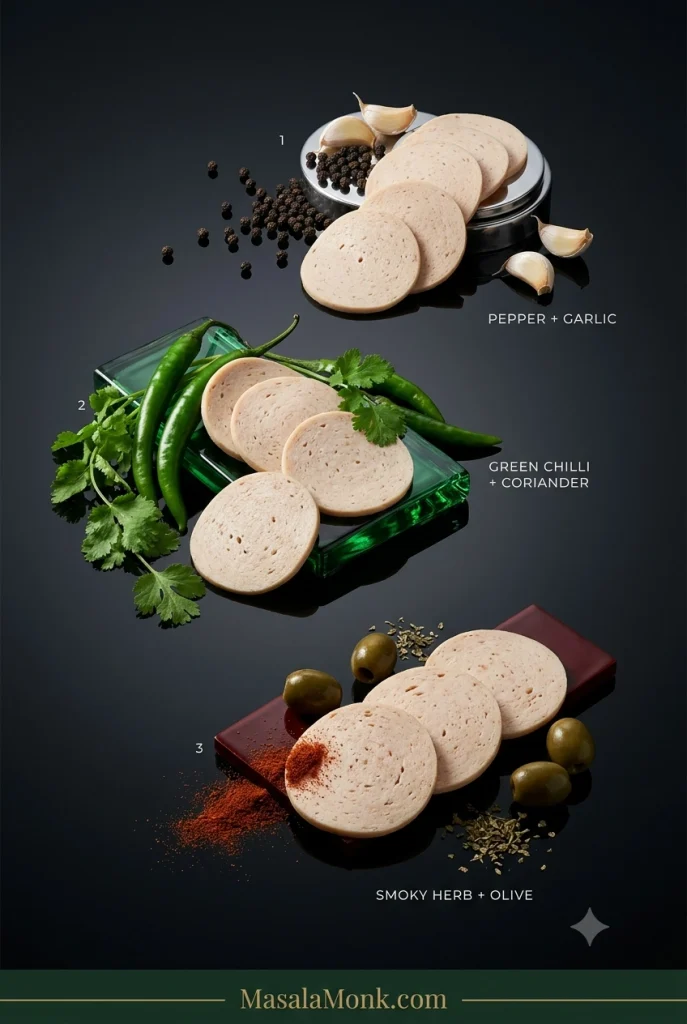
Once you know what the basic chicken paste should feel like, keep the meat, salt and moisture balance steady and change the aromatics around them.
Pepper & Garlic
Keep the garlic from the base recipe, increase the black pepper to about 1½ tsp, keep the mustard and use sweet or smoked paprika. Leave out the chilli flakes for a gentler version.
It stays savoury and peppery even when cold, which makes it particularly good in sandwiches. A little honey mustard gives those flavours a sweet-sharp edge.
Ginger, Green Chilli & Coriander
Add 1 tsp finely grated ginger, 1 small green chilli and 2 tbsp finely chopped coriander. Keep the black pepper, and add chilli flakes only if you want another layer of heat.
The ginger and coriander keep the flavour fresh while the green chilli brings heat without flooding the chicken with sauce. Serve the slices with a thick green chutney for a brighter sandwich or roti wrap.
Smoky Herb & Olive
Use 1–1½ tsp smoked paprika, ½ tsp dried oregano, ¼ tsp dried thyme and 1–2 tbsp finely chopped, well-drained green olives. Add a small pinch of chilli flakes if you like.
Pat the olives dry before chopping. Their salty, briny flavour is welcome; a pocket of olive brine inside the salami isn’t.
Once There’s a Cold Log in the Fridge

It earns its fridge space quickly. Brown a couple of slices and add a fried egg for breakfast, or keep them cold with cucumber, lettuce, tomato, pickles, mustard and cheese. Shredded cabbage or crisp coleslaw is especially good against the softer salami.
For a quick roti wrap, add sliced onion, cucumber and green chutney, then squeeze over lime just before eating. When packing it for school or work, use an insulated lunch bag with a cold pack.
The salami is already cooked, so pizza, pasta and omelettes only need enough extra heat to warm or brown it. Add thin rounds toward the end of pizza baking, fold diced pieces into eggs, or colour thicker slices briefly in a pan before tossing them through pasta.
If both logs aren’t going to disappear into breakfasts, sandwiches and wraps within the next few days, freeze the second one while it’s still fresh.
How to Store and Freeze Homemade Chicken Salami
Treat this as cooked perishable chicken, not shelf-stable salami.
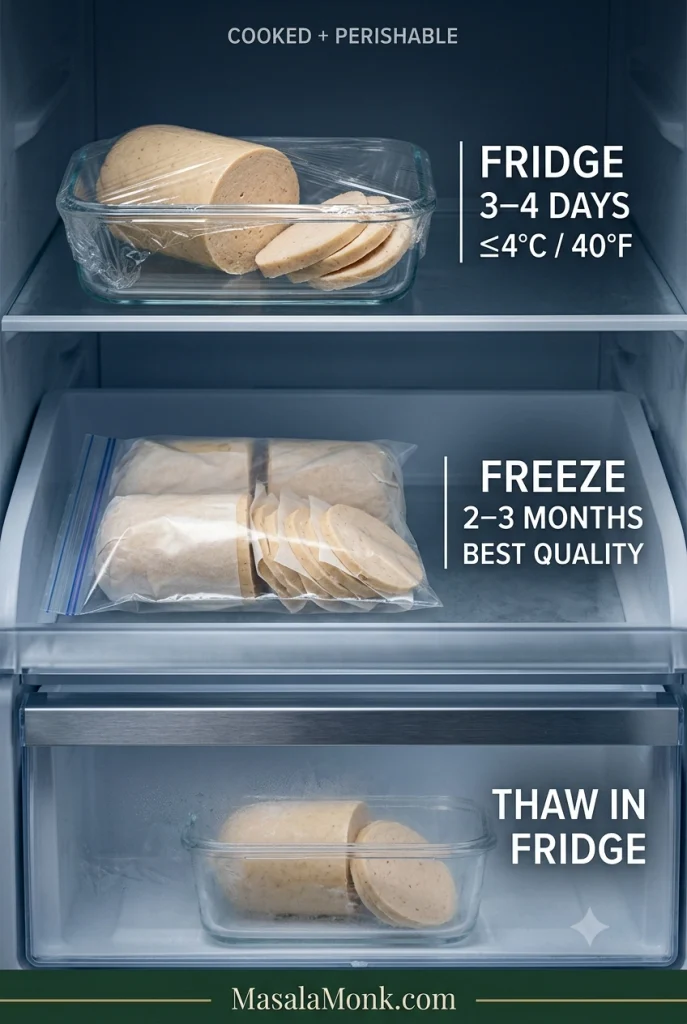
Refrigerator
Wrap a completely cold log tightly or transfer it to an airtight container. Cover cut surfaces once you begin slicing so they don’t dry out.
Keep homemade chicken salami at 40°F / about 4°C or colder and use it within 3–4 days. This matches USDA storage guidance for fresh sausage cooked at home.
Freezer
Freeze half logs or meal-sized portions rather than one large block. For sliced salami, put small sheets of parchment between portions so they separate easily.
Two to three months is a useful freezer window for best quality. Food kept continuously frozen remains safe beyond that, but flavour and texture gradually decline.
Thawing
Thaw the salami in the refrigerator. A frozen-and-thawed slice may be a little softer than one cut from a freshly chilled log, particularly with very lean or wetter batches.
That short refrigerator life is also the clearest reminder that this recipe is a very different thing from traditional dry salami.
Cooked Chicken Salami vs Traditional Dry-Cured Salami
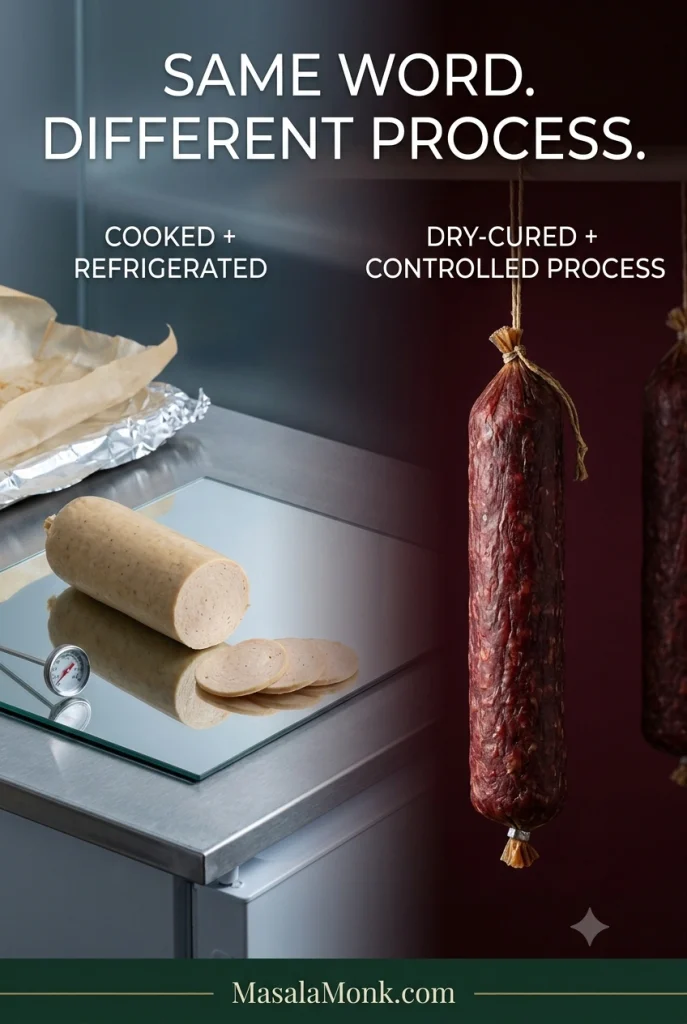
Traditional dry salami is perfectly possible to make at home, but it is a different project. Depending on the style, it can involve precisely measured curing ingredients, starter cultures, fermentation, appropriate casings, controlled temperature and humidity, and weeks of drying.
That process deserves a validated recipe of its own. Smell and appearance alone cannot establish that raw cured meat is safe, and curing products with different formulations should not be swapped spoon-for-spoon because their names look similar.
For this cooked chicken version, the rule is much simpler: cook the ground poultry fully, chill it promptly and keep it refrigerated.
A Few Remaining Questions
Does this use curing salt or added preservatives?
No. This version uses ordinary salt, but no curing salt or separate preservative system. Keep it refrigerated and use it within 3–4 days, or freeze it.
Does the chicken have to touch aluminium foil?
No. Baking parchment sits directly against the chicken and the foil goes around the outside for support. A covered heatproof mould is another option if you prefer not to use a foil-wrapped log.
Can I make it without a food processor?
Very finely ground chicken can be mixed vigorously with salt until tacky to make a coarser cooked sausage. For the smooth deli-style texture in this recipe, a food processor or powerful chopper is strongly preferred.
Can I freeze the slices?
Yes. Chill the salami completely first, freeze meal-sized portions with parchment between the slices, and thaw what you need in the refrigerator.
Can I use turkey, pork or beef?
The general cooked-log idea can be adapted, but this recipe is formulated around chicken. Ground turkey should also reach 165°F / 74°C. For ground pork and ground beef, use at least 160°F / 71°C. Different meats have different fat levels, so expect some change in texture rather than treating them as exact one-for-one substitutions.
Is homemade chicken salami healthy?
Homemade does not automatically mean healthier. Making the salami yourself gives you control over the chicken, salt, seasonings and optional binder, while the nutritional picture still depends on those choices and on portion size. It is better thought of as a homemade cooked cold cut than as a health food.
The Best Part Comes the Next Morning
After a night in the refrigerator, the knife should pass through cleanly and the cold slice should lift in one piece.
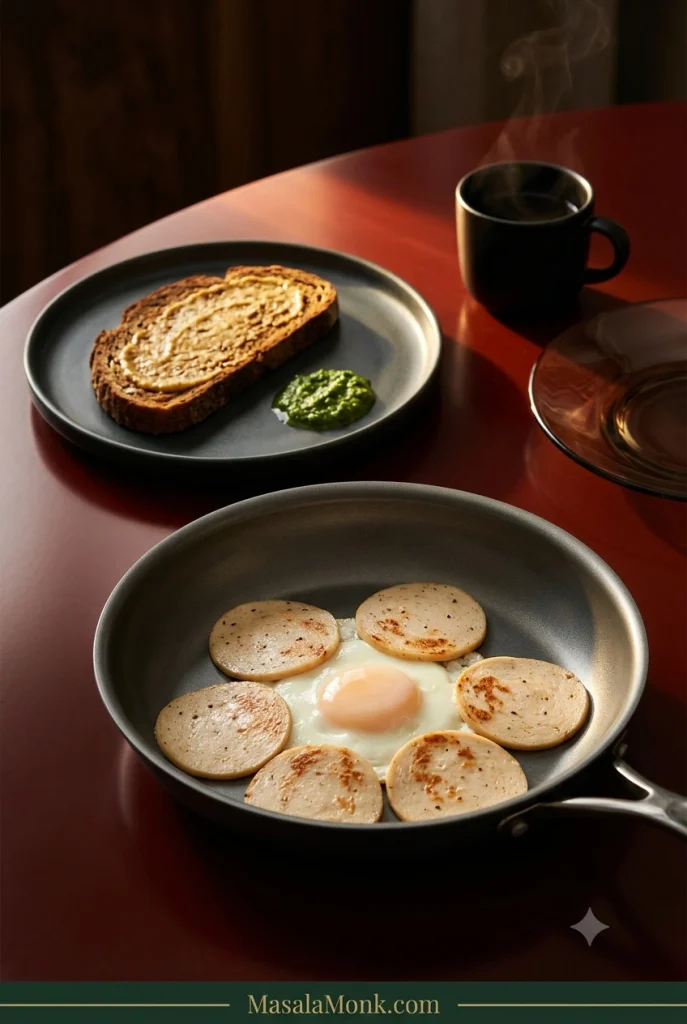
Eat it cold, or give a couple of slices a minute in a hot pan until the edges brown and the garlic wakes up again. Add an egg, toast and mustard—or a swipe of green chutney—and breakfast is done.