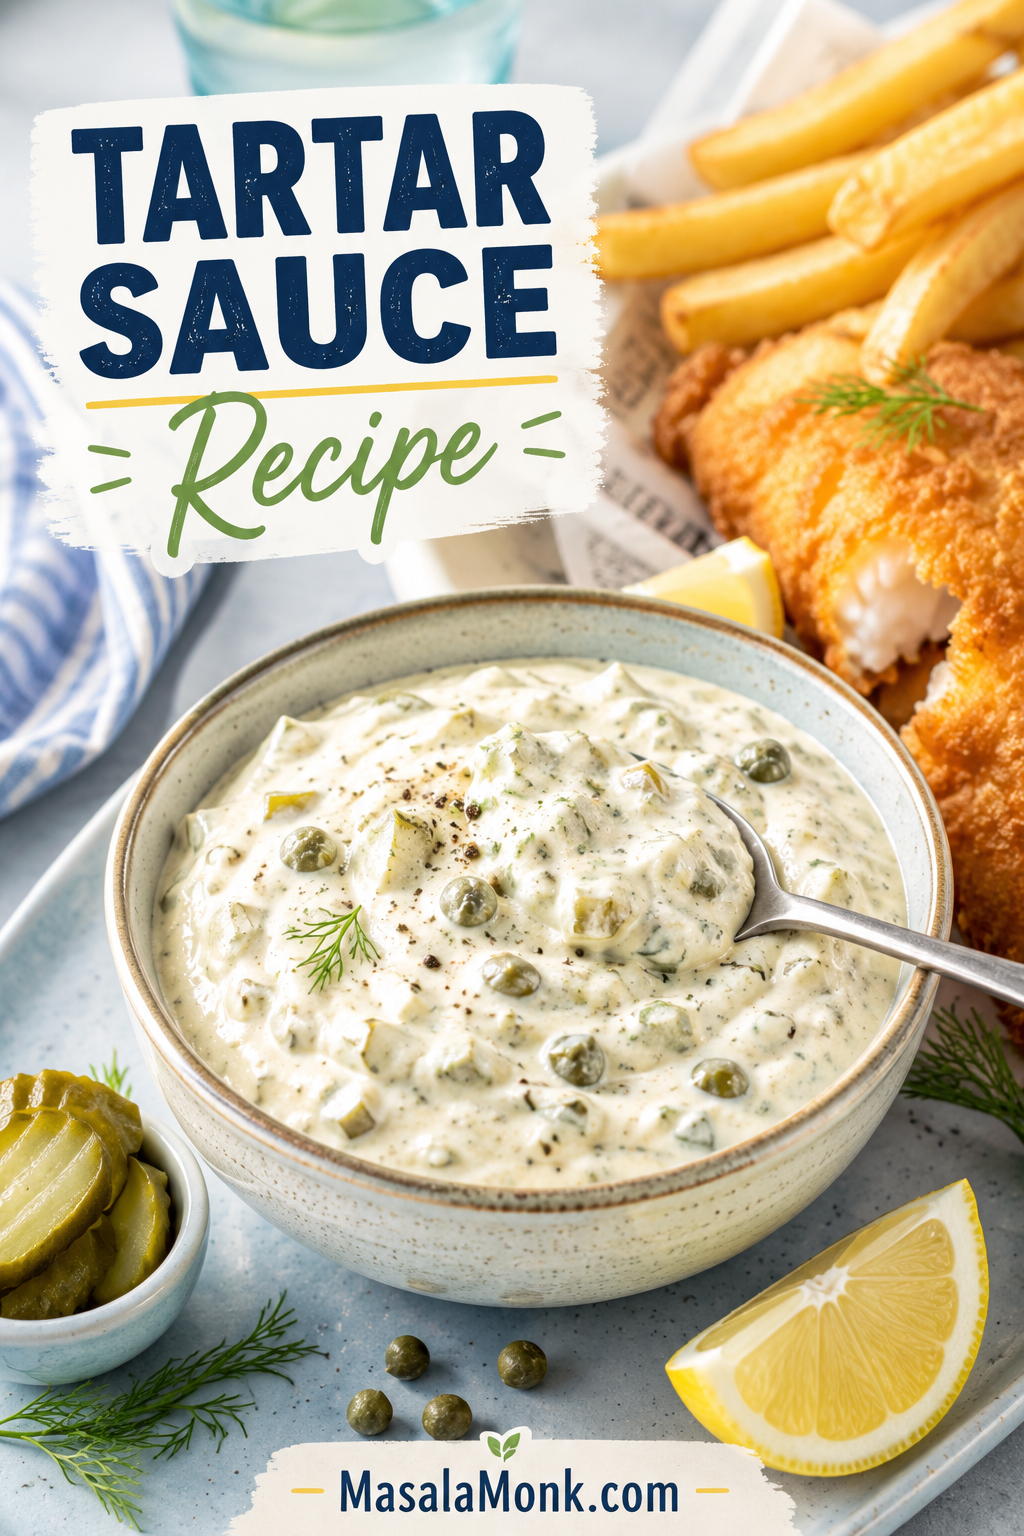
The best tartar sauce recipe makes hot fried fish taste better, not heavier. It should be creamy enough to cling, loose enough to spoon, and full of tiny pickle-and-caper bites so every forkful gets a little crunch, lemon, salt, and freshness.
This no-cook homemade tartar sauce is built for fish and chips, fish sticks, crab cakes, salmon cakes, shrimp, fries, and fried fish sandwiches. Start with the classic dill pickle version when you want the best match for fish and chips, use the quick relish version when dinner is moving fast, and use the substitution notes when the fridge is missing relish, pickles, capers, lemon, or mayo.
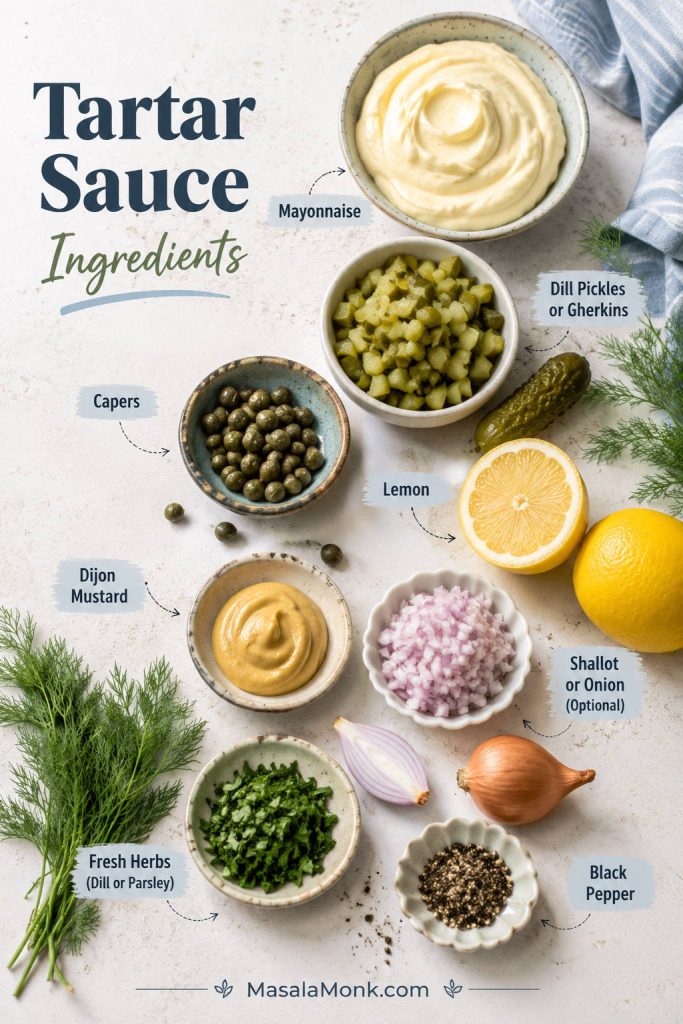
To make tartar sauce, stir mayonnaise with finely chopped dill pickles or relish, lemon juice, capers, Dijon mustard, herbs, and black pepper. Chill it for 15 to 30 minutes if you have time. For fish and chips, start with dill pickles, gherkins, or cornichons; for fish sticks or soft fish sandwiches, sweet relish gives a milder diner-style sauce.
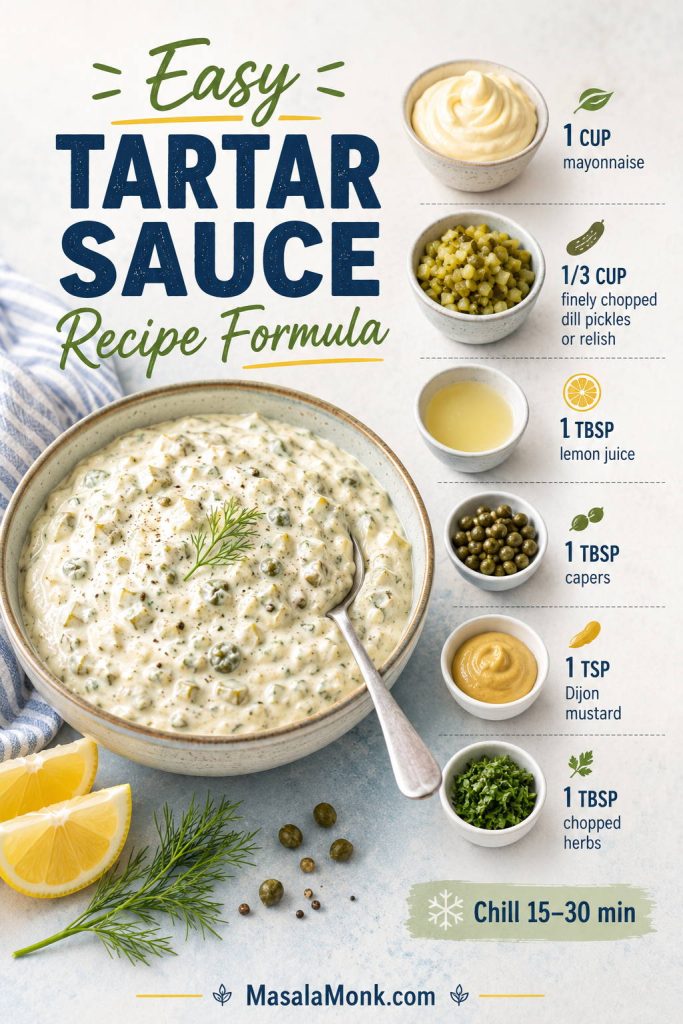
Best default ratio: For every 1 cup of mayo, use about ⅓ cup finely chopped dill pickles or relish, 1 tablespoon lemon juice, 1 tablespoon capers, 1 teaspoon Dijon, and 1 tablespoon chopped herbs. Make it before you start frying, and the sauce will be cold, rested, and ready when the fish hits the plate.
Use this formula as the starting point, then taste after chilling; the pickles, capers, lemon, and herbs settle as they rest.
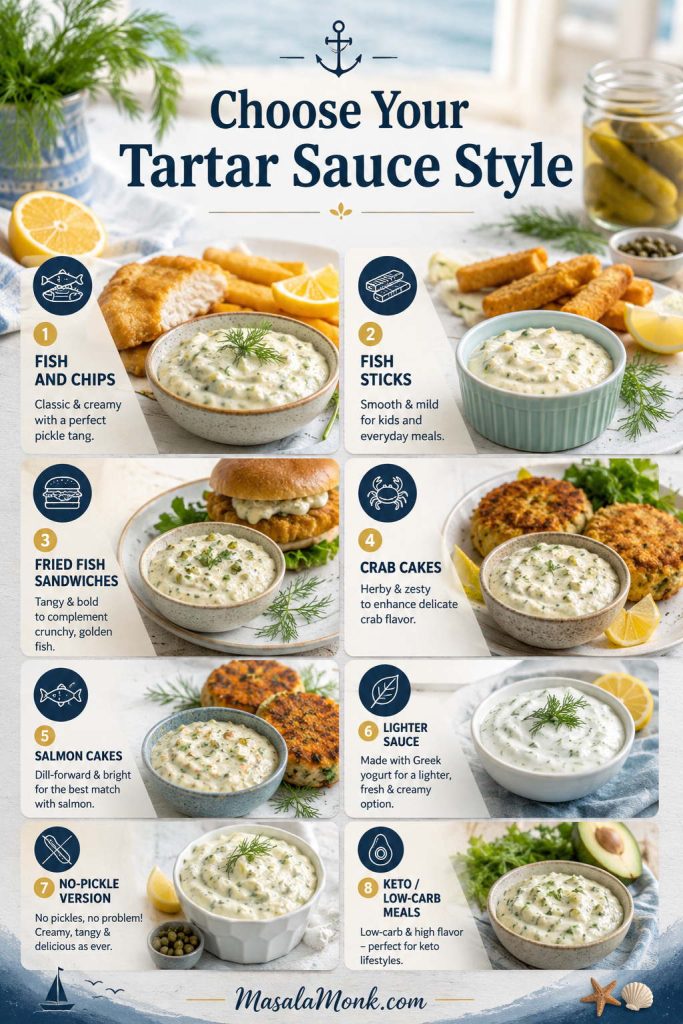
Not sure which version fits your meal? Use the style guide below before you start mixing.
Homemade Tartar Sauce at a Glance
Prep time
10 minutes
Cook time
0 minutes
Rest time
15–30 minutes recommended; 1 hour if using raw onion or shallot
Yield
About 1¼ cups / 300 ml
Serving size
2 tablespoons / 30 ml
Servings
8–10
Best with
Fish and chips, fried fish, fish sticks, seafood cakes, shrimp, fries, and fish sandwiches
Main texture
Thick, spoonable, lightly chunky, and easy to dip
Storage
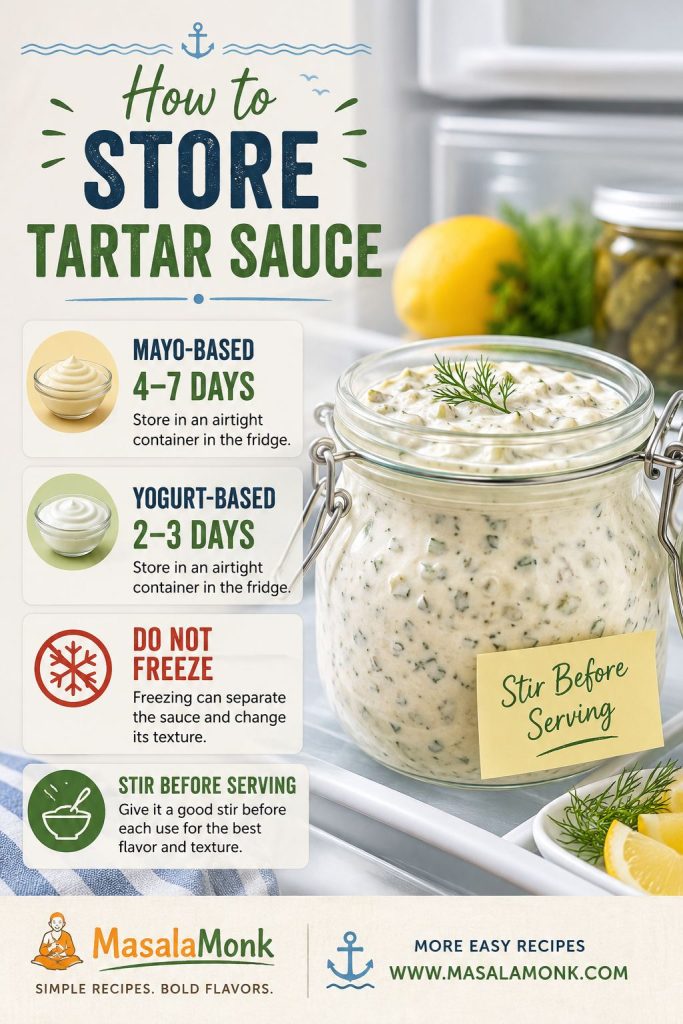
Mayo-based sauce: best quality within 4–7 days; Greek yogurt sauce: 2–3 days
Freezing
Not recommended
Start with this bowl when dinner is moving fast; the notes below are there for texture choices, missing ingredients, lighter bases, and different seafood plates.
Homemade Tartar Sauce Recipe for Fish and Chips
This no-cook sauce is thick enough to sit on hot fish without sliding off, but still loose enough to spoon. The key is fine chopping: the pickles and capers should show up in every bite without turning the sauce into a bowl of relish.
Make the bowl before the fish goes in the oil, and the sauce will taste more settled by the time dinner is ready.
Prep10 minutes
Cook0 minutes
Rest15–30 minutes
Yield1¼ cups / 300 ml
Ingredients
1 cup mayonnaise, about 225 g / 240 ml / 8 fl oz
⅓ cup finely chopped dill pickles, gherkins, or cornichons, about 55–65 g
1 tablespoon capers, drained and chopped, about 9–10 g
1 tablespoon fresh lemon juice, 15 ml
1–2 teaspoons pickle juice, optional, for extra tang or to loosen the sauce
1 teaspoon Dijon mustard, 5 ml
1 tablespoon chopped fresh dill or parsley, about 2–4 g
1 tablespoon finely minced shallot or onion, optional
½ teaspoon Worcestershire sauce, optional
¼ teaspoon black pepper
Salt, only if needed
Method
Chop the mix-ins finely. Finely chop the pickles, capers, herbs, and optional shallot or onion. Smaller pieces give the sauce better texture and more even flavor. If one bite tastes like plain mayo and the next tastes like a pickle jar, the pieces are too big.
Mix the base. Add the mayonnaise, lemon juice, Dijon mustard, and black pepper to a bowl. Stir until smooth.
Fold in the flavor. Add the chopped pickles, capers, herbs, optional pickle juice, and optional onion or shallot. Stir until evenly combined.
Taste before salting. Pickles and capers are salty, so add salt only after tasting.
Rest if possible. Cover and refrigerate for 15–30 minutes. The sauce works immediately, but resting lets the chopped ingredients season the mayo.
Adjust and serve cold. Stir once more before serving. Add lemon for lift, pickle juice for tang, mayo for softness, or capers for a saltier seafood edge.
Finished taste cue: The sauce should taste creamy first, then pickle-crunchy and lemony, with a light finish. If it feels heavy, add lemon or pickle juice. If it bites too hard, soften it with another spoonful of mayo.
Recipe Notes
Want it sweeter? Swap the chopped dill pickles for sweet pickle relish.
Serving fried fish? Use dill pickles, capers, lemon, and herbs.
Prefer a smoother sandwich sauce? Mince the pickles and capers very finely or pulse once or twice.
Making it vegan? Choose vegan mayo and skip Worcestershire sauce unless you are using a vegan one.
Want it lighter? Replace half or all of the mayo with plain Greek yogurt.
Keeping it keto? Choose full-fat mayo, dill pickles, capers, lemon, herbs, and no sweet relish or sugar.
Yield note: Yield varies slightly depending on how finely the pickles are chopped and whether you add pickle juice.
For more swaps and missing-ingredient fixes, see the substitution guide.
Choose Your Tartar Sauce Style
Use this table when you already know what is on the plate. It keeps the sauce matched to the meal without overthinking the bowl.
You are serving
Use this style
Fish and chips
Dill pickles or gherkins, capers, lemon, and herbs
Fish sticks
Sweet relish, mayo, and lemon juice
Fried fish sandwich
Finely minced relish or pickles, a little onion, and a smoother texture
Crab cakes
Lemon, capers, dill, and a little extra pepper or cayenne
Salmon cakes
Extra dill, lemon zest, and a thicker mayo base
No pickles
Capers, shallot, lemon juice, and Dijon
Lighter sauce
Half mayo and half Greek yogurt
Keto or low-carb meal
Full-fat mayo, dill pickles, capers, lemon, and no sweet relish
The best bowl depends on the meal: sharper for crisp seafood, smoother for sandwiches, and lighter when the plate needs a fresher finish.
Why This Tartar Sauce Recipe Works
This sauce works because it balances fat, acid, salt, crunch, and rest time. Mayo gives the sauce body, while lemon and pickle juice cut through the mayo’s richness. Pickles bring texture, capers add small salty pops, and a short chill lets the chopped ingredients season the mayo instead of sitting in it separately.
That is why finely chopping matters. Large pickle pieces make some bites taste plain and others taste too sharp. Smaller pieces spread flavor through the bowl, so each spoonful lands the same way.
What Is Tartar Sauce Made Of?
Tartar sauce, also called tartare sauce in the UK and some other regions, is a creamy sauce usually made with mayonnaise, pickles or relish, lemon juice, herbs, and salty ingredients such as capers. It is most often served with fried fish, fish and chips, fish sticks, crab cakes, shrimp, and seafood sandwiches.
The creamy base can be as simple as store-bought mayo, but if you want to build the sauce from scratch, MasalaMonk’s mayo recipe walks through classic, eggless, vegan, garlic, spicy, and herb mayo options.
This small ingredient list works because every part has a job: mayo gives body, pickles add crunch, capers bring salt, and lemon keeps the sauce awake.
Ingredient
What it does
Can you skip or swap it?
Mayonnaise
Creates the thick, creamy base.
Swap in vegan mayo, Greek yogurt, sour cream, or a half-mayo, half-yogurt mix.
Dill pickles, gherkins, or cornichons
Add crunch, acidity, and pickle flavor.
Sweet relish works for a sweeter sauce; capers help if you have no pickles.
Capers
Add small salty pops that suit seafood.
Optional, but worth using. Replace with extra pickles or pickle juice.
Lemon juice
Lifts the mayo and cuts through fried food.
Pickle juice, white vinegar, or apple cider vinegar can stand in.
Dijon mustard
Adds gentle sharpness and depth.
Yellow mustard, a little vinegar, or no mustard at all will still work.
Dill, parsley, chives, or tarragon
Add freshness and color.
Dried dill works in a pinch; otherwise, leave herbs out.
Shallot or onion
Adds savory bite.
Optional. Onion powder gives a milder pantry-style flavor.
Worcestershire sauce
Adds a deeper savory note.
Optional. Skip for vegetarian or vegan tartar sauce unless using a vegetarian or vegan Worcestershire.
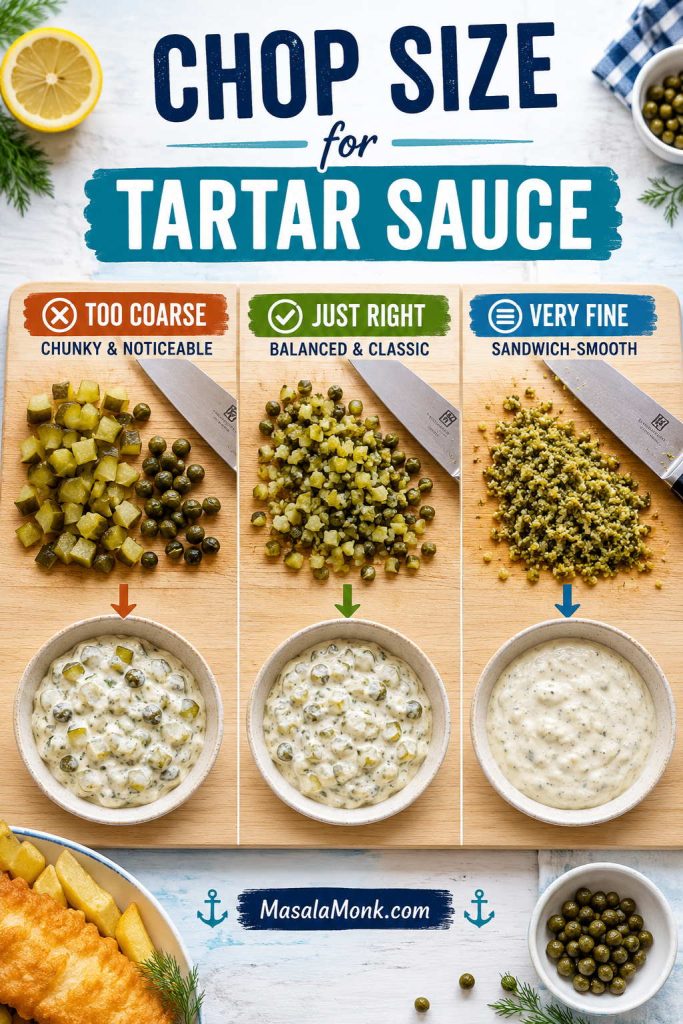
The Only Equipment Detail That Matters: Chop Size
No blender is needed. A bowl, spoon, knife, cutting board, and storage jar are enough. The important part is chop size: pickles and capers should be small enough to spread through the mayo, but not so tiny that the sauce loses texture.
Chop size is the quiet difference between homemade tartar sauce that tastes balanced and a bowl where one bite is plain while the next is all pickle.
Use a small food processor only when you want a smoother sandwich-style sauce. For dipping fish and chips, a knife gives better control.
After chopping, check the finished texture target so the sauce clings without turning stiff or runny.
How to Make Tartar Sauce Step by Step
1. Chop the Pickles and Capers Finely
The sauce should not feel like chopped pickles held together with mayo. Chop the pickles, capers, herbs, and optional onion finely so every spoonful tastes balanced. If the pieces are too large, some bites taste salty and others taste plain.
2. Mix the Mayo, Lemon, and Mustard First
Add the mayonnaise to a small bowl, then stir in the lemon juice, Dijon mustard, and black pepper. This loosens the mayo slightly and helps the sharper ingredients spread evenly before the chunky ingredients go in.
3. Fold in the Pickles, Capers, and Herbs
Add the chopped pickles, capers, herbs, and optional onion or shallot. Stir until everything is evenly coated. The sauce should look creamy and speckled, with small bits of pickle, caper, and herbs in every spoonful.
4. Taste Before Adding Salt
Pickles, relish, capers, mustard, and Worcestershire sauce can all bring salt. Taste before adding more. If the bowl feels dull, it may need lemon juice, pickle juice, capers, or mustard before it needs salt.
5. Chill, Then Adjust
You can serve it immediately, but 15–30 minutes in the fridge improves the flavor. Stir once more before serving. Add lemon for lift, pickle juice for tang, mayo for softness, or capers for a saltier seafood edge.
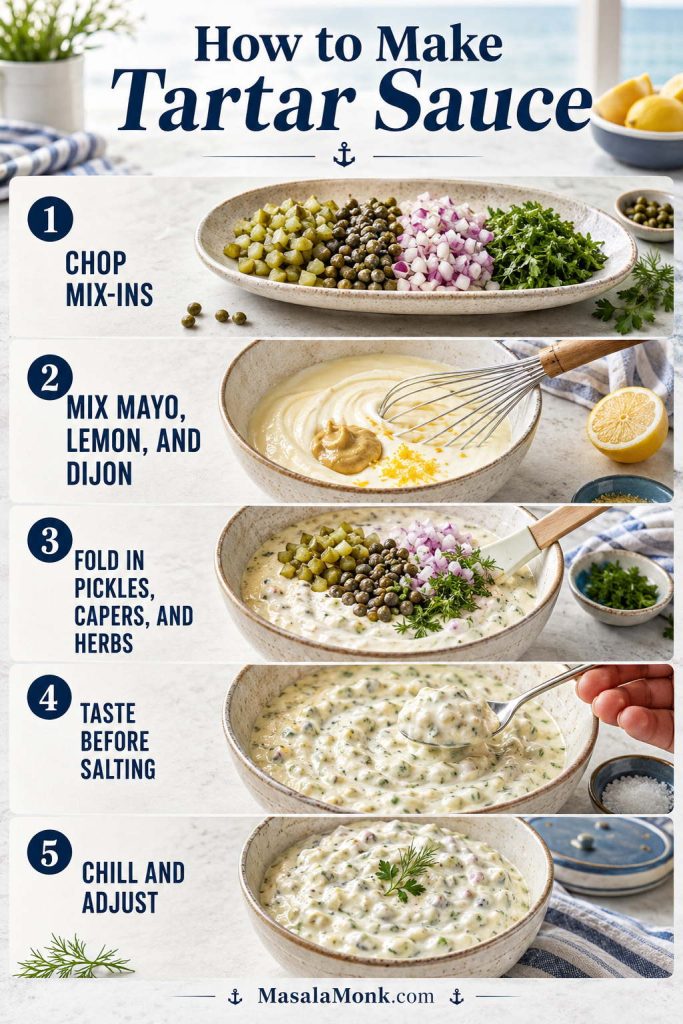
Here is the full stir-and-chill sequence at a glance.
Even though tartar sauce is no-cook, sequence still matters: chop small, season the base, fold gently, taste late, and chill before serving.
Texture Target: Chunky Dip or Smooth Sandwich Sauce
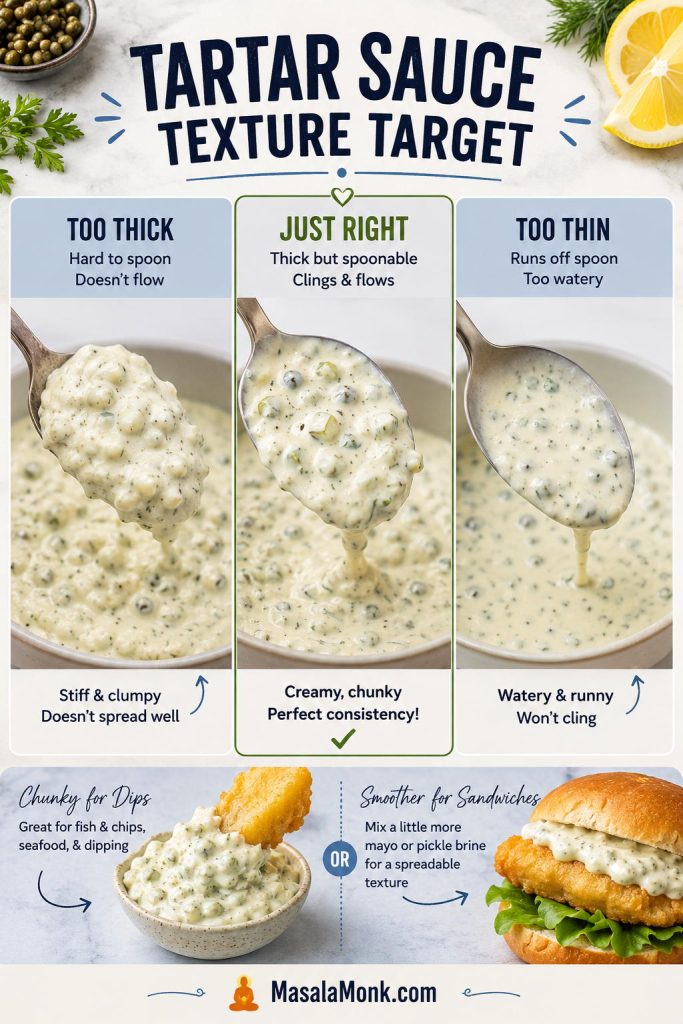
The sauce should be thick enough to sit on a piece of fish without sliding off, but loose enough to spoon easily. For dip texture, keep the pickles and capers finely chopped but visible. For sandwich texture, mince everything smaller or pulse once or twice.
Aim for a sauce that holds on a spoon without feeling stiff. Keep dip versions chunkier and sandwich versions finer.
If the sauce looks stiff, loosen it with pickle juice, lemon juice, or a teaspoon of water. If it looks runny, add a spoonful of mayo and chill it for 15–30 minutes. A good bowl should cling, not puddle.
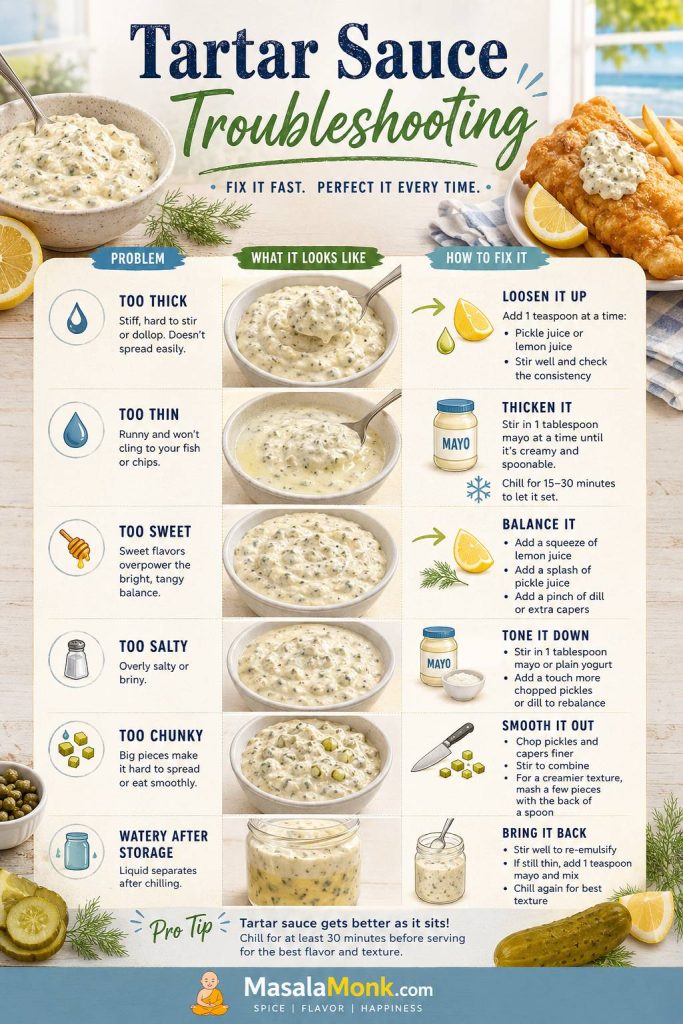
If the sauce has already gone too thick, thin, sweet, or salty, use the troubleshooting guide before making bigger changes.
3-Ingredient Tartar Sauce
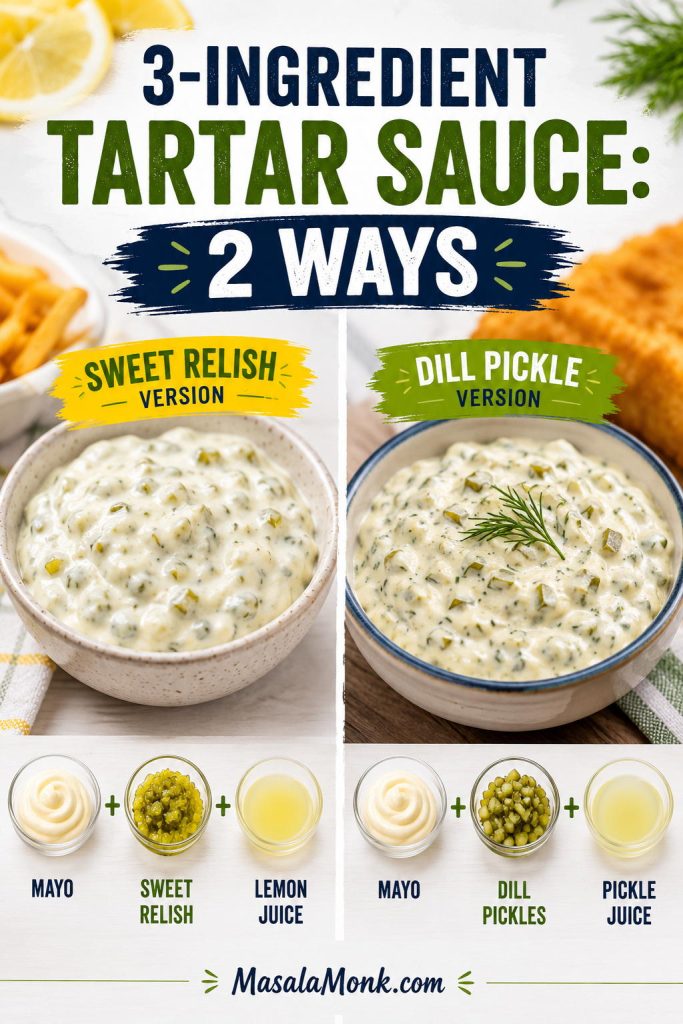
When you need the fastest bowl, you only need mayonnaise, pickles or relish, and lemon juice or pickle juice. This quick pantry sauce is not as layered as the full recipe, but it is exactly right for fish sticks, quick fried fish, frozen seafood, sandwiches, and busy weeknight dinners.
In a hurry, use relish and the sauce is closer to 5 minutes. For the best fish-and-chips texture, finely chopping pickles, capers, and herbs is worth the extra few minutes.
Sweet Relish 3-Ingredient Tartar Sauce
1 cup mayonnaise
⅓ to ½ cup sweet pickle relish
1 teaspoon lemon juice
Dill Pickle 3-Ingredient Tartar Sauce
1 cup mayonnaise
⅓ cup finely chopped dill pickles
1–2 tablespoons pickle juice or lemon juice
Stir, taste, and chill if possible. More pickle juice makes the bowl tangier; another spoonful of mayo softens it.
Three ingredients can still make a useful quick tartar sauce: relish gives a softer finish, while dill pickles give a sharper one.
If one of those ingredients is missing, the substitution section below will help you rebuild the bowl.
Sweet Relish vs Dill Pickles: Which Is Better?
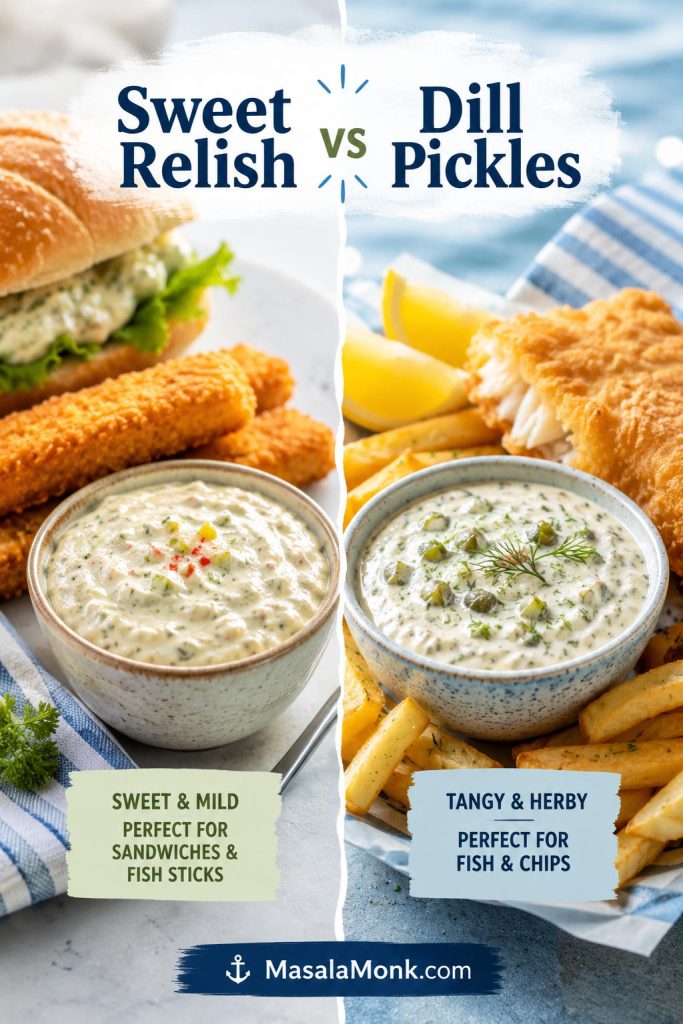
Team dill pickle for fish and chips, team sweet relish for fish sticks — both have a place, but they are not the same sauce. Dill pickles, gherkins, and cornichons give you a more direct pickle bite. Sweet relish gives you a softer, sweeter, more diner-style sauce.
Beside crisp battered fish, dill pickles or gherkins are the better default. If you want both directions in one bowl, use half dill pickle and half sweet relish.
Sweet relish and dill pickles both belong in tartar sauce, but they solve different cravings: soft and familiar versus crisp and pickle-bright.
The best tartar sauce for fish and chips should be thick, cold, pickle-forward, and lemony enough to wake up the batter. Make it first, then let it chill while the fish cooks and the chips finish.
Mix the tartar sauce before frying, because a short chill makes the sauce taste settled by the time the fish is hot and crisp.
If you are making the full meal, pair this sauce with MasalaMonk’s fish and chips recipe. While the sauce rests, you can prep the batter from MasalaMonk’s fish batter recipe so the cold sauce and hot coating are ready at the same time.
The goal is not fancy. It is that second bite where the fish still feels crisp and the sauce makes it easier to keep going.
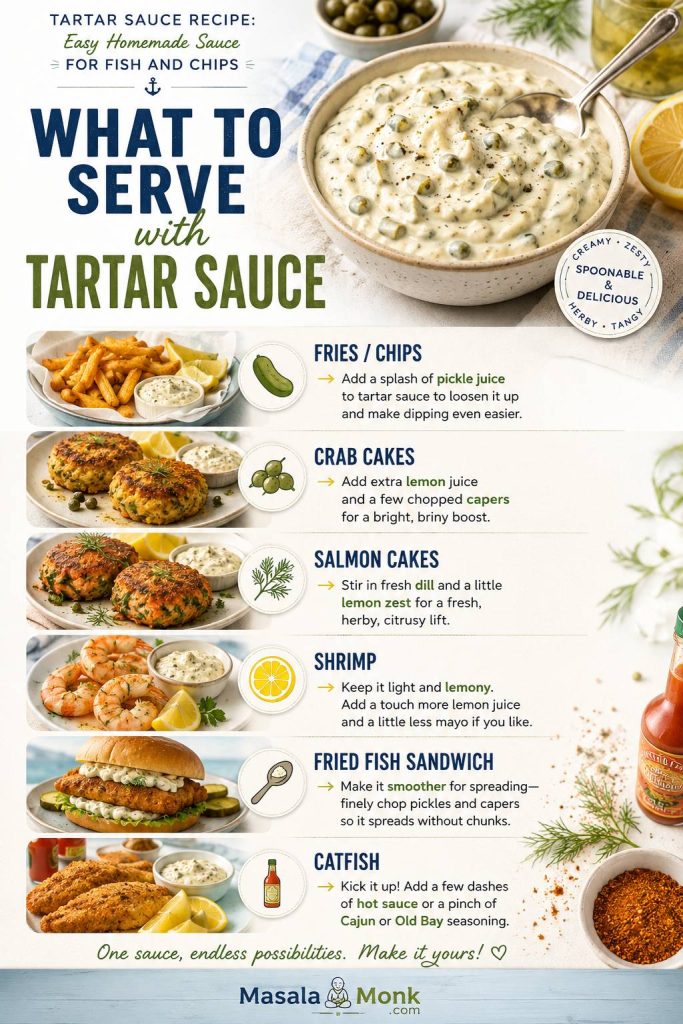
What to Serve with Tartar Sauce
Once the basic sauce is made, adjust the texture or seasoning for the food beside it instead of repeating the whole recipe.
Serve with
Small adjustment
Fries or chips
Loosen slightly with pickle juice so it dips easily.
Crab cakes
Add extra lemon, capers, and a pinch of cayenne.
Salmon cakes
Add more dill and a little lemon zest.
Shrimp
Keep it lighter with parsley, lemon, and less onion.
Fried fish sandwich
Mince everything smaller so the sauce spreads cleanly.
Catfish
Add hot sauce, Cajun seasoning, or Old Bay-style seafood seasoning.
After the base is ready, adjust by the plate: loosen it for fries, add lemon for seafood cakes, or mince it finer for a sandwich spread.
That same cold, lemony contrast works beside MasalaMonk’s fish cakes, especially against crisp potato and flaky white fish. It is just as useful with salmon croquettes, where the capers and dill echo the flavors already working in the patties.
For a fry-night plate, MasalaMonk’s battered fries give the sauce exactly what it wants: something hot, crisp, and salty to cut through.
Homemade vs Store-Bought Tartar Sauce
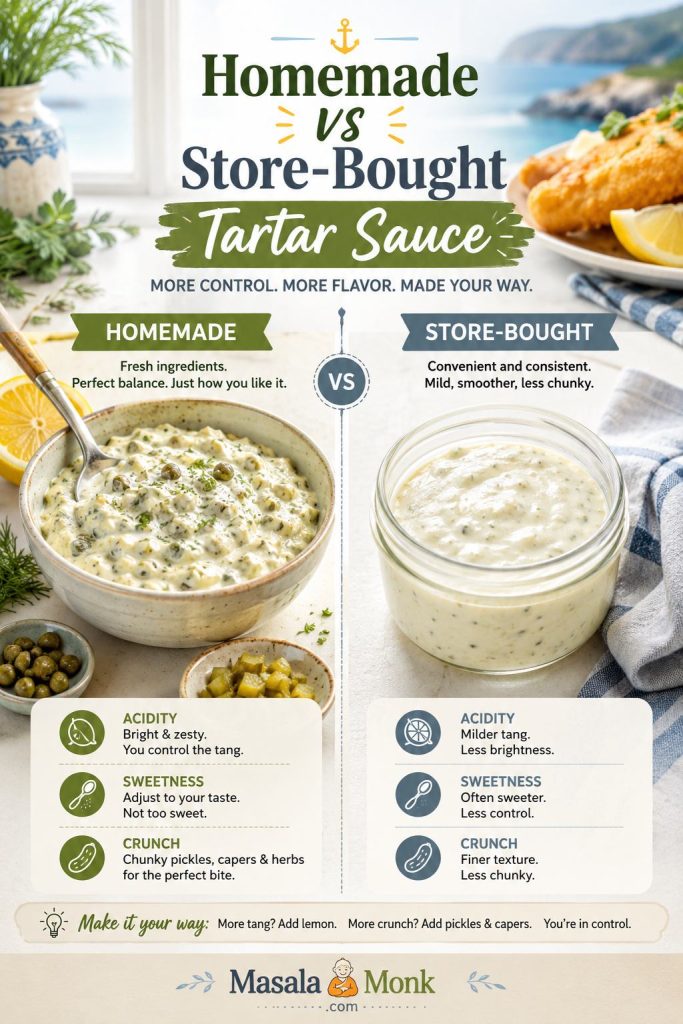
Store-bought tartar sauce is convenient, but homemade gives you control over the three things bottled sauces often get wrong: sweetness, acidity, and crunch. Some jars taste sugary. Others taste flat, heavy, or short on pickle texture.
Bottled sauce is convenient, but homemade tartar sauce lets you decide how sweet, sharp, chunky, or herb-forward the final bowl should be.
Homemade wins when you want a livelier lemon-and-pickle finish and better chop texture. Bottled wins when convenience matters more. That is the whole comparison.
Tartar Sauce Substitutions: No Relish, No Pickles, No Mayo, No Capers, No Lemon
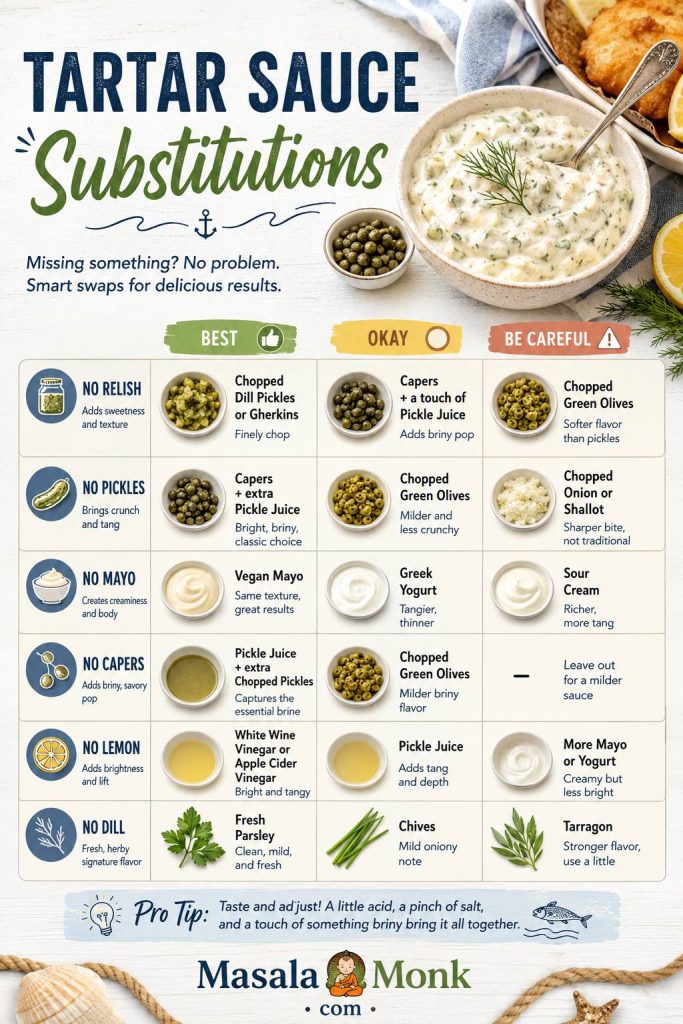
This is the kind of sauce that forgives a half-empty fridge. If you have mayo and something pickled, you are already close. Use the table below to choose the best swap without pushing the sauce too thin, too sweet, or too sour.
Missing
Best
Okay
Be careful with
Relish
Finely chopped dill pickles, gherkins, or cornichons
Capers plus a little pickle juice
Adding sugar too early
Pickles
Capers, shallot, lemon juice, herbs, and Dijon
Sweet relish if you want a softer sauce
Plain mayo with no briny ingredient
Mayo
Vegan mayo
Greek yogurt, sour cream, or half yogurt and half mayo
Thin milk-based bases
Capers
Extra chopped pickles or cornichons
Pickle juice
Adding salt before tasting
Lemon
Pickle juice
White vinegar or apple cider vinegar
Too much vinegar at once
Dill
Parsley, chives, or tarragon
A pinch of dried dill
Too much dried herb
Missing relish, lemon, capers, or mayo does not have to stop dinner; instead, choose swaps that keep the sauce creamy, seasoned, and balanced.
Tartar Sauce Without Relish
You do not need relish. Finely chopped dill pickles, gherkins, or cornichons often give better texture for fish and chips. If you still want sweetness, add a tiny pinch of sugar at the end.
Tartar Sauce Without Pickles
No pickles or relish is not ideal, but the sauce is saveable. Capers bring salt, lemon brings lift, Dijon adds sharpness, and a little minced shallot gives the base something savory to hold onto.
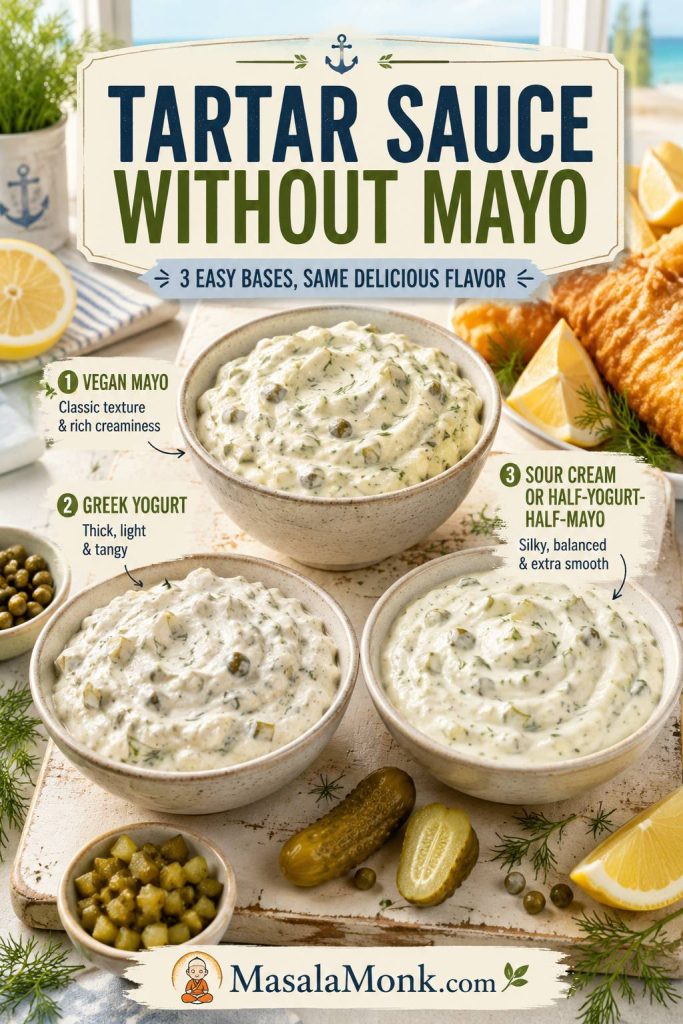
Tartar Sauce Without Mayo
For a no-mayo bowl, choose vegan mayo, Greek yogurt, or sour cream. Vegan mayo gives the closest classic texture. Greek yogurt makes it lighter and tangier, while sour cream makes it softer and richer.
Tartar Sauce Without Capers
Add extra chopped pickles for crunch, a spoonful of relish for sweetness, or a splash of pickle juice if the bowl tastes flat. Taste before adding salt because pickles may already bring enough.
Tartar Sauce Without Lemon Juice
Pickle juice is the easiest lemon swap because it brings tang and seasoning at the same time. Vinegar also works, but add it slowly so the sauce does not turn harsh.
Vegan, Dairy-Free, Low-Calorie, Keto, and Low-Carb Tartar Sauce
Once you know the balance, you can change the base without losing the sauce. The base can be mayo, vegan mayo, Greek yogurt, or sour cream; the rest of the bowl still needs pickle, acid, salt, and texture.
If you are choosing the base carefully, MasalaMonk’s eggless mayonnaise recipe explains the difference between egg-free mayo and fully vegan mayo.
Need
Best adjustment
Vegan or egg-free
Choose vegan mayo, then keep the same pickle, lemon, caper, herb, and Dijon balance.
Dairy-free
Mayo-based tartar sauce is usually dairy-free, but not egg-free. Check labels, especially for flavored mayo or Worcestershire sauce.
Low-calorie or no-mayo
Choose Greek yogurt, or use half yogurt and half mayo for a lighter sauce that still tastes creamy.
Keto, low-carb, or sugar-free
Choose full-fat mayo and dill pickles. Avoid sweet relish, added sugar, and sweetened sauces.
Low-sodium
Use fewer capers and pickles, then lean on lemon juice, herbs, black pepper, and a small amount of mustard.
A no-mayo tartar sauce still needs body, so vegan mayo gives the closest classic texture while Greek yogurt brings a lighter tang.
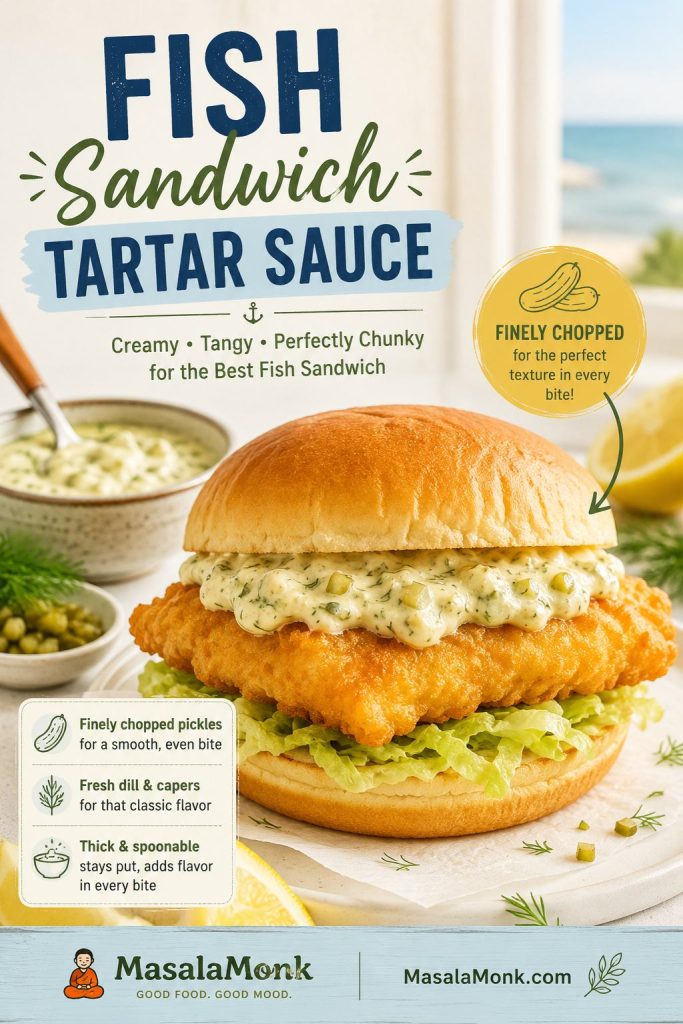
Fish Sandwich / Filet-O-Fish-Style Tartar Sauce
A fish sandwich-style sauce is smoother, sweeter, and more oniony. It makes more sense on a soft fish sandwich than beside a plate of crisp battered fish. Finely minced pickles or relish work better here than chunky pickle pieces, and a short chill helps the onion flavor settle into the mayo.
For a fried fish sandwich, finer chopping helps tartar sauce spread evenly instead of slipping out in large pickle-heavy bites.
This is a flavor direction, not an exact restaurant copy. Use dill relish or very finely minced pickles, add 1–2 teaspoons minced onion, add a tiny pinch of sugar if needed, and chill for at least 1 hour.
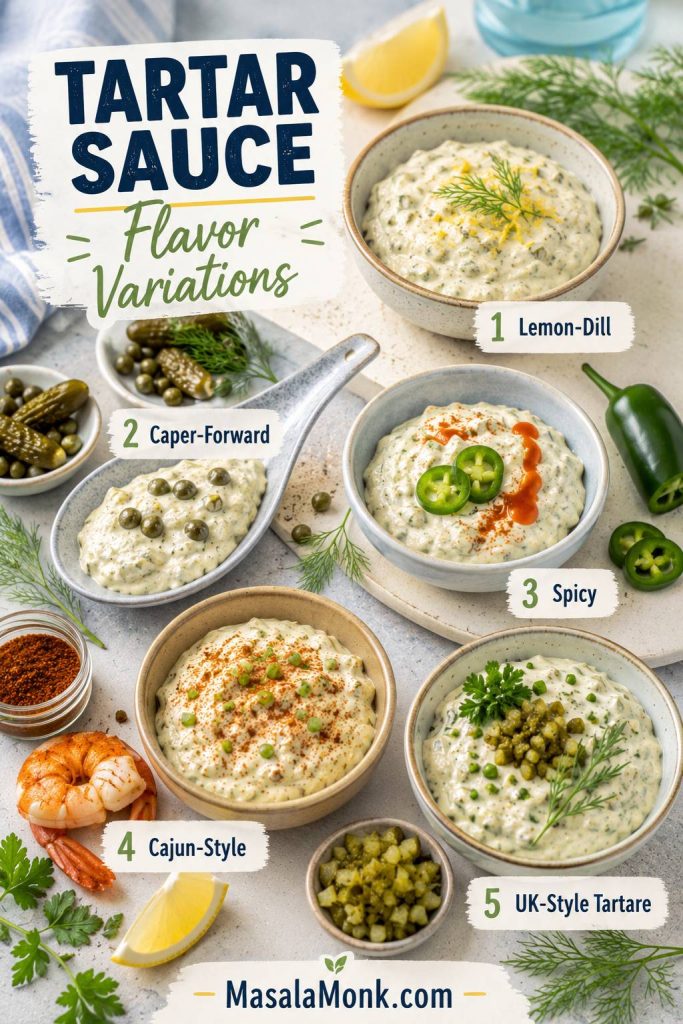
Flavor Variations
Think of the base sauce as the calm version. Lemon makes it livelier, Dijon makes it rounder, cayenne makes it warmer, and herbs make it fresher.
Variation
How to adjust 1 cup mayo
Best with
Lemon-dill
Add ½ teaspoon lemon zest, 1 extra teaspoon lemon juice, and another tablespoon chopped dill.
Salmon cakes, shrimp, lighter fish
Caper-forward
Increase capers to 2 tablespoons and use cornichons or gherkins.
Crab cakes, fried seafood, richer fish
Spicy
Add ½ teaspoon hot sauce or 1 teaspoon minced jalapeño, then taste after resting.
Catfish, fried fish sandwiches, shrimp
Old Bay or Cajun
Add ¼ teaspoon seasoning, then taste before adding salt.
Seafood platters, shrimp, catfish
UK-style tartare
Use gherkins or cornichons, capers, parsley, chives, and optional tarragon.
Fried cod, haddock, thick chips
Once the base sauce tastes balanced, keep flavor changes small: extra dill, more capers, gentle heat, seafood seasoning, or fresh herbs.
For a homemade heat option, MasalaMonk’s pepper sauce guide can help you choose a vinegar-forward hot sauce style.
Troubleshooting Homemade Tartar Sauce
Fix the bowl slowly. A teaspoon of lemon juice, pickle juice, mayo, or capers can change everything, so stir, taste, and adjust again before adding more.
Problem
Fix now
Prevent next time
Too thick
Stir in lemon juice, pickle juice, or 1 teaspoon water at a time.
Do not drain the pickles completely dry if you want a looser dip.
Too thin
Add more mayo and chill for 30 minutes.
Add pickle juice slowly and drain watery relish before mixing.
Too sweet
Add lemon juice, chopped dill pickles, capers, Dijon, or herbs.
Start with ⅓ cup relish, or use half dill pickle and half relish.
Too sour
Soften with more mayo or a tiny pinch of sugar.
Add vinegar or lemon in teaspoons, not tablespoons.
Too salty
Add more mayo, Greek yogurt, or sour cream.
Taste before salting because capers and pickles already season the sauce.
Use at least one pickled or salty ingredient, not mayo alone.
Too chunky
Pulse briefly or chop the mix-ins finer.
Use smaller dice for sandwich sauce and slightly larger dice for dip.
Watery after storage
Stir well and add a spoonful of mayo if needed.
Drain relish better and avoid over-loosening before chilling.
Fix tartar sauce in teaspoons, not big swings; a little pickle juice, mayo, lemon, or finer chopping can bring the whole bowl back into balance.
How to Store Tartar Sauce
Store the sauce in an airtight container in the refrigerator. A clean glass jar works well because it keeps the sauce covered and easy to stir before serving.
Mayo-based tartar sauce: best quality within 4–7 days when kept cold in a clean, airtight container.
Greek yogurt or no-mayo tartar sauce: best within 2–3 days because the texture loosens faster.
Homemade mayo, fresh onion, or yogurt sauces: use the shorter storage window.
Make-ahead: make it up to 1 day ahead for better flavor.
Long meals: return the sauce to the fridge when possible instead of leaving it out for hours.
Freezing: not recommended because mayo and yogurt-based sauces can split, turn watery, or lose their creamy texture.
Keep tartar sauce cold, stir it before serving, and avoid freezing so the creamy texture stays spoonable for the next fish-and-chips night.
If the sauce turns watery after chilling, use the troubleshooting guide before serving.
For mayo- or yogurt-based sauces, follow the general two-hour rule for perishable foods: do not leave them out through a long meal before returning them to the fridge.
If the sauce smells off, tastes sour in an unpleasant way, or has been left out too long, discard it.
Frequently Asked Questions
Is tartar sauce the same as tartare sauce?
Yes. In most recipe contexts, tartar sauce and tartare sauce mean the same creamy pickle-based sauce for fish and seafood. “Tartare sauce” is more common in the UK and some other regions.
What is the best pickle for tartar sauce?
Dill pickles, gherkins, and cornichons are best for a fish-and-chips sauce. Sweet pickle relish is better for a sweeter diner-style or fast-food-style sauce.
Does tartar sauce need capers?
No. It can be made without capers, but they add small salty pops that work especially well with seafood. If you skip them, add extra chopped pickle, relish, or pickle juice.
How long should tartar sauce chill before serving?
It can be served immediately, but 15–30 minutes in the fridge improves the flavor. If you added raw onion or shallot, 1 hour is better because the bite softens as it rests.
Can tartar sauce be made ahead?
Yes. Make it a few hours ahead or up to 1 day ahead, then stir and taste before serving. Add a little lemon juice or pickle juice if it needs freshening up.
Is tartar sauce dairy-free?
Many mayo-based tartar sauces are dairy-free, but check the mayonnaise and optional sauces you use. Greek yogurt, sour cream, buttermilk, and crème fraîche sauces are not dairy-free. For a dairy-free and egg-free bowl, use vegan mayo.
What makes homemade tartar sauce taste better than bottled?
Fresh lemon juice, chopped pickles, herbs, and adjustable sweetness make it taste fresher than most bottled sauces. You can push it sharper, sweeter, smoother, or lighter depending on the meal.
What is the best tartar sauce for fish and chips?
Use the dill-pickle version in the recipe card: mayo, dill pickles or gherkins, capers, lemon, herbs, Dijon, and black pepper. Keep it chilled until serving.
Can tartar sauce be frozen?
Freezing is not recommended. Mayo and yogurt-based sauces can split after thawing, leaving the sauce watery, grainy, or oily.
What is the difference between tartar sauce and remoulade?
Tartar sauce is usually a simpler mayo, pickle, lemon, caper, and herb sauce for fish and seafood. Remoulade is more seasoned and can include mustard, garlic, paprika, hot sauce, horseradish, spices, or seafood seasoning.
Final Sauce Notes
A good tartar sauce should not steal the plate. It should sit beside the fish, cling when you dip, and make the next hot bite easier to enjoy — which is exactly why a small bowl made before frying can change the whole meal.
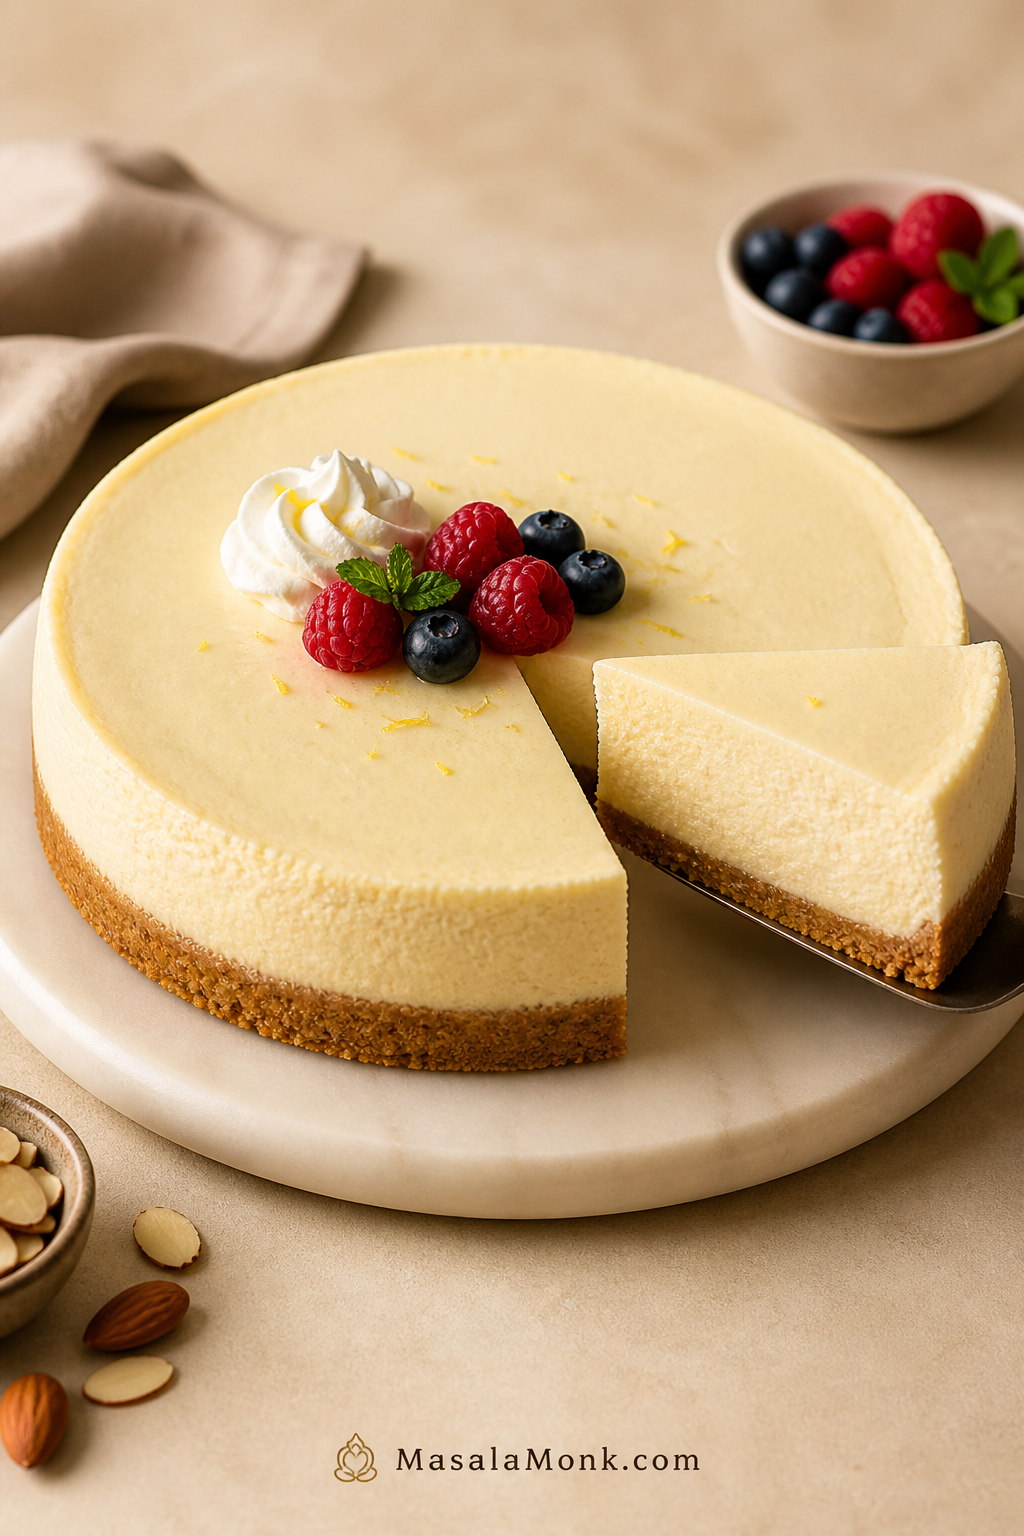
This keto cheesecake recipe gives you the kind of slice people actually want from cheesecake: cool, creamy, rich, smooth, and firm enough to cut cleanly. It has a buttery almond flour crust, a full-fat cream cheese filling, and a slow-cooling method that helps prevent cracks without needing a complicated water bath.
The flavor is classic first and keto second. You get the tang of cream cheese and sour cream, the warmth of vanilla, a little brightness from lemon juice, and a low-carb crust that feels much closer to a traditional cheesecake base than a dry “diet dessert” crust.
Use this as your classic baked cheesecake base. You will also find a crustless option, a no-bake option, sweetener guidance, pan-size help, storage tips, and fixes for common problems like cracks, grainy filling, soggy crust, and a runny center.
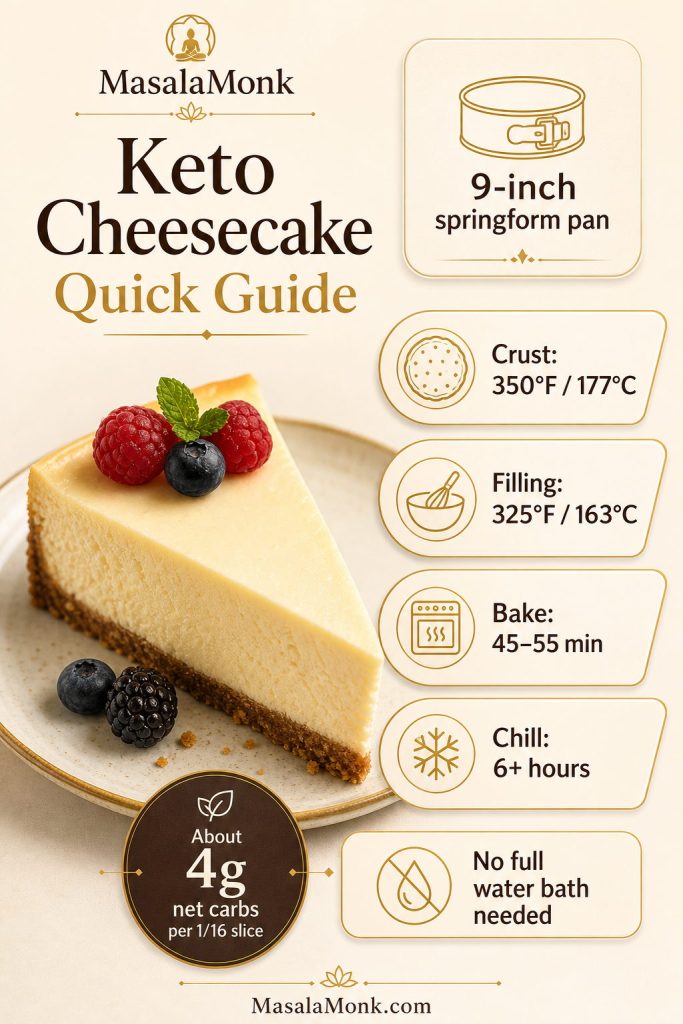
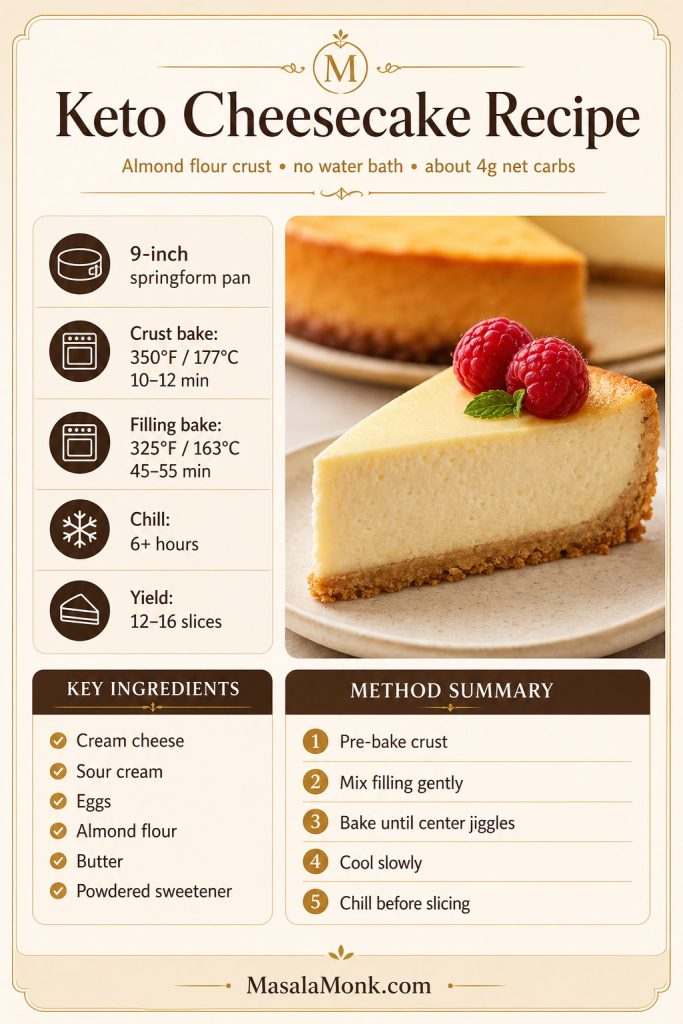
For the best keto cheesecake, make a baked full-fat cream cheese filling in a 9-inch springform pan with a pre-baked almond flour crust. Bake the crust at 350°F / 177°C for 10–12 minutes, then lower the oven to 325°F / 163°C and bake the cheesecake for 45–55 minutes, until the edges are set and the center still has a soft jiggle.
Let it cool slowly, then chill for at least 6 hours or overnight before slicing. A powdered allulose or monk fruit/allulose blend gives the smoothest texture because it dissolves better than coarse granulated sweeteners.
Pan 9-inch springform pan
Crust Almond flour crust
Crust Bake 350°F / 177°C for 10–12 minutes
Filling Bake 325°F / 163°C for 45–55 minutes
Chill Time 6 hours minimum, overnight best
Yield 12 generous or 16 smaller slices
Net Carbs About 4g per 1 of 16 slices
Water Bath Not required
Texture Cool, creamy, dense, and sliceable
Start here if you want the main numbers before baking: pan size, oven temperature, chill time, and approximate net carbs all shape the final keto cheesecake texture.
Before you start: Soften the cream cheese fully, bring the eggs and sour cream to room temperature, line the springform pan with parchment, use powdered sweetener for the filling, and plan for at least 6 hours of chilling. These five details matter more than any fancy technique.
Texture tip: The cheesecake should not look fully firm when it comes out of the oven. If the center is completely set in the oven, it is more likely to be overbaked after chilling.
Why This Keto Cheesecake Works
A good keto cheesecake has to solve three problems at once: it needs to taste like classic cheesecake, avoid a gritty sweetener texture, and hold together without flour or sugar. This version uses full-fat brick cream cheese for structure, sour cream for a smooth tangy finish, eggs for setting, and powdered keto sweetener so the filling stays creamy.
The almond flour crust is pre-baked before the filling goes in. That gives it a warmer, nuttier flavor and helps it hold together under the cheesecake layer. The filling bakes low and slow at 325°F / 163°C, then cools gradually so the center can finish setting without a dramatic temperature shock.
That slow method is what makes this sugar free cheesecake more reliable. You do not need a full water bath, but you do need room-temperature ingredients, gentle mixing, and enough chill time.
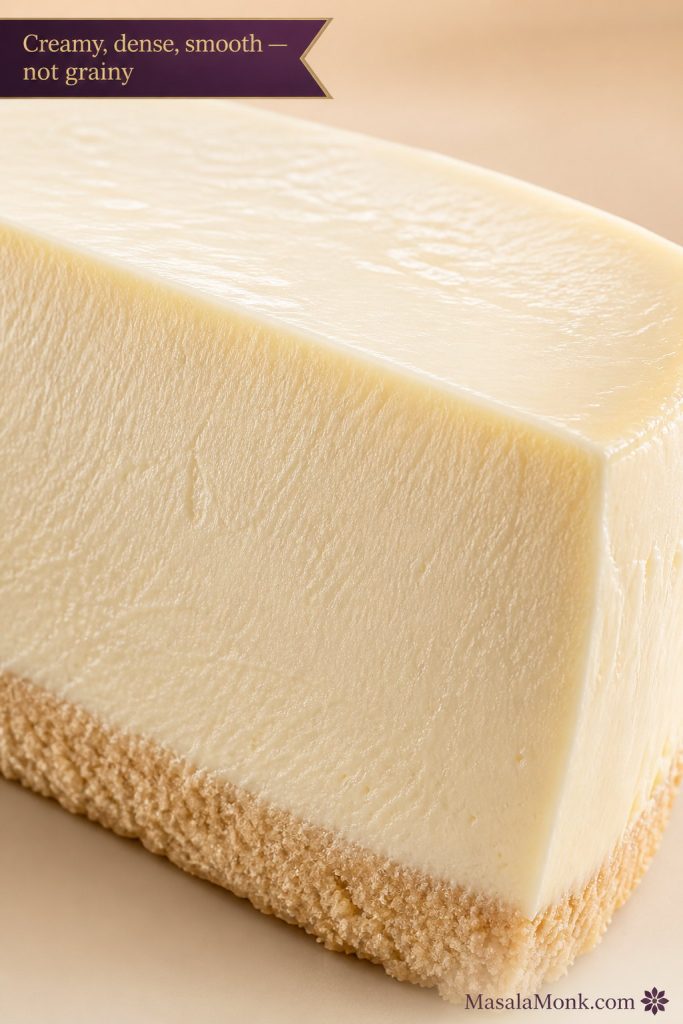
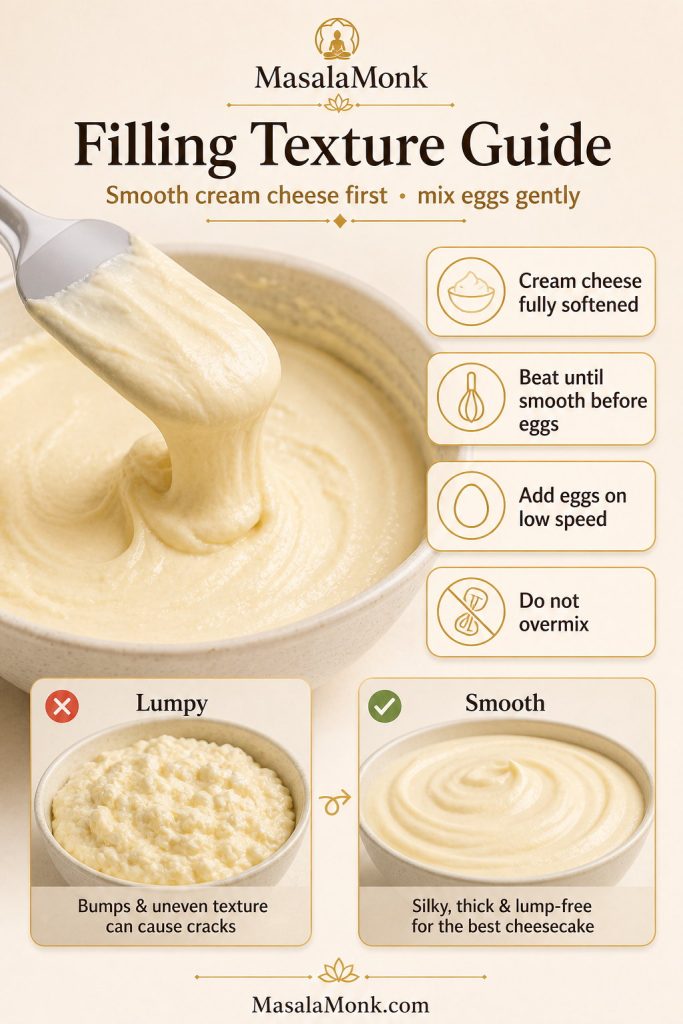
This is the texture goal: creamy, dense, and cleanly cut. If the filling looks grainy, the issue usually starts with cold cream cheese or coarse sweetener.
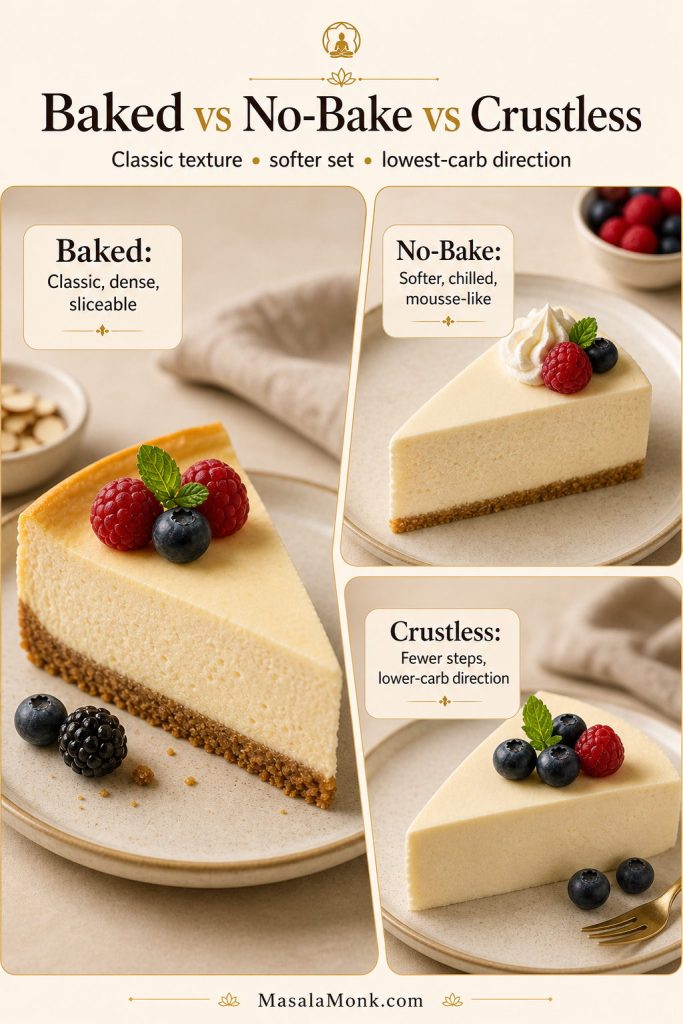
Baked vs No-Bake vs Crustless Versions
Before you start, choose the right style. A baked cheesecake gives the most classic texture, a no-bake version is easier and lighter, and a crustless cheesecake is the simplest way to reduce carbs and skip the almond flour crust.
Before choosing a method, decide what texture you want. Baked keto cheesecake is classic, no-bake cheesecake is softer, and crustless cheesecake keeps things simpler.
Version
Best For
Texture
Main Watch-Out
Baked keto cheesecake
Classic cheesecake flavor and clean slices
Dense, creamy, rich
Do not overbake; cool slowly to prevent cracks
No-bake keto cheesecake
Easy summer dessert or oven-free prep
Lighter, softer, mousse-like
Needs enough chill time to set properly
Crustless keto cheesecake
Lower carbs, fewer steps, no almond flour
Creamy and simple
Pan lining matters so it releases cleanly
The baked version is the focus here because it gives the most traditional cheesecake texture. The crustless and no-bake sections below show how to adapt the base without turning the main recipe into three different desserts at once.
Is Keto Cheesecake Low Carb or No Carb?
Keto cheesecake is low carb, but it is usually not truly zero carb. Cream cheese, sour cream, eggs, almond flour, lemon juice, and even some keto sweeteners can contribute small amounts of total carbs depending on the brands you use.
Think of this as a low carb cheesecake or sugar free cheesecake, not a misleading zero-carb dessert. If you want the lowest-carb version, make the crustless option and cut the cheesecake into 16 smaller slices. That gives you the creamy filling with fewer carbs from the almond flour crust.
Lowest-carb direction: Make it crustless, use a powdered sweetener that fits your carb target, and keep toppings simple. Fresh berries are usually a better choice than thick sauces if you are watching carbs closely.
If you like make-ahead low-carb desserts, this keto chia pudding with almond milk is another easy no-sugar option with simple net-carb math.
You do not need complicated bakery equipment, but a few tools make this cheesecake much easier and cleaner.
9-inch springform pan: The best standard size for this recipe.
Parchment paper: Helps the crust release and makes slicing easier.
Mixing bowls: One for the crust and one large bowl for the filling.
Hand mixer or stand mixer: Helps make the filling smooth without lumps.
Rubber spatula: Useful for scraping the bowl and smoothing the top.
Flat-bottom cup or measuring cup: Presses the almond flour crust firmly into the pan.
Baking sheet: Makes the springform pan easier to move in and out of the oven.
Sharp knife: For clean slices after the cheesecake is fully chilled.
Optional but helpful: Place a pan of hot water on the lower oven rack while the cheesecake bakes. This is not a full water bath, but it adds a little humidity and can help the cheesecake bake more gently.
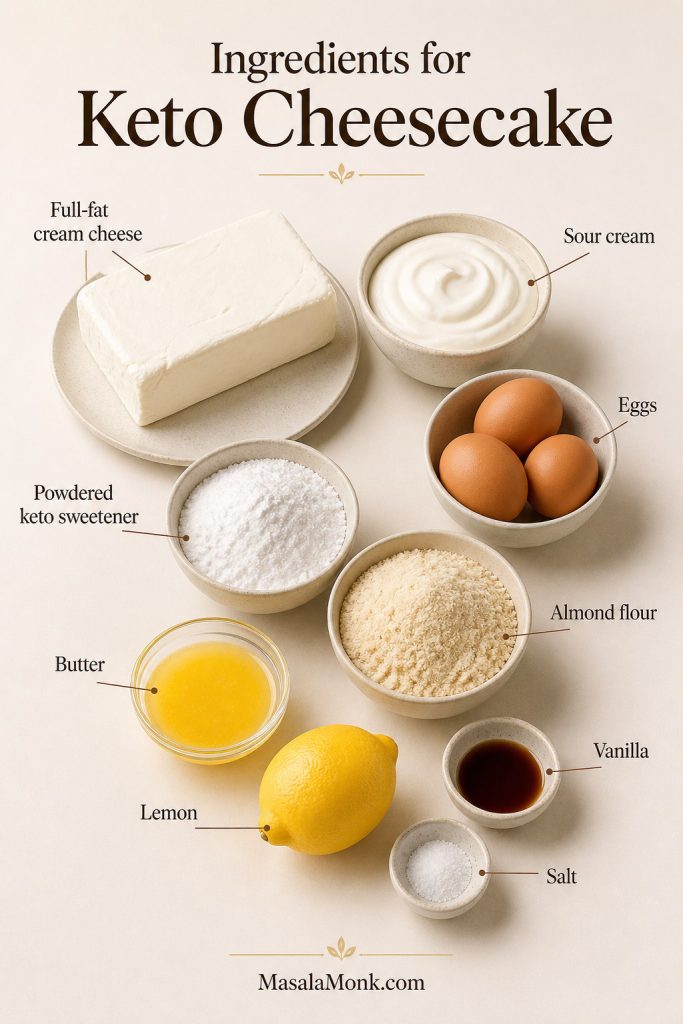
Ingredients for Keto Cheesecake
The ingredient list is simple, but the details matter. For the smoothest low carb cheesecake, use full-fat dairy, room-temperature ingredients, almond flour for the crust, and a powdered sweetener rather than a coarse granulated one.
Keto cheesecake uses simple ingredients, but they need to behave well together. Therefore, full-fat dairy, powdered sweetener, and room-temperature eggs matter more than extra add-ins.
Use 32 oz / 907 g full-fat brick cream cheese, softened to room temperature. Brick-style cream cheese gives the cheesecake body and structure. Tub-style spreadable cream cheese is usually softer and can make the filling looser.
The cream cheese should be soft enough to beat smoothly, but not melted or oily. If it is too cold, the filling can turn lumpy. If it is too warm, the batter can become loose and overmixed.
Sour Cream
Sour cream adds a classic tang and softens the richness of the cream cheese. Use 1/2 cup / 120 g sour cream at room temperature. Full-fat sour cream works best here because low-fat versions can make the texture thinner and less creamy.
Eggs
Use 3 large eggs, also at room temperature. Eggs help the cheesecake set, but they should be mixed in gently. Once the eggs go in, do not whip the batter aggressively. Too much air can make the cheesecake puff up in the oven and crack as it cools.
Sweetener
Use 1 cup to 1 1/4 cups powdered keto sweetener. The exact amount depends on how sweet you like cheesecake and how sweet your specific sweetener tastes. A powdered allulose or monk fruit/allulose blend gives the smoothest texture.
If you use a strong erythritol-heavy sweetener, the cheesecake may have a cooling finish. If you use a coarse granulated sweetener, the filling can taste slightly grainy.
Lemon Juice, Vanilla, and Salt
Fresh lemon juice brightens the filling and makes the cheesecake taste more classic. Vanilla rounds out the sweetness, while salt keeps the flavor from tasting flat.
Lemon juice: 1 tablespoon fresh lemon juice
Vanilla extract: 2 teaspoons
Fine salt: 1/4 teaspoon
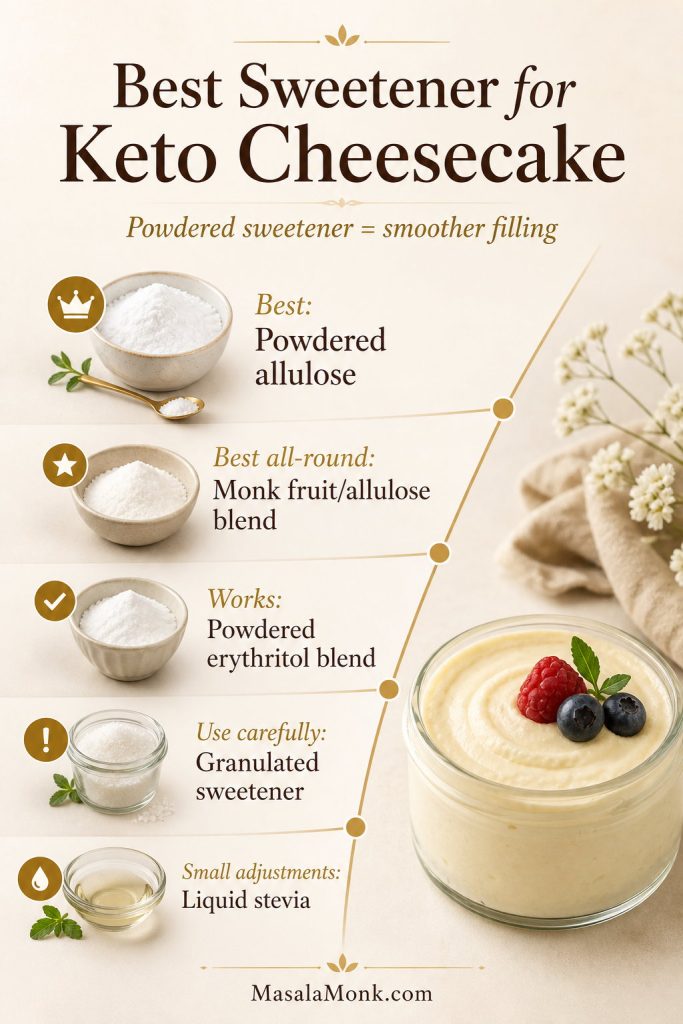
Best Sweetener for a Smooth Cheesecake Filling
The best sweetener for keto cheesecake is one that dissolves smoothly and does not leave the filling gritty. Powdered sweetener is usually better than granulated sweetener for the filling because it blends more evenly into the cream cheese. For a broader baking overview, this low-carb baking guide explains why ingredient choice can affect texture, browning, and aftertaste.
The sweetener matters even more after chilling. Some erythritol-heavy blends can recrystallize in cold desserts, which is why a cheesecake may taste smooth on day one but slightly gritty after a night in the fridge.
The best sweetener for keto cheesecake is not only about sweetness. Powdered allulose or a monk fruit/allulose blend helps the filling stay smoother after chilling.
Less likely to taste grainy; may brown slightly faster in some baked goods
Powdered monk fruit/allulose blend
Best all-round choice
Good sweetness and smooth texture when powdered
Powdered erythritol blend
Works if you like the taste
Can leave a cooling effect or slight crystallized texture
Granulated keto sweetener
Better for crust than filling
Can make the filling grainy unless blended very well
Liquid stevia
Small sweetness adjustment
Does not add bulk; too much can taste bitter
Best choice for this recipe: Use powdered allulose or a powdered monk fruit/allulose blend in the filling. For the crust, powdered or finely granulated keto sweetener both work.
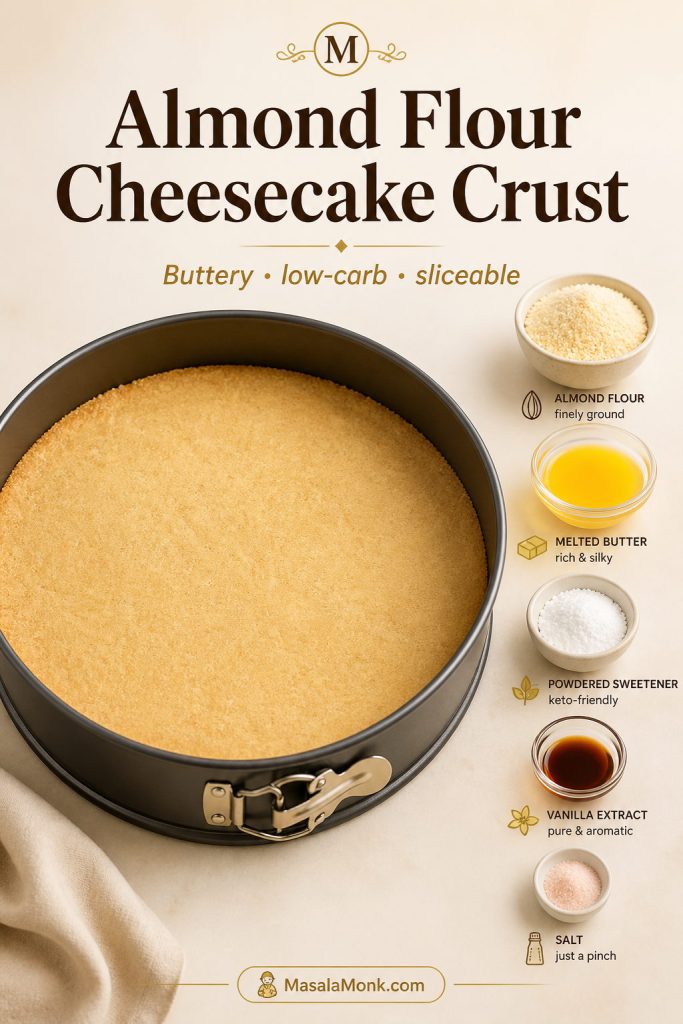
The almond flour cheesecake crust is one of the most important parts of this recipe. A good cheesecake crust with almond flour should still taste buttery, hold together under the filling, and slice cleanly after chilling.
It replaces the usual graham cracker crust with a gluten-free, low-carb base that still feels like a real cheesecake crust.
A good almond flour cheesecake crust should feel compact before it goes into the oven. Pressing firmly helps the low-carb crust bake into a sliceable base.
Mix everything until the almond flour looks evenly moistened. It should feel like damp sand and hold together when pressed. Press it firmly into the bottom of a parchment-lined 9-inch springform pan, then bake at 350°F / 177°C for 10–12 minutes, until lightly golden and fragrant.
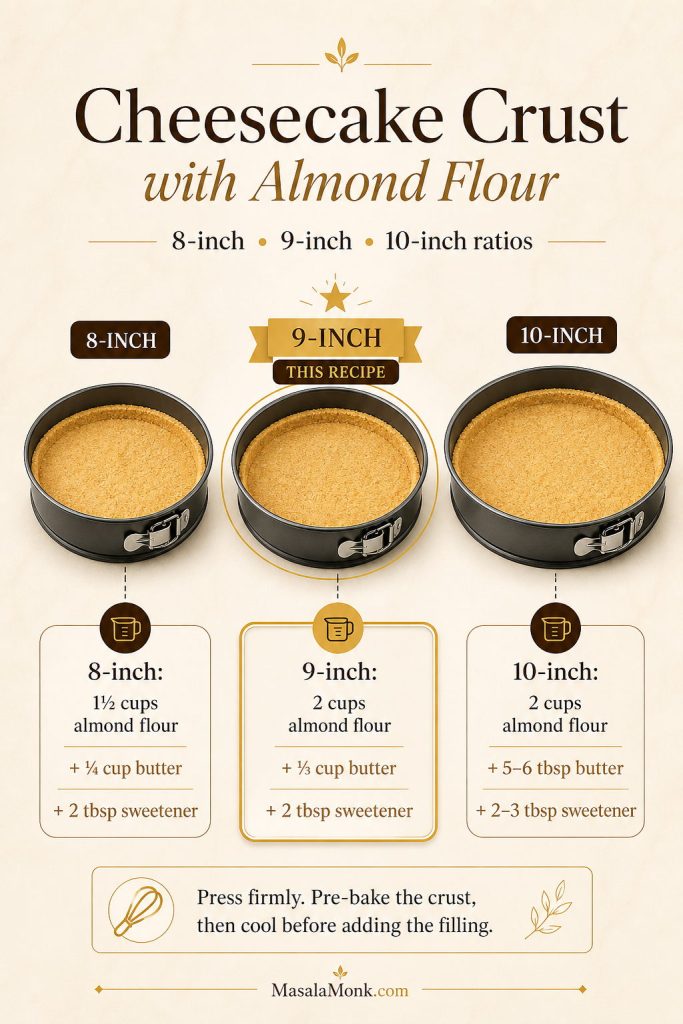
Almond Flour Crust Ratio Guide
The same almond flour cheesecake crust does not behave the same in every pan. A smaller pan makes the crust feel thicker, while a wider pan spreads the mixture thinner and may need a little more butter to stay sliceable.
Use the 9-inch ratio for this keto cheesecake recipe as written. If you change pan size, press the crust firmly, pre-bake it until lightly golden, and let it cool before adding the filling.
Pan Size
Almond Flour
Butter
Sweetener
Best Use
8-inch
1 1/2 cups / about 168 g
1/4 cup / 57 g
2 tbsp
Thicker cheesecake or smaller batch
9-inch
2 cups / about 224 g
1/3 cup / 75 g
2 tbsp
This recipe as written
10-inch
2 cups / about 224 g
5–6 tbsp / 70–85 g
2–3 tbsp
Thinner, wider cheesecake
When making cheesecake crust with almond flour, pan size changes everything. As a result, the right butter-to-flour ratio keeps the crust from turning greasy or crumbly.
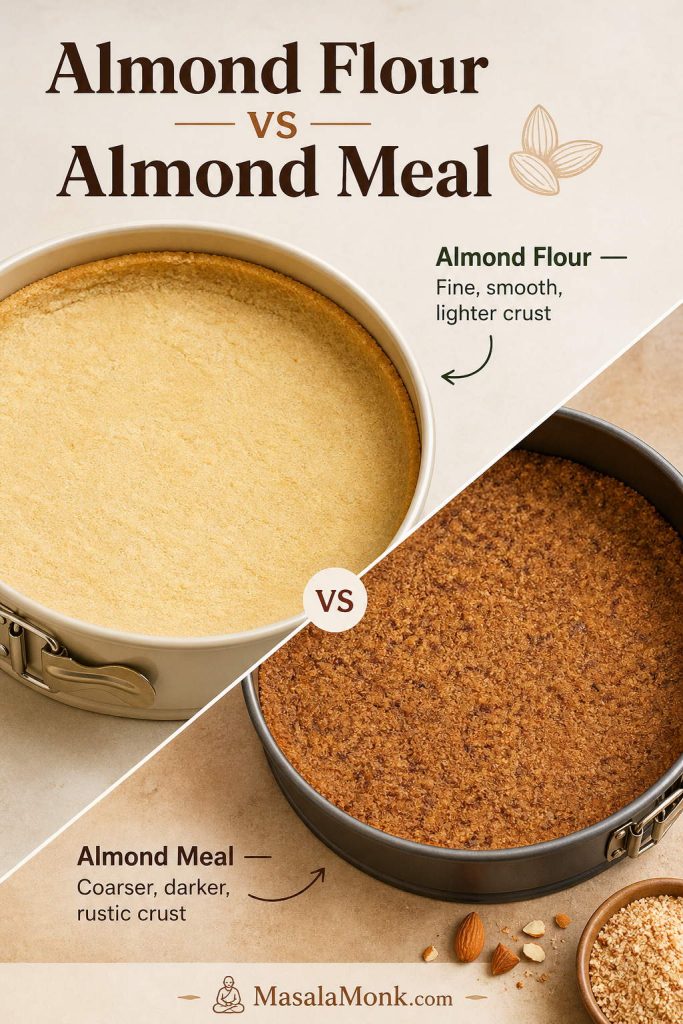
Blanched almond flour gives the neatest crust because it is finer and lighter. Almond meal can work, but it is usually coarser and may make the crust more rustic or crumbly. For a smooth, classic cheesecake look, use fine blanched almond flour.
If you are searching for an almond meal crust for cheesecake, the same basic idea works, but the texture will be darker, coarser, and more rustic. Fine blanched almond flour gives a smoother shortbread-style crust, while almond meal gives a nuttier, more graham-cracker-like look.
Almond flour and almond meal are not identical in cheesecake crust. Almond flour gives a smoother finish, while almond meal creates a darker, more rustic bite.
A crumbly keto cheesecake crust usually means one of three things: not enough butter, not enough pressing, or not enough baking. The crust should be pressed firmly with the bottom of a cup, especially around the edges. After baking, let it cool for a few minutes before adding the filling.
If the crust still seems loose, add 1 extra tablespoon melted butter next time. If it seems greasy, reduce the butter slightly or bake the crust a minute or two longer.
How to Avoid a Soggy Almond Flour Crust
Pre-baking is the easiest fix. A lightly golden crust holds up better under the filling than a raw almond flour crust. You should also avoid pouring very warm or loose filling onto the crust. The cream cheese filling should be smooth and room temperature, not runny.
Cheesecake Crust Without Almond Flour
You can make the crust without almond flour, but do not swap coconut flour 1:1. Coconut flour absorbs much more liquid and will make the crust dry and dense if used in the same amount.
For a nut-free direction, use a tested sunflower seed flour crust or skip the crust completely and make the crustless option below.
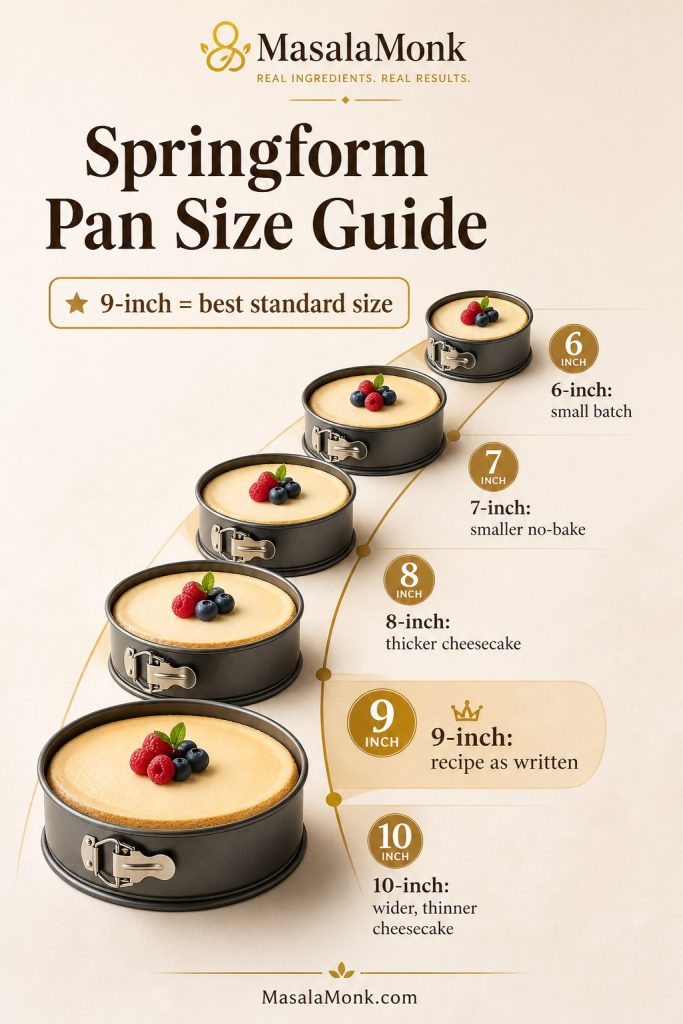
This recipe is designed for a 9-inch springform pan. Different pan sizes change the height, bake time, and texture, so use the table below if you need to adjust.
A 9-inch springform pan is the safest standard for this keto cheesecake recipe. Smaller pans create more height, while larger pans bake thinner and faster.
Use a scaled-down recipe; bake time will be shorter
7-inch
Taller no-bake cheesecake
Works well for smaller no-bake versions
8-inch
Thicker baked cheesecake
May need a little more bake time because the filling is deeper
9-inch
Best standard size
Use the recipe as written
10-inch
Wider, slightly thinner cheesecake
May bake faster; watch the center jiggle carefully
How to Make Keto Cheesecake
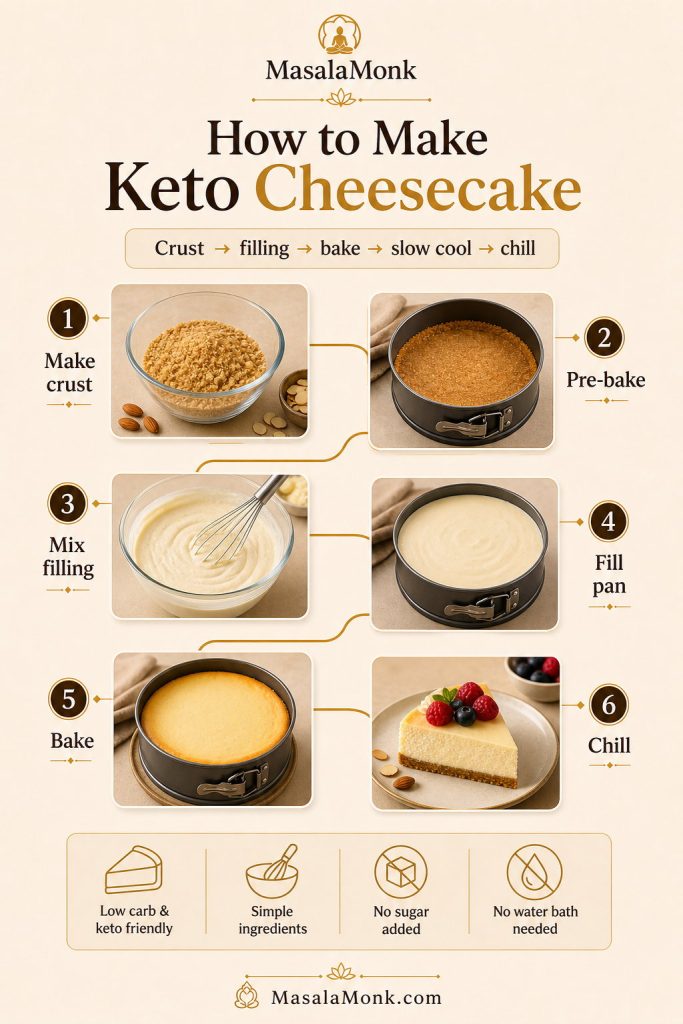
The method is simple, but the order matters. Make the crust first, reduce the oven temperature, mix the filling gently, then cool the cheesecake slowly.
The best keto cheesecake method is not rushed. First build the crust, then mix the filling gently, bake until softly set, cool slowly, and chill before slicing.
Line the bottom of a 9-inch springform pan with parchment paper. Lightly grease the sides. If your springform pan is older or tends to leak butter, place it on a baking sheet before it goes into the oven.
Step 2: Make the Almond Flour Crust
In a bowl, stir together almond flour, melted butter, sweetener, vanilla, and salt. The mixture should look like damp crumbs. Press it firmly into the bottom of the prepared pan. Use a flat-bottom cup to compact it evenly.
Bake the crust at 350°F / 177°C for 10–12 minutes, until it smells nutty and looks lightly golden at the edges. Remove it from the oven and let it cool slightly while you make the filling.
Step 3: Mix the Cheesecake Filling
Lower the oven to 325°F / 163°C. Beat the softened cream cheese on medium-low speed until smooth. Add the powdered sweetener and beat again until combined. Scrape the bowl well so no dense pockets of cream cheese remain.
Add the sour cream, lemon juice, vanilla, and salt. Mix until smooth. Add the eggs one at a time, mixing on low speed just until each egg disappears into the batter.
Smooth cheesecake filling starts before the eggs are added. Once the cream cheese is fully beaten, switch to gentle mixing so the batter does not trap excess air.
Do not overmix after adding eggs. Extra air can make the cheesecake rise too much in the oven and crack as it cools.
Step 4: Fill the Pan
Pour the filling over the cooled almond flour crust. Smooth the top with a spatula. Tap the pan gently on the counter once or twice to release large air bubbles, but do not bang it aggressively.
Step 5: Bake Low and Slow
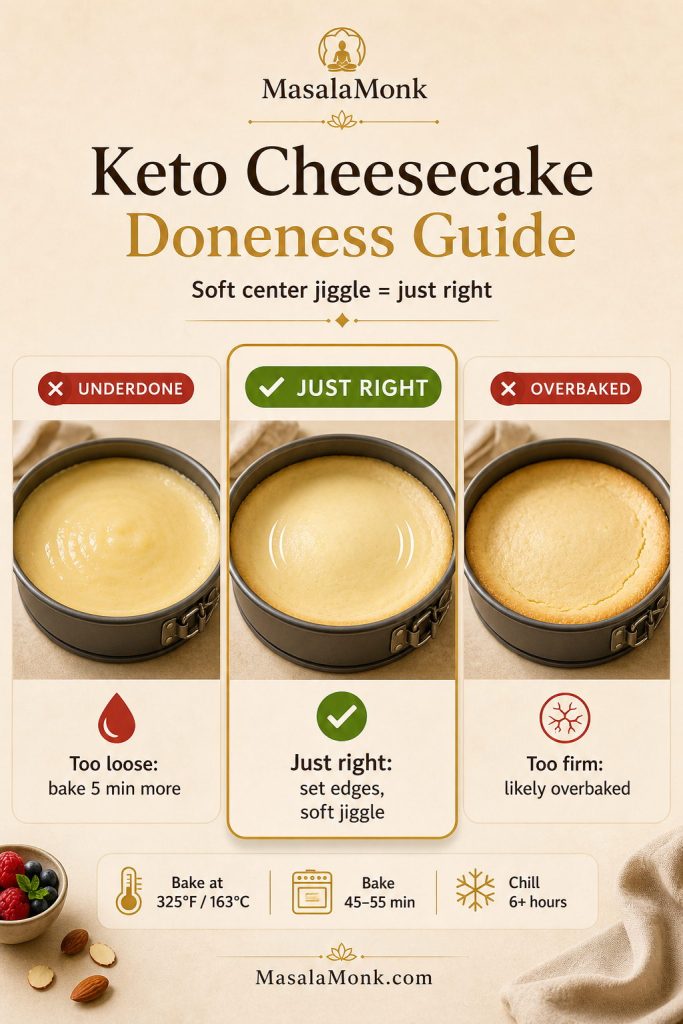
Bake at 325°F / 163°C for 45–55 minutes. The edges should look set and slightly puffed, while the center should still wobble gently when the pan is nudged.
If the center looks liquid and sloshes, bake for another 5 minutes and check again. If the entire cheesecake looks fully firm in the oven, it is likely overbaked.
Step 6: Cool Slowly
Turn off the oven. Crack the oven door open and leave the cheesecake inside for 20–30 minutes. Then move it to the counter and let it cool to room temperature.
Once cool, cover and refrigerate for at least 6 hours. Overnight chilling gives the cleanest slices and best texture.
How to Know When the Cheesecake Is Done
The most reliable doneness cue is the jiggle test. The outer 2–3 inches should look set, while the center should still wobble like soft gelatin. It should not look wet, soupy, or liquid, but it should not be completely firm either.
Cheesecake keeps setting as it cools. That is why a slightly jiggly center is correct. If you bake until the center is completely firm, the final chilled cheesecake can turn dense, dry, or cracked.
A softly jiggly center is not a mistake. Instead, it means the cheesecake can finish setting as it cools, which helps prevent a dry or cracked texture.
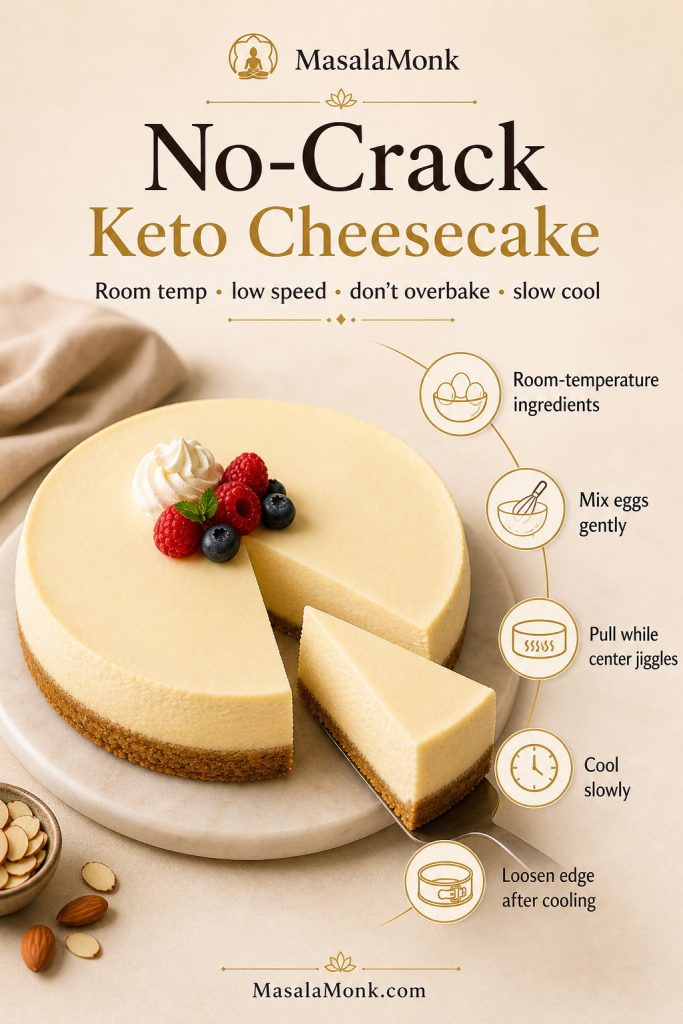
Cracks do not ruin cheesecake, but they are easy to reduce. Most cracks come from cold ingredients, overmixing, overbaking, or cooling too quickly.
Use room-temperature ingredients: Cold cream cheese creates lumps, and cold eggs can make the batter harder to mix evenly.
Mix gently after adding eggs: Eggs trap air quickly. Too much air makes the cheesecake puff and collapse.
Do not overbake: The center should still jiggle softly when the cheesecake comes out.
Cool gradually: Leave the cheesecake in the turned-off oven with the door cracked before moving it to the counter.
Loosen the edge: After cooling slightly, run a thin knife around the edge so the cheesecake does not pull against the pan as it contracts.
No-crack keto cheesecake depends on temperature control. Room-temperature ingredients, low-speed mixing, and slow cooling give the filling a better chance to settle evenly.
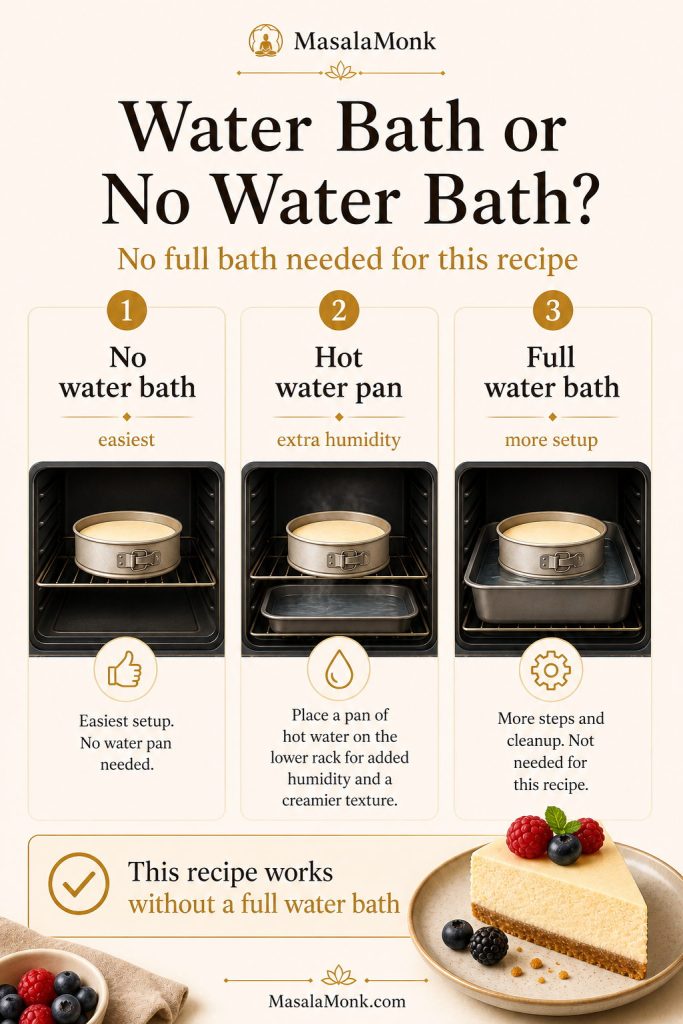
No water bath required: This recipe is written to work without a full water bath. If your oven runs hot or you want extra insurance, place a pan of hot water on the lower rack for gentle humidity.
Water Bath or No Water Bath?
You do not need a full water bath for this keto cheesecake recipe. The slow bake at 325°F / 163°C, room-temperature ingredients, gentle mixing, and gradual cooling are enough for a smooth cheesecake in most ovens.
A full water bath can help cheesecakes bake gently, but it also adds extra steps and can leak into a springform pan if the wrapping is not secure. King Arthur Baking explains that a water bath can help reduce cracks, but for this recipe the easier option is to place a pan of hot water on the lower oven rack. It adds a little humidity without putting the cheesecake pan directly in water.
You can make this keto cheesecake without a full water bath. However, a hot water pan on the lower rack can add humidity if your oven tends to run dry.
Still not a guarantee if the cheesecake is overbaked
Full water bath
Very gentle baking
More setup; springform pans can leak
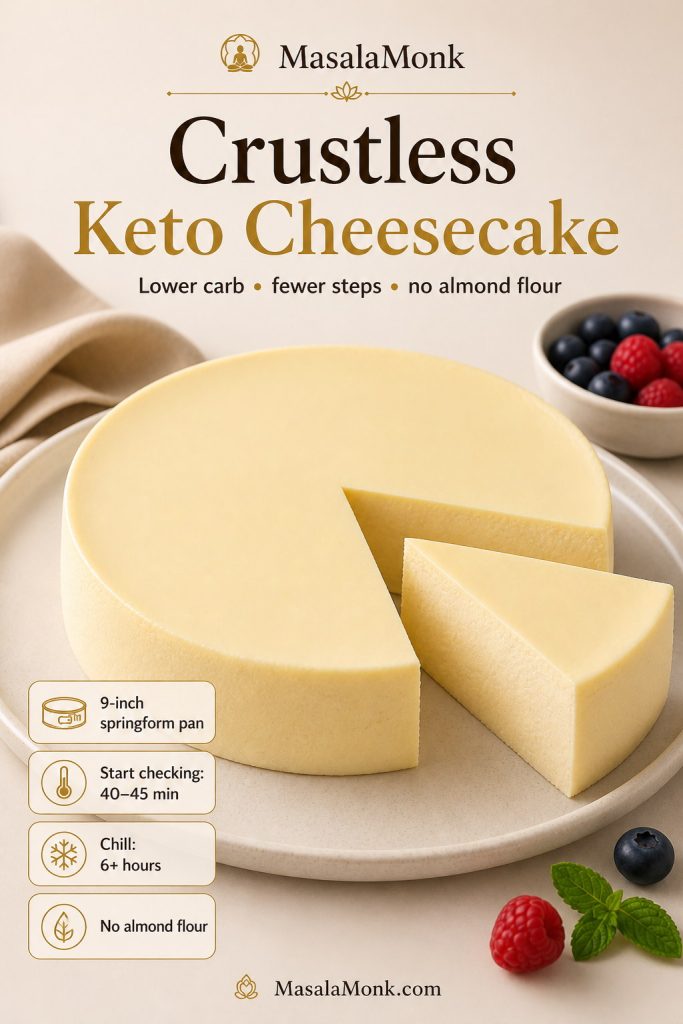
Crustless Keto Cheesecake Option
You can make this cheesecake without the almond flour crust. A crustless keto cheesecake is slightly lower in carbs, simpler to prepare, and useful if you are avoiding nuts.
To make it crustless, skip the crust ingredients and line the bottom of the springform pan with parchment. Grease the sides well. Pour the filling directly into the pan and bake at 325°F / 163°C until the edges are set and the center still jiggles softly.
The bake time may be slightly shorter because there is no crust layer. Start checking around 40–45 minutes. Chill completely before slicing, because crustless cheesecake needs time to firm up for clean edges.
Crustless keto cheesecake removes the almond flour base, so the pan matters more. Line it well, chill fully, and slice cold for the cleanest edges.
Best crustless tip: Do not skip the parchment. Without a crust, the filling sits directly against the pan, so lining and chilling are what help the slices release cleanly.
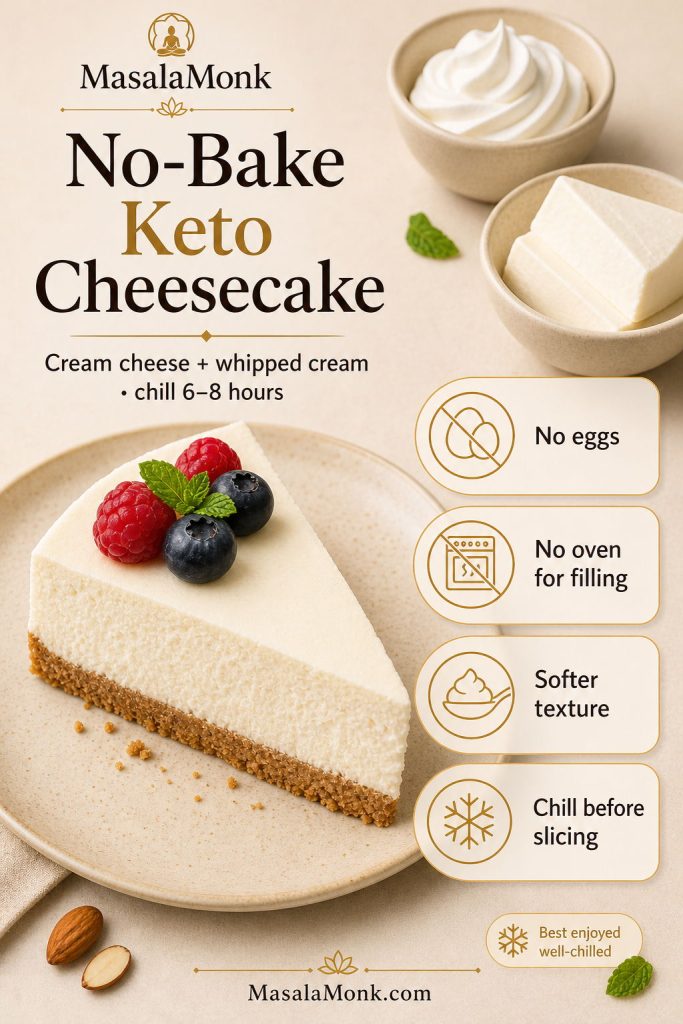
No-Bake Keto Cheesecake Option
A no-bake keto cheesecake is a different style of cheesecake. It is lighter, softer, and more mousse-like because it sets in the refrigerator instead of baking with eggs.
For a 9-inch no-bake keto cheesecake, use the almond flour crust as written, then chill or briefly bake the crust before adding the filling. For the filling, beat 24 oz / 680 g softened full-fat cream cheese with 3/4 to 1 cup powdered keto sweetener, 2 teaspoons vanilla, 1 tablespoon lemon juice, and a pinch of salt until smooth. In a separate bowl, whip 1 cup / 240 ml heavy cream to soft peaks, then fold it into the cream cheese mixture.
No-bake keto cheesecake is a separate style, not just an unbaked version of the main filling. It relies on whipped cream and long chilling instead of eggs.
This makes a slightly lower 9-inch no-bake cheesecake. For a taller no-bake keto cheesecake, use an 8-inch springform pan and chill it overnight before slicing.
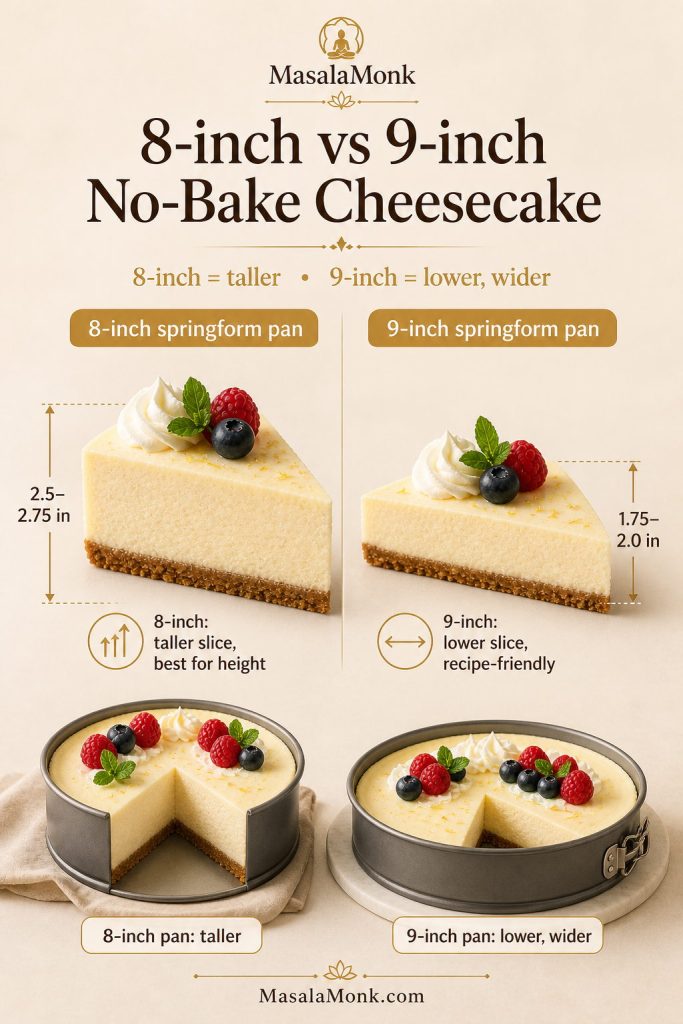
8-Inch vs 9-Inch No-Bake Keto Cheesecake
No-bake cheesecake height depends heavily on pan width because the filling sets in the refrigerator instead of rising or firming in the oven. An 8-inch pan gives a taller, more bakery-style slice, while a 9-inch pan gives a wider cheesecake with a slightly lower profile.
Both pan sizes work, but the chilling time matters more in the taller version. If you use an 8-inch pan, chill overnight before slicing so the center has enough time to set cleanly.
For no-bake keto cheesecake, pan width changes the look of the slice. An 8-inch pan gives height, while a 9-inch pan gives a lower, wider cheesecake.
Spread the filling over the crust, smooth the top, cover, and refrigerate for at least 6–8 hours. Overnight is better. If the cheesecake is sliced too soon, it can look soft or collapse at the edges.
Important: Do not use the baked filling from the recipe card for the no-bake version. The baked filling relies on eggs and oven heat to set. The no-bake version needs whipped cream and long chilling instead.
If you want the classic non-keto version with a sweeter filling and regular crumb crust, use this no bake cheesecake recipe instead.
Best use: Choose baked keto cheesecake when you want classic dense cheesecake texture. Choose the no-bake version when you want an easier, lighter, oven-free dessert.
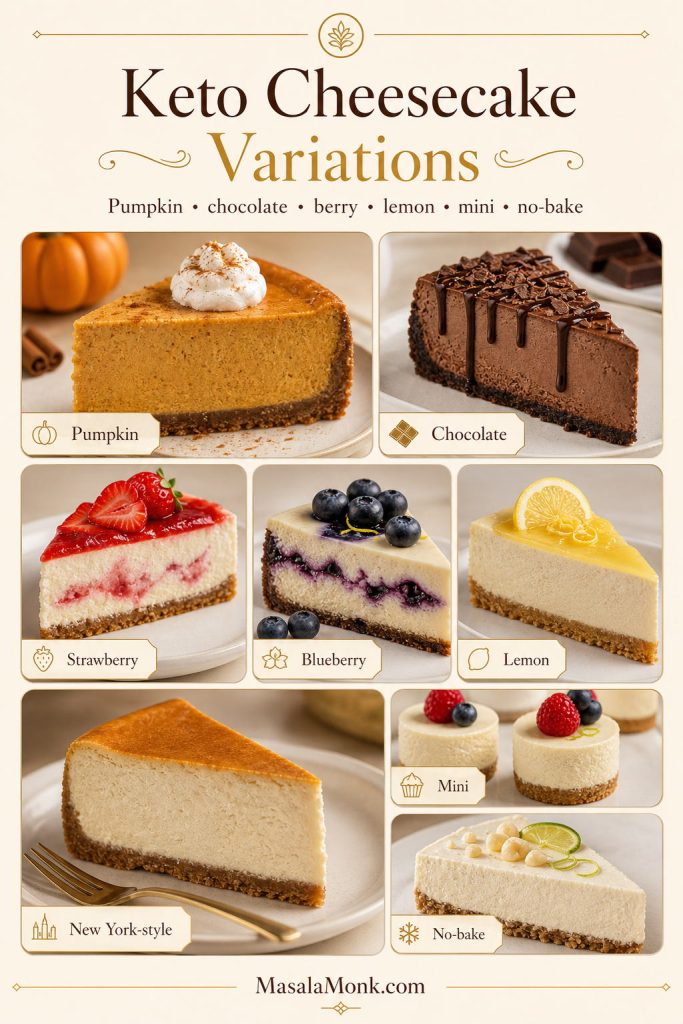
Once you understand the base, you can use it for other low carb cheesecake flavors. Keep the structure the same, then adjust carefully so the filling still sets properly. In most cases, toppings are safer than mix-ins because they add flavor without loosening the cheesecake.
Keto cheesecake variations work best when the base stays stable. Therefore, toppings and small flavor accents are safer than adding too much liquid to the filling.
Pumpkin cheesecake needs pumpkin puree, pumpkin pie spice, and a little cinnamon in the filling. Since pumpkin adds moisture, it works better as a dedicated variation than as a casual stir-in. With this base cheesecake, a spoonful of pumpkin spice whipped cream on top gives you the flavor without changing the bake.
Keto Chocolate Cheesecake
A chocolate version works best with melted sugar-free chocolate or cocoa powder in the filling. Chocolate changes both sweetness and texture, so taste the filling before adding eggs and adjust the sweetener if needed. If you want a separate creamy chocolate dessert instead, this avocado chocolate mousse stays in the same rich, spoonable dessert lane.
Keto Strawberry Cheesecake
The cleanest strawberry version keeps the filling vanilla and adds a sugar-free strawberry topping after baking. Fresh berry toppings are easier to control than mixing watery fruit into the batter. Cooked and cooled strawberry sauce gives stronger flavor without making the cheesecake soft.
Keto Blueberry Cheesecake
A thick low-carb blueberry sauce works best as a topping or light swirl. If using a swirl, keep it concentrated and spoon it lightly over the top before baking. Too much fruit sauce can make the center loose.
Keto Lemon Cheesecake
To make the cheesecake brighter, add lemon zest to the filling. Zest gives strong lemon flavor without adding much liquid. Avoid adding too much extra lemon juice because excess liquid can soften the filling.
Mango Cheesecake and Keto Limits
Mango is not usually the easiest strict-keto cheesecake flavor because it brings natural sugar and extra moisture. If you are not keeping the dessert strictly keto and want a fruit-forward no-bake version, this no bake mango cheesecake recipe is the better fit.
Keto New York Cheesecake
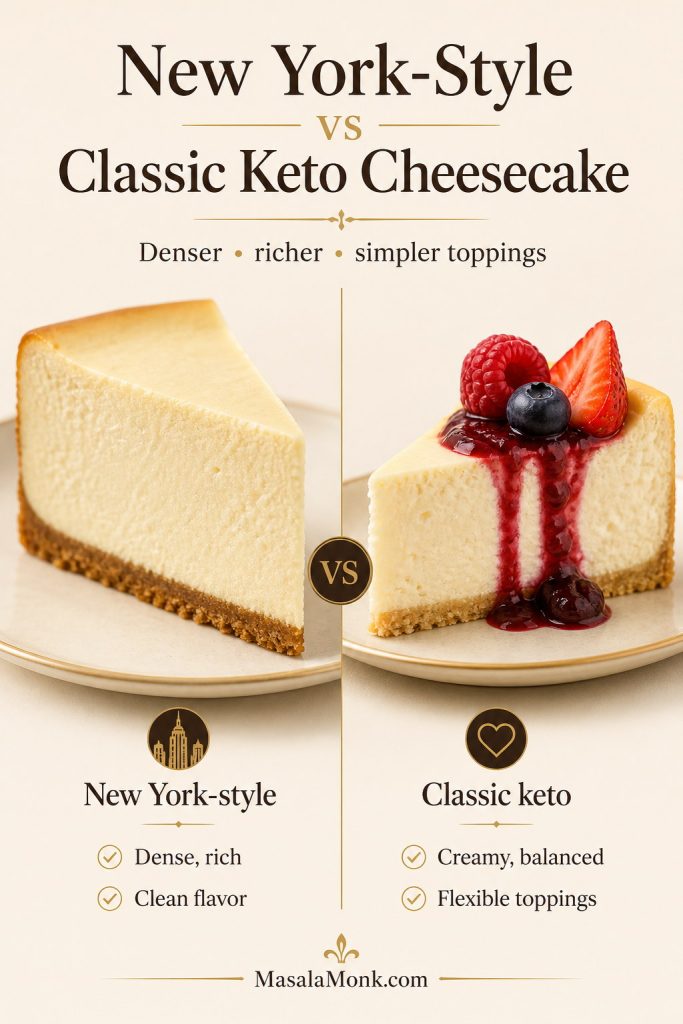
For a New York-style keto cheesecake, keep the flavor simple and focus on a dense, creamy texture. Use full-fat brick cream cheese, sour cream, eggs, vanilla, lemon juice, and the almond flour crust. Avoid fruit puree or chocolate in the filling because those move it away from the classic New York-style profile.
The biggest difference is texture. A New York-style keto cheesecake should feel rich, smooth, and slightly dense rather than fluffy. Chill it overnight before slicing, and serve toppings on the side so the clean cheesecake flavor stays central.
New York-style keto cheesecake should feel denser and cleaner, while classic keto cheesecake is more flexible. Keep toppings lighter if you want that rich bakery-style texture.
Ricotta gives keto cheesecake a lighter, slightly more Italian-style texture. It is less dense than an all-cream-cheese filling and can taste a little grainier unless blended very smooth. Use full-fat ricotta, drain excess liquid if it looks wet, and blend it with cream cheese rather than using ricotta alone.
For the most reliable result, treat ricotta cheesecake as a separate variation rather than a direct one-for-one swap. If you are experimenting, replace only part of the cream cheese with smooth ricotta and keep the eggs, lemon, vanilla, and sweetener balanced so the cheesecake still sets.
High-Protein Keto Cheesecake
For a higher-protein direction, cottage cheese, Greek yogurt, ricotta, or protein powder can be used in separate cheesecake styles. For a breakfast-style version of that idea, these high-protein low-carb pancakes use similar cottage cheese and low-carb logic.
Protein powder needs care in cheesecake because it can make the filling dry, chalky, or rubbery if added casually. If using cottage cheese, blend it completely smooth before adding it to a cheesecake filling. A high-protein low carb cheesecake works best as its own tested variation rather than a direct swap inside this classic baked version.
Mini Keto Cheesecakes, Cups, and Bites
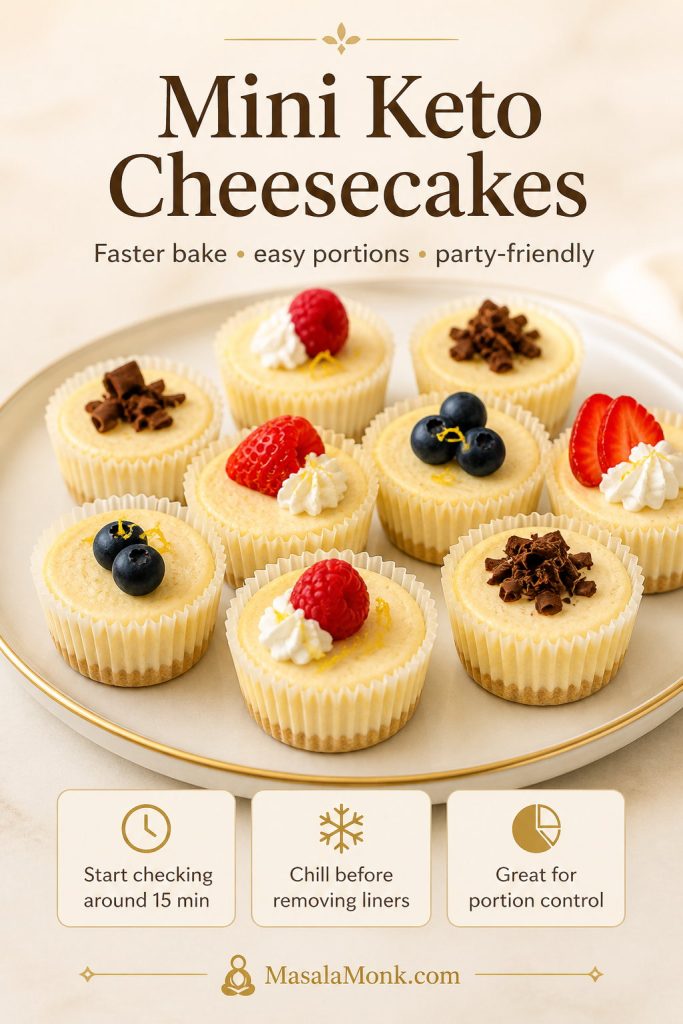
You can turn the same flavor idea into mini keto cheesecakes by baking the crust and filling in a lined muffin pan. Mini versions bake faster, chill faster, and are easier to portion for parties, lunch boxes, or meal prep.
Start checking mini cheesecakes around 15 minutes. They are done when the edges look set and the centers still have a slight wobble. Chill them fully before removing the liners. For true keto cheesecake bites or fat bombs, use a separate no-bake cream cheese mixture instead of this baked filling.
Mini keto cheesecakes are great for portion control, but they still need proper chilling. Since they bake faster, start checking early and let them set before serving.
A 3 ingredient keto cheesecake is usually a no-bake shortcut made with cream cheese, keto sweetener, and another creamy ingredient such as whipped cream, Greek yogurt, or keto vanilla yogurt. It is useful for a quick dessert, but it will not have the same baked cheesecake texture as this full recipe.
Keto Cheesecake Troubleshooting
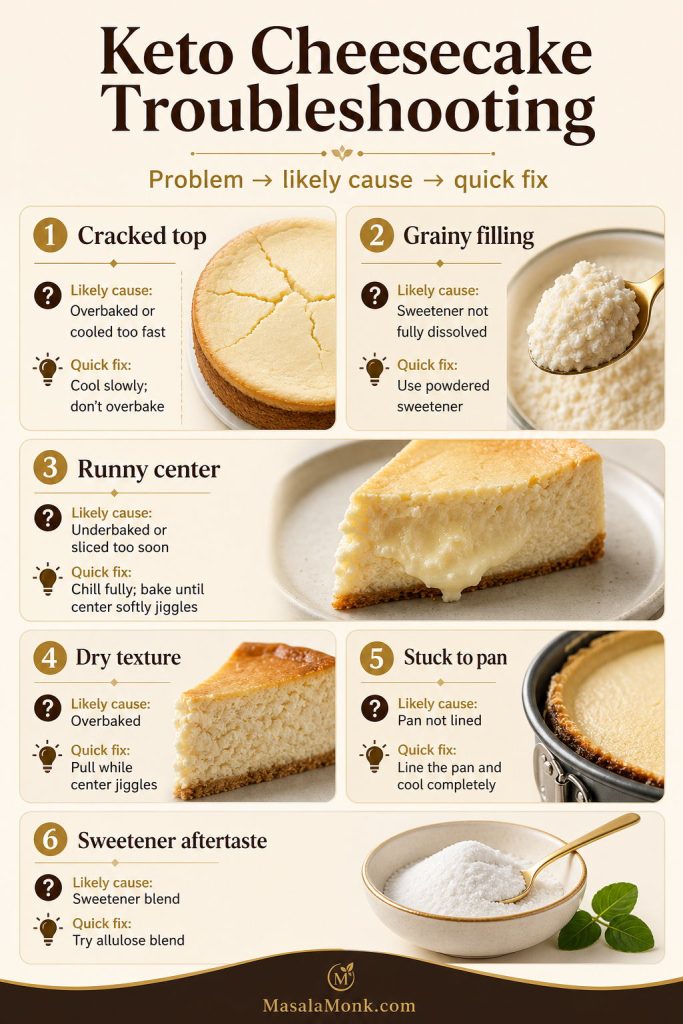
Most keto cheesecake problems are easy to diagnose. Use this table to fix the current cheesecake if possible and prevent the issue next time.
Troubleshooting keto cheesecake is easier when you match the problem to the cause. Cracks, graininess, runny centers, and stuck slices each need a different fix.
Cool slowly next time; serve current cheesecake with whipped cream or berry topping
Lumpy filling
Cream cheese was too cold
Use fully softened cream cheese and beat it smooth before adding eggs
Grainy texture
Coarse sweetener or crystallizing sweetener
Use powdered allulose or powdered monk fruit/allulose blend
Soggy crust
Crust was not pre-baked enough or filling was too loose
Pre-bake crust until lightly golden and let it cool before filling
Crumbly crust
Not enough butter or not pressed firmly
Add 1 extra tablespoon melted butter next time and press with a flat-bottom cup
Runny center
Underbaked or sliced too soon
Bake until softly jiggly, then chill at least 6 hours before slicing
Dry texture
Overbaked cheesecake
Pull it from the oven while the center still jiggles
Cheesecake stuck to pan
No parchment or not enough chilling
Line the pan and chill fully before removing the springform ring
Sweetener aftertaste
Sweetener blend does not suit your taste
Try allulose or a monk fruit/allulose blend; add lemon and vanilla for balance
Almond Flour Crust Fixes
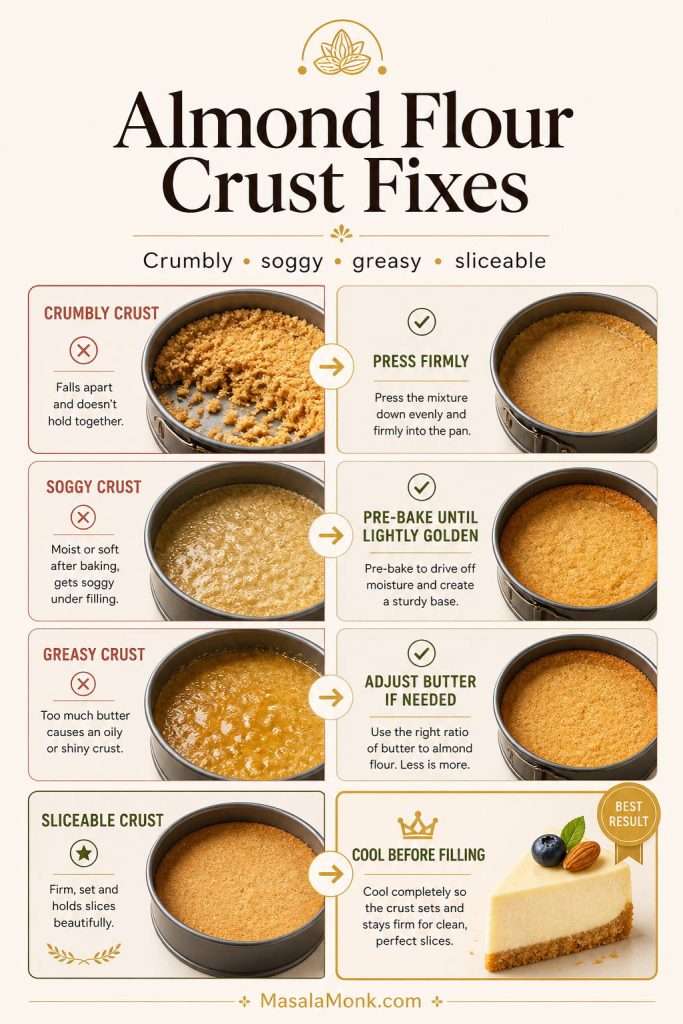
Almond flour crust problems usually come from pressure, butter balance, or bake time. If the crust crumbles, it often needed firmer pressing or a touch more butter. If it turns soggy, it usually needed a longer pre-bake or more cooling time before the filling went in.
The goal is a crust that feels compact, lightly golden, and sturdy enough to lift with the cheesecake slice. Fixing the crust separately is useful because the filling can be perfect while the base still needs adjustment.
Almond flour crust problems usually come down to pressure, butter, or baking time. Press firmly, pre-bake until lightly golden, and cool before adding filling.
After chilling, the cheesecake should slice cleanly, hold its shape on a plate, and feel dense but creamy when you cut through it. The center should not be runny, the filling should not taste grainy, and the almond flour crust should stay firm enough to lift with the slice.
The flavor should be rich and tangy, not flat or overly sweet. If your cheesecake tastes slightly muted when cold, let slices sit at room temperature for 10–15 minutes before serving.
Storage and Freezing
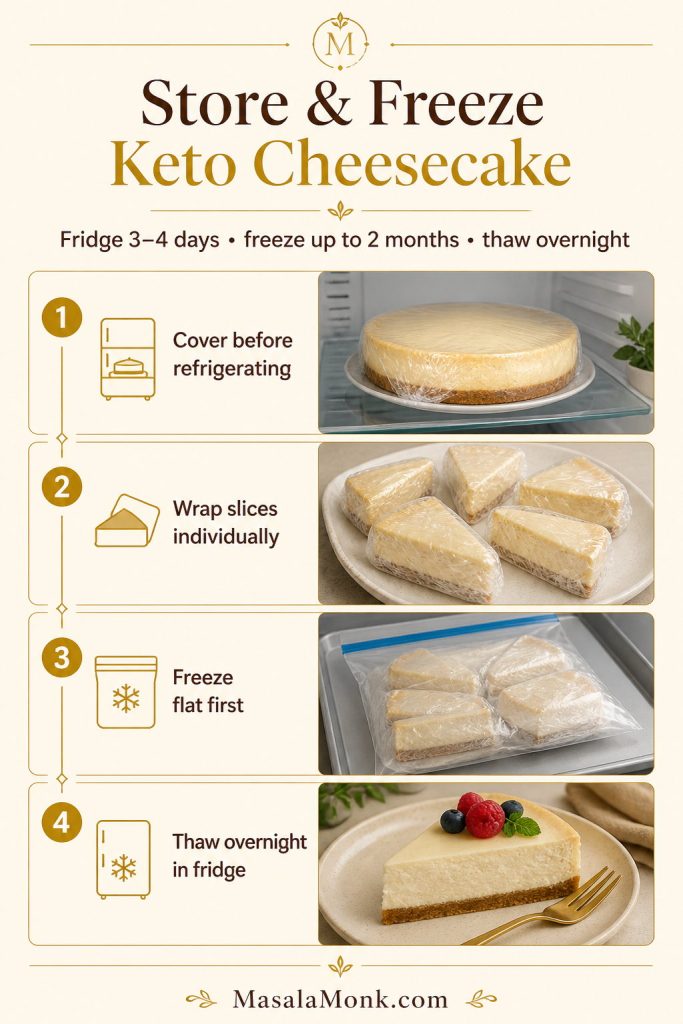
Keto cheesecake is an excellent make-ahead dessert because the texture improves after chilling. Keep it covered in the refrigerator until ready to serve. For food safety, the USDA recommends using refrigerated leftovers within 3–4 days or freezing them for longer storage.
Keto cheesecake is one of the better make-ahead desserts. For the best texture, refrigerate covered, freeze slices individually, and thaw overnight before serving.
Refrigerator: Store covered for 3–4 days for the best balance of texture and food safety.
Freezer: Freeze slices or the whole cheesecake for up to 2 months for best quality.
Thawing: Thaw overnight in the refrigerator for the best texture.
Serving: Slice cold, then let slices sit at room temperature for 10–15 minutes if you prefer a softer texture.
For freezing, place chilled slices on a parchment-lined tray until firm, then wrap individually. This keeps the slices from sticking together and makes it easier to thaw only what you need.
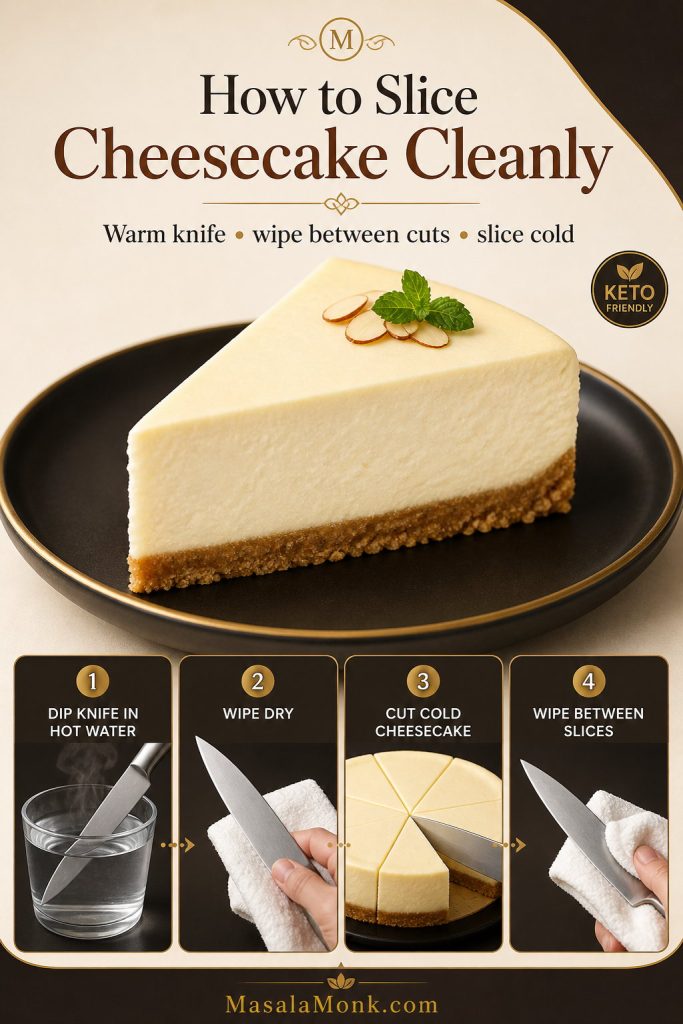
How to Slice Cheesecake Cleanly
For clean slices, chill the cheesecake fully before cutting. Use a sharp knife, dip it in hot water, wipe it dry, then cut one slice. Wipe the knife between cuts so the filling stays smooth and the almond flour crust does not drag through the slice.
Clean cheesecake slices come from cold cheesecake and a warm knife. Wipe between cuts so the creamy filling and almond flour crust stay neat.
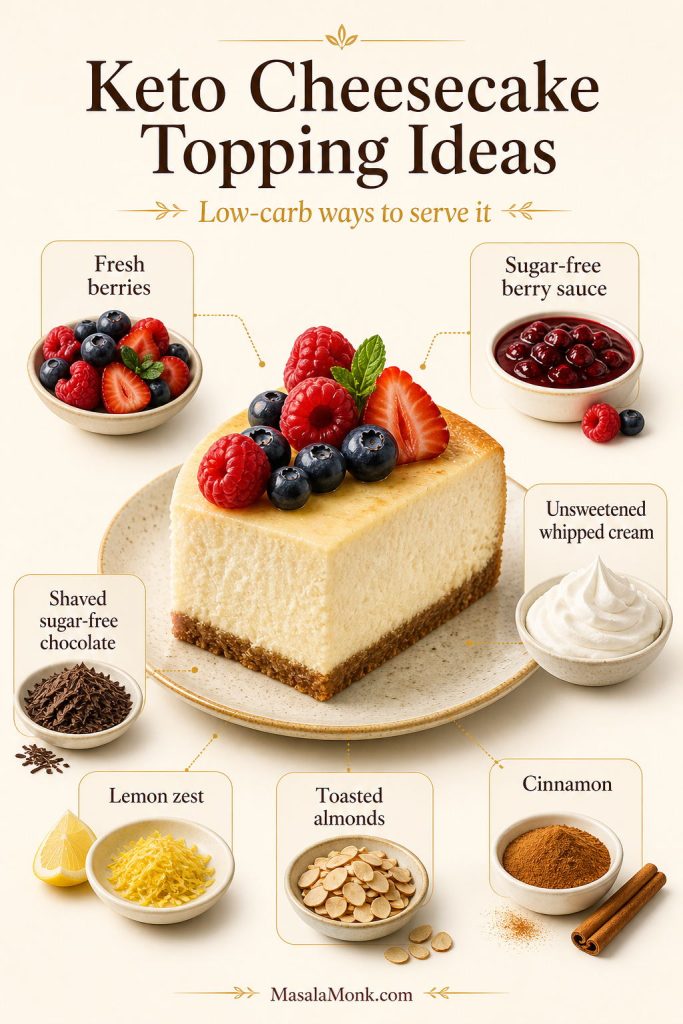
This keto cheesecake is rich enough to serve plain, but toppings can make it feel more special without adding much sugar.
Fresh strawberries, raspberries, or blueberries
Sugar-free berry sauce
Unsweetened whipped cream
Shaved sugar-free chocolate
Lemon zest
Toasted sliced almonds
A light dusting of cinnamon for a warmer flavor
Low-carb toppings should support the cheesecake, not bury it. Fresh berries, whipped cream, lemon zest, shaved chocolate, toasted almonds, and cinnamon all keep the flavor balanced.
Keep toppings simple if you want the cheesecake texture to stay the focus. Watery fruit sauces should be cooked down and cooled before adding.
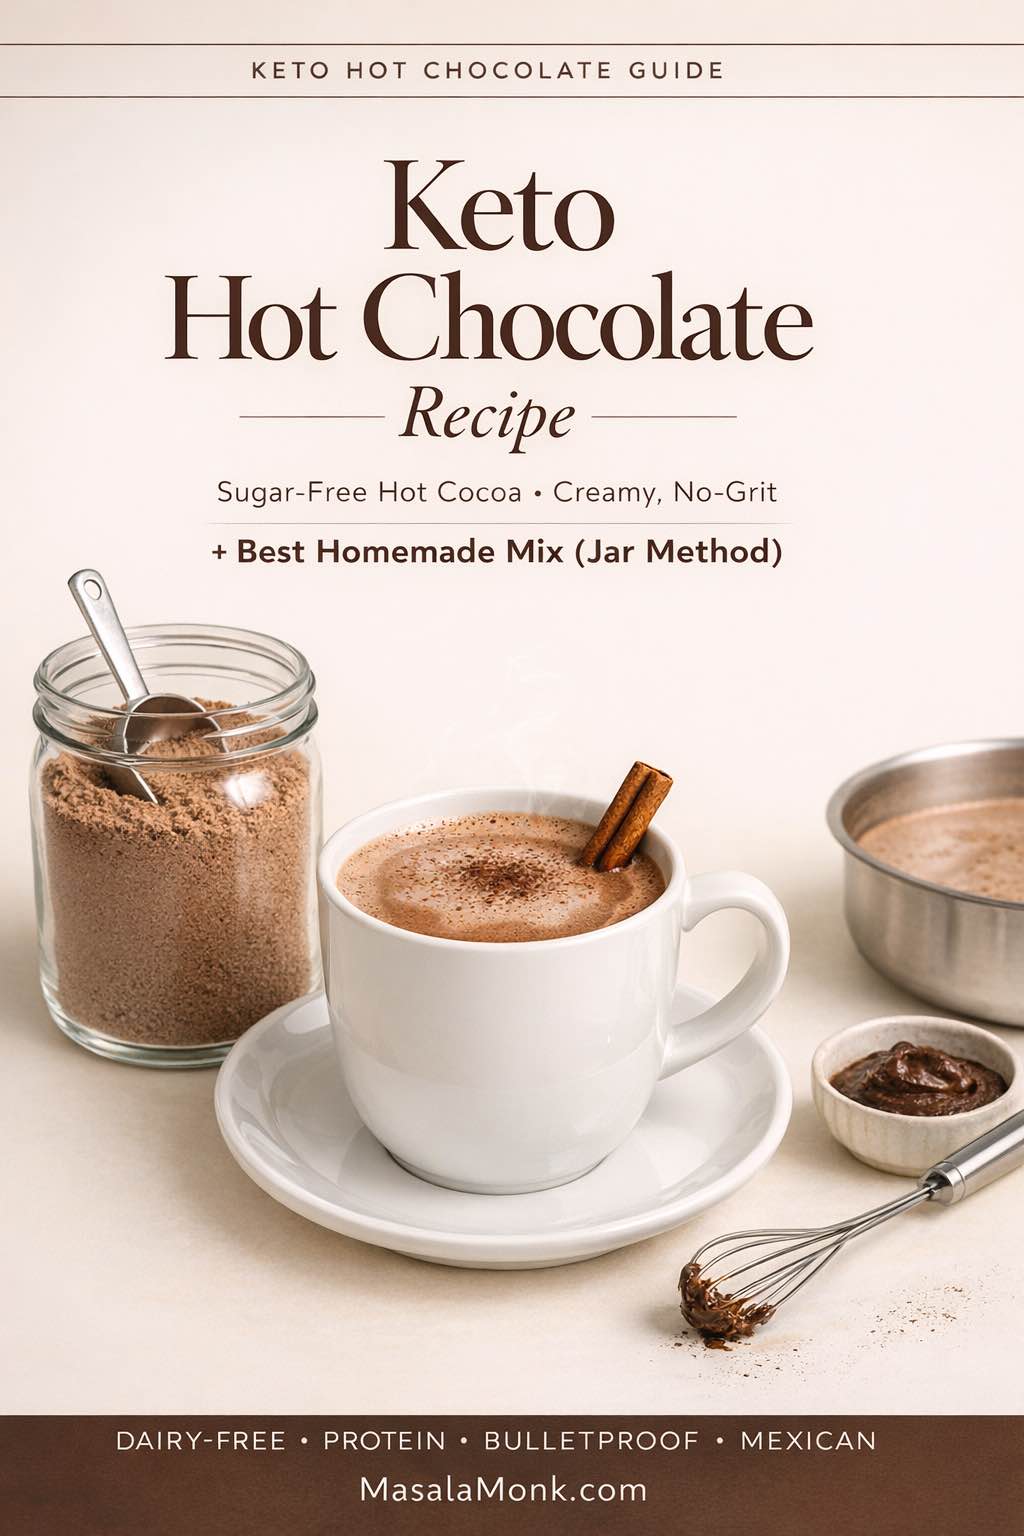
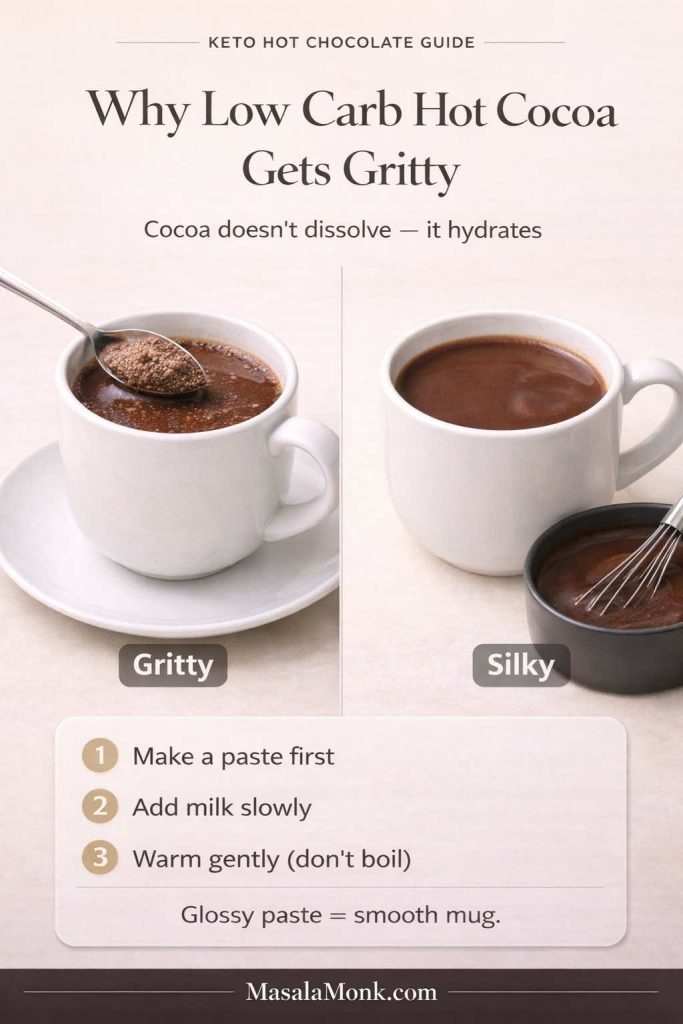
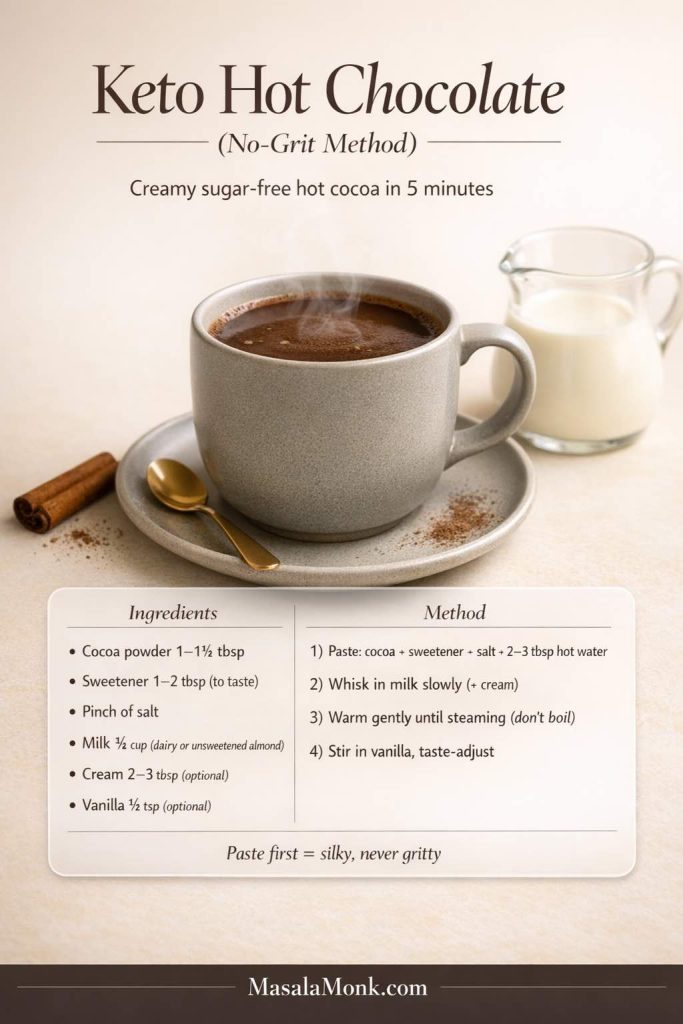
For a cozy pairing, serve a small slice with keto hot chocolate instead of a sugary drink.
Keto Cheesecake Recipe Card
This creamy keto cheesecake has a buttery almond flour crust, smooth sugar-free cream cheese filling, and a slow-cooling method that helps prevent cracks. It is rich, low carb, gluten-free, and made without a water bath.
Prep Time 25 minutes
Crust Bake 10–12 minutes
Cheesecake Bake 45–55 minutes
Cooling Time 1½–2 hours
Chill Time 6 hours minimum, overnight best
Total Time About 9 hours, plus overnight chill if preferred
Yield 12–16 slices
Pan 9-inch springform
Net Carbs About 4g per 1 of 16 slices
Water Bath Not required
Method Baked cheesecake
Difficulty Easy with slow cooling
Ingredients
For the Almond Flour Crust
2 cups / about 224 g blanched almond flour
1/3 cup / 75 g unsalted butter, melted
2 tablespoons powdered keto sweetener
1 teaspoon vanilla extract
1/4 teaspoon fine salt
For the Cheesecake Filling
32 oz / 907 g full-fat brick cream cheese, softened
1 cup to 1 1/4 cups powdered keto sweetener, preferably allulose or monk fruit/allulose blend
1/2 cup / 120 g sour cream, room temperature
3 large eggs, room temperature
1 tablespoon fresh lemon juice
2 teaspoons vanilla extract
1/4 teaspoon fine salt
Instructions
Prepare the pan. Line the bottom of a 9-inch springform pan with parchment paper and lightly grease the sides.
Heat the oven for the crust. Preheat the oven to 350°F / 177°C.
Make the crust. Stir almond flour, melted butter, sweetener, vanilla, and salt until the mixture looks like damp crumbs.
Press and bake the crust. Press the crust firmly into the pan using the bottom of a cup. Bake for 10–12 minutes, until lightly golden. Let it cool slightly.
Lower the oven temperature. Reduce the oven to 325°F / 163°C.
Beat the cream cheese. In a large bowl, beat softened cream cheese until smooth. Scrape the bowl well.
Add sweetener. Add 1 cup powdered keto sweetener and beat until smooth. Taste before adding eggs and add up to 1/4 cup more sweetener if you prefer a sweeter cheesecake.
Add sour cream and flavorings. Mix in sour cream, lemon juice, vanilla, and salt until smooth.
Add eggs gently. Add eggs one at a time on low speed, mixing only until each egg is incorporated. Do not overmix.
Fill the pan. Pour the filling over the cooled crust and smooth the top.
Bake. Bake at 325°F / 163°C for 45–55 minutes, until the edges are set and the center still jiggles softly.
Cool slowly. Turn off the oven, crack the door open, and leave the cheesecake inside for 20–30 minutes.
Cool at room temperature. Move the cheesecake to the counter and cool completely.
Chill. Cover and refrigerate for at least 6 hours, preferably overnight.
Slice and serve. Run a thin knife around the edge before releasing the springform ring. Slice cold with a sharp knife.
Recipe Notes
For the smoothest filling, use powdered sweetener rather than coarse granulated sweetener.
Do not overbake. The center should still wobble gently when the cheesecake comes out of the oven.
For a crustless version, skip the crust, line and grease the pan well, and start checking the bake around 40–45 minutes.
For a more New York-style texture, chill the cheesecake overnight and serve toppings on the side rather than mixing fruit into the filling.
For the lowest-carb version, make the cheesecake crustless and slice it into 16 smaller portions.
Nutrition will vary by brand of sweetener, cream cheese, sour cream, and almond flour.
Approximate Nutrition
Approximate per 1 of 16 slices: 330–360 calories, 7–9 g protein, 32–35 g fat, and about 4 g net carbs. For 12 larger slices, net carbs are closer to about 5 g per slice. Exact values depend on the brands used.
Save this keto cheesecake recipe card for the key numbers: almond flour crust, 9-inch pan, gentle bake, slow cooling, and at least 6 hours of chilling.
Traditional cheesecake is usually not keto because the filling contains sugar and the crust is often made with graham crackers. This version uses an almond flour crust and keto sweetener to keep the carbs low.
Is keto cheesecake zero carb?
No. It is usually low carb, not zero carb. Dairy, eggs, almond flour, lemon juice, and some sweeteners can all add small amounts of carbs. For the lowest-carb version, make it crustless and keep toppings simple.
How many net carbs are in keto cheesecake?
This recipe has about 4 g net carbs per slice if cut into 16 slices, or about 5 g net carbs if cut into 12 larger slices. The exact number depends on the almond flour, cream cheese, sour cream, and sweetener brands you use.
What can I use instead of almond flour?
The easiest option is to make the crustless version. You can also use a tested nut-free crust, but coconut flour should not be swapped 1:1 for almond flour because it absorbs much more moisture.
How do I make keto cheesecake no crust?
For keto cheesecake no crust, skip the almond flour base, line the pan with parchment, grease the sides well, and pour the filling directly into the pan. Start checking the cheesecake a little earlier because there is no crust layer.
How is no-bake keto cheesecake different?
A no-bake version uses a different filling structure. It usually sets with whipped cream and long chilling instead of eggs and baking, so the texture is softer and more mousse-like.
Do I need a water bath for keto cheesecake?
A full water bath is not required. This recipe uses room-temperature ingredients, gentle baking at 325°F / 163°C, careful mixing after the eggs go in, and slow cooling. For extra insurance, place a pan of hot water on the lower oven rack.
What is the best sweetener for keto cheesecake?
Powdered allulose or a powdered monk fruit/allulose blend gives the smoothest filling. Coarse granulated sweeteners can taste gritty, and some erythritol-heavy blends can leave a cooling finish.
Why did my keto cheesecake crack?
Cracks usually happen because the filling was overmixed, the cheesecake was overbaked, or it cooled too quickly. Use room-temperature ingredients, mix gently after adding eggs, pull it from the oven while the center still jiggles, and cool it slowly.
Why is my cheesecake grainy?
Grainy cheesecake often comes from coarse sweetener or a sweetener that crystallizes as it chills. Use powdered sweetener in the filling and avoid overmixing once the eggs are added.
Does coconut flour work for the crust?
Not as a direct swap. Coconut flour is much more absorbent than almond flour, so it needs a different ratio of fat and liquid. For this recipe, almond flour is the better choice unless you are using a tested coconut flour crust.
Ricotta vs cottage cheese: do they work?
Both can work in separate cheesecake styles, but the texture will be different. Ricotta gives a lighter, slightly grainier cheesecake, while cottage cheese needs blending until completely smooth. For this classic version, brick cream cheese gives the best result.
How long do mini keto cheesecakes bake?
Mini cheesecakes usually bake faster than a full cheesecake, often around 15–22 minutes depending on size. Use a muffin pan with liners, watch for set edges and slightly wobbly centers, then chill well before serving.
How do you freeze keto cheesecake?
Freeze it only after the cheesecake has chilled completely. Wrap slices individually or freeze them on a parchment-lined tray first, then store them in an airtight container. Thaw overnight in the refrigerator for the best texture.
Keto hamburger recipes work best when they match the kind of dinner you actually want tonight. Sometimes that means a classic bunless cheeseburger. Other nights, a fast burger bowl, a warm cheeseburger skillet, or a bacon cheeseburger casserole makes more sense while still delivering the same savory, low-carb comfort.
Start with the best first recipe if you want the closest thing to a classic burger night, then use the comparison below to choose between a bowl, skillet, casserole, or one of the shorter variations depending on how much time you have and how well you need it to reheat. If you want extra context on why beef fits so naturally into low carb eating, MasalaMonk’s beef on keto guide is a useful companion read.
Across these formats, the same pattern shows up again and again: classic burgers need enough fat and enough sharp condiments to still feel complete without the bun, bowls need more sauce than most people expect, skillets need real browning or they slip into generic creamy beef, and casseroles need something bright on the plate so the richness does not flatten out.
For most readers, the best first recipe is the Classic Bunless Keto Cheeseburgers. It feels most like a real burger dinner, teaches the decisions that matter most, and makes it easier to decide whether you want to stay with burgers or move toward bowls, skillets, casseroles, and other burger-style formats later.
The craving may be the same, but the best answer changes with the night. Sometimes a real burger shape still matters. Sometimes speed matters more. On other nights, the smarter move is choosing the version that reheats well tomorrow instead of forcing everything into a bunless burger plate tonight.
Best First Keto Hamburger Recipe: Classic Bunless Keto Cheeseburgers
For most readers, the best first recipe is still the Classic Bunless Keto Cheeseburgers. It comes closest to a real burger dinner, teaches the decisions that matter most, and makes it easier to judge whether your next move should be a faster bowl, a warmer skillet, or a more make-ahead-friendly casserole.
Why start here: it stays closest to the classic burger experience while still fitting keto comfortably
What it teaches: beef choice, patty shaping, seasoning, cheese timing, sauce balance, and bun alternatives that actually work
Who it suits best: readers who want a true burger shape before branching into bowls, skillets, or casseroles
What to do next: stay with this if you want a burger plate, move to the burger bowl if you want speed, or shift to the skillet or casserole if you want better leftovers
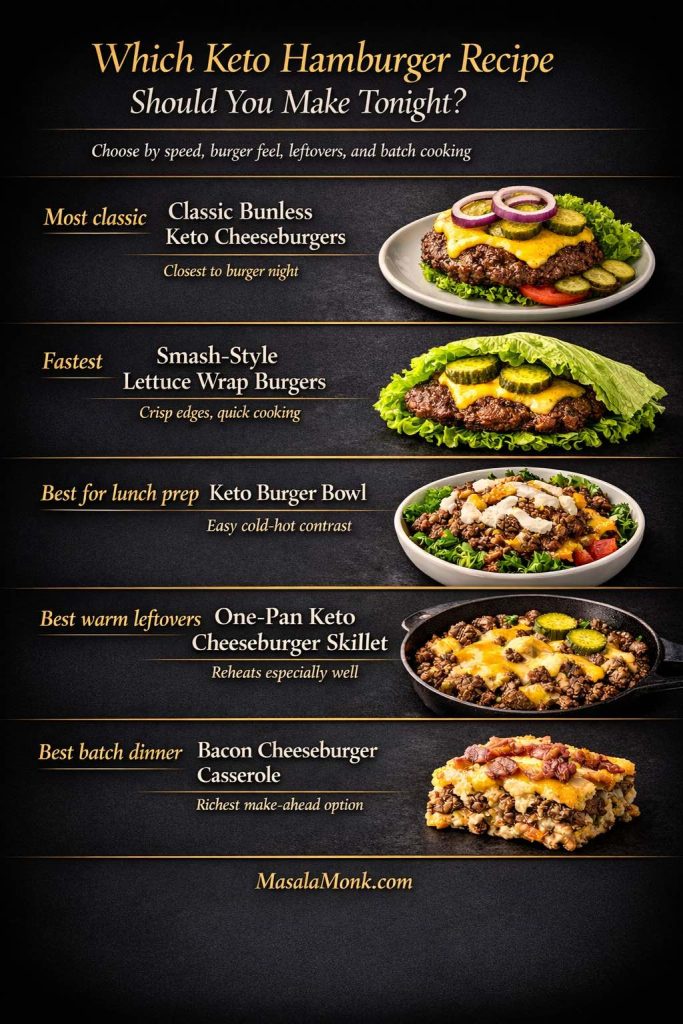
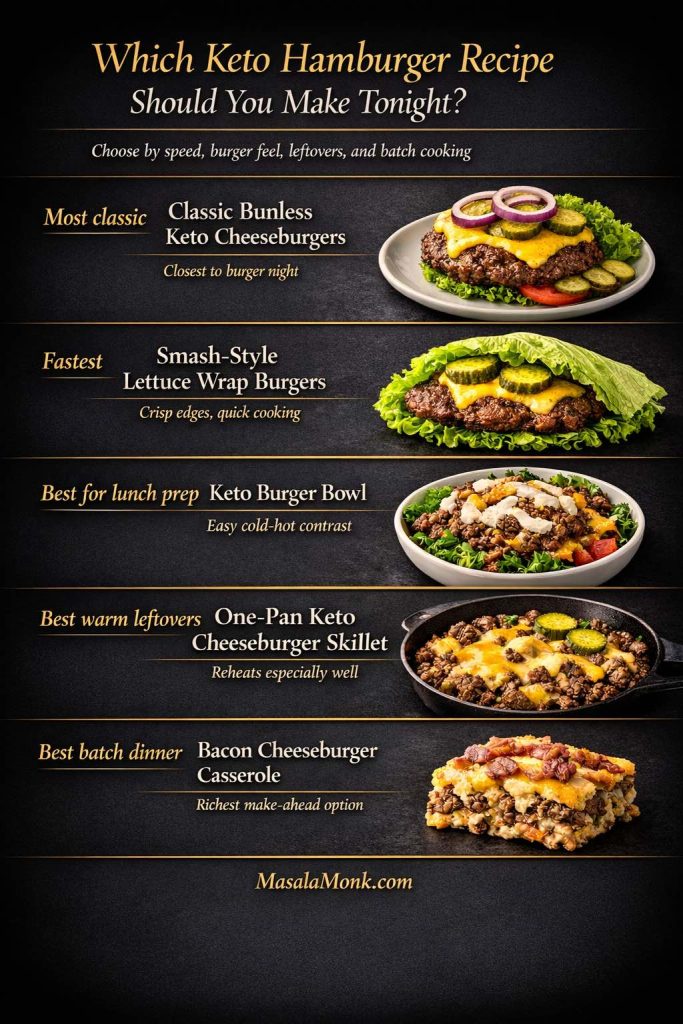
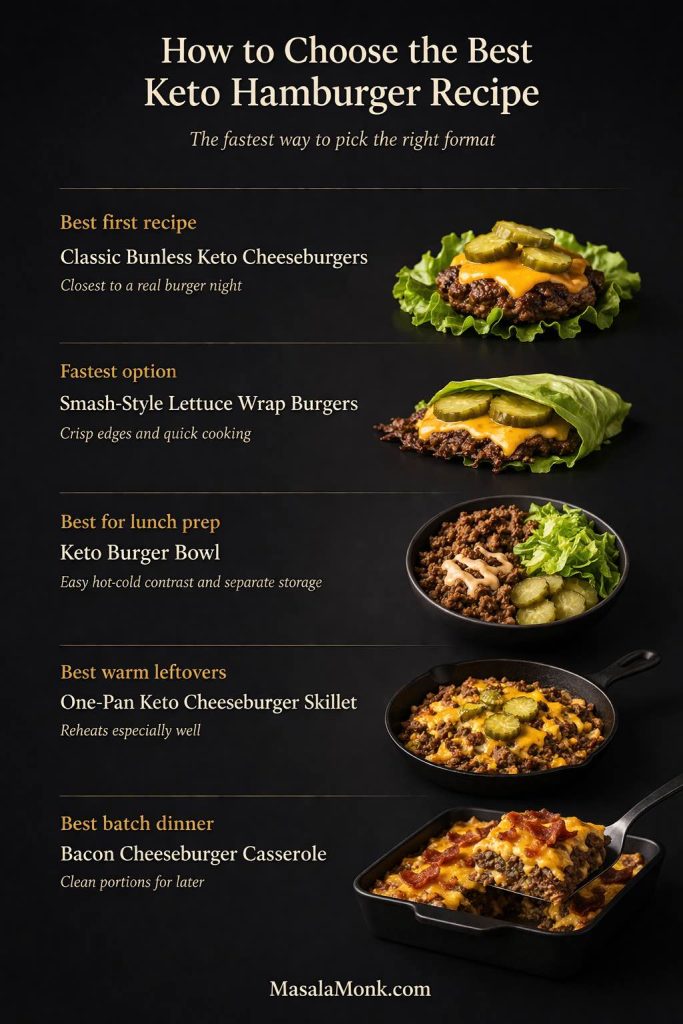
Use this matrix to choose by speed, leftovers, and how closely each option still feels like a classic burger dinner. In other words, if you already know whether you want a real burger, a fast bowl, a warm skillet, or a make-ahead casserole, this is the quickest way to land on the right recipe.
Recipe
Best for
Time
Leftovers
How burger-like it feels
Classic Bunless Keto Cheeseburgers
Closest to a real burger night
20 min
Fair
Very high
Keto Burger Bowl with Homemade Burger Sauce
Fast lunch or easy dinner
20 min
Very good
High
One-Pan Keto Cheeseburger Skillet
Warm weeknight dinner
25 min
Excellent
Medium-high
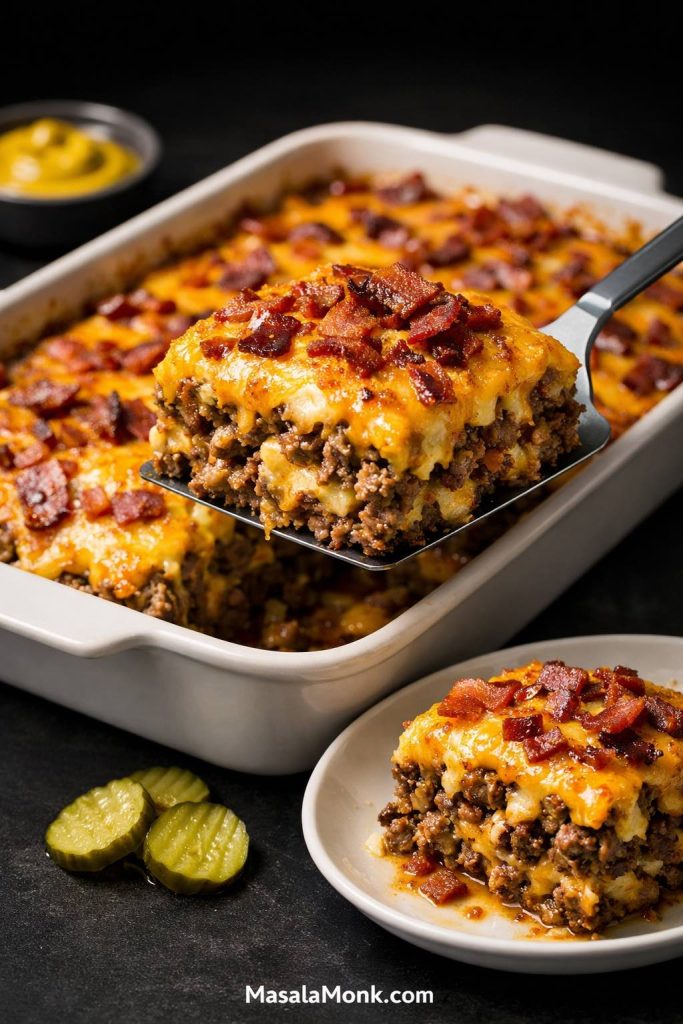
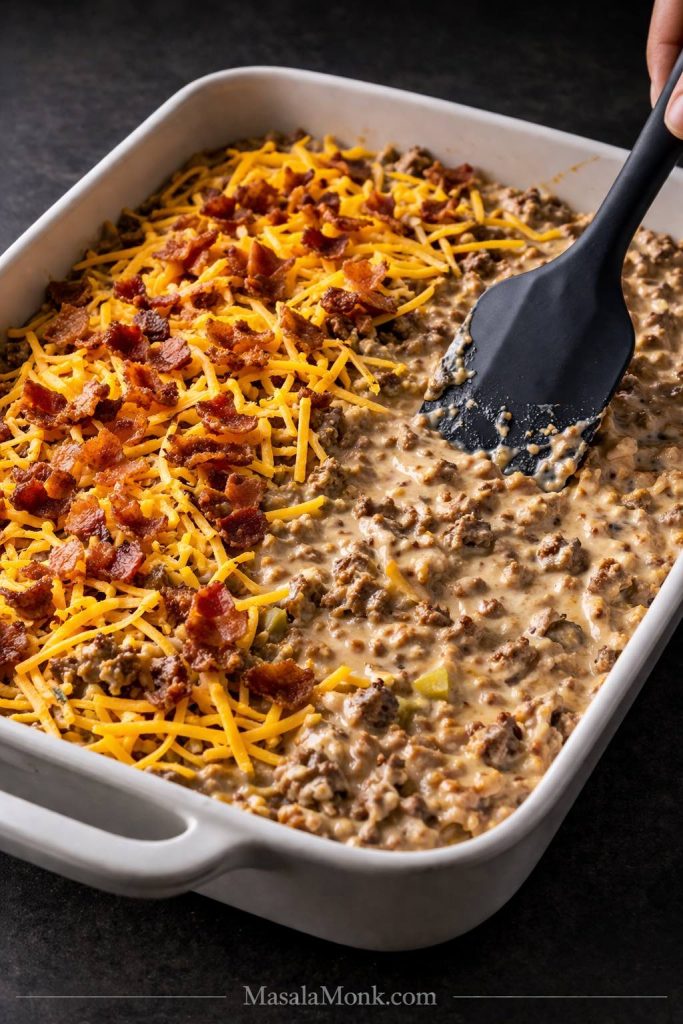
Bacon Cheeseburger Casserole
Comfort food and meal prep
40 min
Excellent
Medium-high
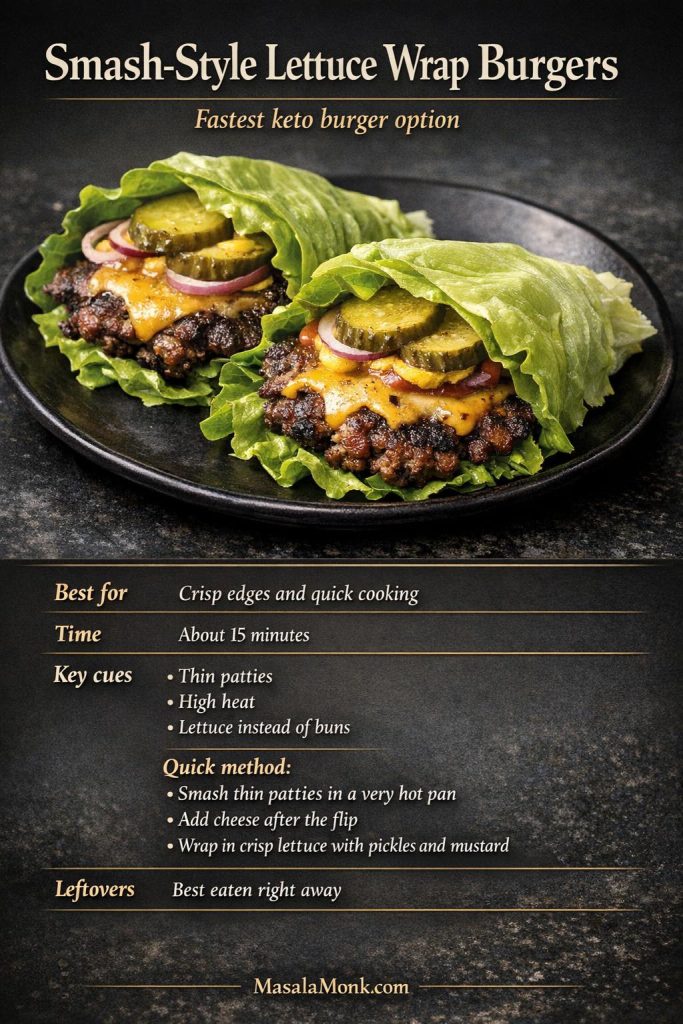
Smash-Style Lettuce Wrap Burgers
Crisp edges and fast cooking
15 min
Fair
Very high
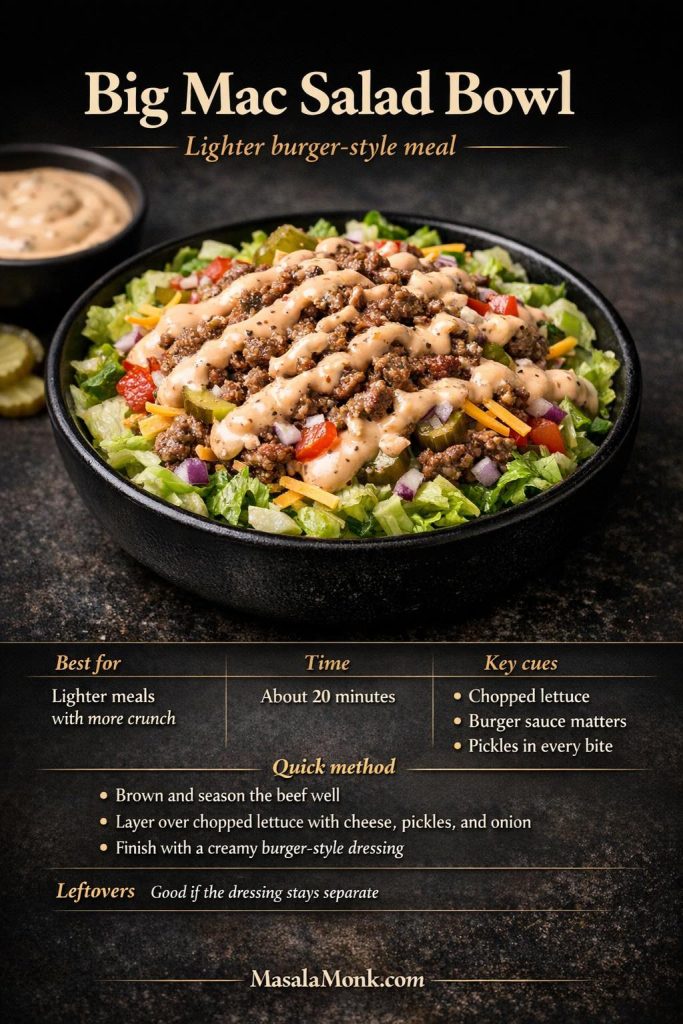
Big Mac Salad Bowl
Lighter burger-style meal
20 min
Good
Medium
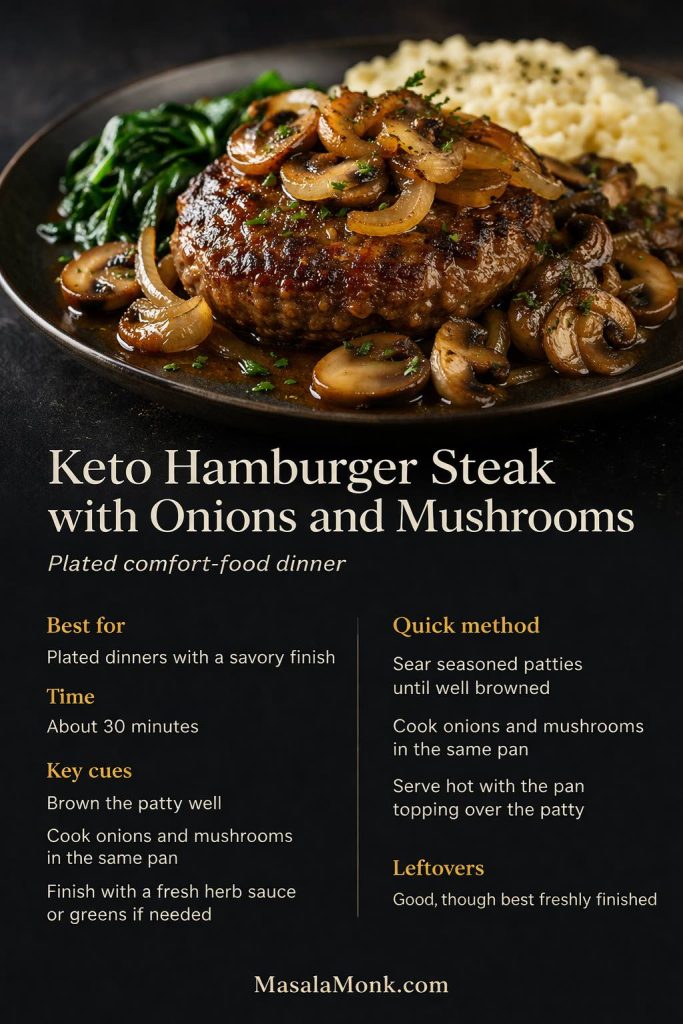
Keto Hamburger Steak with Onions and Mushrooms
Plated comfort-food dinner
30 min
Good
Medium
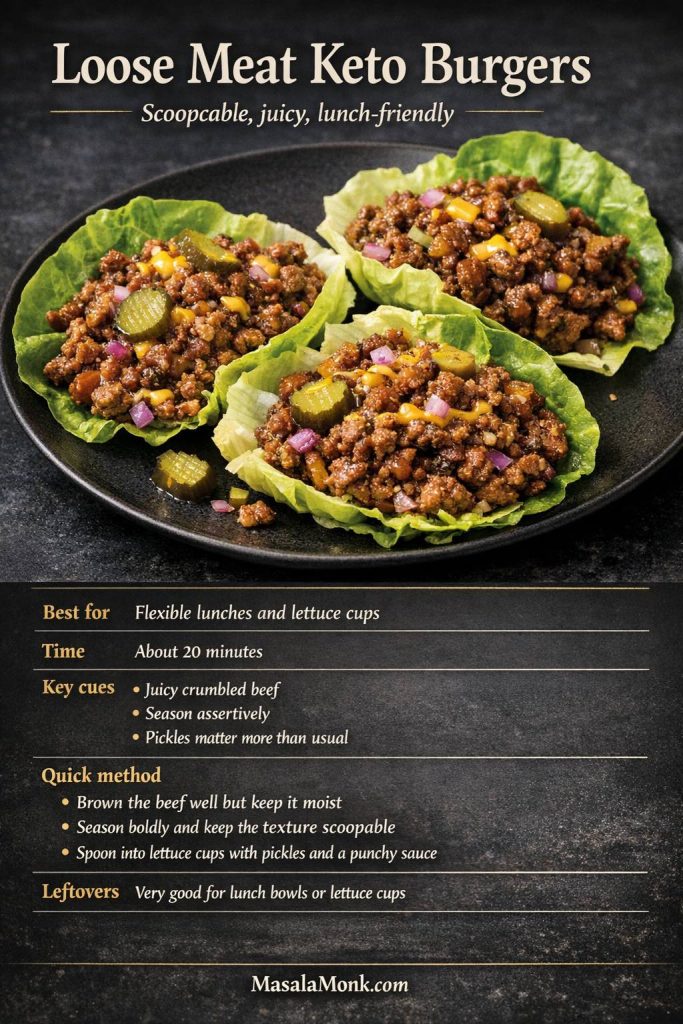
Loose Meat Keto Burgers
Quick scoopable beef dinner
20 min
Very good
Medium
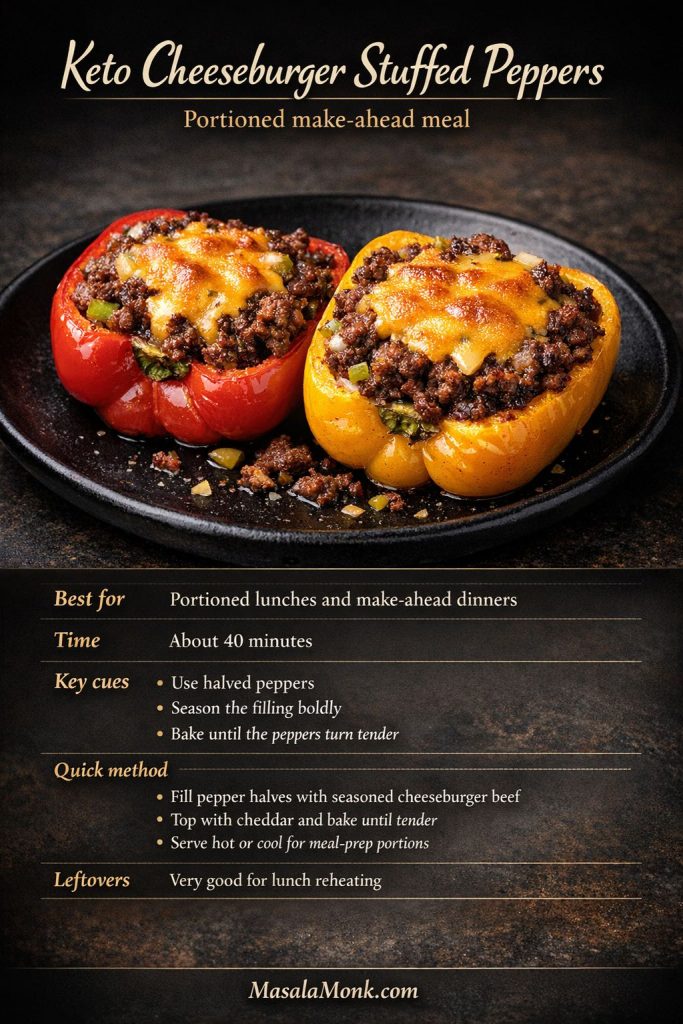
Keto Cheeseburger Stuffed Peppers
Portioned make-ahead meals
40 min
Excellent
Medium
Use this quick chooser to decide whether tonight calls for the most classic bunless burger, the fastest lettuce-wrap option, an easy burger bowl, a reheatable skillet, or a batch-friendly casserole.
Choose Tonight’s Winner
Most classic: Classic Bunless Keto Cheeseburgers
Fastest: Smash-Style Lettuce Wrap Burgers
Best for lunch prep: Keto Burger Bowl with Homemade Burger Sauce
Best warm leftovers: One-Pan Keto Cheeseburger Skillet
Best batch dinner: Bacon Cheeseburger Casserole
4 Full Keto Hamburger Recipes
These four recipes cover the formats most people actually want: a classic bunless burger, a fast burger bowl, a warm cheeseburger skillet, and a richer casserole for leftovers or meal prep. So if you only cook from four sections here, start with these.
1. Classic Bunless Keto Cheeseburgers
Choose this when: you want the clearest keto burger answer and still want dinner to feel like burger night rather than a workaround.
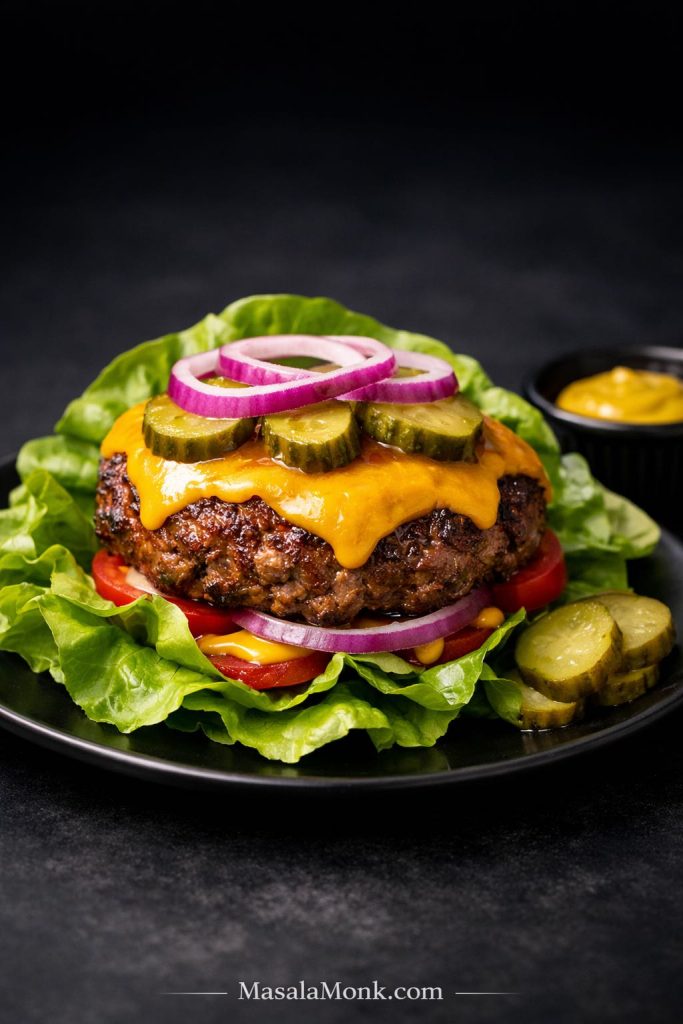
A good bunless cheeseburger should not feel like the bun was simply removed and nothing else was adjusted. It should still eat like a full burger dinner: juicy in the center, properly seasoned, sharp from mustard and pickles, and rich enough that the missing bun stops feeling like the main story after the first bite.
Pickles, mustard, and onion do more of the real flavor-lifting work here than any bun substitute, which is why this bunless keto cheeseburger still feels like a full burger dinner.
Serves: 4
Prep time: 10 minutes
Cook time: 10 minutes
Estimated net carbs: about 3 to 5 grams per serving, depending on toppings and sauce
Best for: readers who want the clearest keto burger answer
Ingredients
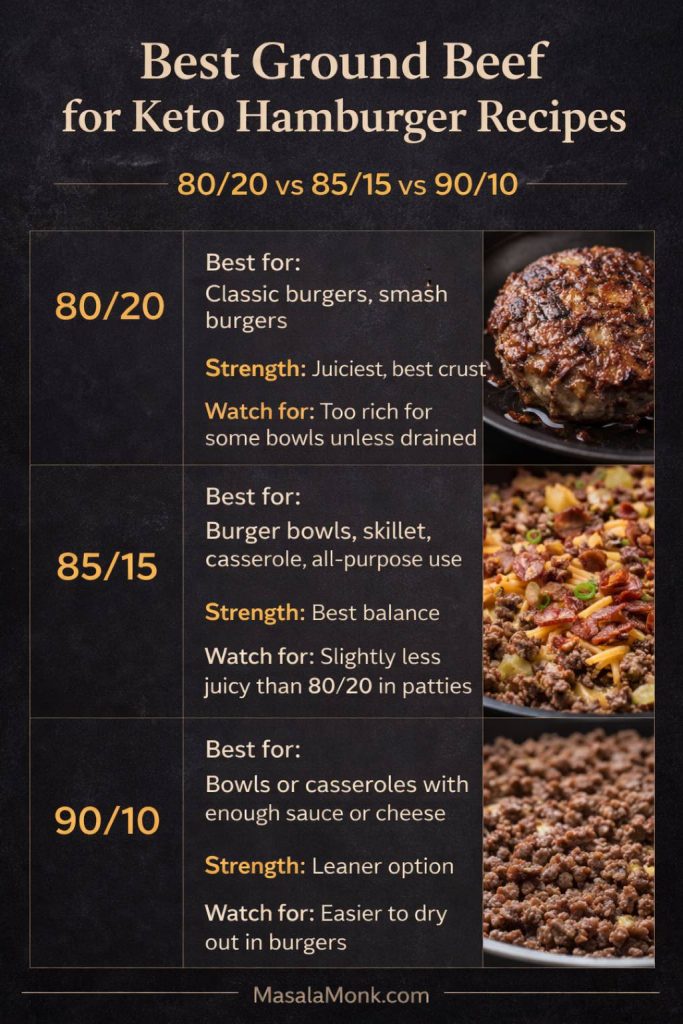
1 1/2 pounds ground beef, ideally 80/20 or 85/15
1 1/2 teaspoons kosher salt
3/4 teaspoon black pepper
1 teaspoon garlic powder
1 teaspoon onion powder
4 slices cheddar or American cheese
8 large lettuce leaves for wrapping or serving
1/2 small red onion, thinly sliced
8 to 12 pickle slices
1 small tomato, sliced, optional
2 tablespoons mustard
1/4 cup burger sauce, or a mix of mayo, mustard, and finely chopped pickles
Substitutions
Beef: use 80/20 for a juicier burger and stronger crust, or use 85/15 if you want a slightly cleaner finish with less dripping.
Cheese: American melts more smoothly, while cheddar gives a sharper, more classic cheeseburger flavor.
Sauce: go with burger sauce for the fullest diner-style result, or keep it simpler with mustard and mayo.
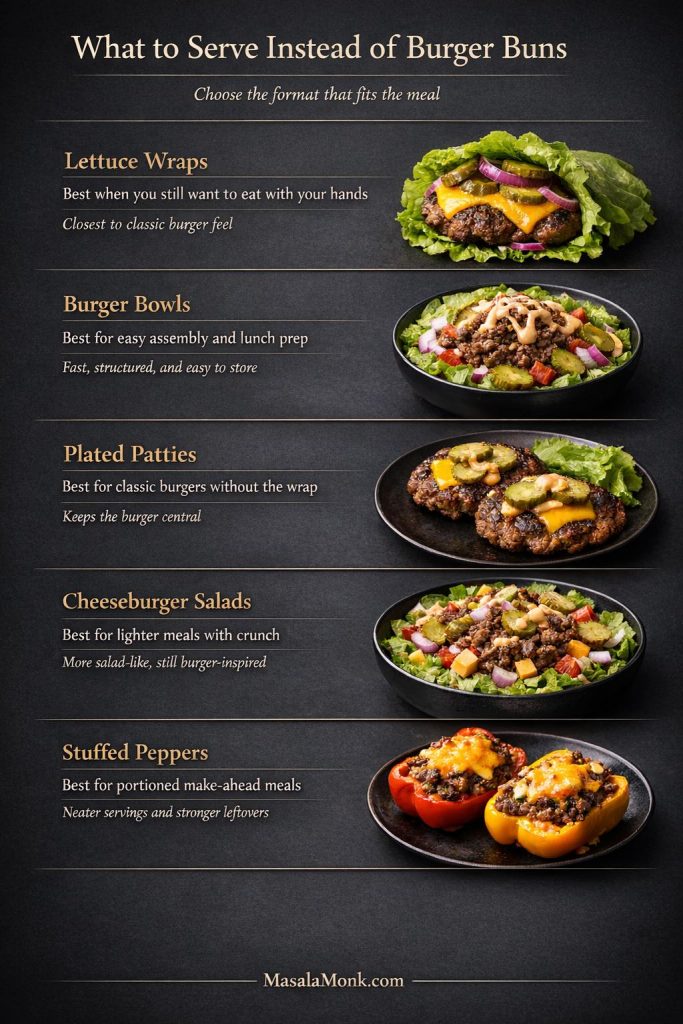
Serving style: use lettuce wraps if you still want a hand-held burger, or plate the patties with toppings on the side if you want a less messy meal.
Toppings: tomato is optional, while pickles and onion do more of the real flavor-lifting work.
Method
Divide the beef into 4 equal portions and shape them gently into broad patties about 1/2 to 3/4 inch thick. In a skillet, slightly flatter patties usually cook more evenly and develop better crust than very thick ones. Press a shallow dimple into the center of each one.
Season both sides with salt, pepper, garlic powder, and onion powder just before cooking.
Heat a cast-iron skillet or grill over medium-high heat until the surface is properly hot. Then add the patties and leave them alone long enough to develop color rather than nudging them early.
Cook the patties for about 4 minutes on the first side, then flip and cook 3 to 4 minutes more depending on thickness.
Add the cheese during the last minute so it melts cleanly without pushing the burgers too far.
Rest briefly, then serve with lettuce, onion, pickles, tomato if using, mustard, and burger sauce.
Why those small details matter: a slight center dimple helps thicker patties stay flatter, while seasoning just before cooking keeps the texture looser and juicier. If you want the deeper technique breakdown, Serious Eats has useful reads on patty shaping and salting ground beef.
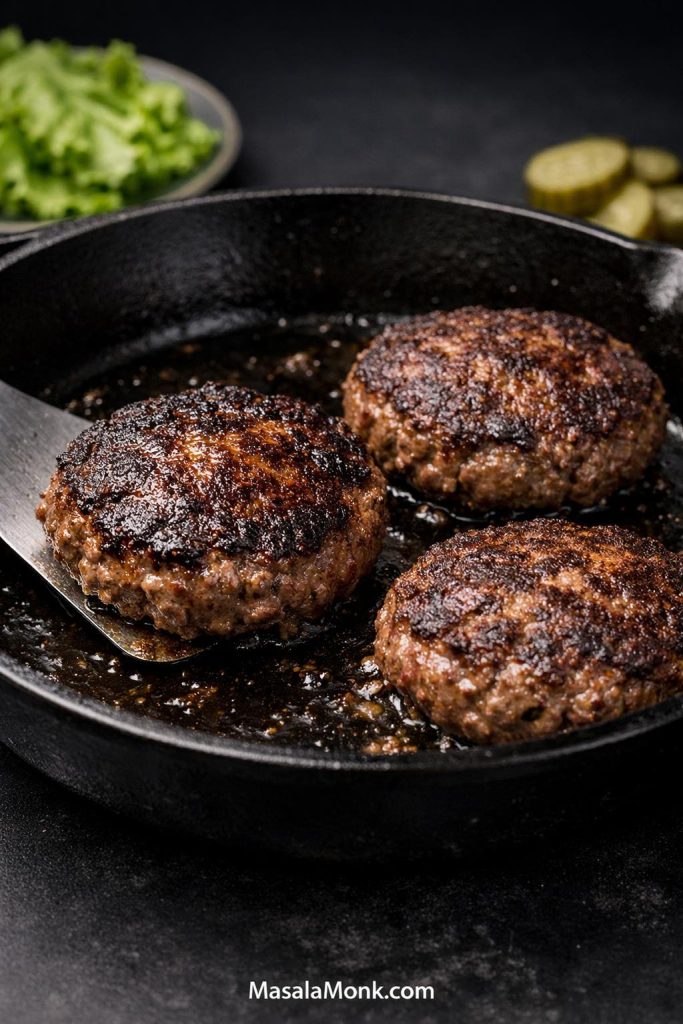
The stage you want before adding cheese: a dark, even crust that keeps a classic bunless keto cheeseburger tasting like a real burger dinner instead of steamed ground beef.
Tips for Best Results
Handle the meat as lightly as possible and keep the patties cold until they hit the pan. That preserves a looser, juicier texture. Keep the topping stack restrained too. In this format, pickles usually do more flavor work than tomato, and American cheese gives a cleaner melt while cheddar gives a sharper finish.
Common Mistakes
Overworking the meat: that makes the patties denser and less juicy.
Salting too early: the texture can become tighter than you want.
Pressing the burgers in the pan: that pushes out the juices instead of improving browning.
Why This Format Works
What makes this one so reliable is that it keeps the classic burger logic intact instead of compensating with too many toppings. The beef stays central, the cheese rounds it out, and the pickles and mustard keep the whole thing from tasting heavy. Once that balance is right here, the bowl, skillet, and casserole versions become much easier to judge.
Best Way to Serve It
For the most classic feel, serve these as lettuce wraps or as a plated burger meal with pickles and a simple low-carb vegetable side such as sautéed cabbage or roasted broccoli.
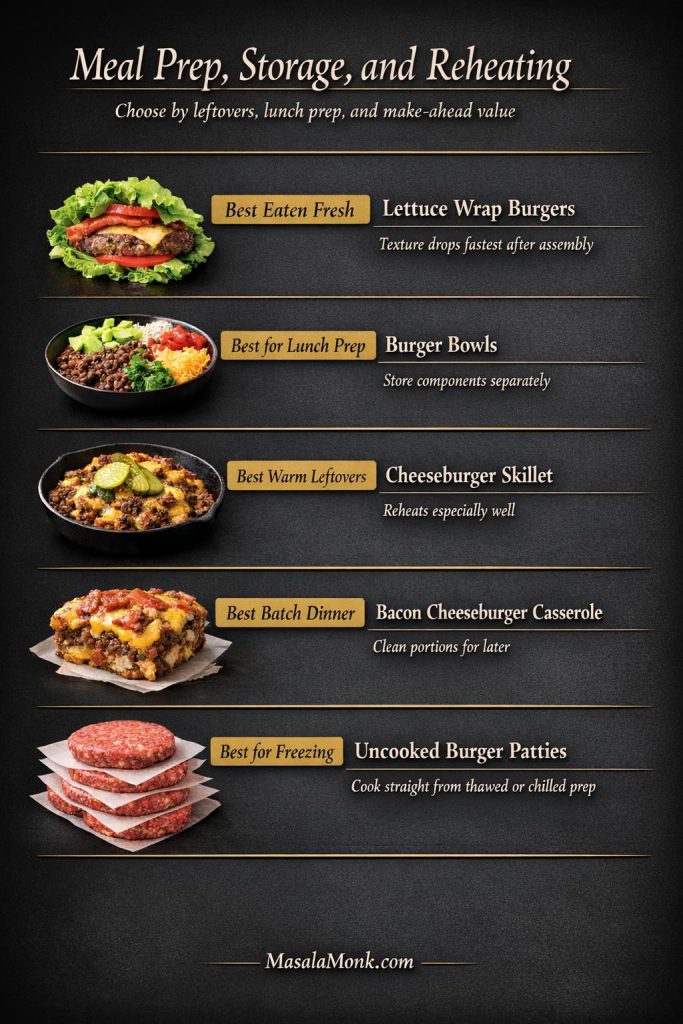
Best with: mustard, pickles, sautéed cabbage, or roasted broccoli. Leftovers: best fresh, but patties reheat well in a covered skillet and work especially well turned into burger bowls the next day.
Choose this when: you want the burger flavor fast, want something easier to prep ahead, or do not care about keeping a hand-held burger shape.
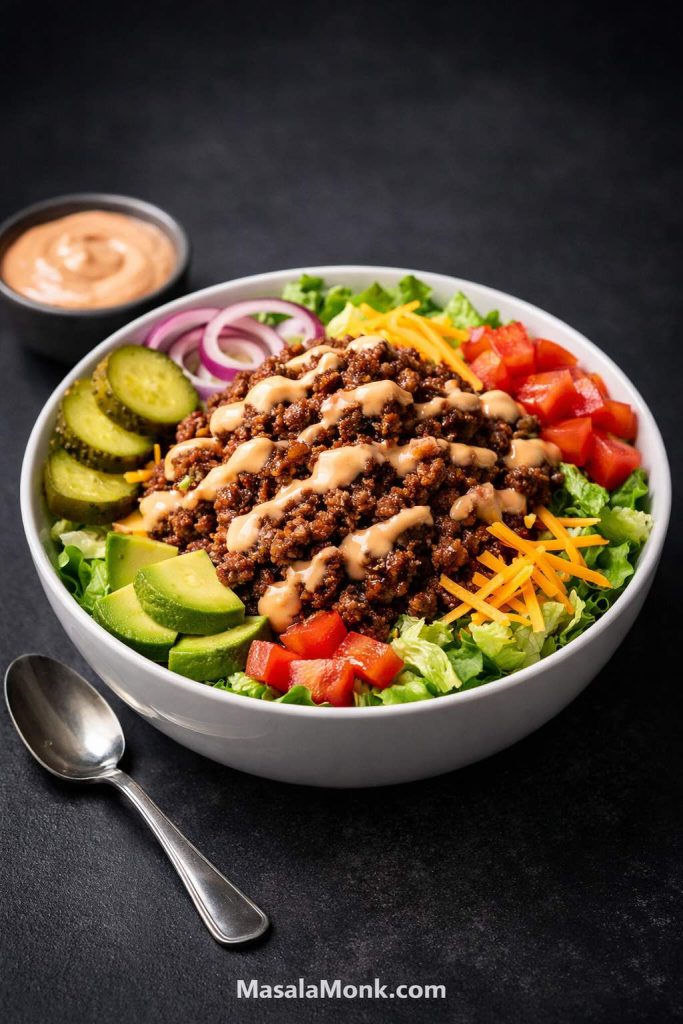
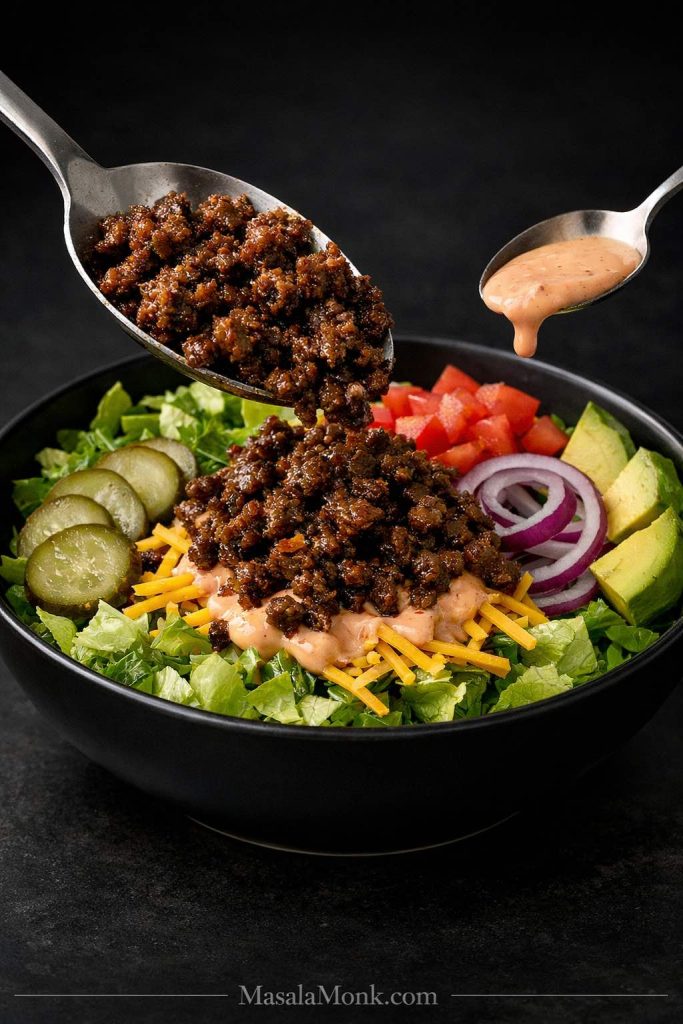
A burger bowl should still read clearly as a burger dinner, not just salad plus beef. That means proper browning, enough pickles and cheese, and a sauce with enough punch to keep every bite lively instead of soft and one-note.
A good keto burger bowl still tastes unmistakably like burger night, which is why the browned beef, pickles, cheese, and burger sauce need to stay more prominent than the salad base.
Serves: 4
Prep time: 12 minutes
Cook time: 8 minutes
Estimated net carbs: about 5 to 7 grams per serving, depending on sauce and vegetables
Best for: fast dinners, lunch prep, and easy no-bun meals
Ingredients
1 pound ground beef
1 teaspoon kosher salt
1/2 teaspoon black pepper
1 teaspoon garlic powder
1/2 teaspoon onion powder
6 cups chopped romaine or iceberg lettuce
1 cup cherry tomatoes, halved
1/2 red onion, thinly sliced
1/2 cup sliced pickles
1 cup shredded cheddar cheese
1 avocado, sliced
1/2 cup burger sauce, ideally mayo-based with mustard and chopped pickles
Greens: romaine gives more structure, while iceberg gives the cold, crunchy burger-joint feel.
Cheese: cheddar is the easiest default, though shredded Monterey Jack also works if you want a milder bowl.
Sauce: use classic burger sauce for the most familiar burger result, or switch to tzatziki if you want a cooler, tangier bowl.
Fat level: 85/15 often works especially well here because the beef still stays flavorful without making the bowl greasy.
Add-ons: avocado is optional, but pickles are harder to skip if you want the bowl to taste distinctly burger-like.
Method
Brown the beef in a skillet over medium-high heat, breaking it up as it cooks.
Season with salt, pepper, garlic powder, and onion powder, then cook until well browned rather than merely gray.
Meanwhile, divide the lettuce among 4 bowls and top with tomatoes, onion, pickles, cheese, and avocado.
Spoon the warm beef over the bowls so the cheese softens slightly and the bowl feels more like a meal than a cold salad.
Finish with burger sauce. For a cooler, tangier take, add tzatziki instead of or alongside the classic burger sauce.
Serve right away, or for meal prep let the beef cool slightly and store the beef, toppings, and sauce separately so the greens stay crisp.
Adding the hot browned beef and burger sauce at the end keeps this keto burger bowl tasting like burger night instead of a cold salad with beef on top.
Tips for Best Results
Keep the lettuce cold, the beef deeply browned, and the sauce slightly sharper than you think it needs to be. Burger bowls often go wrong because the components are individually fine but too quiet together. Iceberg gives the coldest burger-joint crunch, while romaine holds up better for meal prep, and a sharper sauce usually does more than extra cheese.
Common Mistakes
Underseasoning the beef: the bowl tastes flat even if the toppings are good.
Using a weak sauce: that makes the whole bowl drift toward generic salad territory.
Assembling too early: the lettuce softens and the bowl loses the texture contrast that makes it work.
Why This Format Works
What makes this one especially useful is that it keeps the burger profile intact while removing the part that tends to make burger meals messier to build, store, and reheat. As a result, it is one of the most practical keto hamburger recipes when you want speed and leftovers at the same time. It is also flexible enough to handle sharper sauces, more pickles, or a cooler yogurt-based topping without losing what makes the bowl satisfying.
Best Way to Serve It
Use crisp lettuce as the base, keep the sauce separate for storage, and add avocado right before serving if you want the best texture. This is one of the easiest make-ahead options because the beef, toppings, and sauce can all be stored separately and assembled in minutes.
Best with: extra pickles, avocado, or a slightly sharper burger sauce than you would use on a bunless burger. Leftovers: very good, as long as the beef, greens, and sauce stay separate until serving.
Choose this when: you want a warmer hamburger-meat dinner that still tastes clearly like cheeseburger dinner and holds up better than lettuce wraps in the fridge.
This is the right move on nights when a burger shape matters less than warmth, ease, and leftovers. The key is keeping the cheeseburger flavor clear. Once the beef is properly browned and the mustard, cheese, and pickles stay noticeable, the dish feels like a real burger dinner translated into spoonable form rather than a random creamy beef skillet.
This one-pan keto cheeseburger skillet really lands when the beef is deeply browned and the cheese, pickles, and mustard cues still read clearly enough to keep the cheeseburger profile intact.
Serves: 4
Prep time: 10 minutes
Cook time: 15 minutes
Estimated net carbs: about 4 to 6 grams per serving
Best for: weeknight dinners and strong leftovers
Ingredients
1 pound ground beef
1/2 onion, diced
2 cloves garlic, minced
1 teaspoon kosher salt
1/2 teaspoon black pepper
1 teaspoon garlic powder
1 tablespoon mustard
2 ounces cream cheese
1/2 cup heavy cream
1 1/2 cups shredded cheddar cheese
1/4 cup chopped pickles, optional
2 tablespoons chopped parsley or chives
Substitutions
Beef: 85/15 is a good middle ground here, although 80/20 still works if you drain excess fat first.
Cheese: cheddar gives the clearest cheeseburger flavor, while pepper jack can work if you want a slightly spicier finish.
Cream base: use cream cheese and heavy cream for the richest version, or use a little less cream if you want the skillet tighter and meatier.
Flavor lift: chopped pickles are optional, but they help the skillet stay recognizably burger-like.
Serving shift: serve it as-is in bowls, or spoon it over sautéed cabbage if you want the meal to feel fuller.
Method
Brown the beef with the onion in a large skillet over medium heat until the onion softens and the beef develops good color.
If the pan looks overly greasy, drain just enough fat to keep the skillet balanced. Leave some behind, though, because that richness helps the finished dish still taste like cheeseburger instead of lean beef in sauce.
Add the garlic, salt, pepper, and garlic powder, then stir briefly until fragrant.
Lower the heat and stir in the mustard, cream cheese, and heavy cream until the mixture turns creamy and evenly combined.
Add the cheddar and stir until melted. Fold in chopped pickles if using.
Taste and adjust the salt before serving, because cheese can mute the seasoning slightly once everything comes together.
Finish with parsley or chives and serve hot.
This skillet is in the right zone when the beef stays deeply browned, the cheddar melts into the pan without turning it soupy, and the pickles still cut through the richness.
Tips for Best Results
The beef needs more browning than most creamy skillet recipes ask for. That is what gives the dish backbone. Then keep the cream under control. Too much richness softens the cheeseburger profile, while a smaller amount lets the beef, mustard, cheese, and pickles stay distinct. Fold in a small amount of pickles at the end or scatter them on top, because cooked too hard into the base they lose the sharp edge that keeps the skillet tasting clearly like cheeseburger.
Common Mistakes
Not browning the beef enough: the skillet loses depth and starts tasting one-note.
Adding too much cream: the cheeseburger profile gets blurred.
Under-salting after the cheese goes in: the finished skillet can taste dull even though it looks rich.
Why This Format Works
What keeps this skillet satisfying is that it still reads as a cheeseburger dinner instead of drifting into generic creamy beef. The mustard, cheese, beef, and optional pickles keep the flavor profile clear, while the one-pan format makes it one of the easiest warm keto hamburger dinners to revisit during the week.
Best Way to Serve It
Serve it in bowls, over sautéed cabbage, or with a simple sharp green side. This is worth making even when you are really cooking for tomorrow as much as tonight.
Best with: sautéed cabbage, roasted mushrooms, or a simple green salad. Leftovers: excellent; reheat gently on the stove so the cheese stays smooth and the skillet does not tighten too much.
Choose this when: you want the richest comfort-food version, need stronger leftovers, or want a burger-style dinner that feels made for batch cooking.
This is the richest option here, so balance matters more than volume. The casserole should feel satisfying and cheesy, yet still have enough mustard, bacon, or pickle sharpness to stop the last few bites from tasting heavier than the first few. That contrast is what makes it worth baking instead of just turning dinner into another skillet.
A bacon cheeseburger casserole makes the most sense when you want a richer make-ahead dinner, and the clean lifted slice shows why resting it before serving helps the texture hold together better.
Serves: 6
Prep time: 15 minutes
Cook time: 25 minutes
Estimated net carbs: about 4 to 6 grams per serving
Best for: meal prep, family dinners, and generous leftovers
Ingredients
1 1/2 pounds ground beef
6 strips bacon, cooked and crumbled
1/2 onion, diced
1 teaspoon kosher salt
1/2 teaspoon black pepper
1 teaspoon garlic powder
1 tablespoon mustard
4 ounces cream cheese
2 large eggs
1/2 cup heavy cream
2 cups shredded cheddar cheese, divided
2 tablespoons chopped pickles or no-sugar pickle relish, optional
Substitutions
Beef: 85/15 works well if you want the casserole rich but not overly heavy, while 80/20 gives the fullest comfort-food version.
Bacon: you can leave it out, but the casserole loses some of the smoky edge that helps it stand apart from the skillet.
Cheese: cheddar is the best default, though a cheddar-mozzarella mix can soften the sharpness if you want a milder finish.
Pickle element: chopped pickles or no-sugar relish both work, though pickles usually taste cleaner.
Structure: bake it in one casserole dish for family-style serving, or divide it into smaller dishes if you want easier portions for meal prep.
Method
Preheat the oven to 375°F.
Brown the beef with the onion, then stir in the salt, pepper, garlic powder, mustard, and cream cheese.
Whisk the eggs and heavy cream in a bowl, then stir in 1 1/2 cups of the cheddar.
Combine the beef mixture with the egg-cheese mixture and fold in the bacon and pickles if using.
Transfer to a greased baking dish, spread it evenly, top with the remaining cheese, and bake for 20 to 25 minutes until hot and set.
Pull the casserole when the center is just set rather than baking until it looks very firm. It will tighten further as it rests.
Rest for 5 to 10 minutes before serving so the casserole slices more cleanly.
Before baking, spread the casserole base evenly, then top it with cheddar and bacon so the bacon cheeseburger casserole bakes more evenly and finishes with better texture.
Tips for Best Results
Letting the casserole rest matters more than it looks on paper. A short rest firms the texture, improves the slices, and keeps the inside from feeling looser than it really is. Keep something bright nearby too. This version usually improves more from mustard, pickles, bacon, or a sharper side on the plate than from extra cheese or cream in the dish itself.
Common Mistakes
Overbaking: the casserole becomes tighter and less juicy than it should be.
Skipping the rest time: it slices messily and feels wetter than necessary.
Underseasoning the filling: cheese alone does not carry the whole dish.
Why This Format Works
This casserole makes the most sense when burger flavor matters more than burger shape. It portions more neatly than the skillet, survives the next day better than lettuce wraps, and feels more worth making when you already know leftovers matter. For basic fridge and freezer timing, the FoodSafety.gov cold storage chart is still the cleanest external reference to keep in mind.
Best Way to Serve It
Serve this with something sharp on the side so the richness does not flatten out.
Best with: pickles, a crisp salad, or a mustard-forward side element. Leftovers: excellent; cool fully before portioning for cleaner slices and better reheating.
These shorter variations give you a few more useful ways to solve the same burger craving, especially when you want crisp edges, easier lunch prep, a plated dinner, or better portioning. So while they are shorter than the four main recipes, they should still feel like real options rather than decorative extras.
5. Smash-Style Lettuce Wrap Burgers
Choose this on nights when speed matters more than leftovers and you want the crispest crust in the group.
Use small beef balls, a very hot skillet or griddle, cheese, pickles, mustard, and sturdy lettuce leaves instead of buns. MasalaMonk’s classic smash burger method is a natural internal reference here, while Serious Eats’ smash burger technique explains why the crust develops so well.
These smash-style lettuce wrap burgers are one of the fastest keto burger options when you want crisp edges, strong burger flavor, and almost no cleanup.
Smash once right away, season, then leave the patties alone until the edges turn deeply browned and crisp before flipping. Add cheese, stack into lettuce, and serve immediately. This is one of the few burger styles here that really loses its point once it sits.
Best with: mustard, pickles, and the simplest possible toppings. Leftovers: poor; this version loses its edge once it sits.
6. Big Mac Salad Bowl
This is the lighter route, but it still needs enough sauce and pickle flavor to read as a real burger-style meal rather than merely lean.
Build it with chopped lettuce, warm seasoned beef, shredded cheese, onions, pickles, and a creamy dressing that clearly tastes like burger sauce. Chop everything fairly small so each bite lands as a real mix instead of forkfuls that swing between salad and plain beef.
Big Mac salad bowl holds up best when the lettuce is chopped, the beef is well browned, and the burger-style dressing is bold enough to keep the whole bowl tasting clearly burger-inspired instead of salad-like.
One thing that matters more than it seems: this is the easiest version to over-chill into blandness, so the dressing has to do more flavor work than in a classic burger bowl.
Fast build: keep the lettuce, beef, toppings, and dressing separate until the last minute so the bowl stays crisp and the beef does not chill the whole dish too much.
Best with: extra pickles, finely chopped onions, or avocado. Leftovers: good, but only if the dressing stays separate.
7. Keto Hamburger Steak with Onions and Mushrooms
This is the better fit when dinner should feel plated, savory, and a little more old-school than burger-like in shape.
Sear seasoned patties, then cook onions and mushrooms in the same pan until they pick up color and absorb the beef flavor left behind. A spoonful of chimichurri over the top helps a lot here, because the plate can get heavy without some freshness.
A keto hamburger steak does best when the onions and mushrooms are cooked in the same pan as the patty, because that is what turns it from a plain bunless burger into a more savory plated dinner.
Serve it with wilted greens, sautéed cabbage, or cauliflower mash. This one reheats reasonably well, though the onion-and-mushroom finish is best when freshly made.
Best with: cauliflower mash, wilted greens, or sautéed cabbage. Leftovers: decent, though the onion-and-mushroom finish is best fresh.
8. Loose Meat Keto Burgers
This is one of the easiest versions for flexible leftovers, because the filling stores better than assembled burgers and can move between lettuce cups, bowls, and salads without much trouble.
Brown the beef well, season it assertively, and keep it moist enough to scoop rather than dry and crumbly. A little pepper sauce stirred into mayo makes a strong spicy finish here, especially when the rest of the build is fairly simple.
Loose meat keto burgers are at their best when the beef stays juicy and boldly seasoned, because this format depends more on scoopable texture, pickles, and sauce than on patty structure.
What makes or breaks it: the beef has to stay juicy enough to scoop and bold enough to stand on its own, because this format depends more on seasoning, pickles, and sauce than on patty structure.
Pickles matter more than usual in this format. Since there is no patty structure and no bun, that sharper edge is often what keeps the loose meat from tasting like ordinary seasoned ground beef.
Best with: pickles, crisp lettuce, and a punchy sauce. Leftovers: very good for lunch bowls or lettuce cups.
9. Keto Cheeseburger Stuffed Peppers
Choose this one when portioning and reheating matter more than speed.
Fill halved peppers with seasoned cheeseburger beef, mustard, and cheese, then bake until the peppers turn tender and the tops bubble. Because the peppers add sweetness and bulk, the filling needs more confidence than usual with salt, mustard, or pickle on the side.
These keto cheeseburger stuffed peppers come out best when the filling is seasoned boldly and the peppers bake until tender, because that is what makes them feel like a real make-ahead meal instead of just peppers with beef added in.
These are especially useful for make-ahead lunches. They do not hit the same fast-burger craving as the classic or smash-style versions, but they store much better and feel more complete the next day.
Make-ahead note: bake fully, cool, then refrigerate in portions so they reheat as complete lunches without any extra assembly.
Best with: pickles on the side or a sharper green salad. Leftovers: very good; one of the best short variations for lunch reheating.
How to Keep Hamburger Recipes Keto
The beef is usually the easy part. The meal drifts off course when buns, sweet sauces, breadcrumb binders, or standard diner sides start piling onto the plate. So the real skill is not making hamburger meals feel restricted. It is making them feel complete without leaning on the parts that add most of the unnecessary carbs.
The easiest way to keep hamburger recipes keto is to watch the extras: skip the bun, sugary sauces, fries, breadcrumbs, and sweet relish, then use lettuce wraps, burger bowls, mustard or burger sauce, lower-carb vegetables, and dill pickles instead.
Switch the Format Instead of Forcing a Bun
Lettuce wraps work when you still want a hand-held burger feel. Meanwhile, bowls and salads work better for speed and meal prep. Skillets and casseroles make more sense when you want a warmer, more filling hamburger-meat dinner with stronger leftovers. Once you stop forcing every meal into burger form, the rest of keto burger cooking gets easier.
Common Carb Traps
Breadcrumb binders: these can quietly push patties away from the simple low-carb version you actually want.
Sugary ketchup-heavy sauces: the sauce is often where the hidden carbs arrive first.
Sweet relish: even small amounts can shift the meal more than expected.
Too much onion: onions are useful, but in skillet and casserole versions they can add up fast.
Heavy bun substitutes: some “keto buns” still make the meal heavier and less clean than bowls, lettuce wraps, or plated burgers.
Standard diner sides: fries, chips, and similar add-ons can undo the rest of the plate quickly.
Use Smarter Condiments
Mustard, mayo-based burger sauce, pickle-forward dressings, herb sauces, and spicy mayo all work well here because they add richness and sharpness without pushing the meal toward sweetness. A good keto-friendly mustard and a simple homemade mayo base cover most of what you need for burgers, bowls, and burger sauce. When you want a cooler finish, Greek tzatziki also works especially well with burger bowls and plated patties.
Quick rule: when in doubt, keep the beef simple, skip the sweet sauces, and let acid, cheese, and a sharper sauce do the heavy lifting.
Best Ground Beef for Keto Hamburger Recipes
The best beef blend depends on the format. For burgers and smash burgers, fattier beef usually works better because it browns harder and stays juicier. By contrast, skillets, casseroles, and stuffed peppers can handle slightly leaner beef when enough cheese, cream, bacon, or sauce is already doing part of the richness work.
For keto hamburger recipes, 80/20 usually gives the juiciest burgers and best crust, 85/15 is the easiest all-purpose choice, and 90/10 works best when bowls or casseroles have enough sauce, cheese, or bacon to support leaner beef.
80/20: best for classic burgers and smash burgers where browning and juiciness matter most.
85/15: the easiest all-purpose middle ground for bowls, burgers, skillets, and casseroles.
90/10: workable for bowls or casseroles only if enough sauce, cheese, bacon, or another richness source supports it.
As a rule, 80/20 gives better crust and a juicier bite in intact patties, while 85/15 often gives a cleaner balance in bowls and skillet dinners. Leaner than that can still work, yet it usually needs extra help from sauce, cheese, bacon, or careful cooking time so the meat does not dry out.
If the beef stays in patty form, fat matters more. If it gets crumbled into bowls, skillets, or casseroles, sauce and cheese can carry more of the richness without the meal feeling dry.
For general burger technique, Serious Eats’ burger fundamentals are still useful because they reinforce the big things that matter most: keep the meat cold, handle it lightly, and resist overworking it. Meanwhile, USDA FoodData Central is a handy neutral reference if you want to compare common blends like 80/20 and 90/10.
Best Sauces for Keto Hamburger Recipes
The best keto burger sauce depends on the format: classic burgers want a thicker mayo-mustard-pickle finish, bowls need a looser sharper sauce, skillets benefit from a more mustard-forward edge, and casseroles usually work better with sauce served on the side.
For classic burgers: a simple mix of mayo, mustard, and chopped pickles gives the cleanest burger finish.
For burger bowls: go slightly sharper and slightly looser so the sauce spreads easily and does more flavor work in every bite.
For skillet: keep it mustard-forward or finish with pickles rather than pushing in more cream.
For casserole: sauce usually works better on the side than baked into the dish, where it can blur the texture.
Best cool option:tzatziki works especially well with burger bowls and plated patties.
Best fresh-herb option:chimichurri fits plated patties and hamburger steak better than bowls or casseroles.
What to Serve Instead of Burger Buns
The smartest move is not always replacing the bun with another bread-like stand-in. Quite often, the cleaner answer is changing the structure of the meal and letting the burger profile carry through in a form that suits the night better. That is what makes the best versions feel satisfying rather than like a workaround.
Skipping burger buns works best when you change the format, not just remove the bread: lettuce wraps stay closest to the hand-held feel, bowls and salads help with assembly, plated patties keep the burger central, and stuffed peppers are the strongest make-ahead option.
Lettuce wraps: best when you still want to eat with your hands
Burger bowls: best for easy assembly and lunch prep
Cheeseburger salads: best for lighter meals with crunch
Plated patties with vegetables: best for hamburger steak or classic burgers without the wrap
Cauliflower mash, green beans, roasted broccoli, and sautéed cabbage: best for turning a burger plate into a full dinner
Best Sides by Format
With classic burgers: roasted broccoli, green beans, or sautéed cabbage
With burger bowls: avocado, extra pickles, and crunchy salad vegetables
With skillet: sautéed cabbage, roasted mushrooms, or simple greens
With casserole: pickles, slaw-style salad, or sharper greens
With hamburger steak: mushrooms, cauliflower mash, or wilted greens
This is also where sauce choice matters. For example, chimichurri works especially well on plated patties, while tzatziki fits bowls and salads better. Meanwhile, a mayo-and-mustard burger sauce remains the most classic bridge between all of these serving styles.
The best bun replacement is often not bread-like at all. More often, it is the format that suits the meal better.
Meal Prep, Storage, and Reheating
Not every hamburger-style meal behaves the same way in the fridge. Burger bowls, skillets, casseroles, stuffed peppers, and loose meat burgers all store better than fully assembled lettuce wraps. So if tomorrow’s lunch matters almost as much as tonight’s dinner, the format should influence your choice from the start.
Not every keto hamburger format stores the same way: lettuce wraps are best eaten fresh, burger bowls work best with separate components, skillets reheat especially well, casseroles portion neatly for later, and uncooked patties are the strongest freezer option.
Best for leftovers: cheeseburger skillet, casserole, stuffed peppers, loose meat burgers
Best frozen: uncooked patties, casserole portions, stuffed peppers
Best eaten fresh: lettuce wraps and fully dressed cheeseburger salads
Best reheated gently: burger patties in a covered skillet or low oven, skillets on the stove, casseroles covered first
Store components separately whenever texture matters. Keep burger bowl beef, greens, and sauce apart until serving; reheat patties gently; and dress lettuce-based meals at the last minute. A few extra minutes of separate storage work usually pays off with much better leftovers.
Keto Hamburger Recipes FAQ
Can you eat hamburgers on keto?
Yes. In most cases, the burger itself fits easily. The bun, sugary sauces, and higher-carb sides are usually what push the meal away from keto. That is why bowls, lettuce wraps, and plated burger meals work so well here.
What is the best first keto hamburger recipe to make?
For most readers, the best first recipe is the classic bunless keto cheeseburger because it is the clearest and most direct burger answer. From there, burger bowls and cheeseburger skillets are the easiest ways to branch out without leaving the flavor profile behind.
What temperature should a hamburger reach?
Because burgers use ground beef, the safest practical target is the USDA recommendation of 160°F. That guidance comes directly from the USDA ground beef food safety page.
Which keto hamburger recipes are best for meal prep?
Burger bowls, cheeseburger skillets, bacon cheeseburger casserole, loose meat burgers, and stuffed peppers all work well for meal prep. Lettuce wraps, however, are best eaten fresh because their texture drops off quickly once assembled.
If you only remember five things from this guide, start with the classic bunless cheeseburger for the most burger-like result, go to smash-style lettuce wraps for speed, choose the burger bowl for lunch prep, rely on the skillet for warm leftovers, and make the casserole when batch cooking matters most.
Final Thoughts on Keto Hamburger Recipes
The strongest keto hamburger recipes page is not the one that tries to force every dinner into a single burger shape. It is the one that helps readers solve the same craving in the form that actually fits the night. Sometimes that is a classic cheeseburger with enough sharpness and richness to stand on its own. Sometimes it is a fast bowl, a skillet that reheats well, or a casserole that earns its place through leftovers. Taken together, those options give readers one clear place to start, enough depth to cook from, and enough range to stay useful after the first visit.
Ravioli has range. It can be quiet and cozy—just a few pasta pillows with a simple butter sauce—or it can feel like a restaurant plate with glossy sauce, a finishing drizzle, and that little moment where everyone at the table pauses after the first bite. The funny part is, you don’t need a culinary degree to make a ravioli recipe feel special. You need a plan: the right cooking method for the ravioli you have (fresh, frozen, or refrigerated), a sauce that actually clings, and a finishing move that makes the whole thing taste intentional.
This post is built for all of it. If you’re making ravioli from scratch, you’ll find a solid ravioli dough recipe and sealing tips that help prevent blowouts. If you’re leaning on store bought ravioli (which is honestly a smart move half the time), you’ll still get “best ravioli” results at home—because sauce choice and finishing technique matter more than people admit. Along the way, we’ll take the Italian classic and give it an Indian accent in the most natural way: nutty brown ghee instead of sage brown butter, malai-style mushroom cream sauce, curry leaf tempering over butter-garlic cream, and a tomato-cream sauce that feels unmistakably makhani without turning your ravioli into curry.
Even so, before we jump into fillings and sauces, it helps to start with one calming idea: ravioli doesn’t need perfection. Instead, it needs gentleness, timing, and a little confidence. Once you have those three, everything else becomes play.
Ravioli, but smarter: fresh vs frozen vs refrigerated
Any ravioli recipe can go wrong in predictable ways. Fresh ravioli tears because it’s delicate and overhandled. Frozen ravioli goes watery because it’s boiled too hard, then dumped onto a plate while the sauce waits somewhere else. Refrigerated ravioli turns bland because it’s treated like a generic pasta instead of a filled pasta that needs gentleness.
Bookmark this: the simplest ravioli timing cheat sheet—fresh, frozen, or refrigerated—plus the two steps that make any ravioli taste better fast: salt the water and finish the pasta in sauce for a glossy, clingy coat.
So let’s lock in the base.
If you ever want a deep, reassuring read on handmade ravioli technique—rolling thickness, shaping, sealing, all the little details that keep your ravioli from leaking—King Arthur’s guide is genuinely helpful: How to make ravioli at home. If you’re the kind of person who likes to understand why pasta behaves the way it does, Serious Eats has a classic step-by-step approach to fresh egg pasta: Fresh egg pasta technique.
How to cook fresh ravioli without bursting
Fresh ravioli cooks fast. That’s the entire point. Use a wide pot, salted water, and a gentle simmer. You want movement, not chaos. A rolling boil can smack ravioli into itself until seams pop.
Fresh ravioli is delicate—so the win is gentleness. Use a wide pot with a lively simmer (not a rolling boil), stir just once, cook 30–60 seconds after it floats, then lift with a slotted spoon. Biggest upgrade: finish the ravioli in warm sauce for 30–60 seconds so it gets a glossy coat and stays intact.
A reliable rhythm looks like this:
Bring water to a boil, then reduce to a lively simmer.
Drop ravioli in gently.
Stir once with a soft hand to prevent sticking.
When ravioli floats, give it another 30–60 seconds.
Lift out with a slotted spoon, not a colander.
The biggest upgrade: sauce goes into the pan first. Not on the plate. Not in a separate bowl. A thin layer of sauce in a skillet, ravioli lands into it, and then you spoon sauce over the top while it bubbles for a few seconds. That tiny finishing step helps the sauce cling and protects the ravioli from being torn apart by enthusiastic tossing.
Also, if you’re cooking very delicate handmade ravioli, consider cooking in batches. That way, the pot stays steady, the water temperature doesn’t crash, and you’re not stirring through a crowd of pasta pillows that want to be treated like glass.
How to cook frozen ravioli so it stays tender
Frozen ravioli wants steadiness. It can handle a bit more time, yet it hates being boiled aggressively. Keep the water at a steady simmer.
Frozen ravioli can taste surprisingly restaurant-level—if you treat it gently. Keep the water at a steady simmer (not a hard boil), cook straight from frozen, then move ravioli directly into a warm skillet of sauce. The game-changer is 1–2 tbsp starchy pasta water: it helps emulsify the sauce so it turns glossy and clingy instead of watery. If ravioli splits, lower the heat and cook in batches, lifting with a spider or slotted spoon. Full ravioli guide + Indian-inspired sauce twists on MasalaMonk.com — save this for weeknights!
The next move is what separates “fine” from “wow”: transfer the cooked ravioli directly into a skillet of warm sauce and let it bubble together for 30–60 seconds. That little bit of pasta water that comes along for the ride is not a problem; it’s an emulsifier. It turns “pasta sauce for ravioli” into a glossy coat instead of a puddle.
If you’re trying to make a “best frozen ravioli” moment at home, don’t judge the ravioli alone. Judge the sauce-to-ravioli relationship. Most frozen ravioli becomes excellent when the sauce is thick enough to cling and you finish it in the pan.
Meanwhile, if your frozen ravioli tends to split, lower the heat slightly and avoid stirring with a spoon that has sharp edges. A gentle swirl of the pot is often enough; afterwards, use a slotted spoon to lift, not pour.
How to cook refrigerated ravioli (the weeknight hero)
Refrigerated ravioli is the sweet spot for most people. It’s faster than frozen and sturdier than handmade. Treat it like fresh ravioli with slightly more forgiveness.
Refrigerated ravioli is the weeknight sweet spot—fast like fresh, sturdier than handmade. The simple win is technique: gently simmer in well-salted water, lift with a slotted spoon (don’t drain), then finish the ravioli in warm sauce for 30–60 seconds so it turns glossy and clingy instead of watery. Finally, pick one finishing touch—cracked pepper, toasted cumin, lemon, spiced ghee, or herbs—to make “store-bought” taste intentional. Save this card and follow the full ravioli guide on MasalaMonk.com.
Here’s the trick that keeps refrigerated ravioli from tasting like “just a packet”: finish it in sauce and add one finishing element—cracked pepper, toasted cumin, a splash of lemon, a drizzle of spiced ghee, a handful of herbs. One move. Not ten.
When you do that, “store bought ravioli” stops being a compromise and starts being a strategy.
At the same time, don’t forget salt. A mild filling needs a properly salted cooking liquid, and a sauce needs seasoning in layers. If you salt only at the end, the ravioli can taste oddly flat even when the sauce looks perfect.
The foundation: a ravioli dough recipe (plus wrappers and shortcuts)
Some nights call for the full project: flour on the counter, dough resting under a bowl, the whole experience. On other nights, you want ravioli for dinner without turning your kitchen into a workshop. Both are valid. The goal here is to give you options that still feel like real ravioli, whether you’re mixing dough or using ravioli wrappers.
Leaky ravioli usually comes down to three things—messy edges, trapped air, or overfilling. Use this quick sealing method: keep the rim clean, press from the filling outward to remove air pockets, then crimp firmly and rest 5–10 minutes so the seam sets before boiling.
Classic egg ravioli dough (by hand or mixer)
If you’ve been using a stand mixer or rolling by hand, the principles stay the same: hydration, kneading, resting, rolling thin, and sealing with care.
Ingredients
300 g flour (all-purpose works; 00 flour is lovely if you have it)
3 large eggs
1 egg yolk (for elasticity and richer color)
1/2 tsp fine salt
1 tsp olive oil (optional, helps handling)
1–2 tbsp water only if needed
Classic egg ravioli dough, made simple: flour + eggs + a proper rest gives you a smooth dough that rolls thin and seals clean—whether you knead by hand or use a stand mixer. Use this card as your quick reference, then scroll up in the post for sealing tips (so your ravioli stays intact) and the cook-time guides (fresh/frozen/refrigerated) to finish it like a restaurant plate.
Method
Make a mound of flour, create a well, add eggs, yolk, salt, and oil.
Whisk inside the well, slowly pulling flour inward until a shaggy dough forms.
Knead 8–10 minutes until smooth and elastic.
Wrap and rest 30–60 minutes.
That rest is not optional. It lets the flour hydrate and relaxes gluten so rolling is easier. After resting, roll thin—thinner than you think—and use minimal filling so the ravioli seals without strain.
If you want a technique-first explanation with visuals and rolling guidance, King Arthur’s ravioli resource is worth keeping bookmarked: How to make ravioli at home.
A quick rolling note: if you roll too thick, the ravioli tastes heavy and the seams don’t seal as cleanly. Conversely, if you roll too thin, it can tear. The sweet spot is thin enough to see a faint shadow of your hand through it, yet strong enough to lift without stretching.
Eggless ravioli dough (still legit recipe)
If you want eggless ravioli, aim for a dough that’s pliable and not too dry.
Eggless ravioli dough that actually works: keep it pliable (not dry), rest it 45–60 minutes, then roll thin so it seals gently. This card shows the exact ingredient ratios + the quick method—perfect when you want homemade ravioli without eggs. Save it for later, and for the full “fresh vs frozen vs refrigerated” cooking guide + sauce-finishing tricks, head to the complete post on MasalaMonk.com and pin this for your next weeknight pasta plan.
Ingredients
300 g all-purpose flour
1/2 tsp salt
2 tbsp olive oil
~140–160 ml warm water (add gradually)
Knead until smooth, rest 45–60 minutes, and roll thin. Eggless dough can be slightly less elastic, so seal carefully and avoid overstuffing.
Ravioli wrappers, wonton sheets, and “tonight” shortcuts
Wrapper shortcuts can deliver a surprisingly good ravioli dinner, especially when the filling is thick and the sauce is clingy.
Need ravioli tonight without making dough? This quick wonton-wrapper method is the weeknight cheat code: keep the filling thick, press out air, crimp firmly, simmer gently, then finish in warm sauce for 30–60 seconds so everything turns glossy and clingy (not watery). Save this for the next “what’s for dinner?” moment.
If you’re using wonton sheets as ravioli wrappers:
Keep filling thick, not wet.
Seal with a thin smear of water, press out air, and crimp firmly.
Simmer gently—don’t boil hard.
Finish in sauce quickly; don’t let wrappers sit too long in water.
This approach won’t mimic handmade pasta perfectly, but it can deliver a surprisingly good ravioli dinner with far less effort. More importantly, it opens the door to creative fillings and sauces—exactly what we’re about to do.
To make wrappers feel more “pasta-like,” you can also brush them lightly with egg wash before sealing. It strengthens the seam and adds a richer bite. In addition, try cooking them at a gentler simmer and finishing them in sauce immediately; that finishing step does a lot of heavy lifting.
Twist 1: Butternut squash ravioli with brown ghee + curry leaves
Butternut squash ravioli has a built-in personality: sweet, mellow, slightly nutty. That’s why the classic pairing is brown butter sage. People love the toasted butter aroma against the sweetness of squash, and it’s a combination that shows up constantly in “butternut squash ravioli with brown butter sage” conversations.
This is the fastest way to make butternut squash ravioli taste restaurant-level at home: finish it in nutty brown ghee, crackle curry leaves for aroma, then serve with a silky tomato-cream (makhani-style) dip on the side for contrast.
The Indian move is not to reinvent the wheel. It’s to keep the wheel, change the spokes.
Instead of sage, we lean on curry leaves. Instead of brown butter, we use brown ghee. You keep the nutty aroma, yet the finish is unmistakably different—warm, fragrant, and just a little more exciting.
Brown ghee “sage-butter” sauce recipe for squash ravioli
This works beautifully for butternut squash ravioli, pumpkin ravioli, and squash stuffed ravioli recipes. It also turns frozen butternut squash ravioli into something that feels handmade.
If your squash ravioli ever tastes a little too sweet, this is the fix: brown ghee + curry leaves + cumin for a nutty, aromatic “sage-butter” vibe—without sage. Drizzle, toss, and finish with lemon zest if needed for that restaurant-style balance. Save this card for the next time you’re making butternut squash ravioli, pumpkin ravioli, or frozen squash ravioli and want it to feel handmade.
Ingredients
3 tbsp ghee
10–15 curry leaves (fresh is best; dried works in a pinch)
1/2 tsp toasted cumin seeds or a pinch of ground cumin
Black pepper
Optional: pinch of nutmeg
Optional: lemon zest + a squeeze of lemon
Method
Warm ghee in a small pan until it starts to smell toasted and deepens slightly in color.
Add curry leaves. They’ll crackle and perfume the ghee.
Stir in cumin and black pepper.
Add nutmeg if you want a warmer, slightly sweet background note.
Toss cooked ravioli in the sauce and finish with lemon zest if the ravioli is very sweet.
Why it works: squash wants something nutty and aromatic. Brown butter gives nutty; curry leaf gives aromatic. Brown ghee gives both without needing sage at all.
If you want to link this section into your broader “Indian twist pasta” universe, it plays nicely with creamy pasta reinventions like our Indian-inspired Alfredo twists because they share the same silky, comfort-forward DNA.
A gentle pumpkin ravioli recipe variation
If you’re working with pumpkin ravioli—fresh or frozen—consider adding a whisper of Kashmiri chili for warmth and color. Not heat. Warmth. Pumpkin likes spice that feels cozy rather than aggressive.
At the end, sprinkle roasted pistachios if you want a subtle Indian dessert vibe without turning dinner sweet. The pistachio crunch also helps if the ravioli is very soft.
If you want to make the squash ravioli from scratch—dough, filling, the whole thing—this filling is structured to be thick enough to seal well and rich enough to taste like something you’d order.
Roasted butternut squash makes a naturally thick ravioli filling—caramelized, gently spiced with cumin, and extra creamy with crumbled paneer (or a vegan cashew/coconut swap). Keep portions small—about 1 to 1½ teaspoons—so the seams stay sealed and the ravioli cooks leak-free.
Ingredients
2 cups roasted butternut squash (roast cubes until caramelized, then mash)
1/2 cup paneer, finely crumbled (optional but excellent)
1 tbsp ghee
1/2 tsp cumin seeds
1/2 tsp ground coriander
1/4 tsp black pepper
1/4 tsp nutmeg (optional, but gorgeous with squash)
1/2 tsp salt (adjust)
1 tbsp finely chopped toasted nuts (optional)
1–2 tsp lemon juice (optional, for brightness)
Method
Roast squash until edges caramelize, then mash until smooth.
Heat ghee, add cumin seeds, let them sizzle briefly.
Stir in mashed squash and spices, cook 2–3 minutes to evaporate excess moisture.
Fold in paneer off heat so it stays creamy.
Let cool completely before filling ravioli.
Vegan swap: use cashew cream or coconut cream in place of paneer, or fold in a thick mashed white bean for body. The goal is a filling that is creamy yet not wet.
Assembly tip: keep filling small—about 1 to 1½ teaspoons per ravioli for standard sizes. More filling feels generous, but it puts stress on the seam and raises the chances of leaking.
As an alternative, you can also try a goats cheese ravioli style vibe by blending a small amount of tangy cheese into the squash; it’s not traditional Indian, yet it pairs beautifully with curry leaf brown ghee and tastes elegant.
Twist 2: Mushroom ravioli with creamy “mushroom malai” sauce recipe
Mushroom ravioli lives in that earthy, savory zone where cream sauces make sense. That’s why people gravitate toward creamy mushroom sauce for ravioli, and why mushroom ravioli recipe ideas often feel restaurant-y even when they’re simple.
When mushroom ravioli needs a sauce that feels both cozy and elevated, this peppery malai-style cream coats every bite—silky, earthy, and quick enough for a weeknight, yet dramatic enough for a dinner you want to remember.
The Indian twist here is subtle. We’re not trying to make it spicy. We’re trying to make it deeper. Malai-style sauces tend to be creamy, aromatic, and gently spiced. In other words, they’re a natural match for a mushroom ravioli recipe.
Creamy mushroom sauce recipe for ravioli
This sauce works with mushroom stuffed ravioli, cheese ravioli, spinach ravioli, and even store bought ravioli that leans earthy.
Ingredients
2 tbsp butter or ghee
250–300 g mushrooms, sliced
2 cloves garlic, minced
1/2 tsp black pepper (more if you love peppery sauces)
Pinch of cumin (or a few cumin seeds toasted first)
1/2 cup cream (or cashew cream for a plant based ravioli dinner)
1/4 tsp kasuri methi, crushed between your palms
Salt
A splash of pasta water
Creamy mushroom ravioli sauce, upgraded the MasalaMonk way: brown the mushrooms first, deglaze with a splash of pasta water for gloss, then simmer with cream (or cashew cream) until it coats the spoon. The quiet finisher is kasuri methi—it adds a deep, savory “new” note that makes mushroom or cheese ravioli taste restaurant-level without shouting “spice.” Save this card for weeknights.
Method
Sauté mushrooms in butter/ghee until they release water and start browning.
Add garlic and pepper; cook until fragrant.
Add a splash of pasta water to create a glossy base.
Stir in cream; simmer until thick enough to coat a spoon.
Finish with kasuri methi and adjust salt.
The kasuri methi is the quiet hero. It doesn’t scream “Indian.” It murmurs it. That’s exactly what you want: a familiar creamy mushroom ravioli sauce that tastes new without tasting confused.
Truffle ravioli vibes without overdoing it
Truffle ravioli and ravioli truffle sauce often lead people into heavy-handed flavors. If you want that truffle-ish feeling without the intensity, stick to the elements that make truffle exciting: earthiness and richness.
Here are gentle ways to get there:
Brown mushrooms harder for deeper savoriness.
Use more black pepper than you normally would.
Finish with a small gloss of butter/ghee and a sprinkle of parmesan.
You’ll still hit that “truffle ravioli” mood, especially with mushroom ravioli, yet it won’t dominate the plate.
As a pairing, coffee-forward cocktails tend to sit beautifully after rich mushroom ravioli dinners. If you want a fun blog post that fits naturally, our espresso martini variations are an easy “dessert drink” moment—especially when the meal has that creamy, earthy finish.
Ravioli filling recipe: mushroom masala + ricotta (or vegan “cream”)
If you’re making mushroom ravioli from scratch, this filling leans into deep mushroom flavor while staying thick enough to seal cleanly.
Making ravioli at home gets way easier when the filling is thick, dry, and scoopable—this mushroom masala + ricotta ravioli filling is built exactly for that. Cook the mushrooms down until the moisture is gone, bloom the cumin + coriander, then cool completely before folding in ricotta (or thick hung curd). The payoff: ravioli that seals cleanly, doesn’t leak, and tastes deeply savory. Save this card for your next pasta night, and use it alongside your favorite sauce (creamy mushroom, brown ghee-curry leaf, or a quick tomato).
Ingredients
350–400 g mushrooms, finely chopped (a mix is best, but even one type works)
1 tbsp ghee or butter
1 small onion, finely chopped
2 cloves garlic, minced
1/2 tsp cumin seeds
1/2 tsp ground coriander
1/2 tsp black pepper
1/4 tsp chili flakes (optional)
1/2 tsp salt (adjust)
1/2 cup ricotta (or thick hung curd; ricotta is classic)
2 tbsp grated parmesan (optional, but helps structure)
1 tbsp chopped herbs (parsley or cilantro—either works)
1 tsp lemon zest (optional)
Method
Heat ghee, toast cumin seeds briefly.
Add onion, cook until translucent, then add garlic.
Add mushrooms and cook until moisture evaporates and the mixture browns.
Stir in spices and salt, cook another minute.
Cool completely.
Fold in ricotta and parmesan; mix until thick and scoopable.
Vegan option: use thick cashew cream + a spoon of nutritional yeast + a small amount of mashed tofu for body. The key is still the same: thick filling, no watery seep.
This filling also works beautifully in “ravioli di portobello” style dinners and feels naturally aligned with creamy mushroom sauce for ravioli, mushroom ravioli pasta sauce, and those cozy “best fresh ravioli” nights when you want something earthy.
Twist 3: Lobster ravioli sauce—butter garlic cream with a curry leaf recipe
Seafood ravioli has a particular kind of appeal. Its a recipe that feels fancy, it cooks fast, and it’s exactly the sort of thing people buy when they want a “treat” without doing too much. That’s why lobster ravioli shows up so often—along with the real question behind it: what’s the best sauce for a lobster ravioli recipe?
This is the most foolproof way to make lobster ravioli taste expensive: a silky butter-garlic cream sauce, finished with crackly curry leaves and a gentle chili warmth—brightened with lemon so every bite feels rich but never heavy.
Butter sauce for lobster ravioli is the classic. Butter garlic sauce for lobster ravioli is the louder classic. Add cream to the recipe and suddenly the whole plate feels “restaurant.” We’ll keep that structure, then add one finishing move that makes it feel Indian-inspired without hijacking the seafood.
Butter garlic cream sauce for lobster ravioli
This is your easy lobster ravioli sauce recipe that still tastes luxurious.
Ingredients
2 tbsp butter (or ghee)
2 cloves garlic, minced
1/2 cup cream
Lemon zest + a squeeze of lemon
Black pepper
A splash of pasta water
Method
Melt butter, sauté garlic gently (don’t brown it aggressively).
Stir in cream and a splash of pasta water.
Simmer until slightly thick and glossy.
Finish with lemon and pepper.
That’s your base. Now the twist.
Want a restaurant-style lobster ravioli sauce at home? This butter garlic cream sauce gets its “what did you do?” upgrade from a quick curry leaf + Kashmiri chili tadka drizzled right on top. Use it for lobster (or crab) ravioli, finish with lemon zest + black pepper, and serve immediately while it’s glossy and clingy.
The Indian finish: curry leaf + Kashmiri chili tempering
In a separate small pan:
Warm 1 tsp ghee.
Add a handful of curry leaves (they crackle instantly).
Add a pinch of Kashmiri chili.
Drizzle this over your finished sauce right before serving.
Suddenly, your creamy lobster ravioli sauce has aroma. It has lift. It has that “what did you do?” effect.
If you’re cooking lobster filled ravioli or crab ravioli, a quick seafood-handling reference is always reassuring—especially if you’re storing leftovers. FoodSafety.gov has clear guidance on handling fish and shellfish: Safe selection and handling of fish & shellfish. For a straightforward storage reference, USDA’s answer on fish storage timing is useful: How long can you store fish?.
A quick note on “butter garlic ravioli sauce” balance
It’s easy for butter-garlic sauces to taste flat if there’s no brightness. Lemon is the simplest fix. So is zest. So is black pepper. Even a tiny splash of pasta water can help the sauce cling instead of separating.
When you get this right, it becomes the kind of sauce you’ll use not only for a seafood ravioli recipe but for cheese raviolis, spinach cheese ravioli, and even basic meat ravioli frozen dinners you want to upgrade.
Filling recipe: homemade lobster (or crab) ravioli that won’t leak
Homemade lobster ravioli sounds like a flex, yet the recipe of ravioli filling itself can be straightforward if you treat it like a seafood mousse-light: rich, cohesive, and not watery.
Making homemade lobster (or crab) ravioli? This no-leak ravioli filling is the move: finely chopped seafood + ricotta (or cream cheese) + sautéed shallot, then a quick 20–30 minute chill so it stays thick, scoopable, and easy to seal. Save this card—wet filling is the fastest path to ravioli blowouts.
Ingredients
250 g cooked lobster meat (or crabmeat), finely chopped
2 tbsp butter
1 small shallot (or very finely chopped onion), sautéed until soft
1 clove garlic, minced (optional)
1/4 cup ricotta (or cream cheese for a firmer set)
2 tbsp grated parmesan (optional)
1 tbsp chopped chives or cilantro
Zest of 1/2 lemon
Black pepper
Salt to taste
Method
Sauté shallot in butter until soft; add garlic briefly if using.
Cool slightly, then combine with chopped lobster/crab.
Stir in ricotta and parmesan until the mixture holds together.
Add herbs, lemon zest, pepper, and salt.
Chill 20–30 minutes so it firms up before filling.
Why this works: ricotta (or cream cheese) keeps the filling creamy while preventing free liquid from seeping into dough. That matters, because wet filling is the quickest path to ravioli blowouts.
This filling pairs beautifully with the butter sauce for lobster ravioli, but it also holds its own under a tomato-cream sauce if you prefer that lane.
Twist 4: Creamy tomato sauce for lobster ravioli—makhani recipe without going off-road
Tomato-cream sauce is the other major lobster lane. You see it in creamy lobster ravioli sauce ideas, lobster ravioli pasta sauce recipe discussions, and every “best pasta sauce for lobster ravioli” type conversation. The base makes sense: tomatoes bring acidity, cream brings richness, and together they create a sauce that tastes indulgent while still feeling balanced.
If you love a rich, restaurant-style ravioli dinner, this makhani-inspired tomato-cream sauce is the upgrade: tangy tomato depth, a silky finish, and just enough curry-leaf aroma to make store-bought ravioli taste completely new.
The Indian-inspired move here is makhani-adjacent: tomato, butter, cream (or cashew cream), and a finishing note that hints at that familiar restaurant flavor.
Tomato-cream sauce recipe that clings to ravioli
The key is structure. In this recipe, thin tomato sauce slides right off ravioli. A sauce that’s been reduced and enriched clings.
Ingredients
2 tbsp butter or ghee
2 cloves garlic
2 tbsp tomato paste
1/2 cup crushed tomatoes or passata
1/2 cup cream (or cashew cream)
Pinch of kasuri methi
Pinch of garam masala (optional, keep it light)
Salt, pepper
Pasta water
If your sauce keeps sliding off ravioli, this tomato-cream ravioli sauce fixes it. The trick is tomato paste + reduction first, then cream + a splash of pasta water for that glossy, clingy coat. Finish with kasuri methi (and a tiny pinch of garam masala if you want a quiet makhani vibe). Save this for cheese ravioli, lobster/crab ravioli, or any store-bought ravioli that needs a “restaurant” upgrade.
Method
Heat butter/ghee, sauté garlic.
Add tomato paste and cook it for a minute until it darkens slightly.
Add crushed tomatoes; simmer until thicker than you think it needs to be.
Add cream/cashew cream and a splash of pasta water to emulsify.
Finish with kasuri methi and a tiny pinch of garam masala if you want that makhani whisper.
This sauce works for lobster ravioli, crab ravioli, shrimp ravioli (if you ever go there), and surprisingly well for cheese ravioli too. It’s also a beautiful answer to “best ravioli sauce recipe” because it does the two things ravioli needs most: cling and contrast.
Make it feel “restaurant” without making it heavy
If your tomato-cream sauce tastes too rich, it doesn’t need less cream. It needs more balance:
lemon zest
black pepper
a hint of heat
or simply more reduction before adding cream
Once it tastes lively, it suddenly feels expensive.
For readers who like a broader context on fats and cooking choices—especially when you’re choosing between butter, ghee, cream, and oils—Harvard Health has a straightforward overview of cooking oil choices: Expand your healthy cooking oil choices. You don’t need to turn dinner into a lecture; it’s just a handy perspective if you like understanding how fats fit into a bigger picture.
This is where ravioli becomes deeply satisfying. Keema-style filling gives you that rich, meaty ravioli experience that sits in the same comfort zone as beef ravioli, meat ravioli, and even those hearty “short rib ravioli” dinners—just with Indian warmth.
Use this keema ravioli filling when you want bold flavor and clean seals: cook the meat mixture down until it’s dry and cohesive (no liquid pooling), then do the spoon-stands-up test so your ravioli stays sealed, juicy, and leak-free in the pot.
1 tbsp breadcrumbs or finely grated parmesan (optional binder)
Method
Heat ghee, toast cumin seeds.
Add onion, cook until golden.
Add ginger-garlic, cook until fragrant.
Add meat, break it up, cook until browned.
Stir in spices, salt, and tomato paste; cook until the mixture looks dry and cohesive.
Add peas if using; cook briefly.
Cool completely; fold in cilantro and a binder if needed.
Important: keema filling must be dry enough to seal. If it looks wet, keep cooking it down. If it feels crumbly, add a spoon of ricotta or a tiny splash of cream to bind. You’re looking for something that scoops neatly and holds shape.
Keema ravioli loves either sauce lane:
butter-garlic cream with curry leaf tempering for a luxurious feel, or
tomato-cream makhani style for a comforting, “Sunday dinner” vibe.
Twist 5: Toasted ravioli—air fryer or oven, plus chutney-style dips
Toasted ravioli is the snack version of ravioli, and it’s genuinely addictive. It also happens to be a way to make frozen ravioli exciting, which is why toasted versions spread fast at parties and on game nights.
Crispy toasted ravioli is the easiest way to turn frozen ravioli into a party snack—serve it with coconut chutney, kara chutney, and thecha for a bold Indian-inspired dip trio that makes every bite crunchy, creamy, and spicy.
The Indian-inspired recipe is playful: toasted ravioli becomes a crispy appetizer with dips that feel like they belong at a party. Instead of marinara-only energy, you give it chutney energy.
Toasted ravioli recipe (air fryer)
This works with cheese ravioli, meat ravioli, mushroom ravioli, and even mini ravioli if you find them.
Method
Lightly coat ravioli in oil. If you want extra crunch, dip in beaten egg and coat in breadcrumbs.
Air fry until crisp and golden, flipping once.
Timing varies by ravioli size and fryer power, so the best rule is visual: you want deep golden edges and a firm bite. If you hear a light crisp crackle when you tap one, you’re in business.
Oven baked toasted ravioli (less fuss, still crisp)
Bake on a rack if possible. A rack keeps air moving so you don’t get soggy bottoms. If you’re doing a tray-only method, flip halfway.
Crispy toasted ravioli without guessing: pick your lane—air fryer, oven, or deep-fry—and use the doneness rule (deep golden edges + firm bite). The rack tip is the cheat code for no soggy bottoms, and the marinara + parmesan dip makes it party-perfect. Save this for cheese, meat, or mushroom ravioli nights.
Deep-fried ravioli from frozen
If you want the classic fried raviolis feel, deep frying is fast:
keep oil hot enough to crisp quickly
don’t crowd the pot
drain on a rack, not paper towels (paper towels can trap steam)
If you’re serving a platter of toasted ravioli at a party, it’s smart to follow basic food safety timing so things don’t sit out too long. USDA’s food safety basics keep it clear and practical: Steps to keep food safe.
Dips that make it Indian-inspired without trying too hard
Here’s the fun part. You don’t need ten dips. You need two or three that cover different moods.
For creamy, cooling balance: South Indian coconut chutney is an easy win with toasted ravioli, especially cheese and spinach ravioli bites.
For deeper heat and a punchy snack vibe: Kara chutney gives the platter a bold, savory backbone.
If you want something that leans spicy and garlicky, Thecha chutney turns toasted ravioli into a genuinely addictive snack.
If this section is your favorite—and it often becomes the favorite—pair it with something bright and citrusy for a complete appetizer moment. A Lemon Drop Martini fits beautifully when the dips are spicy and the bites are crisp.
Ravioli filling recipe: palak-paneer-inspired filling (the most natural crossover)
Palak paneer is already a creamy, garlicky, comforting dish. Fold it into ravioli and it feels like it was meant to happen.
This palak-paneer ravioli filling is the most natural Indian twist: blanch and squeeze the spinach, cook it down until thick, then fold in crumbly paneer (and a touch of cream) so the filling stays creamy, garlicky, and easy to seal—no watery leaks.
Ingredients
250 g spinach (fresh or frozen)
1 tbsp ghee
1/2 tsp cumin seeds
2 cloves garlic, minced
1 small green chili (optional, adjust)
200 g paneer, crumbled finely
2 tbsp cream (optional, helps bind)
1/2 tsp salt (adjust)
Black pepper
Optional: pinch of kasuri methi
Method
Blanch spinach quickly, squeeze out moisture, then chop finely or blend.
Heat ghee, toast cumin seeds, add garlic and chili.
Add spinach and cook until thick and not watery.
Mix in paneer, cream, salt, pepper, and kasuri methi.
Cool completely before filling ravioli.
Why it seals well: the spinach is cooked down, the paneer is crumbly and absorbent, and the mixture becomes thick. That thickness matters, especially if you’re using thinner pasta dough or wrapper shortcuts.
This filling is also a brilliant candidate for baked ravioli casseroles because it stays creamy under heat without becoming runny.
Ravioli variations that keep the flavor: keto, low carb, vegan, gluten-free
A good ravioli night shouldn’t be limited by dietary needs. The trick is to respect structure: ravioli is wrapper + filling + sauce. If one element changes (keto wrapper, gluten-free wrapper, vegan filling), the other two can compensate.
Keto ravioli (cheese-wrap recipe)
Keto ravioli is one of those ideas that sounds fake until you try it. It works because melted cheese becomes pliable, then crisps into a satisfying wrapper.
Keto ravioli that actually feels like comfort food: use mozzarella slices as wrappers, keep the filling thick, fold + sealISEAL, then crisp until golden. This card makes the method foolproof (and the “no wet puddles” rule saves you from blowouts). Try it with palak-style spinach, paneer-style filling, or keema-style meat—then serve with a rich sauce and a bright squeeze of lemon. Save this for your next low-carb dinner night.
How it goes
Use thin mozzarella slices as “sheets.”
Warm until pliable.
Add a thick filling, fold, and seal.
Crisp lightly in a pan or bake briefly.
For fillings, Indian flavors shine because they bring intensity without relying on carbs:
palak-style spiced spinach
paneer-style seasoned cheese
keema-style spiced meat
Since keto also tends to overlap with drink choices, a natural companion for this section is our keto mocktails roundup. If you want something cozy instead, keto hot chocolate turns dinner into a full vibe.
Low carb ravioli that still feels like comfort food
Low carb ravioli doesn’t have to mean joyless. If you’re not doing cheese-wrap ravioli, another approach is to focus on sauces and fillings and keep portions satisfying:
choose a richer sauce (butter-garlic cream, mushroom malai, tomato-cream)
add protein and vegetables on the side
serve fewer ravioli, but make each bite count
Vegan ravioli (plant based filling ideas)
For a vegan ravioli recipe, the best fillings are thick and bold:
lentil filling (dal-style, reduced until thick)
spiced mushroom-onion filling
coconut vegetable filling with mustard seeds and curry leaves
Pair vegan ravioli with coconut chutney or a coconut-forward sauce, and you’ll never feel like something is missing.
Gluten-free ravioli without frustration
Gluten-free ravioli can be done, yet it’s easiest when you use a tested method or a wrapper shortcut. If you’re doing gluten free ravioli dough, the big keys are hydration and gentle handling. If you’re using gluten-free wrappers or wonton-style sheets, keep the filling thick and seal carefully.
Even when the wrapper changes, sealing technique stays the same. King Arthur’s ravioli guide remains useful for the mechanics of sealing and shaping: How to make ravioli at home.
Recipe for Filling: vegan lentil “dal” filling (surprisingly perfect for ravioli)
This is one of the most satisfying plant based ravioli options because it’s naturally thick and flavorful.
Ingredients
1 cup red lentils
2 1/2 cups water
1 tbsp oil
1/2 tsp cumin seeds
1 small onion, finely chopped
1 tsp ginger-garlic paste
1 tsp ground coriander
1/2 tsp turmeric
1/2 tsp salt (adjust)
Lemon juice
Chopped cilantro
This is the vegan ravioli filling that actually seals: thick red lentil “dal” cooked down until scoopable, then finished with cumin tempering, lemon, and cilantro for lift. Use it when you want plant-based ravioli that feels hearty—not like a substitute. The key is texture: if it spreads on the spoon, keep cooking until it mounds. Pair it with a coconut-curry sauce for comfort or a tomato-based sauce for contrast. Save this card for your next ravioli night.
Method
Cook lentils until soft; then cook down until thick.
In a separate pan, temper cumin in oil, sauté onion until golden.
Add ginger-garlic and spices, then stir into lentils.
Cook another few minutes until the mixture is scoopable.
Finish with lemon and cilantro, then cool.
Pair this filling with coconut-curry style sauce or a tomato-based sauce depending on mood. Either way, it feels hearty rather than “replacement.”
The sauce logic that makes ravioli feel “best” at home
People talk about “best ravioli sauce” like it’s one thing. In reality, it’s a match.
Ravioli is already stuffed, which means it doesn’t want a sauce that competes with its filling. It wants a sauce that either supports the filling or contrasts it gently. When you get that right, “ravioli and sauce” becomes something you crave, not just something you eat.
Stop guessing the “best ravioli sauce.” Use this quick decision chart: match your filling (cheese, spinach+cheese, mushroom, seafood, squash) to the sauce lane that supports it or contrasts it—then finish with one smart touch (lemon zest + pepper, kasuri methi, curry leaf tadka, etc.). It’s the easiest way to make store-bought or homemade ravioli taste restaurant-level at home—without extra effort. Full ravioli sauce + filling ideas (Indian twists included) are in this post, pick your lane, and save this chart for every ravioli night. Pin it so you always have it.
Cheese ravioli sauce ideas
Cheese ravioli tends to be mild and creamy, so it benefits from:
tomato-cream sauce with a little brightness
butter sauce with black pepper and lemon zest
a thin drizzle of spiced ghee if you want an Indian hint without changing the whole dish
That said cheese raviolis also work surprisingly well as toasted ravioli because their filling stays stable and the crisp wrapper creates contrast.
Spinach and cheese ravioli (ricotta-style recipe)
Spinach ravioli wants:
cream sauce that’s peppery and not too thick
a light garlic butter sauce
or a spinach-forward sauce that feels palak-inspired
If you’ve ever made ricotta spinach ravioli and wondered why it tasted flat, it was likely missing pepper, acid, or a finishing herb.
Mushroom ravioli
Mushroom ravioli loves cream sauces, but it also loves simplicity:
mushroom malai cream sauce for richness
butter sauce with pepper for something lighter
tomato-cream if you want a contrasting tang
Seafood ravioli (lobster/crab)
Seafood ravioli loves:
butter-garlic cream with curry leaf tadka
tomato-cream makhani style if you want richer, “restaurant” feel
Squash ravioli (butternut/pumpkin)
Squash ravioli loves:
brown ghee + curry leaves (nutty, aromatic)
or a lighter butter sauce with lemon zest for balance
If you’re ever unsure, taste the filling first. If the filling is sweet, add brightness. Then if the filling is rich, add acid or pepper. And if the filling is mild, add aroma. That one small habit keeps the whole meal from feeling one-note.
Bringing it all together: a ravioli night that feels effortless
It’s easy to overcomplicate a ravioli recipe because it looks fancy. However, the real charm is that ravioli is forgiving when you treat it gently and finish it well.
Want ravioli that tastes “restaurant” without the effort? Use this quick ravioli night formula: pick your ravioli, match the sauce lane (support vs gentle contrast), then add ONE finishing move (curry leaf tadka, kasuri methi, or lemon zest + black pepper). Choose cozy dinner vibes or a snack platter (hello toasted ravioli). Save this as your ravioli sauce cheat sheet—then click through to MasalaMonk for the full sauces, fillings, and Indian twist options.
Here’s a simple way to build a meal that feels complete:
Pick your ravioli (cheese, mushroom, squash, seafood).
Decide whether you want it plated like dinner or served like a snack.
If you’re doing the snack route, toasted ravioli with coconut chutney and kara chutney can be the entire evening’s personality. If you’re doing the cozy dinner route, mushroom ravioli with malai-style cream sauce and a quiet dessert-drink moment like an espresso martini can make the night feel surprisingly special without any extra work.
Still, sometimes the mood is “feed a crowd,” and that’s where baked and slow-cooker versions become genuinely useful. They keep the ravioli theme intact while shifting the labor from “hands-on cooking” to “set it and relax.”
Baked ravioli casserole (the “million-dollar” comfort recipe)
A baked ravioli casserole is the ultimate shortcut-meets-comfort dish. It’s the same idea as a lasagna, but easier because ravioli becomes the “layer.” This style works especially well with frozen cheese ravioli, frozen meat ravioli, and refrigerated ravioli. It also adapts beautifully to Indian-inspired sauces—because baked pasta loves bold flavor.
This baked ravioli casserole is the easiest “lasagna shortcut”: layer ravioli with a thick sauce, bake until bubbly, then scoop up that golden, cheesy pull—perfect for feeding a crowd or making dinner once and enjoying it twice.
A classic baked ravioli casserole (with Indian-leaning sauce options)
Ingredients
1 to 1.5 kg ravioli (frozen or refrigerated)
3–4 cups sauce (choose one below)
2 cups shredded mozzarella (or a mix of mozzarella + cheddar)
1/2 cup parmesan (optional)
1 tbsp butter or ghee (for greasing)
Optional: sautéed mushrooms, spinach, or cooked keema as an extra layer
Mushroom malai sauce (from Twist 2): rich and earthy
Simple marinara-style tomato sauce finished with curry leaf tempering (lighter, still special)
Baked ravioli casserole that tastes “restaurant” with almost zero effort. Use frozen or fresh ravioli, pick one thick sauce lane (tomato-cream makhani, mushroom malai, or marinara finished with curry leaf tadka), then layer: thin sauce → ravioli → sauce + mozzarella, repeat, and bake until bubbly + browned. The best part? A final finish—curry leaf ghee drizzle or a kasuri methi pinch—makes it taste intentional, not “just pasta bake.” Get the full ravioli sauce logic + variations (including seafood + squash lanes) on MasalaMonk.
Method
Heat oven to 190°C / 375°F.
Grease a baking dish with butter/ghee.
Add a thin layer of sauce.
Layer ravioli in a single layer.
Spoon sauce over, then add cheese.
Repeat layers until you’re done, finishing with sauce and cheese.
Cover with foil and bake 25–30 minutes.
Uncover and bake another 10–15 minutes until bubbly and browned.
Why it works: ravioli already contains filling, so the casserole stays interesting even if you don’t add extra layers. Nevertheless, adding a thin layer of keema or sautéed mushrooms between ravioli layers can make it feel like a “million dollar” baked ravioli casserole without making it complicated.
Serving idea: finish with a drizzle of curry leaf ghee or a pinch of kasuri methi over the top right before serving. That last aromatic lift makes the whole casserole taste intentional.
Baked lobster ravioli (yes, you can)
If you’re baking lobster ravioli, choose a sauce that protects it:
a gentle tomato-cream sauce
or a butter-cream sauce with lemon
Avoid super-high heat for too long. Seafood filling can get rubbery if overbaked, so keep the bake time closer to “just until heated through and bubbly,” not “deeply browned for an hour.”
Crock pot ravioli recipe (and slow cooker ravioli “lasagna”)
Slow cooker ravioli is one of those recipes that sounds suspicious until you try it. It’s essentially a crockpot lasagna with ravioli: layers of ravioli, sauce, cheese, and any extras you like. It’s perfect for busy days and surprisingly reliable for feeding people.
Crock pot ravioli is the ultimate hands-off dinner: layer ravioli, sauce, and cheese, let the slow cooker do the work, then scoop up a bubbling, melty ravioli “lasagna” with zero boiling and maximum comfort.
Crock pot ravioli (basic recipe)
Ingredients
1 kg frozen ravioli (cheese ravioli is the easiest starting point)
4 cups sauce (thicker is better)
2 cups shredded mozzarella
1/2 cup parmesan (optional)
Optional add-ins: cooked keema, sautéed mushrooms, spinach, or roasted vegetables
Method
Lightly grease the slow cooker.
Spread a thin layer of sauce on the bottom.
Add a layer of frozen ravioli.
Add sauce, then cheese.
Repeat layers.
Cook on LOW for 3–4 hours or HIGH for 1.5–2.5 hours, depending on your slow cooker.
Let it sit 10–15 minutes before serving so it sets.
Why thickness matters: a watery sauce can make slow cooker ravioli loose and soupy. A thicker sauce creates layers and keeps everything cohesive.
Want crock pot ravioli that’s cheesy and layered—not watery? This slow cooker ravioli method uses frozen ravioli + thick sauce + mozzarella so it sets like a cozy casserole (no soupy mess). The “no-soupy layer rule” is simple: start with a thin sauce layer, build ravioli → sauce → cheese, then let it rest 10–15 minutes to firm up. Perfect for busy nights, potlucks, and feeding a crowd. Grab the full guide with sauce options (makhani-style tomato-cream, mushroom malai, curry-leaf tempering) + add-ins like keema, spinach, or mushrooms on MasalaMonk.com. Save/pin this for your next weeknight dinner!
Indian-inspired slow cooker variations
Makhani-style slow cooker ravioli: use tomato-cream sauce and add a light kasuri methi finish at the end.
Keema ravioli “lasagna” in the crock pot: add cooked keema as a thin layer between ravioli.
Palak-paneer ravioli slow cooker bake: layer spinach-paneer filling as an extra or use spinach-and-cheese ravioli plus a creamy sauce.
Because slow cookers hold heat for a long time, seafood ravioli is not the best candidate here. Stick to cheese, mushroom, beef/keema, spinach, or squash. Those fillings love gentle, extended heat.
A final word on what makes these “Indian twists” actually work
A good twist doesn’t fight the original dish. It harmonizes with it. That’s why these five ideas hold together:
Squash ravioli stays nutty and aromatic; it just moves from sage to curry leaf.
Mushroom ravioli stays creamy and earthy; it just gets a malai-style finish.
Lobster ravioli sauce stays butter-garlic and glossy; it just gets a tempering drizzle.
Tomato-cream stays tomato-cream; it just leans makhani in the most subtle, respectful way.
Toasted ravioli stays crisp and snacky; it just gets dips that feel exciting.
You can use these as a template for almost any ravioli dinner: choose your base, pick a sauce that clings, finish with one Indian accent, and let ravioli do what it does best—feel comforting and impressive at the same time.
Ravioli night, but make it effortless and a little Indian. This quick cheat-sheet shows why each twist works (squash + curry leaf, mushroom + malai-style finish, lobster/crab + tadka drizzle, tomato-cream + makhani whisper, toasted ravioli + exciting dips) and the simple template: pick ravioli → pick a sauce that clings → finish with ONE smart accent (kasuri methi, curry leaf, lemon zest, black pepper). Save this for your next weeknight dinner, then use it as a plug-and-play guide for “best ravioli sauce” pairings. Pin now + try one tonight.
And if you’re planning a full “ravioli night,” it’s easy to round it out without drifting away from the theme. For something bright and citrusy, a Lemon Drop Martini matches seafood and creamy sauces surprisingly well. Meanwhile, for a deeper after-dinner note, an espresso martini turns the end of the meal into a small event. Finally, if you’re keeping things low carb, keto mocktails or keto hot chocolate keep the cozy factor high without feeling like an afterthought.
1) How do you cook ravioli so it doesn’t fall apart?
Start with gently simmering water instead of a hard boil, because aggressive bubbling can bang ravioli into itself and split the seams. Next, stir only once at the beginning to prevent sticking. After that, lift ravioli out with a slotted spoon rather than dumping it into a colander. Finally, finish it in warm sauce for 30–60 seconds so the ravioli stays coated and intact.
2) How long do you cook fresh ravioli?
In most cases, fresh ravioli takes about 2–4 minutes. Once it floats, let it go another 30–60 seconds, then lift it out. If the ravioli is large ravioli or extra thick, it may need a little longer. Either way, the goal is tender pasta with a filling that stays creamy, not overcooked.
3) How do you cook frozen ravioli without making it mushy?
Rather than thawing first, cook frozen ravioli straight from the freezer in gently simmering water for roughly 4–7 minutes, depending on size. Then, instead of letting it sit, move it directly into sauce and let it bubble briefly. That quick finish helps the sauce cling and prevents a watery, slippery bite.
4) How long does refrigerated ravioli take to cook?
Typically, ravioli refrigerated packs cook similarly to fresh ravioli—around 3–5 minutes in gently simmering water. Even so, the best move is to transfer it into sauce right away so it doesn’t taste plain. In addition, a final touch like black pepper, lemon zest, or a drizzle of spiced ghee can make refrigerated ravioli feel far more “fresh.”
5) What is the easiest way to make ravioli at home?
If you want the simplest route, use ravioli wrappers or ravioli wonton sheets, keep the filling thick, seal tightly, and simmer gently. Alternatively, if you want true homemade texture, make a basic ravioli dough, rest it well, roll it thin, and keep fillings modest so sealing is easy. Either way, the most important part is squeezing out air before sealing.
6) How do you seal ravioli so it doesn’t leak?
First, keep the edge of the dough clean—any filling on the rim will break the seal. Then, lightly moisten the border with water or egg wash, press out air pockets, and seal firmly. Afterward, crimp with a fork if you like. As a last step, let shaped ravioli rest a few minutes before cooking; that short pause can help the seal set.
7) What’s the best flour for ravioli dough?
Many people use all-purpose flour successfully, especially for weeknight ravioli. However, “00” flour creates a silkier texture if you prefer a softer bite. If you want a slightly firmer chew, blending a small portion of semolina with all-purpose can help. Ultimately, the key is proper kneading and resting, not chasing one perfect flour.
8) Can you make ravioli dough in a KitchenAid?
Yes—ravioli dough KitchenAid mixing works well. Use the paddle initially to combine, then switch to the dough hook for kneading until smooth. Still, you’ll likely need to finish with a short hand-knead to feel the texture. After that, wrap and rest the dough so rolling is easier and the dough doesn’t spring back.
9) What’s the best ravioli dough recipe texture supposed to feel like?
A good pasta dough should feel smooth, elastic, and only slightly tacky. If it’s crumbly, it needs more hydration. If it’s sticky, it needs a dusting of flour and more kneading. Meanwhile, resting is crucial; without rest, even a good dough can feel too tight and difficult to roll thin.
10) How thin should pasta dough be for ravioli?
Aim for thin enough that you can see a faint shadow of your hand through it, yet strong enough to lift without tearing. If it’s too thick, the ravioli tastes heavy and the seams feel bulky. On the other hand, if it’s paper-thin, it may tear around the filling. Therefore, thin-and-strong is the goal.
11) What’s the best sauce for ravioli?
The best sauce for ravioli depends on what’s inside the pasta. Cheese-filled ravioli usually tastes best with a bright tomato sauce, a simple butter sauce, or a light cream sauce that doesn’t overwhelm the filling. Mushroom ravioli pairs naturally with a creamy mushroom sauce because it amplifies the earthy flavor and keeps the bite rich and smooth. Butternut squash ravioli is happiest with a nutty butter-style sauce—often brown butter with sage—because it balances sweetness; however, a brown ghee finish with curry leaves gives the same toasted warmth with a different aroma. Lobster ravioli typically shines with a butter-garlic cream sauce or a tomato-cream sauce, since both support seafood without masking it; in either case, a touch of lemon and black pepper keeps the plate lively rather than heavy.
12) What’s a good sauce for cheese ravioli?
If you want classic comfort, use a simple ravioli sauce like marinara or tomato sauce. If you want richer flavor, choose a cream sauce for ravioli or a butter sauce for ravioli with garlic and pepper. Additionally, a small finishing touch—lemon zest, chili flakes, or herbs—can brighten cheese ravioli without overpowering it.
13) What sauce goes with spinach and ricotta ravioli?
Spinach and ricotta ravioli sauce options tend to work best when they’re not too heavy. A light cream sauce, a gentle garlic-butter sauce, or a tomato sauce with enough acidity to balance the creamy filling are all strong picks. Moreover, black pepper and a hint of lemon can make spinach ravioli taste more vivid.
14) What’s the best sauce for butternut squash ravioli?
Classic pairings include brown butter sage sauce for butternut squash ravioli, because nutty butter balances the sweetness. If you want something different, a butter sauce for butternut squash ravioli with citrus zest, toasted spices, or a curry-leaf ghee finish can be equally satisfying. Either way, avoid watery sauces—squash ravioli needs cling.
15) How do you make brown butter sage sauce for ravioli?
Melt butter, let it foam, then continue cooking until it smells nutty and turns golden-brown. Next, add sage leaves until crisp. Finally, season with salt. For squash ravioli, this sauce is especially popular; for other fillings, it still works whenever you want a rich, aromatic finish.
16) What’s the best lobster ravioli sauce?
Butter garlic sauce for lobster ravioli is a top choice because it supports the seafood without masking it. Alternatively, creamy lobster ravioli sauce with tomato and cream is another favorite when you want a richer, restaurant-style feel. In either case, lemon and black pepper keep lobster ravioli from tasting too heavy.
17) How do you make an easy lobster ravioli sauce at home?
Start with butter and gently sautéed garlic. Then add cream and a splash of pasta water to emulsify. Afterward, finish with lemon zest and pepper. If you want extra depth, add a small pinch of chili or herbs. This approach stays simple while still tasting special.
18) What’s the best cream sauce for lobster ravioli?
A good cream sauce for lobster ravioli should be silky, not thick like glue. Use butter, garlic, cream, and a bit of pasta water to help it cling. Then finish with lemon for brightness. If you want a slightly tangy version, blend in a small amount of reduced tomato paste to create a gentle “pink” sauce effect.
19) What’s the best sauce for mushroom ravioli?
Cream sauce for mushroom ravioli is the most common pairing because it amplifies the earthy flavor. A creamy mushroom sauce for ravioli made with sautéed mushrooms, garlic, pepper, and cream usually hits the sweet spot. Still, if you want something lighter, a butter-and-pepper sauce can also work well.
20) Can you bake ravioli instead of boiling it?
Yes—baked ravioli is a popular comfort option. Generally, you layer ravioli with sauce and cheese and bake until bubbly. Because the sauce does most of the cooking, ravioli can go into the dish frozen or refrigerated in many cases. After baking, let it rest briefly so it sets and slices neatly.
21) What is a “million dollar ravioli casserole” and how is it different?
A million dollar ravioli casserole is essentially baked ravioli layered with a rich sauce, plenty of cheese, and sometimes an added creamy layer for extra indulgence. Compared with basic baked ravioli, it’s richer, more “lasagna-like,” and designed to feed a crowd. For that reason, frozen cheese ravioli and frozen meat ravioli are common choices.
22) Can you make a crock pot ravioli recipe?
Yes—crock pot ravioli is a slow cooker version of ravioli lasagna. Typically, you layer sauce, frozen ravioli, and cheese, then cook until tender. Since slow cookers vary, the timing depends on your model; however, using a thicker sauce helps everything stay cohesive rather than soupy.
23) Is ravioli healthy?
Ravioli can fit into many eating styles depending on portion, filling, and sauce. Vegetable ravioli or ravioli with vegetables can feel lighter, while creamy sauces and extra cheese make it richer. If you want a healthier ravioli approach, use a lighter sauce, add vegetables, and keep portions satisfying rather than oversized.
24) What’s the easiest low carb ravioli option?
One of the simplest low carb ravioli approaches is using a cheese-wrap “shell” instead of pasta dough. That style also fits well for keto ravioli. Another option is focusing on a rich sauce and filling while serving a smaller portion alongside vegetables or salad.
25) Can you make gluten free ravioli at home?
Yes, although gluten free ravioli dough can be more delicate and requires careful handling. Many people use a tested gluten-free dough blend or a wrapper shortcut. In all cases, thick fillings, gentle simmering, and careful sealing make a big difference in whether gluten free ravioli holds together.
26) Can you make vegan ravioli that still tastes rich?
Absolutely. Vegan ravioli works best with fillings that are naturally creamy or thick—such as lentils, mushrooms, or coconut-based vegetables. Then, pair it with a sauce that clings, like a tomato-based sauce or a creamy plant-based sauce. As a result, the meal feels complete rather than “missing something.”
27) How do you toast ravioli from frozen?
Toasted ravioli frozen is usually made by coating ravioli lightly (oil or breading), then crisping it in an oven or air fryer until golden. For extra crunch, breadcrumb coating helps. Once it’s crisp, serve immediately so the exterior stays snappy.
28) How do you make toasted ravioli in an air fryer?
For toasted ravioli recipe air fryer style, coat ravioli lightly, place in a single layer, and air fry until crisp, flipping once. Since air fryers vary, check early; you want deep golden edges without drying out the filling.
29) Can you deep fry ravioli from frozen?
Yes—deep fried ravioli frozen is a classic appetizer style. Keep the oil hot enough to crisp quickly, fry in batches, and drain well. Afterwards, serve right away so the coating stays crisp rather than steaming.
30) What’s the best way to reheat ravioli?
For the best texture, reheat ravioli in sauce on the stove over gentle heat with a splash of water. Alternatively, for baked ravioli casseroles, reheat covered so it warms through without drying. Microwaving works in a pinch, yet it can make ravioli a bit softer, so sauce helps protect the texture.
31) How do you store cooked ravioli?
Cool cooked ravioli quickly, store in an airtight container, and keep it with a bit of sauce so it doesn’t stick. Then reheat gently in sauce. This method preserves texture better than storing ravioli completely dry.
32) What’s the best filling for homemade ravioli?
That depends on the mood. Cheese and spinach ravioli is classic. Mushroom stuffed ravioli feels rich and earthy. Squash filled ravioli is sweet and cozy. Meat ravioli recipe styles (beef, sausage, or keema) feel hearty. Ultimately, the best filling is one that’s thick enough to seal and flavorful enough that the ravioli stands on its own even before sauce.
Some cravings don’t show up as hunger. They arrive as mood, as temperature, as memory—and that’s exactly why keto hot chocolate can feel like such a small, perfect reset.
One minute you’re fine, and the next you want a warm mug in your hands—something chocolatey, soothing, and faintly indulgent. Not a sad substitute. Not a watery brown drink that tastes like “diet.” You want the kind of hot cocoa that feels like it belongs to your evening.
That’s where keto hot chocolate earns its place. When it’s made with the right method, it’s smooth and glossy, the chocolate flavor is deep, and the sweetness is dialed in instead of screaming. Even better, the same base can become a keto hot chocolate mix, a keto protein hot chocolate, a dairy free keto hot chocolate, a bulletproof keto hot chocolate, or a cozy Mexican hot chocolate—without turning your kitchen into a science project.
Why most “low carb hot cocoa” disappoints
Before we get into variations, it helps to name the real enemy: grit. Almost every disappointing mug of low carb hot cocoa fails because the cocoa never truly dissolves and the cup never gets body. The fix is surprisingly simple, and once you learn it, you’ll stop thinking of this as a “keto recipe” and start thinking of it as your new default.
If your low carb hot cocoa tastes gritty, it’s usually because cocoa doesn’t dissolve—it hydrates. This quick guide shows the fix: make a glossy cocoa paste first, then add milk slowly and warm gently for silky keto hot chocolate every time. Save it for your next mug.
Along the way, we’ll keep things grounded in what matters: ingredients, technique, and comfort. We’ll also sprinkle in a few credible references where they genuinely help—like what cocoa is, why labels can be confusing, and where carb counts come from—using sources such as the USDA nutrition database and straightforward label guidance from the FDA. For a broader cocoa primer, you can also check MasalaMonk’s guide to cacao vs chocolate vs dark chocolate.
What you’re really building here is a ritual you can repeat. The first time you make it, you might measure. The second time, you’ll start adjusting by instinct. By the third or fourth mug, you’ll know exactly how rich you like it, what sweetener tastes best to you, and which “finish” makes the whole thing feel like a treat rather than just a warm drink.
Also, it’s worth saying out loud: hot chocolate doesn’t have to be loud to be good. A perfectly balanced cup can be subtle—deep cocoa, gentle sweetness, and enough creaminess to feel comforting without becoming heavy. That kind of cup is often the one you keep coming back to, especially when you want something warming but still want to sleep well afterward.
Keto Hot Chocolate: The “No-Grit” Recipe That Changes Everything
Let’s start with the mug you’ll make most often: classic keto hot chocolate (or keto hot cocoa, if you grew up calling it that). The goal is a creamy, sugar free hot chocolate that feels like the real thing—because it is, just built differently.
There are two small moves that make a big difference:
Make a cocoa paste first.
Add body on purpose, not by accident.
When cocoa hits liquid the wrong way, it forms dry floating clumps that never truly disappear. You can whisk forever and still end up with that sandy finish at the bottom of the mug. On the other hand, when you hydrate cocoa into a paste before adding your milk, the drink turns silky almost immediately. It’s a small step, yet it’s the reason some cups taste café-level and others taste like regret.
Creamy keto hot chocolate, the no-grit way: whisk cocoa into a glossy paste first, then add milk and warm gently for smooth sugar-free hot cocoa every time. Save this quick recipe card for cozy low carb hot chocolate nights.
Here’s the other subtle win: once the cocoa is hydrated properly, you can use less sweetener and still feel satisfied. That’s because the flavor reads fuller. In contrast, a gritty cup almost demands extra sweetness to “cover” the bitterness—yet it rarely works. So the paste method doesn’t just improve texture; it also makes the whole drink easier to balance.
Another quiet detail: the temperature you serve it at matters. Too hot, and you’ll taste bitterness and sweetener edges more sharply. Slightly cooler—still steaming, still cozy—and the chocolate tastes rounder. It’s a small shift, yet it’s one of those things you notice once you’ve had a truly good cup.
Ingredients for Keto Hot Cocoa (1 big mug)
You can keep this simple or customize it. Start with the basics:
1 to 1½ tablespoons unsweetened cocoa powder
sweetener of choice (powdered blends dissolve the smoothest)
a pinch of salt
milk of choice (dairy or unsweetened almond milk are common)
optional: a little heavy cream or coconut cream for richness
optional: vanilla for a finished flavor
If you’re someone who likes tight carb math, the simplest approach is to track the cocoa and any dairy you use. For a reliable reference point, the USDA FoodData Central database is a solid baseline for cocoa powder nutrition and similar staples.
Now, let’s talk taste. Cocoa can read bitter if sweetness isn’t shaped, and sweetener can read “sharp” if cocoa isn’t supported. The little pinch of salt is what makes it taste like hot chocolate instead of chocolate water. It doesn’t make it salty; it makes it complete.
To make this even more forgiving, think of your ingredients in three roles:
Cocoa = the backbone. This is your “chocolate identity.”
Sweetener = the contour. It doesn’t have to dominate; it just smooths the edges.
Fat/creaminess = the body. This is what turns cocoa into cocoa.
Once you see it that way, you can tweak without fear. If your cup tastes thin, it’s usually body, not cocoa. If your cup tastes harsh, it’s often salt, vanilla, or the sweetener choice—not that you “did it wrong.”
A quick note on cocoa powder choices: natural cocoa tends to be brighter and sometimes fruitier, while Dutch-process often reads smoother and deeper. Either can be perfect. The “best” one is whichever makes you want a second sip.
How to Make Keto Hot Chocolate (Step-by-Step Recipe)
Step 1: Make the cocoa paste (this is the whole secret)
Add cocoa powder, sweetener, and a pinch of salt to a small saucepan. Then pour in 2–3 tablespoons of hot water (or hot milk) and whisk until you get a smooth, glossy paste.
Step 1 is the make-or-break move for silky keto hot chocolate: whisk cocoa, sweetener, and salt into a glossy paste with a few tablespoons of hot water before you add milk. This quick step prevents gritty low carb hot cocoa and makes every mug taste smoother—save it for next time.
You’re looking for a texture that resembles chocolate syrup—thick, shiny, and uniform. This step matters because cocoa doesn’t “dissolve” the way sugar does; it needs to be hydrated. When you turn it into a paste first, you prevent the floating cocoa clumps that make low carb hot cocoa taste gritty.
If the paste feels stubborn at the start, keep going. Cocoa often takes a few extra seconds to fully drink in the liquid. If needed, add one teaspoon more hot water and whisk again. The goal is something that moves like satin, not something stiff like dough.
Step 2: Loosen the paste with a splash of milk
Once the paste is smooth, add a small splash of milk while whisking constantly. This step bridges the gap between thick paste and silky drink. When you do it slowly, the cocoa stays emulsified, and the texture stays uniform.
Step 2 is where keto hot chocolate turns from paste to a smooth mug: add milk slowly while whisking so the cocoa stays silky and never clumps. Save this step card for creamy sugar-free hot cocoa that tastes café-level every time.
After that first splash, add the rest of the milk in a steady stream. If you’re using cream or coconut cream for extra body, add it here as well so it warms through and blends in.
At this point, you can choose the mood of your cup:
For a richer, more “drinking chocolate” feel, go heavier on cream.
For a lighter, more sippable mug, use more milk and skip extra fat.
Both versions can still be keto hot chocolate; they simply land differently.
Step 3: Warm gently until steaming (never boiling)
Place the saucepan over low to medium heat and warm the mixture until it’s steaming and completely smooth. Keep whisking occasionally, especially around the edges, where cocoa can cling.
Step 3 keeps keto hot chocolate tasting rich instead of harsh: warm the cocoa gently until it’s steaming, whisk occasionally, and stop before it boils. This simple move protects the chocolate flavor and keeps sugar-free hot cocoa smooth—save this step card for consistent results.
Avoid boiling. Boiling can flatten the chocolate aroma and make certain sweeteners taste sharper than they should. Moreover, gentle heat keeps dairy tasting fresh instead of “cooked,” which is especially noticeable in a simple sugar free hot chocolate where there’s nowhere for off-flavors to hide.
As it warms, you’ll see the texture change—first thinner, then suddenly velvety once everything is fully integrated. That’s your cue that the cup is ready.
Step 4: Finish, taste, and adjust with intent
Turn off the heat and stir in vanilla (if you’re using it). Then taste immediately, while it’s still warm, because sweetness and bitterness show up differently as the drink cools.
Step 4 is how keto hot chocolate becomes “perfect for you”: taste, then tweak—pinch of salt for flat, a touch more sweetener for bitter, cream for body, or a splash of milk if it’s too strong. Save this step card for consistently smooth, sugar-free hot cocoa.
Use these small, targeted fixes rather than big swings:
If it tastes flat: add a tiny extra pinch of salt.
If it tastes too bitter: add a touch more sweetener.
If it’s too thin: add a spoon of cream or coconut cream and whisk smooth.
If it’s too intense: add a splash more milk to soften it.
Once it tastes right, that’s your foundation. From here, the drink moves into “best keto hot chocolate” territory—not by piling on more cocoa, but by polishing the cup with aroma and structure.
Make it feel “finished” (then add a tiny flourish)
This is the moment to decide what kind of hot cocoa you want to drink tonight. If you want it darker and more intense, keep it simple and cocoa-forward. Then if you want it softer and more dessert-like, add a whisper of vanilla or a little extra cream. And if you want it to feel like a café mug, focus on texture—whisk a bit longer, or froth it briefly. That tiny choice—intense vs cozy, clean vs creamy—changes the experience more than any complicated ingredient ever will.
Once it tastes right, add a finishing touch that feels luxurious without changing the whole drink: a light dusting of cinnamon on top, a few drops of vanilla stirred in at the very end, or a small swirl of cream poured in last so it ribbons through the mug. It’s not about making it fancy; it’s about making it feel like yours.
A small note for cocoa lovers: darker chocolate products tend to be richer in cocoa solids than milk chocolate versions. If you enjoy a quick overview of why dark chocolate is typically the “stronger cocoa” choice, Harvard’s nutrition news has a readable explainer on dark chocolate and cocoa compounds.
Sweetness Without the Weird Aftertaste (Monk Fruit, Allulose, and Friends)
A lot of people land on monk fruit because they want a sugar free keto hot chocolate that doesn’t feel like compromise. Monk fruit can work beautifully—especially in blends—but the experience depends on what it’s paired with.
Here’s the practical truth: some sweeteners dissolve better, and some sweeteners taste better. Occasionally, the one that dissolves beautifully tastes slightly different than what you expect. That’s not failure; it’s just chemistry and palate.
In practice, you’re aiming for a sweetness that feels like warmth, not candy. If your cup tastes sweet but not comforting, it’s often missing vanilla, salt, or body. On the flip side, if your cup tastes rich but a little too bitter, a smaller adjustment to sweetener can fix it without needing to rebuild the whole drink.
Not all sweeteners behave the same in keto hot chocolate. Use this quick guide to pick by taste and texture—monk fruit for clean sweetness, allulose for a softer sugar-like feel, erythritol if you pair it with vanilla/cream, and stevia when you use less. Save it for smoother sugar-free hot cocoa every time.
Hot Chocolate With Monk Fruit: How to Make It Taste Natural
If you’re using monk fruit, choose a powdered blend if possible. Powder dissolves quickly, while granulated sweeteners can leave a faint texture. If your monk fruit blend includes erythritol, it may cool slightly on the tongue. That cooling effect can be minimized by:
warming gently instead of boiling,
adding vanilla,
rounding the cup with a spoon of cream or coconut cream,
and using the cocoa paste method so the drink is smooth to begin with.
Allulose is another option that can give a softer sweetness and a more “classic” hot cocoa vibe. Meanwhile, stevia can work, though it usually benefits from vanilla and a richer base.
If you’re experimenting, do it in small changes. Add half the sweetener you think you need, taste, then decide. Because once cocoa is balanced, the cup often needs less sweetness than you expect.
Instead of chasing “perfect,” build the cup you want: a cozy low carb hot chocolate that tastes like chocolate first and sweet second.
Keto Hot Chocolate Mix: A Homemade Powder You’ll Actually Keep on Hand
Now for the part that makes this feel easy: the jar. A homemade keto hot chocolate mix (or low carb cocoa mix) turns a craving into a one-minute ritual.
This approach is also ideal if you like the idea of hot chocolate packets, but you want something cleaner and more customizable. It’s the same comfort, just made at home and adjusted to your taste.
The real joy here is that you can build a mix that matches your personality:
a darker, less-sweet mix you use most nights,
a “holiday” mix with cinnamon and vanilla,
or a richer blend for weekends when you want the mug to feel like dessert.
Make-ahead keto hot chocolate mix you can keep in the pantry: whisk cocoa, sweetener, and salt into a DIY powder, then scoop 2 tablespoons per mug for quick, creamy sugar-free hot cocoa anytime. Save this recipe card for easy low carb hot chocolate all winter.
Homemade Keto Hot Chocolate Mix (Recipe for 10–20 Servings)
In a bowl, whisk together:
1 cup unsweetened cocoa powder
¾ to 1 cup powdered sweetener (adjust to preference)
Once it’s evenly mixed, pour it into a dry jar with a tight lid.
If you want the jar to feel extra “instant,” you can split your mix into two layers: a base cocoa blend and a second “finishing” blend (like vanilla powder and cinnamon). Then you can scoop either one depending on what mood you’re in. It’s a small move, yet it keeps the ritual fun.
How Much Keto Hot Cocoa Mix Per Mug?
Start with 2 tablespoons per mug. Then adjust:
1½ tablespoons for a lighter cup
2½ to 3 tablespoons for a richer cup
To keep it silky, use the same trick as the fresh version: stir the mix with a splash of hot water to form a paste, then add hot milk.
If you prefer a lighter drink, use more milk and less mix. If you prefer a deeper “drinking chocolate” feeling, use more mix and a slightly richer base. Either way, the paste step keeps the experience smooth.
When You Want “No Carb Hot Chocolate Mix” Results
People often say “no carb hot chocolate” or “zero carb hot chocolate,” yet cocoa itself contains carbohydrates. The realistic aim is “very low net carbs,” not literal zero.
That said, you can keep it extremely low by:
using water + a bit of cream (instead of a full mug of milk),
choosing a sweetener that works for you,
and using cocoa strategically rather than excessively.
When labels get confusing, it helps to understand how “added sugars” appear on packaging. The FDA has a clear explanation of added sugars on the Nutrition Facts label. Even if you mostly make your own mix, that knowledge helps when you’re comparing store options.
Low Carb Hot Chocolate That Feels Thick and Luxurious (Without Cornstarch)
Traditional hot chocolate mixes often rely on starches for body. Keto versions usually don’t. That’s why some cups taste thin.
If you want a low carb low sugar hot chocolate that feels like dessert in a mug, add thickness intentionally. Here are a few easy paths:
Want low carb hot chocolate that feels thick and luxurious without cornstarch? Use one of these easy paths: cream or coconut cream for instant body, collagen peptides for smooth “roundness,” or cocoa butter for silky richness (especially for sugar-free white hot chocolate). Save this guide for dessert-level hot cocoa texture.
1) Cream or Coconut Cream
A spoonful of cream makes a dramatic difference. Coconut cream does the same for dairy-free cups.
If you like your cup extra velvety, add the cream at the end rather than at the beginning. That way the flavor stays bright and the texture feels plush without tasting overly “cooked.”
2) Collagen Peptides
Collagen is nearly invisible in hot cocoa and adds a subtle “roundness” without making it chalky. It’s also an easy bridge into a high protein low carb hot chocolate.
To make collagen blend smoothly, stir it into your cocoa paste before the milk goes in. That way it’s hydrated and hidden within the chocolate base.
3) Cocoa Butter (Especially for White Hot Chocolate)
Cocoa butter adds richness and a smooth mouthfeel. It’s especially helpful when you’re chasing a sugar free white hot chocolate that tastes like a real white cocoa instead of vanilla milk.
A little goes a long way. Even a small amount can shift the drink from “nice” to “silky.”
Keto Protein Hot Chocolate (High-Protein, Low-Carb, and Still Cozy)
If you’ve ever tried to stir protein powder into hot liquid and watched it turn into a lumpy mess, you’re not alone. Protein hot chocolate can be fantastic, but it needs a gentler approach.
The goal is a keto protein hot chocolate that’s warm, filling, and smooth—almost like a mug you could have after dinner when you want something comforting but also want to stay on track.
You can also choose the vibe here. If you want it to feel more like a dessert, increase richness and keep sweetness moderate. If you want it to feel more like a post-workout drink, keep it lighter and focus on smooth mixing.
Keto protein hot chocolate that stays smooth: make a quick cocoa paste, then whisk your protein into a warm slurry before pouring—so you get high-protein, low-carb hot cocoa with zero clumps. Save this recipe card for an easy post-workout or cozy night-in mug.
The Easy Anti-Clump Method
Instead of adding protein directly to hot cocoa, do this:
Add your protein powder to a mug.
Stir in a small splash of warm liquid to form a smooth slurry.
Then pour the hot chocolate in slowly while whisking.
This works for whey isolate, casein, and many vegan blends.
If your protein powder tends to taste “plain,” vanilla matters even more here. A touch of vanilla makes chocolate read more chocolatey and makes sweetener taste less sharp. Additionally, a pinch of salt can make protein flavors taste smoother, especially in chocolate drinks.
If you like the idea of building a high-protein morning routine, pairing a warm protein cocoa with something prep-friendly can feel surprisingly satisfying. For example, MasalaMonk’s high protein overnight oats can work as a broader “macro” companion, even if you personally keep the oats version for higher-carb days.
Dairy Free Keto Hot Chocolate (Almond Milk and Beyond)
Dairy-free doesn’t have to mean disappointing. In fact, a dairy free keto hot chocolate can be one of the smoothest versions—especially if you build body thoughtfully.
If you’ve ever made almond milk hot cocoa and thought, “It’s good, but it feels a bit thin,” you’re not imagining it. Almond milk is naturally lighter. Once you know that, you can compensate in a way that still tastes clean.
Dairy-free keto hot chocolate that still tastes creamy: almond milk hot cocoa made silky with a cocoa paste and finished with coconut cream for café-level body. Save this recipe card for an easy sugar-free, low carb hot drink on cozy nights.
Almond Milk Hot Chocolate Keto Style
Unsweetened almond milk is a common base because it’s light and easy to find. However, almond milk alone can taste thin in hot cocoa. To fix that:
add coconut cream,
or add a touch of cocoa butter,
or blend briefly to create a richer mouthfeel.
For an especially smooth dairy-free cup, warm your almond milk gently and avoid boiling. Almond milk can taste slightly “toasted” if overheated, which can make cocoa taste harsher.
Macadamia milk can be wonderfully creamy as well, and coconut milk beverage offers a naturally fuller texture.
For plant-forward dessert direction that still feels aligned with this cozy theme, you might also enjoy a gentle internal hop into something like MasalaMonk’s keto vegan dessert ideas—especially if you’re leaning into coconut-based sweets and warm spices.
Bulletproof Keto Hot Chocolate (Frothy, Filling, and Surprisingly Comforting Recipe)
Sometimes you don’t just want hot cocoa—you want something that sticks with you. Bulletproof hot chocolate is that version.
It’s still keto hot chocolate, but it leans into satiety and warmth. It’s the mug you make when you want a steady, cozy feeling, not a sugar spike.
This version also tends to feel more “luxurious” than you expect because blending creates a café-style foam. When it’s done well, the texture is almost like a hot chocolate latte.
Bulletproof keto hot chocolate for extra-cozy mornings: start with a strong cocoa base, add butter (and optional MCT), then blend until frothy for a creamy, filling sugar-free hot cocoa that stays emulsified. Save this recipe card for a warm low carb hot drink that actually keeps you satisfied.
Bulletproof Hot Chocolate Formula (One Mug)
Start with a slightly stronger base (so it doesn’t get diluted by fat):
make keto hot cocoa using water plus a splash of milk,
then add butter or ghee,
optionally add a small amount of MCT oil,
blend until frothy.
Blending is the key. Otherwise, you’ll get an oil slick that feels unpleasant.
A helpful trick: start small with fats, especially MCT oil. You can always add more next time. The most satisfying cup is often the one that feels creamy and stable rather than overly rich.
When you blend it for even 10–15 seconds, the drink becomes foamy and luxurious—almost like a café drink that happens to be low carb.
Keto Mexican Hot Chocolate (Warm Spice, Deep Cocoa, Zero Fuss)
Mexican hot chocolate isn’t about heat for heat’s sake. It’s about warmth and aroma. The spice should feel like a soft glow behind the cocoa.
Keto Mexican hot chocolate is all about warmth, not heat: cinnamon deepens the cocoa, while a tiny pinch of chili makes the flavor feel richer and more festive. Save this recipe card for a cozy, sugar-free hot cocoa twist that’s perfect for cold nights.
To make keto Mexican hot chocolate, add:
cinnamon
a tiny pinch of chili or cayenne
vanilla
optionally a tiny pinch of nutmeg
You can also add these to your jar mix and create a second flavor jar for easy variety.
If you want the spice to feel more rounded, cinnamon plus vanilla is the core. Chili is optional, and it should be used with restraint. One tiny pinch can be enough to make the cocoa taste deeper without tasting “spicy.”
This version is especially good on nights when you want something different but don’t want to think too hard.
White Hot Chocolate Sugar Free (The Cozy Vanilla-Chocolate Recipe)
White hot chocolate is a special case. It doesn’t rely on cocoa powder. Instead, it relies on cocoa butter and milk solids in traditional versions.
A sugar free white hot chocolate aims to mimic that creamy, vanilla-forward richness without sugar.
Because it’s not cocoa-powder-based, it tastes softer and more fragrant. It’s the mug you make when you want comfort but don’t necessarily want “dark chocolate energy.”
Sugar-free white hot chocolate that tastes like the cozy café version: warm milk, melt in cocoa butter, then finish with vanilla and a pinch of salt for a creamy keto-friendly white hot cocoa. Save this recipe card for an easy low carb hot drink when you want something lighter than classic cocoa.
Simple Sugar-Free White Hot Chocolate (One Mug)
warm milk (dairy or unsweetened almond milk)
melt in cocoa butter
sweeten to taste
add vanilla and a pinch of salt
whisk until glossy
If you’re going dairy-free, coconut cream can help bring the richness back.
This is also one of the moments where “labels” matter if you’re buying cocoa butter chips or similar ingredients. Even when something says sugar free, it’s worth understanding how sugars are listed and what’s being used for bulk. The FDA’s guidance on added sugars can be surprisingly clarifying.
Low Glycemic Hot Chocolate: What That Actually Means in Practice
“Low glycemic” can mean different things depending on who’s using the phrase. If you’re looking for a low glycemic hot chocolate, what you’re often trying to do is avoid ingredients that behave like quick sugar in the body.
Low glycemic hot chocolate isn’t a magic ingredient—it’s a practical approach: start with an unsweetened base, sweeten in a way that suits you, and skip packaged “mystery fillers.” Save this guide for low glycemic hot cocoa choices that keep your mug cozy and your decisions simple.
Instead of turning this into a lecture, it’s enough to understand two basics:
Glycemic index refers to how carbohydrate-containing foods affect blood sugar.
Glycemic load considers portion size as well.
If you want a clear, neutral explanation, Oregon State’s Linus Pauling Institute offers a helpful overview of glycemic index and glycemic load.
For a printable reference that can support your broader meal planning, MasalaMonk also has a low glycemic index foods list. It’s a handy resource if your “warm drink” habit tends to connect with snack choices afterward.
In daily life, “low glycemic hot cocoa” usually comes down to three practical choices:
keep your base unsweetened (cocoa and milk choices matter),
sweeten with something that suits your body and preferences,
and avoid mystery fillers that can sneak into packaged mixes.
Homemade versions make this easy because you control the whole story.
When You’re Craving Chocolate but Don’t Want a “Dessert Spiral”
This is where keto hot chocolate becomes more than a recipe. It becomes a tool.
Sometimes you want chocolate because you’re tired, bored, cold, or simply craving comfort. A warm mug can satisfy that desire in a way that a random snack often can’t. Still, what you pair it with matters. Not in a perfectionist way—just in a “how do I want to feel after this?” way.
When you’re craving chocolate, a keto hot chocolate can satisfy the comfort without turning into a snack spiral. Use this pairing guide to choose your vibe: dessert-like with a warm drizzle, a crunch reset with something salty, or a cozy companion cookie. Save it for low carb hot cocoa nights when you want the craving to feel “finished.”
If you want something truly dessert-like
A drizzle can turn the mug into a café drink. If you enjoy that idea, MasalaMonk’s 3-minute homemade chocolate syrup is a useful technique reference for getting a smooth, glossy chocolate finish. Even if you adapt the sweetener to suit your style, the method itself is gold.
If you want to take it one step further without making it fussy, warm the syrup slightly before drizzling. That way it ribbons through the mug instead of sinking. It’s a small sensory upgrade that makes the drink feel intentional.
If you want something crunchy to balance the sweetness
A savory bite can be the reset button. It sounds odd until you try it. Something like MasalaMonk’s guide to seaweed snacks as a keto-friendly option can offer a surprisingly satisfying contrast after a warm, chocolatey drink.
The contrast works because it changes the direction of your palate. Sweetness can spark more sweetness cravings; salt and crunch often calm them.
If you want something warm-and-cozy that stays in the chocolate lane
A cookie pairing is classic. If you want a chocolate-on-chocolate moment without repeating the same flavor in the mug, MasalaMonk’s double chocolate cookie variations can be a fun companion for weekends or holidays.
Turning Keto Hot Chocolate Into a “Make-Once, Use-All-Week” Ritual
One reason hot cocoa habits stick is repetition: the same comfort, night after night. That’s why the jar mix is so useful. Still, you can make it even easier by deciding on two or three “default versions” ahead of time.
Turn keto hot chocolate into a make-once, use-all-week ritual: set up a simple cocoa station (mix jar, sweetener, cinnamon, vanilla, whisk) and pick 2–3 default mugs—classic, protein, dairy-free, bulletproof, Mexican, or vanilla-rich white. Save this guide to make low carb hot cocoa feel automatic on busy nights.
Here are a few combinations that feel distinct without requiring extra work:
1) Classic Keto Hot Cocoa (Weeknight Default)
cocoa paste method
almond milk or dairy milk
vanilla + pinch of salt
2) Keto Protein Hot Chocolate (When You Want It to Hold You)
base cocoa
collagen or whey isolate
blend or slurry method
3) Dairy Free Keto Hot Chocolate (Plant-Forward Comfort)
almond milk + coconut cream
cinnamon + vanilla
optional cocoa butter for richness
4) Bulletproof Hot Chocolate (When You Want Extra Cozy)
slightly strong base
butter/ghee
blend until frothy
5) Keto Mexican Hot Chocolate (When You Want Something Different)
cinnamon + tiny pinch chili
vanilla
slightly richer base
6) White Hot Chocolate Sugar Free (When You Want Vanilla-Rich Comfort)
cocoa butter + milk
vanilla + salt
whisk until glossy
Once you’ve made these once or twice, they feel automatic. Moreover, because the method is the same—paste, whisk, warm, finish—you don’t need to “learn” six separate recipes. You’re just nudging the mug in a different direction.
If you want to make the routine even smoother, set up your pantry like a tiny cocoa station:
a jar of cocoa mix,
your preferred sweetener,
cinnamon and vanilla,
and a small whisk or frother.
That way the “decision fatigue” disappears. When you want a low carb hot drink, it’s just a few familiar motions.
A Small Cocoa Reality Check (Because It Helps You Choose Better)
If you’ve ever wondered why one cocoa powder tastes rich and another tastes thin, it often comes down to cocoa solids, processing, and personal preference. Darker cocoa products tend to bring stronger flavor, and that’s why many people prefer them for hot cocoa.
Not all cocoa powders taste the same in keto hot chocolate. This quick reality-check compares natural cocoa (brighter), Dutch-process (smoother and often richer in hot cocoa), and dark/black cocoa (intense—best blended). Save it to choose cocoa that matches the mood of your low carb hot drink.
Harvard’s overview on dark chocolate and cocoa flavonoids is a readable reference if you enjoy the “why” behind your ingredients. Meanwhile, for strict numbers, the USDA FoodData Central database is a useful baseline for cocoa powder nutrition data.
The point isn’t to chase the “perfect” cocoa powder. The point is to understand that your ingredients shape your mug, and once your technique is right, your cup becomes reliably good.
If you’re curious about how cacao differs from cocoa and chocolate in everyday use, MasalaMonk’s breakdown of cacao vs chocolate vs dark chocolate is a helpful rabbit hole—especially if you like knowing what you’re actually tasting.
Making a Low Carb Hot Drink Feel Like a Treat (Even When It’s Simple)
A hot keto drink doesn’t need a dozen ingredients to feel special. Often, it’s one small detail that creates the “treat” feeling:
a dusting of cinnamon on top
a tiny pinch of salt that unlocks the cocoa
a splash of vanilla that makes it taste finished
a frothy blend that feels café-level
or a richer base that makes it feel like dessert
A low carb hot drink can feel like a treat with one small upgrade: cinnamon for cozy aroma, a pinch of salt for deeper cocoa, vanilla to make it taste finished, a quick froth for café texture, or a richer base for dessert-mug vibes. Save this keto hot chocolate guide for easy sugar-free hot cocoa upgrades anytime.
That’s also why this ritual can work even if you don’t drink it every day. You can reserve it for the moments when you want comfort and you want it without the after-feel of sugar.
If you’re in a phase where you’re exploring more low carb drinks beyond hot cocoa, MasalaMonk’s keto mocktails can be a fun branch-off for weekends—different vibe, same “drink that feels like an event” energy.
And if you ever want your mug to feel like it came from a café without changing ingredients at all, try this: pour it back and forth once between mug and measuring cup. It aerates the drink slightly and wakes up the aroma. It’s not necessary, yet it adds a little softness to the experience.
A Cozy Way to Use Leftover Cocoa Mix (So Nothing Goes Stale)
If you make a jar of keto hot chocolate mix and it’s sitting there, you can use it beyond mugs. One gentle, low-effort idea is turning it into a chilled dessert cup.
Don’t let your keto hot chocolate mix sit and go stale—turn it into a chilled dessert cup instead. This cocoa mix chia pudding uses unsweetened milk, chia seeds, and 1–2 tablespoons of mix for a simple low carb pudding that sets overnight and tastes extra chocolatey with a tiny pinch of salt on top. Save it for easy make-ahead comfort.
Chia pudding is especially friendly to cocoa flavors. You can stir a spoonful of cocoa mix into your liquid before adding chia, then let it set overnight. If you want a broader inspiration lane, MasalaMonk has a versatile roundup of chia pudding recipes. It’s a simple way to keep the chocolate comfort going without always making a hot drink.
If you’re doing this in a more keto-leaning way, keep the liquid unsweetened and let the cocoa mix provide the sweetness. Then finish with a little pinch of salt on top right before eating. That pinch makes “chocolate pudding” flavor pop in exactly the same way it does in hot cocoa.
Why This Works So Well When You’re Staying Low Sugar
One of the sneakiest parts of cutting sugar is realizing how much “comfort” you used to outsource to it. Dessert wasn’t just dessert; it was punctuation. It was a pause. It was a way to turn the day off.
A creamy sugar free hot chocolate gives you a gentle replacement that still feels like care. It’s warm. It’s sensory. And it’s slow enough that your brain gets the message. Meanwhile, because you’re building the sweetness and richness on purpose, you’re not stuck in the cycle of “not enough flavor → add more → want more.”
If you’re ever unsure about how “sugar free” products define themselves, it’s worth understanding the basics of what labels mean. The FDA’s explanation of added sugars on the nutrition label is surprisingly useful, even if you mostly make your own drinks.
Not every “sugar-free” packet is truly low carb. Use this label-check card to scan serving size, added sugars, and total carbs fast—so your low carb hot cocoa stays keto-friendly without surprise fillers. Save it for grocery trips and winter drink season.
Also, there’s something quietly powerful about making the mug the “event.” When the drink tastes good and feels complete, you don’t need to keep grazing afterward. That’s often the difference between feeling deprived and feeling satisfied.
Your “Pick-a-Mood” Shortcut: Choose Your Keto Hot Chocolate Style Tonight
If you want the simplest decision tree imaginable, use this:
Want the classic? Make keto hot cocoa with the paste method and finish with vanilla.
Want it to keep you full? Make keto protein hot chocolate and use the slurry method.
Want it dairy-free? Use almond milk and add coconut cream for body.
Want it extra cozy? Make bulletproof keto hot chocolate and blend it frothy.
Want it spicy-warm? Make keto Mexican hot chocolate with cinnamon and a whisper of chili.
Want vanilla-rich comfort? Make sugar free white hot chocolate with cocoa butter.
Pick your mug based on the moment: this keto hot chocolate guide shares 7 easy variations—classic no-grit, DIY mix, protein, dairy-free, bulletproof, Mexican spice, and sugar-free white hot chocolate—built from one simple base method. Save it for quick low carb hot cocoa choices all winter.
None of these require more time than the others once you’ve done them once. In fact, after a week, it starts to feel like brewing tea: you know what you like, you know what the mug needs, and you stop thinking about it.
If you want one more option that fits neatly inside the same framework, try a “mint night” version: stir in a tiny drop of peppermint extract at the very end (seriously, tiny). It turns the mug into a wintery treat without pushing it into toothpaste territory. Paired with a cookie or enjoyed alone, it can feel like a holiday mug on a random Tuesday.
A good mug doesn’t announce itself. It just changes your evening.
That’s the quiet power of a well-made keto hot chocolate. It’s not trying to be a substitute. It’s just a better habit: warm, chocolatey, low carb, and tailored to the way you actually live.
So make the cocoa paste. Add the pinch of salt. Choose your milk. Pick your mood. Then take the first sip slowly—because that’s the whole point.
Hot cocoa not tasting right? Use this quick troubleshooting guide to fix keto hot chocolate fast—make a cocoa paste for gritty texture, add sweetener + vanilla for bitterness, use cream for body, balance sweetness with more cocoa, and prevent protein clumps with a warm slurry. Save it for smoother sugar-free hot cocoa every time.
FAQs
1) Is keto hot chocolate actually keto-friendly?
Yes—when you build it with unsweetened cocoa (or cacao), a keto-approved sweetener, and a low-carb liquid like unsweetened almond milk or a measured amount of dairy. The biggest swing factor is usually the milk choice and any add-ins, so keeping those intentional is what makes a mug reliably keto-friendly.
2) What’s the difference between keto hot chocolate and keto hot cocoa?
In everyday use, they’re the same idea: a low carb, sugar free hot chocolate-style drink. Some people use “hot cocoa” to mean cocoa powder-based, while “hot chocolate” can imply melted chocolate. On keto, both can work—the cocoa powder version is simpler, and the melted-chocolate version can taste richer if you’re using low carb baking chocolate or keto-friendly chocolate chips.
3) How do I make sugar free keto hot chocolate taste like the real thing?
Focus on three things: fully hydrating the cocoa (the paste method), adding a pinch of salt, and giving the cup some body (a little cream, coconut cream, or cocoa butter). After that, vanilla and gentle heat do the rest—because when the drink is smooth and balanced, it automatically tastes more “classic.”
4) Why does my low carb hot cocoa turn out gritty or chalky?
Most grit comes from cocoa not being hydrated properly. Start by whisking cocoa, sweetener, and salt with a small splash of hot water to form a glossy paste, then add milk gradually. Chalkiness can also come from certain sweeteners or protein powders, so switching to a powdered sweetener blend—or mixing protein as a slurry first—usually fixes it.
5) What sweetener works best for hot chocolate with monk fruit?
Monk fruit blends are popular because they can taste clean and sweet, but the best results usually come from powdered versions that dissolve quickly. If your blend includes erythritol and you notice cooling, adding vanilla and a bit of creaminess can round it out. Alternatively, allulose often gives a softer sweetness that feels more like traditional hot cocoa.
6) Can I make keto hot chocolate with almond milk?
Absolutely. Almond milk keto hot chocolate is one of the easiest versions to keep low carb. Still, almond milk is naturally lighter, so adding a tablespoon or two of cream (or coconut cream for dairy-free) helps it feel fuller and more satisfying.
7) How do I make dairy free keto hot chocolate creamy, not thin?
Choose a richer plant milk if you like, then add body with coconut cream or a small amount of cocoa butter. Another option is blending briefly to emulsify everything, which creates a smoother texture that feels more like a café drink.
8) What is keto hot chocolate mix, and how is it different from the drink?
Keto hot chocolate mix is the dry, pantry-ready version—basically your cocoa powder, sweetener, and salt pre-combined so you can make a mug fast. The drink is what you get after you mix it with hot liquid. In practice, the mix saves time, while the “from scratch” version lets you adjust more precisely in the moment.
9) How many tablespoons of keto hot chocolate powder should I use per mug?
Usually 2 tablespoons per mug is a strong starting point. However, if you want a lighter low carb drinking chocolate, use 1½ tablespoons; conversely, if you want something closer to a deep cocoa, try 2½ to 3 tablespoons and add a richer liquid.
10) Can I make keto hot chocolate packets at home?
Yes. If you make a dry keto hot cocoa mix, you can portion it into small containers or pouches for grab-and-go convenience. Just keep it dry, and include a note for yourself on how much liquid to add per serving.
11) What’s the best keto hot chocolate recipe for a really rich, “dessert” mug?
Use the cocoa paste method, then build richness with cream (or coconut cream), plus vanilla and a pinch of salt. If you want it extra luxurious, add a tiny bit of cocoa butter, or blend the finished drink for a foamy, café-style texture.
12) How do I make high protein low carb hot chocolate without clumps?
Instead of dumping protein powder into hot liquid, make a slurry first: mix the protein with a few tablespoons of warm liquid until smooth, then pour in the hot cocoa while whisking. This approach works for keto protein hot chocolate with whey isolate, casein, collagen, and many vegan blends.
13) Is bulletproof keto hot chocolate the same as regular keto hot cocoa?
It starts the same, then adds fat (usually butter or ghee, sometimes MCT oil) and gets blended until frothy. As a result, bulletproof hot chocolate keto-style tends to feel more filling and can replace a snack for some people.
14) How do I keep bulletproof hot chocolate from getting oily on top?
Blending is the difference. Use a blender, stick blender, or frother so the fat emulsifies into the drink. Also, start with smaller amounts of butter/MCT and increase only if you love the texture.
15) What is keto Mexican hot chocolate?
It’s a spiced version of keto hot chocolate, typically with cinnamon and a tiny pinch of chili or cayenne, plus vanilla. The idea is warmth and depth, not intense heat—so the spice stays in the background and makes the cocoa taste richer.
16) How do I make white hot chocolate sugar free?
White hot chocolate is usually cocoa butter-based rather than cocoa-powder-based. For sugar free white hot chocolate, melt cocoa butter into warm milk (dairy or almond milk), then add sweetener, vanilla, and a pinch of salt. For a fuller texture, a spoon of cream or coconut cream helps.
17) What does “low glycemic hot chocolate” mean?
Typically it means using unsweetened cocoa and choosing sweeteners and liquids that don’t behave like fast sugar for you. That might involve avoiding added sugars and starchy thickeners, then focusing on a balanced recipe that’s still satisfying.
18) Why do some mixes claim “0 carb hot chocolate” or “no carb hot cocoa”?
Often it’s a mix of serving sizes, rounding rules, and how labels handle sugar alcohols or fiber. In real kitchens, cocoa itself contains some carbs, so “very low carb” is usually the more realistic expectation. If you’re strict, measure your ingredients and calculate based on the exact products you use.
19) How can I make a lower calorie low carb hot cocoa recipe?
Use unsweetened almond milk (or a lighter dairy option), keep added fats minimal, and rely on cocoa, vanilla, and salt for satisfaction rather than extra cream. Even so, you can still make it feel indulgent by blending it frothy or adding a spice note like cinnamon.
20) Can I make keto hot chocolate ahead of time?
Yes. You can prep the dry keto hot chocolate mix for instant mugs all week, or you can make the drink itself and reheat gently. If reheating, warm it slowly and whisk as it heats so the cocoa stays smooth and the texture stays consistent.