Let’s be honest: Sometimes, the most magical things in the kitchen happen when you have just a couple of eggs left in the fridge, a growling stomach, and a spark of curiosity. Eggs are like little edible treasures—packed with protein, affordable, and capable of starring in dishes from every corner of the world.
But what if you only have two? Is that enough? The answer: Absolutely! From quick weekday breakfasts to cozy solo dinners, here are 10 detailed, creative ways to transform just two eggs into something wonderful. We’ll sprinkle in tips, flavor twists, and point you to more deep-dives on MasalaMonk.com along the way!
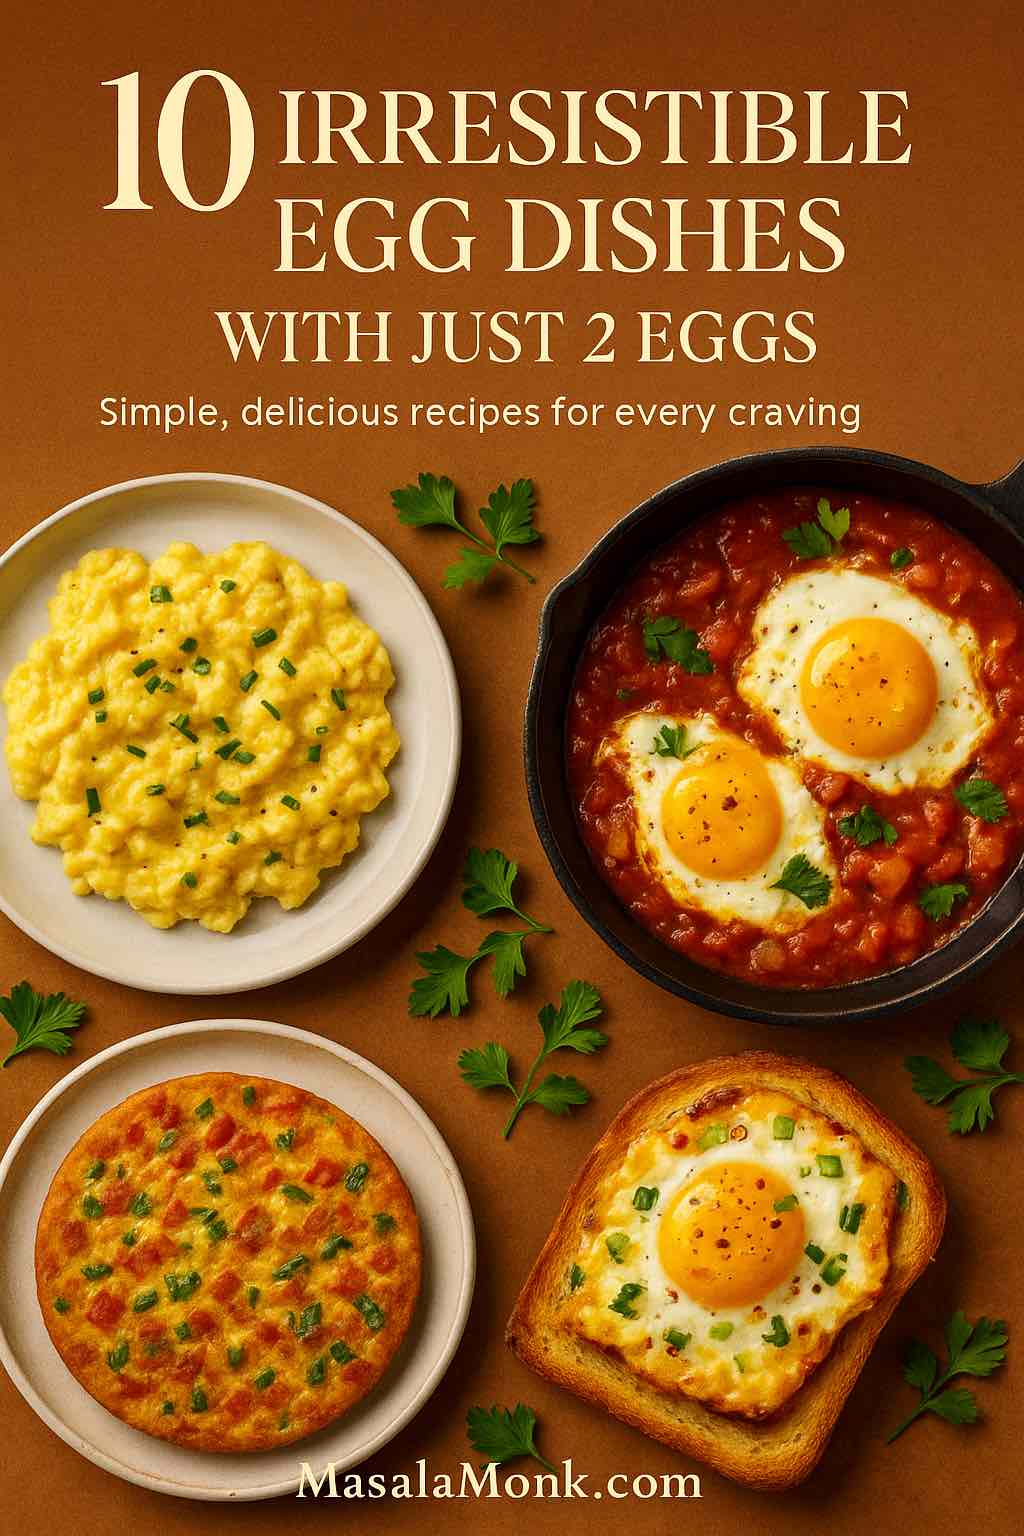
1. Creamy Classic Scrambled Eggs
There’s a reason every culture has its own version of scrambled eggs. They’re soothing, reliable, and quick to make—plus, they’re a blank canvas for your favorite flavors.
How to Make (the Right Way):
Crack 2 eggs into a bowl, add a generous pinch of salt, a grind of black pepper, and just a tiny splash of milk or cream (totally optional, but adds a lovely softness). Whisk with a fork or small whisk until everything is smoothly combined and a little frothy.
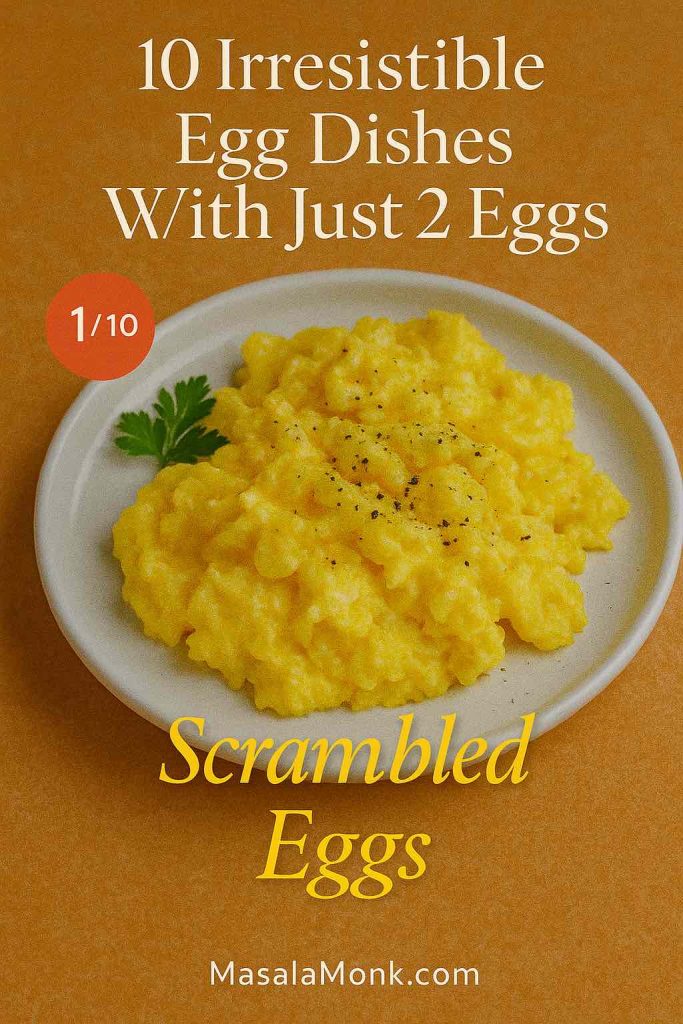
Fluffy scrambled eggs made with just 2 eggs, butter, and a hint of chives—perfect for a quick, protein-packed breakfast or brunch.
Melt a pat of butter in a nonstick pan over gentle heat (don’t rush it—good scrambled eggs are all about patience). Pour in your eggs, and with a silicone spatula, slowly stir from the edges to the center, letting soft curds form. The moment they look barely set, remove from heat—they’ll keep cooking from residual warmth.
Flavor Upgrade:
A handful of chopped chives or coriander, a sprinkle of grated cheddar, or a dusting of smoked paprika can work wonders. For even more ways to amp up your eggs, visit Egg-cellent Seasoning Options for Flavorful Eggs.
Personal Touch:
Serve with buttered sourdough or even spoon them onto hot rice, Japanese-style. Some days, it’s the simplest things that feel like a big, warm hug.
2. Soft or Hard-Boiled Eggs (the Anytime Snack)
Eggs don’t need much to be a satisfying snack or lunch. Boiled eggs are portable, filling, and can be dressed up in countless ways.
How to Make (Foolproof):
Place 2 eggs in a saucepan, cover with cold water by about an inch, and bring to a gentle boil. For soft-boiled (runny yolk, firm white), cook for 6-7 minutes. For hard-boiled (set all the way through), go for 10-12 minutes. Immediately transfer eggs to a bowl of ice water (or run under cold water) to stop cooking and make peeling a breeze.
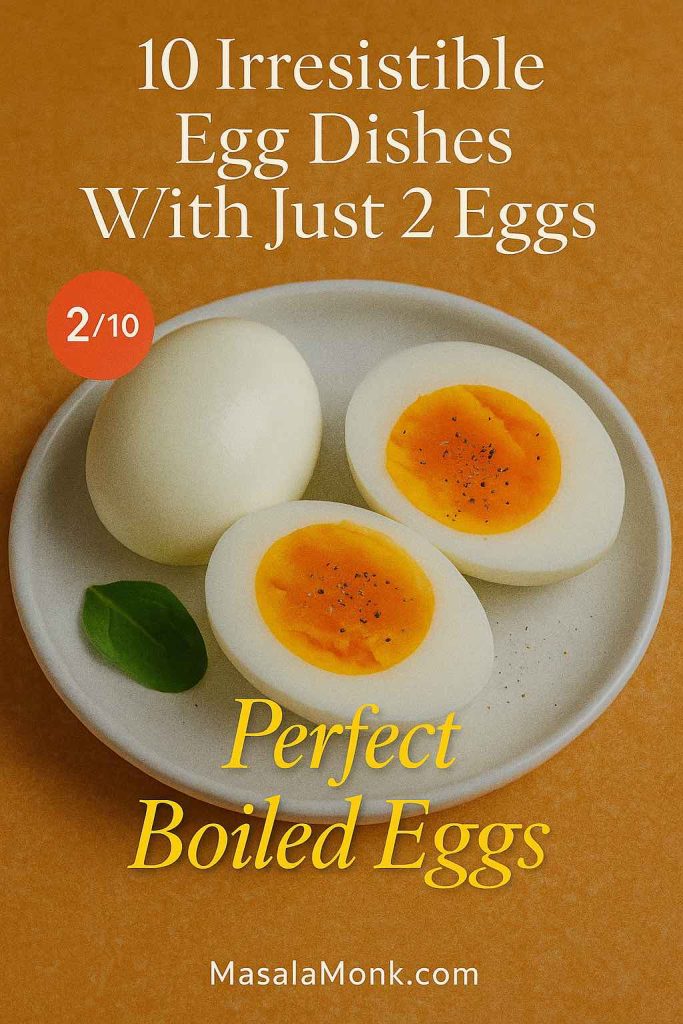
Soft or hard-boiled eggs done right—enjoy these easy, protein-rich boiled eggs on toast, salads, or as a healthy snack.
Slice them over salads, nestle into a bento box, or sprinkle with flaky salt and a little chili powder for a quick snack.
Egg Nutrition:
Curious about how much nutrition you’re actually getting? Check out How Much Protein in Two Boiled Eggs? for the details on protein, calories, and why boiled eggs are a dietitian’s favorite.
Pro Tip:
Experiment with flavor: Try marinating peeled eggs in soy sauce and garlic for “ramen eggs,” or toss slices with a bit of chaat masala for an Indian twist.
3. Masala Omelette (Spicy Indian Comfort Food)
If you’ve ever visited an Indian railway station or a roadside dhaba, you’ve probably spotted someone expertly flipping a masala omelette on a sizzling tawa. Two eggs, a few chopped veggies, and a handful of spices make for a breakfast that’s bursting with flavor and memories.
How to Make:
Whisk 2 eggs with salt. Add finely chopped onion, tomato, green chili, and fresh coriander. Toss in a pinch each of turmeric, red chilli powder, and black pepper. Heat oil or ghee in a pan, pour in the mixture, and cook on medium heat, swirling to spread evenly. Flip to brown both sides, then serve hot.
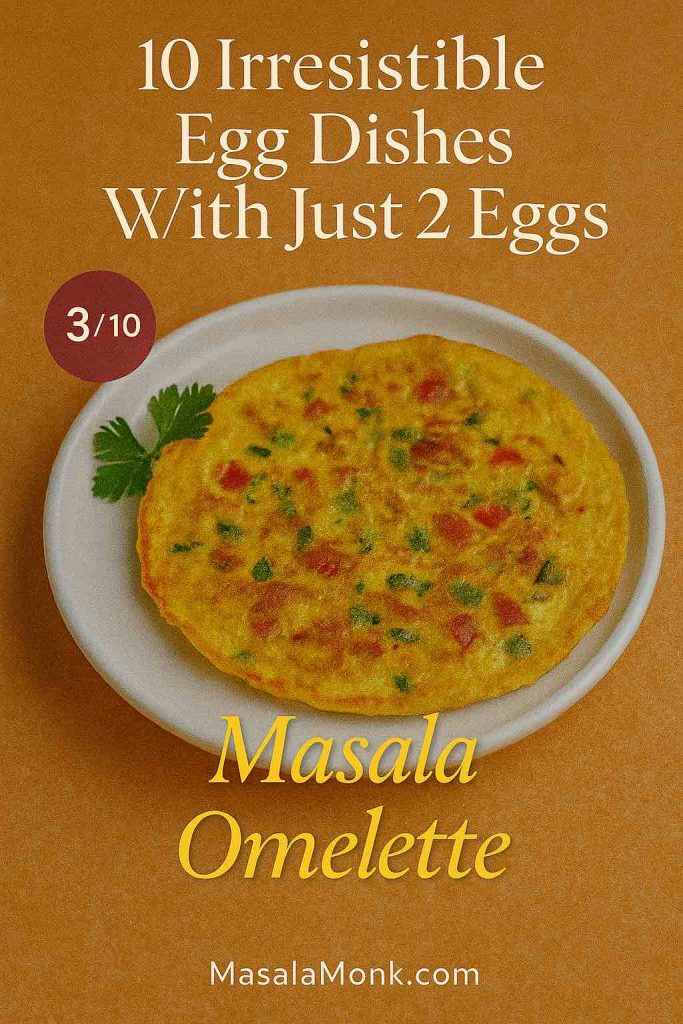
Spicy Indian masala omelette loaded with onions, tomatoes, green chilies, and fresh coriander—ready in minutes with just 2 eggs.
Level It Up:
Stuff with cheese, leftover sabzi, or even crumbled paneer for extra richness. For a truly “desi” twist, pair with pav or tuck inside buttered bread for a street-style sandwich.
Want to explore even more Indian-inspired egg fusion? Head over to Eggs Benedict: Desi Twist Challenge.
4. Shakshuka (Eggs Poached in Spicy Tomato Sauce)
Shakshuka is the kind of breakfast (or dinner!) that makes you want to mop the bowl clean with a hunk of bread. Originating from North Africa and wildly popular across the Middle East, it’s a celebration of eggs and bold, tangy-sweet flavors.
How to Make:
In a skillet, sauté chopped onion, bell pepper, and garlic in olive oil until soft. Add a can of diced tomatoes (or fresh if you have), a teaspoon of cumin, paprika, and a pinch of cayenne. Simmer until thickened, then make two small wells and gently crack your eggs into them. Cover and cook on low heat until the whites are set but yolks remain runny.
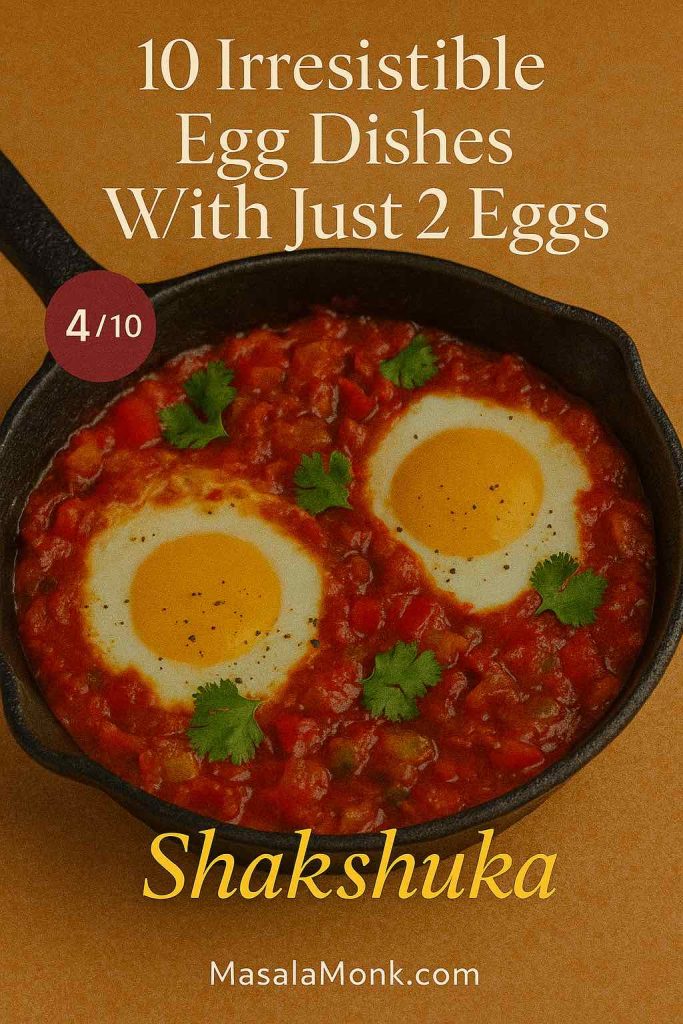
A single-serve shakshuka with two eggs poached in a flavorful tomato and pepper sauce—bring Middle Eastern breakfast to your table.
Serving Suggestion:
Finish with a sprinkle of feta, a handful of parsley, and serve straight from the pan with toasted sourdough or warm pita.
Want to know where this dish fits into Mediterranean mornings? See 10 Most Popular Mediterranean Breakfasts.
5. Cloud Eggs (For When You Feel Fancy)
Cloud eggs are part breakfast, part magic trick. They’re fluffy, photogenic, and taste like a cross between a soufflé and a poached egg. Perfect for impressing guests—or just brightening a grey morning.
How to Make:
Separate your 2 eggs, placing whites and yolks in different bowls. Whip the whites until stiff peaks form (electric beaters are your friend). On a lined baking tray, dollop the whipped whites into two mounds and create a small nest in each. Bake at 190°C (375°F) for 3 minutes, then add a yolk to each nest and bake for another 2 minutes until just set.
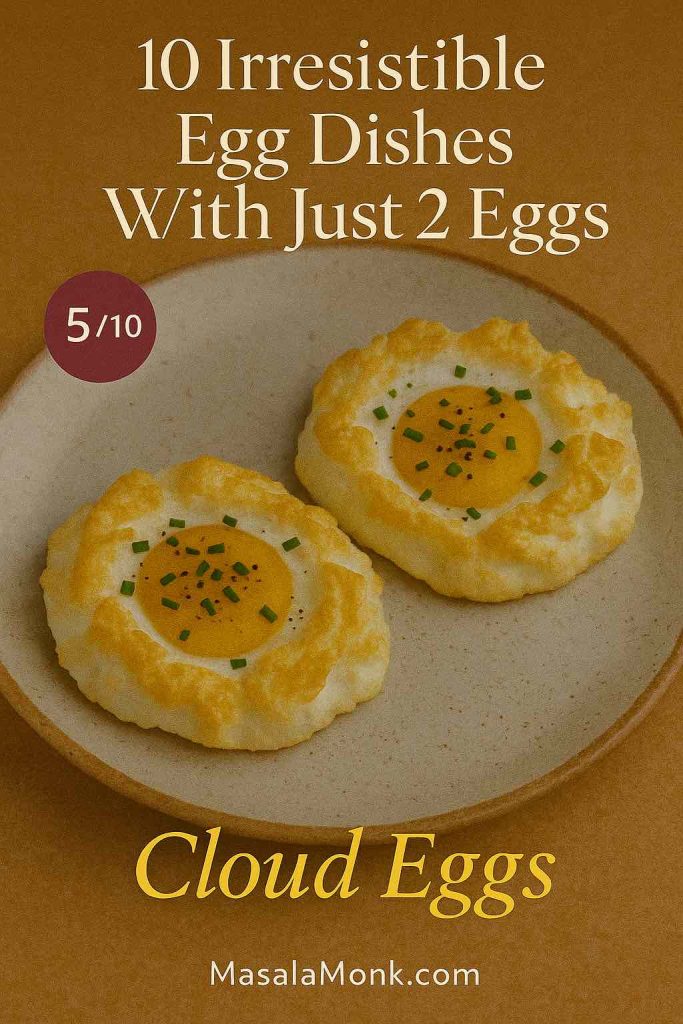
Whip up Instagram-worthy cloud eggs with just two eggs—fluffy whites, golden yolks, and a sprinkle of herbs for a show-stopping brunch.
Science Corner:
Curious why egg whites whip so dramatically? Find out in Can You Really Not Whip Egg Whites if There’s Yolk in Them? Let’s Crack This Myth.
Garnish:
A little parmesan, chives, or smoked paprika on top and you’re set for an Instagram post.
6. Mini Frittata (Eggs for Dinner, or Anytime)
A frittata is essentially an Italian open-faced omelette—thick, fluffy, and endlessly adaptable. With two eggs, you can create a mini version perfect for solo meals or meal prep.
How to Make:
Beat 2 eggs with salt, pepper, and a tablespoon of milk or cream. Pour into a small, greased oven-safe dish or a muffin tin. Scatter over whatever you have: sautéed spinach, chopped tomatoes, cooked potato, cheese, or herbs. Bake at 180°C (350°F) until puffed and golden, about 12–15 minutes.

Easy mini frittata baked with vegetables and cheese—healthy, customizable, and perfect for meal prep or quick dinners with 2 eggs.
Why You’ll Love It:
Frittatas are brilliant for using up leftovers and sneaking extra veggies into your diet. Serve warm or at room temperature with a fresh salad.
7. Egg Drop Soup (For Rainy Evenings or Sick Days)
Egg drop soup is Chinese comfort in a bowl—warm, soothing, and ready in minutes. If you love silky, ribbon-like egg textures, this one’s for you.
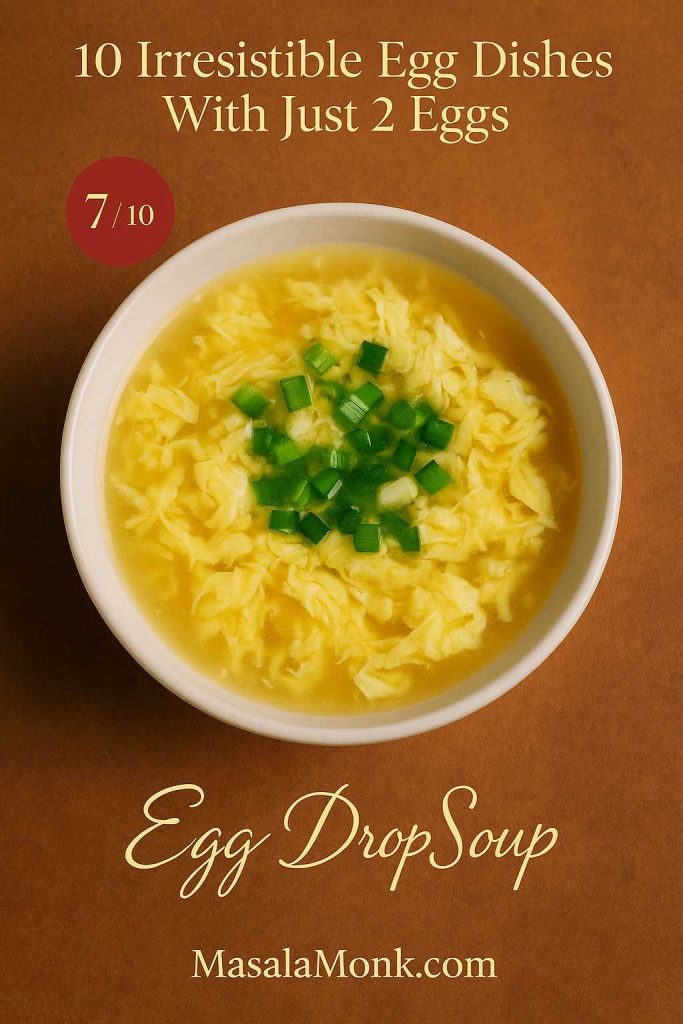
Classic Chinese egg drop soup made from scratch with two eggs—silky egg ribbons in savory broth, ideal for a light meal or appetizer.
How to Make:
Bring 2 cups of chicken or vegetable broth to a gentle simmer. Beat 2 eggs in a small bowl. With a fork or chopsticks, swirl the broth in one direction, then slowly drizzle in the eggs. Watch as soft egg “ribbons” form instantly. Add a splash of soy sauce, white pepper, and finish with chopped scallions.
Plant-Based Twist:
Eggs not your thing today? Try a tofu scramble instead—see Tofu Instead of Eggs: 5 High-Protein Plant-Based Breakfast Ideas.
Optional:
Toss in a handful of spinach or a few drops of sesame oil for depth.
8. Classic Egg Salad (Perfect for Sandwiches and Snacks)
Egg salad is a retro lunchbox hero and comes together in no time with just two eggs. It’s creamy, tangy, and perfect for spreading on toast or spooning into lettuce wraps.
How to Make:
Boil 2 eggs until firm, peel, and chop them up. In a bowl, mix with a spoonful of mayonnaise, a dash of mustard, salt, pepper, and fresh herbs like dill or parsley. Want to spice it up? Add a little chopped celery, onion, or even a pinch of curry powder.
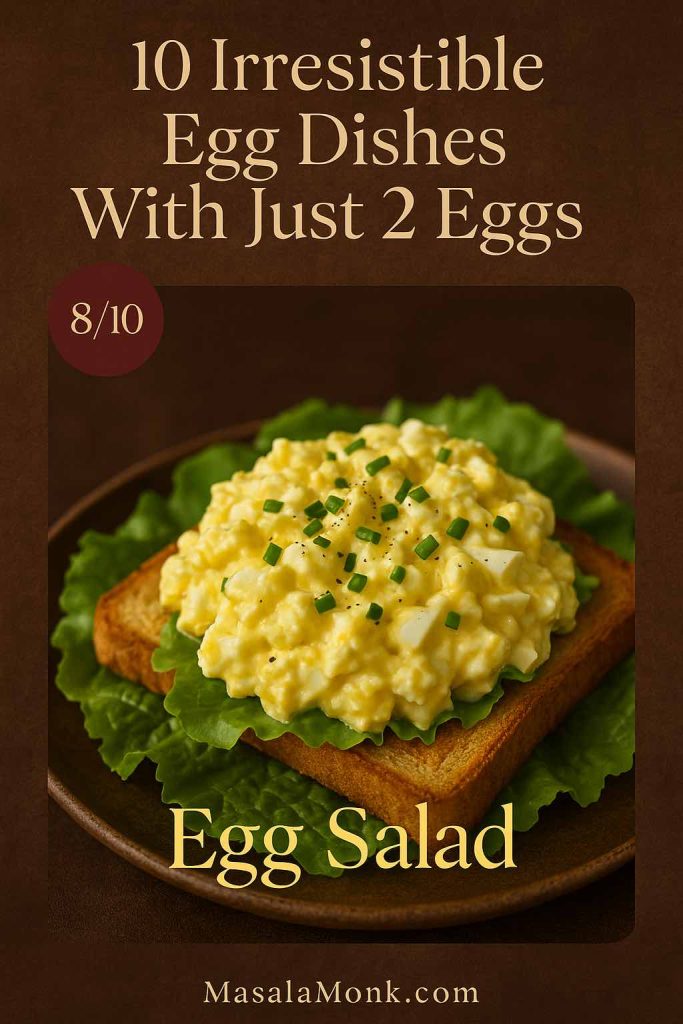
Creamy, tangy egg salad made from just two eggs—great for sandwiches, wraps, or as a low-carb, protein-rich lunch.
Health Note:
Egg yolks are packed with nutrients and healthy fats. If you’re curious about what makes them so good for you, read Egg Yolks or Yellow: Nutritional & Protein Profile.
Serving Suggestion:
Slather on toast, stuff into pita bread, or serve as a dip with crackers.
9. Mini Spanish Tortilla (Tortilla Española)
Don’t let the name fool you—a Spanish tortilla is not a wrap, but a tender, thick omelette loaded with potatoes and onions. Making a mini version with just two eggs is perfect for a hearty meal-for-one.
How to Make:
Thinly slice a small potato and half an onion. Sauté in olive oil over low heat until golden and soft (patience pays off here). Beat 2 eggs, season, and combine with the veggies. Pour back into the pan, smooth the top, and cook gently until the bottom is golden. Carefully flip (use a plate if you must) and finish cooking the other side.
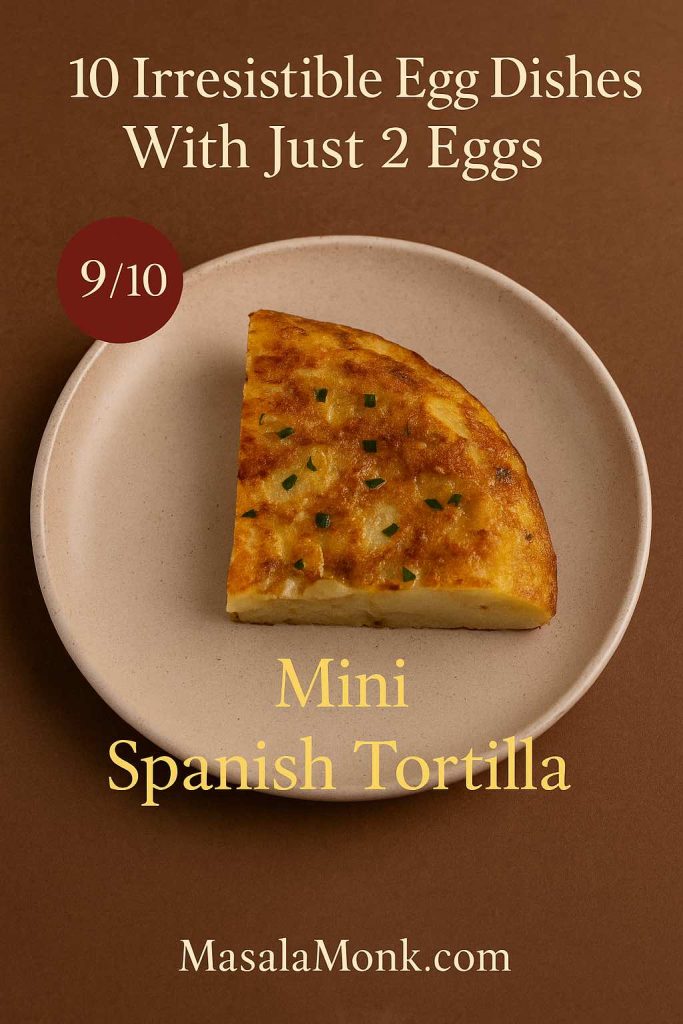
Spanish tortilla for one: thin-sliced potato and onion cooked with two eggs for an authentic, satisfying tapa or breakfast.
Variations:
Try adding red peppers, cooked chorizo, or a sprinkle of smoked paprika for a twist. Serve warm or at room temperature with a tomato salad.
10. Eggs Kejriwal (Mumbai’s Spicy Toasted Egg & Cheese)
Eggs Kejriwal is a cult favorite from Mumbai’s old Irani cafés—a spicy, cheesy open-faced sandwich that’s so much more than “egg on toast.”
How to Make:
Toast a slice of bread, slather with a little butter, then add grated cheese (cheddar works well) and a finely chopped green chilli for heat. Place under the broiler or in a hot pan until the cheese bubbles. Then, top with a fried egg (or even a soft-boiled one split open) and a sprinkle of black pepper.
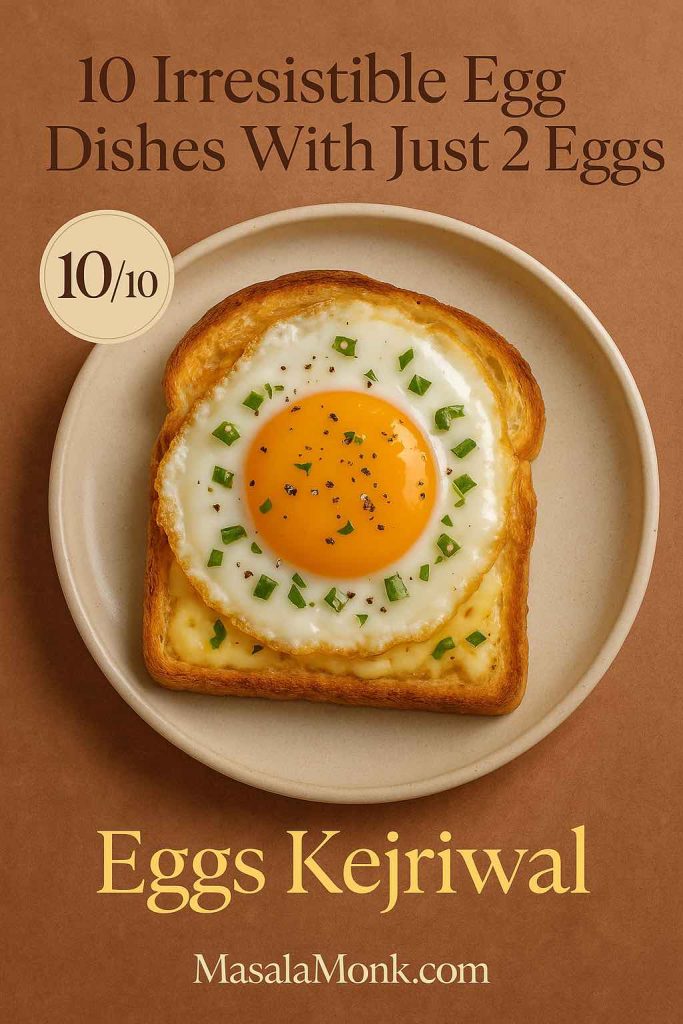
Iconic Mumbai-style Eggs Kejriwal—crisp toast topped with cheese, green chilies, and a runny fried egg for a spicy, satisfying treat.
Pro Tip:
Serve with ketchup, chutney, or a cup of strong chai for the full experience.
Final Thoughts: Two Eggs, Endless Possibilities
Next time you peer into your fridge and see just two eggs, remember this list. Whether you’re feeling classic, creative, healthy, or indulgent, there’s a two-egg recipe waiting to make your day better.
Experiment, taste, and make it your own—eggs are forgiving and open to nearly infinite flavor combinations.
Eggs are also a nutritional powerhouse:
Rich in protein, vitamins, and healthy fats, they’re ideal for building muscle, fueling your brain, or simply starting your day on a happy note.
Pro Tips for the Best Egg Dishes
- Always season eggs before cooking—it makes a world of difference in texture and flavor.
- Cook on low heat for tender results—high heat toughens eggs.
- Get creative with toppings and sides: Chutneys, salsas, and pickles all love eggs.
- Don’t waste the yolk! That’s where much of the nutrition and flavor live.
For more tips, inspiration, and the latest egg trends, keep browsing MasalaMonk.com. Your kitchen, your rules—happy cooking!
FAQs for 10 Egg Dishes with 2 Eggs
1. Can I double these recipes if I have more eggs?
Absolutely! Each recipe is designed for two eggs but can be scaled up easily. Just multiply the ingredient quantities by the number of eggs you’re using, and adjust the pan size and cooking time as needed.
2. What are the health benefits of eating two eggs a day?
Two eggs provide about 12–14 grams of high-quality protein, healthy fats, vitamin D, choline, and a host of other nutrients. They keep you full, support muscle health, and are generally considered safe for most people as part of a balanced diet. For more on nutrition, see How Much Protein in Two Boiled Eggs?.
3. Can I use egg substitutes in these recipes?
Yes! For plant-based options, use tofu scramble in place of scrambled eggs, or try commercially available vegan egg replacers for frittatas and omelettes. For more ideas, check Tofu Instead of Eggs: 5 High-Protein Plant-Based Breakfast Ideas.
4. How do I keep my scrambled eggs soft and creamy, not rubbery?
Cook on low heat, stir gently, and remove the eggs from heat just before they’re fully set. They’ll finish cooking with residual warmth. Adding a splash of milk or cream helps too.
5. What are some good side dishes to serve with these egg recipes?
Pair eggs with toasted bread, parathas, rice, sautéed greens, roasted potatoes, or fresh salads. Chutneys, salsas, and pickles also make excellent accompaniments.
6. Are brown eggs healthier than white eggs?
No—brown and white eggs have virtually the same nutritional value. The color difference comes from the breed of chicken, not the nutritional content.
7. Can I prepare these egg dishes ahead of time?
Some dishes, like boiled eggs, egg salad, and mini frittatas, store well in the fridge for up to 3 days. Scrambled eggs and omelettes are best enjoyed fresh.
8. What’s the best way to peel hard-boiled eggs?
Cool eggs in ice water immediately after boiling. Crack the shell all over and peel gently under running water. Older eggs often peel more easily than very fresh ones.
9. How can I make my egg dishes more flavorful?
Use fresh herbs, spices, or seasoned salts. Try flavor boosters like garlic, onions, cheese, or even a drizzle of chili oil. For more ideas, read Egg-cellent Seasoning Options for Flavorful Eggs.
10. Can I make these dishes if I don’t have a nonstick pan?
Yes. Use a well-seasoned cast iron pan or a stainless steel pan with enough oil or butter to prevent sticking. For oven-baked dishes like frittatas, line your baking dish with parchment or grease it well.