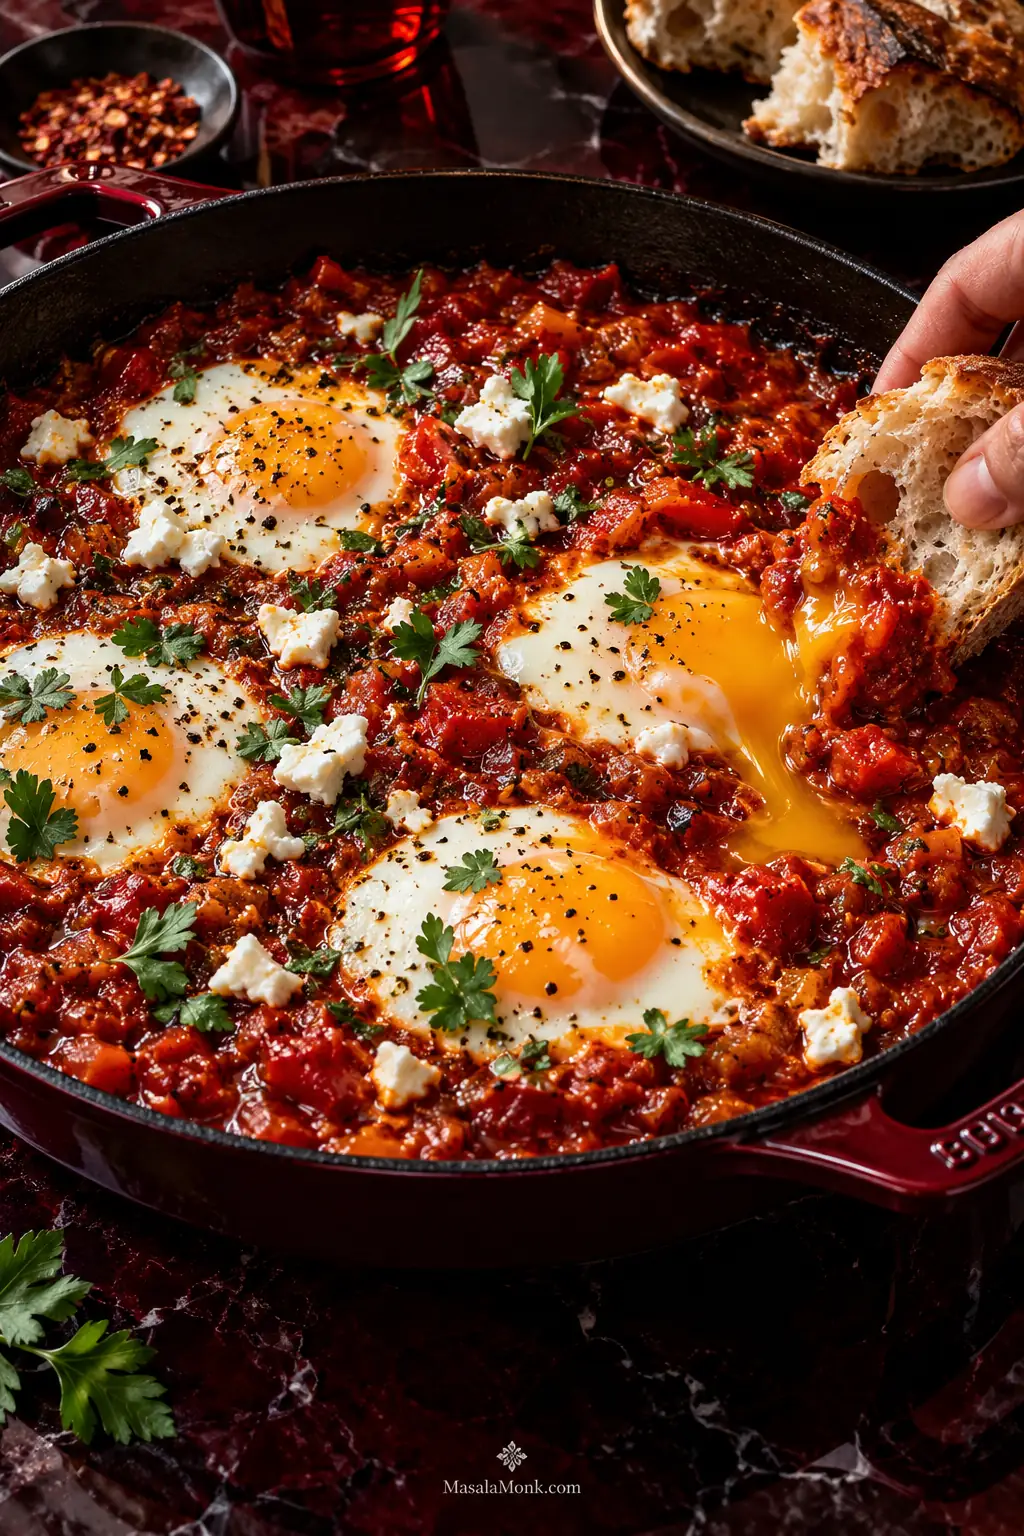
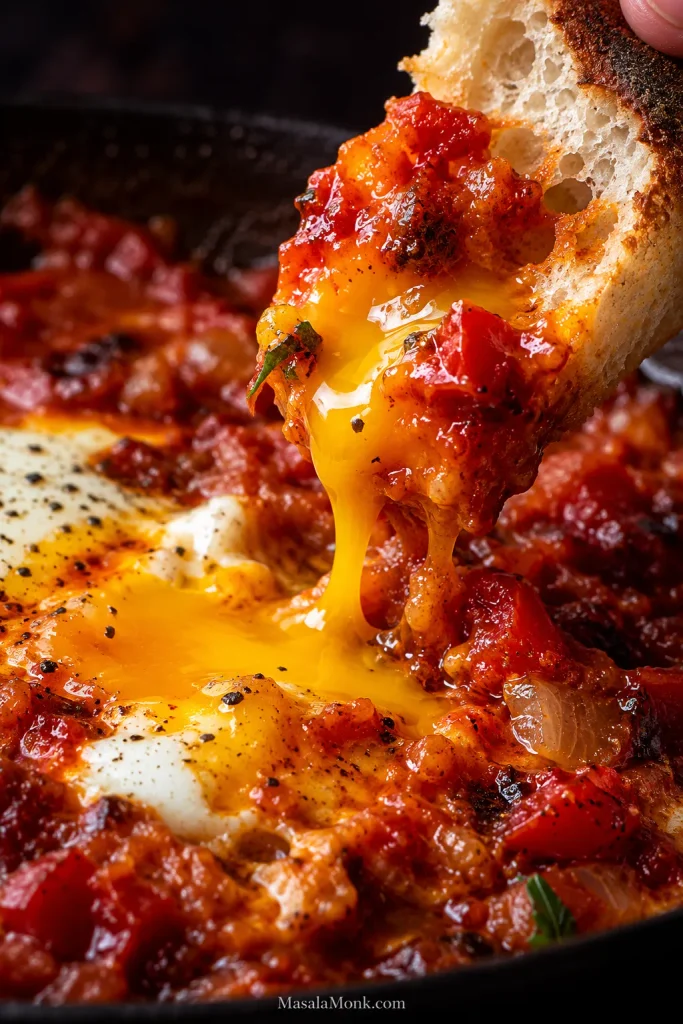
Shakshuka is at its best when the tomato sauce clings to a piece of torn bread, the whites are just set, and the yolk spills into the sauce as soon as you break it. Onion, pepper, garlic, cumin and paprika make the base, but the real trick is knowing when the sauce is ready for the eggs.
Shakshuka is a one-pan dish of eggs gently poached in a spiced tomato and pepper sauce, with roots in North Africa and versions now eaten widely across the Middle East and beyond. The handoff is the heart of this shakshuka recipe: finish the sauce first, then change how you cook.
Onion and bell pepper soften with cumin, paprika and garlic before tomatoes cook down into a thick, scoopable sauce. Six eggs go in off the heat, then finish gently until the whites are set and the yolks are as soft or firm as you like.
Serves 3 generously or 4 with bread and sides
Prep About 10 minutes
Cook About 25–35 minutes
Total About 35–45 minutes
Pan 12-inch / 30 cm skillet with lid
Eggs 6 large
Ingredients
2 tablespoons / 30 mL olive oil
1 medium yellow onion, diced, about 5½–6 oz / 150–170 g prepared
1 medium-large red bell pepper, diced, about 5½–7 oz / 160–200 g prepared; green also works for a sharper flavor
½ teaspoon fine sea salt, plus more after the sauce has reduced
3 garlic cloves, finely chopped, about 12 g
1 teaspoon ground cumin
1 teaspoon sweet paprika
¼ teaspoon red pepper flakes, or to taste
2 tablespoons / about 30 g tomato paste
1 can whole peeled tomatoes, 28 oz / 794 g, crushed with their juices, or the same weight of good crushed tomatoes
¼ teaspoon freshly ground black pepper
6 large eggs
2–3 oz / 60–85 g feta, crumbled, optional
2–4 tablespoons chopped flat-leaf parsley or cilantro, optional
Method
Soften the onion and pepper. Heat the olive oil in a 12-inch / 30 cm skillet over medium heat. Add the onion, bell pepper and ½ teaspoon salt. Cook for about 7–8 minutes, stirring occasionally, until the onion is translucent, a little gold is appearing at the edges and the pepper has lost its raw crunch.
Bloom the aromatics. Add the garlic, cumin, paprika and red pepper flakes. Stir for about 30 seconds, until the garlic and spices smell aromatic.
Cook the tomato paste. Stir it through the vegetables for 1–2 minutes, until the paste turns a deeper brick red and loses its raw canned smell.
Add the tomatoes. Pour in the crushed tomatoes with their juices and add the black pepper. Bring everything to a lively simmer, then adjust the heat so the sauce bubbles steadily without spitting aggressively.
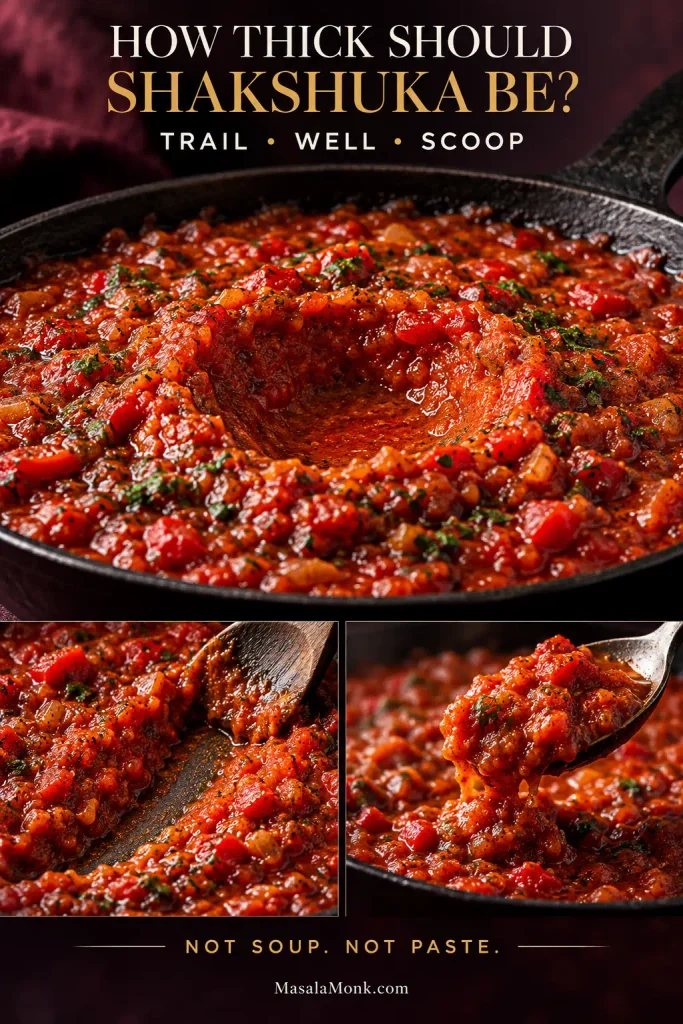
Finish the sauce. Start checking after about 10 minutes. In a 12-inch / 30 cm skillet, the sauce often reaches the right consistency in 10–15 minutes; wetter tomatoes or a narrower pan can take longer. Drag a spoon across the bottom and look for a trail that stays open briefly. Press a shallow well into the sauce; it should not immediately flood. Lift a spoonful and it should still slump back into the pan. Taste now. Canned tomatoes vary considerably in saltiness, so season until the sauce tastes finished, staying slightly conservative if you plan to add feta at the end.
Add and Cook the Eggs
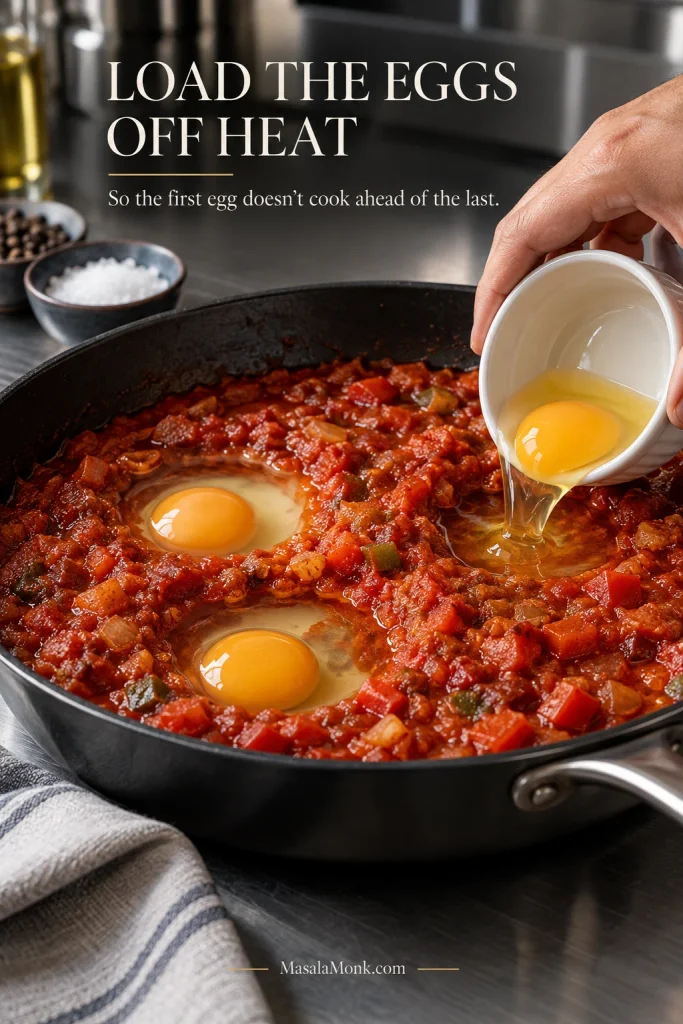
Take the skillet off the heat and add all six eggs. Make six broad, shallow wells. Crack each egg into a small bowl or ramekin first, then slide it gently into place. Loading them away from the burner keeps the first egg from cooking while you are still placing the last.
Return the skillet to low heat. Cover and start checking after about 4 minutes. The eggs often take about 4–8 minutes after the skillet returns to the heat. If a thick patch of white beside a yolk still looks glassy, spoon a little hot tomato sauce over that white only, leave the yolk exposed, cover briefly and check again.
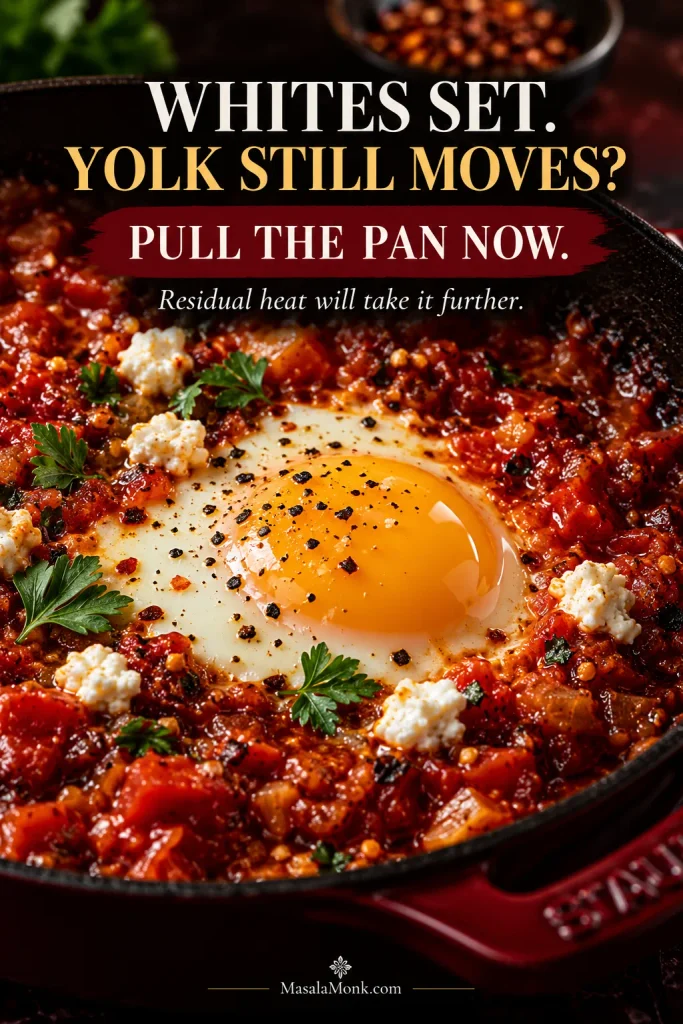
Stop where you like the yolks. The whites should be opaque and tender rather than rubbery. Soft yolks still move clearly when the skillet is nudged; jammy yolks move less; firm yolks barely move at all. Pull the skillet a little early because the hot tomato sauce and pan continue cooking the eggs after the burner is off.
Finish and serve. Scatter with feta and herbs if using. The feta should begin to soften against the hot tomatoes while the herbs stay bright on top. Bring the skillet straight to the table.
Useful Method Notes
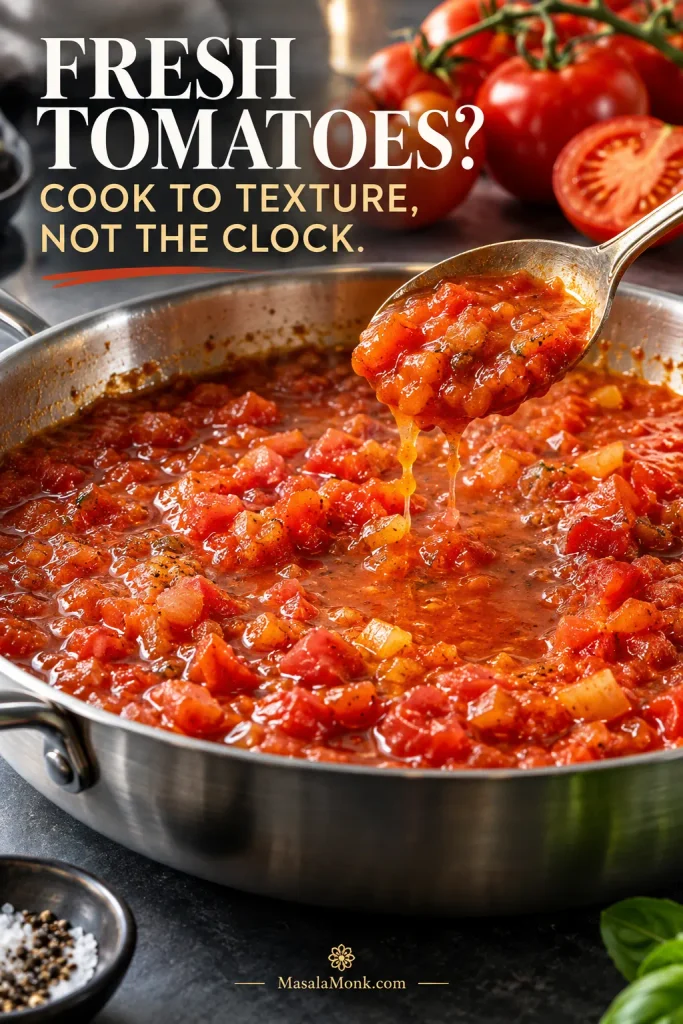
Fresh tomatoes: start with about 1.75–2 lb / 800–900 g ripe tomatoes, weighed after coring, then roughly chopped. Their water content varies, so cook to the same trail, well and scoop cues instead of copying the canned-tomato timing.
Oven finish: preheat the oven to 375°F / 190°C before making the egg wells. Transfer the oven-safe skillet after adding the eggs and start checking around 7–8 minutes.
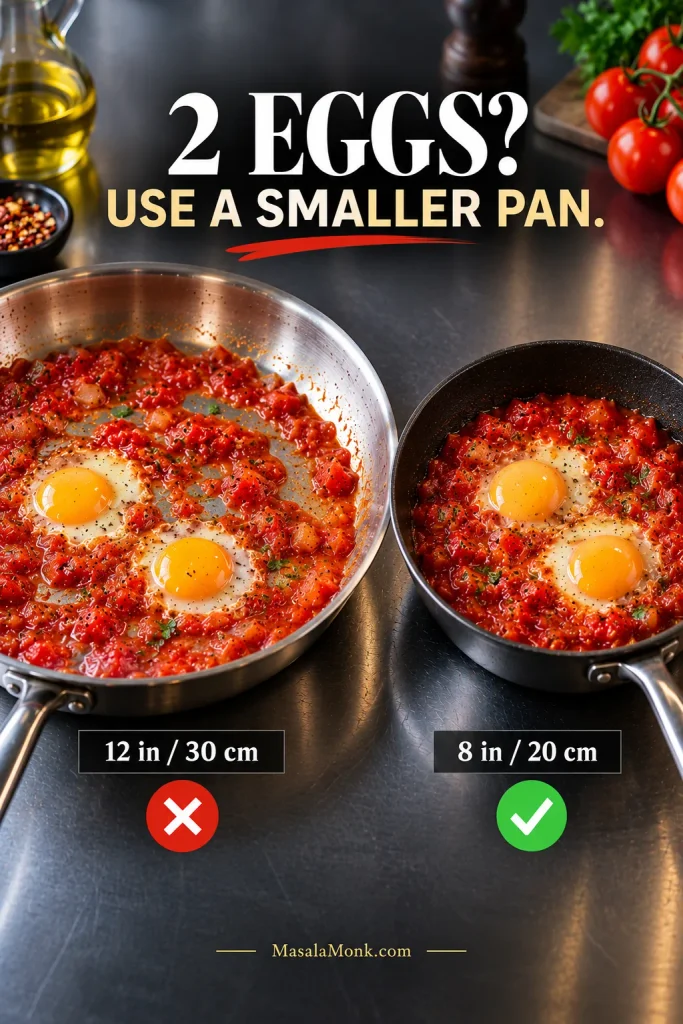
Smaller batch: about 8 inches / 20 cm suits two eggs; roughly 9–10 inches / 23–25 cm works well for three or four. See Shakshuka for One or Two for the full scaling guide.
Need fully cooked eggs? Continue until both whites and yolks are firm. The FDA’s egg-safety guidance gives conservative cooking advice and information about pasteurized eggs for dishes served with softer yolks.
The Pan Changes Jobs When the Eggs Go In
Before the eggs, moisture is the problem. Onion and pepper need time to soften. Tomato paste needs a brief cook. The tomatoes need steady bubbling and uncovered surface area so excess water can escape. Taste and finish the seasoning here too.
After the eggs, excessive heat is the problem. The sauce is already finished. Lower heat gives the whites time to set without pushing every yolk farther than you wanted.
A wide skillet of canned tomatoes may reach the right consistency quickly; juicy fresh tomatoes in a narrower pan can take considerably longer. The clock changes with the pan and tomatoes. The finished sauce should not.
Listen as the skillet changes jobs. Before the eggs, expect an active simmer and steady steam; afterward, the pan should sound calmer. Hard spitting around the eggs means the heat is still too high.
Build a Tomato-Pepper Sauce That Can Hold an Egg
The finished sauce should taste ready to eat: savory from onion and garlic, sweet from the softened pepper, warmly spiced and concentrated enough to stand on its own.
Fresh vs Canned Tomatoes for Shakshuka
For the most predictable result, use whole peeled or crushed canned tomatoes. Whole tomatoes let you control how chunky the sauce stays; crushed tomatoes save that step. Diced tomatoes work too, although some brands stay firmer and may need breaking down with the spoon. Passata gives the smoothest sauce and can reduce a little faster.
Fresh tomatoes deserve different treatment because their water content changes so much. Start with roughly 1.75–2 lb / 800–900 g ripe tomatoes, weighed after coring, then roughly chopped. Cook them until the sauce reaches the same consistency as the canned version. A juicy summer tomato may take much longer than a dense Roma. If the pan suddenly looks wetter than expected, nothing is wrong; give it time. For larger batches, our tomato sauce from fresh tomatoes guide goes deeper into choosing tomatoes and reducing excess water.
With fresh tomatoes, watch the liquid moving between the pieces. The surface can look thick while clear moisture still collects underneath, so let that free liquid cook away before adding the eggs.
Build Flavor and Control the Reduction
Tomato paste gives the sauce more depth without demanding a long simmer. Cook 2 tablespoons / 30 g with the softened vegetables until it turns brick red and loses its raw canned smell. Leave it out and the tomatoes may need longer to reach the same body.
Cumin brings the earthy note, sweet paprika deepens the pepper flavor, and chile controls the heat. Smoked paprika works too if you want the whole pan noticeably smokier.
Crowd this amount of sauce into a small, deep skillet and you will wait longer for the tomatoes to reduce. A 12-inch / 30 cm skillet gives roughly 28 oz / 794 g tomatoes enough exposed surface while still leaving room for six eggs; spread the sauce much wider and it can dry sooner. Material matters less than shape here; stainless-steel, enameled, nonstick and well-seasoned cast-iron skillets can all work.
How Thick Should Shakshuka Be?
Check three things before the eggs go in.
Trail: drag a spoon through the sauce. The line across the bottom should stay visible for a moment before the tomatoes slowly move back.
Well: press a shallow hollow into the sauce. It should remain open instead of immediately filling with watery liquid.
Scoop: lift some sauce with the spoon. It should slump and fall back into the skillet, not sit in a stiff mound.
The three checks matter most when they disagree. If a sauce holds a well but still pours freely from the spoon, give it another short uncovered simmer before adding the eggs.
You want the middle ground: not soup, not tomato paste. Taste it too. The tomatoes should feel rounded and concentrated, the sweet pepper should still sit behind them, and the cumin should come through clearly. Once yours does that, the eggs can go in.
Too thick? Stir in water 1 tablespoon / 15 mL at a time until the sauce loosens without becoming runny.
This is the annoying part of shakshuka: a yolk can look perfect while the thick white beside it is still translucent. Turning the burner higher usually punishes the yolk first.
Add the Eggs Evenly
Take the skillet off the burner. Make broad, shallow wells and slide in the eggs one by one from small bowls or ramekins.
Separate ramekins make the eggs easier to place and let you catch a stray shell or broken yolk before either reaches the finished sauce.
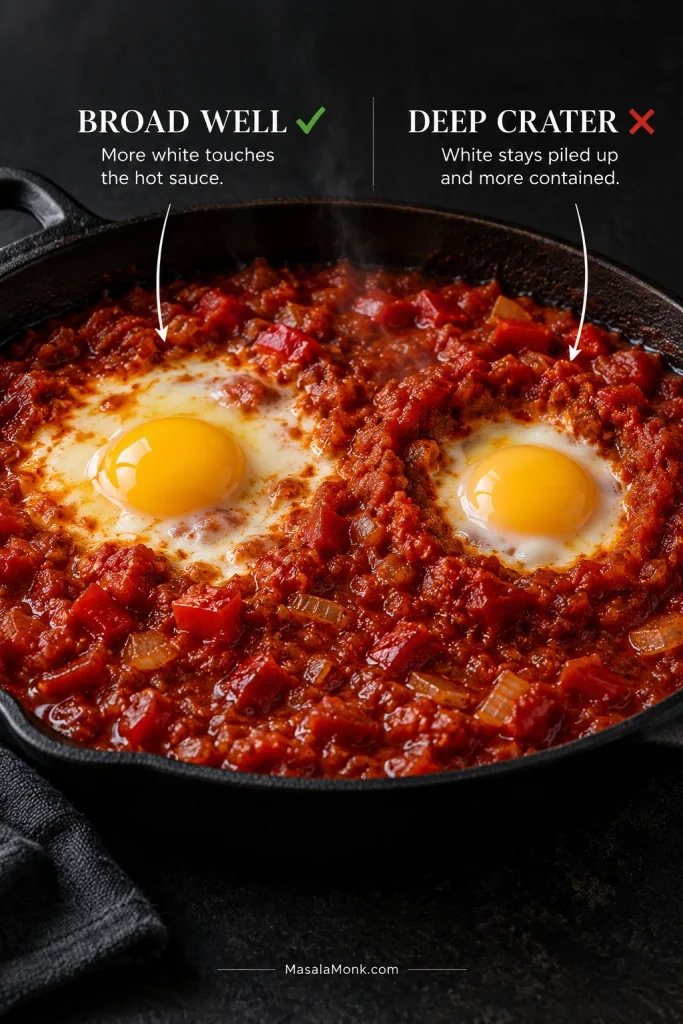
Deep craters hold a thick mass of white close to the yolk, where it takes longer to set. Broad wells let some of that white spread across the hot tomato sauce.
Widen the well with the back of the spoon instead of digging to bare pan. A broad depression gives the white more hot sauce to touch while keeping sauce beneath the egg.
Help the Whites Set Without Overcooking the Yolks
Return the loaded skillet to low heat and cover it. Start checking after about four minutes.
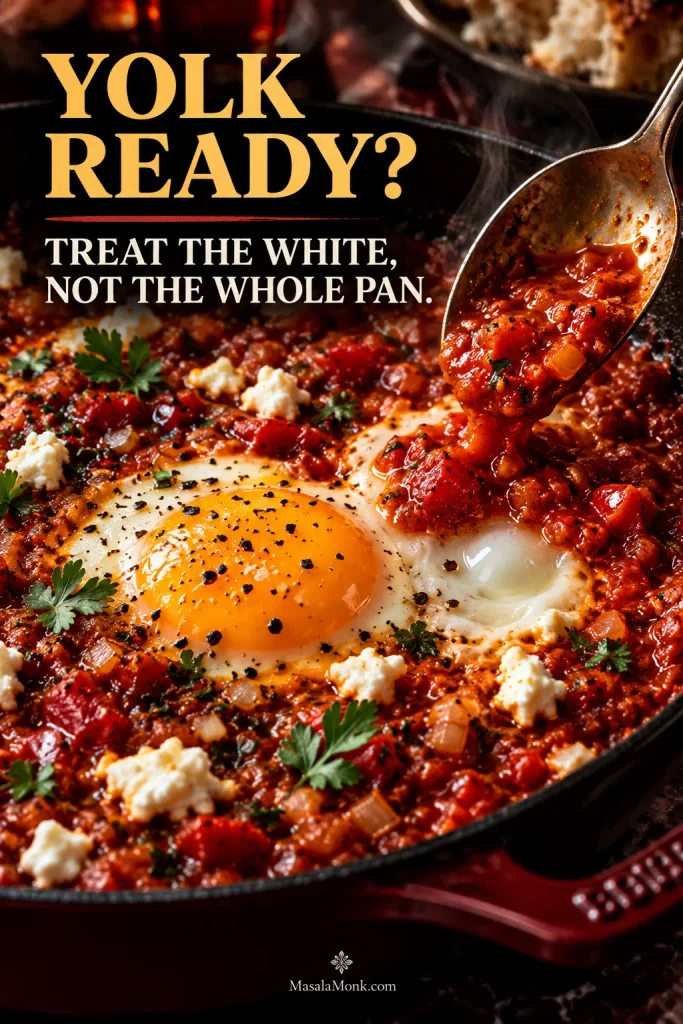
A glassy patch of thick white does not mean the whole pan needs more heat. Spoon a little hot tomato sauce over the white and leave the yolk uncovered. Do not chase one stubborn white by cooking the other five yolks to death.
Take the hot sauce from a clear patch between the eggs, not from beneath the yolk you are protecting. Spoon it over the stubborn white only to add heat without disturbing the yolk.
One side of the skillet may run hotter than the other. Rotate the pan and judge the eggs individually; they do not all need to be done at once.
Soft, Jammy or Firm Eggs
Target
White
Yolk
Soft / runny
Opaque and softly set
Domed and clearly moving when the pan is nudged
Jammy
Fully set
Thicker with a smaller, slower jiggle
Firm
Completely set
Little or no visible movement
Take the skillet off the heat slightly before the yolks look completely finished. The hot tomato sauce and skillet will carry them a little further.
Opaque whites and a yolk that still moves are your cue to stop for soft eggs. Pull the skillet slightly early; the hot sauce and pan will keep cooking the yolks.
Finish Shakshuka in the Oven
An oven can help when your burner has obvious hot spots or the bottoms of the eggs repeatedly firm before the tops of the whites.
Preheat to 375°F / 190°C before adding the eggs. Once the loaded oven-safe skillet goes in, start checking around 7–8 minutes. Some batches need longer; use the whites and yolks to make the final call.
Rescue the Pan
When something goes wrong, first check whether the eggs are already in the skillet.
Before the Eggs Go In
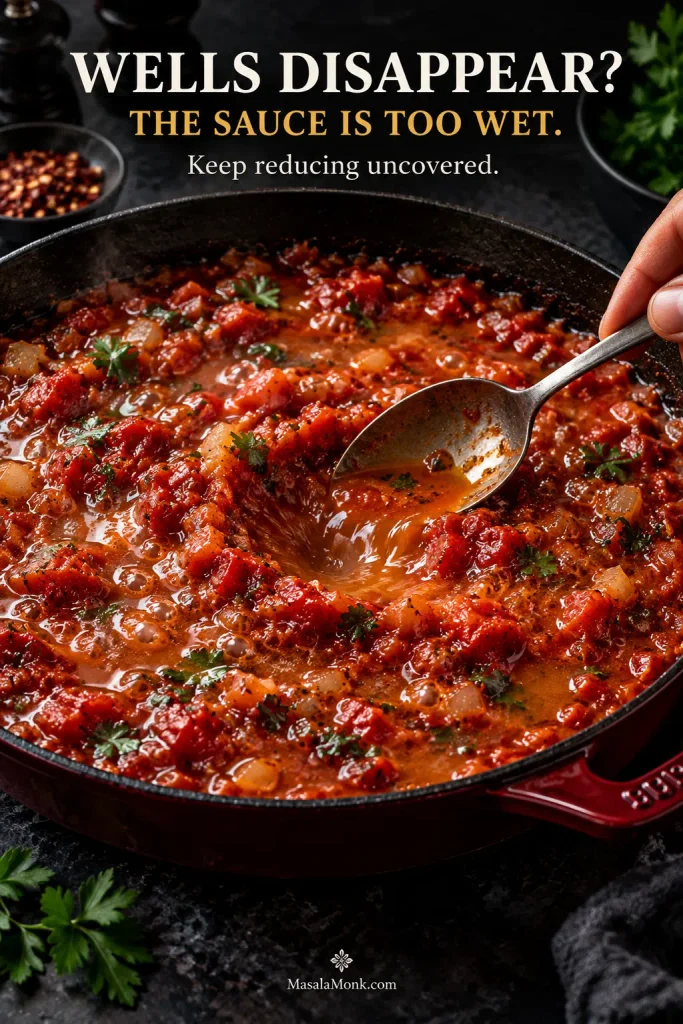
The sauce is watery or the wells immediately disappear. Keep simmering uncovered. The eggs can wait.
Test the deepest part of the skillet, not just the rim. The edges may look reduced while the center is still loose; if a well there floods, keep simmering uncovered.
Fresh tomatoes have flooded the skillet. Nothing has necessarily gone wrong; they may contain more water. Keep cooking until the sauce reaches the same consistency cues.
The sauce is too thick. Add water 1 tablespoon / 15 mL at a time until it becomes scoopable again.
The flavor is weak. Check the consistency first. A loose sauce can make the tomatoes, pepper, salt and spices all taste muted.
The tomatoes taste sharply acidic. Cook them fully and check the salt. Once the sauce is properly reduced, a tiny pinch of sugar can soften an unusually harsh batch without making it sweet.
After the Eggs Go In
White translucent, yolk nearly ready? Treat that white locally with a little hot tomato sauce; do not keep cooking the whole pan.
One side is cooking faster. Rotate the skillet.
The yolks keep going hard. Check earlier and take the pan off sooner. Carryover heat will finish them a little further.
The bottom is catching. Lower the burner. The sauce no longer needs hard bubbling.
The lid leaves the surface watery. Uncover briefly. Next time, reduce the sauce a little further before adding the eggs, or use the oven finish if your stovetop repeatedly gives you trouble.
The same pan control matters when you scale shakshuka down. A smaller batch needs a smaller skillet: put two eggs and a little sauce in the same 12-inch pan used for six and everything becomes shallow, fast-cooking and harder to control.
For a two-egg shakshuka, choose the skillet by sauce depth. You want enough tomato sauce beneath and around each egg to form broad wells without exposing large areas of bare pan.
For one 2 eggs About 8 in / 20 cm skillet
For two 3–4 eggs About 9–10 in / 23–25 cm skillet
Full pan 6 eggs About 12 in / 30 cm skillet
The simplest small-batch system is to make the sauce once. Reheat enough to form a generous layer that can hold broad, shallow egg wells, then add only the eggs you plan to eat. A container of finished sauce in the fridge turns tomorrow’s breakfast into a few minutes of eggs instead of another round of chopping onion, pepper and garlic.
Make Ahead and Store the Sauce
Stop before the eggs. Cool the finished tomato-pepper sauce promptly and refrigerate it in a covered container. Reheat the portion you need until bubbling, then add fresh eggs.
Use refrigerated cooked leftovers within 3–4 days, following USDA guidance for handling leftovers safely. Finished shakshuka can be reheated, but its yolks will become firmer.
For longer storage, freeze the sauce without eggs. Thaw it in the refrigerator, reheat it in a skillet and finish with fresh eggs.
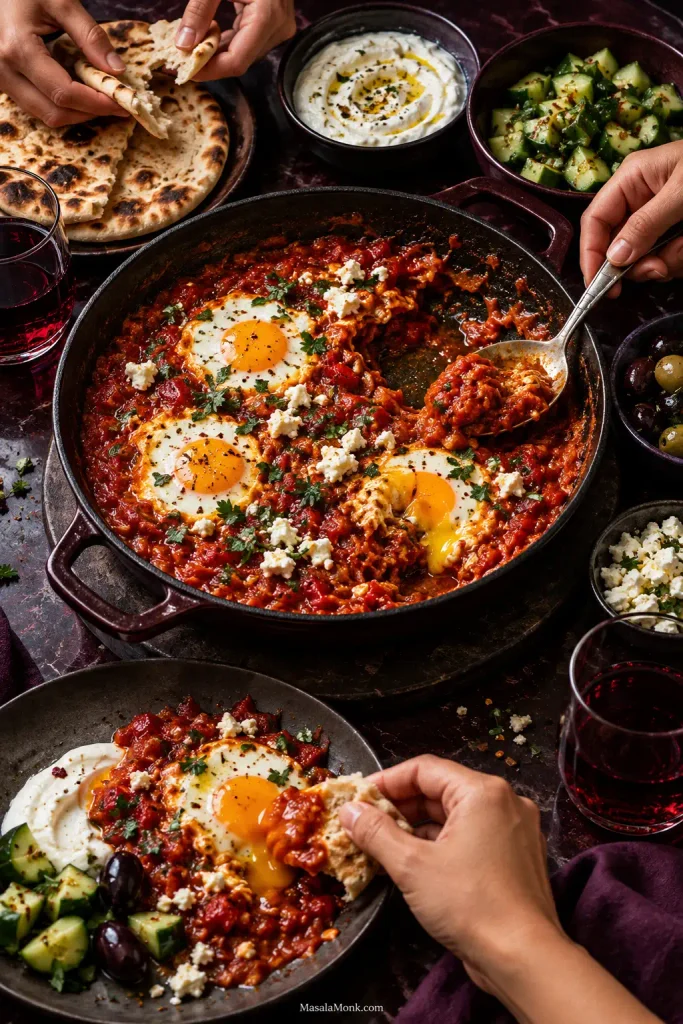
Bread gets first place beside the skillet. Warm pita, flatbread or a crusty loaf can scoop the thick tomato sauce and catch the yolk when it breaks. Our homemade pita bread recipe includes both oven and stovetop methods.
Shakshuka may be known as breakfast or brunch food, but it is just as comfortable at lunch or dinner. Thick yogurt or labneh, olives and extra feta can round out the table.
Something cold and crisp is especially welcome beside hot tomatoes and a rich yolk. Our cucumber salad with vinegar, dill and onion adds crunch and acidity without asking you to cook another dish.
Keep cool sides beside the skillet so yogurt, labneh or cucumber can brighten individual bites without cooling the shakshuka meant for second servings.
Put the skillet in the middle of the table. Shakshuka is easier to love when nobody is trying to carve six perfect restaurant portions out of it. Spoon an egg and plenty of sauce into shallow bowls, tear the bread, pass it around, and go back for whatever is left between the eggs.
Then break a yolk. Let it run through the cumin-scented tomatoes, drag a warm piece of bread through both, and take the next bite while the skillet is still hot.
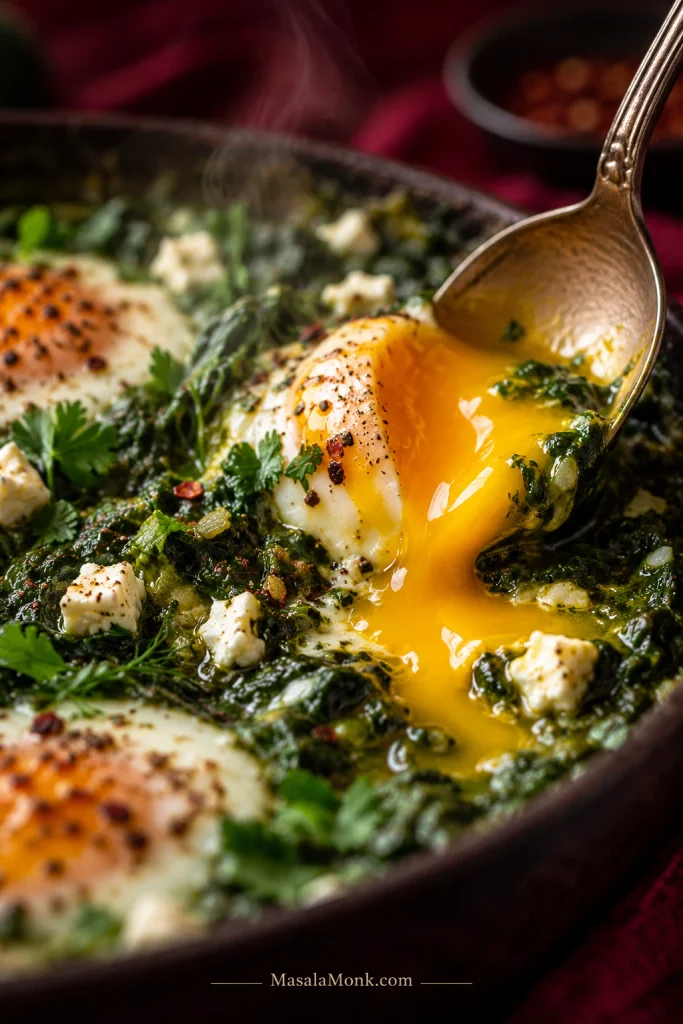
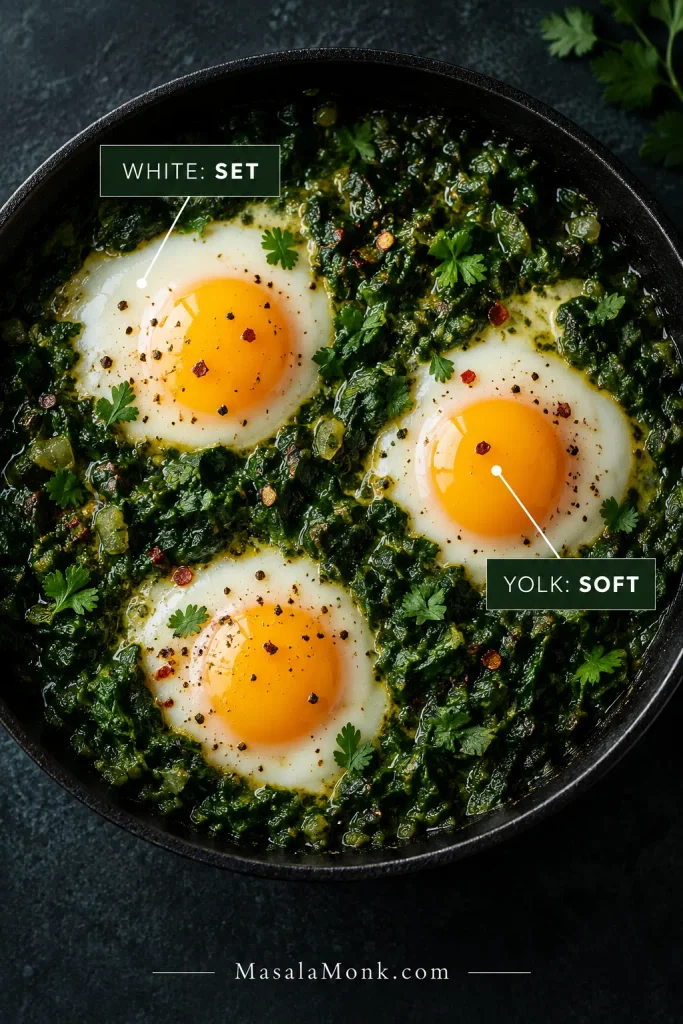
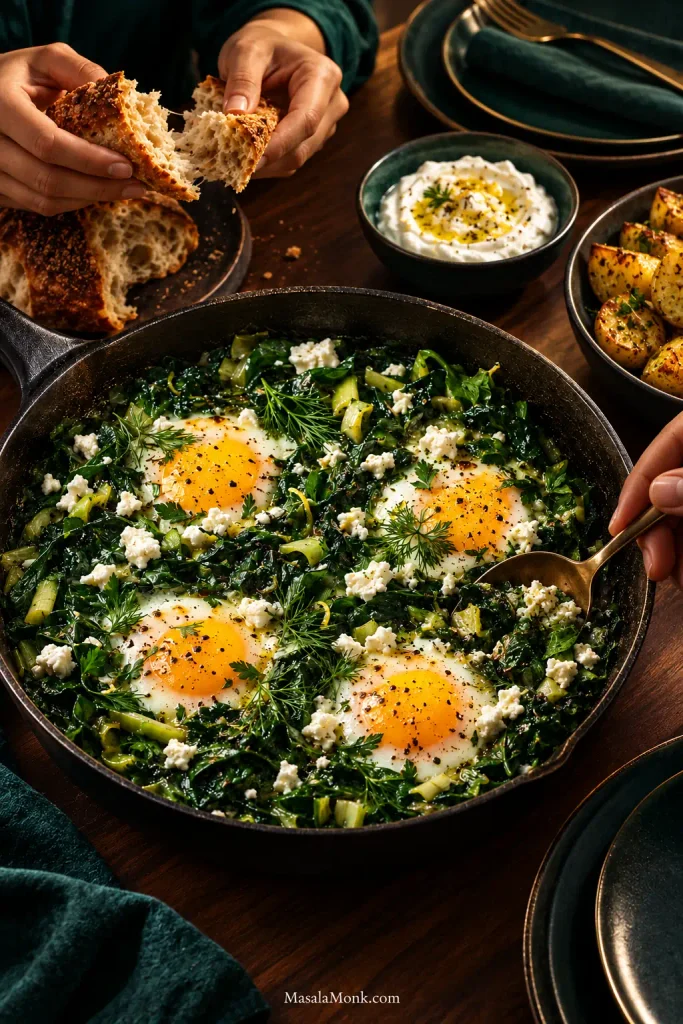
Scoop through this green shakshuka and the spoon should catch soft spinach and herbs, salty feta and enough warm yolk to coat the greens underneath. Tear off a piece of bread and you get all three in one bite. Instead of the familiar tomato base, this version builds the pan around spinach, leek and herbs.
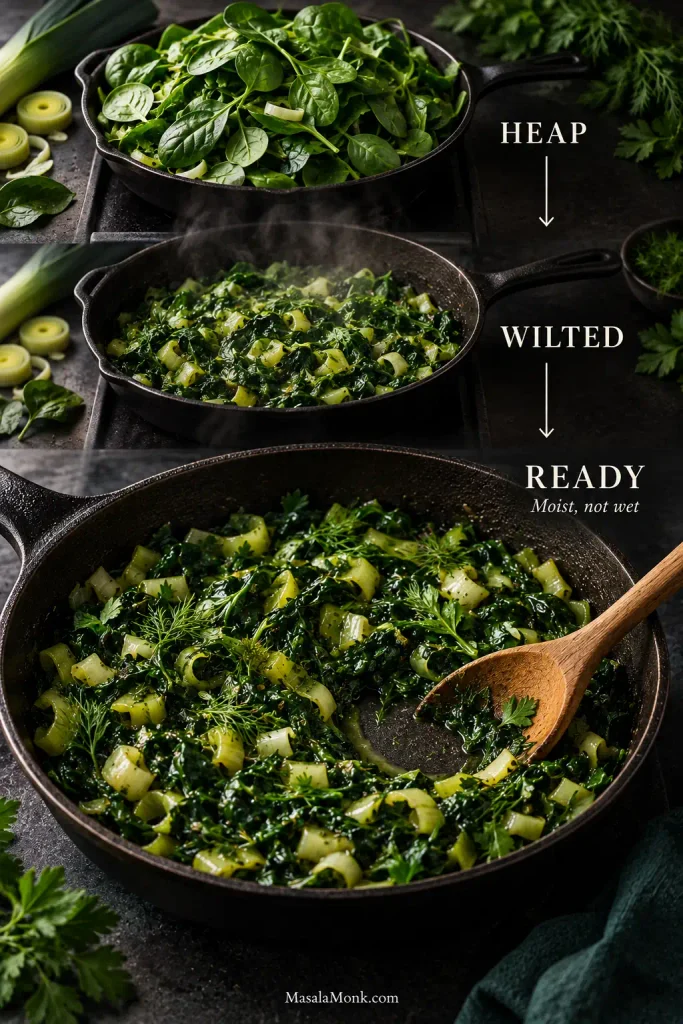
The spinach starts as a heap and quickly folds down around the sweet leek and warm spices. Watch the pan most closely before the eggs: the greens should still be juicy, but there should not be loose water underneath them. After that, the skillet is forgiving. Feta, reserved herbs and a little extra lemon turn a handful of ordinary ingredients into a meal that feels surprisingly generous.
Spinach and leek cook down with warm spices, herbs and lemon before four eggs settle into deep wells and cook gently under a lid. The whole skillet comes together in about 30 minutes, with feta, the remaining herbs and extra lemon added at the end.
Serves 2 as a main dish or 4 smaller brunch portions
Prep About 10 minutes
Cook About 20 minutes
Total About 30 minutes
Pan 10-inch / 25 cm skillet with lid
Eggs Covered stovetop
Useful equipment: a 10-inch / 25 cm skillet, a lid (clear if you have one), a flexible spatula or wooden spoon, and a small bowl or ramekin for cracking the eggs. Without a matching lid, use another heatproof lid that covers the skillet or tent it snugly with foil.
Ingredients
For the skillet
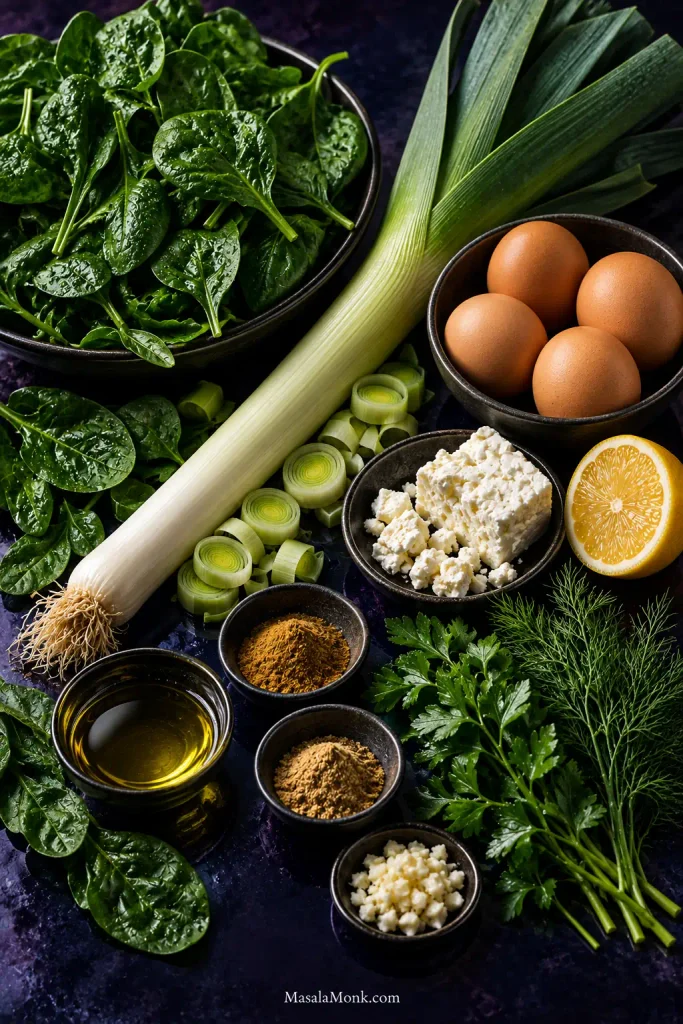
2 tablespoons / 30 ml extra-virgin olive oil
1 large leek, about 6 oz / 170 g trimmed white and light-green parts, washed thoroughly and thinly sliced
3 garlic cloves, about 9 g, finely chopped
1 teaspoon ground cumin
½ teaspoon ground coriander
½ teaspoon Aleppo pepper, optional
10 oz / 285 g baby spinach
½ oz / 15 g flat-leaf parsley, roughly one generous handful, chopped and divided
⅓ oz / 10 g fresh dill, roughly one small handful, chopped and divided
Finely grated zest of ½ lemon
1 tablespoon / 15 ml fresh lemon juice, plus more to taste
¼ teaspoon fine salt, plus more to taste
Freshly ground black pepper
4 large eggs
For the table
3 oz / 85 g feta, crumbled
Lemon wedges
Harissa, Aleppo pepper or chile oil, optional
Warm pita or crusty bread
Leek and warm spices build the base; meanwhile, lemon, herbs and feta arrive later so the spinach stays fresh and distinctly green.
Method
Build the Green Base
Soften the leek. Heat the olive oil over medium heat. Add the leek and ¼ teaspoon salt. Cook for 5–7 minutes, until soft and sweet-smelling. A little color is fine.
Add the garlic and spices. Stir in the garlic, cumin, coriander and optional Aleppo pepper. Cook for about 30 seconds, until fragrant.
Wilt the spinach in batches. Add several handfuls at a time, folding them into the leek as they collapse.
Cook away the loose water. Leave the skillet uncovered and stir occasionally. Make a hollow with the back of a spoon. Thin liquid rushing straight into it means the spinach needs longer.
Season, then check the pan. Stir in about half of the parsley and dill, the lemon zest and 1 tablespoon / 15 ml lemon juice. Add black pepper, taste, and add more salt only if needed. Make another hollow with the spoon. The spinach is ready for the eggs when no loose puddle remains, the spoon-made well mostly holds, and the spinach tastes properly seasoned.
Use the right-hand “READY” stage as the cue: the greens should look glossy rather than puddled, and the spoon track should stay visible for a moment. Volume alone is misleading because spinach collapses long before all of its released water is gone.
Load the Eggs
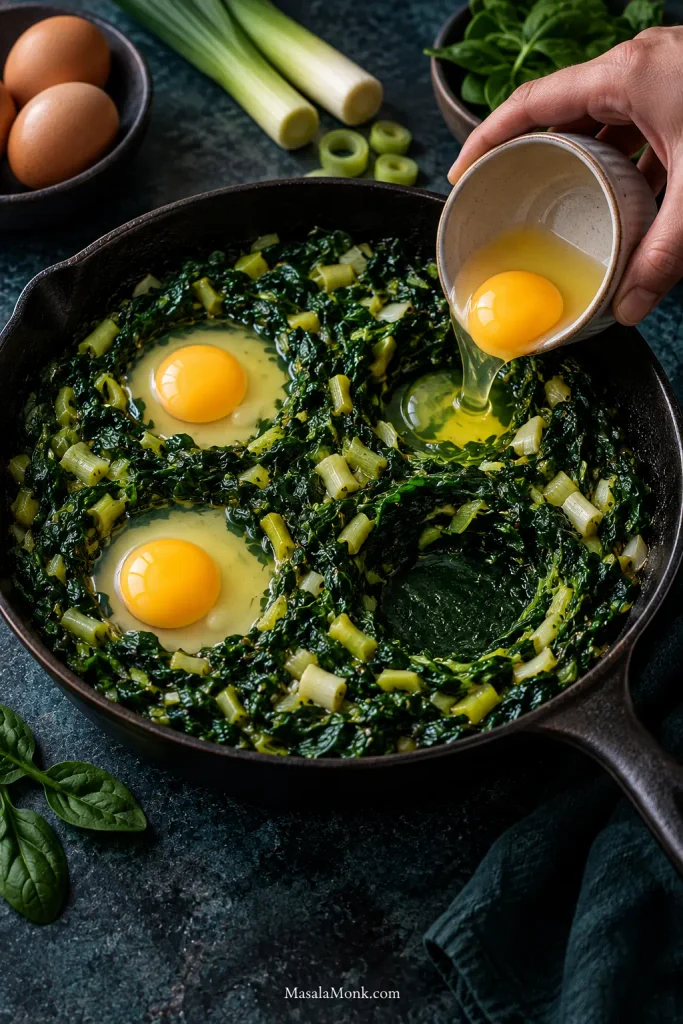
Make four deep wells. Take the skillet off the heat. Crack each egg into a small bowl first, then slide it into a well. Loading all four eggs off heat keeps the first from cooking far ahead of the last.
Aim to keep most of each white inside its well while the yolk sits near the surface. If a white starts running sideways, deepen the next well rather than trying to push the egg back through the greens.
Cook and Finish
Cover and cook gently. Return the skillet to low or medium-low heat and check at around 3 minutes. For soft yolks, look for set whites and moving yolks. Rotate the pan if one side is cooking faster, then remove it just before the yolks reach the texture you want. The hot skillet will carry them a little farther.
Add the feta and serve. Scatter over the feta and remaining herbs. Taste the spinach around an egg, then add more lemon, salt or chile if needed.
Spoon into one of the eggs while the skillet is still hot and let the yolk run through the spinach.
Once the yolk breaks, it becomes part of the sauce. That is why a little lemon at the finish matters: its acidity keeps the combination of soft yolk, feta and cooked greens rich without feeling heavy.
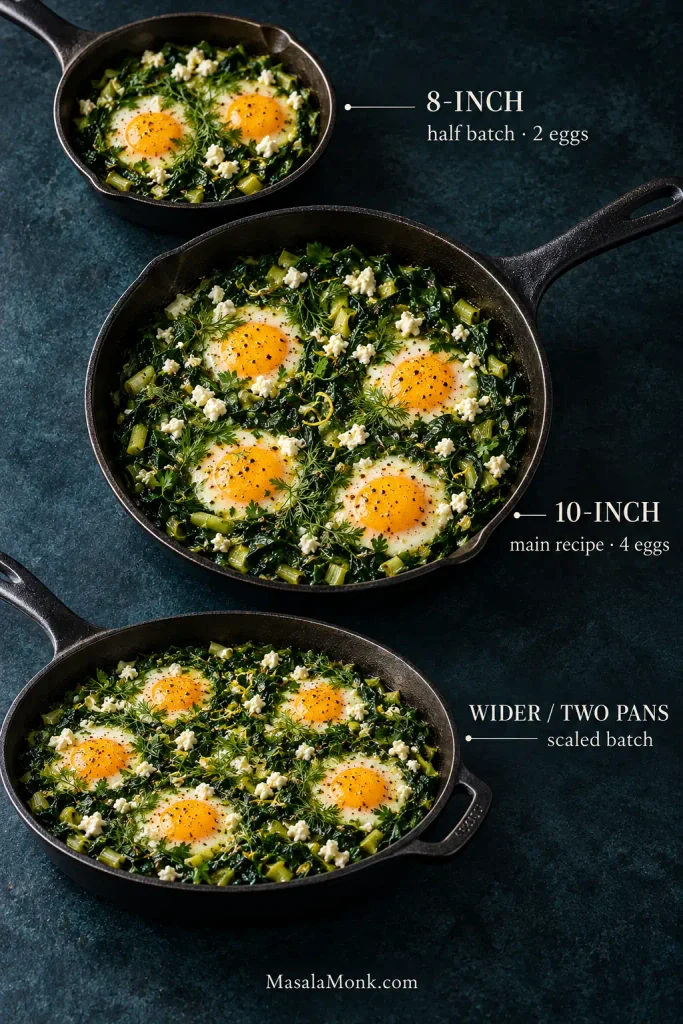
A 10-inch / 25 cm skillet gives this amount of spinach enough depth without trapping too much water underneath it. Wider skillets dry the greens faster; smaller ones hold water longer.
The same principle matters when scaling up. Twice the spinach packed into the original skillet takes longer to reduce, so a wider pan—or two skillets—is easier to manage.
Smaller Batches
Reduce the pan size along with the food. For roughly half the spinach and two eggs, an 8-inch / 20 cm skillet is a useful starting point. Spread that smaller amount through the original 10-inch pan and it will reduce faster.
Use the 10-inch pan as the depth reference when scaling: the greens should spread in a similarly shallow layer. Keeping roughly the same depth preserves evaporation better than simply adding more cooking time.
The target is simple: not soup, and not a pan of dry sautéed spinach. Get that balance right and the yolk clings to the greens instead of disappearing into liquid underneath them.
Set Whites, Soft Yolks
For soft yolks, pull the skillet when the whites are set but the yolks still move when the pan is gently nudged.
With a clear lid, watch the whites turn opaque without releasing the steam that sets their tops. Pull the pan while the yolks are still glossy; carryover heat will firm them further.
A little unevenness is normal when four eggs share one skillet. Heat reaches the eggs from below while steam sets the tops, and some burners or pans run hotter on one side.
If one side gets ahead, rotate the skillet. A heavy pan keeps cooking after it leaves the burner, too. Cast iron makes this especially obvious: a yolk that looks loose when you switch off the heat can be noticeably firmer by the time the pan reaches the table.
If everyone wants roughly the same doneness, add the eggs together as in the main recipe. When preferences differ, stagger them deliberately: give the eggs destined for firm yolks a short head start, then add the softer-yolk eggs later. Dinner survives and everyone gets the yolk they wanted.
Egg safety: When cooking for someone who needs fully cooked eggs, take both whites and yolks through until firm. FDA guidance recommends firm whites and yolks; pasteurized eggs are the safer choice when eggs are served undercooked, especially for people at higher risk from foodborne illness.
When the Burner Is Too Uneven
An oven can take the burner out of the equation. Preheat it to 375°F / 190°C, use an oven-safe skillet and transfer the pan once the eggs are in. Start checking at about 4 minutes; many pans will need longer, so judge the eggs by the whites and yolks rather than the clock.
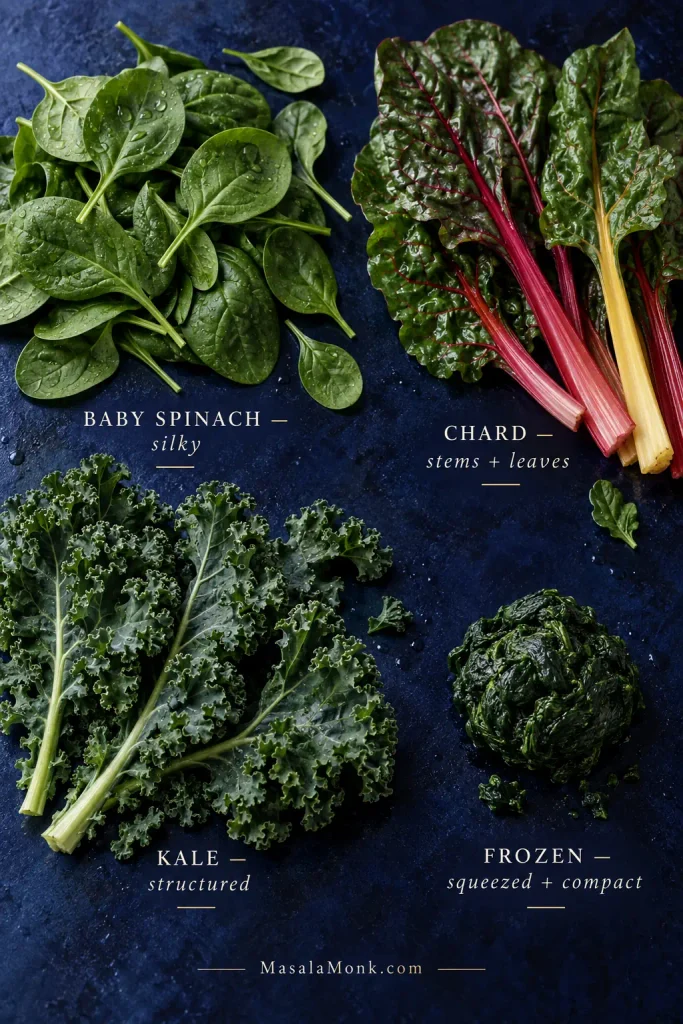
Softest and fastest; collapses dramatically and releases plenty of water.
Cook uncovered until the loose liquid is gone.
Swiss chard
More structure, with tender leaves and useful stems.
Slice the stems finely and cook them with the leek before adding the leaves.
Kale
Heartier and chewier; keeps more of its shape.
Remove tough stems, slice finely and give it longer to soften.
Frozen spinach
Already collapsed and much more compact than fresh spinach.
Use about 6–7 oz / 170–200 g by package weight as a starting point. Thaw completely, squeeze very dry and add it after the aromatics. Brands vary, so treat this as a practical starting quantity rather than an exact fresh-spinach equivalent.
Choose greens by the cooked texture you want: baby spinach turns silky, chard stays more substantial, kale keeps the most structure, and squeezed frozen spinach starts compact.
Frozen spinach looks surprisingly small after a proper squeeze. That’s useful here: the water left in the towel is water you no longer have to drive out of the skillet. The same issue shows up in homemade spanakopita, where wet spinach can soften both the filling and the pastry around it.
When mixing greens, give chard or kale a head start and add tender spinach later. Save some parsley and dill for scattering over the cooked eggs so the herbs still taste lively when the skillet reaches the table.
What You Can Swap
Leek: a medium yellow or white onion is fine. Let it soften before adding the garlic.
Feta: goat cheese gives a similar tangy contrast. Thick yogurt or labneh works better spooned alongside than stirred into the spinach.
Dill: use more parsley, some cilantro, or a smaller amount of mint.
Heat: skip the Aleppo pepper for a mild skillet, or add harissa or chile oil to individual portions.
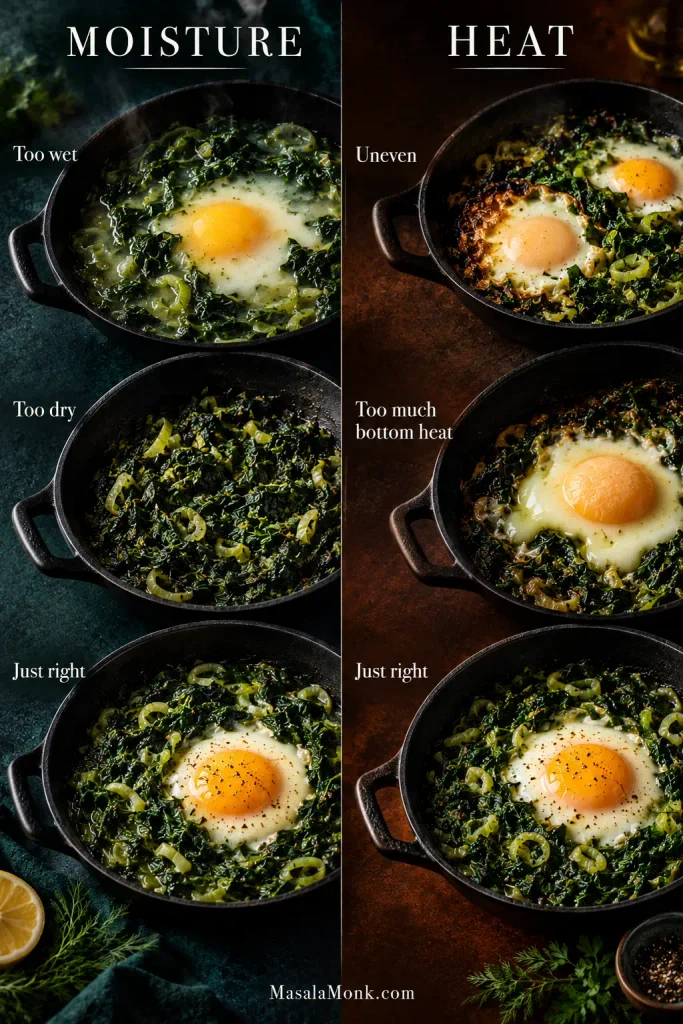
Most problems here come down to two things: moisture and heat. If the greens are swimming, deal with the water before the eggs go in. Eggs racing ahead usually mean the heat needs lowering or redistributing.
Use timing to diagnose the pan: problems before the eggs usually point to moisture; problems during egg cooking usually point to heat. Fix the cause, not the clock.
What You See
Likely Cause
What to Do
Water pooling under the spinach
The leaves have wilted but their released liquid has not evaporated.
Keep cooking uncovered before adding the eggs.
Spinach looks dry
The pan reduced too far.
Add water 1 tablespoon / 15 ml at a time until the greens loosen.
The spinach tastes flat
It may need freshness or acidity more than another layer of seasoning.
Try lemon and fresh herbs before reaching for more spice or salt.
An egg spreads through the spinach
The greens are too wet, the well is too shallow, or both.
Reduce remaining liquid and make the next wells deeper.
One side cooks much faster
The burner or skillet has a hot spot.
Rotate the skillet or move it to the oven.
Yolk is firm while the white still looks loose
Strong bottom heat is cooking the yolk faster than steam sets the top, or the egg is sitting too high.
Use deeper wells, gentler heat and a snug cover. Move to the oven if the same problem keeps returning.
Yes, you can make green shakshuka ahead—just stop before the eggs. Cook the leek, spices and spinach, cool and refrigerate the mixture, then reheat it and add fresh eggs shortly before serving. Add the feta after the eggs are cooked.
Leftover shakshuka can be reheated, but the yolks will firm up. For freezing, portion the cooked spinach mixture without eggs or feta, thaw it in the refrigerator, reheat thoroughly and add fresh eggs at the end.
If you want an egg dish that reheats well as a whole, an oven-baked frittata is a better fit.
What to Serve With Green Shakshuka
Bread earns its place here. Warm homemade pita, sourdough or another crusty loaf is ideal for scooping the greens and wiping up the yolk left around the edges of the skillet.
Greek lemon potatoes turn it into a more substantial meal. Thick yogurt, labneh or a plate of crisp raw vegetables bring something cool alongside.
Green shakshuka suits the middle of the table: every scoop lands a little differently—more yolk, more feta, more greens—while bread turns whatever is left in the skillet into the best part of the meal.
Put the skillet in the middle and let the bread do most of the serving.
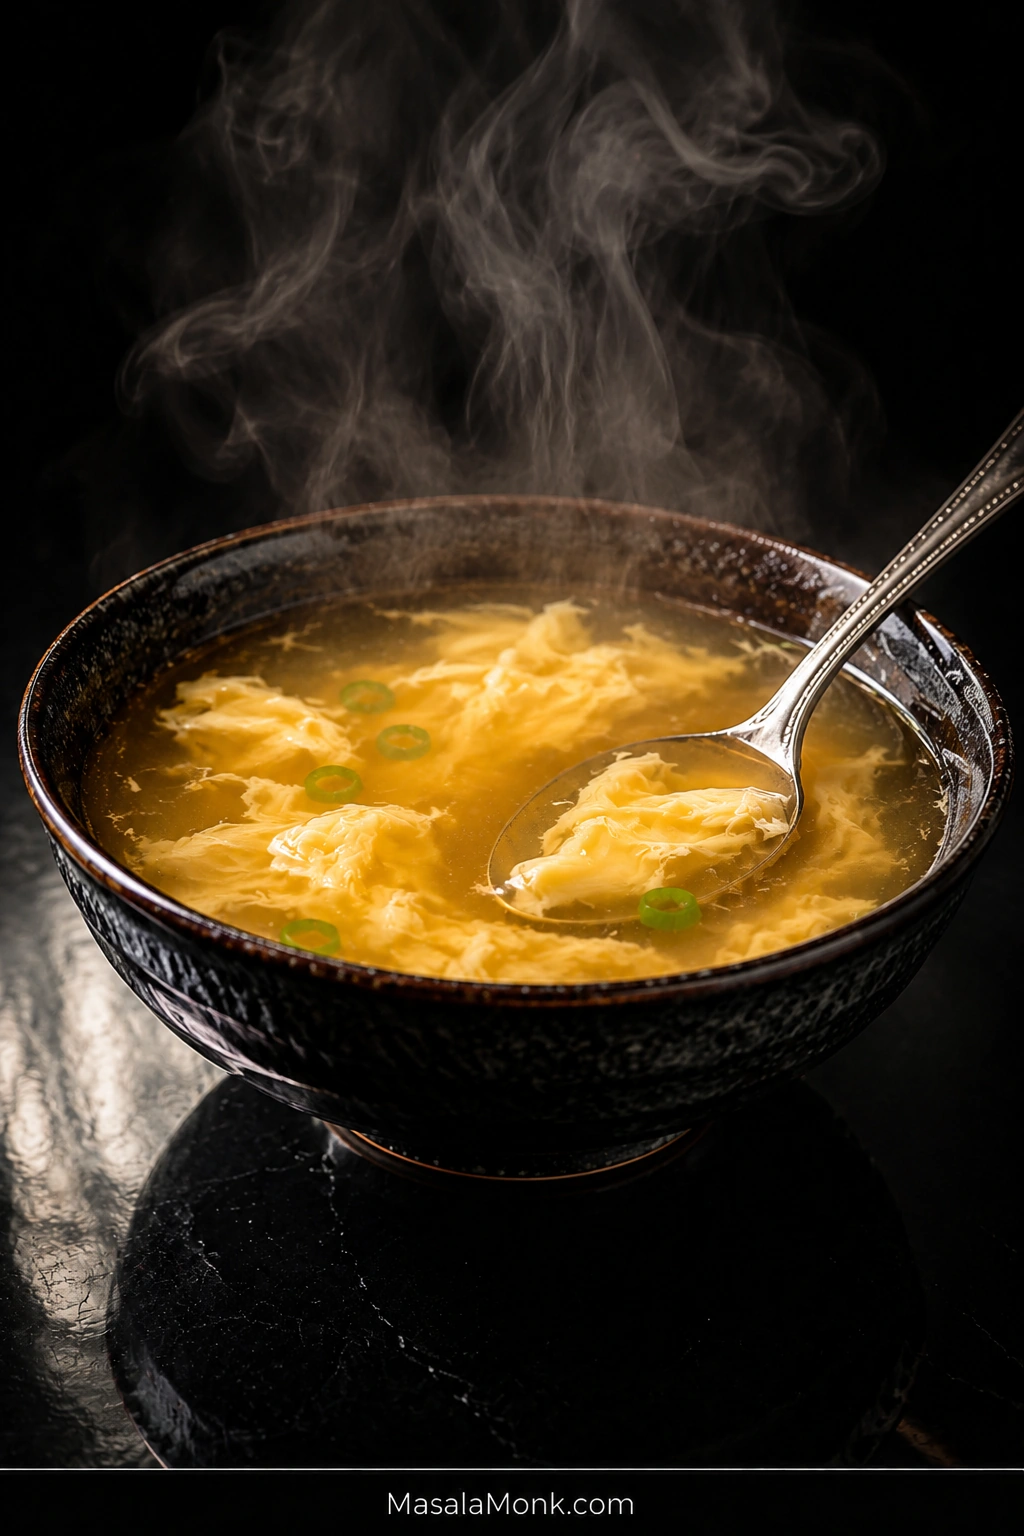
Sometimes egg drop soup is the first thing you want from a Chinese takeout order: a steaming bowl, soft ribbons drifting through savory broth, a few scallion greens on top, and just enough body to make every spoonful feel silky.
The base is simple. The egg pour is the only part worth slowing down for.
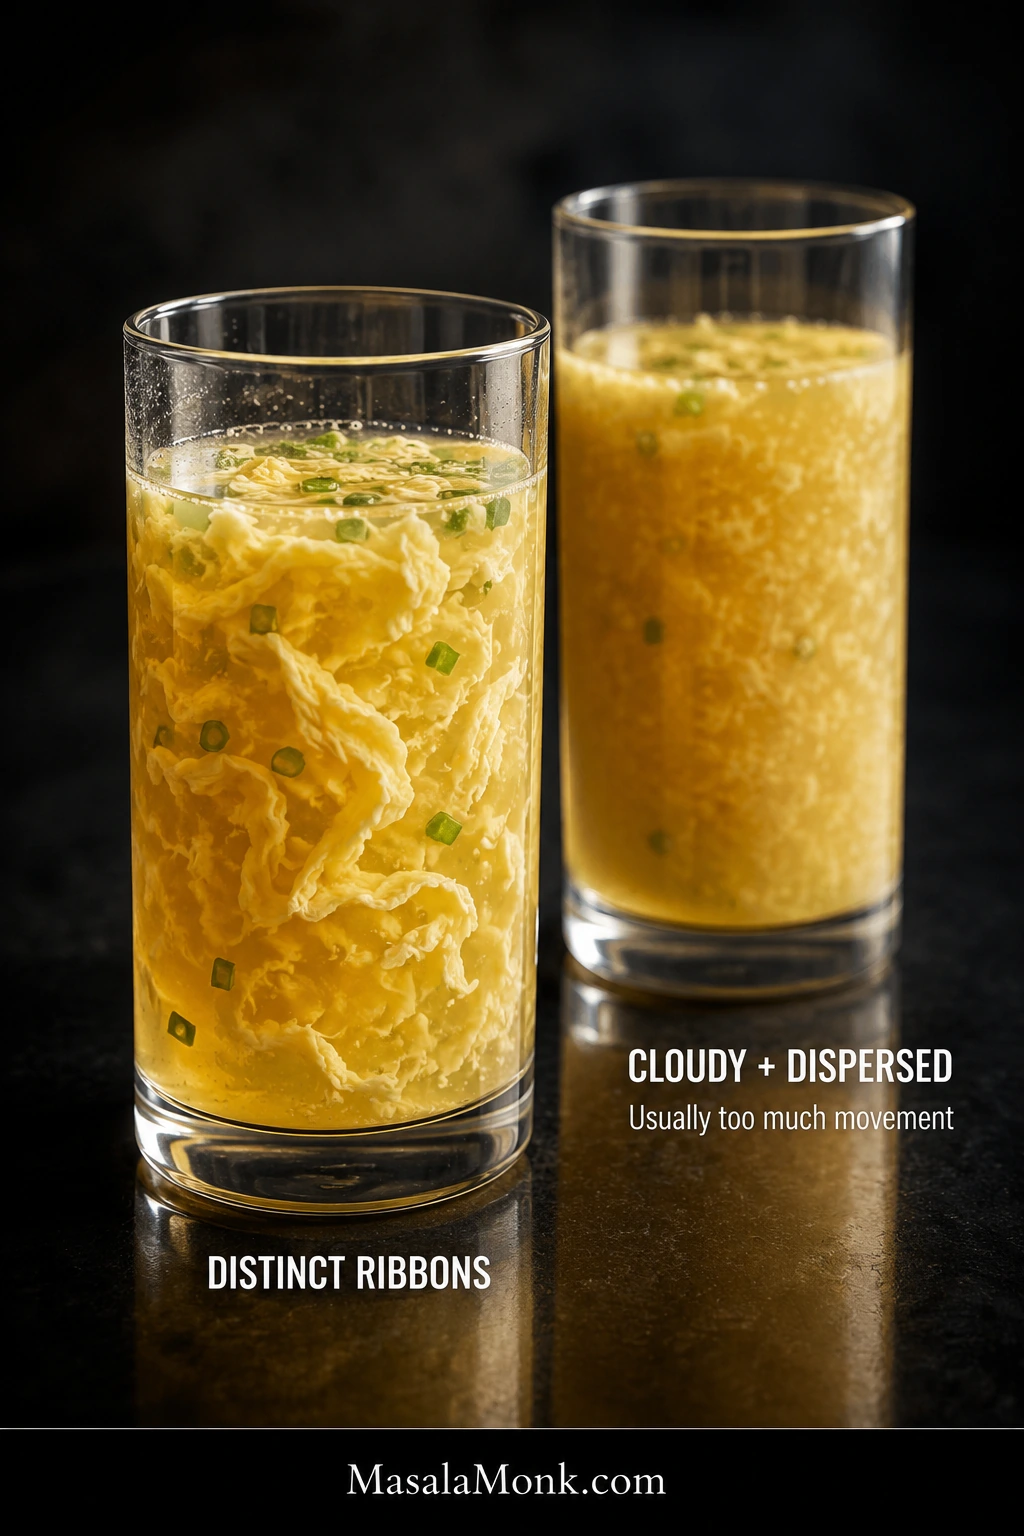
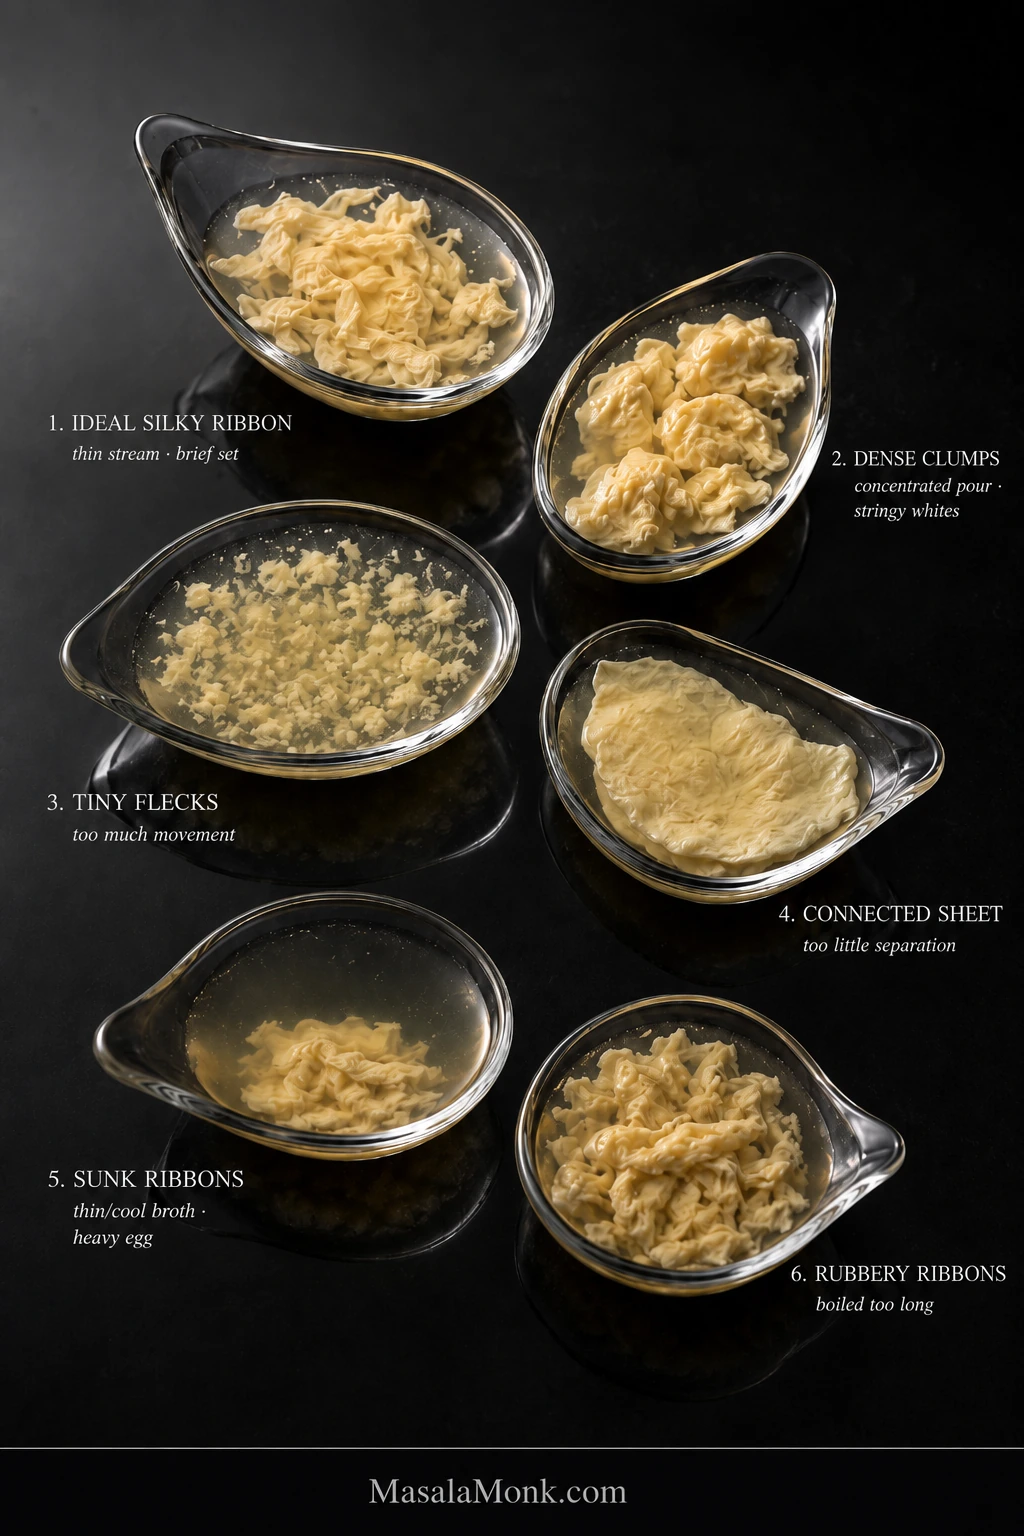
Too much movement can break the egg into tiny flecks. A heavy pour can leave dense clumps. Stir before the egg has set and the ribbons may disappear into cloudy broth.
Thicken first. Create the movement first. Let the egg set before you move it again.
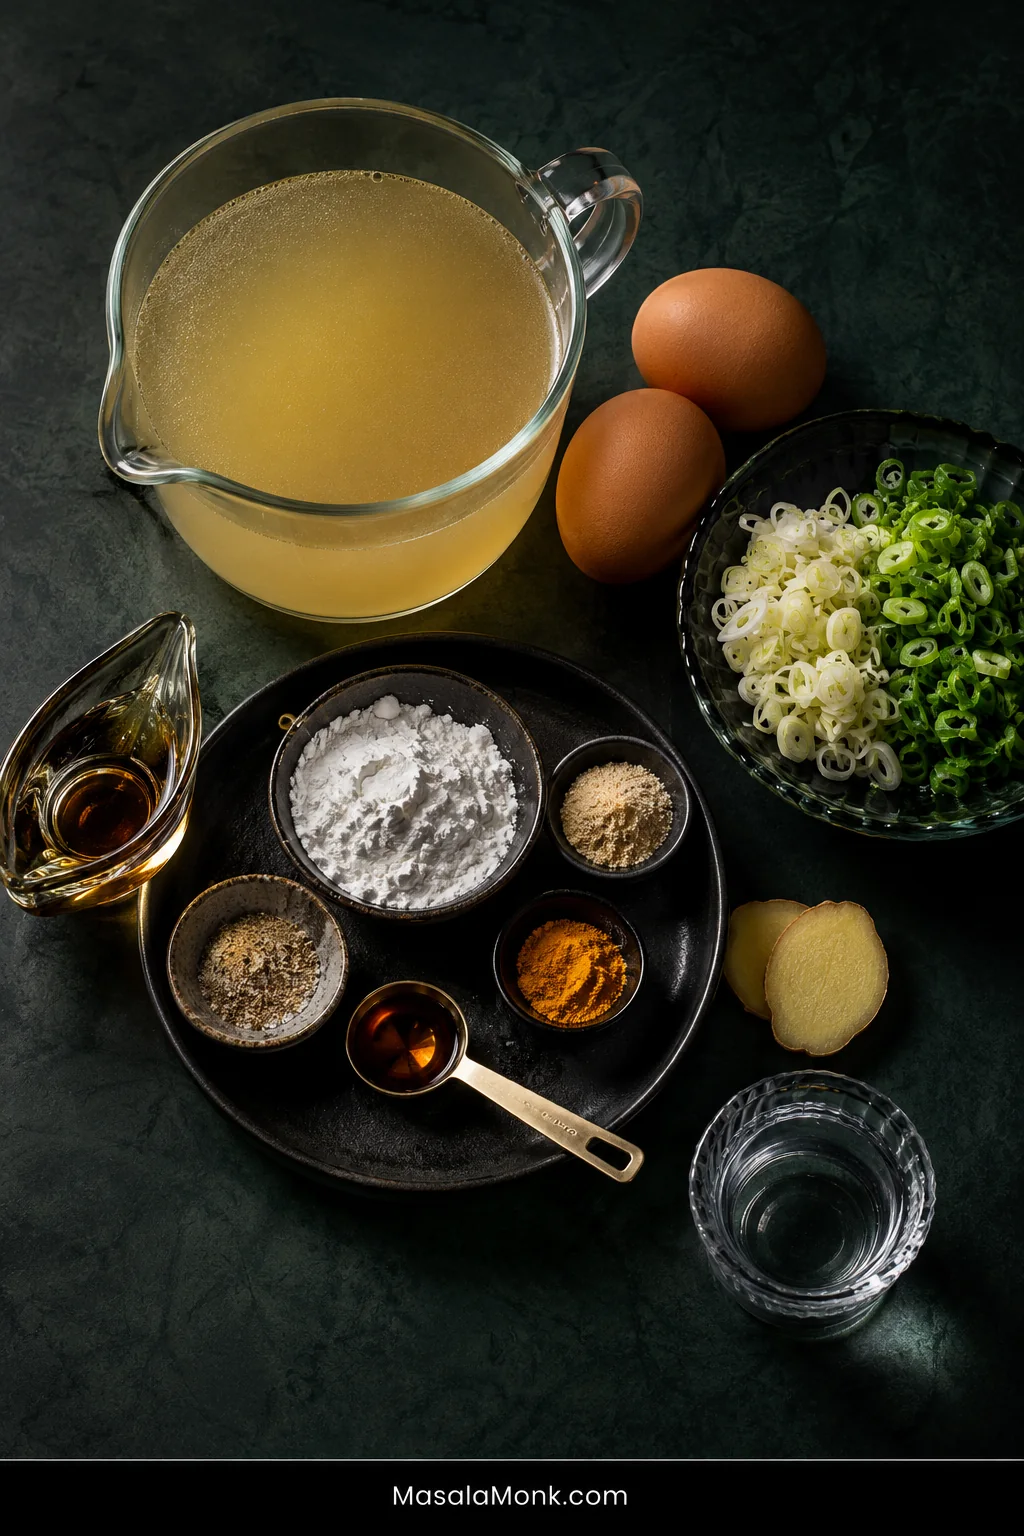
Quick formula: For the base recipe, use 4 cups / 946 ml chicken broth, 2 large eggs, 2 teaspoons / 10 ml water for the eggs, and 1½ tablespoons / about 12 g cornstarch.
This makes 4 starter bowls or 2 generous bowls. The finished soup is broth-forward and lightly thickened, with soft egg ribbons suspended throughout.
Recipe at a Glance
Serves
4 starter bowls or 2 generous bowls
Prep
About 5 minutes
Cook
About 10 minutes
Total
About 15 minutes
Pot
Medium saucepan, about 2½–3 qt
Equipment
Medium saucepan, about 2½–3 quarts
Small bowl for the cornstarch slurry
Spouted measuring cup or another easy-pouring cup for the eggs
Fork or small whisk
Ladle or large spoon
Ingredients
4 cups / 32 fl oz / 946 ml low-sodium chicken broth
2 scallions, thinly sliced, white and green parts separated
2 thin slices fresh ginger, about 5 g
½–1 teaspoon chicken powder or bouillon, optional, depending on your broth
¼ teaspoon ground white pepper, plus more to taste
⅛ teaspoon turmeric, optional, for warmer color
1½ tablespoons cornstarch, about 12 g
1½ tablespoons / 22 ml cold water, for the slurry
2 large eggs, about 100 g without shells
2 teaspoons / 10 ml water, for loosening the eggs
½ teaspoon / 2.5 ml toasted sesame oil, optional, plus more by drops to taste
Salt, as needed after tasting
Most of this recipe’s leverage sits in three things: broth for flavor, egg for texture, and cornstarch for body. The rest should stay deliberately restrained.
1. Season the Broth
Add the chicken broth, scallion whites, ginger, white pepper, and optional turmeric to a medium saucepan.
Bring to a boil, lower the heat, and simmer for 2–3 minutes. Remove the ginger slices after they have flavored the broth.
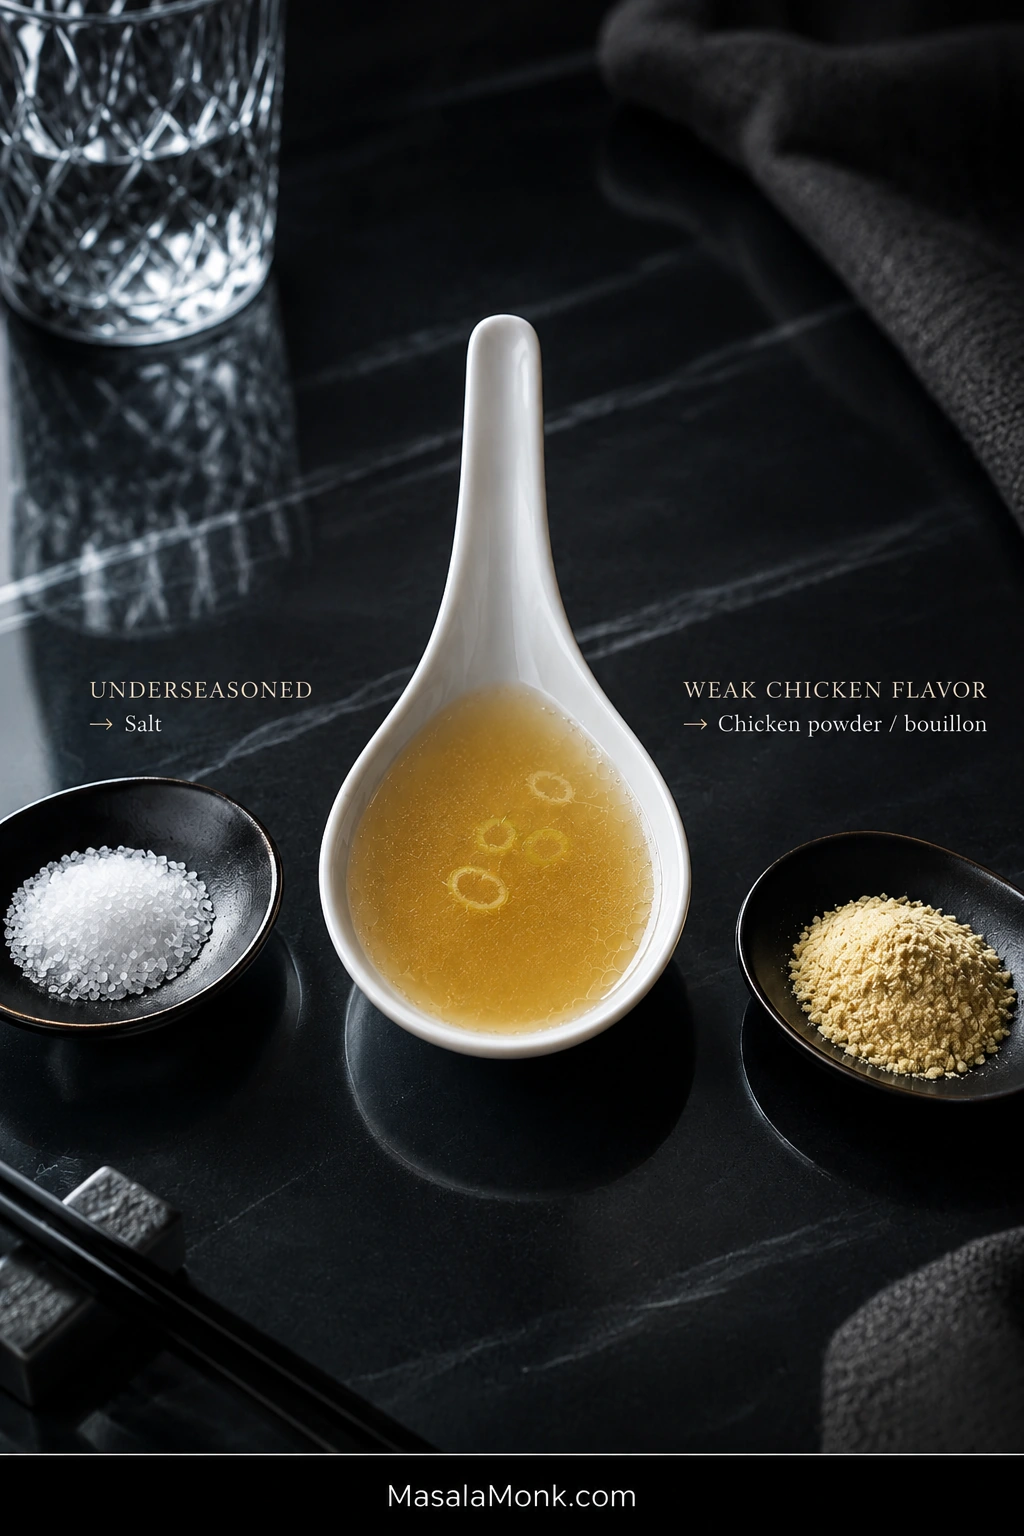
Now taste. If the chicken flavor is good but the broth simply tastes underseasoned, add salt. If the chicken flavor itself feels weak or hollow, add ½ teaspoon chicken powder or bouillon, let it dissolve, and taste again before using more.
Get the broth tasting good here. Cornstarch will change its texture and egg will add richness, but neither one can supply the savory foundation the broth is missing.
If the broth is salty enough but still tastes hollow, the missing piece may be chicken depth rather than more salt.
2. Thicken the Broth
Mix the cornstarch with 1½ tablespoons / 22 ml cold water until smooth.
Stir the slurry again immediately before using it; cornstarch settles quickly. Pour it gradually into the simmering broth while stirring.
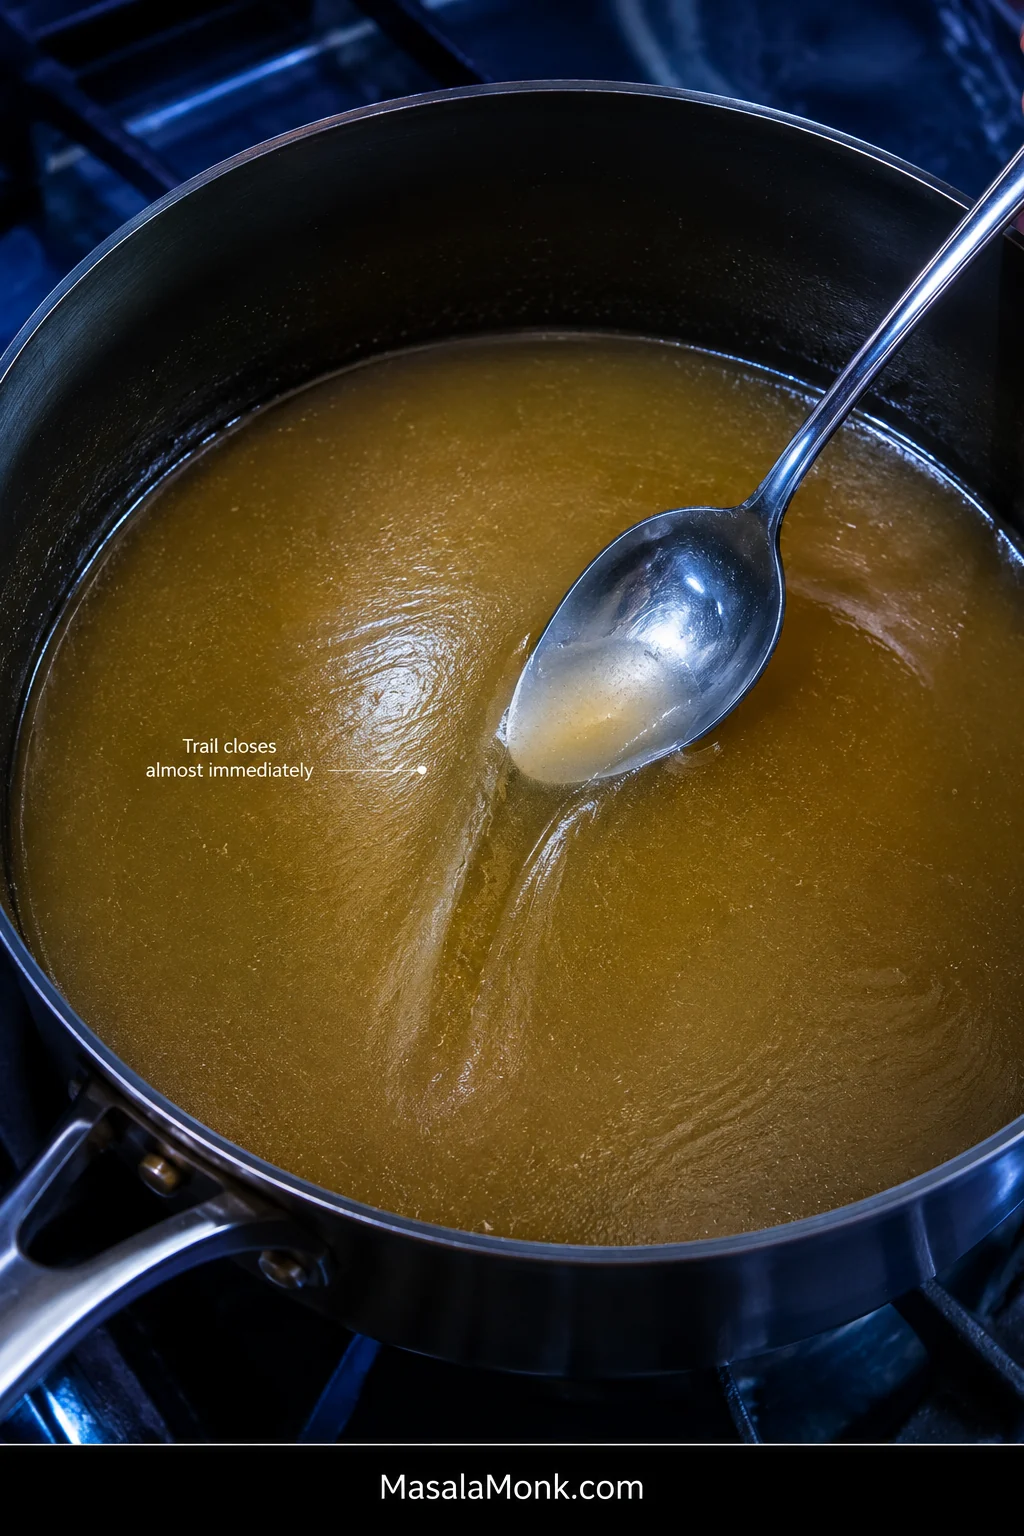
Cook for about 45–60 seconds, then drag a spoon through the pot. The broth should have a slight sheen, and the path behind the spoon should close almost immediately. A lingering trench means the soup is becoming too thick. If it looks almost unchanged from plain stock, give the starch another few seconds at a simmer.
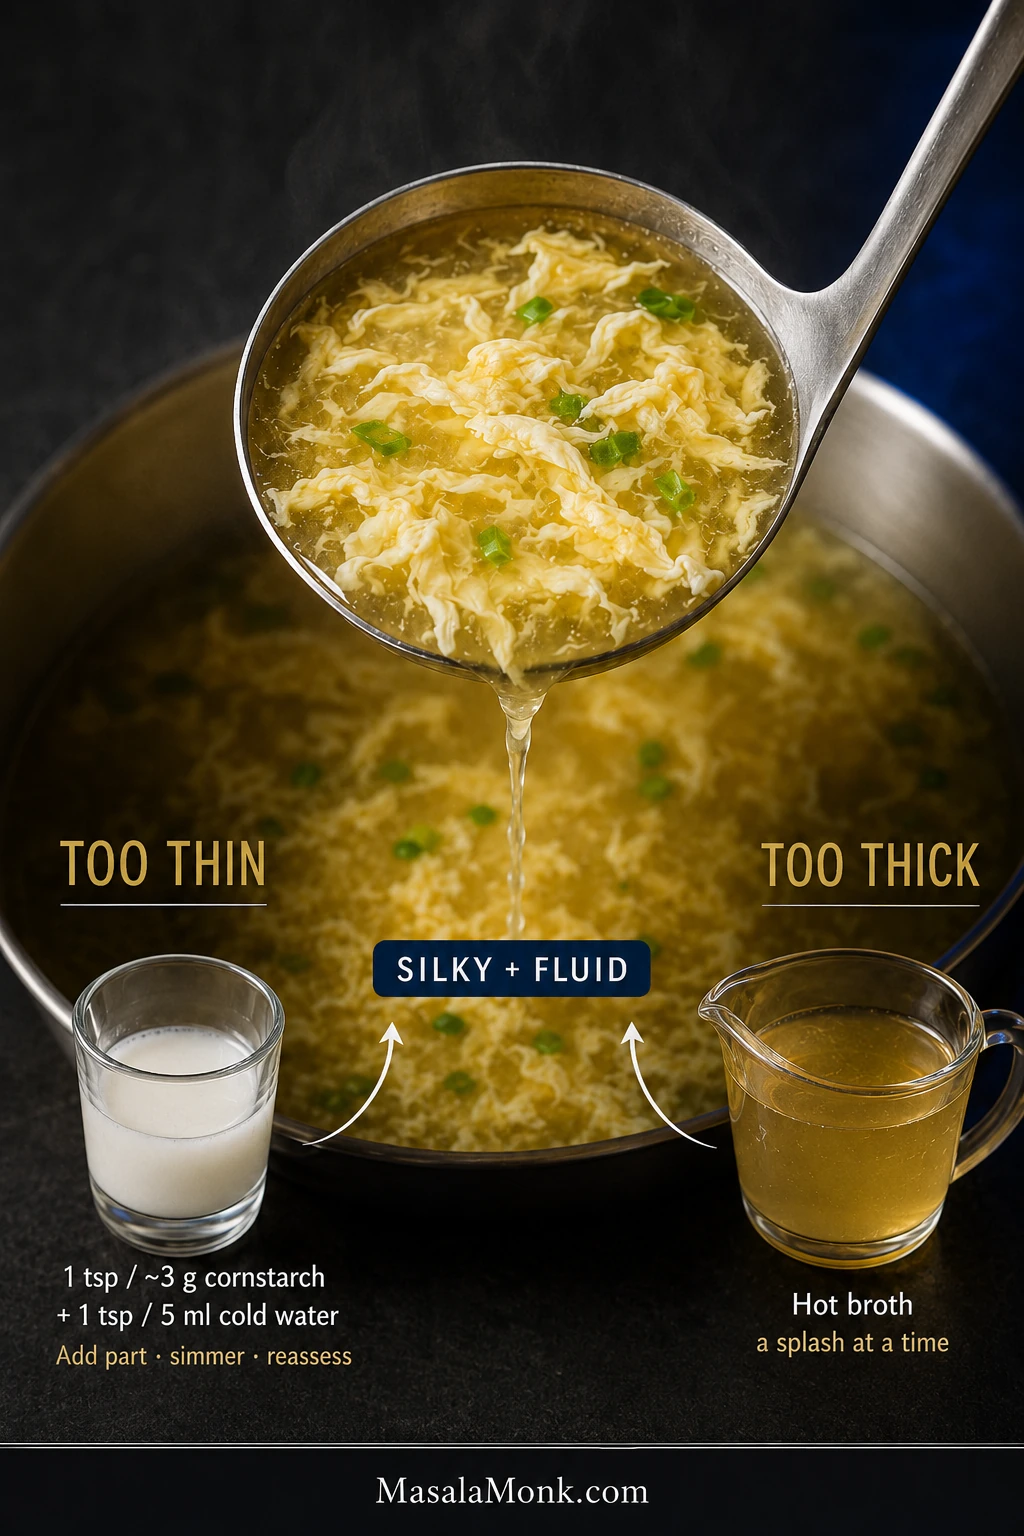
The texture should remain fluid enough to move easily around the saucepan, with just enough body to feel silky on the spoon.
Think of the trail as a wake, not a trench. You want to glimpse where the spoon passed without leaving a channel that sits open behind it.
3. Prepare the Eggs
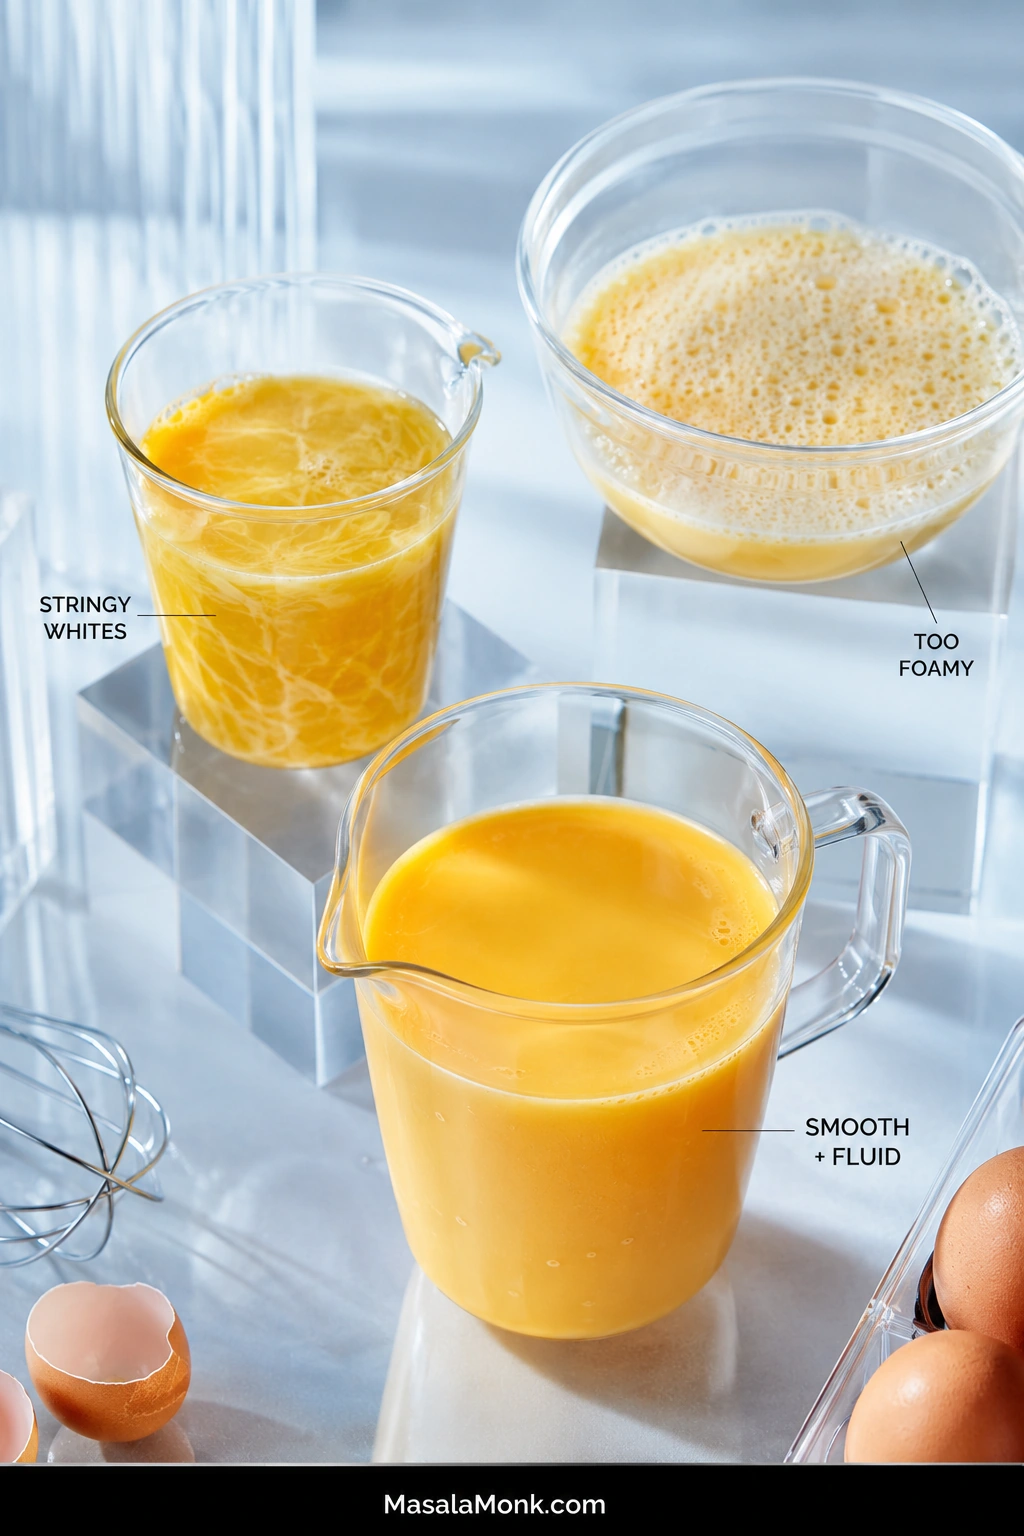
Beat the eggs with 2 teaspoons / 10 ml water until the yolks and whites are evenly combined and no clear, stringy ropes of egg white remain.
The added water makes the eggs easier to pour in a narrow stream. Stop once the mixture is smooth and fluid; foam does not help the ribbons.
The smooth sample gives you the most predictable pour. Stringy whites create uneven pieces, while excess foam makes the stream harder to control.
4. Make the Egg Ribbons
For this simmer-based method, keep a few quiet bubbles breaking the surface.
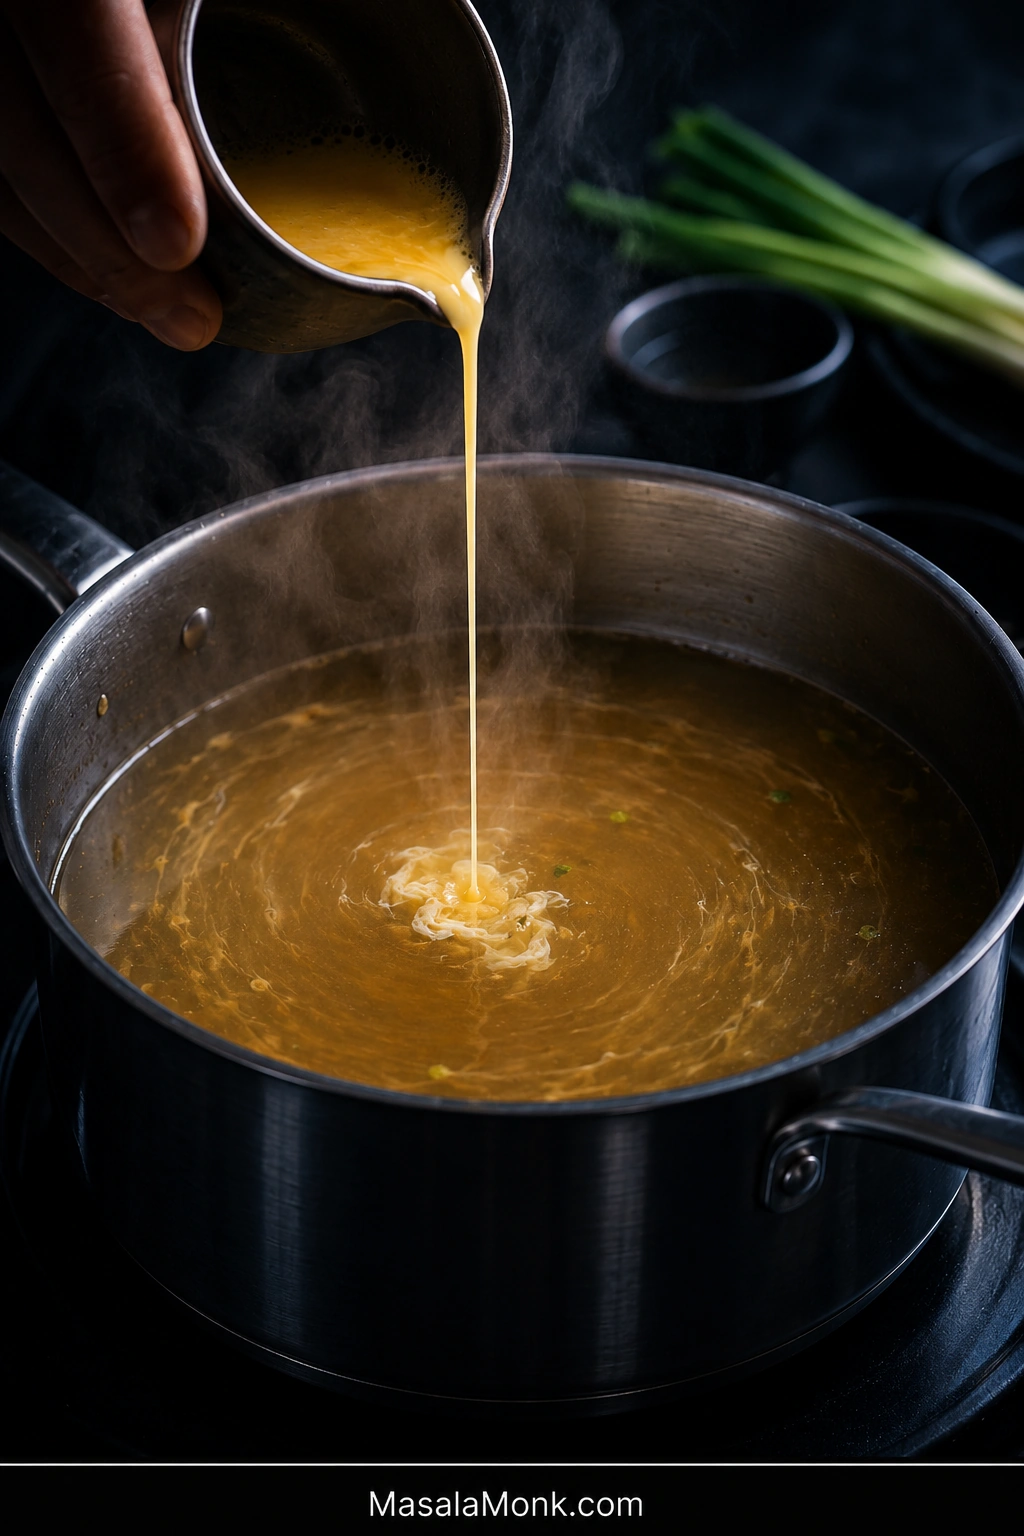
Give the broth one broad circular stir to create a slow current, then put the spoon down.
Pour the egg in a thin, steady stream around the pot, allowing the moving broth to carry it instead of repeatedly pouring into one spot.
Because the spoon is out of the pot, the slow current can stretch a narrow pour into ribbons instead of breaking the setting egg into flecks.
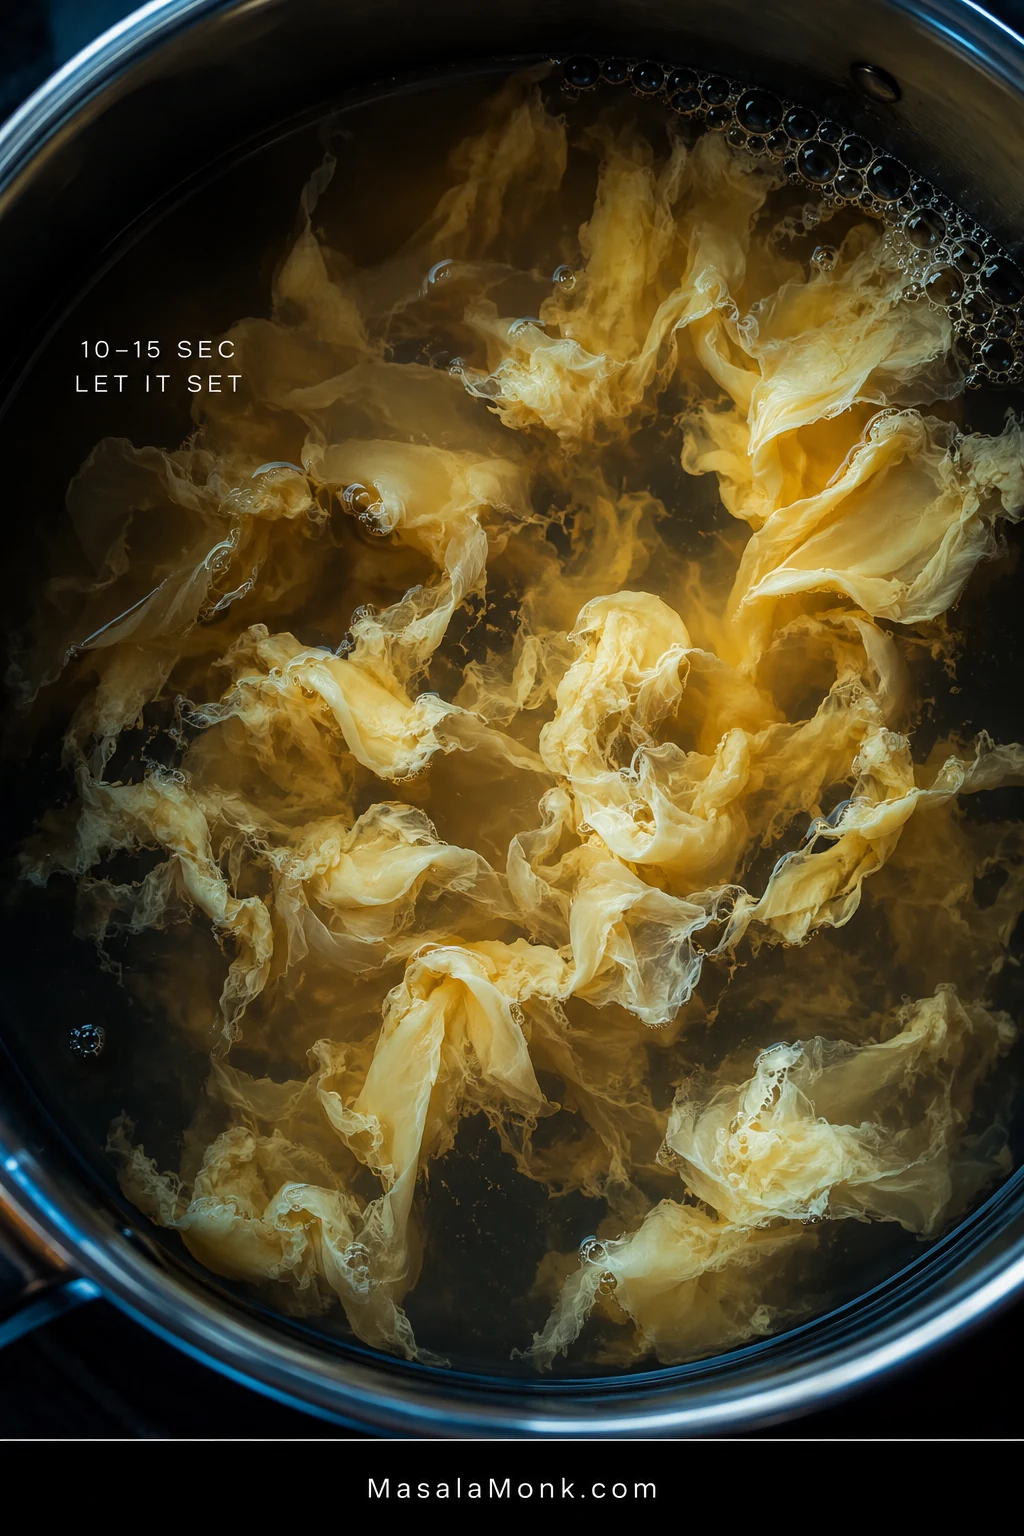
Leave the soup untouched for about 10–15 seconds, or until the egg is opaque and distinct ribbons are visible. Use one or two easy strokes to separate pieces that have joined together.
Watch the color change: translucent streaks become opaque folds. That shift—not the stopwatch alone—tells you the egg is ready for gentle separation.
Once those ribbons are visible, the tricky part is over.
A spouted cup gives you the most control. With a wider cup, hold a fork across the lip and let the beaten egg pass through the tines in a narrower stream.
5. Finish and Serve
Turn off the heat. Add the scallion greens and, if you like it, ½ teaspoon toasted sesame oil.
Taste once more. Add salt only when needed. Increase the sesame oil by drops so its toasted fragrance stays in the background.
Serve while the soup is steaming and the ribbons are soft.
Before You Sit Down: Check the Soup
The broth pours easily from the ladle.
The egg floats through it as ribbons or soft flowers instead of one heavy mass.
White pepper gives the sip a quiet warmth.
The ribbons do not need to look identical. When the soup tastes good and looks inviting, stop adjusting it and eat it hot.
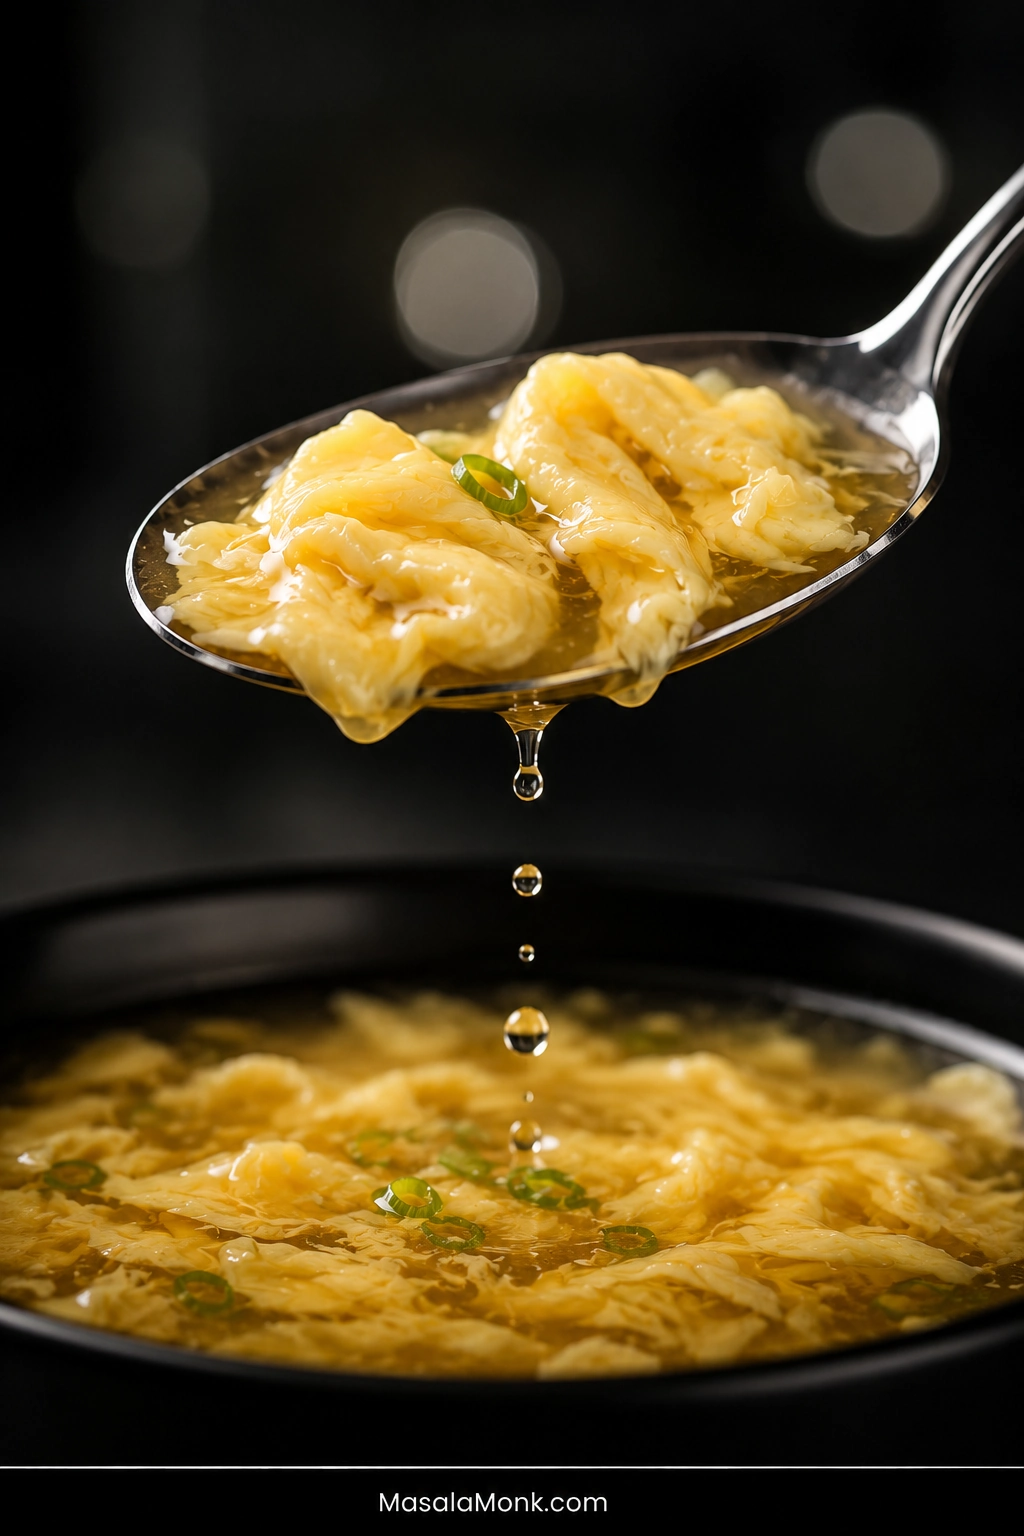
Lifted from the broth, tender ribbons should drape and fold rather than stand stiff like curds. That softness is more useful to judge than perfect shape.
Egg Drop Soup Ingredients: What Matters Most
Start with a clean-tasting chicken broth rather than one dominated by heavy roasting, tomatoes, or strong herbs. A mild broth is fine because you can correct its salt and savory strength before making the ribbons.
Cornstarch gives many restaurant-style versions their lightly glossy body and helps keep the egg suspended. The amount determines how broth-like or thick the finished soup feels.
White pepper supplies the familiar earthy warmth. Chicken powder or bouillon strengthens weak chicken flavor, while sesame oil is an optional finishing aroma and is best added cautiously.
Turmeric only adjusts color here. It is not needed for the flavor or for successful egg ribbons.
Choose Your Texture
One restaurant may serve egg drop soup almost broth-like while another makes it thick enough to cling to the spoon. Ribbon size varies too.
You want…
Try this
A lighter broth
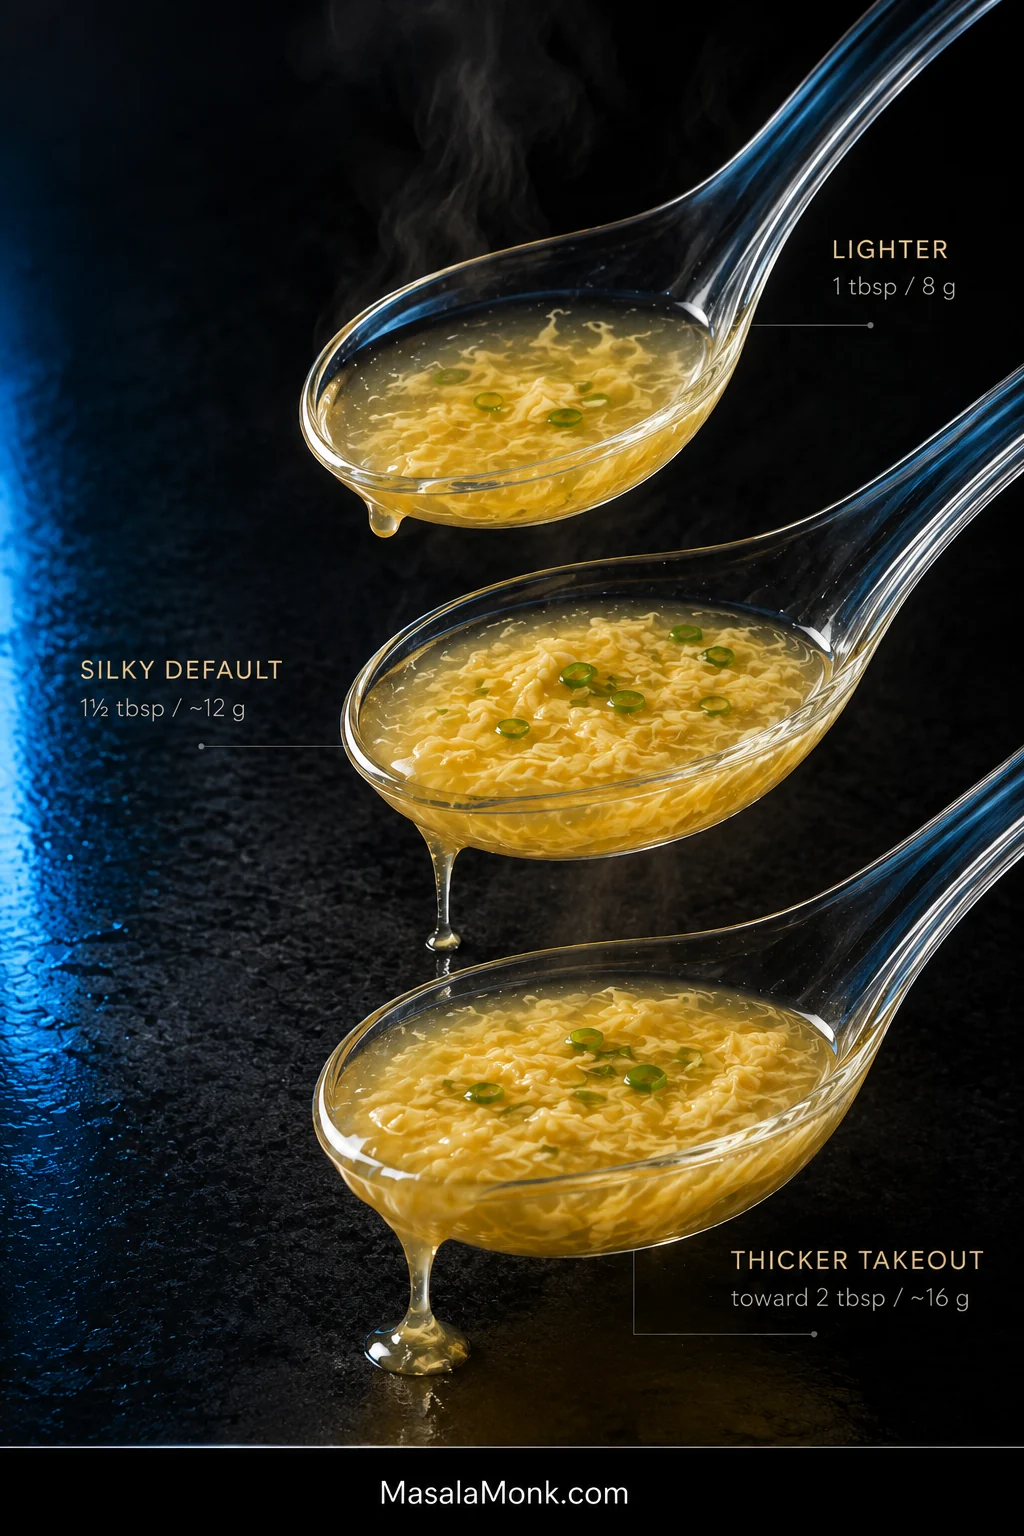
Start with about 1 tbsp / 8 g cornstarch
The silky default
Use 1½ tbsp / about 12 g
A thicker takeout texture
Increase gradually toward 2 tbsp / about 16 g
More egg
Use 3 large eggs
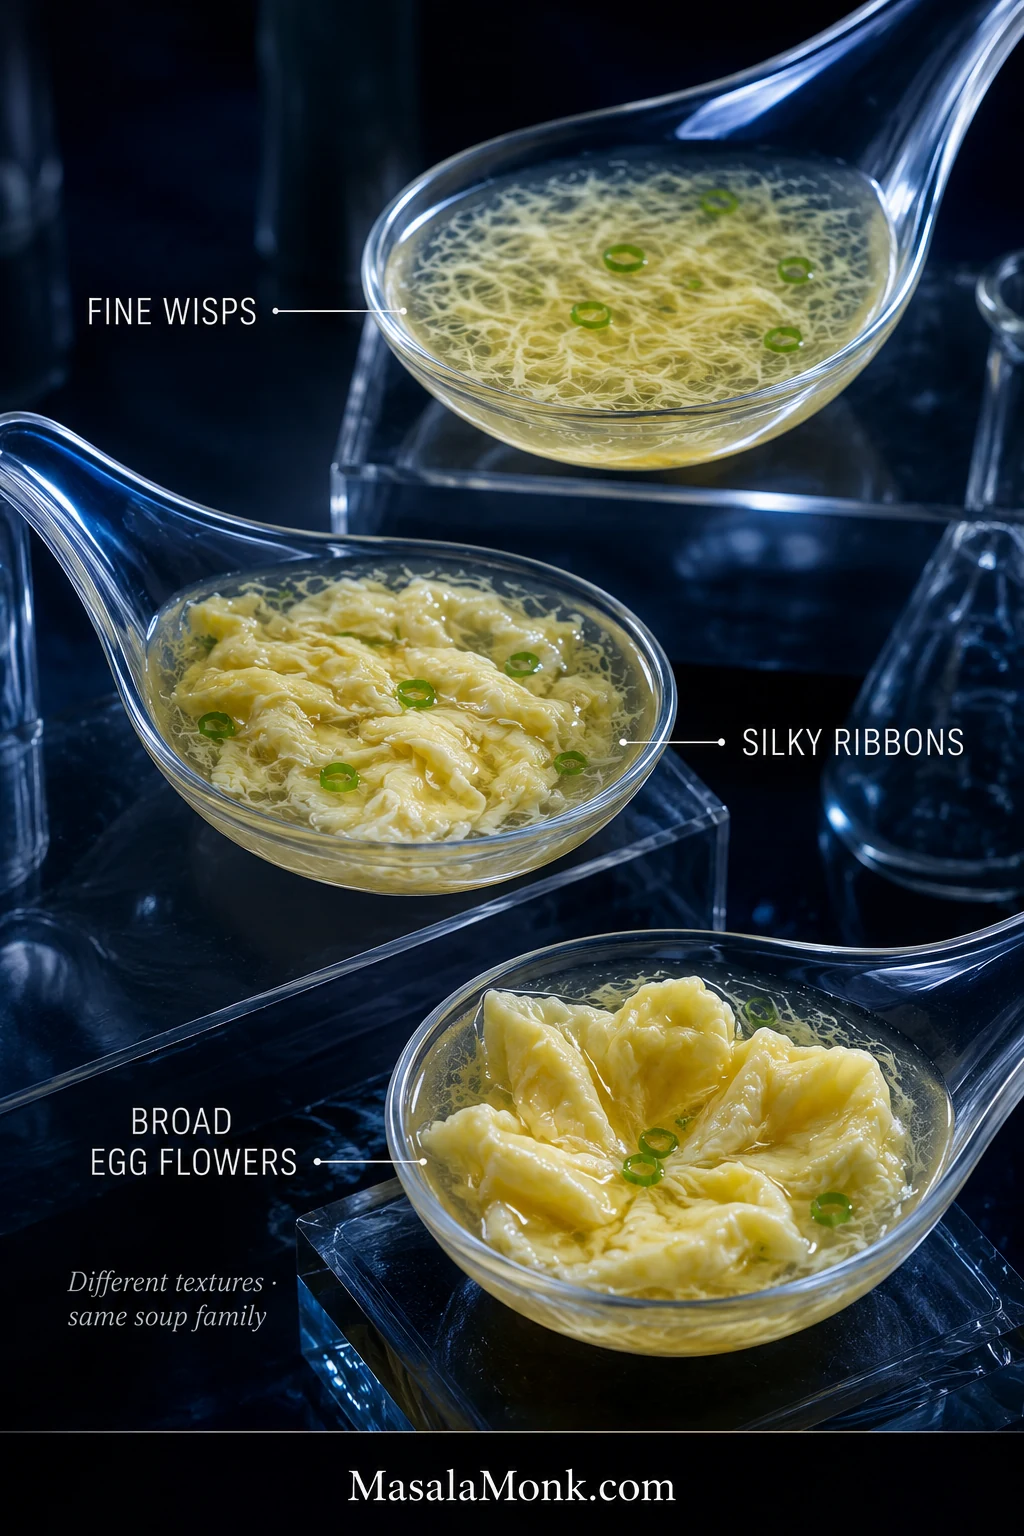
Fine wisps
Use a finer stream with more movement in the broth
Broad soft flowers
Give the egg more stillness once it enters
These are starting points, not pass-or-fail rules. The difference between wisps, ribbons, and broad flowers is mostly texture and appearance.
Read the drips, not the color. Lighter broth runs cleanly off the spoon; a thicker takeout-style egg drop soup coats and releases more slowly.
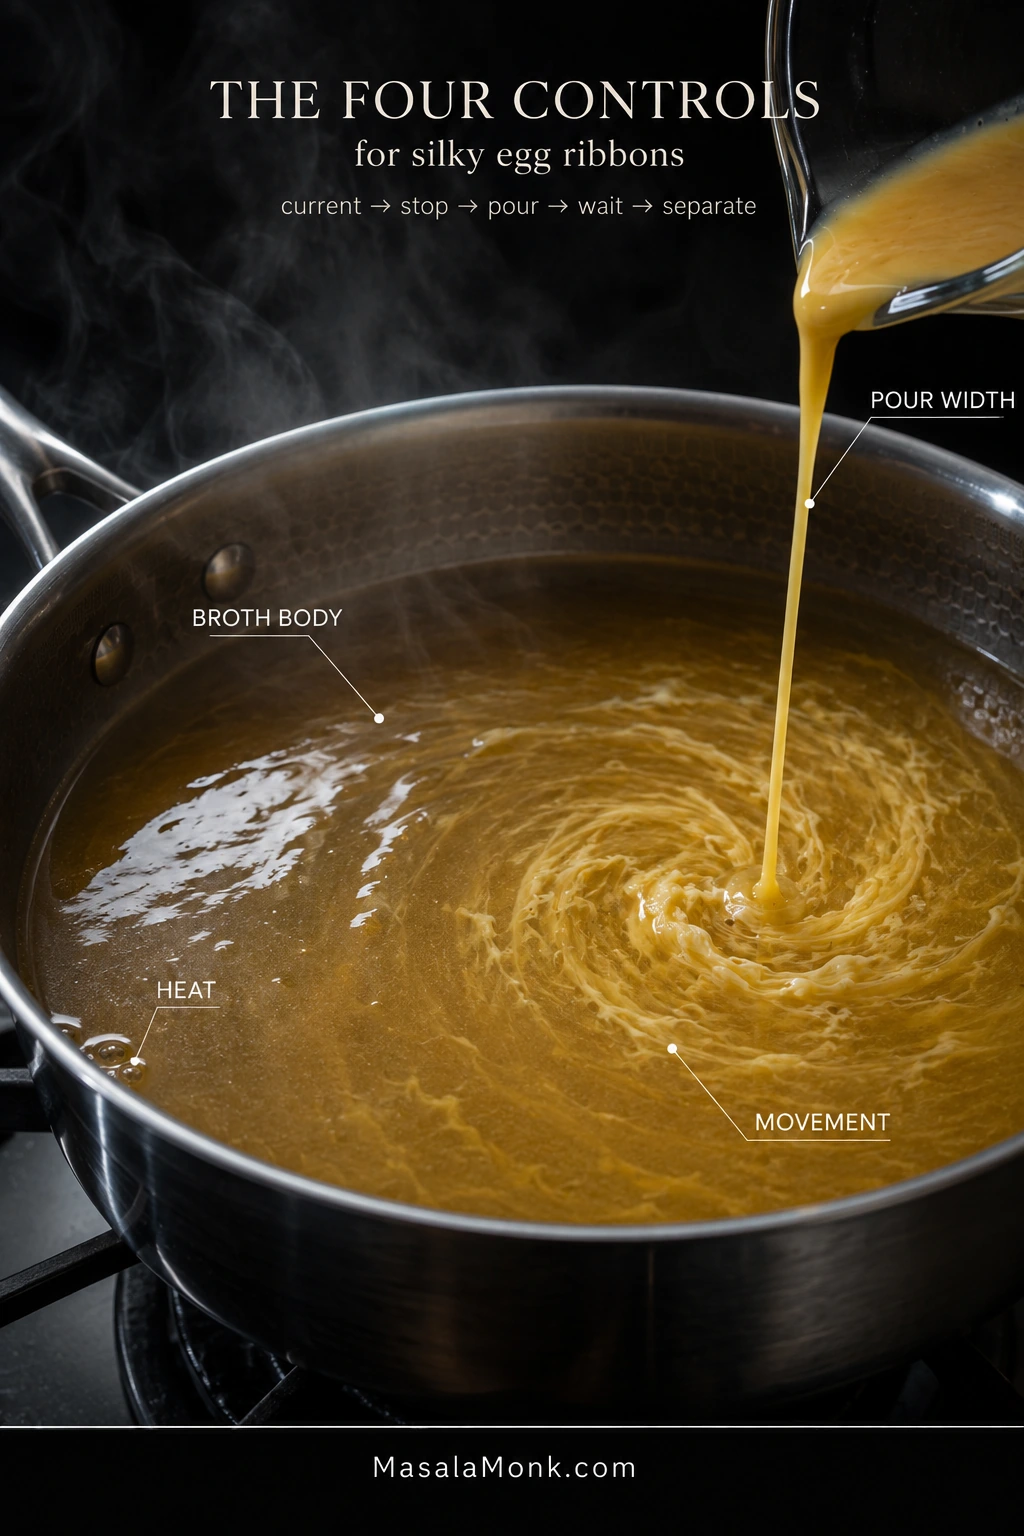
The shape of the egg comes down to four controls: broth body, heat, pour width, and movement.
A little starch slows the egg enough to help it remain suspended instead of immediately sinking through thin broth. Too much starch goes the other way and makes the soup heavy. Heat matters too: vigorous boiling can break delicate egg apart, while broth that has cooled too far may not set the stream cleanly with this simmer-based method.
Pour width changes the size of the pieces that enter the soup. A narrow stream produces finer ribbons; a heavier stream naturally forms broader ones. Movement determines how much those setting pieces are broken apart.
After you create a slow current, the broth can do most of the work. Continued stirring during the pour breaks the setting egg into smaller pieces before the ribbons have time to hold together.
Create the current → stop stirring → pour → wait → gently separate.
Use this as a diagnosis map rather than a formula. Large pieces point you toward pour width and stillness; tiny flecks point you toward excess movement or heat.
That same pause-before-stirring principle is useful in Hot and Sour Soup, where the egg shares the broth with tofu, mushrooms, and stronger seasonings.
Why Homemade Egg Drop Soup Doesn’t Taste Like the Restaurant
The frustrating batch is the one that looks right but tastes nothing like the soup you had in mind.
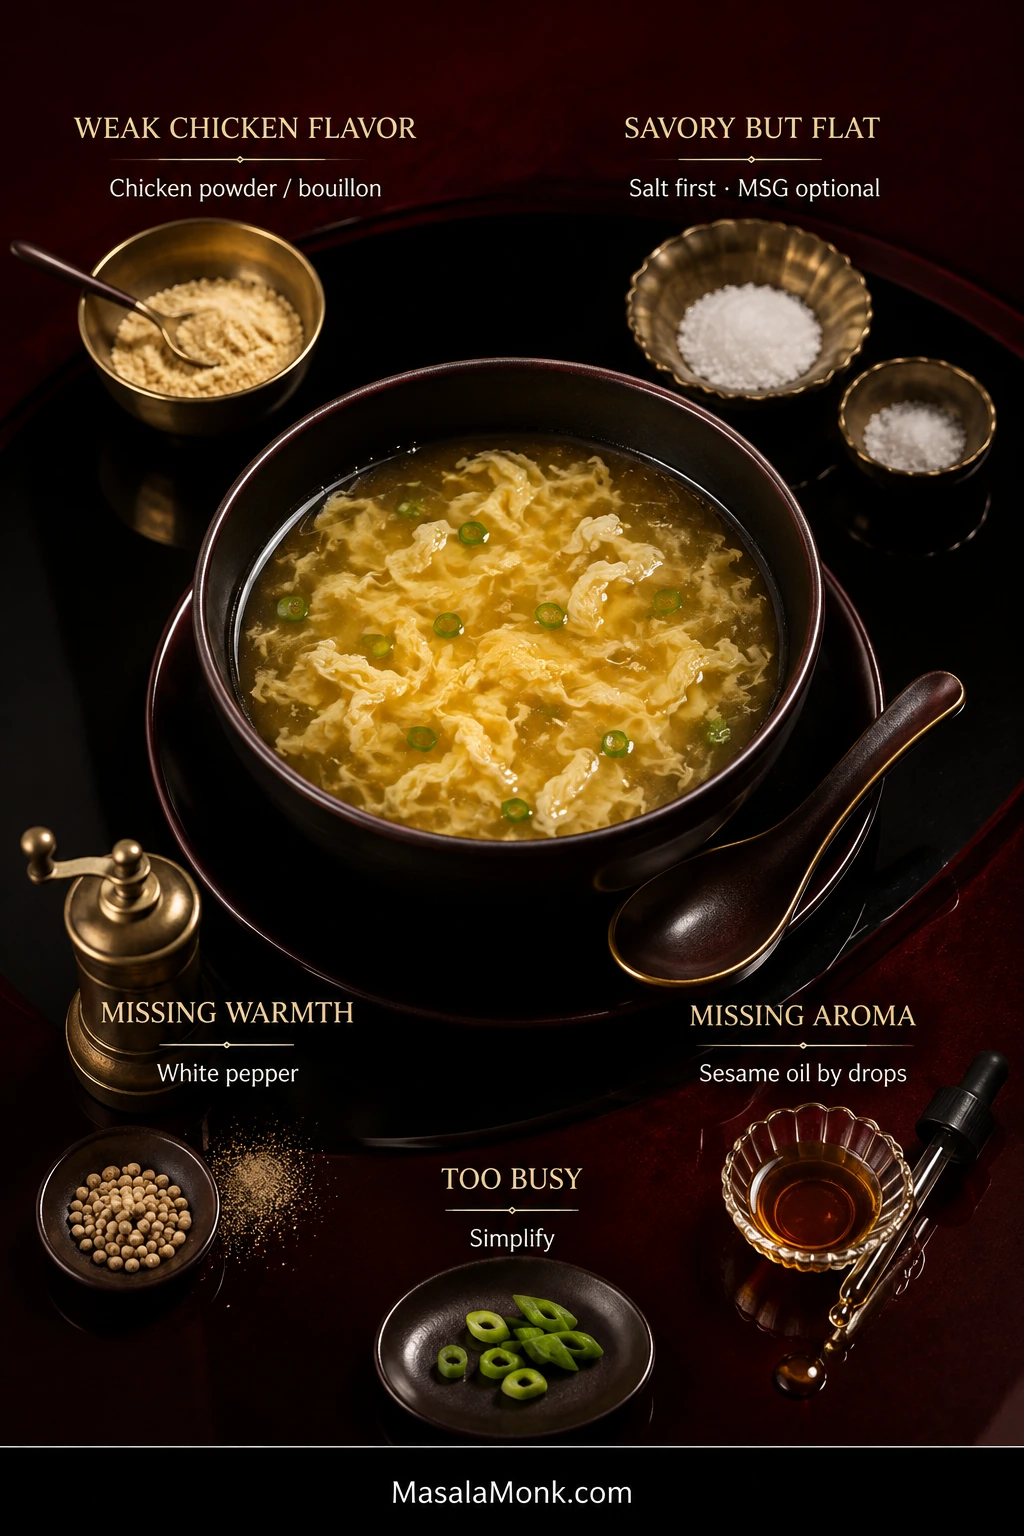
The difference is usually broth strength, salt and savory depth, white pepper, or how heavily sesame and soy are used. Start with what you can actually taste instead of adding every seasoning at once.
Weak chicken flavor: add some chicken powder or bouillon. Mild carton broth benefits more from this than a rich homemade stock.
Savory but flat: check the salt first. When the salt tastes right, add a very small pinch of MSG, stir, taste, and add more only if the broth needs it. Many chicken powders already contain MSG, so read the label before adding more. The FDA’s overview of MSG has more background on the ingredient and its use in food.
Missing warmth: add another touch of white pepper. Its heat tends to arrive toward the back of the sip without dominating the first taste.
Missing aroma: try a few drops of toasted sesame oil and stop when the fragrance becomes noticeable.
Tastes too busy: simplify. Skip the soy sauce, reduce or omit sesame oil, and let chicken broth, white pepper, ginger, and scallion carry the soup. Some takeout versions are much more restrained than heavily seasoned homemade recipes.
Restaurant-style flavor often comes from restraint. The best correction is usually the smallest adjustment that makes the broth taste complete, then stopping there.
Do You Need Soy Sauce?
No. Soy sauce is perfectly usable, but it changes both the color and flavor of the broth.
For a pale, clean-tasting soup, build the chicken flavor first. Add soy when you specifically want its savory fermented character.
Why Is Restaurant Egg Drop Soup Yellow?
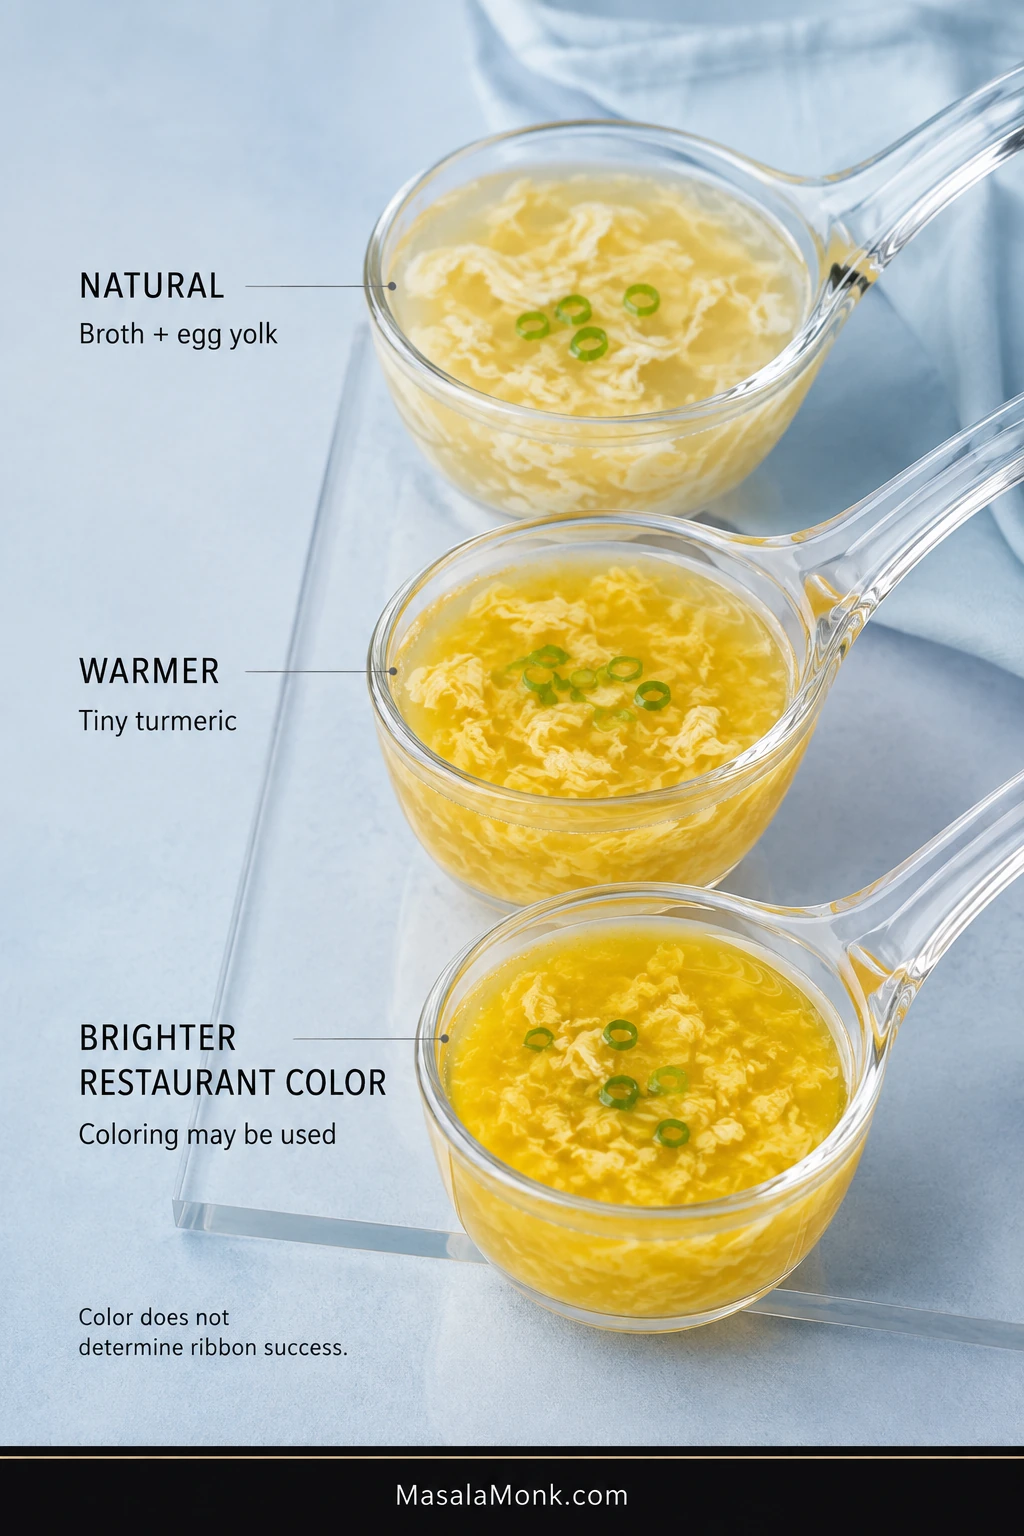
Egg drop soup can be naturally pale yellow; brighter restaurant-yellow versions may use turmeric or food coloring. Color has nothing to do with whether the ribbons formed correctly.
Chicken broth and egg yolks on their own can range from cream-gold to soft yellow.
For a warmer shade, the base recipe needs only ⅛ teaspoon turmeric. More can begin changing the flavor instead of simply warming the color.
Some Chinese-American restaurants use food coloring for a brighter takeout look. It is entirely cosmetic.
Pale soup is not failed soup.
Color and technique are separate variables. A pale bowl can have perfect ribbons, while brighter restaurant-yellow soup may simply use turmeric or coloring.
Troubleshooting
Broth problems are easier to rescue than cooked egg. You can thicken a watery soup, loosen an over-thickened one, and strengthen a bland broth. After the egg has cooked into a particular shape, the useful question is what caused it and what can be done with the bowl you already have.
My Egg Disappeared and the Broth Turned Cloudy
The egg dispersed before distinct ribbons had time to set. Continuous stirring is the usual culprit; broth that has cooled too far can also make clean setting harder with this method.
Give the poured egg more stillness while it sets. The broth may stay cloudy, but that does not stop it from tasting good.
Glass makes the difference easy to see: distinct ribbons hold their shape, while dispersed egg turns the broth hazier. The cloudy version is different—not wasted.
I Got Scrambled-Looking Clumps
Large dense pieces usually mean too much egg reached one area at once, or thick ropes of white were still present in the beaten eggs.
A narrower pour and fully blended eggs prevent most of this. Separate the clumps lightly in the soup you already have and carry on. The texture is different, but dinner is still dinner.
I Got Tiny Flecks
The egg was broken apart by too much movement while it was trying to set.
Use less agitation after the pour. The flecks will not turn back into broad ribbons, but the soup itself is perfectly usable.
I Got One Big Sheet of Egg
The egg set with too little separation and joined into one connected piece.
Break the sheet gently into ribbons. When newly poured egg turns opaque, one or two careful strokes are enough to separate it before the whole mass sets together.
My Soup Is Too Thin
Give the original slurry about a minute at a simmer before assuming you need more starch.
Still too light? Mix 1 teaspoon / about 3 g cornstarch + 1 teaspoon / 5 ml cold water. Add part of it, simmer briefly, and reassess before using the rest.
My Soup Is Too Thick
Add hot low-sodium chicken broth a splash at a time, moving the spoon carefully around the ribbons.
If it takes a substantial amount of broth to loosen the soup, use less cornstarch when you make it again.
Both rescues are deliberately incremental. Cornstarch keeps developing as it simmers, while extra broth also dilutes seasoning—so correct a little, then reassess.
Other Quick Fixes
Ribbons sank: thin broth, heavy pieces of egg, too much egg, or broth that cooled too far can contribute. Keep the base egg ratio and make sure the broth is back at a quiet simmer before pouring.
Rubbery egg: prolonged boiling after the ribbons have set is usually responsible. When the egg is opaque and set, finish the soup and get it off the heat.
Cornstarch lumps: if you spot them before adding the egg, strain the broth and return it to the saucepan. After ribbons have formed, remove obvious lumps with a spoon instead of sending the finished soup through a strainer.
Too much sesame oil: dilute the soup with more broth. Sesame is much easier to add than remove.
Broth looks brown: dark stock or soy sauce is usually responsible. The color alone does not mean anything went wrong.
Soup tastes of turmeric: dilute it when practical and use less in the next pot.
Identify the shape before choosing the fix. Clumps, flecks, sheets, sinking, and rubbery ribbons point back to different moments in the egg-drop process.
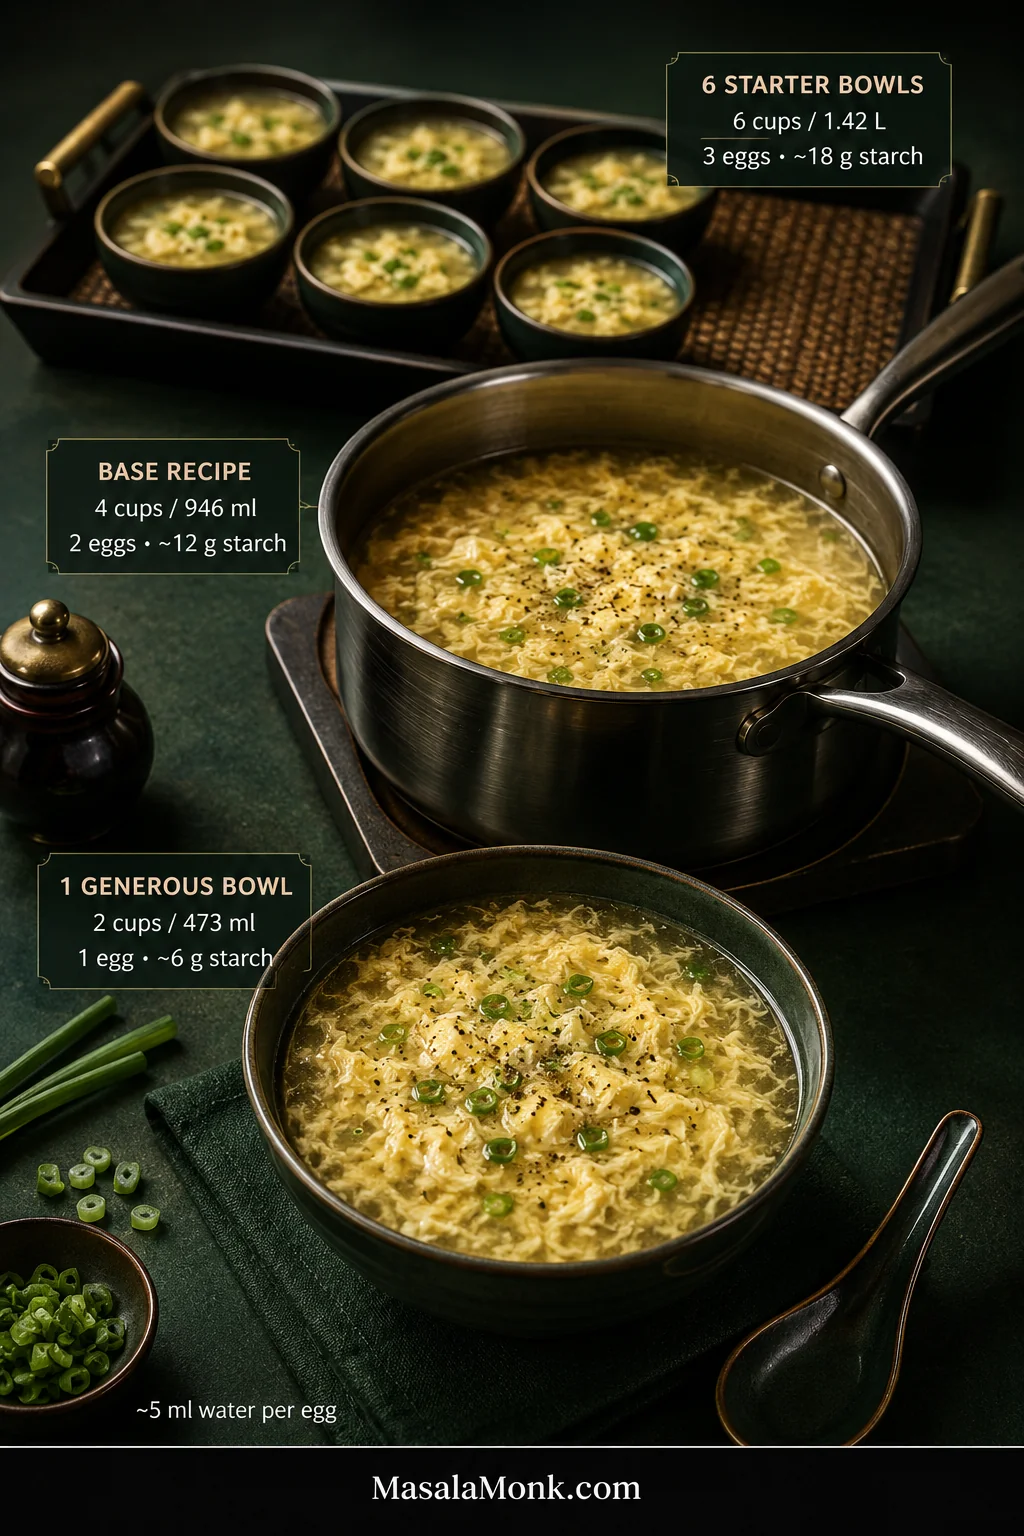
How to Scale Egg Drop Soup for One, Two or a Crowd
Egg drop soup is especially handy when you are cooking only for yourself. One egg and a couple of cups of broth are enough for a hot lunch or easy dinner without leaving a large pot behind.
Need
Starting broth
Egg
Cornstarch
1 generous bowl
2 cups / 473 ml
1 large / ~50 g
2¼ tsp / ~6 g
Base recipe
4 cups / 946 ml
2 large / ~100 g
1½ tbsp / ~12 g
6 starter bowls
6 cups / 1.42 L
3 large / ~150 g
2¼ tbsp / ~18 g
Use about 1 teaspoon / 5 ml water per large egg to loosen the mixture.
Scale broth, eggs, and cornstarch by measurement. Salt, bouillon, and chicken powder are better adjusted by taste because brands vary so much.
Scaling changes more than the arithmetic. A larger pot can take longer to recover a gentle simmer, so re-check the heat before the egg pour.
Variations and Substitutions
Can I Make Egg Drop Soup Without Cornstarch?
Yes. Leave the cornstarch out and the egg will continue to form wisps or ribbons. The broth will simply be lighter and more delicate, without the glossy body common in many Chinese-American restaurant versions.
Other Easy Variations
Potato starch: make a cold slurry and begin with less than the full cornstarch quantity. Add gradually until the broth reaches the same spoon-path cue used in the base recipe; different starches do not always thicken one-for-one.
Vegetable broth: choose a clean, savory one. Dark roasted or tomato-heavy broth changes the character of the soup considerably.
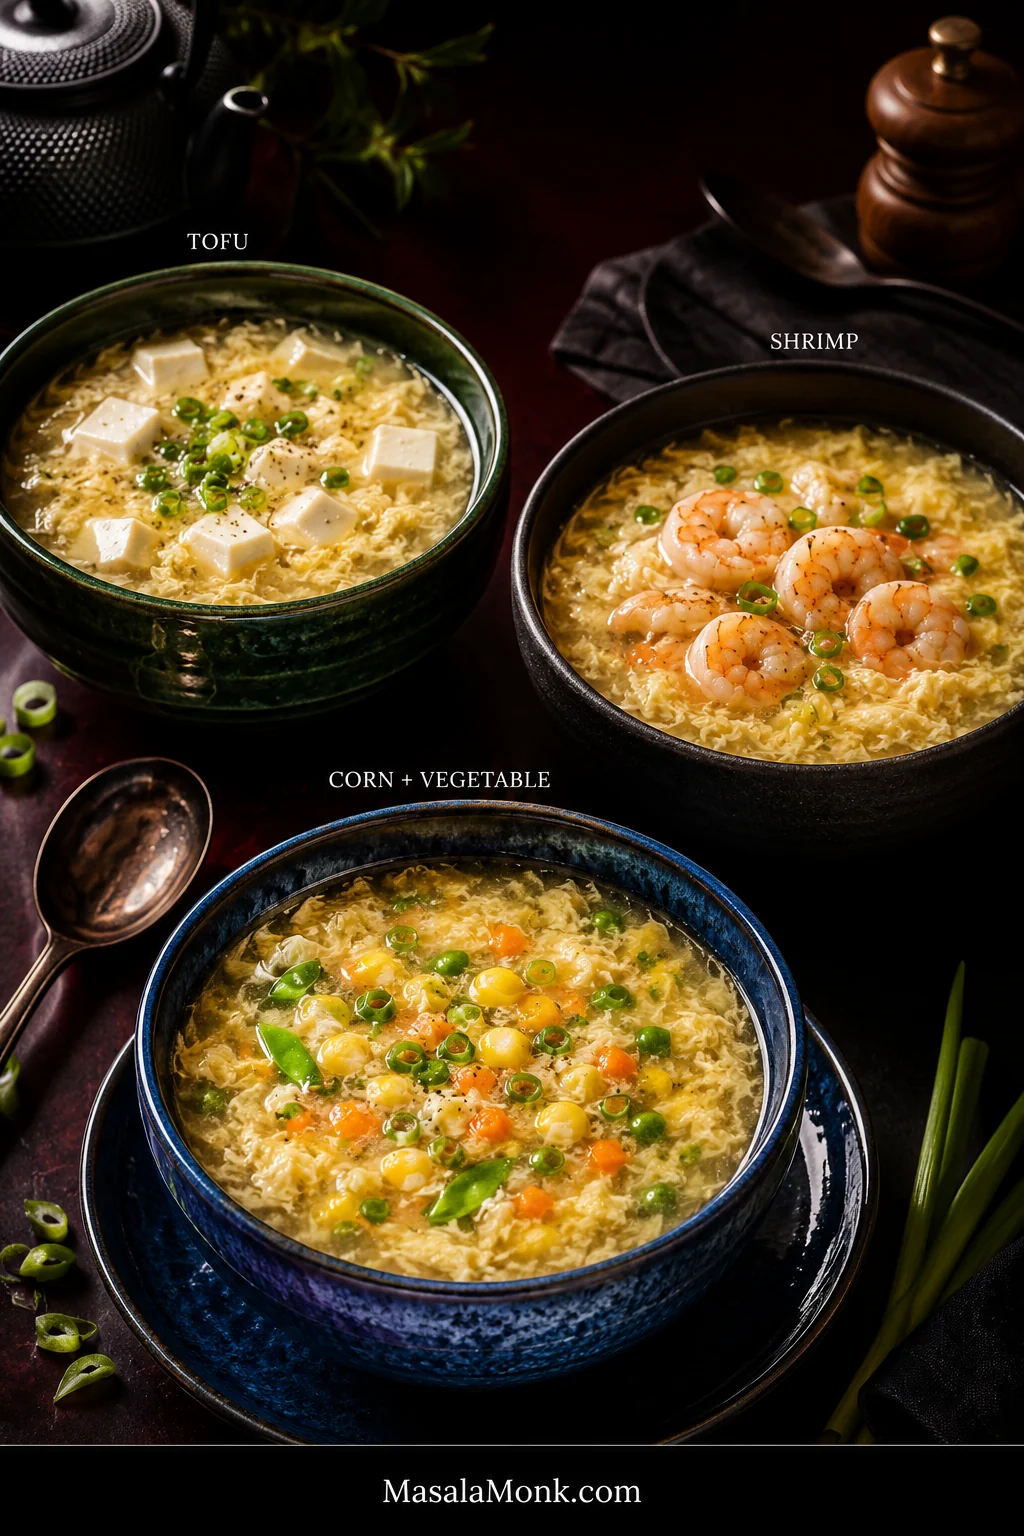
Tofu: warm small cubes of soft or silken tofu in the seasoned broth before adding the slurry and egg. For a tofu-centered meal, serve the soup alongside Mapo Tofu and rice.
Shrimp: poach peeled, deveined shrimp until barely cooked, lift them out, and continue with the slurry and egg. Return the shrimp at the end just long enough to heat through.
Vegetables: peas, finely diced carrot, mushrooms, spinach, and other quick-cooking vegetables fit easily. Add firm vegetables earlier and delicate greens near the end.
Corn: a handful adds sweetness and texture. With enough corn to become a main flavor, the soup takes on a noticeably sweeter, fuller character.
Rice: spoon cooked rice into individual bowls so leftovers do not absorb most of the broth. Starting from dry rice? Our guide to cooking rice covers the basics.
Whatever you add, leave enough open broth for the egg ribbons to move and stay visible. The variation should support the soup rather than crowd it.
Is Egg Flower Soup the Same as Egg Drop Soup?
Yes. Egg drop soup and egg flower soup generally refer to the same broad family of soups. “Egg flower” describes the soft, flower-like shapes created when beaten egg sets in hot broth.
The exact soup changes from kitchen to kitchen. Some versions are clear and delicate with fine wisps; others have broad flowers and noticeably more body.
This spectrum also explains why two restaurants can serve visibly different soups under the same name: ribbon geometry varies even when the underlying technique belongs to the same family.
Chinese home-style soups may include tomato, seaweed, tofu, corn, or vegetables. Many Chinese-American restaurant versions lean toward concentrated chicken flavor, some starch thickening, white pepper, and egg suspended through a pale or yellow broth.
Egg plays a completely different role in Egg Foo Young, another Chinese-American restaurant favorite where it becomes the body of the dish instead of delicate ribbons in broth.
Your favorite restaurant may serve its soup thinner, thicker, brighter, or more egg-heavy. The controls above make those differences easy to adjust.
What to Serve With Egg Drop Soup
As a starter, egg drop soup works especially well with something that brings more texture or substance to the table.
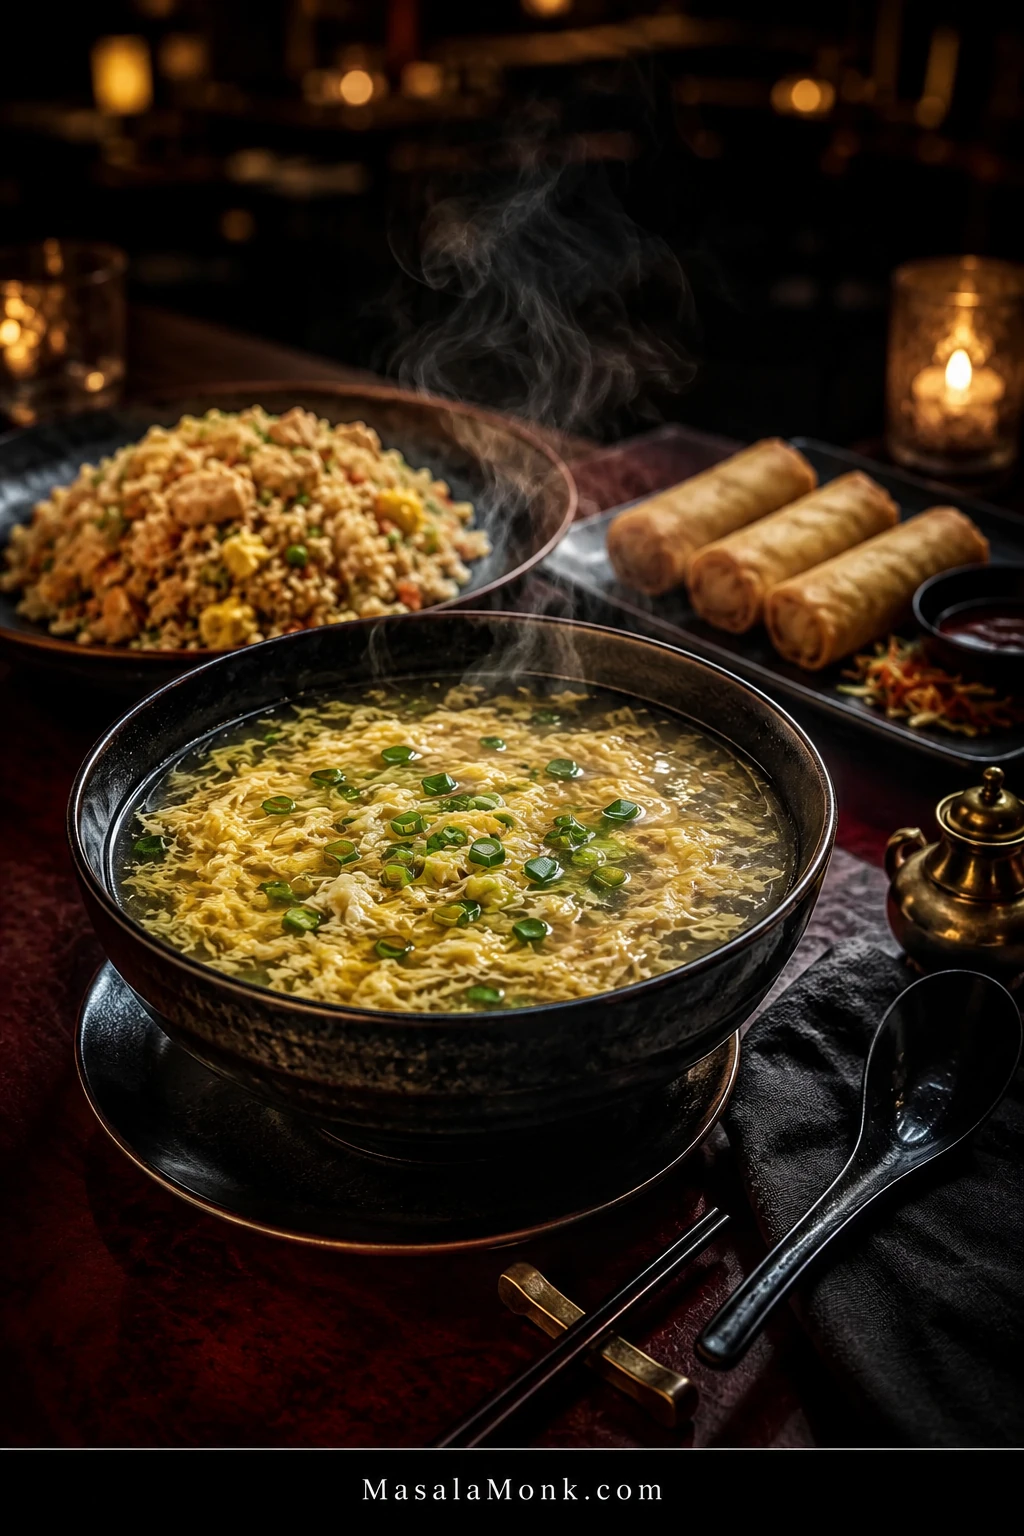
A small bowl before Chicken Fried Rice makes an easy takeout-style dinner: hot soup first, followed by separate grains, vegetables, egg, and chicken.
Crispy spring rolls add crunch; steamed dumplings, plain rice, Chinese-style noodles, stir-fried vegetables, and simple chicken or beef dishes all fit comfortably beside it.
After all the technique, texture contrast is what makes the meal satisfying: soft soup beside fried rice, crisp spring rolls, dumplings, or another substantial side.
Two generous cups can also make a light lunch on their own, especially on a day when cooking anything elaborate sounds unnecessary.
Make Ahead, Store & Reheat
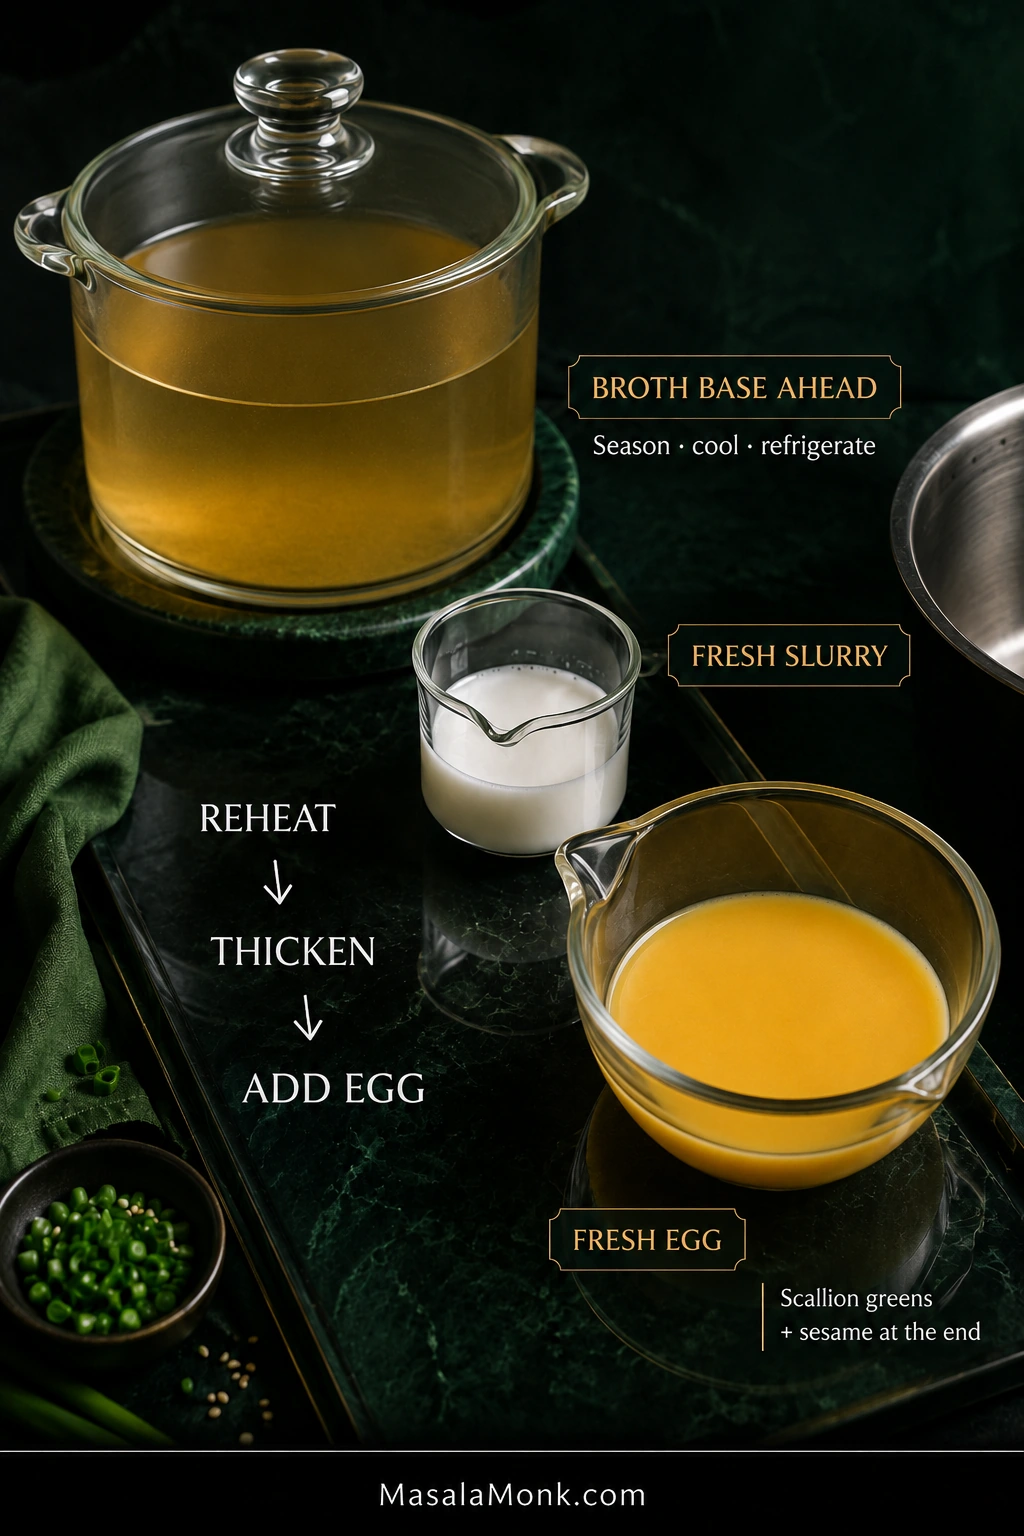
Egg drop soup is nicest when the ribbons have just been made, but the seasoned broth is easy to prepare ahead. That gives you most of the convenience while saving the egg for the last few minutes.
Best Make-Ahead Method
Prepare the seasoned broth, remove the ginger slices, cool it, and refrigerate without cornstarch or egg.
Bring the broth back to a simmer when you want the soup.
Add a freshly mixed slurry.
Add freshly beaten egg when the broth has the body you want.
Finish with scallion greens and optional sesame oil.
A few minutes at the stove later, you have fresh ribbons without remaking the broth from the beginning.
Broth waits better than ribbons do. For make-ahead egg drop soup, hold the seasoned base, then thicken and pour the egg close to serving.
Storing Leftovers
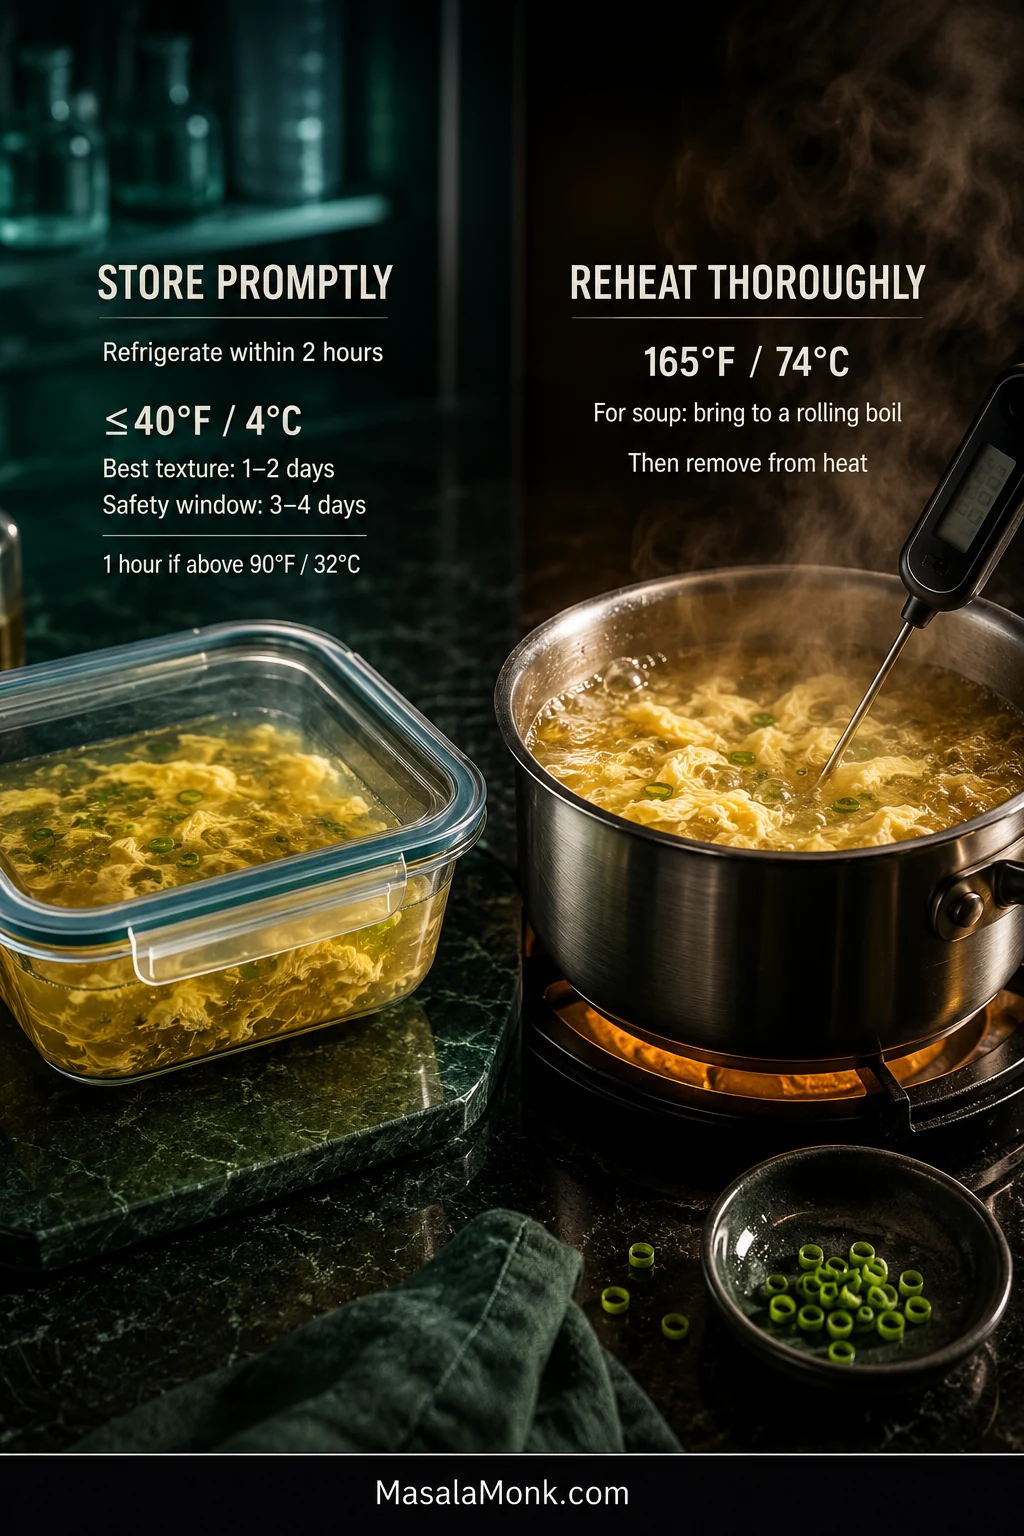
Refrigerate leftovers promptly in a covered, shallow container. For the nicest ribbon and broth texture, aim to eat the soup within 1–2 days. Properly refrigerated cooked leftovers generally have a broader 3–4 day food-safety window at 40°F / 4°C or below.
Get leftovers into the refrigerator within 2 hours of cooking, or within 1 hour when the surrounding temperature is above 90°F / 32°C. The USDA guide to leftovers and reheating has the broader food-safety guidance.
Reheating
Bring leftover soup to a rolling boil when reheating and make sure it reaches 165°F / 74°C. After the soup is thoroughly hot, take it off the heat so the cooked ribbons spend as little extra time boiling as possible.
In the microwave, heat in shorter intervals and stir between them so the soup warms evenly.
If chilled soup has lost some of its original body, mix 1 teaspoon / about 3 g cornstarch + 1 teaspoon / 5 ml cold water. Add only as much of that slurry as the reheated soup needs.
The shallow container is part of the method, not just storage. It helps leftovers cool more quickly and evenly; reheating then brings the soup back to serving temperature.
Can You Freeze It?
The seasoned broth base freezes better than the completed soup. Thaw and reheat the broth, then add fresh slurry and egg when you are ready to eat.
The best part of learning the egg pour is not making every ribbon look identical. It is knowing that a saucepan of broth and a couple of eggs can become that familiar steaming soup whenever you want it.
Some nights it is a starter before dinner. Some nights it is the whole point: something warm, savory, and comforting on the table in about 15 minutes.
Ham and cheese quiche is what you make when brunch needs to feel special but you do not want to stand at the stove. It uses cooked ham, a simple egg custard, plenty of cheese, and a crust that can be homemade, refrigerated, frozen, or skipped completely.
The most satisfying bites have smoky ham, melted cheese, and soft custard against the flaky edge of the crust. This version is creamy without being loose, savory without being too salty, and practical enough for a holiday brunch, a quiet lunch, or a weeknight dinner with salad.
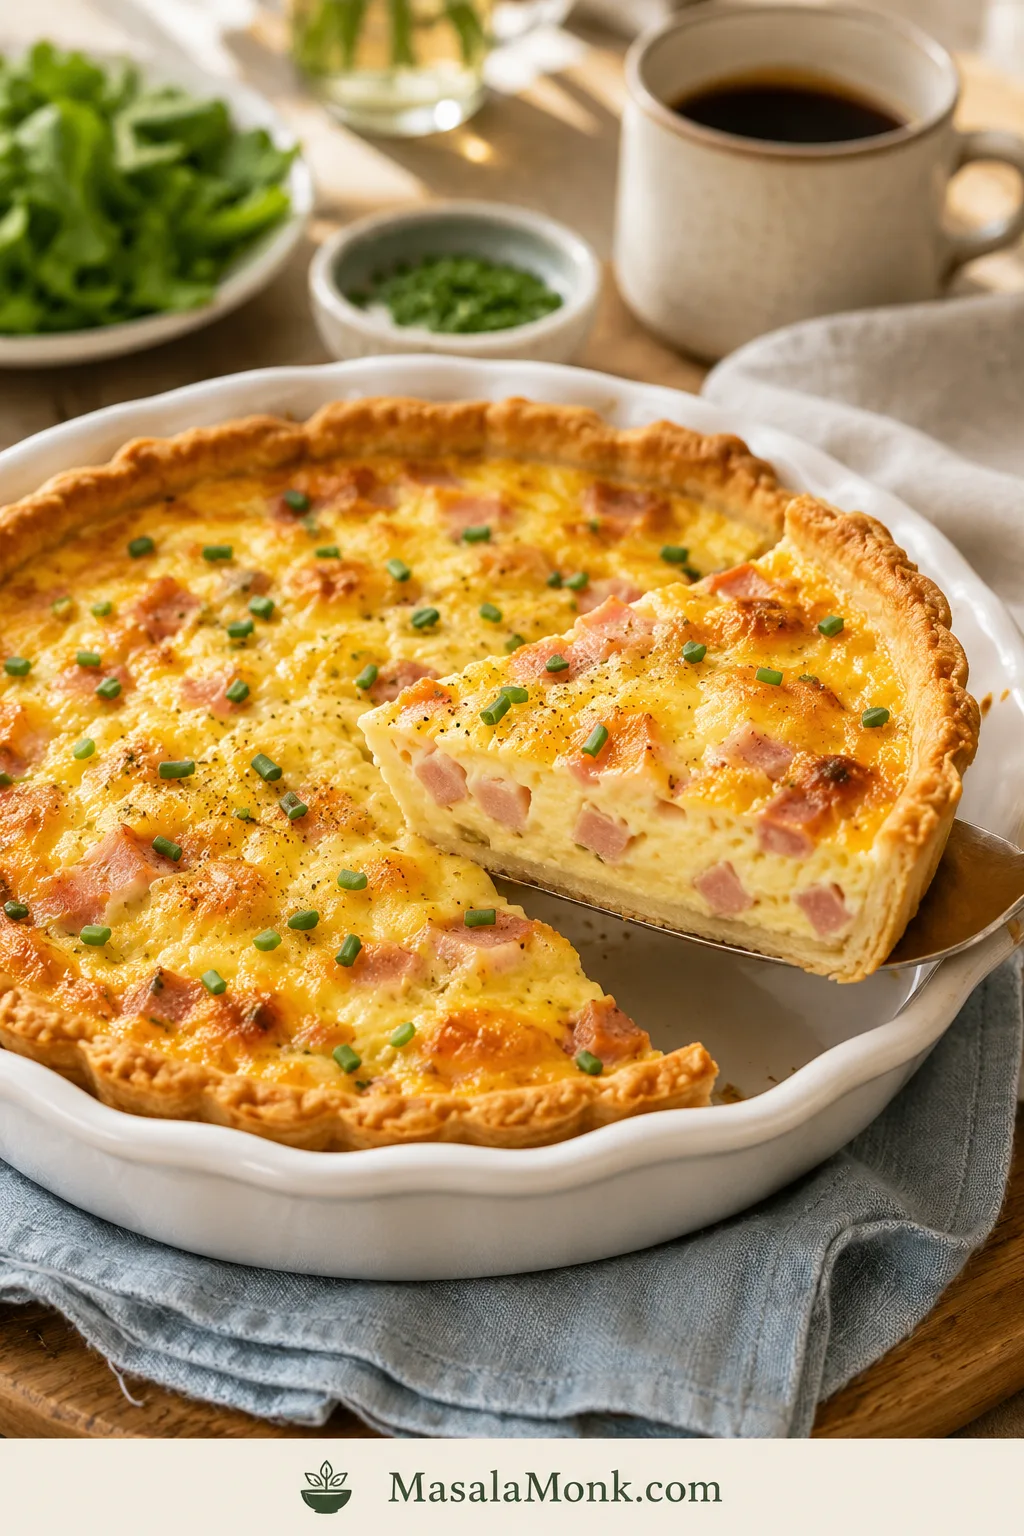
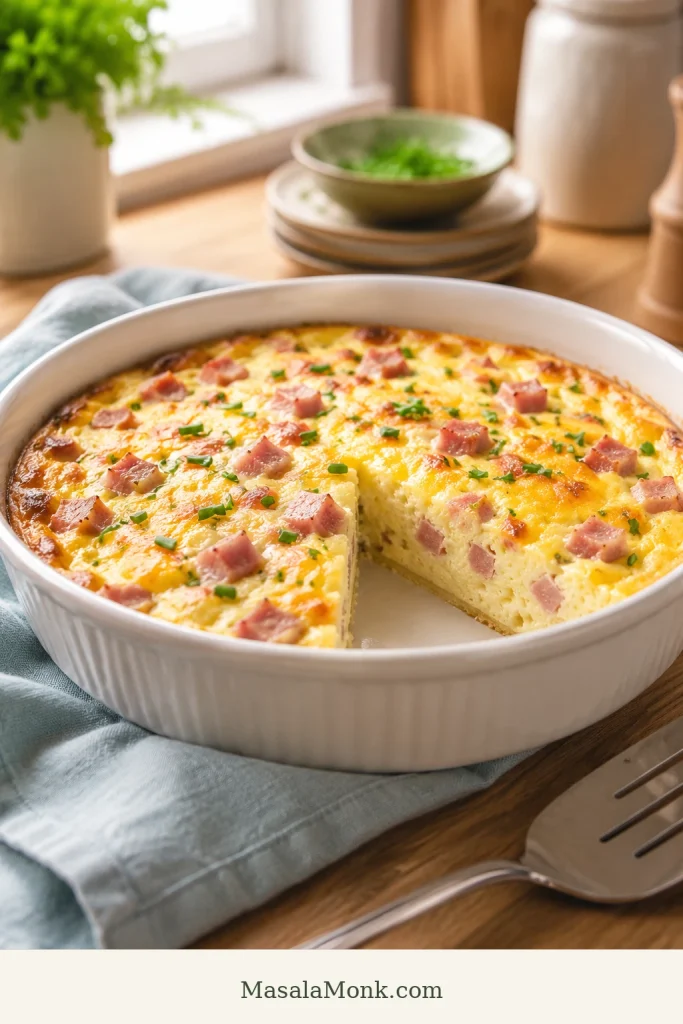
A good slice should hold together but still look soft inside; that creamy custard is what keeps this from feeling like a firm egg bake.
This ham and cheese quiche is built for real kitchens: the kind with leftover holiday ham, a frozen crust in the freezer, or a bit of cheese that needs using. As long as the ham is cooked, diced small, and not wet, the recipe is flexible.
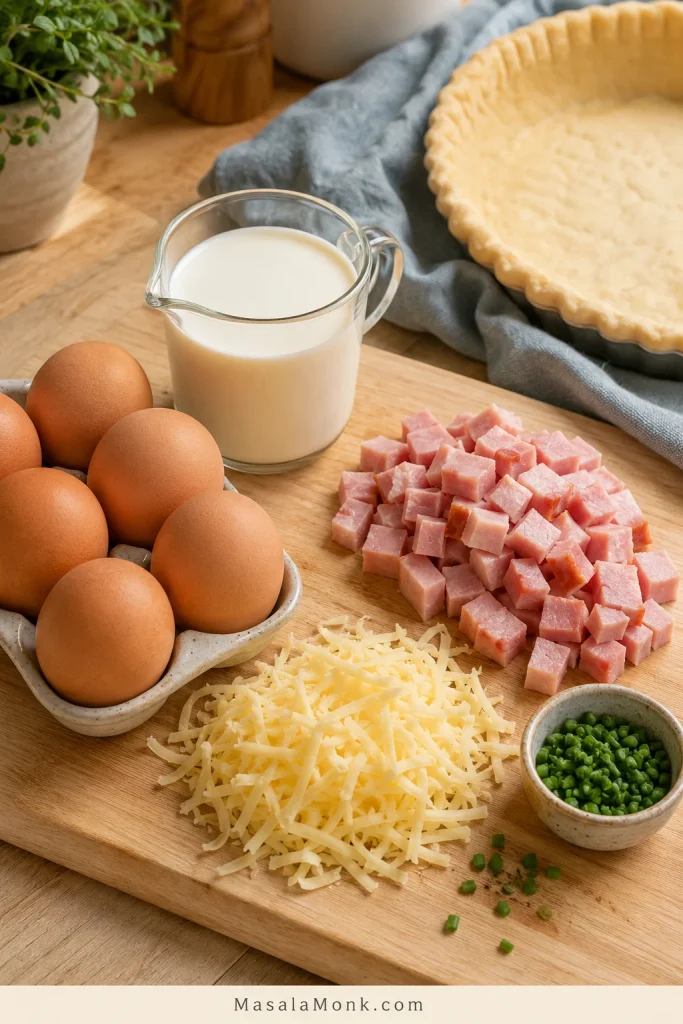
The base is simple: 5 large eggs, 1 cup dairy, 1½ cups diced ham, and 1½ cups cheese for one 9-inch / 23 cm quiche. That ratio keeps the center creamy but sliceable, so you do not end up with a stiff egg pie or a watery middle.
Start with the quick answer and recipe if you are ready to bake. The extra notes are there for frozen crusts, crustless baking, make-ahead timing, variations, and troubleshooting.
For one 9-inch / 23 cm ham and cheese quiche, use 5 large eggs, 1 cup dairy, 1½ cups cooked diced ham, and 1½ cups shredded cheese. Par-bake the crust, fill it, bake at 375°F / 190°C until the edges are set and the center is soft-set, then rest for 10 minutes before slicing.
Quiche Element
Use This
Eggs
5 large eggs
Dairy
1 cup / 240 ml / 8 fl oz half-and-half, or cream + milk
Ham
1½ cups / 200–225 g / 7–8 oz cooked diced ham, loosely measured
Cheese
1½ cups / 150–170 g / 5–6 oz shredded cheese, loosely measured
Oven
375°F / 190°C for a crusted quiche
Done when
Edges are set and the center is soft-set, not liquid
For a first bake, keep it simple: deep-dish frozen or refrigerated pie crust, half-and-half, 1 cup sharp cheddar, ½ cup Swiss, and diced cooked ham. Once you see how the center should wobble, the variations become much easier.
Use the base as a balance check: eggs help the custard set, dairy keeps it tender, and ham and cheese make the filling generous without weighing it down.
Choose Your Ham and Cheese Quiche Path
Start with the same creamy base, then choose the version that fits your day: frozen crust for ease, crustless for meal prep, or extra vegetables when the fridge needs clearing.
If This Is Your Situation
Best Path
You want the easiest brunch
Use a deep-dish frozen crust, half-and-half, sharp cheddar, Swiss, and cooked diced ham.
You have leftover holiday ham
Dice it small, pat it dry if needed, reduce the salt, and balance sweet glaze with Dijon and black pepper.
You want no crust
Grease the pie dish well and bake the same egg mixture at 350°F / 175°C until just set.
You want the creamiest texture
Use half-and-half, or equal parts heavy cream and whole milk.
You are adding vegetables
Cook, drain, and cool them before they touch the egg mixture.
You are meal-prepping
Bake the quiche first, cool it, slice it, then refrigerate or freeze the slices.
Ham and Cheese Quiche Recipe
Description
This easy quiche has a creamy egg custard, diced cooked ham, plenty of cheese, and a crisp-tender pie crust. Use a frozen deep-dish crust for the easiest version, or make it with homemade or refrigerated crust. Serve it for brunch, lunch, holidays, meal prep, or an easy dinner with salad.
Crustless note: For a no-crust version, use the same filling in a well-greased 9-inch / 23 cm pie dish and bake at 350°F / 175°C for 30–40 minutes. See the crustless ham and cheese quiche section for the full method.
Prep Time: 15 minutes
Par-Bake Time: 10–12 minutes
Final Bake Time: 35–45 minutes
Resting Time: 10 minutes
Total Time: About 1 hour 10 minutes to 1 hour 20 minutes
Servings: 6–8 slices
Equipment
9-inch / 23 cm pie dish or 9-inch deep-dish frozen pie shell
Rimmed baking sheet
Mixing bowl
Whisk
Measuring cups and spoons
Fork
Foil or pie shield
Wire rack
Instant-read thermometer, optional
Ingredients
1 9-inch / 23 cm deep-dish pie crust, homemade, refrigerated, or frozen
5 large eggs
1 cup / 240 ml / 8 fl oz half-and-half, or ½ cup / 120 ml heavy cream plus ½ cup / 120 ml whole milk
1½ cups / 200–225 g / 7–8 oz cooked diced ham, measured loosely, not packed
1½ cups / 150–170 g / 5–6 oz shredded cheese, measured loosely, not packed
2–3 tablespoons chopped green onions or chives
1 teaspoon Dijon mustard
¼ teaspoon black pepper
¼–½ teaspoon salt
Small pinch of nutmeg, optional
1 tablespoon butter or oil, optional, if sautéing onion, mushrooms, spinach, or other vegetables
Use ¼ teaspoon salt if your ham or cheese is salty. Use ½ teaspoon only if your ham is mild and your cheese is not very salty.
Instructions
1. Preheat and Set Up
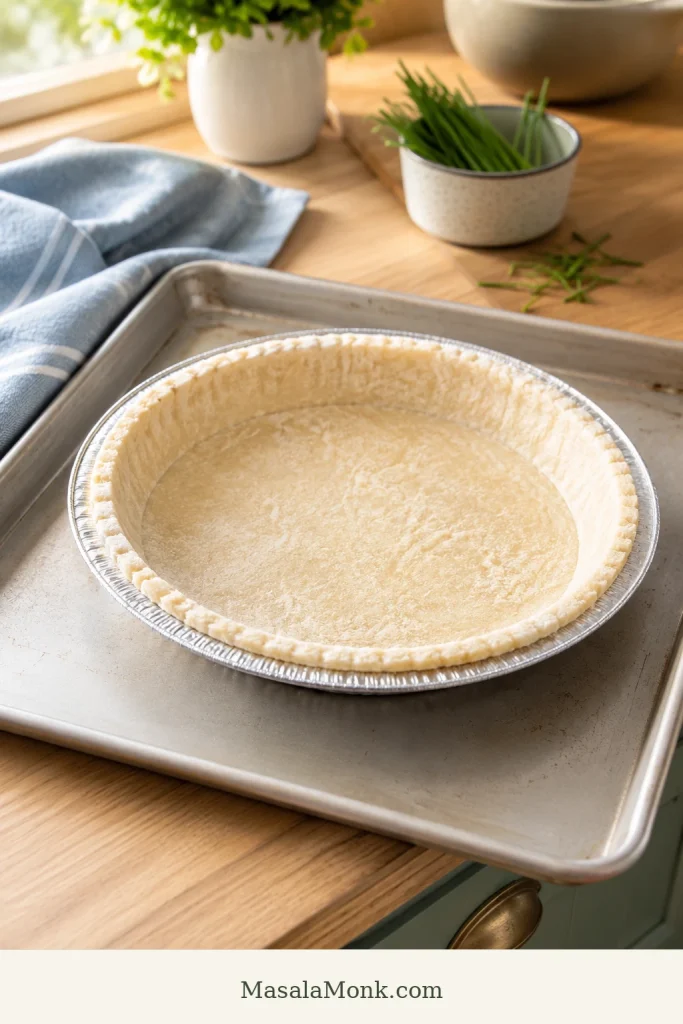
Heat the oven to 375°F / 190°C and set a rack in the middle or lower-middle position. Place the pie crust on a rimmed baking sheet so it is easier to move and any overflow is caught.
2. Par-Bake the Crust
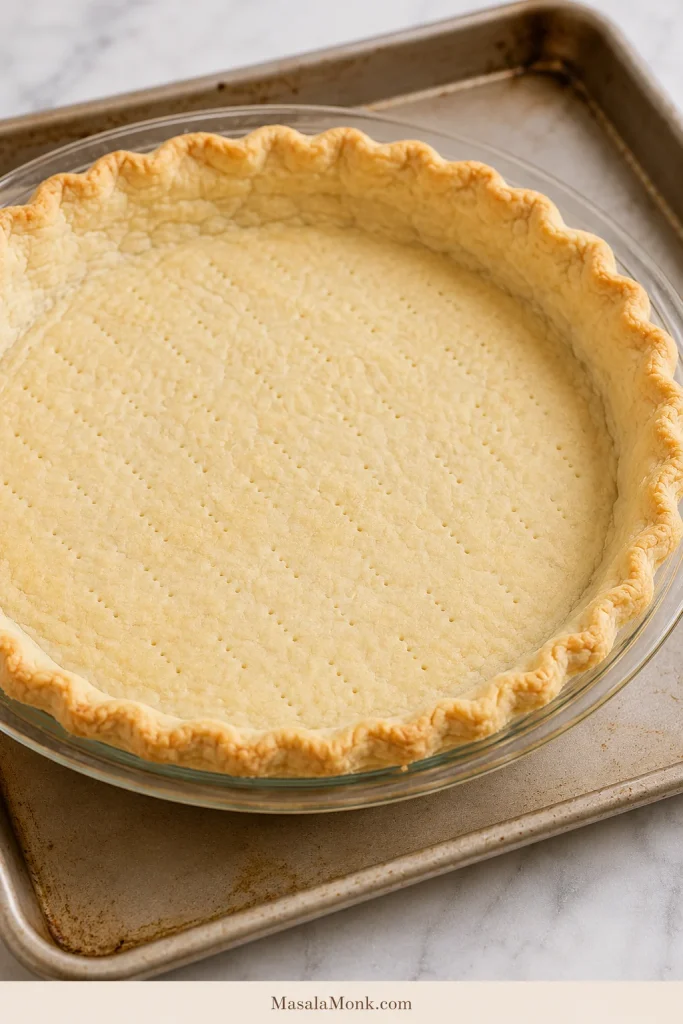
Give the crust a short head start for 10–12 minutes, or follow the package timing if using a frozen shell. The surface should look dry and lightly set, even if it is still pale. Gently press down any puffed spots with a spoon.
Par-bake the crust until the surface looks dry and lightly set; it should not be deeply browned yet because it bakes again with the custard.
3. Whisk the Custard
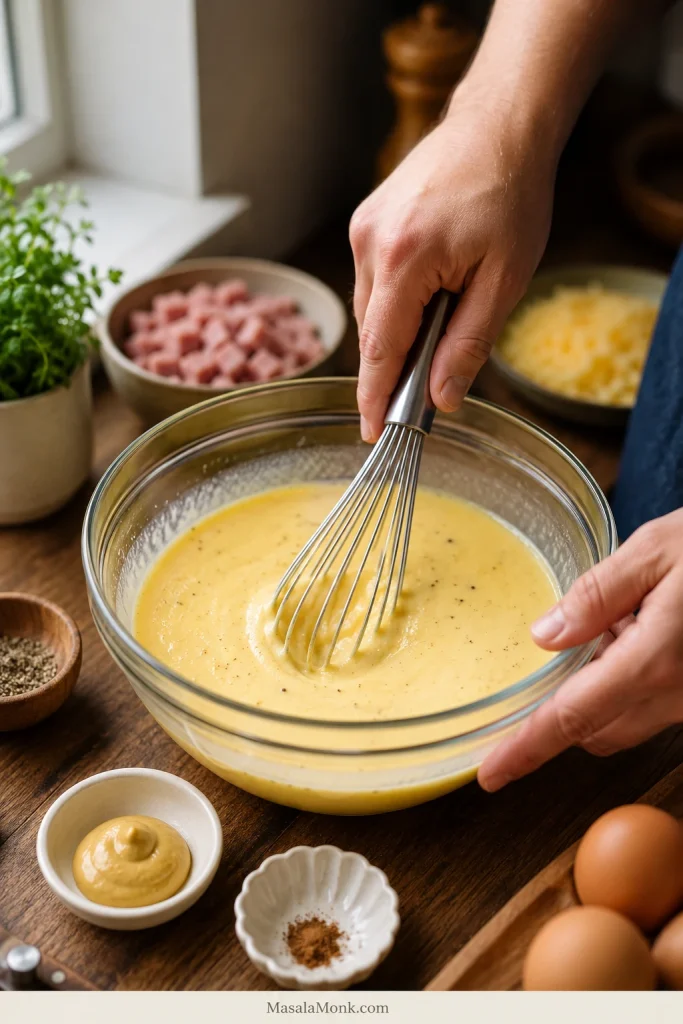
Combine the eggs, half-and-half, Dijon mustard, black pepper, salt, and nutmeg in a mixing bowl until the mixture looks smooth and evenly yellow. Stop once it is blended; the custard should not be bubbly or foamy.
Whisk the eggs and dairy just until smooth; a calm, even custard bakes more neatly than one whipped full of foam.
4. Layer the Ham, Cheese, and Chives
Scatter the diced ham evenly over the warm par-baked crust. Add the shredded cheese and green onions or chives so the filling is spread across the base before the custard goes in.
Layer the ham, cheese, and chives before the custard goes in so every slice gets flavor throughout instead of one heavy layer at the bottom.
5. Pour Without Overfilling
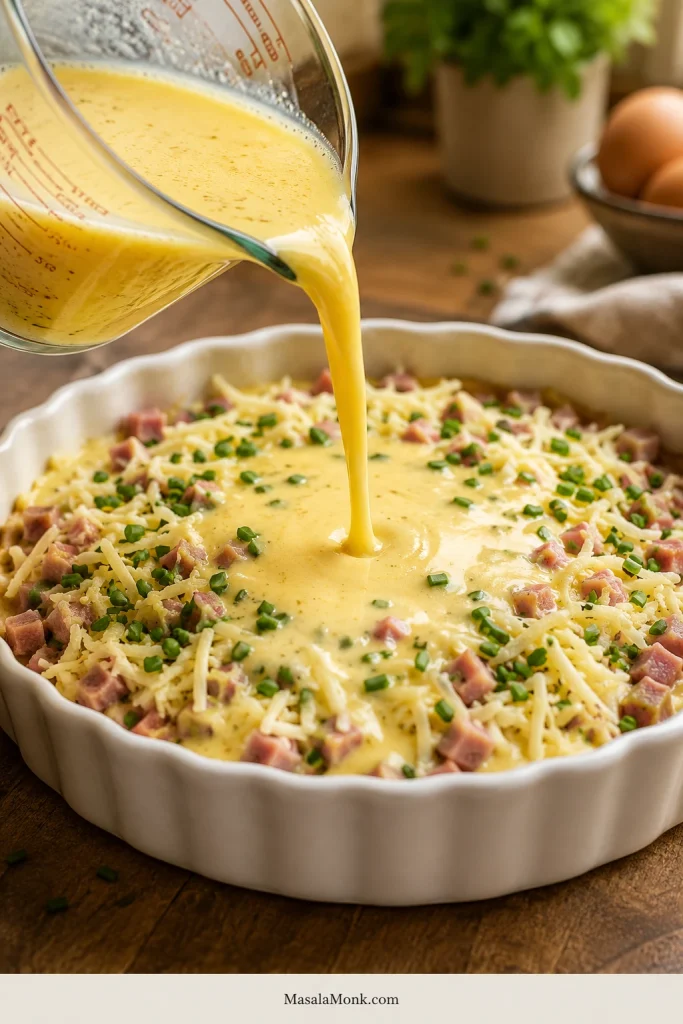
Add the egg mixture slowly over the ham and cheese so it can settle into the gaps. Stop before it touches the rim, especially if the crust is shallow. A clean oven is worth more than one extra spoonful.
Pour slowly so the custard settles between the ham and cheese; this helps the quiche bake evenly from the crust edge to the center.
A shallow crust may not hold every drop of custard. When the filling looks close to the top, save the extra for a greased ramekin instead of risking overflow.
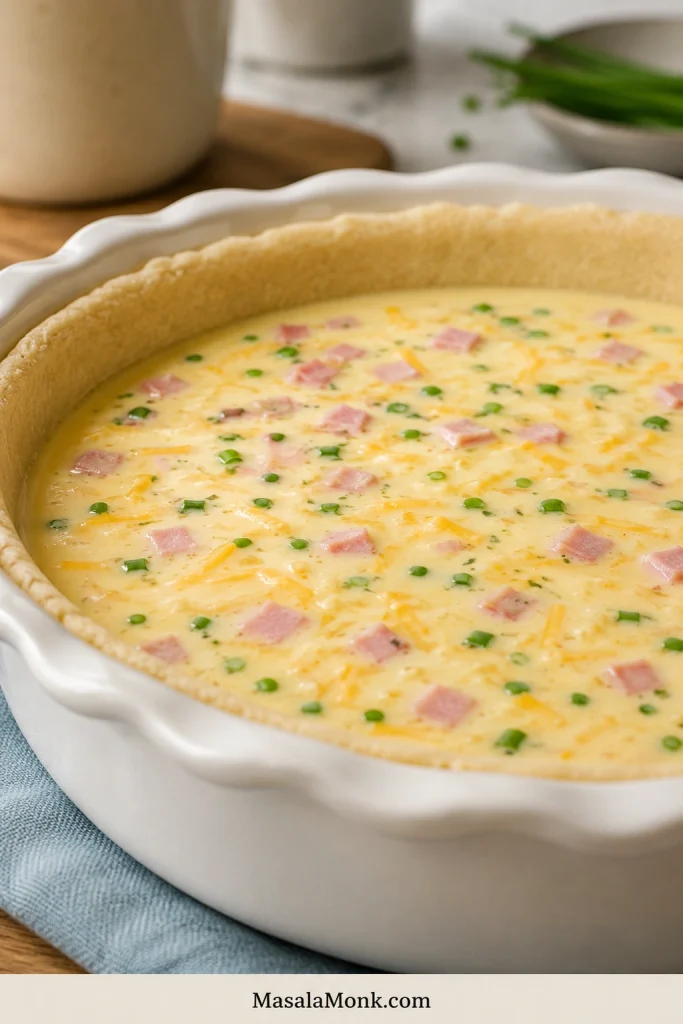
Stop before the filling reaches the rim; leaving visible crust above the custard is one of the easiest ways to prevent overflow in a deep-dish quiche.
6. Bake Until Soft-Set
Slide the quiche into the oven for 35–45 minutes, until the edges are set and the center moves like soft-set pudding when you gently nudge the pan. Cover the crust edge with foil or a pie shield if it browns too quickly, and tent the whole quiche loosely if the top colors before the center is ready.
A softly puffed top, golden cheese spots, and a browned crust edge are better doneness clues than waiting for the center to look firm.
7. Rest Before Slicing
Set the quiche on a wire rack for 10 minutes before cutting. The center settles as it cools, which helps the slices lift cleanly instead of slumping.
8. Serve Warm or Room Temperature
Bring slices to the table warm or at room temperature for the creamiest texture. Chilled leftovers are fine for quick lunches, but the custard tastes better once the chill comes off.
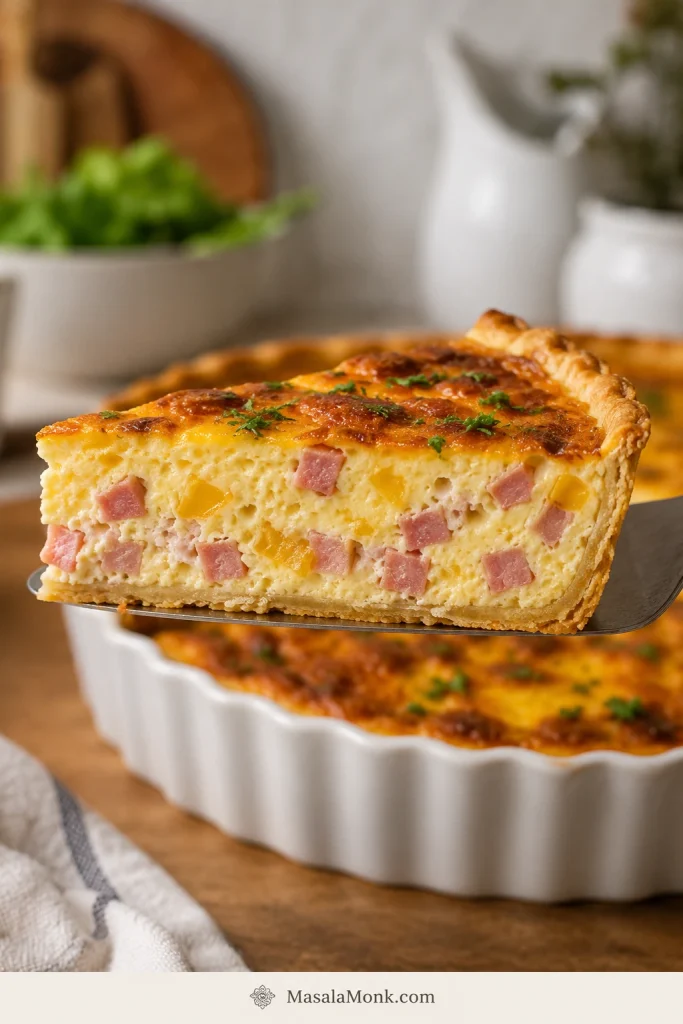
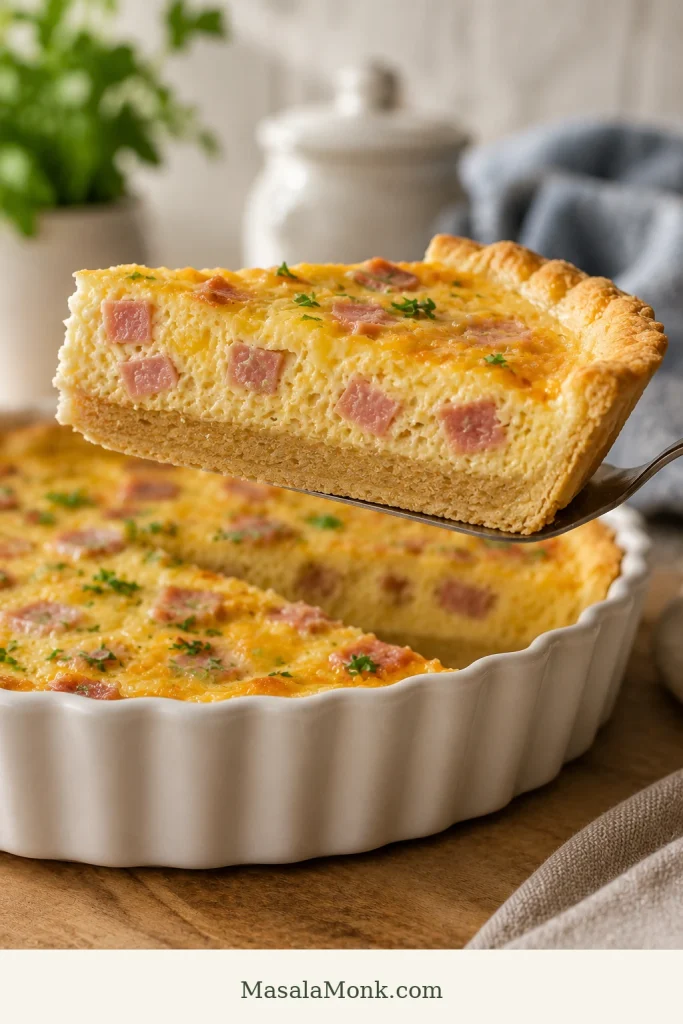
A good slice should look softly set in the center, with ham and cheese suspended through the custard instead of sunk into one dense layer.
A clean cross-section shows the target texture: ham suspended through the custard, a tender middle, and a crust strong enough to lift.
Recipe Notes
This recipe card is for the crusted version. For crustless baking, use the crustless note above or jump to the crustless quiche section.
If using frozen crust, make it deep-dish. Regular frozen shells can work, but they often cannot hold all the filling; the frozen crust notes explain why.
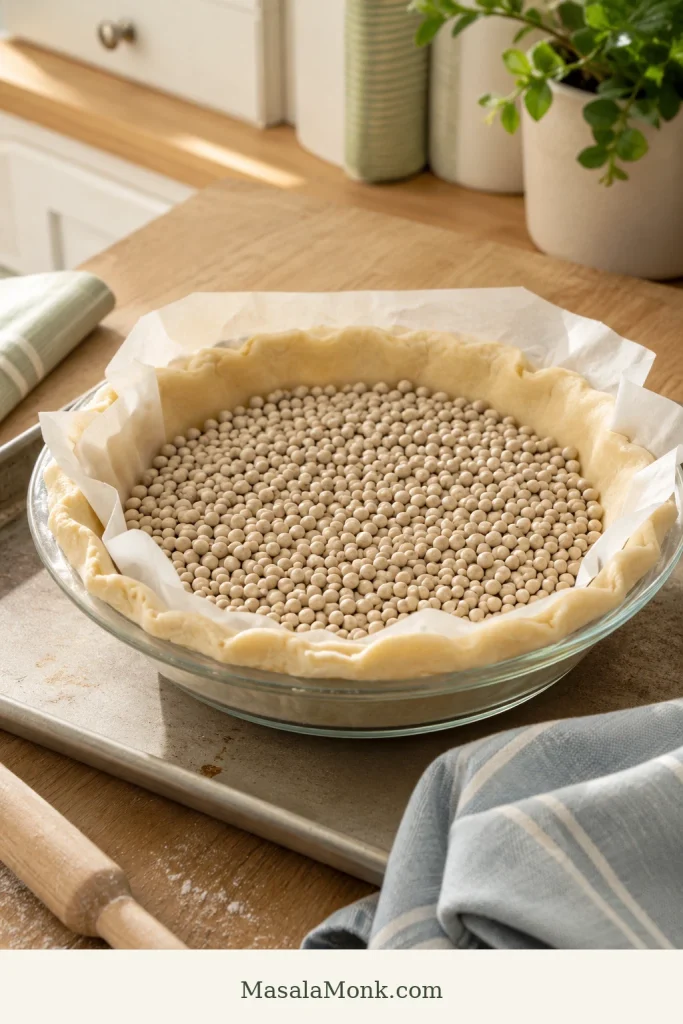
If using homemade or refrigerated pie dough, chill it in the dish, line it with parchment, add pie weights, dried beans, or uncooked rice, and par-bake until the edges begin to set. Frozen crusts can usually follow package directions.
Cook, drain, and cool vegetables before adding them so they do not throw off the texture.
Do not overfill a shallow crust. Extra egg mixture can be baked in a small greased ramekin.
Why This Recipe Works
That ratio does most of the work here: 5 large eggs + 1 cup dairy + 1½ cups ham + 1½ cups cheese. Five eggs give the slice structure, one cup of dairy keeps the center soft instead of omelet-like, and the ham and cheese stay generous without weighing down the custard.
The goal is a slice that lifts cleanly but still tastes soft and creamy, with little pockets of ham and melted cheese all the way through.
A short head start in the oven also protects the crust. It keeps the bottom from turning pale and soft once the wet custard goes in, and it helps you avoid the usual quiche problems: too much liquid, wet add-ins, a soft bottom crust, and eggs baked until rubbery.
Ingredients and Key Tips
Quiche is forgiving, but it is not random. Once you control moisture, salt, and bake time, the rest becomes flexible.
Ham
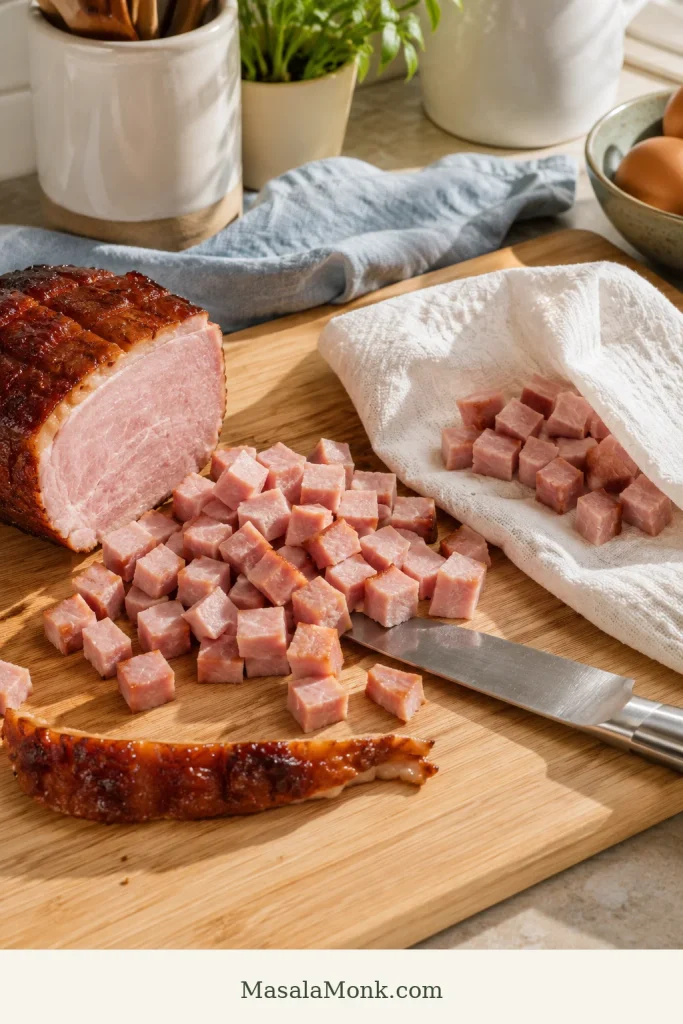
Almost any cooked ham works here: leftover holiday ham, ham steak, smoked ham, or thick-cut deli ham. Dice it small so it spreads evenly through the custard.
This is especially useful after a holiday meal, Sunday dinner, or any time you have cooked ham in the fridge. The ham is already seasoned and ready to help; you are not building brunch from nothing, just giving leftovers a better second life.
For deli ham, choose thicker slices and dice them small. Watery packages need a quick blot before the ham goes into the crust because extra moisture can affect the custard just like wet vegetables can.
Salty ham needs less salt in the egg mixture. You can always add a little salt at the table, but you cannot remove it once it is baked into the dish.
With sweet glazed ham, trim away any thick sticky edges before dicing. A little sweetness is fine, but too much glaze can make the quiche taste sweeter and more casserole-like than classic ham quiche. Dijon mustard, black pepper, cheddar, Swiss, or Gruyère will help balance it.
Blot wet ham before adding it; this small step helps prevent watery quiche, especially with deli ham or glazed leftovers.
Brown the ham if it is pale, wet, or mild. Skip this step if the ham is already smoky, dry, or strongly flavored. A quick 2–3 minutes in a dry skillet or a little butter gives the edges more savory flavor.
Eggs
Five eggs is the sweet spot for this size: enough structure to slice, but not so many that the center turns firm and omelet-like.
Dairy
For the creamiest everyday texture, half-and-half gives you the easiest balance. If half-and-half is not available where you live, use equal parts heavy cream and whole milk.
Whole milk also works for a lighter quiche. The center will be less rich, but it will still set if you keep the egg-to-dairy ratio steady.
Cheese
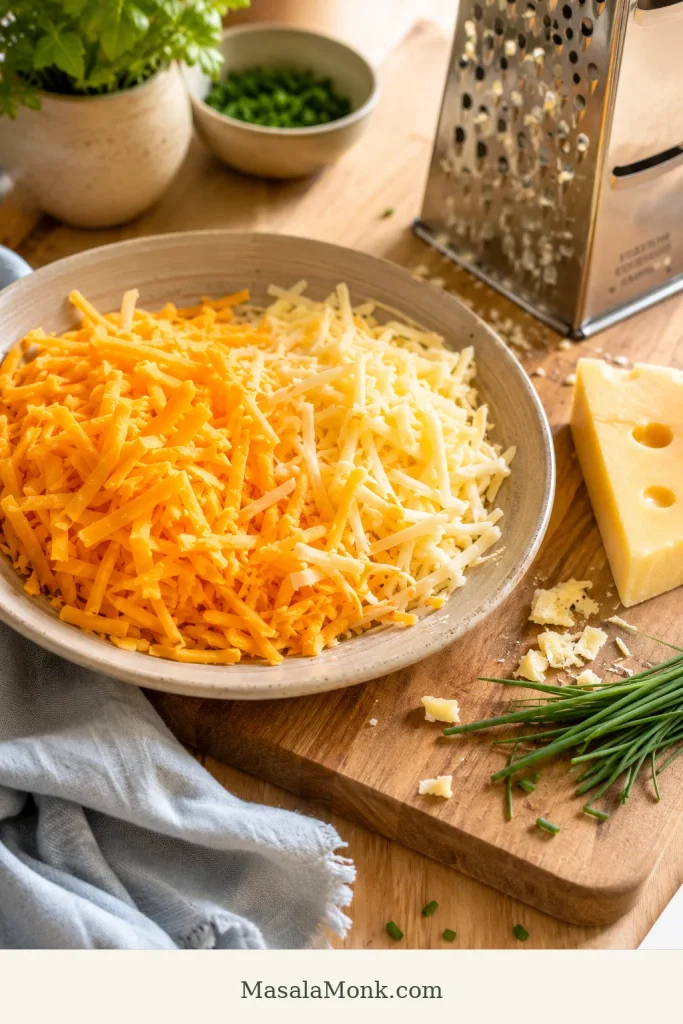
For cheese, stay with something that actually has flavor. Sharp cheddar gives the quiche that familiar melted ham-and-cheese pull, Swiss is mild and classic, and Gruyère makes the dish feel more brunch-table polished.
Measure shredded cheese loosely, not packed tightly into the cup. Too much cheese can make the quiche greasy, salty, or heavy. Freshly shredded cheese melts most smoothly, but pre-shredded cheese is fine when convenience matters.
Avoid fresh mozzarella unless it is very well drained. It can release water into the custard. Low-moisture mozzarella is safer, but it is mild, so it works better as part of a blend than as the main cheese.
Green Onions, Chives, Onion, or Garlic
Green onions and chives are the easiest because they can go straight into the egg mixture. If using yellow onion, shallot, or garlic, sauté them first so the flavor softens before baking.
Dijon, Pepper, and Nutmeg
Dijon mustard adds gentle sharpness without making the quiche taste mustardy. Black pepper keeps the custard from tasting flat. A tiny pinch of nutmeg is optional, but it works beautifully with eggs, cream, cheese, and ham.
Before You Bake, Check These 5 Things
If you remember only three things, par-bake the crust, control wet add-ins, and pull the quiche before the center turns firm. If the center still makes you nervous, the doneness cues below explain the wobble, resting time, and thermometer range.
The crust is par-baked and lightly set.
The ham is diced small and patted dry if it feels wet.
Any vegetables are cooked, drained, and cooled slightly.
The cheese and ham are measured loosely, not packed down.
The egg mixture sits below the rim of the crust.
Best Crust, Dairy, and Cheese Choices
This is where you can make the recipe fit your kitchen. Frozen crust, homemade crust, cream, milk, cheddar, Swiss, or Gruyère can all work — the goal is to keep the custard balanced and the crust from going soft.
Using a Frozen Pie Crust
If you are using a frozen crust, you are not cheating; you are making brunch easier. Choose a 9-inch deep-dish frozen crust if you can. Regular frozen shells can work, but they often cannot hold all the filling.
Keep the crust in its tin if it comes that way, place it on a rimmed baking sheet, prick the base lightly, and par-bake for 10–12 minutes before filling. Do not worry if it is not deeply browned after the first bake. It will go back into the oven with the custard.
A deep-dish frozen pie crust makes frozen crust quiche easier because it gives the egg custard enough room and helps reduce spillover.
Homemade or Regular Pie Crust
Not every 9-inch crust holds the same amount of custard. A regular 9-inch crust can still work, but you may not need every drop of the egg mixture.
If using homemade pie dough, chill it in the dish before blind baking. Line it with parchment, fill with pie weights, dried beans, or uncooked rice, and bake until the edges begin to set before removing the weights.
With homemade or refrigerated dough, blind-baking with parchment and pie weights helps the crust hold its shape before the wet filling goes in.
Do not fill the crust all the way to the rim. Quiche can puff as it bakes. If you have extra egg mixture, bake it in a small greased ramekin instead of forcing it into the crust.
What Dairy Makes the Creamiest Texture?
The dairy is where you can quietly change the whole personality of the quiche. Cream makes it rich, milk makes it lighter, and half-and-half sits comfortably in the middle.
Dairy
Texture and Flavor
Good Use
Heavy cream
Richest, softest, most custardy
Special brunch or holiday quiche
Half-and-half
Creamy but not too heavy
Everyday choice
Whole milk
Lighter and less rich
Lighter quiche that still sets
Low-fat milk
Less creamy and slightly less forgiving
Use only if you accept a lighter texture
½ cream + ½ whole milk
Rich and balanced
Easy substitute for half-and-half
If you do not have half-and-half, use ½ cup / 120 ml heavy cream + ½ cup / 120 ml whole milk. To make the quiche without heavy cream, use 1 cup / 240 ml whole milk.
Cheddar, Swiss, or Gruyère?
Ham needs cheese with enough flavor to stand up to it. Sharp cheddar gives bold, familiar flavor. Swiss gives a mild, nutty, classic brunch taste. Gruyère makes the custard richer and deeper.
For an everyday version, use 1 cup sharp cheddar + ½ cup Swiss. For a richer brunch version, use 1 cup Gruyère + ½ cup cheddar or Swiss. A little Parmesan can also be added for salty, nutty depth, but use it lightly.
Sharp cheddar with Swiss or Gruyère gives ham quiche familiar melt plus a more brunch-ready finish.
Bake Time, Doneness, and Visual Cues
For a crusted quiche, use 375°F / 190°C for 35–45 minutes. A shallow quiche may finish closer to 35 minutes, while a deep-dish or vegetable-heavy one may need closer to 45–50 minutes.
Use 350°F / 175°C for the crustless version or a very deep filling. Save 400°F / 200°C mainly for par-baking crust or quick browning, not for the full custard bake.
Visual Doneness Cues
After par-baking: the crust should look dry and lightly set, not deeply browned.
After whisking: the egg mixture should look smooth and lightly yellow, not frothy.
Before baking: the egg mixture should sit below the rim, with a little breathing room.
Near the end: the top may puff slightly and turn golden in spots.
When done: the center should move like soft-set pudding, not ripple like raw liquid.
After resting: the center should look calmer, and the slice should hold when lifted.
If the crust browns too quickly, cover the edges with foil or a pie shield and keep baking until the center is set. If the top browns before the center is ready, tent the whole quiche loosely with foil.
The first time you bake quiche, the wobble can feel wrong. It is not. The quiche is done when the edges are puffed and set, the center is soft-set but not liquid, and the top is lightly golden in places.
Thermometer and Resting Cues
If using a thermometer, the center should reach at least 160°F / 71°C for egg safety. For a tender, sliceable quiche, start checking around 165°F / 74°C and avoid pushing far past 185°F / 85°C. Carryover heat and resting time will help the center finish setting.
A thermometer gives extra confidence with quiche doneness: the center should be safe and set without baking until the eggs turn rubbery.
If you are unsure, give the quiche a few more minutes of rest before cutting rather than putting it back into the oven too quickly. Resting often fixes a soft-looking center; overbaking does not.
Let the quiche rest before slicing; this pause helps the center settle so the slices lift cleaner and taste creamier.
Crustless Ham and Cheese Quiche and Easy Variations
Once the base is steady, this quiche is easy to bend toward the day: crusted for brunch, crustless for meal prep, mini for parties or lunchboxes.
If You Want…
Do This
Classic ham and cheese quiche
Use cheddar + Swiss in a par-baked crust
Richer brunch quiche
Use Gruyère and a cream + milk mixture
Lighter quiche
Use whole milk instead of cream or half-and-half
Crustless quiche
Grease the dish well and bake at 350°F / 175°C
Vegetable quiche
Cook and cool vegetables before adding them
Mini quiches
Use muffin tins and fill each cup about ¾ full
Leftover ham quiche
Dice ham small and reduce added salt if needed
Crustless Ham and Cheese Quiche
The crustless version is not just the fallback. It is the faster, lighter version for meal prep or for anyone skipping pastry.
To make it crustless, skip the pie crust and bake the egg mixture in a well-greased 9-inch / 23 cm pie dish. Use the same base: 5 eggs, 1 cup / 240 ml dairy, 1½ cups ham, 1½ cups cheese, Dijon, pepper, and herbs.
Bake at 350°F / 175°C for 30–40 minutes, or until the center is just set. The crustless version is softer than the crusted version, so let it rest for at least 10 minutes before slicing.
The lighter crustless ham and cheese quiche uses the same creamy filling but bakes directly in a greased dish.
For another no-crust egg bake, the frittata recipe is the skillet-style route; for muffin-tin meal prep, use the egg muffins recipe.
Ham and Swiss Quiche
Ham and Swiss quiche has a mild, nutty, classic brunch flavor. Use Swiss for all or part of the cheese. A good blend is 1 cup Swiss + ½ cup sharp cheddar. Dijon mustard and chives work especially well with this version.
Ham and Spinach Quiche
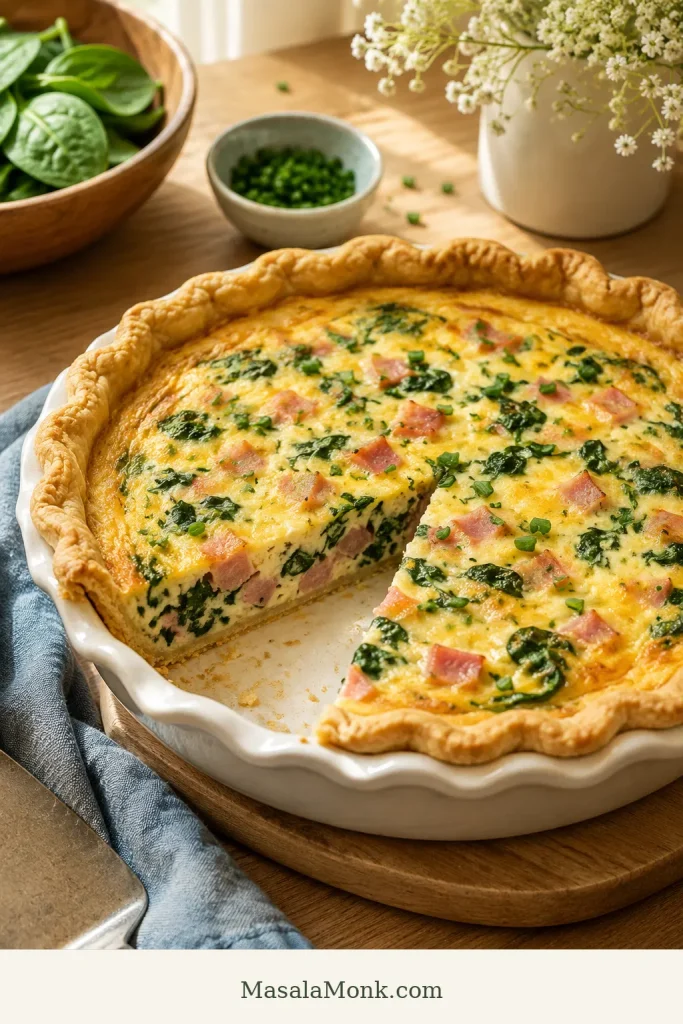
For ham and spinach quiche, use either 1 cup cooked fresh spinach or ½ cup frozen spinach that has been thawed and squeezed very dry. Spinach pairs well with Swiss, Gruyère, cheddar, feta, or goat cheese.
Wet spinach is not a small issue. It can make the center watery, even if the egg ratio is right.
Cook or squeeze spinach dry before making ham and spinach quiche; the greens should add color and flavor, not extra water.
Broccoli Ham and Cheese Quiche
For broccoli ham quiche, use 1 cup small broccoli florets. Steam, blanch, microwave, or sauté them first, then drain well and chop small. Sharp cheddar is the easiest pairing, but Swiss or Gruyère also work.
Small cooked broccoli florets keep broccoli ham and cheese quiche tender, balanced, and easy to cut.
Mushroom, Onion, Asparagus, and Other Add-Ins
Add-ins are where a good quiche can go watery, so treat them before they reach the crust. A few minutes in a skillet can save the whole dish.
Add-In
Amount
Prep
Mushrooms
¾–1 cup sliced
Sauté until the moisture evaporates
Onion or shallot
¼–½ cup chopped
Sauté until softened
Asparagus
¾–1 cup chopped
Blanch or sauté if thick
Bell pepper
½ cup diced
Sauté for better texture
Tomato
Small amount
Remove seeds and excess moisture
Let cooked vegetables cool for a few minutes before adding them. Hot add-ins can start setting the eggs unevenly before the dish even reaches the oven.
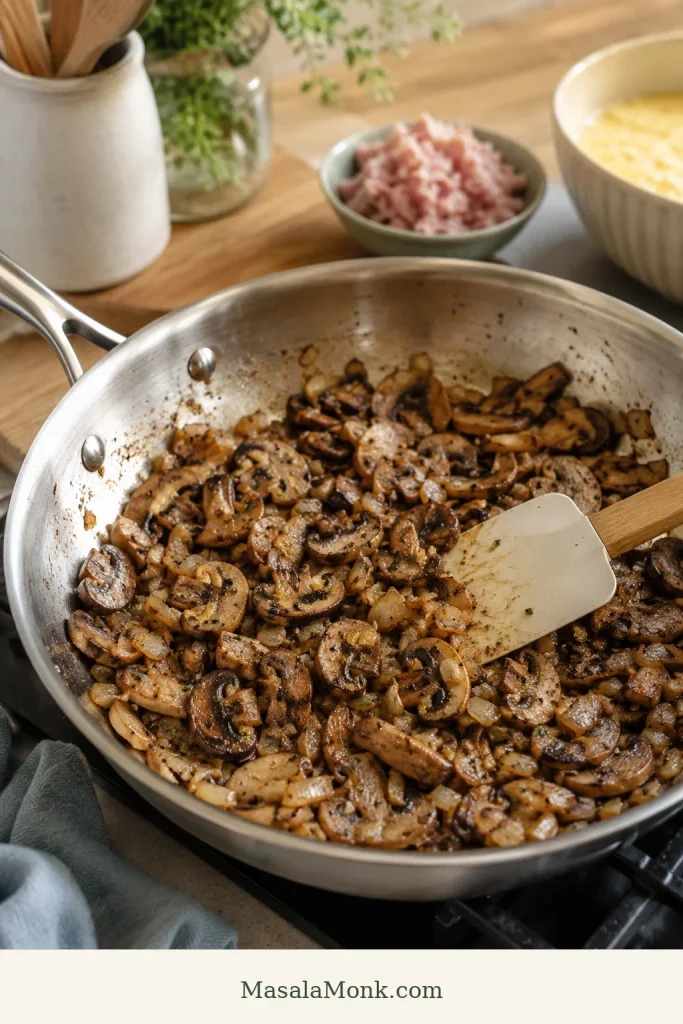
Sauté mushrooms and onions until their moisture cooks off; this is a simple fix for watery quiche.
Mini Ham and Cheese Quiche
Mini ham and cheese quiches are best when you want party bites, brunch trays, lunchboxes, or freezer-friendly portions. Use the same egg mixture, but cut the ham and add-ins smaller so each bite gets ham, cheese, and custard. For leftovers, use the make-ahead, storage, and reheating cues below.
The full filling usually makes about 10–12 regular muffin-size mini quiches or 24–30 mini muffin-size bites, depending on how much crust and add-ins you use.
Regular muffin tin: bake at 350°F / 175°C for 18–25 minutes.
Mini muffin tin: bake at 350°F / 175°C for 14–20 minutes.
With crust: press small pie crust or puff pastry rounds into greased cups before filling.
Without crust: grease the tin very well or use silicone liners.
Filling level: fill each cup about ¾ full so the egg mixture has room to puff.
Let mini quiches cool for 5 minutes before loosening them with a small knife. They freeze well after baking; reheat from chilled or thawed in a 325°F / 160°C oven until warmed through.
Party-size mini ham and cheese quiches work best with small pastry crusts, visible ham, and room for the custard to puff.
Other Shortcut Variations
Puff pastry works well for mini quiches and party bites. Crescent dough gives a softer, breadier crust. A Bisquick-style ham and cheese bake is closer to an impossible pie than a classic quiche, so it is better treated as a separate recipe rather than a small swap.
For an old-fashioned ham and cheese quiche, keep it simple: pie crust, cooked ham, cheddar and Swiss, half-and-half, green onions or chives, and black pepper.
Make Ahead, Storage, and Reheating
Quiche is one of the rare egg dishes that actually likes being made ahead. It can rest, settle, reheat, and still taste good when everyone finally reaches the table.
This is also why quiche works so well for hosting: it gives you something generous to serve without asking you to cook every egg to order. When the timing is sorted, jump to what to serve with it for plate ideas.
For a crisper crust, do not pour the raw egg mixture into the shell many hours before baking. The crust can absorb moisture and soften before it ever reaches the oven. If you want to prep ahead, par-bake the crust, dice the ham, shred the cheese, cook any vegetables, and keep the egg mixture separate until baking.
Let the quiche cool completely, then cover it and refrigerate for 3–4 days, whole or in slices. That timing lines up with USDA leftover food safety guidance.
Freezer
Quiche freezes more cleanly after baking. Cool it completely, wrap it tightly, and freeze it whole or sliced for up to 2 months for the creamiest texture.
The crust may soften slightly after freezing, but reheating in the oven helps bring it back. If freezing slices, wrap them individually or place parchment between them so they do not stick together.
For a freezer breakfast that reheats faster than quiche, MasalaMonk’s breakfast burrito recipe is the better handheld option.
Reheating
For a better texture, reheat slices in a 325°F / 160°C oven until warmed through. Reheat loosely covered with foil, then uncover for the last few minutes if the crust needs crisping.
The microwave works for individual slices when speed matters, but it will soften the crust. If reheating from frozen, thaw overnight in the refrigerator first.
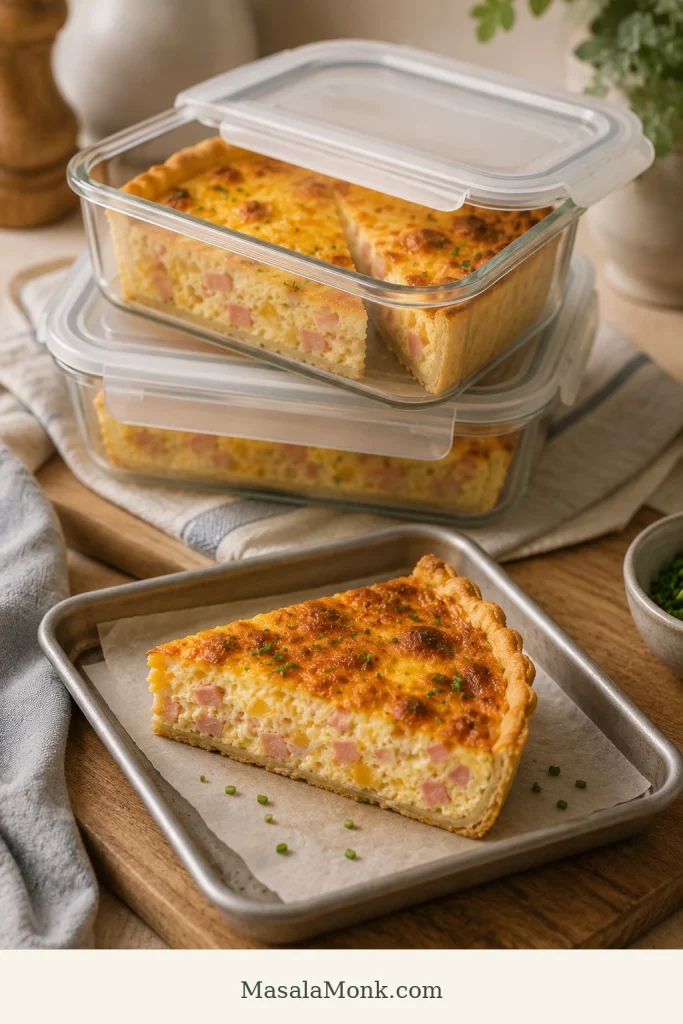
Make-ahead ham and cheese quiche slices store well once cooled; reheat them in the oven or toaster oven when you want the crust to stay crisp.
What to Serve with Ham and Cheese Quiche
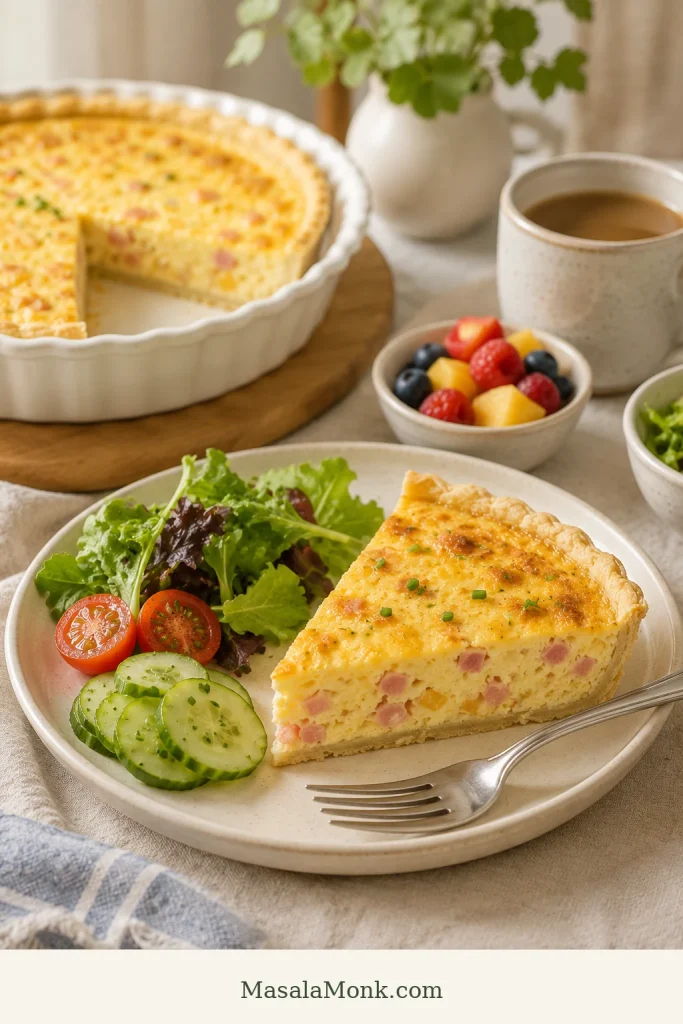
The quiche already brings richness, salt, and comfort. The best sides simply make the plate feel fresher. A crisp salad or fresh fruit keeps each creamy, salty bite from feeling heavy.
Serve the rich quiche with fruit, greens, cucumber, or coffee so the creamy, salty slices feel balanced.
Potlucks: cool slightly, slice cleanly, and serve warm or at room temperature.
How to Avoid Watery, Soggy, or Rubbery Quiche
When quiche goes wrong, it usually gives you clues. A watery middle, soggy bottom, rubbery texture, or salty bite can almost always be traced back to moisture, timing, salt, or overfilling — not to quiche being difficult.
Once you know what the center should look like, quiche stops feeling mysterious.
Problem
Most Likely Cause
Fix Next Time
Watery center
Wet vegetables, watery ham, too much dairy, or underbaking
Cook and drain add-ins, keep the ratio steady, and rest before slicing
Soggy crust
Crust not par-baked or custard sat in crust too long
Par-bake first and assemble close to baking
Rubbery texture
Overbaking
Pull while the center is still soft-set
Too salty
Salty ham and cheese plus full added salt
Use ¼ teaspoon salt or less with salty ham
Overflow
Shallow crust or filling too close to rim
Use deep-dish crust and stop below the rim
The 3 Biggest Quiche Mistakes
Skipping the par-bake: this is the fastest path to a soft bottom crust.
Adding wet ingredients: watery ham, spinach, mushrooms, and tomatoes can loosen the custard.
Baking until fully firm: pull it while the center is still soft-set, then let it rest.
Why is my quiche watery?
Watery quiche is almost always a moisture or timing problem. The usual culprits are wet spinach, raw mushrooms, watery ham, too much dairy, underbaking, or slicing before the center has had time to settle.
Cook and drain vegetables before adding them.
Squeeze spinach very dry.
Pat wet ham dry.
Use the 5 eggs to 1 cup dairy ratio.
Bake until the center is just set.
Rest for 10 minutes before slicing.
Why is my crust soggy?
A soggy crust usually means the crust was not par-baked, the egg mixture sat in the crust too long before baking, or wet ingredients released moisture into the bottom. Par-bake the crust, cook and drain vegetables, and avoid assembling the raw custard in the crust too far ahead.
The best no-soggy-bottom proof is underneath: the crust should look firm enough to lift, not pale, wet, or collapsed.
Why is my quiche rubbery?
Rubbery quiche is usually overbaked. Eggs become firm and tough when they cook too long. Remove the quiche when the center still has a gentle wobble. It will finish setting as it rests.
Why did the center not set?
The center may not set if the quiche is very deep, the oven temperature is too low, the mixture has too much liquid, or it simply needs more time. Cover the crust edges with foil if needed and continue baking until the center no longer looks liquid.
Why is it too salty?
Ham and cheese both bring salt. If your ham is salty, use less salt in the egg mixture. Dijon, black pepper, green onions, chives, and a small amount of cream can help balance the flavor without adding more salt.
Why did it overflow?
The crust may have been too shallow or filled too close to the top. Use a deep-dish crust when possible, stop before the egg mixture reaches the rim, and always bake the quiche on a rimmed baking sheet.
FAQs
Does ham and cheese quiche work without crust?
Yes. Grease a 9-inch / 23 cm pie dish, add the filling, and bake at 350°F / 175°C for 30–40 minutes. Rest before slicing so the center can settle.
Milk instead of cream: will the quiche still set?
Yes. Whole milk works. Keep it to 1 cup / 240 ml so the center still slices cleanly. It will taste lighter than a cream version, but it will still be a proper, sliceable quiche.
Best substitute for half-and-half
Use ½ cup / 120 ml heavy cream plus ½ cup / 120 ml whole milk. You can also use 1 cup / 240 ml whole milk for a lighter version.
Best cheese for ham quiche
Sharp cheddar gives bold flavor, Swiss gives a classic ham quiche taste, and Gruyère makes it richer. A cheddar-Swiss blend is the easiest everyday choice.
Frozen pie crust: deep-dish or regular?
Deep-dish is better because regular frozen shells may not hold all the filling. Par-bake the crust first, place it on a rimmed baking sheet, and avoid overfilling it.
Spinach in quiche: fresh, frozen, cooked, or raw?
Fresh spinach should be wilted first, and frozen spinach should be thawed and squeezed very dry. Raw or wet spinach can make the quiche watery.
Make-ahead quiche: bake first or assemble later?
Bake it first for the easiest make-ahead plan. To prep parts ahead, keep the par-baked crust, cooked add-ins, cheese, ham, and egg mixture separate until baking.
Freezing ham and cheese quiche: whole or sliced?
Both work. Bake it first, cool it completely, then freeze it whole or in slices. Slices are easier for quick meals. Thaw overnight in the refrigerator and reheat in the oven for the best texture.
Doneness cues for creamy, sliceable quiche
The edges should be set, and the center should look soft-set, not liquid. A gentle wobble is okay. If using a thermometer, the center should reach at least 160°F / 71°C.
Watery quiche: what went wrong?
Quiche usually turns watery because of wet vegetables, watery ham, too much dairy, underbaking, or slicing too soon. Cook and drain add-ins, use the right egg-to-dairy ratio, and rest it before slicing.
Is ham and cheese quiche the same as quiche Lorraine?
Not exactly. Quiche Lorraine is traditionally made with bacon or lardons and a savory custard. Ham and cheese quiche has a similar creamy egg base, but uses cooked ham and usually includes cheese like cheddar, Swiss, or Gruyère.
Final Thoughts
Once the ratio makes sense, this stops feeling like a recipe you have to follow tightly and starts feeling like a brunch formula you can use. Cooked ham after a holiday, spinach from the fridge, cheddar one week, Swiss the next, crusted for brunch, crustless for meal prep — it all works as long as the base stays steady.
That is the kind of recipe worth keeping: calm, flexible, and good enough for both leftover ham and a proper brunch table. Slice it warm, serve it with something crisp or fresh, and let the ham, cheese, custard, and flaky crust do the quiet work.
If you make it, start with the cheddar-Swiss version once, then tell me where you took it: crustless, extra herbs, leftover holiday ham, spinach, broccoli, or a different cheese blend.
Eggs Benedict looks calm and polished on a brunch plate, but the sauce is usually where the nerves begin. The muffins are toasting, the eggs are poaching, the butter is melting, and suddenly one small bowl of hollandaise can decide whether breakfast feels effortless or chaotic.
This easy Benedict sauce recipe keeps that moment simple. It makes a warm, buttery, lemony blender hollandaise in about 5 minutes, without standing over a double boiler or worrying that the sauce will split before the eggs are ready.
This is not just a fast hollandaise. It is a no-panic Benedict sauce guide with the cues that matter most: hot butter, a slow pour, the right glossy texture, the right amount for brunch, and a rescue plan if the sauce starts to split.
Already dealing with an oily or broken sauce? Jump to the troubleshooting guide and come back to the method once the sauce is stable.
Benedict sauce is hollandaise by its brunch name: warm, buttery, lemony, and built for poached eggs. Once the cues are clear, it stops feeling fragile and starts feeling like something you can actually trust on a busy brunch morning.
Benedict sauce is hollandaise sauce, the warm sauce traditionally served over Eggs Benedict and sometimes simply called Eggs Benedict sauce. It is made by emulsifying egg yolks, melted butter, lemon juice, salt, and a little cayenne or white pepper into a smooth, buttery sauce.
So if a restaurant menu, recipe card, or brunch guide says hollandaise, it is talking about the same sauce many home cooks mean when they search for Benedict sauce.
In the classic method, the yolks are whisked gently over heat while butter is slowly added. In this blender version, the machine does the whisking for you. Melted butter is streamed into seasoned yolks, and the mixture turns from loose yellow liquid into a pale, creamy sauce in minutes.
A good batch tastes rich, bright, and lightly tangy. It should fall in a soft ribbon and settle over poached eggs instead of sliding straight off like melted butter.
Benedict Sauce vs Hollandaise Sauce
The name changes with the setting. Restaurants and classic cookbooks usually call it hollandaise; at home, many people call it Benedict sauce because that is the dish they know and love. “Eggs Benedict sauce” is another everyday name for the same butter-and-yolk emulsion.
Either way, the sauce has one job: make poached eggs taste like brunch. A good batch lands between melted butter and mayonnaise: soft, warm, and able to settle over the egg. The texture matters more than the name.
For classic Eggs Benedict, this sauce goes over toasted English muffins, ham or Canadian bacon, and poached eggs. If you like building breakfast around eggs and bread, these breakfast sandwich ideas are useful for English muffin, bagel, croissant, and waffle-style brunch bases.
Benedict Sauce At-a-Glance
Detail
What to Know
Time
About 5 minutes
Yield
About 220–240 ml / just under 1 cup
Serves
4 generous Eggs Benedict plates or 6–8 individual Benedict halves
Main method
Standard blender
Most important cue
Pour hot melted butter slowly over 30–45 seconds
Texture target
Silky, spoon-coating, and pourable
Best timing
Make it near the end and serve warm
Best with
Eggs Benedict, poached eggs, salmon, crab, asparagus, and roasted vegetables
Start with the numbers that prevent guesswork: about 5 minutes, just under 1 cup of sauce, and a slow butter pour. Once those cues are clear, the whole brunch feels easier to manage.
Ingredients That Make It Work
With a sauce this simple, there is nowhere for dull lemon or lukewarm butter to hide. Fresh lemon, hot melted butter, and a slow enough pour do most of the work; the yolks and butter build the body while the seasonings keep the richness balanced.
For a reliable batch, use:
3 large egg yolks, about 50–55 g total
10 tablespoons unsalted butter, 142 g / 5 oz
1 tablespoon fresh lemon juice, 15 ml
½ teaspoon Dijon mustard, optional
¼ teaspoon fine salt, plus more to taste
Small pinch cayenne pepper or white pepper
1–3 teaspoons hot water, only if needed to thin
Each ingredient has a specific job. Yolks hold the emulsion, hot butter builds body, lemon keeps the sauce bright, and a little hot water lets you fine-tune the final pour.
Egg Yolks
Egg yolks give hollandaise its color, body, and ability to hold the butter. They are the reason the sauce becomes creamy instead of separating into lemon juice and melted fat.
Use large eggs if possible. Very small eggs may make the finished batch looser, while extra-large yolks can make it thicker and richer. Large yolks give the most predictable result.
Unsalted Butter
Use 10 tablespoons unsalted butter, or about 142 g / 5 oz. This gives about 220–240 ml / just under 1 cup of sauce: enough for a small brunch, without leaving you with a large bowl of delicate leftover hollandaise.
The butter should be fully melted before it goes into the blender. Look for butter that is liquid, lightly steaming, and possibly gently foaming. It should not be browned. If it has melted but no longer feels hot, rewarm it briefly before pouring.
Hot butter is one of the biggest success cues in blender hollandaise. It should be fully melted and lightly steaming, because “just melted” butter may not give the yolks enough warmth to thicken properly.
You do not need a thermometer. The practical cue is enough: hotter than “just melted,” but not cooked into browned butter. Salted butter also works, but start with less added salt and adjust after blending.
The pour matters as much as the heat, so check the slow butter pour cue before you start blending.
Lemon, Dijon, Salt, and Pepper
Fresh lemon keeps the sauce from tasting heavy. Dijon is optional, but it gives the flavor a rounder tang without making the finished sauce taste like mustard.
Start with ¼ teaspoon fine salt, then adjust at the end. A small pinch of cayenne or white pepper should lift the butter and lemon, not make the sauce spicy.
Hot Water
Hot water is your texture adjustment. If the hollandaise tightens as it sits, a teaspoon or two brings it back to a softer pour without restarting.
Useful ratio: for about 220–240 ml / just under 1 cup Benedict sauce, use 3 large yolks, 10 tablespoons hot melted butter, 1 tablespoon lemon juice, salt, and a small pinch of cayenne or white pepper. Dijon is optional, but helpful.
Once everything is measured, move to the blender method so the butter can go in while it is still hot.
How to Make This Blender Hollandaise
Once the butter is hot, the recipe moves fast. Measure the ingredients first, melt the butter, then pour slowly while the blender does the hard part. After the butter is melted, the actual blending takes less than a minute.
1. Blend the Yolks Until Lighter and Frothy
Add the egg yolks, lemon juice, Dijon mustard if using, salt, and cayenne or white pepper to the blender.
Blend for 15–30 seconds, until the yolks look slightly lighter and a little frothy. This gives the butter a better base to blend into.
Blend the yolks before adding butter so the sauce has movement from the start. This quick frothy stage helps the butter blend in smoothly instead of breaking the emulsion.
2. Melt the Butter Until Hot and Lightly Steaming
Melt the butter in a small saucepan over low to medium-low heat, or in the microwave in short bursts. It should be fully liquid and lightly steaming. A little foam is fine; browning is not needed.
If the butter cools while you are setting up the blender, warm it again for a few seconds. Starting with butter that is still hot gives the sauce a better chance of thickening properly.
3. Stream the Butter Slowly for 30–45 Seconds
Turn the blender on low to medium-low. Remove the center cap from the lid. With the blender running, pour the butter through the opening in a thin, steady stream.
Think of the butter pour as the whole recipe: slow enough for the yolks to keep up, warm enough to help them thicken, steady enough to stay smooth. If the butter goes in all at once, the emulsion is more likely to break.
The slow pour is the heart of this easy hollandaise sauce. When the butter goes in over 30–45 seconds, the yolks have time to absorb it and turn creamy instead of greasy.
Avoid jumping straight to high speed once the butter starts going in. Too much splashing can coat the sides of the blender instead of feeding the sauce evenly.
After blending, use the ribbon test to confirm the sauce is thick enough for poached eggs.
4. Adjust Until Glossy and Spoon-Coating
Once all the butter is blended in, stop and check the sauce. It should look paler, thicker, and creamier than when you started, with a buttery-lemon smell rather than an eggy one.
The payoff is immediate: a pale, glossy sauce that smells like butter and lemon and falls from the spoon in a soft yellow ribbon. That is the point where Eggs Benedict stops feeling like a restaurant trick.
The shift from loose to glossy tells you the emulsion has formed. Once the sauce turns paler, thicker, and smoother, it is ready for tasting, adjusting, and spooning over eggs.
Too thick: loosen with hot water, one teaspoon at a time.
Flat flavor: add a tiny pinch of salt or a few drops of lemon.
Too sharp: blend in a little more warm melted butter.
Greasy or split: use the rescue method in the troubleshooting section.
Taste before you fix. Hollandaise often needs one tiny adjustment, not a full rescue.
Perfect Texture Cues
Perfect hollandaise should feel like a warm custard sauce, not melted butter and not mayonnaise. It should cling, move, and pour.
The Soft Ribbon Test
The spoon test is the easiest check. Dip a spoon into the sauce. It should coat the back, then fall in a soft ribbon when lifted. It should not look oily around the edges, grainy, foamy, or separated.
A proper ribbon should fall slowly from the spoon and settle back into the bowl. That tells you the sauce is thick enough for poached eggs while still loose enough to pour.
When it coats, ribbons, and shines, the batch is ready. Oily edges, however, mean the sauce needs fixing before it reaches the eggs.
Oily edges mean it is time to use the boiling-water rescue, not keep pouring the sauce over eggs.
Texture Guide: Glossy, Thick, or Split
Texture tells you what to do next. Glossy Benedict sauce is ready, thick sauce needs hot water, and split sauce needs a rescue before it ever reaches the eggs.
What You See
What It Means
What to Do
Silky, warm, and pourable
The sauce is right
Serve soon or hold gently warm
Very thick or mayonnaise-like
The sauce is too tight or has cooled
Blend or whisk in hot water 1 teaspoon at a time
Thin and weak
The emulsion may not have fully formed
Blend a little longer; warm very gently if needed
Greasy or separated
The emulsion broke
Use the boiling-water rescue below
Grainy or scrambled
The yolks overheated
Restart for the smoothest result
A sauce that thickens as it sits is not ruined. Hollandaise naturally tightens as it cools. A teaspoon or two of hot water can bring it back to a softer pouring texture.
At this point, you know the three things that protect the sauce: warmth, movement, and a little patience. The recipe card below keeps those cues in one place.
A quick blender Benedict sauce made with egg yolks, hot melted butter, lemon juice, and a pinch of cayenne. It turns glossy, buttery, and spoon-coating in minutes, ready for poached eggs, smoked salmon, asparagus, or crab.
Prep Time 2 minutes
Melt Time 3 minutes
Total Time 5 minutes
Yield About 220–240 ml / just under 1 cup
Servings 4 plates or 6–8 halves
Method Standard blender
Best Served Fresh and warm
Hold Time 15–30 minutes over hot water
Ingredients
3 large egg yolks, about 50–55 g total
10 tablespoons unsalted butter, 142 g / 5 oz
1 tablespoon fresh lemon juice, 15 ml
½ teaspoon Dijon mustard, optional
¼ teaspoon fine salt, plus more to taste
Small pinch cayenne pepper or white pepper
1–3 teaspoons hot water, only if needed to thin
Instructions
Add the egg yolks, lemon juice, Dijon mustard if using, salt, and cayenne or white pepper to a blender.
Blend for 15–30 seconds, until the yolks look slightly lighter and a little frothy.
Melt the butter until fully liquid, hot, and lightly steaming. Do not brown it.
With the blender running on low to medium-low, slowly pour the hot butter through the lid opening in a thin stream. Aim to pour over 30–45 seconds.
Blend for a few more seconds, then stop and check the sauce. It should be smooth, warm, and spoon-coating.
Taste and adjust with a few drops of lemon juice, a tiny pinch of salt, or a little cayenne if needed.
If the sauce is too thick, blend in hot water 1 teaspoon at a time until it pours smoothly.
Serve warm over Eggs Benedict, poached eggs, smoked salmon, asparagus, crab cakes, or vegetables.
Recipe Notes
Use fully melted butter that is still hot enough to steam lightly.
Give the butter 30–45 seconds to stream in. That slow pour is what helps the sauce stay smooth.
The finished batch should be warm, silky, and pourable. If it tightens, loosen it with a small splash of hot water.
Best served fresh. Hold briefly over hot water if needed, and try the boiling-water rescue if the sauce splits.
Keep the recipe card close for the two cues that matter most: hot butter and a slow pour. With blender hollandaise, those small checks protect the texture before the sauce ever reaches the eggs.
Why This Blender Method Works
Hollandaise works because egg yolks can hold butter and lemon together when they are blended gradually. The blender is not replacing technique completely; it is giving you constant movement while the yolks slowly accept the butter.
The blender helps most at the moment where hollandaise usually fails: the first few seconds of adding butter. The yolks need movement before they need speed. That is why this recipe starts by blending the yolks alone, then adds hot butter slowly instead of dumping everything in at once.
The blender helps most at the fragile beginning, when the yolks first meet the butter. Instead of relying on frantic whisking, you get steady movement while the emulsion forms.
If you enjoy understanding sauces, the same emulsion idea shows up in homemade mayonnaise too: the yolks help hold fat and liquid together so the sauce turns creamy instead of separated.
Yolks create the base. They give the butter and lemon a structure to blend into.
Hot butter adds body. It warms and loosens the yolks while building richness.
A slow pour protects the emulsion. The yolks get time to absorb the butter instead of breaking.
Lemon and water keep it balanced. Lemon cuts the richness; water lets you soften the texture if it tightens.
Once you see the emulsion form, the sauce feels much less mysterious. It is not magic; it is just a slow pour, steady movement, and a little heat working together.
Best Blender, Jar, or Bowl to Use
Tiny batches sound convenient, but many full-size blenders struggle when there is not enough yolk mixture for the blades to catch. This batch size is intentional: large enough for most standard blenders to work properly, but not so large that you end up with a bowl of fragile leftover sauce.
Use a standard blender for the easiest full small-batch brunch sauce.
Use an immersion blender if you have a tall, narrow jar that lets the sauce pull into the blade.
Use a double boiler if you want more deliberate yolk heating and do not mind whisking.
Use a bowl and whisk if you have no appliance and can work slowly over gentle heat.
Use a food processor only in a pinch; wide bowls can make small batches harder to emulsify.
A standard blender is the easiest tool for this batch, although a tall jar or whisk bowl can work when needed. Choose the setup that gives the sauce movement without overheating it.
For the blender method, use a blender with a lid that has a removable center cap. That opening lets you pour in the butter while the blender runs. You will also need a small saucepan or microwave-safe cup for melting butter, a measuring cup with a spout, and a spatula.
Once you know your blender can handle the batch, the next question is how much sauce to make.
How Much Sauce to Make for Brunch
How Much Sauce Per Plate?
Plan on 1½–2 tablespoons sauce per Benedict half, or 3–4 tablespoons per plate when each plate has two halves. On most plates, that gives you a generous pour without flooding the muffin.
A normal Eggs Benedict plate needs enough hollandaise to coat the egg, not drown the muffin. Use 3–4 tablespoons per plate, then make a 1.5x batch if potatoes, asparagus, salmon, or crab are joining the table.
Serving Need
Sauce Amount
Practical Note
1 Benedict half
1½–2 tablespoons
Enough to coat the egg without flooding the muffin
1 plate / 2 halves
3–4 tablespoons
A normal restaurant-style pour
2 plates
⅓–½ cup
A small amount; some blenders may struggle with tiny batches
4 plates
¾ cup to just under 1 cup
The ideal home brunch batch
8 Benedict halves
Just under 1 cup
A lighter pour for each half
Extra saucy brunch
1¼ cups or 1.5x batch
Useful if serving asparagus, salmon, or potatoes too
Yield and Batch Size
You will get about 220–240 ml / just under 1 cup, depending on yolk size and how much water you use to adjust the texture. That is enough for 4 generous plates or 6–8 individual Benedict halves, depending on how heavy your pour is.
This batch makes just under 1 cup, enough for about four generous plates. That keeps the recipe practical for brunch without leaving too much delicate sauce behind.
This is also the part of brunch where people quietly ask for “just a little more sauce,” so make the 1.5x batch if potatoes, asparagus, or salmon are also on the table.
For the least stressful cooking order, use the brunch timing sequence before you start poaching eggs.
The Easiest Brunch Timing Order
Eggs Benedict is not difficult because of one step. It feels difficult because everything wants to be warm at the same time. The easiest rhythm is simple: toast, warm, poach, blend, assemble.
Eggs Benedict feels calmer when the order is clear: toast, warm, poach, blend, assemble. The sauce comes last so it lands on the eggs while still warm and glossy.
Feeding a table and want something lower-pressure? A breakfast casserole with hash browns is easier to make ahead than poaching eggs one by one.
Make the Sauce Last
Toast the English muffins first and keep them warm.
Warm the ham, Canadian bacon, smoked salmon plate, spinach, or other base.
Have the poaching water ready and poach the eggs close to serving time.
Make the blender hollandaise last, once the other parts are almost ready.
Assemble immediately and spoon the sauce over the eggs while it is warm.
Make the hollandaise after the muffins, base, and poached eggs are nearly ready. That way, the sauce spends less time waiting and more time coating the plate beautifully.
When the eggs finish before the sauce, hold the poached eggs briefly in warm water. When the sauce finishes first, keep it gently warm over hot water and loosen it before serving if needed.
How to Hold Hollandaise Without Splitting It
This sauce is smoothest right after blending, but short holding is fine. Think warm bath, not stovetop cooking. You are keeping the sauce comfortable, not cooking it again.
A warm water bath buys you time without turning holding into cooking. Keep the bowl gently warm, then loosen the hollandaise with hot water if it thickens before serving.
Spoon the sauce into a warm bowl.
Set the bowl over a pan of hot water, not boiling water.
The bowl should feel warm, not aggressively hot.
Stir occasionally so the edges do not overheat.
Hold for 15–30 minutes if needed.
If it thickens, loosen it with a teaspoon or two of hot water.
That gentle hold buys you time without making the sauce feel like another thing to manage. Do not put hollandaise over direct high heat; too much heat can make it grainy or cause the yolks to scramble.
Brunch timing tip: make the sauce last whenever possible. If the rest of the plate is ready, fresh blender hollandaise makes Eggs Benedict feel much easier.
If the sauce thickens or separates while waiting, use the troubleshooting guide before serving.
Troubleshooting: How to Fix Benedict Sauce
If the sauce breaks, thickens, or looks wrong, pause before throwing it away. Most problems are fixable unless the yolks have fully scrambled.
A sauce that looks wrong for a moment is not a failed brunch. It is usually just asking for heat, water, or a slower hand. Look first, fix second.
Save split sauce. Restart scrambled sauce. If the sauce is oily or separated, the emulsion can often come back. If the yolks have turned grainy or scrambled, the smooth texture is usually gone.
Split hollandaise and scrambled hollandaise need different decisions. If it looks oily, try saving it; however, once the yolks turn grainy, restarting is usually the smoother path.
The 3 Mistakes That Usually Break It
Adding the butter too fast. The yolks need time to absorb the butter.
Using butter that has cooled too much. Lukewarm butter can make the sauce weak or greasy.
Heating the finished sauce too aggressively. Direct heat can scramble the yolks or split the sauce.
Most hollandaise problems are easier to fix when you identify the texture first. Thick sauce needs a little hot water, thin sauce needs more blending, and a broken emulsion needs the rescue step.
Problem
Likely Cause
Fix Now
Split or greasy texture
Butter went in too fast, butter cooled too much, or the emulsion broke
Blend in 1 tablespoon boiling water slowly. Add a second tablespoon only if needed.
Too thick
It cooled down or the emulsion is too tight
Whisk or blend in hot water 1 teaspoon at a time.
Too thin
Butter was not hot enough, yolks were under-blended, or the sauce needs a little more time
Blend a little longer. If needed, warm very gently while whisking.
Grainy texture
Yolks overheated or started to scramble
Straining may help slightly, but restarting usually gives the best result.
Too lemony
Too much acid for the amount of butter
Blend in a little more warm melted butter.
Flat flavor
Not enough salt, lemon, or gentle heat
Add a tiny pinch of salt or a few drops of lemon juice.
Cooled before serving
It sat too long or the bowl was cold
Warm gently over hot water and loosen with hot water if needed.
The Boiling-Water Rescue for Split Sauce
If your sauce looks greasy or separated, add 1 tablespoon boiling water to a clean blender or bowl. With the blender running, or while whisking constantly, slowly drizzle the broken sauce into the hot water. The heat and water can help pull the emulsion back together.
The boiling-water rescue gives split hollandaise a clean place to rebuild. Add the broken sauce slowly, because the emulsion needs a fresh start, not another rushed pour.
If the sauce improves but still looks slightly broken, add another tablespoon of boiling water only if needed. Do not keep adding water blindly, or the sauce can become too thin.
No blender does not mean no hollandaise. Use the bowl-and-whisk path when equipment is the issue; use the double-boiler path when you want more deliberate yolk heating.
No blender does not mean no hollandaise. A bowl and whisk solves the equipment problem, while a double boiler gives you gentler control over yolk heating.
Bowl-and-Whisk Hollandaise
Use the same ingredient amounts. Set a heatproof bowl over barely simmering water, making sure the bottom of the bowl does not touch the water. Whisk the yolks, lemon juice, and 1 tablespoon water until the mixture looks lighter and slightly thickened, then remove the bowl from the heat and slowly whisk in the melted butter.
It works well, although it needs a slower hand and more attention than the blender version. Keep the heat gentle, whisk constantly, and do not let the bowl get too hot.
Double-Boiler Hollandaise
For a more traditional cooked-yolk approach, set a heatproof bowl over a pan of barely simmering water, again making sure the bowl does not touch the water. Whisk the egg yolks, lemon juice, and 1 tablespoon water until the mixture looks slightly lighter, warm, and a little thicker.
Remove the bowl from the heat, then gradually whisk in warm melted butter. If the sauce tightens too much, loosen it with warm water in small splashes.
This method takes longer than the blender version, but it gives you more control over warming the yolks. Keep the heat gentle; hollandaise likes warmth, not aggression.
Food Safety Note for Blender Hollandaise
Blender hollandaise is warmed mostly by the melted butter. Because of that, the yolks may not get as thoroughly heated as they would in a custard or double-boiler sauce. For young children, pregnant people, older adults, or anyone immunocompromised, use pasteurized eggs or choose the double-boiler method above. For general egg-safety guidance, see the FDA egg safety guide.
This is not meant to make the sauce feel intimidating; it simply gives careful households a clear path: use pasteurized eggs, or choose the double-boiler method above.
Homemade vs Packet Hollandaise
There is no shame in packet or jarred hollandaise on a chaotic morning. Convenience has its place, especially for casseroles, breakfast bakes, or low-pressure sides. For classic Eggs Benedict, though, fresh blender sauce tastes brighter, warmer, and more buttery-lemony.
Packet hollandaise can help on a busy morning, but homemade blender sauce gives you more control: brighter lemon, softer texture, and a warmer, fresher pour.
The homemade version also lets you adjust the plate in real time: more lemon for salmon, a thicker pour for eggs, a looser sauce for asparagus, or a little cayenne for crab. Packet sauce rarely gives you that kind of control.
Flavor Variations
Think of the base sauce as the calm version. Lemon makes it brighter, Dijon makes it rounder, cayenne makes it warmer, and herbs make it feel fresher.
Once the base sauce is smooth, small flavor changes can match the plate. Lemon sharpens salmon, Dijon rounds out ham, cayenne suits crab, and herbs brighten spring vegetables.
Extra lemon: add a few more drops at the end for smoked salmon, asparagus, or crab.
Dijon hollandaise: use ½–1 teaspoon Dijon for classic Eggs Benedict, ham, or breakfast potatoes.
Cayenne hollandaise: add a slightly larger pinch for crab Benedict, steak and eggs, or rich seafood plates.
White pepper hollandaise: use white pepper instead of cayenne for a more traditional brunch flavor.
Herb hollandaise: stir in chopped chives, dill, or tarragon after blending for salmon, asparagus, or spring brunch plates.
Smoked paprika hollandaise: add a small pinch for potatoes, steak, or roasted vegetables.
For dietary swaps, a good dairy-free butter can make a hollandaise-style sauce closest to the original. Yogurt or mayo-based versions are lighter shortcuts, while cashew or tofu sauces belong more in vegan Benedict territory. They can be useful, but they are alternatives rather than classic hollandaise.
More Ways to Use It
Once the main Benedict plate is handled, this lemony butter sauce can stretch into the rest of brunch: vegetables, seafood, potatoes, and simple egg plates.
Spoon it over asparagus with black pepper, smoked salmon with extra lemon, crab cakes with a little cayenne, or breakfast potatoes when you want the plate to feel more like brunch than leftovers.
Beyond Eggs Benedict, hollandaise works best where butter, lemon, and warmth already make sense: asparagus, salmon, crab cakes, potatoes, and simple egg plates.
Egg dishes: classic Eggs Benedict, Eggs Florentine, poached eggs on toast, steak and eggs, or a slice of frittata when you want a brunch plate that still feels egg-forward.
Toast and brunch plates: spoon a little over poached eggs, sautéed greens, or avocado toast when you want something richer than lemon or hot sauce.
Seafood: try it with smoked salmon, crab cakes, salmon croquettes, shrimp, scallops, or grilled salmon.
Vegetables and potatoes: use it with asparagus, roasted broccoli, broccolini, breakfast potatoes, grain bowls, or vegetable plates topped with eggs.
If the food underneath is rich, use a slightly sharper sauce with a few extra drops of lemon. If the food is lean or vegetable-heavy, the classic version works beautifully.
Storage and Reheating
Hollandaise is at its best right after blending, while it is still warm, glossy, and loose enough to spoon over eggs.
If you have leftovers, refrigerate them in a covered container and use them within 1–2 days for best quality. The sauce will thicken when cold and may separate slightly. That does not always mean it is ruined, but reheating needs to be gentle.
Freezing is not recommended. The emulsion usually suffers when thawed and reheated, so the texture will not be as smooth as a fresh batch.
Fresh hollandaise has the smoothest pour, although a short fridge stay is manageable. Reheat slowly over warm water; freezing and harsh heat both work against the emulsion.
How to Reheat It
Set the sauce in a heatproof bowl over warm water.
Whisk gently as it loosens.
Add small splashes of hot water if it is too thick.
Use very low heat only; do not boil.
If using a microwave, use very short bursts and whisk between each one.
You can hold it briefly and reheat leftovers carefully, but if texture really matters, make the sauce fresh.
For meal-prep mornings, sturdy egg dishes are much easier to store. These egg muffin cups are a better make-ahead option when you want eggs ready for the week instead of a delicate sauce.
The Brunch Payoff
Once you know the slow pour, the soft ribbon, and the gentle warm hold, the final plate feels much less fragile.
This is the brunch payoff: warm hollandaise, a runny yolk, and a toasted muffin catching the sauce. Once you know the cues, Benedict sauce feels far less fragile than it looks.
Need a quick answer instead? The Benedict sauce FAQs cover storage, reheating, salted butter, lemon swaps, and sauce amounts.
Benedict Sauce FAQs
Is Benedict sauce the same as hollandaise?
Yes. Benedict sauce is the everyday name many home cooks use for hollandaise when it is served on Eggs Benedict. The recipe is the same basic butter, yolk, lemon, and seasoning emulsion.
What is Eggs Benedict sauce made of?
Eggs Benedict sauce is usually made with egg yolks, melted butter, lemon juice, salt, and cayenne or white pepper. This blender version also includes optional Dijon mustard for a little extra brightness.
Why did my sauce split?
It usually splits when the butter goes in too quickly, cools too much, or the emulsion never fully forms. If it looks oily or separated, try the boiling-water rescue before restarting.
How do I fix sauce that is too thin or too thick?
For a thick sauce, whisk in small splashes of hot water until it loosens. For a thin sauce, blend a little longer; if needed, warm it gently while whisking. Avoid high heat because the yolks can scramble.
How long can hollandaise stay warm?
Hold it for 15–30 minutes over hot water, not direct heat. Stir now and then, and loosen it if it thickens. If the bowl feels hot enough to cook eggs, it is too hot for holding hollandaise.
Can I make or reheat it ahead of time?
It is best made fresh. You can hold it warm for 15–30 minutes, and leftovers can be reheated gently over warm water, but hollandaise thickens and can separate as it cools. Treat reheating as a careful rescue, not a full make-ahead plan.
Does blender hollandaise cook the egg yolks?
The melted butter warms the yolks, but blender hollandaise may not cook them fully like a custard. Use pasteurized eggs or the double-boiler method if that matters for your household.
Can I make it without a blender?
Yes. Use the same ingredients in a heatproof bowl over barely simmering water. It takes more whisking than the blender method, but the cue is the same: gentle heat, slow butter, smooth texture.
Is Dijon mustard required?
Dijon is optional. Use it when you want a rounder, slightly tangier sauce; leave it out when you want a more classic hollandaise flavor.
Can I use salted butter?
Salted butter works, but treat the recipe salt as optional at first. Blend the sauce, taste it, then add only what it needs.
What can I use instead of lemon juice?
Fresh lemon is best because it gives hollandaise a clean brightness. White wine vinegar can work in a pinch, but start with less because it can taste sharper and more pointed than lemon.
How much sauce do I need for four Eggs Benedict plates?
For four plates with two Benedict halves each, plan on ¾ cup to just under 1 cup sauce. This recipe makes enough for a normal pour; make 1.5x if everyone likes extra sauce or if potatoes, asparagus, or salmon are also on the table.
Why is my hollandaise pale instead of bright yellow?
Egg yolk color varies. Some yolks make a deeper yellow sauce, while others make a paler one. If the flavor and texture are right, the color is not a problem.