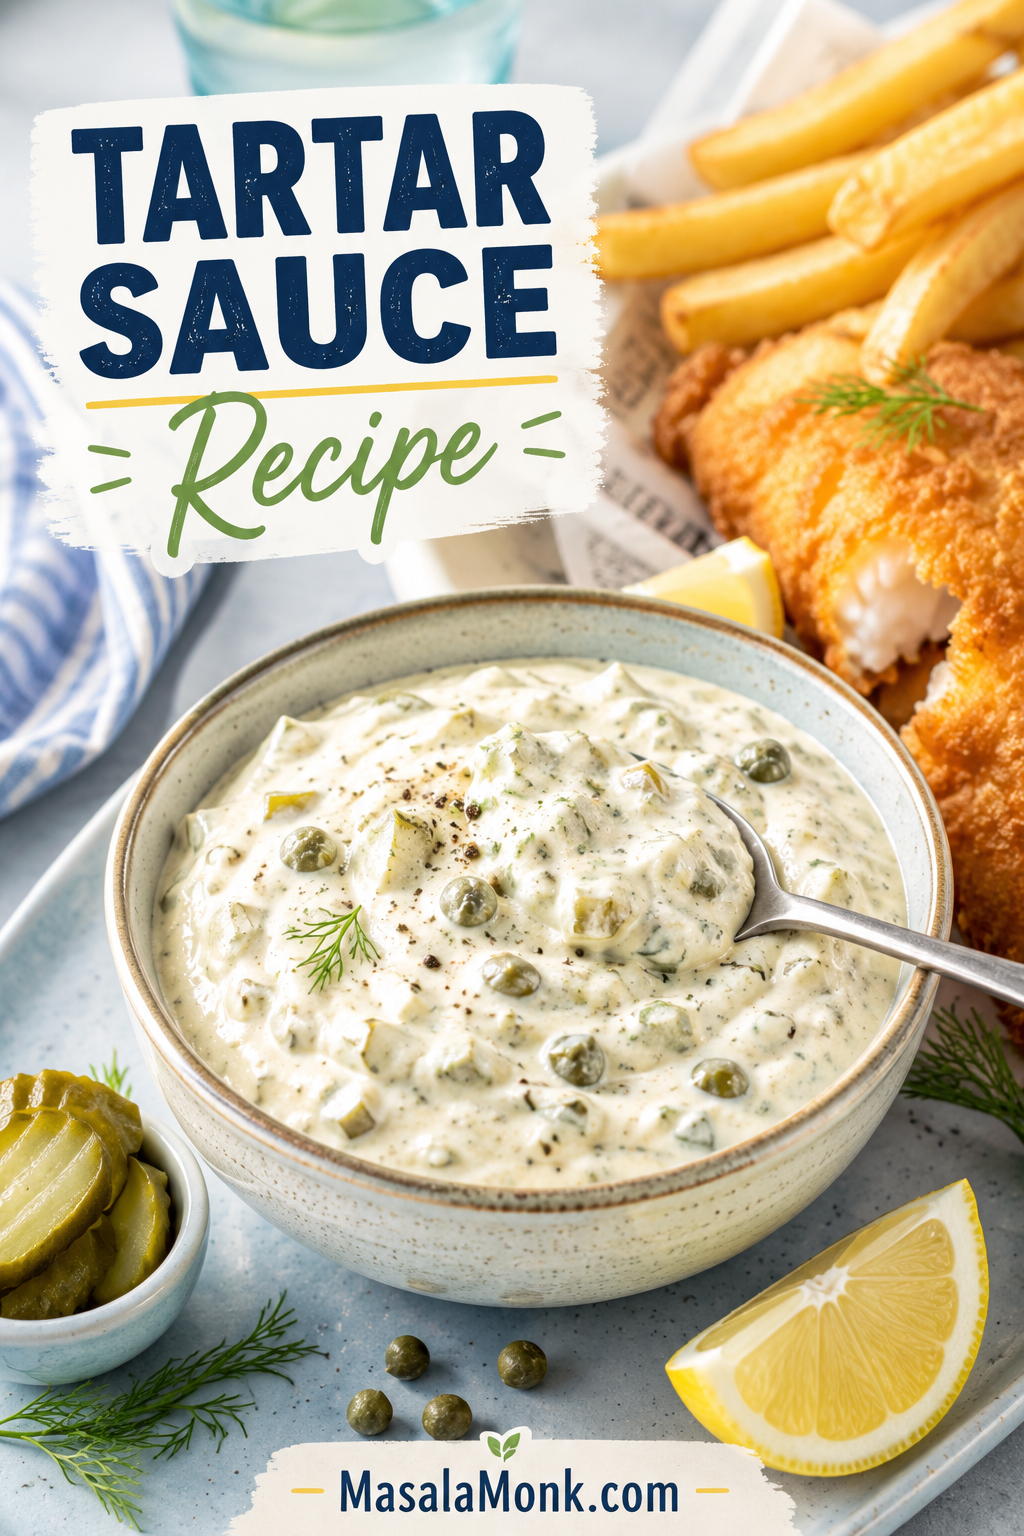
The best tartar sauce recipe makes hot fried fish taste better, not heavier. It should be creamy enough to cling, loose enough to spoon, and full of tiny pickle-and-caper bites so every forkful gets a little crunch, lemon, salt, and freshness.
This no-cook homemade tartar sauce is built for fish and chips, fish sticks, crab cakes, salmon cakes, shrimp, fries, and fried fish sandwiches. Start with the classic dill pickle version when you want the best match for fish and chips, use the quick relish version when dinner is moving fast, and use the substitution notes when the fridge is missing relish, pickles, capers, lemon, or mayo.
What’s in This Guide
Make the Sauce
Quick Answer: How to Make Tartar Sauce
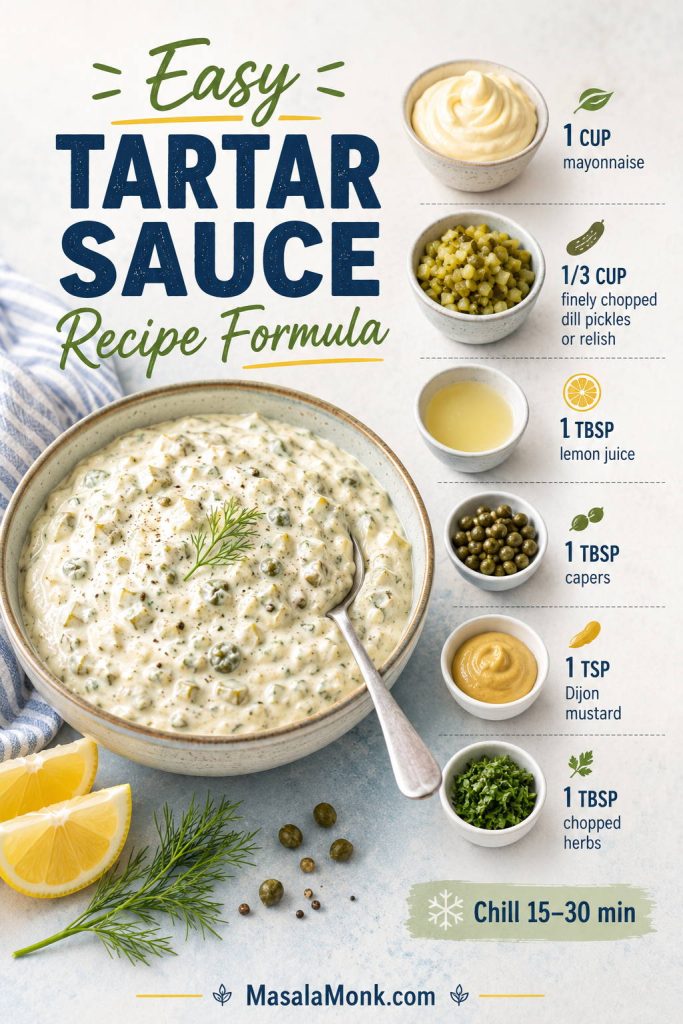
To make tartar sauce, stir mayonnaise with finely chopped dill pickles or relish, lemon juice, capers, Dijon mustard, herbs, and black pepper. Chill it for 15 to 30 minutes if you have time. For fish and chips, start with dill pickles, gherkins, or cornichons; for fish sticks or soft fish sandwiches, sweet relish gives a milder diner-style sauce.
Best default ratio: For every 1 cup of mayo, use about ⅓ cup finely chopped dill pickles or relish, 1 tablespoon lemon juice, 1 tablespoon capers, 1 teaspoon Dijon, and 1 tablespoon chopped herbs. Make it before you start frying, and the sauce will be cold, rested, and ready when the fish hits the plate.
Not sure which version fits your meal? Use the style guide below before you start mixing.
Homemade Tartar Sauce at a Glance
| Prep time | 10 minutes |
| Cook time | 0 minutes |
| Rest time | 15–30 minutes recommended; 1 hour if using raw onion or shallot |
| Yield | About 1¼ cups / 300 ml |
| Serving size | 2 tablespoons / 30 ml |
| Servings | 8–10 |
| Best with | Fish and chips, fried fish, fish sticks, seafood cakes, shrimp, fries, and fish sandwiches |
| Main texture | Thick, spoonable, lightly chunky, and easy to dip |
| Storage | Mayo-based sauce: best quality within 4–7 days; Greek yogurt sauce: 2–3 days |
| Freezing | Not recommended |
Start with this bowl when dinner is moving fast; the notes below are there for texture choices, missing ingredients, lighter bases, and different seafood plates.
Homemade Tartar Sauce Recipe for Fish and Chips
This no-cook sauce is thick enough to sit on hot fish without sliding off, but still loose enough to spoon. The key is fine chopping: the pickles and capers should show up in every bite without turning the sauce into a bowl of relish.
Make the bowl before the fish goes in the oil, and the sauce will taste more settled by the time dinner is ready.
Ingredients
- 1 cup mayonnaise, about 225 g / 240 ml / 8 fl oz
- ⅓ cup finely chopped dill pickles, gherkins, or cornichons, about 55–65 g
- 1 tablespoon capers, drained and chopped, about 9–10 g
- 1 tablespoon fresh lemon juice, 15 ml
- 1–2 teaspoons pickle juice, optional, for extra tang or to loosen the sauce
- 1 teaspoon Dijon mustard, 5 ml
- 1 tablespoon chopped fresh dill or parsley, about 2–4 g
- 1 tablespoon finely minced shallot or onion, optional
- ½ teaspoon Worcestershire sauce, optional
- ¼ teaspoon black pepper
- Salt, only if needed
Method
- Chop the mix-ins finely. Finely chop the pickles, capers, herbs, and optional shallot or onion. Smaller pieces give the sauce better texture and more even flavor. If one bite tastes like plain mayo and the next tastes like a pickle jar, the pieces are too big.
- Mix the base. Add the mayonnaise, lemon juice, Dijon mustard, and black pepper to a bowl. Stir until smooth.
- Fold in the flavor. Add the chopped pickles, capers, herbs, optional pickle juice, and optional onion or shallot. Stir until evenly combined.
- Taste before salting. Pickles and capers are salty, so add salt only after tasting.
- Rest if possible. Cover and refrigerate for 15–30 minutes. The sauce works immediately, but resting lets the chopped ingredients season the mayo.
- Adjust and serve cold. Stir once more before serving. Add lemon for lift, pickle juice for tang, mayo for softness, or capers for a saltier seafood edge.
Finished taste cue: The sauce should taste creamy first, then pickle-crunchy and lemony, with a light finish. If it feels heavy, add lemon or pickle juice. If it bites too hard, soften it with another spoonful of mayo.
Recipe Notes
- Want it sweeter? Swap the chopped dill pickles for sweet pickle relish.
- Serving fried fish? Use dill pickles, capers, lemon, and herbs.
- Prefer a smoother sandwich sauce? Mince the pickles and capers very finely or pulse once or twice.
- Making it vegan? Choose vegan mayo and skip Worcestershire sauce unless you are using a vegan one.
- Want it lighter? Replace half or all of the mayo with plain Greek yogurt.
- Keeping it keto? Choose full-fat mayo, dill pickles, capers, lemon, herbs, and no sweet relish or sugar.
- Yield note: Yield varies slightly depending on how finely the pickles are chopped and whether you add pickle juice.
For more swaps and missing-ingredient fixes, see the substitution guide.
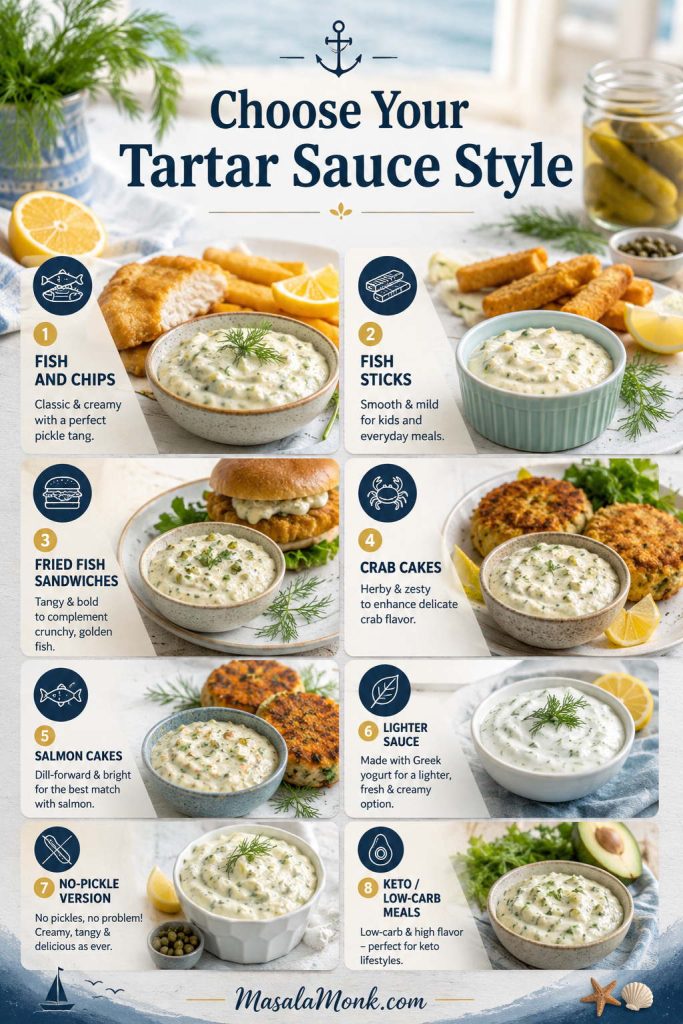
Choose Your Tartar Sauce Style
Use this table when you already know what is on the plate. It keeps the sauce matched to the meal without overthinking the bowl.
| You are serving | Use this style |
|---|---|
| Fish and chips | Dill pickles or gherkins, capers, lemon, and herbs |
| Fish sticks | Sweet relish, mayo, and lemon juice |
| Fried fish sandwich | Finely minced relish or pickles, a little onion, and a smoother texture |
| Crab cakes | Lemon, capers, dill, and a little extra pepper or cayenne |
| Salmon cakes | Extra dill, lemon zest, and a thicker mayo base |
| No pickles | Capers, shallot, lemon juice, and Dijon |
| Lighter sauce | Half mayo and half Greek yogurt |
| Keto or low-carb meal | Full-fat mayo, dill pickles, capers, lemon, and no sweet relish |
Why This Tartar Sauce Recipe Works
This sauce works because it balances fat, acid, salt, crunch, and rest time. Mayo gives the sauce body, while lemon and pickle juice cut through the mayo’s richness. Pickles bring texture, capers add small salty pops, and a short chill lets the chopped ingredients season the mayo instead of sitting in it separately.
That is why finely chopping matters. Large pickle pieces make some bites taste plain and others taste too sharp. Smaller pieces spread flavor through the bowl, so each spoonful lands the same way.
What Is Tartar Sauce Made Of?
Tartar sauce, also called tartare sauce in the UK and some other regions, is a creamy sauce usually made with mayonnaise, pickles or relish, lemon juice, herbs, and salty ingredients such as capers. It is most often served with fried fish, fish and chips, fish sticks, crab cakes, shrimp, and seafood sandwiches.
The creamy base can be as simple as store-bought mayo, but if you want to build the sauce from scratch, MasalaMonk’s mayo recipe walks through classic, eggless, vegan, garlic, spicy, and herb mayo options.
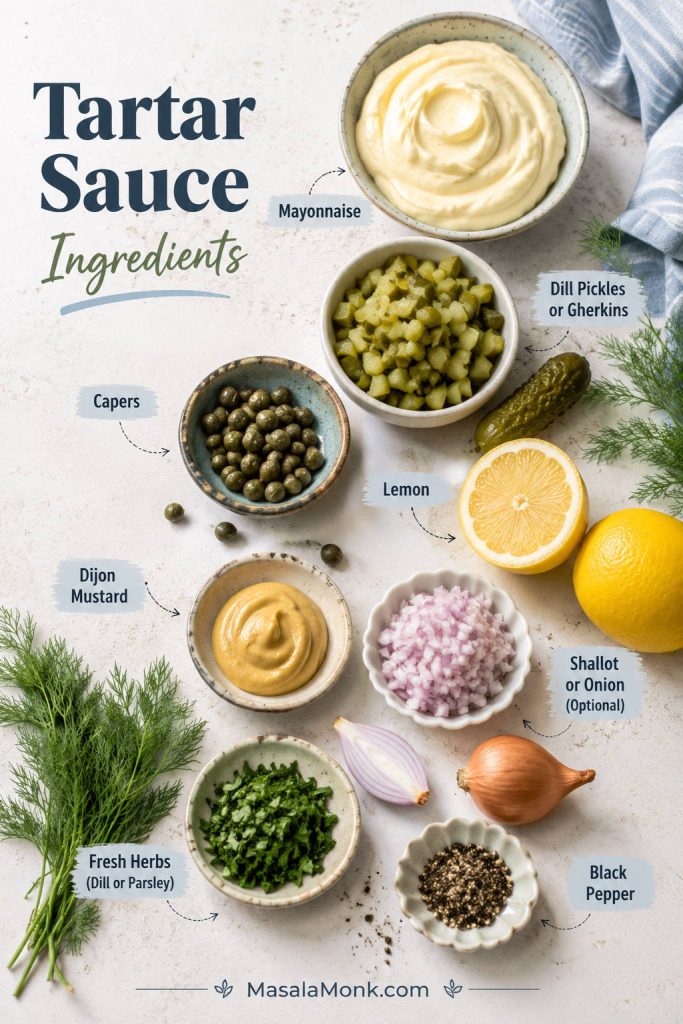
| Ingredient | What it does | Can you skip or swap it? |
|---|---|---|
| Mayonnaise | Creates the thick, creamy base. | Swap in vegan mayo, Greek yogurt, sour cream, or a half-mayo, half-yogurt mix. |
| Dill pickles, gherkins, or cornichons | Add crunch, acidity, and pickle flavor. | Sweet relish works for a sweeter sauce; capers help if you have no pickles. |
| Capers | Add small salty pops that suit seafood. | Optional, but worth using. Replace with extra pickles or pickle juice. |
| Lemon juice | Lifts the mayo and cuts through fried food. | Pickle juice, white vinegar, or apple cider vinegar can stand in. |
| Dijon mustard | Adds gentle sharpness and depth. | Yellow mustard, a little vinegar, or no mustard at all will still work. |
| Dill, parsley, chives, or tarragon | Add freshness and color. | Dried dill works in a pinch; otherwise, leave herbs out. |
| Shallot or onion | Adds savory bite. | Optional. Onion powder gives a milder pantry-style flavor. |
| Worcestershire sauce | Adds a deeper savory note. | Optional. Skip for vegetarian or vegan tartar sauce unless using a vegetarian or vegan Worcestershire. |
The Only Equipment Detail That Matters: Chop Size
No blender is needed. A bowl, spoon, knife, cutting board, and storage jar are enough. The important part is chop size: pickles and capers should be small enough to spread through the mayo, but not so tiny that the sauce loses texture.
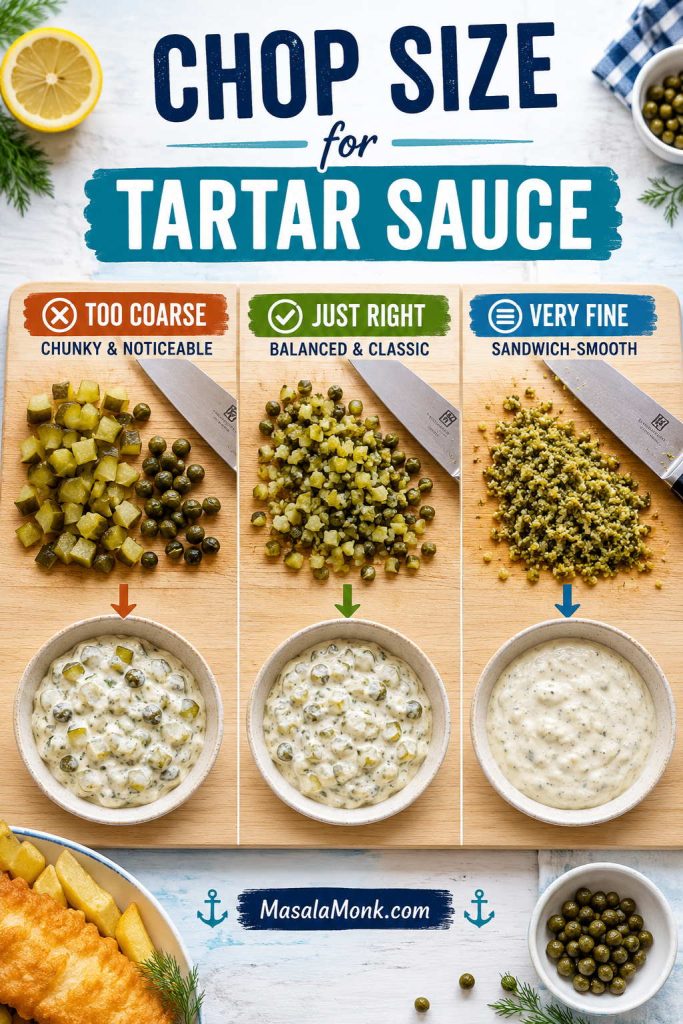
Use a small food processor only when you want a smoother sandwich-style sauce. For dipping fish and chips, a knife gives better control.
After chopping, check the finished texture target so the sauce clings without turning stiff or runny.
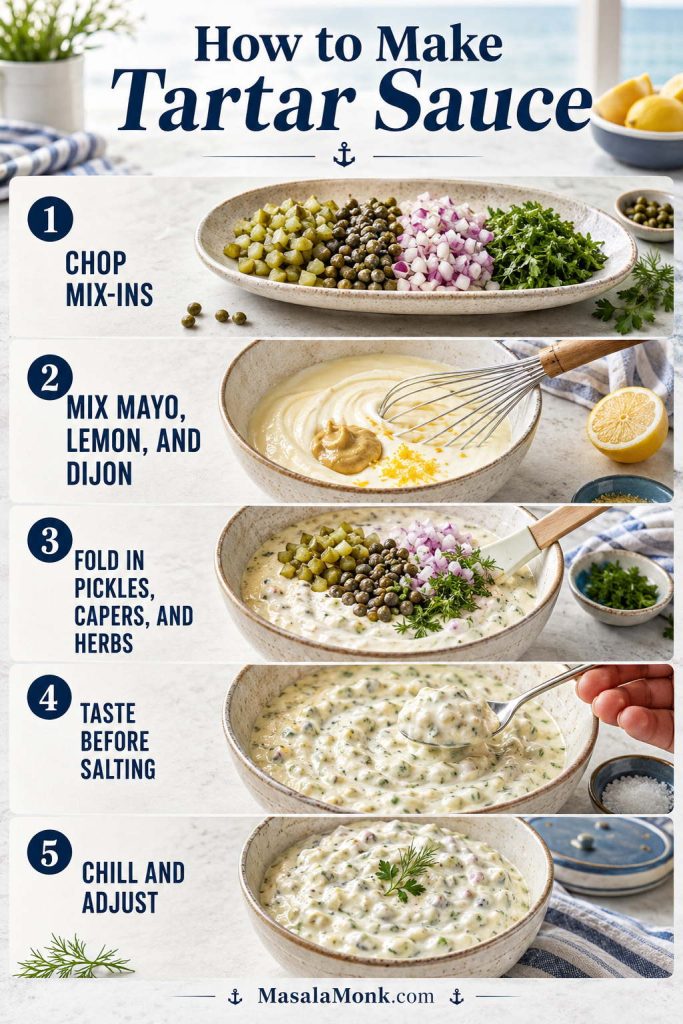
How to Make Tartar Sauce Step by Step
1. Chop the Pickles and Capers Finely
The sauce should not feel like chopped pickles held together with mayo. Chop the pickles, capers, herbs, and optional onion finely so every spoonful tastes balanced. If the pieces are too large, some bites taste salty and others taste plain.
2. Mix the Mayo, Lemon, and Mustard First
Add the mayonnaise to a small bowl, then stir in the lemon juice, Dijon mustard, and black pepper. This loosens the mayo slightly and helps the sharper ingredients spread evenly before the chunky ingredients go in.
3. Fold in the Pickles, Capers, and Herbs
Add the chopped pickles, capers, herbs, and optional onion or shallot. Stir until everything is evenly coated. The sauce should look creamy and speckled, with small bits of pickle, caper, and herbs in every spoonful.
4. Taste Before Adding Salt
Pickles, relish, capers, mustard, and Worcestershire sauce can all bring salt. Taste before adding more. If the bowl feels dull, it may need lemon juice, pickle juice, capers, or mustard before it needs salt.
5. Chill, Then Adjust
You can serve it immediately, but 15–30 minutes in the fridge improves the flavor. Stir once more before serving. Add lemon for lift, pickle juice for tang, mayo for softness, or capers for a saltier seafood edge.
Here is the full stir-and-chill sequence at a glance.
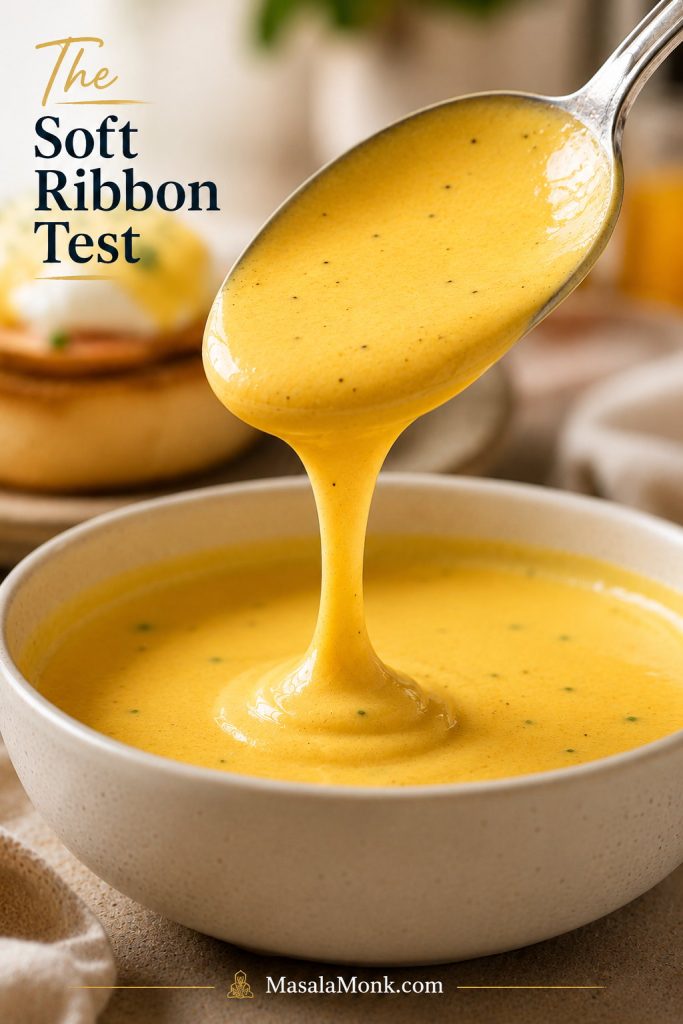
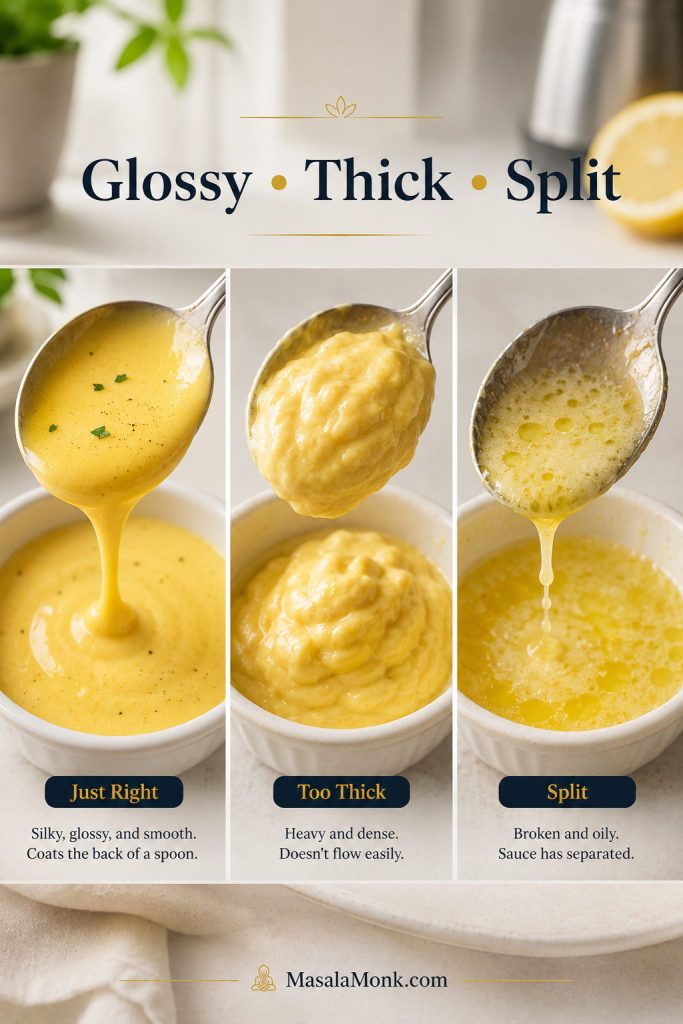
Texture Target: Chunky Dip or Smooth Sandwich Sauce
The sauce should be thick enough to sit on a piece of fish without sliding off, but loose enough to spoon easily. For dip texture, keep the pickles and capers finely chopped but visible. For sandwich texture, mince everything smaller or pulse once or twice.
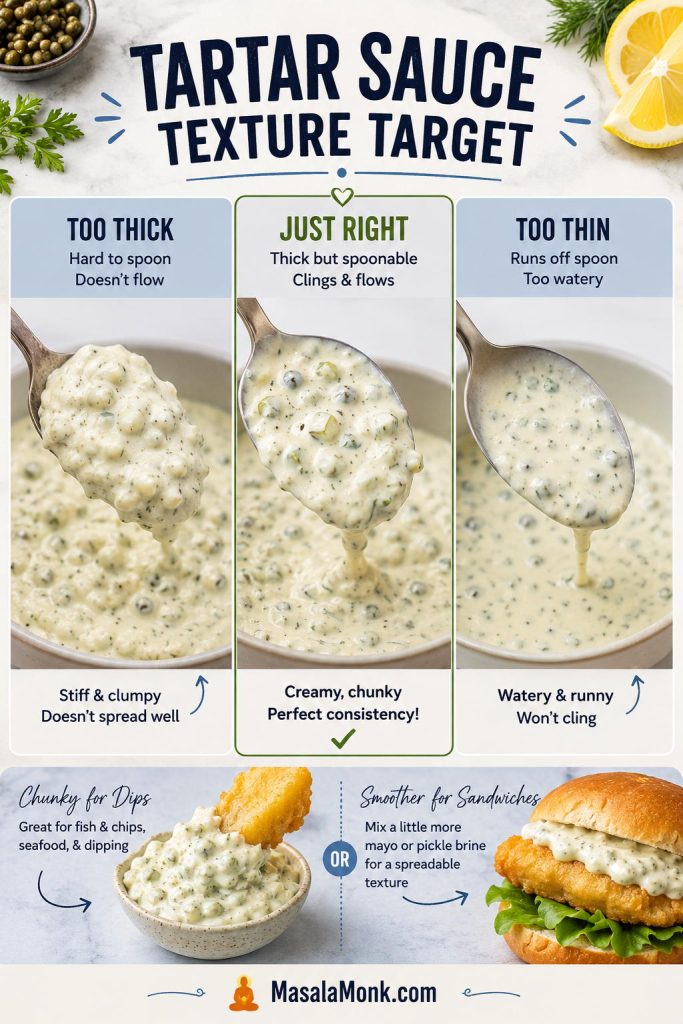
If the sauce looks stiff, loosen it with pickle juice, lemon juice, or a teaspoon of water. If it looks runny, add a spoonful of mayo and chill it for 15–30 minutes. A good bowl should cling, not puddle.
If the sauce has already gone too thick, thin, sweet, or salty, use the troubleshooting guide before making bigger changes.
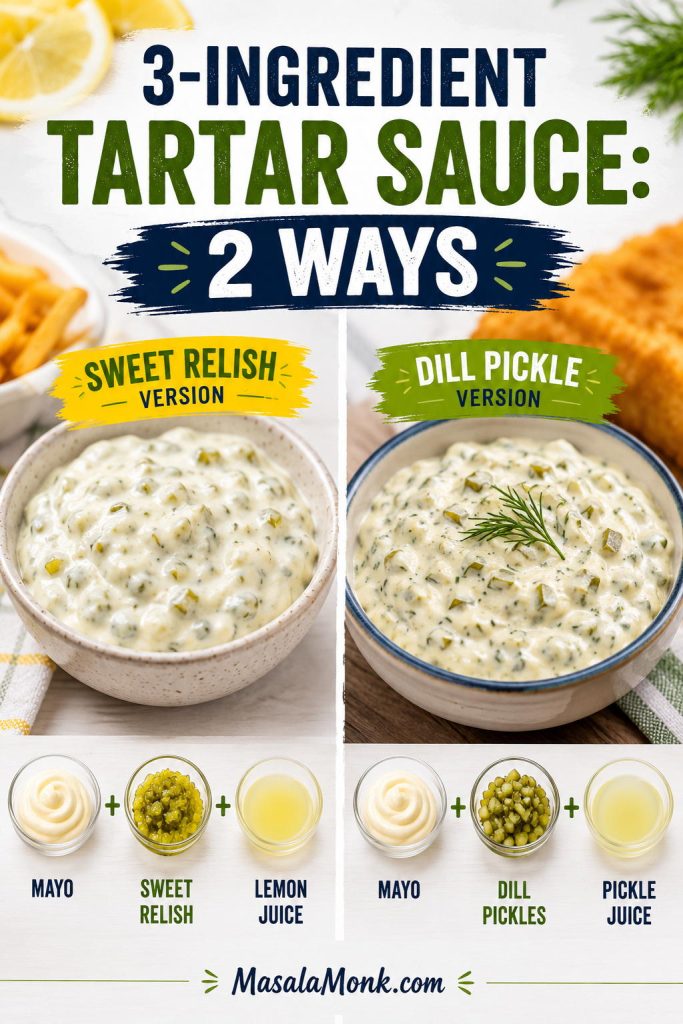
3-Ingredient Tartar Sauce
When you need the fastest bowl, you only need mayonnaise, pickles or relish, and lemon juice or pickle juice. This quick pantry sauce is not as layered as the full recipe, but it is exactly right for fish sticks, quick fried fish, frozen seafood, sandwiches, and busy weeknight dinners.
In a hurry, use relish and the sauce is closer to 5 minutes. For the best fish-and-chips texture, finely chopping pickles, capers, and herbs is worth the extra few minutes.
Sweet Relish 3-Ingredient Tartar Sauce
- 1 cup mayonnaise
- ⅓ to ½ cup sweet pickle relish
- 1 teaspoon lemon juice
Dill Pickle 3-Ingredient Tartar Sauce
- 1 cup mayonnaise
- ⅓ cup finely chopped dill pickles
- 1–2 tablespoons pickle juice or lemon juice
Stir, taste, and chill if possible. More pickle juice makes the bowl tangier; another spoonful of mayo softens it.
If one of those ingredients is missing, the substitution section below will help you rebuild the bowl.
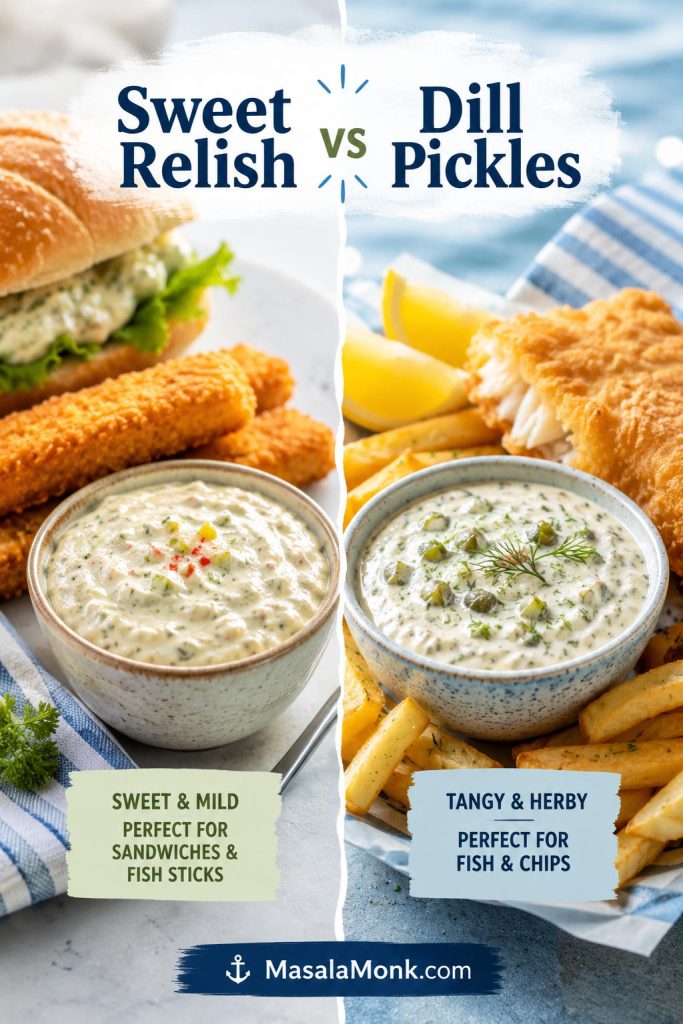
Sweet Relish vs Dill Pickles: Which Is Better?
Team dill pickle for fish and chips, team sweet relish for fish sticks — both have a place, but they are not the same sauce. Dill pickles, gherkins, and cornichons give you a more direct pickle bite. Sweet relish gives you a softer, sweeter, more diner-style sauce.
Beside crisp battered fish, dill pickles or gherkins are the better default. If you want both directions in one bowl, use half dill pickle and half sweet relish.
For the full fried-fish version, jump to the fish-and-chips sauce section.
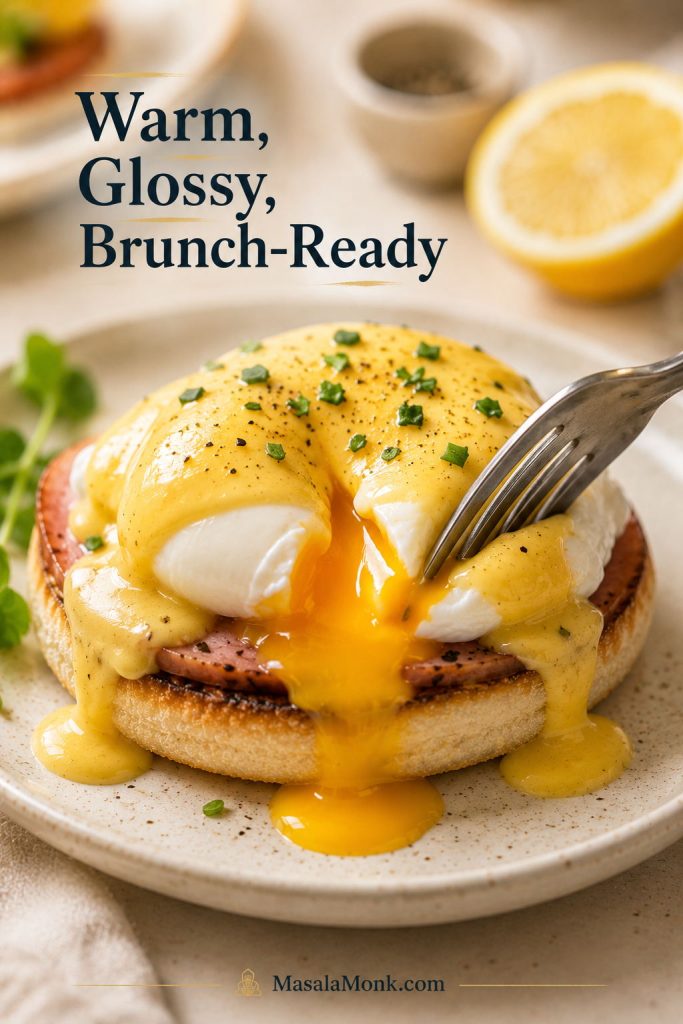
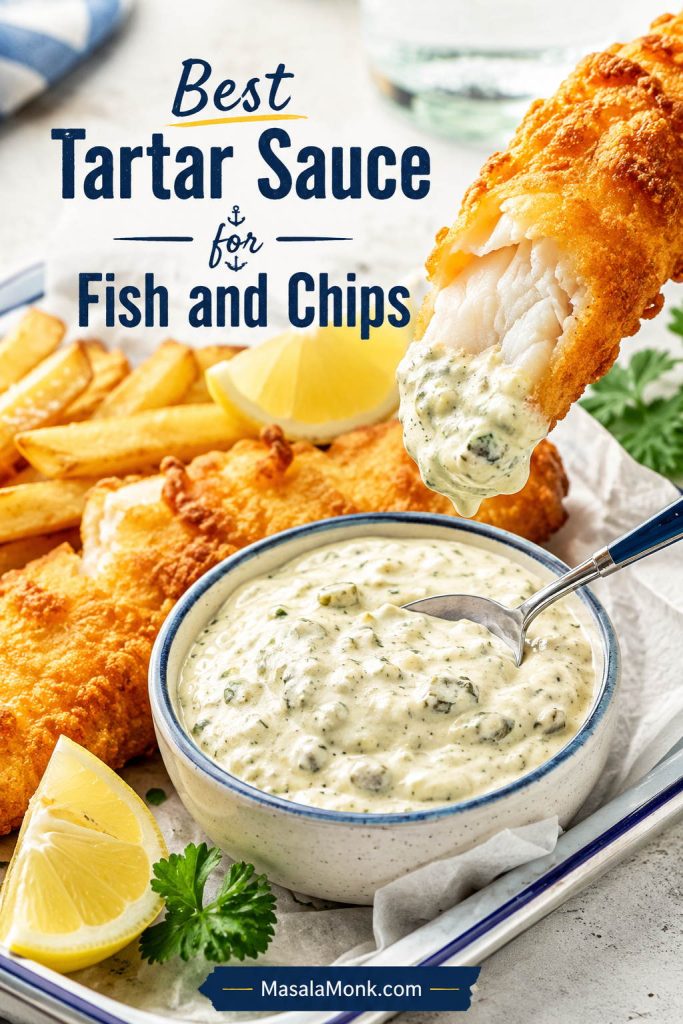
Best Tartar Sauce for Fish and Chips
The best tartar sauce for fish and chips should be thick, cold, pickle-forward, and lemony enough to wake up the batter. Make it first, then let it chill while the fish cooks and the chips finish.
If you are making the full meal, pair this sauce with MasalaMonk’s fish and chips recipe. While the sauce rests, you can prep the batter from MasalaMonk’s fish batter recipe so the cold sauce and hot coating are ready at the same time.
The goal is not fancy. It is that second bite where the fish still feels crisp and the sauce makes it easier to keep going.
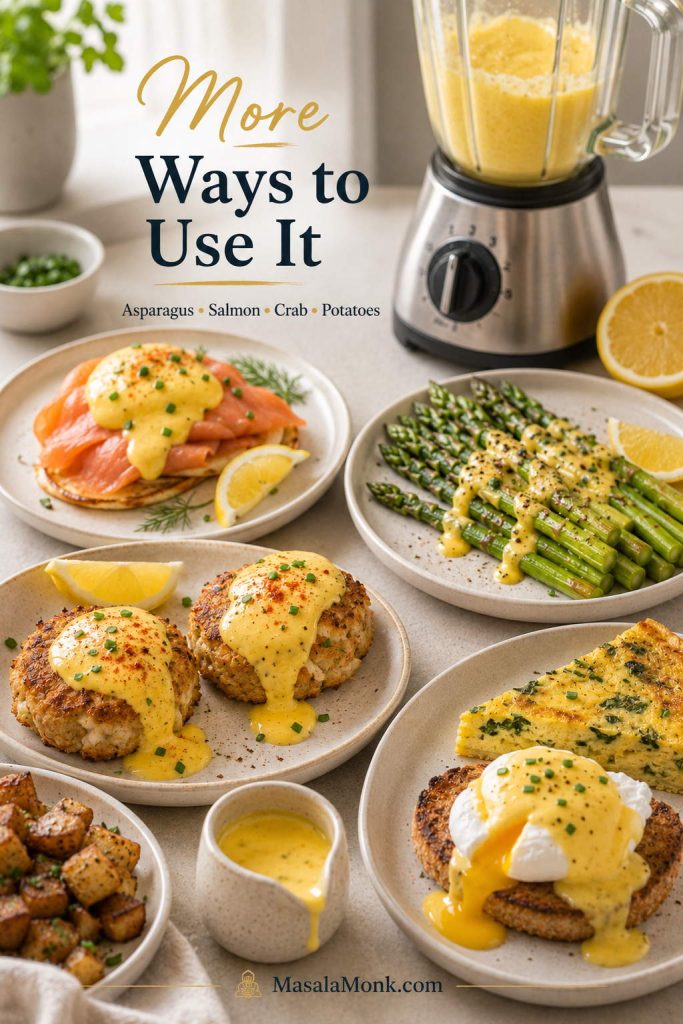
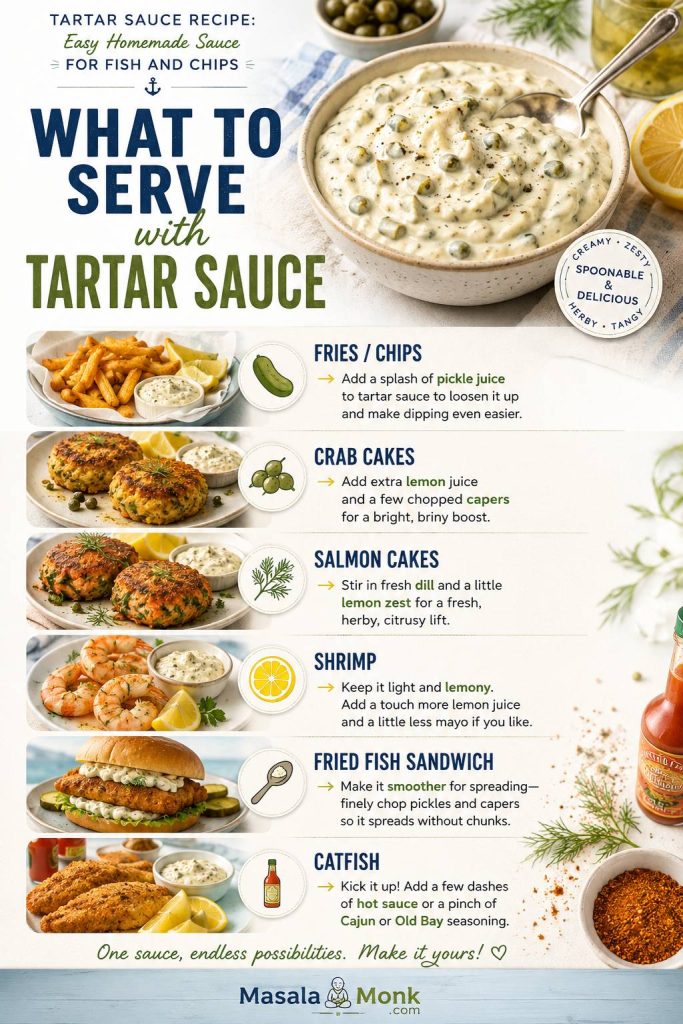
What to Serve with Tartar Sauce
Once the basic sauce is made, adjust the texture or seasoning for the food beside it instead of repeating the whole recipe.
| Serve with | Small adjustment |
|---|---|
| Fries or chips | Loosen slightly with pickle juice so it dips easily. |
| Crab cakes | Add extra lemon, capers, and a pinch of cayenne. |
| Salmon cakes | Add more dill and a little lemon zest. |
| Shrimp | Keep it lighter with parsley, lemon, and less onion. |
| Fried fish sandwich | Mince everything smaller so the sauce spreads cleanly. |
| Catfish | Add hot sauce, Cajun seasoning, or Old Bay-style seafood seasoning. |
That same cold, lemony contrast works beside MasalaMonk’s fish cakes, especially against crisp potato and flaky white fish. It is just as useful with salmon croquettes, where the capers and dill echo the flavors already working in the patties.
For a fry-night plate, MasalaMonk’s battered fries give the sauce exactly what it wants: something hot, crisp, and salty to cut through.
Homemade vs Store-Bought Tartar Sauce
Store-bought tartar sauce is convenient, but homemade gives you control over the three things bottled sauces often get wrong: sweetness, acidity, and crunch. Some jars taste sugary. Others taste flat, heavy, or short on pickle texture.
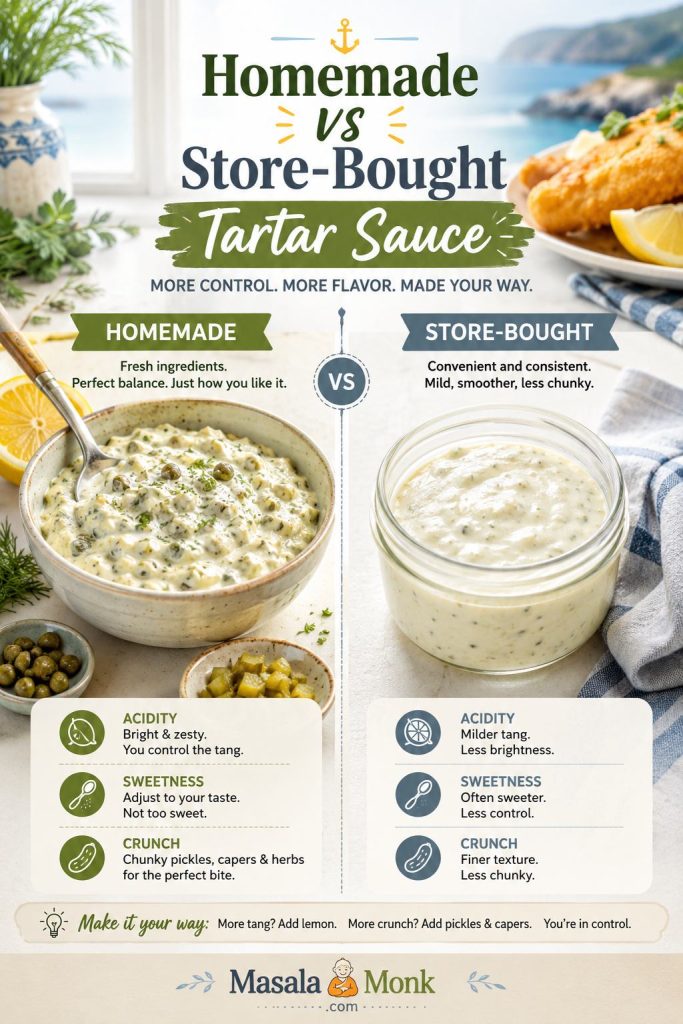
Homemade wins when you want a livelier lemon-and-pickle finish and better chop texture. Bottled wins when convenience matters more. That is the whole comparison.
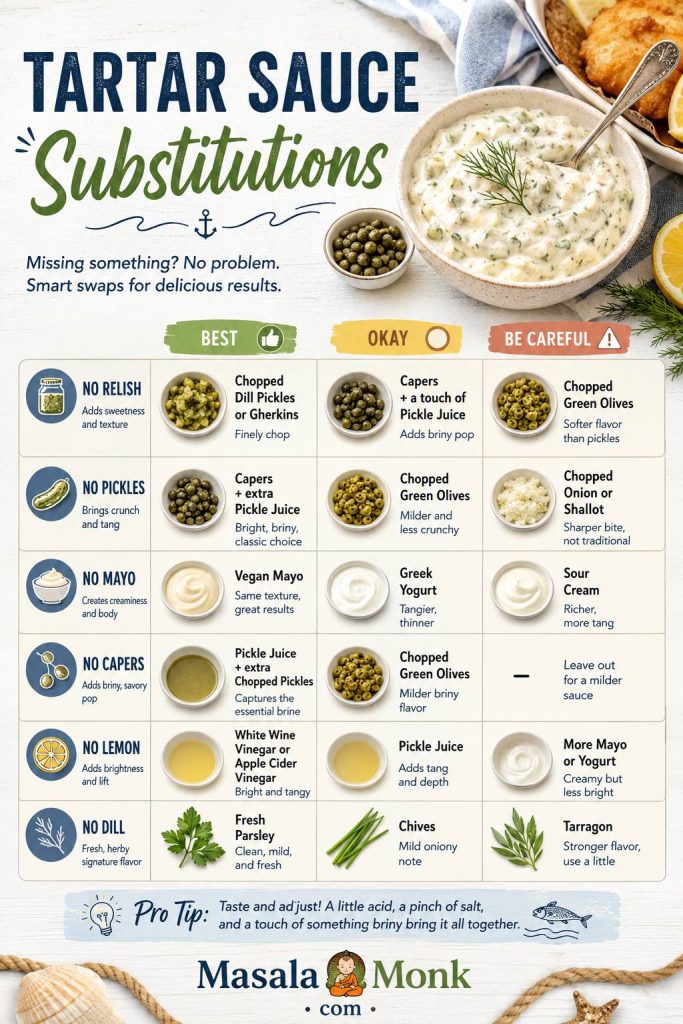
Tartar Sauce Substitutions: No Relish, No Pickles, No Mayo, No Capers, No Lemon
This is the kind of sauce that forgives a half-empty fridge. If you have mayo and something pickled, you are already close. Use the table below to choose the best swap without pushing the sauce too thin, too sweet, or too sour.
| Missing | Best | Okay | Be careful with |
|---|---|---|---|
| Relish | Finely chopped dill pickles, gherkins, or cornichons | Capers plus a little pickle juice | Adding sugar too early |
| Pickles | Capers, shallot, lemon juice, herbs, and Dijon | Sweet relish if you want a softer sauce | Plain mayo with no briny ingredient |
| Mayo | Vegan mayo | Greek yogurt, sour cream, or half yogurt and half mayo | Thin milk-based bases |
| Capers | Extra chopped pickles or cornichons | Pickle juice | Adding salt before tasting |
| Lemon | Pickle juice | White vinegar or apple cider vinegar | Too much vinegar at once |
| Dill | Parsley, chives, or tarragon | A pinch of dried dill | Too much dried herb |
Tartar Sauce Without Relish
You do not need relish. Finely chopped dill pickles, gherkins, or cornichons often give better texture for fish and chips. If you still want sweetness, add a tiny pinch of sugar at the end.
Tartar Sauce Without Pickles
No pickles or relish is not ideal, but the sauce is saveable. Capers bring salt, lemon brings lift, Dijon adds sharpness, and a little minced shallot gives the base something savory to hold onto.
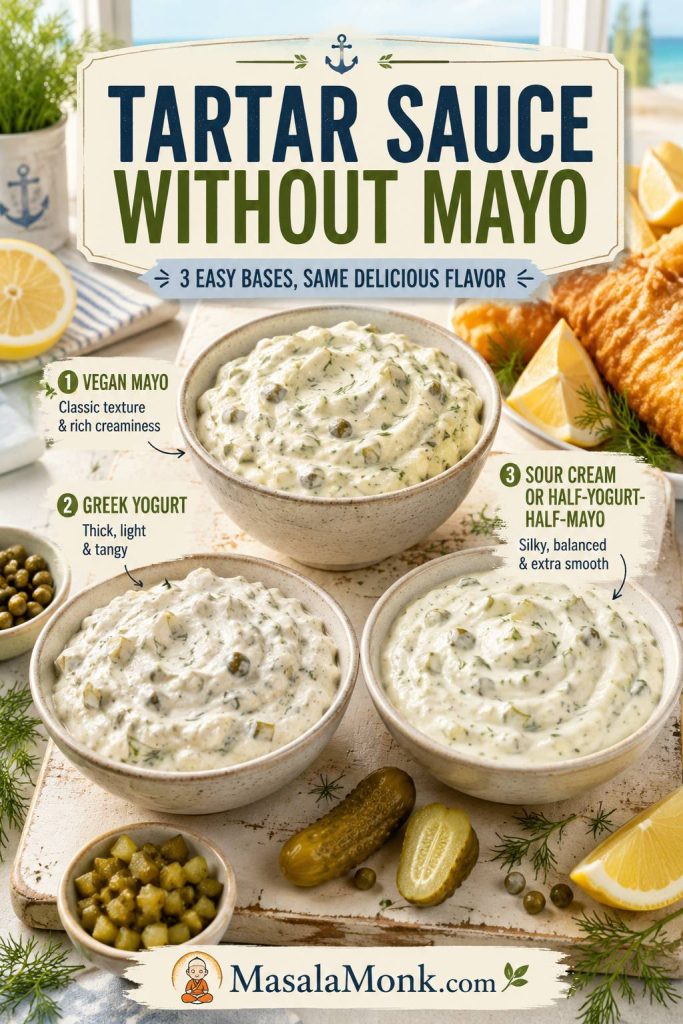
Tartar Sauce Without Mayo
For a no-mayo bowl, choose vegan mayo, Greek yogurt, or sour cream. Vegan mayo gives the closest classic texture. Greek yogurt makes it lighter and tangier, while sour cream makes it softer and richer.
Tartar Sauce Without Capers
Add extra chopped pickles for crunch, a spoonful of relish for sweetness, or a splash of pickle juice if the bowl tastes flat. Taste before adding salt because pickles may already bring enough.
Tartar Sauce Without Lemon Juice
Pickle juice is the easiest lemon swap because it brings tang and seasoning at the same time. Vinegar also works, but add it slowly so the sauce does not turn harsh.
Vegan, Dairy-Free, Low-Calorie, Keto, and Low-Carb Tartar Sauce
Once you know the balance, you can change the base without losing the sauce. The base can be mayo, vegan mayo, Greek yogurt, or sour cream; the rest of the bowl still needs pickle, acid, salt, and texture.
If you are choosing the base carefully, MasalaMonk’s eggless mayonnaise recipe explains the difference between egg-free mayo and fully vegan mayo.
| Need | Best adjustment |
|---|---|
| Vegan or egg-free | Choose vegan mayo, then keep the same pickle, lemon, caper, herb, and Dijon balance. |
| Dairy-free | Mayo-based tartar sauce is usually dairy-free, but not egg-free. Check labels, especially for flavored mayo or Worcestershire sauce. |
| Low-calorie or no-mayo | Choose Greek yogurt, or use half yogurt and half mayo for a lighter sauce that still tastes creamy. |
| Keto, low-carb, or sugar-free | Choose full-fat mayo and dill pickles. Avoid sweet relish, added sugar, and sweetened sauces. |
| Low-sodium | Use fewer capers and pickles, then lean on lemon juice, herbs, black pepper, and a small amount of mustard. |
Fish Sandwich / Filet-O-Fish-Style Tartar Sauce
A fish sandwich-style sauce is smoother, sweeter, and more oniony. It makes more sense on a soft fish sandwich than beside a plate of crisp battered fish. Finely minced pickles or relish work better here than chunky pickle pieces, and a short chill helps the onion flavor settle into the mayo.
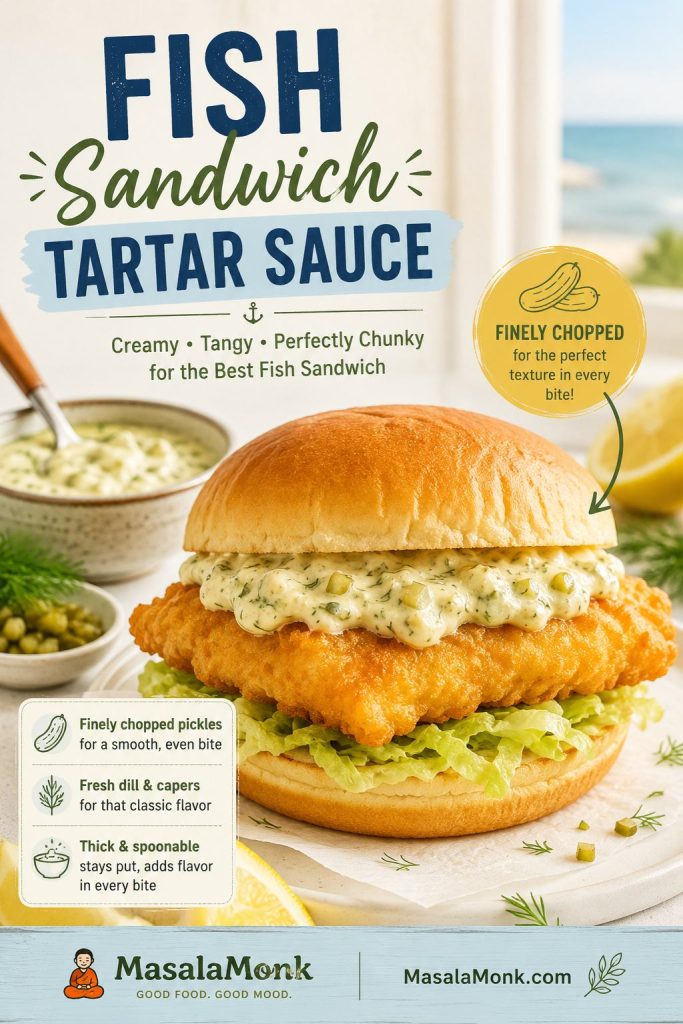
This is a flavor direction, not an exact restaurant copy. Use dill relish or very finely minced pickles, add 1–2 teaspoons minced onion, add a tiny pinch of sugar if needed, and chill for at least 1 hour.
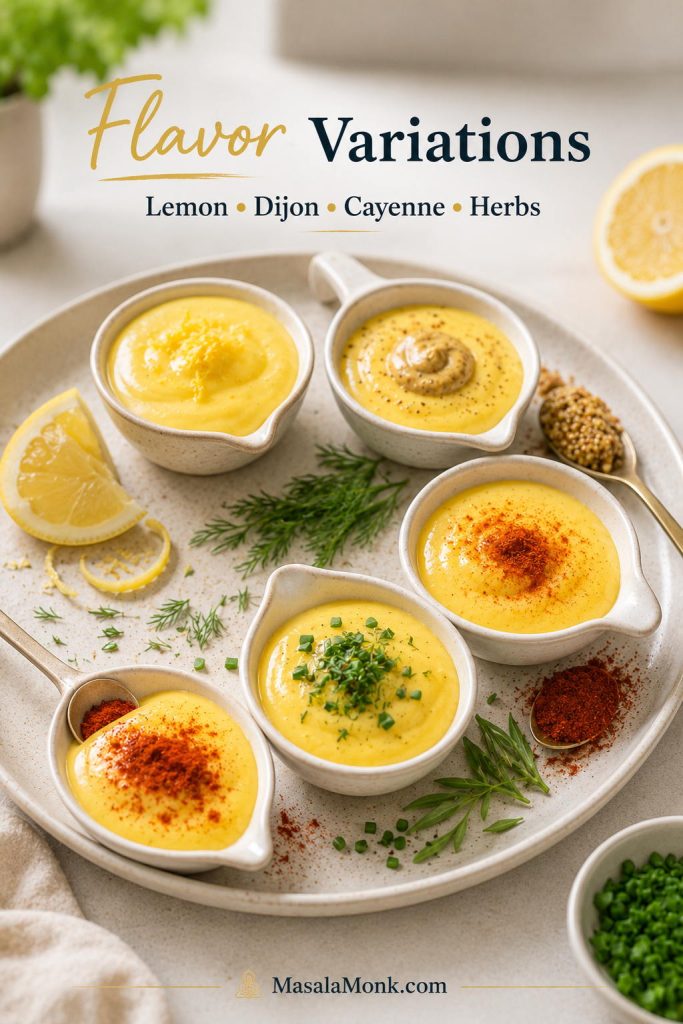
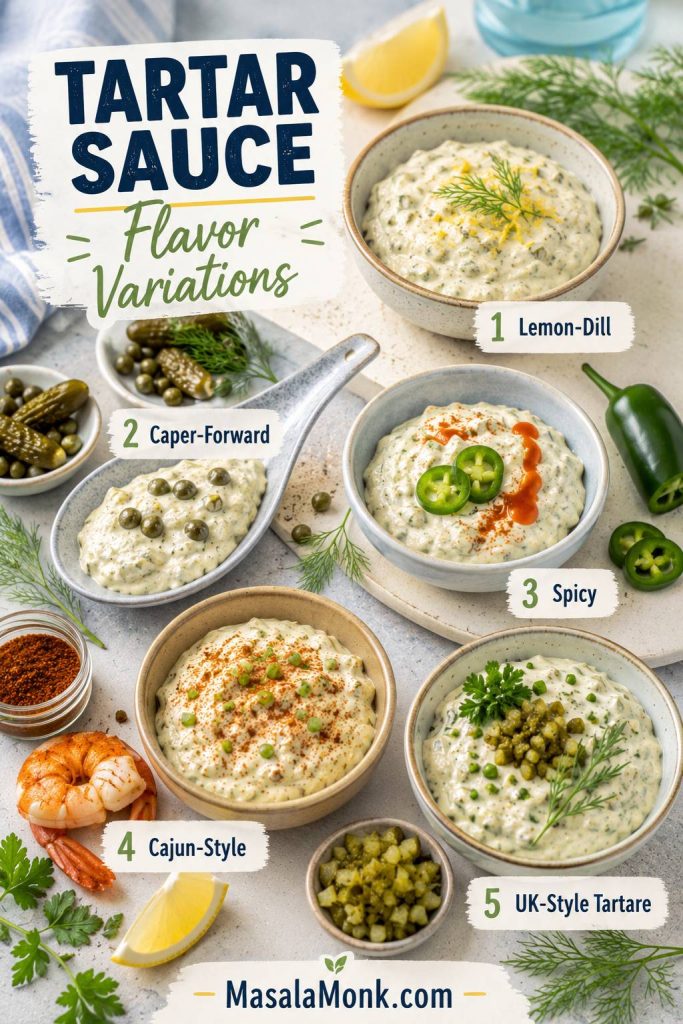
Flavor Variations
Think of the base sauce as the calm version. Lemon makes it livelier, Dijon makes it rounder, cayenne makes it warmer, and herbs make it fresher.
| Variation | How to adjust 1 cup mayo | Best with |
|---|---|---|
| Lemon-dill | Add ½ teaspoon lemon zest, 1 extra teaspoon lemon juice, and another tablespoon chopped dill. | Salmon cakes, shrimp, lighter fish |
| Caper-forward | Increase capers to 2 tablespoons and use cornichons or gherkins. | Crab cakes, fried seafood, richer fish |
| Spicy | Add ½ teaspoon hot sauce or 1 teaspoon minced jalapeño, then taste after resting. | Catfish, fried fish sandwiches, shrimp |
| Old Bay or Cajun | Add ¼ teaspoon seasoning, then taste before adding salt. | Seafood platters, shrimp, catfish |
| UK-style tartare | Use gherkins or cornichons, capers, parsley, chives, and optional tarragon. | Fried cod, haddock, thick chips |
For a homemade heat option, MasalaMonk’s pepper sauce guide can help you choose a vinegar-forward hot sauce style.
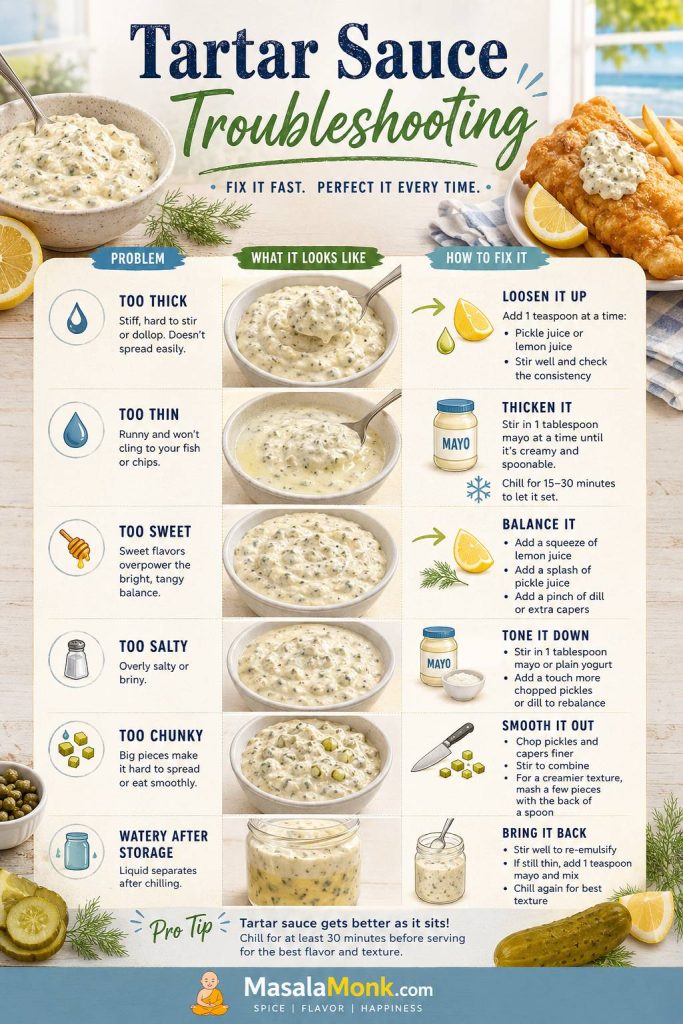
Troubleshooting Homemade Tartar Sauce
Fix the bowl slowly. A teaspoon of lemon juice, pickle juice, mayo, or capers can change everything, so stir, taste, and adjust again before adding more.
| Problem | Fix now | Prevent next time |
|---|---|---|
| Too thick | Stir in lemon juice, pickle juice, or 1 teaspoon water at a time. | Do not drain the pickles completely dry if you want a looser dip. |
| Too thin | Add more mayo and chill for 30 minutes. | Add pickle juice slowly and drain watery relish before mixing. |
| Too sweet | Add lemon juice, chopped dill pickles, capers, Dijon, or herbs. | Start with ⅓ cup relish, or use half dill pickle and half relish. |
| Too sour | Soften with more mayo or a tiny pinch of sugar. | Add vinegar or lemon in teaspoons, not tablespoons. |
| Too salty | Add more mayo, Greek yogurt, or sour cream. | Taste before salting because capers and pickles already season the sauce. |
| Too bland | Add capers, pickle juice, Dijon, lemon juice, pepper, or Worcestershire sauce. | Use at least one pickled or salty ingredient, not mayo alone. |
| Too chunky | Pulse briefly or chop the mix-ins finer. | Use smaller dice for sandwich sauce and slightly larger dice for dip. |
| Watery after storage | Stir well and add a spoonful of mayo if needed. | Drain relish better and avoid over-loosening before chilling. |
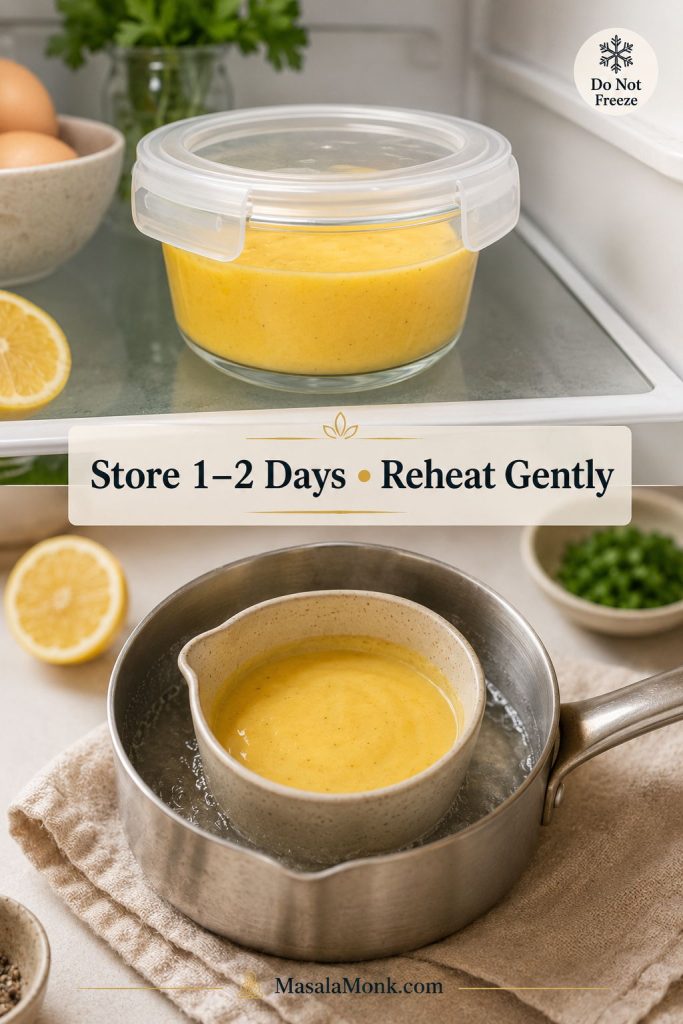
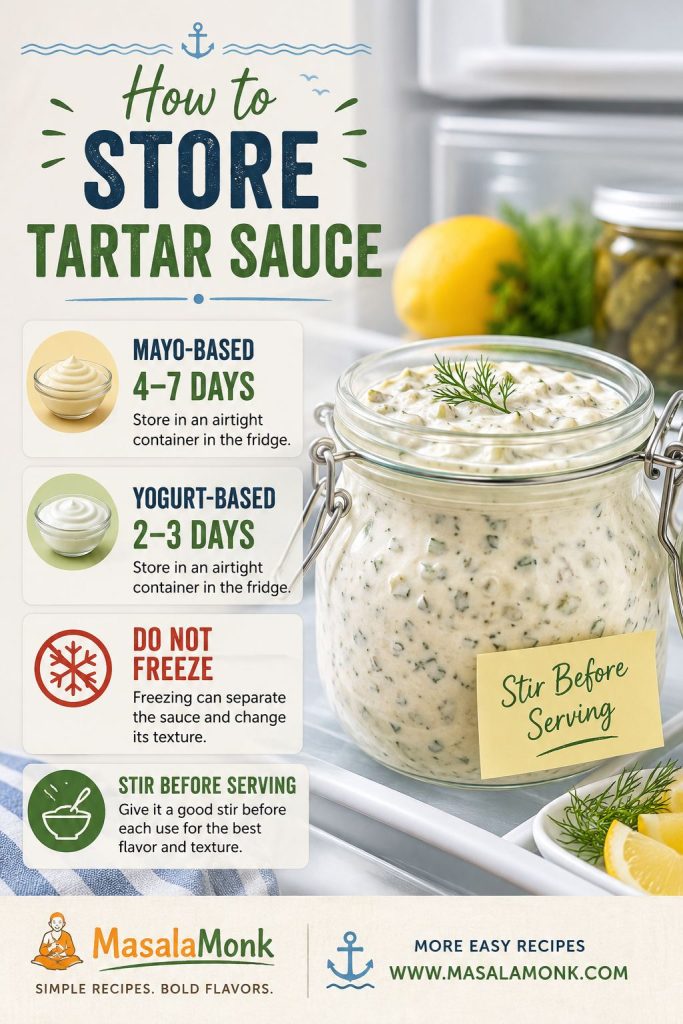
How to Store Tartar Sauce
Store the sauce in an airtight container in the refrigerator. A clean glass jar works well because it keeps the sauce covered and easy to stir before serving.
- Mayo-based tartar sauce: best quality within 4–7 days when kept cold in a clean, airtight container.
- Greek yogurt or no-mayo tartar sauce: best within 2–3 days because the texture loosens faster.
- Homemade mayo, fresh onion, or yogurt sauces: use the shorter storage window.
- Make-ahead: make it up to 1 day ahead for better flavor.
- Long meals: return the sauce to the fridge when possible instead of leaving it out for hours.
- Freezing: not recommended because mayo and yogurt-based sauces can split, turn watery, or lose their creamy texture.
If the sauce turns watery after chilling, use the troubleshooting guide before serving.
For mayo- or yogurt-based sauces, follow the general two-hour rule for perishable foods: do not leave them out through a long meal before returning them to the fridge.
If the sauce smells off, tastes sour in an unpleasant way, or has been left out too long, discard it.
Frequently Asked Questions
Is tartar sauce the same as tartare sauce?
Yes. In most recipe contexts, tartar sauce and tartare sauce mean the same creamy pickle-based sauce for fish and seafood. “Tartare sauce” is more common in the UK and some other regions.
What is the best pickle for tartar sauce?
Dill pickles, gherkins, and cornichons are best for a fish-and-chips sauce. Sweet pickle relish is better for a sweeter diner-style or fast-food-style sauce.
Does tartar sauce need capers?
No. It can be made without capers, but they add small salty pops that work especially well with seafood. If you skip them, add extra chopped pickle, relish, or pickle juice.
How long should tartar sauce chill before serving?
It can be served immediately, but 15–30 minutes in the fridge improves the flavor. If you added raw onion or shallot, 1 hour is better because the bite softens as it rests.
Can tartar sauce be made ahead?
Yes. Make it a few hours ahead or up to 1 day ahead, then stir and taste before serving. Add a little lemon juice or pickle juice if it needs freshening up.
Is tartar sauce dairy-free?
Many mayo-based tartar sauces are dairy-free, but check the mayonnaise and optional sauces you use. Greek yogurt, sour cream, buttermilk, and crème fraîche sauces are not dairy-free. For a dairy-free and egg-free bowl, use vegan mayo.
What makes homemade tartar sauce taste better than bottled?
Fresh lemon juice, chopped pickles, herbs, and adjustable sweetness make it taste fresher than most bottled sauces. You can push it sharper, sweeter, smoother, or lighter depending on the meal.
What is the best tartar sauce for fish and chips?
Use the dill-pickle version in the recipe card: mayo, dill pickles or gherkins, capers, lemon, herbs, Dijon, and black pepper. Keep it chilled until serving.
Can tartar sauce be frozen?
Freezing is not recommended. Mayo and yogurt-based sauces can split after thawing, leaving the sauce watery, grainy, or oily.
What is the difference between tartar sauce and remoulade?
Tartar sauce is usually a simpler mayo, pickle, lemon, caper, and herb sauce for fish and seafood. Remoulade is more seasoned and can include mustard, garlic, paprika, hot sauce, horseradish, spices, or seafood seasoning.
Final Sauce Notes
A good tartar sauce should not steal the plate. It should sit beside the fish, cling when you dip, and make the next hot bite easier to enjoy — which is exactly why a small bowl made before frying can change the whole meal.