Posted on Leave a comment

Cinnamon Roll Recipe

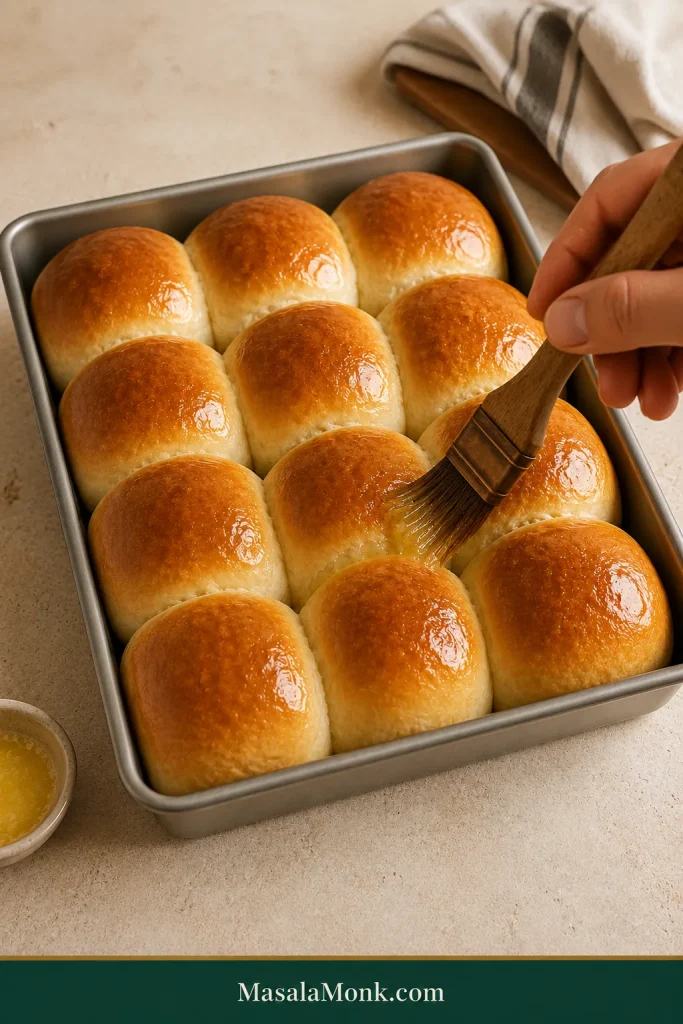
Rectangular pan of homemade cinnamon rolls with cream cheese icing melting into the swirls.

These homemade cinnamon rolls are for the exact moment you want warm, pull-apart rolls with gooey cinnamon centers, tender edges, and cream cheese icing melting into the swirls — without the raw-dough gamble in the middle of the pan.

Most cinnamon rolls go wrong in two quiet ways: the dough gets over-floured, or the pan comes out when the tops look done but the center is still underbaked. This recipe keeps both in check with soft elastic dough, a full second rise, and a clear center-roll doneness cue.

You can make them the same day for a cozy baking project, or shape them at night and bake them fresh in the morning. They fit a slow weekend, a holiday morning, a birthday breakfast, or any day when a warm pan of cinnamon rolls is the whole point.

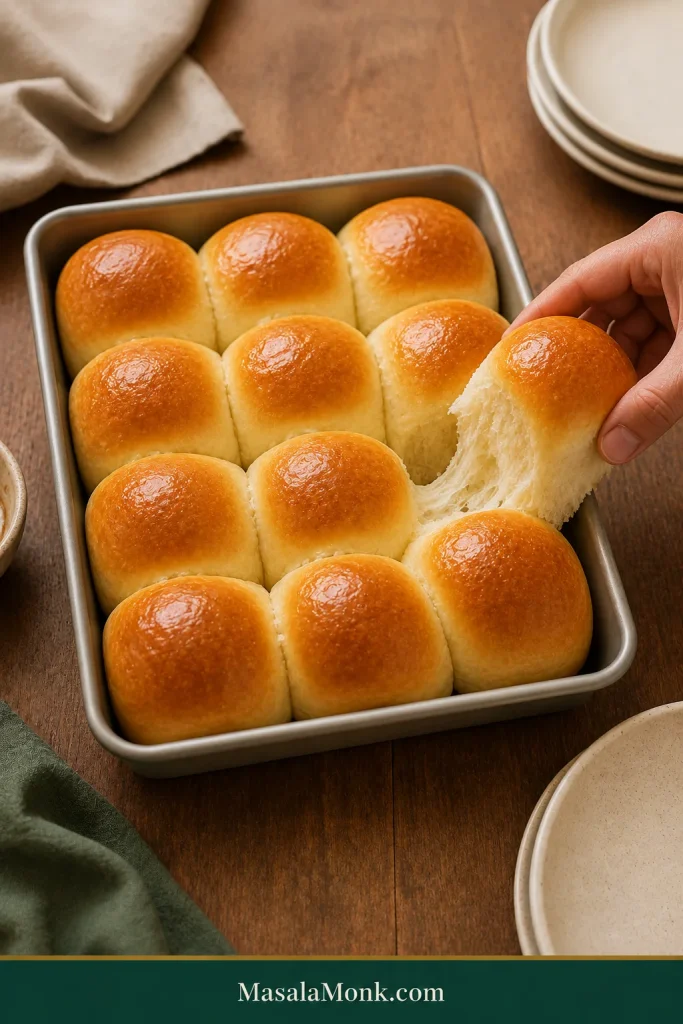
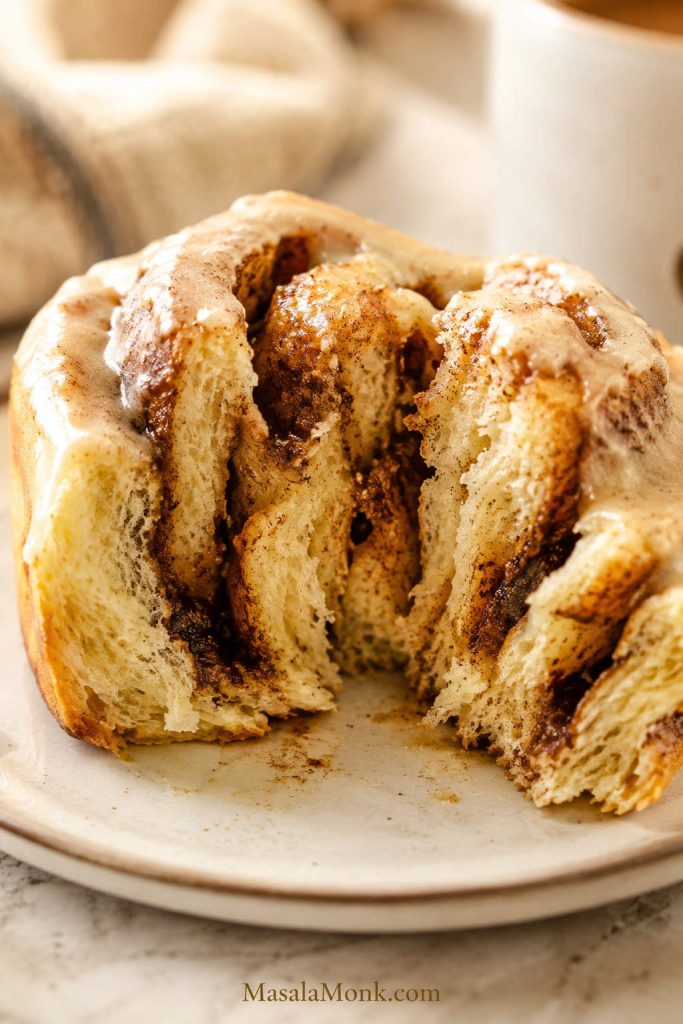
Gooey cinnamon roll pulled apart to show a soft baked center
This is the key promise: gooey cinnamon swirls with a center that looks baked and soft, not wet or raw.

Quick Answer: How to Make Soft Cinnamon Rolls

To make soft homemade cinnamon rolls, mix a rich yeast dough with warm milk, butter, egg, sugar, flour, and yeast. Knead until the dough is smooth and a little tacky, then let it rise until doubled. Roll it out, spread with softened-butter cinnamon sugar filling, cut into 12 rolls, and let the shaped rolls rise again until rounded and puffy.

Bake in a 9×13-inch pan at 350°F / 175°C for 24–28 minutes. Look for lightly golden tops, but use the center roll as the better cue. The best target is about 190°F / 88°C, which means the rolls are baked through while staying tender.

Spread cream cheese icing over the warm rolls after 5–10 minutes. For extra-moist centers, pour ⅓ cup / 80 ml warm heavy cream around the risen rolls just before baking, or use up to ½ cup / 120 ml for a richer, gooier pan.

The promise: soft, gooey cinnamon rolls with tender edges, creamy icing, and a center that bakes through without turning the pan dry.
Avoid the three big mistakes: do not add flour just to make the dough dry, do not melt the filling butter, and do not pull the pan just because the tops look golden.

Cinnamon Roll Recipe Card

Soft, gooey homemade cinnamon rolls that bake through in the center, with plush yeast dough, a brown sugar cinnamon swirl, optional warm cream for extra-moist centers, and cream cheese icing that melts into the rolls while they are still warm. Serve them while the icing is still soft and the centers are warm enough to pull apart in ribbons.

Prep Time35 minutes
Rise Time1 hour 45 minutes to 2 hours 30 minutes
Bake Time24–28 minutes
Total TimeAbout 2 hours 50 minutes to 3 hours 45 minutes
Yield12 rolls

Ingredients

Dough Ingredients

  • 1 cup / 240 ml warm whole milk
  • 2¼ teaspoons / 7 g instant yeast or active dry yeast
  • ⅓ cup / 65–70 g granulated sugar
  • 5 tablespoons / 70 g unsalted butter, melted and slightly cooled
  • 1 large egg
  • 1 large egg yolk
  • 4 cups / about 480 g flour, preferably bread flour for taller rolls or all-purpose flour for a softer homemade texture, plus 1–2 tablespoons only if needed
  • 1 teaspoon / 6 g fine salt
  • Butter or neutral oil, for greasing the bowl and pan

Cinnamon Filling

  • ⅓ cup / 75 g unsalted butter, softened
  • ¾ cup / 150 g packed brown sugar
  • 2 tablespoons / 14–16 g ground cinnamon
  • ¼ teaspoon fine salt
  • Optional: 1 teaspoon flour or cornstarch to help hold the filling together

Cream Cheese Icing

  • 4 oz / 113 g cream cheese, softened
  • 4 tablespoons / 55 g unsalted butter, softened
  • Powdered sugar, 1 cup / 120 g, plus ¼ cup / 30 g more for thicker icing
  • Vanilla extract, 1 teaspoon
  • Milk or cream, 1–3 tablespoons as needed
  • Pinch of salt

Optional Heavy Cream Upgrade

  • ⅓ cup / 80 ml heavy cream for softer rolls, or up to ½ cup / 120 ml for a richer, gooier pan

Instructions

Dough, Filling, and First Rise

  1. Warm the milk. The milk needs to feel comfortably warm, not hot. For active dry yeast, stir the yeast into the warm milk with a pinch of sugar and rest for 5–10 minutes, until foamy. Instant yeast can go directly into the dough.
  2. Make the dough. In a large bowl or stand mixer bowl, combine warm milk, yeast, sugar, melted butter, egg, and egg yolk. Add flour and salt. Mix until a rough dough forms.
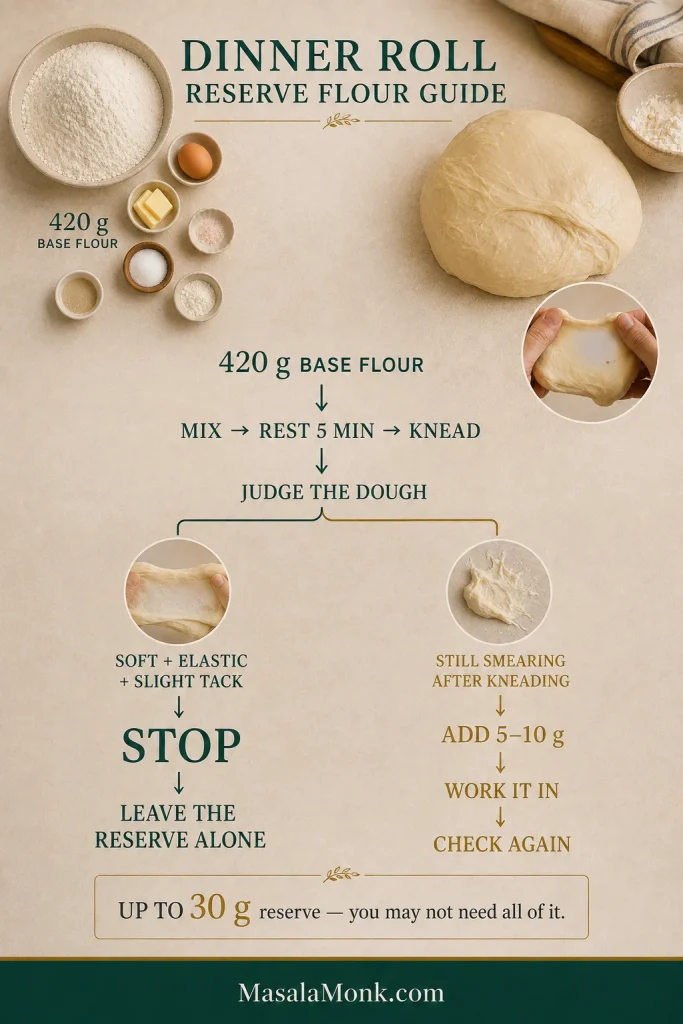
  3. Knead. Knead for 8–10 minutes by hand or 5–7 minutes in a stand mixer on low-medium speed, until the dough is smooth, stretchy, and slightly tacky. Add extra flour only 1 tablespoon at a time if the dough is sticking heavily.
  4. First rise. Place the dough in a lightly greased bowl. Cover with plastic wrap, a damp clean towel, or a lid so the surface does not dry out. Let rise for 60–90 minutes, or until doubled. Active dry yeast may rise a little more slowly than instant yeast, so give the dough extra time if needed.

Shape, Bake, and Ice

  1. Make the filling. Mix softened butter, brown sugar, cinnamon, and salt into a thick paste. When the filling is hard to spread, let it sit at room temperature for a few minutes rather than melting it.
  2. Roll and fill. Roll the dough into a rectangle about 12×18 inches. Spread the filling evenly, leaving a small border on one long edge.
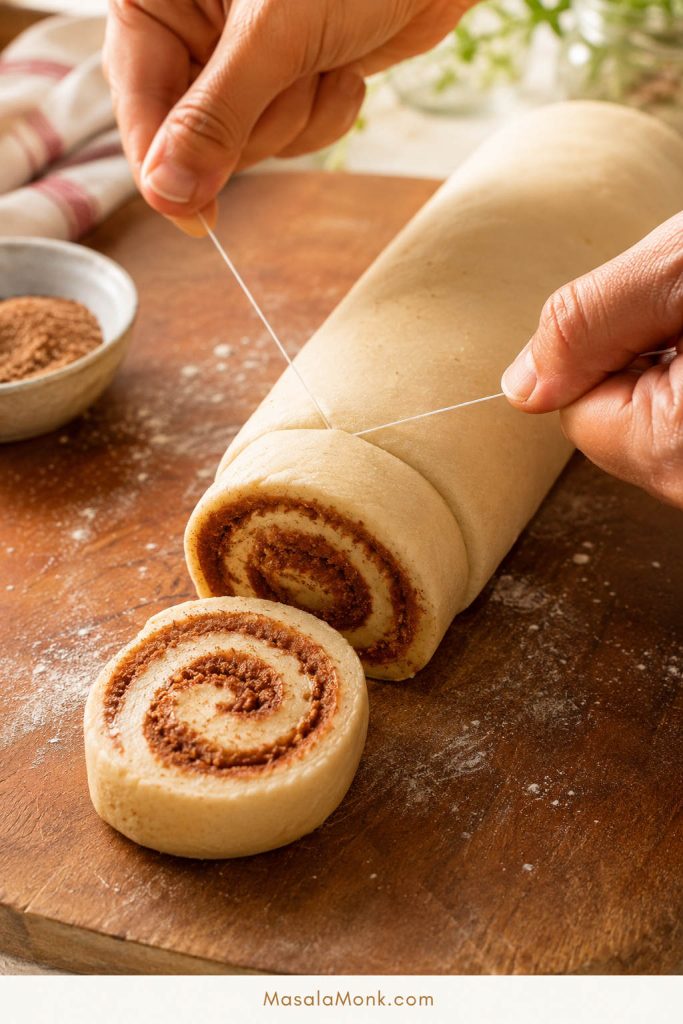
  3. Shape. Roll from the long side into a snug log. Cut into 12 even rolls using unflavored dental floss, clean thread, or a sharp knife. Aim for pieces about 1½ inches thick.
  4. Second rise. Place rolls in a greased 9×13-inch pan. Cover and let rise for 45–60 minutes, until puffy and lightly touching.
  5. Add heavy cream, if using. Pour warm heavy cream around the risen rolls. You should see cream around the base, not a flooded pan.
  6. Bake. Bake at 350°F / 175°C for 24–28 minutes, until lightly golden and the center roll reaches about 190°F / 88°C.
  7. Make icing. Beat cream cheese and butter until smooth. Add powdered sugar, vanilla, salt, and enough milk or cream to make a soft, spreadable icing.
  8. Ice and serve. Cool rolls for 5–10 minutes, then spread icing over the warm rolls.

Success Notes

  • Softer rolls: Start with the listed flour and add more only if the dough is sticking heavily.
  • Extra-gooey rolls: Use the warm heavy cream option, but keep it to ½ cup / 120 ml or less.
  • Thicker frosting: Wait 10–15 minutes before icing.
  • Overnight option: Shape, cover, refrigerate, then let the rolls become puffy at room temperature before baking.
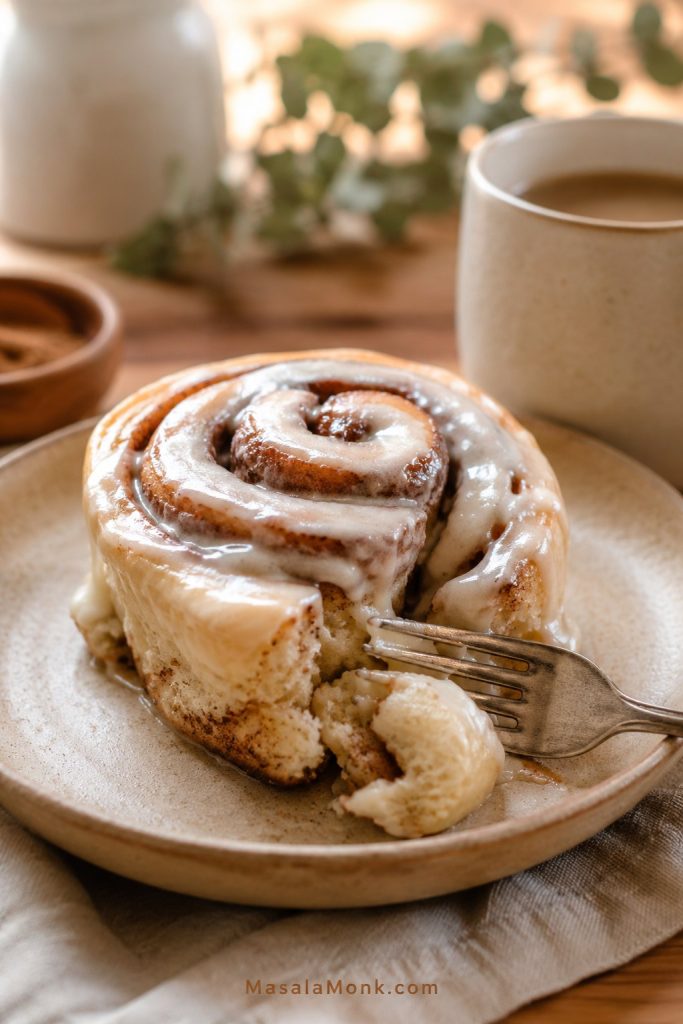
This is the finished serving cue: soft dough, a visible cinnamon swirl, and cream cheese icing that still looks creamy rather than dry.
Single homemade cinnamon roll with cream cheese icing and soft cinnamon swirl
A single iced roll shows the serving texture: soft dough, visible cinnamon swirl, and creamy icing.

Cinnamon Rolls at a Glance

Question Answer
Yield 12 cinnamon rolls
Pan size 9×13-inch baking dish
Oven temperature 350°F / 175°C
Bake time 24–28 minutes
Total time About 2 hours 50 minutes to 3 hours 45 minutes, including cooling before icing
Doneness cue Center roll reaches about 190°F / 88°C
Flour choice Bread flour for taller rolls; all-purpose flour for a softer homemade texture
Yeast choice Instant yeast for ease; active dry yeast also works
Filling style Softened-butter brown sugar cinnamon paste
Icing Cream cheese icing, with a no-cream-cheese option below
Make-ahead option Shape and refrigerate overnight before baking

Choose Your Cinnamon Roll Path

Use the same base recipe, then adjust the timing or finish depending on the kind of cinnamon rolls you want today. Pick the path that matches what you care about most: a same-day bake, brunch timing, extra-gooey centers, thicker frosting, or avoiding a doughy middle.

If you want… Do this
Same-day soft cinnamon rolls Start earlier in the day and bake after two complete rises.
Overnight cinnamon rolls for brunch Shape tonight, chill, then bake once puffy in the morning.

Gooey cinnamon rolls with heavy cream Pour warm cream around the risen rolls before baking.

Cinnamon rolls with thick cream cheese frosting Cool the rolls 10–15 minutes before icing.

Cinnamon rolls without a doughy middle Check the center roll; golden tops are not enough.

What This Recipe Is Built Around

Recipe notes: this cinnamon roll recipe is built around a 9×13-inch pan, 12 rolls, a soft enriched dough, and a center-roll doneness cue. Bread flour gives taller rolls; all-purpose flour gives a softer homemade crumb. The heavy cream option is kept moderate so the rolls stay gooey without turning soggy at the bottom.

This is not a no-yeast shortcut roll and not a canned-roll hack. It is a soft yeast cinnamon roll recipe built for a gooey swirl, tender edges, and a center that bakes through properly.

The goal is simple: gooey, not doughy. Look for rolls that smell warm and cinnamon-sweet, pull apart softly, and have a center that feels baked and plush instead of wet or heavy.

Why This Cinnamon Roll Recipe Works

This recipe works because it protects both sides of the cinnamon-roll problem: enough moisture for gooey swirls, but enough structure and bake time for the middle to finish properly.

Enriching the dough with milk, butter, egg, and egg yolk gives you tenderness without turning the bread part heavy. The lightly sweet dough still has enough strength to rise well, hold its shape, and support the cinnamon filling.

Careful flour guidance prevents dry rolls. Starting with the listed amount and adding more only when the dough is truly sticking heavily keeps the dough soft enough to bake into pull-apart rolls instead of dense, dry spirals.

A softened-butter filling helps prevent leaks. When butter, brown sugar, cinnamon, and salt are mixed into a paste, the swirl stays more even. The optional spoonful of flour or cornstarch helps bind the filling so it does not immediately run into the bottom of the pan.

Pan size and oven temperature protect the center. A 9×13-inch pan gives 12 rolls enough room to rise while keeping them close enough to stay tender. Baking at 350°F / 175°C gives the center time to finish before the tops over-brown.

For the heavy cream option, the amount is controlled rather than flooded. A moderate pour adds moisture and a gooey finish while keeping the pan from turning soggy at the bottom.

The center roll is the clearest test. Top color helps, but the middle roll tells you when the pan is truly done. Aim for about 190°F / 88°C in the center.

Ingredients You Need

Every good cinnamon roll comes down to three parts working together: dough that rises soft, filling that stays in the swirl, and icing that melts just enough into the warm rolls.

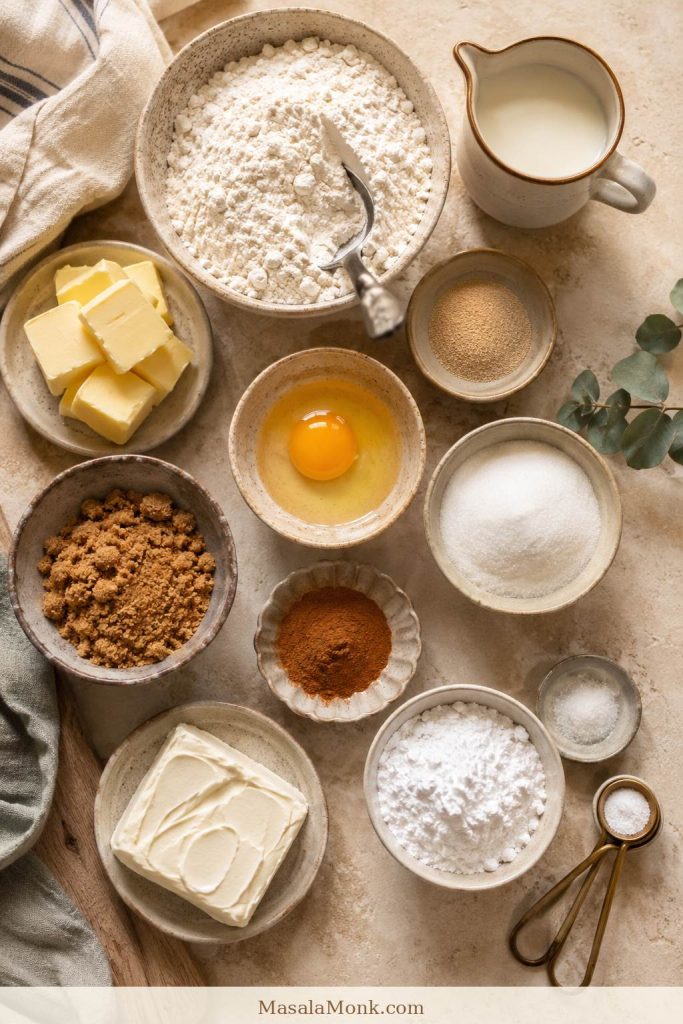
Ingredients for homemade cinnamon rolls including flour, milk, butter, eggs, yeast, sugar, and cinnamon
The dough, filling, and icing are simple pantry ingredients; the texture comes from how they are handled.

Dough Ingredients

The dough uses flour, milk, yeast, sugar, butter, egg, egg yolk, and salt.

Milk makes the dough softer than water. Butter adds richness. The egg and yolk help the rolls bake up tender, while sugar lightly sweetens the dough and helps the yeast work.

Together, they make the kind of dough that bakes up soft enough to pull apart, but strong enough to hold the cinnamon swirl.

Salt is small but important. It balances the sweetness and makes the cinnamon flavor taste fuller.

Filling Ingredients

The filling uses softened butter, brown sugar, cinnamon, and a pinch of salt.

Softened butter is easier to spread and less likely to leak out. Brown sugar gives the filling a deeper, caramel-like sweetness. Light or dark brown sugar both work, though dark brown sugar gives a stronger molasses flavor.

When the filling is right, it should spread like soft cinnamon butter, not pour like syrup.

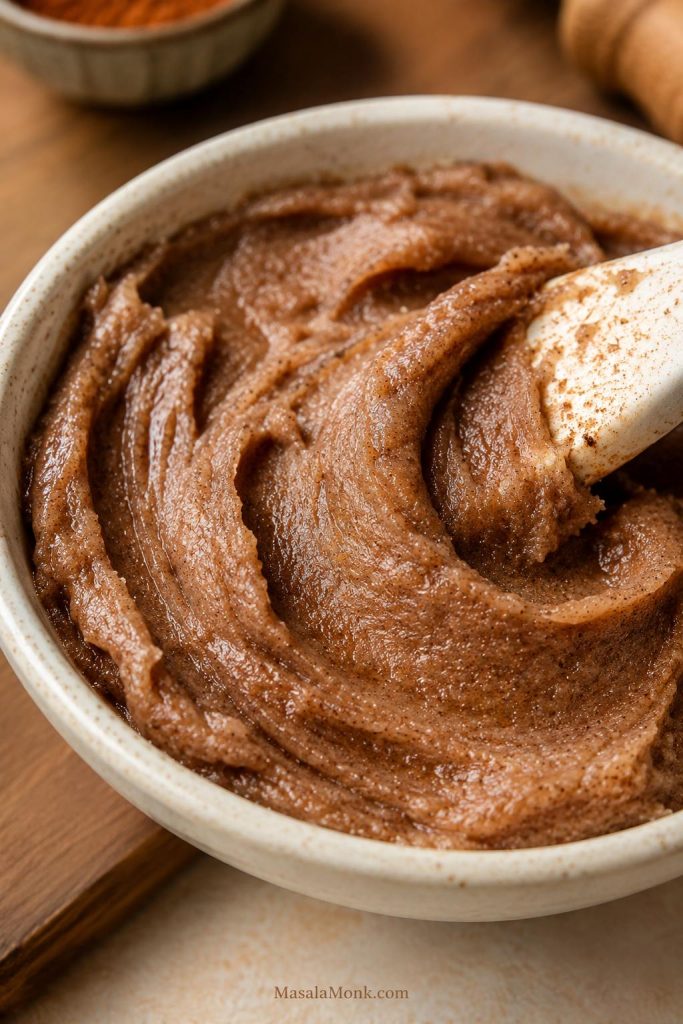
Brown sugar cinnamon filling mixed with softened butter for cinnamon rolls
Softened butter makes a spreadable cinnamon-sugar paste that is less likely to leak than melted butter.

Icing Ingredients

Cream cheese icing uses cream cheese, butter, powdered sugar, vanilla, milk or cream, and salt.

It gives the icing its tang, while butter makes it smooth. Powdered sugar thickens it, and milk or cream lets you adjust the texture.

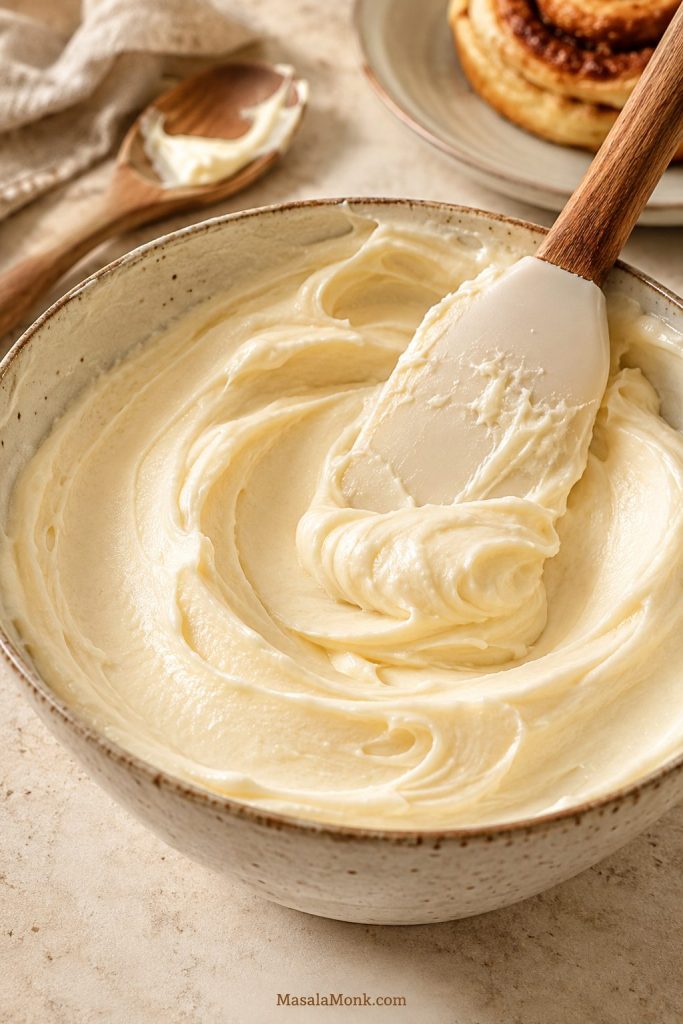
Smooth cream cheese icing for homemade cinnamon rolls
The icing looks right when it is smooth and spreadable, not thin or watery.
Flavor tip: A tiny pinch of salt in both the filling and the icing keeps the rolls from tasting only sweet.

Useful Equipment

You do not need a professional bakery setup for homemade cinnamon rolls, but a few tools make the recipe easier and more reliable.

  • Large mixing bowl or stand mixer: either works; a mixer saves effort, but hand-kneading is fine.
  • 9×13-inch pan: the most reliable size for 12 rolls that bake evenly.
  • Rolling pin: helps roll the dough into an even rectangle.
  • Unflavored dental floss, clean thread, or a sharp knife: gives clean cuts without squashing the spirals.
  • Instant-read thermometer: useful for checking warm milk and the center roll.
  • Foil: helpful if the tops brown before the center is done.
No thermometer? You can still make these. The milk needs to feel warm, not hot. For doneness, gently pull at a seam in the center roll; it should look baked and bread-like, not wet, shiny, or paste-like.

Flour Choice for Cinnamon Rolls

Before you start mixing, flour is the one ingredient worth slowing down for. An over-floured dough is the fastest way to lose that pull-apart cinnamon roll texture.

Bread flour and all-purpose flour both work in this recipe. The choice depends on the texture you like.

Flour Works well for What to expect
Bread flour Taller, bakery-style rolls More structure, slightly chewier texture, good rise
All-purpose flour Plush homemade rolls More tender texture, easy everyday option
Excess flour Dry rolls Heavy dough, dry edges, dense texture
Gluten-free flour Separate gluten-free recipe Not a simple 1:1 swap for this dough

Think of flour as the difference between a roll that tears softly and one that feels heavy. The goal is not a dry, easy-to-handle dough; the goal is a dough that bakes up tender.

Start with the listed amount and give the dough a minute to come together before adding more. If you measure by cups, spoon flour into the cup and level it instead of scooping directly from the bag. A little tackiness is what keeps the finished rolls soft.

Instant Yeast vs Active Dry Yeast

Instant yeast keeps the dough simple because it can be mixed straight in, with no separate proofing step.

Active dry yeast also works. For reliable results, proof it first by stirring it into warm milk with a pinch of sugar. After 5–10 minutes, look for foam on the surface. If it stays flat, the yeast may be old or the milk temperature may be off.

Aim for milk around 105–115°F / 40–46°C. Warm milk helps yeast wake up, while hot milk can damage it and slow or stop the rise. In a cold kitchen, slow movement does not mean failure; the dough just needs more time. Wait for puffiness, not the timer.

How the Dough Feels When It Is Right

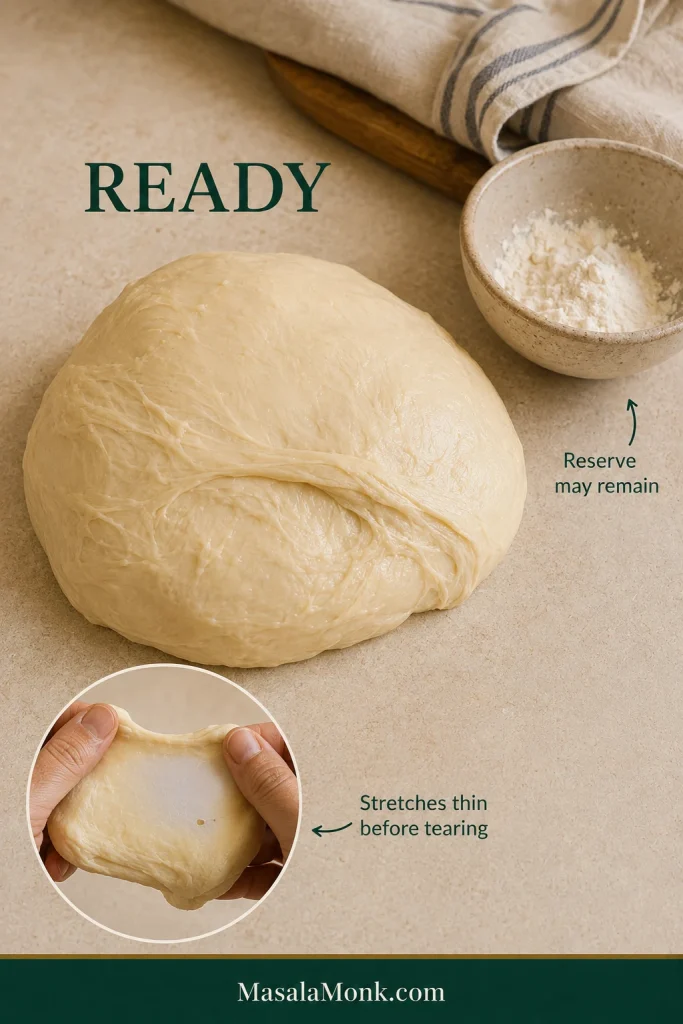
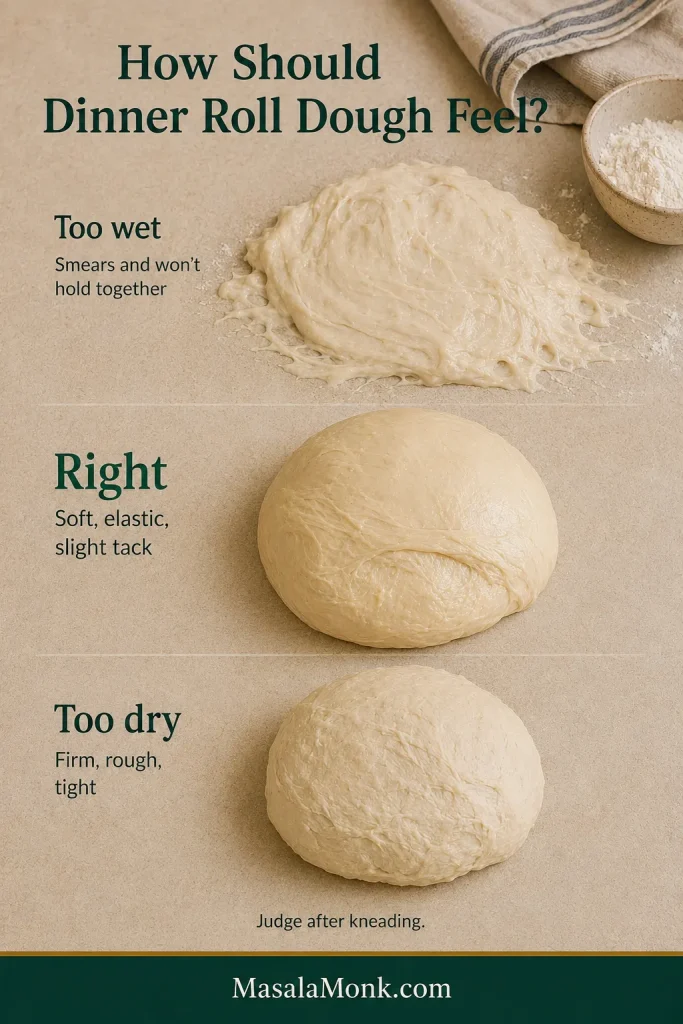
Dough texture is one of the biggest clues in this recipe. A soft, elastic dough gives the rolls their pull-apart texture; a dry, over-floured dough makes them heavy.

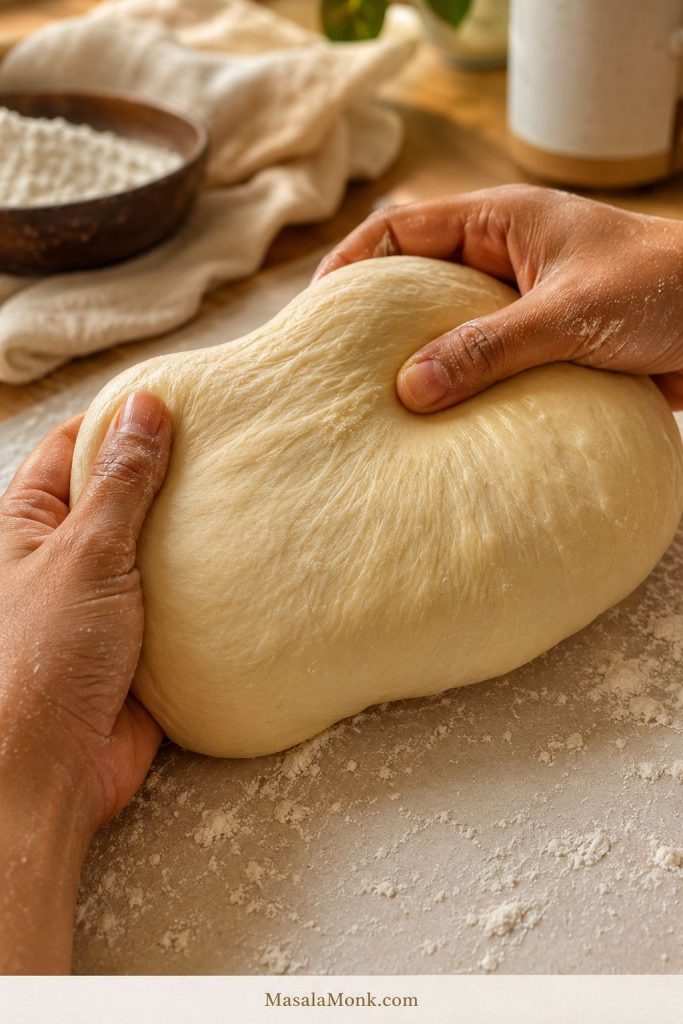
Soft elastic cinnamon roll dough after kneading
The ideal dough is smooth, elastic, and slightly tacky, not dry or stiff.
Dough cue What it means What to do
Soft, smooth, slightly tacky Ideal dough Keep going with the recipe
Sticking heavily to hands or bowl Slightly wet Add flour 1 tablespoon at a time only after kneading
Dry, stiff, or tearing Excess flour Stop adding flour and give the dough enough rise time
Tight and shrinking while rolling Gluten needs to relax Rest the dough for 5–10 minutes, then continue
Not rising after 90 minutes Cold kitchen, weak yeast, or overheated milk Move to a warmer spot and wait longer; if there is no movement, the yeast may be inactive

A little tackiness is your friend here. If the dough feels slightly messier than expected, that is usually better than a dough that feels dry and stiff.

Once the dough feels soft and elastic, the recipe gets easier. From here, you are not fighting the dough anymore — you are shaping it into the warm, cinnamon-filled pan you actually came for.

How to Make Cinnamon Rolls Step by Step

The method is simple once you know what to look for. The clock is only a guide; risen dough and a properly baked center matter more than exact minutes.

1. Make the Dough

Warm the milk until it feels comfortably warm, not hot. Combine the milk, yeast, sugar, melted butter, egg, and egg yolk. Add the flour and salt, then mix until a rough dough forms.

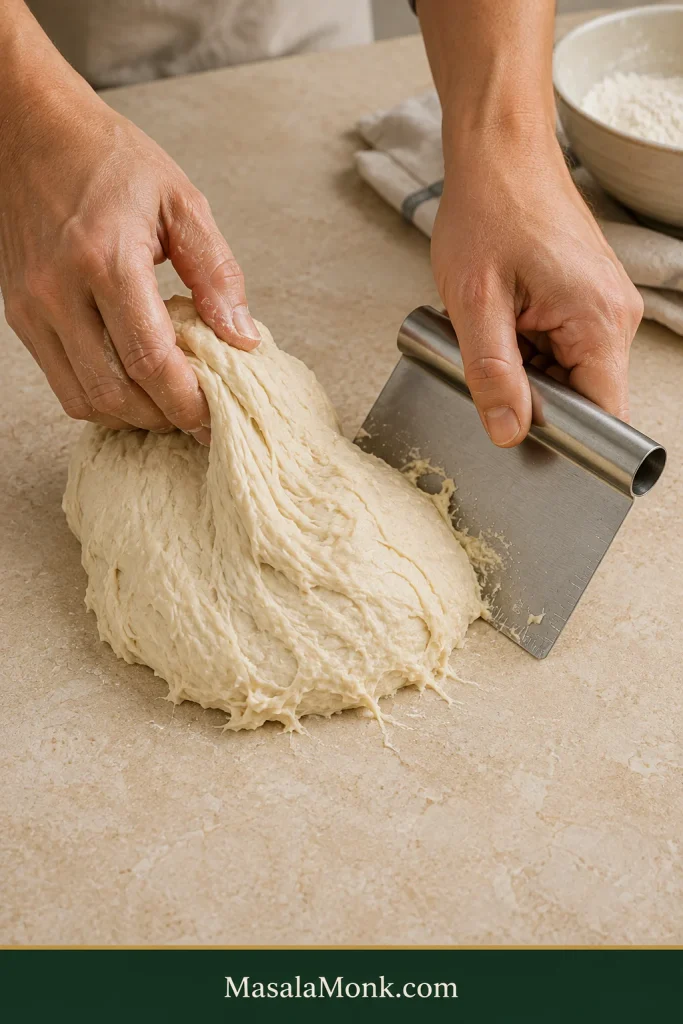
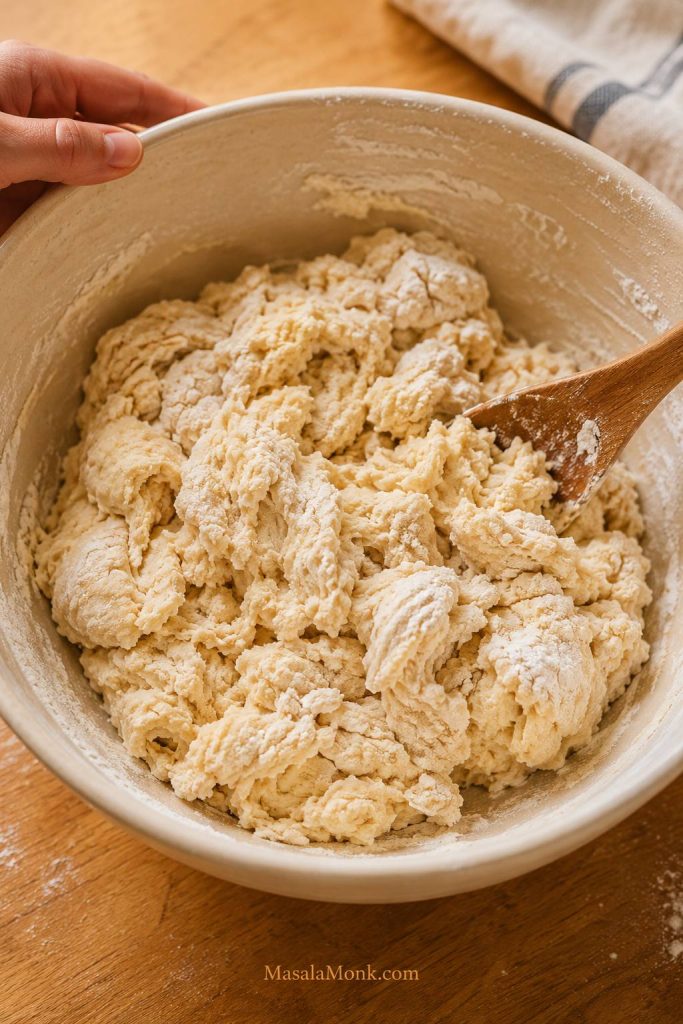
At first, the dough may look shaggy. As it kneads, it will become smoother and more elastic.

Shaggy cinnamon roll dough before kneading
A rough, shaggy dough is normal before kneading; it smooths out as the gluten develops.

2. Knead Until Smooth

Knead by hand for 8–10 minutes, or use a stand mixer for 5–7 minutes on low-medium speed.

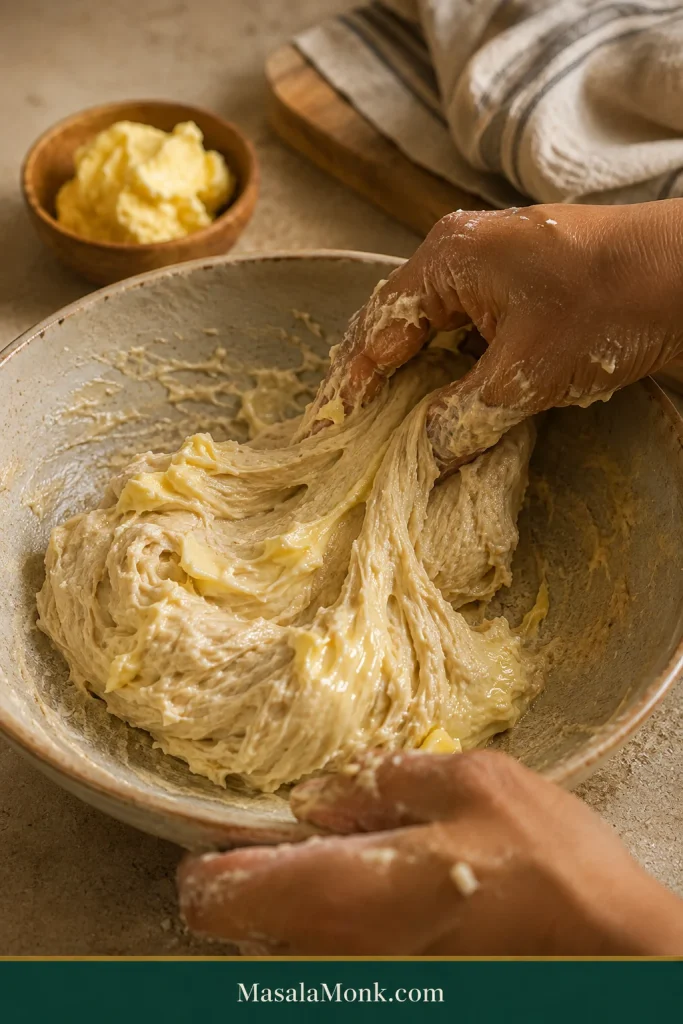
Before adding more flour: keep kneading for another minute or two. Enriched dough often looks sticky before it turns smooth and elastic. Add flour only if it is still smearing heavily on the bowl or hands after kneading.

You are aiming for dough that feels soft, stretchy, and slightly tacky — not dry and stiff. This is the moment many bakers reach for extra flour, so pause before you do. If the dough is soft but manageable, you are probably on the right track.

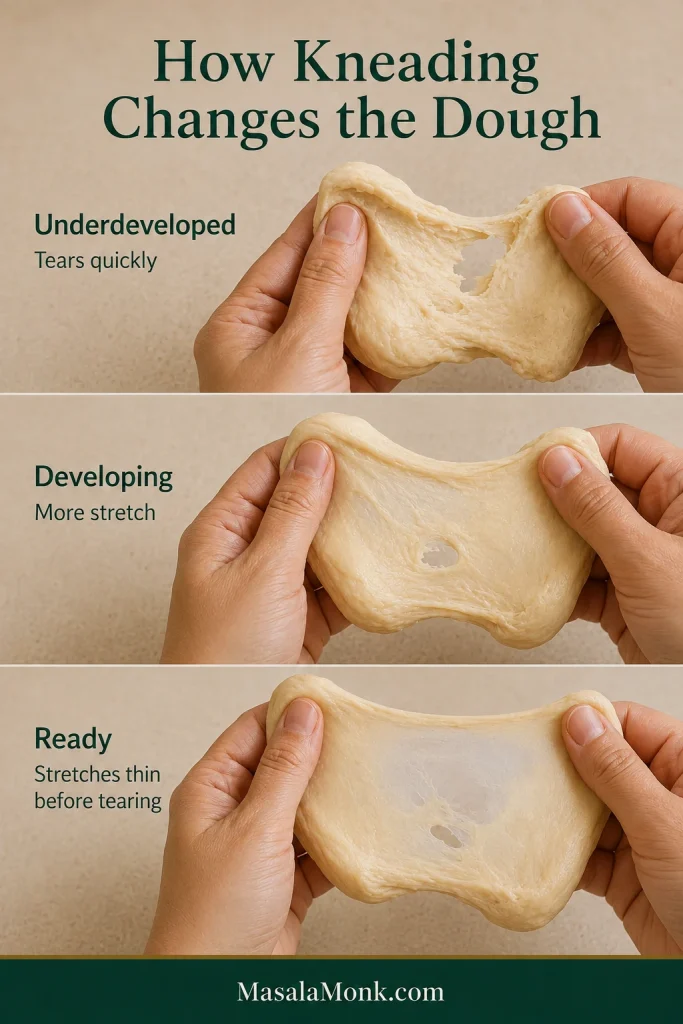
When the dough is ready, it stretches a little before tearing and feels elastic, responsive, and light rather than stiff.

3. Let the Dough Rise

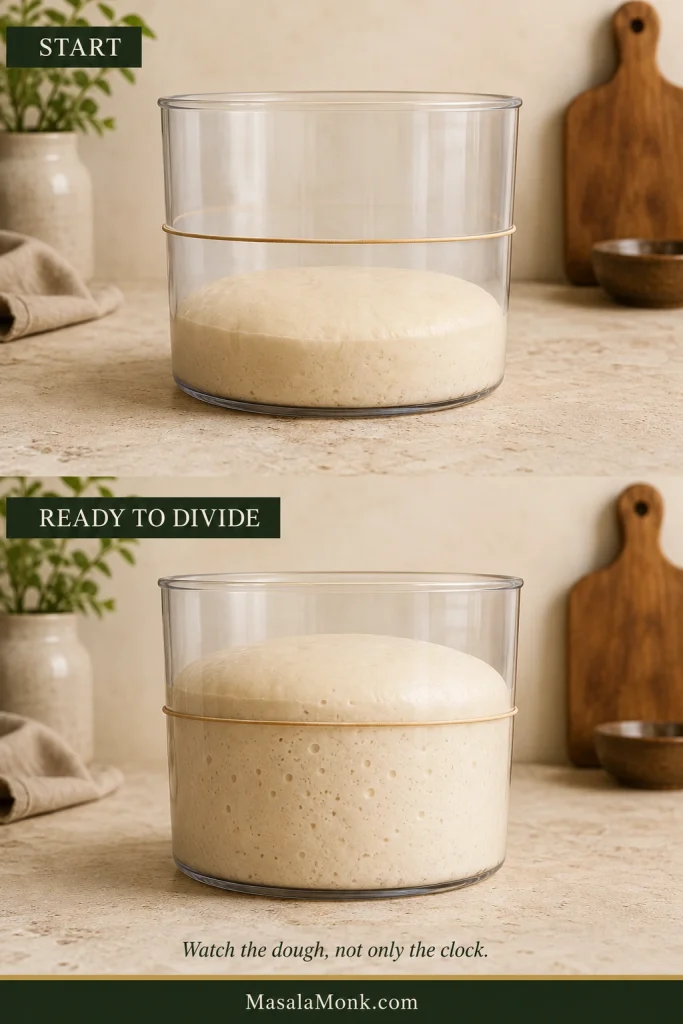
Place the dough in a lightly greased bowl. Cover the bowl with plastic wrap, a damp clean towel, or a lid so the surface does not dry out. Let it rise until doubled. This usually takes 60–90 minutes, but the dough matters more than the clock.

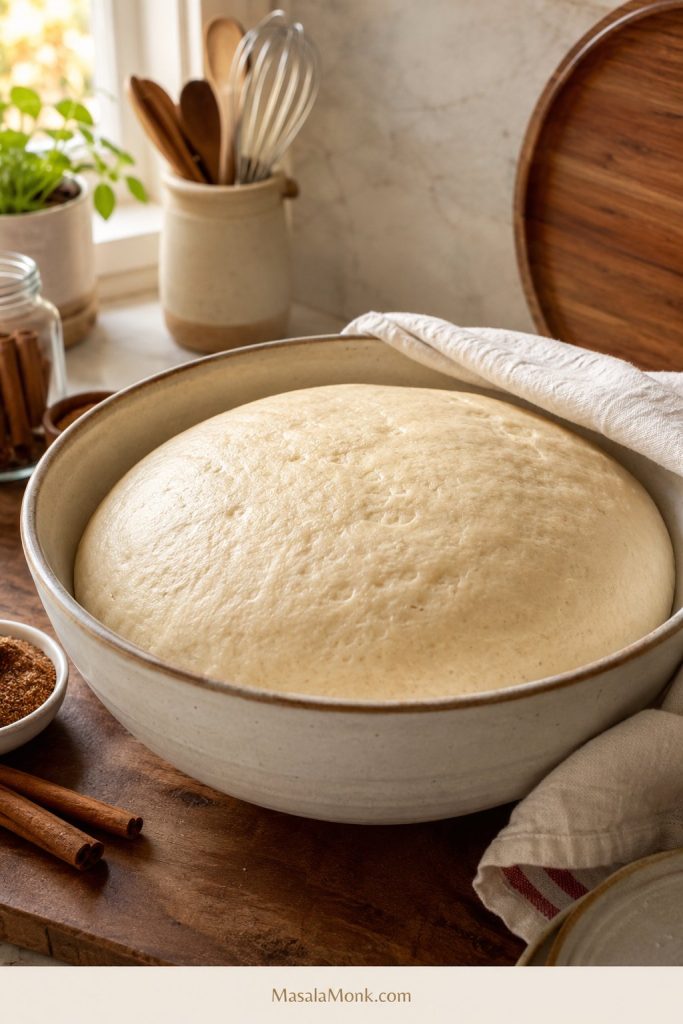
A cold kitchen slows the rise, while a warm kitchen speeds it up. The dough should look airy, expanded, and relaxed before you move on.

Cinnamon roll dough after the first rise, doubled and airy
After the first rise, the dough looks doubled, airy, and soft.

4. Make the Cinnamon Filling

Mix softened butter, brown sugar, cinnamon, and salt into a spreadable paste.

Softened butter keeps the filling thick enough to stay in place. When the filling is hard to spread, let it sit at room temperature for a few minutes. Avoid melting it, because melted butter is more likely to leak out.

5. Roll Out the Dough

Lightly flour the counter and roll the dough into a rectangle about 12×18 inches.

The rectangle does not need perfect corners. Even thickness matters more. If the dough keeps shrinking back, let it rest for 5–10 minutes, then continue rolling.

6. Fill, Roll, and Cut

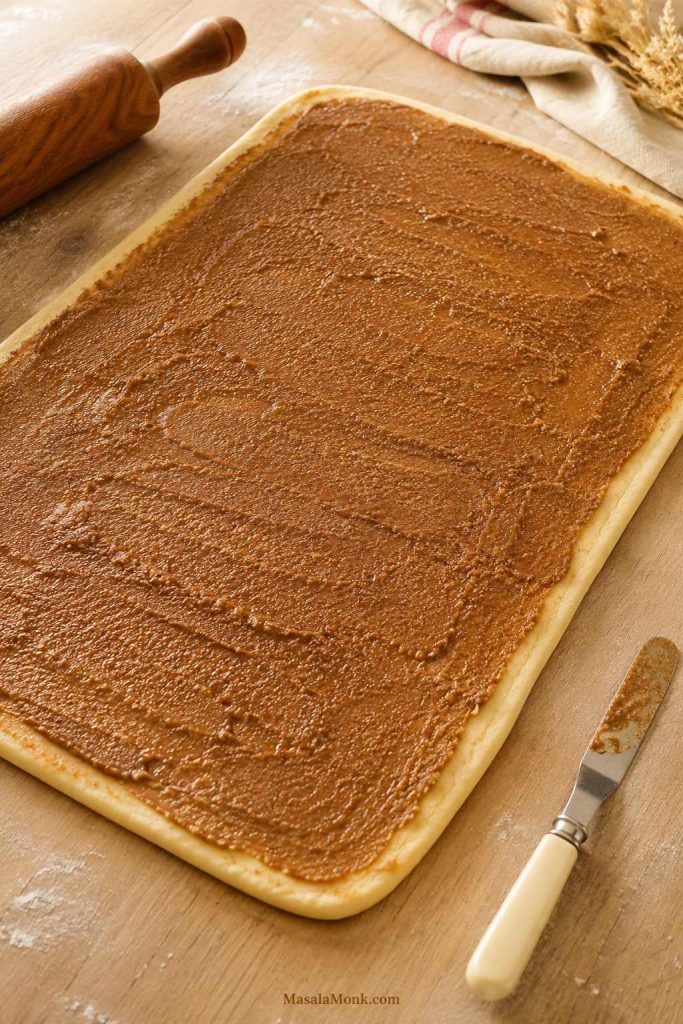
Spread the filling evenly over the dough, leaving a small border along one long edge so the log seals cleanly.

Rolled cinnamon roll dough with brown sugar cinnamon filling spread evenly
Spread the filling evenly and leave a small border so the log seals cleanly.

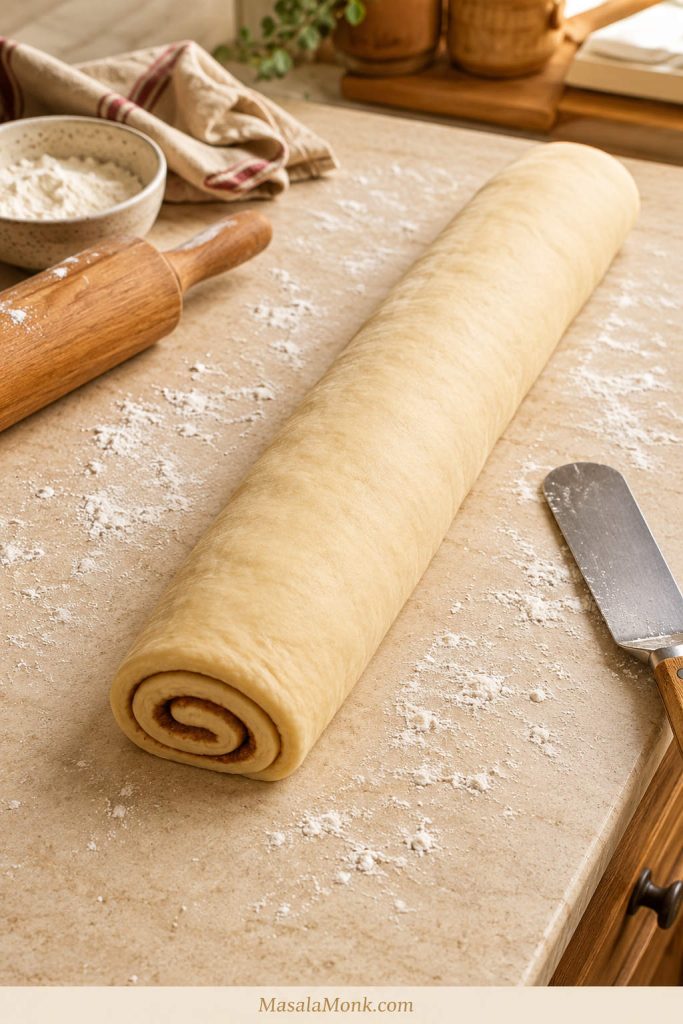
Roll from the opposite long side into a snug log, then turn the seam down before cutting so the rolls hold their shape.

Cinnamon roll dough rolled into a log before cutting
A snug dough log helps the rolls hold their swirl without compressing the centers.

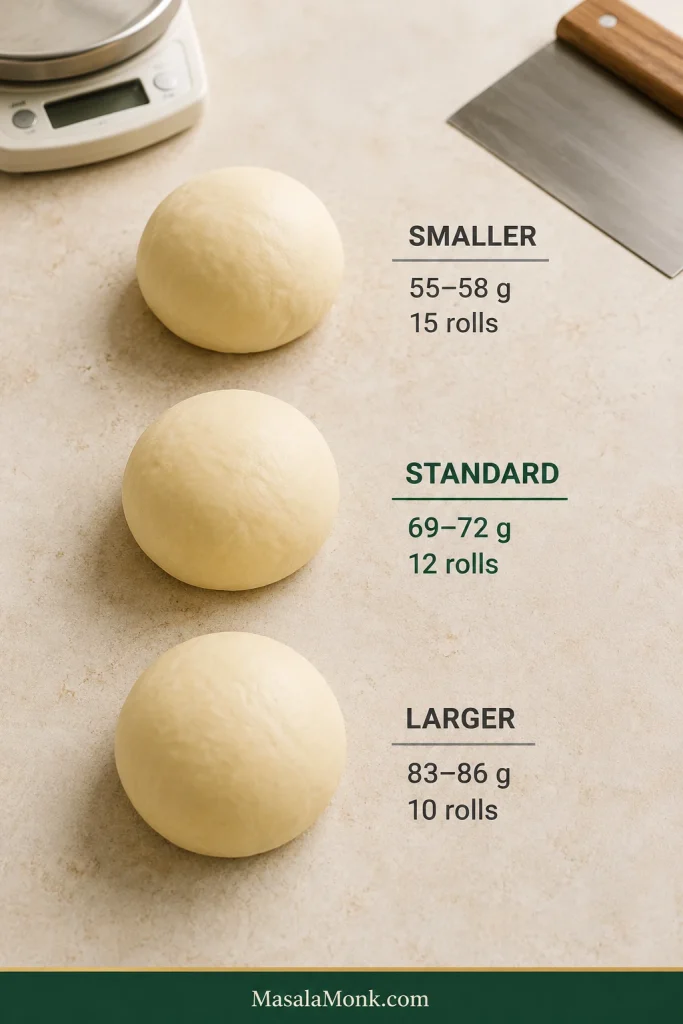
Cut into 12 even rolls. Dental floss or clean thread gives the neatest cuts, but a sharp knife also works. Each roll will be about 1½ inches thick, which helps the batch bake at the same pace.

Cutting cinnamon rolls with floss for clean even slices
Floss or clean thread cuts neat rolls without squashing the spiral.

The spirals do not need to look bakery-perfect before they rise. Even rolls and a little breathing room matter more than perfect swirls.

7. Let the Rolls Rise Again

Place the rolls in a greased 9×13-inch pan. Cover and let them rise until rounded and lightly touching, about 45–60 minutes.

Cinnamon rolls arranged in a 9x13 pan before the second rise
Leave a little space between the cut rolls so they can expand during the second rise.

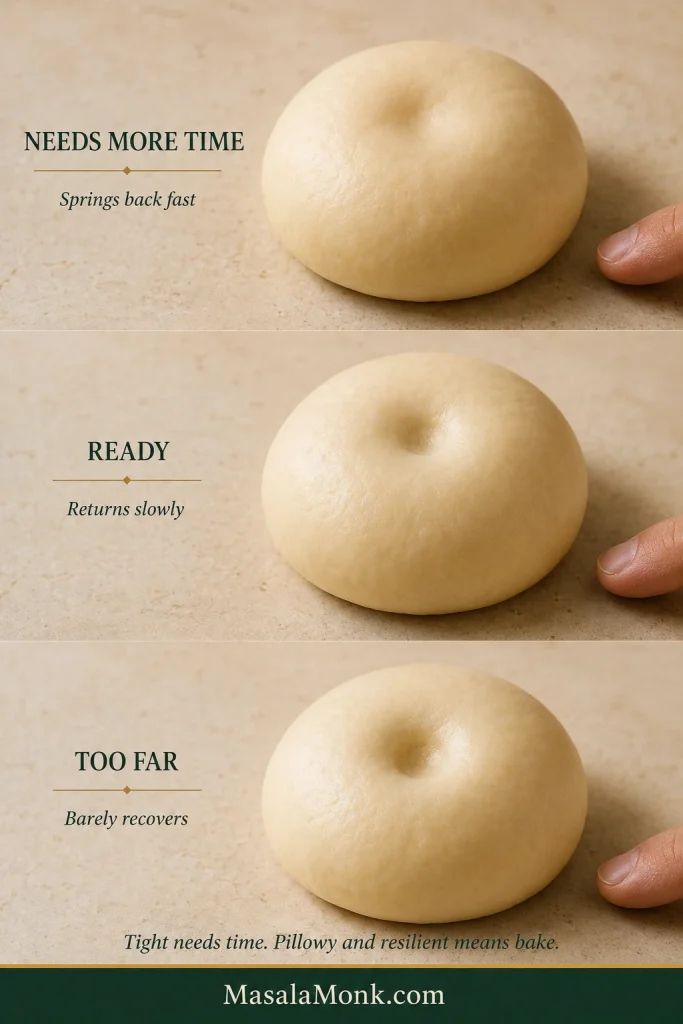
If the rolls still look tight and small, give them more time. Look for rolls that have relaxed, expanded, and lightly pressed against each other.

Puffy cinnamon rolls after the second rise ready to bake
Before baking, the rolls look puffy, rounded, and lightly touching.

Once the dough has risen, the hard part is mostly over. From here, you are shaping, waiting for puffiness, and protecting the center of the pan.

Before baking, check this: the rolls need to look puffy, rounded, and lightly touching. This is the point where patience pays off; puffy rolls going into the oven become softer rolls coming out. If you are using heavy cream, warm it first rather than pouring it in cold.

8. Bake

Bake at 350°F / 175°C for 24–28 minutes. Look for lightly golden tops and a center roll at about 190°F / 88°C.

A better doneness moment is not just when the tops turn golden. It is when the center roll gives you a soft, steamy pull instead of a wet doughy tear.

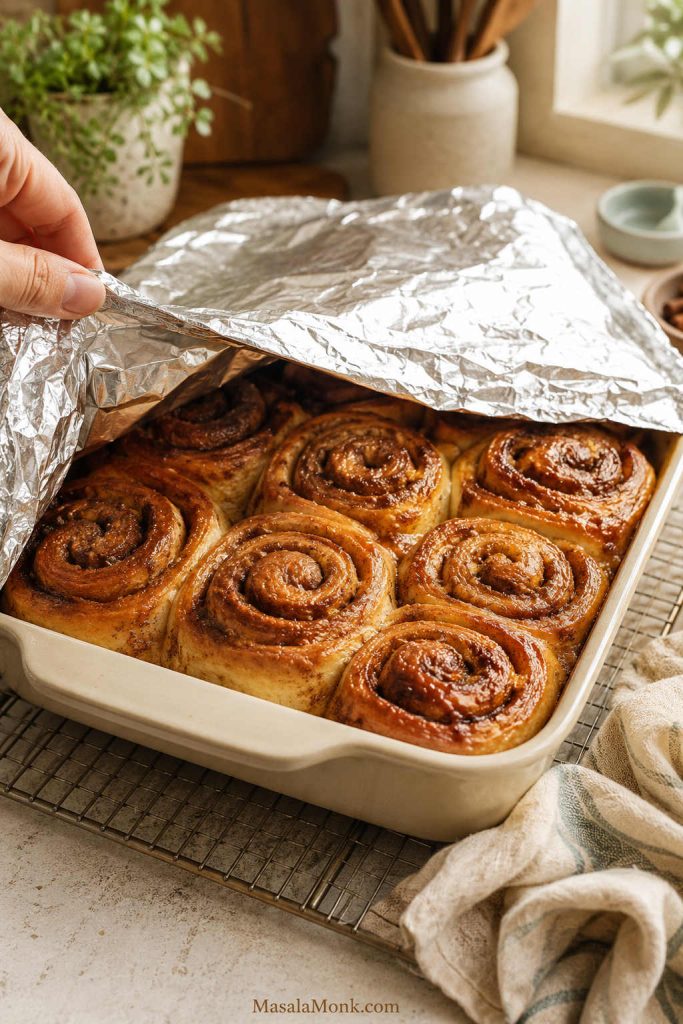
If the tops are golden but the center is not done, cover the pan loosely with foil and bake for a few more minutes. A few extra minutes under foil is better than serving rolls that look golden on top but stay underbaked in the middle.

The kitchen will smell warm and cinnamon-sweet before the tops get deeply browned.

Baked cinnamon rolls before icing with lightly golden tops
The baked rolls look lightly golden before icing, not dark or dry-looking.

9. Ice While Warm

Let the rolls cool for 5–10 minutes before icing. The icing softens into the warm spirals, leaving some creamy pockets on top and some melted sweetness in the cinnamon layers.

Pan Size, Bake Time, and Internal Temperature

The pan affects how quickly the edges brown and how long the center needs to bake. For this recipe, a 9×13-inch pan is the safest default.

Pan Result Note
9×13-inch pan Even bake for 12 rolls Recommended for this recipe
9×9-inch pan Taller, gooier rolls Centers may need more time because the pan is crowded
Two 9-inch round pans Good for gifting or freezing Split the batch evenly
Dark metal pan Faster browning Check early and tent with foil if needed
Glass or ceramic dish Softer edges May need a few extra minutes

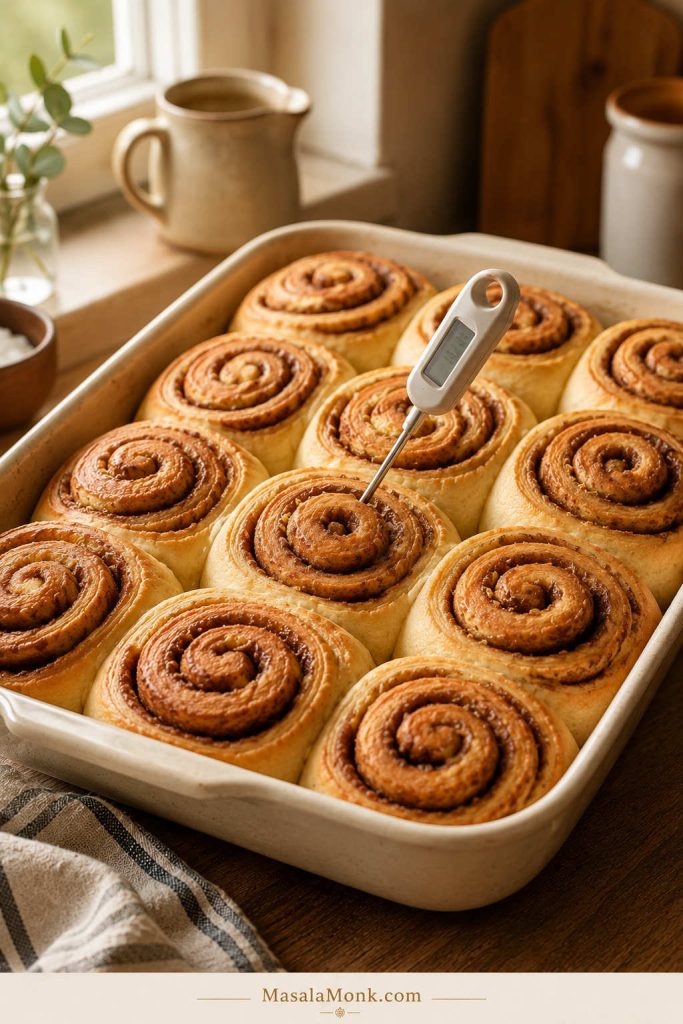
A reliable internal temperature for homemade cinnamon rolls is about 190°F / 88°C in the center roll. Check the middle of the pan, not an edge roll, because the outside rolls bake faster and can look done while the center still needs a few minutes.

Instant-read thermometer checking the center roll for cinnamon roll doneness
Check the center roll, not an edge roll, when using internal temperature as the doneness cue.

If you do not have a thermometer, check the middle roll by gently pulling at a seam. Look for a baked, bread-like center, not shiny, wet, or paste-like. A gooey cinnamon swirl is good; raw-looking dough in the center is not.

If the tops are browning before the center is done, tent the pan loosely with foil and keep baking for a few more minutes. This lets the middle finish without drying out the top.

Gooey Cinnamon Rolls with Heavy Cream

Warm heavy cream is a popular way to make cinnamon rolls richer and more moist. It helps soften the rolls as they bake and can turn some of the cinnamon sugar into a syrupy bottom layer. The key in this recipe is using a moderate amount so the rolls stay gooey without turning soggy.

After the second rise, warm ⅓ cup / 80 ml heavy cream until just warm. Pour it around the risen rolls before baking. For extra-gooey rolls, you can use up to ½ cup / 120 ml.

Warm heavy cream poured around cinnamon rolls before baking
Pour warm cream around the risen rolls; the pan needs only a modest pour.
Heavy cream question Answer
Cold cream? No. Warm it first so it does not slow the dough or shock the risen rolls.
Milk instead of cream? Yes, but it will be less rich and less gooey than cream.
Where to pour it Pour it around and lightly over the risen rolls. Do not flood the pan.
Skipping the cream The rolls still work; cream is only for a softer, gooier finish.

This works best in the 9×13-inch pan because the cream can spread evenly around the rolls. When it works well, you get a softer center and a little cinnamon-sugar syrup at the bottom without losing the shape of the rolls.

Cream Cheese Icing for Cinnamon Rolls

Cream cheese icing is the classic finish for homemade cinnamon rolls. It is creamy, tangy, and rich enough to balance the sweet cinnamon filling.

Beat the softened cream cheese and butter together first. Once smooth, add powdered sugar, vanilla, salt, and a little milk or cream. Add the liquid slowly so the icing stays spreadable instead of runny.

For that bakery-window look, wait longer. If you want icing that slips into the cinnamon seams and makes the center taste almost custardy, ice earlier. When some of the frosting disappears into the warm rolls, that is not a mistake — that is the part people go back for.

Cream cheese icing spread over warm homemade cinnamon rolls
Spread icing while the rolls are warm so some melts into the cinnamon seams.

When to Ice Cinnamon Rolls

Desired result When to ice What happens
Gooey, melted icing About 5 minutes after baking Icing melts into the spirals
Thick, visible frosting 10–15 minutes after baking Icing stays creamier on top
Gooey with visible frosting Thin layer warm, second layer before serving Gooey center with visible frosting

Cinnamon Roll Icing Without Cream Cheese

For a simple vanilla icing, whisk together:

  • 1 cup / 120 g powdered sugar
  • 2 tablespoons / 28 g melted butter
  • 1 teaspoon vanilla extract
  • 1–2 tablespoons milk or cream
  • Pinch of salt

Add more milk for a thinner drizzle or more powdered sugar for thicker icing. This version is sweeter and lighter than cream cheese icing, and it works well when you want a quick glaze. For a fuller butter-based frosting that can be spread or piped, use this Buttercream Frosting Recipe.

Overnight Cinnamon Rolls

Overnight cinnamon rolls are perfect when you want fresh rolls in the morning without making the dough from scratch at sunrise.

This is the easiest way to make cinnamon rolls feel relaxed for brunch: the messy work is done the night before, and the morning is mostly rise, bake, and ice.

In the morning, your job is mostly patience: let the rolls lose their chill, puff up, and then bake into something that feels fresh instead of rushed.

Overnight cinnamon rolls resting in the morning before baking
Overnight rolls need time to lose their chill and puff before baking if they still look tight.

Make the dough, let it complete the first rise, roll it out, add the filling, cut the rolls, and place them in the pan. Cover tightly and refrigerate for 8–12 hours.

Do Overnight Cinnamon Rolls Need to Come to Room Temperature?

Not always. If the rolls already look puffy, relaxed, and lightly touching when they come out of the refrigerator, let them sit while the oven preheats. When they still look tight, cold, and small, give them 45–90 minutes at room temperature before baking. The goal is puffy rolls, not a fixed clock time.

For reliable overnight results:

  • Do not refrigerate the shaped rolls much longer than 12 hours.
  • Let the cold rolls puff before baking instead of putting tight, cold rolls straight into the oven.
  • Bake at 350°F / 175°C for 24–28 minutes, checking the center before serving.

Very long refrigeration can overproof the rolls, making them weaker or syrupy at the bottom. For the softest texture, bake them the next morning.

How to Store, Freeze, and Reheat Cinnamon Rolls

Need Method
Bake tomorrow morning Shape, cover, and refrigerate overnight after the first rise.
Save leftovers Refrigerate cream-cheese-iced rolls and reheat gently.
Freeze for later Freeze baked rolls for the easiest serving later.
Fresh-baked texture Freeze shaped unbaked rolls before the second rise, then thaw and proof before baking.

Room Temperature

Un-iced rolls or rolls with simple vanilla glaze can sit covered at room temperature for 1–2 days if your kitchen is cool.

Refrigerator

Because cream cheese icing is dairy-based, refrigerate iced rolls within 2 hours of serving. They keep for 3–4 days, though the refrigerator can dry them out a little, so reheat gently before eating.

Food safety note: For general leftover guidance, the USDA recommends refrigerating leftovers for 3–4 days: USDA leftovers and food safety.

Freezer

Freeze baked cinnamon rolls with or without icing. Let them cool completely, wrap tightly, and freeze for up to 2 months.

You can also freeze shaped unbaked rolls before the second rise. Thaw overnight in the refrigerator, then let them sit at room temperature until puffy before baking.

Reheating

Reheat individual rolls in the microwave for 10–15 seconds at a time. For a full pan, cover loosely with foil and warm in a low oven.

If a roll seems dry, add a small spoon of milk or cream near the roll before reheating. It helps soften the bread without making it soggy.

Troubleshooting Cinnamon Rolls

If something looks off, do not panic. Cinnamon rolls usually give you clues before they fail: stiff dough, tight-looking rolls, filling that starts to run, or tops that brown before the middle is done.

Even careful bakers get a batch that rises slowly, leaks filling, or browns early. Use these cues to understand what happened and what to change next time.

Quick Cinnamon Roll Fixes

Problem Likely cause Fix
Cinnamon rolls are dry Excess flour, overbaking, dark pan, or not enough icing while warm Weigh flour, keep dough slightly tacky, bake until the middle is set, and tent if tops brown early
Cinnamon rolls are dense Weak yeast, short rise, under-kneading, or cold kitchen Use fresh yeast, knead until smooth, rise until doubled, and let shaped rolls get puffy
Centers are doughy Crowded pan, thick cuts, short second rise, or underbaking Use a 9×13 pan, cut evenly, finish the second rise, and bake until the center is done
Filling leaked out Melted butter, loose roll, filling spread to edge, or overfilled dough Use softened butter paste, leave a border, roll snugly, and place seam side down
Rolls did not rise Old yeast, hot milk, or cold room Use fresh yeast, keep milk warm not hot, and give dough more time in a warm spot
Icing disappeared Rolls were very hot Wait 10–15 minutes for visible frosting or use a thin warm layer plus a second layer
Centers popped up Tight rolling or a small pan Roll snugly but gently, and use a 9×13 pan
Bottoms are soggy Heavy cream overload, underbaking, or overproofing overnight Use less cream, bake until the center is done, and avoid very long refrigeration

Use the table for a quick diagnosis, then read the notes below for the problems that most often affect texture.

The good news: most of these problems are easy to prevent next time once you know the cue to watch for.

Dry Cinnamon Rolls

Dry rolls usually mean the dough was over-floured or the pan baked too long. Keep the dough soft and slightly tacky after kneading.

A dark pan can also brown the edges quickly. If the tops or edges are browning before the center is done, cover the pan loosely with foil and keep baking.

Cinnamon rolls tented with foil when tops brown before the center is done
Loosely tent the pan with foil if the tops brown before the center finishes baking.

Doughy Middle in Cinnamon Rolls

The center rolls bake last. Crowded rolls, thick cuts, or an early pull from the oven can leave the middle doughy.

Check the center of the pan instead of relying only on the edge rolls. A center temperature of about 190°F / 88°C is the clearest sign that the pan is done.

Cinnamon roll center showing a baked interior with gooey cinnamon swirl
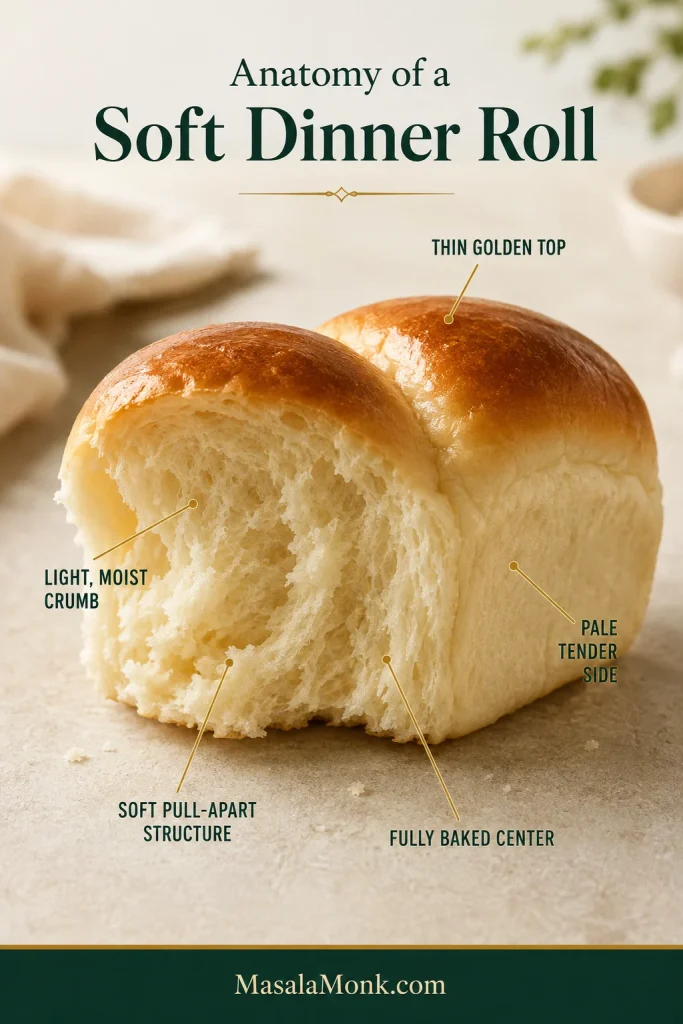
A fully baked center looks bread-like and soft with gooey cinnamon, not wet raw dough.

Filling Leaking Out

The butter may have melted, or the dough may have been rolled loosely. A softened-butter filling paste stays in place better.

Leaving a small border along one long edge also helps seal the log.

Rolls Not Rising

Old yeast, overheated milk, or a cold room can slow the rise. When the dough is slowly expanding, give it more time. No movement at all usually means the yeast was probably inactive.

Cinnamon Roll Variations

These are flavor and format ideas, not full conversion formulas. The base dough is designed for classic soft yeast cinnamon rolls, so bigger changes may need their own tested recipe.

Pumpkin Cinnamon Rolls

Add pumpkin puree and warm spices to the dough or filling, then finish with maple cream cheese icing. Pumpkin adds moisture, so use a tested pumpkin version or adjust flour carefully.

Apple Cinnamon Rolls

Add finely chopped apples or a controlled amount of apple pie filling. A heavy apple layer can make the centers wet, so keep the filling modest. For homemade filling, use this Apple Pie Filling Recipe and keep the amount modest inside the rolls.

Sourdough Cinnamon Rolls

Use active sourdough starter or discard for a tangier dough and longer fermentation. Sourdough timing depends on starter strength and room temperature. If you are still building your starter, start with this Sourdough Starter Recipe.

For more starter-based bakes, this Sourdough Recipe guide covers loaves, rolls, buns, and bagels.

Cinnamon Roll Cookies

For cookies, use cinnamon sugar swirl flavor in a buttery cookie dough. This gives you cinnamon roll flavor without yeast or rise time, but it will not have the soft pull-apart crumb of this recipe.

Puff Pastry Cinnamon Rolls

Puff pastry works when you want fast, flaky cinnamon rolls instead of soft yeast rolls. Bake them spaced apart, not crowded like this dough, because puff pastry needs room to expand.

Vegan Cinnamon Rolls

For vegan cinnamon rolls, use plant-based milk and butter, and replace the egg carefully rather than simply leaving it out. This Flax Egg guide explains the classic flaxseed meal ratio for vegan baking, though a fully vegan cinnamon roll still needs its own dough balance.

Cinnamon Rolls vs Cinnamon Buns vs Cinnamon Scrolls

Whatever you call them — cinnamon rolls, cinnamon buns, or cinnamon scrolls — the craving is usually the same: soft spiral dough, warm cinnamon sugar, and something sweet on top.

In the US, “cinnamon rolls” is the most common term. “Cinnamon buns” may mean the same thing, though some versions include sticky toppings, nuts, or caramel. “Cinnamon scrolls” is common in some regions outside the US.

For this recipe, the method is the same: soft yeast dough, cinnamon sugar filling, spiral shape, and icing or glaze.

Shortcut Cinnamon Roll Questions

Yeast-Free Cinnamon Rolls

You can, but the texture changes. Yeast gives these rolls their fluffy, stretchy, pull-apart crumb. No-yeast cinnamon rolls are faster, but they usually bake up more like soft biscuits or scones.

For these bakery-style rolls, yeast is worth using. If you want something faster, a biscuit-style cinnamon roll is a better direction, but it will not have the same pull-apart crumb.

Using Canned Cinnamon Rolls Instead

Canned cinnamon rolls are great when you want a shortcut brunch or dessert. They will not have the same homemade yeast-dough texture, but they can still be turned into a cozy bake with fruit filling, cream, or extra cinnamon sugar.

For a quick dessert using refrigerated rolls, try this Apple Cinnamon Roll Bake with Apple Pie Filling. It is better for shortcut baking, while this recipe is better when you want homemade cinnamon rolls from scratch.

What to Serve with Cinnamon Rolls

At brunch, cinnamon rolls work well beside something simple and lightly sweet. Serve them with coffee, fruit, eggs, yogurt, or something cool and café-style like an Iced Matcha Latte. With a sweeter spread, keep the sides fresh and light; for a more balanced breakfast, add something savory.

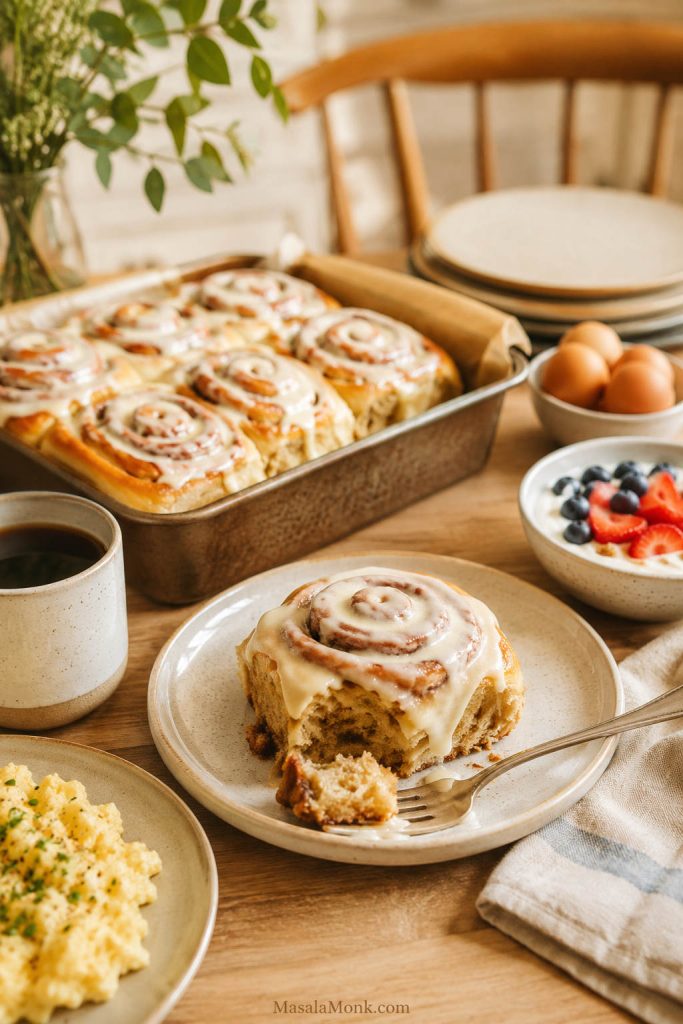
Cinnamon rolls served for brunch with coffee, fruit, and a simple breakfast side
Keep brunch sides simple and fresh so the cinnamon rolls stay the centerpiece.

Frequently Asked Questions

All-Purpose Flour for Cinnamon Rolls

Absolutely. All-purpose flour gives a softer homemade texture and works well when extra flour is kept under control.

Is bread flour better for cinnamon rolls?

Bread flour gives taller, slightly chewier rolls with more structure. Use it if you want a more bakery-style result.

Active Dry Yeast Instead of Instant Yeast

Use the same amount, but proof active dry yeast in warm milk with a little sugar for 5–10 minutes before mixing the dough.

Milk Temperature for Yeast

Aim for milk around 105–115°F / 40–46°C. It should feel warm, not hot.

Using 2% Milk Instead of Whole Milk

Whole milk gives a richer dough, but 2% milk works. Avoid skim milk if you want the softest texture.

Internal Temperature for Cinnamon Rolls

Aim for about 190°F / 88°C in the center roll. This helps confirm the middle is baked through even if the tops already look golden.

How do I tell if cinnamon rolls are done without a thermometer?

Gently pull at a seam in the middle roll. Look for a baked, bread-like center, not wet, shiny, or paste-like.

Dry Cinnamon Rolls

They were likely over-floured, baked too long, or browned quickly in a dark pan. Keep the dough soft and avoid pulling the pan before the middle is done.

Dense Cinnamon Rolls

Dense rolls usually come from weak yeast, short rise time, under-kneading, or excess flour. Let the dough double and let the shaped rolls puff before baking.

Doughy Middle

They may be underbaked, crowded, cut thick, or not risen enough. The center should look set before serving.

Preventing Doughy Centers

Use a 9×13-inch pan for 12 rolls, cut the rolls evenly, let them complete the second rise, and check the center roll before pulling the pan from the oven.

Cinnamon Rolls Popping Up in the Center

The log may have been rolled tightly, the pan may have been crowded, or the rolls may have needed more room to expand.

Adding Heavy Cream Before Baking

You can. Warm heavy cream makes the rolls richer and gooier. Use ⅓ cup / 80 ml for a softer pan or up to ½ cup / 120 ml for extra-gooey rolls.

Overnight Cinnamon Rolls

For overnight cinnamon rolls, make the dough, complete the first rise, shape the rolls, cover the pan tightly, and refrigerate for 8–12 hours. In the morning, let the rolls sit until puffy if they still look tight and cold, then bake.

Freezing Cinnamon Rolls

Freezing works well. Baked rolls can be frozen after cooling, or you can freeze shaped unbaked rolls before the second rise. Thaw and let them get puffy before baking.

Doubling This Recipe

To double the recipe, use two 9×13-inch pans and rotate them if your oven has hot spots.

Choosing Cinnamon Roll Icing

Cream cheese icing is the classic choice because it is creamy, tangy, and rich. A simple vanilla glaze without cream cheese also works.

Icing Without Cream Cheese

For a simple glaze, mix powdered sugar, melted butter, vanilla, milk or cream, and a pinch of salt. Add more milk for a thin glaze or more powdered sugar for thicker icing.

No Stand Mixer Method

A stand mixer helps, but hand kneading works. Mix the dough in a large bowl and knead for 8–10 minutes, until it turns smooth and stretchy.

Final Tips for Soft, Gooey Cinnamon Rolls

Great cinnamon rolls are not about rushing the dough or baking until the tops are dark. Once you understand the cues, homemade cinnamon rolls stop feeling like a gamble. You are not just waiting for a timer; you are watching the dough, the rise, and the center of the pan.

The goal is gooey, not doughy: fluffy edges, cinnamon-rich swirls, creamy icing, and a middle that pulls apart warm instead of feeling heavy, wet, or underbaked.

Did you make these? Leave a comment with the flour you used, whether you baked them same-day or overnight, and whether you added the warm cream. Those details help other readers choose their own cinnamon roll path.
Posted on Leave a comment

Lemonade Scones Recipe

Tall golden lemonade scones on a light tea table, with one scone split open and filled with jam and cream beside a teacup.

This lemonade scones recipe is the shortcut bake you make when you want warm, tender scones without rubbing butter into flour. You only need self-raising flour, cream, and fizzy lemonade, and the dough is supposed to look soft, rough, and a little messy before it bakes into tall, split-open scones.

The point is not just speed. The real win is a batch of scones that rise properly, pull apart easily, and stay soft enough for jam, cream, butter, or lemon curd instead of turning dry, flat, or doughy. If regular scones have ever felt fussy, this version is a good place to rebuild confidence.

If you have seen recipes for scones using lemonade and wondered how they work, the idea is simple: cream brings richness, self-raising flour brings lift, and lemonade adds moisture, gentle sweetness, and fizz. This guide keeps the recipe easy while showing you the small details that help lemonade scones rise tall instead of turning dense, sticky, pale, or dry.

The 3-Ingredient Shortcut

Before you start, it helps to see why this shortcut works. The recipe looks unusually simple, but the flour, cream, and fizzy lemonade each replace a step from a more traditional scone method.

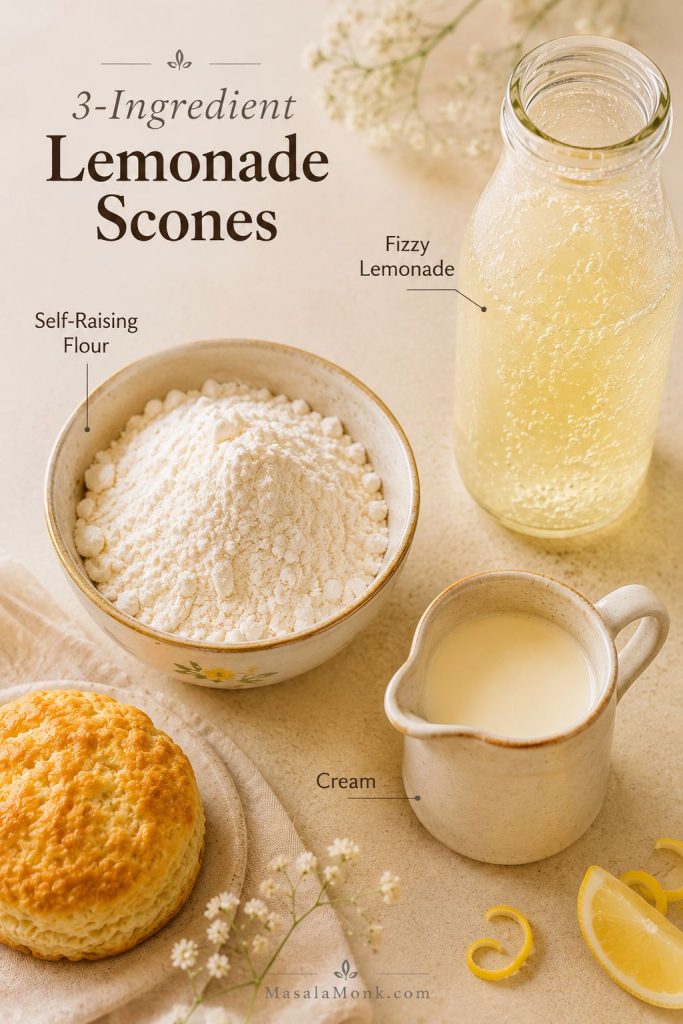
Self-raising flour in a bowl, cream in a small jug, and fizzy lemonade beside a finished scone on a light work surface.
Three ingredients can work beautifully when each one does its job. Self-raising flour gives lift, cream replaces the butter-rubbing step, and fizzy lemonade adds the moisture and gentle sweetness that bring the dough together.

Quick Answer: How to Make Lemonade Scones

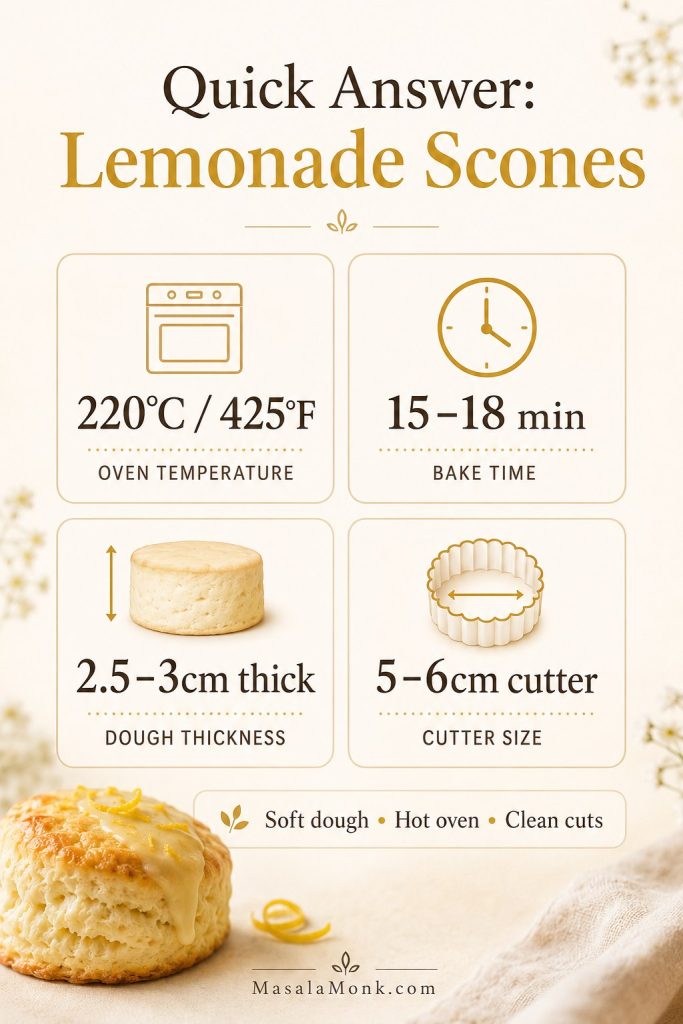
To make this lemonade scones recipe, mix self-raising flour, chilled cream, and chilled fizzy lemonade into a soft, slightly sticky dough. Pat the dough to about 2.5–3cm / 1–1¼ inches thick, cut cleanly with a floured round cutter, place the scones just touching on a tray, brush the tops with milk or cream, and bake at 220°C / 425°F for about 15–18 minutes.

Use this quick visual guide as the fast check before you mix: temperature, bake time, dough height, and cutter size are the details that control most of the final result.

Quick guide image for lemonade scones showing oven temperature, bake time, dough thickness, and cutter size beside a baked scone.
Keep these numbers close before you start: 220°C / 425°F, 15–18 minutes, 2.5–3cm dough thickness, and a 5–6cm cutter. Together, they give the dough enough heat, height, and structure to rise properly.

If the dough looks a little shaggy, do not panic. Lemonade scone dough is meant to feel softer than regular scone dough. That loose, slightly tacky texture is part of what keeps the centers tender after baking.

Recipe Detail Best Starting Point
Main ingredients Self-raising flour, chilled cream, fizzy lemonade
Oven temperature 220°C / 425°F, or 200°C fan
Bake time 15–18 minutes
Dough thickness 2.5–3cm / 1–1¼ inches
Cutter size 5–6cm / 2–2½ inches
Texture goal Tall, tender, lightly golden scones that split open easily

Before You Mix the Dough

Before you start: cold cream, fizzy lemonade, a thick dough, and light handling do most of the work. The dough does not need to look perfect. If it is soft, rough-looking, and just holding together, you are probably on the right track.

For the best rise, bake the scones soon after mixing. The dough comes together quickly, and it performs best while the cream is cold and the lemonade is still lively.

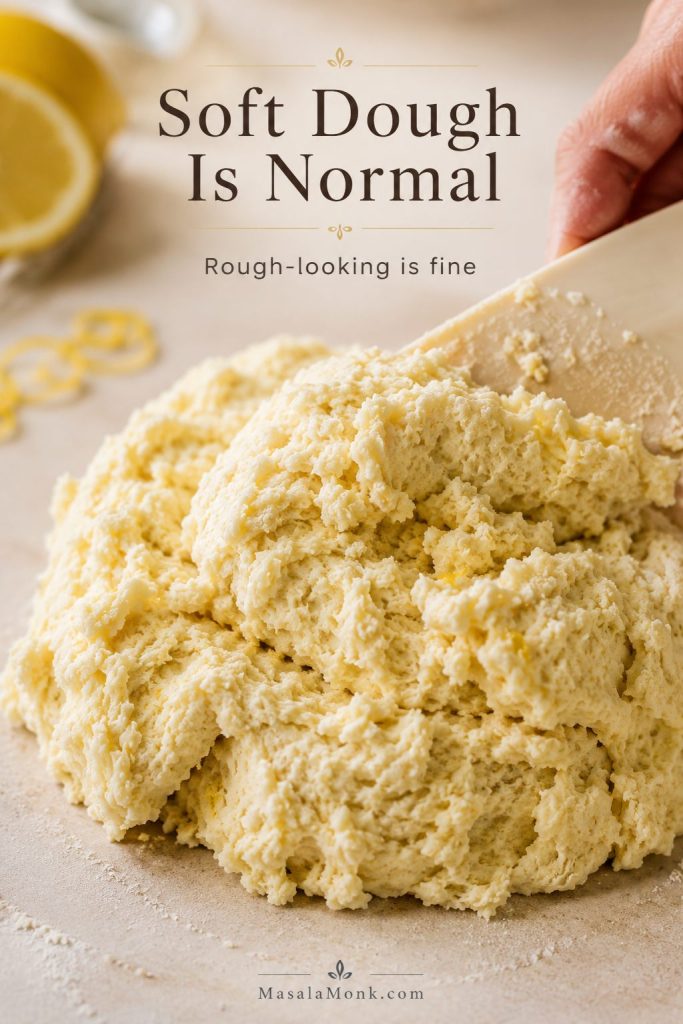
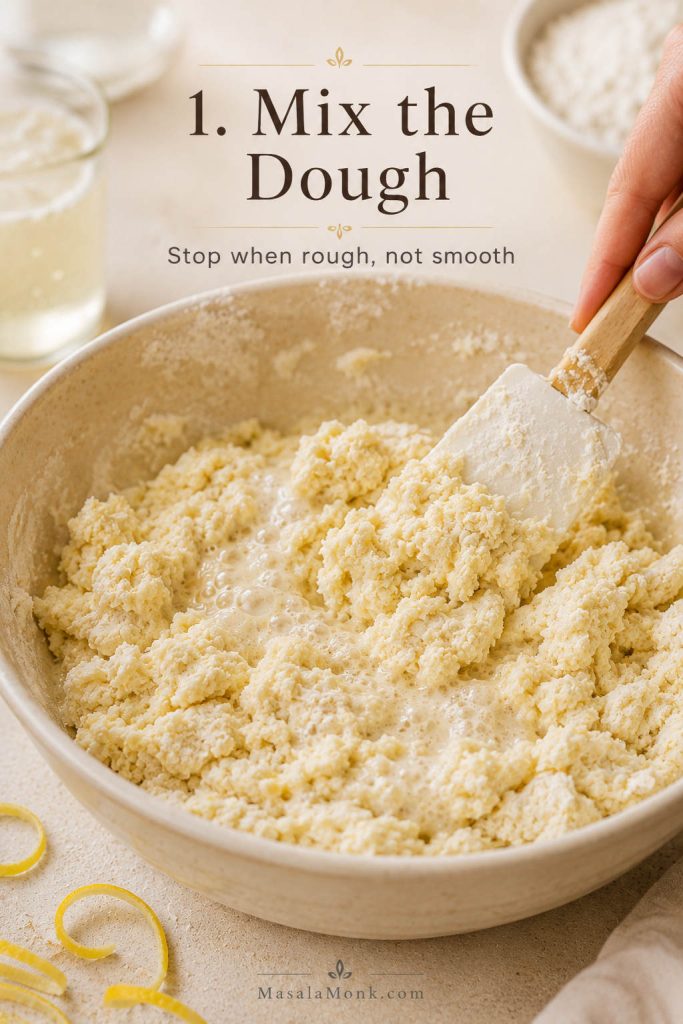
The dough cue matters more than a perfectly tidy bowl. If it looks soft and rough at this stage, that is usually a good sign.

Soft rough lemonade scone dough in a mixing bowl with a spatula, showing a slightly messy texture rather than a smooth dough ball.
This is the moment many bakers worry the dough is wrong. However, lemonade scone dough should look rough and slightly tacky, because a too-smooth dough usually means it has been handled more than it needs.

If Your Oven Runs Hot

Oven note: a hot oven helps scones rise quickly. If your oven runs hot or the tops brown before the centers cook through, use 200°C / 390°F or 180°C fan and bake a few minutes longer.

Already know the basics? Skip to the full recipe card, or go straight to fixes for flat, dense, or sticky scones.

What Are Lemonade Scones?

Lemonade scones are shortcut scones made with self-raising flour, cream, and carbonated lemonade. They are especially associated with Australian-style home baking: quick, practical, generous, and usually served warm with jam and cream.

Traditional scones usually start by rubbing cold butter into flour. Here, cream brings the fat, so you skip that step. The lemonade adds liquid, gentle sweetness, and fizz, while the self-raising flour helps the dough rise.

For a more traditional butter-rubbed afternoon tea version, see our easy English scone recipe. This cream-and-lemonade version is the faster option when you want warm scones without cutting butter into flour.

A quick naming note: in this recipe, “lemonade” means the clear, fizzy British/Australian-style soft drink, not flat homemade lemon juice lemonade.

Fizzy Lemonade vs Flat Lemonade

This is the most important naming difference in the whole recipe. The lemonade needs to be carbonated, because flat homemade lemonade behaves more like a sweet lemon drink than the fizzy liquid this dough is built around.

Comparison image showing fizzy lemonade on one side and flat homemade lemonade on the other for use in scones.
For this recipe, fizzy lemonade is the shortcut ingredient, not flat homemade lemonade. The bubbles are not the only source of rise, but they help keep the dough lighter when combined with fresh self-raising flour and a hot oven.

The word “lemonade” can mean different things depending on where you live. For these scones, use a sweet carbonated lemon drink, Sprite-style soda, or 7Up-style soda. This difference in meaning is exactly why the clarification matters.

Using Sprite, 7Up, or lemon-lime soda? Jump to the soda swap notes.

Despite the name, the finished scones do not taste sharply lemony. They are mild, creamy, and gently sweet. For brighter lemon flavor, serve them with lemon curd, add a little lemon zest to the dough, or finish with a light lemon glaze.

Ingredients for Lemonade Scones

Because the ingredient list is short, each ingredient has a real job. Once you understand those jobs, this lemonade scones recipe becomes much easier to adjust without losing the soft texture.

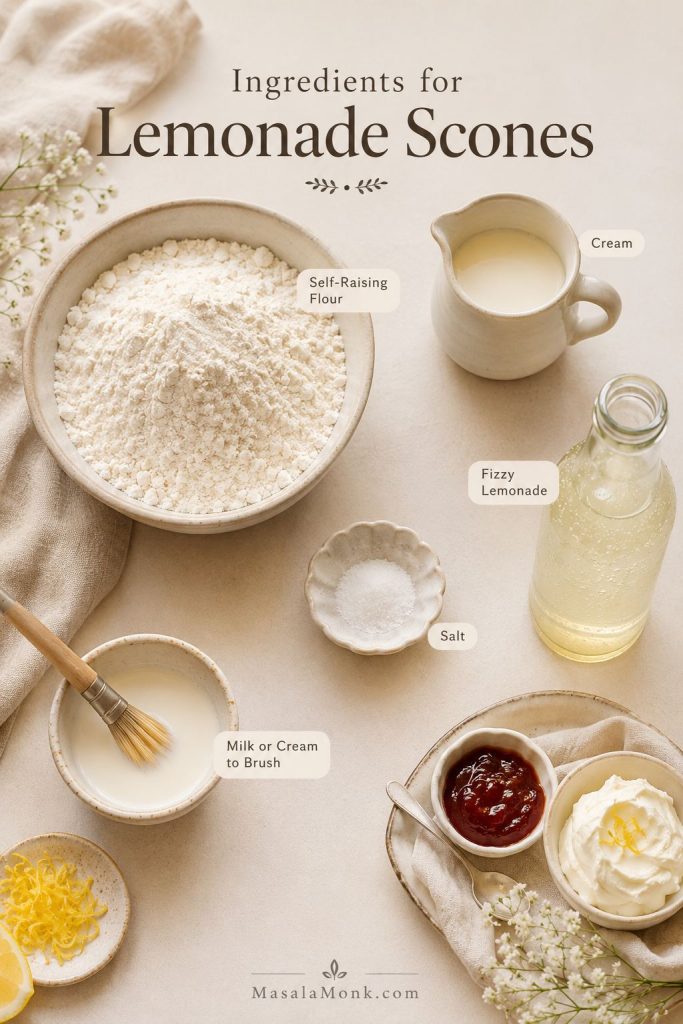
Here is the full working set before the recipe starts: the three main ingredients, plus the small extras that help with flavor, brushing, and serving.

Ingredient spread for lemonade scones showing self-raising flour, cream, fizzy lemonade, salt, and a small brushing liquid on a light surface.
Because this recipe has so few ingredients, stale flour or flat lemonade shows up quickly in the final texture. Start with fresh self-raising flour, cold cream, and newly opened fizzy lemonade for the best rise.

Self-Raising Flour

Self-raising flour gives the scones structure and lift. If your flour has been open for a long time, the raising agent may be weaker, which can lead to flatter scones. For the tallest result, use a fresh bag and measure carefully.

The most reliable measurement is 500g self-raising flour. Cup measurements can vary by country and measuring style, so use grams if you can. As a rough guide, 500g is about 3⅓ metric cups or about 4 loosely spooned-and-levelled US cups.

Cream

Use chilled heavy cream, thickened cream, or whipping cream. Cream is what makes this shortcut work because it brings the richness you would normally get from butter, without asking you to rub cold butter into flour.

Start with 250ml / 1 cup cream in the dough. Keep a little extra nearby for brushing the tops or loosening the mixture if dry flour remains in the bowl.

No cream at home? Check the no-cream options before you start mixing.

Fizzy Lemonade

Use chilled, carbonated lemonade or a clear lemon-lime soda. Open the bottle or can right before mixing, while it still has plenty of fizz. Flat lemonade will not give the same lightness.

Optional Salt

A small pinch of salt keeps the scones from tasting flat, especially if your self-raising flour is very plain. You only need about ¼ teaspoon.

Jam, Cream, Lemon Curd, or Fruit Topping

Jam and cream are classic, especially with a cup of tea. Clotted cream, whipped cream, butter, lemon curd, or warm fruit topping all work well too. A spoonful of thick homemade apple pie filling turns these into quick dessert scones, especially if the scones are still warm enough for the topping to soften into the split center.

Equipment You Need

You do not need special equipment. The most useful “tool” is actually a light hand, but these basics make the dough easier to handle and help the scones rise evenly.

  • Large mixing bowl
  • Digital scale or measuring cups
  • Flat-bladed knife, spatula, or fork for mixing
  • Lightly floured work surface
  • 5–6cm / 2–2½ inch round cutter, or a floured knife for squares
  • Baking tray
  • Parchment paper
  • Pastry brush
  • Wire rack
  • Clean tea towel for softer tops after baking

A round cutter gives the classic look, but squares are easier for beginners because you do not have to re-roll scraps. Either shape works as long as the dough stays thick and lightly handled.

How to Make Lemonade Scones

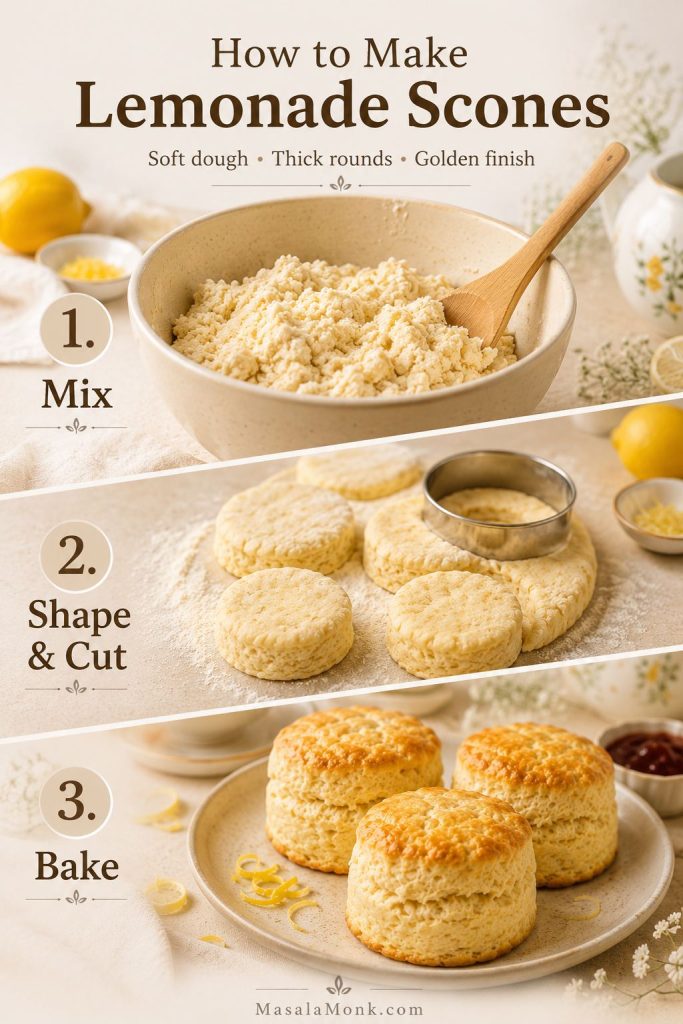
The main rule in this lemonade scones recipe is simple: stop mixing as soon as the dough comes together. You are not trying to make it smooth. A rough, lightly handled dough gives a softer scone than one that has been kneaded into a tidy ball.

The method breaks into three simple stages: mix the rough dough, shape and cut it gently, then bake while the dough is still cool and lively.

Three-step guide showing how to mix lemonade scone dough, shape and cut the dough, and bake the scones until golden.
The method is shorter than regular scones: mix a rough dough, pat it thick, cut straight down, and bake while the dough is still cool. Those small choices matter more than making the dough look perfect.

1. Mix the Dough

Preheat the oven to 220°C / 425°F, or 200°C fan. Line a large baking tray with parchment paper.

Add the self-raising flour to a large mixing bowl and stir in the salt if using. Pour in 250ml chilled cream and 250ml chilled fizzy lemonade, then mix gently with a flat-bladed knife, spatula, or fork until a rough dough forms.

If dry flour remains at the bottom of the bowl, add extra cream 1 tablespoon at a time. The dough should come together, but it should still look soft, rough, and a little messy.

Lemonade scone dough being gently mixed in a bowl with visible flour and liquid still coming together.
Stop mixing once the dough just comes together. At this stage, a few rough edges are better than a polished dough ball, because overmixing can make the baked scones tight instead of light.

2. Shape and Cut the Scones

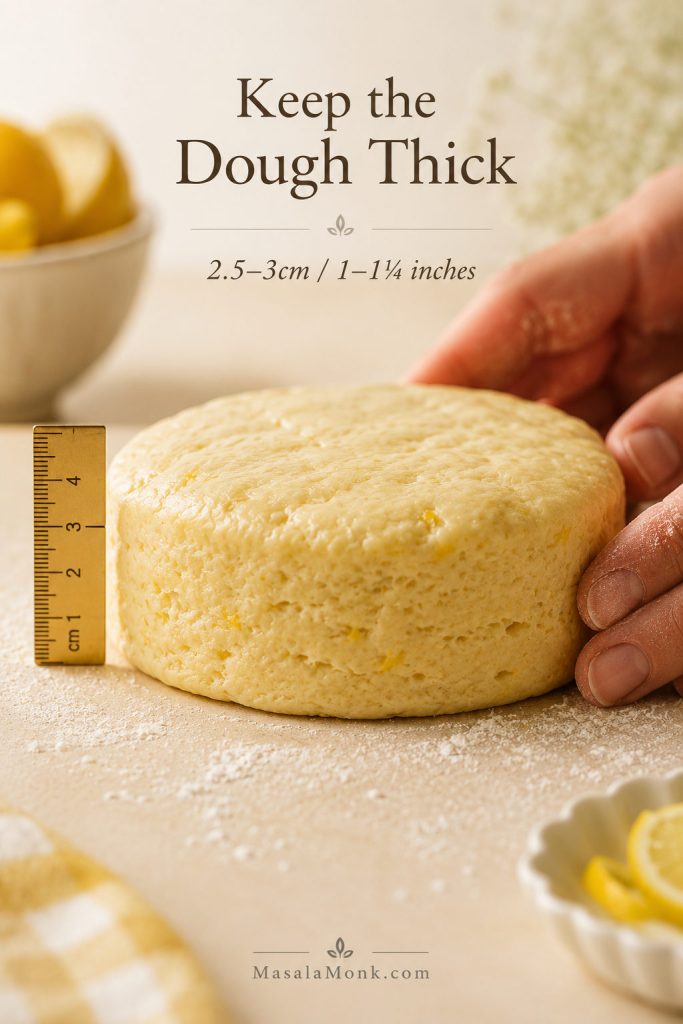
Lightly flour the bench and your hands. Turn the dough out, bring it together gently, and pat it to about 2.5–3cm / 1–1¼ inches thick so the scones have room to rise.

Dough Thickness

This is one of the easiest places to lose height. The dough should be patted thick enough that the scones have room to rise, rather than rolled or pressed thin like cookie dough.

Side view of lemonade scone dough patted thick on a floured surface with a ruler showing about 2.5 to 3 centimetres in height.
Dough thickness is one of the easiest ways to control the final height. If you pat the dough too thin, the scones may bake up wide and flat even if the ingredients are right.

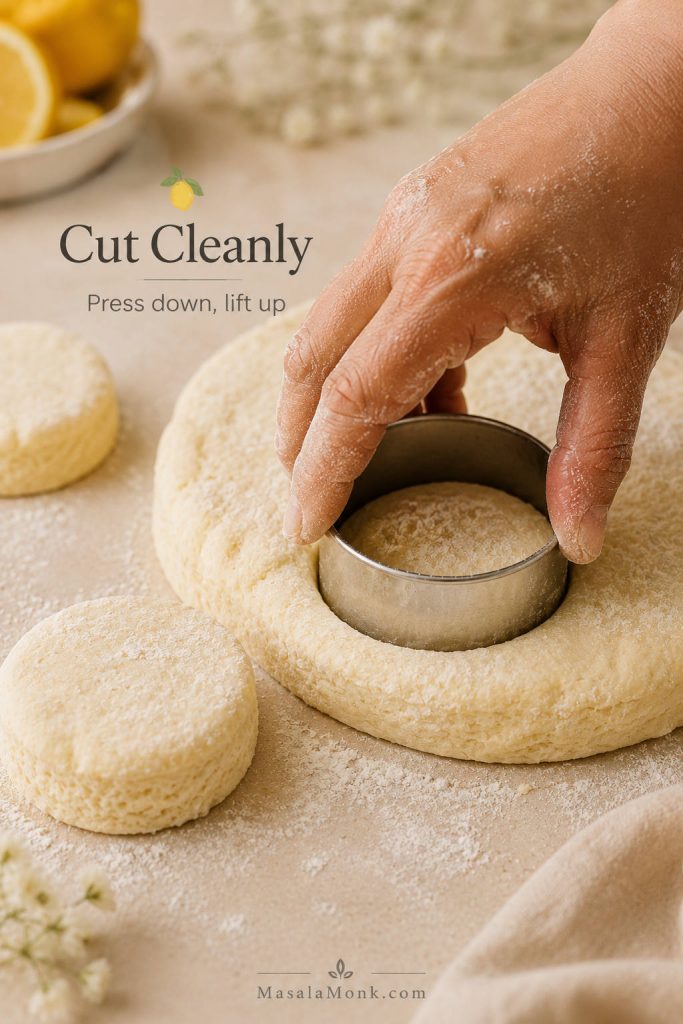
Dip a 5–6cm / 2–2½ inch round cutter in flour, press down cleanly, and lift back up. If you re-roll scraps, press them together gently rather than kneading them smooth. Second-cut scones may be a little less tall, but they will still be tender if you handle them lightly.

A hand pressing a round cutter straight down into thick lemonade scone dough on a lightly floured surface.
Pressing straight down keeps the cut edges open. As a result, the scones can rise more evenly instead of sealing at the sides and leaning in the oven.

Arrange the scones on the prepared tray so they are just touching or nearly touching. This helps them rise upward instead of spreading outward.

Tray Spacing

The tray should look a little closer than you might expect. Lemonade scones rise better when they can support each other, so place them just touching or nearly touching instead of spreading them far apart.

Unbaked lemonade scone rounds arranged close together on a parchment-lined baking tray.
Close spacing is not a mistake here. When the scones sit just touching, they support one another as they bake, which helps them rise upward and keeps the sides softer.

3. Bake Until Risen and Golden

Brush only the tops with a little milk or cream. Try not to drip down the sides because that can seal the edges.

Bake for 15–18 minutes, or until the scones are risen, lightly golden, and sound hollow when tapped on top. For softer tops, cover the hot scones loosely with a clean tea towel for a few minutes after baking.

Freshly baked lemonade scones with lightly golden tops on a tray or cooling rack.
Look for risen scones with lightly golden tops rather than deep browning. Since ovens vary, checking height, color, and the center texture is more reliable than using color alone.

What the Baked Crumb Should Look Like

Once the scones are baked, the inside tells you more than the outside alone. A good lemonade scone should split open easily, with a soft center that can hold jam, cream, butter, or lemon curd without feeling dry or heavy.

Split-open lemonade scone showing a soft tender crumb, with jam and cream nearby.
The crumb is the real test. A well-made lemonade scone should open easily, look soft inside, and feel ready for jam, cream, butter, or lemon curd without turning dry or heavy.

What the Dough Should Look Like

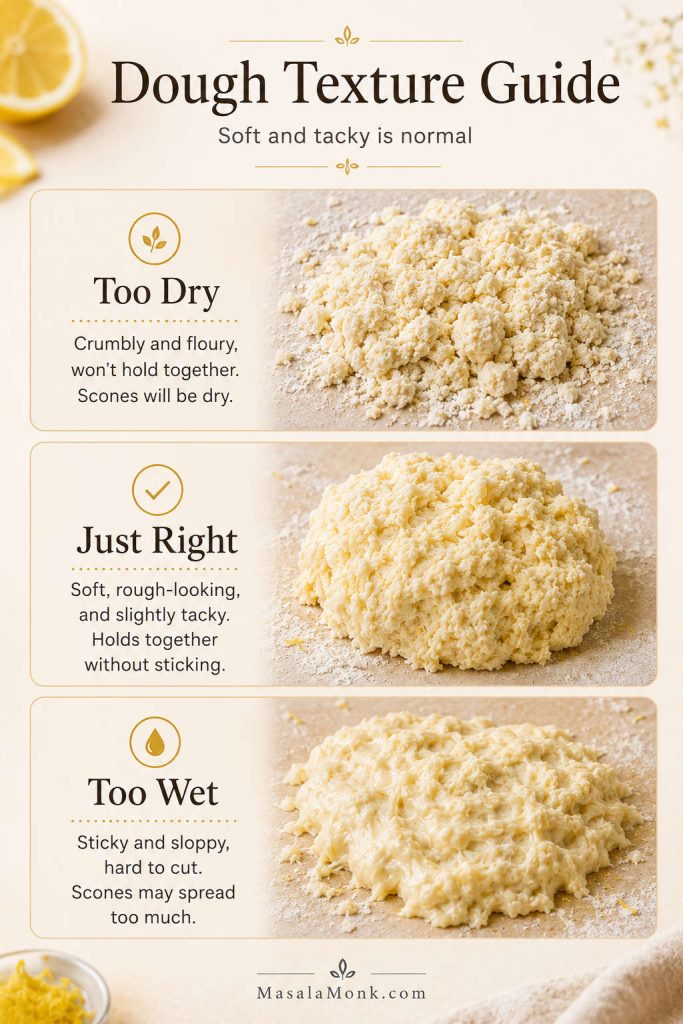
Think soft and rough-looking, not smooth and tidy. The dough should hold together when you pat it, but it may still feel tacky under your hands. This is the stage where many people second-guess the recipe, but a soft dough is normal for lemonade scones.

The mistake is not stickiness. The mistake is adding so much extra flour that the dough becomes dry, firm, and heavy. Lightly flour your hands and the bench, bring the dough together gently, and stop once it can be patted into shape.

Use the comparison below as a quick check before you add more flour. The best dough is soft enough to feel tacky, but firm enough to shape and cut.

Three-panel dough texture guide for lemonade scones showing dough that is too dry, just right, and too wet.
This dough should be tacky, not stiff. If you keep adding flour until it feels tidy and dry, the scones are more likely to turn heavy, so use just enough flour to shape and cut cleanly.

If the dough feels too sticky, too dry, or hard to cut, check the troubleshooting table before working in lots of extra flour.

Cut Cleanly for a Better Rise

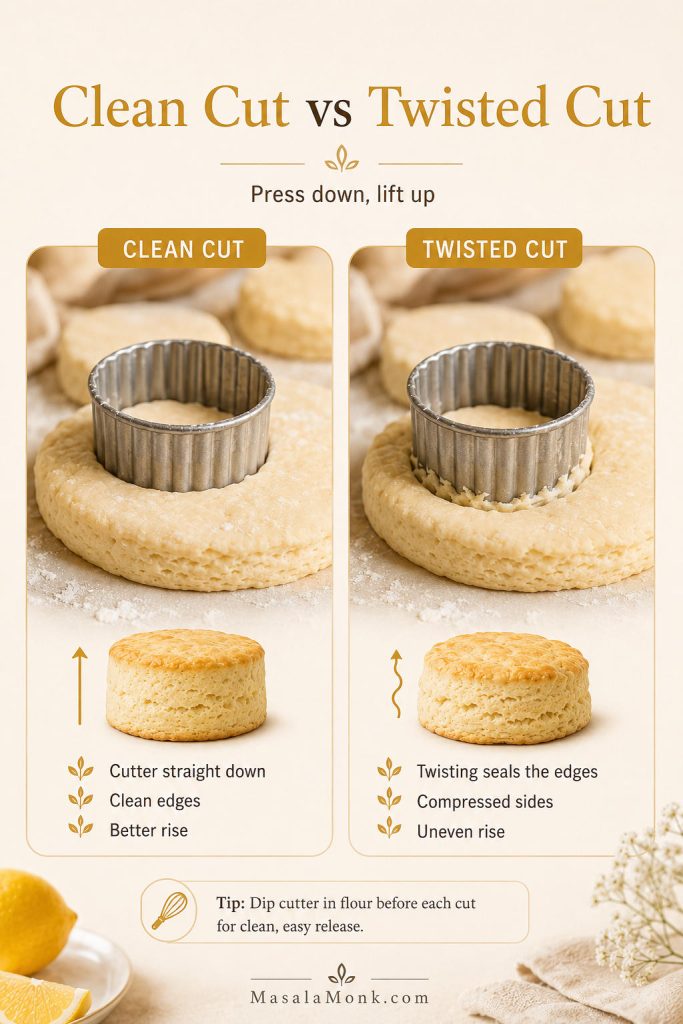
Dip the cutter in flour, press down cleanly, and lift it back up. Twisting can smear the sides of the dough, which may make the scones lean or rise unevenly. If you do not have a round cutter, cut the dough into squares with a floured knife instead.

Side-by-side comparison of a clean scone cutter cut versus a twisted cut in thick dough.
Twisting the cutter can seal and drag the dough edges. Instead, press down and lift straight up, especially if you want taller lemonade scones with a more even rise.

Does the Dough Need to Chill?

For this quick version, you do not need to chill the dough if your cream and lemonade are cold and you work quickly. If the dough becomes warm, slack, or difficult to cut, chill it for 15–20 minutes before baking. Chilling is a rescue move here, not a required one-hour wait.

For tall, tender scones: use fizzy lemonade, keep the dough thick, handle it lightly, and press the cutter straight down. If you do those four things, you are already most of the way there.

Using an air fryer instead of the oven? Use the air fryer timing and spacing notes.

Why Lemonade Works in Scones

Lemonade scones work because the three ingredients cover the jobs that butter, sugar, liquid, and raising agents usually do in a standard scone recipe. The shortcut feels unusual, but the logic is simple.

Ingredient or Step What It Does
Self-raising flour Provides flour structure and built-in raising agent for lift.
Cream Adds fat and richness, replacing the butter-rubbing step.
Fizzy lemonade Adds liquid, gentle sweetness, and carbonation, which helps keep the shortcut dough light when it is handled gently.
Hot oven Gives the dough a fast lift before the outside sets.
Gentle handling Keeps the crumb tender instead of tough or dense.

The bubbles alone do not do all the work. The full system matters: fresh self-raising flour, cold cream, newly opened lemonade, a loose dough, minimal handling, and a properly hot oven.

Self-Raising Flour Substitute

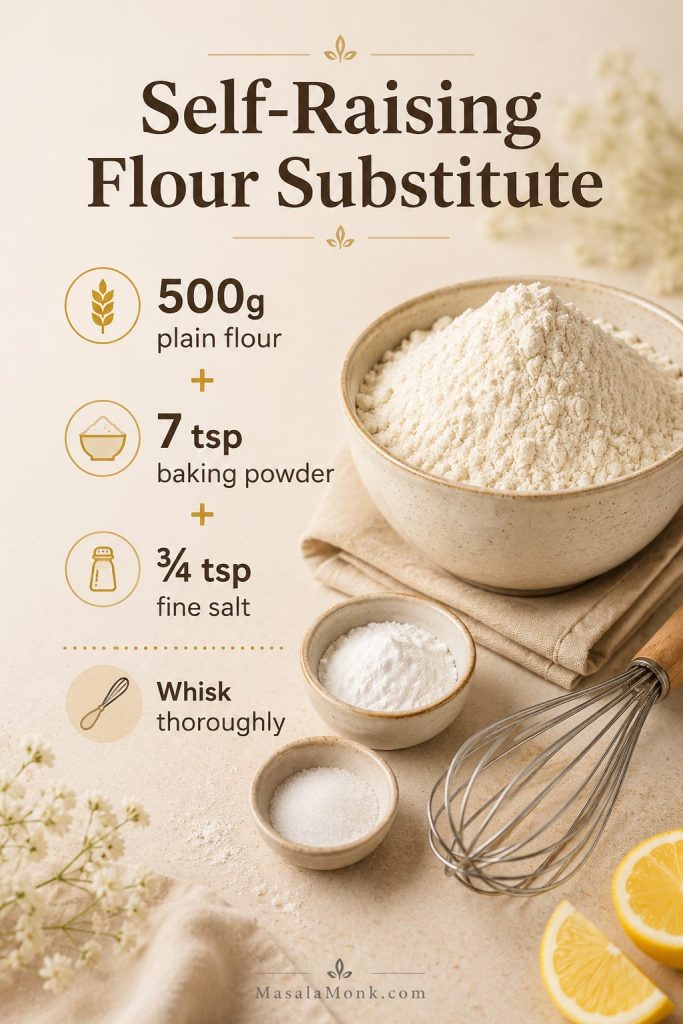
If you do not have self-raising flour, you can make a substitute with plain flour or all-purpose flour, baking powder, and salt.

The full-recipe substitute is easiest to follow by weight. Once the flour, baking powder, and salt are evenly whisked, you can use it in place of self-raising flour in the main recipe.

Plain flour, baking powder, salt, and a whisk arranged as a self-raising flour substitute guide for scones.
Homemade self-raising flour works best when the baking powder is evenly mixed through the flour. Therefore, whisk the substitute thoroughly before adding cream and lemonade, so every scone has the same chance to rise.
For This Recipe Use
Instead of 500g self-raising flour 500g plain/all-purpose flour + 7 teaspoons baking powder + ¾ teaspoon fine salt

Whisk the flour, baking powder, and salt very well before adding the cream and lemonade, so the raising agent is evenly distributed. For smaller batches, use about 2 teaspoons baking powder per 150g / 1 metric cup flour, then add a small pinch of salt.

Because this recipe depends on lift, fresh flour and fresh baking powder matter. Self-raising flour formulas vary slightly by country and brand, but the ratio above is a reliable starting point for this high-rise scone dough. For a more general homemade self-rising flour reference, King Arthur Baking uses flour, baking powder, and salt in a slightly gentler ratio.

Sprite, 7Up, and Lemon-Lime Soda Swaps

Sprite, 7Up, and similar clear lemon-lime sodas can work in lemonade scones. The scones care more about fizz and sweetness than the name on the bottle, so open it right before mixing.

If you are outside Australia or the UK, this is the part that matters most: use Sprite, 7Up, or a clear fizzy lemon-lime soda, not flat homemade lemonade made with lemon juice, sugar, and water.

Drink Works? Notes
Fizzy lemonade Yes Best default for this recipe.
Sprite or 7Up-style soda Yes Good substitute, especially for US readers.
Flat homemade lemonade Not ideal Missing the fizz that helps lighten the dough.
Sugar-free lemonade Possible, not best May brown less and can leave an aftertaste.
Strongly flavored soda Only as a variation May change the color and flavor of the scones.

If you try a local lemon-lime soda, pay attention to sweetness and fizz first. Those two things matter more than the brand name, and they are useful details to remember for your next batch.

Guide showing clear fizzy lemon-lime soda options for lemonade scones, including generic lemon-lime soda and fizzy lemonade.
Sprite-style or 7Up-style lemon-lime soda is a practical swap when British or Australian-style fizzy lemonade is not available. The key is freshness: open it right before mixing so the soda is still lively.

Lemonade Scones Without Cream

The cream version is the best first batch because cream brings both liquid and fat. No-cream swaps can work, but they are easier once you have felt the original dough.

If you remove the cream, the dough still needs richness from somewhere; otherwise the scones can turn dry, tough, or bread-like. Start with slightly less of the swap than the full cream amount, then add more only if dry flour remains in the bowl.

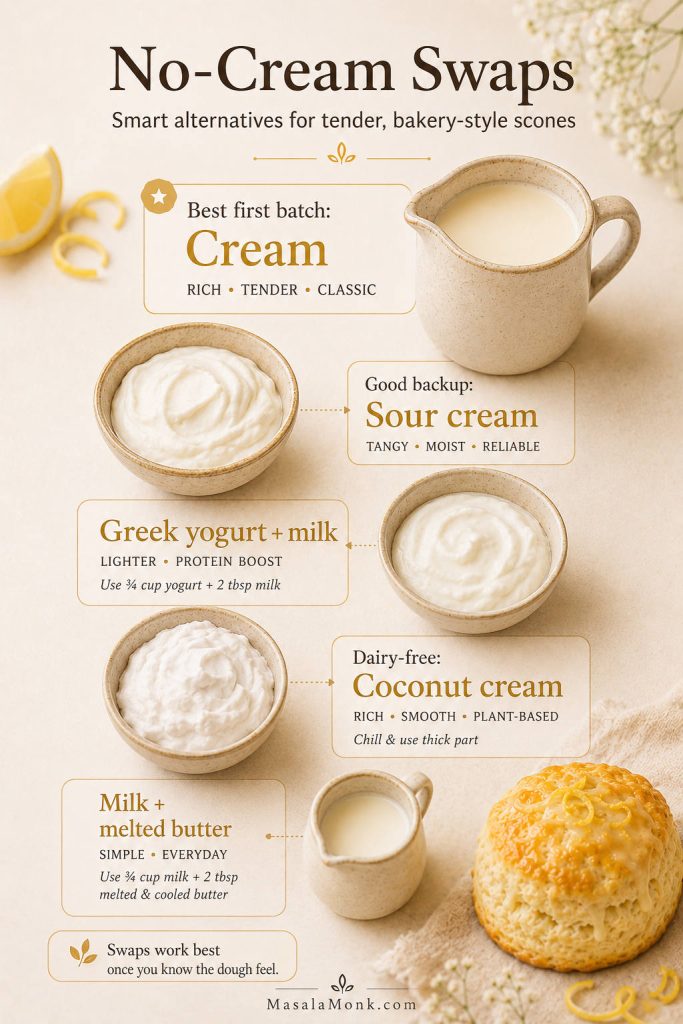
Swap Best Use
Sour cream Good backup when you still want richness and tenderness.
Greek yogurt + splash of milk Useful if you want body and tang, but the dough may be slightly less rich.
Full-fat coconut cream Best dairy-free direction, though it may add mild coconut flavor.
Milk + melted butter Workable, but no longer the same simple 3-ingredient shortcut.
Plain milk alone Least ideal; the scones usually taste less rich and more bread-like.
Comparison board showing cream, sour cream, Greek yogurt with milk, coconut cream, and milk with butter as no-cream swap options for lemonade scones.
Cream is still the most reliable first choice because it brings fat and liquid together. Once you know the original dough texture, sour cream, yogurt with milk, or coconut cream become easier to judge.

The same cold-fat principle shows up in other baking projects too. In our apple pie crust recipe, cold butter helps create flaky layers; here, chilled cream gives the shortcut dough richness without the rubbing-in step.

Best advice: if this is your first time making the recipe, use full-fat cream. Once you know how the dough should feel, the swaps are much easier to judge.

Air Fryer Lemonade Scones

You can adapt this lemonade scones recipe for the air fryer, but think small batch rather than crowded basket. Air fryer scones can work beautifully when they have enough space for the heat to move around them.

For most basket-style air fryers, a half batch is easier to manage. Crowding traps steam, browns the tops too quickly, and can leave the centers underdone.

Small batch of lemonade scones spaced apart in an air fryer basket, with a temperature note for air fryer baking.
Air fryer lemonade scones need space more than they need a full basket. Because the heat is concentrated, smaller batches help the centers cook through before the tops brown too quickly.
  1. Preheat the air fryer to 175–180°C / 350°F.
  2. Make the dough as directed, then cut slightly smaller scones so the centers cook through.
  3. Place the scones in a single layer with space around them.
  4. Brush the tops with milk or cream.
  5. Air fry for 8–12 minutes, checking at 8 minutes. Larger scones may need 12–14 minutes.
  6. Cool briefly, then serve warm with jam and cream.

If your air fryer runs hot, start at the lower end of the time range and check the center of one scone before serving.

Lemonade Scone Variations

Keep variations modest the first time you make the recipe. This dough is designed to be light, so too much fruit, zest, extra liquid, or heavy add-ins can make the scones spread, lean, or bake up dense.

Lemonade Scones with Lemon Curd

Lemon curd is the best move if you expected a stronger lemon flavor from the lemonade itself. You can also add a little finely grated lemon zest to the dough, but keep the amount modest so the dough does not become wet or bitter.

If you like bright citrus desserts, you may also enjoy this orange olive oil cake, which has a softer cake-style crumb and deeper orange flavor than these mild lemonade scones.

Fruit Lemonade Scones

Fold in a small handful of sultanas, raisins, currants, blueberries, or raspberries after the dough starts to come together. Keep the amount to about ½ cup for the first batch. If using juicy berries, handle the dough gently so the fruit does not bleed too much into the crumb.

Gluten-Free Lemonade Scones

Use a gluten-free self-raising flour blend designed for baking. The dough may feel more delicate, so handle it gently and avoid adding too much extra flour. Gluten-free scones often dry out faster, so serve them warm or reheat briefly before serving.

If the gluten-free dough feels fragile, pat it into a disc and cut it into wedges instead of re-rolling rounds. That reduces handling and helps the scones hold together.

Vegan Lemonade Scones

For a vegan direction, use a dairy-free cream alternative with enough fat, such as full-fat coconut cream or a thick plant-based cream. Check that the lemonade is vegan-friendly and use plant milk for brushing the tops.

How to Fix Lemonade Scones

If your first batch is not perfect, the fix is usually easy to spot. Lemonade scones are sensitive to a few small things: fresh flour, dough thickness, light handling, and oven heat. Once you know which one went wrong, the next batch is much easier.

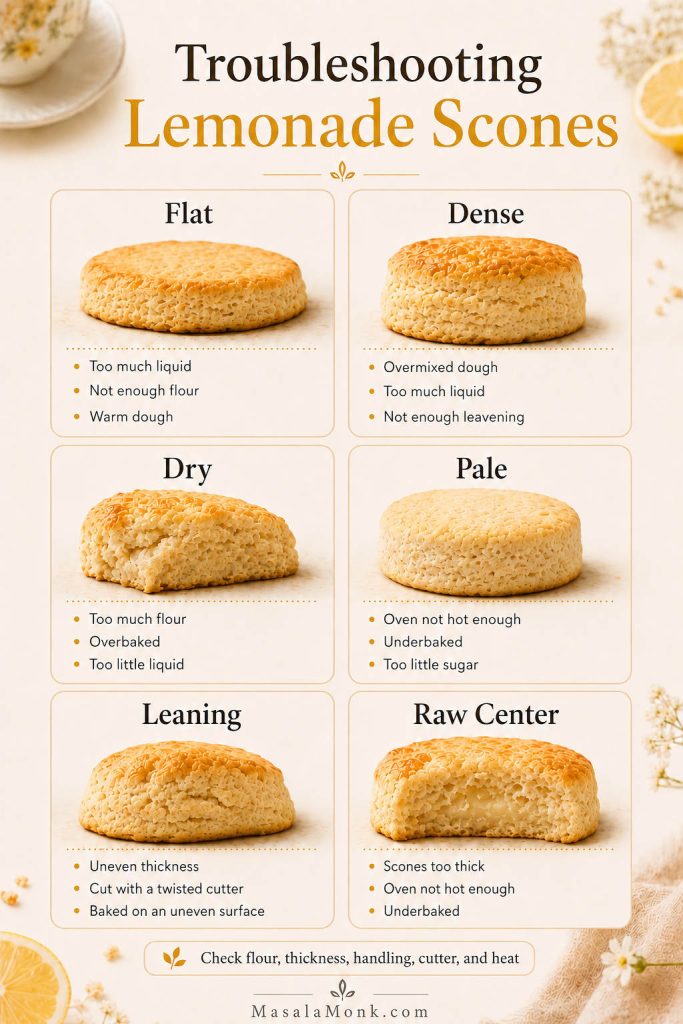
Troubleshooting guide for lemonade scones showing examples of flat, dense, dry, pale, leaning, and raw-centre scones.
Most lemonade scone problems point back to one of five things: flour freshness, dough thickness, handling, cutter technique, or heat. Use the visual clues here before changing the whole recipe.
Problem Likely Cause Best Fix
Dough is very sticky The dough is naturally soft, or there is slightly too much liquid. Flour your hands and bench lightly. Add extra flour only a little at a time.
Scones are flat Old self-raising flour, dough too thin, oven too cool, or cutter twisted. Use fresh flour, keep the dough 2.5–3cm thick, preheat fully, and press the cutter down cleanly.
Scones are dense The dough was mixed or handled too much. Mix only until rough and just combined, then bring together gently with floured hands.
Scones are dry Too much flour was added on the bench, or the scones were overbaked. Keep the dough soft and bake only until risen, lightly golden, and cooked through.
Tops are pale No milk or cream brush, or oven not hot enough. Brush the tops lightly and bake in a properly preheated oven.
Scones lean sideways Cutter was twisted or scraps were overworked. Dip cutter in flour, cut cleanly, and handle re-rolled scraps gently.
Centers are raw Scones are too thick, too large, or baked too quickly on the outside. Cut slightly smaller scones or bake a few minutes longer at a slightly lower temperature.
Crust is too firm Scones cooled uncovered. Cover hot scones loosely with a clean tea towel for a few minutes after baking.

Storage, Freezing, and Reheating

These scones are best on the day they are baked, especially while still warm. Like most scones, they become firmer as they cool and sit.

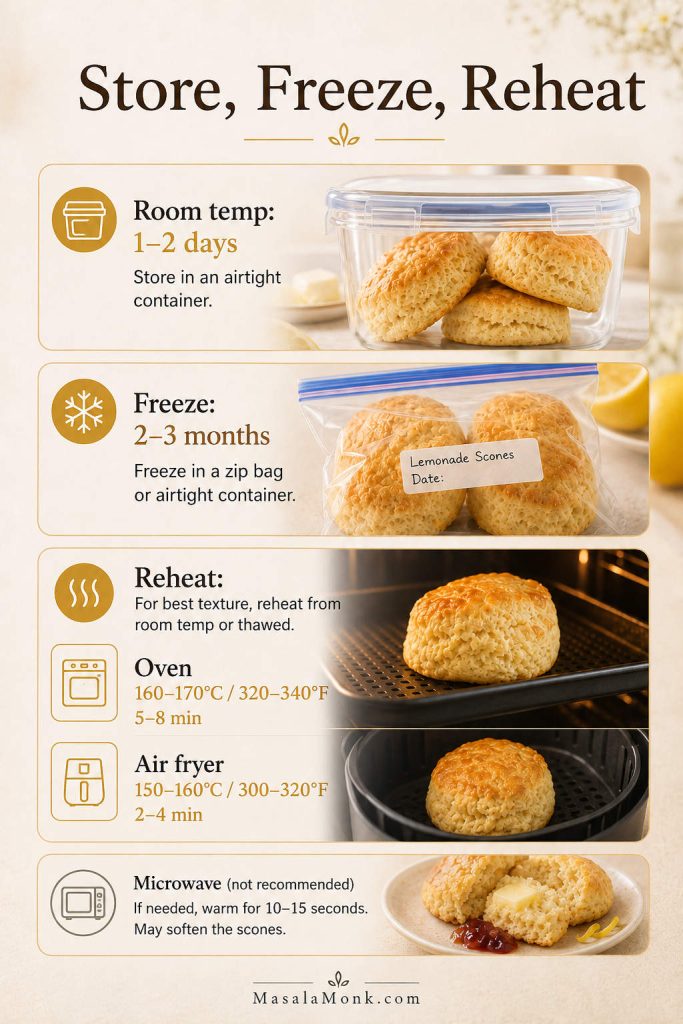
Storage and reheating guide showing lemonade scones in an airtight container, freezer storage, and gentle oven or air fryer reheating.
Lemonade scones are best warm on the day they are baked, but they are not useless the next day. Store them airtight, freeze extras early, and reheat gently so the crumb does not dry out.
  • Room temperature: store cooled scones in an airtight container for 1–2 days.
  • Freezer: freeze baked scones for up to 2–3 months. Wrap well to prevent freezer dryness.
  • Reheating in oven: warm at 160–170°C / 320–340°F for 5–8 minutes.
  • Reheating in air fryer: warm at 150–160°C / 300–320°F for 2–4 minutes.
  • Microwave: use only a short burst, around 10–15 seconds, because long microwaving can make scones rubbery.

You can also freeze cut, unbaked scones. Freeze them on a tray first, then transfer to a freezer bag. Bake from frozen, adding a few extra minutes to the bake time.

If you are building out easy comfort desserts for the week, this rice pudding with cooked rice is another low-effort recipe that turns simple leftovers into something warm and creamy.

Lemonade Scones Recipe Card

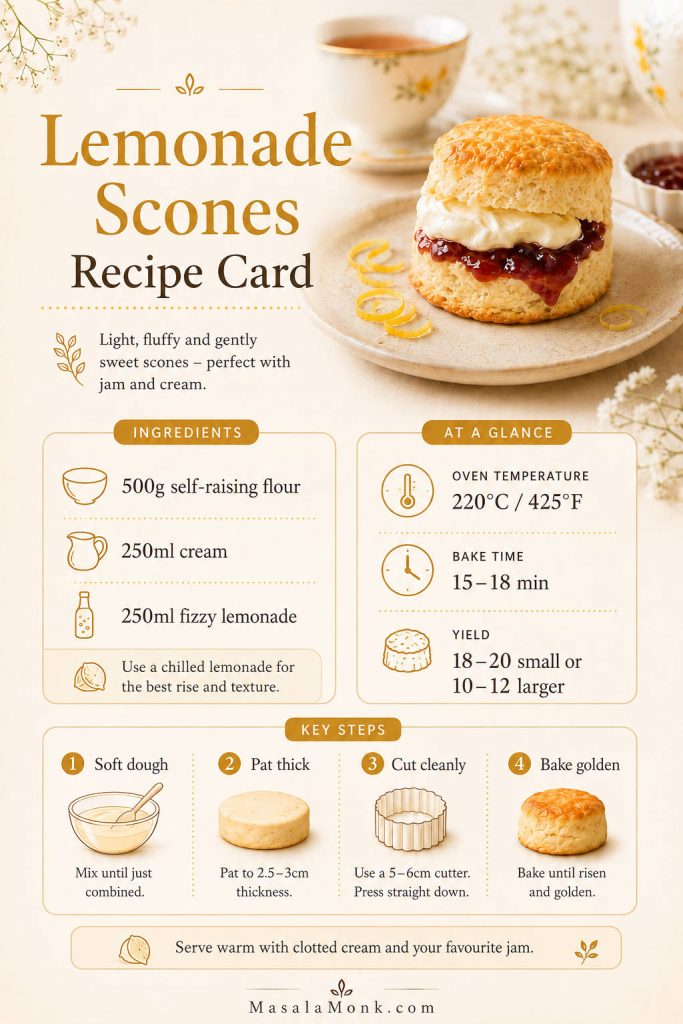
This lemonade scones recipe makes soft, tender 3-ingredient scones with self-raising flour, cream, and fizzy lemonade. They are best served warm, split open, and topped with jam and cream, clotted cream, butter, or lemon curd.

Prep Time10–15 minutes
Bake Time15–18 minutes
Total Time25–35 minutes
Yield18–20 small scones with a 5cm cutter, or 10–12 larger scones with a 6cm cutter

Ingredients

  • 500g self-raising flour — about 3⅓ metric cups or roughly 4 loosely spooned-and-levelled US cups, plus extra for dusting
  • 250ml chilled heavy cream, thickened cream, or whipping cream — about 1 cup, plus up to 50ml extra for brushing or adjusting the dough
  • 250ml chilled fizzy lemonade — about 1 cup
  • ¼ teaspoon fine salt, optional
  • 1–2 tablespoons milk or cream, for brushing the tops if not using the extra cream above
  • Jam, cream, clotted cream, butter, or lemon curd, for serving

Instructions

  1. Preheat the oven to 220°C / 425°F, or 200°C fan. Line a large baking tray with parchment paper.
  2. Add the self-raising flour to a large mixing bowl. Stir in the salt if using.
  3. Pour in 250ml chilled cream and 250ml chilled fizzy lemonade.
  4. Use a flat-bladed knife, spatula, or fork to mix gently until a soft, rough, slightly sticky dough forms. If there is dry flour left in the bowl, add extra cream 1 tablespoon at a time.
  5. Lightly flour the bench and your hands. Turn the dough out and bring it together gently.
  6. Pat the dough to 2.5–3cm / 1–1¼ inches thick.
  7. Dip a 5–6cm / 2–2½ inch round cutter in flour. Press down cleanly and lift straight back up so the sides can rise evenly.
  8. Place the scones on the prepared tray so they are just touching or nearly touching.
  9. Brush the tops lightly with milk or cream.
  10. Bake for 15–18 minutes, or until risen, lightly golden on top, hollow-sounding when tapped, and no longer wet or doughy in the center when gently pulled apart.
  11. Cover the hot scones loosely with a clean tea towel for a few minutes if you want softer tops.
  12. Serve warm with jam and cream, clotted cream, butter, or lemon curd.

Notes

  • The dough should be soft and a little tacky, not dry and smooth.
  • Use newly opened fizzy lemonade for the best lift.
  • If using plain flour, use 500g flour + 7 teaspoons baking powder + ¾ teaspoon fine salt.
  • For taller scones, keep the dough thick and cut cleanly.
  • If your oven browns quickly, bake at 200°C / 390°F or 180°C fan and add a few extra minutes.
  • For air fryer lemonade scones, cook smaller scones at 175–180°C / 350°F for 8–12 minutes, checking early.
Saveable recipe card for lemonade scones showing ingredient quantities, oven temperature, bake time, yield, and key method notes.
Save the core formula before you bake: 500g self-raising flour, 250ml cream, 250ml fizzy lemonade, thick dough, clean cuts, and a hot oven. That simple system is what makes the recipe work.

FAQs

Here are the questions that usually come up once people realise “lemonade” can mean something different depending on where they live.

What kind of lemonade works best for lemonade scones?

Use a clear, sweet, fizzy lemonade or lemon-lime soda, opened right before mixing. The fizz matters more than the brand.

Do lemonade scones taste like lemonade?

Not strongly. They taste more like mild cream scones with gentle sweetness. For more lemon flavor, serve them with lemon curd, add a little lemon zest, or drizzle with a light lemon glaze.

Why is my lemonade scone dough so sticky?

A little stickiness is normal. Lemonade scone dough should feel softer than regular scone dough, so lightly flour your hands and bench instead of working lots of extra flour into the dough.

Why did my lemonade scones not rise?

The most common reasons are old self-raising flour, a cool oven, dough patted too thin, overworked dough, or a twisted cutter. Fresh flour, thick dough, clean cutting, and a hot oven make the biggest difference.

Sprite or 7Up: which one works better?

Both can work. Choose a clear, fizzy lemon-lime soda with a clean flavor, and open it right before mixing the dough.

What cream should I use?

Use heavy cream, thickened cream, or whipping cream. Full-fat cream gives the best texture because it replaces the butter used in traditional scones.

How thick should the dough be?

Pat the dough to about 2.5–3cm / 1–1¼ inches thick. Thinner dough usually means flatter scones.

Should lemonade scones touch while baking?

Yes, place them just touching or nearly touching. This encourages the scones to rise upward and keeps the sides softer.

Is sugar-free lemonade okay?

It can work, but regular fizzy lemonade gives better sweetness, browning, and flavor. Some sugar-free versions can also leave an aftertaste.

How do I make lemonade scones without cream?

Use a richer replacement such as sour cream, Greek yogurt with a splash of milk, full-fat coconut cream, or milk plus melted butter. Plain milk alone usually makes the scones less rich and more bread-like.

Are lemonade scones the same as regular scones?

They are similar in shape and serving style, but the method is different. Regular scones usually use butter rubbed into flour; lemonade scones use cream and fizzy lemonade to make a faster shortcut dough.

How do I reheat lemonade scones without drying them out?

Warm them gently in a low oven at 160–170°C / 320–340°F for 5–8 minutes, or in the air fryer at 150–160°C / 300–320°F for 2–4 minutes. Long microwaving can make them rubbery.

For another shortcut bake with a cozy, serve-warm feel, try this apple cinnamon roll bake with apple pie filling.

If you make these lemonade scones, notice how the dough felt before baking: soft and tacky, dry and crumbly, or almost too wet to cut? Share that detail with your result, especially if you used Sprite, 7Up, gluten-free flour, or a no-cream swap. Those real-batch notes are genuinely helpful for other readers trying the same version.

Back to top

Posted on 4 Comments

Easy English Scone Recipe

Split English scone topped with strawberry jam and clotted cream for an easy English scone recipe cover image.

This English scone recipe is built for the classic result: round scones with a light, tender crumb, gently golden tops, and just enough sweetness to work beautifully with jam and clotted cream. If you want an easy English scone recipe that stays close to the traditional style, this is the version to make.

The charm of English scones is that they do not ask for much. They ask for a dough that stays soft, handling that stays light, and shaping that gives them enough height to rise properly in the oven. Get those choices right, and the result feels balanced, familiar, and unmistakably classic.

Served warm or at room temperature with strawberry jam and clotted cream, these scones feel instantly at home on an afternoon tea table. They are especially lovely with masala chai recipes if you want a warmer spiced pairing, or with a cappuccino recipe if you are serving them for breakfast or brunch.

English Scone Recipe Ingredients

The ingredient list is short on purpose. Nothing here is decorative, and each ingredient has a clear job in the finished bake.

Dry Ingredients for English Scones

You will need:

  • 250 g self-raising flour
  • 1 tsp baking powder
  • 30 g caster sugar
  • 1 pinch salt

Self-raising flour keeps the method simple and gives the dough the kind of lift that suits classic English scones especially well. The extra baking powder adds support and helps keep the rise reliable. The sugar stays modest because this is not meant to be a sugary café pastry. It is meant to leave room for jam and cream at the table.

If you do not have self-raising flour, use 250 g plain flour plus 3 tsp baking powder in total for a close substitute. That will get you much nearer the intended texture than trying to improvise the swap.

English scone ingredients guide showing self-raising flour baking powder sugar butter milk egg wash jam and clotted cream with ingredient role notes.
The structure of a good English scone starts here: flour and baking powder for lift, cold butter for tenderness, milk for a soft dough, and a finishing setup built around jam and clotted cream rather than extra sweetness in the base.

Butter, Milk, and Egg

You will need:

  • 60 g cold unsalted butter, cubed
  • 150 to 170 ml whole milk
  • 1 tsp vanilla extract, optional
  • 1 egg, beaten, for egg wash

Cold butter helps create the tender crumb that makes a good scone feel light rather than heavy. It should be rubbed into the flour until the mixture looks airy and crumbly, not greasy or paste-like. The milk brings the dough together, though the exact amount can vary slightly depending on your flour and your kitchen conditions. The egg does not go into the dough here. Instead, it is brushed over the tops so the scones bake with a soft shine and a gentle golden finish.

Classic English Scone Toppings: Jam and Clotted Cream

For the classic serving style, use:

  • strawberry jam
  • clotted cream

That pairing is not just a serving suggestion. It is part of the logic of the bake itself. English scones stay plainer and less sweet because they are designed to be completed at the table rather than to carry all the richness on their own.

Traditional cream tea is built around scones, jam, clotted cream, and tea, which is one reason this style remains so restrained and balanced. For a more useful reference point than a generic explainer, the protected Cornish clotted cream specification shows why it is treated as a distinct product, while the National Trust’s fruit scones recipe reflects the same classic jam-and-clotted-cream serving tradition.

If clotted cream is difficult to find where you live, mascarpone is the neatest substitute. Thick lightly whipped cream also works, though it gives a looser and less traditional finish.

Small Variations That Still Keep Them English-Style

If you want a little variation without changing the character of the recipe too much, keep it restrained. A small handful of currants or sultanas fits naturally, and a little lemon zest can work well too.

What does not belong in this version is a heavy fruit load, thick glaze, chocolate chips, or any shortcut that turns the bake into something else altogether.

Also Read: Punjabi Mutton Bhuna – Amritsari Village-Style Gosht Recipe

Easy English Scones Recipe Card

Yield: 8 scones
Prep time: 15 minutes
Bake time: 12 to 15 minutes
Total time: about 30 minutes
Oven temperature: 220°C / 425°F

Ingredients

  • 250 g self-raising flour
  • 1 tsp baking powder
  • 30 g caster sugar
  • 1 pinch salt
  • 60 g cold unsalted butter, cubed
  • 150 to 170 ml whole milk
  • 1 tsp vanilla extract, optional
  • 1 egg, beaten, for egg wash
  • strawberry jam, for serving
  • clotted cream, for serving
English scone recipe card showing ingredients, quick method, and classic scones served with jam and clotted cream.
Use this recipe card when you want the ingredient list, bake temperature, and quick method in one place. It is most useful once you know the flow and want to make a batch without scrolling through the full guide.

How to Make English Scones Step by Step

The method is simple, but the small cues matter. Most disappointing batches trace back to dough that was too dry, too heavily handled, or shaped too thin before baking.

1. Heat the Oven and Prepare the Tray

Heat the oven to 220°C / 425°F and line a baking tray with parchment paper. A fully preheated oven matters here because the scones need strong early heat to rise before the structure sets.

Step 1 English scone recipe graphic showing a lined baking tray and oven preheated to 220C 425F before baking.
Starting with a fully heated oven gives English scones a better chance of rising quickly before the structure sets. That early burst of heat matters more than many people expect when the goal is a lighter, taller result.

Use a middle rack unless your oven runs unusually hot at the top.

2. Mix the Dry Ingredients

In a large bowl, whisk together the self-raising flour, baking powder, caster sugar, and salt. This takes almost no time, but it helps distribute the lift evenly before the butter goes in.

Step 2 English scone recipe graphic showing flour, baking powder, sugar, and salt being mixed in a bowl before the butter is added
A quick whisk here helps distribute the baking powder, sugar, and salt more evenly through the dough, which gives the scones a more consistent start.

3. Rub in the Butter

Add the cold butter cubes and rub them into the flour mixture with your fingertips until the texture looks like coarse crumbs.

You want a mixture that feels sandy and airy, with a few tiny buttery pieces still visible. If you squeeze a little in your hand, it should briefly clump, then fall apart again. Once the butter turns greasy or starts smearing into the flour, you have gone too far. If large cubes remain untouched, keep working a little longer.

Step 3 English scone recipe graphic showing cold butter being rubbed into flour until the mixture looks sandy and crumbly.
The butter should be rubbed in only until the mixture looks sandy and crumbly, with a few tiny buttery pieces still visible. That is what helps the finished scones stay tender instead of turning heavy or tight.

4. Add the Milk and Bring the Dough Together Gently

Pour in 150 ml milk and the vanilla, if using. Stir with a butter knife, fork, or spatula until the mixture starts to gather into a dough. Add more milk only if needed, a little at a time.

The dough should feel soft, slightly tacky, and easy to press together. It should not feel dry and stubborn, and it should not slump like batter either.

Step 4 English scone recipe dough guide showing too dry, just right, and too wet dough after adding milk.
This is the most important texture check in the recipe. The dough should look soft, rough, and cohesive enough to hold together without becoming sticky or slumped.

This is where many batches go wrong. People often stop early because they are nervous about stickiness, then end up with a dough that seems tidy but bakes up heavier than it should. In practice, slightly softer is usually safer than slightly dry.

5. Pat the Dough Thick Without Kneading

Turn the dough onto a lightly floured surface. With lightly floured hands, bring it together with a few gentle presses, then pat it into a round or rectangle about 2.5 to 3 cm thick.

Step 5 English scone recipe graphic showing dough patted 2.5 to 3 cm thick before cutting the scones.
Patting the dough thick gives the scones room to rise upward instead of baking flatter than you want. That one choice changes the final look more than many people expect.

Do not knead the dough like bread. Do not press it into a smooth, tight disc. It only needs to come together neatly enough to cut.

6. Cut Out the Scones

Use a 5 to 6 cm round cutter dipped lightly in flour. Press straight down, then lift cleanly.

Do not twist the cutter. Twisting compresses the edge and makes a clean rise harder. It seems like a small detail, but it shows up clearly in the oven.

Step 6 English scone recipe graphic showing a round cutter pressed straight down into thick dough without twisting.
A straight downward cut keeps the edges cleaner than a twisting motion, which gives the scones a better chance of rising neatly in the oven.

Place the cut scones on the lined tray with a little space between them. Gather the scraps gently, pat them together once, and cut again. The last few may look slightly less neat than the first ones, but they will still bake well if you do not keep reworking the dough.

If the cut rounds look soft or slightly slack at this stage, chill them for 10 minutes before baking. That short rest can help them hold their shape better.

7. Egg Wash and Bake

Brush only the tops with beaten egg. Try not to let the egg wash run down the sides, because that can limit the rise by sealing the edges.

Step 7 English scone recipe graphic showing scones on a lined tray with egg wash and the correct lightly golden baked finish.
Do not judge doneness by color alone. The best batch should have lightly golden tops, sides that look set rather than damp, and bottoms that feel dry and baked through without turning hard.

Bake for 12 to 15 minutes. They are done when the tops are lightly golden, the sides look set rather than damp, and the bottoms look dry and lightly colored rather than pale and wet.

If they still look slightly heavy after 12 minutes, give them another minute or two and check again. When in doubt, break open the least tidy one from the batch. The center should look tender and set, not wet or gummy.

8. Cool Slightly and Serve

Let the scones cool for about 10 minutes before splitting and serving. They are excellent still slightly warm, when the crumb feels especially soft and the contrast with jam and clotted cream is at its best.

Step 8 English scone recipe graphic showing a split scone served with jam clotted cream and tea.
A short cooling time helps the crumb settle before serving, and it also keeps the jam and clotted cream from sliding around too much on a steaming-hot scone. This last pause improves the final experience more than it seems.

For a colder-day pairing, they also work beautifully with homemade hot chocolate with cocoa powder.

Why These English Scones Stay Light and Tender

The result stays light because the method avoids the three mistakes that most often drag scones down: dry dough, heavy handling, and shaping that is too thin.

A dough that feels slightly soft will usually bake better than one that feels overly tidy and controlled. Extra pressing and rerolling tighten the crumb. Thin shaping leaves less room for upward lift. Add those problems together, and even a good ingredient list can still produce a disappointing batch.

That is why the method stays restrained. It gives the dough enough structure to hold shape, but not so much handling that the finished scones lose their tenderness.

English Scones vs American Scones

Although they share a name, English scones and American scones usually aim for very different results. English scones are typically round, lightly sweet, and softer in character, while American scones are often larger, richer, more heavily flavored, and shaped in wedges.

In the English style, the scones are usually served as part of afternoon tea, split and spread with jam and clotted cream. On their own, they are modest by design.

Comparison graphic showing English scones with jam and clotted cream beside sweeter glazed American scones with key differences in shape texture and serving style.
This side-by-side guide shows why this post stays firmly in the English-scone lane. English scones are rounder, lighter, and built for jam and clotted cream, while American scones are usually sweeter, wedge-shaped, and more pastry-like.

American scones, by contrast, tend to be larger, sweeter, and richer. They are more likely to include chocolate, berries, glaze, nuts, citrus, or stronger mix-ins, and they are often treated as a standalone pastry to eat with coffee rather than as part of a cream-tea table.

That difference is exactly why this recipe stays deliberately restrained. The goal is not to make the richest or most dramatic scone possible. The goal is to make one that feels unmistakably English-style and succeeds on those terms.

Also Read: Cookie Pie Recipe: 10 Best Flavors, Fillings and Variations

How to Serve English Scones with Jam and Clotted Cream

The classic serving style is part of the point, not an afterthought. These scones feel most like themselves when they are split and served with strawberry jam and clotted cream, whether you arrange them before serving or set everything out so people can build their own.

Serving guide for English scones showing how to split the scone, add strawberry jam, top with clotted cream, and serve with tea.
Classic English scones are meant to be finished at the table, not treated like a sweeter standalone pastry. Use this guide to see the traditional flow clearly: split the scone, add jam, top with clotted cream, and serve with tea.

Split them gently rather than crushing them flat, then add the jam and clotted cream just before serving. If you are building a full cream-tea setup, keep the tea hot and the scones lightly warm or fully cooled rather than steaming, so the toppings sit neatly instead of sliding off.

Slightly warm scones are often the most satisfying because the crumb feels softer and the butteriness comes through more clearly. Room-temperature scones are just as traditional and often more practical for a fuller afternoon tea spread. What matters most is that they still feel fresh enough to split cleanly and tender enough inside to welcome jam and cream.

This is also where the restrained sweetness of the dough proves its value. A heavily sweetened scone would compete with the toppings, while a classic English scone leaves room for them and lets the full serving feel balanced rather than overdone. For a more heritage-led British reference point, the National Trust’s traditional fruit scones recipe follows the same broader jam-and-clotted-cream serving direction.

Tea is the obvious partner, though coffee works beautifully too. If you want something warm alongside them, masala chai recipes and a cappuccino recipe both fit naturally.

English Scone Troubleshooting Guide

If your batch turns out dense, dry, flat, or uneven, the cause is usually easier to trace than it first seems.

English scone troubleshooting guide showing common problems like dense dry flat and pale scones with quick causes and fixes.
Keep this troubleshooting guide nearby when a batch turns out dense, dry, flat, or pale. Most problems trace back to dough texture, thickness, cutter technique, or baking cues, so spotting the likely cause makes the next batch much easier to fix.

Why Did My Scones Turn Out Dense?

Dense scones usually come from dough that was too dry or too heavily worked. If the mixture felt stiff before baking, cracked when pressed, or needed force to come together, that is the clearest clue.

Keep the dough softer next time, stop mixing earlier, and handle the scraps as little as possible. Also make sure the oven is fully hot before the tray goes in.

Why Are My English Scones Dry?

Dry scones are usually the result of dough that began too stiff or baking that ran too long. If the tops went deeper brown than intended, the crumb may have dried out before you pulled them.

Use enough milk to keep the dough soft, and take them out when they are lightly golden rather than deeply browned. Once they are fully cool, store them promptly instead of leaving them exposed on the counter.

Why Didn’t My Scones Rise Properly?

Poor rise usually points to one of four things: old baking powder, dough patted too thin, a cutter twisted instead of pressed straight down, or an oven that was not fully hot.

Use fresh raising ingredients, keep the dough thick, cut cleanly, and bake in a properly preheated oven.

Why Did They Spread Instead of Rising Tall?

Spreading is usually a sign that the dough was too warm, too wet, or too thin. If the cut rounds looked soft and a little slack on the tray before baking, that is your clue.

Hold back some of the milk until you know the dough needs it, keep the thickness at 2.5 to 3 cm, and chill the cut scones briefly if they seem very soft.

Why Are the Tops Pale or Uneven?

Pale tops usually mean the egg wash was too light, the oven heat was a little low, or the dough thickness varied across the batch. Uneven tops can also happen when the scraps are handled more roughly than the first cuts.

Brush the tops carefully, keep the dough even, and make sure the oven is fully hot.

How Do I Keep English Scones Soft After Baking?

Do not overbake them, let them cool only as long as needed, then store them airtight once fully cool. A brief reheat before serving helps a lot.

Also Read: White Russian Recipe: 7 Variants to Try, From Classic to Frozen

How to Store, Freeze, and Reheat English Scones

English scones are best the day they are baked, when the crumb is softest and the structure still feels freshest. Even so, they store and freeze better than many people expect if you handle them properly.

If freshness matters most to you, freezing shaped unbaked scones is usually the better move than storing baked ones for too long. That way you keep more of the just-baked texture and get much closer to the original result.

Storage guide for English scones showing room temperature storage, freezing baked scones, freezing dough, and reheating in a low oven.
Use this guide to keep English scones worth eating after the first bake. Room-temperature storage works best for the short term, freezing baked scones helps with leftovers, freezing shaped dough gives you the freshest later result, and gentle reheating brings back more of the soft crumb.

Room-Temperature Storage for English Scones

Once fully cool, store the scones in an airtight container at room temperature. They are best within 24 hours and still pleasant on day two if gently rewarmed.

Should You Refrigerate Them?

Refrigeration is usually not the best choice for plain baked scones because it can make them feel firmer and less fresh. Room temperature for a short window or freezing for longer storage is usually the better route.

How to Freeze a Baked English Scone

Let the baked scones cool completely, then wrap them well and freeze them in an airtight container or freezer bag. Thaw them, then warm them gently until just heated through.

How to Freeze Unbaked English Scone Dough

Freezing shaped dough is often the better option if you want fresh-baked scones later. Cut the scones, place them on a tray until firm, then transfer them to a freezer-safe container or bag. Bake from frozen, giving them about 2 to 4 extra minutes as needed.

How to Reheat English Scones Without Drying Them Out

Warm the scones in a low oven just until heated through. Do not blast them with high heat or leave them in too long. Gentle reheating brings back some softness without drying out the crumb.

How to Turn These English Scones Into Fruit Scones

If you want to adapt this recipe into a fruit version, fold in a small handful of currants or sultanas after the butter has been rubbed in and before the milk goes in. If you enjoy bakes that lean more fruit-forward and comforting, peach cobbler with canned peaches is another good one to bookmark.

Variation guide showing how to turn English scones into fruit scones with currants or sultanas without overloading the dough.
A fruit-scone variation works best when it stays restrained. Adding about 40 to 60 grams of currants or sultanas gives the dough a classic fruit note without weighing it down too much, though the crumb will be slightly denser than the plain version.

The key is restraint. A little dried fruit works beautifully. Too much starts to weigh the dough down and changes the balance of the bake. As a guide, around 40 to 60 g is enough for this quantity of dough.

Fold the fruit through gently so it spreads evenly without overworking the dough. You want enough in each scone to taste it, but not so much that the mixture turns heavy, patchy, or harder to cut cleanly.

Final Thoughts

A good English scone recipe does not need extra drama. It needs the right decisions at the right moments.

Keep the dough soft, shape it thick enough to rise well, cut it cleanly, and bake it in a properly heated oven. Do that, and you end up with the kind of scone people actually want: tender, gently risen, lightly sweet, and ready for jam and clotted cream.

That is why this version stays so focused. It is not trying to cover every possible style. It is trying to help you make one classic batch well, and that clarity is what makes a recipe worth returning to. If you enjoy classic bakes that reward small technique choices, sourdough English muffins are another strong next bake.

Also Read: White Russian Recipe: 7 Variants to Try, From Classic to Frozen

English Scone FAQs

1. Can I make English scones without self-raising flour?

Yes. For this recipe, use 250 g plain flour plus 3 tsp baking powder in total for the closest substitute. That will get you much nearer the intended texture than trying to guess the swap.

2. What can I use instead of clotted cream?

Mascarpone is the neatest substitute if clotted cream is hard to find. Thick lightly whipped cream also works, though it gives a softer, looser, and less traditional finish.

3. Why didn’t my English scones rise properly?

The most common causes are dough that was patted too thin, old baking powder, twisting the cutter instead of pressing straight down, or putting the tray into an oven that was not fully preheated. Keeping the dough thick and the oven properly hot makes a big difference.

4. Can I freeze English scone dough?

Yes. Shape and cut the scones first, freeze them until firm, then transfer them to a freezer-safe container or bag. Bake them from frozen and add about 2 to 4 extra minutes as needed.

Posted on 1 Comment

Glycemic Index: Guide to High and Low GI Foods FREE PDF List

woman having a dental check up

In the world of nutrition, the Glycemic Index (GI) plays a crucial role in helping you make informed dietary choices. Whether it’s fruits, vegetables, grains, legumes, or any category of food, understanding their GI is essential for managing your blood sugar levels and overall health. This post delves deep into the world of GI, offering insights into high and low GI foods across various categories, and presents a FREE pdf comprehensive guide for your journey towards healthier eating.

What is the Glycemic Index (GI)?

The Glycemic Index is a ranking system for carbohydrates, measuring how quickly they raise blood sugar levels. High GI foods cause a rapid increase in blood sugar, while low GI foods provide a gradual, sustained energy release, making them a preferable choice for maintaining balanced blood sugar levels.

High GI Foods to Be Cautious Of

Fruits

High GI fruits like watermelon and pineapple can cause a sudden spike in your blood sugar levels. Opting for low GI fruits like cherries and apples is a healthier alternative.

Vegetables

Certain vegetables like potatoes have a high GI, making it essential to choose alternatives like sweet potatoes or leafy greens for a balanced diet.

Grains

Refined grains such as white rice and white bread have a high GI, making whole grains like brown rice and whole wheat bread a better choice.

Why Choose Low GI Foods?

Low GI foods, including legumes, nuts, and seeds, offer numerous health benefits, such as improved blood sugar control, enhanced weight management, and reduced risk of heart disease and type 2 diabetes.

Explore Various Food Categories

Our post explores various food categories, including snacks, beverages, sweets, desserts, frozen and canned foods, fast foods, baked goods, sauces, and condiments, providing insights into their GI and offering healthier alternatives.

Grab Your Free Guide Now!

To make your journey towards understanding and choosing low GI foods easier, we’re offering a FREE download of our extensive PDF guide to the High Glycemic Index Foods list. This guide provides a detailed exploration of various food categories, their GI scores, and healthier low-GI alternatives.

Download Your Free Guide Here!

Conclusion

Understanding the Glycemic Index of foods is a significant step toward making informed and health-conscious dietary choices. Our comprehensive guide is designed to be your companion in this journey, offering detailed insights and practical information for choosing foods that contribute positively to your health and well-being.

Don’t wait! Embark on your journey towards healthier eating and download the free guide today. Equip yourself with the knowledge to make food choices that align with your health objectives and nutritional needs. Your path to a balanced diet and optimal health begins now.

Tags

Glycemic Index, High GI Foods, Low GI Foods, Healthy Eating, Blood Sugar Levels, Nutritional Choices, Fruits, Vegetables, Grains, Legumes, Snacks, Beverages, Sweets, Desserts, Frozen and Canned Foods, Fast Foods, Baked Goods, Sauces, Condiments, Free Guide, Download, Health Journey, Balanced Diet, Optimal Health