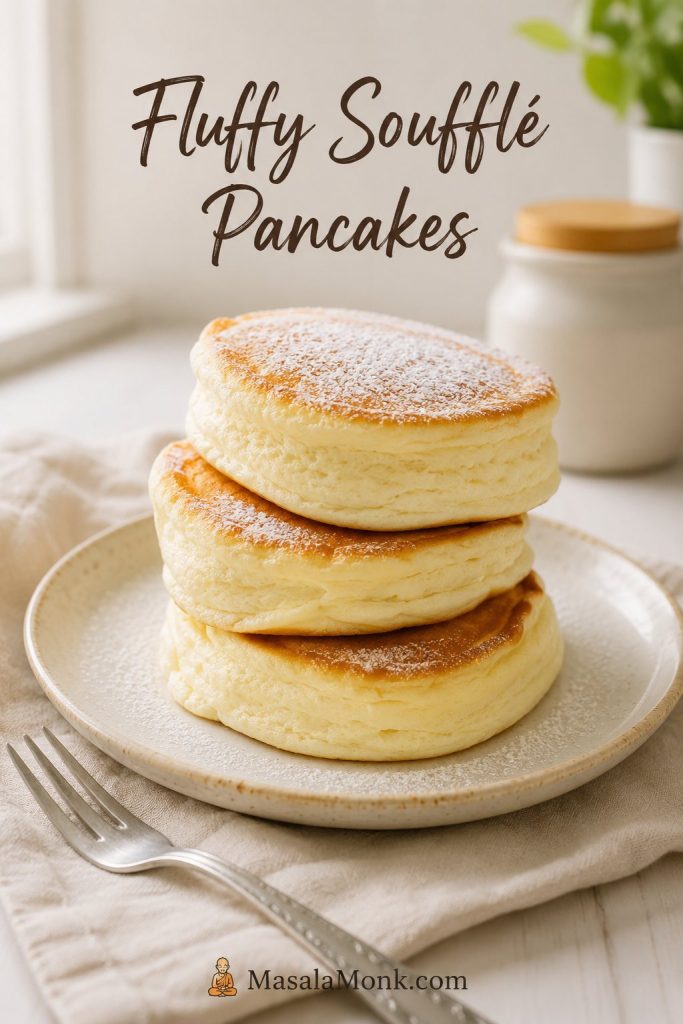
Japanese pancakes look magical until you try to make them at home. They rise like little clouds, jiggle when the plate moves, and seem soft enough to collapse under a spoon. Then the real fear arrives: what if they spread flat, burn on the bottom, stay raw in the center, or puff up beautifully in the pan and sink the second you serve them?
The real challenge is technique, not ingredients. That is the moment this Japanese pancakes recipe is built for. The ingredients are simple, but the method matters. These are not regular pancakes with extra baking powder. They are small soufflés cooked like pancakes, and once you treat them that way, the method starts to make sense.
The secret is a stable meringue, gentle folding, controlled heat, a little steam, and patience. In this guide, you will get exact grams and spoon measures, the right batter texture, the meringue stage to aim for, ring-mold and no-mold methods, a pancake-mix shortcut, and clear fixes for deflating, spreading, burning, shrinking, and raw centers. If you only remember one framework, start with the 3 checks that decide whether Japanese pancakes rise or collapse.
By the time you reach the pan, you will know what the meringue should look like, how the batter should stand, when to flip, and why a pancake that looks almost ready often needs one more covered minute. That extra minute is not hesitation; it is usually the difference between a pancake that holds and one that sinks as it cools.
If you want a more classic pancake stack instead of the tall soufflé style, you may also like these fluffy buttermilk pancakes with stewed cinnamon apples. This recipe is for the café-style Japanese soufflé pancakes that are tall, soft, jiggly, and best eaten right away.
This is the home-cook target: soft, tall pancakes that feel special without needing every edge to look like a perfect café cylinder.
In This Guide
Start Here
Make Them Work
Quick Answer: How Do You Make Fluffy Japanese Pancakes?
Japanese pancakes, often called Japanese soufflé pancakes, are tall pancakes made by folding whipped egg whites into a small yolk batter and cooking the batter slowly in a covered pan. The fluff comes mostly from meringue, not from baking powder alone.
For the best height, beat the egg whites to glossy stiff peaks, fold gently, scoop the batter into tall mounds, cook on gentle heat, and use a little steam so the center sets before the outside over-browns. A ring mold gives the neatest shape, but the no-mold Japanese pancake method works by stacking the batter in layers. If your first batch spreads, burns, or sinks, use the troubleshooting guide before changing the whole recipe. Serve them immediately because this soufflé-style texture naturally settles as it cools.
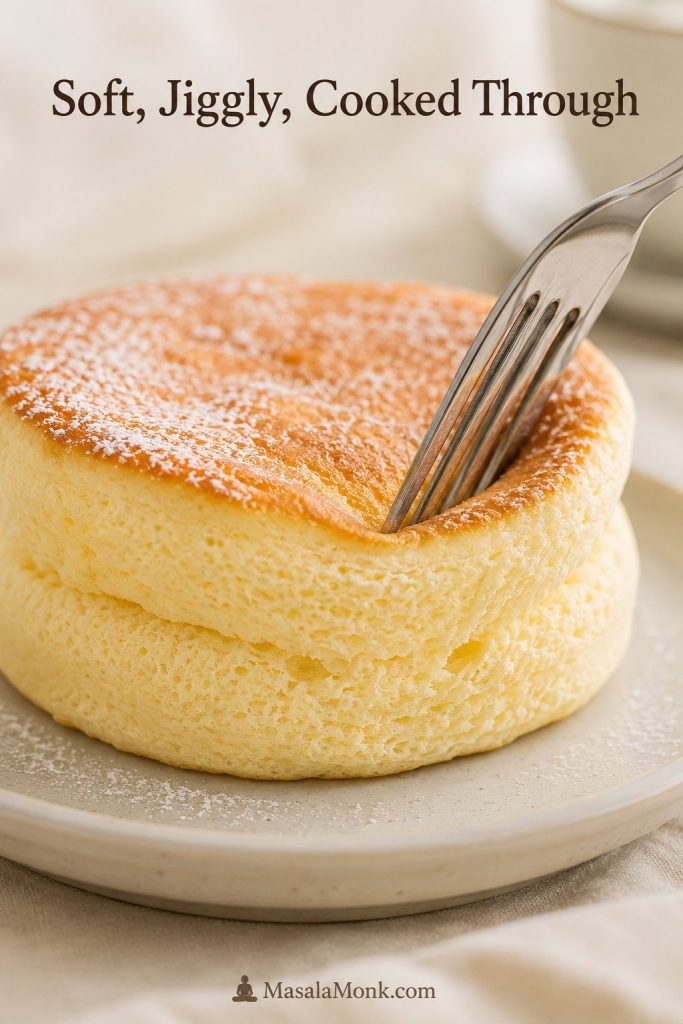
What Jiggly but Cooked Through Looks Like
The pancake should move softly, but it should still feel set. Think gentle spring, not wet batter hiding under a browned top.
Japanese Pancakes at a Glance
| Yield | 2–3 thick pancakes |
| Texture goal | Tall, soft, airy, gently jiggly, cooked through |
| Meringue target | Glossy firm/stiff peaks |
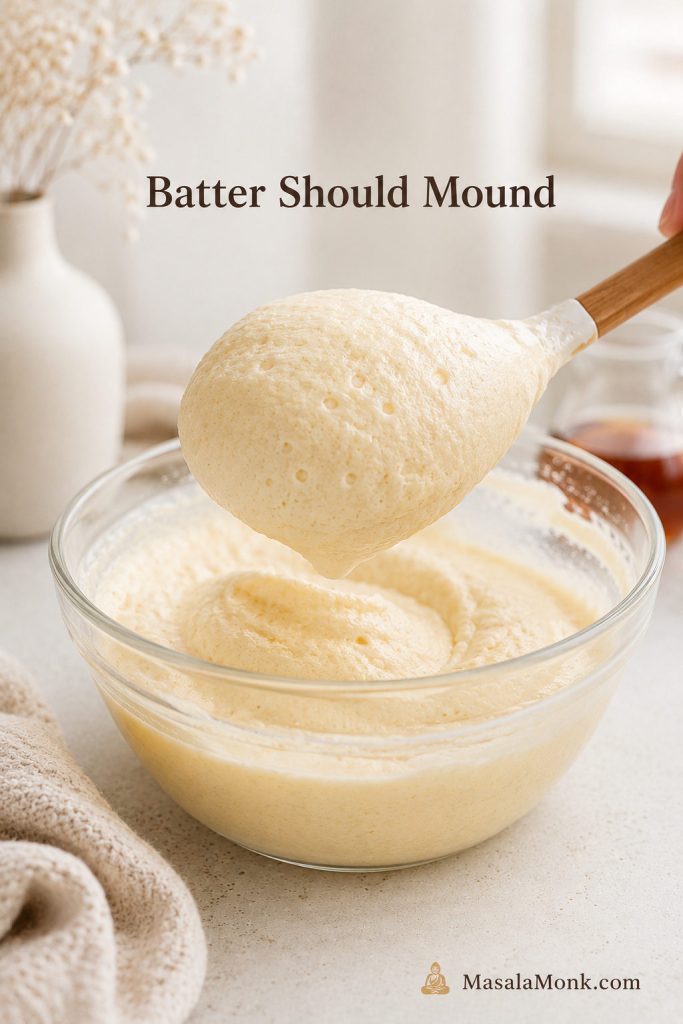
| Batter texture | Thick and spoonable; it should mound, not pour |
| Pan target | About 300°F / 150°C |
| Workable pan range | 285–320°F / 140–160°C |
| First side | 6–8 minutes covered, depending on size |
| Second side | 4–6 minutes covered |
| Cook time | About 12–15 minutes per batch |
| Mold | Optional; no-mold method included |
| Best served | Immediately, ideally within 5–10 minutes |
What Are Japanese Pancakes?
In this tall, café-style version, Japanese pancakes means Japanese soufflé pancakes: soft, airy pancakes made with whipped egg whites and cooked gently until they rise into a thick, delicate stack.
They are different from regular pancakes. A normal pancake batter is mixed, poured, and cooked fairly quickly. Japanese soufflé pancake batter is built around foam. The egg whites are beaten into a meringue, folded into a yolk mixture, then cooked low and slow so the foam has time to set.
That is why the method feels more precise than a usual pancake recipe. You are not only browning batter on a pan. You are setting a fragile structure full of air. Once that idea clicks, the recipe stops feeling mysterious and starts feeling manageable.
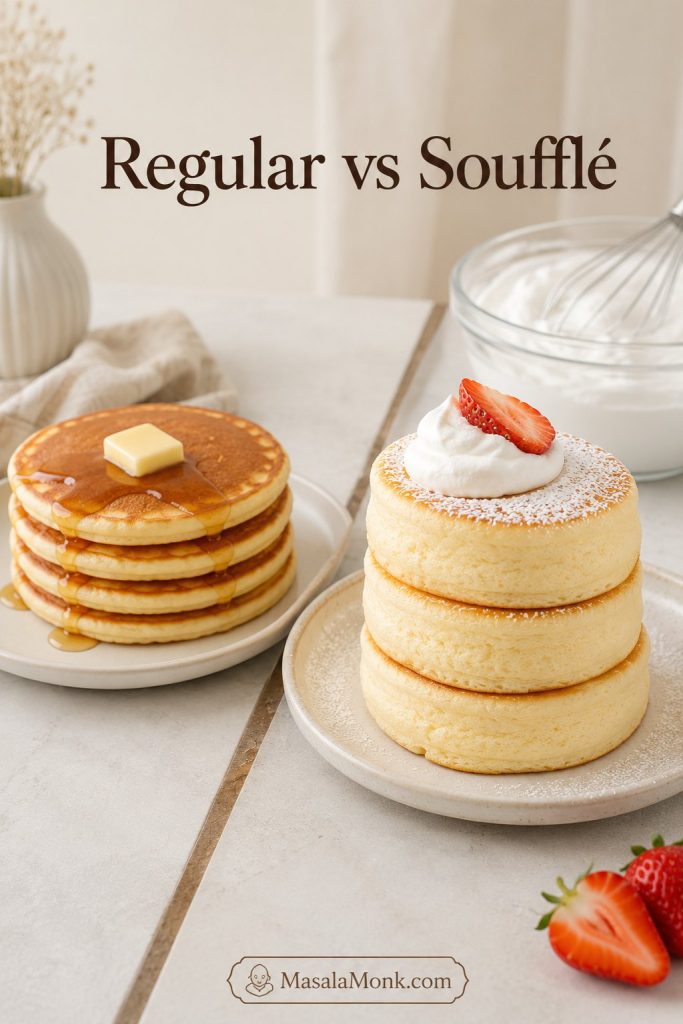
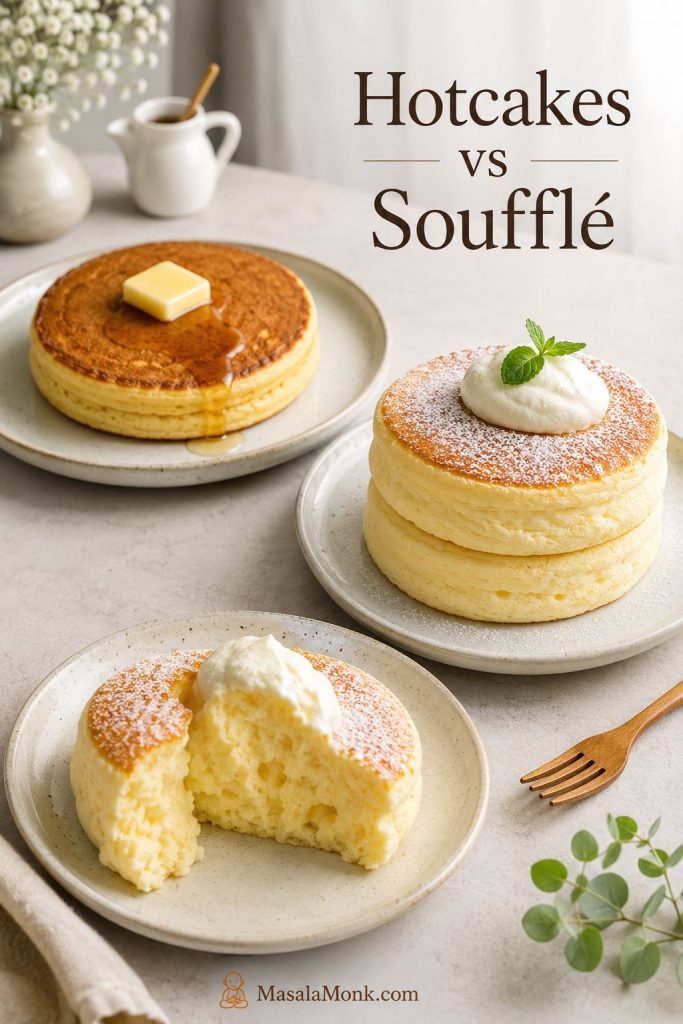
Japanese Hotcakes vs Japanese Soufflé Pancakes vs Fuwa Fuwa Pancakes
The names can get confusing because several styles of Japanese pancakes appear in cafés, cookbooks, and social videos. Here is the simple difference.
| Term | What it usually means | Texture |
|---|---|---|
| Japanese hotcakes | Thicker, sweeter, more regular-style pancakes, often made from a batter or mix | Soft, cakey, and sturdy |
| Japanese soufflé pancakes | Tall pancakes lifted with whipped egg whites and cooked slowly | Airy, jiggly, delicate, and cloudlike |
| Fuwa fuwa pancakes | A texture-focused name for soft, fluffy pancakes | Light, soft, and pillowy |
| Jiggly pancakes | A social-media-friendly name for Japanese soufflé pancakes | Wobbly and tall, but still cooked through |
This recipe focuses on the tall, meringue-based pancake version. Japanese soufflé cake is a different dessert, usually closer to Japanese cheesecake or cotton cheesecake, which is baked rather than cooked on a skillet. There is a short note on that difference later in the post.
So if you came here for the tall, jiggly café pancakes, you are in the right place. If you wanted a sturdier everyday hotcake, treat this as the soufflé-style weekend version instead.
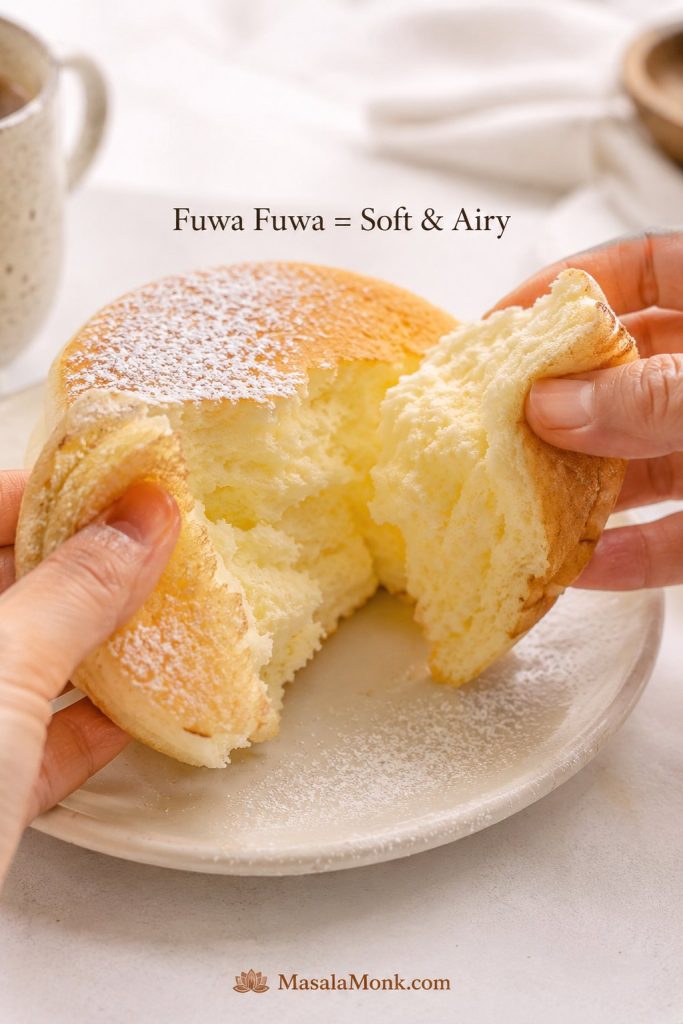
What Does Fuwa Fuwa Mean?
Fuwa fuwa is a Japanese expression used for something soft, airy, and fluffy. In a pancake context, it describes the texture people want from café-style Japanese pancakes: tall, tender, light, and gently wobbly.
Fuwa fuwa texture does not come from making the batter sweeter or loading it with baking powder. It comes from air. The egg whites trap tiny bubbles, sugar helps stabilize those bubbles, and gentle heat gives the pancake enough time to cook without collapsing too quickly.
Texture target: A good Japanese soufflé pancake should feel soft and airy, with a gentle jiggle. It should not be wet, runny, or raw in the center.
Before You Start: Set Yourself Up to Win
This small setup step makes the recipe much easier. Once the meringue is folded into the batter, the clock starts. The batter slowly loses air as it sits, so you do not want to stop halfway through to find a lid, wash a spatula, or clear space on the stove.
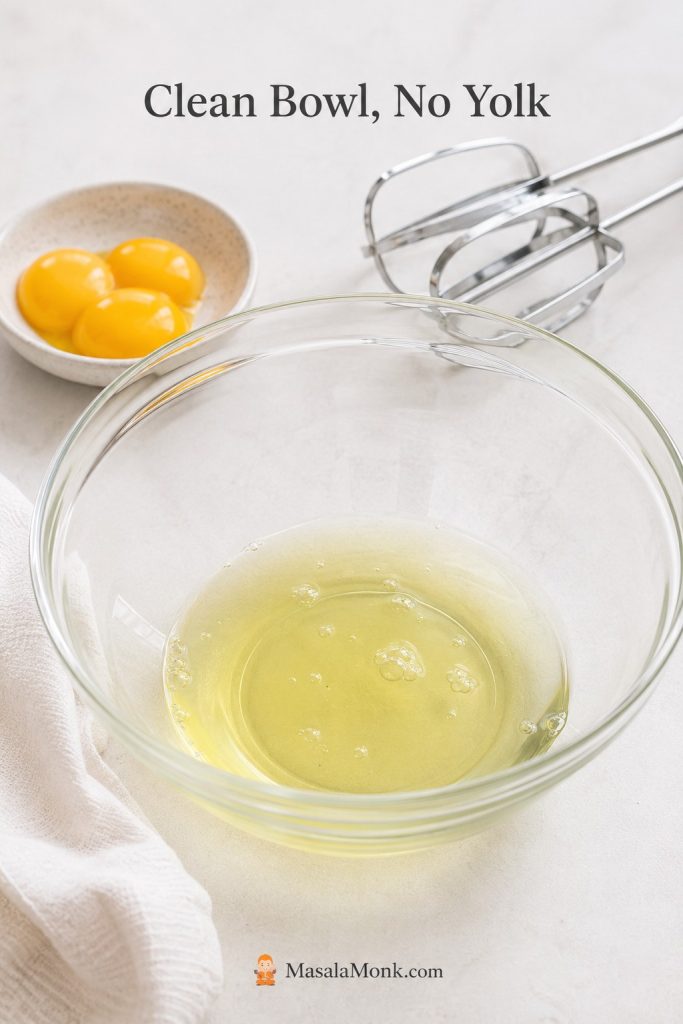
- Use clean, dry bowls and beaters. Grease or yolk in the egg whites can weaken the meringue; the meringue guide shows what the right texture should look like.
- Have the pan, lid, spatula, water, and serving plates ready. The batter should be cooked soon after folding.
- Start with gentle heat. You can always cook a little longer, but you cannot un-burn the outside.
- Make only 2–3 pancakes at once. Crowding makes flipping harder and lowers control.
- Serve immediately. These pancakes are meant to be eaten fresh, while the structure is still warm and lifted.
Why the Egg White Bowl Must Be Clean
Before you beat the whites, check the bowl and beaters. This tiny setup detail protects the foam that gives the pancakes their height.
Beginner reassurance: Your first batch may not look like a café stack, and that is completely normal. If the pancakes taste good but sit a little lower, you are already close. The next batch usually improves once you understand your pan heat and meringue texture.
Why This Japanese Pancakes Recipe Works
Home kitchens are messy in the best way: one stove runs hot, another pan holds heat differently, and not everyone has a ring mold. Instead of asking you to trust the timer blindly, this method shows you what to look for at each stage.
- Meringue gives height. The whipped egg whites are the main lift in this style. Baking powder helps a little, but it cannot replace a strong foam.
- A small amount of flour keeps the pancakes light. Too much flour makes them cakey and heavy; too little structure makes them fragile.
- Cornstarch gives extra support. A teaspoon helps the delicate foam hold together without making the pancake dense.
- Slow covered cooking sets the middle. Tall pancakes need more time than normal pancakes. High heat gives you a browned outside and a wet center.
- Steam helps the pancake set. A covered pan traps moisture and heat around the tall batter so the inside cooks through.
- Layered scooping builds height without a mold. Instead of pouring all the batter at once, you add it in mounds so the pancake rises upward, not outward.
The 3 Checks That Decide Whether They Rise or Collapse
If the recipe starts to feel fussy, bring it back to three checks: the meringue should hold itself, the batter should stand in a mound, and the heat should be gentle enough that the middle sets before the bottom browns too deeply.
| Check | What you want | What it tells you |
|---|---|---|
| Meringue | Shiny, firm peaks that hold their shape | A drooping meringue usually leads to spread; a dry, clumpy one is hard to fold smoothly. |
| Batter | Thick, airy, and able to mound on a spoon | A batter that slides off the spoon instead of sitting in a mound will usually cook flatter. |
| Heat | Gentle enough to cook slowly under a lid | The bottom should set and lightly color while the center has time to catch up. |
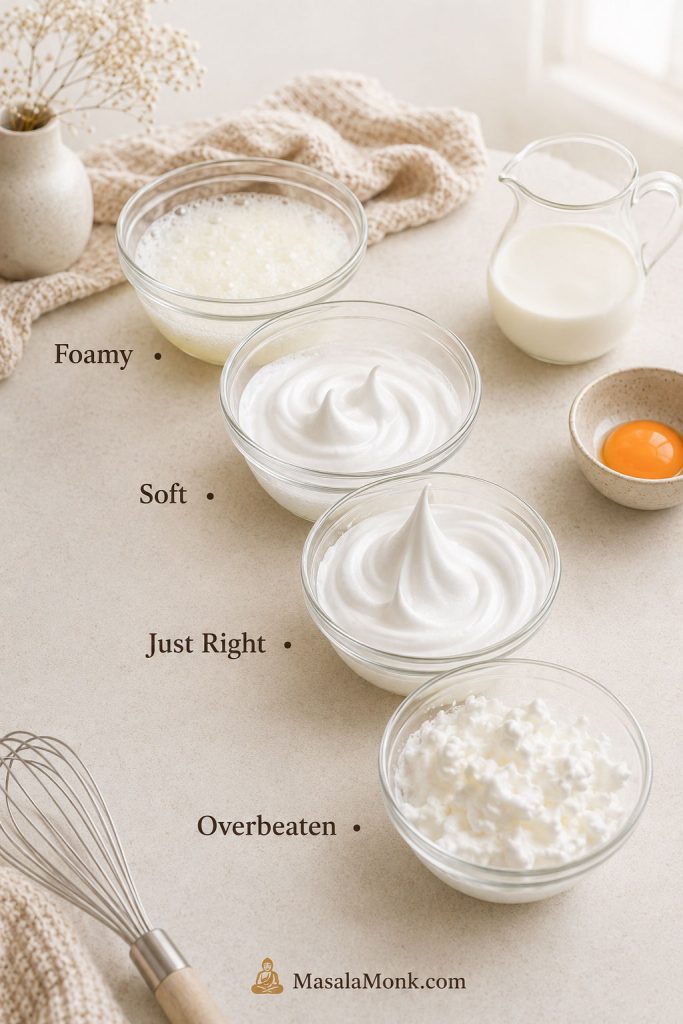
Meringue Stages for Japanese Pancakes
Use the meringue stage as your first checkpoint. Foam is too early, soft peaks are usually weak, glossy firm peaks are the target, and dry clumps mean you went too far.
A pancake that looks tall but feels liquid under the spatula needs more covered time, not a brave flip. In testing, the pancakes that looked almost ready were usually the ones that needed one more covered minute.
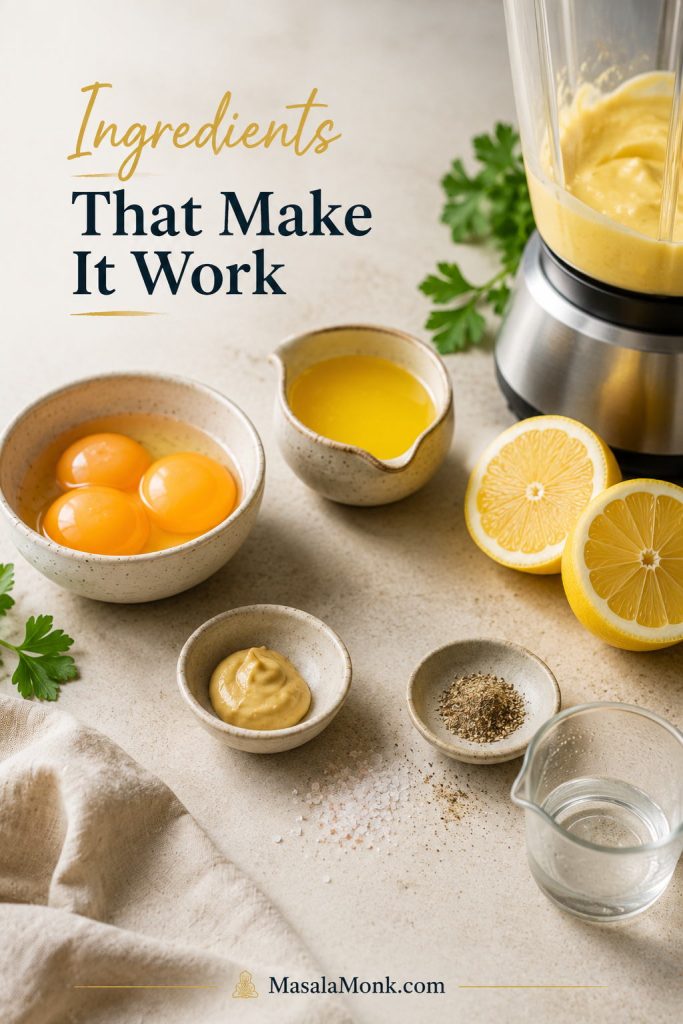
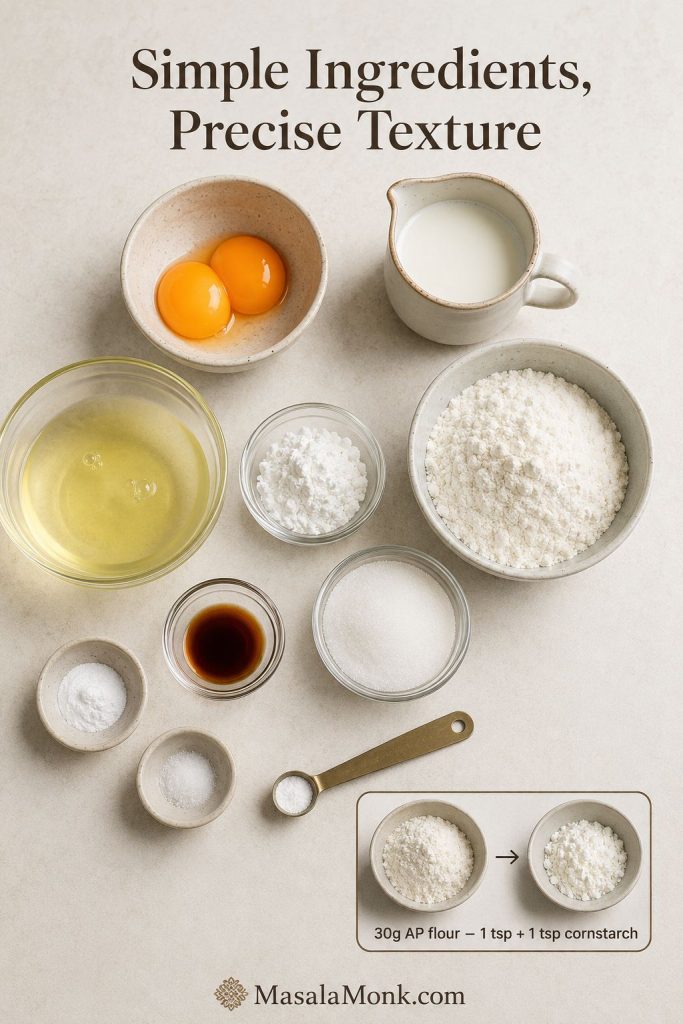
Ingredients for Japanese Soufflé Pancakes
Use a scale if you have one. This is a tiny batter, so small changes matter. An extra splash of milk can make the batter slide instead of mound, and a heavy scoop of flour can make the pancakes feel cakey instead of cloudlike. The gram amounts in this recipe are the ones to follow here. After mixing, compare your bowl with the batter texture cues before scooping.
| Ingredient | Amount | Why it matters |
|---|---|---|
| Large egg yolks | 2 yolks, about 35–40g | Make the rich base of the batter |
| Large egg whites | 2 whites, about 60–65g | Create the main soufflé lift |
| Whole milk | 20ml / 1 tbsp + 1 tsp | Loosens the yolk batter without making it runny |
| Vanilla extract | ½ tsp | Softens the eggy flavor |
| Cake flour | 30g / about ¼ cup spooned and leveled | Gives light structure |
| Cornstarch | 1 tsp / about 3g | Helps support the delicate foam |
| Baking powder | ¼ tsp | Adds a little backup lift |
| Fine salt | Pinch | Balances the sweetness |
| Granulated sugar | 24–25g / 2 tbsp | Sweetens and stabilizes the meringue |
| Cream of tartar | ¼ tsp | Helps stabilize the egg whites |
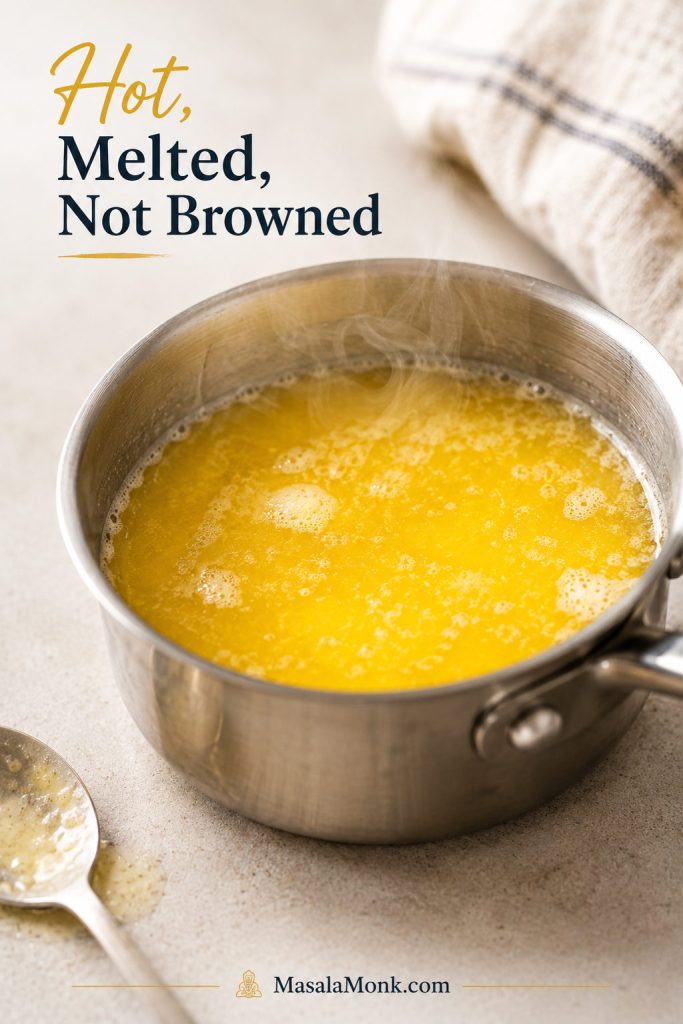
| Neutral oil or melted butter | For greasing | Prevents sticking without frying the pancake |
| Water | 1–2 tbsp total | Creates steam under the lid |
Ingredient Notes and Substitutions
Cake flour: Cake flour gives a lighter pancake. If you do not have it, measure 30g all-purpose flour, remove 1 teaspoon, and replace that teaspoon with cornstarch.
Cream of tartar: This helps the egg whites whip into a more stable meringue. If you do not have it, use 1 teaspoon lemon juice or ½ teaspoon white vinegar instead.
Egg temperature: Cold eggs can be easier to separate cleanly, while room-temperature whites usually whip faster. Either works here as long as the bowl is clean and the whites are beaten to the right stage.
Milk: Whole milk gives the best body. Add more only if the yolk batter is too stiff to mix. The finished batter should feel light but not loose.
Optional taller version: For a taller café-style pancake, use 3 egg whites and 2 yolks. Keep the other ingredients the same, but fold carefully because the batter becomes more delicate. Start with the basic 2-white version if this is your first try.
Equipment: What You Need and What You Don’t
You do not need a professional kitchen to make fluffy Japanese pancakes. The most important “equipment” is really control: a clean bowl for the whites, a pan that heats gently, and a lid that traps steam around the tall batter. If you have molds, see how to use a ring mold; if not, the no-mold method is built for a normal home pan.
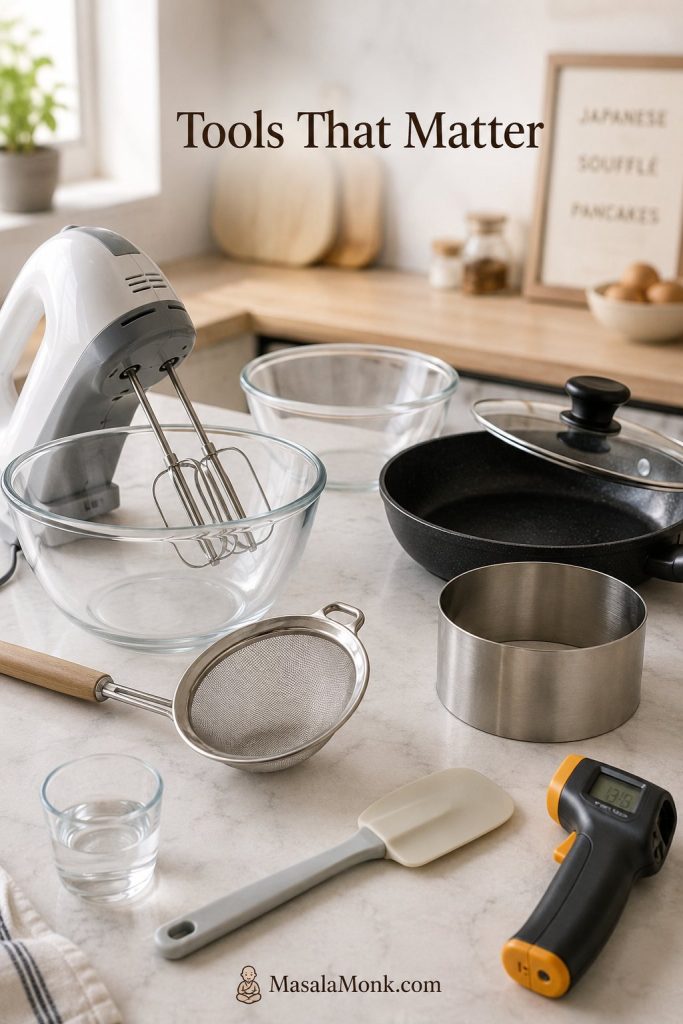
Essential Equipment
- Electric hand mixer or stand mixer
- Two clean mixing bowls
- Fine mesh sieve
- Nonstick pan or electric griddle
- Tight-fitting lid, preferably tall enough not to touch the pancakes
- Thin flexible spatula
- Paper towel for spreading a thin film of oil
Helpful but Optional
- Cookie scoop or disher for even mounds
- Piping bag for cleaner shaping
- Ring molds for straighter sides
- Infrared thermometer for checking pan surface temperature
- Instant-read thermometer for checking the center of the pancake
Choose Your Method: Ring Mold, No Mold, or Pancake Mix
There is more than one way to make these pancakes, and the best path depends on your tools and comfort level. A ring mold gives the neatest sides, the no-mold method is friendlier for home cooks, and pancake mix is a convenience shortcut rather than a magic fix.
| Method | Best for | What to watch |
|---|---|---|
| Basic 2-white batter | First attempts and best control | Start here before trying a taller, more delicate version. |
| No mold | Home cooks who want fewer tools | The batter must be thick enough to mound; the shape will be softer. |
| Ring mold | Very tall, straight-sided pancakes | Grease the mold well and fill only halfway to two-thirds full. |
| Pancake mix shortcut | Convenience | The mix replaces the dry base, not the whipped egg whites. |
| 3-white version | Extra height after you know the method | Fold carefully because the batter becomes more delicate. |
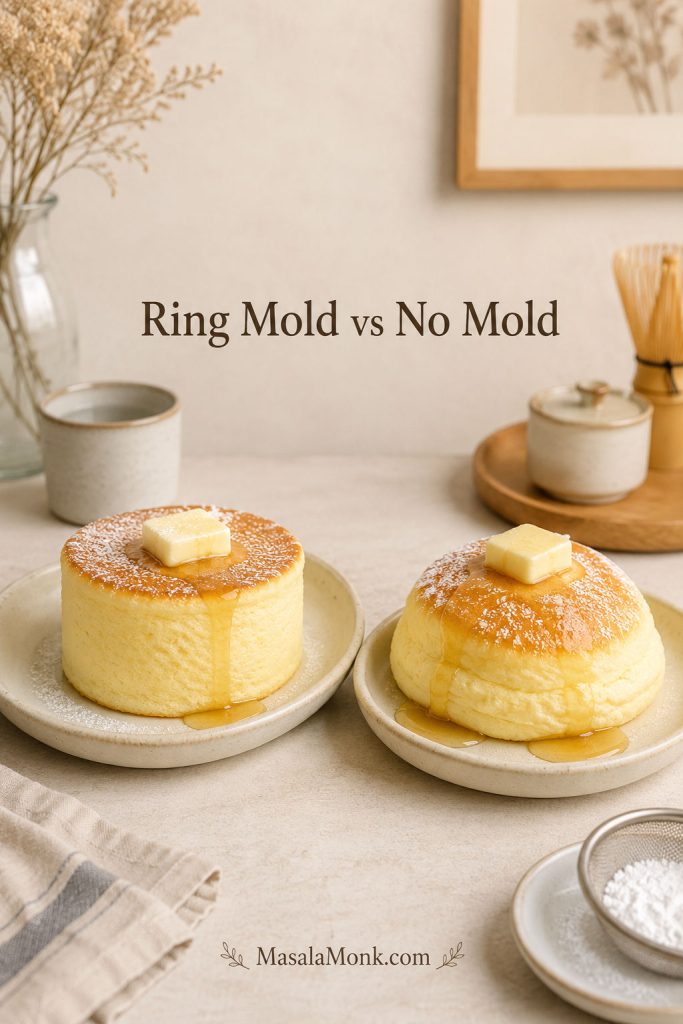
A ring mold can make the pancakes look more like café cylinders, but it is not required for a lovely plate. Without a mold, expect softer café-style mounds rather than perfectly vertical sides. The texture can still be airy, tender, and special.
How to Make Japanese Pancakes Without a Mold
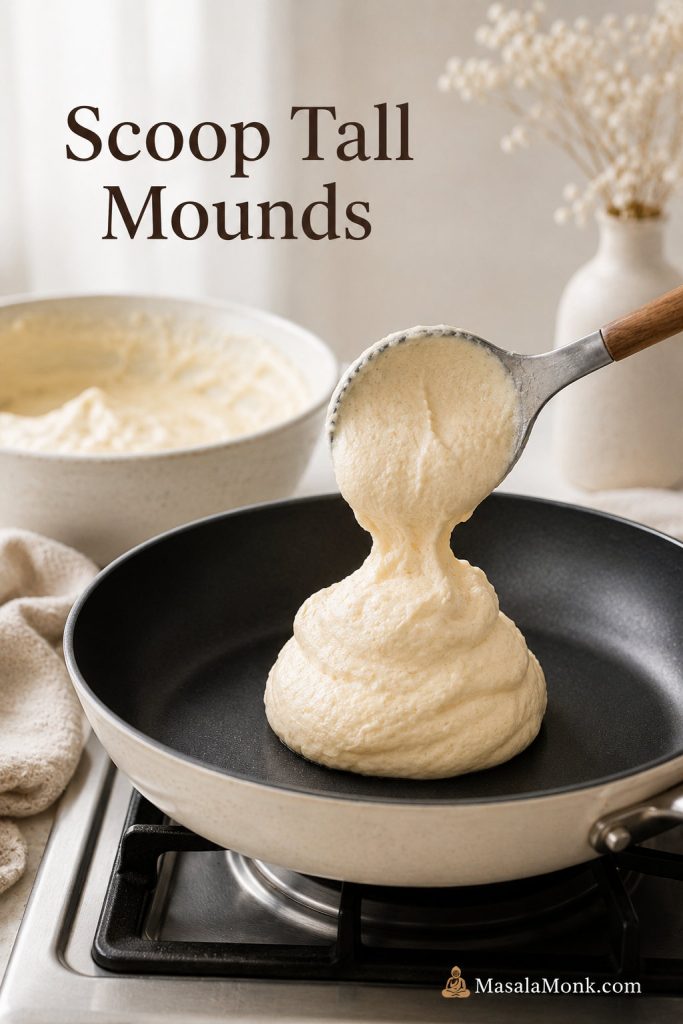
For the no-mold method, scoop the batter into tall mounds instead of pouring it. Use about two-thirds of the batter for the first mounds and reserve the rest for topping them after the base starts to set.
No-Mold First Layer
The first scoop should sit tall in the pan. Once that base begins to set, it can hold more batter without spreading as much.
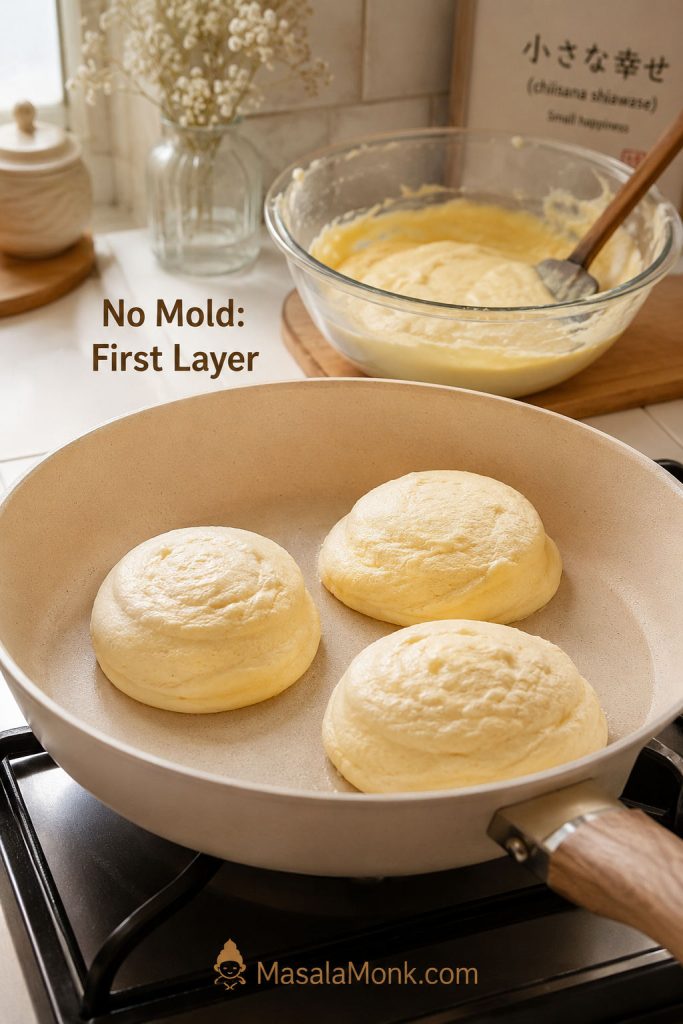
- Preheat the pan on gentle heat and wipe it with a thin film of oil.
- Scoop 2–3 tall mounds of batter into the pan, leaving space between them.
- Add 2 teaspoons water to the empty space in the pan, away from the batter.
- Cover and cook for 3–4 minutes, until the bottom layer starts to set.
- Add the reserved batter on top of each pancake.
- Cover again and cook until the sides look less glossy and the base releases cleanly.
- Flip gently, add another small splash of water, cover, and finish cooking.
How to Layer No-Mold Japanese Pancakes
Add the reserved batter after the first layer has started to hold its shape. This gives the pancake height without needing a ring mold.
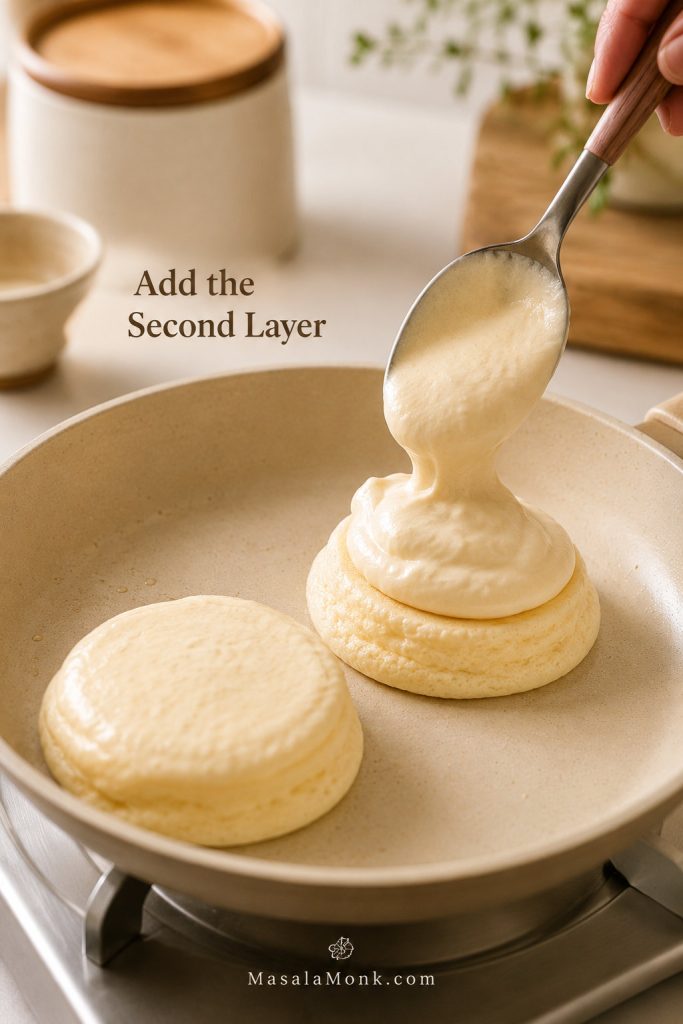
The no-mold pancakes may lean a little, and their edges may look softer. That is not failure. The win is a pancake that rises upward, cooks through, and lands on the plate warm and tender.
How to Use a Ring Mold
Use a ring mold about 2.5–3 inches wide and roughly 2 inches high. Grease the inside very well, place it in the pan, and fill it only halfway to two-thirds full. The batter needs room to rise.
How High to Fill a Ring Mold
Leave visible headroom in the mold. Filling to the top looks dramatic, but it gives the batter nowhere to rise.
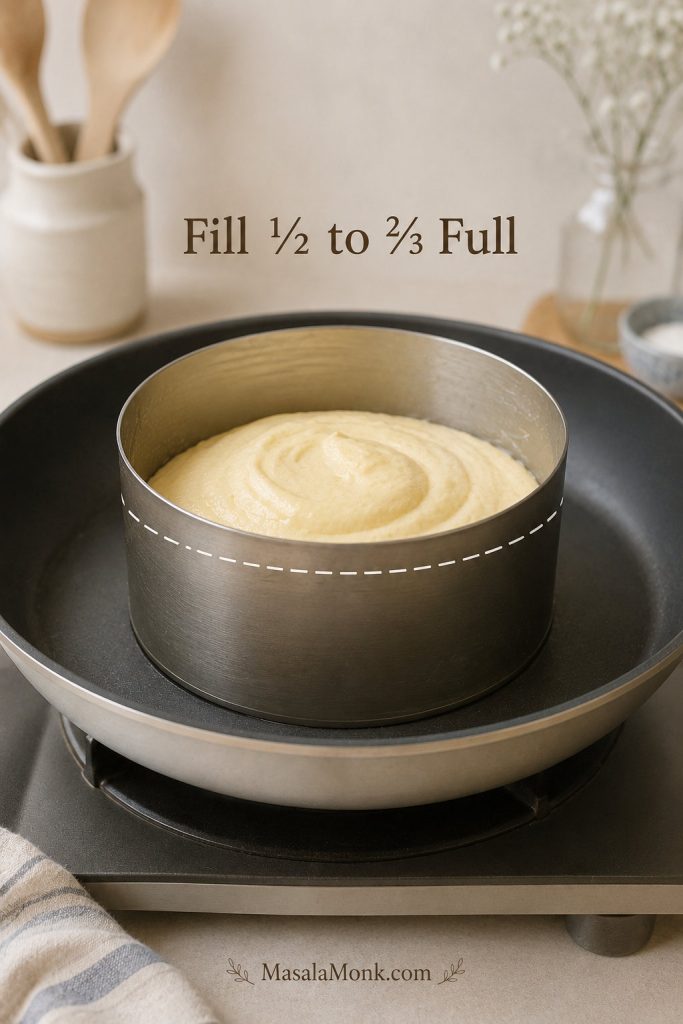
When flipping, slide a thin spatula under the mold and use tongs to steady the ring. A pancake that resists or looks wet at the sides is asking for more time. Ring molds get hot, so use tongs or a towel when adjusting them.
Meringue Guide: The Most Important Step
The meringue is where these pancakes get their height. Think of it as the scaffolding inside the pancake: too soft and the batter spreads; too dry and it becomes hard to fold smoothly.
A good meringue looks shiny and confident. It should not slide around the bowl like foam, and it should not break into dry chunks. When the peak stands with only a small bend at the tip, you are in the right zone. In testing, batter made with soft peaks spread quickly, even when the pan heat was right.
The Glossy Firm Peak Target
The target is not just “fluffy.” It is glossy, structured foam that can hold the batter up once it reaches the pan.

Soft Peaks vs Stiff Peaks
Soft peaks may seem close, but this batter needs a stronger foam. A drooping peak often becomes a spreading pancake.
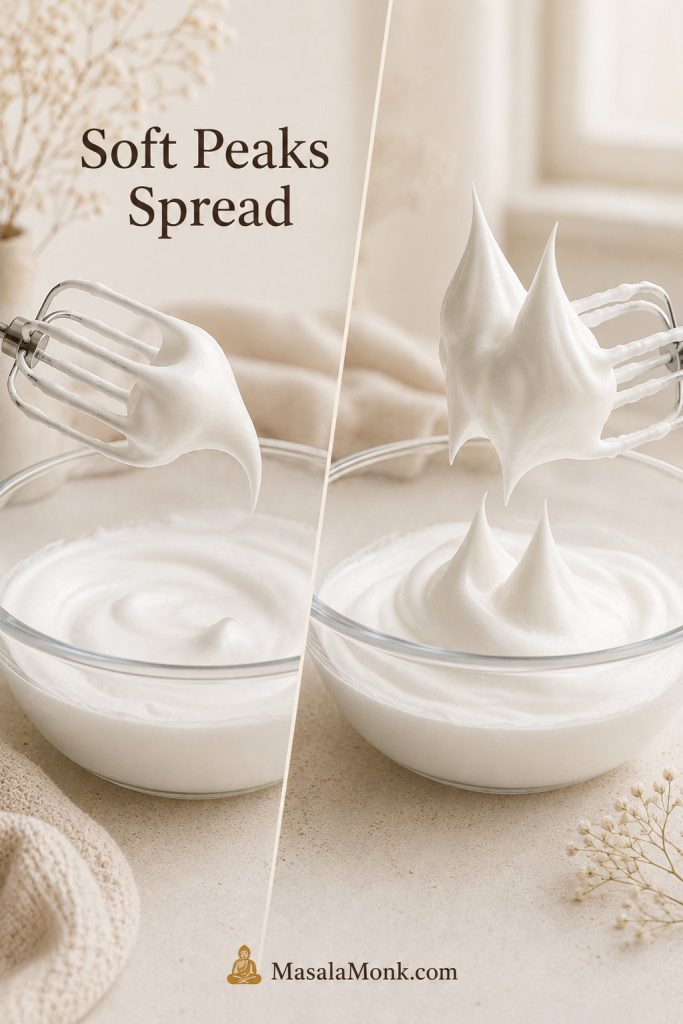
| Meringue stage | What it looks like | Use it? |
|---|---|---|
| Foamy | Bubbles with no real shape | No. Too early. |
| Soft peaks | Peak forms but droops over | Usually too weak for tall pancakes. |
| Firm/stiff glossy peaks | Peak stands upright or nearly upright; meringue looks smooth and shiny | Yes. This is the target. |
| Dry or clumpy peaks | Grainy, dull, broken-looking foam | No. Overbeaten and harder to fold. |
What Overbeaten Meringue Looks Like
The other mistake is going too far. Once the meringue looks dry, dull, and broken, it becomes harder to fold into a smooth, airy batter.

- Use a clean, dry bowl. Any grease or yolk can weaken the foam.
- Start beating the egg whites with cream of tartar until foamy.
- Add the sugar gradually, not all at once.
- Beat until the meringue is shiny and structured enough to hold strong peaks.
- Stop before it turns dry, grainy, or chunky.
If the whites refuse to foam after a minute or two, it is usually better to start over in a clean bowl than to keep trying to rescue them. A little yolk or grease can quietly ruin the lift.
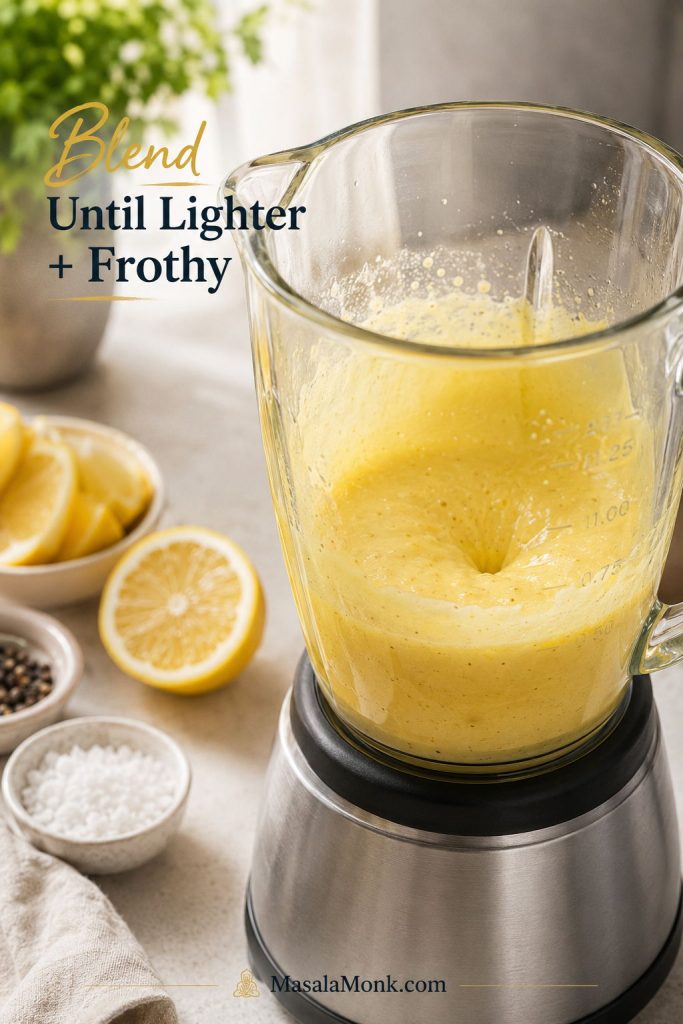
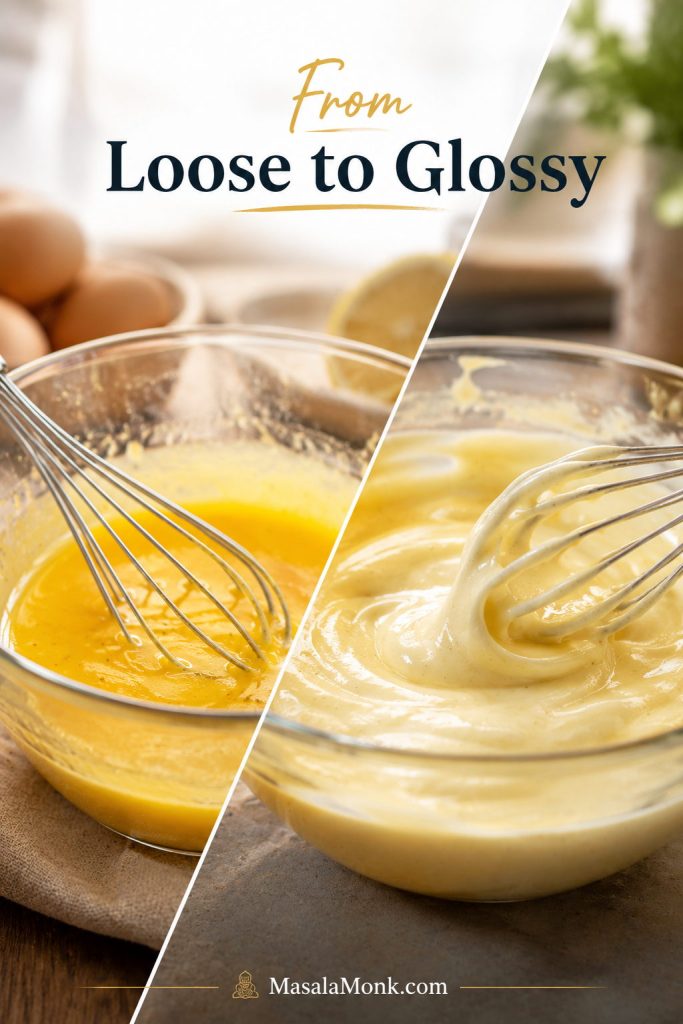
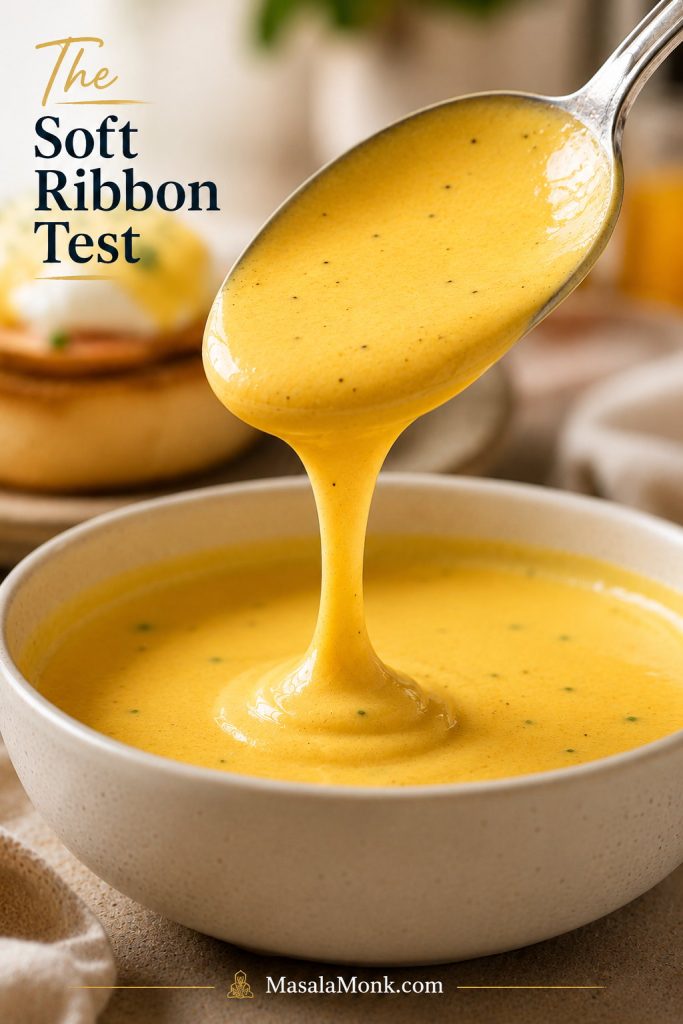
What the Batter Should Look Like
The batter should be thick, airy, and spoonable. It should hold its shape when dropped into the pan. It should not pour like crepe batter or spread immediately into a flat circle.
When folding, keep the movement calm and broad. Sweep under the batter, turn it over itself, and stop before you flatten the air out of it. A few faint streaks are better than a perfectly smooth batter that has lost its lift.
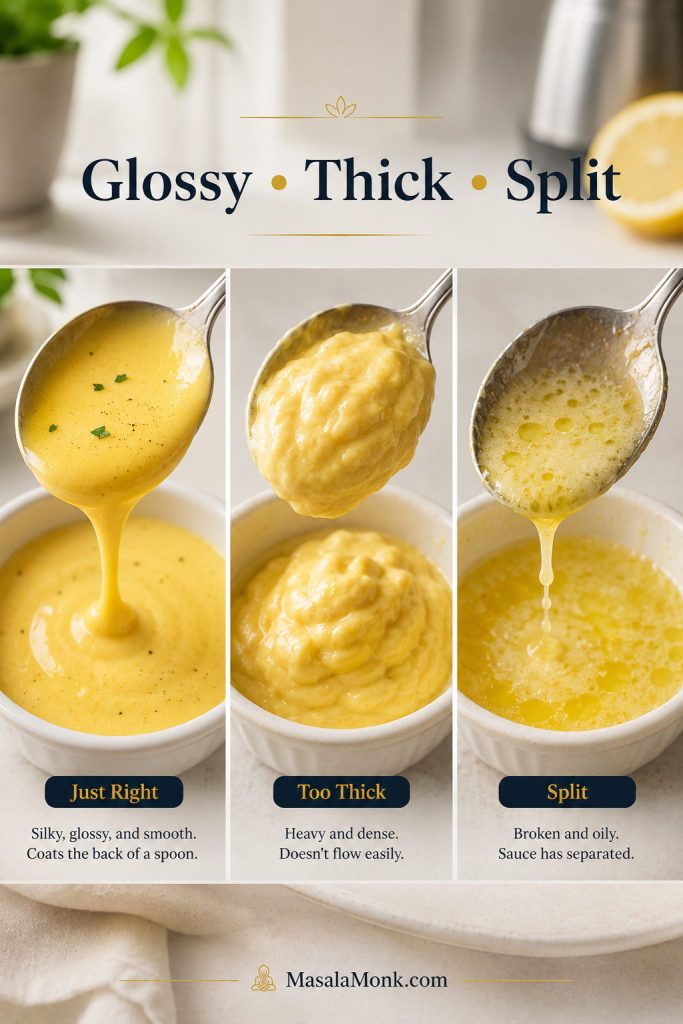
| Batter cue | What it means |
|---|---|
| Thick and mounds on a spoon | Good. The meringue is holding structure. |
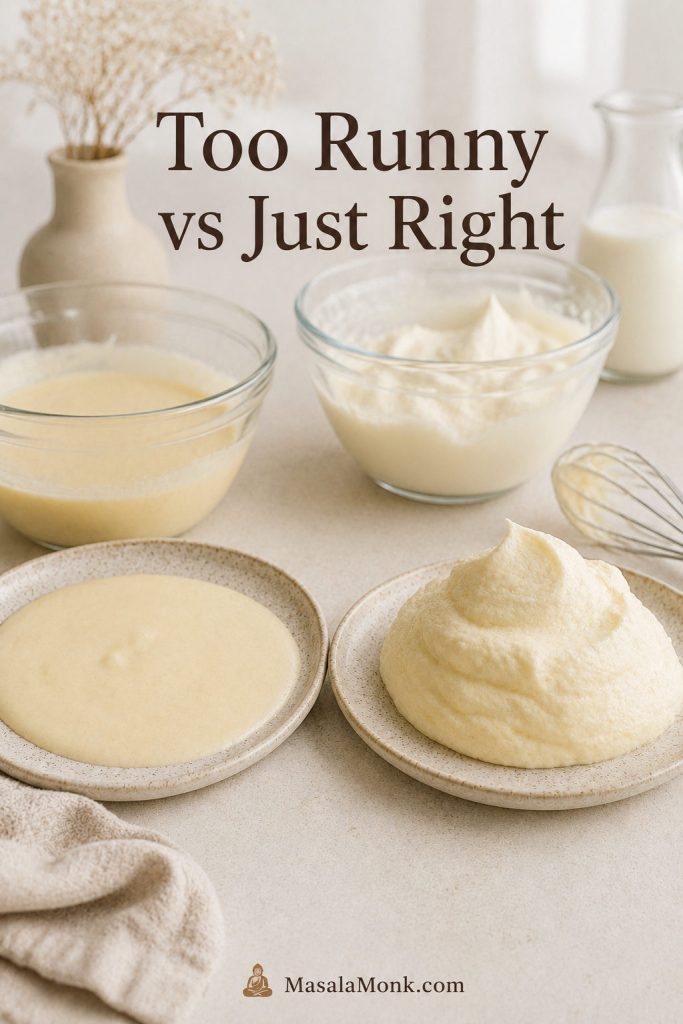
| Loose and pourable | Meringue may be underwhipped, overfolded, or the batter has too much liquid. |
| Lumpy with dry white clumps | Meringue may be overbeaten or not folded evenly. |
| Watery at the bottom | Batter has started breaking down. Cook immediately, but expect less height. |
Runny vs Moundable Batter
Before the pan gets involved, the bowl already tells you a lot. Batter that sits in a mound has structure; batter that flows quickly is already warning you it may spread.
How to Make Japanese Soufflé Pancakes Step by Step
Read through the method once before starting. The batter is best cooked soon after folding, so it helps to have the pan, lid, spatula, water, and serving plates ready.
First-batch reality check: The first pancake is where you learn your pan. A quick-browning bottom means the heat needs to come down. A spreading mound points back to the meringue or batter texture. A shorter but cooked-through pancake is still progress.
1. Separate the Eggs
Separate 2 large eggs into yolks and whites. Keep the whites completely free of yolk. If you separated the eggs while cold, let the whites sit for a few minutes while preparing the yolk batter. They do not need to be perfectly room temperature; the final meringue stage matters more.
2. Make the Yolk Batter
In a medium bowl, whisk the egg yolks, milk, vanilla, and salt until smooth. Sift in the cake flour, cornstarch, and baking powder. Whisk just until the batter is smooth and thick. Add extra milk only if the batter is too stiff to mix.
3. Beat the Meringue
In a clean bowl, beat the egg whites and cream of tartar until foamy. Add the sugar gradually while beating. Continue until the meringue is smooth, shiny, and firm enough to stand. If the peak stage feels unclear, check the glossy firm peak cue before folding. Soft peaks make soft pancakes; firm peaks give the batter a chance to rise tall.
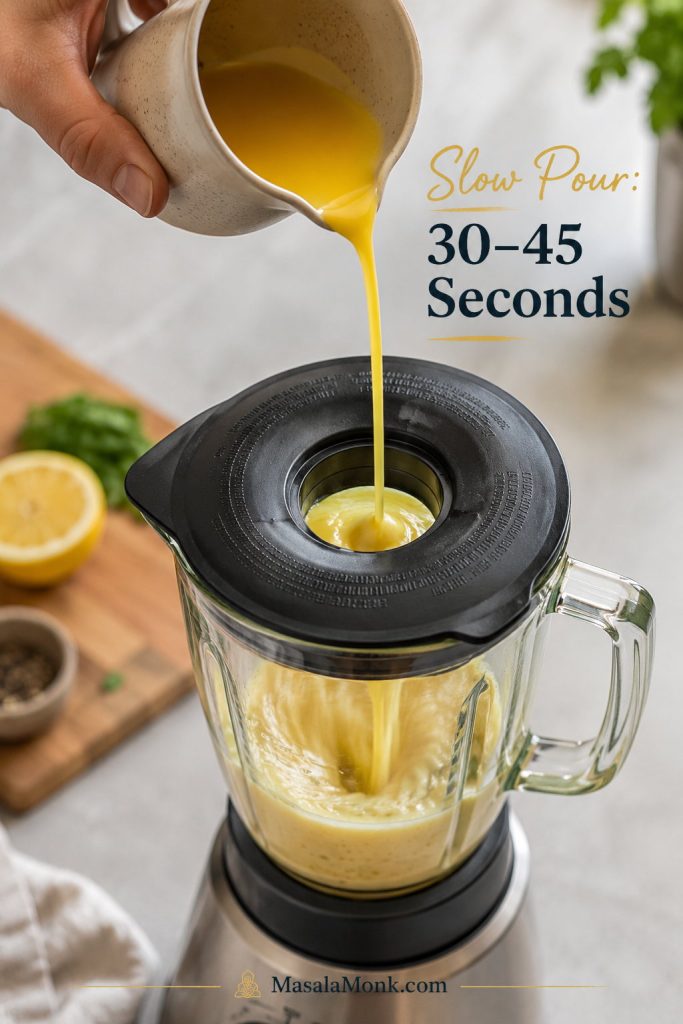
4. Fold the Batter
Add about one-third of the meringue to the yolk batter and mix it in more freely to lighten the base. Add the remaining meringue in two additions, folding with a spatula until the batter is mostly even, thick, and airy.
Before scooping, the batter should match the moundable batter cues. A batter that sits proudly on the spoon is ready for the pan; one that slides away quickly will usually cook flatter, so move quickly and keep the mounds smaller.

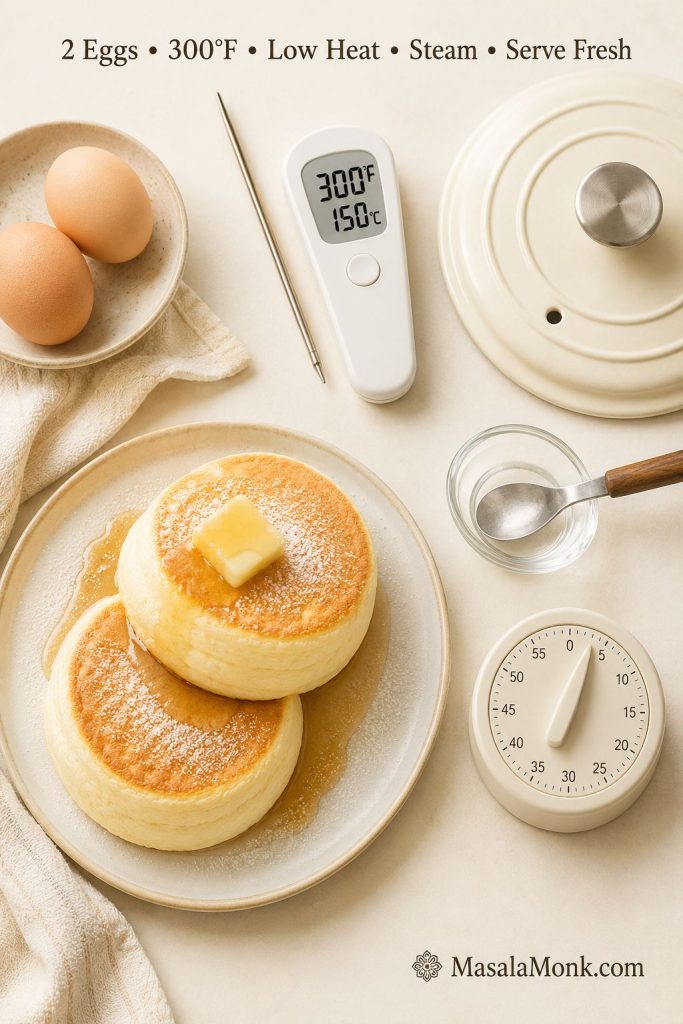
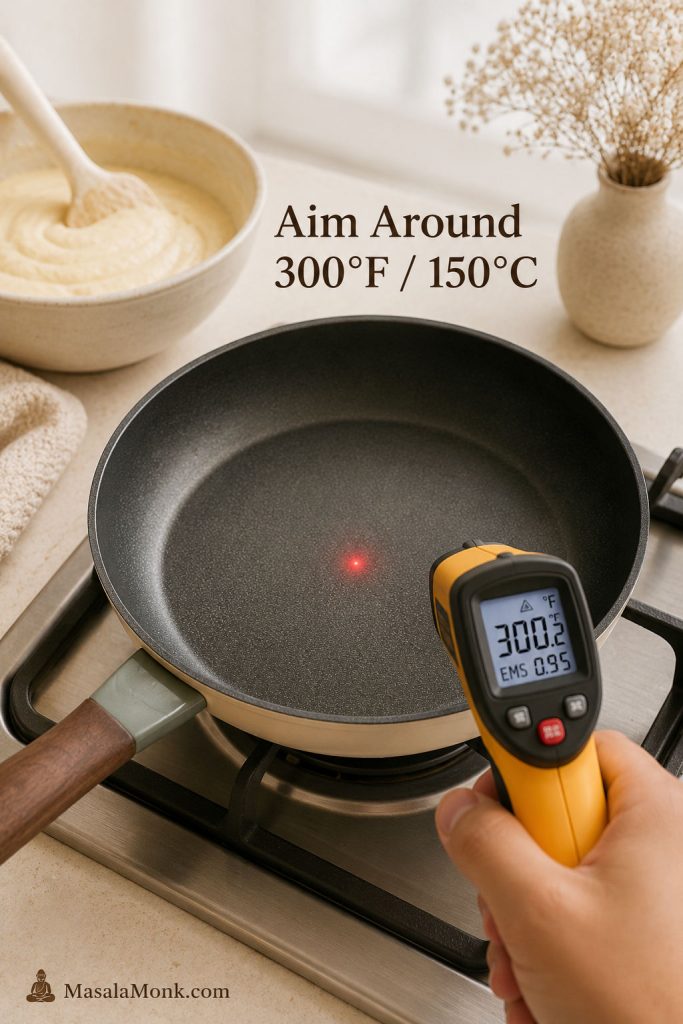
5. Preheat the Pan Gently
Set a nonstick pan over gentle heat. If using an infrared thermometer, aim for about 300°F / 150°C, with a workable range of 285–320°F / 140–160°C. Wipe the pan with a very thin film of oil.
If your lid is low, use smaller mounds so the batter does not touch the lid as it rises.
6. Scoop and Steam
Scoop the batter into 2 or 3 tall mounds. Use about two-thirds of the batter for this first layer and reserve the rest for building height. Add 2 teaspoons water to the empty area of the pan, away from the batter, and cover immediately.
7. Build Height
After 3–4 minutes, the first layer should look slightly more set around the base. Add the reserved batter on top of each mound. Cover again and continue cooking.
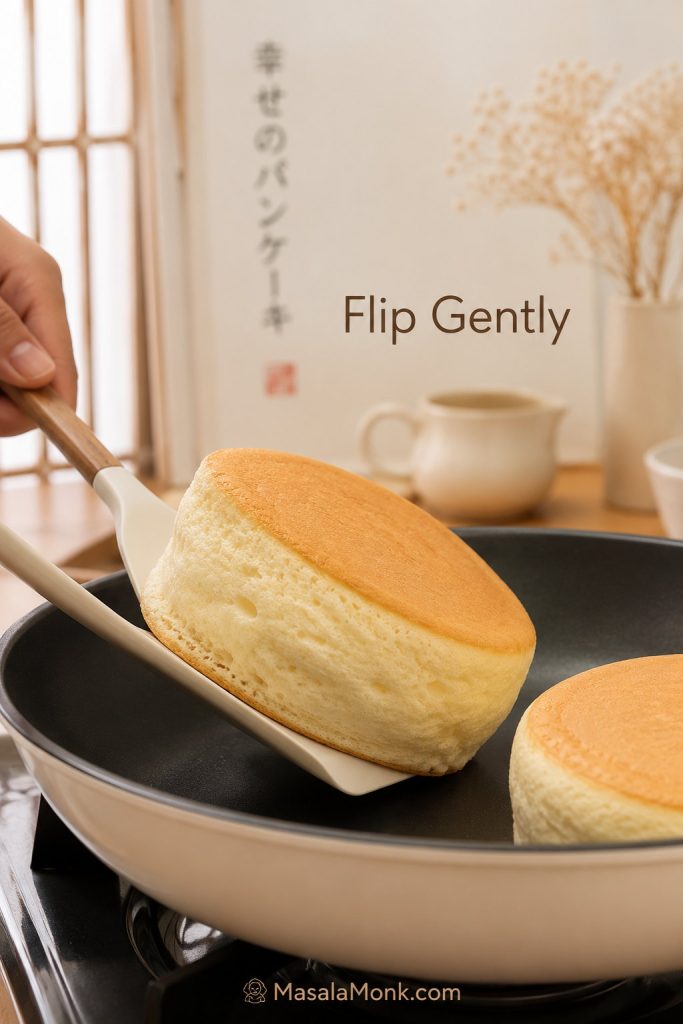
8. Flip Gently
Flip when the sides look less glossy, the bottom is lightly golden, and the pancake feels like it has a body of its own. The spatula should slide under with support, not drag through wet batter.
How to Know When Japanese Pancakes Are Ready to Flip
This is the part where most people want to move too soon. Wait for the sides to lose their wet gloss and for the pancake to feel supported under the spatula.
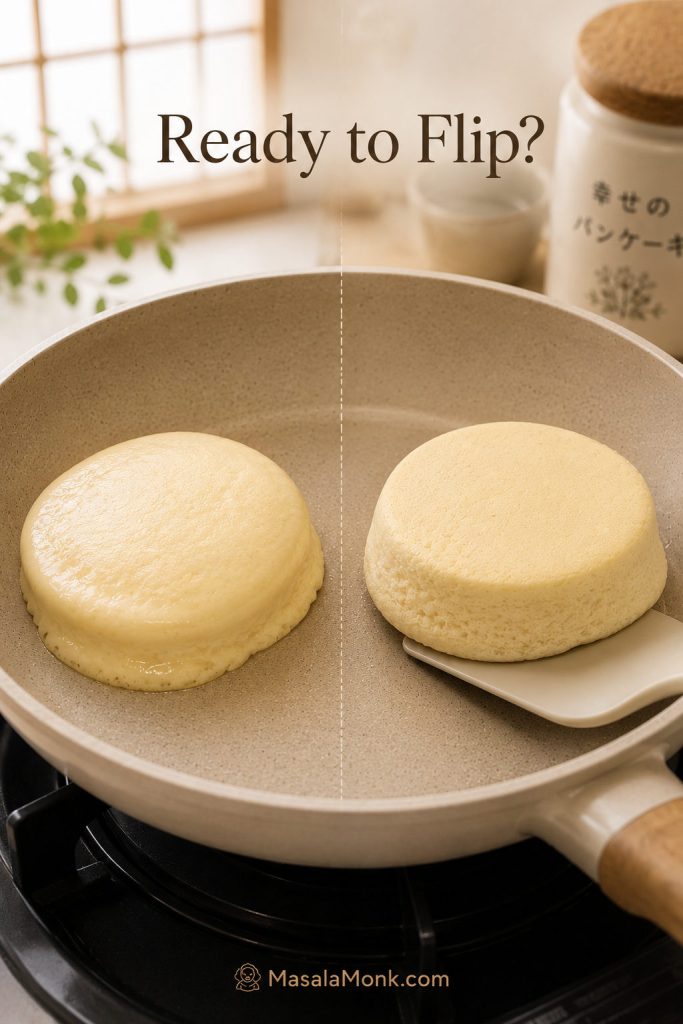
If you are nervous here, that is normal. The safer move is usually one more covered minute, not forcing the spatula under a pancake that is still wet at the sides. Use the flip-readiness cues before trying again.
After flipping, add another small splash of water, cover, and cook until the second side is set. Let the pancake keep the air you built into it; a gentle flip is enough.
9. Serve Immediately
These pancakes have a short golden window. Bring the plate to the table first, then bring the pancakes. A little settling is normal because the hot air inside cools, but they are at their softest and tallest right away.
The best bite is warm, soft, and custard-tender in the center without being wet. The pancake should give under the fork, then spring back just a little. That is the café-at-home moment you are cooking toward.
Low Heat and Steam: Time, Temperature, and Doneness
Most failed Japanese pancakes come down to heat. Tall batter needs time. When the pan is too hot, the outside browns before the inside cooks. When the pan is too cool and the lid is lifted too often, the center can stay gummy.
Best Pan Temperature for Japanese Pancakes
Think gentle surface heat, not a hot pancake rush. A pan near 300°F gives the foam time to set before the bottom goes too dark.
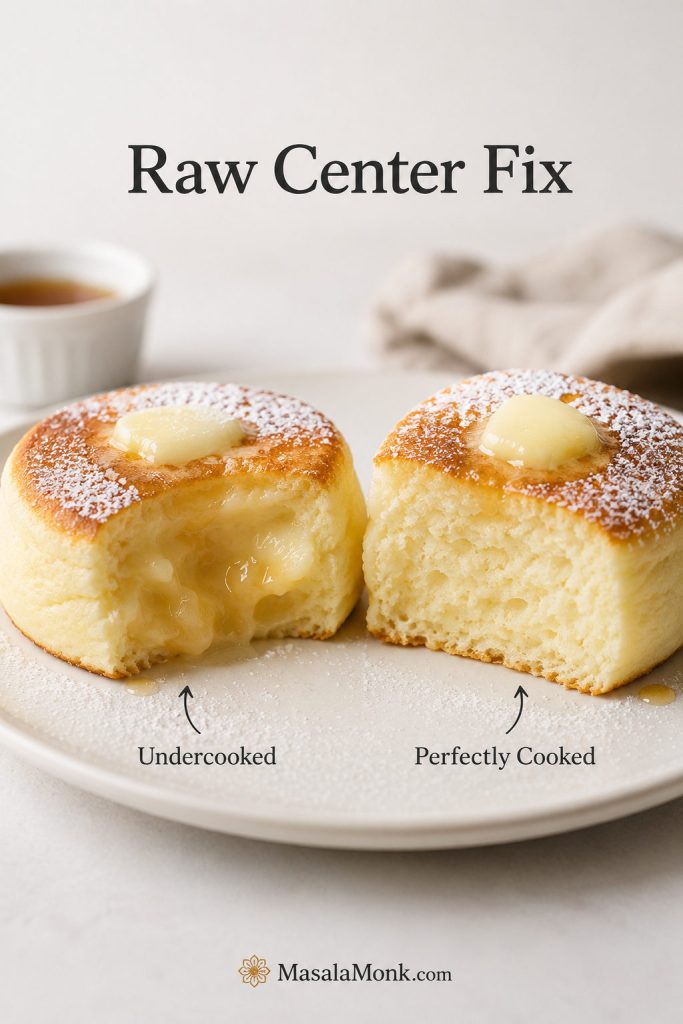
The bottom should not race ahead of the middle. A sweet, warm pancake smell is fine; a toasted smell before the sides look set is your cue to lower the heat. The batches that browned fastest were also the ones most likely to stay wet inside. If the outside is browning while the middle stays wet, go straight to the raw center fix.
| Cooking cue | Best target |
|---|---|
| Pan surface temperature | 285–320°F / 140–160°C |
| Ideal target | About 300°F / 150°C |
| First side | 6–8 minutes total, covered |
| Second side | 4–6 minutes, covered |
| Steam water | 2 teaspoons to 1 tablespoon at a time |
| Optional center temperature | About 160°F / 71°C |
| Best serving window | Immediately, ideally within 5–10 minutes |
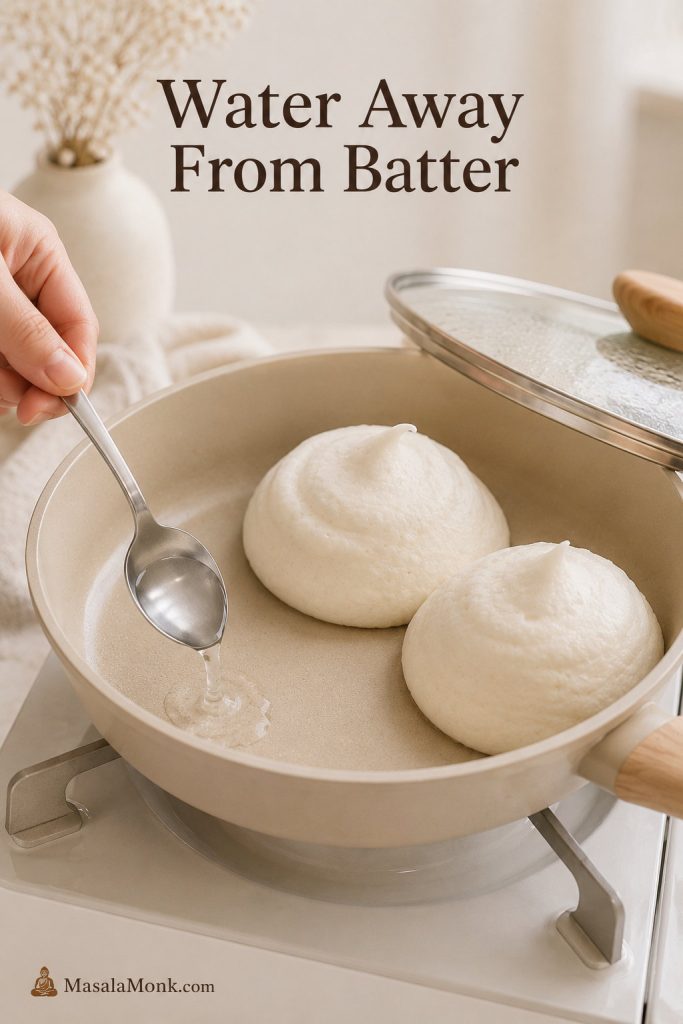
The water should go into the empty space in the pan, not on top of the batter. You only need enough to create a quiet puff of steam under the lid, not a puddle.
Where to Add Water for Steam
Place the water beside the batter so the steam can circulate around the pancakes. Pouring on top can thin or disturb the mounds you just built.
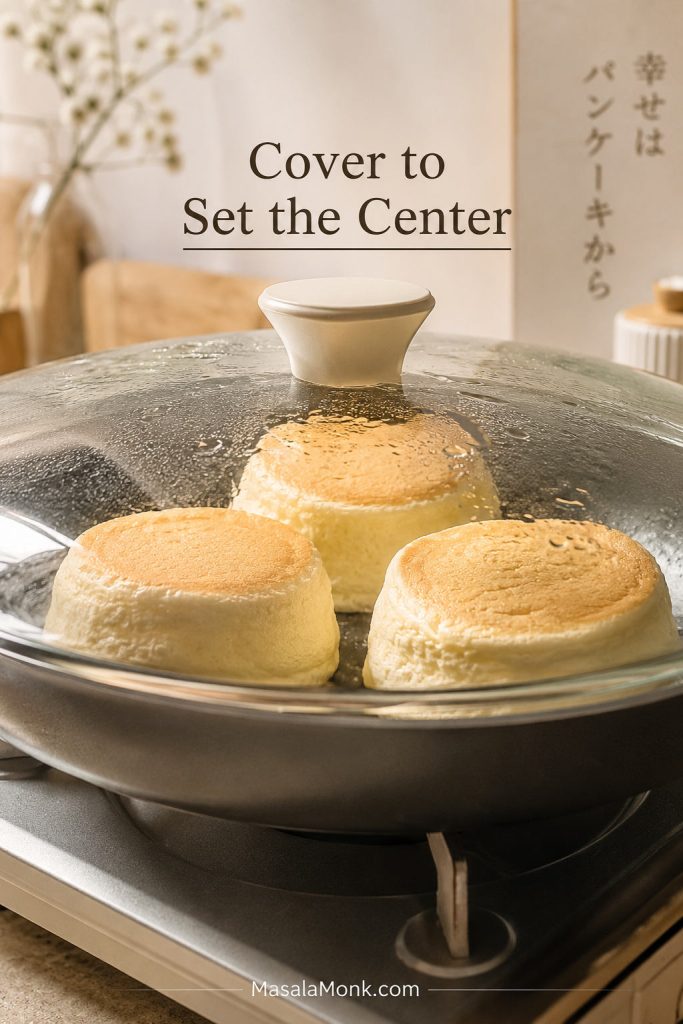
Why Covered Steam Cooking Matters
Once covered, the pan becomes a small steam chamber. Keep the lid on long enough for the center to set instead of chasing color too early.
How to Tell If the Pan Is Too Hot or Too Cool
| What you see | What it means | What to do |
|---|---|---|
| Bottom browns deeply in 2–3 minutes | Pan is too hot | Lower the heat and move the pan off the burner briefly |
| Edges look cooked but center feels liquid | Heat is too high or pancake is too thick | Cover longer on low heat and make smaller mounds next time |
| Pancake barely colors after 8 minutes | Pan may be too cool | Increase heat very slightly, but keep it gentle |
| Pancake deflates when lid opens | Structure is not set yet | Cover again and give it more time before flipping |
Keep the lid on as much as possible. Every time you lift it, you release heat and steam, and the pancakes may take longer to set.
Optional safety cue: If using a thermometer, aim for about 160°F / 71°C in the center. The pancake should also feel softly bouncy, not liquid, when touched gently. For general egg-dish temperature guidance, see the USDA egg safety guide.
Can You Make Japanese Soufflé Pancakes With Pancake Mix?
Yes, you can make a shortcut version with pancake mix, but use it for fewer dry ingredients, not to skip the soufflé technique. The height still comes from whipped egg whites.
Think of pancake mix as a replacement for the flour, baking powder, and part of the dry base. It does not replace separated eggs, meringue, slow covered cooking, steam, or gentle folding.
Japanese hotcake mix or regular pancake mix can both work, but the result may be a little sweeter, cakier, or more mix-flavored than the main recipe. Keep the heat low because mixes with sugar can brown faster.
If you want a more everyday pancake-mix direction instead of the soufflé method, this guide to blueberry pancakes and homemade pancake mix is the better place to go.
Simple Pancake Mix Shortcut Formula
| Ingredient | Amount |
|---|---|
| Large eggs | 2, separated |
| Pancake mix | 3 tablespoons / about 25–30g |
| Milk | 1½–2 tablespoons / 22–30ml, added gradually |
| Vanilla | ½ teaspoon |
| Sugar | 2 tablespoons / 24–25g |
| Cream of tartar | Pinch to ¼ teaspoon, or a few drops of lemon juice |
Start with 1½ tablespoons milk. Add the remaining ½ tablespoon only if the yolk batter is too stiff to mix. Pancake mixes vary, and a looser shortcut batter is harder to stack tall.
Make the yolk batter with the yolks, milk, vanilla, and pancake mix. Beat the whites with the acid and sugar until the meringue is glossy and holds its shape, then fold and cook the same way as the main recipe.
Shortcut truth: Pancake mix can make the dry ingredients easier, but it will not save a weak meringue. If the egg whites are not whipped well, the pancakes will still spread or deflate.
What Success Looks Like
A good batch does not have to look identical to a café pancake. Look for these signs instead.
- The batter rises upward more than it spreads outward.
- The sides look set instead of glossy-wet.
- The pancake releases from the pan without tearing.
- The center feels softly bouncy, not liquid.
- The inside is moist and airy, not raw.
- The pancakes settle slightly after serving, but do not collapse into flat rounds.
Normal settling means the pancakes soften and lower slightly as they cool. A failure collapse means they flatten quickly, slump into the plate, or look wet in the middle.
Save the batch: If the first pancakes are shorter than expected but cooked through and soft, serve them proudly with toppings. A slightly shorter pancake with a set center is better than a dramatic tall pancake that is wet inside.
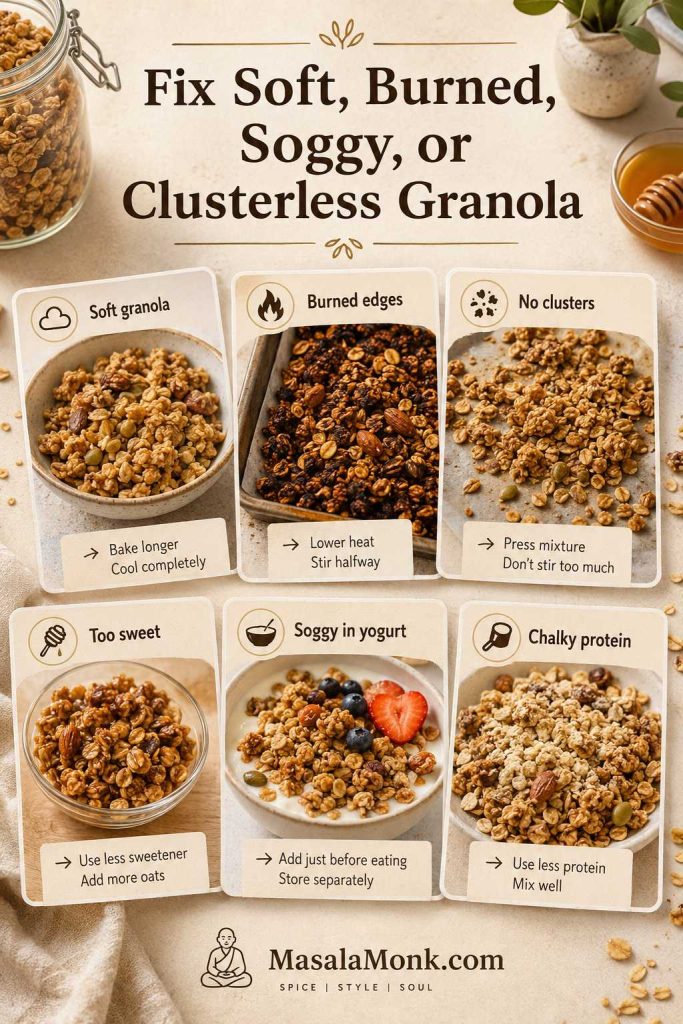
Troubleshooting Japanese Pancakes
Most pancake problems are not disasters. They are clues. Find the problem you actually saw, not the problem you are afraid of, and the next batch becomes much easier.
This style is technique-sensitive, but the fixes are usually simple: strengthen the meringue, fold less, lower the heat, cook longer covered, or make smaller mounds.
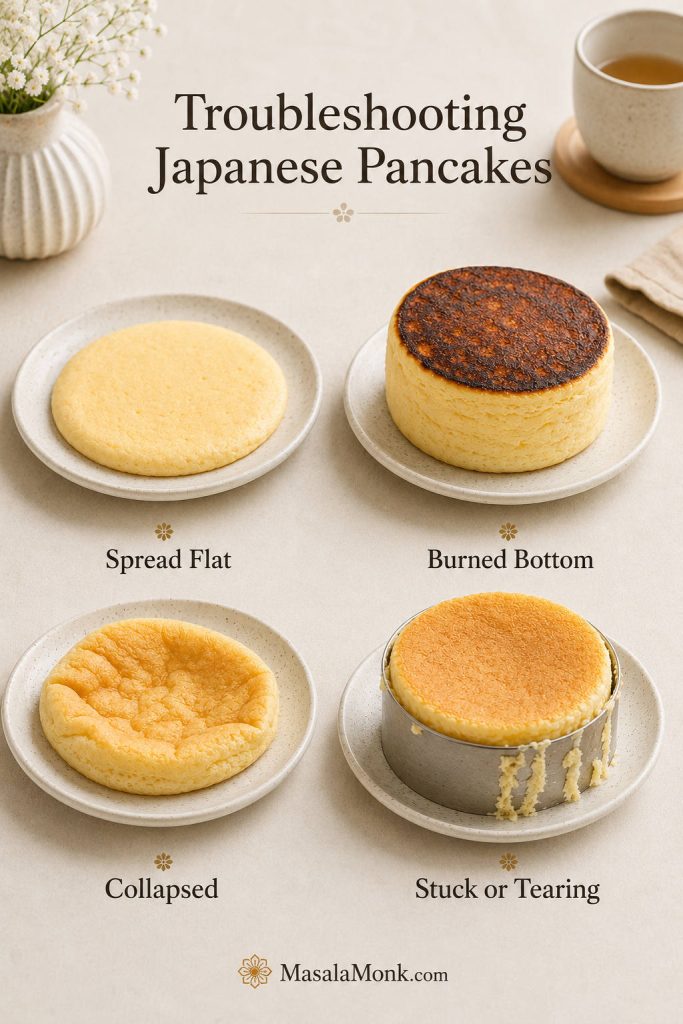
Rise, Spread, and Collapse Problems
| Problem | Likely cause | Fix now | Next time |
|---|---|---|---|
| Pancakes never rose | Meringue was too soft, batter was overfolded, or the pan was too hot too soon | Cook them through, stack with toppings, and serve as soft pancakes | Beat to firm peaks that hold their shape and fold more gently |
| Pancakes rose in the pan but collapsed on the plate | Center was undercooked or structure was too weak | Serve quickly; texture may still be pleasant | Cook longer covered and make slightly smaller mounds |
| Batter spread flat | Meringue was underwhipped, batter was too loose, or too much milk was added | Use a ring mold if you have one | Batter should hold a mound, not pour |
Heat, Doneness, and Texture Problems
| Problem | Likely cause | Fix now | Next time |
|---|---|---|---|
| Outside burned | Pan was too hot | Lower heat immediately and move pan briefly off the burner | Use gentle heat and aim for 285–320°F / 140–160°C |
| Center stayed raw | Pancakes were too tall, flipped early, or cooked too hot outside | Cover and cook longer on low heat | Make smaller mounds and use steam |
| Pancakes wrinkled or shrank at the sides | Sudden cooling, undercooked center, or weak structure | Serve quickly while still warm | Cook until the center is set and avoid opening the lid too often |
| Eggy flavor | Underseasoned batter or undercooked center | Add toppings such as fruit, cream, or syrup | Use vanilla, salt, and enough cook time |
Flipping, Batch, and Mold Problems
| Problem | Likely cause | Fix now | Next time |
|---|---|---|---|
| Pancake cracked while flipping | It was flipped before the base set | Support with a second spatula if needed | Wait until the sides look less glossy and the base releases cleanly |
| Second batch was flatter | Batter sat too long and lost air | Cook immediately if possible | Make a small batch or use two pans |
| Pancakes stuck to mold | Mold was not greased well enough | Loosen gently with a thin knife | Grease the inside of the ring generously before filling |
Why Did My Japanese Pancakes Deflate?
The most common reasons are weak meringue, overfolded batter, heat that was too high, or an undercooked center. Some settling is normal after cooking, but a full collapse usually means the pancake did not have enough structure to hold itself.
Why Are My Pancakes Raw Inside?
The pan was probably too hot or the pancakes were too large. High heat browns the outside before the center has time to set. Lower the heat, cover the pan, use a little steam, and make slightly smaller mounds next time.
Why Is My Batter Runny?
Runny batter usually means the meringue was underwhipped, overmixed into the yolk batter, or left sitting too long. The batter should look airy and thick enough to hold a mound.
Why Are They Not Jiggly?
They may be too thin, overcooked, or made with batter that lost too much air. The jiggle comes from height, moisture, and a set-but-soft center. Aim for thick mounds, gentle heat, and a center that feels bouncy rather than dry.
Why Was the Second Pancake Worse Than the First?
Soufflé pancake batter loses air as it sits. If the first pancake was tall and the later ones were flatter, the batter probably waited too long. For best results, cook all the batter at once in one large pan, use two pans, or make a smaller batch.
Best Toppings for Japanese Pancakes
Japanese soufflé pancakes are delicate, so the best toppings should make them feel café-special without crushing them. Think light cream, soft fruit, a little syrup, or a sauce served mostly to the side. The pancakes are the drama; the toppings should frame them.
Classic Café-Style Toppings
- Powdered sugar
- Softened butter
- Maple syrup
- Whipped cream
- Fresh strawberries or mixed berries
For a warmer fruit topping, spoon over a little homemade apple pie filling; keep the portion light so it does not flatten the stack.
Japanese-Inspired Toppings
- Matcha whipped cream
- Sweet red bean paste
- Black sesame cream
- Kinako sugar
- Yuzu honey
Dessert-Style Toppings
- Vanilla ice cream
- Homemade chocolate syrup
- Berry compote
- Caramelized bananas
- Salted caramel
For the tallest look, finish with powdered sugar, berries, or a light cream first. Add heavier sauces at the table, after the pancakes have had their moment.
Can You Make Japanese Pancakes Ahead?
This is a cook-and-eat-now recipe, and that is part of its charm. The batter should not be made ahead because the meringue loses air as it sits. Cooked pancakes also deflate as they cool, which is normal for this style.
If you have leftovers, refrigerate them in an airtight container for up to 1 day. Reheat gently in a covered pan over low heat or microwave briefly at low power. They will still be soft, but they will not be as tall or jiggly as freshly cooked pancakes.
Japanese Soufflé Pancakes vs Japanese Soufflé Cake
Japanese soufflé pancakes and Japanese soufflé cake sound similar, but they are different recipes. The pancake version is cooked in a pan or on a griddle and served like breakfast pancakes. Japanese soufflé cake usually refers to Japanese cheesecake or cotton cheesecake, which is baked, sliced, and served as a dessert.
Both use meringue logic, so they share that soft, airy personality. However, the method, texture, and serving style are different. If you wanted the cake version, see this Japanese cheesecake recipe.
FAQs About Japanese Pancakes
Are Japanese pancakes and soufflé pancakes the same thing?
For this tall, café-style version, yes. Here, Japanese pancakes means Japanese soufflé pancakes: thick pancakes made with whipped egg whites and cooked slowly until soft, airy, and jiggly.
Do I need a ring mold?
No. A ring mold gives cleaner sides and more dramatic height, but the no-mold method still works if the batter is thick enough to mound. The shape will be softer, but the pancakes can still be fluffy and tender.
Why did my pancakes collapse after cooking?
A little settling is normal. A dramatic collapse usually means the meringue was too weak, the batter was overmixed, or the center needed more covered cooking time. The fix is usually stronger peaks, gentler folding, and a lower, slower pan.
How do I know when to flip them?
Flip when the bottom is lightly golden, the sides look less glossy, and the pancake releases cleanly from the pan. If the spatula drags through wet batter, cover the pan again and give it another minute.
Can I use pancake mix?
Yes, but pancake mix only replaces the dry base. You still need separated eggs, whipped egg whites, gentle folding, steam, and slow covered cooking for the soufflé height.
Can I make the batter ahead?
No. Once the meringue is folded in, the batter starts losing air. Make it, scoop it, and cook it right away for the best rise.
Can I double this recipe?
You can, but only if your pan or griddle can cook the batter right away. Soufflé pancake batter loses air as it waits, so a small fresh batch is usually better than a large bowl sitting on the counter.
Can I make them without cake flour?
Yes. Use 30g all-purpose flour, remove 1 teaspoon, and replace that teaspoon with cornstarch. The pancakes may be slightly less delicate than the cake-flour version, but the swap works well for this small batch.
Can I make them gluten-free?
A cup-for-cup gluten-free flour blend is the safest first experiment, but this batter is delicate, so results can vary. Almond flour is heavier and can make soufflé pancakes collapse more easily. For a more reliable gluten-free-style pancake, try almond flour pancakes instead.
Can I make these eggless or vegan?
Classic Japanese soufflé pancakes depend on egg-white meringue, so eggless or vegan versions need a separate tested formula. For an easier egg-free or vegan-friendly pancake direction, a recipe like oat pancakes is a better place to start.
Can I make keto Japanese soufflé pancakes?
Not cleanly with this exact recipe. Low-carb flours and sweeteners change the batter structure, and soufflé pancakes are already delicate. Use a dedicated keto pancake formula rather than adapting this one directly.
Why do they taste eggy?
Eggy flavor usually comes from undercooking, skipping vanilla or salt, or using a formula with a very high egg ratio. Cook the center through, keep the vanilla and salt, and serve with fruit, cream, or syrup.
What does fuwa fuwa mean?
Fuwa fuwa means soft, fluffy, and airy. For Japanese pancakes, it describes the cloudlike texture created by whipped egg whites and gentle cooking.
Once you understand the three checks — meringue that holds, batter that mounds, and heat that stays gentle — these pancakes stop feeling like a café trick. They become a small weekend project you can actually pull off, one covered minute at a time.
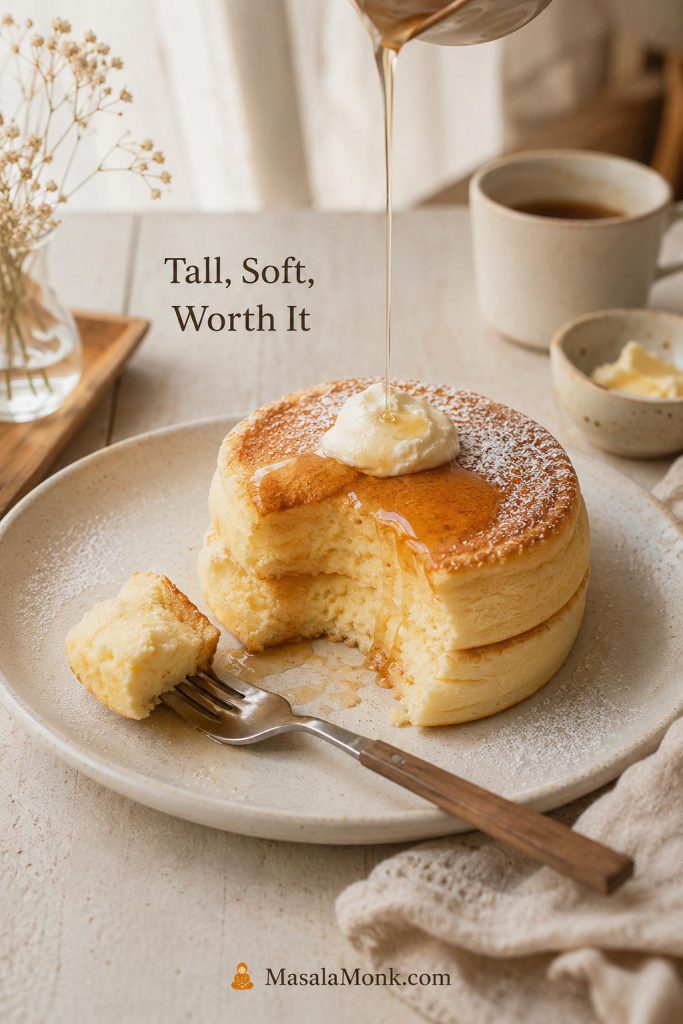
Serve Japanese Pancakes While They Are Tall and Warm
Bring the plate to the table first, then bring the pancakes. The reward is that first soft bite while the stack is still warm, lifted, and a little magical.
Japanese Pancakes Recipe Card
Japanese Pancakes Recipe: Fluffy Soufflé Pancakes
Tall, soft, jiggly Japanese soufflé pancakes made with whipped egg whites, a light yolk batter, gentle heat, and steam. Use the no-mold method for a simple home version or ring molds for straighter café-style sides.
Ingredients
Yolk Batter
- 2 large egg yolks, about 35–40g
- 20ml whole milk, about 1 tablespoon + 1 teaspoon
- ½ teaspoon vanilla extract
- 30g cake flour, about ¼ cup spooned and leveled
- 1 teaspoon cornstarch, about 3g
- ¼ teaspoon baking powder
- Pinch of fine salt
Meringue
- 2 large egg whites, about 60–65g
- 24–25g granulated sugar, about 2 tablespoons
- ¼ teaspoon cream of tartar, or 1 teaspoon lemon juice, or ½ teaspoon white vinegar
For Cooking
- Neutral oil or melted butter, for greasing
- 1–2 tablespoons water, for steam, used in small splashes
- Powdered sugar, whipped cream, berries, maple syrup, or toppings of choice
Instructions
Make the Batter
- Prepare the pan and tools. Set out the pan, lid, spatula, water, and serving plates before mixing.
- Separate the eggs. Place the yolks in one bowl and the whites in a clean, dry mixing bowl. Make sure no yolk gets into the whites.
- Make the yolk batter. Whisk the yolks, milk, vanilla, and salt. Sift in the cake flour, cornstarch, and baking powder. Whisk just until thick and smooth.
- Start the meringue. Beat the egg whites with cream of tartar until foamy. Add the sugar gradually.
- Beat to glossy stiff peaks. Continue beating until the meringue is shiny and holds strong peaks. Stop before it turns dry or clumpy.
- Fold the batter. Lighten the yolk batter with one-third of the meringue, then fold in the rest until the batter is thick, airy, and mostly even.
Cook and Serve
- Preheat gently. Heat a nonstick pan over low heat. If using a thermometer, aim for about 300°F / 150°C. Wipe with a thin film of oil.
- Scoop the pancakes. Add 2 or 3 tall mounds of batter, using about two-thirds first and reserving the rest. Add 2 teaspoons water away from the batter and cover.
- Build height. After 3–4 minutes, add the reserved batter on top. Cover again and cook until the sides look less glossy and the bottom releases cleanly.
- Flip carefully. Slide a thin spatula under each pancake and flip gently. Add another small splash of water, cover, and cook for 4–6 minutes more.
- Check doneness. The pancakes should be lightly golden, softly bouncy, and set in the center. If using a thermometer, aim for about 160°F / 71°C.
- Serve immediately. Dust with powdered sugar and add toppings. Some settling is normal as the pancakes cool.
Recipe Notes
- Best cue: The batter should hold a soft mound, and the cooked pancakes should feel gently bouncy in the center.
- If the batter spreads: The meringue was likely too soft, the batter was overfolded, or too much liquid was added.
- If the center is raw: Lower the heat, cover longer, and make smaller mounds next time.
- No-mold layering: Use about two-thirds of the batter for the first mounds and reserve the rest for topping.
- For ring molds: Grease well and fill only halfway to two-thirds full.
- For taller pancakes: Use 3 egg whites and 2 yolks, keeping the other ingredients the same, but fold carefully.
- Pancake mix shortcut: Use the shortcut formula in the guide above; the mix replaces the dry base, not the whipped egg whites.
- Storage: Best fresh. Leftovers can be refrigerated for 1 day, but they will lose height and jiggle.