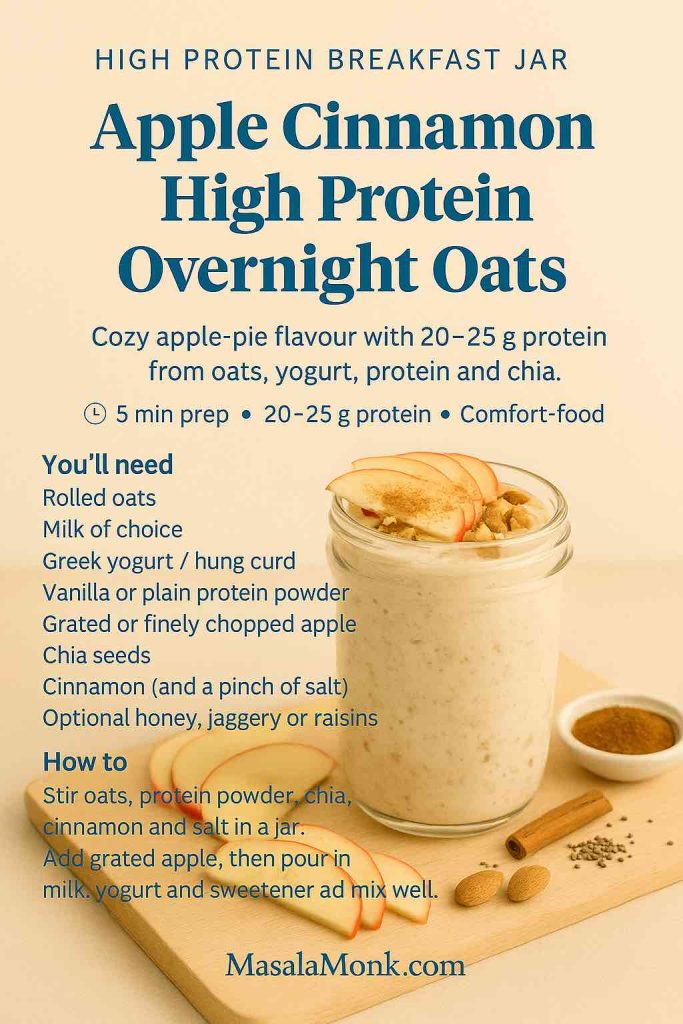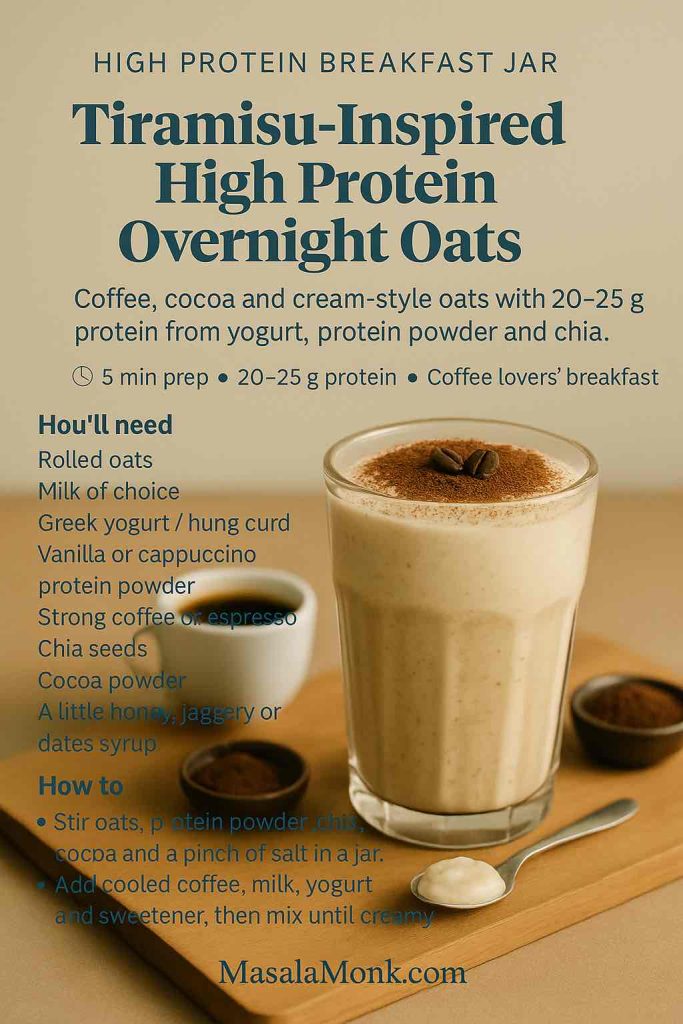
Posted on Leave a comment

Scrambled Eggs with Cottage Cheese Recipe

Scrambled eggs with cottage cheese served on a plate with toast, chives, and black pepper.

Scrambled eggs with cottage cheese can go one of two ways: creamy, soft, and surprisingly good, or loose and a little strange. The difference is not luck. It is the ratio, the cottage cheese you use, and how gently you cook the eggs.

This recipe is built for the good version: high-protein scrambled eggs that stay tender, creamy, and satisfying without turning wet or rubbery. It walks you through the ratio, the smoother blended option, the egg-white version, microwave method, add-ins, and the fixes that keep cottage cheese eggs from turning watery.

This is especially useful if you want a higher-protein breakfast but still want food that feels warm, familiar, and satisfying. It is not trying to turn eggs into a diet trick; it is just a better, creamier scramble with more staying power.

Quick Answer: How to Make Scrambled Eggs with Cottage Cheese

To make scrambled eggs with cottage cheese, whisk 2 large eggs with 1/4 cup cottage cheese, then cook the mixture gently in a nonstick skillet over medium-low heat. Push the eggs slowly with a silicone spatula until they are thickened, creamy, and just set through.

Best Starting Ratio

The best starting ratio is 1/4 cup cottage cheese for every 2 eggs. Small-curd 2% cottage cheese gives the most reliable texture, while full-fat cottage cheese tastes richer. If the eggs look loose in the pan, use less cottage cheese next time, drain very liquid cottage cheese, avoid high heat, and cook gently long enough for extra moisture to evaporate.

The full cottage cheese egg ratio guide below shows how to make the eggs subtler, creamier, or better suited to egg whites.

You do not need milk here. Cottage cheese already adds moisture and body, so milk can push the eggs toward watery instead of creamy.

If your last batch turned loose or watery, skip ahead to the watery cottage cheese egg fixes before you cook again.

At a glance: Use 4 large eggs, 1/2 cup / 110–120g cottage cheese, and 1 tablespoon / 14g butter for 2 servings. Cook in a nonstick skillet over medium-low heat for 4–5 minutes. Most reliable cottage cheese: small-curd 2% or full-fat. Texture goal: creamy, soft, and fully set, not runny.

Ratio guide showing 2 eggs with 1/4 cup cottage cheese and 4 eggs with 1/2 cup cottage cheese.
For the easiest cottage cheese egg ratio, start with 1/4 cup cottage cheese for every 2 large eggs. Then adjust slightly if your cottage cheese is extra thick or watery.

What the Texture Should Look Like

The goal is not a runny protein hack or a rubbery diet scramble. The best version should taste like soft scrambled eggs with a little extra creaminess, body, and staying power.

Done right, the eggs taste creamy and lightly savory, not aggressively cheesy. The curds soften into the scramble, the pepper gives it a little lift, and a handful of chives or scallions makes the whole plate feel fresher.

A good plate feels simple but a little upgraded: soft eggs, gentle creaminess from the cottage cheese, enough protein to hold you over, and a texture that still feels like breakfast instead of a food trend.

Close-up of creamy scrambled eggs with cottage cheese showing soft folds, chives, pepper, and no pooling liquid.
Look for soft folds that hold together on the fork. That texture means the eggs are creamy and set, rather than loose, wet, or overcooked.

Why Add Cottage Cheese to Scrambled Eggs?

Cottage cheese changes scrambled eggs in three useful ways: it adds protein, makes the eggs more satisfying, and gives them a creamy texture when cooked gently. It is also mild enough that the eggs still taste like eggs, especially if you use a balanced ratio and season them well.

More Protein Without Protein Powder

Eggs are already a strong breakfast ingredient, but cottage cheese makes them more filling. That is why cottage cheese eggs are popular with people looking for high-protein breakfasts, lighter brunch ideas, and quick post-workout meals.

The exact protein will depend on your eggs and cottage cheese brand. If you are tracking closely, use the nutrition label on your cottage cheese and a food database such as USDA FoodData Central.

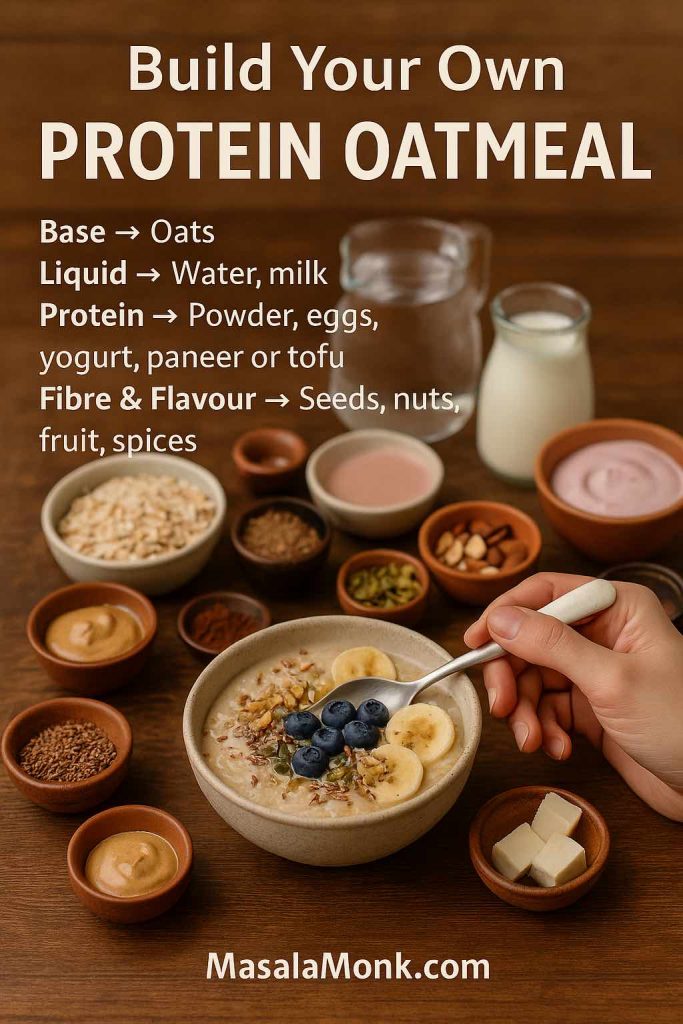
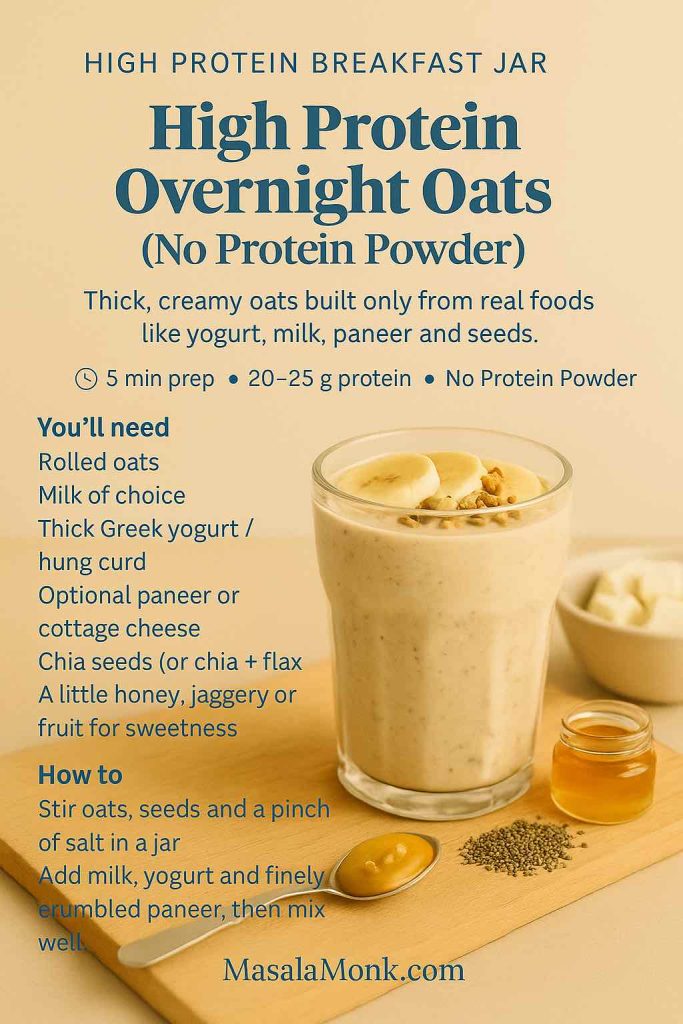
For another breakfast built around everyday protein-rich ingredients, this protein oatmeal guide uses options like eggs, yogurt, cottage cheese, paneer, nuts, and seeds without relying only on protein powder.

Creamier Texture When Cooked Gently

Cottage cheese adds moisture and body to the eggs. With medium-low heat, the curds soften into the scramble and help the eggs stay tender. With high heat, the eggs can tighten too quickly and turn rubbery before the cottage cheese has a chance to settle into the mixture.

Mild Flavor, Easy Add-Ins

These eggs do not have to taste strongly of cottage cheese. If you use small-curd cottage cheese and whisk it in well, the flavor is mild, creamy, and lightly savory. Chives, scallions, black pepper, hot sauce, chili crisp, avocado, spinach, and toast all work well with the flavor.

Ingredients for Scrambled Eggs with Cottage Cheese

You only need a few ingredients, but each one affects the final texture. In a simple recipe like this, small choices matter: the cottage cheese style, pan heat, and amount of salt all change the result.

Ingredients for scrambled eggs with cottage cheese including eggs, cottage cheese, butter, pepper, salt, and chives.
Because this recipe uses only a few ingredients, each choice matters. Thick cottage cheese, light salt, black pepper, and fresh chives help the scramble taste balanced.

Eggs

Use large eggs. Four large eggs make two servings, while two large eggs plus 1/4 cup cottage cheese make a good single serving. Whole eggs give the best flavor, color, and structure. You can add egg whites for more protein, but an all-egg-white cottage cheese scramble is easier to overcook and can turn thin if the ratio is not controlled.

Cottage Cheese

Use 1/2 cup / about 4 oz / 110–120g cottage cheese for 4 eggs, or 1/4 cup / 55–60g cottage cheese for 2 eggs. Small-curd cottage cheese is the easiest choice because it blends into the eggs more naturally. Large-curd cottage cheese works, but the curds stay more visible.

For the most reliable texture, use 2% cottage cheese. Full-fat cottage cheese gives richer eggs. Fat-free cottage cheese can work, but it often contains more moisture, so it can make the eggs wetter if you use too much.

Butter, Oil, or Cooking Spray

Butter gives the richest flavor and helps the eggs cook into soft folds. Use 1 tablespoon / 1/2 oz / 14g butter for 4 eggs. Olive oil works well if you want something lighter; use 1–2 teaspoons / 5–10ml. Cooking spray is fine for a lower-calorie version, but use a truly nonstick pan and keep the heat gentle.

Salt, Pepper, and Herbs

Cottage cheese is already salty, so season carefully. Start with black pepper and only a tiny pinch of salt, then taste after cooking. Chives, scallions, dill, parsley, and cracked black pepper are especially good here.

Best Cottage Cheese for Scrambled Eggs

The most reliable cottage cheese for scrambled eggs is small-curd 2% cottage cheese. It is creamy enough to soften into the eggs but not so rich that the scramble feels heavy. It also tends to behave better in the pan than watery fat-free cottage cheese.

Three bowls comparing small-curd, full-fat, and watery fat-free cottage cheese for scrambled eggs.
For most batches, 2% small-curd cottage cheese is the safest starting point because it softens into the eggs more evenly, while watery cottage cheese can loosen the scramble.

Small-Curd vs Large-Curd Cottage Cheese

The smaller curd disperses more evenly and gives a softer texture. Large-curd cottage cheese is fine if you like visible curds, but it can make the eggs look more uneven.

Small-curd and large-curd cottage cheese scrambled eggs compared side by side.
A smaller curd gives smoother scrambled eggs, while large-curd cottage cheese keeps more visible texture. Choose the one that matches how much curd you want to notice.

If you are cooking for someone who is skeptical of cottage cheese, use small-curd cottage cheese or blend the eggs and cottage cheese together for a smoother scramble.

For the full texture breakdown, compare the whisk, blend, and fold methods.

2%, Full-Fat, or Fat-Free?

Cottage Cheese Type Result in Scrambled Eggs Best Use
2% Creamy, balanced, reliable Best everyday choice
Full-fat Richest and softest Best for extra-creamy eggs
Low-fat Can work well, depending on brand Good if it is thick, not watery
Fat-free More likely to release moisture Use less and cook gently

If your cottage cheese looks especially liquidy, spoon off a little of the excess before adding it to the eggs. Thick, creamy cottage cheese gives you a much easier path to a soft scramble.

Should You Blend the Cottage Cheese First?

Blend the cottage cheese with the eggs if you want a smooth texture with no visible curds. Do not blend if you like the soft, slightly cheesy texture of cottage cheese eggs. For most people, whisking small-curd cottage cheese directly into the eggs is enough.

Scrambled Eggs with Cottage Cheese Ratio Guide

Start with the Balanced Ratio

The safest starting ratio is 1/4 cup cottage cheese for every 2 large eggs. Another way to think of it is about 1–2 tablespoons cottage cheese per egg, depending on how creamy or subtle you want the scramble.

If you are nervous about curds or wateriness, start with 2 tablespoons cottage cheese for 2 eggs. Then, if you love cottage cheese and want a creamier, more filling scramble, increase slightly without overloading the eggs.

Ratio Options by Texture

Style Eggs Cottage Cheese Metric Best For
Subtle / beginner 2 large eggs 2 tbsp 25–30g Less curdy, safer first try
Balanced default 2 large eggs 1/4 cup 55–60g Creamy, high-protein everyday eggs
Family batch 4 large eggs 1/2 cup / about 4 oz 110–120g Main recipe-card version
Extra creamy 2 large eggs 1/3 cup 75–80g More cottage-cheese-forward
Egg-white boosted 2 eggs + 1/4–1/3 cup egg whites 1/4 cup 60–80ml egg whites + 55–60g cottage cheese Higher-protein version
Cottage cheese scrambled eggs ratio guide showing subtle, balanced, extra creamy, and egg-white boosted versions.
The ratio changes the whole scramble. Start balanced, then go lighter for subtle cottage cheese flavor or creamier when you want a more filling breakfast.

What Testing Showed

After testing the whisked, blended, and folded versions, the tradeoff is simple: the whisked 2-eggs-to-1/4-cup cottage cheese ratio is the most reliable everyday balance. Blending makes the smoothest scramble, but it tastes a little less like classic soft eggs. Folding the cottage cheese in near the end gives the most visible curds and works only when the cottage cheese is thick, not watery.

For your first try, choose the balanced default. Once you know how your cottage cheese behaves in the pan, you can go lighter, smoother, or more cottage-cheese-forward next time.

Make this first: If this is your first time making scrambled eggs with cottage cheese, use 2 eggs, 1/4 cup / 55–60g cottage cheese, 1/2 tablespoon butter, black pepper, and medium-low heat. It is the safest balance of creamy, high-protein, and not too wet.

Once the ratio is set, use the gentle stovetop method to keep the eggs creamy instead of dry.

How to Make Scrambled Eggs with Cottage Cheese

The whole recipe comes down to gentle heat and patience. A few quiet minutes in the pan can turn the eggs into soft, creamy folds instead of dry curds or a loose scramble.

Step-by-step guide showing eggs being whisked, cottage cheese being added, eggs cooking gently, and the finished scramble.
The steps are simple, but the heat does the real work. Cook slowly so the eggs gather into soft folds instead of tightening into dry curds.

Step 1: Whisk the Eggs

Crack the eggs into a mixing bowl and whisk until the yolks and whites are fully combined. This helps the cottage cheese distribute evenly instead of sitting in pockets.

Step 2: Add the Cottage Cheese

Whisk in the cottage cheese, black pepper, and only a small pinch of salt. If you want smoother eggs, blend the eggs and cottage cheese for a few seconds instead of whisking by hand.

Step 3: Heat the Pan Gently

Warm a nonstick skillet over medium-low heat. For 2 eggs, an 8-inch skillet works well. For 4 eggs, use a 10-inch skillet. Add butter or oil and let it melt without browning.

Step 4: Cook Slowly Into Soft Folds

Pour in the egg mixture. Let the edges set for 10–20 seconds, then use a silicone spatula to slowly push the eggs from the outside of the pan toward the center. Keep moving gently so the eggs gather into soft, creamy folds instead of breaking into tiny dry curds. The pan should look calm, not sizzling.

Scrambled eggs with cottage cheese cooking gently in a nonstick pan with a silicone spatula.
A quiet pan is a good sign. When the eggs move slowly under the spatula, they have time to turn creamy before they dry out.

Step 5: Stop While Creamy, Not Runny

Remove the eggs from the heat when they are thickened, creamy, and set through. They will keep cooking slightly from residual heat, so do not wait until they look completely dry in the pan.

You will know they are ready when the eggs hold soft folds on the spatula, look creamy instead of shiny-wet, and slide onto the plate without liquid pooling behind them. If the eggs look glossy but hold together, they are usually ready; if liquid runs around them, give them a little more time over gentle heat.

Doneness guide for cottage cheese scrambled eggs showing too wet, just right, and too dry textures.
“Just right” is creamy but not runny. If the eggs still slide apart with liquid around them, keep them on gentle heat a little longer.

If the eggs still look shiny, separated, or loose, the troubleshooting section will help you fix the next batch.

For food safety, scrambled eggs should be cooked until they are not runny. The FDA’s egg safety guidance recommends cooking egg dishes thoroughly, especially when serving children, older adults, pregnant people, or anyone with a weakened immune system.

Whisk, Blend, or Fold? Three Texture Options

There is more than one way to add cottage cheese to scrambled eggs. The best method depends on whether you want the cottage cheese to disappear into the eggs or stay slightly visible.

Method How to Do It Texture Best For
Whisk Whisk cottage cheese into raw eggs Soft, lightly curdy, fluffy Best everyday version
Blend Blend eggs and cottage cheese briefly Smooth and creamy Cottage-cheese skeptics
Fold Cook eggs first, then fold cottage cheese near the end More visible curds People who like cottage cheese texture
Whisk, blend, and fold methods for adding cottage cheese to scrambled eggs.
Whisking is the everyday method, blending makes the smoothest cottage cheese eggs, and folding gives the most noticeable curd texture.

Choose blended if visible curds bother you, whisked for the easiest weekday scramble, and folded only if you actually enjoy the cottage cheese texture.

Using egg whites changes the texture, so check the egg-white version before swapping out too many yolks.

When Should You Add the Cottage Cheese?

Add cottage cheese before cooking for the whisked or blended versions. Fold it in near the end only if you want a more visible cottage cheese texture and your cottage cheese is thick enough not to loosen the eggs.

Egg Whites with Cottage Cheese

Egg whites with cottage cheese are useful if you want a lighter, higher-protein scramble, but the ratio matters. Because they contain more water than yolks, they need a little more care in the pan. Use too many whites with too much cottage cheese, and the eggs can turn thin.

Best Egg-White Ratio

For the creamiest texture, keep at least some whole egg in the scramble. The yolk adds flavor, color, and a little structure, which helps the egg whites feel less flat.

Version Use This Ratio Texture
Balanced egg-white boost 2 eggs + 1/4 cup / 60ml egg whites + 1/4 cup / 55–60g cottage cheese Creamy, lighter, still flavorful
Leaner version 1 egg + 1/2 cup / 120ml egg whites + 2–3 tbsp cottage cheese Lighter, less rich, more delicate
All egg whites 3/4 cup / 180ml egg whites + 2 tbsp cottage cheese Leanest, but easiest to overcook or make watery
Egg-white cottage cheese scrambled eggs ratio guide with balanced, leaner, and all-egg-white versions.
Egg whites add protein, but they also add water. Keeping one yolk in the mix helps cottage cheese eggs stay creamy, structured, and less likely to turn thin.

If your egg-white scramble turns thin, the watery egg fixes explain how to adjust the cottage cheese and heat.

Lighter High-Protein Version

For a lighter plate, use 1 whole egg, 1/2 cup / 120ml egg whites, and 2–3 tablespoons cottage cheese. Serve it with spinach, tomatoes on the side, or avocado toast depending on whether you want a lower-calorie breakfast or a more filling meal. It is not a shortcut or a promise; it is simply a protein-rich breakfast that can fit into many eating styles depending on what you serve with it.

How to Keep Egg-White Cottage Cheese Eggs from Getting Watery

Use a thick cottage cheese, skip the milk, and cook over medium-low heat until the eggs are set through. If liquid starts pooling in the pan, keep the heat gentle and give the eggs a little more time. Do not crank the heat up to rush them; that usually makes the eggs rubbery before the moisture cooks off.

Macro-Friendly Add-Ins

Spinach, mushrooms, scallions, tomatoes on the side, hot sauce, and herbs all work well. If you are adding mushrooms, peppers, or vegetables that release moisture, cook them first so they do not loosen the eggs.

Microwave Cottage Cheese Scrambled Eggs

The skillet version tastes best, but microwave cottage cheese eggs are useful for busy mornings, office breakfasts, and quick solo meals. The texture will be firmer than stovetop scrambled eggs, so cook in short bursts and stir often.

Mug Method for One

Whisk 1 large egg with 1 tablespoon / about 15g cottage cheese in a large microwave-safe mug. Add black pepper and a tiny pinch of salt if needed. Microwave for 30 seconds, stir, then microwave in 15–30 second bursts until the egg is just set through.

Microwave cottage cheese scrambled eggs made in a mug with a whisked egg mixture and a finished bowl of eggs.
For microwave cottage cheese eggs, short bursts are safer than one long cook. Stirring between rounds helps the center set without turning spongy.

Microwave Texture Tips

  • Use a bigger mug than you think you need.
  • Stir between bursts so the egg cooks evenly.
  • Microwave power varies, so treat the final 15–30 seconds as flexible.
  • Stop when the egg is just set, then let it stand for 20–30 seconds before eating.
  • Add herbs, hot sauce, or chives after cooking.
  • For 2 eggs, use a small microwave-safe bowl instead of a narrow mug.

Add-Ins and Serving Ideas

Scrambled eggs with cottage cheese are mild enough to go savory, spicy, herby, or brunch-style. Avoid adding raw vegetables that release a lot of water directly to the pan in large amounts. Instead, cook them first or serve them on the side.

Best Add-Ins for the Eggs

Add-In How to Use It Notes
Spinach Wilt before or during cooking Adds volume and color
Mushrooms Cook first Prevents loose eggs
Bell pepper Dice small and sauté first Good for veggie scrambles
Scallions or chives Add near the end Fresh, simple, and not watery
Tomatoes Serve on the side or add cooked Raw tomatoes can release water
Chili crisp or hot sauce Add after cooking Best for flavor contrast
Everything bagel seasoning Sprinkle after cooking Use lightly because it is salty
Add-ins for cottage cheese scrambled eggs including cooked spinach, mushrooms, chives, tomatoes, and hot sauce.
Add-ins work best after the moisture is under control. Cook mushrooms, spinach, and peppers first, then finish with herbs, hot sauce, or chili crisp.

Three Easy Ways to Serve Them

  • Simple weekday plate: cottage cheese eggs, buttered toast, black pepper, and chives.
  • Avocado toast version: mashed avocado, creamy eggs, chili crisp, and scallions on sourdough.
  • Breakfast taco version: warm tortilla, cottage cheese eggs, potatoes, salsa, and hot sauce.
Three serving ideas for cottage cheese scrambled eggs with toast, avocado toast, and a breakfast taco.
Once the base scramble is right, it can go three ways: a simple toast plate, creamy avocado toast, or a breakfast taco with potatoes and salsa.

What to Serve with Cottage Cheese Eggs

  • Buttered sourdough toast
  • Avocado toast
  • Breakfast tacos
  • Roasted potatoes or air fryer hash browns
  • Sautéed spinach or mushrooms
  • Fresh tomatoes
  • Fruit on the side
  • Hot sauce, chili crisp, or salsa

For the easiest plate, keep it simple: creamy eggs, crisp toast, something fresh, and something sharp or spicy. A little hot sauce, salsa, chili crisp, or black pepper keeps the cottage cheese from making the plate taste too mild.

Cottage cheese scrambled eggs served with crispy potatoes, fresh tomatoes, and hot sauce.
A few sides make the eggs feel complete. Crisp potatoes add contrast, tomatoes add freshness, and hot sauce cuts through the creamy cottage cheese.

If you want to turn the eggs into a handheld breakfast, tuck them into a tortilla with potatoes, peppers, salsa, or avocado. This breakfast burrito recipe has more ideas for building a filling wrap without making it soggy.

How to Fix Watery or Loose Cottage Cheese Eggs

If your first batch is not perfect, do not write off the recipe. Cottage cheese brands vary a lot, and one small ratio or heat adjustment usually fixes it.

This is the section to read if you tried cottage cheese eggs once and wondered why everyone else seemed to be getting a creamy scramble while yours looked loose, shiny, or separated.

If your eggs tasted good but looked loose, shiny, or a little separated, the recipe probably does not need to be abandoned. It usually just needs less liquid, thicker cottage cheese, or gentler heat.

Watery cottage cheese scrambled eggs compared with creamy set eggs in a troubleshooting guide.
Watery cottage cheese eggs usually come from too much liquid, high heat, or a loose cottage cheese brand. Fix those first before changing the whole recipe.

Why Cottage Cheese Eggs Turn Watery

  • Too much cottage cheese
  • Very liquid cottage cheese
  • Watery fat-free or low-fat cottage cheese
  • Heat that was too high
  • Not enough gentle cooking time
  • Raw mushrooms, tomatoes, or peppers
  • Too many egg whites
  • Added milk

Troubleshooting Watery Cottage Cheese Eggs

What Happened Most Likely Cause Next Batch Fix
Eggs tasted good but looked loose Too much liquid in the cottage cheese Drain the cottage cheese or use 2 tbsp per 2 eggs
Eggs turned rubbery and wet Heat was too high Use medium-low heat and cook a little longer
Eggs looked separated Curds released moisture before the eggs set Whisk better, use thicker cottage cheese, and stir gently
Egg-white version turned thin Too much water from whites plus cottage cheese Keep one yolk or reduce cottage cheese to 2 tbsp
Diagnostic guide showing fixes for loose, rubbery, separated, and thin egg-white cottage cheese eggs.
Use the pan clues to fix the next batch: drain liquidy cottage cheese, lower the heat, stir gently, or keep one yolk when using egg whites.

Fixes Before Cooking

Problem to Prevent What to Do
Cottage cheese looks liquidy Spoon off excess liquid or use slightly less cottage cheese
You dislike curds Blend the cottage cheese with the eggs
You want less moisture Use 2 tbsp cottage cheese per 2 eggs
Using vegetables Cook moisture-heavy vegetables first
Using egg whites Keep at least one yolk or cook gently a little longer

Fixes While Cooking

What You See Fix
Liquid pooling in the pan Keep cooking gently and fold slowly until the extra moisture evaporates
Eggs setting too fast Lower the heat or remove the pan briefly
Curds separating Stir less aggressively and use lower heat
Eggs getting rubbery Pull from the heat sooner next time and use medium-low heat

What Not to Do

  • Skip the milk; cottage cheese already brings moisture.
  • Avoid high heat, which can make the eggs tighten before the moisture cooks off.
  • Do not start with an extra-heavy cottage cheese ratio on your first try.
  • Cook mushrooms, tomatoes, or peppers first if you are adding more than a small handful.
  • Once soft folds form, stir gently instead of aggressively breaking the eggs apart.

Once the ratio and heat are right, the recipe is simple: whisk, cook gently, stop while creamy, and serve while the eggs are still soft and warm.

Scrambled Eggs with Cottage Cheese Recipe

Soft, creamy scrambled eggs with cottage cheese for a protein-rich breakfast that feels cozy, filling, and ready in about 10 minutes.

Prep Time5 minutes
Cook Time4–5 minutes
Total Time10 minutes
Yield2 servings

Approximate nutrition: One serving, made with 2 large eggs, 1/4 cup cottage cheese, and 1/2 tablespoon butter, is usually around 220–270 calories with about 18–22g protein. Exact numbers depend on your cottage cheese brand and cooking fat. Because cottage cheese brands vary widely in protein, sodium, and moisture, treat these numbers as an estimate unless you calculate with your exact label.

Equipment

  • Mixing bowl
  • Whisk or fork
  • 10-inch nonstick skillet
  • Silicone spatula

Ingredients

  • 4 large eggs
  • 1/2 cup cottage cheese, about 4 oz / 110–120g, preferably small-curd 2% or full-fat
  • 1 tablespoon butter, about 1/2 oz / 14g, or 1–2 teaspoons / 5–10ml olive oil
  • 1/8 teaspoon fine salt, optional
  • Black pepper, to taste
  • 1 tablespoon chopped chives or scallions, optional

Method

  1. Crack the eggs into a mixing bowl and whisk until the yolks and whites are fully combined.
  2. Whisk in the cottage cheese, black pepper, and a tiny pinch of salt if using.
  3. Place a nonstick skillet over medium-low heat. Add the butter or oil and let it melt without browning.
  4. Pour in the egg mixture and let the edges begin to set for 10–20 seconds.
  5. Use a silicone spatula to slowly push the eggs from the outside of the pan toward the center, forming soft folds. The pan should look calm, not sizzling.
  6. Keep cooking gently until the eggs are thickened, creamy, and set through. If liquid runs around the eggs, give them another minute over gentle heat.
  7. Remove from the heat, sprinkle with chives or scallions if using, and serve immediately.

Notes

  • Blend the cottage cheese with the eggs first for a smoother texture.
  • Use 2 tablespoons cottage cheese per 2 eggs if you want less cottage cheese texture.
  • For an egg-white boosted version, use 2 eggs, 1/4 cup / 60ml egg whites, and 1/4 cup / 55–60g cottage cheese.
  • Salt lightly because cottage cheese is already salty.
  • Use medium-low heat. High heat can make the eggs rubbery.
  • Do not add milk; cottage cheese already adds moisture.
Saveable recipe card for scrambled eggs with cottage cheese showing the main ratio, cooking time, and method notes.
This saveable version keeps the formula simple: four eggs, half a cup of cottage cheese, medium-low heat, and no milk for a creamy two-serving scramble.

Once you make it once, adjust the ratio to match your cottage cheese and your pan. Some brands melt in softly, some release more liquid, and some taste saltier than others. The recipe gets easier after the first batch.

Storage and Reheating

These are absolutely best right from the pan, so treat leftovers as a backup breakfast rather than the main plan. Still, if you have extra, they can work if you cool and reheat them gently.

For the freshest texture, make the main recipe card version right before serving.

How Long Do They Keep?

Store leftover cottage cheese scrambled eggs in an airtight container in the refrigerator for up to 2 days. Let them cool before closing the container so steam does not create extra moisture.

How to Reheat Without Making Them Rubbery

Reheat in the microwave at reduced power in 15–30 second bursts, stirring gently between bursts. Stop as soon as the eggs are warm. You can also reheat them in a nonstick skillet over low heat.

For a freezer-friendly breakfast instead of fresh scrambled eggs, use the same soft-cooked egg logic in meal prep breakfast burritos, where the eggs need to stay tender without making the tortilla soggy.

Can You Freeze Cottage Cheese Scrambled Eggs?

I would not freeze them. Eggs and cottage cheese can both release moisture after thawing, so the texture usually suffers. For a better make-ahead breakfast, try egg muffins or a sliceable frittata instead.

When you need breakfast for a table instead of one skillet, a breakfast casserole with hash browns is a better make-ahead option than stovetop scrambled eggs.

Final Serving Texture Cue

Before you leave the recipe, remember the main visual cue: the eggs should look creamy, softly folded, and set enough to hold together on the plate.

Final serving of scrambled eggs with cottage cheese with toast, a fork, cottage cheese, and a warm breakfast table setting.
A good cottage cheese scramble should feel warm and familiar, with enough protein and creaminess to make breakfast last longer than plain eggs.

FAQs About Scrambled Eggs with Cottage Cheese

What does cottage cheese do to scrambled eggs?

Cottage cheese adds protein, creaminess, and a mild savory flavor. When cooked gently, it softens into the eggs and makes them more filling without needing milk or cream.

Do scrambled eggs with cottage cheese taste like cottage cheese?

They taste creamy, lightly savory, and only a little tangy. With the balanced ratio, the eggs still taste like eggs; the cottage cheese mostly adds body and richness.

Is it better to blend cottage cheese into eggs?

Blend it if you want smooth eggs with no visible curds. This is the best choice for anyone who likes the protein boost but does not want the cottage cheese texture. Whisk it in if you like a soft, lightly curdy scramble.

Why did my cottage cheese scrambled eggs turn watery?

They probably had too much cottage cheese, a very liquidy brand, too many egg whites, raw watery vegetables, milk, or not enough gentle cooking time. Use 1/4 cup cottage cheese per 2 eggs, choose a thicker cottage cheese, and cook over medium-low heat until the eggs are set through.

What type of cottage cheese works best?

Small-curd 2% cottage cheese is the most reliable everyday choice. Full-fat cottage cheese gives richer eggs. Fat-free cottage cheese can work, but it is more likely to release moisture.

Should I add milk to cottage cheese scrambled eggs?

Skip the milk here. Cottage cheese already brings moisture and body, and adding milk can push the scramble from creamy into loose or wet.

Are cottage cheese eggs good for a high-protein breakfast?

They are a strong high-protein breakfast, especially if you use the balanced ratio of eggs plus cottage cheese instead of stretching the scramble with milk. The exact protein depends on your egg size and cottage cheese label.

Do egg whites work with cottage cheese?

Egg whites work, but the best texture usually comes from keeping at least one whole egg in the mixture. The yolk adds flavor, color, and structure, so the scramble feels creamy instead of thin.

Can I make cottage cheese scrambled eggs in the microwave?

Yes. For one serving, whisk 1 large egg with 1 tablespoon cottage cheese in a large microwave-safe mug. Microwave for 30 seconds, stir, then cook in 15–30 second bursts until set. Let it stand briefly before eating so the center finishes without becoming spongy.

What is the best ratio of cottage cheese to eggs?

The best balanced ratio is 1/4 cup cottage cheese for every 2 large eggs. Use 2 tablespoons for a subtler version, or up to 1/3 cup if you want a richer cottage-cheese-forward scramble.

Can I use boiled eggs with cottage cheese instead?

Yes, but that becomes a different kind of meal. Boiled eggs with cottage cheese work as a quick snack plate, while chopped boiled eggs mixed with blended cottage cheese become a high-protein cottage cheese egg salad.

Back to top

Posted on 1 Comment

Overnight Oats Recipe: Best Base Ratio, Easy Flavors, Storage & Texture Fixes

Creamy overnight oats in a glass jar with fresh fruit, nuts, and a spoon lifting a thick bite.

This overnight oats recipe gives you one dependable breakfast jar, then shows you exactly how to adjust it. Start with rolled oats, milk, yogurt or chia, a little sweetness, and a few hours in the fridge. By morning, the oats soften into a creamy, spoonable breakfast with just enough chew — not watery, not gluey, and not bland.

The real secret is not one rigid formula. The best overnight oats depend on the consistency you like: creamy with yogurt, thicker with chia, lighter without yogurt, looser with extra milk, or higher-protein with Greek yogurt and protein powder. Once you know the base, you can turn the same chilled oats into peanut butter, mango, chocolate, apple cinnamon, coffee, banana, berry, or matcha overnight oats without learning a new recipe every time.

The goal is simple: you should be able to mix a jar at night, understand why the texture works, and know exactly what to do in the morning if it needs more milk, more chia, better toppings, or a little extra flavor.

Overnight Oats Guide

Use this guide to get the base ratio right first, then adjust the creaminess, toppings, storage, and flavor so breakfast fits your morning instead of turning into a soggy fridge experiment.

Quick Answer: The Best Overnight Oats Ratio

The basic overnight oats ratio

The best all-purpose overnight oats ratio is ½ cup rolled oats + ½ cup milk + ¼ cup Greek yogurt or thick curd. In metric, that is about 40 g oats, 120 ml milk, and 60 g yogurt. This gives you creamy overnight oats that are soft, spoonable, and not too watery.

The no-yogurt ratio

For overnight oats without yogurt, go with ½ cup rolled oats + ⅔ cup milk + 1 tablespoon chia seeds. The extra milk helps the oats soften, while chia seeds thicken the mixture so it still feels creamy.

Best oats and chill time

Rolled oats or old-fashioned oats give the best bite. After mixing, let the jar rest for 5 minutes, then stir again before refrigerating to prevent chia clumps and dry pockets. Chill for at least 4 hours, though overnight, about 8 hours, gives the creamiest result.

Overnight oats ratio guide showing creamy classic, no-yogurt, extra-thick, looser, and protein versions.
Use the classic overnight oats ratio as your starting point, then adjust milk, yogurt, chia seeds, or protein powder to make the jar thicker, looser, lighter, or more filling.

Ratio variations at a glance

StyleOatsLiquidYogurt / ChiaBest For
Creamy classic½ cup / 40 g½ cup / 120 ml¼ cup / 60 g yogurt + 1–2 tsp chiaBest default consistency
No yogurt½ cup / 40 g⅔ cup / 160 ml1 tbsp chiaDairy-free or lighter oats
Extra thick½ cup / 40 g½ cup / 120 ml¼ cup / 60 g yogurt + 1 tbsp chiaPudding-like oats
Looser½ cup / 40 g¾ cup / 180 mlOptional yogurt or 1 tsp chiaSofter porridge-style oats
Protein powder½ cup / 40 g¾ cup / 180 ml to start1 scoop protein + optional yogurtHigher-protein meal prep

Once you know the ratio, you can jump straight to the recipe card or use the troubleshooting guide if your oats usually turn too thick, watery, mushy, or clumpy. Using protein powder? The protein powder tips section explains why the jar may need extra milk after chilling.

Why This Overnight Oats Recipe Works

The method works because it balances three things: enough liquid to soften the oats, enough body to keep the breakfast creamy, and enough flavor so it does not taste flat by morning. Rolled oats absorb milk slowly, yogurt or curd adds creaminess, chia seeds help everything set, and a pinch of salt makes the sweet flavors taste brighter.

The second stir matters too. When oats, chia, yogurt, and milk sit for a few minutes, they begin to thicken. Stirring again before refrigerating spreads the chia seeds evenly and prevents dry oats or thick clumps from settling at the bottom. You can see the technique in the second-stir step.

That is what makes the core recipe flexible without feeling random. You can make it creamier with yogurt, thicker with chia, lighter with more milk, sweeter with ripe fruit, or more filling with protein powder or nut butter, while still keeping the same basic method.

Overnight Oats at a Glance

Before you start, here are the practical details that make the recipe easier to repeat.

At-a-glance overnight oats guide with prep time, chill time, rolled oats, jar size, storage, and cold or warm serving notes.
Once the timing is clear, overnight oats become easy to repeat: mix in minutes, chill until creamy, and finish with toppings when you are ready to eat.
DetailBest Answer
Best oatsRolled oats or old-fashioned oats
Prep time5 minutes
Cook time0 minutes
Chill time4 hours minimum; overnight / 8 hours best
Best container size12–16 oz / 350–500 ml; 16 oz is best with toppings
Fridge temperature40°F / 4°C or below
Best storage windowBest in 1–3 days; plain oats usually 3–4 days
Eat cold or warm?Usually cold; can be warmed 30–60 seconds with a splash of milk

If you only want one version to try first, make the creamy classic below. It gives you enough body from yogurt, enough softness from milk, and just a little chia for structure without turning the oats stiff.

Overnight Oats Recipe Card

Creamy Overnight Oats Recipe

This overnight oats recipe is the dependable starting mix: creamy, lightly thickened, easy to flavor, and flexible enough for yogurt, curd, dairy-free milk, chia, fruit, nuts, or protein add-ins.

Prep Time5 minutes

Cook Time0 minutes

Chill Time4 hours minimum

Yield1 breakfast jar

Ingredients

  • ½ cup rolled oats or old-fashioned oats, about 40 g
  • ½ cup milk of choice, 120 ml / 4 fl oz
  • ¼ cup Greek yogurt or thick curd, about 60 g
  • 1–2 teaspoons chia seeds, about 4–8 g
  • 1–2 teaspoons maple syrup, honey, date syrup, or jaggery syrup, 5–10 ml
  • ¼ teaspoon vanilla extract
  • Pinch of fine salt
  • Fruit, nuts, seeds, nut butter, cinnamon, cocoa, coconut, or granola for topping

Instructions

  1. Add the oats, milk, yogurt or curd, chia seeds, sweetener, vanilla, and salt to a jar or lidded container.
  2. Stir very well, scraping the bottom and sides so there are no dry oats, chia clumps, or yogurt pockets.
  3. Let the mixture sit for 5 minutes, then stir again. This second stir helps the chia seeds spread evenly and gives a smoother result.
  4. Cover and refrigerate for at least 4 hours. For the best consistency, chill overnight.
  5. In the morning, stir again. If the oats are too thick, loosen with 1–3 tablespoons milk.
  6. Add fresh fruit, crunchy toppings, nuts, granola, or extra nut butter right before serving.

Recipe Notes

  • No yogurt? Combine ½ cup oats, ⅔ cup milk, and 1 tablespoon chia seeds, or see the no-yogurt ratio for the texture logic.
  • Want a thicker, pudding-like jar? Increase the chia seeds to 1 tablespoon.
  • Adding protein powder? Use 1 scoop and increase the milk by about ¼ cup / 60 ml; see the protein powder tips if your oats turn stiff or clumpy.
  • Need more sweetness? Taste in the morning and adjust then, so the jar does not become dessert-sweet overnight.
  • For the smoothest mix, stir everything in a bowl first, then transfer it to a jar after the second stir.
  • Need more topping guidance? Add crunchy toppings in the morning, or jump to when to add overnight oats toppings.
  • Nutrition varies by milk, yogurt, sweetener, and toppings. The base jar is generally more balanced when it includes yogurt or another protein source, while nut butter, granola, dried fruit, chocolate chips, and syrup can raise calories quickly.

Storage

Overnight oats taste best in the first 1–3 days. A plain sealed serving can usually keep for 3–4 days in the refrigerator at 40°F / 4°C or below. Add delicate fruit, nuts, seeds, and granola closer to serving for the best consistency.

Saveable creamy overnight oats recipe card with oats, milk, yogurt, chill time, second stir tip, topping timing, and storage note.
This base overnight oats recipe gives you the formula to return to whenever you want a make-ahead breakfast without guessing the liquid, chill time, or topping timing.

Want to change the thickness? Use the ratio guide. Want to keep the same base but change the taste? Go to the flavor ideas.

First time making overnight oats? Start with the creamy classic ratio, keep toppings simple, and adjust the thickness in the morning. After one serving, you will know whether you prefer more milk, more chia, or less yogurt.

Overnight Oats Ratio Guide

The easiest way to build the base is to start with equal parts oats and milk, then decide whether you want yogurt, chia, or both. Yogurt makes the oats creamier and more filling. Chia does a different job: it makes the jar thicker and more pudding-like. Extra milk gives you a looser, softer consistency.

Creamy classic ratio

This is the version to start with if you are making overnight oats for the first time. For a creamy everyday texture, combine ½ cup rolled oats, ½ cup milk, and ¼ cup yogurt or curd. It gives you a satisfying breakfast without making the oats too stiff.

Yogurt vs No-Yogurt Overnight Oats

Go this route when you want dairy-free, vegan, or lighter overnight oats. Instead of yogurt, combine ½ cup rolled oats, ⅔ cup milk, and 1 tablespoon chia seeds. Chia replaces some of the body you would normally get from yogurt.

Side-by-side comparison of overnight oats with yogurt and no-yogurt overnight oats thickened with chia seeds.
Yogurt makes overnight oats creamier and tangier, while the no-yogurt version needs extra milk and chia seeds to stay thick and spoonable.

Extra-thick chia ratio

For a thicker, pudding-like result, keep the classic ratio but increase chia seeds to 1 tablespoon. This works especially well with cocoa, peanut butter, banana, and coffee flavors.

Looser porridge-style ratio

If you like softer oats with more movement, combine ½ cup oats and ¾ cup milk, with yogurt or chia kept optional. This version feels closer to chilled porridge.

Texture tip: Overnight oats thicken as they sit. A jar that looks slightly loose at night can be perfect by morning, while a jar with chia or protein powder may need extra milk after chilling.

Choose your overnight oats texture

There is no single perfect consistency. Some people want oats thick enough to hold a spoon upright, while others want something closer to chilled porridge. Use this as your shortcut.

If You Like…Best Adjustment
Thick, spoonable oatsAdd yogurt plus 1 tablespoon chia seeds.
Soft, loose oatsUse ¾ cup milk for every ½ cup oats.
Less tangUse less yogurt and more milk.
More natural sweetnessMix in mashed banana, mango, grated apple, berries, or applesauce.
More staying powerAdd Greek yogurt, soy milk, chia, protein powder, peanut butter, or nut butter.
A lighter breakfastUse milk plus chia instead of yogurt, and keep toppings simple.

If your oats still do not come out the way you like, the texture guide and fixes section will help you adjust the next batch.

How to Scale Overnight Oats for Meal Prep

For meal prep, mix the oats in a large bowl first, then divide them into jars. This is easier than trying to stir several full containers one by one, and it helps every serving taste consistent.

Large bowl of overnight oats being mixed and portioned into several jars for meal prep.
For overnight oats meal prep, mix the base in one bowl first and then divide it into jars, so every serving has the same texture and flavor.
ServingsRolled OatsMilkYogurt / CurdChia Seeds
1 jar½ cup / 40 g½ cup / 120 ml¼ cup / 60 g1–2 tsp
3 jars1½ cups / 120 g1½ cups / 360 ml¾ cup / 180 g1–2 tbsp
5 jars2½ cups / 200 g2½ cups / 600 ml1¼ cups / 300 g1½–3 tbsp

Equipment for Overnight Oats

You do not need special equipment, but the right container makes the oats easier to mix, store, and eat. A jar that is too small might technically hold the ingredients, but it will not give you much room to stir or add toppings.

Best Jar Size for Overnight Oats

Use the jar size as a texture tool, not just a container choice. A little extra room makes stirring easier and keeps fruit or crunchy toppings from spilling over.

Jar size guide for overnight oats showing 8-ounce, 12-ounce, and 16-ounce jars with different fill levels.
A 12-ounce jar works for a basic serving, but a 16-ounce jar gives you more room to stir, add fruit, and keep toppings from spilling over.
  • Jar or lidded container: 12–16 oz / 350–500 ml for one serving.
  • 16 oz / 475–500 ml jar: best if you want room for fruit, nuts, yogurt, and stirring.
  • Mixing bowl: useful when making 3–5 servings at once.
  • Spoon or mini spatula: helpful for scraping the bottom and sides so chia seeds and oats do not clump.
  • Measuring cups and spoons: important until you know the consistency you like.
  • Microwave-safe bowl: optional, only if you plan to warm the oats.

Ingredients You Need for Overnight Oats

A good jar starts with a simple oat mixture, then gets its personality from fruit, spices, nuts, seeds, nut butter, cocoa, coffee, or coconut. Here is what each ingredient does.

Overnight oats ingredients guide with rolled oats, milk, yogurt or curd, chia seeds, sweetener, vanilla, salt, and toppings.
The best overnight oats start with a simple base: rolled oats, liquid, something creamy or thickening, a little seasoning, and toppings added with purpose.

Rolled oats or old-fashioned oats

Rolled oats are the safest default because they soften well while keeping a little texture. Old-fashioned oats and rolled oats can usually be used the same way. For a deeper oat-type breakdown, see this MasalaMonk guide to oats types, nutrition, and differences.

For a quick comparison of rolled oats, quick oats, instant oats, steel-cut oats, and muesli in this recipe, see the best oats for overnight oats section below.

Milk

Dairy milk, oat milk, almond milk, soy milk, coconut milk, and cashew milk can all work. Soy milk and dairy milk add a little more protein. Oat milk and coconut milk make the breakfast creamier, while almond milk keeps it lighter.

Yogurt or thick curd

Greek yogurt or thick curd makes the oats creamier, tangier, and more filling. When your curd is very sour, use a smaller amount and balance it with fruit, vanilla, cinnamon, or a little sweetener.

Chia seeds

Chia seeds thicken the oats and help hold the liquid. Add 1–2 teaspoons for light thickening or 1 tablespoon for a pudding-like result. Too much chia can make the texture feel gluey, so increase it gradually.

If you like the thicker, pudding-style side of overnight oats, you may also enjoy these chia pudding recipes, which use chia as the main thickener rather than a small supporting ingredient.

Sweetener

Maple syrup, honey, date syrup, jaggery syrup, or a mashed ripe banana all work. Start light because fruit and toppings can add sweetness later.

Vanilla, salt, and spices

A tiny pinch of salt makes overnight oats taste less flat. Vanilla, cinnamon, cardamom, cocoa, nutmeg, ginger, or instant espresso powder can also change the flavor without changing the base method.

Toppings

Fruit, nuts, seeds, granola, coconut, peanut butter, almond butter, jam, chocolate chips, or roasted makhana can all work. Soft mix-ins can go in at night, while crunchy toppings are better in the morning. For a quick way to build a better jar, see the topping builder.

Build Better Overnight Oats Toppings

Choose toppings by purpose instead of adding everything at once. Freshness, crunch, creaminess, flavor, and texture each do a different job in the jar.

Overnight oats topping builder showing fruit, nuts, seeds, nut butter, yogurt, spices, granola, and coconut grouped by purpose.
Better toppings do a job: fruit adds freshness, nuts and seeds add crunch, and creamy extras like yogurt or nut butter make the jar more satisfying.

Best Oats for Overnight Oats

The best oats for overnight oats are rolled oats or old-fashioned oats. They absorb liquid evenly and become creamy without turning instantly mushy.

Guide to rolled oats, quick oats, instant oats, steel-cut oats, and muesli for making overnight oats.
Rolled oats are the safest choice for overnight oats because they soften evenly while still keeping enough texture to avoid turning mushy.
Oat TypeCan You Use It?TextureBest Use
Rolled oats / old-fashioned oatsYes, best choiceCreamy with light chewBest default method
Quick oatsYes, but softerVery soft, can turn mushyFast-soak jars or softer oats
Instant oatsOnly if neededSoft, sometimes paste-likeEmergency quick version
Steel-cut oatsNot a simple swapChewy, firm, sometimes toughSeparate steel-cut overnight method
MuesliYes, if oat-heavyMore varied textureNutty, fruit-filled jars

Rolled Oats vs Quick Oats vs Steel-Cut Oats

The soak changes each oat type differently. This comparison is useful when you want to understand why rolled oats are the safest default for this method.

Comparison of soaked rolled oats, quick oats, and steel-cut oats showing different overnight oats textures.
Rolled oats give the best balance of creaminess and chew; quick oats soften more, while steel-cut oats stay too firm for a direct swap.

If you are choosing between rolled oats and steel-cut oats, this MasalaMonk comparison of steel-cut oats vs rolled oats explains the texture difference in more detail.

If your package says old-fashioned oats, this guide to old-fashioned oats and rolled oats will help clarify the naming.

How to Make Overnight Oats

The method is simple, but the small details matter. Stirring well, resting briefly, and stirring again helps prevent dry pockets, chia clumps, and protein powder lumps.

Step-by-step overnight oats method showing ingredients added, stirred, rested, stirred again, chilled, adjusted, and topped.
The overnight oats method is simple, but the rest-and-stir step helps prevent dry pockets and chia clumps before the jar goes into the fridge.

Step 1: Add the base ingredients

Add rolled oats, milk, yogurt or curd, chia seeds, sweetener, vanilla, and salt to a jar or bowl.

Step 2: Stir very well

Scrape the bottom and sides as you stir. Dry oats and chia seeds often hide in the corners of a jar, especially if the container is narrow.

Step 3: Rest for 5 Minutes, Then Stir Again

This second stir is the difference between creamy oats and a serving with clumps at the bottom. It is especially helpful when you use chia seeds, yogurt, cocoa, matcha, or protein powder.

Close-up of overnight oats being stirred again after a short rest to prevent chia clumps and dry pockets.
After the first stir, let the jar sit for five minutes and stir again so chia seeds spread evenly and the oat mixture sets more smoothly.

Step 4: Cover and refrigerate

Chill for at least 4 hours. Overnight, or about 8 hours, gives the best consistency because the oats have more time to soften evenly.

Step 5: Stir and adjust in the morning

If the oats are too thick, add 1–3 tablespoons milk. If they are too loose, add a teaspoon of chia or a spoon of oats and let them sit a little longer.

Step 6: Add toppings

Add fresh banana, crisp apple, granola, toasted nuts, and other crunchy toppings right before eating so they keep their bite.

Overnight Oats Texture Guide

Good overnight oats should be creamy, not watery, gluey, or dry. The final consistency comes down to the oat type, liquid amount, yogurt, chia, and how long the mixture rests.

Overnight oats texture guide showing creamy, thick, loose, and smooth blended oat textures.
Texture is adjustable: yogurt makes oats creamier, chia seeds make them thicker, extra milk makes them looser, and blending makes the base smoother.
TextureHow to Get ItBest Ratio
Creamy and spoonableAdd yogurt or thick curd½ cup oats + ½ cup milk + ¼ cup yogurt
Thick and pudding-likeAdd yogurt plus more chia½ cup oats + ½ cup milk + ¼ cup yogurt + 1 tbsp chia
Loose and porridge-likeIncrease the liquid½ cup oats + ¾ cup milk
ChewierChoose thicker rolled oats and soak overnightKeep the classic ratio, avoid quick oats
Smooth/blendedBlend the mixture before chillingUse the classic ratio, then blend

If you are trying to fix a jar that already went wrong, start with the too thick vs too runny guide, then use the full overnight oats troubleshooting table.

Too Thick, Just Right, or Too Runny?

Before changing the whole recipe, check the texture first. Most jars only need a small correction with milk, oats, or chia seeds.

Overnight oats comparison showing too-thick, just-right, and too-runny textures with milk, chia, and oats as fixes.
Most overnight oats texture problems are easy to fix: add milk when the jar is too thick, or add chia seeds or oats when it is too loose.

How to Fix Overnight Oats

A disappointing jar is usually fixable. In practice, most bad overnight oats are not a recipe problem; they are a ratio or topping-timing problem. Too much chia needs milk, too much liquid needs oats or chia, bland oats need salt and flavor, and watery fruit usually means the toppings went in too early.

Troubleshooting board for overnight oats that are too thick, too runny, mushy, bland, clumpy, or watery from fruit.
A disappointing jar is usually fixable once you know whether the problem is liquid, thickener, oat type, flavor, stirring, or topping timing.
ProblemWhy It HappenedFix It NowNext Time
Too thickToo much chia, protein powder, or too little liquidStir in 1–3 tbsp milkReduce chia or add more milk
Too runnyToo much liquid or not enough soak timeAdd 1–2 tsp chia or 1–2 tbsp oats and restStart with less milk or more thickener
Too mushyQuick oats, instant oats, or too much liquidAdd crunchy toppingsChoose rolled oats
Too chewySteel-cut oats or not enough soak timeAdd milk and rest longerStick with rolled oats for this method
BlandNo salt, vanilla, fruit, spice, or enough sweetnessAdd salt, cinnamon, vanilla, and fruitSeason the mixture at night
Too sourToo much yogurt or very sour curdAdd milk, fruit, or a little sweetenerUse less yogurt or a milder curd
Chia clumpsNot stirred properlyBreak clumps with a spoon and loosen with milkStir, rest 5 minutes, stir again
Protein powder clumpsPowder was not mixed with enough liquidStir hard or blend brieflyMix protein powder with milk first
Watery fruit layerJuicy fruit was mixed in too earlyStir in chia or add thicker toppingAdd delicate fruit in the morning

15 Easy Overnight Oats Flavors

Once the ratio is right, the fun part is flavor. The easiest overnight oats flavors usually follow the same pattern: one main flavor, one creamy or crunchy element, and one fresh topping added in the morning. Start with these combinations, then adjust sweetness and thickness after chilling.

Overnight oats flavor chooser with peanut butter banana, blueberry lemon, apple cinnamon, mango curd, and chocolate peanut butter ideas.
Choose your first overnight oats flavor by mood: peanut butter banana is forgiving, apple cinnamon is cozy, mango curd is bright, and blueberry lemon feels fresh.

Best Flavors to Try First

If you are not sure where to start, choose by mood. Peanut butter banana is the most forgiving first jar because it hides small texture mistakes well. Mango curd tastes bright and lassi-like. Apple cinnamon feels cozy, especially when you add crisp apple in the morning. Chocolate peanut butter is the dessert-style option, while blueberry lemon keeps the jar fresher and lighter.

Peanut butter banana overnight oats topped with banana slices, peanut butter, crushed nuts, and chia seeds.
Peanut butter banana is one of the easiest overnight oats flavors because banana and nut butter both help the jar taste creamy and forgiving.

How to build better flavor

For a breakfast that tastes fresh, keep juicy fruit and crunchy toppings for the morning. For a more dessert-like jar, mix cocoa, coffee, cinnamon, peanut butter, mashed banana, or coconut into the oats before chilling so the flavor has time to settle.

Fruit-Forward Overnight Oats Flavors

Use this group when you want a brighter breakfast jar. Fruit flavors work best when juicy fruit and crunchy toppings are timed carefully.

Fruit-forward overnight oats flavor board with banana, apple cinnamon, mango, blueberry, strawberry, and peach options.
Fruit-forward overnight oats taste best when juicy fruit and crunchy toppings are timed well, so the base stays creamy instead of turning watery.
FlavorMix In at NightAdd in the MorningTexture Note
BananaMashed ripe banana + cinnamonFresh banana slices, walnutsMashed banana thickens the oats
Apple cinnamonCinnamon + grated apple or applesauceDiced apple, walnuts, raisinsAdd crisp apple in the morning
MangoMango puree or chopped mangoFresh mango, coconut, pistachioThick curd gives a lassi-style feel
BlueberryFrozen or fresh blueberriesLemon zest, nuts, yogurt swirlFrozen berries release juice
StrawberryChopped strawberries or strawberry compoteFresh strawberries, granolaAdd granola only before eating
PeachChopped peach + cinnamonMore peach, almonds, granolaRipe peaches can loosen the oats

If fruit jars often turn watery or soft, the topping timing guide will help you decide what to mix in at night and what to add in the morning.

Apple Cinnamon Overnight Oats

This is the cozy option when you want spice and crunch. Add crisp apple close to serving so the topping stays fresh against the creamy oat base.

Apple cinnamon overnight oats topped with diced apple, cinnamon, walnuts, and raisins.
Apple cinnamon overnight oats work best when crisp apple is added close to serving, giving the creamy base a fresh bite and cozy flavor.

Mango Overnight Oats

Mango works especially well with thick curd or yogurt because the jar tastes bright, creamy, and lightly tangy without needing much extra sweetness.

Mango overnight oats with creamy oats, mango puree, fresh mango cubes, coconut, and pistachios.
For mango overnight oats, stir mango puree into the base at night, then add fresh mango cubes in the morning for a brighter texture.

Blueberry Lemon Overnight Oats

Blueberry lemon is the fresh option, but the berries can release juice. Yogurt or chia helps keep the base creamy instead of watery.

Blueberry lemon overnight oats with fresh blueberries, lemon zest, creamy oats, and a spoon lifting a bite.
Blueberry lemon keeps overnight oats fresh and bright, while yogurt or chia seeds help balance the juice released by the berries.

Chocolate, Coffee and Cozy Flavors

These flavors are richer, so balance matters. Bitter ingredients such as cocoa, coffee, and matcha need enough creaminess, salt, and gentle sweetness.

Chocolate, coffee, matcha, maple brown sugar, tiramisu, and chocolate peanut butter overnight oats flavor board.
Chocolate, coffee, matcha, and tiramisu-style overnight oats need enough creaminess, salt, and gentle sweetness to balance bitter flavors.
FlavorMix In at NightAdd in the MorningTexture Note
Chocolate1 tbsp cocoa + extra sweetenerChocolate chips, berries, nutsCocoa absorbs liquid
Chocolate peanut butterCocoa + peanut butterBanana, peanuts, dark chocolateUsually needs a splash more milk
Coffee / latteEspresso powder dissolved in milkCocoa, chocolate chips, yogurtAvoid too much bitter coffee
MatchaMatcha whisked into milkBanana, coconut, sesame, berriesWhisk matcha first to avoid clumps
Maple brown sugarMaple syrup + brown sugar + cinnamonPecans, walnuts, bananaKeep sweetness balanced
TiramisuEspresso + cocoa + vanillaYogurt layer, cocoa dustingUse strong coffee flavor carefully

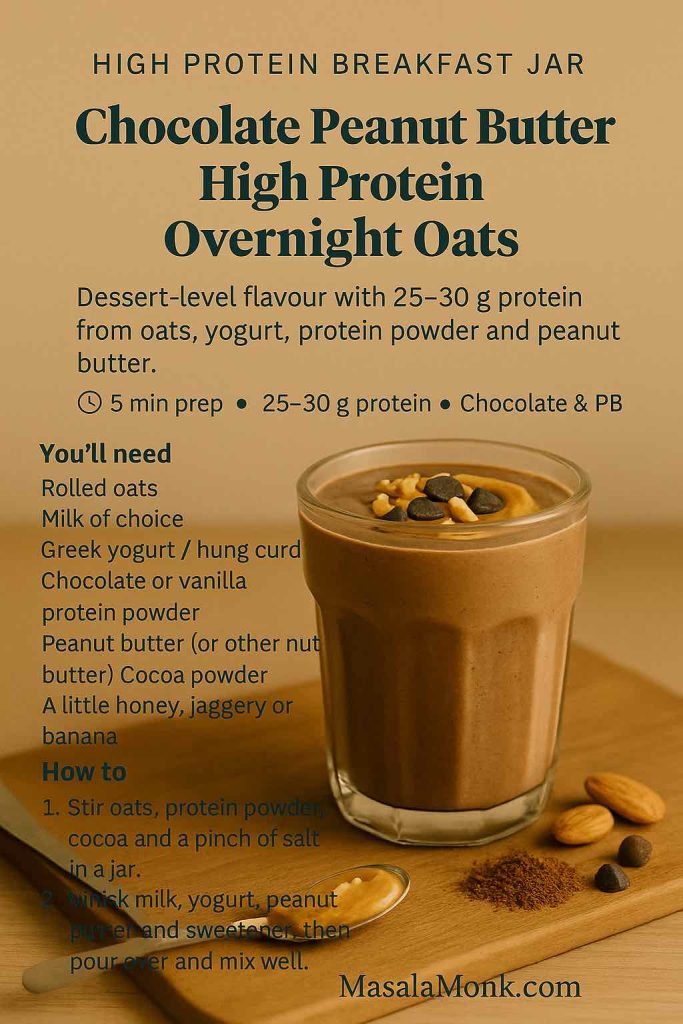
Chocolate Peanut Butter Overnight Oats

Chocolate peanut butter tastes dessert-like, so keep the base balanced with enough milk and a pinch of salt rather than relying only on sweetness.

Chocolate peanut butter overnight oats with cocoa oats, peanut butter swirl, banana slices, and a spoon lifting a thick bite.
Because cocoa and peanut butter both thicken the oat mixture, this flavor often needs a small splash of milk after chilling.

Creamy, Nutty and Tropical Flavors

This flavor family is useful when you want a jar that feels richer and more filling. Creamy add-ins such as nut butter, coconut, yogurt, and seeds give the oats more body.

Creamy, nutty, and tropical overnight oats board with peanut butter, carrot cake, coconut, mango coconut, and nut butter seed ideas.
Nutty and tropical add-ins make overnight oats feel richer, especially when peanut butter, coconut, mango, seeds, or extra yogurt support the oat base.
FlavorMix In at NightAdd in the MorningTexture Note
Peanut butter1 tbsp peanut butter + cinnamonBanana slices, peanuts, extra drizzleAdd extra milk if thick
Carrot cakeGrated carrot + cinnamon + nutmegWalnuts, raisins, coconutYogurt makes it creamier
CoconutCoconut milk + shredded coconutMango, pineapple, toasted coconutRich coconut milk makes it thicker

If you are making overnight oats for the first time, peanut butter banana, apple cinnamon, mango curd, chocolate peanut butter, and blueberry lemon are the easiest flavors to get right. Coffee, matcha, and tiramisu are a little more sensitive because bitter ingredients need enough sweetness, salt, and creaminess to balance them. For more on why the peanut butter version is so satisfying, MasalaMonk’s guide to oatmeal and peanut butter is a useful companion read.

How to Make High-Protein Overnight Oats

For higher-protein overnight oats, build the serving with Greek yogurt, thick curd, soy milk, protein powder, blended cottage cheese or paneer, chia seeds, hemp seeds, peanut butter, or nut butter. For the base amounts before adding protein powder, use the quick ratio guide near the top of the post.

High-protein overnight oats guide with Greek yogurt or curd, soy milk, protein powder, chia, hemp, nut butter, and cottage cheese or paneer.
High-protein overnight oats work best when the base includes a creamy protein source and enough extra liquid to handle overnight thickening.

Protein Powder Overnight Oats Tips

Protein powder is the ingredient most likely to trick you. The jar may look perfect when you mix it, then turn thick and stiff by morning. Start with 1 scoop protein powder and about ¼ cup / 60 ml extra milk, then loosen again after chilling if needed.

Protein powder overnight oats guide showing protein powder mixed with milk first, added to oats, stirred well, thickened overnight, and loosened with milk.
Protein powder thickens as it sits, so mixing it with milk first and adding extra liquid helps prevent clumps and stiffness by morning.

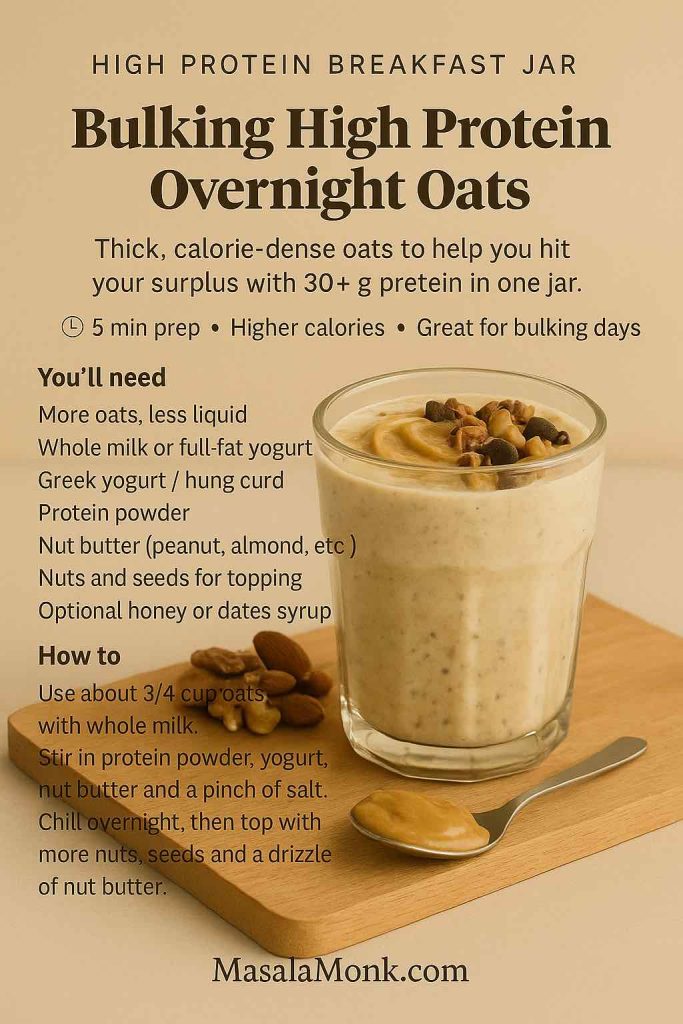
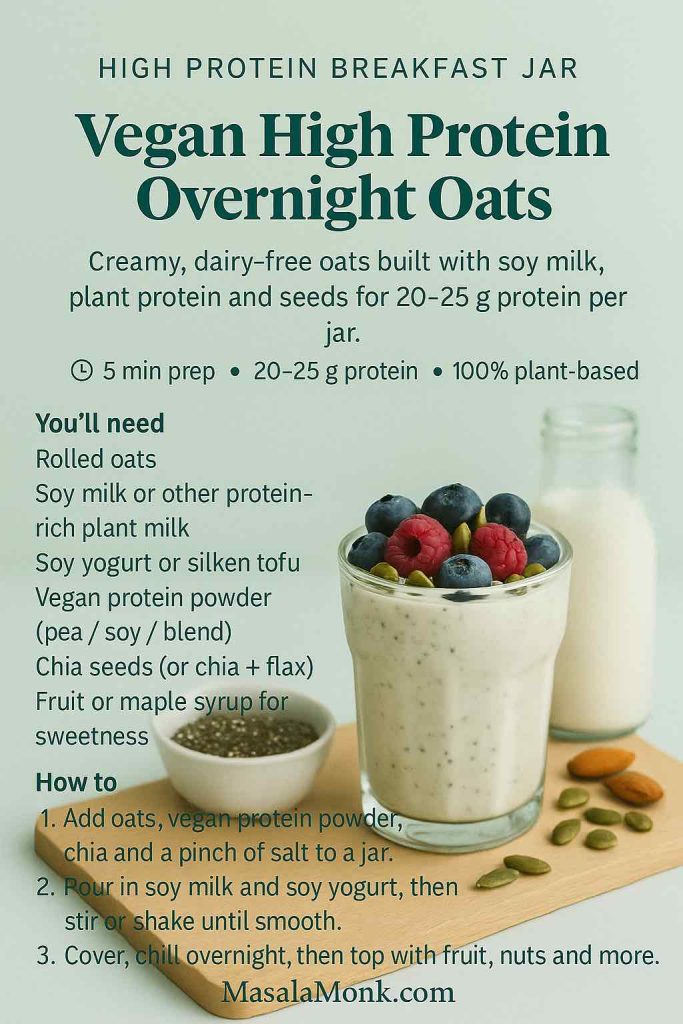
For a full protein-focused version with flavors, macro-friendly ideas, vegan options, and protein powder tips, use this MasalaMonk guide to high protein overnight oats. If you also like warm oats, this protein oatmeal guide covers hot oatmeal and proats-style breakfasts.

Vegan, Dairy-Free, Gluten-Free and No-Yogurt Overnight Oats

The core recipe is easy to adapt. Think of these as swaps, not separate recipes: the oat base stays the same, while the milk, thickener, sweetener, or creamy element changes depending on what you need. If you are skipping dairy, start with the no-yogurt ratio. If you are using water instead of milk, go straight to overnight oats with water, because that version needs extra help from chia, salt, and flavor.

Vegan and dairy-free overnight oats with plant milk, plant yogurt, chia seeds, nut butter, coconut cream, and fruit.
Dairy-free overnight oats can still be creamy when plant milk is paired with chia seeds, plant yogurt, nut butter, coconut cream, or ripe fruit.

Vegan overnight oats

Choose plant milk, plant yogurt if desired, chia seeds, maple syrup or date syrup, and fruit. Oat milk, soy milk, almond milk, and coconut milk all work.

Dairy-free overnight oats

Almond milk, oat milk, soy milk, coconut milk, or cashew milk can replace dairy milk. For creaminess without dairy, add chia seeds, nut butter, coconut cream, mashed banana, or plant yogurt. MasalaMonk also has a guide to homemade oat milk if you want to make your own.

Gluten-free overnight oats

Choose certified gluten-free oats if you need the recipe to be gluten-free. Oats are naturally gluten-free, but cross-contact during processing is common, so the package label matters.

Overnight oats without yogurt

Combine ½ cup rolled oats, ⅔ cup milk, and 1 tablespoon chia seeds. Add nut butter, mashed banana, or coconut cream if you want a creamier result without yogurt.

For the full no-yogurt ratio and how it compares with yogurt-based oats, see the ratio guide above.

Overnight Oats with Water

You can make overnight oats with water, but water needs help. Combine ½ cup oats, ¾ cup water, 1 tablespoon chia seeds, a pinch of salt, vanilla or cinnamon, and something creamy like peanut butter, almond butter, coconut cream, mashed banana, or plant yogurt. Without one of those creamy add-ins, the oats can taste flat.

Overnight oats with water guide showing plain water oats improved with chia seeds, salt, vanilla, cinnamon, banana, and nut butter.
Water works for overnight oats, but it needs help from chia seeds, salt, flavor, and something creamy like banana or nut butter.

Keto-style no-oat overnight oats

Regular oats are not usually keto-friendly. For a keto-style breakfast jar, make a no-oat version with chia seeds, hemp hearts, flaxseed, coconut, and low-carb milk instead of rolled oats. It will not taste exactly like classic overnight oats, but it gives a similar chilled, spoonable breakfast format. If that is the direction you want, this keto chia pudding recipe is a better starting point than trying to force regular oats into a keto breakfast.

Are Overnight Oats Healthy for Weight Loss?

Overnight oats can fit a weight-loss breakfast when the serving has enough protein, fiber, and volume without turning into dessert. Oats give the mixture structure, chia adds fiber and thickness, yogurt or protein powder can make it more filling, and fruit adds sweetness without needing too much syrup.

No single breakfast causes weight loss on its own. Still, a well-built oats jar can make breakfast easier to control because the portions are measured ahead of time.

Oats also bring soluble fiber to the bowl, which is one reason they work so well in a make-ahead breakfast. Harvard’s Nutrition Source has a helpful overview of oats if you want the broader nutrition background.

The main thing is not letting a balanced breakfast jar accidentally turn into dessert. Nut butter, granola, chocolate chips, dried fruit, and syrup are all fine in the right amount, but they add up quickly when they all go into the same container. Keep the base balanced, add enough protein if you need more staying power, and choose toppings with intention.

Balanced overnight oats compared with an overloaded jar containing extra nut butter, granola, syrup, dried fruit, and chocolate chips.
Overnight oats can support a balanced breakfast, but calorie-dense toppings add up quickly when nut butter, granola, syrup, dried fruit, and chocolate all go into one jar.
GoalBetter ChoiceWatch Out For
More fillingGreek yogurt, protein powder, chia, soy milkThin oats with only milk and fruit
Lower sugarBerries, apple, cinnamon, vanillaToo much syrup, jam, sweetened yogurt
More fiberChia, flax, berries, apple, oatsLow-fiber toppings only
Controlled caloriesMeasure nut butter, granola, nutsLarge handfuls of calorie-dense toppings

For more on oats, chia, and fullness-focused breakfasts, see MasalaMonk’s guide to oats and chia seeds for weight loss.

Meal Prep and Storage

Overnight oats are built for meal prep, but consistency changes over time. A plain mixture keeps better than a container loaded with fresh fruit, granola, and crunchy toppings.

Meal prep overnight oats setup with several jars, a mixing bowl, lids, fresh fruit, nuts, seeds, and toppings kept separately.
For better meal-prep texture, store the oat base in jars and keep crunchy or delicate toppings separate until serving.

The biggest meal-prep mistake

The biggest mistake is adding every topping the night before. Soft mix-ins like cocoa, cinnamon, chia, yogurt, nut butter, jam, mashed banana, applesauce, or frozen berries can go in early. Crunchy toppings are different: fresh banana, crisp apple, granola, toasted nuts, and coconut chips are better added right before eating.

For quick topping timing, use the table below, or go back to the flavor ideas if you are planning several jars at once.

Best jar size for overnight oats

For one serving of overnight oats, a 12–16 oz / 350–500 ml jar works best. A 16 oz jar gives you enough space to stir properly and add toppings without overflowing.

Jar SizeHow It WorksBest Use
8 oz / 240 mlVery tight for a full servingSmall portions, snack jars, no bulky toppings
12 oz / 350 mlWorks for one basic servingSingle serving with light toppings
16 oz / 475–500 mlBest overall sizeOne serving with fruit, nuts, yogurt, and stirring room
Bowl or meal-prep containerMore room to mixBatch prep or family portions

How Long Do Overnight Oats Last?

Overnight oats taste best in the first 1–3 days. A plain sealed mixture can usually keep for 3–4 days in the fridge. Some servings may be fine longer, but fruit, yogurt, and toppings soften faster.

Overnight oats storage timeline showing jars for day 1 through day 4, best texture in 1 to 3 days, and refrigeration at 40°F or 4°C.
Overnight oats taste best in the first few days, especially when fresh fruit, nuts, and granola are added closer to serving.

Keep overnight oats refrigerated at 40°F / 4°C or below. For general food-safety guidance, the USDA recommends keeping refrigerators at 40°F or below and using refrigerated leftovers within a few days. You can read their refrigerator safety guidance here: USDA refrigerator safety basics.

When to Add Overnight Oats Toppings

The best overnight oats are usually built in two stages: flavor the oats at night, then add delicate or crunchy toppings in the morning. In short, crunch belongs in the morning.

Overnight oats toppings timing guide showing soft mix-ins to add at night and fresh or crunchy toppings to add in the morning.
Soft mix-ins can go in at night, while fresh fruit and crunchy toppings usually taste better when added right before serving.
Add at NightAdd in the Morning
Cinnamon, cocoa, vanilla, chia, yogurt, nut butter, jam, mashed banana, applesauce, frozen berriesFresh banana, crisp apple, granola, toasted nuts, coconut chips, fresh berries, crunchy seeds, chocolate chips

If you like a little crunch on top, keep granola-style toppings separate until serving. For a make-ahead oat snack in the same pantry lane, these homemade granola bars use oats, nut butter, honey or dates, and seeds in a different meal-prep format.

Can You Freeze Overnight Oats?

You can freeze overnight oats, but the consistency is usually best when you freeze the plain mixture without delicate toppings. Leave headspace in the container because the mixture expands, thaw in the fridge, stir well, then add fresh fruit and crunchy toppings after thawing.

Freezing guide for overnight oats showing plain containers with headspace, thawing in the fridge, and fresh toppings added later.
Overnight oats freeze best when kept plain, with headspace in the container and fresh toppings added only after thawing.

Can You Warm Overnight Oats?

Yes. Overnight oats are usually eaten cold, but you can warm them. Transfer to a microwave-safe bowl or jar, add a splash of milk, and heat for 30–60 seconds, stirring once. Do not microwave a metal lid.

Cold versus warm overnight oats guide showing a chilled jar and warmed oats with a splash of milk, microwave timing, and no metal lid warning.
Overnight oats are usually eaten cold, although you can warm them gently with a splash of milk for a softer, cozier breakfast.

Overnight Oats FAQs

What is the best ratio for this overnight oats recipe?

The best starting ratio is ½ cup rolled oats, ½ cup milk, and ¼ cup yogurt or thick curd. For no-yogurt overnight oats, use ½ cup oats, ⅔ cup milk, and 1 tablespoon chia seeds. For more detail, see the ratio guide and texture guide above.

How long do overnight oats need to soak?

Plan on at least 4 hours. Ideally, give rolled oats an overnight rest of about 8 hours so they become creamier and more even.

Are overnight oats eaten cold or warm?

Most people eat overnight oats cold, straight from the fridge. You can also warm them for 30–60 seconds with a splash of milk when you want a softer, cozier breakfast.

How do you make overnight oats without yogurt?

Skip the yogurt and let chia do the thickening instead. A good no-yogurt ratio is ½ cup oats, ⅔ cup milk, and 1 tablespoon chia seeds.

Do overnight oats need chia seeds?

Chia seeds are helpful, but they are not required. Instead, you can use yogurt or slightly less liquid to keep the oats thick.

How do you make overnight oats with water?

Water works, but it needs help. Add chia seeds, salt, vanilla or cinnamon, and something creamy like nut butter, mashed banana, coconut cream, or plant yogurt so the oats do not taste flat.

Which oats are best for overnight oats?

Rolled oats or old-fashioned oats are best. Quick oats get softer, instant oats can become paste-like, and steel-cut oats need a different method.

What happens if you use steel-cut oats?

Steel-cut oats are not a direct swap here. They stay much chewier and need a longer soak or a separate preparation method.

How long do overnight oats last in the fridge?

They taste best in the first 1–3 days. A plain sealed mixture can usually keep for 3–4 days when refrigerated properly.

Do overnight oats freeze well?

They freeze best when kept plain. Freeze the oats without delicate fruit or crunchy toppings, leave headspace in the container, thaw in the fridge, stir well, and then add fresh toppings after thawing.

Are overnight oats good for weight loss?

They can be, especially when the serving includes protein, fiber, fruit, and measured toppings. Still, large amounts of nut butter, granola, syrup, dried fruit, and chocolate chips can raise calories quickly.

How do you add protein powder to overnight oats?

Add 1 scoop protein powder and increase the milk by about ¼ cup / 60 ml. Then stir very well, because protein powder can clump and thicken as it sits.

Why are my overnight oats too thick?

They may have too much chia, too much protein powder, or not enough liquid. As a quick fix, stir in 1–3 tablespoons milk before eating.

Why are my overnight oats watery?

They may have too much liquid, watery fruit, or not enough soaking time. To fix them, add chia seeds or a spoon of oats and let the mixture sit longer.

The Takeaway

Start with rolled oats, use enough liquid, season the mixture with a pinch of salt, and stir twice before chilling. Then, add delicate fruit and crunchy toppings closer to serving, and adjust the consistency in the morning instead of trying to get everything perfect the night before.

Once you like the base recipe, you can turn it into peanut butter overnight oats, apple cinnamon overnight oats, mango overnight oats, chocolate overnight oats, coffee overnight oats, or a higher-protein version without changing the basic method. And when you want a warm oat breakfast instead of a chilled jar, these oat pancakes are another easy way to use rolled oats for breakfast.

Finished overnight oats jars in a calm breakfast scene with fruit, nuts, spoon, small bowls, and creamy oat texture.
Once you understand the base, overnight oats become a flexible make-ahead breakfast you can adjust for texture, flavor, protein, and meal prep.

Back to top

Posted on 7 Comments

10 Low Carb Chia Pudding Recipes for Weight Loss (Keto, High-Protein, Dairy-Free)

Cover image showing a premium glass jar of low carb chia pudding with a smooth whipped topping on a warm-cream seamless background. Editorial food photography style for “Low Carb Chia Pudding” featuring 10 recipes including keto, high protein, dairy-free, and blended options, with MasalaMonk.com branding.

Chia pudding has a way of sneaking into your routine and then refusing to leave. At first, it feels like a clever trick—stir a few spoonfuls of tiny seeds into milk, refrigerate, and wake up to a spoonable pudding. Before long, though, you realize a simple jar of low carb chia pudding can be more than a trend: it’s a dependable breakfast that doesn’t demand morning effort, a snack that travels well, and a dessert-like bowl that still fits a lighter day.

Why chia pudding works as breakfast, snack, and “healthy dessert”

What makes it especially useful is how easily you can shape it around your cravings. Some mornings you’ll want something light and clean—pudding with almond milk, a little vanilla, and berries. Other times, you’ll prefer a thick, creamy version that leans on Greek yogurt and tastes closer to cheesecake filling. And when your sweet tooth shows up, chocolate chia pudding, cacao chia pudding, or chocolate peanut butter chia seed pudding can feel genuinely comforting without tipping into a sugar spiral.
Collage-style image showing ten low carb chia pudding cups in a clean grid with the heading “Low Carb Chia Pudding (10 Recipes)” and the line “Keto • High Protein • Dairy-Free • Blended.” Features a variety of flavors including vanilla, berry, chocolate, peanut butter, matcha, mango, and mousse, with MasalaMonk.com in the footer.
All 10 low carb chia pudding recipes featured in this post at a glance—creamy keto cups, high protein Greek yogurt jars, dairy-free options, fruit layers, and blended mousse for a smooth pudding texture.

Equally important, chia pudding adapts to different eating styles without forcing you into one “right” way. If you’re leaning keto, coconut milk makes a rich keto pudding base while sweetness stays minimal. If you’re aiming for a paleo-friendly bowl, you can skip dairy and still get a creamy texture with coconut milk or almond milk plus nut butter. Meanwhile, if you’re chasing a higher-protein breakfast, chia pudding with protein powder—or a low carb chia pudding with Greek yogurt—turns the jar into something that feels like a real meal.

If you want a deeper foundation on how chia fits into weight-loss habits—portions, consistency, and simple ways to keep it effortless—this companion guide is worth a read: The Ultimate Guide to Chia Pudding for Weight Loss.

Now, before we jump into the ten best variations, let’s lock in the base. Once you get the ratio and texture right, every flavor becomes easier, smoother, and more repeatable.

Also Read: Garlic & Paprika Cabbage Rolls (Keto-Friendly Recipes) – 5 Bold Savory Twists


Low Carb Chia Pudding for Weight Loss: Why It Works So Well

For weight loss, the best breakfasts explain themselves later—when you realize you didn’t spend the whole morning thinking about snacks. That’s exactly where low carb chia pudding shines: it’s simple, satisfying, and surprisingly good at keeping your appetite calm between meals.

Why chia pudding keeps you full longer

Chia helps in a very practical way: when it hydrates, it turns your milk into a thick, spoonable gel. Because of that texture, you naturally eat more slowly, and the jar tends to feel more substantial than it looks—especially compared to breakfasts that disappear in three bites.
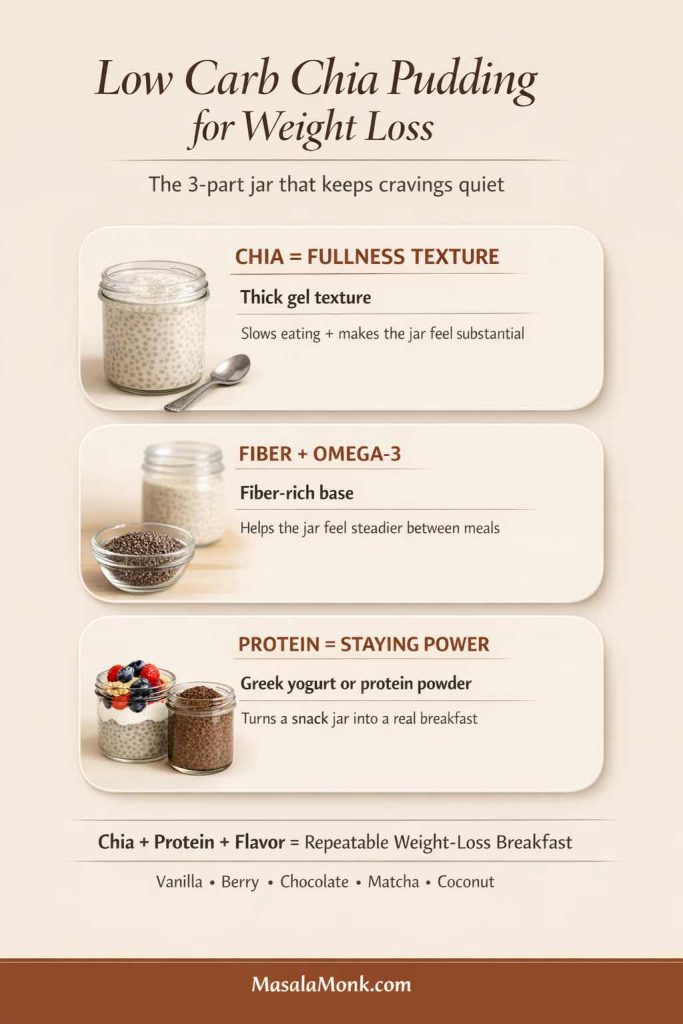
Infographic titled “Low Carb Chia Pudding for Weight Loss” explaining why it works: chia creates thick gel texture that slows eating, chia provides fiber + omega-3, and adding protein (Greek yogurt or protein powder) boosts staying power. Includes takeaway “Chia + Protein + Flavor = repeatable weight-loss breakfast” and MasalaMonk.com in the footer.
Why low carb chia pudding works so well: the gel texture slows eating, fiber helps the jar feel steadier between meals, and protein (Greek yogurt or protein powder) is the upgrade that turns it into a true breakfast—not just a snack.

At the same time, chia is naturally fiber-rich and contains omega-3 fats, which is part of why it’s such a popular base for a steady “grab-and-go” breakfast. If you want a clean, evidence-based overview, Harvard’s Nutrition Source has a helpful summary on chia seeds nutrition (fiber + omega-3). Then, if you like checking calories, macros, or serving-size details, you can cross-reference with the USDA chia seed nutrition data.

The real upgrade is protein

Still, satisfaction isn’t only about chia. Protein is the piece that makes a jar feel like a meal—which is why “pudding and Greek yogurt,” “chia seed and Greek yogurt pudding,” and “chia pudding with protein powder” are such common staples. When your breakfast includes a solid protein anchor, it tends to feel steadier and more complete, so you’re less likely to start grazing out of habit.
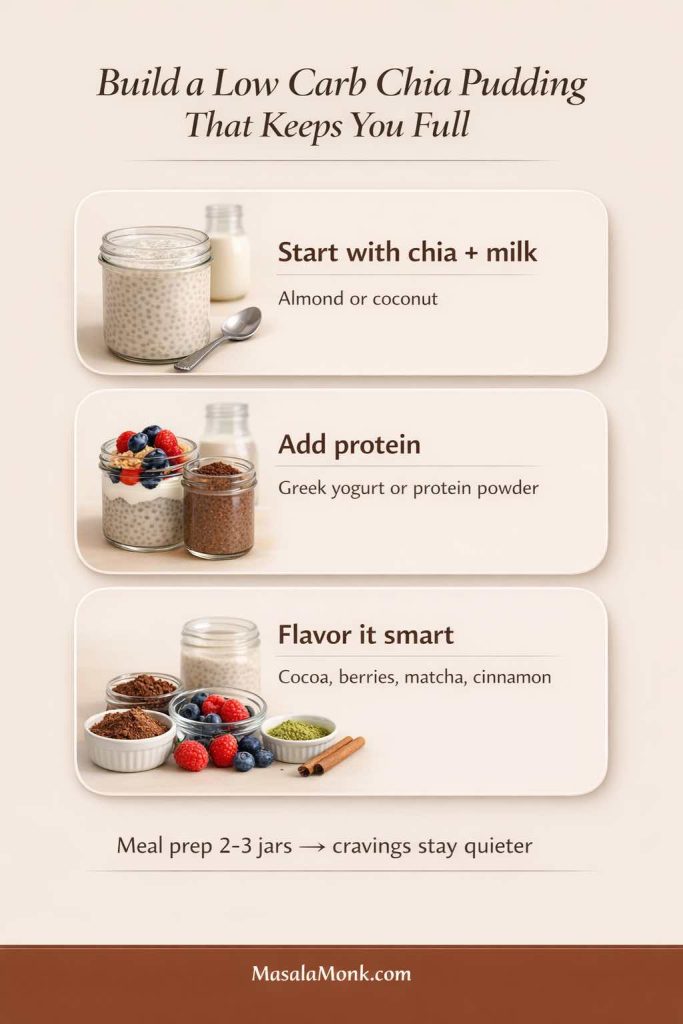
Three-step infographic showing how to build a low carb chia pudding that keeps you full. Step 1: start with chia + milk (almond or coconut). Step 2: add protein (Greek yogurt or protein powder). Step 3: flavor it smart (cocoa, berries, matcha, cinnamon). Includes note “Meal prep 2–3 jars → cravings stay quieter” and MasalaMonk.com in the footer.
Use this quick builder to make low carb chia pudding feel “meal-level”: start with chia + milk, add protein (Greek yogurt or protein powder), then flavor it with cocoa, berries, matcha, or cinnamon. Prep 2–3 jars at once and you’ve got a simple routine that stays satisfying all week.

If your mornings often end with cravings, switching to a high protein & low carb chia pudding is one of the easiest upgrades: keep the chia base, then build in protein with Greek yogurt (thick and creamy) or protein powder (especially in chocolate versions). For a broader framework that pairs perfectly with a chia routine, this guide is a strong companion: how to eat 100 grams of protein a day.

So yes—chia helps. Even better, the best results usually come from the combination: chia for texture and fiber, protein for staying power, and flavor choices you genuinely look forward to eating.

Also Read: Eggless Yorkshire Pudding (No Milk) Recipe


Low Carb Chia Pudding Base Recipe (Perfect Ratio, No Clumps)

Everything starts here. Whether you’re making keto chia pudding, chia pudding paleo, dairy free chia pudding, or a blended chia pudding mousse, the base method stays the same.

The basic chia pudding ratio (and how to adjust it)

For a classic, spoonable base:

  • 3 tablespoons chia seeds (about 36–40 g)
  • 1 cup / 240 ml liquid (almond milk, coconut milk, dairy milk, oat milk, etc.)
  • A pinch of salt
  • Optional: ½ teaspoon vanilla
  • Optional: sweetener to taste
Infographic showing the low carb chia pudding base ratio: 3 tbsp chia seeds + 1 cup milk (240 ml), with add-ins (pinch of salt, optional vanilla, optional sweetener). It also shows how to adjust thickness: 2½ tbsp per cup for a lighter thinner set, or 3 tbsp plus richer milk for a thicker custardy set. Includes “Best chill: 2 hours (overnight best)” and MasalaMonk.com footer.
Here’s the dependable low carb chia pudding base ratio: 3 tablespoons chia to 1 cup milk (240 ml). Use 2½ tablespoons for a lighter set, or keep 3 tablespoons and switch to a richer milk (like canned coconut milk) for a thicker, custardy chia pudding—then chill at least 2 hours (overnight is best).

That ratio gives you a thick, pudding-like texture—great for low carb chia pudding cups, a chia pudding glass, or a single serve chia pudding jar. If you prefer it thinner, drop to 2½ tablespoons chia per cup of liquid. Conversely, if you like a dense, custardy texture, keep 3 tablespoons and use a richer liquid like canned coconut milk.

The mixing pattern that prevents clumps

This is the method that makes the difference between “silky” and “why is it lumpy?”

  1. Add chia seeds to the liquid, plus salt and vanilla (and sweetener, if using).
  2. Whisk vigorously for 20–30 seconds.
  3. Let it sit for 10 minutes.
  4. Whisk again, thoroughly.
  5. Cover and refrigerate at least 2 hours; overnight is even better.

That second whisk is the hinge. It’s the moment when the seeds have started to hydrate but haven’t fully set yet, which means you can break up clumps before they lock in.
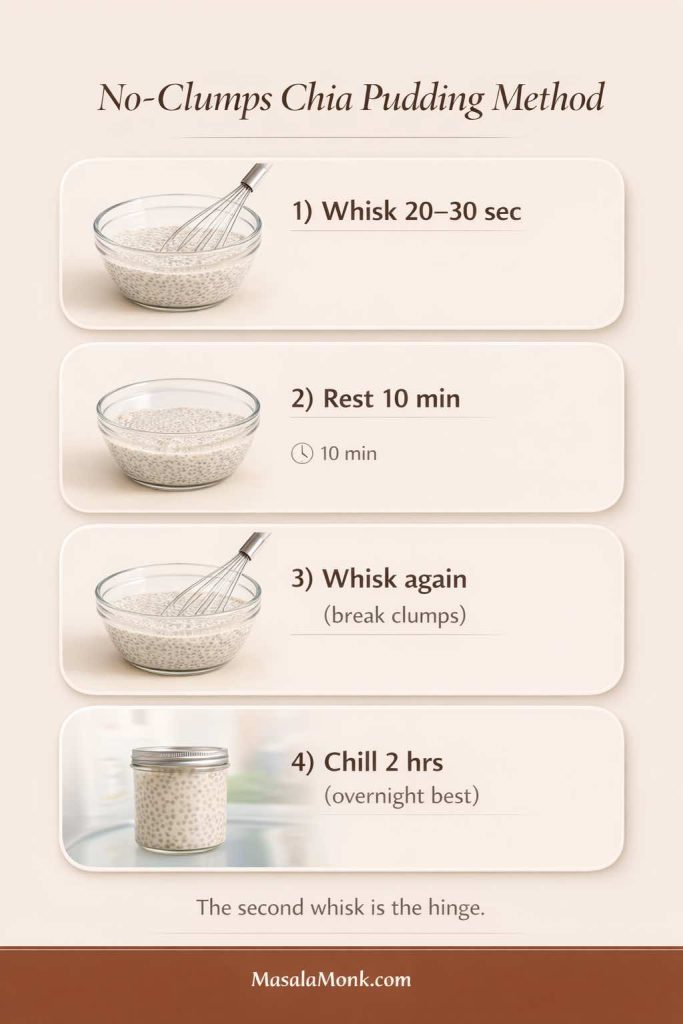
Step-by-step infographic titled “No-Clumps Chia Pudding Method” showing four steps: 1) whisk 20–30 seconds, 2) rest 10 minutes, 3) whisk again to break clumps, and 4) chill 2 hours (overnight best). Includes a bowl-and-whisk visual sequence, a jar chilling in the fridge, and the note “The second whisk is the hinge,” with MasalaMonk.com in the footer.
If your chia pudding turns lumpy, this is the fix: whisk well, rest 10 minutes, then whisk again before chilling. That second whisk breaks clumps right when the seeds start hydrating—so your low carb chia pudding sets smooth, thick, and spoonable instead of bumpy.

Quick chia pudding vs “instant” chia pudding

Chia needs time to hydrate, so it’s never truly instant in the way instant oats are. Still, you can make a quick low carb chia seed pudding when you’re pressed for time.

Use the same ratio, whisk well, do the 10-minute stir, and refrigerate for 30–45 minutes. It will be softer than overnight, yet it’s still spoonable—especially if you make it as chia pudding with yogurt or add protein powder.

Why soaking matters

Chia expands dramatically when it absorbs liquid. Because of that, it’s best eaten soaked rather than dry. If you want the reason in plain terms, this clinical case report shows what can happen when dry chia is swallowed without enough liquid: why chia should be soaked first.

Also Read: Crock Pot Chicken Breast Recipes: 10 Easy Slow Cooker Dinners (Juicy Every Time)


Choosing Your Liquid: Almond Milk, Coconut Milk, Oat Milk, and More

Liquid is the secret “ingredient” that decides whether your pudding tastes light, rich, tropical, or dairy-creamy. It’s also the easiest lever to pull depending on whether you’re going for keto pudding, paleo chia seed pudding, or a more classic breakfast pudding recipe.
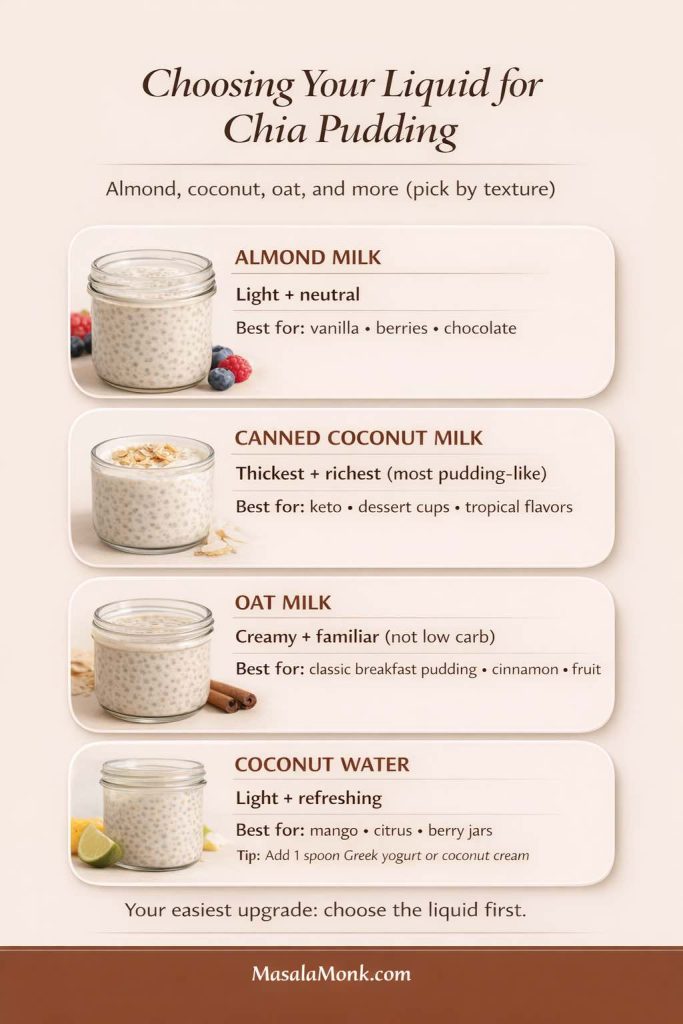
Infographic titled “Choosing Your Liquid for Chia Pudding” showing four options with texture notes and best uses: almond milk (light + neutral), canned coconut milk (thickest + richest), oat milk (creamy + familiar, not low carb), and coconut water (light + refreshing) with a tip to add Greek yogurt or coconut cream. Includes “Your easiest upgrade: choose the liquid first” and MasalaMonk.com in the footer.
Your chia pudding texture is mostly decided by the liquid. Almond milk keeps it light and versatile, canned coconut milk makes the richest pudding-like set, oat milk gives a classic creamy breakfast feel (not low carb), and coconut water stays light and fruit-friendly—especially with a spoon of Greek yogurt or coconut cream.

Pudding with almond milk (clean, light, versatile)

Chia pudding with almond milk is a classic because it’s neutral and easy to customize. It’s also a natural base for low carb chia pudding and many keto-friendly variations. If you want a dedicated keto version built around almond milk, this is a strong reference recipe: keto chia pudding with almond milk.

Coconut milk for chia pudding (thickest texture, richest feel)

If you want your chia pudding to taste like real pudding, use canned coconut milk. It’s also a favorite for keto chia pudding coconut milk versions because the fat content naturally boosts satisfaction. For a paleo chia seed pudding approach, coconut milk is equally useful.

A small detail helps a lot here: canned coconut milk varies. Some are thin; others are thick. If yours pours like cream, whisk in a little water so it hydrates evenly. That way you avoid dense, under-hydrated pockets.

Oat milk chia pudding (not keto, but creamy and familiar)

Oat milk makes a gentle, classic pudding flavor. It’s not low carb, so it’s best as an optional variation for non-keto readers who still want a healthy breakfast pudding.

Chia pudding with coconut water (light, refreshing, fruit-friendly)

Coconut water makes a lighter gel. It’s lovely with mango, citrus, and berries; however, it won’t feel as creamy. For a richer texture, add a spoon of Greek yogurt or a spoon of coconut cream before serving.

Also Read: Mozzarella Sticks Recipe (Air Fryer, Oven, or Fried): String Cheese, Shredded Cheese, and Every Crunchy Variation


Homemade vs Premade Chia Pudding (Cups, Mixes, and Convenience Options)

Sometimes you want the easiest option. That’s why premade chia pudding and premade chia seed pudding cups have become common grab-and-go items. A chia pudding cup can be a decent choice, especially if it keeps your day from derailing into ultra-processed snacks.
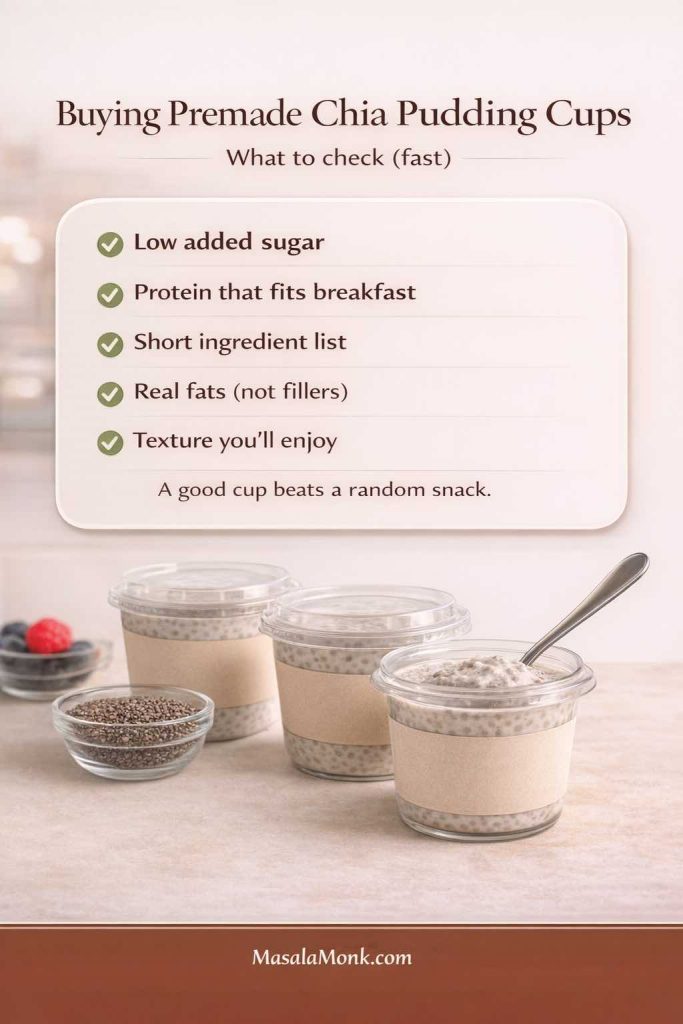
Infographic titled “Buying Premade Chia Pudding Cups” with a checklist: low added sugar, protein that fits breakfast, short ingredient list, real fats (not fillers), and texture you’ll enjoy. Photoreal scene shows unbranded chia pudding cups on a smooth counter with a spoon and a small bowl of chia seeds, plus the line “A good cup beats a random snack” and MasalaMonk.com in the footer.
If you’re buying premade chia pudding cups, a quick label check makes all the difference: keep added sugar low, choose a protein amount that works for breakfast, aim for a short ingredient list, and skip filler-heavy cups. Most importantly, pick a texture you’ll actually enjoy—because the best chia pudding cup is the one you’ll happily grab again.

If you’re choosing store-bought chia seed pudding cups, prioritize:

  • low or no added sugar,
  • a protein amount that makes sense for breakfast (if you want it to act like breakfast),
  • a short ingredient list,
  • and a texture you actually enjoy.

If you prefer to keep things homemade but fast, a chia pudding mix can work too. Some mixes are simply chia plus flavoring; others include sweeteners and thickeners. Even then, the most repeatable path is often a simple base batch plus flavor add-ins—cocoa, cinnamon, matcha, vanilla, fruit—so you can make multiple chia seed pudding cups in one go.

Also Read: Sourdough Starter Recipe: Make, Feed, Store & Fix Your Starter (Beginner Guide)


High Protein Chia Pudding: Greek Yogurt, Protein Powder, and Collagen

When people talk about protein chia pudding, they usually mean one of three styles:

  1. chia pudding with Greek yogurt
  2. chia pudding with protein powder
  3. chia collagen add-ins (often paired with yogurt)
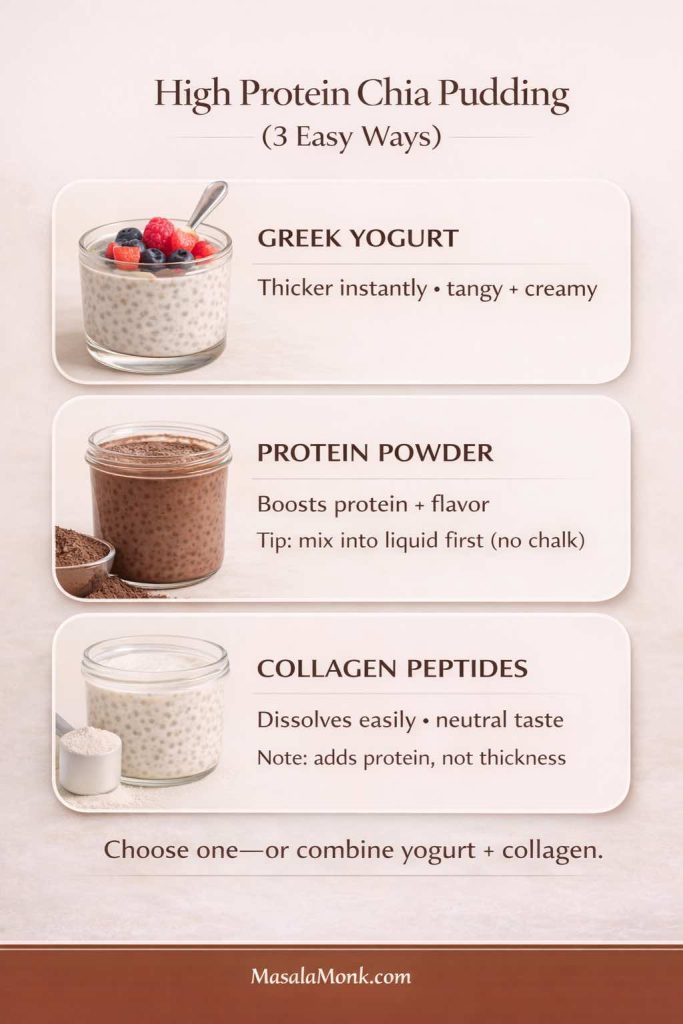
Infographic titled “High Protein Chia Pudding (3 Easy Ways)” showing three options with photoreal jars: Greek yogurt (thicker instantly, tangy + creamy), protein powder (boosts protein + flavor with tip to mix into liquid first), and collagen peptides (dissolves easily, neutral taste; adds protein not thickness). Includes the line “Choose one—or combine yogurt + collagen” and MasalaMonk.com in the footer.
When you want high protein chia pudding, you’ve got three reliable routes: Greek yogurt for instant thickness and a creamy tang, protein powder for a bigger protein boost (best mixed into the liquid first so it stays smooth), or collagen peptides for an easy add-in that dissolves fast without changing flavor. Pick one—or combine yogurt + collagen for the most “meal-level” jar.
Step-by-step infographic titled “How to Mix Protein Powder (No Chalk)” showing three steps for smooth protein chia pudding: 1) whisk protein powder into the liquid first, 2) add chia seeds and whisk again, 3) rest 10 minutes, whisk, then chill. Includes the takeaway “Always dissolve first—then seed” and MasalaMonk.com in the footer.
The easiest way to avoid chalky protein chia pudding is to dissolve protein powder in the liquid first, then add chia and whisk again. After a 10-minute rest, give it one more whisk before chilling—this keeps the jar smooth, thick, and spoonable instead of gritty.

Greek yogurt thickens pudding instantly and adds a tang that makes chocolate, berries, vanilla, and peanut butter taste richer. Protein powder boosts protein and flavor, but it can turn chalky if it isn’t mixed properly. Collagen peptides dissolve easily and tend to be neutral, although they don’t thicken the same way chia does.

If you like a measured, realistic overview of collagen claims, this one is balanced: what collagen supplements can (and can’t) do.

If you want a complementary “drinkable breakfast” option that fits the same protein-forward routine, this is a natural companion: Greek yogurt shake recipes for a protein-packed breakfast.


10 Low Carb Chia Pudding Recipes (Keto, Paleo, Protein, Blended, Fruit)

Each recipe below makes 1–2 servings depending on appetite. For meal prep, multiply ingredients, then portion into chia pudding cups or jars. Meanwhile, if you’re building variety without extra work, make two or three bases at once: one almond milk jar, one coconut milk jar, and one Greek yogurt jar. That way, you’re never stuck eating the same flavor five days in a row.
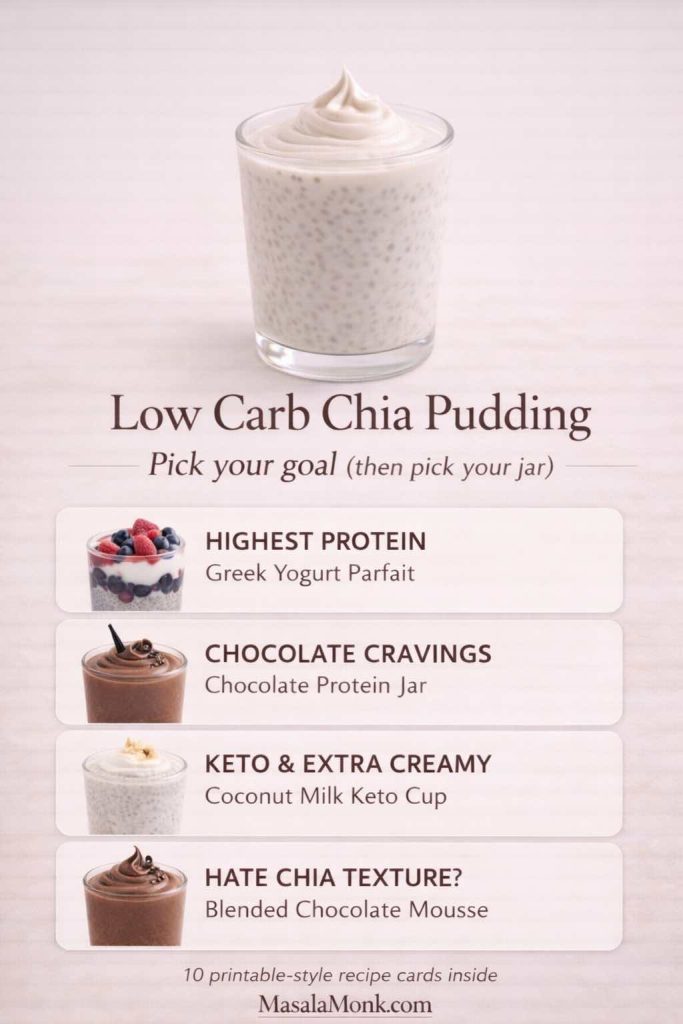
Goal-based chooser graphic for low carb chia pudding with a hero jar at the top and four labeled choices: “Highest Protein – Greek Yogurt Parfait,” “Chocolate Cravings – Chocolate Protein Jar,” “Keto & Extra Creamy – Coconut Milk Keto Cup,” and “Hate Chia Texture? – Blended Chocolate Mousse.” Clean editorial layout with MasalaMonk.com in the footer.
Not sure which jar to make first? Start with your goal: highest protein, chocolate cravings, extra-creamy keto, or blended mousse if you don’t like chia texture—then jump into the matching recipe below.

1) Keto Chia Pudding with Almond Milk (Vanilla Base That Never Fails)

This is the everyday low carb chia pudding that works as breakfast, snack, or a simple dessert. It’s also the best “starter” jar because it takes flavors well.

Ingredients (1–2 servings)

  • 3 tablespoons chia seeds
  • 1 cup unsweetened almond milk
  • ½ teaspoon vanilla extract
  • Pinch of salt
  • Optional sweetener: monk fruit/erythritol/stevia, to taste
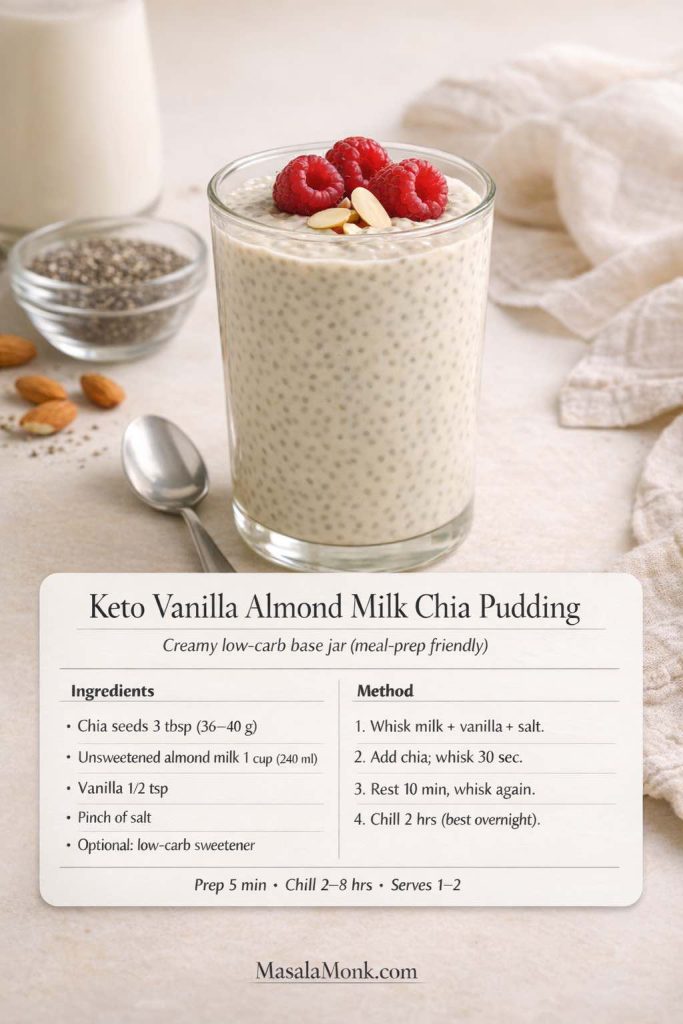
Recipe card image of keto vanilla almond milk chia pudding in a glass topped with raspberries and sliced almonds, with ingredients and steps for a low carb chia pudding base. Includes chia-to-milk ratio, quick stir method, and prep/chill times, styled as a meal-prep friendly high-protein breakfast.
This keto vanilla almond milk chia pudding is the “base jar” you’ll use all week—creamy, low carb, and easy to meal prep. Make it overnight for the smoothest texture, then customize it after training with Greek yogurt or a scoop of protein powder, or keep it simple with berries and nuts for a quick fitness-friendly breakfast that actually satisfies.

Method

  1. In a bowl or jar, whisk almond milk, vanilla, salt, and sweetener (if using).
  2. Stir in chia seeds and whisk vigorously for 20–30 seconds.
  3. Let it rest 10 minutes, then whisk again until no clumps remain.
  4. Cover and refrigerate 2 hours or overnight.

Flavor variations

  • Add ½ teaspoon cinnamon for a warm “vanilla-cinnamon pudding” base.
  • Add a tablespoon of shredded coconut for coconut puddings recipes energy without needing extra sweetness.
  • Stir in 1–2 tablespoons of Greek yogurt right before serving for a creamier finish.

Toppings that keep it low carb
Chopped nuts, cacao nibs, a small handful of berries, or a spoon of nut butter.

If you want a dedicated keto version with extra detail, this internal recipe fits perfectly: keto chia pudding with almond milk.


2) Chia Pudding with Greek Yogurt (High Protein, Ultra Creamy)

If you like pudding with Greek yogurt, this version can feel like cheesecake in a jar. It also adapts well: vanilla, chocolate, berry, citrus, even coffee flavors.

Ingredients (1–2 servings)

  • ¾ cup Greek yogurt (plain works best)
  • 3 tablespoons chia seeds
  • 2–4 tablespoons water or almond milk (to loosen)
  • ½ teaspoon vanilla
  • Pinch of salt
  • Optional sweetener, to taste
Recipe card image of high-protein Greek yogurt chia pudding in a glass with a berry compote layer, topped with strawberries, blueberries, chopped nuts, and a light nut-butter drizzle. The card lists ingredients and steps for a thick chia pudding with Greek yogurt, including the stir-twice method and chill time, styled as a meal-prep breakfast cup.
This high-protein Greek yogurt chia pudding is the thick, creamy option when you want a breakfast that holds you steady—especially after a workout. The berry layer makes it feel like a parfait, while the chia-to-yogurt base keeps it filling and meal-prep friendly. Make two cups at once and rotate toppings through the week for an easy high protein chia pudding routine.

Method

  1. Whisk Greek yogurt, vanilla, salt, and 2 tablespoons water (or almond milk) until smooth.
  2. Stir in chia seeds and mix thoroughly.
  3. Rest 10 minutes, then stir again to redistribute the seeds evenly.
  4. Refrigerate at least 2 hours.

Texture tuning

  • Too thick? Add a splash of water or almond milk and stir.
  • Too thin? Add 1 tablespoon chia, stir, and chill 30–60 minutes.

Toppings that make it feel like dessert
Berries, chopped nuts, cocoa powder dusted on top, or a spoon of peanut butter.

If you want a similar high-protein breakfast base that isn’t yogurt, this link fits naturally as an alternative: cottage cheese for breakfast.


3) Chocolate Protein Chia Pudding (Protein Powder + Cocoa)

This jar is for the days you want pudding chia chocolate flavor without the “diet” vibe. Done right, it tastes like a rich chocolate pudding.

Ingredients (1–2 servings)

  • 1 cup unsweetened almond milk (or dairy milk)
  • 1 scoop protein powder (chocolate, or vanilla plus cocoa)
  • 2 tablespoons cocoa powder or cacao powder
  • 3 tablespoons chia seeds
  • Pinch of salt
  • Optional sweetener, to taste
  • Optional: 1 tablespoon Greek yogurt (for extra creaminess)
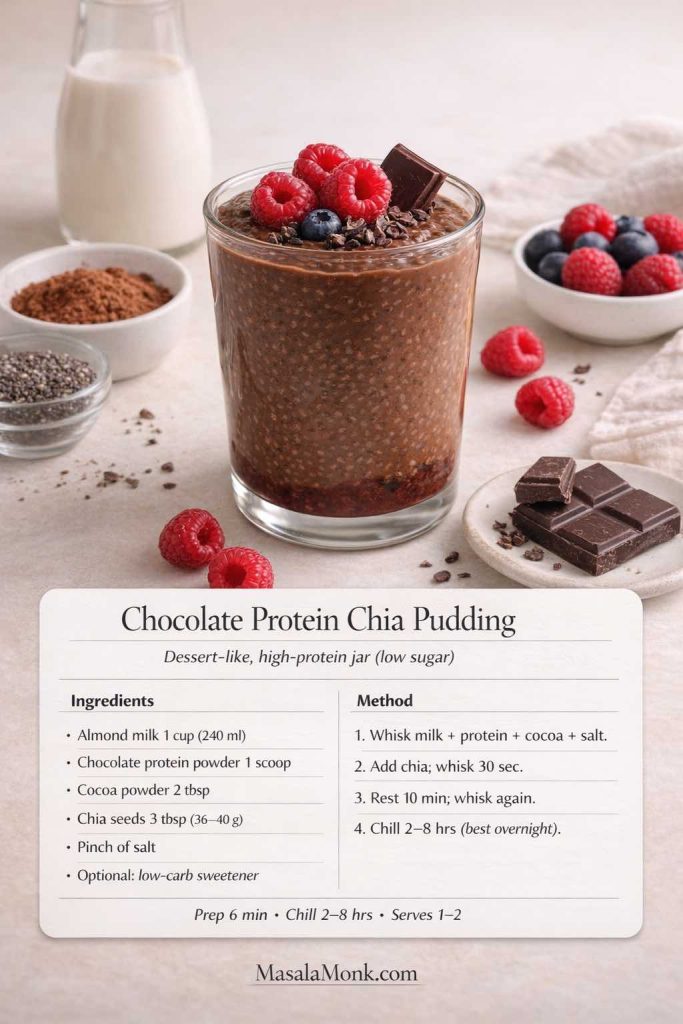
Recipe card image of chocolate protein chia pudding in a clear glass topped with raspberries, cacao nibs, and dark chocolate. The card shows ingredients and steps for a low carb chia pudding made with almond milk, cocoa powder, and chocolate protein powder, including the stir-twice method and chill time, styled as a dessert-like high-protein snack or breakfast.
When cravings hit, this chocolate protein chia pudding is the “dessert that behaves.” Cocoa and a scoop of protein turn a simple jar into a rich, low sugar treat that still fits a low carb day—perfect after training, as an afternoon snack, or whenever you want something chocolatey that keeps you satisfied.

Method

  1. Whisk almond milk, protein powder, cocoa/cacao, salt, and sweetener until completely smooth.
  2. Stir in chia seeds and whisk again.
  3. Rest 10 minutes; whisk a second time to prevent clumps.
  4. Refrigerate overnight for the best set.

How to keep it smooth
If your protein powder tends to clump, whisk it into a small amount of milk first to make a smooth paste, then add the rest of the milk.

Topping ideas
A spoon of whipped Greek yogurt, crushed nuts, cacao nibs, or a few berries.

Also Read: How to make No-Bake Banana Pudding: No Oven Required Recipe


4) Chocolate Peanut Butter Chia Seed Pudding (Classic, Comforting, Satisfying)

This is the jar that feels like a treat. Chocolate and peanut butter do most of the work, so you can keep sweetness low and still love it.

Ingredients (1–2 servings)

  • 1 cup almond milk (or dairy milk)
  • 3 tablespoons chia seeds
  • 1–2 tablespoons peanut butter
  • 1 tablespoon cocoa powder
  • Pinch of salt
  • Optional sweetener
Recipe card image of chocolate peanut butter chia pudding in a clear glass with a peanut butter swirl, topped with raspberries, chopped peanuts, and cacao nibs. The card lists ingredients and steps for a low carb chia pudding made with almond milk, cocoa powder, chia seeds, and peanut butter, including the stir-rest-stir method and chill time, with MasalaMonk.com in the footer.
Chocolate peanut butter chia pudding is the comfort-jar that still plays nicely with a low carb day—rich cocoa flavor, a creamy peanut butter swirl, and a thick spoonable set that’s perfect for cravings. Prep it the night before, then top with berries and nuts for a keto-friendly dessert vibe that also works as a high-protein snack.

Method

  1. Whisk milk, cocoa, salt, and sweetener until smooth.
  2. Whisk in peanut butter until fully dissolved.
  3. Stir in chia seeds, rest 10 minutes, stir again, then refrigerate.

Make it even better
Add a tiny splash of vanilla, or a pinch of cinnamon. Surprisingly, cinnamon makes chocolate taste deeper.

Topping ideas
Strawberries, raspberries, chopped roasted nuts, or a light sprinkle of shredded coconut.

Also Read: Chicken Adobo — Step-by-Step Recipe — Classic Filipino Adobong Manok


5) Matcha Chia Pudding (Green Tea Latte Style)

Matcha and chia seeds are a surprisingly good match. The flavor is clean and slightly bitter, which is exactly why a touch of vanilla and a pinch of salt can make it taste more rounded.

Ingredients (1–2 servings)

  • 1 cup almond milk (or a light coconut milk beverage)
  • 3 tablespoons chia seeds
  • 1–2 teaspoons matcha powder
  • ½ teaspoon vanilla
  • Pinch of salt
  • Optional sweetener
Recipe card image of matcha chia pudding in a clear glass with a creamy pale green set, topped with a kiwi slice, pistachio pieces, and a small dollop of yogurt. The card lists ingredients and steps for a green tea latte style chia seed pudding made with almond milk, matcha, vanilla, and chia seeds, including the stir-rest-stir method and chill time, with MasalaMonk.com in the footer.
This matcha chia pudding tastes like a green tea latte in a jar—fresh, creamy, and surprisingly satisfying. It’s a great low carb breakfast when you want something lighter than chocolate but still crave a dessert-style texture. Prep it overnight, then top with fruit and nuts for a café-style chia pudding cup that’s easy to meal prep and fun to switch up.

Method

  1. Sift matcha into the milk (or whisk it in slowly) until smooth.
  2. Add vanilla, salt, and sweetener if using.
  3. Stir in chia, rest 10 minutes, stir again, then refrigerate.

How to avoid matcha clumps
If matcha is stubborn, whisk it with 1–2 tablespoons warm water first to create a smooth paste, then whisk that into the milk.

Caffeine note
If you’re sensitive to caffeine, keep matcha closer to 1 teaspoon and enjoy earlier in the day. For general guidance, Mayo Clinic’s overview is useful: daily caffeine guidance.

If you like matcha as part of a calmer routine, this supportive read fits naturally: tea and cortisol.


6) Mango Chia Pudding (Bright, Tropical, Meal Prep Friendly)

Mango chia pudding tastes like a dessert jar, yet you can keep it controlled by using a smaller mango portion and leaning on lime and salt to amplify flavor.

Ingredients (1–2 servings)

  • 1 cup almond milk or coconut milk beverage
  • 3 tablespoons chia seeds
  • ⅓ cup mango puree (or finely diced mango)
  • Pinch of salt
  • Optional: squeeze of lime
Recipe card image of mango chia pudding in a clear glass with a bright mango puree base and a creamy chia pudding layer on top, garnished with a lime slice and mango cubes. The card lists ingredients and steps for a layered chia seed pudding made with almond milk, chia seeds, mango puree, and optional lime, including chill time and servings, with MasalaMonk.com in the footer.
This mango chia pudding is the “sunrise cup” that makes meal prep feel like dessert—sweet-tropical flavor, a creamy chia layer, and a bright mango base finished with a squeeze of lime. It’s perfect when you want a lighter low carb chia pudding that still feels fun, especially as a grab-and-go breakfast or a mid-afternoon snack.

Method

  1. Make a plain chia base with milk, chia, and salt.
  2. Chill until set.
  3. Fold in mango puree right before eating, or layer mango at the bottom of your cup and spoon chia on top.

How to keep it low carb
Use mango as a flavor accent rather than the entire bowl. You’ll still get the tropical hit, especially with lime.

More mango inspiration
These fit beautifully as follow-ons: How to Make Mango Chia Pudding: 5 Creative Ideas and Chia Pudding for Lunch: 5 Ways to Add More Mango to It.


7) Apple Cinnamon Chia Pudding (Cozy, Filling, Great for Breakfast)

Apple cinnamon chia pudding is comfort in a jar. Depending on how strict your carbs are, you can either use a small amount of apple or skip it and let cinnamon do the heavy lifting.

Ingredients (1–2 servings)

  • 1 cup unsweetened almond milk
  • 3 tablespoons chia seeds
  • ½ teaspoon cinnamon
  • Pinch of salt
  • Optional: ⅓ cup grated apple
  • Optional: pinch of nutmeg
Recipe card image of apple cinnamon chia pudding in a clear glass, topped with a thin apple fan and a light cinnamon dusting. The card shows ingredients and step-by-step method for a low carb chia pudding made with almond milk, chia seeds, cinnamon, salt, and optional grated apple, plus prep and chill time, with MasalaMonk.com in the footer.
Apple cinnamon chia pudding is the cozy breakfast jar that feels like dessert without being heavy—creamy chia, warm spice, and a bright apple finish. Prep it the night before, then fold in grated apple right before eating for the freshest flavor and a thick, spoonable low carb chia pudding you’ll want on repeat.

Method

  1. Whisk milk, cinnamon, salt, and nutmeg if using.
  2. Stir in chia, rest 10 minutes, stir again, then chill.
  3. Fold in grated apple right before serving (it stays fresher that way).

Keto-friendly variation
Skip apple. Add chopped pecans and a drop of vanilla instead for a low carb cinnamon-pecan pudding.

Also Read: Sweetened Condensed Milk Fudge: 10 Easy Recipes


8) Gingerbread Chia Pudding (Warm Spices, Dessert Energy)

This gingerbread chia pudding is perfect when you want something cozy without needing a baked dessert. It also fits nicely under a broader “anti inflammatory” vibe because of the warming spices—without turning into a medical lecture.

Ingredients (1–2 servings)

  • 1 cup almond milk or coconut milk beverage
  • 3 tablespoons chia seeds
  • ½ teaspoon cinnamon
  • ¼ teaspoon ginger
  • Pinch of cloves or allspice
  • Pinch of salt
  • Optional sweetener
Recipe card image of gingerbread chia pudding in a clear glass, topped with a dollop of yogurt and a light cinnamon sprinkle. The card shows ingredients and steps for a warm-spice chia seed pudding made with almond milk, chia seeds, cinnamon, ginger, cloves or allspice, and salt, including the stir-rest-stir method and chill time, with MasalaMonk.com in the footer.
This gingerbread chia pudding brings cozy dessert flavor to a simple low carb chia pudding routine—warm spices, creamy texture, and a thick set that’s perfect for meal prep. Make it overnight, then finish with a spoon of yogurt (or coconut cream) for a rich, satisfying breakfast cup that feels like a treat.

Method

  1. Whisk spices, salt, and sweetener into the milk.
  2. Stir in chia, rest 10 minutes, stir again, then refrigerate.
  3. Serve with crushed nuts or a spoon of yogurt.

Dessert bridge
If you want more warm-spice keto dessert ideas, this fits naturally: keto vegan dessert recipes with ginger.


9) Keto Chia Pudding with Coconut Milk (Ultra Creamy)

This is the thickest, most “real pudding” keto chia pudding option. If you’ve ever felt chia was too watery, this changes everything.

Ingredients (1–2 servings)

  • 3 tablespoons chia seeds
  • ¾ cup canned coconut milk
  • ¼ cup water (adjust to pourable)
  • Pinch of salt
  • ½ teaspoon vanilla
  • Optional sweetener
Recipe card image of coconut milk keto chia pudding in a clear glass with a creamy white set, topped with toasted coconut flakes and a vanilla bean. The card shows ingredients and step-by-step method using canned coconut milk, water, chia seeds, vanilla, and salt, plus prep and chill time for a thick low carb chia pudding, with MasalaMonk.com in the footer.
If you want the thickest, most dessert-like low carb chia pudding, this coconut milk keto chia pudding is the one. Canned coconut milk gives it that rich, spoonable set, while vanilla and toasted coconut make it feel like a treat you’d pay for. Prep it overnight, then add berries or chopped nuts for a simple, satisfying breakfast cup.

Method

  1. Whisk coconut milk, water, vanilla, salt, and sweetener until smooth.
  2. Stir in chia, rest 10 minutes, stir again, then refrigerate.

Texture tip
If it sets extremely thick overnight, loosen with a splash of water before serving and stir well.

If you love mango + coconut together, this is a nice complementary read: mango with coconut milk.


10) Blended Chia Pudding (Smooth Chocolate Mousse)

Blended chia pudding is for anyone who dislikes the “seed” texture. Once blended, it becomes silky—almost like a classic pudding cup.

Ingredients (1–2 servings)

  • 1 cup almond milk (or dairy milk)
  • 3 tablespoons chia seeds
  • 1–2 tablespoons cocoa powder or cacao powder
  • Pinch of salt
  • Optional sweetener
  • Optional: 1 tablespoon peanut butter or 2 tablespoons Greek yogurt
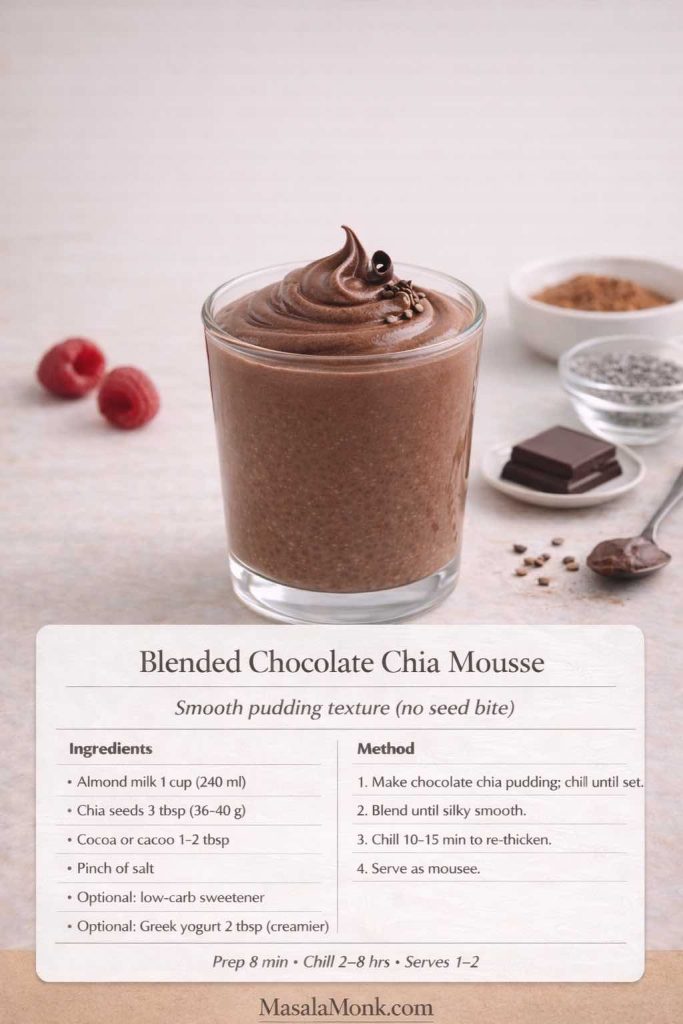
Recipe card image of blended chocolate chia mousse in a clear glass with a piped swirl top, garnished with a dark chocolate curl and cacao nibs. The card lists ingredients and steps for a smooth blended chia pudding made with almond milk, chia seeds, cocoa or cacao, salt, and optional sweetener or Greek yogurt, plus prep and chill time, with MasalaMonk.com in the footer.
If you love chocolate but don’t love the texture of chia seeds, this blended chocolate chia mousse is your best jar. You get the same thick, satisfying low carb chia pudding base, then a quick blend turns it silky and spoonable—more like a classic pudding cup. Keep it simple with cocoa and almond milk, or stir in a little Greek yogurt for an even creamier, high-protein finish.

Method

  1. Make a standard chocolate chia pudding and refrigerate until set (2+ hours).
  2. Blend until completely smooth and glossy.
  3. Chill 10–15 minutes so it thickens again.

Why it’s worth doing
This is one of the best ways to create a creamy chia pudding texture without the “frog egg” feel. It’s also a smart method for protein powder: blend it in after setting to avoid chalky pockets.

Also Read: Sourdough Recipe: 10 Easy Bread Bakes (Loaves, Rolls & Bagels)


Making Chia Pudding Easy to Keep Up With (Meal Prep + Storage)

If you’re making chia seed pudding cups for the week, a simple rhythm helps:

  • Make a plain base batch in a bowl so you can whisk clumps out easily.
  • Portion into jars or cups.
  • Flavor them in two or three different directions so you don’t get bored.
  • Add fresh toppings right before eating.
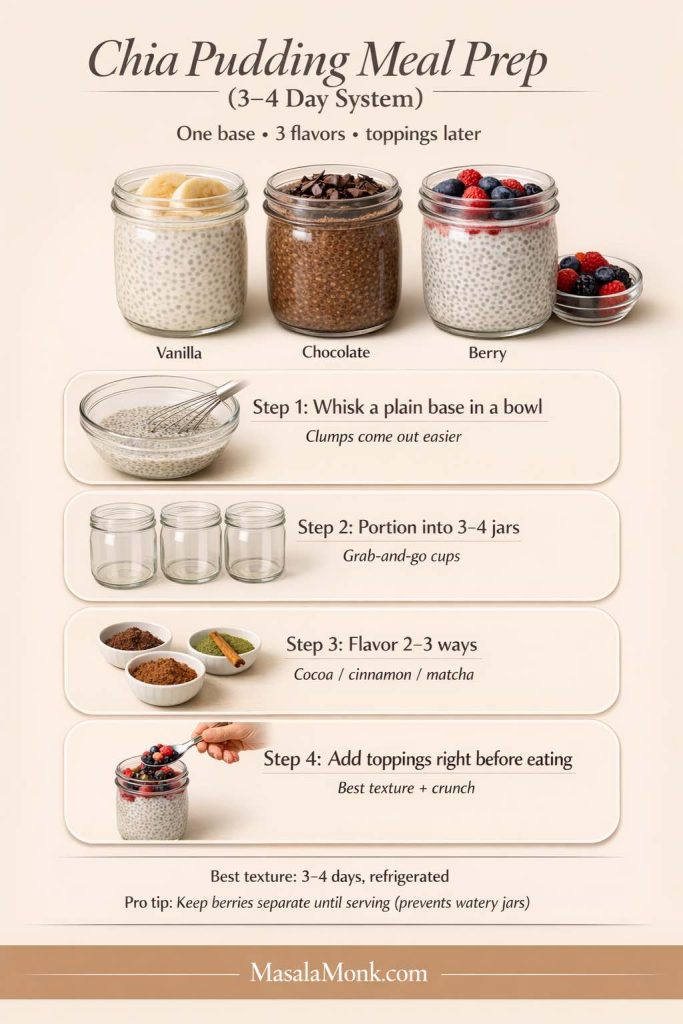
Infographic titled “Chia Pudding Meal Prep (3–4 Day System)” showing three jar flavors (vanilla, chocolate, berry) and four steps: whisk a plain base in a bowl, portion into 3–4 jars, flavor 2–3 ways (cocoa/cinnamon/matcha), and add toppings right before eating for best texture and crunch. Includes storage note “Best texture: 3–4 days, refrigerated” and tip to keep berries separate until serving, with MasalaMonk.com in the footer.
This is the easiest chia pudding routine to stick with: whisk one plain base, portion into 3–4 jars, flavor a few different ways (vanilla, chocolate, berry), and add toppings right before eating so the texture stays thick and fresh. For meal prep, most jars taste best within 3–4 days—especially if you keep berries separate until serving.

For storage time, most people prefer the taste and texture within three to four days. And for general refrigerated leftovers guidance, USDA FSIS is the standard reference: leftovers food-safety storage times.

One subtle trick: if you’re using fruit, especially berries, keep it separate until serving. That way your “chia pudding cups” don’t turn watery, and the flavors stay bright.

Also Read: Peanut Butter Fudge: Recipes & Guide (8 Methods + Easy Variations)


A simple note on keto and chia

Chia can fit into many keto and low carb patterns because it’s easy to portion and pairs well with higher-fat liquids like coconut milk. That’s part of why keto chia seed pudding recipe variations are so common—especially when combined with Greek yogurt or protein powder. If you want a deeper internal explainer focused on chia and keto specifically, this is a natural follow-on: Chia Seeds and the Ketogenic Diet.


The best way to make chia pudding taste like something you crave

A lot of people try chia once, don’t love it, and assume they’re not a “chia person.” Most of the time, it’s not the chia. It’s the flavor balance.

Here’s what tends to make a jar of low carb chia pudding feel genuinely delicious:

  • A pinch of salt, always
  • Vanilla or cinnamon to round out the flavor
  • Cocoa powder when you want depth
  • Something creamy (Greek yogurt, coconut milk, or a spoon of nut butter)
  • A topping that adds contrast—berries, chopped nuts, cacao nibs
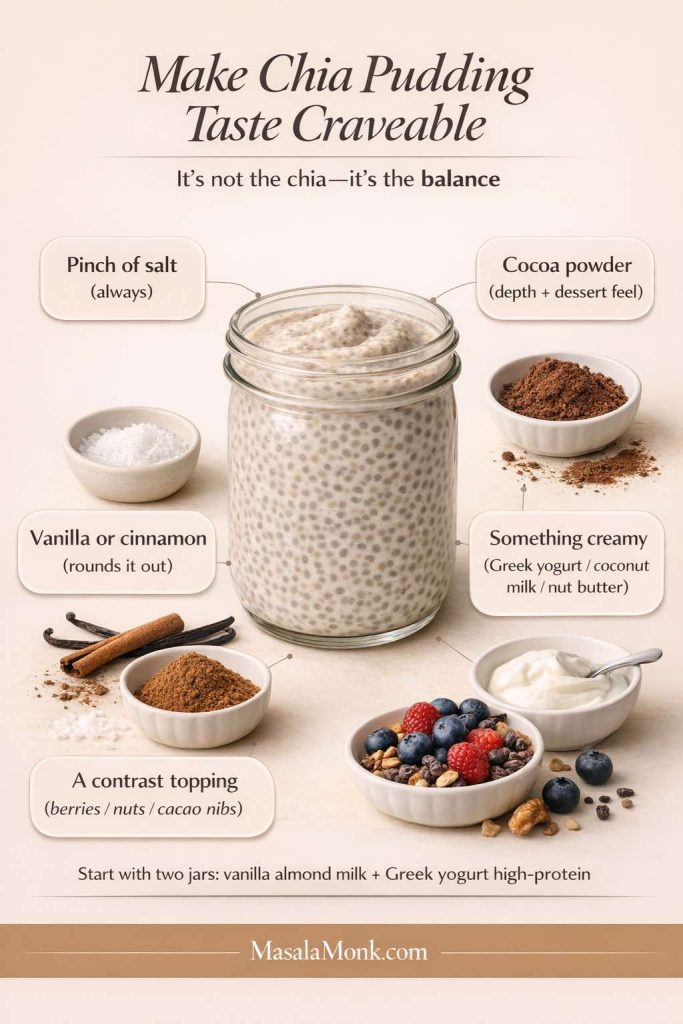
Infographic titled “Make Chia Pudding Taste Craveable” showing a central jar of chia pudding with callouts for flavor balance: pinch of salt, vanilla or cinnamon, cocoa powder, something creamy (Greek yogurt/coconut milk/nut butter), and a contrast topping (berries/nuts/cacao nibs). Bottom note suggests starting with two jars: vanilla almond milk and Greek yogurt high-protein. MasalaMonk.com is in the footer.
If low carb chia pudding tastes “meh,” it’s usually not the chia—it’s the balance. Start with a pinch of salt, add vanilla or cinnamon, bring depth with cocoa powder, then make it creamy with Greek yogurt, coconut milk, or a spoon of nut butter. Finish with a contrast topping like berries, chopped nuts, or cacao nibs, and the jar suddenly feels like a treat you’ll actually crave.

Once you dial that in, low carb chia pudding becomes less of a “health chore” and more of a flexible treat you can keep in rotation. Some weeks you’ll lean into matcha and coconut milk. Other weeks you’ll be in a chocolate peanut butter phase. Then, when you want brightness, mango or berries bring everything to life.

If you make one of these this week, start with two jars: one vanilla almond milk base and one high-protein Greek yogurt version. That way you get variety immediately—light and clean on one side, thick and filling on the other—without creating extra work.

And if you want even more structure for turning chia into a consistent weight-loss habit, revisit the companion guide here: chia pudding for weight loss tips, benefits, and recipes.


FAQs

1) What’s the best low carb chia pudding ratio?

A reliable starting point is 3 tablespoons chia seeds to 1 cup liquid for a thick, spoonable chia seed pudding. If you prefer a lighter texture, use 2½ tablespoons per cup. Conversely, if you want a denser keto pudding feel, keep 3 tablespoons and choose a richer liquid like coconut milk.

2) How long does chia pudding need in the fridge?

Most jars set well in 2–3 hours, although overnight chia pudding usually turns out smoother and more consistent. If you’re meal-prepping chia seed pudding cups, overnight is often the easiest path because the texture stabilizes by morning.

3) Why is my chia seed pudding watery or runny?

Typically, runny chia pudding comes from one of three things: too much liquid, not enough time, or not stirring twice early on. Add 1 teaspoon chia at a time, stir, then refrigerate 30–60 minutes. Also, do a second stir around the 10-minute mark to prevent clumps and uneven hydration.

4) Why did my chia pudding turn too thick?

This happens when chia absorbs more than expected—especially with thick liquids like canned coconut milk. To fix it, stir in a splash of water, almond milk, or coconut milk until it loosens into a creamy chia pudding consistency.

5) Can I make instant chia pudding or quick chia pudding?

You can make a quick chia pudding by whisking thoroughly, stirring again after 10 minutes, and chilling 30–45 minutes. Even so, the best chia pudding texture usually comes from a longer chill. If time is tight, adding Greek yogurt can help it feel thicker sooner.

6) Is chia pudding keto-friendly?

Chia seeds can fit many keto approaches because they’re portionable and pair well with higher-fat liquids. For keto chia pudding, use unsweetened almond milk or coconut milk, keep sweeteners minimal, and choose toppings like nuts, cacao nibs, or unsweetened coconut.

7) What are the best chia seeds for keto or low carb chia pudding?

Both black and white chia seeds work similarly for chia seed pudding low carb recipes. What matters more is freshness and how you store them. If the seeds smell stale or oily, the pudding can taste “off,” even if your recipe is perfect.

8) Can I make chia pudding with almond milk?

Yes—chia pudding with almond milk is one of the most common bases because the flavor is neutral and the texture sets reliably. For extra creaminess, add a spoon of Greek yogurt, coconut cream, or nut butter once it’s set.

9) Can I make chia pudding with coconut milk?

Absolutely. Chia pudding coconut milk versions are often the creamiest and feel closest to a traditional pudding. If you’re using canned coconut milk, thin it slightly with water so the chia hydrates evenly.

10) Can I make chia pudding with oat milk?

Yes, chia pudding with oat milk is popular because it tastes mild and comforting. However, oat milk is not typically low carb, so it’s better for a general “healthy pudding” routine rather than a strict keto plan.

11) Can I make chia pudding with yogurt instead of milk?

You can, and it’s a great way to create a high protein chia pudding. For chia pudding with yogurt no milk, whisk yogurt with a little water to loosen it, then stir in chia. The result is thick, tangy, and very filling.

12) What’s the difference between chia pudding with Greek yogurt vs regular yogurt?

Greek yogurt is thicker and higher in protein, so chia pudding Greek yogurt versions tend to set firmer and feel more like a meal. Regular yogurt can work too, although you may need a bit more chia or a longer chill to reach the same texture.

13) Can I add protein powder to chia pudding?

Yes—chia pudding with protein powder is an easy way to boost protein. For the smoothest result, dissolve the protein powder into the milk first, then add chia. If you add powder directly to a set pudding, it can clump.

14) How do I make chocolate chia protein pudding taste better?

Use cocoa or cacao plus a pinch of salt to deepen the flavor. Then, choose a chocolate protein powder you actually enjoy. A small spoon of peanut butter or Greek yogurt can also make chocolate protein chia pudding taste richer and less “thin.”

15) Can I make blended chia pudding?

Yes. Blended chia pudding is ideal if you dislike the texture of whole chia seeds. First, let the pudding set; afterward, blend until smooth. You’ll get a creamy chia pudding that feels like mousse, especially with cocoa or nut butter.

16) Can I grind or blend chia seeds before soaking?

You can, but it changes the texture quickly and may thicken faster. Ground chia pudding tends to set more like a gel. If you prefer a smoother mouthfeel, blending after soaking often tastes better than blending dry seeds first.

17) What’s the best way to sweeten chia pudding without sugar?

Many people keep it simple with vanilla, cinnamon, cocoa, or fruit. If you want sweetener, choose an option you tolerate well and use a small amount. Often, adding a spoon of peanut butter or coconut milk richness reduces how much sweetness you need.

18) Is chia pudding paleo?

Chia pudding paleo versions usually use almond milk, coconut milk, or coconut water instead of dairy. For a richer bowl, add nut butter, coconut cream, or fruit. If you use yogurt, choose a version that matches your approach.

19) What is anti inflammatory chia pudding?

In practice, it’s chia pudding flavored with ingredients often used in “anti-inflammatory” eating patterns—ginger, cinnamon, cacao, berries, and sometimes turmeric. A ginger chia pudding or gingerbread chia pudding can fit this style while still tasting like dessert.

20) Can I add collagen to chia pudding?

Yes. Chia collagen add-ins are usually easiest because collagen peptides dissolve smoothly. Since collagen doesn’t thicken much, you’ll still rely on chia (and optionally yogurt) for the pudding texture.

21) What toppings work best for chia pudding for weight loss?

For a more weight-loss friendly bowl, focus on toppings that add texture without a big sugar hit: nuts, seeds, unsweetened coconut, cacao nibs, and a measured amount of berries. If you want fruit-forward flavors like mango chia pudding, keep the portion modest and balance it with protein.

22) How do I make strawberry chia seed pudding or berry chia pudding?

Make a plain base first, then fold in mashed strawberries or mixed berries after it sets. Alternatively, layer berries at the bottom of the cup for a “chia pudding with strawberries” effect. If you add watery fruit too early, the pudding can loosen.

23) How do I make mango chia pudding without making it too sweet?

Use mango as a flavor accent: a few tablespoons of puree can be enough. Add lime and a pinch of salt to amplify the tropical flavor, then keep the base unsweetened so the mango stands out naturally.

24) How do I make apple cinnamon chia pudding taste like dessert?

Use cinnamon, vanilla, and a pinch of salt as the backbone. If you’re not strict keto, a small amount of grated apple adds aroma and sweetness. Otherwise, chopped pecans plus cinnamon can mimic an apple-pie vibe without the fruit.

25) How long does chia seed pudding last, and can I meal prep it?

Chia pudding is popular for meal prep because it holds well in the fridge. Many people prep single serve chia pudding cups for several days at a time. For the best texture, keep toppings separate and stir before eating.

26) Why does my chia pudding taste bland?

Usually it needs salt, vanilla, or a stronger flavor base. Cocoa, matcha, cinnamon, and nut butter all make a big difference. Also, richer liquids—like coconut milk—often improve flavor even when sweetness is minimal.

27) What’s the easiest 3 ingredient chia pudding?

A classic 3 ingredient chia pudding is chia seeds + almond milk + vanilla (or chia + coconut milk + cocoa). If you want it sweeter, add a fourth ingredient: your preferred sweetener or a small amount of fruit.

28) Can I make chia seed pudding with regular milk or whole milk?

Yes. Chia seed pudding with milk (including whole milk) sets well and tastes creamy. If your goal is low carb chia pudding, watch the carbs from dairy milk and adjust based on your overall plan.

29) What’s better: chia pudding in a jar, glass, or cups?

Any container works. Chia pudding cups are great for grab-and-go; a chia pudding glass looks nice for serving; a jar is convenient for shaking and stirring. What matters most is leaving enough room to stir well before it sets.

30) Are premade chia pudding cups worth it?

They can be convenient, especially when you need a ready-to-eat snack. Still, homemade lets you control sweetness, protein, and texture. If you like the convenience of premade chia pudding, you can mimic it by prepping chia seed pudding cups in advance with two or three flavors.
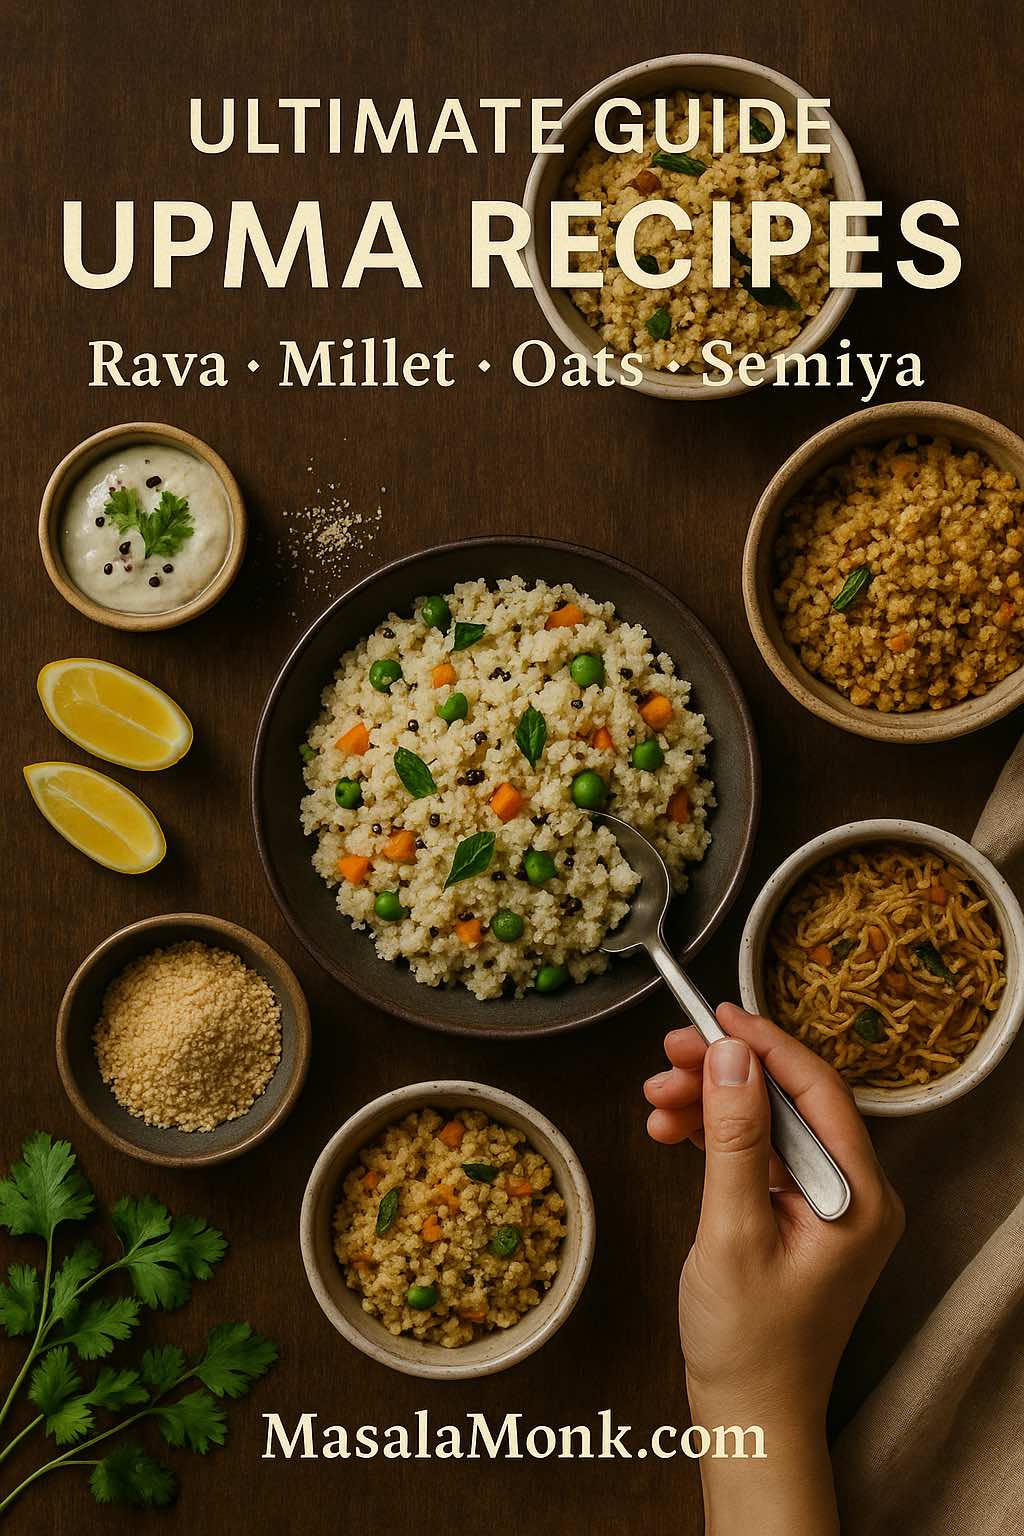
Posted on 6 Comments

Upma Recipe: 10+ Easy Variations (Rava, Millet, Oats, Semiya & More)

Top-down flatlay of five Indian upma varieties—rava, millet, oats and semiya—arranged with chutney, lemon wedges and herbs, hand holding a spoon, cover image for ultimate upma recipes guide on MasalaMonk.

Upma is one of those breakfasts that feels like home, no matter which part of India you’re from. It’s warm, soft, gently spiced, and endlessly adaptable. With a few pantry staples and one basic upma recipe in your head, you can improvise everything from a simple rava upma for rushed mornings to a millet upma for days when you want something a little more wholesome, or even an oats or quinoa upma when you’re leaning towards high-fibre bowls.

For people looking for “upma recipe”, “how to make upma”, “simple upma recipe”, “millet upma recipe”, “semiya upma”, “instant upma premix” or even “upit recipe”, this long, no-rush guide is meant to sit in your kitchen as a one-stop reference. You’ll get:

  • A detailed, step-by-step rava upma recipe with all the tiny tricks that matter
  • Vegetable and masala variations that turn it into a one-bowl meal
  • Millet upma with different grain options and real health context
  • Semiya (vermicelli) upma, for tiffin boxes and kids who love noodles
  • Oats upma and quinoa upma, with links to what science actually says about them
  • Wheat and rice rava upma for days when you don’t feel like semolina
  • A homemade instant upma mix for travel or office lunches
  • Plenty of ideas for what to serve with upma to build a complete breakfast plate

Along the way, you’ll also find links out to trusted recipe writers and nutrition resources, so you’re not just taking one blog’s word for it. For instance, if you like cross-checking your basics, you can always compare with this lovely, traditional South Indian rava upma method on Indian Healthy Recipes, which you’ll find under the title traditional South Indian rava upma recipe.


What Is Upma, Really?

At its heart, upma is a savoury porridge or pilaf made by roasting a grain (most commonly semolina / suji) and then simmering it in a seasoned, tempered liquid. The tempering usually includes mustard seeds, lentils like urad dal and chana dal, curry leaves, green chillies, onion and sometimes ginger. Once the grain absorbs the water and steams, it turns soft and fluffy, ready to be fluffed, finished with lemon and coriander, and eaten hot.

Cast iron skillet filled with soft rava upma topped with peas and curry leaves, surrounded by bowls of semolina, lentils and spices, with a hand sprinkling curry leaves, illustrating the upma cooking method.
One pan, so many breakfasts – a skillet of gently simmering rava upma with all the classic tempering elements that define the upma method.

Traditionally, rava upma is especially popular in South India, often served with coconut chutney and filter coffee. If you’re curious about that version, you can see another take on it at Veg Recipes of India under their traditional upma with coconut chutney, which matches closely with what many homes actually make.

However, the family of upma is much bigger than just semolina. As grains like ragi, foxtail millet, jowar, oats and quinoa become more common in pantries, the same technique is being reused with different bases. That means an “upma recipe” today can be:

  • A classic suji upma with just onions and chillies
  • A colourful vegetable upma
  • A masala upma with sambar powder or garam masala
  • A millet upma packed with fibre and minerals
  • A semiya upma that looks like a noodle stir-fry
  • An oats upma that quietly helps your cholesterol numbers
  • A quinoa upma that feels modern but very Indian in flavour
Flatlay of small bowls showing raw rava, millet, semiya and oats at the top, with cooked rava, vegetable millet and semiya upma in bowls below and a wooden spoon in the centre, illustrating that many grains can be used to make upma.
Rava, millet, semiya and oats in their raw and cooked forms, side by side – a reminder that upma is a method you can apply to many grains, not just semolina.

Instead of treating each of these as a totally separate dish, it helps to understand the common logic once, then play.

Also Read: Double Chocolate Chip Cookies – Easy Recipe with 7 Variations


The Classic Rava Upma Recipe (Suji Upma)

Let’s begin with the version you’re most likely to cook again and again: a simple rava upma. Once you get comfortable with this, switching to millet rava or wheat rava upma becomes almost automatic.

Close-up of a neatly domed serving of soft rava upma with peas, carrots and curry leaves on a ceramic plate, hand reaching for the spoon, with text describing it as an everyday suji breakfast bowl.
Soft, fluffy rava upma piled into an everyday suji breakfast bowl, scented with curry leaves, mustard seeds, onions and a squeeze of lemon.

Ingredients for 2 Servings

  • Semolina / suji / upma rava – ½ cup (medium or slightly coarse)
  • Water – 1½ cups (you can move between 1¼ and 1¾ depending on how soft you like it)
  • Oil or ghee – 2 tablespoons
  • Mustard seeds – ½ teaspoon
  • Urad dal – 1 teaspoon
  • Chana dal – 1 teaspoon
  • Cashew halves – 6–8 (optional but lovely)
  • Onion – 1 small, finely chopped
  • Green chillies – 1–2, slit or chopped
  • Ginger – ½ inch piece, finely chopped
  • Fresh curry leaves – 8–10
  • Salt – to taste
  • Lemon juice – 1–2 teaspoons
  • Fresh coriander – a small handful, chopped

Home cooks and bloggers disagree very gently about the perfect ratio of rava to water. Some prefer it soft and spoonable, others a little drier and crumbly. If you want to dig deeper into this, Raks Kitchen has a useful breakdown of textures and ratios in her rava upma water ratio tips. For now, though, 1:3 is a safe, beginner-friendly place to start.

Step 1: Roast the Rava

Begin by dry-roasting the semolina in a wide pan. Keep the flame low-medium and stir continuously so it doesn’t catch at the bottom.

Step 1 of making rava upma showing a hand stirring semolina in a black skillet with a wooden spatula, with text explaining to dry toast suji on low heat till aromatic to keep upma non-sticky.
Step 1 – gently roasting the rava on low heat so every grain of suji stays separate and the final upma turns out soft, fluffy and never sticky.

You’re looking for:

  • A slightly deeper colour, but not brown
  • A warm, nutty aroma
  • Grains that feel separate when you stir them

This step might feel skippable if you’ve bought “roasted upma rava”, but it’s worth doing anyway. Roasting removes raw flavours and, more importantly, helps the rava swell up evenly without turning sticky.

Once roasted, transfer the rava to a plate and let it cool slightly while you prepare the tempering.

Step 2: Build the Tempering

In the same pan, add the oil or ghee. When it heats up, drop in mustard seeds. As soon as they splutter, stir in urad dal and chana dal.

Step 2 of making upma showing mustard seeds, urad dal, chana dal and cashews sizzling in oil in a black skillet while a hand adds fresh curry leaves with a spoon, illustrating the tempering stage for classic rava upma.
Step 2 – tempering mustard seeds, lentils, cashews and curry leaves in hot oil to create the nutty, fragrant base that makes every rava upma taste authentic.
  • Fry the dals on medium heat until they turn golden and crisp.
  • Add cashews at this stage if you’re using them and fry till lightly golden.

The sizzling mix of mustard, dals and nuts is not just for taste; it contributes crunch in every bite. After this, tip in the curry leaves, chopped ginger and green chillies. They’ll sputter a bit, so stand back for a moment.

Finally, add the chopped onion. Sauté until it turns soft and translucent. You don’t really need to brown the onion for a basic upma recipe; you just want the raw bite to vanish.

Step 3: Bring the Spiced Water to a Boil

Now pour in the measured water and add salt. Taste the water – it should be slightly saltier than you’d like the final upma to be, because the rava will absorb some of that salt.

Step 3 of the rava upma recipe showing a cast-iron skillet of spiced water at a rolling boil with curry leaves and lentils, while a hand sprinkles salt from a wooden spoon, with text explaining to boil the water so the rava cooks quickly and evenly.
Step 3 – add water and salt to the tempering, then bring it to a proper rolling boil so the suji swells quickly and the upma cooks evenly without turning lumpy.

Bring this to a rolling boil. This matters more than it seems:

  • Boiling water helps rava swell quickly and evenly.
  • It dramatically reduces your chances of ending up with lumpy upma.

Meanwhile, if you feel like cross-checking a slightly different style of tempering or vegetable add-ins, you could glance through the traditional South Indian rava upma recipe at Indian Healthy Recipes; you’ll notice the same broad steps.

Step 4: Add the Rava Without Lumps

Once the water is bubbling, lower the flame. Hold the roasted rava in one hand and a spatula in the other.

Step 4 of the rava upma method showing a hand pouring roasted semolina in a thin stream into a skillet of bubbling spiced water while another hand stirs with a wooden spatula, with text explaining to sprinkle suji slowly and stir constantly to avoid lumps.
Step 4 – “raining in” the roasted rava, sprinkling suji slowly into boiling spiced water while stirring so every grain cooks evenly without clumping.
  • Slowly sprinkle the rava into the boiling water in a steady stream.
  • Keep stirring continuously.

The idea is to give each little sprinkle of rava a chance to meet the hot liquid and swell individually. If you dump it all in at once, it will clump and form dumplings.

Within a minute or two, the mixture will start thickening and pulling away from the sides.

Step 5: Steam, Fluff and Finish

At this point, cover the pan and let the upma steam on the lowest flame for about 3–4 minutes. Switch off the heat and allow it to sit, still covered, for another 2 minutes.

Step 5 of the rava upma recipe showing a hand lifting the lid off a steaming skillet of fluffy upma while another hand fluffs it with a spoon, with lemon wedge and coriander nearby and text explaining to steam, fluff and finish with lemon and coriander.
Step 5 – let the upma steam on low, then fluff it and finish with lemon juice and fresh coriander for a soft, airy bowl.

When you open the lid:

  • The rava should be cooked through, soft and fluffy.
  • The surface might look a little dome-like; that’s fine.

Fluff gently with a fork or spatula to loosen up the grains. Finally, add lemon juice and chopped coriander, and fold everything together. Taste and adjust salt or lemon once more.

Serve hot with coconut chutney, podi, pickle or simply a drizzle of ghee on top. For another angle on serving ideas (especially with coconut chutney), you can refer to the version at Veg Recipes of India under their traditional upma with coconut chutney.

Also Read: Carbonara Recipe: Italian Pasta (Creamy, Veggie, Chicken, Shrimp, Tuna & Keto)


Vegetable Upma, Masala Upma Recipe and Other Rava Upma Variations

Once the basic method feels natural, you’ll inevitably start tweaking it. Some mornings you’ll want more vegetables, some days more heat, and sometimes you’ll be in the mood for a slightly indulgent, ghee-laced bowl of “mom upma”.

Vegetable Upma

For a simple vegetable upma, follow the classic recipe with one change: after sautéing the onion, add about ½ to 1 cup of finely chopped vegetables such as:

  • Carrots
  • Green beans
  • Green peas
  • Sweet corn
  • Capsicum
Recipe card style image for vegetable upma showing small bowls of chopped carrots, beans, peas, corn and capsicum on a board with a skillet of onions in the background, plus text explaining to add ½–1 cup mixed veggies after the onions and sauté before continuing the rava upma recipe.
Veggie upgrade – turn plain rava upma into colourful vegetable upma by adding a generous ½–1 cup of finely chopped carrots, beans, peas, corn and capsicum after the onions and sautéing till they brighten.

Sauté the vegetables for a couple of minutes until the colours brighten and they lose their rawness. After that, proceed with water, salt and rava as usual.

This variation cleverly answers many searches like “simple upma recipe”, “veggie upma” or “upma recipe for kids”, without changing the core technique.

Masala Upma

For mornings when you want something closer to a one-bowl lunch, a masala upma works beautifully.

Hand sprinkling turmeric into a pan of vegetable upma with peas, carrots and beans, with small bowls of turmeric and red spice in front and text explaining how to turn veggie upma into masala upma with turmeric and sambar or garam masala.
Masala twist – once the veggies are in, add turmeric for colour and a spoon of sambar or mild garam masala to turn everyday vegetable upma into a fuller, lunch-style masala upma.

In addition to the vegetables:

  • Add ¼ teaspoon turmeric powder for a bright colour.
  • Sprinkle in ½ teaspoon sambar powder or a mild garam masala.

Those additions transform the flavour just enough to make it feel more lunch-worthy, especially if you serve it with a dollop of yoghurt and a salad on the side.

Red Rava Upma Recipe

Sometimes you’ll come across red rava (made from whole wheat or red rice) labelled as “upma rava” too. You can treat it in almost the same way as suji, with slight adjustments:

Recipe card for whole-grain red rava upma showing bowls of regular suji and coarse red rava in the foreground with a skillet of rustic red rava upma behind them, plus text explaining to roast red rava longer and use about 1:3 to 1:3.25 rava to water for a nutty, softer texture.
Whole-grain red rava upma – roast the red rava a little longer, add more water and give it extra time on the stove for a deeper, nuttier bowl that feels closer to a whole grain breakfast.
  • Roast it a little longer; whole-grain rava benefits from deeper roasting.
  • Increase the water slightly to around 1:3 or even 1:3.25 if it’s very coarse.
  • Be patient with cooking time; whole grains take longer to soften.

The result is a nuttier, more rustic upma that fits nicely on days when you want something closer to a whole grain breakfast.

Recipe of “Mom-Style” Ghee Rava Upma

If you grew up on upma made by a mother or grandmother who didn’t shy away from ghee, you might crave that taste from time to time.

Mom-style ghee rava upma in a cast-iron pan topped with deep golden cashews and curry leaves while a hand pours ghee from a spoon, with text explaining to use ghee for tempering and finish each serving with an extra spoon of ghee.
Ghee-lover’s home version – swap oil for ghee, fry the cashews till deep golden and finish each serving with an extra spoon of ghee for that nostalgic, mom-style rava upma flavour.

To get that flavour:

  • Use ghee instead of oil for the tempering.
  • Fry the cashews till deep golden.
  • Finish with a small spoonful of ghee drizzled over each serving.

The extra richness hides in the background, but it makes every spoonful taste like a hug.

Also Read: One-Pot Chicken Bacon Ranch Pasta (Easy & Creamy Recipe)


Millet Upma: Jowar, Foxtail, Ragi and Multi-Millet Rava Recipe

Over the last few years, millet upma has become a favourite for people who want a more nutrient-dense breakfast without sacrificing Indian flavours. Millets are naturally rich in fibre, minerals like iron, calcium and zinc, and often have a gentler effect on blood sugar compared to refined grains.
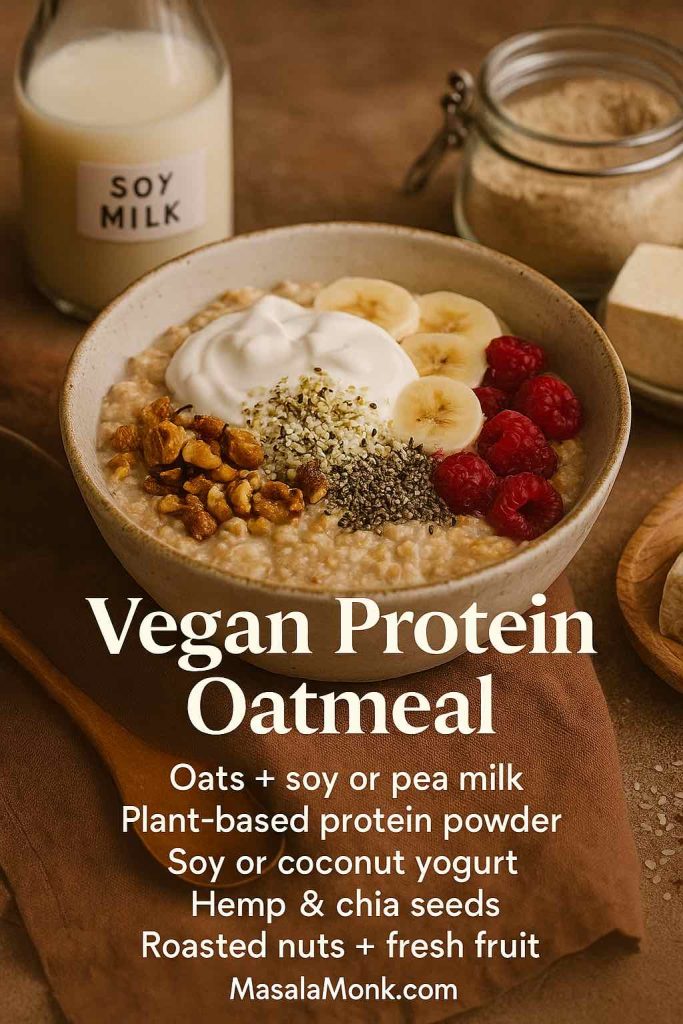
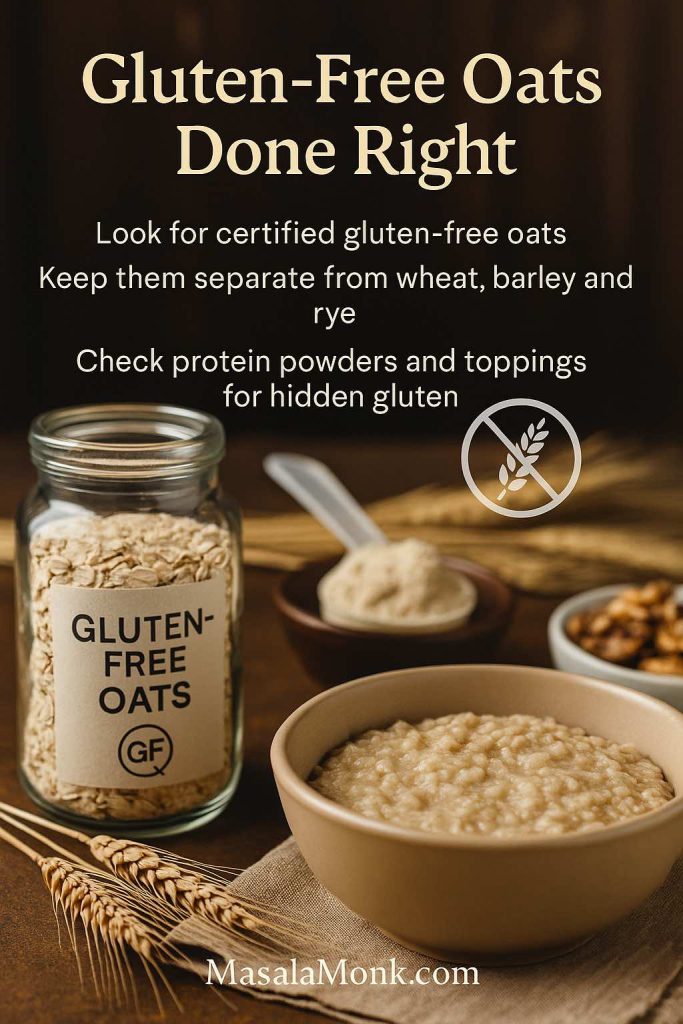
If you’d like to see the bigger picture before you start cooking, two good reads are MasalaMonk’s own overview Millets: The Gluten-Free Superfood and their guide exploring the various types of millets in India. For a more formal look, you can also glance at the ICMR–NIN document on nutritional and health benefits of millets, or FSSAI’s classification of millets as “nutri-cereals” in their millets guidance notes.
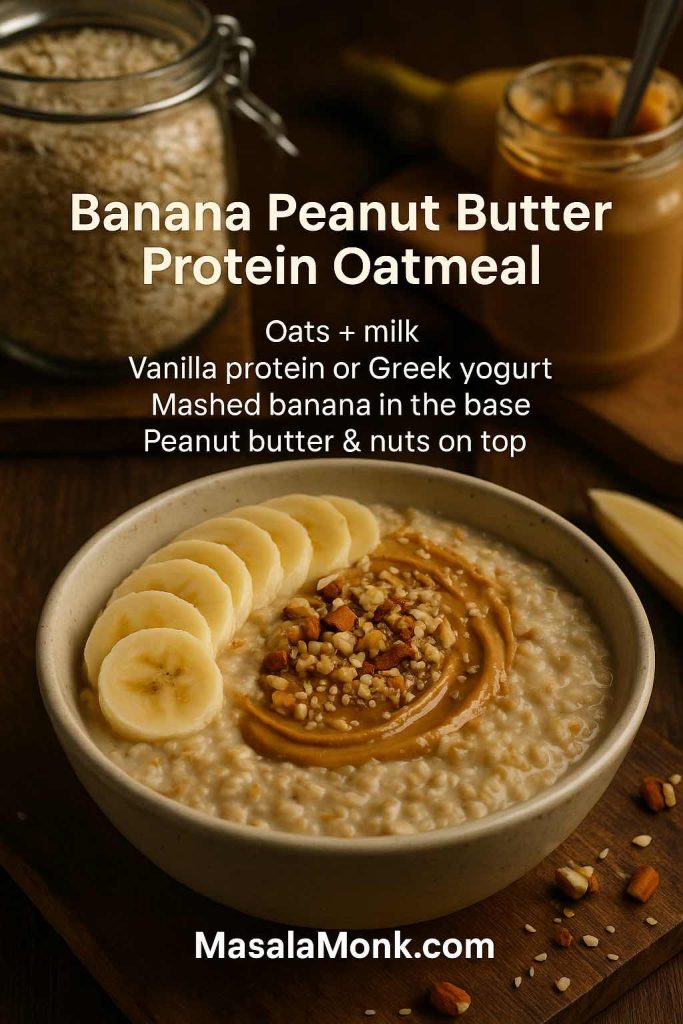
Portrait photo of a fibre-rich millet upma bowl with peas, carrots and curry leaves on a wooden table, surrounded by jars labelled multi millet, foxtail and millet rava, with text describing millet upma as a breakfast that gives more fibre, iron and a gentler blood-sugar rise than plain suji.
Millet upma for mornings that last – a fibre-rich bowl made with multi-millet rava, jowar and foxtail-style grains, offering more iron and a gentler blood-sugar rise than plain suji upma.

Which Millet Rava Works Well for Upma?

You can make a millet upma recipe using:

  • Multi-millet rava blends
  • Jowar rava, often called jonna rava in some regions
  • Foxtail millet rava
  • Ragi-based mixed millet rava (often combined with other millets for better texture)

For a clearer sense of what’s available in Indian markets, this breakdown of common types of millet available in India is handy.

Basic Millet Upma Recipe

For 2 servings:

  • Millet rava – ½ cup
  • Water – 1¾ to 2 cups (millets generally need more water than suji)
  • Oil – 2 tablespoons
  • Mustard seeds – ½ teaspoon
  • Urad dal – 1 teaspoon
  • Chana dal – 1 teaspoon
  • Cashews – a small handful (optional)
  • Onion – 1 small, chopped
  • Ginger – ½ inch, chopped
  • Green chillies – 1–2
  • Curry leaves – a few sprigs
  • Mixed vegetables – ½ to 1 cup
  • Salt, lemon juice, coriander – to taste

The method mirrors rava upma, with a few tweaks:

Recipe card image showing small bowls of millet rava labelled multi-millet, jowar, foxtail mix and ragi above a skillet of cooked millet upma, with text explaining that all these millet ravas work for upma and need to be toasted and cooked with about 1¾–2 cups water for ½ cup rava.
Choose your millet rava – multi-millet, jowar, foxtail and ragi mixes all work beautifully for millet upma when you toast the rava first and use a little extra water for soft, fluffy grains.
  1. Dry roast the millet rava in a pan till it smells toasty and feels lighter.
  2. In another pan (or the same pan after transferring the roasted millet), make the tempering: oil, mustard, dals, cashews, curry leaves, ginger, chillies, onion.
  3. Add vegetables and sauté till they brighten.
  4. Pour in water and salt; bring to a good boil.
  5. Lower the flame and slowly stir in the roasted millet rava, stirring as you go.
  6. Cover and cook on a low flame till the grains soften. Rest for a few minutes and fluff.

Because millets can feel new if you haven’t cooked them much before, you might also enjoy trying other breakfast-style millet recipes, such as fermented ragi (finger millet) idlis or barnyard millet and foxnuts savoury pancakes, which give you more ideas on how to rotate millets through your mornings.

Also Read: Katsu Curry Rice (Japanese Recipe, with Chicken Cutlet)


Wheat and Rice Rava Upma Recipe (Godhuma, Bansi, Samba, Arisi Upma)

Beyond millets, many households regularly switch between suji, wheat rava and rice rava. People looking for “wheat rava upma”, “samba rava upma”, “bansi rava upma”, “rice rava upma” and “arisi upma mix” are all essentially trying to do this rotation with confidence.

Digital food photo showing two bowls of upma on a wooden board, one labelled wheat rava upma and the other rice rava or arisi upma, with small piles of wheat rava and rice rava, curry leaves, green chutney and lemon, plus text explaining that wheat rava needs more water and time while rice rava feels closer to soft rice.
Beyond suji – side-by-side bowls of wheat rava upma and rice rava (arisi) upma, showing how you can swap in godhuma or arisi rava for a heartier, rice-like take on classic upma.

Wheat Rava Upma Recipe

Wheat rava goes by many names: godhuma rava, bansi rava, samba rava, broken wheat and so on. This base yields a slightly chewier, almost pilaf-like upma.

To prepare it:

  • Replace suji with the same quantity of wheat rava.
  • Roast it gently before use.
  • Use around 1½ to 2 cups of water for ½ cup wheat rava, depending on how coarse it is.

The tempering and vegetable combination can be identical to rava upma. The only real difference is the cooking time, which tends to be a touch longer.

If someone at home has to avoid wheat because of an allergy or suspected intolerance, it’s worth reading a focused guide such as wheat allergy: symptoms, causes, and treatment and then leaning on rice or millet-based upma instead of wheat rava versions.

Instructional graphic showing a bowl of wheat rava upma with a pile of wheat rava, and a bowl of rice rava or arisi upma with a pile of rice rava, plus text explaining to roast wheat rava well and use about 1:3 water, and to roast rice rava gently and use about 1:3–1:3.5 water for a soft rice-like texture.
Quick tweaks for wheat and rice rava upma – roast wheat rava well and simmer with about 1:3 water for chewier grains, while rice rava or arisi upma prefers gentler roasting and a little extra water for a soft, rice-like finish.

Recipe for Rice Rava Upma / Arisi Upma

Rice rava (or arisi rava) is simply broken rice. It tends to taste closer to soft rice cooked in a tempering, but still follows the “roast, simmer, steam” logic.

You can:

  • Use ½ cup rice rava to start with.
  • Roast it lightly, just until it loses any raw aroma.
  • Temper oil with mustard seeds, dals, curry leaves, ginger, chillies and onions.
  • Add water and salt (start with about 1½ to 1¾ cups, adjusting as needed).
  • Stir in rice rava, then simmer covered till the grains are soft but not mushy.

If you’re already cooking plain rice alongside, you might find MasalaMonk’s guide on how to cook perfect rice every time helpful; it walks through stovetop, cooker and Instant Pot methods and helps time everything together in a busy kitchen.

Also Read: 10 Best Espresso Martini Recipe Variations (Bar-Tested)


Semiya Upma Recipe (Vermicelli / Seviyan Upma)

Switching gears a little, semiya upma is what many people reach for when they’re dealing with fussy children, tiffin boxes or days when they’re simply bored of rava. Vermicelli upma feels lighter, looks fun on the plate, and still uses the same basic building blocks.

Ingredients for 2 Servings

  • Roasted vermicelli (semiya) – 1 cup
  • Water – 2 to 2¼ cups
  • Oil – 1½ to 2 tablespoons
  • Mustard seeds – ½ teaspoon
  • Urad dal – 1 teaspoon
  • Chana dal – 1 teaspoon
  • Cashew nuts – a small handful (optional)
  • Onion – 1 small, chopped
  • Ginger – ½ inch, minced
  • Green chillies – 1–2, chopped
  • Curry leaves – a sprig or two
  • Mixed vegetables – ½ to 1 cup (peas, carrots, beans, corn)
  • Salt, lemon juice, coriander – to taste
Recipe card for semiya upma showing a bowl of colourful vermicelli upma with peas, carrots and curry leaves, surrounded by bowls of roasted semiya, mustard seeds, lentils and cashews, with text summarising the base ratio, tempering and cooking method for semiya upma.
Semiya upma recipe in a nutshell – roasted vermicelli simmered with tempered mustard, lentils, cashews, onions and mixed veggies for a lighter, tiffin-friendly twist on classic upma.

Method

  1. If the vermicelli isn’t pre-roasted, dry roast it till it turns a light golden-brown and gives off a nutty aroma.
  2. In a separate pan, prepare the tempering exactly as you would for rava upma: oil, mustard, dals, cashews, curry leaves, ginger, chillies, onion.
  3. Add vegetables and sauté briefly until they brighten in colour.
  4. Pour in water and salt, bring to a boil.
  5. Add the roasted vermicelli gradually while stirring so it doesn’t clump.
  6. Lower the heat and cook uncovered or partially covered until the water is absorbed and the semiya is soft but still holds its shape.
  7. Finish with lemon and coriander.

Unlike some other variations, semiya upma doesn’t always need chutney; it tastes quite complete on its own, especially if you’re generous with the vegetables and cashews.

Also Read: Greek Tzatziki Sauce Recipe (1 Master Sauce + 10 Easy Variations)


Oats Upma Recipe: A Savoury, High-Fibre Bowl

Once you’re comfortable with the idea that almost any grain can become an upma, oats are a natural next step. Many readers searching for “oats upma” are looking for a way to eat oats that doesn’t feel like a bowl of sweet porridge.

From a nutrition point of view, oats are rich in beta-glucan, a soluble fibre that helps with satiety and cholesterol regulation. Harvard’s Nutrition Source has a concise explainer under their overview of oats and beta-glucan benefits, and Mayo Clinic offers a practical perspective in their guide to starting your day with healthy oatmeal.

Ingredients for 2 Servings

  • Rolled oats – 1 cup
  • Water – about 1¾ cups (adjust if you like it looser or firmer)
  • Oil – 1½ tablespoons
  • Mustard seeds – ½ teaspoon
  • Urad dal – 1 teaspoon
  • Chana dal – 1 teaspoon
  • Cashew nuts – a few (optional)
  • Onion – 1 small
  • Ginger – ½ inch
  • Green chillies – 1–2
  • Curry leaves
  • Mixed vegetables – ½ cup or more
  • Salt, lemon juice, coriander – as usual
Recipe snapshot for savory oats upma showing a bowl of colourful oats upma with peas, carrots and cashews, surrounded by bowls of rolled oats, mustard seeds, lentils and cashews, with text summarising the ratio, tempering and simmering steps for a high-fibre Indian breakfast bowl.
Savory oats upma recipe snapshot – dry-toasted rolled oats simmered with tempered mustard, lentils, cashews, onions and veggies, then finished with lemon and coriander for a high-fibre Indian breakfast bowl.

Method

  1. Dry toast the oats in a pan for 2–3 minutes until they smell toasty and slightly nutty. This step keeps the final texture pleasant and prevents mushiness.
  2. In another pan, temper oil with mustard, dals and cashews.
  3. Add curry leaves, ginger, chillies and onion, sauté till the onion softens.
  4. Stir in vegetables and fry briefly.
  5. Add water and salt; bring to a boil.
  6. Tip in the toasted oats, lower the flame and cook, stirring occasionally, until they absorb the water and turn soft.
  7. Rest for a couple of minutes, then fluff and garnish with lemon and coriander.

If you enjoy oats in both sweet and savoury forms, you might want to keep a few ideas bookmarked. MasalaMonk’s high protein overnight oats and their guide on turning plain oats into a high-protein meal are both excellent for days when you want more variety and protein without abandoning oats as a base.

Meanwhile, if you’re curious about the “hard” science on oats and cholesterol, you’ll find clinical-trial style evidence in publications that examine oat beta-glucan and LDL reduction in detail; those are reassuring when you commit to eating oats upma regularly.

Also Read: Simple Bloody Mary Recipe – Classic, Bloody Maria, Virgin & More


Quinoa Upma: Low-GI, High-Protein Comfort Recipe

Quinoa might not be native to Indian kitchens, but it slips into Indian flavours surprisingly well. When you treat it like rava and build an upma recipe around it, you get a bowl that tastes familiar but behaves a little differently in your body.

As a grain, quinoa tends to have a lower glycaemic index than both white and brown rice and also brings more protein and minerals per cup. A recent comparison on quinoa vs rice for blood sugar and weight management lays this out in an accessible way, and if you enjoy science-y talks, you might appreciate this Royal Society of Chemistry event that explored whether quinoa can be a healthier alternative to rice.

Ingredients for 2 Servings

  • Quinoa – ½ cup, rinsed thoroughly
  • Water – 1½ cups
  • Oil – 1½ to 2 tablespoons
  • Mustard seeds – ½ teaspoon
  • Urad dal – 1 teaspoon
  • Chana dal – 1 teaspoon
  • Cashews – a handful (optional)
  • Onion – 1 small, chopped
  • Ginger – ½ inch
  • Green chillies – 1–2
  • Curry leaves
  • Mixed vegetables – ½ to 1 cup
  • Salt, lemon juice, coriander
Recipe snapshot for quinoa upma showing a bowl of quinoa upma with peas, carrots and cashews beside small bowls of quinoa and lentils, with text explaining rinsing, tempering and simmering quinoa for a low-GI, high-protein upma bowl.
Quinoa upma recipe snapshot – well-rinsed quinoa simmered with tempered mustard, lentils, cashews, onions and veggies until the grains show little “tails”, then fluffed with lemon and coriander for a low-GI, high-protein upma bowl.

Method

  1. Place the quinoa in a fine-mesh sieve and rinse thoroughly under running water. This helps wash away saponins, which can taste bitter.
  2. In a pan, prepare the tempering with oil, mustard seeds, dals and cashews, followed by ginger, chillies, curry leaves and onion.
  3. Add chopped vegetables and sauté briefly.
  4. Stir in the drained quinoa and sauté for a minute or two; this step gives the grains a lightly toasted flavour.
  5. Pour in the water, add salt, and bring to a boil.
  6. Reduce to a simmer, cover and cook until the water is absorbed and the quinoa grains show little “tails”.
  7. Rest off the heat for a few minutes, then fluff and finish with lemon and coriander.

To see how quinoa compares directly to rice in everyday meals, including dishes like pulao and bowls similar to upma, you might enjoy MasalaMonk’s own quinoa vs rice overview, which brings the conversation back into a very Indian kitchen.


Homemade Instant Upma Mix: Just Add Hot Water

There are days when you have no time to chop onions, wash curry leaves or even stand at the stove for long. That’s when searches like “instant upma mix for travel”, “instant rava upma mix”, “readymade upma packet” and “upma premix” start appearing.

Instead of only relying on store-bought packets, you can make your own instant upma mix in a small weekend batch and use it through the week, or carry it in a jar or pouches when you travel.

Instructional image showing a glass jar labelled Instant Upma Mix surrounded by bowls of roasted rava, mustard seeds, lentils, dried curry leaves and spices, with text explaining how to combine them into a homemade instant upma premix for the week.
Instant upma premix – combine roasted rava with cooled tempering, dried curry leaves, ginger powder, chilli and salt, then store it in a jar or pouches so a hot bowl of upma is only boiling water away all week.

What You Need for a Small Batch

  • Roasted rava – 1 cup
  • Oil – 1 tablespoon (you can leave this out and keep the mix completely dry if you prefer)
  • Mustard seeds – ½ teaspoon
  • Urad dal – 1 teaspoon
  • Chana dal – 1 teaspoon
  • Dried curry leaves – a tablespoon or so
  • Ginger powder – a pinch or two
  • Green chilli powder or red chilli flakes – to taste
  • Salt – ¾ to 1 teaspoon (or pack separately)

Making the Instant Upma Premix at Home

  1. Dry roast the rava if it isn’t already roasted; let it cool completely.
  2. In a small pan, heat the oil and fry mustard seeds, urad dal, chana dal and dried curry leaves until crisp and fragrant. Allow this tempering to cool fully.
  3. Mix the roasted rava with the cooled tempering, ginger powder, chilli powder and salt.
  4. Store the mix in a clean, dry, airtight jar. For travel, portion it into small zip pouches or tiny containers so you can make one serving at a time.

Because the mix already contains salt and spices, all you need at the destination is boiling water and a bowl.

Instructional image showing boiling water being poured from a kettle into an insulated mug filled with instant upma premix on a desk, with text explaining how to add premix, pour hot water, cover and wait a few minutes for an easy travel- or office-friendly upma.
Instant upma, anywhere – add premix to a mug, pour boiling water, cover and wait a few minutes for a hot, comforting bowl at your desk, in a hostel or on a train journey.

How to Cook Instant Rava Upma from the Mix

For one serving:

  • Instant upma premix – ½ cup
  • Boiling water – ¾ to 1 cup

You simply:

  1. Add the premix to a bowl or small insulated container.
  2. Pour boiling water over it, stir well and cover.
  3. Let it stand for 5–7 minutes.
  4. Fluff with a fork and eat.

This approach is especially useful for office lunches, dorm rooms and overnight train journeys. If you’re into meal prepping more broadly, you can pair a home-made upma premix with larger batch cooks using guides like MasalaMonk’s vegetarian and high protein meal prep ideas from Indian cuisine, which help you think in terms of components instead of one-off meals.


What to Serve With Upma (and How to Build a Breakfast Around It)

While upma can absolutely be the only thing on your plate, it often plays very well with other small dishes. On some mornings you might want something cooling and tangy alongside; on others, you might want a hot drink or even a sweet treat to nibble with the last few bites.

Upma breakfast platter on a wooden tray with a bowl of rava upma, coconut and tomato chutneys, podi with ghee, curd, lemon wedges and a tumbler of filter coffee, with text suggesting pairing upma with chutneys, pickle and a warm drink for a complete morning meal.
Build your upma breakfast – pair any bowl of rava, semiya or millet upma with coconut and tomato chutney, podi with ghee, curd, lemon pickle and a warm drink like filter coffee to turn it into a complete morning ritual.

Here are a few ways to round out the experience:

  • Coconut chutney, tomato chutney, gunpowder (podi) with ghee, lemon pickle or even a simple bowl of curd all sit naturally next to a bowl of suji upma, semiya upma or millet upma.
  • A warm drink balances the savoury comfort of upma nicely. In winter, for instance, you could make a mug of homemade hot chocolate with cocoa powder on the side and turn breakfast into a cosy ritual.
  • On days when you’re fasting for part of the day, sipping on homemade electrolytes for fasting before or after your eating window—within which you eat a lighter millet upma—can help you feel more balanced.

Boosting the Nutrition

If you’re trying to boost the overall nutrition of the plate, there are a few simple tweaks that add up over time:

  • Sprinkle roasted seeds, such as pumpkin or sunflower, on your upma for a bit of crunch and good fats.
  • Stir soaked chia seeds into yoghurt or chutney; for ideas on how to use chia in Indian-style meals, MasalaMonk’s guide on benefits of chia seeds & how to use them in Indian diet offers plenty of inspiration.
  • Add a small fruit component—slices of papaya, orange segments, a banana—to bring in vitamins and sweetness naturally.
Instructional image showing a plate of upma with small bowls of roasted pumpkin and sunflower seeds, yoghurt topped with chia seeds and sliced banana and orange, with text explaining how to add seeds, chia and fruit to make an upma breakfast more nutritious.
Boost your upma plate – sprinkle roasted seeds, stir chia into yoghurt and add a side of fruit so a simple bowl of upma turns into a more balanced, fibre- and nutrient-rich breakfast.

And if you like mixing Indian and Western breakfast styles on weekends, nothing stops you from serving a simple vegetable upma alongside a couple of slices of vegan French toast or baked toast sticks. MasalaMonk’s collection of vegan French toast recipes and their crispy French toast sticks can give you a head start there.


Rotating Grains Through the Week

One quiet advantage of mastering a few upma recipes is that you can then build a weekly rhythm around rotating grains. Instead of eating only suji or only oats, you can switch between several bases while keeping flavours familiar.

For example:

  • Monday – Classic rava upma with onions and chillies
  • Tuesday – Vegetable upma using wheat rava
  • Wednesday – Millet upma with jowar or foxtail millet rava
  • Thursday – Oats upma with lots of vegetables
  • Friday – Semiya upma for a lighter, comforting bowl
  • Saturday – Quinoa upma when you want something special
  • Sunday – A more indulgent ghee rava upma with cashews

The idea of variety is not just about boredom; it’s also about nutrition. The updated Indian dietary guidelines from ICMR emphasise including a range of cereals and millets over the week rather than relying only on refined grains. You can read more about that in the ICMR document on cereals and millets in the diet, which explains why shifting between rice, wheat, millets and other grains matters for long-term health.

Vertical infographic titled Rotate Your Upma Grains Through the Week showing a weekly planner from Monday to Sunday with small illustrations of different upma bowls and text suggesting classic rava upma, wheat vegetable upma, millet upma, oats upma, semiya upma, quinoa upma and ghee rava upma to encourage rotating grains instead of relying on one refined grain.
Rotate your upma grains through the week – move from rava to wheat, millets, oats, semiya and quinoa so breakfast stays interesting while your plate gradually shifts away from a single refined grain.

On top of that, broader resources that list foods rich in soluble fibre—such as this round-up of soluble-fibre-rich foods on Health.com—help you see where oats, barley, pulses and fruits fit into the larger picture of heart and gut health. As you get comfortable with those patterns, you’ll see that a thoughtfully made upma can anchor a very respectable breakfast, especially when it’s paired with pulses, vegetables and a side of fruit or nuts.

Also Read: Air Fryer Hard-Boiled Eggs (No Water, Easy Peel Recipe)


Bringing It All Together

When you step back and look at everything you can do with one simple technique, the humble upma starts to look less like a single dish and more like a framework. With one basic method—roast the grain, build a tempering, simmer, steam and fluff—you can create:

  • A straightforward suji upma for days when you want something quick and familiar
  • A vegetable or masala upma that almost counts as a complete meal
  • A millet upma that uses jowar, foxtail or ragi rava for extra minerals and fibre
  • A wheat or rice rava upma that tweaks the texture just enough to keep things interesting
  • A semiya upma that feels tiffin-friendly and child-approved
  • An oats upma that quietly supports your cholesterol and blood sugar goals
  • A quinoa upma that borrows global ingredients but stays rooted in Indian seasoning
  • A home-made instant upma mix that travels with you wherever you go
Family sitting at a wooden table enjoying bowls of rava upma, with a close-up of hands holding a bowl in the foreground and text reading “Bringing It All Together – master one upma method and spin it into a cozy, nutritious breakfast”.
Bringing it all together – once you’ve mastered one simple upma method, you can keep serving it in different grains and styles, but what really matters is the shared bowl at the table and the comfort it brings to busy mornings.

You don’t have to memorise separate instructions for each of these. Instead, you only need to internalise the proportions, roasting times and cooking times for each grain. Once you’ve done that, everything else is just small variations: more vegetables one day, more spices another, extra ghee on a Sunday, milder seasoning when someone’s unwell.

Somewhere between “how to make upma” and “which upma recipe should I choose today?”, you’ll probably find your own favourite combination of grain, vegetables, fat and accompaniments. And when that happens, upma stops being just a default breakfast and becomes one of those dishes you can cook almost on autopilot—leaving you free to enjoy the aroma of curry leaves in hot oil, the steam rising from the pan, and the simple pleasure of a warm, comforting bowl at the start of the day.

Also Read: Tres Leches – Mexican 3 Milk Cake Recipe

FAQs

1. What is upma, and how is it different from other Indian breakfasts?

Upma is a savoury, spoonable dish usually made by roasting a grain like rava (semolina, also called suji or upma rava) and then simmering it in a spiced liquid with a tempering of mustard seeds, lentils, curry leaves, chillies and onions. Unlike poha, which uses flattened rice, or idli, which relies on fermented batter, an upma recipe is quick, does not need soaking or grinding, and can be easily adapted to use different grains such as wheat rava, rice rava, millets, oats or quinoa.


2. What is the best rava for a classic rava upma recipe?

For a traditional rava upma or suji upma, medium or slightly coarse upma rava works best. Very fine suji can turn pasty, while extremely coarse rava may feel too chewy. Typically, packets labelled “upma rava” or “bombay rava” are ideal. Wheat rava (bansi or samba) and rice rava also make good upma, but they give a slightly different texture and flavour compared to the classic semolina-based upma recipe.


3. What is the ideal water ratio for soft, fluffy upma?

For most rava upma recipes, a ratio of 1:2½ to 1:3 (rava:water) works well. If you love very soft, hotel-style upma, you can lean closer to 1:3. On the other hand, if you prefer a firmer, grainier texture, you might enjoy 1:2½ more. Millet upma, wheat rava upma and rice rava upma usually need a little extra water; oats upma and quinoa upma also behave differently and often fall somewhere between 1:2 and 1:3 depending on the exact grain and cut.


4. How can I prevent lumps in my rava upma?

To keep your upma smooth and lump-free, the grain needs two things: roasting and careful mixing. First, dry roast the upma rava on a low to medium flame until it smells nutty and feels lighter. Next, bring the water and tempering to a full boil, then lower the heat. Gradually sprinkle the roasted rava into the boiling water with one hand, while you stir constantly with the other. This way, each little bit of rava meets the hot water separately and swells on its own, instead of clumping into balls.


5. Why does my upma turn sticky or mushy?

Upma often becomes sticky if the rava is not roasted enough, if the water ratio is too high for the grain, or if it is stirred aggressively after cooking. For a classic rava upma recipe, roast the semolina until it is aromatic, measure the water accurately, and once it has steamed, fluff gently rather than vigorously mixing it. For semiya upma (vermicelli upma) and oats upma, overcooking or adding too much water can also create a gluey texture, so it helps to keep the flame low and stop cooking as soon as the grain is just tender.


6. How do I make a simple upma recipe without vegetables?

A basic suji upma without vegetables is straightforward. Dry roast the rava, prepare a tempering with oil or ghee, mustard seeds, urad dal, chana dal, curry leaves, ginger, green chillies and onions, then add water and salt and bring it to a boil. Slowly stir in the roasted rava, cook covered for a few minutes, and finally finish with lemon juice and coriander. Even though there are no vegetables, this minimal upma recipe still tastes satisfying because of the fragrant tempering and the roasted flavour of the rava.


7. Can I make upma without onion or garlic?

Many people prefer a satvik upma recipe without onion or garlic, and that version is absolutely possible. In that case, rely more on curry leaves, ginger, green chillies, mustard seeds and lentils in the tempering. You can also add grated coconut or chopped coriander at the end for extra freshness. This style of upma is common on fasting days or festival mornings, and it works equally well with rava upma, millet upma and even oats upma.


8. Is upma healthy, or is it just a heavy breakfast?

Upma can be as light or as indulgent as you choose to make it. A plain rava upma recipe made with a moderate amount of oil or ghee, plenty of vegetables and served with yoghurt or chutney can fit into a balanced diet. Nevertheless, rava is a refined grain, so if you want a more nutrient-dense bowl, it helps to rotate with millet upma, wheat rava upma, oats upma or quinoa upma. By changing the base grain, increasing the amount of vegetables and moderating the fat, you can turn a simple upma recipe into a wholesome, everyday breakfast.


9. Which type of upma is better for weight management or diabetes?

Although individual needs differ, many people looking for a “healthy upma recipe” gravitate towards millet upma, oats upma or quinoa upma. These versions often have more fibre and a gentler impact on blood sugar compared to an upma recipe made only with refined semolina. In addition, adding vegetables, a small portion of nuts or seeds and pairing the bowl with yoghurt or a protein-rich side makes the meal more filling and may reduce the urge to snack soon after. Even so, portion size still matters, so lighter, moderate servings usually work best.


10. What are some easy variations beyond rava upma?

Beyond the classic rava upma, it is quite simple to explore other versions using the same basic method. For instance, semiya upma (vermicelli upma) swaps rava for roasted vermicelli threads; millet upma uses millet rava such as jowar, foxtail or multi-millet blends; oats upma relies on rolled oats; quinoa upma uses rinsed quinoa simmered with the tempering; and rice rava or arisi upma uses broken rice. The seasoning and vegetables can remain almost identical, so once you grasp one upma recipe, the others become natural extensions.


11. How do I prepare an instant upma mix for travel or busy mornings?

An instant upma mix starts with roasted rava and a very dry tempering. To assemble it, first roast the semolina thoroughly and cool it, then fry mustard seeds, urad dal, chana dal and dried curry leaves in a little oil until crisp. Once everything is completely cool, mix the rava, the tempering, dry spices such as ginger powder and chilli powder, and salt. Store the mixture in an airtight jar or in single-serving pouches. Later on, you only need to combine a portion of this instant upma mix with boiling water, allow it to stand covered for a few minutes, and fluff it before eating.


12. How long can roasted rava or instant upma premix be stored?

Roasted rava alone, if cooled thoroughly and kept in an airtight container away from moisture and insects, keeps well for several weeks and often even a couple of months. Instant upma premix that contains oil and spices generally has a shorter shelf life, though it still lasts a few weeks at room temperature in a cool, dry cupboard. If your climate is very humid, keeping smaller quantities of the premix in the fridge can be a safer choice. In any case, it is wise to check aroma and appearance before use; if the mix smells stale or looks clumpy, it is better not to use it.


13. Can I make upma in a pressure cooker or microwave?

Upma is traditionally cooked in an open pan, but it can also be adapted to a pressure cooker or microwave when needed. In a cooker, you can prepare the tempering, add rava and water, then cook on low heat without placing the whistle, treating the cooker like a heavy pan. In a microwave, you may roast rava and prepare the tempering separately, then combine everything with hot water in a microwave-safe bowl and cook in short bursts, stirring in between. Both methods work, although controlling texture and avoiding overcooking is usually easiest on the stovetop.


14. Is upma suitable for toddlers and children?

Upma can be very child-friendly, especially when you keep the spices gentle and cut the vegetables finely. For toddlers, it helps to make the rava upma slightly softer, use only a mild amount of chilli (or skip it altogether), and mash or blend the bowl lightly if needed. As children grow older, you can gradually introduce vegetable upma, semiya upma, millet upma and even a lightly spiced masala upma. Because the basic upma recipe is soft and easy to chew, it often works well as one of the early family foods that kids can share with adults.

Posted on 7 Comments

Protein Oatmeal: Turn Plain Oats into a High-Protein Meal

Person holding a bowl of high-protein oatmeal topped with banana, peanut butter, nuts and chia seeds on a rustic breakfast table.

Most people think of oatmeal as “a healthy carb.” It’s warm, comforting, full of fibre… and then you’re hungry again two hours later. Now imagine that same cozy bowl redesigned as a high-protein meal that actually keeps you full, supports your training or weight-loss goals, and still tastes like dessert if you want it to. That’s the idea behind protein oatmeal: you keep everything good about oats and simply upgrade the protein.

In this guide, you’ll learn:

  • Why oats are such an excellent starting point
  • How much protein you actually get from oats (and why that’s not enough)
  • Different ways to build high protein oatmeal – with and without protein powder
  • How to tweak your bowl for muscle gain, weight loss, vegan or gluten-free diets
  • Flavour ideas so your oatmeal protein breakfast never feels boring

By the end, you’ll have a simple framework you can use to turn any plain oats into a high-protein meal that fits your life.

Also Read: High Protein Overnight Oats | 5 Recipes (Low Calorie, Vegan, Bulking & More)


Why Oats Deserve a Spot in a High-Protein Breakfast

Before you add anything to your oats, it helps to understand why they’re worth eating in the first place.

Oats are one of the most nutrient-dense whole grains available. They provide:

  • A generous amount of soluble fibre, especially beta-glucan, which supports heart health and more stable blood sugar
  • Complex carbohydrates that digest slowly
  • Useful amounts of vitamins, minerals and antioxidant compounds
Person scooping rolled oats from a glass jar into a bowl on a wooden table with milk and a heart-shaped dish, illustrating oats as a nutrient-dense breakfast base.
Oats quietly do the heavy lifting: fibre for digestion, slow carbs for steady energy and nutrients that set the stage for a high-protein oatmeal breakfast.

If you want a clear, friendly overview of oat types, benefits and basic nutrition, MasalaMonk already has a detailed guide to oats, types and nutrition. It walks through steel-cut, rolled, quick and instant oats, and explains how each behaves in your bowl.

In addition, articles on major health sites consistently link regular oatmeal consumption to improved cholesterol profiles, better blood sugar control and long-term heart health. Oats are often highlighted as one of the top whole grains to include in a heart-supportive diet.

So from a health perspective, oats already do a lot:

  • The fibre helps with appetite and digestion.
  • The slow carbs give you steady energy rather than a hard crash.
  • The nutrients quietly check off several boxes in your daily needs.

However, there’s one big limitation: protein.

Also Read: The Science of Protein: Maximizing Muscle Growth and Recovery


How Much Protein Is in Oats – and Why It’s Not Enough

Oats have a reputation as a higher-protein grain, and that’s true compared with many cereals. Yet the actual numbers matter.

Most nutrition databases show that:

  • 100 g of dry oats provide roughly 13–17 g of protein (depending on variety and brand).

That certainly makes oats more protein-dense than, say, rice. Nevertheless, most people don’t eat 100 g of dry oats in one sitting. A typical portion might be:

  • 40–50 g dry oats (around ½ cup), which only gives 5–7 g of protein.

That’s… okay. It’s better than a sugary breakfast cereal, but it doesn’t come close to the 20–30 g of protein that many people aim for in a high protein oatmeal breakfast.

Two bowls of oatmeal on a wooden table, one plain and one topped with yogurt, banana and seeds, showing how the same oats can become high-protein oatmeal.
Same oats, different protein: a plain bowl gives you only a few grams of protein, while layering yogurt, banana, nut butter and seeds turns it into a 20–30 g high-protein oatmeal meal.

Meanwhile, research on higher-protein breakfasts suggests:

  • Meals with more protein tend to improve appetite control later in the day.
  • People often experience fewer cravings and less late-night snacking when breakfast has a solid protein dose.

So oats alone are “protein friendly,” yet they don’t automatically become high protein oatmeal on their own. To reach that level, you need to layer proteins onto the oat base.

That’s good news, because it means you can keep everything you like about oats and simply upgrade them instead of replacing them.

Also Read: 10 High Calorie Protein Shakes & Smoothie Recipes for Healthy Weight Gain


Step 1: Choose the Right Oats for Your Protein Bowl

The type of oats you start with changes cooking time, texture and even how “heavy” the meal feels. Once you choose your base, it becomes much easier to design your version of protein oatmeal.

Rolled, Steel-Cut or Quick: Which Is Best?

For everyday high protein oatmeal, you’ll usually work with three main options:

  1. Rolled / Old-Fashioned Oats
    • Steamed and flattened whole oats
    • Cook in just a few minutes
    • Turn soft and creamy, ideal for classic porridge
  2. Steel-Cut Oats
    • Whole oat groats chopped into pieces
    • Need more simmering time
    • Stay chewy and nutty, with a slightly lower glycaemic impact
  3. Quick or Instant Oats
    • More finely processed
    • Cook quickly or even just by soaking
    • Can turn mushy if overcooked
Three bowls showing rolled oats, steel-cut oats and quick oats on a wooden board, with a hand scooping rolled oats to illustrate different oatmeal textures.
Rolled, steel-cut or quick: choosing your oat texture is the first step to building protein oatmeal that feels creamy, chewy or ultra-fast to make.

If you’d like a deep comparison, have a look at MasalaMonk’s breakdown of steel-cut oats vs rolled oats. It goes into texture, cooking methods and nutrition in much more detail, and it’s a helpful companion piece if you’re trying to decide which to stock at home.

For protein oatmeal, rolled oats are usually the most practical choice: they cook fast, hold mix-ins well and can be used in the microwave, on the stove or baked. Steel-cut oats work beautifully on days when you want something hearty and leisurely. Quick oats shine when you need a high protein oatmeal in under five minutes.

If you ever wonder whether you can swap different oat types in recipes, MasalaMonk also answers that in a simple guide to substituting old-fashioned oats for rolled oats. Knowing how flexible oats actually are makes it easier to experiment.

A Word on “Oats” vs “Oatmeal”

Sometimes people use “oats” and “oatmeal” as if they were the same thing. Technically:

  • Oats are the raw grain (rolled, steel-cut, instant, etc.).
  • Oatmeal is the prepared dish—what you actually eat from the bowl.

If that distinction ever feels fuzzy, MasalaMonk has a short explainer on the difference between oats and oatmeal that clears things up in everyday language.

Once your base is clear, you can move on to the next decision: what to cook the oats in.


Step 2: Liquids That Quietly Boost Your Protein

The liquid you choose influences flavour, creaminess and, in some cases, the total protein content of your oatmeal.

Here are the main contenders:

Water

  • Zero calories from the liquid
  • Very neutral base
  • Leaves all the work to your add-ins

Cow’s Milk

  • Adds extra protein, calcium and creaminess
  • Works well for both sweet and savoury bowls

Soy Milk

  • The highest-protein plant milk
  • Excellent choice for high protein vegan oatmeal

Oat Milk, Almond Milk and Others

  • Lovely texture and flavour
  • Lower in protein but often fortified with vitamins and minerals
  • Great when you rely on other ingredients for the main protein boost
Glass of water, bottles of milk, soy milk and oat milk arranged around a bowl of rolled oats with a hand reaching in, showing different liquid bases for oatmeal.
Water keeps it lean, milk adds creaminess and protein, soy boosts plant protein, while oat and nut milks bring comfort and flavour to your protein oatmeal bowl.

If you enjoy doing things from scratch, you can even make your own oat milk and then cook your oats in it. MasalaMonk’s method for easy homemade oat milk is designed to avoid the classic slimy texture people complain about.

There’s also a full discussion of oat milk and its benefits, including how it may support weight management and digestion. That information can help you decide when oat milk belongs in your protein oatmeal, and when you might prefer dairy or soy instead.

At this point, you have a base:

  • The kind of oats you like
  • A liquid that fits your preferences

Next, you can finally add the star of the show: protein.

Also Read: How to make Almond Milk at Home


Step 3: Oatmeal with Protein Powder – The Quickest Upgrade

When people look for “oatmeal with protein powder,” “protein powder oats” or “oatmeal and protein powder,” they’re usually looking for a shortcut. They want high protein oatmeal that’s fast, simple and predictable.

Protein powder fits that brief perfectly.

Choosing a Protein Powder for Oatmeal

Several types of protein powders work well with oats. The best one for you depends on taste, digestion, budget and whether you eat animal products.

Bowl of creamy oatmeal surrounded by jars of whey, pea, plant and collagen protein powders, with a hand scooping powder as text highlights how to choose a protein for oats.
Pick your protein partner: whey for creamy bowls, casein for thick pudding-style oats, plant blends for vegan protein oatmeal and collagen as a gentle booster to your oats.

Here’s how they generally behave:

Whey Protein

  • Mixes very easily
  • Tends to give you the creamiest texture
  • Ideal for chocolate protein oatmeal, vanilla bowls, mocha oats and other dessert-style flavours

Casein Protein

  • Thickens more than whey
  • Fantastic when you want a pudding-like effect, almost like a custard or thick protein porridge
  • Often very filling, which is useful for appetite control

Plant-Based Proteins (Pea, Soy, Rice–Pea Blends)

  • Essential for oatmeal high in vegan protein.
  • Might be slightly thicker or more “earthy” in flavour, but blends improve every year
  • Work very well when you pair them with spices, cocoa or fruits

Collagen Powder

If you’re trying to build more plant-forward meals, have a look at MasalaMonk’s list of plant-based protein sources for meal prep. Many of those ingredients also slide neatly into high protein oatmeal bowls.

How to Add Protein Powder Without Ruining Your Oats

Nobody wants lumpy, chalky oatmeal. Fortunately, there’s a simple method that makes oatmeal with protein powder smooth and enjoyable:

  1. Cook your oats with water or milk until they’re just how you like them.
  2. Take the pan off the heat and let it stand for a minute so the mixture stops bubbling.
  3. In a separate cup or small bowl, whisk your protein powder with a little liquid to create a smooth, pourable paste.
  4. Stir that paste into the warm oats until everything looks creamy and uniform.

You can then adjust thickness with more liquid if needed.

Hand whisking protein powder with milk into a smooth paste next to a warm bowl of oatmeal, showing how to avoid lumpy protein oats.
Whisk protein powder with a little liquid first, then stir the smooth paste into warm oatmeal to enjoy creamy, high-protein oats without any chalky lumps.

This technique works beautifully for:

  • Vanilla protein oatmeal topped with banana and cinnamon
  • Chocolate porridge protein with cocoa powder and a few dark chocolate shavings
  • Berry-heavy bowls where the oats and powder form a base for strawberries, blueberries or cherries

Finally, if you prefer to drink your breakfast, you can turn this into a high protein oatmeal shake. Blend cooked oats, liquid and protein powder until completely smooth, then add ice or frozen fruit for a milkshake-like texture.

Also Read: Healthy Wholewheat Carrot Chia Seed Pancakes- Vegetarian High Protein Recipe


Step 4: High Protein Oatmeal Without Protein Powder

Protein powders are convenient, yet they’re not mandatory. You can still build protein rich oatmeal using everyday foods you probably already have in your kitchen.

Egg Whites and Whole Eggs

One of the simplest ways to raise the protein content of oatmeal is to add egg whites directly into the pot.

Egg whites are:

  • Almost pure protein
  • Very low in fat and carbohydrate
  • Mild in flavour when cooked properly

To make egg white oatmeal, you can:

  1. Cook your oats in water or milk as usual.
  2. Turn the heat down to low once they’re nearly done.
  3. Slowly pour in liquid egg whites while whisking continuously.
  4. Keep stirring for another minute or two until the mixture thickens and the eggs are cooked.

The result is a subtly fluffy, silky high protein oatmeal that doesn’t taste like scrambled egg. This method is ideal for low calorie high protein oatmeal, particularly if you combine it with water or low-fat milk.

If you use a microwave, simply cook your oats in a deep bowl until almost done, stir in whisked egg whites, then microwave again in short bursts, stirring in between to avoid overcooking.

For even more protein, you can add one whole egg (for richness and nutrients) plus extra whites (for volume and total protein) in the same way.

Also Read: Egg Yolks or Yellow: Nutritional & Protein Profile

Person spooning yogurt into a bowl of oatmeal on a wooden table surrounded by paneer, peanut butter, nuts, seeds and an egg, showing how to boost protein without powder.
Boost protein without powder: egg whites, yogurt or paneer, plus nuts and seeds can turn a simple bowl of oats into rich, high-protein oatmeal using everyday kitchen staples.

Greek Yogurt, Curd, Cottage Cheese and Paneer

Dairy is another excellent way to transform plain oats into high protein oatmeal without any powders.

A few effective combinations include:

  • Oats cooked with water, then cooled slightly and mixed with thick Greek yogurt
  • Porridge swirled with hung curd or a high-protein curd
  • Warm oatmeal topped with soft paneer or cottage cheese, either plain or lightly blended

These additions not only increase protein, they also boost creaminess and tang. You can easily create a bowl that feels indulgent while still staying within your calorie target.

This method works especially well for:

  • High protein oatmeal for weight loss – use low-fat dairy and plenty of fruit or spices
  • Bulking oatmeal – use full-fat versions and add nuts or nut butter on top

Because the dairy is stirred in after cooking, you maintain control over the final texture. You can keep things thick like a cheesecake, or loosen them into a smoother high protein porridge.

Also Read: is Greek Yogurt A Healthy Choice for People with Diabetes?

Nuts, Seeds and Nut Butters

Nuts and seeds play two roles in protein oatmeal:

  • They add extra protein and healthy fats.
  • They provide crunch and flavour, which makes your bowl more satisfying.

Some favourites are:

  • Peanut butter, almond butter or cashew butter
  • Chopped almonds, walnuts, peanuts or pistachios
  • Chia, flax and hemp seeds

A classic example is oatmeal with peanut butter protein and banana. This combination hits all the right notes: creamy, slightly salty, naturally sweet and very filling. If that pairing interests you, it’s worth reading MasalaMonk’s detailed article on oatmeal and peanut butter for effective weight loss. It explains how the blend of fibre, protein and fat can support hunger management instead of fighting it.

Similarly, oats and chia seeds for weight loss shows how combining those two ingredients gives you both protein and fibre in a single scoop. That’s exactly what you want when you’re building high fibre high protein oatmeal that keeps you full for hours.

Also Read: Benefits of Nuts and Seeds – Protein-Packed Superfoods


High Protein Oatmeal for Muscle Gain and Bulking

Once you understand the building blocks, you can tune your bowl for different goals. Let’s start with muscle gain and strength training.

When your focus is building muscle, calories and protein both matter. You’re often aiming for:

  • A calorie surplus to support growth
  • Plenty of protein for recovery and repair
  • Enough carbohydrates to fuel workouts

In this context, your protein oatmeal becomes more than breakfast; it’s part of your training gear.

Bowl of bulking protein oatmeal topped with banana slices, peanut butter and mixed nuts with a protein shaker in the background, showing a high-protein pre- or post-workout breakfast.
Bulking protein oatmeal with oats, milk, whey or casein, banana, peanut butter and nuts – a 25–35 g protein bodybuilder breakfast that works perfectly before or after your workout.

A bulking-oriented bowl might look like this:

  • Rolled or steel-cut oats cooked in milk
  • Whey or casein protein mixed in after cooking
  • A sliced banana for extra carbohydrates and sweetness
  • A spoon of peanut butter or almond butter
  • A sprinkle of nuts and seeds on top

That kind of bowl easily turns into bodybuilder oatmeal with 25–35 g of protein, substantial carbs and healthy fats. It’s perfect as oats for pre-workout or even as a post-training meal when you want something warm instead of a shake.

To see how a breakfast like this fits into your total daily intake, MasalaMonk’s guide on how to eat 100 grams of protein a day can be helpful. When your first meal is already a serious oatmeal protein breakfast, hitting that number becomes far easier.


High Protein Oatmeal for Weight Loss and Appetite Control

On the flip side, you might be trying to lose fat or manage your weight. In that case, you still want high protein oatmeal, but with a different emphasis:

  • Enough protein to protect muscle and control hunger
  • Plenty of fibre and volume
  • Moderated calories and sugars
Bowl of lean protein oatmeal topped with berries, apple pieces and chia seeds beside a tape measure and notebook, illustrating a high-protein high-fibre breakfast for weight loss.
Lean protein oatmeal with oats, low-fat milk, egg whites or lean protein, chia seeds and fresh fruit – a high-protein, high-fibre breakfast that keeps you full while fitting a calorie deficit.

A weight-loss-oriented bowl could look like this:

  • A moderate portion of oats, cooked in water or a mix of water and low-fat milk
  • Egg whites or a scoop of lean protein powder for high protein low calorie oatmeal
  • Chia seeds for thickness and extra fibre
  • A generous handful of berries or chopped apple
  • Cinnamon and vanilla for flavour instead of lots of sugar

This type of high protein oatmeal for weight loss is designed to:

  • Keep you full until your next meal
  • Fit into a calorie deficit
  • Feel like a proper breakfast rather than “diet food”

Because oats already support steady blood sugar and digestion, and added protein increases satiety, combining them intelligently can make it easier to stay consistent with your plan.


Vegan High Protein Oatmeal

If you follow a plant-based diet, oats are one of your best friends. They’re naturally vegan, widely available and extremely flexible. You simply need to make sure you pair them with solid plant proteins.

Bowl of vegan protein oatmeal made with soy milk and topped with plant yogurt, banana slices, raspberries, hemp seeds, chia seeds and nuts.
Vegan protein oatmeal with soy milk, plant-based yogurt, seeds, nuts and fresh fruit shows how easy it is to build a 20–25 g protein bowl without any dairy or eggs.

A vegan-friendly high protein oatmeal might include:

  • Oats cooked in soy milk or a fortified pea-based drink
  • A plant-based protein powder (pea, soy or a blend)
  • Soy yogurt or coconut yogurt stirred in at the end
  • Hemp seeds, chia seeds and roasted nuts for crunch and extra protein

You can easily reach 20–25 g of protein in a bowl like that, especially if you’re generous with soy milk and a decent scoop of vegan protein.

If you’d like more ideas for plant-based proteins to plug into your protein oatmeal, MasalaMonk’s post on plant-based protein sources for high-protein meal prep is a great starting point. Several of the ingredients there—beans, lentils, tofu, tempeh, seeds and nuts—can be adapted to both sweet and savoury oat bowls.

There’s also a playful guide to using tofu instead of eggs in breakfast which can give you even more ideas for protein-rich, plant-based mornings.


Gluten-Free Protein Oatmeal: Doing It Safely

Many people who follow a gluten-free diet would love to enjoy oats, yet they’re understandably cautious. The situation is a little nuanced.

On one hand, pure oats are naturally gluten-free. The main proteins in oats are called avenins, not gluten. On the other hand, oats are often grown, transported or processed in facilities that also handle wheat, barley or rye. Because of that, they can easily become contaminated with gluten.

Coeliac-focused organisations explain that:

  • Certified gluten-free oats are produced and tested to contain less than a small threshold of gluten (typically 20 parts per million).
  • Most people with coeliac disease can tolerate these certified oats.
  • A small percentage are sensitive even to pure oats and may need to avoid them entirely.

If you’d like to read more, Beyond Celiac’s overview of oats and the gluten-free diet and Celiac Canada’s statement on oats both summarise the current thinking very clearly.

Jar of certified gluten-free oats beside a warm bowl of oatmeal, protein powder and wheat stalks with a gluten-free symbol, illustrating how to make gluten-free protein oatmeal safely.
Gluten-free oats done right: choose certified gluten-free oats, keep them away from wheat, barley and rye, and always check protein powders and toppings for hidden gluten before you build your protein oatmeal.

To enjoy gluten free protein oatmeal safely, you can:

  • Choose certified gluten-free oats
  • Check your protein powders for hidden gluten sources
  • Be careful with toppings such as granola or flavoured additions that might include malt, barley or wheat

Once you’ve covered that base, you can use all the same protein-boosting strategies—egg-free if needed—to build high protein gluten free oatmeal that feels just as comforting as any other bowl.

Also Read: All About Gluten: Symptoms, Testing, Diet & 7-Day Gluten-Free Meal Plan


Flavour Ideas for Protein Oatmeal (Without Losing the Macros)

Now that the structure is clear, it’s time for the fun part: flavour. The beauty of protein oatmeal is that you can dress it up in almost any direction while keeping the macros on your side.

Here are a few themes you can play with.

Chocolate Protein Oatmeal

This one is perfect when you want breakfast to taste like dessert.

  • Rolled oats cooked in milk or soy milk
  • Chocolate or cocoa-flavoured protein powder blended in after cooking
  • A spoon of Greek yogurt or soy yogurt for extra creaminess
  • Berries and a few dark chocolate chips on top

By adjusting the amount of sweetener and chocolate, you can tilt this bowl toward high protein low sugar oatmeal or make it a richer treat for bulking phases.

Bowl of banana peanut butter protein oatmeal topped with banana slices, peanut butter swirl and chopped nuts, with recipe text overlay on a rustic wooden table.
Banana Peanut Butter Protein Oatmeal – oats with milk, vanilla protein or Greek yogurt, mashed banana in the base and a peanut butter–nut topping for a cosy, high-protein breakfast.

Banana Peanut Butter Protein Oatmeal

This bowl feels like comfort in a mug: warm, nutty, slightly salty and sweet.

  • Oats cooked in milk
  • Vanilla protein powder or a big spoon of Greek yogurt
  • Mashed ripe banana stirred in
  • A swirl of peanut butter and some chopped nuts on top

The mix of fibre, protein and fats here makes this classic oatmeal peanut butter protein bowl very satisfying. For more ideas in this flavour lane, you can dig into MasalaMonk’s article on oatmeal and peanut butter as a power combo.

Apple Cinnamon Protein Oatmeal

Think of this as apple pie for breakfast, minus the pastry.

  • Oats cooked with water or milk
  • Vanilla protein powder, yogurt or cottage cheese mixed through
  • Diced apple simmered with the oats or briefly sautéed with a bit of cinnamon
  • Ground cinnamon, nutmeg and a teaspoon of maple syrup or date syrup

With a few tweaks, this becomes either a lean high protein oatmeal or a more indulgent autumn bowl, and it naturally matches phrases like “apple cinnamon protein oatmeal” and “cinnamon protein oatmeal” without forcing anything.

Maple Brown Sugar Protein Oatmeal (Lightened)

Those maple brown sugar packets are nostalgic, but they’re easy to upgrade.

  • Cook oats in a mix of water and milk.
  • Stir in plain or lightly sweetened protein powder.
  • Add a small spoon of brown sugar and a drizzle of maple syrup—less than you’d usually use.
  • Finish with plenty of cinnamon and a pinch of salt.

Here, most of the sweetness comes from a modest amount of sugar and the natural flavour of oats and milk, while protein acts as the backbone. That’s how you end up with low sugar protein oatmeal that still tastes like the original.

Four bowls of protein oatmeal on a wooden table showing chocolate, apple cinnamon, maple brown sugar and cranberry almond flavours with text saying one protein oatmeal base, many flavours.
One protein oatmeal base, many flavours: chocolate, apple cinnamon, maple brown sugar and cranberry almond bowls show how easy it is to change the toppings while keeping your macros on track.

Cranberry Almond Protein Oatmeal

For something brighter and slightly tart:

  • Oats cooked in milk or soy milk
  • Protein blended into the base
  • A handful of sliced almonds
  • A sprinkle of dried cranberries or fresh cranberries cooked down briefly with a touch of sweetener

This variation is an easy way to enjoy “cranberry almond” style oats while keeping a firm eye on protein and fibre.

Also Read: Basics of Macronutrients: Diet’s Building Blocks


Beyond the Bowl: Protein Oats as Bars, Puddings and Snacks

Once you’re comfortable building protein oatmeal, it’s natural to wonder what else you can do with oats and protein. The same ingredients often morph beautifully into bars, puddings and grab-and-go snacks.

If you like the idea of portable oat-based snacks, you might enjoy:

For a more dessert-like approach, chia pudding with steel-cut oats and mango shows how oats and chia can transform into a cold, spoonable treat that still offers plenty of fibre and some protein.

All of these recipes work on the same core principle you’re using for protein oatmeal: combine oats, protein sources and fibre, then adjust flavours and textures to suit your tastes.


Where Overnight Oats Fit In

You might have noticed that this guide focuses mostly on hot or freshly prepared oats. That’s deliberate.

Hot bowl of protein oatmeal with banana and seeds next to a jar of high protein overnight oats with yogurt and blueberries, showing two ways to use the same oat and protein base.
Same building blocks, different routine: enjoy hot protein oatmeal right now and keep a jar of high protein overnight oats ready in the fridge for later.

Overnight oats are essentially cold oatmeal made in advance. They soak instead of simmering, but they rely on the same ideas:

  • A base of oats
  • A liquid
  • Protein sources like yogurt, milk or protein powder
  • Flavourings and toppings

Because MasalaMonk already has a full guide to jar-based recipes, you can treat this article and that one as siblings:

  • Use this piece when you’re thinking about hot protein oatmeal, microwave oats and stovetop porridge.
  • Switch to the dedicated guide to high protein overnight oats when you want set-and-forget jars that live in the fridge and are ready when you wake up.

The underlying logic is the same; the difference is mainly temperature and convenience.


A Simple Framework You Can Use Every Day

Instead of memorising dozens of recipes, it’s often more helpful to keep a simple framework in mind. Once you understand the structure, you can improvise endlessly.

Hand holding a spoon over a bowl of protein oatmeal surrounded by small bowls of oats, milk, yogurt, tofu, nuts, seeds and spices with text explaining how to build your own protein oatmeal.
Build your own protein oatmeal: start with oats, choose a liquid, add your favourite protein source, then layer in seeds, nuts, fruit and spices to create a high-protein bowl that fits your day.

Think of high protein oatmeal like this:

  1. Base
    • 40–60 g oats (rolled, steel-cut or quick)
  2. Liquid
    • Enough water, milk or plant milk to reach your favourite consistency
  3. Main Protein
    • 1 scoop of protein powder or
    • Several egg whites or
    • A generous amount of yogurt, curd, cottage cheese, paneer or tofu
  4. Fibre and Extras
    • Chia, flax or hemp seeds
    • Fruits or grated vegetables
    • Nuts or nut butters
  5. Flavour
    • Cocoa, vanilla, cinnamon, cardamom, nutmeg, citrus zest, coffee, fruit, or a touch of sweetener

From there, you simply adjust:

  • More oats + nut butter + toppings → bulking oatmeal and bodybuilder oatmeal
  • Fewer oats + extra egg whites or lean protein + lots of berries → low calorie high protein oatmeal
  • Soy milk + vegan protein + plant yogurt → high protein vegan oatmeal
  • Certified gluten-free oats + careful choice of protein powder → gluten free protein oatmeal

Once you’ve played with this a few times, upgrading your oats stops feeling like a “recipe” and becomes second nature. You’ll look at a bowl of plain oats and immediately see three or four different ways to turn it into a high-protein meal that actually matches your day.

And that’s the real power of protein rich oatmeal: it’s not just one dish, it’s a flexible system. You start with oats, you layer in protein, you add fibre and flavour, and you walk away from the table feeling properly fed—rather than wondering what snack you’re going to hunt down next.

FAQs

1. How much protein is in oatmeal, and what makes it “protein oatmeal”?

Plain oats usually provide around 5–7 grams of protein per ½ cup (40–50 g) of dry oats. That’s more than most breakfast cereals, but on its own it’s still not a high protein meal.
You turn it into protein oatmeal by adding extra protein sources like whey or plant protein powder, egg whites, Greek yogurt, cottage cheese, tofu, or soy yogurt until the bowl reaches roughly 15–30 grams of total protein.


2. What is the best protein for oats?

The “best protein for oats” depends on your preferences and goals:

  • Whey protein mixes smoothly and is great for creamy high protein oatmeal.
  • Casein protein makes thicker, more filling bowls and works well for dessert-style oats.
  • Pea or soy protein are excellent options if you want high protein vegan oatmeal.
  • Egg whites or Greek yogurt are ideal when you prefer whole foods over powders.

As long as you enjoy the taste and digest it well, it can become your best protein for oats.


3. How do I add protein powder to oatmeal without clumps?

To make smooth oatmeal with protein powder, cook your oats first and let them cool slightly. Separately, whisk the protein powder with a small amount of liquid into a thin paste. After that, stir this paste into the warm oats until everything is blended. This approach avoids chalky lumps and gives you creamy protein oatmeal every time.


4. Does heating protein powder in oatmeal destroy the protein?

Gently heating protein powder in oatmeal and protein powder recipes will not destroy the protein or make it useless. Moderate cooking temperatures might change texture a bit, but the amino acids remain intact. However, extremely high, prolonged heat can sometimes affect flavour, so it’s usually better to stir protein powder into warm oats after cooking instead of boiling it for a long time.


5. How can I make high protein oatmeal without protein powder?

If you don’t want to use any powders, you can still build high protein oatmeal by combining oats with:

  • Egg whites or whole eggs
  • Greek yogurt or hung curd
  • Cottage cheese or paneer
  • Tofu or soy yogurt
  • Nuts, seeds and nut butters

Blending these into your bowl creates protein rich oatmeal with impressive macros, even though there is no protein powder.


6. Is oatmeal good for bodybuilding and muscle gain?

Yes, oatmeal can be excellent for bodybuilding when you turn it into high protein oatmeal. Oats provide slow-digesting carbohydrates and fibre, which support training performance and steady energy. When you mix in enough protein from powders, egg whites, dairy or tofu, you get bodybuilder oatmeal that fits perfectly into a muscle gain meal plan. It’s especially useful as a pre-workout or post-workout meal when you want sustained fuel rather than a fast sugar hit.


7. Can I eat protein oatmeal for weight loss?

Absolutely. In fact, oatmeal and protein powder for weight loss is a very common strategy. A bowl of low calorie high protein oatmeal made with a moderate amount of oats, lean protein (like egg whites or low-fat Greek yogurt), berries and chia seeds can keep you full for hours. The combination of fibre and protein helps manage appetite, so you’re less likely to overeat later in the day, as long as your overall calorie intake stays in a deficit.


8. What’s the difference between protein oatmeal and high protein porridge?

The terms often overlap. In many cases:

  • Protein oatmeal refers to any oatmeal that has been upgraded with extra protein.
  • High protein porridge is usually hot, spoonable oats with a thicker, more traditional porridge texture.

In practice, both describe oats cooked with liquid and fortified with ingredients like protein powder, egg whites, yogurt, or paneer. The exact word you use matters less than making sure the bowl has enough protein for your needs.


9. Are proats and overnight protein oatmeal the same thing?

Proats” is a casual term that usually means “protein oats.” It can refer to hot oats with protein powder or to overnight protein oatmeal stored in jars. On the other hand, overnight oats specifically soak in the fridge instead of cooking on the stove. So:

  • All overnight protein jars are a type of proats.
  • Not all proats are overnight oats, because some are cooked and served hot.

Both formats use the same idea: oats plus liquid plus a protein source.


10. How do I make low calorie high protein oatmeal that’s still filling?

For low calorie high protein oatmeal, focus on three things:

  1. Portion control for oats – use a moderate amount (e.g., 30–40 g dry) instead of a huge serving.
  2. Lean protein – add egg whites, low-fat yogurt, cottage cheese or a lean protein powder to raise protein without many extra calories.
  3. Volume and fibre – stir in grated zucchini or carrot, chia seeds, berries or apple to bulk up the bowl and slow digestion.

This combination creates a big, satisfying portion of high protein oatmeal without pushing your calories too high.


11. Can I have protein oatmeal at night?

Yes, you can enjoy protein oatmeal in the evening as well. Many people like a warm bowl of oats as a pre-bed snack, especially when they add slow-digesting protein like casein, paneer or Greek yogurt. This kind of high protein porridge can help you feel relaxed and keep hunger away overnight. Just consider your total daily calories and your personal digestion; some prefer lighter meals very close to bedtime.


12. Is oatmeal high in protein compared to other grains?

Oats are relatively high in protein compared to many other grains, which is why people talk about oats high in protein. However, even though 100 g of dry oats may contain 13–17 g of protein, a typical serving is smaller, so it’s not enough to qualify as a full high protein meal. That’s why combining oats with eggs, dairy, tofu or protein powder is so effective: you retain the advantages of oats while lifting total protein to a more substantial level.


13. What is the best type of oats for protein oatmeal?

You can turn any oat type into protein oatmeal, but some work better for certain preferences:

  • Rolled oats are versatile and ideal for most bowls.
  • Steel-cut oats are great for chewier, slow-cooked high protein porridge.
  • Quick oats are perfect when speed matters and you want almost instant breakfast.

Ultimately, the best oats are the ones you enjoy eating and can cook consistently, because consistency matters more than tiny differences in macros.


14. How do I make high protein vegan oatmeal?

To create high protein vegan oatmeal, combine oats with plant-based proteins:

  • Cook oats in soy milk or pea-based milk.
  • Add a scoop of vegan protein powder (pea, soy or a blend).
  • Stir in soy yogurt or coconut yogurt for extra creaminess.
  • Top with hemp seeds, chia seeds, nuts and nut butter.

By layering these ingredients, you can easily build high protein vegan oatmeal bowls with 20–25 grams of protein or more, without using any animal products.


15. Can I prep protein oatmeal in advance?

Yes, there are several ways to prep protein oatmeal ahead of time:

  • Cook a batch of plain oats and store in the fridge, then reheat with extra liquid and add protein just before serving.
  • Prepare jar-style proats with oats, liquid and protein powder or yogurt to keep in the fridge for a few days.
  • Bake oat-based dishes like protein oat bars, which you can grab as a portable breakfast.

As long as you store everything in the fridge and reheat gently, prepped high protein oatmeal can make busy mornings much easier while still giving you a balanced start to the day.