Posted on Leave a comment

Idli Recipe: Soft, Fluffy South Indian Idlis With Fermented Batter

Brass plate of soft South Indian idlis with one idli torn open beside sambar and coconut chutney on a dark blue set.

A really good idli feels lighter than it looks. Press one gently and it gives under your finger, then springs back. Tear it open and the middle is soft and porous, ready to drink in sambar or catch a spoonful of coconut chutney. Even ghee and podi are enough when the idli itself is right.

Most of that softness is decided before the batter reaches the steamer. Urad that never gained much air tends to stay heavy, and very stiff batter struggles to expand. Then a few unnecessary minutes of steam can firm up a batch that fermented beautifully.

That is what makes idli frustrating when it goes wrong: you soak, grind and wait overnight, then discover the problem in the first steamed plate. The finished idli usually tells you where to look. Use the 4:1 batter below as your baseline; if yours behaves differently, the later sections help trace the cause.

Quick Answer: How to Make Soft, Fluffy Idlis

Start with a 4:1 rice-to-urad ratio by weight: 400 g idli rice and 100 g urad, plus 20 g poha and ¼ teaspoon methi. Soak the rice and urad separately for about 4 hours. Grind the urad until pale, smooth and airy; grind the rice and poha separately until very fine with just a faint grain remaining.

When the two are mixed, the batter should fall from a ladle in a thick, broad ribbon and slowly settle back into the bowl. Ferment until it has risen, shows fine bubbles, feels lighter and smells clean and mildly sour.

Steam in an already hot steamer and begin checking common medium idlis around 9–10 minutes. The surface should look matte and set, and the centre should spring lightly when touched. Rest the plates for 2–3 minutes before unmoulding.

Soft & Fluffy Idli Recipe

Recipe at a Glance

YieldAbout 20–24 medium idlis, depending on mould size and fill
Rice : urad4:1 by weight
Typical hands-on prepAbout 25–35 minutes with a blender or mixer-grinder
SoakingAbout 4 hours at room temperature
FermentationFrom about 8 hours in a warm kitchen, judge by rise, bubbles, texture and aroma
SteamingBegin checking around 9–10 minutes
Plan aheadCommonly about 13–18 hours in warm conditions; cooler kitchens take longer

Making idli for breakfast? Soak in the afternoon, grind in the evening and ferment overnight. In the morning, judge the batter while the steamer heats. Most of the elapsed time is simply waiting.

Equipment

  • Kitchen scale, strongly recommended
  • Two soaking bowls
  • Wet grinder, high-speed blender or mixer-grinder
  • Large fermentation container
  • Idli plates and steamer, or another covered steaming vessel
  • Ladle and spoon for unmoulding
  • Kitchen thermometer, optional for a cold kitchen

Ingredients

Use the gram measurements when possible. Cup sizes vary between kitchens and countries; 400 g rice and 100 g urad always preserve the intended 4:1 ratio.

IngredientMetricApproximate volume
Idli rice / suitable parboiled rice400 gabout 2 cups
Whole skinned urad dal / urad gota100 gabout ½ cup
Thick poha / flattened rice20 gabout ¼ cup
Fenugreek seeds / methiabout 1 g¼ teaspoon
Fine salt6 gabout 1 teaspoon if finely ground
Cold water for urad — mixer/blender method120–150 ml½ cup to ½ cup + 2 tablespoons
Cold water for rice — mixer/blender method180–220 ml¾ cup to just under 1 cup
Oil or ghee for greasingas needed

If your salt is coarse, use the 6 g weight instead of trying to match one teaspoon exactly.

Wet-grinder note: the water quantities above are starting ranges for blade grinders. Stone grinders take water differently as the urad expands. Add it gradually and stop when the urad has become light and airy.

1. Soak the Rice and Urad Separately

Rinse the rice several times and cover it generously with fresh water. In another bowl, rinse the urad, add the methi and cover with fresh water.

Soak both for about 4 hours. About 20–30 minutes before grinding, rinse the poha and soak it separately until soft. Keep the rice and urad apart because they need different grinding textures.

Need to soak longer? Keep room-temperature soaking to about four hours. For a longer soak, refrigerate the rice and urad at 4°C / 40°F or below. The BC Centre for Disease Control’s dosa and idli food-safety guidance provides additional controls for soaking and refrigerated storage.

2. Grind the Urad Until It Looks Almost Whipped

Drain the urad and methi well. With a mixer-grinder or high-speed blender, begin with about 120 ml cold water. Grind, scrape the jar as needed and add more cold water a little at a time.

If your mixie heats quickly, chill the soaked urad first. The finished batter should be pale and smooth, but smoothness is only half the job. It should also look noticeably fuller, with fine bubbles through it, and feel light on the spoon instead of sitting there like a dense paste.

Give a warm jar a short rest before continuing.

Wet grinder: grind the urad first and add water gradually while the stones work. Stop when it is smooth, airy and clearly expanded.

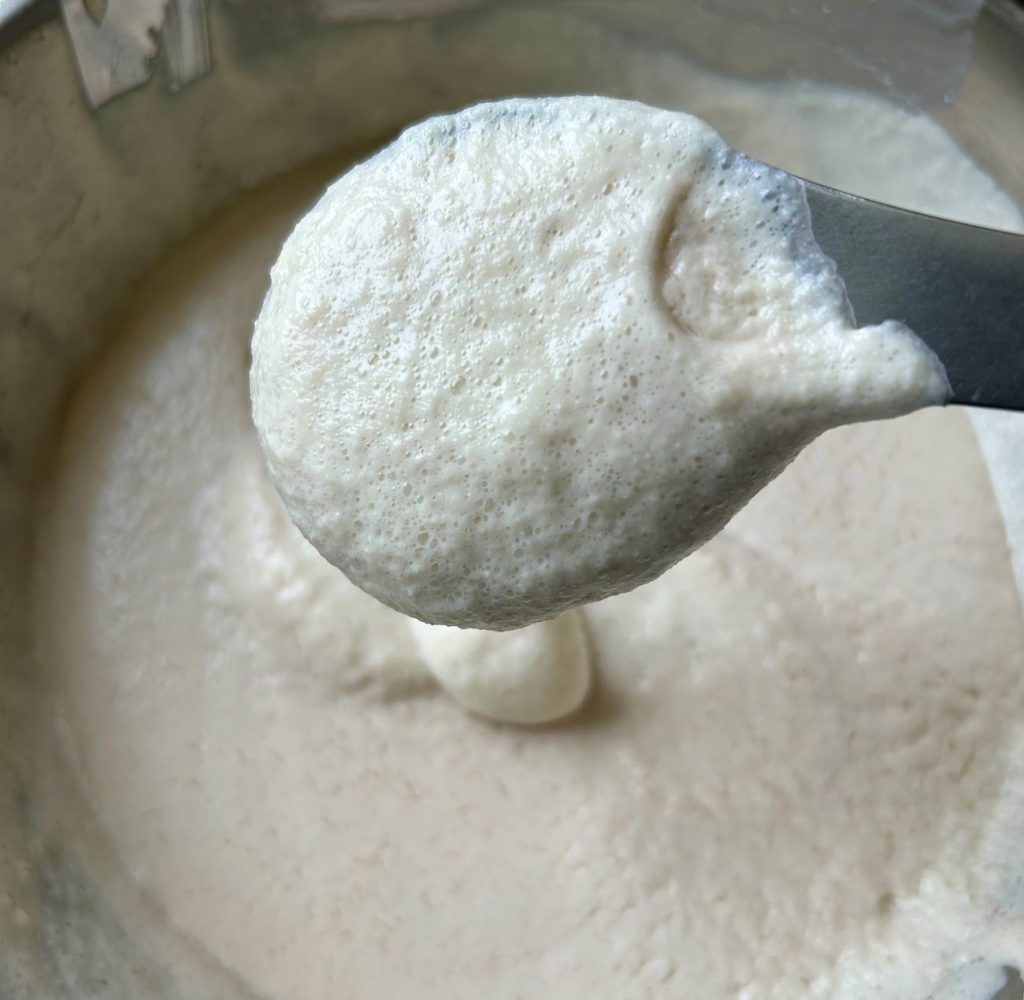
Spoon lifting pale, freshly ground urad batter with a smooth, pillowy texture and fine air bubbles above a stainless-steel bowl.
Fermentation cannot fully replace aeration the grinder never built. Light, expanded urad gives the later batter more structure to work with.

3. Grind the Rice and Poha

Drain the rice and poha. For a blade grinder, start with about 180 ml cold water and add more only as needed to keep the mixture moving.

Rub a little between your fingertips. Rice is much more forgiving than the urad here. Hard pieces need more grinding, but if it went slightly smoother than intended, carry on with the batch.

Wet grinder: remove the urad first, then grind the rice and poha separately to a very fine texture with a faint grain remaining.

Thumb and forefinger rubbing a thin smear of finely ground rice batter to show its faint grainy texture.
A faint grain is enough here: once hard pieces are gone, chasing perfectly silky rice batter usually adds less than getting the urad aeration right.

4. Combine and Check the Flow

Transfer both batters to a clean container that will be no more than about half full after mixing. Add the salt and mix thoroughly.

Lift a ladleful and let it fall back into the bowl. Good batter comes down in a broad, thick ribbon, sits on the surface briefly and then slowly disappears. Heavy clumps mean it needs a little more water. Add 1 tablespoon / 15 ml at a time and stop as soon as the ribbon flows properly.

Ladle pouring idli batter in a broad, thick ribbon into a stainless-steel bowl, where it folds over itself and slowly settles.
Think of the ribbon as a hydration endpoint rather than a water measurement; rice and grinder differences can change how much water gets you there.

5. Ferment

Cover the container with a lid or plate without sealing it airtight and leave it somewhere comfortably warm.

In a warm kitchen, from about 8 hours onward, judge the batter by what has changed. It should sit higher in the bowl, show fine bubbles along the sides and feel lighter when you scoop into it with a ladle. The aroma should be gently sour and still pleasant.

Before-and-ready idli batter fermentation comparison in two clear vessels; ready batter sits higher with fine bubbles and a lighter texture.
Do not chase somebody else’s dramatic rise. Compare your own batter before and after: lift, fine bubbles, lighter body and mild tang are the useful changes.

When those signs are there, heat the steamer. Almost no movement by morning usually points to temperature first.

6. Heat the Steamer

Add enough water to create strong steam without letting it touch the idli plates. Around 1½–2 cups / 360–480 ml works as a starting point for many home steamers. Bring the water to an active simmer or boil before the filled stand goes in.

Pressure cooker: use it as a steamer with the lid on and the weight/whistle removed. Instant Pot: use a steaming setup with the valve venting. Do not pressure-cook the idlis.

7. Fill the Idli Moulds

Lightly grease the cavities. Give the fermented batter one or two gentle folds if it needs evening out, then fill the moulds about three-quarters full. For many medium plates that works out to roughly 3 tablespoons / 45 ml, but there is no need to measure each cavity.

Angled stainless-steel idli plate with the mould cavities filled about three-quarters full, leaving visible space above the batter.
Leaving headroom does more than prevent overflow: similar fill levels make the steaming time across a plate much easier to interpret.

8. Steam Until the Centre Is Set

Put the stand into the already steaming vessel and cover. Begin checking around 9–10 minutes.

Lift the lid and let the steam clear. The tops should look softly matte instead of wet and shiny. Press the middle gently; it should spring back. A skewer inserted into the thickest part should come out without raw batter.

Deeper moulds usually need a little longer. Once the centre is set, take the plate out. A cooked centre is the finish line; extra steam only makes the idli firmer.
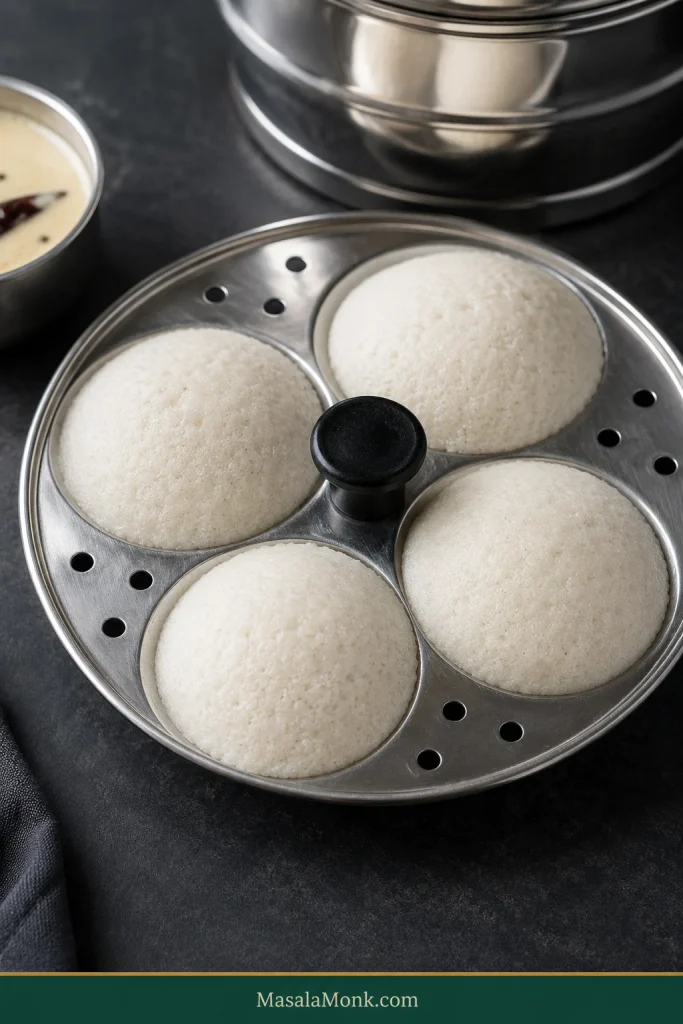
Steamed idlis still in a stainless-steel mould with natural ivory, matte, set tops and gentle domes.
Matte, set tops and a springy centre are the cue to stop steaming; once the centre is cooked through, extra time only makes the crumb firmer.

9. Rest and Unmould

Leave the plates for 2–3 minutes. Dip a spoon in water, slide it around the edge and lift each idli gently from underneath.

Break the first one while it is warm. An open, moist crumb means the timing is right for the remaining plates.

Close-up of a freshly torn idli showing a moist, airy interior with many small, irregular interconnected pores.
Treat the first warm idli as feedback on the whole process. Open, moist crumb suggests the batter had enough structure and the steamer stopped in time.

If that first plate is already soft and airy, keep going. If not, use the shortcuts below to trace the batter, fermentation or steamer.

Need help with the batter or your finished idlis? Rice & Urad · Ratio · Grinder Guide · Batter Consistency · Fermentation · Steaming · Troubleshooting · Scaling · Storage

Choosing Rice and Urad for This Batter

Start With Idli Rice

Use idli rice or Ponni parboiled rice when available. Sona Masoori also works; adjust the water as needed and expect a somewhat different crumb. Basmati and other aromatic long-grain rice are less predictable for this style of idli.

Outside India, Indian groceries commonly carry bags labelled Idli Rice, Ponni Boiled Rice or Ponni Parboiled Rice. Idli rava belongs to a different method and should not replace the whole rice cup-for-cup.

Fresh Urad Matters More Than Whole vs Split

Whole skinned urad, often sold as urad gota, is an excellent choice, and split skinned urad works too. Buy from a shop with good turnover when possible. Fresh urad usually hydrates and expands better; older stock can become perfectly smooth in the grinder and still stay disappointingly heavy.

Markedly yellowed or tired-looking dal can suggest age, although colour by itself is not a reliable date stamp.

Five labeled bowls showing idli rice, Ponni parboiled rice, Sona Masoori, whole skinned urad gota and split skinned urad.
At the shop, get into the right rice family first; then prioritise good-turnover urad instead of obsessing over whole versus split.

About the poha and methi: excellent idlis can be made from rice, urad, water and salt alone. This version uses 20 g poha for a little extra softness and only ¼ teaspoon methi. No methi? Make the batter without it.

An ivory or off-white idli is normal. Texture matters far more than chasing a perfectly white surface.

For a millet version, use a batter designed around the grain instead of replacing the rice here. Our Fermented Ragi Idli uses its own balance of ragi, rice, poha and urad.

Why the Rice-to-Urad Ratio Can Vary

For this recipe, use 4:1 by weight: 400 g rice to 100 g urad. Other excellent idli recipes use 3:1, 5:1 and more rice-heavy ratios because urad quality, grinder performance and additions such as poha all change the way the batter behaves.

Keep the 4:1 base while you learn the recipe. Heavy idlis are better diagnosed through the grind, batter thickness and steaming before you start changing the dry ratio.

Two kitchen scales show 400 grams of rice and 100 grams of urad for a 4:1 ratio by weight, with poha, methi and water cues below.
Holding the 4:1 ratio steady makes troubleshooting easier: changes in texture are then easier to trace to grinding, hydration or steaming.

Wet Grinder, High-Speed Blender or Mixer-Grinder?

If you own a wet grinder, use it; it is the easiest of the three for building highly aerated urad. A powerful blender is the fastest. A regular mixie also works well when you keep the urad cold, avoid overloading the jar and add water gradually.

Comparison of a wet grinder, high-speed blender and mixie with short notes about water, heat, circulation and batch size.
The ingredients may be identical, but the failure points change: stone pickup, blender circulation and mixie heat each deserve a different kind of attention.

Wet Grinder

A wet grinder works slowly and generally keeps the batter cooler. Grind the urad first, adding water gradually as the stones work, until it is smooth, airy and clearly expanded. The texture is the useful endpoint here, not an arbitrary number of minutes.

Some large wet grinders struggle with only 100 g dry urad because the soaked dal forms too shallow a layer. If yours is barely being picked up by the stones, double the recipe or use a smaller grinder.

High-Speed Blender

A powerful blender moves fast, and the batter can heat fast with it. Use cold water, leave enough room for the mixture to circulate and stop when the urad is airy and noticeably larger in volume.

Regular Mixer-Grinder

An everyday Indian mixie works well for idli batter. Chill the soaked urad if the machine heats aggressively, drain it well and work in manageable batches.

Urad that stays dense even after the water, heat and batch size are under control may simply be meeting the limits of that particular jar and blade setup.

Reading the Batter When Something Looks Off

Smooth Urad That Never Became Airy

If the urad is perfectly smooth but still sits heavily on the spoon, do not let the smoothness fool you. The useful change is the extra air and volume: well-ground urad feels much lighter and contains fine bubbles throughout.

Side-by-side freshly ground urad batter comparison: smooth but dense batter on the left and more expanded, airy batter with fine bubbles on the right.
A dense urad batter can be perfectly smooth and still ferment. It simply begins with less trapped air for the mixed batter to expand around.

A small drop often floats in water when the urad has trapped plenty of air. Treat that as one clue, not a verdict on the finished batter.

Rice That Went Too Smooth—or Stayed Too Coarse

Hard rice pieces need more grinding. Completely smooth rice batter is much less worrying; continue with the batch.

Too Thick, Right or Too Thin?

StateWhat You SeeWhat It Can Cause
Too thickFalls in clumps and leaves pronounced moundsSlower expansion and dense idlis
Good rangeFalls in a thick ribbon that slowly disappearsEnough moisture while still holding height
Too thinPours quickly and levels almost immediatelyFlat, weak or sticky idlis

Too-stiff batter is easy to loosen a tablespoon at a time. Make the last water additions slowly; once the batter pours freely, taking that water back out is much harder.

Three matched ladles compare idli batter that is too thick, correct with a broad thick ribbon, and too thin with a narrow fast-flowing stream.
Use these states to choose a direction, not an exact water number: heavy ridges need cautious loosening; a fast pour means stop adding water.

Fermenting Idli Batter in Warm and Cool Kitchens

An overnight ferment in a hot kitchen and one in a cold apartment are not the same job. If you can control the temperature, around 28–30°C / 82–86°F is a useful working range.

Kitchen / Batter EnvironmentWhat to Expect
About 28–30°C / 82–86°FBegin checking around 8 hours, then judge by the batter itself
About 25–27°C / 77–81°FA slower rise is normal
Below about 24°C / 75°FGive the bowl gentle, controlled warmth
Very warm kitchenFermentation moves faster, so check earlier

For a Cold Kitchen

A switched-off oven with its light on can provide a warmer spot. With an Instant Pot, use Yogurt/fermentation mode with a loose or glass lid; do not seal the pot for pressure. The batter still decides when fermentation is finished, so do not run the full programmed cycle blindly.

A kitchen thermometer is useful when you are unsure how warm the space really is. Gentle warmth is enough.
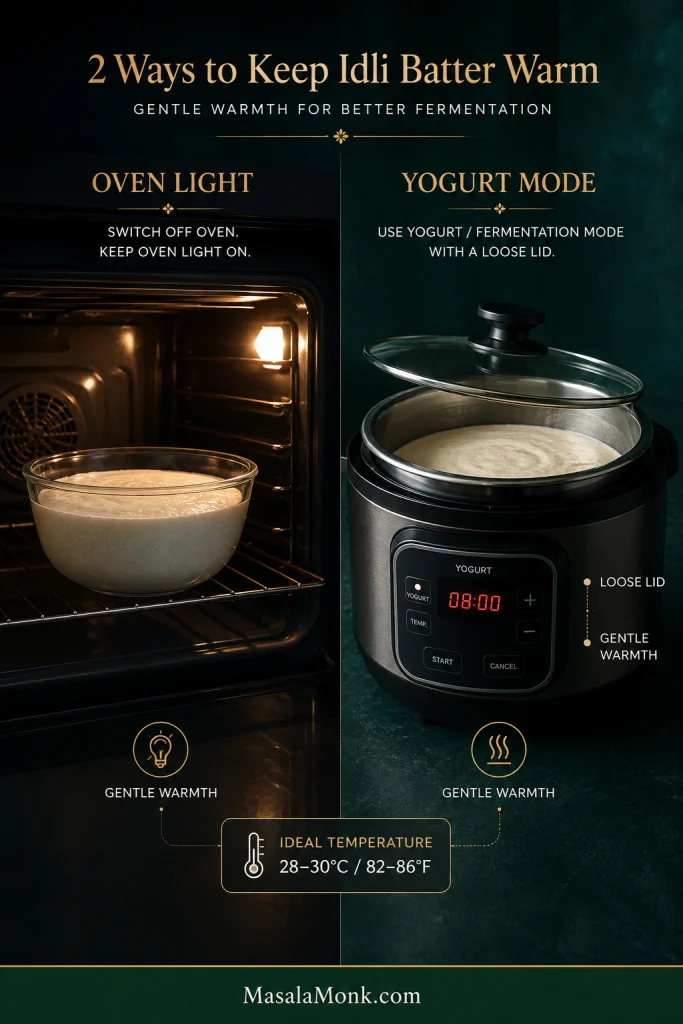
Cold-kitchen fermentation guide showing batter in a switched-off oven with the light on and in a loose-lidded cooker on yogurt mode, with a 28–30°C temperature cue.
Use an oven light or Yogurt mode for gentle warmth, then judge readiness by the same rise, fine bubbles, lighter body and mild tang as usual.

Ready batter usually gives several clues together: it sits higher in the container, fine bubbles appear along the sides or surface, the batter feels lighter when you scoop through it, and the aroma has developed a mild fermented tang.

Does Idli Batter Have to Double?

No. A big rise is encouraging. Read it together with the bubbles, lighter texture and aroma. A lively batch can be ready without matching somebody else’s dramatic before-and-after photograph.

My Batter Didn’t Rise Overnight. What Now?

A cold kitchen may simply need more time and a warmer spot. If the batter was already kept comfortably warm, compare its consistency next. Very thick batter struggles to expand; very loose batter may bubble without building much height. Dense urad gives fermentation less airy structure to work with.

Fix those fundamentals before reaching for Eno, baking soda or yeast. Extra gas does not repair a poorly ground or badly balanced batter.

How to Steam Idli Without Guessing

Idli recipes give different steaming times because steamers and moulds differ. A shallow cavity in a compact stovetop steamer does not cook like a deep cavity halfway up a tall stack.

Start with an already hot steamer and fill the cavities to roughly the same level. About three-quarters full is a useful visual guide. Those two habits remove much of the variation before the timer starts.

Use the First Plate to Calibrate Your Steamer

With an unfamiliar steamer or mould, cook one plate before filling every rack. Begin checking the centre around 9–10 minutes.

A wet centre needs another minute or two. Dry, firm idlis mean the next plate should come out earlier. Once you know your moulds and steamer, the timing becomes routine.

Bottom plate wet while the others are fine? Its position is the first suspect, not the batter. It may be sitting unusually close to the boiling water or catching more condensation.

Three idli examples show a wet centre needing more steaming, a dry firm idli needing less time, and a just-right idli for setting the steamer timing.
Your first successful plate becomes a local calibration for that mould and steamer, so the next batch starts with evidence instead of a generic timer.

No Idli Stand?

Use shallow heat-safe cups or small bowls inside a covered steamer. Grease them lightly and leave room for expansion.

Cups are often deeper than idli moulds, so the centre usually needs a little longer. Judge doneness by the set surface and springy middle instead of treating 9–10 minutes as an exact promise.

Standard stainless-steel idli plate beside several shallow heat-safe cups and bowls used as substitutes; deeper cups may need longer steaming.
Substitute vessels do not cook by capacity alone: a deeper centre changes the steaming job even when two cups hold roughly the same amount.

What Went Wrong With Your Idli?

The cooked texture usually narrows the possibilities quickly. Change one thing at a time.

What Happened?Start HereNext Move
Hard + denseUrad aeration, thick batter, steamingLoosen the remaining batter if needed and shorten the next steaming test
Hard despite a good riseBatter thickness and steamingConfirm the batter still has a thick-ribbon flow, then take the next plate out earlier
Hard + flatFermentation and urad aerationFor the next batch, revisit warmth, dal freshness and how much volume the urad gained
Soft but flatLoose batter or heavy post-fermentation mixingAdd no more water and handle the remaining batter gently
Dry / rubberyToo much steamingShorten the next plate
Soft hot, noticeably hard once coolSteaming time and moisture lossTake the next plate out as soon as the centre sets and keep cooked idlis covered
Wet / gummy centreWeak steam, deep fill or undercookingImprove the steam and cook only until the middle sets
Sticks to the mouldRest, greasing and donenessRest 2–3 minutes and loosen with a wet spoon
Batter barely roseTemperature, consistency, uradWork through the fermentation section
Too sourContinued fermentationRefrigerate and use it for dosa or paniyaram
Four cut idlis compare a moist airy crumb, a dense compact crumb, a wetter gummy centre, and a drier more rubbery crumb.
Use the crumb to narrow the search before changing anything: weak structure, an unset centre and excess steaming leave different signatures.

My Batter Fermented Beautifully. Why Are the Idlis Hard?

If the batter rose well but the idlis are hard, consider batter thickness and steaming before extending fermentation. Urad should have been airy, not merely smooth. The mixed batter should have flowed in a thick ribbon instead of sitting in heavy lumps. Vigorous mixing after fermentation can knock out some of that volume, while idlis left over steam after the centre has set become firmer.

A nicely shaped idli that feels dry and resistant often points toward steamer calibration. By contrast, a heavy crumb from edge to centre sends you farther back toward the urad and water.

Two cut idlis compare a dry, well-shaped later-stage steaming problem with a fully cooked but heavy, dense earlier-stage batter problem.
Use the finished idli to decide how far back to investigate: dry but well-shaped points late; uniformly heavy crumb sends you back toward the batter.

Flat Idlis: Soft or Hard?

Hard, flat idlis often go with weak fermentation, poor urad aeration or batter that stayed too heavy. A flat idli that stays soft points more toward loose batter or vigorous stirring after fermentation.

Two low-profile idlis and their cut sections compare a flat idli with a soft open crumb and a flat idli with a harder, tighter crumb.
Shape alone does not diagnose a flat idli; the texture inside decides which branch of troubleshooting is worth following.

Sticky Mould or Gummy Crumb?

An idli that is cooked through but sticks to the mould may simply need another minute of rest, better greasing or a wet spoon. A gummy centre is a different problem: mould fill, steam strength and unusually loose batter are the first places to investigate.

Comparison showing a properly cooked idli sticking to its stainless-steel mould on the left and an idli with a wetter under-set gummy centre on the right.
Surface release and internal doneness are separate signals: better greasing or resting can help sticking, but it will not cure an unset centre.

Cooked Outside, Raw in the Middle?

Start with the steamer. Weak steam, unusually deep moulds or cavities filled almost to the rim can leave the middle behind. Correct the steam and fill before changing the batter.

Once you know what changed, return to the full idli recipe for the next batch.

How Much Batter Do You Need for 20, 50 or 100 Idlis?

Mould capacities vary enough that exact counts are misleading. Use these as planning quantities, then note what one batch actually gives you in your own plates.

Planning GoalRiceUradPoha
About 20–24 idlis400 g100 g20 g
About 40–48 idlis800 g200 g40 g
Plan for at least 501 kg250 g50 g
Plan for at least 1002 kg500 g100 g

Scale the methi and salt by the same factor. For a large batch, grind several normal-sized loads instead of packing one jar or wet grinder too full, and divide the mixed batter between roomy fermentation containers.

Scale the dry ingredients mathematically; add grinding water by texture. Five batches will not necessarily need exactly five times the water.

Before steaming for a crowd, make one plate first.

Five-step large-batch idli workflow showing weighing ingredients, grinding in batches, leaving fermentation headroom, judging water by batter texture and testing one idli plate before a large serving.
Scaling ingredients is arithmetic; scaling the process means protecting grinder load, fermentation headroom and steam consistency as the batch grows.

Need exactly 1 kg of finished batter? Weigh one successful mixed batch in your kitchen first. Final batter weight changes with draining and grinding water.

Fresh Batter, Day-2 Batter & Leftover Idlis

Fresh vs Refrigerated Batter

For the softest idlis, use the batter fresh or during the first day or two after refrigeration. Fermentation continues slowly in the fridge, so the batter becomes more sour and may loosen, separate slightly or occasionally become more gelled.

If the fresh batter made excellent idlis and the refrigerated portion later behaves differently, use the older batter for dosa, uttapam or Kuzhi Vegetable Paniyarams. Should this happen often in your kitchen, steaming a few extra idlis while the batter is at its best is perfectly sensible.

Three-stage storage guide showing fresh idli batter, refrigerated batter for dosa, uttapam or paniyaram, and cooked idlis stored for chilling or freezing.
When refrigerated batter remains sound but loses its best idli texture, the extra tang often suits dosa, uttapam or paniyaram better.

Keep refrigerated batter at 4°C / 40°F or below. The BCCDC guidance for controlled dosa/idli processes describes refrigerated holding of roughly 5–7 days, but those controls are not identical to every home recipe. Use the batter much earlier for the best idli texture.

Some liquid separation can happen as fermentation continues, so do not judge the batter by that sign alone. Visible fuzzy mould, unusual pink or orange patches, or a clearly rotten or otherwise off smell are reasons to discard it. If you are unsure about its safety, discard it.

Storing Cooked Idlis

Keep freshly steamed idlis covered while the next plates cook. Idlis that are wonderfully soft when hot but noticeably hard once cool often benefit from a shorter steam on the next batch.

Cool leftovers promptly and refrigerate them in a closed container. Reheat briefly with steam, or microwave under a damp paper towel in short bursts until hot throughout. Cooked idlis also freeze well and can be steamed straight from frozen until hot throughout.

Can You Make Dosa With This Idli Batter?

Yes. Scoop out only what you need and thin it gradually with water until it spreads comfortably across a hot tawa. Slightly older batter works especially well for dosa and uttapam because the stronger tang suits them.

This is an idli-first 4:1 batter, so it may not spread or crisp exactly like a batter designed specifically for very thin, crisp masala dosa.

Four-step visual showing the main idli batter left unchanged, a portion transferred to another bowl, water added gradually, and the thinner batter spread on a hot tawa.
Keeping dilution outside the main batch preserves your option to steam more idlis later instead of committing all the batter to dosa.

What to Serve With Idli

A hot idli is mild enough to work with something cool and creamy, a bowl of sambar, or a dry podi-and-ghee plate.

Coconut chutney: cool chutney against a hot idli is hard to improve upon. Make our South Indian Coconut Chutney while the final plates are steaming so both arrive fresh.

Sambar: break an idli into the hot broth and leave it for a few seconds. The edges soften first, the centre stays springy, and the open crumb fills with sambar.

Torn soft idli partly dipped into orange-red sambar, with the porous upper crumb visible as sauce soaks into the lower edge; coconut chutney sits behind it.
Those interconnected pores are functional: they hold sambar inside a soft idli while enough structure remains for the crumb to stay tender rather than dissolve.

The Next Batch Gets Easier

The second or third batch is easier because you already know how the batter moved through your grinder and how long your moulds needed over steam. If something changes, the finished idli gives you somewhere to start.

Lift the lid, let the steam clear and ease an idli from the plate while it is still warm. Spoon over chutney or sambar, or keep breakfast simple with sesame oil or ghee and our Idli Podi / Milagai Podi.
Back to recipe ↑ · Back to top ↑

Posted on 6 Comments

Upma Recipe: 10+ Easy Variations (Rava, Millet, Oats, Semiya & More)

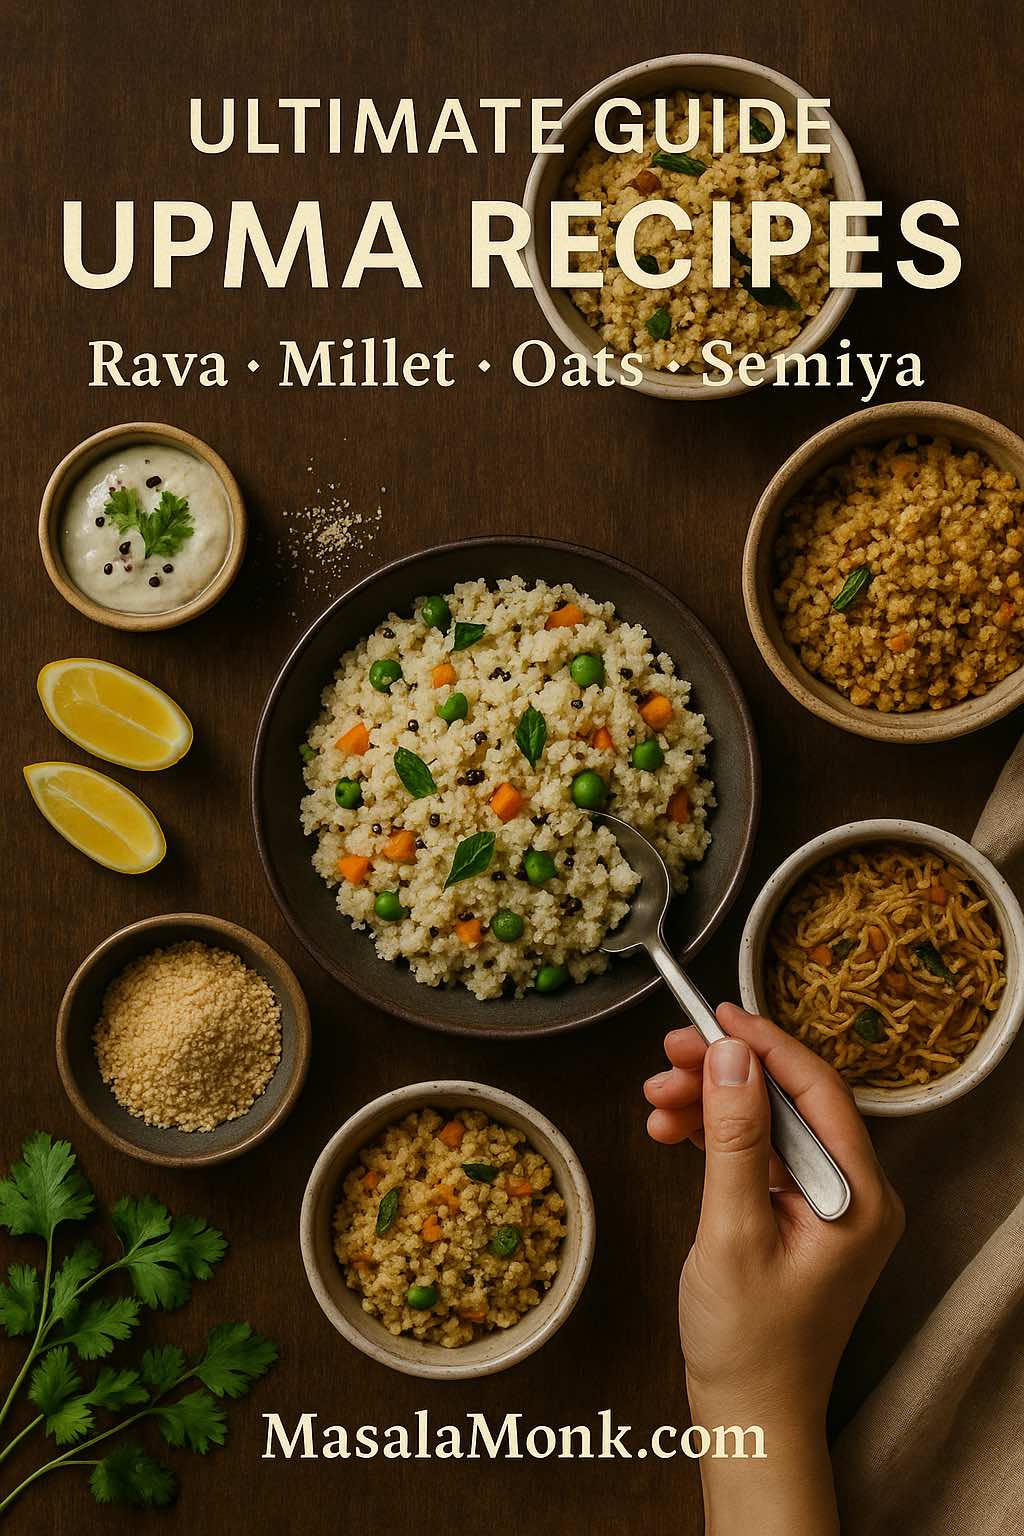
Top-down flatlay of five Indian upma varieties—rava, millet, oats and semiya—arranged with chutney, lemon wedges and herbs, hand holding a spoon, cover image for ultimate upma recipes guide on MasalaMonk.

Upma is one of those breakfasts that feels like home, no matter which part of India you’re from. It’s warm, soft, gently spiced, and endlessly adaptable. With a few pantry staples and one basic upma recipe in your head, you can improvise everything from a simple rava upma for rushed mornings to a millet upma for days when you want something a little more wholesome, or even an oats or quinoa upma when you’re leaning towards high-fibre bowls.

For people looking for “upma recipe”, “how to make upma”, “simple upma recipe”, “millet upma recipe”, “semiya upma”, “instant upma premix” or even “upit recipe”, this long, no-rush guide is meant to sit in your kitchen as a one-stop reference. You’ll get:

  • A detailed, step-by-step rava upma recipe with all the tiny tricks that matter
  • Vegetable and masala variations that turn it into a one-bowl meal
  • Millet upma with different grain options and real health context
  • Semiya (vermicelli) upma, for tiffin boxes and kids who love noodles
  • Oats upma and quinoa upma, with links to what science actually says about them
  • Wheat and rice rava upma for days when you don’t feel like semolina
  • A homemade instant upma mix for travel or office lunches
  • Plenty of ideas for what to serve with upma to build a complete breakfast plate

Along the way, you’ll also find links out to trusted recipe writers and nutrition resources, so you’re not just taking one blog’s word for it. For instance, if you like cross-checking your basics, you can always compare with this lovely, traditional South Indian rava upma method on Indian Healthy Recipes, which you’ll find under the title traditional South Indian rava upma recipe.


What Is Upma, Really?

At its heart, upma is a savoury porridge or pilaf made by roasting a grain (most commonly semolina / suji) and then simmering it in a seasoned, tempered liquid. The tempering usually includes mustard seeds, lentils like urad dal and chana dal, curry leaves, green chillies, onion and sometimes ginger. Once the grain absorbs the water and steams, it turns soft and fluffy, ready to be fluffed, finished with lemon and coriander, and eaten hot.

Cast iron skillet filled with soft rava upma topped with peas and curry leaves, surrounded by bowls of semolina, lentils and spices, with a hand sprinkling curry leaves, illustrating the upma cooking method.
One pan, so many breakfasts – a skillet of gently simmering rava upma with all the classic tempering elements that define the upma method.

Traditionally, rava upma is especially popular in South India, often served with coconut chutney and filter coffee. If you’re curious about that version, you can see another take on it at Veg Recipes of India under their traditional upma with coconut chutney, which matches closely with what many homes actually make.

However, the family of upma is much bigger than just semolina. As grains like ragi, foxtail millet, jowar, oats and quinoa become more common in pantries, the same technique is being reused with different bases. That means an “upma recipe” today can be:

  • A classic suji upma with just onions and chillies
  • A colourful vegetable upma
  • A masala upma with sambar powder or garam masala
  • A millet upma packed with fibre and minerals
  • A semiya upma that looks like a noodle stir-fry
  • An oats upma that quietly helps your cholesterol numbers
  • A quinoa upma that feels modern but very Indian in flavour
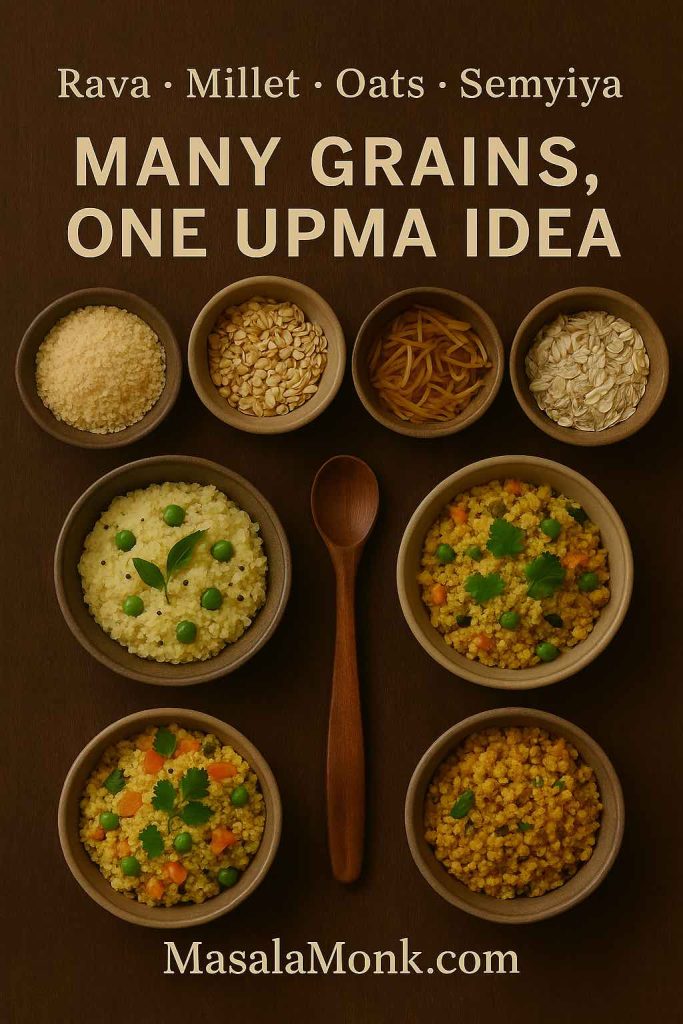
Flatlay of small bowls showing raw rava, millet, semiya and oats at the top, with cooked rava, vegetable millet and semiya upma in bowls below and a wooden spoon in the centre, illustrating that many grains can be used to make upma.
Rava, millet, semiya and oats in their raw and cooked forms, side by side – a reminder that upma is a method you can apply to many grains, not just semolina.

Instead of treating each of these as a totally separate dish, it helps to understand the common logic once, then play.

Also Read: Double Chocolate Chip Cookies – Easy Recipe with 7 Variations


The Classic Rava Upma Recipe (Suji Upma)

Let’s begin with the version you’re most likely to cook again and again: a simple rava upma. Once you get comfortable with this, switching to millet rava or wheat rava upma becomes almost automatic.

Close-up of a neatly domed serving of soft rava upma with peas, carrots and curry leaves on a ceramic plate, hand reaching for the spoon, with text describing it as an everyday suji breakfast bowl.
Soft, fluffy rava upma piled into an everyday suji breakfast bowl, scented with curry leaves, mustard seeds, onions and a squeeze of lemon.

Ingredients for 2 Servings

  • Semolina / suji / upma rava – ½ cup (medium or slightly coarse)
  • Water – 1½ cups (you can move between 1¼ and 1¾ depending on how soft you like it)
  • Oil or ghee – 2 tablespoons
  • Mustard seeds – ½ teaspoon
  • Urad dal – 1 teaspoon
  • Chana dal – 1 teaspoon
  • Cashew halves – 6–8 (optional but lovely)
  • Onion – 1 small, finely chopped
  • Green chillies – 1–2, slit or chopped
  • Ginger – ½ inch piece, finely chopped
  • Fresh curry leaves – 8–10
  • Salt – to taste
  • Lemon juice – 1–2 teaspoons
  • Fresh coriander – a small handful, chopped

Home cooks and bloggers disagree very gently about the perfect ratio of rava to water. Some prefer it soft and spoonable, others a little drier and crumbly. If you want to dig deeper into this, Raks Kitchen has a useful breakdown of textures and ratios in her rava upma water ratio tips. For now, though, 1:3 is a safe, beginner-friendly place to start.

Step 1: Roast the Rava

Begin by dry-roasting the semolina in a wide pan. Keep the flame low-medium and stir continuously so it doesn’t catch at the bottom.

Step 1 of making rava upma showing a hand stirring semolina in a black skillet with a wooden spatula, with text explaining to dry toast suji on low heat till aromatic to keep upma non-sticky.
Step 1 – gently roasting the rava on low heat so every grain of suji stays separate and the final upma turns out soft, fluffy and never sticky.

You’re looking for:

  • A slightly deeper colour, but not brown
  • A warm, nutty aroma
  • Grains that feel separate when you stir them

This step might feel skippable if you’ve bought “roasted upma rava”, but it’s worth doing anyway. Roasting removes raw flavours and, more importantly, helps the rava swell up evenly without turning sticky.

Once roasted, transfer the rava to a plate and let it cool slightly while you prepare the tempering.

Step 2: Build the Tempering

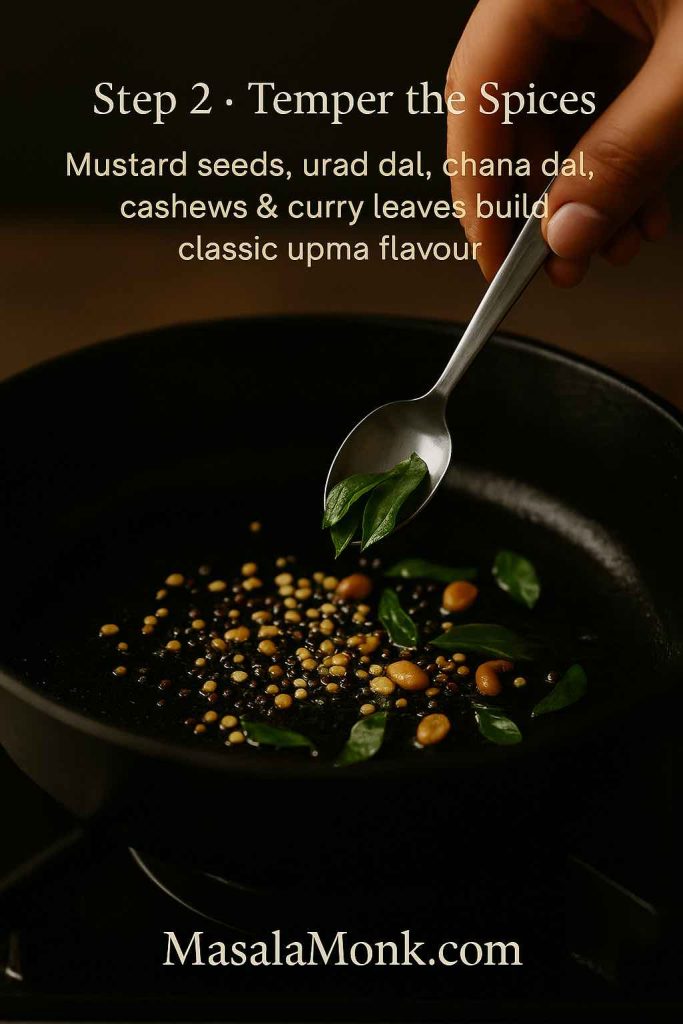
In the same pan, add the oil or ghee. When it heats up, drop in mustard seeds. As soon as they splutter, stir in urad dal and chana dal.

Step 2 of making upma showing mustard seeds, urad dal, chana dal and cashews sizzling in oil in a black skillet while a hand adds fresh curry leaves with a spoon, illustrating the tempering stage for classic rava upma.
Step 2 – tempering mustard seeds, lentils, cashews and curry leaves in hot oil to create the nutty, fragrant base that makes every rava upma taste authentic.
  • Fry the dals on medium heat until they turn golden and crisp.
  • Add cashews at this stage if you’re using them and fry till lightly golden.

The sizzling mix of mustard, dals and nuts is not just for taste; it contributes crunch in every bite. After this, tip in the curry leaves, chopped ginger and green chillies. They’ll sputter a bit, so stand back for a moment.

Finally, add the chopped onion. Sauté until it turns soft and translucent. You don’t really need to brown the onion for a basic upma recipe; you just want the raw bite to vanish.

Step 3: Bring the Spiced Water to a Boil

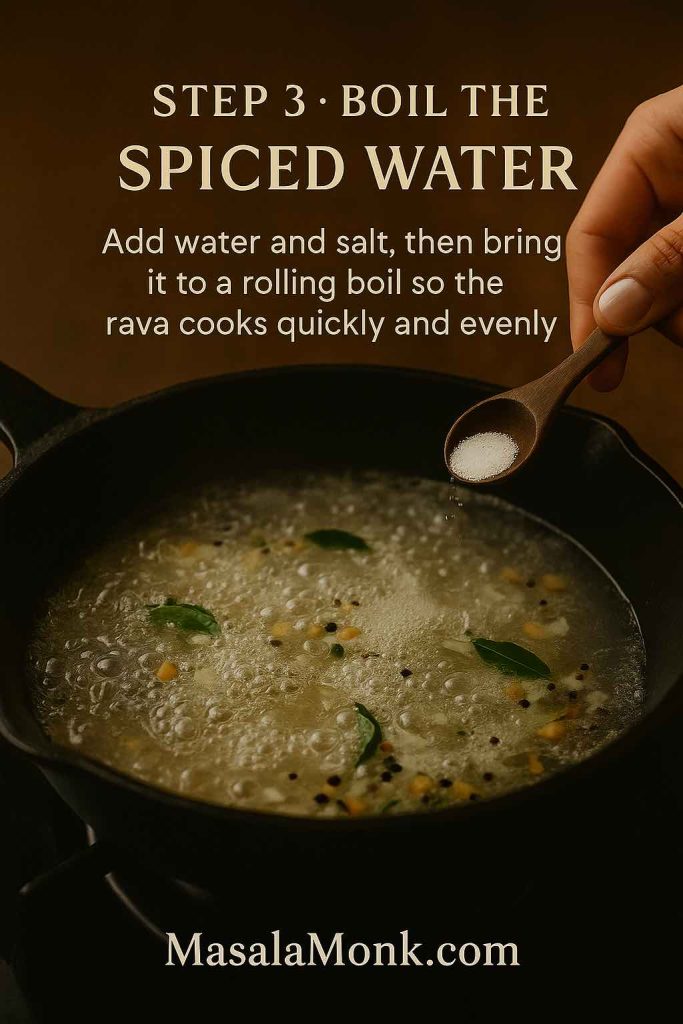
Now pour in the measured water and add salt. Taste the water – it should be slightly saltier than you’d like the final upma to be, because the rava will absorb some of that salt.

Step 3 of the rava upma recipe showing a cast-iron skillet of spiced water at a rolling boil with curry leaves and lentils, while a hand sprinkles salt from a wooden spoon, with text explaining to boil the water so the rava cooks quickly and evenly.
Step 3 – add water and salt to the tempering, then bring it to a proper rolling boil so the suji swells quickly and the upma cooks evenly without turning lumpy.

Bring this to a rolling boil. This matters more than it seems:

  • Boiling water helps rava swell quickly and evenly.
  • It dramatically reduces your chances of ending up with lumpy upma.

Meanwhile, if you feel like cross-checking a slightly different style of tempering or vegetable add-ins, you could glance through the traditional South Indian rava upma recipe at Indian Healthy Recipes; you’ll notice the same broad steps.

Step 4: Add the Rava Without Lumps

Once the water is bubbling, lower the flame. Hold the roasted rava in one hand and a spatula in the other.

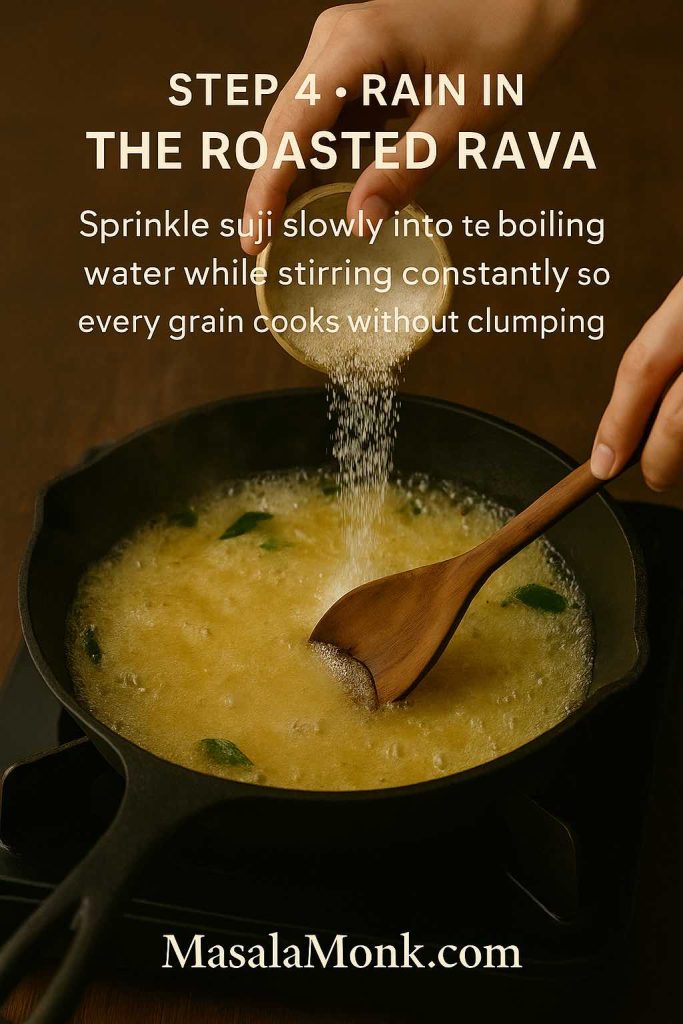
Step 4 of the rava upma method showing a hand pouring roasted semolina in a thin stream into a skillet of bubbling spiced water while another hand stirs with a wooden spatula, with text explaining to sprinkle suji slowly and stir constantly to avoid lumps.
Step 4 – “raining in” the roasted rava, sprinkling suji slowly into boiling spiced water while stirring so every grain cooks evenly without clumping.
  • Slowly sprinkle the rava into the boiling water in a steady stream.
  • Keep stirring continuously.

The idea is to give each little sprinkle of rava a chance to meet the hot liquid and swell individually. If you dump it all in at once, it will clump and form dumplings.

Within a minute or two, the mixture will start thickening and pulling away from the sides.

Step 5: Steam, Fluff and Finish

At this point, cover the pan and let the upma steam on the lowest flame for about 3–4 minutes. Switch off the heat and allow it to sit, still covered, for another 2 minutes.

Step 5 of the rava upma recipe showing a hand lifting the lid off a steaming skillet of fluffy upma while another hand fluffs it with a spoon, with lemon wedge and coriander nearby and text explaining to steam, fluff and finish with lemon and coriander.
Step 5 – let the upma steam on low, then fluff it and finish with lemon juice and fresh coriander for a soft, airy bowl.

When you open the lid:

  • The rava should be cooked through, soft and fluffy.
  • The surface might look a little dome-like; that’s fine.

Fluff gently with a fork or spatula to loosen up the grains. Finally, add lemon juice and chopped coriander, and fold everything together. Taste and adjust salt or lemon once more.

Serve hot with coconut chutney, podi, pickle or simply a drizzle of ghee on top. For another angle on serving ideas (especially with coconut chutney), you can refer to the version at Veg Recipes of India under their traditional upma with coconut chutney.

Also Read: Carbonara Recipe: Italian Pasta (Creamy, Veggie, Chicken, Shrimp, Tuna & Keto)


Vegetable Upma, Masala Upma Recipe and Other Rava Upma Variations

Once the basic method feels natural, you’ll inevitably start tweaking it. Some mornings you’ll want more vegetables, some days more heat, and sometimes you’ll be in the mood for a slightly indulgent, ghee-laced bowl of “mom upma”.

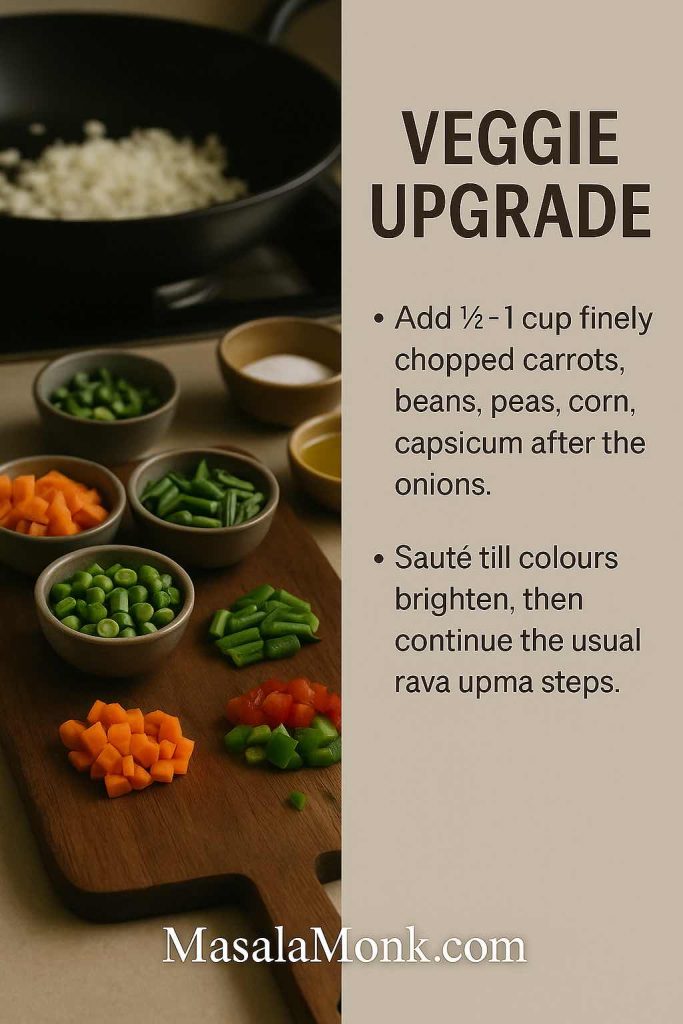
Vegetable Upma

For a simple vegetable upma, follow the classic recipe with one change: after sautéing the onion, add about ½ to 1 cup of finely chopped vegetables such as:

  • Carrots
  • Green beans
  • Green peas
  • Sweet corn
  • Capsicum
Recipe card style image for vegetable upma showing small bowls of chopped carrots, beans, peas, corn and capsicum on a board with a skillet of onions in the background, plus text explaining to add ½–1 cup mixed veggies after the onions and sauté before continuing the rava upma recipe.
Veggie upgrade – turn plain rava upma into colourful vegetable upma by adding a generous ½–1 cup of finely chopped carrots, beans, peas, corn and capsicum after the onions and sautéing till they brighten.

Sauté the vegetables for a couple of minutes until the colours brighten and they lose their rawness. After that, proceed with water, salt and rava as usual.

This variation cleverly answers many searches like “simple upma recipe”, “veggie upma” or “upma recipe for kids”, without changing the core technique.

Masala Upma

For mornings when you want something closer to a one-bowl lunch, a masala upma works beautifully.

Hand sprinkling turmeric into a pan of vegetable upma with peas, carrots and beans, with small bowls of turmeric and red spice in front and text explaining how to turn veggie upma into masala upma with turmeric and sambar or garam masala.
Masala twist – once the veggies are in, add turmeric for colour and a spoon of sambar or mild garam masala to turn everyday vegetable upma into a fuller, lunch-style masala upma.

In addition to the vegetables:

  • Add ¼ teaspoon turmeric powder for a bright colour.
  • Sprinkle in ½ teaspoon sambar powder or a mild garam masala.

Those additions transform the flavour just enough to make it feel more lunch-worthy, especially if you serve it with a dollop of yoghurt and a salad on the side.

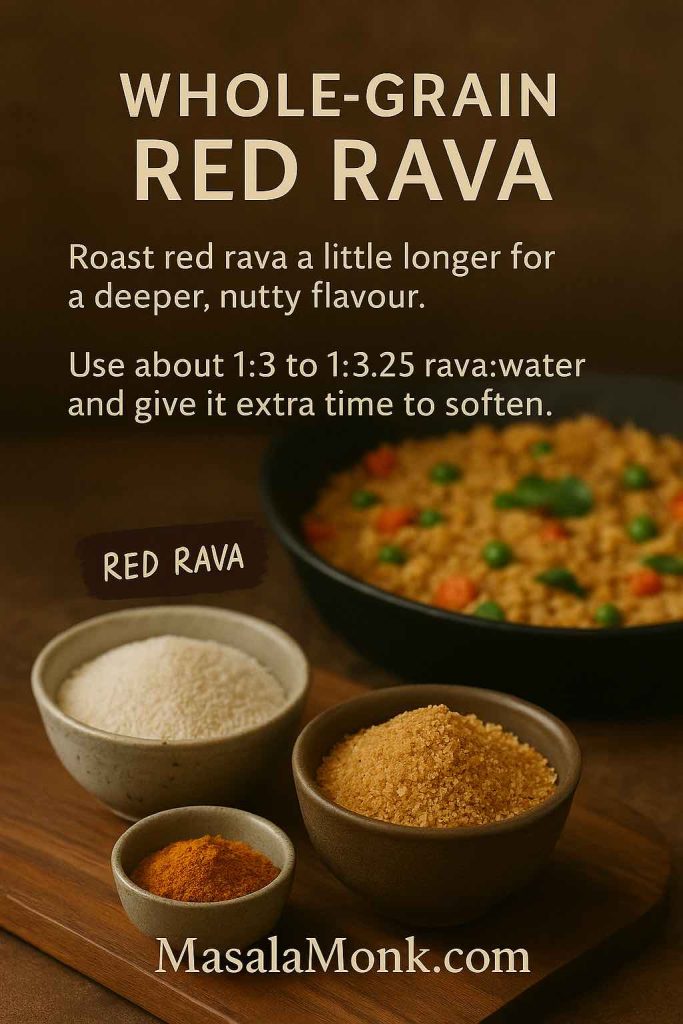
Red Rava Upma Recipe

Sometimes you’ll come across red rava (made from whole wheat or red rice) labelled as “upma rava” too. You can treat it in almost the same way as suji, with slight adjustments:

Recipe card for whole-grain red rava upma showing bowls of regular suji and coarse red rava in the foreground with a skillet of rustic red rava upma behind them, plus text explaining to roast red rava longer and use about 1:3 to 1:3.25 rava to water for a nutty, softer texture.
Whole-grain red rava upma – roast the red rava a little longer, add more water and give it extra time on the stove for a deeper, nuttier bowl that feels closer to a whole grain breakfast.
  • Roast it a little longer; whole-grain rava benefits from deeper roasting.
  • Increase the water slightly to around 1:3 or even 1:3.25 if it’s very coarse.
  • Be patient with cooking time; whole grains take longer to soften.

The result is a nuttier, more rustic upma that fits nicely on days when you want something closer to a whole grain breakfast.

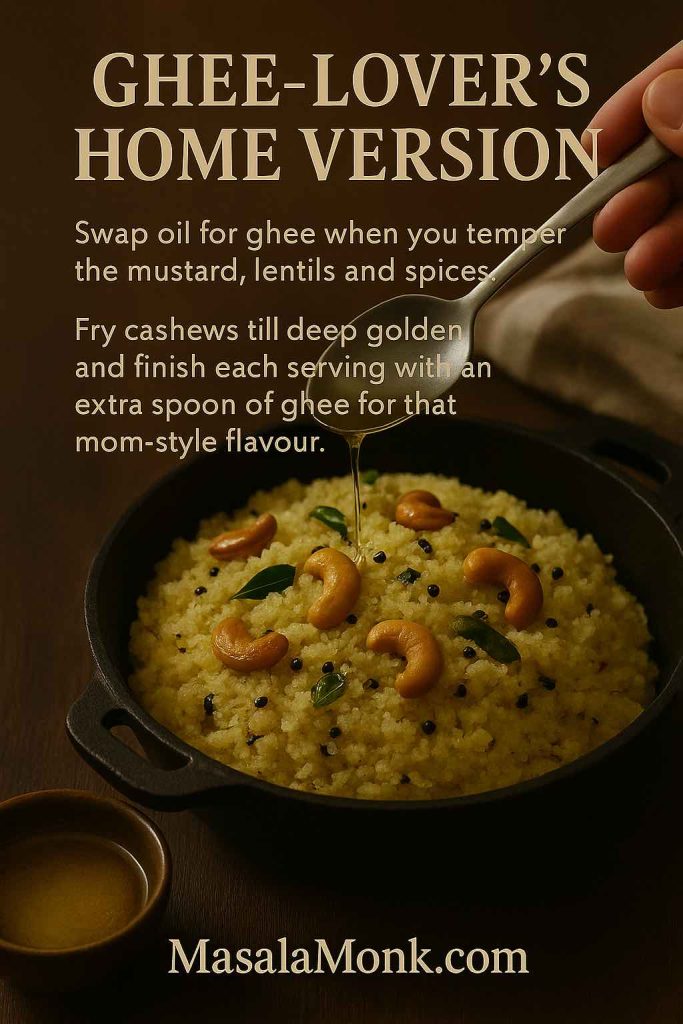
Recipe of “Mom-Style” Ghee Rava Upma

If you grew up on upma made by a mother or grandmother who didn’t shy away from ghee, you might crave that taste from time to time.

Mom-style ghee rava upma in a cast-iron pan topped with deep golden cashews and curry leaves while a hand pours ghee from a spoon, with text explaining to use ghee for tempering and finish each serving with an extra spoon of ghee.
Ghee-lover’s home version – swap oil for ghee, fry the cashews till deep golden and finish each serving with an extra spoon of ghee for that nostalgic, mom-style rava upma flavour.

To get that flavour:

  • Use ghee instead of oil for the tempering.
  • Fry the cashews till deep golden.
  • Finish with a small spoonful of ghee drizzled over each serving.

The extra richness hides in the background, but it makes every spoonful taste like a hug.

Also Read: One-Pot Chicken Bacon Ranch Pasta (Easy & Creamy Recipe)


Millet Upma: Jowar, Foxtail, Ragi and Multi-Millet Rava Recipe

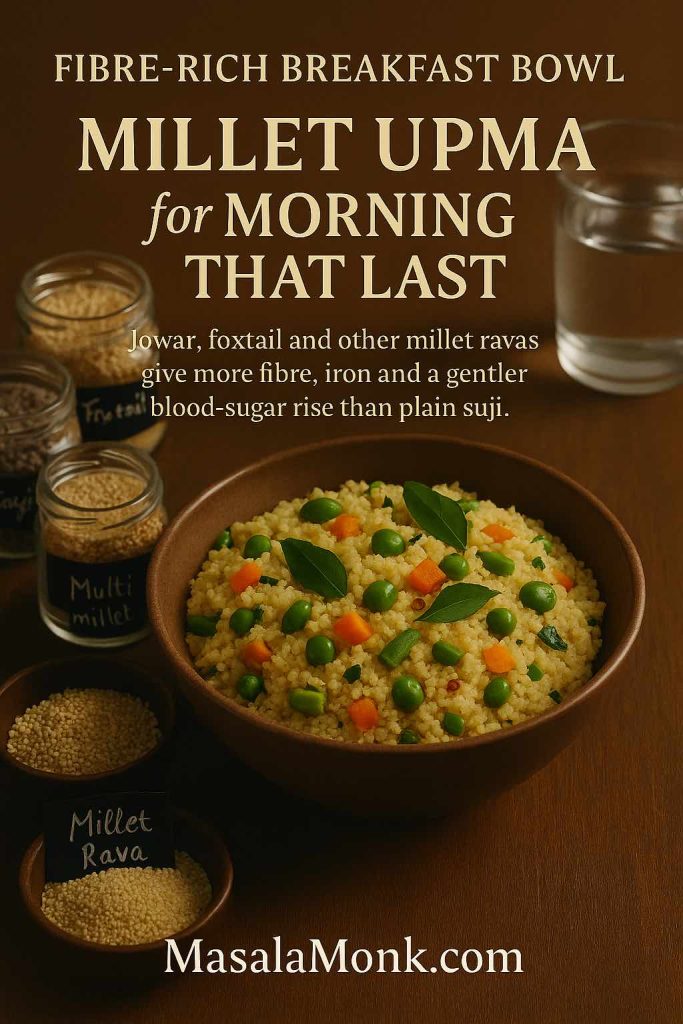
Over the last few years, millet upma has become a favourite for people who want a more nutrient-dense breakfast without sacrificing Indian flavours. Millets are naturally rich in fibre, minerals like iron, calcium and zinc, and often have a gentler effect on blood sugar compared to refined grains.

If you’d like to see the bigger picture before you start cooking, two good reads are MasalaMonk’s own overview Millets: The Gluten-Free Superfood and their guide exploring the various types of millets in India. For a more formal look, you can also glance at the ICMR–NIN document on nutritional and health benefits of millets, or FSSAI’s classification of millets as “nutri-cereals” in their millets guidance notes.

Portrait photo of a fibre-rich millet upma bowl with peas, carrots and curry leaves on a wooden table, surrounded by jars labelled multi millet, foxtail and millet rava, with text describing millet upma as a breakfast that gives more fibre, iron and a gentler blood-sugar rise than plain suji.
Millet upma for mornings that last – a fibre-rich bowl made with multi-millet rava, jowar and foxtail-style grains, offering more iron and a gentler blood-sugar rise than plain suji upma.

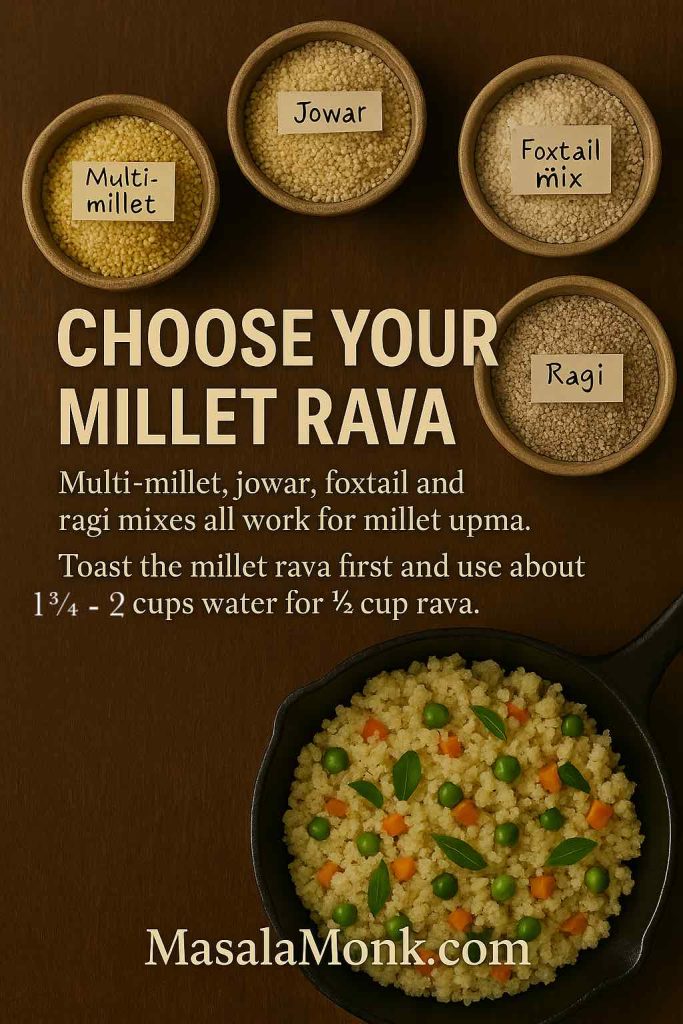
Which Millet Rava Works Well for Upma?

You can make a millet upma recipe using:

  • Multi-millet rava blends
  • Jowar rava, often called jonna rava in some regions
  • Foxtail millet rava
  • Ragi-based mixed millet rava (often combined with other millets for better texture)

For a clearer sense of what’s available in Indian markets, this breakdown of common types of millet available in India is handy.

Basic Millet Upma Recipe

For 2 servings:

  • Millet rava – ½ cup
  • Water – 1¾ to 2 cups (millets generally need more water than suji)
  • Oil – 2 tablespoons
  • Mustard seeds – ½ teaspoon
  • Urad dal – 1 teaspoon
  • Chana dal – 1 teaspoon
  • Cashews – a small handful (optional)
  • Onion – 1 small, chopped
  • Ginger – ½ inch, chopped
  • Green chillies – 1–2
  • Curry leaves – a few sprigs
  • Mixed vegetables – ½ to 1 cup
  • Salt, lemon juice, coriander – to taste

The method mirrors rava upma, with a few tweaks:

Recipe card image showing small bowls of millet rava labelled multi-millet, jowar, foxtail mix and ragi above a skillet of cooked millet upma, with text explaining that all these millet ravas work for upma and need to be toasted and cooked with about 1¾–2 cups water for ½ cup rava.
Choose your millet rava – multi-millet, jowar, foxtail and ragi mixes all work beautifully for millet upma when you toast the rava first and use a little extra water for soft, fluffy grains.
  1. Dry roast the millet rava in a pan till it smells toasty and feels lighter.
  2. In another pan (or the same pan after transferring the roasted millet), make the tempering: oil, mustard, dals, cashews, curry leaves, ginger, chillies, onion.
  3. Add vegetables and sauté till they brighten.
  4. Pour in water and salt; bring to a good boil.
  5. Lower the flame and slowly stir in the roasted millet rava, stirring as you go.
  6. Cover and cook on a low flame till the grains soften. Rest for a few minutes and fluff.

Because millets can feel new if you haven’t cooked them much before, you might also enjoy trying other breakfast-style millet recipes, such as fermented ragi (finger millet) idlis or barnyard millet and foxnuts savoury pancakes, which give you more ideas on how to rotate millets through your mornings.

Also Read: Katsu Curry Rice (Japanese Recipe, with Chicken Cutlet)


Wheat and Rice Rava Upma Recipe (Godhuma, Bansi, Samba, Arisi Upma)

Beyond millets, many households regularly switch between suji, wheat rava and rice rava. People looking for “wheat rava upma”, “samba rava upma”, “bansi rava upma”, “rice rava upma” and “arisi upma mix” are all essentially trying to do this rotation with confidence.

Digital food photo showing two bowls of upma on a wooden board, one labelled wheat rava upma and the other rice rava or arisi upma, with small piles of wheat rava and rice rava, curry leaves, green chutney and lemon, plus text explaining that wheat rava needs more water and time while rice rava feels closer to soft rice.
Beyond suji – side-by-side bowls of wheat rava upma and rice rava (arisi) upma, showing how you can swap in godhuma or arisi rava for a heartier, rice-like take on classic upma.

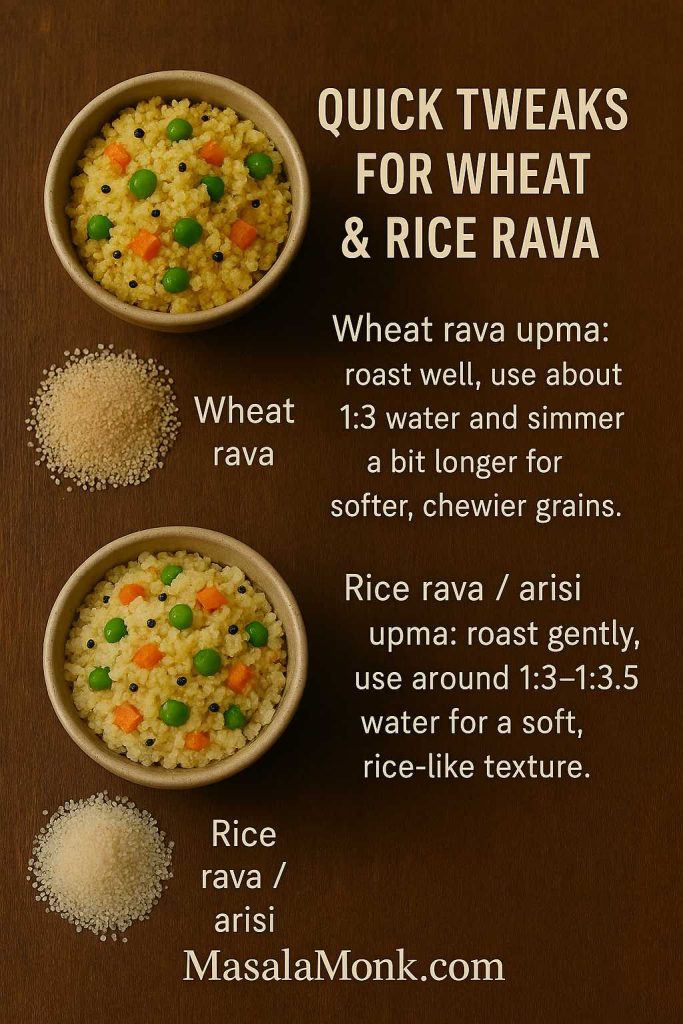
Wheat Rava Upma Recipe

Wheat rava goes by many names: godhuma rava, bansi rava, samba rava, broken wheat and so on. This base yields a slightly chewier, almost pilaf-like upma.

To prepare it:

  • Replace suji with the same quantity of wheat rava.
  • Roast it gently before use.
  • Use around 1½ to 2 cups of water for ½ cup wheat rava, depending on how coarse it is.

The tempering and vegetable combination can be identical to rava upma. The only real difference is the cooking time, which tends to be a touch longer.

If someone at home has to avoid wheat because of an allergy or suspected intolerance, it’s worth reading a focused guide such as wheat allergy: symptoms, causes, and treatment and then leaning on rice or millet-based upma instead of wheat rava versions.

Instructional graphic showing a bowl of wheat rava upma with a pile of wheat rava, and a bowl of rice rava or arisi upma with a pile of rice rava, plus text explaining to roast wheat rava well and use about 1:3 water, and to roast rice rava gently and use about 1:3–1:3.5 water for a soft rice-like texture.
Quick tweaks for wheat and rice rava upma – roast wheat rava well and simmer with about 1:3 water for chewier grains, while rice rava or arisi upma prefers gentler roasting and a little extra water for a soft, rice-like finish.

Recipe for Rice Rava Upma / Arisi Upma

Rice rava (or arisi rava) is simply broken rice. It tends to taste closer to soft rice cooked in a tempering, but still follows the “roast, simmer, steam” logic.

You can:

  • Use ½ cup rice rava to start with.
  • Roast it lightly, just until it loses any raw aroma.
  • Temper oil with mustard seeds, dals, curry leaves, ginger, chillies and onions.
  • Add water and salt (start with about 1½ to 1¾ cups, adjusting as needed).
  • Stir in rice rava, then simmer covered till the grains are soft but not mushy.

If you’re already cooking plain rice alongside, you might find MasalaMonk’s guide on how to cook perfect rice every time helpful; it walks through stovetop, cooker and Instant Pot methods and helps time everything together in a busy kitchen.

Also Read: 10 Best Espresso Martini Recipe Variations (Bar-Tested)


Semiya Upma Recipe (Vermicelli / Seviyan Upma)

Switching gears a little, semiya upma is what many people reach for when they’re dealing with fussy children, tiffin boxes or days when they’re simply bored of rava. Vermicelli upma feels lighter, looks fun on the plate, and still uses the same basic building blocks.

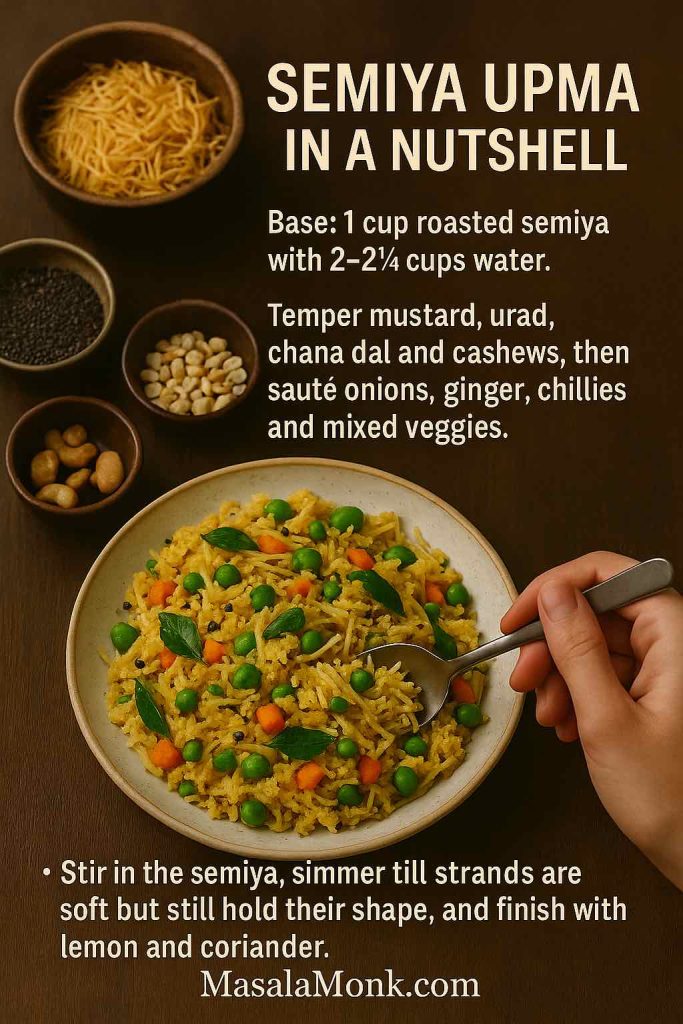
Ingredients for 2 Servings

  • Roasted vermicelli (semiya) – 1 cup
  • Water – 2 to 2¼ cups
  • Oil – 1½ to 2 tablespoons
  • Mustard seeds – ½ teaspoon
  • Urad dal – 1 teaspoon
  • Chana dal – 1 teaspoon
  • Cashew nuts – a small handful (optional)
  • Onion – 1 small, chopped
  • Ginger – ½ inch, minced
  • Green chillies – 1–2, chopped
  • Curry leaves – a sprig or two
  • Mixed vegetables – ½ to 1 cup (peas, carrots, beans, corn)
  • Salt, lemon juice, coriander – to taste
Recipe card for semiya upma showing a bowl of colourful vermicelli upma with peas, carrots and curry leaves, surrounded by bowls of roasted semiya, mustard seeds, lentils and cashews, with text summarising the base ratio, tempering and cooking method for semiya upma.
Semiya upma recipe in a nutshell – roasted vermicelli simmered with tempered mustard, lentils, cashews, onions and mixed veggies for a lighter, tiffin-friendly twist on classic upma.

Method

  1. If the vermicelli isn’t pre-roasted, dry roast it till it turns a light golden-brown and gives off a nutty aroma.
  2. In a separate pan, prepare the tempering exactly as you would for rava upma: oil, mustard, dals, cashews, curry leaves, ginger, chillies, onion.
  3. Add vegetables and sauté briefly until they brighten in colour.
  4. Pour in water and salt, bring to a boil.
  5. Add the roasted vermicelli gradually while stirring so it doesn’t clump.
  6. Lower the heat and cook uncovered or partially covered until the water is absorbed and the semiya is soft but still holds its shape.
  7. Finish with lemon and coriander.

Unlike some other variations, semiya upma doesn’t always need chutney; it tastes quite complete on its own, especially if you’re generous with the vegetables and cashews.

Also Read: Greek Tzatziki Sauce Recipe (1 Master Sauce + 10 Easy Variations)


Oats Upma Recipe: A Savoury, High-Fibre Bowl

Once you’re comfortable with the idea that almost any grain can become an upma, oats are a natural next step. Many readers searching for “oats upma” are looking for a way to eat oats that doesn’t feel like a bowl of sweet porridge.

From a nutrition point of view, oats are rich in beta-glucan, a soluble fibre that helps with satiety and cholesterol regulation. Harvard’s Nutrition Source has a concise explainer under their overview of oats and beta-glucan benefits, and Mayo Clinic offers a practical perspective in their guide to starting your day with healthy oatmeal.

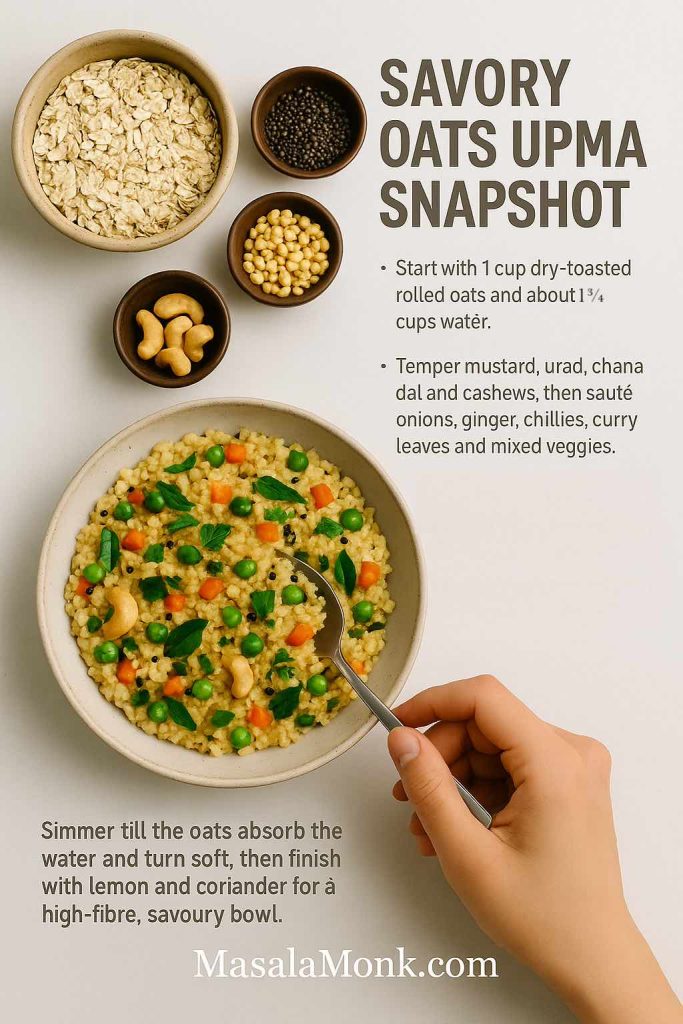
Ingredients for 2 Servings

  • Rolled oats – 1 cup
  • Water – about 1¾ cups (adjust if you like it looser or firmer)
  • Oil – 1½ tablespoons
  • Mustard seeds – ½ teaspoon
  • Urad dal – 1 teaspoon
  • Chana dal – 1 teaspoon
  • Cashew nuts – a few (optional)
  • Onion – 1 small
  • Ginger – ½ inch
  • Green chillies – 1–2
  • Curry leaves
  • Mixed vegetables – ½ cup or more
  • Salt, lemon juice, coriander – as usual
Recipe snapshot for savory oats upma showing a bowl of colourful oats upma with peas, carrots and cashews, surrounded by bowls of rolled oats, mustard seeds, lentils and cashews, with text summarising the ratio, tempering and simmering steps for a high-fibre Indian breakfast bowl.
Savory oats upma recipe snapshot – dry-toasted rolled oats simmered with tempered mustard, lentils, cashews, onions and veggies, then finished with lemon and coriander for a high-fibre Indian breakfast bowl.

Method

  1. Dry toast the oats in a pan for 2–3 minutes until they smell toasty and slightly nutty. This step keeps the final texture pleasant and prevents mushiness.
  2. In another pan, temper oil with mustard, dals and cashews.
  3. Add curry leaves, ginger, chillies and onion, sauté till the onion softens.
  4. Stir in vegetables and fry briefly.
  5. Add water and salt; bring to a boil.
  6. Tip in the toasted oats, lower the flame and cook, stirring occasionally, until they absorb the water and turn soft.
  7. Rest for a couple of minutes, then fluff and garnish with lemon and coriander.

If you enjoy oats in both sweet and savoury forms, you might want to keep a few ideas bookmarked. MasalaMonk’s high protein overnight oats and their guide on turning plain oats into a high-protein meal are both excellent for days when you want more variety and protein without abandoning oats as a base.

Meanwhile, if you’re curious about the “hard” science on oats and cholesterol, you’ll find clinical-trial style evidence in publications that examine oat beta-glucan and LDL reduction in detail; those are reassuring when you commit to eating oats upma regularly.

Also Read: Simple Bloody Mary Recipe – Classic, Bloody Maria, Virgin & More


Quinoa Upma: Low-GI, High-Protein Comfort Recipe

Quinoa might not be native to Indian kitchens, but it slips into Indian flavours surprisingly well. When you treat it like rava and build an upma recipe around it, you get a bowl that tastes familiar but behaves a little differently in your body.

As a grain, quinoa tends to have a lower glycaemic index than both white and brown rice and also brings more protein and minerals per cup. A recent comparison on quinoa vs rice for blood sugar and weight management lays this out in an accessible way, and if you enjoy science-y talks, you might appreciate this Royal Society of Chemistry event that explored whether quinoa can be a healthier alternative to rice.

Ingredients for 2 Servings

  • Quinoa – ½ cup, rinsed thoroughly
  • Water – 1½ cups
  • Oil – 1½ to 2 tablespoons
  • Mustard seeds – ½ teaspoon
  • Urad dal – 1 teaspoon
  • Chana dal – 1 teaspoon
  • Cashews – a handful (optional)
  • Onion – 1 small, chopped
  • Ginger – ½ inch
  • Green chillies – 1–2
  • Curry leaves
  • Mixed vegetables – ½ to 1 cup
  • Salt, lemon juice, coriander
Recipe snapshot for quinoa upma showing a bowl of quinoa upma with peas, carrots and cashews beside small bowls of quinoa and lentils, with text explaining rinsing, tempering and simmering quinoa for a low-GI, high-protein upma bowl.
Quinoa upma recipe snapshot – well-rinsed quinoa simmered with tempered mustard, lentils, cashews, onions and veggies until the grains show little “tails”, then fluffed with lemon and coriander for a low-GI, high-protein upma bowl.

Method

  1. Place the quinoa in a fine-mesh sieve and rinse thoroughly under running water. This helps wash away saponins, which can taste bitter.
  2. In a pan, prepare the tempering with oil, mustard seeds, dals and cashews, followed by ginger, chillies, curry leaves and onion.
  3. Add chopped vegetables and sauté briefly.
  4. Stir in the drained quinoa and sauté for a minute or two; this step gives the grains a lightly toasted flavour.
  5. Pour in the water, add salt, and bring to a boil.
  6. Reduce to a simmer, cover and cook until the water is absorbed and the quinoa grains show little “tails”.
  7. Rest off the heat for a few minutes, then fluff and finish with lemon and coriander.

To see how quinoa compares directly to rice in everyday meals, including dishes like pulao and bowls similar to upma, you might enjoy MasalaMonk’s own quinoa vs rice overview, which brings the conversation back into a very Indian kitchen.


Homemade Instant Upma Mix: Just Add Hot Water

There are days when you have no time to chop onions, wash curry leaves or even stand at the stove for long. That’s when searches like “instant upma mix for travel”, “instant rava upma mix”, “readymade upma packet” and “upma premix” start appearing.

Instead of only relying on store-bought packets, you can make your own instant upma mix in a small weekend batch and use it through the week, or carry it in a jar or pouches when you travel.

Instructional image showing a glass jar labelled Instant Upma Mix surrounded by bowls of roasted rava, mustard seeds, lentils, dried curry leaves and spices, with text explaining how to combine them into a homemade instant upma premix for the week.
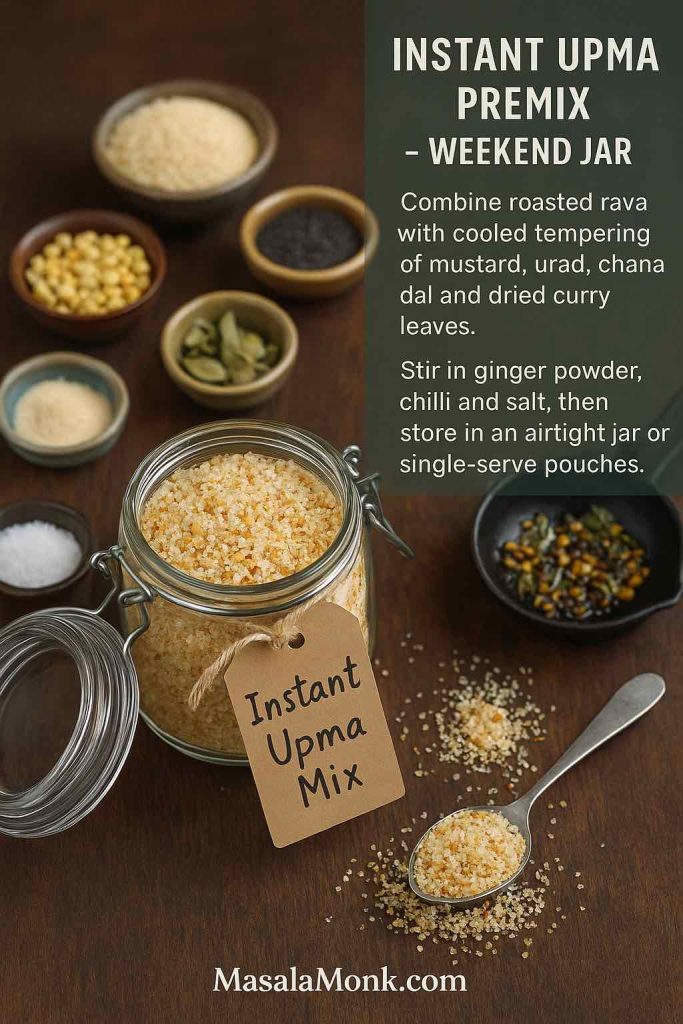
Instant upma premix – combine roasted rava with cooled tempering, dried curry leaves, ginger powder, chilli and salt, then store it in a jar or pouches so a hot bowl of upma is only boiling water away all week.

What You Need for a Small Batch

  • Roasted rava – 1 cup
  • Oil – 1 tablespoon (you can leave this out and keep the mix completely dry if you prefer)
  • Mustard seeds – ½ teaspoon
  • Urad dal – 1 teaspoon
  • Chana dal – 1 teaspoon
  • Dried curry leaves – a tablespoon or so
  • Ginger powder – a pinch or two
  • Green chilli powder or red chilli flakes – to taste
  • Salt – ¾ to 1 teaspoon (or pack separately)

Making the Instant Upma Premix at Home

  1. Dry roast the rava if it isn’t already roasted; let it cool completely.
  2. In a small pan, heat the oil and fry mustard seeds, urad dal, chana dal and dried curry leaves until crisp and fragrant. Allow this tempering to cool fully.
  3. Mix the roasted rava with the cooled tempering, ginger powder, chilli powder and salt.
  4. Store the mix in a clean, dry, airtight jar. For travel, portion it into small zip pouches or tiny containers so you can make one serving at a time.

Because the mix already contains salt and spices, all you need at the destination is boiling water and a bowl.

Instructional image showing boiling water being poured from a kettle into an insulated mug filled with instant upma premix on a desk, with text explaining how to add premix, pour hot water, cover and wait a few minutes for an easy travel- or office-friendly upma.
Instant upma, anywhere – add premix to a mug, pour boiling water, cover and wait a few minutes for a hot, comforting bowl at your desk, in a hostel or on a train journey.

How to Cook Instant Rava Upma from the Mix

For one serving:

  • Instant upma premix – ½ cup
  • Boiling water – ¾ to 1 cup

You simply:

  1. Add the premix to a bowl or small insulated container.
  2. Pour boiling water over it, stir well and cover.
  3. Let it stand for 5–7 minutes.
  4. Fluff with a fork and eat.

This approach is especially useful for office lunches, dorm rooms and overnight train journeys. If you’re into meal prepping more broadly, you can pair a home-made upma premix with larger batch cooks using guides like MasalaMonk’s vegetarian and high protein meal prep ideas from Indian cuisine, which help you think in terms of components instead of one-off meals.


What to Serve With Upma (and How to Build a Breakfast Around It)

While upma can absolutely be the only thing on your plate, it often plays very well with other small dishes. On some mornings you might want something cooling and tangy alongside; on others, you might want a hot drink or even a sweet treat to nibble with the last few bites.

Upma breakfast platter on a wooden tray with a bowl of rava upma, coconut and tomato chutneys, podi with ghee, curd, lemon wedges and a tumbler of filter coffee, with text suggesting pairing upma with chutneys, pickle and a warm drink for a complete morning meal.
Build your upma breakfast – pair any bowl of rava, semiya or millet upma with coconut and tomato chutney, podi with ghee, curd, lemon pickle and a warm drink like filter coffee to turn it into a complete morning ritual.

Here are a few ways to round out the experience:

  • Coconut chutney, tomato chutney, gunpowder (podi) with ghee, lemon pickle or even a simple bowl of curd all sit naturally next to a bowl of suji upma, semiya upma or millet upma.
  • A warm drink balances the savoury comfort of upma nicely. In winter, for instance, you could make a mug of homemade hot chocolate with cocoa powder on the side and turn breakfast into a cosy ritual.
  • On days when you’re fasting for part of the day, sipping on homemade electrolytes for fasting before or after your eating window—within which you eat a lighter millet upma—can help you feel more balanced.

Boosting the Nutrition

If you’re trying to boost the overall nutrition of the plate, there are a few simple tweaks that add up over time:

  • Sprinkle roasted seeds, such as pumpkin or sunflower, on your upma for a bit of crunch and good fats.
  • Stir soaked chia seeds into yoghurt or chutney; for ideas on how to use chia in Indian-style meals, MasalaMonk’s guide on benefits of chia seeds & how to use them in Indian diet offers plenty of inspiration.
  • Add a small fruit component—slices of papaya, orange segments, a banana—to bring in vitamins and sweetness naturally.
Instructional image showing a plate of upma with small bowls of roasted pumpkin and sunflower seeds, yoghurt topped with chia seeds and sliced banana and orange, with text explaining how to add seeds, chia and fruit to make an upma breakfast more nutritious.
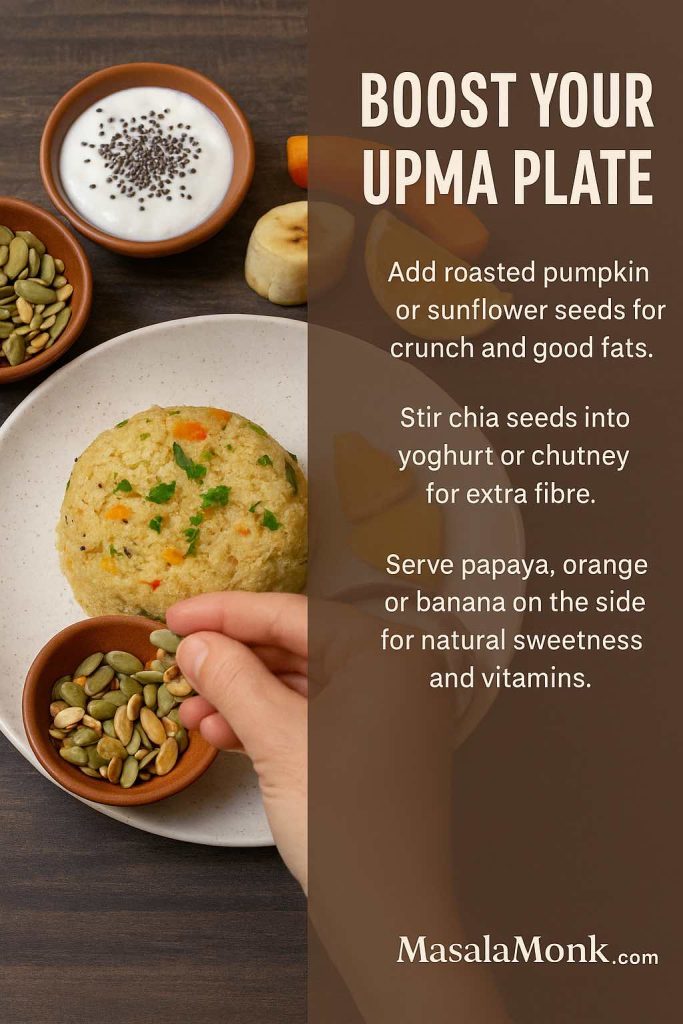
Boost your upma plate – sprinkle roasted seeds, stir chia into yoghurt and add a side of fruit so a simple bowl of upma turns into a more balanced, fibre- and nutrient-rich breakfast.

And if you like mixing Indian and Western breakfast styles on weekends, nothing stops you from serving a simple vegetable upma alongside a couple of slices of vegan French toast or baked toast sticks. MasalaMonk’s collection of vegan French toast recipes and their crispy French toast sticks can give you a head start there.


Rotating Grains Through the Week

One quiet advantage of mastering a few upma recipes is that you can then build a weekly rhythm around rotating grains. Instead of eating only suji or only oats, you can switch between several bases while keeping flavours familiar.

For example:

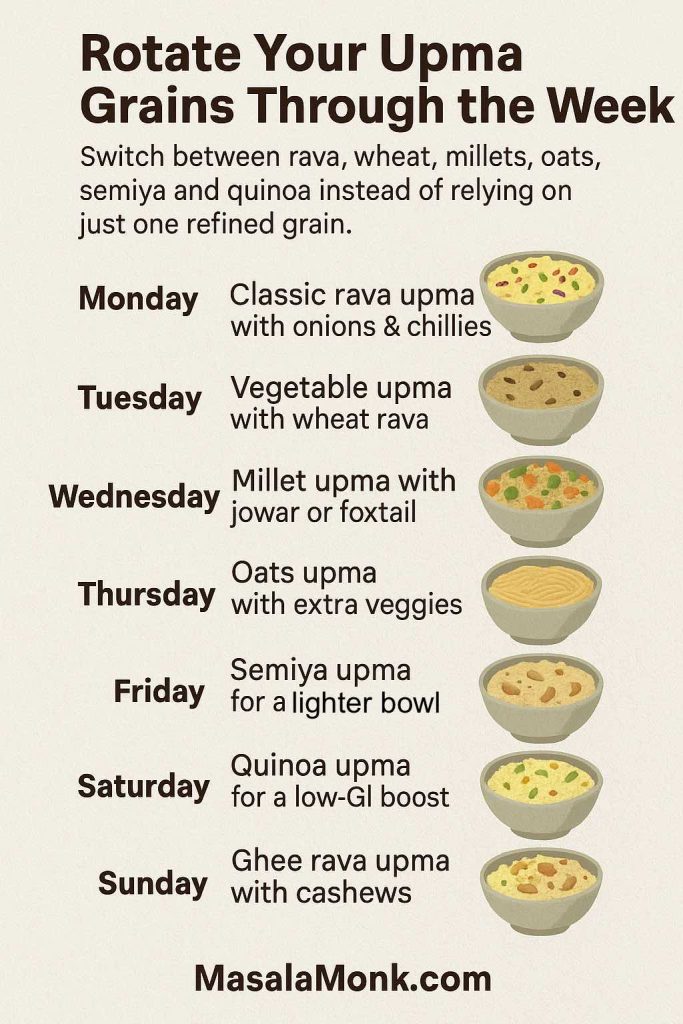
  • Monday – Classic rava upma with onions and chillies
  • Tuesday – Vegetable upma using wheat rava
  • Wednesday – Millet upma with jowar or foxtail millet rava
  • Thursday – Oats upma with lots of vegetables
  • Friday – Semiya upma for a lighter, comforting bowl
  • Saturday – Quinoa upma when you want something special
  • Sunday – A more indulgent ghee rava upma with cashews

The idea of variety is not just about boredom; it’s also about nutrition. The updated Indian dietary guidelines from ICMR emphasise including a range of cereals and millets over the week rather than relying only on refined grains. You can read more about that in the ICMR document on cereals and millets in the diet, which explains why shifting between rice, wheat, millets and other grains matters for long-term health.

Vertical infographic titled Rotate Your Upma Grains Through the Week showing a weekly planner from Monday to Sunday with small illustrations of different upma bowls and text suggesting classic rava upma, wheat vegetable upma, millet upma, oats upma, semiya upma, quinoa upma and ghee rava upma to encourage rotating grains instead of relying on one refined grain.
Rotate your upma grains through the week – move from rava to wheat, millets, oats, semiya and quinoa so breakfast stays interesting while your plate gradually shifts away from a single refined grain.

On top of that, broader resources that list foods rich in soluble fibre—such as this round-up of soluble-fibre-rich foods on Health.com—help you see where oats, barley, pulses and fruits fit into the larger picture of heart and gut health. As you get comfortable with those patterns, you’ll see that a thoughtfully made upma can anchor a very respectable breakfast, especially when it’s paired with pulses, vegetables and a side of fruit or nuts.

Also Read: Air Fryer Hard-Boiled Eggs (No Water, Easy Peel Recipe)


Bringing It All Together

When you step back and look at everything you can do with one simple technique, the humble upma starts to look less like a single dish and more like a framework. With one basic method—roast the grain, build a tempering, simmer, steam and fluff—you can create:

  • A straightforward suji upma for days when you want something quick and familiar
  • A vegetable or masala upma that almost counts as a complete meal
  • A millet upma that uses jowar, foxtail or ragi rava for extra minerals and fibre
  • A wheat or rice rava upma that tweaks the texture just enough to keep things interesting
  • A semiya upma that feels tiffin-friendly and child-approved
  • An oats upma that quietly supports your cholesterol and blood sugar goals
  • A quinoa upma that borrows global ingredients but stays rooted in Indian seasoning
  • A home-made instant upma mix that travels with you wherever you go
Family sitting at a wooden table enjoying bowls of rava upma, with a close-up of hands holding a bowl in the foreground and text reading “Bringing It All Together – master one upma method and spin it into a cozy, nutritious breakfast”.
Bringing it all together – once you’ve mastered one simple upma method, you can keep serving it in different grains and styles, but what really matters is the shared bowl at the table and the comfort it brings to busy mornings.

You don’t have to memorise separate instructions for each of these. Instead, you only need to internalise the proportions, roasting times and cooking times for each grain. Once you’ve done that, everything else is just small variations: more vegetables one day, more spices another, extra ghee on a Sunday, milder seasoning when someone’s unwell.

Somewhere between “how to make upma” and “which upma recipe should I choose today?”, you’ll probably find your own favourite combination of grain, vegetables, fat and accompaniments. And when that happens, upma stops being just a default breakfast and becomes one of those dishes you can cook almost on autopilot—leaving you free to enjoy the aroma of curry leaves in hot oil, the steam rising from the pan, and the simple pleasure of a warm, comforting bowl at the start of the day.

Also Read: Tres Leches – Mexican 3 Milk Cake Recipe

FAQs

1. What is upma, and how is it different from other Indian breakfasts?

Upma is a savoury, spoonable dish usually made by roasting a grain like rava (semolina, also called suji or upma rava) and then simmering it in a spiced liquid with a tempering of mustard seeds, lentils, curry leaves, chillies and onions. Unlike poha, which uses flattened rice, or idli, which relies on fermented batter, an upma recipe is quick, does not need soaking or grinding, and can be easily adapted to use different grains such as wheat rava, rice rava, millets, oats or quinoa.


2. What is the best rava for a classic rava upma recipe?

For a traditional rava upma or suji upma, medium or slightly coarse upma rava works best. Very fine suji can turn pasty, while extremely coarse rava may feel too chewy. Typically, packets labelled “upma rava” or “bombay rava” are ideal. Wheat rava (bansi or samba) and rice rava also make good upma, but they give a slightly different texture and flavour compared to the classic semolina-based upma recipe.


3. What is the ideal water ratio for soft, fluffy upma?

For most rava upma recipes, a ratio of 1:2½ to 1:3 (rava:water) works well. If you love very soft, hotel-style upma, you can lean closer to 1:3. On the other hand, if you prefer a firmer, grainier texture, you might enjoy 1:2½ more. Millet upma, wheat rava upma and rice rava upma usually need a little extra water; oats upma and quinoa upma also behave differently and often fall somewhere between 1:2 and 1:3 depending on the exact grain and cut.


4. How can I prevent lumps in my rava upma?

To keep your upma smooth and lump-free, the grain needs two things: roasting and careful mixing. First, dry roast the upma rava on a low to medium flame until it smells nutty and feels lighter. Next, bring the water and tempering to a full boil, then lower the heat. Gradually sprinkle the roasted rava into the boiling water with one hand, while you stir constantly with the other. This way, each little bit of rava meets the hot water separately and swells on its own, instead of clumping into balls.


5. Why does my upma turn sticky or mushy?

Upma often becomes sticky if the rava is not roasted enough, if the water ratio is too high for the grain, or if it is stirred aggressively after cooking. For a classic rava upma recipe, roast the semolina until it is aromatic, measure the water accurately, and once it has steamed, fluff gently rather than vigorously mixing it. For semiya upma (vermicelli upma) and oats upma, overcooking or adding too much water can also create a gluey texture, so it helps to keep the flame low and stop cooking as soon as the grain is just tender.


6. How do I make a simple upma recipe without vegetables?

A basic suji upma without vegetables is straightforward. Dry roast the rava, prepare a tempering with oil or ghee, mustard seeds, urad dal, chana dal, curry leaves, ginger, green chillies and onions, then add water and salt and bring it to a boil. Slowly stir in the roasted rava, cook covered for a few minutes, and finally finish with lemon juice and coriander. Even though there are no vegetables, this minimal upma recipe still tastes satisfying because of the fragrant tempering and the roasted flavour of the rava.


7. Can I make upma without onion or garlic?

Many people prefer a satvik upma recipe without onion or garlic, and that version is absolutely possible. In that case, rely more on curry leaves, ginger, green chillies, mustard seeds and lentils in the tempering. You can also add grated coconut or chopped coriander at the end for extra freshness. This style of upma is common on fasting days or festival mornings, and it works equally well with rava upma, millet upma and even oats upma.


8. Is upma healthy, or is it just a heavy breakfast?

Upma can be as light or as indulgent as you choose to make it. A plain rava upma recipe made with a moderate amount of oil or ghee, plenty of vegetables and served with yoghurt or chutney can fit into a balanced diet. Nevertheless, rava is a refined grain, so if you want a more nutrient-dense bowl, it helps to rotate with millet upma, wheat rava upma, oats upma or quinoa upma. By changing the base grain, increasing the amount of vegetables and moderating the fat, you can turn a simple upma recipe into a wholesome, everyday breakfast.


9. Which type of upma is better for weight management or diabetes?

Although individual needs differ, many people looking for a “healthy upma recipe” gravitate towards millet upma, oats upma or quinoa upma. These versions often have more fibre and a gentler impact on blood sugar compared to an upma recipe made only with refined semolina. In addition, adding vegetables, a small portion of nuts or seeds and pairing the bowl with yoghurt or a protein-rich side makes the meal more filling and may reduce the urge to snack soon after. Even so, portion size still matters, so lighter, moderate servings usually work best.


10. What are some easy variations beyond rava upma?

Beyond the classic rava upma, it is quite simple to explore other versions using the same basic method. For instance, semiya upma (vermicelli upma) swaps rava for roasted vermicelli threads; millet upma uses millet rava such as jowar, foxtail or multi-millet blends; oats upma relies on rolled oats; quinoa upma uses rinsed quinoa simmered with the tempering; and rice rava or arisi upma uses broken rice. The seasoning and vegetables can remain almost identical, so once you grasp one upma recipe, the others become natural extensions.


11. How do I prepare an instant upma mix for travel or busy mornings?

An instant upma mix starts with roasted rava and a very dry tempering. To assemble it, first roast the semolina thoroughly and cool it, then fry mustard seeds, urad dal, chana dal and dried curry leaves in a little oil until crisp. Once everything is completely cool, mix the rava, the tempering, dry spices such as ginger powder and chilli powder, and salt. Store the mixture in an airtight jar or in single-serving pouches. Later on, you only need to combine a portion of this instant upma mix with boiling water, allow it to stand covered for a few minutes, and fluff it before eating.


12. How long can roasted rava or instant upma premix be stored?

Roasted rava alone, if cooled thoroughly and kept in an airtight container away from moisture and insects, keeps well for several weeks and often even a couple of months. Instant upma premix that contains oil and spices generally has a shorter shelf life, though it still lasts a few weeks at room temperature in a cool, dry cupboard. If your climate is very humid, keeping smaller quantities of the premix in the fridge can be a safer choice. In any case, it is wise to check aroma and appearance before use; if the mix smells stale or looks clumpy, it is better not to use it.


13. Can I make upma in a pressure cooker or microwave?

Upma is traditionally cooked in an open pan, but it can also be adapted to a pressure cooker or microwave when needed. In a cooker, you can prepare the tempering, add rava and water, then cook on low heat without placing the whistle, treating the cooker like a heavy pan. In a microwave, you may roast rava and prepare the tempering separately, then combine everything with hot water in a microwave-safe bowl and cook in short bursts, stirring in between. Both methods work, although controlling texture and avoiding overcooking is usually easiest on the stovetop.


14. Is upma suitable for toddlers and children?

Upma can be very child-friendly, especially when you keep the spices gentle and cut the vegetables finely. For toddlers, it helps to make the rava upma slightly softer, use only a mild amount of chilli (or skip it altogether), and mash or blend the bowl lightly if needed. As children grow older, you can gradually introduce vegetable upma, semiya upma, millet upma and even a lightly spiced masala upma. Because the basic upma recipe is soft and easy to chew, it often works well as one of the early family foods that kids can share with adults.

Posted on Leave a comment

Idli Podi | Milagai Podi Recipe

If you have never heard of podi before, podi is a flavourful South Indian coarse spice powder condiment made with lentils, seeds and spices and served with Idlis. But for most fans, you can say podi is an emotion. It is like a flavour imbibed in every bite. Podi is a general South Indian word that means “powder”. In the Tamil language, the word milagai means red chilies and podi means powder. Idli podi is always served with ghee or sesame oil. There is a popular dish in South India where idlis are smeared with podi and ghee or sesame oil. But Idli Podi is not just limited to idlis. You can serve podi with paniyarams, sprinkle it on dosas, uttapams or make podi rice. Its main purpose is to add flavour to a meal, sometimes when certain spices are involved, podis can aid digestion too.

The flavour of podi is quite unique and tasty. There is a slight crunch in it that comes from roasted lentils. The nutty taste comes from sesame seeds with some smokiness and pungency from red chilies and other ingredients.

You can try serving podi with Ragi Idli. They pair beautifully with podi and other sautéed vegetables and makes a healthy, gluten free breakfast.

The recipe is pretty simple. You just have to roast the ingredients and grind everything together. There is some spiciness and heat in a typical milagai podi but you can control the heat as per your preference. There are variations to idli podi where some like to add dry coconut, curry leaves or peanuts.

There is another variation of idli podi called as gunpowder which is spicy and includes more red chilies as well as garlic.

The podi recipe that I am sharing with you is a recipe that I have been making for years now. There is always a jar of podi at my house. I like to add this powder in Masala Idli, sprinkle it on dosa, serve it with paniyarams or make podi rice with ghee. 

Tips for making Idli Podi

  1. Always use fresh spices and lentils to make podi. 
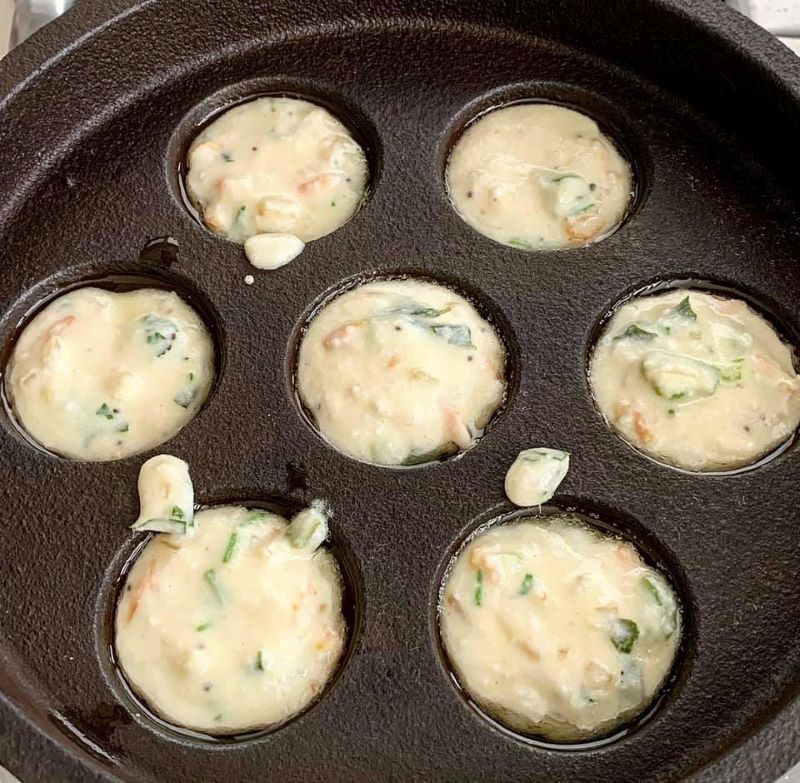
  2. It is always better to soak lentils for an hour in warm water and dry them with cotton kitchen towel before roasting. 
  3. I always add sesame seeds to make podi. It gives a great flavour and also is super nutritious. You can skip it if you like. You can use either black or white sesame seeds. 


  4. Rinse curry leaves with fresh water and then pat dry them with a kitchen towel. 
  5. Do not roast sesame seeds for long or it will taste bitter. 

Let’s see how you can make this flavour bomb.

Recipe: makes approx 200 grams

Ingredients: 

  • Urad dal: 1/2 cup
  • Channa dal: 1/4th cup
  • Curry leaves: 1/2 cup
  • Sesame seeds: 1/4th cup
  • Dried Red Chillies: 12-15 (add more if you like)
  • Mustard seeds: 2 tsps
  • Hing/Asafetida: 1/4th tsp
  • Oil: 2 tbsps
  • Salt as per taste

Method: 

  • Wash and soak both the lentils separately for an hour in warm water. This step is optional. You can just wash the lentils, pat dry and roast them but soaking helps to soften the lentils and makes them easy to digest.
  • Bring a wide heavy bottom pan to medium heat. Add sesame seeds and roast them till they become slightly brown and start crackling and popping. Set aside in a large plate.
  • Roast curry leaves till the leaves become crisp and shrink in size. Set aside.
  • Now add washed, soaked and towel dried urad dal. Roast till golden brown and fragrant. Set aside. 
  • Add channa dal and roast. Chana dal takes longer to roast. It should get browned or golden. For uniform cooking and color, keep on stirring them often.
  • Now add a tbsp of oil and roast dry red chilies on a low flame. Roast till you get a pungent smoky aroma from chilies. Set aside
  • Next add mustard seeds and roast them till they start crackling and popping in the pan. Set aside.
  • Lastly, add a tbsp of oil and cook asafoetida or hing in it for 10-15 seconds. Mix it with the other roasted ingredients.
  • Once everything is well roasted, put it all in a blender. Add salt to taste and grind well. Grind in intervals of some seconds to a coarse powder. Do not grind in one go for long as the sesame seeds will release oil.
  • Store Podi in an airtight glass jar. The powder will last you almost a year.

Happy Cooking!! 🙂

Do give this recipe a shot. If you try this recipe, do give us a shout out. Just click a picture and tag us on @masala.monk or use the hashtag #MasalaMonkRecipe and share on Instagram and Facebook. We would love to hear from you. 🙂

Posted on 1 Comment

Kuzhi Vegetable Paniyarams Recipe

Vegetable Paniyaram or Appe/Appam as it is commonly known is a South Indian breakfast recipe made from idli/dosa batter and known as kuzhi Paniyaram in Tamil, Paddu in Kannada, and Gunta Ponugulu in Telugu. It’s the best way to use idli dosa batter if the batter has turned sour after a couple of days. It is perfect for kids too as it is extremely healthy, has a good dose of vegetables and looks colourful and attractive. My kid loves it and often asks for it especially in his school tiffin. He would take extra to school as requested by his friends. 🙂

Some years back my uncle gifted this cast iron Paniyaram pan (appe pan) to me and it has been my most treasured kitchen possessions. Since then my obsession with appe pan started and I make not only paniyarams in it but also fritters, little pancake balls, patties, bread rolls, falafel, kofte and dahi bhallas. Basically, anything that you need to shallow or deep fry can be made in appe pan with much less oil. 

I like the instant version of Vegetable Paniyaram – it is quick to make with leftover idli/dosabatter. The last few cups of idli batter might not always yield soft idlis or make soggy dosas. I add mixed sautéed veggies with some spices into the leftover idli batter and it turns into flavourful paniyarams which I often serve with Coconut Chutney or Kara Chutney.  They are really crispy on the outside and soft on the inside.

Check out this recipe below. If you have leftover Idli batter you can use that. In the recipe below I’ll share with you the recipe of fresh batter

Recipe: makes 20-25 paniyarams 

Ingredients 

For the Batter

  1. White Split Urad Dal: 1/2 cup
  2. Bengal Gram/Channa Dal: 1/8th cup
  3. Fenugreek Seeds: 1 tsp
  4. Rice: 1 cup
  5. Flattened Rice/Poha: 1/4th cup
  6. Water as required for the batter
  7. Rock Salt: 1 tsp

For Paniyarams 

  1. Mixed Chopped or Grated Vegetables: 1 cup (I used onion, capsicum, carrot)
  2. Minced Ginger: 1 tsp
  3. Asafoetida/Hing: a pinch
  4. Mustard Seeds: 1 tsp
  5. Curry Leaves: Handful
  6. Oil/Ghee for Cooking
  7. Salt to taste
  8. Green chilies: 2 (optional)

Instructions 

  • Wash and soak urad dal, channa dal and 1 tsp of fenugreek seeds for 3-4 hours. 
  • Wash and soak rice and poha for 3-4 hours.
  • First grind the dals using water. Add water gradually to make a smooth thick but flowing consistency batter. 
  • Now grind rice and poha, again by adding little water at a time to make thick but flowing consistency batter.
  • Mix both the batters in a steel or a glass bowl. Add rock salt. Mix well. Leave it for fermentation for atleast 8 hours or more at a warm place. The batter will rise and will become airy with tiny bubbles. If it hasn’t then leave for some more time. 
  • In a pan, add a tbsp of oil. Add some mustard seeds & hing. Let mustard seeds splutter. Now add some finely chopped green chilies if using, curry leaves and minced ginger. Cook for few seconds then add finely chopped vegetables of your choice.
  • Season it with some salt. Cook for 2 minutes on medium flame or till they soften a bit. Allow it to cool. Then add the sauteed vegetables to the fermented batter and mix gently.
  • Now your batter is ready. The consistency of the batter is similar to idli batter. If it’s thick, add a bit of water. Check for salt. Heat Paniyaram pan to medium heat. Brush it with ghee or oil in each cavity and fill it with batter. Leave some space for paniyarams to rise.
  • Cover with a lid and cook on medium to low flame for 3 minutes or when the top has set, and edges have browned.
  • Then with a help of a skewer or a knife flip the paniyarams and cook the other side for 2-3 minutes. 
  • Serve immediately with chutney of your choice. 

Tips:

  • Cook appe on low-medium heat or else you will end up with raw batter in the middle.
  • You may use any combination of veggies minced broccoli, cauliflower, cabbage, or greens like methi or drumstick leaves works too.
  • Use a paniyaram pan that has been seasoned well and used in the past. If not the paniyarams will stick to the pan.

Do give this recipe a shot. I am sure this will be your child’s and your family’s new favourite. If you try this recipe, do give us a shout out. Just click a picture and tag us on @masala.monk or use the hashtag #MasalaMonkRecipe and share on Instagram and Facebook. We would love to hear from you. 🙂