

A really good idli feels lighter than it looks. Press one gently and it gives under your finger, then springs back. Tear it open and the middle is soft and porous, ready to drink in sambar or catch a spoonful of coconut chutney. Even ghee and podi are enough when the idli itself is right.
Most of that softness is decided before the batter reaches the steamer. Urad that never gained much air tends to stay heavy, and very stiff batter struggles to expand. Then a few unnecessary minutes of steam can firm up a batch that fermented beautifully.
That is what makes idli frustrating when it goes wrong: you soak, grind and wait overnight, then discover the problem in the first steamed plate. The finished idli usually tells you where to look. Use the 4:1 batter below as your baseline; if yours behaves differently, the later sections help trace the cause.
Quick Answer: How to Make Soft, Fluffy Idlis
Start with a 4:1 rice-to-urad ratio by weight: 400 g idli rice and 100 g urad, plus 20 g poha and ¼ teaspoon methi. Soak the rice and urad separately for about 4 hours. Grind the urad until pale, smooth and airy; grind the rice and poha separately until very fine with just a faint grain remaining.
When the two are mixed, the batter should fall from a ladle in a thick, broad ribbon and slowly settle back into the bowl. Ferment until it has risen, shows fine bubbles, feels lighter and smells clean and mildly sour.
Steam in an already hot steamer and begin checking common medium idlis around 9–10 minutes. The surface should look matte and set, and the centre should spring lightly when touched. Rest the plates for 2–3 minutes before unmoulding.
Soft & Fluffy Idli Recipe
Recipe at a Glance
| Yield | About 20–24 medium idlis, depending on mould size and fill |
|---|---|
| Rice : urad | 4:1 by weight |
| Typical hands-on prep | About 25–35 minutes with a blender or mixer-grinder |
| Soaking | About 4 hours at room temperature |
| Fermentation | From about 8 hours in a warm kitchen, judge by rise, bubbles, texture and aroma |
| Steaming | Begin checking around 9–10 minutes |
| Plan ahead | Commonly about 13–18 hours in warm conditions; cooler kitchens take longer |
Making idli for breakfast? Soak in the afternoon, grind in the evening and ferment overnight. In the morning, judge the batter while the steamer heats. Most of the elapsed time is simply waiting.
Equipment
- Kitchen scale, strongly recommended
- Two soaking bowls
- Wet grinder, high-speed blender or mixer-grinder
- Large fermentation container
- Idli plates and steamer, or another covered steaming vessel
- Ladle and spoon for unmoulding
- Kitchen thermometer, optional for a cold kitchen
Ingredients
Use the gram measurements when possible. Cup sizes vary between kitchens and countries; 400 g rice and 100 g urad always preserve the intended 4:1 ratio.
| Ingredient | Metric | Approximate volume |
|---|---|---|
| Idli rice / suitable parboiled rice | 400 g | about 2 cups |
| Whole skinned urad dal / urad gota | 100 g | about ½ cup |
| Thick poha / flattened rice | 20 g | about ¼ cup |
| Fenugreek seeds / methi | about 1 g | ¼ teaspoon |
| Fine salt | 6 g | about 1 teaspoon if finely ground |
| Cold water for urad — mixer/blender method | 120–150 ml | ½ cup to ½ cup + 2 tablespoons |
| Cold water for rice — mixer/blender method | 180–220 ml | ¾ cup to just under 1 cup |
| Oil or ghee for greasing | as needed | — |
If your salt is coarse, use the 6 g weight instead of trying to match one teaspoon exactly.
Wet-grinder note: the water quantities above are starting ranges for blade grinders. Stone grinders take water differently as the urad expands. Add it gradually and stop when the urad has become light and airy.
1. Soak the Rice and Urad Separately
Rinse the rice several times and cover it generously with fresh water. In another bowl, rinse the urad, add the methi and cover with fresh water.
Soak both for about 4 hours. About 20–30 minutes before grinding, rinse the poha and soak it separately until soft. Keep the rice and urad apart because they need different grinding textures.
Need to soak longer? Keep room-temperature soaking to about four hours. For a longer soak, refrigerate the rice and urad at 4°C / 40°F or below. The BC Centre for Disease Control’s dosa and idli food-safety guidance provides additional controls for soaking and refrigerated storage.
2. Grind the Urad Until It Looks Almost Whipped
Drain the urad and methi well. With a mixer-grinder or high-speed blender, begin with about 120 ml cold water. Grind, scrape the jar as needed and add more cold water a little at a time.
If your mixie heats quickly, chill the soaked urad first. The finished batter should be pale and smooth, but smoothness is only half the job. It should also look noticeably fuller, with fine bubbles through it, and feel light on the spoon instead of sitting there like a dense paste.
Give a warm jar a short rest before continuing.
Wet grinder: grind the urad first and add water gradually while the stones work. Stop when it is smooth, airy and clearly expanded.

3. Grind the Rice and Poha
Drain the rice and poha. For a blade grinder, start with about 180 ml cold water and add more only as needed to keep the mixture moving.
Rub a little between your fingertips. Rice is much more forgiving than the urad here. Hard pieces need more grinding, but if it went slightly smoother than intended, carry on with the batch.
Wet grinder: remove the urad first, then grind the rice and poha separately to a very fine texture with a faint grain remaining.

4. Combine and Check the Flow
Transfer both batters to a clean container that will be no more than about half full after mixing. Add the salt and mix thoroughly.
Lift a ladleful and let it fall back into the bowl. Good batter comes down in a broad, thick ribbon, sits on the surface briefly and then slowly disappears. Heavy clumps mean it needs a little more water. Add 1 tablespoon / 15 ml at a time and stop as soon as the ribbon flows properly.

5. Ferment
Cover the container with a lid or plate without sealing it airtight and leave it somewhere comfortably warm.
In a warm kitchen, from about 8 hours onward, judge the batter by what has changed. It should sit higher in the bowl, show fine bubbles along the sides and feel lighter when you scoop into it with a ladle. The aroma should be gently sour and still pleasant.

When those signs are there, heat the steamer. Almost no movement by morning usually points to temperature first.
6. Heat the Steamer
Add enough water to create strong steam without letting it touch the idli plates. Around 1½–2 cups / 360–480 ml works as a starting point for many home steamers. Bring the water to an active simmer or boil before the filled stand goes in.
Pressure cooker: use it as a steamer with the lid on and the weight/whistle removed. Instant Pot: use a steaming setup with the valve venting. Do not pressure-cook the idlis.
7. Fill the Idli Moulds
Lightly grease the cavities. Give the fermented batter one or two gentle folds if it needs evening out, then fill the moulds about three-quarters full. For many medium plates that works out to roughly 3 tablespoons / 45 ml, but there is no need to measure each cavity.

8. Steam Until the Centre Is Set
Put the stand into the already steaming vessel and cover. Begin checking around 9–10 minutes.
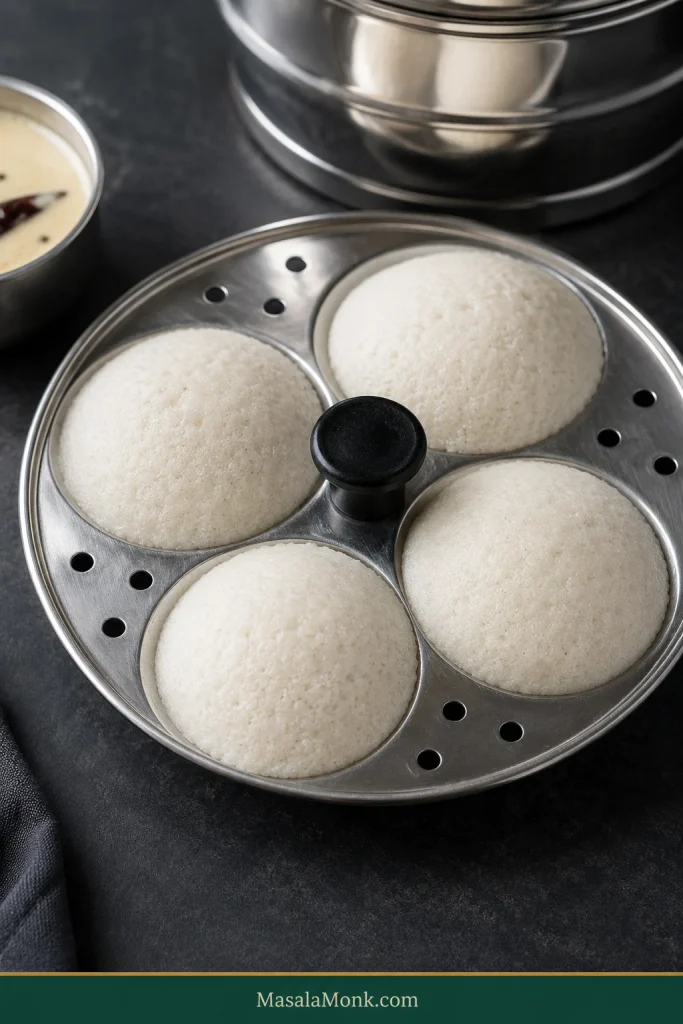
Lift the lid and let the steam clear. The tops should look softly matte instead of wet and shiny. Press the middle gently; it should spring back. A skewer inserted into the thickest part should come out without raw batter.
Deeper moulds usually need a little longer. Once the centre is set, take the plate out. A cooked centre is the finish line; extra steam only makes the idli firmer.
9. Rest and Unmould
Leave the plates for 2–3 minutes. Dip a spoon in water, slide it around the edge and lift each idli gently from underneath.
Break the first one while it is warm. An open, moist crumb means the timing is right for the remaining plates.

If that first plate is already soft and airy, keep going. If not, use the shortcuts below to trace the batter, fermentation or steamer.
Need help with the batter or your finished idlis? Rice & Urad · Ratio · Grinder Guide · Batter Consistency · Fermentation · Steaming · Troubleshooting · Scaling · Storage
Choosing Rice and Urad for This Batter
Start With Idli Rice
Use idli rice or Ponni parboiled rice when available. Sona Masoori also works; adjust the water as needed and expect a somewhat different crumb. Basmati and other aromatic long-grain rice are less predictable for this style of idli.
Outside India, Indian groceries commonly carry bags labelled Idli Rice, Ponni Boiled Rice or Ponni Parboiled Rice. Idli rava belongs to a different method and should not replace the whole rice cup-for-cup.
Fresh Urad Matters More Than Whole vs Split
Whole skinned urad, often sold as urad gota, is an excellent choice, and split skinned urad works too. Buy from a shop with good turnover when possible. Fresh urad usually hydrates and expands better; older stock can become perfectly smooth in the grinder and still stay disappointingly heavy.
Markedly yellowed or tired-looking dal can suggest age, although colour by itself is not a reliable date stamp.

About the poha and methi: excellent idlis can be made from rice, urad, water and salt alone. This version uses 20 g poha for a little extra softness and only ¼ teaspoon methi. No methi? Make the batter without it.
An ivory or off-white idli is normal. Texture matters far more than chasing a perfectly white surface.
For a millet version, use a batter designed around the grain instead of replacing the rice here. Our Fermented Ragi Idli uses its own balance of ragi, rice, poha and urad.
Why the Rice-to-Urad Ratio Can Vary
For this recipe, use 4:1 by weight: 400 g rice to 100 g urad. Other excellent idli recipes use 3:1, 5:1 and more rice-heavy ratios because urad quality, grinder performance and additions such as poha all change the way the batter behaves.
Keep the 4:1 base while you learn the recipe. Heavy idlis are better diagnosed through the grind, batter thickness and steaming before you start changing the dry ratio.

Wet Grinder, High-Speed Blender or Mixer-Grinder?
If you own a wet grinder, use it; it is the easiest of the three for building highly aerated urad. A powerful blender is the fastest. A regular mixie also works well when you keep the urad cold, avoid overloading the jar and add water gradually.

Wet Grinder
A wet grinder works slowly and generally keeps the batter cooler. Grind the urad first, adding water gradually as the stones work, until it is smooth, airy and clearly expanded. The texture is the useful endpoint here, not an arbitrary number of minutes.
Some large wet grinders struggle with only 100 g dry urad because the soaked dal forms too shallow a layer. If yours is barely being picked up by the stones, double the recipe or use a smaller grinder.
High-Speed Blender
A powerful blender moves fast, and the batter can heat fast with it. Use cold water, leave enough room for the mixture to circulate and stop when the urad is airy and noticeably larger in volume.
Regular Mixer-Grinder
An everyday Indian mixie works well for idli batter. Chill the soaked urad if the machine heats aggressively, drain it well and work in manageable batches.
Urad that stays dense even after the water, heat and batch size are under control may simply be meeting the limits of that particular jar and blade setup.
Reading the Batter When Something Looks Off
Smooth Urad That Never Became Airy
If the urad is perfectly smooth but still sits heavily on the spoon, do not let the smoothness fool you. The useful change is the extra air and volume: well-ground urad feels much lighter and contains fine bubbles throughout.

A small drop often floats in water when the urad has trapped plenty of air. Treat that as one clue, not a verdict on the finished batter.
Rice That Went Too Smooth—or Stayed Too Coarse
Hard rice pieces need more grinding. Completely smooth rice batter is much less worrying; continue with the batch.
Too Thick, Right or Too Thin?
| State | What You See | What It Can Cause |
|---|---|---|
| Too thick | Falls in clumps and leaves pronounced mounds | Slower expansion and dense idlis |
| Good range | Falls in a thick ribbon that slowly disappears | Enough moisture while still holding height |
| Too thin | Pours quickly and levels almost immediately | Flat, weak or sticky idlis |
Too-stiff batter is easy to loosen a tablespoon at a time. Make the last water additions slowly; once the batter pours freely, taking that water back out is much harder.

Fermenting Idli Batter in Warm and Cool Kitchens
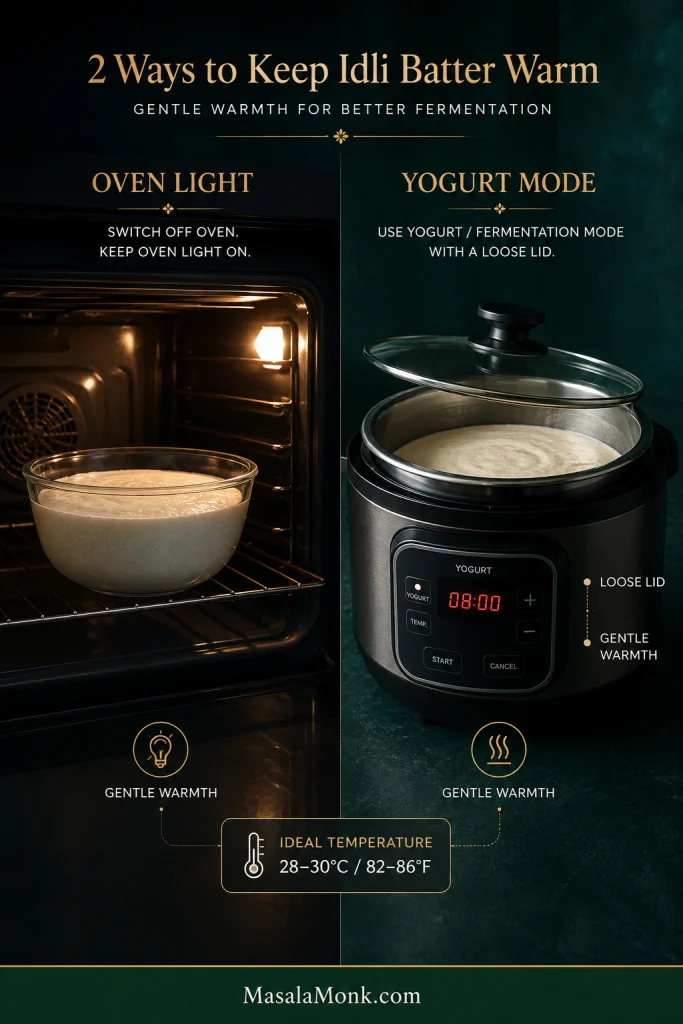
An overnight ferment in a hot kitchen and one in a cold apartment are not the same job. If you can control the temperature, around 28–30°C / 82–86°F is a useful working range.
| Kitchen / Batter Environment | What to Expect |
|---|---|
| About 28–30°C / 82–86°F | Begin checking around 8 hours, then judge by the batter itself |
| About 25–27°C / 77–81°F | A slower rise is normal |
| Below about 24°C / 75°F | Give the bowl gentle, controlled warmth |
| Very warm kitchen | Fermentation moves faster, so check earlier |
For a Cold Kitchen
A switched-off oven with its light on can provide a warmer spot. With an Instant Pot, use Yogurt/fermentation mode with a loose or glass lid; do not seal the pot for pressure. The batter still decides when fermentation is finished, so do not run the full programmed cycle blindly.
A kitchen thermometer is useful when you are unsure how warm the space really is. Gentle warmth is enough.
Ready batter usually gives several clues together: it sits higher in the container, fine bubbles appear along the sides or surface, the batter feels lighter when you scoop through it, and the aroma has developed a mild fermented tang.
Does Idli Batter Have to Double?
No. A big rise is encouraging. Read it together with the bubbles, lighter texture and aroma. A lively batch can be ready without matching somebody else’s dramatic before-and-after photograph.
My Batter Didn’t Rise Overnight. What Now?
A cold kitchen may simply need more time and a warmer spot. If the batter was already kept comfortably warm, compare its consistency next. Very thick batter struggles to expand; very loose batter may bubble without building much height. Dense urad gives fermentation less airy structure to work with.
Fix those fundamentals before reaching for Eno, baking soda or yeast. Extra gas does not repair a poorly ground or badly balanced batter.
How to Steam Idli Without Guessing
Idli recipes give different steaming times because steamers and moulds differ. A shallow cavity in a compact stovetop steamer does not cook like a deep cavity halfway up a tall stack.
Start with an already hot steamer and fill the cavities to roughly the same level. About three-quarters full is a useful visual guide. Those two habits remove much of the variation before the timer starts.
Use the First Plate to Calibrate Your Steamer
With an unfamiliar steamer or mould, cook one plate before filling every rack. Begin checking the centre around 9–10 minutes.
A wet centre needs another minute or two. Dry, firm idlis mean the next plate should come out earlier. Once you know your moulds and steamer, the timing becomes routine.
Bottom plate wet while the others are fine? Its position is the first suspect, not the batter. It may be sitting unusually close to the boiling water or catching more condensation.

No Idli Stand?
Use shallow heat-safe cups or small bowls inside a covered steamer. Grease them lightly and leave room for expansion.
Cups are often deeper than idli moulds, so the centre usually needs a little longer. Judge doneness by the set surface and springy middle instead of treating 9–10 minutes as an exact promise.

What Went Wrong With Your Idli?
The cooked texture usually narrows the possibilities quickly. Change one thing at a time.
| What Happened? | Start Here | Next Move |
|---|---|---|
| Hard + dense | Urad aeration, thick batter, steaming | Loosen the remaining batter if needed and shorten the next steaming test |
| Hard despite a good rise | Batter thickness and steaming | Confirm the batter still has a thick-ribbon flow, then take the next plate out earlier |
| Hard + flat | Fermentation and urad aeration | For the next batch, revisit warmth, dal freshness and how much volume the urad gained |
| Soft but flat | Loose batter or heavy post-fermentation mixing | Add no more water and handle the remaining batter gently |
| Dry / rubbery | Too much steaming | Shorten the next plate |
| Soft hot, noticeably hard once cool | Steaming time and moisture loss | Take the next plate out as soon as the centre sets and keep cooked idlis covered |
| Wet / gummy centre | Weak steam, deep fill or undercooking | Improve the steam and cook only until the middle sets |
| Sticks to the mould | Rest, greasing and doneness | Rest 2–3 minutes and loosen with a wet spoon |
| Batter barely rose | Temperature, consistency, urad | Work through the fermentation section |
| Too sour | Continued fermentation | Refrigerate and use it for dosa or paniyaram |

My Batter Fermented Beautifully. Why Are the Idlis Hard?
If the batter rose well but the idlis are hard, consider batter thickness and steaming before extending fermentation. Urad should have been airy, not merely smooth. The mixed batter should have flowed in a thick ribbon instead of sitting in heavy lumps. Vigorous mixing after fermentation can knock out some of that volume, while idlis left over steam after the centre has set become firmer.
A nicely shaped idli that feels dry and resistant often points toward steamer calibration. By contrast, a heavy crumb from edge to centre sends you farther back toward the urad and water.

Flat Idlis: Soft or Hard?
Hard, flat idlis often go with weak fermentation, poor urad aeration or batter that stayed too heavy. A flat idli that stays soft points more toward loose batter or vigorous stirring after fermentation.

Sticky Mould or Gummy Crumb?
An idli that is cooked through but sticks to the mould may simply need another minute of rest, better greasing or a wet spoon. A gummy centre is a different problem: mould fill, steam strength and unusually loose batter are the first places to investigate.

Cooked Outside, Raw in the Middle?
Start with the steamer. Weak steam, unusually deep moulds or cavities filled almost to the rim can leave the middle behind. Correct the steam and fill before changing the batter.
Once you know what changed, return to the full idli recipe for the next batch.
How Much Batter Do You Need for 20, 50 or 100 Idlis?
Mould capacities vary enough that exact counts are misleading. Use these as planning quantities, then note what one batch actually gives you in your own plates.
| Planning Goal | Rice | Urad | Poha |
|---|---|---|---|
| About 20–24 idlis | 400 g | 100 g | 20 g |
| About 40–48 idlis | 800 g | 200 g | 40 g |
| Plan for at least 50 | 1 kg | 250 g | 50 g |
| Plan for at least 100 | 2 kg | 500 g | 100 g |
Scale the methi and salt by the same factor. For a large batch, grind several normal-sized loads instead of packing one jar or wet grinder too full, and divide the mixed batter between roomy fermentation containers.
Scale the dry ingredients mathematically; add grinding water by texture. Five batches will not necessarily need exactly five times the water.
Before steaming for a crowd, make one plate first.

Need exactly 1 kg of finished batter? Weigh one successful mixed batch in your kitchen first. Final batter weight changes with draining and grinding water.
Fresh Batter, Day-2 Batter & Leftover Idlis
Fresh vs Refrigerated Batter
For the softest idlis, use the batter fresh or during the first day or two after refrigeration. Fermentation continues slowly in the fridge, so the batter becomes more sour and may loosen, separate slightly or occasionally become more gelled.
If the fresh batter made excellent idlis and the refrigerated portion later behaves differently, use the older batter for dosa, uttapam or Kuzhi Vegetable Paniyarams. Should this happen often in your kitchen, steaming a few extra idlis while the batter is at its best is perfectly sensible.

Keep refrigerated batter at 4°C / 40°F or below. The BCCDC guidance for controlled dosa/idli processes describes refrigerated holding of roughly 5–7 days, but those controls are not identical to every home recipe. Use the batter much earlier for the best idli texture.
Some liquid separation can happen as fermentation continues, so do not judge the batter by that sign alone. Visible fuzzy mould, unusual pink or orange patches, or a clearly rotten or otherwise off smell are reasons to discard it. If you are unsure about its safety, discard it.
Storing Cooked Idlis
Keep freshly steamed idlis covered while the next plates cook. Idlis that are wonderfully soft when hot but noticeably hard once cool often benefit from a shorter steam on the next batch.
Cool leftovers promptly and refrigerate them in a closed container. Reheat briefly with steam, or microwave under a damp paper towel in short bursts until hot throughout. Cooked idlis also freeze well and can be steamed straight from frozen until hot throughout.
Can You Make Dosa With This Idli Batter?
Yes. Scoop out only what you need and thin it gradually with water until it spreads comfortably across a hot tawa. Slightly older batter works especially well for dosa and uttapam because the stronger tang suits them.
This is an idli-first 4:1 batter, so it may not spread or crisp exactly like a batter designed specifically for very thin, crisp masala dosa.

What to Serve With Idli
A hot idli is mild enough to work with something cool and creamy, a bowl of sambar, or a dry podi-and-ghee plate.
Coconut chutney: cool chutney against a hot idli is hard to improve upon. Make our South Indian Coconut Chutney while the final plates are steaming so both arrive fresh.
Sambar: break an idli into the hot broth and leave it for a few seconds. The edges soften first, the centre stays springy, and the open crumb fills with sambar.

The Next Batch Gets Easier
The second or third batch is easier because you already know how the batter moved through your grinder and how long your moulds needed over steam. If something changes, the finished idli gives you somewhere to start.
Lift the lid, let the steam clear and ease an idli from the plate while it is still warm. Spoon over chutney or sambar, or keep breakfast simple with sesame oil or ghee and our Idli Podi / Milagai Podi.








