
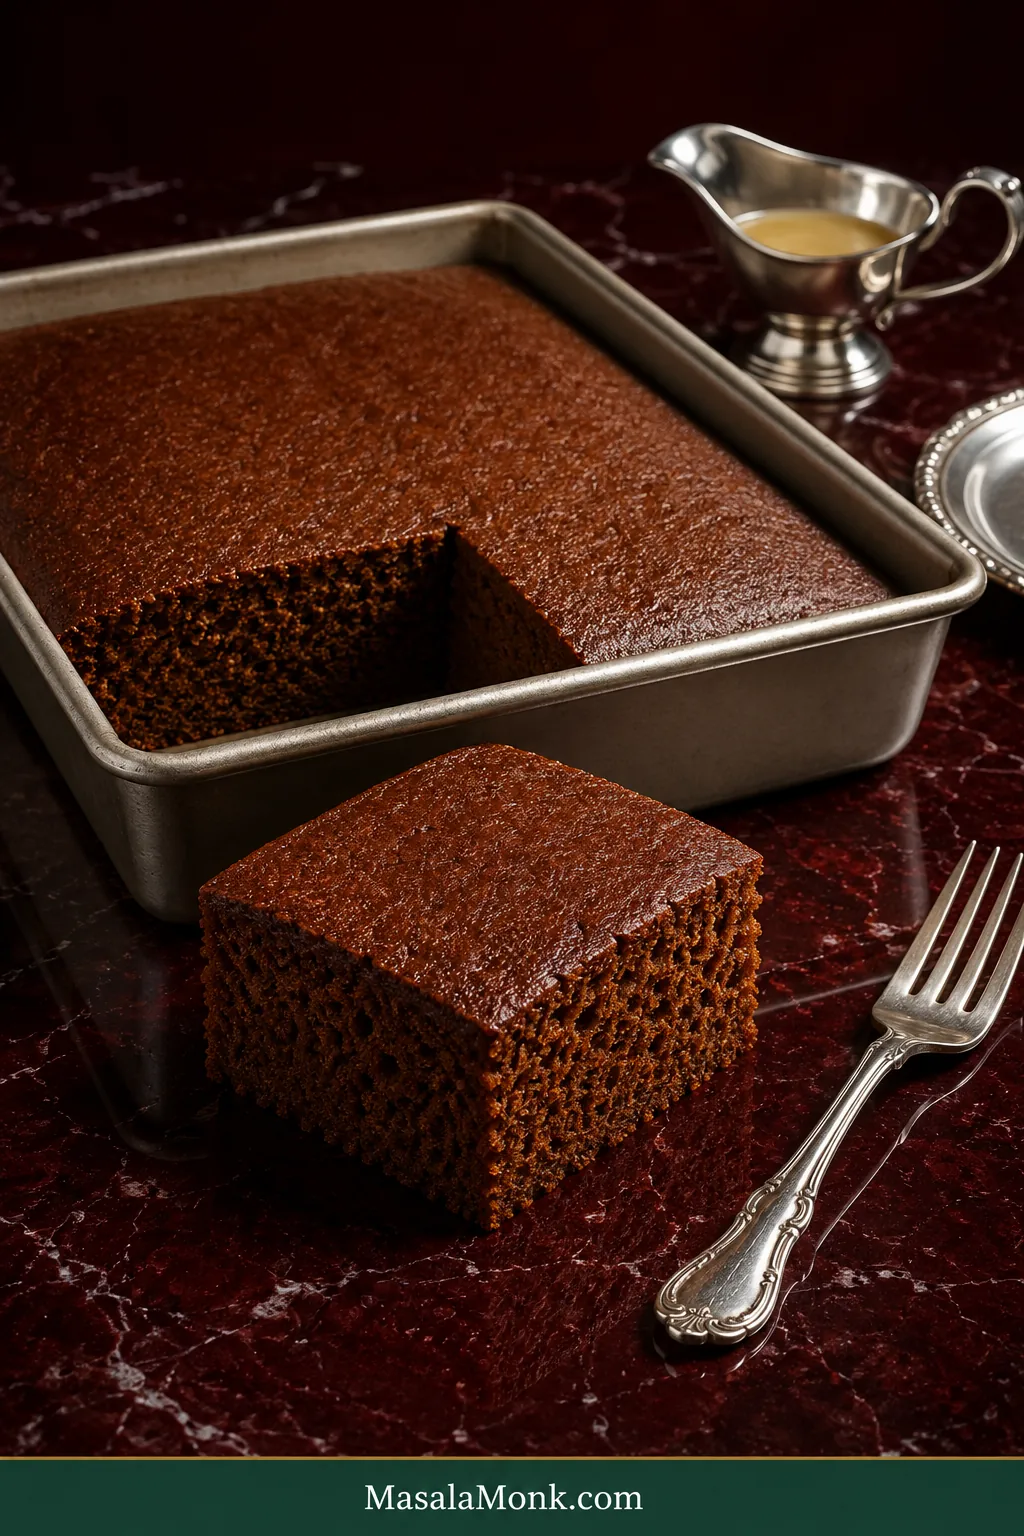
A good gingerbread cake announces itself before you cut it. The kitchen fills with the deep smell of molasses and warm ginger, the top settles into a rich mahogany brown, and a square gives easily under the fork while the crumb holds together.
Its middle is soft and moist, the edges stay tender, and once cooled the crumb cuts cleanly. Ginger comes through clearly against the molasses.
This is old-fashioned gingerbread in the best sense: one uncomplicated 9×13-inch molasses cake, mixed by hand, cut into squares and perfectly happy without decoration. It has the easygoing feel of a snacking cake—good with coffee in the afternoon, comfortable after dinner, and simple enough to sit beside richer desserts on a holiday table.
Quick Answer: How to Make Moist Gingerbread Cake
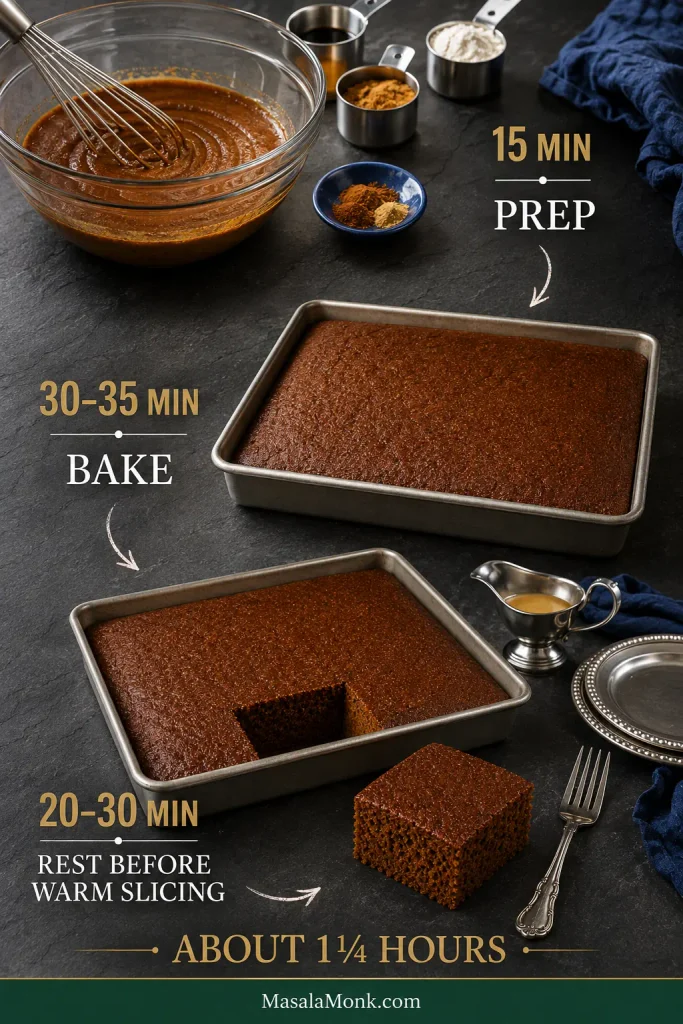
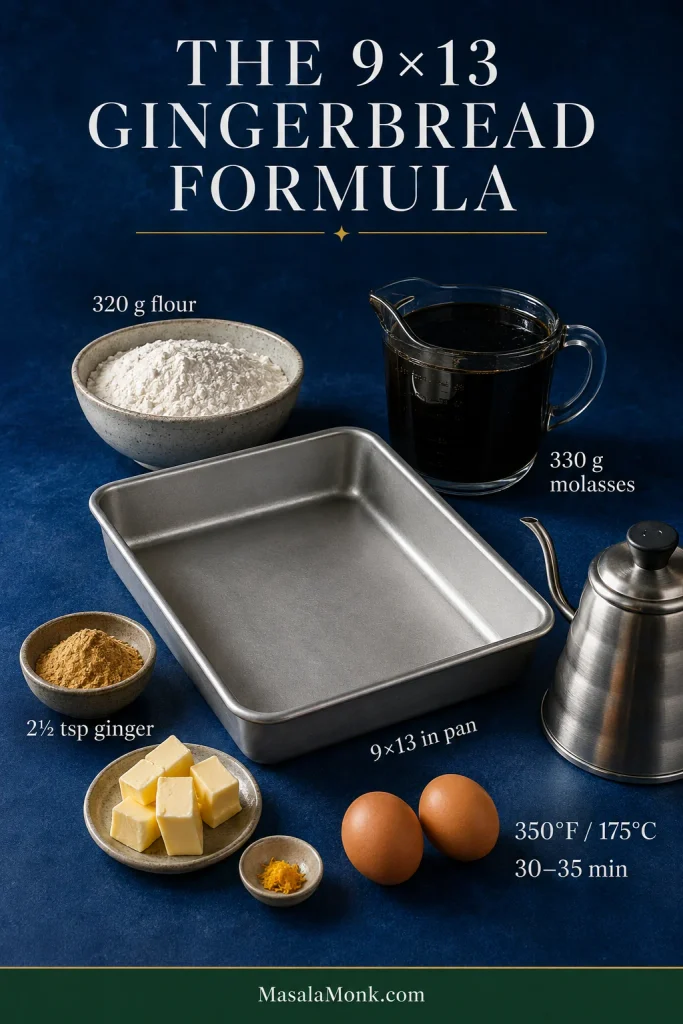
For moist gingerbread cake, bake a fluid molasses batter in a light-colored 9×13-inch pan at 350°F / 175°C for about 30–35 minutes, until the center is set and springy and a tester carries moist crumbs but no wet batter.
Mix regular unsulphured molasses with brown sugar, melted butter, a little neutral oil and hot water. Once the mixture feels comfortably warm, with no steam rising, add the eggs, then mix in the dry ingredients until evenly combined and no dry flour remains.
The batter will be dark and unusually fluid. Pour it into the prepared pan promptly and start checking around 28–30 minutes. Let the cake itself—not the timer alone—tell you when it is ready.
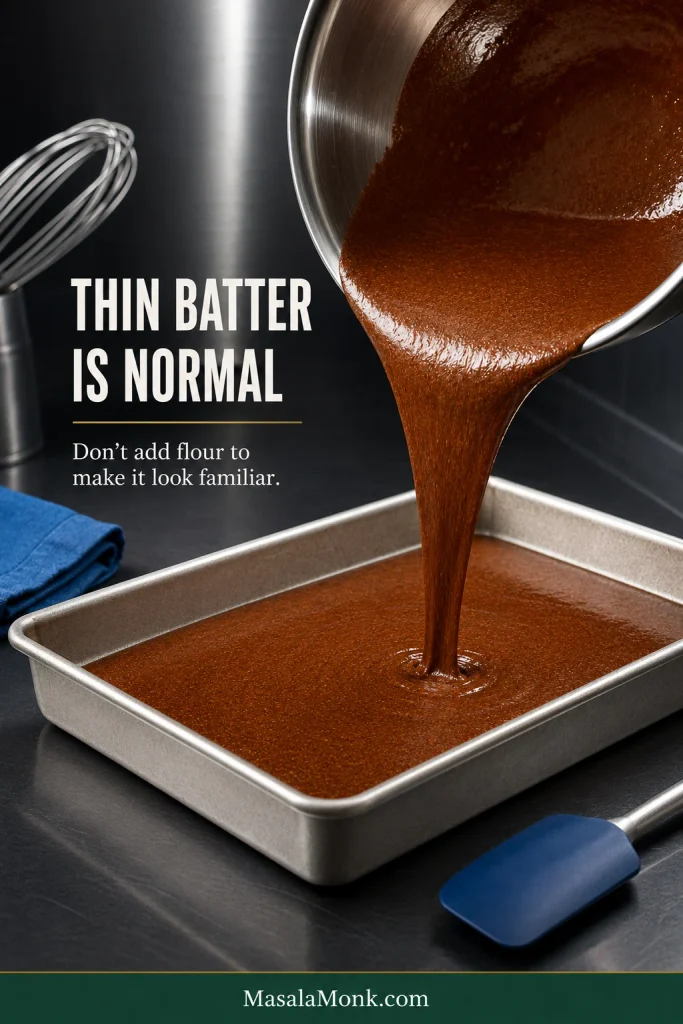
Thin batter is normal here. It will look much looser than ordinary butter-cake batter. Do not add extra flour to make it look more familiar.
Gingerbread Cake Recipe
Moist & Easy Gingerbread Cake
A soft, ginger-forward molasses cake baked in one 9×13-inch pan, with a tender crumb that stays moist into the next day.
Cool completely before frosting or cutting especially neat squares.
Equipment
- 9×13-inch / 23×33 cm light-colored metal baking pan, about 2 inches / 5 cm deep
- Parchment paper, with enough overhang for a sling if you want to lift the whole cake out
- Large mixing bowl
- Medium mixing bowl
- Whisk
- Flexible silicone or rubber spatula
- Digital kitchen scale, preferably
- Kettle or small saucepan for the hot water
- Wire cooling rack
Dry ingredients
- 320 g all-purpose flour (2⅔ cups)
- 2½ teaspoons ground ginger
- 1½ teaspoons ground cinnamon
- ¼ teaspoon ground cloves
- ¼ teaspoon ground nutmeg
- 1 teaspoon baking soda
- 1 teaspoon baking powder
- ½ teaspoon fine salt
Wet ingredients
- 150 g packed dark brown sugar (¾ cup)
- 330 g regular/original unsulphured molasses (about 1 cup / 240 ml)
- 113 g unsalted butter (½ cup / 4 oz), melted
- 60 ml neutral oil (¼ cup), such as sunflower, canola or vegetable oil
- 240 ml hot water (1 cup)
- 2 large eggs
- 1 teaspoon vanilla extract
Using a scale? Set the large mixing bowl on it, tare to zero and pour the molasses directly into the bowl. It is much easier than scraping sticky molasses from a measuring cup.
Mix and assemble
- Prepare the oven and pan. Heat the oven to 350°F / 175°C conventional / 160°C fan with a rack in the center. Lightly grease the pan and line the base with parchment. If you want to lift the whole cake out before cutting, leave parchment overhang along two opposite sides to form a sling.
- Mix the dry ingredients. Whisk the flour, ginger, cinnamon, cloves, nutmeg, baking soda, baking powder and salt together thoroughly.
- Make the molasses mixture. Whisk the brown sugar, molasses, melted butter and oil in a large bowl. Slowly whisk in the hot water. Let the mixture stand for a few minutes, until comfortably warm and no longer steaming, then whisk in the eggs one at a time and add the vanilla.
- Bring the batter together. Add the dry ingredients and mix until evenly combined and no dry flour remains. Sweep a flexible spatula around the sides and firmly across the bottom to catch hidden pockets. There is no need to beat the batter for volume.
- Pour the batter. It will be dark and easily pourable. Resist the urge to thicken it with extra flour. Pour it straight into the prepared pan.
Bake and cool
- Bake. Transfer the pan directly to the oven. Avoid opening the door during roughly the first 25 minutes. Begin checking around 28–30 minutes; most cakes will finish in about 30–35 minutes.
- Check the center. The middle should look set and spring back gently when touched. A tester may carry a few moist crumbs but should not have wet batter. The edges may also begin to pull slightly from the pan; consider that an extra clue, not something you have to wait for.
- Let the crumb settle. Cool on a wire rack for at least 20–30 minutes before cutting. Let the cake cool completely for the neatest slices or before frosting. If you made a parchment sling, wait until the cake is completely cool before lifting it from the pan; warm gingerbread is softer and easier to break.
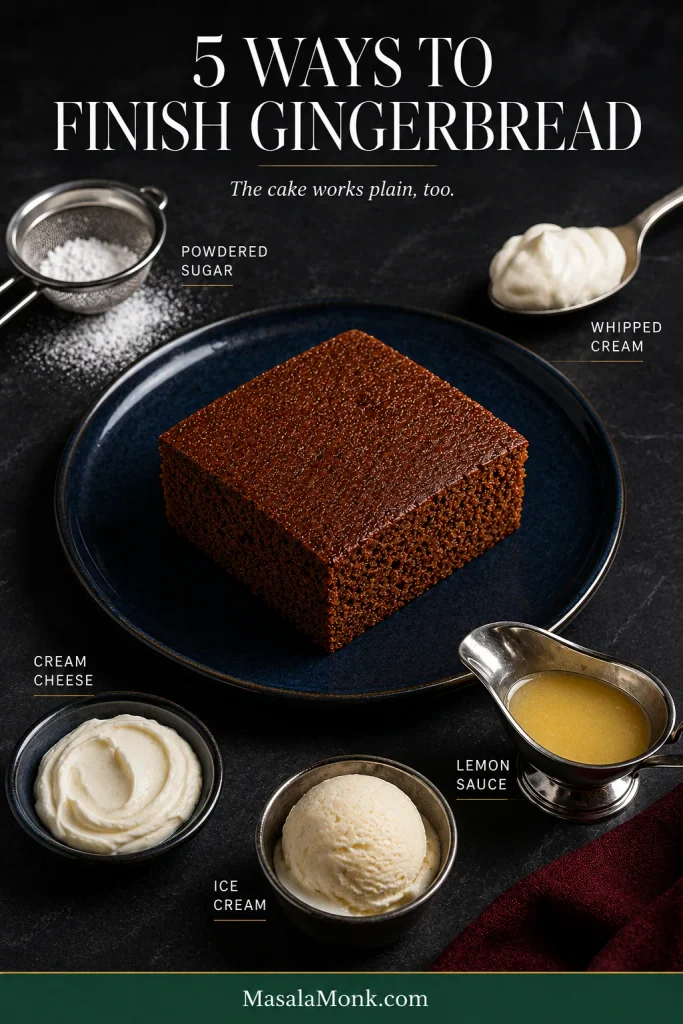
To serve: enjoy it plain, dust it with powdered sugar, add softly whipped cream, spread on a restrained layer of cream cheese frosting, or spoon over lemon sauce.
Need More Help?
Bake It Right
Serve & Save It
Fixes & Options
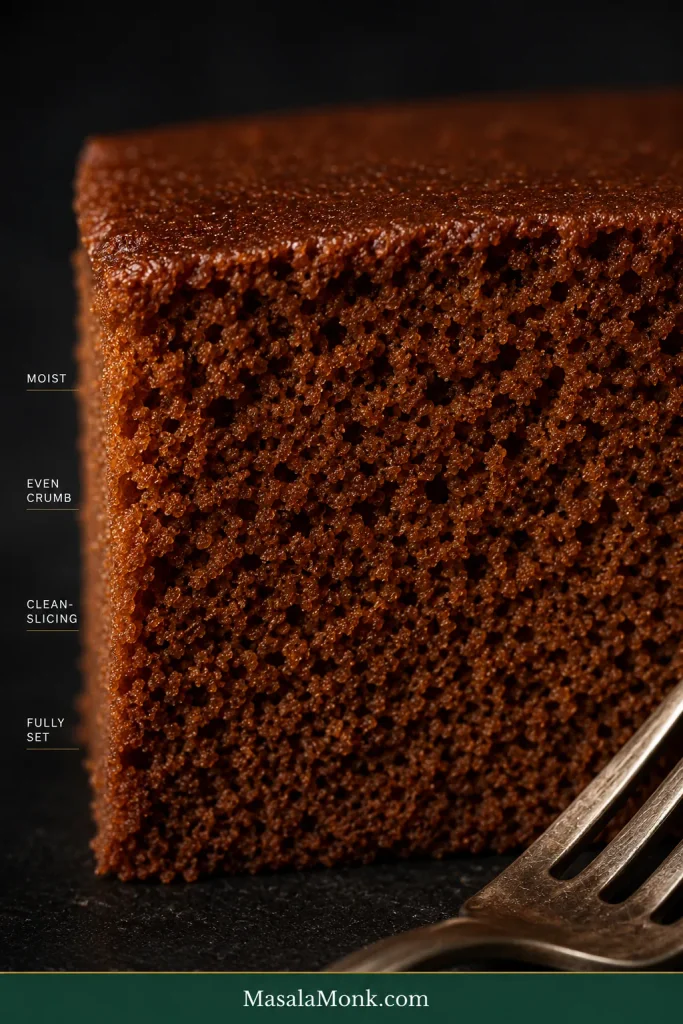
The Slice We’re Aiming For
- Soft with a little body: tender enough for the fork to slide through easily, but not airy like sponge cake.
- Moist and clean-slicing: the crumb feels almost plush and still holds together once cooled.
- Ginger-forward: ginger reaches you first; cinnamon warms it; clove and nutmeg stay in the background.
- Deeply colored: expect a rich mahogany-brown crumb with the rounded caramel edge of molasses.
After its initial rest, the crumb is especially yielding. Once fully cool, it cuts into neat, dark squares.
Gingerbread Cake vs Ginger Cake vs Sticky Ginger Cake
American-style gingerbread cake is usually a soft molasses cake with ginger leading the spice. “Ginger cake” is a broader term; sticky ginger cake usually points toward a darker, denser British-style cake.
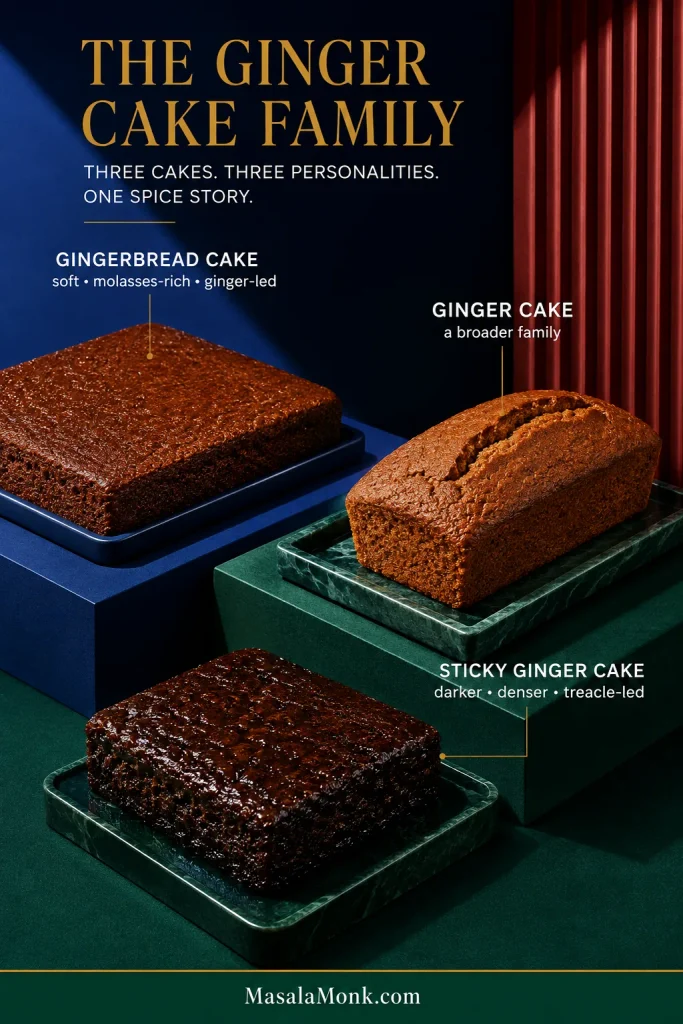
Gingerbread cake: this is the family our recipe belongs to—molasses-rich, ginger-led and commonly baked as a straightforward single layer.
Ginger cake: a broader name that can describe molasses gingerbread, a loaf, a fresh-ginger cake or another regional style altogether.
Sticky ginger cake: usually a more British style, often made with black treacle, golden syrup or stem ginger and intended to become darker, denser and stickier as it rests.
If it is the same molasses-and-ginger family you want in a completely different texture, the Gingerbread Cookies Recipe turns those flavors into soft-centered cut-outs that roll cleanly and hold their shapes.
Why This Recipe Works
Molasses does more than sweeten the cake. It gives gingerbread its deep color, caramelized flavor and characteristic moisture. Regular unsulphured molasses brings plenty of depth and still leaves room for the ginger to stay clear.
Butter brings fuller cake flavor; the smaller amount of neutral oil helps the crumb stay tender after cooling.
Baking soda and baking powder share the lifting work. Baking soda reacts with acidity in the molasses-rich batter, while baking powder supplies additional lift. Together they help this substantial, fluid batter rise without turning the crumb light and sponge-like.
Hot water thins the molasses so it mixes evenly through the batter. The heavy, sticky mixture becomes much easier to combine by hand.
Cinnamon adds warmth around the ginger. Clove and nutmeg stay quieter. If you prefer several warm spices to share the spotlight more evenly, the Spice Cake Recipe takes that broader approach.
Ingredients That Matter Most
Which Molasses Should You Use?
The best molasses for this gingerbread cake is regular/original unsulphured molasses. Dark or robust molasses makes a stronger, less sweet cake; blackstrap is considerably more bitter and is not the best choice here.
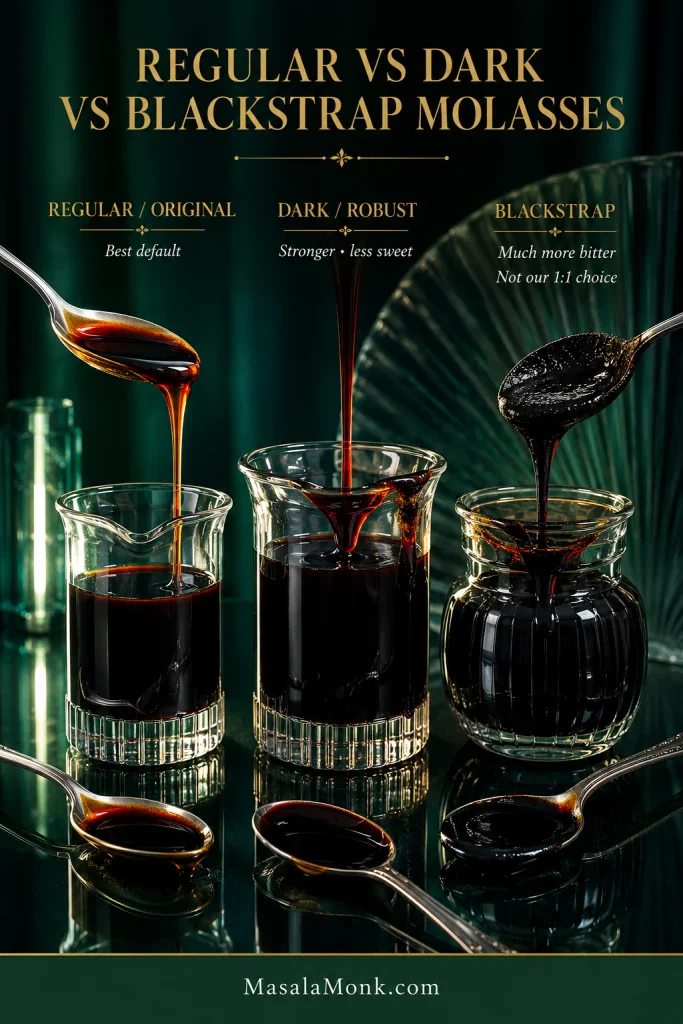
| Molasses | How it tastes here | Best use |
|---|---|---|
| Regular/original unsulphured | Deep, rounded and pleasantly sweet | Best default |
| Dark/robust | Darker, stronger and somewhat less sweet | Good if you already enjoy assertive molasses |
| Blackstrap | Much more bitter, mineral-forward and intense | Not recommended as a straight 1:1 swap |
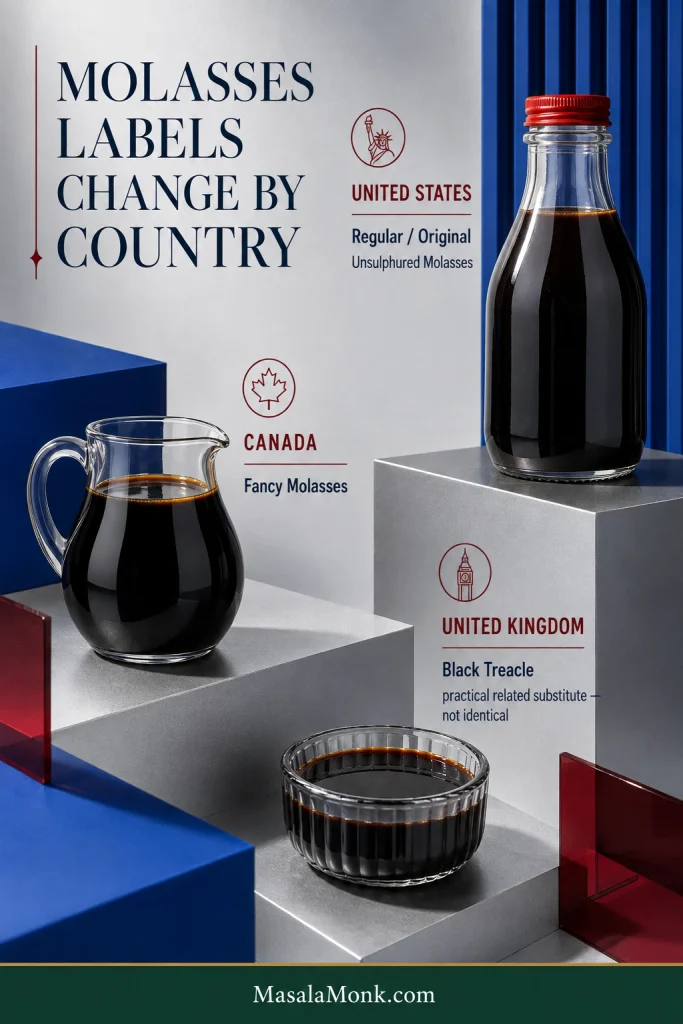
Outside the US, the labels change. Canadian fancy molasses is generally closest to the flavor we’re after. In the UK, black treacle is a practical related substitute when American-style molasses is hard to find, but it is not identical. Some black treacles taste somewhat sweeter and rounder, so expect a slightly different cake.
If the labels on different jars are confusing, King Arthur Baking has a useful guide to light, dark and blackstrap molasses.
Ground, Fresh and Crystallized Ginger
Ground ginger gives the whole cake its broad, familiar ginger warmth. Fresh ginger is brighter and sharper. Use it as a boost; keep the ground ginger as the foundation.
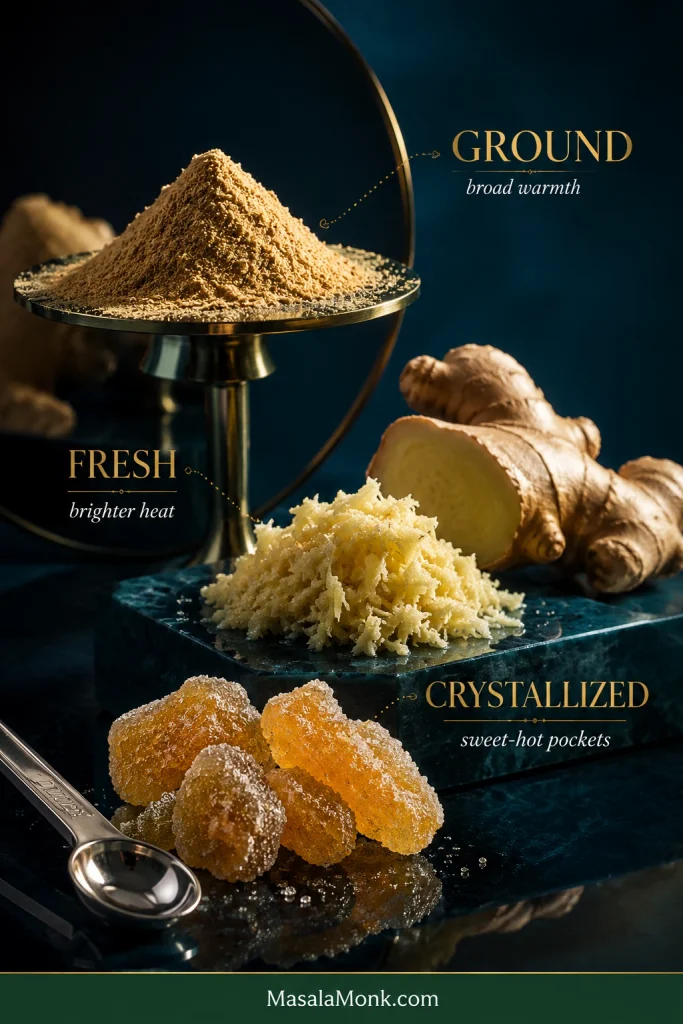
To make a stronger cake, increase the ground ginger to about 3 teaspoons. For brighter, fresher heat, keep the ground ginger and add 1 tablespoon finely grated fresh ginger to the wet mixture.
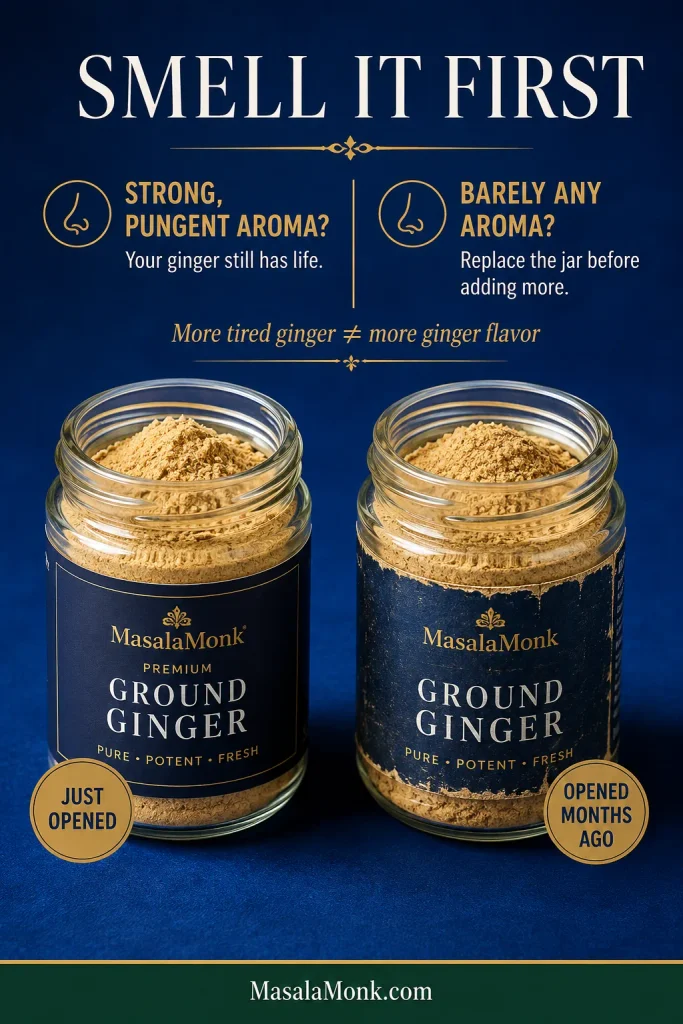
Before adding more: smell the ground ginger already in your jar. Fresh spice smells warm and pungent as soon as you open it. A faint aroma means a new jar will do more for the cake than another spoonful of tired ginger.
If you want to experiment with crystallized ginger, dice it finely and fold in only a small amount. It creates concentrated sweet-hot pockets through the cake. In a batter this fluid, some pieces may settle toward the bottom, and tossing them in flour does not reliably prevent that.
Tempted to use a premixed warm-spice blend? Check what is actually in it first. The Apple Pie Spice Recipe, for example, is intentionally cinnamon-led; gingerbread needs ginger to lead.
As for the hot liquid, water is deliberate. Coffee can be lovely in gingerbread, but some people notice it before the ginger. Hot water loosens the molasses without introducing another strong flavor.
What the Batter Should Look Like
If this is your first molasses gingerbread, the batter may look loose enough to make you check the ingredient list again. Nothing is missing.
When the hot water reaches the molasses mixture, it loosens dramatically. After the flour goes in, mix until no dry streaks remain, then sweep the spatula firmly across the bottom of the bowl; dry pockets can hide easily in such a dark batter.
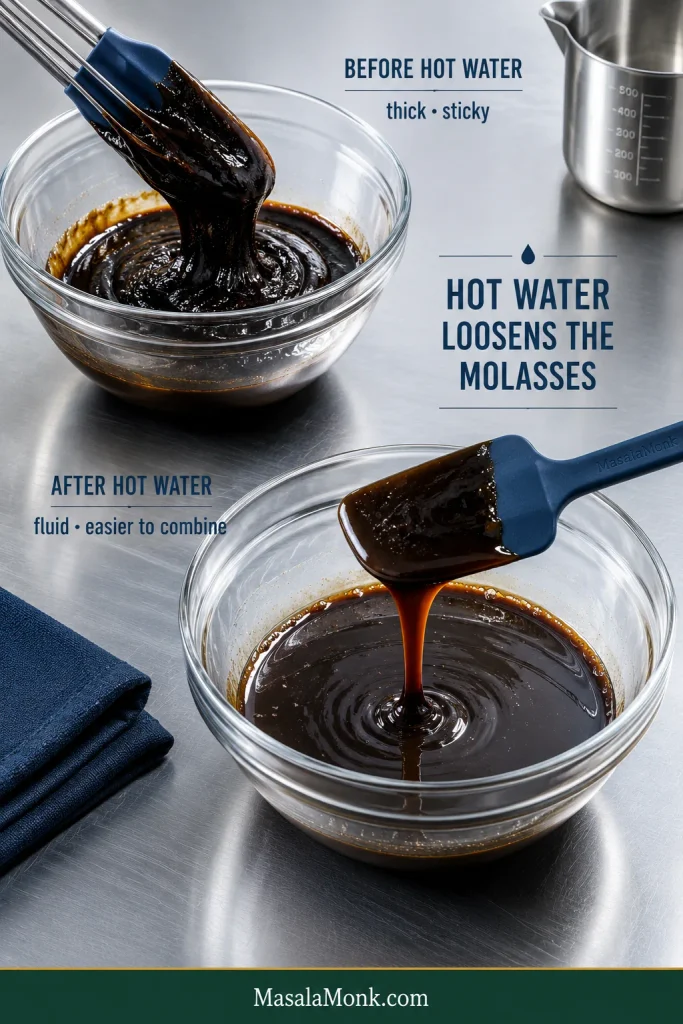
The finished batter falls easily from the spatula and spreads across the pan almost by itself. Keep that consistency rather than thickening it. Once everything is combined, pour it into the prepared pan and get it into the oven promptly.
Ready for the oven? See how to tell when the center is done.
How to Tell When It’s Done
Gingerbread cake is done when the center looks set, springs back gently and a tester shows moist crumbs but no wet batter. The edges may also begin to pull slightly from the pan.
A dark cake makes the last few minutes harder to read. Use several clues together; no single one has to carry the decision.
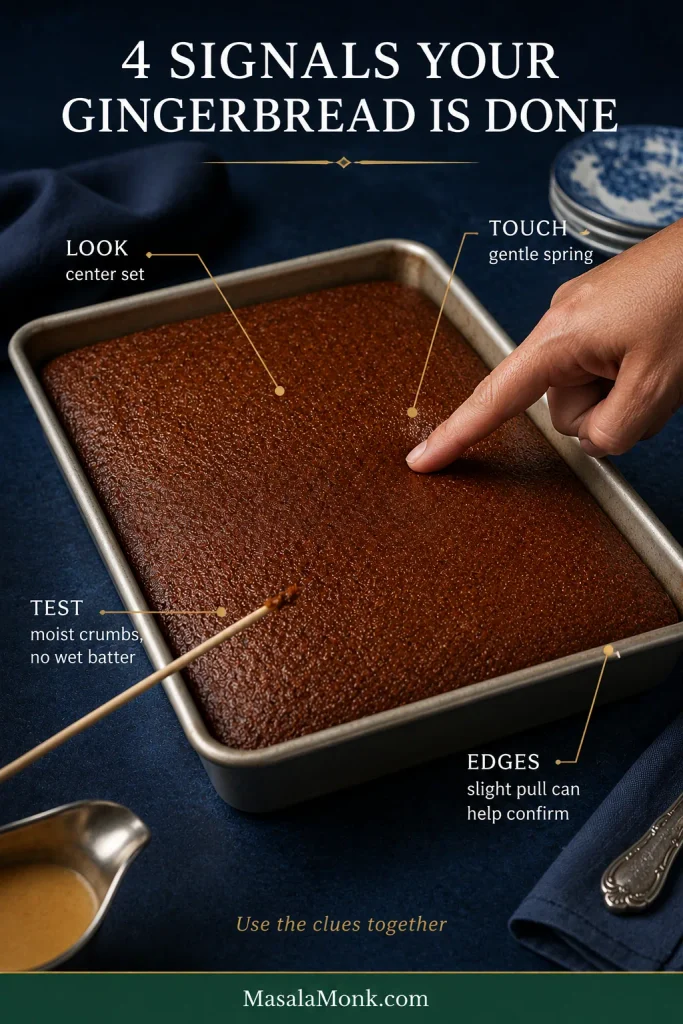
Use the Four-Signal Doneness Test
- Look: the center is set, with no liquid or visible rippling.
- Touch: a light press near the center springs back.
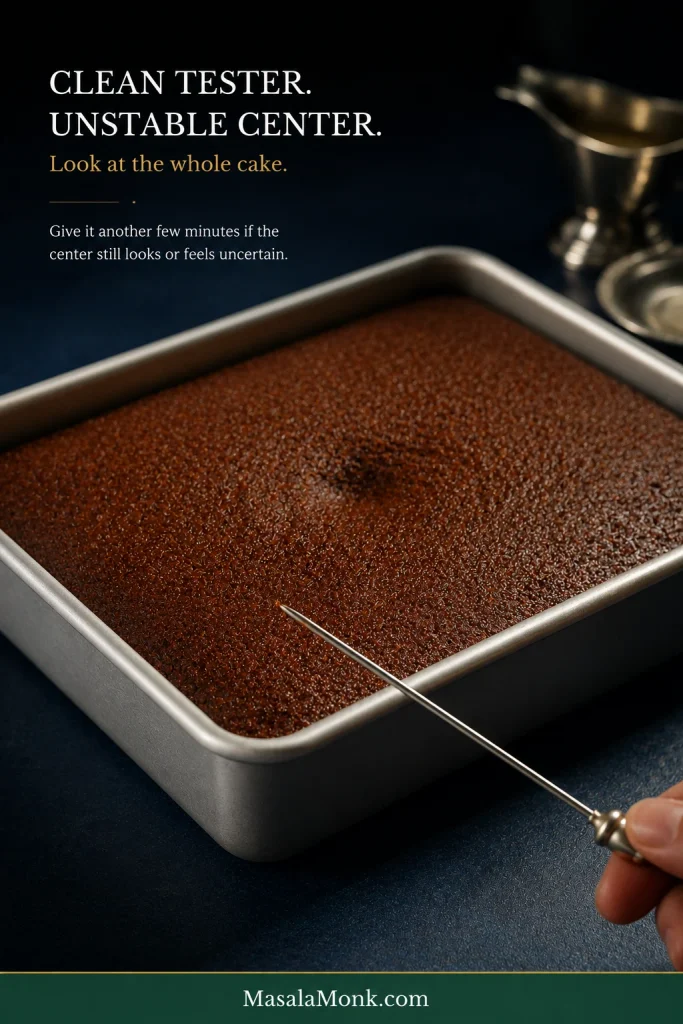
- Test: a few moist crumbs are good; wet batter means it needs longer.
- Check the edges: they may just begin to pull from the pan. Treat this as supporting evidence.
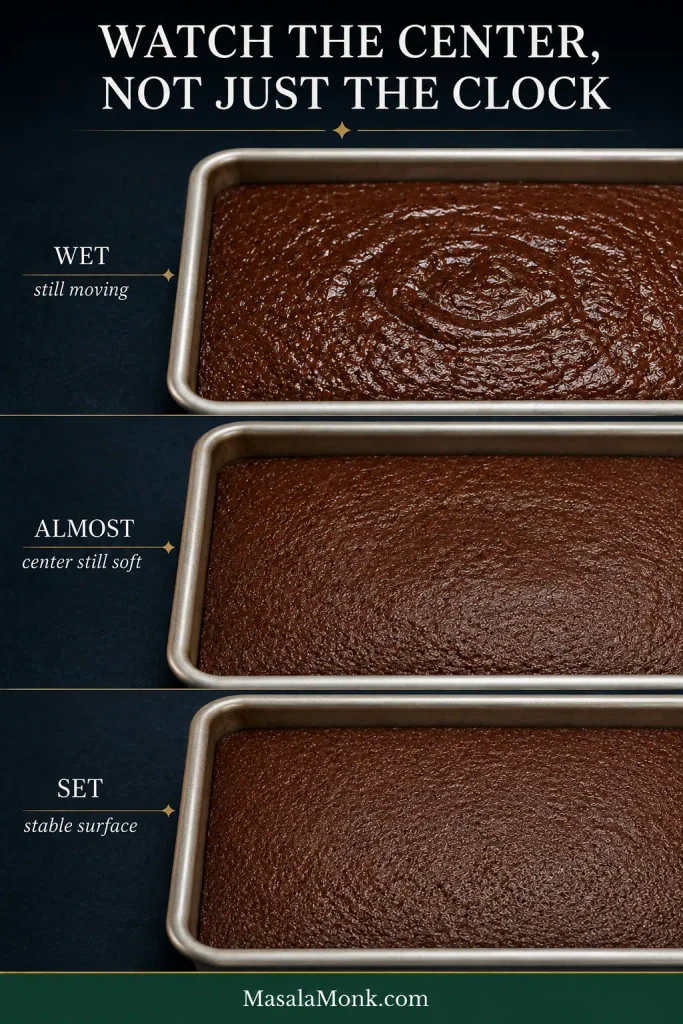
Start checking around 28–30 minutes. Your oven and pan may move the finish slightly earlier or later.
What if the tester looks clean but the center still seems uncertain? Look at the whole cake. If the middle remains visibly unstable or stays indented when lightly touched, give it another few minutes.
Moist vs Gummy: Know the Difference
Properly moist gingerbread has a soft, even crumb that holds together when sliced; underbaked gingerbread looks shiny, compressed or pasty through the center.
| Properly moist | Gummy or underbaked |
|---|---|
| Soft, even crumb | Shiny or compressed strip through the center |
| Holds together once cooled | Pasty or wet-looking interior |
| Moist crumbs on a tester | Wet batter on the tester |
| Slices cleanly after resting | Knife smears with raw-looking batter |
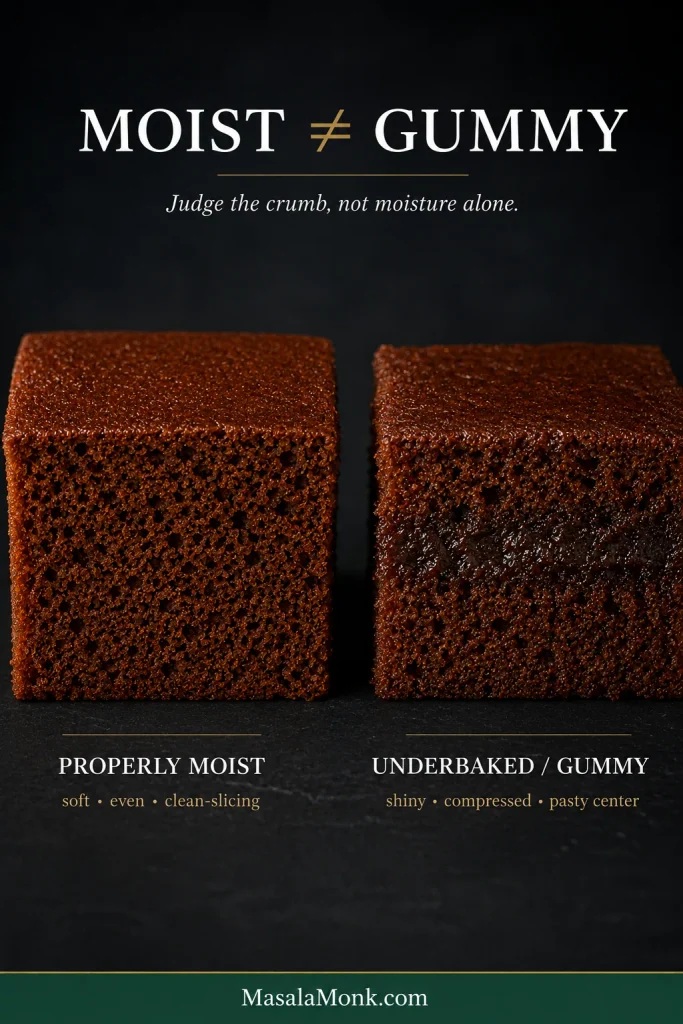
If the first slice looks suspiciously dense, remember when you cut it. Molasses-rich cake continues settling as steam escapes, and a slice taken too soon can look wetter and more compressed than it will after the recommended 20–30 minutes of cooling.
Still not sure what went wrong? Go to the troubleshooting guide.
What to Serve With It
A good square does not need frosting to make sense. Plain gingerbread carries plenty of ginger and molasses on its own; the options below simply take it in different directions.
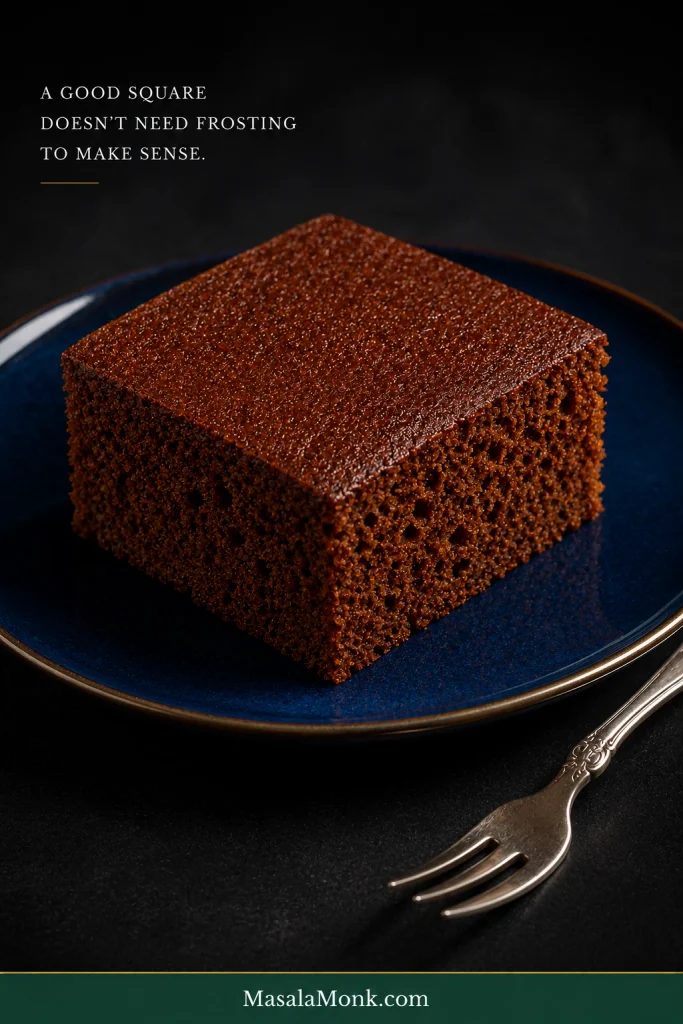
- Powdered sugar: dust the fully cooled cake shortly before serving.
- Whipped cream: add a softly whipped spoonful beside each square.
- Cream cheese frosting: keep the layer thin and tangy so the ginger still leads.
- Lemon sauce: spoon it over the cut cake with the sauce still warm and pourable.
- Vanilla ice cream or custard: let a little soften into the crumb.
Softly whipped cream works especially well when it bends gently from the whisk. Firm decorating peaks are more than this cake needs. The Whipped Cream Recipe shows exactly what soft, medium and firm peaks look like.
Old-Fashioned Lemon Sauce for Gingerbread
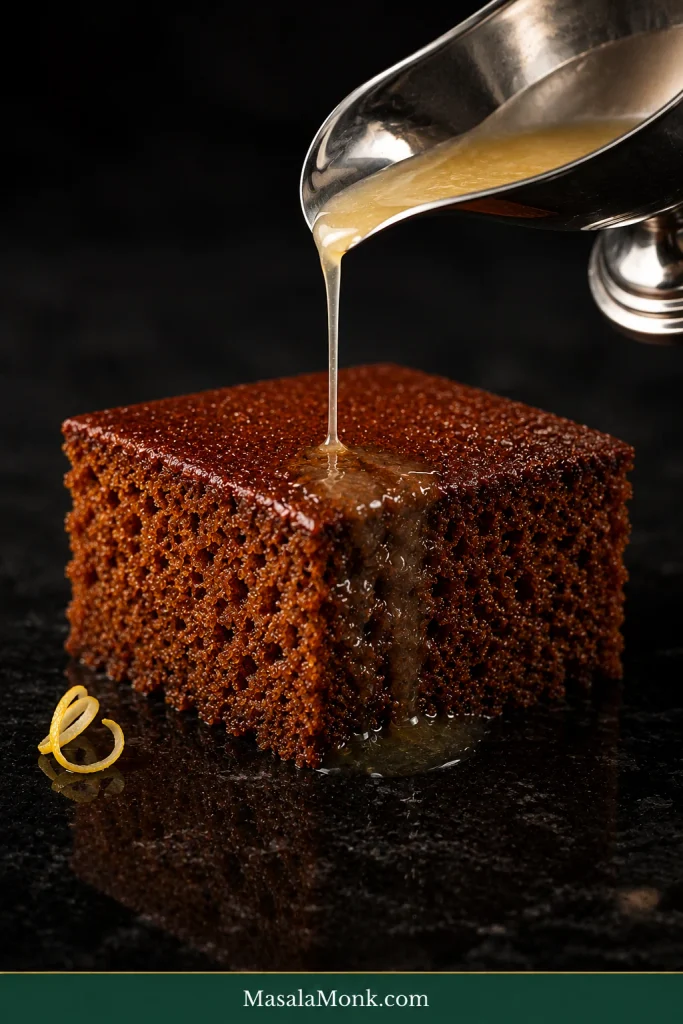
Warm lemon sauce can sound unexpected if you grew up eating gingerbread with frosting, but the pairing makes immediate sense on the plate. The cake is dark and warmly spiced; lemon brings brightness. A little sauce slips into the cut face of the crumb while the zest keeps each bite lively.
Quick Warm Lemon Sauce
Makes about 1 cup / 240 ml, enough for 12–15 light servings.
- 100 g granulated sugar (½ cup)
- 8 g cornstarch (1 tablespoon)
- 240 ml water (1 cup)
- 45 ml fresh lemon juice (3 tablespoons)
- Finely grated zest of 1 lemon
- 28 g unsalted butter (2 tablespoons)
- Small pinch of salt
Whisk the sugar and cornstarch together in a small saucepan, then gradually whisk in the water. Bring to a gentle boil over medium heat, stirring regularly.
Lower the heat and simmer gently for about 4–5 minutes, stirring often, until lightly syrupy. Remove from the heat and stir in the lemon juice, zest, butter and salt.
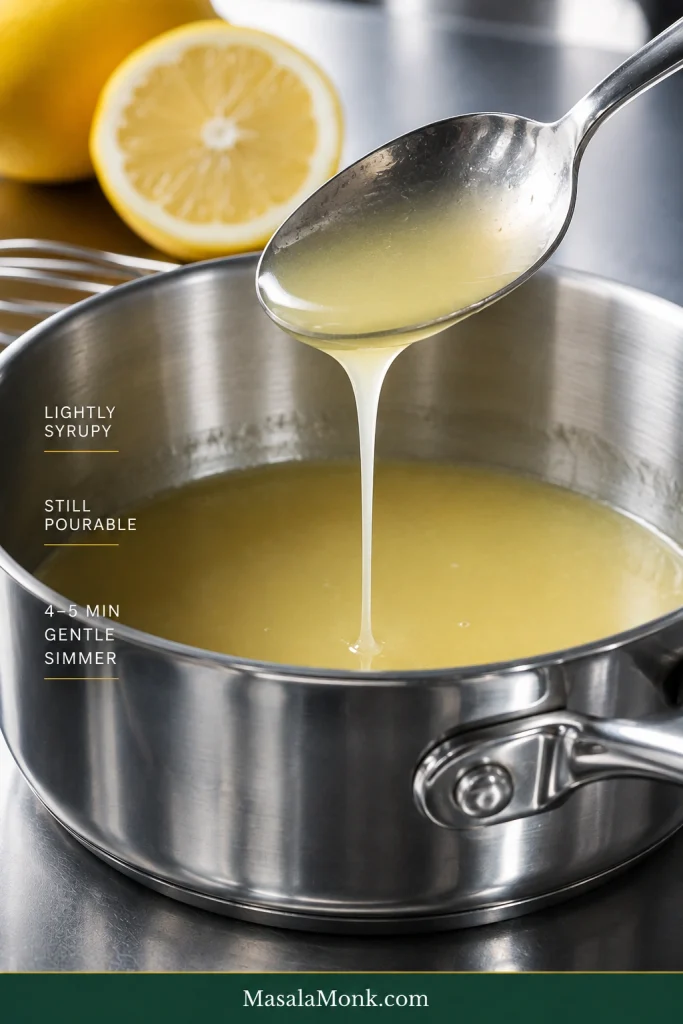
Serve it warm and pourable. The sauce should be thin enough to slip into the cut surface of the cake. If it thickens as it stands, loosen it with a small splash of warm water.
Refrigerate leftover sauce separately in a covered container and warm it gently before serving, adding a splash of water if needed to restore its pourable consistency.
The pairing has history behind it, too. Toni Tipton-Martin’s Jubilee pays homage to an old-time ginger cake served with lemon sauce and bourbon Chantilly; the James Beard Foundation’s gingerbread with lemon sauce is a lovely place to explore that tradition further.
If Something Went Wrong
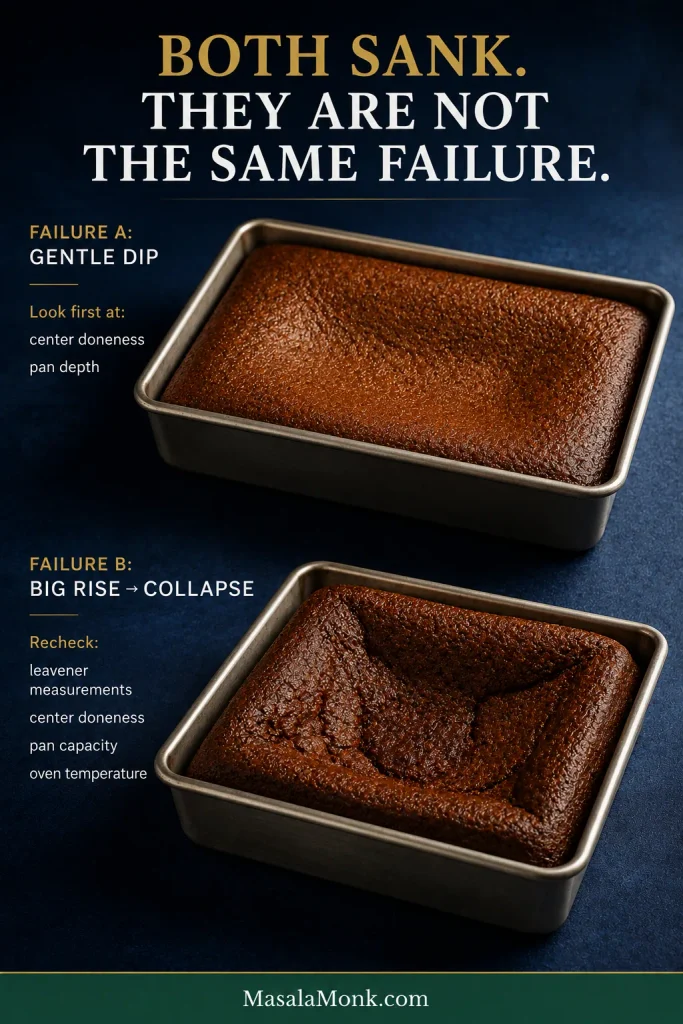
When the sunken center is wet or gummy, start with bake completion and pan depth. A cake that rises unusually high and then collapses points somewhere else: recheck the leaveners, center doneness, pan capacity and oven temperature.
| What happened | Likely causes | What to change |
|---|---|---|
| Center sank | Center needed longer; layer too deep; oven running cool; door opened early | Use the intended pan and judge the center with the doneness cues above |
| Rose dramatically, then collapsed | Too much or mismeasured leavener; center not fully set; pan overfilled or too deep; oven-temperature problem | Recheck the small measurements, pan and oven, then make sure the center is fully baked |
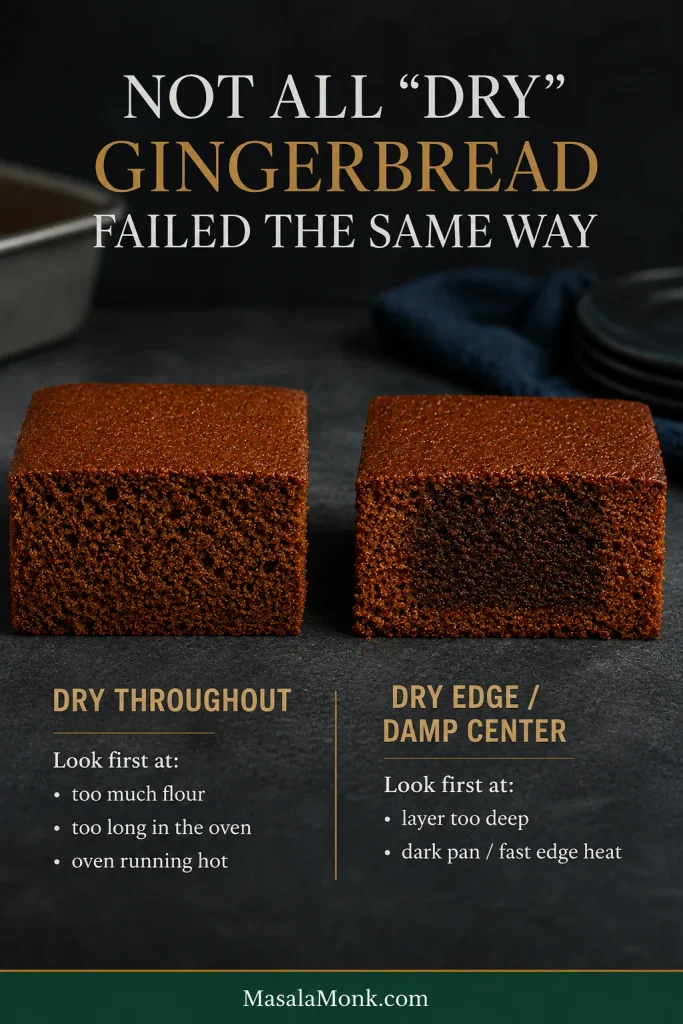
| Dry throughout | Too much flour; too long in the oven; oven running hot | Use 320 g flour and begin checking sooner |
| Dry edges, damp middle | Layer too deep or pan very dark | Use the specified light-colored 9×13-inch pan |
| Gummy middle | Underbaked or sliced very hot | Use the doneness guide above and allow the crumb time to settle |
| Dense or heavy | Too much flour; old baking powder or soda; batter left standing for an extended time | Measure flour accurately, use fresh leaveners and bake soon after mixing |
| Bitter | Blackstrap/very robust molasses; too much clove; leavener measurement error | Use regular molasses and recheck the small measurements |
| Not gingery enough | Old ground ginger; very mild spice | Replace stale ginger or use the stronger-ginger option above |
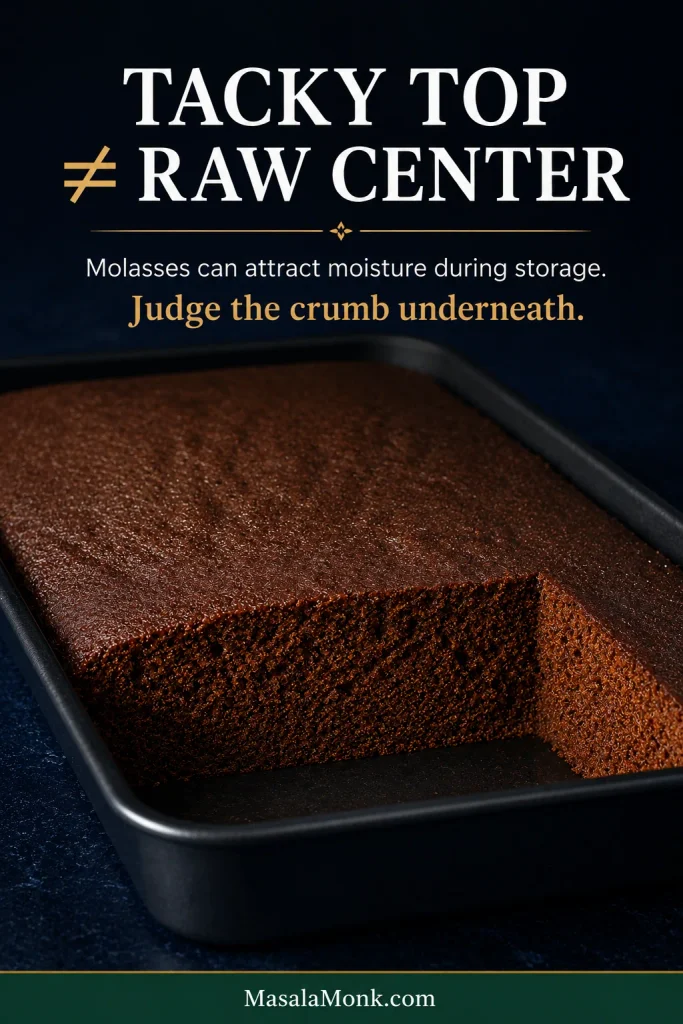
| Tacky top after storage | Molasses attracting moisture | Often normal; judge the crumb underneath separately |
Why did the middle sink?
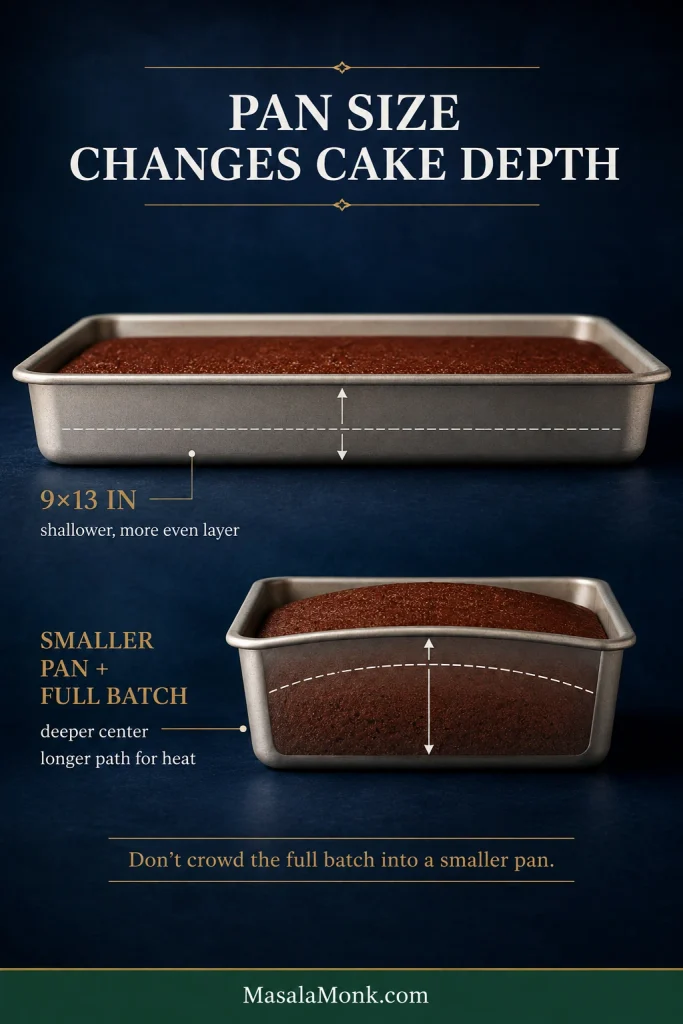
If the cake rose normally and later developed a gentle dip, the middle probably needed a little more time. In a deeper layer, the edges can look finished while the center is still trying to catch up.
A cake that balloons dramatically, overflows or builds a large dome before collapsing tells a different story. Recheck the baking soda and baking powder measurements, the amount of batter in the pan and the oven temperature.
Don’t blame the molasses first. A sunken middle usually sends you back to bake completion, pan depth, leaveners or oven temperature.
Why is it dry?
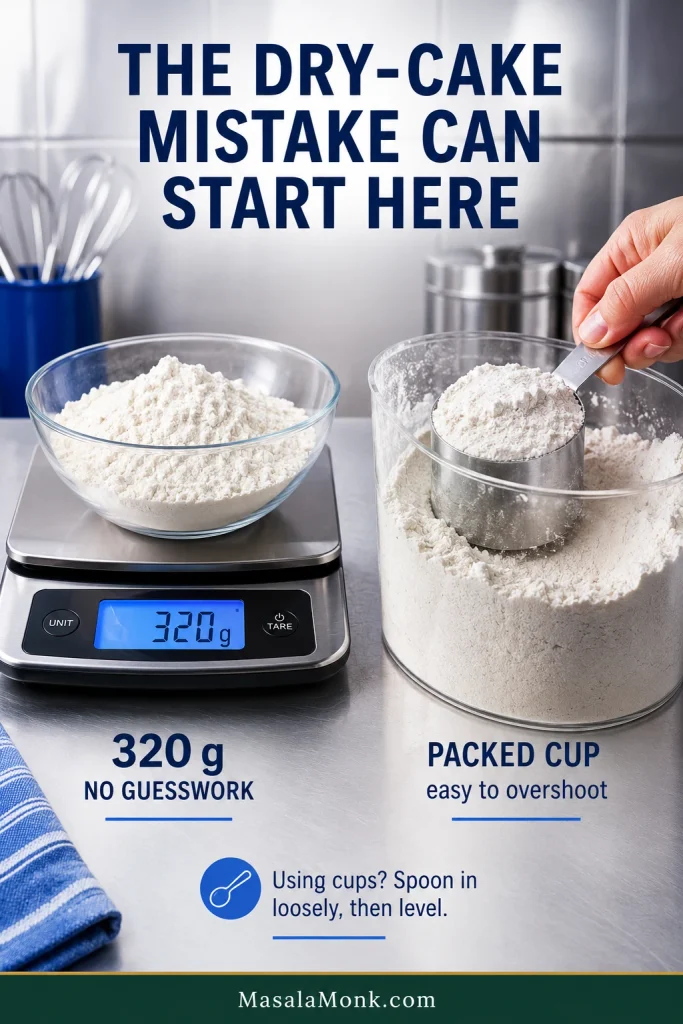
Start with flour. Scooping directly from the bag can pack much more into a measuring cup than the cake needs; a scale removes the guesswork at 320 g. If using cups, spoon the flour loosely into the cup and level the top.
Then look at the bake. Once the center has set, extra oven time mainly means more moisture leaving the cake. Dry edges around a damp middle are different: the outside has moved ahead while the center still needs time.
Can You Use a Different Pan?
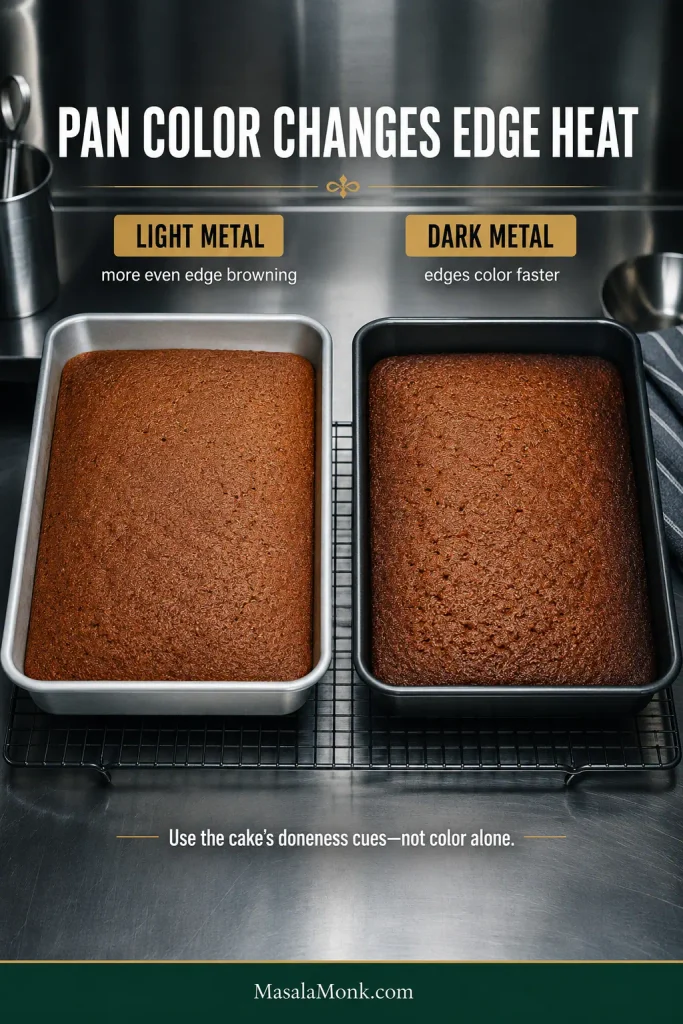
Change the pan and you change the bake. A deeper cake needs more time at the center; dark metal pushes the edges faster.
| Pan | What changes | Best approach |
|---|---|---|
| 9×13-inch light metal | Relatively shallow, even layer | Best choice for this recipe |
| Smaller square pan | Deeper batter and longer center bake | Don’t crowd the full batch into it; use a recipe quantity intended for that pan |
| Dark metal | Base and edges color faster | Begin checking earlier |
| Glass or ceramic | Different heat transfer and more retained heat | Follow the physical doneness cues instead of copying metal-pan timing |
For loaf, Bundt or layer-cake versions, use a formula written for that shape. Those pans change the depth and handling enough that borrowed bake times become unreliable.
Make It a Day Ahead
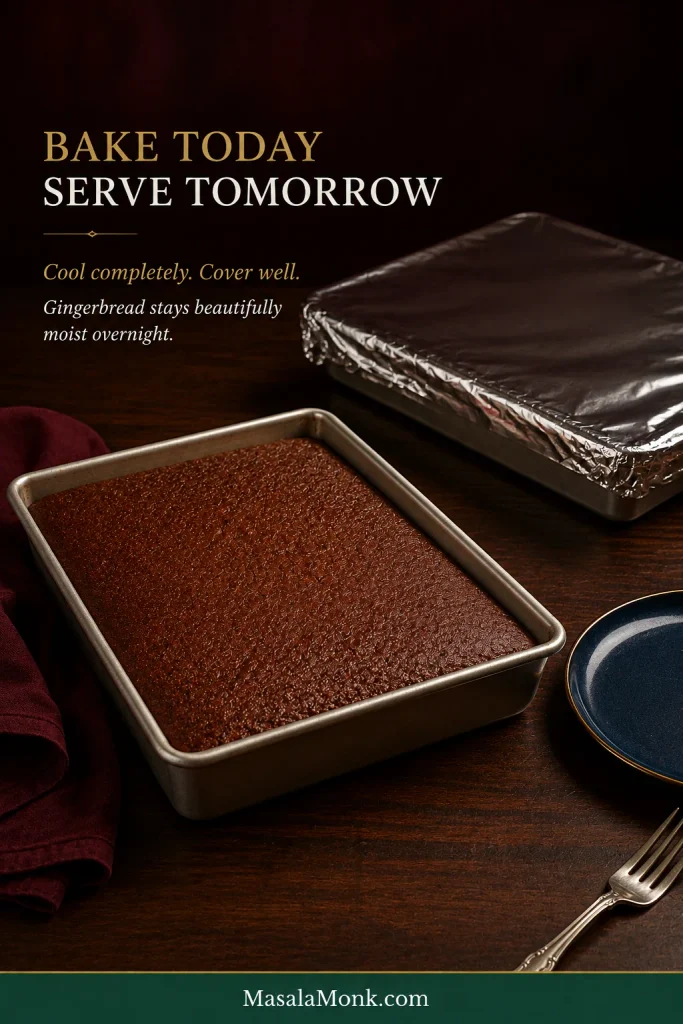
Gingerbread is unusually friendly to making ahead. Kept well covered, it stays moist overnight. The spice settles more deeply into the molasses as it rests.
The day before
- Bake the cake and let it cool completely.
- Leave it whole when possible; exposed cut edges dry faster.
- Cover the pan tightly or move the whole cake to an airtight container.
- Keep an unfrosted cake at cool room temperature.
On serving day
- Add powdered sugar shortly before serving.
- Keep whipped cream chilled separately.
- Frost only after the cake is completely cool.
- Warm lemon sauce gently before serving.
Storage and Freezing
Store unfrosted gingerbread airtight at room temperature for about 3 days; refrigerate it once topped with cream cheese frosting, or freeze it well wrapped for up to 2 months for best quality.
Room temperature
Leave the cake whole or in larger pieces when practical. Every fresh cut gives the interior another exposed edge.
A tacky top after a day or two can be part of molasses-rich gingerbread’s character, not a sign that the cake is raw. Judge the crumb underneath separately.
If your kitchen is particularly warm or humid, keep the cake tightly covered in the refrigerator and let individual slices come back toward room temperature before serving.
Refrigerator
Let refrigerated slices lose some of their chill before serving. As they move back toward room temperature, the crumb becomes more tender again.
Freezer
Cool the cake completely, wrap the whole cake or individual portions tightly, and place them in a freezer-safe container or bag.
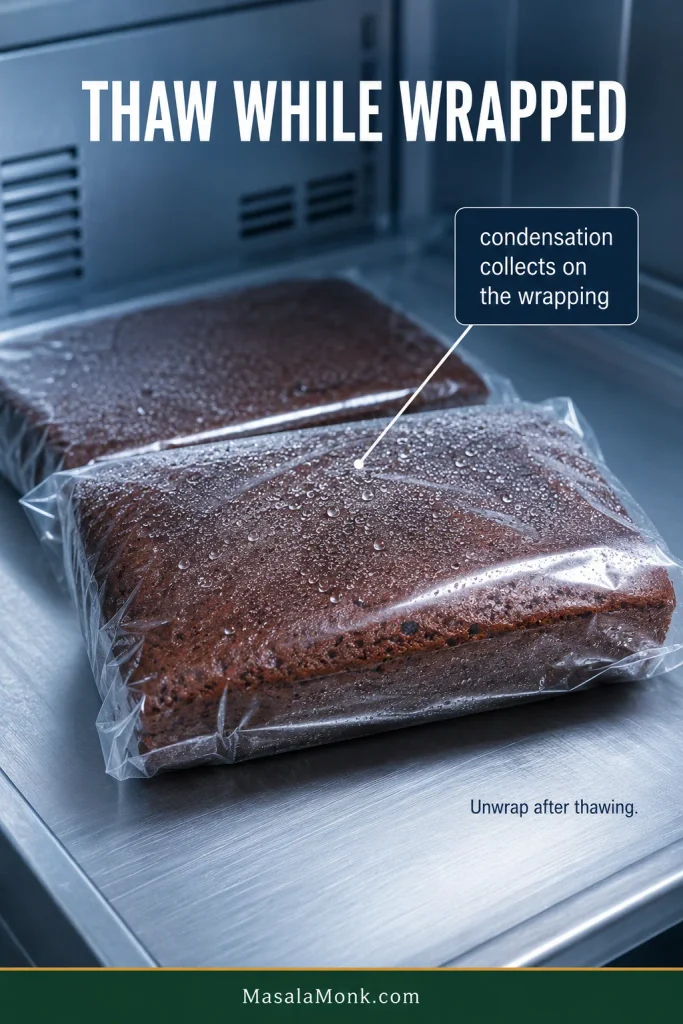
Thaw while still wrapped so condensation collects on the wrapping instead of directly on the cake.
Substitutions and Variations
Some flavor changes are easy. Once you change the main syrup, flour system or eggs, you are changing the structure of the cake too.
Light brown sugar: use the same amount. The cake will taste slightly lighter, but the molasses still provides most of its character.
Other syrups: honey, maple syrup and golden syrup are not full-cup substitutes for the molasses here. If one of those is what you have, choose a cake that uses it as the main sweetener.
Gluten-free: use a gingerbread built around a gluten-free flour blend. Different blends absorb liquid differently, so a straight cup-for-cup swap can change the center considerably.
Vegan: an egg-free gingerbread is the cleaner route. Replacing the butter is fairly straightforward; replacing the eggs changes both rise and tenderness.
A Cake That’s Even Better Tomorrow
Serve the first square slightly warm if you can. The crumb gives easily under the fork, and the smell of ginger and molasses rises as soon as you break through the top.
Add softly whipped cream if you want something cool against the spice. Warm lemon sauce brings brightness, while vanilla ice cream melting into one edge makes the dessert more indulgent.
Then cover what is left.
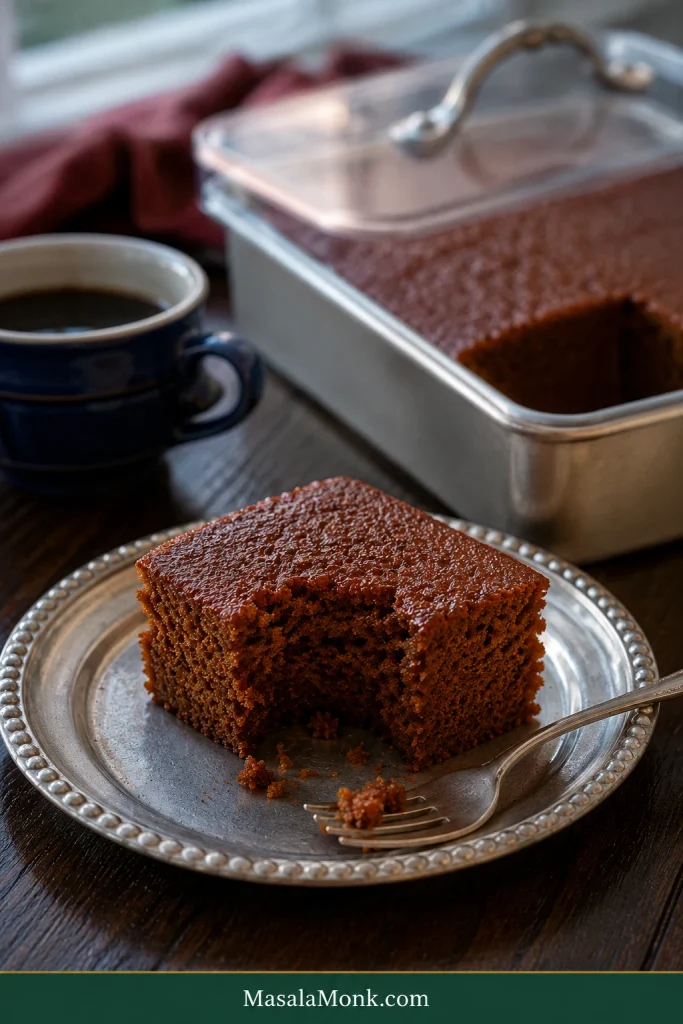
Tomorrow, cut another square and notice how the ginger has settled into the molasses. The crumb is still tender, the spice tastes rounder, and somehow that simple second slice can be the one that makes the recipe worth keeping.








