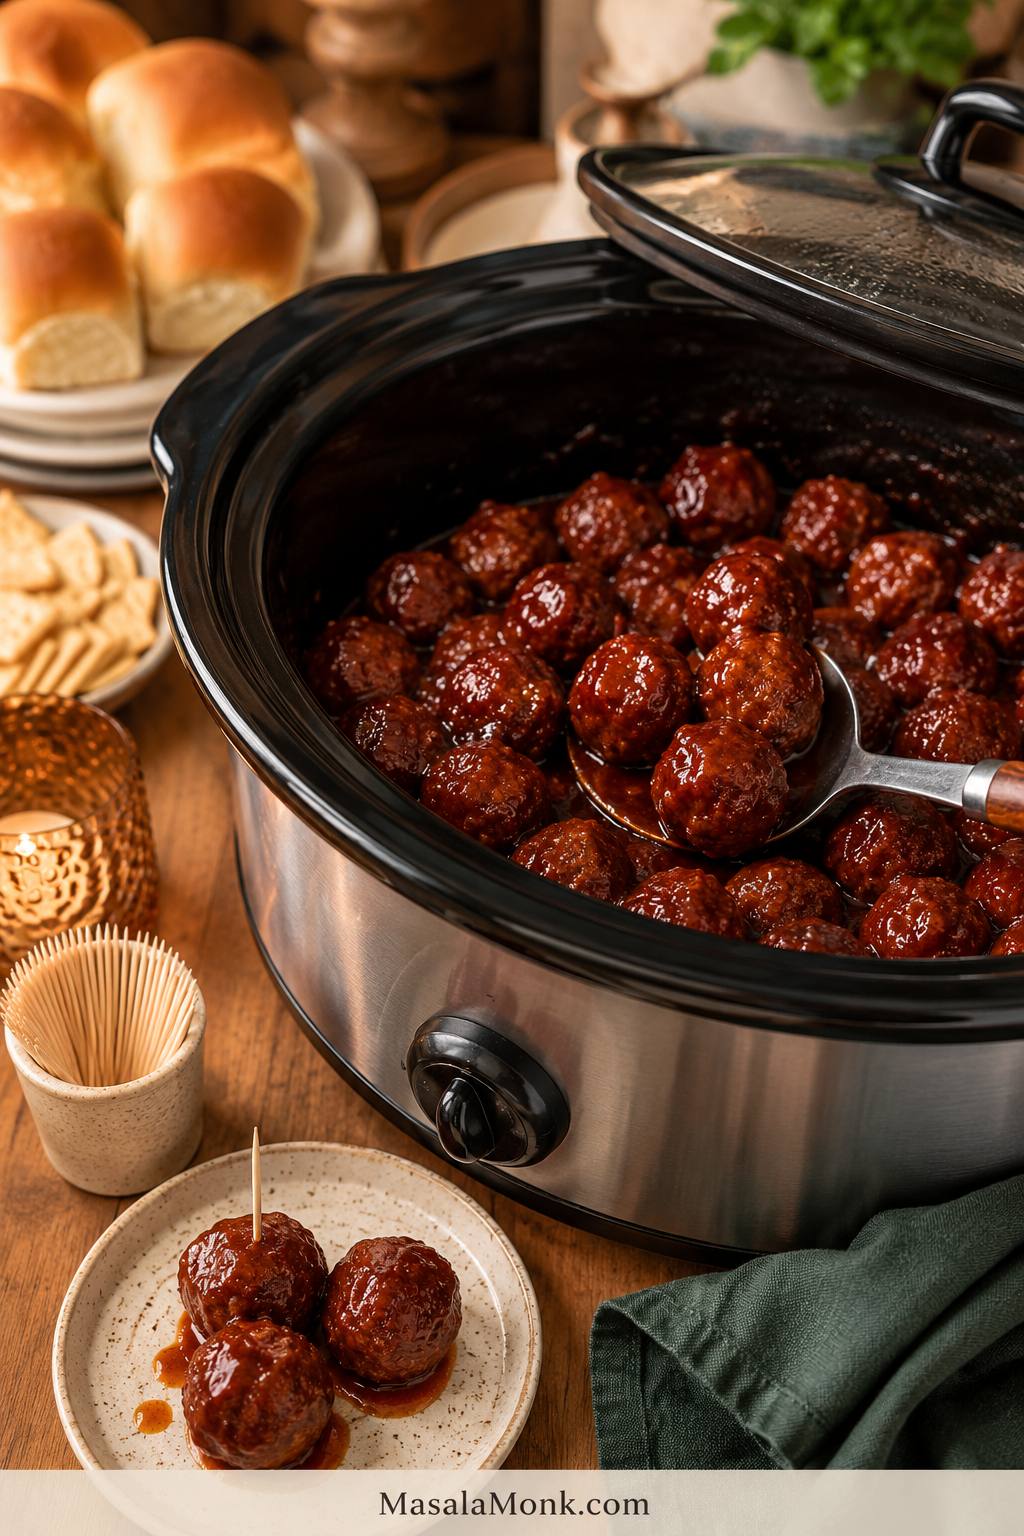
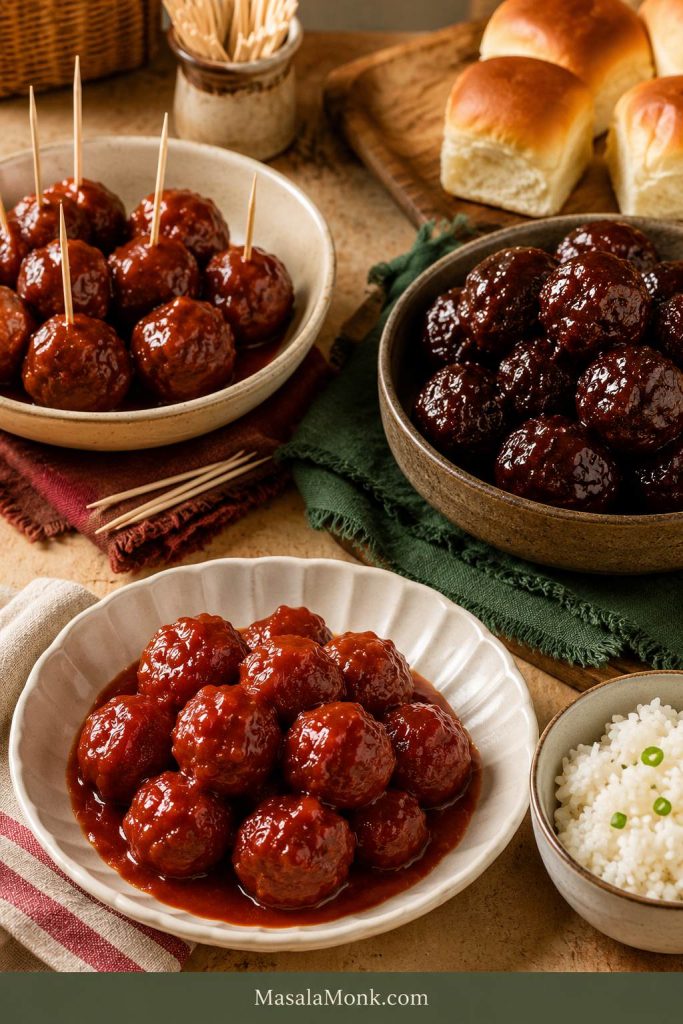
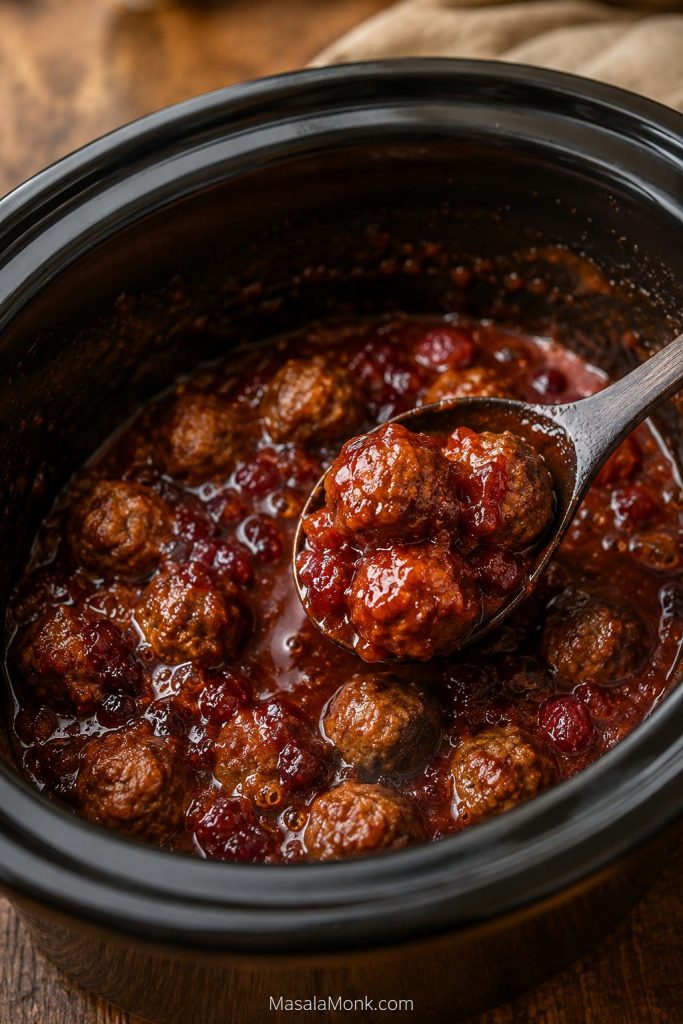
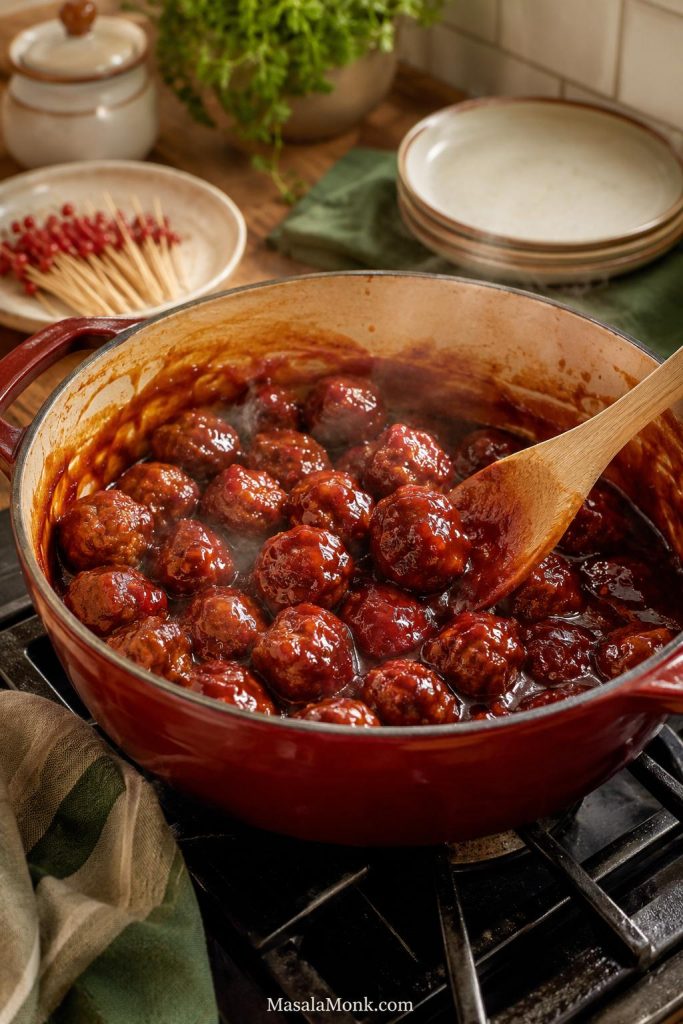
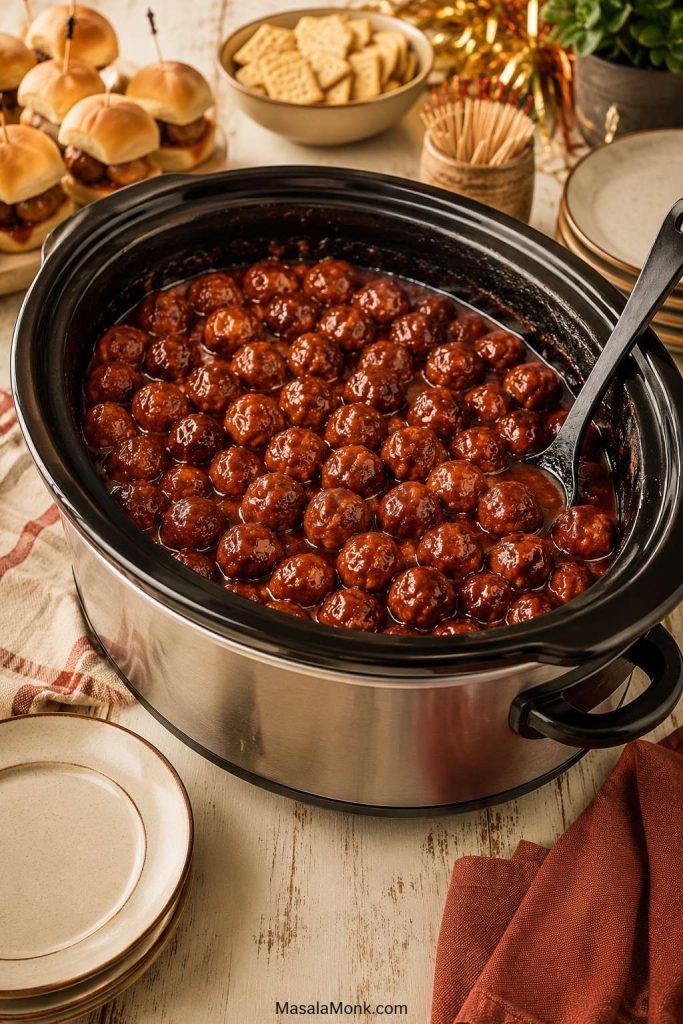
Grape jelly meatballs are the kind of party food that makes people suspicious for about five seconds, then sends them back for another toothpick. The ingredient list sounds strange until the sauce starts bubbling: sweet grape jelly, tangy chili sauce, and tender meatballs turning glossy in the slow cooker while you finish the rest of the table.
Keep the classic version simple: fully cooked meatballs, grape jelly, and bottled chili sauce in the crockpot. As the batch warms, the jelly melts into the sauce, the chili sauce balances the sweetness, and the slow cooker holds everything until people are ready to serve themselves.
It is old-school, low-stress, and very good at doing what party food should do: stay warm, taste familiar, and disappear quietly while people keep talking. Once the lid goes on, you get a hot appetizer that can take care of itself while you finish the rest of the food.
Quick Answer: The 3 Ingredients for Grape Jelly Meatballs
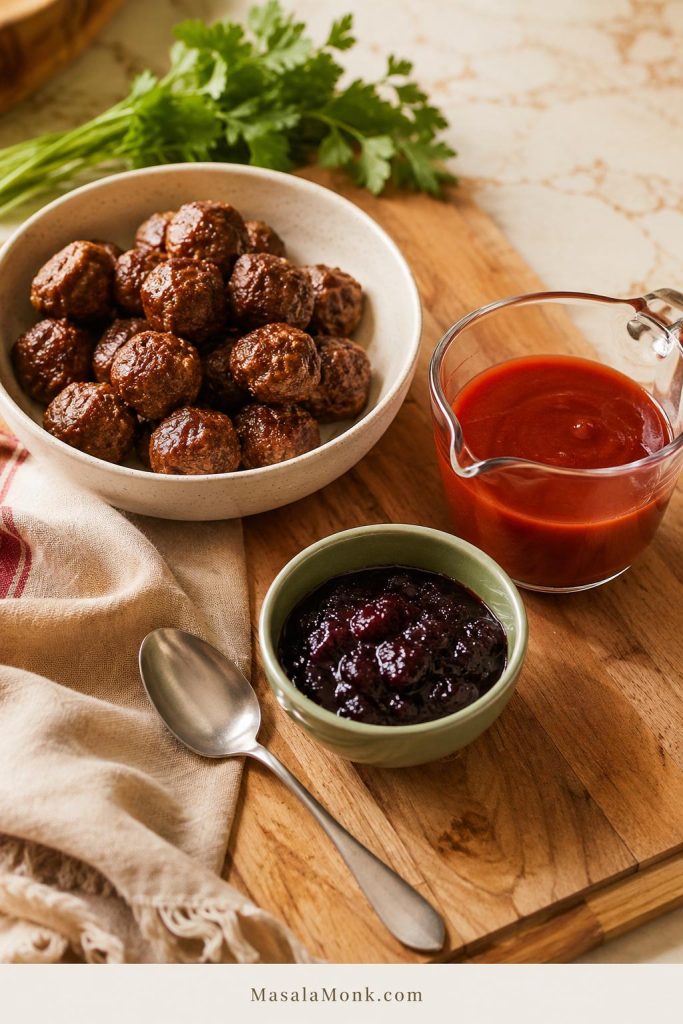
To make grape jelly meatballs, combine 2 lb / 900 g fully cooked frozen meatballs, 10–12 oz / 280–340 g grape jelly, and 12 oz / 340 g bottled chili sauce, the tomato-based kind usually found near ketchup, in a slow cooker. Cook on HIGH for 2–3 hours or LOW for 4–5 hours, stirring once or twice, until the sauce has melted together, the coating clings, and the meatballs are heated through.
| Ingredient | Amount | Role |
|---|---|---|
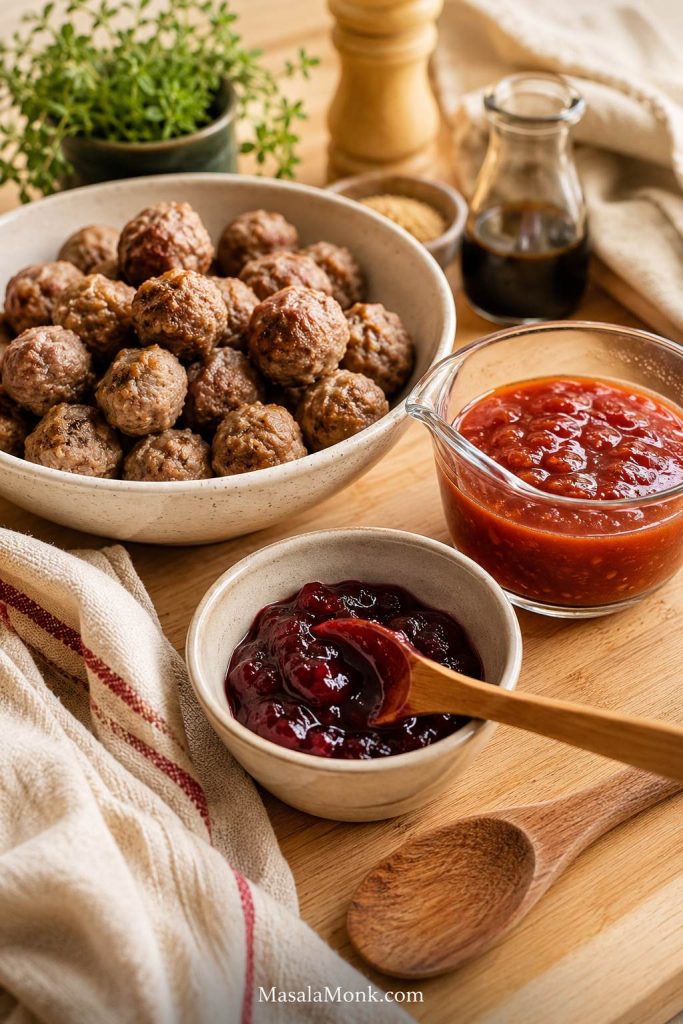
| Fully cooked frozen homestyle meatballs | 32 oz / 2 lb / 900 g | Easy party base, usually about 48–50 small meatballs. |
| Grape jelly | 10–12 oz / 280–340 g | Sweetness, shine, and sticky body. |
| American-style bottled chili sauce | 12 oz / 340 g | Tangy tomato balance. |
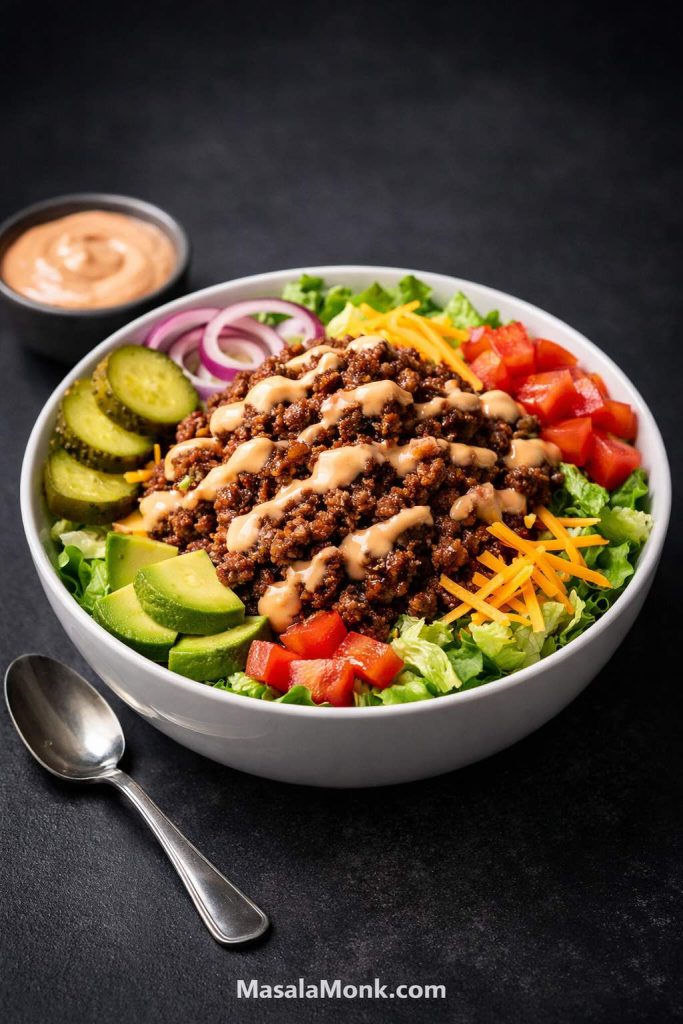
What the three ingredients do
This is the moment where the recipe looks stranger than it tastes. Seeing the ingredients together makes the grape jelly less confusing before the sauce melts.
Increase the grape jelly to 18–20 oz / 510–565 g for a sweeter, stickier potluck glaze. Go with BBQ sauce for a smoky version. For the mildest pantry batch, ketchup works too, especially with a splash of Worcestershire sauce or vinegar.
Choose Your Sauce Version
You can keep the meatballs exactly the same and change only the sauce to fit the crowd. Start with the classic chili sauce version if this is your first time. Choose BBQ sauce for game day. Use ketchup when you want the mildest, most pantry-friendly version.
| Situation | Best version | What to use |
|---|---|---|
| First time making these | Classic chili sauce version | 2 lb meatballs + 10–12 oz grape jelly + 12 oz chili sauce |
| Sweet potluck glaze | Extra grape jelly version | 2 lb meatballs + 18–20 oz grape jelly + 12 oz chili sauce |
| Game day or BBQ crowd | BBQ version | 2 lb meatballs + 1 cup grape jelly + 1 1/2 to 2 cups BBQ sauce |
| Pantry-only version | Ketchup version | 2 lb meatballs + 3/4 to 1 cup grape jelly + 1 1/2 cups ketchup |
| Less sweet / more balanced | Classic ratio + sharpener | Add vinegar, Dijon, Worcestershire, black pepper, or hot sauce after tasting |
Sauce comparison: chili sauce, BBQ, or ketchup
The meatballs stay the same; the sauce decides whether the batch tastes classic, smoky, or mild.
BBQ sauce gives the friendliest game-day flavor. BBQ sauces vary a lot, so if yours is already sweet and thick, start with less grape jelly and add more only after tasting. Ketchup is not a failure version; it is simply softer, sweeter, and milder. Add vinegar or Worcestershire if you want it closer to the tang of chili sauce.
The chili sauce version tastes most classic, but BBQ sauce is the one many families grew up with. This is exactly the kind of recipe where the “right” version depends on whose slow cooker you remember.
The Best Ratio for Grape Jelly Meatballs
The best all-purpose ratio is 2 lb / 900 g fully cooked meatballs, 10–12 oz / 280–340 g grape jelly, and 12 oz / 340 g bottled chili sauce. It gives you enough sauce to coat the meatballs without turning the slow cooker into a bowl of syrup.
You will see two common versions: a balanced version with 10–12 oz grape jelly and a sweeter potluck version with an 18–20 oz jar. Neither is wrong. Use the smaller amount when you want savory-sweet balance; use the larger jar when you want the sticky retro party glaze.
The Visual Ratio: Balanced First, Sweeter Later
Start balanced first. You can always make the glaze sweeter, but pulling back too much jelly is harder once the whole jar is in the pot.
Recipe Card: Grape Jelly Meatballs
Grape Jelly Meatballs Recipe
Glossy, sweet-tangy grape jelly meatballs made in the slow cooker with fully cooked meatballs, grape jelly, and bottled chili sauce. Easy to keep warm for parties, potlucks, holidays, and game day, with notes for BBQ sauce, ketchup, stovetop, oven, and Instant Pot versions.
Ingredients
- 32 oz / 2 lb / 900 g fully cooked frozen homestyle meatballs
- 10–12 oz / 280–340 g grape jelly
- 12 oz / 340 g American-style bottled chili sauce
- Add 1 teaspoon Worcestershire sauce, optional
- Use 1/2 teaspoon garlic powder, optional
- Finish with 1/4 to 1/2 teaspoon black pepper, optional
Instructions
- Add grape jelly and chili sauce to a 4–5 quart slow cooker.
- Stir lightly. The jelly does not need to be fully melted yet.
- Add the fully cooked meatballs and turn them through the mixture.
- Cover and cook on HIGH for 2–3 hours or LOW for 4–5 hours.
- Stir once or twice while the meatballs heat.
- When the sauce has melted together and the meatballs are hot, switch to WARM and serve.
Notes
- For a sweeter party glaze, increase grape jelly to 18–20 oz / 510–565 g.
- BBQ version: combine 1 1/2 to 2 cups BBQ sauce with 1 cup grape jelly.
- Ketchup version: combine 1 1/2 cups ketchup with 3/4 to 1 cup grape jelly.
- Use American-style bottled chili sauce, not chili garlic sauce, Thai sweet chili sauce, or sriracha as a direct replacement.
- If using homemade meatballs, cook them fully before adding them to the sauce.
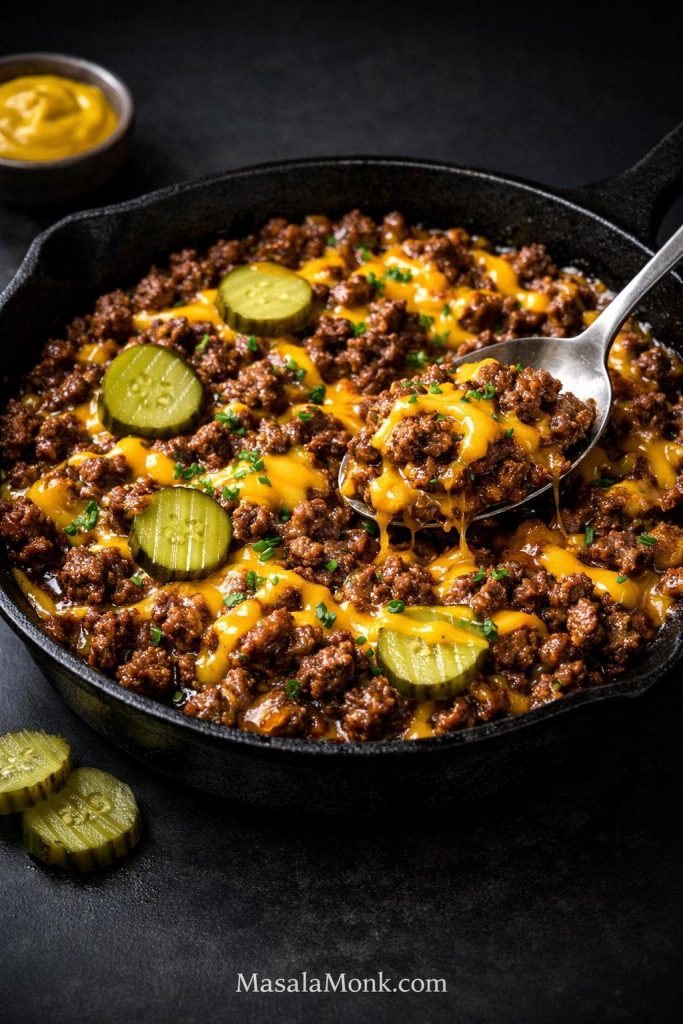
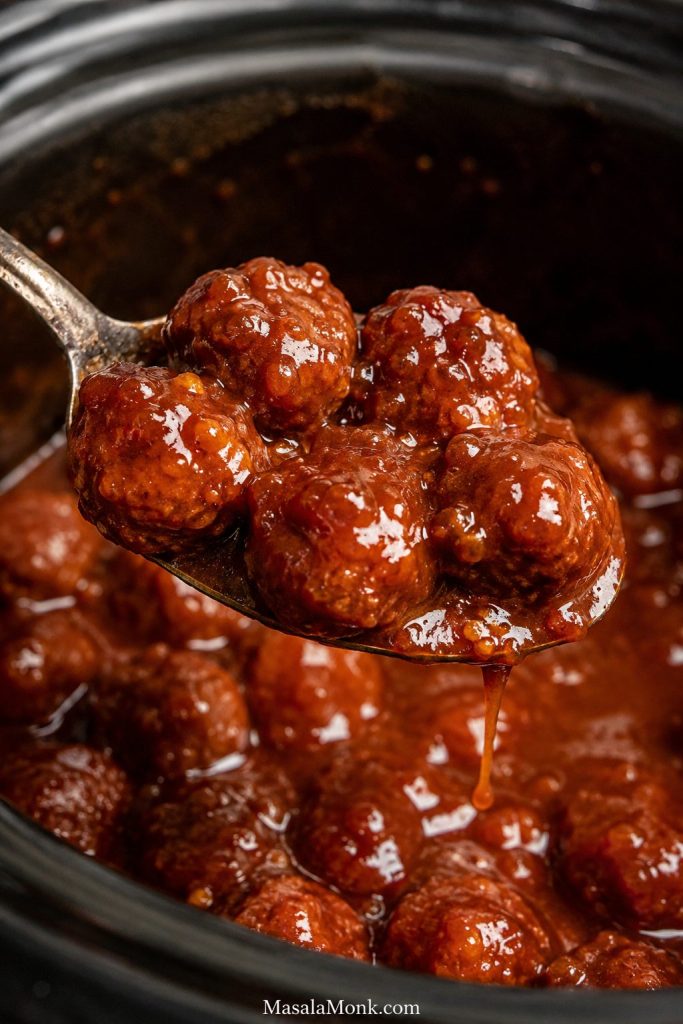
- The sauce is ready when there are no streaks of jelly left and the coating clings to the meatballs.
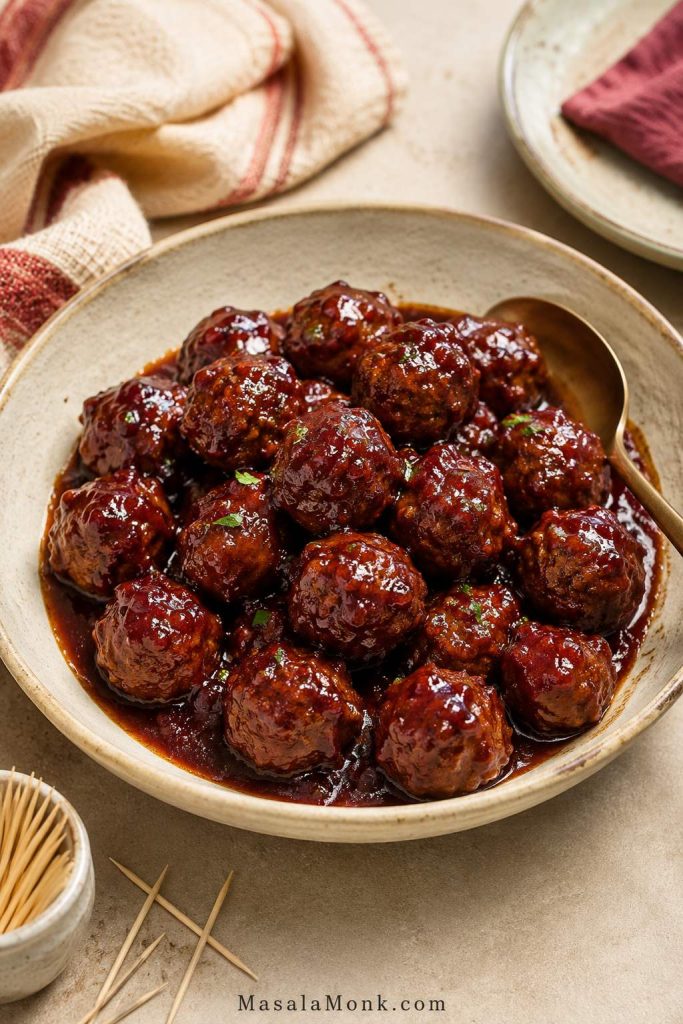
What the Finished Sauce Should Look Like
After the recipe card, use this as the visual target: saucy, spoonable, and glossy without being watery.
That is the whole basic recipe. From here, use only what you need: scale the batch for a party, choose the sauce version your crowd will like best, make it without a crockpot, or fix the sauce if it tastes too sweet, too thin, or too sharp.
More Helpful Notes
Recipe Basics
Cooking & Variations
Party Planning
Fix, Store & Swap
Ingredients You Need
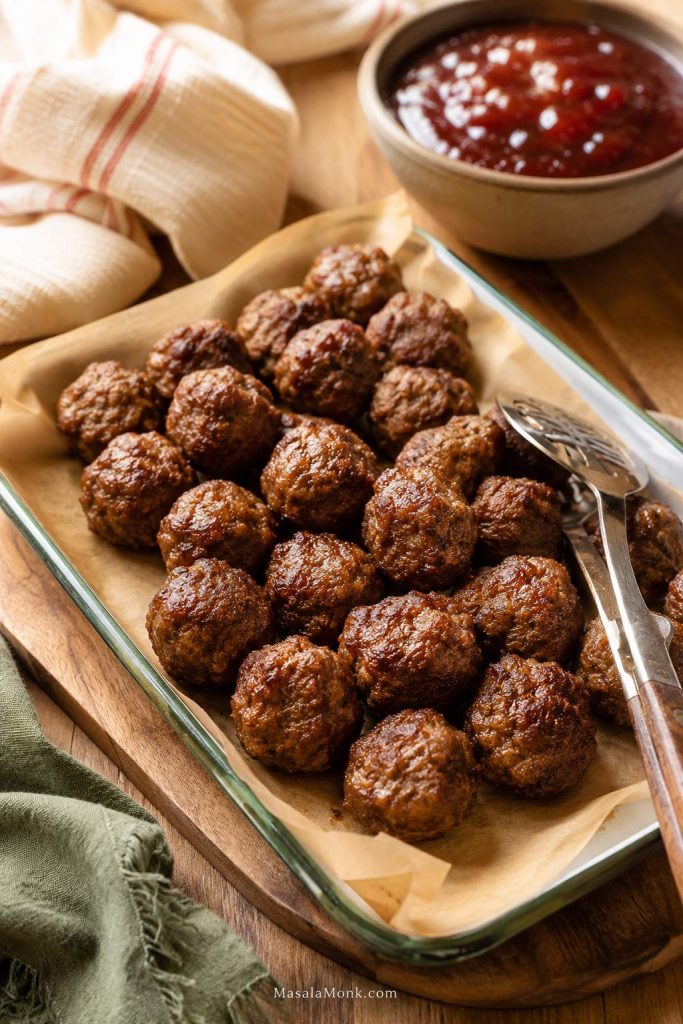
Fully cooked meatballs
A 32 oz / 2 lb / 900 g bag of fully cooked frozen homestyle meatballs is the easiest choice. Most bags this size contain around 48–50 small meatballs, though the exact count depends on the brand.
For the most classic flavor, choose plain homestyle cocktail meatballs rather than strongly seasoned Italian meatballs. Beef, pork, turkey, chicken, or mixed meatballs can all work, but the sauce tastes most familiar with mild beef or beef-pork style meatballs.
If your bag is closer to 26–28 oz instead of 32 oz, you can still use the recipe. Hold back a few spoonfuls of sauce at first, then add more if the meatballs need extra coating. If your meatballs are larger than cocktail-size, give them more time to heat through.
For crowds, it is worth checking the meatball label for breadcrumbs, egg, dairy, soy, or gluten, since frozen meatballs vary by brand.
Grape jelly
Grape jelly gives the sauce sweetness, shine, and thickness. Concord grape jelly has the most familiar flavor, but any regular grape jelly works.
The grape jelly is the part that makes people pause, but it is also the part that makes the sauce work. It melts into sweetness and body, not a grape-flavored coating.
For a balanced sauce, use 10–12 oz / 280–340 g. For a sweeter, extra-saucy version, use 18–20 oz / 510–565 g.
If your jar is 10 oz, use the whole thing for a balanced batch. If your jar is 18–20 oz, start with about half to two-thirds of the jar, then add more after tasting if you want the sweeter potluck glaze.
Bottled chili sauce
Choose American-style bottled chili sauce, the tomato-based sauce usually sold near ketchup. The bottle may say “chili sauce,” but the flavor should be tangy and mildly spiced, not fiery hot.
If you cannot find it, BBQ sauce or ketchup can still make a good batch. The flavor changes, but the method stays simple.
Optional flavor boosters
The basic 3-ingredient version works on its own. Use these only if the warm sauce tastes like it needs a little more depth, sharpness, or heat:
- Add 1 teaspoon Worcestershire sauce for savory depth
- Use 1/2 teaspoon garlic powder for a rounder flavor
- Sprinkle in 1/4 to 1/2 teaspoon black pepper for mild heat
- Stir in 1 teaspoon Dijon mustard if the sauce is too sweet
- Brighten with 1 teaspoon vinegar or lemon juice if it needs brightness
- Hot sauce or sriracha if you want more heat
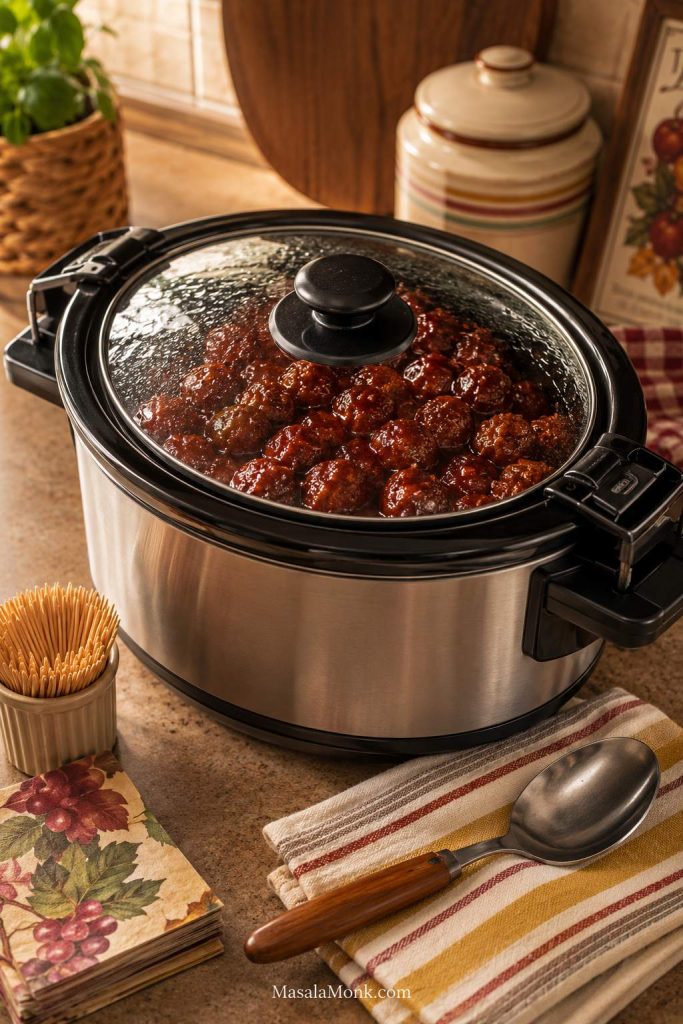
How to Make Grape Jelly Meatballs in the Crockpot
A 4–5 quart slow cooker works well for a standard 2 lb batch. For a double batch, use a 6 quart slow cooker so the meatballs heat evenly and you still have room to stir.
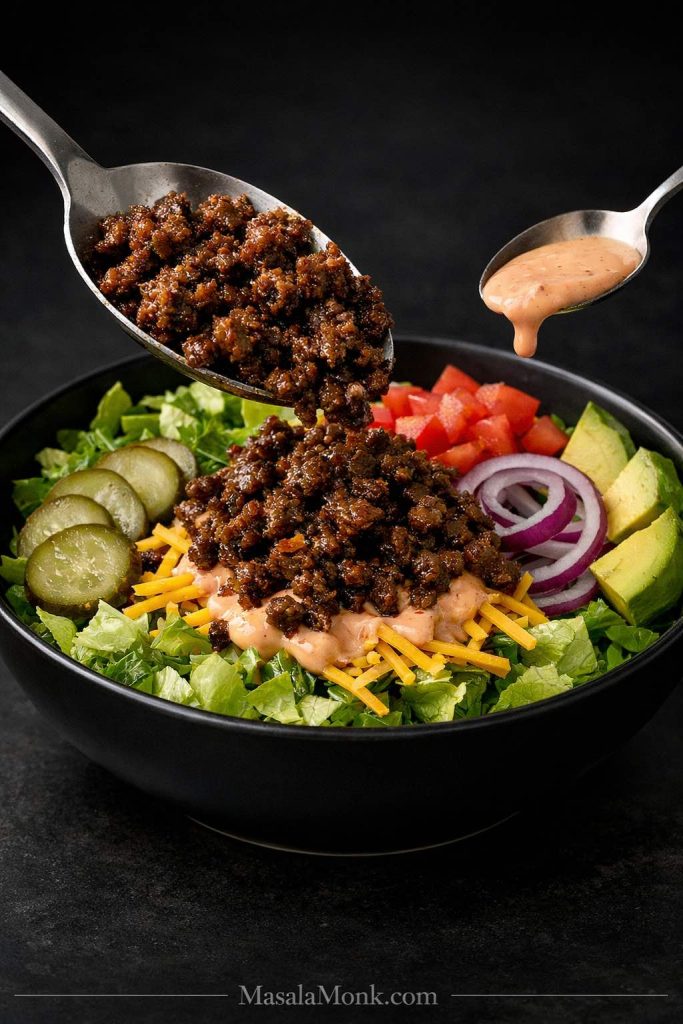
Before cooking: why the sauce looks uneven
Do not worry if the slow cooker looks patchy at the start. Heat is what turns the separate sauce pockets into one coating.
- Add the grape jelly and chili sauce to the slow cooker.
- Stir roughly. The jelly does not need to be fully smooth yet.
- Add the fully cooked meatballs.
- Turn them through the mixture until coated.
- Cover and cook on HIGH for 2–3 hours or LOW for 4–5 hours.
- Stir once or twice during cooking.
- When the meatballs are hot and there are no streaks of jelly left, switch the slow cooker to WARM for serving.
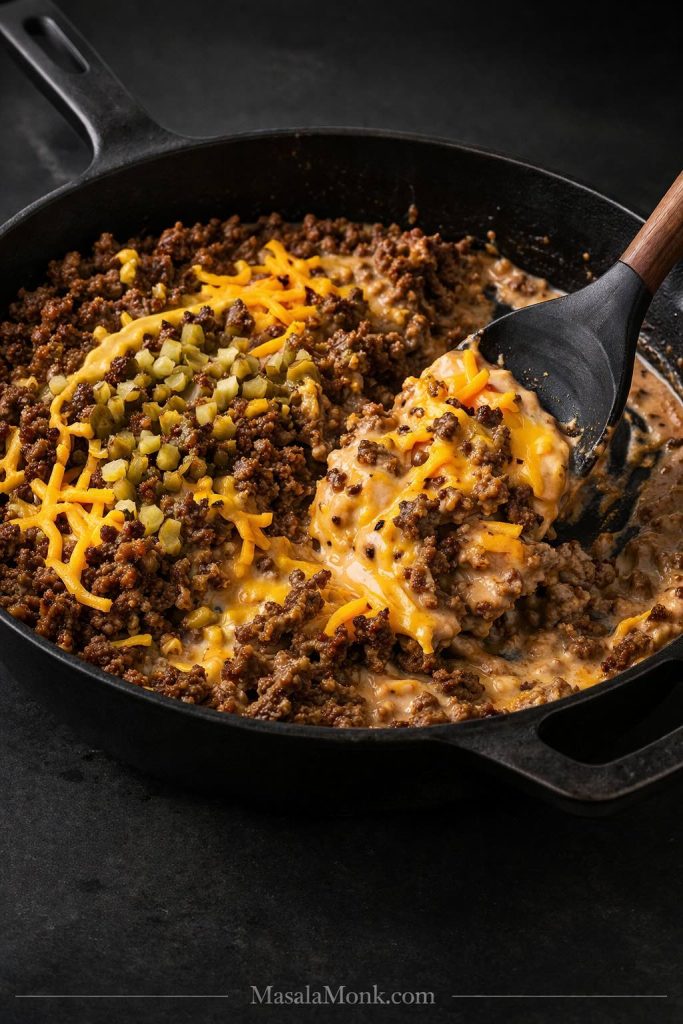
If the mixture looks thin halfway through, do not panic. It thickens as the jelly melts, the meatballs warm through, and the edges of the slow cooker begin to bubble.
Halfway through: wait before adjusting
This is the stage where people often adjust too early. Wait until the jelly melts before adding more sweetness, tang, or thickener.
Once the meatballs are hot, avoid leaving them on HIGH for too long. The sauce can reduce around the edges, become overly sticky, and make the meatballs taste drier. WARM is the better setting for serving.
How to know the meatballs are done
The meatballs are ready when the sauce has fully melted, the coating looks unified, and the meatballs are heated through. Around the edges of the slow cooker, the mixture may bubble gently and thicken slightly.
If you use homemade meatballs, cook them through before adding them to the sauce. Some homemade slow-cooker meatball recipes cook raw meatballs in sauce, but this party version is easier to control when the meatballs are cooked first. You get better texture, simpler timing, and less guesswork.
Why This Ratio Works
This version starts with 10–12 oz grape jelly instead of a full 18–20 oz jar, so the sauce still tastes like a savory appetizer instead of a candy glaze. It is also easier to adjust: if the sauce needs more sweetness, you can add it, but if it starts too sweet, you have fewer ways to pull it back.
What Balanced Sauce Should Look Like
This is the sauce check: it should move easily from the spoon while still holding onto the meatballs.
The method stays honest to what this recipe is supposed to be: one slow cooker, fully cooked meatballs, and no extra pan unless you want to thicken the sauce faster. The result is glossy, sweet-tangy, and easy to hold warm without turning the edges into syrup.
When These Meatballs Work Best
These meatballs work three ways: as cocktail meatballs with toothpicks, as a slow cooker appetizer for game day, or as a saucy dinner over rice or mashed potatoes. They are built for fully cooked meatballs, a warm sauce, and a slow cooker that can hold everything on a buffet table.
They are small, warm, saucy, and easy to take without committing to a full plate. That is why they disappear slowly at first, then suddenly all at once.
Once the meatballs are heated through, the crockpot keeps them warm while people serve themselves. If you like this kind of hands-off party food, this slow cooker pulled pork recipe works for the same reason: the slow cooker handles the timing, and the sauce does the heavy lifting.
The recipe works because the sauce pulls in two directions at once: grape jelly gives sweetness and shine, while chili sauce, BBQ sauce, or ketchup keeps it from tasting one-note. A little vinegar, mustard, Worcestershire, or hot sauce can fine-tune the flavor once everything is warm.
Why the Jelly and Chili Sauce Work
The jelly melts into a glossy glaze
At first, the grape jelly may sit in thick spoonfuls beside the chili sauce. That is normal. Give it heat and time, and it melts into a spoon-coating sauce instead of tasting like meatballs in jam. The mixture may look separated for the first 20–30 minutes, so do not judge it too early.
Chili sauce keeps the sweetness in check
Grape jelly alone would be too sweet. Bottled chili sauce brings tomato, vinegar, mild spice, and enough tang to make the sauce taste savory. If it smells sharp at first, wait until everything warms through before adjusting.
Fully cooked meatballs make it party-proof
Frozen fully cooked meatballs are already shaped, cooked, and ready to heat. You do not need to thaw, sear, or fuss with anything if the package says they can be heated from frozen.
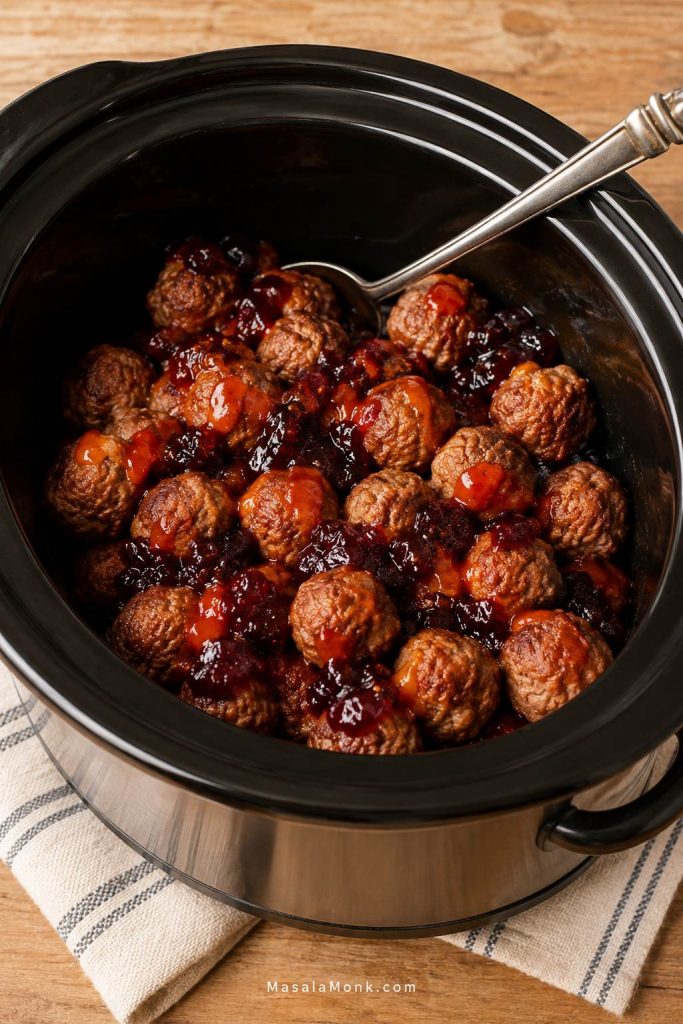
The crockpot holds everything without babysitting
The slow cooker warms the meatballs gently, melts the jelly into the sauce, and holds everything ready until people start serving themselves. Once the batch is hot, switch to WARM so the coating stays saucy instead of reducing too far around the edges.
Crockpot Time Chart
Slow cookers do vary, so use the times below as a guide and the visual cues as your final check. You are looking for hot meatballs, melted sauce, and a coating that clings instead of pooling at the bottom.
| Batch size | Slow cooker size | HIGH | LOW |
|---|---|---|---|
| 1 lb / 450 g meatballs | 2–3 quart | 1.5–2 hours | 3–4 hours |
| 2 lb / 900 g meatballs | 4–5 quart | 2–3 hours | 4–5 hours |
| 4 lb / 1.8 kg meatballs | 6 quart | 3–4 hours | 5–6 hours |
Stir occasionally, but avoid lifting the lid too often. Once the meatballs are fully hot, switch to WARM for serving.
Before You Start: Sauce Mistakes to Avoid
- Use the right chili sauce. Bottled tomato-based chili sauce is not the same as chili garlic sauce, Thai sweet chili sauce, or sriracha.
- Let the jelly melt before judging the flavor. The sauce tastes different once the jelly has fully melted into the chili sauce.
- Switch from HIGH to WARM once the meatballs are hot. This keeps the edges from over-thickening.
- Mix cornstarch with cold water first. Adding dry cornstarch directly to hot sauce can make it clump.
- Cook homemade meatballs before saucing. This version is for heating and coating fully cooked meatballs, not cooking raw meat from scratch.
Chili Sauce vs BBQ Sauce vs Ketchup
If you already picked a version above, use this section to fine-tune it. Chili sauce keeps things classic and balanced, BBQ sauce brings smoke, and ketchup needs a little sharpening when you want a pantry-only batch.
Chili sauce tastes like a tangier, bolder ketchup-style sauce. Ketchup makes the meatballs softer and sweeter, while chili sauce gives the classic version more tomato tang and mild spice.
| Version | Meatballs | Sauce | Flavor |
|---|---|---|---|
| Classic chili sauce | 2 lb / 900 g | 10–12 oz grape jelly + 12 oz chili sauce | Tangy, classic, balanced |
| Sweeter party glaze | 2 lb / 900 g | 18–20 oz grape jelly + 12 oz chili sauce | Stickier, sweeter, extra saucy |
| BBQ version | 2 lb / 900 g | 1 cup grape jelly + 1 1/2 to 2 cups BBQ sauce | Smoky and sweet |
| Ketchup version | 2 lb / 900 g | 3/4 to 1 cup grape jelly + 1 1/2 cups ketchup | Mild and sweet-tangy |
If using ketchup, add Worcestershire sauce, vinegar, mustard, black pepper, or chili powder if the sauce tastes flat. If using BBQ sauce, start with the lower amount of jelly and add more only if you want a sweeter coating.
No Crockpot? Make Them on the Stovetop, in the Oven, or in the Instant Pot
The crockpot is still the easiest choice when guests are coming, but you are not stuck if it is already full. The same grape jelly mixture works on the stovetop, in the oven, and in the Instant Pot with a few small adjustments.
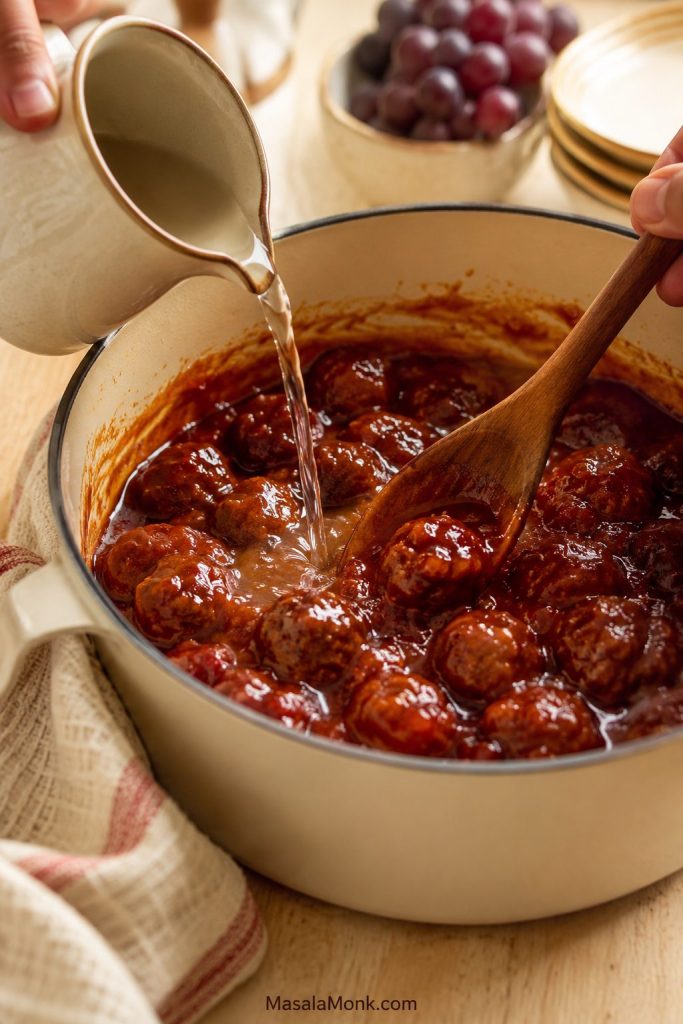
Stovetop method
- Add grape jelly and chili sauce to a Dutch oven, deep skillet, or large saucepan.
- Warm over medium-low heat until the jelly melts into the chili sauce.
- Add the meatballs and stir to coat.
- Cover and simmer for 15–20 minutes, stirring occasionally.
- If the meatballs are large or still very frozen, allow 25–30 minutes.
Use the stovetop when you need them faster or when the sauce needs a few extra minutes to tighten into a thicker coating.
Oven method
- Heat the oven to 350°F / 175°C.
- Add meatballs, grape jelly, and chili sauce to a covered baking dish or Dutch oven.
- Stir to coat.
- Cover and bake for 45–60 minutes.
- Stir halfway through.
- Uncover for the last 10 minutes if the coating looks too thin.
Reach for the oven when the slow cooker is already busy or when a wide baking dish is easier than stirring a crowded crockpot.
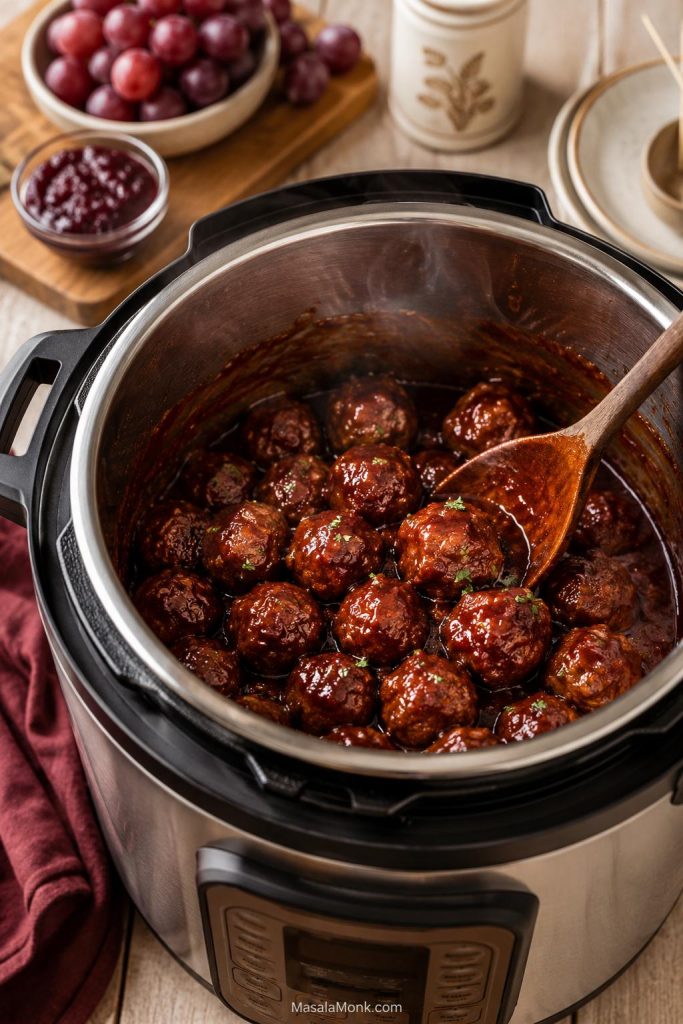
Instant Pot method
The Instant Pot works, but it is not the best method for the glossiest sauce or for holding meatballs during a party. Use it when speed matters, then transfer the meatballs to a slow cooker on WARM or to a serving dish.
- Add the meatballs, grape jelly, chili sauce, and 1/2 to 3/4 cup water to the Instant Pot.
- Pressure cook for 5–10 minutes, depending on meatball size.
- Quick release carefully.
- Use the sauté function to simmer uncovered until the mixture thickens and coats the spoon.
Do not skip the sauté step if you want a sticky coating. The mixture will look thinner at first because of the added water.
Can You Use Homemade Meatballs?
You do not need homemade meatballs for this recipe to work. Frozen fully cooked meatballs are the point when you need an easy party appetizer. Homemade meatballs are simply an upgrade if you have the time.
Cooked meatballs before sauce
Homemade meatballs are an upgrade, but they should be cooked first so the sauce is only heating and coating them, not cooking raw meat.
For a simple homemade batch, use:
- Ground beef or beef-pork mix, 2 lb / 900 g
- Breadcrumbs or panko, 1 cup
- Milk, 1/2 cup
- Eggs, 2
- Finely chopped onion, 1/2 cup
- Garlic powder, 1 teaspoon
- Salt, 1 teaspoon
- Black pepper, 1/2 teaspoon
Mix gently, shape into 1-inch meatballs, then bake or brown them before adding them to the sauce. Ground beef or pork meatballs should be cooked through to 160°F / 71°C. Poultry meatballs should reach 165°F / 74°C.
How Much to Make for a Party
A 2 lb bag usually gives about 48–50 small meatballs. If you are serving several appetizers, people will take fewer. If these are the main hot snack, plan for more.
| Use case | Amount to plan |
|---|---|
| Light appetizer with other snacks | 3–4 meatballs per person |
| Heavier appetizer | 5–6 meatballs per person |
| Dinner over rice, noodles, or potatoes | 6–8 meatballs per person |
| 2 lb / 900 g bag | About 12–16 appetizer servings |
| 4 lb / 1.8 kg double batch | About 24–32 appetizer servings |
What a Double Batch Looks Like
Use this as the capacity check: the slow cooker can look full, but it still needs room for stirring.
If you are not sure how much your crowd will eat, make the double batch. These are exactly the kind of appetizers people keep taking one at a time until the slow cooker is suddenly empty.
Sauce Scaling Chart
Use this chart when your bag size is smaller, larger, or when you want a sweeter party-style batch. The standard batch is saucy enough for a party bowl, but not so heavy that the meatballs swim in sauce.
| Batch | Meatballs | Grape jelly | Chili sauce |
|---|---|---|---|
| Small bag | 26–28 oz / 740–800 g | 8–10 oz / 225–280 g | 10–12 oz / 280–340 g |
| Half batch | 1 lb / 450 g | 5–6 oz / 140–170 g | 6 oz / 170 g |
| Standard balanced batch | 2 lb / 900 g | 10–12 oz / 280–340 g | 12 oz / 340 g |
| Sweeter party batch | 2 lb / 900 g | 18–20 oz / 510–565 g | 12 oz / 340 g |
| Double balanced batch | 4 lb / 1.8 kg | 20–24 oz / 560–680 g | 24 oz / 680 g |
| Double sweeter batch | 4 lb / 1.8 kg | 36–40 oz / about 1–1.1 kg, or roughly two 18–20 oz jars | 24 oz / 680 g |
Simple Party Timeline
If you are serving these for a party, start the slow cooker about 3 hours before guests arrive if cooking on HIGH, or 5 hours before if cooking on LOW. That gives the meatballs time to heat through and gives you a little buffer before serving.
| When | What to do |
|---|---|
| Night before | Mix the grape jelly and chili sauce, or cook the full batch and refrigerate it after cooling. |
| Before serving a refrigerated batch | Reheat on the stovetop, in the oven, or in the microwave until hot, then move to the slow cooker on WARM. |
| 3–5 hours before serving a fresh batch | Cook the meatballs in the slow cooker, depending on HIGH or LOW timing. |
| When guests arrive | Switch to WARM, stir, and set out toothpicks plus a spoon for extra sauce. |
| During serving | Stir occasionally and loosen the sauce with a splash of water or broth if the edges thicken. |
Taking Them to a Potluck
If you are taking grape jelly meatballs to another house, the easiest option is to cook or reheat them before you leave, keep the slow cooker covered during the trip, then plug it in as soon as you arrive and keep the meatballs on WARM.
How to Hold Them Warm at a Potluck
The covered slow cooker shines as a holding tool. For best texture and safety, bring the meatballs hot before you rely on WARM.
For a longer trip, transport the meatballs chilled in a sealed container, reheat them until hot when you arrive, then move them to the slow cooker for serving. Do not rely on a cold slow cooker full of refrigerated meatballs to reheat the batch quickly.
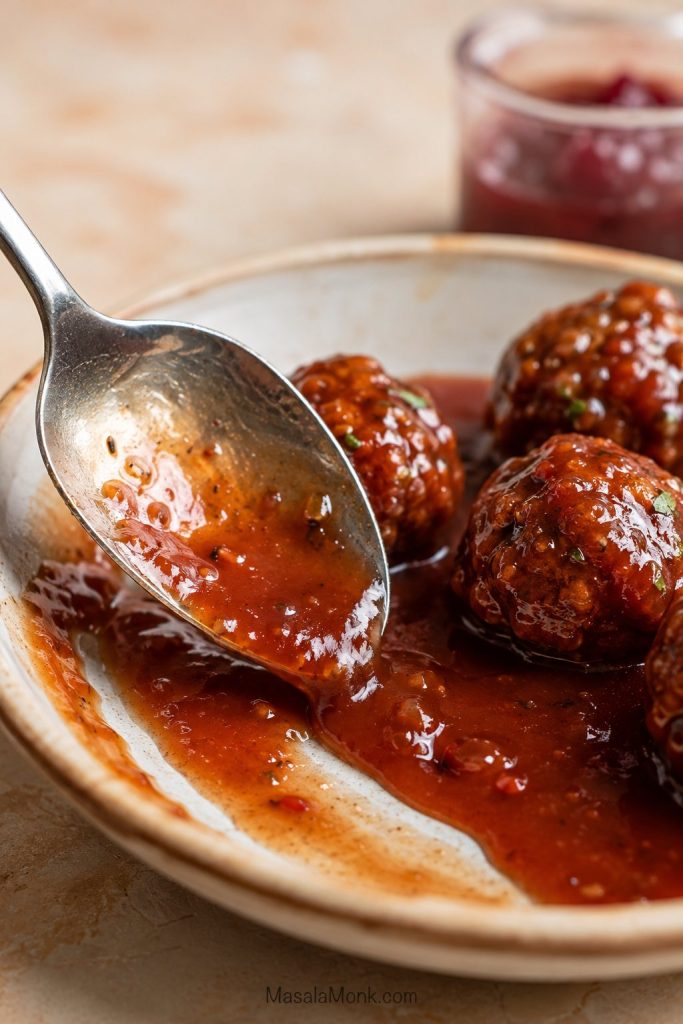
How to Fix Grape Jelly Meatball Sauce
If your first taste makes you think, “this is too sweet,” do not start over. Wait until the jelly has melted, then adjust the hot sauce in the direction it needs to go.
The good news is that this sauce is forgiving. Once it is warm, small adjustments make a big difference.
| Problem | Fix |
|---|---|
| Too sweet | Add more chili sauce, Dijon, vinegar, lemon juice, Worcestershire sauce, black pepper, or hot sauce. |
| Too tangy | Add more grape jelly or a spoonful of BBQ sauce. |
| Too thin | Simmer uncovered or add a cornstarch slurry. |
| Too thick | Add water, broth, pineapple juice, or a little BBQ sauce. |
| Flat flavor | Add Worcestershire sauce, Dijon, black pepper, vinegar, hot sauce, or a pinch of salt. |
| Coating not clinging | Cook longer, stir well, or reduce slightly. |
| Too spicy | Add more grape jelly or BBQ sauce. |
| Meatballs drying out | Add a splash of water and keep them on WARM, not HIGH. |
If the sauce gets too thick
Sauce that drags instead of spoons needs loosening before serving, especially after sitting on WARM or thickening around the slow cooker edges.
If the sauce drags instead of pours, loosen it before serving. These meatballs should feel glossy and easy to spoon, not sticky enough to fight with.
How to thicken the sauce
For light thickening, mix 1 teaspoon cornstarch with 1 teaspoon cold water. For a thicker glaze, mix 2 teaspoons cornstarch with 2 teaspoons cold water.
Stir the slurry into the hot mixture and cook until it turns shiny and coats the spoon. In a slow cooker, add the slurry near the end and cook on HIGH for another 15–20 minutes. For faster thickening, transfer the sauce to a saucepan and simmer for a few minutes.
How to make the sauce less sweet
Add something tangy, savory, or spicy. A splash of vinegar, a little Dijon mustard, extra chili sauce, Worcestershire sauce, black pepper, lemon juice, or hot sauce can pull the sauce back into balance.
Start small, stir, taste, and adjust again. It is much easier to add more sharpness than to fix a sauce that has gone too sour.
Substitutions: Grape Jelly, Chili Sauce, and Meatballs
Grape jelly substitutes
Grape jelly is classic, but other fruit preserves can work with the same sweet-savory idea. The mixture may look less smooth if you use jam or preserves with fruit pieces.
| Substitute | Flavor result |
|---|---|
| Cranberry sauce | Tangier, holiday-style, and good with chili sauce. |
| Apricot preserves | Lighter, fruity, and good with BBQ sauce. |
| Orange marmalade | Citrus-sweet with a slight bitter edge. |
| Raspberry preserves | Sweeter berry flavor. |
| Hot pepper jelly | Spicy-sweet and stronger in flavor. |
| Strawberry jelly | Works, but tastes sweeter and less classic. |
| Grape jam | Similar flavor, but thicker and less smooth than jelly. |
For a holiday-style version, cranberry sauce is the most natural swap. If you already like sweet-tart cranberry sauce with savory food, that same flavor direction works beautifully with cocktail meatballs. This cranberry sauce with orange juice has the kind of bright, tangy-sweet profile that pairs well with warm appetizers.
Chili sauce substitutes
Go with BBQ sauce when you want a smoky, game-day flavor. Use ketchup when you want the mildest pantry version, then add Worcestershire sauce, vinegar, Dijon, black pepper, or chili powder if it tastes flat.
Meatball substitutes
Turkey, chicken, beef, pork, beef-pork, and plant-based meatballs can all work as long as they are fully cooked before going into the sauce. Choose mild meatballs if you want the classic party flavor.
Can you use low-sugar or sugar-free grape jelly?
Yes, but the sauce may be thinner, less shiny, or slightly sharper depending on the sweetener. Taste after the jelly melts before adding vinegar, mustard, or hot sauce. If the coating looks thin, use the cornstarch slurry method to help it cling to the meatballs.
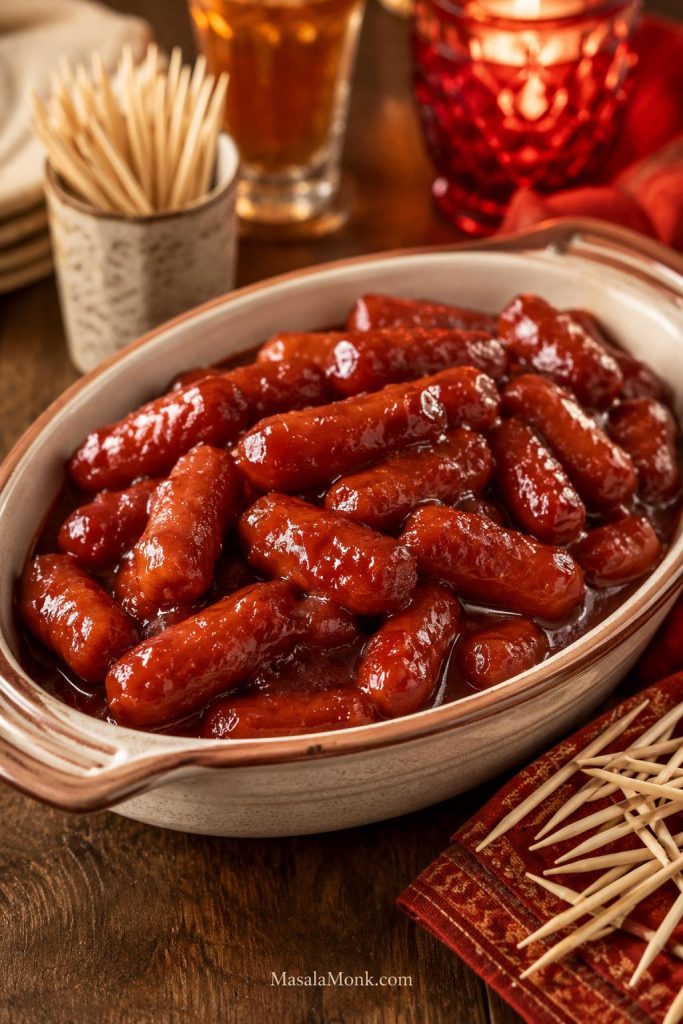
Can You Use Little Smokies Instead of Meatballs?
Little Smokies can go straight into this sauce too. Use 2–3 lb cocktail sausages with the same grape jelly and chili sauce mixture, then cook until hot and well coated.
How the Little Smokies Version Looks
Use this version when you want the same sauce but a snappier cocktail-sausage bite instead of soft meatballs.
What to Serve with Grape Jelly Meatballs
For parties, let these be the warm, saucy anchor on the table. Surround them with something crunchy, something creamy, and something easy to grab.
For a slow-cooker setup, set out toothpicks plus a small spoon or ladle. Toothpicks are easy for grabbing meatballs, but a spoon helps people get enough sauce.
What to Serve With Party Meatballs
A good party spread gives the warm meatballs contrast: something soft, something crunchy, something tangy, and something creamy.
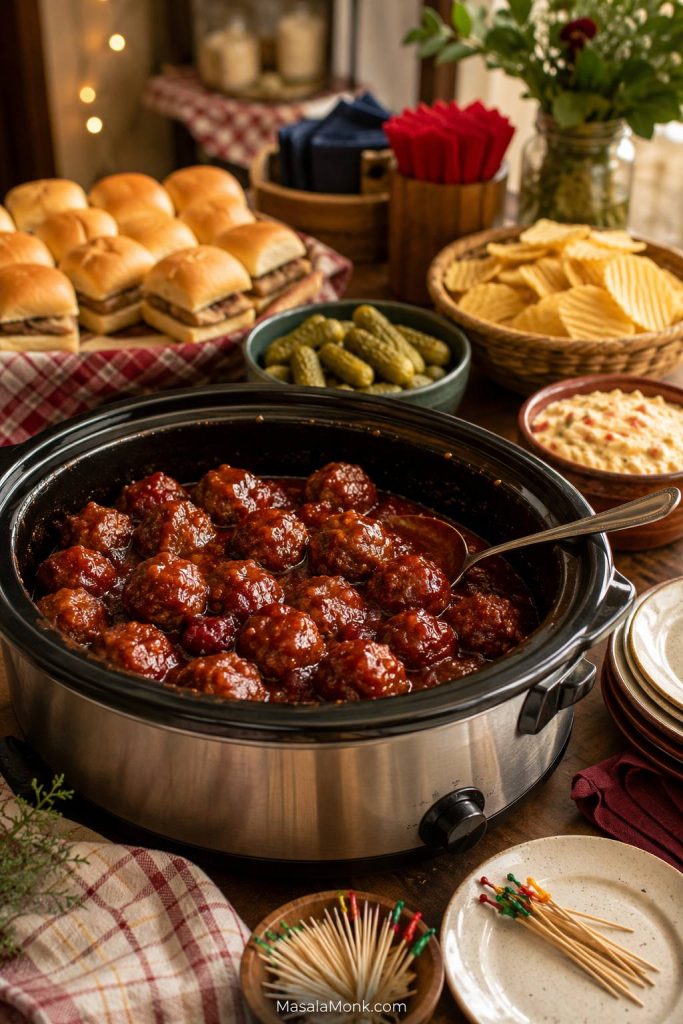
For parties
- Toothpicks or cocktail forks
- Slider buns
- Pull-apart bread
- Cheese ball with crackers or pretzels
- 7 layer dip with sturdy chips
- Pickles
- Raw vegetables and dip
Turn Them Into Dinner
To make this feel like a main dish, give the sauce something soft to land on instead of serving the meatballs alone.
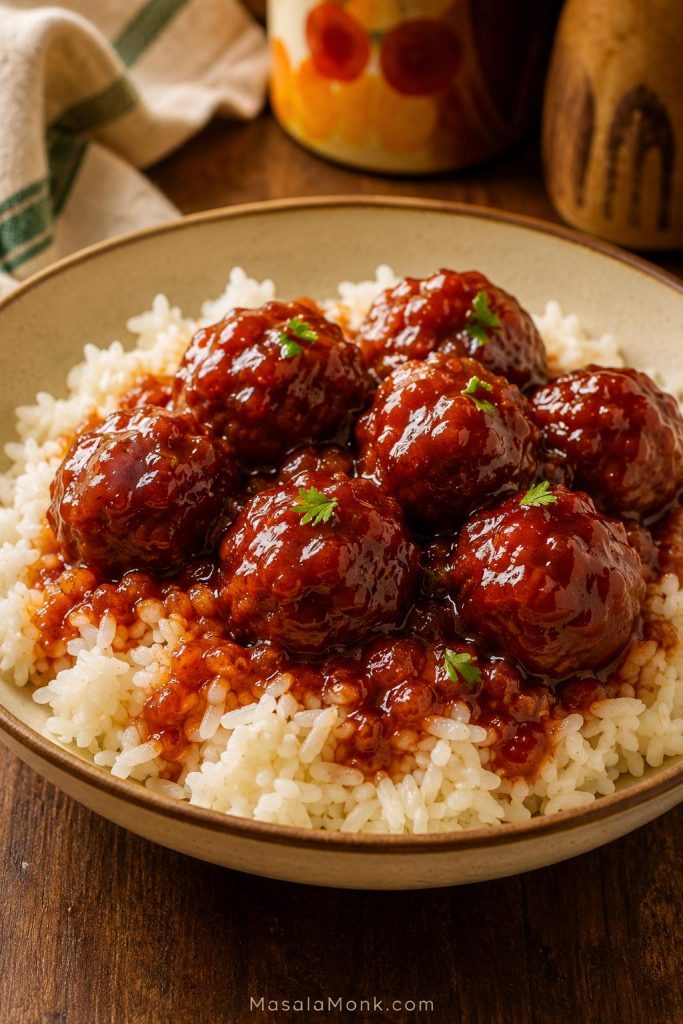
- Steamed rice
- Garlic mashed potatoes
- Egg noodles
- Pasta
- Macaroni and cheese
- Roasted vegetables
Because the sauce is bold and a little sweet, it pairs best with something simple and starchy. Rice, potatoes, and noodles all work because they soak it up without competing with it.
Can You Make Grape Jelly Meatballs Ahead?
Yes. You can make grape jelly meatballs ahead for parties, holidays, and game day. Cook the meatballs in the sauce, let them cool, then store them in an airtight container in the fridge.
Before serving, reheat them on the stovetop, in the oven, or in the microwave until hot. Once reheated, move them to the slow cooker on WARM. If the sauce has thickened in the fridge, stir in a splash of water, broth, or BBQ sauce until it loosens again.
Do not ask the slow cooker to bring cold leftovers up to temperature. Reheat first, then use the slow cooker to hold them warm for serving.
You can also mix the grape jelly and chili sauce ahead of time and keep the sauce refrigerated. When ready to cook, add the sauce and meatballs to the slow cooker and continue with the recipe.
For a cold make-ahead appetizer beside the hot meatballs, this cheese ball recipe works well because it can chill while the slow cooker handles the warm food.
Storage, Freezing, and Reheating
Leftovers keep well because the sauce thickens around the meatballs as it chills. Store them in an airtight container in the fridge for 3–4 days.
To freeze, cool the meatballs completely, then freeze them with the sauce in a freezer-safe container for up to 2–3 months. Thaw overnight in the fridge before reheating.
Reheat on the stovetop, in the microwave, or in the oven until hot. The sauce thickens when cold, so do not panic if leftovers look stiff from the fridge. Add a splash of water if needed, then move the meatballs to a slow cooker on WARM if you want to serve them at a party.
FAQs
What are grape jelly meatballs made of?
Classic grape jelly meatballs use fully cooked meatballs, grape jelly, and bottled chili sauce. The jelly gives sweetness and shine, while the chili sauce keeps the sauce tangy instead of candy-sweet.
Why do people put grape jelly in meatballs?
Grape jelly melts into the sauce and acts like the sweet part of a sweet-and-sour glaze. Once it mixes with chili sauce, it tastes more savory-sweet than fruity.
Do grape jelly meatballs taste like grape jelly?
Not exactly. The jelly adds sweetness, shine, and body, but the chili sauce turns the flavor sweet, tangy, and savory instead of jammy.
What kind of chili sauce do you use?
Use American-style bottled chili sauce, usually found near ketchup. It is tomato-based, tangy, and mildly spiced. Do not use chili garlic sauce, Thai sweet chili sauce, or sriracha as a direct replacement.
What is the difference between chili sauce and ketchup in this recipe?
Chili sauce tastes like a tangier, bolder ketchup-style sauce. Ketchup makes the meatballs softer and sweeter, while chili sauce gives the classic version more tomato tang and mild spice.
Can BBQ sauce replace chili sauce?
Yes. Use 1 1/2 to 2 cups BBQ sauce and 1 cup grape jelly for 2 lb / 900 g meatballs. The flavor will be smokier and sweeter.
Does ketchup work instead of chili sauce?
Yes. Use 1 1/2 cups ketchup and 3/4 to 1 cup grape jelly for 2 lb / 900 g meatballs. Add Worcestershire sauce, vinegar, mustard, or chili powder if it tastes too sweet or flat.
Is grape jam okay instead of grape jelly?
Yes. Grape jam has a similar flavor, but it may be thicker and less smooth because it contains more fruit pulp. Add a splash of water if needed.
What can I use instead of grape jelly?
Cranberry sauce, apricot preserves, orange marmalade, raspberry preserves, hot pepper jelly, strawberry jelly, or grape jam can work. Jam and preserves may make the sauce less smooth than jelly.
Do I thaw frozen meatballs first?
Most fully cooked frozen meatballs can go straight into the slow cooker, but check the package instructions. If a brand recommends thawing first, follow the package.
Do Italian meatballs work?
Yes, but homestyle meatballs taste more like the classic party version. Italian meatballs can work, though the herbs and cheese may make the sauce taste more dinner-style.
Should raw meatballs go into this recipe?
This recipe assumes the meatballs are already cooked. Cook raw or homemade meatballs first, then add them to the sauce for heating and coating.
What size slow cooker do I need?
A 4–5 quart slow cooker works well for 2 lb / 900 g meatballs. Use a 6 quart slow cooker for a double batch.
How long do grape jelly meatballs cook in the crockpot?
For a standard 2 lb / 900 g batch, cook on HIGH for 2–3 hours or LOW for 4–5 hours, until the meatballs are hot and the sauce has melted together.
How do I double grape jelly meatballs?
Yes. Use 4 lb / 1.8 kg fully cooked meatballs, 20–24 oz / 560–680 g grape jelly, and 24 oz / 680 g chili sauce. Use a 6 quart slow cooker and stir once or twice.
How do I keep them warm for a party?
Once the meatballs are fully hot, switch the slow cooker to WARM and stir occasionally. If the sauce thickens around the edges, add a splash of water or broth.
How long can grape jelly meatballs stay on WARM?
Once fully hot, they can sit on WARM as long as the slow cooker keeps them hot, ideally at 140°F / 60°C or above. For best texture, serve within 2–4 hours.
How do I make them without a crockpot?
Yes. Simmer them on the stovetop for 15–20 minutes, or bake covered at 350°F / 175°C for 45–60 minutes. You can also use an Instant Pot with added water, then reduce the sauce after pressure cooking.
How do I thicken grape jelly meatball sauce?
Mix 1 teaspoon cornstarch with 1 teaspoon cold water, then stir it into the hot sauce. For a thicker glaze, use 2 teaspoons cornstarch with 2 teaspoons cold water.
How do I make grape jelly meatballs less sweet?
Add chili sauce, vinegar, lemon juice, Dijon mustard, Worcestershire sauce, hot sauce, black pepper, or chili flakes. Add a little at a time and taste before adding more.
Does low-sugar or sugar-free grape jelly work?
Yes, but the sauce may be thinner, less shiny, or slightly sharper. Taste after the jelly melts, then thicken with a cornstarch slurry if needed.
Do homemade meatballs work?
Yes. Cook homemade meatballs first, then add them to the grape jelly sauce. Frozen fully cooked meatballs are easier for parties, but homemade meatballs give you more control over texture.
Can Little Smokies replace the meatballs?
Yes. Use 2–3 lb Little Smokies or cocktail sausages with the same sauce, then cook until hot and coated. They will taste saltier and snappier than meatballs.
What do you serve with grape jelly meatballs?
For parties, serve them with toothpicks, slider buns, chips and dip, pickles, raw vegetables, or a cheese board. For dinner, spoon them over rice, mashed potatoes, egg noodles, or macaroni and cheese.
Can you freeze grape jelly meatballs?
Yes. Cool them completely, then freeze with the sauce in a freezer-safe container for up to 2–3 months. Thaw overnight in the fridge and reheat until hot.
Final Thoughts
The easiest ratio to remember is simple: 2 lb meatballs, 10–12 oz grape jelly, and 12 oz bottled chili sauce. Let the jelly melt fully, then taste before adjusting.
Once you know that base, the rest is easy: more jelly for sweetness, BBQ sauce for smoke, vinegar or mustard for tang, and a splash of water if the sauce gets too thick. It is not a fancy appetizer, and that is exactly why it works: people know what to do with it, the slow cooker keeps it ready, and the bowl usually empties before anyone admits how simple it was.