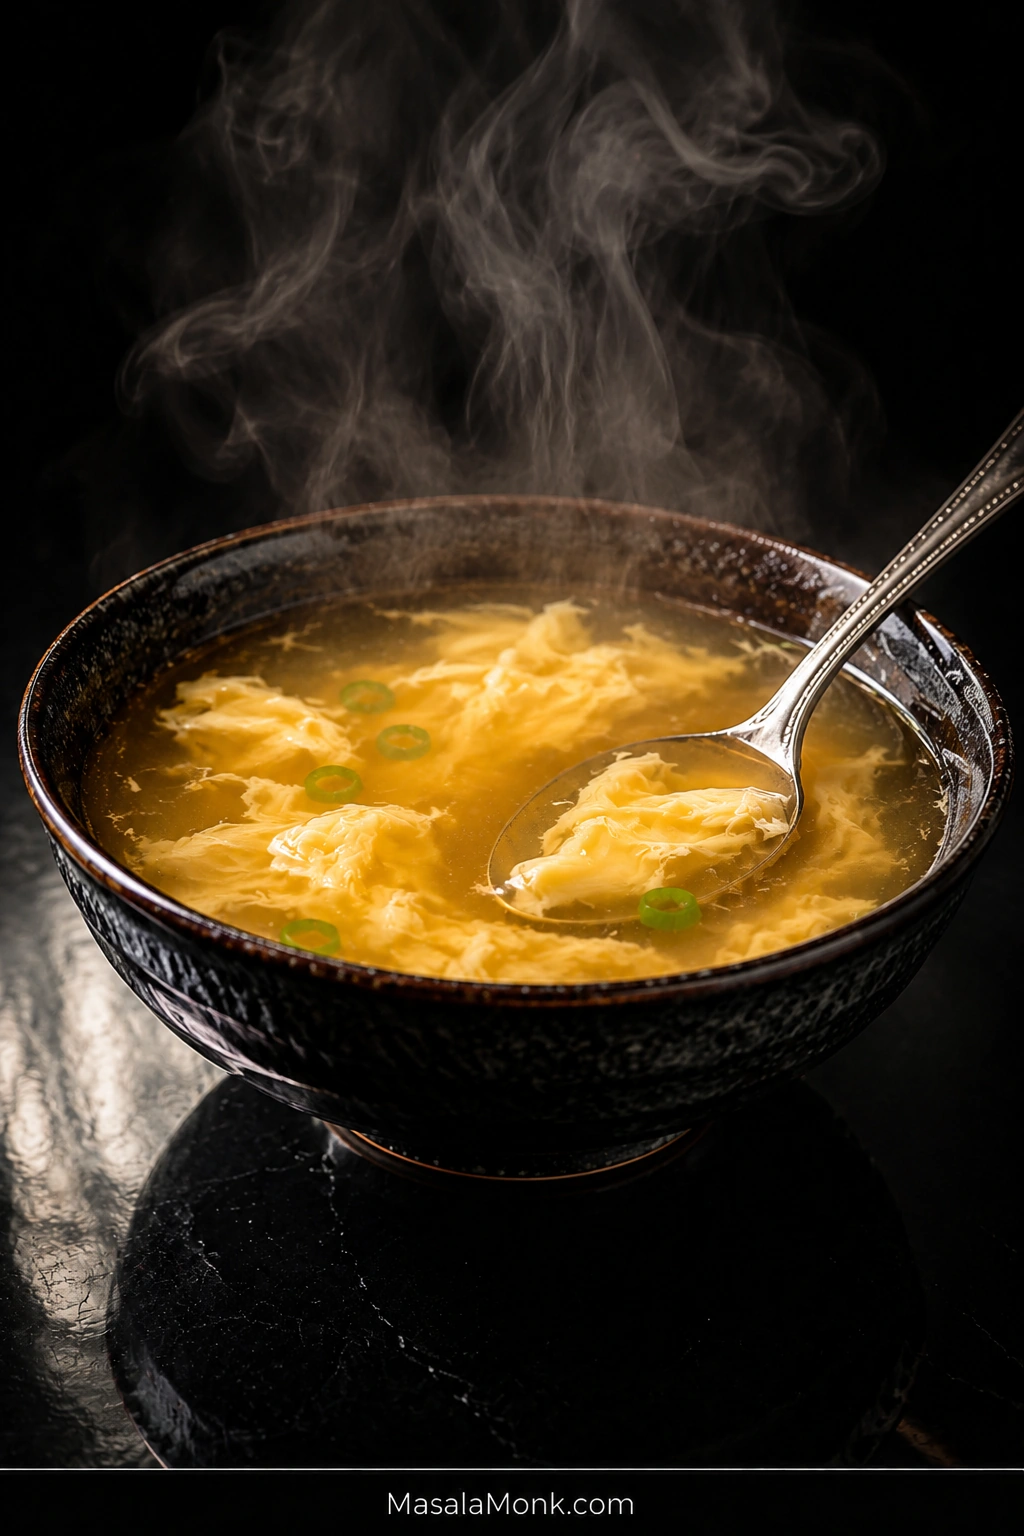
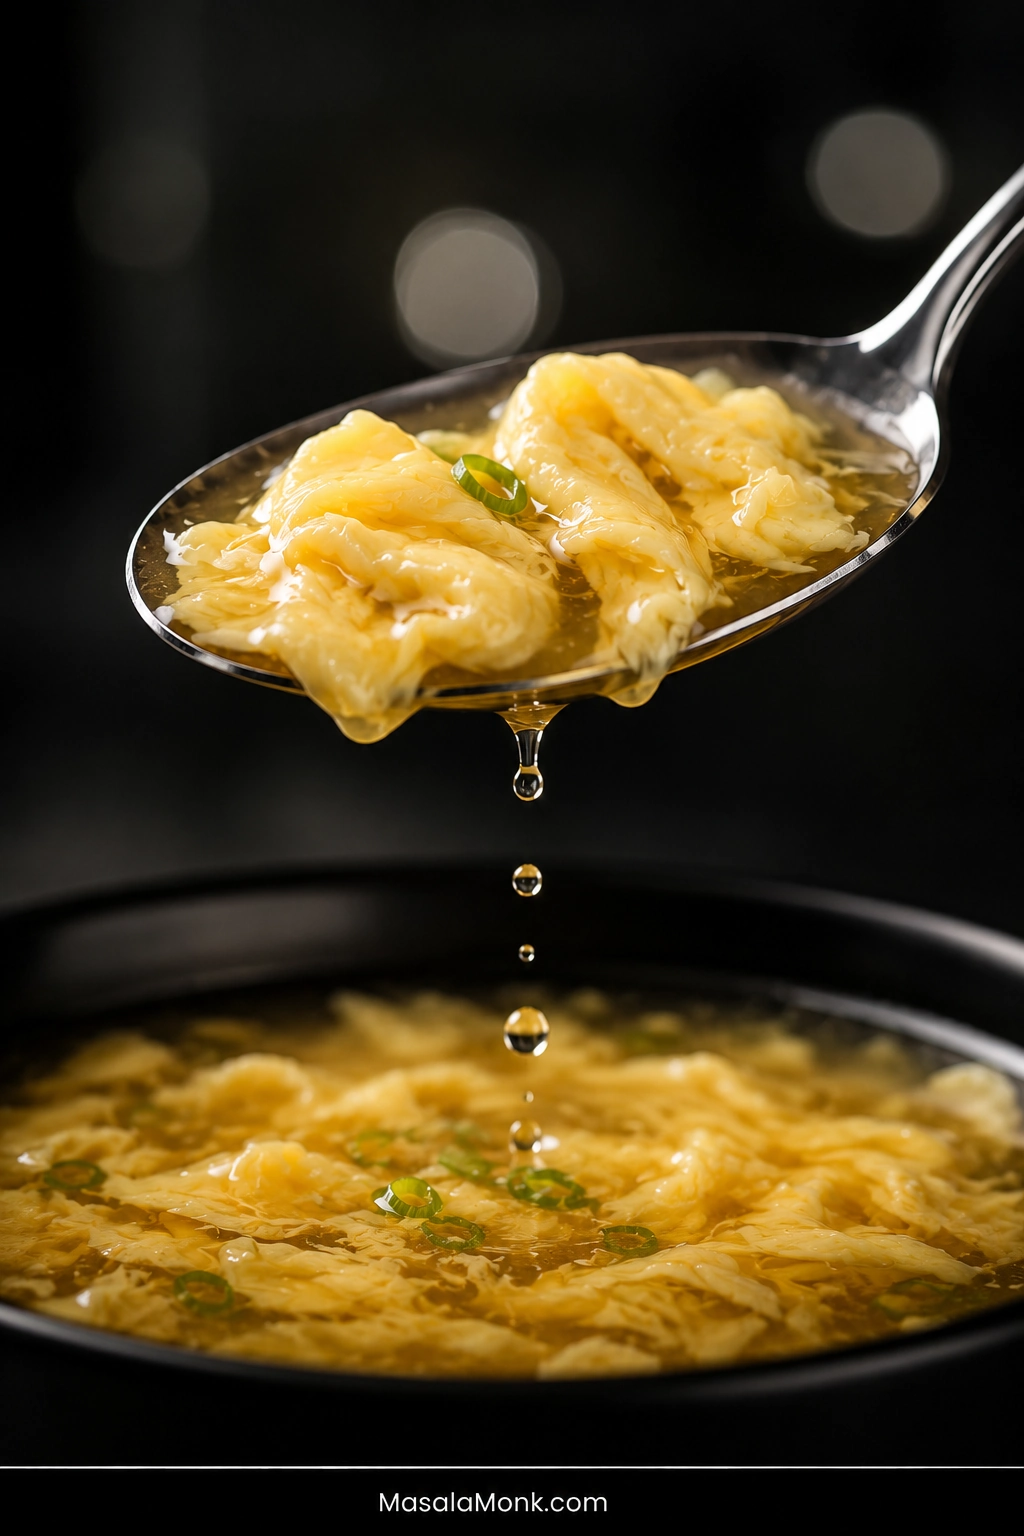
Sometimes egg drop soup is the first thing you want from a Chinese takeout order: a steaming bowl, soft ribbons drifting through savory broth, a few scallion greens on top, and just enough body to make every spoonful feel silky.
The base is simple. The egg pour is the only part worth slowing down for.
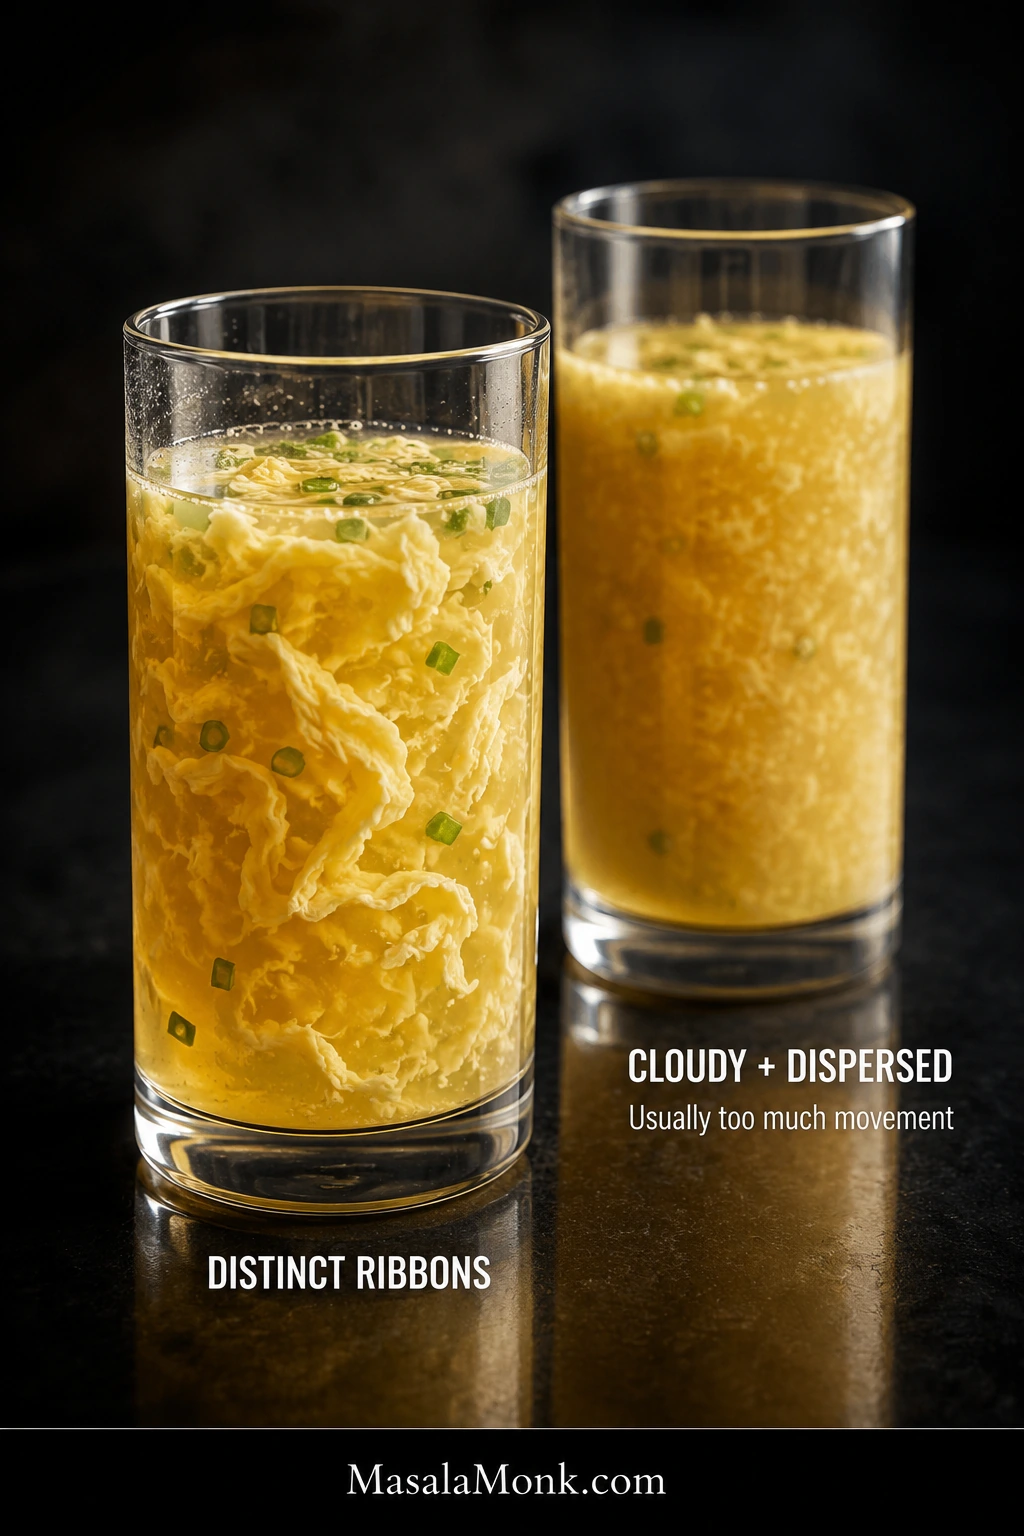
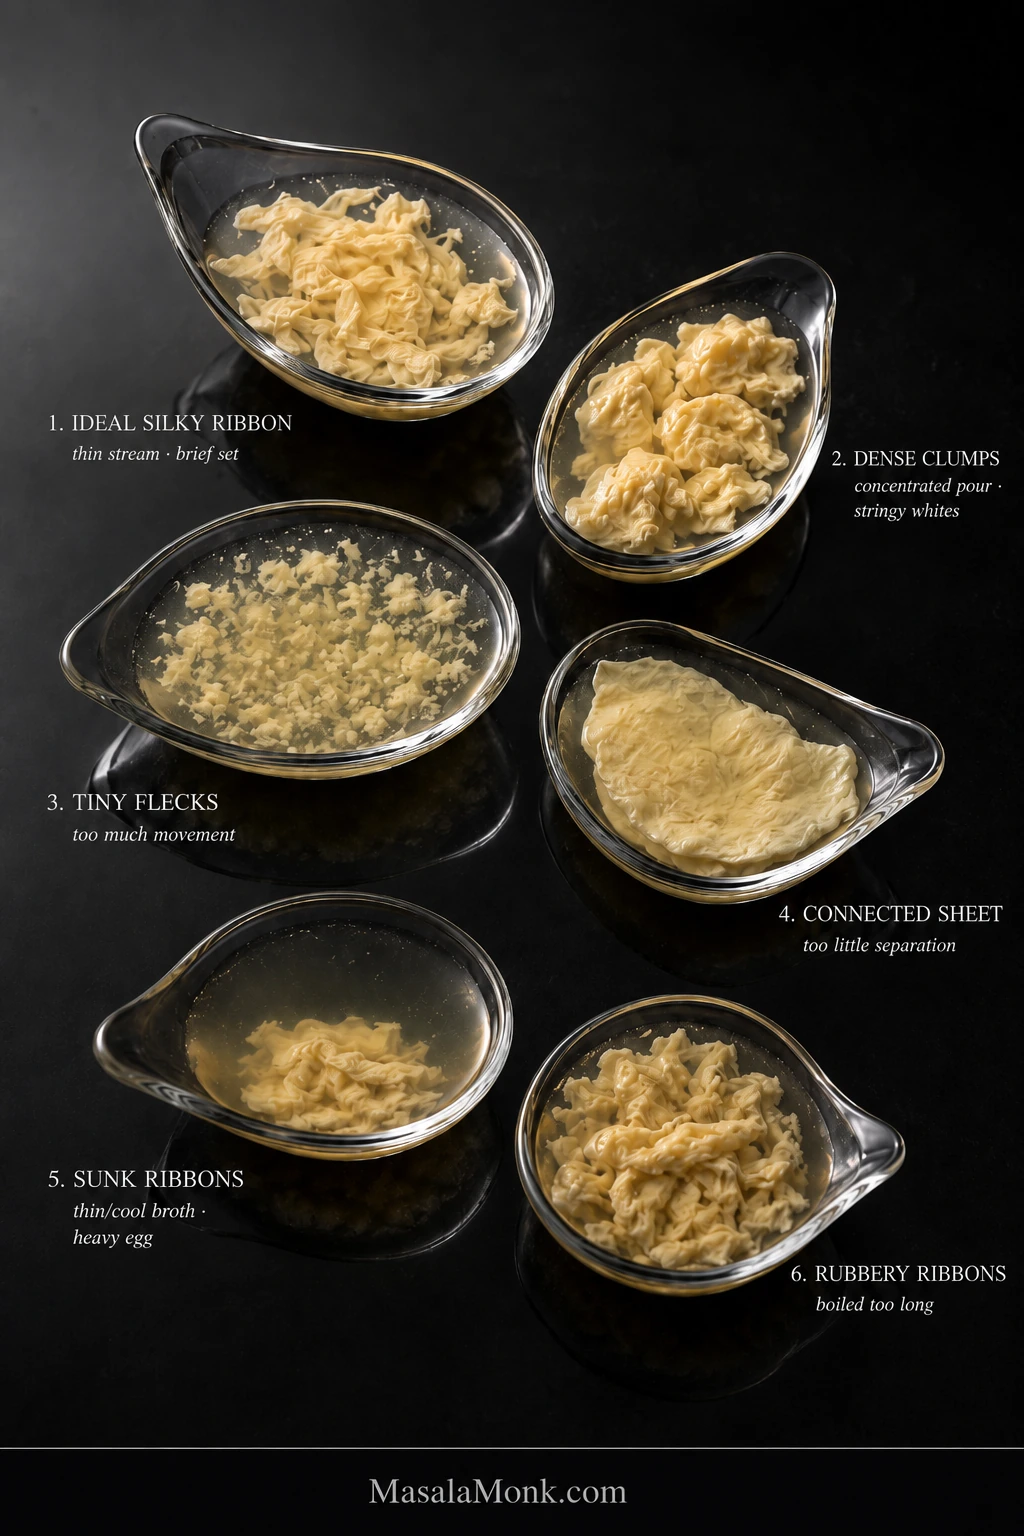
Too much movement can break the egg into tiny flecks. A heavy pour can leave dense clumps. Stir before the egg has set and the ribbons may disappear into cloudy broth.
Thicken first. Create the movement first. Let the egg set before you move it again.
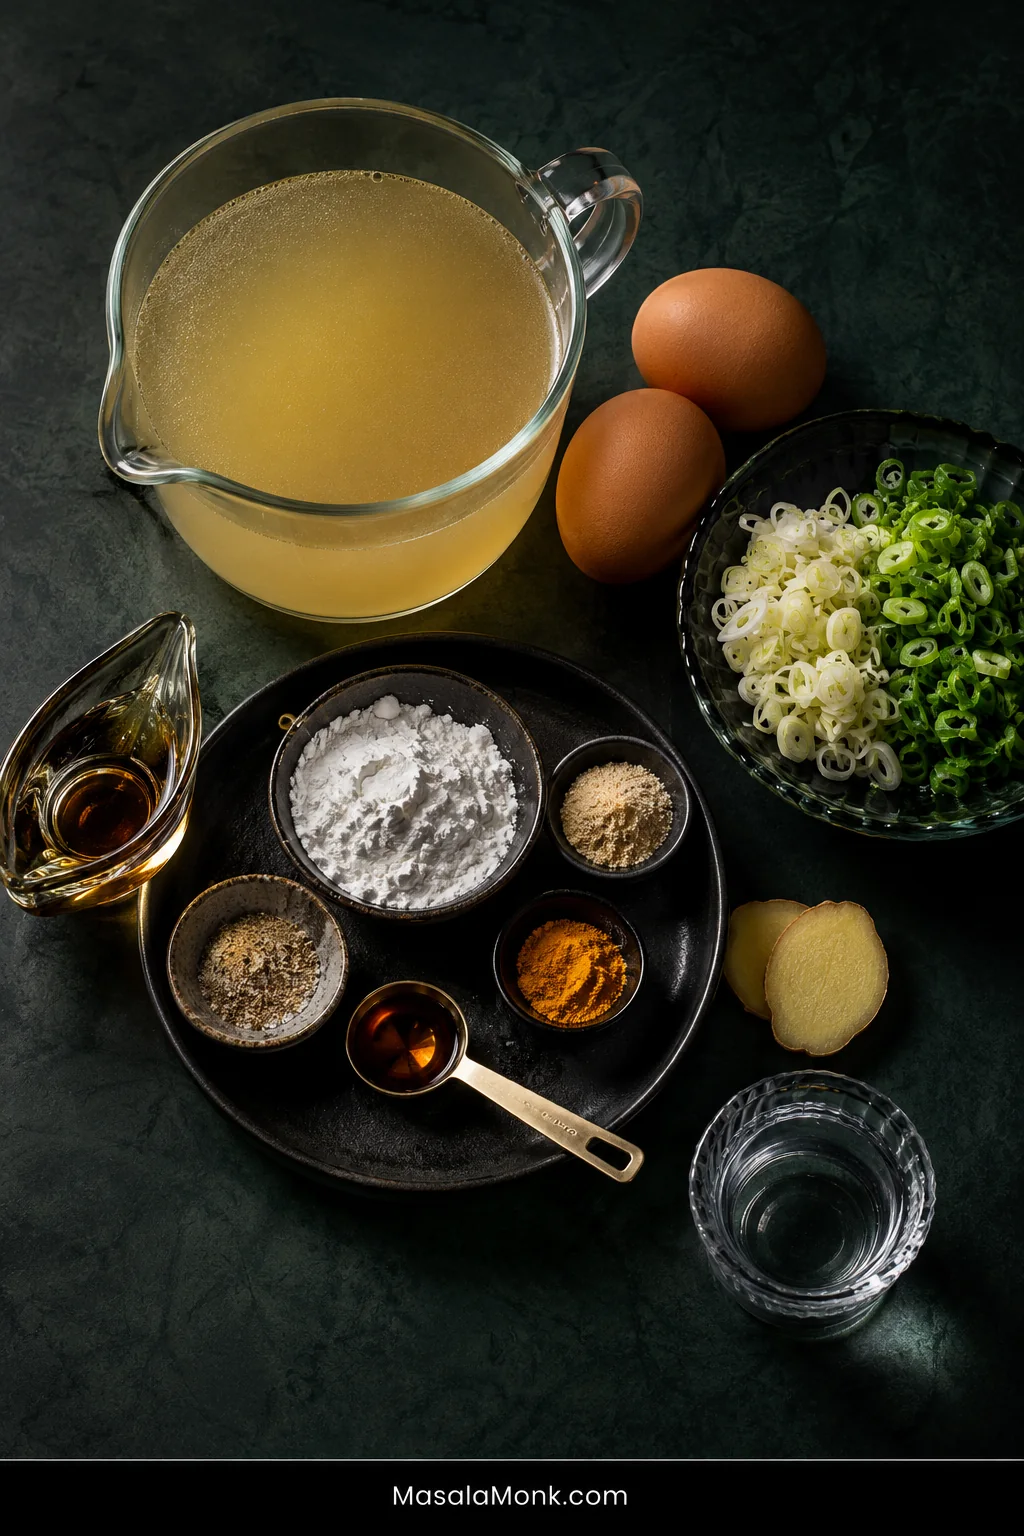
Quick formula: For the base recipe, use 4 cups / 946 ml chicken broth, 2 large eggs, 2 teaspoons / 10 ml water for the eggs, and 1½ tablespoons / about 12 g cornstarch.
This makes 4 starter bowls or 2 generous bowls. The finished soup is broth-forward and lightly thickened, with soft egg ribbons suspended throughout.
Recipe at a Glance
Serves
4 starter bowls or 2 generous bowls
Prep
About 5 minutes
Cook
About 10 minutes
Total
About 15 minutes
Pot
Medium saucepan, about 2½–3 qt
Equipment
Medium saucepan, about 2½–3 quarts
Small bowl for the cornstarch slurry
Spouted measuring cup or another easy-pouring cup for the eggs
Fork or small whisk
Ladle or large spoon
Ingredients
4 cups / 32 fl oz / 946 ml low-sodium chicken broth
2 scallions, thinly sliced, white and green parts separated
2 thin slices fresh ginger, about 5 g
½–1 teaspoon chicken powder or bouillon, optional, depending on your broth
¼ teaspoon ground white pepper, plus more to taste
⅛ teaspoon turmeric, optional, for warmer color
1½ tablespoons cornstarch, about 12 g
1½ tablespoons / 22 ml cold water, for the slurry
2 large eggs, about 100 g without shells
2 teaspoons / 10 ml water, for loosening the eggs
½ teaspoon / 2.5 ml toasted sesame oil, optional, plus more by drops to taste
Salt, as needed after tasting
Most of this recipe’s leverage sits in three things: broth for flavor, egg for texture, and cornstarch for body. The rest should stay deliberately restrained.
1. Season the Broth
Add the chicken broth, scallion whites, ginger, white pepper, and optional turmeric to a medium saucepan.
Bring to a boil, lower the heat, and simmer for 2–3 minutes. Remove the ginger slices after they have flavored the broth.
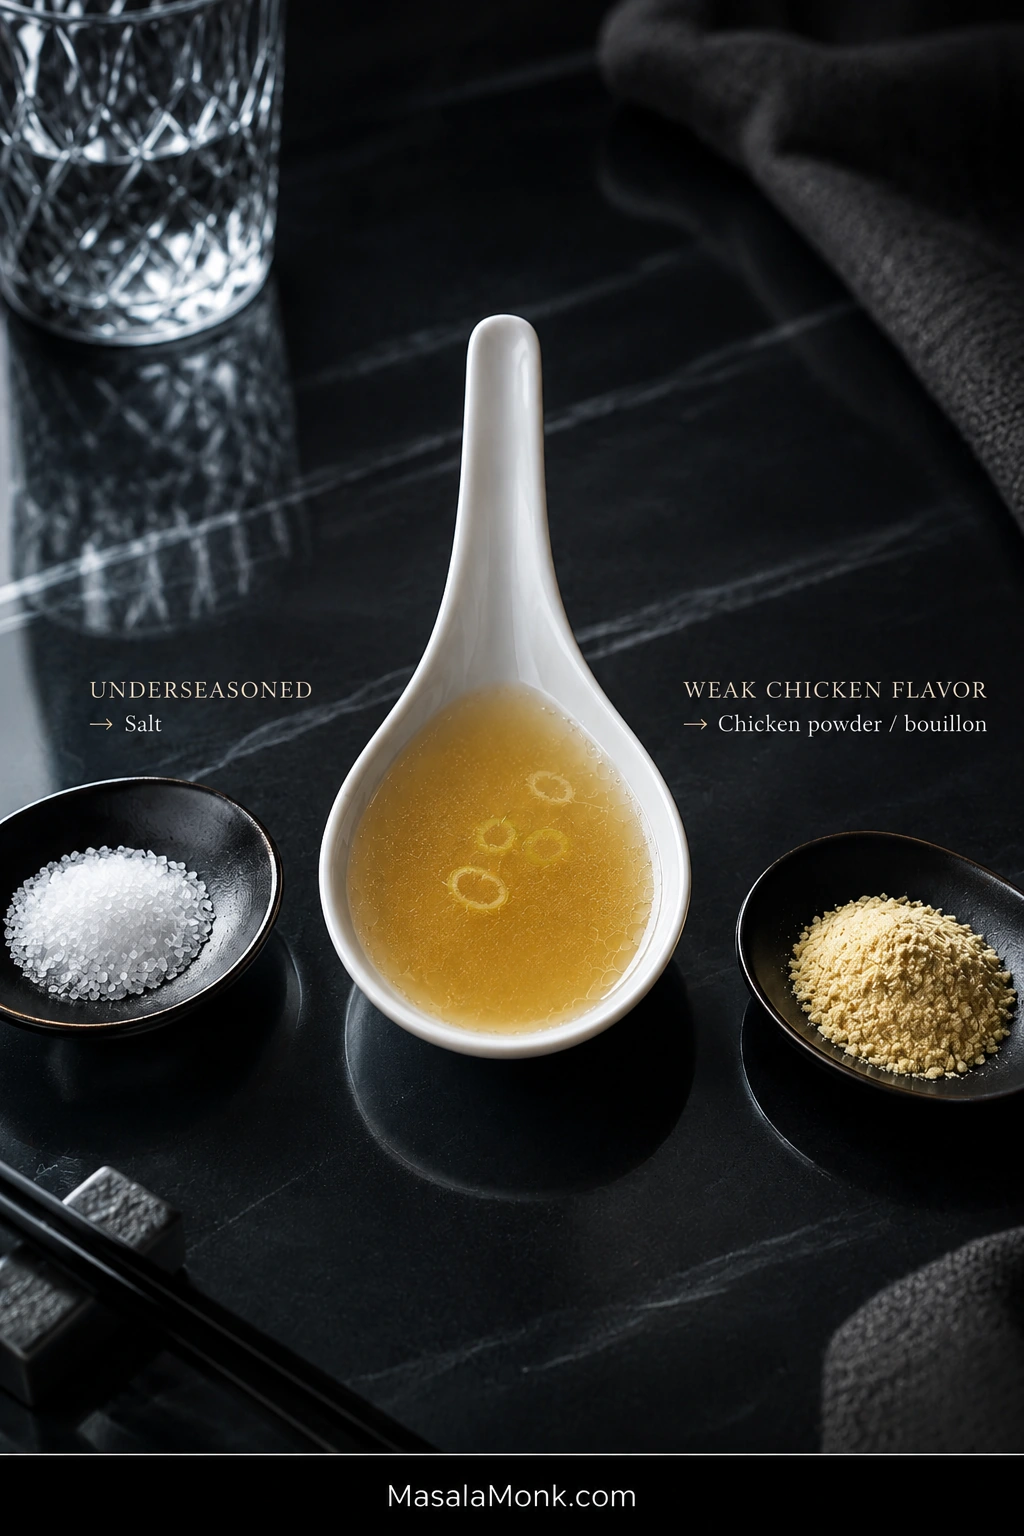
Now taste. If the chicken flavor is good but the broth simply tastes underseasoned, add salt. If the chicken flavor itself feels weak or hollow, add ½ teaspoon chicken powder or bouillon, let it dissolve, and taste again before using more.
Get the broth tasting good here. Cornstarch will change its texture and egg will add richness, but neither one can supply the savory foundation the broth is missing.
If the broth is salty enough but still tastes hollow, the missing piece may be chicken depth rather than more salt.
2. Thicken the Broth
Mix the cornstarch with 1½ tablespoons / 22 ml cold water until smooth.
Stir the slurry again immediately before using it; cornstarch settles quickly. Pour it gradually into the simmering broth while stirring.
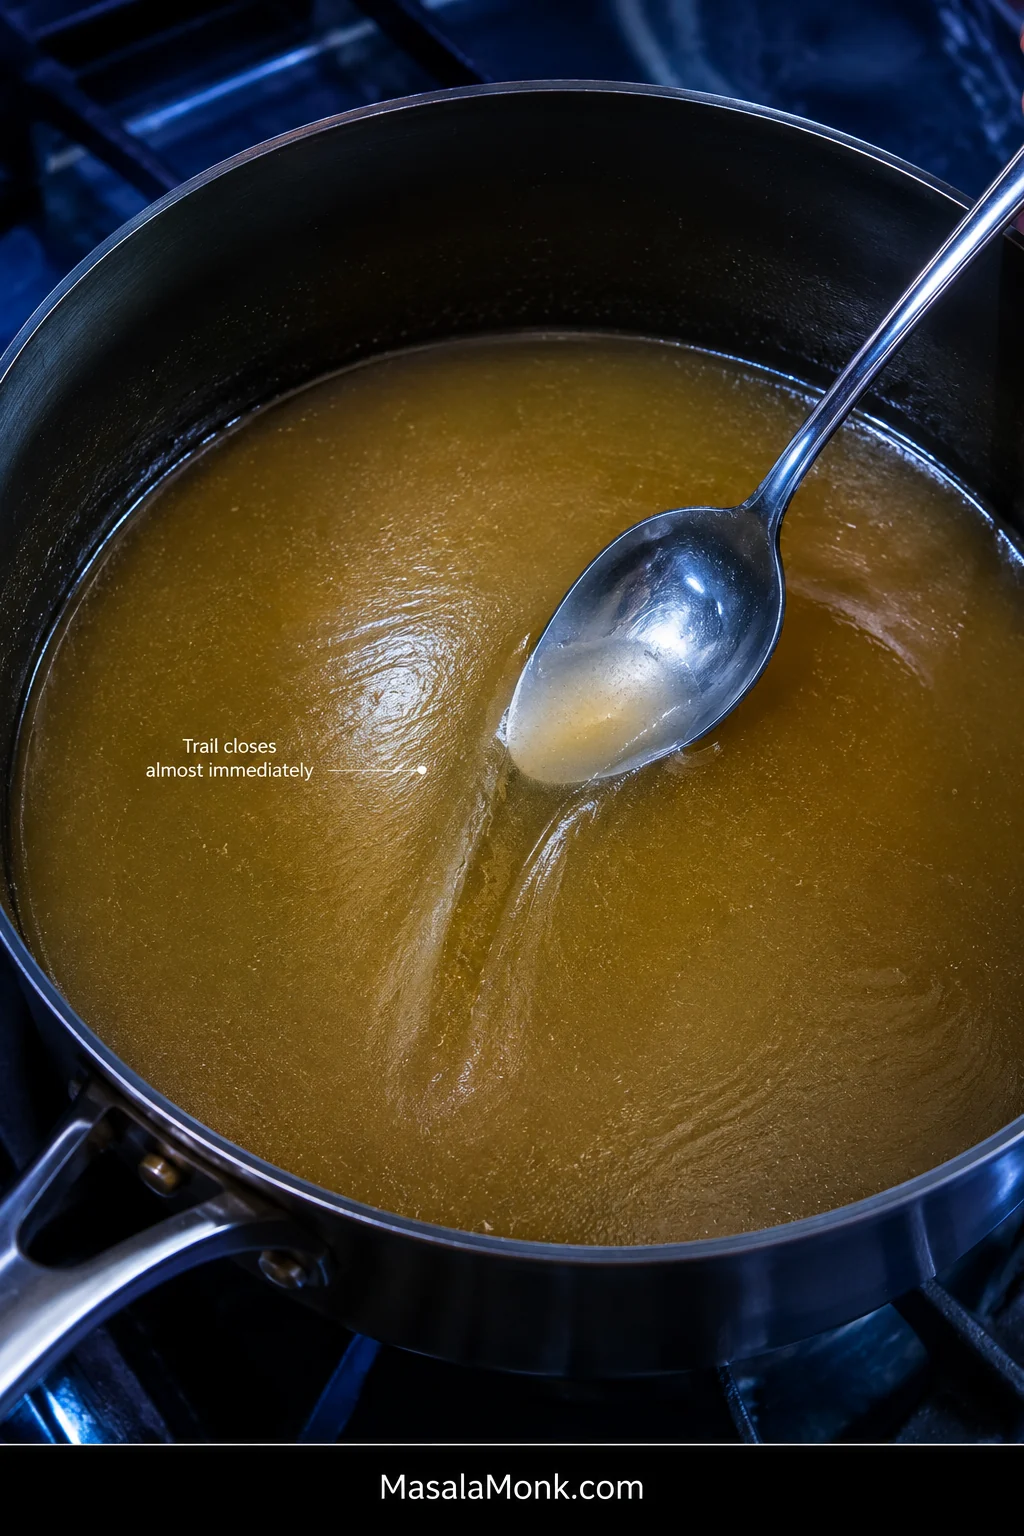
Cook for about 45–60 seconds, then drag a spoon through the pot. The broth should have a slight sheen, and the path behind the spoon should close almost immediately. A lingering trench means the soup is becoming too thick. If it looks almost unchanged from plain stock, give the starch another few seconds at a simmer.
The texture should remain fluid enough to move easily around the saucepan, with just enough body to feel silky on the spoon.
Think of the trail as a wake, not a trench. You want to glimpse where the spoon passed without leaving a channel that sits open behind it.
3. Prepare the Eggs
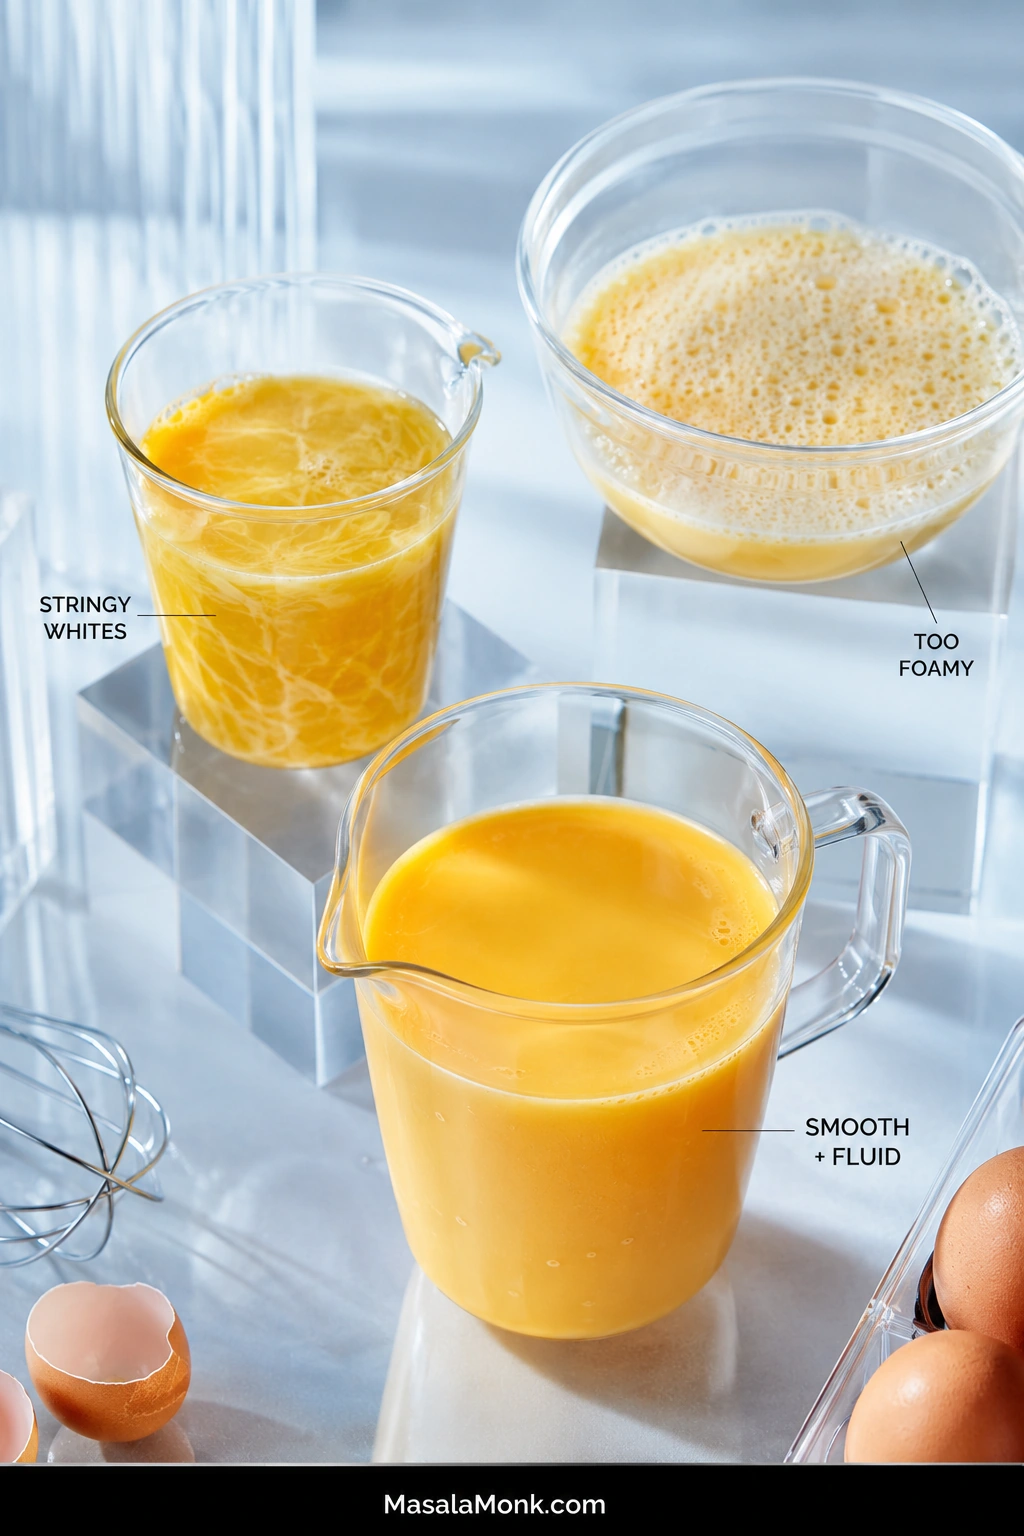
Beat the eggs with 2 teaspoons / 10 ml water until the yolks and whites are evenly combined and no clear, stringy ropes of egg white remain.
The added water makes the eggs easier to pour in a narrow stream. Stop once the mixture is smooth and fluid; foam does not help the ribbons.
The smooth sample gives you the most predictable pour. Stringy whites create uneven pieces, while excess foam makes the stream harder to control.
4. Make the Egg Ribbons
For this simmer-based method, keep a few quiet bubbles breaking the surface.
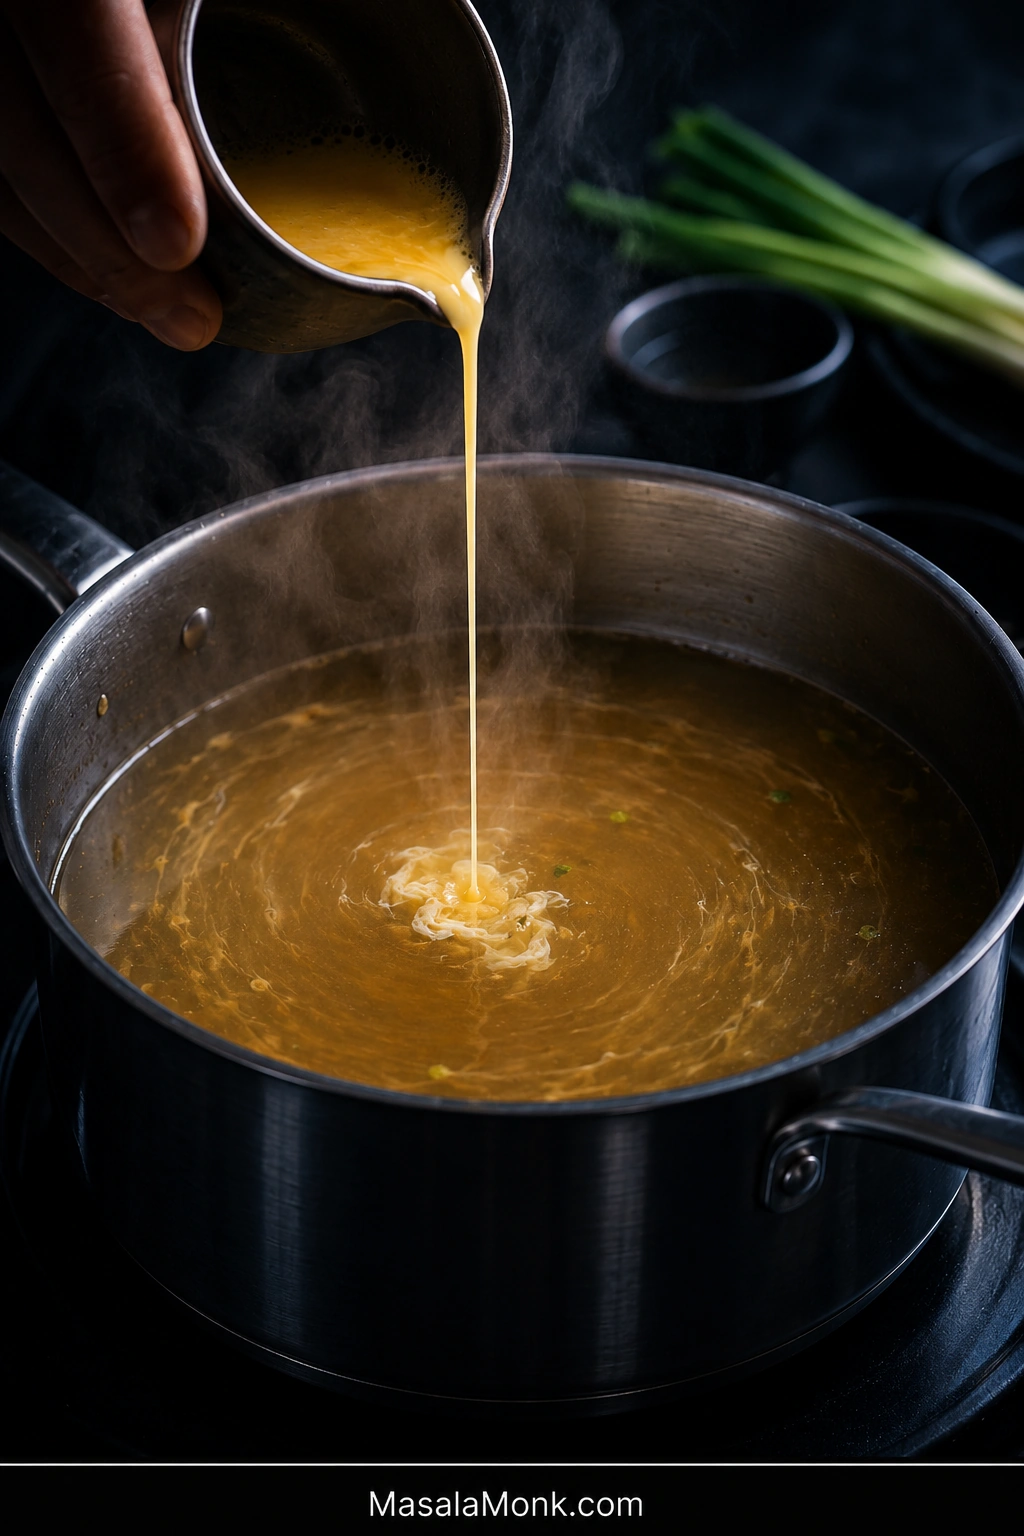
Give the broth one broad circular stir to create a slow current, then put the spoon down.
Pour the egg in a thin, steady stream around the pot, allowing the moving broth to carry it instead of repeatedly pouring into one spot.
Because the spoon is out of the pot, the slow current can stretch a narrow pour into ribbons instead of breaking the setting egg into flecks.
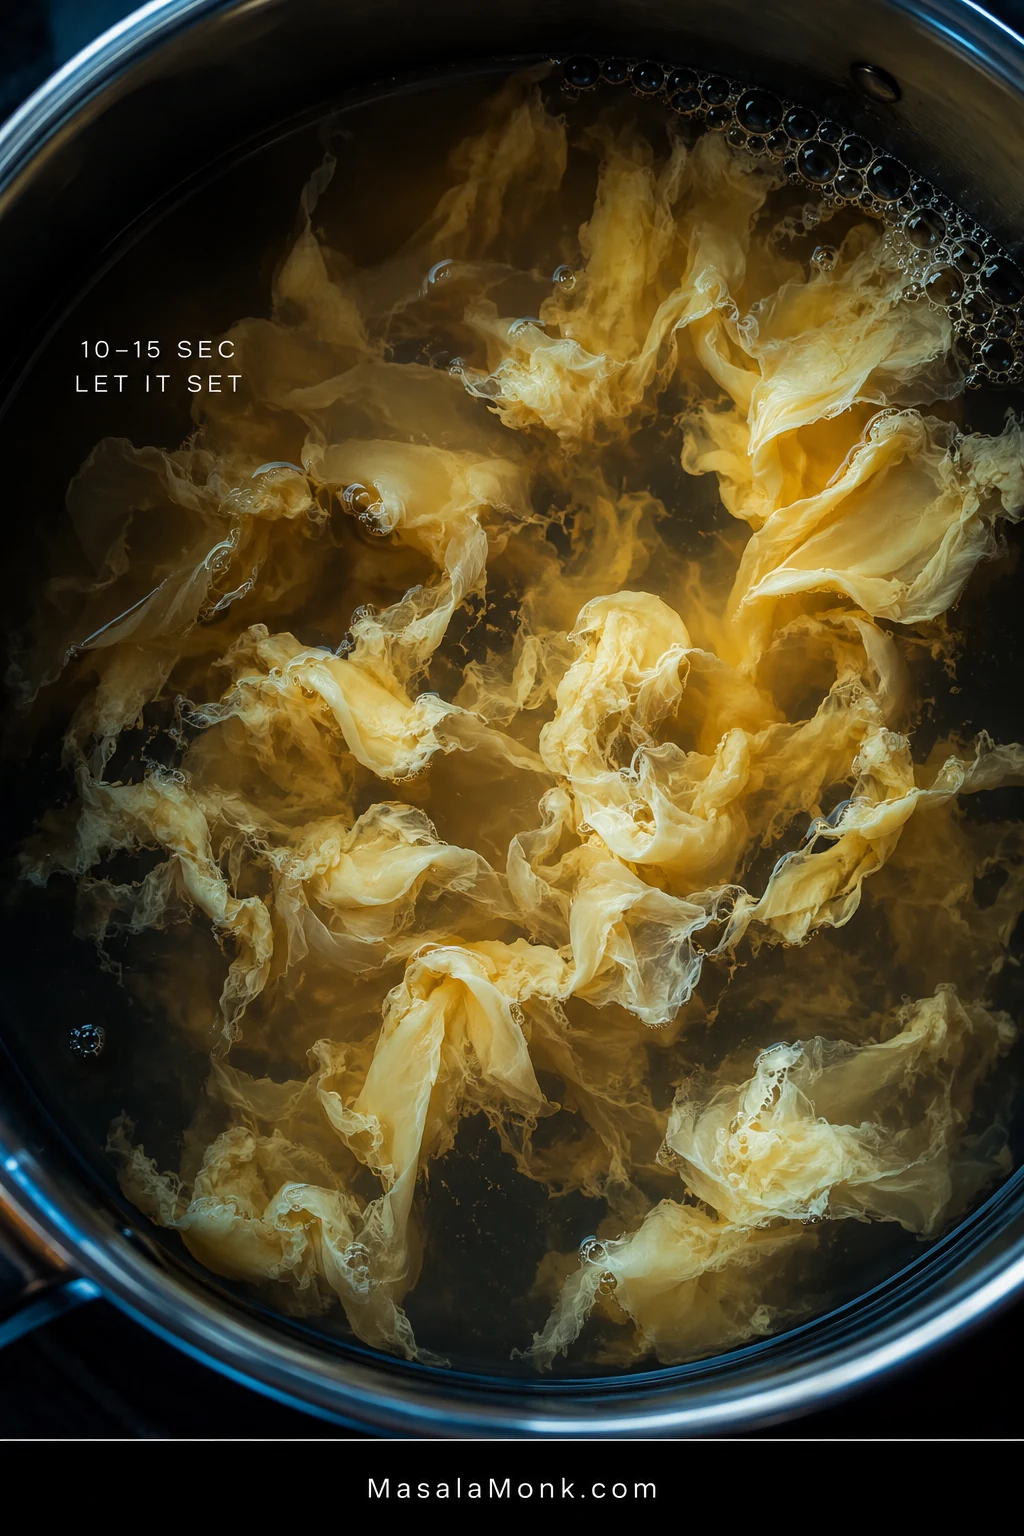
Leave the soup untouched for about 10–15 seconds, or until the egg is opaque and distinct ribbons are visible. Use one or two easy strokes to separate pieces that have joined together.
Watch the color change: translucent streaks become opaque folds. That shift—not the stopwatch alone—tells you the egg is ready for gentle separation.
Once those ribbons are visible, the tricky part is over.
A spouted cup gives you the most control. With a wider cup, hold a fork across the lip and let the beaten egg pass through the tines in a narrower stream.
5. Finish and Serve
Turn off the heat. Add the scallion greens and, if you like it, ½ teaspoon toasted sesame oil.
Taste once more. Add salt only when needed. Increase the sesame oil by drops so its toasted fragrance stays in the background.
Serve while the soup is steaming and the ribbons are soft.
Before You Sit Down: Check the Soup
The broth pours easily from the ladle.
The egg floats through it as ribbons or soft flowers instead of one heavy mass.
White pepper gives the sip a quiet warmth.
The ribbons do not need to look identical. When the soup tastes good and looks inviting, stop adjusting it and eat it hot.
Lifted from the broth, tender ribbons should drape and fold rather than stand stiff like curds. That softness is more useful to judge than perfect shape.
Egg Drop Soup Ingredients: What Matters Most
Start with a clean-tasting chicken broth rather than one dominated by heavy roasting, tomatoes, or strong herbs. A mild broth is fine because you can correct its salt and savory strength before making the ribbons.
Cornstarch gives many restaurant-style versions their lightly glossy body and helps keep the egg suspended. The amount determines how broth-like or thick the finished soup feels.
White pepper supplies the familiar earthy warmth. Chicken powder or bouillon strengthens weak chicken flavor, while sesame oil is an optional finishing aroma and is best added cautiously.
Turmeric only adjusts color here. It is not needed for the flavor or for successful egg ribbons.
Choose Your Texture
One restaurant may serve egg drop soup almost broth-like while another makes it thick enough to cling to the spoon. Ribbon size varies too.
You want…
Try this
A lighter broth
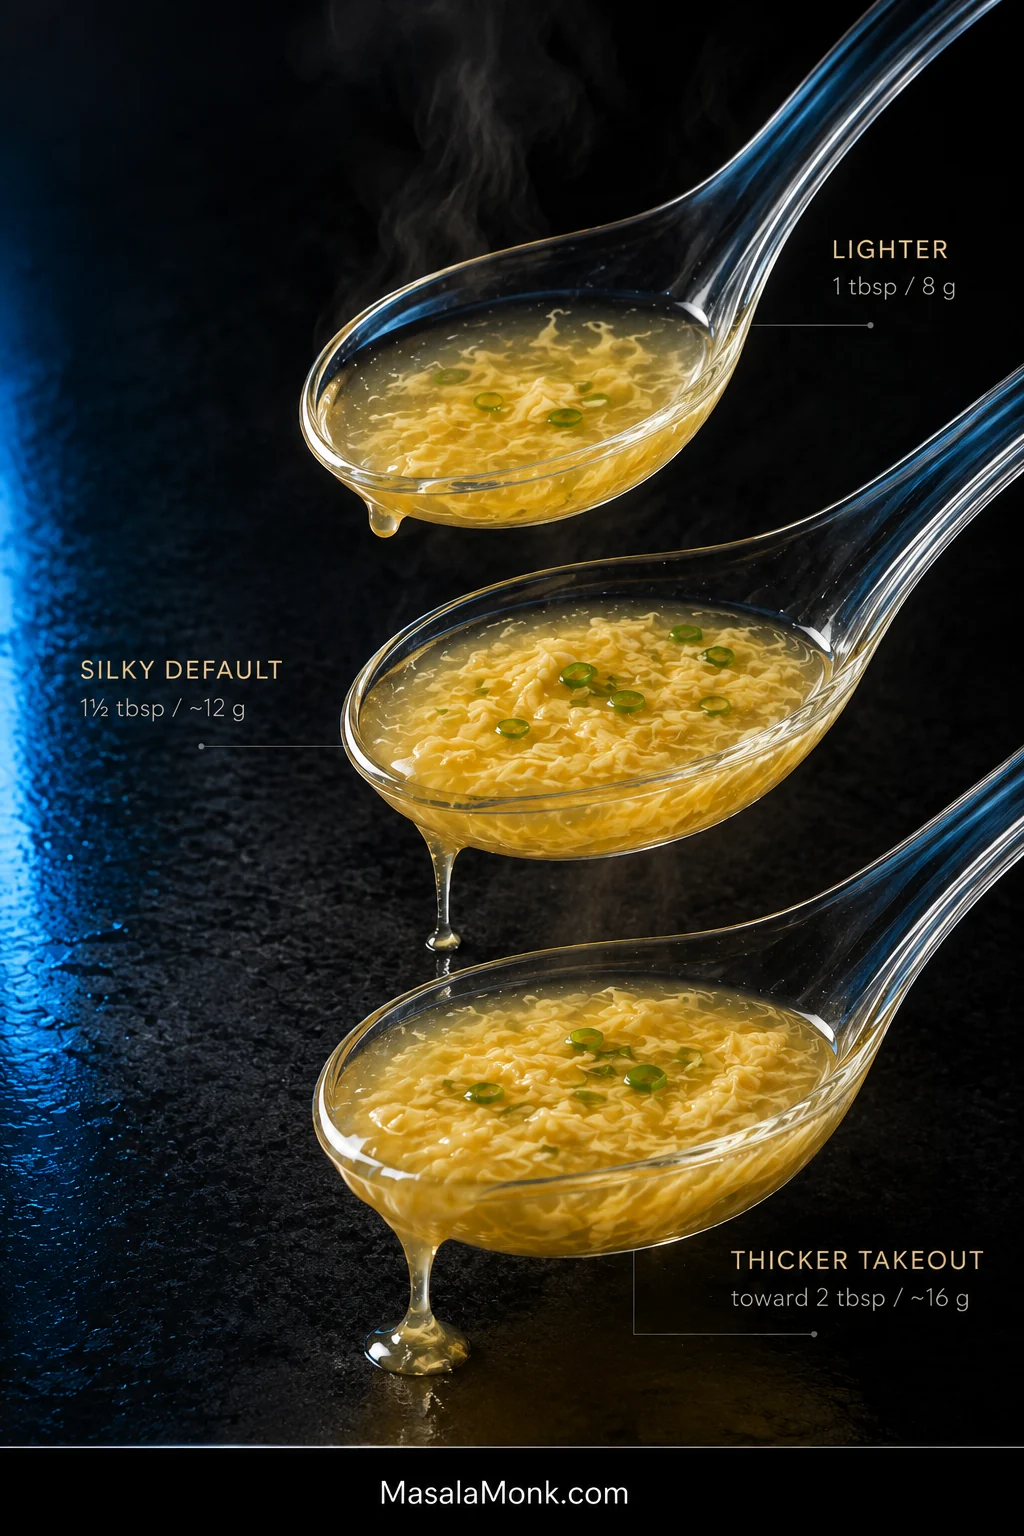
Start with about 1 tbsp / 8 g cornstarch
The silky default
Use 1½ tbsp / about 12 g
A thicker takeout texture
Increase gradually toward 2 tbsp / about 16 g
More egg
Use 3 large eggs
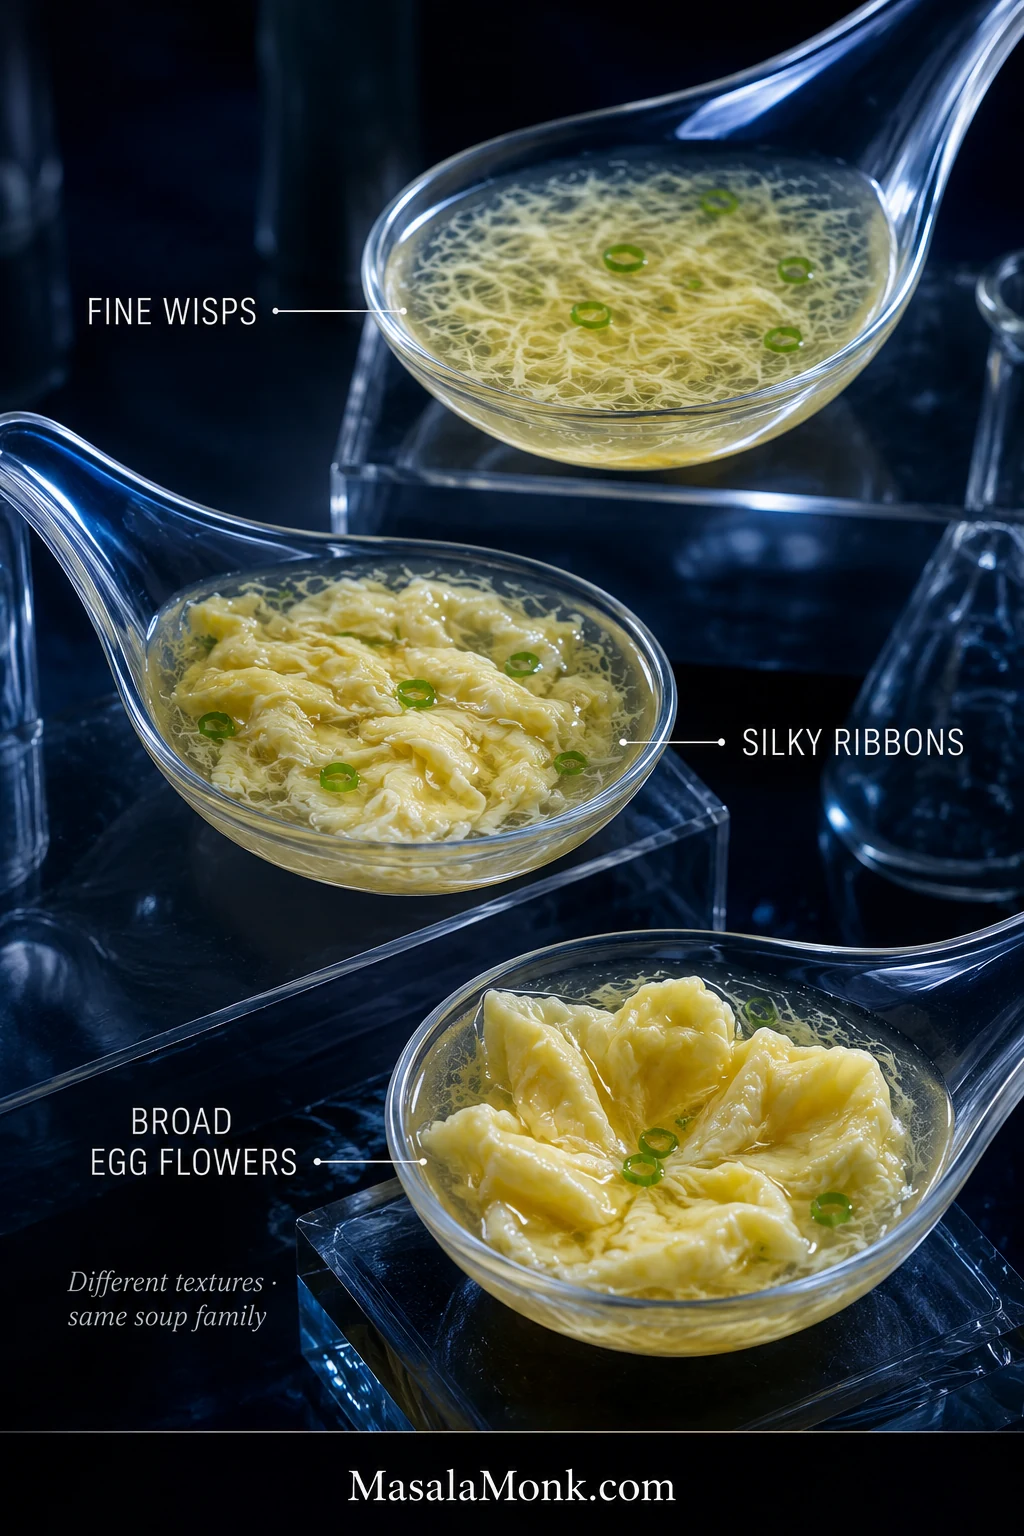
Fine wisps
Use a finer stream with more movement in the broth
Broad soft flowers
Give the egg more stillness once it enters
These are starting points, not pass-or-fail rules. The difference between wisps, ribbons, and broad flowers is mostly texture and appearance.
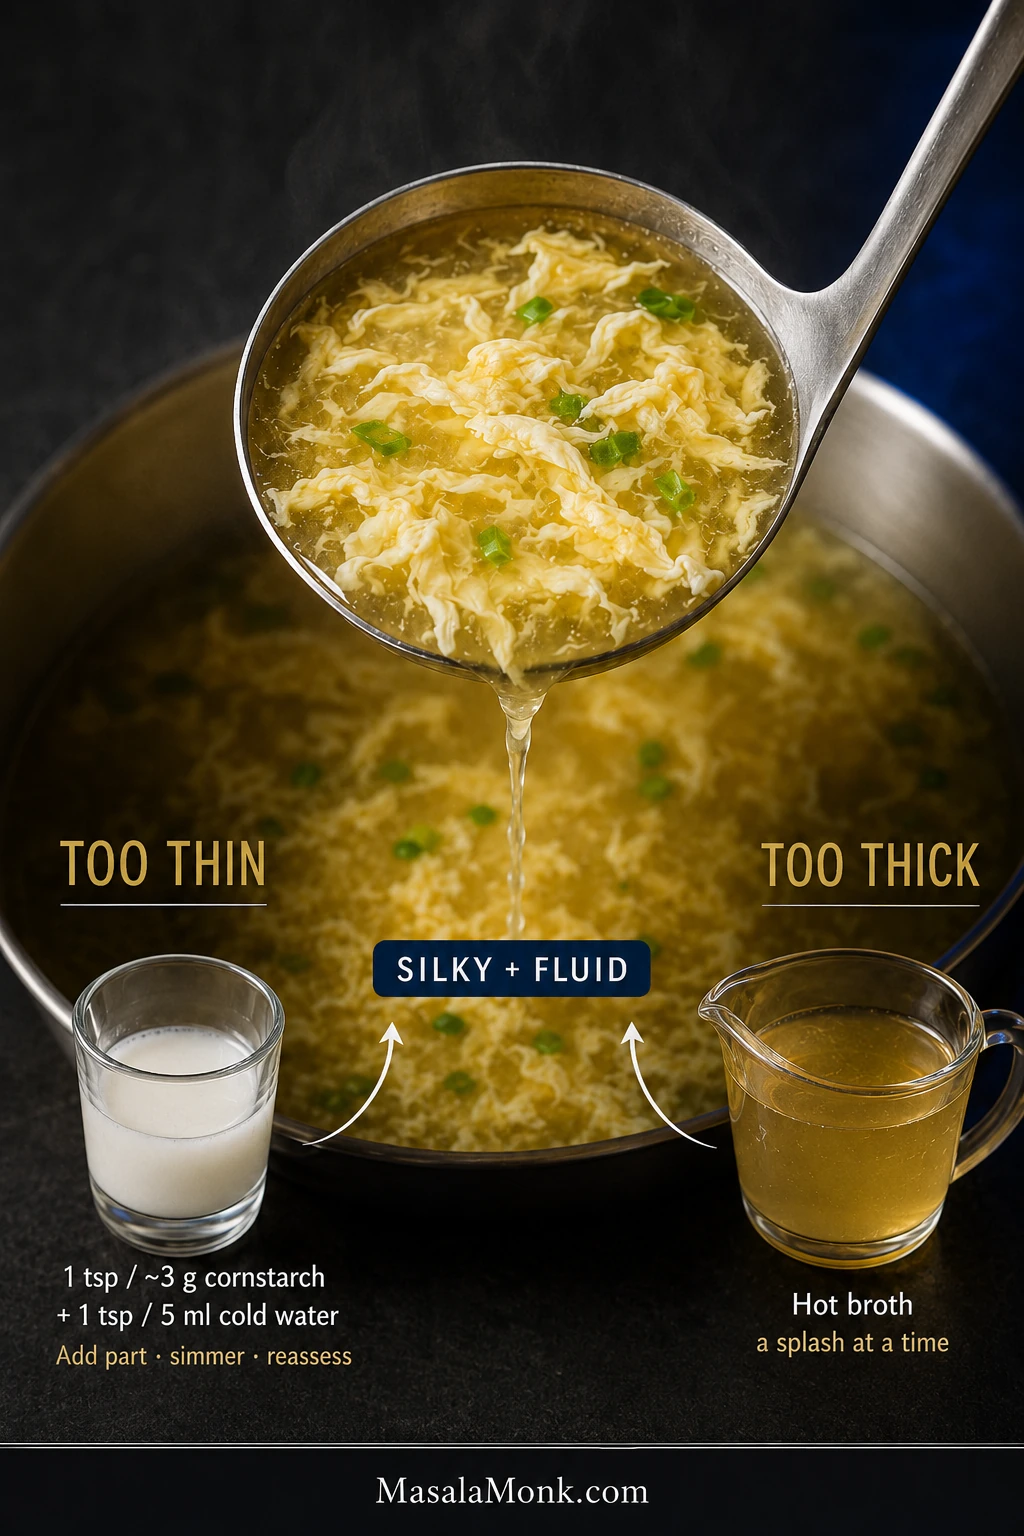
Read the drips, not the color. Lighter broth runs cleanly off the spoon; a thicker takeout-style egg drop soup coats and releases more slowly.
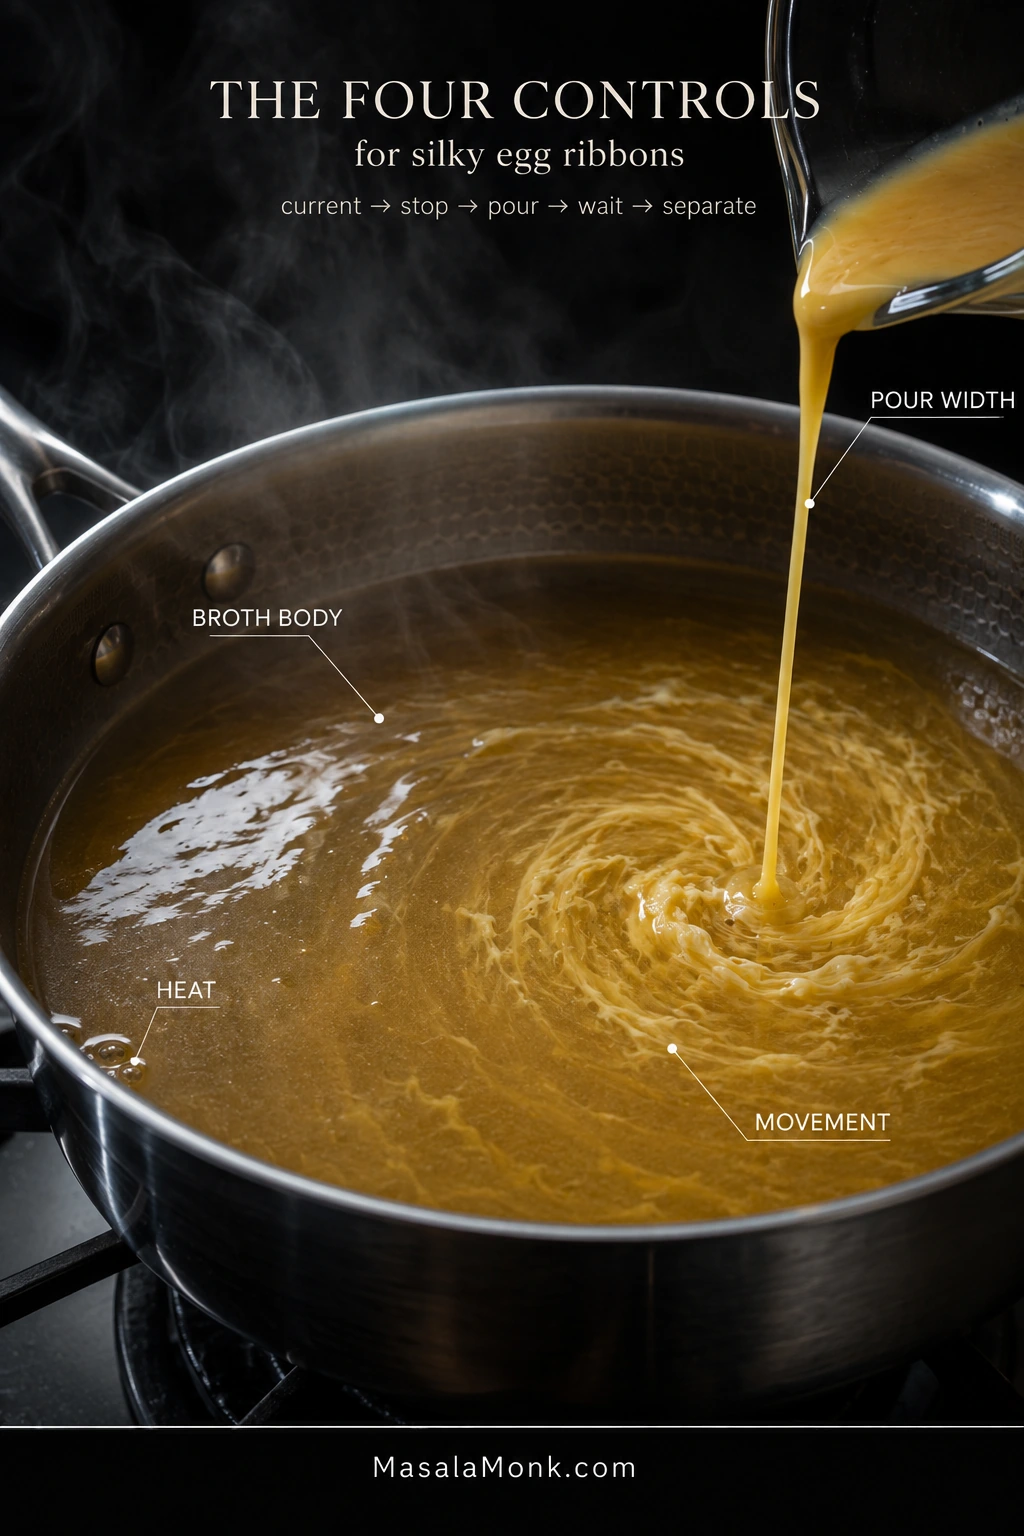
The shape of the egg comes down to four controls: broth body, heat, pour width, and movement.
A little starch slows the egg enough to help it remain suspended instead of immediately sinking through thin broth. Too much starch goes the other way and makes the soup heavy. Heat matters too: vigorous boiling can break delicate egg apart, while broth that has cooled too far may not set the stream cleanly with this simmer-based method.
Pour width changes the size of the pieces that enter the soup. A narrow stream produces finer ribbons; a heavier stream naturally forms broader ones. Movement determines how much those setting pieces are broken apart.
After you create a slow current, the broth can do most of the work. Continued stirring during the pour breaks the setting egg into smaller pieces before the ribbons have time to hold together.
Create the current → stop stirring → pour → wait → gently separate.
Use this as a diagnosis map rather than a formula. Large pieces point you toward pour width and stillness; tiny flecks point you toward excess movement or heat.
That same pause-before-stirring principle is useful in Hot and Sour Soup, where the egg shares the broth with tofu, mushrooms, and stronger seasonings.
Why Homemade Egg Drop Soup Doesn’t Taste Like the Restaurant
The frustrating batch is the one that looks right but tastes nothing like the soup you had in mind.
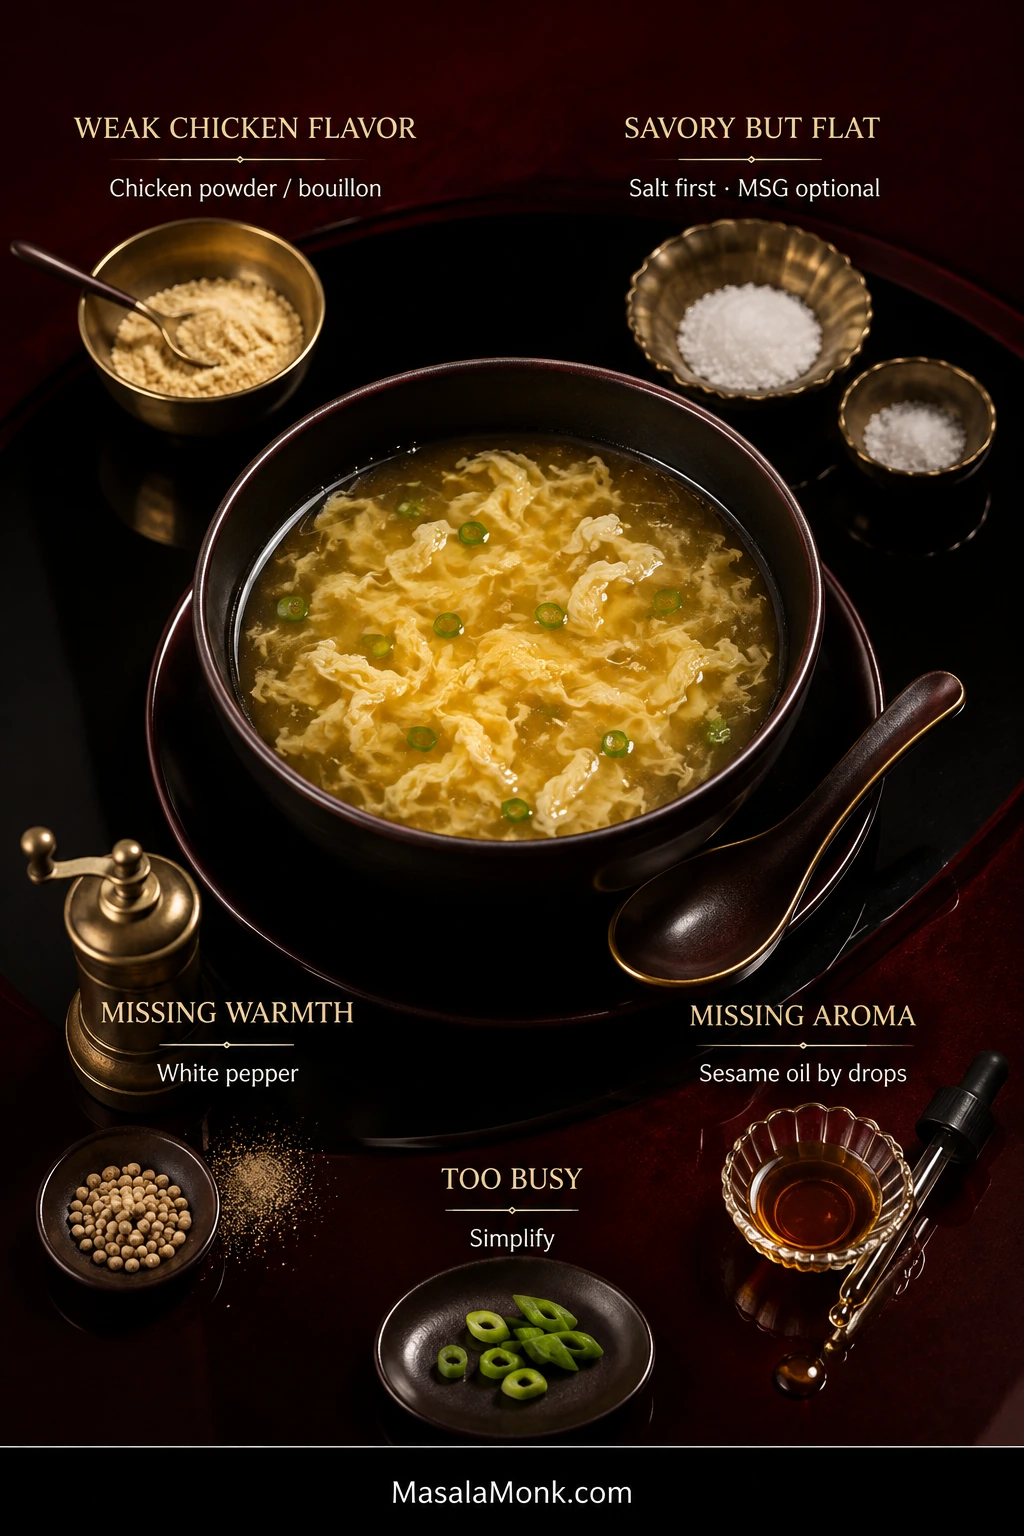
The difference is usually broth strength, salt and savory depth, white pepper, or how heavily sesame and soy are used. Start with what you can actually taste instead of adding every seasoning at once.
Weak chicken flavor: add some chicken powder or bouillon. Mild carton broth benefits more from this than a rich homemade stock.
Savory but flat: check the salt first. When the salt tastes right, add a very small pinch of MSG, stir, taste, and add more only if the broth needs it. Many chicken powders already contain MSG, so read the label before adding more. The FDA’s overview of MSG has more background on the ingredient and its use in food.
Missing warmth: add another touch of white pepper. Its heat tends to arrive toward the back of the sip without dominating the first taste.
Missing aroma: try a few drops of toasted sesame oil and stop when the fragrance becomes noticeable.
Tastes too busy: simplify. Skip the soy sauce, reduce or omit sesame oil, and let chicken broth, white pepper, ginger, and scallion carry the soup. Some takeout versions are much more restrained than heavily seasoned homemade recipes.
Restaurant-style flavor often comes from restraint. The best correction is usually the smallest adjustment that makes the broth taste complete, then stopping there.
Do You Need Soy Sauce?
No. Soy sauce is perfectly usable, but it changes both the color and flavor of the broth.
For a pale, clean-tasting soup, build the chicken flavor first. Add soy when you specifically want its savory fermented character.
Why Is Restaurant Egg Drop Soup Yellow?
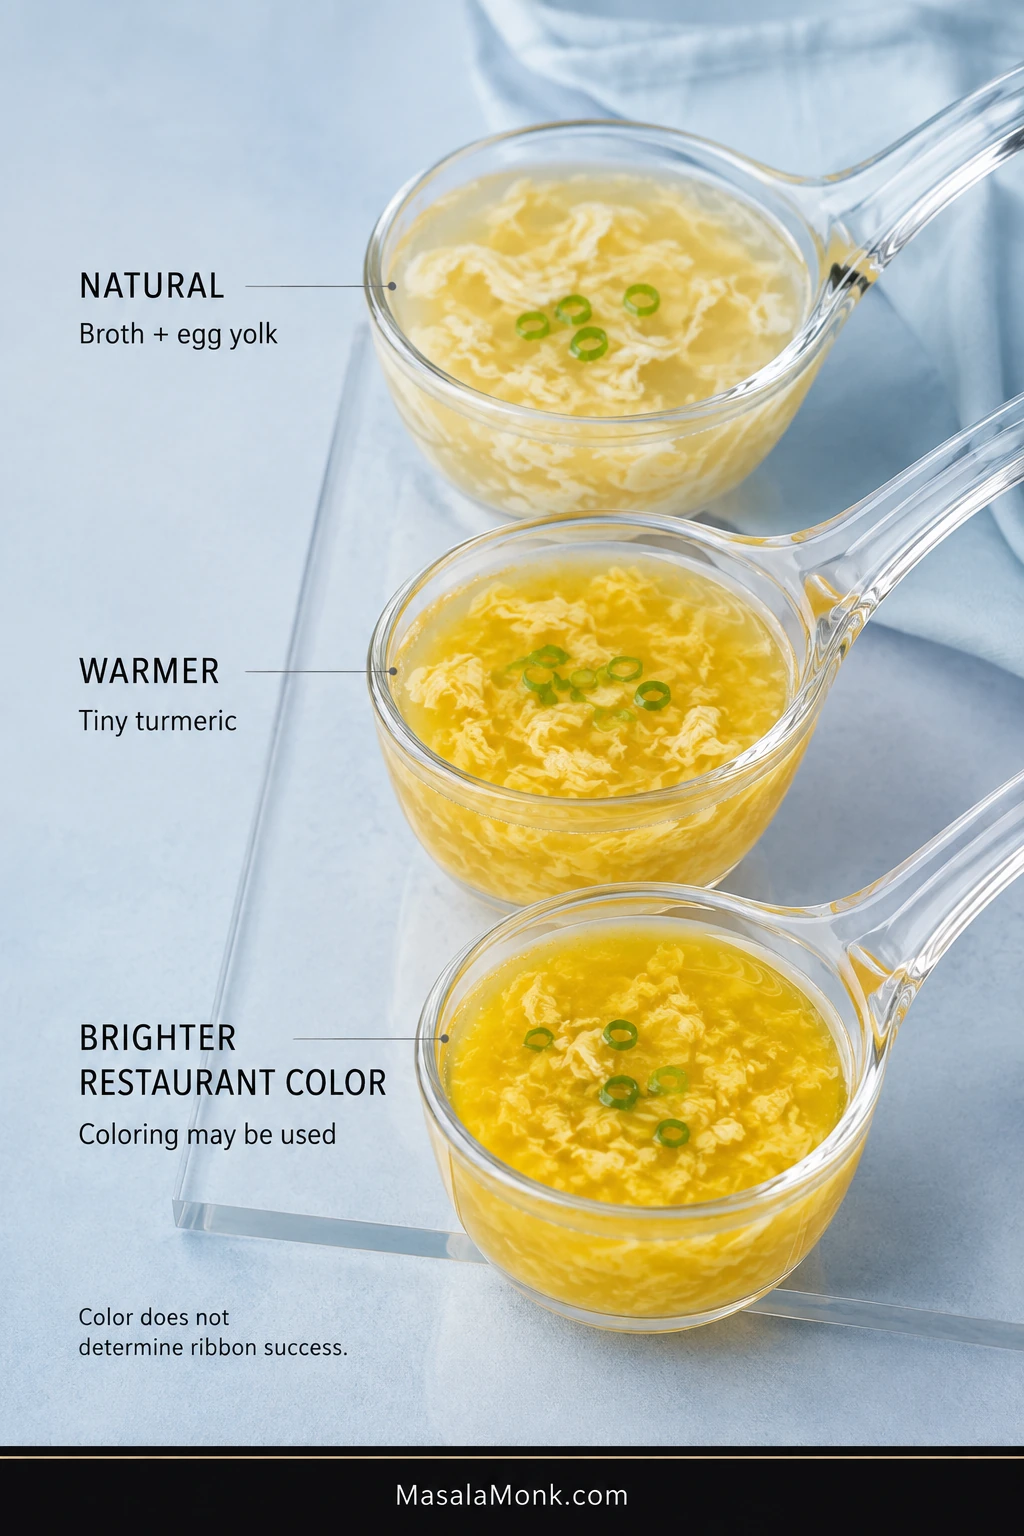
Egg drop soup can be naturally pale yellow; brighter restaurant-yellow versions may use turmeric or food coloring. Color has nothing to do with whether the ribbons formed correctly.
Chicken broth and egg yolks on their own can range from cream-gold to soft yellow.
For a warmer shade, the base recipe needs only ⅛ teaspoon turmeric. More can begin changing the flavor instead of simply warming the color.
Some Chinese-American restaurants use food coloring for a brighter takeout look. It is entirely cosmetic.
Pale soup is not failed soup.
Color and technique are separate variables. A pale bowl can have perfect ribbons, while brighter restaurant-yellow soup may simply use turmeric or coloring.
Troubleshooting
Broth problems are easier to rescue than cooked egg. You can thicken a watery soup, loosen an over-thickened one, and strengthen a bland broth. After the egg has cooked into a particular shape, the useful question is what caused it and what can be done with the bowl you already have.
My Egg Disappeared and the Broth Turned Cloudy
The egg dispersed before distinct ribbons had time to set. Continuous stirring is the usual culprit; broth that has cooled too far can also make clean setting harder with this method.
Give the poured egg more stillness while it sets. The broth may stay cloudy, but that does not stop it from tasting good.
Glass makes the difference easy to see: distinct ribbons hold their shape, while dispersed egg turns the broth hazier. The cloudy version is different—not wasted.
I Got Scrambled-Looking Clumps
Large dense pieces usually mean too much egg reached one area at once, or thick ropes of white were still present in the beaten eggs.
A narrower pour and fully blended eggs prevent most of this. Separate the clumps lightly in the soup you already have and carry on. The texture is different, but dinner is still dinner.
I Got Tiny Flecks
The egg was broken apart by too much movement while it was trying to set.
Use less agitation after the pour. The flecks will not turn back into broad ribbons, but the soup itself is perfectly usable.
I Got One Big Sheet of Egg
The egg set with too little separation and joined into one connected piece.
Break the sheet gently into ribbons. When newly poured egg turns opaque, one or two careful strokes are enough to separate it before the whole mass sets together.
My Soup Is Too Thin
Give the original slurry about a minute at a simmer before assuming you need more starch.
Still too light? Mix 1 teaspoon / about 3 g cornstarch + 1 teaspoon / 5 ml cold water. Add part of it, simmer briefly, and reassess before using the rest.
My Soup Is Too Thick
Add hot low-sodium chicken broth a splash at a time, moving the spoon carefully around the ribbons.
If it takes a substantial amount of broth to loosen the soup, use less cornstarch when you make it again.
Both rescues are deliberately incremental. Cornstarch keeps developing as it simmers, while extra broth also dilutes seasoning—so correct a little, then reassess.
Other Quick Fixes
Ribbons sank: thin broth, heavy pieces of egg, too much egg, or broth that cooled too far can contribute. Keep the base egg ratio and make sure the broth is back at a quiet simmer before pouring.
Rubbery egg: prolonged boiling after the ribbons have set is usually responsible. When the egg is opaque and set, finish the soup and get it off the heat.
Cornstarch lumps: if you spot them before adding the egg, strain the broth and return it to the saucepan. After ribbons have formed, remove obvious lumps with a spoon instead of sending the finished soup through a strainer.
Too much sesame oil: dilute the soup with more broth. Sesame is much easier to add than remove.
Broth looks brown: dark stock or soy sauce is usually responsible. The color alone does not mean anything went wrong.
Soup tastes of turmeric: dilute it when practical and use less in the next pot.
Identify the shape before choosing the fix. Clumps, flecks, sheets, sinking, and rubbery ribbons point back to different moments in the egg-drop process.
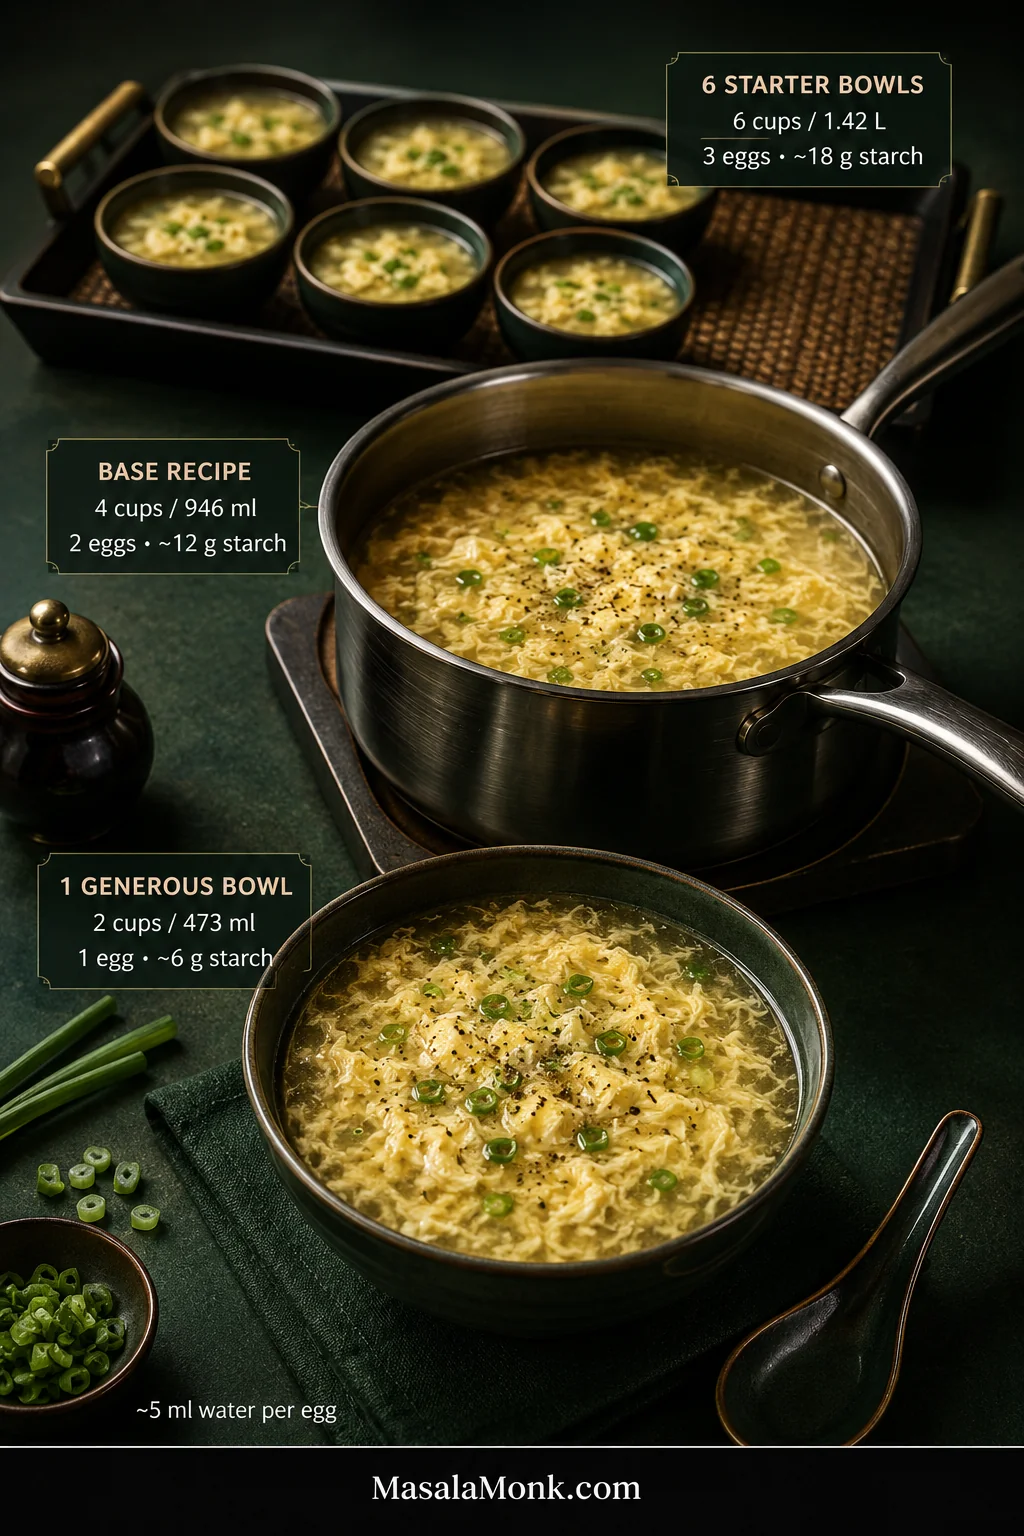
How to Scale Egg Drop Soup for One, Two or a Crowd
Egg drop soup is especially handy when you are cooking only for yourself. One egg and a couple of cups of broth are enough for a hot lunch or easy dinner without leaving a large pot behind.
Need
Starting broth
Egg
Cornstarch
1 generous bowl
2 cups / 473 ml
1 large / ~50 g
2¼ tsp / ~6 g
Base recipe
4 cups / 946 ml
2 large / ~100 g
1½ tbsp / ~12 g
6 starter bowls
6 cups / 1.42 L
3 large / ~150 g
2¼ tbsp / ~18 g
Use about 1 teaspoon / 5 ml water per large egg to loosen the mixture.
Scale broth, eggs, and cornstarch by measurement. Salt, bouillon, and chicken powder are better adjusted by taste because brands vary so much.
Scaling changes more than the arithmetic. A larger pot can take longer to recover a gentle simmer, so re-check the heat before the egg pour.
Variations and Substitutions
Can I Make Egg Drop Soup Without Cornstarch?
Yes. Leave the cornstarch out and the egg will continue to form wisps or ribbons. The broth will simply be lighter and more delicate, without the glossy body common in many Chinese-American restaurant versions.
Other Easy Variations
Potato starch: make a cold slurry and begin with less than the full cornstarch quantity. Add gradually until the broth reaches the same spoon-path cue used in the base recipe; different starches do not always thicken one-for-one.
Vegetable broth: choose a clean, savory one. Dark roasted or tomato-heavy broth changes the character of the soup considerably.
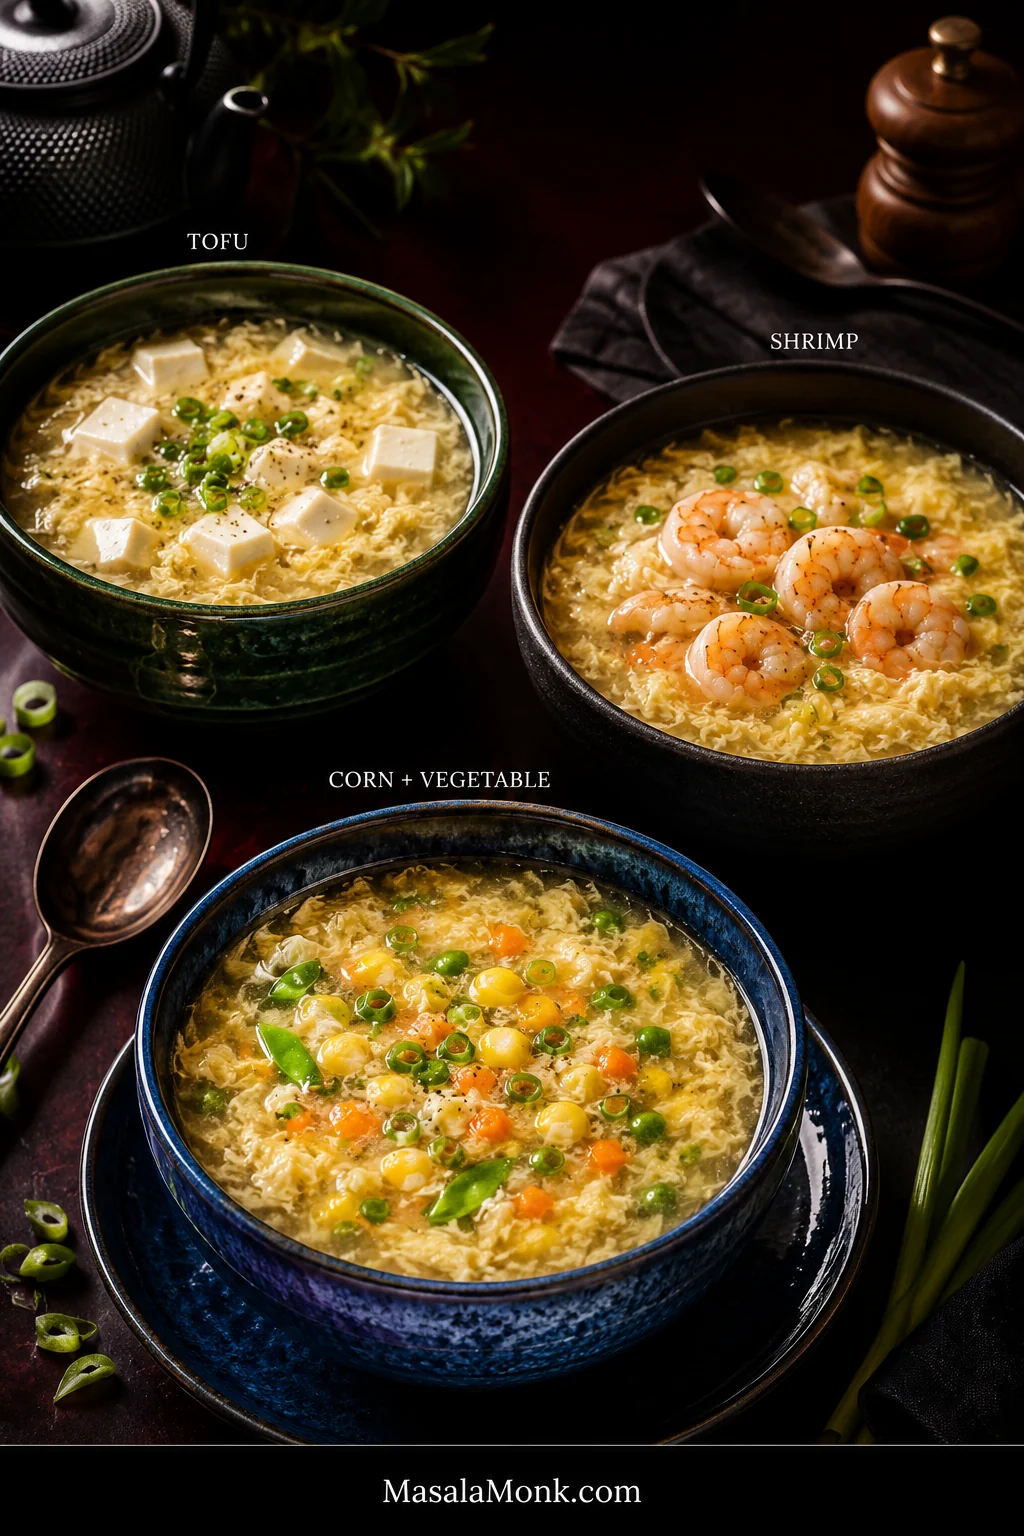
Tofu: warm small cubes of soft or silken tofu in the seasoned broth before adding the slurry and egg. For a tofu-centered meal, serve the soup alongside Mapo Tofu and rice.
Shrimp: poach peeled, deveined shrimp until barely cooked, lift them out, and continue with the slurry and egg. Return the shrimp at the end just long enough to heat through.
Vegetables: peas, finely diced carrot, mushrooms, spinach, and other quick-cooking vegetables fit easily. Add firm vegetables earlier and delicate greens near the end.
Corn: a handful adds sweetness and texture. With enough corn to become a main flavor, the soup takes on a noticeably sweeter, fuller character.
Rice: spoon cooked rice into individual bowls so leftovers do not absorb most of the broth. Starting from dry rice? Our guide to cooking rice covers the basics.
Whatever you add, leave enough open broth for the egg ribbons to move and stay visible. The variation should support the soup rather than crowd it.
Is Egg Flower Soup the Same as Egg Drop Soup?
Yes. Egg drop soup and egg flower soup generally refer to the same broad family of soups. “Egg flower” describes the soft, flower-like shapes created when beaten egg sets in hot broth.
The exact soup changes from kitchen to kitchen. Some versions are clear and delicate with fine wisps; others have broad flowers and noticeably more body.
This spectrum also explains why two restaurants can serve visibly different soups under the same name: ribbon geometry varies even when the underlying technique belongs to the same family.
Chinese home-style soups may include tomato, seaweed, tofu, corn, or vegetables. Many Chinese-American restaurant versions lean toward concentrated chicken flavor, some starch thickening, white pepper, and egg suspended through a pale or yellow broth.
Egg plays a completely different role in Egg Foo Young, another Chinese-American restaurant favorite where it becomes the body of the dish instead of delicate ribbons in broth.
Your favorite restaurant may serve its soup thinner, thicker, brighter, or more egg-heavy. The controls above make those differences easy to adjust.
What to Serve With Egg Drop Soup
As a starter, egg drop soup works especially well with something that brings more texture or substance to the table.
A small bowl before Chicken Fried Rice makes an easy takeout-style dinner: hot soup first, followed by separate grains, vegetables, egg, and chicken.
Crispy spring rolls add crunch; steamed dumplings, plain rice, Chinese-style noodles, stir-fried vegetables, and simple chicken or beef dishes all fit comfortably beside it.
After all the technique, texture contrast is what makes the meal satisfying: soft soup beside fried rice, crisp spring rolls, dumplings, or another substantial side.
Two generous cups can also make a light lunch on their own, especially on a day when cooking anything elaborate sounds unnecessary.
Make Ahead, Store & Reheat
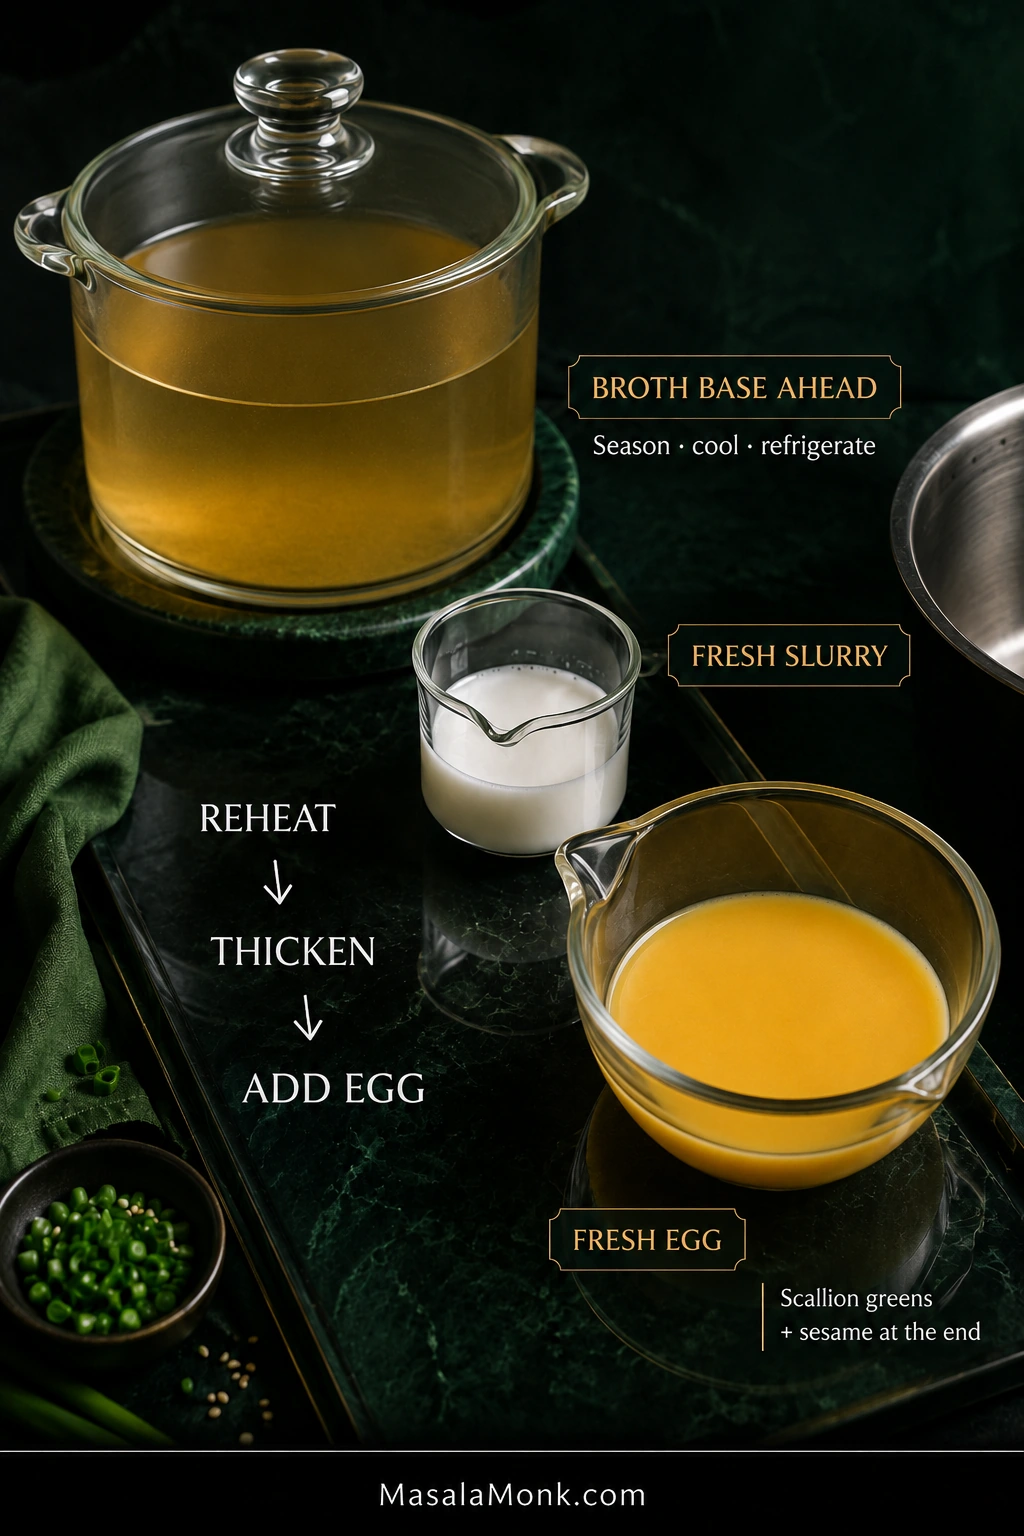
Egg drop soup is nicest when the ribbons have just been made, but the seasoned broth is easy to prepare ahead. That gives you most of the convenience while saving the egg for the last few minutes.
Best Make-Ahead Method
Prepare the seasoned broth, remove the ginger slices, cool it, and refrigerate without cornstarch or egg.
Bring the broth back to a simmer when you want the soup.
Add a freshly mixed slurry.
Add freshly beaten egg when the broth has the body you want.
Finish with scallion greens and optional sesame oil.
A few minutes at the stove later, you have fresh ribbons without remaking the broth from the beginning.
Broth waits better than ribbons do. For make-ahead egg drop soup, hold the seasoned base, then thicken and pour the egg close to serving.
Storing Leftovers
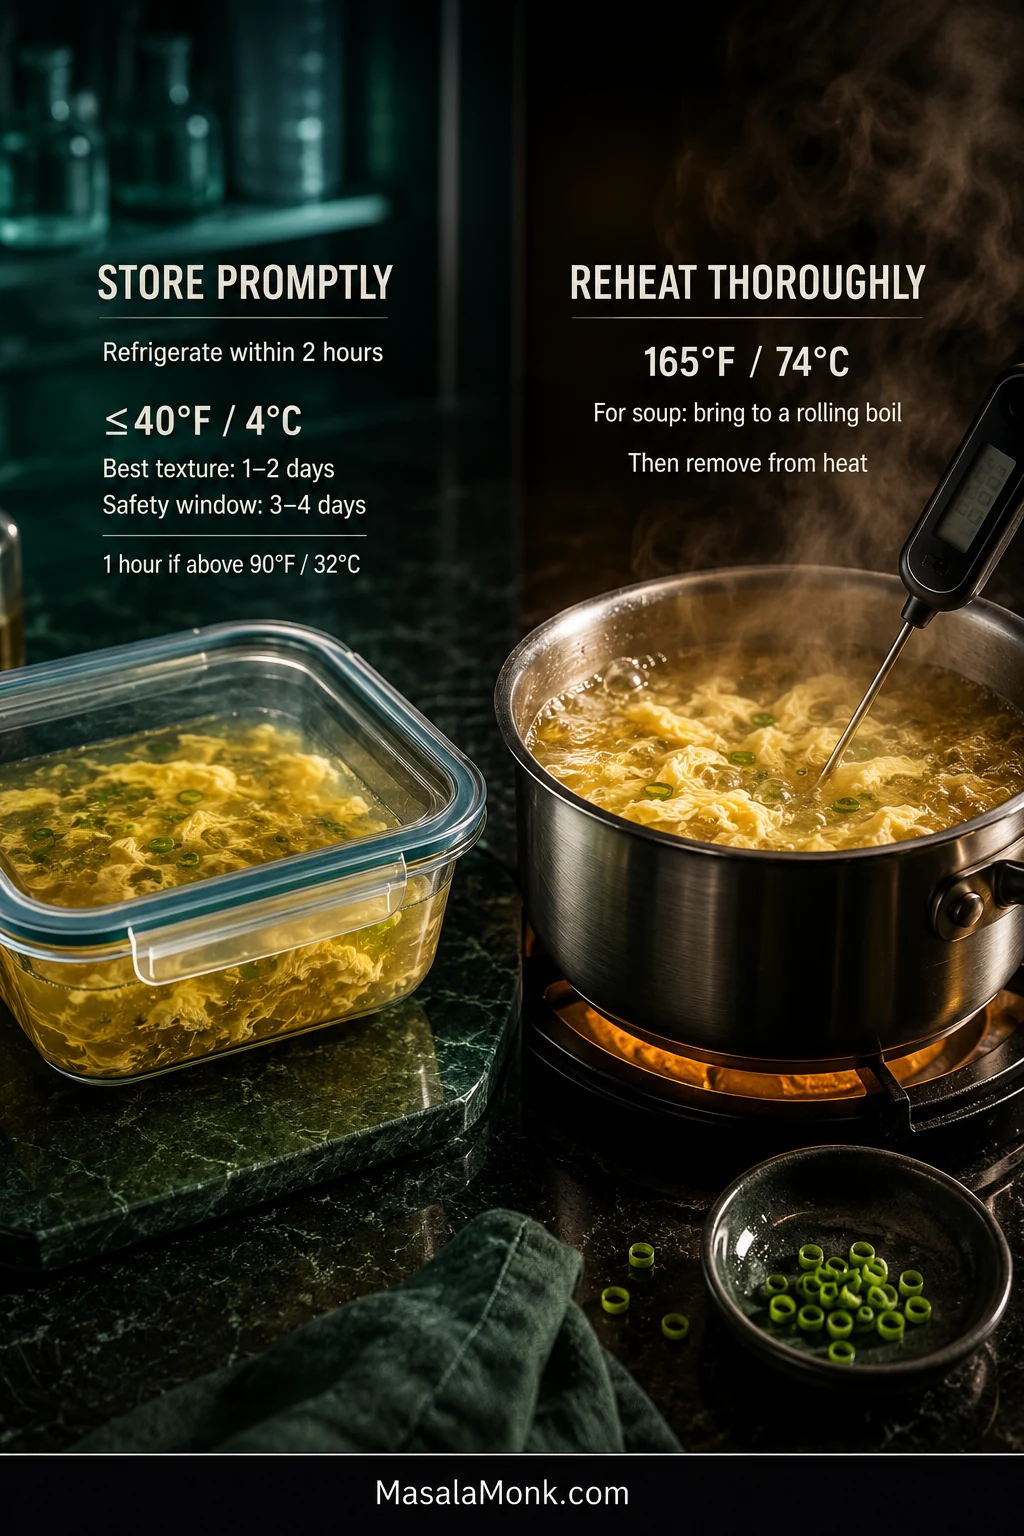
Refrigerate leftovers promptly in a covered, shallow container. For the nicest ribbon and broth texture, aim to eat the soup within 1–2 days. Properly refrigerated cooked leftovers generally have a broader 3–4 day food-safety window at 40°F / 4°C or below.
Get leftovers into the refrigerator within 2 hours of cooking, or within 1 hour when the surrounding temperature is above 90°F / 32°C. The USDA guide to leftovers and reheating has the broader food-safety guidance.
Reheating
Bring leftover soup to a rolling boil when reheating and make sure it reaches 165°F / 74°C. After the soup is thoroughly hot, take it off the heat so the cooked ribbons spend as little extra time boiling as possible.
In the microwave, heat in shorter intervals and stir between them so the soup warms evenly.
If chilled soup has lost some of its original body, mix 1 teaspoon / about 3 g cornstarch + 1 teaspoon / 5 ml cold water. Add only as much of that slurry as the reheated soup needs.
The shallow container is part of the method, not just storage. It helps leftovers cool more quickly and evenly; reheating then brings the soup back to serving temperature.
Can You Freeze It?
The seasoned broth base freezes better than the completed soup. Thaw and reheat the broth, then add fresh slurry and egg when you are ready to eat.
The best part of learning the egg pour is not making every ribbon look identical. It is knowing that a saucepan of broth and a couple of eggs can become that familiar steaming soup whenever you want it.
Some nights it is a starter before dinner. Some nights it is the whole point: something warm, savory, and comforting on the table in about 15 minutes.
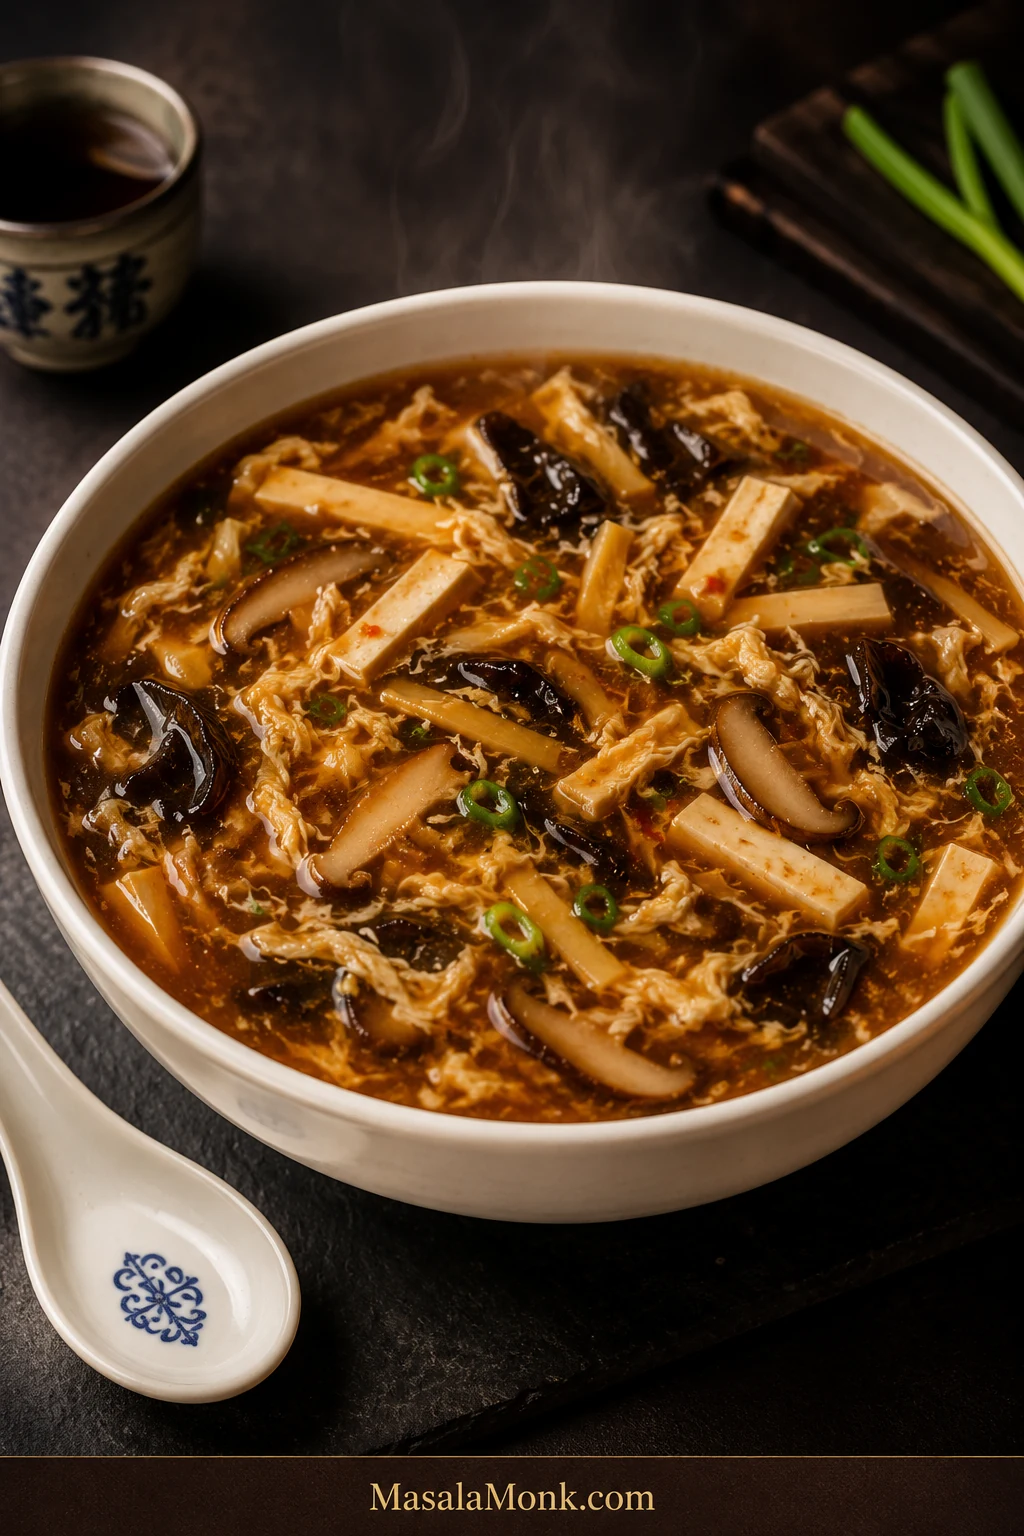
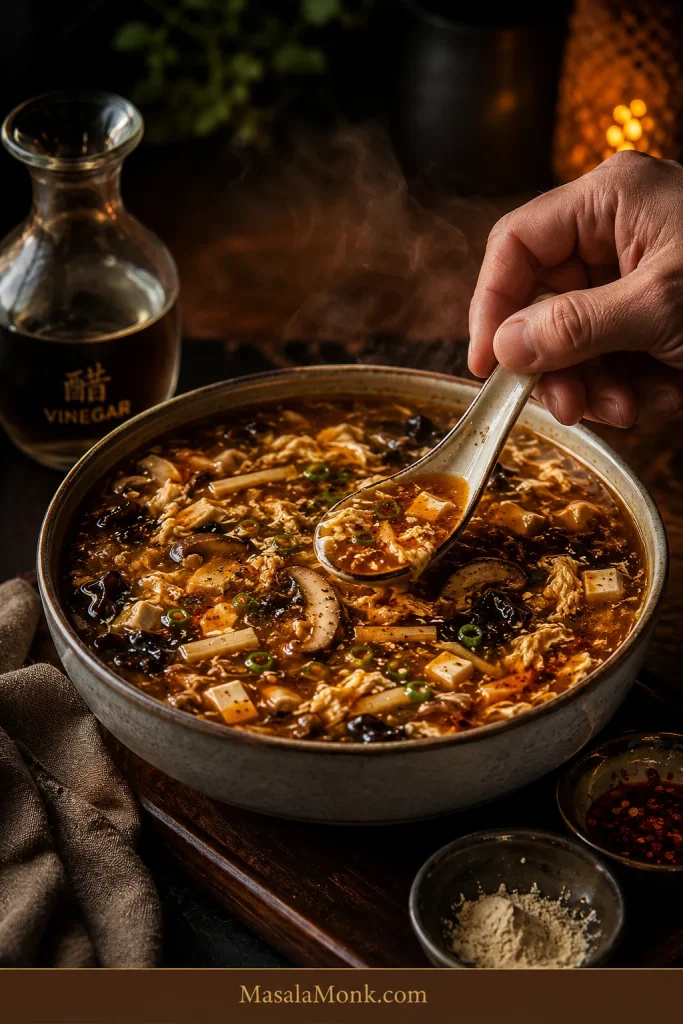
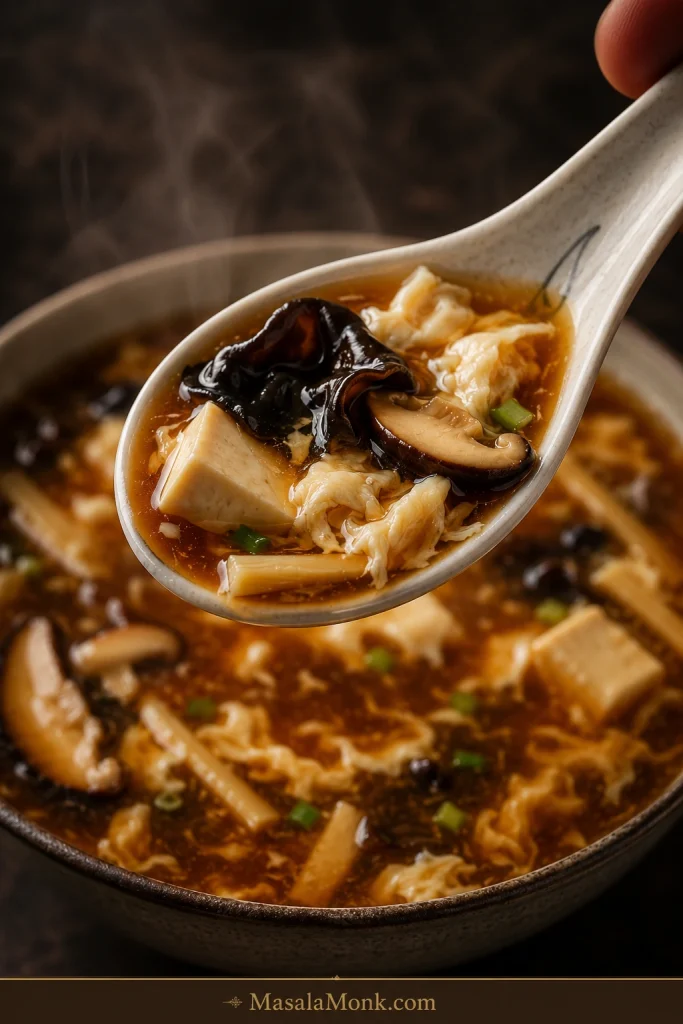
Hot and sour soup is one of those bowls you notice before the first spoonful. Vinegar rises with the steam, white pepper catches gently at the back of your throat, and underneath it all is savory broth threaded with mushrooms, tender tofu and silky ribbons of egg.
It is also surprisingly easy to get almost right. Plenty of chilli makes the soup spicy without necessarily giving it that familiar white-pepper warmth. Too much starch turns the broth gluey. Let the vinegar cook too long and some of its brightness fades. Pour the egg too quickly and it disappears into cloudy flecks instead of ribbons.
The simplest way to make restaurant-style hot and sour soup is to build it in layers: make the broth savory first, thicken only until it looks right, set the egg, then adjust sourness and peppery heat separately at the end.
Maybe the bowl in your head is thin and sharply peppery. Maybe it is darker and glossy, with enough vinegar to catch in your nose over the first spoonful. This method gives you a reliable place to start—and enough room to take the pot toward whichever version you remember.
Quick Answer: What Makes Hot and Sour Soup Hot and Sour?
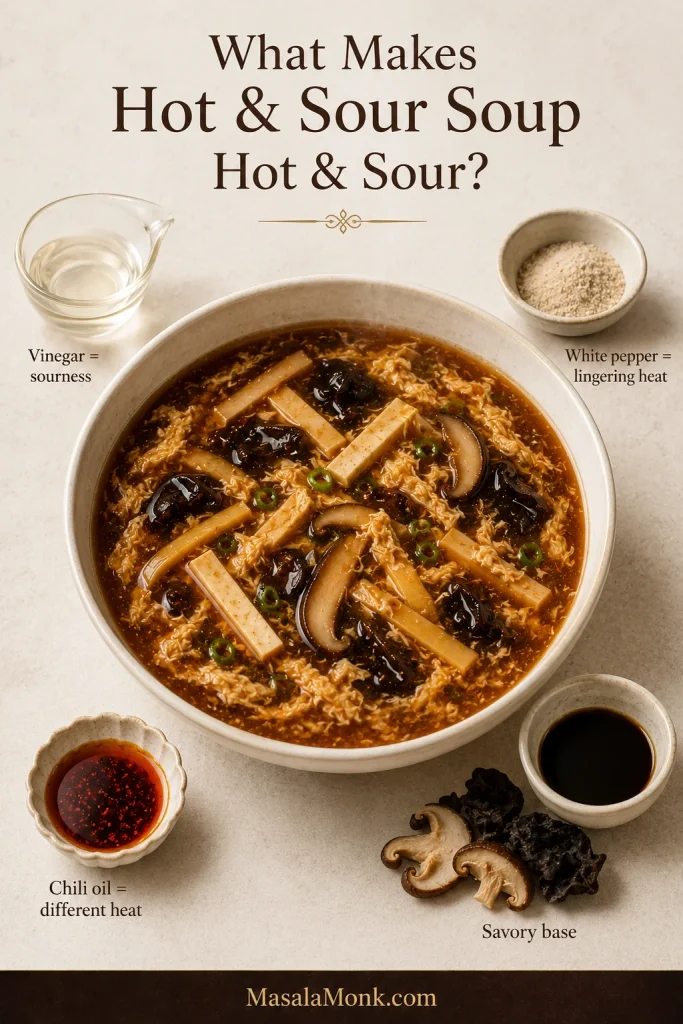
White pepper gives hot and sour soup its characteristic peppery heat. Vinegar supplies the sourness. Chilli oil gives a more immediate chilli burn. White pepper leaves the cleaner warmth that lingers after each sip.
Broth, mushrooms and soy sauce provide the savory foundation. Cornstarch controls the body of the soup, while egg provides the silky strands.
Check one thing at a time. Is the broth savory enough? Then judge the heat, sourness and thickness. Finally, look for some contrast—soft tofu or egg against something chewy or crisp. Fix only what is missing.
Sourness and heat are separate controls. Vinegar brightens the broth; white pepper provides the lingering warmth that chilli alone does not recreate.
Which Hot and Sour Soup Are You Looking For?
Hot and sour soup is a Chinese soup built around peppery heat and vinegar sourness, usually with ingredients such as mushrooms, tofu and egg; restaurant versions vary considerably in thickness and supporting ingredients.
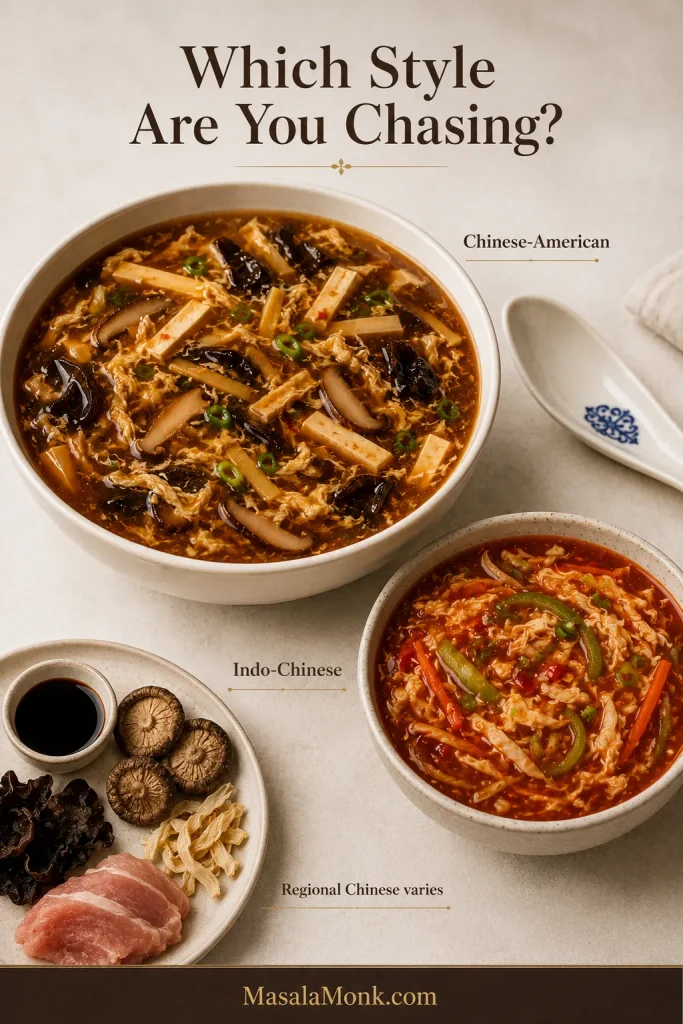
Two excellent hot and sour soups can look surprisingly different. It helps to know which style you are chasing before you start changing the vinegar, chilli or starch.
Color can mislead. Chinese-American, regional Chinese and Indo-Chinese hot and sour soups can differ in thickness, heat and ingredients, so season toward the bowl you actually want.
Style
What to Expect
Chinese-American restaurant style
Brownish, glossy, peppery and tangy, usually with mushrooms, tofu and egg. This is the style made below.
Regional Chinese versions
Recipes vary widely and may use black vinegar, dried shiitake, wood ear, dried lily buds and pork, with thickness varying considerably by style.
Indo-Chinese restaurant style
Often redder and more chilli-forward, with vegetables such as cabbage, carrot and capsicum/bell pepper, and sometimes chicken.
This recipe makes the first style: savory broth with a clear vinegar tang, white-pepper warmth, a glossy broth that still pours freely and enough contrast between mushrooms, tofu and egg to keep the soup interesting.
Many Chinese-American restaurant versions also include thin strips of pork or chicken. Here, added meat is optional, with an easy chicken or pork variation later.
Hot and Sour Soup Recipe
Using fresh mushrooms, this takes about 30–35 minutes from prep to bowl. Dried mushrooms need soaking time but give the broth more depth. Keep some vinegar and white pepper in reserve either way so you can make the final adjustment by taste.
Recipe Snapshot
Prep: about 15 minutes
Cook: about 15–20 minutes
Total with fresh mushrooms: about 30–35 minutes
Total with dried mushrooms: about 40–50 minutes, depending on how much soaking overlaps with prep
Makes: 4 generous bowls or about 6 appetizer servings
No specialty market tonight? Fresh shiitake or cremini, ordinary low-sodium broth and distilled white or unseasoned rice vinegar still make a very good soup. Wood ear and bamboo are optional.
Equipment: a 4–5 quart / 4–5 litre saucepan or Dutch oven, a few small prep bowls, and a fine-mesh strainer if using shiitake soaking liquid.
Ingredients and Measurements
Broth & Solids
Mushrooms: 15 g dried shiitake, about 4 medium mushrooms, or 5 oz / 140 g fresh shiitake or cremini. Use up to 6 oz / 170 g fresh mushrooms for a mushroom-heavy soup.
Wood ear: ¼ oz / 7 g dried wood ear mushrooms (black fungus), dry weight, optional.
Broth: 6 cups / 1.4 litres total low-sodium chicken or vegetable broth. If using strained shiitake soaking liquid, substitute up to ½ cup / 120 ml for the same amount of broth.
Tofu: 8 oz / 225 g firm or medium-firm tofu, cut into thin strips or small spoon-sized cubes.
Bamboo: ½ cup / about 70 g bamboo shoots, drained, rinsed and cut into strips, optional.
Ginger: 1 teaspoon finely grated fresh ginger.
Broth Seasoning
1½ tablespoons / 22 ml Chinese light soy sauce or regular soy sauce; start with 1 tablespoon / 15 ml if your broth or bouillon is already quite salty
1 teaspoon / 5 ml dark soy sauce, optional
½ teaspoon sugar
Fine salt, only if needed after tasting
Thickening & Egg
3 tablespoons / about 24 g cornstarch (UK: cornflour). Make the full slurry but expect to begin with about two-thirds.
¼ cup / 60 ml cold water or cold broth
2 large eggs
1 teaspoon water, optional, to loosen the beaten eggs slightly
Hot-Sour Finish
¼ cup / 60 ml distilled white vinegar or unseasoned rice vinegar, divided: 3 tablespoons / 45 ml to start, plus up to 1 tablespoon / 15 ml more to taste
1 teaspoon ground white pepper, divided: ¾ teaspoon to start, plus up to ¼ teaspoon more to taste
1 teaspoon toasted sesame oil
2 scallions, thinly sliced, optional
Chilli oil, optional, for serving
1. Soak and Prep Before the Pot Gets Hot
Using fresh mushrooms? Skip the soaking instructions below, slice them, and continue with the rest of the prep.
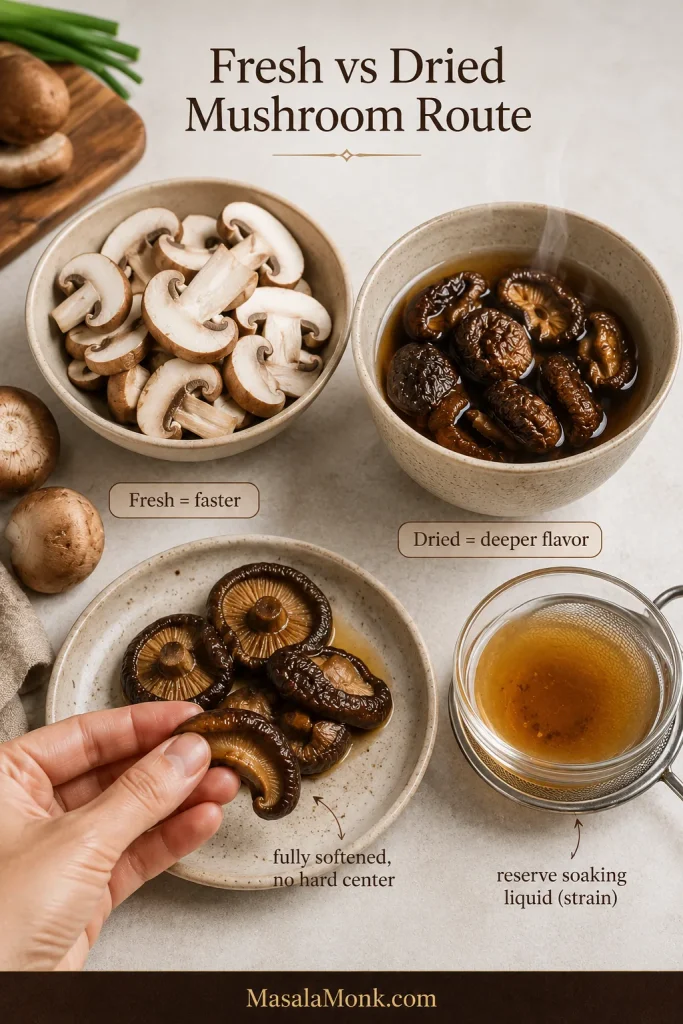
Fresh mushrooms are the faster route. Dried shiitake are worth the soak when you want more mushroom depth, especially with a mild broth.
If using dried mushrooms, cover them with very hot water and soak until completely pliable. Most soften in about 20–30 minutes, but the mushrooms get the final say: there should be no hard, dry center left.
If you plan to use shiitake soaking liquid in the broth, soak the dried shiitake separately from the wood ear. Lift the softened mushrooms from the water, trim any tough stems and slice thinly. Strain the shiitake liquid through fine mesh or carefully pour off only the clear upper portion. Leave the sediment behind.
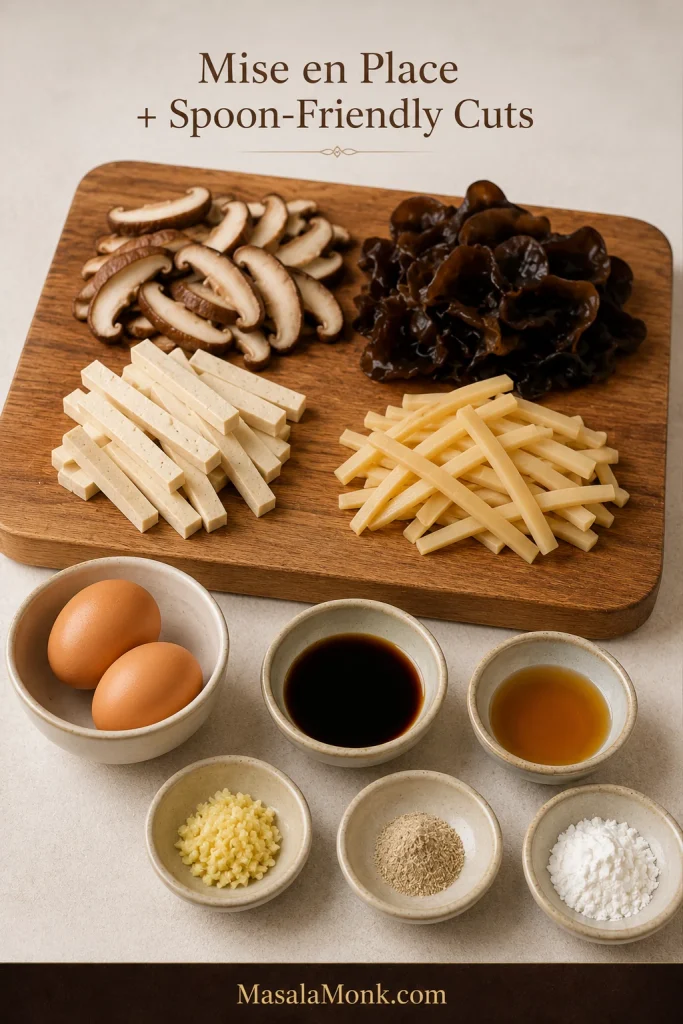
For a more restaurant-like spoonful, cut the mushrooms, tofu and bamboo into fairly thin pieces of similar length. Measure the seasonings, beat the eggs and mix the cornstarch with cold water or cold broth.
Use the spoon as the size guide. Tofu, mushrooms and bamboo should fit comfortably into one bite instead of arriving as long, awkward pieces.
In another small bowl, whisk together 3 tablespoons / 45 ml vinegar and ¾ teaspoon white pepper for the finish. Once the broth starts simmering, the remaining steps move quickly, so have everything within reach.
2. Build a Broth That Already Tastes Good
Add the broth, mushrooms, bamboo shoots, ginger, soy sauce, optional dark soy and sugar to the pot. Bring to a gentle simmer over medium-high heat, then lower the heat and cook for about 5 minutes.
Add the tofu and simmer for another 2–3 minutes. Firm tofu tolerates stirring well. With softer tofu, sweep the spoon around the pieces so they stay intact.
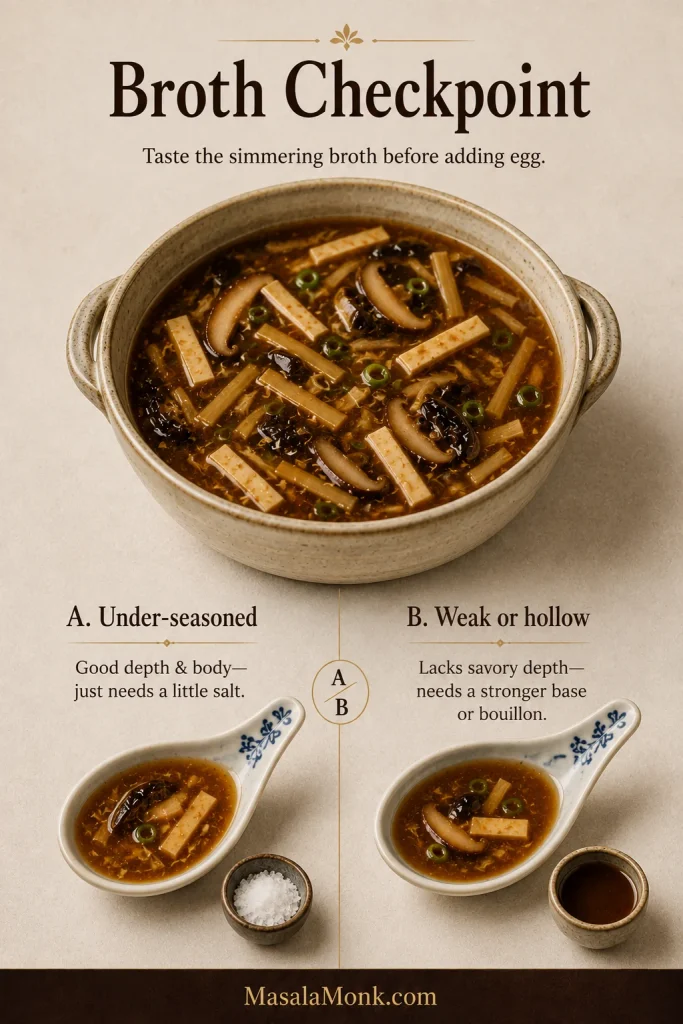
Check the broth here. It should already be savory enough to drink on its own, even though the vinegar and white pepper are still missing.
If the broth has good depth but simply needs more seasoning, add salt a small pinch at a time. If it tastes weak or hollow, deepen the base with a small amount of concentrated broth or bouillon. Extra soy alone can push the salt too far. Starch can change a watery texture; it cannot fix watery flavor.
Taste before thickening. Once starch and the final seasonings go in, a weak broth becomes harder to diagnose cleanly.
3. Add the Slurry Gradually
Cornstarch has a habit of settling the moment you stop looking at it, so stir the slurry thoroughly just before it goes into the soup.
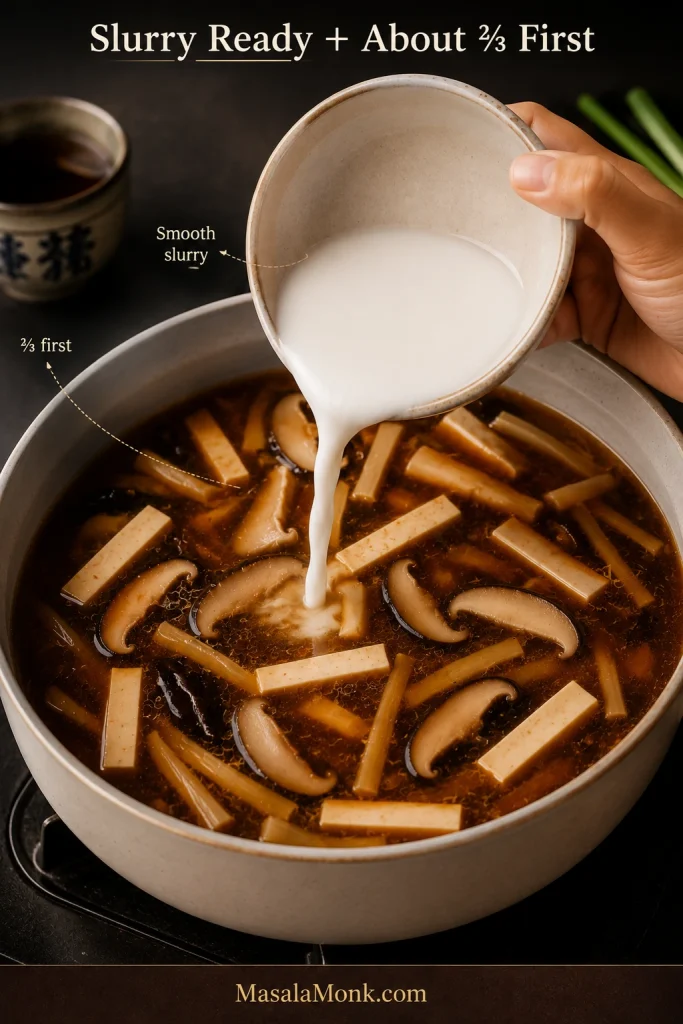
While stirring, pour in about two-thirds of the slurry. Return the soup to a simmer and wait 20–30 seconds before judging the texture.
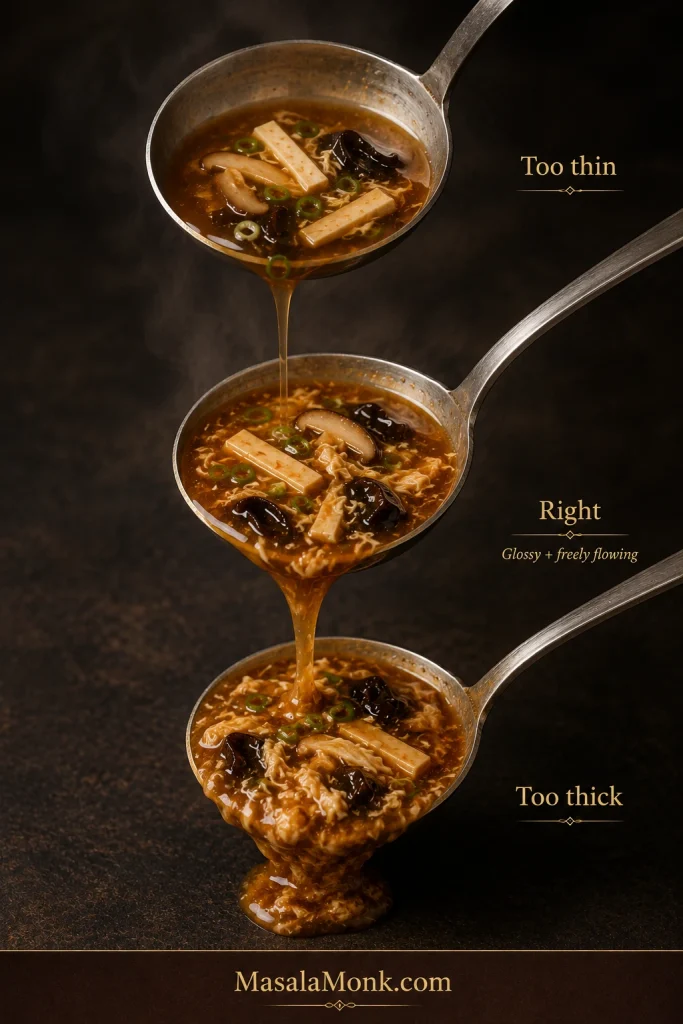
Lift some with a spoon and tip it back. The broth should leave a glossy trace, then fall away cleanly. It should still move like soup, not gravy.
Still too light? Remix the remaining slurry and add it in stages. Bring the soup back to a simmer each time before deciding whether it needs more.
Start with about two-thirds of the slurry, bring the soup back to a simmer, then judge. Add more only if the broth still needs body.
4. Pour the Egg Ribbons
Beat the eggs until the whites and yolks are completely combined. A teaspoon of water makes them slightly easier to pour in a fine stream, but it is optional.
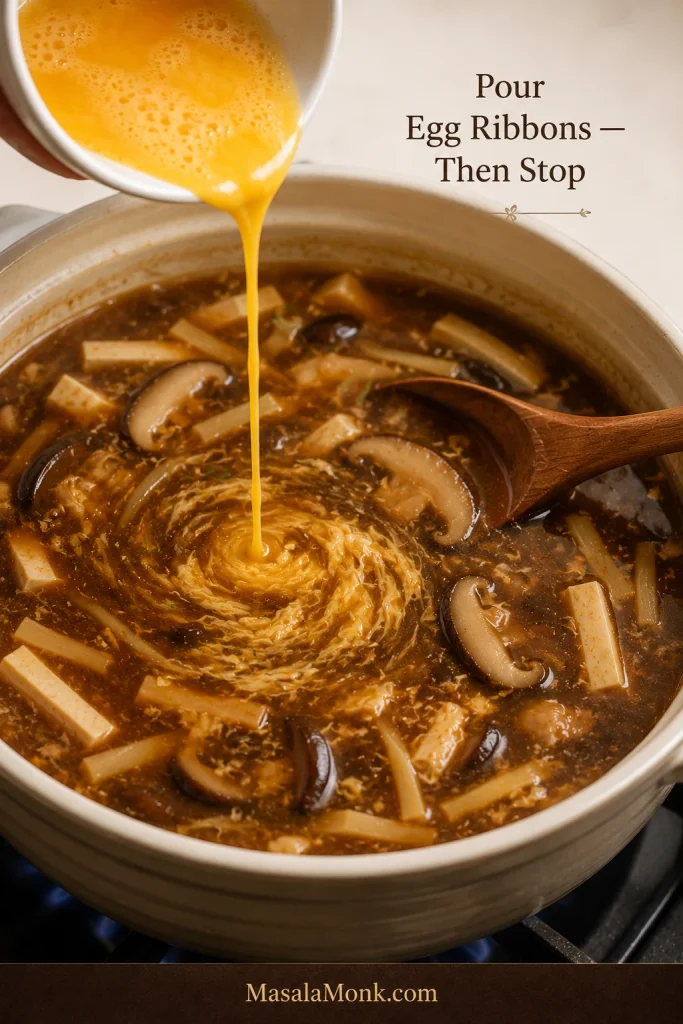
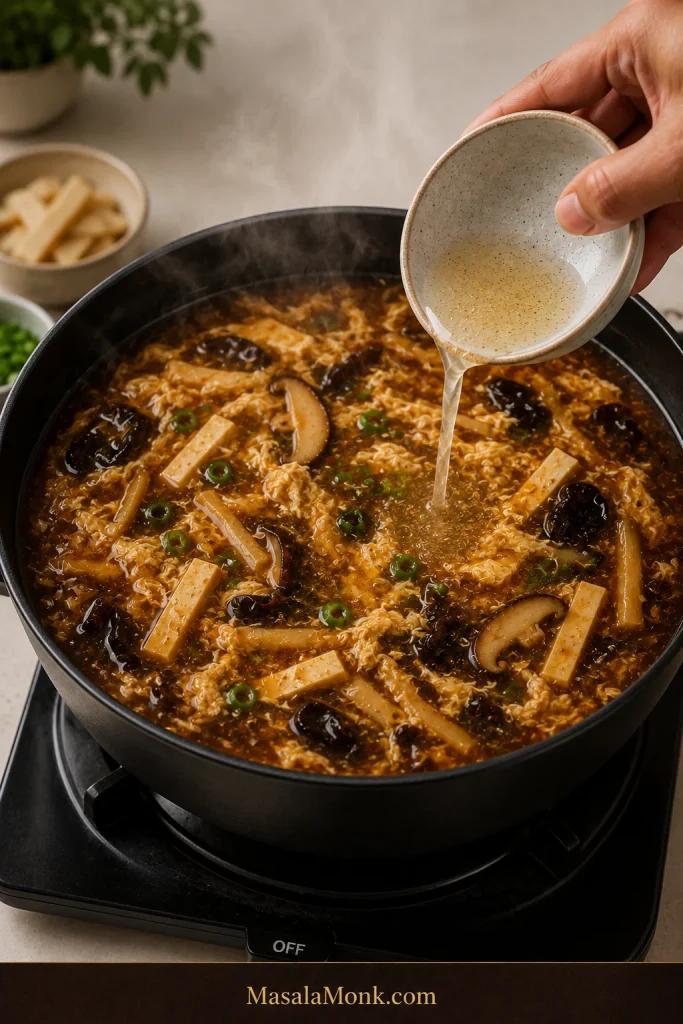
Keep the thickened soup at a gentle simmer. Stir slowly in one direction to create a mild current, then pour the beaten egg in a thin stream as you move your hand around the pot.
Then stop.
Once all the egg is in, leave the pot unstirred until the strands look set. Stir once or twice afterward to separate them without breaking them into tiny flecks.
Pour the egg in a thin stream into a mild current, then stop stirring until the strands look set.
5. Turn Off the Heat—Then Make It Hot and Sour
Add the vinegar and white pepper after the heat is off. Stir in the prepared vinegar-and-pepper mixture, then add the toasted sesame oil.
Once the heat is off, the job changes from cooking to preserving aroma. That is when vinegar and white pepper can stay sharp, fragrant and distinct.
Taste, Adjust and Stop
Now taste. This is where you steer the soup toward the one you remember. For more sourness, add the remaining vinegar 1 teaspoon / 5 ml at a time. For stronger peppery warmth, add the reserved white pepper in small pinches. If it tends to clump, first mix it with a teaspoon of vinegar or broth.
The vinegar should brighten the broth without erasing the mushrooms and soy underneath it. White pepper should become more noticeable toward the finish than on the first instant of the sip.
Add scallions if using and put extra vinegar, white pepper and chilli oil on the table.
Try one complete spoonful before serving. Check the savory base first, then the vinegar and white pepper, then the body and textures.
Change one thing at a time. A pale soup may already taste right. A glossy soup does not need more starch just because another restaurant serves theirs thicker.
Taste broth and solids together. Mushrooms, tofu and egg can change how strong the vinegar or white pepper feels in a complete bite.
Something crisp is lovely beside the soft tofu and egg. Crispy vegetable spring rolls make an especially good contrast.
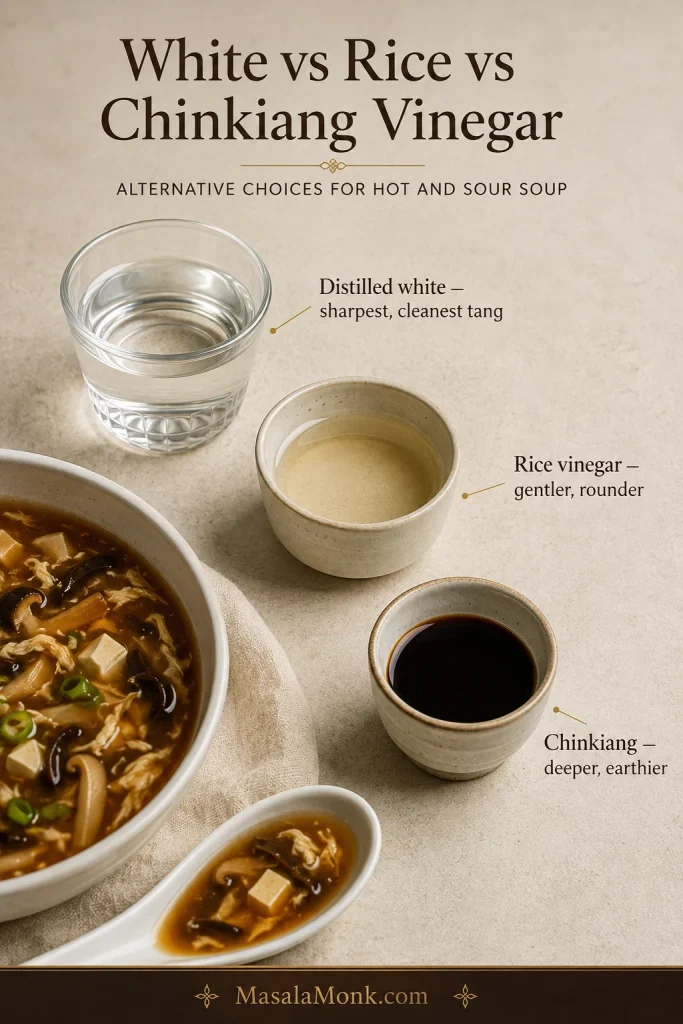
For Chinese-American takeout-style soup, distilled white vinegar gives the sharpest, cleanest tang. Use unseasoned rice vinegar for gentler acidity, or Chinkiang black vinegar for a deeper, earthier sourness.
Distilled white vinegar is direct and bright. If the soup you remember has a nose-tingling takeout tang, this will usually get you there fastest.
Unseasoned rice vinegar is softer and rounder. The soup remains distinctly sour, but the acidity lands less sharply.
Chinkiang or Chinese black vinegar brings earthy, slightly malty flavor along with acidity. Use it in place of the white or rice vinegar, starting with the same 3 tablespoons / 45 ml off heat, then adjust by taste because brands vary.
For familiar Chinese-American takeout-style hot and sour soup, distilled white vinegar is the cleanest starting point; rice vinegar softens the edge, while Chinkiang adds darker depth.
Adding most of the vinegar after cooking keeps the acidity lively. Prolonged boiling makes its sharp edge less noticeable.
White Pepper vs Chilli
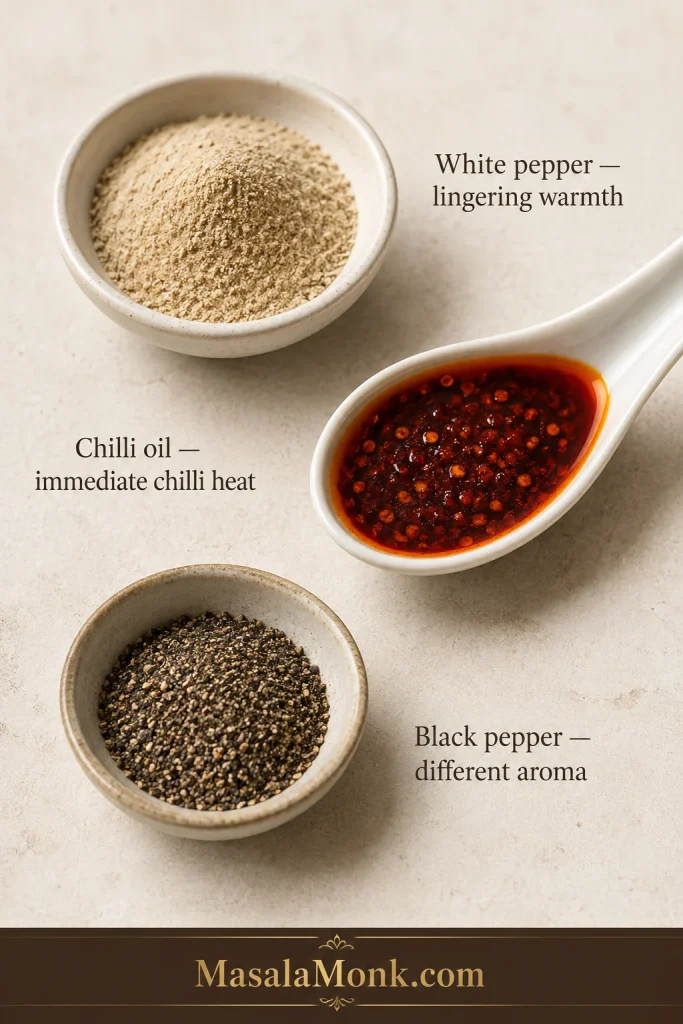
White pepper delivers the sharp warmth that builds toward the end of the sip. Chilli oil hits sooner with a more obvious chilli burn.
Black pepper will still add heat, but its aroma is different; white pepper gives the more familiar Chinese-American restaurant-style finish.
Use the timing of the heat as a clue: chilli burns sooner, while white pepper is more noticeable toward the finish and lingers differently from black pepper.
If you know you prefer gentler heat, start with ½ teaspoon white pepper instead of ¾ teaspoon in the finishing mixture. The standard recipe starts with ¾ teaspoon and keeps the final ¼ teaspoon in reserve.
Keep chilli at the table unless everyone wants it. One serving may be fiery while another stays purely peppery.
How Thick Should Hot and Sour Soup Be?
Hot and sour soup should be glossy and lightly spoon-coating while still flowing freely. It should not move like gravy.
Thickness is easiest to judge while the soup is moving. The right broth briefly coats the ladle, then falls cleanly instead of hanging like sauce.
Restaurants disagree on exactly where that line sits. Some versions are almost brothy. Others are thick enough to keep strips of tofu and mushroom suspended.
If the takeout soup you love is particularly dense, take this one thicker too. The staged slurry lets you stop early or keep building body without committing the entire pot at once.
Used all the slurry and still want it very thick? Mix another 1 tablespoon cornstarch with 1 tablespoon cold water. Add it gradually, return the soup to a simmer and reassess before making another batch.
If you overshoot, loosen the soup with hot broth and check the seasoning again.
How to Make Silky Egg Ribbons
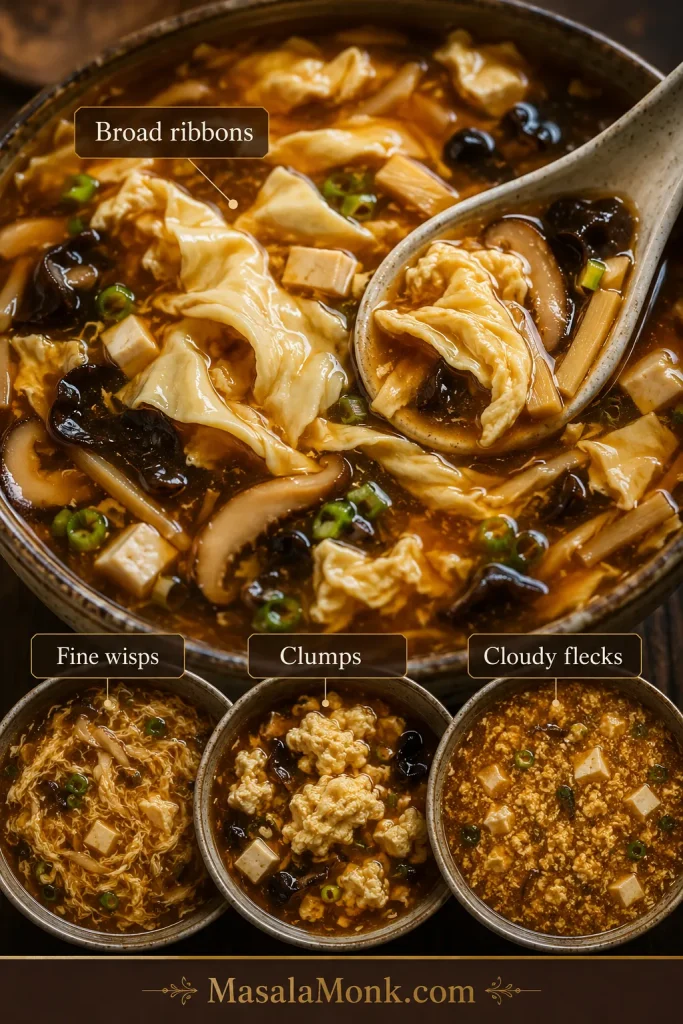
Why do some bowls have broad egg ribbons while others have fine wisps? Broth thickness, pour speed and movement all affect the shape.
A broth with some body supports the egg better than a completely thin liquid. A calm current encourages broader ribbons. More movement breaks the egg into finer strands.
The pause matters too. Stir before the egg has set and the strands break into flecks. Pour too much into one place and you get larger clumps.
The egg itself records what happened in the pot. Broad ribbons, fine wisps, clumps and cloudy flecks reveal differences in pour speed and stirring.
Imperfect ribbons do not ruin dinner. The technique helps you get the shape you prefer more consistently.
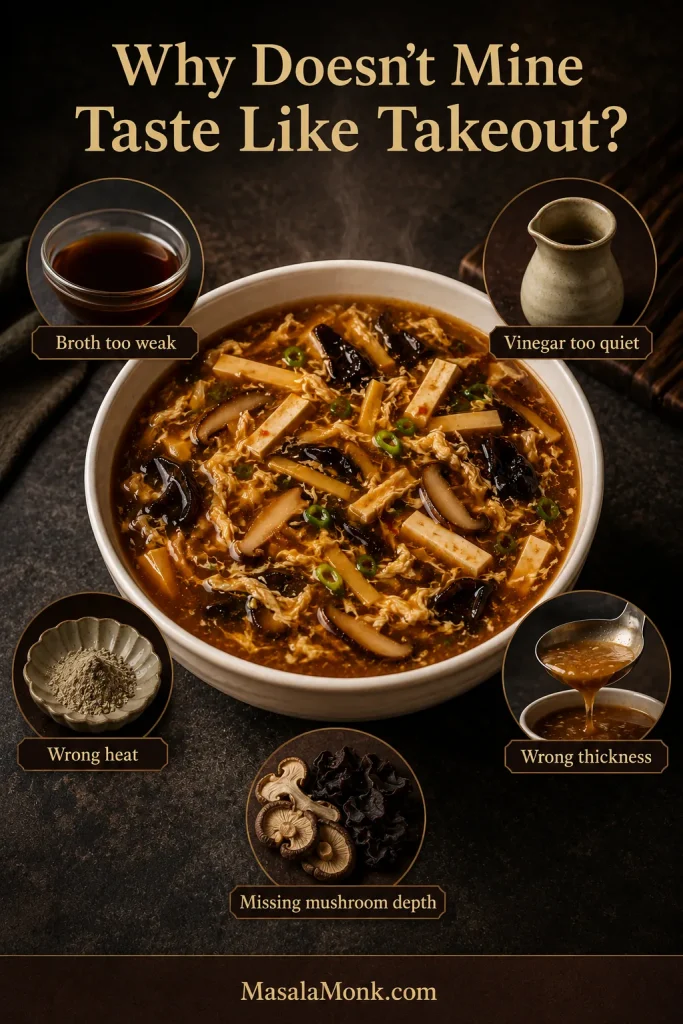
Why Doesn’t My Homemade Hot and Sour Soup Taste Like Chinese Takeout?
You can make a perfectly good hot and sour soup and still know after the first taste that it is not the restaurant soup you were trying to make.
The usual differences are a weaker broth base, not enough fresh vinegar or white-pepper heat, and a starch level that does not match the restaurant version you remember.
The base tastes weak. Some restaurants start with a more concentrated broth or bouillon-style base.
The heat is mostly chilli. Chilli burn does not taste the same as white-pepper warmth.
The vinegar has gone quiet. A fresh splash after cooking brings the sourness back into focus.
The texture is wrong. Your favorite place may use considerably more—or less—starch.
The soup lacks mushroom depth or contrast. Dried shiitake brings savoriness. Wood ear or bamboo adds a firmer bite beside the soft tofu and egg.
When homemade hot and sour soup feels close but not quite right, start with broth depth before chasing extra vinegar, pepper or soy sauce.
Restaurant kitchens may also lean on more sodium or MSG. Our guide to MSG and umami explains what MSG does to savory perception. It is optional here; if you use it, count it as part of the overall seasoning so the broth does not become overly salty.
Once the soup is where you want it, shrimp fried rice turns it into a fuller takeout-style meal without making the soup itself heavier.
Hot and Sour Soup Ingredients: What Each One Adds
The ingredient list looks less intimidating once flavor and texture are separated. Some ingredients deepen the broth; others are there for chew, crunch or softness.
Ingredient
Main Job
If You Skip It
Dried shiitake
Deep mushroom savoriness
The broth tastes lighter
Wood ear
Springy chew
Less textural contrast
Tofu
Soft body
The soup feels less substantial
Bamboo
Clean crunch
Little change to the broth itself
Dark soy
Deeper color
The soup looks lighter
Broth: Mild Homemade or Deeper Takeout Flavor?
Chicken broth gives the most familiar base, while vegetable broth works well for a meatless version. Mild carton broth makes a lighter soup. A more concentrated chicken or bouillon-style base gets closer to the savory intensity of many Chinese-American takeout versions.
You should still be able to taste the broth after the vinegar goes in. If all you notice is sourness, the foundation was probably too weak. Concentrated broth also brings more sodium, so start with less soy and salt and adjust once everything is hot.
Mushrooms: Flavor and Texture Are Separate Jobs
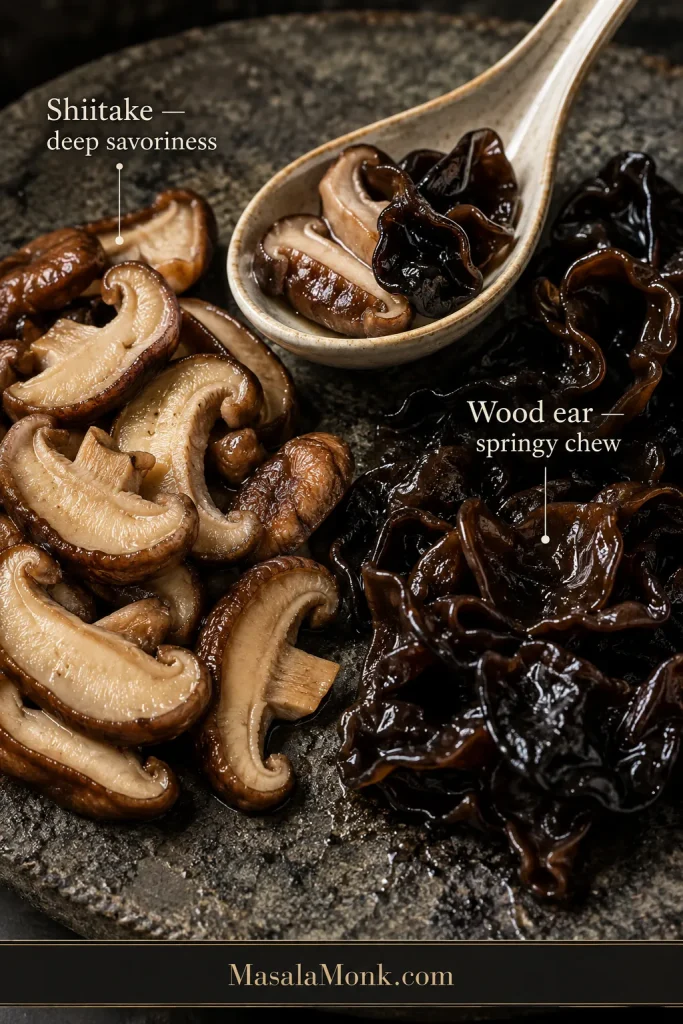
Dried shiitake deepens both the smell and flavor of the broth as it simmers. Its brown soaking liquid is intensely mushroomy too, which is why a strained portion is useful in the pot.
Wood ear does something different. It brings a springy bite against the softer tofu and egg. If you omit it, bamboo or water chestnuts restore some crunch.
Using both mushrooms gives depth without making every bite soft. If one is missing, replace the job it performs—not simply the mushroom name.
Dried lily buds are another traditional addition in some Chinese versions, bringing an earthy, slightly chewy element. They are optional and not needed for the restaurant-style recipe above.
Tofu: Firm Is Easiest
Firm or medium-firm tofu is easiest because it holds its shape. Soft tofu gives the soup a silkier, more delicate texture but is more fragile.
A partly used block can go into Mapo tofu, which takes the same ingredient in a much bolder, spicier direction.
Bamboo Shoots: Taste Before They Go In
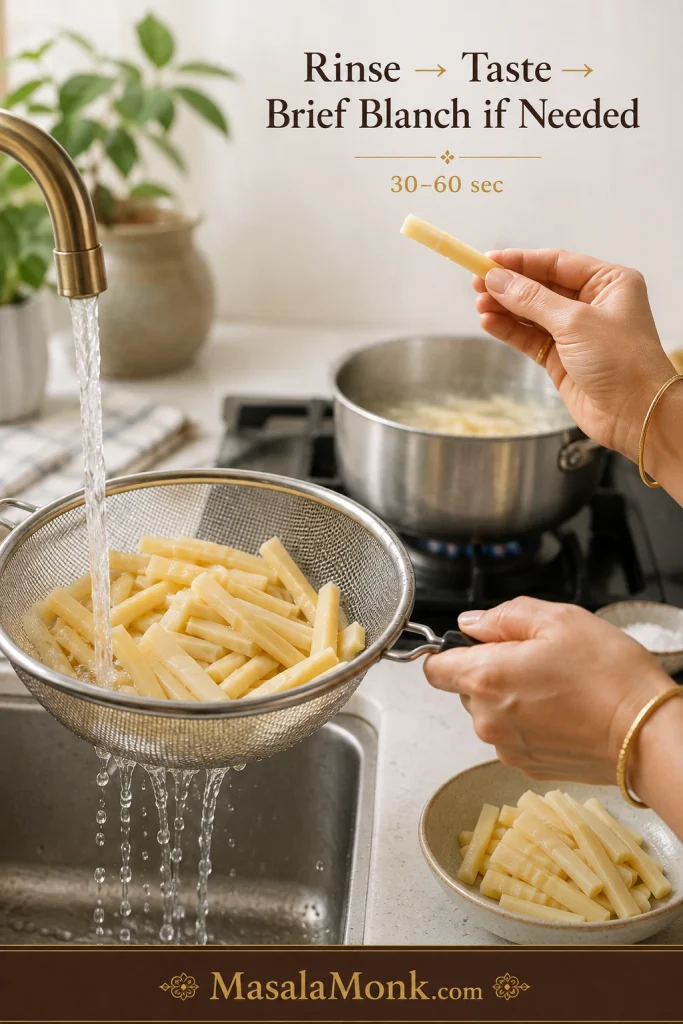
Some canned bamboo carries a strong aroma straight from the tin. Drain and rinse it well. If a piece still tastes unpleasant, blanch the bamboo in boiling water for 30–60 seconds and drain it before adding it to the soup.
The quick blanch is about cleaner flavor, not softer bamboo. If rinsing removes the canned note, there is no reason to cook it again.
Soy, Ginger, Sugar and Final Aromatics
Chinese light soy sauce or regular soy sauce supplies salt and savoriness. Dark soy is mainly useful for deeper color and is entirely optional.
A lighter-colored soup may already taste exactly right. Adding regular soy merely to darken the liquid risks making the soup saltier than intended. No need to chase the color.
Ginger gives the base a fresh aromatic edge. The small amount of sugar rounds the soy and vinegar without making the soup sweet. Toasted sesame oil goes in after cooking so its nutty aroma remains noticeable.
Making the soup without onion or garlic? Neither is required. Omit the scallions, avoid garlic-containing chilli condiments, and check packaged broth and sauce labels because some brands include onion or garlic.
Missing one ingredient rarely ruins the soup. Most substitutions change flavor, texture or both.
No dried shiitake? Use fresh shiitake or cremini. The mushroom flavor will be lighter.
No wood ear? Leave it out, or use bamboo or water chestnuts for some crunch.
No cornstarch? Leave it out for a brothier soup. The egg ribbons may not stay suspended as evenly. Potato starch is another option; add it gradually because it thickens differently.
No tofu? Omit it or use cooked chicken or pork for a firmer, meatier result.
Adding Chicken or Pork
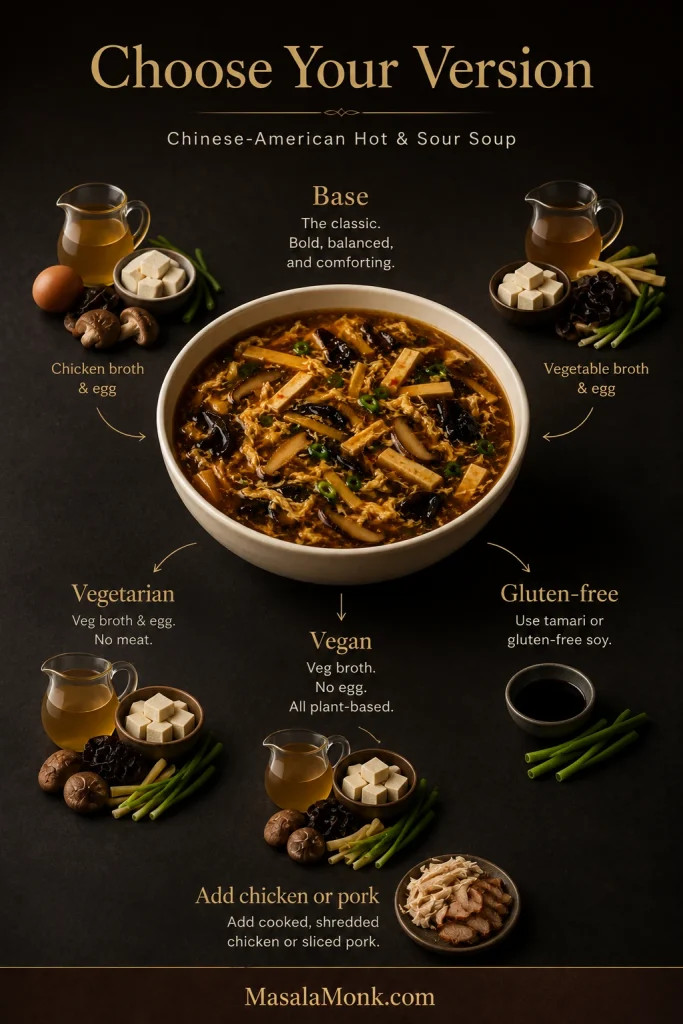
Stir about 4 oz / 115 g cooked shredded chicken or thinly sliced cooked pork into the soup with the tofu, or use the meat in place of tofu. Heat it through briefly before finishing the soup.
Vegetarian, Vegan & Gluten-Free
For vegetarian hot and sour soup, use vegetable broth and keep the tofu, mushrooms and egg. For a vegan version, omit the egg as well. A mushroom-forward broth becomes especially useful once the chicken broth and egg are gone.
For a gluten-free version, use certified gluten-free tamari or soy sauce and check the broth, vinegar and chilli-condiment labels. Chinese black vinegars vary by brand, and some contain wheat-derived ingredients.
Most variations need only targeted swaps. Change the broth, egg, soy sauce or protein according to the version you want rather than rebuilding the entire soup.
Keep additions in proportion to the broth. Pile in too many extras and the vinegar and white pepper start getting lost among all the solids.
You want soft tofu or egg, something with bite, and enough broth around both for the soup to remain lively.
What About Indo-Chinese Hot and Sour Soup?
Indo-Chinese hot and sour soup is usually redder, more vegetable-heavy and more chilli-driven than this Chinese-American version. It works better as its own style than as this soup with extra chilli sauce.
Common additions include cabbage, carrot, capsicum/bell pepper, chicken, chilli sauce or chilli paste and sometimes tomato or ketchup, with green-chilli vinegar alongside. When that is the soup you want, those ingredients should shape the pot from the beginning.
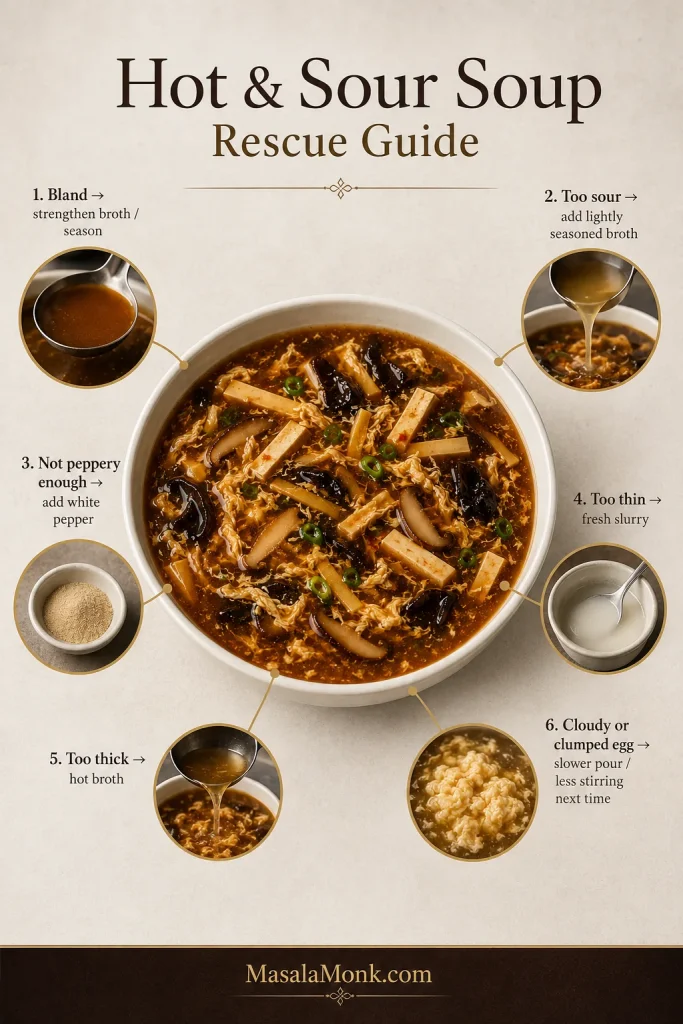
Most problems become much easier to fix once you identify which part of the soup actually went wrong.
Fix the problem that actually failed, retaste, then move on. Changing salt, vinegar, white pepper and starch together makes the next adjustment harder to read.
What Happened?
Likely Reason
Quick Fix
Bland
The savory base is weak
Strengthen the broth; then adjust soy or salt
Not sour enough
Too little fresh acidity
Add vinegar 1 tsp / 5 ml at a time
Too sour
Too much vinegar
Add lightly seasoned broth gradually, then reassess seasoning and body
Not peppery enough
Too little white pepper
Add small pinches after cooking
Too chilli-hot
Too much chilli
Dilute gradually with lightly seasoned broth, then rebalance
Too thin
Not enough starch
Add a small fresh slurry and return to a simmer
Too thick
Too much starch
Add hot broth gradually, then reseason
Cloudy egg
The egg dispersed before setting
Pour more slowly and wait before stirring next time
Big egg clumps
Too much egg entered one spot
Use a finer stream around the pot next time
Broken tofu
Hard boiling or too much stirring
Use a softer simmer and less movement
Gritty or grainy
Sediment or a starch problem
Check the soaking liquid and slurry; see below
What the Egg Shape Tells You
Large clumps usually mean too much egg reached one area at once. Very fine flecks suggest too much movement before the egg set. A milky or cloudy broth means the egg dispersed through the liquid before distinct strands formed.
There is nothing urgent to rescue—the soup will still taste good. The shape tells you what to change next time.
Gritty, Grainy or Muddy-Tasting Soup
Visible or earthy grit often points to sediment from shiitake soaking liquid. A powdery or starchy mouthfeel may mean the slurry was not mixed smoothly, the soup did not return to a simmer after the starch went in, or the wrong corn product was used.
For thickening, use the fine white starch sold as cornstarch in the US and cornflour in the UK—not cornmeal or coarser US-style corn flour.
Poorly rinsed bamboo sometimes carries an unpleasant canned flavor. White pepper varies by brand; if yours tastes stale or unpleasantly harsh to you, try a fresher or different one before increasing the amount. Too much dark soy added only for color may make the broth taste muddy.
If one ingredient tastes wrong on its own, piling on extra vinegar or chilli usually just hides it.
Make Ahead, Storage and Reheating
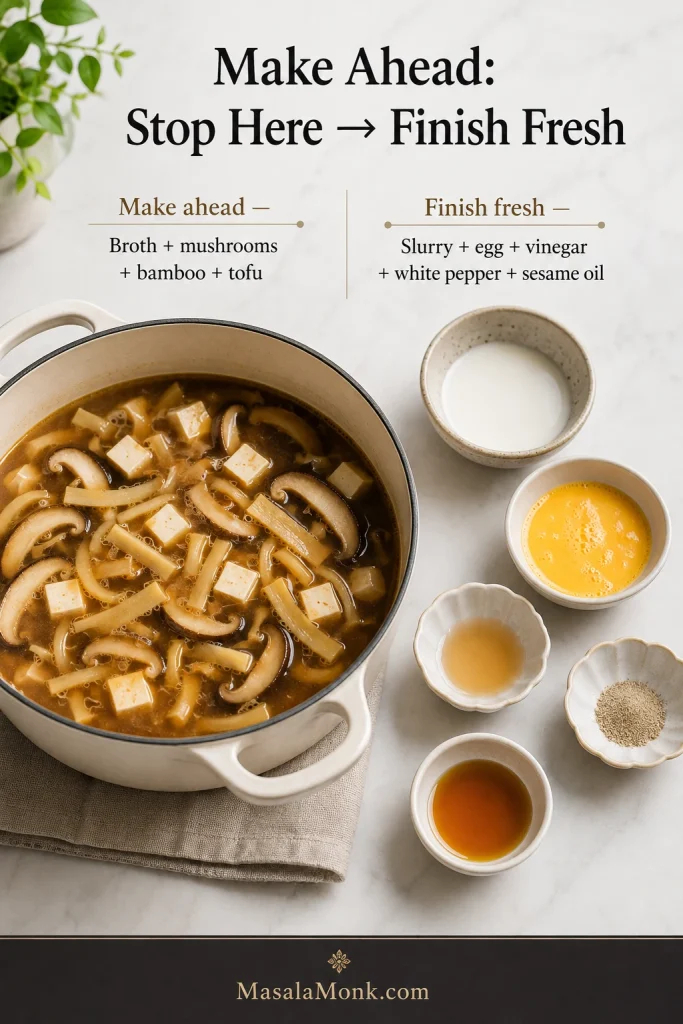
For make-ahead prep, prepare the broth, mushrooms, bamboo and tofu in advance. Reheat the base before serving, then do the final starch adjustment, egg ribbons, vinegar, white pepper and sesame oil close to serving time for the freshest texture and aroma.
This make-ahead split protects the two things that fade fastest: freshly set egg texture and the bright finish from vinegar, white pepper and sesame oil.
Storage, Reheating and Freezing
Cool leftovers promptly and refrigerate them in a covered container for 3–4 days. The USDA leftovers guidance recommends reheating leftovers thoroughly to 165°F / 74°C and bringing soups to a boil during reheating.
After the soup is thoroughly reheated, lower the heat and check it again. If it has loosened, stir in a small fresh slurry and briefly return it to a simmer. If the flavor seems dull, fresh vinegar and white pepper are often more useful than extra salt.
You can freeze hot and sour soup, but the tofu, egg and starch-thickened broth may not return to exactly the same texture after thawing. Correct the body and seasoning after reheating.
Leftovers also make a quick noodle soup. Add cooked noodles or ramen, loosen with broth if needed, and refresh the vinegar and white pepper just before eating.
One Last Taste
A good hot and sour soup should feel lively rather than heavy: savory broth underneath, vinegar bright in the steam, white pepper warming the finish, and soft tofu and egg interrupted now and then by the springy bite of wood ear or the crunch of bamboo.
Some people will want another splash of vinegar. Others will reach for more white pepper. Keep both on the table, taste once more, and stop when the bowl tastes like the one you were hoping for.
The best bite carries several textures at once: silky egg and tofu, meaty shiitake, springy wood ear and crisp bamboo in the same bright, peppery-sour broth.
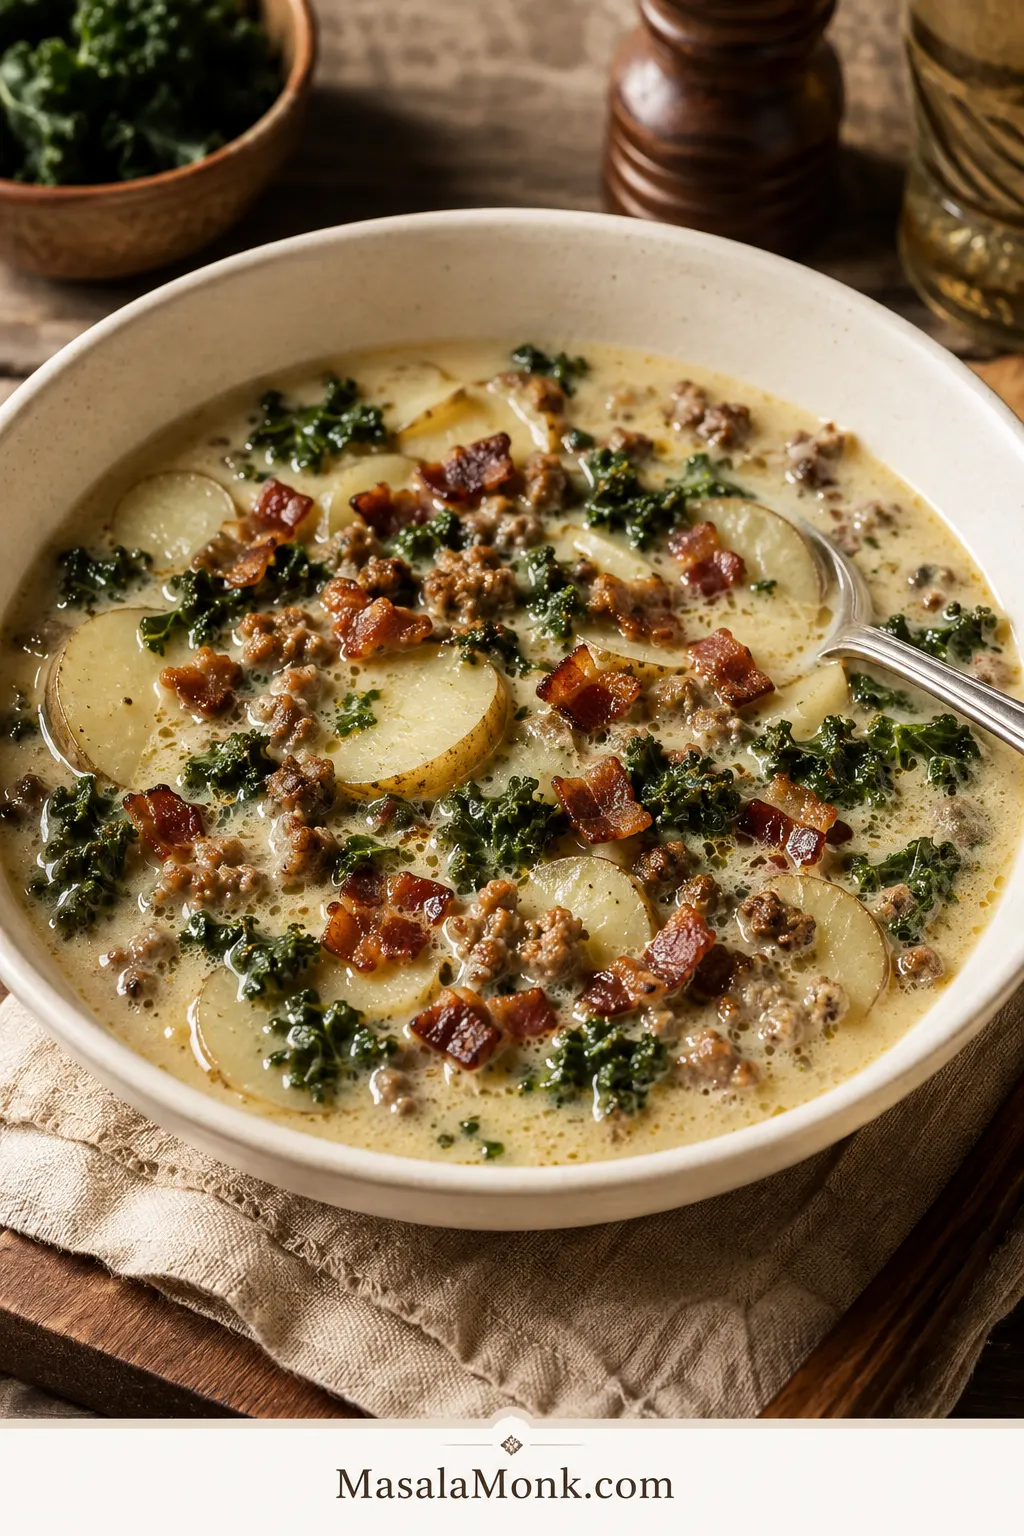
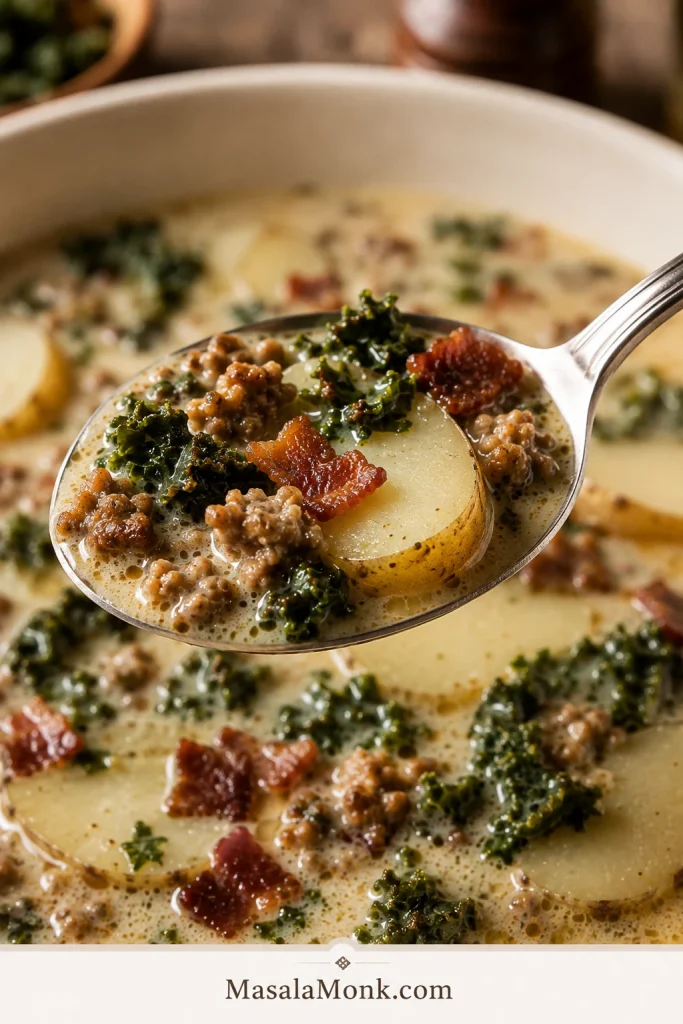
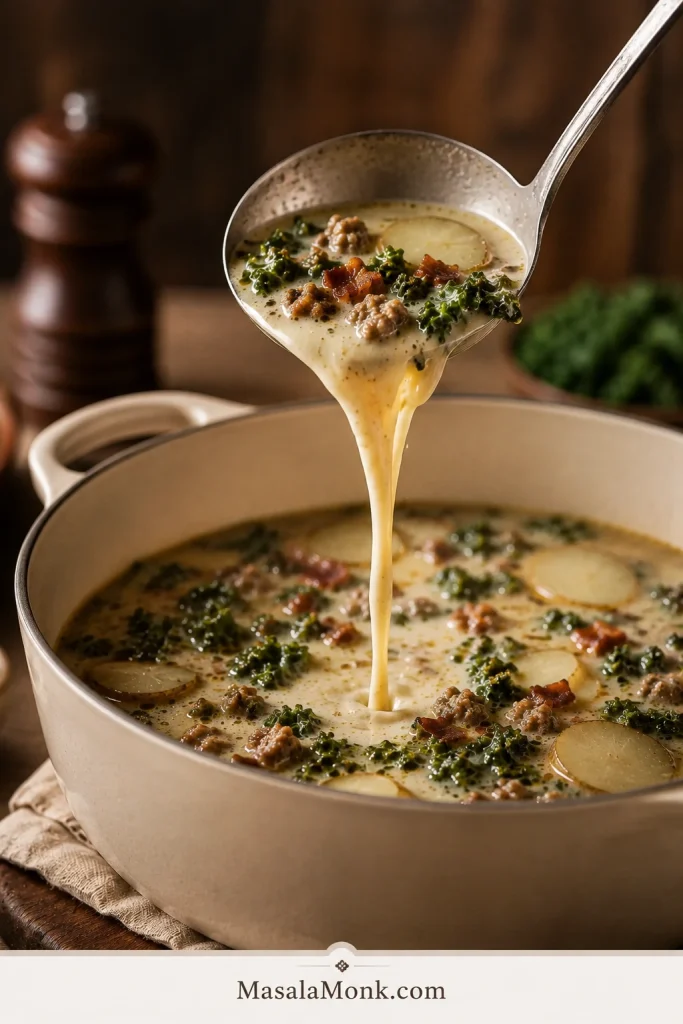
The best spoonful of Zuppa Toscana carries browned Italian sausage, a tender slice of potato, softened kale and enough creamy broth to bring everything together.
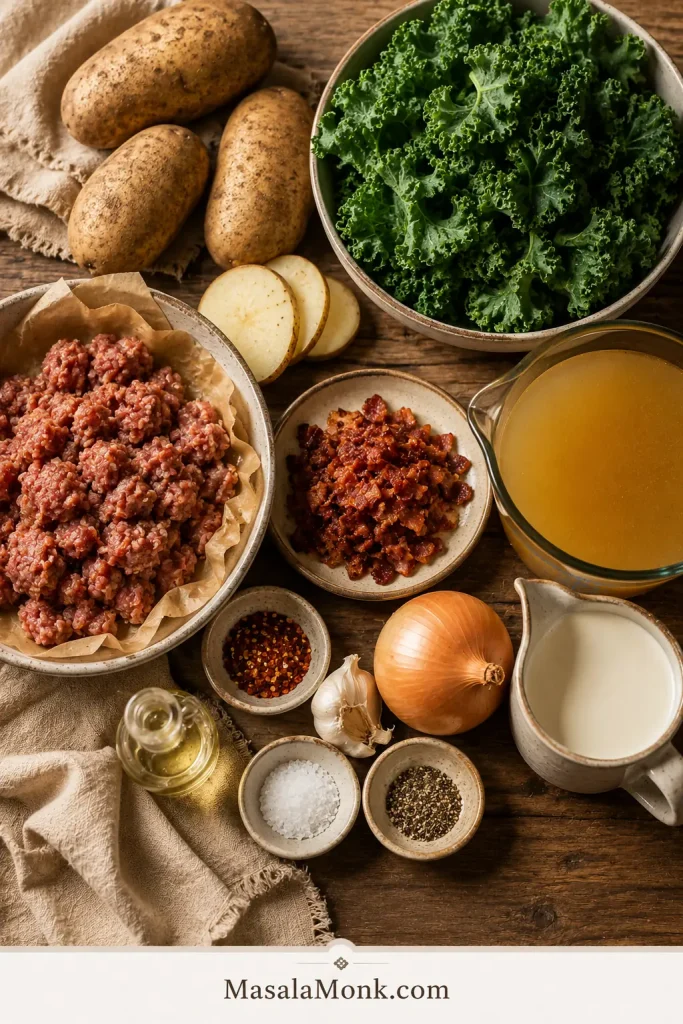
This is a one-pot, Olive Garden-style Zuppa Toscana with Italian sausage, russet potatoes, kale, bacon and creamy chicken broth. This version keeps the familiar richness without turning the broth heavy: savory first, creamy but still flowing, with tender potatoes that stay intact. You may remember the name, or simply remember it as that creamy sausage-and-kale soup from Olive Garden. Crisp bacon at the end brings a welcome crunch against the soft potatoes and creamy broth.
There is plenty of room to make it yours. Hot or mild sausage both work. Potato skins are optional. Spinach can stand in for kale. Those choices shift the flavor or texture without making the recipe fussy.
Crisp the bacon, brown the Italian sausage and leave only a thin coating of rendered fat behind. Soften onion and garlic, then simmer evenly sliced russet potatoes in chicken broth until tender. Return the sausage, add kale, and finish with heavy cream once the greens have softened.
Remember three things: give the sausage time to brown, keep the potato pieces close to the same thickness, and add the cream near the end over gentle heat.
A good spoonful keeps sausage, potato and kale distinct while the creamy broth ties everything together.
Zuppa Toscana Recipe
Tender russets, browned sausage and softened kale make this substantial enough for dinner, while cream rounds out the broth and crisp bacon is added at the finish.
Recipe at a Glance
Prep time
About 20 minutes
Cook time
40–45 minutes
Total time
About 1 hour
Method
One-pot stovetop
Yield
Roughly 10 cups / 2.4 litres, depending on evaporation
Serves
6–7 dinner portions or 10 starter portions
Pot
5½–6 quart / 5.2–5.7 litre Dutch oven or heavy pot
4 oz / 113 g bacon, about 4 thick-cut slices, chopped
1 lb / 454 g Italian pork sausage, hot or mild; use bulk sausage or remove the casings from links
1 medium yellow onion, finely chopped, about 1 cup / 150 g
4 medium garlic cloves, finely minced
¼–½ teaspoon crushed red pepper flakes, optional; with hot sausage, start without them and add extra heat after tasting
1½ lb / 680 g russet potatoes, scrubbed
5 cups / 40 fl oz / 1.18 litres low-sodium chicken broth or stock
½ teaspoon freshly ground black pepper, plus more to taste
¼ teaspoon fine salt, plus more to taste
4 oz / 115 g curly kale, tough stems removed and leaves chopped
1 cup / 8 fl oz / 240 ml heavy cream
½–1 teaspoon white-wine vinegar, optional, only if the soup still tastes heavy or flat after the salt is right
Broth and potatoes make up most of the bowl; cream comes in at the end, so richness never has to mean heaviness.
Optional for serving: grated Parmesan and extra crushed red pepper.
Equipment
5½–6 quart / 5.2–5.7 litre Dutch oven or heavy-bottomed pot
Slotted spoon
Ladle
Instant-read thermometer, optional
Instructions
Prep and Brown
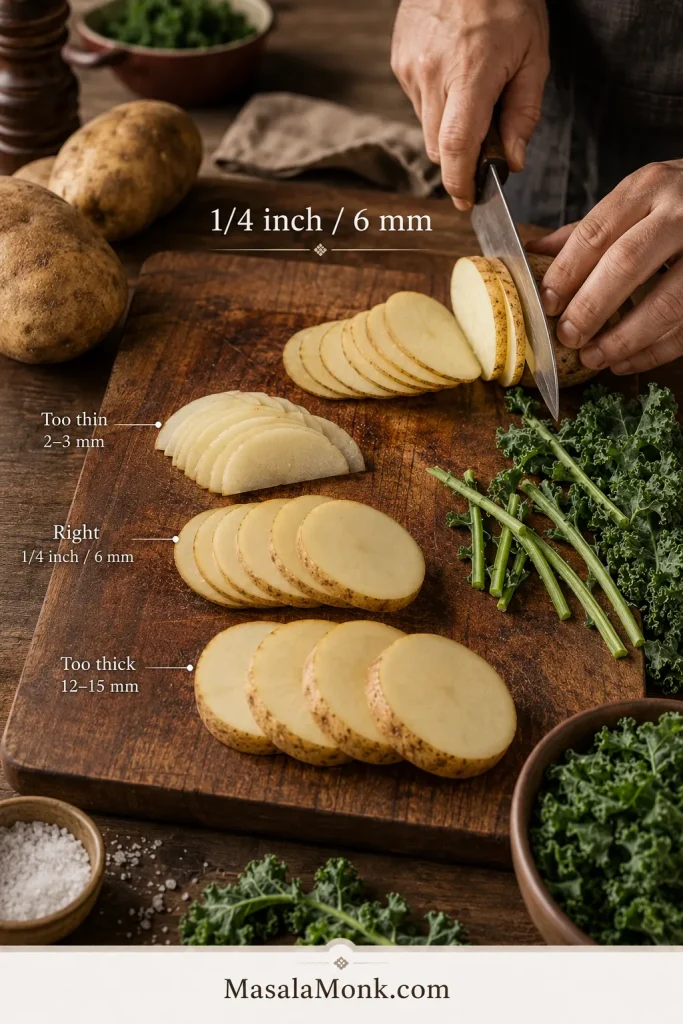
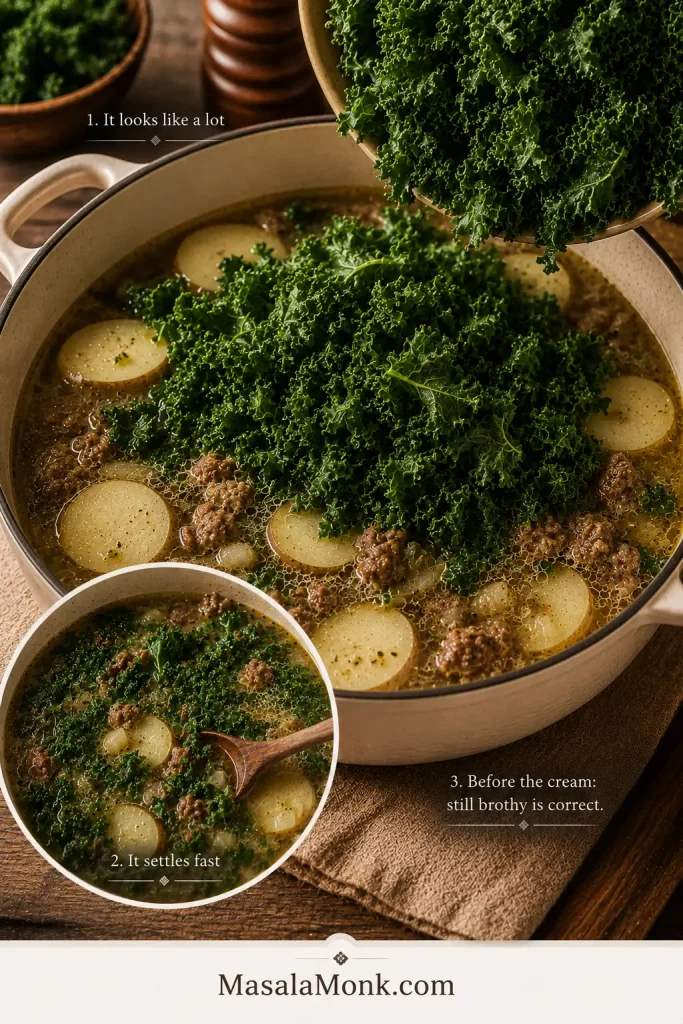
Prep the potatoes and kale. Leave the potato skins on or peel them if you prefer. Halve the potatoes lengthwise; quarter especially wide ones, then slice crosswise about ¼ inch / 6 mm thick. They do not need to be ruler-perfect—just reasonably even. Strip the tough stems from the kale and chop the leaves into spoon-friendly pieces. The pile looks generous at first, but it settles quickly in the soup.
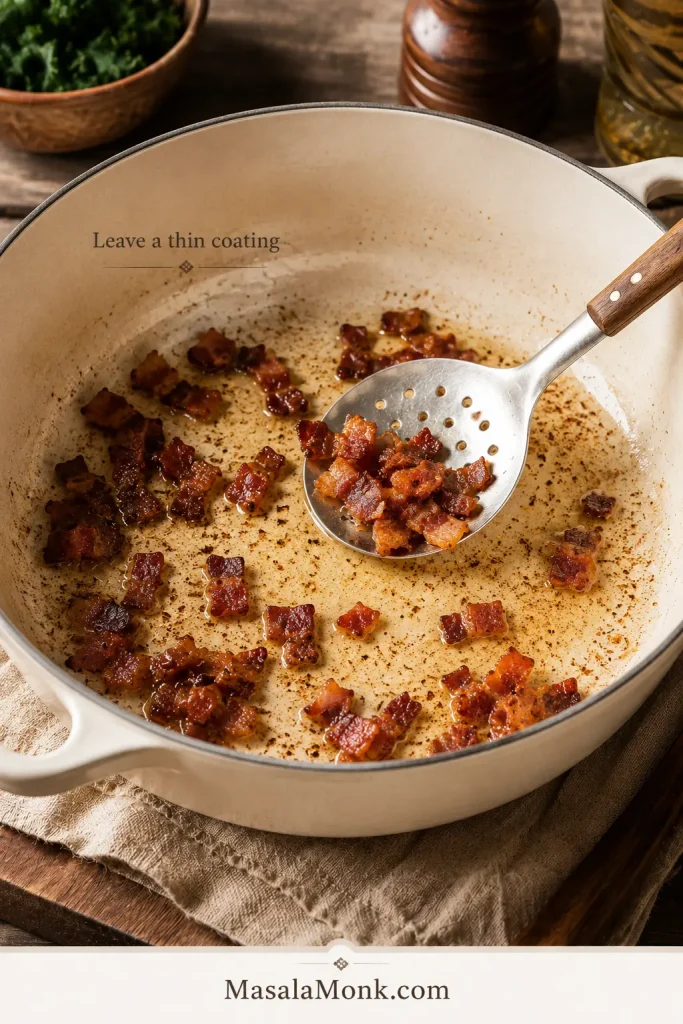
Crisp the bacon. Put the chopped bacon in the cold pot and set it over medium heat. Cook 6–8 minutes, stirring occasionally, until crisp and browned. Remove it with a slotted spoon. Leave a thin glossy coating of fat on the bottom and spoon away any obvious puddle.
Brown the sausage. Increase the heat to medium-high. Add the sausage and let part of it sit against the hot surface before breaking it up. Cook 5–7 minutes, until browned and cooked through. A mix of medium and smaller crumbles works well; there is no need to make them perfectly uniform. A larger crumble should reach 160°F / 71°C if checked with an instant-read thermometer. Transfer the sausage to the plate with the bacon. If it has released a deep puddle of fat, spoon away the excess and leave only a thin coating in the pot.
Build the Broth
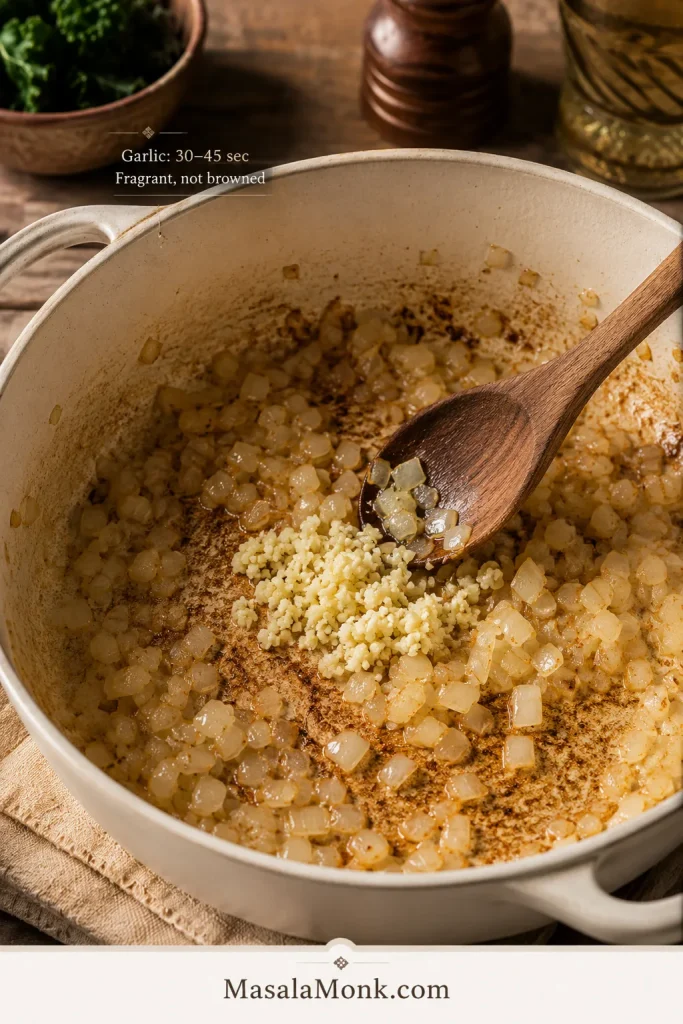
Cook the onion and garlic. Reduce the heat to medium. Add the onion and cook 4–5 minutes, stirring and scraping up the browned bits, until softened. Add the garlic and optional red pepper flakes and cook another 30–45 seconds, just until fragrant.
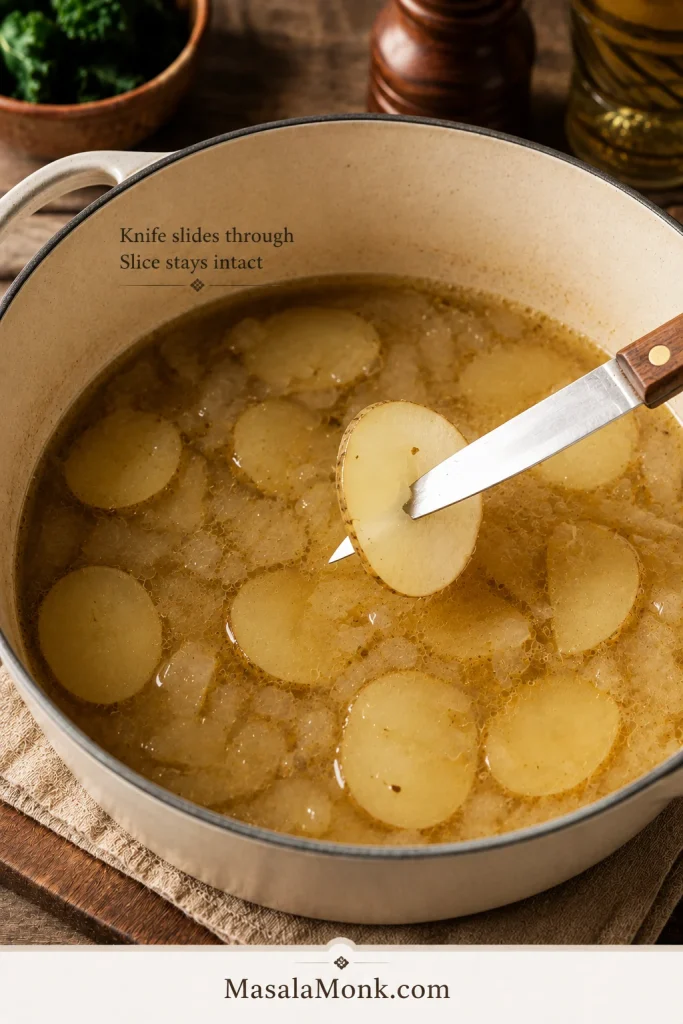
Simmer the potatoes. Pour in the chicken broth and scrape the bottom well so the browned bits dissolve into the liquid. Add the potatoes, black pepper and ¼ teaspoon salt. Bring to a boil, then reduce to a steady simmer. Cook 12–16 minutes, checking early. The potatoes are ready when a knife or fork passes through without meeting a chalky center and the slice holds together when lifted.
Return the sausage and add the kale. Stir the sausage back in, then add the kale. Simmer 3–5 minutes, until the leaves bend easily onto a spoon. Mature kale may need another minute. Before the cream goes in, the soup will look fairly brothy—that is exactly where it should be.
Finish and Serve
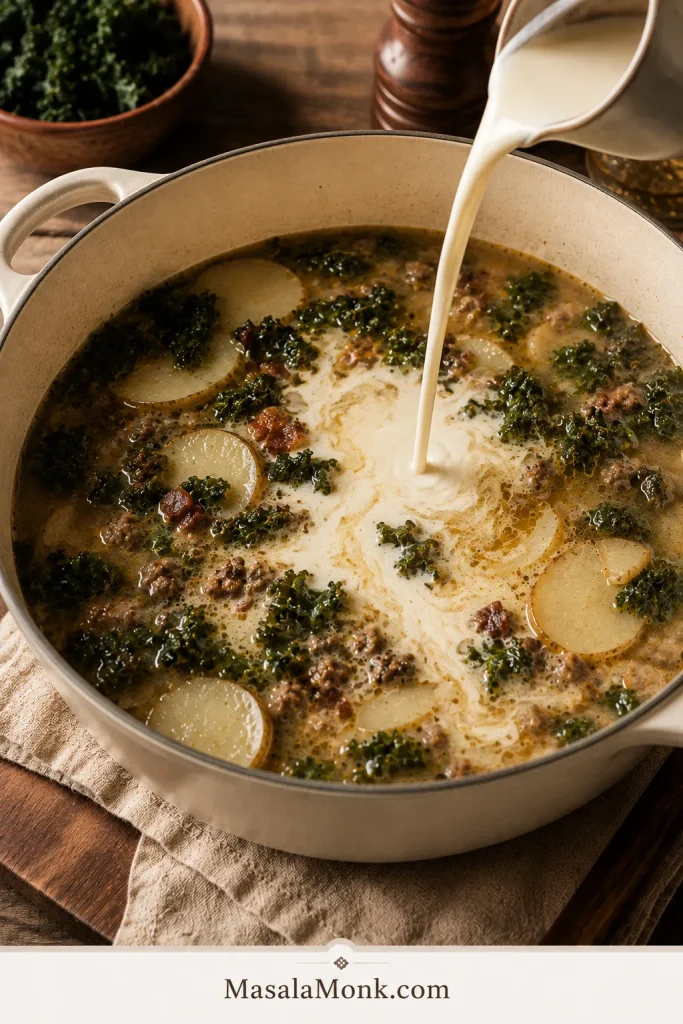
Finish with cream and season. Reduce the heat to low. Stir in the heavy cream and about half of the cooked bacon. Warm for 2–3 minutes. The broth will turn paler and more opaque while the sausage, potatoes and kale remain clearly visible. Taste and add more salt, black pepper or red pepper only as needed. If the salt is right but the soup tastes heavy or muted, stir in ½ teaspoon white-wine vinegar, taste, and add a little more only if the broth still needs brightness.
Serve. Ladle into bowls and scatter over the remaining crisp bacon. Add Parmesan or extra red pepper at the table if you like.
Recipe Notes
Half-and-half: use the same starting volume. Stir a ladle of hot broth into refrigerator-cold half-and-half, then add the warmed mixture over low heat.
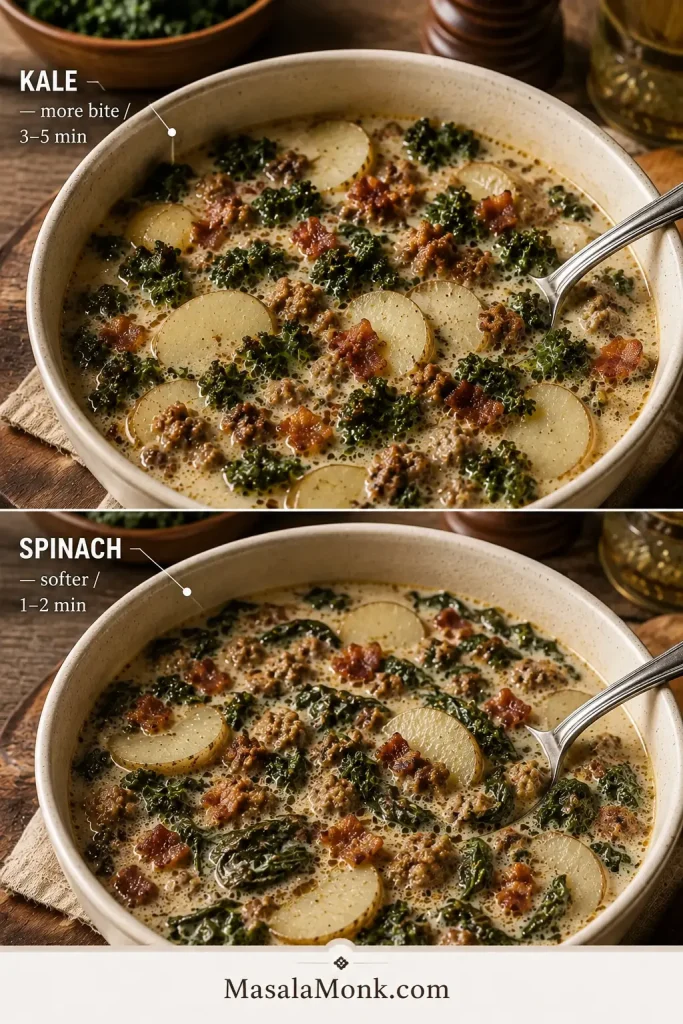
Spinach: replace the kale and add the spinach only during the final 1–2 minutes.
Crispier bacon: keep all of the cooked bacon out of the soup and add it only at serving.
Doubling: use at least an 8-quart pot and brown the sausage in batches. Double the ingredient quantities, but do not double the potato cooking time; check them by tenderness.
Before serving: give the finished pot one gentle bottom-to-top stir so the sausage and kale are evenly distributed from the first bowl to the last.
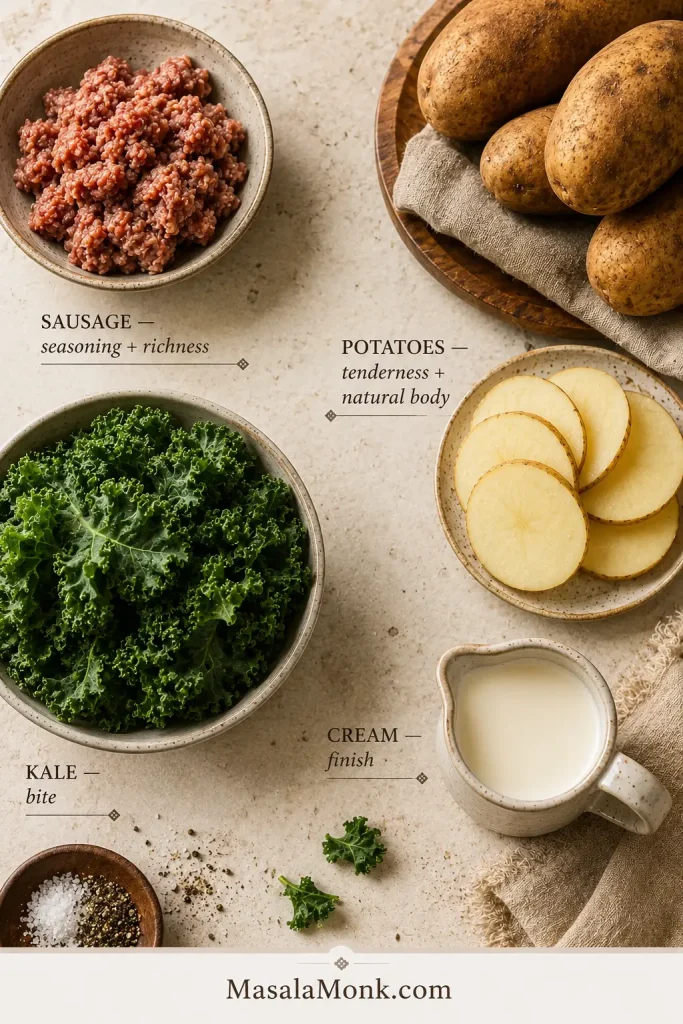
Get these four ingredients right and most of the soup takes care of itself. Sausage brings much of the seasoning, potatoes add body, kale keeps some bite in the spoon, and cream rounds everything out at the end.
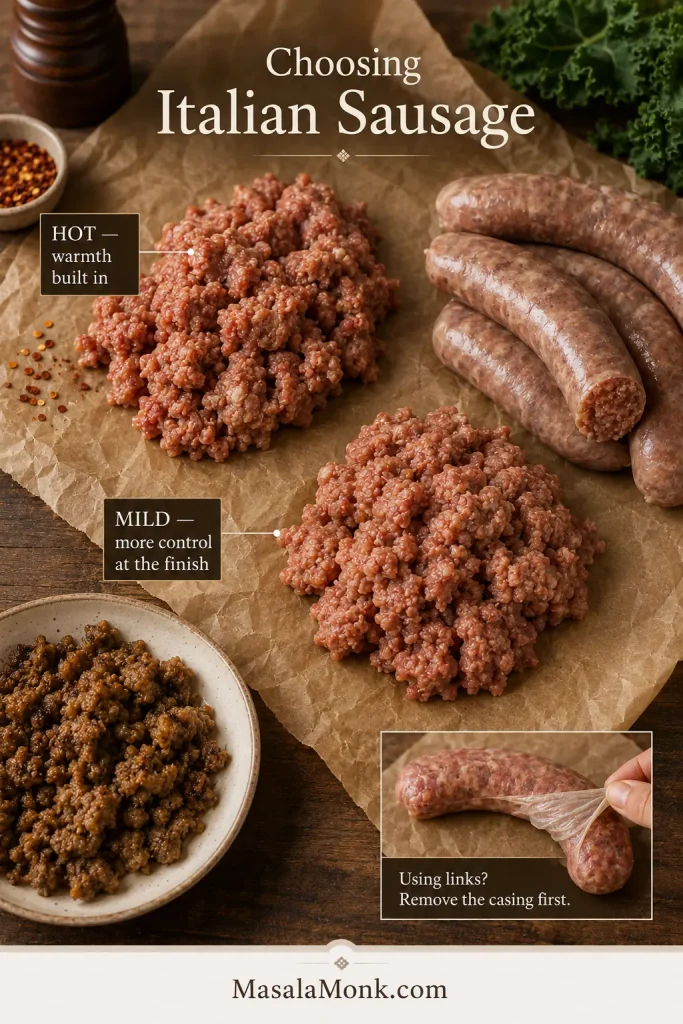
Which Italian Sausage Is Best for Zuppa Toscana?
Most of the seasoning in this soup comes from the sausage, so hot versus mild changes more than just the heat. Hot Italian pork sausage brings more spice into the broth from the beginning; mild sausage gives you more control at the end.
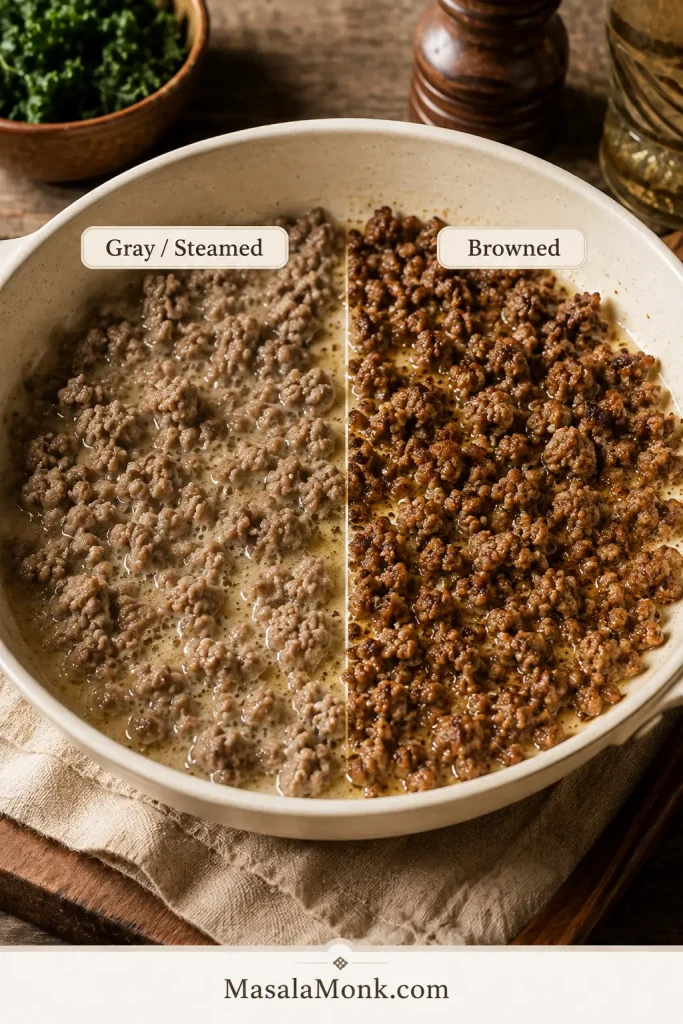
The sausage seasons the broth as it browns, so real color matters more than perfectly even crumbles. Bulk sausage is easiest, but links work just as well once the casings are removed.
Aim for medium and smaller crumbles with real browned edges—not uniformly gray, finely broken meat.
Giving sausage room to brown pays off in sausage pasta too, where those browned edges become part of the sauce rather than disappearing under it.
Best Potatoes for Zuppa Toscana—and Why the Cut Matters
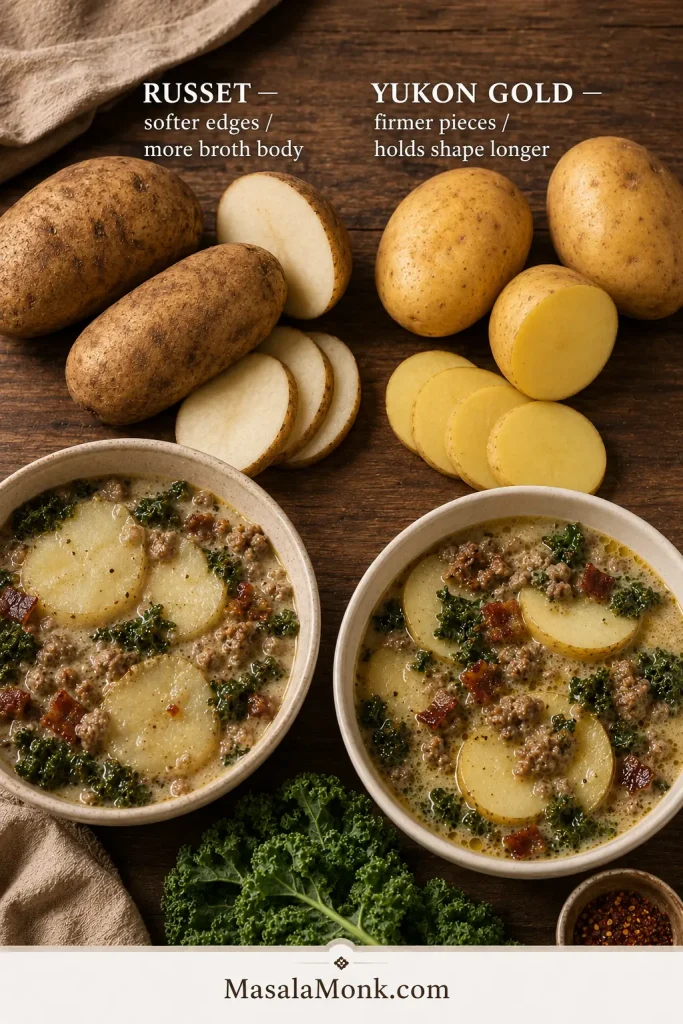
Russets suit this version particularly well because their starchier edges give the broth some natural body.
Yukon Golds are a good alternative when you want firmer, tidier pieces. Russets soften more around the edges; Yukons hold their shape longer.
The cut determines the clock. Pieces around ¼ inch / 6 mm thick cook quickly while keeping enough structure to survive the spoon.
Keep the slices close to ¼ inch / 6 mm thick; matching thickness matters more than matching shape.
A knife should slip through without resistance while the slice stays intact when lifted.
Test one of the thickest slices. If it is tender and still intact, the smaller pieces are usually ready too.
Kale, Spinach and the Creamy Finish
Choosing Your Greens
For this soup, curly kale is the first choice. Spinach works too, but gives the bowl a much softer green.
If you prefer more bite in each spoonful, kale is the better choice. Remove the tough stems and chop the leaves small enough to sit comfortably on a spoon. Lacinato or Tuscan kale works as well and may soften faster.
Fold kale in by the handful so it wilts without rough stirring once the potatoes are tender.
Choosing the Cream
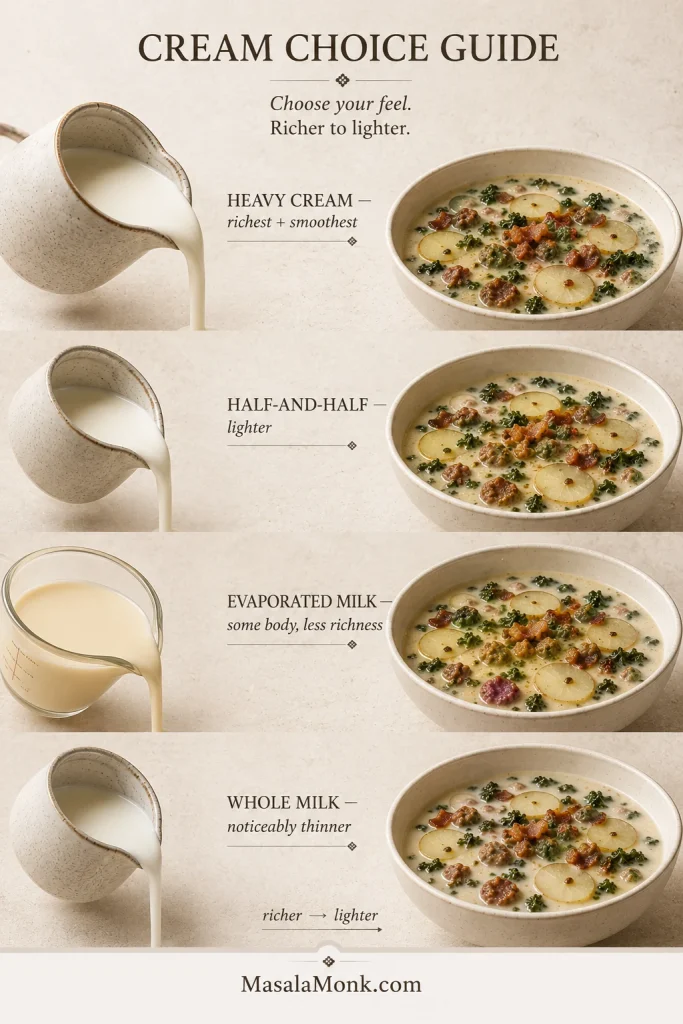
Heavy cream gives the richest, smoothest finish. Half-and-half is lighter, evaporated milk keeps some body with less richness, and whole milk makes the broth noticeably thinner.
Lighter dairy makes a thinner finish; let the potatoes provide more of the body rather than simply adding more dairy.
Add the dairy near the end and avoid prolonged hard boiling. Lower-fat choices benefit from gentler handling, but the goal stays simple: a creamy soup that still tastes clearly of sausage and savory broth.
Stir gently at the finish—the cream only needs to disperse, and tender russets can break if the pot is overworked.
Adding the cream near the end works in tomato basil soup too, keeping it smooth without muting the tomato base.
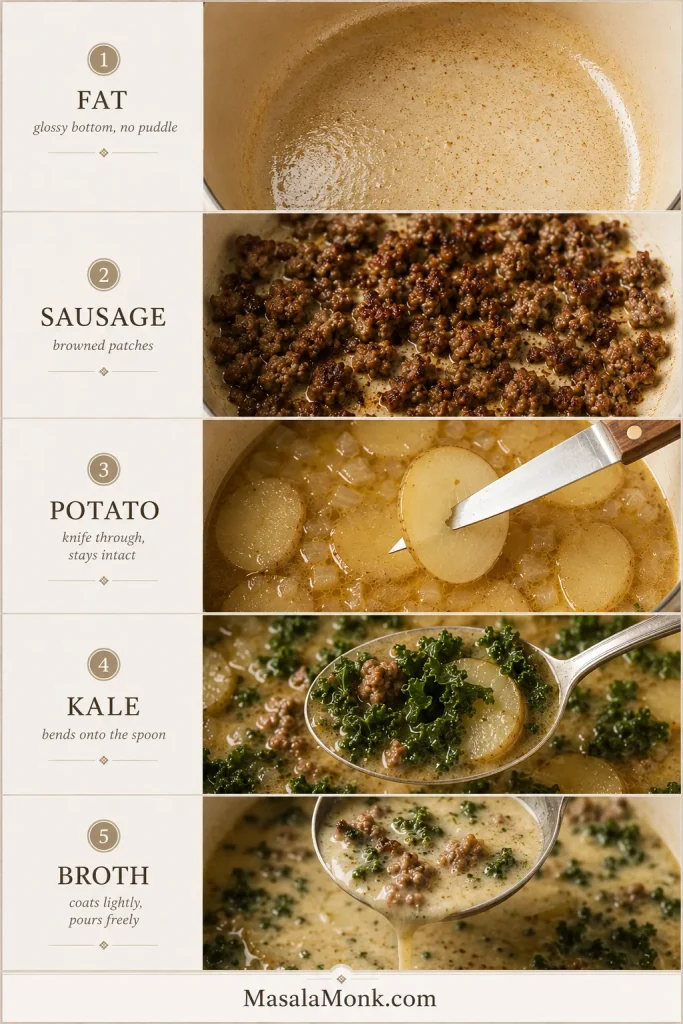
Once those choices are settled, the timer matters less than recognizing a handful of visual and tactile checkpoints.
Sausage: browned patches rather than uniformly gray crumbles.
Potatoes: the knife slips through and the slice stays intact.
Kale: the leaves bend into the spoon without leathery resistance.
Broth: creamy enough to coat lightly, loose enough to pour freely.
Rendered bacon fat: after the bacon comes out, the pot should look evenly glossy rather than flooded. Tilt it briefly if you are unsure; a visible puddle means more should come out.
Onion, garlic and fond: soften the onion over the browned bits and scrape up what releases easily. The broth will lift the rest, so the pot does not need to look perfectly clean before you move on.
Adjust the Creaminess and Seasoning
Creamy is a finish here, not a thickness category.
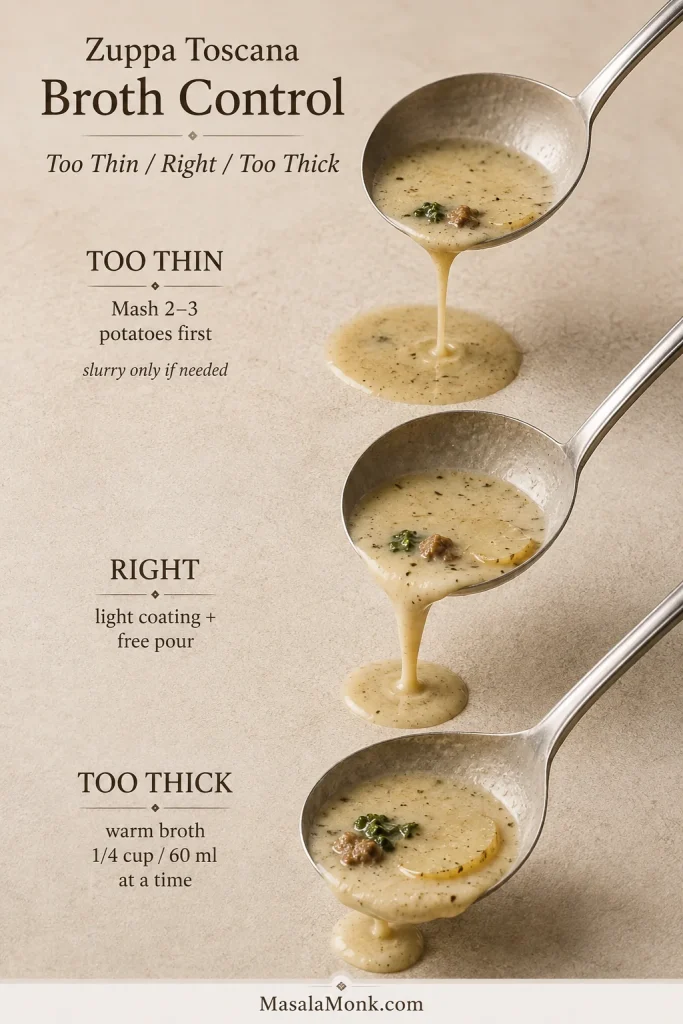
The right broth leaves a light film on the ladle and still pours freely.
If your soup looks thinner than expected after the cream goes in, give the potatoes a chance to help before reaching for a thickener. Mash two or three cooked pieces into the broth and let that starch disperse for a minute. If it is still thinner than you want, whisk together 1 tablespoon cornstarch and 1 tablespoon cold water, add half the slurry, simmer for a minute and reassess.
Too thick is easier: add warm broth in ¼-cup / 60 ml splashes until the ladle moves easily again.
Adjust in small steps, stir, then check another ladleful before changing anything else.
Then season in order: salt first, spice second, acidity last. Bacon, sausage and packaged broth vary enough that the soup itself is the best guide.
Troubleshooting: Fix the Soup You Have
This is a forgiving soup, and most problems are easier to correct than they first look. Match what you are seeing to the table before changing several things at once.
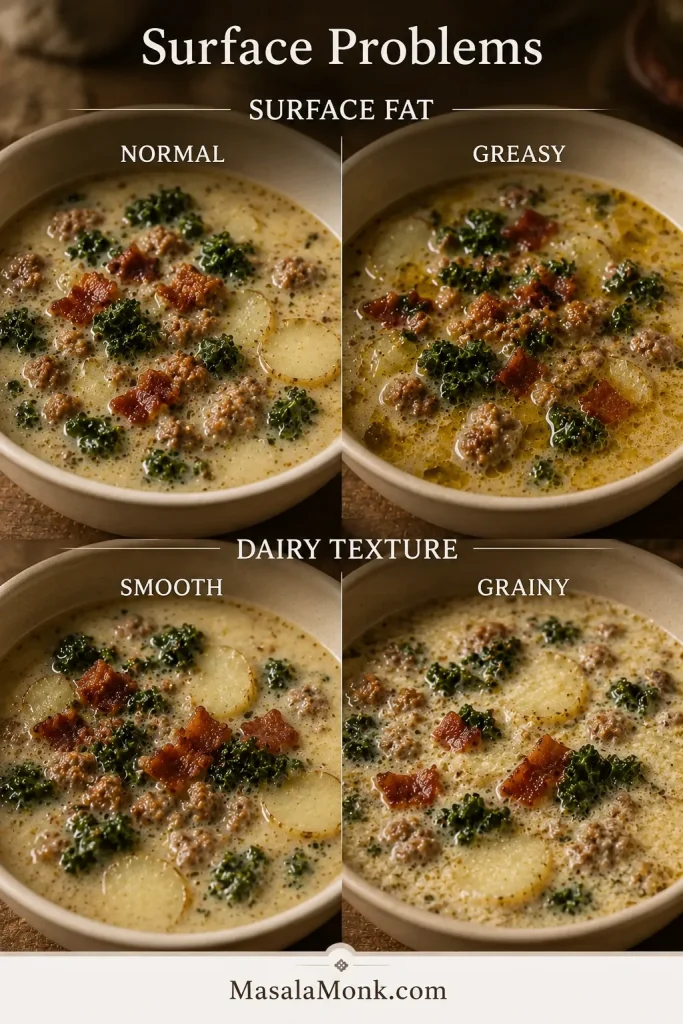
Grease forms shiny pools; overheated dairy looks finely speckled through the broth.
Texture and Doneness Problems
Problem
What to do now
Next time
Greasy
More cream will not fix the greasiness. Let the surface settle and skim the obvious pools instead.
Spoon away more rendered fat before cooking the onion.
Too thin
Mash 2–3 potato pieces into the broth. Use a small cornstarch slurry only if needed.
Keep the broth-to-potato ratio as written, and wait until the cream is in before adding extra liquid.
Too thick
Add warm low-sodium broth ¼ cup / 60 ml at a time.
Keep the simmer gentle and avoid unnecessary reduction.
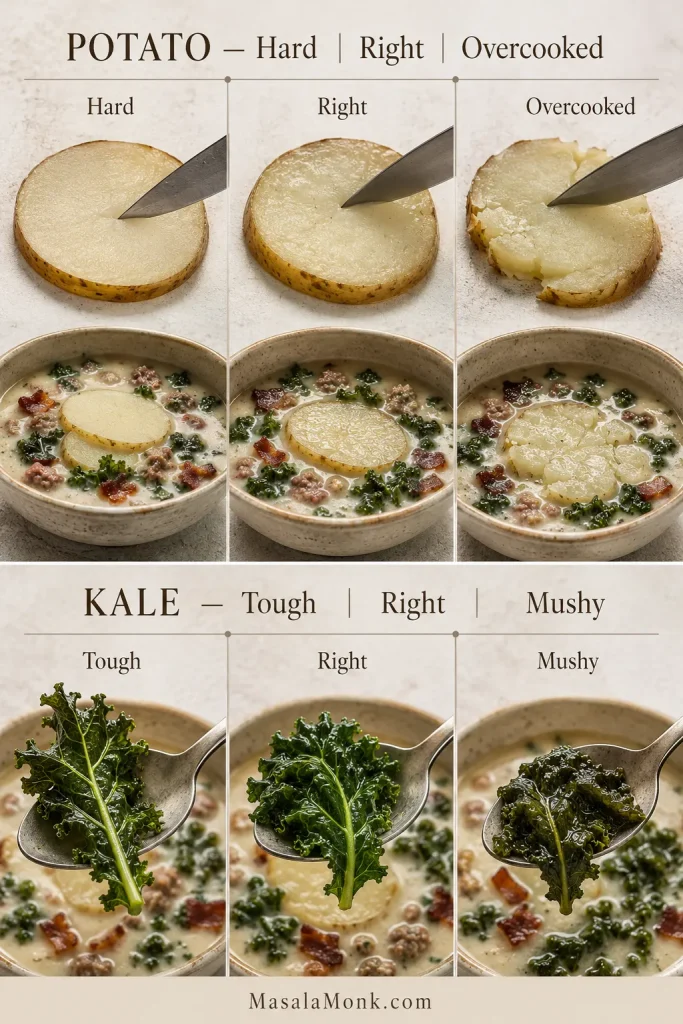
Hard potatoes
Keep simmering. If the kale is already tender, lift it out and return it once the potatoes are ready.
Keep the slices close to ¼ inch / 6 mm thick.
Potatoes falling apart
You cannot firm them back up, but you can keep them from breaking down further. Stir as little as possible and serve once the rest of the soup is ready.
Cut them slightly thicker or begin checking sooner.
Tough kale
Simmer another 1–2 minutes.
Remove thick stems and chop the leaves smaller.
Mushy kale
Once kale has gone very soft, its bite will not come back. Stop cooking and serve rather than softening it further.
Add the kale later.
Potato and Kale Doneness at a Glance
Potato and kale can finish at different times—judge each on its own.
Dairy and Seasoning Problems
Problem
What to do now
Next time
Grainy dairy
Take the soup off high heat and stir gently. The texture may improve, although it may not become completely smooth again.
Add dairy near the end and avoid prolonged hard boiling.
Bland
Add salt gradually, then check black pepper or red pepper. Consider acidity only after the salt is right.
Give the sausage time to brown and taste the whole soup before serving.
Too salty
Add unsalted broth ¼ cup / 60 ml at a time, then reassess both the seasoning and thickness.
Use low-sodium broth and keep early seasoning light.
The swaps above keep the soup fairly close to the main recipe. These next changes alter the flavor or texture more noticeably, but they can still work well.
No bacon: brown the sausage directly and add a small splash of olive oil only if the pot looks dry. The soup loses some smoke but keeps its basic character.
Chicken or turkey Italian sausage: use the same weight. Expect a leaner, slightly less rich soup. Ground poultry should reach 165°F / 74°C.
Cauliflower: replace some or all of the potato with bite-size florets and cook only until tender. The soup will have less natural starch and a lighter body.
Plant cream: choose a rich, unsweetened product rather than thin plant milk. Flavor and body vary considerably by brand.
Gluten-free: the base recipe uses no flour. Check the sausage, bacon and broth labels when the soup needs to be reliably gluten-free.
A fully vegan version needs more than a dairy swap. It tastes best when the plant-based sausage, vegetable broth and dairy-free cream are chosen to work together.
Can You Adapt Zuppa Toscana for a Slow Cooker or Instant Pot?
Yes, but the potatoes cook differently and the timing changes enough that these are better treated as separate methods rather than direct stovetop conversions. Whichever appliance you use, keep the same basic order: brown the sausage first, cook the potatoes in the broth, then add the greens and cream near the end.
Slow cooker: Brown the sausage before it goes into the slow cooker so the broth gets the benefit of that browning without carrying all of the rendered fat with it. Cook the potatoes in the broth until tender, then add the kale and cream near the end instead of letting either spend the whole cook in the slow cooker.
Finishing the richer ingredients later works well in slow cooker broccoli cheese soup too, after the vegetables have had their long cook.
Instant Pot: Use sauté to brown the sausage, then pressure-cook the potato-and-broth base without the cream. Add kale and dairy only after the lid is open. For consistent potatoes, use a pressure-cooker-specific recipe rather than guessing from the stovetop timing.
What Is Zuppa Toscana? Olive Garden Copycat vs Tuscan Soup
“Zuppa Toscana” simply means “Tuscan soup,” but the creamy sausage, potato and kale version familiar to many American diners is closely associated with Olive Garden.
This recipe is deliberately an Olive Garden-style Zuppa Toscana. Tuscany itself has a much broader soup tradition, so this is not presented as a definitive traditional Tuscan formula.
If you want an Italian-style soup built around vegetables, beans, pasta and tomato broth instead, Minestrone Soup heads in a completely different direction.
What to Serve With Zuppa Toscana
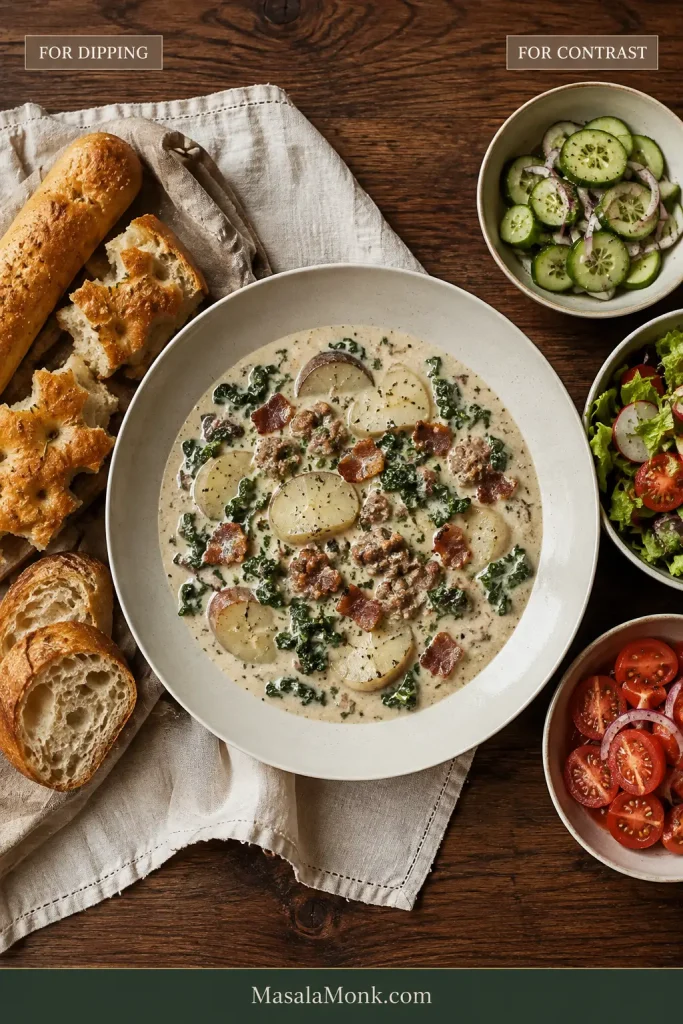
A generous bowl already gives you sausage, potatoes and greens, so dinner does not need much else. Something crisp, sharp or crusty alongside it is usually enough.
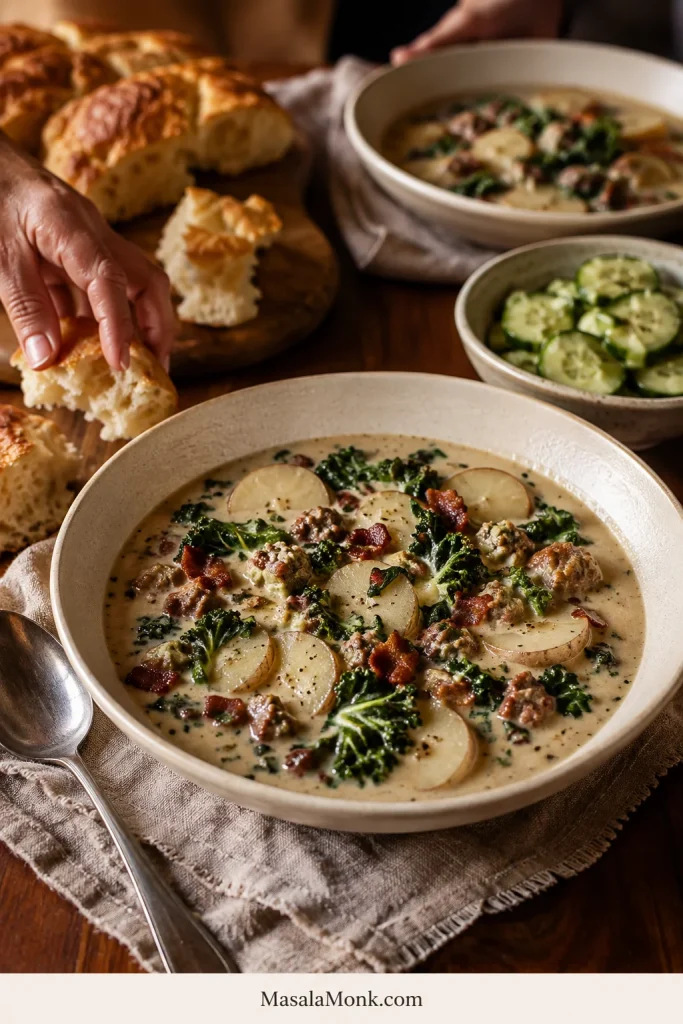
For dipping, go with warm breadsticks, focaccia or a crusty loaf. For contrast, choose something fresh and acidic—a crisp green salad, simple tomato salad or cucumber salad with vinegar, dill and onion.
Bread handles the dipping; a crisp, acidic salad keeps the meal from feeling heavy.
If you want the bread to be part of the meal, sourdough focaccia gives you crisp olive-oil edges and a soft middle that soaks up the broth left at the bottom of the bowl.
A bowl, a piece of good bread and something fresh on the side—and dinner is essentially handled.
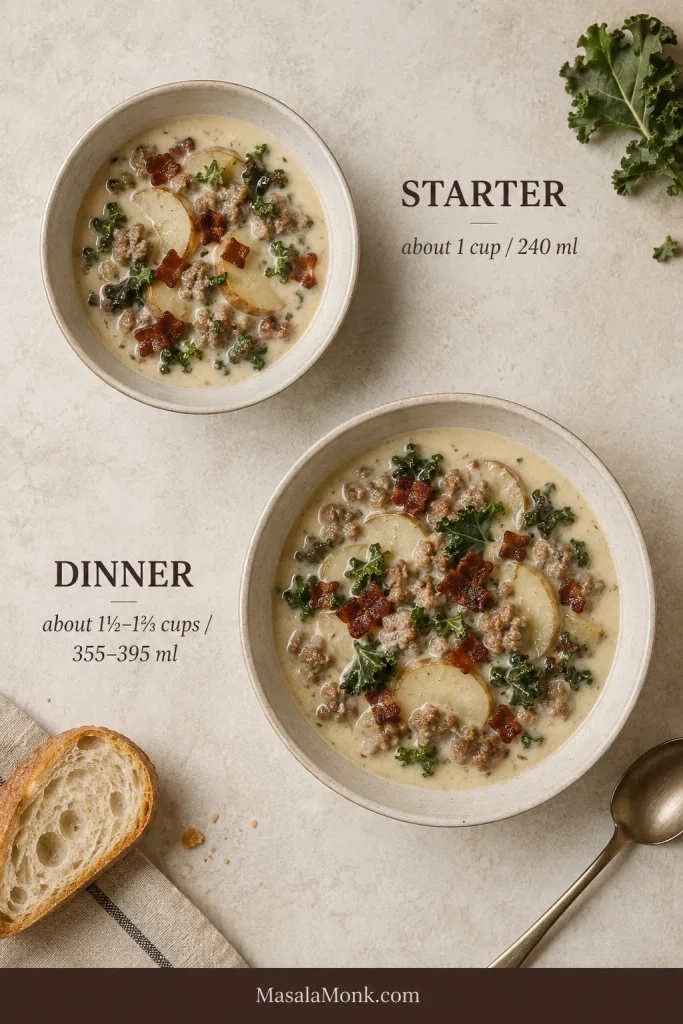
How Much Soup Is One Serving?
Olive Garden’s nutrition information lists a restaurant soup serving as 8 fl oz, or about 1 cup / 240 ml. That works well as a starter at home too. For dinner, allow roughly 1½–1⅔ cups / 355–395 ml per person.
Think starter versus dinner: about 1 cup for the first, roughly 1½–1⅔ cups for the second.
Make Ahead, Store, Freeze and Reheat
Make Ahead
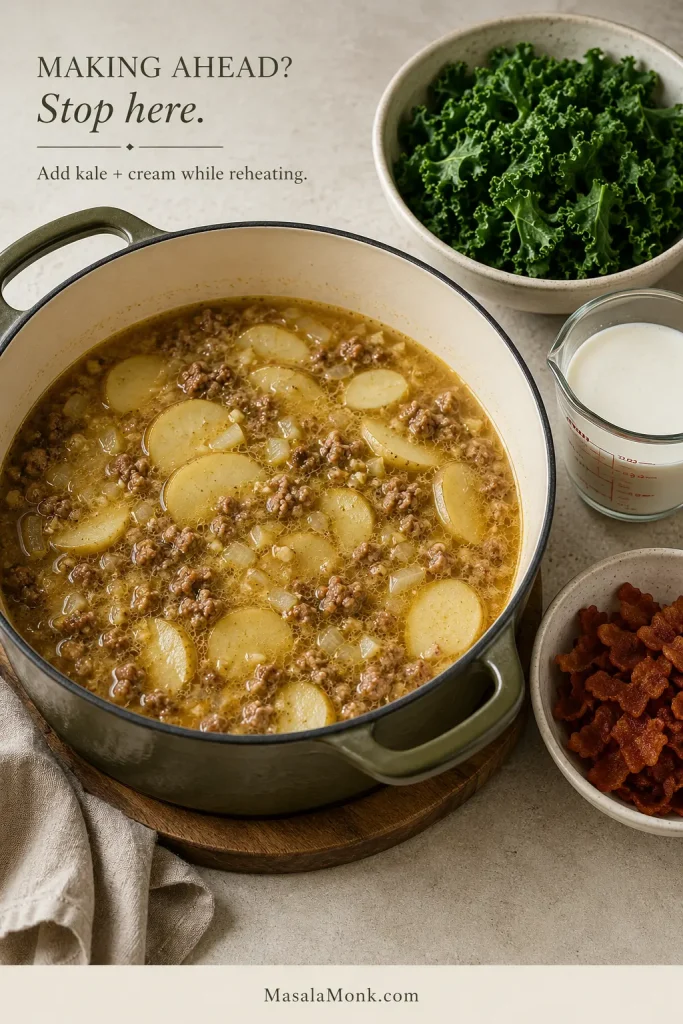
You can make the soup earlier the same day or the night before. For the freshest greens and smoothest finish, stop once the potatoes are tender, then add the kale and cream while reheating.
That is a useful stopping point when you are cooking for guests: most of the work is finished, and the last few minutes happen just before serving.
Keep the bacon separate until serving so it stays crisp.
Refrigerate
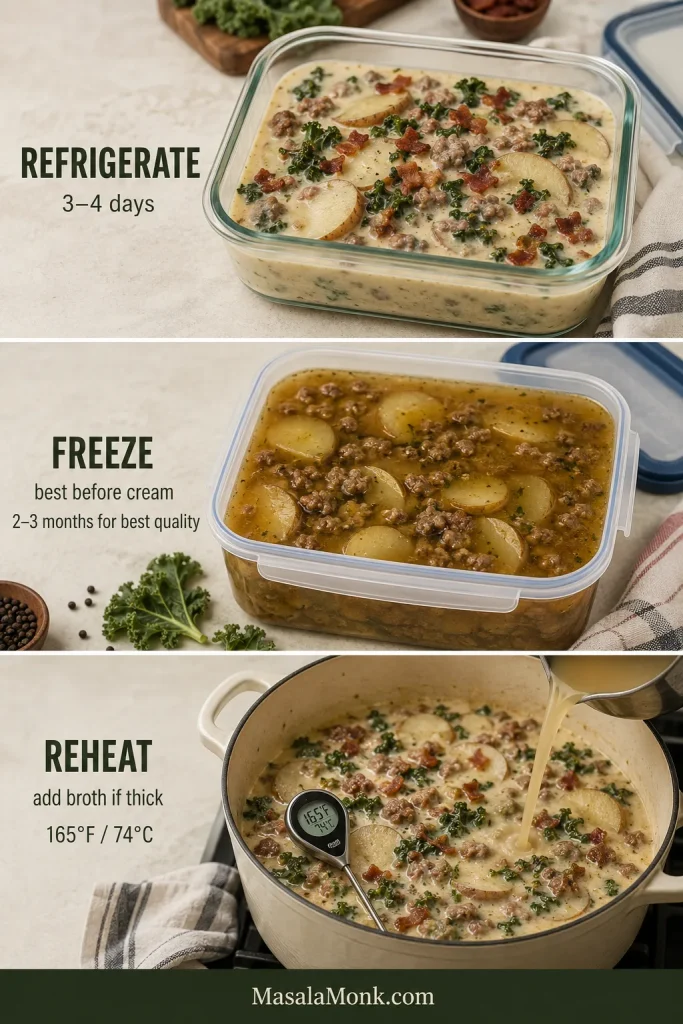
Divide a large batch among shallow covered containers so it cools quickly, and refrigerate within 2 hours rather than leaving the whole Dutch oven on the counter. Use refrigerated leftovers within about 3–4 days.
Freeze
The best texture comes from freezing the sausage-and-potato base before adding the cream. Potatoes may soften after thawing, while fresh cream gives the reheated soup a smoother finish.
Frozen soup is best within about 2–3 months. Thaw the base, reheat it thoroughly, then add fresh kale and cream.
Reheat
Do not be surprised if refrigerated Zuppa Toscana looks considerably thicker the next day. The potatoes keep absorbing broth as the soup rests. Add enough broth while reheating to bring back a flowing consistency.
Reheat while stirring so the dairy warms evenly, then bring the soup briefly to a full boil before removing it from the heat. Leftovers should reach 165°F / 74°C. Planned make-ahead batches keep the smoothest texture when the cream is added after the base is hot.
Storage at a glance: refrigerate finished soup promptly, freeze the cream-free base when possible, and judge whether reheated soup needs extra broth only after it is hot and stirred through.
For current cooling, refrigerator and reheating recommendations, see the USDA leftovers guidance.
It is also the kind of leftover that makes tomorrow’s lunch feel already taken care of.
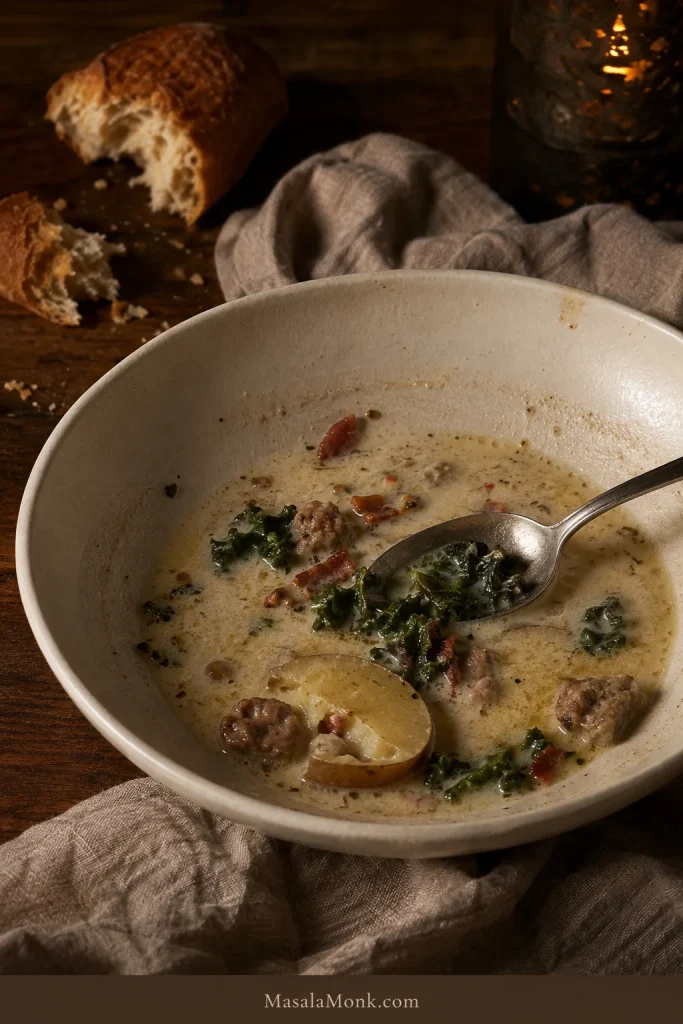
By the time the bowls hit the table, the potato should split easily with the spoon, the kale should curl into the creamy broth, and browned sausage should be tucked through nearly every spoonful. Scatter the crisp bacon over the top while it can still crackle against the softer soup.
If you make it, tell me which route you took: hot or mild sausage—and did you stay with kale or use spinach?
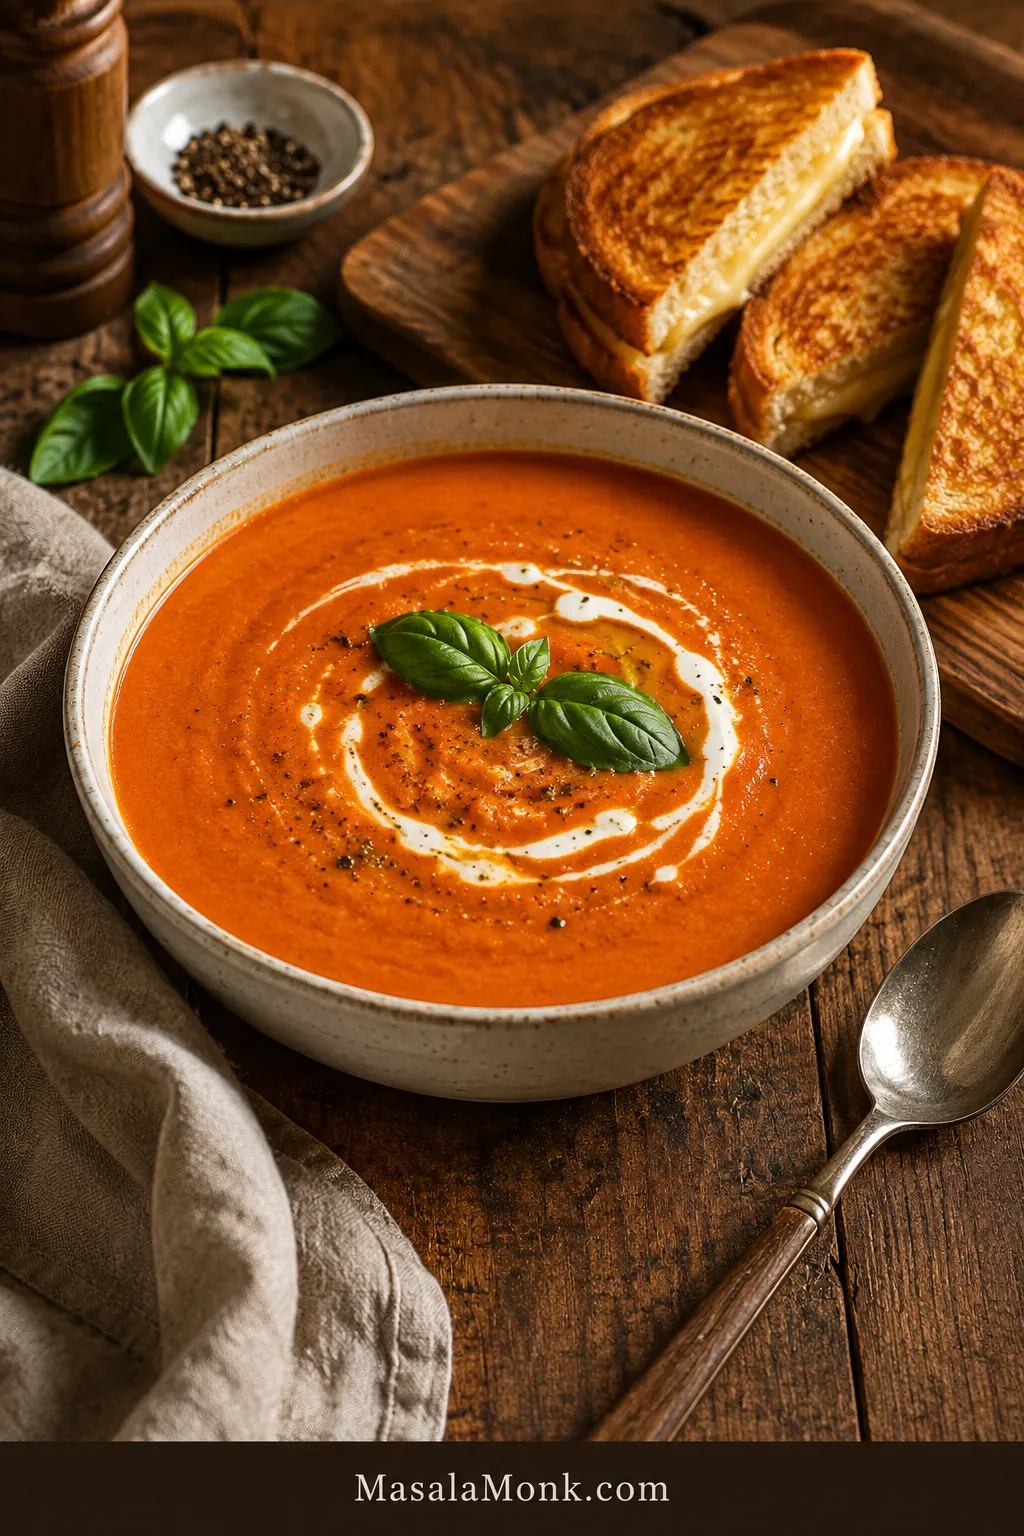
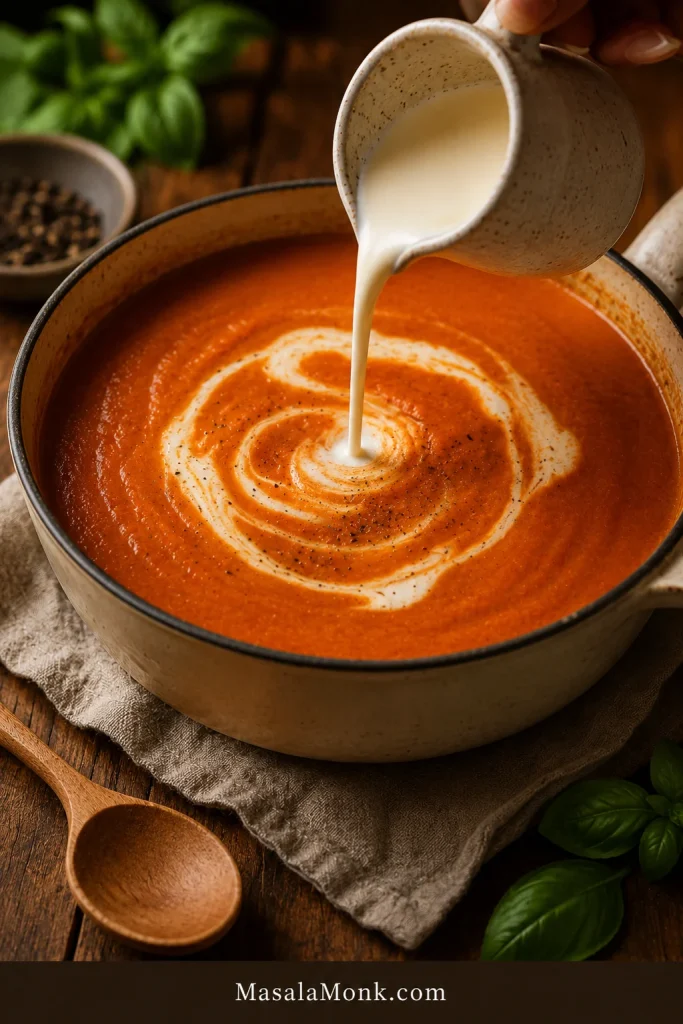
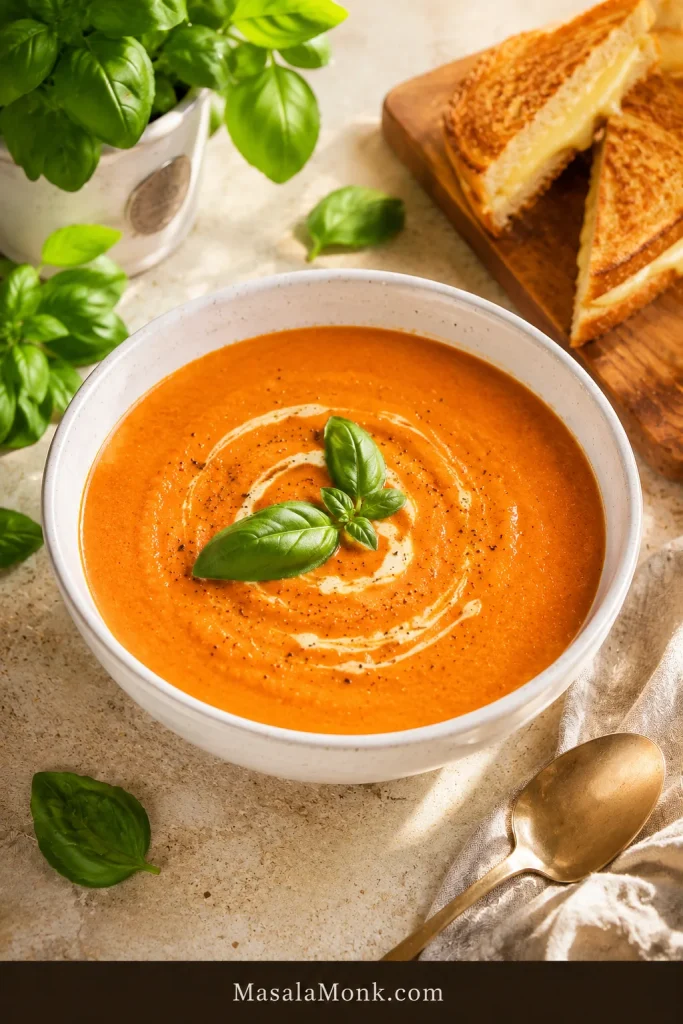
A good tomato bisque should feel like tomato soup got dressed up for grilled cheese night: glossy, velvety, rich enough to comfort you, but still bright enough to taste like tomatoes. This is the bowl you make when classic tomato soup sounds good, but you want it creamier, smoother, and a little more special.
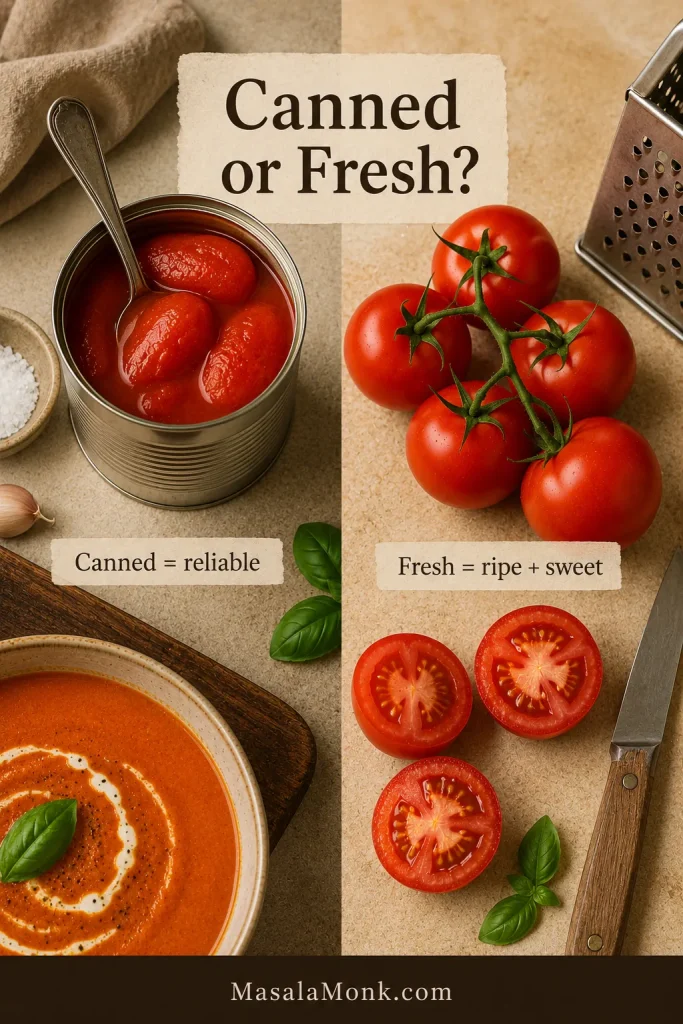
The main recipe starts with canned tomatoes because they are reliable, pantry-friendly, and easy to turn into a rich, blended soup. When fresh tomatoes are ripe and sweet, you can use those too. Either way, the method is simple: cook the vegetables, deepen the tomato paste, simmer the tomatoes, blend, then finish gently with cream.
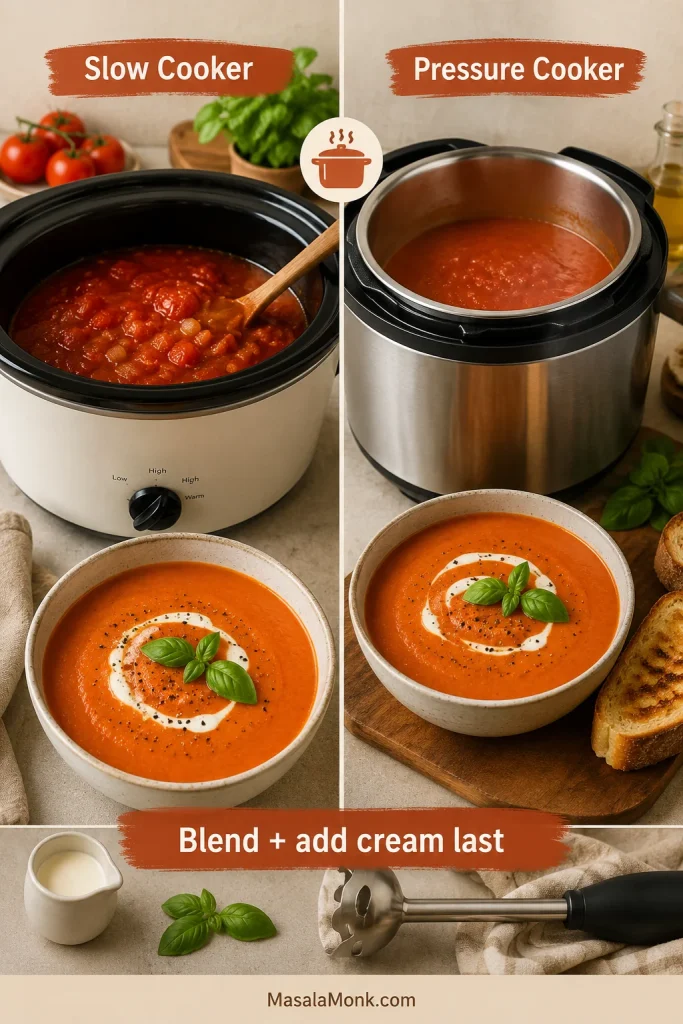
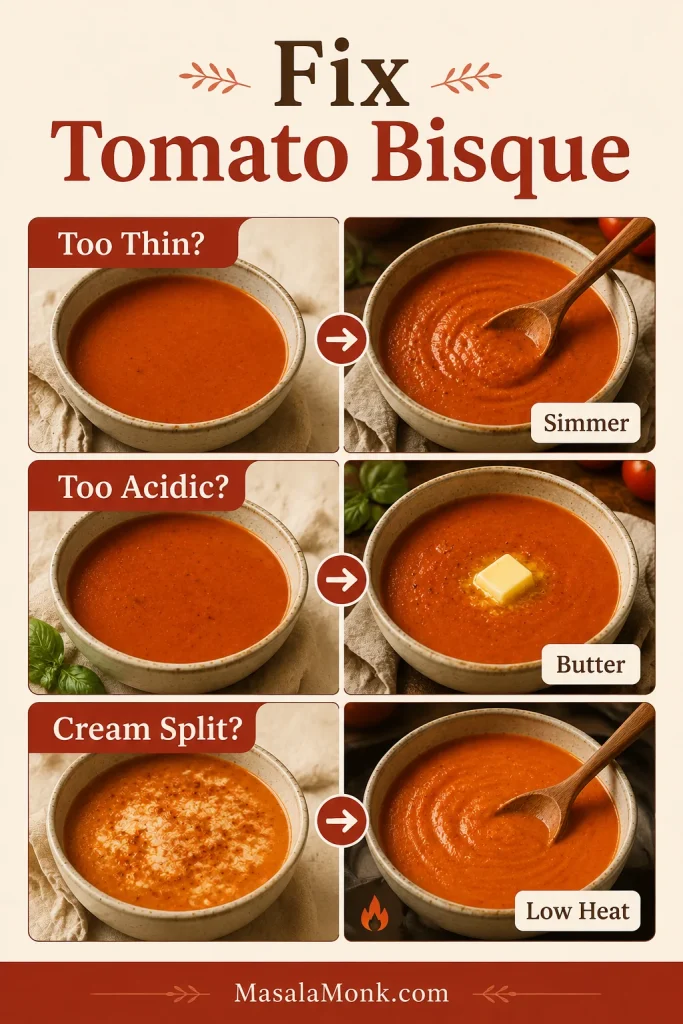
The one rule to remember is this: blend first, loosen later, cream last. That keeps the soup silky instead of watery, rounded instead of heavy, and creamy without splitting.
If you want the lightest fresh-tomato bowl, make this fresh tomato soup recipe. This one is the richer lane: blended, cream-softened, spoon-coating, and built for a grilled cheese dunk.
For most home cooks, tomato bisque means tomato soup made smoother, richer, and creamier. It is blended until silky and finished with cream, milk, butter, or a creamy dairy-free alternative.
Tomato soup can be light, brothy, chunky, or fresh-tasting. A bisque is usually smoother, thicker, fuller-bodied, and more rounded. Some restaurant-style versions use a roux, but you do not need one for a good homemade bowl.
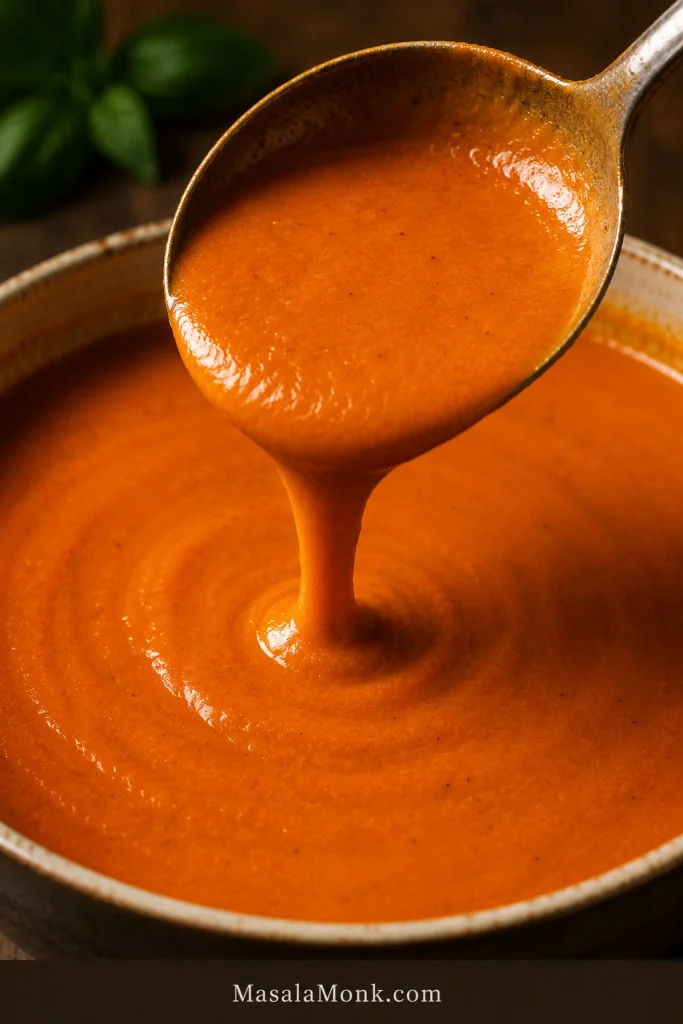
The promise: This recipe stays spoon-coating because the broth is controlled early, the vegetables are blended into the base, and the cream goes in only after the soup is already smooth. It is better to start slightly thick; the blender will tell you what the soup needs.
Texture Cue Before You Start
Before serving, check the spoon. The bisque should cling in a smooth layer instead of running off like broth or sitting thick like sauce.
At a Glance
Here is the recipe logic before you start.
Main version
Easy creamy canned tomato bisque
Total time
About 40 minutes
Servings
4 large bowls or 6 smaller bowls
Yield
About 6 to 7 cups soup
Tomatoes
1 can whole peeled or crushed tomatoes, 28 oz / about 794 g
Fresh tomato swap
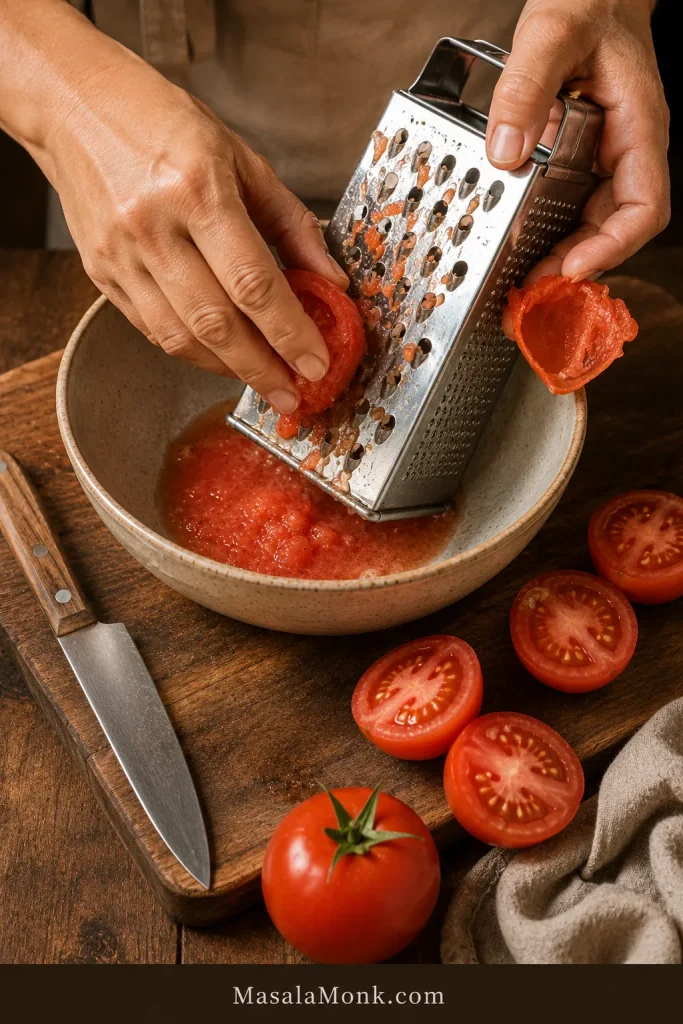
2.5 lb / about 1.1 kg ripe tomatoes, or up to 3 lb / 1.35 kg if watery
Broth for canned tomatoes
Start with 2 cups / 480 ml
Broth for fresh tomatoes
Start with 1 to 1 1/2 cups / 240 to 360 ml because fresh tomatoes release liquid
Cream
1/2 cup / 120 ml heavy cream, half-and-half, or cashew cream
Best tool
Immersion blender
Texture cue
Smooth, glossy, spoon-coating, and pourable
Best pairing
Grilled cheese
Recipe Card
Prep time: 10 minutes Cook time: 30 minutes Total time: 40 minutes Servings: 4 large bowls or 6 smaller bowls Yield: About 6 to 7 cups Method: Stovetop Difficulty: Easy
Ingredients
2 tablespoons olive oil or butter, about 30 ml oil or 28 g butter
1 medium onion, chopped, about 150 g
1 medium carrot, chopped, about 70 to 80 g
1 celery rib, chopped, about 40 to 50 g
3 garlic cloves, minced, about 9 to 12 g
2 tablespoons tomato paste, about 30 g
1 can whole peeled tomatoes or crushed tomatoes, 28 oz / about 794 g
Fresh tomato option: use 2.5 lb / about 1.1 kg ripe tomatoes, or up to 3 lb / 1.35 kg if watery
2 cups vegetable broth or chicken broth, 480 ml, for canned tomatoes
For fresh tomatoes, start with 1 to 1 1/2 cups broth, 240 to 360 ml, plus more as needed
1 teaspoon dried basil or Italian seasoning
1/2 teaspoon dried oregano or thyme
1/2 teaspoon salt, then more to taste
1/4 teaspoon black pepper
Pinch of red pepper flakes, optional
1/2 cup heavy cream, half-and-half, or cashew cream, 120 ml
1 tablespoon butter, optional, for finishing, about 14 g
Fresh basil, Parmesan, croutons, or grilled cheese, for serving
Instructions
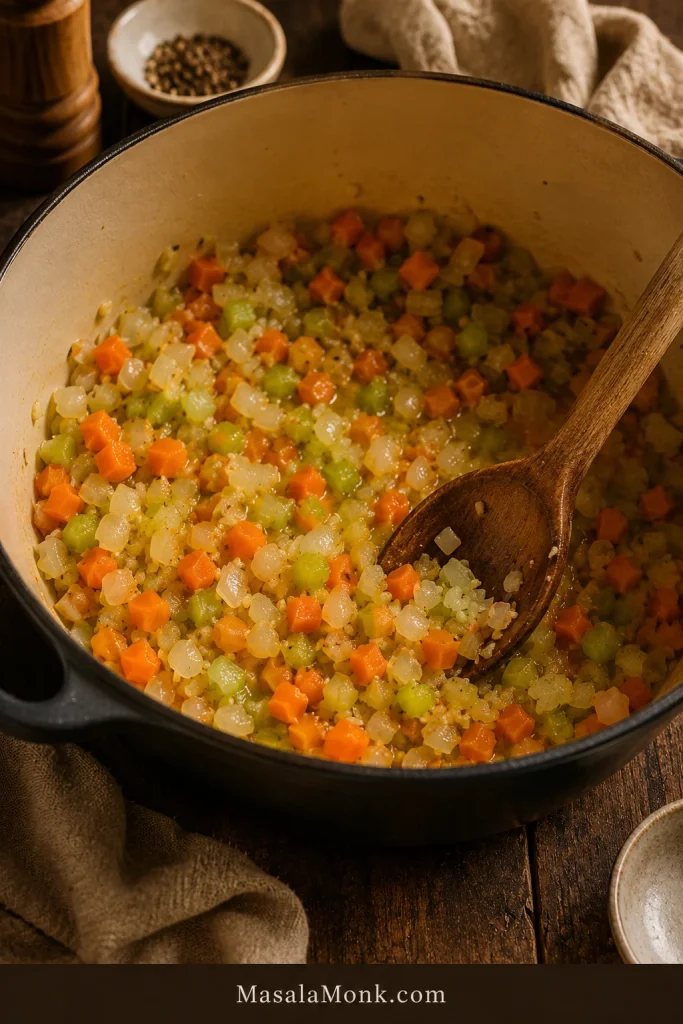
Warm the olive oil or butter in a large non-reactive soup pot or Dutch oven over medium heat.
Add the onion, carrot, and celery. Cook for 6 to 8 minutes, stirring often, until the vegetables soften and the onion turns translucent.
Add the garlic and cook for about 30 seconds, just until fragrant.
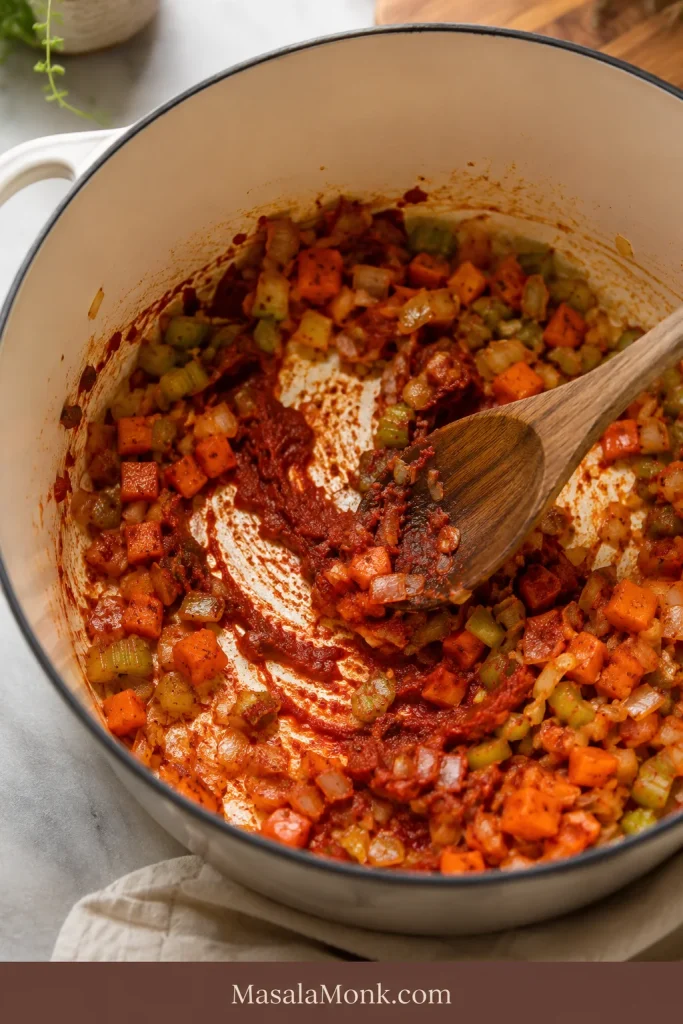
Stir in the tomato paste. Cook for 1 to 2 minutes, until it darkens slightly and smells deeper. If it starts sticking, splash in a spoonful of broth and scrape the bottom of the pot.
Add the canned tomatoes with their juices. If using whole peeled tomatoes, crush them lightly with a spoon in the pot.
Add 2 cups broth for canned tomatoes, or 1 to 1 1/2 cups broth for fresh tomatoes. Stir in the dried basil or Italian seasoning, oregano or thyme, salt, black pepper, and red pepper flakes if using.
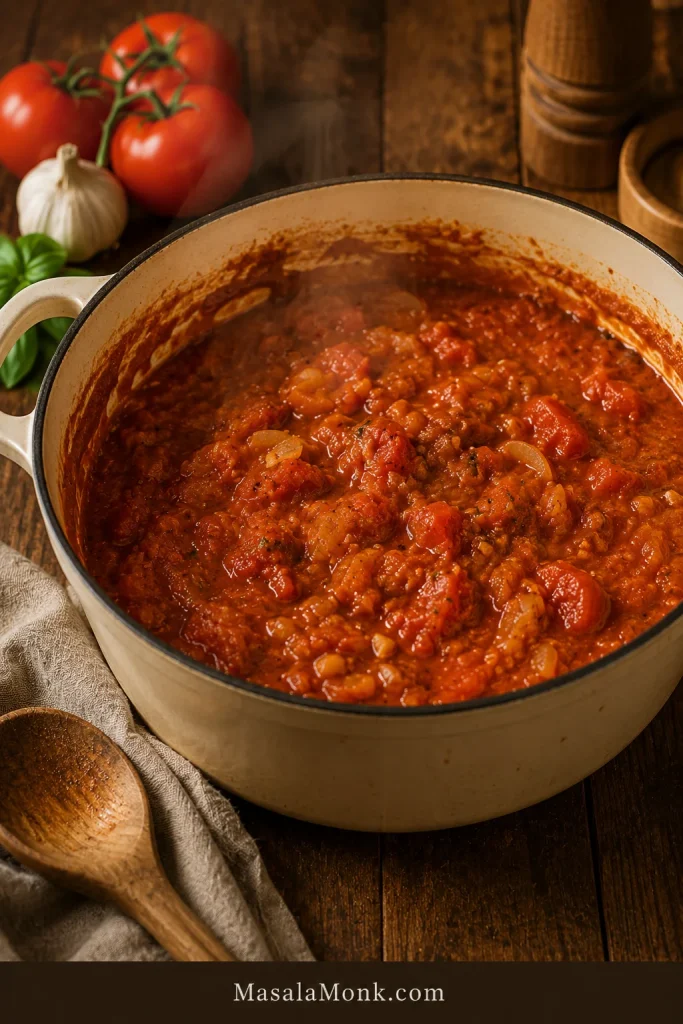
Bring to a gentle boil, then reduce the heat and simmer uncovered for 20 to 25 minutes, until the vegetables are very soft and the tomato flavor tastes less sharp.
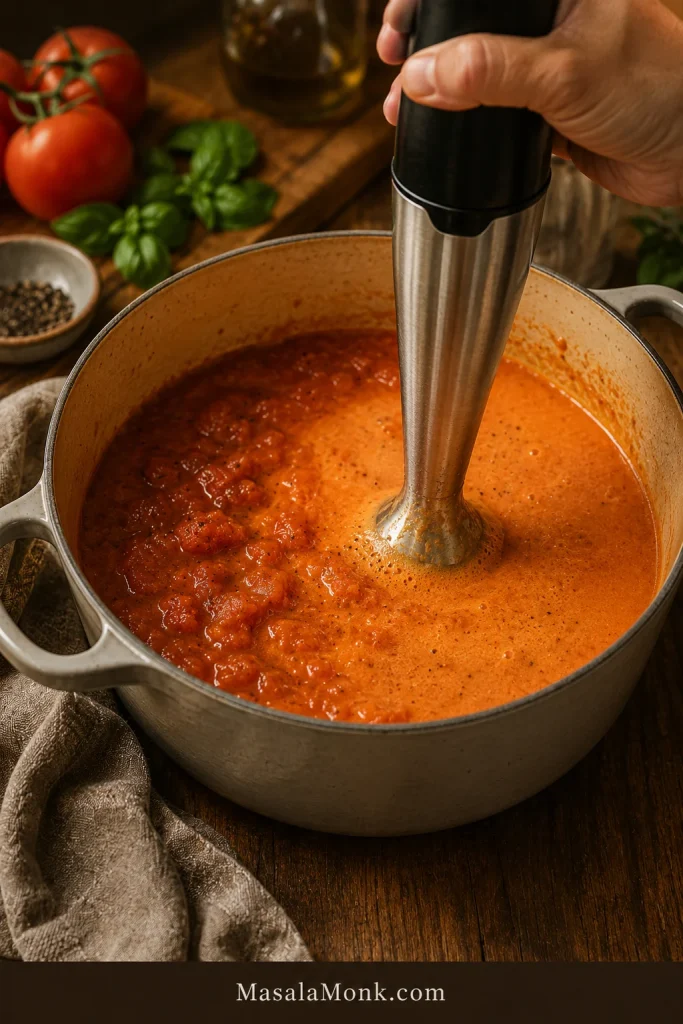
Blend the soup until smooth with an immersion blender. For an extra-silky texture, use a countertop blender in batches.
Check the texture. If the soup is too thick, add broth a little at a time until it is spoon-coating and pourable.
Lower the heat. Stir in the cream and warm gently for 2 to 3 minutes. Do not boil hard after adding cream.
Taste and adjust with more salt first. Add butter or Parmesan for richness, or basil for freshness.
Serve hot with fresh basil, croutons, Parmesan, or grilled cheese.
Recipe Notes
Best tomato choice: whole peeled tomatoes or crushed tomatoes.
Texture rule: blend first, loosen later, cream last.
Fresh tomato swap: use 2.5 lb / about 1.1 kg ripe tomatoes, or up to 3 lb / 1.35 kg if the tomatoes are watery.
Broth for fresh tomatoes: start with 1 to 1 1/2 cups / 240 to 360 ml broth because fresh tomatoes release more liquid.
Optional depth upgrade: simmer the soup with a small Parmesan rind, then remove it before blending. Or finish with a tiny splash of sherry vinegar or lemon juice if the soup tastes flat. Skip the Parmesan rind for dairy-free soup.
Thicker bowl: use the optional roux method or simmer uncovered a little longer.
Dairy-free soup: use vegetable broth, olive oil, and cashew cream.
This is the soup to make when you want comfort without a complicated cooking project. It works especially well when:
Tomato soup sounds good, but you want it richer and creamier.
Grilled cheese is already part of the plan.
A pantry dinner needs to feel more homemade than a plain can of soup.
Fresh tomatoes are out of season, but deep tomato flavor still matters.
Restaurant-style tomato soup sounds good, but a heavy floury roux does not.
For a lighter meal around the soup, a fresh side like this chickpea salad adds brightness and protein without making the bowl itself heavier.
Choose Your Version
The easiest reliable version starts with canned tomatoes, not fresh tomatoes and not canned tomato soup. Canned whole peeled tomatoes or crushed tomatoes give steady flavor, enough body, and repeatable results without waiting for perfect summer produce.
Make the main pot first, then choose the lane that fits your tomatoes, time, and mood. Once you make the base once, you will probably know your house version: basil-heavy, extra creamy, roasted, spicy, or built around grilled cheese.
You want…
Make this version
What to change
The easiest reliable bowl
Canned tomato bisque
Use 28 oz / 794 g canned whole peeled or crushed tomatoes
Fresh garden flavor
Fresh tomato bisque
Use 2.5 lb / 1.1 kg ripe tomatoes and start with less broth
Deeper fresh tomato flavor
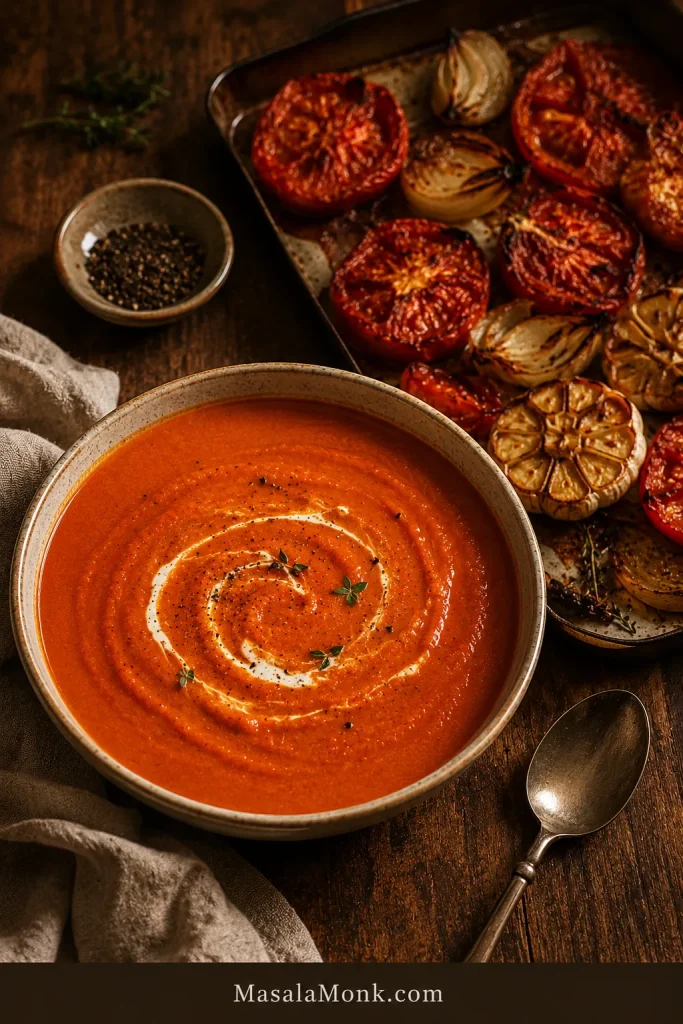
Roasted tomato bisque
Roast fresh tomatoes before simmering
Brighter herb flavor
Tomato basil bisque
Add fresh basil near the end, then blend
Smoky-sweet flavor
Roasted red pepper tomato bisque
Add one drained 12 oz / 340 g jar roasted red peppers
Restaurant-style thickness
Roux-thickened tomato bisque
Add a small butter-and-flour roux
Dairy-free creaminess
Vegan tomato bisque
Use vegetable broth and cashew cream
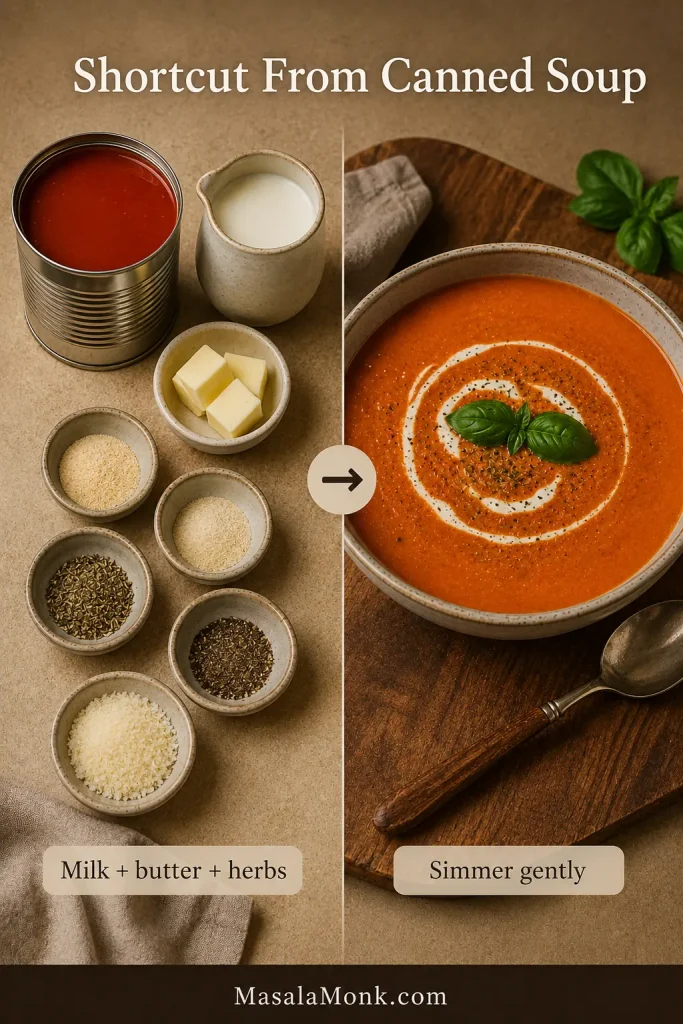
A quick pantry shortcut
Canned tomato soup bisque
Upgrade condensed tomato soup with milk or half-and-half, butter, herbs, and Parmesan
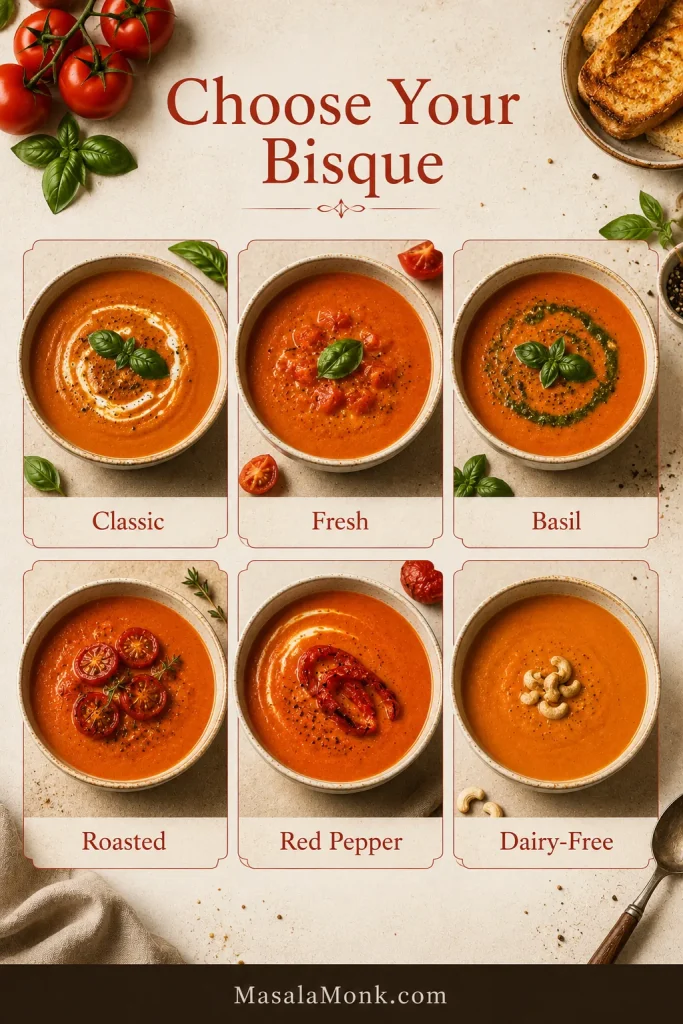
Visual Guide to Tomato Bisque Versions
Use this guide to choose your tomato bisque style, from classic and fresh to basil, roasted, red pepper, or dairy-free.
The recipe is not trying to be fancy. It is trying to keep the tomato flavor deep, the texture smooth, and the cream from taking over.
Tomato paste adds depth. Give it a minute in the pot and it stops tasting raw, turning deeper and almost sweet.
Onion, carrot, and celery soften the acidity. The carrot especially helps balance sharp tomatoes naturally.
Canned tomatoes make the result reliable. You do not have to wait for peak-season tomatoes to make a good bowl.
Blending creates body. The vegetables become part of the texture, not just flavor in the background.
Gentle cream keeps the flavor balanced. It should soften the tomato edge, not make the soup pale and sleepy.
Equipment You Need
The only tool that really changes the experience is the blender. Everything else is basic soup-pot cooking.
Large non-reactive soup pot or Dutch oven: stainless steel, enamel-coated cast iron, or a heavy nonstick soup pot works well.
Immersion blender: the easiest tool because you can blend directly in the pot.
Countertop blender: gives the silkiest texture, but hot soup must be blended carefully in batches.
Fine mesh sieve, optional: use it only if you want an ultra-smooth restaurant-style finish.
Hot blender safety: If using a countertop blender, do not fill the jar more than halfway. Vent the lid, cover it with a towel, and start on low speed. Hot soup expands quickly in a sealed blender.
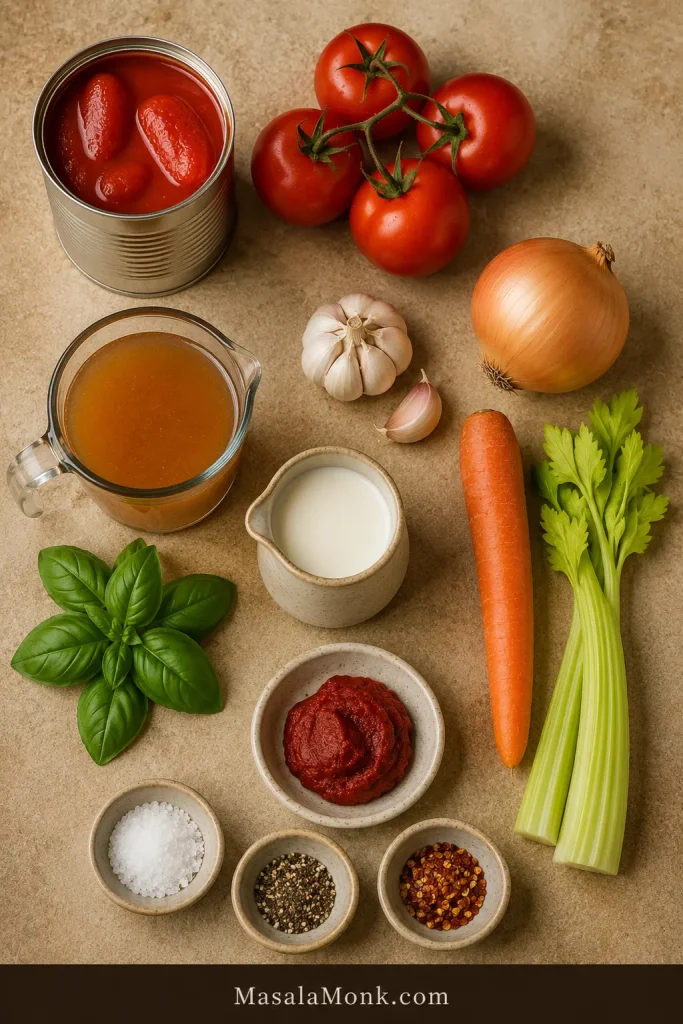
Ingredients You Need
The ingredients are simple, but each one has a job in the pot.
Ingredient Snapshot
Each ingredient has a job: aromatics build body, tomato paste adds depth, and cream finishes the soup.
Tomatoes
A 28 oz / 794 g can of whole peeled or crushed tomatoes is the easiest starting point. Whole peeled tomatoes usually give the best balance of flavor and body. Crushed tomatoes are convenient and blend quickly. Diced tomatoes can work, but they may need longer blending. Fire-roasted tomatoes add smoky depth if you want a bolder bowl.
If you are choosing between whole, crushed, diced, and fire-roasted tomatoes, this guide to canned tomato types is helpful.
Onion, Carrot, Celery, and Garlic
This is the flavor base. Onion brings sweetness, carrot helps soften tomato acidity, celery adds savory depth, and garlic makes the soup taste fuller. Cook them until the pot smells sweet and savory before the tomatoes go in.
Tomato Paste
Tomato paste is the little shortcut to deeper flavor. Stir it into the softened vegetables and let it cook for 1 to 2 minutes before adding broth. When it is ready, it should smell less sharp and more like roasted tomatoes.
Broth
Vegetable broth keeps the recipe vegetarian. Chicken broth gives a slightly deeper savory flavor. Canned tomatoes need about 2 cups / 480 ml broth to start. Fresh tomatoes release more liquid, so they need less at first.
Cream
Heavy cream gives the most classic finish. Half-and-half makes it lighter. Cashew cream gives the best neutral dairy-free texture. The color should turn slightly softer after cream, not pale orange.
Herbs and Finishes
Dried basil or Italian seasoning can simmer with the tomatoes. Fresh basil tastes best near the end, when it still smells bright. Parmesan, butter, croutons, black pepper, and grilled cheese all make the finished bowl more satisfying.
Canned Tomatoes vs Fresh Tomatoes
Both canned and fresh tomatoes can work. The best choice depends on what you have and how the tomatoes taste before they go into the pot.
Canned vs Fresh Tomato Guide
Canned tomatoes are the reliable year-round choice. Fresh tomatoes work best when they smell sweet, taste ripe, and are in season.
Canned tomatoes work best when…
Fresh tomatoes work best when…
You want reliable flavor year-round
Tomatoes are ripe, sweet, and in season
You want the easiest version
You want a brighter garden-style bowl
You want less prep
You do not mind peeling, grating, roasting, or simmering longer
Your fresh tomatoes are bland or watery
Your fresh tomatoes smell sweet and taste good raw
One 28 oz can of tomatoes is about 794 g. For the closest fresh swap, use 2.5 lb / about 1.1 kg ripe tomatoes. If your tomatoes are watery or you want a fuller fresh-tomato base, use up to 3 lb / 1.35 kg.
Fresh Tomato Grating Shortcut
For the smoothest fresh version, peel the tomatoes first or roast them before blending. If you do not want to peel tomatoes, halve them and grate the cut side on the large holes of a box grater. The pulp goes into the bowl, and most of the skin stays in your hand. Use that pulp in place of peeled chopped tomatoes.
For fresh tomato bisque, grate ripe tomatoes when you want the pulp without peeling. Most of the skin stays behind on the grater.
If fresh tomatoes taste watery raw, roast them or use canned tomatoes instead. A soup that looks thick before blending is usually on the right track. Adjust the body after it has been blended.
If you have more ripe tomatoes than this soup needs, turn the rest into this tomato sauce from fresh tomatoes for pasta, pizza, or freezer meals.
How to Make Tomato Bisque
The tricky part is not the cooking. It is adding too much liquid before the soup has a chance to blend smooth. Keep the order simple: build the base, deepen the tomato paste, simmer, blend, adjust the body, then add cream.
Step 1: Soften the Vegetables
Warm olive oil or butter in a large non-reactive pot over medium heat. Add the onion, carrot, and celery. Cook for 6 to 8 minutes, stirring often, until the onion is translucent and the vegetables are softening. The carrot should be tender enough to blend cleanly later.
First, soften the onion, carrot, celery, and garlic until the pot smells sweet and savory. This gives the soup body before tomatoes go in.
Step 2: Cook the Tomato Paste
Add the garlic and cook for about 30 seconds. Stir in the tomato paste and cook for 1 to 2 minutes. It should darken slightly and leave rusty streaks on the vegetables. If the bottom of the pot gets sticky, add a spoonful of broth and scrape it clean as you stir.
Next, cook the tomato paste into the vegetables until rusty red-orange streaks appear. That small step makes the tomato flavor deeper.
Step 3: Simmer the Tomatoes
Add the tomatoes with their juices. Crush whole peeled tomatoes lightly with a spoon so they simmer evenly. Add broth, herbs, salt, pepper, and red pepper flakes if using. Simmer uncovered for 20 to 25 minutes, until the vegetables are very soft and the tomato flavor tastes rounder.
Before blending, the soup base should look thick and concentrated. A slightly thick pot is easy to loosen; a watery one is harder to fix.
Step 4: Blend and Adjust
Blend until smooth. An immersion blender is easiest; a countertop blender gives a silkier finish. After blending, the soup should fall from a spoon in a smooth ribbon, not splash like broth. If it is too thick, add broth a splash at a time.
Once the vegetables are soft, blending turns the tomato base into one smooth, creamy body.
Step 5: Finish Gently
Lower the heat and stir in the cream. Warm gently for 2 to 3 minutes. Taste and adjust with salt first, then richness or brightness if needed. The final spoonful should feel rounded, not heavy, with enough tomato brightness to make you want the next bite.
Add cream only after the soup is blended, then warm it gently. This keeps the bisque smooth instead of grainy or split.
Success Cues
Vegetables: the carrot and celery should be soft enough to mash against the side of the pot.
Tomato paste: it should smell deeper and less metallic.
After simmering: the tomato flavor should taste rounder, not raw or sharp.
Blended texture: the soup should be glossy, smooth, and spoon-coating.
Before serving: if it tastes flat, add salt first; if it tastes sharp, add butter, cream, or a very small pinch of sugar.
Smooth Ribbon Texture
After blending, look for a smooth ribbon from the spoon. That means the soup is creamy, spoon-coating, and still pourable.
Creaminess is mostly about restraint. You want the finish to soften the tomato edge, not bury the tomato flavor.
If you want…
Use…
Watch for…
Classic richness
Heavy cream
Warm gently after adding
A lighter finish
Half-and-half
The soup may be slightly thinner
Dairy-free creaminess
Cashew cream
Blend the cashew cream completely smooth
More gloss
Butter
Add near the end
More savory depth
Parmesan
Add less salt first
A green finish
Basil pesto
Use a small spoon on top, not too much
A small spoon of basil pesto works well on top, especially if you want more basil flavor without adding more cream.
Optional Restaurant-Style Roux
You do not need a roux for this recipe. The blended vegetables and tomatoes already give the soup body. Use a small roux only if you want a thicker, restaurant-style bowl.
For that version, use 2 tablespoons butter / 28 g and 2 tablespoons flour / about 16 g. After the vegetables soften, melt the butter, stir in the flour, and cook for 1 to 2 minutes. Slowly add the broth while stirring, then add the tomatoes and continue with the recipe.
Keep the roux small. Too much flour can mute tomato brightness and make the soup taste more like cream sauce. To keep it gluten-free, skip the roux and control thickness with less broth, longer simmering, and good blending.
For a restaurant-style finish, blend until completely smooth, strain only if you want it extra silky, then serve with a small swirl of cream, cracked black pepper, basil oil, or Parmesan. Aim for a glossy bowl, not a grainy one.
Variations
You do not need any of these to make a good bowl. They are simply easy ways to steer the same base in a different direction.
Tomato Basil
For a brighter, greener bowl, add 1 cup loosely packed fresh basil, about 20 to 25 g, after simmering. Blend it into the hot soup, then save a few leaves for garnish if you like. Long simmering can make fresh basil taste dull.
For tomato basil bisque, add fresh basil near the end so the flavor stays green, fragrant, and bright instead of cooked down.
If you want a lighter basil-forward soup rather than a creamier bisque, use this tomato basil soup recipe.
Roasted Tomato
Roasting is best when fresh tomatoes are ripe but a little watery. It concentrates their flavor, softens acidity, and gives the soup deeper sweetness.
Use 2.5 to 3 lb / 1.1 to 1.35 kg fresh tomatoes. Halve them and roast with olive oil, onion, and garlic at 400°F / 200°C for 25 to 35 minutes, until the tomatoes collapse and the edges start to caramelize. Add the roasted tomatoes to the pot with broth and continue with the main recipe.
Roasting the tomatoes first concentrates their sweetness, giving the bisque deeper flavor and a softer acidic edge.
If you are building a fuller soup-night meal, these roasted carrots keep the table warm, sweet, and simple without making the soup heavier.
Roasted Red Pepper
Roasted red peppers make the bowl sweeter, deeper, and slightly smoky. Add one drained 12 oz / 340 g jar with the tomatoes before simmering. Blend until smooth, then finish with cream. A small pinch of smoked paprika works well, but keep it light.
Roasted red peppers bring smoky sweetness to the bowl, making tomato bisque taste richer without relying on extra cream.
Can You Make Tomato Bisque From Canned Tomato Soup?
Yes. You can turn canned tomato soup into a quick pantry version when speed matters more than full homemade flavor. Think of the can as the foundation, not the finished soup: a little fat, dairy, seasoning, and a fresh garnish can make it taste more intentional.
Shortcut From Condensed Tomato Soup
For 1 can condensed tomato soup, add:
1 can milk or half-and-half, or milk with a splash of cream
1 tablespoon butter
1/4 teaspoon garlic powder
1/4 teaspoon onion powder
1/2 teaspoon dried basil or Italian seasoning
Black pepper to taste
1 to 2 tablespoons Parmesan, optional
Simmer gently for 8 to 10 minutes, stirring often. Finish with fresh basil, croutons, Parmesan, or grilled cheese.
When using canned tomato soup, treat it as a base. Milk or half-and-half, butter, herbs, pepper, and Parmesan make it taste more intentional.
For the best flavor, start with canned tomatoes or fresh tomatoes instead of canned tomato soup. When speed matters, the shortcut works. To make a true homemade bowl, use the main recipe.
Dietary Options
The creamy finish is flexible, so no one has to miss the comfort of the bowl. Once the broth, fat, cream, and toppings match your needs, the recipe still works.
Need
How to adjust
Vegetarian
Use vegetable broth. The rest of the main recipe can stay the same.
Vegan
Use vegetable broth, olive oil instead of butter, and cashew cream instead of heavy cream.
Dairy-free
Cashew cream or a plain unsweetened plant-based cream works best. Leave out Parmesan and the Parmesan rind.
Gluten-free
Skip the optional roux, or use a gluten-free thickener if needed. Check broth and toppings.
Lower sodium
Use no-salt-added canned tomatoes and low-sodium broth, then season at the end.
Dairy-Free Cashew Cream
To make cashew cream, soak 1/2 cup cashews in hot water for 20 to 30 minutes. Drain, then blend with 1/2 cup fresh water until completely smooth. Add about 1/2 cup to the soup, then add more only if needed.
For dairy-free tomato bisque, cashew cream gives the soup a smooth, neutral finish without coconut flavor.
Slow Cooker, Instant Pot / Pressure Cooker, and Blender Notes
The stovetop method gives the most control, but the recipe adapts well when you need a more hands-off path. These versions are best for the days when you want the same cozy bowl without standing over the stove.
Keep the same order in mind: cook for flavor, blend for body, then add cream at the end.
Slow Cooker and Pressure Cooker Tomato Bisque
Slow cooker or Instant Pot / pressure cooker both work, but the rule stays the same: blend the tomato base first, then add cream last.
For best flavor, sauté the onion, carrot, celery, garlic, and tomato paste first. Add them to the slow cooker with the tomatoes, herbs, and broth. Cook on low for 6 to 8 hours or high for 3 to 4 hours. Blend until smooth, then stir in the cream at the end.
For a heartier tomato-rich slow cooker dinner, this crock pot lasagna soup goes in a pasta-and-ricotta direction instead of a smooth creamy bisque.
Instant Pot or Pressure Cooker
Use the sauté function for the onion, carrot, celery, garlic, and tomato paste. Add the tomatoes, broth, and herbs. Pressure cook for 8 to 10 minutes, let the pressure release naturally for 5 minutes, then quick release. Blend smooth and stir in the cream after cooking.
Countertop Blender
If blending hot soup in a countertop blender, work in batches, vent the lid, cover with a towel, and start slowly. A high-speed blender gives the smoothest texture.
What to Serve With Tomato Bisque
This is where the soup turns into dinner. Grilled cheese is the classic pairing for a reason: the soup is creamy and tangy; the sandwich is crisp, buttery, and salty. The best bite is the corner of grilled cheese after it has been dipped: crisp at the edge, soft where it meets the soup, salty enough to make the tomato taste brighter.
Grilled Cheese Dunk
Serve tomato bisque with grilled cheese for contrast: crisp bread, melted cheese, and creamy soup clinging to the corner.
If you want bread on the side instead of a sandwich, this homemade garlic bread loaf is a natural fit with a creamy tomato bowl. For a grilled cheese upgrade, a thin layer of garlic aioli adds savory depth without needing another filling.
Classic cheddar grilled cheese
Sourdough grilled cheese
Garlic bread
Parmesan croutons
Toasted cheese sandwich
Basil oil or fresh basil
Simple green salad
Roasted vegetables
Crusty bread
Parmesan toast
Mistakes to Avoid
Adding too much broth early: start with the listed amount, then adjust after blending.
Using bland fresh tomatoes without roasting: watery tomatoes make watery soup.
Adding cream before blending: the base should be smooth first.
Boiling after adding cream: gentle heat keeps the texture creamy.
Under-seasoning: tomato-based soups often taste flat until they have enough salt.
Overdoing the roux: too much flour can dull the tomato flavor.
Troubleshooting
Most problems come down to the same three things: acidity, thickness, and heat. If your first taste seems too sharp, do not panic. Tomato soups often settle after a few more minutes of simmering and a small amount of cream or butter.
Tomato Bisque Troubleshooting Guide
Most tomato bisque problems have simple fixes: simmer thin soup, soften sharpness with butter or cream, and lower the heat if cream splits.
Simmer it a little longer, then taste again. If it still tastes sharp, add a pinch of sugar, a little more cream, or a tablespoon of butter. A very small pinch of baking soda can also help, but use less than 1/8 teaspoon to start. Too much baking soda can make the soup taste dull.
How do I fix thin soup?
Simmer uncovered for a few more minutes. For a thicker version, use the optional roux, add cream or cashew cream, or blend in a little more cooked carrot.
How do I thin it without making it watery?
Add broth or water a little at a time until it reaches the texture you like. Warm gently and taste again after thinning because you may need more salt or pepper.
Why did the cream split?
The heat was probably too high. Add cream after blending, lower the heat, and warm the soup gently. Avoid boiling once the cream is in the pot.
How do I make it smoother?
Blend it longer. A countertop blender gives a silkier texture than an immersion blender. For a very smooth restaurant-style finish, strain the blended soup through a fine mesh sieve before adding cream.
Why does it taste flat?
Add salt first. If it still needs brightness, add black pepper, fresh basil, Parmesan, or a tiny splash of lemon juice.
Storage, Freezing, and Reheating
This soup reheats well, especially if you store the tomato base before adding cream. Reheated gently, it makes tomorrow’s lunch feel planned instead of leftover.
How long does it last in the fridge?
Cool the soup before storing, and refrigerate leftovers within 2 hours. Store it in an airtight container for 3 to 4 days. For general leftover safety, the USDA’s leftovers and food safety guide also recommends using refrigerated leftovers within 3 to 4 days.
Can you freeze it?
It freezes best before cream is added. Freeze the blended tomato base for up to 3 months, then thaw, reheat, and stir in the cream at the end. If the soup already has cream in it, you can still freeze it, but the texture may be less smooth after thawing.
How should you reheat it?
Reheat over low to medium-low heat, stirring often. Do not boil hard after cream has been added. Add a splash of broth or water if the soup thickens in the fridge.
If you want a chunkier tomato-broth soup with beans, vegetables, and pasta, this minestrone soup recipe is the better direction for another night.
FAQs
What is the difference between tomato soup and tomato bisque?
Tomato bisque is usually smoother, creamier, and richer than basic tomato soup. It is blended until silky and finished with cream, butter, milk, or a creamy alternative. Some restaurant-style versions also use a roux.
Are canned tomatoes or fresh tomatoes better?
Canned tomatoes are better for reliable flavor and easy cooking. Fresh tomatoes are best when they are ripe, sweet, and in season. If fresh tomatoes taste watery, roast them first or combine them with canned tomatoes.
What kind of canned tomatoes should I use?
Whole peeled tomatoes are the best first choice because they usually bring the best balance of flavor and body. Crushed tomatoes are the easier shortcut when you want less blending. Diced tomatoes can work, but they may need more blending.
How many fresh tomatoes replace a 28 oz can?
Start with about 2.5 lb / 1.1 kg ripe tomatoes to replace one 28 oz / 794 g can. Go up to 3 lb / 1.35 kg if your tomatoes are watery or you want a fuller fresh-tomato base.
Does tomato bisque need cream?
Classic tomato bisque is usually creamy, but you have options. Heavy cream is richest, half-and-half is lighter, and cashew cream works well for dairy-free soup.
What is the best way to thicken tomato bisque?
Blend the vegetables into the soup, start with controlled broth, and simmer uncovered if needed. For a restaurant-style texture, use a small roux with butter and flour. A dairy-free thicker soup can use cashew cream.
Can you make tomato bisque from canned tomato soup?
Yes. Add milk or half-and-half to condensed tomato soup, then season it with butter, garlic powder, onion powder, basil, black pepper, and Parmesan. A splash of cream can make it richer, but a full can of cream may be too heavy.
How do I make vegan tomato bisque?
Use vegetable broth, olive oil instead of butter, and cashew cream or another dairy-free cream instead of heavy cream. Cashew cream gives the most neutral creamy texture.
Can you freeze tomato bisque without ruining the texture?
Freeze the blended tomato base before adding cream. Thaw, reheat gently, and stir in the cream at the end. If the soup already contains cream, the texture may change slightly after freezing.
What goes well with tomato bisque?
Grilled cheese is the classic pairing. It also goes well with garlic bread, Parmesan croutons, sourdough toast, basil oil, a green salad, roasted vegetables, or a toasted cheese sandwich.
The Bowl You’re Aiming For
Once you understand the method, this soup becomes flexible. Make it richer, make it fresher, add basil, roast the tomatoes, or rescue a can on a busy night. As long as you smooth the base before thinning and add cream gently at the end, you are in control of the bowl.
Are you making the classic creamy version, the fresh tomato version, or the canned-soup shortcut tonight? Whichever way you go, keep the order gentle: blend the base smooth, adjust the body slowly, and add the cream at the end. Do that, and you get a glossy, velvety bowl with enough richness for comfort and enough brightness to keep every spoonful alive.
Ladle it into a warm bowl, add basil or a swirl of cream, and keep the grilled cheese close.
Lobster bisque feels intimidating for one honest reason: lobster is expensive, and the soup shows every shortcut. Weak stock tastes flat. Boiled cream can turn grainy. Lobster meat that sits in the pot too long becomes rubbery instead of sweet and tender.
This version is built to avoid those problems. It gives you a creamy, silky, restaurant-style bowl using lobster tails, seafood stock, aromatics, tomato paste, dry sherry or white wine, and cream. You can keep it simple with clean-tasting seafood stock, or take the fuller route and simmer the lobster shells into that same stock for a sweeter, more layered base.
It is still an easy lobster bisque built around lobster tails, but when you have an extra 25 minutes, the shells give the stock that deeper restaurant-style flavor.
The goal is simple: make the bowl taste like you used the expensive, old-school method, while giving you a calmer lobster-tail path that is much harder to ruin.
You do not need live lobster. There is no chef-only technique hiding in the fine print. You just need to treat the lobster with care, let the shells do some of the flavor work, and keep the cream stage low and steady instead of boiling hard.
It is the kind of soup that makes dinner feel planned and generous, whether you serve it as a holiday starter, a date-night bowl, or a quiet weekend dinner with bread on the side.
To make lobster bisque, briefly poach lobster tails in seafood stock just until the meat turns opaque. Remove the meat, save the shells, and use that same stock as the flavor base. For deeper flavor, simmer the shells with aromatics, tomato paste, herbs, and wine if using, then strain and measure the stock.
In a heavy pot, cook onion, celery, carrot, garlic, and tomato paste in butter, add flour, deglaze with dry sherry or white wine, pour in the prepared stock, and simmer until the vegetables are tender. Blend, strain if you want a polished finish, stir in cream over low heat, adjust the base, and add the lobster meat right before serving.
The whole method is about restraint: build flavor from the shells, then protect the cream and lobster at the finish.
For most home cooks, the best balance is the middle path: lobster tails poached in seafood stock, shells simmered back into that same stock, then cream and lobster added only once the base is ready.
This visual keeps the lobster bisque order simple: cook the tails briefly, use the shells for flavor, smooth the base, and protect the cream and lobster at the finish.
First poach the tails, then simmer the shells, blend the base, add cream, and warm the lobster last; that order protects both flavor and texture.
Lobster Bisque at a Glance
Main lobster choice
Lobster tails
Servings
4 generous bowls or 6 appetizer servings
Finished amount
About 5½ to 6 cups / 1.3 to 1.4 liters
Total time
About 1 hour 20 minutes to 1 hour 30 minutes
Texture goal
Smooth, creamy, silky, lightly spoon-coating
Recommended path
Poach tails, simmer shells into the same stock, then finish with cream and lobster
Fullest stock option
Seafood stock simmered with lobster shells
Shortcut stock option
Clean-tasting seafood or lobster stock
Main thickener
Flour roux, with gluten-free options below
Classic alcohol option
Dry sherry, dry white wine, or a little brandy
No-alcohol option
Extra seafood stock plus lemon juice or sherry vinegar
Make-ahead tip
Make the base ahead; add cream and lobster before serving
Freezer tip
Freeze the base before adding cream and lobster
As a serving guide, a generous bowl is about 1⅓ to 1½ cups. An appetizer serving is closer to 1 cup.
Lobster Bisque Recipe Card
Creamy Lobster Bisque With Lobster Tails
This creamy lobster bisque is made with lobster tails, seafood stock, aromatics, tomato paste, dry sherry or white wine, and cream. The recommended path is simple: poach the lobster tails in stock, simmer the shells into that same stock for deeper flavor, build the bisque base, blend, strain, add cream, adjust the base, and warm the lobster only right before serving.
Prep Time
20 minutes
Cook Time
1 hour to 1 hour 10 minutes
Total Time
1 hour 20 minutes to 1 hour 30 minutes
Servings
4 generous bowls or 6 appetizer servings
Yield
About 5½ to 6 cups / 1.3 to 1.4 liters
Main path: this card uses the shell-enhanced method because it gives the richest flavor without requiring whole live lobsters. For shortcuts, cooked lobster, no-alcohol swaps, and gluten-free thickening, see the quick notes after the card.
Read this before starting: the same 4 cups of stock are used first to poach the lobster, then simmered with the shells, then measured again for the bisque. You are not starting with 8 cups of stock.
The same 4 cups of stock do three jobs: poach the lobster, pull flavor from the shells, and become the measured base for the bisque.
Ingredients
For the lobster and shell-enhanced stock
4 lobster tails, 4 to 5 oz each / 115 to 140 g each
½ cup dry white wine / 120 ml, optional for the shell stock
Up to 1 cup water or extra seafood stock / 240 ml, only if needed to top up after simmering
1 bay leaf
2 sprigs thyme, or ½ teaspoon dried thyme
For the bisque base
4 tablespoons unsalted butter / 56 g
1 medium onion, finely chopped / about 150 g
2 celery ribs, finely chopped / about 100 g
1 medium carrot, finely chopped / about 75 g
3 garlic cloves, minced
2 tablespoons tomato paste / about 32 g, or 3 tablespoons for deeper color
3 tablespoons all-purpose flour / about 24 g
½ cup dry white wine / 120 ml
¼ cup dry sherry / 60 ml
4 cups prepared lobster-shell stock from above / 960 ml
½ teaspoon sweet paprika
Pinch of cayenne pepper, optional
½ teaspoon dried thyme, or 1 teaspoon fresh thyme leaves
¾ to 1 cup heavy cream / 180 to 240 ml
1 teaspoon lemon juice or sherry vinegar, plus more to taste
Salt and black pepper, to taste
1 tablespoon chopped chives, parsley, or tarragon, for finishing
Stock note: after simmering and straining, measure the liquid again. You need 4 cups / 960 ml for the bisque. If you are short, top it up with water or more seafood stock.
Instructions
Lobster and shell stock
Prepare the lobster tails. Use kitchen shears to cut along the top of each shell. Leave the meat inside for the brief poach; you will remove it after cooking.
Poach the lobster in the stock. Bring the 4 cups seafood or lobster stock to a low simmer. Add the lobster tails and cook for 3 to 5 minutes, depending on size, just until the meat turns opaque. Remove the tails from the stock. When cool enough to handle, pull out the meat, chop it into bite-size pieces, and set it aside. Save the shells and keep the stock.
Build the shell stock. In a pot, heat 1 tablespoon olive oil or butter. Add the lobster shells, rough-chopped onion, celery, carrot, garlic, and tomato paste. Cook for 5 to 7 minutes, stirring often, until the shells smell fragrant and the tomato paste darkens slightly. Add wine if using, then pour in the lobster-poaching stock. Then add bay leaf and thyme. Simmer for 25 to 35 minutes.
Strain and measure the stock. Pass the shell stock through a fine mesh strainer. Measure the liquid. You need 4 cups / 960 ml for the bisque. If you have less, top it up with water or seafood stock. Extra stock can be saved for thinning the soup or reheating leftovers.
Build and smooth the bisque base
Start the bisque base. In a heavy Dutch oven or soup pot, melt the butter over medium heat. Add finely chopped onion, celery, and carrot. Cook for 6 to 8 minutes, until softened and sweet-smelling but not browned.
Build the garlic and tomato paste base. Stir in the garlic and cook for 30 seconds. Add tomato paste and cook for 2 to 3 minutes, stirring often, until it deepens from bright red to brick-red and smells savory.
Make the roux. Sprinkle in the flour and stir for 1 to 2 minutes. The mixture should look thick and pasty, like the vegetables are coated in a soft roux. If it looks dry, lower the heat and keep stirring.
Deglaze. Slowly pour in the white wine and sherry, scraping the bottom of the pot. Let it bubble for 2 to 3 minutes so the sharp alcohol smell softens.
Pour in stock and simmer. Add 4 cups prepared stock, paprika, cayenne if using, thyme, and a small pinch of salt and pepper. Bring to a steady simmer and cook for 18 to 22 minutes, until the vegetables are very tender and the broth tastes full. Salt gradually because seafood stock, clam juice, and lobster base can be salty.
Blend. Carefully blend the soup until smooth using an immersion blender or countertop blender. If using a countertop blender, work in batches and vent the lid slightly so steam can escape.
Strain for a silkier texture. For the most polished finish, pass the blended soup through a fine mesh strainer into a clean pot. Press with a ladle for liquid, then leave the gritty bits behind.
Finish with cream and lobster
Add cream over low heat. Set the pot over low heat. Stir in ¾ cup cream. Add more cream if you want a richer bowl. The soup should look smooth and shiny, with steam rising but no hard bubbling.
Finish the bisque base. Taste and adjust salt, pepper, lemon juice, or sherry vinegar. The finished base should lightly coat a spoon, smell sweet and buttery, and taste balanced. If it tastes heavy, add lemon juice or sherry vinegar. A thin base needs a little more simmering before the lobster goes in. Flat flavor usually means salt should be checked first.
Add the lobster and serve. Stir in the chopped lobster meat and warm it for 1 to 2 minutes. For the safest texture, divide the lobster among bowls and ladle the hot bisque over it. Garnish with chives, parsley, or tarragon and serve hot, not boiling.
Shortcuts, Swaps, and Special Cases
Use these notes when real life does not match the main path exactly: no shells, cooked lobster, no wine, gluten-free needs, or making the base ahead. The recipe is forgiving as long as you protect the stock, cream, and lobster texture.
Easy version: poach the lobster in seafood stock, skip the shell-simmering step, and use that stock directly in the bisque.
Flavor upgrade: poach the lobster in stock, then simmer the shells in that same stock before making the soup.
Cooked lobster meat: skip poaching, use 4 cups seafood stock, and add the cooked lobster only right before serving.
Without lobster shells: use lobster stock if possible, or strengthen seafood stock with ¼ to ½ cup clam juice or a small spoonful of lobster base. Add salty bases carefully and taste before adding more salt.
No alcohol: replace the ½ cup wine and ¼ cup sherry in the bisque base with ¾ cup extra seafood stock. If you are also skipping the optional wine in the shell stock, use another ½ cup stock there too. Finish with lemon juice or sherry vinegar for brightness.
Gluten-free: skip the flour. After blending, whisk 1½ tablespoons cornstarch with 2 tablespoons cold water, stir it into the warm soup, and simmer for 1 to 2 minutes. You can also simmer 2 tablespoons uncooked white rice in the stock until tender, then blend it into the base.
Dairy-free: use cashew cream for the most neutral finish. Add it near the end over low heat, just as you would heavy cream.
Freezing: freeze the base before adding cream and lobster for the smoothest texture.
The whole recipe is built around one idea: poach the lobster carefully, use the shells to deepen the stock if you can, blend the base smooth, add cream over low heat, and warm the lobster only right before serving. That path gives you a rich, polished bowl without buying whole live lobsters or guessing through the most expensive part of the process.
Lobster tails keep the method approachable, while the saved shells add the deeper stock flavor that makes the bisque taste more restaurant-style.
The tails give you tender meat for the finished bowl, while the shells turn ordinary seafood stock into something sweeter and more seafood-rich. The aromatics soften in butter until sweet. Tomato paste cooks until it turns brick-red, which gives the soup color and savory depth. Wine and sherry brighten the base so the cream does not make everything taste heavy.
The shell step is the one shortcut I would not skip when I have the shells in front of me. It adds more flavor than extra cream ever will.
The final texture comes from three small choices: simmering the vegetables until tender, blending the base thoroughly, and straining if you want a smoother finish. Cream goes in after blending, and the lobster goes in right before serving. That is the quiet trick: the lobster is the prize, so do not make it do extra work in the pot.
What Is Lobster Bisque?
Lobster bisque is the smooth, creamy side of seafood soup: less chunky than chowder, more polished than stew, and built around shellfish stock, aromatics, tomato paste, wine or sherry, and cream. When it is done well, it tastes rich but not heavy, sweet with lobster but not fishy, and smooth enough to feel special.
Thickness is not the real goal. Balance is: a full seafood base, a little sweetness from the aromatics and tomato paste, enough acidity to wake everything up, and cream that makes the soup plush without muting the lobster.
Equipment You Need
You do not need a restaurant kitchen here. A heavy pot builds flavor, a blender smooths the base, and a fine mesh strainer gives the soup its polished finish.
Heavy Dutch oven or soup pot: for sautéing, simmering, and finishing the soup.
Kitchen shears: for cutting open lobster shells cleanly.
Cutting board and sharp knife: for chopping aromatics and lobster meat.
Blender or immersion blender: for smoothing the base.
Fine mesh strainer: for a silkier, more polished texture.
Whisk: for working flour into the base without clumps.
Ladle and measuring cup: for straining, measuring, and adjusting stock.
The fine mesh strainer is not mandatory, but it is the difference between a rustic homemade soup and a smooth bisque. Use it if you have one. If you use a countertop blender, blend hot soup in batches and vent the lid slightly so steam can escape.
Ingredients for Lobster Bisque
Once the method makes sense, the ingredient list feels much less fancy. Each item is there to build sweetness, body, brightness, or shellfish depth.
Once the lobster tails, seafood stock, aromatics, tomato paste, cream, herbs, and lemon are laid out, the recipe feels organized instead of intimidating.
Lobster Tails
For homemade bisque, lobster tails are the most practical choice. They are easier to find than whole live lobsters, simpler to cook, and still give you shells for stock. Four tails, about 4 to 5 oz each, give enough lobster for 4 generous bowls or 6 appetizer portions.
Frozen lobster tails work well. Thaw them overnight in the refrigerator, or place them in a sealed bag in cold water if you need a faster thaw. Pat them dry before cooking so they do not water down the base.
If you bought extra lobster meat and want a colder, buttery seafood-shack style meal later, save some for these lobster rolls with extra lobster meat.
Lobster Shells or Seafood Stock
The shells are where much of the deep lobster flavor lives. You can make a solid soup with store-bought seafood stock, but simmering the tail shells in that stock makes the base taste fuller and more special.
Taste the stock before using it. If it tastes harsh, stale, metallic, or aggressively salty, it will show up in the finished soup. Lobster bisque does not hide bad stock well.
Without shells, use the cleanest seafood or lobster stock you can find. Clam juice can help in a pinch, but it can be salty, so use it carefully. Chicken stock is an emergency backup, not the ideal choice, because it does not give the same seafood depth.
Onion, Celery, Carrot, and Garlic
These aromatics create the savory foundation. Chop them finely for the bisque itself so they soften quickly and blend smoothly. For the shell stock, rough chopping is fine because everything gets strained.
Tomato Paste
This paste is not there to make the bisque taste like tomato soup. Once it cooks to a brick-red color, it gives the soup warmth, sweetness, color, and a savory base note.
Flour or Thickener
You only need a small amount of flour. It gives the soup body without turning it into gravy. For a gluten-free version, cornstarch slurry is the quickest fix, while rice gives a softer, old-school texture once blended.
Sherry, Wine, or Brandy
Dry sherry is classic here. A dry white wine is easier to find and works beautifully. Brandy or cognac can add a deeper special-occasion note. Use dry alcohol, not sweet dessert-style wine.
Heavy Cream
Cream should make the bisque feel plush, not dull. Add it after blending so the lobster and stock still stay in front.
Herbs and Seasoning
Thyme, tarragon, chives, parsley, paprika, and a tiny pinch of cayenne all work well with lobster. Keep the seasoning warm and supportive. The lobster should still be the main flavor.
Best Lobster to Use
You have more options than you might think. The right choice depends on how much work you want to do, how much shellfish depth you want in the stock, and whether you are starting with raw or cooked meat.
Lobster option
Works?
Use it for
Raw lobster tails
Yes
Most practical default for homemade bisque
Frozen lobster tails
Yes
Thaw first, then cook briefly
Cooked lobster meat
Yes
Add near serving so it does not overcook
Whole lobster
Yes
Deepest flavor, but more work
Lobster shells only
Yes
Use for stock; add separate cooked lobster if serving
Langostino
Yes
Budget-friendly variation or pasta add-in
Shrimp or crab
Yes
Useful variation, but not classic lobster bisque
If you are buying lobster tails specifically for this recipe, look for tails that smell clean and mild, not fishy. Avoid tails with gray patches, strong odor, or freezer burn. For more buying context before shopping, NOAA’s American lobster guide is a helpful reference on flavor, texture, and seafood basics. Read NOAA’s American lobster seafood guide.
Choose Your Lobster Bisque Method
Use this table when you are deciding how much time, lobster flavor, and shortcut help you want. The middle path is the sweet spot for most kitchens: easy enough to manage, but deep enough to taste special.
Method
What you do
Flavor level
Use it for
Easy
Poach lobster tails in seafood stock and use that stock directly
Clean and simple
Weekends, first-time bisque, simpler cooking
Better
Poach the tails, then simmer the shells in that same stock
Fuller and sweeter
Most home cooks who want deeper flavor
Best
Make a fuller lobster stock from shells, bodies, aromatics, and wine
Deepest and most layered
Special occasions, dinner parties, holiday starters
Shortcut
Use lobster base or clam juice with seafood stock
Strong but salt-sensitive
When you need flavor fast
Most balanced path: poach the lobster tails in seafood stock, then simmer the shells in that same stock for 25 to 35 minutes. It is not much harder than the easy version, but the broth tastes much fuller.
The middle path is the sweet spot: poach lobster tails in stock, then simmer the shells back into that stock before building the bisque.
How to Make Quick Lobster Stock From Shells
If you have lobster shells, do not throw them away. A quick shell stock turns a simple base into a much better one. This is the step where the soup starts to smell expensive.
Sautéing lobster shells with aromatics and tomato paste gives the stock a sweeter, deeper base than seafood stock alone.
After poaching the lobster tails in seafood stock, save that stock. Heat a tablespoon of butter or olive oil in a pot. Add the shells and cook them for a few minutes until they smell fragrant. Then add onion, celery, carrot, garlic, and a spoonful of tomato paste. Once the paste darkens slightly, deglaze with dry white wine if using. Add the lobster-poaching stock, a bay leaf, and thyme. Simmer for 25 to 35 minutes, then strain well.
After simmering, strain for liquid rather than solids: press gently for flavor, then leave the gritty shell bits behind.
Next, measure the liquid. Use 4 cups / 960 ml for the bisque. Short on stock? Top it up with water or seafood stock. Extra stock is a bonus — save it for thinning the soup, reheating leftovers, or making a small seafood sauce.
Measure the strained stock before moving on, because the bisque base needs the right amount of liquid to cook and blend properly.
The simmer should be steady but not rough. A lazy bubble is enough. Press on the shells and vegetables while straining to extract the liquid, then leave the gritty bits behind.
If your stock smells sweet, buttery, and seafood-rich here, you have already done the most important flavor work. That is when the recipe starts to feel less like a gamble and more like a plan.
Success Checkpoints for Lobster Bisque
Use these checkpoints as you cook. They turn the recipe from a list of steps into something you can read with your eyes, nose, and spoon.
Use the visual checkpoints as you cook, because color, aroma, texture, and timing matter more than the clock alone.
Stage
Correct sign
Problem sign
Lobster poach
Meat turns opaque but still looks tender
Tight curl, rubbery texture, or long simmering
Shell stock
Sweet, buttery, seafood-rich aroma
Harsh, stale, or aggressively salty smell
Tomato paste
Brick-red and savory-smelling
Bright red and raw-smelling
Simmered base
Vegetables are very soft
Carrot or celery still feels firm
Blended soup
Smooth and lightly spoon-coating
Pasty, gritty, watery, or fibrous
Cream stage
Smooth, shiny, and not boiling hard
Grainy, split, or aggressively bubbling
Final lobster
Warmed through for 1 to 2 minutes
Left to simmer in the finished soup
If the soup lightly coats a spoon before the lobster goes in, the texture is already close. The lobster only needs to warm through at the finish; that restraint is what keeps it tender.
Once those signs are there, the hard part is behind you. From here, the bisque is less about effort and more about finishing it with restraint.
Before you start the detailed method, use the cook-time table below with the success checkpoints. The lobster should turn opaque and tender before it ever reaches the final bisque.
How Long to Cook Lobster Tails for Bisque
Lobster tails for bisque should be cooked briefly. The meat should turn opaque and firm up slightly, but it should not become tight or chewy.
Lobster tail size
Approximate cook time
What to look for
4 oz / 115 g
3 to 4 minutes
Opaque meat, still tender
5 oz / 140 g
4 to 5 minutes
Opaque and just firm
6 oz / 170 g
5 to 6 minutes
Cooked through but not tight
Cooked lobster meat
Warm only 1 to 2 minutes
Do not simmer for long
When in doubt, slightly undercook the lobster during the first step. It will warm again in the finished soup. Overcooked lobster is the main reason homemade bisque feels disappointing.
Stop when the lobster meat is opaque and tender-looking; meanwhile, a tight curl usually warns that it has gone too far.
For food safety, the FDA says shrimp, lobster, and crab should be cooked until the flesh is pearly and opaque. In this recipe, that means cooking the tails briefly, then warming the chopped meat near serving instead of letting it simmer in the pot. See the FDA safe food handling guidance.
Now that the timing and doneness cues are clear, follow the step-by-step method and keep the lobster out of long simmering.
Step-by-Step Instructions
1. Prep the Lobster Tails
Cut along the top of each shell with kitchen shears. Leave the meat inside for the brief poach. The cut helps heat reach the meat and makes the meat easier to remove after cooking.
Cutting along the top shell helps the lobster tail cook evenly and, later, makes the meat easier to remove without tearing.
2. Poach the Lobster Briefly
Bring the seafood stock to a low simmer, then add the tails. For most 4 to 5 oz tails, 3 to 5 minutes is enough. The meat should turn opaque, but it should not tighten into a rubbery curl. Remove the tails right away, cool them slightly, then pull out and chop the meat.
This is the moment to be conservative. The lobster does not need to be fully pampered yet; it only needs to be protected.
Keep the poach brief and gentle; the lobster only needs to turn opaque because it warms once more in the finished bisque.
3. Separate Meat, Shells, and Stock
Save both the shells and the poaching stock. The stock already has a little lobster flavor now, and the shells can make it taste even more layered.
Once the tails are poached, the shells go back into the stock, while the meat waits safely for the final warm-through.
4. Make the Shell-Enhanced Stock
Cook the shells with rough-chopped aromatics and tomato paste until the pot smells sweet, buttery, and seafood-rich. Add wine if using, then pour in the lobster-poaching stock. Simmer, strain, measure, and use 4 cups for the bisque.
5. Sauté the Aromatics
Melt butter in a heavy pot and add onion, celery, and carrot. Cook until the vegetables soften and smell sweet, about 6 to 8 minutes. Soft vegetables blend more smoothly and create a better base.
Softened onion, celery, and carrot give the bisque a sweeter foundation and help the blended base turn smoother later.
6. Build Brick-Red Tomato Paste Flavor
Add garlic and tomato paste. Stir until the paste darkens from bright red to a deeper brick-red color. That little bit of cooking improves the color and removes raw tomato sharpness.
Cook the tomato paste until it turns brick-red; that small color change adds warmth, depth, and a less raw tomato taste.
7. Add Flour
Sprinkle flour over the vegetables and stir until everything looks thick and coated. It should look like a soft paste, not a dry clump. This gives the soup body without making it heavy.
Before adding liquid, the flour should coat the vegetables like a soft paste; this gives the lobster bisque body without heaviness.
8. Deglaze With Wine and Sherry
Pour in the wine and sherry slowly, scraping up the bottom of the pot. Let it bubble briefly so the sharp alcohol smell softens. This is where the base starts to smell like classic bisque instead of simple vegetable soup.
9. Build the Simmering Base
Pour in the prepared stock, then season with paprika, thyme, cayenne if using, and a little salt and pepper. Simmer until the vegetables are very soft and the broth tastes full. Add salt gradually; stock and seafood bases can sneak up on you.
When the shell stock meets the tomato-aromatic base, the pot shifts from simple vegetables into a true lobster bisque foundation.
10. Smooth the Bisque Base
Use an immersion blender or countertop blender to smooth the base. An immersion blender is convenient, but a countertop blender usually gives the smoothest result. Work in batches if needed and be careful with steam.
Blend only after the vegetables are tender; otherwise, the base can stay fibrous instead of turning silky.
11. Strain for a Polished Finish
For the silkiest finish, strain the blended soup through a fine mesh strainer. If you want the bowl to feel like restaurant bisque, this is the extra minute that pays you back.
Straining after blending is optional, but it is the step that makes homemade lobster bisque feel polished and restaurant-smooth.
12. Add Cream Over Low Heat
Return the strained soup to the pot and lower the heat. Stir in the cream slowly. The soup should look smooth and shiny, not bubbling like it is still cooking hard.
Add cream over low heat, then keep the soup steaming rather than boiling so the texture stays smooth and silky.
13. Finish the Bisque Base
Taste the base before the lobster goes in. It should lightly coat a spoon, smell sweet and buttery, and taste balanced. If it tastes heavy, add lemon juice or sherry vinegar. A thin base needs a little more simmering. Flat flavor usually means salt should be checked first.
The base should lightly coat a spoon before the lobster goes in; thick enough to feel silky, but not heavy like gravy.
14. Warm Lobster Right Before Serving
Stir in the chopped lobster meat during the final minute or two, just long enough to warm it. You can also place it directly in bowls and ladle the hot bisque over it. The soup should arrive at the table hot, smooth, and composed — not bubbling like it is still cooking.
Add the lobster only at the end so the bisque stays creamy and the tail meat remains tender in the finished bowl.
The three texture rules: save the lobster-poaching stock, keep the cream below a hard boil, and keep the lobster out of the long simmer so it stays tender.
If the bisque tastes flat, looks thin, feels too thick, or the cream seems grainy, go to troubleshooting lobster bisque before adding more cream.
A well-made bisque should feel creamy and smooth, not grainy or chunky. The easiest way to get that texture is to cook the vegetables until fully tender, blend thoroughly, and strain the soup after blending.
Cook the vegetables long enough. Hard carrot or celery pieces will not blend smoothly.
Use enough liquid. A very thick base can turn pasty in the blender.
Blend in batches if needed. Do not overfill a countertop blender with hot soup.
Strain for a smoother finish. This is optional, but it makes the bowl feel more polished.
Add cream after blending. Cream finishes the texture instead of getting cooked hard from the beginning.
If the soup looks a little plain before the cream, do not worry; the final richness comes later. When it is thicker than you like after blending, loosen it with warm stock before adding more cream. More cream makes it richer, but stock keeps the lobster flavor cleaner.
How to Thicken Lobster Bisque
The soup should have body, but it should not feel like gravy. The goal is a light spoon-coating texture, not a heavy sauce.
Thickener
Use it for
How it affects texture
Flour roux
Classic creamy bisque
Smooth, reliable, familiar
Cornstarch slurry
Gluten-free quick fix
Glossy and fast-thickening
Cooked rice
Old-school silky texture
Velvety once blended
Reduction
Stronger flavor
Deepens taste but takes longer
Blended vegetables
Lighter body
Natural thickness, less rich
If the bisque is too thin, simmer it uncovered for a few minutes, or whisk 1 teaspoon cornstarch with 1 tablespoon cold water and stir it into the warm soup. For a fully gluten-free version from the start, skip the flour and use 1½ tablespoons cornstarch mixed with 2 tablespoons cold water after blending. Simmer for 1 to 2 minutes so it thickens.
If it is too thick, loosen it with warm seafood stock. Adding dry flour directly to finished soup can clump and leave a raw flour taste, so use a slurry or reduction instead.
Sherry, Wine, Brandy, and No-Alcohol Options
Lobster bisque often uses alcohol because it adds aroma and balances the richness of cream and shellfish. You have several reliable options.
Option
Flavor
Use it for
Dry sherry
Classic, nutty, mellow
Traditional lobster bisque flavor
Dry white wine
Bright and clean
Everyday version
Brandy or cognac
Deep and special-occasion
A more luxurious bowl
No alcohol
Milder, still balanced
Use extra stock plus lemon or sherry vinegar
For the most balanced version, use white wine and a little dry sherry. To make it without alcohol, replace the ½ cup wine and ¼ cup sherry in the bisque base with ¾ cup extra seafood stock. If you are also skipping the optional wine in the shell stock, use another ½ cup stock there too. Finish with lemon juice or sherry vinegar so the soup still tastes bright.
No-alcohol does not mean flat. The stock gives body, while lemon juice or sherry vinegar gives the lift that wine would normally bring.
The same no-wine idea works beautifully in seafood pasta too. This shrimp scampi without wine uses garlic, lemon, butter, and stock when you want a brighter seafood dinner without opening wine.
Skip sweet sherry unless you intentionally want a sweeter soup. Dry sherry is the safer choice for classic flavor.
Troubleshooting Lobster Bisque
If the soup is not where you want it yet, do not assume it is ruined. Bisque usually needs one clear adjustment: salt, acid, stock, cream, or lower heat.
Before you fix the soup, taste it in this order: salt first, then acid, then stock depth, then cream. Most bland bisque is not missing more cream; it is missing balance.
Before adding more cream, fix bland lobster bisque in order: salt first, then acid, then stock depth, and only then richness.
Bland Lobster Bisque
If the bisque tastes bland, do not panic. Check salt first, then add a little lemon juice or sherry vinegar. If it still tastes thin or hollow, the stock may need more shell flavor, reduction, or a small amount of lobster base. Add more cream only after the soup already tastes balanced.
Fishy-Tasting Bisque
A fishy taste usually comes from old seafood, poor-quality stock, or over-reduced briny liquid. Use fresh-smelling lobster, simmer the shells steadily but not aggressively, and balance the finished soup with lemon, herbs, cream, and enough aromatics.
Rubbery Lobster
Chewy lobster almost always means the meat spent too much time in heat. The soup can still taste good, but next time, treat lobster like the finishing touch, not an ingredient that needs to cook in the pot. If you already have cooked lobster, put it in the bowls and ladle hot bisque over it.
Bisque That Is Too Thin
Simmer it uncovered for a few minutes to reduce, or add a small cornstarch slurry. You can also blend in more of the cooked vegetables if you have not strained the soup yet.
Bisque That Is Too Thick
Add warm seafood stock a little at a time until the texture feels right. Use more cream only if you also want it richer.
Split or Grainy Cream
The heat was probably too high after the cream was added. Keep the soup low enough that it steams rather than bubbles hard. If it looks slightly separated, blending can help, but prevention is better.
How to Make Lobster Bisque Pasta or Use Bisque as Pasta Sauce
Lobster bisque pasta is a smart way to use leftover homemade bisque or upgrade a container of store-bought bisque. Think of the soup as a creamy seafood sauce first: reduce it slightly, loosen it with pasta water, and add seafood only near the finish.
Quick lobster bisque pasta formula for 2 servings: use 1½ to 2 cups lobster bisque, 6 to 8 oz pasta / 170 to 225 g, ¼ cup reserved pasta water / 60 ml, and 4 to 6 oz cooked lobster, shrimp, crab, scallops, or langostino.
Leftover lobster bisque becomes a creamy seafood pasta sauce when you reduce it slightly, toss with noodles, and loosen with pasta water.
To make it, simmer the bisque for 3 to 5 minutes so it thickens slightly. Add cooked pasta and toss with a splash of pasta water until the sauce coats the noodles. Then fold in lobster, shrimp, crab, scallops, or langostino near the end, and finish with lemon juice, black pepper, and herbs.
Pasta shapes that work well include linguine, fettuccine, rigatoni, fusilli, farfalle, and lobster ravioli. Use Parmesan lightly if you like, but do not overdo it. The sauce is already rich, and too much cheese can hide the seafood flavor.
For another creamy seafood pasta that uses pasta water to keep the sauce silky instead of heavy, this creamy salmon pasta with lemon and garlic follows the same gentle-sauce logic with tender fish.
Thick sauce: add pasta water.
Thin sauce: reduce it before adding pasta.
Overly rich: add lemon juice or a little chili.
Flat flavor: add herbs, black pepper, or a splash of sherry vinegar.
How to Upgrade Store-Bought Lobster Bisque
Homemade gives you the cleanest lobster flavor, but store-bought bisque can still be useful as a shortcut for soup, lobster bisque pasta, seafood sauce, or a quick starter. Most store-bought lobster bisque needs one of two things: more body or more brightness.
Store-bought problem
Quick rescue
Watery
Simmer to reduce before serving or tossing with pasta
Bland
Add lemon juice, sherry vinegar, herbs, or a small splash of dry sherry
Lacks lobster
Add cooked lobster, shrimp, crab, scallops, or langostino
Too salty
Loosen with unsalted stock or cream, not more seafood base
Heavy and flat
Add lemon, herbs, black pepper, or a small splash of acid
If it tastes salty and heavy at the same time, do not add more seafood base. Loosen it with unsalted stock or a little cream, then add lemon or herbs to make it taste cleaner.
Store-bought lobster bisque usually needs one clear fix: reduce watery soup, brighten with lemon and herbs, add seafood, or loosen saltiness.
For ravioli, reduce the bisque until it lightly coats a spoon, then use it as a sauce instead of a full bowl of soup. If the store-bought bisque already contains cream, warm it over low heat so the texture stays smooth.
These variations all work best when the core bisque base is balanced first. After that, shrimp, crab, spice, gluten-free thickeners, or dairy-free cream can change the bowl without changing the method.
Use the same bisque base for shrimp, crab, spicy, gluten-free, or dairy-free variations without changing the core method.
Shrimp and Lobster Bisque
When you want the bowl to feel fuller without buying extra lobster, shrimp is the easiest helper. Add shrimp shells to the stock for extra seafood flavor, then add peeled shrimp during the final few minutes of cooking.
Crab and Lobster Bisque
For a softer, sweeter bowl, crab works especially well when you want delicate pieces of seafood in each spoonful. Stir lump crab meat into the finished soup after the cream and fold carefully so the crab stays in pieces.
Langostino Lobster Bisque
Use langostino when the bisque is heading toward pasta, ravioli, or a budget-friendly seafood dinner. Add it near serving, just long enough to warm through.
Spicy Lobster Bisque
A little heat can make the bisque feel even cozier, especially when you are serving it with bread, rice, or pasta. Add cayenne, smoked paprika, chili flakes, or a small amount of Cajun seasoning, but keep the spice supportive rather than overpowering.
Gluten-Free Lobster Bisque
Skip the flour and thicken after blending with cornstarch slurry, rice, or gluten-free flour. Cornstarch is the quickest route, while rice gives a softer, more old-school texture and a classic blended body.
Dairy-Free Lobster Bisque
Use cashew cream for the most neutral dairy-free option. Coconut milk can work, but it will change the flavor and make the soup taste sweeter. Add dairy-free cream near the end over low heat, just as you would heavy cream.
Lighter Lobster Bisque
Use less cream, rely more on blended vegetables, and finish with lemon juice for brightness. The soup will be lighter, though less rich than the classic version.
Lobster Bisque vs Lobster Soup vs Lobster Chowder
These names are often used loosely, but they are not exactly the same.
Dish
Texture
Typical style
Lobster bisque
Smooth, blended, creamy
Silky soup made with shellfish stock and cream
Lobster soup
Varies
Broad term for any lobster-based soup
Lobster chowder
Chunky
Often includes potatoes, cream, and larger pieces
Lobster stew
Rustic
Usually lobster-forward and less blended
If you want a classic bisque, keep it smooth and strain it if possible. For a chowder-style lobster soup, add potatoes and skip the final fine straining.
Another creamy seafood soup that stays chunkier and simpler than bisque is this salmon soup recipe: potatoes, dill, lemon, cream, and tender salmon added near the end.
What to Serve With Lobster Bisque
This is the kind of soup that does not need a crowded plate around it. A small bowl, good bread, and something crisp on the side are enough to make it feel like a planned meal, whether you serve it as a starter, a light dinner, or part of a special seafood spread.
Because lobster bisque is rich, pair it with crusty bread or garlic bread plus something crisp, fresh, and lemony.
Crusty bread is the easiest pairing, but a warm garlic bread loaf from scratch makes the bowl feel more like a full dinner.
Good crusty bread or garlic bread
Simple green salad with lemony dressing
Roasted asparagus or green beans
Baked potatoes or twice-baked potatoes
Steak for a surf-and-turf dinner
Lobster rolls if you have extra lobster meat
Shrimp scampi for a seafood dinner spread
Light pasta or lobster ravioli
For another cozy starter with a restaurant-style feel, this French onion soup for a cozy starter gives you the same slow, savory comfort in a non-seafood direction.
Make-Ahead, Storage, Freezing, and Reheating
Plan Ahead
The strongest make-ahead method is to prepare the base through the blending and straining step, then refrigerate it before adding cream and lobster. When ready to serve, warm the base, add cream, and finish with lobster.
For dinner-party timing, make the base up to 1 day ahead. Reheat it over low heat, add cream shortly before serving, and warm the lobster in the bowls or in the soup for only the final minute. That approach keeps the soup smooth and lets you serve it like it was finished fresh, even if most of the work happened yesterday.
Refrigerate
Store leftovers in an airtight container in the refrigerator for up to 2 to 3 days. Reheat over low heat.
Freeze
For the smoothest texture, freeze the base before adding cream and lobster. Cream-based soups can separate after freezing, and lobster meat can become less tender after repeated heating. Freeze the base for up to 2 to 3 months, thaw overnight in the refrigerator, then reheat and add cream and lobster just before serving.
Reheat
Warm the soup over low heat, stirring often. Keep the heat low enough that the soup steams rather than bubbles hard. If it thickens in the refrigerator, loosen it with a splash of seafood stock or cream.
Use Leftovers
Leftover bisque is excellent as a pasta sauce, seafood sauce, or base for lobster ravioli. Reduce it, add pasta water if needed, and finish with lemon or herbs.
That is the quiet bonus of a good bisque base: even a small amount can turn pasta, ravioli, or seafood into another special meal.
FAQ
These are the quick answers for the questions that usually come up once you start adapting the recipe.
Can I make lobster bisque with lobster tails?
Yes. Lobster tails are the most practical choice for homemade lobster bisque because they give you tender meat and shells for stock. You get the ease of tails while still building deeper flavor from the shells.
Are lobster shells required?
No, but lobster shells are the easiest way to make homemade bisque taste fuller and sweeter. If you do not have shells, use the cleanest lobster or seafood stock you can find, then balance the finished soup with lemon juice or sherry vinegar.
What if I already have cooked lobster meat?
Add cooked lobster only right before serving, just long enough to warm it. Since cooked meat gives you no shells for stock, use lobster stock if possible or strengthen seafood stock carefully with clam juice or lobster base.
Which stock works best?
Lobster stock or shell-enhanced seafood stock gives the fullest flavor. Clean seafood stock is the next best option, clam juice can help in small amounts, and chicken stock should be treated as an emergency backup because it lacks seafood depth.
How do I make it without wine or sherry?
Replace the ½ cup wine and ¼ cup sherry in the base with ¾ cup seafood stock. Finish with lemon juice or sherry vinegar so the soup still has brightness and does not taste flat.
What thickens lobster bisque best?
A flour roux is the classic choice. For gluten-free bisque, use cornstarch slurry or blended rice. To make a thinner finished soup, reduce it instead of adding more cream.
Why does my lobster bisque taste bland?
Start with salt, then add acid, then check stock depth. A little lemon juice or sherry vinegar often wakes up the soup, but if the stock itself is weak, shells, reduction, or a small amount of lobster base may be needed.
Why does lobster turn rubbery in bisque?
Lobster turns rubbery when it spends too long in heat. Treat it like the finishing touch, not an ingredient that needs to simmer: cook it briefly, remove it, and warm it only right before serving.
Is lobster bisque gluten-free?
It can be. Skip the flour and thicken after blending with cornstarch slurry, rice, or gluten-free flour. Cornstarch is fastest, while rice gives a softer blended texture and a more classic old-school body.
Can lobster bisque be dairy-free?
Yes, but it will taste less classic. Cashew cream is the most neutral option; coconut milk works, but it can make the soup sweeter. Add dairy-free cream near the end over low heat, just as you would heavy cream.
Does lobster bisque freeze well?
The base freezes better than the finished soup. Freeze before adding cream and lobster, then use within 2 to 3 months. Add cream and lobster only after reheating so the texture stays smoother and the seafood stays tender.
Can lobster bisque be used as pasta sauce?
Yes. Lobster bisque pasta works best when the bisque is reduced slightly, tossed with pasta, loosened with pasta water, and finished with seafood, lemon, and herbs.
What is the difference between lobster bisque and lobster chowder?
Lobster bisque is smooth, blended, and creamy. By contrast, lobster chowder is chunkier and often includes potatoes, cream, and larger pieces of seafood or vegetables.
What should I serve with lobster bisque?
Serve lobster bisque with crusty bread, garlic bread, a lemony salad, roasted vegetables, baked potatoes, or steak for a surf-and-turf meal. The best pairings are simple, crisp, or bread-like because the soup is already rich.
Lobster bisque should feel special, but it does not need to feel stressful. Start with lobster tails, use a stock you would happily taste on its own, save the shells if you can, and keep the lobster meat out of the long simmer. The best lobster bisque is not the one with the most complicated method. It is the one where the stock tastes clean, the cream stays silky, and the lobster is still tender when the spoon reaches the bowl.