Posted on Leave a comment

Tinola Recipe: Filipino Chicken Tinola / Tinolang Manok with Papaya or Sayote

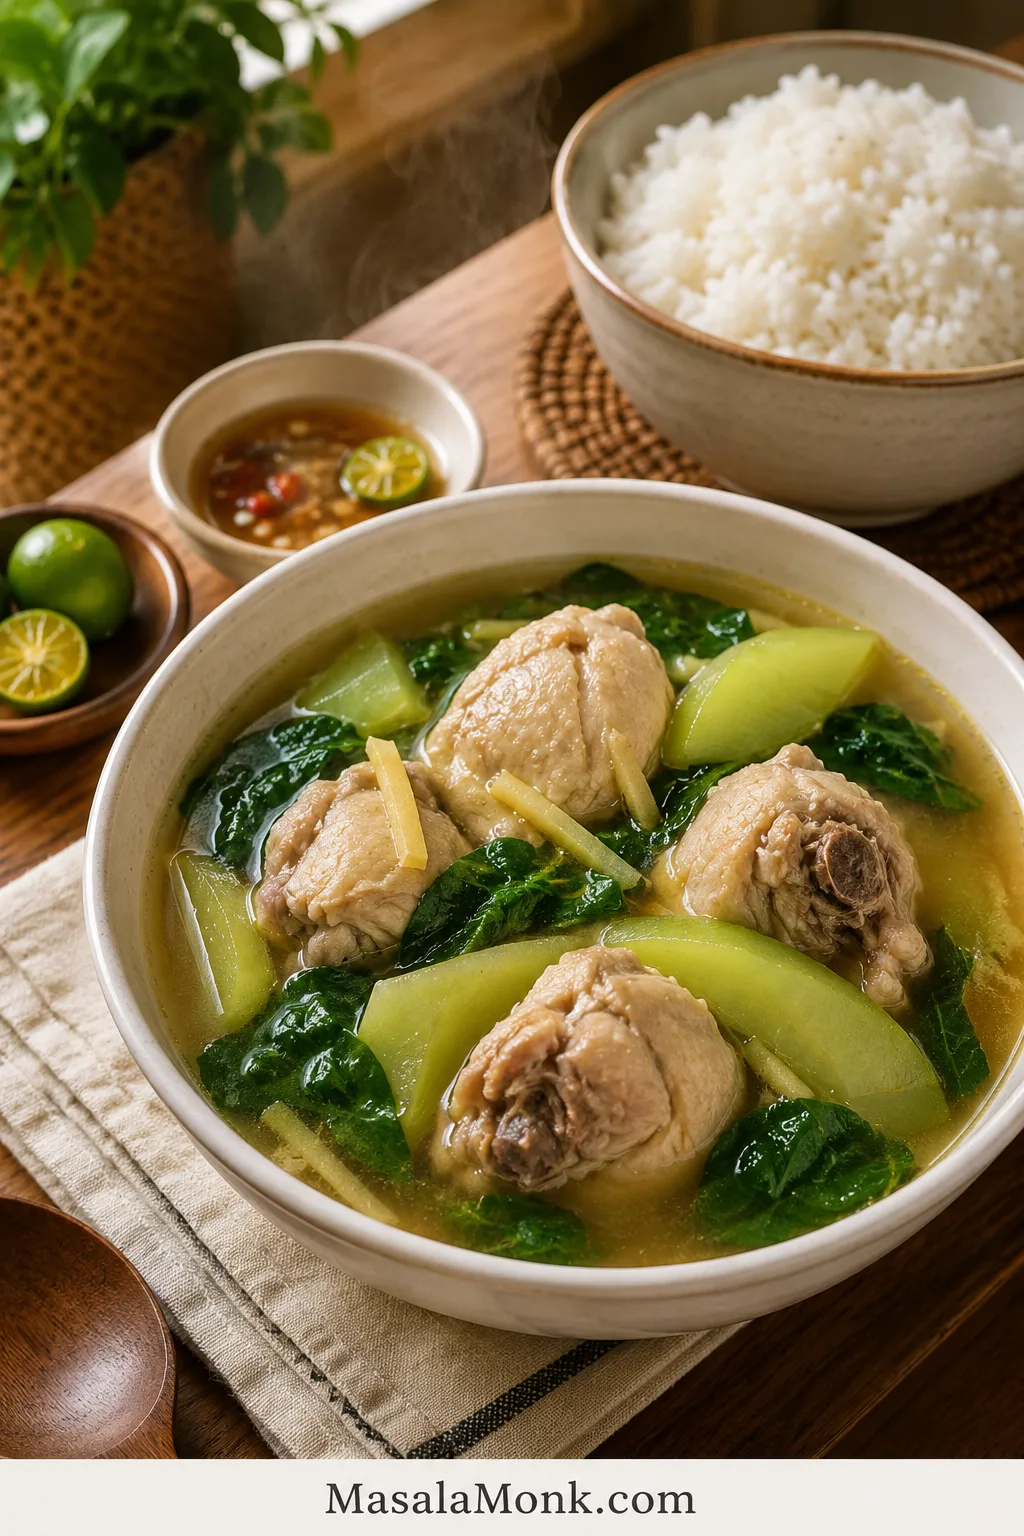
Bowl of Chicken Tinola with golden broth, bone-in chicken, green papaya or sayote wedges, leafy greens, steamed rice, calamansi, and dipping sauce.

Tinola is the kind of Filipino chicken soup that feels light and restorative, but still filling when poured over rice. In a good pot, the broth is clear, gingery, and savory, the chicken is tender, and the green papaya or sayote softens without falling apart.

It is the kind of soup that feels right when you want something gentle, but not empty — warm broth, tender chicken, fresh greens, and rice that soaks up every spoonful.

This Tinola recipe, also called Chicken Tinola or Tinolang Manok, is made with bone-in chicken, fresh ginger, garlic, onion, fish sauce, green papaya or sayote, and leafy greens like malunggay, dahon ng sili, spinach, or pechay.

This version keeps the flavor classic, but it also works in real kitchens: sayote if you cannot find green papaya, spinach if malunggay is not available, and clear timing cues so the soup tastes full instead of flat.

Most importantly, it is built around the two things that make or break Tinola: a broth that tastes gingery and full, not watery, and vegetables that turn tender without collapsing.

Quick Answer: What Is Tinola?

Tinola is a Filipino broth-based dish. The most common version is Tinolang Manok, which means Chicken Tinola. It is usually made with chicken, ginger, garlic, onion, fish sauce, green papaya or sayote, and leafy greens such as malunggay or dahon ng sili.

In English, Chicken Tinola is best described as a Filipino ginger chicken soup. It is usually eaten as a main dish with rice, not just as a starter soup.

  • Best chicken: bone-in thighs, drumsticks, wings, or mixed cuts.
  • Flavor base: fresh ginger, fish sauce, garlic, and onion.
  • Vegetable choice: green papaya for a softer classic feel, or sayote for a firmer bite.
  • Best greens: malunggay or dahon ng sili if available; spinach, pechay, or bok choy if not.
  • Best cooking cue: simmer gently until the chicken is tender and reaches 165°F / 74°C.

Make It Now

Have your chicken, ginger, and vegetables ready? Use this quick path, then follow the recipe card for exact amounts.

  1. Sauté ginger, garlic, and onion until fragrant.
  2. Add chicken and cook until the surface loses its raw color.
  3. Add fish sauce before the liquid so the chicken is seasoned early.
  4. Simmer gently until the chicken is tender.
  5. Add your chosen vegetable near the end, then finish with greens.

Classic but flexible: classic Tinola often means chicken, ginger, patis, green papaya, and malunggay or dahon ng sili. But Tinola is also a home dish, so many cooks use sayote when papaya is hard to find, spinach when malunggay is unavailable, and chicken broth or rice wash when the chicken needs a little help. The point is not to make the pot rigid; it is to keep the soup gingery, savory, clear, and good with rice.

A good pot of Tinola should feel simple, but not thin. The broth should taste like the chicken, ginger, and patis had time to become one thing, not like separate ingredients floating in hot water. That is why this recipe builds the flavor early and waits before adding the vegetables.

Save this Tinola rule: ginger early, patis before broth, chicken until tender, papaya or sayote late, greens last.

Tinola Recipe Card

Filipino Chicken Tinola / Tinolang Manok

This Chicken Tinola recipe keeps the two common problems away: watery broth and vegetables that fall apart before the chicken is tender. The chicken is seasoned early, the simmer stays gentle, and the vegetables go in when the meat is nearly ready.

Prep Time15 minutes
Cook Time45 minutes
Total Time1 hour
Servings4 to 6
MethodStovetop
CuisineFilipino
Main Equipment5 to 6 quart / 4.7 to 5.7 L pot or Dutch oven

Ingredients

  • 2 to 2 1/2 lb / 900 g to 1.1 kg bone-in chicken pieces, such as thighs, drumsticks, wings, or mixed cuts
  • 1 1/2 to 2 tablespoons neutral oil / 22 to 30 ml
  • 1 medium onion, sliced
  • 4 garlic cloves, minced or crushed
  • 45 to 60 g / 1 1/2 to 2 oz fresh ginger, sliced, julienned, or lightly smashed
  • 2 to 3 tablespoons fish sauce / patis / 30 to 45 ml, plus more to taste
  • 6 cups water, low-sodium chicken broth, or rice wash / 1.4 L
  • 350 to 500 g / 12 to 18 oz green papaya or sayote/chayote, peeled and cut into wedges. Remove seeds if using papaya.
  • 2 packed cups / 60 to 90 g malunggay, dahon ng sili, spinach, pechay, or bok choy
  • 1/2 teaspoon black pepper, plus more to taste
  • Salt, only if needed after tasting

Optional Ingredients

  • 1 chicken cube, only if using water and you want a stronger shortcut broth
  • Calamansi or lime, for serving
  • Fresh chili, for heat
  • Extra fish sauce, for serving
  • 1 stalk lemongrass, bruised, for a fragrant variation

Instructions

  1. Prep the chicken and vegetables. Cut the chicken into similar-sized pieces if needed. Peel your chosen vegetable. If using green papaya, remove the seeds. Cut the pieces into 1 1/2 to 2 inch wedges.
  2. Sauté the aromatics. Heat oil in a large pot over medium heat. Add onion, garlic, and ginger. Cook for 2 to 3 minutes, stirring often, until fragrant and softened. The pot should smell warm and clearly gingery.
  3. Add the chicken. Cook for 5 to 7 minutes, turning occasionally, until the chicken loses its raw color and begins to lightly brown on the surface.
  4. Season early. Add 2 tablespoons fish sauce and stir well. Cook for 1 to 2 minutes so the fish sauce coats the chicken and aromatics.
  5. Add liquid and skim. Pour in water, broth, or rice wash. Bring to a boil, then skim off foam or scum from the surface.
  6. Simmer gently. Lower the heat, cover partially, and simmer for 25 to 35 minutes, or until the chicken is tender and reaches 165°F / 74°C internally.
  7. Add the vegetables. Simmer for 5 to 12 minutes, depending on the size and firmness of the pieces, until fork-tender but not mushy.
  8. Finish with greens. Add malunggay, dahon ng sili, spinach, pechay, or bok choy. Cook for 1 to 2 minutes, or turn off the heat and cover until the greens wilt.
  9. Taste and serve. Adjust with more fish sauce, salt, black pepper, calamansi, or chili. Serve hot with steamed rice.

Recipe Notes

  • Bone-in thighs and drumsticks are the easiest choice if you want tender chicken and a fuller broth.
  • The pot should smell clearly of ginger before the liquid goes in.
  • Green papaya gives a softer, slightly sweet, more classic feel. Sayote stays firmer and fresher.
  • Delicate greens need only enough heat to wilt. Fold them in at the end so they stay bright.
  • A chicken cube can rescue a weak pot, especially if you are using plain water or lean chicken. Start with less fish sauce if you add one, then adjust at the end.

What Good Tinola Should Taste Like

A good bowl of Tinola tastes light, gingery, savory, and balanced. The soup is not heavy, but it has enough seasoning and chicken flavor to make you want to spoon it over rice.

The easiest test is the rice: spoon a little broth over hot rice. If it tastes warm, gingery, and savory without needing rescue, the pot is ready.

  • Ginger tastes noticeable, warm, and fresh.
  • Fish sauce gives depth without making the soup taste fishy.
  • Chicken turns tender, especially near the bone.
  • Green papaya softens more; sayote keeps a slightly firmer bite.
  • The greens taste fresh, not dull or overcooked.

Why This Tinola Recipe Works

This recipe is built to solve two common Tinola problems: broth that tastes watery and vegetables that turn mushy. The fix is not complicated. Start the flavor before the liquid goes in, simmer the chicken gently, then add the pieces only when the meat is nearly tender.

  • The flavor starts before the broth. Ginger, garlic, and onion cook in oil first so the soup has a warm aromatic base.
  • Fish sauce seasons the chicken early. Salt can season Tinola, but patis gives the broth its rounded, savory depth.
  • The simmer stays gentle. A steady simmer helps the chicken turn tender without making the liquid rough or cloudy.
  • The vegetables go in late. Do not add them just because the broth is boiling. Add them when the chicken is already nearly tender.
  • The greens stay fresh. Finish with them at the end so the soup keeps a bright green finish.

The simple idea: build flavor before the broth, wait for the chicken to turn tender, then add the vegetables and greens in stages. That is the difference between flat Tinola and a bowl you want to spoon over rice.

The rule below is the whole Tinola method in one glance: build ginger and patis early, give the chicken time, then protect the vegetables and greens at the end.

Five-step Chicken Tinola cooking rule showing ginger early, patis before broth, chicken until tender, vegetables late, and greens last.
Follow this Tinola order to build flavor and protect texture: ginger early, patis before broth, chicken until tender, vegetables late, and greens last.

Ingredients Explained

Think of the ingredients in layers: ginger for warmth, chicken for body, fish sauce for depth, papaya or sayote for texture, and greens for freshness. Once those layers make sense, the recipe becomes much easier to adjust without losing what makes Tinola taste like Tinola.
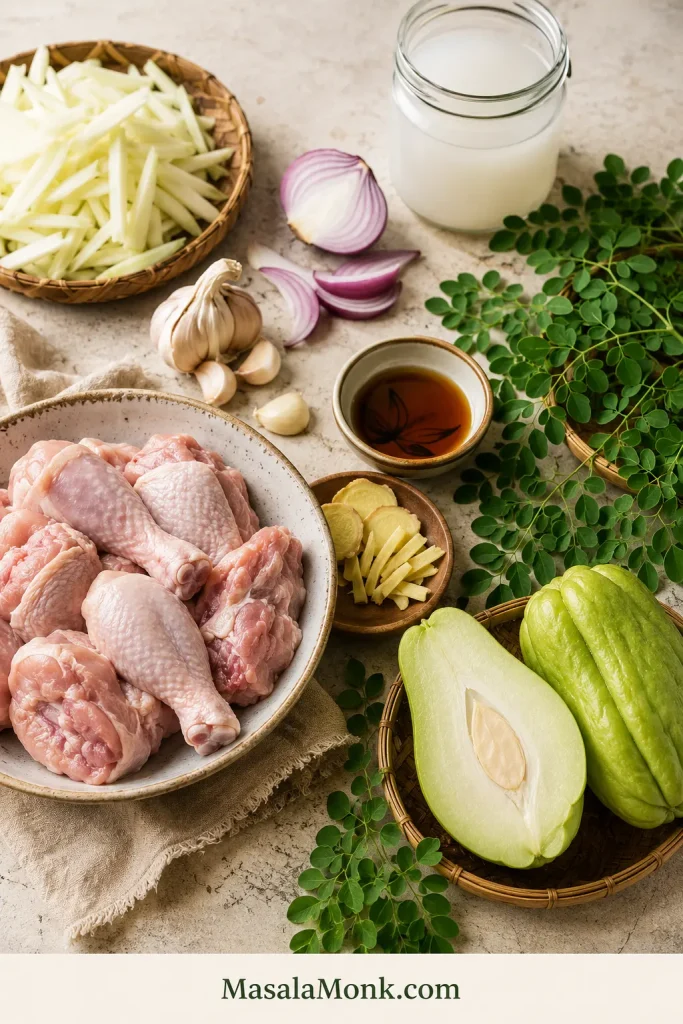
Chicken Tinola ingredients on a board, including bone-in chicken, ginger, garlic, onion, fish sauce, green papaya, sayote, malunggay leaves, and rice wash.
These Tinola ingredients each have a job: chicken gives body, ginger brings warmth, patis adds savory depth, and papaya or sayote gives the soup its gentle bite.

Chicken

Bone-in chicken gives Tinola the kind of body that plain water cannot create on its own. Thighs, drumsticks, wings, or a whole chicken cut into serving pieces all work well.

Boneless thighs can work if you want a faster version, but the broth will be lighter. Chicken breast is lean, but it can dry out if boiled hard or cooked too long. Use a gentle simmer and check it earlier if breast meat is what you have.

Ginger

Ginger is the backbone of Tinola. A small token slice is not enough. Use about 45 to 60 g / 1 1/2 to 2 oz fresh ginger for a full pot. Slice it, julienne it, or lightly smash it so it releases flavor into the oil and broth.

When the ginger hits the oil, the pot should smell sharp, warm, and awake. A weak aroma usually means the final broth will taste weak too. If the ginger feels shy, the Tinola will too.

Garlic and Onion

Garlic and onion round out the ginger. Cook them just until fragrant and softened before the chicken goes in; they do not need to brown deeply.

Fish Sauce / Patis

Fish sauce is where the broth starts getting its backbone. Let it hit the hot pot before the water goes in, and it seasons the chicken instead of just floating salty on top later.

Give it a minute in the hot pot so the sharp edge cooks off and the soup starts with depth instead of last-minute saltiness.

Water, Chicken Broth, or Rice Wash

Water works well if you use bone-in chicken, enough ginger, and proper seasoning. Low-sodium chicken broth gives a stronger shortcut flavor. Rice wash, sometimes called hugas bigas, gives the soup a little more body and a softer feel.

If using rice wash, use the second rinse rather than the first. The second rinse is usually cleaner while still giving the soup a little body. Use rice wash when you want a softer, slightly fuller broth; use water or low-sodium broth when you want a cleaner, lighter-tasting pot.

A chicken cube can rescue a weak pot, especially if you are using plain water or lean chicken. Use it if you need it, but let ginger, chicken, and fish sauce do most of the work.
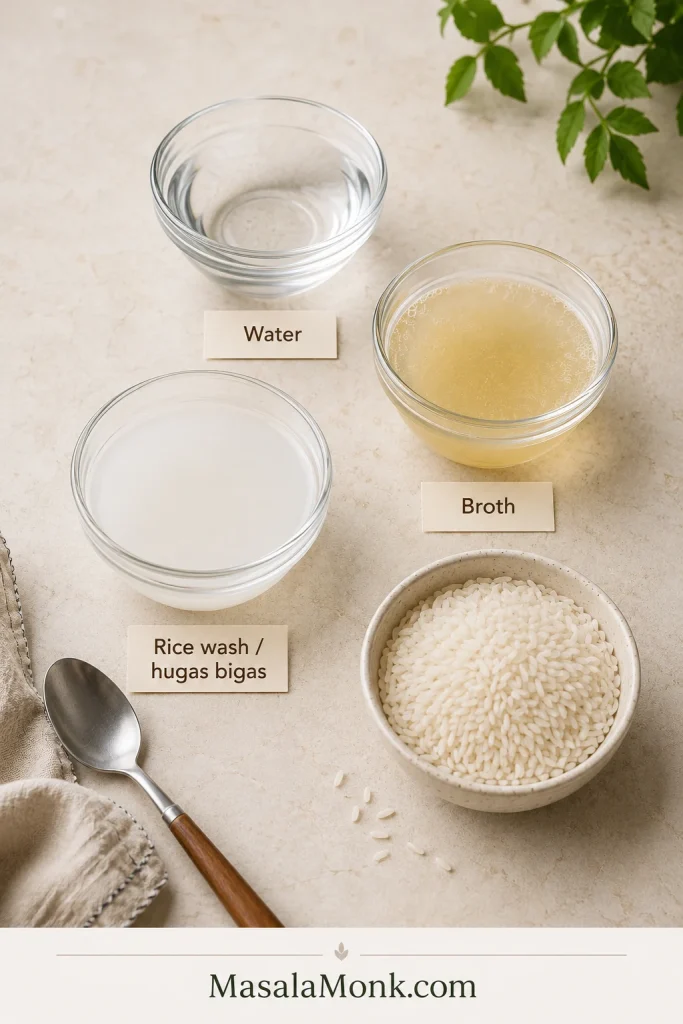
Three bowls labeled water, broth, and rice wash or hugas bigas, with uncooked rice nearby for making Chicken Tinola.
Rice wash, or hugas bigas, gives Tinola a softer body; meanwhile, plain water keeps it light, and broth adds shortcut depth.

Green Papaya or Sayote

Green papaya and sayote are both common in Tinola. Papaya becomes softer and slightly sweet, while sayote, also called chayote, stays firmer with a milder, fresher flavor.

Use the one your market gives you. Tinola is forgiving as long as the broth is gingery and the vegetable goes in at the right time.

Leafy Greens

Malunggay and dahon ng sili are classic Tinola greens. Spinach, pechay, and bok choy are practical substitutes. The exact leaf matters less than the timing.

Add something green and fresh at the end, then stop before the leaves lose their brightness.

Shopping Tip

Filipino markets may have the classic leaves and green papaya. At a regular supermarket, sayote/chayote and spinach can still get you a good, comforting pot.

Best Chicken Cuts for Tinola

The chicken cut matters because Tinola is not only about the meat — it is also about what the meat gives back to the pot.

Bone-in thighs, drumsticks, wings, or mixed cuts are the most forgiving choices for this soup because they can simmer without drying out.

Chicken CutBest ForNotes
Bone-in thighsBest flavor and tendernessThe easiest all-round choice.
DrumsticksBudget-friendly family mealsEasy to serve and good for broth.
WingsExtra collagen and bodyGreat mixed with thighs or drumsticks.
Whole chicken, cut upTraditional family-style potGives different textures in one soup.
Boneless thighsFaster weeknight versionLess broth depth, but still flavorful.
Chicken breastLean versionCan dry out; simmer gently and avoid overcooking.

Chicken should reach 165°F / 74°C internally. FoodSafety.gov lists 165°F / 74°C as the safe minimum internal temperature for chicken, turkey, and other poultry. See the safe minimum internal temperature chart.

Best all-round choice: use bone-in thighs and drumsticks. They give the soup enough flavor, cook evenly, and stay tender even if the pot simmers a little longer.

If you bought a larger pack of thighs and want a dry, crispy dinner another night, this air fryer chicken thighs recipe uses the same reliable cut in a completely different way.

Green Papaya vs Sayote

For many cooks, the first big choice is green papaya or sayote.

Green papaya gives the bowl a softer, more classic feel. Sayote keeps a firmer, cleaner bite. Neither one ruins the dish, so choose based on what you can find and what texture you like.
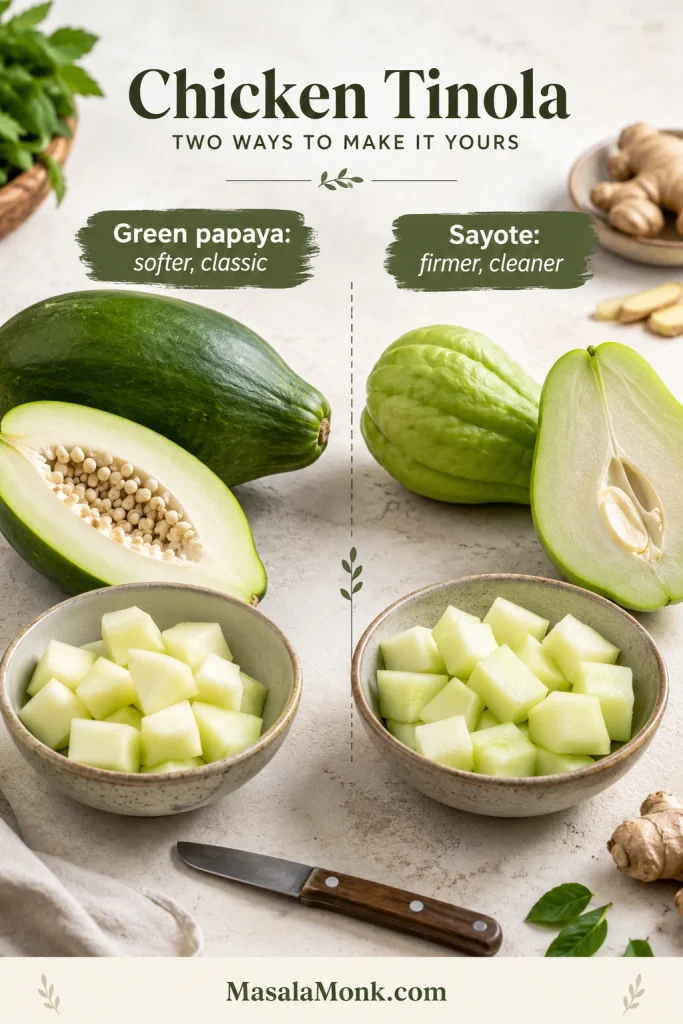
Green papaya and sayote shown side by side with whole and cut pieces for comparing vegetables used in Chicken Tinola.
Green papaya makes Tinola softer and more classic, while sayote stays firmer, cleaner, and easier to find in many markets.
OptionTextureFlavorBest For
Green papayaSoft-tender and absorbs brothMild, slightly sweetA more classic Tinola feel
Sayote / chayoteFirmer and cleanerMild, fresh, neutralEasy supermarket version
Semi-ripe papayaSofter and sweeterNoticeably sweetUse only if you intentionally want a sweeter soup
UpoSoft and wateryDelicateAvailable substitute
KalabasaCreamier and sweeterRicher, less classicA variation, not the default
Labanos / daikonFirm and slightly pepperySharperWorks in a pinch

If you want a clearer, more ginger-forward bowl, sayote is a very good choice. For the softer texture many people associate with Tinola, use green papaya.

If you buy a whole green papaya and have extra left after Tinola, you can use it in a fresh salad like this raw papaya salad.

Cut whichever one you use into wedges large enough to hold their shape. Add the pieces only after the chicken is nearly tender. If they go in too early, they can turn mushy before the chicken is done.

Tinola Greens: Malunggay, Dahon ng Sili, Spinach, Pechay, or Bok Choy

Traditional Tinola often uses malunggay or dahon ng sili. Outside the Philippines, those can be harder to find. Spinach, pechay, bok choy, or watercress will not make the soup wrong — they simply make it more practical for your kitchen.
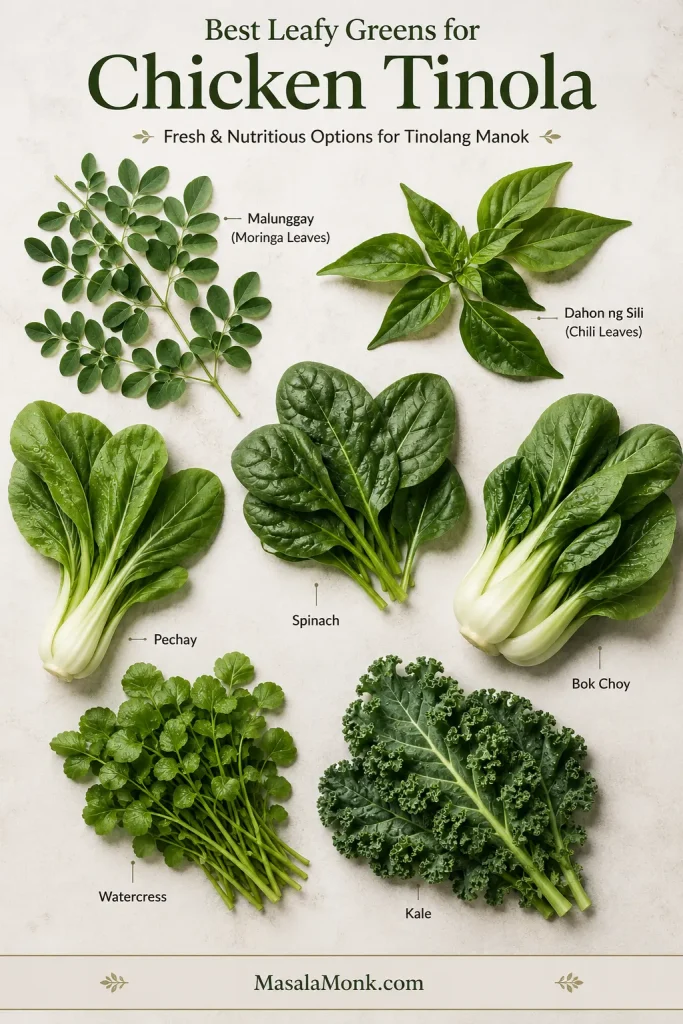
Labeled guide board of Tinola greens, including malunggay, dahon ng sili, spinach, pechay, bok choy, watercress, and kale.
Malunggay and dahon ng sili are classic Tinola greens; however, spinach, pechay, bok choy, watercress, or kale can still work when timed well.
GreenTraditional?FlavorHow to Add
Malunggay / moringaYesEarthy, green, slightly bitterLast 1 to 2 minutes
Dahon ng sili / chili leavesYesMildly pepperyLast 1 to 2 minutes
SpinachSubstituteSoft and mildOff heat or last 1 minute
Pechay / bok choySubstituteMild with more bodyStems first, leaves last
KaleSubstituteStronger and chewierSimmer 2 to 4 minutes
WatercressSubstitutePeppery and freshLast minute

Do not add delicate greens too early. The leaves should still look alive, not dull. If you are using bok choy or pechay, add the thicker stems first and the leaves later. With spinach, turn off the heat and let the leaves wilt gently.

Equipment and Pot Size

Tinola is a simple one-pot soup, but the pot still matters. Use a pot wide enough that the chicken can sit in the aromatics before the liquid goes in. If the pot is too crowded, the chicken steams instead of picking up flavor from the ginger, garlic, onion, and fish sauce.

  • 5 to 6 quart / 4.7 to 5.7 L pot or Dutch oven: roomy enough for bone-in chicken, broth, papaya or sayote, and greens without boiling over.
  • Wide spoon or ladle: useful for skimming foam, scum, and extra oil from the surface.
  • Tongs: helpful for turning chicken pieces while they cook with the aromatics.
  • Instant-read thermometer: the most reliable way to check that chicken reaches 165°F / 74°C.

A smaller pot can still work, but keep the simmer gentle and watch the liquid level once the vegetables go in.

Cooking Time by Stage

Tinola is simple, but timing decides whether the bowl tastes clean and tender or flat and overcooked.
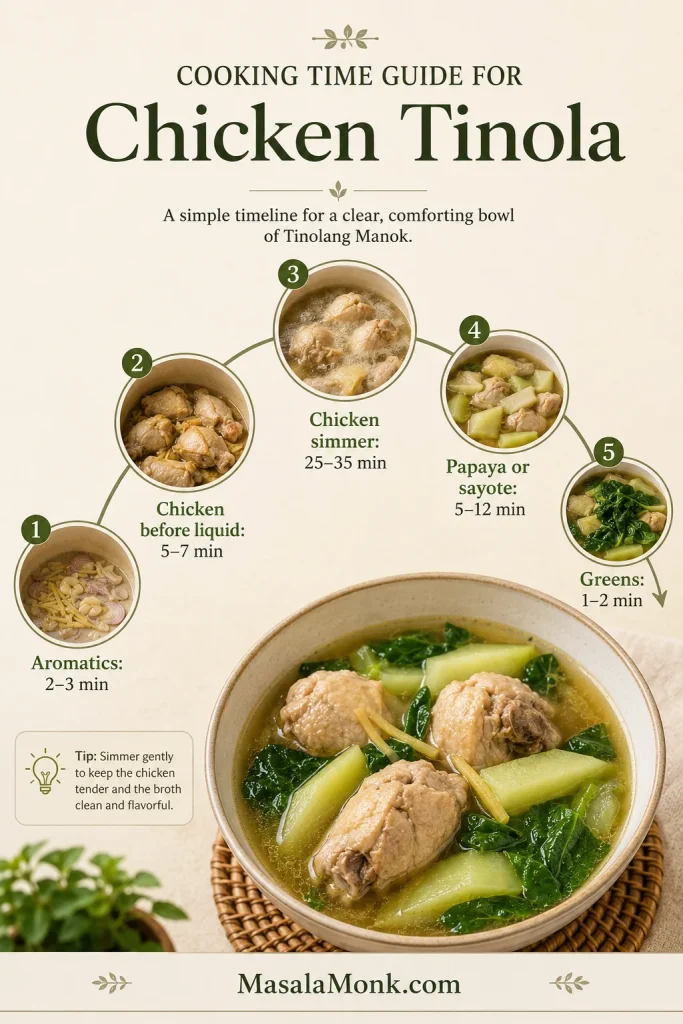
Cooking time guide for Chicken Tinola showing aromatics for 2 to 3 minutes, chicken before liquid for 5 to 7 minutes, chicken simmer for 25 to 35 minutes, papaya or sayote for 5 to 12 minutes, and greens for 1 to 2 minutes.
Good Tinola is mostly timing: aromatics first, chicken long enough to tenderize, vegetables near the end, and greens for the final minute.
StageApproximate TimeWhat to look for
Sauté ginger, garlic, and onion2 to 3 minutesAromatics smell warm, sharp, and fragrant.
Cook chicken before liquid5 to 7 minutesChicken loses raw color and lightly browns on the surface.
Fish sauce with chicken1 to 2 minutesFish sauce coats the chicken and smells savory.
Chicken simmer25 to 35 minutesChicken is tender and reaches 165°F / 74°C.
Papaya or sayote5 to 12 minutesPieces are fork-tender but still hold shape.
Leafy greens1 to 2 minutesLeaves are just wilted and still fresh-tasting.

Timing note: in most home pots, bone-in thighs and drumsticks begin turning tender around 30 minutes after the broth starts simmering. Sayote often softens faster than thick green papaya wedges, so start checking the vegetables at 5 minutes. Spinach wilts best off heat, while pechay and bok choy work better when the stems go in before the leaves.

Native chicken or very large bone-in pieces may need more time before the vegetables go in. Wait until the meat is already turning tender, or the pieces may overcook before the chicken is ready.

Back to top ↑

Step-by-Step Tinola Method

Once the aromatics are fragrant, the rest of the soup is mostly about patience: simmer the chicken gently, then add the vegetables when the meat is nearly tender.

1. Prep the Chicken and Vegetables

Pat the chicken dry if it is very wet. If the pieces are very uneven, cut larger pieces down so they cook more evenly.

Peel the green papaya or sayote. If using green papaya, remove the seeds. Cut the vegetable into 1 1/2 to 2 inch wedges so the pieces can simmer without falling apart.

2. Sauté Ginger, Garlic, and Onion

Heat oil in a large pot over medium heat. Add the onion, garlic, and ginger. Cook for 2 to 3 minutes, stirring often.

The aromatics should smell warm, sharp, and fragrant. This is where the soup starts becoming Tinola, so do not rush past the ginger.
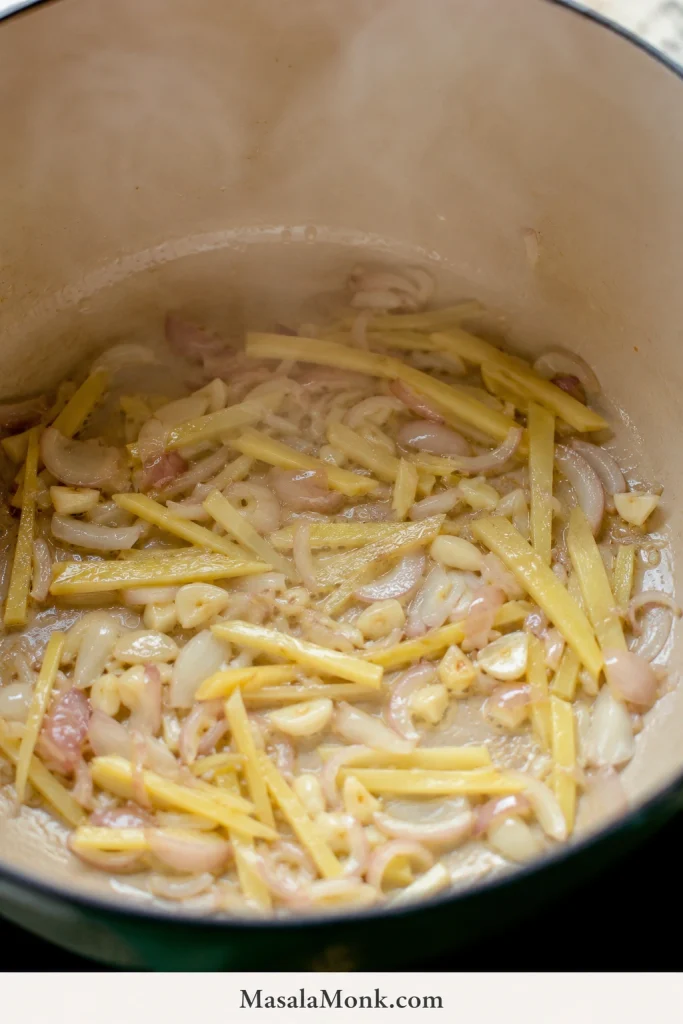
Sliced ginger, garlic, and onion sautéing in oil inside a pot for Chicken Tinola.
Start with ginger, garlic, and onion before adding water; as a result, the broth begins with aroma instead of tasting flat later.

3. Add the Chicken and Lightly Brown It

Add the chicken pieces to the pot. Cook for 5 to 7 minutes, turning occasionally. The chicken does not need a deep brown crust, but the surface needs to lose its raw color and pick up some flavor from the aromatics.

This step gives the soup more depth than simply boiling raw chicken in water.
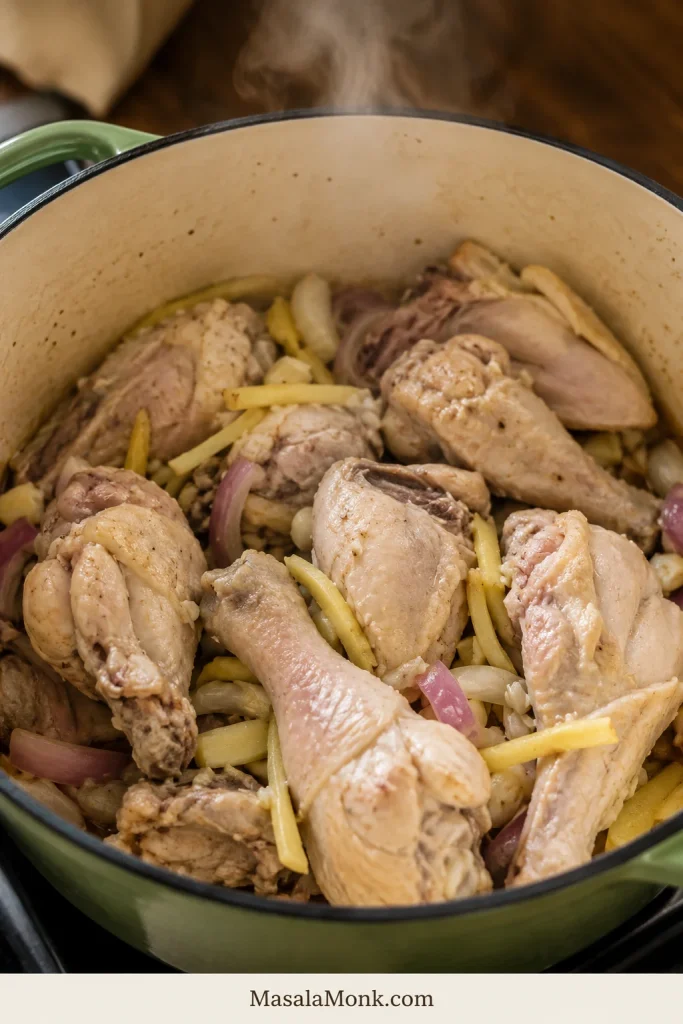
Bone-in chicken pieces cooking with sliced ginger, garlic, and onion in a pot before broth is added.
Cooking chicken with ginger and aromatics before the liquid goes in helps the meat season early and gives Tinola a fuller broth.

4. Add Fish Sauce Early

Add 2 tablespoons fish sauce and stir well. Let it cook with the chicken for 1 to 2 minutes before adding the liquid.

This gives the meat and aromatics a savory base. You can always add more fish sauce at the end, but adding some early helps the flavor cook into the soup instead of sitting only on the surface.
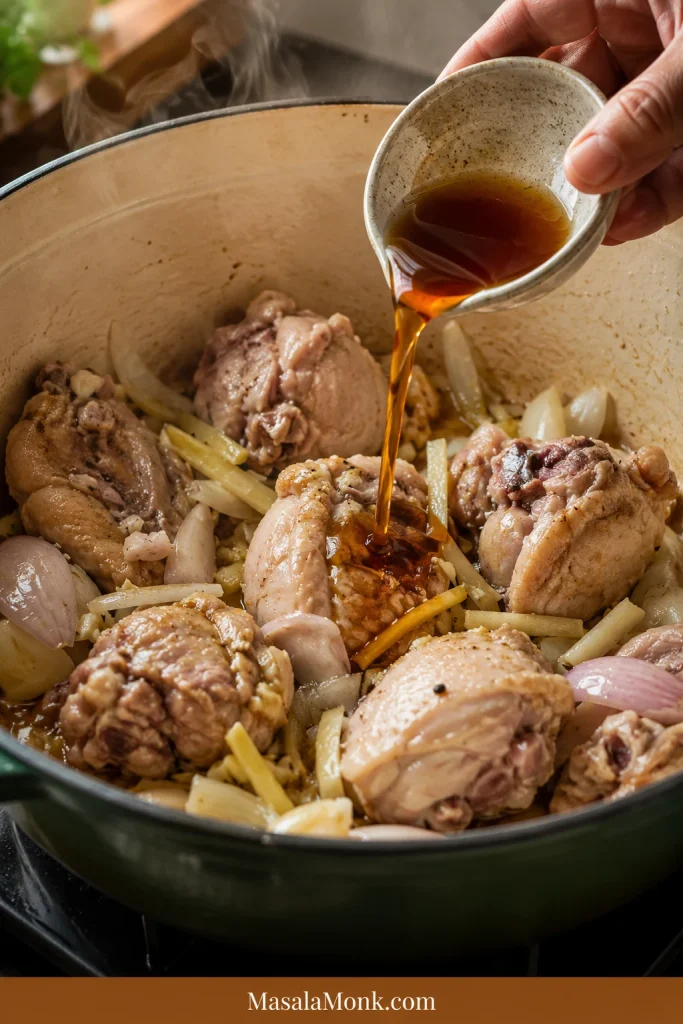
Fish sauce being poured into a pot with bone-in chicken, ginger, garlic, and onion before any broth is added.
Add patis before the broth, not after everything is diluted; this lets the chicken and aromatics absorb savory depth from the start.

5. Add Liquid, Boil, and Skim

Pour in 6 cups water, chicken broth, or rice wash. Bring the pot to a boil. As foam rises, skim it off with a wide spoon or ladle.

Skimming at this stage keeps the liquid clearer. It is much easier to remove foam before the vegetables and greens go in.
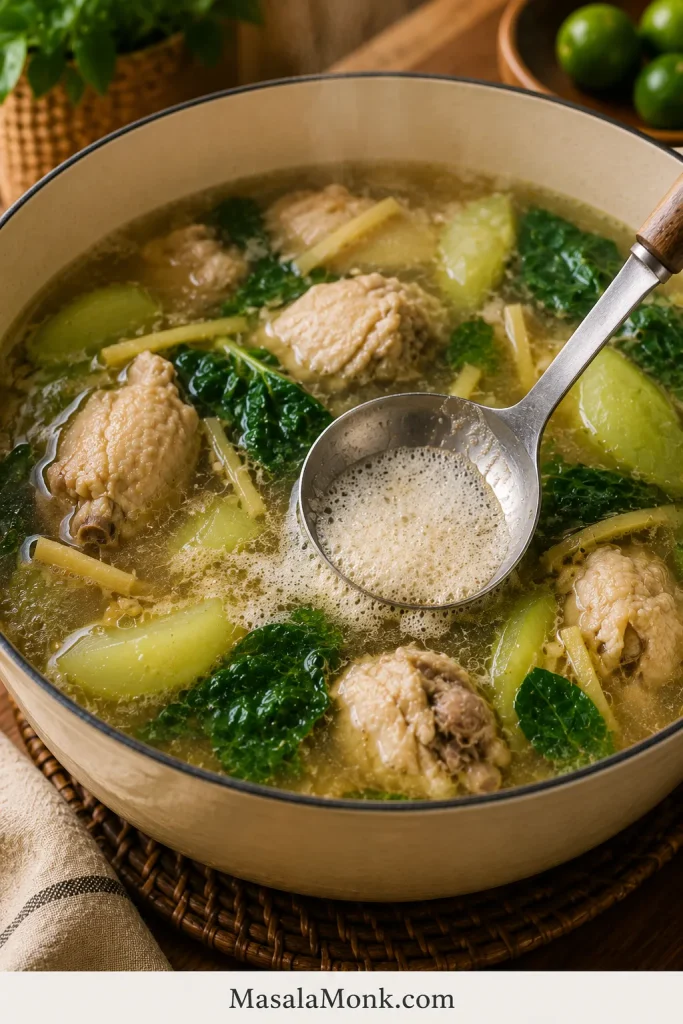
Ladle skimming foam from the surface of Chicken Tinola broth with chicken, ginger, greens, and vegetable pieces in the pot.
Skim the foam after the first boil, then lower the heat; this keeps Tinola broth cleaner without overworking the chicken.

6. Simmer Until the Chicken Is Tender

Lower the heat to a gentle simmer. Cover the pot partially and cook for 25 to 35 minutes, or until the chicken is tender and reaches 165°F / 74°C internally.

The chicken should feel tender near the bone. Avoid a hard boil. A rough boil can make the broth cloudy and the chicken tougher.

7. Add Green Papaya or Sayote

Add the green papaya or sayote once the chicken is nearly tender. Do not add them just because the broth is boiling; wait until the meat has already started giving flavor back to the pot. Simmer for 5 to 12 minutes, depending on how large and firm the pieces are.

Look for tender edges with enough firmness in the center that the wedges do not collapse in the bowl. If they start breaking apart, they have gone too far.
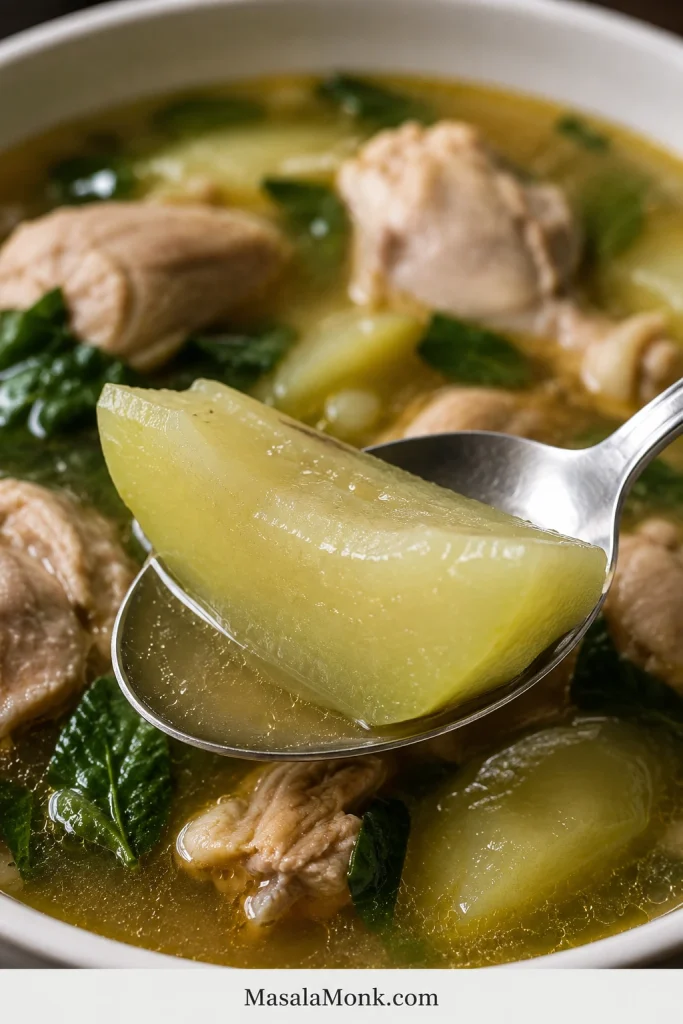
Spoon lifting an intact green papaya or sayote wedge from Chicken Tinola broth, with chicken and greens in the background.
Add papaya or sayote near the end so the edges soften while the pieces still hold their shape in the bowl.

8. Add the Greens at the End

Add malunggay, dahon ng sili, spinach, pechay, or bok choy near the end. Delicate leaves need only 1 to 2 minutes. Spinach can often be added off heat and covered until wilted.

Pull them off the heat while they are still bright and just wilted. If they look dull and tired, they have cooked too long.
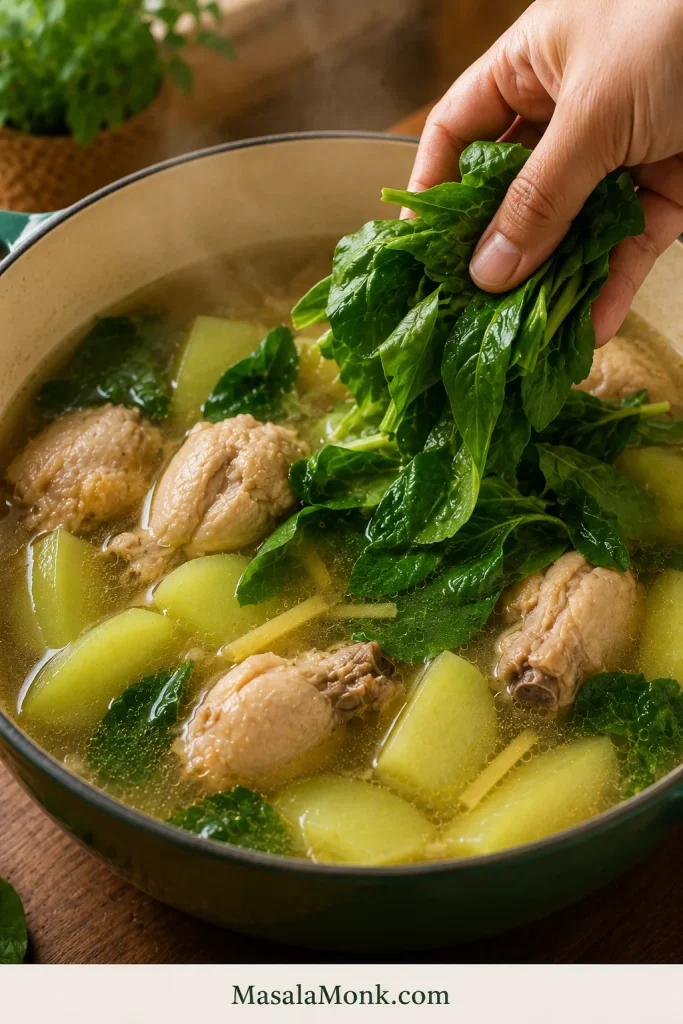
Hand adding fresh leafy greens to a pot of Chicken Tinola with broth, chicken pieces, and green vegetable wedges.
Greens go in last because they only need enough heat to wilt; that way, Chicken Tinola stays fresh, bright, and not overcooked.

9. Taste and Serve

Taste the soup before serving. Adjust with more fish sauce, salt, black pepper, calamansi, or chili.

The test is the rice: spoon a little broth over hot rice. If it tastes warm, gingery, and savory without needing rescue, the pot is ready. The broth can taste a touch stronger from the spoon than it does in the bowl, because rice softens everything.

Timing cue: add the vegetables after the chicken is mostly tender, not at the beginning. That one choice keeps the pieces from collapsing before the chicken is done.

Fix Bland Tinola Broth

Bland Tinola is frustrating because it can look right before it tastes right — clear broth, chicken, greens, rice — but the spoonful feels empty.

It usually means one of four things: not enough ginger, not enough fish sauce, weak boneless chicken, or too much liquid without final seasoning.

The fix is usually not more salt alone. Tinola needs ginger warmth, chicken flavor, fish sauce depth, and a final taste before serving.
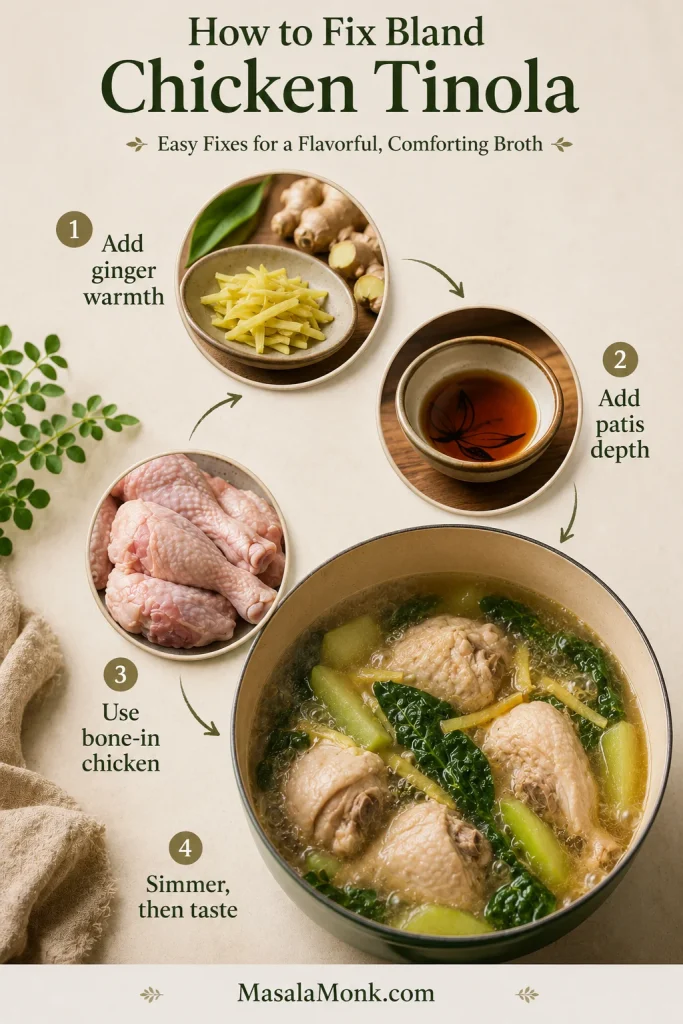
Troubleshooting guide for bland Chicken Tinola broth with ginger, fish sauce, bone-in chicken, and a simmering pot.
When Chicken Tinola tastes thin, fix the base first: strengthen the ginger, deepen with patis, simmer the chicken properly, then taste again.
  • Use bone-in chicken. It gives the broth more body than boneless breast.
  • Use enough fresh ginger. Tinola should smell warm and gingery before the liquid even goes in.
  • Sauté the aromatics first. Do not just boil everything together from the start.
  • Add fish sauce before simmering. Let it coat the chicken and aromatics.
  • Simmer gently. This keeps the chicken tender and the soup balanced.
  • Skim foam and extra oil. This improves both flavor and appearance.
  • Taste at the end. The soup may need more patis, salt, pepper, calamansi, or chili.

If your Tinola has ever tasted like hot water with chicken in it, start with ginger and patis before reaching for more salt. A few extra minutes of gentle simmering can also help the chicken give more back to the pot.

Fast fix for bland Tinola: simmer a few fresh ginger slices in the broth for 5 minutes, add a small splash of fish sauce, then taste again. If the soup still feels thin, let it simmer uncovered for a few minutes to concentrate slightly.

Keep Tinola Broth Clear

Clear Tinola broth comes from gentle cooking and good timing. Bring the liquid to a boil first, then skim off the foam or scum that rises to the surface. After that, lower the heat to a gentle simmer.
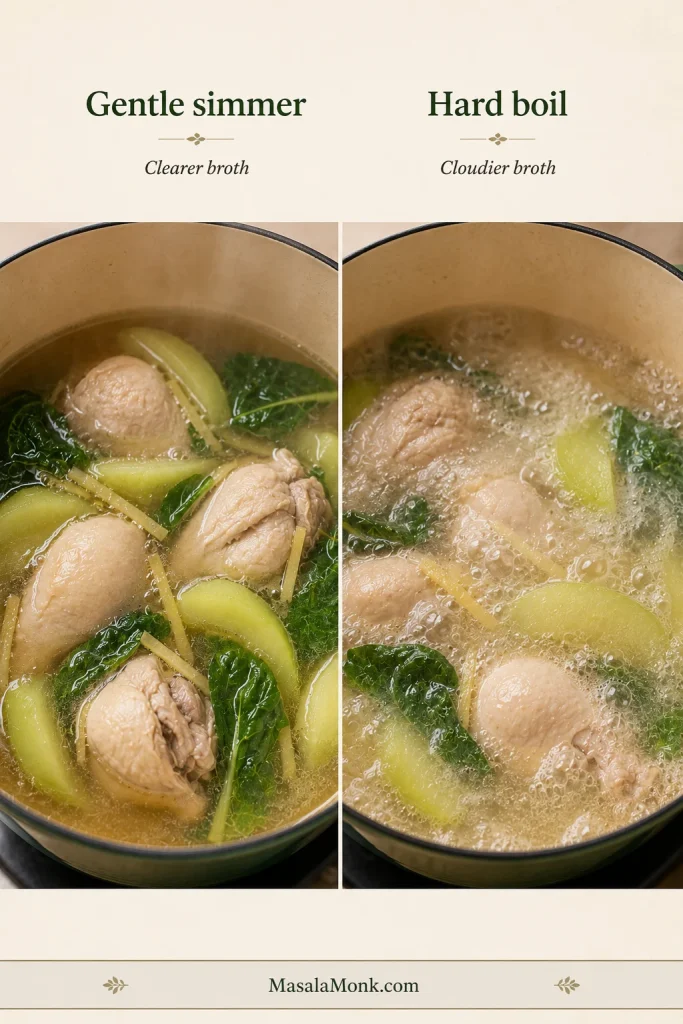
Comparison graphic showing gentle simmer with clearer Chicken Tinola broth beside hard boil with cloudier broth and stronger bubbling.
A gentle simmer keeps Tinola calmer and clearer; by contrast, a hard boil can make the broth cloudy and the chicken tougher.
  • Boil first, then skim. Remove foam while the surface is still easy to see.
  • Lower the heat after skimming. A gentle simmer keeps the broth calmer.
  • Use a wide spoon or ladle. It is easier to lift off scum and extra oil without stirring everything back in.
  • Finish with greens at the end. Delicate leaves stay brighter when they are not boiled for long.
  • Avoid hard boiling the chicken. Rough heat can make the liquid cloudy and the meat tougher.
  • Stop stirring aggressively once foam rises. Let it collect on the surface so you can skim it cleanly.
  • Pull delicate leaves before they turn dull. Fresh-looking greens make the whole bowl feel cleaner.

A home pot of Tinola does not need restaurant-perfect clarity. Skim what you can, keep the simmer gentle, and focus on a broth that tastes balanced and aromatic.

Tinola Ingredients in Tagalog and English

Tinola recipes often move between English, Tagalog, and market names, especially when you are shopping outside the Philippines. If you are shopping at a Filipino market, reading a family recipe, or watching a Tagalog cooking video, these are the ingredient names you are most likely to see.
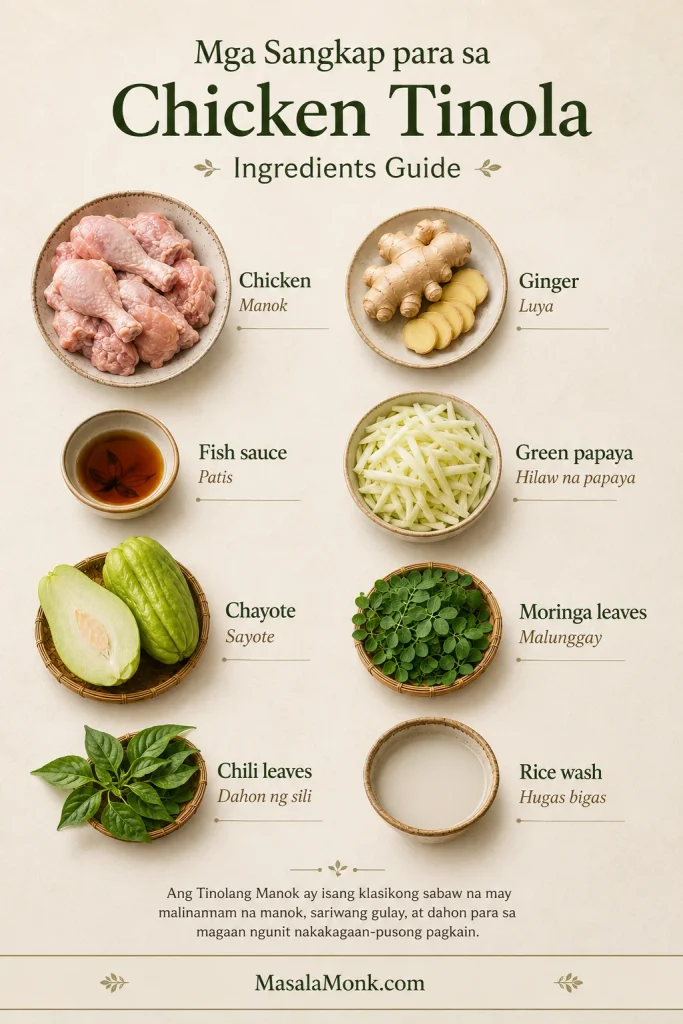
Tagalog-English ingredient guide for Chicken Tinola showing chicken as manok, ginger as luya, fish sauce as patis, green papaya as hilaw na papaya, chayote as sayote, moringa leaves as malunggay, chili leaves as dahon ng sili, and rice wash as hugas bigas.
This Tagalog-English Tinola guide makes shopping and recipe reading easier, especially for manok, luya, patis, sayote, malunggay, and hugas bigas.
EnglishFilipino / Common Name
ChickenManok
GingerLuya
GarlicBawang
OnionSibuyas
Fish saucePatis
Green papayaHilaw na papaya
ChayoteSayote
Moringa leavesMalunggay
Chili leavesDahon ng sili
Rice washHugas bigas
Black pepperPaminta

A short Tagalog-style procedure would be:

Paano lutuin: igisa ang luya, bawang, sibuyas at manok; lagyan ng patis; pakuluan hanggang lumambot; idagdag ang papaya o sayote; tapusin sa malunggay o dahon ng sili.

In English: sauté ginger, garlic, onion, and chicken; season with fish sauce; simmer until tender; add papaya or sayote; finish with malunggay or chili leaves.

Serving Suggestions

Tinola is usually served as a main dish with steamed rice. The broth is often spooned over rice, so it needs enough flavor to carry the meal.

  • Steamed white rice
  • Extra fish sauce / patis on the side
  • Calamansi or lime
  • Fresh chili
  • Black pepper
  • A small dipping sauce of patis and calamansi

The broth does not need to taste salty by itself; it needs to wake up when it hits hot rice. If the soup tastes slightly strong alone but perfect over rice, you are in the right zone.
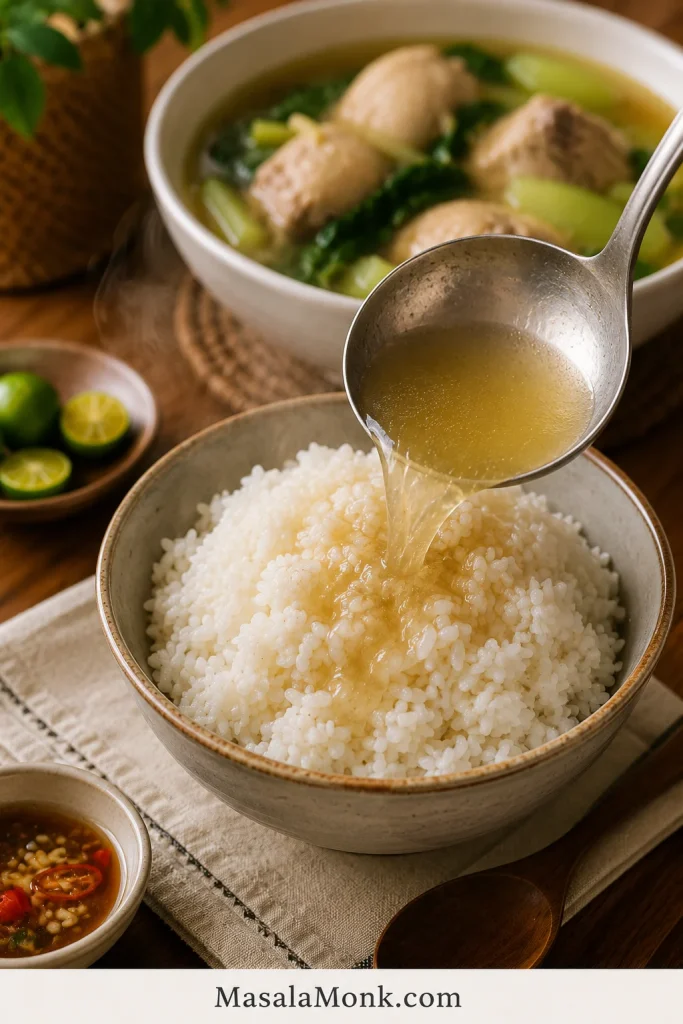
Golden Chicken Tinola broth being poured from a ladle over steamed white rice, with a bowl of Tinola in the background.
The rice test is simple: once the broth touches hot rice, it should taste rounded, savory, and alive — not weak or watery.

For another Filipino chicken classic, make Chicken Adobo on a different night. Adobo is darker, tangier, and braised, while Tinola is lighter, gingery, and broth-based.

For a Filipino vegetable dish that also belongs with rice, try Pinakbet Tagalog, a savory mix of tender vegetables and bagoong.

Tinola is especially good when you want something warm, light, and restorative. It is the kind of soup that feels gentle but still satisfying.

Storage, Freezing, and Reheating

Let leftover Tinola cool, then transfer it to an airtight container and refrigerate within 2 hours.

  • Refrigerator: store for up to 3 days.
  • Freezer: freeze the chicken and broth if needed, but expect the vegetables and greens to soften after thawing.
  • Best texture: freeze without the greens, then add fresh spinach, malunggay, pechay, or bok choy when reheating.
  • Reheating: warm gently on the stovetop until hot throughout. Reheated chicken should reach 165°F / 74°C.

Green papaya and sayote can soften after freezing, so expect a gentler texture if you freeze the finished soup.

Tinola Variations

Once the basic ginger broth method makes sense, you can adjust the vegetable, greens, broth, or protein. Keep the same quiet logic: build the flavor first, cook the main ingredient gently, and finish with the delicate pieces last.

Easy Swaps for This Recipe

  • Tinola with green papaya: softer, slightly sweet, and more classic in feel. Use firm green papaya, not ripe orange papaya.
  • Tinola with sayote: firmer, cleaner, and easy to find in many markets.
  • Tinola with malunggay: earthy, green, and traditional. Add it at the end.
  • Tinola with spinach or pechay: practical when malunggay or dahon ng sili are not available.
  • Tinola with rice wash: slightly fuller broth. Use the second rice rinse for a clearer flavor.

Variations That Cook a Little Differently

  • Native chicken Tinola: deeper flavor, but usually needs a longer simmer before the vegetables go in.
  • Instant Pot Tinola: pressure cook the chicken first, then add the vegetables separately so they do not overcook.
  • Fish or seafood Tinola: use the same ginger-broth idea, but cook fish or mussels briefly so they stay tender.
  • Tinola sa gata or golden Tinola: coconut milk, turmeric, or squash make the soup richer and less like the clear classic version.

Back to top ↑

Common Mistakes

MistakeWhat HappensFix
Using only boneless breastWeak broth and dry meatUse bone-in pieces, or simmer breast gently and check it early.
Not using enough gingerSoup tastes flatUse 45 to 60 g / 1 1/2 to 2 oz fresh ginger.
Adding fish sauce only at the endFlavor tastes salty but shallowAdd some before simmering, then adjust later.
Using a chicken cube with full fish sauceSoup becomes too saltyStart with less patis if using a cube, then adjust after simmering.
Adding too much waterSoup tastes thin even after seasoningUse about 6 cups liquid for 2 to 2 1/2 lb chicken, then simmer uncovered briefly if needed.
Boiling too hardCloudy broth and tougher chickenSkim first, then simmer gently.
Adding the vegetable too earlyPieces turn mushyAdd them after the chicken is nearly tender.
Overcooking greensDull, tired leavesFinish with greens at the end.
Not tasting before servingFinal soup tastes blandAdjust with patis, salt, pepper, calamansi, or chili.
Using ripe papaya by mistakeSoup becomes too sweetUse green papaya or switch to sayote.

FAQ

What is Tinola in English?

Tinola is often described in English as Filipino ginger chicken soup. The chicken version is called Tinolang Manok or Chicken Tinola.

What does Tinola mean?

Tinola generally refers to a Filipino broth-based dish. Tinolang Manok is the chicken version most people mean when they say Chicken Tinola.

Is Tinola the same as Tinolang Manok?

Tinola is the general dish. Tinolang Manok is the chicken version. Since chicken is the most common version, many people use Tinola and Tinolang Manok to mean the same thing.

What should Tinola taste like?

Tinola should taste light but not empty: gingery, savory, and good enough that the broth makes plain rice feel like a meal. If the soup tastes flat, it usually needs more patis, more ginger, or a few more minutes for the chicken to flavor the broth.

What are the main ingredients of Chicken Tinola?

The main ingredients are chicken, ginger, garlic, onion, fish sauce, water or broth, green papaya or sayote, and leafy greens such as malunggay, dahon ng sili, spinach, or pechay.

Do you use green papaya or sayote for Tinola?

Both work. Green papaya gives Tinola a softer, slightly sweet, more classic texture. Sayote stays firmer and tastes mild and fresh, which makes it useful when you want cleaner pieces in the bowl.

What can I substitute for green papaya in Tinola?

Sayote or chayote is the best substitute for green papaya. Upo, kalabasa, or labanos can work in some variations, but they change the flavor and texture.

What leaves are used in Tinola?

The classic choices are malunggay and dahon ng sili. When those are hard to find, spinach, pechay, bok choy, watercress, or kale can work. The important part is adding the greens late enough that they stay fresh.

What can I substitute for malunggay?

Spinach is the easiest substitute for malunggay. Pechay, bok choy, watercress, or kale can also work. Add delicate greens at the end so they do not overcook.

Can I use spinach, pechay, or bok choy in Tinola?

Yes. Spinach wilts quickly and can be added off heat. Pechay and bok choy work best when the thicker stems go in before the leaves.

What is dahon ng sili?

Dahon ng sili means chili leaves. They are used in some traditional Tinola recipes and give the soup a mild peppery green flavor.

What is the best chicken part for Tinola?

Bone-in thighs and drumsticks are the easiest all-round choice. They stay tender, add body to the broth, and are harder to overcook than breast meat.

How long should Tinola simmer?

Tinola usually simmers for about 25 to 35 minutes after the liquid is added, depending on the size of the chicken pieces. Add the vegetables near the end and cook for another 5 to 12 minutes.

How do you keep Tinola broth clear?

Bring the broth to a boil, skim off the foam, then lower the heat to a gentle simmer. Avoid hard boiling the soup for a long time.

Why does my Tinola taste bland?

Tinola tastes bland when the broth lacks ginger, patis, bone-in chicken flavor, or enough simmering time. More salt alone will not fix an empty broth; add ginger warmth, fish sauce depth, and enough time for the chicken to give flavor back to the pot.

Can I make Tinola without fish sauce?

You can, but fish sauce gives Tinola much of its savory depth. If avoiding fish sauce, use salt plus low-sodium chicken broth, and consider adding a little soy sauce or coconut aminos. The flavor will not be exactly traditional.

Can I freeze Chicken Tinola?

Chicken Tinola can be frozen, but the greens and vegetables may soften after thawing. For best results, freeze the chicken and broth, then add fresh greens when reheating.

What is the difference between Tinola and Nilagang Manok?

Tinola is a ginger-forward Filipino chicken soup usually made with fish sauce, green papaya or sayote, and leafy greens. Nilagang Manok is a simpler boiled chicken soup that often uses vegetables like cabbage, potatoes, or saba banana and does not have the same strong ginger profile.

Final Note
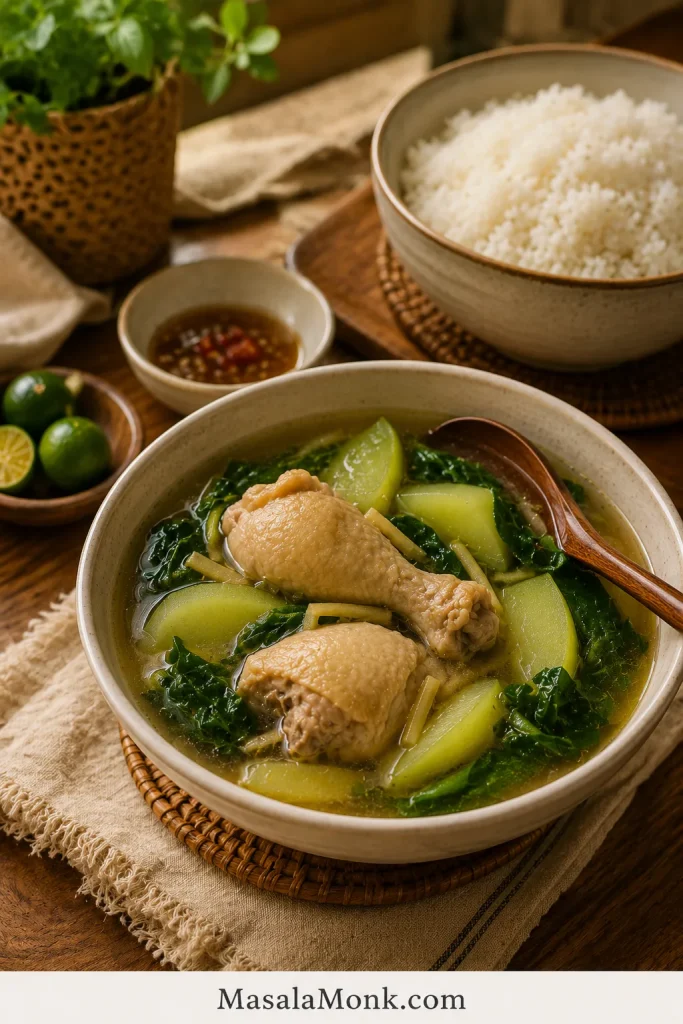
Served bowl of Chicken Tinola with ginger broth, bone-in chicken, green papaya or sayote, leafy greens, steamed rice, calamansi, and dipping sauce.
A finished bowl of Chicken Tinola should feel quiet but complete: warm broth, tender chicken, bright greens, and rice that makes the soup feel like dinner.

Tinola does not need to shout. No watery broth, no collapsed vegetables, no loud tricks — just generous ginger, chicken that has time to flavor the pot, patis added early, and greens folded in last. When those pieces come together, the soup tastes calm but complete: simple food that still feels cared for.
Back to top ↑

Posted on Leave a comment

Pho Recipe: Vietnamese Noodle Soup with Clear Broth, Beef, Chicken, Noodles, and Toppings

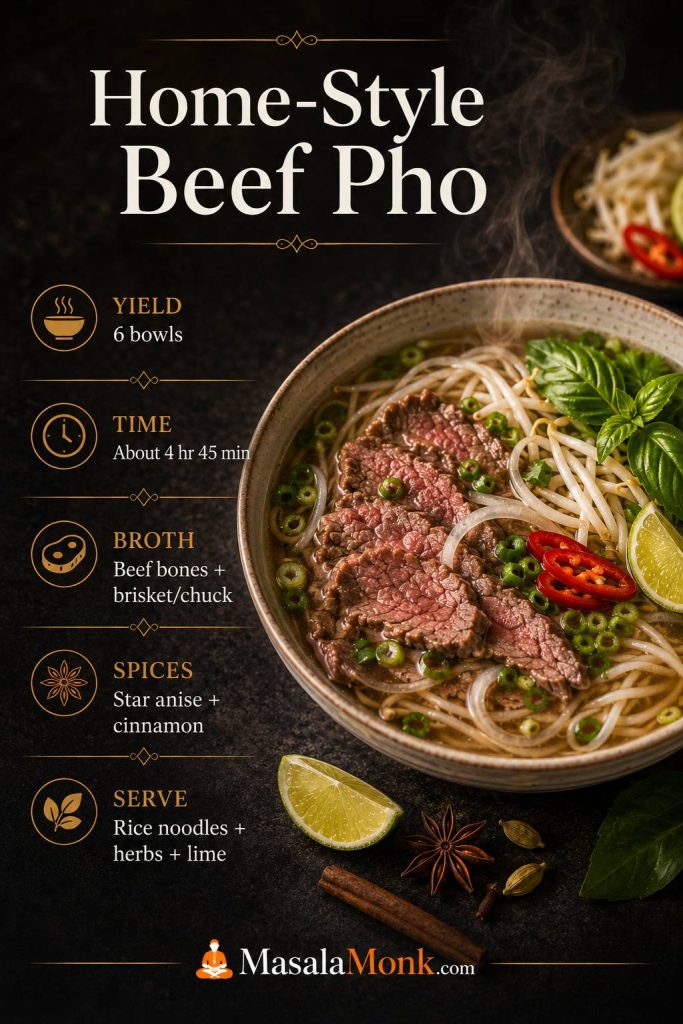
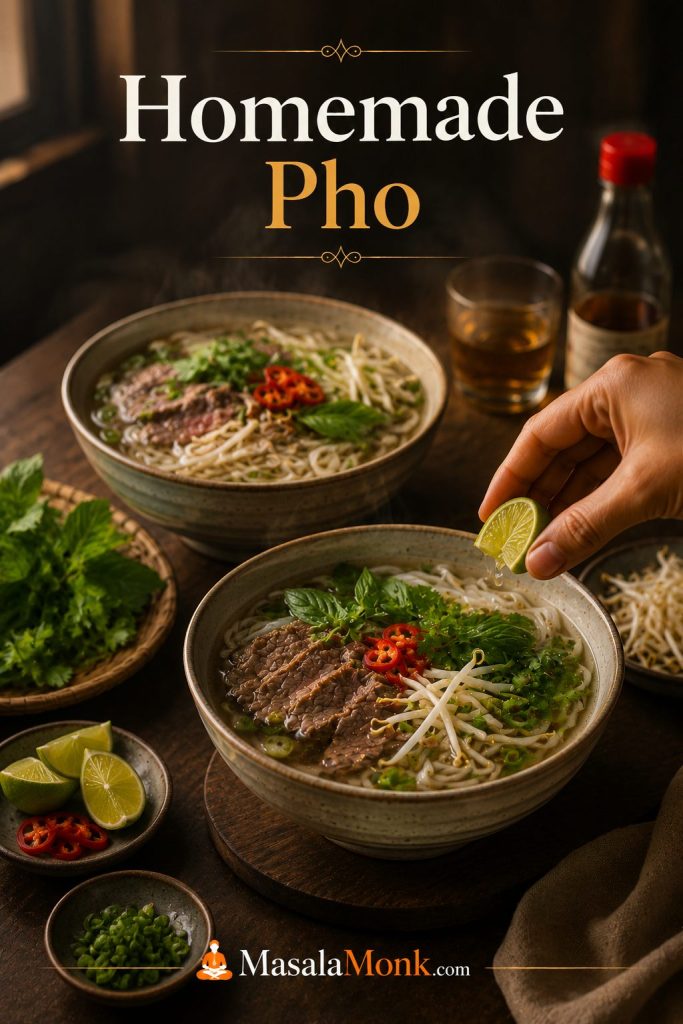
Finished beef pho bowl with amber broth, flat rice noodles, thin sliced beef, herbs, bean sprouts, lime, chili, and scallions.

This pho recipe is for the day you want the comfort of a real Vietnamese noodle soup at home, but do not want to get lost in bones, spices, noodles, and conflicting broth advice. The process is easier once you stop treating pho as one giant task and start seeing it as four smaller jobs: build a clean aromatic broth, cook the noodles separately, prepare the beef and toppings, then assemble everything while the broth is steaming hot.

This is a home-style beef pho recipe built for a serious homemade pot, without pretending you need a restaurant setup. You get clear broth, real beef flavor, whole spices, proper rice noodles, and practical fixes for the mistakes that usually make pho taste flat.

Use the full beef version when you want broth depth, the quick pho section when you want a weeknight bowl, and the chicken or vegan notes when those fit your kitchen better. The method changes, but the goal stays the same: clean aroma, balanced broth, separate noodles, fresh toppings, and hot assembly.

Table of Contents

Start with the version that fits your day, then use the broth, noodle, topping, and troubleshooting sections to build a bowl that tastes clean, aromatic, and satisfying.

Quick Answer: How to Make Pho at Home

To make pho at home, start with a broth made from beef bones, a flavorful simmering cut such as brisket or chuck, browned onion, ginger, whole spices, fish sauce, salt, and a little rock sugar. Simmer it gently until the broth tastes deep and aromatic, then strain it and season it slightly stronger than a normal soup.

Next, cook the rice noodles separately, divide them into bowls, add sliced cooked beef and paper-thin raw beef if using, then ladle very hot broth over the top. Finish with herbs, bean sprouts, lime, chili, onion, scallions, and optional sauces on the side.

The two biggest mistakes are boiling the broth too hard and letting the noodles cook directly in the broth. Keep the broth at a gentle simmer while it cooks, then bring it back to a full boil only when you are ready to assemble the bowls.

Best first version: make the beef pho below if you want the clearest lesson in how pho works. Once you understand the broth, noodles, and bowl assembly, chicken pho, quick pho, and plant-based pho become much easier to adapt.

First-Time Pho Recipe Roadmap

If you are making the full beef version, give yourself a few unrushed hours. Homemade pho is not difficult, but it rewards calm timing. You do not want to be slicing beef, washing herbs, boiling noodles, and fixing broth seasoning all at the same time.

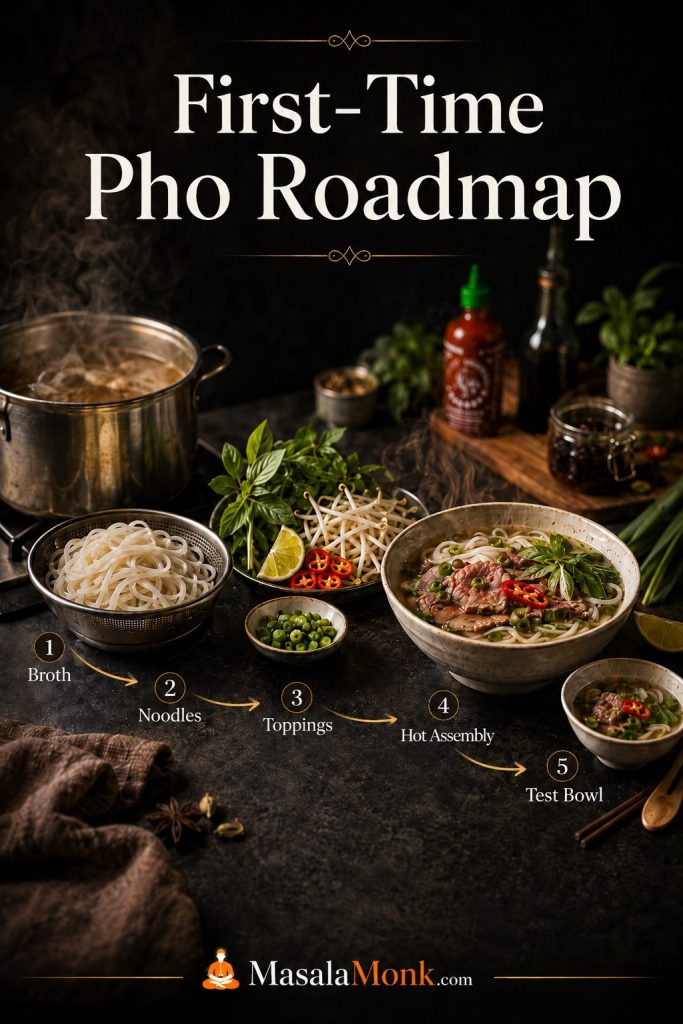
First-time pho roadmap showing broth, noodles, toppings, hot assembly, and one test bowl as the main stages.
If pho feels overwhelming, divide it into four jobs instead: make the broth, prepare the noodles, set up the toppings, and assemble at the end. That rhythm keeps the recipe manageable.
Step What to do Why it helps
1 Make the broth on a day when you are not rushed. The simmer is simple, but it needs time and attention.
2 Prepare noodles and toppings only when the broth is nearly ready. Noodles stay better, herbs stay fresh, and the final bowl feels cleaner.
3 Taste the broth before assembly. It should be a little bolder than sipping soup because noodles soften the flavor.

4 Bring the strained broth to a full boil only at serving. The long simmer should be gentle, but the final pour should be hot.
5 Assemble one test bowl first. If it tastes flat, you can fix the broth before serving the rest.

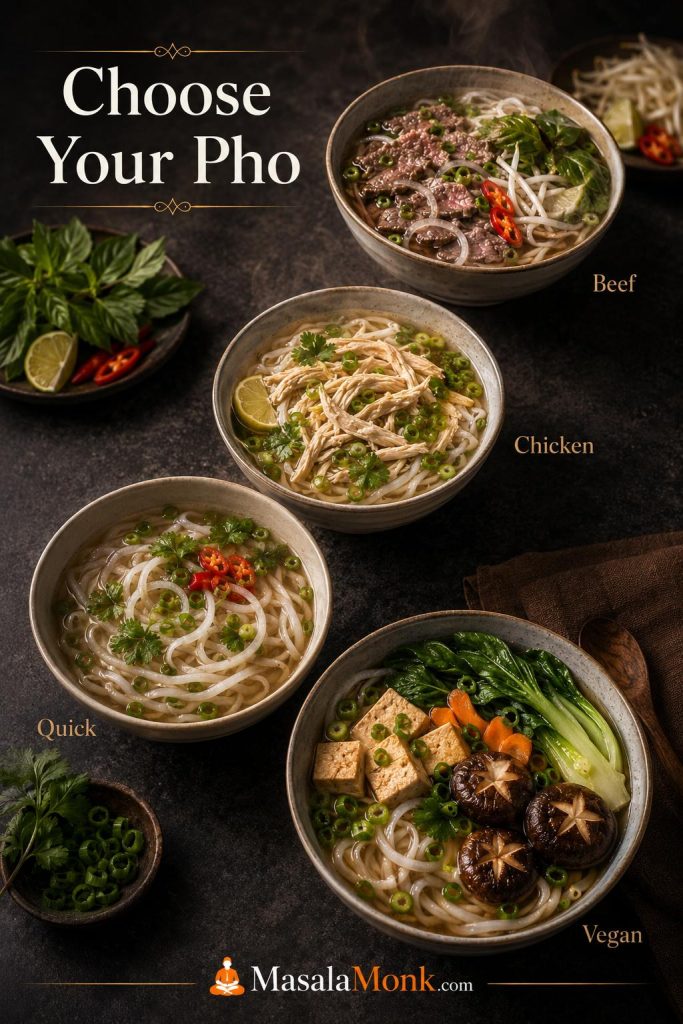
Choose Your Pho: Beef, Chicken, Quick, or Vegan

Pho does not have to mean the same thing every time. It can be a slow weekend broth, a lighter chicken soup, a practical shortcut, or a plant-based bowl with serious flavor. The trick is not to pretend every version is the same.


Four pho bowls showing beef pho, chicken pho, quick pho, and vegan pho with different proteins, broths, and toppings.
Beef pho gives the deepest flavor, chicken pho is lighter, quick pho suits busy nights, and vegan pho depends on mushroom depth. Pick the version that fits your day, not the one that sounds most ambitious.

Which Pho Recipe Should You Make?

Choose the path that fits your time and ingredients, then build the bowl with the same basic logic: aromatic broth, rice noodles added at the end, fresh toppings, and hot broth to bring everything together.

Version Best for What changes Time expectation
Traditional beef pho Deep broth, classic beef noodle soup flavor, weekend cooking Uses beef bones, brisket or chuck, roasted aromatics, whole spices, and a long gentle simmer About 4–5 hours
Chicken pho An easier first pho, lighter broth, fewer hard-to-find ingredients Uses chicken, chicken broth or a whole-chicken base, similar aromatics, and a shorter simmer About 45–90 minutes
Quick pho Weeknight cravings when you want a pho-style bowl without a full broth project Uses good store-bought broth, roasted aromatics, warm spices, fish sauce, and fresh toppings About 30–60 minutes
Vegetarian or vegan pho Plant-based bowls that still need depth and aroma Uses mushrooms, browned onion and ginger, whole spices, tamari or soy sauce, and tofu or vegetables About 45–75 minutes
Instant Pot pho Faster extraction from bones and meat Uses pressure cooking, then careful straining, skimming, and final seasoning About 2–3 hours with pressure release

The Best First Pho Recipe to Try

If you have the time, beef pho is the best version for understanding how pho gets its depth. If you are rushed, start with chicken pho or quick pho instead. A calm, well-seasoned shortcut bowl is better than a stressed full beef version.

After you understand the broth, noodles, and bowl assembly, the other versions are not confusing anymore. They are simply different ways of building aroma, body, salt, sweetness, freshness, and heat.

What Is Pho?

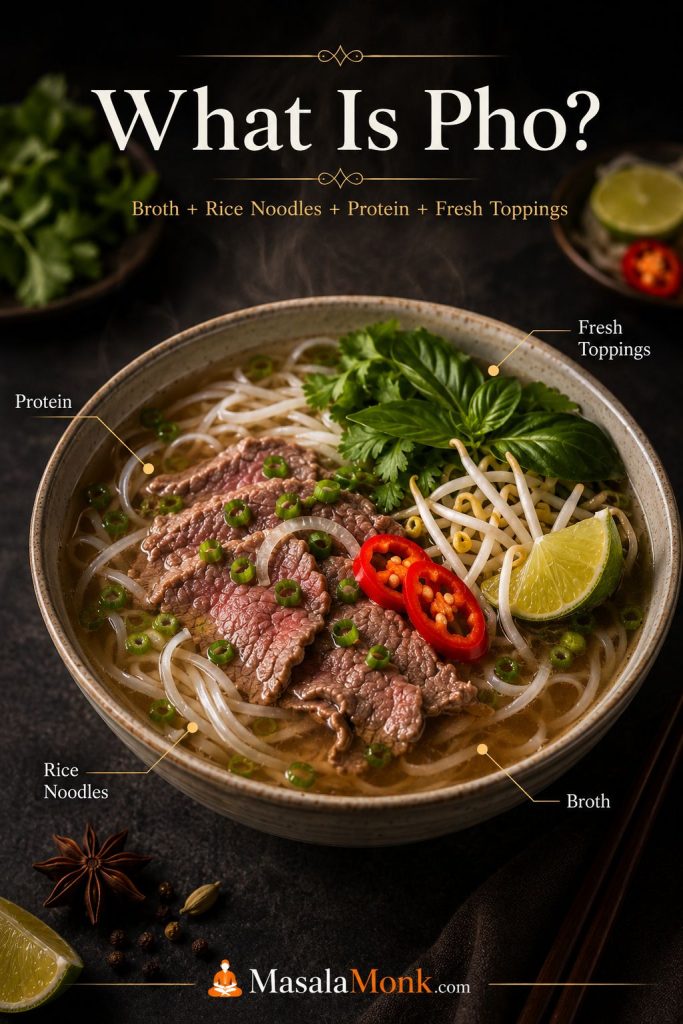
Pho, or phở, is a Vietnamese noodle soup built around aromatic broth, flat rice noodles, meat or another protein, and fresh toppings. Beef pho is often called phở bò, while chicken pho is called phở gà. A good bowl tastes savory, fragrant, lightly sweet in the background, and fresh from herbs and lime.

Pho bowl with callouts for broth, rice noodles, protein, and fresh toppings such as herbs, sprouts, lime, chili, and scallions.
Pho works in layers: the broth carries the bowl, the flat noodles give it body, the protein adds substance, and herbs, lime, sprouts, and chili wake everything up at the table.

In every version, the broth does most of the work. Bones or chicken give body, onion and ginger bring warmth, whole spices create the unmistakable aroma, fish sauce and salt build savoriness, and fresh toppings brighten the finished bowl. If you want a light background read on pho’s place in Vietnamese food culture, Vietnam Travel has a useful overview of the story of Vietnamese pho.

A quick note on style: Pho varies by region, family, restaurant, and personal habit, so this is not the only “correct” way to make it. This version is a practical home-style beef pho built around the core moves that matter most: clean broth, roasted aromatics, whole spices, rice noodles, hot assembly, and fresh toppings.

Pho at a Glance

Recipe type Home-style beef pho / Vietnamese noodle soup
Yield 6 large bowls
Starting water 4.5 L / 19 cups
Finished broth About 3.5–4 L / 3.7–4.2 quarts, depending on evaporation
Prep time 45 minutes
Cook time About 4 hours
Total time About 4 hours 45 minutes
Pot size 9–10 L / 10-quart stockpot is ideal
Broth temperature while simmering Gentle simmer, roughly 85–95°C / 185–203°F, not a rolling boil
Noodles per bowl 50–80 g dried banh pho noodles, or about 120 g fresh noodles
Broth per bowl 500–650 ml / 2–2¾ cups hot broth

The starting water is higher than the final broth yield because some liquid evaporates during the long simmer. If the pot reduces too far, add hot water near the end and adjust the seasoning before serving.

Why This Recipe Works

This pho recipe uses both beef bones and a flavorful simmering cut because bones and meat do different jobs. Bones give body, richness, and depth. Brisket, chuck, or shank makes the broth taste more rounded and gives you tender cooked beef for the bowls.

Parboiling keeps the broth cleaner. Browned onion and ginger add roasted aroma, while the toasted spice bundle gives the broth its pho fragrance without leaving grit behind. A gentle simmer keeps the broth clearer instead of greasy and muddy.

The broth is seasoned slightly stronger than a regular soup because rice noodles, herbs, sprouts, beef, and lime will soften the flavor once the bowl is assembled. That one detail is why a broth that tastes bold in the pot can taste balanced at the table.

Pho Recipe Ingredients

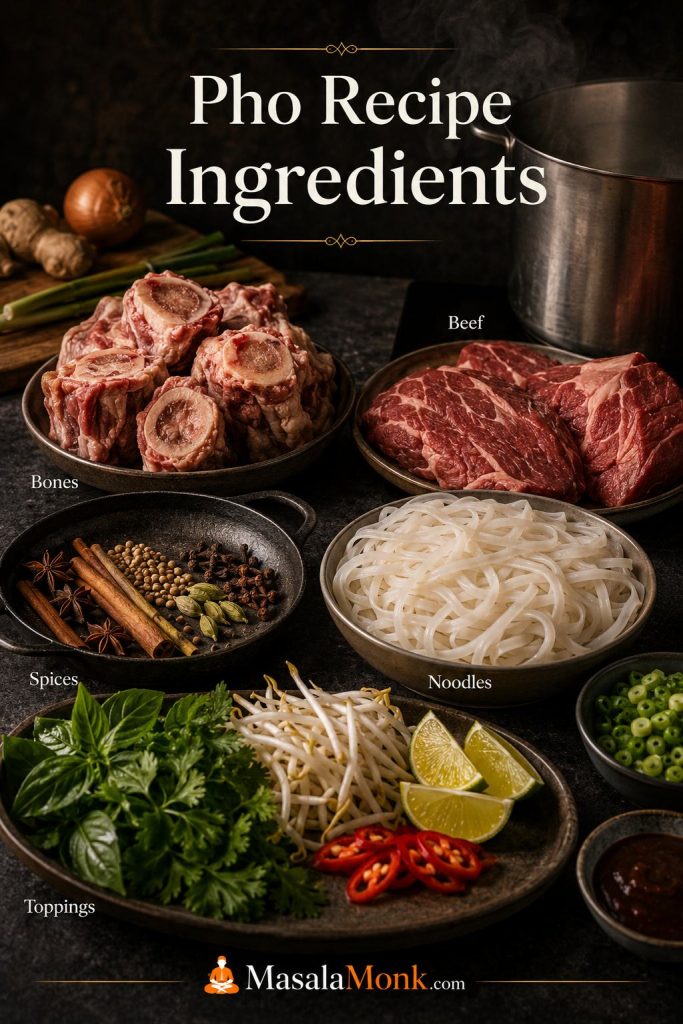
Good pho does not need a huge list of fancy ingredients, but each ingredient has a job. The broth needs bones or chicken for body, meat for savoriness, onion and ginger for aroma, spices for warmth, fish sauce and salt for depth, sugar for balance, and noodles that stay silky after hot broth is poured over them.

Pho ingredients arranged on a counter with beef bones, brisket, onion, ginger, whole spices, rice noodles, herbs, sprouts, lime, and chili.
The ingredient list looks long at first, yet each part has a clear job: bones add body, onion and ginger add warmth, spices build fragrance, and herbs and lime sharpen the final bowl.

Broth Ingredients

  • Beef bones: marrow, knuckle, leg, neck, oxtail, or meaty soup bones help build flavor and body.
  • Brisket, chuck, or shank: this seasons the broth and becomes the cooked sliced beef for serving.
  • Onion and ginger: browning them gives the broth a deeper, lightly smoky aroma.
  • Water: start with 4.5 L / 19 cups so you end with enough broth for 6 bowls after simmering.
  • Fish sauce: adds savory depth. Add it near the end so the final seasoning stays controlled.
  • Salt: seasons the broth itself, not just the toppings.
  • Rock sugar or regular sugar: rounds the broth without making it taste sugary.

Whole Spices

The classic pho aroma comes from whole spices, not powdered seasoning dumped into the pot. Star anise is the most recognizable note, while cinnamon, cloves, coriander, fennel, and black cardamom add warmth and depth.

  • Star anise: the signature sweet-spiced aroma.
  • Cinnamon: warm backbone. Use sticks, not ground cinnamon.
  • Cloves: powerful and easy to overdo, so use a small amount.
  • Coriander seeds: gentle citrusy lift.
  • Fennel seeds: optional, with a sweet herbal edge.
  • Black cardamom: optional, smoky, and strong. One pod is enough.

Pho Noodles

Use banh pho, the flat rice noodles made for pho. Dried noodles are easier to find and work very well when soaked or cooked separately. Fresh noodles need only a quick blanch. For a deeper noodle guide, Andrea Nguyen’s Viet World Kitchen has a helpful explanation of banh pho flat rice noodles.

If rice-based cooking often gives you texture trouble, MasalaMonk’s guide on how to cook rice perfectly is a useful companion for understanding rinsing, soaking, resting, and why starch control matters.

Beef, Chicken, or Plant-Based Protein

For beef pho, use two kinds of beef: one cut for simmering in the broth and one tender cut for the bowl. Brisket, chuck, or shank are good for simmering. Eye of round, sirloin, tenderloin, or flank can be sliced paper-thin and cooked by the hot broth in the bowl.

For chicken pho, use bone-in chicken, chicken thighs, or a whole-chicken base. For vegetarian or vegan pho, build body with mushrooms, roasted aromatics, whole spices, tamari or soy sauce, and tofu or vegetables.

Toppings, Herbs, and Condiments

Toppings should brighten the bowl, not cover up the broth. Bean sprouts add crunch, herbs add aroma, lime adds lift, chili adds heat, and sauces add sweetness or spice. Hoisin and sriracha are optional. To preserve the broth’s clean flavor, try sauces on the side for dipping meat instead of stirring a lot into the whole bowl.

  • Bean sprouts
  • Thai basil, mint, cilantro, or a mix
  • Lime wedges
  • Sliced chili or jalapeño
  • Thinly sliced onion
  • Scallions
  • Hoisin sauce, optional
  • Sriracha or chili sauce, optional

If you want something cool and crunchy on the side, this easy cucumber salad recipe has Asian-style and spicy cucumber variations that work well beside hot, aromatic noodle bowls.

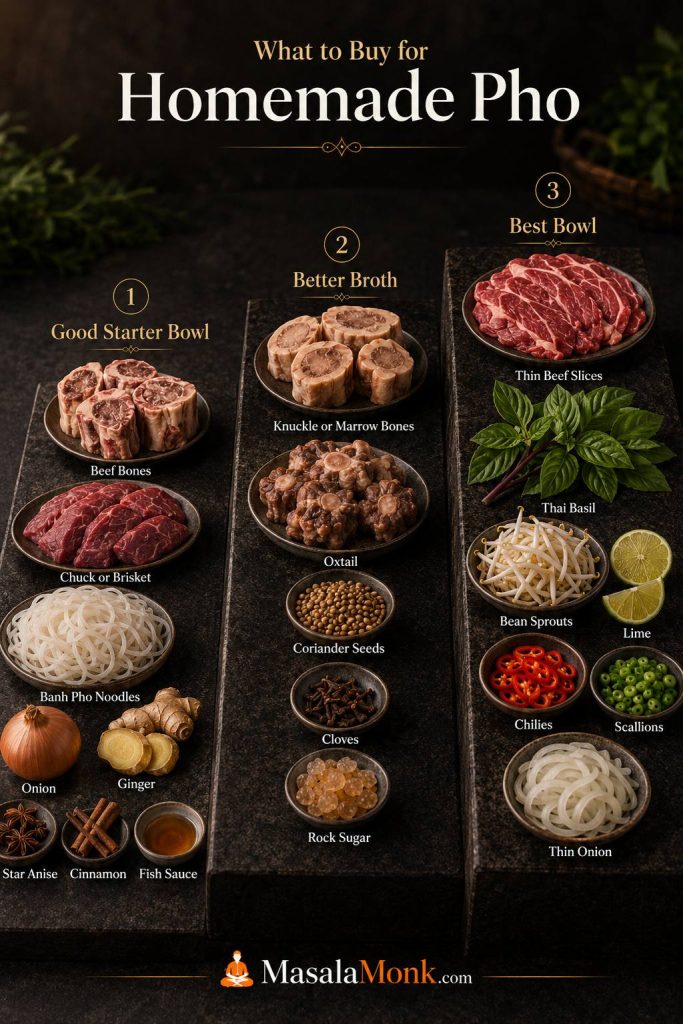
What to Buy for Homemade Pho

If this is your first time making pho, do not worry about buying every possible beef cut, herb, or spice. Focus on the ingredients that change the broth most: bones, one flavorful simmering cut, onion, ginger, whole spices, fish sauce, and proper flat rice noodles.

Pho shopping guide with starter ingredients, broth upgrades, and fresh toppings for homemade pho.
You do not need every possible cut or garnish to make good pho at home. Start with the essentials, then add better bones, deeper flavor builders, and more toppings when you want a fuller bowl.
Level Buy this What it gives you
Minimum good beef pho Meaty beef bones, chuck or brisket, banh pho noodles, onion, ginger, star anise, cinnamon, fish sauce A satisfying homemade bowl with real broth character
Better broth Add knuckle bones, marrow bones, oxtail, coriander seed, cloves, and rock sugar More body, deeper aroma, and better balance
Best topping setup Add eye of round or sirloin, Thai basil, bean sprouts, lime, chilies, scallions, and thin onion A fresher, more complete restaurant-style bowl
Shortcut version Low-sodium broth, onion, ginger, whole spices, fish sauce, rice noodles, herbs, and lime A good weeknight bowl, but not the same body as long-simmered beef pho

Think of the shopping list for this pho recipe as a ladder. The first level can still make good pho. The higher levels add body, aroma, and freshness, but they are not worth stressing over if they keep you from cooking.

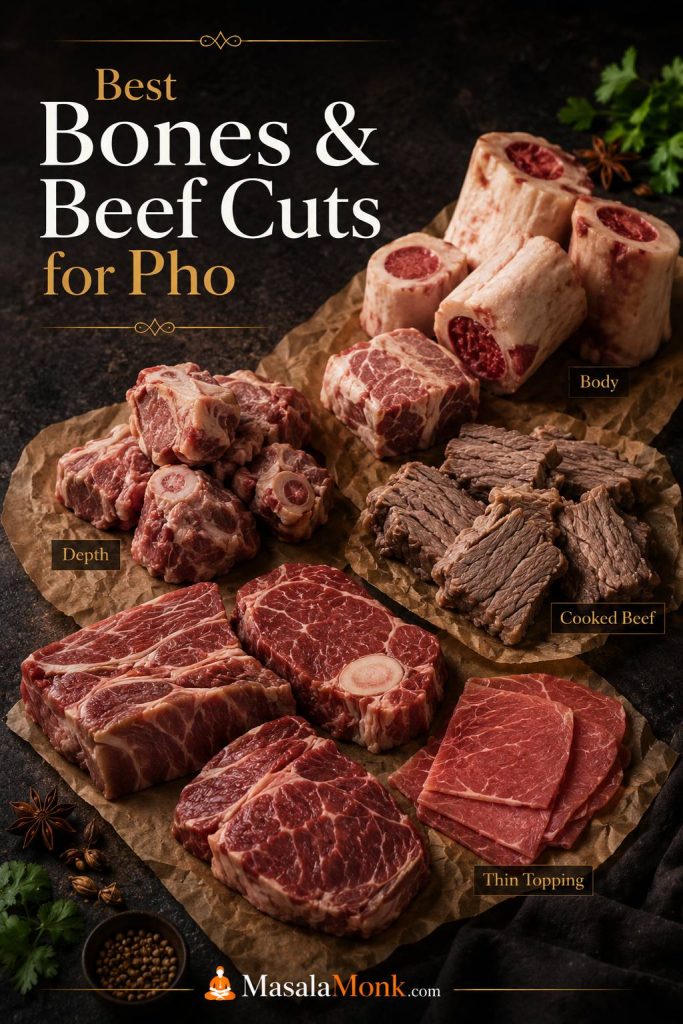
Best Bones and Beef Cuts for Pho

Great beef pho usually needs both bones and meat. Bones bring body and depth, but meat makes the broth taste more rounded and satisfying. A pot made only with bones can taste thin or hollow, while a pot with only meat can lack the gelatin-rich texture that makes pho broth feel complete.

Beef bones and cuts for pho, including marrow bones, knuckle bones, brisket, chuck, shank, and thin sliced raw beef.
Good beef pho depends on using the right cut for the right purpose: bones bring body, simmering cuts add richness, and paper-thin beef gives the bowl its classic finishing touch.
Beef or bone Best use What it adds
Marrow bones Broth base Richness and beef flavor, though they can add fat that needs skimming
Knuckle or leg bones Broth base Gelatin and body
Neck bones or oxtail Broth base Meatiness and depth
Brisket Simmered meat and topping Classic cooked beef slices with rich flavor
Chuck Simmered meat and topping Beefy, affordable, and forgiving
Shank Simmered meat and topping Deep flavor and a slightly firmer texture
Eye of round, sirloin, tenderloin, or flank Raw thin-sliced topping Tender slices that cook in very hot broth

For the easiest home version, use a mix of meaty bones, marrow or knuckle bones, and brisket or chuck. If your butcher has oxtail or neck bones, they are excellent, but you do not need every cut to make a strong homemade bowl.

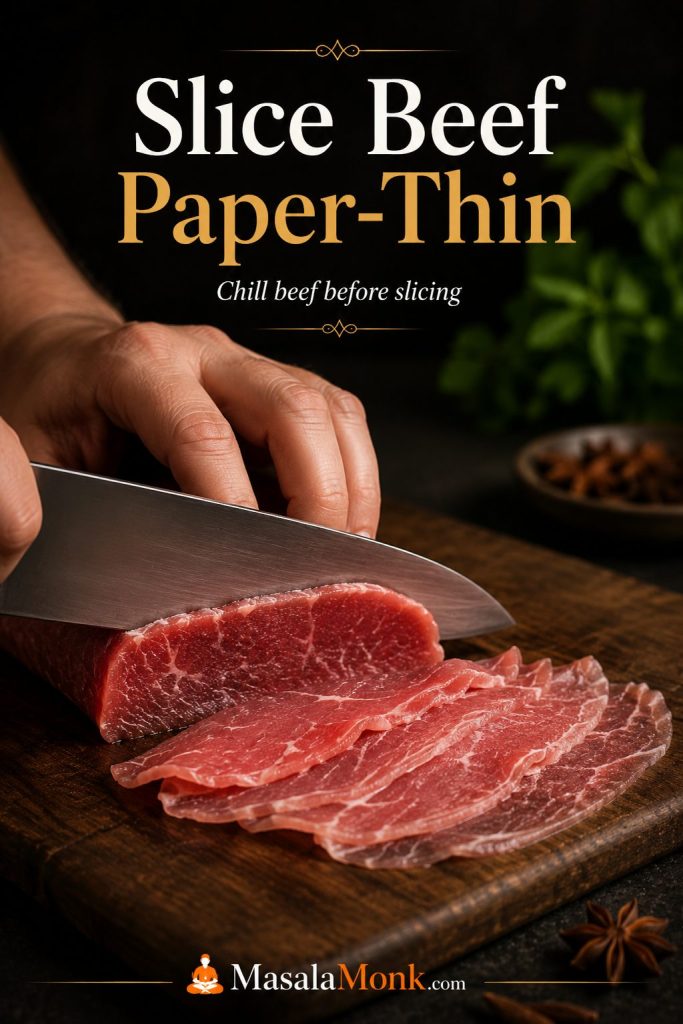
Thin beef tip: place the raw beef for topping in the freezer for 15–25 minutes before slicing. It should firm up, not freeze solid. This makes it much easier to cut paper-thin slices.

How Thin to Slice Beef for Pho

For raw beef topping, thickness matters more than the exact cut. The slices should be thin enough that hot broth can warm them quickly in the bowl. If the beef is cut too thick, it may stay cold or raw-looking even after the broth is poured.

Chill the beef briefly before slicing, then cut across the grain with a sharp knife. Aim for flexible, paper-thin slices rather than steak-like strips. For a fully cooked bowl, dip the slices into simmering broth first, then add them to the noodles.

Chilled raw beef being sliced very thin with a chef’s knife for pho topping.
Chilled beef slices far more cleanly than warm beef. As a result, it is easier to get the paper-thin slices that hot broth can quickly warm in the bowl.

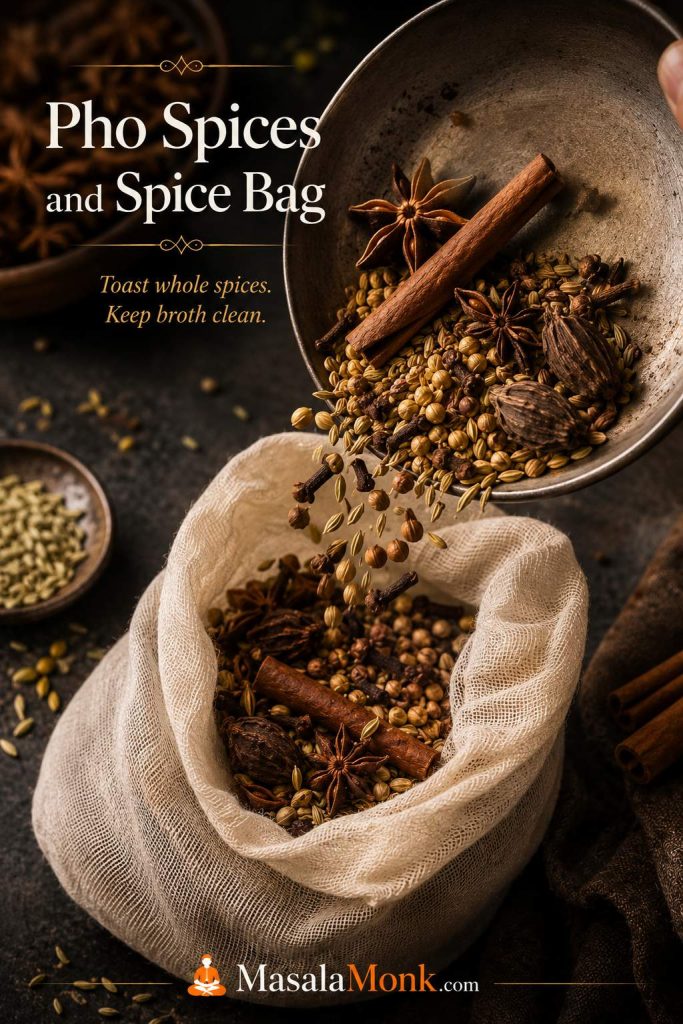
Pho Spices and Spice Bag

Use whole spices and toast them briefly before they go into the broth. Toasting wakes up the aroma, while a spice bag keeps the broth cleaner and makes it easier to remove the spices before they become too strong.

Whole pho spices going into a spice bag, including star anise, cinnamon, cloves, coriander, fennel, and black cardamom.
Whole spices should perfume the pot, not muddy it. A spice bag gives pho its signature fragrance while helping you control when the spices have given enough.

Ground spices are not ideal for the main broth because they can cloud the liquid and leave grit at the bottom of the bowl. If you only have ground spices, use them very sparingly in a shortcut broth, then strain carefully through a fine-mesh strainer lined with cheesecloth.

Spice Amount for this recipe Role
Star anise 6–8 pods Signature pho aroma
Cinnamon sticks 1–2 sticks Warmth and sweetness
Cloves 4–6 whole cloves Deep spice; use carefully
Coriander seeds 1 tablespoon Citrusy lift
Fennel seeds 1–2 teaspoons, optional Sweet herbal note
Black cardamom 1 pod, optional Smoky depth

Add the spice bag during the later part of simmering instead of leaving it in for the entire cook. If the broth starts smelling more like a spice cabinet than beef soup, remove the bag early. The spices should support the broth, not take over the bowl.

How to Make Clear Pho Broth

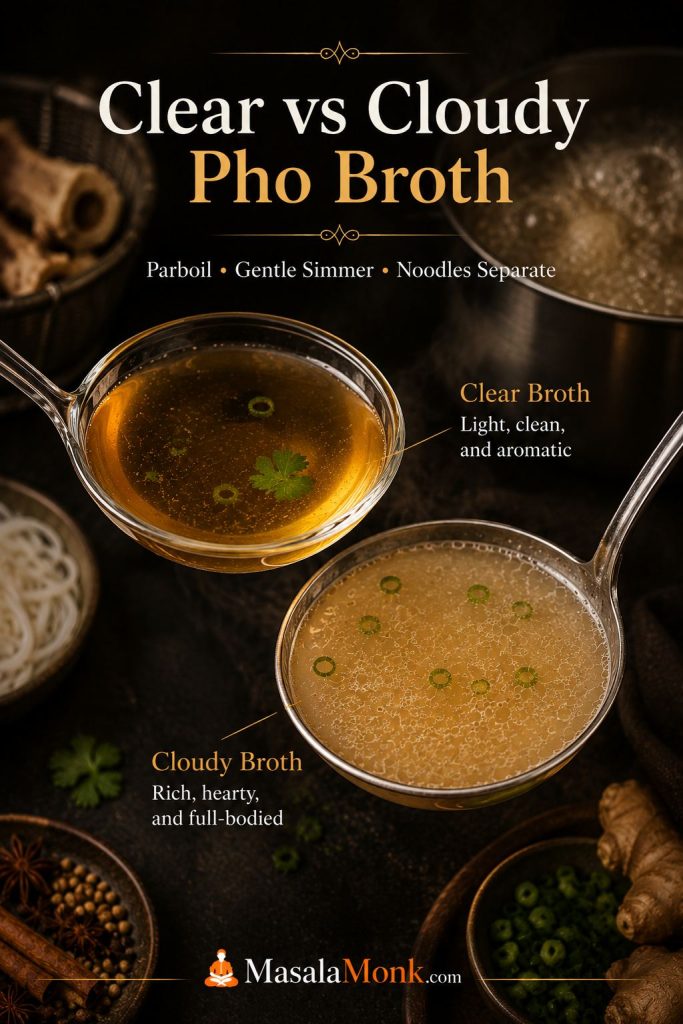
Clear broth comes from good preparation and gentle heat. The goal is not a weak broth; it is a broth that tastes deep but looks clean. Parboil the bones, rinse them well, brown the aromatics, simmer gently, skim when needed, and strain before serving.

The broth should smell warm from the spices, roasted from the onion and ginger, and savory before you ever add noodles. When it is right, it tastes bold on its own but not harsh, with enough salt and fish sauce to carry the plain rice noodles.

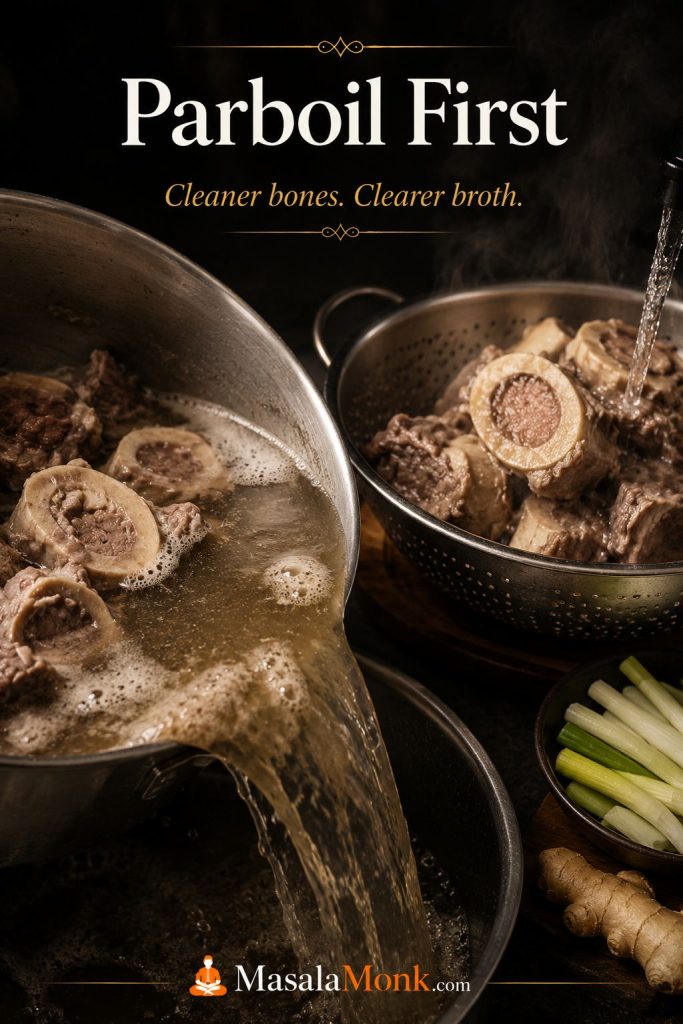
Why You Parboil the Bones First

Parboiling removes surface impurities, blood, and loose proteins before the real broth begins. Add the bones and simmering beef to a pot, cover with water, bring to a hard boil for 5–10 minutes, then drain. Rinse the bones and meat under warm water and scrub the pot before starting the actual broth.

This step feels annoying, but it is one of the biggest differences between clear broth and a murky pot. You are not throwing away the good flavor. You are removing the material that would cloud the broth later.

Beef bones being parboiled and rinsed before starting a fresh pot of pho broth.
Parboiling may feel like extra work; however, it is one of the best ways to improve pho broth clarity. Once the bones are rinsed and the pot is reset, the real simmer starts much cleaner.

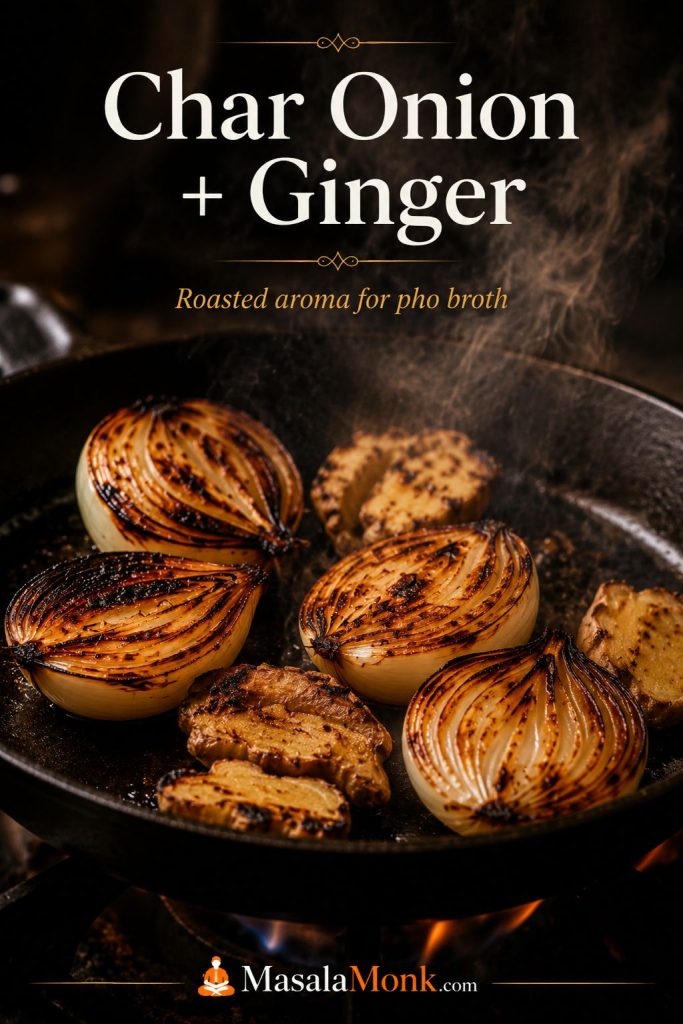
Why You Char the Onion and Ginger

Charring onion and ginger gives pho broth a roasted, lightly smoky aroma. You can do this over a gas flame, in a dry skillet, under a broiler, or on a grill pan. The cut sides should be deeply browned in spots, not just lightly warmed.

Onion halves and split ginger charred in a pan for pho broth.
Charred onion and ginger add roasted depth that plain raw aromatics cannot match. Because of that, the broth tastes warmer, rounder, and more like pho instead of generic beef soup.

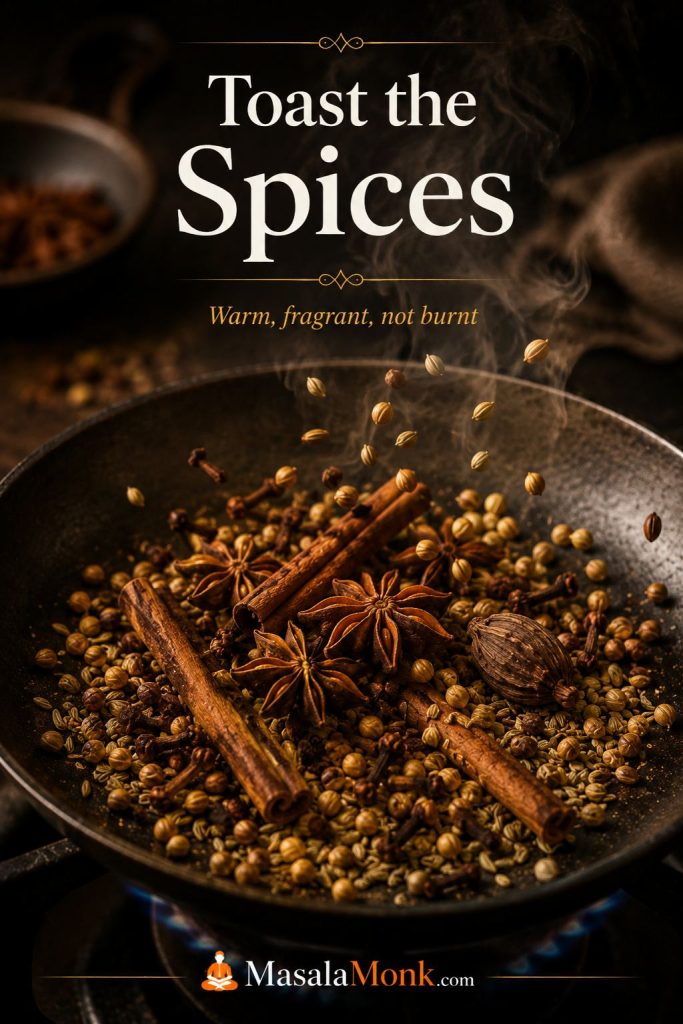
Why You Toast the Spices

Toasting whole spices for 3–5 minutes makes them more fragrant. Use medium heat and keep them moving so they smell warm and aromatic, not burnt. After toasting, tie them in cheesecloth or place them in a spice bag.

Whole pho spices toasting in a pan, including star anise, cinnamon, cloves, coriander, and fennel.
Toasting wakes up the spices before they go into the broth. Even a short toast helps star anise, cinnamon, and coriander smell fuller and more alive in the finished pot.

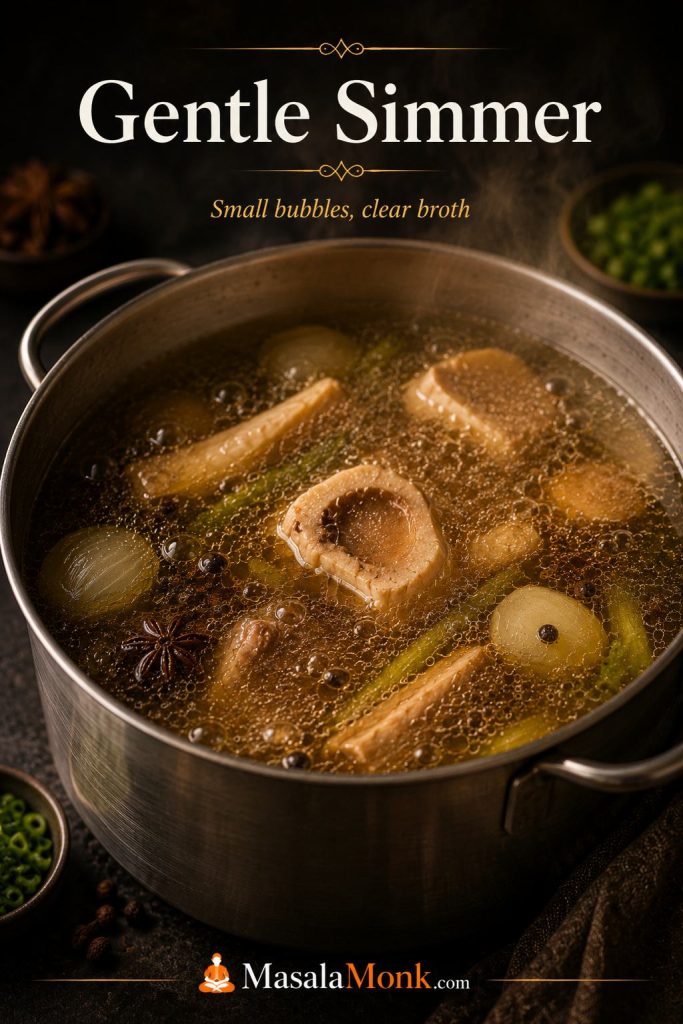
How Long to Simmer Pho Broth

For this beef pho, plan on about 4 hours of gentle simmering after the parboil step. Keep the broth at a quiet simmer, roughly 85–95°C / 185–203°F. You should see small, steady bubbles and gentle movement, not a rolling boil that shakes the whole pot.

A rolling boil can pull fat and loose particles into the broth, which makes it cloudy and greasy. A calm simmer extracts flavor from the bones and meat while keeping the broth cleaner.

Pho broth gently simmering in a stockpot with small bubbles, bones, onion, ginger, and spices.
Small steady bubbles are the sweet spot for pho broth. The pot should look alive, not violent, so flavor develops without shaking fat and sediment through the liquid.

How to Season Pho Broth

Pho broth should taste slightly stronger than a normal sipping soup before it goes into the bowl. The noodles, meat, herbs, sprouts, and lime will soften the seasoning. If the broth tastes perfect in the pot, it may taste a little flat once the bowl is assembled.

Season near the end with fish sauce, salt, and a little rock sugar or sugar. Look for savory first, gentle sweetness in the background, warm spice in the aroma, and enough clarity that lime and herbs can brighten the bowl at the table.

When the broth is right, it should smell like roasted onion and warm spice first, then taste savory, clean, and slightly rounded. It should not taste like plain beef stock with noodles waiting nearby.

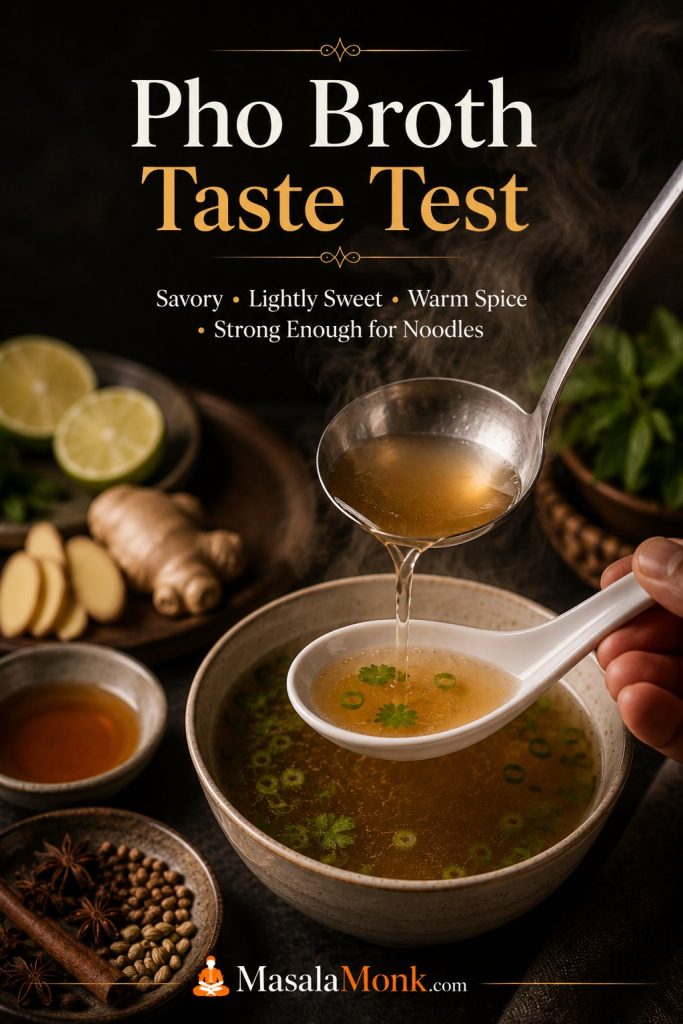
How Pho Broth Should Taste Before Serving

Before serving, taste the strained broth before it hits the bowl. It should feel a little too bold by itself: savory first, lightly sweet in the background, warm with spice, and strong enough to carry plain rice noodles. If it tastes perfect as a sipping soup, it may taste quiet once the noodles, beef, herbs, sprouts, and lime are added.

The broth for this pho recipe is on track when it smells roasted from onion and ginger, warm from star anise and cinnamon, and savory before any noodles are added. It should not smell muddy, greasy, burnt, or aggressively sweet.

Clear pho broth being tasted from a spoon beside fish sauce, lime, spices, and aromatics.
Taste the broth before serving, not after the bowls are built. It should seem a little assertive on its own, or it may fade once the noodles and toppings go in.
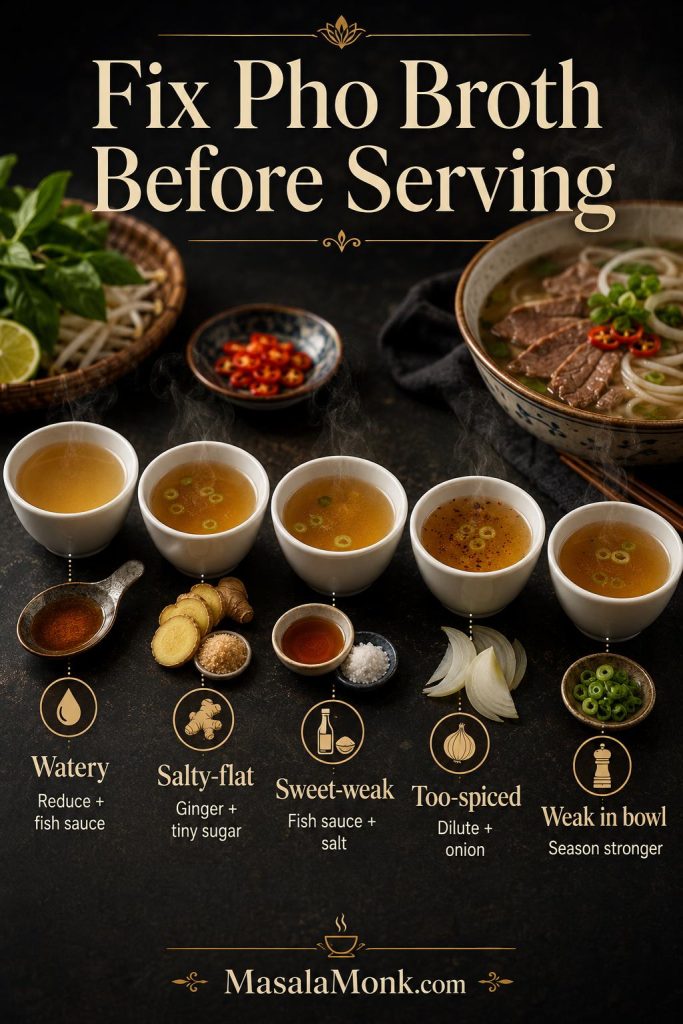
What you taste What it means How to adjust
Thin or watery The broth needs more concentration or seasoning Simmer uncovered a little longer, or add fish sauce in small amounts
Salty but flat It has salt, but not enough aroma or balance Add a tiny pinch of sugar, more ginger aroma, or brighten later with lime
Sweet but weak The sugar or onion is louder than the savory base Add fish sauce or salt gradually
Too spiced The spice bag stayed in too long Remove the spices, dilute slightly, and simmer with onion or ginger
Good in the pot but weak in the bowl The broth was seasoned like soup, not like pho broth Season the next bowls slightly stronger before ladling

How to Fix Pho Broth Before Serving

Do the final broth check before you assemble the bowls, not after everyone has started eating. At this point, the broth should taste slightly stronger than a normal soup because plain noodles, beef, herbs, sprouts, and lime will soften the flavor once they land in the bowl.

Thin broth should be reduced briefly before you add more seasoning. For sweet but weak broth, add fish sauce or salt in small amounts. When the broth smells too spiced, remove the spice bag and dilute it slightly. Fixing the pot now is much easier than trying to rescue six finished bowls later.

Pho broth seasoning guide showing fixes for watery, salty-flat, sweet-weak, too-spiced, and weak broth.
The smartest time to fix pho broth is right before serving. Watery broth often needs reducing, sweet broth needs savory balance, and a quiet-tasting broth usually needs stronger seasoning.

Best Noodles for Pho

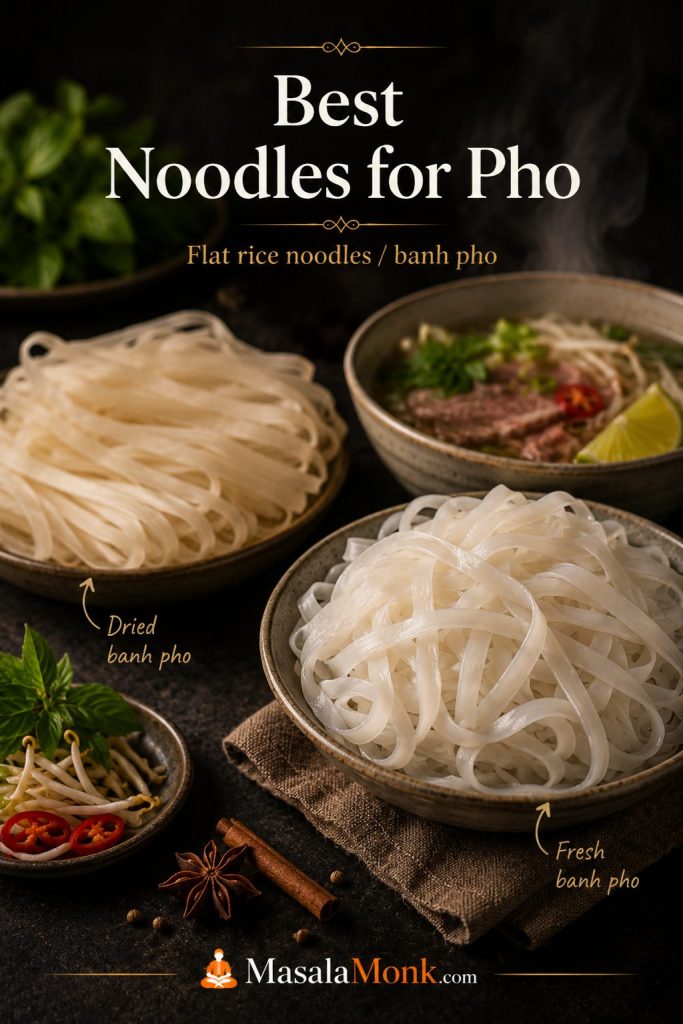
The best noodles for pho are banh pho, flat rice noodles. They may be sold dried or fresh. Dried noodles are usually easier to find, and they hold up well when soaked or cooked separately. Fresh noodles are softer and usually need only a quick blanch.

Dried and fresh banh pho flat rice noodles arranged with herbs, lime, sprouts, and chili.
Banh pho, the classic flat rice noodle, gives pho the right texture. It stays tender and slippery without turning the bowl heavy or chewy like the wrong noodle can.

Dried vs Fresh Pho Noodles

Noodle type Best use How to handle
Dried banh pho Most home cooks; easy to store and find Soak or cook according to the package, drain well, and add to bowls just before serving
Fresh banh pho Best texture when available Blanch briefly to loosen and warm; do not boil aggressively
Very wide rice noodles Better for stir-fry than classic pho bowls Use only if that is what you have, but expect a heavier bowl
Rice vermicelli Not ideal for pho Save it for other Vietnamese noodle bowls rather than using it as the first choice here

What Width of Rice Noodles to Use

Small to medium flat rice noodles are best for pho soup. They should be wide enough to feel silky and satisfying, but not so wide that they dominate the bowl. Very wide noodles are more common in stir-fries and can make pho feel heavy.

How to Cook Pho Noodles Without Making Them Mushy

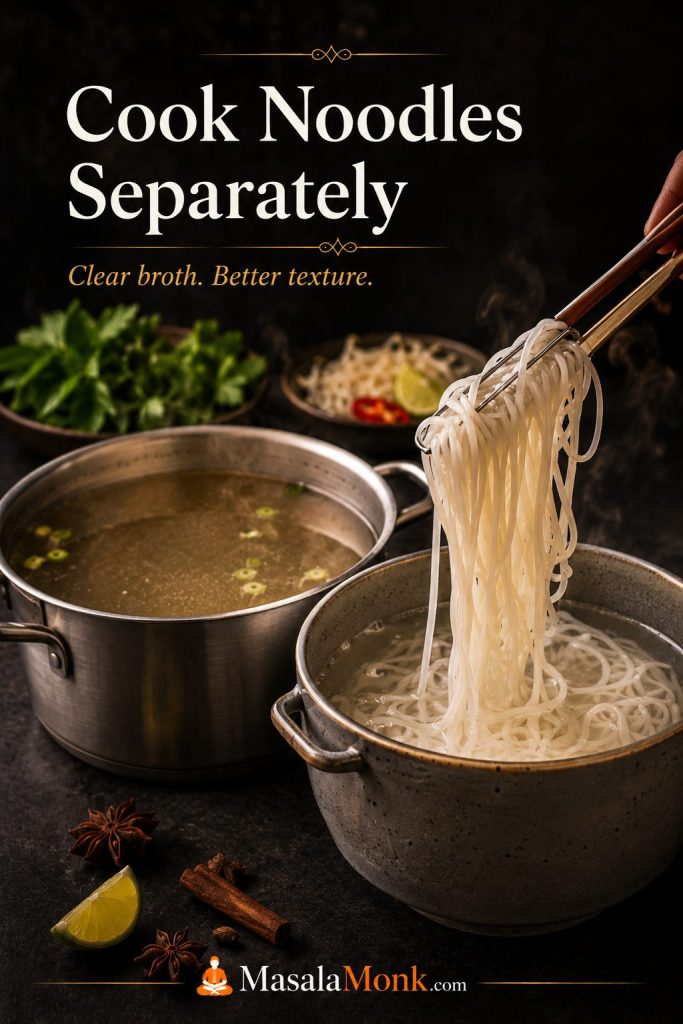
Cook pho noodles away from the broth. That one habit keeps the liquid clearer and gives the noodles a better texture in the finished bowl. The noodles should meet the broth only at the very end.

Flat rice noodles being cooked separately from a pot of clear pho broth.
Keep the noodles out of the broth pot until serving. This one habit helps the soup stay cleaner and prevents the rice noodles from sitting too long and going soft.
Common mistake: adding noodles to the broth pot. Rice noodles release starch and keep absorbing liquid. Cook them separately, drain them well, and add them to bowls only when serving.
  • Do not simmer noodles in the broth. They release starch and make the broth cloudy.
  • Do not store noodles in broth. They keep absorbing liquid and turn mushy.
  • Do not cook them too early. Prepare them close to serving time when possible.
  • Use 50–80 g dried noodles per bowl. Use the lower end for lighter bowls and the higher end for noodle-heavy bowls.
  • Refresh clumped noodles with hot water. Drain again before adding them to bowls.

Pho Noodle Texture Guide

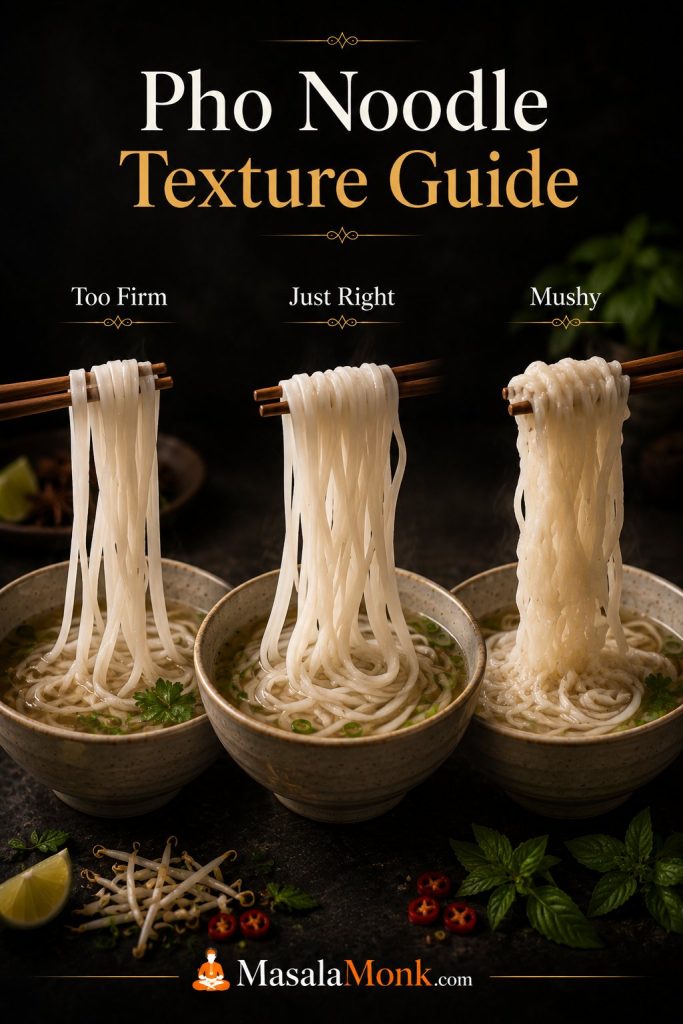
Noodle texture can make a good broth feel better or worse. The goal is not a soft pile of rice noodles that breaks apart, and it is not a stiff noodle that fights the broth. Good pho noodles should bend easily, feel slippery, and still hold their shape when lifted with chopsticks.

If the noodles feel too firm, give them a little more time or refresh them with hot water. If they are already tearing, clumping, or collapsing before they reach the bowl, they have gone too far. Cook them close to serving time whenever possible.

Pho noodle texture guide showing rice noodles labeled too firm, just right, and mushy.
Pho noodles should bend easily and feel silky, yet they still need enough structure to hold their shape once the hot broth is poured over them.

The noodles should be soft and slippery, but still have enough bite that they do not collapse in the hot broth.

How to Assemble Pho Bowls

Once the broth is strained and seasoned, the rest of the recipe moves quickly. Have the noodles cooked, herbs washed, beef sliced, broth hot, and bowls ready before you start assembling.

Bring the final broth to a full boil when it goes into the bowl, especially if you are using raw thin-sliced beef. Keep the simmering stage gentle, but make the serving stage hot and fast.

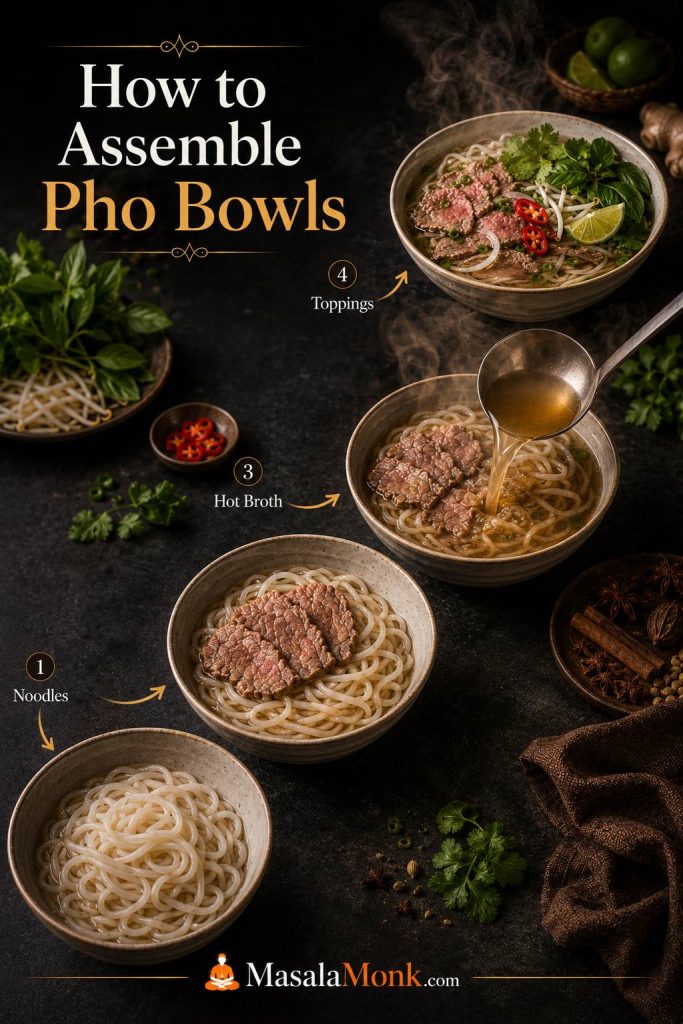
Pho bowl assembly sequence showing noodles, beef, hot broth, and fresh toppings added in order.
The bowl is built in layers so each part keeps its texture. Noodles stay silky, beef gets the heat it needs, and herbs and lime stay fresh until the last second.
  1. Add cooked rice noodles to each bowl.
  2. Layer in slices of cooked brisket, chuck, or shank.
  3. Tuck in paper-thin raw beef slices if using.
  4. Ladle very hot broth directly over the beef and noodles.
  5. Top with onion, scallions, herbs, sprouts, chili, and lime.
  6. Serve immediately with optional hoisin and sriracha on the side.

Why the Final Broth Pour Must Be Hot

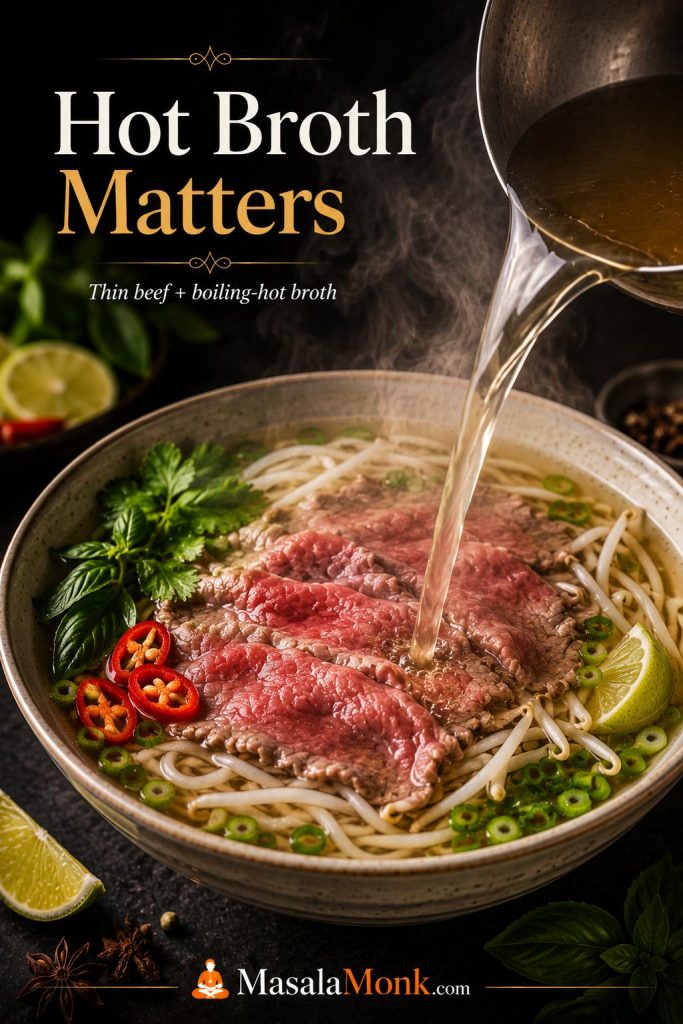
The long broth simmer should stay calm, but the final pour should be very hot. That last burst of heat warms the noodles, releases the aroma from the broth, and helps thin beef soften or cook in the bowl.

If the broth is only warm, the bowl can taste dull and the beef may not change texture properly. Bring the strained broth back to a full boil right before serving, then ladle it over the noodles and beef immediately.

Very hot pho broth being poured over thin sliced beef, noodles, herbs, sprouts, lime, and chili.
Hot broth matters most at the final pour. If the liquid is not hot enough, the beef stays too raw and the whole bowl loses some of its aroma and lift.
Raw beef note: the topping beef must be very fresh, kept cold, sliced paper-thin, and covered with boiling-hot broth right away. For children, pregnant guests, older adults, immunocompromised guests, or anyone uncomfortable with rare beef, use cooked beef only or dip the slices directly into simmering broth until fully cooked before adding them to the bowl.

What a Finished Beef Pho Bowl Should Feel Like

A finished beef pho bowl should not feel heavy, muddy, or overloaded. It should taste balanced: savory broth first, then soft noodles, tender beef, fresh herbs, sharp lime, and a little crunch from sprouts or onion.

If the first bowl tastes flat, do not keep assembling the rest. Add more seasoning to the broth, brighten the bowl with lime, or bring the broth back to a stronger boil before serving the next one. One test bowl can save the whole pot.

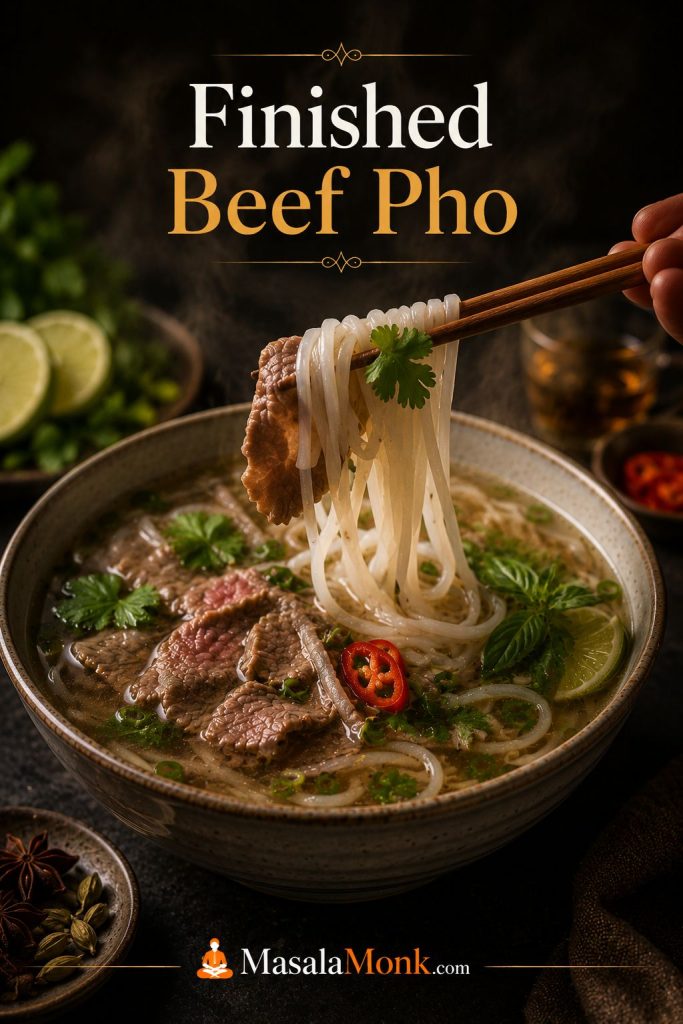
Finished beef pho bowl with chopsticks lifting flat rice noodles above sliced beef and herbs.
A finished beef pho bowl should feel balanced rather than heavy: savory broth, tender beef, soft noodles, bright herbs, fresh lime, and just enough crunch from onion or sprouts.

Suggested Pho Cooking Timeline

This timeline keeps the long recipe from feeling chaotic. The exact minutes do not have to be perfect; use it as a rhythm for the pot.

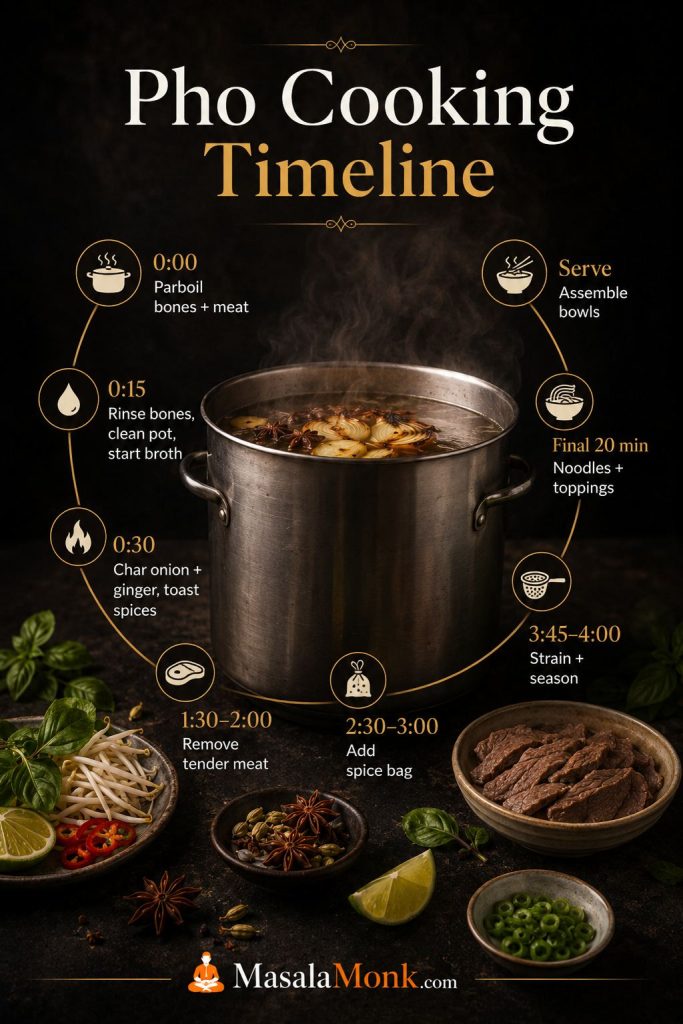
Pho cooking timeline showing parboiling bones, starting broth, charring aromatics, adding spices, straining, preparing noodles, and serving.
A timeline turns pho from a guessing game into a sequence. Once the broth is underway, you can time the meat, spices, noodles, and toppings without crowding the final 20 minutes.
Time What to do
0:00 Parboil bones and meat.
0:15 Rinse bones and meat, clean the pot, and start the fresh broth.
0:30 Char onion and ginger, then toast the spices.
1:30–2:00 Remove brisket, chuck, or shank once tender enough to slice later.
2:30–3:00 Add the spice bag for the final stretch of simmering.
3:45–4:00 Strain, skim, and season the broth.
Final 20 minutes Cook noodles, slice beef, wash herbs, cut lime, and prepare toppings.
Serving Bring broth to a full boil and assemble bowls immediately.

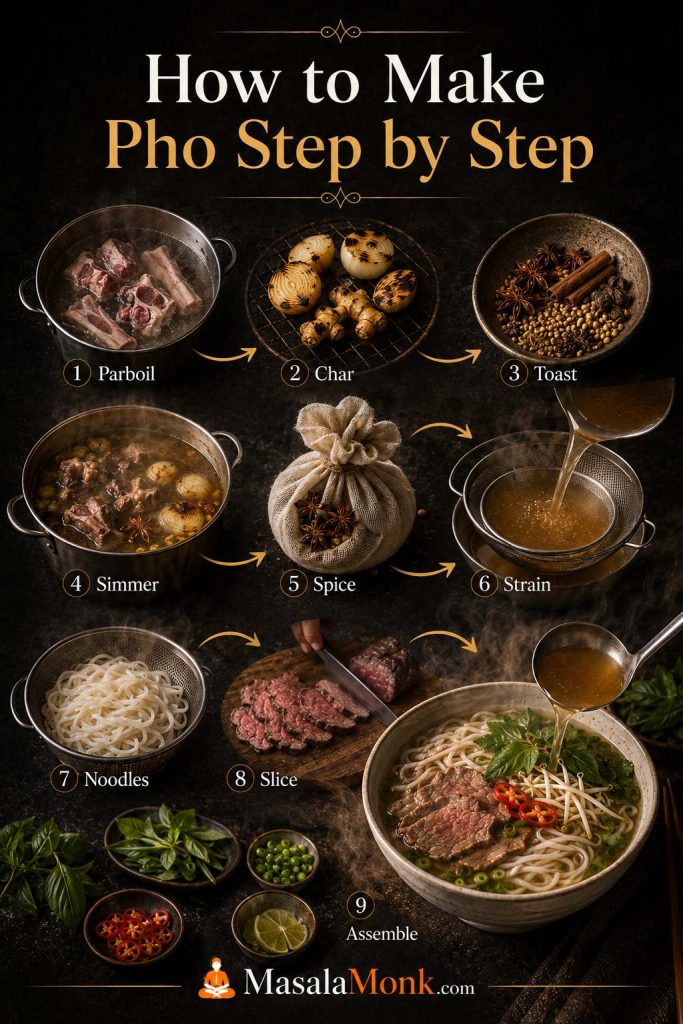
How to Make Pho Step by Step

Step-by-step pho process showing parboiling, charring aromatics, toasting spices, simmering broth, straining, cooking noodles, slicing beef, and assembling bowls.
Every step protects either flavor, clarity, or texture. Parboiling cleans the base, charring builds aroma, straining refines the broth, and separate noodles keep the final bowl clean.

1. Parboil the Bones and Meat

Place the beef bones and brisket, chuck, or shank in a large pot. Cover with water, bring to a hard boil, and boil for 5–10 minutes. Drain everything, rinse the bones and meat under warm water, and scrub the pot clean.

2. Char the Onion and Ginger

Halve the onions and split the ginger lengthwise. Char them over a gas flame, in a dry skillet, under a broiler, or on a grill pan until the surfaces are browned and fragrant. This usually takes 8–12 minutes depending on your heat source.

3. Toast the Spices

Add the star anise, cinnamon, cloves, coriander, fennel, and black cardamom if using to a dry skillet. Toast over medium heat for 3–5 minutes, shaking the pan often. Transfer to a spice bag or wrap in cheesecloth.

4. Start the Broth

Return the rinsed bones and simmering beef to the clean pot. Add 4.5 L / 19 cups fresh water, the charred onion, charred ginger, salt, and rock sugar. Bring to a boil, then immediately lower to a gentle simmer.

5. Simmer Gently

Simmer gently for about 1½–2 hours, skimming the surface when needed. When the brisket, chuck, or shank is tender, remove it from the broth, cool slightly, wrap, and refrigerate until slicing. Continue simmering the bones, keeping them mostly submerged; add hot water if the broth reduces too aggressively.

6. Add the Spice Bag

Add the toasted spice bag for the final 60–90 minutes of simmering. This gives the broth a clear pho aroma without letting the spices become bitter or too dominant. Remove the spice bag early if the broth smells strong enough before the time is up.

7. Strain and Season

Strain the broth through a fine-mesh strainer. Skim excess fat. Season with fish sauce, more salt, and a little sugar if needed. The broth should taste slightly stronger than a normal soup because the noodles and toppings will soften it.

8. Cook the Noodles

Cook or soak the banh pho noodles according to the package directions. Drain well. If they are ready before the broth, rinse lightly and keep them separate, then refresh briefly with hot water before serving.

9. Slice the Beef and Prepare Toppings

Slice the cooked brisket, chuck, or shank against the grain. Thinly slice the raw beef topping if using. Wash the herbs, cut the lime, slice the chilies, and prepare sprouts, scallions, and onion.

10. Assemble and Serve

Bring the strained broth back to a full boil. Divide noodles among bowls, add cooked beef and raw beef slices, then ladle hot broth over the top. Add toppings and serve immediately.

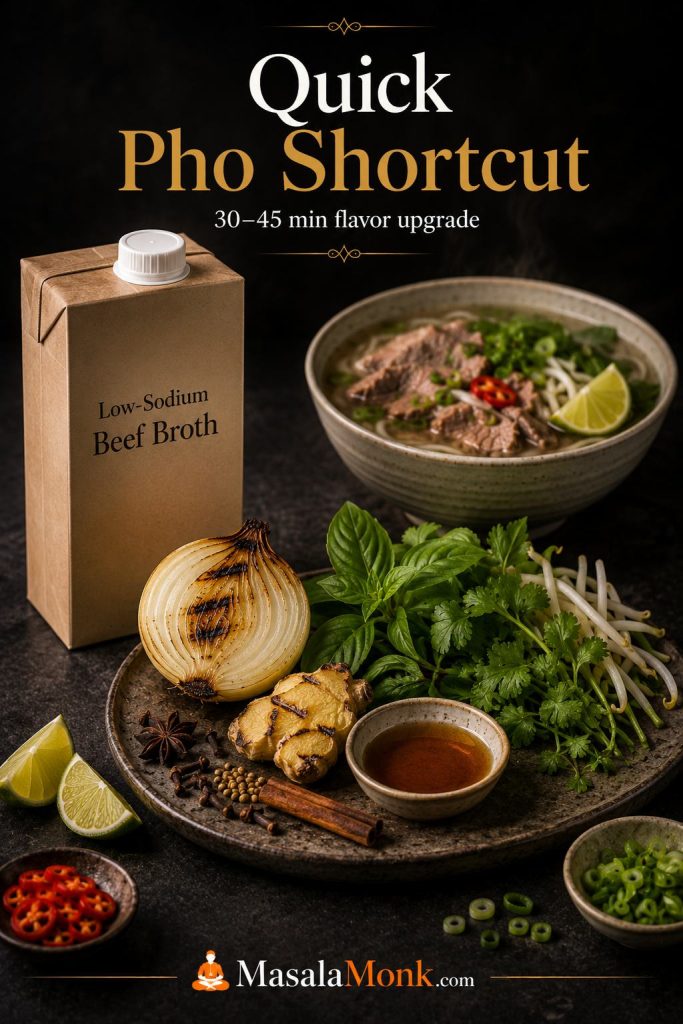
Quick Pho Recipe Shortcut

Shortcut honesty: quick pho is best when you want the aroma and comfort of pho without a full stockpot project. It will not have the same body as long-simmered bone broth, so do not judge it by the same standard. Use it for weeknights; use the full beef version when broth depth matters most.

A quick pho shortcut can still make a good pho-style bowl if you build aroma properly. The key is to improve the broth instead of simply heating stock and adding noodles.

Quick pho setup with low-sodium beef broth, charred onion, ginger, whole spices, fish sauce, herbs, and a finished bowl.
A quick pho shortcut still needs time to build character. Otherwise, it tastes like broth with noodles rather than a proper pho-style bowl with depth and aroma.

How to Upgrade Broth for Quick Pho

The shortcut version should still taste built, not rushed. Give the broth enough time with charred aromatics and whole spices before you season it, then use fresh herbs and lime at the end to make the bowl feel complete.

A fast pho recipe works best when you still give the broth 30–45 minutes with aromatics and spices. Simmer 1.5–2 L / 6–8 cups good low-sodium beef or chicken broth with 1 charred onion, a 2–3 inch piece of charred ginger, 2–3 star anise pods, 1 small cinnamon stick, 2 cloves, and 1 teaspoon coriander seeds. Strain, then season with fish sauce, salt, and a little sugar.

Shortcut pho should still smell like pho before it reaches the bowl. If it only tastes like boxed broth, give the onion, ginger, and spices more time.

  • Use good low-sodium broth so you can control the final seasoning.
  • Brown the onion and ginger instead of adding them raw.
  • Toast the spices before simmering.
  • Keep the simmer short but focused: 30–45 minutes is enough to perfume the broth.
  • Keep the noodles out of the broth until serving and finish with fresh herbs, lime, sprouts, and chili.

For a better shortcut beef pho, simmer a piece of brisket, chuck, or shank in store-bought broth for 1½–2½ hours with the aromatics and spices. It is still much faster than a full bone broth, but it gives the bowl more body and real beef flavor.

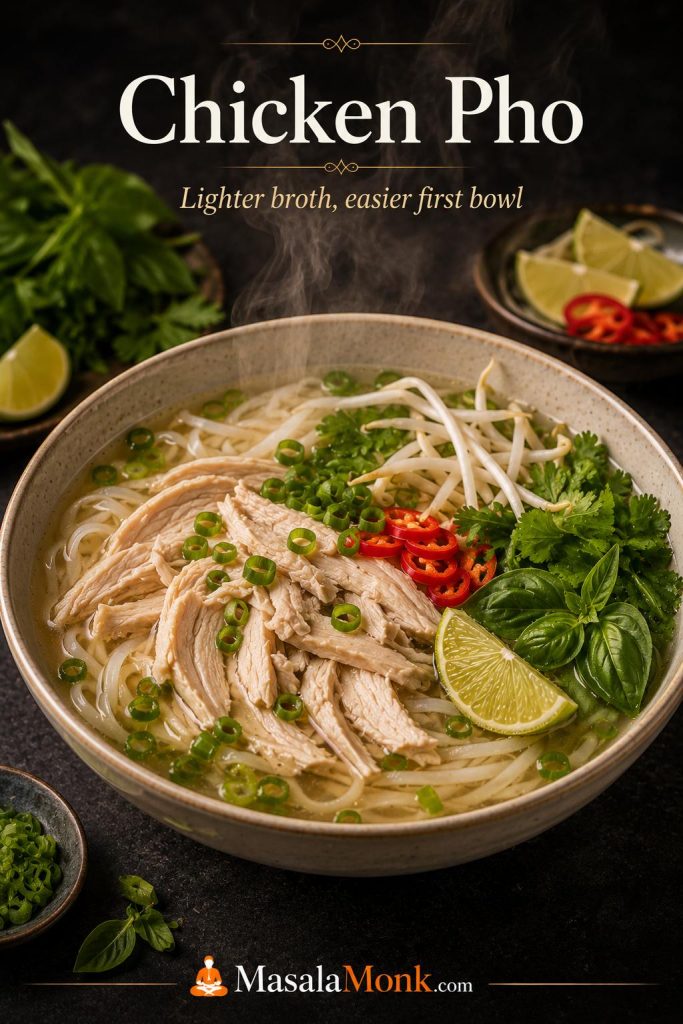
Chicken Pho Recipe Option

Chicken pho is often the easiest first pho to make at home. It needs less time than beef pho and does not require the same hunt for beef bones. The bowl should taste lighter, cleaner, and brighter than beef pho, not like a forced beef-style broth.

Chicken pho bowl with pale golden broth, rice noodles, shredded chicken, herbs, sprouts, scallions, lime, and chili.
Chicken pho is often the easiest first version to make at home. It cooks faster than beef pho, yet it still rewards good broth, proper noodles, and bright finishing herbs.

For a simple chicken pho, simmer 1.5–2 L / 6–8 cups chicken broth with 1 charred onion, a 2–3 inch piece of charred ginger, 2–3 star anise pods, 1 small cinnamon stick, 2 cloves, and 1 teaspoon coriander seeds. Add 450–700 g / 1–1½ lb chicken thighs, chicken breasts, or bone-in chicken pieces and simmer gently until cooked through. This amount makes about 3–4 bowls, depending on how much broth you like in each bowl.

Remove the chicken, shred or slice it, strain the broth, and season with fish sauce, salt, and a small amount of sugar. Serve with banh pho noodles, herbs, sprouts, lime, chili, onion, and scallions. If you want a richer chicken version, use bone-in chicken and simmer closer to 75–90 minutes.

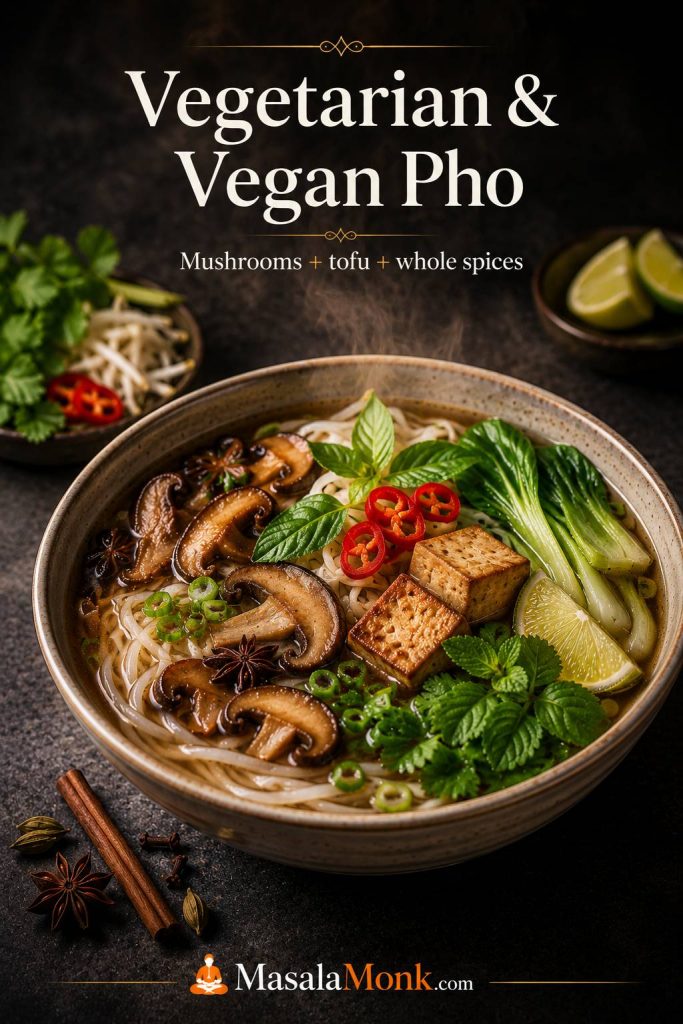
Vegetarian and Vegan Pho Recipe Options

Vegetarian pho and vegan pho need more than plain vegetable broth. Without bones, meat, or fish sauce, you need to build umami from mushrooms, roasted aromatics, whole spices, and a salty-savory seasoning such as tamari or soy sauce.

Vegetarian and vegan pho bowl with mushrooms, tofu, bok choy, rice noodles, herbs, lime, chili, and aromatic broth.
Vegetarian and vegan pho need real savory depth to feel satisfying. Mushrooms, tofu, roasted aromatics, and soy or tamari help the broth taste layered instead of thin.

Build a Vegan Pho Broth Base First

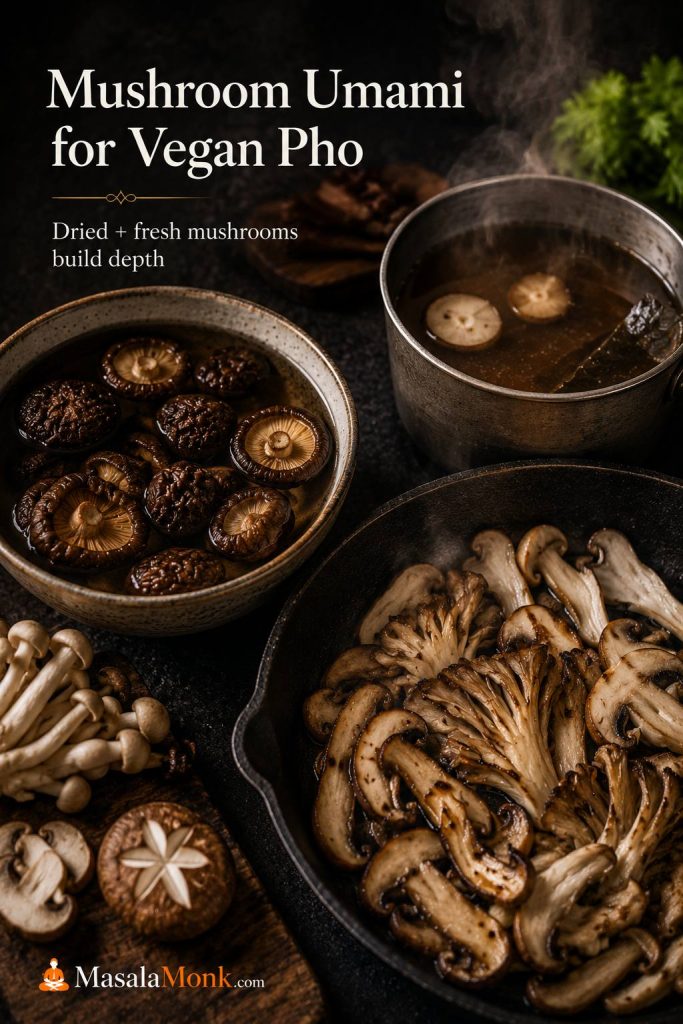
A plant-based broth needs extra umami, so start with 1.5–2 L / 6–8 cups vegetable broth or water, charred onion, charred ginger, toasted pho spices, 20–30 g dried shiitake or mixed dried mushrooms, and 225–300 g / 8–10 oz fresh mushrooms. Season with tamari or soy sauce, a little sugar, and salt to taste. Add tofu, bok choy, sautéed mushrooms, or other vegetables to the finished bowl.

Dried shiitake mushrooms soaking, fresh mushrooms cooking in a pan, and mushroom broth for vegan pho.
Dried mushrooms deepen the broth, while fresh mushrooms improve the bite of the finished bowl. Using both gives vegan pho a fuller, more convincing flavor.

For another simple way to make mushrooms feel satisfying rather than watery, MasalaMonk’s skillet mushroom and zucchini stir fry is a useful side or topping-style idea; just cook the vegetables drier if you want to add them to a noodle bowl.

Flavor Fixes for Vegetarian and Vegan Pho

  • Use mushrooms: shiitake, cremini, oyster mushrooms, or dried mushrooms add depth.
  • Keep the charred onion and ginger: they still matter in plant-based pho.
  • Use whole spices: star anise, cinnamon, cloves, coriander, and fennel still create the pho aroma.
  • Replace fish sauce: use tamari, soy sauce, or a vegan fish sauce alternative.
  • Add protein: tofu, mushrooms, bok choy, or other vegetables work well.
  • Do not overdo sweetness: plant-based broth can become sweet quickly if the vegetables dominate.

Dried mushrooms are especially helpful because they add a deeper savory base and keep the broth from tasting like plain vegetable soup. Strain out the dried mushrooms if they are tough, or slice them thinly and return them to the bowl if they are tender enough to eat.

If soy sauce or tamari starts making the broth taste too salty, dilute gently and rebuild flavor with ginger, herbs, chili, and lime instead of adding more salt. Lower-sodium soy sauce or tamari gives you more room to adjust.

If you use miso or kombu, keep them subtle so the bowl still tastes like pho rather than a different noodle soup.

Pho Troubleshooting: Broth, Noodles, and Beef

Most pho problems come from one of four places: the broth boiled too hard, the seasoning was not balanced, the noodles were handled like pasta in soup, or the final broth was not hot enough for assembly.

Pho troubleshooting guide showing cloudy broth, weak broth, greasy broth, mushy noodles, clumped noodles, flat broth, and beef not cooking.
Before fixing pho, identify what failed. Cloudy broth points to heat or starch, mushy noodles point to timing, and flat flavor usually points to under-seasoned broth.

Broth Problems in This Pho Recipe

Use this table to fix broth issues before they affect every bowl.

Comparison of clear and cloudy pho broth with bowls of broth, noodles, bones, herbs, and a strainer.
Clear pho broth does not mean weak broth. Instead, it usually means the bones were cleaned well, the simmer stayed gentle, and the noodles were kept out of the pot.
Problem What probably happened How to fix it
Cloudy broth Bones were not parboiled, the pot boiled too hard, or noodles were cooked in the broth Strain well, avoid stirring aggressively, and simmer gently next time. Cook noodles separately.
Weak broth Too much water, not enough meat or bones, too short a simmer, or under-seasoning Simmer longer, reduce slightly, and adjust with fish sauce, salt, and a little sugar.
Greasy broth Fat from marrow or meat was not skimmed Skim with a ladle, use a fat separator, or chill the broth and remove the solid fat.
Too salty Too much fish sauce or salt, or broth reduced more than expected Dilute with hot water or unsalted broth, then rebalance with aromatics and a tiny amount of sugar if needed.
Too sweet Too much rock sugar or naturally sweet vegetables Add fish sauce or salt in small amounts. Brighten the bowl with lime at serving.
Too spice-heavy The spice bag stayed in too long or the spices were too strong Remove the spice bag, dilute with broth or water, and simmer with extra onion or ginger if needed.

Noodle and Bowl Problems in This Pho Recipe

Use this table when the broth is good, but the final bowl still feels off.

Problem What probably happened How to fix it
Mushy noodles Noodles were overcooked or sat in hot broth too long Cook noodles separately and add them to bowls right before serving.
Noodles clumped Cooked noodles sat too long after draining Rinse or refresh briefly with hot water, loosen with chopsticks or tongs, then divide into bowls.
Raw beef did not cook in the bowl Broth was not hot enough or beef slices were too thick Bring broth to a full boil and slice beef paper-thin. Dip slices in simmering broth first if needed.
Broth tastes flat after assembling The broth was seasoned perfectly in the pot but diluted by noodles and toppings Season broth slightly stronger before serving. Add lime, herbs, fish sauce, or chili at the table.

Test One Bowl Before Serving the Pot

If your first bowl tastes flat, fix the broth before assembling the rest. One test bowl can save the whole pot.

The easiest way to avoid most of these issues is to keep the broth and noodles separate until the last moment. Store them separately, reheat them separately, and assemble only as many bowls as you plan to eat right away.

Make-Ahead, Storage, Freezing, and Reheating

Pho is one of the best make-ahead soups if you store the components separately. The broth can be made ahead, chilled, skimmed, and reheated. The noodles and herbs should be prepared close to serving.

Pho storage guide showing separate containers of broth, cooked beef, noodles, and herbs with sprouts.
Leftover pho works best when it is stored like separate parts, not one finished soup. Keep broth, beef, noodles, herbs, and sprouts apart so the next bowl still tastes fresh.
  • Broth: refrigerate for 3–4 days, or freeze for about 3 months for best quality.
  • Cooked beef: refrigerate separately and slice before serving.
  • Noodles: best cooked fresh. If needed, store separately and refresh with hot water.
  • Herbs and sprouts: wash and dry, but add only at serving.
  • Reheating: bring broth back to a boil before assembling bowls.

If the broth tastes too concentrated after refrigeration or reheating, add a little hot water and adjust the seasoning. Reheat only the amount you plan to serve, bring it back to a full boil for assembly, and keep the noodles, herbs, sprouts, and beef stored separately until you build fresh bowls.

Before You Start the Recipe Card

Before starting, read the broth timing, noodle timing, and raw beef note once. The recipe is easiest when the broth is treated as the main project and the noodles, toppings, and bowl assembly happen at the end.

Home-style beef pho recipe card with a finished bowl, yield, cooking time, broth notes, spices, noodles, herbs, and lime.
Use this recipe card as a quick memory guide for the full beef pho method: long-simmered broth, whole spices, banh pho noodles, thin beef, fresh herbs, lime, and a hot final pour.

Home-Style Beef Pho Recipe Card

This beef pho recipe makes clear, aromatic Vietnamese-style noodle soup with beef bones, brisket or chuck, roasted onion and ginger, toasted whole spices, rice noodles, thin-sliced beef, herbs, and lime.

Yield6 large bowls
Prep Time45 minutes
Cook Time4 hours
Total Time4 hours 45 minutes

Equipment

  • 9–10 L / 10-quart stockpot
  • Large skillet, broiler, grill pan, or gas flame for charring
  • Fine-mesh strainer
  • Cheesecloth, muslin, or spice bag
  • Ladle and tongs
  • Large serving bowls
  • Sharp knife
  • Optional: fat separator

Broth Ingredients

  • 1 kg / 2 lb meaty beef bones, such as neck bones, oxtail, or meaty soup bones
  • 1 kg / 2 lb marrow, knuckle, leg, or other beef bones
  • 1.25–1.5 kg / 2¾–3⅓ lb beef brisket, chuck, or shank
  • 4.5 L / 19 cups fresh water, plus more if needed
  • 2 large onions, halved
  • 150 g / 5 oz fresh ginger, split lengthwise
  • 1 tablespoon salt, plus more to taste
  • 25–40 g yellow rock sugar, or 1–2 tablespoons regular sugar
  • 45–60 ml / 3–4 tablespoons fish sauce, plus more to taste

Spice Bag

  • 6–8 star anise pods
  • 1–2 cinnamon sticks
  • 4–6 whole cloves
  • 1 tablespoon coriander seeds
  • 1–2 teaspoons fennel seeds, optional
  • 1 black cardamom pod, optional

For Each Bowl

  • 50–80 g dried banh pho rice noodles, or about 120 g fresh pho noodles
  • 30–45 g / 1–1½ oz raw eye of round, sirloin, tenderloin, or flank, sliced paper-thin
  • A few slices cooked brisket, chuck, or shank
  • 500–650 ml / 2–2¾ cups boiling-hot broth
  • Bean sprouts
  • Thai basil, mint, cilantro, or a mix
  • Lime wedges
  • Sliced chili or jalapeño
  • Thinly sliced onion and scallions
  • Hoisin and sriracha, optional

Instructions

Build the broth

  1. Parboil the bones and meat. Place the beef bones and brisket, chuck, or shank in a large pot. Cover with water, bring to a hard boil, and boil for 5–10 minutes. Drain, rinse the bones and meat, and clean the pot.
  2. Char the aromatics. Char the halved onions and split ginger over a gas flame, in a dry skillet, under a broiler, or on a grill pan until browned and fragrant.
  3. Toast the spices. Toast the star anise, cinnamon, cloves, coriander, fennel, and black cardamom if using for 3–5 minutes over medium heat. Transfer to a spice bag or cheesecloth bundle.
  4. Start the broth. Add the rinsed bones and meat back to the clean pot. Add 4.5 L / 19 cups fresh water, charred onion, charred ginger, salt, and rock sugar. Bring to a boil, then reduce to a gentle simmer.
  5. Simmer gently. Simmer for 1½–2 hours, skimming as needed. Remove the brisket, chuck, or shank once tender, cool slightly, then refrigerate until slicing. Continue simmering the bones, keeping them mostly submerged; add hot water if the broth reduces too aggressively.
  6. Add the spice bag. Add the toasted spice bag for the final 60–90 minutes of simmering. Remove it earlier if the broth smells strongly spiced.
  7. Strain and season. Strain the broth through a fine-mesh strainer. Skim excess fat. Season with fish sauce, more salt, and a little sugar if needed. The broth should taste slightly stronger than a normal soup.

Finish the bowls

  1. Cook the noodles separately. Cook or soak the banh pho noodles according to package directions. Drain well and keep separate from the broth.
  2. Prepare the beef and toppings. Slice the cooked beef. Slice the raw beef paper-thin. Wash herbs, prepare sprouts, cut lime wedges, and slice onion, scallions, and chili.
  3. Assemble the bowls. Bring the broth back to a full boil. Add noodles, cooked beef, and raw beef slices to bowls. Ladle boiling-hot broth over the top, then finish with herbs, sprouts, lime, chili, onion, scallions, and optional sauces.

Notes

  • Keep the broth at a gentle simmer, not a rolling boil, for a clearer finish.
  • Cook noodles separately. Do not simmer them in the broth.
  • For raw beef topping, slice the beef very thin and use boiling-hot broth. For a fully cooked option, use cooked beef only or dip the slices directly into simmering broth before serving.
  • Broth should taste slightly stronger in the pot because noodles and toppings dilute the seasoning.
  • Store broth, noodles, meat, and herbs separately for best leftovers.

Final Adjustments Before Serving Pho

The final adjustment is where homemade pho starts to feel personal. Once the bowl is built, taste it the way you will actually eat it: with noodles, beef, herbs, lime, sprouts, and hot broth together.

A quiet bowl may need more fish sauce or salt in the broth. When the flavor feels heavy, lime and herbs can lift it. Thin-tasting pho usually needs more broth concentration or a stronger simmer before the next bowl. This last check is what turns a good pot of pho into a bowl that tastes right to you.

Two bowls of homemade pho served with lime, herbs, sprouts, scallions, chili, and a hand squeezing lime over one bowl.
The final adjustment is where homemade pho becomes personal. A little more lime, fish sauce, salt, or aroma can turn a good bowl into one that tastes exactly right to you.

FAQs

What Pho Tastes Like

Pho tastes savory, aromatic, lightly sweet, and fresh at the same time. The broth should be beefy or chicken-forward, with warm spice from star anise and cinnamon, brightness from herbs and lime, and a clean finish from rice noodles and fresh toppings.

How to Pronounce Pho

Pho is usually pronounced closer to “fuh” than “foe.” The written Vietnamese word is phở.

The Best Noodles for Pho

Flat rice noodles called banh pho are best. Use small or medium-width noodles for soup. Dried banh pho is easy to store and works well; fresh banh pho only needs a quick blanch before serving.

How to Make Pho Without Beef Bones

Use good low-sodium beef broth, charred onion and ginger, toasted pho spices, fish sauce, and a flavorful cut like brisket or chuck if you still want beef depth. The broth will be lighter than bone broth, but it can still make a satisfying shortcut bowl.

When a Pho Spice Packet Works

A whole-spice pho packet can work well, especially for a first batch. Toast the spices briefly if they are loose enough to toast, then simmer them in the broth inside the packet or a spice bag. Powdered seasoning packets are better treated as shortcut helpers, not the whole flavor base.

Why Pho Broth Turns Cloudy

Cloudy pho broth usually comes from skipping the parboil step, boiling the pot too aggressively, stirring too much, or cooking noodles directly in the broth. Parboil and rinse the bones, keep the broth at a gentle simmer, and cook noodles separately.

How Long This Pho Recipe Should Simmer

This pho recipe should simmer for about 4 hours after the parboil step. Some traditional-style beef pho recipes go longer, especially with large bones, while chicken pho and shortcut pho need less time.

The Spices That Give Pho Its Aroma

The most common pho spices are star anise, cinnamon, cloves, coriander seeds, and sometimes fennel seeds or black cardamom. Use whole spices, toast them briefly, and keep them in a spice bag for a cleaner broth.

How to Handle Raw Beef Topping Safely

The beef used as a topping should be very fresh, kept cold, sliced paper-thin, and covered with boiling-hot broth right before serving. For a fully cooked option, use cooked beef only or dip the slices directly into simmering broth until they are no longer raw, then add them to the bowl.

Why Pho Tastes Flat

Flat pho usually needs better seasoning or more balance. Add fish sauce or salt in small amounts, check for a little sweetness, and brighten the finished bowl with lime and herbs. If the finished bowl tastes quiet, the broth was probably seasoned for sipping rather than for noodles.

Where Hoisin and Sriracha Belong

Hoisin and sriracha are optional. They can be delicious with pho, but adding too much directly to the broth can cover the clean flavor you worked to build. Try using them on the side as dipping sauces for the meat.

Beef Pho vs Chicken Pho

Beef pho is usually deeper, richer, and built around beef bones and beef cuts. Chicken pho is lighter, faster, and often easier for a first homemade version. Both use aromatic broth, rice noodles, herbs, and fresh toppings.

The Best Way to Make Pho Ahead

Make the broth ahead, then store the broth, cooked beef, noodles, herbs, and sprouts separately. Chilling the broth also makes it easier to remove excess fat. Reheat the broth until very hot and assemble fresh bowls when ready to eat.

How to Store Pho Leftovers

Store the broth, noodles, beef, and herbs separately. Refrigerate broth for 3–4 days, or freeze it for about 3 months for best quality. Reheat the broth until hot, then assemble fresh bowls with noodles and toppings.

How to Keep Pho Gluten-Free

Pho is often easy to make gluten-free because the noodles are rice-based, but the sauces and packaged ingredients still need a label check. Check fish sauce, hoisin sauce, soy sauce, broth cartons, seasoning packets, and any store-bought sauces before using them.