Posted on Leave a comment

How Long to Cook a Turkey: Cooking Time Chart by Weight & Oven Temperature

Whole roasted turkey with deep golden-brown skin on a silver platter beside a carving knife against a dark blue-black background.

How long to cook a turkey depends mostly on its weight, whether it is stuffed, how completely it is thawed, and the oven temperature. At 325°F / 163°C, a fully thawed, unstuffed 8–24 lb turkey generally takes about 2¾ to 5 hours. Stuffing adds time.

Seeing 325°F in one recipe, 350°F in another, and different times for the same 14-pound bird? That does not necessarily mean one chart is wrong. Different recipes use different temperatures, methods and assumptions. First make sure you’re comparing the same cooking method.

A useful schedule should leave you with browned skin, juicy breast meat, properly cooked dark meat and enough breathing room to finish the rest of dinner—not force the turkey to hit one magic minute.

Start taking temperatures toward the early end of the appropriate range. That gives you the chance to stop when the turkey is safely cooked instead of giving an already-finished breast another half hour just because the clock says so. Check the thickest part of the breast, the innermost part of the thigh, and the innermost part of the wing; each should reach at least 165°F / 74°C.

The chart tells you when to check. The thermometer tells you when dinner is cooked.

This guide covers an intact turkey roasted in the oven. Turkey breast, tenderloin, legs and wings have different cooking times. Convection ovens, oven bags, electric roasters, smokers and spatchcocked birds have their own timing too; those routes are covered farther down.

Updated September 2026. Timing and food-safety details were checked against current USDA/FSIS and FoodSafety.gov guidance.

Turkey Cooking Time Chart at 325°F

For a fully thawed turkey in a conventional oven, start here.

Turkey weightUnstuffed at 325°FStuffed at 325°FUnstuffed: first check
8–12 lb / 3.6–5.4 kg2¾–3 hours3–3½ hoursFrom 2¾ hr
12–14 lb / 5.4–6.4 kg3–3¾ hours3½–4 hoursFrom 3 hr
14–18 lb / 6.4–8.2 kg3¾–4¼ hours4–4¼ hoursFrom 3¾ hr
18–20 lb / 8.2–9.1 kg4¼–4½ hours4¼–4¾ hoursFrom 4¼ hr
20–24 lb / 9.1–10.9 kg4½–5 hours4¾–5¼ hoursFrom 4½ hr

These ranges follow the FoodSafety.gov turkey roasting chart. For a stuffed turkey, begin checking near the early end of the stuffed range rather than using the unstuffed first-check column.

Infographic comparing 325°F cooking times for stuffed and unstuffed turkeys from 8 to 24 pounds, with progressively larger roasted turkeys.
Turkey cooking time by weight works in bands rather than exact promises. Find the row containing your bird, then use the early edge as the point where active checking begins.

The times are approximate. Two birds with the same label weight can still finish differently. And 12, 14, 18 and 20 pounds sit where two published rows touch, which is why those exact weights can produce different-looking answers on reliable charts.

Already at 165°F earlier than expected? Recheck the breast, thigh and wing. All three safely there? Take the turkey out. More oven time is not automatically better.

How Long to Cook Your Exact Turkey Weight

Your turkey has an exact weight, while the official chart uses ranges. The table below turns those ranges into two useful planning points for an unstuffed turkey at 325°F: when to take the first temperature reading and how long to keep the cooking window open.

First Check and Planning Window by Weight

Your turkeyApprox. metricFirst checkPlanning window
8 lb3.6 kg2¾ hrThrough 3 hr
9 lb4.1 kg2¾ hrThrough 3 hr
10 lb4.5 kg2¾ hrThrough 3 hr
11 lb5.0 kg2¾ hrThrough 3 hr
12 lb5.4 kg2¾ hrThrough 3¾ hr
13 lb5.9 kg3 hrThrough 3¾ hr
14 lb6.4 kg3 hrThrough 4¼ hr
15 lb6.8 kg3¾ hrThrough 4¼ hr
16 lb7.3 kg3¾ hrThrough 4¼ hr
17 lb7.7 kg3¾ hrThrough 4¼ hr
18 lb8.2 kg3¾ hrThrough 4½ hr
19 lb8.6 kg4¼ hrThrough 4½ hr
20 lb9.1 kg4¼ hrThrough 5 hr
21 lb9.5 kg4½ hrThrough 5 hr
22 lb10.0 kg4½ hrThrough 5 hr
23 lb10.4 kg4½ hrThrough 5 hr
24 lb10.9 kg4½ hrThrough 5 hr

The planning window is time you leave available, not a guaranteed finish time or a maximum. At the boundary weights—12, 14, 18 and 20 lb—it deliberately uses the longer adjoining official range so dinner is not built around the most optimistic possibility.

Infographic with timelines for 12, 14, 16, 18 and 20 pound turkeys, marking an earlier first temperature check and a longer planning window.
These two times solve different problems: the first-check marker helps prevent overcooking, while the wider planning window keeps a late-running turkey from throwing off dinner.

How Long to Cook a 12 lb Turkey

Begin checking a 12 lb / 5.4 kg unstuffed turkey around 2¾ hours, but keep the planning window open through about 3¾ hours. Twelve pounds sits where two official weight ranges overlap.

How Long to Cook a 14 lb Turkey

Start checking a 14 lb / 6.4 kg unstuffed turkey around 3 hours and keep the planning window open through roughly 4¼ hours. Fourteen pounds is shared by two published rows, which is why reliable charts can appear to give different answers.

Roasted 14 pound turkey beneath two intersecting timing bands for 12–14 lb and 14–18 lb, with first-check and planning-window times.
A 14 lb turkey sits exactly where two published weight bands meet. So check from the earlier range, but keep enough schedule room for the later one instead of treating either number as a promise.

How Long to Cook a 16 lb Turkey

Allow about 3¾–4¼ hours at 325°F for a 16 lb / 7.3 kg unstuffed turkey. Once rest and carving are included, a 6 PM dinner usually means getting this bird into the oven around early afternoon.

How Long to Cook an 18 lb Turkey

Start checking an 18 lb / 8.2 kg turkey around 3¾ hours and keep the planning window open through about 4½ hours. Eighteen pounds is another overlap between two published rows.

How Long to Cook a 20 lb Turkey

Begin checking a 20 lb / 9.1 kg turkey around 4¼ hours and keep the planning window open through about 5 hours. On a bird this large, check several locations before calling it done.

Already have a 25–30 lb turkey? The National Turkey Federation’s 24–30 lb range is roughly 5–5¼ hours unstuffed or 5¼–6¼ hours stuffed at 325°F. Still shopping? Two smaller birds are usually easier to cook evenly, time and carve than one enormous turkey.

Planning dinner? → Work backward from serving time

Turkey Cooking Time Per Pound: Why One Number Does Not Fit Every Bird

At 325°F, don’t use one fixed minutes-per-pound number. The USDA ranges work out to roughly 21–23 minutes per pound for an 8 lb turkey, 14–16 minutes per pound at 16 lb, and about 11–13 minutes per pound at 24 lb. Use the weight chart for the actual schedule.

A bigger turkey does not simply take the same number of minutes multiplied by more pounds. Stuffing, ice remaining in the cavity, oven accuracy, bird shape, pan depth and repeated door opening can move the finish further.

Graph with 8, 16 and 24 pound raw turkeys increasing in size while approximate cooking minutes per pound decrease.
Turkey cooking time per pound is not linear. Applying one fixed rate across every size can make a small bird seem faster—or a large bird much slower—than the weight-based ranges suggest.

Can You Cook Turkey at 350°F or 375°F?

Using 350°F or 375°F? Don’t convert the 325°F chart. Follow a complete turkey method written for that temperature. Higher-temperature recipes have their own timing, browning and foil decisions.

Three oven scenes showing turkeys at 325°F, 350°F and 375°F with progressively warmer lighting and method-specific guidance.
A 325°F chart cannot simply be recalculated for 350°F or 375°F. Once oven temperature changes, timing and browning behavior change together, so the method and its timetable need to stay paired.
Oven approachHow to use itWhat changes
325°F / 163°CUse the main chart on this pageStandard conventional-oven reference
350°F / 177°CUse timing written for that recipeUsually a shorter cook
375°F / 191°CUse a 375°F-specific methodCooking and browning move faster
High-heat startFollow the complete recipeFast initial browning before heat is usually reduced

Why 325°F Is the Main Chart

The 325°F / 163°C table gives us one authoritative conventional-oven reference across multiple weights and both stuffed and unstuffed birds. USDA guidance says a conventional oven should be set no lower than 325°F.

Turkey at 350°F

A common 350°F planning rule is about 13 minutes per pound for an unstuffed turkey and 15 minutes per pound for a stuffed one. That belongs to recipes designed around 350°F; it is not a mathematical conversion of the USDA 325°F table.

Published 350°F schedules vary. Once you’ve chosen one of those recipes, keep its approximate timing and cooking instructions together.

Turkey at 375°F

There is no universal 375°F timetable to substitute for the 325°F chart. Use the schedule supplied with the 375°F method. Faster browning is the predictable part: honey, maple syrup and sugary rubs need earlier watching, and foil can protect skin that reaches a deep golden color before the meat is ready.

Temperature-scale check: 180°C is about 356°F, not 180°F. Check the scale when moving between recipes, ovens or countries; that mistake can turn a normal roast into an all-day wait.

Using convection, an oven bag, roaster or smoker? → See the method-specific timetable

Stuffed vs Unstuffed Turkey: How Much Longer Does Stuffing Take?

Stuffing makes a turkey take longer and adds another doneness checkpoint: the center of the stuffing must reach 165°F / 74°C. For the easiest holiday schedule and better browning, bake the dressing separately.

Split infographic comparing an unstuffed turkey cavity with a stuffed turkey cavity, with heat-flow arrows and a 165°F stuffing-center marker.
Stuffing sits deep inside the bird, so its center can lag behind the hotter outer meat. That slow-heating center is why stuffed turkey cooking time needs its own schedule.

At 325°F, a 12–14 lb turkey takes roughly 3–3¾ hours unstuffed versus 3½–4 hours stuffed. At 20–24 lb, the ranges are about 4½–5 hours and 4¾–5¼ hours.

Stuffing the bird? Add it immediately before roasting and keep it loose rather than packing the cavity tightly.

Baked in its own dish, the dressing gets the chance to develop a browned top instead of steaming inside the turkey. Our Southern cornbread dressing is built for that separate-pan approach.

Turkey Still Frozen? Here Is the Safe Path

No time left to thaw? A plain, unstuffed frozen turkey can go directly into a conventional oven. Plan on at least 50% more cooking time than for a thawed bird. Dinner may move later, but the turkey can still be cooked safely.

Turkey Thawing Times

Turkey weightRefrigerator at 40°F / 4°C or belowCold-water thawing
4–12 lb / 1.8–5.4 kg1–3 days2–6 hours
12–16 lb / 5.4–7.3 kg3–4 days6–8 hours
16–20 lb / 7.3–9.1 kg4–5 days8–10 hours
20–24 lb / 9.1–10.9 kg5–6 days10–12 hours
Infographic showing refrigerator and cold-water turkey thawing times for 4–12, 12–16, 16–20 and 20–24 pound birds.
Turkey thawing times are really a planning choice between days and hands-on hours. Refrigerator thawing is easier to schedule ahead; cold-water thawing is faster but demands repeated attention.

Exactly 12, 16 or 20 lb? Those weights sit where the published refrigerator-thaw rows overlap too. For holiday planning, give yourself the longer window rather than making dinner depend on the shortest possible thaw.

In the refrigerator, the broader rule is about 24 hours for every 4–5 pounds. A turkey thawed there can remain refrigerated for another 1–2 days before cooking.

For cold-water thawing, keep the turkey in leak-proof packaging or a food-safe leak-proof bag, submerge it in cold tap water, allow roughly 30 minutes per pound, and replace the water every 30 minutes. Cook immediately after thawing.

Sealed raw turkey fully submerged in clear cold water in a large glass container beside a 30-minute timer and thawing-step labels.
The 30-minutes-per-pound estimate is only the clock. Cold-water turkey thawing also depends on keeping the package leak-proof, the bird submerged and the water cold throughout.

The Outside Is Soft but the Cavity Is Still Icy

A soft breast doesn’t prove the whole bird is thawed. Check the cavity. The neck and giblet packet should come free, and the joints should no longer feel locked by ice.

Ice still inside means the fully thawed timetable no longer fits neatly. The outside warms first, so a reassuring shallow reading can coexist with much colder meat deeper in the bird. Give the turkey extra time and check more than one location as it cooks.

Raw whole turkey on a roasting tray with a thermal-style overlay changing from warm orange at the surface to blue in deeper meat and the cavity.
Touching the breast only tells you about the surface. On a large turkey, flexible outer flesh can coexist with ice around the cavity and joints much deeper inside.

A microwave can also thaw a turkey that fits, provided you follow the appliance’s defrost instructions and cook it immediately afterward. Hot water, warm water and the kitchen counter are not safe thawing methods.

Cooking a Turkey From Frozen

FoodSafety.gov gives these approximate conventional-oven times for a turkey that starts frozen:

Frozen turkeyApproximate oven time
8–12 lb / 3.6–5.4 kg4¼–4½ hours
12–14 lb / 5.4–6.4 kg4½–5¾ hours
14–18 lb / 6.4–8.2 kg5¾–6½ hours
18–20 lb / 8.2–9.1 kg6½–6¾ hours
20–24 lb / 9.1–10.9 kg6¾–7½ hours
Comparison infographic with thawed and from-frozen cooking-time ranges for unstuffed turkeys from 8 to 24 pounds.
Frozen turkey cooking time can add several hours, not another few minutes. For the largest birds on this chart, that difference is big enough to reshape the entire dinner schedule.

The giblet packet may still be frozen in place when the bird goes into the oven. Once the cavity loosens enough, remove it carefully with tongs or a fork and continue roasting.

From-frozen rescue means the conventional oven. Don’t cook a still-frozen turkey in an oven bag, smoker, grill or deep fryer. Microwave thawing is different: thaw according to the appliance instructions and cook immediately afterward.

Commercially frozen pre-stuffed turkey: do not thaw it. Keep it frozen and cook it according to the package cooking directions. The turkey and center of the stuffing must both reach 165°F / 74°C.

Turkey ready for the oven? → Build the dinner schedule

What Time Should You Put the Turkey in the Oven?

Once you know the weight, oven method, stuffing situation and thaw state, work backward from dinner. Doing the math earlier than that can give you a beautifully precise schedule for the wrong turkey.

Quick formula: serving time − carving time − resting time − the longer realistic cooking estimate = when the turkey should go into the oven.

Turkey Start-Time Examples

The examples below leave about 40 minutes between the planned oven-out time and dinner for resting, carving and getting the platter to the table.

TurkeyServePut it in byFirst check
12 lb unstuffed5 PMAbout 12:35 PMAbout 3:20 PM
14 lb unstuffed5 PMAbout 12:05 PMAbout 3:05 PM
16 lb unstuffed6 PMAbout 1:05 PMAbout 4:50 PM
20 lb unstuffed6 PMAbout 12:20 PMAbout 4:35 PM
Vertical dinner-planning timeline for a 16 pound unstuffed turkey, showing oven-in time, first check, planning window and 6 PM serving.
Working backward from dinner protects the rest of the meal from an uncertain finish time. An early temperature check gives you room for a slower bird without sacrificing the resting-and-carving buffer.

The 12-, 14- and 20-pound examples deliberately use the longer adjoining range for their oven-in time. Their first checks come from the earlier range.

Schedule from the longer end and check from the shorter end. An early turkey gives you options. An underdone turkey when every side dish is hot gives you fewer.

First whole turkey? Don’t try to memorize the page. Get the bird into the oven on schedule, set an alarm for the first temperature check, and keep the thermometer nearby.

The rest period is useful kitchen time. Assemble or partly cook oven-heavy sides earlier, then use the freed oven to reheat, brown or finish them. A green bean casserole, for example, can make its final trip through the oven while the turkey rests.

Roasted turkey resting on a platter in front of an open oven containing dinner rolls and casseroles in a dark modern kitchen.
Use turkey resting time for jobs that need reheating, browning or a quick final bake. Long-cooking sides should already be well underway before the turkey leaves the oven.

Already cooking? → Go to the doneness check

How to Cook a Turkey at 325°F: The Short Version

Got your timing sorted? Here’s the whole 325°F method in five steps.

  1. Check the label before adding salt. Remove the neck and giblets, pat the turkey dry and season it appropriately.
  2. Set the bird breast side up in a shallow roasting pan, preferably on a rack.
  3. Roast at 325°F / 163°C using the weight chart as your approximate time range.
  4. Begin checking near the early end and continue until the breast, thigh and wing each reach at least 165°F / 74°C. If the turkey is stuffed, check that the center of the stuffing reaches 165°F / 74°C too.
  5. Rest the turkey for at least 20 minutes, then carve.
Five-panel infographic showing turkey preparation, breast-side-up roasting at 325°F, thermometer checking, and a final 20-minute rest.
The value of this five-step 325°F turkey method is the order: check the label before salting, set up the pan before roasting, and verify doneness before beginning the rest.

Cooking for a much smaller table? The oven-baked Turkey Tenderloin Recipe gives you a smaller cut with a much shorter cook.

Set Up the Turkey for an Easier Roast

Check the Label, Cavities and Seasoning

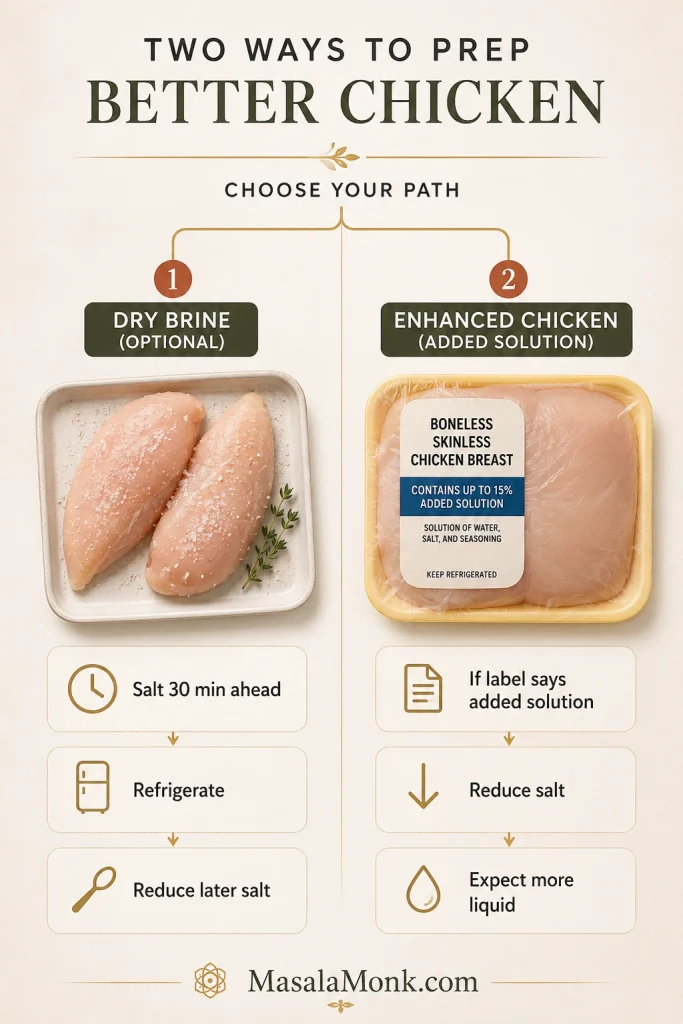
Enhanced, self-basting, basted, pre-brined, or “contains up to a stated percentage of solution” on the label? The turkey already contains added seasoned liquid. That percentage is not simply the salt percentage, but it is a reason to go easy before stacking a dry brine, salted butter, salty seasoning and bouillon onto the same bird.

Close-up of packaged raw turkey with callouts highlighting enhanced, self-basting, basted, pre-brined and contains added solution.
These label terms can change how aggressively you season. If the turkey already contains seasoned solution, stacking brine, salted butter and a salty rub can push both the bird and the drippings too far.

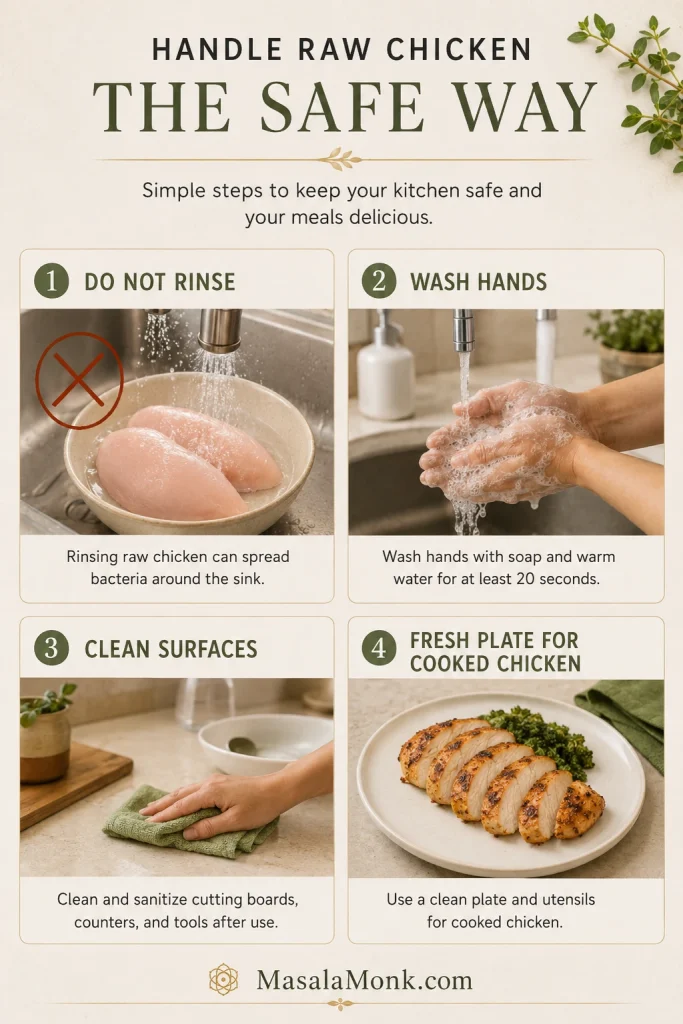
Check both cavities for the neck and giblet package. Pat the turkey dry instead of rinsing it; splashing raw-poultry juices around the sink can spread contamination. After handling the bird, wash your hands with soap and water for at least 20 seconds and clean the countertop, sink, utensils and anything else the raw turkey touched.

Pre-seasoned birds can leave salty drippings too. Taste before concentrating them into gravy. Our Turkey Gravy Recipe From Drippings shows how to balance the pan juices with stock.

Set Up the Pan

A roasting rack is helpful, not mandatory. It lifts the turkey above pooled drippings and improves airflow around the lower bird. No rack? A bed of sturdy vegetables or another food-safe support can keep the turkey off the bottom.

Very deep roasting pans can reduce airflow around the bird and push the cook later, another reason the timetable is only approximate.

Keep the bird breast side up for this method. The skin gets direct heat for browning, and you don’t have to wrestle a large, hot turkey halfway through the cook.

Comparison of a turkey in a shallow roasting pan with rack and airflow arrows versus the same turkey in a deep-sided pan with reduced airflow.
Pan shape is one reason equally weighted turkeys can finish at different times. A shallow roasting pan exposes more of the bird to circulating heat, while deep walls surround more of the lower turkey.

Manage the Browning Without Babysitting the Oven

Once the skin is as deeply golden as you’d be happy to put on the table, foil can protect the darkening areas while the meat finishes. Sweet rubs and glazes may get there sooner.

Basting is optional. It can add surface flavor and color, but it doesn’t replace temperature control for keeping the breast juicy. Opening the oven every 20 minutes also dumps heat; occasional basting is plenty when a recipe calls for it.

Three close-up turkey-skin stages labeled pale, deep golden and too dark, with loose aluminum foil shown at the deep-golden stage.
Once the skin reaches the color you want on the table, protect it if the meat still needs time. Foil manages browning; it does not turn a low internal temperature into a finished turkey.

Ready to check the turkey? → See where and how to take the temperature

How to Know When Turkey Is Done

This is the moment that matters: can the turkey come out now?

Turkey is done when the thickest breast, innermost thigh and innermost wing each reach at least 165°F / 74°C. If the bird is stuffed, the center of the stuffing must reach 165°F too.

Where to checkWhere the probe goesSafety-first target
BreastCenter of the thickest breast meat, away from bone and cavity165°F / 74°C
ThighInnermost thick thigh where the leg meets the body, away from bone165°F / 74°C minimum
WingInnermost wing area, away from bone165°F / 74°C
StuffingCenter of the stuffing, if used165°F / 74°C

This follows current USDA turkey roasting guidance.

Whole roast turkey with three thermometer probes marking the thickest breast, innermost thigh and innermost wing, plus a 165°F minimum label.
One hot spot cannot speak for the whole bird. A three-point turkey temperature check keeps a ready breast from being mistaken for a ready turkey when another area still needs heat.

Dark meat can benefit from additional heat, while pushing the breast unnecessarily high can turn juicy slices dry and chalky. Some advanced methods deliberately use controlled carryover cooking below 165°F; this guide uses the simpler 165°F-before-serving rule for the breast, thigh and wing.

Put the Probe in Thick Meat, Away From Bone

A strange reading deserves a second check nearby. The sensor should be in thick meat—not against bone, just beneath the skin, or hanging into the hollow cavity.

A leave-in probe is useful for watching one spot during the roast. An instant-read thermometer is better for checking the other breast, thighs and wing areas once you’re close.

Four-panel close-up showing correct turkey thermometer placement, a probe touching bone, a probe too shallow under the skin, and a probe ending in the cavity.
A thermometer only answers the question you ask it. If the sensor touches bone, sits just under the skin or slips into the cavity, reposition it before changing the cooking plan.

Start Checking Before You Expect It to Be Done

Set your timer for the first check, not for when the turkey is supposed to be done.

Pink Meat and Pop-Up Timers

Safely cooked turkey can retain some pink, especially around joints or after smoking. Color alone is not a dependable doneness test. Breast, thigh and wing safely at temperature? Slight pinkness by itself is not a reason to keep roasting.

Close-up of carved roast turkey with a small pink area in the breast beside a digital thermometer reading 165°F / 74°C, under the message “Check temperature, not color.”
A pink tint can survive even when turkey is safely cooked, so color is a weak final judge. When appearance and temperature disagree, trust a valid thermometer reading over the shade of the meat.

A pop-up timer is another clue, not the final answer. It measures one location. When it pops, check the turkey with your thermometer.

Give the Turkey Time to Rest

Rest the turkey for at least 20 minutes before carving. Twenty to thirty minutes is comfortable for many birds: carving is less rushed, and the last dishes can make it to the table.

Those minutes are also enough time to warm or bake soft dinner rolls without making them compete with the turkey earlier in the day.

An hour-long delay is different. That’s holding cooked food, not simply resting it.

Close-up of a thick slice being carved from a roasted turkey breast, showing moist pale meat beneath deeply browned skin with a carving knife and fork.
Proper timing shows up here: moist breast meat beneath deeply browned skin, after enough rest to carve cleanly.

Turkey not behaving as expected? → Troubleshoot it

What Is Your Turkey Doing Right Now?

Most turkey trouble begins when two signals disagree: the clock says one thing and the thermometer another; the breast is ready while the thigh lags; or the skin looks finished while the center still needs time.

Turkey troubleshooting infographic with a whole roasted turkey in the center and six surrounding problem-and-fix panels for early temperature, low temperature, breast-thigh mismatch, thermometer disagreement, dark skin and smoking pan.
When the turkey stops matching the timetable, diagnose the signal before changing course. Temperature, browning, timing and pan problems may look equally urgent, but they do not need the same fix.
What you seeWhat to do first
165°F much earlier than expectedRecheck breast, thigh and wing; remove if all are ready
Time is up, temperature is lowKeep cooking; check thawing, oven and probe placement
Breast done, thigh lowShield breast and keep checking the thigh
Thigh hot, breast lowRecheck the breast in more than one spot
Thermometers disagreeMove probes away from bone and cavity; verify accuracy if needed
Skin too darkLoosely shield the dark area with foil
Turkey is pinkCheck breast, thigh and wing for 165°F
Finished earlyRest, then move to safe holding if needed
Dinner ready, turkey notKeep roasting the underdone area until it reaches 165°F
Pan is smokingProtect the drippings without shocking hot cookware
Forgot the giblet packageCheck the package material and condition
Turkey is dryNext time begin temperature checks sooner

It Reached 165°F Much Earlier Than Expected

Take another set of readings before assuming the thermometer is wrong. Breast, thigh and wing all safely at temperature? The turkey is finished. Oven calibration, airflow, bird shape and ordinary variation can all move the finish forward.

The Time Is Up but the Turkey Is Still Below Temperature

Keep cooking it.

Then find out why it is behind. Common reasons include ice in the cavity, stuffing, an oven running cool, repeated door opening, an unusually deep pan, a different appliance, or a thermometer sitting against bone instead of in thick meat.

When the readings are valid and still low, the schedule has to move; the safe-temperature target does not.

The Breast and Thigh Are Finishing at Different Times

Breast done but thigh low? Loosely shield the breast and keep roasting. Take a second thigh reading nearby before adding a long stretch of oven time, just in case the first probe touched bone. Dark meat can handle—and often benefits from—more heat, so don’t drag the breast upward just because the thigh needs longer.

Roast turkey in an oven with the breast loosely covered in foil and a thermometer probe in the thigh, labeled to shield the breast and keep checking the thigh.
If the breast is already safe while the thigh still runs low, protect what is finished instead of driving the breast hotter. Shield the breast loosely, then keep checking the inner thigh.

A hot thigh with a low breast needs the opposite response: check the breast in more than one spot and continue until it is safe. Turkey shape and oven hot spots do not guarantee that the thighs always finish last.

The Thermometers Disagree

Move the probe first. Keep it away from bone and the cavity and give the reading a moment to settle.

Not sure which thermometer to trust? Check it in well-stirred ice water. The sensing area should read about 32°F / 0°C without touching the sides or bottom of the container; follow the manufacturer’s calibration instructions if it does not.

Two-step thermometer troubleshooting graphic showing probes in a roast turkey, then a probe moved away from bone and the cavity, followed by an ice-water check reading about 32°F / 0°C.
An ice-water test checks the thermometer, not the turkey. First rule out bad probe placement; if the readings still seem wrong, about 32°F / 0°C gives you a known reference point.

An oven thermometer is also worth checking when every turkey seems to finish implausibly early or late.

The Skin Is Getting Too Dark

Loosely cover the darkening area with foil and keep cooking. Sweet rubs and glazes can brown especially quickly at higher temperatures.

The Turkey Finished an Hour Early

Twenty or thirty minutes early is useful; that’s largely the rest the turkey needed anyway. Let it sit while you finish gravy, warm serving dishes or bring the mashed potatoes to the table.

A much longer wait becomes a holding problem. Keep hot-held turkey at 140°F / 60°C or above. Without safe hot holding, cooked turkey should not sit at room temperature for more than 2 hours.

Several hours to wait? Carve and refrigerate the meat promptly in shallow containers, then reheat it to 165°F / 74°C. Holding the whole bird hot indefinitely is hard on both the meat and the skin.
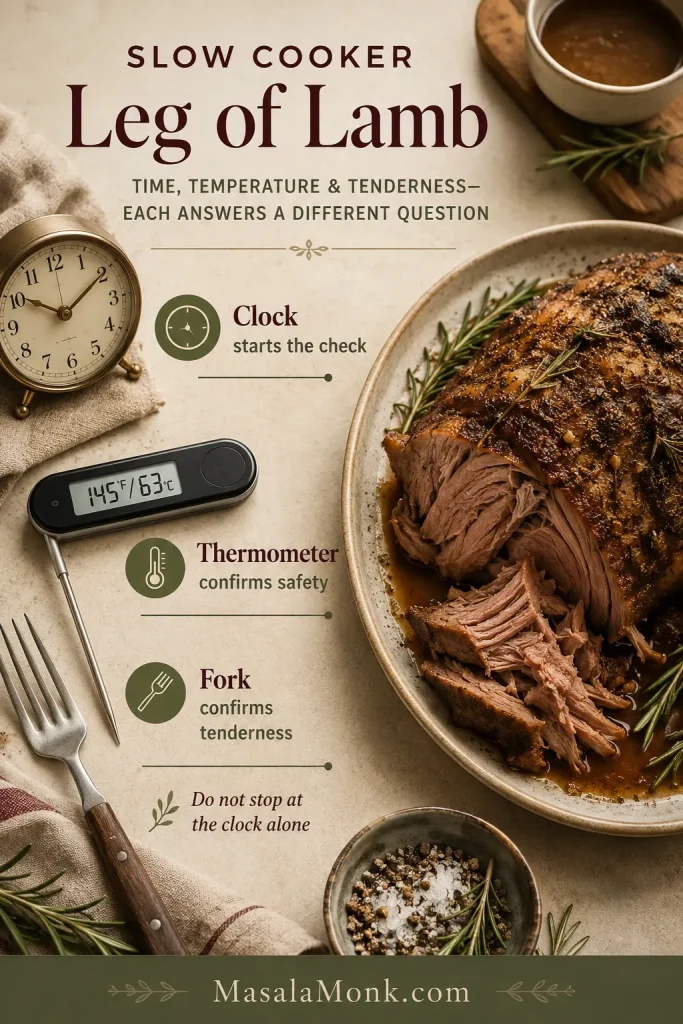
Three-path decision graphic for an early-finished turkey: a 20–30 minute rest, hot holding at 140°F / 60°C or above, or carving, chilling and reheating to 165°F / 74°C for a several-hour delay.
Finishing early is manageable once the delay is classified correctly. A short gap can be a normal rest, a longer wait needs safe hot holding, and a several-hour delay calls for chilling and reheating.

Dinner Is Ready and the Turkey Is Not

Underdone meat needs more cooking. A safely cooked breast with a lagging thigh or leg can be loosely shielded with foil while the underdone area continues toward 165°F.

The Pan Is Smoking

Drippings can scorch before the turkey is finished, particularly with high heat, a dry pan or sugary seasoning. With a metal roasting pan, a small amount of hot water or unsalted stock can help protect the drippings when your roasting setup allows it.

Glass and ceramic cookware need more caution: avoid sudden temperature changes and follow the cookware manufacturer’s guidance rather than pouring liquid blindly into a screaming-hot dish. Once the pan juices are bitter and black, don’t build gravy around them.

Roast turkey in a metal pan with smoking drippings as a small amount of hot liquid is added, beside a glass-or-ceramic cookware warning about sudden temperature change.
Darkening drippings can be rescued before they turn bitter, but the pan material changes what is safe to do next. Metal tolerates a little hot liquid; glass or ceramic needs protection from sudden temperature shock.

You Forgot the Giblet Bag

A paper-wrapped giblet packet cooking inside the turkey is not, by itself, a reason to discard a safely cooked bird.

Plastic is different. A packet that remained intact and unchanged does not automatically ruin the turkey. Melted, warped or broken-down plastic is a different situation: do not use the turkey.

The Turkey Came Out Dry

Dry breast meat usually points back to excessive internal temperature, not too little basting. Once the breast has overshot its finish, spooning pan juices over the surface cannot put that moisture back inside.

Next time, start checking sooner.

Close-up turkey breast slices progressing from moist to dry beside a rising heat-and-time line and a basting brush, illustrating moisture loss from extra oven time.
Basting can make the surface glossy and flavorful, but it cannot undo an overcooked center. Dry turkey breast is mainly a temperature-management problem, which is why earlier checking matters more than another spoonful of pan juices.

Need the core timing numbers again? ↑ Back to the main 325°F chart

Using a Different Cooking Method? Follow Its Own Timetable

Not using the standard oven method? Treat this section as a routing guide. Its job is to keep you from applying the main 325°F chart to a cooking method that behaves differently.

Routing infographic comparing six turkey cooking methods—conventional oven, convection, oven bag, electric roaster, smoker and spatchcock—with separate clocks showing that each method uses its own timetable.
Use this as a routing map: identify the equipment or turkey shape first, then follow that method’s timetable below. Conventional-oven numbers are not portable across convection, bags, roasters, smokers and spatchcocked birds.
MethodTiming differenceMain tradeoff
Conventional ovenUse the main 325°F chartStandard reference method
Convection ovenUsually fasterBegin checking earlier
Oven cooking bagOften much fasterMoist cooking, softer skin
Electric roasterMay match conventional timing or finish soonerFrees oven space, usually less browning
SmokerSeparate low-heat scheduleSmoke flavor; skin can soften
SpatchcockMuch fasterFlatter, more even roasting

Convection Oven

Convection can shorten the cook. USDA guidance says you may reduce the oven temperature by 25°F, but a convection oven should be set no lower than 300°F / 149°C.

Convection turkeyApproximate time
14–18 lb unstuffed2½–3¼ hours
18–22 lb unstuffed3¼–3½ hours
14–18 lb stuffed3–3¼ hours
18–22 lb stuffed3¼–3¾ hours

Check the oven manufacturer’s guidance too, then verify doneness in the breast, thigh and wing.

Oven Cooking Bag

A cooking bag traps steam and heat around the turkey, so it can roast much faster than in an open pan. USDA gives these approximate times for an unstuffed turkey at 350°F / 177°C:

Turkey in oven bagApproximate time
8–12 lb1½–2 hours
12–16 lb2–2½ hours
16–20 lb2½–3 hours
20–24 lb3–3½ hours

Add about 30 minutes for a stuffed bird and follow the bag manufacturer’s directions. Trapped steam contains splatter and helps retain moisture, but deeply crisp skin is harder to achieve.

Electric Roaster

Electric roasters vary, and some finish considerably sooner than a conventional oven. Follow the appliance manual and begin checking early.

The practical win is oven space. The main oven stays available for candied yams, casseroles and rolls; covered roasters often give you paler, softer skin in return.

Smoked or Spatchcocked Turkey

For a thawed, unstuffed 8–12 lb turkey, USDA’s alternate-method guidance uses roughly 20–30 minutes per pound as a smoker planning estimate. Weather, smoker temperature and airflow can move that number substantially, so use a dedicated smoking method.

Spatchcocking needs its own timetable too. Flattening the bird exposes more of it to heat and shortens the cook dramatically.

Using the standard oven method? ↑ Back to the main 325°F chart

Turkey Cooking Time FAQs

1. Can You Cook Two Turkeys at the Same Time?

Cooking two turkeys does not mean doubling the cook time or adding their weights together. If the oven can hold two similarly sized birds in separate shallow pans with enough space for hot air to circulate, plan each turkey by its own weight. Leave a little extra scheduling room for airflow and oven recovery, and temperature-check each bird separately.

Two similarly sized turkeys roasting in separate shallow pans inside one oven with airflow arrows, separate clocks and check markers showing that each bird is timed and checked independently.
A fuller oven may recover heat more slowly after the door opens, so leave a little extra schedule room. Still, each turkey keeps its own weight-based clock and its own temperature checks.

2. Does a Turkey Cook Faster Covered or Uncovered?

Don’t use covering as a shortcut for the cook time in this guide. Roast the turkey uncovered, then use foil once the skin is brown enough. Fully covered methods and oven bags have different heat and moisture conditions and need their own timetable.

3. Can You Cook a Turkey the Day Before?

Yes. Cook it fully, carve or portion it, refrigerate promptly in shallow containers, then reheat the meat to 165°F / 74°C before serving.

Extra cooked meat can become turkey pot pie the next day rather than disappearing into a week of identical sandwiches.

4. Can You Cook a Turkey Overnight?
Don’t improvise a very-low overnight roasting temperature just so the turkey can cook unattended. For the conventional method in this guide, use 325°F / 163°C or above and monitor the cook. Cooking ahead and reheating safely is a more predictable way to free the oven.


Once the first temperature check is on your schedule, most of the uncertainty is gone. Give the finished turkey its rest, use that window to bring the sides together, then carve and get it to the table. A bird that finishes a little earlier or later than the planning window suggested is normal; it doesn’t have to throw the rest of dinner off course.

Partially carved golden-brown roast turkey on a silver platter with juicy breast slices and dark meat, beside serving dishes on a dark dinner table.
Crisp skin and juicy slices are the payoff for planning early, checking temperature and giving the turkey time to rest.
Posted on Leave a comment

Lamb Chops Recipe: How to Cook Juicy, Tender Lamb Chops

Garlic-herb lamb rib chops with dark browned crusts in a black skillet; one chop is cut open to show a warm pink center, with garlic, rosemary and pan juices around the meat.

The first minute tells you a lot about a lamb chop. It should hit the skillet with a confident sizzle. The fatty edge starts to bronze, and the broad side begins forming a crust instead of releasing a puddle of moisture into the pan.

If you do not cook lamb often, chops can feel a little unforgiving—especially when you have paid good money for them. Fortunately, most of the guesswork disappears once you know which cut you bought, how thick it is, and where to put the thermometer.

The recipe below is written for rib or loin lamb chops about 1 to 1¼ inches / 2.5 to 3 cm thick. They get a deep brown crust first, then garlic, rosemary, thyme, butter and lemon toward the end. A few minutes later, you are aiming for browned edges, juicy meat and foaming garlic butter ready to spoon over the top.

Shoulder, blade or forequarter chops need a different approach, as do chops that are unusually thin, very thick, heavily marinated or frozen. Those differences matter more than whether a recipe says three minutes or four.

Quick Answer: How to Cook Lamb Chops

For rib or loin chops about 1 to 1¼ inches / 2.5 to 3 cm thick, pat the meat dry, season with salt and pepper, and sear in a hot heavy skillet for about 3–4 minutes on the first side. Flip and begin checking the center after roughly 2 minutes; many chops need another 1–2 minutes. Cook to 145°F / 63°C in the thickest part, then rest for at least 3 minutes.

A substantial fat edge can go against the hot pan first until it browns and begins releasing clear fat. Add butter, crushed garlic, rosemary and thyme after the main crust has formed so the garlic and herbs flavor the lamb without scorching.

Thin chops need earlier checking. Very thick chops are easier to control when you brown them first and finish the center with gentler heat.

Vertical lamb chop cooking guide showing a raw chop being dried, a chop searing in a pan, a thermometer checking doneness, and a cooked chop resting. Text reads: Dry, Sear, Check, 145°F / 63°C, Rest 3 min.
Treat the clock as a reminder to look, not an instruction to keep cooking. Dry, sear, probe and rest in that order, then pull each chop when it is ready.

Garlic-Herb Lamb Chops Recipe

These are quick skillet chops, but the deep crust and garlic butter make dinner feel much more deliberate than the few minutes at the stove suggest.

Recipe at a glance

Best cutRib or loin chops
Thickness1–1¼ inches / 2.5–3 cm
Serves4
PrepAbout 10 minutes
CookAbout 25 minutes for the full cook when making two batches, including fat-edge browning where needed and the quick pan sauce
RestAt least 3 minutes
TotalAbout 38 minutes, including the minimum rest
Pan10–12 inch heavy skillet
Temperature145°F / 63°C

You will also need: sturdy tongs and an instant-read thermometer. Cast iron is excellent, but a heavy stainless-steel skillet works well too.

Ingredients

  • 8 small lamb rib chops or 4 large lamb loin chops, about 800–900 g / 1¾–2 lb total, ideally 1–1¼ inches / 2.5–3 cm thick
  • 8 g fine sea salt; weighing is especially useful with kosher salt because crystal size varies widely
  • About 1 teaspoon freshly ground black pepper
  • 15 ml / 1 tablespoon neutral high-heat cooking oil, plus more as needed between batches
  • 30 g / 2 tablespoons unsalted butter, divided between batches if needed
  • 4 garlic cloves, peeled and lightly crushed
  • 2–3 fresh rosemary sprigs
  • 4–6 fresh thyme sprigs
  • 15 ml / 1 tablespoon fresh lemon juice, for the pan sauce or finishing
  • 5 ml / 1 teaspoon Dijon mustard, optional
  • Up to 60 ml / ¼ cup unsalted or low-sodium stock or water, optional, for the pan sauce

Seasoning ahead: Salt the chops immediately before cooking, or about 45 minutes or more ahead. That avoids the awkward middle window when salt has drawn moisture onto the surface but the chop has not yet had time to dry again. For longer make-ahead preparation, refrigerate the salted chops uncovered for several hours or overnight.

How to make pan-seared lamb chops

1. Dry and inspect the chops

Do not rinse raw lamb; splashing can spread bacteria around the sink and nearby surfaces. Pat the chops thoroughly dry with paper towels and, as you do, wipe away any tiny bone fragments left on freshly cut surfaces.

Trim obvious tough, silvery membrane and unusually thick, hard or dangling pieces of exterior fat. Leave the normal softer fat edge in place so it can brown and release some of its fat into the skillet.

Take the chops from the refrigerator while you gather the ingredients and heat the pan. They do not need an hour on the counter.

Lamb chop preparation guide comparing a damp surface that steams with a dry surface that browns, with visual guidance for trimming excess hard fat while retaining useful fat.
Patting lamb chops dry does two jobs at once: it improves browning and gives you a chance to spot bone fragments, silvery membrane or hard dangling fat before the pan gets hot.

2. Season the lamb

Season both sides evenly with salt and black pepper.

Fresh rosemary, thyme and garlic can wait. They taste better after the chops have browned, when the heat is calmer and there is butter in the pan to carry their flavor.

Using marinated chops? Remove heavy clumps of yogurt, minced garlic, herbs or spice paste before they hit the skillet. A thin coating is fine; a dripping-wet one will fight you all the way to a good crust.
3. Heat the skillet

Place a heavy skillet over medium-high heat and give it time to become properly hot. Add the oil and swirl it into a thin film.

A 10–12 inch skillet usually holds four small rib chops comfortably, or fewer large loin chops. It is tempting to squeeze in one more when dinner is waiting, but crowded chops steam around the edges instead of browning cleanly. Cook another batch.

4. Brown the fat edge when there is one

Hold a chop upright with tongs and press a substantial fatty edge against the skillet for about 1–2 minutes. The edge should turn golden-brown, and you should see a little clear rendered fat collecting in the pan.

Barely any fat there? Skip it.

Metal tongs hold a raw lamb rib chop upright on its fatty edge in a black skillet while the fat begins to render and turn golden.
Think of the fat edge as a separate surface that needs its own turn against the skillet. If you ignore it, the meat can be juicy while the exterior fat remains stubbornly chewy.

5. Build the crust

Lay the chops flat with some room around each one. Start with about 3–4 minutes on the first broad side for chops around 1 inch / 2.5 cm thick.

Leave them alone long enough to brown. A properly formed crust releases more readily from the pan. A chop that still feels firmly stuck often needs another 20–30 seconds rather than being torn free.

Three-stage lamb chop searing progression showing a pale surface that is too early to turn, a partially browned surface, and a deeply browned crust ready to flip.
Use release as a clue, not force. Once the crust is properly set, the chop usually lifts more cleanly; if it still clings, give it a few more seconds instead of tearing it free.

6. Flip and start checking

Turn the chops. Start checking the thickest pieces after about 2 minutes on the second side. Many chops around this thickness need another 1–2 minutes.

Nervous about overcooking them? Check early. A thick chop can always have another minute; a dry one cannot be made juicy again.

Chops 1½ inches / 4 cm or thicker? Brown both sides, then transfer an oven-safe skillet to a 350°F / 175°C oven. Begin checking after a few minutes. Gentler heat gives the center time to catch up without pushing the crust too far.

7. Add butter, garlic and herbs

As the chops get close to temperature, reduce the heat if necessary and add the butter, crushed garlic, rosemary and thyme.

The butter should foam while the garlic and herbs become fragrant. Let the garlic turn pale golden, not dark brown. Tilt the skillet slightly and spoon the foaming butter over the lamb for about 30–60 seconds, moving the garlic and herbs through the pan as you baste.

For two batches, divide the butter, garlic and herbs between them.

Close-up of a browned lamb rib chop in a dark skillet while a spoon pours bubbling garlic-and-herb butter over the meat.
The baste works best as the handoff from searing to finishing. Once the pan calms slightly, foaming butter can carry garlic and herbs over the lamb without turning those aromatics bitter.

8. Check the thickest part

Insert the thermometer into the thickest fleshy part, keeping the sensing tip clear of the bone and large pockets of fat. With thinner chops, approaching from the side often makes the center easier to hit accurately.

Cook the chops to 145°F / 63°C. One thinner chop does not need to wait in the pan for the thickest one; remove pieces as they become ready.

Raw lamb rib chop on stainless steel with a thermometer probe entering horizontally from the side into the thickest meat. Labels identify “Thickest meat,” “Away from bone,” and “Side entry helps.”
A thermometer can be accurate and still be placed badly. Side entry helps you hit the true center, while checking lamb chops individually keeps the thinnest piece from waiting for the thickest.

9. Rest the lamb

Transfer the chops to a warm plate or rack and rest for at least 3 minutes. Cover finished chops very loosely while another batch cooks. A tight foil tent traps steam and softens the crust.

Use those few minutes to get the plates and sides ready. Get the lamb to the table while the browned edges are still hot and the garlic butter is glossy across the surface.

10. Use the browned bits for a quick pan sauce

Deep brown—not black—bits on the bottom of the skillet can become a quick sauce. A large pool of rendered lamb fat will make it greasy, so pour most of that fat away first and leave roughly a tablespoon in the pan.

Lower the heat, add the lemon juice, Dijon if using, and a splash of stock or water, then scrape up the browned bits. Those flavorful deposits are often called fond. Simmer until the liquid reduces slightly and looks glossy enough to lightly coat a spoon.

Black or bitter residue is better left alone. Skip the sauce and squeeze a little lemon over the rested chops instead.

Dark skillet guide comparing brown fond labeled “Brown → Use” with black burnt residue labeled “Black → Skip,” followed by a spoon lifting glossy brown pan sauce after deglazing.
Fond is useful only when it tastes roasted rather than burnt. Before deglazing, pour off excess lamb fat and keep the mahogany deposits; black residue is better left out of the pan sauce.

Cooking for 2, 4 or more

  • For 2: halve the lamb and seasoning. The cooking time per chop stays about the same.
  • For 4: use the recipe as written. Eight small rib chops may still require two batches.
  • For 6–8: scale the ingredients and cook more batches. More chops do not need more minutes each.

Thyme or oregano can replace rosemary. Olive oil and lemon can stand in for the butter, and water will loosen the browned bits when no stock is handy. Dijon is optional.

Changing rosemary is a substitution. Changing loin chops to shoulder chops is a change of cooking method.

Jump: Check your cut · Time by thickness · Internal temperature

Rib, Loin or Shoulder: Which Lamb Chop Do You Have?

“Lamb chop” covers several cuts, and this is where a lot of confusing cooking advice begins. Their tenderness, fat distribution and connective tissue can be quite different.

Three raw lamb cuts on a dark aubergine background: a long-boned rib chop labeled “Quick-sear,” a T-bone-shaped loin chop labeled “Quick-sear,” and an irregular multi-muscle shoulder chop labeled “Check the method.”
A curved rib bone, mini T-bone or irregular multi-muscle shoulder shape tells you more than the label “lamb chop.” Identify the anatomy first, because the cut determines which kind of heat the meat can tolerate.

What Lamb Chops Should You Buy?

For the skillet recipe above, choose rib or loin chops around 1 to 1¼ inches / 2.5 to 3 cm thick and reasonably even in size. Some soft exterior fat is useful because it can brown against the skillet. Huge hard pieces can be trimmed. Frenched bones are mainly cosmetic; they make the chop look neater but do not make it cook better.

Raw rib and loin lamb chops on a glossy blue surface with metal calipers spanning their thickness. Labels show 1–1¼ inches / 2.5–3 cm, even thickness, soft fat is useful, and Frenching is for appearance.
At the butcher counter, matching thickness across the batch matters more than cosmetic Frenching. Chops that start alike are easier to pull at the right moment without sacrificing one piece for another.

Rib chops and lamb cutlets

Rib chops have a curved rib bone and a relatively small eye of tender meat. When the exposed bone has been cleaned for presentation, they may be sold as frenched chops or lamb lollipops.

They are naturally tender and suit quick pan-searing, grilling and broiling. Small rib chops move through their cooking window quickly, so start checking early.

Double-rib chops are worth asking for when a butcher is cutting a rack to order and you want a thicker, more forgiving piece for pan-searing.

Bought the rack intact? This skillet recipe is for separated chops; cook a whole rack intact and slice it afterward.

Loin chops

Loin chops often resemble miniature T-bone steaks. They are meatier than many rib chops and work particularly well in a skillet.

Boneless loin chops use the same general approach when their thickness is similar. Their shape changes how quickly they heat through, so bone-in and boneless pieces may not finish together.

Shoulder, blade and forequarter chops

Shoulder is where “four minutes per side” starts falling apart. These chops contain more connective tissue, seams of fat and sometimes several muscles running through the same piece.

A thin shoulder chop may do well over high heat. A thick one can hit the thermometer number and still fight the knife. That is not the same failure as a dry, overcooked loin chop.

Cooking a whole leg instead? See our roast leg of lamb recipe.

How Long to Cook Lamb Chops, Based on Thickness

Once you know you have a tender rib or loin chop, thickness becomes much more useful than another generic “minutes per side” rule.

ThicknessStart withNext moveWatch for
½–¾ in / 1.25–2 cm2–3 minutes on the first sideCheck almost immediately after flippingOvercooking
About 1 in / 2.5 cm3–4 minutes on the first sideCheck at 2 minutes; many need another 1–2Going past the target
About 1¼ in / 3 cmAround 4 minutes on the first sideCheck after 2–3 minutes, then continue as neededCrust darkening before the center is ready
1½ in+ / 4 cm+Brown both broad sidesFinish with gentler heatOutside getting too dark
Four raw lamb rib chops shown from the narrow side with calipers measuring ¾ inch / about 2 cm, 1 inch / 2.5 cm, 1¼ inches / 3 cm, and 1½+ inches / 4+ cm. Cooking guidance progresses from “Check very early” to “Sear → gentler heat.”
Thickness changes the shape of the cook, not simply its length. Thin lamb chops need earlier checking, whereas very thick chops often need a shift from hard searing to gentler finishing heat.

A very thick chop does not need to stay over fierce direct heat once the crust looks right. Move to gentler heat and let the center catch up. That protects the contrast you are after: a properly browned exterior without drying the center just to get a thick chop cooked through.

Pan weight and batch size matter too. Heavy cast iron holds heat better than a thin skillet, while several cold chops cool a pan more than one or two. The table tells you when to start looking; the meat tells you when to stop.

What Temperature Should Lamb Chops Reach?

USDA whole-cut lamb benchmark: Cook lamb chops to 145°F / 63°C in the thickest part, then rest them for at least 3 minutes.

Cooked lamb rib chop with a digital thermometer inserted into the meat and a warm pink cut face visible. Large text reads “145°F / 63°C” and “Rest 3+ min.”
Use 145°F / 63°C plus a 3-minute rest as an individual finish line. If one lamb chop gets there first, remove it; a batch does not need to finish all at once.

Color or touch alone is not a reliable safety check. The USDA guidance for whole-cut lamb is the benchmark used throughout this recipe.

Why do some recipes show lower numbers? Restaurant doneness charts and the USDA benchmark are answering slightly different questions. Culinary recipes may use lower temperatures for rare or medium-rare lamb, including lower pull temperatures expected to rise during resting; the USDA figure above is the food-safety benchmark used here.

Put the probe into the thickest fleshy part and keep the sensing tip clear of bone and large pockets of fat. On a thin chop, inserting from the side often makes the center easier to hit. Once the probe is in the right place, you no longer have to guess from color, firmness or a timer.

What a Properly Cooked Lamb Chop Looks Like

Close-up of a sliced lamb rib chop with a browned exterior, warm pink interior, visible meat fibers, rendered fat and a clean bone.
A cut-open lamb chop tells you about eating quality, not safety. Look for moist fibers and rendered fat through the center; let the thermometer answer the safety question.

Why Lamb Chops Go Wrong

A chewy lamb chop does not automatically mean you cooked it badly. First notice whether the meat is dry or still juicy. Those two symptoms point to very different problems.

Four lamb chop cooking problems: a pale wet chop labeled “Gray + Wet,” a heavily blackened chop with a pink center labeled “Black Outside / Center Late,” a chop with burnt garlic and herbs, and a chop with scorched marinade.
Troubleshooting gets easier once you separate surface problems from center problems. Wet-gray meat, burnt coating and an over-dark crust each point toward a different correction rather than the same answer: more heat.
What happenedCauseNext-time fix
Tough and dryOvercooked, especially if thin or leanStart checking sooner and remove pieces individually
Juicy but chewyA connective cut such as shoulderMatch the cooking method to the cut
Black outside, center not readyToo much direct heat for the thicknessFinish the center with gentler heat
Gray and wet instead of brownedWet surface, crowded pan or insufficient heatDry the meat, heat the skillet properly and cook in batches
Garlic or herbs turned blackThey went in too earlyAdd them with the butter near the end
Wet marinade burnedToo much yogurt, garlic or spice paste remained on the surfaceRemove the excess before searing
One chop perfect, another overdoneDifferent thicknessesProbe and remove each piece separately
Meat tender, fat edge chewyThe exterior fat needed more direct heatBrown a substantial fat edge against the skillet first

Dry and Tough vs Juicy and Chewy Lamb

Done and tender are not always the same test. A rib or loin chop that is dry and tough was probably cooked too far. A shoulder chop can remain juicy yet chewy because its connective tissue has not had time to soften.

Two cooked lamb cross-sections side by side. The left is pale and dry with tight fibers, labeled “Dry + Tough — Too Far.” The right is moist with several muscle groups and connective seams, labeled “Juicy + Chewy — May Need Time.”
Two lamb chops can both be called “tough” and need opposite fixes. A dry rib or loin chop needed less cooking; a juicy, chewy shoulder chop usually needs more time under gentler, moist heat.

The meat itself varies too. Butcher trimming, the exact position of the cut, fat and connective tissue can make one batch behave differently from another. When a familiar method suddenly produces a tougher chop, recheck the cut before simply adding more high heat.

Can You Save Overcooked or Chewy Lamb Chops?

Dry, overcooked lamb will not become juicy again, but thin slices are easier to enjoy with pan sauce, yogurt sauce or another moist accompaniment. A juicy-but-chewy shoulder chop can often go back into gentle moist heat until its connective seams soften. Leave burnt garlic or black fond behind rather than scraping bitter flavors over the meat. If a pale chop has already reached temperature, do not keep cooking it only to chase a darker crust.

Lamb chop rescue guide showing dry lamb sliced and covered with sauce; a shoulder chop cooking gently in liquid; burnt garlic and fond left in a pan; and a pale but cooked lamb chop. Labels explain the corresponding rescue for each problem.
Rescue what is still fixable. Moisture and thin slicing can improve how dry lamb eats, but only connective-tissue toughness is likely to become more tender with additional cooking.

Smoke, Aroma and Spoilage: Other Lamb Chop Problems

Harsh, acrid smoke usually means something in the skillet is burning. Once the crust is established, lower the heat if necessary. Pour away a large pool of rendered fat between batches, and do not leave wet garlic or heavy marinade in the pan through the initial hard sear.

Lamb has a naturally distinctive aroma, much of it carried in the fat. For a milder result, trim an unusually heavy exterior fat layer and finish the chops with lemon, mint, parsley or yogurt.

Obviously spoiled meat should be discarded, and a normal smell or appearance cannot prove that meat is safe. If its storage history is questionable, do not use smell as reassurance.

Once you separate overcooking from connective-tissue toughness and surface problems, most lamb-chop failures become much easier to diagnose—and easier to avoid the next time you cook them.

Go to: Recipe & ingredients · Shoulder chops · Marinades · Other methods

Should You Pan-Sear or Braise Lamb Shoulder Chops?

Thin, well-marbled shoulder chops can take a fast sear. Thick chops with obvious connective seams are usually much better braised, where those chewy parts have time to soften.

For a conventional covered braise, a 325°F / 165°C oven is a useful starting point. Add enough flavorful liquid to create a shallow, moist braising environment and cover the pan.

Start checking around 1½ hours. Thick shoulder chops commonly need around 2 hours, sometimes longer. Keep cooking until a fork or knife moves through the connective seams with very little resistance.

Use the time for planning. Pull the chops when those tougher seams are genuinely tender. Hard boiling or several unnecessary extra hours can leave even softened meat dry.

Raw lamb shoulder chop with several muscle groups above a black braising pan containing a dark, tender shoulder chop being pulled apart with a fork. Text reads “Sear / Braise,” “Start checking ~1½ hr,” and “Stop when the seams soften.”
Shoulder is ready when the connective seams yield, not when the clock reaches a particular number. Start checking before the meat collapses, then stop once a knife or fork moves through those seams with little resistance.

Our Moroccan lamb tagine with apricots shows the same shoulder logic in a full slow-cooked dish.

Do Lamb Chops Need a Marinade?

No. Tender rib and loin chops do not need a marinade to become tender. Use one mainly for flavor; salt, acid and yogurt can also change seasoning and surface texture over time.

Garlic, rosemary and lemon are the simple route used here. The meat stays relatively dry while it browns, then the herbs and garlic join the butter near the end.

For Mediterranean-style chops, use oregano, garlic, lemon and olive oil. Cool Greek tzatziki sauce works naturally alongside those flavors.

Mint, parsley, lemon and olive oil make a sharper finishing sauce. Cumin, paprika and black pepper give the lamb a warmer, earthier profile. Keep sugary seasonings away from the fiercest heat because they scorch quickly.

Yogurt-spiced lamb needs a little extra care

Yogurt, ginger, garlic, cumin, coriander, garam masala and chili make a terrific base for tandoori-style or masala chops. The challenge is getting a yogurt-coated chop browned without scorching the coating.

Lift the meat from the marinade and remove thick clumps before cooking. A thin coating can stay. Yogurt and minced garlic thick enough to drip into the skillet are likely to blacken before a thick chop is ready in the center.

Two raw marinated lamb rib chops against a red background. The left has a thin speckled yogurt coating labeled “Thin coating → Browns”; the right has thick uneven yogurt clumps labeled “Heavy clumps → Burn.”
Leave flavor on the chop, not heavy pockets of marinade. A thin yogurt-spice film can brown, while thick ridges and drips are the parts most likely to blacken before the center is ready.

Reserve any marinade you plan to serve before the raw lamb goes in. If marinade has touched raw lamb, discard it or bring it to a full boil before using it as a sauce.

Marinate lamb in the refrigerator, even for a short 30-minute marinade. Thirty minutes is enough to add noticeable surface flavor to tender chops; a few refrigerated hours work well for many herb, spice and yogurt marinades. Strongly acidic mixtures left overnight can begin changing the surface texture.

Skillet, Grill, Air Fryer or Oven Finish: Which Method Fits Your Chops?

No single cooking method wins every time. Instead, start with the cut and thickness you have, then choose how much direct browning, hands-on control or gentler finishing heat the chop needs.

Lamb chop cooking-method selector beginning with raw chops and branching to four cooked examples: skillet labeled “Fast + Controlled,” grill labeled “Direct Heat + Char,” air fryer labeled “Hands-Off,” and an already-seared chop in a skillet inside an oven labeled “Thick Chops.”
Choose by trade-off: skillet for control and basting, grill for direct char, air fryer for convenience, and an oven finish when a thick center is lagging behind an already-browned crust.

Skillet and Oven Finish

For the rib and loin chops in the main recipe, skillet cooking gives the best fit. Direct contact with the pan gives you fast browning plus the option to baste with garlic and butter.

Oven finish for thick chops: useful when a very thick chop has already browned but still needs time in the center. Move an oven-safe skillet to 350°F / 175°C and start checking after a few minutes.

Grill and Air Fryer Lamb Chops

For the grill, preheat to medium-high. With rib chops around 1 inch / 2.5 cm thick, start with roughly 3–4 minutes on the first side, then flip and begin checking after about 3 minutes. Loin chops of similar thickness can fall into a similar window but are often meatier.

Keep a cooler part of the grill available because dripping lamb fat can flare suddenly. Move the chops away from fierce flame once the outside has the color you want, and cook to 145°F / 63°C. Rest at least 3 minutes. Fresh chimichurri is especially good with the smoke and char.

Air fryer: for rib or loin chops around 1 inch / 2.5 cm thick, heat the air fryer to about 375°F / 190°C and arrange the chops in a single layer. Cook for about 6 minutes, turn, then begin checking after another 4 minutes.

Many chops fall somewhere around 10–12 minutes total, but air fryers vary considerably. Continue only as needed to reach 145°F / 63°C, then rest for 3 minutes.

Next: Serving ideas · Leftovers · Back to top

What to Serve With Lamb Chops

The best sides for lamb chops include mashed or lemon-roasted potatoes, peas or green beans, tomato-cucumber salad, couscous or rice, and yogurt- or mint-based sauces.

Lamb chops are rich and deeply savory, so the easiest plates give them something comforting alongside something fresh or acidic.

Finished garlic-herb lamb chops with mashed potatoes and green vegetables on a dark plate, plus smaller pairing groups for bright sides with lemon potatoes, tomato-cucumber salad and yogurt; spiced sides with rice, mint yogurt and roasted vegetables; and quick sides with couscous and dressed greens.
A balanced lamb-chop dinner usually needs one substantial side and one fresh, sharp or cool element. That simple structure keeps rich meat satisfying without making the whole plate feel heavy.

For a classic comfort plate: serve the garlic-herb chops with creamy mashed potatoes, peas or green beans, and the warm pan juices spooned over the top.

For something brighter: add Greek lemon potatoes, tomato-cucumber salad and cool yogurt or tzatziki. Hot lamb, crisp salad and cold yogurt make a particularly good mouthful.

With cumin- or yogurt-spiced chops: basmati rice, mint yogurt and roasted vegetables work naturally. Couscous or bulgur with dressed greens is useful when dinner needs to move quickly.

Two average rib chops per person is a useful starting point when there are substantial sides. Large loin chops are meatier, so look at the amount of meat rather than simply counting bones. By weight, about 8 oz / 225 g raw bone-in lamb per person is a practical starting point; bone size and appetites vary.

Leftover Lamb Chops

Refrigerate leftover lamb within 2 hours of cooking and use it within 3–4 days. When the surrounding temperature is above 90°F / 32°C, refrigerate it within 1 hour. USDA recommends reheating leftovers to 165°F / 74°C.

To reheat whole lamb chops without drying them out: place them in a small baking dish with a splash of stock, water or leftover pan sauce. Cover with foil and warm in a 350°F / 175°C oven. Start checking after about 10 minutes and continue only as needed until heated through to 165°F / 74°C.

Sliced or chopped leftovers are often easier to warm gently than a whole chop. Tuck the meat into flatbread with yogurt and greens, or scatter thin slices over rice, couscous or a sharply dressed salad.

Three-stage leftover lamb chop guide. A cooked chop rests in a cool stainless setting, then reheats gently in a covered pan with a small amount of liquid at 165°F / 74°C, and finally appears sliced beside couscous, tomatoes, greens and yogurt sauce.
Leftover lamb chops are easier to protect than to restore. Reheat whole chops gently with a little moisture, or slice them into a new dish so the meat spends less time heating again.

Cooked lamb can also be frozen. A little sauce or cooking juice helps protect it during reheating; for best quality, use frozen cooked lamb within about 2–3 months.

Jump: Recipe & ingredients · FAQs · Back to top

Frequently Asked Questions

1. Can lamb chops still be pink when they are cooked?

Yes. Color alone does not reliably tell you internal temperature. Cook whole-cut lamb chops to 145°F / 63°C in the thickest part and rest them for at least 3 minutes.

2. Should lamb chops come to room temperature before cooking?

No long counter rest is necessary. Take the chops from the refrigerator while you prepare the ingredients and heat the skillet. A dry surface, thickness and internal temperature matter much more.

3. Can you cook lamb chops from frozen?

Yes, but the skillet timings in this recipe are written for thawed chops. Refrigerator thawing gives you a drier surface and more predictable browning. As a planning rule, meat cooked from frozen can take about 50% longer, although chop thickness and cooking method still matter. Chops thawed in cold water or in the microwave should be cooked promptly afterward. Never thaw raw lamb on the counter.

4. Can I use boneless lamb loin chops?

Yes. Use the same general skillet method and match the chops by thickness where possible. Boneless pieces can differ in shape and may finish sooner or later than bone-in chops, so begin checking rather than relying on the bone-in timing alone.

5. Are lamb chops and mutton chops the same?

Not necessarily. In standard meat terminology, lamb comes from a young sheep, while mutton comes from a mature sheep. In India and parts of South Asia, “mutton” is also commonly used for goat meat.

Check what animal and cut you actually bought before using quick lamb-chop timings. Goat chops, mature-sheep chops and tender lamb rib or loin chops can behave quite differently in the pan.


Serve the chops while the crust is still hot and the garlic butter is glossy.

Close-up of a French-cut lamb rib chop on a glossy black surface with a dark browned herb crust, rendered golden fat, clean bone and a warm pink center with visible meat fibers; one slice rests beside the chop in pan juices.
The strongest success cues travel from one batch to the next: an irregular crust, rendered edge fat and moist fibers through the center. Once those become familiar, problems are easier to spot early and correct while you still can.

Next time, look at the cut and thickness before you look at the clock. Most of the mystery disappears from there.

Recipe & ingredients ↑ · Back to top ↑

Posted on Leave a comment

Stuffed Acorn Squash Recipe – Sausage, Apple, Wild Rice & More

Two roasted acorn squash halves filled with browned sausage, wild rice, green Granny Smith apple, toasted pecans, herbs and Parmesan on a dark serving surface.

Acorn squash is slow; the filling isn’t. The trick with a good stuffed acorn squash recipe is getting those two timelines to meet. A half can look beautifully browned from above while the flesh underneath is still stubbornly firm. Leave everything in long enough for the squash to catch up and the sausage cooks twice, exposed rice dries around the edges, and the apple slowly disappears into the stuffing.

So most of the cooking happens before anything gets stuffed. The squash gets a head start in the oven while the sausage browns in the skillet. Wild rice goes in already tender, and the apple waits until near the end.

This version fills the roasted halves with mild Italian sausage, wild rice, Granny Smith apple, onion, celery, sage, thyme, toasted pecans and Parmesan. Wild rice has enough chew to stand up to the soft squash, the tart apple cuts through the sausage, and pecans keep a bit of crunch. Parmesan catches on exposed rice and sausage and browns in salty little patches.

Maple syrup and brown sugar aren’t required. This version stays savory, with cider vinegar, black pepper and herbs keeping the naturally sweet squash in balance. With a sharp salad or something green alongside, one stuffed half is plenty for dinner.

Jump to: Recipe · Filling ideas · Thanksgiving · Make ahead · Troubleshooting


Sausage, Apple & Wild Rice Stuffed Acorn Squash Recipe

The squash should give easily under a fork without collapsing. The filling should be moist and loose enough to mound, with browned sausage, tender rice and pieces of apple you can still pick out.

Yield4 main-course servings or 6–8 smaller holiday-side portions
Active time25–30 minutes
Elapsed totalAbout 70–85 minutes; much of the filling work overlaps the first roast
Initial roast30–45 minutes
Final bake12–15 minutes
Oven400°F / 205°C conventional / about 185°C fan
Squash size2 similar squash, ideally around 1¼ lb / 570 g each
Make aheadUp to 1 day

Starting with dry wild rice? Put it on before prepping the squash; package timings vary, and you need 1½ cups cooked. Much of that cooking time overlaps the first roast. For ordinary rice, this guide to cooking rice covers several varieties and methods.

Ingredients

  • 2 medium-large acorn squash, ideally about 1¼ lb / 570 g each; 1–1½ lb / 450–680 g each works
  • 1 tablespoon / 15 ml olive oil for the squash, plus extra if the skillet looks dry
  • ½ teaspoon fine salt for the squash, plus more after tasting
  • Freshly ground black pepper, to taste
  • 12 oz / 340 g mild pork Italian sausage, bulk or casings removed
  • 1 small yellow onion, cut into ¼-inch / 6-mm dice
  • 2 celery ribs, finely diced
  • 2 garlic cloves, minced
  • 1 teaspoon dried sage
  • ½ teaspoon dried thyme
  • 1 medium Granny Smith apple, cored and cut into ¼–⅜-inch / 6–10-mm dice; peel it for a softer filling
  • 1½ cups cooked wild rice or cooked wild-rice blend
  • ⅓ cup / about 40 g toasted pecans, roughly chopped
  • 2 teaspoons / 10 ml apple cider vinegar, plus more as needed
  • ½ cup / about 55 g finely grated Parmesan, divided
  • ⅓ cup / about 40 g dried cranberries, optional
  • Fresh parsley, sage or thyme for finishing, optional

Wait before adding extra salt. Italian sausage and Parmesan vary quite a bit, and rice cooked in broth may already bring salt of its own.

Equipment: a stable cutting board, sharp chef’s knife, sturdy spoon, large rimmed baking sheet, parchment, wide spatula or turner, large skillet, and a saucepan if you’re starting with dry rice.

Ingredient arrangement with browned sausage, wild rice, Granny Smith apple, cider vinegar, pecans, Parmesan and herbs for stuffed acorn squash filling.
In an acorn squash filling, sequence matters as much as the ingredient list. Aromatics need time to soften, apple needs much less, and pecans only need warming; treating them alike is how distinct textures disappear.

How Long to Roast Acorn Squash at 400°F

For acorn squash around 1¼ lb / 570 g each, start checking after 30 minutes at 400°F / 205°C. Most need 30–45 minutes before stuffing. A fork should slip easily into the thickest flesh while the shell remains sturdy enough to hold the filling.

How to Make Stuffed Acorn Squash

Start the Rice and Roast the Squash

  1. Cook the wild rice if needed. Follow the package until the grains are tender all the way through, then measure 1½ cups cooked. There shouldn’t be a hard center left in the grain.
  2. Heat the oven. Preheat to 400°F / 205°C conventional / about 185°C fan. Line a large rimmed baking sheet with parchment.
  3. Cut, scoop and steady the squash. Set one dry squash on a board that will not slide and cut it lengthwise with a sharp chef’s knife. Work around the woody stem when it resists, then scoop out the seeds and stringy center.

    For a particularly hard rind, pierce the squash several times and microwave it for 1–2 minutes. Let it cool enough to handle before cutting. If a half rocks when placed cut-side up, shave a very thin piece from the rounded base so it sits securely.
Acorn squash being stabilized, carefully cut around the hard stem, opened, seeded and steadied on a cutting surface.
A stable base helps twice: it makes the squash easier to control under the knife and later keeps the filled half level, so the filling stays where you mound it.
  1. Season and roast cut-side down. Brush the flesh with the olive oil and season with the ½ teaspoon salt and black pepper. Set the halves cut-side down on the parchment-lined tray.

    Begin checking at 30 minutes. A fork should slip easily into the thickest part of the flesh. Take out any half that finishes ahead of the others; similar-looking squash don’t always cook at the same speed.

    Thirty minutes tells you when to pick up the fork. The fork tells you when the squash is ready.
Roasted acorn squash shown cut-side down, then turned over as a fork tests the thick orange flesh for tenderness.
Check the thick shoulder, not only the thin rim. If a fork slips easily near the cavity but still meets resistance farther out, the squash can look ready while its densest flesh remains underdone.

Brown and Balance the Filling

  1. Brown the sausage while the squash roasts. Heat a large skillet over medium heat. Add the sausage, break it into small crumbles and leave it alone for short stretches so the edges brown. Cook pork sausage to 160°F / 71°C, in line with USDA safe-temperature guidance.

    Spoon off any standing pool of fat, leaving enough to lightly coat the skillet. If the pan looks dry—especially with a leaner sausage—add about 1 teaspoon olive oil before the vegetables.
  2. Add the onion, celery, herbs and apple. Cook the onion and celery with the sausage for 5–7 minutes, until softened and beginning to color. Add the garlic, sage and thyme and cook for 30–60 seconds. By now the skillet should smell unmistakably of browned sausage, onion and sage.

    Add the apple and cook for another 2–3 minutes. Its edges should soften while the pieces remain distinct.
  3. Finish the filling. Fold in the cooked wild rice, pecans, cider vinegar, about three-quarters of the Parmesan and the cranberries, if using. Let everything heat through.

    Glossy is good; puddled is not. Drag a spoon across the skillet. The filling should look moist without liquid immediately flooding the cleared path. Cook another minute uncovered if it is wet; add a small splash of broth or olive oil if it looks dry.

    Taste for salt first. If the sausage and rice still taste heavy or dull, add cider vinegar about ½ teaspoon at a time. Stop when the filling tastes brighter; the vinegar itself shouldn’t stand out. Finish with black pepper as needed.
Side-by-side comparison of glossy sausage, wild-rice and green-apple filling with controlled moisture versus watery filling with visible liquid pooling.
Excess liquid is easiest to fix in the skillet. Reduce it before stuffing; otherwise the filling steams instead of browning, and the exposed grains lose definition.

Fill, Bake and Rest

  1. Check the squash. Turn the roasted halves cut-side up with a wide spatula or turner. A fork should pass easily through the thickest flesh. Give a firmer half another five minutes if it needs it. Taste a little warm squash and season it again if the flesh seems flat.
  2. Fill the halves. Spoon the filling into the cavities and mound it generously above the rim. A medium-large half takes around 1–1½ cups, though the space inside each squash will vary. Save any extra filling for another meal.

    For an unusually tight cavity, scoop out 1–2 tablespoons of cooked squash and fold it into the filling.
  3. Bake for another 12–15 minutes. Sprinkle over the remaining Parmesan, concentrating some on the exposed rice and sausage. Return the squash to the oven until the center is hot, the cheese has browned in spots and a few grains around the top are starting to crisp. If the top is still pale once the middle is hot, broil for 1–2 minutes.
Three-stage view of filling loosely mounded into roasted acorn squash, baked until hot, then briefly broiled for browned exposed edges.
Keep the mound irregular rather than smoothing it flat. Those peaks catch more heat, so rice, sausage and Parmesan brown at different rates and give the top a mix of crisp and tender.
  1. Rest for 5 minutes. Scatter over fresh parsley, sage or thyme if using. Push the fork through the sausage and rice into the squash underneath. The best bite has chewy grain, tart apple, browned sausage and soft squash together.
Close-up forkful containing orange acorn squash flesh, browned sausage, wild rice, green apple, pecan and Parmesan.
A five-minute rest lets the filling settle and the Parmesan firm slightly, so a forkful holds together more easily with the squash underneath.

Cooking for two? Use 1 squash and halve the remaining ingredients. The roasting time for that squash stays the same.

Want to adapt it? Filling ideas · Thanksgiving version · Make it ahead
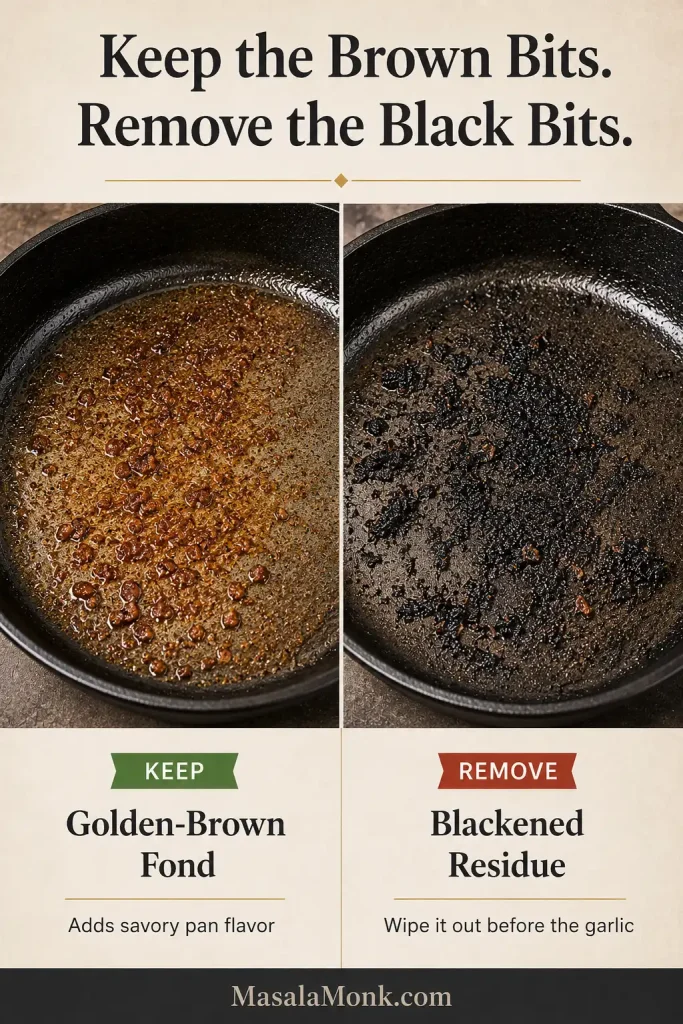

Build the Filling

Plan on 2–3 cups of filling per medium squash—around 1–1½ cups per half. Some squash simply have more room than others.

When you change the filling, keep the contrasts that make the original work: something hearty, a cooked grain, aromatics, a tart note and some crunch. You don’t need to copy every ingredient exactly.

RoleGood choices
Hearty elementPork sausage, turkey/chicken sausage, seasoned ground poultry, or mushrooms + lentils/chickpeas
GrainWild rice, ordinary rice, farro, quinoa, barley or prepared stuffing
AromaticsOnion, celery, garlic and herbs
Acid or tartnessGranny Smith apple, cider vinegar, lemon or cranberries
CrunchPecans, walnuts or pepitas
Savory depthParmesan-style cheese, feta, tamari or nutritional yeast

How to Keep It Savory

The easiest way to stop the squash drifting too sweet is to balance its natural sweetness. Parmesan adds salt and savoriness; sage, thyme and black pepper push the filling further toward the savory side. Cider vinegar is especially helpful when sausage and rice taste rich but dull: add a little until the flavor lifts without tasting distinctly of vinegar.

Savory stuffed acorn squash with sausage, wild rice, green apple, pecans and herbs beside cider vinegar used for seasoning balance.
Salt and acid solve different problems. If the filling tastes muted, check the salt first. If it is already seasoned but still feels heavy, a little cider vinegar is the smarter adjustment.

Dried cranberries are optional. If the rest of dinner already includes something sweet—such as honey- or maple-roasted carrots—leave them out and keep maple syrup for anyone who wants a drizzle at the table.

Best Grains for the Filling

Wild rice remains the first choice for this filling. The easiest substitution is 1½ cups cooked brown or white rice, particularly when you already have some left over.

Farro is worth using when you want a firmer, nuttier bite. Quinoa makes the filling noticeably softer, so keep the pecans or pepitas. Barley gives it more of the cohesive feel of traditional stuffing. Whatever grain you choose, cook it before it goes into the squash.

Cooked wild rice, regular rice, farro and quinoa displayed separately to compare grain textures for stuffed acorn squash.
Wild rice and farro stay more distinct after the final bake, while quinoa blends into the soft squash. With softer grains, pecans or pepitas matter more for contrast.

Vegetable, Meat, Cheese & Crunch Swaps

Mushrooms are the vegetable addition that contributes the most savory flavor here. Give them enough skillet time for their water to cook away and the edges to brown. Kale can cook with the onion and celery; baby spinach only needs a quick wilt near the end. For a vegetable-heavy filling, reduce the cooked rice from 1½ cups to around 1 cup, or expect some filling left over.

The closest meat substitution is 12 oz / 340 g turkey or chicken Italian sausage. Very lean sausage may need a teaspoon or two of olive oil in the skillet. Cook poultry sausage to 165°F / 74°C.

Plain ground turkey or chicken works in the same quantity, but it needs the seasoning the sausage would have supplied. Add the sage and thyme as written, a pinch of fennel seed, black pepper and about ½ teaspoon fine salt. Wait until the rice and cheese are mixed in before deciding whether it needs more salt. A little olive oil helps very lean poultry brown without drying out.

Parmesan is still the best fit for the main recipe because it browns on the exposed grains without making the filling overly cheesy. Gruyère melts more deeply into the rice, while feta gives a meatless version a sharper edge. Walnuts can replace pecans, and toasted pepitas are the simplest nut-free option.

Vegetarian and Vegan Variations

For a meatless version, brown 8–10 oz / 225–285 g mushrooms well and add 1 cup cooked lentils or chickpeas. Choose cheese explicitly labelled suitable for vegetarians, whether that’s a hard Parmesan-style cheese or feta.

For a vegan version, keep the mushrooms and legumes, skip the cheese and start with 1 tablespoon low-sodium tamari plus 2 tablespoons nutritional yeast. Taste once the rice is mixed in. Add 1 tablespoon olive oil if the filling seems dry, and adjust the tamari only after tasting because it is already salty.


Stuffed Acorn Squash for Thanksgiving

This stuffed acorn squash recipe is especially useful at Thanksgiving because the long roast can happen the day before, leaving only the short finishing bake when the oven is busiest.

Several browned stuffed acorn squash halves with sausage, wild rice, green apple, pecans, Parmesan and a restrained amount of cranberries on a holiday platter.
A restrained amount of cranberry gives the Thanksgiving version bright color and occasional tart-sweet bites without pushing the whole filling toward sweetness.

Keep the cranberries and pecans if you want more tart fruit and crunch on the holiday table, or replace some or all of the wild rice with prepared savory stuffing. Cornbread dressing fits especially well with the sage, onion and celery.

If you’re using leftover turkey, soften the onion and celery first, then add chopped cooked turkey near the end so it only needs to warm through. Expect to need a little more olive oil, sage, black pepper and salt because cooked turkey brings less fat and seasoning than Italian sausage.

Serve cranberry sauce alongside. A spoonful of cranberry sauce with orange juice gives the plate tart-sweet contrast without loosening the rice filling.

Once browned, the filled halves look at home among the rest of a holiday spread. A whole half is substantial enough for a main; when the squash is one of several side dishes, four large halves can be divided into 6–8 smaller portions. Spoon filling together with the squash underneath so each serving gets both.

Planning the rest of the meal? Make it ahead · What to serve with it · Storage & reheating


Make Ahead, Serving & Leftovers

Can You Make Stuffed Acorn Squash Ahead?

Yes. You can make this stuffed acorn squash recipe up to one day ahead. For the best texture, cool the roasted squash and filling separately, then cover and refrigerate them.

When you’re ready to serve, fill the chilled halves and bake at 400°F / 205°C for 15–25 minutes, until the center reaches 165°F / 74°C. Cover the top loosely with foil if it browns before the middle is hot.

Make-ahead workflow showing roasted squash and cooked filling stored separately, then assembled the next day and baked until the center reaches 165°F or 74°C.
Cold filling needs longer to heat through than a same-day filling. Keep the mound loose and cover the top if it browns early, giving the center time to catch up.

What to Serve With Stuffed Acorn Squash

Bright, crisp sides keep a sausage-stuffed half from feeling too heavy. Try a lemony salad or cabbage slaw for acidity; roasted Brussels sprouts or green beans add a firmer green contrast; sautéed kale, chard or spinach keeps a weeknight plate lighter.

Meanwhile, a sharp vinaigrette makes the next forkful of sweet squash, sausage and browned Parmesan taste brighter.

One sausage-and-wild-rice stuffed acorn squash half on a deep blue plate beside a fresh, crisp green salad with vinaigrette.
A sharp salad works best as contrast on the side. Dress the greens just before serving so their crispness and acidity stay intact beside the soft squash and rich filling.

If another side is going into the oven at the same time, something that cooks comfortably around 400°F keeps the meal simpler. At Thanksgiving, the squash also sits naturally beside green bean casserole, dressing and potatoes.

Storage, Reheating & Freezing

Refrigerate: get leftovers into the refrigerator within 2 hours and keep them covered for 3–4 days. These timings follow USDA leftovers guidance.

Reheat in the oven: place the squash in a baking dish, add a small splash of water or broth to the dish around the squash if the filling looks dry, and cover loosely with foil. Warm at 350°F / 175°C until the center reaches 165°F / 74°C. Uncover near the end if you want the top to dry and brown again.

Stuffed acorn squash stored in a covered container, then reheated under foil at 350°F or 175°C until the center reaches 165°F or 74°C before uncovering.
When reheating stuffed acorn squash, add broth or water around the base rather than pouring it over the filling. Cover first so the moisture circulates; then uncover briefly to revive the browned surface.

Microwave: place one portion in a microwave-safe dish, add a teaspoon or two of water if the filling looks dry, and cover loosely. Heat in 60–90 second bursts, turning or repositioning the squash between bursts, until the center reaches 165°F / 74°C. The squash will be softer than oven-reheated leftovers.

Freeze: assembled halves can be frozen, but cooked squash loses some firmness after thawing. Aim to use them within 2–3 months. For better texture, freeze extra filling on its own and roast fresh squash when you need it.


Stuffed Acorn Squash Troubleshooting

Most problems come back to one of three things: the squash needed more time, the skillet held too much or too little moisture, or the stuffed halves stayed in the oven too long.

Troubleshooting graphic showing hard squash flesh, coarse stringy flesh, watery filling and dry filling, with a corrective action for each problem.
Hard flesh points first to under-roasting; coarse stringiness can mean undercooking or an older squash; pooled liquid belongs back in the skillet; dry filling usually needs moisture or a shorter final bake.

Squash and Filling Problems

ProblemWhat to do
Squash is still hardCover the filling loosely with foil and keep roasting until a fork slips into the flesh. Next time, let the squash reach that point before filling.
Squash collapsedIt went too far during the first roast. Pull the halves once the flesh is soft but the rind can still support them.
Filling tastes good, squash tastes blandThe flesh underneath needed more seasoning. Salt it before roasting, then taste a little warm squash before filling.
Filling is greasySpoon excess sausage fat from the skillet after browning. Leave enough to coat the vegetables, but no standing pool.
Filling is dryAdd a splash of broth or olive oil. Lean meat, too much grain or a long final bake can all pull moisture from the filling.
Filling is wateryKeep cooking it uncovered. Apple, vegetables and sausage can all release liquid. The spoon-path test should leave a glossy skillet without liquid flooding the gap.
Dish tastes too sweetLeave out the cranberries and bring the filling back with black pepper, Parmesan, herbs and a little more cider vinegar.
Filling tastes flatCheck the salt first. If it is seasoned but still feels heavy or dull, add cider vinegar in small amounts until the flavors brighten.
Apple disappearedThe flavor will still be fine. Next time, give the apple only 2–3 minutes in the skillet.

Grain, Browning and Leftover Problems

ProblemWhat to do
Rice is hardIt went in undercooked. Wild rice, ordinary rice, quinoa, farro and barley should be tender before assembly.
Exposed grains are dry or crunchyThe stuffed squash baked too long, or the grain was already firm. Once the center is hot and the top has browned, take it out.
Top will not brownOnce the middle is hot, finish it for 1–2 minutes under the broiler.
Frozen leftovers are soft or wateryThat is a normal texture change from freezing cooked squash. Freeze the filling separately next time if texture matters most.

Why Is the Squash Stringy?

Check the doneness first. Undercooked squash can feel fibrous because the flesh still resists the fork. If it is fully tender yet unusually dry, coarse and stringy throughout, the squash itself may be older or lower quality. Firm squash that feel heavy for their size are a better starting point.

What if It Tastes Extremely Bitter?

Stop eating it. An intensely, abnormally bitter squash isn’t something to fix with maple syrup or seasoning. Poison Control advises spitting out very bitter squash and discarding the rest because elevated cucurbitacins can be responsible. Cooking does not make that problem safe.

Stuffed Acorn Squash FAQs

1. Can You Eat Acorn Squash Skin?

Yes. Cooked acorn squash skin is edible, but you don’t have to eat it. Some skins soften nicely; others remain fairly chewy. Eat it if you like the texture, or scoop the soft flesh away from the rind as you would with a baked potato.

2. Can I Use Butternut, Carnival or Kabocha Squash?

Yes. Carnival squash is the closest substitute. Butternut and kabocha vary more in shape, thickness and density, so use tenderness as your guide. The flesh should be nearly tender before the filling goes in.

3. Can I Use Prepared Stuffing Instead of Wild Rice?

Yes. Start with 1½ cups prepared, already-moistened stuffing in place of the 1½ cups cooked wild rice. Add more only if the filling needs it and your squash have room. Don’t add dry stuffing mix and expect it to hydrate during the short final bake. Taste before adding more salt because prepared stuffing may already be well seasoned. Savory herb stuffing or cornbread dressing both work naturally with the sausage, apple and sage.

If the squash is tender and the filling tastes right before assembly, the final bake only needs to heat everything through and brown the top.

Cook it now: Back to the recipe · Back to the top

Posted on Leave a comment

Moroccan Lamb Tagine Recipe With Apricots

Finished Moroccan lamb tagine in a dark serving pot with braised lamb shoulder, plump dried apricots, toasted almonds, cilantro and glossy brown sauce.

A good lamb tagine announces itself before anyone takes a bite. Lift the lid and you get spice, lamb and fruit; press a fork into the meat and it gives without collapsing; spoon through the pot and the sauce clings instead of running like broth.

This Moroccan lamb tagine gets there with shoulder, onions, fragrant spices and a deliberately modest amount of braising liquid. The dried apricots wait until the lamb is almost tender, so they can soften in the sauce without spending hours dissolving into it.

Sweetness stays in the background. Most comes from the apricots, while lemon sharpens the sauce at the end. Honey is optional, and worth adding only after you taste the pot.

You don’t need a traditional tagine pot, either. A heavy Dutch oven or covered casserole handles the long braise beautifully, and the method leaves room for the reality that one shoulder, lid or oven rarely behaves exactly like another.

Quick Answer: How to Make Moroccan Lamb Tagine

Brown 1 kg / 2.2 lb lamb shoulder, soften the onions and briefly cook the spices. Add 350 ml / about 1½ cups stock or water and braise covered at 180°C / 160°C fan / 350°F until nearly tender. Add the dried apricots for about 25 minutes. Once the lamb is tender, reduce the sauce only if it needs it, then finish with lemon, toasted almonds and fresh cilantro.

Close-up spoonful of tender braised lamb, softened apricot and glossy tagine sauce with almonds, herbs and a little lemon zest.
A finished bite should bring the lamb, apricot and sauce together at once: tender meat, soft fruit, a glossy coating and a little almond crunch. That is the texture and balance the recipe is working toward.

Moroccan Lamb Tagine Recipe With Apricots

Tender lamb shoulder braised with warm spices and dried apricots, brightened with lemon and finished with toasted almonds and fresh cilantro.

Jump to Ingredients · Jump to Instructions · Recipe at a Glance

Recipe at a Glance

Serves5 servings; up to 6 with generous bread, grain and sides
Prep time25 minutes
Cook timeUsually 2½–3¼ hours; particularly firm shoulder may take longer
Total timeAbout 3–3¾ hours, with extra time possible for firmer lamb
Oven180°C / 160°C fan / 350°F
Best potHeavy 24–26 cm / about 9½–10¼-inch Dutch oven or similar covered casserole
DonenessA fork enters the lamb easily and the meat yields while remaining in chunks

This is a patient recipe, not a complicated one. Most of the active work happens while you brown the lamb and build the onion-and-spice base; the oven handles the long middle. Keep a little extra hot water or stock nearby in case your pot loses moisture quickly.

No marinating is required. Seasoning before browning and the long braise give the lamb plenty of time with the spice base, so you can start this recipe the day you plan to eat it.

Ingredients

For the Lamb and Braise

  • 1 kg / 2.2 lb trimmed boneless lamb shoulder, cut into roughly 4 cm / 1½-inch pieces
  • 8 g fine salt (about 1¼ teaspoons; weighing is more reliable), plus more to taste
  • 2 tablespoons / 30 ml olive oil or neutral cooking oil
  • 350 g / 12 oz onions, thinly sliced
  • 5 garlic cloves, finely chopped
  • 25 g / about 1½ tablespoons tomato paste
  • 350 ml / about 1½ cups low-sodium chicken stock or water, plus more only if needed

Spices

  • 2 teaspoons ground cumin
  • 2 teaspoons ground coriander
  • 1 teaspoon ground ginger
  • 1 teaspoon ground turmeric
  • ½ teaspoon freshly ground black pepper
  • 1 teaspoon sweet paprika
  • ⅛–¼ teaspoon cayenne pepper, optional
  • 1 medium cinnamon stick
  • Small pinch saffron threads, optional; bloom for 10 minutes in 30 ml / 2 tablespoons taken from the measured stock or water

Apricots and Finishing Ingredients

  • 180 g / about 6¼ oz dried apricots; halve very large ones
  • 1 lemon, finely grated zest plus 1–2 tablespoons juice, to taste
  • 1–2 teaspoons honey, optional
  • 50 g / about 1¾ oz sliced or slivered almonds
  • Small handful fresh cilantro (coriander leaves), roughly chopped

Ingredient Notes

  • Water or stock: water works beautifully here. The lamb, onions and spices build plenty of flavor as they braise, so stock is optional rather than something you need to buy specially. With well-seasoned stock, reduce the initial salt to about 5–6 g and adjust near the end.
  • Ras el hanout: use about 1½–2 tablespoons in place of the cumin, coriander, ground ginger, turmeric, paprika, black pepper and cayenne. Begin at the lower end with a potent blend. Omit the cinnamon stick if the blend is already cinnamon-heavy, and account for any added salt.
Dark editorial ingredient arrangement labeled savory base, warm spice, fruit and finish, showing the main flavor layers used in lamb tagine.
Instead of treating lamb tagine spices as one long list, think about what each layer contributes. The onion base creates savory depth, warm spices fill the aroma, dried fruit changes the middle of the bite, and the final lemon, herbs and almonds provide contrast. Complexity comes from those layers working in sequence, not from simply adding more spice.

Instructions

Prepare and Brown the Lamb

  1. Heat the oven. Heat to 180°C / 160°C fan / 350°F.
  2. Prepare the lamb. Trim away large hard deposits and seams of exterior fat, leaving the marbling within the shoulder. Cut into roughly 4 cm / 1½-inch pieces, pat dry and season with the measured salt.
Raw lamb shoulder being trimmed, with labels showing hard exterior fat to remove, marbling to keep and pieces cut to about 4 cm or 1½ inches.
With lamb shoulder for tagine, the biggest cubes effectively set the cooking clock. Keep the main pieces in roughly the same size family so one of the larger ones becomes a trustworthy tenderness benchmark later. Smaller scraps soften sooner and can make the pot appear ready before the substantial pieces have finished braising.
  1. Brown in batches. Heat the oil in the Dutch oven over medium-high heat. Brown the lamb in about three batches, roughly 3–4 minutes per batch. Give the pieces room to make good contact with the pot and turn them only once or twice. A few deep brown patches are enough; every surface does not need to be perfect. Transfer the lamb to a plate.
Three lamb pieces in a dark pan labeled too pale, enough and too dark, showing different levels of browning before braising.
When browning lamb for tagine, watch the bottom of the pot as well as the meat. Brown fond will loosen into the onions and eventually deepen the sauce; blackened residue brings bitterness instead. Between batches, meanwhile, give the pot a moment to recover its heat so the next pieces brown rather than release enough moisture to steam.

Build the Flavor Base

  1. Soften the onions. Reduce the heat to medium. Add the onions and cook for 7–8 minutes, scraping up the browned bits, until soft and beginning to turn golden. Deep caramelization isn’t necessary.
  2. Build the spice base. Add the garlic and cook for about 30 seconds. Stir in the cumin, coriander, ground ginger, turmeric, paprika, black pepper and cayenne, if using. Cook for 30–45 seconds, just until fragrant. Move on before the spices darken rapidly or smell acrid. Add the cinnamon stick and tomato paste and cook for another minute.
Soft onions, garlic, tomato paste, ground spices and a cinnamon stick cooking in a dark Dutch oven before the lamb and braising liquid are added.
A useful cue for the lamb tagine spice base is when it stops looking like separate ingredients. The ground spices lose their dusty appearance, the tomato paste blends into the onions, and the whole mixture becomes cohesive and glossy. Once that happens, add the liquid rather than extending the frying simply because the clock says you can.

Start the Braise

  1. Add the lamb and liquid. Return the lamb and any juices to the pot. Pour in the measured stock or water, including the saffron infusion if using, and bring to a gentle simmer. The liquid should sit around the meat and reach only partway up the pieces.
  2. Cover and braise for 60 minutes. Transfer the covered pot to the oven. The sauce will look loose at this stage. Leave it alone for now.
  3. Look at the moisture. Lift the lid after an hour. There should be sauce around the lamb and no dry, frying patches around the bottom edge. If the bottom is drying, add 60 ml / ¼ cup hot water or stock. Add up to another 60 ml / ¼ cup only if the pot still looks genuinely dry. Cover and cook for another 30 minutes.
Two braising stages showing lamb with liquid partway up the meat at the start and sauce still visible after cooking, with a note to add hot liquid only if drying.
For lamb tagine braising liquid, use the bottom edge of the pot as your warning zone. The upper surfaces of the meat can remain exposed; what matters is that the base stays moist rather than dry and frying. A broad casserole will reach that point faster than a snug Dutch oven, so pot geometry matters as much as the starting quantity.

Test Tenderness and Add the Apricots

  1. Test the lamb. Push a fork into one of the largest pieces. Clear resistance means more covered cooking. Continue in 15-minute intervals until the fork enters fairly easily and the meat keeps its shape.
Side-by-side fork test of braised lamb labeled resists and yields, showing firm cooked meat compared with tender meat whose fibers open slightly while staying intact.
The target for braised lamb tenderness sits between two obvious extremes: no stubborn resistance, but no shredding on contact either. A fork should enter with little effort while the chunk keeps enough structure to reach the plate intact. Falling-apart meat can be delicious, but it is already beyond the texture this particular lamb tagine is aiming for.

Check the Finished Texture

  1. Add the apricots. Stir in the dried apricots, cover and cook for 25 minutes. While they cook, toast the almonds in a dry frying pan over medium heat for 2–4 minutes, tossing often, until lightly golden and fragrant. Tip them onto a plate immediately.
A hand adding dried apricots to nearly tender braised lamb, with instructions to add the apricots near the end and cover the pot for 25 minutes.
Once dried apricots are softening in lamb tagine, handling becomes as important as timing. Stir only as much as necessary and move the fruit gently through the sauce; plumped apricots break much more easily than dry ones. Keeping them intact preserves little pockets of fruit rather than distributing all their sweetness through the entire pot.
  1. Know when to stop. Test one of the largest pieces of lamb and an apricot. The lamb should yield easily without collapsing; the apricots should be soft and full. If the lamb still resists, cover and continue in 10–15-minute intervals. If the apricots reach the texture you want before the lamb does, lift them onto a plate and return them later.
  2. Finish the sauce. If the lamb and apricots are ready and the sauce already lightly coats them, leave it alone. For a very brothy pot, lift the lamb and apricots onto a warm plate and reduce the sauce uncovered for 5–15 minutes, then return everything briefly to coat and heat through. Loosen an over-reduced sauce with hot water or stock, 30–60 ml / 2–4 tablespoons at a time. Mash two or three apricots into the sauce if you want it slightly thicker and fruitier.
Three spoonfuls of tagine sauce labeled brothy, ready and too tight, showing progressively thicker sauce textures.
The spoon gives a clearer lamb tagine sauce test than the busy surface of the pot. Brothy sauce runs off almost immediately; ready sauce leaves a thin glossy film before sliding away; over-reduced sauce sits heavily and starts to mound. That movement tells you more about concentration than color alone.

Season and Serve

  1. Season. Remove the cinnamon stick and skim excess surface fat. Check the salt first, then add lemon juice to taste. Taste before reaching for honey; the apricots may already have given you enough sweetness. Start with 1 teaspoon if you want more.
  2. Serve. Add the lemon zest, fresh cilantro and toasted almonds. Stir gently and serve hot.

Scaling up: use a larger pot as well as more ingredients. Let the liquid level around the lamb guide the extra stock or water; braising liquid rarely scales neatly with the meat.


How to Read the Pot as It Cooks

The recipe gives you the timetable. The pot tells you when that timetable needs changing.

Cooking guide showing lamb braising moisture, a fork testing tenderness and sauce coating a spoon, labeled moisture, tenderness and sauce.
Think of moisture, tenderness and sauce as three separate dials on the same braise. A dry bottom is a moisture problem; a resistant fork is a tenderness problem; a spoon that will not hold a light coating is a sauce problem. Diagnose the right dial first, because fixing one automatically can make another worse.

The measured liquid is only a starting point. A broad casserole loses water faster than a snug Dutch oven with a heavy lid, while the lamb and onions contribute moisture of their own. Two cooks can start with the same amount and see very different pots an hour later.

The first hour is mostly about leaving the lamb alone. Keep enough moisture in the pot for a gentle braise while the shoulder is firm. A drying bottom is your cue for a splash of hot liquid. Starting with too much stock creates the opposite problem: plenty of water that eventually has to cook away.

Moisture buys the shoulder time. Eventually the useful question changes: has that time actually made the meat tender?

Lamb can be cooked through and still feel chewy because its connective tissue has not softened enough. Test one of the larger pieces. The fork should enter easily and gentle pressure should make the meat yield without collapsing.

If the fork still has to argue with the lamb, dinner needs more time.

Once the Lamb Is Tender, Judge the Sauce

Tender meat changes the job. A brothy pot can now spend some time uncovered; sauce that already coats the lamb lightly is close to where you want it.

Perfect lamb and apricots in a pot with too much liquid is an easy fix. Lift the solids onto a warm plate, reduce the sauce on its own, then return everything briefly to coat and heat through.

Hand lifting tender lamb and softened apricots from a Dutch oven with a slotted spoon while loose brown sauce continues simmering in the pot.
Once the finished lamb and apricots are out of the pot, the sauce can reduce more actively without pushing either solid further. Return them only briefly when the liquid has reached the consistency you want, so the final coating stays concentrated without sacrificing tenderness.

At the table, aim for enough sauce to collect around the lamb and soak into bread or a spoonful of grain.

Fix My Lamb Tagine

Lamb Problems

ProblemWhat to do
Lamb is still toughCover and cook for another 15 minutes, then test one of the largest pieces again.
Lamb is dry and still chewyKeep it in the moist braise while a fork meets resistance. Very lean cuts and small pieces have less room for error.
Lamb is tender but dryStop cooking it and serve with plenty of sauce. Next time use shoulder or neck and keep the pieces larger.
Lamb is falling apartStir as little as possible and serve gently. Begin the tenderness checks earlier next time.

Sauce and Seasoning Problems

ProblemWhat to do
Sauce is wateryOnce the lamb is nearly tender, leave the lid off and let some water evaporate.
Lamb is ready but sauce is very wateryLift the lamb and apricots onto a warm plate, reduce the sauce separately, then return them briefly to coat and heat through.
Sauce is disappearingAdd hot water or stock 30–60 ml / 2–4 tablespoons at a time.
Tagine tastes too sweetCheck the salt first, then add lemon juice a little at a time. Leave out the honey.
Tagine tastes flatCorrect the salt, then add lemon before reaching for more ground spice.
Sauce tastes bitter or burntTransfer the unburnt upper portion to a clean pot without scraping the bottom, then reassess the seasoning.
Surface looks greasySkim the excess fat now, or chill the tagine and lift away the hardened fat before reheating.
Bottom is catchingLower the heat, add a small amount of hot liquid and leave the scorched material stuck to the pot.

Apricot Problems

ProblemWhat to do
Apricots have broken downThey’ve become part of the sauce. Add them later next time for more distinct pieces.
Apricots are still firmGive them another 10–15 minutes in the hot sauce.

The Best Lamb for Tagine

Lamb shoulder gives you the widest margin for error. It stays succulent through a long braise, while its collagen gives the sauce natural body as the shoulder softens. That also gives you some breathing room when the meat and sauce don’t reach their ideal point at exactly the same moment.

CutHow it behaves
ShoulderJuicy, well suited to a long braise and the best all-round choice.
NeckDeeply flavorful with plenty of connective tissue; allow extra time if necessary.
LegLeaner and more prone to drying during prolonged cooking.
Diced/stewing lambConvenient when the underlying cut is suitable for braising and the pieces are not too small.
Raw lamb shoulder, neck, leg and cubed stewing lamb arranged on a dark butcher board with labels describing each cut for braising.
At the butcher counter, the meat itself can tell you something the label cannot. Shoulder tends to look irregular and marbled; leg is cleaner and leaner; neck carries more compact connective tissue. Most importantly, “stewing lamb” describes how the meat has been cut, not which lamb cut it came from, so it is worth asking what is actually in the pack.

Already bought a whole leg and want to keep it intact? Our roast leg of lamb is built for browned edges, a juicy center and carving into slices.
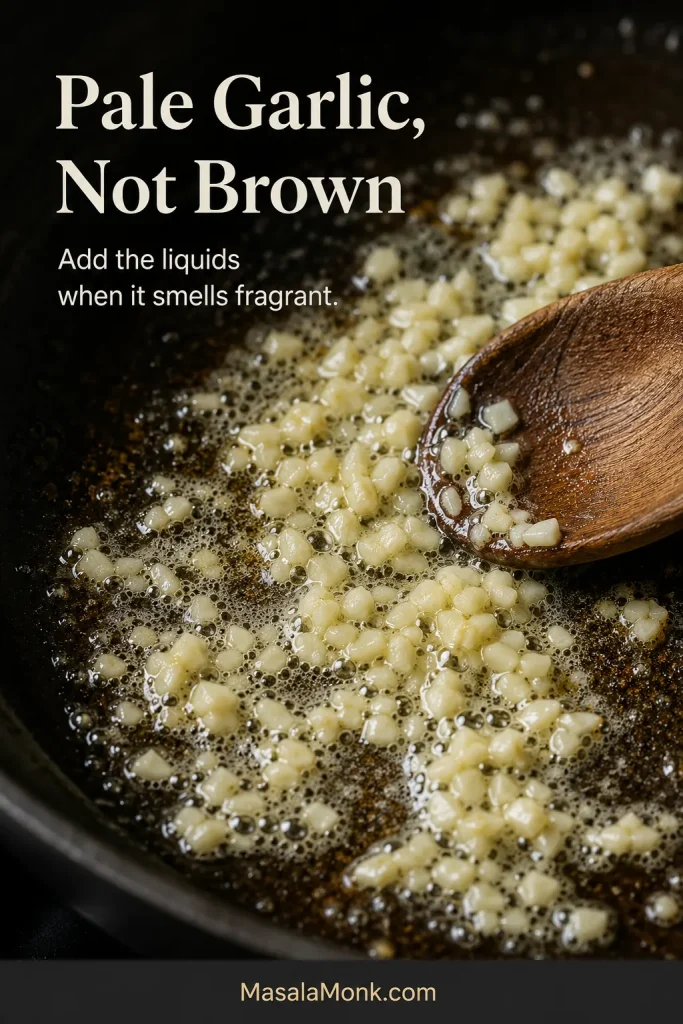
Buying and Preparing Lamb Shoulder

The 1 kg / 2.2 lb in this recipe means shoulder after trimming. A heavy exterior fat cap means buying a little extra. Bone-in shoulder works too; allow extra purchase weight for the bone, then judge the cooking by tenderness rather than trying to match the boneless weight exactly.

Remove thick deposits and hard seams of exterior fat while keeping the marbling within the meat. Leave the chunks generous—around 4 cm / 1½ inches. Small pieces dry out more easily over a long braise.

Shanks need their own bone-in timing, while minced lamb belongs in a kefta-style tagine rather than this recipe.

Mutton and goat also suit these spices, although older meat may take longer to soften. For a completely different use of mutton—drier, darker and built around a reduced masala—see our Punjabi mutton bhuna.

Apricots, Spices and the Sweet-Savory Balance

Dried apricots soften in the sauce and pick up some of the lamb and spice around them. Their tart edge matters: the fruit tastes sweet, but the next forkful still tastes unmistakably like lamb.

For 1 kg / 2.2 lb lamb, 180 g / about 6¼ oz dried apricots gives the fruit a clear presence without dominating every bite. Adding them once the shoulder is nearly tender protects their texture if the meat takes longer than expected.

This recipe is formulated for dried apricots. Fresh apricots contain much more water and soften quickly, so add them only near the end and cook just until tender instead of making a direct gram-for-gram substitution. Drain canned apricots particularly well if they’re packed in syrup.

Dried apricots shown at three stages in dark sauce: firm and wrinkled, plump and ready, and partly broken down.
When judging dried apricot texture in tagine, look at shape as well as gloss. Firm fruit stays wrinkled and compact; ready fruit swells and rounds out while keeping clean edges; farther along, those edges begin feathering into the sauce. That last stage is not ruined fruit—it simply shifts more apricot flavor from distinct pieces into the braising liquid.

The Spice Blend

Cumin and coriander carry most of the earthy flavor, with ginger and black pepper adding warmth. Turmeric and paprika deepen the sauce. Cinnamon should remain a background note rather than make the lamb taste candied.

The blend is aromatic but mild rather than chile-hot. Cayenne controls the heat here, so you can leave it out for a gentler lamb tagine or increase it carefully if you prefer more warmth.

Ras el hanout can replace most of the individual ground spices, but blends vary enormously. Start around 1½ tablespoons and use up to 2 tablespoons with a milder blend, accounting for any salt, chili or cinnamon already present.

Saffron is optional. A small pinch adds a subtle floral note, but the tagine doesn’t depend on it. If that little jar rarely leaves the cupboard, our guide to saffron and how to use it explains where its flavor earns a place.

Salt and acidity become more pronounced as the sauce reduces, so make the important adjustments near the end. Check the salt first, then add lemon. Taste before reaching for honey; the apricots may already have given you enough sweetness.

What Is a Tagine—and Is There One Authentic Version?
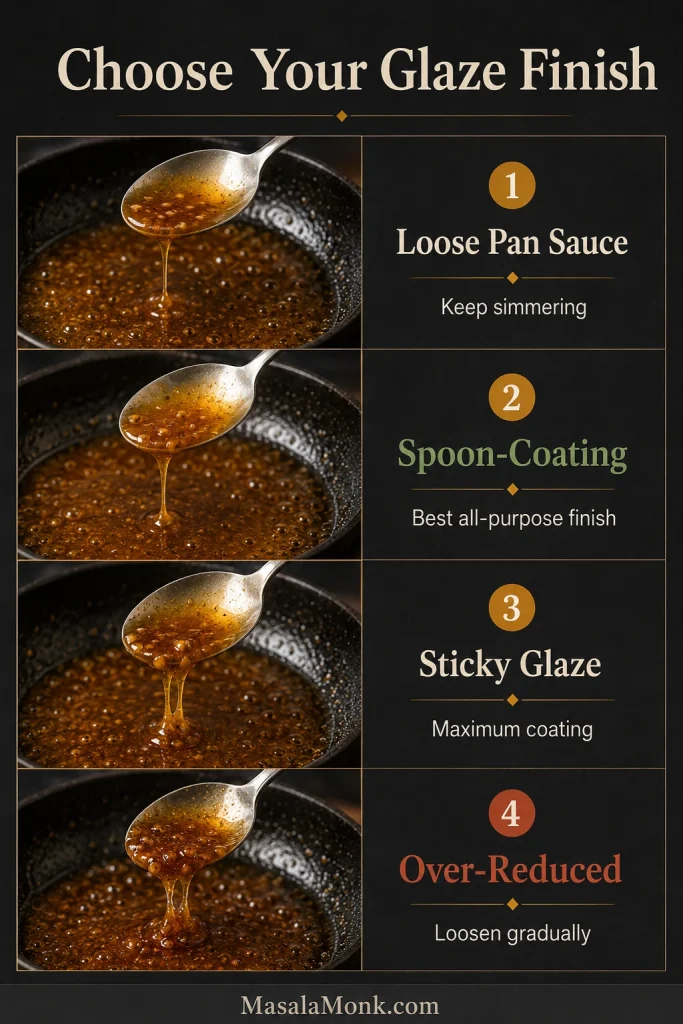
The word tagine refers both to the distinctive lidded cooking vessel and to the family of dishes associated with it. In other words, “tagine” describes both the pot and a style of slow, gently cooked dishes. Moroccan tagine isn’t one fixed recipe: lamb may appear with prunes or apricots, while other versions feature preserved lemon and olives, vegetables, fish or kefta. For a wider look at the food tradition, the Moroccan National Tourist Office has a useful overview of tajine and other emblematic dishes.

This version is designed around a Dutch oven in a conventional home oven, with browned shoulder as its base. Those are deliberate choices for this recipe, not claims about how every Moroccan cook prepares tagine.

Do You Need a Tagine Pot?

No. A heavy Dutch oven you already own can make an excellent tagine. It holds the steady, covered heat the shoulder needs and moves easily from stovetop to oven.

Black enameled Dutch oven beside a traditional conical clay tagine, both containing lamb and apricot braise, with text explaining that the cookware handles heat differently.
For a tagine pot vs Dutch oven comparison, carry over the flavor idea rather than automatically carrying over the same liquid and timing. Heavy cast iron and clay manage stored heat, direct heat and evaporation differently. Therefore, the vessel is part of the cooking method—not merely a different-looking container for exactly the same instructions.

This recipe also browns the lamb first. Some tagine methods skip that step; here, the dark patches on the shoulder and the fond left in the pot create a deeper roasted base.

Cooking in an actual tagine? Make sure the vessel is intended for cooking. Glazed ceramic, unglazed clay, flameproof ceramic and cast-iron versions behave differently, so follow the manufacturer’s instructions for seasoning, direct heat and thermal shock. Some clay vessels benefit from a heat diffuser over a concentrated gas flame.

For stovetop cooking in a heavy covered pot, maintain the gentlest simmer you can. Look at the bottom and liquid a little more often than you would in the oven because concentrated sauce can catch over direct heat. Let tenderness, not the clock, decide when the lamb is ready.

Slow cooker or pressure cooker: both retain far more moisture than this Dutch-oven method, so do not carry the 350 ml / about 1½ cups liquid quantity across unchanged. For a reliable conversion, use an appliance-specific lamb-tagine formula and add the dried apricots late enough to keep their shape rather than treating this recipe as a line-by-line conversion.

Prunes, Dates, Preserved Lemon and Other Variations

Prunes produce a darker, more jammy sauce and pair particularly well with almonds. They usually bring enough sweetness without much help from honey.

Dates are sweeter still, with more caramel depth. Use them more sparingly than apricots and keep enough lemon in the sauce to give the lamb some contrast.

Three finished lamb tagine portions made with apricots, prunes and dates, showing lighter amber, dark jammy and deep caramel fruit variations.
Switching dried fruit changes the finishing decisions as well as the flavor. Apricot keeps the sauce brighter, prune pushes it darker and jammier, and date brings deeper caramel sweetness. After changing the fruit, taste again before copying the apricot version’s honey or lemon adjustments, because the balance at the end may need to move with the substitution.

Preserved lemon and olives take the dish somewhere saltier and more intensely citrusy. Both bring seasoning of their own, so begin with less salt and use water or low-sodium stock.

Cooked chickpeas can stretch the pot; add them during the last 20–30 minutes. Carrots, squash and sweet potato in generous bite-size pieces need roughly 30–45 minutes and will absorb some of the braising liquid.

Mrouzia is a different preparation altogether, traditionally associated with lamb, honey, raisins and almonds. It deserves its own recipe.

What to Serve With Lamb Tagine

The tagine is soft, fragrant and deeply flavored, so its best partners are simple: something to catch the sauce and something fresh enough to sharpen the plate.

Hands tearing bread beside a large lamb and apricot tagine, with separate bowls of couscous, rice and cucumber-herb salad on a dark dining table.
When deciding what to serve with lamb tagine, organize the table around contrast. Keep bread closest for sweeping through the sauce, serve couscous or rice separately when you want a more substantial plate, and put something cool and crisp alongside. That arrangement lets each bite move between rich, absorbent and fresh instead of becoming uniformly soft.

Moroccan bread is the classic table partner. Tear it and use it to scoop the lamb and sweep through the sauce. If khobz isn’t available, homemade pita is a practical stand-in.

For a plated meal, couscous is light and excellent at absorbing the braising juices. For a gluten-free plate, choose rice; standard couscous is wheat-based. Our rice cooking guide will help if you want loose, separate grains.

A lemony salad, fresh herbs or cucumber gives the plate a cooler, sharper side. Our crisp cucumber salad works especially well against the warm lamb and fruit.

Make Ahead, Store, Freeze and Reheat

If people are coming over, this is the kind of make-ahead recipe that genuinely changes the evening. The lamb can already be tender, excess fat can be removed cleanly once chilled, and all that’s left is warming the sauce and adding the fresh garnish.

Cook the tagine completely, cool it promptly and refrigerate it. The USDA’s leftovers guidance recommends refrigerating cooked food within 2 hours and generally using refrigerated leftovers within 3–4 days.

How to Reheat and Freeze Lamb Tagine

Remove any hardened excess fat while the tagine is cold, then reheat gently with the lid on. Wait until it is hot before deciding whether the sauce needs loosening; add small splashes of water or low-sodium stock only if necessary.

Reheat until thoroughly hot throughout; if checking with a thermometer, leftovers should reach 74°C / 165°F. Add fresh cilantro, lemon zest and toasted almonds after reheating.

For freezing, cool the tagine and pack it into airtight meal-sized portions. Freeze for up to 3 months for best quality, thaw overnight in the refrigerator when possible, and reheat thoroughly.

One last thing: a refrigerated tagine can look almost dry because lamb gelatin has set and the fruit is holding moisture. Give it heat before you give it stock. Much of the sauce returns as it warms.

Same bowl of lamb and apricot tagine shown cold with thick set sauce and reheated with looser glossy sauce and visible steam.
When reheating lamb tagine, judge the sauce by movement rather than shine. Cold gelatin can still catch the light and look moist even though it will not flow; once thoroughly hot, the sauce should move freely around the lamb again. Only after seeing that hot state can you tell whether refrigeration or reheating actually cost enough moisture to require extra liquid.

The useful moment to remember is not when the timer beeps. It is when you lift the lid, press a fork into one of the larger pieces and feel the lamb finally give. Lemon lifts the darker sauce, while the toasted almonds add a little crackle against all that softness.

Scatter over the cilantro, put bread within reach, and leave the serving spoon near the pot. The sauce at the bottom is worth going back for.

Posted on Leave a comment

Chicken Chow Mein Recipe: Easy Takeout-Style Noodles With Homemade Chow Mein Sauce

Chicken chow mein in a dark carbon-steel wok with thin chicken strips, medium-thin noodles, green cabbage, bean sprouts, carrots and scallions, with glossy strands and scattered browned edges.

Chow mein does not give you much time to think once the pan is hot. Chicken comes out, vegetables go in, noodles hit the hot surface, and the sauce has only a minute or two to turn everything glossy before dinner is ready.

That speed is part of the appeal—and the reason homemade chicken chow mein can unravel so quickly. Noodles go in wet. Cabbage cools the pan. Chicken keeps cooking while everything else catches up. A little more sauce seems like the answer, and suddenly the noodles are soft instead of fried.

When it goes right, you can smell the difference before the pan reaches the table: toasted noodles, hot garlic and ginger, the savory edge of soy and oyster sauce. The chicken stays juicy, the vegetables snap, and a few noodle strands catch darker around the edges while the rest remain springy.

This recipe gets there by keeping the jobs separate. Thin strips of chicken get a short cornstarch marinade, the vegetables cook and come out, and the noodles get a mostly empty pan. Everything meets again only when each part is ready.

A wok is excellent, but you do not need restaurant equipment. A wide skillet works too.

Quick Answer

Good chow mein depends on timing and space as much as ingredients. The useful cue is simple: noodles should bend, separate and arrive at the wok without dripping. Anything already cooked can then make room for the next stage.


How to Make Chicken Chow Mein

Recipe card: servings, timings, ingredients, equipment and the complete method are below.

The chicken and vegetables come out before the noodles go in. It can look fussy on paper, but it makes the cooking easier: nothing sits around overcooking while you fight for space. It is one pan, just not one pile.

Once everything is sliced and the sauce is mixed, the actual stir-frying is only a handful of short stages.

Serves4 as a generous main course
DifficultyEasy, but fast-moving once the pan is hot
PrepAbout 20–25 minutes
CookingAbout 12–15 minutes
TotalAbout 35–40 minutes
Best pan14-inch / 35 cm wok; a roomy 12-inch / 30 cm skillet also works with batching

Chicken and Quick Marinade

  • 450 g / 1 lb boneless skinless chicken thighs or chicken breast
  • 1 tablespoon / 15 ml Chinese light soy sauce or regular/all-purpose soy sauce
  • 1 tablespoon / 15 ml Shaoxing wine
  • 1 tablespoon / about 8 g cornstarch (cornflour in the UK)
  • 1 tablespoon / 15 ml water
  • 1 teaspoon / 5 ml neutral cooking oil
  • ¼ teaspoon white pepper

Cut the chicken about 5–6 mm / ¼ inch thick and roughly 5 cm / 2 inches long where practical. Slice chicken breast across the grain.

Thin strips of raw chicken being sliced for chow mein beside a small bowl of marinade on a dark kitchen work surface.
For cleaner, thinner chicken strips, start with meat that is very cold and slightly firm. Consistent pieces cook at a similar pace, which matters once a fast stir-fry leaves little time to chase individual pieces for doneness.

Sauce Ingredients

  • 2 tablespoons / 30 ml Chinese light soy sauce or regular/all-purpose soy sauce
  • 2 teaspoons / 10 ml dark soy sauce
  • 2 tablespoons / 30 ml oyster sauce
  • 1 tablespoon / 15 ml Shaoxing wine
  • 2 teaspoons / about 8 g sugar
  • ¼ teaspoon white pepper
  • 1 teaspoon / 5 ml toasted sesame oil
  • 1 teaspoon / about 3 g cornstarch (cornflour in the UK)
  • ¼ cup / 60 ml water or unsalted chicken stock
  • ¼ teaspoon MSG or ½ teaspoon chicken powder, optional

Keep another 2 tablespoons / 30 ml water beside the stove in case the noodles need loosening at the end.

Measured ingredients for homemade chow mein sauce arranged in small bowls and vessels, including soy-based sauces, seasonings and liquid ingredients.
Give the sauce one final stir before it hits the wok. That keeps the seasoning and cornstarch evenly dispersed, so the sauce behaves consistently from the first splash to the last.

Noodles, Vegetables and Aromatics

  • 250 g / 9 oz dried Chinese egg or dried chow mein noodles
  • Using fresh noodles? Use the package amount intended for about 4 servings. Fresh noodle products vary too much in hydration and cooking state for one reliable gram-for-gram conversion from dried noodles.
  • 3 tablespoons / 45 ml neutral high-heat oil such as peanut, canola, grapeseed or rice-bran oil, divided
  • 1 teaspoon neutral oil for drained noodles only if they are prone to sticking
  • 250 g / 9 oz green cabbage, thinly shredded
  • 1 medium carrot, about 100 g / 3½ oz, cut into fine matchsticks
  • 150 g / 5 oz bean sprouts
  • 4 scallions (spring onions), cut into 2.5–5 cm / 1–2 inch lengths
  • 3 garlic cloves, finely chopped
  • 15 g / ½ oz fresh ginger, finely grated or minced

Instructions

Have Everything Ready Before the Wok Gets Hot

Prepared chicken chow mein ingredients beside an empty wok, including marinated chicken, noodles, sauce, cabbage, carrots, bean sprouts, scallions, garlic, ginger and cooking oil.
Arrange the station in cooking order: keep the quick finishing ingredients separate so they can hit the wok only when the final texture needs them.

Prep Before the Wok

  1. Mix the sauce. Whisk the light soy, dark soy, oyster sauce, Shaoxing wine, sugar, white pepper, sesame oil, cornstarch, water or stock, and optional MSG or chicken powder until smooth. Set it aside and stir again just before it goes into the pan; the cornstarch will settle.
  2. Cut the vegetables, then marinate the chicken. Prepare the cabbage, carrot, scallions, garlic and ginger first. On a separate or thoroughly cleaned board, slice the chicken and mix it with the marinade ingredients. Wash your hands and clean the knife, board and anything else that touched the raw chicken immediately. Leave the chicken for 10–15 minutes while you prepare the noodles.
  3. Prepare the noodles last. Start checking dried noodles about a minute before the package’s full cooking time. Stop when the strands bend and separate easily but feel firmer than you want to eat. Drain and briefly rinse under cool water, then shake the colander firmly. Spread the noodles loosely for a couple of minutes. Lift a small handful; dripping noodles need more draining or a gentle blot with a clean kitchen towel. Toss with 1 teaspoon oil only when the strands are prone to sticking.

Cook in Stages

  1. Partially cook the chicken. Heat the wok or skillet over medium-high heat until hot. Add 1 tablespoon oil and spread the chicken into a loose layer. An immediate sizzle is what you want. Cook in two batches when the pieces would otherwise heavily overlap. Stir-fry for about 2 minutes, until most surfaces are opaque with a little browning. Transfer to a clean plate or bowl; the thickest pieces may remain slightly underdone inside.
  2. Cook the cabbage and carrot. Add another tablespoon oil and stir-fry for about 1½–2 minutes. The cabbage should soften at the edges while keeping some bite; the carrot should bend but not flop. Add the garlic and ginger for the final 20–30 seconds, just until their raw sharpness disappears and the aroma turns strong and savory. Let obvious liquid evaporate, then transfer everything to a bowl.
Lightly browned chicken strips and briefly stir-fried cabbage, carrots and other vegetables in a hot wok, with the vegetables still bright and structured.
Let excess cooking juices stay behind. The chicken and vegetables have already done their job; bringing that liquid back can make the final noodle toss wetter than intended.
  1. Give the noodles the pan. Add the final tablespoon of oil and spread the noodles across as much hot surface as possible. Leave them alone for 30–45 seconds, then lift and turn. Continue for about 2 minutes. The pan should sound like frying, not simmering. Some strands will curl, wrinkle or darken while others stay pale. Uneven browning is fine. Those toasted patches give the noodles a deeper, nuttier edge that comes through after the sauce goes in.
Medium-thin yellow chow mein noodles spread across a dark wok with exposed metal and scattered golden-brown toasted patches, without chicken, vegetables or sauce.
Lift and turn the noodles in broad sections instead of stirring constantly. More strands get direct pan contact, so you build toasted edges without sacrificing the softer noodles underneath.

Finish and Serve

  1. Finish the stir-fry. Stir the sauce again and pour it over the noodles. Immediately return the chicken and vegetables. Leave behind any noticeable puddle of thin watery liquid on the chicken plate. Toss for 1–2 minutes, adding the reserved water 1 tablespoon at a time only when the noodles need loosening. A crowded 12-inch skillet is easier to handle as two half-batches.
  2. Add the bean sprouts and scallions. Give them 30–60 seconds. The sprouts should be hot, juicy and crisp. The thickest piece of chicken should reach 165°F / 74°C.
  3. Taste one forkful. It should be savory first, with mild sweetness and white-pepper warmth behind it. No single flavor component should dominate. The best forkful has chicken, cabbage or a crisp bean sprout tangled through noodles that are soft in places and toasted in others. Very little sauce should remain at the bottom. Turn off the heat and serve immediately.

Prefer softer noodles? Shorten the dedicated noodle-frying stage a little. For more browned edges, give them another 30–60 seconds of pan contact before the sauce goes in.

A Little Uneven Is Fine

The noodles should pull apart easily, the chicken should stay juicy, and some crunch should remain in the vegetables. Broken strands, darker patches and slightly softer cabbage are normal.

Finished chicken chow mein in a wok with separate glossy noodles, thin chicken strips, cabbage, bean sprouts, carrots and scallions, with little visible liquid underneath.
Use appearance and movement as the final check: glossy strands, little loose liquid, visible vegetables and chicken spread through the noodles. When those cues line up, turn off the heat and serve.

If this does not look like the chow mein you grew up ordering, you’re probably not misremembering it.

Why Chicken Chow Mein Looks Different Depending Where You Live

At its broadest, chow mein refers to noodles that are fried or stir-fried, but the dish can look very different depending on region and restaurant tradition. This recipe is the lightly glazed stir-fried-noodle style, with chicken and vegetables folded back through noodles that have had direct contact with the pan.

Some Cantonese restaurant versions use a crisp noodle base topped with saucy meat and vegetables. Some old-fashioned American-Chinese or Subgum-style chow mein is a chicken-and-vegetable gravy dish served with crunchy fried noodles.

Lo mein usually starts with cooked noodles that are tossed through sauce rather than deliberately fried for browned edges. It tends to be softer and more sauce-forward; this chow mein puts more emphasis on direct pan contact and noodle texture.

Here, the target is springy noodles, scattered browned edges, crisp vegetables and tender chicken.

Four noodle dishes compare lightly glazed stir-fried chicken chow mein, crisp noodles with a saucy topping, American-Chinese chow mein with gravy and crunchy noodles, and soft sauce-tossed lo mein.
Menu wording can hint at the expected texture: “crispy,” “pan-fried” or “lo mein” often point toward different noodle treatments. Regional usage varies, though, so the dish description matters more than the name alone.

The Chow Mein Noodle Guide

If you’ve ever followed the noodle packet perfectly and ended up with a sticky heap in the wok, you may not have cooked the noodles “wrong.” They may simply have been too soft—or too wet—for another round of heat.

Open the packet before the water boils and see what you actually bought. Raw noodles, steamed noodles and ready-to-wok noodles can look remarkably similar while starting at very different stages of cooking.

Which Chow Mein Noodles Did I Buy?

Guide comparing several noodle products used or sold for chow mein, including fresh or steamed noodles, dried noodles and crisp fried noodles, with the crispy product identified separately.
Package names are clues, not guarantees. Two products labeled “chow mein noodles” may have undergone very different amounts of cooking, so the preparation directions on an unfamiliar packet are often more useful than the product name itself.
If the package says…What you probably haveWhat to do
Dried chow mein / Chinese egg noodlesDry and uncookedBoil until flexible but firmer than serving doneness, then cool and drain thoroughly.
Fresh raw / unsteamed egg noodlesFresh but uncookedCook according to the package, often with a brief boil or blanch. Stop while they retain some firmness.
Fresh steamed / cooked noodlesAlready substantially cookedUsually loosen or briefly blanch rather than giving them a full boil.
Ready-to-wok / straight-to-wok noodlesHydrated and prepared for quick pan cookingLoosen as directed and avoid unnecessary boiling. Watch for extra surface moisture.
Instant ramenDry and very quick-cookingDiscard the seasoning packet and cook only until barely flexible.
Crispy chow mein noodlesAlready fried and crunchyNot the noodle for this recipe.

A note on “Hong Kong-style” noodles: the name describes a noodle style, not one universal preparation state. They may be sold raw, steamed or dried, so the package directions matter more than the words “Hong Kong-style” on the front.

Fresh noodle labels can be maddeningly vague. One yellow packet wants several minutes in boiling water; the packet beside it wants to go almost straight into the wok. The Woks of Life’s Chinese noodle guide (opens in a new tab) is useful when the refrigerated case looks like a wall of nearly identical noodles.

Four Things to Check Before the Wok

  1. Flexible: the noodle bends and separates without cracking.
  2. Firm enough: noodles you boil yourself should remain slightly underdone; pre-cooked noodles need enough firmness to handle another brief cook.
  3. Dry outside: the strands are not carrying obvious water into the pan.
  4. Loose: the noodles are separate instead of compressed into one warm, starchy block.
Four noodle readiness checks labeled Flexible, Firm Enough, Dry Outside and Loose, showing a bent strand, an intact strand, surface-dry noodles and separated strands.
Each noodle check guards against a different failure: flexibility limits breakage, firmness survives the second cook, a dry exterior protects pan heat, and loose strands expose more noodle surface to the wok. Together, they predict behavior rather than merely doneness.

Doneness and dryness are separate problems. A noodle can be cooked correctly and still be wet enough to cool the pan. It can also be dry and separate but already too soft to handle another few minutes of heat.

If water drips when you lift a handful, give the noodles more time in the colander or blot them gently. Wet noodles steal heat.

Two woks compare wet noodles producing heavy steam with surface-dry noodles making direct pan contact and developing browned patches; labels read “Wet → Steams” and “Surface-Dry → Fries.”
“Surface-dry” does not mean dehydrated, cold or stiff. Chow mein noodles can still be warm and flexible; the useful difference is that free water is no longer coating them and consuming the wok’s heat before frying can begin.

Homemade Chow Mein Sauce: Coat, Don’t Pool

For this version, a good chow mein sauce is almost invisible once dinner is finished. You should taste it everywhere without seeing much of it underneath.

Matched pans labeled Coat and Pool compare glossy separated chicken chow mein with little liquid underneath against wetter noodles sitting in visible dark sauce.
Judge chow mein sauce after it has been tossed over heat for a moment, not at the instant it enters the wok. Cornstarch thickens as it heats, while chicken and vegetables can release moisture of their own, changing the final consistency.

If the noodles taste salty but flat, more soy only pushes the salt higher. Deeper flavor also comes from oyster sauce, Shaoxing wine, white pepper, aromatics and the browning the noodles picked up in the pan.

Light or all-purpose soy does most of the seasoning. Dark soy is there mainly for color and deeper soy flavor. Oyster sauce gives the noodles body and a little sweetness; Shaoxing brings an aromatic note that suits this version. White pepper adds warm, earthy background heat.

One label is worth checking closely here: Shaoxing products sold specifically as cooking wine sometimes contain added salt. That can push an otherwise balanced sauce much farther than expected.

Toasted sesame oil goes into the sauce for aroma, not into the wok as the main frying oil. Sugar softens the salty edges, while the small amount of cornstarch helps the sauce cling. MSG or chicken powder is optional for extra savory depth. You do not need a separate seasoning packet; this sauce already does that job.

The homemade stir-fry sauce guide (opens in a new tab) uses many of the same building blocks for other stir-fries.

When the balance is right, the noodles remain the main event—only darker, fuller and more savory, with an occasional toasted edge coming through.

Tender Chicken, Vegetables With Some Bite

Chicken thigh gives you a little more margin before it dries out. Breast works well too, especially when thinly sliced across the grain. The cornstarch leaves a light coating around either cut during both trips through the heat; baking soda is not necessary for this method.

Keep the vegetables long and fairly thin. Cabbage works well in narrow ribbons, carrots in matchsticks and scallions in 1–2 inch lengths. Once everything comes back together, the chicken and vegetables should weave through the noodles rather than sitting in separate piles on top.

Wok or Skillet?

On a normal home stove, listen to the pan. A sharp sizzle means the food is frying; a wet, quiet simmer means moisture is taking over.

  • 14-inch / 35 cm flat-bottom carbon-steel wok: the best size for the full recipe. Wok shape and burner strength vary, so split the final stage if it feels cramped.
  • 12-inch / 30 cm large skillet: completely workable. Batch the chicken when needed and expect two half-batches when everything goes back in if the skillet is shallow.
  • Coated nonstick pan: usable, but follow the manufacturer’s heat guidance rather than automatically heating it until it smokes.
Large carbon-steel wok holding chicken chow mein beside a 12-inch stainless skillet with a smaller batch, illustrating the difference in usable cooking and tossing space.
A wok gives you more vertical room to move food; a skillet depends more on its flat cooking surface. That makes spreading and batching especially useful as the pan fills.

A home burner will not give you exactly the same smoky char and aroma as very high-heat restaurant wok cooking. That’s fine. Good direct pan contact gives the noodles plenty of toasted character.

Cooking for more people? Make two complete batches. Double the ingredients, not the pan load.

Chicken Chow Mein Troubleshooting

If dinner is already in the pan, don’t start over. Find the problem that looks familiar and fix that first. You can analyze dinner later.

Four troubleshooting scenes show watery steaming chow mein with food being removed, pale noodles resting against the pan, plain noodles and cabbage added to an overly seasoned batch, and water added to dry clumped noodles.
Before changing the seasoning, identify the actual failure: too much moisture, poor pan contact, too much salt or dry/tight noodles. Fix the physical problem first; otherwise one rescue can create another.

Before the wok

ProblemFix
Noodles already too softCool and drain immediately. Keep their later frying and saucing brief.
Noodles stuck in one blockLoosen gently. A quick cool rinse can help boiled dried noodles; drain and dry them again afterward.
Vegetables dripping wetPat them dry before they enter the pan.
Sauce tastes far too saltyDilute it slightly with water before cooking. Check the stock, chicken powder and cooking wine too.
Cornstarch lumpyWhisk the lumps smooth with a small amount of liquid before mixing them back into the sauce.

While frying

ProblemFix
Pan filling with water / everything steamingStop adding food. Remove some if needed and let the liquid cook off before continuing; finish in batches.
Noodles stickingCheck crowding and moisture before adding more liquid. Lift gently instead of scraping hard.
No noodle browningGive the strands 30–45 seconds of contact before turning instead of stirring continuously.
Chicken cooking too fastTake it out and return it near the end.
Noodles and vegetables will not mixLift and toss. Loosen clumps gently instead of chopping through the strands.

After the sauce goes in

ProblemFix
Too saltyAdd plain noodles or extra unseasoned vegetables if you have them, or a small splash of water if the dish can absorb it. Sugar will not remove salt.
Too sweetAdd a small splash of water and toss. Extra plain noodles or vegetables help even more.
BlandCheck salt first. Then try a little oyster sauce, white pepper or optional MSG/chicken powder. Add soy only a teaspoon at a time.
Too dry or sauce gummyAdd water 1 tablespoon at a time and toss over heat until the noodles loosen and regain their gloss.
Too wetKeep the pan uncovered and reduce the liquid. Remove some food first if necessary.
Chicken toughNext time, slice it thinner and remove it sooner during the first fry.

Substitutions and Variations

Chow mein substitution guide showing Chinese noodles with instant ramen and thin pasta, dark soy sauce, oyster-style sauces and small vessels representing Shaoxing wine alternatives.
When using instant ramen, the noodle block is the useful substitute—not the seasoning packet. The packet can push the dish far saltier than the homemade sauce is designed to be.
Instead of…Try…Expect…
Chow mein / Chinese egg noodlesInstant ramen — the closer quick substituteThinner, softer noodles. Discard the seasoning packet and cook only until barely flexible.
Chow mein / Chinese egg noodlesThin spaghetti or angel hair — a pantry fallbackA firmer, more pasta-like chew.
Dark soy sauceOmit it rather than replacing it volume-for-volume with regular soyThe noodles will be paler, but the sauce balance stays closer to the original.
Oyster sauceVegetarian mushroom oyster-style sauceThe closest straightforward replacement.
Oyster sauceHoisin sauceNot a neutral swap; the result will be sweeter. Reduce or omit the sugar.
Shaoxing wineDry sherryA similar aromatic role.
Shaoxing wineStock or waterLess aromatic depth, but the method works.
Bean sproutsExtra cabbage, bok choy or another crisp vegetableA different crunch without changing the basic method.

For chicken and mushroom chow mein: add about 150 g / 5 oz sliced mushrooms and reduce the cabbage to about 150 g / 5 oz. Cook the mushrooms until most of the water they release has evaporated. Keeping the full cabbage quantity as well works better when the mushrooms get their own turn in the pan.

Make it spicy

Add chili crisp, chili oil, sliced fresh chili or a little chili-garlic sauce at the end. Sweet chili sauces change the balance, so use less sugar in the chow mein sauce when needed.

Dietary adjustments

Lower sodium: use lower-sodium soy sauce and unsalted stock, skip the chicken powder, and compare the sodium on the noodles, oyster sauce and cooking wine. Some Shaoxing cooking wines contain added salt.

Gluten-free: use noodles labeled for a gluten-free diet, certified gluten-free tamari or soy sauce, and a gluten-free oyster-style sauce. Check the Shaoxing wine and optional chicken powder too; many Shaoxing products are not gluten-free. Use a verified gluten-free dry sherry or sake, or replace the wine with stock or water when needed.

Halal: use halal-certified chicken and check the noodles, sauces and stock according to the requirements you follow. Replace Shaoxing wine with stock, water or an appropriate certified alcohol-free cooking seasoning.

Using leftover cooked chicken: skip the raw-chicken marinade and add sliced cooked chicken near the end, giving it enough time to reheat fully to 165°F / 74°C. Adding it much earlier usually dries it out.

Make-Ahead, Storage and Reheating

The sauce, cabbage and carrot can be prepared up to a day ahead and refrigerated separately. Raw chicken can be sliced ahead too, but keep it covered and completely separate from the vegetables. Leave the bean sprouts and scallions until close to cooking time.

If you need to boil the noodles ahead, cool them promptly, drain and surface-dry them well, toss with a very small amount of neutral oil and refrigerate them separately.

Cool leftover chicken chow mein promptly and refrigerate it in a covered container for up to 3–4 days. The USDA’s food-safety guidance (opens in a new tab) recommends reheating leftovers to 165°F / 74°C.

A skillet or wok gives chilled noodles the best chance of loosening without turning mushy. Add about 1 tablespoon water per serving and toss over medium-high heat until steaming hot and the added water has mostly evaporated.

Leftover chicken chow mein reheating in a dark skillet while a hand adds a tablespoon of water near the pan edge, with steam rising from noodles, chicken and vegetables.
Let steam loosen cold noodle clumps first rather than forcing them apart with a spatula. Once the strands relax, gentle tossing reheats them with less tearing.

For the microwave, cover loosely and heat in short intervals, stirring between them.

Freezing is possible but not ideal. The noodles soften and bean sprouts lose much of their crunch after thawing.

What to Serve With Chicken Chow Mein

Chicken chow mein is already a full meal, so sides work best when they bring a different texture or temperature rather than more heaviness. A small bowl of egg drop soup (opens in a new tab) keeps things light and broth-based, while a cool cucumber salad (opens in a new tab) gives the hot, savory noodles a crisp, sharp contrast.


Once the noodles are glossy, the vegetables still have some bite and the pan is nearly dry, dinner is done.

Get the chow mein onto plates while it still looks a little unruly. Browned strands, crisp bean sprouts and chicken tucked through the noodles are exactly where they should be.

Close-up chopsticks lifting glossy chow mein noodles with a thin browned chicken strip, cabbage, bean sprout and scallion against a dark background.
The best bite is intentionally varied: toasted noodle edges beside softer strands, tender chicken and a crisp sprout. Serve immediately, while those contrasts are still distinct.