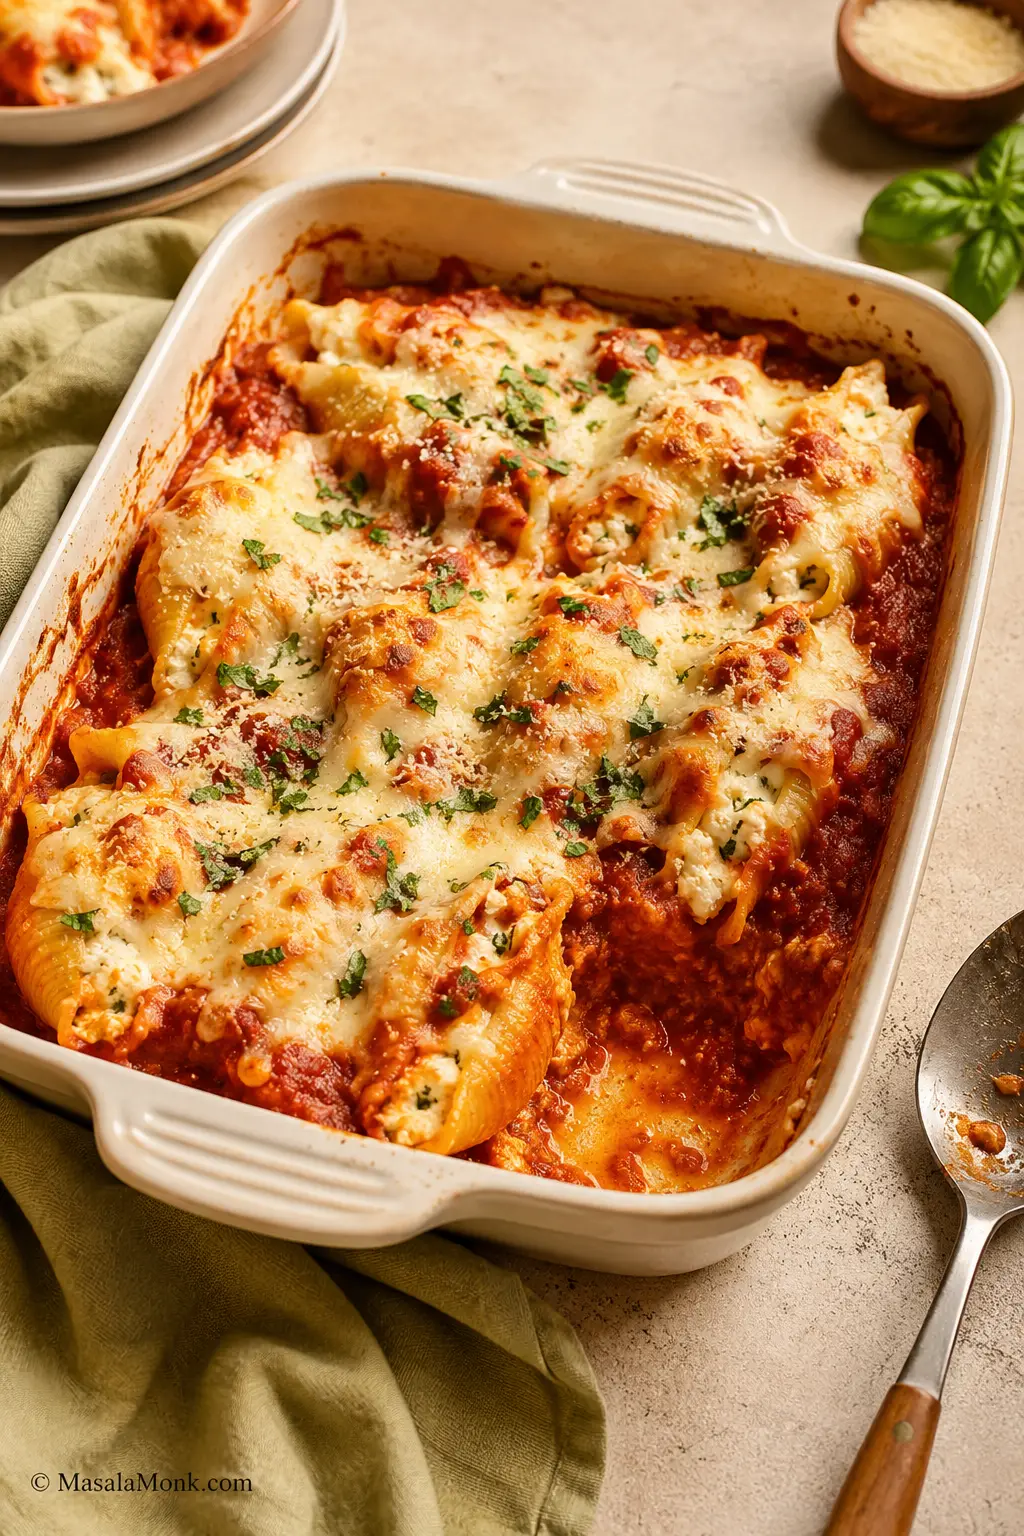
Stuffed shells are the kind of baked pasta that makes the table feel full before anyone even sits down: tender jumbo shells, creamy ricotta filling, tomato sauce bubbling around the edges, and mozzarella melted over the top. They give you lasagna-level comfort without all the layering, and the recipe is much more forgiving than it looks.
This version is built to avoid the usual stuffed shell problems: loose ricotta filling, dry pasta edges, shells that turn mushy after baking, and a tray that looks good on top but tastes flat in the middle. Think of it as the no-dry-shell method: thick filling, enough sauce, a covered bake first, and tender shells all the way through.
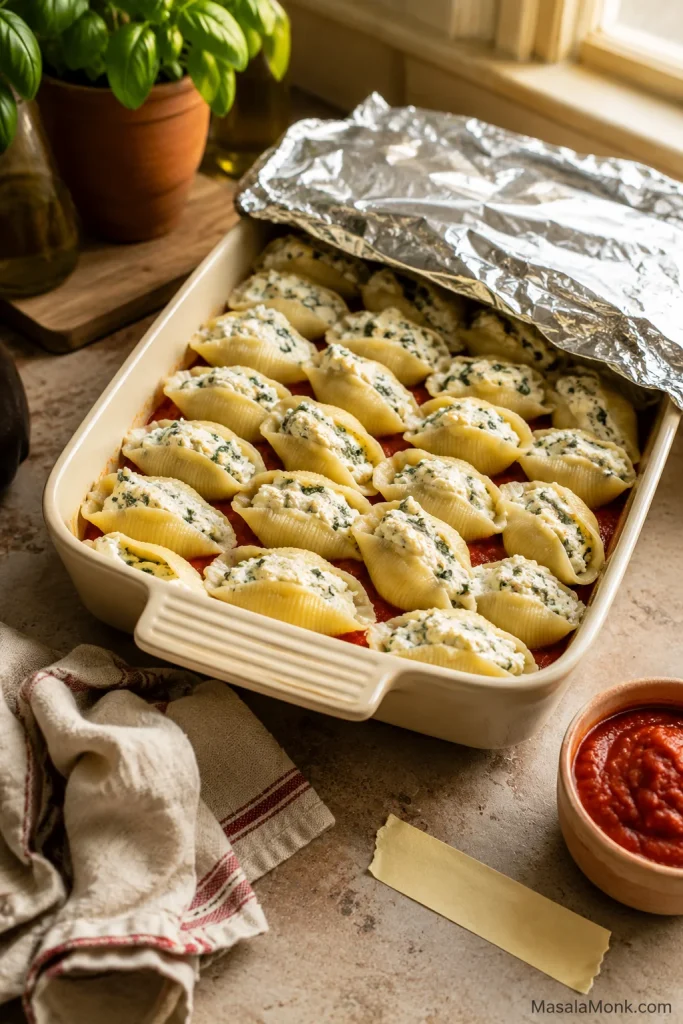
It fits one classic 9×13-inch baking dish: about 20–24 filled jumbo shells, a seasoned ricotta-mozzarella filling, marinara under and over the pasta, and mozzarella melted on top. A few shells may tear while boiling. The first few you fill may look messy. That is normal. Once everything is tucked into sauce and baked until bubbling, nobody at the table can tell which ones were imperfect.
Stuffed Shells at a Glance
No long planning needed. Here is the quick version before you start.
- Start with a 12 oz / 340g box of jumbo pasta shells, or enough to cook 28–30 shells.
- Aim to fill about 24 shells. If your shells are very large, you may fit closer to 20–22 in the baking dish.
- Mix 15–16 oz / 425–454g ricotta with mozzarella, parmesan, egg, garlic, herbs, salt, and pepper.
- Use about 3 cups / 720ml marinara sauce, with sauce under and over the shells.
- Bake at 375°F / 190°C for 25 minutes covered, then 8–10 minutes uncovered.
- Rest for 5–10 minutes before serving so the filling settles and the shells lift more cleanly.
Boil, fill, sauce, cover, bake, rest — that is the whole recipe. This is also a good one to save because the base method stays the same even when the filling changes.
Quick answers: Yes, you boil the shells first for this version. Use about 3 cups sauce for one 9×13-inch baking dish. Egg helps the filling set, but you can skip it if you prefer a softer filling. Stuffed shells freeze best before baking.
Why This Stuffed Shells Recipe Works
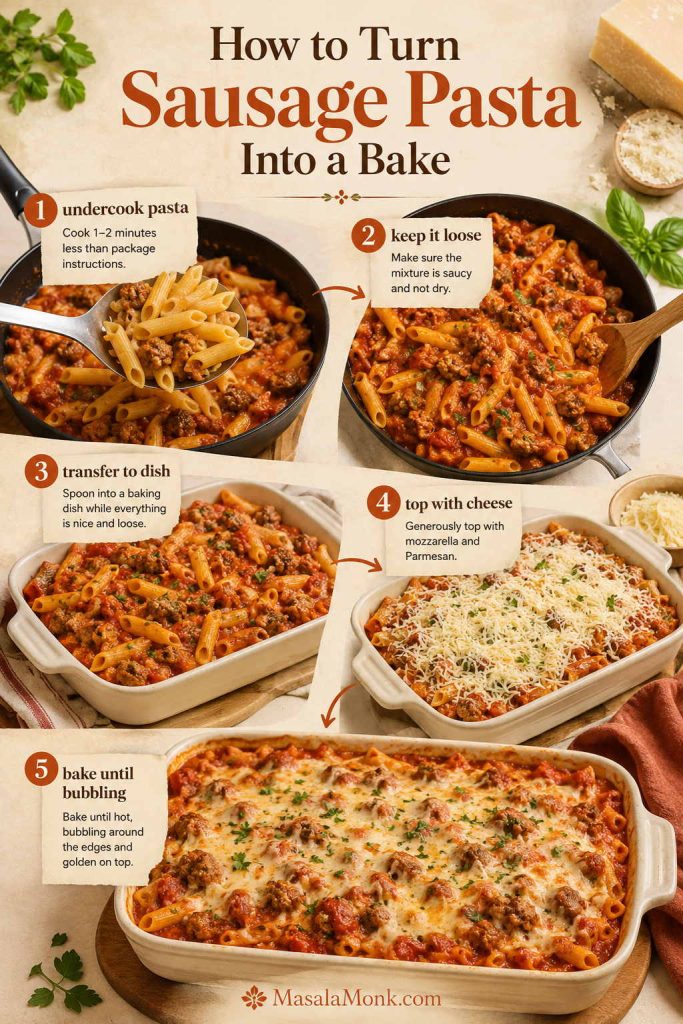
This method is built around four small choices that make the biggest difference: undercook the shells slightly, keep the ricotta filling thick, use sauce under and over the pasta, and bake covered before browning the cheese.
- Shells stay tender. Boiling them just shy of al dente keeps them flexible enough to fill, but firm enough to finish in the oven.
- Filling stays creamy, not runny. Ricotta gives body, mozzarella gives melt, parmesan adds savory depth, and egg helps everything set.
- Sauce protects the pasta. Marinara on the bottom keeps the shells from sticking, while sauce over and around the shells prevents dry edges.
- A covered bake does the work. Foil traps heat and steam so the pasta finishes cooking gently before the cheese browns.
- Flexibility is built in. Keep it classic, add spinach, stir meat into the sauce, swap in cottage cheese, or freeze a batch for later.
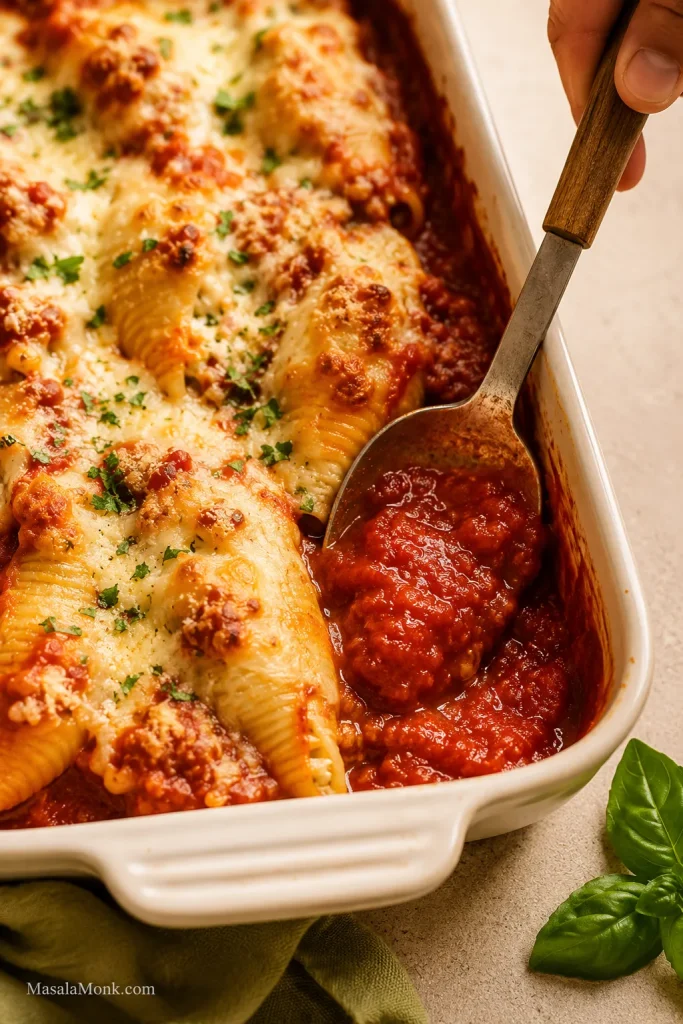
Best of all, the edge of the baking dish tells you dinner is almost ready: sauce bubbling up around the shells, little golden patches of mozzarella, and the smell of garlic, tomato, and browned cheese.
Ingredients You Need
Stuffed shells do not need complicated ingredients, but they do need the right balance: sturdy shells, thick ricotta filling, enough sauce, and mozzarella that melts without making the pasta watery.
Jumbo Pasta Shells
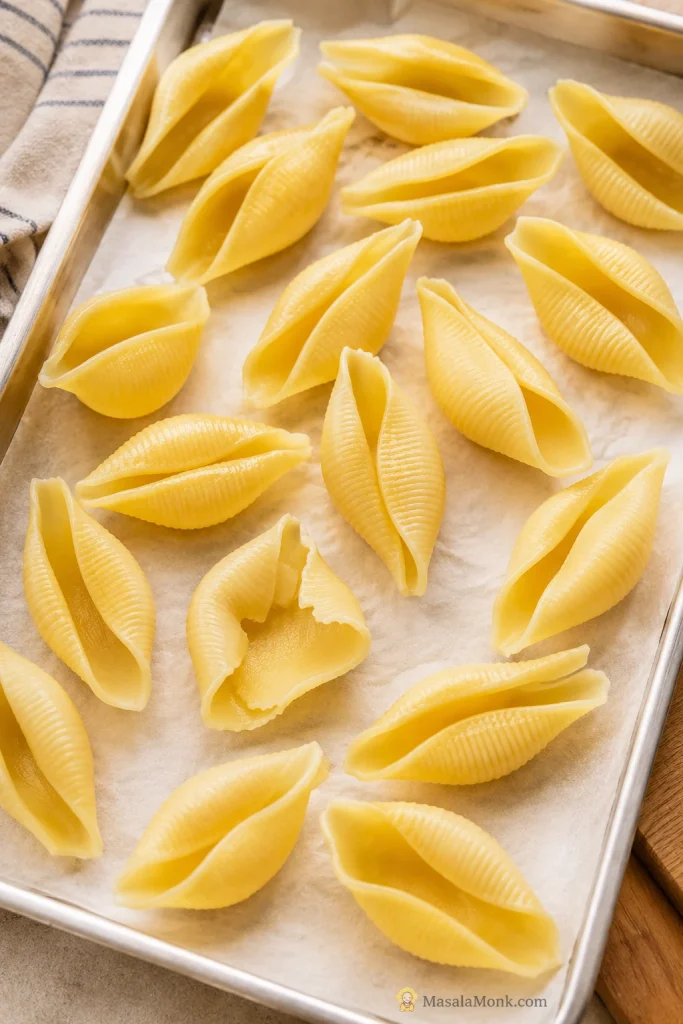
Choose a 12 oz / 340g box of jumbo pasta shells. These are the large shells made for stuffing, not small shell pasta or macaroni-style shells. Cook 28–30 jumbo shells for one baking dish, or cook the whole box if you like having extra backups.
Some shells will split or fold while boiling, so cook a few extras and move on. The sauce and cheese hide almost everything.
Ricotta Cheese
Use 15–16 oz / 425–454g ricotta cheese. Whole milk ricotta gives the creamiest filling. Loose or watery ricotta should be drained for 10–15 minutes in a fine-mesh strainer or on a few layers of paper towel before mixing. For the right texture, the ricotta filling section shows what the mixture should look like before stuffing.

Mozzarella
You need 3 cups shredded low-moisture mozzarella, about 12 oz / 340g, divided between the filling and topping. Low-moisture mozzarella melts into the filling and gives the top a bubbly finish without watering down the pasta. Fresh mozzarella can be used on top in small amounts, but it is softer and wetter.
Parmesan or Pecorino
Use ½ cup / 45–55g grated parmesan or pecorino. Ricotta gives you the creamy center, but parmesan or pecorino is what makes the filling taste seasoned and savory instead of just milky.
Egg
One large egg helps bind the ricotta filling so it holds together after baking. You can skip it, but the filling will be softer. If you leave out the egg, add a little extra parmesan or mozzarella to help the filling hold.
Marinara Sauce
About 3 cups / 720ml marinara sauce gives one baking dish enough sauce for the bottom, top, and edges. A 24 oz / 680g jar is the practical shortcut and usually gives enough sauce for one batch. A good jarred marinara is not a shortcut to apologize for here; stuffed shells are mostly about enough sauce and a well-seasoned filling. If you want to make your own, this homemade marinara sauce gives you a classic base plus spicy, dipping, low-sodium, and sugar-free variations.
Very thick marinara benefits from 2–4 tablespoons of water before baking. If your jar is slightly short or extra thick, loosen it with a splash of water and save a little warm sauce for serving.
Garlic, Herbs, Salt, and Pepper
Ricotta needs seasoning. Garlic, Italian seasoning or fresh herbs, salt, pepper, and optional red pepper flakes make the filling taste like dinner instead of plain cheese. Use ½ teaspoon salt if your parmesan and sauce are already salty. Use closer to ¾ teaspoon if your ricotta is mild and your sauce is lower in salt.
Dried Italian seasoning is the easiest pantry option. Fresh parsley adds brightness, basil gives a sweeter flavor, and oregano gives the filling a stronger Italian-American note. Save fresh basil partly for the top after baking.
Optional Spinach
Either fresh or frozen spinach works; the real rule is to squeeze out as much moisture as possible. Wet spinach can turn a creamy filling loose and watery. For the full version, jump to spinach ricotta stuffed shells.
Optional Meat
The main recipe below is a classic cheese stuffed shells recipe, but cooked ground beef or Italian sausage can make the meal heartier. Brown the meat fully before adding it to the sauce or filling, then drain off excess fat so the pasta does not turn greasy. For the heartier version, see meat stuffed shells.
Tools That Help
You do not need special tools. A large pot, colander, mixing bowl, 9×13-inch / 23×33 cm baking dish, foil, and a spoon or zip-top bag are enough. A zip-top bag with one corner snipped off can make filling the shells faster and neater, but a spoon works perfectly well.
The first few shells are usually the messiest; by the fifth or sixth one, you will know exactly how much filling your shells can hold.
What Pasta Shells Should You Use?
Jumbo pasta shells are the shape you want here. They are large enough to hold ricotta filling and sturdy enough to bake in sauce. Small shells, medium shells, macaroni shells, and regular conchiglie are better for tossing with sauce, not stuffing.
Boil the shells 2–3 minutes shy of al dente. They should be flexible enough to open and fill, but not fully soft. Spread them on a tray to cool; rinse only if they are sticking badly or too hot to handle.
Depending on shell size and your baking dish, you may fit 20–24 filled shells. Aim for 24, but do not force them in. A slightly looser baking dish bakes better than crushed shells.
The Best Ricotta Filling for Stuffed Shells
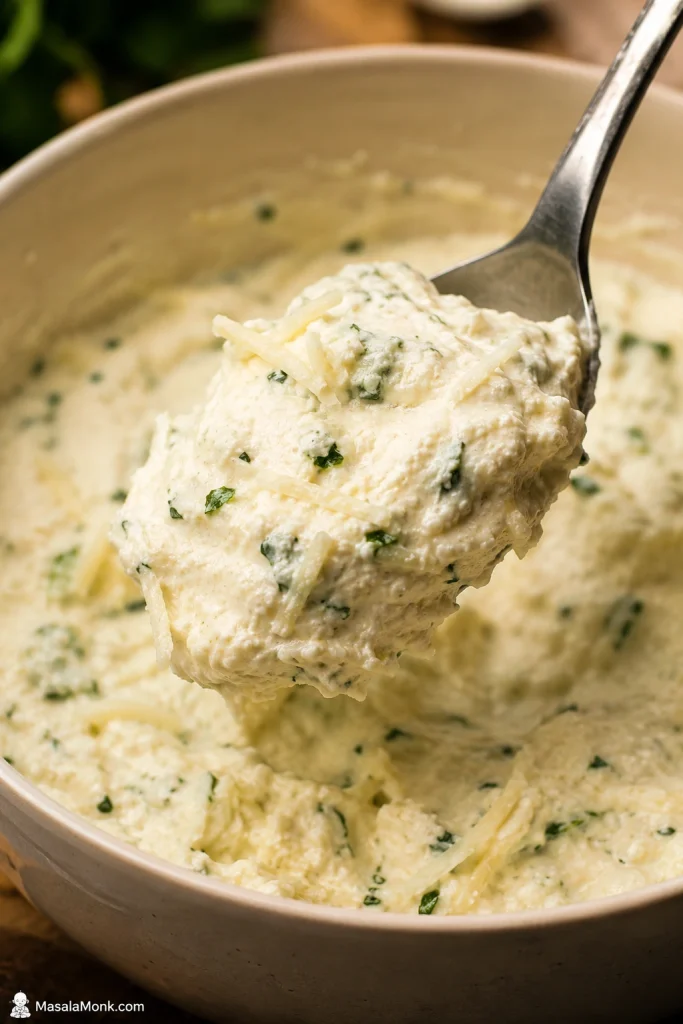
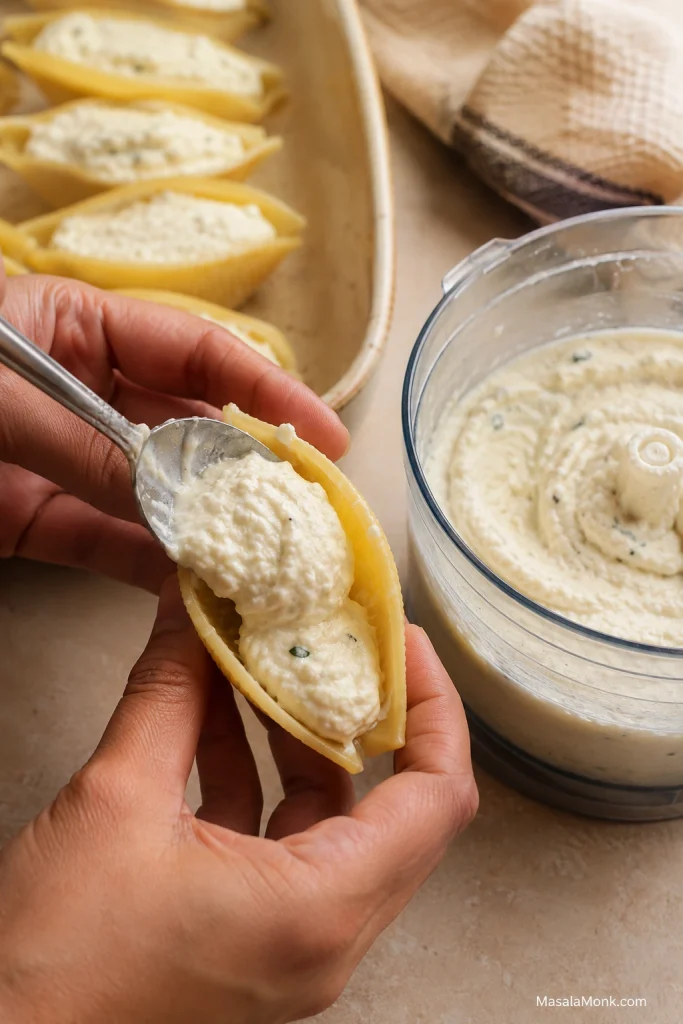
The filling should look thick and scoopable, more like a cheese spread than a sauce. It should mound on a spoon without running off. If it spreads like sauce, it is too wet; if it feels dry or crumbly, a spoonful of ricotta or sauce will loosen it.
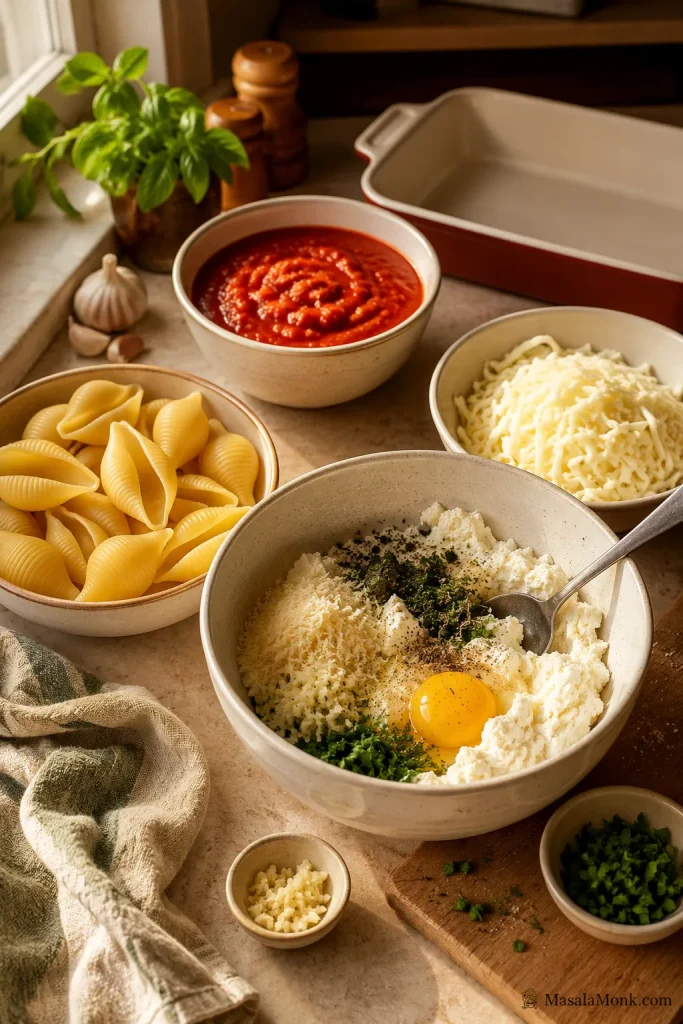
A good stuffed shells filling uses ricotta for creaminess, mozzarella for melt, parmesan or pecorino for savory depth, egg for structure, and garlic, herbs, salt, and pepper for flavor. To check the seasoning safely, mix the cheeses, garlic, herbs, salt, and pepper first, taste, then add the egg last.
Save This Stuffed Shells Filling Ratio
For one 9×13-inch baking dish, use:
- 15–16 oz / 425–454g ricotta
- 2 cups / about 225g mozzarella inside the filling
- ½ cup / 45–55g parmesan or pecorino
- 1 large egg
- 1–2 garlic cloves
- Herbs, salt, and pepper
- 1 cup / about 115g mozzarella for the top
Once the filling looks thick and scoopable, you are in good shape.
How Much Sauce Do Stuffed Shells Need?
Use about 3 cups / 720ml marinara for one 9×13-inch baking dish. The shells should sit in sauce and have sauce spooned over and around them, but they do not need to be buried.
- 1 cup / 240ml goes on the bottom of the baking dish
- 1½–2 cups / 360–480ml goes over and around the filled shells
- Extra warm sauce can be served on the side if you like a saucier plate
Before baking, you should still see the shape of each shell, but the edges should be surrounded by sauce.
How to Make Stuffed Shells
With the shells, filling, and sauce sorted, assembly is simple: sauce, filled shells, more sauce, cheese, foil, and oven. While the shells boil, mix the filling and spread sauce in the baking dish. By the time the shells are cool enough to handle, the filling and baking dish are ready.
1. Boil the shells
Bring a large pot of salted water to a boil. Add the jumbo shells and cook them 2–3 minutes less than the package says for al dente. Drain and let them cool until they are easy to handle.
2. Make the ricotta filling
In a large bowl, mix ricotta, 2 cups mozzarella, parmesan, egg, garlic, herbs, salt, pepper, and optional red pepper flakes. The filling should be creamy but thick enough to hold its shape on a spoon.
3. Add sauce to the baking dish
Spread about 1 cup of marinara sauce across the bottom of a 9×13-inch / 23×33 cm baking dish. This layer keeps the shells from sticking and protects the bottom of the pasta.
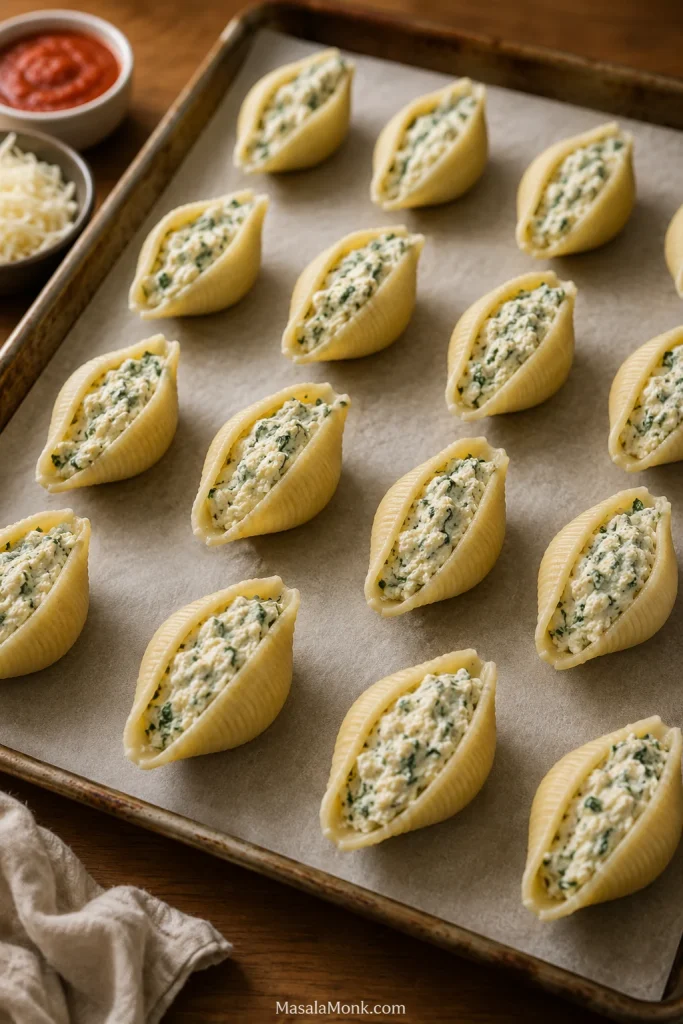
4. Fill the shells
Fill each shell with about 1½–2 tablespoons / about 30g of ricotta filling, depending on shell size. Use a spoon, piping bag, or zip-top bag. Fill generously, but not so much that the shells split. Do not worry if a little filling shows or the shells sit at slightly different angles.

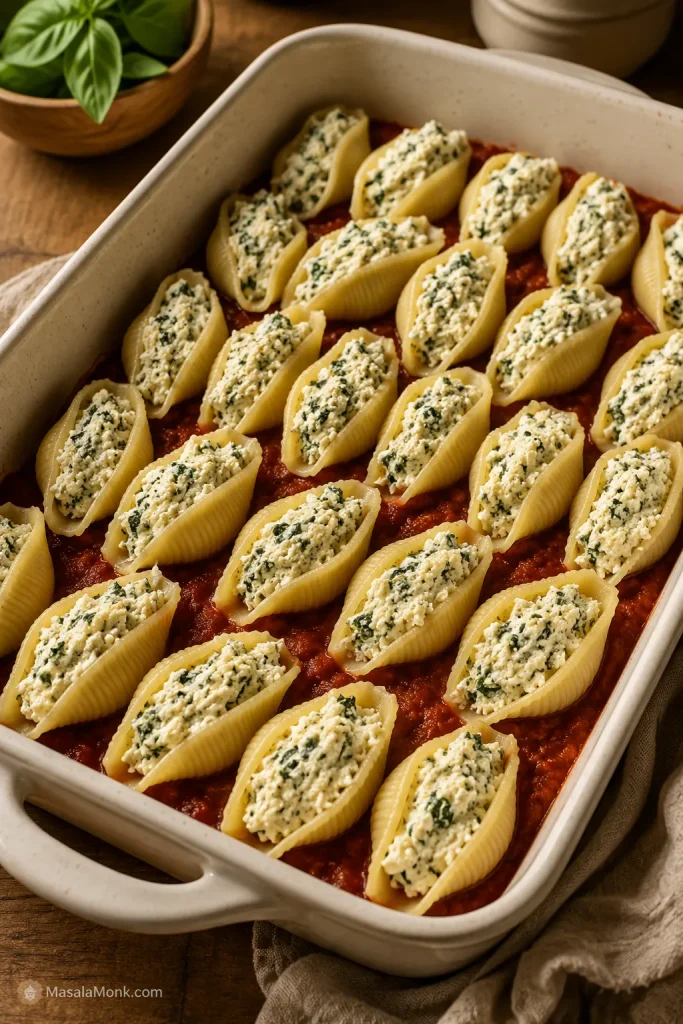
5. Arrange and sauce
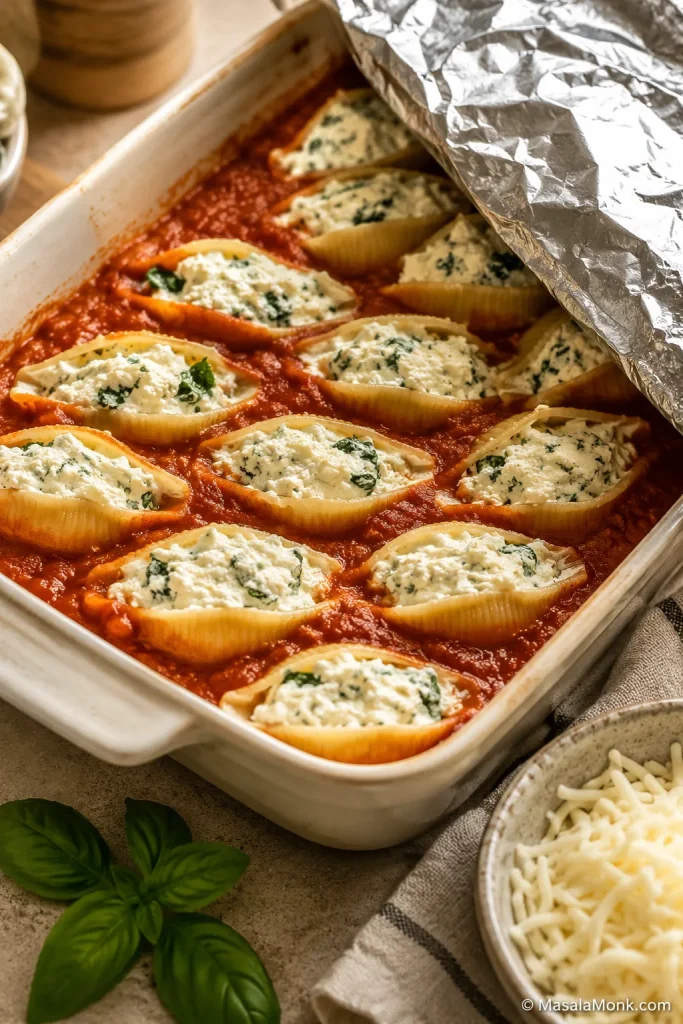
Place the filled shells in the baking dish, filling-side up. Spoon the remaining sauce over and around the shells. You want the pasta to look full and well-coated, not dry or sparse.
6. Bake covered, then uncovered
Cover the baking dish with foil without pressing it into the shells. If the foil may touch the sauce or cheese, place a sheet of parchment under the foil or tent the foil slightly. Bake at 375°F / 190°C for 25 minutes.
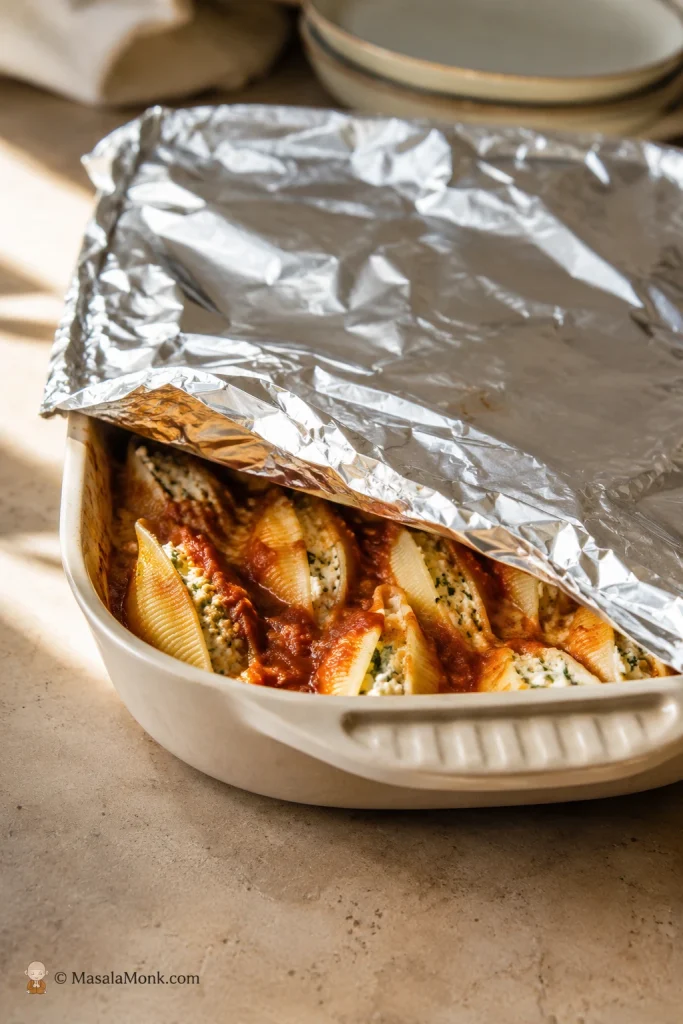
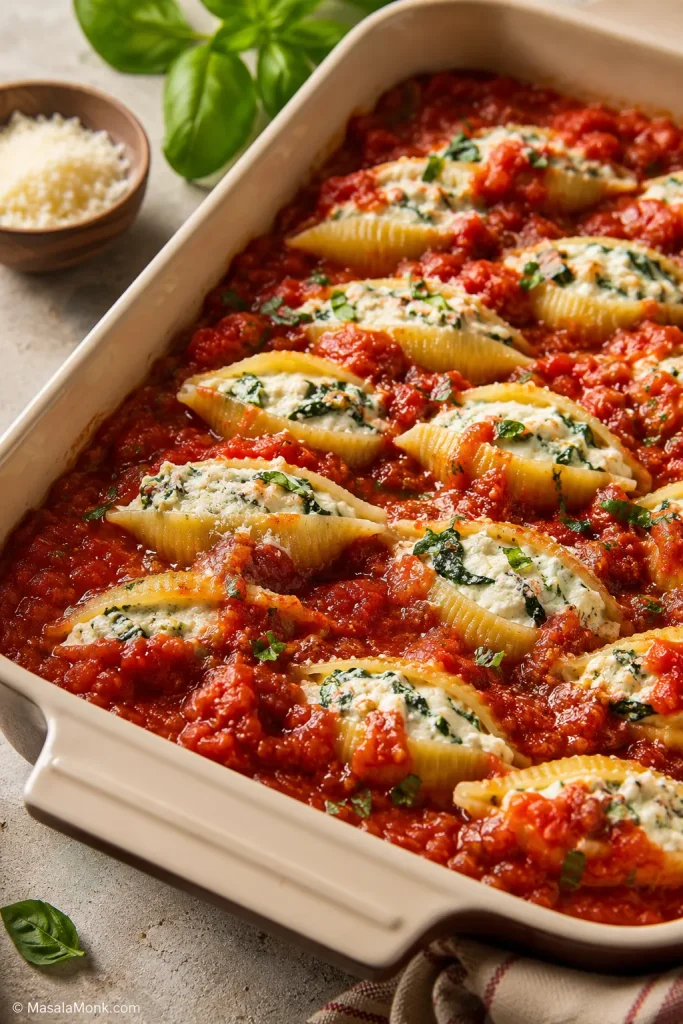
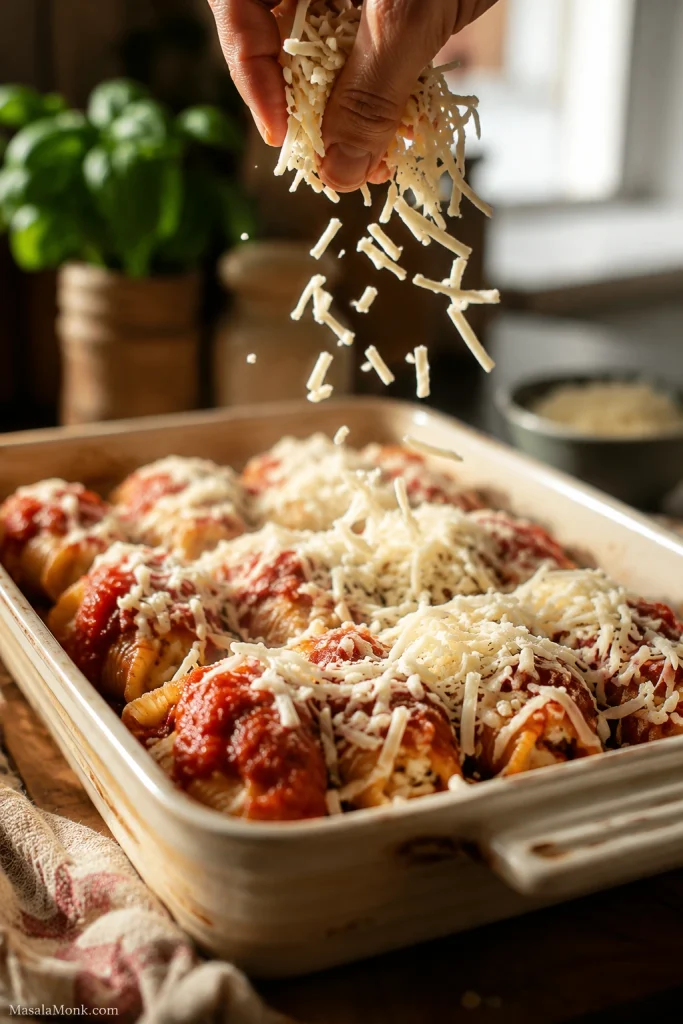
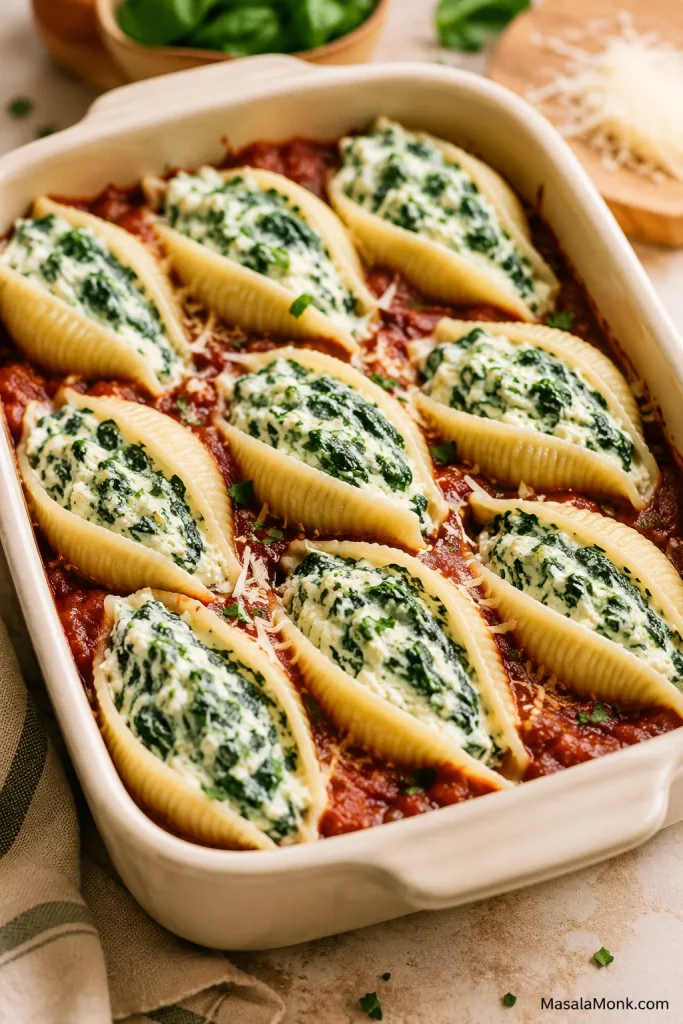
Remove the foil, sprinkle the remaining mozzarella over the top, and bake for another 8–10 minutes, until the cheese is melted and the sauce is bubbling. The uncovered bake is where the top gets those golden spots.
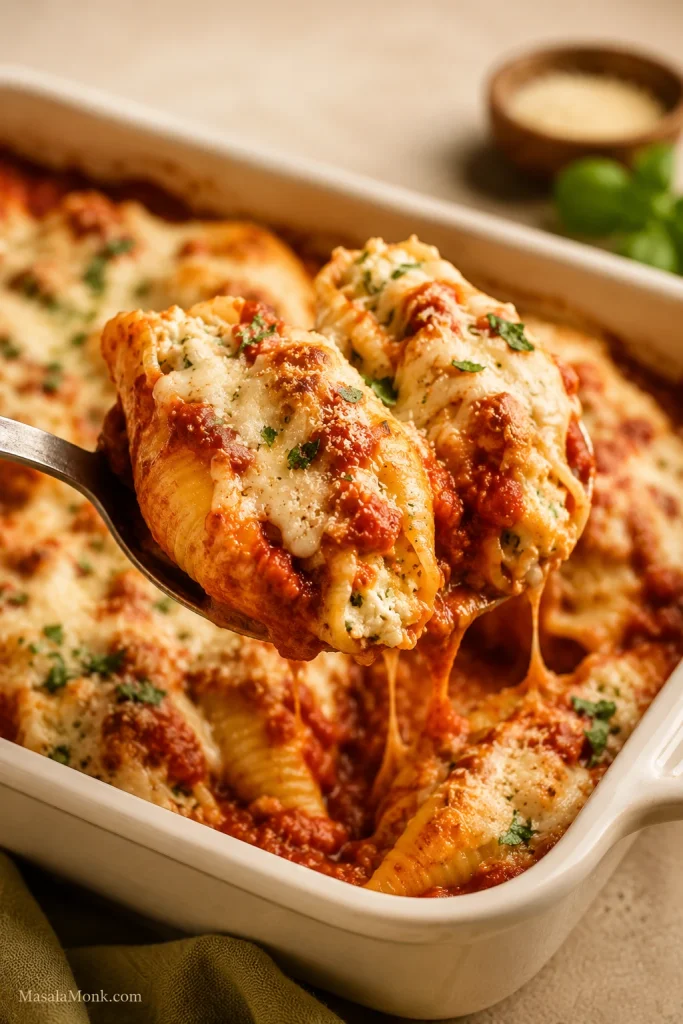
7. Rest before serving
Let the stuffed shells rest for 5–10 minutes before serving. This is the hardest part because it smells ready, but the short rest makes serving much cleaner. After resting, the shells should lift from the baking dish without spilling all their filling.
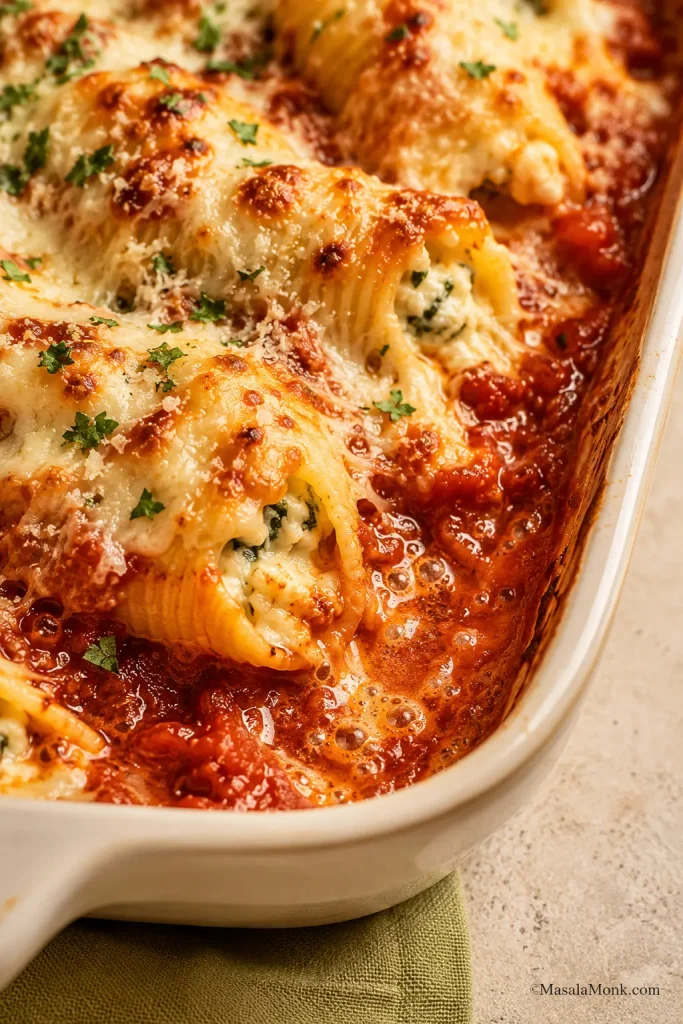
How to Know When Stuffed Shells Are Done
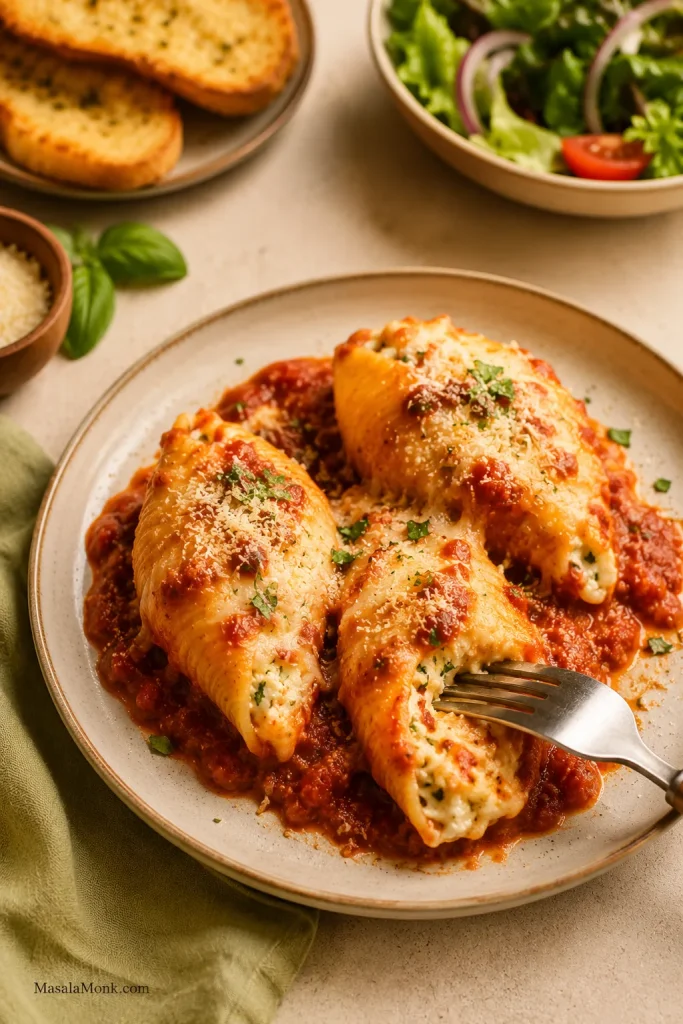
The stuffed shells are done when the sauce is bubbling around the edges, the cheese is melted and lightly browned in spots, and the filling is hot in the center. The best bite is fork-tender pasta, thick ricotta filling, tangy tomato sauce, and a little golden mozzarella from the top.
If the top cheese browns before the center is hot, cover the pasta loosely with foil again and keep baking until the filling is hot through the middle.
Stuffed Shells Recipe
This is the full classic version: jumbo shells filled with seasoned ricotta, tucked into marinara, covered until tender, then finished uncovered so the mozzarella melts into golden spots.
Ingredients
- 12 oz / 340g jumbo pasta shells, or enough to cook 28–30 shells
- 3 cups / about 720ml marinara sauce, or one 24 oz / 680g jar, divided
- 15–16 oz / 425–454g ricotta cheese
- 3 cups shredded low-moisture mozzarella, about 12 oz / 340g, divided
- ½ cup / 45–55g grated parmesan or pecorino
- 1 large egg
- 1–2 garlic cloves, minced or grated
- 1 tsp dried Italian seasoning, or 2–3 tbsp chopped fresh parsley or basil
- ½–¾ tsp salt, plus more for pasta water
- ¼–½ tsp black pepper
- Pinch of red pepper flakes, optional
- A few drops of olive oil, only if needed to keep cooked shells from sticking
Instructions
- Heat the oven. Preheat the oven to 375°F / 190°C.
- Cook the shells. Bring a large pot of salted water to a boil. Add 28–30 jumbo shells and cook 2–3 minutes less than the package directions for al dente. Drain and let cool until easy to handle. If the shells start sticking, spread them on a tray or toss with only a few drops of olive oil.
- Make the filling. In a large bowl, combine ricotta, 2 cups mozzarella, parmesan, garlic, Italian seasoning or herbs, salt, pepper, and red pepper flakes if using. Taste the cheese mixture before adding the egg, then mix in the egg last.
- Prepare the baking dish. Spread about 1 cup of marinara sauce over the bottom of a 9×13-inch / 23×33 cm baking dish.
- Fill the shells. Spoon about 1½–2 tablespoons / about 30g filling into each shell. Arrange the filled shells in the dish, filling-side up. Aim for 24 filled shells; if your shells are very large, 20–22 may fit better.
- Add sauce. Spoon the remaining marinara sauce over and around the shells. Cover the baking dish tightly with foil, tenting it slightly so it does not press into the cheese or filling.
- Bake covered. Bake for 25 minutes, until the shells are hot and the sauce is bubbling around the edges.
- Finish uncovered. Remove the foil, sprinkle the remaining 1 cup mozzarella over the top, and bake uncovered for 8–10 minutes, until the cheese is melted and lightly browned in spots.
- Rest and serve. Let the stuffed shells rest for 5–10 minutes before serving. Serve with extra warm marinara if you like a saucier plate.
Recipe Notes
- Softer top cheese: Add all the mozzarella before covering and baking if you want a fully melted top.
- Stretchier browned top: Save the final cup of mozzarella and add it after the covered bake.
- Spinach shells: Add 5 oz / 140g cooked fresh spinach or 8 oz / 225–250g thawed frozen spinach, squeezed very dry.
- Meat sauce version: Add ½–1 lb / 225–450g cooked ground beef or Italian sausage to the sauce, and increase sauce by ½–1 cup if the pasta looks dry.
- Cottage cheese swap: Blend cottage cheese briefly for a smoother filling and drain it first if it looks watery.
Small Details That Make Better Stuffed Shells
- Cook 28–30 shells. You need backups for the ones that tear.
- Drain watery ricotta. Loose ricotta makes the filling run instead of mound.
- Taste before adding egg. It is easier to fix bland filling before the egg goes in.
- Loosen very thick marinara. A few tablespoons of water help the sauce move around the shells.
- Cover first. The pasta finishes cooking in the sauce before the cheese browns.
- Rest before serving. The filling firms slightly as it sits.
Make-Ahead, Freezer, and Reheating Instructions
Stuffed shells are one of the best baked pasta dinners to prepare ahead. The shells, filling, sauce, and cheese all hold up well, and a freezer batch feels like a future dinner already handled. This is also a good place to make two baking dishes: bake one tonight and freeze the second before baking.
Best Make-Ahead Option
Assemble the stuffed shells up to 24 hours ahead. Fill the shells, arrange them in sauce, cover tightly, and refrigerate. Let them sit at room temperature only while the oven preheats, about 20–30 minutes. If baking straight from the fridge, add 5–10 minutes to the covered baking time.
Best Freezer Option
Freeze stuffed shells before baking. Assemble the shells in a freezer-safe baking dish, cover tightly with plastic wrap and foil or a freezer-safe lid, and freeze for up to 2–3 months for best quality.
If you froze the shells in a glass or ceramic baking dish, thaw them overnight unless the dish is labeled freezer-to-oven safe. That helps prevent sudden temperature shock. You can also freeze the filled shells separately and transfer them to an oven-safe dish with sauce before baking.
Best Small-Batch Freezer Option
Freeze filled shells on a tray until firm, then transfer them to a freezer-safe bag or container. Later, place only the number of shells you need into a baking dish with sauce and cheese. This is useful when you want 2–4 servings instead of a full batch.
Best Texture After Freezing
For the best texture, thaw frozen stuffed shells overnight in the refrigerator before baking. Before baking, remove any plastic wrap and cover the baking dish again with foil. Bake as directed, adding 5–10 extra minutes if the pasta is still cold.
How to Bake Frozen Stuffed Shells
To bake from frozen, cover the baking dish with foil and bake at 350°F / 175°C for about 60–75 minutes, or until the center is steaming hot. Uncover, add cheese if needed, and bake 10–15 minutes more until bubbling and melted.
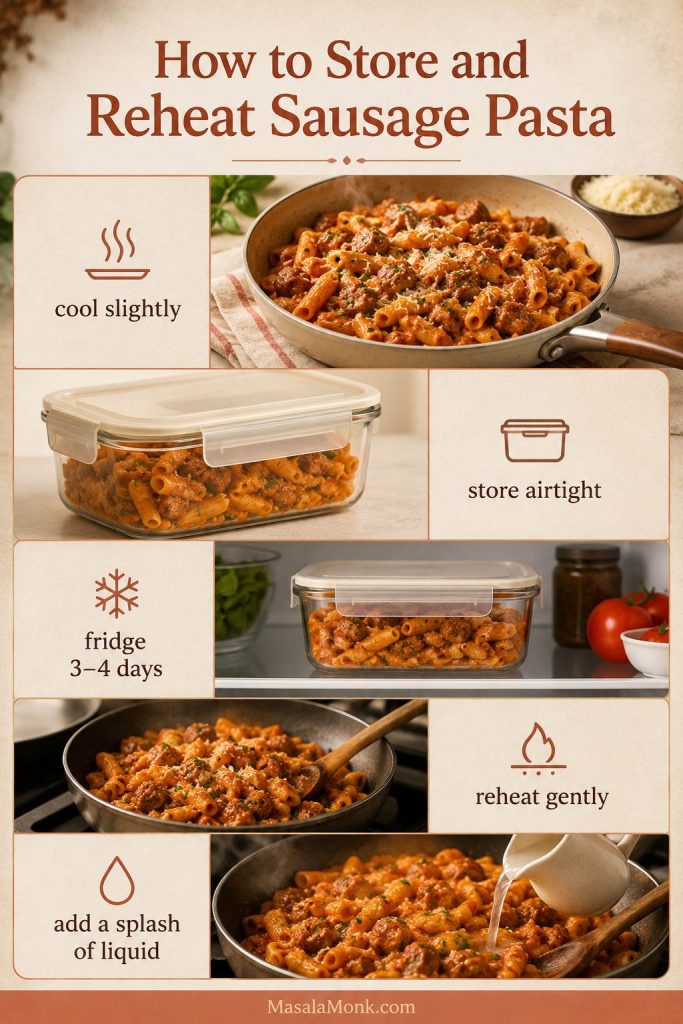
How to Store Leftovers
Store leftover stuffed shells in an airtight container in the refrigerator for 3–4 days. A 3–4 day refrigerator window is also the general USDA guidance for cooked leftovers, so it is a good limit to use here.
How to Reheat Stuffed Shells
Reheat covered in the oven at 350°F / 175°C until hot, or microwave individual portions. Add a spoonful of extra sauce or a small splash of water before reheating so the pasta does not dry out.
Leftover Ideas
Leftover stuffed shells are best reheated with extra sauce, but you can also chop them into smaller pieces and reheat them like baked pasta. Add fresh herbs, parmesan, or a little extra marinara to wake the flavor back up. This is the sort of dinner that makes leftovers feel like a reward.
Stuffed Shells Variations
Think of the recipe card as the house version. The variations are how you adjust the pasta for the people eating it — greener for spinach lovers, meatier for Sunday dinner, lighter with cottage cheese, or richer with Alfredo.
Which Stuffed Shells Variation Should You Make?
- Classic: Make the ricotta version as written first if you want the most traditional baked pasta.
- Spinach: Choose spinach ricotta stuffed shells when you want the dish to feel a little fresher and greener.
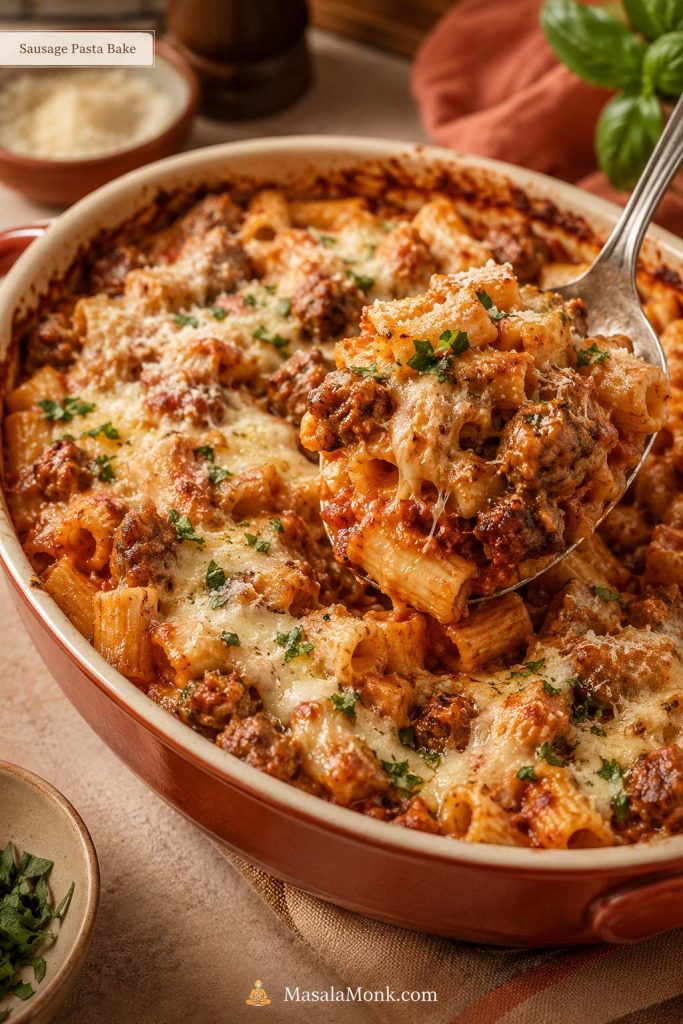
- Beef or sausage: Use the meat sauce version for a heartier Sunday-style dinner.
- Cottage cheese: Try stuffed shells without ricotta if you want a lighter, higher-protein filling or do not have ricotta.
- Alfredo: Make Alfredo stuffed shells for a richer white-sauce version with chicken or spinach.
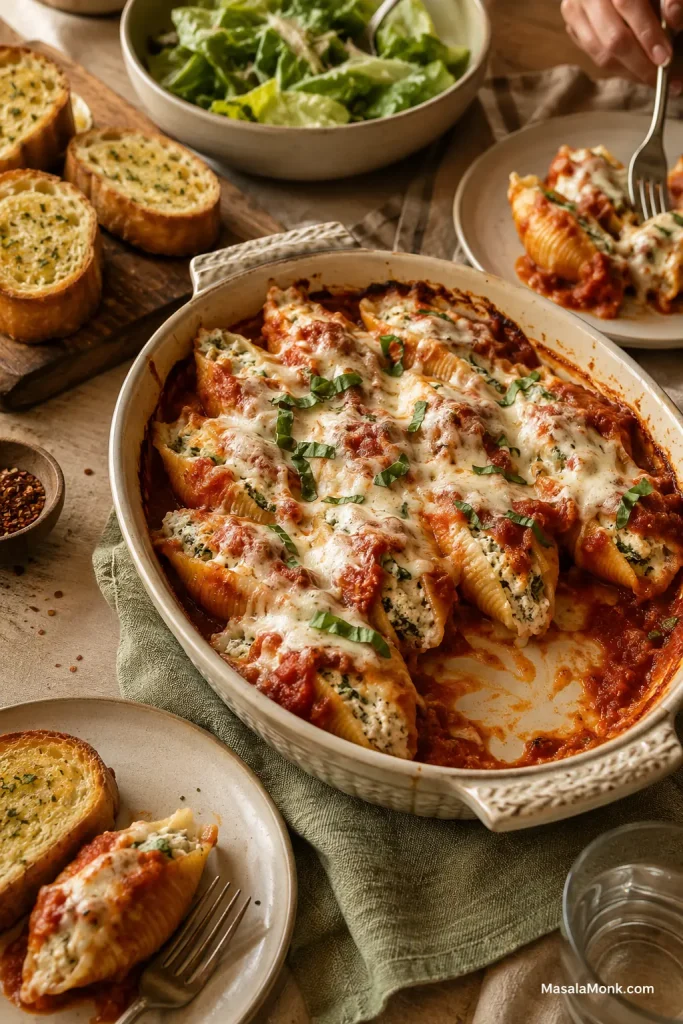
Spinach Ricotta Stuffed Shells
Add spinach to the ricotta filling for a classic spinach stuffed shells variation. Fresh spinach and frozen spinach both work, but the spinach needs to be cooked, chopped, and squeezed very dry before it goes into the filling. Use about 5 oz / 140g fresh spinach or 8 oz / 225–250g frozen spinach.
Beef Stuffed Shells
For the cleanest shells, keep the ricotta filling mostly cheese-based and put the browned meat in the sauce. That gives every bite a hearty meat sauce without making the shells heavy or hard to close. Brown ½–1 lb / 225–450g ground beef with a little salt, pepper, garlic, and Italian seasoning, then drain excess fat before adding it to the marinara.
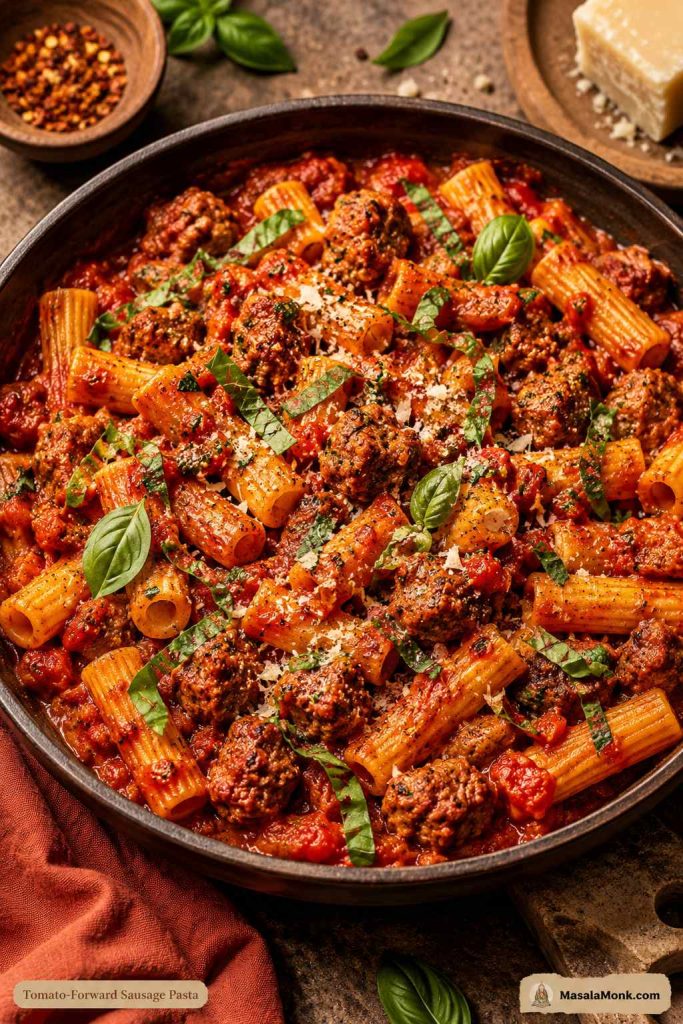
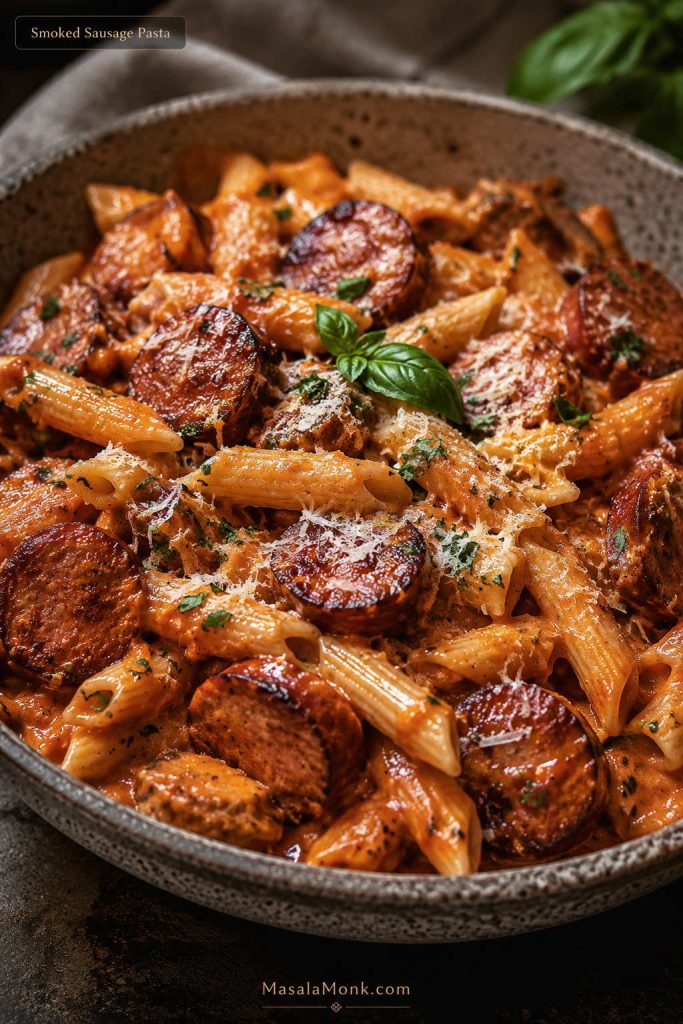
Sausage Stuffed Shells
Italian sausage brings more seasoning than ground beef, so it is the easiest way to make the sauce taste deeper. Remove it from the casing if needed, brown it well, and drain any excess fat. Sausage brings more salt and spice than plain ground beef, so taste before adding extra seasoning.

Cottage Cheese Stuffed Shells
Cottage cheese is the easiest ricotta swap and a good option if you want a lighter, higher-protein filling. Replace ricotta 1:1 by weight, drain it if watery, and blend it briefly for a smoother texture. The flavor is a little tangier and less classic than ricotta, but it bakes up creamy when mixed with mozzarella, parmesan, egg, garlic, and herbs.
Stuffed Shells Without Ricotta
If you do not have ricotta, use cottage cheese, a mix of cream cheese and mozzarella, a meat filling, roasted vegetables, or tofu ricotta for a dairy-free version. This helps if you dislike ricotta or simply do not have it. The recipe can still work well as long as the filling is thick and not watery.
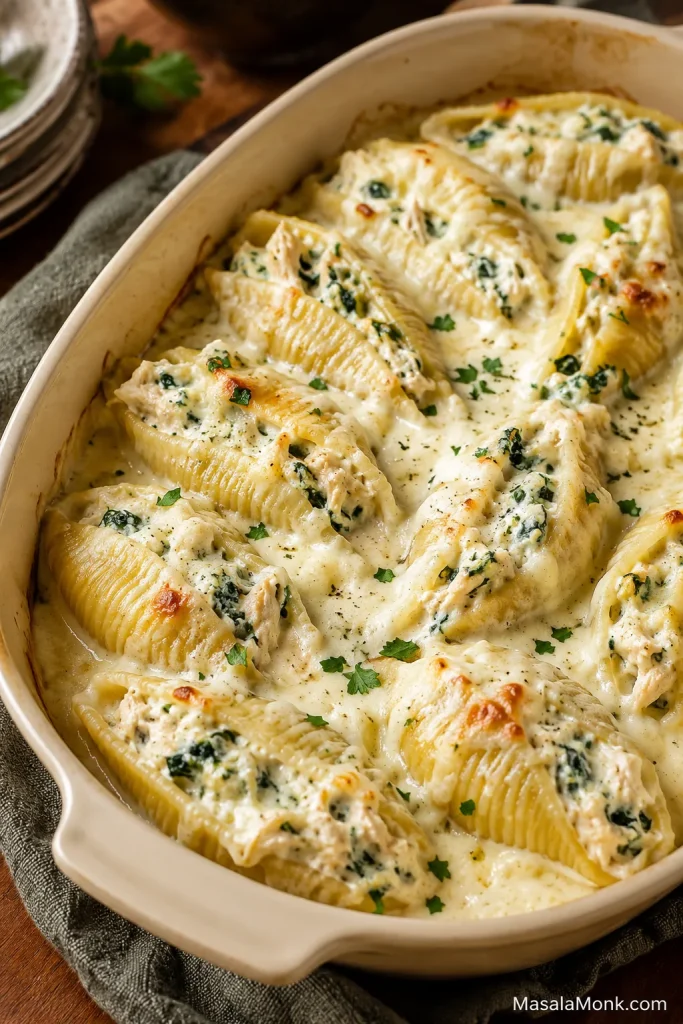
Alfredo Stuffed Shells
For a creamy white-sauce version, use Alfredo sauce instead of marinara. Because Alfredo is rich, spinach or chicken works especially well here. For more creamy pasta dinner ideas, see this chicken Alfredo pasta guide.
No-Boil Stuffed Shells
No-boil stuffed shells can work, but they need a different sauce ratio and a longer covered bake. This recipe is written for boiled shells because it gives the most predictable texture: shells that are flexible enough to fill, tender after baking, and less likely to stay firm in the center. If you want a true no-boil version, increase the sauce or liquid and keep the dish tightly covered until the pasta is fully tender.
Serving and Scaling
How Many Stuffed Shells Per Person?
Plan on 3–4 stuffed shells per adult if serving with salad, bread, or vegetables. Plan on 4–5 shells per person for a heartier main dish with fewer sides. A 9×13-inch baking dish with about 20–24 stuffed shells serves 6 people generously.
Can You Double This Recipe?
Yes. To double the recipe, use two 9×13-inch baking dishes instead of crowding everything into one deep dish. If baking both at the same time, rotate them halfway through if your oven has hot spots. If the pans are cold from the fridge, they may need a few extra minutes of covered baking time. You can also bake one now and freeze one for later.
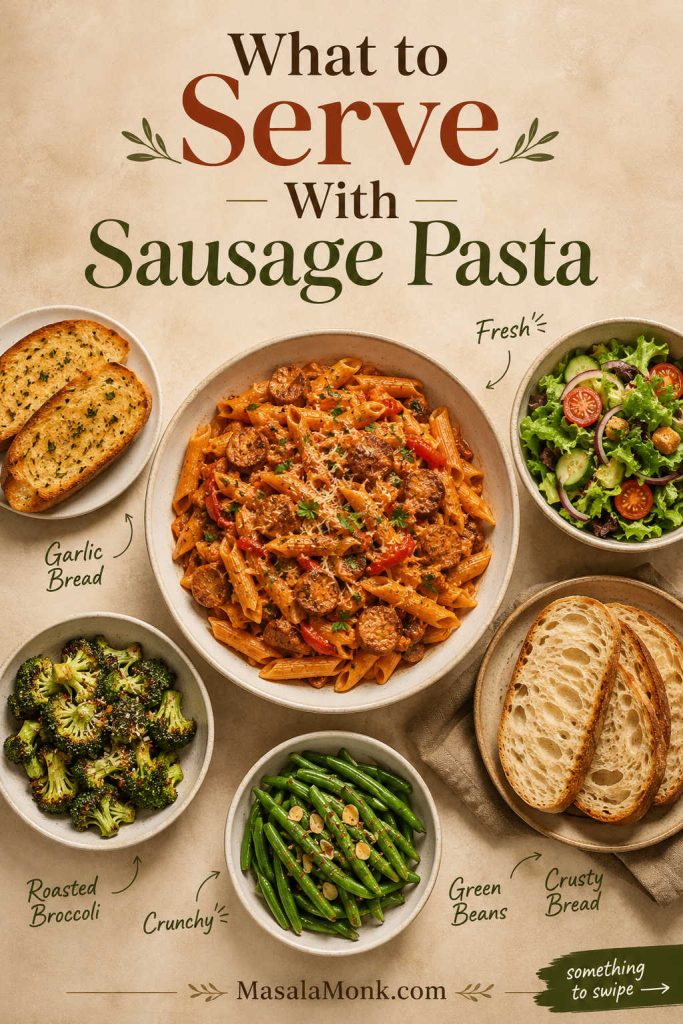
What to Serve with Stuffed Shells
Stuffed shells are rich, cheesy, and well-sauced, so they pair best with something crisp, green, garlicky, or simple. On a weeknight, salad is enough. When serving company, add garlic bread and something fresh on the side.
Classic Comfort Sides
- Homemade garlic bread loaf
- Warm crusty bread
- Caesar salad
Light and Fresh Sides
- Simple green salad with vinaigrette
- Cucumber salad with vinegar, dill, and onion
- Arugula salad with lemon
Extra Vegetable Sides
- Roasted broccoli
- Sautéed spinach or greens
- Roasted zucchini or eggplant
- Steamed green beans
Bigger Dinner Add-Ons
- Minestrone or vegetable soup
- Antipasto-style olives, peppers, and marinated vegetables
- Beet salad with roasted beets, feta, and walnuts
- Roasted vegetables
A fresh side can still feel filling: this chickpea salad brings lemon, herbs, cucumber, and crunch beside the cheesy shells.
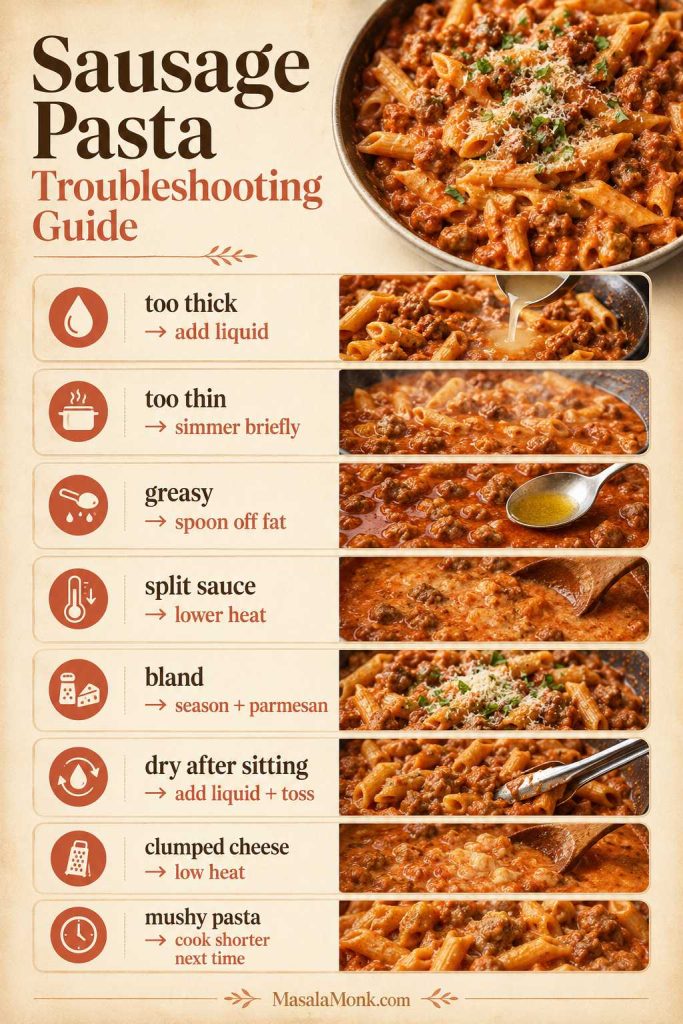
Troubleshooting Stuffed Shells
| Problem | Cause | Fix |
|---|---|---|
| Shells tear | Overcooked or handled too hot | Undercook slightly, cool, and boil extras |
| Shells stick | Cooled in a pile | Spread on a tray or use a few drops of oil |
| Filling is watery | Wet ricotta or spinach | Drain ricotta and squeeze spinach dry |
| Filling leaks | Too much filling or loose filling | Use about 30g filling per shell and keep filling thick |
| Shells are dry | Too little sauce or uncovered too long | Use sauce under and over; bake covered first |
| Edges dry out | Not enough sauce near edges | Spoon extra sauce around edges |
| Filling tastes bland | Ricotta under-seasoned | Add salt, parmesan, garlic, herbs, and pepper |
| Pasta is mushy | Shells fully cooked before baking | Boil 2–3 minutes shy of al dente |
| Top browns too fast | Uncovered too long | Cover loosely and keep baking |
| Frozen center is cold | Covered bake too short | Keep baking covered until center is hot |
| Cheese turns rubbery | Overbaked or poor melting cheese | Bake just until melted and use low-moisture mozzarella |
| Pasta looks watery | Wet filling or vegetables | Drain ingredients and rest before serving |
If the shells or edges look dry after baking, spoon warm marinara around the pasta before serving. Sauce brings moisture back better than adding more cheese.
Frequently Asked Questions
A few common questions come up once you start adjusting the recipe. These quick answers should help you choose the right shells, filling, sauce, and make-ahead method.
What pasta shells do I use for stuffed shells?
Use jumbo pasta shells. Small shells, medium shells, and macaroni-style shells are not large enough for stuffing.
Do you have to boil shells before stuffing them?
For this version, yes. Boiling first gives you shells that are soft enough to fill but firm enough to finish in the oven. No-boil shells need more liquid and a longer covered bake.
What is the best cheese filling for stuffed shells?
The best classic filling uses ricotta, mozzarella, parmesan or pecorino, egg, garlic, herbs, salt, and pepper. Ricotta makes it creamy, mozzarella adds melt, parmesan adds depth, and egg helps it hold together.
Do I need egg in stuffed shells?
Egg helps the filling set so the shells lift more cleanly. You can skip it, but the filling will be softer. If skipping egg, add a little extra parmesan or mozzarella.
Can I use cottage cheese instead of ricotta?
You can replace ricotta 1:1 by weight, drain cottage cheese if watery, and blend it first if you want a smoother filling. The no-ricotta section gives more options.
Can I make stuffed shells without ricotta?
Yes — use cottage cheese, cream cheese mixed with mozzarella, a meat filling, roasted vegetables, or tofu ricotta. Keep the filling thick so it does not run out of the shells.
How much sauce do stuffed shells need?
For one 9×13-inch baking dish, use about 3 cups / 720ml sauce. Spread about 1 cup on the bottom and spoon the rest over and around the filled shells.
Do you bake stuffed shells covered or uncovered?
Bake them covered for most of the time so the pasta stays moist and the filling heats through. Uncover at the end to melt and lightly brown the cheese.
How do you keep stuffed shells from drying out?
Use sauce under and over the shells, cover the baking dish for the first bake, and reheat leftovers with extra sauce or a small splash of water. That is the same no-dry-shell method used in the main recipe.
Can I make stuffed shells ahead of time?
Yes. Assemble stuffed shells up to 24 hours ahead, cover, and refrigerate. The make-ahead section explains the timing and freezer options.
Can stuffed shells be frozen?
Freeze them before baking for the best texture, either as a full baking dish or as individual filled shells. Use within 2–3 months for best quality.
Can I bake stuffed shells from frozen?
You can bake them covered at 350°F / 175°C for 60–75 minutes, or until the center is hot. Then uncover and bake until the sauce bubbles and the cheese melts.
Can I add meat to stuffed shells?
Meat works best in the sauce, where it makes the dish heartier without weighing down the ricotta filling. Brown and drain the meat before adding it.
How many stuffed shells per person?
Plan on 3–4 stuffed shells per adult with sides, or 4–5 shells per person for a heartier main dish.
How long do leftover stuffed shells last?
Leftovers keep for 3–4 days and reheat best with extra sauce. Store them in an airtight container in the refrigerator and reheat until hot.
Make It Your Own
A good batch of stuffed shells should feel generous: pasta tucked into sauce, cheese bubbling around the edges, and enough filling in every shell that nobody feels shortchanged. The whole recipe comes back to the same simple method: thick filling, enough sauce, covered bake, tender shells.
This is the kind of tray that looks a little messy in the best way: sauce at the edges, cheese pulling from the spoon, and enough shells for someone to quietly go back for one more.
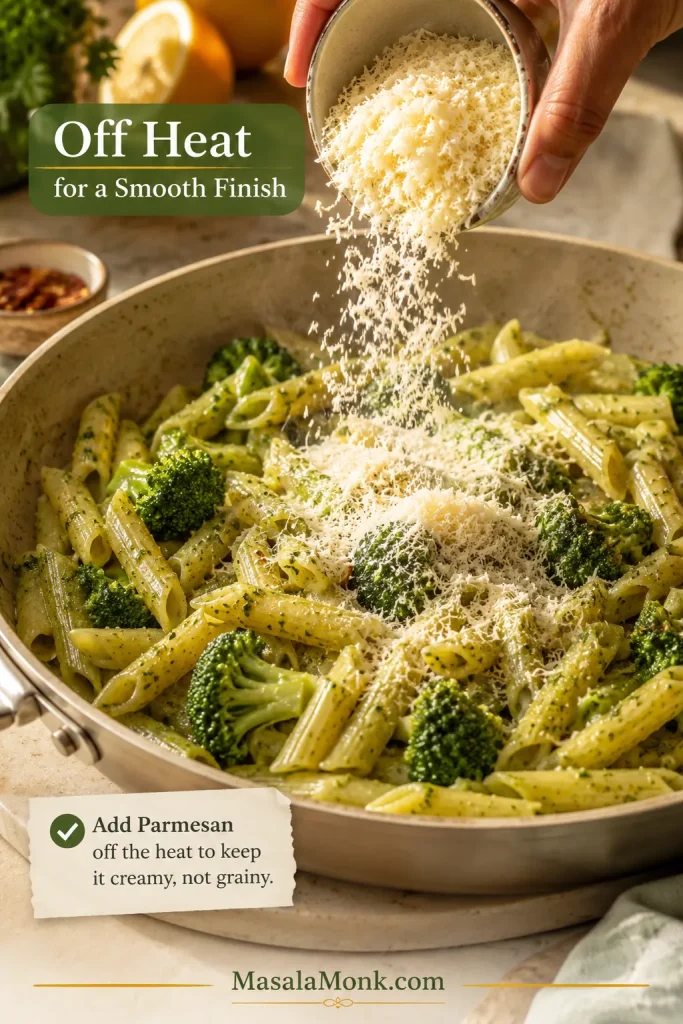
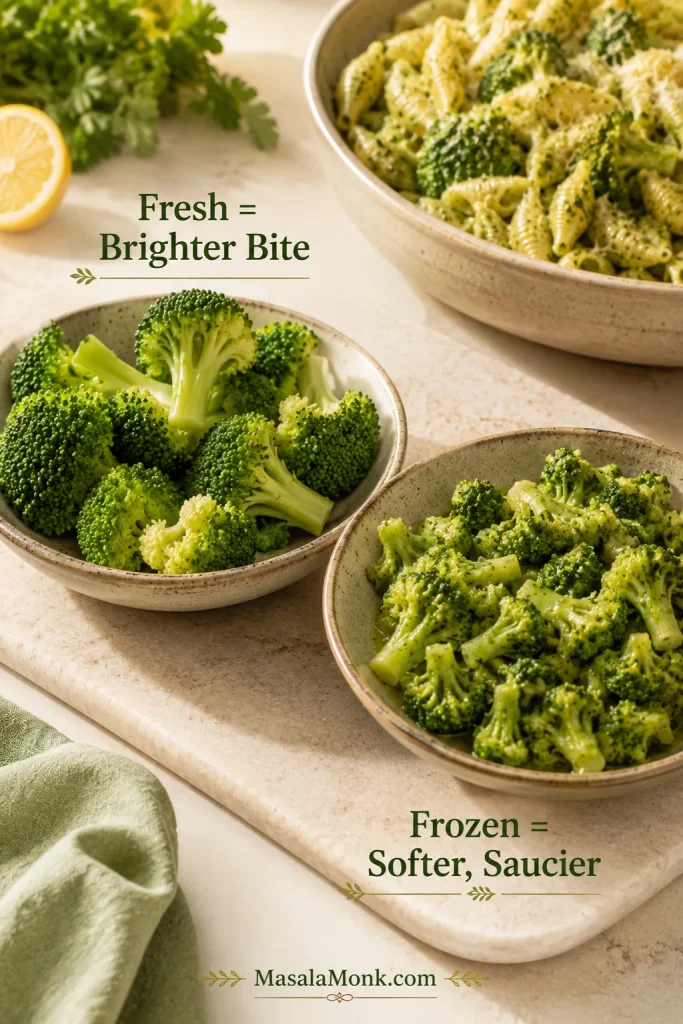
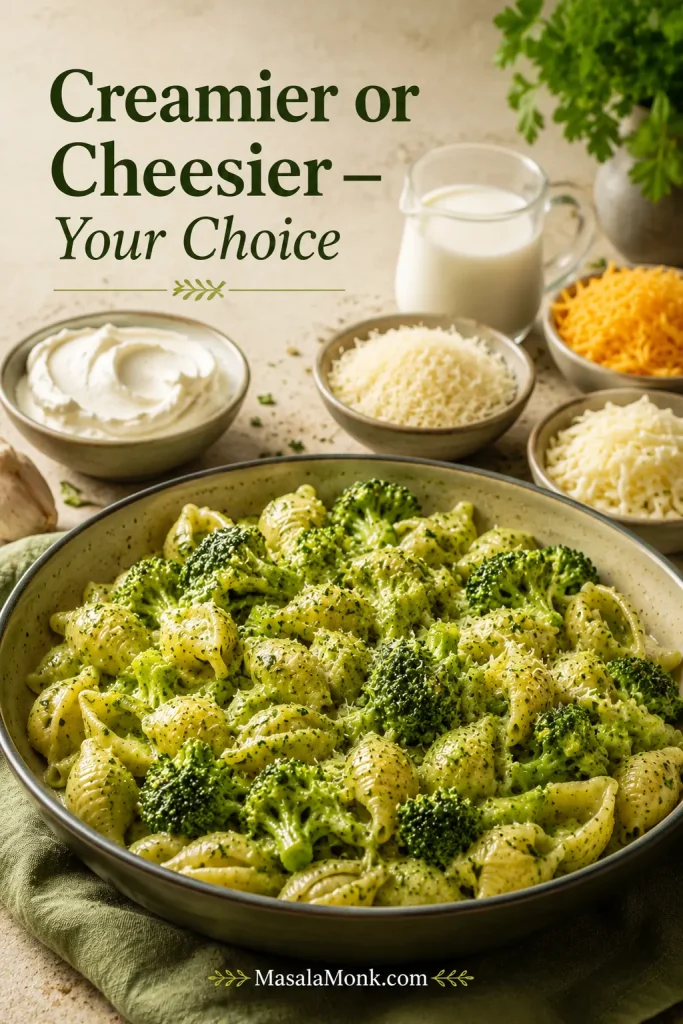
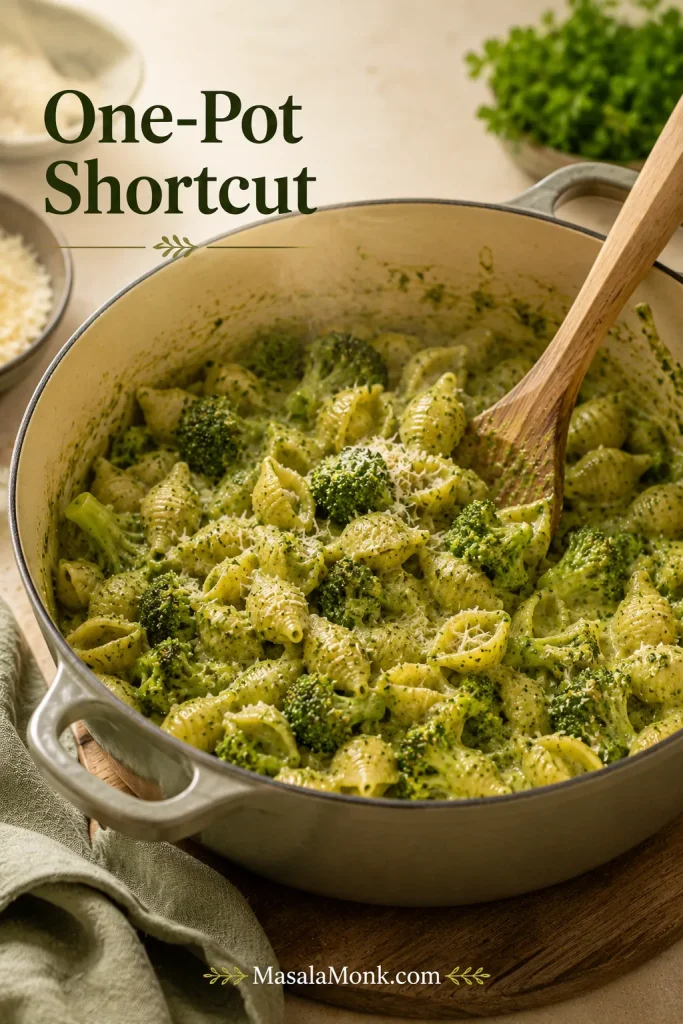
You can keep the recipe classic, add spinach, make it meaty with beef or sausage, swap in cottage cheese, use Alfredo sauce, or freeze a batch for another night. For another cozy pasta dinner after this one, save this broccoli pasta too.
If you make these stuffed shells, tell us which version landed on your table: classic ricotta, spinach, meat sauce, cottage cheese, Alfredo, or extra saucy. I especially want to know if you froze a batch for later — that is where this recipe really earns its keep.