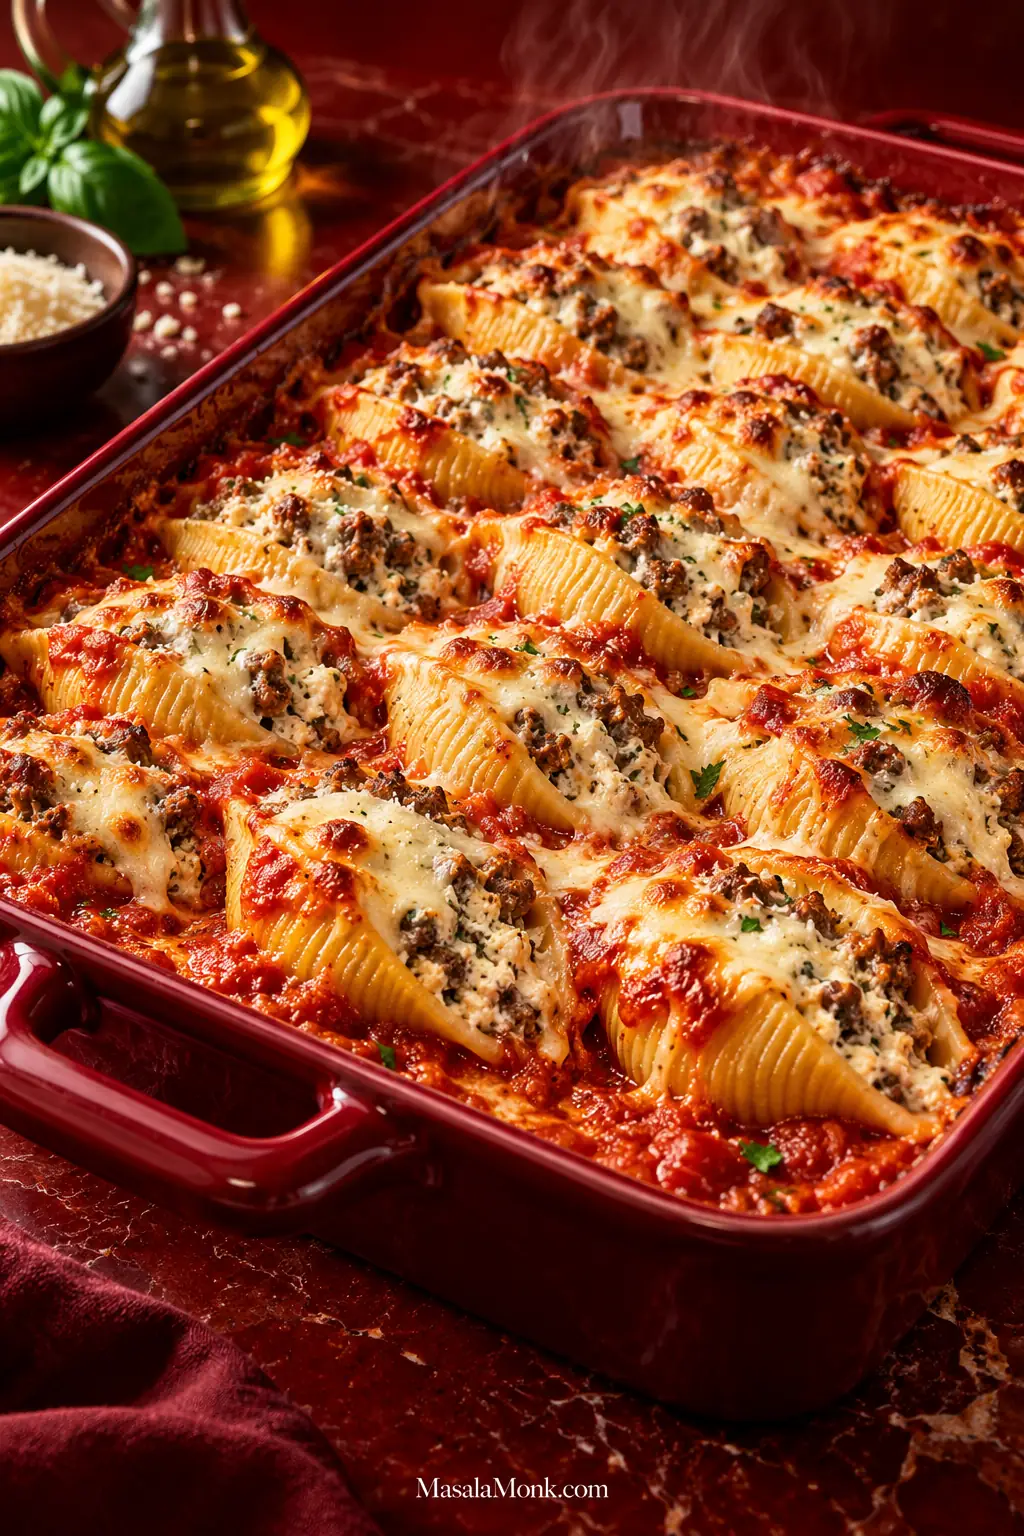
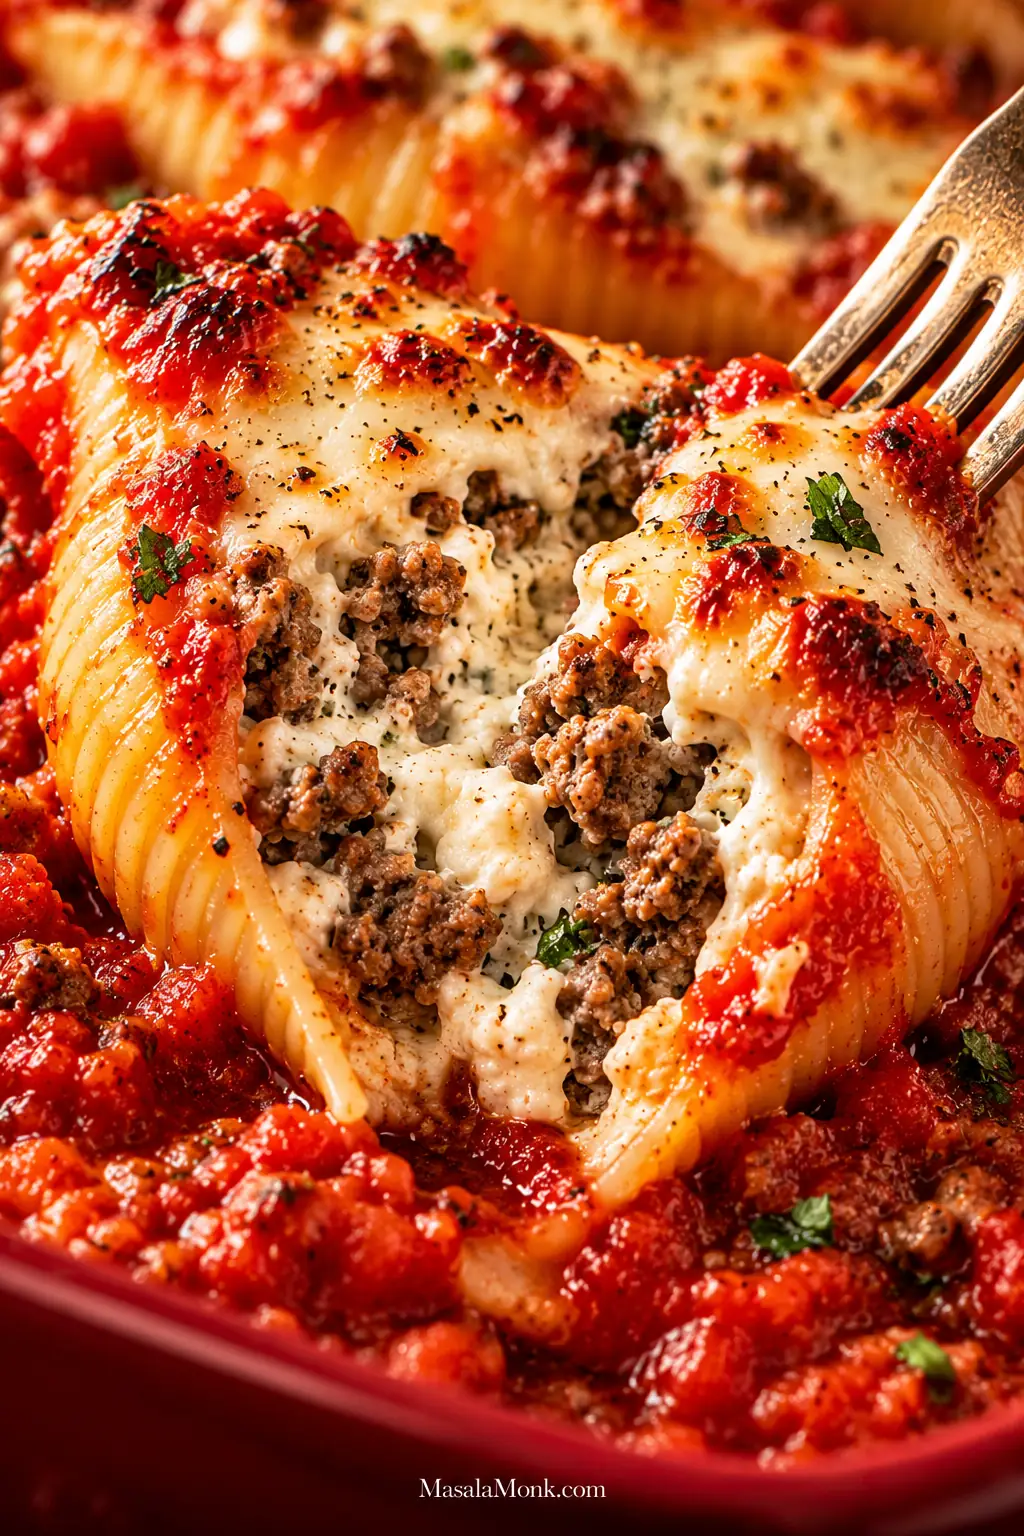
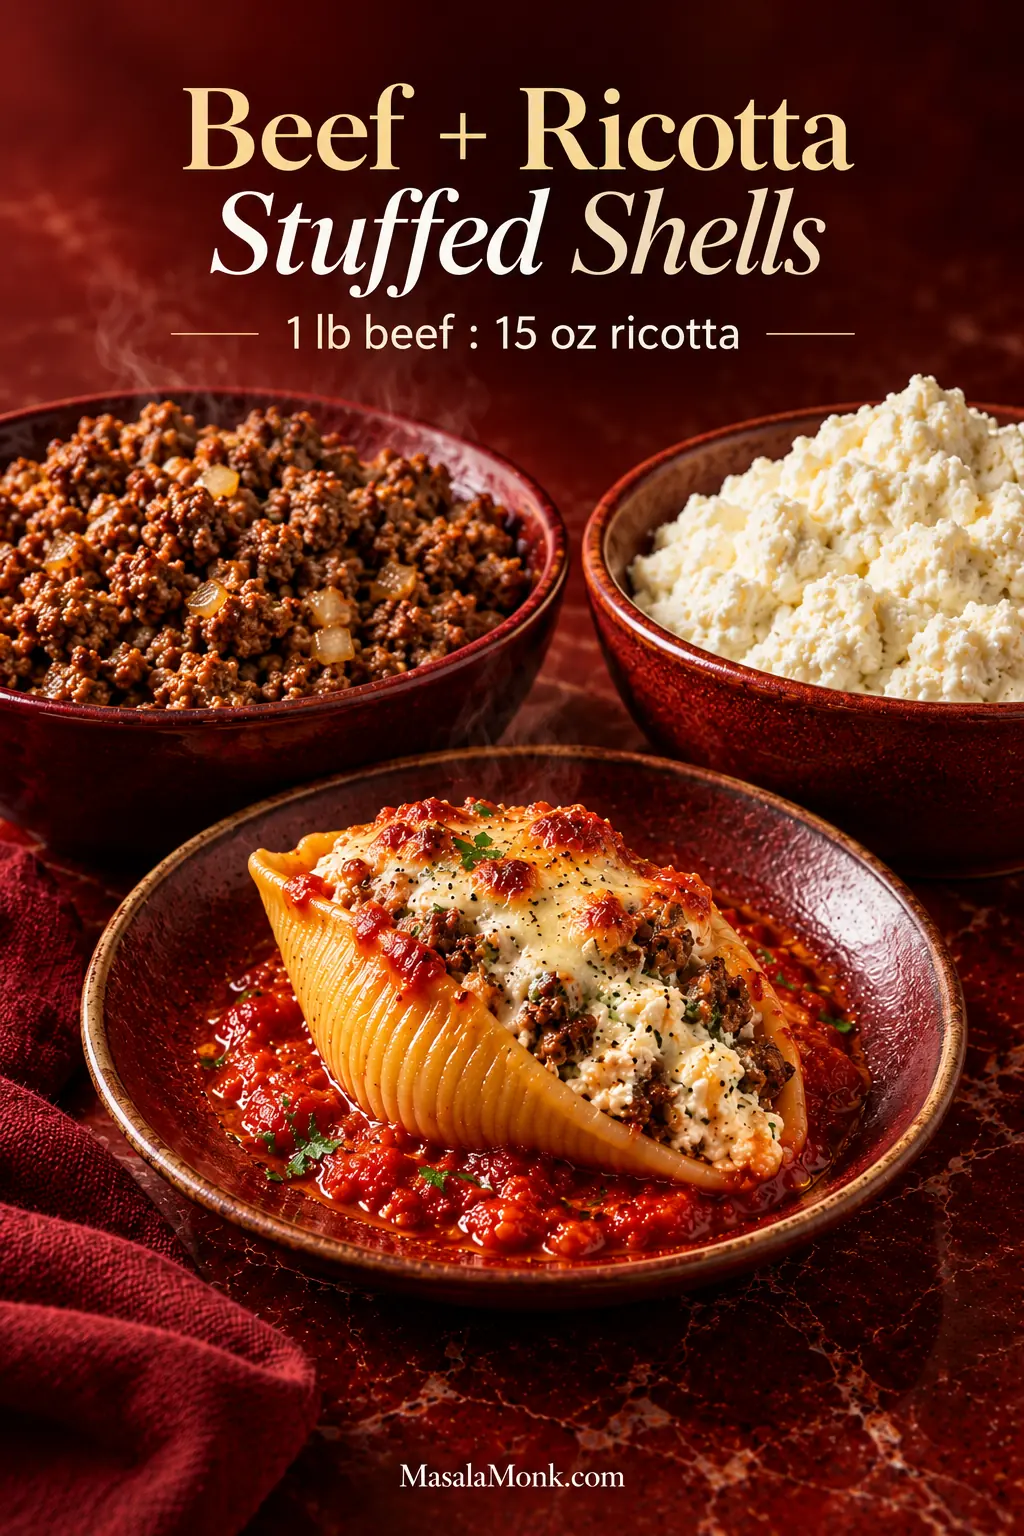
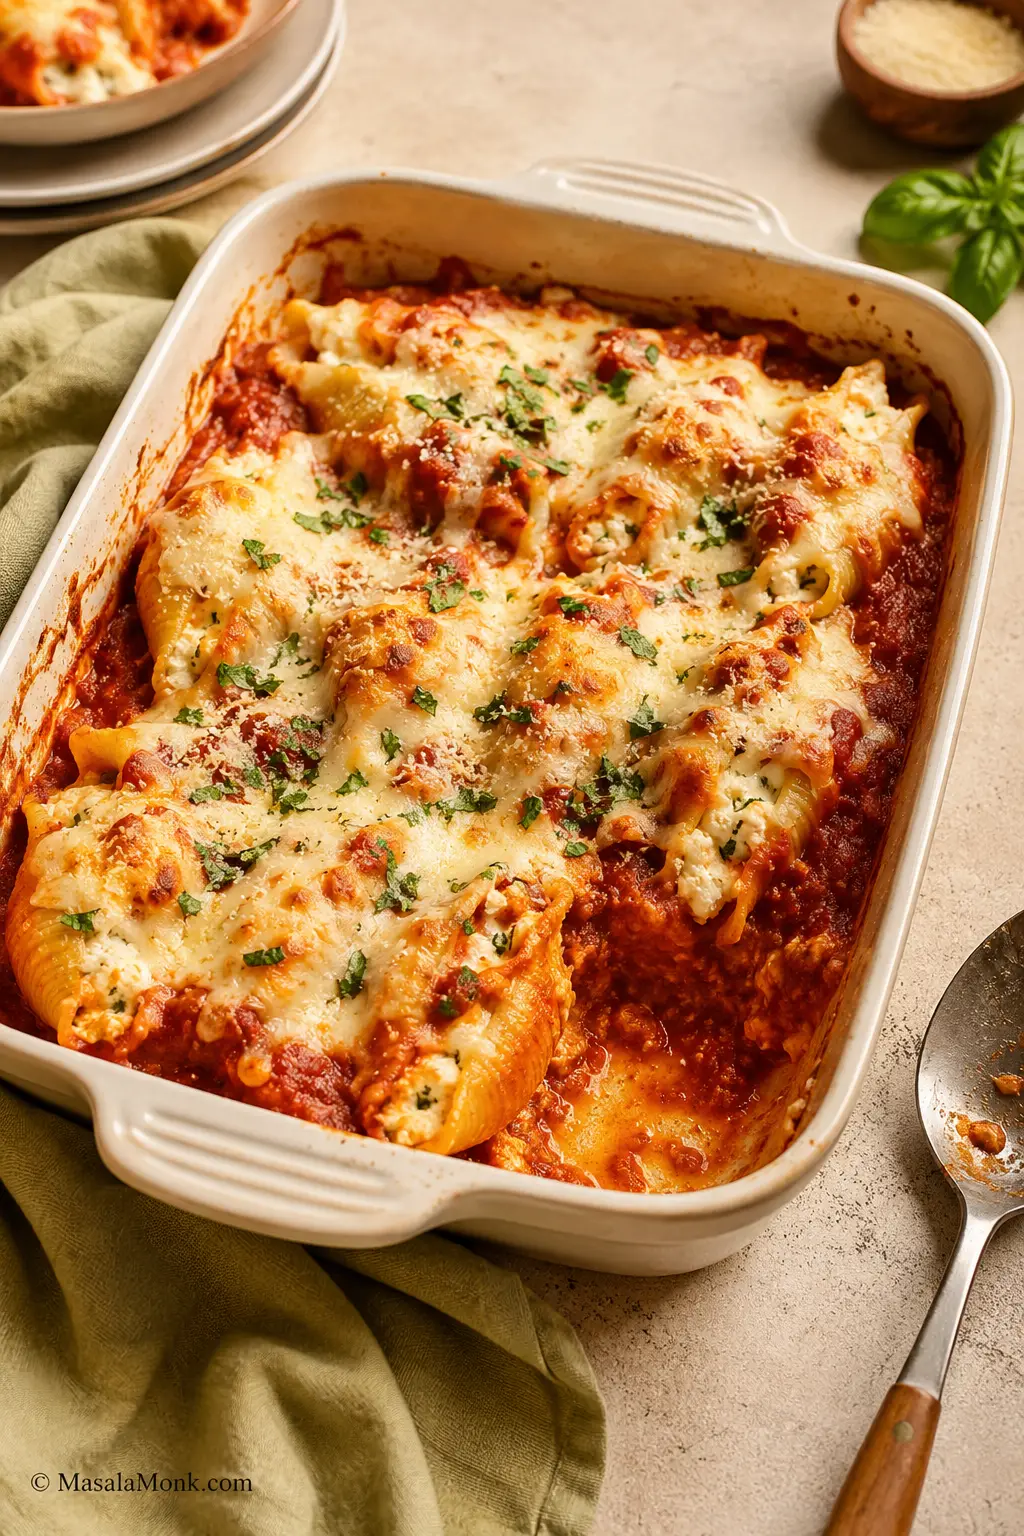
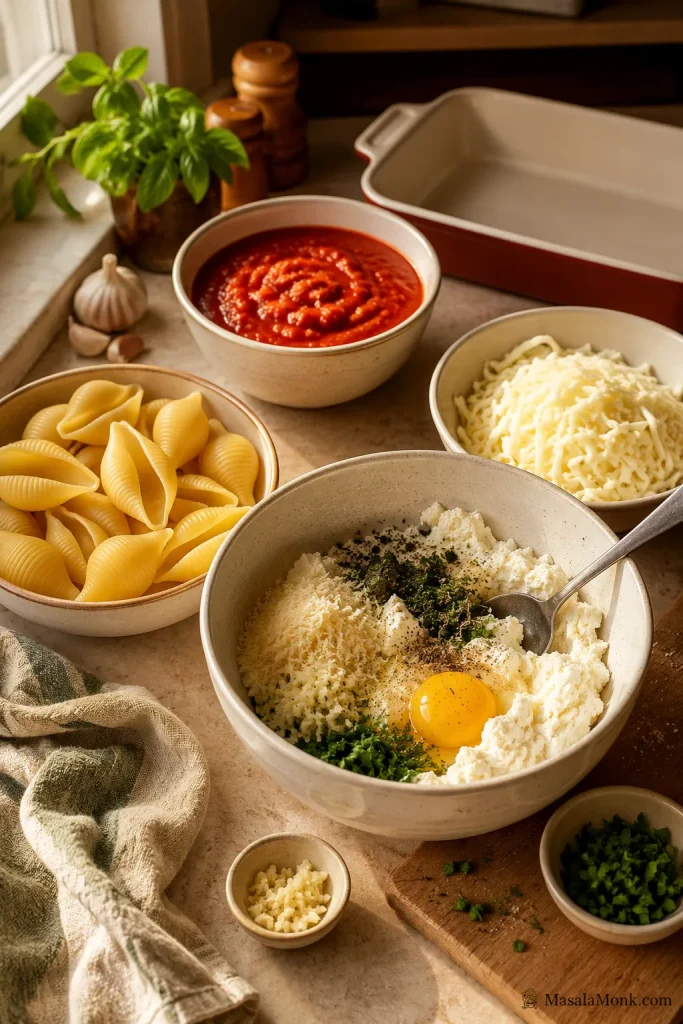
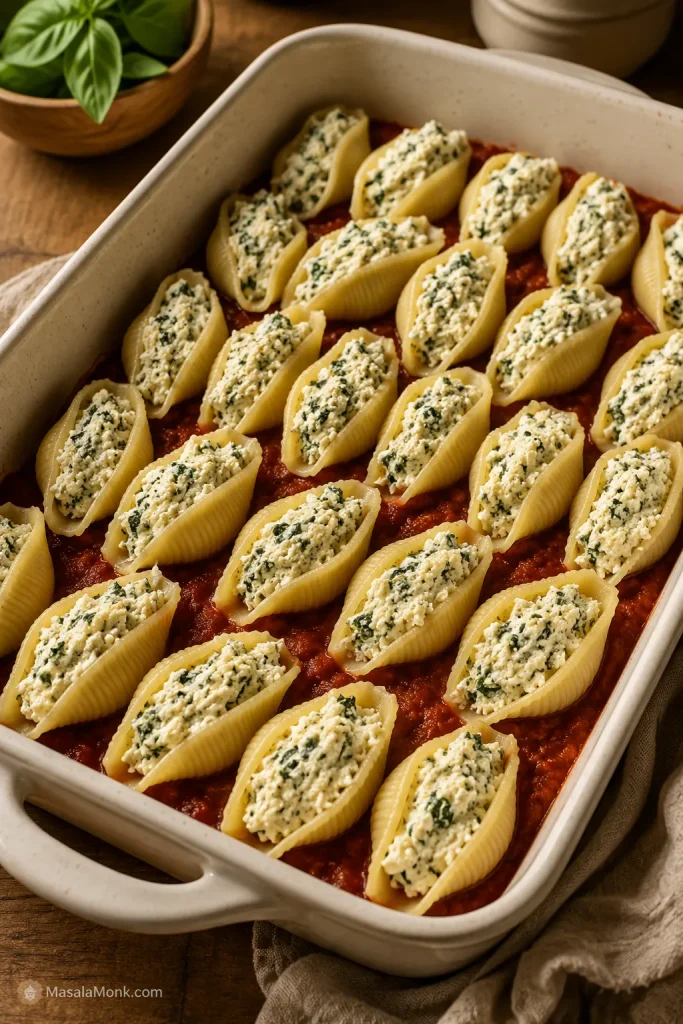
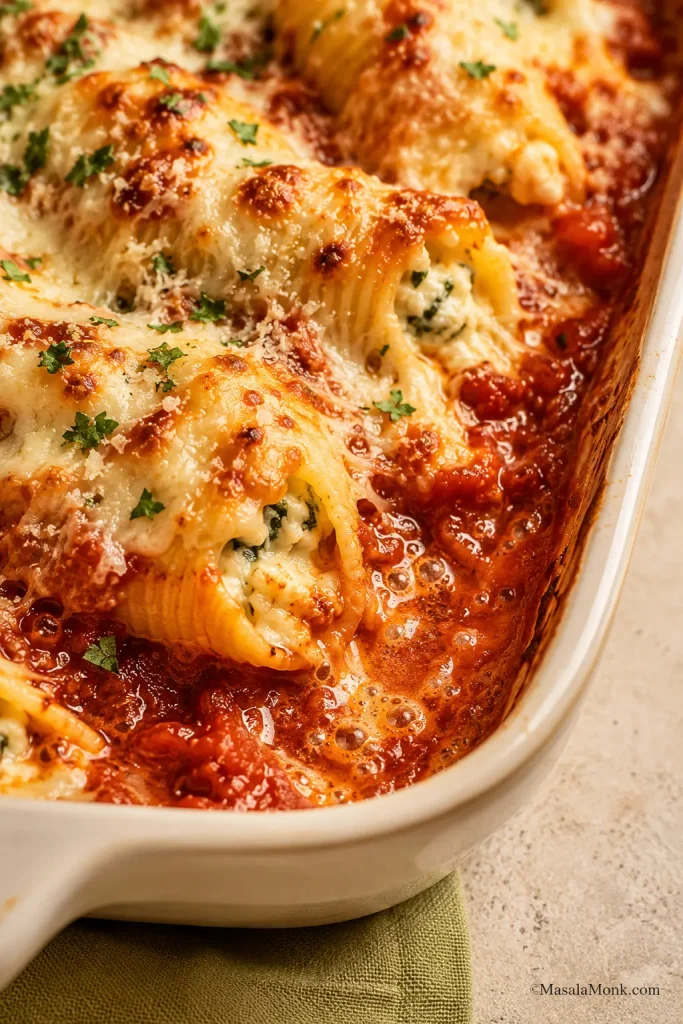
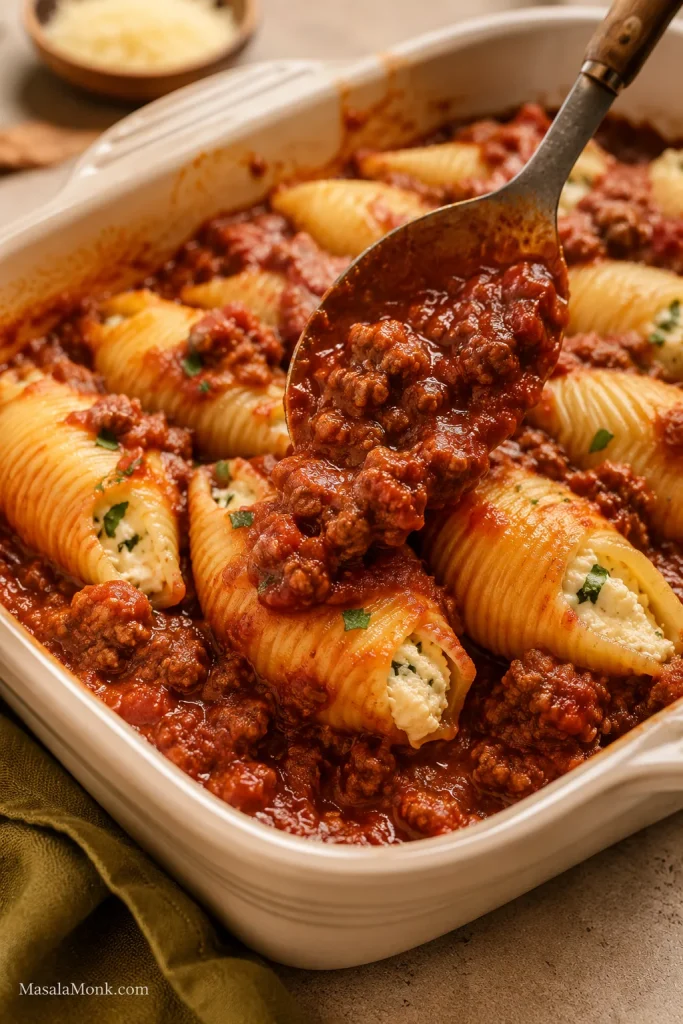
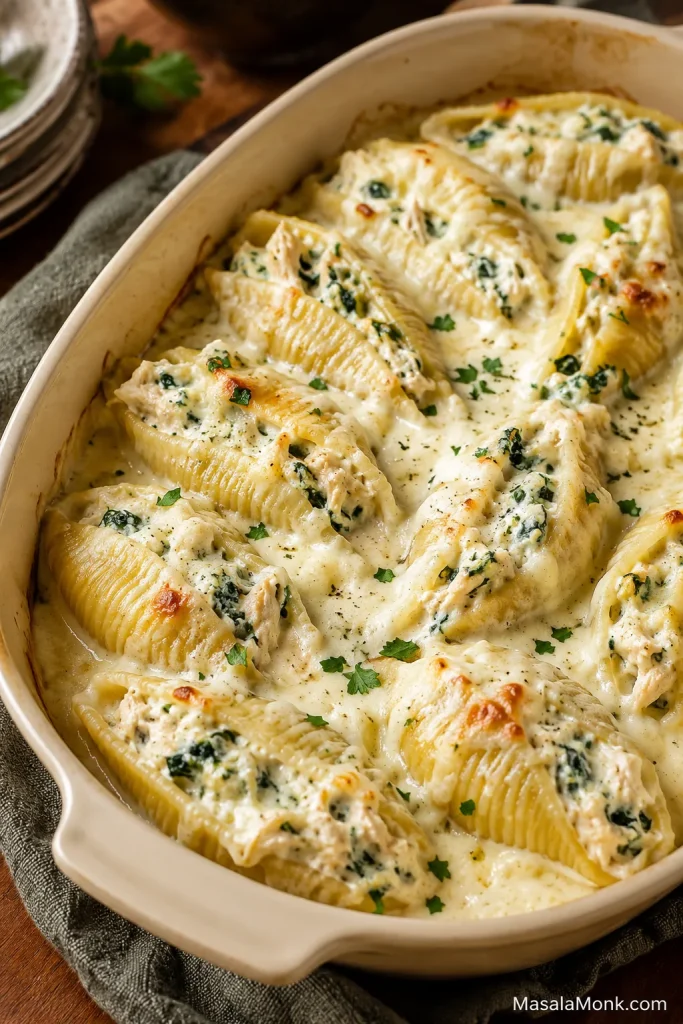
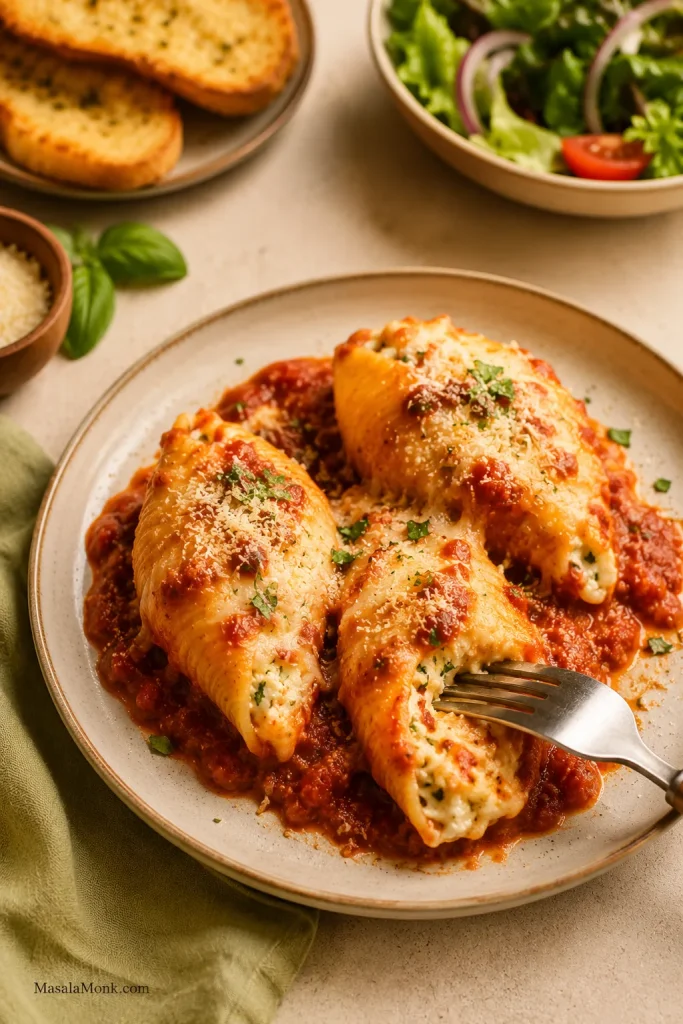
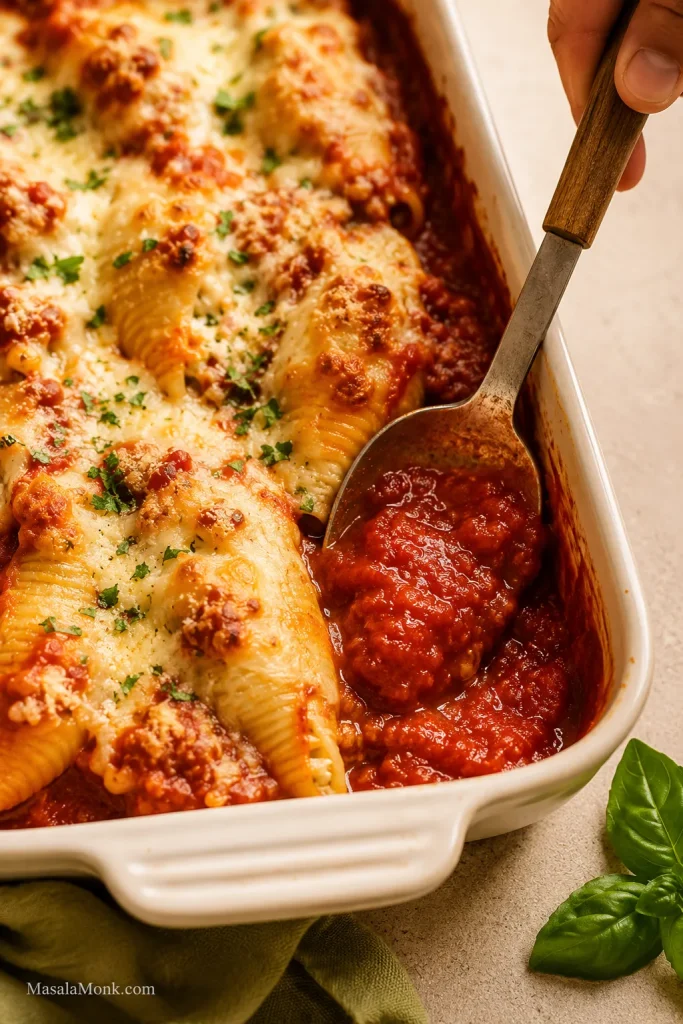
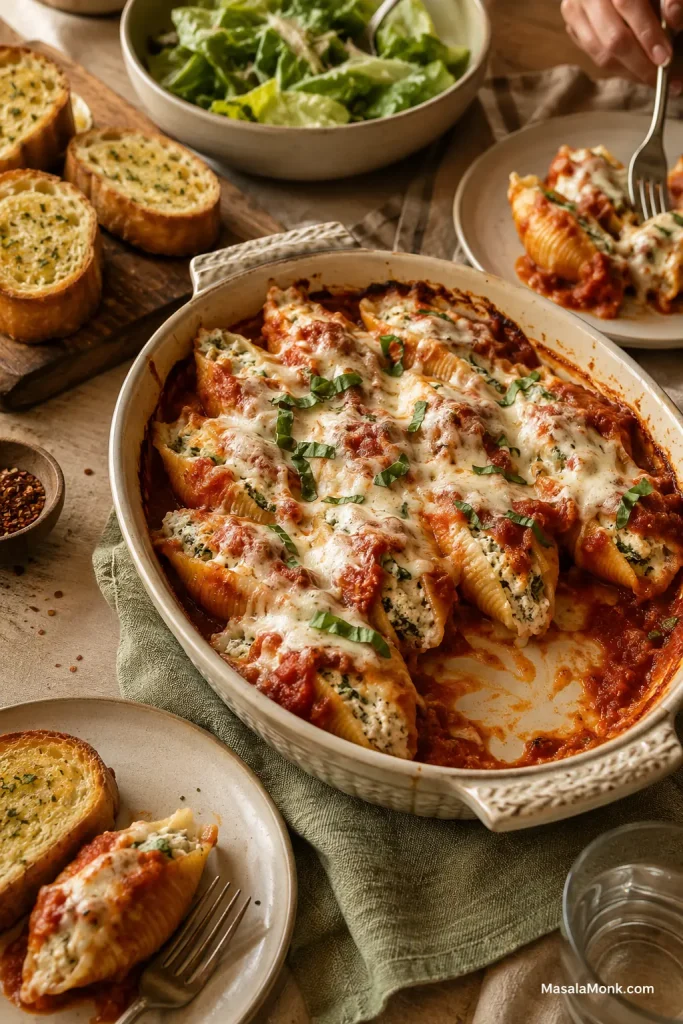
These stuffed shells with meat are filled with seasoned ground beef, creamy ricotta, mozzarella and Parmesan. They bake in marinara until the sauce bubbles around the edges and the cheese melts over the top. The beef goes right into the filling, so every shell gets a generous, savory center rather than cheese in one bite and meat in another.
Let the beef get properly browned before it goes into the ricotta, and pull the shells from the water while they’re still a little firm. They’ll be easier to fill, and they’ll finish cooking in the sauce without turning mushy.
The recipe makes about 24 stuffed shells—enough for six hearty servings or eight with sides. You can also assemble the casserole a day ahead, which is handy when you’d rather have most of dinner dealt with before the evening gets busy.
Servings6 at 4 shells each, or 8 at 3 each with sides
Oven375°F / 190°C
Baking dish9×13 in / 23×33 cm
Prep timeAbout 35 minutes
Bake time30–35 minutes
Rest time10 minutes
Total timeAbout 1 hour 20 minutes
Ingredients
Pasta and sauce
28 jumbo pasta shells, allowing a few extras in case some break
24 oz / 680 g marinara sauce
2–4 tablespoons / 30–60 ml water, only if needed to loosen a very thick sauce
Beef and ricotta filling
2 teaspoons / 10 ml olive oil
½ medium yellow onion, finely chopped (about ½ cup / 75 g)
1 lb / 454 g ground beef, preferably 90% lean
3 garlic cloves, minced
15 oz / 425 g whole-milk ricotta, drained briefly if visibly watery
8 oz / 225 g low-moisture mozzarella, shredded and divided
½ cup / about 45 g finely grated Parmesan
1 large egg
1½ teaspoons Italian seasoning
¾ teaspoon fine sea salt, divided, plus more for the pasta water
½ teaspoon freshly ground black pepper
2 tablespoons chopped fresh parsley, optional
¼ teaspoon crushed red pepper flakes, optional
Can’t find jumbo shells? Manicotti is a good alternative, and cooked lasagna sheets can be rolled around the filling. Small pasta shells are too small to stuff individually; if that’s what you have, a baked pasta such as baked ziti is a better fit.
For the beef, 90% lean gives you plenty of flavor without producing as much rendered fat as a fattier blend. An 85% lean package works too. Use low-moisture mozzarella for the filling and topping. Freshly shredded melts especially well, but a bag of pre-shredded mozzarella is completely fine here.
Because the sauce flavors every shell, use a marinara you already enjoy. Jarred sauce keeps dinner simple; our homemade marinara sauce is another option when you want to make the sauce too.
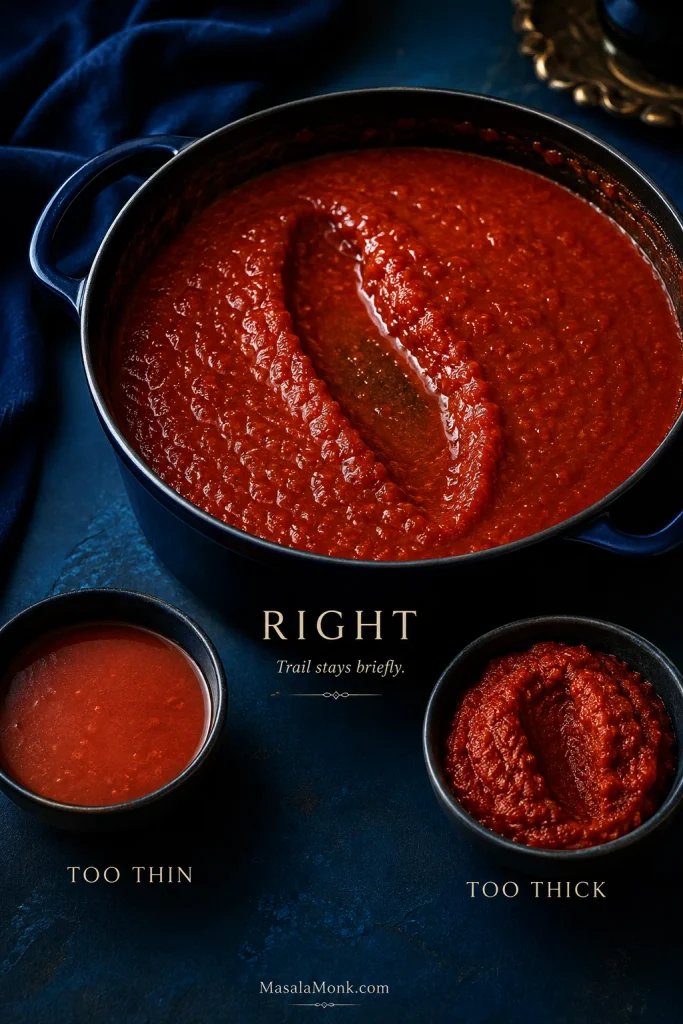
If the marinara is very thick, loosen it with a splash of water. If it’s unusually thin, simmer it briefly until it clings lightly to a spoon.
Equipment
9×13-inch / 23×33 cm baking dish
Large pot and colander
Tray or large plate for the cooked shells
Large skillet
Aluminum foil
Large mixing bowl
Large spoon or 2-tablespoon scoop, optional
Instant-read thermometer, optional
How to Make Stuffed Shells with Meat
1. Prepare the baking dish
Heat the oven to 375°F / 190°C. Spread about 1 cup of marinara over the bottom of a 9×13-inch / 23×33 cm baking dish. Keep the remaining sauce for the assembled shells.
2. Cook the shells until bendable, not tender
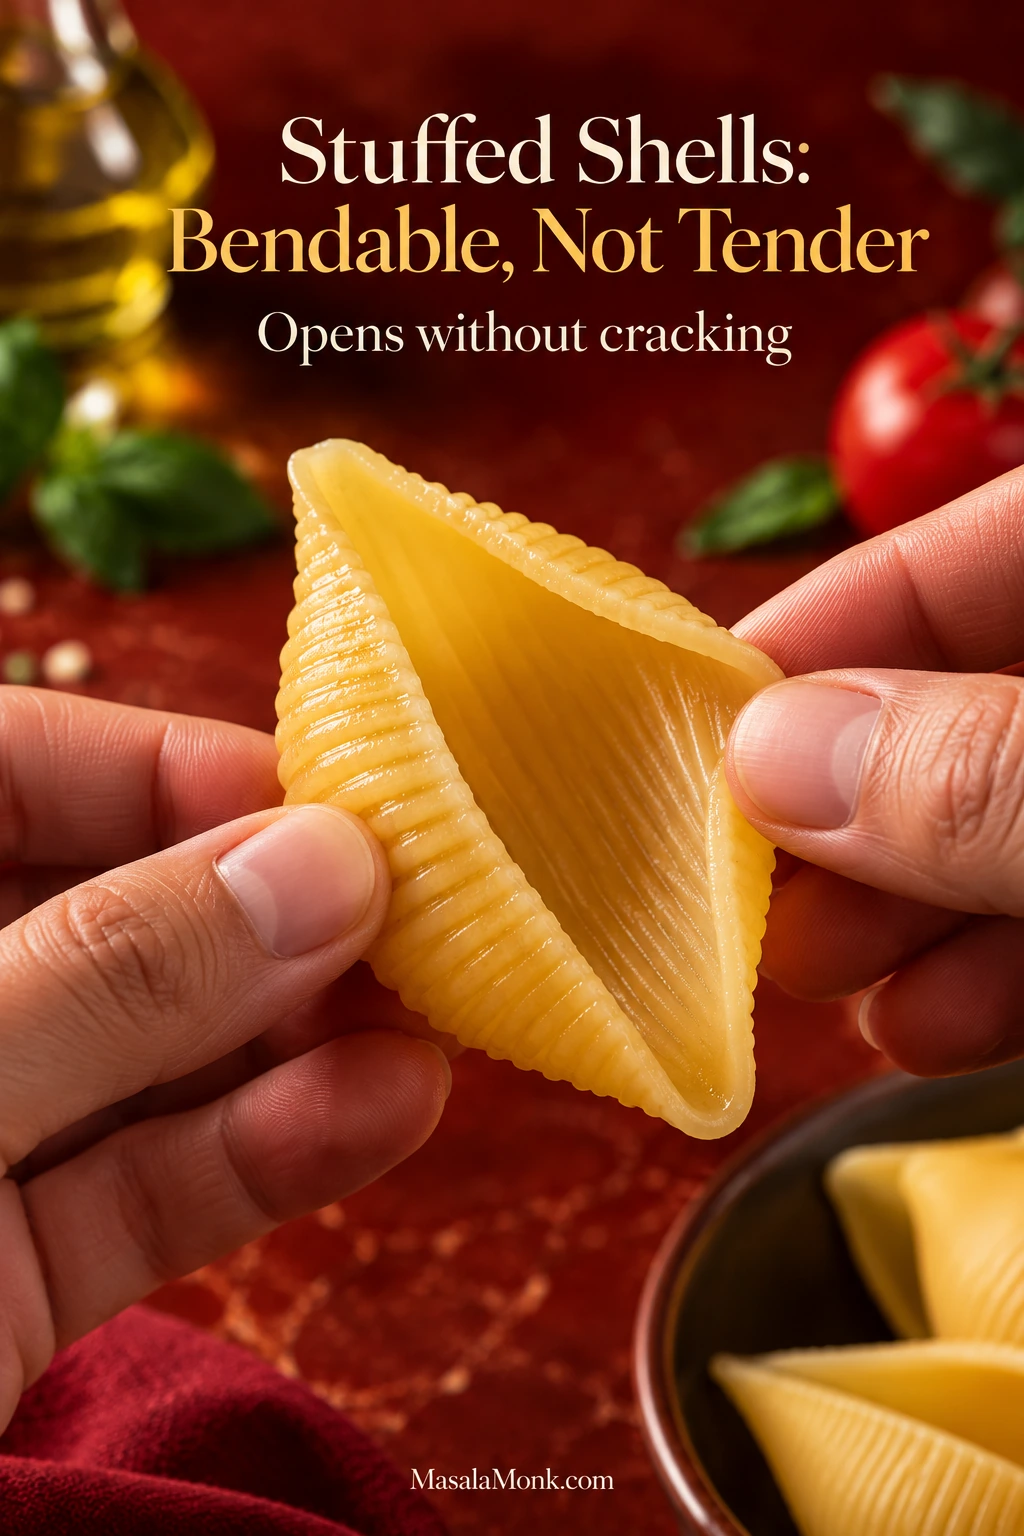
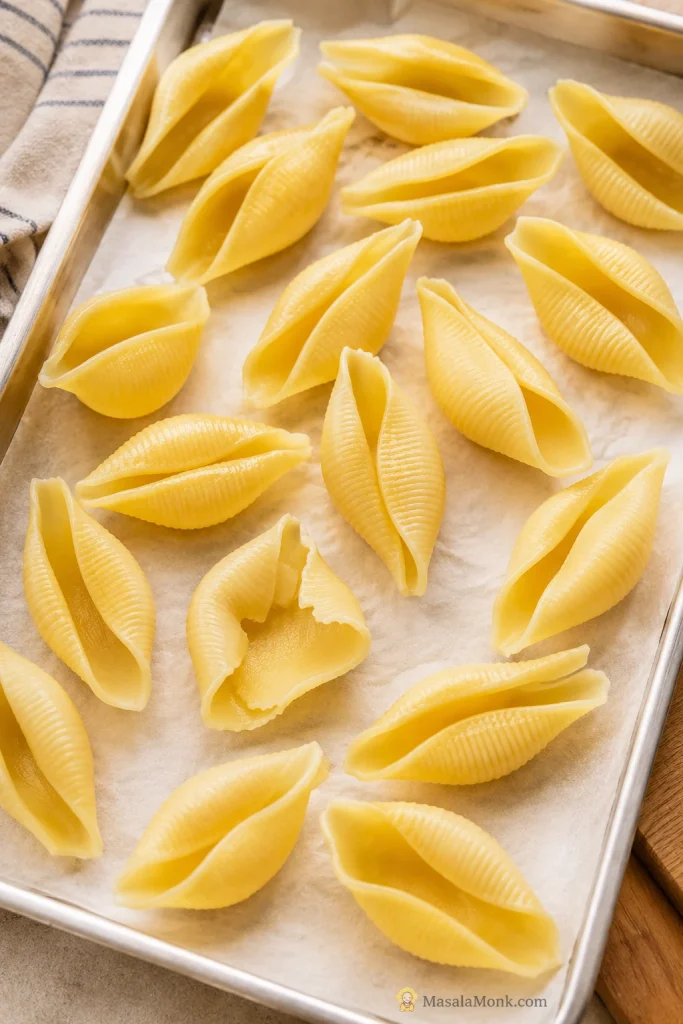
Bring a large pot of well-salted water to a boil. Add the 28 jumbo shells and start checking them about 2 minutes before the shortest cooking time listed on the package. Use their texture as the final guide: a shell should open without cracking but still feel distinctly firm.
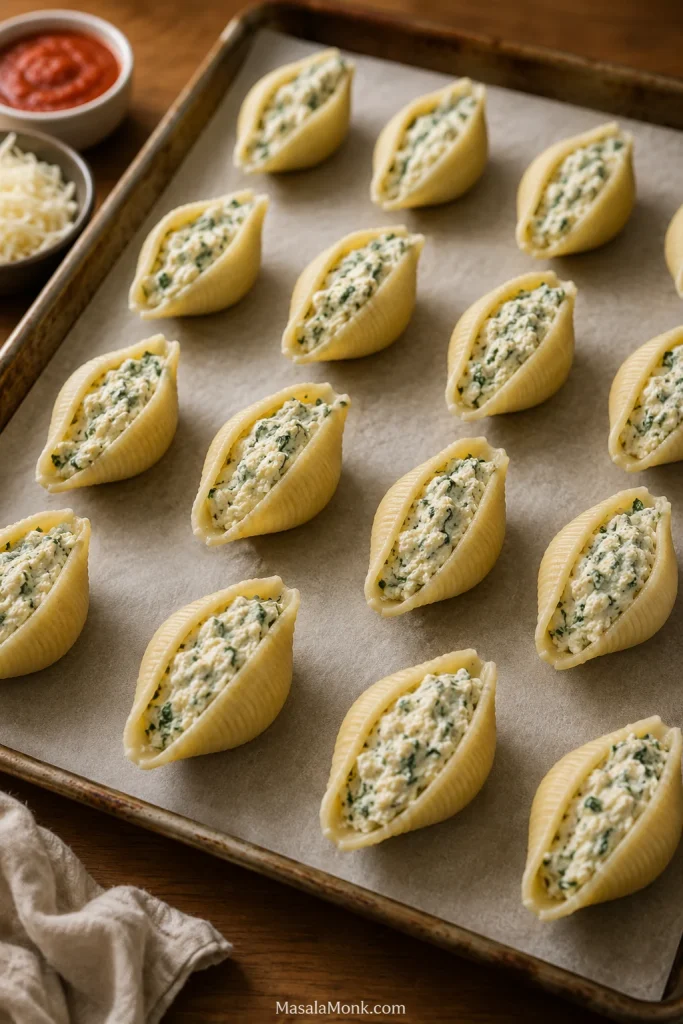
Drain immediately and spread the shells in a single layer on a tray or large plate. Separate any that begin sticking together. They’ll finish cooking once the casserole goes into the oven.
A jumbo pasta shell that is ready to fill should flex with a little resistance. If it turns floppy in the pot, it will be harder to drain, open and stuff without tearing.
3. Brown and season the beef
Heat the 2 teaspoons / 10 ml olive oil in a large skillet over medium heat. Add the onion and cook for 3–4 minutes, until softened.
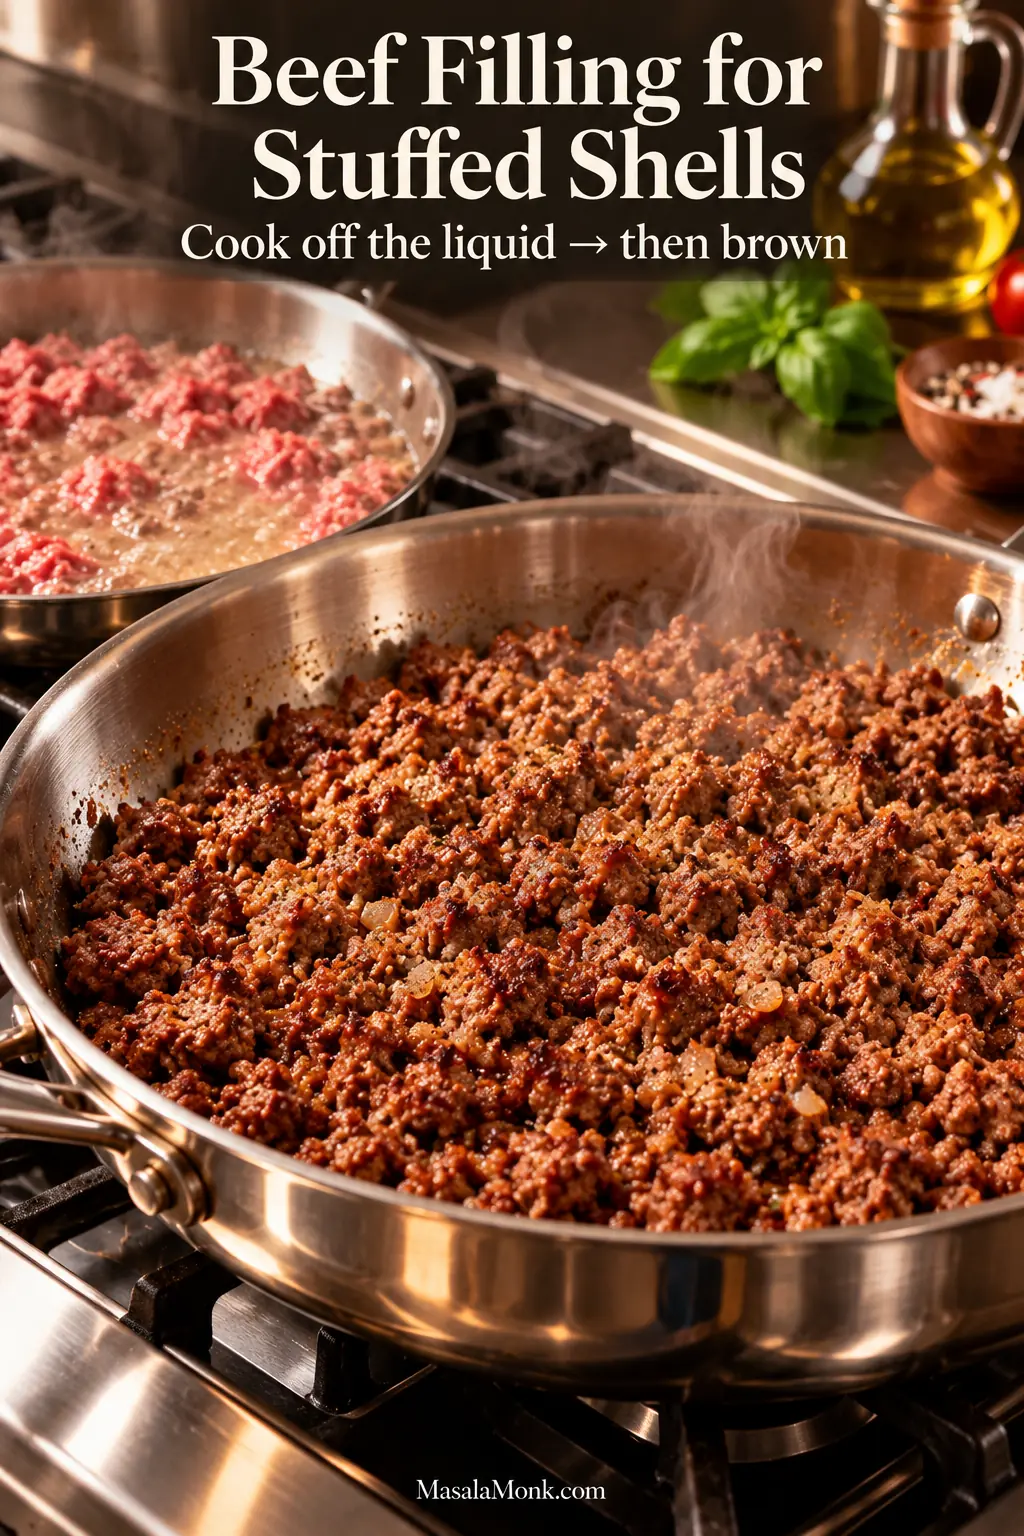
Add the ground beef and break it into small crumbles. Let the released liquid cook away, raising the heat to medium-high if needed. If a large pool of rendered fat remains, spoon or drain off the excess. Then let some of the crumbles sit against the skillet long enough to develop browned edges.
Listen as well as look when browning ground beef: the pan shifts from bubbling to a sharper sizzle once excess moisture has cooked away. That is the point when real browning can begin.
Reduce the heat to medium. Add the garlic, Italian seasoning, ½ teaspoon salt, black pepper and optional red pepper flakes. Cook for another 30–60 seconds, just until you can smell the garlic. The beef should reach 160°F / 71°C before it comes off the heat.
Taste a small piece of the cooked beef and adjust the seasoning now, before it goes into the ricotta mixture. Once the filling contains raw egg, don’t taste it. Transfer the beef to a bowl or plate and let it cool until warm, not steaming hot.
4. Mix the beef and ricotta filling
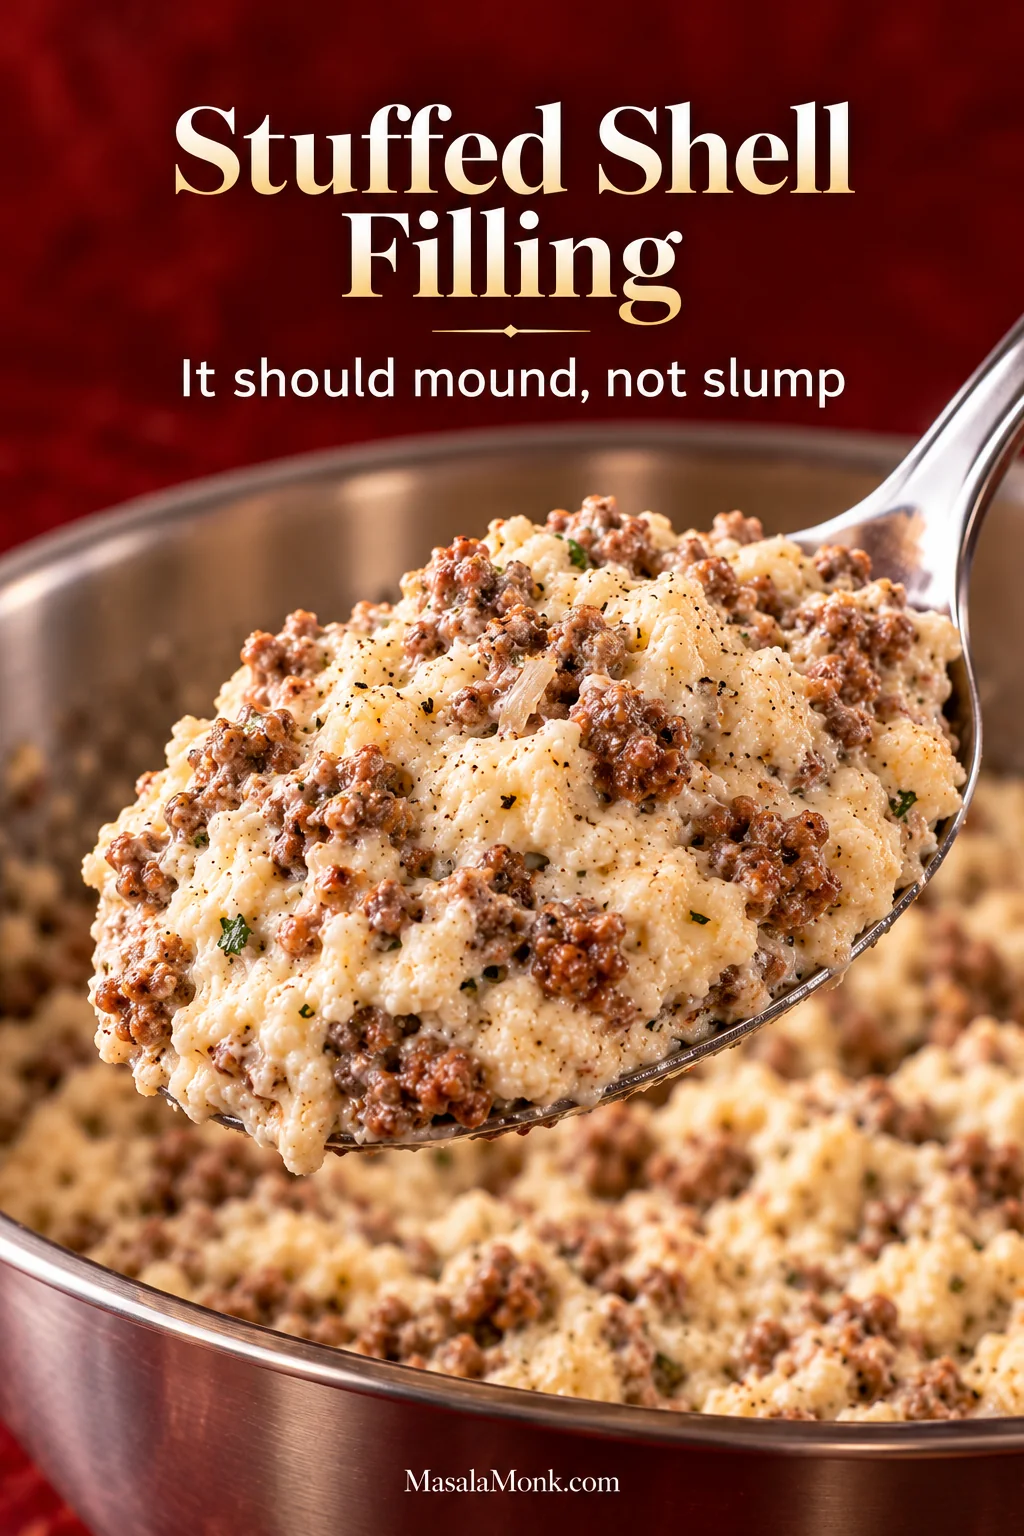
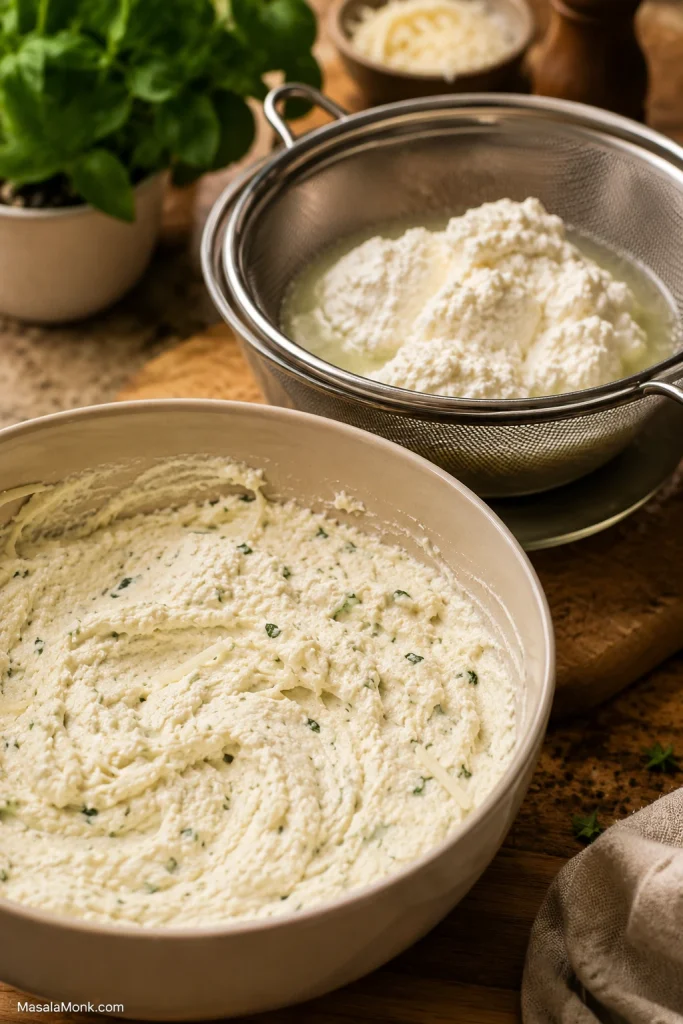
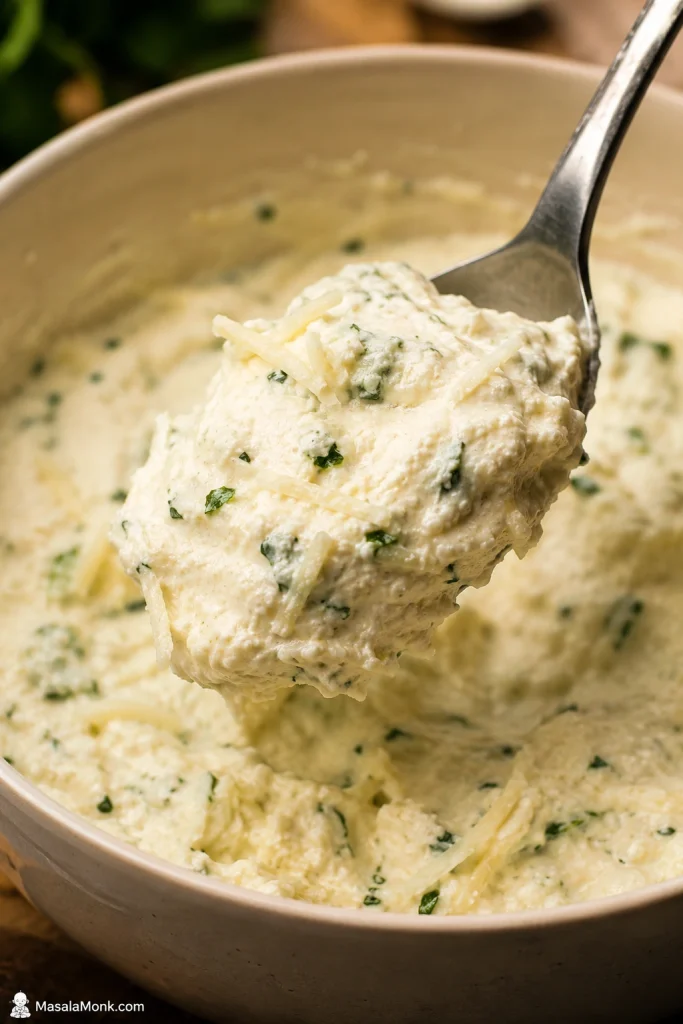
In a large bowl, combine the ricotta, 4 oz / 113 g mozzarella, Parmesan, egg and remaining ¼ teaspoon salt. Add the parsley if using, then fold in the cooled beef. The mixture should be creamy but thick enough to mound on a spoon.
If the beef-and-ricotta filling spreads flat instead of holding a soft mound, check its moisture before stuffing the shells. Watery ricotta or residual skillet liquid is much easier to correct in the bowl than after baking.
5. Fill the shells evenly
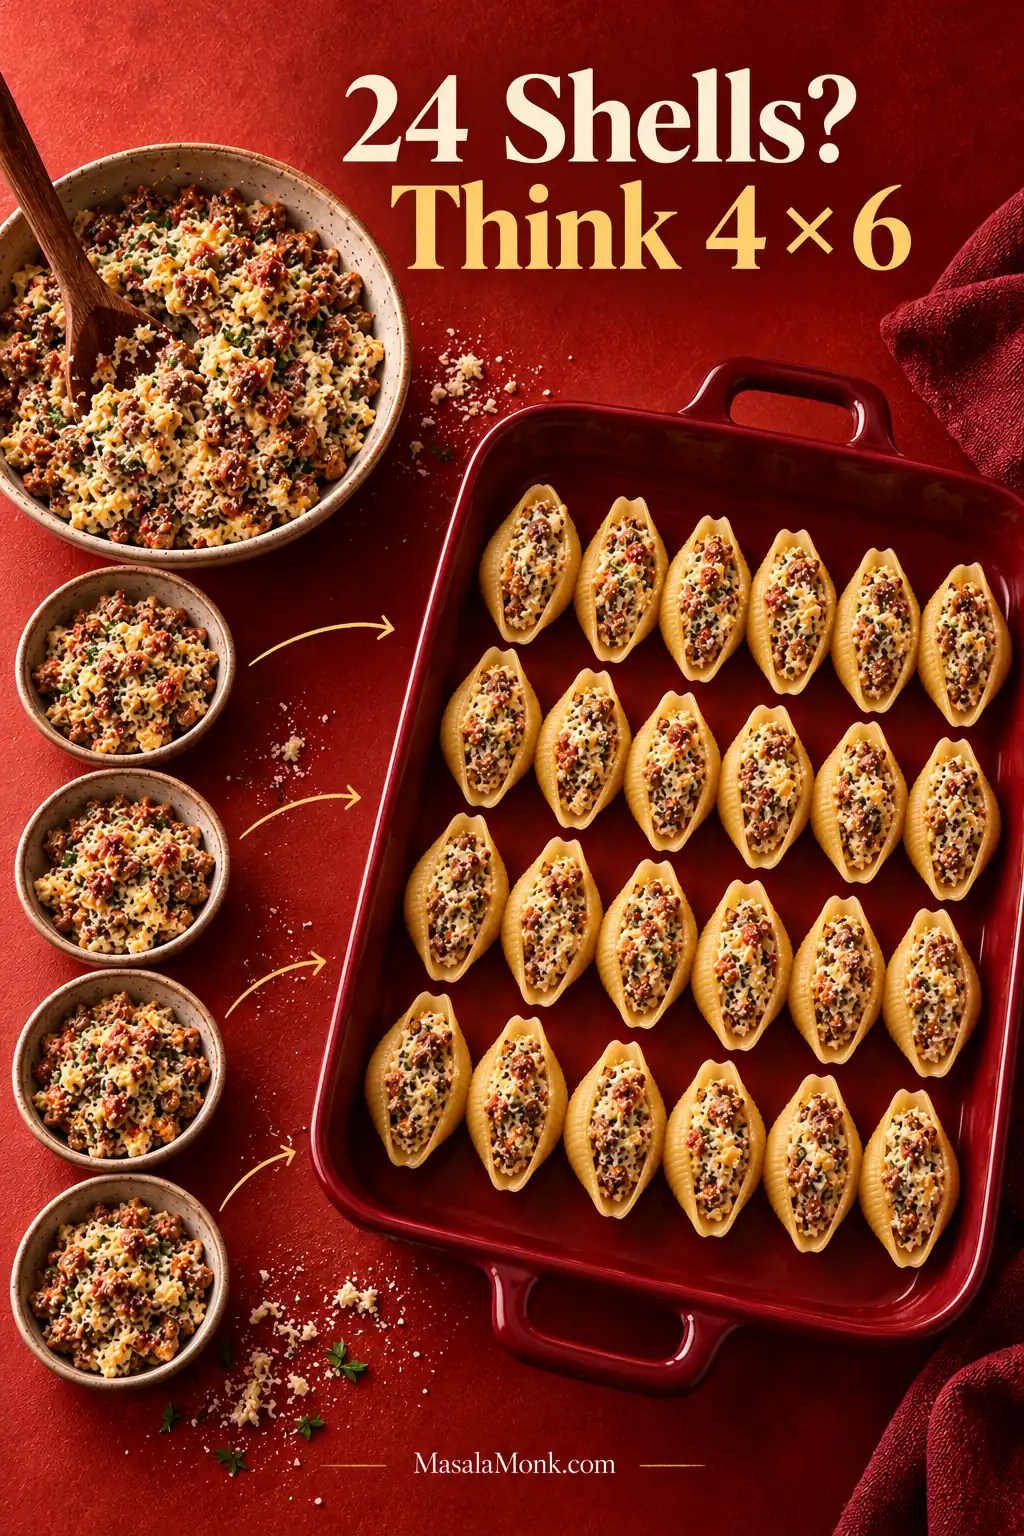
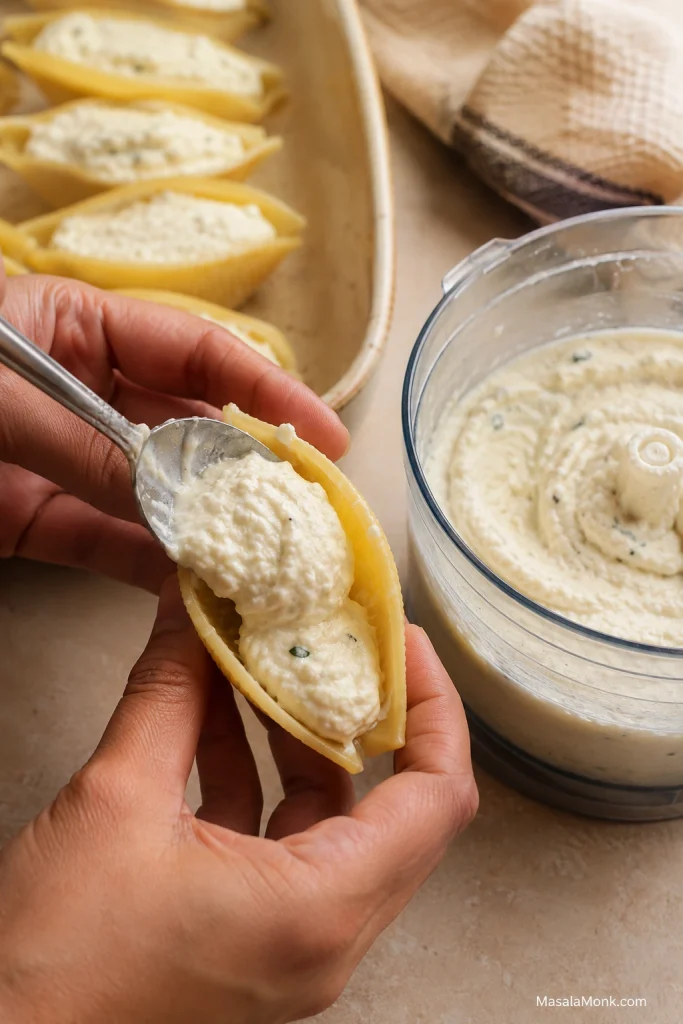
Fill about 24 intact shells with roughly 2 heaping tablespoons of filling each, adding more to any especially large shells. A 2-tablespoon scoop makes this quicker if you have one.
There’s an easy way to avoid beautifully overstuffing the first six and running short at the end. Mentally divide the filling into four portions, then use about one portion for every six shells. They don’t need to look identical. Fill them generously without forcing the pasta open.
Treat each group of six stuffed shells as a checkpoint. If one quarter of the filling is nearly gone after only four or five shells, redistribute before continuing. That is easier than discovering the shortage at the final row.
6. Add the sauce and mozzarella
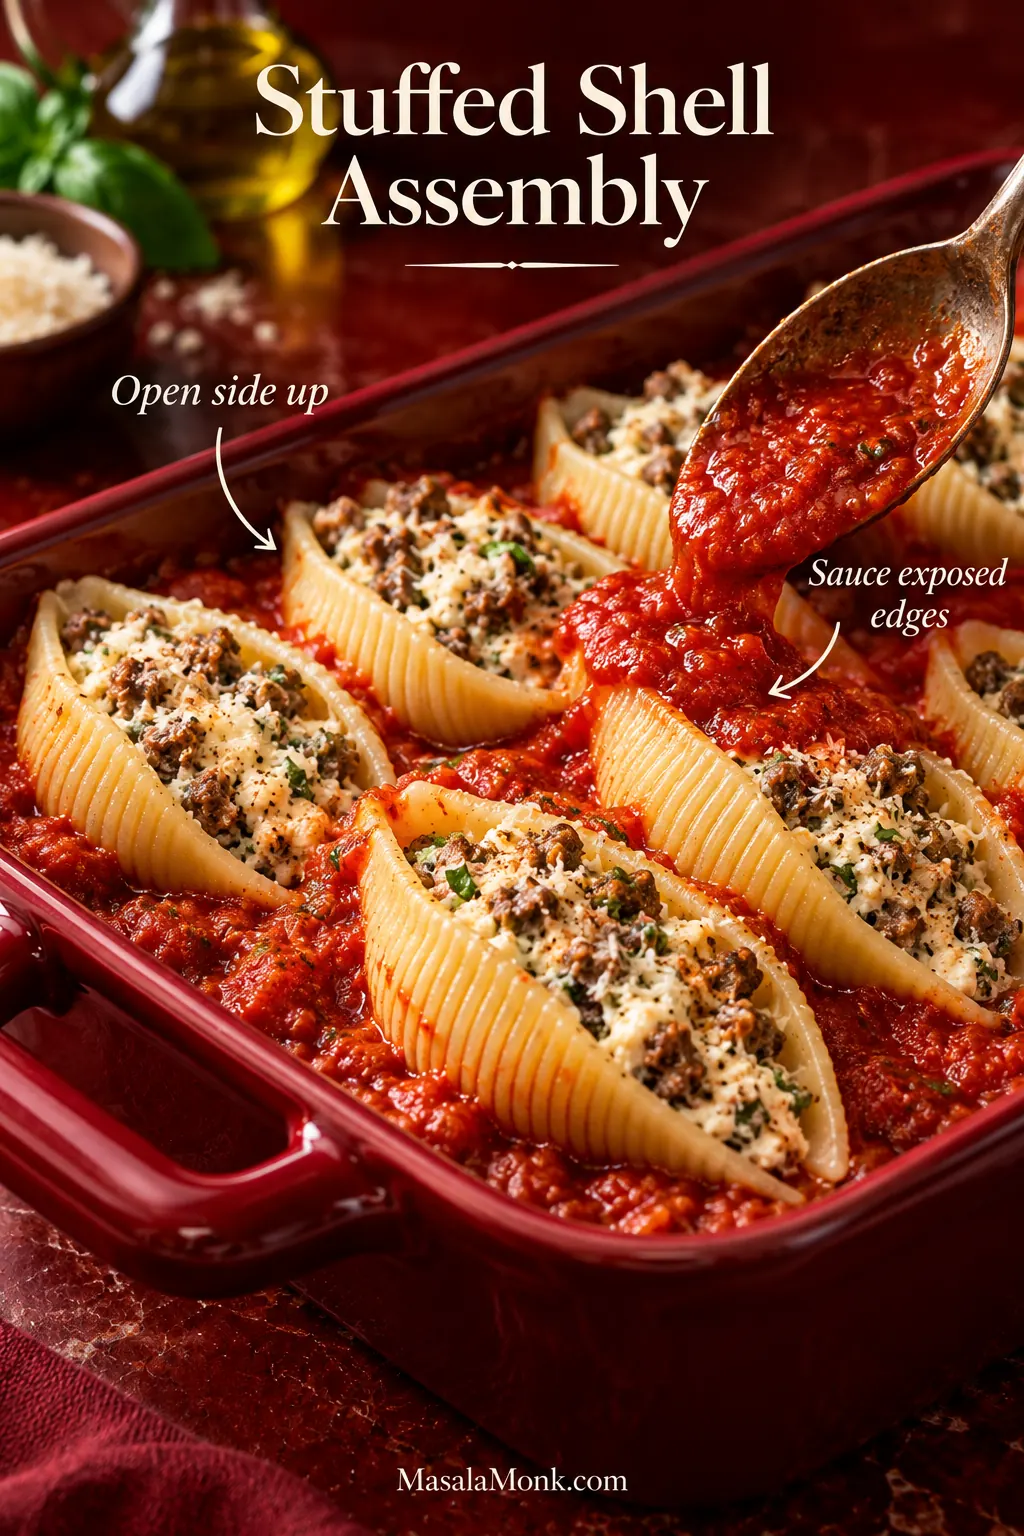
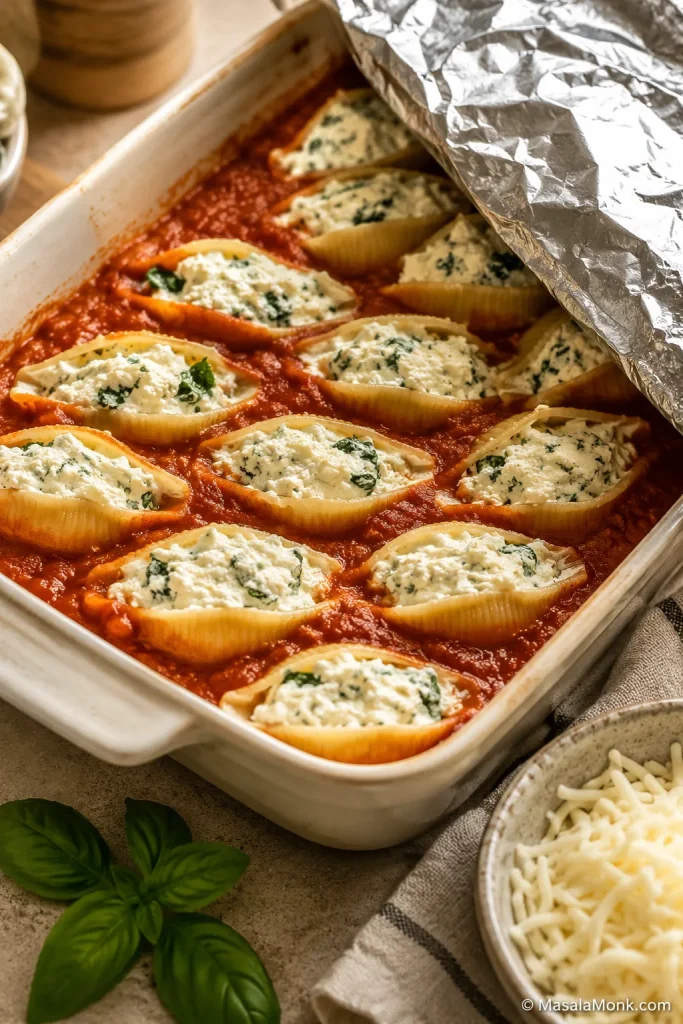
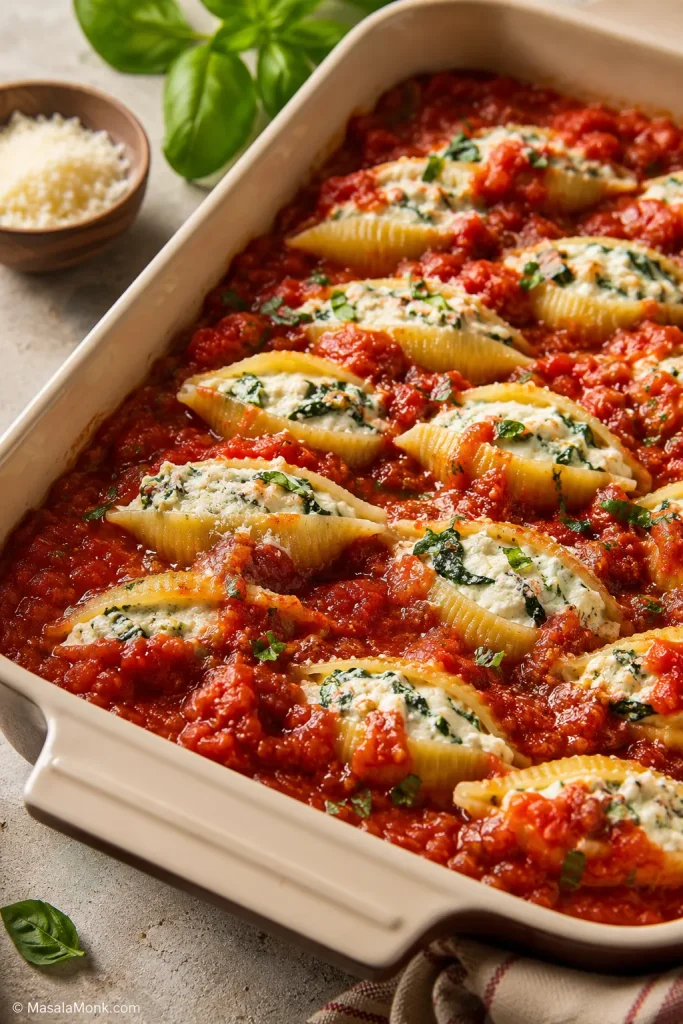
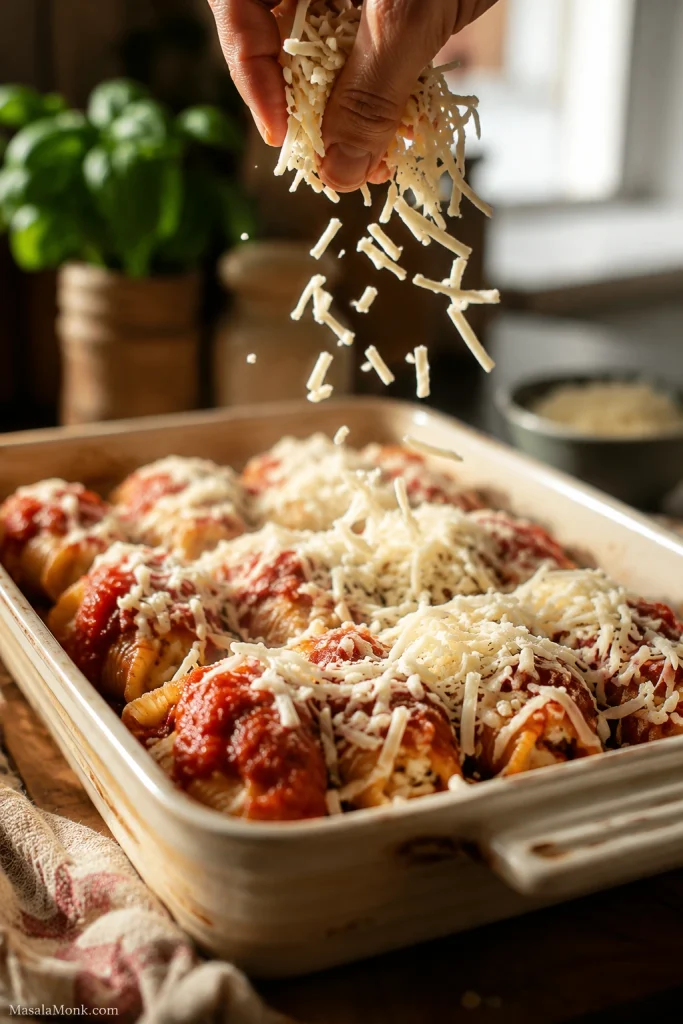
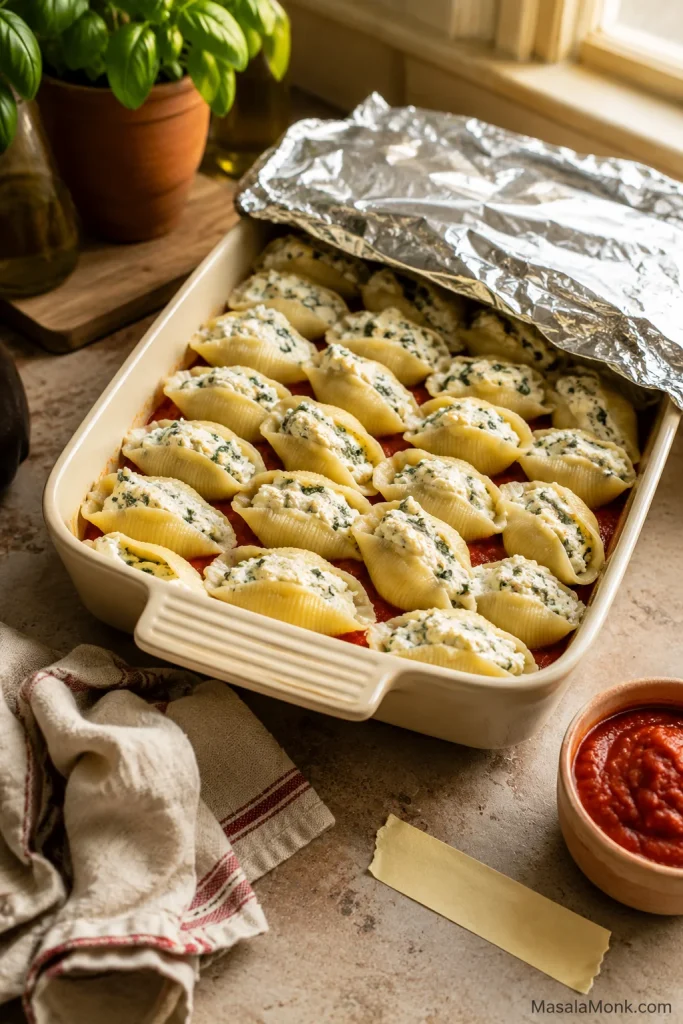
Arrange the filled shells open side up over the marinara. Spoon the remaining sauce around them and over any exposed pasta edges, then scatter the remaining 4 oz / 113 g mozzarella across the top.
It’s fine to leave the ridges visible. Just make sure the exposed pasta isn’t sitting completely dry, since those edges are the first to harden in the oven.
Focus extra marinara on the thin lips and exposed tips of the stuffed shells. Those small areas lose moisture faster than the pasta already resting against sauce, even when the main ridges remain uncovered.
7. Bake covered, then uncover
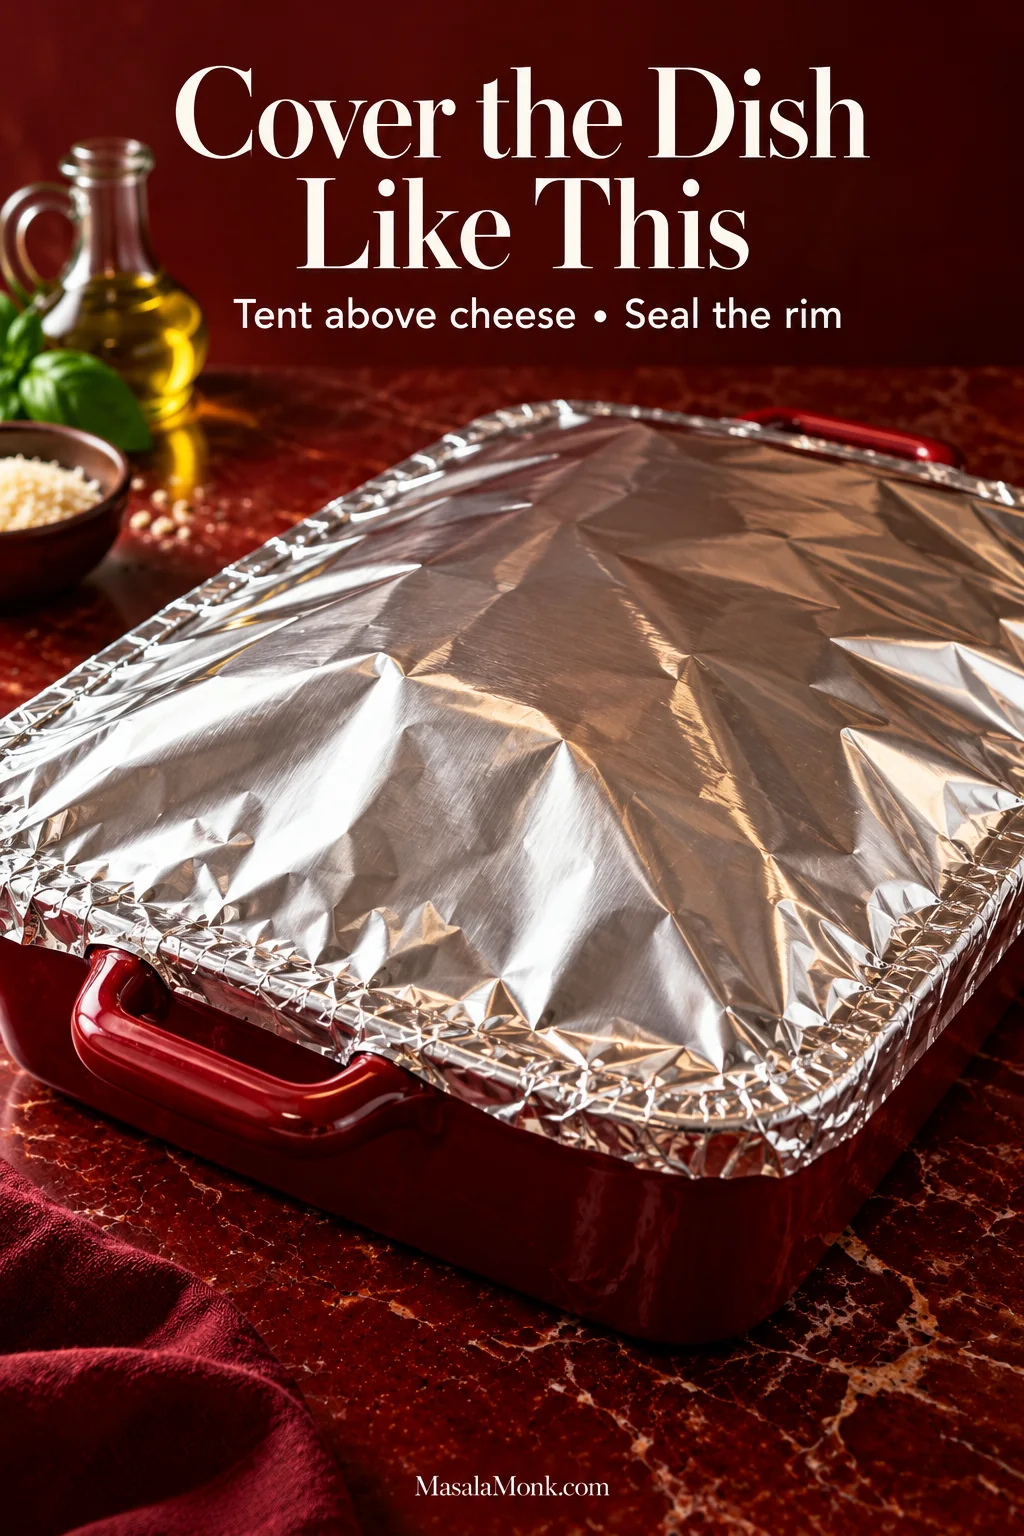
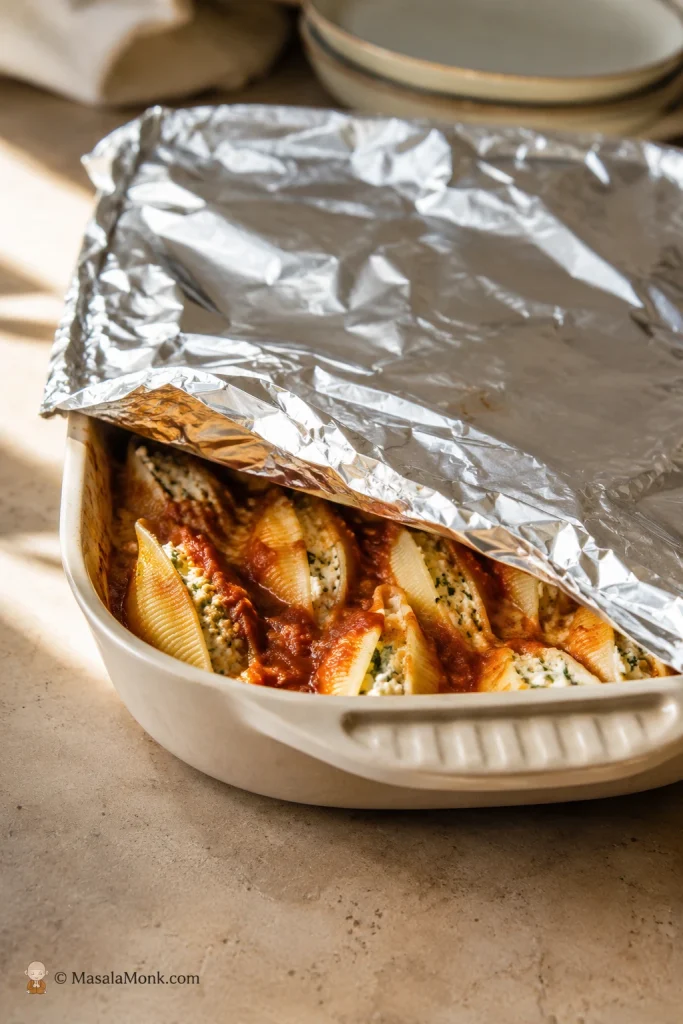
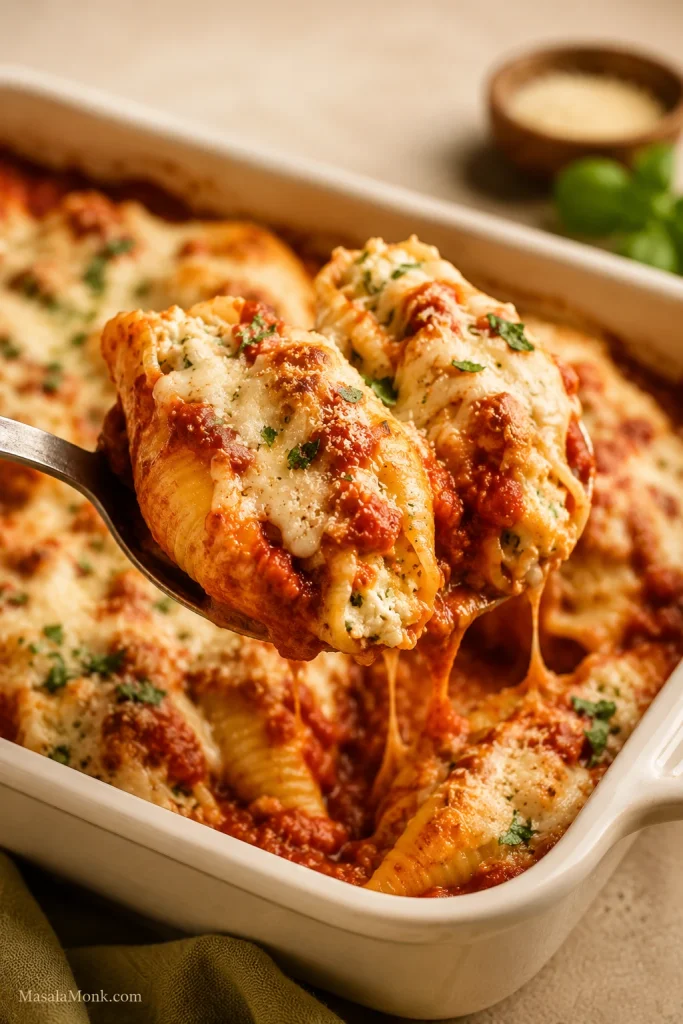
Cover the dish with foil, tenting it above the mozzarella but sealing it around the rim. Bake for 25 minutes, then remove the foil and bake for another 5–10 minutes. The sauce should be bubbling around the shells, with the mozzarella melted across the tops and catching some color in spots.
The foil only needs a shallow dome above the mozzarella. Meanwhile, a snug seal around the rim keeps humid heat inside the casserole, helping the pasta finish tenderizing without the cheese sticking to the foil.
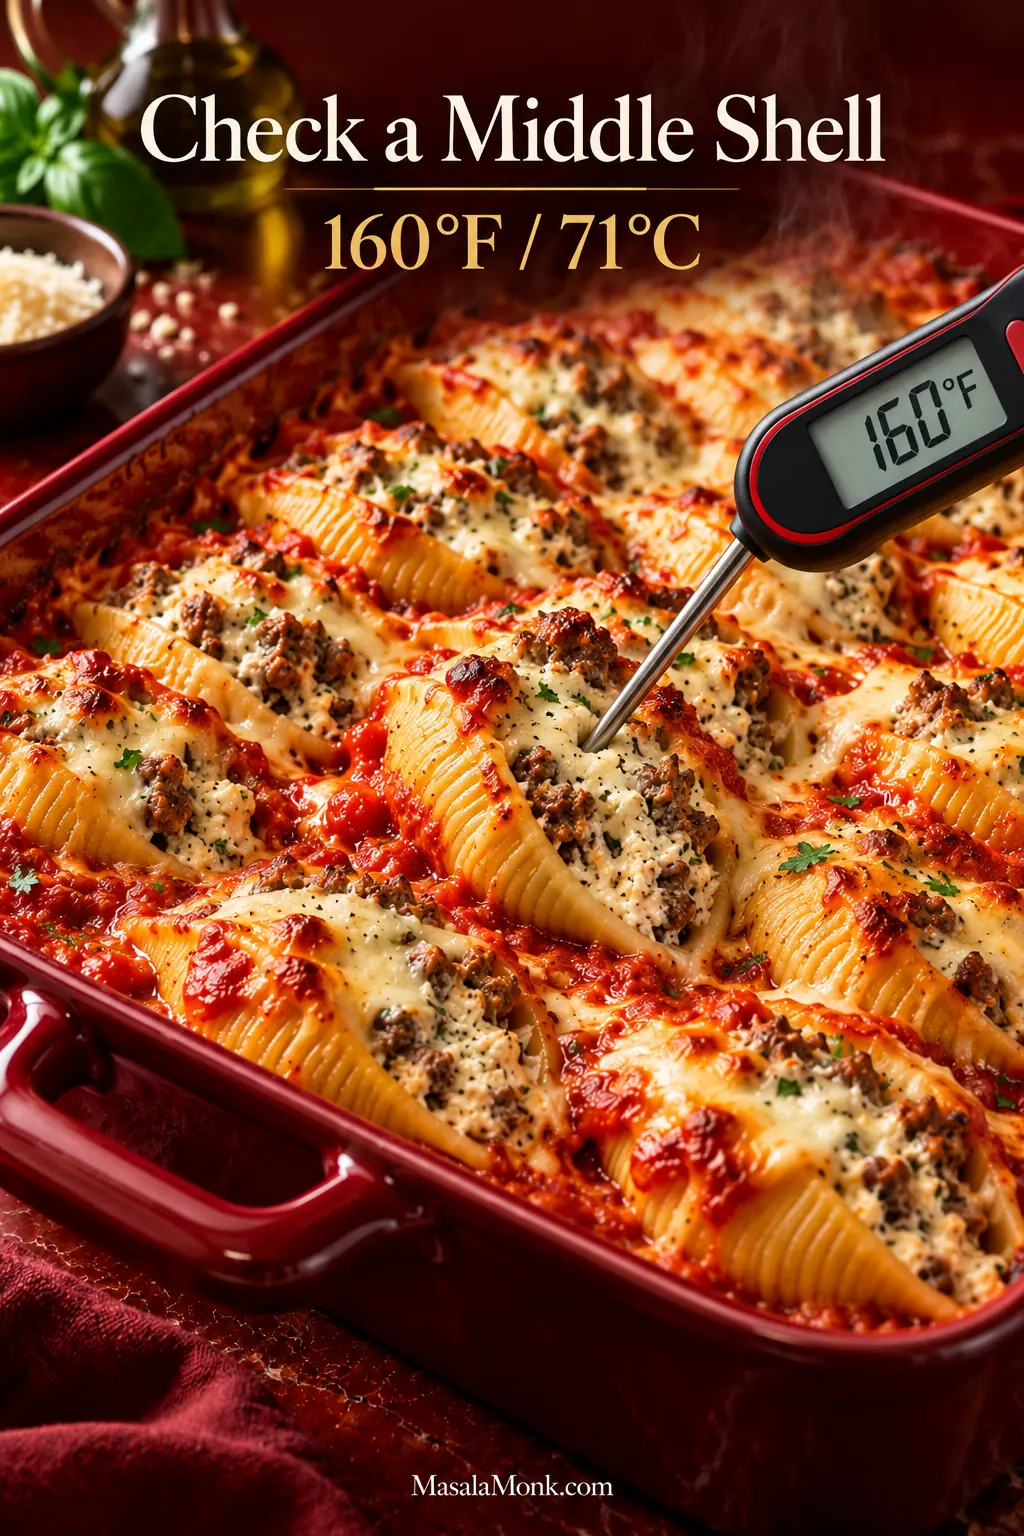
Check one of the shells near the middle of the casserole instead of judging doneness only by the bubbling edges. The pasta should be tender and the filling steaming hot all the way through. If you’re checking with a thermometer, the filling in a shell near the middle should reach 160°F / 71°C.
For the most useful temperature check, place the thermometer tip in the filling of a middle shell—not merely in hot marinara, against the pasta wall or near the hotter edge of the baking dish.
8. Rest before serving
Let the casserole stand for 10 minutes. It’ll still be plenty hot, but the shells will lift from the dish more cleanly and the filling will have a chance to settle.
Cut into one and you should find browned beef throughout the ricotta filling, with marinara tucked into the shell’s ridges and mozzarella melted over the top.
A properly rested ground-beef-and-ricotta stuffed shell should hold together when lifted while the center stays soft and creamy. The goal is structure around the filling, not a dry or firmly set interior.
Getting the Meat and Ricotta Filling Right
How much beef and ricotta do you need?
For about 24 stuffed shells, use 1 lb / 454 g ground beef with 15 oz / 425 g ricotta. That gives you beef in every shell without making the filling dense or pushing out the ricotta. The egg helps the beef-and-ricotta mixture hold together once baked.
You can change the ratio, but adding more meat isn’t necessarily the best route to stronger beef flavor. Good browning and seasoning do more without crowding the ricotta out of the shell.
Keep the browned beef in fairly small crumbles so it distributes through the ricotta instead of collecting in a few heavy pockets. That gives each stuffed shell beef throughout while the center stays creamy.
If you want the same meat, cheese and marinara combination without filling two dozen shells, our classic lasagna turns it into a different baked pasta dinner.
Should the meat go in the filling or the sauce?
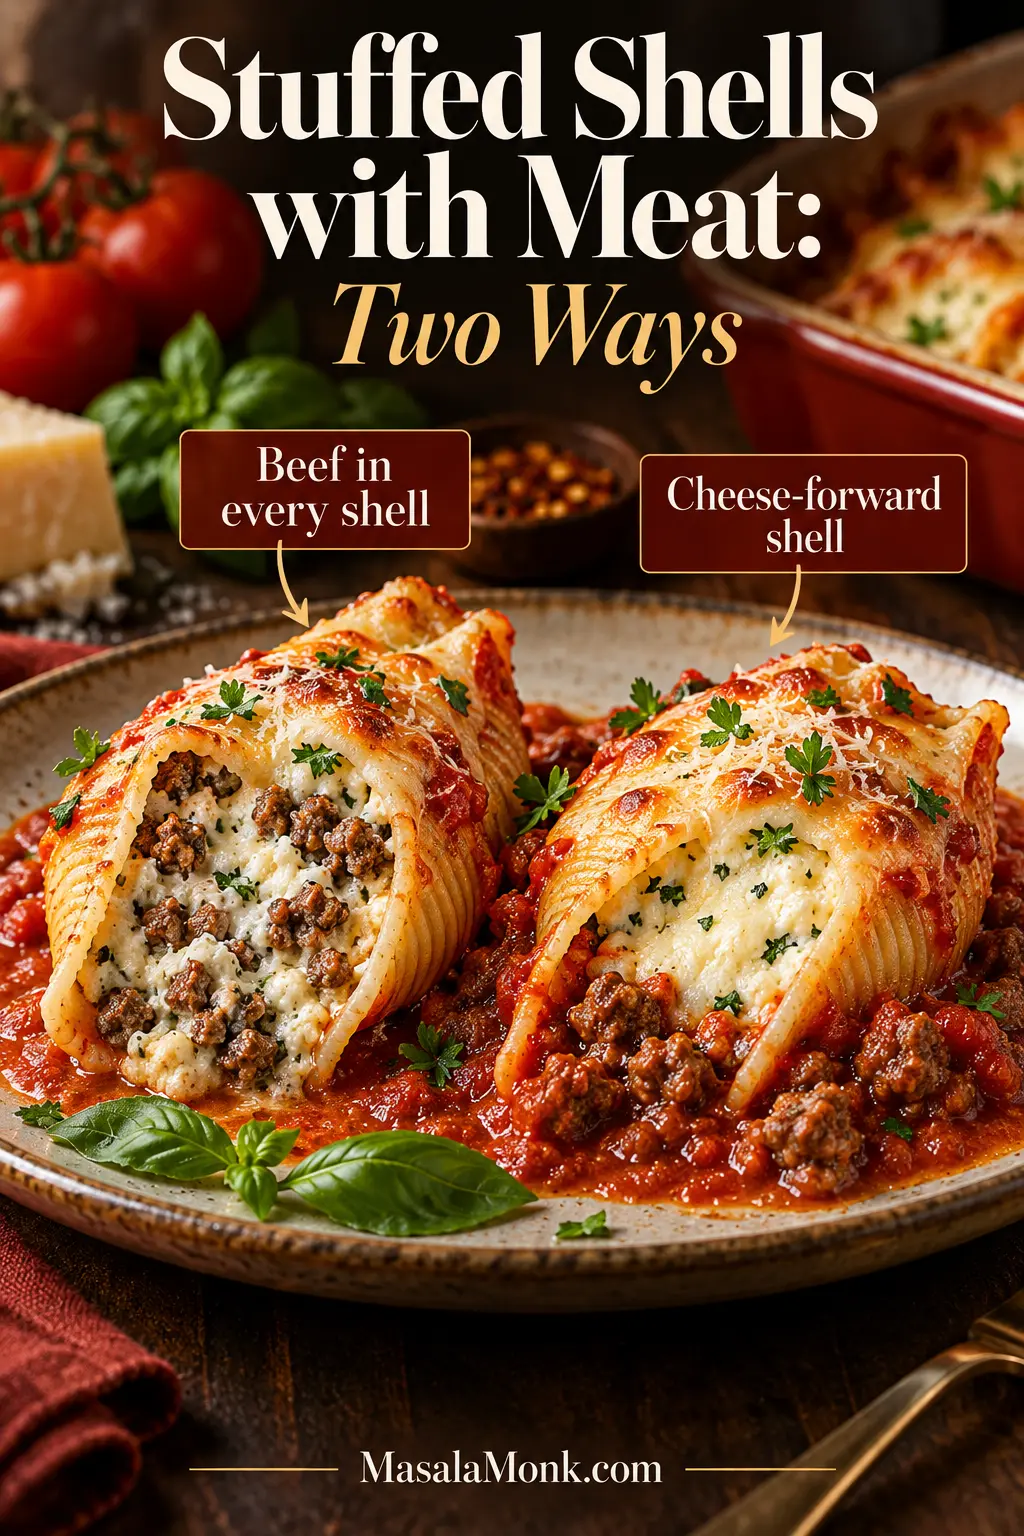
Both work; the difference is where you want the beef. Mixing it with the ricotta gives every shell a substantial meat-and-cheese filling. Stirring it into the marinara keeps the inside more cheese-forward and spreads the beef around the pasta instead.
Where the beef goes changes each forkful. Meat mixed into the ricotta makes every stuffed shell self-contained. By contrast, beef in the marinara makes the amount of meat depend more on how much sauce is served with it.
For the meat-sauce version, cook the beef as directed but stir it into the marinara instead. Fill the shells with the ricotta, mozzarella, Parmesan and egg mixture, then assemble and bake as above.
For a version without meat, our classic stuffed shells recipe keeps the filling focused on ricotta, mozzarella and Parmesan.
Troubleshooting Stuffed Shells with Meat
Why are my stuffed shells watery?
Watery stuffed shells usually come from loose ricotta, liquid left with the ground beef, wet vegetables, very thin marinara or pasta that was cooked too far before baking.
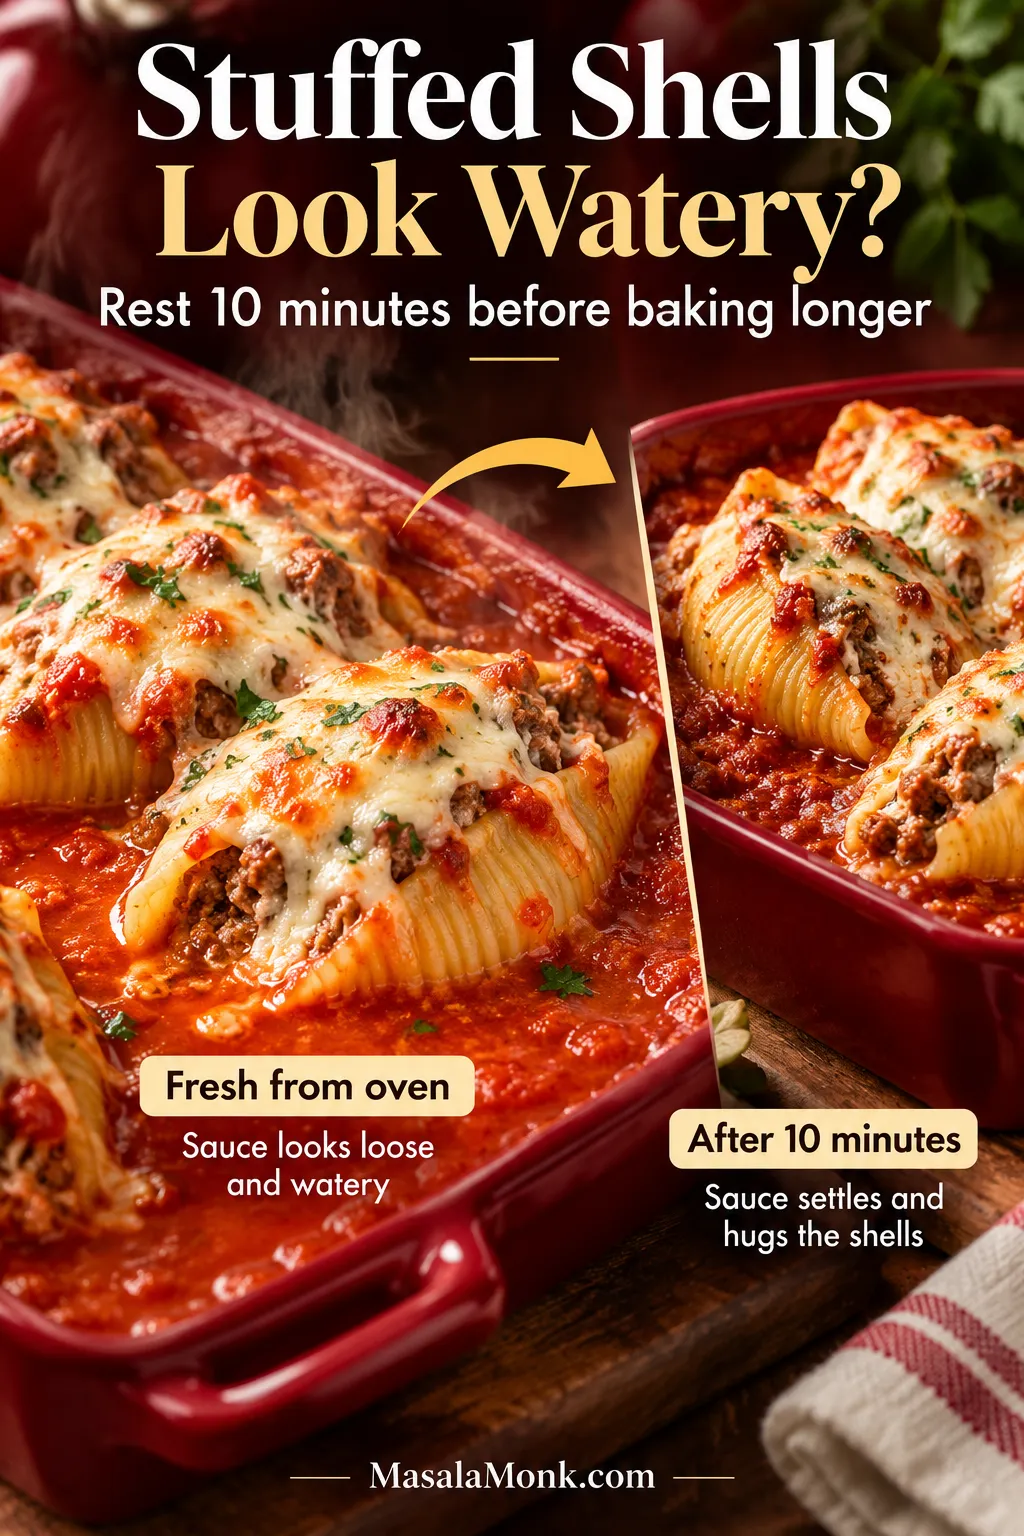
A casserole that simply looks wet when it first leaves the oven is different. Give it the full 10-minute rest before deciding it needs more heat. Some loose sauce around the shells is normal and will settle. Prolonged baking, however, can dry the pasta and make the ricotta grainy without solving the original problem.
After the 10-minute rest, judge what remains. If marinara still pools heavily around the stuffed shells, investigate ricotta, beef liquid, vegetables or sauce consistency. Do that before automatically extending the bake and drying the pasta.
Too much time in the oven is a common culprit. Whole-milk ricotta helps keep the filling tender, but prolonged heat can still dry it out. Start checking the shells near the end of the recommended baking window instead of extending the bake just because the surface still looks saucy.
Running short on filling
The first shells probably got more than their share. If you are still filling them, use the four-groups-of-six checkpoint for the remaining shells; otherwise, move some filling from the fullest shells into the emptier ones.
Why do stuffed shells tear?
They may have cooked too long or stuck together while cooling. Pull them from the water while they’re still firm, spread them out after draining and open each shell gently. The few extras in the pot are there for the occasional casualty.
Hard pasta edges
Exposed pasta probably didn’t have enough sauce or spent too long in dry oven heat. Spoon marinara over bare edges and keep the casserole covered for most of the bake. The short uncovered finish is enough to melt the cheese and give it some color.
For an all-sausage version, replace the beef with 1 lb / 454 g mild or hot Italian sausage. Or use ½ lb / 227 g each of ground beef and Italian sausage. This keeps the familiar beef flavor while adding some of the sausage’s extra seasoning and richness. Drain excess fat after browning, and go lightly with added salt until you’ve accounted for the seasoning already in the sausage.
Ground turkey
Replace the beef with 1 lb / 454 g ground turkey. Turkey is milder and often leaner, so season it well and cook away any liquid in the skillet before adding it to the cheese mixture. Ground poultry should reach 165°F / 74°C.
Beef, ricotta and spinach
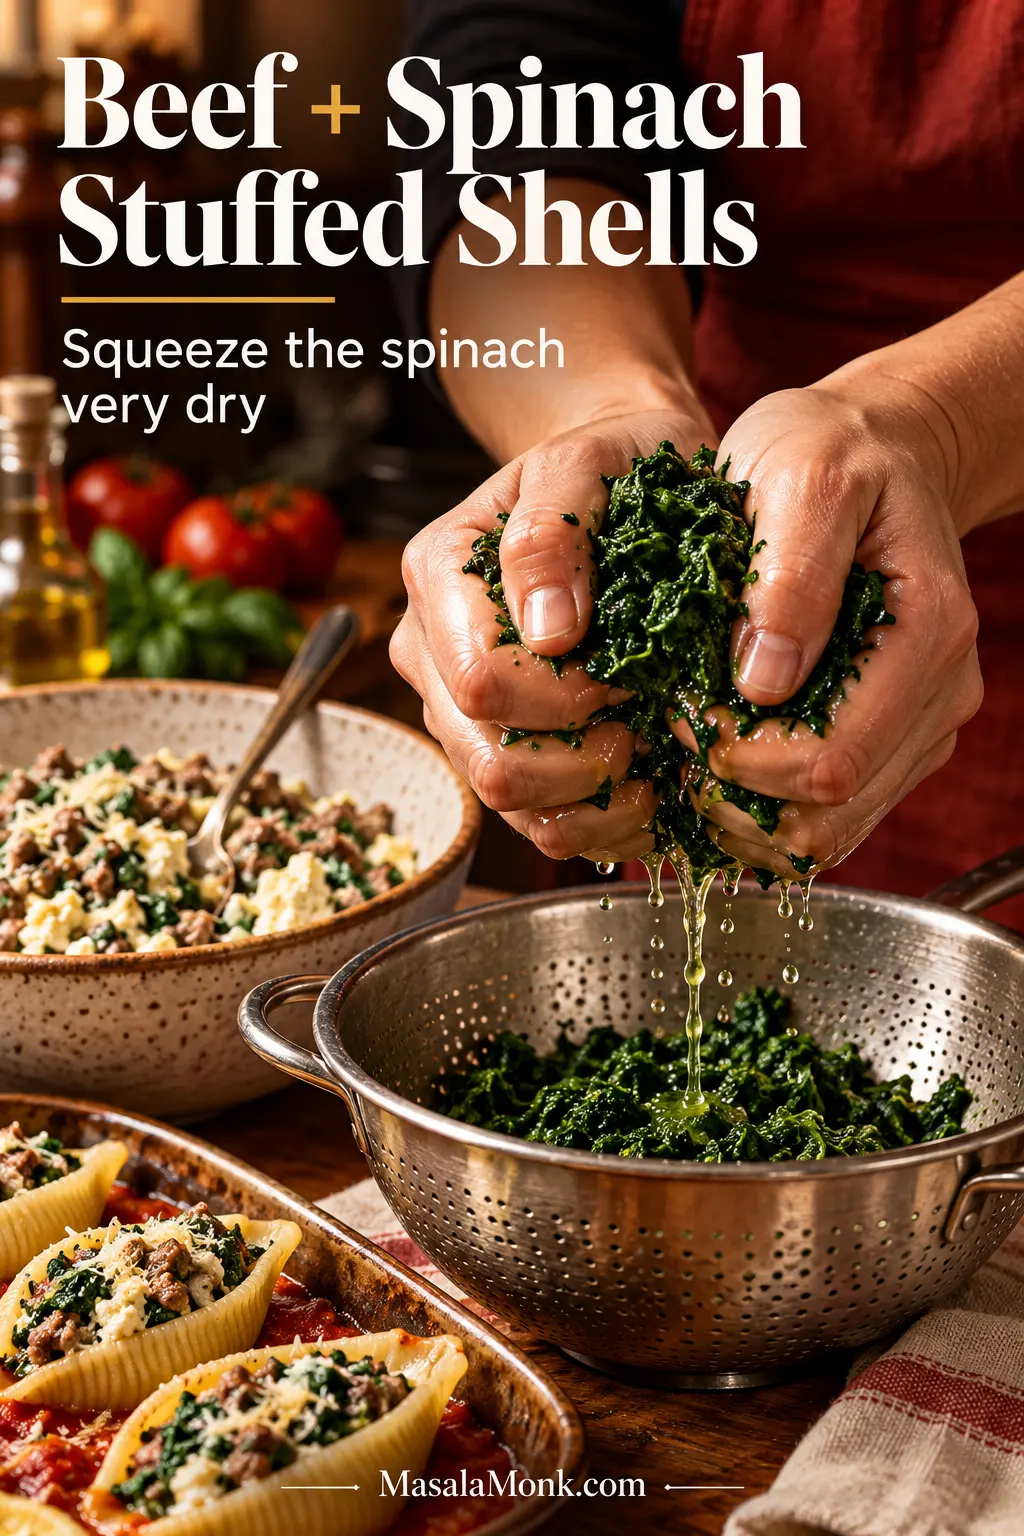
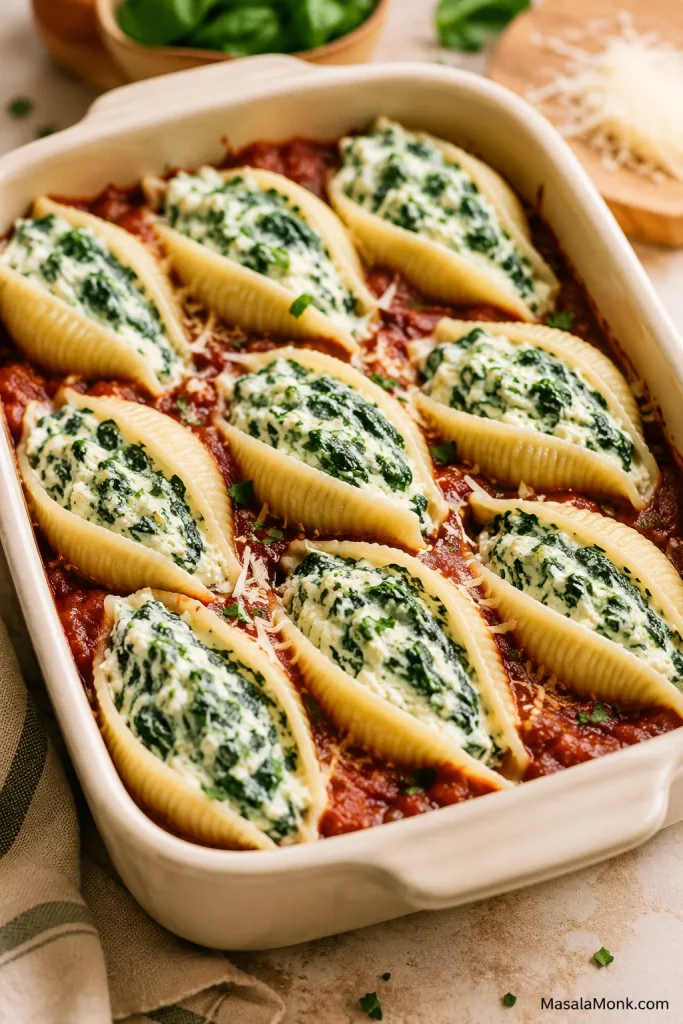
Add about 5 oz / 140 g frozen chopped spinach, thawed and squeezed very dry. Water left in the spinach goes straight into the filling. If you want vegetables to be more than an add-in, our vegetable lasagna builds the dish around them from the start.
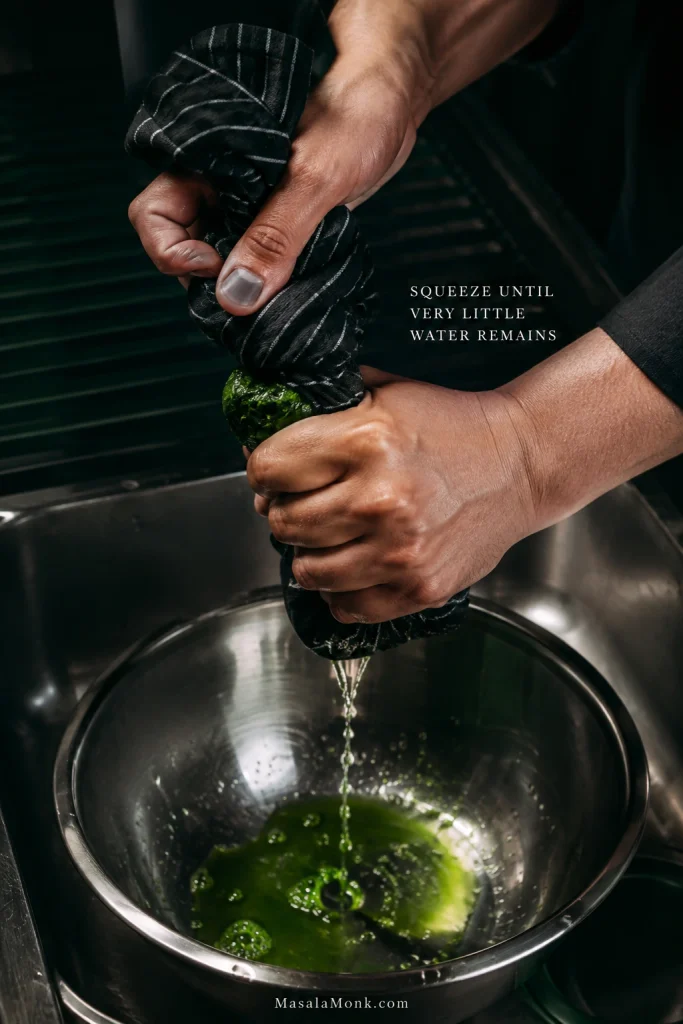
For beef and spinach stuffed shells, properly drained spinach should form a compact clump and stop releasing water under firm pressure. That physical cue is more reliable than squeezing it for an arbitrary number of seconds.
Make Ahead, Freeze and Reheat
Can I assemble stuffed shells the day before?
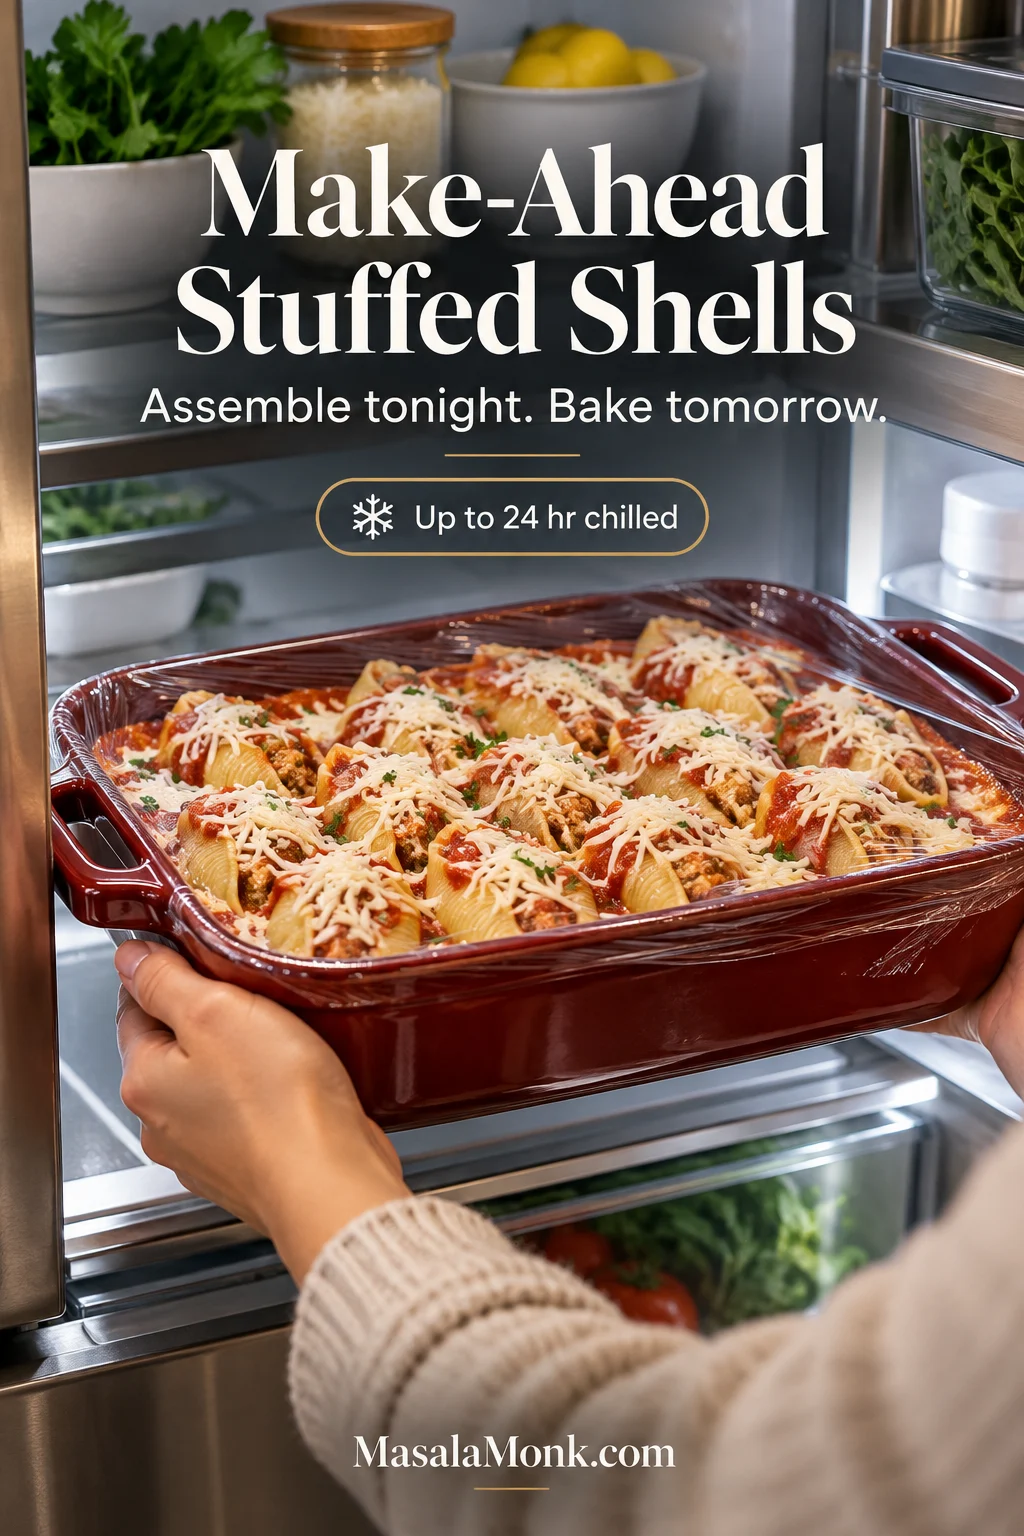
Yes. Assemble the casserole through the mozzarella topping, cover it and refrigerate promptly for up to 24 hours. That gets most of the work out of the way before dinner.
Keep make-ahead stuffed shells tightly covered while they chill. Otherwise, exposed pasta ridges can begin drying in the refrigerator before the casserole ever reaches the oven, especially around the upper edges.
When baking straight from the refrigerator, allow roughly 10–15 extra minutes of covered baking time as a starting point. A very cold dish may need longer, so check a shell near the middle before uncovering for the final 5–10 minutes.
You can also make the beef-and-ricotta filling up to 24 hours ahead, refrigerate it promptly, then cook and fill the shells closer to baking time.
Can you freeze stuffed shells?
Yes. Bake the stuffed shells first, refrigerate them promptly until chilled, then cover tightly and freeze for up to 2–3 months for best quality.
Thaw the baked shells overnight in the refrigerator for the most even reheating. Individual baked portions can also be frozen separately when you don’t want to reheat the entire casserole.
How to store and reheat leftovers
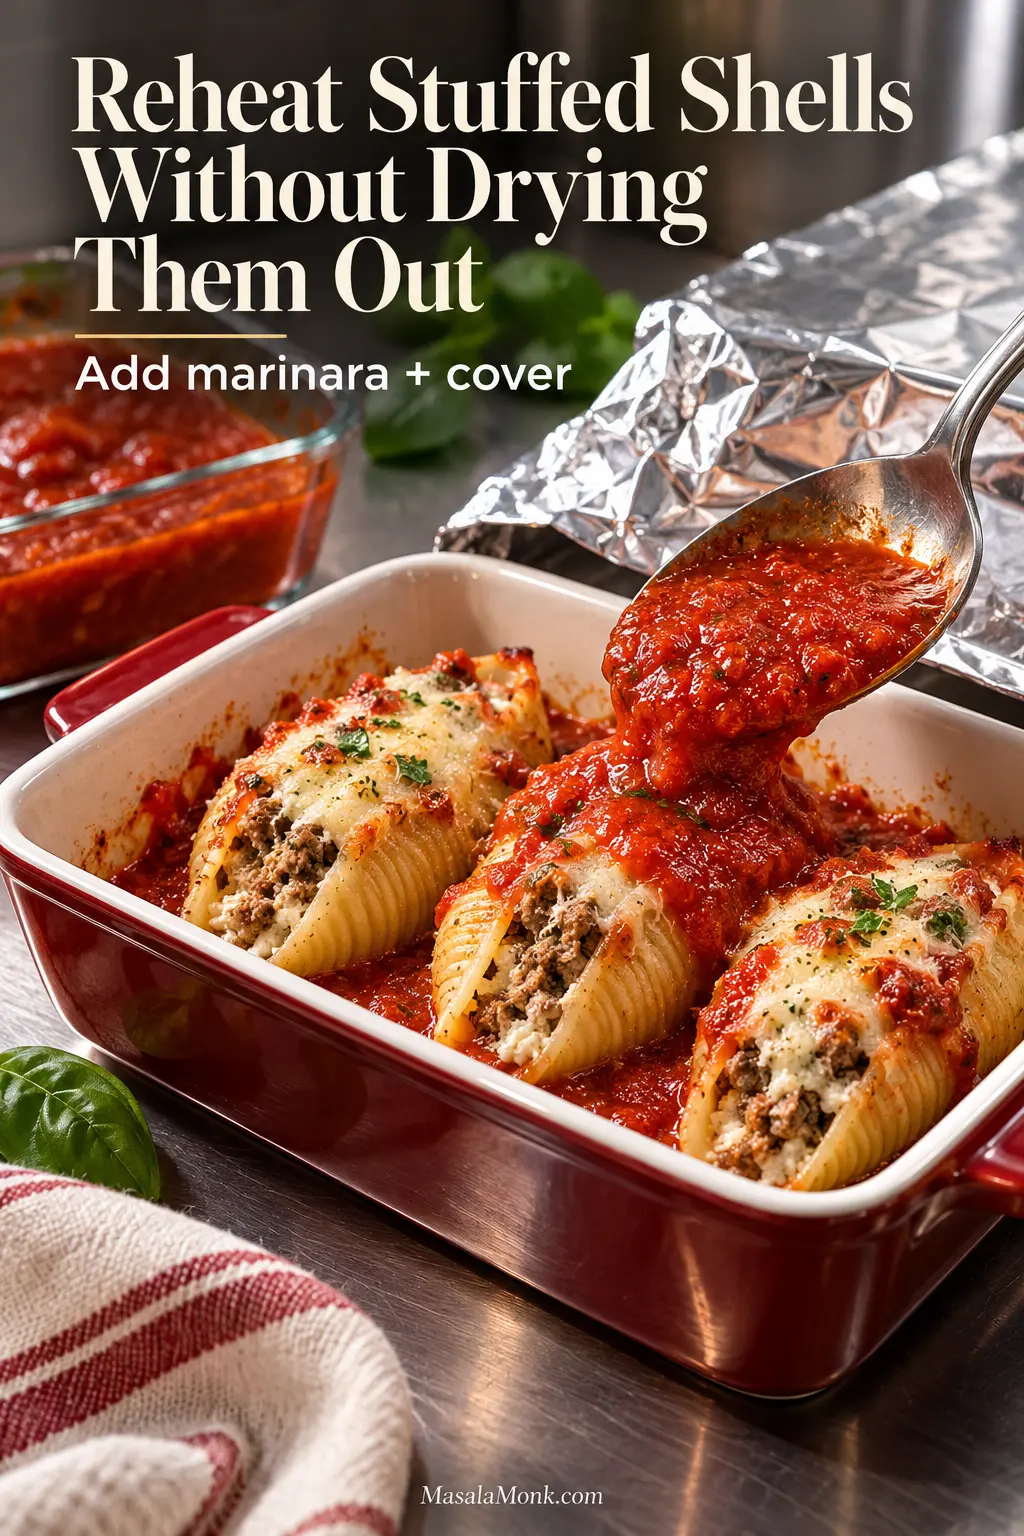
Refrigerate leftovers promptly in a covered container and use them within 3–4 days. A spoonful of marinara helps if the pasta has dried slightly in the refrigerator.
When reheating leftover stuffed shells, aim the extra marinara at pasta that looks matte or dry—particularly exposed lips and ridges. This restores moisture where it is needed without turning the whole portion unnecessarily soupy.
For a larger refrigerated or thawed portion, cover and reheat at 350°F / 175°C for about 20–25 minutes as a starting point. Continue until the center reaches 165°F / 74°C. Individual portions can be loosely covered and reheated in the microwave until hot throughout.
How Many Stuffed Shells Per Person?
These stuffed shells are substantial enough to serve as the main dish. From one batch, plan on:
4 stuffed shells per person for 6 hearty servings.
3 stuffed shells per person for about 8 servings with sides.
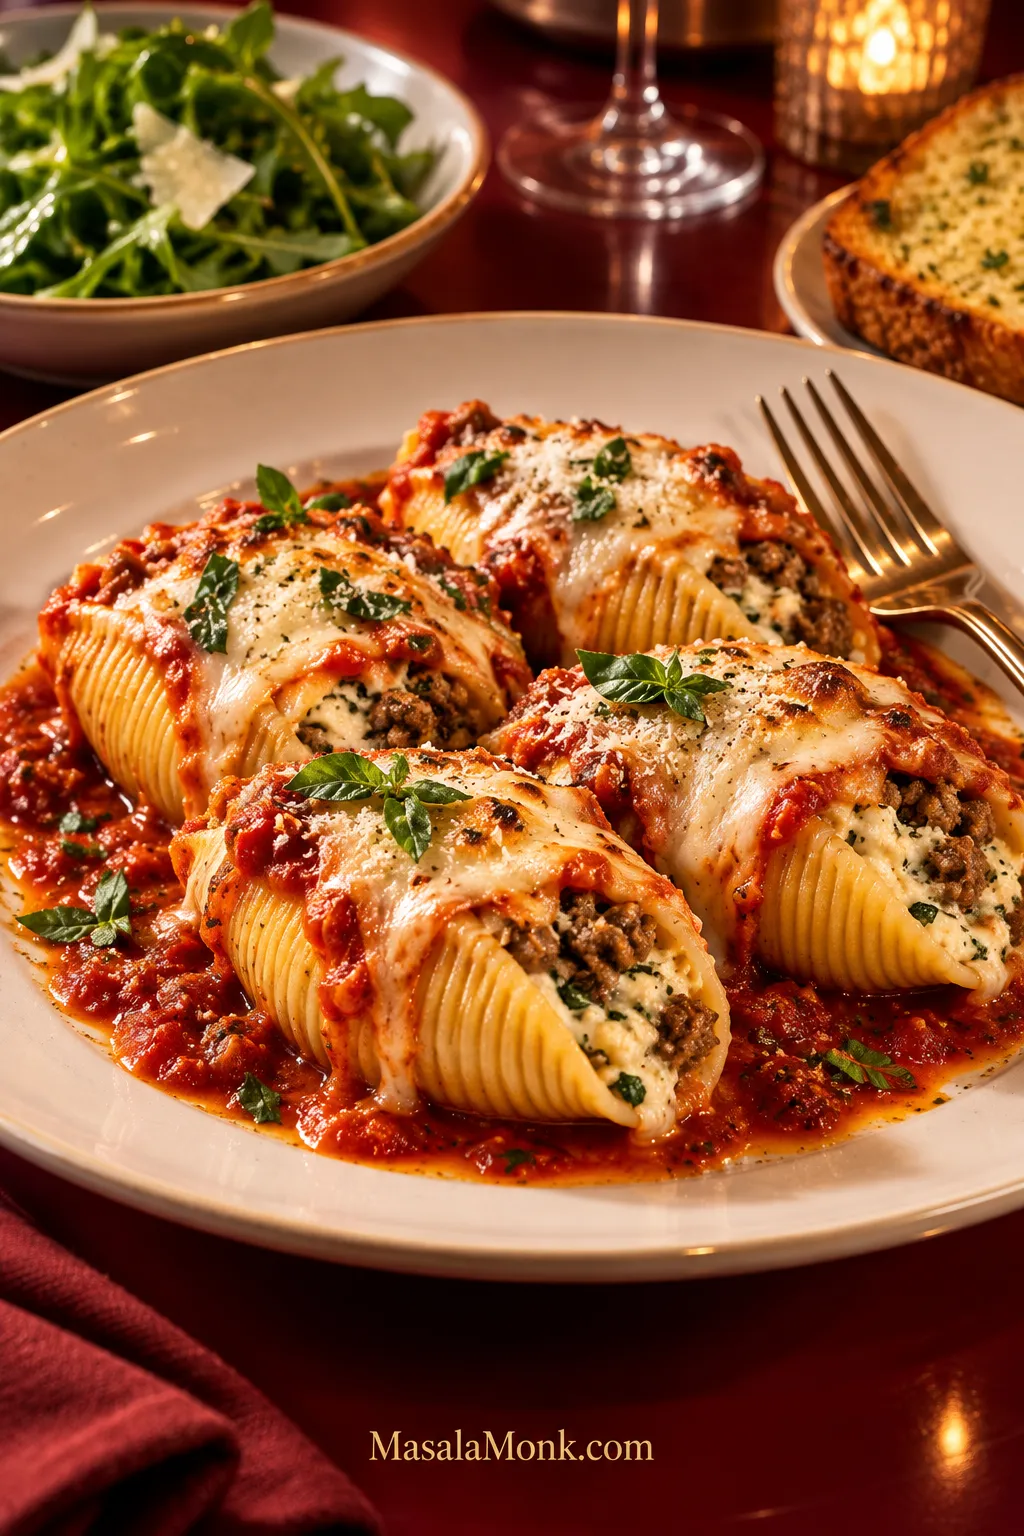
For a hearty serving of stuffed shells with meat, four shells fill the plate without needing to be buried in sauce. Spoon marinara around and lightly over them so the beef-and-ricotta centers remain visible and easy to portion.
What to Serve with Stuffed Shells
A cold, crunchy side works especially well against the hot casserole. Our broccoli salad brings crisp vegetables and a tangy dressing, while a simple green salad is an easy lighter option.
For something warm, green beans almondine adds lemon and toasted almonds without competing with the marinara. Roasted broccoli works too, and garlic bread is an easy choice when you want something for the sauce left on the plate.
Bring the casserole to the table while the mozzarella is still soft and stretchy, and spoon some of the marinara from the dish over each serving. Add something crisp or green alongside if you like. That’s really all these shells need.
Before this becomes lasagna, the vegetables should already taste worth eating. The mushrooms need to be dark and savory, the zucchini smaller and browned at the edges, the onion sweet, and the peppers and carrots properly tender. If the filling tastes flat before it goes between the noodles, another layer of cheese will not magically make it exciting.
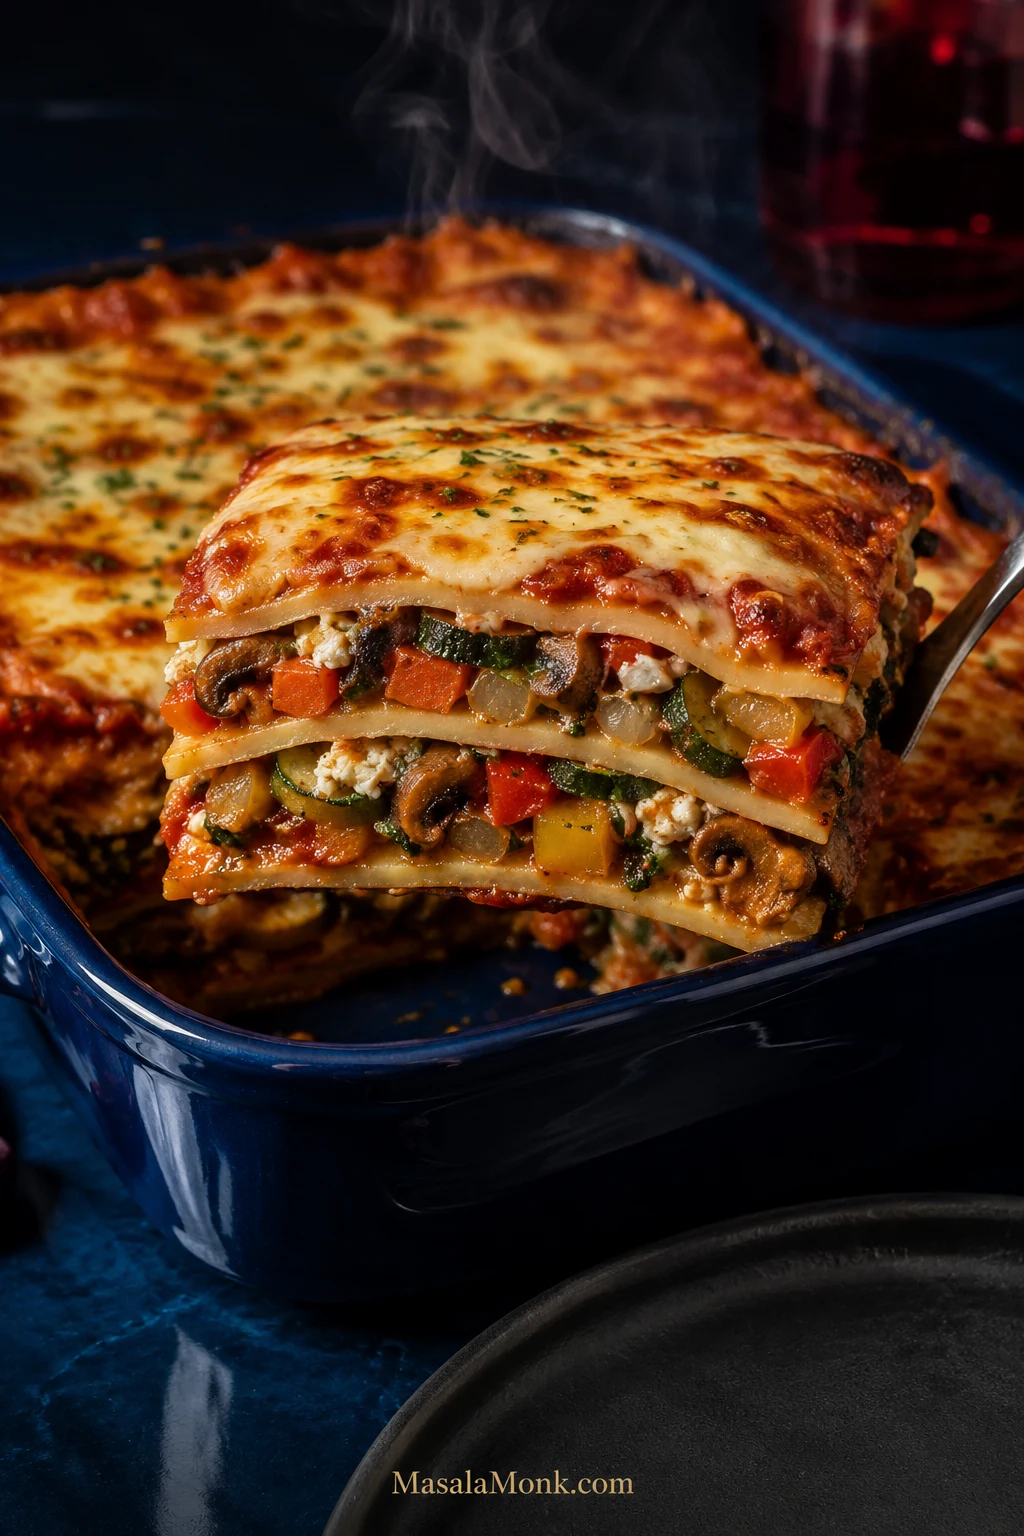
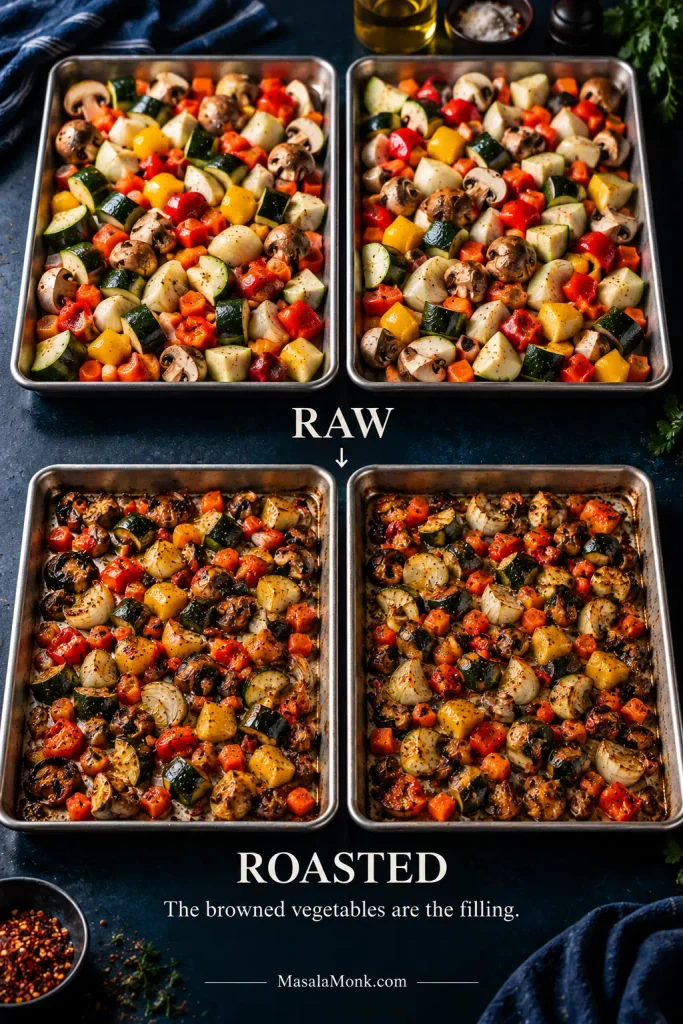
A deep 9 × 13-inch pan holds about 2 pounds / 910 g of roastable vegetables, plus spinach, layered with ricotta, mozzarella, tomato sauce and pasta. The finished lasagna is deeply cheesy, but the roasted vegetables are what give each layer its character. The browned vegetables are the filling.
Timings help, but watch the food too: mushrooms that release their water and begin browning again, marinara that clings to a spoon, and a knife that passes through the middle without catching on firm pasta.
Raw vegetable volume can be misleading: moisture loss dramatically reduces zucchini, mushrooms, peppers and onions during roasting. That is why a generous raw quantity can become two balanced filling layers without making the finished lasagna overwhelmingly vegetable-heavy.
This version uses roasted vegetables, ricotta, low-moisture mozzarella, tomato sauce and oven-ready lasagna sheets. There is no separate pot of noodles to boil.
Allow about 2 hours from the first chop to the first slice, with a little extra breathing room the first time you make it. You are not working for all of that: the ricotta, spinach and sauce can be handled while the vegetables roast, and the final 20 minutes belong to the lasagna, not you.
Pan
9 × 13 inches / 23 × 33 cm, ideally at least 2½ inches / 6 cm deep
Yield
8 main-dish servings or 10–12 smaller servings with sides
Hands-on prep
About 45–50 minutes, with some work happening while the vegetables roast
Vegetable roast
20–25 minutes using two pans; add about 20–25 minutes if you need to roast in two batches
Covered bake
40 minutes, then check; some pans need another 5–10 minutes
Uncovered bake
10–15 minutes
Rest
20 minutes; 25–30 minutes for particularly neat slices
Cooking for more people? Make two regular 9 × 13-inch pans rather than one unusually deep double batch. They bake more evenly, are easier to move, and give you more browned edges.
Ingredients
Vegetables
9 oz / 250 g zucchini, about 1 medium-large or 2 small, unpeeled and cut into roughly ½-inch / 1–1.5 cm pieces
8 oz / 225 g mushrooms, about one 8-ounce package, quartered if small or thickly sliced if larger
6 oz / 170 g red or yellow bell pepper, about 1 large, cut into roughly ½-inch / 1–1.5 cm pieces
5 oz / 150 g yellow onion, about 1 medium, cut into roughly ½-inch / 1–1.5 cm pieces
4 oz / 115 g carrot, about 1 large or 2 small, cut into smaller ¼-inch / 6 mm dice
5 oz / 140 g frozen chopped spinach, thawed; or about 8 oz / 225 g fresh spinach
3 tablespoons / 45 ml olive oil
1 teaspoon fine salt
1 teaspoon Italian seasoning
½ teaspoon garlic powder
½ teaspoon freshly ground black pepper
Ricotta Filling
15 oz / 425 g whole-milk ricotta, drained if whey is visibly pooling around it
1 large egg
1½ oz / 42 g Parmesan or another hard Italian-style cheese, finely grated
1 small garlic clove, finely grated
1 teaspoon finely grated lemon zest
2 tablespoons finely chopped fresh basil or flat-leaf parsley
¼ teaspoon fine salt, or to taste depending on the cheese
¼ teaspoon black pepper
For the Layers
4 cups / 950 ml thick marinara sauce, homemade or jarred
8–9 oz / 225–255 g oven-ready/no-boil lasagna sheets, or enough for 3 complete pasta layers; sheet count varies by brand
12 oz / 340 g low-moisture mozzarella, shredded, about 3 cups
½ oz / 14 g Parmesan or another hard Italian-style cheese, finely grated, for the top
Optional: red pepper flakes and fresh basil for serving
If you avoid animal rennet, check the cheese labels. Traditional Parmigiano Reggiano uses animal rennet, while vegetarian alternatives may use microbial or other non-animal coagulants. The Vegetarian Society’s guide to vegetarian cheese can help when the label is unclear.
Lightly oil the bottom and sides of a deep 9 × 13-inch / 23 × 33 cm baking dish. You will also need two large rimmed sheet pans; half-sheet pans, roughly 13 × 18 inches / 33 × 46 cm, are ideal. Have a mixing bowl, clean kitchen towel and foil ready too.
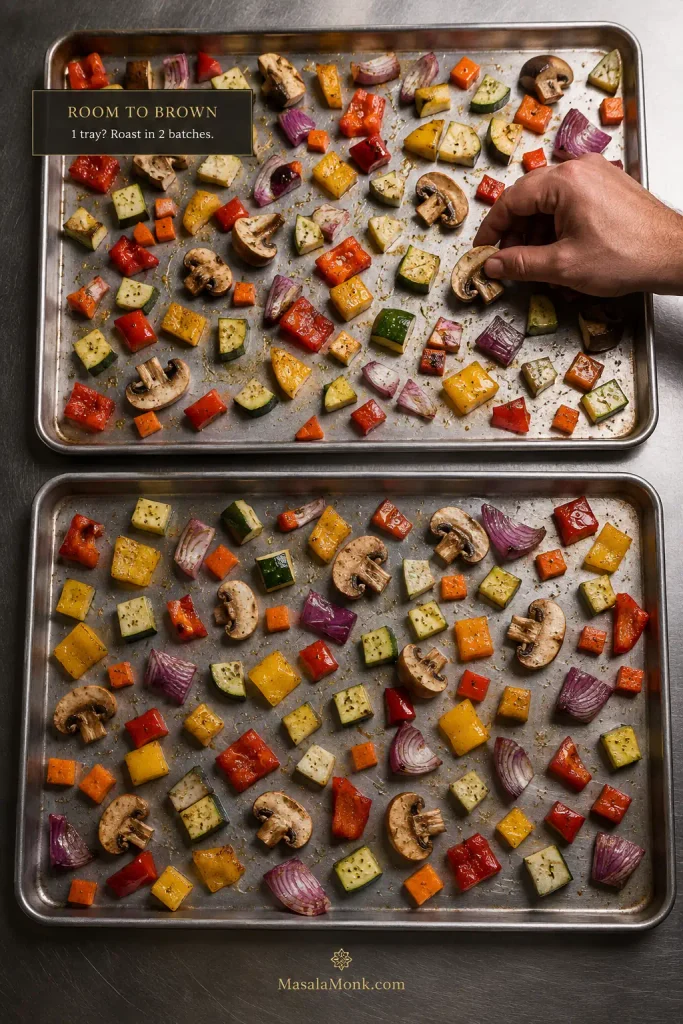
If the trays need separate oven racks, you will swap their positions halfway through roasting. Only one suitably large tray? Roast the vegetables in two batches rather than crowding them, and allow another 20–25 minutes.
Lasagna can bubble over as it bakes. If the assembled filling sits close to the rim, put the baking dish on a rimmed sheet pan before it goes into the oven.
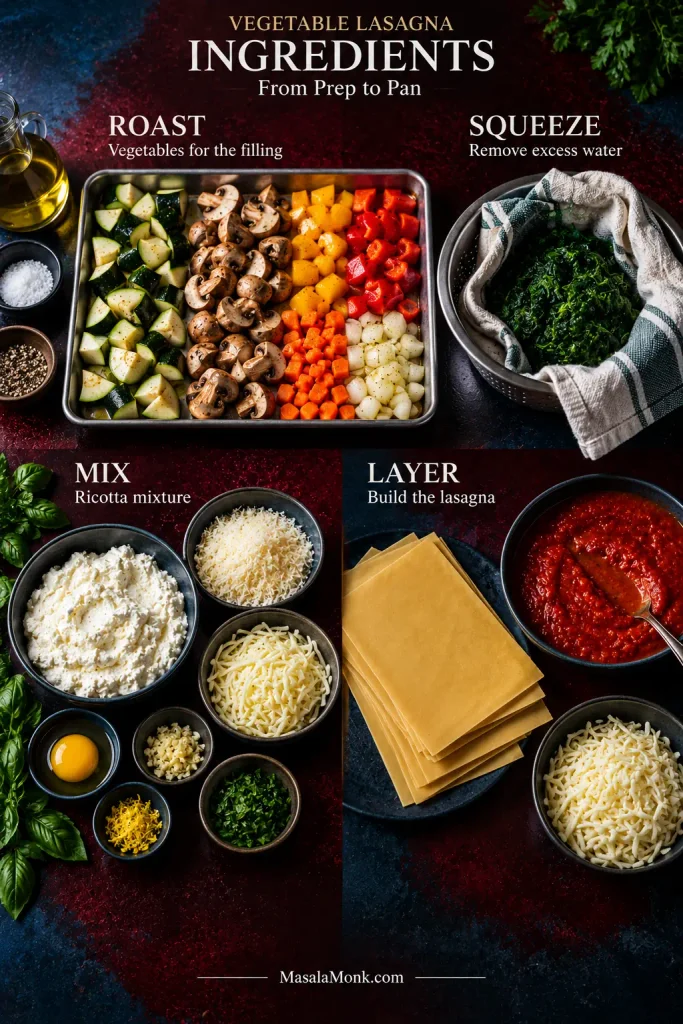
Think of the recipe as four checkpoints rather than one long ingredient list: control vegetable moisture, control spinach moisture, season the cheese, then balance the pasta with sauce. Catching a problem at its own checkpoint is much easier than fixing it after assembly.
1. Roast the Vegetables Until They Taste Finished
Heat the oven to 425°F / 220°C.
Divide the zucchini, mushrooms, bell pepper, onion and carrot between the two sheet pans. Add the olive oil, salt, Italian seasoning, garlic powder and black pepper. Toss well and spread everything out.
Crowded vegetables steam. Give these some room.
If the trays still look wet halfway through roasting, extending the timer is not always the best first move. Redistributing crowded pieces can expose more surface to hot air, helping evaporation and browning happen together instead of simply cooking the vegetables softer.
Roast for 20–25 minutes, stirring once. If the pans are on separate racks, swap the upper and lower pans and turn them front-to-back when you stir.
How to Know the Vegetables Are Ready
What looked like an unreasonable amount of vegetables at the beginning will look much more manageable now. The onion smells sweeter and the zucchini has shrunk. Peppers are tender, carrot pieces nearly cooked through, and dark edges have started appearing across both trays.
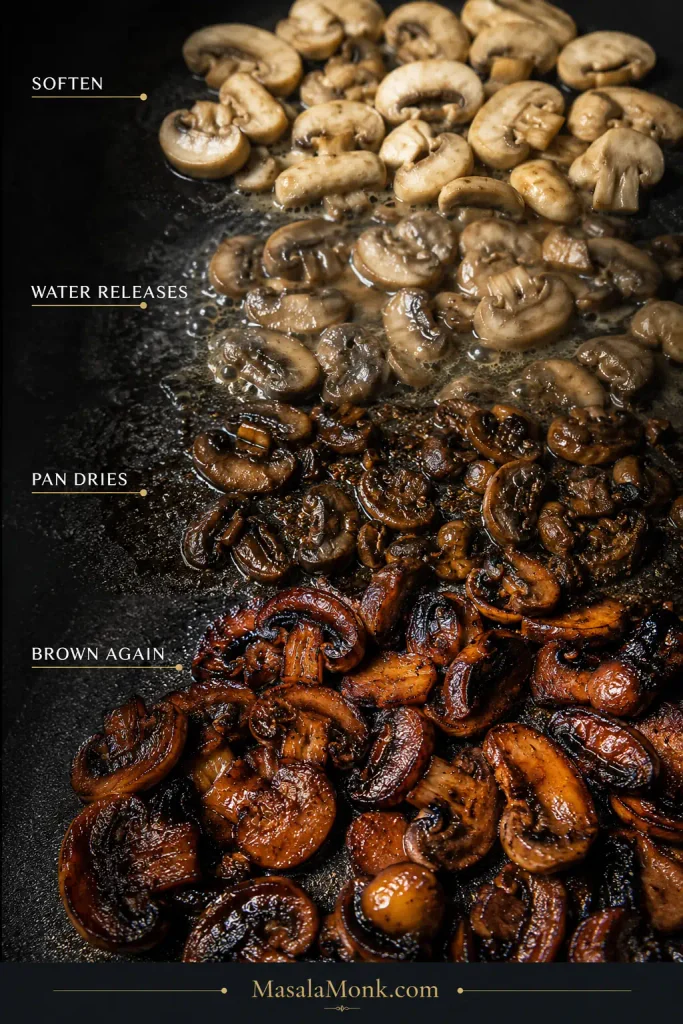
Mushrooms are especially easy to read. First they soften. Then they release enough liquid to make the pan look wetter than it did before. Keep going. The liquid disappears, the pan dries, and the mushrooms begin to brown again.
When mushrooms release a panful of liquid, keep cooking rather than draining it away. Once the pan dries, the concentrated flavor has a chance to brown.
Taste one.
Then taste a piece of zucchini and some onion. If those bites are not good now, fix the seasoning before they disappear between pasta and cheese.
Reduce the oven to 375°F / 190°C.
2. Dry the Spinach
Put the thawed spinach in the center of a clean kitchen towel, gather the towel around it and twist firmly over the sink. Keep squeezing until very little more liquid comes out.
Using fresh spinach? Wilt the 8 oz / 225 g in a large pan, let it cool enough to handle, squeeze out the excess liquid and chop it.
After squeezing, loosen the compact spinach with your fingers or a fork before mixing it into the roasted vegetables. That small step distributes the greens through both filling layers instead of leaving dense wet pockets in only a few slices.
Break the spinach apart and mix it through the roasted vegetables.
3. Check the Sauce
A good jarred marinara keeps this dinner practical.
Drag a spoon through the sauce. The trail should remain for a moment before slowly closing, and the sauce needs to be loose enough to spread easily across the dry noodles. If it runs like tomato juice, simmer it uncovered for a few minutes.
For no-boil lasagna noodles, sauce is part of the cooking system as well as the flavor. If a thin marinara needs reducing, judge and measure the sauce after reduction so you still have enough finished sauce to hydrate the pasta properly.
Stop before it becomes heavily reduced or pasty. Oven-ready sheets need enough sauce around them to become tender.
Taste the sauce too. Ricotta, mozzarella and pasta soften its seasoning once everything is layered.
Making the sauce from fresh tomatoes? They carry more water, so reduction matters. The fresh tomato sauce recipe shows the consistency to look for before measuring the 4 cups / 950 ml.
4. Mix the Ricotta
Stir together the ricotta, hard cheese, garlic, lemon zest, herbs, salt and pepper without the egg first.
Taste it. The ricotta needs enough seasoning to remain noticeable once it is surrounded by pasta, vegetables and tomato sauce. The lemon zest is there for brightness rather than obvious lemon flavor.
Once the seasoning is right, stir in the egg. It helps the cheese layer set; without it, the ricotta simply stays softer.
The messy part is mostly over now. The trays are roasted, the spinach is squeezed, the sauce is ready and the ricotta is mixed.
From here, you’re building.
5. Build the Layers
The vegetables, sauce and ricotta should each taste properly seasoned on their own before you layer them.
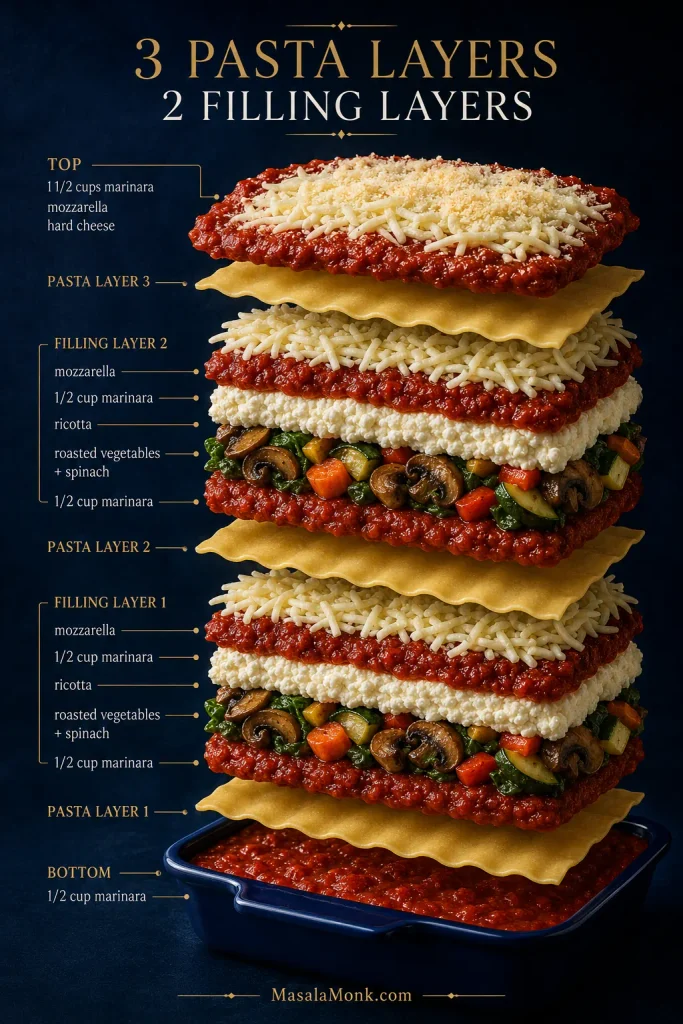
Divide the vegetables and ricotta mixture roughly in half. Keep the marinara, noodles and mozzarella beside the baking dish. You are making three pasta layers and two filling layers.
Layering evenly matters more than making every spoonful mathematically identical. Broad, fairly level filling layers heat more predictably than thick vegetable mounds, while three complete pasta layers give the finished lasagna structure without turning it into an unnecessarily tall stack.
Bottom
½ cup marinara
Enough oven-ready pasta to cover the pan
First Filling Layer
½ cup marinara, spread over the noodles
Half the ricotta filling
Half the vegetables
Another ½ cup marinara
About 1 cup mozzarella
Second Filling Layer
A second complete pasta layer
½ cup marinara
Remaining ricotta filling
Remaining vegetables
Another ½ cup marinara
About 1 cup mozzarella
Top
Final complete pasta layer
Remaining 1½ cups marinara
Remaining mozzarella
½ oz / 14 g grated hard cheese
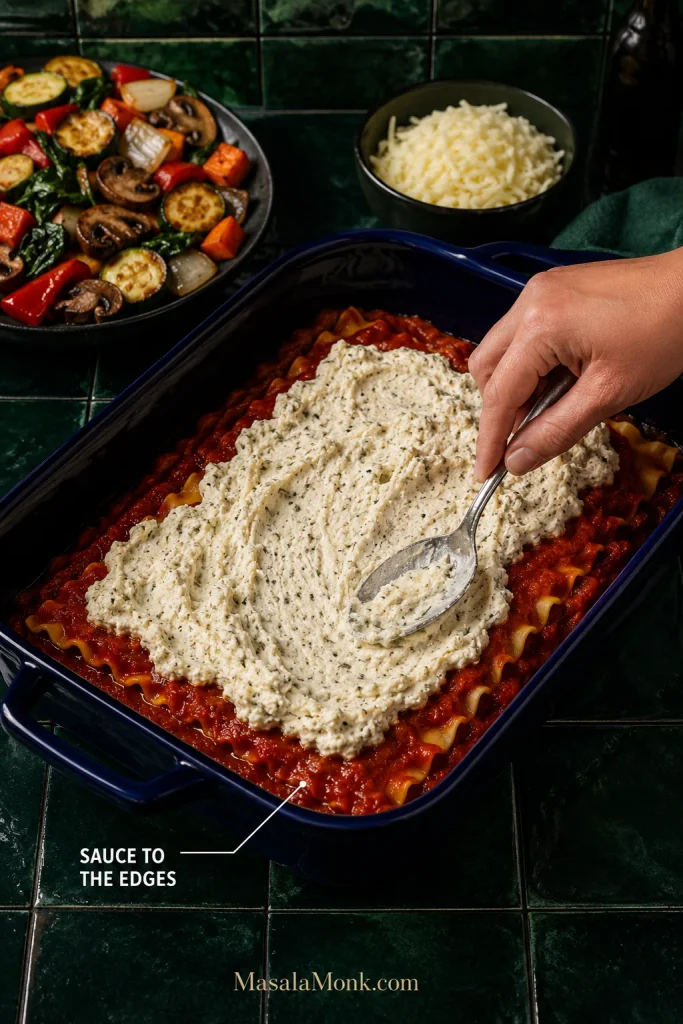
Dollop the ricotta onto the sauced noodles and spread it before adding the vegetables. It is much easier to move ricotta across a flat sheet of pasta than across a pile of zucchini and mushrooms.
Do not chase a perfectly smooth ricotta layer. A lightly spread, mottled layer lets the roasted vegetables settle into the cheese instead of sliding across a slick surface, while sauce at the perimeter protects the pasta where drying happens fastest.
Set the next pasta layer down and press gently over any obvious vegetable mounds. Don’t pack the filling.
Sheet sizes vary, sometimes a lot. Three complete pasta layers are the useful target. Break sheets to fill a real gap, but avoid thick patches of overlapping dry pasta.
Cover the final noodle layer completely with the last 1½ cups of marinara, right into the corners. Pasta left exposed here is likely to stay hard.
The two trays of vegetables, bowl of ricotta and stack of pasta have finally become one pan of lasagna.
6. Cover and Cook the Pasta
Cover the dish tightly with foil. Lightly oil the underside if it sits close to the cheese.
Bake at 375°F / 190°C for 40 minutes.
Forget about browning for now. The middle of the pan and the dry noodles need the covered heat first.
7. Check the Middle, Then Brown the Top
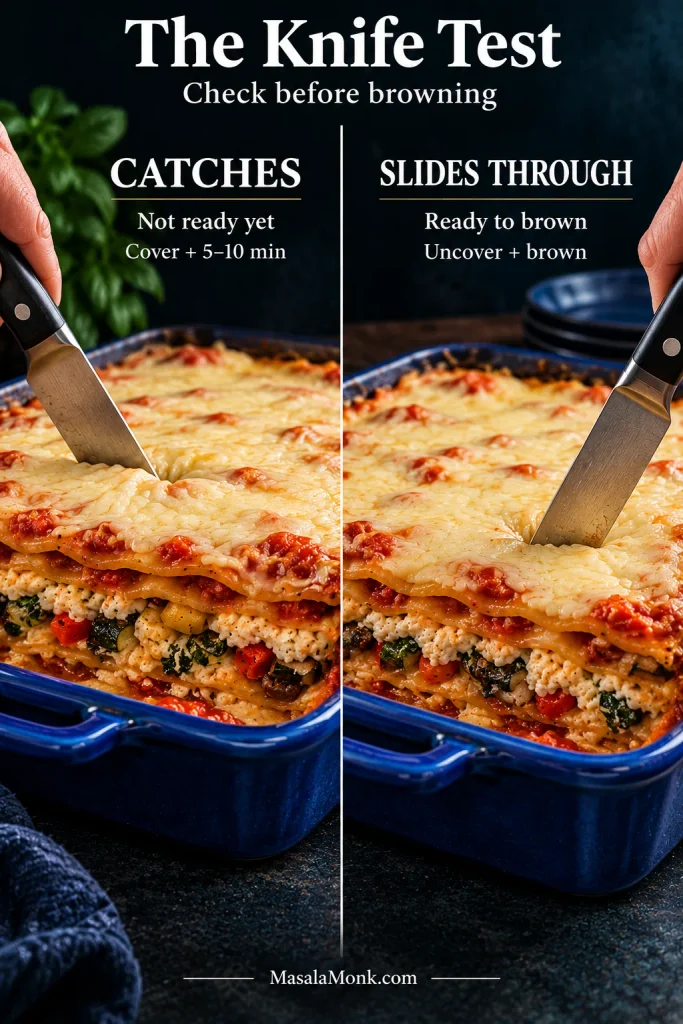
Push a thin knife through the middle after 40 minutes.
If it slides through without catching on firm pasta, you’re ready to uncover. If the knife catches, nothing has gone wrong. Cover the pan again and give it another 5–10 minutes.
When checking doneness, distinguish firm pasta resistance from simply bumping into a piece of carrot or another vegetable. A hydrated noodle gives way smoothly; an undercooked sheet feels broader, firmer and more leathery against the knife.
A refrigerator-cold pan or thicker oven-ready sheets may need closer to 50 minutes covered.
Once the pasta is tender, remove the foil and bake for another 10–15 minutes. Tomato sauce will bubble around the perimeter. The mozzarella picks up golden patches, darker freckles and, here and there, a crisp edge.
If your baking dish is broiler-safe, a pale but fully cooked top can have a brief broil. Stay close—the distance between bronzed mozzarella and burned cheese is surprisingly short.
8. Give It 20 Minutes Before You Ask It to Be a Slice
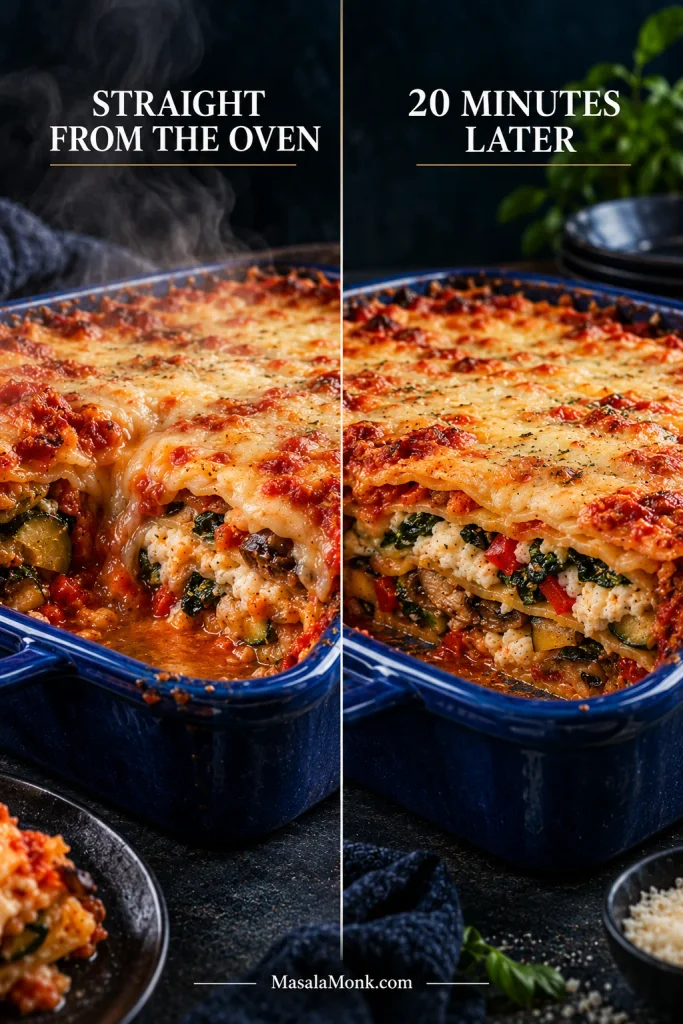
Take the pan out and leave it alone for 20 minutes.
The furious bubbling subsides, the ricotta firms a little and the sauce stops running quite so freely when you cut.
For particularly clean slices, wait 25–30 minutes. The middle will remain plenty hot.
Resting changes mobility more than moisture quantity. The liquid has not vanished after 20 minutes; rather, the sauce, cheese and filling have cooled just enough to move less freely, which is why the same lasagna becomes noticeably easier to portion.
This is not a 30-minute dinner. It does not need to become an all-afternoon project either.
Jarred marinara: use one that passes the consistency check above and move on.
Oven-ready noodles: no boiling, draining or handling floppy sheets.
Frozen spinach: excellent here once thoroughly squeezed.
Pre-shredded low-moisture mozzarella: a perfectly reasonable place to save a few minutes.
Vegetables roasted a day ahead: the most useful shortcut when tomorrow’s assembly needs to be quick.
Best Vegetables for Lasagna
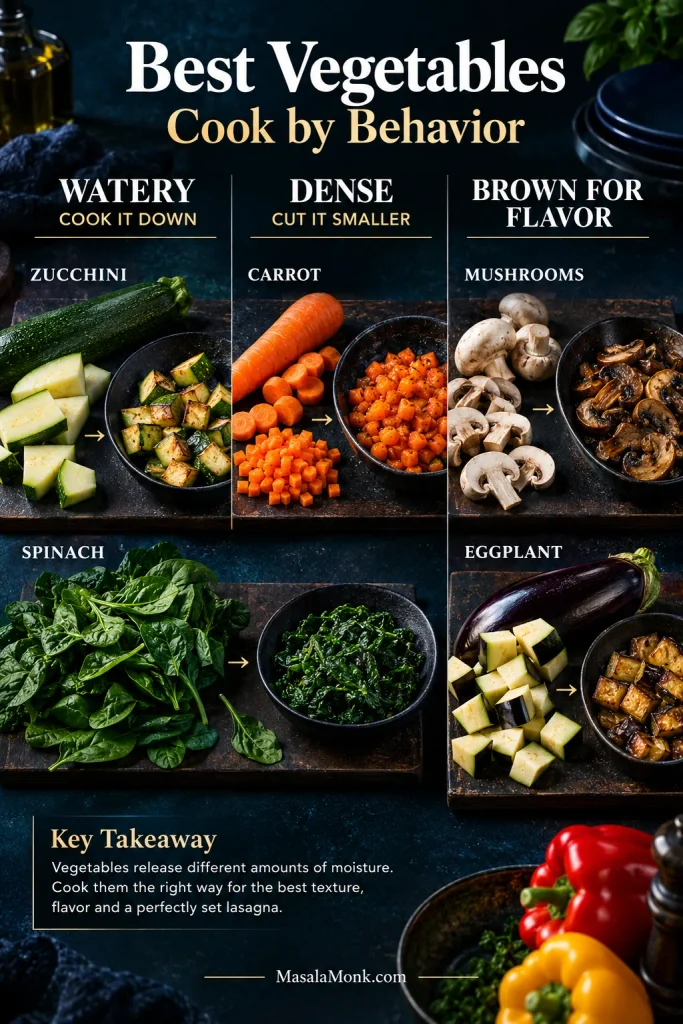
For this style of lasagna, cook the vegetables before layering them. Raw zucchini and mushrooms can release too much liquid in the pan, while dense vegetables may still be firm by the time the pasta is done.
Zucchini can become eggplant without much trouble. Carrot is different. It carries far less water and takes longer to soften, so replacing vegetables cup-for-cup can change the filling more than expected.
The base recipe uses about 2 pounds / 910 g of trimmed roastable vegetables, plus spinach. Raw weight is a useful rough guide for substitutions; then account for how dense and watery the replacement is.
The best vegetables for lasagna are often the ones that can be swapped for something with similar density and water content. Zucchini and eggplant behave more alike than zucchini and carrot, for example, so matching cooking behavior makes substitutions far more predictable.
How to Swap Vegetables Without Throwing Off the Filling
Vegetable
How to Use It
Zucchini
Tender and fairly watery. Roast until smaller and browned. Eggplant is an easy replacement.
Mushrooms
Deeply savory. Keep cooking until their released liquid is gone and browning starts again.
Spinach
Wilt fresh or thaw frozen, then squeeze firmly. Kale works too but needs more cooking.
Bell peppers
Sweet and forgiving. Roast until tender. Well-drained roasted red peppers also work.
Carrots
Sweet and relatively dry. Cut them smaller so they become tender at roughly the same time as the other vegetables.
Onion
Give it enough time to soften and brown. Large undercooked pieces are distracting in the finished slice.
Eggplant
Silky and savory after roasting. Excellent in place of some or all of the zucchini.
Butternut squash
Dense and sweet. Use small cubes and roast until nearly tender.
Broccoli or cauliflower
Use small pieces and roast first. Better as part of a mixed filling than the entire filling.
Kale
More robust than spinach. Remove tough stems and cook it until properly tender.
No mushrooms? Replace their 8 oz / 225 g with eggplant, extra pepper, zucchini or a mixture. You lose some savory depth, so give the tomato sauce a final taste before assembly.
For a smoother, more hidden-vegetable filling, grate zucchini into the marinara and simmer until tender and its extra moisture has cooked away. Browned mushrooms can be chopped very finely, and spinach can simply be minced before mixing it through.
Vegetable Lasagna With Frozen Vegetables
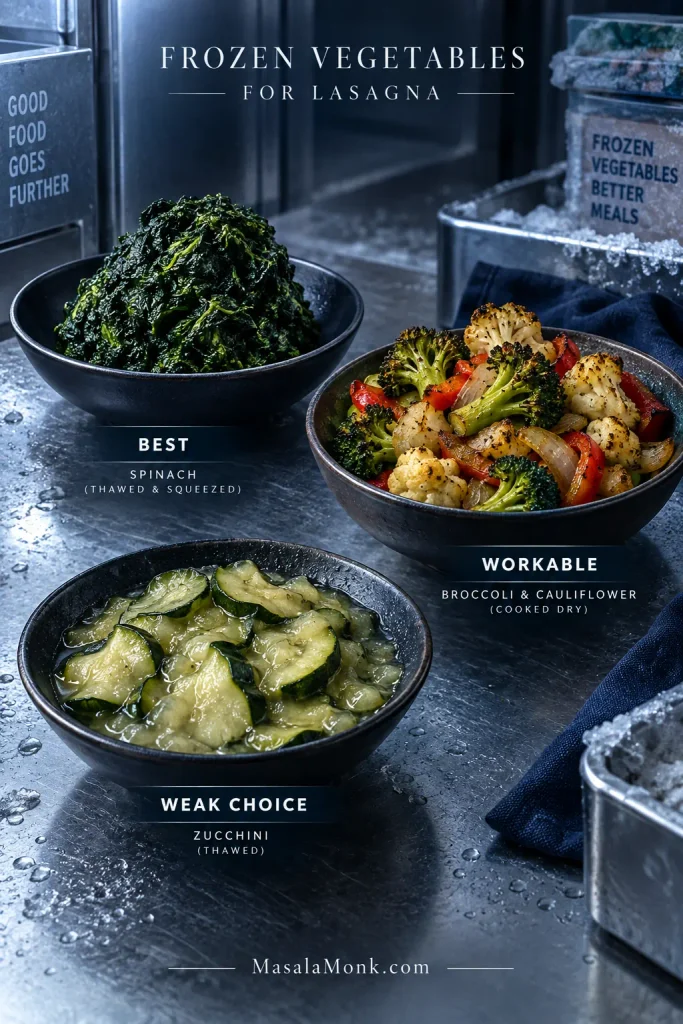
Frozen spinach is excellent here. Frozen zucchini is not. Most other frozen vegetables fall somewhere between those two.
With frozen vegetables for lasagna, fix excess moisture at the vegetable stage rather than compensating by cutting back too aggressively on marinara. That distinction matters with oven-ready pasta, which can still need plenty of sauce even when the filling itself started wet.
Frozen Vegetable
Best Approach
Spinach
Thaw completely and squeeze firmly until very little more water comes out.
Broccoli or cauliflower
Thaw, drain and blot. Roast or sauté briefly if the pieces still look wet.
Peppers or pepper-and-onion mixes
Sauté until released water evaporates and some color starts developing.
Mixed vegetables
Thaw, then sauté until the pan no longer looks wet. Choose the blend for flavor as well as convenience.
Zucchini
It can be used, but the texture is considerably softer and wetter. Fresh zucchini is much better here.
If most of the filling comes from frozen vegetables, cook and drain them before assembly. Aim for about 5 cups total cooked, well-drained vegetables across the two filling layers, including spinach if you’re using it.
The volume does not need to be exact. Two full, fairly level layers are enough.
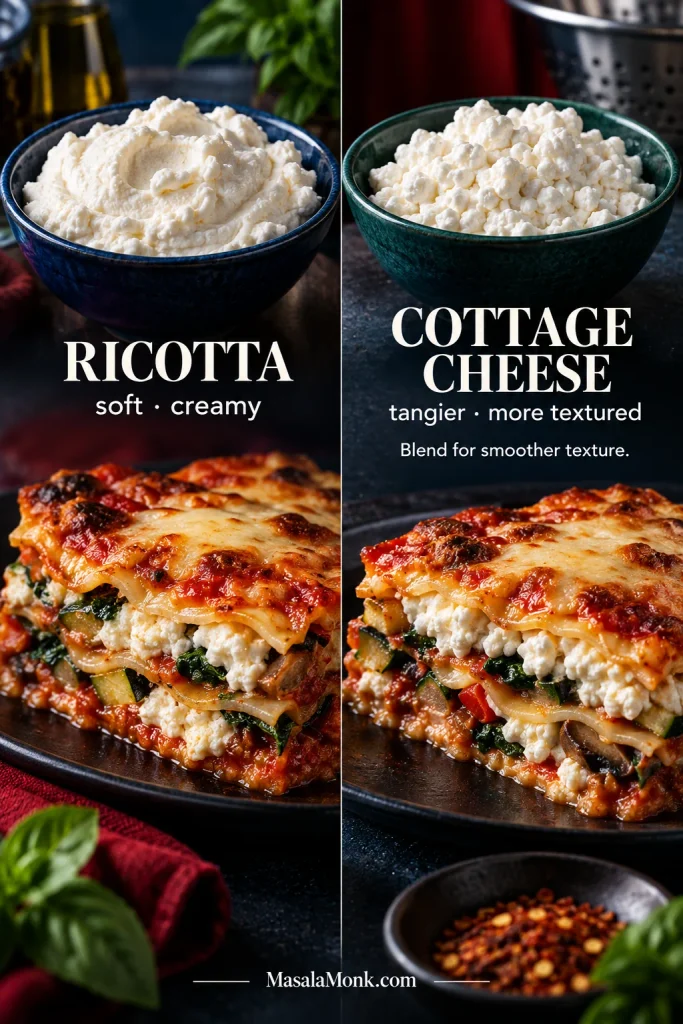
Ricotta leaves soft, creamy pockets between the roasted vegetables, sauce and pasta. A very loose tub needs draining first.
Using Cottage Cheese Instead
Cottage cheese is tangier, with visible curds unless you blend it. Swap it for the ricotta by weight—15 oz / 425 g—and make the rest of the filling exactly the same way. Blend the cottage cheese before adding the other ingredients when you want a smoother texture, and drain off obvious liquid first.
For ricotta vs cottage cheese in lasagna, neither option is automatically “drier” across every brand. Choose the cheese for the texture you want, then judge the tub in front of you: visible pooled whey matters more to the finished pan than the name on the label.
The cottage cheese lasagna is built around that cheese from the start rather than treating it as a substitution.
For a different style altogether, béchamel gives you a softer, silkier lasagna with creaminess spread more evenly through the layers. The béchamel sauce for lasagna is the better starting point for that version.
No-Boil and Regular Lasagna Noodles
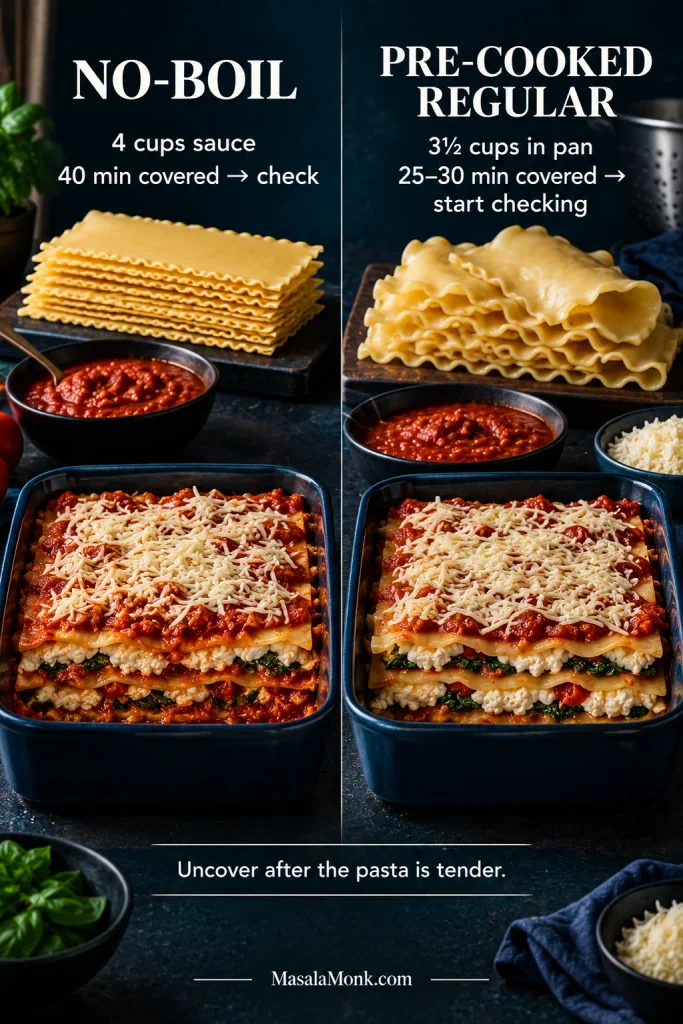
This version is built for oven-ready/no-boil sheets. Keep every sheet well covered with sauce and give the pan the full covered bake before checking the pasta.
Using Pre-Cooked Regular Noodles
Cook enough regular noodles for the same three complete pasta layers; sheet dimensions and package sizes vary. Boil them only until flexible and a little firmer than you would serve as finished pasta.
For cooked noodles, reduce the sauce over each vegetable layer from ½ cup to ¼ cup. Keep every other sauce amount the same; this uses 3½ cups in the lasagna and leaves ½ cup to warm for serving if you want extra sauce at the table.
Changing noodle type changes more than bake time. No-boil lasagna noodles arrive dry and take part of their hydration from the sauce, whereas pre-cooked noodles bring water into the pan themselves; therefore, the sauce quantity should change with the pasta method.
Pre-cooked noodles do not need the full 40–50 minute hydration stage. Cover the freshly assembled lasagna and start checking it after 25–30 minutes at 375°F / 190°C. Once the middle is hot and bubbling, uncover and brown the cheese for another 10–15 minutes.
A refrigerator-cold pan will take longer. Judge it by a thoroughly hot, bubbling middle rather than the clock alone.
Gluten-free sheets vary too much by brand for one universal method. Follow the package directions, keep dry sheets well sauced and check the pasta before uncovering.
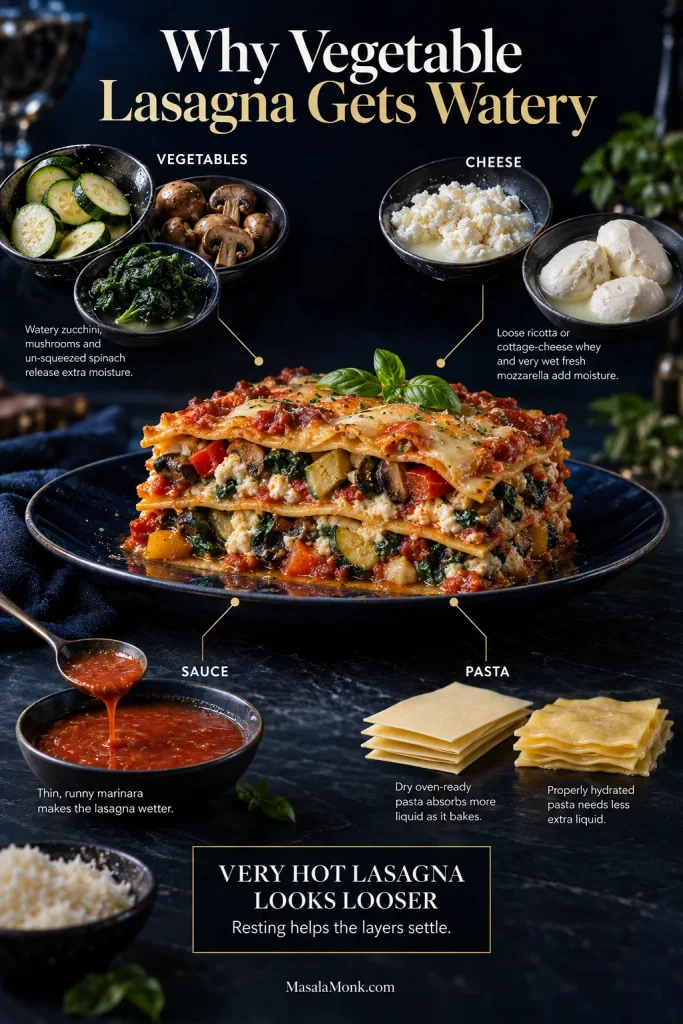
Most watery lasagnas are not ruined by one dramatic mistake. They get there by accumulation: spinach that still held water, mushrooms that never reached the browning stage, unusually loose ricotta and thin tomato sauce all meeting in the same pan.
Vegetables: zucchini, mushrooms and spinach can release plenty of water. Roasting, sautéing and squeezing deal with much of it before layering.
Cheese: ricotta and cottage cheese vary by brand. If whey is pooling, drain it. Fresh mozzarella contains considerably more water than low-moisture mozzarella and is not a straightforward 1:1 substitute here unless it is drained and blotted extremely well.
Sauce: very thin marinara loosens the whole pan. Sauce reduced too far creates the opposite problem when dry noodles need liquid.
Pasta: oven-ready sheets absorb liquid while they cook. Boiled noodles arrive in the pan already hydrated.
The useful distinction in watery vegetable lasagna is not simply “more liquid versus less liquid.” It is controlled moisture versus uncontrolled moisture: pasta needs deliberate hydration, while vegetable water, cheese whey and excessively thin sauce can accumulate where the recipe does not need them.
A lasagna also looks looser when it is extremely hot. Straight from the oven, the sauce moves more freely; after 20 minutes, the layers hold themselves together much better.
A spoonful of juices around a very hot first slice is not a failed lasagna.
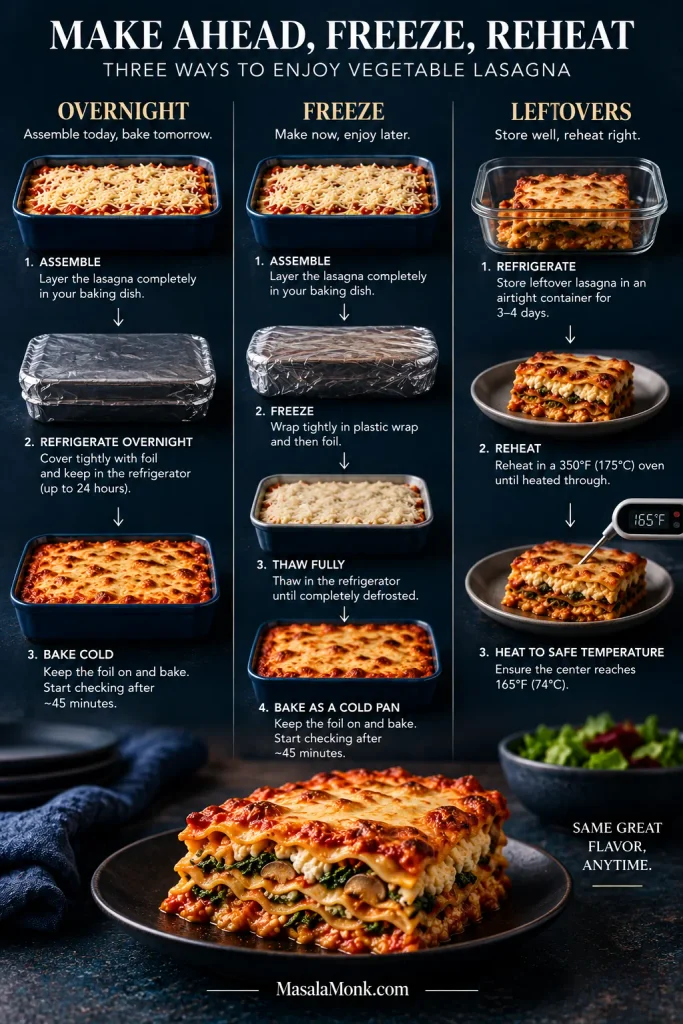
Cover the assembled pan tightly and refrigerate overnight. The next day, start checking the pasta after about 45 minutes covered. The whole dish begins cold, so it usually needs longer than a freshly assembled pan.
With make-ahead vegetable lasagna, watch the center rather than trusting the browned edges. A refrigerator-cold or fully thawed pan can look active around the perimeter while the middle is still catching up, so doneness cues remain more reliable than adding one fixed number of minutes.
Opening the refrigerator and finding dinner already built is one of the better rewards for doing the chopping a day early.
Prep the Components Earlier
The roasted vegetables and tomato sauce can be made up to 2 days ahead and refrigerated separately. Mix the ricotta and assemble closer to baking.
Freeze the Whole Pan or Individual Slices
A tightly wrapped assembled lasagna can be frozen before baking. Thaw it fully in the refrigerator; a deep frozen 9 × 13-inch pan may take longer than one night to thaw through.
Once fully thawed, treat it like any other refrigerator-cold assembled lasagna: bake covered at 375°F / 190°C and start checking the pasta after about 45 minutes. Uncover once the noodles are tender and brown the top.
For leftover slices, cool the lasagna first, divide it into individual portions, wrap well and freeze. Thawing in the refrigerator gives the most even reheating.
Leftovers and Reheating
Refrigerate leftovers promptly in covered containers and use them within 3–4 days, or freeze them for longer storage. The USDA’s leftover-safety guidance has additional storage and reheating advice.
For several refrigerated slices or a larger portion, cover and reheat at about 350°F / 175°C until hot through the middle. Uncover for the last few minutes if you want to refresh the cheese on top.
For a measurable food-safety endpoint, USDA recommends reheating leftovers to 165°F / 74°C in the center.
A single slice usually does better with gentler staged microwave heating than one long blast at maximum power. Chilled lasagna has another advantage: the layers often cut even more cleanly the next day.
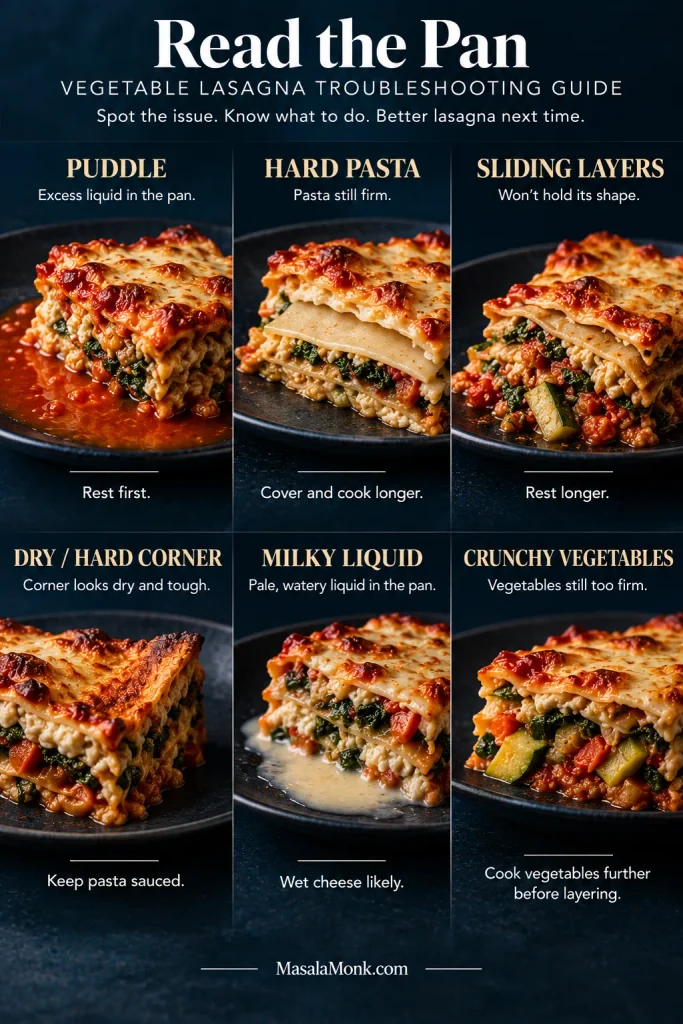
A good lasagna can slump a little at the edge of the plate and still be exactly right. What deserves attention is a real pool of liquid, genuinely hard pasta, a dry top, a cold middle or vegetables that never became tender.
If the first slice collapses, give the pan another few minutes before deciding anything dramatic. The first piece out of a very hot lasagna is often the least tidy one.
What You See
What to Do
Thin puddle around the edges
Rest the pan first. If a genuine pool remains, carefully spoon off a little before serving. Next time, cook more moisture out of the vegetables or reduce an unusually thin sauce.
Noodles hard throughout
Cover the pan again and give the pasta another 5–10 minutes, then check once more.
Mushy pasta
There is no real rescue once pasta is over-softened. Next time, boil regular noodles less or adjust the amount of liquid or baking time for very thin oven-ready sheets.
Lasagna slides apart
Give it more time to rest before cutting another slice. Very wet cheese, loose sauce and excessively thick filling layers can make the problem worse.
Lasagna is dry
Serve it with warm marinara. Next time, keep the pasta fully covered and check the bake earlier.
Everything tastes flat
Add grated hard cheese, herbs, black pepper or chile at the table. Next time, brown and season the vegetables properly and taste the sauce and ricotta before layering.
A Few Other Clues
Hard top corners: pasta was probably left exposed above the sauce.
Milky liquid: unusually wet ricotta, cottage cheese or mozzarella is often involved.
Crunchy vegetables: dense vegetables were cut too large or did not cook far enough before assembly.
Good vegetable lasagna troubleshooting starts by identifying what kind of liquid or resistance you are seeing. Tomato-colored runoff suggests a different problem from pale milky whey, while hard pasta points toward hydration rather than excess moisture—even though all three can make a slice look wrong.
Should a Watery Lasagna Stay in the Oven Longer?
Only if the pasta still needs cooking.
A slightly loose lasagna often improves more from ten minutes on the counter than ten more minutes in the oven. A flooded one can remain wet underneath while the cheese and exposed pasta get drier and drier.
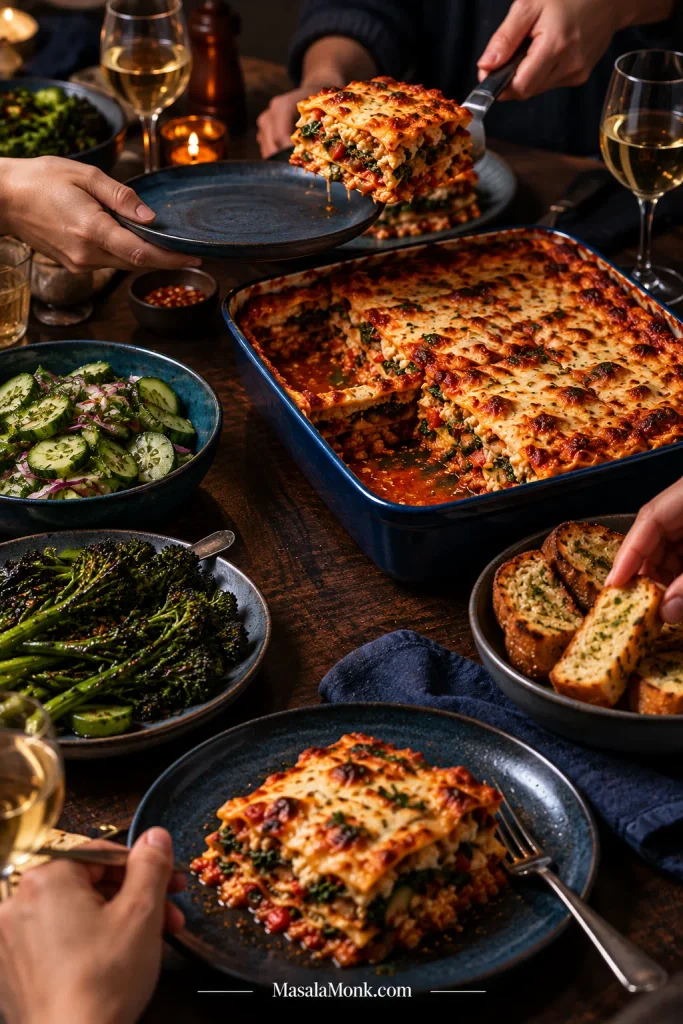
What to Serve With Vegetable Lasagna
Lasagna already brings soft pasta, roasted vegetables, tomato and plenty of creamy cheese. Something crisp, green or sharply dressed beside it gives the next bite a useful contrast.
Cucumber salad: cold cucumber, onion, dill and vinegar cut through the richness; this cucumber salad recipe is a natural fit.
Roasted broccoli or broccolini: charred edges and a greener, slightly bitter contrast to the sweeter tomato sauce.
For what to serve with vegetable lasagna, think in terms of contrast rather than quantity. Choose something crisp and acidic, something green and charred, or garlic bread for maximum comfort; you do not need three additional rich sides around an already generous main dish.
Cut through a browned corner and lift the first piece. The cheese at the edge may be a little crisp while the layers underneath stay soft, with creamy ricotta between zucchini, mushrooms and peppers and enough tomato sauce to keep the pasta tender without running across the plate.
The vegetable lasagna worth making again is the one where the vegetables taste good before they become filling, the pasta is tender, and the whole generous pan still knows how to become a slice.
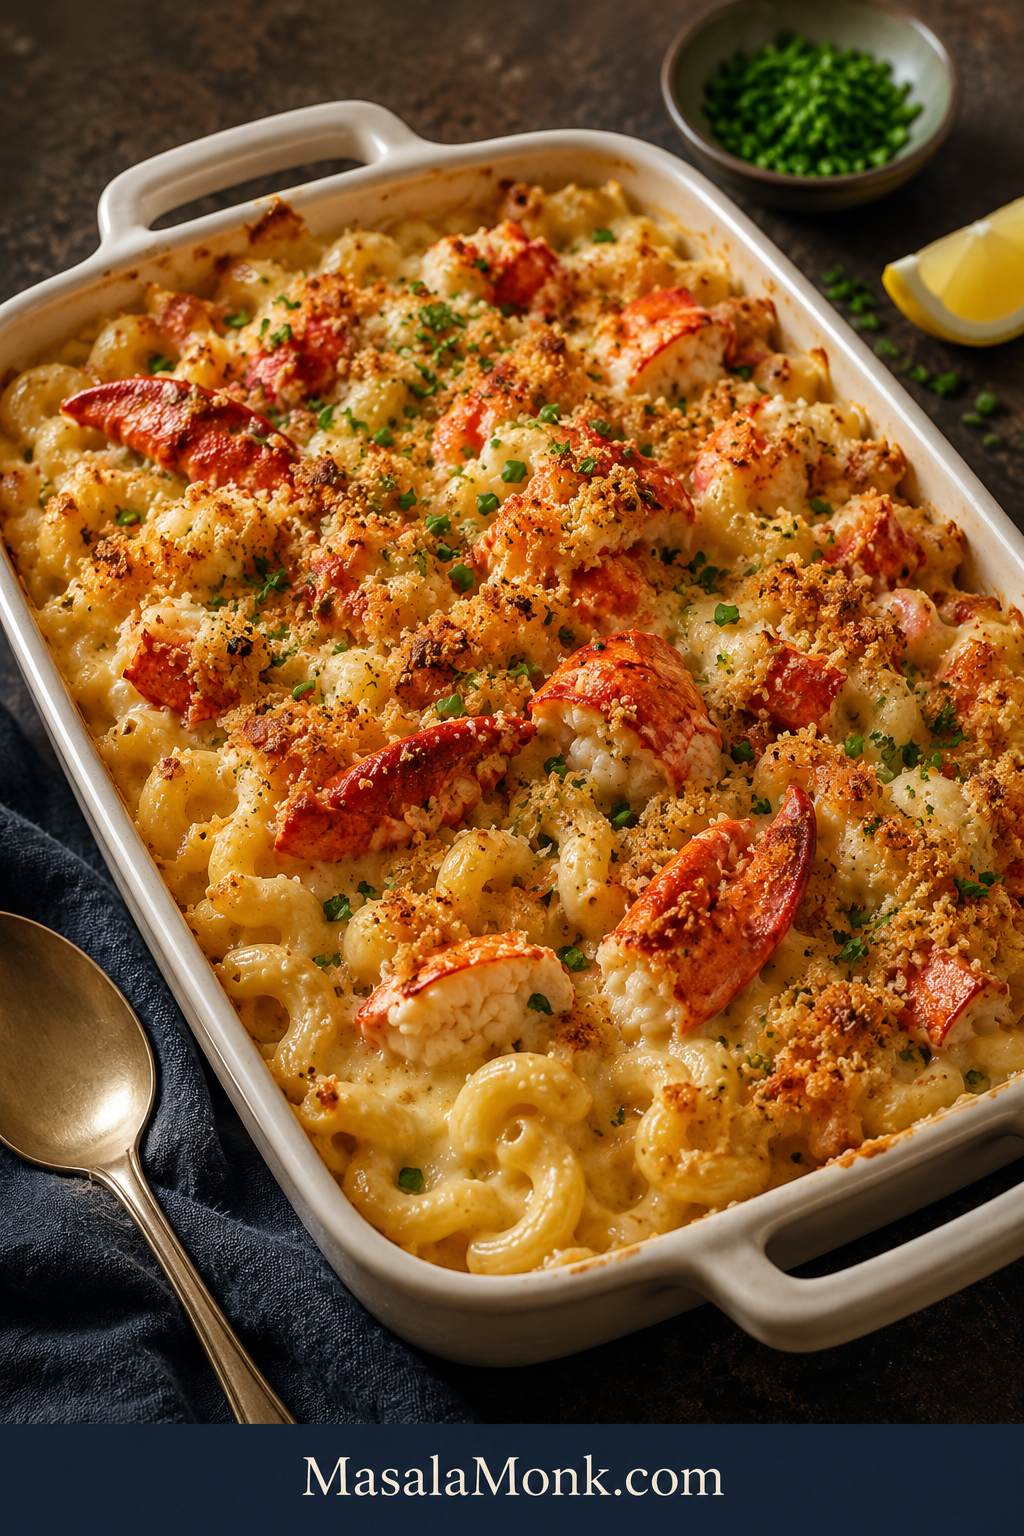
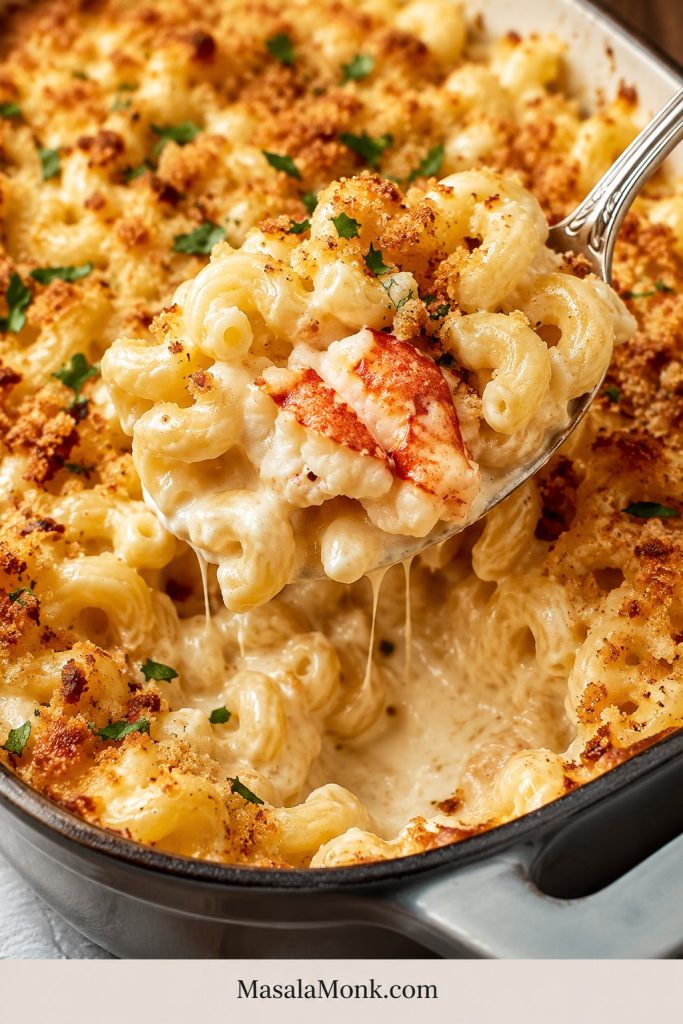
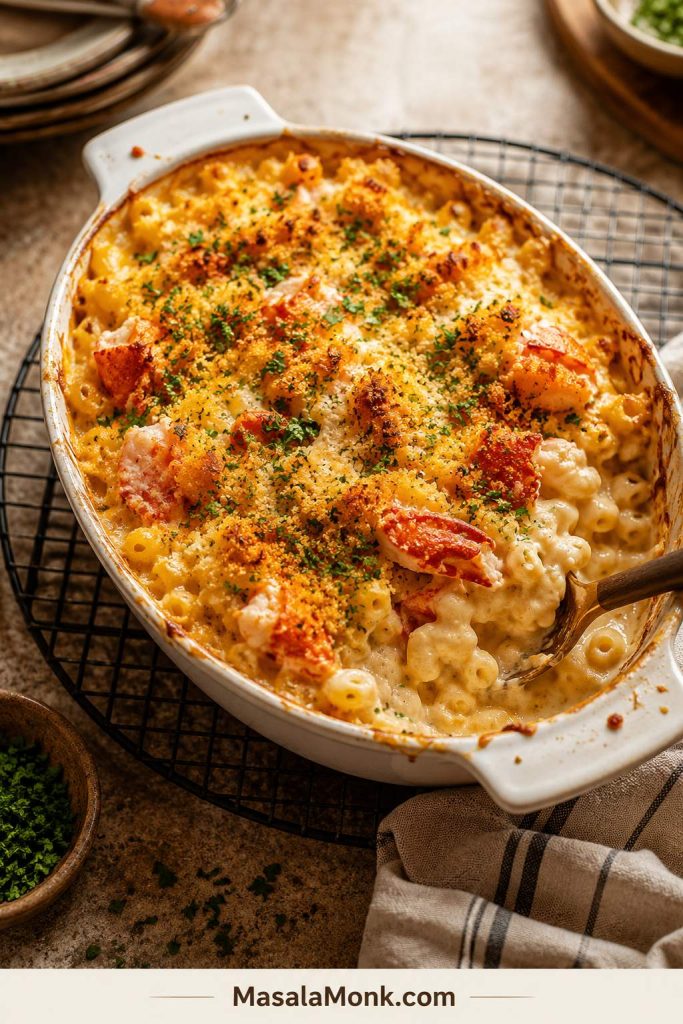
Lobster mac and cheese is what you make when regular mac and cheese is not enough. It should be creamy, buttery, golden, and generous, with real pieces of lobster in every serving — not a dry baked casserole where the seafood turns chewy and disappears into the sauce.
This version is built around three details: a smooth cheese sauce, tender lobster, and a short bake. The sauce starts a little loose, the cheese melts gently, and the lobster goes in after the pasta is already coated so it stays sweet and soft.
In the best spoonful, you get creamy pasta, buttery crumbs, and a piece of lobster you can actually see. Make it for a holiday side, a steakhouse-style dinner, a seafood night, a date night, or any meal where comfort food needs to feel special.
If lobster makes you nervous because it feels expensive or easy to overcook, this guide gives you the calm path: what to buy, how much to use, which cheese melts best, when to add the lobster, and how to bake the pan without drying it out.
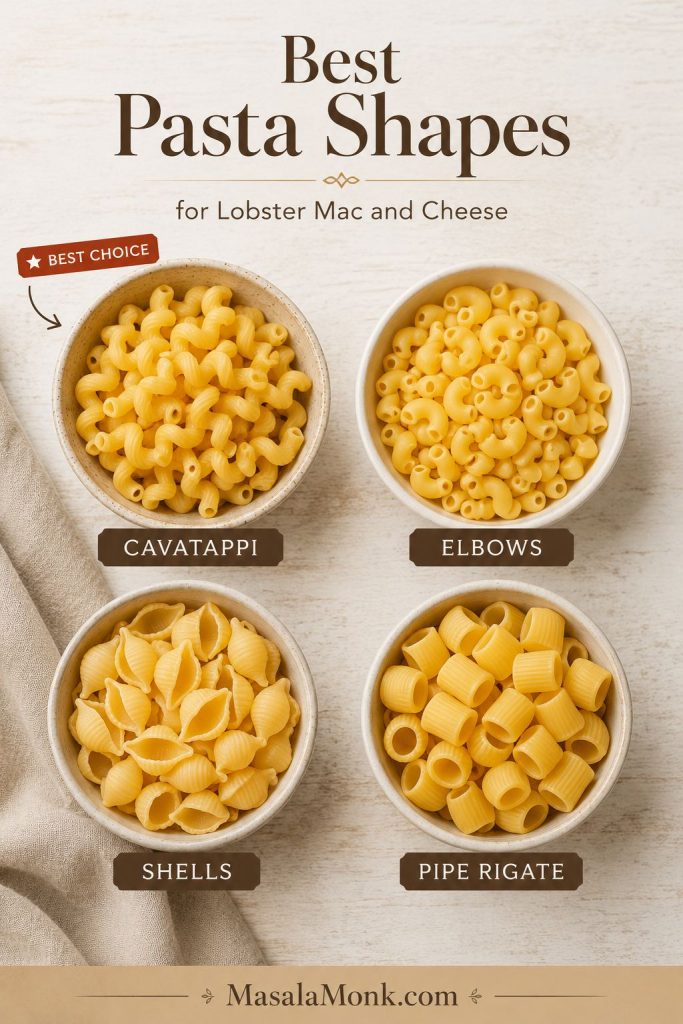
A great lobster mac and cheese starts with short pasta, a generous cheese sauce, and lobster that is treated like a finishing ingredient. Cavatappi, elbow macaroni, shells, and other short pasta shapes work well because they hold the sauce instead of letting it slide off.
Cook the pasta about 2 minutes short of al dente. Before baking, the pasta should look saucier than you want the final serving to be. Saucy before baking means creamy after baking.
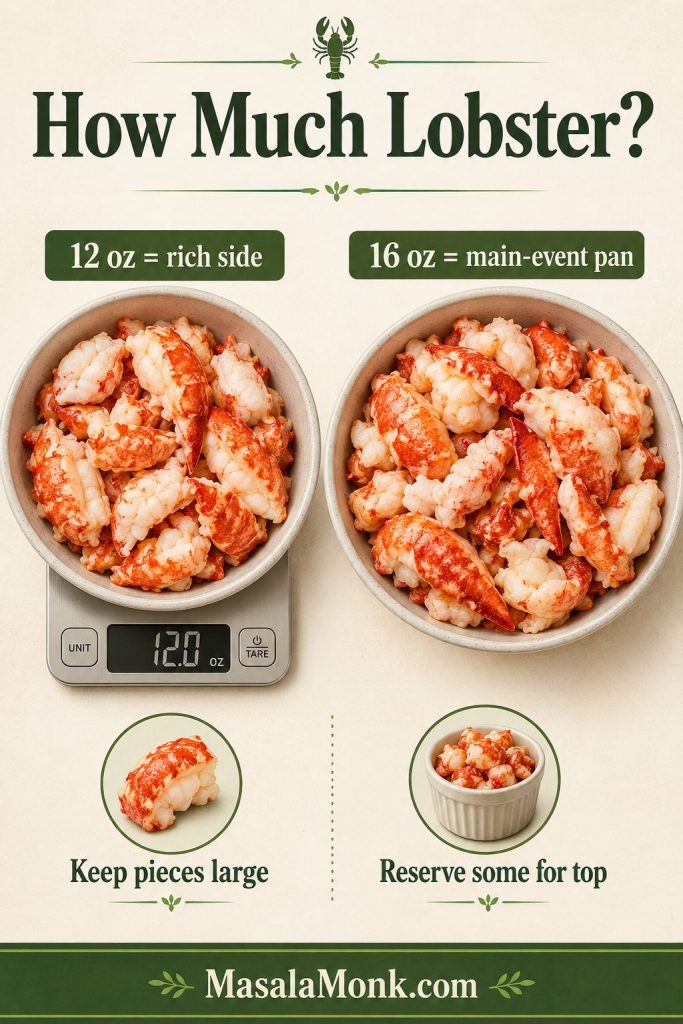
Use 12 oz / 340 g cooked lobster meat for a rich side dish, or 16 oz / 454 g when the mac is meant to feel like the main event. Keep the pieces generous and reserve a few for the top so the lobster looks as generous as it tastes.
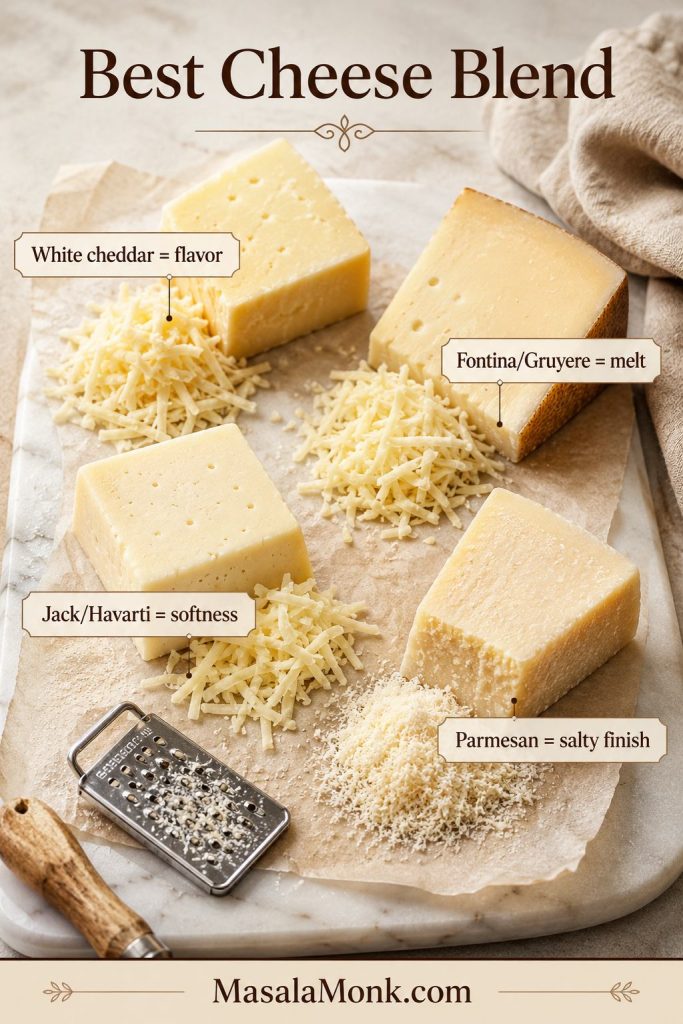
The cheese blend matters because lobster is sweet and delicate. White cheddar gives classic flavor, fontina or Gruyere gives a smooth restaurant-style melt, Monterey Jack or Havarti adds softness, and parmesan gives salty depth. Freshly grated cheese melts more smoothly than pre-shredded cheese.
Bake at 375°F / 190°C for 20 to 25 minutes, just until the edges bubble and the topping turns golden. The oven is there to finish the dish, not to cook the lobster.
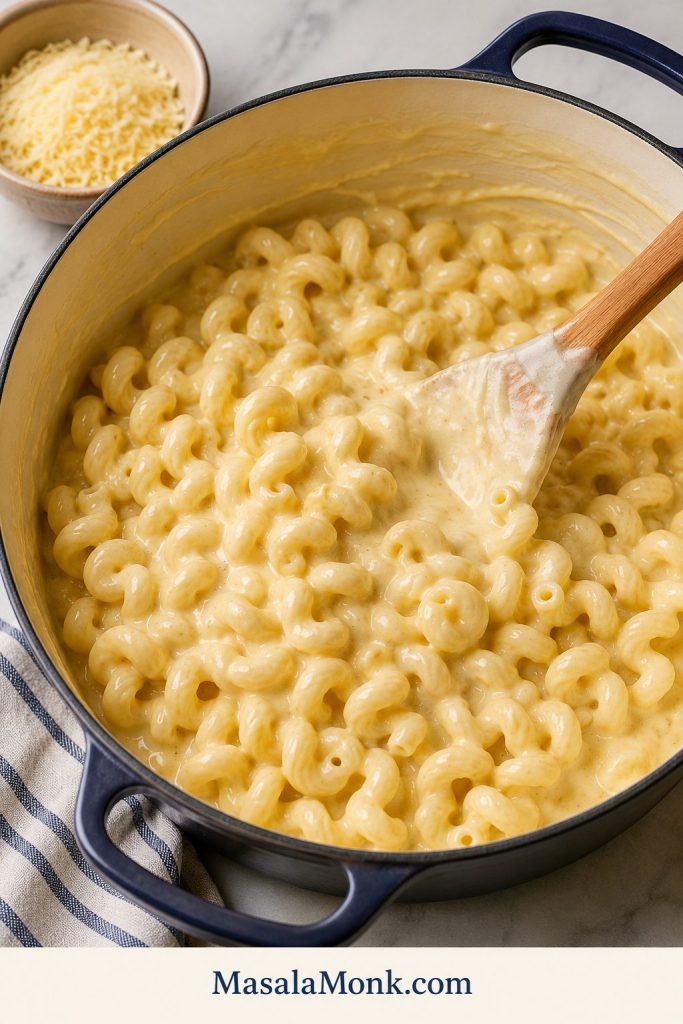
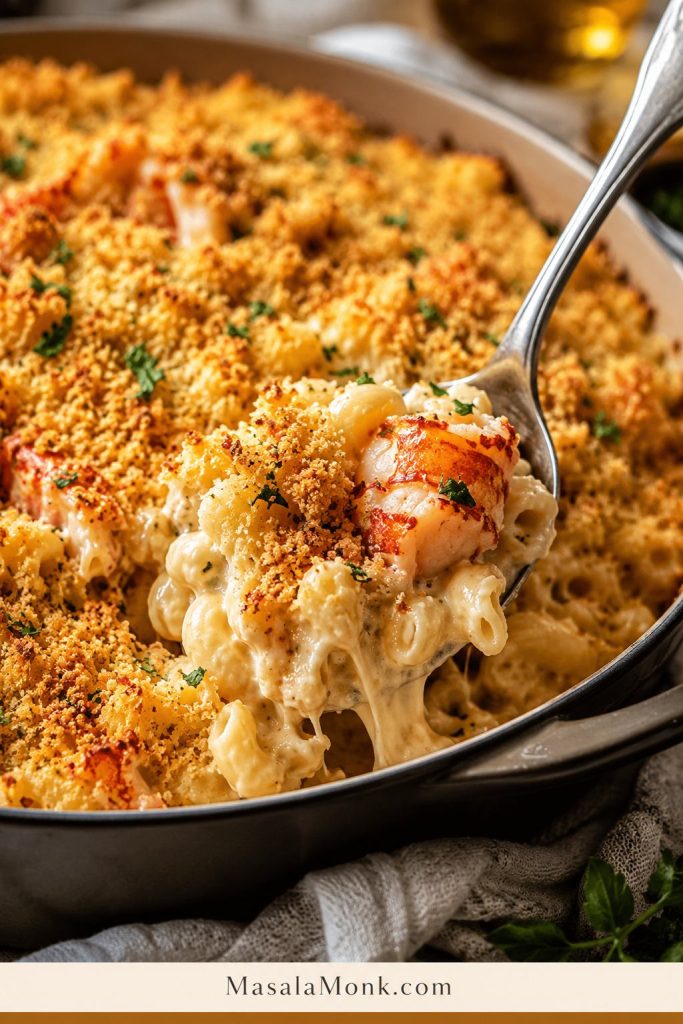
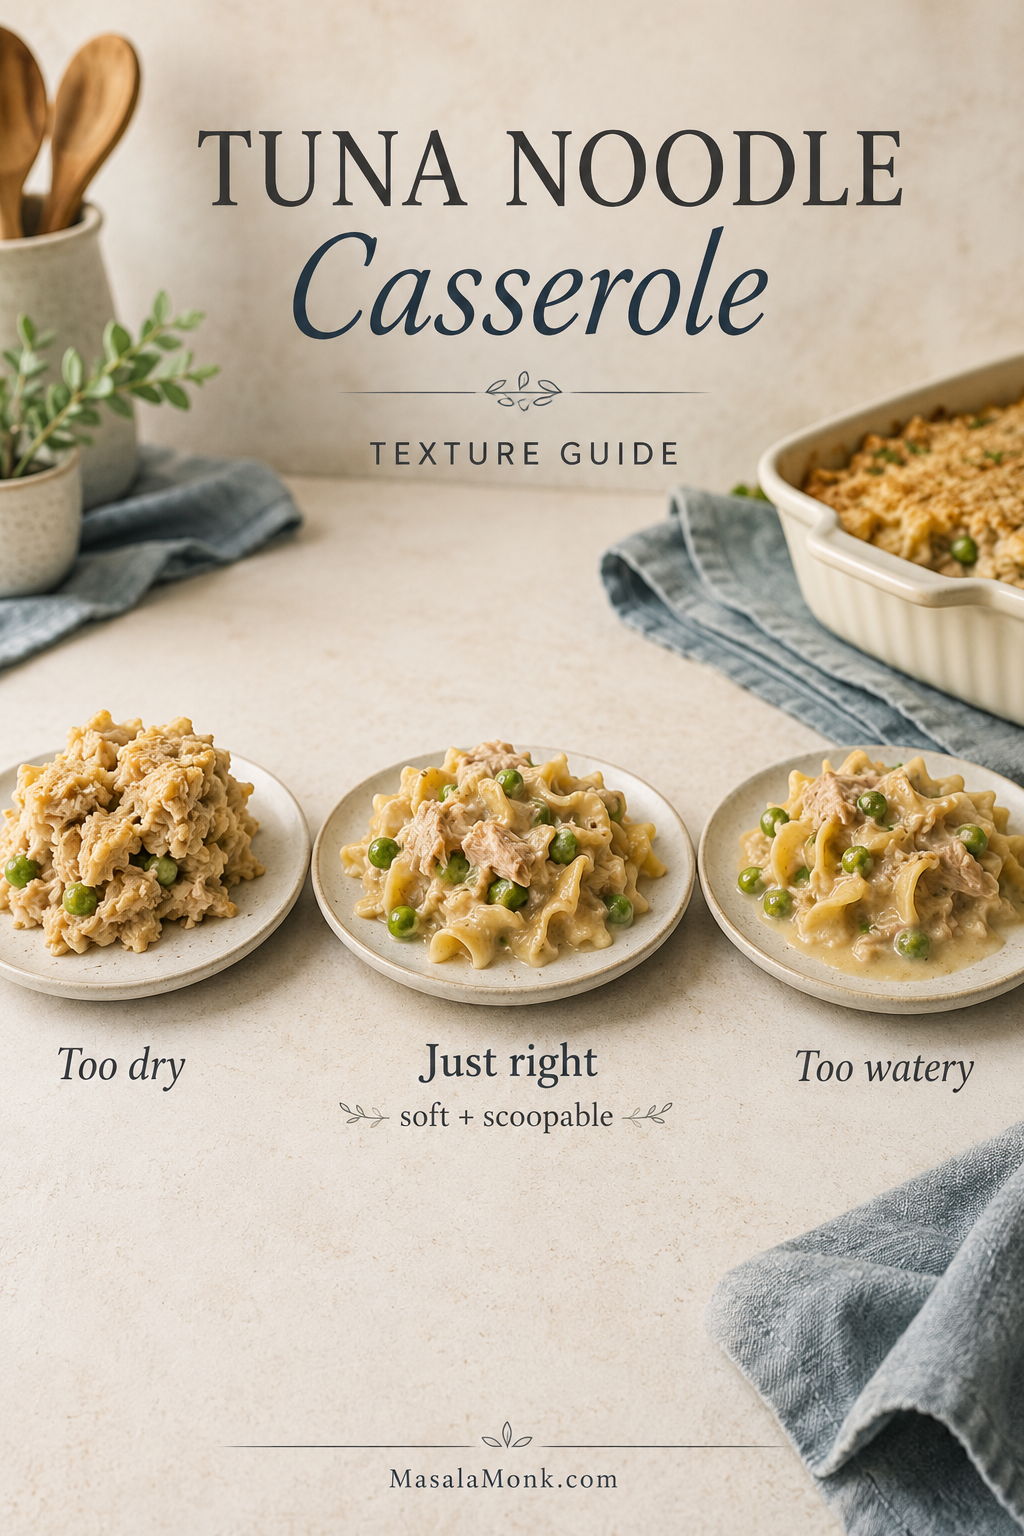
Before you start cooking, notice the texture target: the finished pan should scoop creamy, not stiff. This is the visual cue to keep in mind as you build the sauce and bake briefly.
The first scoop should prove the pan is still creamy. Look for glossy pasta, visible lobster, and a soft center instead of a dry block of baked macaroni.
Lobster Mac and Cheese at a Glance
Detail
Recommendation
Pasta
1 lb / 454 g cavatappi, elbows, shells, or another short pasta
Lobster amount
12 oz / 340 g for a rich side, 16 oz / 454 g for a main-event pan
Lobster tail amount
Enough tails to yield 12 to 16 oz / 340 to 454 g cooked meat, usually 4 to 5 medium tails
Lobster tail cue
Cook gently until opaque, white, and just firm; timing is only a guide
Cheese amount
About 22 oz / 620 g freshly grated cheese total
Cheese blend
White cheddar + fontina or Gruyere + Monterey Jack or Havarti + parmesan
Oven temperature
375°F / 190°C
Bake time
20 to 25 minutes
Texture target
Sauce should look slightly loose before baking
Lobster rule
Cook gently, add after the sauce is ready, and keep the bake short
Topping
Buttered panko for crispness, crushed Ritz for buttery holiday flavor
Servings
8 main-dish servings or 10 to 12 side-dish servings
Here is the full recipe first, with the deeper lobster, cheese, and baking notes right after it.
Creamy Baked Lobster Mac and Cheese Recipe Card
Recipe name: Creamy Baked Lobster Mac and Cheese
Description: Rich, creamy baked lobster mac and cheese with tender lobster, a smooth cheese sauce, and a buttery golden topping.
Servings: 8 as a main dish, or 10 to 12 as a side
Prep time: 25 minutes
Cook time: 30 minutes
Total time: 55 minutes
Good for: holidays, date nights, steak dinners, seafood dinners, and special occasion sides
Equipment
Large pot for pasta
Large saucepan or Dutch oven for the cheese sauce
Whisk
9×13-inch baking dish
Box grater
Kitchen shears, if using lobster tails
Small bowl for the topping
Rimmed baking sheet, optional, to catch any bubbling sauce
Ingredients
For the Pasta and Lobster
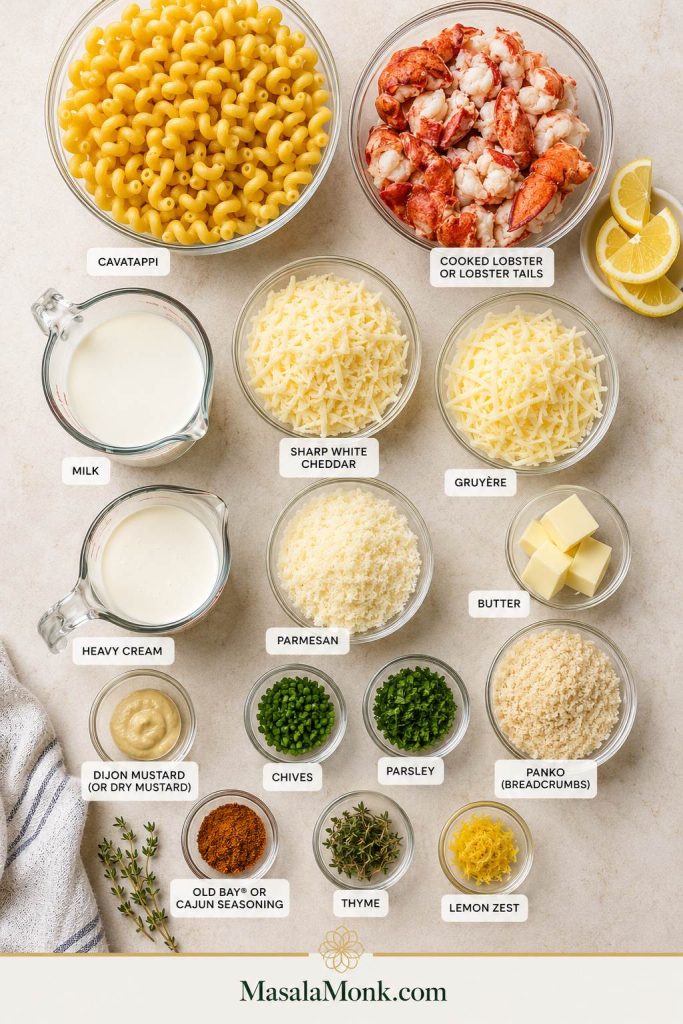
1 lb / 454 g cavatappi, elbow macaroni, shells, or another short pasta
12 to 16 oz / 340 to 454 g cooked lobster meat, chopped into generous pieces
Or enough lobster tails to yield 12 to 16 oz / 340 to 454 g cooked meat, usually 4 to 5 medium tails
Salt, for the pasta water
For the Cheese Sauce
6 tbsp / 85 g unsalted butter
1/3 cup / about 42 g all-purpose flour
3 cups / 720 ml whole milk
1 cup / 240 ml heavy cream or evaporated milk
8 oz / 225 g white cheddar, freshly grated
8 oz / 225 g fontina or Gruyere, freshly grated
4 oz / 115 g Monterey Jack or Havarti, freshly grated
2 oz / 55 g parmesan, finely grated
Dijon mustard: 1 to 2 tsp, or dry mustard powder: 1 tsp
Garlic powder: 1 tsp
Onion powder: 1 tsp
Old Bay or Cajun seasoning: 1/2 to 1 tsp, optional
Paprika: 1/4 tsp, optional
Black pepper, to taste
Salt, to taste
For the Topping
3/4 to 1 cup panko breadcrumbs or crushed Ritz crackers
2 to 3 tbsp / 28 to 43 g melted butter
2 tbsp grated parmesan
1 tbsp chopped parsley or chives, plus more for serving
Optional: 1/2 tsp lemon zest
Instructions
Cook the Pasta and Lobster
Preheat the oven. Heat the oven to 375°F / 190°C. Lightly butter a 9×13-inch baking dish.
Cook the pasta. Bring a large pot of salted water to a boil. Cook the pasta about 2 minutes less than the package directions. It should still have a little firmness. Drain and set aside.
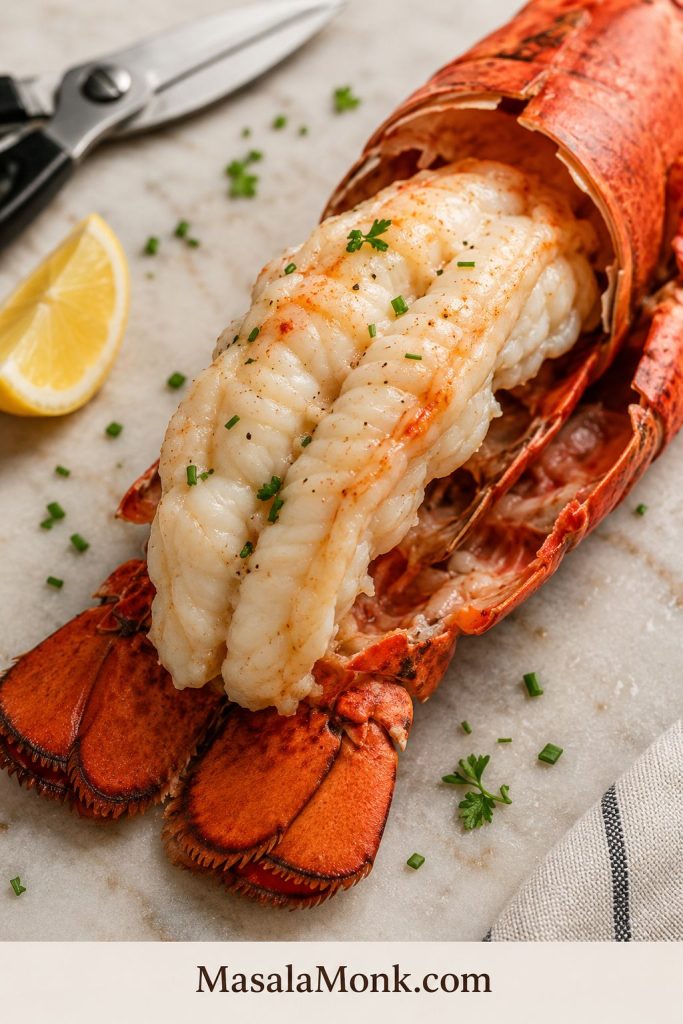
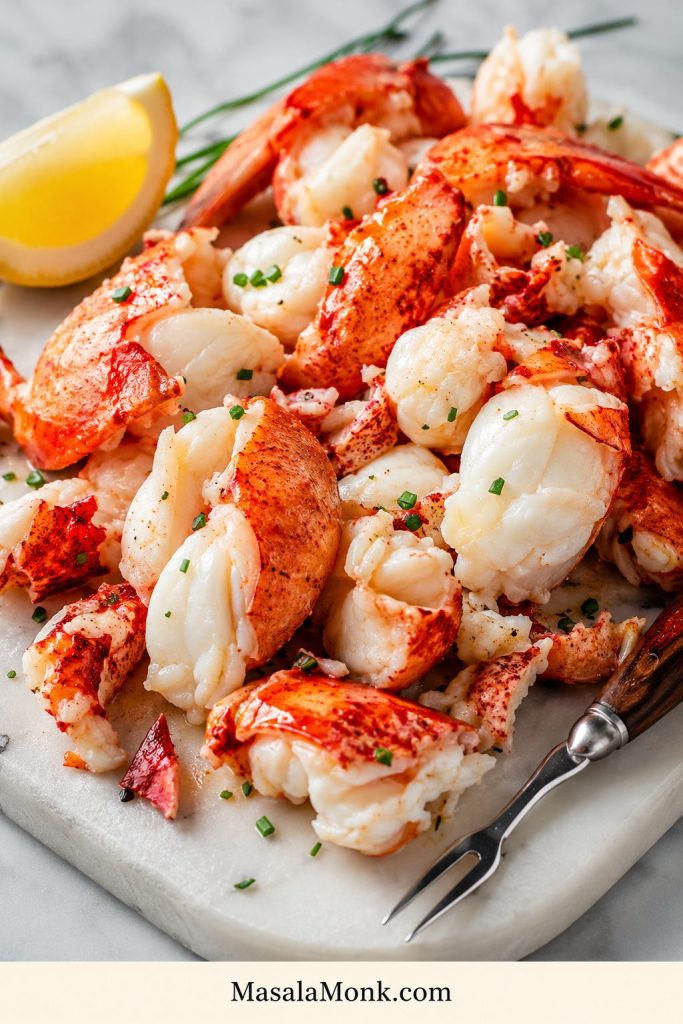
Prepare the lobster. If using cooked lobster meat, chop it into generous pieces and pat it dry. If using lobster tails, cook enough tails to yield 12 to 16 oz / 340 to 454 g cooked meat. For 4 to 6 oz tails, this often takes about 4 to 6 minutes, but trust the look and feel more than the timer. The meat should look white and opaque, not glassy. Remove the meat from the shells, chop, and set aside.
Build the Cheese Sauce
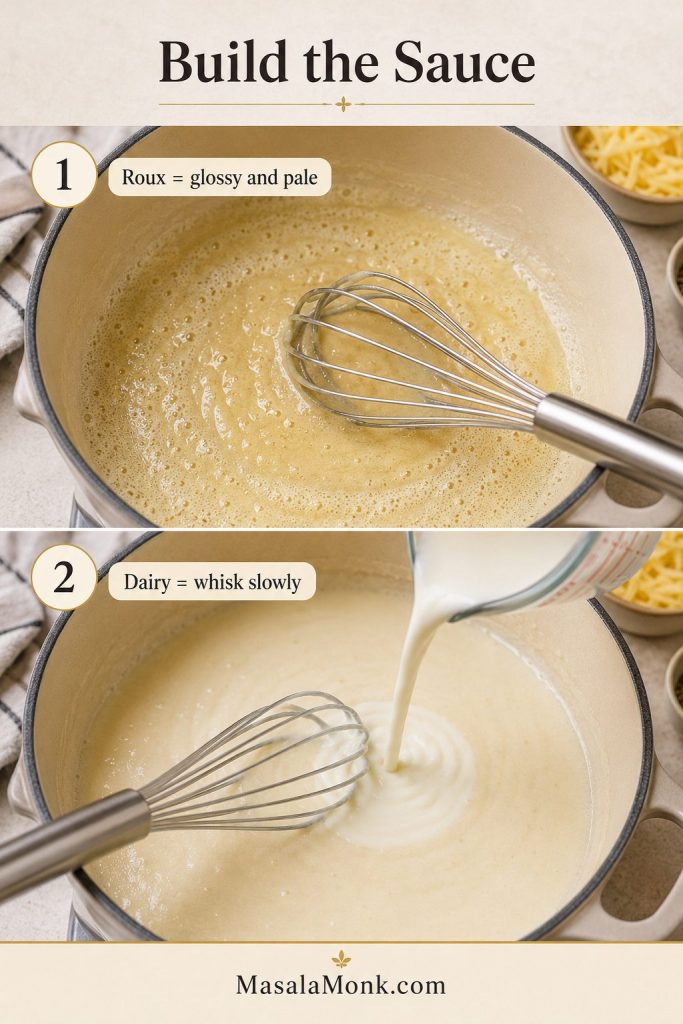
Make the roux. In a large saucepan or Dutch oven, melt 6 tbsp butter over medium heat. Add the flour and whisk for 1 to 2 minutes, until smooth and lightly foamy. The roux should look glossy, not deeply browned.
Add the dairy. Slowly whisk in the milk, then the cream or evaporated milk. Cook, whisking often, until the sauce thickens enough to lightly coat a spoon. This usually takes 3 to 6 minutes.
Season the sauce. Stir in the Dijon or dry mustard, garlic powder, onion powder, optional Old Bay or Cajun seasoning, paprika, black pepper, and a small pinch of salt. Taste before adding more salt, especially if using parmesan, Old Bay, Cajun seasoning, or salted lobster meat.
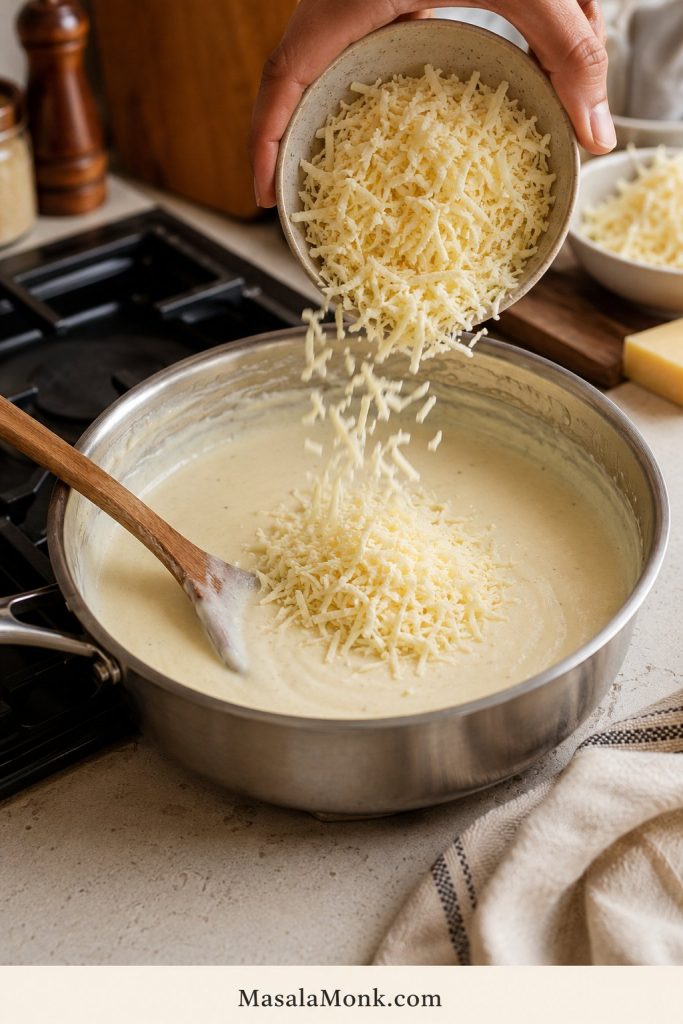
Add the cheese gently. Lower the heat or turn it off. Add the grated cheeses a handful at a time, stirring until melted before adding more. The sauce should be smooth, loose, and pourable, not stiff.
Assemble, Bake, and Rest
Combine pasta and sauce. Fold the drained pasta into the cheese sauce. If the mixture looks too thick, add a splash of milk. Before baking, the pasta should look a little saucier than you want the final serving to be.
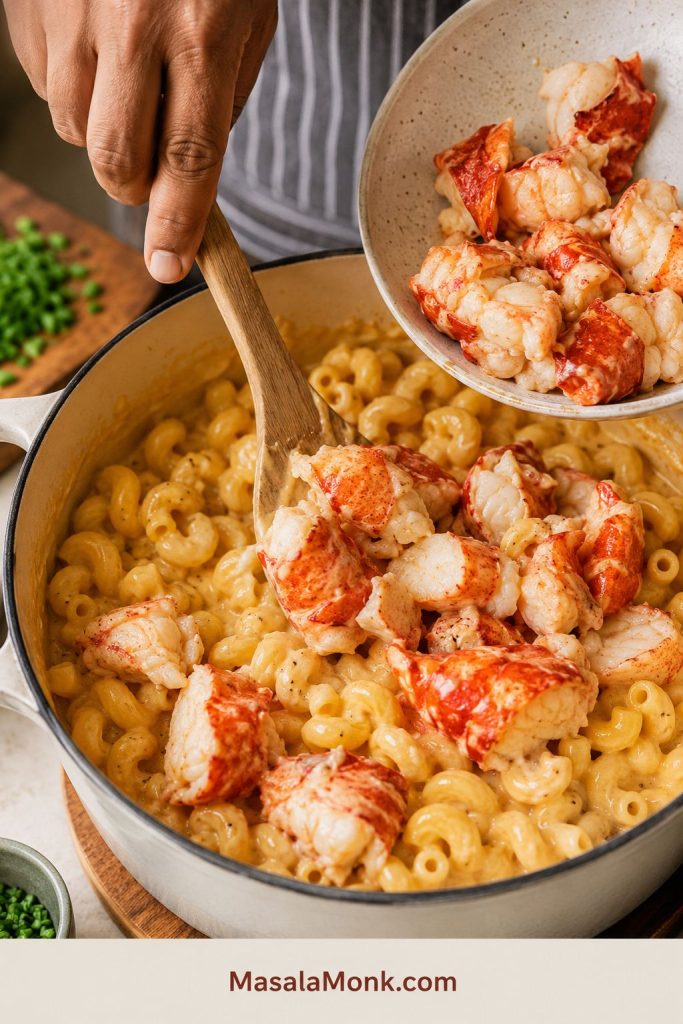
Add the lobster. Gently stir in most of the lobster once the pasta is coated. Reserve a few pieces for the top if you want the lobster to stay visible after baking.
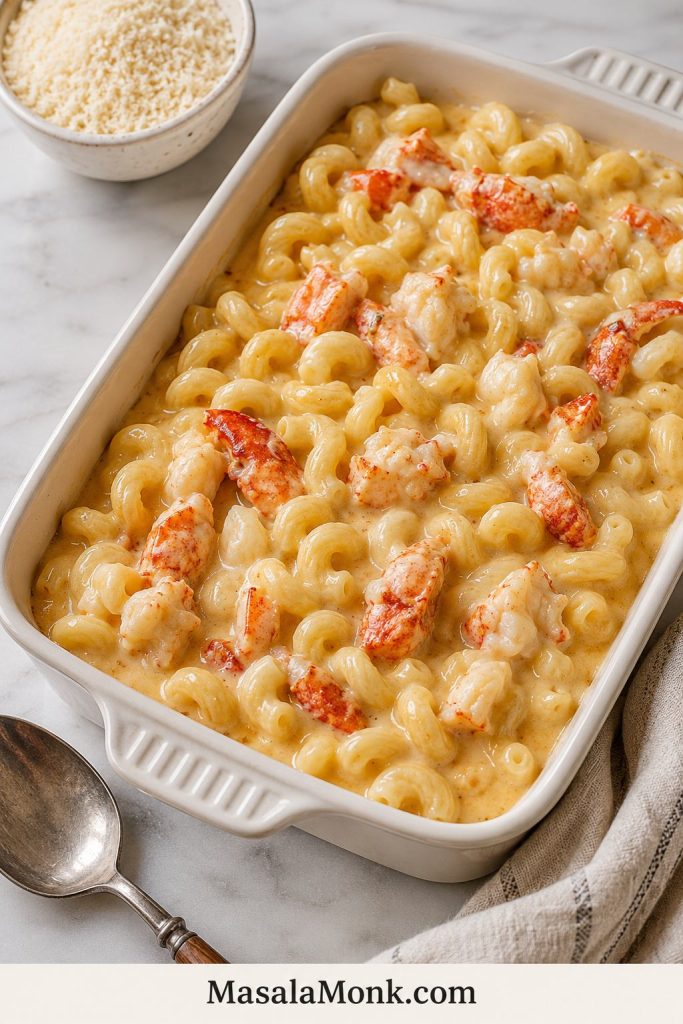
Transfer to the baking dish. Spoon the mixture into the prepared dish. Scatter the reserved lobster pieces over the top.
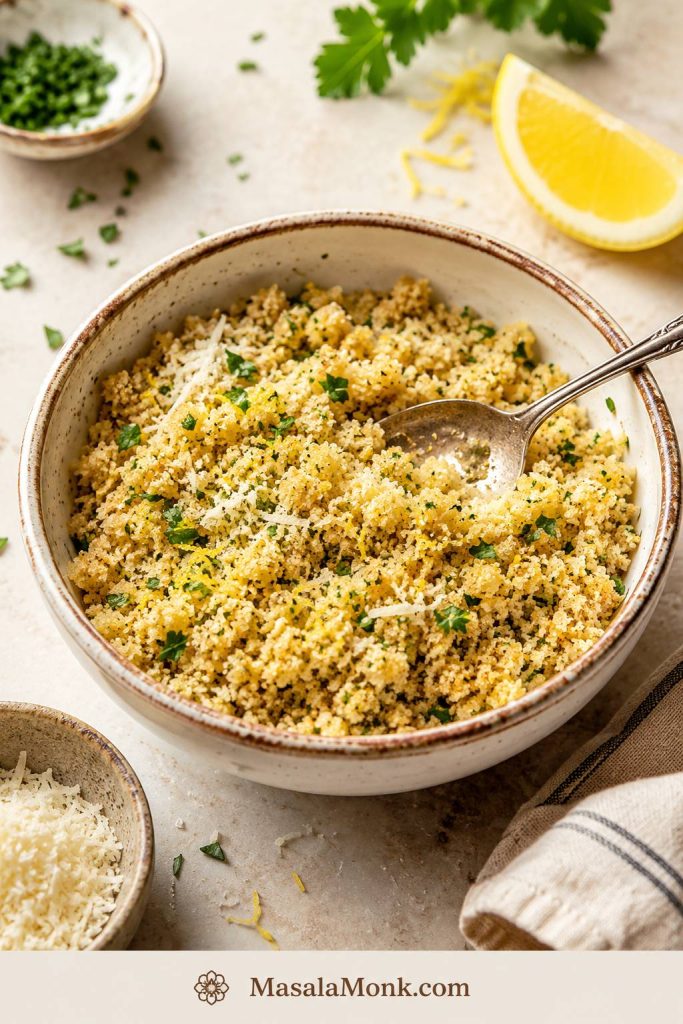
Add the topping. In a small bowl, mix panko or crushed Ritz crackers with melted butter, parmesan, parsley or chives, and optional lemon zest. Sprinkle evenly over the mac and cheese.
Bake. Bake for 20 to 25 minutes, until the edges are bubbling and the topping is golden. If you want more browning, broil for 1 to 3 minutes, watching carefully.
Rest and serve. Let the pan rest for 8 to 10 minutes before serving. This helps the sauce settle without becoming stiff.
Recipe Notes
Freshly grated cheese melts better than pre-shredded cheese.
Stop cooking lobster as soon as it is opaque and tender. It will warm again in the pasta.
Pull the dish while the center still looks creamy. The edges should bubble and the topping should be golden.
For a stovetop version, skip the baking step and top each serving with toasted buttered panko.
For deeper seafood flavor, use a small splash of seafood stock or lobster stock without thinning the sauce too much.
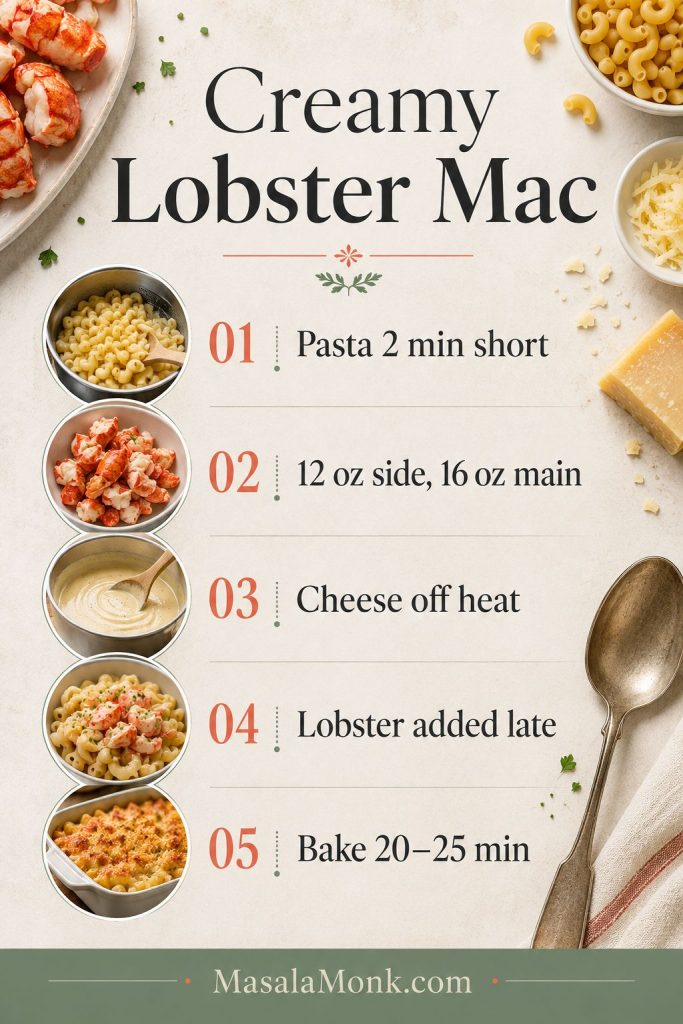
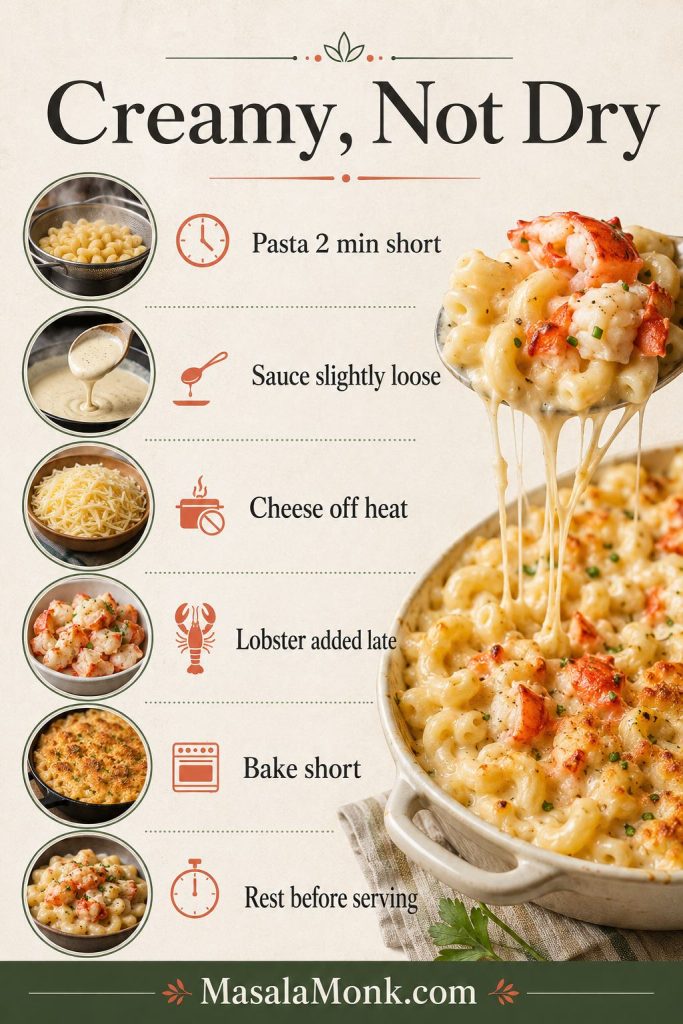
Use the guide below as the short visual version of the method before you move into the deeper lobster, cheese, and baking notes.
Use this quick method map before you start: cook pasta short, keep the sauce loose, melt cheese gently, add lobster late, and bake only until the top browns.
Why This Lobster Mac and Cheese Works
This recipe works because every part protects the final texture. The pasta starts firm, the sauce starts loose, the cheese melts gently, and the lobster warms through instead of cooking twice.
The sauce is generous. Baked mac thickens in the oven, so the sauce begins a little looser than a stovetop version.
The pasta has bite. Stopping early keeps it from turning soft after baking.
The cheese blend is balanced. White cheddar gives flavor, while fontina, Havarti, Monterey Jack, or Gruyere helps keep the sauce smooth.
The lobster stays protected. It is already tender before it reaches the oven, so the bake only warms it through.
The topping browns quickly. Buttered panko or Ritz gives crunch without forcing the casserole to bake too long.
The method gives you options. Bake it for a crisp top, or keep it stovetop for the creamiest possible finish.
If you already love classic mac and cheese, this is the richer seafood version: more luxurious, more buttery, and built for a special table.
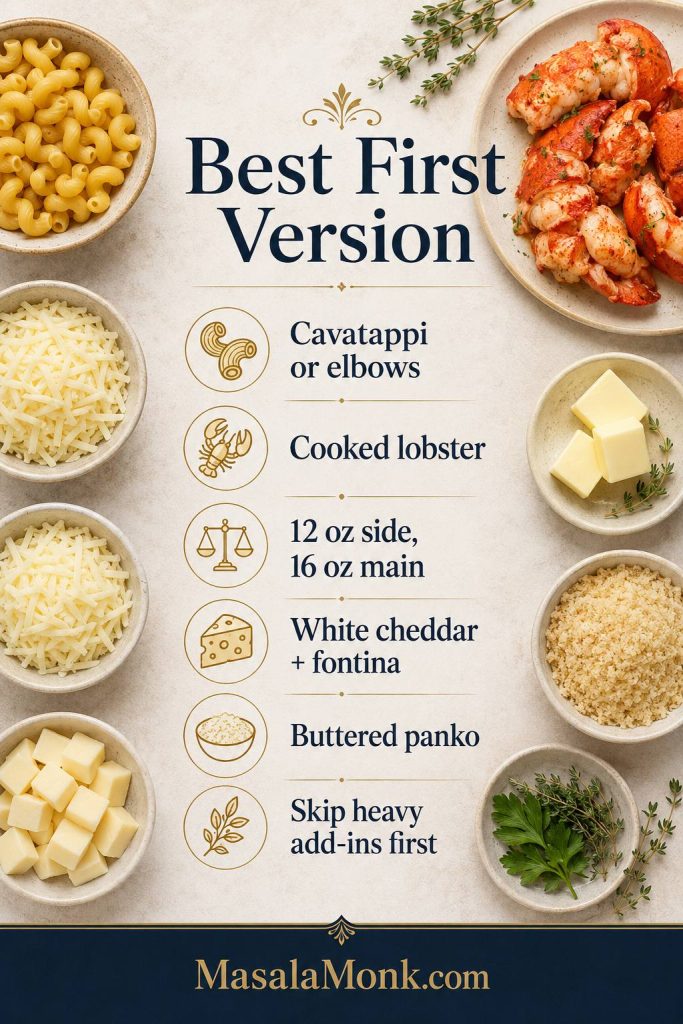
Start Here: The Best First Version
The first time you make lobster mac and cheese, keep the choices simple. This is the calmest path to a creamy, generous pan:
Best First Version
Pasta: cavatappi or elbows
Lobster: cooked lobster meat, or gently cooked lobster tails
Amount: 12 oz for a rich side, 16 oz for a main-event pan
Cheese: white cheddar + fontina, with Monterey Jack or Havarti for extra softness
Topping: buttered panko
Skip the first time: bacon, truffle oil, heavy Cajun seasoning, and too many seafood add-ins
This version lets the lobster stay visible, the sauce stay smooth, and the bake stay short. Once that base works, the variations become much easier to trust.
The first pan should be steady before it gets fancy: a simple cheese blend, cooked lobster, short pasta, and a topping that browns fast.
For the most dependable first pan, keep the formula simple: cooked lobster, short pasta, smooth-melting cheese, and buttered panko. Once that base works, upgrades are easier to control.
Make this when the mac and cheese is supposed to be part of the occasion, not just a side dish.
Holiday dinners that need something richer than regular mac and cheese
Steakhouse-style dinners at home
Seafood nights with lobster, crab, shrimp, or fish
Date nights that feel cozy but still special
Dinner parties where one dish should feel like the splurge
Meals where cooked lobster or lobster tails need to stretch into a full pan
It is the kind of dish people notice before they even take a bite. The pan looks generous, the top smells buttery, and the first scoop should feel creamy instead of heavy.
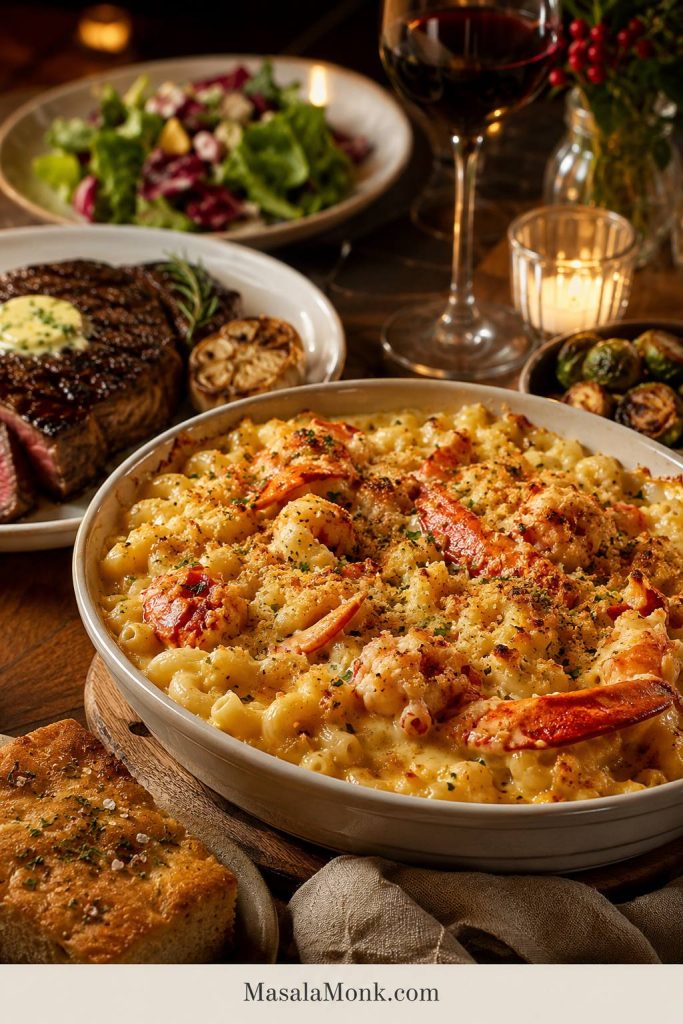
For a dinner-table version, use the mac as the rich centerpiece and let the rest of the plate bring freshness, crunch, or simple protein.
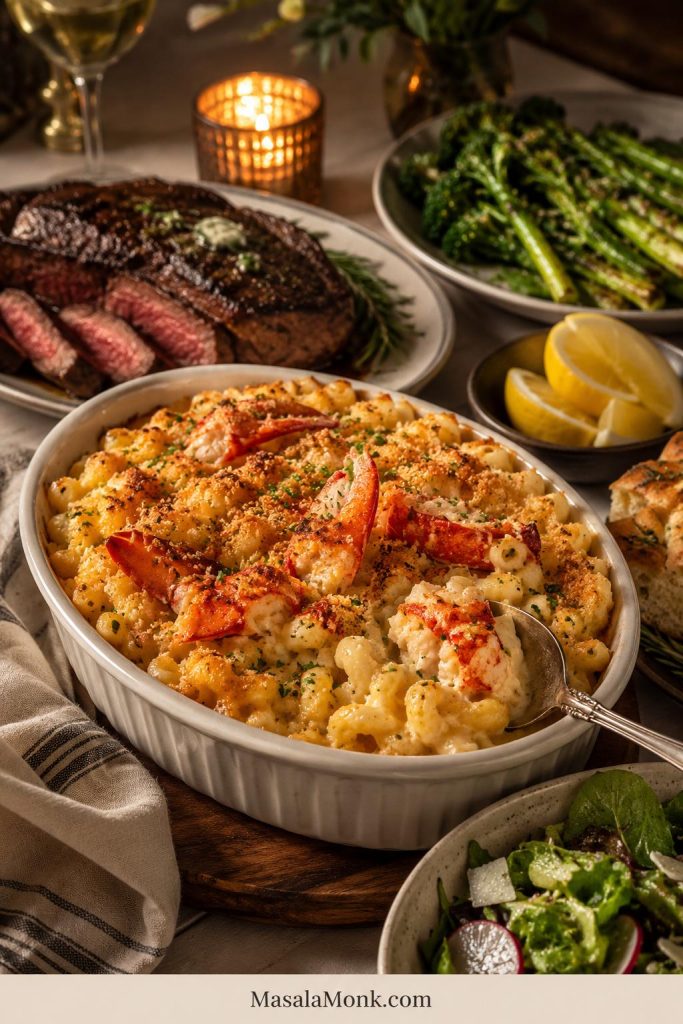
Because lobster mac is creamy and rich, it shines beside steakhouse-style sides with contrast. Think crisp greens, roasted vegetables, bread, or a simple protein.
Need a Specific Tip?
Jump to the lobster, cheese, baking, storage, and troubleshooting sections below.
The ingredient list is not complicated, but nothing is here as filler. The pasta holds sauce, the cheese melts into the body of the dish, the lobster brings the sweetness, and the topping gives every scoop a little crunch.
Here is the ingredient logic in one place before the detailed substitutions begin.
Every ingredient has a job: pasta catches sauce, lobster adds sweetness, cheese gives body, cream keeps things loose, and panko brings the crisp finish.
Pasta
Cavatappi is worth using here because the curls and ridges hold sauce well and make the pan look a little more restaurant-style. Elbow macaroni is classic and easy to find. Medium shells, pipe rigate, small rigatoni, and other short pasta shapes also work.
Very thin pasta shapes can overcook quickly and disappear into the sauce. For a baked pan, stop cooking the pasta about 2 minutes before it reaches al dente.
Short pasta shapes make better lobster mac because they hold sauce in the curves. Cavatappi is especially helpful since its ridges catch creamy cheese sauce in every bite.
Lobster
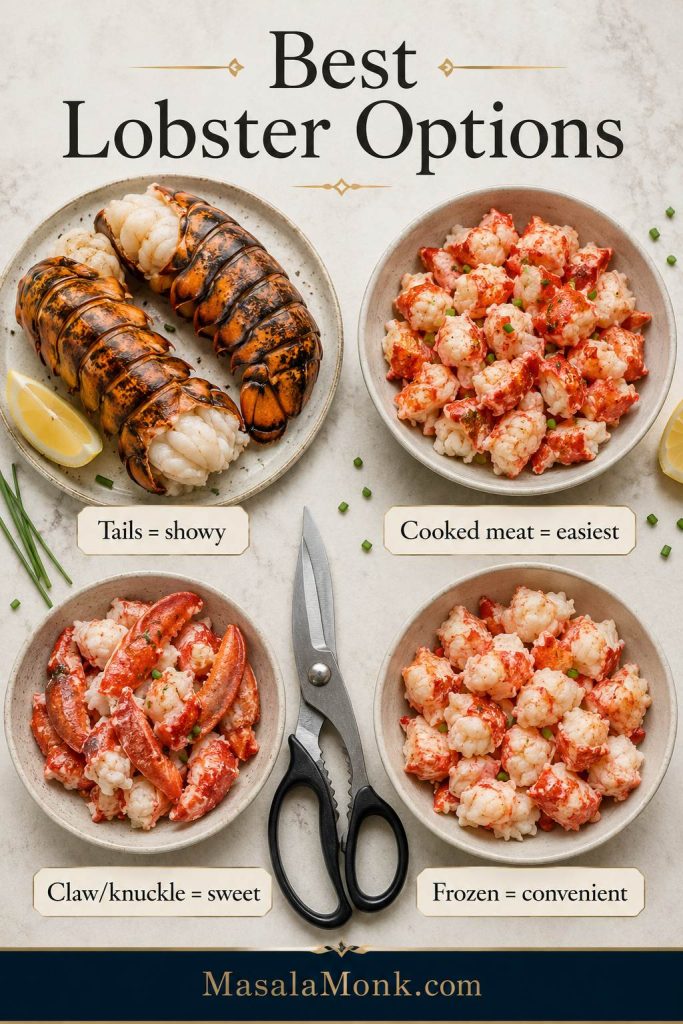
Cooked lobster meat is the easiest option. Lobster tails give you prettier, larger chunks. Claw and knuckle meat can be especially sweet and tender. Frozen lobster meat works too, but it needs to be thawed fully, drained well, and patted dry before it goes into the sauce.
For 1 lb / 454 g pasta, use 12 oz / 340 g lobster for a rich side dish or 16 oz / 454 g when the mac is meant to feel like the main event. Lobster tail yield varies, so buy by cooked meat weight when possible.
Let the lobster amount match the occasion. Use 12 ounces for a luxurious side dish, or go closer to 16 ounces when the mac is meant to be the main event.
Big pieces make the pan feel generous. Keep the lobster chunks large enough to notice, and reserve a few pieces for the top instead of chopping everything tiny.
You do not need the most expensive lobster pieces for this to work. Claw, knuckle, frozen cooked meat, or a smaller amount of tail meat can still make the pan feel special if the sauce is smooth and the lobster is treated gently.
Cheese
One cheese rarely gives you everything this dish needs. White cheddar gives familiar mac-and-cheese flavor. Fontina, Havarti, Monterey Jack, or Gruyere helps with melt and creaminess. Parmesan adds salty depth, but it should be an accent, not the main cheese.
Sharp cheddar works best when it has help from smoother melting cheeses. On its own, it can taste bold but turn heavy or grainy if the heat gets too high.
Milk, Cream, or Evaporated Milk
Whole milk gives the sauce body, while cream makes it feel more luxurious. Evaporated milk is a useful middle path: creamy, stable, and less likely to feel thin after baking. You can use all whole milk for a lighter version, but the finished sauce will be less rich.
Seasonings
Dijon or dry mustard balances the richness without making the dish taste mustardy. Garlic powder and onion powder give the sauce a familiar savory base. Old Bay or Cajun seasoning is optional, but it works beautifully with lobster. Use it lightly if you want the seafood flavor to stay delicate, and taste before adding extra salt.
For a Cajun-style seafood feel, you can use a little more seasoning and serve the mac with something like this seafood boil sauce on the side for people who want extra buttery heat.
Topping
Panko gives a crisp, light topping that lets the lobster stay the focus. Crushed Ritz crackers make the top richer, saltier, and more holiday-casserole style. Parmesan helps with browning. Lemon zest is optional, but even a small pinch makes the lobster taste brighter and keeps the cheese from feeling too heavy.
Which Lobster Should You Use?
There is no single right lobster for this dish. The right choice depends on your budget, what you can buy easily, and how showy you want the final pan to look. Fresh lobster is lovely, but it is not the only way to make a great pan. What matters more is how gently you cook it and how dry it is before it meets the sauce.
Best Lobster Options for Mac and Cheese
Use this section as the buying guide: cooked meat is easiest, tails look showy, claw and knuckle meat stay sweet, and frozen lobster works if it is thawed and dried well.
Different lobster choices solve different problems: tails look impressive, claw meat tastes sweet, cooked meat saves effort, and frozen lobster helps when time is tight.
How to Use Each Lobster Type
Lobster Type
Works Well For
How to Use It
Cooked lobster meat
Easiest method
Chop into large pieces, pat dry, and add after the pasta is coated.
Lobster tails
Showy presentation
Steam, poach, or simmer gently until opaque and just firm, then chop.
Claw and knuckle meat
Sweet, tender flavor
Use like cooked lobster meat and fold it in gently.
Frozen lobster meat
Convenience
Thaw overnight, drain well, pat dry, and stir in once the sauce is ready.
Leftover lobster
Quick upgrade
Add at the end just to warm through.
Langostino
Budget-friendly substitute
Use as a lobster-style substitute, but call it langostino clearly.
Lobster Tail and Frozen Lobster Notes
If you are using lobster tails, kitchen shears make the shells easier to open. Cook the tails only until the meat is opaque, white, and just firm. Time is only a guide; stop when the lobster looks tender and pulls from the shell easily because it will warm again in the pasta.
If lobster tails are the part that makes you nervous, this guide to grilled lobster tails goes deeper into thawing, cutting the shell, checking doneness, and avoiding rubbery lobster.
If you have extra cooked lobster after making this dish, save the larger pieces for buttery lobster rolls instead of chopping every last bit into the mac.
Raw lobster is better cooked gently first, rather than relying on the casserole to cook it evenly. That way the pasta does not have to stay in the oven too long, and the lobster can warm through without turning tough.
If you are starting with frozen lobster, thaw it overnight in the refrigerator when possible. The FDA’s seafood safety guide is a helpful reference for choosing, thawing, and handling seafood safely.
Once the lobster is dry, tender, and cut into real pieces, half the battle is already won.
The best cheese is a blend, not a single cheese. Lobster is sweet and delicate, so the sauce should be creamy, rich, and flavorful without overpowering the seafood.
The cheese should make the lobster taste richer, not cover it up. If the sauce tastes heavy before the lobster goes in, it will feel even heavier after baking.
Think of the blend as flavor, melt, and finish: one sharp cheese, one smooth melting cheese, and one salty accent cheese.
The blend should support the lobster instead of covering it. Use one cheese for flavor, one for smooth melt, and one small finishing cheese for depth.
The best cheese blend should melt smoothly without burying the lobster. Use cheddar for flavor, fontina or Gruyere for melt, Jack or Havarti for softness, and parmesan for finish.
Cheese Options and What They Do
Cheese
Use?
Why It Works or Does Not Work
White cheddar
Yes
Gives classic mac-and-cheese flavor and sharpness.
Fontina
Yes
Melts smoothly and keeps the sauce creamy.
Gruyere
Yes
Adds nutty, restaurant-style flavor.
Havarti
Yes
Mild, creamy, and smooth-melting.
Monterey Jack
Yes
Melts easily and keeps the sauce soft.
Parmesan
Accent only
Adds salty depth, but does not melt like a main sauce cheese.
Smoked Gouda
Optional
Good in small amounts, but too much can overpower lobster.
Cream cheese or mascarpone
Optional
Adds extra creaminess and helps stabilize the sauce.
Blue cheese or feta
Skip
Too strong, too crumbly, and likely to fight the lobster.
Pre-shredded cheese
Only if needed
Convenient, but anti-caking starch can make the sauce less smooth.
The finished sauce should taste rich but not loud. You should still be able to taste the sweetness of the lobster through the cheese.
What the Cheese Sauce Should Look Like
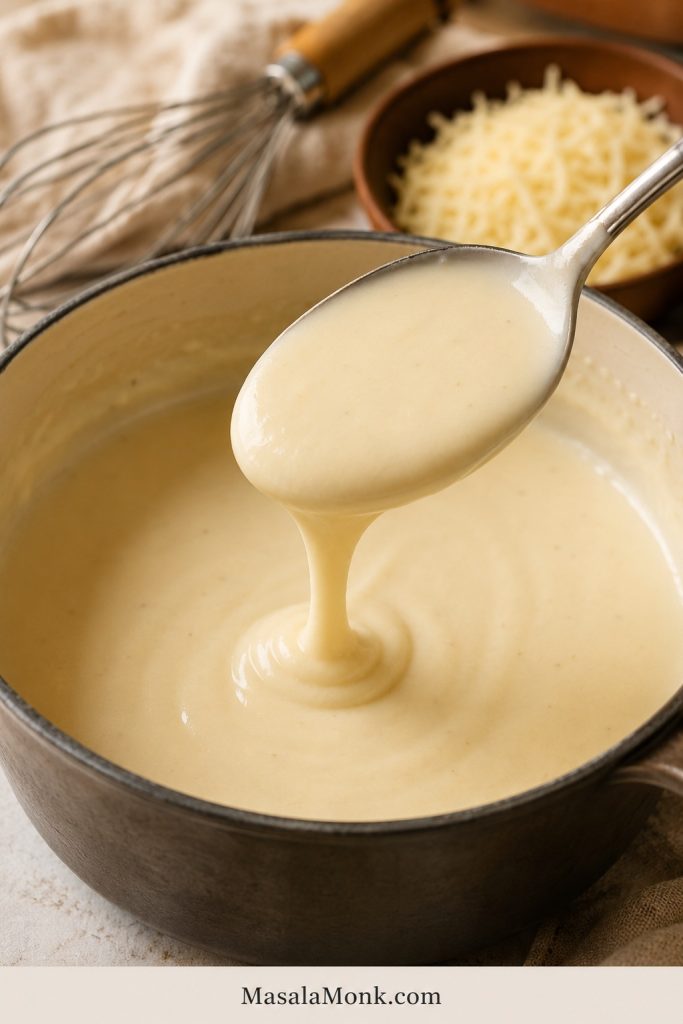
When the sauce looks glossy and loose enough to move, it has room to thicken in the oven without turning heavy.
The sauce should coat the spoon but still flow back into the pan. If it looks too thick here, the finished baked lobster mac may turn heavy.
For the smoothest sauce, grate the cheese yourself and add it off heat or over very low heat. High heat is one of the most common reasons cheese sauce turns grainy or oily.
If cheese sauce is where your mac usually goes wrong, read through the tips in this cheese sauce recipe. The same rules apply here: gentle heat, freshly grated cheese, and enough liquid to keep the sauce smooth.
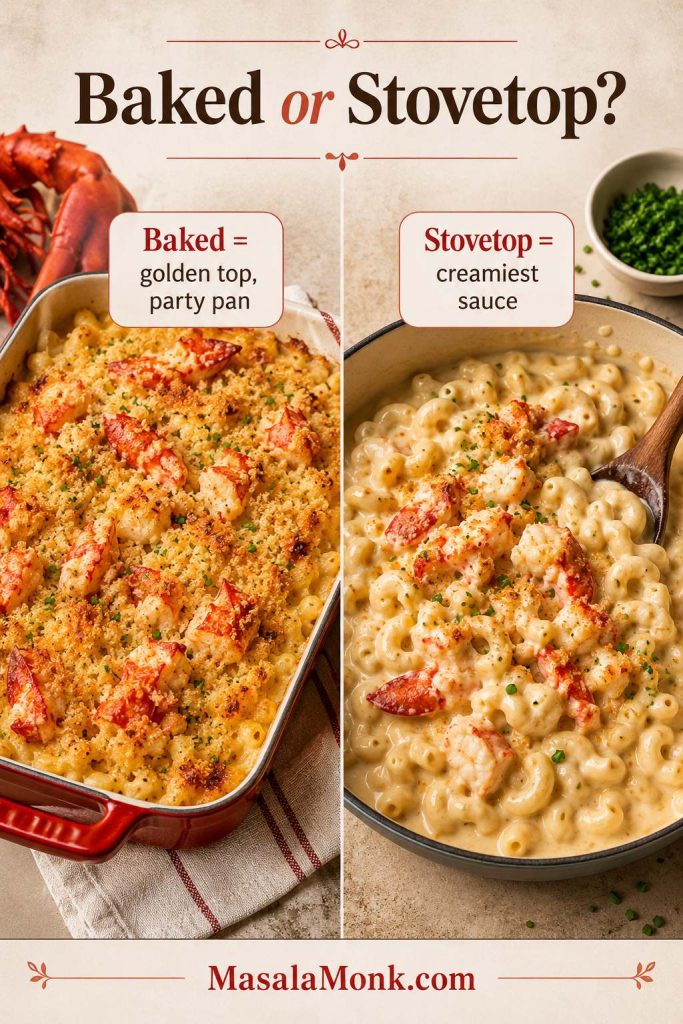
Baked lobster mac and cheese gives you the crisp top, bubbling edges, and holiday casserole feeling most people expect. It is the strongest version when you want a dramatic side dish or a special dinner centerpiece.
Stovetop lobster mac is creamier and gentler for the seafood because it avoids extra oven time. Make the pasta and sauce on the stove, add the lobster at the end, and top each serving with toasted buttered panko.
Choose the method based on the texture you want: baked for a browned top, stovetop for the softest sauce.
Choose baked lobster mac when you want a golden top and party-pan presentation. Choose stovetop when creamy sauce matters more than crunch.
Version
Works Well For
Texture Note
Baked
Golden top, holidays, parties, steak dinners
Pull the pan while the center still looks creamy.
Stovetop
Maximum creaminess and tender seafood
Add toasted crumbs separately for crunch.
Covered-then-uncovered bake
Make-ahead casseroles
Add topping near the end so it stays crisp.
This recipe uses the baked method but keeps the bake short. You still get bubbling edges and buttery crumbs, while the lobster stays tender inside the sauce.
The recipe feels much easier once you follow the right order: cook the pasta short, prepare the lobster gently, build the sauce slowly, melt the cheese off heat, fold the lobster in near the end, and bake only until the edges bubble.
Preheat the Oven and Butter the Dish
Heat the oven to 375°F / 190°C and lightly butter a 9×13-inch baking dish. Set the dish nearby so the pasta can move into it while the sauce is still loose and warm.
Cook the Pasta Short of Al Dente
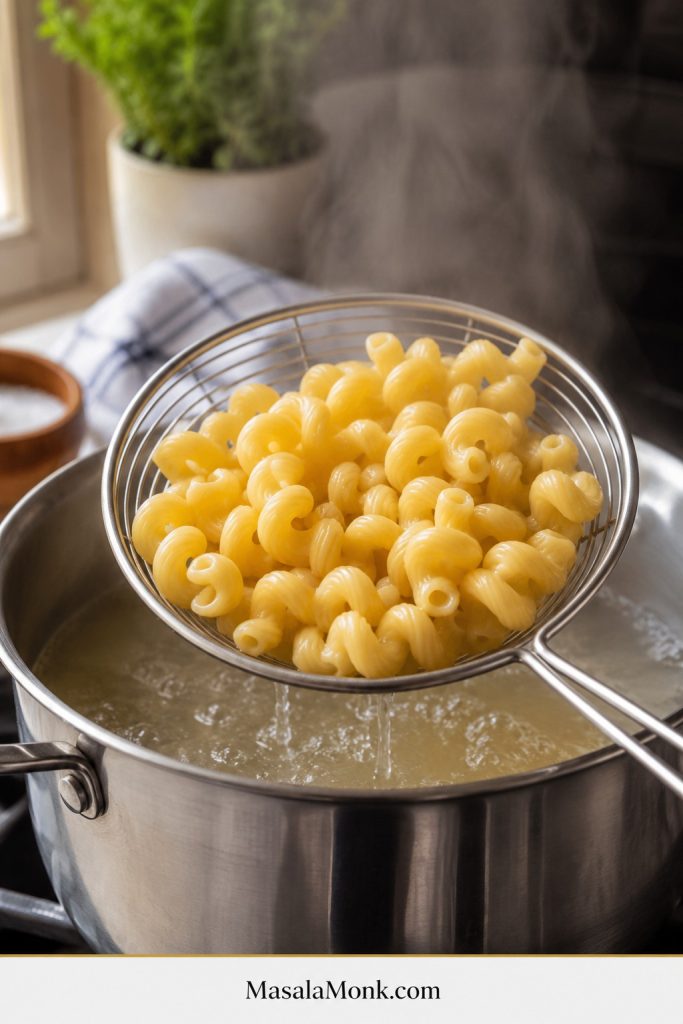
Boil the pasta in salted water and stop about 2 minutes before the package says it is done. The pasta should still have a little firmness. This prevents it from turning soft after baking.
Drain the pasta and keep it nearby. Rinsing is usually unnecessary unless the pasta is sticking badly. A little starch helps the cheese sauce cling.
Pull the pasta about 2 minutes early. Then it can finish in the sauce as the casserole bakes, rather than turning swollen, soft, or mushy.
Prepare the Lobster
If using cooked lobster meat, chop it into generous pieces and pat it dry. Frozen lobster should be thawed completely and dried well so it does not water down the sauce.
If using lobster tails, cook them gently until opaque and just firm. You can steam, poach, or simmer them. Once cooked, remove the meat from the shells and cut it into bite-size chunks. Keep the lobster separate while you make the sauce.
Stop cooking lobster tails when the meat turns white, opaque, and just firm. Since the lobster warms again in the sauce and oven, this early restraint keeps it tender.
Cut the Lobster into Generous Pieces
Treat lobster like a finishing ingredient. It only needs to warm through later, after the pasta and sauce are ready, so the pieces should stay large enough to notice in every serving.
Cut lobster into pieces large enough to notice. That keeps the seafood present in each creamy scoop instead of letting it disappear into the pasta.
Make a Pale Roux
Melt butter in a large saucepan or Dutch oven, then whisk in flour. Cook for 1 to 2 minutes so the flour loses its raw taste. The roux should look smooth, glossy, and lightly foamy, not deeply browned.
Whisk in the Milk and Cream
Add the milk slowly while whisking, then add the cream or evaporated milk. Let the sauce simmer until it thickens enough to coat a spoon. Keep it loose enough to flow from the spoon; baked mac needs more moisture than it looks like it needs at first.
A smooth sauce starts before the cheese goes in. First cook a pale glossy roux, then whisk in the dairy slowly so the base thickens without lumps.
Season the Sauce
Stir in the Dijon or dry mustard, garlic powder, onion powder, optional Old Bay or Cajun seasoning, paprika, black pepper, and a small pinch of salt. Taste before adding more salt, especially if using parmesan, Old Bay, Cajun seasoning, or salted lobster meat.
Add the Cheese Off Heat
Lower the heat or turn it off before adding the cheese. Stir it in gradually, a handful at a time. This helps the sauce melt smoothly instead of separating.
Aim for creamy and pourable, not stiff. The pasta should look almost too creamy before it bakes. That is the trick.
Strong heat can make cheese sauce grainy or oily, so melt the cheese off heat or over very low heat for a smoother baked mac.
Coat the Pasta First
Fold the pasta into the sauce before the lobster goes in. This gives every curve of pasta a chance to catch the sauce and keeps the seafood from being stirred too aggressively.
Coat the pasta before the lobster goes in. This way, the sauce reaches every curve of cavatappi and the delicate seafood does not get overmixed.
Add the Lobster Last
Once the pasta is coated, gently add the lobster. This keeps the pieces from breaking apart and lets them stay sweet, soft, and noticeable in every scoop.
Lobster should be folded in late, after the pasta is already sauced. At this point, it only needs to warm through, not cook a second time.
Transfer to the Baking Dish
Spoon the mixture into the prepared dish. For a more generous-looking pan, reserve a few pieces of lobster and place them on top before adding the crumb topping.
Check the Pan Before Topping
Before the topping goes on, the pasta should look glossy and slightly loose, with lobster pieces still visible. This is the best time to add a splash of milk if the mixture already looks tight.
Before the crumbs go on, the pan should look glossy, slightly loose, and generous with lobster. That extra moisture helps protect the creamy center during baking.
Add the Buttered Panko Topping
Mix panko or crushed Ritz crackers with melted butter, parmesan, herbs, and optional lemon zest. Sprinkle the topping evenly over the pan so it can brown quickly.
Buttered panko browns faster than dry crumbs, giving the casserole a crisp golden top without keeping the lobster in the oven too long.
Bake Until Bubbling and Golden
Bake at 375°F / 190°C for 20 to 25 minutes. The edges should bubble and the topping should be golden, while the center still looks creamy when you scoop into it.
Pull the pan when the edges bubble and the topping turns golden. The center should still look soft because it will thicken slightly as it rests.
Rest Before Serving
Let the dish rest for 8 to 10 minutes before serving. A short rest helps the sauce settle so the first scoop holds together without turning stiff.
A short rest helps the first scoop hold together without losing creaminess. If the inside still looks glossy under the crumbs, the bake time was right.
The safest default oven temperature is 375°F / 190°C. It is hot enough to brown the topping and bubble the sauce, but not so hot that the lobster is likely to overcook before the casserole is ready.
350°F / 175°C is gentler and useful for reheating or make-ahead pans, but browning takes longer.
375°F / 190°C gives this recipe the best balance: bubbling edges, toasted crumbs, and a creamy center.
400°F / 200°C can brown quickly, but it gives you less room for error with lobster and cheese sauce.
For this recipe, bake at 375°F / 190°C for 20 to 25 minutes. If the topping needs more color, broil briefly at the end instead of baking the whole dish longer.
How to Keep Lobster Mac and Cheese Creamy
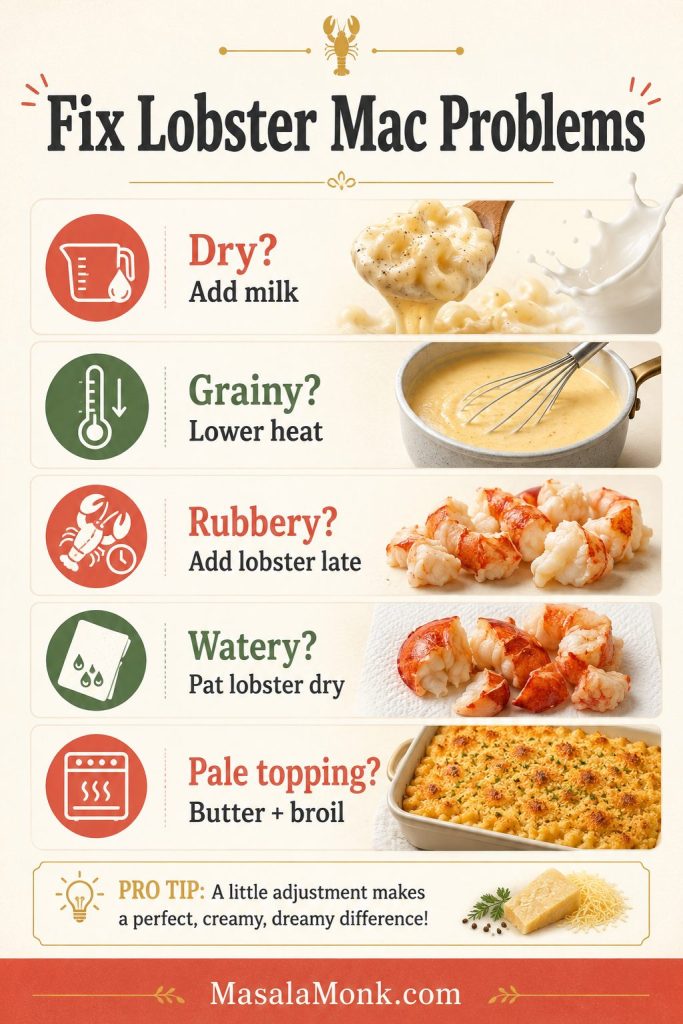
If baked mac turns dry, it is usually a few small things adding up: pasta cooked too far, sauce too thick, cheese overheated, or the pan left in the oven too long.
Use these visual checks before the pan goes into the oven and again when it comes out.
For creamy baked lobster mac, start saucier than expected, melt cheese gently, add lobster late, bake briefly, and rest the pan before serving.
Use enough sauce. Pasta absorbs moisture in the oven, so the mixture should look a little loose before baking.
Undercook the pasta. Stop about 2 minutes before al dente for a baked pan.
Grate the cheese yourself. Freshly grated cheese melts more smoothly.
Add cheese off heat. Gentle heat keeps the sauce smoother and less oily.
Add seafood after the sauce is ready. Lobster only needs to warm through inside the pasta.
Pull it at the right moment. The edges should bubble, the topping should brown, and the center should still look creamy.
Rest before serving. A short rest helps the sauce settle without becoming watery.
A thick-looking pan needs help before it reaches the oven. Add 1/4 cup / 60 ml milk at a time until the pasta looks glossy and saucy again.
Lobster gets rubbery when it is cooked too long or reheated too aggressively. Since it warms again inside the mac, it should stay on the tender side before it goes into the dish.
The easiest way to protect the lobster is to cook it gently first, add it late, and avoid repeated high heat.
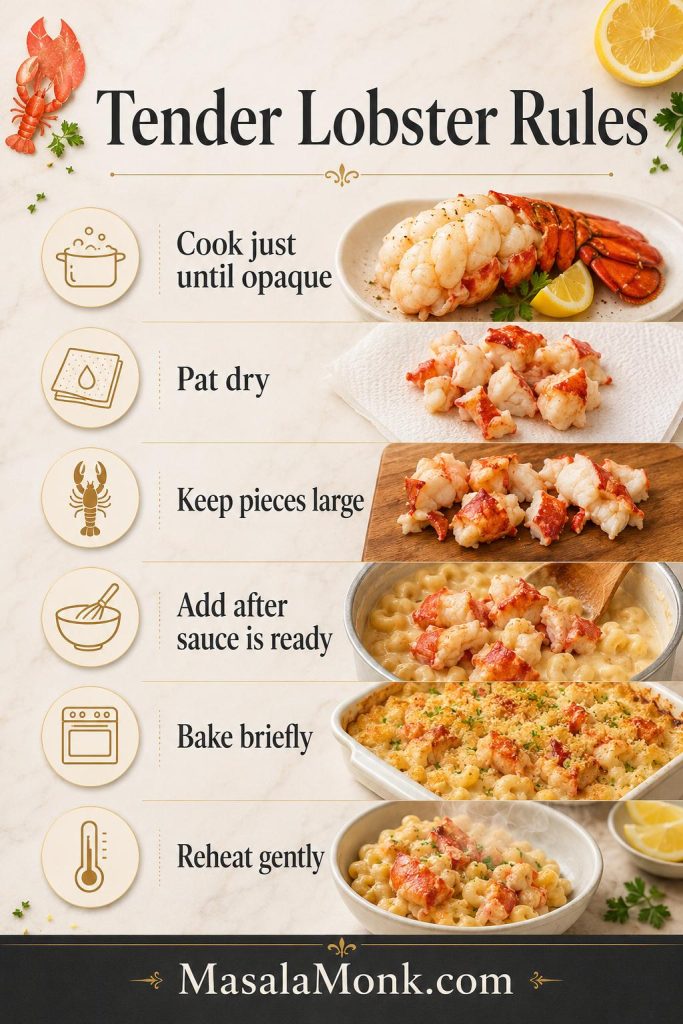
Tender lobster is mostly about timing. Cook it just until opaque, pat it dry, keep the pieces large, and fold it in only after the sauce is ready.
Cook lobster tails only until the meat turns opaque and just firm.
Use cooked lobster meat if you want the easiest method.
Pat lobster dry so extra moisture does not thin the sauce.
Cut lobster into generous chunks instead of tiny bits.
Add the lobster after the pasta is already coated in sauce.
Keep the uncovered bake short.
Reheat leftovers gently with a splash of milk or cream.
Lobster should feel like the prize in the bite, not the thing you have to chew around. If it is already tender before baking, your job is to protect it.
How to Make It Taste Restaurant-Style
Restaurant-style lobster mac and cheese usually feels more polished because of the pasta shape, the cheese blend, the visible lobster pieces, and the finishing touches. The dish should look generous before anyone tastes it.
Use cavatappi. The curls hold sauce and make the pan look special.
Choose a white cheese blend. White cheddar, Gruyere, fontina, and parmesan give a steakhouse-style look and flavor.
Keep some lobster visible. A few reserved pieces on top make the whole pan feel more generous.
Finish with chives or parsley. A little green makes the rich sauce look brighter.
Add a small splash of sherry, seafood stock, or lobster cooking liquid. Use just enough to add depth, not enough to make the sauce taste boozy or fishy.
Broil briefly if needed. A quick 1 to 3 minute broil can give the topping a golden steakhouse finish.
Optional Lobster-Shell Flavor Boost
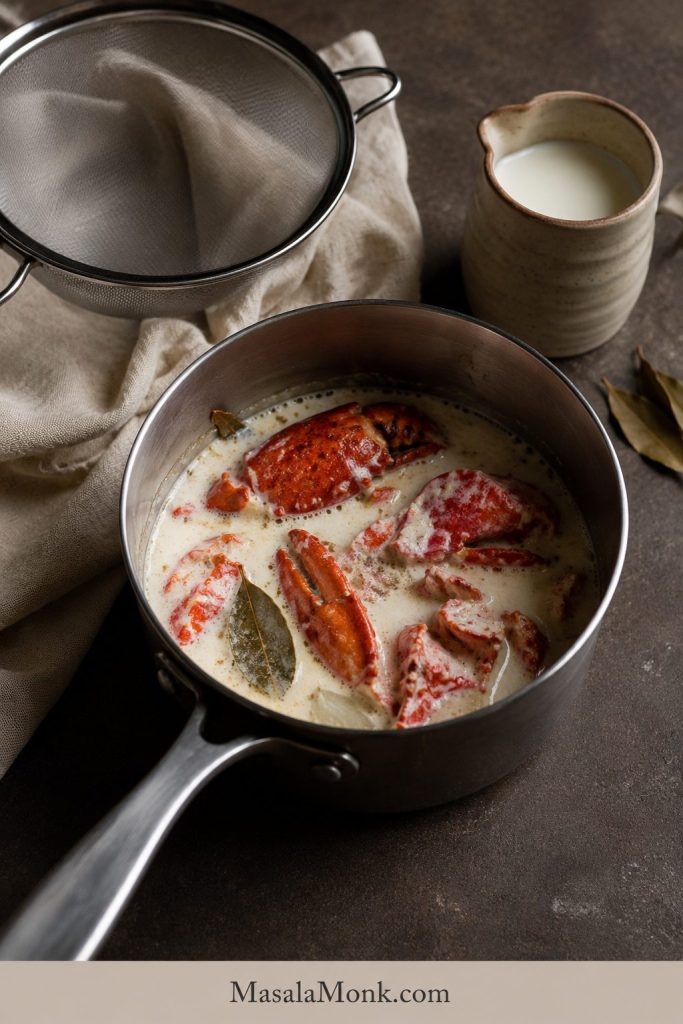
If you cooked lobster tails yourself, you can use the shells for a subtle restaurant-style boost. Simmer the shells gently in the milk and cream for about 10 minutes with a small piece of onion or a bay leaf, then strain before making the sauce. Keep the heat gentle and do not reduce the dairy too much.
For deeper restaurant-style flavor, steep lobster shells gently in the dairy, then strain before making the cheese sauce. It adds seafood depth without overpowering the pan.
This step is optional. The base recipe works without it, but it adds a little more lobster depth when you want the dish to feel extra special.
For a bigger seafood-table mood, serve it next to a Cajun seafood boil and keep the mac slightly milder so the lobster flavor still comes through.
Make-Ahead Lobster Mac and Cheese
The safest plan is to prep the lobster, cheese, and topping ahead, but assemble and bake the pasta fresh when possible. That gives you the creamiest sauce and the most tender lobster.
For hosting, the goal is to reduce last-minute work without sacrificing the fresh-baked texture.
For make-ahead lobster mac, prep the components early but bake fresh when possible. Keeping the topping separate preserves crunch and protects the creamy sauce.
Recommended Make-Ahead Method
Grate the cheese up to 1 day ahead.
Cook and chop the lobster up to 1 day ahead.
Mix the panko or Ritz topping ahead and refrigerate it separately.
Cook the pasta and make the sauce closer to baking time for the best texture.
Assemble and bake just before serving.
For guests, prepping the parts early and baking the pan fresh is the sweet spot: less last-minute work, but still a creamy center and tender lobster.
If You Need to Assemble It Ahead
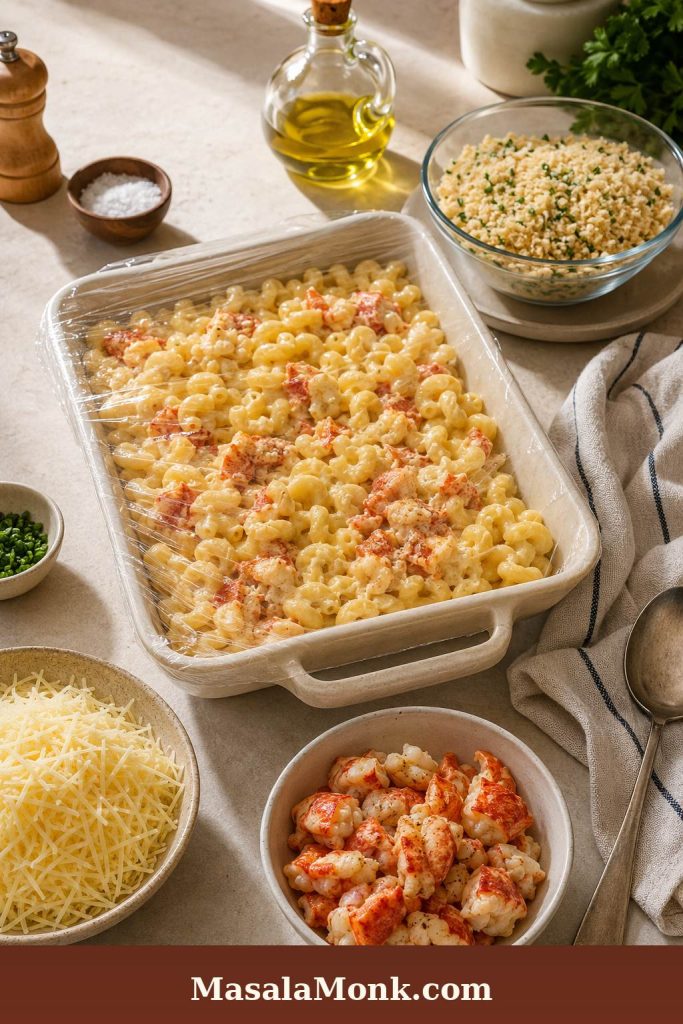
If you need to assemble the whole dish ahead, transfer the pasta, sauce, and lobster to the baking dish, but keep the topping separate. Cover and refrigerate for up to 24 hours. Before baking, let the dish sit at room temperature for about 30 minutes while the oven heats.
Bake covered at 350°F / 175°C until warmed through, then uncover, add the topping, and continue baking until golden. Add a splash of milk or cream if the pasta looks dry before baking.
Fully baking, chilling, and rebaking the whole pan is less ideal for a special meal because the lobster and sauce both lose some tenderness. It can work for leftovers, but fresh assembly gives the best texture.
This mac is at its best when it is freshly baked and creamy, but leftovers can still be good if you reheat them gently and add moisture back into the sauce.
Storage
Cool leftovers, then transfer to an airtight container.
Refrigerate for up to 3 days, though the texture is best within the first 1 to 2 days. For general leftover safety timing, see the USDA leftover food safety guide.
Keep the topping if already baked, but know it will soften in the fridge.
Freezing is possible, but not ideal because creamy cheese sauces can separate after thawing.
Oven Reheating
Place leftovers in a baking dish and add a splash of milk or cream. Cover with foil and reheat at 300°F to 325°F / 150°C to 165°C until warmed through. Remove the foil for the last few minutes if you want to refresh the topping.
Microwave Reheating
For single servings, add a splash of milk or cream and microwave in short bursts, stirring gently between each one. Use lower power if possible. Heating it until boiling can toughen the lobster and make the sauce split.
Try to reheat only what you plan to eat. Repeated reheating is hard on both lobster and cheese sauce.
Lobster Mac and Cheese Variations
Once the base pan works, the variations become fun — not stressful experiments with expensive seafood. Keep the same sauce logic: gentle cheese heat, gently warmed seafood, and a sauce that stays slightly loose if the pan will be baked.
Use the base method first, then change one flavor direction at a time so the seafood and sauce stay balanced.
Once the base recipe is reliable, variations become easier. Add crab for sweetness, shrimp for extra seafood, Cajun seasoning for heat, or Ritz crumbs for buttery crunch.
Lobster Crab Mac and Cheese
Choose this version when you want the pan to feel softer, sweeter, and more holiday-table than steakhouse. Use half lobster and half lump crab meat, then fold the crab in gently at the end so the pieces stay intact.
Lobster Shrimp Mac and Cheese
Choose this when you want a fuller seafood mac without buying more lobster. Add cooked medium or large shrimp near the end, and chop them only if they are very large so they stay juicy instead of tight.
Seafood Mac and Cheese
Use lobster, crab, and shrimp when you want the pan to feel more like a seafood feast than a side dish. Old Bay, Cajun seasoning, or a small pinch of cayenne can push it toward seafood-boil flavor.
Cajun Lobster Mac and Cheese
Choose this version when you want seafood-boil energy: a little bolder, a little warmer, and still creamy underneath. Pepper Jack can replace part of the Monterey Jack or Havarti if you want gentle heat.
Truffle Lobster Mac and Cheese
Choose this for steakhouse polish. Add a small amount of truffle butter or truffle oil at the end, and use restraint; too much truffle can take over before the lobster has a chance to shine.
Bacon Lobster Mac and Cheese
Keep bacon on top, where it gives smoky crunch without taking over the whole sauce. Stirring too much bacon into the cheese sauce can make the dish taste saltier and heavier than it needs to be.
Ritz Cracker Topping
Choose Ritz when you want buttery, nostalgic holiday-casserole flavor. The crumbs brown beautifully and make the top taste richer than panko.
Extra Creamy Stovetop Lobster Mac
Choose stovetop when sauce texture matters more than a baked crust. Make the sauce, add the pasta and lobster, and serve immediately with toasted buttered panko on top.
What to Serve With Lobster Mac and Cheese
This dish is rich, so the right sides either make the meal feel more special or cut through the creaminess with freshness.
For the most balanced table, pair the creamy pasta with something crisp, green, lemony, roasted, or simply cooked.
Since lobster mac is rich, serve it with contrast. Steak, roasted greens, crisp salad, bread, or lemony vegetables make the meal feel complete without becoming too heavy.
If you want a lighter seafood main beside a smaller scoop of mac, baked tilapia keeps the plate from feeling too heavy. For a full seafood dinner, pair smaller portions with lobster bisque and something bright on the side.
For a lighter starter before a rich pan of lobster mac, tomato soup, cucumber salad, or a bright vinaigrette salad works better than adding another heavy cream-based dish.
Homemade vs Frozen Lobster Mac and Cheese
Frozen and prepared lobster mac and cheese can be convenient, especially from grocery stores like Costco, Whole Foods, or Aldi. Homemade gives you more control over the lobster pieces, cheese blend, sauce texture, and topping.
The biggest difference is the lobster. In a homemade pan, the pieces can stay larger and sweeter instead of disappearing into the sauce. To improve a store-bought version, add a splash of cream, a handful of freshly grated cheese, extra lobster if you have it, and a fresh buttery breadcrumb topping.
Troubleshooting Lobster Mac and Cheese
If something feels off, it is usually fixable. Most problems come down to heat, moisture, or timing.
Use the guide below as the quick fix map before you adjust the sauce, seafood, or topping.
Most lobster mac problems come from heat, moisture, or timing. Dry mac needs milk, grainy sauce needs gentler heat, and rubbery lobster needs to be added later next time.
Problem
Likely Cause
Fix
Mac and cheese is dry
Not enough sauce, pasta overcooked, or baked too long
Add more milk before baking and pull the dish when edges bubble.
Cheese sauce is grainy
Cheese was overheated or pre-shredded cheese was used
Add cheese off heat and use freshly grated cheese next time.
Cheese sauce is oily
Heat was too high or cheese separated
Lower the heat, add cheese gradually, and avoid boiling the sauce.
Lobster is rubbery
Lobster was overcooked or baked too long
Cook lobster gently, add it late, and bake briefly.
Sauce is watery
Frozen lobster was not drained or sauce was too thin
Pat lobster dry and simmer the sauce until it lightly coats a spoon.
Mac tastes bland
Not enough salt, mustard, or seasoning
Season the sauce before adding pasta; use Dijon, garlic powder, and a little seafood seasoning.
Topping is pale
Not enough butter or too little oven time
Use buttered crumbs and broil briefly at the end.
Topping burns before center is hot
Oven too hot or topping added too early for make-ahead bake
Bake covered first, then add topping near the end.
What is the best cheese for lobster mac and cheese?
Use white cheddar, fontina or Gruyere, Monterey Jack or Havarti, and a little parmesan. White cheddar gives flavor, the smoother cheeses keep the sauce creamy, and parmesan adds salty depth.
Do lobster tails work in mac and cheese?
Yes. Lobster tails give you large, impressive pieces. Cook them gently until opaque, white, and just firm, then chop the meat and add it after the sauce is ready.
Should lobster be cooked before adding it?
Yes. Cook the lobster gently first, then let it warm through in the sauce. The oven should not be responsible for cooking raw lobster inside the casserole.
How much lobster do I need per person?
For this recipe, 12 to 16 oz / 340 to 454 g cooked lobster meat gives about 1.5 to 2 oz lobster per main-dish serving, or less if served as a holiday side. Use 16 oz if you want visible lobster in every scoop.
How do you keep baked lobster mac from drying out?
Use enough sauce, cook the pasta 2 minutes short of al dente, melt the cheese gently, and pull the pan while the center still looks creamy. The pasta should look slightly loose before it goes into the oven.
Why did my cheese sauce turn grainy?
Cheese sauce usually turns grainy when the cheese is overheated or when pre-shredded cheese is used. Lower the heat or turn it off before adding cheese, and stir in freshly grated cheese a handful at a time.
What is the best make-ahead method?
Prep the components ahead and bake fresh. Grate the cheese, cook the lobster, and prepare the topping in advance. If assembling the whole dish ahead, keep the topping separate and add it near the end of baking.
Is frozen lobster meat okay?
Yes. Thaw frozen lobster meat overnight in the refrigerator, drain it well, and pat it dry before adding it. Extra moisture can make the sauce watery.
Can I use imitation lobster or imitation crab?
You can, but the flavor and texture will be different from real lobster. Add imitation lobster or imitation crab near the end just to warm through.
Is stovetop lobster mac better than baked?
Stovetop lobster mac is usually creamier because it avoids oven time. Baked lobster mac gives you a crisp topping and bubbling casserole texture. Choose stovetop for maximum creaminess and baked for special-occasion presentation.
What pasta shape works best?
Cavatappi is one of the best choices because the curls hold sauce and make the finished pan look restaurant-style. Elbow macaroni, shells, and other short pasta shapes also work well.
Can you freeze lobster mac and cheese?
You can freeze it, but it is not ideal. Creamy cheese sauces can separate after thawing, and lobster can become tougher when reheated. Thaw overnight, add milk or cream, cover, and reheat gently.
How do I turn this into seafood mac and cheese?
Use a mix of lobster, crab, and shrimp. Keep the seafood cooked gently and add it after the sauce is ready so it stays tender. Add Old Bay or Cajun seasoning for a stronger seafood-style flavor.
Lobster mac and cheese is rich, cozy, and impressive, but it should not feel risky. Once you know the three main rules — keep the sauce loose, melt the cheese gently, and add the lobster after the sauce is ready — the dish becomes much easier. Serve it bubbling from the oven, or keep it stovetop and extra silky. Either way, the goal is the same: tender lobster, smooth sauce, buttery crumbs, and a first scoop that makes the whole pan feel worth the occasion.
Stuffed shells are the kind of baked pasta that makes the table feel full before anyone even sits down: tender jumbo shells, creamy ricotta filling, tomato sauce bubbling around the edges, and mozzarella melted over the top. They give you lasagna-level comfort without all the layering, and the recipe is much more forgiving than it looks.
This version is built to avoid the usual stuffed shell problems: loose ricotta filling, dry pasta edges, shells that turn mushy after baking, and a tray that looks good on top but tastes flat in the middle. Think of it as the no-dry-shell method: thick filling, enough sauce, a covered bake first, and tender shells all the way through.
It fits one classic 9×13-inch baking dish: about 20–24 filled jumbo shells, a seasoned ricotta-mozzarella filling, marinara under and over the pasta, and mozzarella melted on top. A few shells may tear while boiling. The first few you fill may look messy. That is normal. Once everything is tucked into sauce and baked until bubbling, nobody at the table can tell which ones were imperfect.
Stuffed Shells at a Glance
No long planning needed. Here is the quick version before you start.
Start with a 12 oz / 340g box of jumbo pasta shells, or enough to cook 28–30 shells.
Aim to fill about 24 shells. If your shells are very large, you may fit closer to 20–22 in the baking dish.
Mix 15–16 oz / 425–454g ricotta with mozzarella, parmesan, egg, garlic, herbs, salt, and pepper.
Use about 3 cups / 720ml marinara sauce, with sauce under and over the shells.
Bake at 375°F / 190°C for 25 minutes covered, then 8–10 minutes uncovered.
Rest for 5–10 minutes before serving so the filling settles and the shells lift more cleanly.
Boil, fill, sauce, cover, bake, rest — that is the whole recipe. This is also a good one to save because the base method stays the same even when the filling changes.
Quick answers: Yes, you boil the shells first for this version. Use about 3 cups sauce for one 9×13-inch baking dish. Egg helps the filling set, but you can skip it if you prefer a softer filling. Stuffed shells freeze best before baking.
Start with the essentials: jumbo shells, thick ricotta filling, marinara, mozzarella, parmesan, egg, garlic, and herbs.
Why This Stuffed Shells Recipe Works
This method is built around four small choices that make the biggest difference: undercook the shells slightly, keep the ricotta filling thick, use sauce under and over the pasta, and bake covered before browning the cheese.
Shells stay tender. Boiling them just shy of al dente keeps them flexible enough to fill, but firm enough to finish in the oven.
Filling stays creamy, not runny. Ricotta gives body, mozzarella gives melt, parmesan adds savory depth, and egg helps everything set.
Sauce protects the pasta. Marinara on the bottom keeps the shells from sticking, while sauce over and around the shells prevents dry edges.
A covered bake does the work. Foil traps heat and steam so the pasta finishes cooking gently before the cheese browns.
Flexibility is built in. Keep it classic, add spinach, stir meat into the sauce, swap in cottage cheese, or freeze a batch for later.
Best of all, the edge of the baking dish tells you dinner is almost ready: sauce bubbling up around the shells, little golden patches of mozzarella, and the smell of garlic, tomato, and browned cheese.
The no-dry-shell method is simple: sauce underneath, sauce around the edges, and foil on top for the first bake.
Ingredients You Need
Stuffed shells do not need complicated ingredients, but they do need the right balance: sturdy shells, thick ricotta filling, enough sauce, and mozzarella that melts without making the pasta watery.
Jumbo Pasta Shells
Choose a 12 oz / 340g box of jumbo pasta shells. These are the large shells made for stuffing, not small shell pasta or macaroni-style shells. Cook 28–30 jumbo shells for one baking dish, or cook the whole box if you like having extra backups.
Some shells will split or fold while boiling, so cook a few extras and move on. The sauce and cheese hide almost everything.
Ricotta Cheese
Use 15–16 oz / 425–454g ricotta cheese. Whole milk ricotta gives the creamiest filling. Loose or watery ricotta should be drained for 10–15 minutes in a fine-mesh strainer or on a few layers of paper towel before mixing. For the right texture, the ricotta filling section shows what the mixture should look like before stuffing.
Loose ricotta should be drained first; thick filling is what prevents watery stuffed shells after baking.
Mozzarella
You need 3 cups shredded low-moisture mozzarella, about 12 oz / 340g, divided between the filling and topping. Low-moisture mozzarella melts into the filling and gives the top a bubbly finish without watering down the pasta. Fresh mozzarella can be used on top in small amounts, but it is softer and wetter.
Parmesan or Pecorino
Use ½ cup / 45–55g grated parmesan or pecorino. Ricotta gives you the creamy center, but parmesan or pecorino is what makes the filling taste seasoned and savory instead of just milky.
Egg
One large egg helps bind the ricotta filling so it holds together after baking. You can skip it, but the filling will be softer. If you leave out the egg, add a little extra parmesan or mozzarella to help the filling hold.
Marinara Sauce
About 3 cups / 720ml marinara sauce gives one baking dish enough sauce for the bottom, top, and edges. A 24 oz / 680g jar is the practical shortcut and usually gives enough sauce for one batch. A good jarred marinara is not a shortcut to apologize for here; stuffed shells are mostly about enough sauce and a well-seasoned filling. If you want to make your own, this homemade marinara sauce gives you a classic base plus spicy, dipping, low-sodium, and sugar-free variations.
Very thick marinara benefits from 2–4 tablespoons of water before baking. If your jar is slightly short or extra thick, loosen it with a splash of water and save a little warm sauce for serving.
Garlic, Herbs, Salt, and Pepper
Ricotta needs seasoning. Garlic, Italian seasoning or fresh herbs, salt, pepper, and optional red pepper flakes make the filling taste like dinner instead of plain cheese. Use ½ teaspoon salt if your parmesan and sauce are already salty. Use closer to ¾ teaspoon if your ricotta is mild and your sauce is lower in salt.
Dried Italian seasoning is the easiest pantry option. Fresh parsley adds brightness, basil gives a sweeter flavor, and oregano gives the filling a stronger Italian-American note. Save fresh basil partly for the top after baking.
Optional Spinach
Either fresh or frozen spinach works; the real rule is to squeeze out as much moisture as possible. Wet spinach can turn a creamy filling loose and watery. For the full version, jump to spinach ricotta stuffed shells.
Optional Meat
The main recipe below is a classic cheese stuffed shells recipe, but cooked ground beef or Italian sausage can make the meal heartier. Brown the meat fully before adding it to the sauce or filling, then drain off excess fat so the pasta does not turn greasy. For the heartier version, see meat stuffed shells.
Tools That Help
You do not need special tools. A large pot, colander, mixing bowl, 9×13-inch / 23×33 cm baking dish, foil, and a spoon or zip-top bag are enough. A zip-top bag with one corner snipped off can make filling the shells faster and neater, but a spoon works perfectly well.
The first few shells are usually the messiest; by the fifth or sixth one, you will know exactly how much filling your shells can hold.
What Pasta Shells Should You Use?
Jumbo pasta shells are the shape you want here. They are large enough to hold ricotta filling and sturdy enough to bake in sauce. Small shells, medium shells, macaroni shells, and regular conchiglie are better for tossing with sauce, not stuffing.
Boil the shells 2–3 minutes shy of al dente. They should be flexible enough to open and fill, but not fully soft. Spread them on a tray to cool; rinse only if they are sticking badly or too hot to handle.
Depending on shell size and your baking dish, you may fit 20–24 filled shells. Aim for 24, but do not force them in. A slightly looser baking dish bakes better than crushed shells.
Cook jumbo shells just shy of al dente and boil a few extras, because a torn shell or two is normal when stuffing pasta.
The Best Ricotta Filling for Stuffed Shells
The filling should look thick and scoopable, more like a cheese spread than a sauce. It should mound on a spoon without running off. If it spreads like sauce, it is too wet; if it feels dry or crumbly, a spoonful of ricotta or sauce will loosen it.
A good stuffed shells filling uses ricotta for creaminess, mozzarella for melt, parmesan or pecorino for savory depth, egg for structure, and garlic, herbs, salt, and pepper for flavor. To check the seasoning safely, mix the cheeses, garlic, herbs, salt, and pepper first, taste, then add the egg last.
A good ricotta filling should mound on a spoon, not drip, so it stays creamy inside each pasta shell.
Save This Stuffed Shells Filling Ratio
For one 9×13-inch baking dish, use:
15–16 oz / 425–454g ricotta
2 cups / about 225g mozzarella inside the filling
½ cup / 45–55g parmesan or pecorino
1 large egg
1–2 garlic cloves
Herbs, salt, and pepper
1 cup / about 115g mozzarella for the top
Once the filling looks thick and scoopable, you are in good shape.
How Much Sauce Do Stuffed Shells Need?
Use about 3 cups / 720ml marinara for one 9×13-inch baking dish. The shells should sit in sauce and have sauce spooned over and around them, but they do not need to be buried.
1 cup / 240ml goes on the bottom of the baking dish
1½–2 cups / 360–480ml goes over and around the filled shells
Extra warm sauce can be served on the side if you like a saucier plate
Before baking, you should still see the shape of each shell, but the edges should be surrounded by sauce.
The shells should stay visible, but the edges need enough marinara to finish tender instead of drying out.
How to Make Stuffed Shells
With the shells, filling, and sauce sorted, assembly is simple: sauce, filled shells, more sauce, cheese, foil, and oven. While the shells boil, mix the filling and spread sauce in the baking dish. By the time the shells are cool enough to handle, the filling and baking dish are ready.
1. Boil the shells
Bring a large pot of salted water to a boil. Add the jumbo shells and cook them 2–3 minutes less than the package says for al dente. Drain and let them cool until they are easy to handle.
2. Make the ricotta filling
In a large bowl, mix ricotta, 2 cups mozzarella, parmesan, egg, garlic, herbs, salt, pepper, and optional red pepper flakes. The filling should be creamy but thick enough to hold its shape on a spoon.
3. Add sauce to the baking dish
Spread about 1 cup of marinara sauce across the bottom of a 9×13-inch / 23×33 cm baking dish. This layer keeps the shells from sticking and protects the bottom of the pasta.
4. Fill the shells
Fill each shell with about 1½–2 tablespoons / about 30g of ricotta filling, depending on shell size. Use a spoon, piping bag, or zip-top bag. Fill generously, but not so much that the shells split. Do not worry if a little filling shows or the shells sit at slightly different angles.
Fill each shell generously, then stop before the pasta stretches or splits around the ricotta filling.
5. Arrange and sauce
Place the filled shells in the baking dish, filling-side up. Spoon the remaining sauce over and around the shells. You want the pasta to look full and well-coated, not dry or sparse.
Once the filled shells sit in sauce, cover the dish so the pasta can finish baking gently and evenly.
6. Bake covered, then uncovered
Cover the baking dish with foil without pressing it into the shells. If the foil may touch the sauce or cheese, place a sheet of parchment under the foil or tent the foil slightly. Bake at 375°F / 190°C for 25 minutes.
Foil traps steam during the first bake, which helps stuffed pasta shells stay soft and tender.
Remove the foil, sprinkle the remaining mozzarella over the top, and bake for another 8–10 minutes, until the cheese is melted and the sauce is bubbling. The uncovered bake is where the top gets those golden spots.
Add mozzarella after the covered bake, then uncover the dish so the cheese melts and lightly browns.
7. Rest before serving
Let the stuffed shells rest for 5–10 minutes before serving. This is the hardest part because it smells ready, but the short rest makes serving much cleaner. After resting, the shells should lift from the baking dish without spilling all their filling.
Rest baked stuffed shells before serving so the filling settles and each shell lifts cleanly from the sauce.
How to Know When Stuffed Shells Are Done
The stuffed shells are done when the sauce is bubbling around the edges, the cheese is melted and lightly browned in spots, and the filling is hot in the center. The best bite is fork-tender pasta, thick ricotta filling, tangy tomato sauce, and a little golden mozzarella from the top.
Check the edge of the baking dish: bubbling sauce and melted cheese mean the shells are hot through the center.
If the top cheese browns before the center is hot, cover the pasta loosely with foil again and keep baking until the filling is hot through the middle.
Stuffed Shells Recipe
This is the full classic version: jumbo shells filled with seasoned ricotta, tucked into marinara, covered until tender, then finished uncovered so the mozzarella melts into golden spots.
Yield: 6 servings
Prep time: 30 minutes
Cook time: 35 minutes
Total time: 1 hour 5 minutes
Oven temperature: 375°F / 190°C
Baking dish: 9×13-inch / 23×33 cm
Ingredients
12 oz / 340g jumbo pasta shells, or enough to cook 28–30 shells
3 cups / about 720ml marinara sauce, or one 24 oz / 680g jar, divided
15–16 oz / 425–454g ricotta cheese
3 cups shredded low-moisture mozzarella, about 12 oz / 340g, divided
½ cup / 45–55g grated parmesan or pecorino
1 large egg
1–2 garlic cloves, minced or grated
1 tsp dried Italian seasoning, or 2–3 tbsp chopped fresh parsley or basil
½–¾ tsp salt, plus more for pasta water
¼–½ tsp black pepper
Pinch of red pepper flakes, optional
A few drops of olive oil, only if needed to keep cooked shells from sticking
Instructions
Heat the oven. Preheat the oven to 375°F / 190°C.
Cook the shells. Bring a large pot of salted water to a boil. Add 28–30 jumbo shells and cook 2–3 minutes less than the package directions for al dente. Drain and let cool until easy to handle. If the shells start sticking, spread them on a tray or toss with only a few drops of olive oil.
Make the filling. In a large bowl, combine ricotta, 2 cups mozzarella, parmesan, garlic, Italian seasoning or herbs, salt, pepper, and red pepper flakes if using. Taste the cheese mixture before adding the egg, then mix in the egg last.
Prepare the baking dish. Spread about 1 cup of marinara sauce over the bottom of a 9×13-inch / 23×33 cm baking dish.
Fill the shells. Spoon about 1½–2 tablespoons / about 30g filling into each shell. Arrange the filled shells in the dish, filling-side up. Aim for 24 filled shells; if your shells are very large, 20–22 may fit better.
Add sauce. Spoon the remaining marinara sauce over and around the shells. Cover the baking dish tightly with foil, tenting it slightly so it does not press into the cheese or filling.
Bake covered. Bake for 25 minutes, until the shells are hot and the sauce is bubbling around the edges.
Finish uncovered. Remove the foil, sprinkle the remaining 1 cup mozzarella over the top, and bake uncovered for 8–10 minutes, until the cheese is melted and lightly browned in spots.
Rest and serve. Let the stuffed shells rest for 5–10 minutes before serving. Serve with extra warm marinara if you like a saucier plate.
Recipe Notes
Softer top cheese: Add all the mozzarella before covering and baking if you want a fully melted top.
Stretchier browned top: Save the final cup of mozzarella and add it after the covered bake.
Spinach shells: Add 5 oz / 140g cooked fresh spinach or 8 oz / 225–250g thawed frozen spinach, squeezed very dry.
Meat sauce version: Add ½–1 lb / 225–450g cooked ground beef or Italian sausage to the sauce, and increase sauce by ½–1 cup if the pasta looks dry.
Cottage cheese swap: Blend cottage cheese briefly for a smoother filling and drain it first if it looks watery.
Small Details That Make Better Stuffed Shells
Cook 28–30 shells. You need backups for the ones that tear.
Drain watery ricotta. Loose ricotta makes the filling run instead of mound.
Taste before adding egg. It is easier to fix bland filling before the egg goes in.
Loosen very thick marinara. A few tablespoons of water help the sauce move around the shells.
Cover first. The pasta finishes cooking in the sauce before the cheese browns.
Rest before serving. The filling firms slightly as it sits.
Make-Ahead, Freezer, and Reheating Instructions
Stuffed shells are one of the best baked pasta dinners to prepare ahead. The shells, filling, sauce, and cheese all hold up well, and a freezer batch feels like a future dinner already handled. This is also a good place to make two baking dishes: bake one tonight and freeze the second before baking.
Best Make-Ahead Option
Assemble the stuffed shells up to 24 hours ahead. Fill the shells, arrange them in sauce, cover tightly, and refrigerate. Let them sit at room temperature only while the oven preheats, about 20–30 minutes. If baking straight from the fridge, add 5–10 minutes to the covered baking time.
Stuffed shells are ideal for make-ahead dinners because you can refrigerate or freeze them before baking.
Best Freezer Option
Freeze stuffed shells before baking. Assemble the shells in a freezer-safe baking dish, cover tightly with plastic wrap and foil or a freezer-safe lid, and freeze for up to 2–3 months for best quality.
If you froze the shells in a glass or ceramic baking dish, thaw them overnight unless the dish is labeled freezer-to-oven safe. That helps prevent sudden temperature shock. You can also freeze the filled shells separately and transfer them to an oven-safe dish with sauce before baking.
Best Small-Batch Freezer Option
Freeze filled shells on a tray until firm, then transfer them to a freezer-safe bag or container. Later, place only the number of shells you need into a baking dish with sauce and cheese. This is useful when you want 2–4 servings instead of a full batch.
Freeze stuffed shells in a single layer first so they do not stick together; once firm, you can transfer them for easy small-batch freezer meals later.
Best Texture After Freezing
For the best texture, thaw frozen stuffed shells overnight in the refrigerator before baking. Before baking, remove any plastic wrap and cover the baking dish again with foil. Bake as directed, adding 5–10 extra minutes if the pasta is still cold.
How to Bake Frozen Stuffed Shells
To bake from frozen, cover the baking dish with foil and bake at 350°F / 175°C for about 60–75 minutes, or until the center is steaming hot. Uncover, add cheese if needed, and bake 10–15 minutes more until bubbling and melted.
How to Store Leftovers
Store leftover stuffed shells in an airtight container in the refrigerator for 3–4 days. A 3–4 day refrigerator window is also the general USDA guidance for cooked leftovers, so it is a good limit to use here.
How to Reheat Stuffed Shells
Reheat covered in the oven at 350°F / 175°C until hot, or microwave individual portions. Add a spoonful of extra sauce or a small splash of water before reheating so the pasta does not dry out.
Leftover Ideas
Leftover stuffed shells are best reheated with extra sauce, but you can also chop them into smaller pieces and reheat them like baked pasta. Add fresh herbs, parmesan, or a little extra marinara to wake the flavor back up. This is the sort of dinner that makes leftovers feel like a reward.
Stuffed Shells Variations
Think of the recipe card as the house version. The variations are how you adjust the pasta for the people eating it — greener for spinach lovers, meatier for Sunday dinner, lighter with cottage cheese, or richer with Alfredo.
Which Stuffed Shells Variation Should You Make?
Classic: Make the ricotta version as written first if you want the most traditional baked pasta.
Beef or sausage: Use the meat sauce version for a heartier Sunday-style dinner.
Cottage cheese: Try stuffed shells without ricotta if you want a lighter, higher-protein filling or do not have ricotta.
Alfredo: Make Alfredo stuffed shells for a richer white-sauce version with chicken or spinach.
Spinach Ricotta Stuffed Shells
Add spinach to the ricotta filling for a classic spinach stuffed shells variation. Fresh spinach and frozen spinach both work, but the spinach needs to be cooked, chopped, and squeezed very dry before it goes into the filling. Use about 5 oz / 140g fresh spinach or 8 oz / 225–250g frozen spinach.
For spinach ricotta stuffed shells, squeeze the spinach dry so the filling stays creamy instead of watery.
Beef Stuffed Shells
For the cleanest shells, keep the ricotta filling mostly cheese-based and put the browned meat in the sauce. That gives every bite a hearty meat sauce without making the shells heavy or hard to close. Brown ½–1 lb / 225–450g ground beef with a little salt, pepper, garlic, and Italian seasoning, then drain excess fat before adding it to the marinara.
Sausage Stuffed Shells
Italian sausage brings more seasoning than ground beef, so it is the easiest way to make the sauce taste deeper. Remove it from the casing if needed, brown it well, and drain any excess fat. Sausage brings more salt and spice than plain ground beef, so taste before adding extra seasoning.
For meat stuffed shells, keep the cheese inside the pasta and stir browned beef or sausage into the marinara.
Cottage Cheese Stuffed Shells
Cottage cheese is the easiest ricotta swap and a good option if you want a lighter, higher-protein filling. Replace ricotta 1:1 by weight, drain it if watery, and blend it briefly for a smoother texture. The flavor is a little tangier and less classic than ricotta, but it bakes up creamy when mixed with mozzarella, parmesan, egg, garlic, and herbs.
Stuffed Shells Without Ricotta
If you do not have ricotta, use cottage cheese, a mix of cream cheese and mozzarella, a meat filling, roasted vegetables, or tofu ricotta for a dairy-free version. This helps if you dislike ricotta or simply do not have it. The recipe can still work well as long as the filling is thick and not watery.
For stuffed shells without ricotta, blend cottage cheese until smooth so the filling holds its shape inside the pasta.
Alfredo Stuffed Shells
For a creamy white-sauce version, use Alfredo sauce instead of marinara. Because Alfredo is rich, spinach or chicken works especially well here. For more creamy pasta dinner ideas, see this chicken Alfredo pasta guide.
Alfredo stuffed shells are the creamy white-sauce variation to choose when you want spinach, chicken, or a richer pasta bake.
No-Boil Stuffed Shells
No-boil stuffed shells can work, but they need a different sauce ratio and a longer covered bake. This recipe is written for boiled shells because it gives the most predictable texture: shells that are flexible enough to fill, tender after baking, and less likely to stay firm in the center. If you want a true no-boil version, increase the sauce or liquid and keep the dish tightly covered until the pasta is fully tender.
Serving and Scaling
How Many Stuffed Shells Per Person?
Plan on 3–4 stuffed shells per adult if serving with salad, bread, or vegetables. Plan on 4–5 shells per person for a heartier main dish with fewer sides. A 9×13-inch baking dish with about 20–24 stuffed shells serves 6 people generously.
For dinner portions, plan on three to four ricotta stuffed shells per adult with salad, garlic bread, or vegetables.
Can You Double This Recipe?
Yes. To double the recipe, use two 9×13-inch baking dishes instead of crowding everything into one deep dish. If baking both at the same time, rotate them halfway through if your oven has hot spots. If the pans are cold from the fridge, they may need a few extra minutes of covered baking time. You can also bake one now and freeze one for later.
What to Serve with Stuffed Shells
Stuffed shells are rich, cheesy, and well-sauced, so they pair best with something crisp, green, garlicky, or simple. On a weeknight, salad is enough. When serving company, add garlic bread and something fresh on the side.
Bake just until melted and use low-moisture mozzarella
Pasta looks watery
Wet filling or vegetables
Drain ingredients and rest before serving
If the shells or edges look dry after baking, spoon warm marinara around the pasta before serving. Sauce brings moisture back better than adding more cheese.
When the edges look dry, spoon warm marinara around the shells before serving to soften them again.
Frequently Asked Questions
A few common questions come up once you start adjusting the recipe. These quick answers should help you choose the right shells, filling, sauce, and make-ahead method.
What pasta shells do I use for stuffed shells?
Use jumbo pasta shells. Small shells, medium shells, and macaroni-style shells are not large enough for stuffing.
Do you have to boil shells before stuffing them?
For this version, yes. Boiling first gives you shells that are soft enough to fill but firm enough to finish in the oven. No-boil shells need more liquid and a longer covered bake.
What is the best cheese filling for stuffed shells?
The best classic filling uses ricotta, mozzarella, parmesan or pecorino, egg, garlic, herbs, salt, and pepper. Ricotta makes it creamy, mozzarella adds melt, parmesan adds depth, and egg helps it hold together.
Do I need egg in stuffed shells?
Egg helps the filling set so the shells lift more cleanly. You can skip it, but the filling will be softer. If skipping egg, add a little extra parmesan or mozzarella.
Can I use cottage cheese instead of ricotta?
You can replace ricotta 1:1 by weight, drain cottage cheese if watery, and blend it first if you want a smoother filling. The no-ricotta section gives more options.
Can I make stuffed shells without ricotta?
Yes — use cottage cheese, cream cheese mixed with mozzarella, a meat filling, roasted vegetables, or tofu ricotta. Keep the filling thick so it does not run out of the shells.
How much sauce do stuffed shells need?
For one 9×13-inch baking dish, use about 3 cups / 720ml sauce. Spread about 1 cup on the bottom and spoon the rest over and around the filled shells.
Do you bake stuffed shells covered or uncovered?
Bake them covered for most of the time so the pasta stays moist and the filling heats through. Uncover at the end to melt and lightly brown the cheese.
How do you keep stuffed shells from drying out?
Use sauce under and over the shells, cover the baking dish for the first bake, and reheat leftovers with extra sauce or a small splash of water. That is the same no-dry-shell method used in the main recipe.
Can I make stuffed shells ahead of time?
Yes. Assemble stuffed shells up to 24 hours ahead, cover, and refrigerate. The make-ahead section explains the timing and freezer options.
Can stuffed shells be frozen?
Freeze them before baking for the best texture, either as a full baking dish or as individual filled shells. Use within 2–3 months for best quality.
Can I bake stuffed shells from frozen?
You can bake them covered at 350°F / 175°C for 60–75 minutes, or until the center is hot. Then uncover and bake until the sauce bubbles and the cheese melts.
Can I add meat to stuffed shells?
Meat works best in the sauce, where it makes the dish heartier without weighing down the ricotta filling. Brown and drain the meat before adding it.
How many stuffed shells per person?
Plan on 3–4 stuffed shells per adult with sides, or 4–5 shells per person for a heartier main dish.
How long do leftover stuffed shells last?
Leftovers keep for 3–4 days and reheat best with extra sauce. Store them in an airtight container in the refrigerator and reheat until hot.
Make It Your Own
A good batch of stuffed shells should feel generous: pasta tucked into sauce, cheese bubbling around the edges, and enough filling in every shell that nobody feels shortchanged. The whole recipe comes back to the same simple method: thick filling, enough sauce, covered bake, tender shells.
This is the kind of tray that looks a little messy in the best way: sauce at the edges, cheese pulling from the spoon, and enough shells for someone to quietly go back for one more.
Serve stuffed shells family-style with garlic bread and salad; this is the pasta bake people come back to for one more shell.
You can keep the recipe classic, add spinach, make it meaty with beef or sausage, swap in cottage cheese, use Alfredo sauce, or freeze a batch for another night. For another cozy pasta dinner after this one, save this broccoli pasta too.
If you make these stuffed shells, tell us which version landed on your table: classic ricotta, spinach, meat sauce, cottage cheese, Alfredo, or extra saucy. I especially want to know if you froze a batch for later — that is where this recipe really earns its keep.
This tuna noodle casserole recipe with egg noodles is the creamy, cozy baked dinner people usually mean when they talk about old-fashioned tuna casserole: wide egg noodles, canned tuna, peas, cream of mushroom soup, milk, optional cheddar, and a crunchy potato chip, cracker, or breadcrumb topping.
It is pantry comfort food, but it should still scoop creamy instead of baking into a dry noodle block. The key is simple: cook the noodles just shy of tender, use enough sauce for the full 9×13-inch dish, and pull the casserole when the edges are bubbling and the center still looks moist.
This close scoop shows the goal before serving: soft egg noodles that stay moist underneath the crisp topping.
At a glance: This tuna noodle casserole uses 12 oz / 340 g wide egg noodles, 2 cans tuna, 2 cans cream of mushroom soup, 3/4 to 1 cup / 180 to 240 ml milk, 1 cup / 140 g peas, optional cheddar, and a crunchy topping. Bake in a 9×13-inch / 23×33 cm dish at 375°F / 190°C for 20 to 25 minutes, until bubbling at the edges.
The classic full-pan formula starts with egg noodles, tuna, cream of mushroom soup, milk, peas, and a crisp topping, then bakes until the edges bubble.
Quick Answer: Tuna Noodle Casserole with Egg Noodles
To make tuna noodle casserole with egg noodles, boil wide egg noodles until just shy of tender. Mix them with well-drained canned tuna, peas, cream of mushroom soup, milk, seasonings, and cheddar if using. Spread into a greased 9×13-inch dish, add a crunchy topping, and bake at 375°F / 190°C for 20 to 25 minutes, until the edges bubble and the top is lightly golden.
Texture cue: before baking, the noodles should be generously coated and easy to stir. If the mixture already feels stiff in the bowl, it will be dry after baking.
Why This Tuna Noodle Casserole Works
The goal is not a fancy casserole. The goal is the old-school one done properly: creamy noodles, flaky tuna, sweet peas, and a crisp top. This version keeps the familiar cream-of-mushroom flavor while using enough sauce for a full 9×13-inch dish.
Wide egg noodles give the casserole its soft-but-sturdy bite.
Two cans of soup plus milk make enough sauce for a full pan.
Frozen peas add sweetness and color without extra prep.
Gently folded tuna stays in flakes instead of disappearing into the sauce.
A topping added right before baking stays crisp instead of steaming soft.
Best First Batch
If this is your first time making tuna noodle casserole, start with the classic version: cream of mushroom soup, wide egg noodles, tuna, peas, milk, and either potato chips or buttered panko on top. Once that base is right, the variations are easy.
Use 2 cans cream of mushroom soup and potato chips or crackers.
Extra creamy
You worry about dry casserole
Use the full 1 cup / 240 ml milk and optional sour cream.
No-soup
You want homemade sauce
Use butter, flour, milk, broth, mushrooms, onion, and celery.
Small batch
You are cooking for 1–2 people
Use 4 oz / 115 g noodles, 1 can tuna, and an 8×8-inch dish.
Lighter
You want less richness
Use more vegetables, less cheese, and the no-soup sauce option.
For the safest first batch, keep it classic: cream of mushroom soup, wide egg noodles, peas, optional cheddar, and potato chips or crackers on top. After that, adjust the sauce, topping, or vegetables to match your taste.
Start with the classic tuna noodle casserole first, then adjust one part at a time: sauce, topping, batch size, or vegetables.
Ingredients for Tuna Noodle Casserole
The familiar version is built from pantry and freezer staples, but each ingredient still matters. Wide noodles give the casserole its soft structure, tuna adds protein, peas bring sweetness, condensed soup creates the sauce, and the topping adds the crunch that makes the bake feel finished.
Simple pantry staples work best when each one has a job: noodles for structure, tuna for protein, peas for sweetness, and crumbs or chips for crunch.
Wide egg noodles are part of what makes this casserole taste like tuna noodle casserole instead of just tuna pasta. They are tender but sturdy, hold sauce well, and give the dish the old-school texture people expect. Cook them 1 minute shy of al dente so they finish softening in the oven without turning mushy.
Wide egg noodles give the most familiar bite; meanwhile, thinner noodles soften faster and extra-wide noodles need a little more sauce.
Noodle Type
Best For
What to Know
Wide egg noodles
Best old-fashioned tuna noodle casserole texture
Soft, saucy, and sturdy enough for baking.
Medium egg noodles
Softer casserole texture
Cook quickly, so check early and avoid overboiling.
Extra-wide egg noodles
More rustic, hearty texture
Need enough sauce because the larger noodles absorb more.
Elbow macaroni
Tuna mac-style casserole
Works well, but feels less like an egg noodle casserole.
Rotini or penne
Pasta bake style
Better for a tuna pasta bake than this old-school noodle casserole.
Canned Tuna
Two standard 5 oz / 142 g cans of tuna are enough for a full 9×13-inch casserole without making the dish taste overwhelmingly fishy. Chunk light tuna gives a milder, softer casserole, while solid white albacore gives larger, firmer flakes. Either works, but fold the tuna in gently so it does not disappear into the sauce.
Choose tuna by texture: chunk light blends in gently, while solid white tuna gives the casserole larger, more visible flakes.
Tuna Type
Best For
What to Know
Chunk light tuna in water
Classic mild casserole
Soft, affordable, and easy to mix into the sauce.
Solid white albacore
Larger tuna flakes
Firmer texture and cleaner pieces, but usually stronger tasting.
Tuna packed in oil
Richer flavor
Drain very well or the casserole can feel heavy.
Whatever tuna you use, drain it well. Extra liquid from the can can make the sauce loose in the wrong way, while undrained oil can make the casserole taste heavy. If you want a lighter canned-tuna meal for another day, these healthy tuna salad recipes give you avocado, Greek yogurt, Mediterranean, no-mayo, and high-protein options.
Drain the tuna before mixing; extra liquid can make the sauce thin before the casserole even reaches the oven.
Cream of Mushroom Soup
Condensed cream of mushroom soup is the shortcut sauce behind the old-school flavor most people expect here. For a 9×13 casserole, use 2 cans, 10.5 oz / 298 g each, then loosen the condensed soup with 3/4 to 1 cup / 180 to 240 ml milk before adding the noodles.
Milk
Milk turns the condensed soup into a bakeable sauce. Start with 3/4 cup / 180 ml for a thicker casserole, or use a full cup / 240 ml if you want the noodles more generously coated or plan to make the casserole ahead.
Whisk cream of mushroom soup with milk before adding noodles so the sauce coats evenly instead of staying thick in pockets.
Peas and Vegetables
Frozen peas are the easiest vegetable here because they cook quickly and add sweetness. You do not need to thaw frozen peas before mixing them in; they warm through quickly in the oven. If using larger frozen vegetables, thaw and drain them first so they do not water down the sauce.
You can also add sautéed onion, celery, mushrooms, carrots, or a small amount of spinach. Watery vegetables should be cooked or drained first.
Frozen peas can go straight into tuna noodle casserole, while larger vegetables should be thawed and drained so they do not thin the sauce.
Cheddar Cheese
Cheddar is optional, but it makes the casserole richer and more family-dinner friendly. Use 1 cup / 113 g for a balanced version or 1 1/2 cups / 170 g for a cheesier casserole.
Crunchy Topping
Potato chips, buttery crackers, panko, breadcrumbs, and fried onions all work. Add the topping right before baking so it stays crisp instead of turning soft from the sauce.
Because condensed soup, canned tuna, cheddar, crackers, chips, and fried onions can all be salty, taste the sauce before adding extra salt. Black pepper, garlic powder, onion powder, Dijon mustard, or a small squeeze of lemon can add flavor without making the casserole too salty.
Since soup, tuna, cheese, chips, and crackers can all be salty, build flavor with pepper, garlic, onion, Dijon, or lemon before adding more salt.
Equipment You Need
You do not need special equipment, but the pan size matters more than it seems. A shallow 9×13-inch / 23×33 cm baking dish is better than a deep, narrow dish because the casserole heats evenly and does not turn dense in the center before the edges are hot.
A shallow 9×13 dish spreads the tuna noodle casserole evenly, so the center heats through before the edges overbake.
Large pot for boiling egg noodles
Colander for draining noodles
Large mixing bowl or deep skillet
9×13-inch / 23×33 cm baking dish, about 3 quarts
Small bowl for mixing the topping
Foil for make-ahead, reheating, or chilled casserole baking
Optional skillet or saucepan if making the no-soup sauce
How to Make Tuna Noodle Casserole
The order keeps the texture in check: cook the noodles, mix the sauce, fold gently, spread evenly, then add topping just before baking.
1. Boil the Egg Noodles
Bring a large pot of salted water to a boil. Add 12 oz / 340 g wide egg noodles and cook them about 1 minute less than the package’s al dente time. The noodles should bend easily but still have a little firmness in the center.
Pull the egg noodles early because they keep absorbing sauce in the oven, which helps prevent a mushy tuna noodle casserole.
2. Mix the Creamy Sauce
In a large bowl, whisk together the cream of mushroom soup, milk, black pepper, garlic powder, and onion powder. The sauce should be smooth before the noodles go in.
3. Fold in Tuna, Peas, Cheese, and Noodles
Add the well-drained tuna, frozen peas, cheddar, and cooked egg noodles. Fold gently so the tuna stays in small flakes instead of disappearing into the sauce. The noodles should be coated, but not swimming.
Gentle folding keeps the tuna in flakes and helps the sauce coat the egg noodles without turning the filling pasty.
4. Spread Into a Baking Dish
Grease a 9×13-inch / 23×33 cm baking dish and spread the mixture evenly. Do not pack it down firmly; a lighter layer heats more evenly.
Before the topping goes on, the casserole mixture should spread easily, with sauce clinging to the noodles instead of pooling in the dish.
5. Add the Crunchy Topping
Sprinkle crushed potato chips, crackers, or buttered panko over the top. If using breadcrumbs or panko, mix them with melted butter first so they brown instead of drying out.
6. Bake Until Bubbly
Bake uncovered at 375°F / 190°C for 20 to 25 minutes, until the edges are bubbling and the topping is lightly golden. Rest for 5 minutes before serving.
Tuna Noodle Casserole Recipe Card
Tuna Noodle Casserole Recipe with Egg Noodles
This is the classic pantry-style tuna noodle casserole: wide egg noodles, tuna, peas, cream of mushroom soup, milk, cheddar, and a crisp potato chip, cracker, or breadcrumb topping. It is simple, cozy, and built to stay soft, saucy, and scoopable after baking.
Prep Time15 minutes
Cook Time25 minutes
Total Time40 minutes
Yield6–8 servings
Equipment: large pot, colander, large mixing bowl, 9×13-inch / 23×33 cm baking dish, small topping bowl.
Ingredients
12 oz / 340 g wide egg noodles
Salt for the pasta water, plus extra only if the sauce needs it
2 cans tuna, 5 oz / 142 g each, drained well
2 cans condensed cream of mushroom soup, 10.5 oz / 298 g each
3/4 to 1 cup / 180 to 240 ml milk
1 cup / 140 g frozen peas, no need to thaw
1 cup / 113 g shredded cheddar cheese, optional but recommended
1/2 teaspoon black pepper
1/4 teaspoon garlic powder
1/4 teaspoon onion powder
1 cup crushed potato chips or buttery crackers, about 35 to 45 g depending on the topping
Optional Buttered Breadcrumb Topping
1/2 cup / about 30 g panko or breadcrumbs
2 tablespoons / 28 g melted butter
2 tablespoons grated parmesan, optional
Optional Add-Ins
1/2 cup chopped celery, sautéed
1/2 cup chopped onion, sautéed
8 oz / 225 g mushrooms, sautéed
1/2 cup sour cream or 2 to 3 tablespoons mayo for an extra creamy version
1 teaspoon Dijon mustard or a small squeeze of lemon for brightness
Instructions
Preheat the oven. Heat oven to 375°F / 190°C. Grease a 9×13-inch / 23×33 cm baking dish.
Cook the noodles. Bring a large pot of salted water to a boil. Cook the egg noodles 1 minute shy of al dente. Drain well.
Make the sauce mixture. In a large bowl, whisk together cream of mushroom soup, 3/4 cup milk, black pepper, garlic powder, and onion powder. If using sour cream, mayo, Dijon, lemon, sautéed celery, onion, or mushrooms, stir them into the sauce now. Add the remaining 1/4 cup milk if the sauce looks very thick.
Add the filling. Fold in the well-drained tuna, peas, cheddar, and cooked egg noodles. Mix gently so the tuna stays in flakes instead of breaking down completely.
Fill the dish. Spread the mixture evenly into the prepared baking dish. It should look creamy and slightly loose, with the noodles fully coated but not swimming in sauce. If it looks stiff before baking, stir in 2 to 4 tablespoons more milk.
Add topping. Sprinkle crushed potato chips or crackers over the top. If using panko or breadcrumbs, mix them with melted butter first, then sprinkle over the casserole.
Bake. Bake uncovered for 20 to 25 minutes, until the edges are bubbling and the topping is lightly golden.
Rest and serve. Let the casserole rest for 5 minutes before serving.
Notes
Taste the sauce before adding extra salt because condensed soup, tuna, cheese, chips, and crackers can all be salty.
For a faster bake, use 400°F / 200°C and check after 15 minutes.
If baking from chilled, cover loosely for the first half of baking and add 10 to 15 extra minutes.
Add crunchy topping right before baking, especially for make-ahead casserole.
For leftovers, add a splash of milk before reheating; the reheating section shows the cue.
Keep the core tuna noodle casserole formula handy: egg noodles, tuna, soup, milk, peas, topping, and a 375°F bake until bubbling.
A quick safety note for families: for general fish-consumption guidance, especially for children or people who are pregnant or breastfeeding, see the FDA’s advice about eating fish.
How Long to Bake Tuna Noodle Casserole
The best default is 375°F / 190°C for 20 to 25 minutes. This temperature heats the casserole through without drying the noodles too quickly or burning the topping.
Oven Temperature
Best Use
Approximate Time
375°F / 190°C
Best all-purpose creamy bake
20–25 minutes
400°F / 200°C
Faster weeknight bake if the mixture is warm
15–20 minutes
425°F / 220°C
Very fast bake
15–20 minutes, but watch for drying or topping browning too quickly
375°F / 190°C from chilled
Make-ahead casserole from the refrigerator
30–40 minutes; cover loosely for the first half if needed
Bake time is a cue, not just a number; when the edges bubble and the center is hot, the casserole is ready.
The casserole is done when the edges bubble, the center is hot, and the topping is golden in spots. If the topping browns before the center is hot, loosely tent the dish with foil and continue baking.
If the casserole is coming from the fridge, check the make-ahead guidance before baking.
Should Tuna Noodle Casserole Be Covered While Baking?
Bake freshly assembled tuna noodle casserole uncovered so the topping can crisp. Cover it loosely with foil only if the casserole is cold from the refrigerator, the topping is browning too fast, or you are reheating leftovers.
Bake fresh tuna noodle casserole uncovered for crunch; cover loosely only when reheating, baking from chilled, or slowing down browning.
Tuna Noodle Casserole with Cream of Mushroom Soup
The cream-of-mushroom version is the main recipe here because it matches the comfort-food casserole most people are looking for: quick, pantry-friendly, creamy, and familiar. For a 9×13-inch tuna noodle casserole, use 2 cans condensed cream of mushroom soup and 3/4 to 1 cup milk.
Stir the soup and milk together before adding noodles so there are no thick pockets of soup. Cream of celery soup gives a lighter vegetable flavor, while one can cream of mushroom plus one can cream of chicken makes the sauce richer and more savory.
If you like understanding sauce texture, this easy cheese sauce recipe shows how milk, cheese, and gentle heat keep sauces smooth instead of grainy or gluey.
Tuna Noodle Casserole Without Soup
For a homemade version without condensed soup, make a quick white sauce with butter, flour, milk, broth, mushrooms, onion, and celery. Melt 4 tablespoons / 56 g butter in a skillet. Cook 1 small chopped onion, 1 to 2 celery ribs, and 8 oz / 225 g mushrooms until softened. Add 2 minced garlic cloves, then stir in 1/3 cup / 40 g flour.
Slowly whisk in 1 1/2 cups / 360 ml milk and 1 1/2 cups / 360 ml broth. Simmer until creamy, then fold in tuna, peas, noodles, and cheese if using. If the sauce thickens before the noodles are added, loosen it with extra milk or broth 2 tablespoons at a time.
For tuna noodle casserole without soup, a quick white sauce gives you better control over salt, thickness, and mushroom flavor.
For a deeper white-sauce reference, this béchamel sauce guide explains the butter-flour-milk method that also helps a homemade tuna casserole sauce stay smooth.
Best Tuna Noodle Casserole Toppings
The topping changes the whole personality of the casserole. Potato chips make it salty and old-fashioned, crackers make it buttery, panko makes it crisp, and fried onions make it taste more like a holiday casserole.
Potato chips give you the nostalgic church-supper casserole. Buttered panko gives you a cleaner, crispier top.
Topping
Best For
How to Use It
Potato chips
Old-fashioned salty crunch
Crush lightly and add right before baking.
Ritz or buttery crackers
Buttery comfort-food topping
Crush coarsely; mix with a little melted butter if needed.
Panko
Crispest clean topping
Mix with melted butter and optional parmesan.
Breadcrumbs
Classic balanced topping
Use with melted butter so they brown evenly.
Fried onions
Green bean casserole-style crunch
Use lightly because the flavor is strong.
The topping changes the whole casserole: potato chips taste nostalgic, crackers feel buttery, and panko gives a cleaner crunch.
Crushed potato chips are the old-fashioned choice when you want salty crunch and a true retro tuna casserole finish.
Choosing a topping for a make-ahead casserole? See the make-ahead notes so the topping stays crisp.
How to Keep Tuna Noodle Casserole Creamy, Not Dry
The fix for dry tuna casserole happens before it goes into the oven, not after it comes out. Dryness usually comes from overcooked noodles, sauce that was too thick before baking, too much time in the oven, or leftovers reheated without adding moisture back.
The best texture starts before baking: slightly firm egg noodles, a generous sauce coating, and a stop point when the edges bubble.
Before Baking
Cook the noodles 1 minute shy of al dente.
Use the full 1 cup / 240 ml milk if making the casserole ahead.
Do not pack the noodles tightly into the baking dish.
After Baking or Reheating
Rest the casserole for 5 minutes, not 15 or 20.
For leftovers, add a splash of milk before reheating.
Cover while reheating, then uncover briefly to crisp the topping.
If a serving is already dry, stir in a spoonful of warm milk or cream before serving.
The best tuna noodle casserole is soft and scoopable; if it slices like a block or leaks sauce, the balance needs adjusting.
If the casserole is already baked and the texture still seems off, use the troubleshooting guide to decide whether the issue is sauce, noodles, topping, or bake time.
No-Boil Tuna Noodle Casserole: Is It Worth It?
No-boil tuna noodle casserole works when convenience matters more than perfect noodle texture. It saves a pot, but the noodles need more liquid, a tightly covered pan, and a longer bake so they can soften in the sauce.
For the best egg noodle texture, boiling the noodles separately still gives the best result. If you do try a no-boil version, make the sauce much looser, press the noodles under the liquid, and cover the pan tightly with foil.
Add the topping only after the noodles are tender; otherwise the top can brown before the casserole is fully cooked.
No-boil tuna noodle casserole needs extra liquid and patience, so keep the topping off until the noodles have softened.
Stovetop Tuna Noodle Casserole
This is the weeknight version when you want the flavor of tuna noodle casserole without waiting for a baked top. It will be softer and saucier than the oven version, and the topping is sprinkled on at the end instead of browned in the oven.
Cook the noodles separately, or simmer them gently in a creamy sauce in a Dutch oven. Stir in the tuna and peas near the end so the tuna stays flaky and the peas do not overcook. Finish each serving with crushed crackers, potato chips, or toasted breadcrumbs for crunch.
The stovetop version stays softer and saucier, while the crunch comes from adding chips, crackers, or crumbs at the end.
Tuna Noodle Casserole for Two
A full 9×13-inch pan is great for family dinner, but an 8×8-inch dish or 1.5-quart baking dish is easier when you only want a few servings. Keep the sauce generous, add the topping right before baking, and check early because a smaller casserole heats faster.
Ingredient
Small-Batch Amount
Egg noodles
4 oz / 115 g
Tuna
1 can, 5 oz / 142 g, drained
Peas
1/2 cup / 70 g
Cream of mushroom soup
1/2 to 2/3 can for balanced sauce, or 1 full can for extra creamy
Milk
1/4 to 1/3 cup / 60 to 80 ml
Dish
8×8-inch dish or 1.5-quart baking dish
Bake time
15–20 minutes at 375°F / 190°C
Use an 8×8 dish when you want the same comfort-food flavor without committing to a full 9×13 pan.
Old-Fashioned Tuna Noodle Casserole
For an old-fashioned tuna noodle casserole, keep the ingredients simple: egg noodles, canned tuna, cream of mushroom soup, milk, peas, cheddar, and crushed potato chips. Use light seasoning, add celery or onion only if you like that retro casserole flavor, and taste before salting because the soup, tuna, cheese, and chips already bring plenty.
What to Serve with Tuna Noodle Casserole
Tuna noodle casserole is rich, creamy, and filling, so the best sides are usually fresh, crisp, or simple. You do not need a heavy side dish unless you are feeding a larger crowd.
Fresh sides: green salad, cucumber salad, coleslaw, or tomato cucumber salad.
Vegetables: steamed broccoli, green beans, roasted carrots, asparagus, or peas and carrots.
Bread: dinner rolls, biscuits, garlic bread, or a simple slice of toasted sourdough.
Bright sides: pickles, lemony salad, or vinegar-based slaw to balance the creamy casserole.
Because tuna noodle casserole is rich and filling, fresh salad, green vegetables, bread, or a bright pickle-style side keeps the plate balanced.
Serve it soon after the short rest, while the sauce is still creamy and the topping has some crunch.
Make Ahead, Store, and Freeze Tuna Noodle Casserole
Make Ahead
Assemble the casserole without the crunchy topping, cover, and refrigerate for up to 1 day. When ready to bake, let it sit at room temperature while the oven preheats, stir in a small splash of milk if the noodles have absorbed too much sauce, add the topping, and bake. A chilled casserole may need 10 to 15 extra minutes. For topping choices that hold up best, jump back to the topping guide.
For make-ahead tuna noodle casserole, refrigerate the filling without the topping so the crumbs, chips, or crackers stay crisp.
Storage
Store leftovers in an airtight container in the refrigerator for 3 to 4 days. For general leftover safety guidance, see the USDA’s leftovers and food safety guide.
Freezing
You can freeze tuna noodle casserole before or after baking, but the noodles will soften slightly after thawing. For best texture, freeze the casserole without the topping, then add fresh topping before baking or reheating.
Freeze tuna noodle casserole without the topping; then add fresh chips, crackers, or crumbs before baking or reheating.
Reheating
To reheat, add a splash of milk, cover loosely with foil, and warm in a 325°F / 165°C oven until hot. Remove the foil for the last few minutes if you want to re-crisp the topping. For single servings, microwave gently with a splash of milk and stir halfway through. If leftovers still seem dry, check the creamy, not dry tips for moisture fixes.
When reheating tuna noodle casserole, a small splash of milk helps loosen the sauce after the noodles absorb moisture in the fridge.
Tuna Noodle Casserole Variations
Extra Cheesy Tuna Noodle Casserole
For a cheesier family-style bake, increase the cheddar to 1 1/2 or 2 cups and sprinkle a little extra cheese under the topping. For a sharper flavor, use sharp cheddar or add parmesan to the crumb topping. If you are in a full cheesy comfort-food mood, this macaroni and cheese recipe covers stovetop, baked, and Southern-style versions with similar creamy-baked pasta logic.
Tuna Noodle Casserole with Celery, Onion, or Mushrooms
Sautéed celery, onion, or mushrooms make the casserole taste a little fresher and more homemade. Cook them in a little butter before adding them to the dish so they add flavor without releasing too much water in the bake.
Healthier Tuna Noodle Casserole
For a lighter but still creamy version, use whole wheat egg noodles or a higher-protein pasta, add more vegetables, reduce the cheese, and use the no-soup sauce option.
Tuna Noodle Casserole Without Peas
Leave the peas out or replace them with corn, broccoli, mushrooms, spinach, or mixed vegetables. If using watery vegetables, cook or drain them first.
Tuna Hotdish
Tuna hotdish is often very similar to tuna noodle casserole, especially in Midwestern-style cooking. It usually means a creamy baked casserole with noodles or another starch, canned tuna, vegetables, and a crunchy topping.
Troubleshooting Tuna Noodle Casserole
Most tuna casserole problems are fixable once you know whether the issue came from the noodles, the sauce, the topping, or the bake time.
Most tuna casserole problems come from the noodles, sauce, topping, or bake time; once you spot the cause, the fix is usually simple.
Problem
Likely Cause
Fix
Dry casserole
Too little sauce, overcooked noodles, or overbaking
Add more milk before baking, cook noodles short, and bake only until bubbly.
Mushy noodles
Noodles boiled too long or held too long before baking
Cook 1 minute shy of al dente and bake soon after mixing.
Watery sauce
Undrained tuna, too much milk, or watery vegetables
Drain tuna well, do not overdo the milk, thaw and drain larger frozen vegetables, and bake uncovered.
Bland flavor
Not enough seasoning or too much plain pasta
Add black pepper, garlic powder, onion powder, mustard, sharp cheddar, or a squeeze of lemon.
Soggy topping
Topping added too early, casserole covered while hot, or leftovers stored with topping
Add topping right before baking. For leftovers, refresh with a few new crumbs or chips after reheating.
Topping browns too fast
Oven too hot or topping too close to broiler
Tent loosely with foil and continue baking until the center is hot.
Once baked, the tuna noodle casserole should scoop easily, with creamy noodles underneath and a lightly crisp topping on top. If it looks bubbly at the edges and still moist in the center, it is ready.
FAQs
Do you cook egg noodles before baking tuna casserole?
Cook the egg noodles first, but stop about 1 minute before they are fully al dente. They will continue softening in the oven.
How much milk do you add to tuna noodle casserole?
For a 9×13-inch tuna noodle casserole with 2 cans of condensed soup, use 3/4 to 1 cup / 180 to 240 ml milk. Use the full cup if you want it creamier or are making it ahead.
Do you need one or two cans of cream of mushroom soup?
For a full 9×13-inch casserole with 12 oz / 340 g egg noodles, 2 cans of condensed soup give the best creamy texture. One can is better for a smaller casserole.
What kind of tuna works best?
Chunk light tuna works well for a softer, milder casserole, while solid white albacore gives larger flakes and a firmer bite. Drain either type well.
Should tuna noodle casserole be covered while baking?
Bake it uncovered if the casserole is freshly assembled. Cover loosely with foil only if it is chilled, reheating, or browning too quickly before the center is hot.
Why is my tuna noodle casserole dry?
It probably had too little sauce, overcooked noodles, or baked too long. The casserole should come out when the edges are bubbling, not when the top looks dry.
What can replace cream of mushroom soup?
Cream of celery soup is the closest easy swap. Cream of chicken makes the sauce richer, and a homemade butter-flour-milk sauce gives you the most control over salt and texture.
Can tuna noodle casserole be made ahead?
Make it up to 1 day ahead, but leave off the topping until just before baking. If the noodles absorb too much sauce in the fridge, stir in a small splash of milk before baking.
Can you freeze tuna noodle casserole?
Freezing works, though the noodles soften after thawing. Freeze without the topping for the best texture, then add fresh topping before baking or reheating.
Is tuna hotdish the same as tuna noodle casserole?
They are very similar. “Hotdish” is often the Midwestern term for a creamy baked casserole with a starch, protein, vegetables, and a topping.
What vegetables go well in tuna noodle casserole?
Peas are the classic choice, but celery, onion, mushrooms, carrots, broccoli, spinach, corn, and mixed vegetables all work. Cook or drain watery vegetables first so they do not thin the sauce.