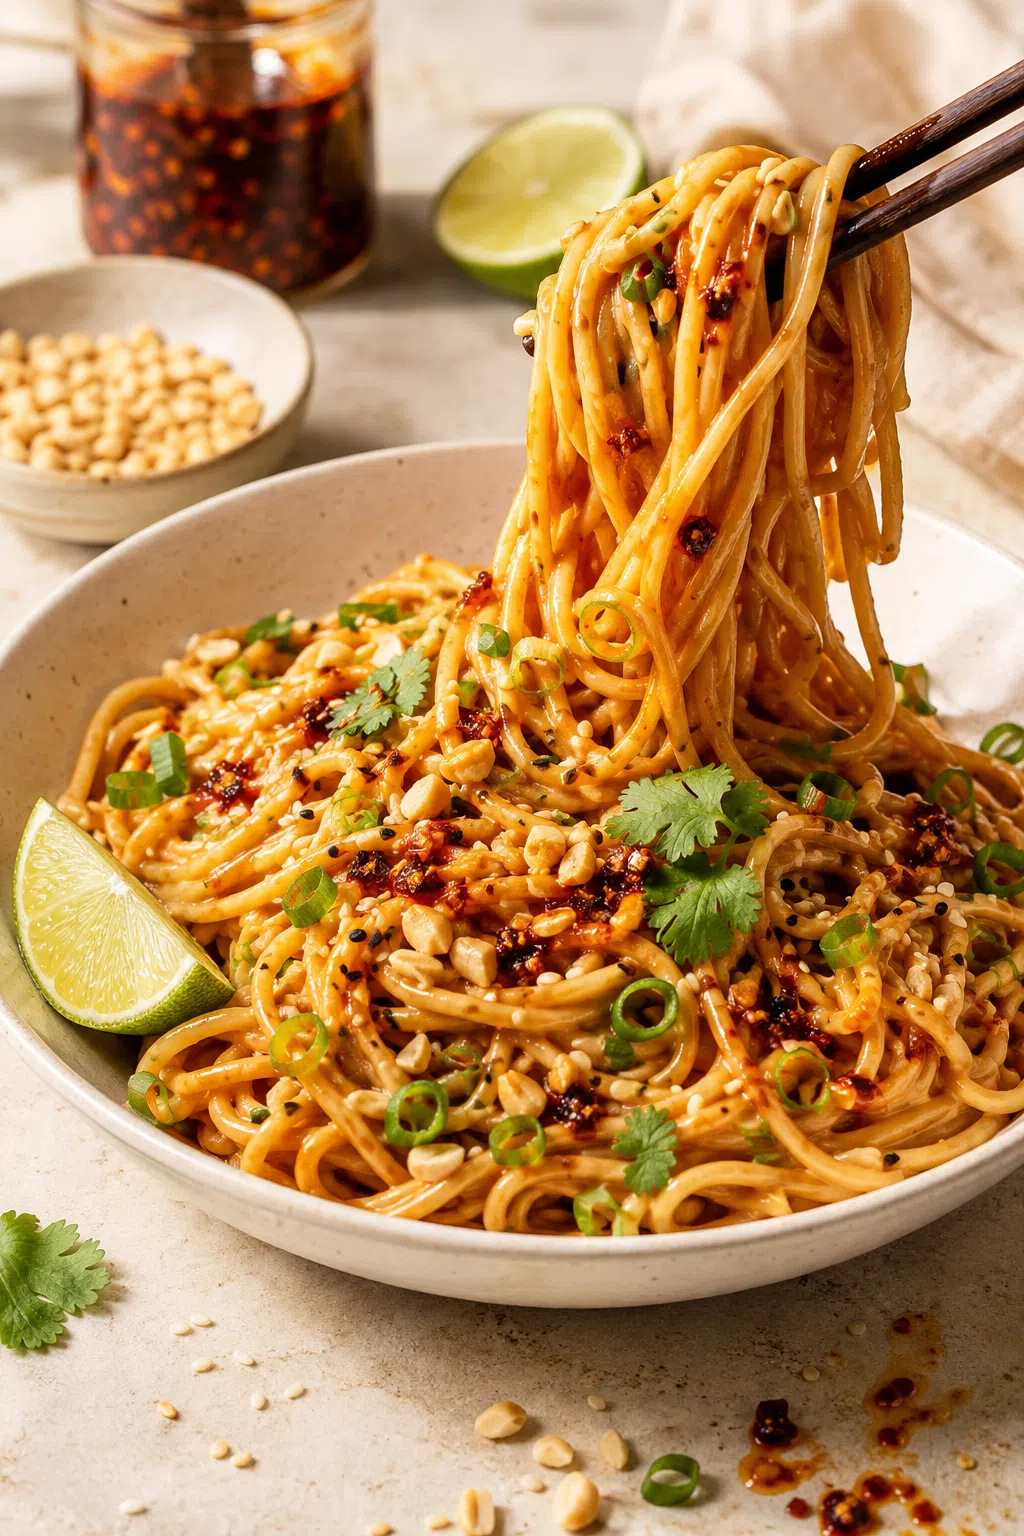
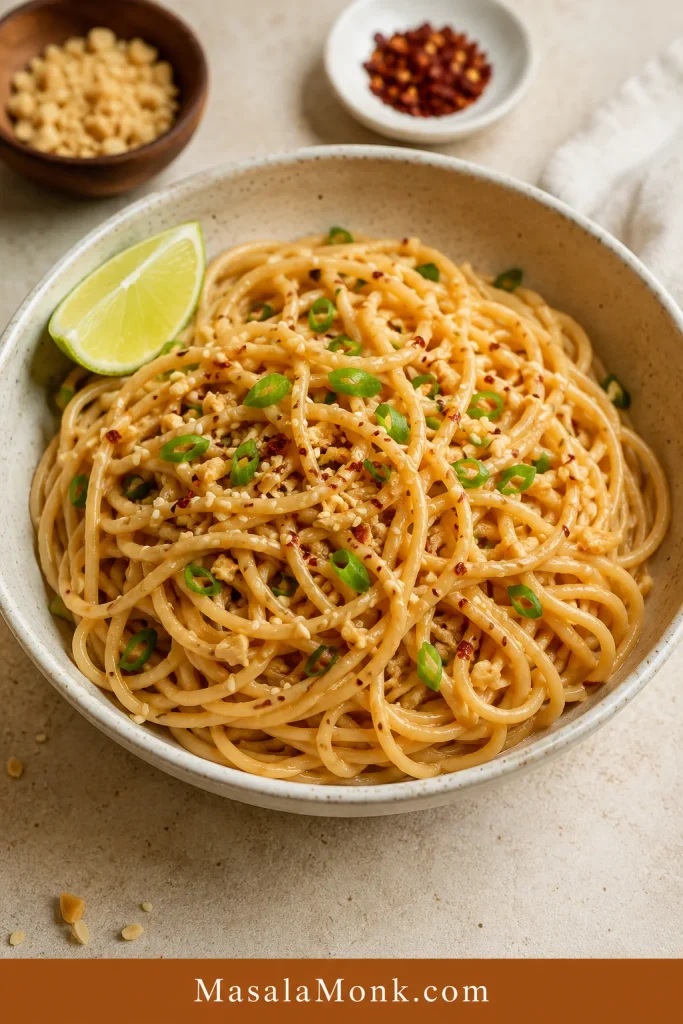
Peanut noodles are the dinner you make when you have noodles, peanut butter, and very little patience. This version is built around the one thing that makes or breaks the bowl: a peanut sauce loose enough to cling to every strand without turning thick, dry, or clumpy.
These creamy peanut noodles are ready in about 20 minutes. They turn a packet of noodles and a jar of peanut butter into something that feels like dinner: rich but not heavy, peanutty but not pasty, and bright enough that you want another bite.
Keep them plain and pantry-friendly, make them spicy with chili crisp, serve them cold with cucumber and herbs, or turn them into a full meal with tofu, chicken, shrimp, egg, or edamame. However you build them, the goal is the same: glossy strands, salty-tangy peanut flavor, and enough crunch or lime to keep you going back for another bite.
Make This Tonight If You Have
- 8 oz / 225 g dried noodles, spaghetti, ramen, rice noodles, udon, soba, or another noodle you already have
- ½ cup / about 128 g peanut butter
- Soy sauce or tamari
- Rice vinegar, lime, lemon, or a small splash of regular vinegar
- Warm water to turn the peanut butter into sauce
- Garlic, ginger, chili, scallions, herbs, peanuts, or crunchy vegetables if available
The easiest version is spaghetti, peanut butter, soy sauce, vinegar or lemon, chili flakes, and warm water. No lime, no rice noodles, no chili crisp? Use what you have. This bowl forgives imperfect noodles, half a lime, and whatever crunchy vegetables are left in the fridge.
Pantry check: this is the simplest version of the recipe promise — noodles, peanut butter, salty seasoning, acid, chili, and enough liquid to make dinner happen.

Quick Answer
To make peanut noodles, cook 8 oz / 225 g dried noodles, reserve ½ cup / 120 ml noodle water, then whisk ½ cup / about 128 g peanut butter with soy sauce or tamari, rice vinegar, lime juice, a little sweetener, garlic, ginger, chili, and ¼ cup / 60 ml warm water. Toss with the noodles, then loosen with reserved noodle water until the noodles look shiny, saucy, and easy to lift.
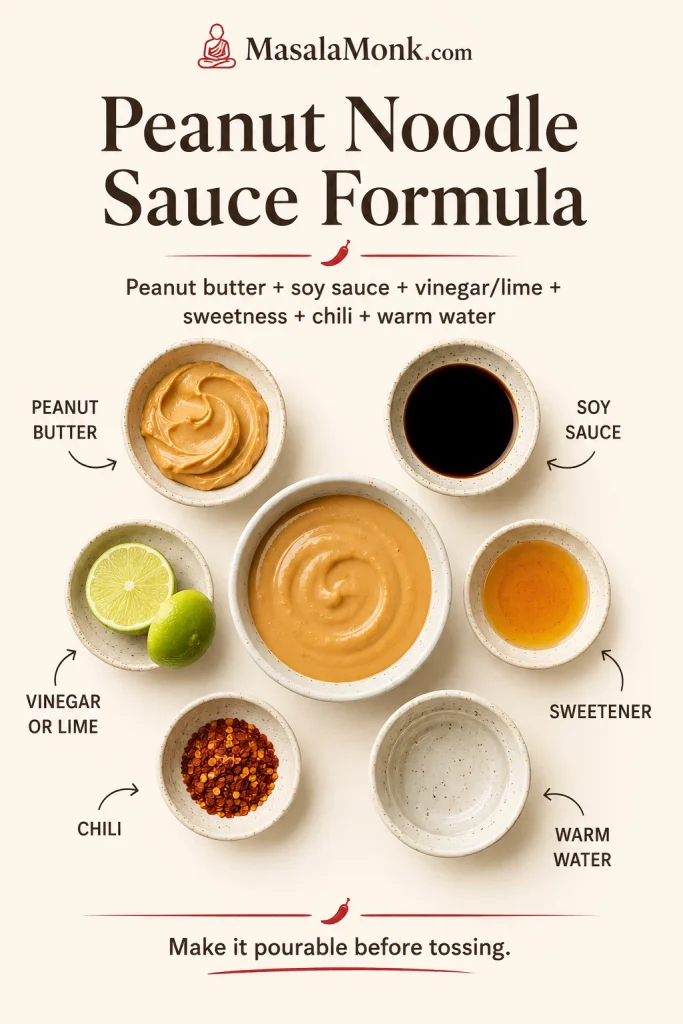
The basic peanut noodle sauce formula is simple: peanut butter for body, soy sauce for salt, vinegar or lime for brightness, a little sweetener for balance, chili for heat, and warm water to make it pourable. That is the difference between peanut butter on noodles and peanut sauce noodles.
| For 4 servings | Use |
|---|---|
| Noodles | 8 oz / 225 g dried noodles |
| Peanut butter | ½ cup / about 128 g |
| First thinning liquid | ¼ cup / 60 ml warm water |
| Final adjustment | Reserved noodle water or warm water, in small splashes |
| Best texture cue | Pourable sauce before tossing, glossy noodles after tossing |
Sauce shortcut: use this formula when the bowl tastes flat, too thick, too salty, or too peanut-heavy.
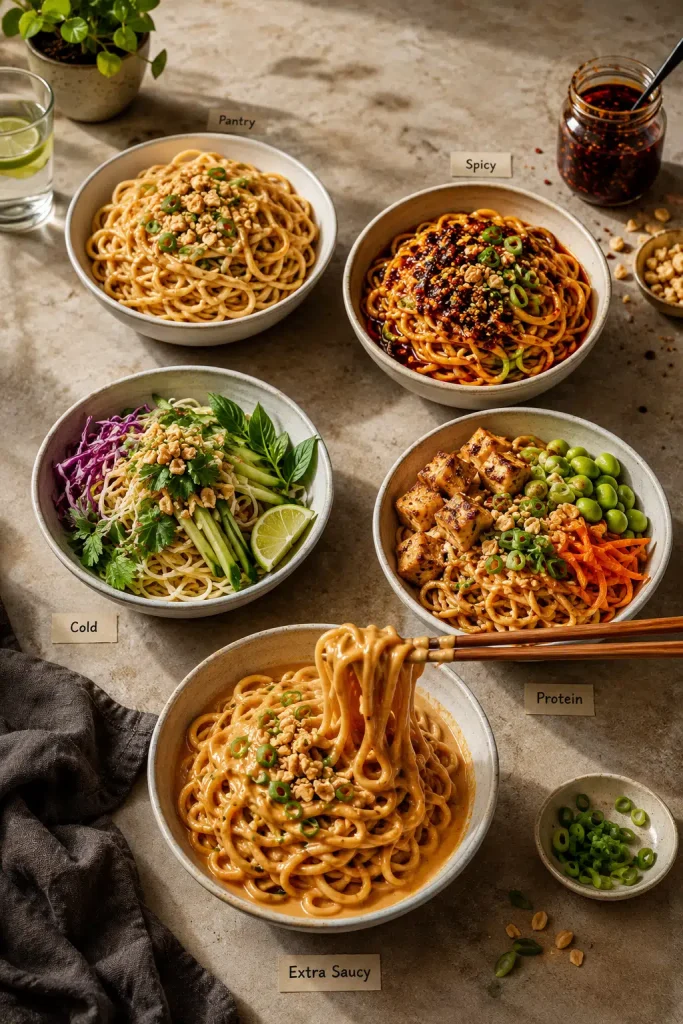
Choose Your Bowl
Start with the same sauce, then steer the bowl toward the kind of dinner you need: pantry-simple, spicy, cold, protein-heavy, or extra saucy.
| What you want | Use | Finish with |
|---|---|---|
| Pantry dinner | Spaghetti, peanut butter, soy sauce, vinegar or lemon | Chili flakes, peanuts, scallions |
| Spicy takeout-ish bowl | Ramen, udon, wheat noodles, or spaghetti | Chili crisp, chili oil, lime |
| Cold lunch bowl | Rice noodles or soba | Cucumber, cabbage, herbs, sesame |
| Full dinner bowl | Udon, wheat noodles, spaghetti, or rice noodles | Tofu, chicken, shrimp, egg, or edamame |
| Extra-saucy noodles | 6–7 oz / 170–200 g dried noodles | More peanut sauce and noodle water |
For the first time, start with spaghetti or udon, creamy peanut butter, low-sodium soy sauce, lime or vinegar, and chili crisp if you like heat. After that, the same sauce can go pantry-simple, spicy, cold, protein-heavy, or extra saucy.
Use the bowl guide below when you know the kind of meal you want but need help choosing the noodle, topping, or finish.
Creamy Peanut Noodles Recipe
This is the main recipe: 8 oz / 225 g noodles, a ½-cup peanut butter sauce, and just enough warm water and noodle water to make the sauce silky instead of stiff. You only need a pot, a colander, a bowl or jar for the sauce, a whisk or fork, and tongs for lifting and tossing.
| Prep time | 10 minutes |
| Cook time | 10 minutes |
| Total time | 20 minutes |
| Servings | 4 |
| Best served | Warm, room temperature, or cold |
Ingredients
For the noodles
- 8 oz / 225 g dried noodles, or 16–20 oz / 450–570 g fresh noodles
- Salt for the cooking water, if using wheat noodles, spaghetti, or pasta-style noodles
For the peanut sauce
- ½ cup / about 128 g creamy peanut butter
- 2 tablespoons / 30 ml low-sodium soy sauce or tamari
- 1 tablespoon / 15 ml rice vinegar
- 1 tablespoon / 15 ml lime juice or lemon juice
- 1 tablespoon honey, maple syrup, brown sugar, or jaggery
- 1 small garlic clove, finely grated
- 1 teaspoon grated fresh ginger
- 1–2 teaspoons sriracha, chili garlic sauce, chili oil, or chili crisp
- ¼ cup / 60 ml warm water, plus more as needed
- ½ cup / 120 ml reserved noodle water, for adjusting while tossing
For finishing
- 2 scallions, thinly sliced
- 2–3 tablespoons chopped peanuts
- Fresh cilantro, basil, or mint
- Sesame seeds
- Lime wedges
- Optional vegetables or protein, such as cucumber, cabbage, carrots, tofu, chicken, egg, shrimp, or edamame
Method
1. Cook the Noodles
Bring a large pot of water to a boil for wheat noodles, spaghetti, udon, soba, or ramen. For rice noodles, cook or soak according to the package directions. Keep the noodles slightly firm rather than soft, because overcooked noodles can turn sticky once tossed with peanut sauce.
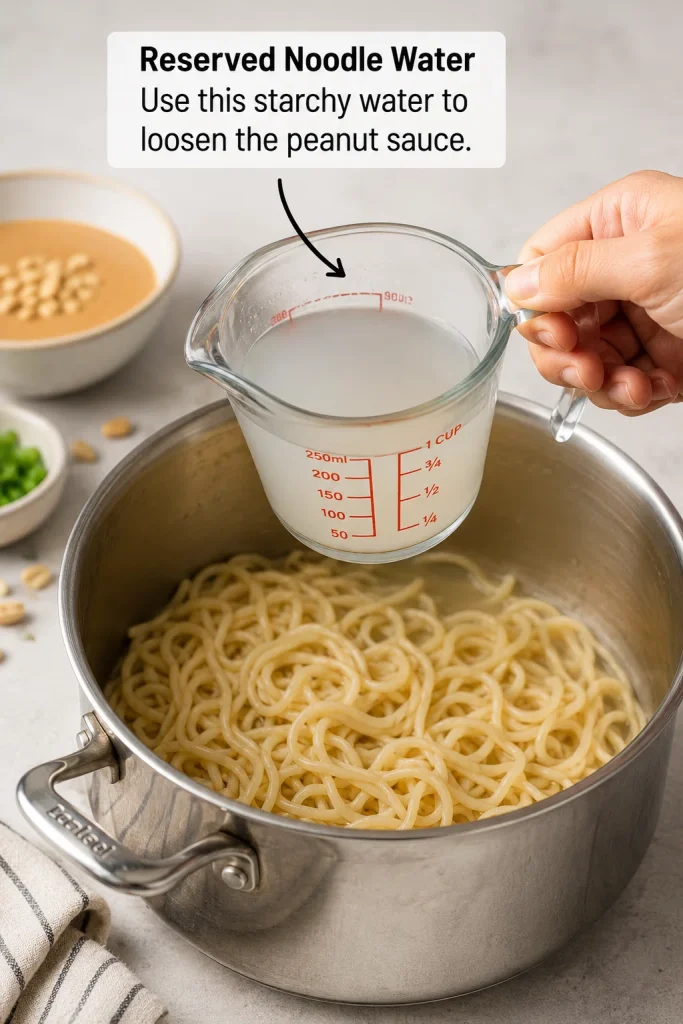
2. Reserve Noodle Water
Before draining, scoop out at least ½ cup / 120 ml of the cooking water. This gives you an easy way to loosen the sauce while mixing.
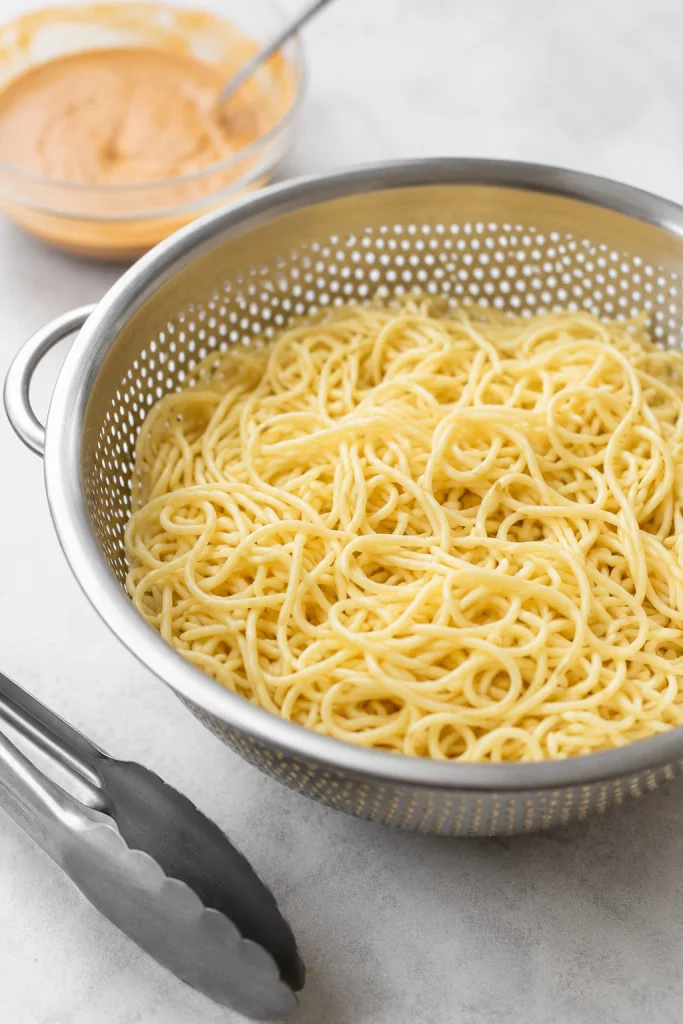
3. Drain the Noodles
For warm wheat noodles, spaghetti, udon, or ramen, drain and keep the noodles warm. For rice noodles, soba, or cold noodles, rinse briefly under cool water to remove extra starch and stop the cooking. If cooked noodles must sit before saucing, toss them with only 1 teaspoon neutral oil; skip the oil if you are saucing right away.
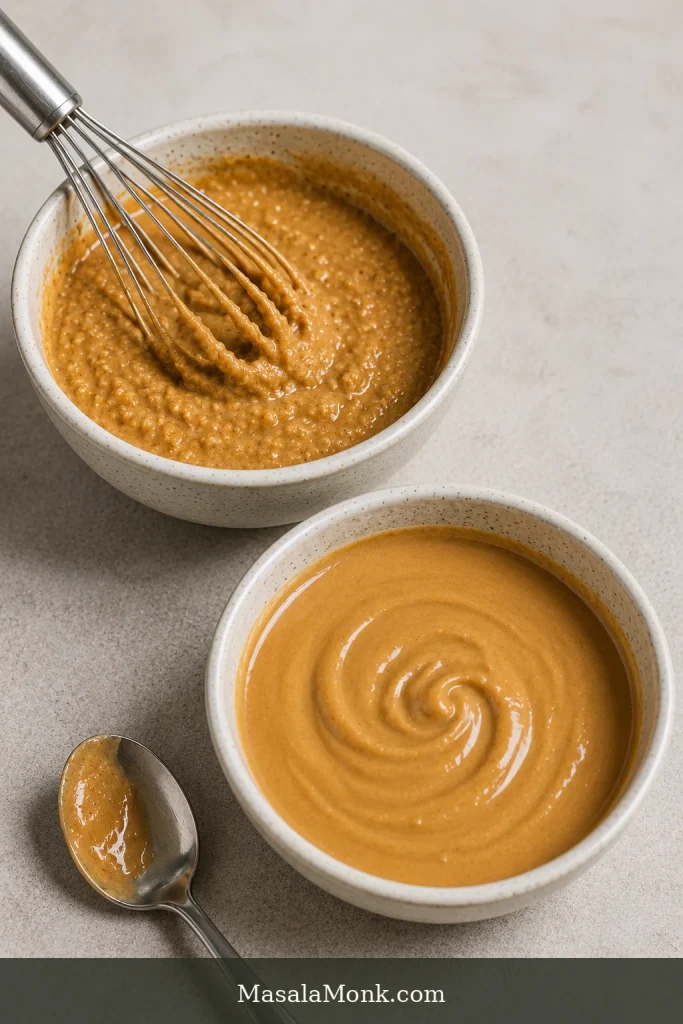
4. Whisk the Peanut Sauce
In a medium bowl or jar, combine peanut butter, soy sauce or tamari, rice vinegar, lime juice, sweetener, garlic, ginger, chili, and ¼ cup / 60 ml warm water. Whisk until smooth and pourable. If the sauce resists the whisk or looks like peanut butter spread, add another small splash of warm water.
Texture check: the sauce should move before it meets the noodles, so fix thickness here rather than fighting clumps later.
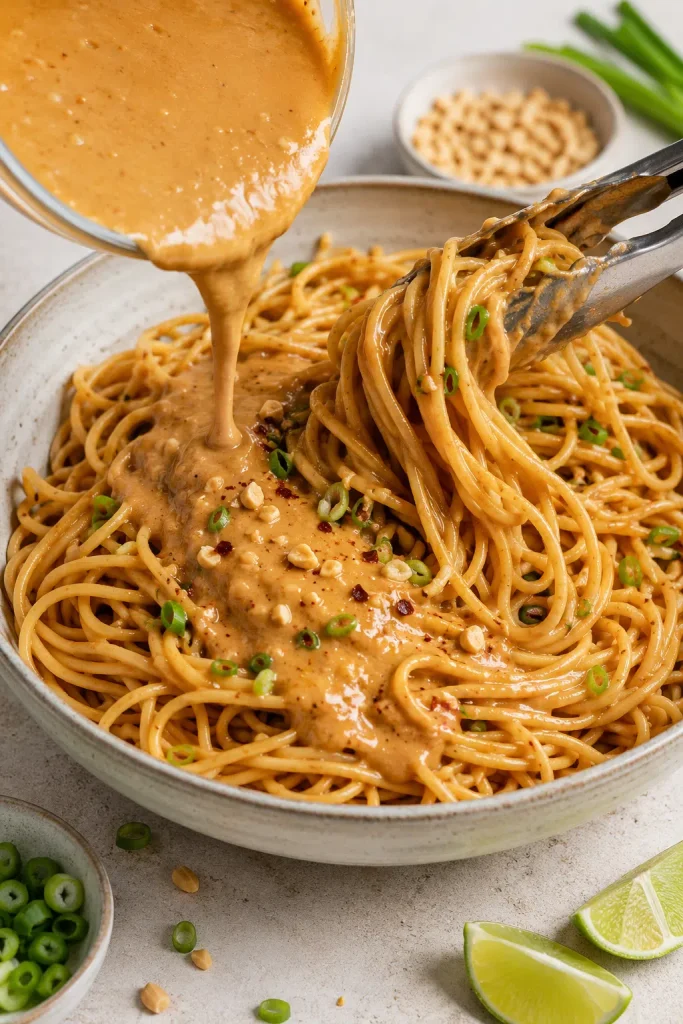
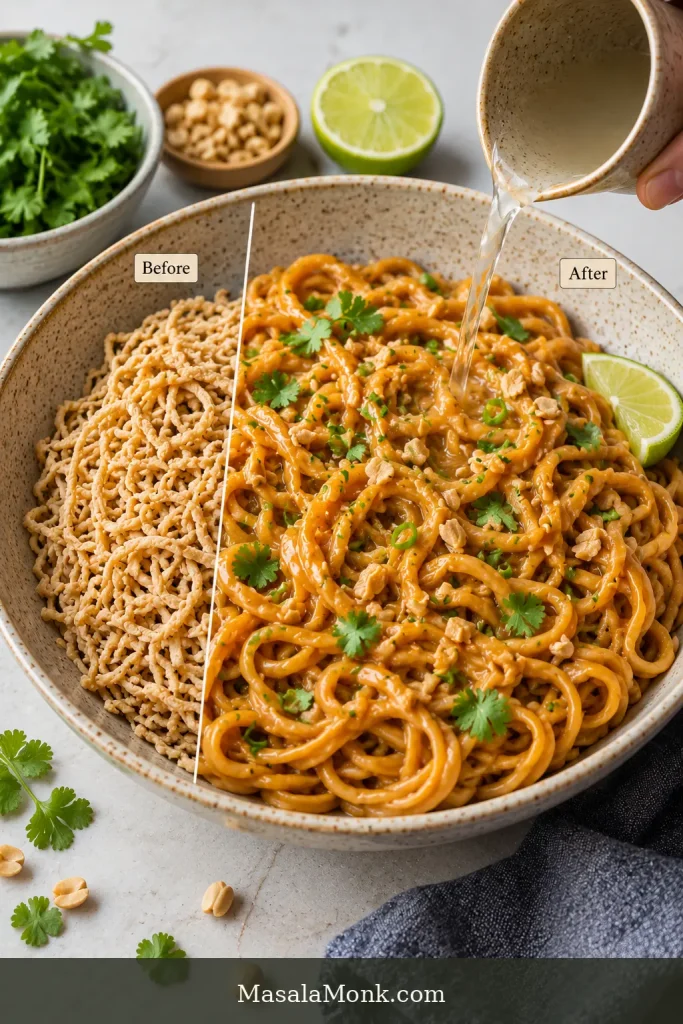
5. Toss the Noodles
Add the noodles to a large bowl. Pour over most of the peanut sauce and lift with tongs until the strands look glossy. Add reserved noodle water in small splashes until the sauce falls around the noodles instead of dragging through them.
6. Adjust the Flavor
Taste after mixing. Use soy sauce for more salt, lime for brightness, chili for heat, or a little water if the sauce is too intense. When the bowl tastes rich but sleepy, it probably needs lime.
7. Finish and Serve
Add scallions, chopped peanuts, herbs, sesame seeds, and lime wedges. If the bowl sits for a few minutes before serving, lift and turn the noodles once more with a small splash of water.
Final cue: the bowl is ready when the noodles are twirlable and the toppings add crunch, freshness, heat, and brightness.
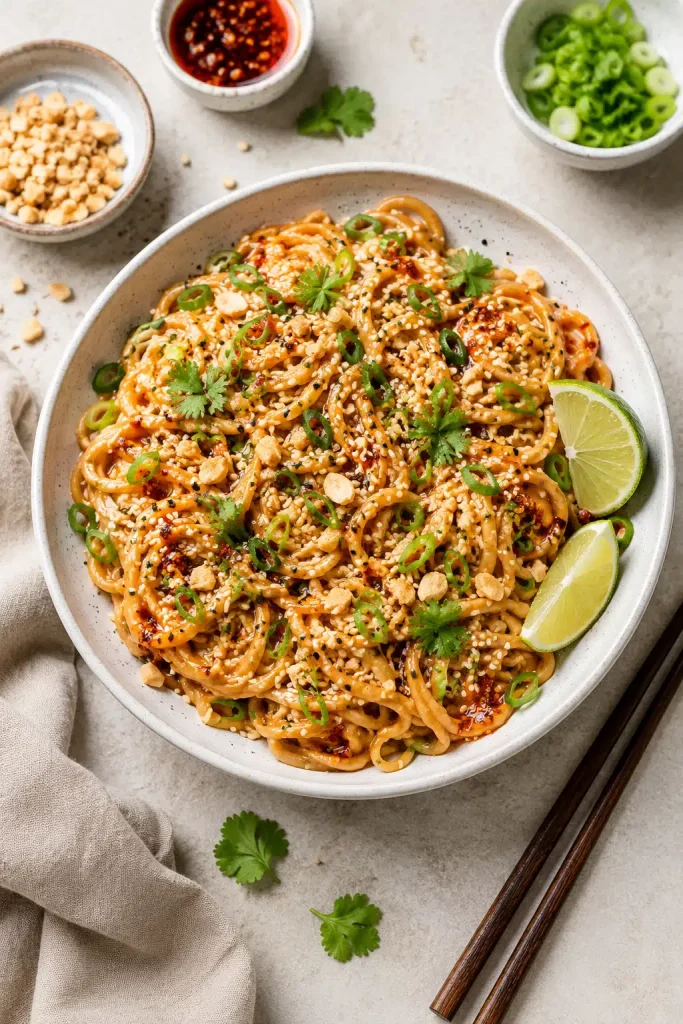
The finished bowl should be glossy, saucy enough to twirl, and bright at the edges from lime or vinegar. Add peanuts, scallions, herbs, or crunchy vegetables and it stops feeling like pantry noodles and starts feeling like dinner.
Recipe Notes
- Natural peanut butter works, but every jar behaves differently. Stir it fully before measuring and expect to use a little more warm water.
- If using regular soy sauce instead of low-sodium soy sauce, start with 1½ tablespoons and adjust after tossing.
- For extra-saucy noodles, use 6–7 oz / 170–200 g dried noodles, or add another 1–2 tablespoons peanut butter and enough warm water to loosen the sauce.
- Leftovers revive with 1–2 tablespoons hot water, broth, or cool water per serving.
- This recipe contains peanuts. For a peanut-free kitchen, use a separate seed-butter noodle sauce recipe; seed butters thicken differently.
- For a sauce-first version you can use for dipping, satay, salads, bowls, and noodles, see this MasalaMonk peanut sauce recipe.
Before you keep scrolling: if the sauce feels too thick, go to the peanut sauce texture guide. If you are choosing noodles, jump to best noodles for peanut noodles.
More Tips for Better Peanut Noodles
- Three Cues for Better Peanut Noodles
- Ingredients and Smart Swaps
- Best Noodles for Peanut Noodles
- How to Make Them Look and Taste Right
- Peanut Sauce Texture Guide
- Serve Them Hot or Cold
- Add-Ins and Variations
- What to Serve with This Bowl
- Storage, Leftovers, and Meal Prep
- Troubleshooting
- Frequently Asked Questions
The Three Cues That Make Peanut Noodles Better
Peanut noodles are simple, but three small choices decide whether they feel silky or sticky.
- Do not overcook the noodles. Slightly firm noodles hold the sauce better than soft noodles.
- Make the sauce pourable. It should look like a thick dressing, not a dip.
- Taste at the end. Noodles dull the sauce, so the final salt, lime, chili, and sweetness should be adjusted after tossing.
The goal is not a thicker sauce. It is a sauce that moves. Once the noodles look shiny and twirlable, stop fixing them.
Ingredients and Smart Swaps
The sauce is simple, but each ingredient has a job: salty, tangy, sweet, spicy, aromatic, or creamy. Once you understand that, the swaps become easy.
Peanut Butter
Creamy peanut butter gives the most predictable sauce. Natural peanut butter works too, but every jar behaves a little differently; some are runny, some are dry, and some need extra warm water. Crunchy peanut butter adds texture, though the sauce will not be completely smooth. If you make pantry staples from scratch, homemade peanut butter works as long as it is loose enough to whisk smoothly.
Soy Sauce or Tamari
Soy sauce is the salty backbone, so low-sodium gives you room to fix the bowl at the end. Tamari is the closest gluten-free swap, as long as the label says gluten-free. Check the labels on your noodles and chili sauce too.
Rice Vinegar, Lime, or Lemon
Rice vinegar keeps the sauce from feeling heavy; lime makes the finished bowl taste awake. Lemon juice works too. Skipping the acid completely can leave the noodles tasting rich but flat.
Sweetener
Use honey, maple syrup, brown sugar, or jaggery. One tablespoon is enough to round the salty and tangy edges; the noodles should not taste sugary.
Chili
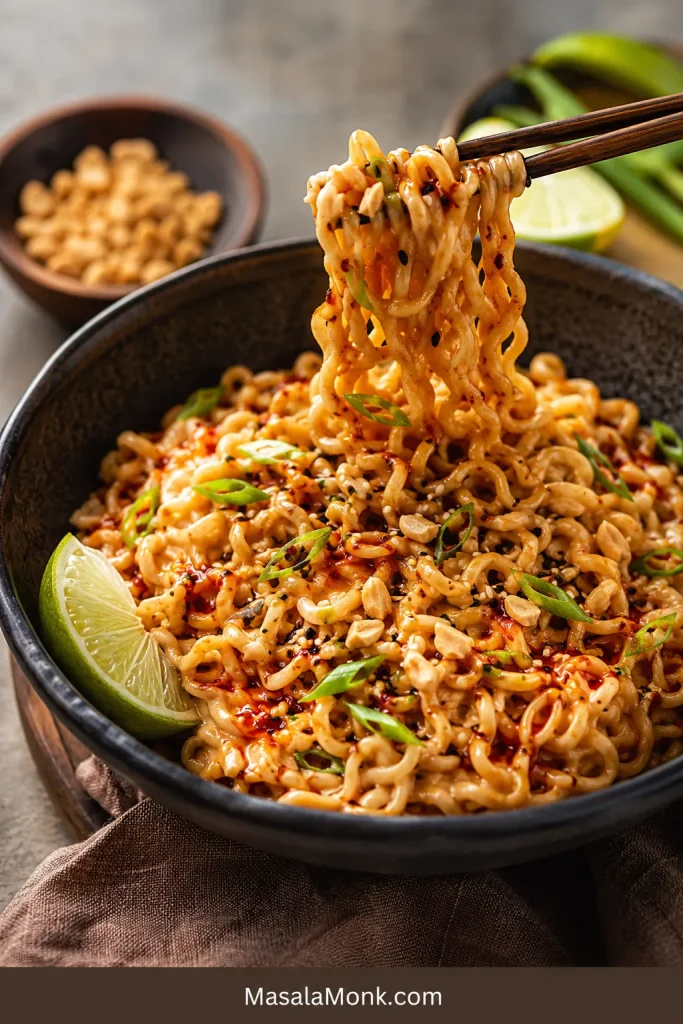
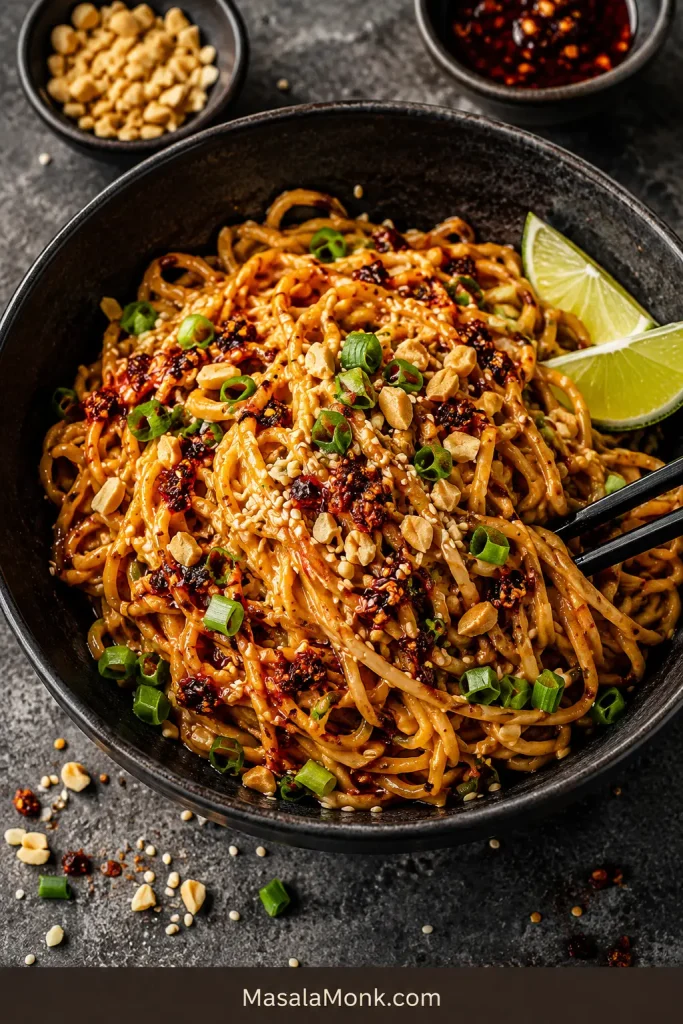
Sriracha gives smooth heat, chili garlic sauce adds punch, chili oil makes the bowl richer, and chili crisp adds heat plus crunch. Start small if you are cooking for a mixed table. Chili crisp takes the bowl into takeout-ish territory: spicy, crunchy, salty, and a little messy in the best way.
Garlic and Ginger
Fresh garlic and ginger keep the sauce from tasting like plain peanut butter and soy sauce. Grate them finely so they disappear into the sauce. In an emergency, use a small pinch of garlic powder and ginger powder.
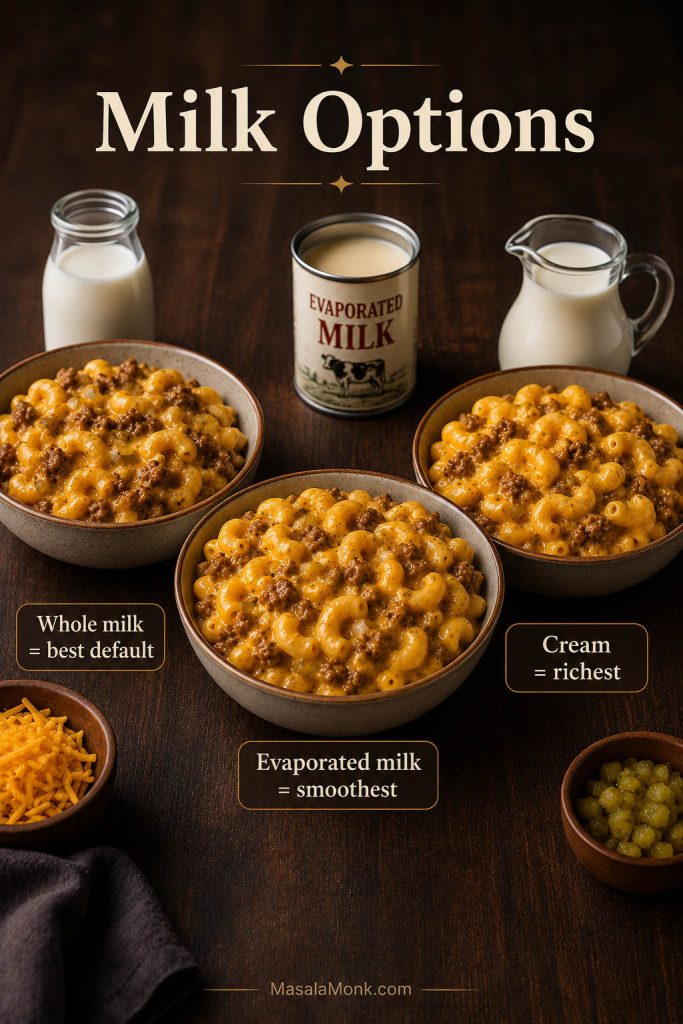
Warm Water and Noodle Water
Warm water turns peanut butter from something that sticks to the spoon into something the noodles can actually wear. Noodle water helps it cling once the noodles are in the bowl. The same idea — salty, bright, slightly sweet, aromatic, and loose enough to coat — also matters in a good stir-fry sauce, especially with tofu, vegetables, or noodles.
Best Noodles for Peanut Noodles
The easiest default choices are spaghetti, wheat noodles, medium rice noodles, ramen, or udon. They hold sauce well, are easy to find, and do not need much fuss.
There is no single correct noodle here. The best choice is the one you can cook without overthinking it. That is why spaghetti belongs in the conversation.
Use this noodle guide to match the recipe to what you already have, whether you want a pantry bowl, a bouncy ramen version, or a cold lunch.
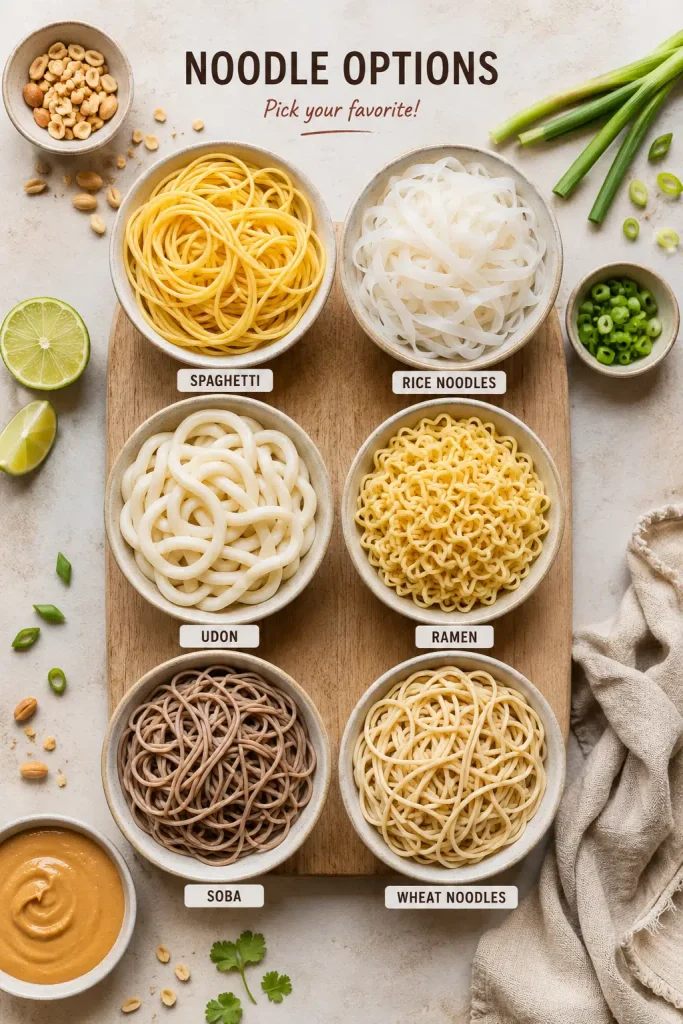
| Noodle | Best use | Rinse? | Texture note |
|---|---|---|---|
| Spaghetti | Pantry hot bowl | No, unless gummy | Reliable and twirlable |
| Rice noodles | Cold bowls, lighter bowls, gluten-free meals* | Usually yes | Delicate and fast-absorbing |
| Udon | Saucy comfort bowl | Usually no | Thick, chewy, satisfying |
| Soba | Cold nutty bowl | Yes | Earthy and best cooled |
| Ramen | Fast spicy bowl | Usually no | Bouncy and quick to absorb |
| Wheat noodles | Classic warm bowl | No, unless gummy | Chewy and sauce-friendly |
| Vermicelli | Light cold bowl | Usually yes | Soft, delicate, easy to break |
*For gluten-free bowls, use certified gluten-free noodles and gluten-free tamari.
A warm bowl is easiest with wheat noodles, spaghetti, udon, or ramen. Cold bowls work better with rice noodles or soba because they rinse and chill well.
Spaghetti is not a compromise here. It is easy to find, holds the sauce nicely, and makes this a real weeknight recipe.
Spaghetti Peanut Noodles
Choose spaghetti when you want the fastest pantry version and do not want to buy specialty noodles. The main trick is keeping the sauce loose enough for long strands.
Ramen Peanut Noodles
Ramen works when you want a bouncy bowl with chili oil, scallions, and a little takeout-style drama. Toss it right before serving because it absorbs sauce quickly.
How to Make Them Look and Taste Right
The recipe card gives you the steps. This section gives you the cues to watch while you cook, so you know when the noodles, sauce, and final bowl look right.
1. The Noodles Should Be Firm, Not Soft
Cook or soak the noodles according to the package directions, but stop before they go soft. Slightly firm noodles stay separate and hold sauce. Overcooked noodles can turn gummy, especially after sitting.
Rinse rice noodles or soba if they feel starchy, or if you are serving them cold. For warm spaghetti, udon, ramen, or wheat noodles, drain and toss while warm.
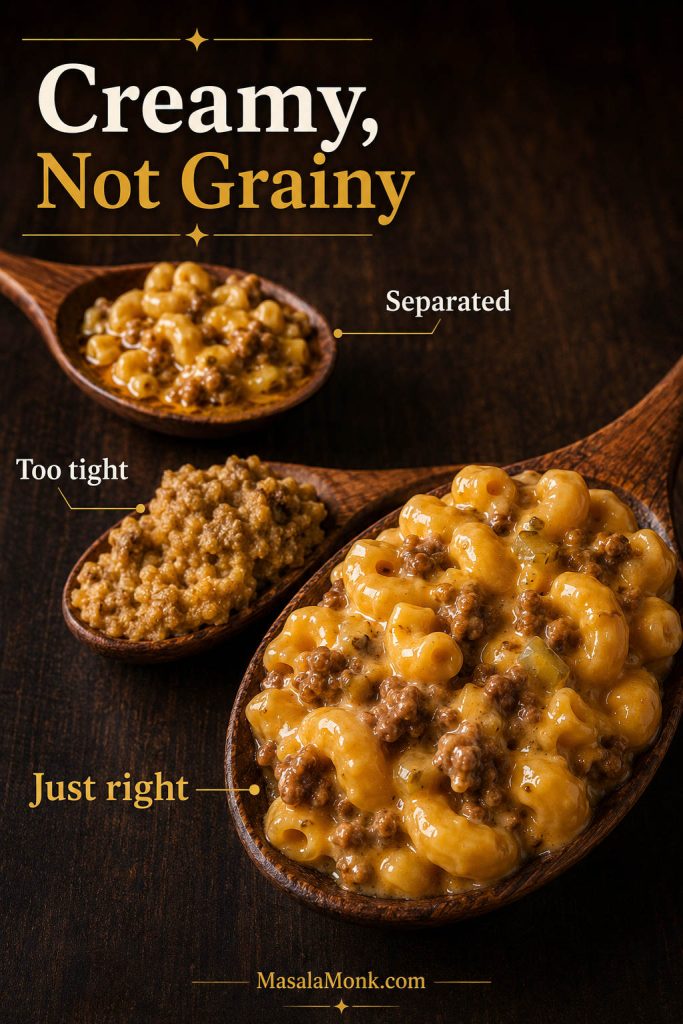
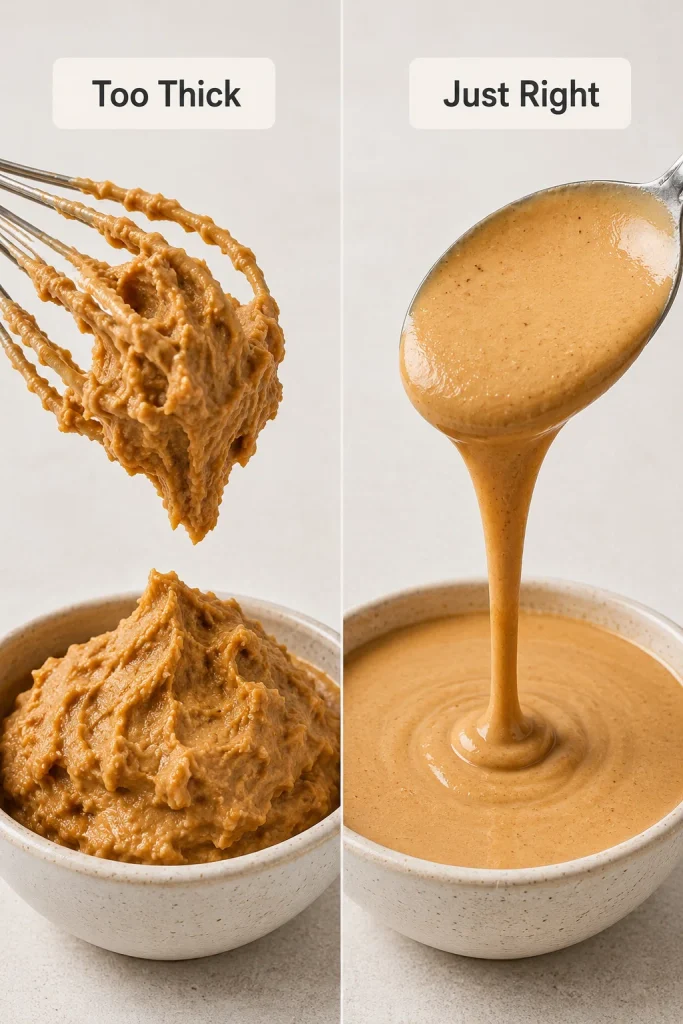
2. The Sauce Should Look Like Thick Dressing
When you first whisk peanut butter with soy sauce, vinegar, lime, and warm water, it may look stiff, split, or grainy. Keep going. Peanut butter often looks worse before it turns smooth.
Stop when the sauce falls from the spoon in thick ribbons. It should not sit on the spoon like peanut butter spread.
3. Lift the Noodles Instead of Mashing Them
Use tongs or two forks to lift and turn the noodles through the sauce. Heavy stirring can break delicate noodles and make soft noodles feel gummy.
If the sauce drags through the noodles, it needs a splash of liquid. If it puddles underneath, keep lifting for a few seconds before adding anything else.
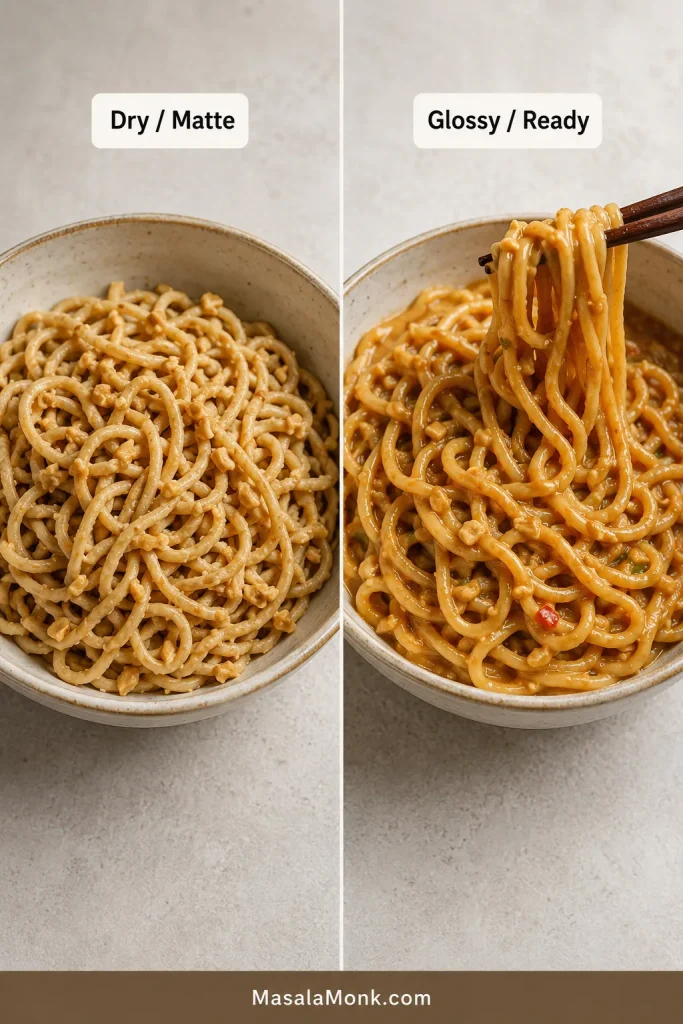
4. The Final Bowl Should Be Shiny, Not Matte
Matte noodles usually mean the sauce is too thick or the noodles have absorbed it while sitting. Shiny noodles mean the sauce is still moving. That is the texture you want.
A final squeeze of lime is not decorative. It wakes up the sauce and keeps the noodles from tasting heavy.
Peanut Sauce Texture Guide
Start here when the problem is texture: sauce that turns too thick, too thin, clumpy, oily, dry, or stiff. Flavor fixes come later in troubleshooting.
Before tossing, the peanut mixture should be spoonable and pourable. After tossing, the noodles should look glossy and lightly covered. Most texture problems are fixed slowly, not by starting over.
| Texture problem | Fix |
|---|---|
| Sauce is too thick before tossing | Whisk in warm water in small splashes. |
| Sauce turns clumpy on noodles | Add noodle water and lift gently until smooth. |
| Noodles look dry or matte | Use hot water, noodle water, or broth to bring back shine. |
| Sauce puddles at the bottom | Stop adding liquid and keep lifting the noodles. |
| Sauce looks oily | Whisk in warm water and a little lime or vinegar. |
| Leftovers are stiff | Add 1–2 tablespoons water or broth per serving. |
Use the visual cue: matte noodles need liquid; shiny noodles are ready to serve.
Do not panic when the sauce thickens. Peanut butter wants to thicken. Add liquid slowly, lift the noodles gently, and it will loosen again.
Still not right? Go to troubleshooting for bland flavor, salty sauce, sticky noodles, and natural peanut butter problems.
Serve Them Hot or Cold
You can serve this bowl hot, room temperature, or cold. Warm, it leans cozy and saucy. Cold, it becomes brighter, crunchier, and more lunch-box friendly.
Pick the serving style first. Hot bowls need loosened sauce, while cold bowls need freshness, crunch, and enough lime to stay awake.
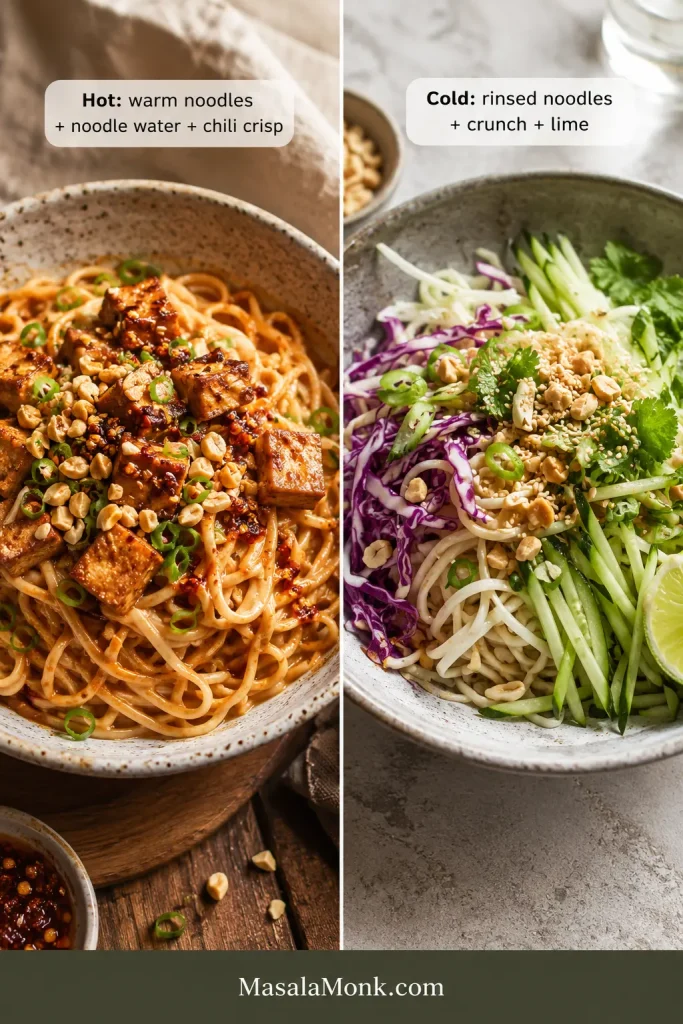
- Hot bowl: Usually do not rinse, unless the noodles are gummy. Loosen with warm noodle water. Add tofu, chicken, shrimp, egg, broccoli, scallions, or chili crisp.
- Cold bowl: Rinse and cool the noodles first. Use cool water and lime to loosen the sauce. Add crunch and herbs right before serving.
Cold peanut noodles are best when they feel crisp, not leftover-ish: cool noodles, cucumber snap, cabbage crunch, fresh herbs, sesame, peanuts, and enough lime to wake everything back up.
If you want the cold version to feel extra fresh, add cucumber inside the bowl or serve it with a crisp cucumber salad on the side.
Add-Ins and Variations
This bowl can stay simple or become a full meal. Think of the noodles as the base, then add one crunchy thing, one fresh thing, and one protein if you want it to feel complete.
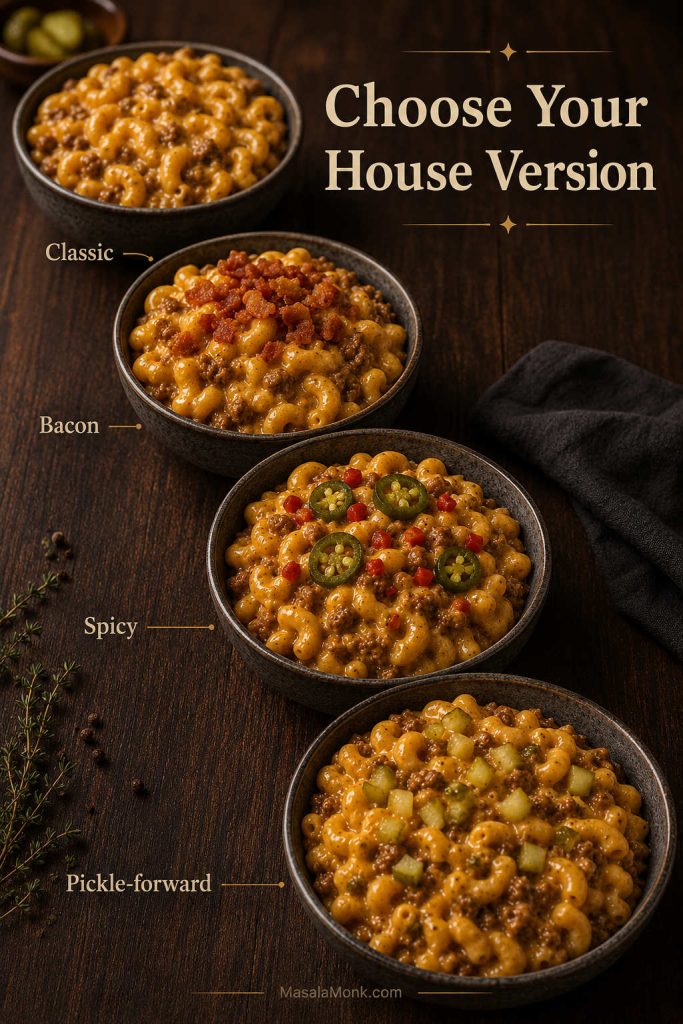
Spicy Peanut Noodles
The spicy version should feel bold and a little messy: creamy peanut sauce, chili heat, scallions, peanuts, and crunchy chili crisp hitting at the end. Add 2 teaspoons sriracha or chili garlic sauce to the peanut sauce, then finish with chili crisp or chili oil. Keep chili crisp mostly on top if you want the crunchy bits to stay bold.
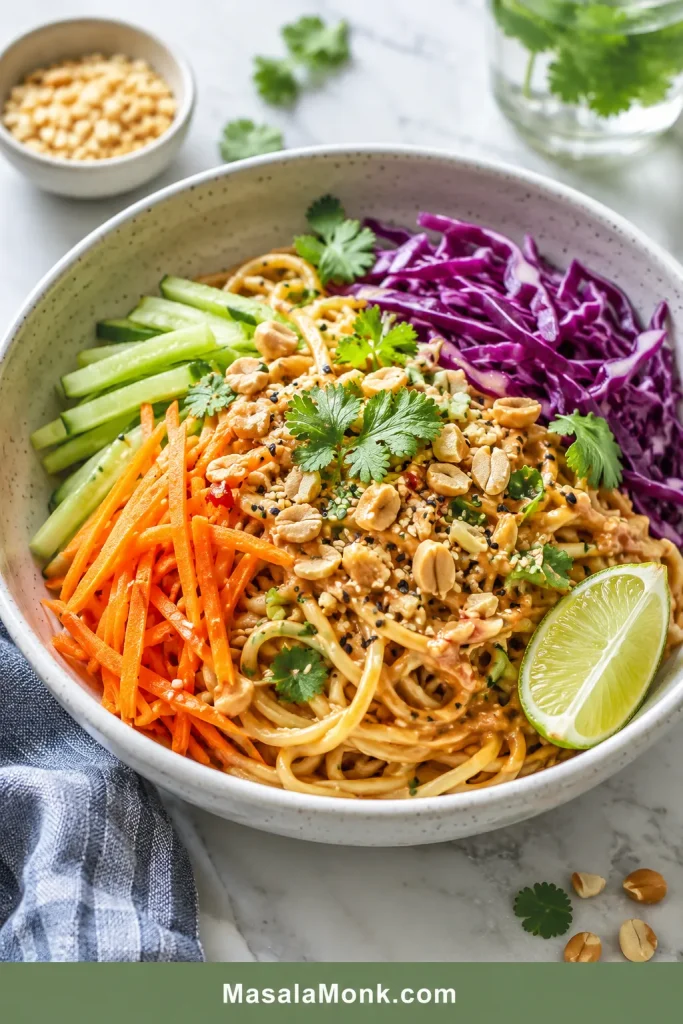
Cold Peanut Noodles
Rice noodles and soba are the easiest choices because they rinse clean and stay light. Keep the sauce a little thinner so the noodles stay silky after chilling, then add cucumber, cabbage, herbs, sesame, peanuts, and lime. This is the version that makes tomorrow’s lunch feel intentional.
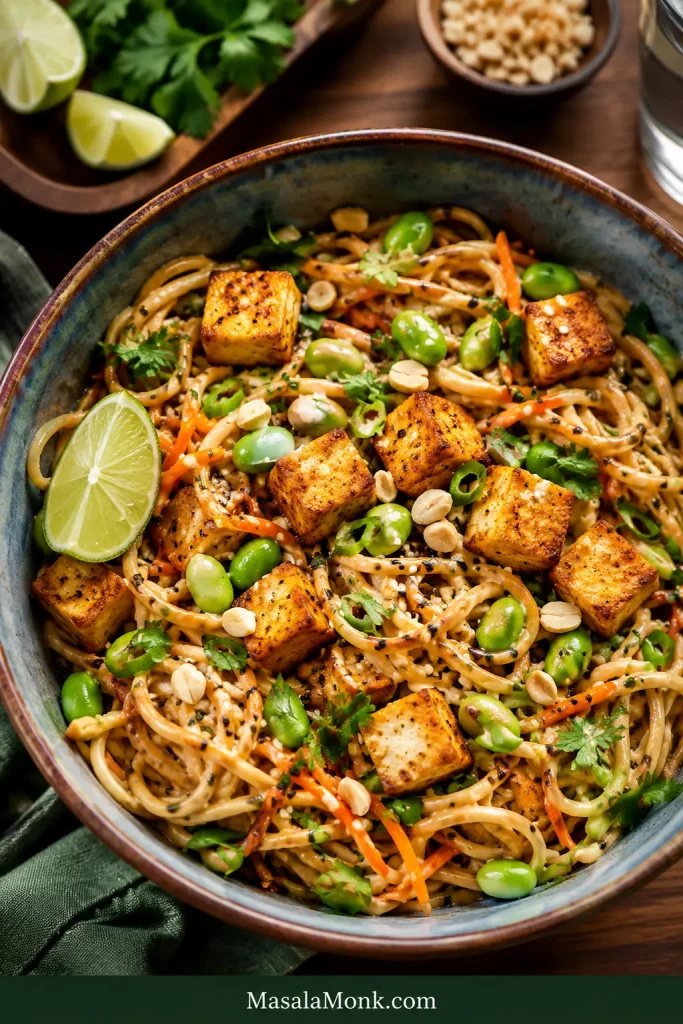
Protein Peanut Noodles
Crispy tofu, cooked chicken, sautéed shrimp, jammy egg, fried egg, tempeh, and edamame all work. Cook the protein separately so the noodles stay silky and the sauce does not dry out in the pan. For a plant-protein version, add crispy tofu or use one of these tofu meal prep ideas when you want bowls that hold up for weekday lunches.
Sesame Peanut Noodles
A little toasted sesame oil makes the sauce deeper and rounder. Start with 1 teaspoon, taste, then add a second teaspoon only if you want more sesame aroma. It should support the peanut flavor, not cover it.
Thai-Style Peanut Noodles
Rice noodles, lime juice, cilantro, basil, chili, and crunchy vegetables move the bowl in a fresher, herbier direction. This Thai-style vegan bowl with peanut butter dressing has more ideas for pairing peanut sauce with vegetables and plant protein without making the noodles do all the work.
Pantry Peanut Noodles
Spaghetti, peanut butter, soy sauce, vinegar or lemon juice, chili flakes, and warm water are enough. It is not fancy, but it saves a busy night when takeout sounds tempting and the noodles are already in the pantry.
What to Serve with This Bowl
The easiest way to serve peanut noodles is to match the add-ins to the meal. Keep the sides fresh or simple because the noodles already bring the richness.
- Light lunch: cucumber, cabbage, herbs, lime, and sesame seeds.
- Protein dinner: crispy tofu, chicken, shrimp, egg, edamame, or tempeh.
- Cold meal prep: rice noodles, carrots, cabbage, cucumber, herbs, and extra lime.
- Spicy bowl: chili crisp, scallions, peanuts, and lime.
- Kid-friendlier bowl: less chili, cucumber, carrots, mild vegetables, and extra peanuts if safe.
As a side dish, serve the noodles with fresh spring rolls, steamed broccoli, stir-fried greens, crispy tofu, grilled chicken, sautéed shrimp, a fried egg, or a light broth-based soup.
Storage, Leftovers, and Meal Prep
These noodles are best when freshly tossed, but leftovers are still useful if you know how to revive them.
Store leftovers in an airtight container in the fridge for 3–4 days. This matches the USDA’s general leftovers and food safety guidance. The noodles will absorb sauce as they sit, so they may look dry or stiff when cold.
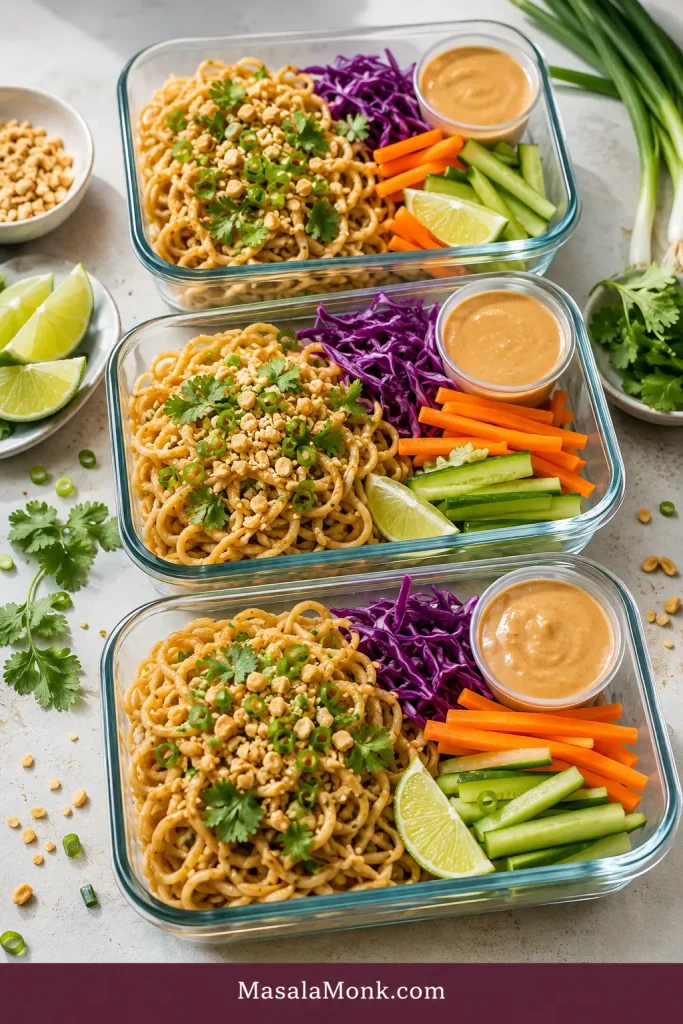
Peanut Noodles Meal Prep
Meal prep works best when the noodles, sauce, and crunchy toppings are stored separately. Toss just before eating so tomorrow’s bowl still has contrast: silky strands, crisp vegetables, fresh herbs, and peanuts that still crunch.
Revive Leftover Peanut Noodles
To reheat, add 1–2 tablespoons hot water or broth per serving, then warm gently and lift until saucy again. Avoid overheating for too long, because the sauce can tighten.
Cold leftovers come back with a splash of cool water and a squeeze of lime. Toss until the noodles loosen, then add herbs, cucumber, or peanuts if you want the serving to feel fresh again.
Troubleshooting: Sticky Noodles, Bland Flavor, Strong Sauce
Most peanut noodle problems are fixable, and very few require starting over. Usually the noodles need a splash of liquid, a little lime, more salt, or a gentler toss.
Sticky Noodles
Use plenty of water when boiling, avoid overcooking, and toss soon after draining. Rice noodles and soba can be rinsed if they feel gummy. Warm wheat noodles usually hold sauce better when they are not rinsed.
Grainy Peanut Sauce
Keep whisking and splash in warm water slowly. Peanut butter can look stiff or split before it turns smooth. A whisk is easiest, but a jar with a tight lid also works.
Bland Peanut Noodles
They probably need balance, not more peanut butter. Use soy sauce or tamari for salt, lime or vinegar for brightness, chili for heat, and ginger or garlic for depth.
Too Salty
Soften the bowl with more noodles, cucumber, cabbage, carrots, lime, or water. Do not add more peanut butter first; that can make the sauce heavier without fixing the salt.
Too Spicy
Bring the heat back down with more noodles, peanut butter, a small touch of sweetener, or extra lime. Crunchy cucumber also helps calm the bowl.
Natural Peanut Butter Problems
Stir the jar well first, then whisk the measured peanut butter with warm water before adding the rest of the sauce ingredients.
Back to the recipe card or jump to more tips.
Frequently Asked Questions
What noodles are best for peanut noodles?
Spaghetti, wheat noodles, medium rice noodles, ramen, udon, and soba all work. If you are making this for the first time, spaghetti, wheat noodles, medium rice noodles, or udon are the easiest because they are predictable and easy to find.
Do you rinse noodles for peanut noodles?
Rinse rice noodles, soba, or noodles you plan to serve cold. For warm wheat noodles, spaghetti, udon, or ramen, it is usually better not to rinse because the surface starch helps the peanut sauce cling.
How do you keep peanut sauce from getting too thick?
Start with a pourable sauce, then loosen slowly with reserved noodle water or warm water. Peanut sauce thickens as it sits, so stop when it clings instead of clumps.
Are peanut noodles served hot or cold?
Both work. Hot noodles feel softer and saucier right away. Cold noodles are best when rinsed, cooled, and paired with crunchy vegetables, herbs, and a slightly thinner sauce.
Can you make peanut noodles ahead of time?
Yes, but they are best if the sauce, noodles, and crunchy toppings are stored separately. If the noodles are already dressed, make the sauce slightly thinner and loosen with water, broth, or lime before eating.
Can you use ramen noodles for peanut noodles?
Yes. Ramen works well because it is quick and bouncy, but it absorbs sauce fast. Keep the peanut sauce slightly thinner and toss right before serving.
Does natural peanut butter work for peanut sauce noodles?
Yes. Natural peanut butter works, but every jar behaves differently. Stir it fully before measuring, then loosen the sauce with warm water until it pours.
What protein goes well with peanut noodles?
Tofu, chicken, shrimp, egg, edamame, and tempeh all work well. Cook the protein separately, then add it on top or fold it in gently after the noodles are sauced.
How long do peanut noodles last in the fridge?
Peanut noodles keep for about 3–4 days in an airtight container, but they will need a splash of liquid to come back. Use water, broth, or lime juice before reheating or serving cold.
Why did my peanut noodles taste bland?
They probably need balance, not more peanut butter. Use soy sauce or tamari for salt, lime or vinegar for brightness, chili for heat, and ginger or garlic for more depth.
Is this recipe vegan?
It can be vegan if you use maple syrup, brown sugar, or jaggery instead of honey. Also check that your noodles, chili sauce, and other add-ins are vegan.
Are peanut noodles Thai or Chinese?
Peanut noodles can lean in different directions depending on the ingredients. Rice noodles, lime, herbs, and chili make the bowl feel Thai-style. Wheat noodles, soy sauce, sesame oil, and chili oil can make it feel closer to Chinese-style cold or warm noodles. This recipe is a practical peanut sauce noodle bowl, not a claim to one traditional regional dish.
Final Tips for Creamy Peanut Noodles
The best peanut noodles are not perfect because you followed every step exactly. They are good because you know what to look for: noodles that lift easily, sauce that clings without clumping, and enough lime, herbs, or crunch to keep the bowl bright.
Once the noodles look shiny and twirlable, stop adjusting and eat. Use the noodles you have, keep it mild, make it spicy, serve it hot, or pack it cold for lunch.