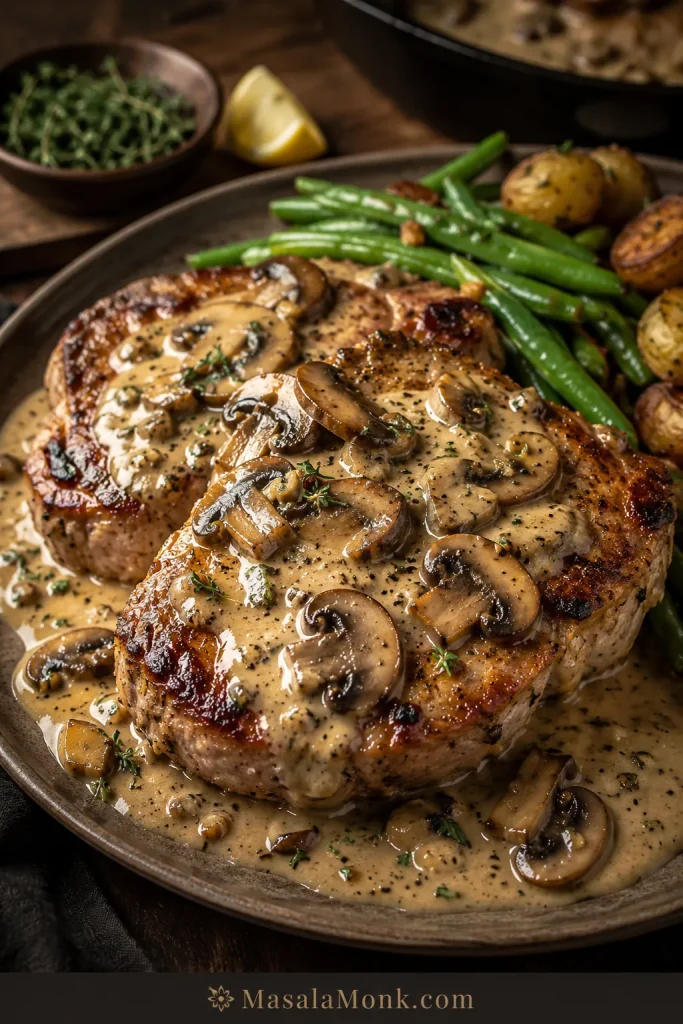
This is the sauce to make when dinner is almost there but needs one thing to pull it together. Steak feels restaurant-style. Chicken tastes richer. Pasta turns silky. Even potatoes, rice, toast, or roasted vegetables feel like a proper meal once a glossy mushroom sauce lands on top.
It is not quite a side dish and not quite a gravy; it is the thing that makes the plate feel finished.
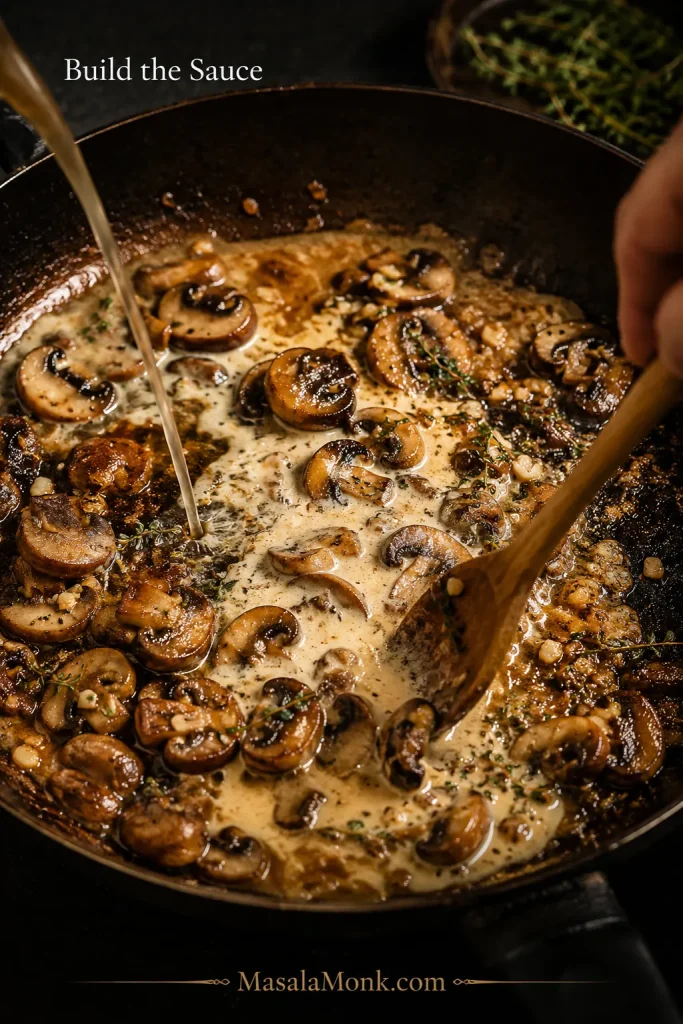
The secret is simple: brown the mushrooms first, then choose the finish. Let them release their moisture, shrink, darken, and catch at the edges before the cream goes in. Once that happens, garlic, broth, cream, parmesan, thyme, black pepper, and a little lemon turn those browned bits into a sauce you can use half a dozen ways.
This creamy mushroom sauce recipe takes about 20 to 25 minutes and makes roughly 3 cups / 700 to 720 ml. Keep it thick for steak, loosen it for pasta, soften it for chicken, or push it slightly toward gravy for potatoes and rice. Start with the creamy version below; the no-cream, no-wine, dairy-free, and gravy-style notes are adaptations, not separate recipes.
In This Recipe
Creamy Mushroom Sauce at a Glance
A good mushroom sauce starts with well-browned mushrooms, then turns into a shiny skillet sauce that tastes savory first and creamy second.
- Time: about 20 to 25 minutes in a wide skillet
- Yield: about 3 cups / 700 to 720 ml
- Mushrooms: 400–450g / 14–16 oz, roughly two 8 oz packs
- Best mushrooms: cremini, baby bella, button, portobello, or mixed mushrooms
- Best uses: steak, chicken, pork chops, pasta, mashed potatoes, rice, vegetables, toast, and omelettes
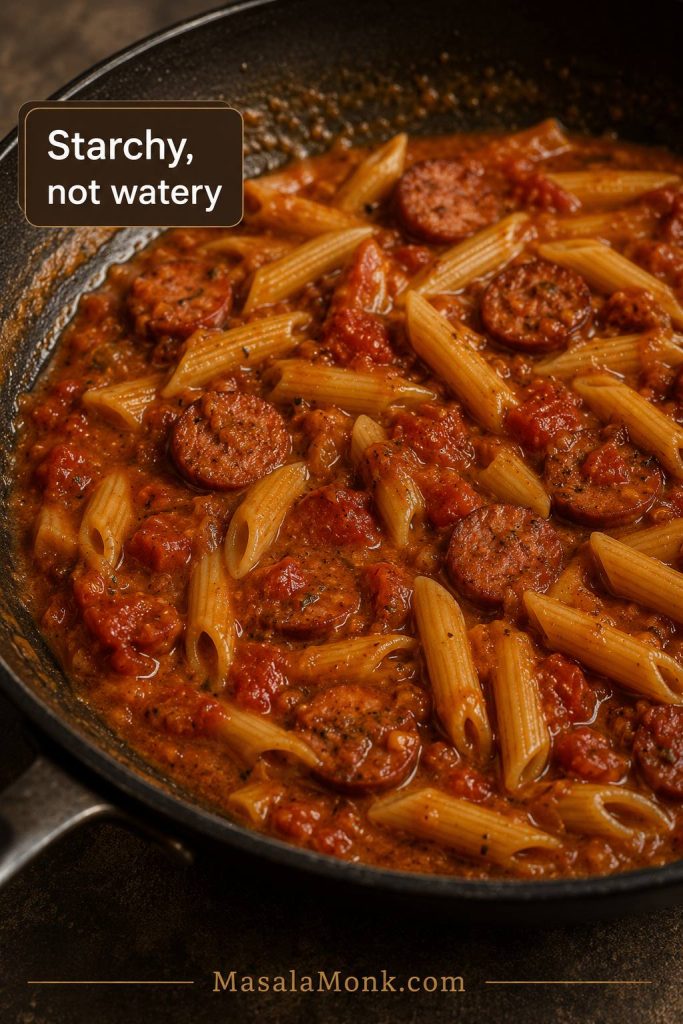
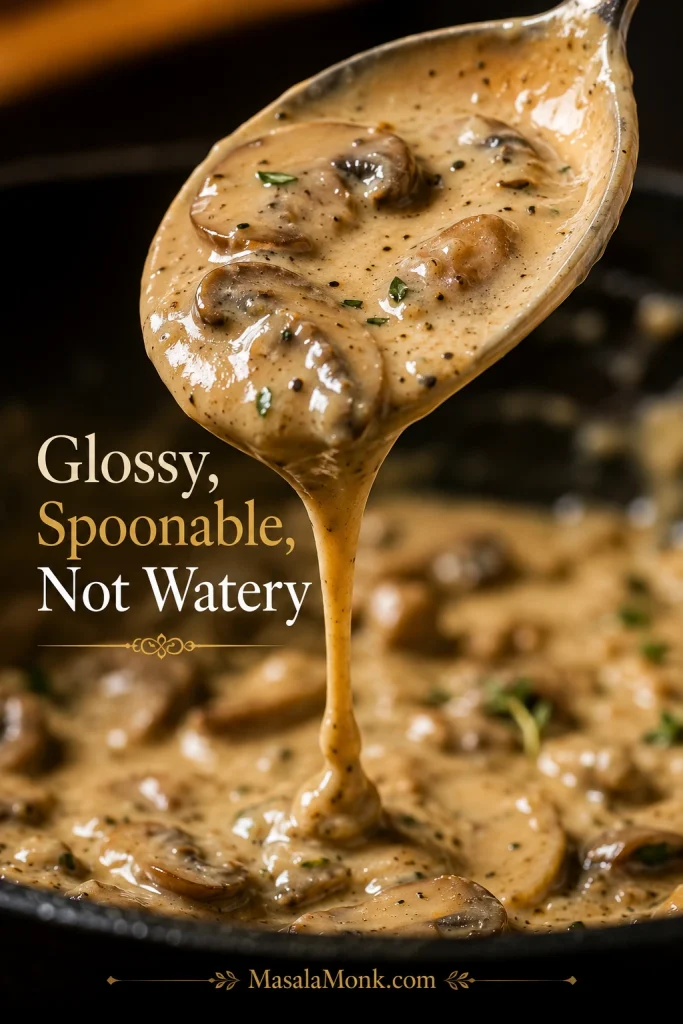
- Texture: smooth and spoonable, not watery, gluey, greasy, or split
This is a skillet mushroom sauce, not a condensed soup shortcut or a mushroom ragu. Brown the mushrooms first, then finish with cream and parmesan so the sauce tastes deep before it tastes creamy.
Choose the Finish Before You Start
One skillet, one base, many possible dinners. Before you reduce it too far, decide where it is going: over steak, through pasta, across chicken, or closer to gravy.
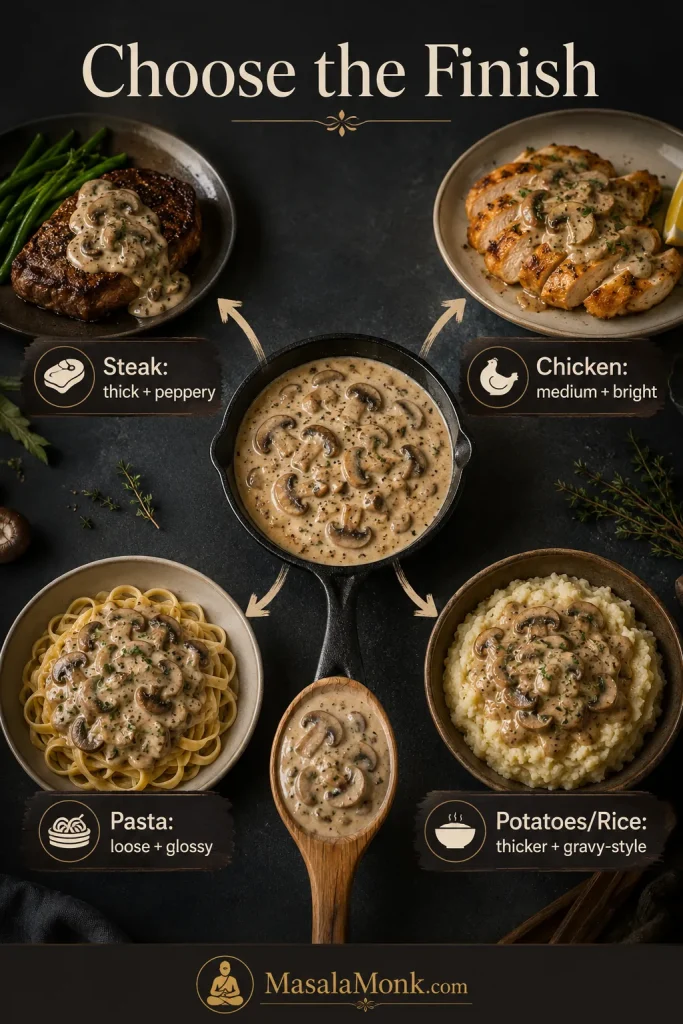
| Serve it with | Texture | Liquid | Finish |
|---|---|---|---|
| Steak | Thick, shiny, spoonable | Beef broth, pan drippings, or red wine | Black pepper, Dijon, Worcestershire, thyme |
| Chicken | Medium creamy | Chicken broth | Lemon, parsley, parmesan |
| Pasta | Looser and silky | Pasta water, cream, broth | Parmesan, black pepper, parsley |
| Pork chops | Creamy and smothered | Chicken broth or pork pan juices | Garlic, thyme, optional slurry |
| Potatoes or rice | Thicker, gravy-like | Stock or broth | Flour or cornstarch option |
| Vegetables or toast | Mushroom-heavy, not too loose | Cream, milk, or broth | Herbs, lemon, black pepper |
Once you know the direction, jump to the notes for steak, chicken, pasta, pork chops, or potatoes and rice.
Before you start: Use a wide skillet. Wait until the mushroom liquid cooks off. Add parmesan over low heat. Those three choices prevent most watery, bland, split, or clumpy mushroom sauce problems.
Pick the direction first, then cook the base recipe below. In the final 2 minutes, the same skillet can stay thick for steak, loosen for pasta, or move closer to gravy.
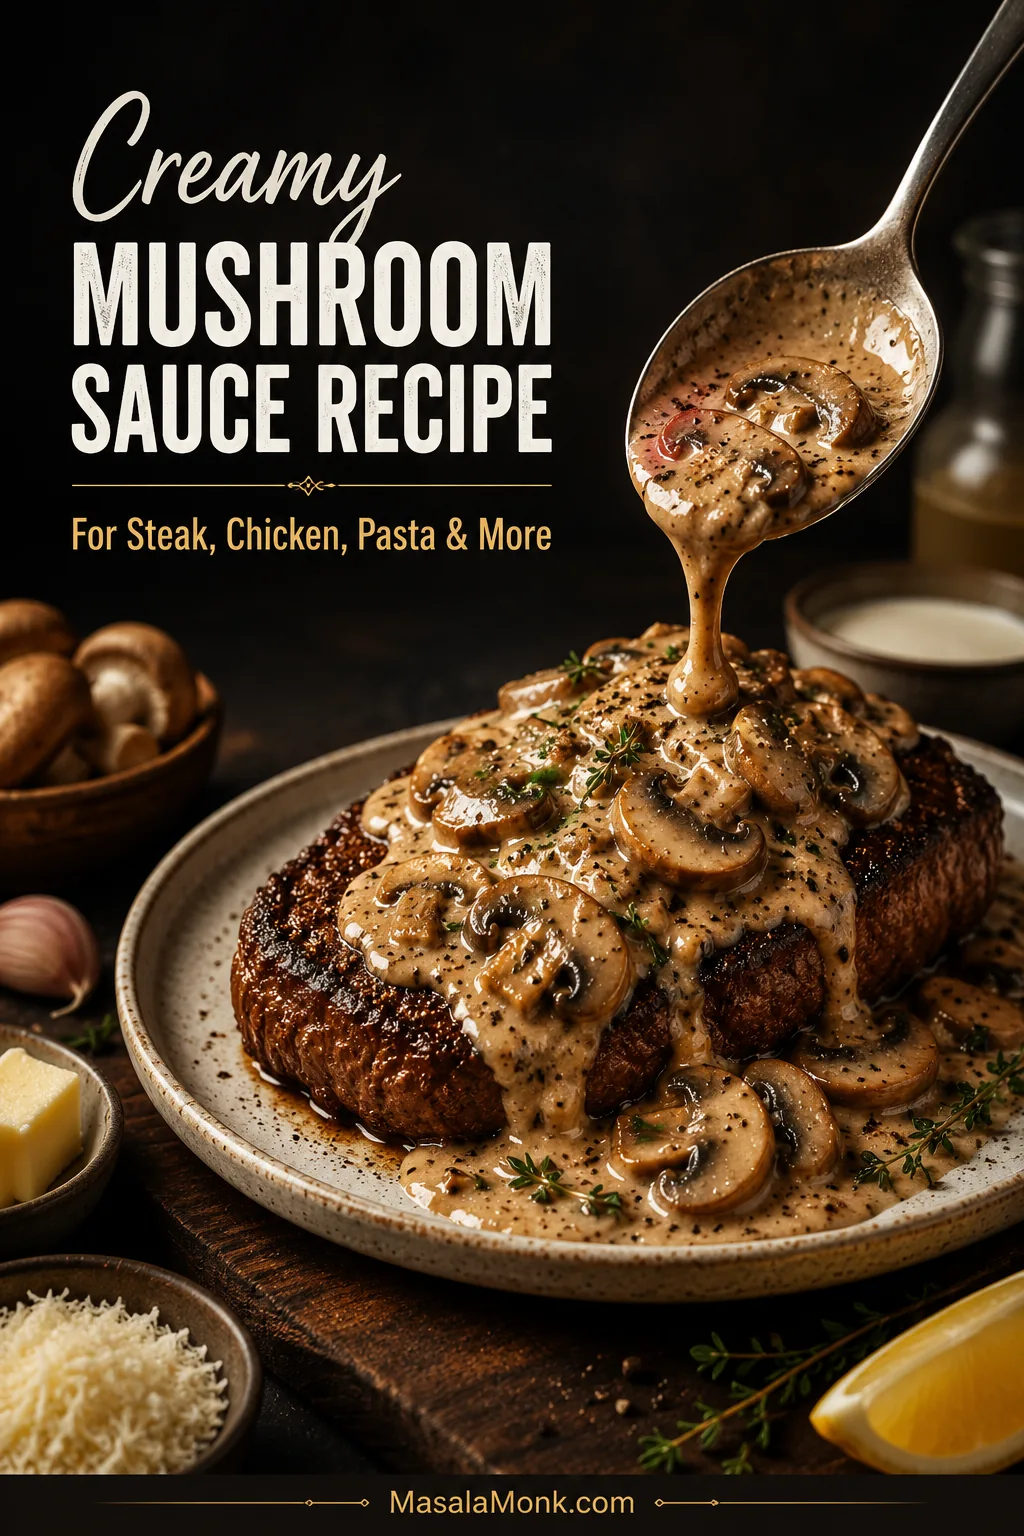
Creamy Mushroom Sauce Recipe for Steak, Chicken, Pasta & More
A flexible skillet mushroom sauce built on deeply browned mushrooms, garlic, broth, cream, parmesan, thyme, and black pepper. Keep it spoonable for steak, looser for pasta, or thicken it slightly for a gravy-style finish.
Serves: 4 to 5 over steak, chicken, or pork chops; 3 to 4 with pasta
Equipment: 10- to 12-inch skillet, wooden spoon or spatula, whisk, measuring cup, fine grater or microplane
Ingredients
- 400–450g / 14–16 oz mushrooms, sliced about 1/4 inch / 6 mm thick
- 2 tbsp / 28g butter
- 1 tbsp / 15 ml olive oil
- 1 small shallot, finely minced, or 1/4 cup minced onion
- 3 garlic cloves, minced
- 2 tsp fresh thyme leaves, or 1/2 tsp dried thyme
- 1/4 cup / 60 ml dry white wine, optional
- 1/2 cup / 120 ml chicken, beef, or vegetable broth
- 1 cup / 240 ml heavy cream or double cream
- 1/3 cup / about 30g finely grated parmesan
- 1–2 tsp lemon juice, to taste
- 1/4 tsp salt to start, plus more to taste after parmesan
- Freshly ground black pepper, to taste
- 1–2 tbsp chopped parsley, optional, for finishing
Optional thickener for a gravy-style sauce: 1 tsp cornstarch mixed with 1 tbsp cold water.
Instructions
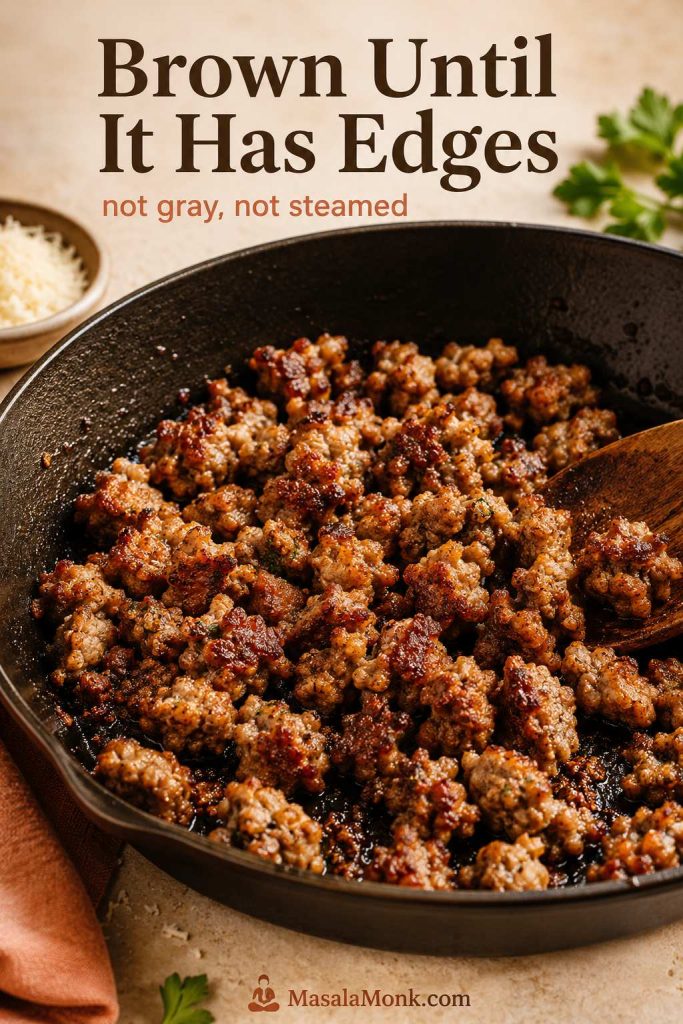
- Brown the mushrooms. Heat the butter and olive oil in a wide skillet over medium-high heat. Add the mushrooms and cook for 6 to 8 minutes, stirring occasionally, until they release moisture, the moisture evaporates, the pan looks mostly dry, and the edges begin to brown. If the pan is crowded, cook them in two batches.
- Add aromatics. Season the browned mushrooms with 1/4 tsp salt and black pepper. Add the shallot or onion and cook for 1 to 2 minutes. Add the garlic and thyme and cook for 30 to 45 seconds, just until fragrant.
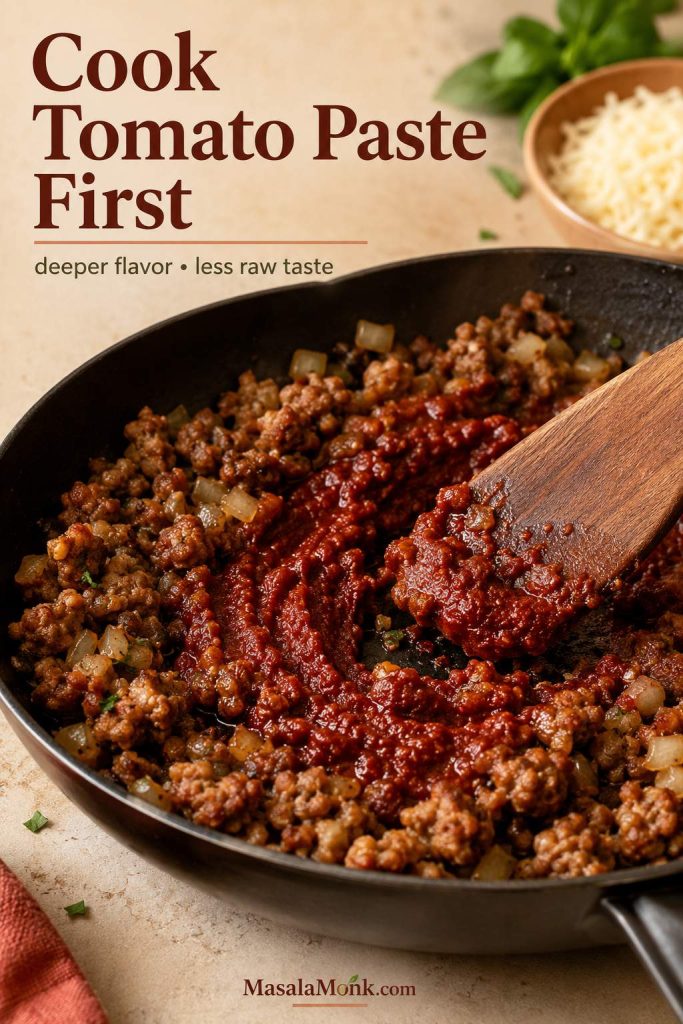
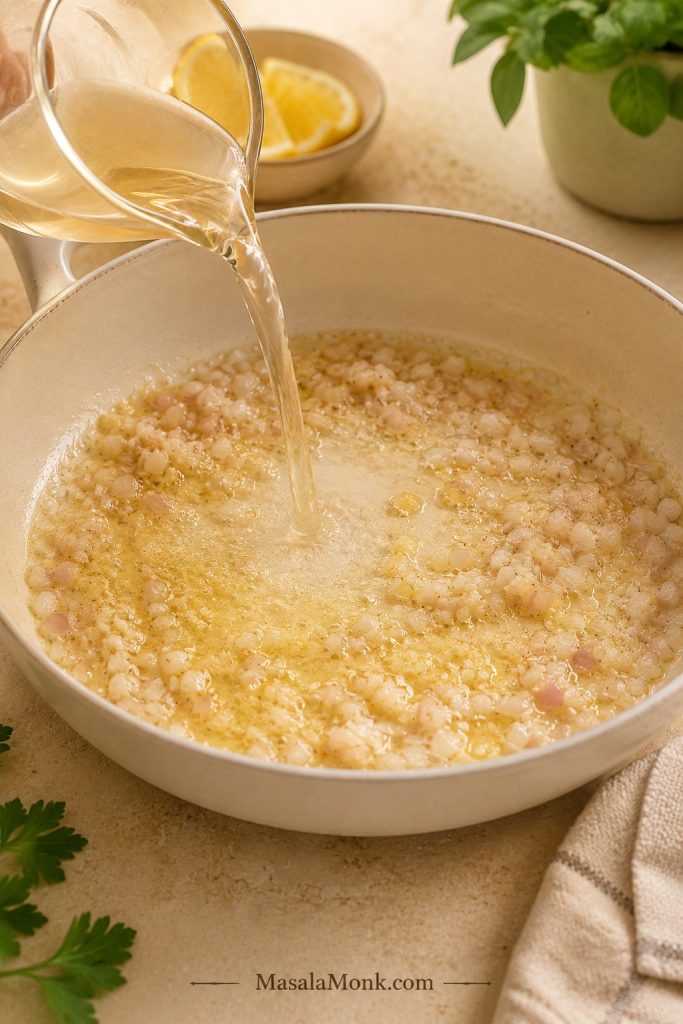
- Deglaze the pan. Pour in the wine, or use extra broth if skipping wine. Scrape the browned bits from the bottom of the skillet. Simmer until the wine smells less sharp and reduces by about half, about 1 minute.
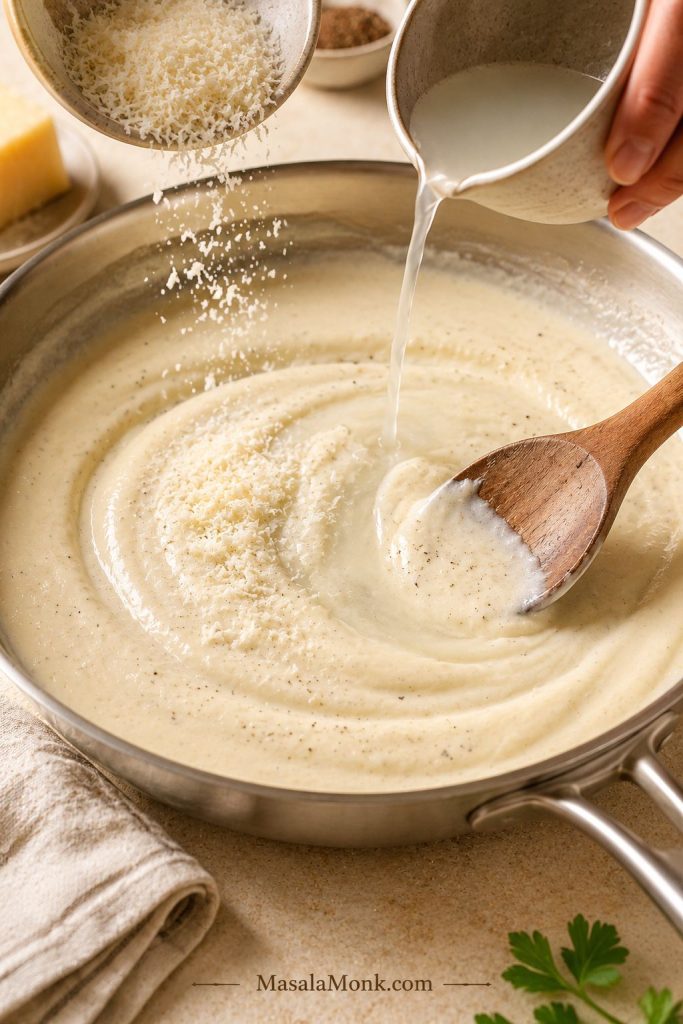
- Add broth and cream. Lower the heat to medium. Add the broth and cream. Simmer gently for 4 to 6 minutes, stirring occasionally, until the cream turns beige, the sauce begins to thicken, and it leaves light trails when you stir.
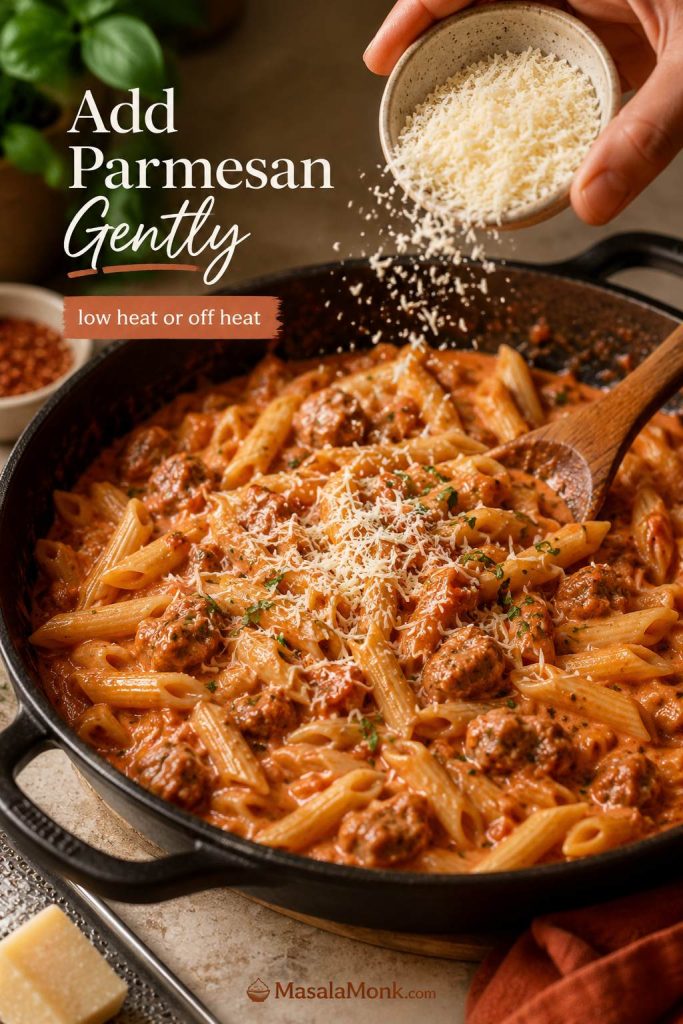
- Finish with parmesan. Reduce the heat to low. Stir in the parmesan gradually until melted and smooth. Taste before adding more salt.
- Balance the sauce. Add black pepper and 1 teaspoon lemon juice. Taste again. If it tastes flat, add salt. If it tastes heavy, add lemon. If it tastes creamy but not savory, add parmesan, Worcestershire, or more pepper.
- Adjust thickness. For steak or pork chops, simmer a little longer until spoonable. For pasta, stop slightly loose and loosen with reserved pasta water as needed. For a thicker gravy-style sauce, stir in the cornstarch slurry and simmer for 30 to 60 seconds.
- Serve warm. Spoon over steak, chicken, pork chops, pasta, mashed potatoes, rice, roasted vegetables, meatballs, toast, or omelettes.
Best Finishes
- Steak: beef broth, Dijon, Worcestershire, and extra black pepper.
- Chicken: chicken broth, lemon, parsley, and a medium-thick texture.
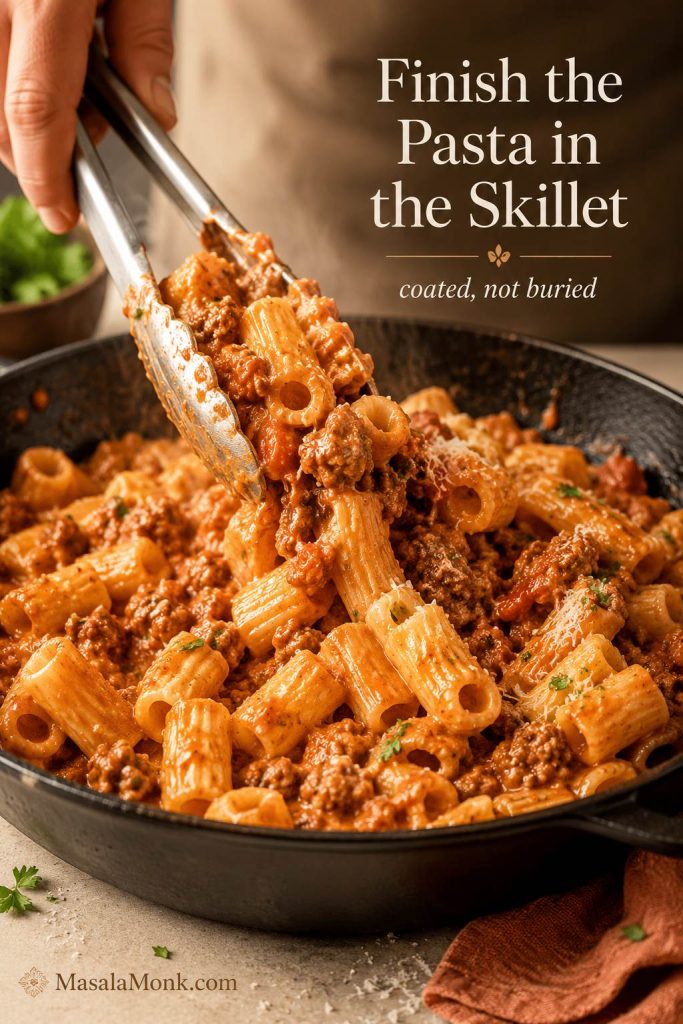
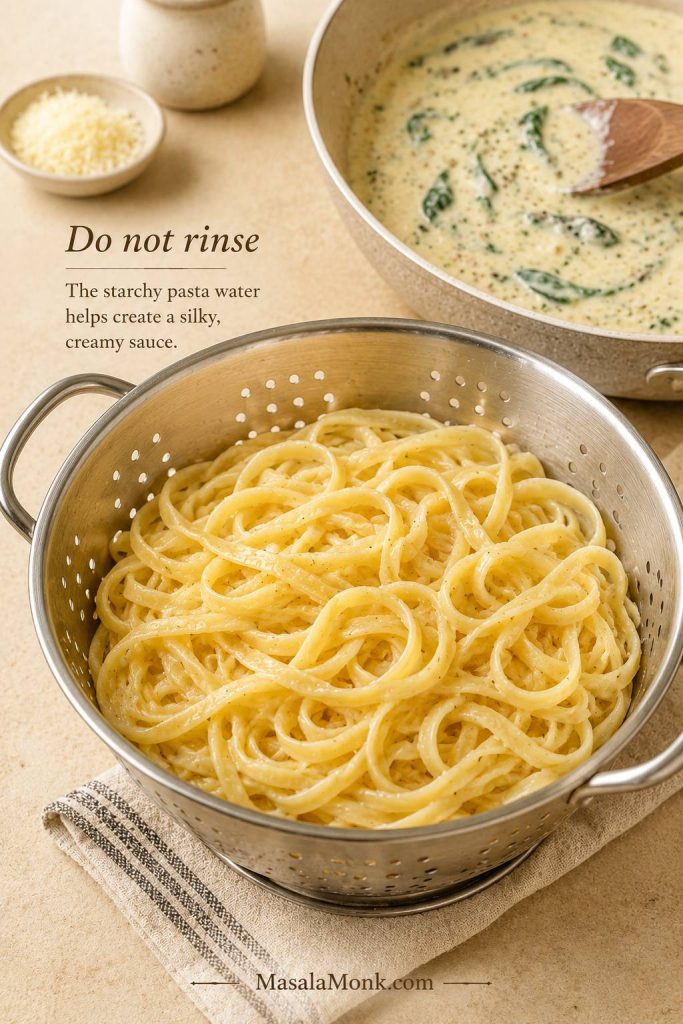
- Pasta: stop the sauce slightly loose and loosen with pasta water.
- No wine or gravy-style: use broth instead of wine; add the optional slurry for a thicker finish.
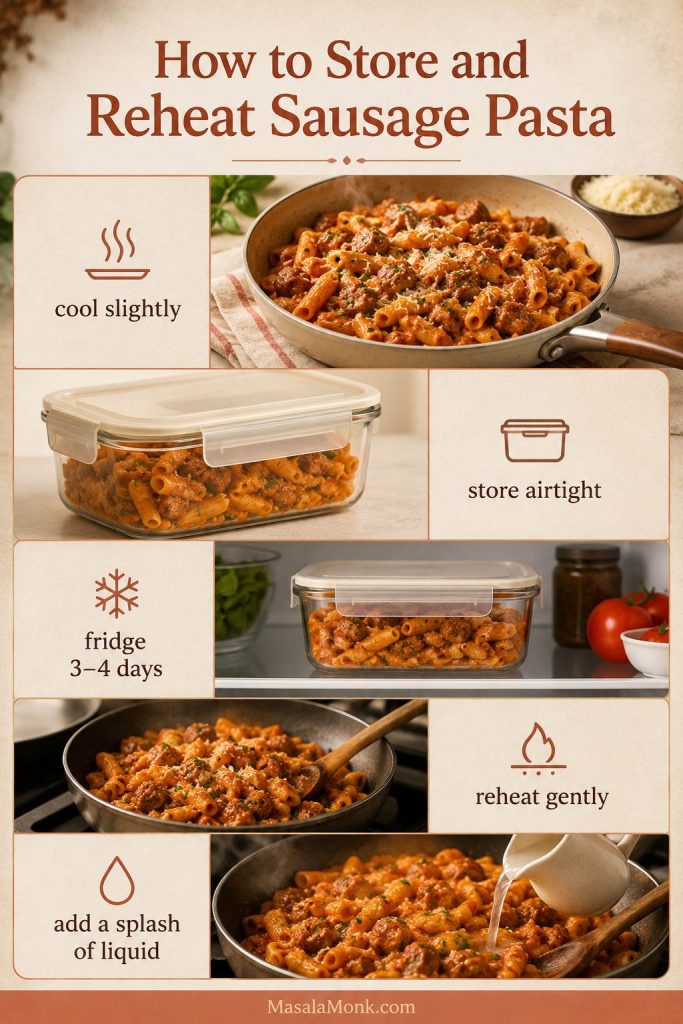
Storage: Refrigerate leftovers and reheat gently with a splash of liquid.
This is the quick turn from browned mushrooms to sauce: liquid lifts the browned bits, and cream pulls everything together.
What Browning Should Look and Smell Like
This is the part where patience pays you back. Mushrooms do not become rich the second they hit the pan. First they steam, then they shrink, then the pan goes quieter and drier, and only after that do the edges begin to brown.
Do not judge the sauce in the first few minutes; mushrooms get messy before they get good. They may look wet, crowded, and pale at first, but keep going. The pan should smell deeper and nuttier before the cream goes in, not just buttery.
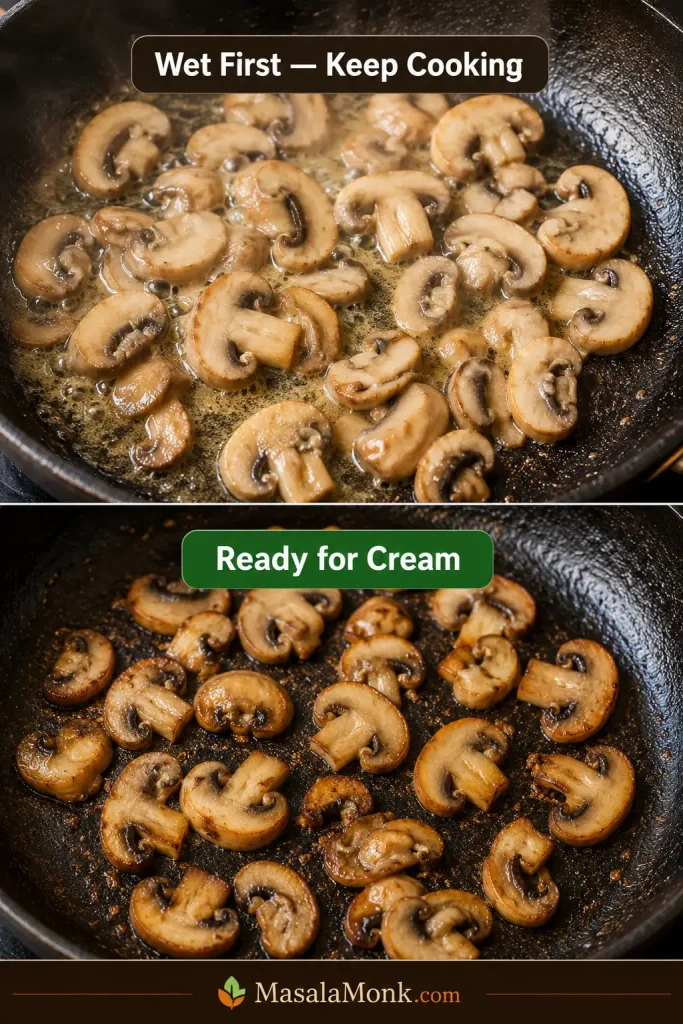
- Too wet: keep cooking until the pan looks mostly dry.
- Too crowded: cook the mushrooms in two batches.
- Too pale: give them another minute or two before adding garlic.
- Ready for cream: the mushrooms are smaller, darker, and golden at the edges.
If the sauce still turns watery, bland, or thin after browning, use the troubleshooting guide before adding more cream.
Once the cream goes in, keep the heat gentle. The cream should turn beige as it picks up the browned mushroom juices. If it tastes creamy but not mushroomy, the problem is usually browning, not the amount of cream.
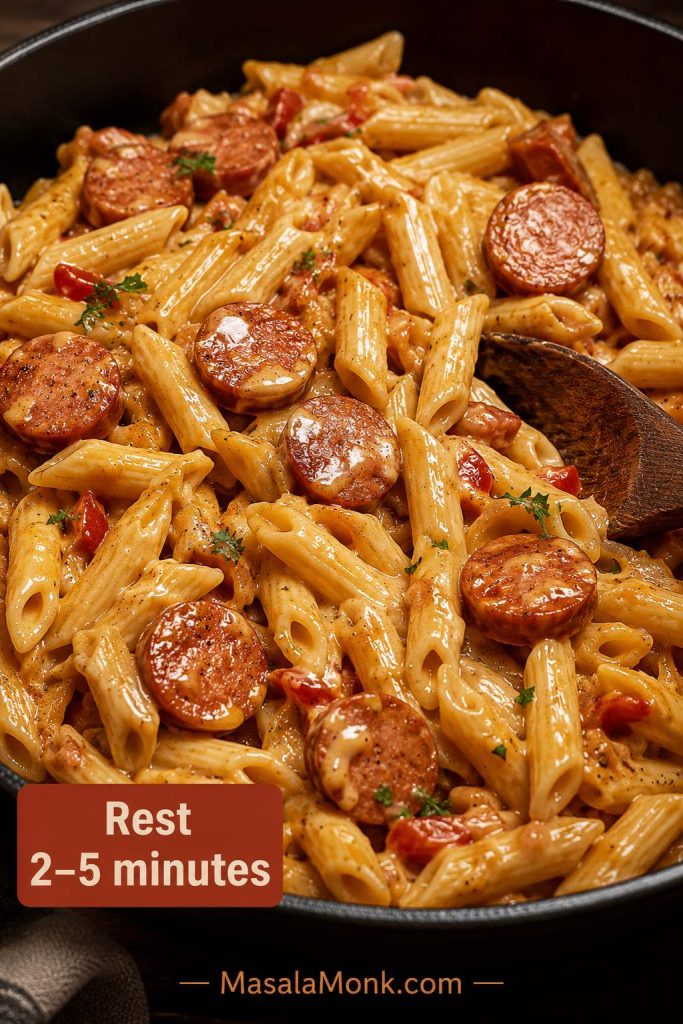
Tested texture note: A 12-inch skillet browns 400–450g mushrooms much better than a small saucepan. If the mushrooms pile up deeply, cook them in two batches. The sauce also thickens after parmesan and again as it cools, so stop slightly looser than you want it on the plate if it will sit for more than 5 minutes or if you are tossing it with pasta.
Ingredient Notes
The sauce is simple enough that the small choices show. Mushrooms bring savoriness, broth balances the pan, cream gives body, parmesan adds depth, and lemon keeps the finish lifted.
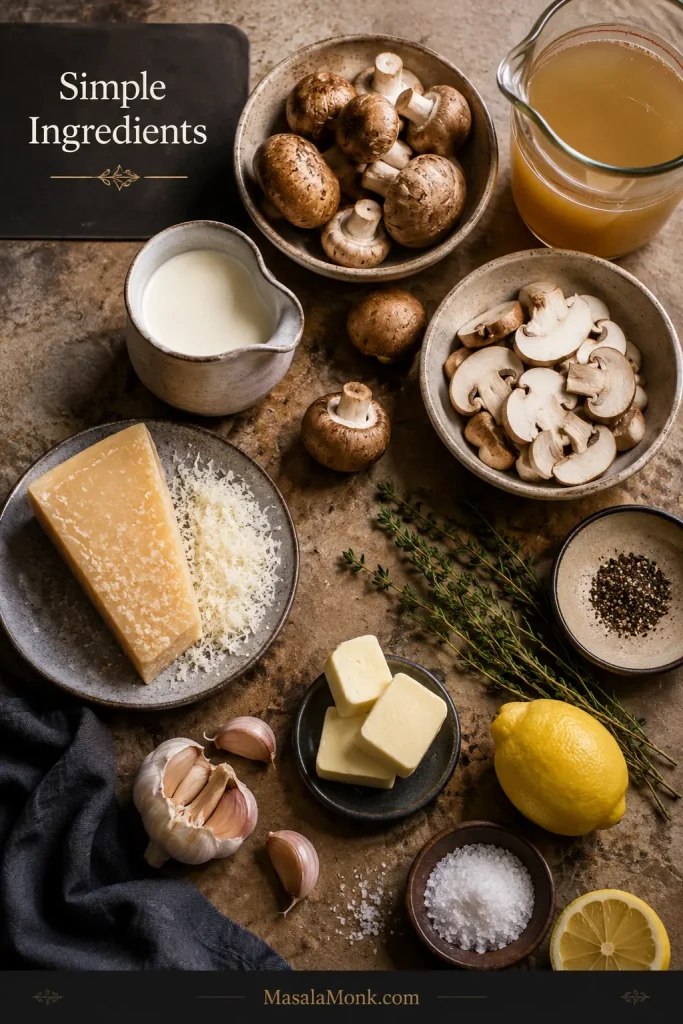
Cremini or baby bella mushrooms give the best everyday flavor, but button, portobello, or mixed mushrooms also work. Slice them about 1/4 inch / 6 mm thick.
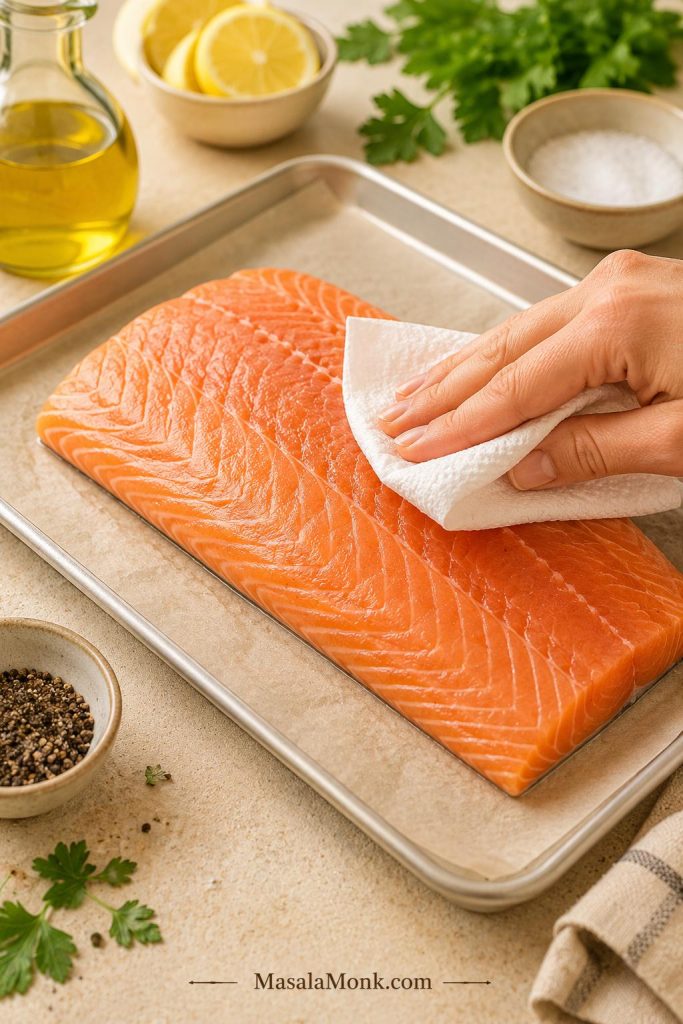
Fresh, dry-looking mushrooms sear better than damp ones. If the mushrooms are dirty, a quick rinse is fine, but dry them well before cooking. For a quick visual reference, the Mushroom Council’s mushroom cleaning tips show the same brush, wipe, or brief-rinse approach.
Butter adds roundness, olive oil helps with heat, and pan drippings make the sauce deeper if you cooked steak, chicken, or pork first. Use chicken broth for chicken and pasta, beef broth for steak, and vegetable broth for a vegetarian version.
Heavy cream gives the smoothest finish, and finely grated parmesan melts into the pan instead of sitting in clumps. MasalaMonk’s Parmesan vs Parmigiano Reggiano guide is helpful when choosing between hard cheeses.
Dry white wine helps lift the browned bits from the pan, but broth works well too. If you skip wine, finish with lemon juice so the sauce still tastes bright.
Cooking without cream, wine, or dairy? Use the no-cream substitutions and dairy-free notes before you start.
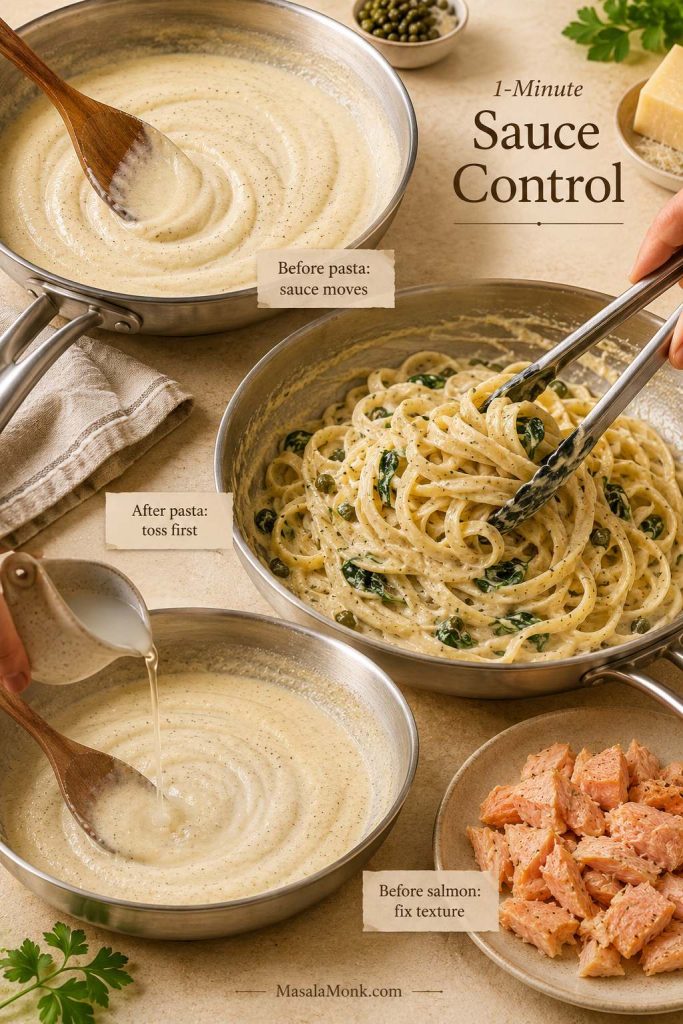
Getting the Texture Right
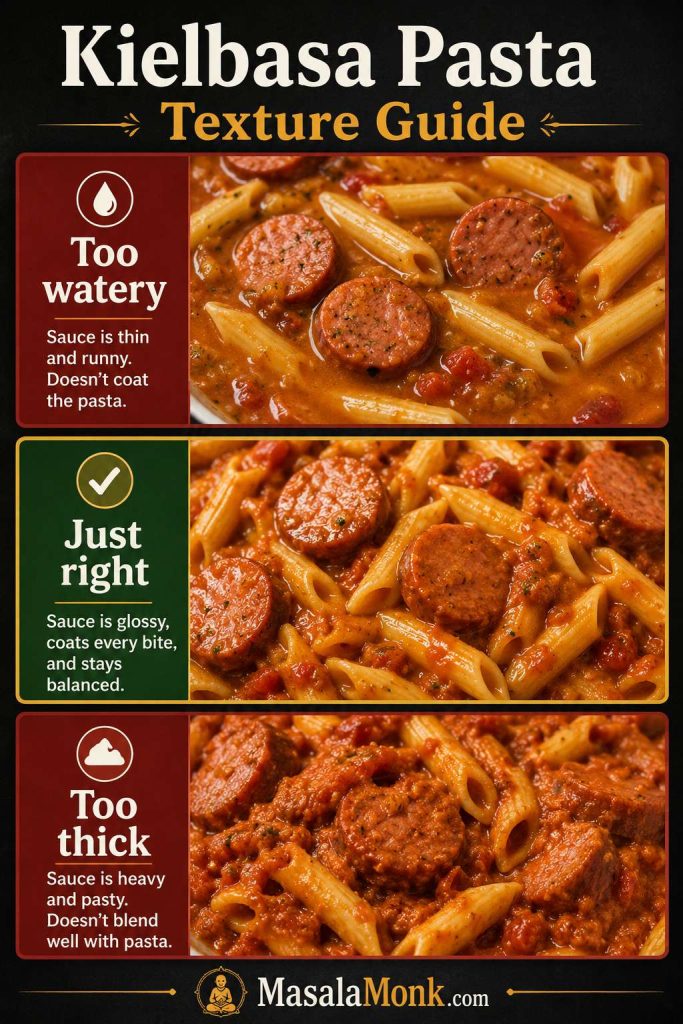
The sauce should coat the back of a spoon and fall in a slow ribbon for steak, chicken, and pork chops. For pasta, it should flow more loosely because it tightens as you toss. For potatoes, rice, or meatballs, it can sit closer to gravy.
Spoon test: Dip a spoon into the sauce and run your finger through the coating on the back. A line that holds for a moment means it is thick enough for steak or chicken. When the coating closes immediately, simmer longer. Loosen the sauce gently if it barely moves.
Then check the final texture.
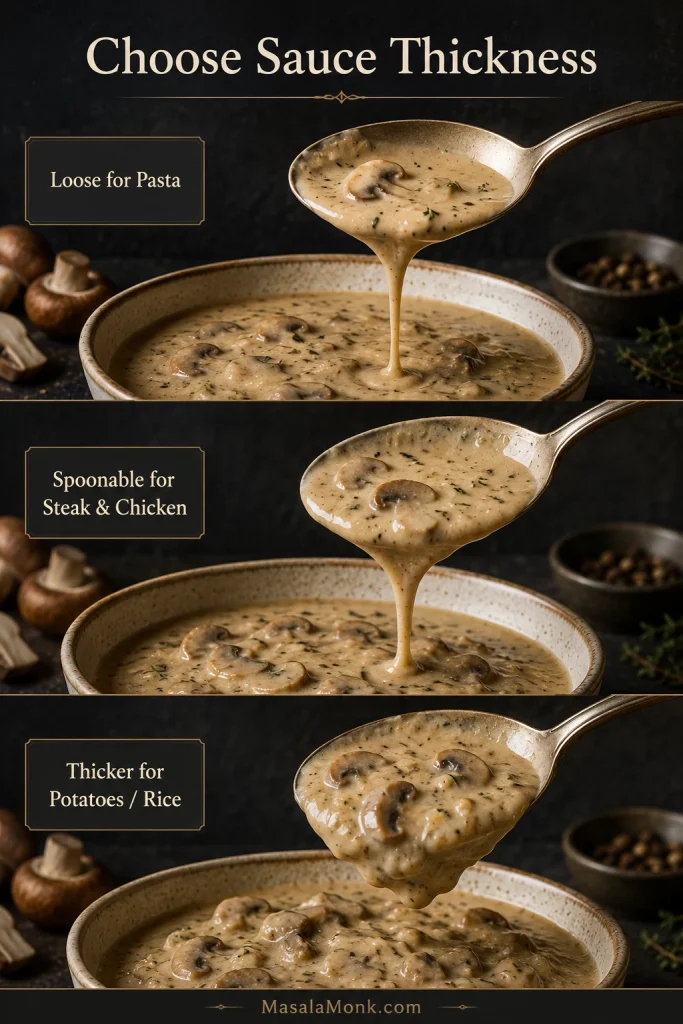
Use that texture guide before serving: thicker for steak, looser for pasta, or gravy-style for potatoes and rice.
If pasta tightens in the bowl, that is normal. A splash of hot pasta water brings it back.
How Much Sauce to Use — and Where It Works Best
Use enough sauce to feel generous, not so much that steak, pasta, or potatoes disappear under it.
| Serve it with | How much to use |
|---|---|
| Steak | 1/3 to 1/2 cup per steak |
| Chicken breast or thigh | 1/3 cup per piece |
| Pork chop | 1/3 to 1/2 cup per chop |
| Pasta | Full batch for 250g / 8 oz long pasta or 300g / 10 oz short pasta |
| Mashed potatoes, rice, or vegetables | 1/4 to 1/3 cup per serving |
| Toast or omelette | 2 to 4 tbsp per serving |
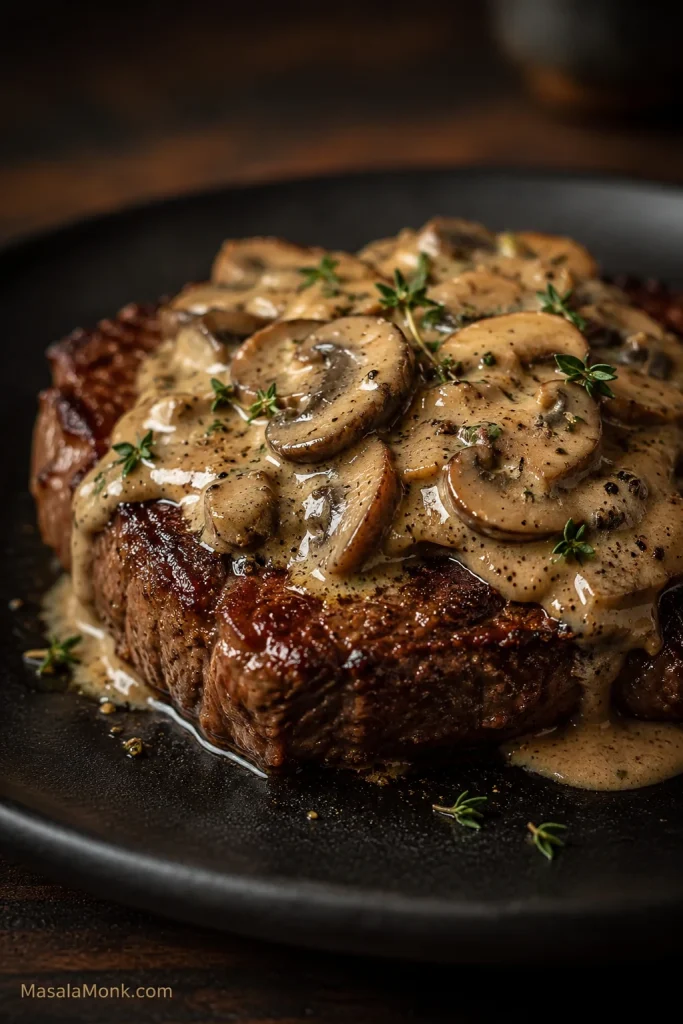
Mushroom Sauce for Steak
For steak: use pan drippings if you have them, and reduce until the sauce sits on the meat instead of running across the plate.
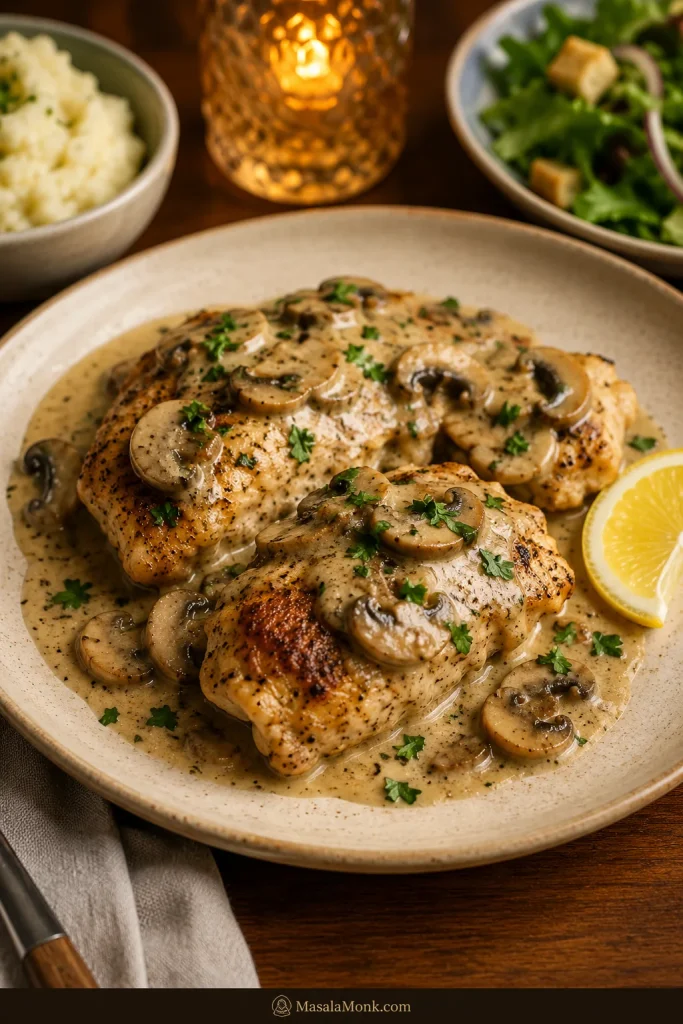
Mushroom Sauce for Chicken
For chicken: keep the sauce medium-thick and bright with lemon or parsley. If the chicken is already cooked, warm it gently in the sauce. If it is not fully cooked, finish it gently until the thickest part reaches 165°F / 74°C. For a complete chicken dinner using this flavor family, see MasalaMonk’s Cream of Mushroom Chicken Recipe.
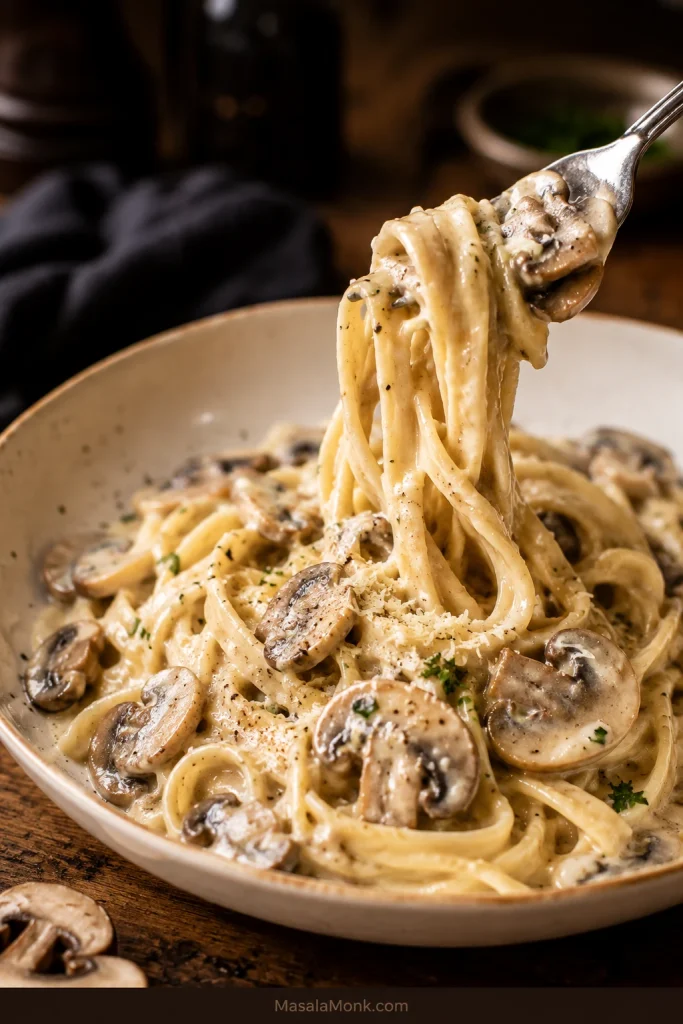
Mushroom Sauce for Pasta
For pasta: keep the sauce loose enough to coat, not clump. Reserve 1 cup pasta water before draining, then toss over low heat and add pasta water 2 to 4 tablespoons at a time until glossy.
Mushroom Sauce for Pork Chops
Pork chops: use chicken broth or pork pan juices and reduce until the sauce coats the chops well. A full pork version is waiting in MasalaMonk’s Cream of Mushroom Pork Chops.
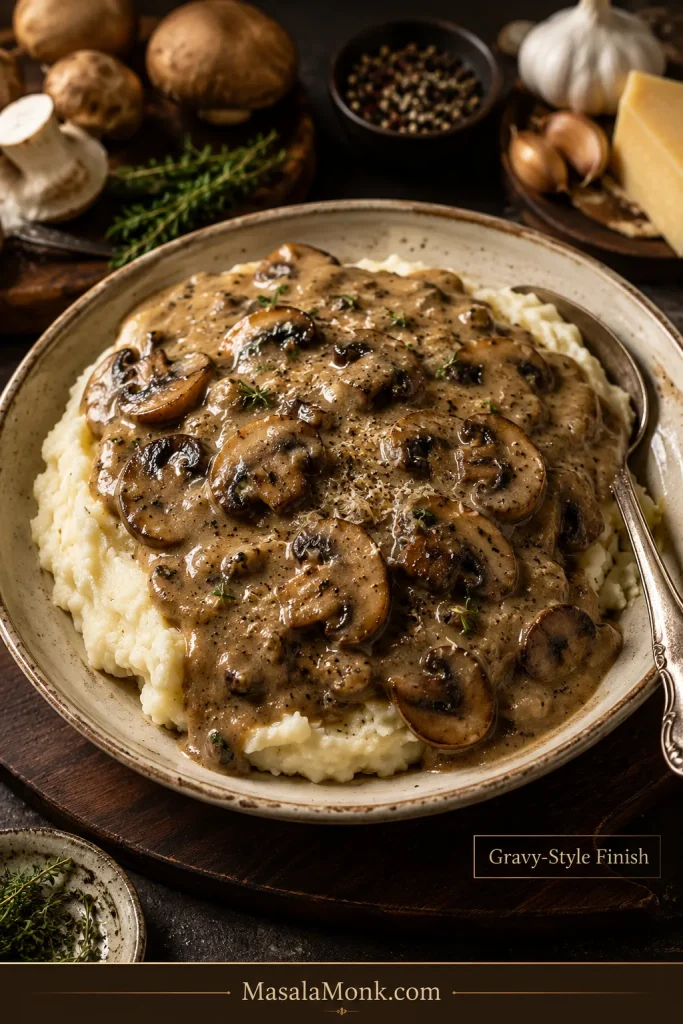
Mushroom Sauce for Potatoes and Rice
Potatoes, rice, vegetables, toast, or omelettes: use a slightly thicker finish and let the mushrooms stay the focus. This sauce is especially good over garlic mashed potatoes. With rice, keep it looser so it soaks in instead of sitting heavily on top; MasalaMonk’s guide on how to cook rice is a simple place to start.
No Cream, No Wine & Dairy-Free Options
Once the base works, substitutions become less risky because you know what each ingredient is replacing. Remove cream and you need body. Skip wine and you need brightness. Go dairy-free and you need body plus savoriness.
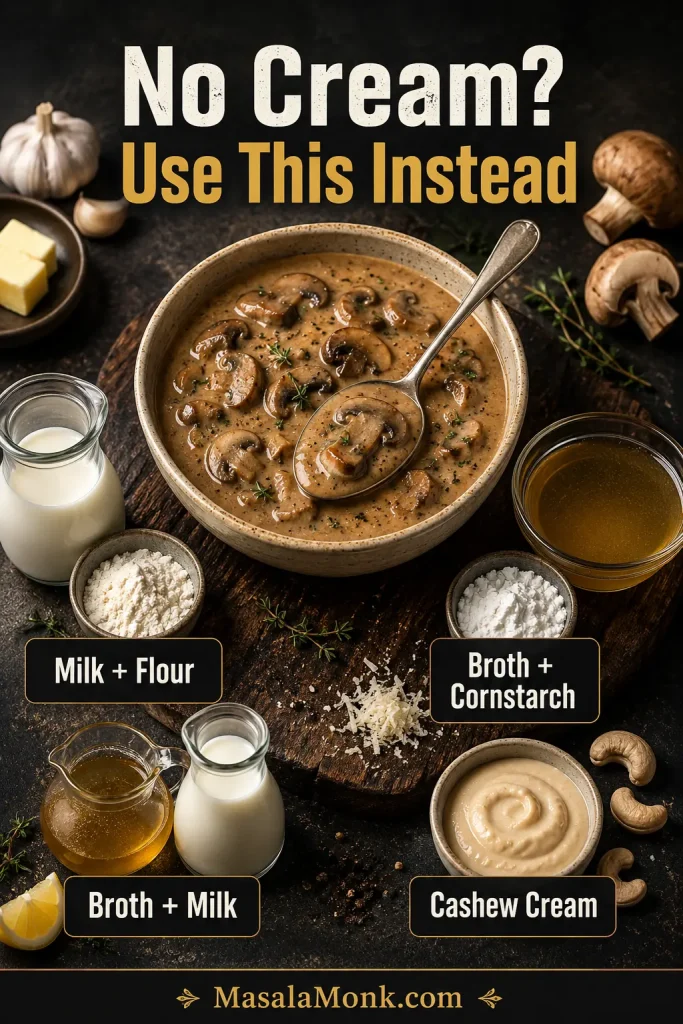
Without Cream
The no-cream versions will not all taste identical, but they can still be rich, savory, and useful. Choose milk + flour for creamy, broth + cornstarch for gravy-like, and cashew cream for dairy-free richness.
| Version | How to replace 1 cup / 240 ml cream | Best for |
|---|---|---|
| Milk + flour | Cook 1 tbsp flour in the fat for 1 minute, then whisk in 1 cup / 240 ml whole milk gradually. | Chicken, pasta, toast |
| Broth + cornstarch | Use 1 cup / 240 ml extra broth, then thicken with 1–2 tsp cornstarch mixed with cold water. | Steak, potatoes, rice, gravy-style sauce |
| Broth + milk | Use 3/4 cup / 180 ml broth plus 1/4 cup / 60 ml whole milk, then thicken lightly if needed. | Lighter creamy sauce |
| Cashew cream | Use 1 cup / 240 ml cashew cream in place of heavy cream. | Dairy-free pasta or vegetables |
If you are also skipping wine or dairy, use the no-wine and dairy-free guide before finishing the sauce.
If using milk instead of cream, keep the heat gentle. Milk-based sauces are more likely to curdle or separate if boiled hard.
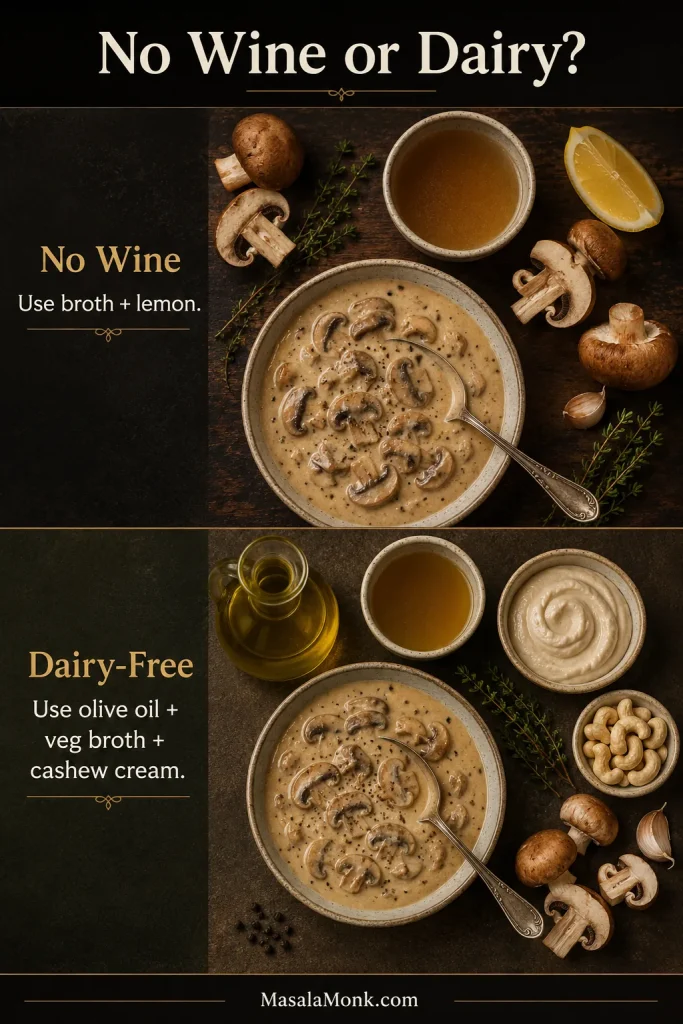
Without Wine
Wine helps, but it is not the soul of the sauce. Browned mushrooms, broth, parmesan, and lemon do most of the real work. Replace the wine with the same amount of broth, then add 1 to 2 teaspoons lemon juice before serving.
Dairy-Free
Use olive oil or vegan butter instead of butter, vegetable broth instead of chicken or beef broth, and cashew cream for the most neutral creamy body. For a lighter sauce, use vegetable broth and cornstarch slurry, then add a small splash of soy sauce or tamari for savory depth. Use unsweetened dairy-free milk only. Avoid sweetened plant milks; coconut milk works but changes the flavor.
These two swaps solve different problems: broth and lemon replace wine’s brightness, while olive oil, vegetable broth, and cashew cream replace dairy’s body.
Small Flavor Adjustments
To make it more garlicky, increase the garlic to 4 or 5 cloves and add it only after the mushrooms brown. A deeper steak version can use red wine, beef broth, Dijon, Worcestershire, thyme, and extra black pepper. Brighten the pan with lemon, parsley, or a splash of white wine. For more savoriness, add a few drops of Worcestershire or soy sauce, more parmesan, or a little extra broth.
Mushroom Sauce vs Mushroom Gravy
The line between sauce and gravy is blurry in real kitchens. If it is going over steak or pasta, keep it silkier. If it is going over potatoes, rice, meatballs, or roasts, you can push it thicker and more stock-forward.
| Feature | Mushroom sauce | Mushroom gravy |
|---|---|---|
| Base | Cream + broth | Stock + roux or slurry |
| Color | Creamy, pale, golden, or beige | Brown and savory |
| Texture | Silky, rich, spoonable | Pourable, thicker, gravy-like |
| Best for | Steak, chicken, pork chops, pasta | Mashed potatoes, meatloaf, roasts, rice |
| Freezing | Not ideal if cream-based | Better if made without cream |
| Thickener | Reduction, parmesan, optional slurry | Flour, roux, or cornstarch |
This recipe is a creamy sauce first. To take it closer to gravy, use more broth, less cream, and the optional cornstarch slurry.
Can This Replace Canned Cream of Mushroom Soup?
Yes, this homemade sauce can replace canned cream of mushroom soup as a spoonable topping for chicken, pork chops, rice, pasta, potatoes, or vegetables. It tastes fresher and more mushroom-forward than canned soup.
As a pourable dinner sauce, keep the full 3-cup batch as written. To make a condensed-soup-style replacement, reduce and thicken it to about 2 cups. A gravy-style topping can stay closer to 2 1/2 to 3 cups, then thicken with slurry or roux.
Casseroles need a thicker sauce than a pourable skillet topping because the sauce has to hold vegetables, noodles, protein, and topping together. To turn the same sauce idea into a full casserole, MasalaMonk’s green bean casserole is a useful next step.
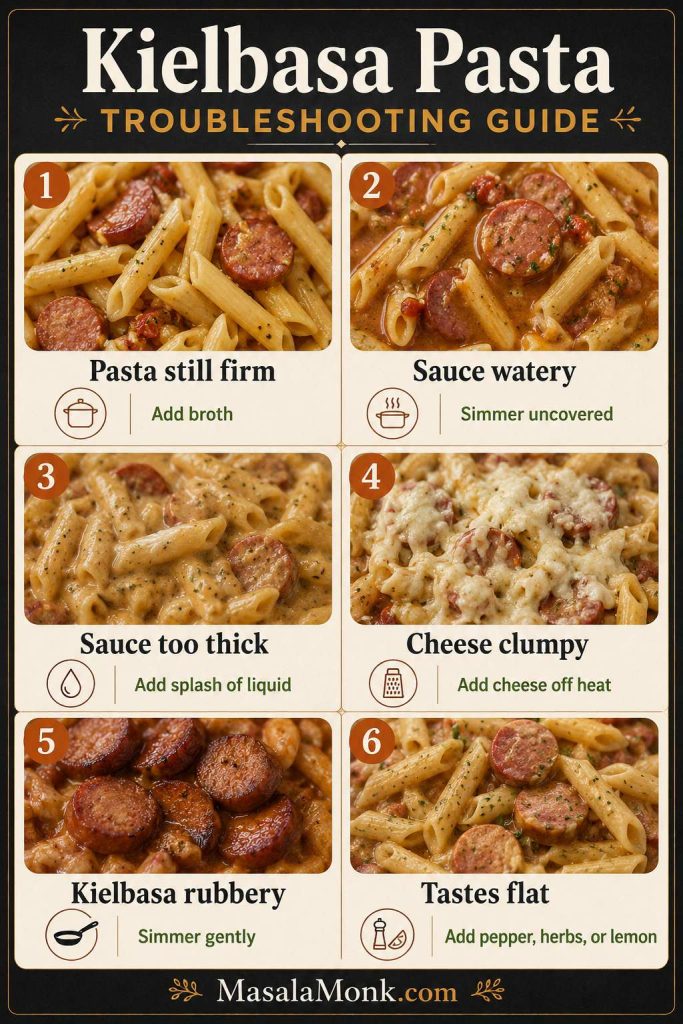
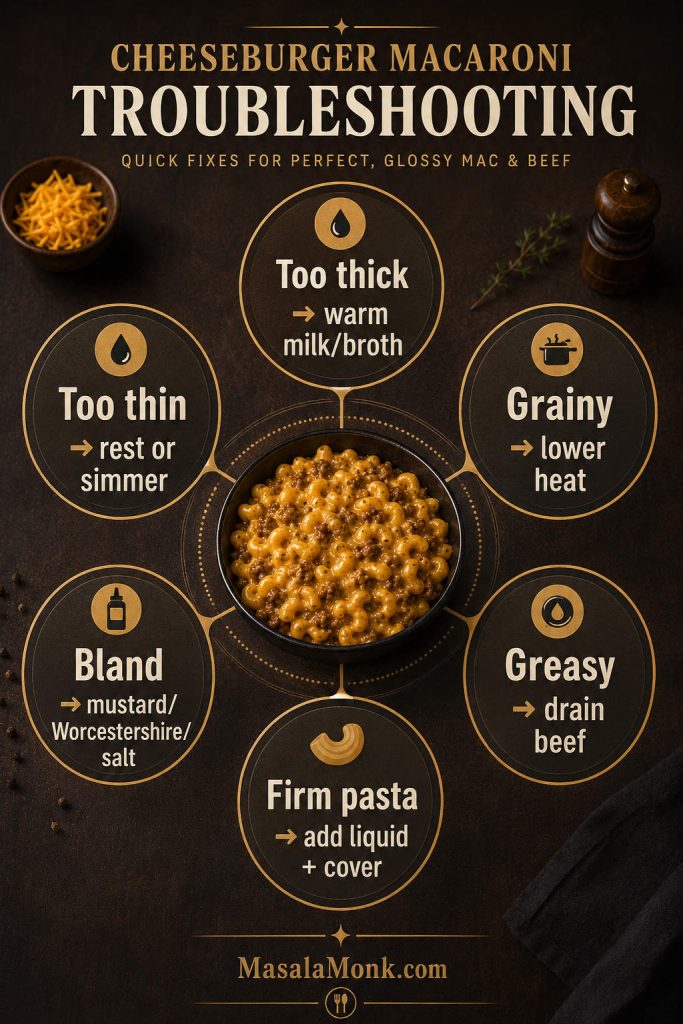
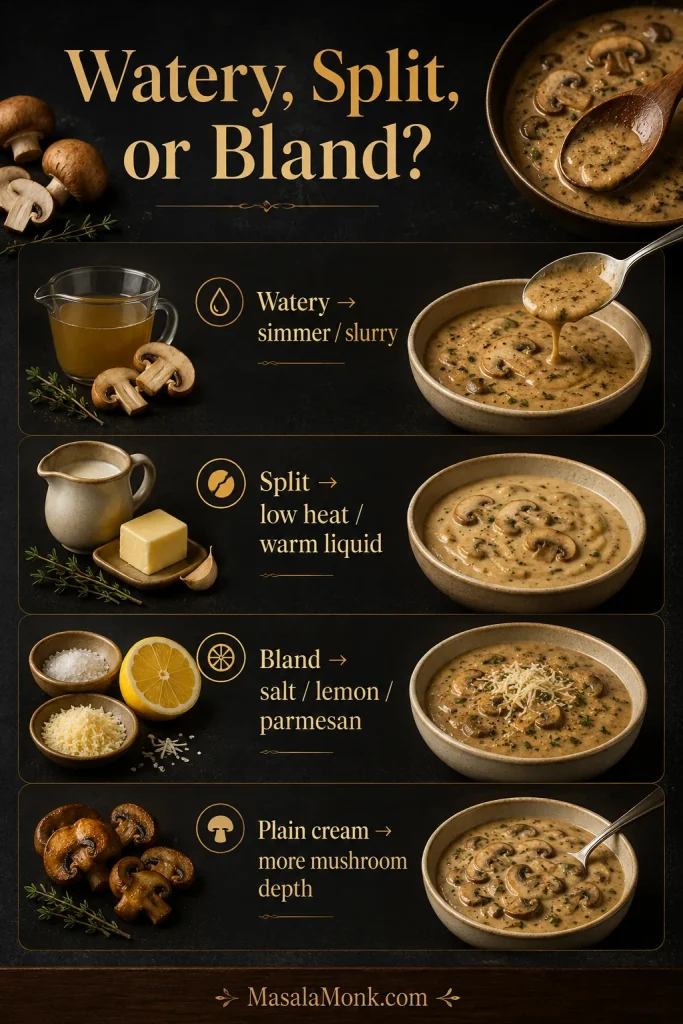
Watery, Split or Bland? Fix It Fast
If your sauce looks wrong, do not panic. Most mushroom sauce problems are fixable. Usually, the issue comes from mushrooms that steamed instead of browned, cream that boiled too hard, cheese added over high heat, or a sauce that was made too thick before pasta or reheating.
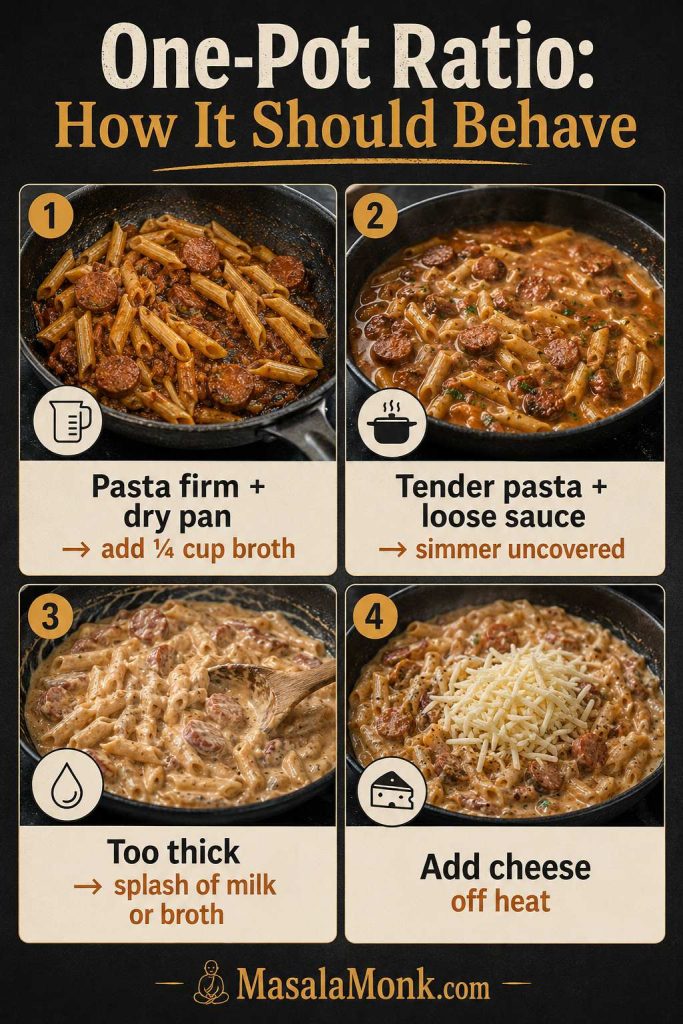
Quick Visual Fixes
Detailed Fix Table
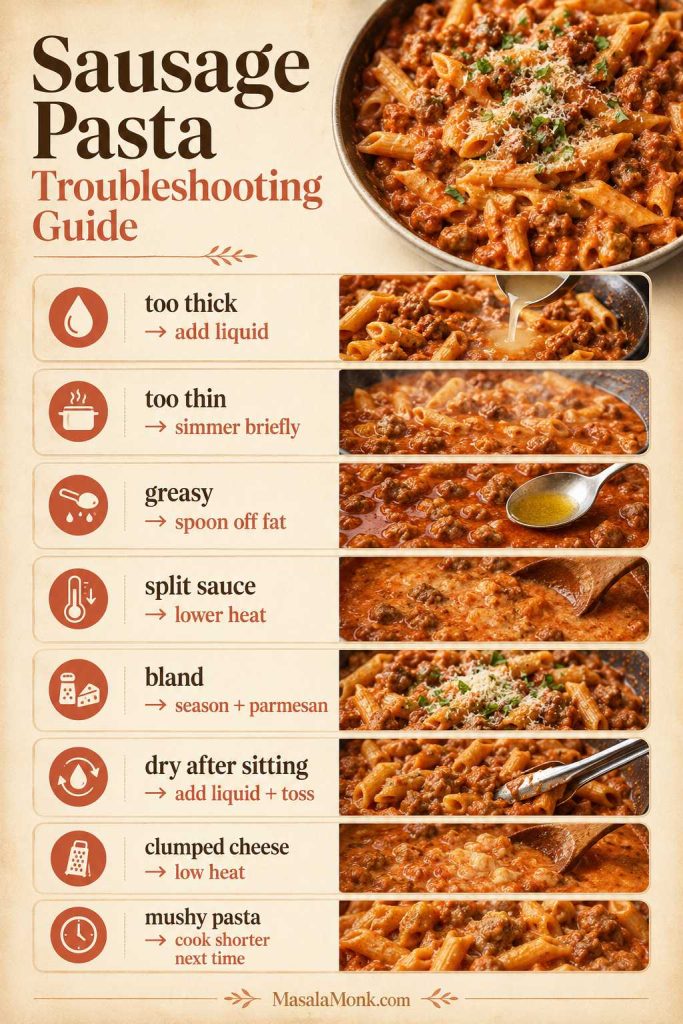
| Problem | Fix now | Next time |
|---|---|---|
| Watery sauce | Simmer uncovered for 2 to 5 minutes, or stir in 1 tsp cornstarch mixed with 1 tbsp cold water. | Give the mushrooms enough time for the pan to dry before adding cream. |
| Too thick | Add warm broth, milk, cream, or pasta water 1 tbsp at a time. | Stop simmering while the sauce is slightly looser than you want it on the plate. |
| Split or greasy | Lower heat and whisk in a splash of warm broth or cream. Avoid adding cold liquid directly. | Keep the cream at a gentle simmer. |
| Tastes like plain cream | Add parmesan, salt, pepper, thyme, lemon, Worcestershire, or a splash of broth. | Brown mushrooms longer and deglaze the pan before adding cream. |
| Bland | Add salt if flat, lemon if heavy, parmesan or Worcestershire if it lacks depth. | Taste after parmesan before final seasoning. |
| Rubbery mushrooms | Keep cooking until moisture evaporates and edges brown. | Use a wide pan and avoid crowding. |
| Floury taste | Simmer 2 to 3 minutes longer after adding liquid. | Cook flour in the fat for about 1 minute before adding liquid. |
| Parmesan clumped | Take the pan off the heat and whisk gently. Add a splash of warm liquid if needed. | Use finely grated parmesan and avoid high heat. |
| Pasta absorbed the sauce | Add pasta water 2 to 4 tbsp at a time and toss over low heat. | Keep the sauce looser before adding pasta. |
Most fixes come back to two things: give the mushrooms more time in the pan, then keep the creamy finish gentle. For watery or bland sauce problems, recheck the wet-to-browned mushroom cue and the spoon test.
Storage, Reheating, and Make-Ahead Tips
Cream sauces are not difficult to reheat; they just do not like being rushed. Store leftovers in an airtight container in the refrigerator for 3 to 4 days. For general leftover safety, the USDA recommends using refrigerated leftovers within 3 to 4 days.
- To refrigerate: cool the sauce, then store in an airtight container.
- To reheat on the stove: warm over low or medium-low heat, stirring often.
- To loosen: add a splash of broth, milk, cream, or pasta water.
- To microwave: use short bursts and stir between each one.
- To freeze: cream-based sauce is not ideal because it can split. A no-cream, gravy-style version freezes better.
If the sauce looks separated after chilling, warm it slowly and whisk in a little liquid. Do not bring it to a hard boil. For more general leftover storage guidance, see the USDA’s Leftovers and Food Safety guide.
FAQs About Mushroom Sauce
Can I use canned mushrooms?
Yes, canned mushrooms work in a pinch, but fresh mushrooms give better browning and flavor. Drain canned mushrooms well, pat them dry, and brown them before adding liquid.
How do I make mushroom sauce thicker?
Simmer mushroom sauce uncovered first; that gives the best flavor. For a faster fix, add a slurry made from 1 teaspoon cornstarch and 1 tablespoon cold water.
Why is my mushroom sauce watery?
Mushroom sauce is usually watery when the pan is still too wet before the cream goes in. Simmer uncovered, or use a small cornstarch slurry if dinner is waiting.
Why does it taste like plain cream?
If mushroom sauce tastes like plain cream, the mushrooms probably needed more browning, or the sauce needs salt, parmesan, pepper, lemon, or Worcestershire. It should taste savory before it tastes creamy.
Is this the same as mushroom gravy?
No. Mushroom sauce is usually creamier and better for steak, chicken, pasta, and pork chops. Mushroom gravy is usually more stock-based, brown, and thickened with flour or cornstarch.
What can I use instead of cream?
Use milk with flour for a lighter creamy sauce, broth with cornstarch for a gravy-style sauce, or cashew cream for dairy-free richness. Milk and broth are thinner than cream, so they usually need a thickener.
Can I make mushroom sauce ahead of time?
Yes. Make it 2 to 3 days ahead, refrigerate, and reheat gently with a splash of liquid. Leftovers keep for 3 to 4 days in an airtight container.
Why did the sauce split?
Cream sauces usually split when boiled too hard or reheated too aggressively. Lower the heat and whisk in a splash of warm broth or cream.
Final Spoonful
Once you understand the texture, this becomes the sauce you can pull out for half-finished dinners: steak that needs polish, chicken that needs richness, pasta that needs gloss, or potatoes that need comfort.
Tried it over steak, chicken, pasta, potatoes, or something else? Tell me what you spooned it over and how you finished it — Dijon, Worcestershire, extra pepper, pasta water, or your own trick.