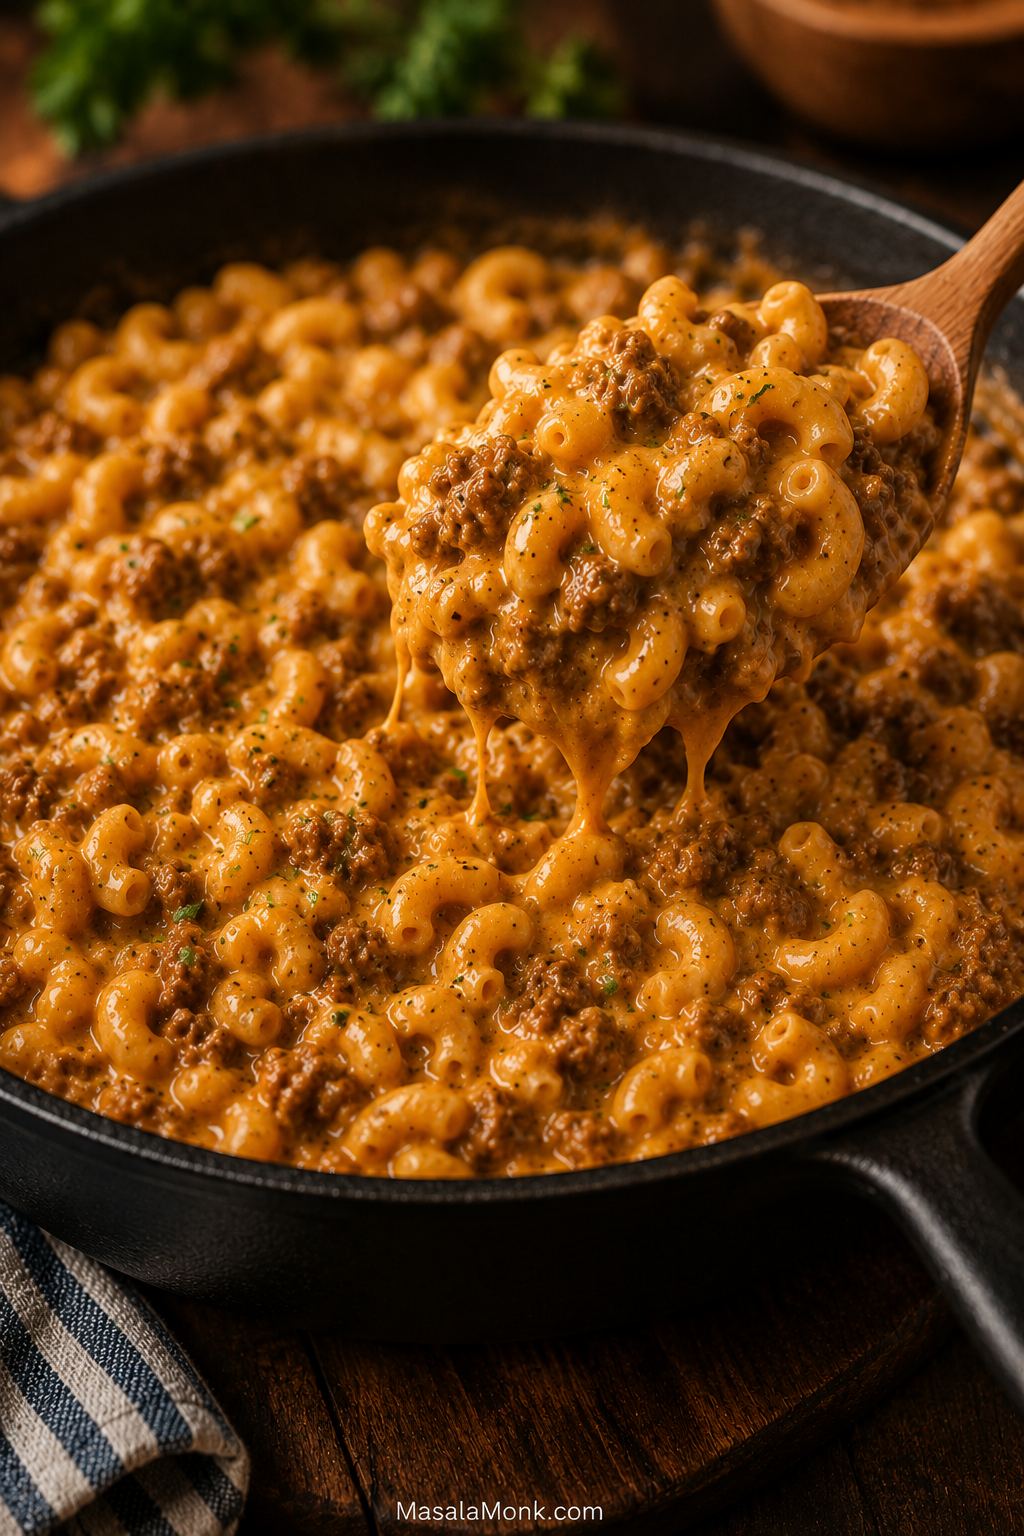
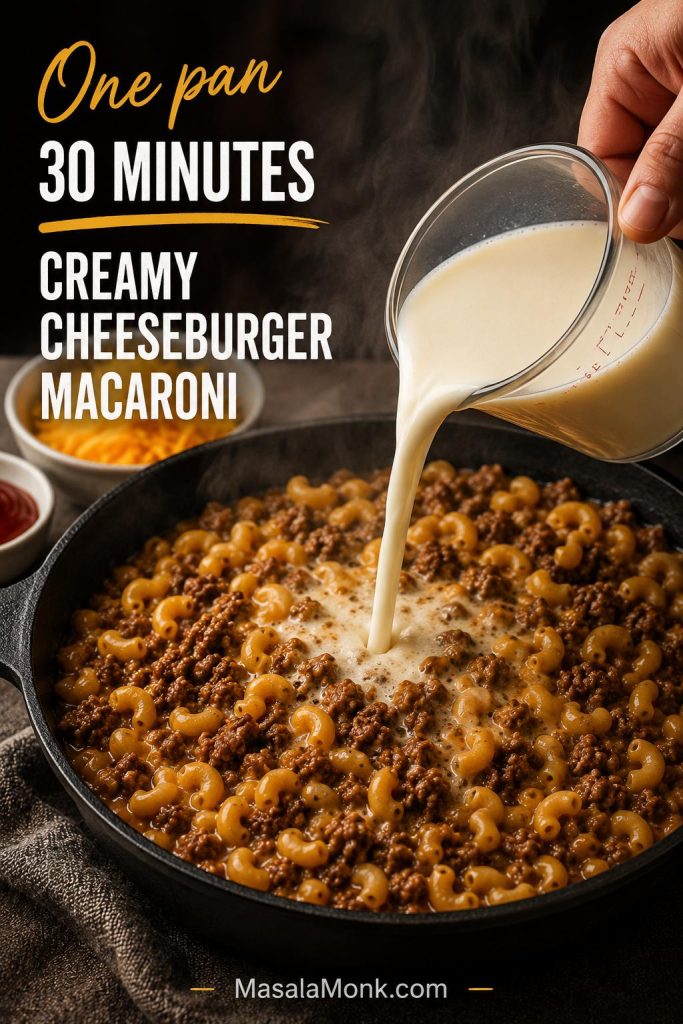
This homemade Hamburger Helper recipe is for the night when you want the comfort of the box, but not the box itself. You want browned beef, tender macaroni, a creamy cheddar sauce, and that familiar cheeseburger-macaroni flavor — only fresher, saucier, and made with ingredients you can actually adjust.
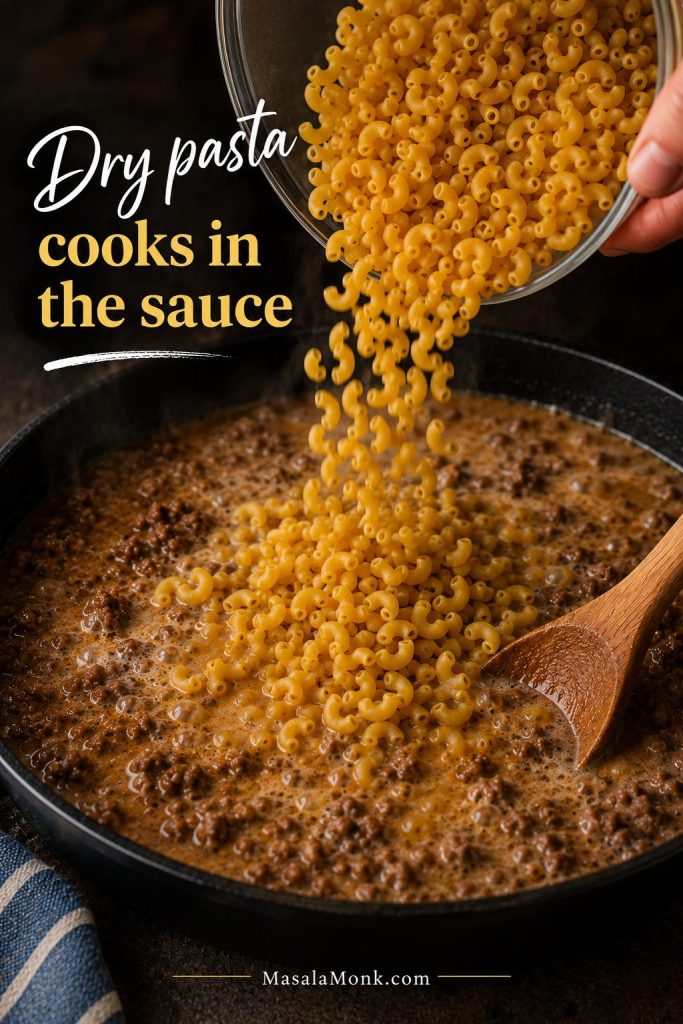
It is still the kind of dinner you make when everyone is hungry and you do not want three pans in the sink. The beef browns in one deep skillet, the pasta cooks right in the sauce, and the cheese melts in at the end. No packet, no separate pasta pot, no fussy sauce.
A Cozy One-Pan Dinner With More Control
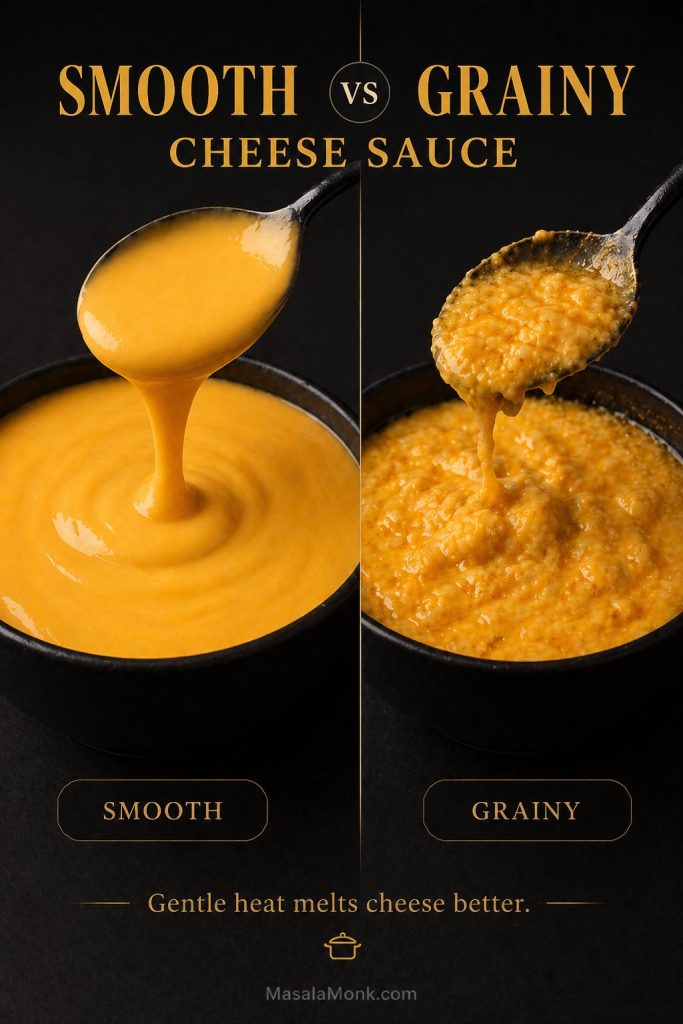
The secret is not making it fancy. Instead, it is getting the little things right: enough liquid for the pasta, enough tomato and mustard for that nostalgic tang, enough cheese for comfort, and gentle heat so the sauce stays creamy instead of grainy.
That is why this version is built around control, not reinvention. You still get the childhood boxed-dinner feeling: beefy noodles, creamy sauce, orange cheddar comfort, and that little tomato-mustard tang in the background. Now you can make it saucier, sharper, milder, tangier, lighter, or closer to the version you remember depending on the night.
Once the ratio clicks, this homemade Hamburger Helper recipe stops feeling like a boxed-dinner workaround and starts feeling like a back-pocket dinner: the kind you can make when the day ran long, the fridge is ordinary, and everyone still needs something warm, cheesy, and reliable.
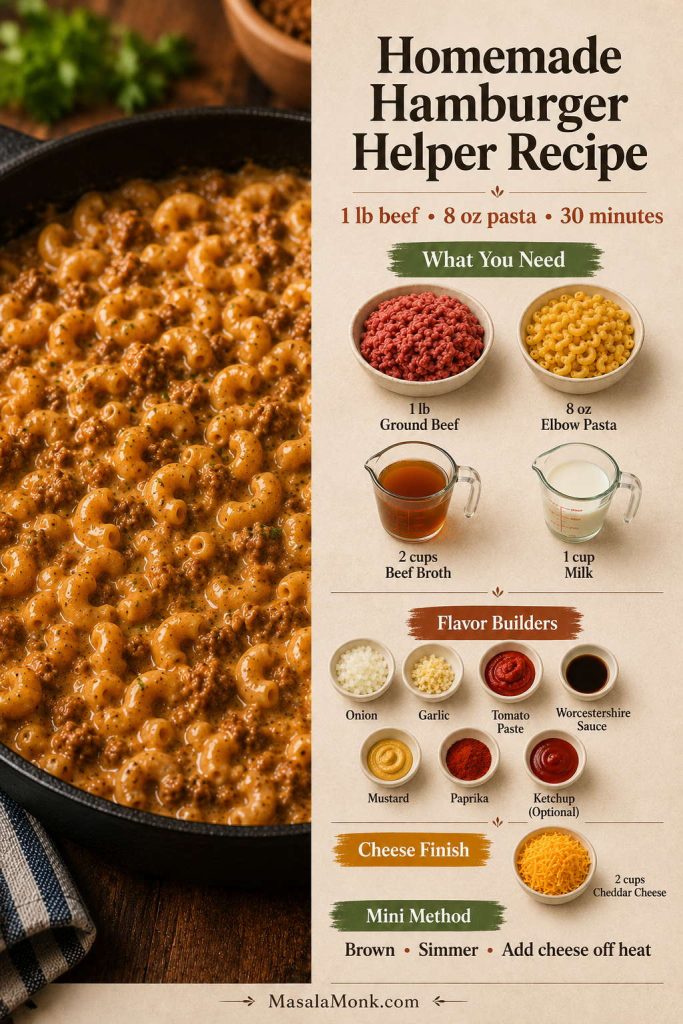
The short version: For a reliable homemade Hamburger Helper recipe, use 1 pound ground beef, 8 ounces short pasta, 2 cups beef broth, 1 cup milk, 2 tablespoons tomato paste, and 1 1/2 to 2 cups freshly grated cheddar. Simmer the pasta gently in the sauce, then turn off the heat before adding cheese. That gives you creamy cheeseburger macaroni instead of dry, grainy beef pasta.
In This Guide
Make the Recipe
Quick Answer: How Do You Make Homemade Hamburger Helper?
To make this homemade Hamburger Helper recipe, brown 1 pound ground beef in a large deep skillet, add onion, garlic, tomato paste, Worcestershire sauce, mustard, paprika, broth, milk, and dry macaroni, then simmer until the pasta is tender. After that, take the pan off the heat and stir in freshly grated cheddar until the sauce turns creamy.
For the best balance, use 1 pound ground beef, 8 ounces dry short pasta, 2 cups beef broth, 1 cup milk, and 1 1/2 to 2 cups shredded cheddar. As a result, you get a saucy, one-pot cheeseburger macaroni that thickens as it rests.
The goal is not to make this taste expensive or restaurant-style. The goal is to make it taste like the comfort you remember, only creamier, fresher, and easier to adjust when your pan, pasta, cheese, or family preference changes.
Already know you want the classic version? Jump to the full recipe card, or keep reading for the sauce ratio and texture cues that help prevent dry or grainy results.
Homemade Hamburger Helper Recipe at a Glance
Best Starting Version
Best starting version: Use 85/15 ground beef, elbow macaroni, beef broth, whole milk, sharp orange cheddar, tomato paste, Worcestershire sauce, mustard, and the optional ketchup. That combination gives the recipe a strong creamy, beefy, cheesy, and nostalgic direction.
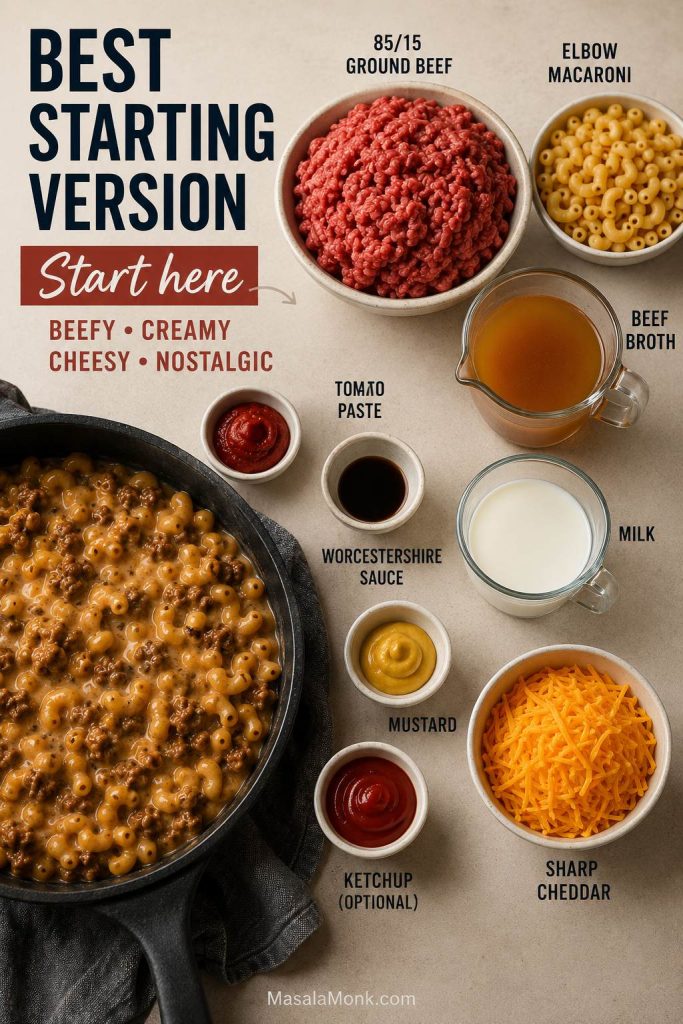
Before you cook, check the full skillet ratio so the pasta has enough liquid to soften without turning the sauce soupy.
What Is Homemade Hamburger Helper?
A homemade Hamburger Helper recipe is a from-scratch version of the classic skillet-dinner idea: ground beef, pasta, seasonings, liquid, and a creamy sauce cooked together in one pan. Instead of relying on a prepared sauce mix, this version builds the flavor with tomato paste, garlic, onion, paprika, Worcestershire sauce, mustard, broth, milk, and real cheese.
Think of it as homemade cheeseburger macaroni. The goal is a cozy, weeknight ground beef dinner that tastes nostalgic, cheesy, savory, and satisfying without tasting flat or overly processed. If you want the same idea with an even stronger burger-style angle, this homemade cheeseburger macaroni recipe goes deeper into that version.
That is the charm of this dinner. It is the skillet you make when the day ran long, the pantry is doing most of the work, and everyone still wants something warm, cheesy, and familiar.
Hamburger Helper, the commercial boxed product, is a pasta meal where you add ingredients like ground beef, water, and milk. The official Hamburger Helper Cheeseburger Macaroni product page shows that basic dinner format. This homemade version keeps the same easy skillet spirit but gives you more control over the flavor, cheese, salt, and sauce texture.
Why This Homemade Hamburger Helper Recipe Works
The biggest mistake with a homemade Hamburger Helper recipe is treating it like ordinary mac and cheese with beef. It needs a little more savory depth. The flavor people remember is not just cheese; it is beefy, salty, slightly tangy, gently tomatoey, and deeply comforting.
This recipe works because tomato paste gives the sauce body, Worcestershire sauce adds beefy depth, mustard gives a subtle cheeseburger note, and paprika brings warm, familiar flavor. Meanwhile, the pasta cooks directly in broth and milk, so the starch helps thicken the sauce naturally. Then the pan comes off the heat before the cheddar goes in, which keeps the sauce smoother and less grainy.
The result is creamy but not soupy, cheesy but not gluey, and familiar without needing a packet. You still get the easy skillet-dinner feeling, while keeping control over the salt, cheese, sauce thickness, pasta shape, and add-ins.
Why This Method Helps Prevent Dry, Grainy, or Bland Results
The most important safeguards in this homemade Hamburger Helper recipe are the liquid ratio, the flavor base, and when the cheese goes in. Too little liquid can leave the pasta firm before the sauce is ready. A sauce that leans too heavily on milk can taste softer and less beefy. Cheese added while the pan is still bubbling is also more likely to turn grainy.
That is why this method relies on broth for beefy depth, milk for creaminess, tomato paste for body, mustard and Worcestershire sauce for cheeseburger-style tang, and cheese added off heat. Elbows keep the result classic, while small shells make the bowl feel extra saucy.
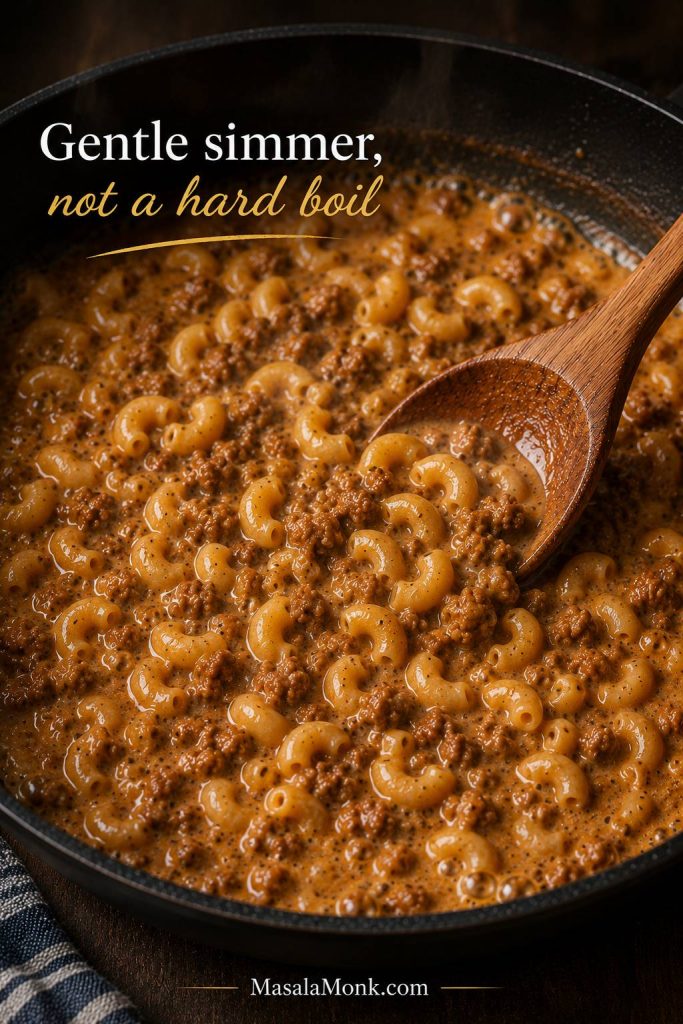
Key technique: Do not boil hard after adding the milk, and let the pan calm down before adding the cheese. A gentle simmer cooks the pasta; off-heat cheese gives the sauce a smoother finish.
What This Homemade Hamburger Helper Should Taste Like
The finished skillet should taste beefy, cheesy, lightly tomatoey, and just a little tangy. It should not taste like plain macaroni with ground beef, and it should not taste like tomato pasta with cheese thrown in. Instead, the best version lands right in the middle: cozy cheeseburger macaroni with a creamy sauce that clings to every bite.
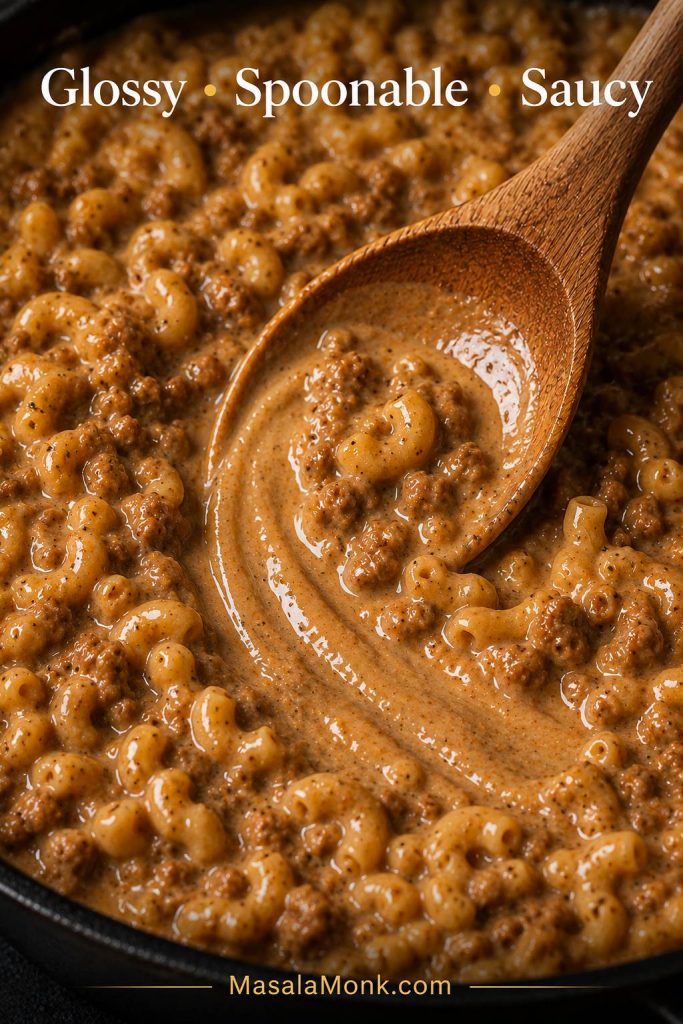
Texture matters just as much. The pasta should be tender but not mushy, the sauce should look glossy and spoonable, and the cheese should melt into the sauce instead of sitting in oily strings. The skillet should look slightly loose before resting because the pasta will keep drinking in sauce for a few minutes after the heat is off.
Before You Start: 5 Things That Make or Break This Recipe
Homemade Hamburger Helper is easy, but one-pot pasta gives you less room to ignore the pan. These five details matter more than they might seem.
- Use a wide, deep pan. A 12-inch deep skillet or Dutch oven lets the pasta cook evenly instead of clumping.
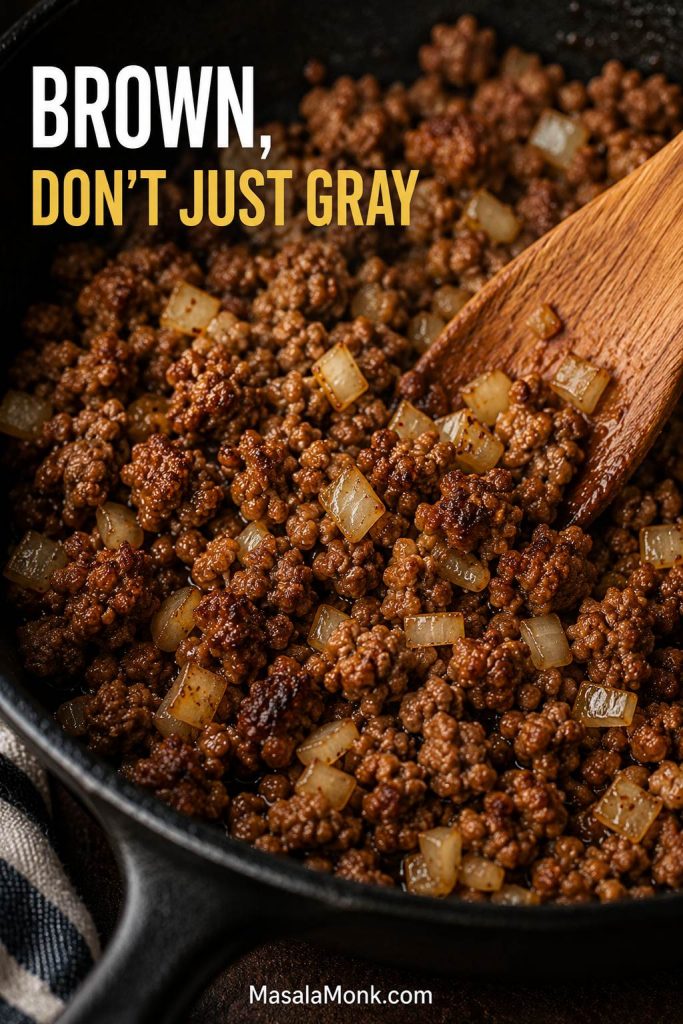
- Brown the beef well. The browned bits give the sauce more flavor than the seasonings alone.
- Simmer gently after adding milk. A hard boil can make the sauce look separated.
- Stir often. Pasta cooked in sauce can stick to the bottom if ignored.
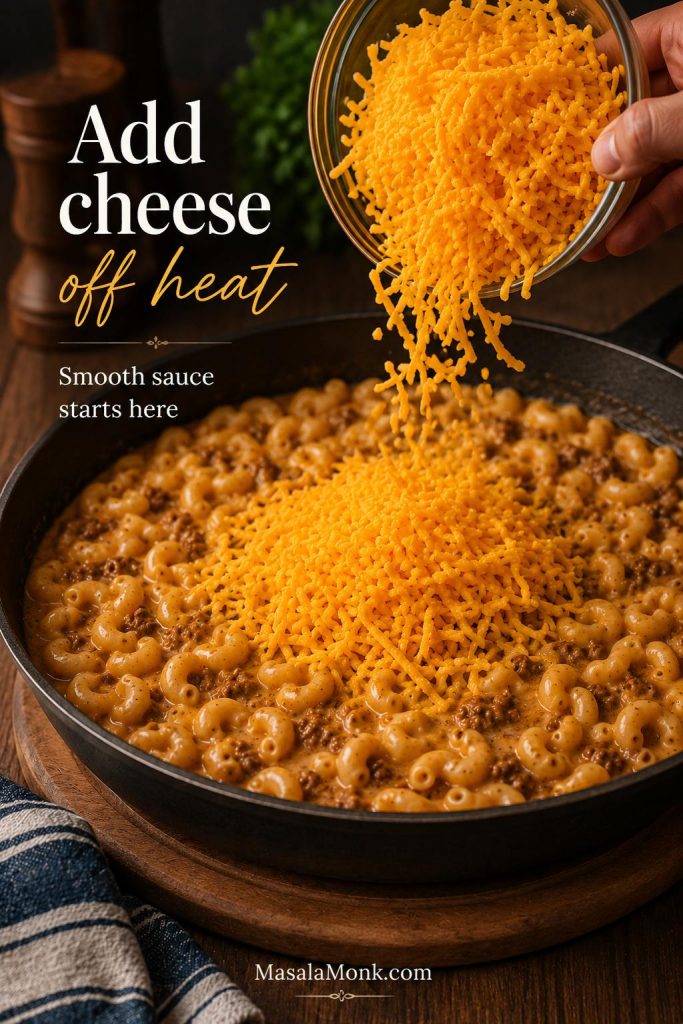
- Add cheese off heat. This is the easiest way to avoid a grainy cheddar sauce.
A few small choices early on make the final skillet creamier, smoother, and easier to adjust.
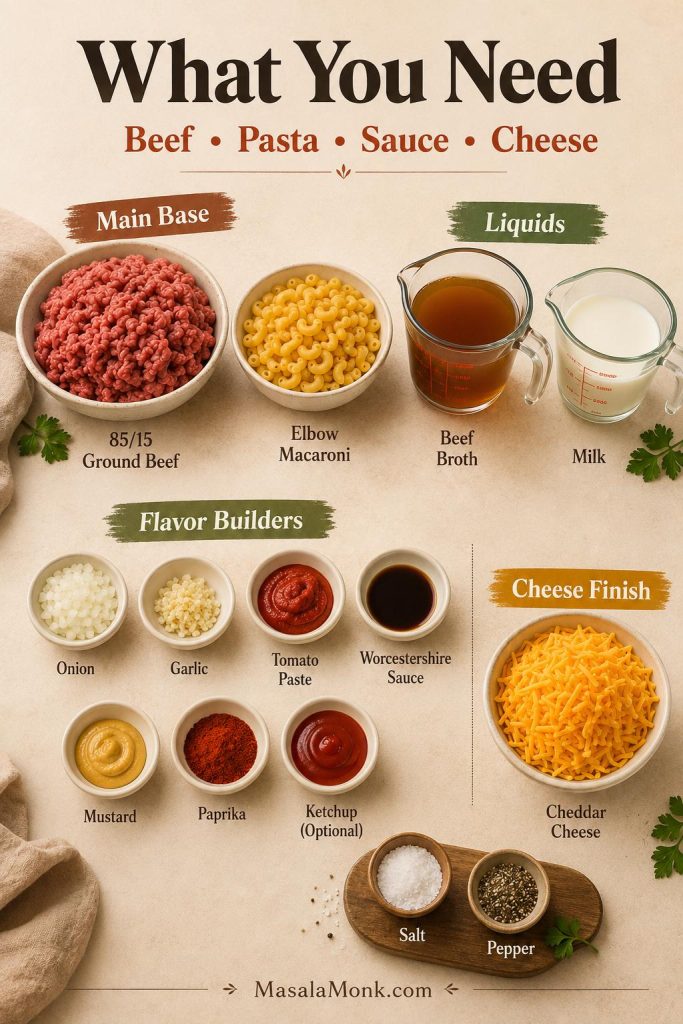
Ingredients You Need
The ingredient list for this homemade Hamburger Helper recipe is simple on purpose. This is the kind of dinner that should work with the beef in the freezer, the pasta in the pantry, and the cheese already in the fridge. The difference between “fine” and “really good” is balance: enough beefy flavor, enough liquid for the pasta, and enough cheese added at the right moment.
Choosing a pasta shape first? Jump to the best pasta guide before you start, especially if you are using shells, rotini, cavatappi, or gluten-free pasta.
Ground Beef
Use 1 pound / 450 g ground beef. An 85/15 blend gives the richest comfort-food flavor, while 90/10 or 93/7 keeps the dish lighter. If the beef releases a lot of fat, drain most of it after browning, but leave a little behind for flavor.
Very lean beef works too, but it may need a tablespoon of oil at the start and a little more seasoning at the end. Ground turkey or ground chicken can also work, although the flavor will be milder and less like the classic beefy skillet dinner.
Short Pasta
Elbow macaroni is the most classic choice. Small shells are excellent too because they catch the sauce. Rotini, cavatappi, and small penne also work, but they may need an extra splash of liquid and a few more minutes.
Broth and Milk
Beef broth gives the sauce a deeper flavor than water. Milk makes it creamy. The best starting point is 2 cups broth plus 1 cup milk for 8 ounces dry pasta. Keep another splash of broth or water nearby in case your pasta needs more liquid before it softens.
Cheese
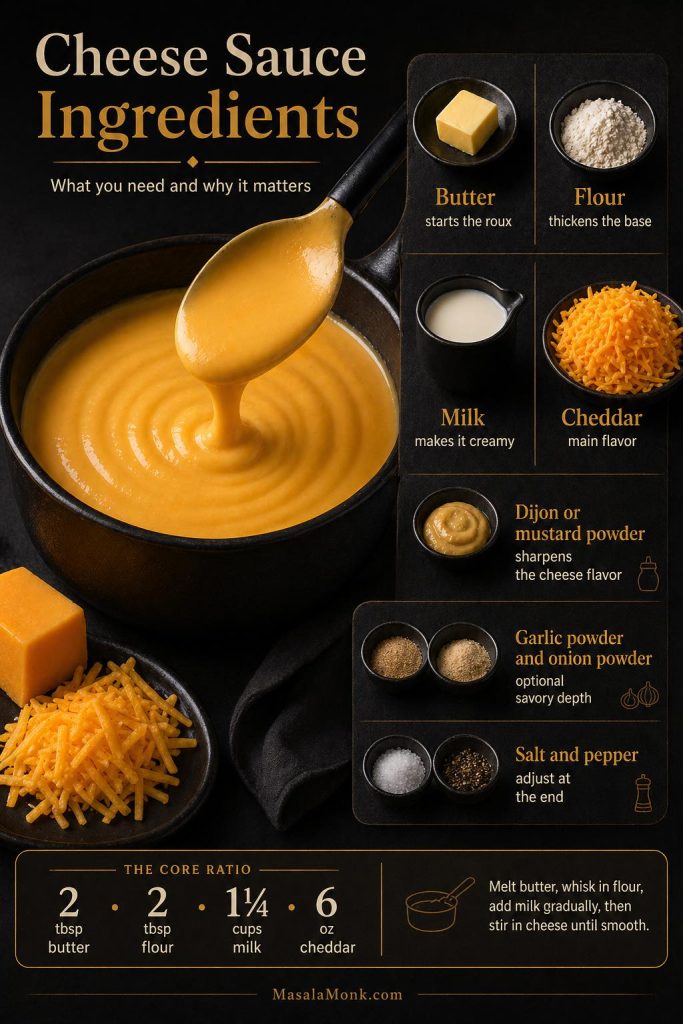
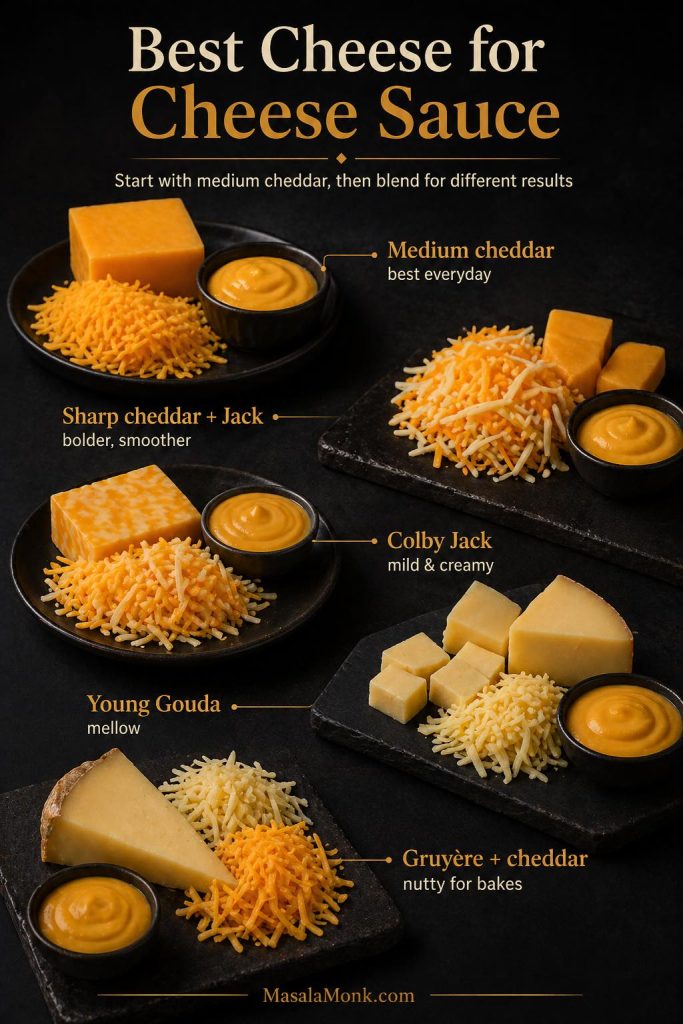
Freshly grated sharp cheddar gives the strongest flavor and the smoothest melt. Pre-shredded cheese can work, but its anti-caking starches may make the sauce less silky. For a meltier, more nostalgic finish, blend cheddar with Monterey Jack, Colby Jack, or a little American cheese. Before you stir cheddar into the pan, see the off-heat cheese step so the sauce has a better chance of staying smooth. This macaroni and cheese recipe is useful if you want a more classic pasta-and-cheese direction with stovetop, baked, and Southern-style versions.
Flavor Builders
Tomato paste, Worcestershire sauce, mustard, garlic, onion, paprika, and a little chili powder create the flavor that makes this taste like a true homemade replacement instead of plain beefy mac and cheese. A spoonful of ketchup is optional, but it helps if you want a sweeter, tangier, more nostalgic cheeseburger macaroni flavor.
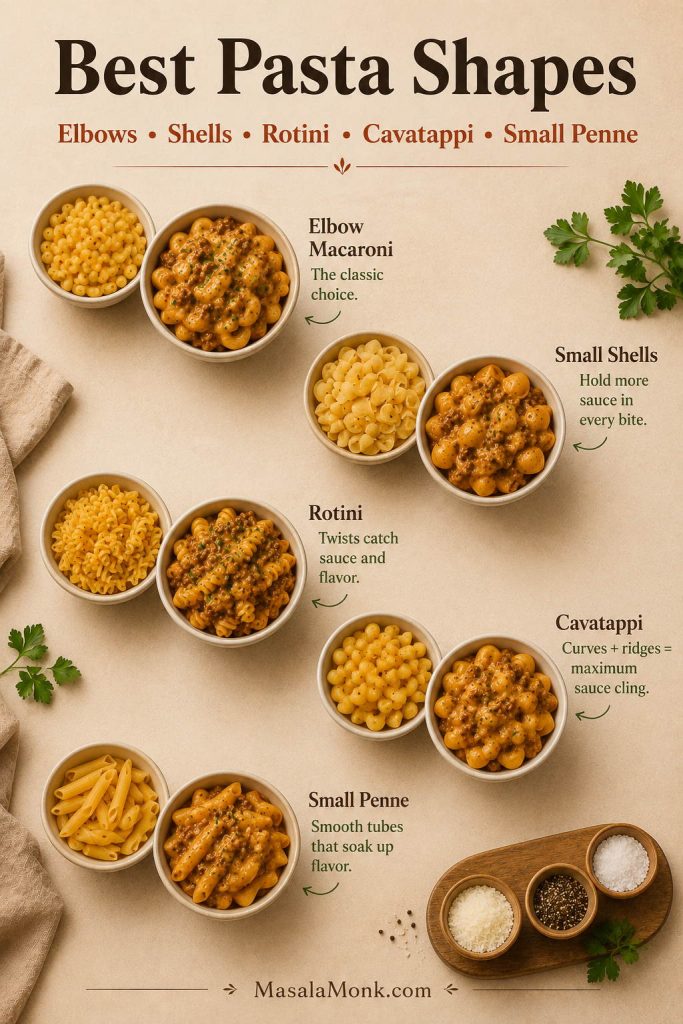
Best Pasta for Homemade Hamburger Helper
The best pasta is a short, sturdy shape that can simmer in sauce without falling apart. Because the pasta cooks directly in the pan, delicate noodles can go soft before the sauce is right.
| Pasta Shape | How It Works | Best Use |
|---|---|---|
| Elbow macaroni | Classic, reliable, cooks evenly | Best first choice |
| Small shells | Holds sauce well and feels extra creamy | Best saucy version |
| Rotini | Good texture but may need extra liquid | Good pantry swap |
| Cavatappi | Chewy and fun, slightly longer cook time | Heartier version |
| Small penne | Works, but the center can take longer to soften | Add liquid as needed |
| Gluten-free short pasta | Works, but can soften quickly | Check early and stir gently |
| Egg noodles | Too delicate for this cheeseburger macaroni style | Better for stroganoff |
| Spaghetti or long pasta | Wrong texture and harder to simmer evenly | Not recommended here |
If you use a larger or thicker pasta shape, do not panic if it needs more liquid. Instead, add 2 to 4 tablespoons of broth or water at a time, stir, and keep simmering gently until the pasta is tender.
The Homemade Hamburger Helper Ratio: Saucy, Not Soupy
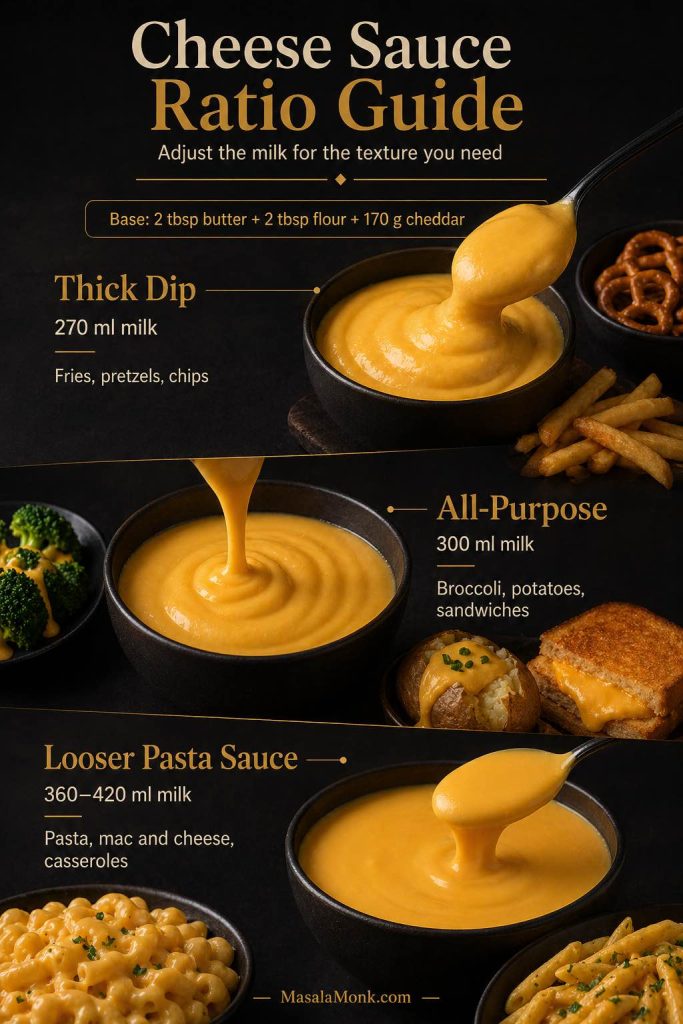
The ratio is the difference between a creamy homemade Hamburger Helper recipe and a skillet of dry beefy noodles. Because the pasta cooks directly in the pan, it needs enough liquid to soften, but not so much that the final dish turns soupy.
The most reliable starting point is 1 pound beef, 8 ounces dry short pasta, 2 cups broth, 1 cup milk, and 1 1/2 to 2 cups cheese. That gives the pasta room to cook while leaving enough starchy liquid for the cheddar to turn into a creamy sauce.
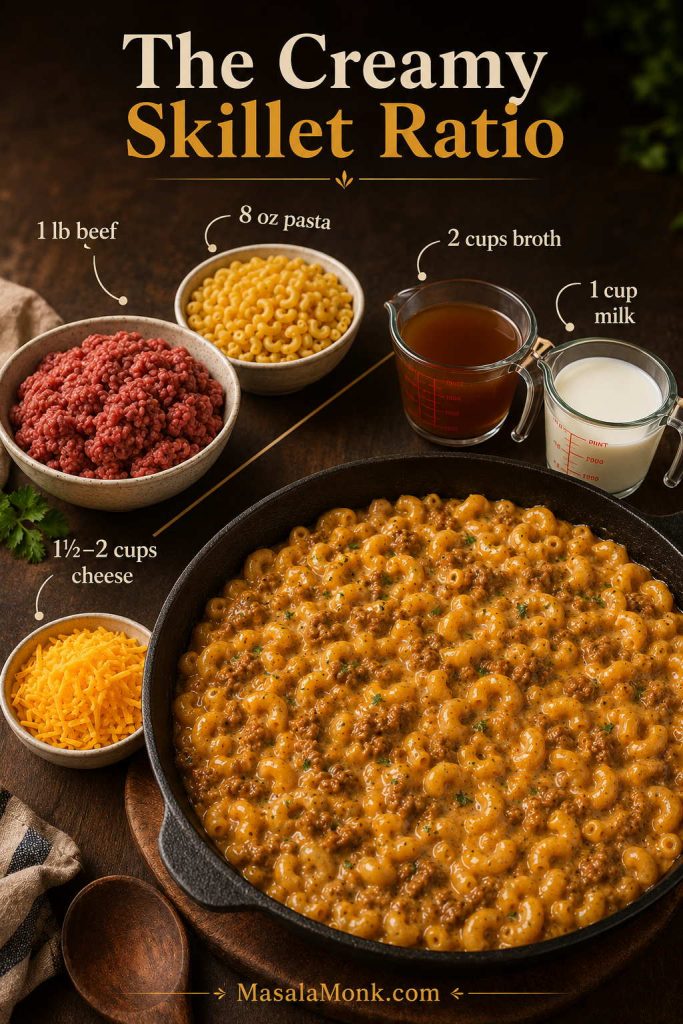
- 1 pound / 450 g ground beef
- 8 ounces / 225 g dry short pasta
- 2 cups / 480 ml beef broth
- 1 cup / 240 ml milk
- 1 1/2 to 2 cups / 170 to 225 g shredded cheese
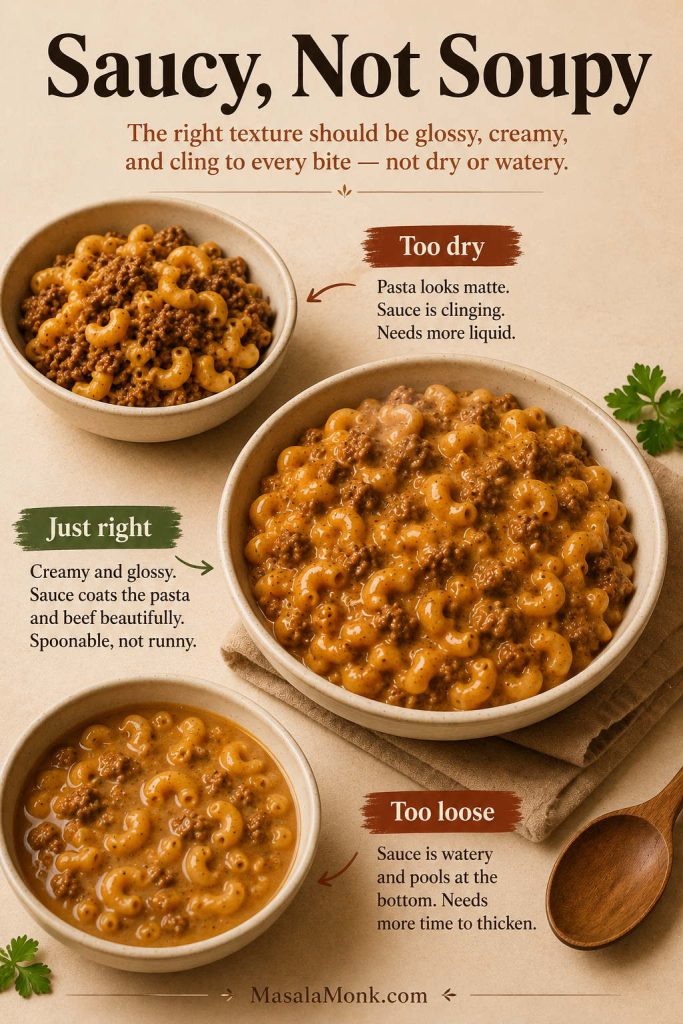
This ratio is intentionally saucy at first because the pasta keeps absorbing liquid while it rests. As a result, the skillet should look slightly looser than the final texture when you turn off the heat. If the pasta is still firm and the pan looks dry, add liquid. If the pasta is tender and the sauce looks loose, simmer uncovered for a minute or two, then rest before judging.
Saucy, Not Soupy Texture Guide
Use this texture cue before serving: the sauce should still move and coat the pasta, not sit dry in clumps or pool thinly around the edges.
If the sauce still turns too thick, too loose, or grainy, jump to the troubleshooting table for quick fixes.
How to Make Homemade Hamburger Helper
This homemade Hamburger Helper recipe is one-pot, but the order still matters. First, browning the beef builds flavor. Then, blooming the tomato paste and spices keeps the sauce from tasting raw. Finally, turning off the heat before adding cheese keeps the finish creamy. The same one-pot logic works in other creamy pasta dinners too, like this one-pot chicken bacon ranch pasta, where the pasta simmers directly in the sauce.
1. Brown the Beef
Heat a large deep skillet or Dutch oven over medium-high heat. Add the ground beef and cook until browned, breaking it up as it cooks. Then add the onion and cook until softened. If there is a lot of grease in the pan, drain most of it.
Do not stop as soon as the beef turns gray. Let some of the pieces brown against the pan, because those browned bits help the sauce taste deeper and less like boiled beef.
Ground beef should be cooked to a safe minimum internal temperature of 160°F / 71°C. A food thermometer is the most reliable way to check. USDA safe minimum temperature chart
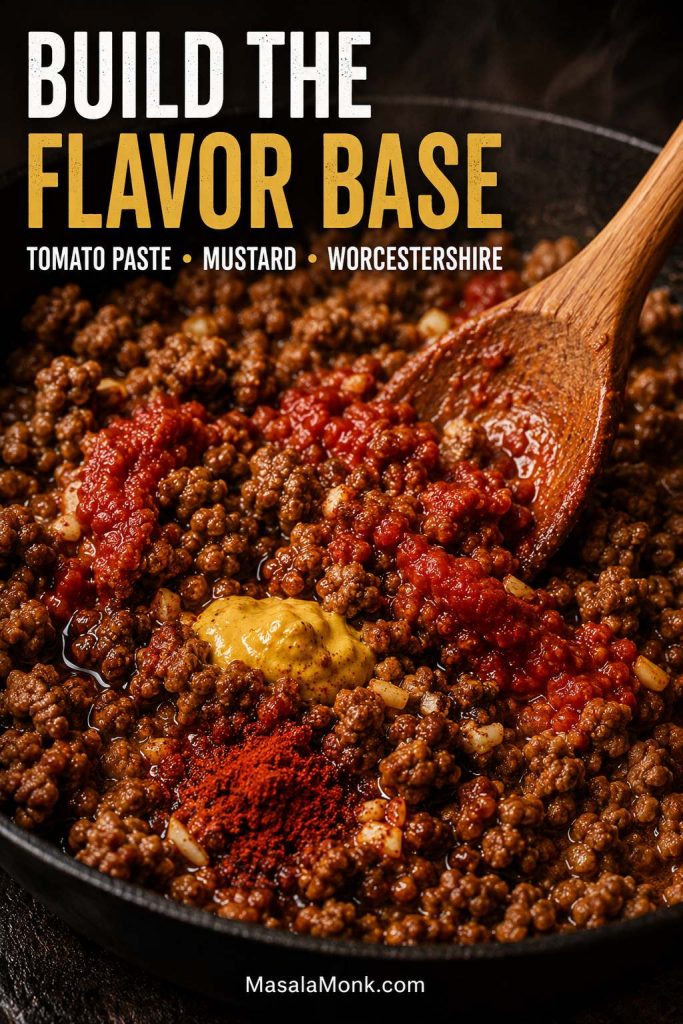
2. Build the Flavor Base
Add the garlic, tomato paste, Worcestershire sauce, mustard, paprika, chili powder, salt, and pepper. Stir for about 1 minute. The tomato paste should darken slightly and coat the beef. This quick step makes the sauce taste deeper and less flat.
After about a minute, the tomato paste should look darker and smell savory instead of raw. If it still smells sharp and tinny, give it another 30 seconds before adding the liquid.
3. Add the Liquid and Pasta
Pour in the beef broth and milk, then stir in the dry pasta. Bring the mixture to a gentle simmer. At this point, avoid a harsh boil, especially after the milk is in the pan.
4. Simmer Until the Pasta Is Tender
Cook uncovered or partially covered, stirring often, until the pasta is tender and the sauce has reduced. This usually takes 10 to 14 minutes, depending on the pasta shape. If the pan gets too dry before the pasta is done, add a splash of broth, milk, or water.
The sauce should bubble gently, not aggressively. Stir across the bottom of the pan so the pasta does not stick, and start checking early if you are using small shells or gluten-free pasta.
Should You Cover the Pan?
You can cook it uncovered or partially covered. Uncovered gives you more control because you can watch the sauce reduce. Partially covered helps if the pasta is still firm but the liquid is reducing too fast. Avoid fully covering the pan for the whole cook time unless you are checking often, because the sauce can stay too loose while the pasta softens.
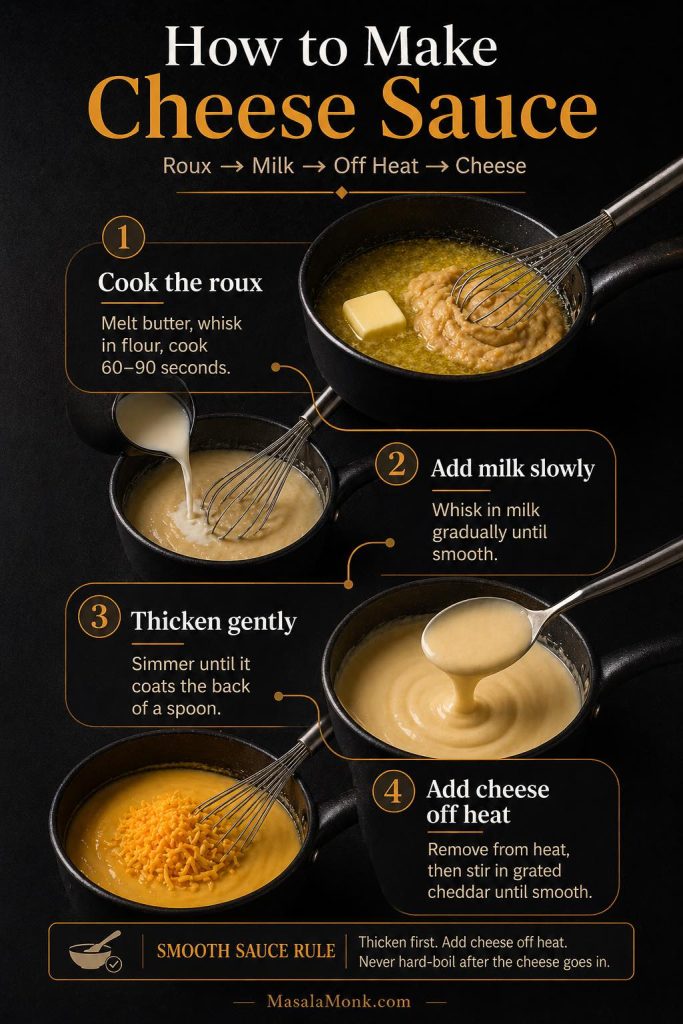
5. Stir in the Cheese Off Heat
Turn off the heat. Add the shredded cheese a handful at a time, stirring until melted. Then let the skillet sit for 2 to 3 minutes before serving so the sauce can settle and thicken.
Wait until the bubbling calms before adding the cheese. The sauce should look hot and glossy, but not actively boiling. That pause is what keeps the cheddar creamy instead of grainy.
Cook’s check: Before adding the cheese, the pasta should be tender and the pan should still have a small amount of glossy liquid. If it looks completely dry, add a splash of milk or broth. If it looks watery, simmer for another minute. Then turn off the heat and add the cheese.
The Spoon Test for the Right Sauce Texture
Before serving, drag a spoon through the skillet. The sauce should coat the pasta, leave a glossy trail, and still move enough to feel creamy.
Common Mistakes That Make the Sauce Dry, Grainy, or Bland
Most problems come from the same few places: the pan gets too dry before the pasta softens, the cheese goes in while the sauce is still bubbling, or the beef-and-pasta base is not seasoned before the cheddar is added. Fix those three things and the skillet becomes much easier to control.
Need the compact cooking version now? Jump to the recipe card. If dinner is already going sideways, use the troubleshooting table.
Homemade Hamburger Helper Recipe
A creamy, one-pot homemade Hamburger Helper recipe with browned ground beef, tender macaroni, real cheddar, and a savory cheeseburger-style sauce. It has the comfort of the boxed classic, but a fresher flavor and a sauce you can actually control.
Equipment
- Large deep 12-inch skillet, sauté pan, or Dutch oven
- Wooden spoon or spatula
- Measuring cups and spoons
- Box grater, if shredding cheese fresh
Ingredients
- 1 tablespoon olive oil or neutral oil, only if using very lean beef
- 1 pound / 450 g ground beef
- 1/2 medium yellow onion, finely chopped, about 1/2 cup / 75 g
- 2 to 3 garlic cloves, minced
- 2 tablespoons / 30 g tomato paste
- 1 tablespoon ketchup, optional for a sweeter nostalgic flavor
- 1 to 2 teaspoons Worcestershire sauce
- 1 teaspoon Dijon mustard or 1/2 teaspoon mustard powder
- 1 teaspoon paprika or smoked paprika
- 1/2 teaspoon chili powder
- 1/2 teaspoon garlic powder
- 1/2 teaspoon onion powder
- 3/4 teaspoon fine salt, plus more to taste
- 1/4 teaspoon black pepper
- 2 cups / 480 ml beef broth
- 1 cup / 240 ml milk
- 8 ounces / 225 g elbow macaroni or small shells
- 1 1/2 to 2 cups / 170 to 225 g freshly grated sharp cheddar cheese
- Optional: chopped parsley, chives, or extra black pepper for serving
Instructions
- Brown the beef. Set a large deep skillet or Dutch oven over medium-high heat. Add the beef and cook, breaking it into small pieces, until browned and cooked through. Add the onion and cook for 2 to 3 minutes, until softened. Drain excess fat if needed.
- Add the flavor base. Stir in the garlic, tomato paste, ketchup if using, Worcestershire sauce, mustard, paprika, chili powder, garlic powder, onion powder, salt, and black pepper. Cook for about 1 minute, stirring constantly, until the tomato paste darkens slightly and coats the beef.
- Add liquid and pasta. Pour in the beef broth and milk. Stir well, scraping the bottom of the pan. Add the dry pasta and stir again.
- Simmer gently. Bring to a gentle simmer, then reduce the heat to medium or medium-low. Cook for 10 to 14 minutes, stirring often, until the pasta is tender and the sauce has reduced. Add a splash of broth, milk, or water if the pan looks dry before the pasta is done.
- Finish with cheese. Turn off the heat. Stir in the cheese a handful at a time until melted and creamy.
- Rest and serve. Let the skillet sit for 2 to 3 minutes. Taste and adjust salt, pepper, or Worcestershire sauce if needed. Serve warm.
Notes
- For the smoothest sauce, grate the cheese yourself, add it off heat, and see the grainy cheese prevention tip.
- Small penne, rotini, or cavatappi may need an extra splash of liquid and 2 to 4 more minutes.
- Too thick after resting? Stir in a splash of warm milk or broth, or see the dry sauce fix.
- For stronger cheeseburger-macaroni flavor, keep the ketchup and mustard in the recipe.
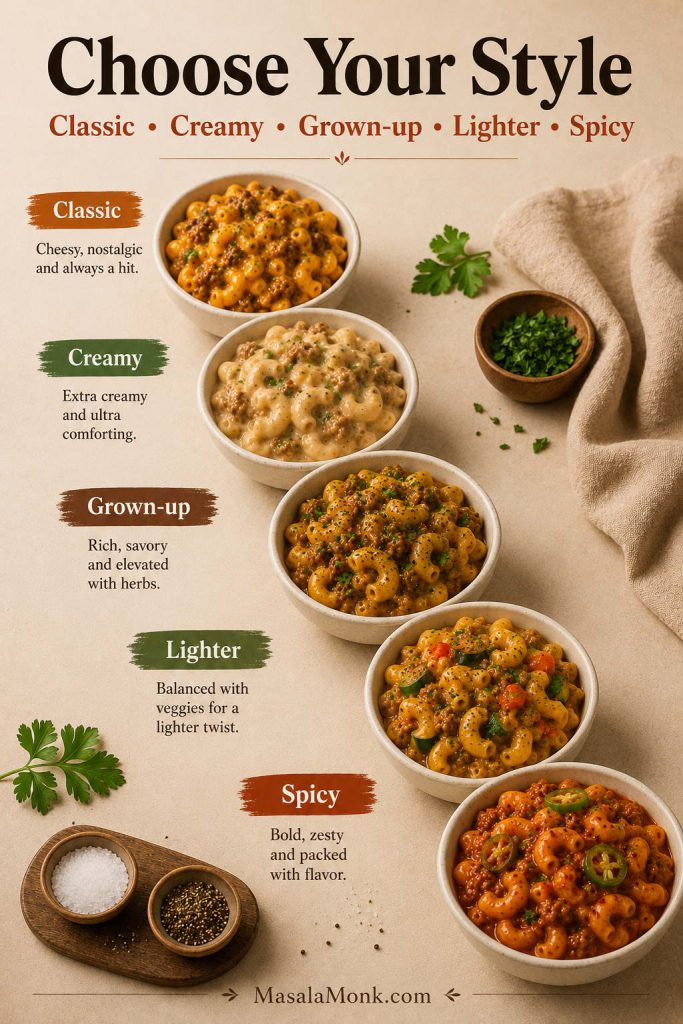
Choose Your Hamburger Helper Style
This is where the recipe becomes yours. Some readers want the closest possible version of the childhood box. Others want a sharper, more homemade skillet pasta with real cheddar and extra garlic. Some need it lighter, higher-protein, or easier for kids. The base ratio stays the same; the flavor direction changes.
Want to compare the actual versions? Jump to variations for the lighter, high-protein, no-milk, gluten-free, spicy, and vegetable options.
| Style | Use This | Flavor Result |
|---|---|---|
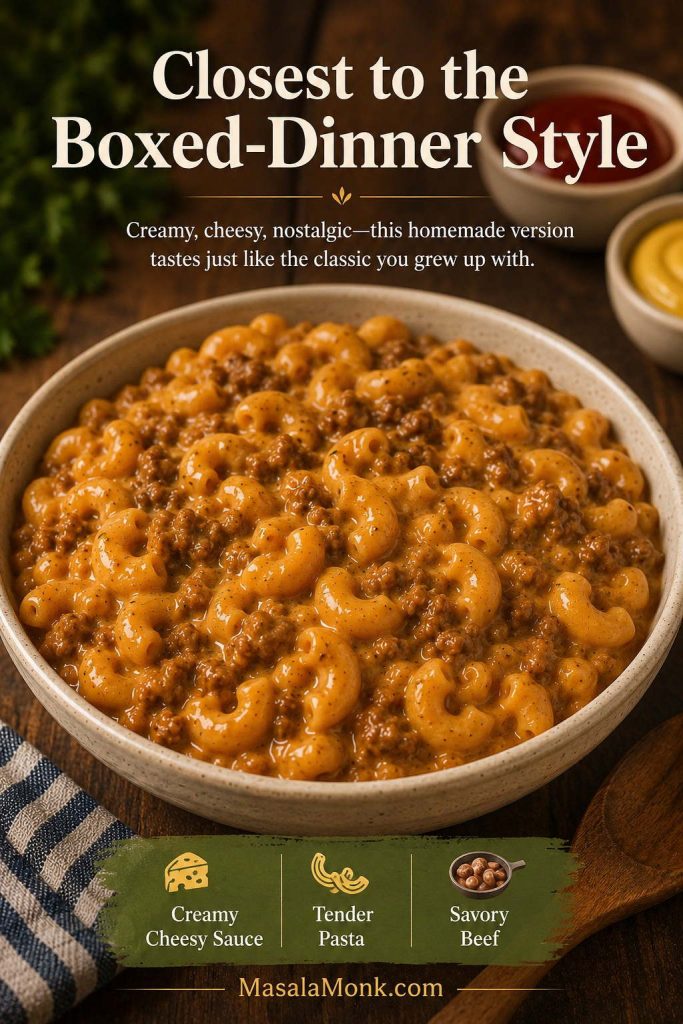
| Closest to the childhood box | Ketchup, mustard, orange cheddar, a little paprika | Sweet-tangy cheeseburger macaroni |
| Creamiest family-style version | Fresh cheddar plus Monterey Jack or American cheese | Smoother, meltier, more kid-friendly |
| More grown-up skillet pasta | Extra garlic, sharp cheddar, black pepper, herbs | Less packet-style, more savory and homemade |
| Lighter but still cozy | Lean beef or turkey, vegetables, whole wheat pasta | Comforting without feeling as heavy |
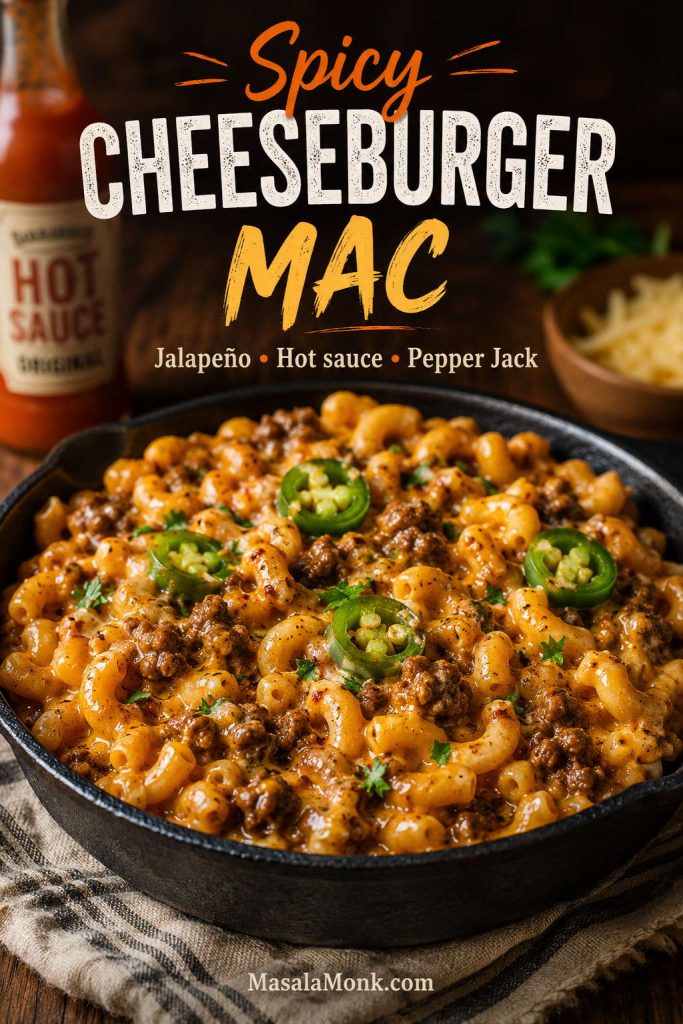
| Spicy cheeseburger mac | Hot sauce, jalapeño, cayenne, Pepper Jack | Cheesy with a warm kick |
This is usually where every household has an opinion. Some people want it sweeter and closer to the box, some want it sharper with real cheddar, some want it extra creamy for kids, and some want enough hot sauce to make it feel more grown-up. If your table is split, start with the classic version, then let people add hot sauce, extra cheddar, pickles, black pepper, or herbs at the end.
How to Get That Nostalgic Cheeseburger Macaroni Flavor
For the most nostalgic version, think savory, cheesy, slightly sweet, slightly tangy, and beefy. Tomato paste gives the sauce body. Ketchup adds the familiar sweet-acidic note. Mustard makes it taste more like cheeseburger macaroni. Worcestershire sauce keeps the beef flavor from tasting flat.
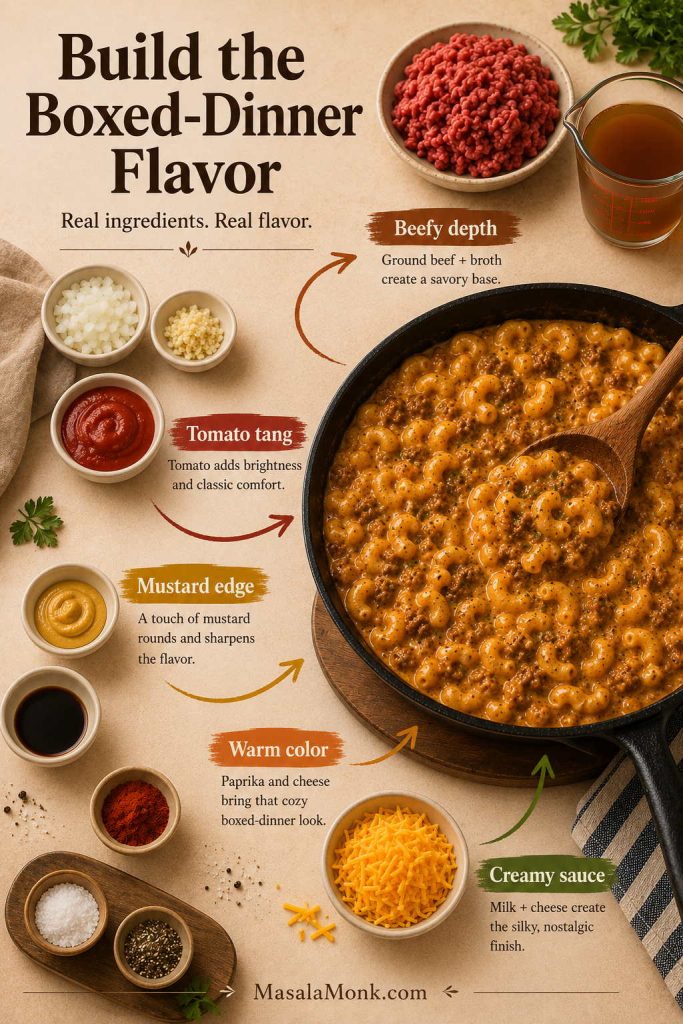
How to Build the Boxed-Dinner Flavor Without the Packet
This is the part many homemade versions miss. The familiar flavor does not come from cheese alone; it comes from beefy depth, a little tomato tang, a subtle mustard edge, warm color, and a sauce that feels creamy without turning gluey.
Want the most nostalgic version? Jump to the closest boxed-dinner style variation.
| What You Remember | How to Build It Here |
|---|---|
| Beefy, savory base | Browned beef, beef broth, Worcestershire sauce |
| Light tomato tang | Tomato paste plus optional ketchup |
| Cheeseburger-style edge | Mustard, cheddar, optional pickles or bacon |
| Warm orange color | Paprika and orange cheddar |
| Smooth, family-style sauce | Fresh cheddar plus a little American cheese, Monterey Jack, or Colby Jack |
That is why this recipe uses small amounts of several flavor builders instead of relying only on cheese. Cheese gives comfort, but tomato paste, mustard, Worcestershire sauce, paprika, and ketchup are what make the skillet taste like cheeseburger macaroni instead of plain beef mac.
- Sweeter tang: add 1 tablespoon ketchup.
- Cheeseburger flavor: use Dijon or mustard powder.
- Deeper savory flavor: use Worcestershire sauce and beef broth.
- Smoother melt: use part cheddar and part American cheese or Colby Jack.
- Stronger color: use paprika and sharp orange cheddar.
Make-Ahead Homemade Hamburger Helper Seasoning Mix
If the boxed version appealed because it was easy, this is the part to save. Mix the dry seasonings ahead of time and keep them in a small jar. Then a busy-night dinner starts with browning beef, not measuring five spices while everyone is hungry.
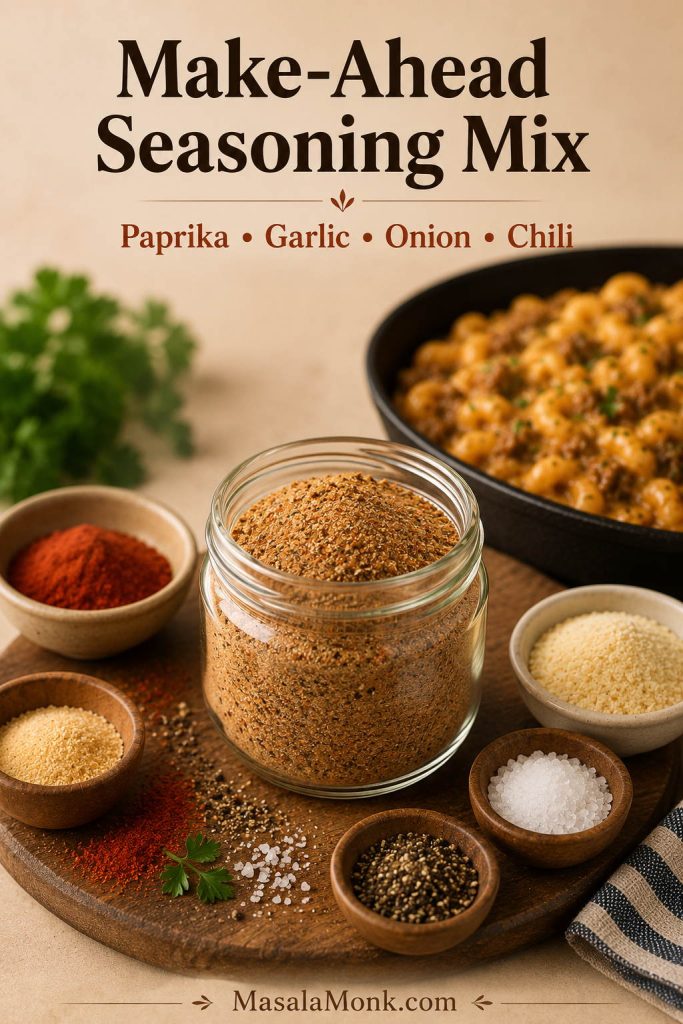
- 1 teaspoon paprika or smoked paprika
- 1/2 teaspoon chili powder
- 1/2 teaspoon garlic powder
- 1/2 teaspoon onion powder
- 3/4 teaspoon fine salt
- 1/4 teaspoon black pepper
- Optional: 1 teaspoon cornstarch for a slightly thicker sauce
Label the jar “Homemade Hamburger Helper mix.” When you cook, still add the tomato paste, Worcestershire sauce, mustard, and cheese fresh. Those ingredients are what keep the sauce from tasting flat.
How to Make It Taste More Homemade
If you want less boxed nostalgia and more homemade skillet-pasta flavor, skip the ketchup, use sharp cheddar, add an extra clove of garlic, and finish with black pepper, chives, parsley, or a little hot sauce. You can also add sautéed mushrooms or bell pepper with the onion for a more grown-up version.
Variations
Cheeseburger Macaroni Hamburger Helper Style
For the most cheeseburger-like version, use elbow macaroni, keep the ketchup and mustard, and use a mix of sharp cheddar and American cheese. You can also top each bowl with chopped pickles, diced tomatoes, or a little crumbled cooked bacon.
Healthy Homemade Hamburger Helper
For a lighter version, use 90/10 or 93/7 ground beef, ground turkey, or ground chicken. Add finely chopped bell pepper, grated carrot, zucchini, spinach, peas, or mushrooms. Whole wheat pasta also works, although it may need a little extra liquid and a few more minutes.
For extra creaminess with a lighter finish, stir in a spoonful or two of plain Greek yogurt after turning off the heat. Do not boil it. The flavor becomes a little tangier and less classic, but the sauce stays creamy if the heat is gentle.
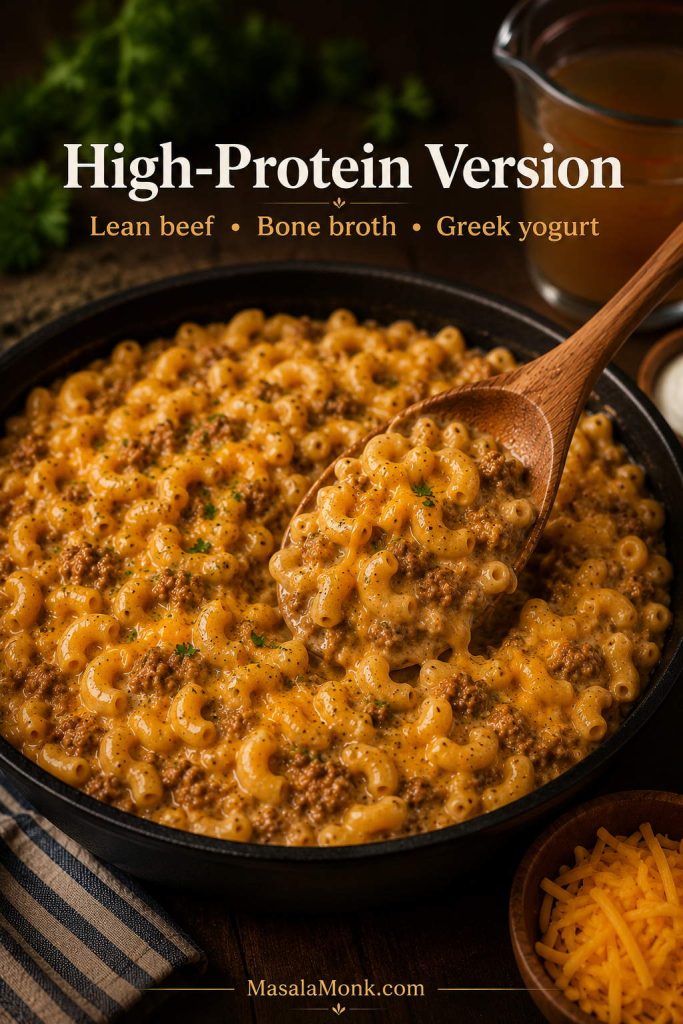
High-Protein Homemade Hamburger Helper
For a higher-protein version, use lean ground beef or ground turkey, high-protein short pasta, beef bone broth, and a little plain Greek yogurt stirred in off heat. Keep the cheddar for flavor, but do not boil the yogurt or the sauce can separate. Because high-protein pastas vary in cooking time and starch release, start checking early and keep extra broth nearby. This version tastes less like the childhood box, but it works well when you want the same comfort-food idea with more protein.

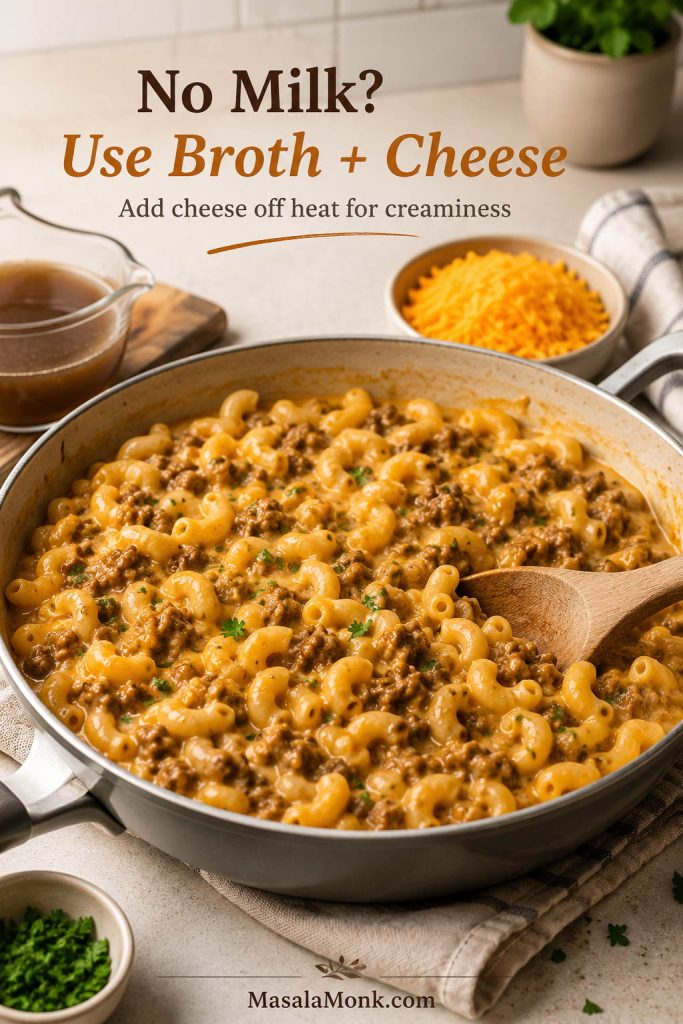
No-Milk Homemade Hamburger Helper
You can make this without milk. Replace the milk with extra beef broth, then make the sauce creamier with cheese at the end. The result is a little less creamy but still very good. For more body, stir 1 teaspoon cornstarch into 2 tablespoons cold broth, then add it near the end and simmer briefly before adding cheese.
Gluten-Free Homemade Hamburger Helper
Use a sturdy gluten-free short pasta and check it early. Gluten-free pasta can go from firm to soft quickly, and it often releases more starch. Stir gently, add liquid only as needed, and serve right away for the best texture.

Spicy Hamburger Helper
Add cayenne, hot sauce, diced jalapeño, or crushed red pepper. Pepper Jack cheese also works well if you want heat without changing the one-pot method.
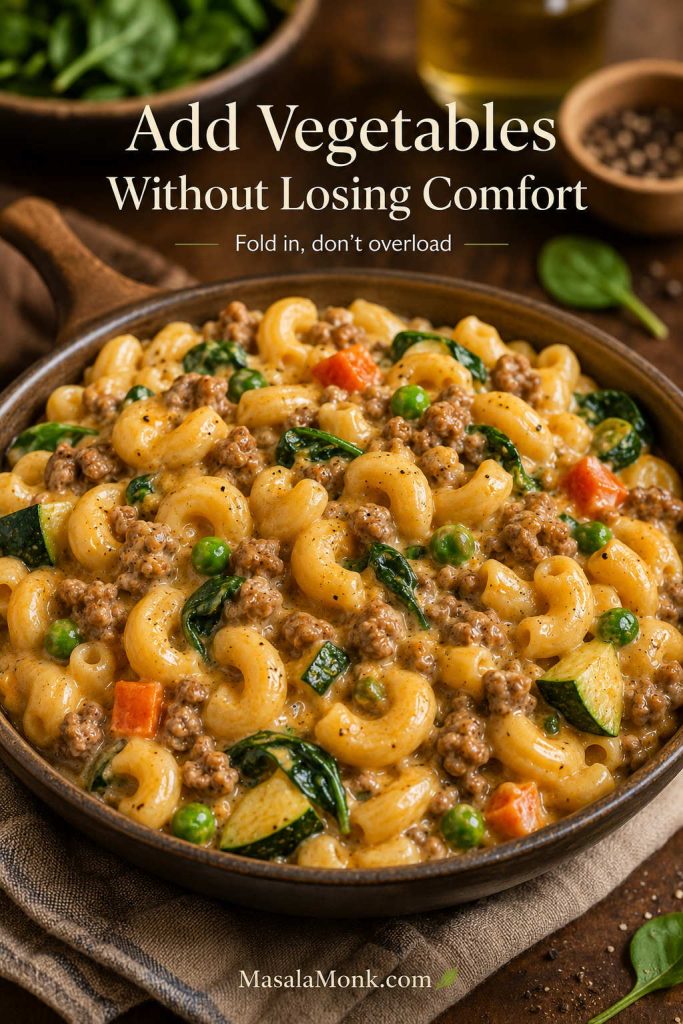
Hamburger Helper with Vegetables
For vegetables that blend into the sauce, add grated carrot or zucchini with the onion. For vegetables that keep their shape, stir in peas, corn, or spinach near the end. Avoid adding too many watery vegetables unless you are ready to simmer the sauce a little longer.
If your comfort-food memory leans more creamy casserole than skillet pasta, this tuna noodle casserole recipe follows the old-school pantry-dinner route with noodles, creamy sauce, and a golden topping.
Is This for Boxed Hamburger Helper or Homemade?
This recipe is the homemade version. It does not use a box, sauce packet, or seasoning packet. It is meant for readers who want the same cozy skillet-dinner idea — beef, pasta, creamy sauce, cheese — made from scratch.

If you already have a box in the pantry, you can still borrow the flavor ideas here. Sauté onion and garlic with the beef, add a little tomato paste for depth, use milk or broth for a richer sauce, and finish with extra cheese or a spoonful of sour cream. That is a different recipe path, but the flavor logic is the same.
Troubleshooting Homemade Hamburger Helper
One-pot pasta is easy, but the sauce can change quickly because the pasta keeps absorbing liquid. Fortunately, most problems are fixable if you catch them before serving.
| Problem | Why It Happened | How to Fix It |
|---|---|---|
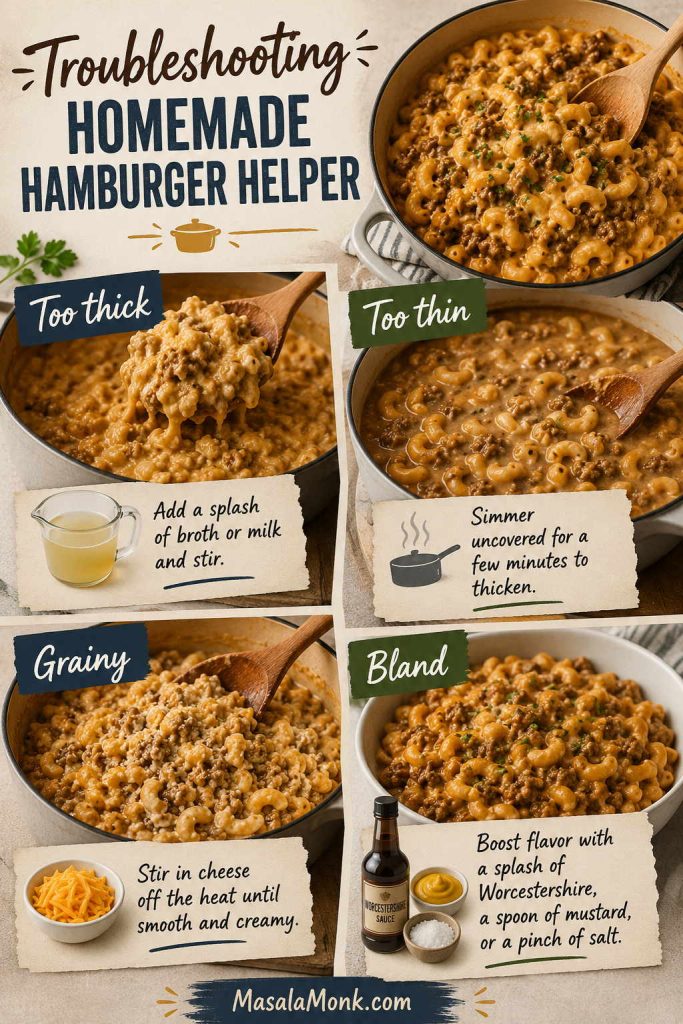
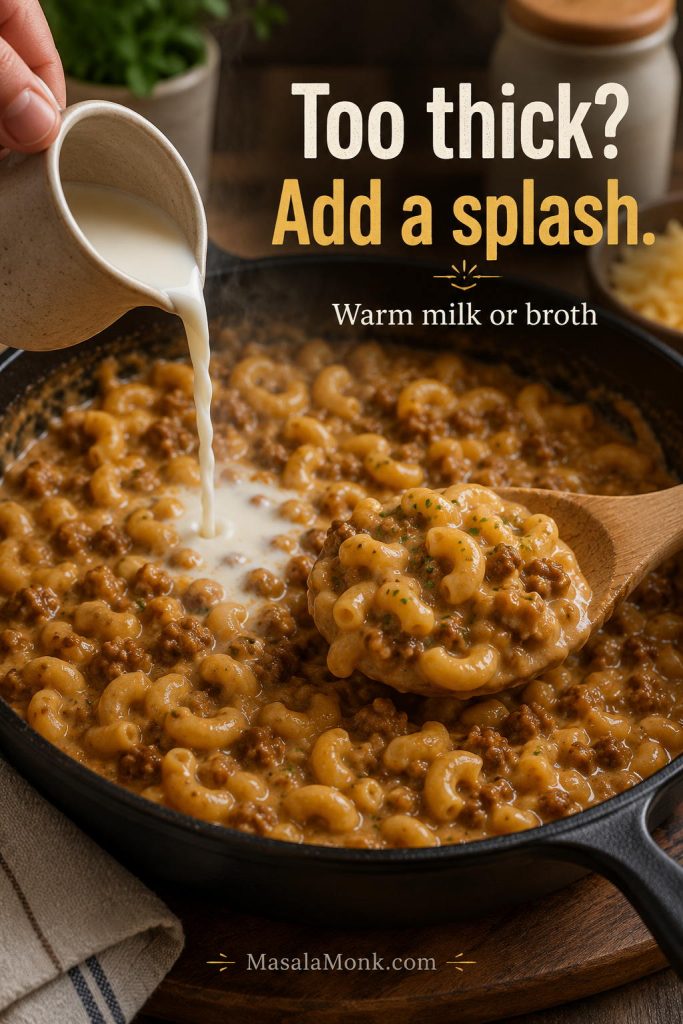
| Sauce is too thick | The pasta absorbed more liquid than expected | Stir in warm milk, broth, or water a splash at a time |
| Sauce is too thin | Too much liquid or pasta not starchy enough | Simmer uncovered for a few minutes, then rest before serving |
| Pasta is still firm | The liquid reduced before the pasta cooked | Add 1/4 cup liquid, cover briefly, and simmer gently |
| Cheese sauce is grainy | Cheese was added over high heat or pre-shredded cheese was used | Remove from heat before adding cheese and use freshly grated cheese |
| Dish tastes bland | Not enough salt, acid, or savory depth | Add salt, Worcestershire sauce, mustard, black pepper, or a small spoon of ketchup |
| Dish tastes greasy | Beef released too much fat | Drain excess fat after browning; use leaner beef next time |
| Milk looks separated | The sauce boiled too hard | Lower the heat, stir gently, and finish with cheese off heat |
| Pasta is sticking | The heat is too high or the pan is too dry | Lower the heat, stir more often, and add a splash of liquid |
How to Fix Dry or Too-Thick Hamburger Helper
If the skillet tightens up, do not add a large pour of liquid at once. Start with a small splash of warm milk, broth, or water, stir, and let the sauce loosen evenly.
How to Prevent Grainy Cheese Sauce
For a smoother cheddar finish, make sure the sauce is hot but no longer bubbling hard before the cheese goes in.

If cheese sauces are where dinner usually goes wrong, this easy cheese sauce recipe explains the smooth-cheddar method in more detail.
Storage, Reheating, and Freezing
This homemade Hamburger Helper recipe is best right after cooking, when the sauce is creamy and the pasta still has a little bite. However, leftovers are still useful for lunch or an easy next-day dinner.
How to Store It
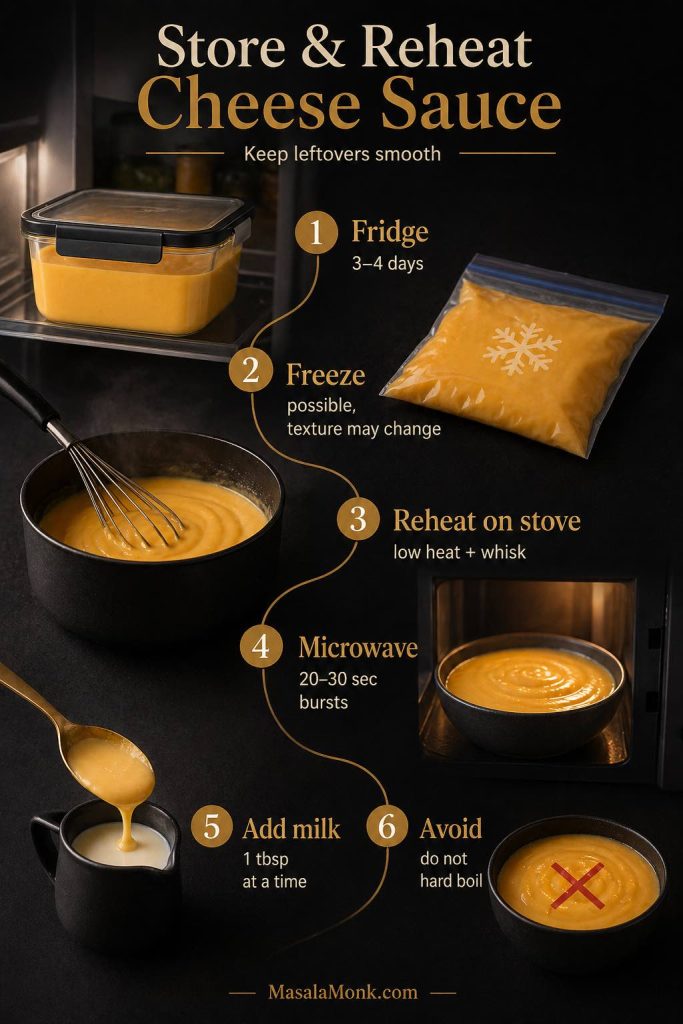
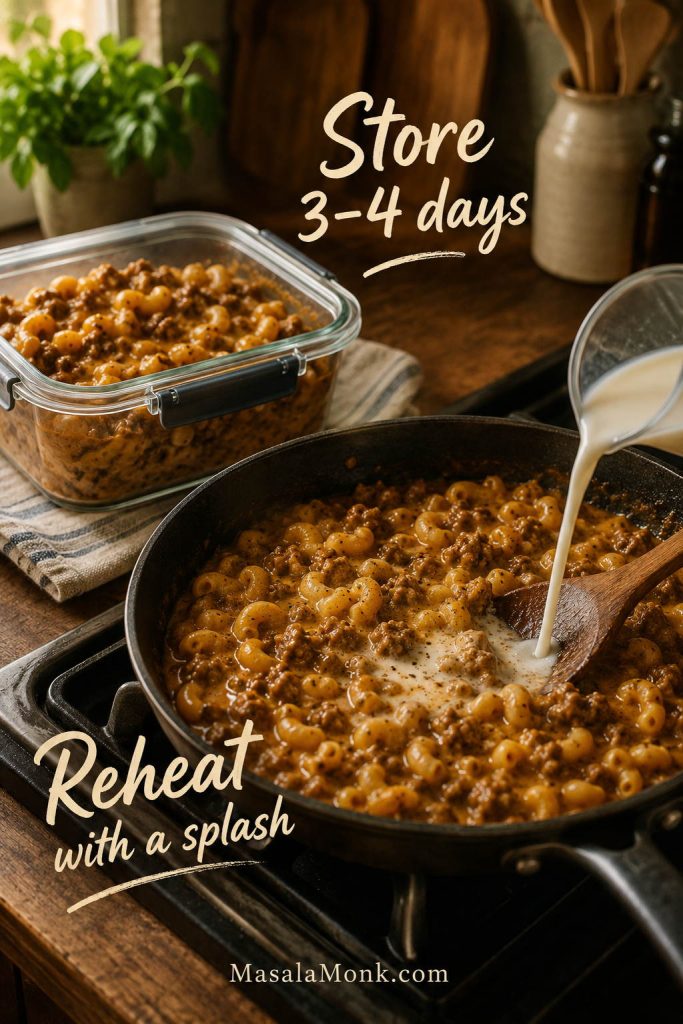
Let leftovers cool, then store them in an airtight container in the refrigerator for up to 3 to 4 days. The pasta will continue absorbing sauce as it sits, so the leftovers will be thicker than the fresh skillet.
How to Reheat It
Reheat gently on the stovetop or in the microwave with a splash of milk, broth, or water. Then stir, warm slowly, and add more liquid if needed. Do not blast it with high heat for too long, because the sauce can turn oily.
Can You Freeze Homemade Hamburger Helper?
You can freeze it, but the pasta will soften after thawing. For best texture, refrigerate leftovers and eat them within a few days. If you do freeze it, use an airtight container, thaw overnight in the refrigerator, and reheat gently with extra liquid.
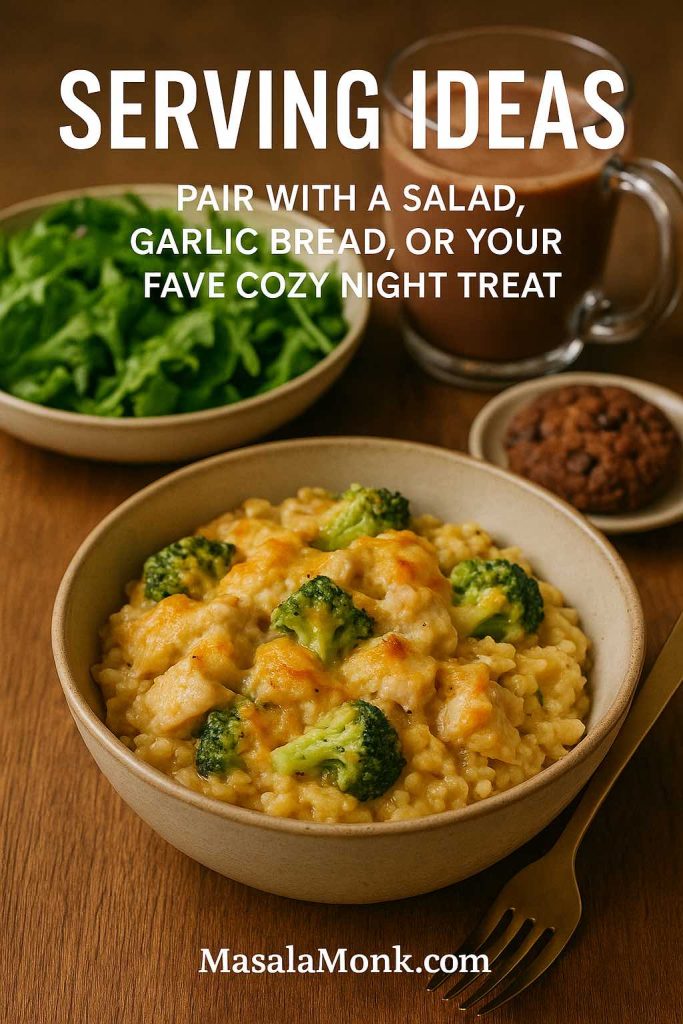
What to Serve With Homemade Hamburger Helper
This is already a complete comfort-food dinner, so the best sides are simple and fresh. A crisp salad, roasted broccoli, green beans, peas, cucumber salad, or steamed vegetables help balance the richness. Garlic bread works too if you want the meal to feel extra cozy.

To keep the plate lighter, serve smaller bowls with a big salad or steamed vegetables. If you are feeding everyone family-style, set the skillet in the center of the table and let people add black pepper, herbs, hot sauce, or extra cheese.
Another cozy ground-beef dinner in the same family-comfort lane is this tater tot casserole recipe, especially if you want a baked, cheesy version of the same pantry-dinner feeling.
FAQs
Is homemade Hamburger Helper the same as cheeseburger macaroni?
It is very close. Cheeseburger macaroni is the best way to describe this homemade Hamburger Helper recipe because it has ground beef, macaroni, cheddar cheese, and a savory cheeseburger-style sauce.
What Hamburger Helper flavor is this closest to?
This recipe is closest to Cheeseburger Macaroni Hamburger Helper. It has ground beef, short pasta, cheddar cheese, tomato paste, mustard, and a little paprika for that familiar cheesy, savory, slightly tangy flavor.
Do I need to boil the pasta separately?
No. The pasta cooks directly in the skillet with the beef, broth, milk, and seasonings. This saves time and helps the sauce thicken because the pasta releases starch as it cooks.
What kind of cheese melts best?
Freshly grated sharp cheddar gives the best flavor. For a smoother, more nostalgic melt, use a blend of cheddar and American cheese, Monterey Jack, or Colby Jack.
Can I make homemade Hamburger Helper without milk?
Milk gives the sauce a softer, creamier finish, but it is not mandatory. Replace it with extra broth, then let the cheese do more of the creamy work at the end. For a thicker sauce, stir 1 teaspoon cornstarch into 2 tablespoons cold broth and add it before the cheese.
Can I use water instead of beef broth?
Water works in a pinch, but beef broth gives the sauce more depth. If water is all you have, add a little more Worcestershire sauce, tomato paste, paprika, salt, and pepper so the dish does not taste flat.
Can I use ground turkey instead of beef?
Ground turkey works well for a lighter skillet, especially with a little extra seasoning. Because turkey is milder than beef, add more Worcestershire sauce, paprika, mustard, or cheese to bring back some of the savory depth.
Why did my sauce get dry?
The pasta absorbed more liquid than expected, or the heat was too high. Stir in warm milk, broth, or water a splash at a time until the sauce loosens, or see the dry sauce fix above.
Why did my cheese turn grainy?
Cheddar can turn grainy when it is boiled or added while the pan is too hot. Turn off the heat, let the bubbling calm, then add freshly grated cheese gradually, or see the smooth cheese tip.
How do I make it more flavorful?
Start with salt, then add savory depth with Worcestershire sauce, mustard, smoked paprika, and tomato paste. For a sweeter boxed-style flavor, keep the optional ketchup.
Can I double the recipe?
A double batch works best in a Dutch oven or very large deep pan. If the pan is crowded, the pasta cooks unevenly and the sauce can reduce before the pasta softens. Stir often and add liquid as needed.
Is this recipe affiliated with Hamburger Helper?
No. This is a homemade, from-scratch recipe inspired by the style of the boxed skillet dinner. It does not use the boxed mix or seasoning packet.
Final Thoughts
The best homemade Hamburger Helper recipe is not trying to turn a boxed dinner into something fancy. It is trying to keep the part people actually loved: the warm skillet, the creamy beef-and-macaroni sauce, the orange cheddar comfort, and the relief of dinner being done.
Start with the classic cheeseburger macaroni version, then bend it toward your own memory. Make it tangier with mustard and ketchup, richer with extra cheddar, lighter with lean beef and vegetables, or saucier with a splash of broth at the end. Once the ratio clicks, this becomes one of those back-pocket dinners you can make without staring at a recipe every time.
What was the boxed dinner flavor in your house: cheeseburger macaroni, stroganoff, lasagna, chili mac, or something else? And if you make it from scratch now, do you want it closer to the childhood version, sharper and more grown-up, or extra creamy for family dinner?