Posted on Leave a comment

Lobster Mac and Cheese Recipe: Creamy Baked Lobster Mac

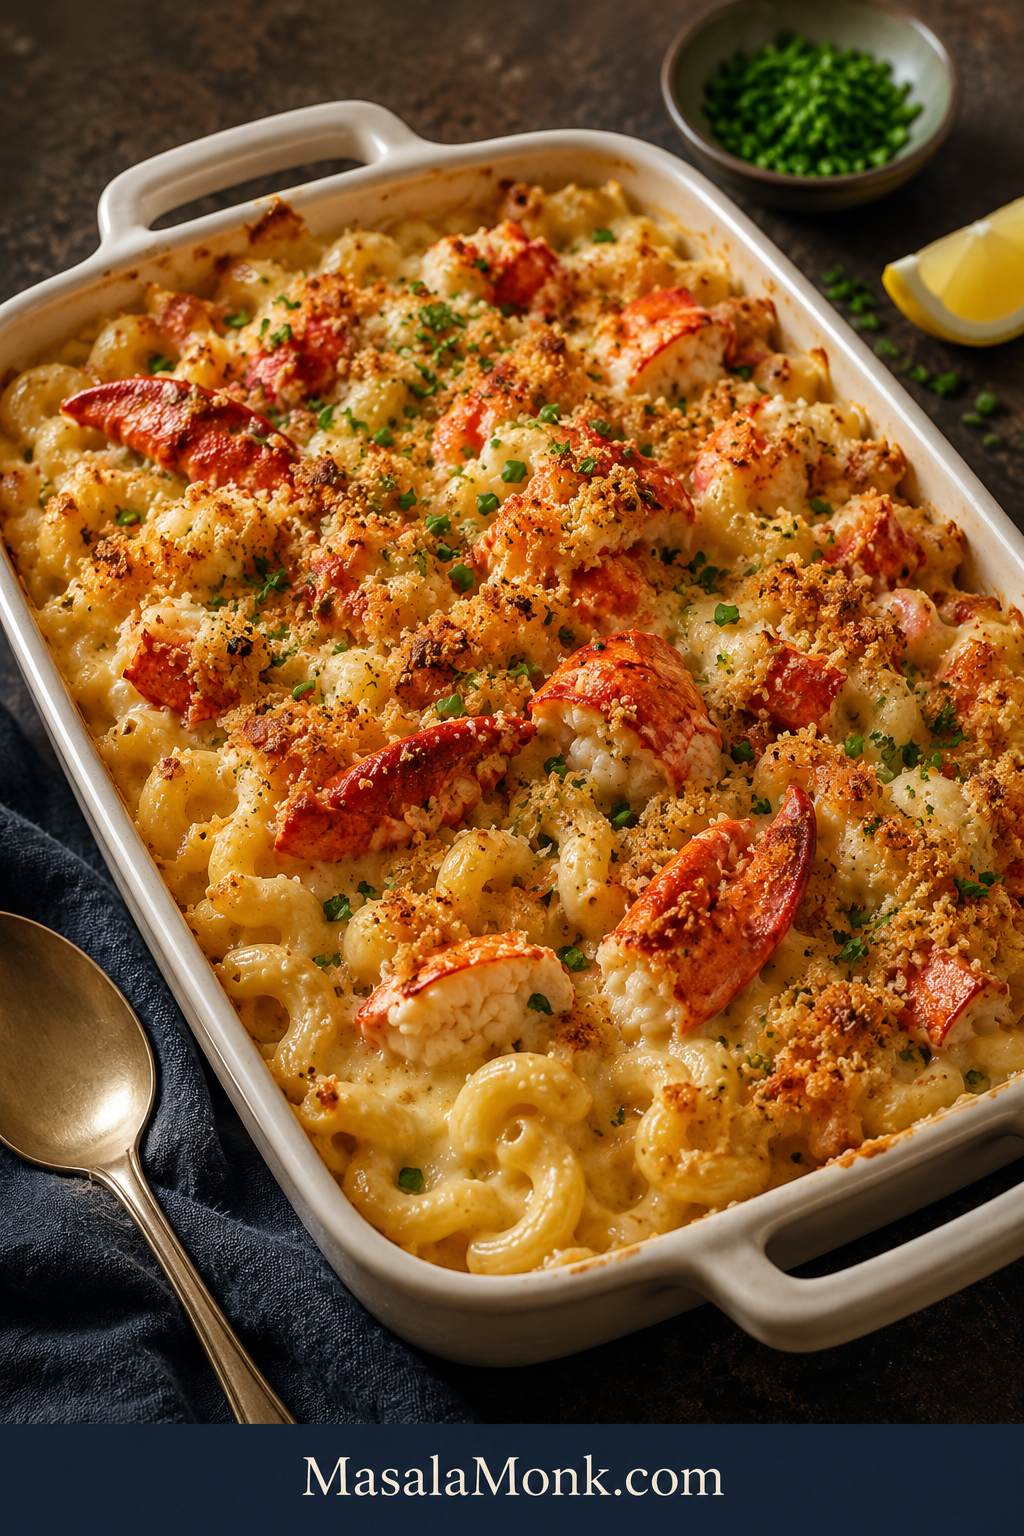
Baked lobster mac and cheese in a white ceramic dish with golden breadcrumb topping, herbs, and visible lobster pieces.

Lobster mac and cheese is what you make when regular mac and cheese is not enough. It should be creamy, buttery, golden, and generous, with real pieces of lobster in every serving — not a dry baked casserole where the seafood turns chewy and disappears into the sauce.

This version is built around three details: a smooth cheese sauce, tender lobster, and a short bake. The sauce starts a little loose, the cheese melts gently, and the lobster goes in after the pasta is already coated so it stays sweet and soft.

In the best spoonful, you get creamy pasta, buttery crumbs, and a piece of lobster you can actually see. Make it for a holiday side, a steakhouse-style dinner, a seafood night, a date night, or any meal where comfort food needs to feel special.

If lobster makes you nervous because it feels expensive or easy to overcook, this guide gives you the calm path: what to buy, how much to use, which cheese melts best, when to add the lobster, and how to bake the pan without drying it out.

Quick Answer: How to Make Lobster Mac and Cheese

A great lobster mac and cheese starts with short pasta, a generous cheese sauce, and lobster that is treated like a finishing ingredient. Cavatappi, elbow macaroni, shells, and other short pasta shapes work well because they hold the sauce instead of letting it slide off.

Cook the pasta about 2 minutes short of al dente. Before baking, the pasta should look saucier than you want the final serving to be. Saucy before baking means creamy after baking.

Use 12 oz / 340 g cooked lobster meat for a rich side dish, or 16 oz / 454 g when the mac is meant to feel like the main event. Keep the pieces generous and reserve a few for the top so the lobster looks as generous as it tastes.

The cheese blend matters because lobster is sweet and delicate. White cheddar gives classic flavor, fontina or Gruyere gives a smooth restaurant-style melt, Monterey Jack or Havarti adds softness, and parmesan gives salty depth. Freshly grated cheese melts more smoothly than pre-shredded cheese.

Bake at 375°F / 190°C for 20 to 25 minutes, just until the edges bubble and the topping turns golden. The oven is there to finish the dish, not to cook the lobster.

Before you start cooking, notice the texture target: the finished pan should scoop creamy, not stiff. This is the visual cue to keep in mind as you build the sauce and bake briefly.
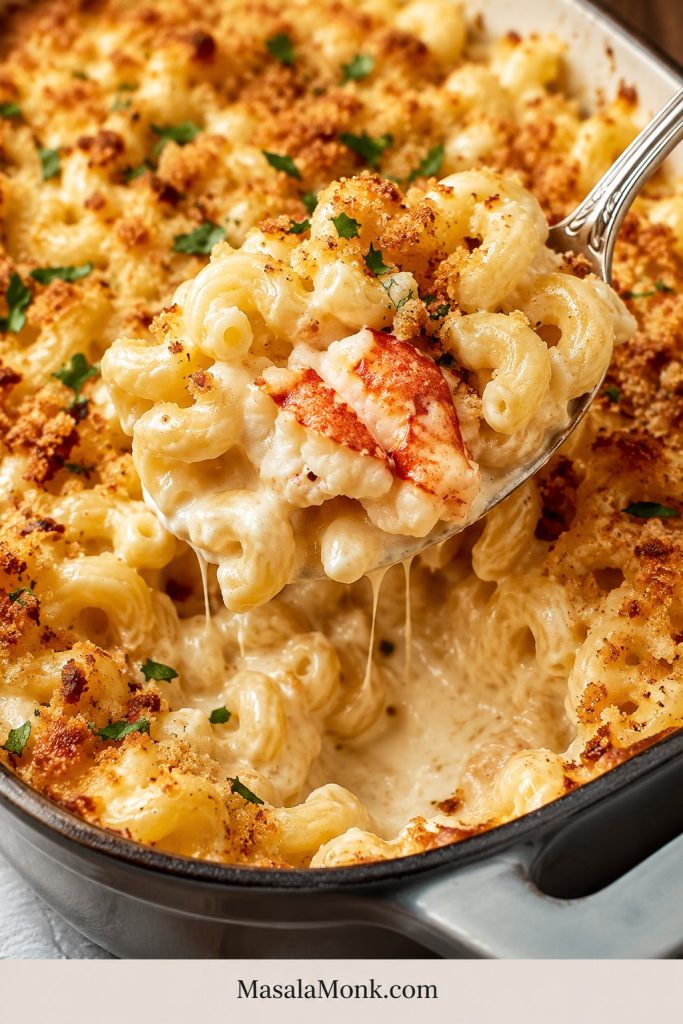
Serving spoon lifting creamy lobster mac and cheese with cavatappi pasta, golden crumbs, herbs, and lobster meat.
The first scoop should prove the pan is still creamy. Look for glossy pasta, visible lobster, and a soft center instead of a dry block of baked macaroni.

Lobster Mac and Cheese at a Glance

DetailRecommendation
Pasta1 lb / 454 g cavatappi, elbows, shells, or another short pasta
Lobster amount12 oz / 340 g for a rich side, 16 oz / 454 g for a main-event pan
Lobster tail amountEnough tails to yield 12 to 16 oz / 340 to 454 g cooked meat, usually 4 to 5 medium tails
Lobster tail cueCook gently until opaque, white, and just firm; timing is only a guide
Cheese amountAbout 22 oz / 620 g freshly grated cheese total
Cheese blendWhite cheddar + fontina or Gruyere + Monterey Jack or Havarti + parmesan
Oven temperature375°F / 190°C
Bake time20 to 25 minutes
Texture targetSauce should look slightly loose before baking
Lobster ruleCook gently, add after the sauce is ready, and keep the bake short
ToppingButtered panko for crispness, crushed Ritz for buttery holiday flavor
Servings8 main-dish servings or 10 to 12 side-dish servings

Here is the full recipe first, with the deeper lobster, cheese, and baking notes right after it.

Creamy Baked Lobster Mac and Cheese Recipe Card

Recipe name: Creamy Baked Lobster Mac and Cheese

Description: Rich, creamy baked lobster mac and cheese with tender lobster, a smooth cheese sauce, and a buttery golden topping.

Servings: 8 as a main dish, or 10 to 12 as a side

Prep time: 25 minutes

Cook time: 30 minutes

Total time: 55 minutes

Good for: holidays, date nights, steak dinners, seafood dinners, and special occasion sides

Equipment

  • Large pot for pasta
  • Large saucepan or Dutch oven for the cheese sauce
  • Whisk
  • 9×13-inch baking dish
  • Box grater
  • Kitchen shears, if using lobster tails
  • Small bowl for the topping
  • Rimmed baking sheet, optional, to catch any bubbling sauce

Ingredients

For the Pasta and Lobster

  • 1 lb / 454 g cavatappi, elbow macaroni, shells, or another short pasta
  • 12 to 16 oz / 340 to 454 g cooked lobster meat, chopped into generous pieces
  • Or enough lobster tails to yield 12 to 16 oz / 340 to 454 g cooked meat, usually 4 to 5 medium tails
  • Salt, for the pasta water

For the Cheese Sauce

  • 6 tbsp / 85 g unsalted butter
  • 1/3 cup / about 42 g all-purpose flour
  • 3 cups / 720 ml whole milk
  • 1 cup / 240 ml heavy cream or evaporated milk
  • 8 oz / 225 g white cheddar, freshly grated
  • 8 oz / 225 g fontina or Gruyere, freshly grated
  • 4 oz / 115 g Monterey Jack or Havarti, freshly grated
  • 2 oz / 55 g parmesan, finely grated
  • Dijon mustard: 1 to 2 tsp, or dry mustard powder: 1 tsp
  • Garlic powder: 1 tsp
  • Onion powder: 1 tsp
  • Old Bay or Cajun seasoning: 1/2 to 1 tsp, optional
  • Paprika: 1/4 tsp, optional
  • Black pepper, to taste
  • Salt, to taste

For the Topping

  • 3/4 to 1 cup panko breadcrumbs or crushed Ritz crackers
  • 2 to 3 tbsp / 28 to 43 g melted butter
  • 2 tbsp grated parmesan
  • 1 tbsp chopped parsley or chives, plus more for serving
  • Optional: 1/2 tsp lemon zest

Instructions

Cook the Pasta and Lobster

  1. Preheat the oven. Heat the oven to 375°F / 190°C. Lightly butter a 9×13-inch baking dish.
  2. Cook the pasta. Bring a large pot of salted water to a boil. Cook the pasta about 2 minutes less than the package directions. It should still have a little firmness. Drain and set aside.
  3. Prepare the lobster. If using cooked lobster meat, chop it into generous pieces and pat it dry. If using lobster tails, cook enough tails to yield 12 to 16 oz / 340 to 454 g cooked meat. For 4 to 6 oz tails, this often takes about 4 to 6 minutes, but trust the look and feel more than the timer. The meat should look white and opaque, not glassy. Remove the meat from the shells, chop, and set aside.

Build the Cheese Sauce

  1. Make the roux. In a large saucepan or Dutch oven, melt 6 tbsp butter over medium heat. Add the flour and whisk for 1 to 2 minutes, until smooth and lightly foamy. The roux should look glossy, not deeply browned.
  2. Add the dairy. Slowly whisk in the milk, then the cream or evaporated milk. Cook, whisking often, until the sauce thickens enough to lightly coat a spoon. This usually takes 3 to 6 minutes.
  3. Season the sauce. Stir in the Dijon or dry mustard, garlic powder, onion powder, optional Old Bay or Cajun seasoning, paprika, black pepper, and a small pinch of salt. Taste before adding more salt, especially if using parmesan, Old Bay, Cajun seasoning, or salted lobster meat.
  4. Add the cheese gently. Lower the heat or turn it off. Add the grated cheeses a handful at a time, stirring until melted before adding more. The sauce should be smooth, loose, and pourable, not stiff.

Assemble, Bake, and Rest

  1. Combine pasta and sauce. Fold the drained pasta into the cheese sauce. If the mixture looks too thick, add a splash of milk. Before baking, the pasta should look a little saucier than you want the final serving to be.
  2. Add the lobster. Gently stir in most of the lobster once the pasta is coated. Reserve a few pieces for the top if you want the lobster to stay visible after baking.
  3. Transfer to the baking dish. Spoon the mixture into the prepared dish. Scatter the reserved lobster pieces over the top.
  4. Add the topping. In a small bowl, mix panko or crushed Ritz crackers with melted butter, parmesan, parsley or chives, and optional lemon zest. Sprinkle evenly over the mac and cheese.
  5. Bake. Bake for 20 to 25 minutes, until the edges are bubbling and the topping is golden. If you want more browning, broil for 1 to 3 minutes, watching carefully.
  6. Rest and serve. Let the pan rest for 8 to 10 minutes before serving. This helps the sauce settle without becoming stiff.

Recipe Notes

  • Freshly grated cheese melts better than pre-shredded cheese.
  • Stop cooking lobster as soon as it is opaque and tender. It will warm again in the pasta.
  • Pull the dish while the center still looks creamy. The edges should bubble and the topping should be golden.
  • For a stovetop version, skip the baking step and top each serving with toasted buttered panko.
  • For deeper seafood flavor, use a small splash of seafood stock or lobster stock without thinning the sauce too much.

Need more help before you start? See which lobster to use, the best cheese blend, how to keep it creamy, or how to avoid rubbery lobster.

Use the guide below as the short visual version of the method before you move into the deeper lobster, cheese, and baking notes.
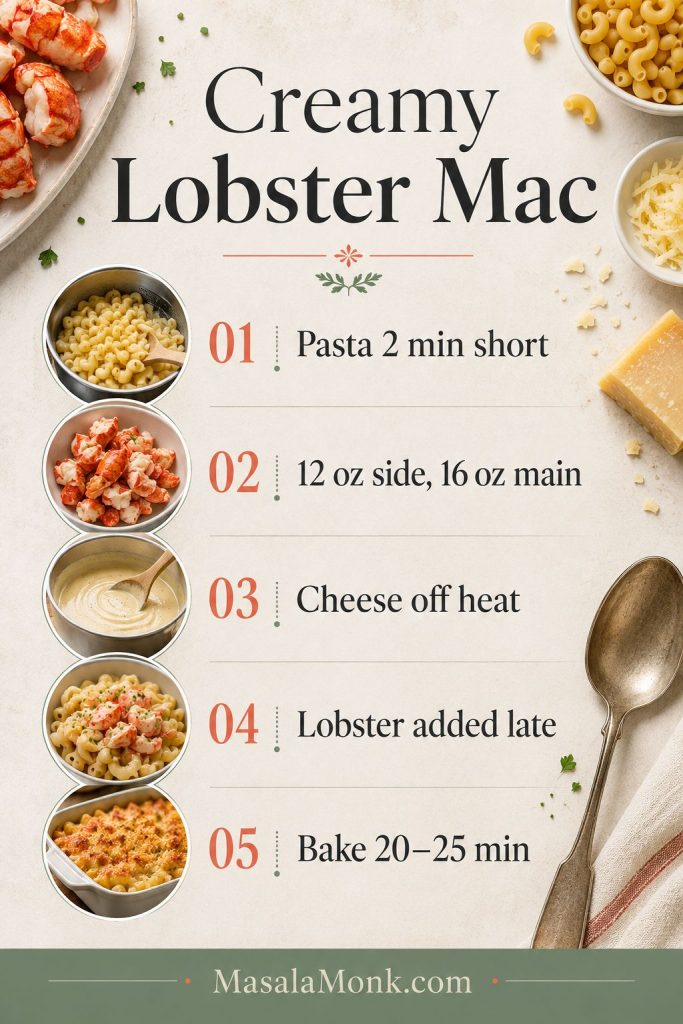
Vertical lobster mac and cheese guide showing tips for pasta timing, lobster amount, cheese melting, late lobster addition, and short baking.
Use this quick method map before you start: cook pasta short, keep the sauce loose, melt cheese gently, add lobster late, and bake only until the top browns.

Why This Lobster Mac and Cheese Works

This recipe works because every part protects the final texture. The pasta starts firm, the sauce starts loose, the cheese melts gently, and the lobster warms through instead of cooking twice.

  • The sauce is generous. Baked mac thickens in the oven, so the sauce begins a little looser than a stovetop version.
  • The pasta has bite. Stopping early keeps it from turning soft after baking.
  • The cheese blend is balanced. White cheddar gives flavor, while fontina, Havarti, Monterey Jack, or Gruyere helps keep the sauce smooth.
  • The lobster stays protected. It is already tender before it reaches the oven, so the bake only warms it through.
  • The topping browns quickly. Buttered panko or Ritz gives crunch without forcing the casserole to bake too long.
  • The method gives you options. Bake it for a crisp top, or keep it stovetop for the creamiest possible finish.

If you already love classic mac and cheese, this is the richer seafood version: more luxurious, more buttery, and built for a special table.

Start Here: The Best First Version

The first time you make lobster mac and cheese, keep the choices simple. This is the calmest path to a creamy, generous pan:

Best First Version

  • Pasta: cavatappi or elbows
  • Lobster: cooked lobster meat, or gently cooked lobster tails
  • Amount: 12 oz for a rich side, 16 oz for a main-event pan
  • Cheese: white cheddar + fontina, with Monterey Jack or Havarti for extra softness
  • Topping: buttered panko
  • Skip the first time: bacon, truffle oil, heavy Cajun seasoning, and too many seafood add-ins

This version lets the lobster stay visible, the sauce stay smooth, and the bake stay short. Once that base works, the variations become much easier to trust.

The first pan should be steady before it gets fancy: a simple cheese blend, cooked lobster, short pasta, and a topping that browns fast.
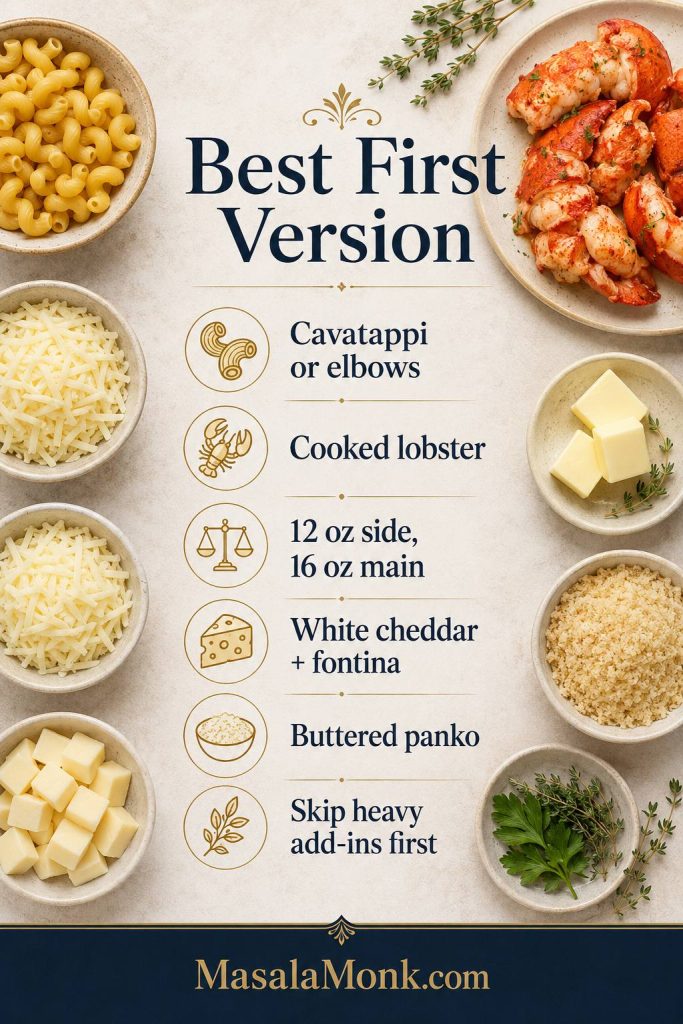
Ingredient guide for a first lobster mac and cheese with pasta, cooked lobster, cheese, butter, panko, herbs, and seasonings.
For the most dependable first pan, keep the formula simple: cooked lobster, short pasta, smooth-melting cheese, and buttered panko. Once that base works, upgrades are easier to control.

Next: Check the ingredient notes, or jump straight to how to make lobster mac and cheese.

When to Make It

Make this when the mac and cheese is supposed to be part of the occasion, not just a side dish.

  • Holiday dinners that need something richer than regular mac and cheese
  • Steakhouse-style dinners at home
  • Seafood nights with lobster, crab, shrimp, or fish
  • Date nights that feel cozy but still special
  • Dinner parties where one dish should feel like the splurge
  • Meals where cooked lobster or lobster tails need to stretch into a full pan

It is the kind of dish people notice before they even take a bite. The pan looks generous, the top smells buttery, and the first scoop should feel creamy instead of heavy.

For a dinner-table version, use the mac as the rich centerpiece and let the rest of the plate bring freshness, crunch, or simple protein.
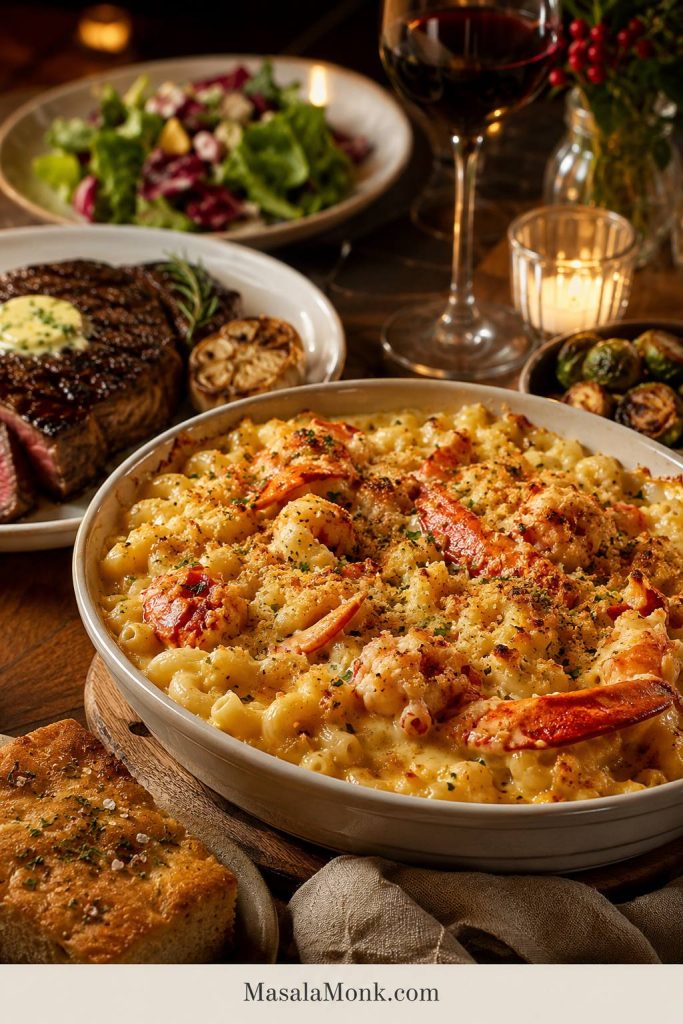
Lobster mac and cheese served on a warm dinner table with steak, salad, bread, and side dishes.
Because lobster mac is creamy and rich, it shines beside steakhouse-style sides with contrast. Think crisp greens, roasted vegetables, bread, or a simple protein.

Need a Specific Tip?

Jump to the lobster, cheese, baking, storage, and troubleshooting sections below.

Ingredients and Substitutions

The ingredient list is not complicated, but nothing is here as filler. The pasta holds sauce, the cheese melts into the body of the dish, the lobster brings the sweetness, and the topping gives every scoop a little crunch.

Here is the ingredient logic in one place before the detailed substitutions begin.
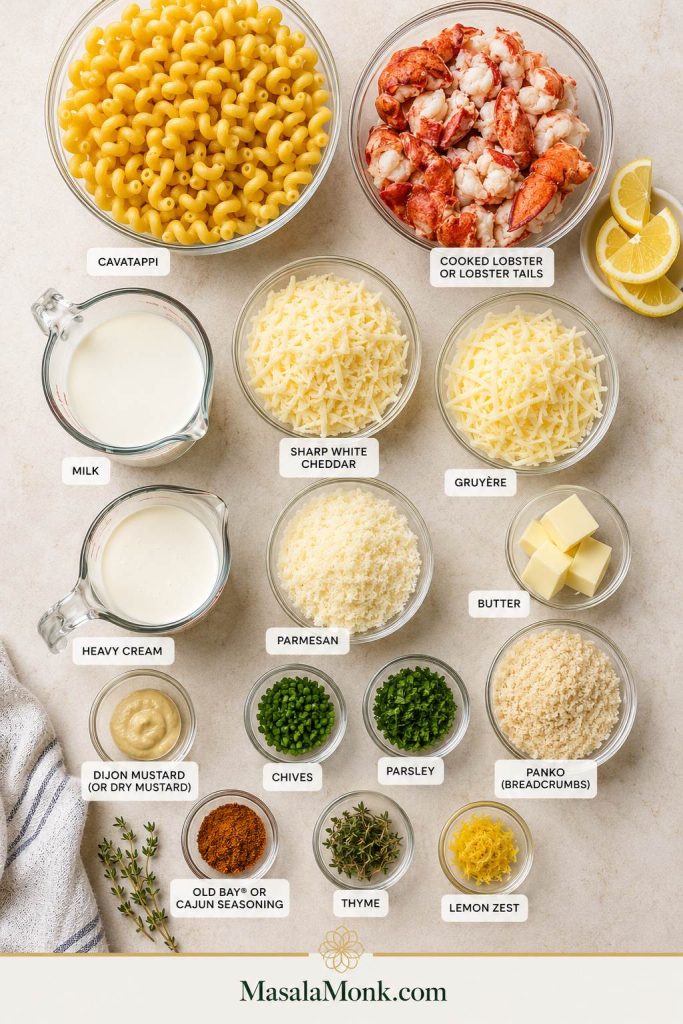
Ingredients for lobster mac and cheese arranged on a light surface, including pasta, lobster, cheese, cream, butter, breadcrumbs, herbs, lemon, and seasoning.
Every ingredient has a job: pasta catches sauce, lobster adds sweetness, cheese gives body, cream keeps things loose, and panko brings the crisp finish.

Pasta

Cavatappi is worth using here because the curls and ridges hold sauce well and make the pan look a little more restaurant-style. Elbow macaroni is classic and easy to find. Medium shells, pipe rigate, small rigatoni, and other short pasta shapes also work.

Very thin pasta shapes can overcook quickly and disappear into the sauce. For a baked pan, stop cooking the pasta about 2 minutes before it reaches al dente.
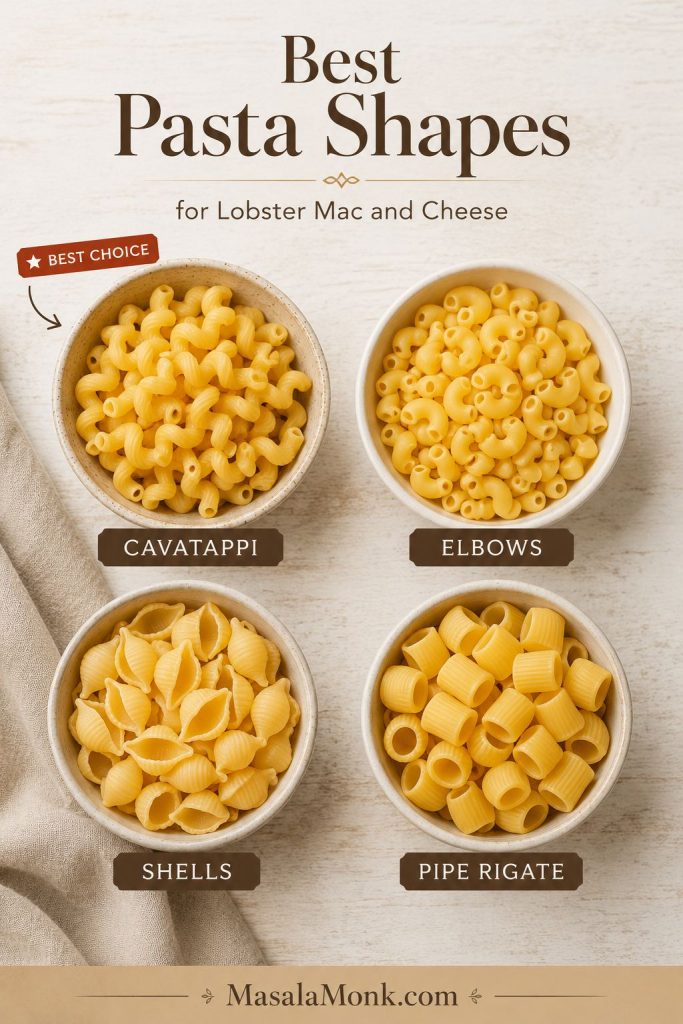
Pasta shape comparison for lobster mac and cheese showing cavatappi, elbows, shells, and pipe rigate.
Short pasta shapes make better lobster mac because they hold sauce in the curves. Cavatappi is especially helpful since its ridges catch creamy cheese sauce in every bite.

Lobster

Cooked lobster meat is the easiest option. Lobster tails give you prettier, larger chunks. Claw and knuckle meat can be especially sweet and tender. Frozen lobster meat works too, but it needs to be thawed fully, drained well, and patted dry before it goes into the sauce.

For 1 lb / 454 g pasta, use 12 oz / 340 g lobster for a rich side dish or 16 oz / 454 g when the mac is meant to feel like the main event. Lobster tail yield varies, so buy by cooked meat weight when possible.
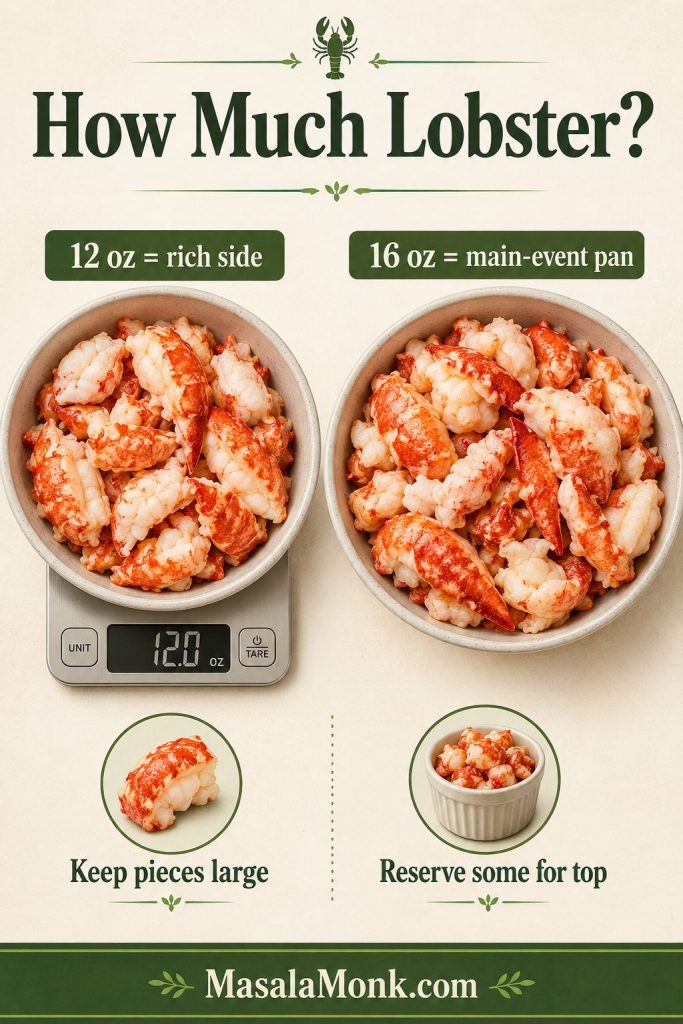
Two portions of cooked lobster meat labeled for 12 ounces and 16 ounces to show how much lobster to use in mac and cheese.
Let the lobster amount match the occasion. Use 12 ounces for a luxurious side dish, or go closer to 16 ounces when the mac is meant to be the main event.

Big pieces make the pan feel generous. Keep the lobster chunks large enough to notice, and reserve a few pieces for the top instead of chopping everything tiny.

You do not need the most expensive lobster pieces for this to work. Claw, knuckle, frozen cooked meat, or a smaller amount of tail meat can still make the pan feel special if the sauce is smooth and the lobster is treated gently.

Cheese

One cheese rarely gives you everything this dish needs. White cheddar gives familiar mac-and-cheese flavor. Fontina, Havarti, Monterey Jack, or Gruyere helps with melt and creaminess. Parmesan adds salty depth, but it should be an accent, not the main cheese.

Sharp cheddar works best when it has help from smoother melting cheeses. On its own, it can taste bold but turn heavy or grainy if the heat gets too high.

Milk, Cream, or Evaporated Milk

Whole milk gives the sauce body, while cream makes it feel more luxurious. Evaporated milk is a useful middle path: creamy, stable, and less likely to feel thin after baking. You can use all whole milk for a lighter version, but the finished sauce will be less rich.

Seasonings

Dijon or dry mustard balances the richness without making the dish taste mustardy. Garlic powder and onion powder give the sauce a familiar savory base. Old Bay or Cajun seasoning is optional, but it works beautifully with lobster. Use it lightly if you want the seafood flavor to stay delicate, and taste before adding extra salt.

For a Cajun-style seafood feel, you can use a little more seasoning and serve the mac with something like this seafood boil sauce on the side for people who want extra buttery heat.

Topping

Panko gives a crisp, light topping that lets the lobster stay the focus. Crushed Ritz crackers make the top richer, saltier, and more holiday-casserole style. Parmesan helps with browning. Lemon zest is optional, but even a small pinch makes the lobster taste brighter and keeps the cheese from feeling too heavy.

Which Lobster Should You Use?

There is no single right lobster for this dish. The right choice depends on your budget, what you can buy easily, and how showy you want the final pan to look. Fresh lobster is lovely, but it is not the only way to make a great pan. What matters more is how gently you cook it and how dry it is before it meets the sauce.

Best Lobster Options for Mac and Cheese

Use this section as the buying guide: cooked meat is easiest, tails look showy, claw and knuckle meat stay sweet, and frozen lobster works if it is thawed and dried well.
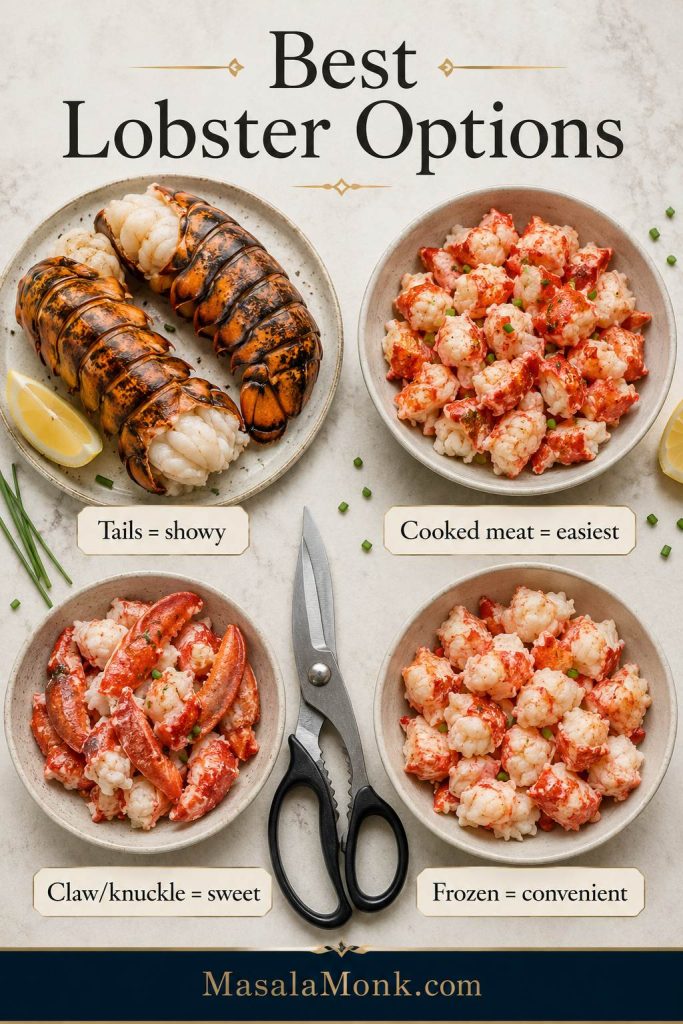
Lobster options board showing lobster tails, cooked lobster meat, claw or knuckle meat, and frozen lobster meat for mac and cheese.
Different lobster choices solve different problems: tails look impressive, claw meat tastes sweet, cooked meat saves effort, and frozen lobster helps when time is tight.

How to Use Each Lobster Type

Lobster TypeWorks Well ForHow to Use It
Cooked lobster meatEasiest methodChop into large pieces, pat dry, and add after the pasta is coated.
Lobster tailsShowy presentationSteam, poach, or simmer gently until opaque and just firm, then chop.
Claw and knuckle meatSweet, tender flavorUse like cooked lobster meat and fold it in gently.
Frozen lobster meatConvenienceThaw overnight, drain well, pat dry, and stir in once the sauce is ready.
Leftover lobsterQuick upgradeAdd at the end just to warm through.
LangostinoBudget-friendly substituteUse as a lobster-style substitute, but call it langostino clearly.

Lobster Tail and Frozen Lobster Notes

If you are using lobster tails, kitchen shears make the shells easier to open. Cook the tails only until the meat is opaque, white, and just firm. Time is only a guide; stop when the lobster looks tender and pulls from the shell easily because it will warm again in the pasta.

If lobster tails are the part that makes you nervous, this guide to grilled lobster tails goes deeper into thawing, cutting the shell, checking doneness, and avoiding rubbery lobster.

If you have extra cooked lobster after making this dish, save the larger pieces for buttery lobster rolls instead of chopping every last bit into the mac.

Raw lobster is better cooked gently first, rather than relying on the casserole to cook it evenly. That way the pasta does not have to stay in the oven too long, and the lobster can warm through without turning tough.

If you are starting with frozen lobster, thaw it overnight in the refrigerator when possible. The FDA’s seafood safety guide is a helpful reference for choosing, thawing, and handling seafood safely.

Once the lobster is dry, tender, and cut into real pieces, half the battle is already won.

Next step: Once the lobster is chosen, see which cheeses melt best or jump to the cooking steps.

Best Cheese for Lobster Mac and Cheese

Best Cheese Blend for Lobster Mac

The best cheese is a blend, not a single cheese. Lobster is sweet and delicate, so the sauce should be creamy, rich, and flavorful without overpowering the seafood.

The cheese should make the lobster taste richer, not cover it up. If the sauce tastes heavy before the lobster goes in, it will feel even heavier after baking.

Think of the blend as flavor, melt, and finish: one sharp cheese, one smooth melting cheese, and one salty accent cheese.

The blend should support the lobster instead of covering it. Use one cheese for flavor, one for smooth melt, and one small finishing cheese for depth.
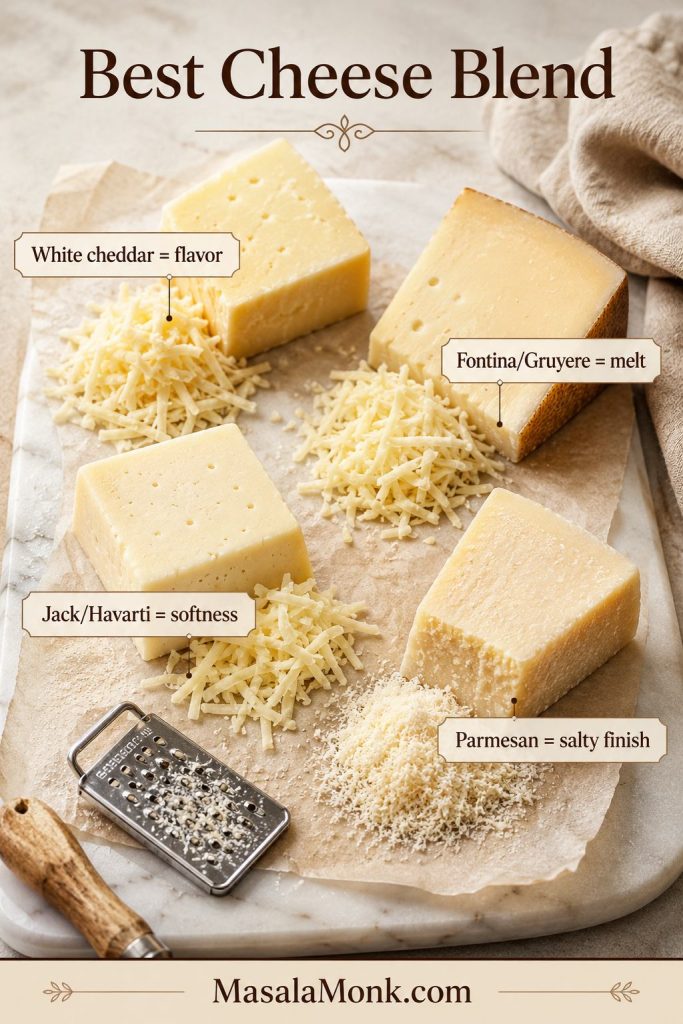
Cheese blend board showing white cheddar, fontina or Gruyere, Monterey Jack or Havarti, and parmesan for lobster mac and cheese.
The best cheese blend should melt smoothly without burying the lobster. Use cheddar for flavor, fontina or Gruyere for melt, Jack or Havarti for softness, and parmesan for finish.

Cheese Options and What They Do

CheeseUse?Why It Works or Does Not Work
White cheddarYesGives classic mac-and-cheese flavor and sharpness.
FontinaYesMelts smoothly and keeps the sauce creamy.
GruyereYesAdds nutty, restaurant-style flavor.
HavartiYesMild, creamy, and smooth-melting.
Monterey JackYesMelts easily and keeps the sauce soft.
ParmesanAccent onlyAdds salty depth, but does not melt like a main sauce cheese.
Smoked GoudaOptionalGood in small amounts, but too much can overpower lobster.
Cream cheese or mascarponeOptionalAdds extra creaminess and helps stabilize the sauce.
Blue cheese or fetaSkipToo strong, too crumbly, and likely to fight the lobster.
Pre-shredded cheeseOnly if neededConvenient, but anti-caking starch can make the sauce less smooth.

The finished sauce should taste rich but not loud. You should still be able to taste the sweetness of the lobster through the cheese.

What the Cheese Sauce Should Look Like

When the sauce looks glossy and loose enough to move, it has room to thicken in the oven without turning heavy.
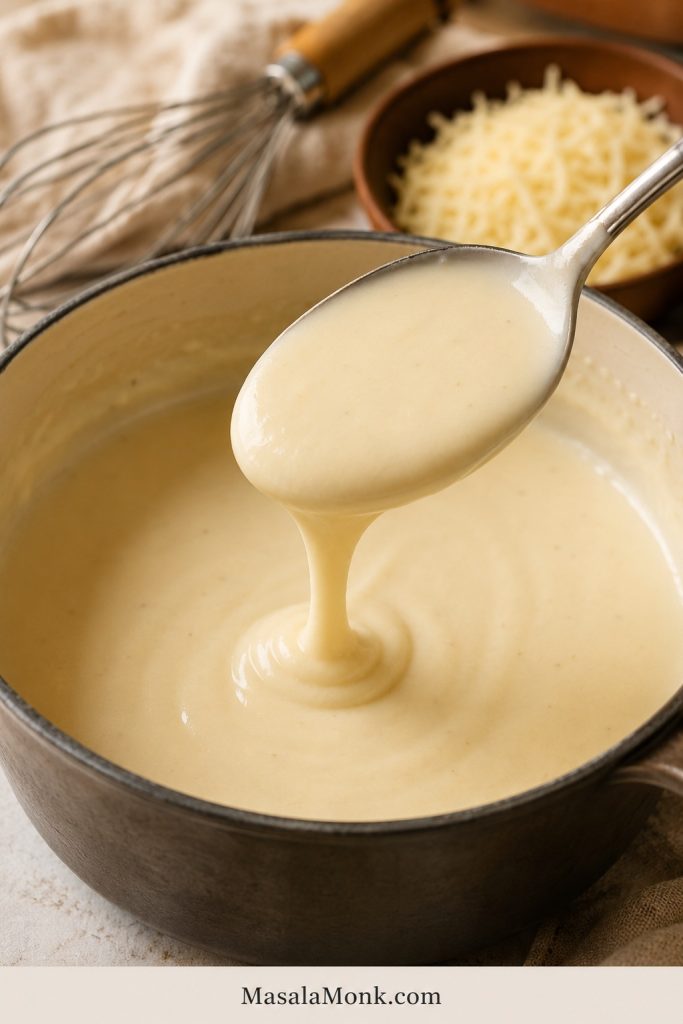
Smooth pale cheese sauce coating a spoon over a saucepan with grated cheese and kitchen tools nearby.
The sauce should coat the spoon but still flow back into the pan. If it looks too thick here, the finished baked lobster mac may turn heavy.

For the smoothest sauce, grate the cheese yourself and add it off heat or over very low heat. High heat is one of the most common reasons cheese sauce turns grainy or oily.

If cheese sauce is where your mac usually goes wrong, read through the tips in this cheese sauce recipe. The same rules apply here: gentle heat, freshly grated cheese, and enough liquid to keep the sauce smooth.

Sauce help: If your cheese sauce usually turns thick or grainy, jump to how to keep lobster mac creamy.

Baked vs Stovetop Lobster Mac and Cheese

Baked lobster mac and cheese gives you the crisp top, bubbling edges, and holiday casserole feeling most people expect. It is the strongest version when you want a dramatic side dish or a special dinner centerpiece.

Stovetop lobster mac is creamier and gentler for the seafood because it avoids extra oven time. Make the pasta and sauce on the stove, add the lobster at the end, and top each serving with toasted buttered panko.

Choose the method based on the texture you want: baked for a browned top, stovetop for the softest sauce.
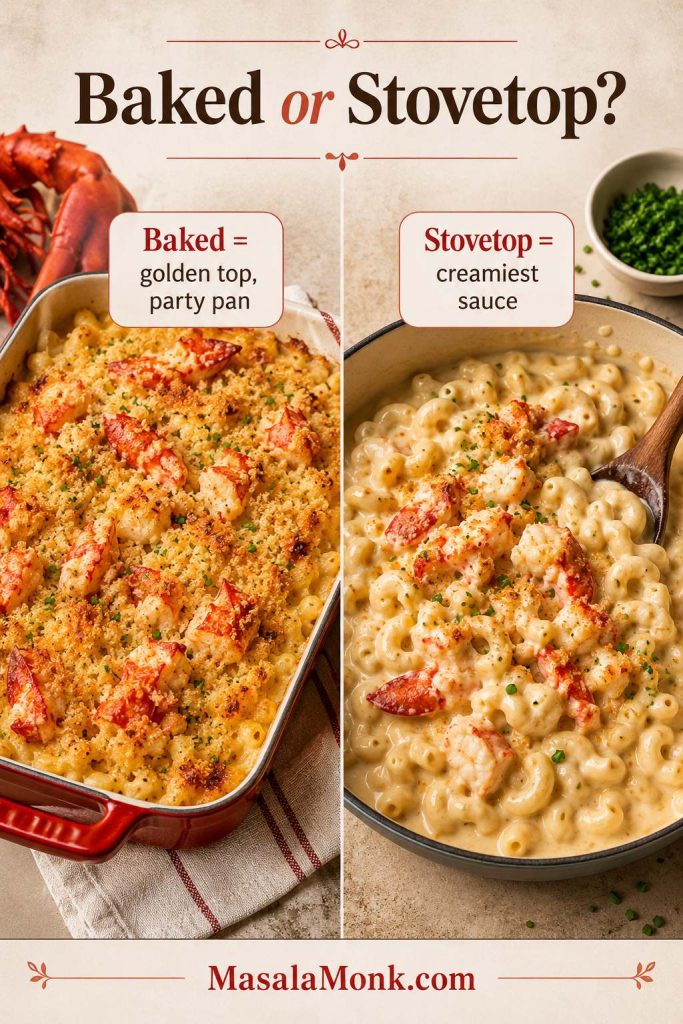
Comparison image showing baked lobster mac and cheese with a golden topping beside a creamier stovetop version.
Choose baked lobster mac when you want a golden top and party-pan presentation. Choose stovetop when creamy sauce matters more than crunch.
VersionWorks Well ForTexture Note
BakedGolden top, holidays, parties, steak dinnersPull the pan while the center still looks creamy.
StovetopMaximum creaminess and tender seafoodAdd toasted crumbs separately for crunch.
Covered-then-uncovered bakeMake-ahead casserolesAdd topping near the end so it stays crisp.

This recipe uses the baked method but keeps the bake short. You still get bubbling edges and buttery crumbs, while the lobster stays tender inside the sauce.

Choosing baked? See the right oven temperature and how to keep the center creamy. Choosing stovetop? Skip to variation ideas or what to serve with it.

How to Make Lobster Mac and Cheese

The recipe feels much easier once you follow the right order: cook the pasta short, prepare the lobster gently, build the sauce slowly, melt the cheese off heat, fold the lobster in near the end, and bake only until the edges bubble.

Preheat the Oven and Butter the Dish

Heat the oven to 375°F / 190°C and lightly butter a 9×13-inch baking dish. Set the dish nearby so the pasta can move into it while the sauce is still loose and warm.

Cook the Pasta Short of Al Dente

Boil the pasta in salted water and stop about 2 minutes before the package says it is done. The pasta should still have a little firmness. This prevents it from turning soft after baking.

Drain the pasta and keep it nearby. Rinsing is usually unnecessary unless the pasta is sticking badly. A little starch helps the cheese sauce cling.
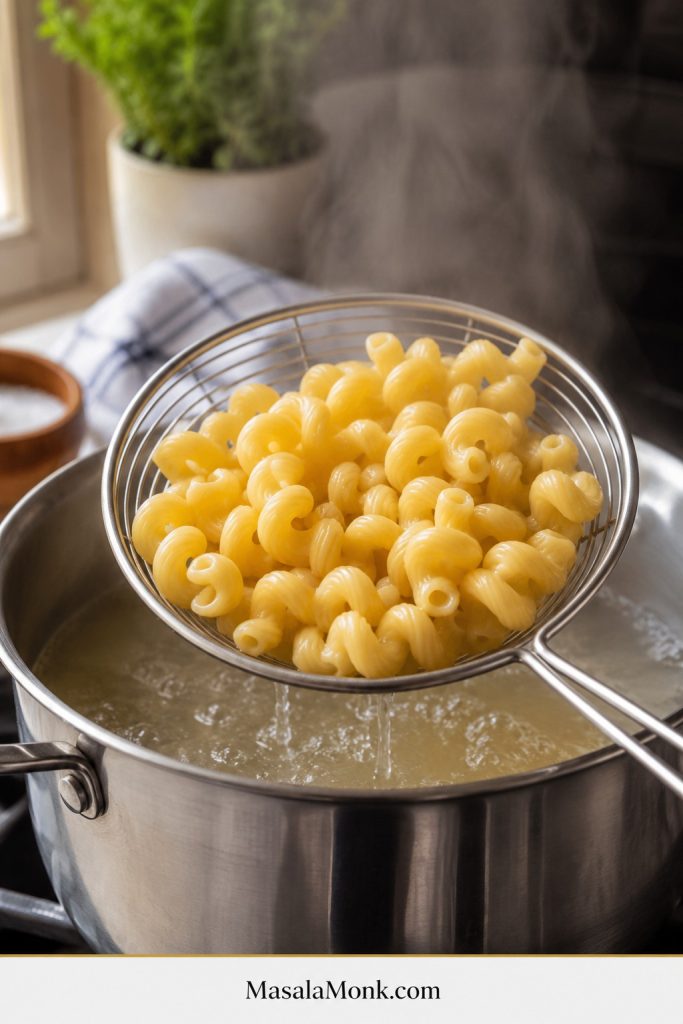
Cavatappi pasta being lifted from boiling water with a strainer during preparation for lobster mac and cheese.
Pull the pasta about 2 minutes early. Then it can finish in the sauce as the casserole bakes, rather than turning swollen, soft, or mushy.

Prepare the Lobster

If using cooked lobster meat, chop it into generous pieces and pat it dry. Frozen lobster should be thawed completely and dried well so it does not water down the sauce.

If using lobster tails, cook them gently until opaque and just firm. You can steam, poach, or simmer them. Once cooked, remove the meat from the shells and cut it into bite-size chunks. Keep the lobster separate while you make the sauce.
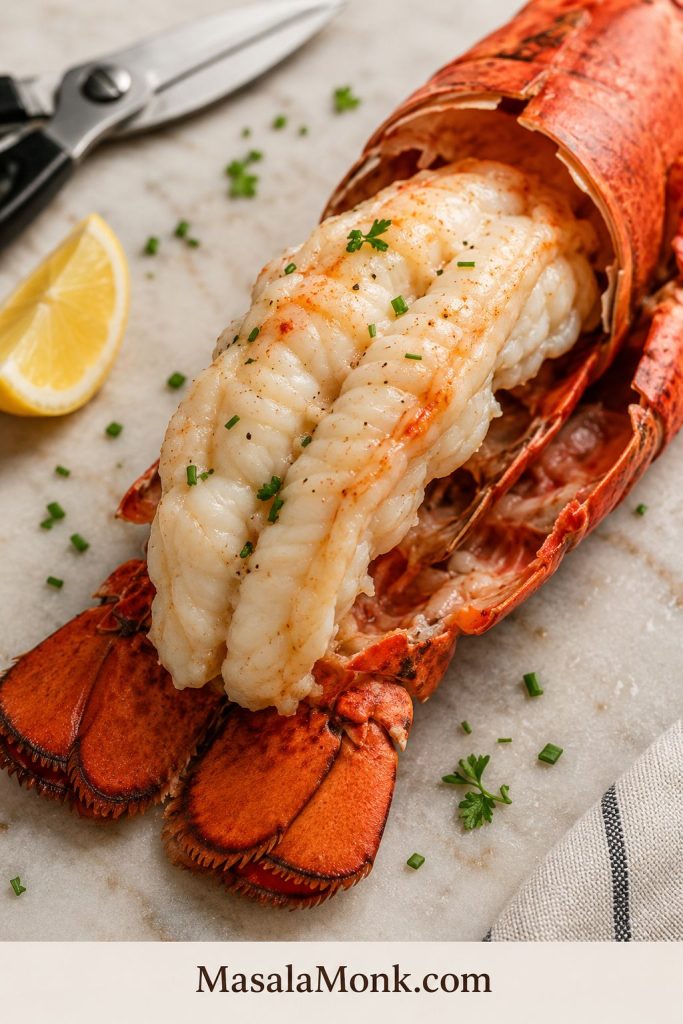
Cooked lobster tail with white opaque meat pulled from a red shell, with lemon, herbs, and kitchen shears nearby.
Stop cooking lobster tails when the meat turns white, opaque, and just firm. Since the lobster warms again in the sauce and oven, this early restraint keeps it tender.

Cut the Lobster into Generous Pieces

Treat lobster like a finishing ingredient. It only needs to warm through later, after the pasta and sauce are ready, so the pieces should stay large enough to notice in every serving.
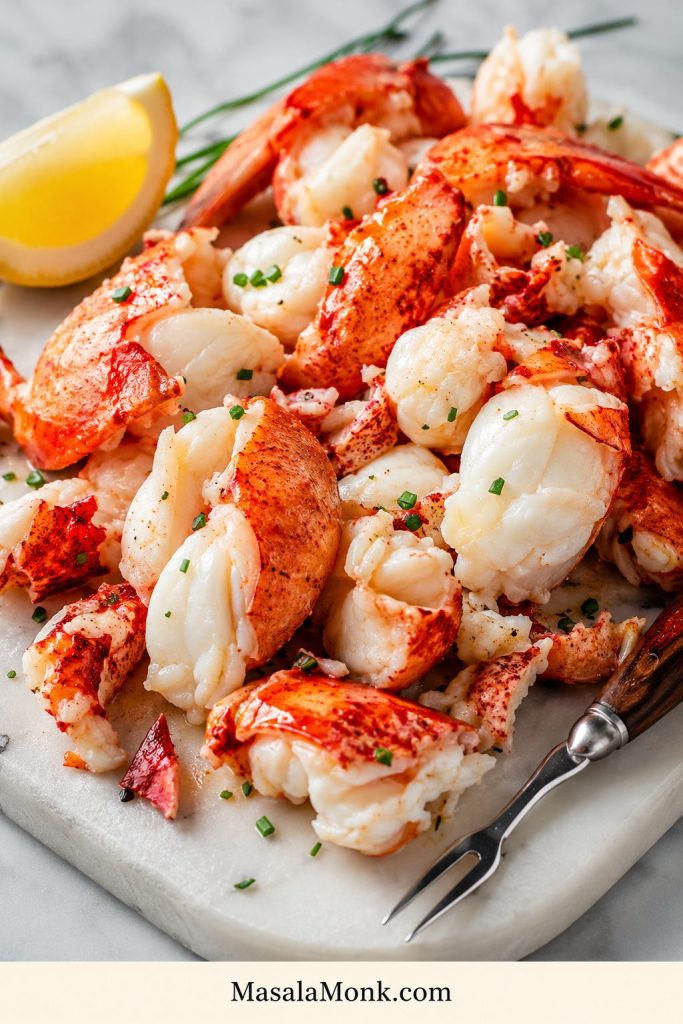
Large chopped lobster pieces on a board with herbs and lemon, ready to be added to mac and cheese.
Cut lobster into pieces large enough to notice. That keeps the seafood present in each creamy scoop instead of letting it disappear into the pasta.

Make a Pale Roux

Melt butter in a large saucepan or Dutch oven, then whisk in flour. Cook for 1 to 2 minutes so the flour loses its raw taste. The roux should look smooth, glossy, and lightly foamy, not deeply browned.

Whisk in the Milk and Cream

Add the milk slowly while whisking, then add the cream or evaporated milk. Let the sauce simmer until it thickens enough to coat a spoon. Keep it loose enough to flow from the spoon; baked mac needs more moisture than it looks like it needs at first.
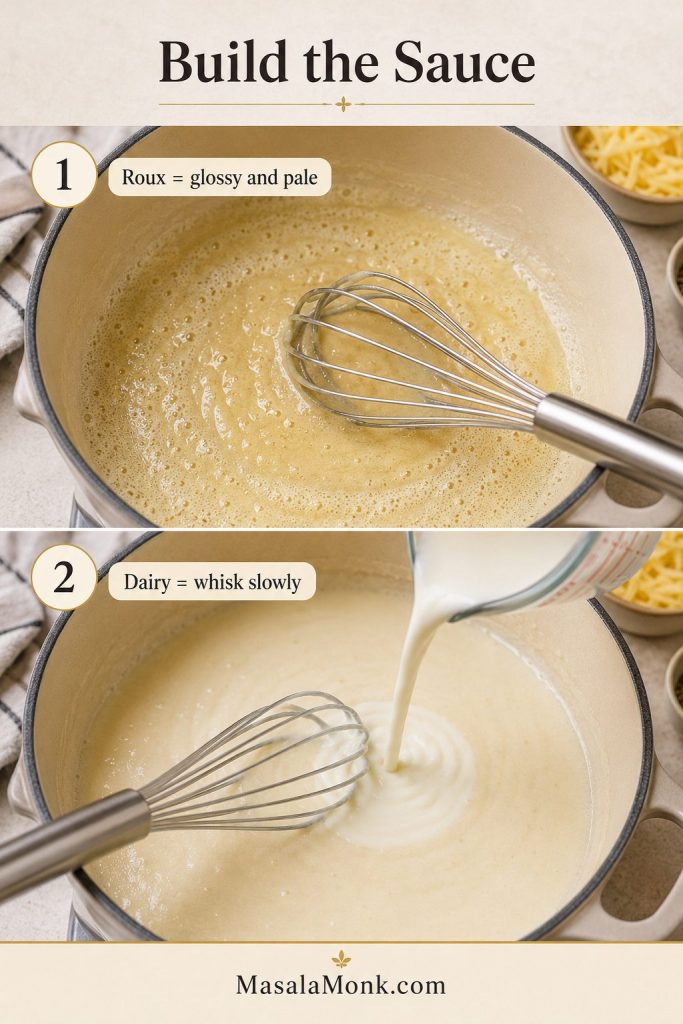
Two-panel process guide showing a pale roux and milk or cream being whisked into sauce for lobster mac and cheese.
A smooth sauce starts before the cheese goes in. First cook a pale glossy roux, then whisk in the dairy slowly so the base thickens without lumps.

Season the Sauce

Stir in the Dijon or dry mustard, garlic powder, onion powder, optional Old Bay or Cajun seasoning, paprika, black pepper, and a small pinch of salt. Taste before adding more salt, especially if using parmesan, Old Bay, Cajun seasoning, or salted lobster meat.

Add the Cheese Off Heat

Lower the heat or turn it off before adding the cheese. Stir it in gradually, a handful at a time. This helps the sauce melt smoothly instead of separating.

Aim for creamy and pourable, not stiff. The pasta should look almost too creamy before it bakes. That is the trick.
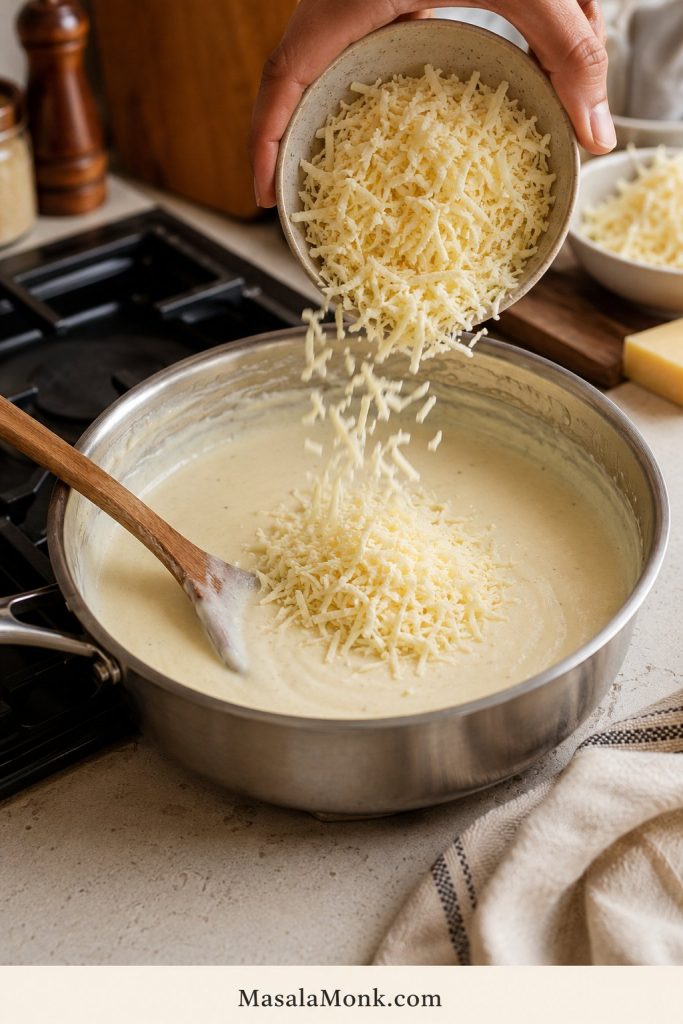
Freshly grated cheese being added to a pot of warm sauce for lobster mac and cheese.
Strong heat can make cheese sauce grainy or oily, so melt the cheese off heat or over very low heat for a smoother baked mac.

Coat the Pasta First

Fold the pasta into the sauce before the lobster goes in. This gives every curve of pasta a chance to catch the sauce and keeps the seafood from being stirred too aggressively.
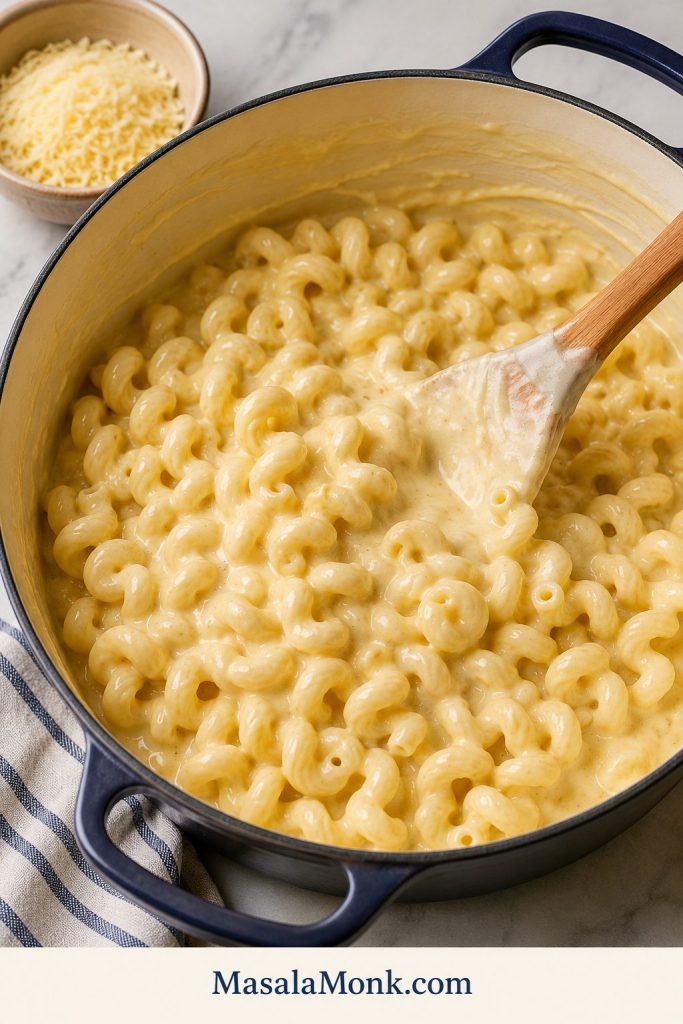
Cavatappi pasta being folded into creamy cheese sauce in a pot before lobster is added.
Coat the pasta before the lobster goes in. This way, the sauce reaches every curve of cavatappi and the delicate seafood does not get overmixed.

Add the Lobster Last

Once the pasta is coated, gently add the lobster. This keeps the pieces from breaking apart and lets them stay sweet, soft, and noticeable in every scoop.
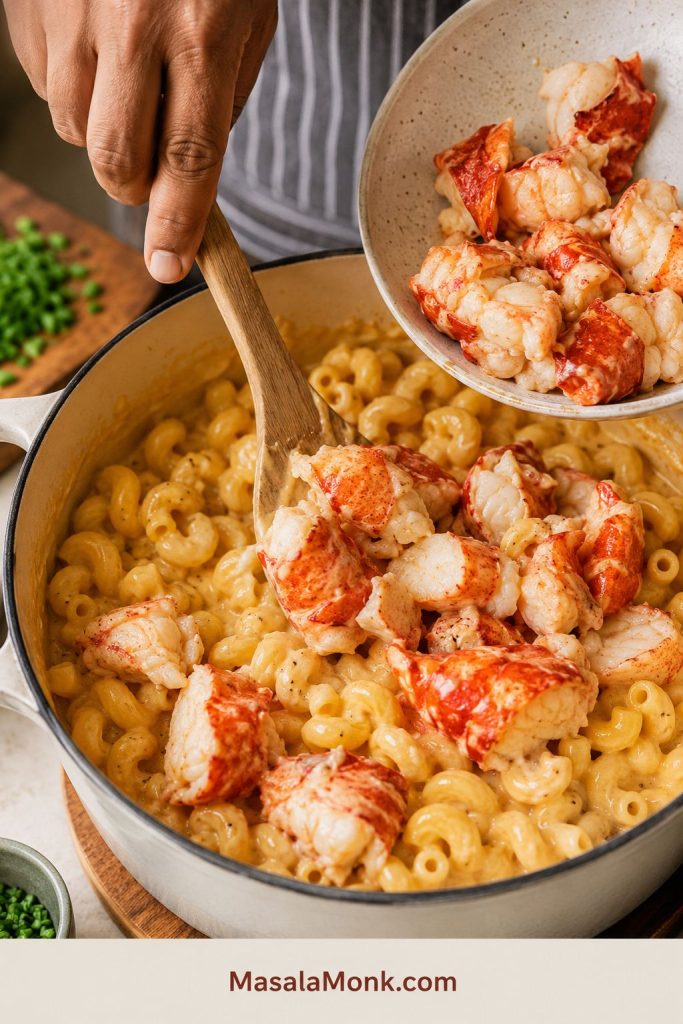
Large lobster pieces being gently folded into sauced cavatappi pasta for lobster mac and cheese.
Lobster should be folded in late, after the pasta is already sauced. At this point, it only needs to warm through, not cook a second time.

Transfer to the Baking Dish

Spoon the mixture into the prepared dish. For a more generous-looking pan, reserve a few pieces of lobster and place them on top before adding the crumb topping.

Check the Pan Before Topping

Before the topping goes on, the pasta should look glossy and slightly loose, with lobster pieces still visible. This is the best time to add a splash of milk if the mixture already looks tight.
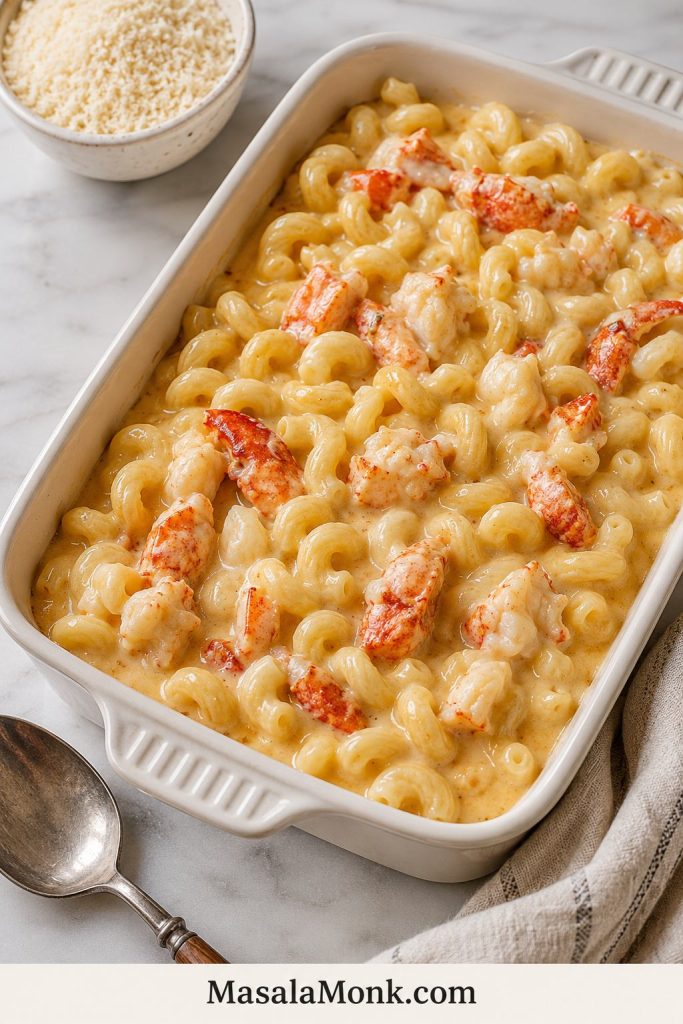
Lobster mac and cheese in a white baking dish before breadcrumb topping, with glossy pasta and visible lobster pieces.
Before the crumbs go on, the pan should look glossy, slightly loose, and generous with lobster. That extra moisture helps protect the creamy center during baking.

Add the Buttered Panko Topping

Mix panko or crushed Ritz crackers with melted butter, parmesan, herbs, and optional lemon zest. Sprinkle the topping evenly over the pan so it can brown quickly.
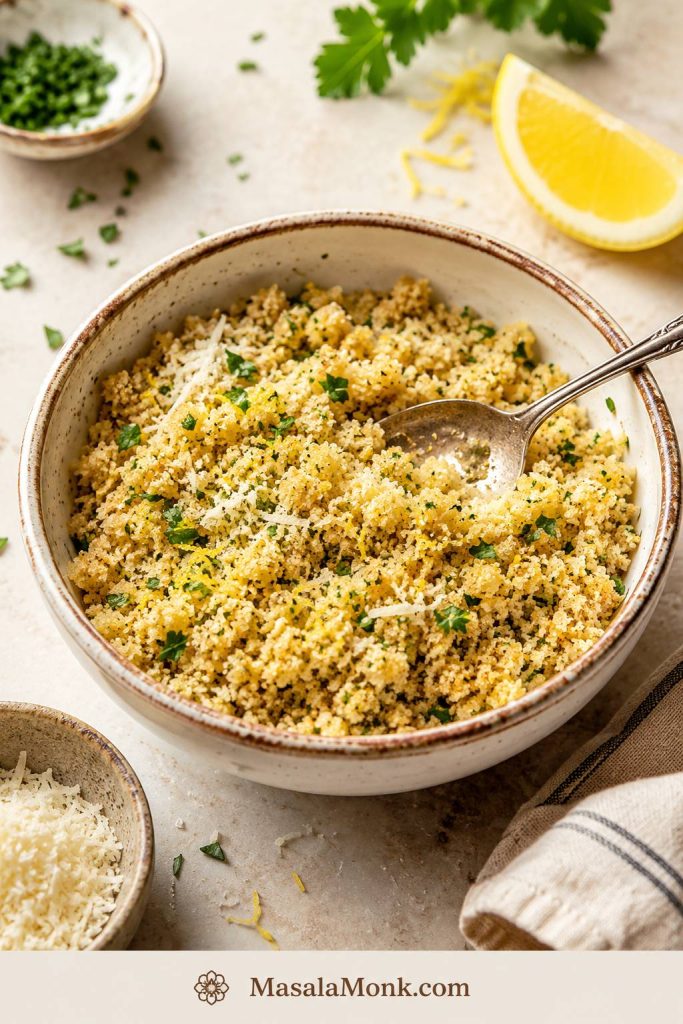
Bowl of buttered panko breadcrumbs with parmesan, herbs, and lemon for topping lobster mac and cheese.
Buttered panko browns faster than dry crumbs, giving the casserole a crisp golden top without keeping the lobster in the oven too long.

Bake Until Bubbling and Golden

Bake at 375°F / 190°C for 20 to 25 minutes. The edges should bubble and the topping should be golden, while the center still looks creamy when you scoop into it.

Baked lobster mac and cheese in a white casserole dish with golden breadcrumb topping, herbs, and visible lobster pieces.
Pull the pan when the edges bubble and the topping turns golden. The center should still look soft because it will thicken slightly as it rests.

Rest Before Serving

Let the dish rest for 8 to 10 minutes before serving. A short rest helps the sauce settle so the first scoop holds together without turning stiff.
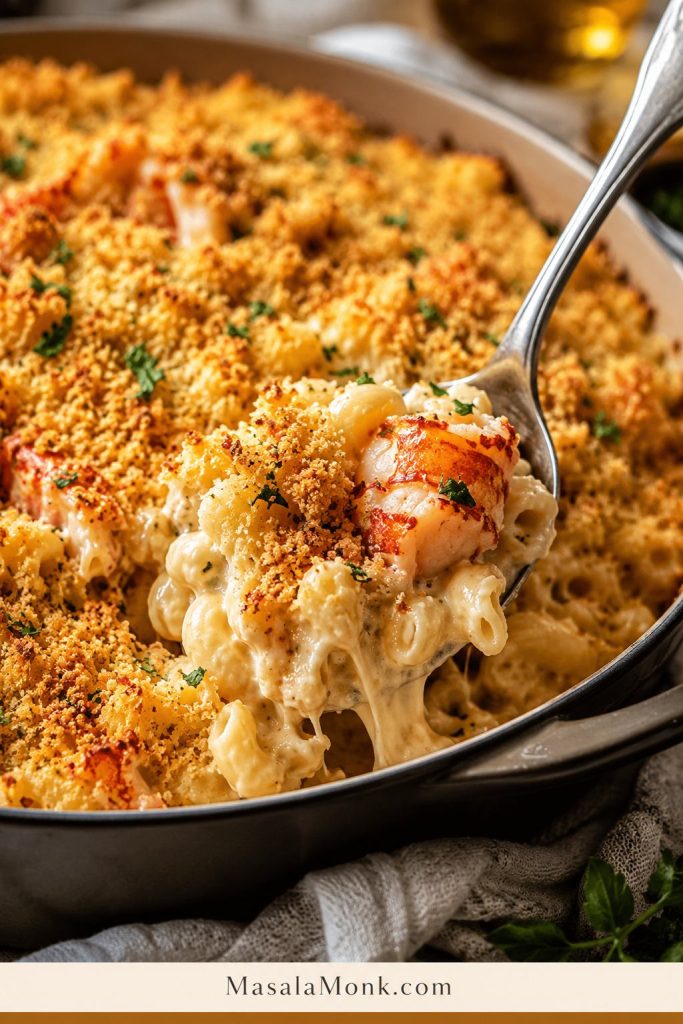
Spoon lifting a creamy scoop from baked lobster mac and cheese with golden crumbs, herbs, pasta, and lobster pieces.
A short rest helps the first scoop hold together without losing creaminess. If the inside still looks glossy under the crumbs, the bake time was right.

Back to recipe card · Fix dry mac before baking · Keep lobster tender

The Right Oven Temperature

The safest default oven temperature is 375°F / 190°C. It is hot enough to brown the topping and bubble the sauce, but not so hot that the lobster is likely to overcook before the casserole is ready.

  • 350°F / 175°C is gentler and useful for reheating or make-ahead pans, but browning takes longer.
  • 375°F / 190°C gives this recipe the best balance: bubbling edges, toasted crumbs, and a creamy center.
  • 400°F / 200°C can brown quickly, but it gives you less room for error with lobster and cheese sauce.

For this recipe, bake at 375°F / 190°C for 20 to 25 minutes. If the topping needs more color, broil briefly at the end instead of baking the whole dish longer.

How to Keep Lobster Mac and Cheese Creamy

If baked mac turns dry, it is usually a few small things adding up: pasta cooked too far, sauce too thick, cheese overheated, or the pan left in the oven too long.

Use these visual checks before the pan goes into the oven and again when it comes out.
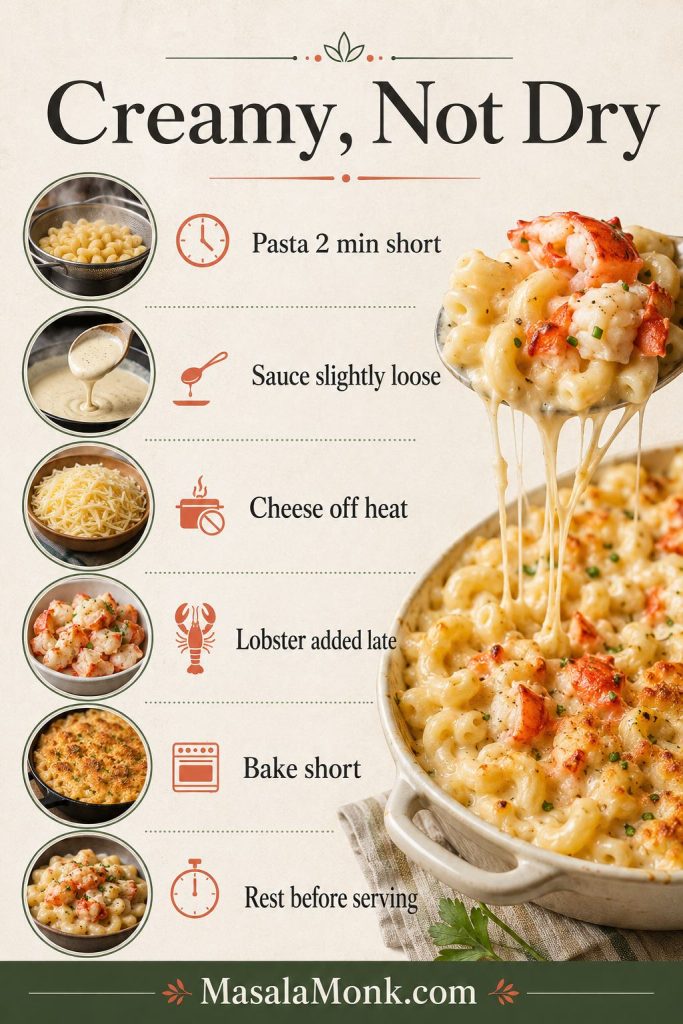
Infographic titled Creamy, Not Dry with tips for keeping lobster mac and cheese creamy, including cooking pasta short, keeping sauce loose, adding lobster late, baking short, and resting before serving.
For creamy baked lobster mac, start saucier than expected, melt cheese gently, add lobster late, bake briefly, and rest the pan before serving.
  • Use enough sauce. Pasta absorbs moisture in the oven, so the mixture should look a little loose before baking.
  • Undercook the pasta. Stop about 2 minutes before al dente for a baked pan.
  • Grate the cheese yourself. Freshly grated cheese melts more smoothly.
  • Add cheese off heat. Gentle heat keeps the sauce smoother and less oily.
  • Add seafood after the sauce is ready. Lobster only needs to warm through inside the pasta.
  • Pull it at the right moment. The edges should bubble, the topping should brown, and the center should still look creamy.
  • Rest before serving. A short rest helps the sauce settle without becoming watery.

A thick-looking pan needs help before it reaches the oven. Add 1/4 cup / 60 ml milk at a time until the pasta looks glossy and saucy again.

Still troubleshooting? See how to avoid rubbery lobster or jump to common fixes.

How to Avoid Rubbery Lobster

Lobster gets rubbery when it is cooked too long or reheated too aggressively. Since it warms again inside the mac, it should stay on the tender side before it goes into the dish.

The easiest way to protect the lobster is to cook it gently first, add it late, and avoid repeated high heat.
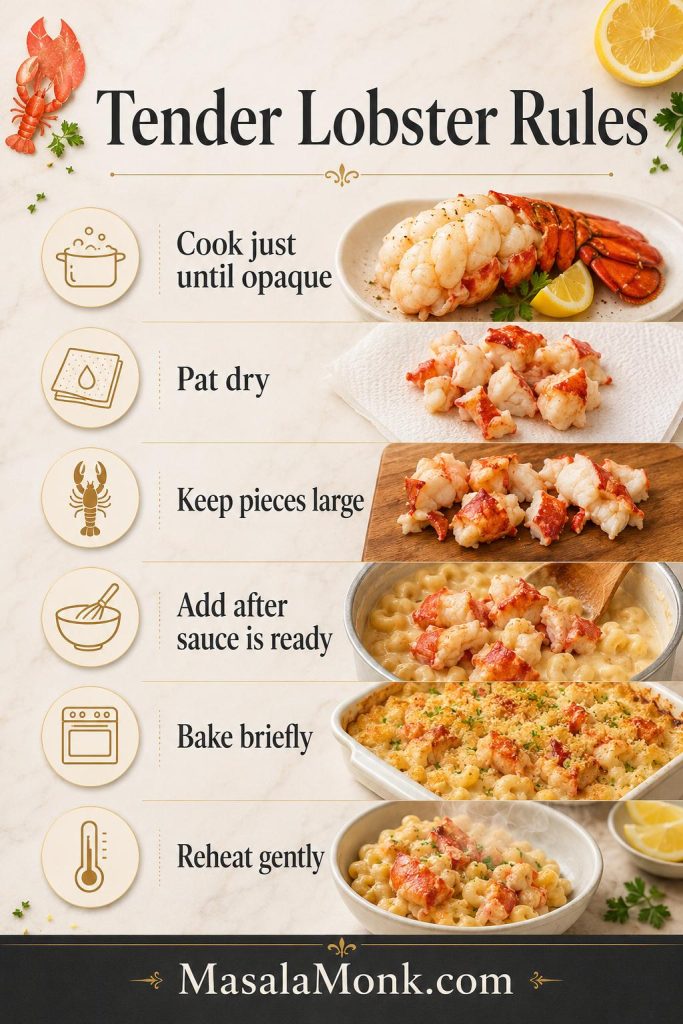
Infographic titled Tender Lobster Rules showing lobster cooking, drying, cutting, adding to sauce, baking briefly, and reheating gently.
Tender lobster is mostly about timing. Cook it just until opaque, pat it dry, keep the pieces large, and fold it in only after the sauce is ready.
  • Cook lobster tails only until the meat turns opaque and just firm.
  • Use cooked lobster meat if you want the easiest method.
  • Pat lobster dry so extra moisture does not thin the sauce.
  • Cut lobster into generous chunks instead of tiny bits.
  • Add the lobster after the pasta is already coated in sauce.
  • Keep the uncovered bake short.
  • Reheat leftovers gently with a splash of milk or cream.

Lobster should feel like the prize in the bite, not the thing you have to chew around. If it is already tender before baking, your job is to protect it.

How to Make It Taste Restaurant-Style

Restaurant-style lobster mac and cheese usually feels more polished because of the pasta shape, the cheese blend, the visible lobster pieces, and the finishing touches. The dish should look generous before anyone tastes it.

  • Use cavatappi. The curls hold sauce and make the pan look special.
  • Choose a white cheese blend. White cheddar, Gruyere, fontina, and parmesan give a steakhouse-style look and flavor.
  • Keep some lobster visible. A few reserved pieces on top make the whole pan feel more generous.
  • Finish with chives or parsley. A little green makes the rich sauce look brighter.
  • Add a small splash of sherry, seafood stock, or lobster cooking liquid. Use just enough to add depth, not enough to make the sauce taste boozy or fishy.
  • Broil briefly if needed. A quick 1 to 3 minute broil can give the topping a golden steakhouse finish.

Optional Lobster-Shell Flavor Boost

If you cooked lobster tails yourself, you can use the shells for a subtle restaurant-style boost. Simmer the shells gently in the milk and cream for about 10 minutes with a small piece of onion or a bay leaf, then strain before making the sauce. Keep the heat gentle and do not reduce the dairy too much.
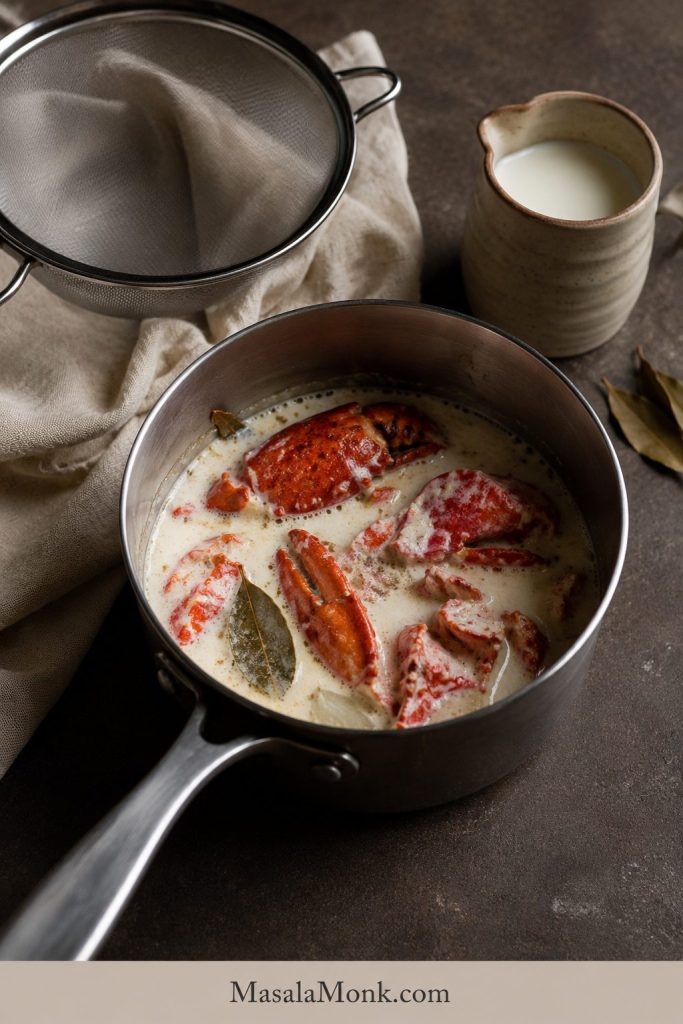
Lobster shells simmering in milk or cream with a bay leaf, with a strainer and pitcher nearby.
For deeper restaurant-style flavor, steep lobster shells gently in the dairy, then strain before making the cheese sauce. It adds seafood depth without overpowering the pan.

This step is optional. The base recipe works without it, but it adds a little more lobster depth when you want the dish to feel extra special.

For a bigger seafood-table mood, serve it next to a Cajun seafood boil and keep the mac slightly milder so the lobster flavor still comes through.

Make-Ahead Lobster Mac and Cheese

The safest plan is to prep the lobster, cheese, and topping ahead, but assemble and bake the pasta fresh when possible. That gives you the creamiest sauce and the most tender lobster.

For hosting, the goal is to reduce last-minute work without sacrificing the fresh-baked texture.
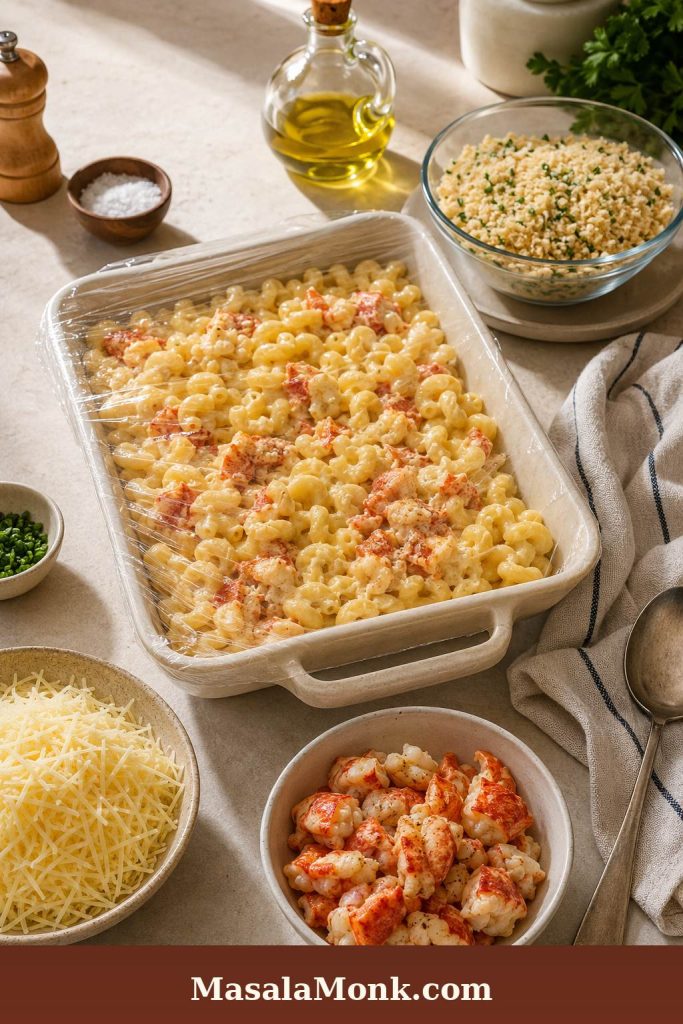
Make-ahead setup for lobster mac and cheese with covered pasta, cooked lobster, grated cheese, panko topping, herbs, and kitchen tools.
For make-ahead lobster mac, prep the components early but bake fresh when possible. Keeping the topping separate preserves crunch and protects the creamy sauce.

Recommended Make-Ahead Method

  • Grate the cheese up to 1 day ahead.
  • Cook and chop the lobster up to 1 day ahead.
  • Mix the panko or Ritz topping ahead and refrigerate it separately.
  • Cook the pasta and make the sauce closer to baking time for the best texture.
  • Assemble and bake just before serving.

For guests, prepping the parts early and baking the pan fresh is the sweet spot: less last-minute work, but still a creamy center and tender lobster.

If You Need to Assemble It Ahead

If you need to assemble the whole dish ahead, transfer the pasta, sauce, and lobster to the baking dish, but keep the topping separate. Cover and refrigerate for up to 24 hours. Before baking, let the dish sit at room temperature for about 30 minutes while the oven heats.

Bake covered at 350°F / 175°C until warmed through, then uncover, add the topping, and continue baking until golden. Add a splash of milk or cream if the pasta looks dry before baking.

Fully baking, chilling, and rebaking the whole pan is less ideal for a special meal because the lobster and sauce both lose some tenderness. It can work for leftovers, but fresh assembly gives the best texture.

Planning leftovers too? See how to store and reheat lobster mac and cheese.

How to Store and Reheat Lobster Mac and Cheese

This mac is at its best when it is freshly baked and creamy, but leftovers can still be good if you reheat them gently and add moisture back into the sauce.

Storage

  • Cool leftovers, then transfer to an airtight container.
  • Refrigerate for up to 3 days, though the texture is best within the first 1 to 2 days. For general leftover safety timing, see the USDA leftover food safety guide.
  • Keep the topping if already baked, but know it will soften in the fridge.
  • Freezing is possible, but not ideal because creamy cheese sauces can separate after thawing.

Oven Reheating

Place leftovers in a baking dish and add a splash of milk or cream. Cover with foil and reheat at 300°F to 325°F / 150°C to 165°C until warmed through. Remove the foil for the last few minutes if you want to refresh the topping.

Microwave Reheating

For single servings, add a splash of milk or cream and microwave in short bursts, stirring gently between each one. Use lower power if possible. Heating it until boiling can toughen the lobster and make the sauce split.

Try to reheat only what you plan to eat. Repeated reheating is hard on both lobster and cheese sauce.

Lobster Mac and Cheese Variations

Once the base pan works, the variations become fun — not stressful experiments with expensive seafood. Keep the same sauce logic: gentle cheese heat, gently warmed seafood, and a sauce that stays slightly loose if the pan will be baked.

Use the base method first, then change one flavor direction at a time so the seafood and sauce stay balanced.
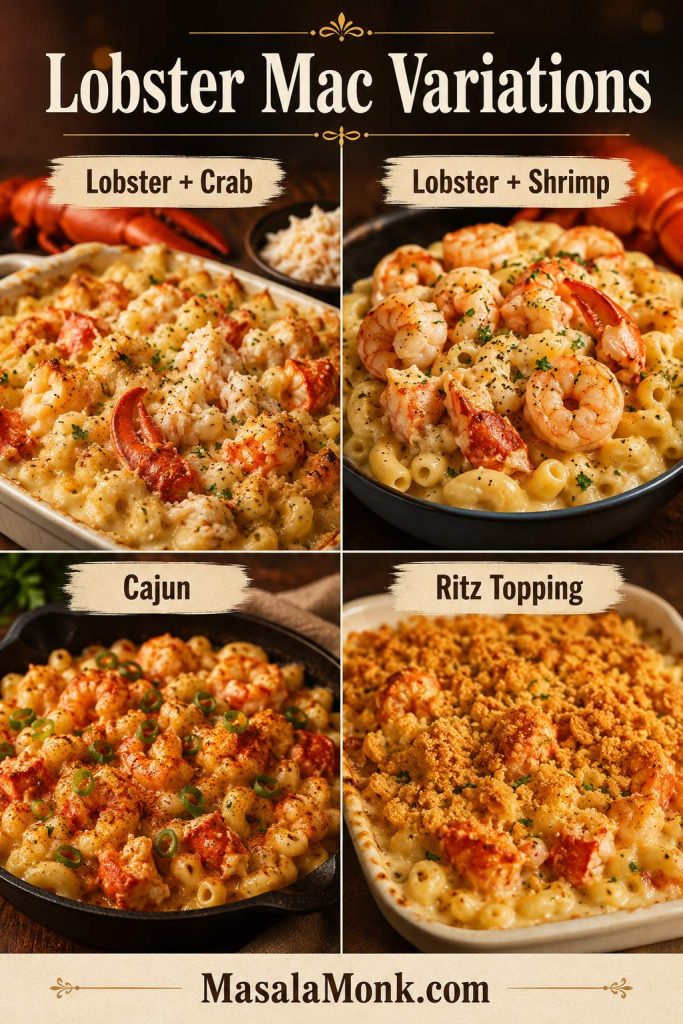
Four-panel lobster mac and cheese variations guide showing lobster crab, lobster shrimp, Cajun, and Ritz topping versions.
Once the base recipe is reliable, variations become easier. Add crab for sweetness, shrimp for extra seafood, Cajun seasoning for heat, or Ritz crumbs for buttery crunch.

Lobster Crab Mac and Cheese

Choose this version when you want the pan to feel softer, sweeter, and more holiday-table than steakhouse. Use half lobster and half lump crab meat, then fold the crab in gently at the end so the pieces stay intact.

Lobster Shrimp Mac and Cheese

Choose this when you want a fuller seafood mac without buying more lobster. Add cooked medium or large shrimp near the end, and chop them only if they are very large so they stay juicy instead of tight.

Seafood Mac and Cheese

Use lobster, crab, and shrimp when you want the pan to feel more like a seafood feast than a side dish. Old Bay, Cajun seasoning, or a small pinch of cayenne can push it toward seafood-boil flavor.

Cajun Lobster Mac and Cheese

Choose this version when you want seafood-boil energy: a little bolder, a little warmer, and still creamy underneath. Pepper Jack can replace part of the Monterey Jack or Havarti if you want gentle heat.

Truffle Lobster Mac and Cheese

Choose this for steakhouse polish. Add a small amount of truffle butter or truffle oil at the end, and use restraint; too much truffle can take over before the lobster has a chance to shine.

Bacon Lobster Mac and Cheese

Keep bacon on top, where it gives smoky crunch without taking over the whole sauce. Stirring too much bacon into the cheese sauce can make the dish taste saltier and heavier than it needs to be.

Ritz Cracker Topping

Choose Ritz when you want buttery, nostalgic holiday-casserole flavor. The crumbs brown beautifully and make the top taste richer than panko.

Extra Creamy Stovetop Lobster Mac

Choose stovetop when sauce texture matters more than a baked crust. Make the sauce, add the pasta and lobster, and serve immediately with toasted buttered panko on top.

What to Serve With Lobster Mac and Cheese

This dish is rich, so the right sides either make the meal feel more special or cut through the creaminess with freshness.

For the most balanced table, pair the creamy pasta with something crisp, green, lemony, roasted, or simply cooked.
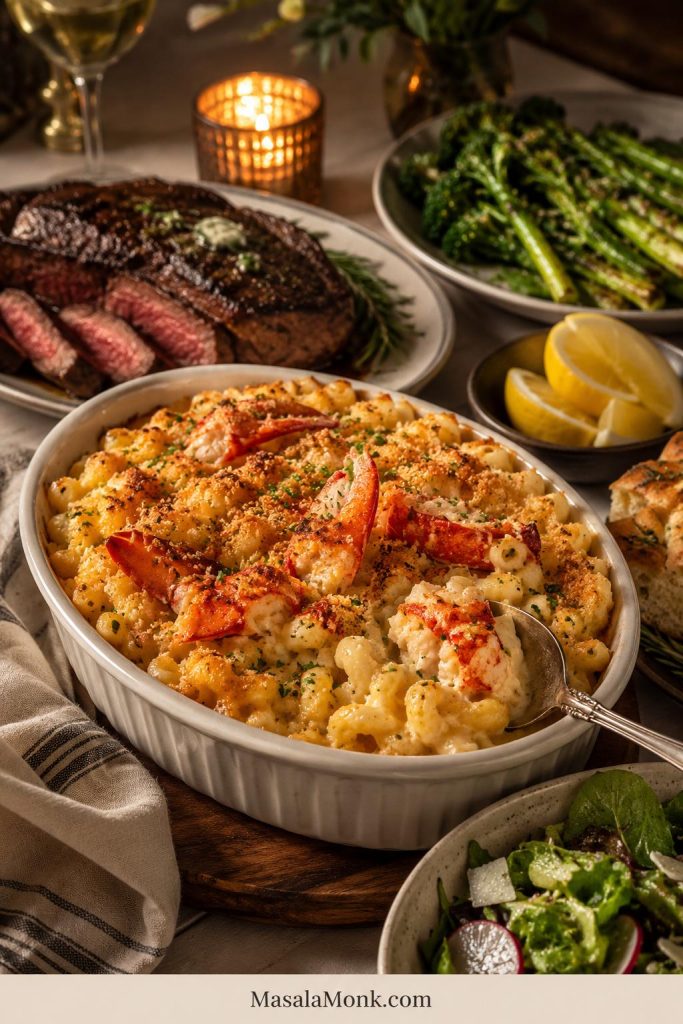
Lobster mac and cheese served with steak, green vegetables, salad, bread, lemon, and a warm dinner table setting.
Since lobster mac is rich, serve it with contrast. Steak, roasted greens, crisp salad, bread, or lemony vegetables make the meal feel complete without becoming too heavy.
  • Steak or roast beef for a steakhouse-style dinner
  • Roasted carrots or asparagus with lemon
  • Sourdough focaccia, garlic bread, or soft dinner rolls
  • Simple green salad with vinaigrette
  • Roasted broccoli or broccolini
  • Tomato cucumber salad
  • Roasted Brussels sprouts
  • Holiday mains like turkey, prime rib, or ham

If you want a lighter seafood main beside a smaller scoop of mac, baked tilapia keeps the plate from feeling too heavy. For a full seafood dinner, pair smaller portions with lobster bisque and something bright on the side.

For a lighter starter before a rich pan of lobster mac, tomato soup, cucumber salad, or a bright vinaigrette salad works better than adding another heavy cream-based dish.

Homemade vs Frozen Lobster Mac and Cheese

Frozen and prepared lobster mac and cheese can be convenient, especially from grocery stores like Costco, Whole Foods, or Aldi. Homemade gives you more control over the lobster pieces, cheese blend, sauce texture, and topping.

The biggest difference is the lobster. In a homemade pan, the pieces can stay larger and sweeter instead of disappearing into the sauce. To improve a store-bought version, add a splash of cream, a handful of freshly grated cheese, extra lobster if you have it, and a fresh buttery breadcrumb topping.

Troubleshooting Lobster Mac and Cheese

If something feels off, it is usually fixable. Most problems come down to heat, moisture, or timing.

Use the guide below as the quick fix map before you adjust the sauce, seafood, or topping.
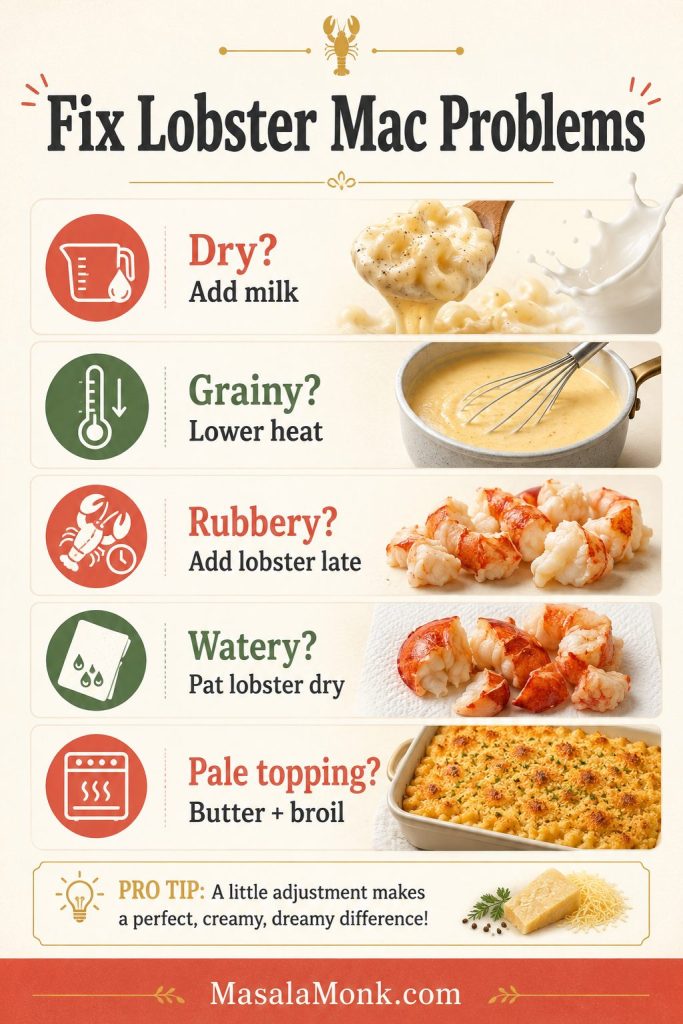
Troubleshooting guide for lobster mac and cheese with fixes for dry, grainy, rubbery, watery, and pale-topped mac and cheese.
Most lobster mac problems come from heat, moisture, or timing. Dry mac needs milk, grainy sauce needs gentler heat, and rubbery lobster needs to be added later next time.
ProblemLikely CauseFix
Mac and cheese is dryNot enough sauce, pasta overcooked, or baked too longAdd more milk before baking and pull the dish when edges bubble.
Cheese sauce is grainyCheese was overheated or pre-shredded cheese was usedAdd cheese off heat and use freshly grated cheese next time.
Cheese sauce is oilyHeat was too high or cheese separatedLower the heat, add cheese gradually, and avoid boiling the sauce.
Lobster is rubberyLobster was overcooked or baked too longCook lobster gently, add it late, and bake briefly.
Sauce is wateryFrozen lobster was not drained or sauce was too thinPat lobster dry and simmer the sauce until it lightly coats a spoon.
Mac tastes blandNot enough salt, mustard, or seasoningSeason the sauce before adding pasta; use Dijon, garlic powder, and a little seafood seasoning.
Topping is paleNot enough butter or too little oven timeUse buttered crumbs and broil briefly at the end.
Topping burns before center is hotOven too hot or topping added too early for make-ahead bakeBake covered first, then add topping near the end.

Back to recipe card · Back to quick answer

FAQ

What is the best cheese for lobster mac and cheese?

Use white cheddar, fontina or Gruyere, Monterey Jack or Havarti, and a little parmesan. White cheddar gives flavor, the smoother cheeses keep the sauce creamy, and parmesan adds salty depth.

Do lobster tails work in mac and cheese?

Yes. Lobster tails give you large, impressive pieces. Cook them gently until opaque, white, and just firm, then chop the meat and add it after the sauce is ready.

Should lobster be cooked before adding it?

Yes. Cook the lobster gently first, then let it warm through in the sauce. The oven should not be responsible for cooking raw lobster inside the casserole.

How much lobster do I need per person?

For this recipe, 12 to 16 oz / 340 to 454 g cooked lobster meat gives about 1.5 to 2 oz lobster per main-dish serving, or less if served as a holiday side. Use 16 oz if you want visible lobster in every scoop.

How do you keep baked lobster mac from drying out?

Use enough sauce, cook the pasta 2 minutes short of al dente, melt the cheese gently, and pull the pan while the center still looks creamy. The pasta should look slightly loose before it goes into the oven.

Why did my cheese sauce turn grainy?

Cheese sauce usually turns grainy when the cheese is overheated or when pre-shredded cheese is used. Lower the heat or turn it off before adding cheese, and stir in freshly grated cheese a handful at a time.

What is the best make-ahead method?

Prep the components ahead and bake fresh. Grate the cheese, cook the lobster, and prepare the topping in advance. If assembling the whole dish ahead, keep the topping separate and add it near the end of baking.

Is frozen lobster meat okay?

Yes. Thaw frozen lobster meat overnight in the refrigerator, drain it well, and pat it dry before adding it. Extra moisture can make the sauce watery.

Can I use imitation lobster or imitation crab?

You can, but the flavor and texture will be different from real lobster. Add imitation lobster or imitation crab near the end just to warm through.

Is stovetop lobster mac better than baked?

Stovetop lobster mac is usually creamier because it avoids oven time. Baked lobster mac gives you a crisp topping and bubbling casserole texture. Choose stovetop for maximum creaminess and baked for special-occasion presentation.

What pasta shape works best?

Cavatappi is one of the best choices because the curls hold sauce and make the finished pan look restaurant-style. Elbow macaroni, shells, and other short pasta shapes also work well.

Can you freeze lobster mac and cheese?

You can freeze it, but it is not ideal. Creamy cheese sauces can separate after thawing, and lobster can become tougher when reheated. Thaw overnight, add milk or cream, cover, and reheat gently.

How do I turn this into seafood mac and cheese?

Use a mix of lobster, crab, and shrimp. Keep the seafood cooked gently and add it after the sauce is ready so it stays tender. Add Old Bay or Cajun seasoning for a stronger seafood-style flavor.

Lobster mac and cheese is rich, cozy, and impressive, but it should not feel risky. Once you know the three main rules — keep the sauce loose, melt the cheese gently, and add the lobster after the sauce is ready — the dish becomes much easier. Serve it bubbling from the oven, or keep it stovetop and extra silky. Either way, the goal is the same: tender lobster, smooth sauce, buttery crumbs, and a first scoop that makes the whole pan feel worth the occasion.

Posted on Leave a comment

Hibachi Ginger Sauce Recipe — Japanese Steakhouse Brown Sauce

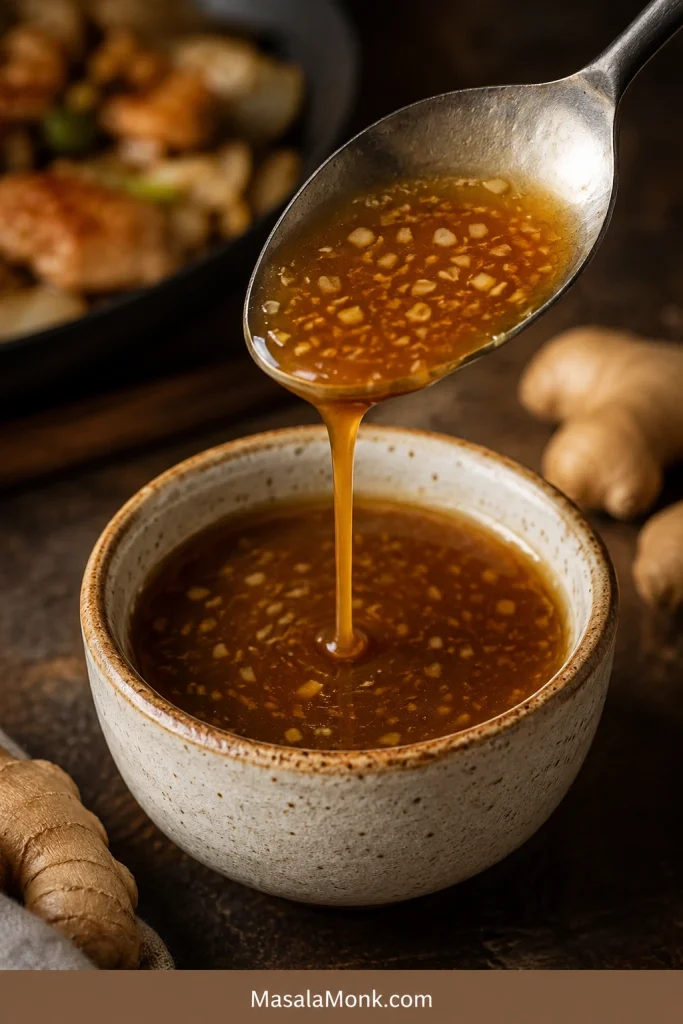
A small ceramic bowl of brown hibachi ginger sauce with visible ginger and onion flecks, served with shrimp, steak bites, fried rice, zucchini, mushrooms, and onion.

If you have ever dipped hibachi shrimp, steak, or fried rice into that sharp brown ginger sauce and wished you had a jar at home, this is the one to make.

This hibachi ginger sauce is pourable, tangy, salty, lightly sweet, and full of fresh ginger-onion bite. It is the brown dipping sauce from the little Japanese steakhouse cup — not creamy yum yum sauce and not the orange ginger dressing from the salad.

The first spoonful should taste like the dip you remember: salty at the start, bright in the middle from lemon and rice vinegar, and warm with ginger at the end. Blend it in 5 minutes, chill it if you can, and serve it with shrimp, steak, chicken, fried rice, noodles, vegetables, dumplings, tofu, or rice bowls.

Before You Blend

  • Use fresh ginger if possible. Ginger paste works in a pinch, but fresh ginger gives the cleanest bite.
  • Choose low-sodium soy sauce. Regular soy sauce can make this dip too salty after it rests.
  • Pulse, don’t fully puree. Tiny ginger and onion flecks are part of the steakhouse-style texture.
  • Let it chill when you can. One hour in the fridge softens the raw onion and makes the sauce taste more rounded.

Quick Answer: What Is Hibachi Ginger Sauce?

Hibachi ginger sauce is a Japanese steakhouse-style dipping sauce made with fresh ginger, onion, soy sauce, rice vinegar, lemon juice, and a little sugar. It is usually served with grilled meats, seafood, vegetables, noodles, and fried rice.

When people ask for the brown sauce from hibachi restaurants, they usually mean this ginger-soy dipping sauce. Yum yum sauce is the creamy pink-orange one. On salad, the orange or tan sauce is usually Japanese ginger dressing.

It is especially good with shrimp fried rice, steak bites, grilled chicken, sautéed mushrooms, zucchini, dumplings, spring rolls, tofu, salmon, and rice bowls.

Hibachi Ginger Sauce Recipe

A 5-minute no-cook Japanese steakhouse-style ginger sauce made with fresh ginger, onion, soy sauce, rice vinegar, and lemon juice. The flavor is salty-tangy first, then bright and gingery, with a little onion bite that mellows after chilling.

Prep Time5 minutes
Cook Time0 minutes
Optional Chill Time1 hour
Total Time5 minutes, or 1 hour 5 minutes with chilling
YieldAbout 1 cup / 240 ml
Servings8
Serving Size2 tablespoons / 30 ml
TexturePourable, lightly textured

Ingredients

  • 2 tablespoons fresh ginger, peeled and grated or finely chopped, about 15 g
  • ½ cup chopped yellow onion, about 70–80 g
  • ⅓ cup low-sodium soy sauce or tamari, 80 ml
  • 3 tablespoons rice vinegar, 45 ml
  • 2 tablespoons fresh lemon juice, 30 ml
  • 1 teaspoon sugar or brown sugar, 4 g
  • ½ teaspoon lemon zest, optional
  • 1 small garlic clove, optional

Equipment

  • Blender, food processor, or mini chopper
  • Microplane, grater, or sharp knife
  • Cutting board
  • Measuring cups and spoons
  • Small jar or airtight container

No blender? Grate the ginger, mince the onion as finely as possible, then shake everything hard in a jar. The dip will be chunkier and more intense, but it still works for dipping.

Instructions

  1. Peel the ginger and grate it, or chop it finely so it blends easily.
  2. Chop the onion into small pieces. Smaller pieces help the mixture blend faster without turning foamy.
  3. Add the ginger, onion, soy sauce, rice vinegar, lemon juice, sugar, and optional lemon zest or garlic to a blender or food processor.
  4. Pulse until the sauce is loose and spoonable. Stop while tiny pieces of ginger and onion are still visible.
  5. Taste before you change anything. Add more lemon juice if it tastes flat, a tiny pinch of sugar if it tastes too strong, or 1–2 tablespoons water if it tastes too salty.
  6. Serve right away, or cover and chill for 1 hour so the flavor tastes smoother and more rounded.

Recipe Notes

  • Do not judge the sauce in the first minute after blending. Raw onion and ginger taste loud at first; chilling is part of the recipe if you want a smoother restaurant-style flavor.
  • Start with 2 tablespoons fresh ginger. Very mild ginger can take another ½ tablespoon after blending. Older, woody, or very hot ginger should rest in the sauce before you add more.
  • Low-sodium soy sauce keeps the sauce from becoming too salty.
  • Use a food processor for a slightly textured sauce and a blender for a smoother one.
  • The dip may separate in the fridge. Stir or shake before serving.
  • Yield may vary slightly depending on how finely the onion is chopped and blended.
  • Store in an airtight jar in the refrigerator and use within 5 days.

Choose Your Version

The main recipe is balanced for home cooking: bold enough for hibachi-style plates, but not so salty that it overwhelms rice, vegetables, or dumplings. Use this quick guide before you add more soy sauce, sugar, or lemon.

A tabletop guide showing hibachi ginger sauce served with steak bites, dumplings, fried rice, a rice bowl, and a jar method.
Start with the base sauce, then adjust it for the meal in front of you. Keep it loose for fried rice, make it bolder for steakhouse plates, or add garlic and sesame oil when serving it with dumplings.
Want This Result?Do This
Closest steakhouse biteAdd extra soy sauce, rice vinegar, lemon, and ginger from the stronger restaurant-style adjustment below.
Less salty everyday sauceStay with the main recipe and use low-sodium soy sauce.
Best for dumplingsAdd the optional garlic and a few drops of toasted sesame oil.
Best for fried riceKeep it loose and bright. Do not thicken it.
Best texturePulse until tiny ginger and onion flecks remain.
No blender versionGrate the ginger, mince the onion finely, and shake everything in a jar.

Already made the sauce? Jump to adjustments after blending or troubleshooting. Still deciding how you want it to taste? Start with why the balance works.

Why This Ginger Sauce Recipe Works

Some restaurant-style ginger sauces lean hard on soy sauce and vinegar. They taste bold with grilled steak or shrimp, but they can become too salty for home dinners. This version keeps the familiar ginger-onion base and balances it with lemon, rice vinegar, and a small amount of sugar.

The finished sauce should hit salty first, then tangy, then gingery. It should not taste creamy, oily, syrupy, or thick. If the onion tastes raw right away, chill the sauce before changing the recipe.

Quick Taste Check

The dip should taste balanced, not sweet or heavy. Flat sauce needs lemon, a too-strong batch needs chill time, and salty sauce needs water 1 tablespoon at a time. When one bite of rice makes you want another, the balance is right.

Chopsticks holding white rice dipped in brown hibachi ginger sauce above a small bowl of sauce, with grilled vegetables and fresh ginger nearby.
Plain rice is the quickest way to test the flavor because it does not hide the sauce. When the bite tastes lightly salty, bright, and gingery, the hibachi ginger sauce is ready.

That balance is why the dip works with a whole plate, not just one bite. It cuts through butter, soy, and seared edges without covering up the shrimp, steak, rice, or vegetables. Use it as a dip, a spoon-over sauce for fried rice, or a brighter alternative when a thicker stir fry sauce would feel too heavy.

What Is Hibachi Ginger Sauce?

The easiest way to understand hibachi ginger sauce is by where it sits on the plate: beside grilled food, not on salad. It cuts through richness, wakes up rice, and adds a fresh ginger bite to shrimp, steak, chicken, vegetables, and noodles.

You may see it called Japanese steakhouse ginger sauce, Benihana-style ginger sauce, hibachi brown sauce, or simply ginger sauce. Most of those names point to the same ginger-soy dipping cup sauce.

Ingredients You’ll Need

The goal is not to make the strongest sauce possible. Aim for that familiar first dip: bright, salty, gingery, and balanced enough that you keep going back for one more bite of rice.

Fresh ginger root, grated ginger, chopped yellow onion, soy sauce, rice vinegar, lemon halves, sugar, and garlic arranged on a wooden board.
Fresh ginger and onion create the bite, while soy sauce, rice vinegar, lemon, and a small amount of sugar bring balance. Together, they keep the sauce savory and bright instead of flat, sour, or overly salty.

Fresh Ginger

Fresh ginger is the main flavor. It gives the sauce its clean bite, gentle heat, and bright fragrance. Peel it first, then grate or finely chop it so it blends evenly.

Two tablespoons gives the sauce a clear ginger flavor without overwhelming everything else. Use 1½ tablespoons for a milder dip or 2½ tablespoons for a stronger one.

Yellow Onion

Onion is what keeps the dip from tasting like soy sauce with ginger stirred in. Yellow onion gives the best balance; white onion tastes sharper, and red onion changes the color and flavor too much for this style.

Soy Sauce or Tamari

Soy sauce brings salt, color, and savory depth. Low-sodium soy sauce is the safest choice because this is a dipping sauce, and salt builds quickly.

Tamari works well for a deeper flavor or a gluten-free version. Coconut aminos can work for a soy-free version, but it is sweeter and less salty, so reduce or skip the sugar and brighten the sauce with extra vinegar or lemon if needed.
For a sweeter cooked soy-ginger glaze instead of a fresh dipping sauce, this teriyaki sauce recipe is the better direction.
Rice Vinegar

Rice vinegar gives the sauce a clean tang without making it harsh. Unseasoned rice vinegar gives you the most control. If using seasoned rice vinegar, blend first, then add sugar only if the sauce still needs rounding.

Lemon Juice

Fresh lemon juice lifts the ginger, keeps the soy sauce from tasting heavy, and gives the dip a clean finish. Lemon zest is optional; use only a little because too much can make the sauce bitter.

Sugar

The sugar is not there to make the sauce sweet. It just rounds off the raw onion, vinegar, lemon, and ginger so the dip tastes balanced instead of harsh. Brown sugar tastes rounder; white sugar keeps the flavor cleaner.

Garlic, Optional

Garlic pushes the dip away from the clean steakhouse flavor and toward a stronger dumpling or noodle sauce. Add one small clove for that version, or leave it out for a cleaner ginger-onion base.

Fresh Ginger vs Ginger Paste vs Ground Ginger

Fresh ginger is best here because the sauce is supposed to taste lively. Dried ginger cannot give the same clean bite.

Ginger OptionDoes It Work?How to Use It
Fresh gingerBest choiceUse 2 tablespoons / about 15 g for the main recipe.
Ginger pasteWorks in a pinchStart with 1½ tablespoons, blend, then add more after tasting.
Ground gingerEmergency onlyStart with ¼ teaspoon. The flavor will be warmer and duller.
Check the label on ginger paste. Some brands include salt, vinegar, oil, or preservatives, and those can change the balance.

How to Make Ginger Sauce

No cooking needed here — just chop, blend, taste, and rest. A blender or food processor gives the cleanest texture, but a hand-chopped jar version still works when you want the sauce quickly.

1. Prep the ginger and onion

Peel the ginger and grate it, or chop it finely. Cut the onion into small pieces so it breaks down quickly.

Fresh ginger being grated on a metal grater beside chopped yellow onion on a wooden cutting board.
Grating the ginger before blending helps its flavor spread evenly through the sauce. Likewise, chopping the onion small gives body without leaving big raw pieces in the finished dip.

2. Add the sauce ingredients

Add the ginger, onion, soy sauce, rice vinegar, lemon juice, sugar, and optional lemon zest or garlic to a blender or food processor.

Chopped onion, fresh ginger, soy sauce, rice vinegar, lemon juice, and sugar inside a food processor before blending.
This no-cook ginger sauce comes together in the food processor. Add the aromatics and liquids together, then pulse in short bursts so the sauce stays loose and lightly textured.

3. Pulse until spoonable

Pulse until the sauce is loose and easy to pour. Stop before it becomes a creamy puree. Tiny visible bits of ginger and onion are a good sign.
Pulsed brown hibachi ginger sauce inside a food processor with small visible pieces of ginger and onion.
Stop pulsing while tiny ginger and onion flecks are still visible. That light texture is what gives Japanese steakhouse ginger sauce its fresh bite instead of a dull, over-blended finish.

4. Taste and adjust

Taste before you change anything, and do not panic if it feels loud at first. This sauce can swing from perfect to too salty quickly, so small adjustments are better than big ones. Add lemon if it tastes flat, a tiny pinch of sugar if it tastes too strong, or 1–2 tablespoons water if it tastes too salty.

5. Chill for smoother flavor

You can serve the sauce right away, but it tastes better after resting. After about an hour in the fridge, the onion relaxes, the ginger settles, and the sauce starts tasting more like the restaurant cup.

Blender vs Food Processor: What Texture Should Ginger Sauce Have?

Both tools work, but they give slightly different results.

Two bowls of brown ginger sauce on a tray, one labeled blender with a smoother texture and one labeled food processor with more visible flecks.
Use a blender for a smoother ginger sauce and a food processor for a more flecked steakhouse-style dip. Either works, but the tool changes the final texture.
ToolBest ForTexture
BlenderSmoother sauceMore even, less textured, easy to pour.
Food processorSteakhouse-style textureLightly textured, with tiny ginger and onion flecks.
Mini chopperSmall batchesWorks well, but scrape the sides once or twice.
No blenderQuick hand-chopped versionChunkier and stronger, but still useful for dipping.

The ideal texture is pourable and lightly flecked. It should not look like mayonnaise, salad dressing, or a thick glaze.

If the sauce turns pale or foamy after blending, let it sit for a few minutes and stir. Air can lighten the color temporarily; after resting, the sauce usually settles into a deeper brown.

Taste and Texture Target

You’ll know the sauce is right when it smells gingery, pours easily from a spoon, tastes bright but not biting, and leaves tiny flecks behind in the cup. It should be brighter than salad dressing and lighter than teriyaki sauce.

A spoon pouring brown hibachi ginger sauce with small flecks back into a ceramic bowl.
The finished sauce should fall easily from a spoon. That pourable texture lets it brighten rice, shrimp, steak, chicken, and vegetables without feeling heavy like a glaze.

How to Adjust the Sauce After Blending

Once the dip is blended, change it slowly. A spoonful of water, lemon, sugar, or soy sauce can move the whole batch.

GoalWhat to Do
More restaurant-styleAdd 1–2 tablespoons soy sauce, 1 tablespoon rice vinegar, and a little extra grated ginger.
Less saltyAdd 1–2 tablespoons water after blending, or use a little less soy sauce next time.
Less intenseChill for 1 hour and add ½ teaspoon sugar if needed.
More gingeryAdd ½ tablespoon more fresh grated ginger.
More texturedUse a food processor and stop while tiny pieces are visible.
SmootherUse a blender and blend a little longer, but stop before it turns foamy.
Gluten-freeUse tamari or certified gluten-free soy sauce.
Soy-freeUse coconut aminos, reduce or skip the sugar, and add extra vinegar or lemon to balance the sweetness.
Better for dumplingsAdd the optional garlic and a few drops of toasted sesame oil.

Benihana-Style Notes

Think of this as Benihana-style, not a claim that it is the restaurant’s exact formula. Benihana’s own ginger sauce notes emphasize fresh ginger, onion, rice vinegar, lemon juice, and low-sodium soy sauce, which lines up with the flavor profile people expect from the brown dipping sauce.

This version keeps that profile but adjusts the balance for a home kitchen. Use the stronger adjustment below when the sauce in your memory was sharper, saltier, and more intense. For a dip you can spoon over rice and use all week, stay with the main recipe.

A small bowl of dark brown Benihana-style ginger sauce with visible flecks, served near shrimp, steak bites, fresh ginger, lemon, and chopsticks.
For a stronger Benihana-style direction, add soy sauce, rice vinegar, lemon, and extra ginger a little at a time. Small changes matter because this dipping sauce can turn too salty quickly.

For a Stronger Restaurant-Style Sauce

After blending the main recipe, make it sharper and more soy-forward by adding:

  • 1–2 extra tablespoons soy sauce
  • 1 extra tablespoon rice vinegar
  • ½ tablespoon extra lemon juice
  • ½ tablespoon extra grated ginger

Add these slowly and taste as you go. It is easier to make the sauce stronger than to rescue a sauce that has become too salty or too sour.

Ginger Sauce vs Ginger Dressing vs Yum Yum Sauce

These sauces often get mixed up because they all show up around hibachi and Japanese steakhouse meals. The easiest way to tell them apart is to look at where they show up on the table: ginger sauce is for the dipping cup, ginger dressing is for salad, and yum yum sauce is the creamy one people spoon over shrimp and fried rice.

Three small cups labeled ginger sauce, yum yum sauce, and ginger dressing, showing a brown sauce, a creamy pink-orange sauce, and an orange-tan dressing.
This side-by-side view clears up the common hibachi sauce mix-up. Brown ginger sauce is for dipping, yum yum sauce is creamy, and Japanese ginger dressing usually belongs on salad.
SauceTextureMain FlavorBest Use
Hibachi ginger sauceBrown, pourable, lightly texturedGinger, onion, soy, vinegar, lemonShrimp, steak, chicken, vegetables, fried rice
Japanese ginger dressingOrange or tan, dressing-likeCarrot, onion, ginger, oil, vinegarGreen salad
Yum yum sauceCreamy, pale pink or orangeMayo, tomato or ketchup, sugar, spicesShrimp, chicken, fried rice, vegetables
Hibachi mustard sauceSmooth, mustard-forwardMustard, soy, sesame, or cream depending styleSteak and chicken
Ginger scallion sauceOil-based and spoonableGinger, scallions, hot oilRice, noodles, poached chicken, tofu

For salad, ginger dressing is usually the better match. Beside hibachi shrimp, steak, chicken, vegetables, or fried rice, this brown ginger sauce is the right one.

What to Eat With Ginger Sauce

Use this sauce beside something rich: buttery mushrooms, seared shrimp, fried rice, grilled steak, or chicken thighs. It makes rice taste brighter, shrimp taste sweeter, and steak feel less heavy after a few bites.

Hibachi-style favorites

  • Hibachi shrimp
  • Steak bites or grilled steak
  • Chicken thighs or chicken breast
  • Salmon or tuna
  • Grilled zucchini, onion, mushrooms, and broccoli
  • Fried rice
  • Hibachi noodles

Takeout-style snacks

  • Dumplings
  • Potstickers
  • Egg rolls
  • Spring rolls
  • Lettuce wraps

For a creamier dip beside spring rolls or noodles, keep this ginger sauce as the bright option and add a bowl of peanut sauce for contrast.

A wooden appetizer board with dumplings, spring rolls, lettuce wraps, brown ginger sauce, and a separate creamy dipping sauce.
This brown ginger dipping sauce also works beyond hibachi dinners. Try it with dumplings, potstickers, spring rolls, and lettuce wraps when you want a bright soy-ginger dip instead of a creamy sauce.

Everyday bowls and meals

  • Rice bowls
  • Noodle bowls
  • Tofu
  • Roasted vegetables
  • Leftover grilled chicken
  • A flexible salmon bowl when you want the sauce with fish

Complete Your Hibachi Night

For a full hibachi-style plate, serve this ginger sauce with fried rice or steamed rice, sautéed zucchini and mushrooms, shrimp or chicken, and one creamy sauce on the side. The ginger sauce brings the bright tang; the creamy sauce brings richness.

A hibachi-style dinner plate with fried rice, shrimp, steak, chicken, zucchini, mushrooms, onion, and a small bowl of brown ginger sauce.
Serve this ginger sauce beside rich hibachi foods. Its ginger, lemon, vinegar, and soy cut through fried rice, seared shrimp, steak, chicken, mushrooms, and buttery vegetables.

Cold leftover rice works especially well because the sauce cuts through the salty, savory flavor. For a fresh base, use this how to cook rice guide before adding shrimp, steak, chicken, tofu, or vegetables.

Optional Warm Drizzle for Bowls and Noodles

Classic hibachi ginger sauce is served cold or at room temperature. But if you want a warmer drizzle for noodles, bowls, or stir-fried vegetables, you can thicken a small portion.

Quick thickened version

  1. Mix ½ teaspoon cornstarch with 1 tablespoon water.
  2. Add ½ cup ginger sauce to a small pan.
  3. Warm over medium-low heat.
  4. Stir in the cornstarch slurry.
  5. Cook for 1–2 minutes, stirring, until lightly thickened.

Heating changes the personality of the sauce. It becomes more of a warm bowl drizzle, and the fresh ginger-onion bite softens. Thicken only what you plan to use right away and keep the rest cold for dipping.

Troubleshooting Ginger Sauce

Fresh ginger and onion can taste strong before they rest. Most problems are easy to fix with a small adjustment.

A troubleshooting board for hibachi ginger sauce with a bowl of brown sauce, lemon wedges, sugar, soy sauce, water, onion, and text explaining flavor fixes.
Fix the sauce in small steps after blending: lemon wakes up a flat batch, chilling softens onion bite, water reduces saltiness, and sugar rounds out too much acid.
ProblemWhy It HappenedHow to Fix It
Too onionyToo much raw onion or not enough resting timeChill for 1 hour. Add a small splash of soy sauce or lemon juice. Use less onion next time.
Overly saltyRegular soy sauce or too much soy sauceAdd 1–2 tablespoons water, a little more onion, or a squeeze of lemon.
Sharp or sourToo much vinegar or lemon juiceAdd ½–1 teaspoon sugar and a small splash of soy sauce.
Flavor feels intenseGinger, onion, vinegar, and lemon are all strongChill the sauce. Add a tiny bit more sugar. Dilute with 1 tablespoon water if needed.
BitterToo much lemon zest or old gingerSkip zest next time. Add a little sugar to round out the bitterness.
Runny textureClassic ginger sauce is naturally looseServe as-is, or use the warm drizzle variation for bowls and noodles.
Chunky textureNot blended enoughPulse 10–20 seconds more, or strain only if you prefer a cleaner pour.
Smooth or foamyOver-blendedLet it settle and stir. Next time, pulse instead of blending continuously.
Separated in the fridgeNormal for a fresh blended sauceShake or stir before serving.

Storage and Make-Ahead

Store the sauce in an airtight jar in the refrigerator and use it within 5 days for the freshest flavor.

Homemade hibachi ginger sauce stored in a glass jar labeled Hibachi Ginger Sauce, with a spoonful of sauce, fresh ginger, garlic, and kitchen ingredients nearby.
Store homemade hibachi ginger sauce in an airtight jar and shake before serving. As it rests, the fresh ginger, onion, and soy-vinegar base can naturally settle.

The flavor is loudest right after blending. After 1 hour in the fridge, the onion and ginger settle down and the soy, vinegar, and lemon taste more balanced. By the next day, the sauce feels rounder, and it is the kind of small jar you end up spooning over leftover rice, cold chicken, or roasted vegetables without planning to.

Shake or stir before serving because the sauce can separate as it sits.

Can you freeze ginger sauce?

You can freeze it in small portions, but the texture will not be as fresh after thawing. The onion and ginger can become slightly watery. For the best dipping texture, make it fresh and refrigerate it instead.

Can you use ginger sauce as a marinade?

Yes, but it is best as a dipping sauce first and a quick marinade second. Use it for shrimp, chicken, tofu, or vegetables when you want a fast ginger-soy flavor.

Because it contains vinegar and lemon juice, do not marinate delicate seafood for too long. Shrimp or fish only needs 10–15 minutes; chicken or tofu can sit for 15–30 minutes.

FAQ

What is the brown sauce at hibachi restaurants?

It is usually ginger sauce: a soy-based dipping sauce made with fresh ginger, onion, vinegar, and lemon. Restaurants commonly serve it with shrimp, steak, chicken, vegetables, noodles, and fried rice.

Is this the same as Benihana ginger sauce?

It is Benihana-style, not the restaurant’s exact formula. The recipe keeps the fresh ginger, onion, soy, vinegar, and lemon profile while using a balanced home-kitchen ratio. Benihana says its signature ginger sauce is prepared fresh and is not sold in stores or bottles. Read Benihana’s note here.

Is ginger sauce the same as yum yum sauce?

No. Ginger sauce is brown, tangy, and soy-based. Yum yum sauce is creamy, usually mayo-based, and pale pink or orange.

Is hibachi ginger sauce the same as ginger salad dressing?

No. Hibachi ginger sauce is a dipping sauce for grilled food and rice. Japanese ginger dressing is usually smoother, often made with carrot, onion, ginger, oil, vinegar, and soy sauce, and served on salad.

Do you serve ginger sauce hot or cold?

Serve it cold, chilled, or at room temperature. It can sit beside hot steak, shrimp, chicken, vegetables, or fried rice, but the sauce itself does not need to be heated.

How long does homemade ginger sauce last?

Use it within 5 days for the freshest flavor. Keep it in an airtight jar in the refrigerator and stir or shake before serving.

Fresh ginger, paste, or powder — which is best?

Fresh ginger is best. Ginger paste can work as a shortcut, but it may contain salt or vinegar. Ground ginger is not recommended because it does not give the same lively flavor.

Can I make ginger sauce without a blender?

Yes. Grate the ginger, mince the onion very finely, add the remaining ingredients to a jar, and shake hard. The sauce will be chunkier and stronger, but it still works for dipping.

Why does my ginger sauce taste too oniony?

Raw onion can taste strong right after blending. Chill the sauce for 1 hour before judging it. If it still tastes too oniony, add a little soy sauce, lemon juice, or sugar to balance it. Next time, use slightly less onion.

What can I serve with ginger sauce?

Serve it with hibachi shrimp, steak, chicken, fried rice, noodles, grilled vegetables, dumplings, spring rolls, tofu, salmon, rice bowls, or roasted vegetables.

Final Tip

The sauce should taste like the first bright bite at the hibachi table: salty, tangy, gingery, and fresh enough to make you want another spoonful of rice or another piece of shrimp. Blend it, chill it if you can, and keep the texture lightly flecked. That little bit of ginger and onion is the whole point.

Posted on Leave a comment

Grape Jelly Meatballs Recipe | Crockpot, Chili Sauce, BBQ & Ketchup

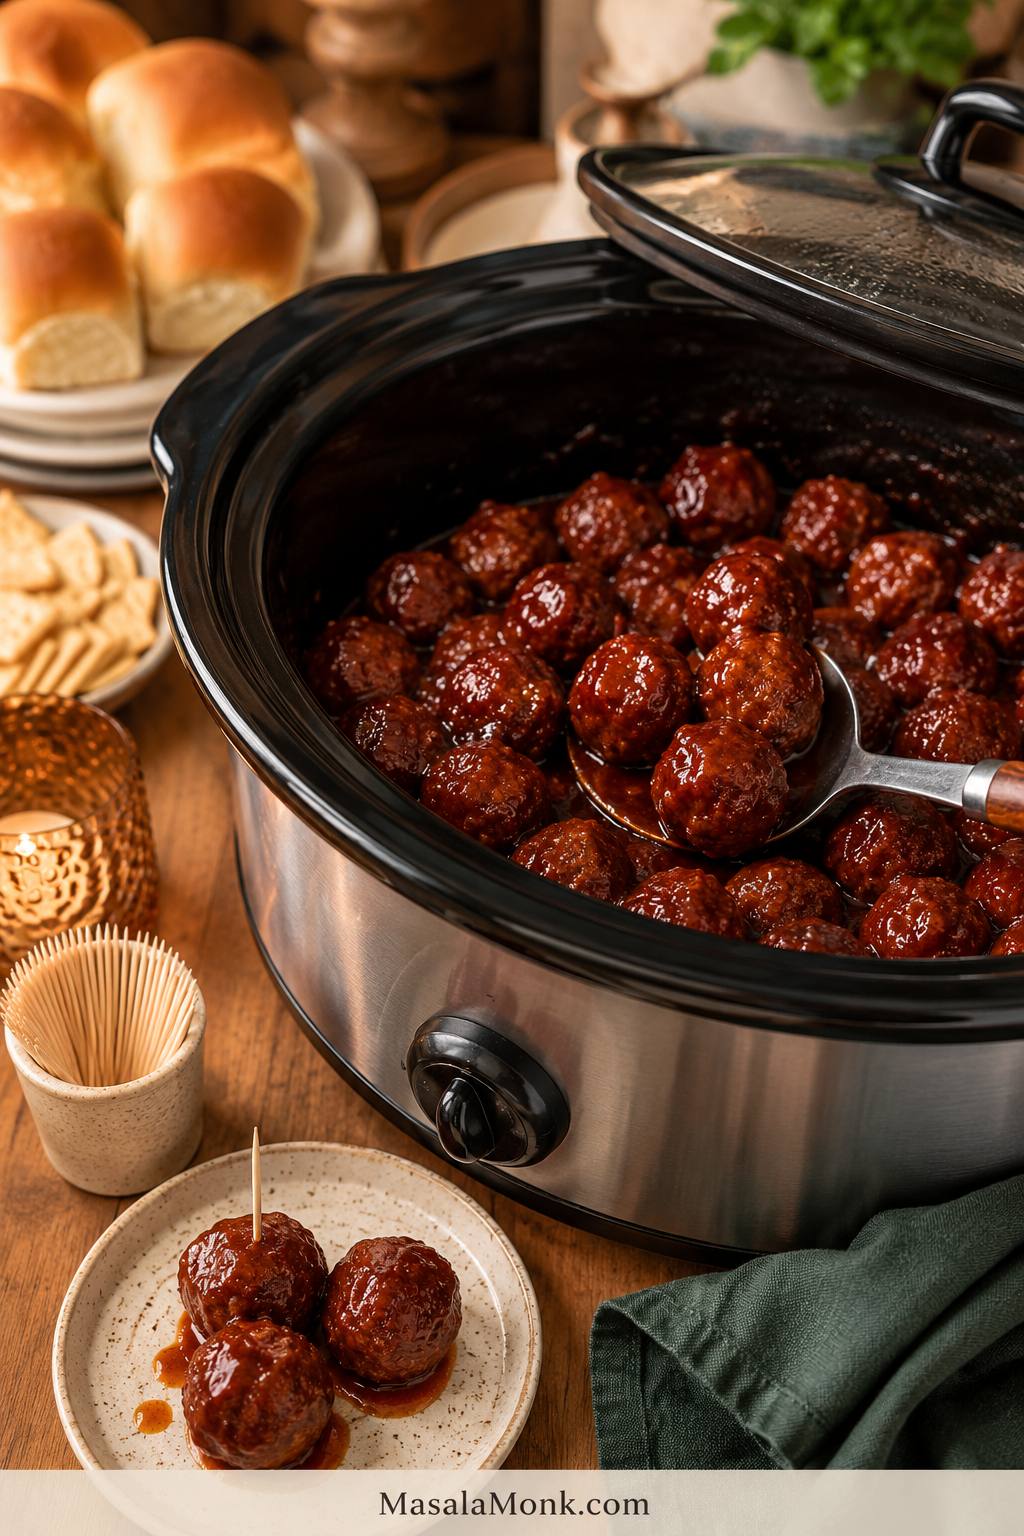
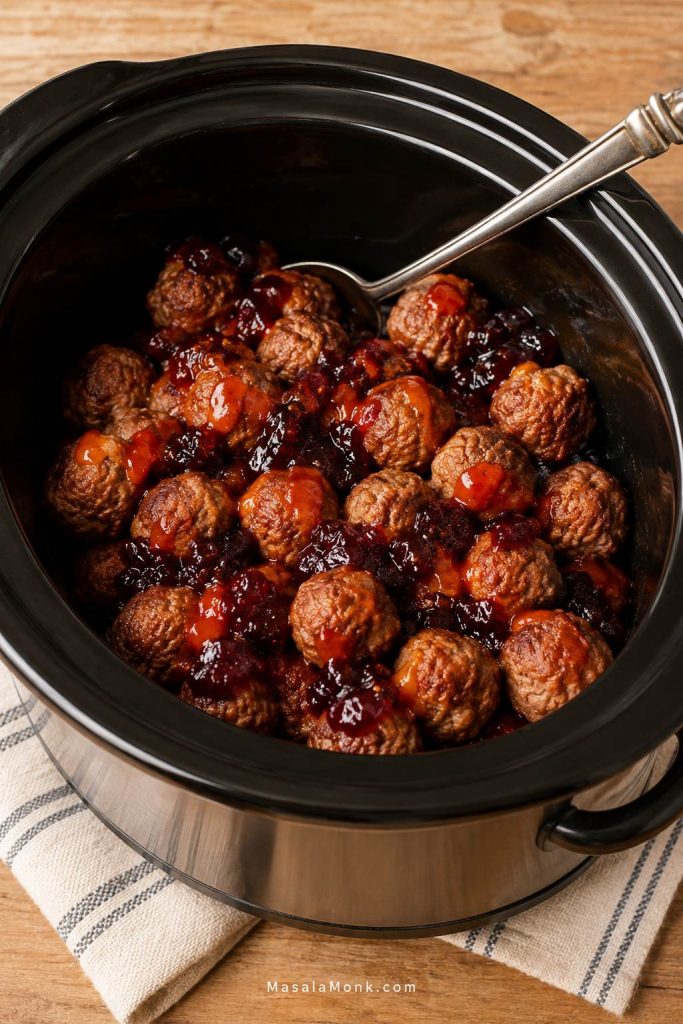
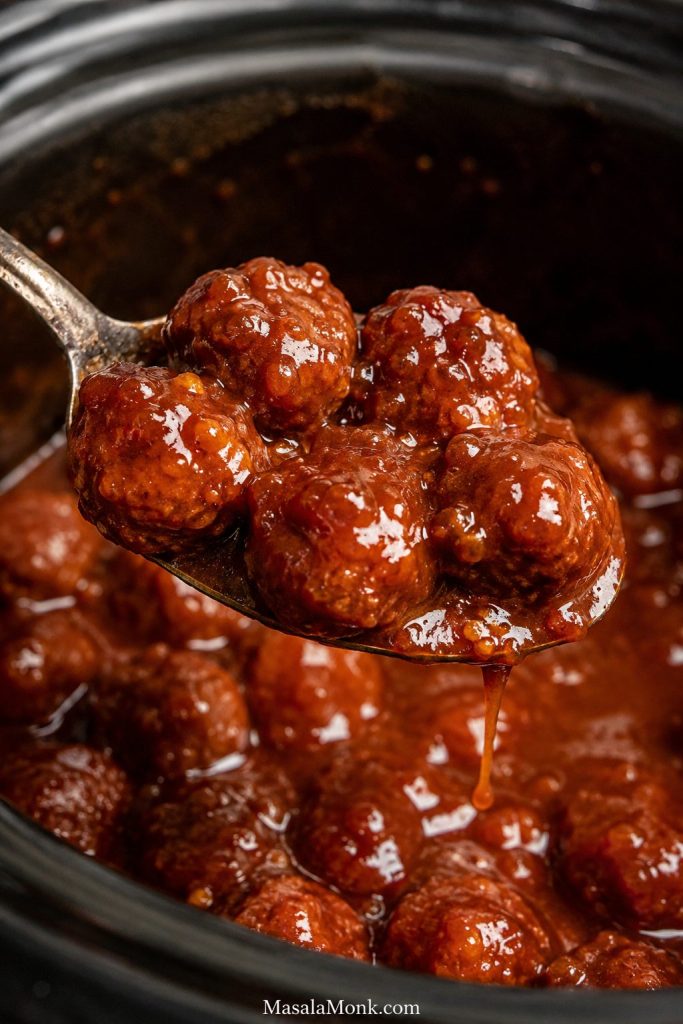
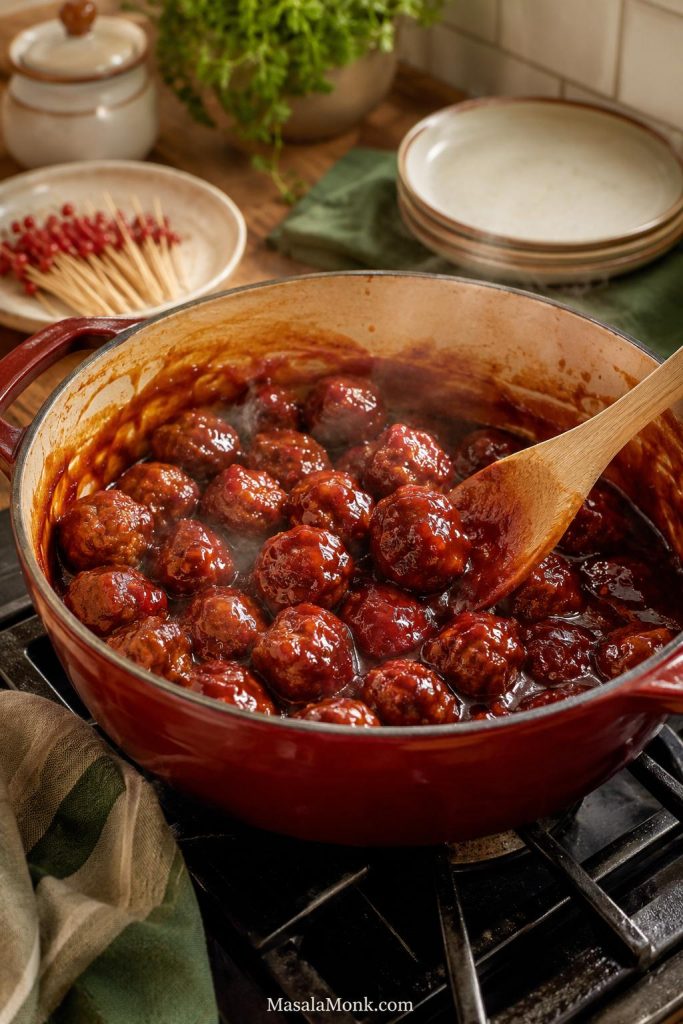
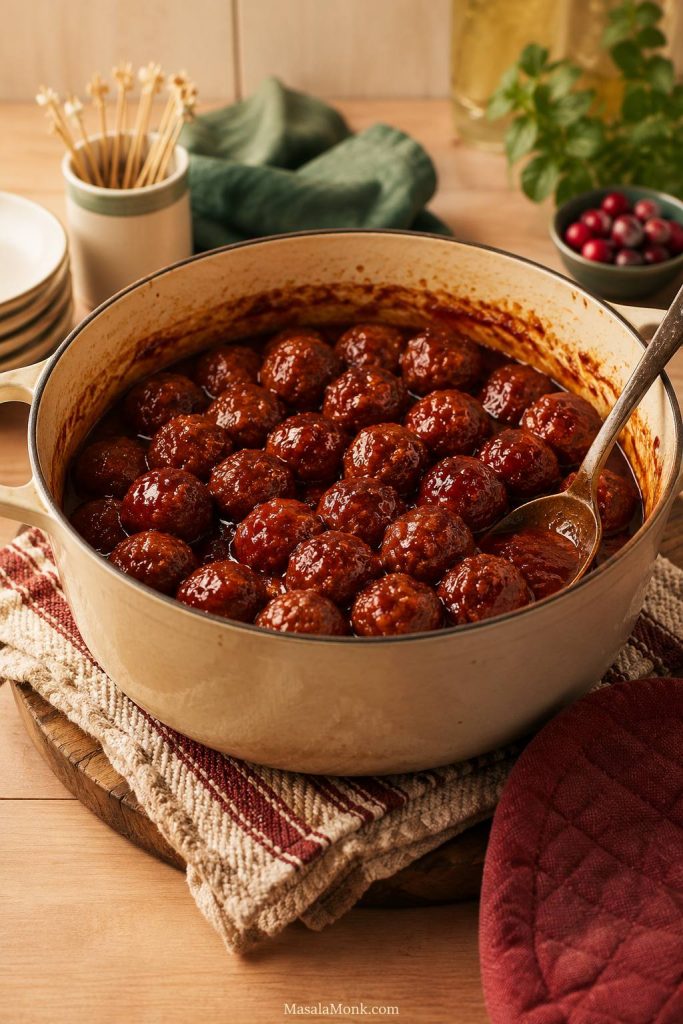
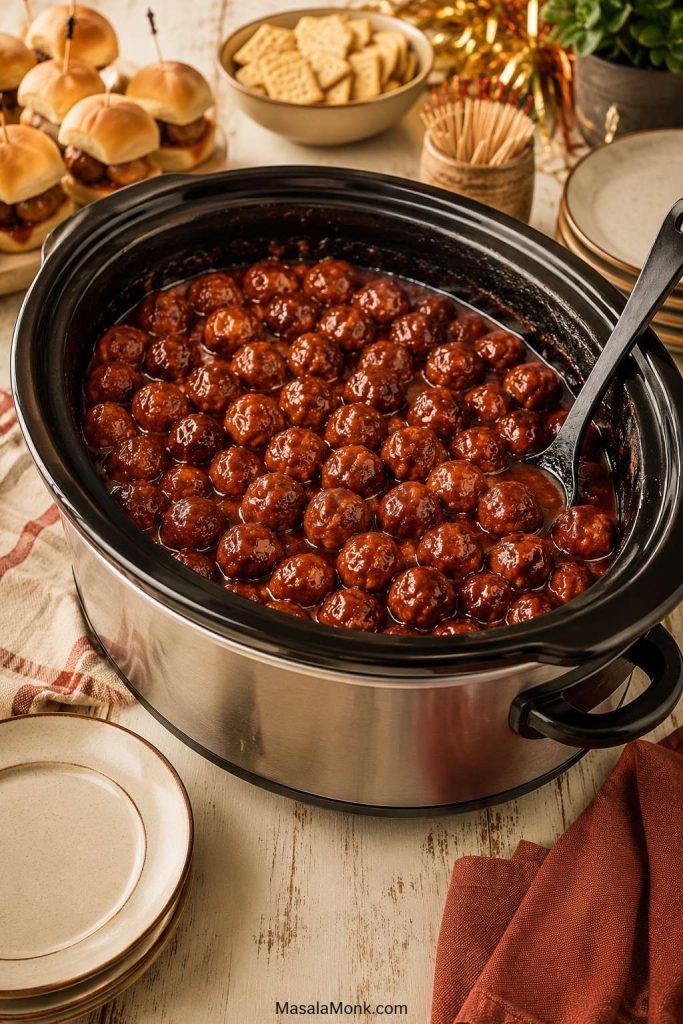
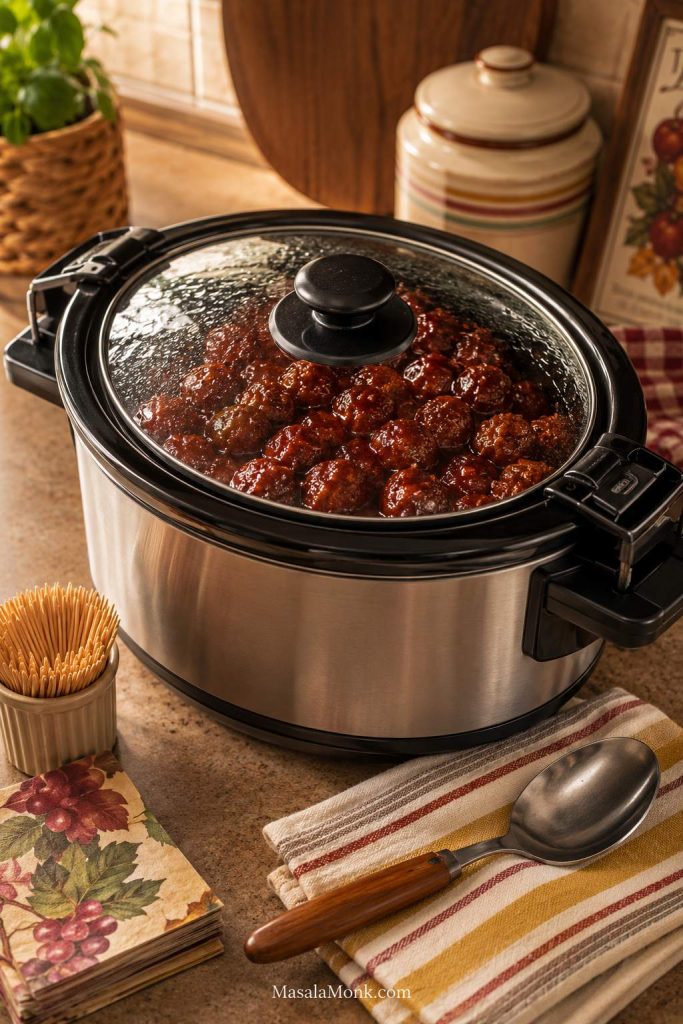
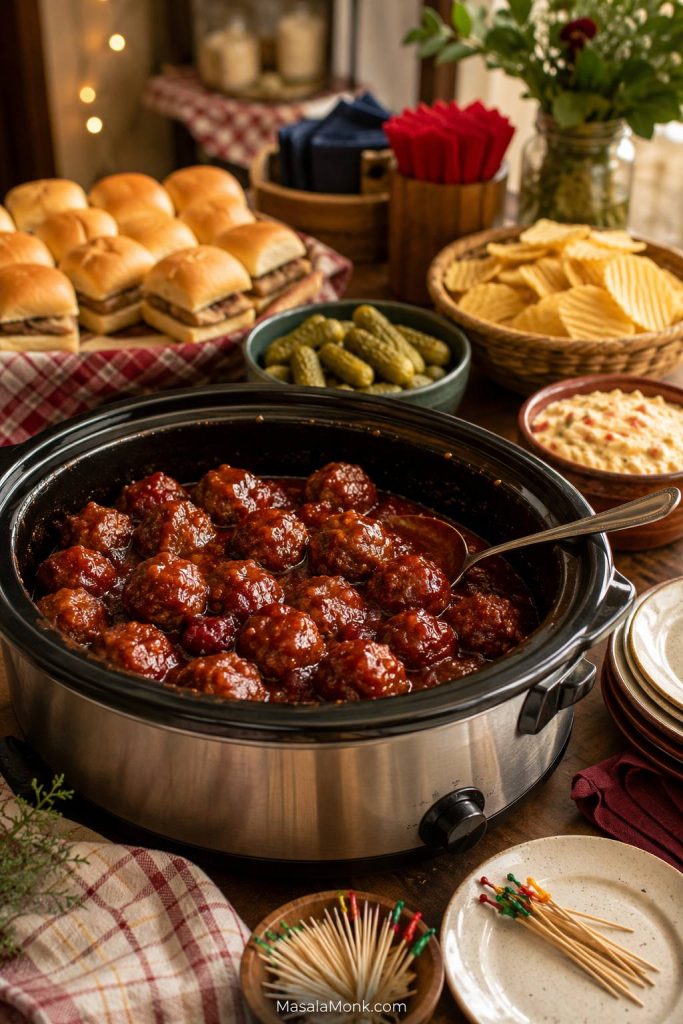
Slow cooker filled with glossy red-brown meatballs, with a serving spoon, toothpicks, small plates, slider buns, and folded napkins on a party table.

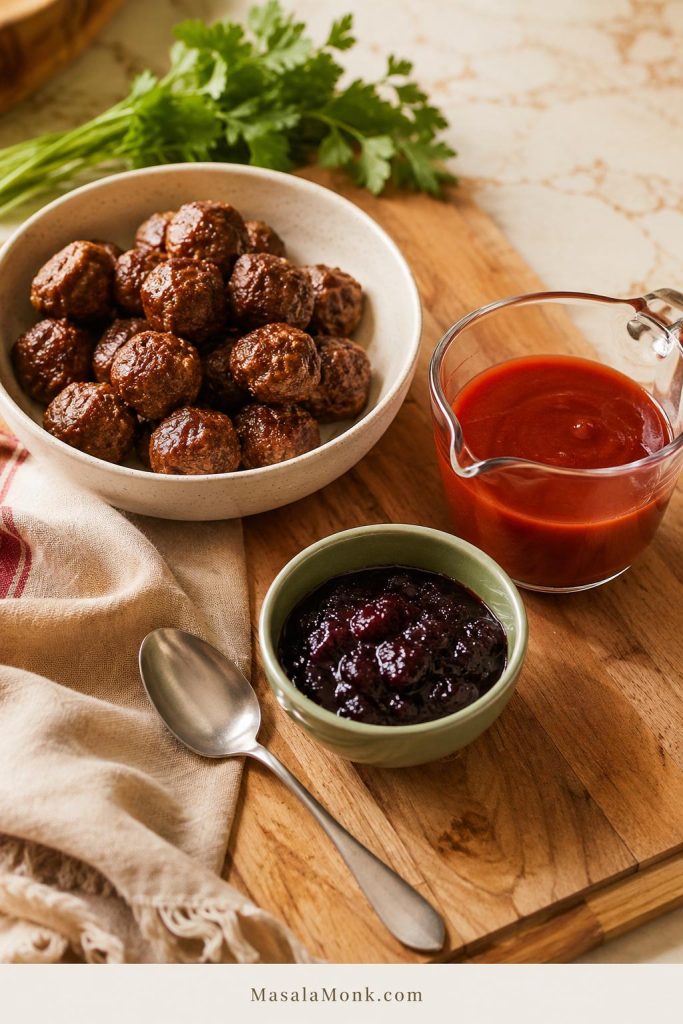
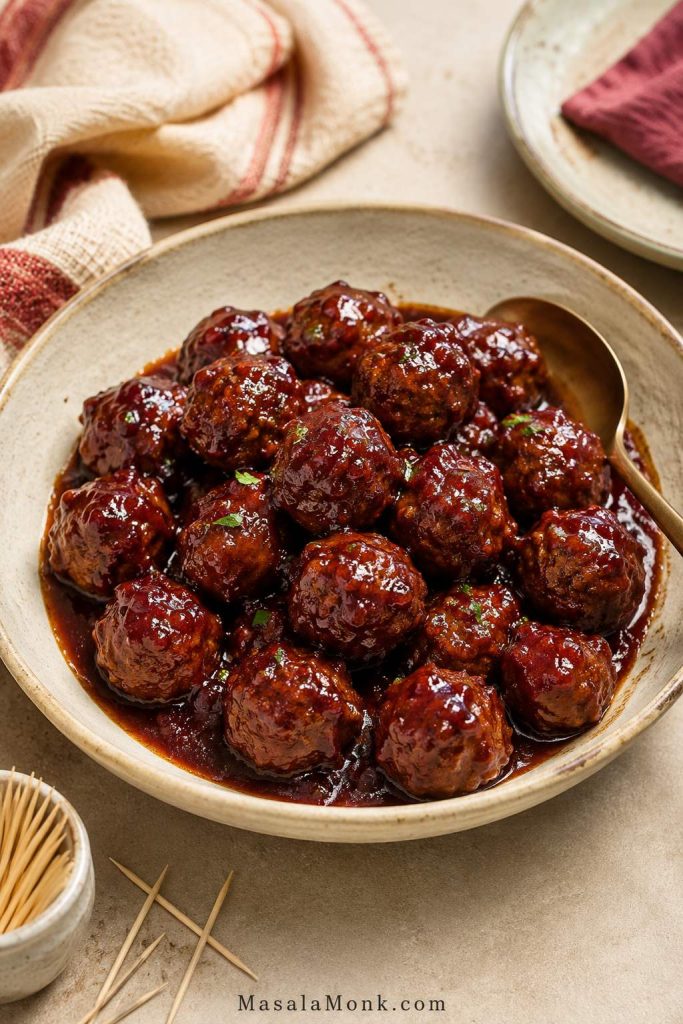
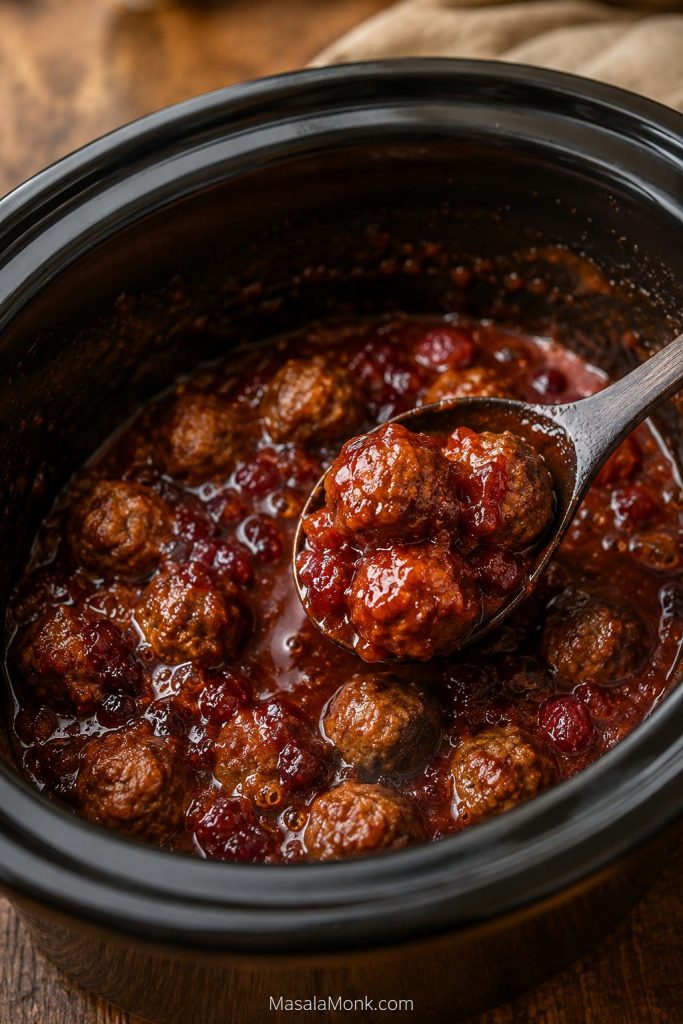
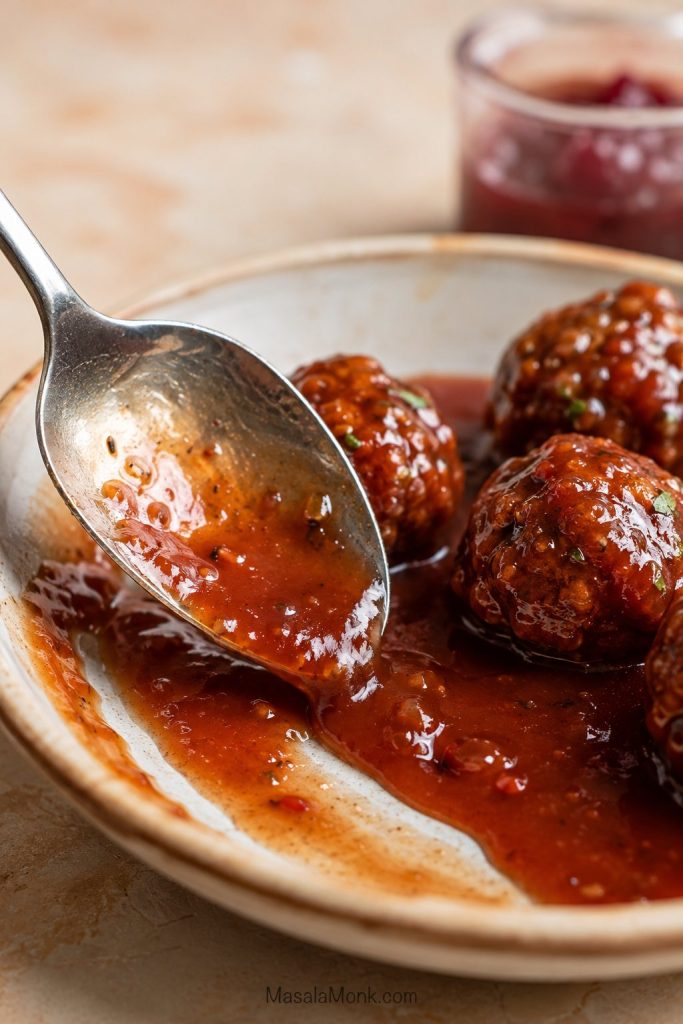
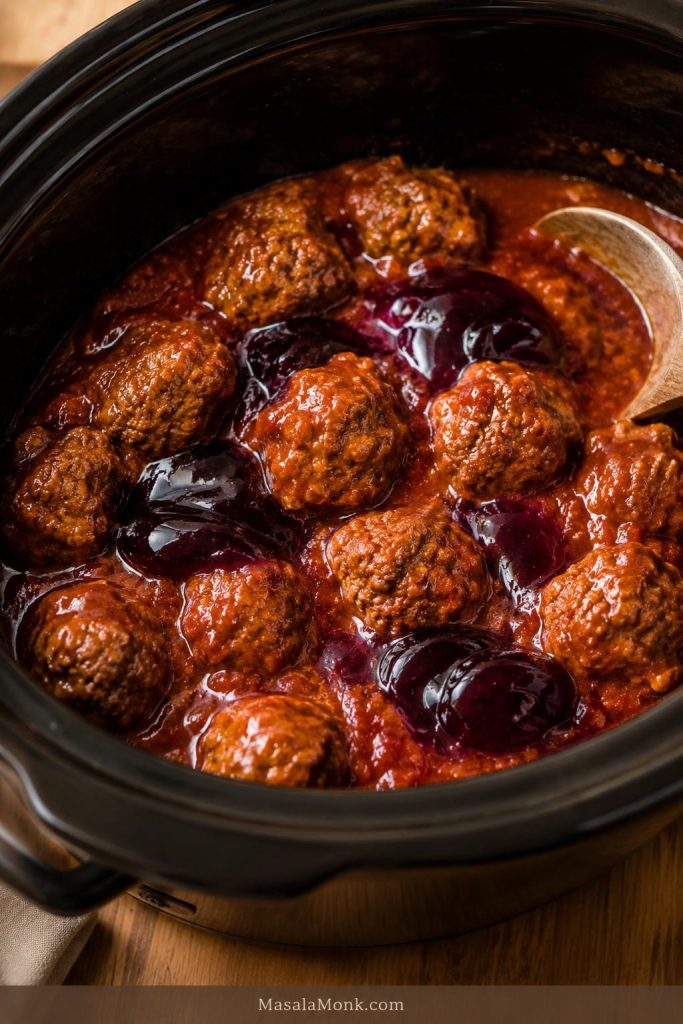
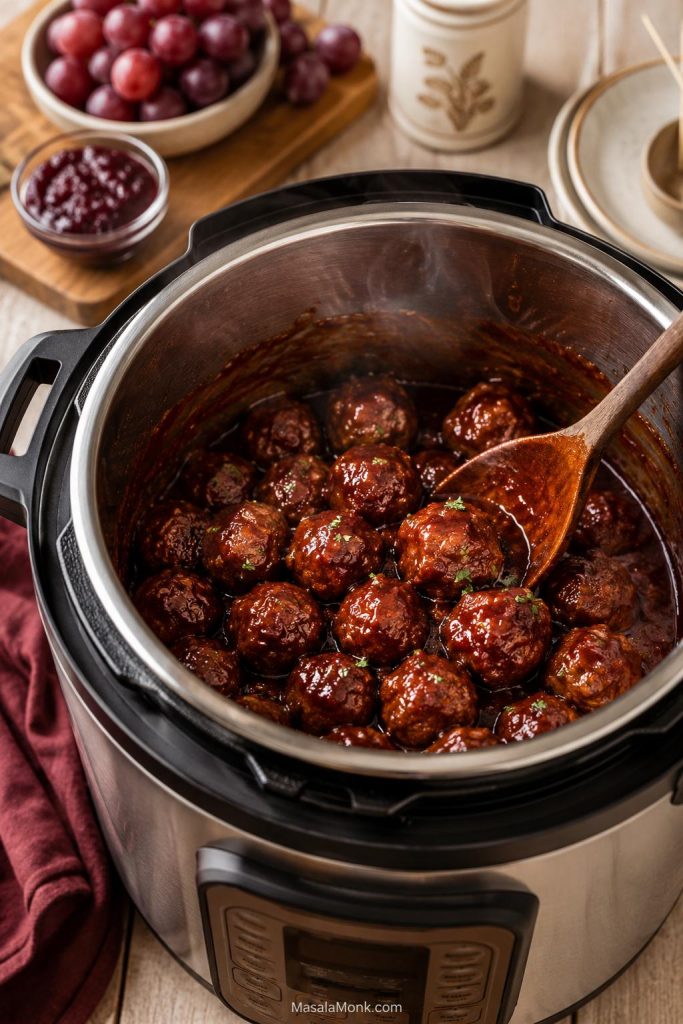
Grape jelly meatballs are the kind of party food that makes people suspicious for about five seconds, then sends them back for another toothpick. The ingredient list sounds strange until the sauce starts bubbling: sweet grape jelly, tangy chili sauce, and tender meatballs turning glossy in the slow cooker while you finish the rest of the table.

Keep the classic version simple: fully cooked meatballs, grape jelly, and bottled chili sauce in the crockpot. As the batch warms, the jelly melts into the sauce, the chili sauce balances the sweetness, and the slow cooker holds everything until people are ready to serve themselves.

It is old-school, low-stress, and very good at doing what party food should do: stay warm, taste familiar, and disappear quietly while people keep talking. Once the lid goes on, you get a hot appetizer that can take care of itself while you finish the rest of the food.

Quick Answer: The 3 Ingredients for Grape Jelly Meatballs

To make grape jelly meatballs, combine 2 lb / 900 g fully cooked frozen meatballs, 10–12 oz / 280–340 g grape jelly, and 12 oz / 340 g bottled chili sauce, the tomato-based kind usually found near ketchup, in a slow cooker. Cook on HIGH for 2–3 hours or LOW for 4–5 hours, stirring once or twice, until the sauce has melted together, the coating clings, and the meatballs are heated through.

IngredientAmountRole
Fully cooked frozen homestyle meatballs32 oz / 2 lb / 900 gEasy party base, usually about 48–50 small meatballs.
Grape jelly10–12 oz / 280–340 gSweetness, shine, and sticky body.
American-style bottled chili sauce12 oz / 340 gTangy tomato balance.

What the three ingredients do

This is the moment where the recipe looks stranger than it tastes. Seeing the ingredients together makes the grape jelly less confusing before the sauce melts.

Ingredients for grape jelly meatballs with cooked meatballs, grape jelly, chili sauce, Worcestershire sauce, and seasonings on a wooden surface.
The base is simple: cooked meatballs, grape jelly, and bottled chili sauce. Once warm, Worcestershire, pepper, vinegar, or mustard can fine-tune the flavor.

Increase the grape jelly to 18–20 oz / 510–565 g for a sweeter, stickier potluck glaze. Go with BBQ sauce for a smoky version. For the mildest pantry batch, ketchup works too, especially with a splash of Worcestershire sauce or vinegar.

At a glance: 5 minutes prep, 2–3 hours on HIGH or 4–5 hours on LOW, 12–16 appetizer servings, best with fully cooked frozen homestyle meatballs.
A quick reassurance: The mixture may look lumpy, separated, or too thin before it heats. That is normal. The jelly melts slowly, the chili sauce turns it savory, and the final sauce should taste balanced rather than candy-sweet. Taste only after everything has warmed together.

Choose Your Sauce Version

You can keep the meatballs exactly the same and change only the sauce to fit the crowd. Start with the classic chili sauce version if this is your first time. Choose BBQ sauce for game day. Use ketchup when you want the mildest, most pantry-friendly version.

SituationBest versionWhat to use
First time making theseClassic chili sauce version2 lb meatballs + 10–12 oz grape jelly + 12 oz chili sauce
Sweet potluck glazeExtra grape jelly version2 lb meatballs + 18–20 oz grape jelly + 12 oz chili sauce
Game day or BBQ crowdBBQ version2 lb meatballs + 1 cup grape jelly + 1 1/2 to 2 cups BBQ sauce
Pantry-only versionKetchup version2 lb meatballs + 3/4 to 1 cup grape jelly + 1 1/2 cups ketchup
Less sweet / more balancedClassic ratio + sharpenerAdd vinegar, Dijon, Worcestershire, black pepper, or hot sauce after tasting

Sauce comparison: chili sauce, BBQ, or ketchup

The meatballs stay the same; the sauce decides whether the batch tastes classic, smoky, or mild.

Three grape jelly meatball sauce versions with chili sauce, BBQ sauce, and ketchup served with party sides.
Choose the sauce by the crowd: chili sauce for classic tang, BBQ sauce for smoky game-day flavor, and ketchup for a milder family batch.
Best default: First time making these? Use 2 lb fully cooked homestyle meatballs, 10–12 oz grape jelly, and 12 oz bottled chili sauce. It is the safest balance for most parties: sweet enough to feel classic, tangy enough to avoid tasting like candy.

BBQ sauce gives the friendliest game-day flavor. BBQ sauces vary a lot, so if yours is already sweet and thick, start with less grape jelly and add more only after tasting. Ketchup is not a failure version; it is simply softer, sweeter, and milder. Add vinegar or Worcestershire if you want it closer to the tang of chili sauce.

The chili sauce version tastes most classic, but BBQ sauce is the one many families grew up with. This is exactly the kind of recipe where the “right” version depends on whose slow cooker you remember.

The Best Ratio for Grape Jelly Meatballs

The best all-purpose ratio is 2 lb / 900 g fully cooked meatballs, 10–12 oz / 280–340 g grape jelly, and 12 oz / 340 g bottled chili sauce. It gives you enough sauce to coat the meatballs without turning the slow cooker into a bowl of syrup.

You will see two common versions: a balanced version with 10–12 oz grape jelly and a sweeter potluck version with an 18–20 oz jar. Neither is wrong. Use the smaller amount when you want savory-sweet balance; use the larger jar when you want the sticky retro party glaze.

Save this ratio: 2 lb meatballs + 12 oz chili sauce + 10–12 oz grape jelly for balance.

The Visual Ratio: Balanced First, Sweeter Later

Start balanced first. You can always make the glaze sweeter, but pulling back too much jelly is harder once the whole jar is in the pot.

Measured ingredients for the best grape jelly meatball ratio with grape jelly, chili sauce, cooked meatballs, and a spoon.
Start with 2 lb meatballs, 10–12 oz grape jelly, and 12 oz chili sauce; add more jelly only if you want a sweeter potluck glaze.

Recipe Card: Grape Jelly Meatballs

Grape Jelly Meatballs Recipe

Glossy, sweet-tangy grape jelly meatballs made in the slow cooker with fully cooked meatballs, grape jelly, and bottled chili sauce. Easy to keep warm for parties, potlucks, holidays, and game day, with notes for BBQ sauce, ketchup, stovetop, oven, and Instant Pot versions.

Prep Time
5 minutes
Cook Time
2–3 hours HIGH or 4–5 hours LOW
Total Time
About 2 hr 5 min to 5 hr 5 min
Yield
12–16 appetizer servings

Ingredients

  • 32 oz / 2 lb / 900 g fully cooked frozen homestyle meatballs
  • 10–12 oz / 280–340 g grape jelly
  • 12 oz / 340 g American-style bottled chili sauce
  • Add 1 teaspoon Worcestershire sauce, optional
  • Use 1/2 teaspoon garlic powder, optional
  • Finish with 1/4 to 1/2 teaspoon black pepper, optional

Instructions

  1. Add grape jelly and chili sauce to a 4–5 quart slow cooker.
  2. Stir lightly. The jelly does not need to be fully melted yet.
  3. Add the fully cooked meatballs and turn them through the mixture.
  4. Cover and cook on HIGH for 2–3 hours or LOW for 4–5 hours.
  5. Stir once or twice while the meatballs heat.
  6. When the sauce has melted together and the meatballs are hot, switch to WARM and serve.

Notes

  • For a sweeter party glaze, increase grape jelly to 18–20 oz / 510–565 g.
  • BBQ version: combine 1 1/2 to 2 cups BBQ sauce with 1 cup grape jelly.
  • Ketchup version: combine 1 1/2 cups ketchup with 3/4 to 1 cup grape jelly.
  • Use American-style bottled chili sauce, not chili garlic sauce, Thai sweet chili sauce, or sriracha as a direct replacement.
  • If using homemade meatballs, cook them fully before adding them to the sauce.
  • The sauce is ready when there are no streaks of jelly left and the coating clings to the meatballs.

What the Finished Sauce Should Look Like

After the recipe card, use this as the visual target: saucy, spoonable, and glossy without being watery.

Finished grape jelly meatballs in a serving bowl with sauce, toothpicks, a spoon, folded napkins, and a small plate.
The finished sauce should lightly pool without turning soupy, so the meatballs are easy to spoon or hold warm in a crockpot.

That is the whole basic recipe. From here, use only what you need: scale the batch for a party, choose the sauce version your crowd will like best, make it without a crockpot, or fix the sauce if it tastes too sweet, too thin, or too sharp.

Back to top ↑

Ingredients You Need

Fully cooked meatballs

A 32 oz / 2 lb / 900 g bag of fully cooked frozen homestyle meatballs is the easiest choice. Most bags this size contain around 48–50 small meatballs, though the exact count depends on the brand.

For the most classic flavor, choose plain homestyle cocktail meatballs rather than strongly seasoned Italian meatballs. Beef, pork, turkey, chicken, or mixed meatballs can all work, but the sauce tastes most familiar with mild beef or beef-pork style meatballs.

If your bag is closer to 26–28 oz instead of 32 oz, you can still use the recipe. Hold back a few spoonfuls of sauce at first, then add more if the meatballs need extra coating. If your meatballs are larger than cocktail-size, give them more time to heat through.

For crowds, it is worth checking the meatball label for breadcrumbs, egg, dairy, soy, or gluten, since frozen meatballs vary by brand.

Grape jelly

Grape jelly gives the sauce sweetness, shine, and thickness. Concord grape jelly has the most familiar flavor, but any regular grape jelly works.

The grape jelly is the part that makes people pause, but it is also the part that makes the sauce work. It melts into sweetness and body, not a grape-flavored coating.

For a balanced sauce, use 10–12 oz / 280–340 g. For a sweeter, extra-saucy version, use 18–20 oz / 510–565 g.

If your jar is 10 oz, use the whole thing for a balanced batch. If your jar is 18–20 oz, start with about half to two-thirds of the jar, then add more after tasting if you want the sweeter potluck glaze.

Bottled chili sauce

Choose American-style bottled chili sauce, the tomato-based sauce usually sold near ketchup. The bottle may say “chili sauce,” but the flavor should be tangy and mildly spiced, not fiery hot.

Important chili sauce note: For this recipe, chili sauce means American-style bottled chili sauce, usually found near ketchup. Heinz chili sauce is a common reference point, but store brands are fine as long as the sauce is smooth, tomatoey, tangy, and mildly spiced. It is not the same as Asian chili garlic sauce, Thai sweet chili sauce, or sriracha.

If you cannot find it, BBQ sauce or ketchup can still make a good batch. The flavor changes, but the method stays simple.

Optional flavor boosters

The basic 3-ingredient version works on its own. Use these only if the warm sauce tastes like it needs a little more depth, sharpness, or heat:

  • Add 1 teaspoon Worcestershire sauce for savory depth
  • Use 1/2 teaspoon garlic powder for a rounder flavor
  • Sprinkle in 1/4 to 1/2 teaspoon black pepper for mild heat
  • Stir in 1 teaspoon Dijon mustard if the sauce is too sweet
  • Brighten with 1 teaspoon vinegar or lemon juice if it needs brightness
  • Hot sauce or sriracha if you want more heat

How to Make Grape Jelly Meatballs in the Crockpot

A 4–5 quart slow cooker works well for a standard 2 lb batch. For a double batch, use a 6 quart slow cooker so the meatballs heat evenly and you still have room to stir.

Before cooking: why the sauce looks uneven

Do not worry if the slow cooker looks patchy at the start. Heat is what turns the separate sauce pockets into one coating.

Cooked meatballs in a slow cooker with grape jelly and chili sauce before the sauce has melted together.
This uneven start is normal. Heat turns the separate jelly and chili sauce into a smooth coating.
  1. Add the grape jelly and chili sauce to the slow cooker.
  2. Stir roughly. The jelly does not need to be fully smooth yet.
  3. Add the fully cooked meatballs.
  4. Turn them through the mixture until coated.
  5. Cover and cook on HIGH for 2–3 hours or LOW for 4–5 hours.
  6. Stir once or twice during cooking.
  7. When the meatballs are hot and there are no streaks of jelly left, switch the slow cooker to WARM for serving.
Texture cue: The sauce is ready when it coats the spoon and clings to the meatballs instead of sitting in separate streaks of jelly and chili sauce. If the edges of the slow cooker start getting sticky, stir and add a splash of water or broth.

If the mixture looks thin halfway through, do not panic. It thickens as the jelly melts, the meatballs warm through, and the edges of the slow cooker begin to bubble.

Halfway through: wait before adjusting

This is the stage where people often adjust too early. Wait until the jelly melts before adding more sweetness, tang, or thickener.

A spoon lifting grape jelly meatballs from a slow cooker while the sauce is partly melted and uneven.
At the halfway point, look for partial coating rather than perfect gloss; the sauce smooths out as the jelly melts.

Once the meatballs are hot, avoid leaving them on HIGH for too long. The sauce can reduce around the edges, become overly sticky, and make the meatballs taste drier. WARM is the better setting for serving.

How to know the meatballs are done

The meatballs are ready when the sauce has fully melted, the coating looks unified, and the meatballs are heated through. Around the edges of the slow cooker, the mixture may bubble gently and thicken slightly.

Finished grape jelly meatballs lifted on a spoon with glossy red-brown sauce clinging to them.
Look for an even coating on the spoon; that means the sauce has come together and the meatballs are heated through.

If you use homemade meatballs, cook them through before adding them to the sauce. Some homemade slow-cooker meatball recipes cook raw meatballs in sauce, but this party version is easier to control when the meatballs are cooked first. You get better texture, simpler timing, and less guesswork.

Why This Ratio Works

This version starts with 10–12 oz grape jelly instead of a full 18–20 oz jar, so the sauce still tastes like a savory appetizer instead of a candy glaze. It is also easier to adjust: if the sauce needs more sweetness, you can add it, but if it starts too sweet, you have fewer ways to pull it back.

What Balanced Sauce Should Look Like

This is the sauce check: it should move easily from the spoon while still holding onto the meatballs.

Spoon dragging through grape jelly meatball sauce to show sauce that is thick enough to cling but still pourable.
A good sauce should flow but still cling. Starting with moderate jelly gives you more control than dumping in a full jar.

The method stays honest to what this recipe is supposed to be: one slow cooker, fully cooked meatballs, and no extra pan unless you want to thicken the sauce faster. The result is glossy, sweet-tangy, and easy to hold warm without turning the edges into syrup.

When These Meatballs Work Best

These meatballs work three ways: as cocktail meatballs with toothpicks, as a slow cooker appetizer for game day, or as a saucy dinner over rice or mashed potatoes. They are built for fully cooked meatballs, a warm sauce, and a slow cooker that can hold everything on a buffet table.

They are small, warm, saucy, and easy to take without committing to a full plate. That is why they disappear slowly at first, then suddenly all at once.

Once the meatballs are heated through, the crockpot keeps them warm while people serve themselves. If you like this kind of hands-off party food, this slow cooker pulled pork recipe works for the same reason: the slow cooker handles the timing, and the sauce does the heavy lifting.

The recipe works because the sauce pulls in two directions at once: grape jelly gives sweetness and shine, while chili sauce, BBQ sauce, or ketchup keeps it from tasting one-note. A little vinegar, mustard, Worcestershire, or hot sauce can fine-tune the flavor once everything is warm.

Why the Jelly and Chili Sauce Work

The jelly melts into a glossy glaze

At first, the grape jelly may sit in thick spoonfuls beside the chili sauce. That is normal. Give it heat and time, and it melts into a spoon-coating sauce instead of tasting like meatballs in jam. The mixture may look separated for the first 20–30 minutes, so do not judge it too early.

Grape jelly melting into chili sauce around cooked meatballs in a black slow cooker.
Those dark jelly pockets melt into the chili sauce, building shine and sweetness without leaving a jammy coating.

Chili sauce keeps the sweetness in check

Grape jelly alone would be too sweet. Bottled chili sauce brings tomato, vinegar, mild spice, and enough tang to make the sauce taste savory. If it smells sharp at first, wait until everything warms through before adjusting.

Fully cooked meatballs make it party-proof

Frozen fully cooked meatballs are already shaped, cooked, and ready to heat. You do not need to thaw, sear, or fuss with anything if the package says they can be heated from frozen.

The crockpot holds everything without babysitting

The slow cooker warms the meatballs gently, melts the jelly into the sauce, and holds everything ready until people start serving themselves. Once the batch is hot, switch to WARM so the coating stays saucy instead of reducing too far around the edges.

Crockpot Time Chart

Slow cookers do vary, so use the times below as a guide and the visual cues as your final check. You are looking for hot meatballs, melted sauce, and a coating that clings instead of pooling at the bottom.

Batch sizeSlow cooker sizeHIGHLOW
1 lb / 450 g meatballs2–3 quart1.5–2 hours3–4 hours
2 lb / 900 g meatballs4–5 quart2–3 hours4–5 hours
4 lb / 1.8 kg meatballs6 quart3–4 hours5–6 hours

Stir occasionally, but avoid lifting the lid too often. Once the meatballs are fully hot, switch to WARM for serving.

Serving safety note: The slow cooker is great for keeping hot food warm, but it should not be used to reheat cold leftovers straight from the fridge. USDA slow cooker food safety guidance recommends reheating leftovers first on the stovetop, in the oven, or in the microwave, then moving them to the slow cooker for serving.

Before You Start: Sauce Mistakes to Avoid

  • Use the right chili sauce. Bottled tomato-based chili sauce is not the same as chili garlic sauce, Thai sweet chili sauce, or sriracha.
  • Let the jelly melt before judging the flavor. The sauce tastes different once the jelly has fully melted into the chili sauce.
  • Switch from HIGH to WARM once the meatballs are hot. This keeps the edges from over-thickening.
  • Mix cornstarch with cold water first. Adding dry cornstarch directly to hot sauce can make it clump.
  • Cook homemade meatballs before saucing. This version is for heating and coating fully cooked meatballs, not cooking raw meat from scratch.

Chili Sauce vs BBQ Sauce vs Ketchup

If you already picked a version above, use this section to fine-tune it. Chili sauce keeps things classic and balanced, BBQ sauce brings smoke, and ketchup needs a little sharpening when you want a pantry-only batch.

Chili sauce tastes like a tangier, bolder ketchup-style sauce. Ketchup makes the meatballs softer and sweeter, while chili sauce gives the classic version more tomato tang and mild spice.

VersionMeatballsSauceFlavor
Classic chili sauce2 lb / 900 g10–12 oz grape jelly + 12 oz chili sauceTangy, classic, balanced
Sweeter party glaze2 lb / 900 g18–20 oz grape jelly + 12 oz chili sauceStickier, sweeter, extra saucy
BBQ version2 lb / 900 g1 cup grape jelly + 1 1/2 to 2 cups BBQ sauceSmoky and sweet
Ketchup version2 lb / 900 g3/4 to 1 cup grape jelly + 1 1/2 cups ketchupMild and sweet-tangy

If using ketchup, add Worcestershire sauce, vinegar, mustard, black pepper, or chili powder if the sauce tastes flat. If using BBQ sauce, start with the lower amount of jelly and add more only if you want a sweeter coating.

No Crockpot? Make Them on the Stovetop, in the Oven, or in the Instant Pot

The crockpot is still the easiest choice when guests are coming, but you are not stuck if it is already full. The same grape jelly mixture works on the stovetop, in the oven, and in the Instant Pot with a few small adjustments.

Stovetop method

  1. Add grape jelly and chili sauce to a Dutch oven, deep skillet, or large saucepan.
  2. Warm over medium-low heat until the jelly melts into the chili sauce.
  3. Add the meatballs and stir to coat.
  4. Cover and simmer for 15–20 minutes, stirring occasionally.
  5. If the meatballs are large or still very frozen, allow 25–30 minutes.

Use the stovetop when you need them faster or when the sauce needs a few extra minutes to tighten into a thicker coating.

Grape jelly meatballs simmering in glossy red sauce in a red Dutch oven on a stovetop with a wooden spoon.
On the stovetop, gentle simmering melts the jelly and tightens the sauce faster than a slow cooker.

Oven method

  1. Heat the oven to 350°F / 175°C.
  2. Add meatballs, grape jelly, and chili sauce to a covered baking dish or Dutch oven.
  3. Stir to coat.
  4. Cover and bake for 45–60 minutes.
  5. Stir halfway through.
  6. Uncover for the last 10 minutes if the coating looks too thin.

Reach for the oven when the slow cooker is already busy or when a wide baking dish is easier than stirring a crowded crockpot.

Oven-baked grape jelly meatballs in a cream-colored baking dish with a spoon, oven mitt, folded towel, and kitchen counter.
A covered baking dish keeps the meatballs saucy when the slow cooker is already busy.

Instant Pot method

The Instant Pot works, but it is not the best method for the glossiest sauce or for holding meatballs during a party. Use it when speed matters, then transfer the meatballs to a slow cooker on WARM or to a serving dish.

  1. Add the meatballs, grape jelly, chili sauce, and 1/2 to 3/4 cup water to the Instant Pot.
  2. Pressure cook for 5–10 minutes, depending on meatball size.
  3. Quick release carefully.
  4. Use the sauté function to simmer uncovered until the mixture thickens and coats the spoon.

Do not skip the sauté step if you want a sticky coating. The mixture will look thinner at first because of the added water.

Grape jelly meatballs inside a pressure cooker insert with steam rising and a wooden spoon stirring the sauce.
After pressure cooking, use sauté to reduce the sauce from loose to spoon-coating.

Can You Use Homemade Meatballs?

You do not need homemade meatballs for this recipe to work. Frozen fully cooked meatballs are the point when you need an easy party appetizer. Homemade meatballs are simply an upgrade if you have the time.

Cooked meatballs before sauce

Homemade meatballs are an upgrade, but they should be cooked first so the sauce is only heating and coating them, not cooking raw meat.

Cooked homemade meatballs on parchment paper in a glass baking dish with tongs and a bowl of red sauce in the background.
Cook homemade meatballs first, then sauce them; the texture stays firmer and timing is easier.

For a simple homemade batch, use:

  • Ground beef or beef-pork mix, 2 lb / 900 g
  • Breadcrumbs or panko, 1 cup
  • Milk, 1/2 cup
  • Eggs, 2
  • Finely chopped onion, 1/2 cup
  • Garlic powder, 1 teaspoon
  • Salt, 1 teaspoon
  • Black pepper, 1/2 teaspoon

Mix gently, shape into 1-inch meatballs, then bake or brown them before adding them to the sauce. Ground beef or pork meatballs should be cooked through to 160°F / 71°C. Poultry meatballs should reach 165°F / 74°C.

Best practical choice: Use frozen fully cooked meatballs for parties. Choose homemade meatballs when you want better texture and have time to cook them before saucing.

How Much to Make for a Party

A 2 lb bag usually gives about 48–50 small meatballs. If you are serving several appetizers, people will take fewer. If these are the main hot snack, plan for more.

Use caseAmount to plan
Light appetizer with other snacks3–4 meatballs per person
Heavier appetizer5–6 meatballs per person
Dinner over rice, noodles, or potatoes6–8 meatballs per person
2 lb / 900 g bagAbout 12–16 appetizer servings
4 lb / 1.8 kg double batchAbout 24–32 appetizer servings

What a Double Batch Looks Like

Use this as the capacity check: the slow cooker can look full, but it still needs room for stirring.

Large slow cooker filled with a double batch of grape jelly meatballs on a party table with slider buns, crackers, toothpicks, and plates.
A double batch needs room to stir. Crowding slows heating and makes the sauce harder to manage.

If you are not sure how much your crowd will eat, make the double batch. These are exactly the kind of appetizers people keep taking one at a time until the slow cooker is suddenly empty.

Sauce Scaling Chart

Use this chart when your bag size is smaller, larger, or when you want a sweeter party-style batch. The standard batch is saucy enough for a party bowl, but not so heavy that the meatballs swim in sauce.

BatchMeatballsGrape jellyChili sauce
Small bag26–28 oz / 740–800 g8–10 oz / 225–280 g10–12 oz / 280–340 g
Half batch1 lb / 450 g5–6 oz / 140–170 g6 oz / 170 g
Standard balanced batch2 lb / 900 g10–12 oz / 280–340 g12 oz / 340 g
Sweeter party batch2 lb / 900 g18–20 oz / 510–565 g12 oz / 340 g
Double balanced batch4 lb / 1.8 kg20–24 oz / 560–680 g24 oz / 680 g
Double sweeter batch4 lb / 1.8 kg36–40 oz / about 1–1.1 kg, or roughly two 18–20 oz jars24 oz / 680 g

Simple Party Timeline

If you are serving these for a party, start the slow cooker about 3 hours before guests arrive if cooking on HIGH, or 5 hours before if cooking on LOW. That gives the meatballs time to heat through and gives you a little buffer before serving.

WhenWhat to do
Night beforeMix the grape jelly and chili sauce, or cook the full batch and refrigerate it after cooling.
Before serving a refrigerated batchReheat on the stovetop, in the oven, or in the microwave until hot, then move to the slow cooker on WARM.
3–5 hours before serving a fresh batchCook the meatballs in the slow cooker, depending on HIGH or LOW timing.
When guests arriveSwitch to WARM, stir, and set out toothpicks plus a spoon for extra sauce.
During servingStir occasionally and loosen the sauce with a splash of water or broth if the edges thicken.

Taking Them to a Potluck

If you are taking grape jelly meatballs to another house, the easiest option is to cook or reheat them before you leave, keep the slow cooker covered during the trip, then plug it in as soon as you arrive and keep the meatballs on WARM.

How to Hold Them Warm at a Potluck

The covered slow cooker shines as a holding tool. For best texture and safety, bring the meatballs hot before you rely on WARM.

Covered slow cooker with grape jelly meatballs visible through the lid beside a spoon, napkins, toothpicks, and towels.
Bring the meatballs hot, then use the covered slow cooker to hold them warm once you arrive.

For a longer trip, transport the meatballs chilled in a sealed container, reheat them until hot when you arrive, then move them to the slow cooker for serving. Do not rely on a cold slow cooker full of refrigerated meatballs to reheat the batch quickly.

How to Fix Grape Jelly Meatball Sauce

If your first taste makes you think, “this is too sweet,” do not start over. Wait until the jelly has melted, then adjust the hot sauce in the direction it needs to go.

The good news is that this sauce is forgiving. Once it is warm, small adjustments make a big difference.

ProblemFix
Too sweetAdd more chili sauce, Dijon, vinegar, lemon juice, Worcestershire sauce, black pepper, or hot sauce.
Too tangyAdd more grape jelly or a spoonful of BBQ sauce.
Too thinSimmer uncovered or add a cornstarch slurry.
Too thickAdd water, broth, pineapple juice, or a little BBQ sauce.
Flat flavorAdd Worcestershire sauce, Dijon, black pepper, vinegar, hot sauce, or a pinch of salt.
Coating not clingingCook longer, stir well, or reduce slightly.
Too spicyAdd more grape jelly or BBQ sauce.
Meatballs drying outAdd a splash of water and keep them on WARM, not HIGH.

If the sauce gets too thick

Sauce that drags instead of spoons needs loosening before serving, especially after sitting on WARM or thickening around the slow cooker edges.

Clear liquid being poured into thick grape jelly meatball sauce while a wooden spoon stirs the meatballs.
If the sauce thickens around the edges, loosen it with a small splash of water or broth so the glaze stays spoonable.

If the sauce drags instead of pours, loosen it before serving. These meatballs should feel glossy and easy to spoon, not sticky enough to fight with.

How to thicken the sauce

For light thickening, mix 1 teaspoon cornstarch with 1 teaspoon cold water. For a thicker glaze, mix 2 teaspoons cornstarch with 2 teaspoons cold water.

Stir the slurry into the hot mixture and cook until it turns shiny and coats the spoon. In a slow cooker, add the slurry near the end and cook on HIGH for another 15–20 minutes. For faster thickening, transfer the sauce to a saucepan and simmer for a few minutes.

How to make the sauce less sweet

Add something tangy, savory, or spicy. A splash of vinegar, a little Dijon mustard, extra chili sauce, Worcestershire sauce, black pepper, lemon juice, or hot sauce can pull the sauce back into balance.

Start small, stir, taste, and adjust again. It is much easier to add more sharpness than to fix a sauce that has gone too sour.

Substitutions: Grape Jelly, Chili Sauce, and Meatballs

Grape jelly substitutes

Grape jelly is classic, but other fruit preserves can work with the same sweet-savory idea. The mixture may look less smooth if you use jam or preserves with fruit pieces.

SubstituteFlavor result
Cranberry sauceTangier, holiday-style, and good with chili sauce.
Apricot preservesLighter, fruity, and good with BBQ sauce.
Orange marmaladeCitrus-sweet with a slight bitter edge.
Raspberry preservesSweeter berry flavor.
Hot pepper jellySpicy-sweet and stronger in flavor.
Strawberry jellyWorks, but tastes sweeter and less classic.
Grape jamSimilar flavor, but thicker and less smooth than jelly.

For a holiday-style version, cranberry sauce is the most natural swap. If you already like sweet-tart cranberry sauce with savory food, that same flavor direction works beautifully with cocktail meatballs. This cranberry sauce with orange juice has the kind of bright, tangy-sweet profile that pairs well with warm appetizers.

Chili sauce substitutes

Go with BBQ sauce when you want a smoky, game-day flavor. Use ketchup when you want the mildest pantry version, then add Worcestershire sauce, vinegar, Dijon, black pepper, or chili powder if it tastes flat.

Meatball substitutes

Turkey, chicken, beef, pork, beef-pork, and plant-based meatballs can all work as long as they are fully cooked before going into the sauce. Choose mild meatballs if you want the classic party flavor.

Can you use low-sugar or sugar-free grape jelly?

Yes, but the sauce may be thinner, less shiny, or slightly sharper depending on the sweetener. Taste after the jelly melts before adding vinegar, mustard, or hot sauce. If the coating looks thin, use the cornstarch slurry method to help it cling to the meatballs.

Can You Use Little Smokies Instead of Meatballs?

Little Smokies can go straight into this sauce too. Use 2–3 lb cocktail sausages with the same grape jelly and chili sauce mixture, then cook until hot and well coated.

How the Little Smokies Version Looks

Use this version when you want the same sauce but a snappier cocktail-sausage bite instead of soft meatballs.

Little Smokies cocktail sausages coated in glossy grape jelly chili sauce in a shallow bowl with toothpicks nearby.
Little Smokies turn the same glaze into a saltier, snappier cocktail-sausage appetizer.

What to Serve with Grape Jelly Meatballs

For parties, let these be the warm, saucy anchor on the table. Surround them with something crunchy, something creamy, and something easy to grab.

For a slow-cooker setup, set out toothpicks plus a small spoon or ladle. Toothpicks are easy for grabbing meatballs, but a spoon helps people get enough sauce.

What to Serve With Party Meatballs

A good party spread gives the warm meatballs contrast: something soft, something crunchy, something tangy, and something creamy.

Grape jelly meatballs on a party table with slider buns, pickles, chips, dip, toothpicks, napkins, and small plates.
Balance the warm saucy meatballs with soft buns, crunchy chips, tangy pickles, and a creamy dip.

For parties

  • Toothpicks or cocktail forks
  • Slider buns
  • Pull-apart bread
  • Cheese ball with crackers or pretzels
  • 7 layer dip with sturdy chips
  • Pickles
  • Raw vegetables and dip

Turn Them Into Dinner

To make this feel like a main dish, give the sauce something soft to land on instead of serving the meatballs alone.

Grape jelly meatballs served over steamed white rice in a shallow bowl with sauce soaking into the rice.
Rice, noodles, or mashed potatoes turn the appetizer into a simple main dish by catching the sweet-tangy sauce.

Because the sauce is bold and a little sweet, it pairs best with something simple and starchy. Rice, potatoes, and noodles all work because they soak it up without competing with it.

Can You Make Grape Jelly Meatballs Ahead?

Yes. You can make grape jelly meatballs ahead for parties, holidays, and game day. Cook the meatballs in the sauce, let them cool, then store them in an airtight container in the fridge.

Before serving, reheat them on the stovetop, in the oven, or in the microwave until hot. Once reheated, move them to the slow cooker on WARM. If the sauce has thickened in the fridge, stir in a splash of water, broth, or BBQ sauce until it loosens again.

Do not ask the slow cooker to bring cold leftovers up to temperature. Reheat first, then use the slow cooker to hold them warm for serving.

You can also mix the grape jelly and chili sauce ahead of time and keep the sauce refrigerated. When ready to cook, add the sauce and meatballs to the slow cooker and continue with the recipe.

For a cold make-ahead appetizer beside the hot meatballs, this cheese ball recipe works well because it can chill while the slow cooker handles the warm food.

Storage, Freezing, and Reheating

Leftovers keep well because the sauce thickens around the meatballs as it chills. Store them in an airtight container in the fridge for 3–4 days.

To freeze, cool the meatballs completely, then freeze them with the sauce in a freezer-safe container for up to 2–3 months. Thaw overnight in the fridge before reheating.

Reheat on the stovetop, in the microwave, or in the oven until hot. The sauce thickens when cold, so do not panic if leftovers look stiff from the fridge. Add a splash of water if needed, then move the meatballs to a slow cooker on WARM if you want to serve them at a party.

FAQs

What are grape jelly meatballs made of?

Classic grape jelly meatballs use fully cooked meatballs, grape jelly, and bottled chili sauce. The jelly gives sweetness and shine, while the chili sauce keeps the sauce tangy instead of candy-sweet.

Why do people put grape jelly in meatballs?

Grape jelly melts into the sauce and acts like the sweet part of a sweet-and-sour glaze. Once it mixes with chili sauce, it tastes more savory-sweet than fruity.

Do grape jelly meatballs taste like grape jelly?

Not exactly. The jelly adds sweetness, shine, and body, but the chili sauce turns the flavor sweet, tangy, and savory instead of jammy.

What kind of chili sauce do you use?

Use American-style bottled chili sauce, usually found near ketchup. It is tomato-based, tangy, and mildly spiced. Do not use chili garlic sauce, Thai sweet chili sauce, or sriracha as a direct replacement.

What is the difference between chili sauce and ketchup in this recipe?

Chili sauce tastes like a tangier, bolder ketchup-style sauce. Ketchup makes the meatballs softer and sweeter, while chili sauce gives the classic version more tomato tang and mild spice.

Can BBQ sauce replace chili sauce?

Yes. Use 1 1/2 to 2 cups BBQ sauce and 1 cup grape jelly for 2 lb / 900 g meatballs. The flavor will be smokier and sweeter.

Does ketchup work instead of chili sauce?

Yes. Use 1 1/2 cups ketchup and 3/4 to 1 cup grape jelly for 2 lb / 900 g meatballs. Add Worcestershire sauce, vinegar, mustard, or chili powder if it tastes too sweet or flat.

Is grape jam okay instead of grape jelly?

Yes. Grape jam has a similar flavor, but it may be thicker and less smooth because it contains more fruit pulp. Add a splash of water if needed.

What can I use instead of grape jelly?

Cranberry sauce, apricot preserves, orange marmalade, raspberry preserves, hot pepper jelly, strawberry jelly, or grape jam can work. Jam and preserves may make the sauce less smooth than jelly.

Do I thaw frozen meatballs first?

Most fully cooked frozen meatballs can go straight into the slow cooker, but check the package instructions. If a brand recommends thawing first, follow the package.

Do Italian meatballs work?

Yes, but homestyle meatballs taste more like the classic party version. Italian meatballs can work, though the herbs and cheese may make the sauce taste more dinner-style.

Should raw meatballs go into this recipe?

This recipe assumes the meatballs are already cooked. Cook raw or homemade meatballs first, then add them to the sauce for heating and coating.

What size slow cooker do I need?

A 4–5 quart slow cooker works well for 2 lb / 900 g meatballs. Use a 6 quart slow cooker for a double batch.

How long do grape jelly meatballs cook in the crockpot?

For a standard 2 lb / 900 g batch, cook on HIGH for 2–3 hours or LOW for 4–5 hours, until the meatballs are hot and the sauce has melted together.

How do I double grape jelly meatballs?

Yes. Use 4 lb / 1.8 kg fully cooked meatballs, 20–24 oz / 560–680 g grape jelly, and 24 oz / 680 g chili sauce. Use a 6 quart slow cooker and stir once or twice.

How do I keep them warm for a party?

Once the meatballs are fully hot, switch the slow cooker to WARM and stir occasionally. If the sauce thickens around the edges, add a splash of water or broth.

How long can grape jelly meatballs stay on WARM?

Once fully hot, they can sit on WARM as long as the slow cooker keeps them hot, ideally at 140°F / 60°C or above. For best texture, serve within 2–4 hours.

How do I make them without a crockpot?

Yes. Simmer them on the stovetop for 15–20 minutes, or bake covered at 350°F / 175°C for 45–60 minutes. You can also use an Instant Pot with added water, then reduce the sauce after pressure cooking.

How do I thicken grape jelly meatball sauce?

Mix 1 teaspoon cornstarch with 1 teaspoon cold water, then stir it into the hot sauce. For a thicker glaze, use 2 teaspoons cornstarch with 2 teaspoons cold water.

How do I make grape jelly meatballs less sweet?

Add chili sauce, vinegar, lemon juice, Dijon mustard, Worcestershire sauce, hot sauce, black pepper, or chili flakes. Add a little at a time and taste before adding more.

Does low-sugar or sugar-free grape jelly work?

Yes, but the sauce may be thinner, less shiny, or slightly sharper. Taste after the jelly melts, then thicken with a cornstarch slurry if needed.

Do homemade meatballs work?

Yes. Cook homemade meatballs first, then add them to the grape jelly sauce. Frozen fully cooked meatballs are easier for parties, but homemade meatballs give you more control over texture.

Can Little Smokies replace the meatballs?

Yes. Use 2–3 lb Little Smokies or cocktail sausages with the same sauce, then cook until hot and coated. They will taste saltier and snappier than meatballs.

What do you serve with grape jelly meatballs?

For parties, serve them with toothpicks, slider buns, chips and dip, pickles, raw vegetables, or a cheese board. For dinner, spoon them over rice, mashed potatoes, egg noodles, or macaroni and cheese.

Can you freeze grape jelly meatballs?

Yes. Cool them completely, then freeze with the sauce in a freezer-safe container for up to 2–3 months. Thaw overnight in the fridge and reheat until hot.

Final Thoughts

The easiest ratio to remember is simple: 2 lb meatballs, 10–12 oz grape jelly, and 12 oz bottled chili sauce. Let the jelly melt fully, then taste before adjusting.

Once you know that base, the rest is easy: more jelly for sweetness, BBQ sauce for smoke, vinegar or mustard for tang, and a splash of water if the sauce gets too thick. It is not a fancy appetizer, and that is exactly why it works: people know what to do with it, the slow cooker keeps it ready, and the bowl usually empties before anyone admits how simple it was.

Back to top ↑

Posted on Leave a comment

Wedge Salad Recipe: Classic Iceberg Wedge with Blue Cheese, Bacon & Ranch Variations

Iceberg lettuce wedge on a cream plate with blue cheese dressing, bacon, cherry tomatoes, chives, blue cheese crumbles, black pepper, and a fork and knife nearby.

A wedge salad is funny because it looks almost too simple: a quarter of iceberg lettuce, a spoonful of dressing, and a few toppings. Then you cut into it and remember why steakhouses never let it disappear.

The lettuce snaps cold under the knife, the dressing settles into the layers, the bacon hits salty and crisp, and suddenly the plainest lettuce in the fridge feels like the best side on the table.

A wedge salad is not a tossed salad. It is a cold, knife-and-fork salad where the details matter: dry lettuce, thick dressing, crisp bacon, and toppings small enough to stay put. The trick is not doing more; it is doing those simple things properly.

What Makes a Good Wedge Salad?

Most disappointing wedge salads fail for the same reason: wet lettuce, thin dressing, warm bacon, and toppings that slide off. This version fixes those small things first, so the salad stays crunchy, creamy, and easy to eat.

This is the kind of recipe to keep in your back pocket for nights when you want a salad that feels special without making the meal harder. Start with the blue cheese wedge salad, then use the ranch, Outback-style, chopped, grilled, keto, vegetarian, no-bacon, and no-blue-cheese options whenever you want a slightly different version.

It also looks more impressive than the work it takes, which is exactly why it is such a good starter for guests, burger nights, steak dinners, and summer meals from the grill.

Make it now: Cut 1 cold iceberg head into 4 wedges. Make or choose a thick blue cheese or ranch dressing, then top each wedge with crisp cooled bacon, small tomatoes, fine onion or chives, blue cheese crumbles, and black pepper. Keep a little core attached, dry the lettuce well, and dress just before serving. Serves: 4 large wedges. Total time: about 30–40 minutes.
What matters most: Dry lettuce, spoonable dressing, cooled bacon, and toppings chopped small enough to stay on the wedge. That is the difference between a crisp steakhouse-style salad and a plate that slides apart.

If you are building a fresh salad spread, this sits nicely next to a crisp cucumber salad or a colorful beet salad.

Quick Answer: What Is a Wedge Salad?

A wedge salad is a cold quarter of iceberg lettuce topped with creamy dressing, crisp bacon, tomatoes, onion or chives, blue cheese crumbles, and black pepper. It is usually served as a knife-and-fork salad, which is part of its old-school charm.

Blue cheese dressing is traditional, while ranch is the easiest milder swap. Iceberg works because it stays crunchy and sturdy under creamy dressing and toppings.

Start here: Choose the blue cheese version for steakhouse flavor, ranch for a milder family version, and balsamic glaze when you want that sweet-tangy Outback-style finish.

Why This Recipe Works

The salad works because the textures stay in balance: crisp iceberg, creamy dressing, salty bacon, juicy tomatoes, and a sharp little finish from onion and blue cheese.

That is why a good wedge salad never feels like a sad side salad. It is fresh enough to reset the plate and rich enough to belong beside burgers, steak, grilled chicken, or a baked potato.

  • Iceberg brings the snap. Its tight layers hold the wedge shape and stand up to a rich dressing.
  • The dressing grips the layers. It should fall from a spoon in thick ribbons, not pour like milk.
  • Crisp bacon gives salty crunch. Soft bacon disappears, but crisp bits make every bite better.
  • The toppings are small on purpose. Think confetti, not chunks.
  • Everything comes together at the end. Last-minute assembly keeps the wedge fresh instead of soggy.
Fork and knife cutting into a dressed iceberg wedge salad with visible lettuce layers, blue cheese dressing, bacon, tomatoes, and crumbles.
Cut straight down through the iceberg layers so each bite gets cold lettuce, creamy dressing, bacon, tomato, and blue cheese together.

What Makes It Taste Like the One You’d Order Out?

A great wedge salad is cold, neat, generous, and balanced. The lettuce is chilled, the dressing is thick enough to coat, the bacon is crisp but not hot, and the toppings stay where they belong.

  • Use cold plates if you can. They help the iceberg stay crisp longer.
  • Dress the cut sides, not just the top. A little dressing in the layers makes better bites.
  • Add toppings after the dressing. The dressing helps hold bacon, tomatoes, onion, and crumbles in place.
  • Finish with black pepper. It cuts through the creamy dressing and sharpens the whole salad.

Wedge Salad Ingredients

The ingredient list is short, so each part has to earn its place.

Iceberg lettuce wedges on a wooden tray with blue cheese dressing, bacon bits, cherry tomatoes, chives, blue cheese crumbles, black pepper, and one wedge being dressed.
Prep the wedge salad ingredients like a small station: dry iceberg wedges, thick dressing, crisp bacon, tomatoes, chives, blue cheese crumbles, and pepper. Then assembly stays fast and clean.

Iceberg Lettuce

Iceberg is the heart of the recipe. It is crisp, mild, refreshing, and sturdy enough to cut into wedges. One medium head gives you 4 large wedges or 6 smaller starter wedges.

Look for a head that feels heavy for its size, with tight leaves and no slimy or brown patches.

Bacon

Thick-cut bacon gives the strongest salty crunch. Cook it until crisp, drain it well, and chop it small so the bits catch in the dressing instead of sliding off the plate.

You can also cook the bacon in the oven. Arrange it on a lined sheet pan and bake at 400°F / 200°C until crisp, usually 15–20 minutes depending on thickness.

Let the bacon cool before adding it. Warm bacon fat can soften the lettuce and loosen the dressing.

Tomatoes

Cherry or grape tomatoes are the easiest win here: sweet, tidy, easy to halve, and less likely to flood the plate than large chopped tomatoes.

If they are very juicy, sprinkle them lightly with salt and let them drain for 5–10 minutes before adding them to the salad. This keeps the finished plate fresher and cleaner.

Red Onion, Chives, or Scallions

Red onion gives a sharp bite, but it can be strong. Dice it finely, or soak it briefly in cold water for a milder flavor.

Chives are the gentlest option. Scallions are fresh and easy, with a little more bite than chives but less intensity than red onion.

Blue Cheese Dressing

Blue cheese, sometimes written as bleu cheese on steakhouse menus, is the classic flavor for a wedge. For the best version, the dressing should sit on the lettuce, not run away from it.

Blue Cheese Crumbles

Extra crumbles make the salad feel richer and more old-school. Use a creamy, tangy blue cheese if you like a smoother bite, or a sharper blue cheese if you want more punch. Either way, use it lightly so the flavor stays balanced.

Shopping note: If you are making the dressing and adding extra crumbles on top, buy about 3–4 oz / 85–115 g blue cheese total.

Black Pepper

Freshly cracked black pepper cuts through the creamy dressing and gives the finished salad a little bite.

Optional Toppings

Balsamic glaze, avocado, hard-boiled egg, cucumber, crispy breadcrumbs, fried shallots, grilled chicken, steak strips, shrimp, croutons, roasted chickpeas, and toasted nuts all work well.

Easy topping rule: Choose one creamy element, one salty or crunchy element, one juicy element, and one sharp or fresh element. That is usually enough.

The Best Lettuce to Use

Iceberg is the classic choice because it has tight layers, clean crunch, and enough structure to hold dressing and toppings. Softer greens can taste good, but they collapse faster.

Whole iceberg lettuce, a halved iceberg head, and a quarter wedge on a wooden board showing the tight inner layers and core.
Iceberg lettuce works best because it stays cold, crisp, and structured. Softer greens collapse faster under creamy dressing and toppings.
  • Iceberg lettuce: the most reliable choice because it is crisp, sturdy, and tightly layered.
  • Romaine hearts: good for grilled wedge salads or Caesar-style wedges.
  • Little gem lettuce: useful for mini wedges or appetizer-style servings.
  • Butter lettuce or green leaf lettuce: better for tossed salads than wedge salads because they are softer.

For the main version, iceberg is still the one to buy. Romaine can work if you want a grilled or Caesar-style variation, but iceberg gives the true chilled crunch.

How to Wash and Cut Iceberg Lettuce for Wedge Salad

The wedge holds together because you cut through the core, not around it. Remove the core too early and the leaves can fall apart before they ever reach the plate.

Hands using a chef’s knife to cut iceberg lettuce through the core on a wooden cutting board.
When cutting iceberg lettuce, slice through the core first. That small anchor keeps each wedge from opening up before it reaches the plate.
  1. Remove damaged or wilted outer leaves.
  2. Rinse the outside of the iceberg head under cold water.
  3. Pat the outside dry with a clean towel.
  4. Trim only the brown end of the stem if needed.
  5. Place the lettuce on a cutting board with the core facing down.
  6. Cut the head in half through the core.
  7. Cut each half through the core again to make 4 wedges.
  8. Keep a small part of the core attached so each wedge holds together.
  9. Gently rinse between the layers only if needed.
  10. Drain the wedges cut-side down.
  11. Pat very dry with paper towels or a clean kitchen towel.
  12. Chill until you are ready to assemble.
Important: Keep a little core attached while cutting the wedges. Once each wedge is on the plate, you can trim away the hard inner piece if needed.

Core Attached Cue

Use this visual check after cutting: each iceberg wedge should still have enough core to hold the layers together, but not so much that the hard center dominates the bite.

Four iceberg lettuce wedges resting on a towel with a small piece of core still attached to each wedge.
Leave a little core attached until serving. It keeps the iceberg wedge neat while you dry the lettuce, move it, and add dressing.

If the lettuce already looks clean inside, avoid forcing water deep between every layer. Rinse what needs rinsing, dry it well, and keep the wedges cold.

Quick produce note: rinse lettuce under plain running water. The FDA also advises skipping soap or produce wash for fruits and vegetables.

The Dressing Should Be Thick, Not Runny

Blue cheese dressing gives this version its creamy, tangy steakhouse flavor. Texture matters as much as taste here.

Think creamy dressing, not pourable dressing. It should fall from a spoon in thick ribbons. Add milk or buttermilk one tablespoon at a time, because it is much easier to thin a thick dressing than rescue a watery one.

Spoon lifting thick, chunky blue cheese dressing from a ceramic bowl with visible blue cheese pieces.
For blue cheese wedge salad, texture matters as much as flavor. Thick, spoonable dressing coats the lettuce instead of running off.

Blue Cheese Dressing Ingredients

Ingredient US Measure Metric
Sour cream ½ cup 120 g
Mayonnaise ¼ cup 55 g
Buttermilk or milk 2–3 tbsp 30–45 ml
Lemon juice or red wine vinegar 1½–2 tsp 7–10 ml
Worcestershire sauce ½ tsp 2–3 ml
Garlic powder ¼ tsp About 1 g
Freshly cracked black pepper ¼–½ tsp 1–2 g
Blue cheese, crumbled 2 oz 56 g
Salt To taste, optional To taste

How to Make the Dressing

Whisk together the sour cream, mayonnaise, buttermilk or milk, lemon juice or vinegar, Worcestershire sauce, garlic powder, and black pepper. Stir in the crumbled blue cheese.

For a smoother dressing, mash some of the cheese into the mixture with the back of a spoon. For a chunkier version, fold the crumbles in gently at the end.

Chill the dressing for 20–30 minutes before serving. If it becomes too thick in the fridge, loosen it with a small splash of buttermilk or milk.

To soften a sharp dressing, add a spoonful more sour cream. For a flat dressing, add a little more lemon juice or black pepper. Taste before adding salt, because blue cheese varies a lot; add only a small pinch if needed.

This makes about 1 to 1¼ cups dressing. Start with ¾ cup for the salad and serve extra on the side if needed.

If you use store-bought dressing, choose a thick one, preferably refrigerated. To make it taste fresher, stir in black pepper, a squeeze of lemon, and a spoonful of blue cheese crumbles. Thin bottled dressing is better served on the side; a wedge needs dressing with some body.

No buttermilk? Use regular milk with a small squeeze of lemon juice, or use milk alone and adjust the tang with lemon juice or vinegar.
No blue cheese? Use ranch, creamy garlic dressing, buttermilk herb dressing, green goddess, or Caesar dressing instead.

How to Make Wedge Salad

Once the lettuce, dressing, bacon, and toppings are ready, assembly takes only a few minutes.

1. Make the Dressing

Whisk together the blue cheese dressing ingredients and chill the dressing for 20–30 minutes. This gives it better flavor and a colder, creamier texture.

2. Cook the Bacon

Cook the bacon in a skillet over medium heat until crisp, about 8–10 minutes. Transfer it to paper towels to drain, then chop or crumble it. Let it cool before it touches the lettuce.

3. Prepare the Toppings

Halve the tomatoes, finely dice the onion, chop the chives, and crumble the blue cheese. If the tomatoes are juicy, salt and drain them for a few minutes.

4. Wash, Dry, and Cut the Lettuce

Cut the iceberg through the core into wedges. Rinse only as needed, drain well, pat dry, and keep the wedges chilled until serving.

5. Plate the Wedges

Place one cold wedge on each plate. Trim the hard core if needed, but keep the wedge intact.

6. Add Dressing and Toppings

Spoon the dressing over each wedge. Add bacon, tomatoes, red onion or chives, blue cheese crumbles, and black pepper.

Hand spooning thick blue cheese dressing over an iceberg wedge before adding bacon, tomatoes, chives, and blue cheese crumbles.
Add dressing first, then toppings. The creamy layer catches bacon, tomatoes, onion, chives, and blue cheese crumbles before they slide away.

7. Serve Immediately

Serve as soon as it is dressed, before the lettuce starts to soften.

How to Plate It So It Looks Good

Place each wedge with one cut side facing up. Spoon dressing over the top and into the layers, then add toppings while the dressing is still sitting on the lettuce. Finish with pepper and chives.

Recipe Card: Wedge Salad Recipe

Wedge Salad with Iceberg Lettuce, Bacon & Blue Cheese Dressing

A crisp steakhouse-style wedge salad with cold iceberg lettuce, thick blue cheese dressing, smoky bacon, juicy tomatoes, chives, and extra crumbles — simple enough for weeknights, polished enough for steak night.

Servings:
4 large side salads
Active Prep Time:
About 20 minutes
Cook Time:
8–10 minutes
Chill Time:
20–30 minutes, while you prep
Total Time:
About 30–40 minutes
Course:
Salad, Side Dish, Starter
Cuisine:
American, Steakhouse-style
Serve It:
Cold and freshly assembled

Equipment

  • Chef’s knife
  • Cutting board
  • Mixing bowl
  • Whisk
  • Skillet or sheet pan for bacon
  • Paper towels or clean kitchen towel
  • Serving plates
  • Optional: small saucepan for balsamic glaze

Ingredients for the Salad

Ingredient US Measure Metric
Iceberg lettuce 1 medium head About 500–700 g
Thick-cut bacon 4–6 strips About 115–170 g raw
Cherry or grape tomatoes, halved 1–1½ cups 150–225 g
Red onion, finely diced ¼ cup 35–40 g
Chives or scallions, chopped 2 tbsp About 6 g
Blue cheese crumbles 1–2 oz 28–56 g
Blue cheese dressing, recipe below ¾–1 cup 180–240 ml
Freshly cracked black pepper To taste To taste

Ingredients for the Blue Cheese Dressing

Ingredient US Measure Metric
Sour cream ½ cup 120 g
Mayonnaise ¼ cup 55 g
Buttermilk or milk 2–3 tbsp 30–45 ml
Lemon juice or red wine vinegar 1½–2 tsp 7–10 ml
Worcestershire sauce ½ tsp 2–3 ml
Garlic powder ¼ tsp About 1 g
Freshly cracked black pepper ¼–½ tsp 1–2 g
Blue cheese, crumbled 2 oz 56 g
Salt To taste, optional To taste

Instructions

  1. Make the dressing. In a bowl, whisk together sour cream, mayonnaise, buttermilk or milk, lemon juice or vinegar, Worcestershire sauce, garlic powder, and black pepper. Stir in the crumbled blue cheese.
  2. Chill the dressing. Refrigerate for 20–30 minutes. If it becomes too thick, loosen it with a small splash of buttermilk or milk. Taste before adding salt.
  3. Cook the bacon. Cook bacon in a skillet over medium heat until crisp, about 8–10 minutes, or bake at 400°F / 200°C until crisp, about 15–20 minutes. Drain, crumble, and let it cool.
  4. Prep the toppings. Halve the tomatoes, finely dice the onion, chop the chives, and crumble extra blue cheese. If the tomatoes are very juicy, salt and drain them for 5–10 minutes.
  5. Prepare the lettuce. Remove damaged outer leaves from the iceberg. Rinse, dry, and cut through the core into 4 wedges. Keep a little core attached so each wedge holds together.
  6. Plate the wedges. Place one cold lettuce wedge on each plate. Trim the hard core if needed.
  7. Add dressing. Spoon blue cheese dressing over each wedge and into the layers.
  8. Add toppings. Sprinkle with bacon, tomatoes, onion or chives, blue cheese crumbles, and black pepper.
  9. Serve immediately. Serve while the lettuce is still cold and crisp.

Recipe Notes

  • Use thick ranch instead of blue cheese dressing for a milder version.
  • Add a light drizzle of balsamic glaze for the Outback-style finish.
  • Chop the iceberg for bowls, potlucks, or easier eating.
  • Briefly grill the wedges for a smoky summer side.
  • For keto, skip sweet glaze or use only a tiny drizzle.
  • For vegetarian, replace bacon with crispy chickpeas, fried onions, smoked almonds, or toasted breadcrumbs.

How to Keep the Salad from Getting Watery

The fastest way to make a wedge salad disappointing is to let water sneak in. Wet lettuce, juicy tomatoes, and thin dressing all work against that cold crunch.

Cut iceberg lettuce wedges drying on a cream towel while a hand pats one wedge dry.
Dry iceberg is the quiet trick behind a better wedge salad. Water between the layers thins the dressing and makes the plate messy.
Problem Likely Cause Fix
Dressing slides off Lettuce is wet Pat the wedges dry and chill them before serving.
Salad tastes watery Tomatoes are too juicy Salt and drain tomatoes for 5–10 minutes.
Wedge falls apart Core was removed too early Cut through the core and trim only after plating if needed.
Toppings roll off Pieces are too large Chop bacon, onion, and tomatoes smaller.
Bacon softens Salad was assembled too early or bacon was added warm Cool the bacon and add it right before serving.
Dressing pools on the plate Dressing is too thin Use less milk or buttermilk, or stir in more sour cream.

Thick vs Thin Dressing Test

Use this cue before serving: thick dressing should sit on the iceberg wedge, while thin dressing will run down the layers and collect on the plate.

Two plated iceberg wedge salads showing thick dressing clinging to one wedge and thinner dressing pooling around another wedge.
Use this dressing test: thick dressing sits on the wedge, while thin dressing runs down the sides. Add milk or buttermilk slowly.

Get those details right and the salad stays crisp instead of sliding apart on the plate.

Simple rule: Make the components ahead, but do not dress the lettuce until you are ready to serve.

Toppings That Actually Stay Put

This is where the wedge becomes fun. Keep it old-school with bacon and blue cheese, make it fresher with cucumber and avocado, or turn it into lunch with chicken, shrimp, egg, or crispy chickpeas.

Choose one direction first: steakhouse, fresh, crunchy, meal-worthy, lighter, or spicy. That keeps the salad balanced instead of overloaded.

Small bacon bits, halved cherry tomatoes, diced red onion, chopped chives, blue cheese crumbles, and black pepper arranged on a wooden board.
For wedge salad toppings, smaller is better. Bacon bits, halved tomatoes, diced onion, chives, and crumbles cling better than large pieces.
Style Topping Ideas
Classic Bacon, tomatoes, red onion, chives, blue cheese crumbles
Steakhouse Balsamic glaze, cracked pepper, fried shallots, extra blue cheese
Crunchy Croutons, toasted breadcrumbs, fried onions, smoked almonds
Make it a meal Grilled chicken, steak strips, shrimp, hard-boiled egg
Fresh Cucumber, avocado, radish, herbs, scallions
Vegetarian Crispy chickpeas, toasted nuts, avocado, roasted corn
Lighter Greek yogurt dressing, turkey bacon, extra tomatoes, cucumber
Spicy Jalapeños, spicy ranch, chili crisp, hot honey drizzle

The goal is not to pile on everything. The goal is to make each bite feel complete: creamy, crunchy, juicy, salty, and fresh.

If you want the salad to eat more like lunch, chickpeas are an easy add-in. For that direction, this chickpea salad recipe is a useful companion.

Wedge Salad Variations

The main version is the one to learn first. After that, the variations are just swaps: change the dressing, add glaze, chop the lettuce, grill the cut sides, or build everything on a platter.

Not sure which version to make? Make blue cheese for the classic steakhouse flavor, ranch for a milder family version, chopped for easier eating, grilled for smoky edges, and Outback-style when you want a sweet-tangy balsamic finish.

Ranch Wedge Salad

Ranch is the easiest alternative if you do not like blue cheese. Start with a thicker ranch base and loosen it slowly; thin ranch slips off before you get a good bite.

Iceberg wedge salad with ranch dressing, bacon, cherry tomatoes, cucumber, chives, avocado pieces, and black pepper on a light plate.
Ranch wedge salad is the easy no-blue-cheese version. Use thick ranch, then add bacon, tomatoes, cucumber, chives, avocado, and pepper.
Quick Ranch Ingredient US Measure Metric
Sour cream ½ cup 120 g
Mayonnaise ¼ cup 55 g
Buttermilk ¼ cup, plus more as needed 60 ml, plus more as needed
Lemon juice 2 tsp 10 ml
Garlic powder 1 tsp 3 g
Dried dill 1–1½ tsp 1–2 g
Chives 2 tbsp About 6 g
Salt ½ tsp 3 g
Black pepper To taste To taste

Whisk everything together and chill before using. Add more buttermilk one tablespoon at a time until the ranch is spoonable. For a fresh ranch version, top the iceberg with bacon, tomatoes, chives, cucumber, black pepper, and optional avocado.

Outback-Style Blue Cheese Wedge Salad with Balsamic Glaze

This is not the official restaurant recipe. It is a home-style version built around the same steakhouse idea: iceberg lettuce, blue cheese dressing, bacon, tomatoes, red onion, crumbles, and a light balsamic glaze drizzle.

Outback-style iceberg wedge salad with blue cheese dressing, bacon, tomatoes, red onion, blue cheese crumbles, chives, and thin balsamic glaze lines.
An Outback-style wedge salad gets its steakhouse finish from balsamic glaze. Keep the drizzle thin so it brightens the blue cheese dressing without taking over.
Balsamic Glaze Ingredient US Measure Metric
Balsamic vinegar ½ cup 120 ml
Brown sugar or honey 2 tbsp 25 g brown sugar or 30 ml honey
Salt Pinch Pinch

Simmer the balsamic vinegar, sugar or honey, and salt over medium-low heat for 5–8 minutes, until it lightly coats the back of a spoon. Let it cool for a few minutes, then drizzle lightly over the finished salad.

This makes more glaze than you need for 4 wedges. Drizzle it last in thin lines, not a heavy pour. Balsamic glaze is a drizzle, not a sauce; too much makes the salad sweet, sticky, and heavy.

Chopped Wedge Salad

A chopped version uses the same ingredients but cuts the iceberg into bite-size pieces. It is easier to eat, easier to pack into bowls, and often the better choice if a full wedge feels awkward.

Chopped wedge salad in a shallow bowl with iceberg lettuce, bacon, tomatoes, red onion, chives, blue cheese crumbles, dressing, and a fork lifting a bite.
A chopped wedge salad keeps the steakhouse flavor but makes it easier to eat. It works well for lunches, potlucks, meal prep, and casual bowls.

Chop the lettuce into large pieces, then add bacon, tomatoes, red onion, chives, blue cheese crumbles, and dressing. Toss lightly or drizzle the dressing over the top. Add hard-boiled egg, grilled chicken, avocado, cucumber, or crispy breadcrumbs if you want it to feel more like a meal.

Grilled Wedge Salad

A grilled version gives the lettuce a smoky edge. Romaine hearts are easiest to grill, but iceberg can work if you keep the core attached and dry the wedges well.

  1. Cut the lettuce into wedges through the core.
  2. Dry the cut sides very well.
  3. Brush the cut sides lightly with oil.
  4. Place the wedges cut-side down on the grill.
  5. Grill just until the edges pick up color.
  6. Serve immediately with blue cheese dressing, ranch, or spicy ranch.

Grill only the cut sides. Leave the rounded outside mostly untouched so the wedge keeps some cool crunch. If your grill is very hot, start with 30–45 seconds per cut side. If it is medium-hot, 1–2 minutes may be enough. The wedges should pick up color at the edges, not wilt all the way through. Grill them last, after the rest of the meal is ready.

Grilled iceberg wedge salad with light char marks, creamy dressing, bacon, tomatoes, chives, blue cheese crumbles, and grill tongs nearby.
Briefly char the cut sides for grilled wedge salad, then stop. You want smoky edges, not cooked lettuce.

Loaded Wedge Salad for a Crowd

For parties, cut the iceberg into 6 smaller wedges and arrange them on a chilled platter. Put dressing in a bowl and toppings in small piles or bowls so guests can build their own plates without the lettuce wilting.

Loaded wedge salad platter with several iceberg wedges, blue cheese dressing, bacon, tomatoes, red onion, chives, blue cheese crumbles, and a dressing bowl.
Serving wedge salad for a crowd is easier with smaller wedges on a platter. Keep dressing and toppings nearby so the lettuce stays fresh.

Good loaded toppings include bacon, cherry tomatoes, red onion, chives, blue cheese crumbles, hard-boiled egg, avocado, cucumber, crispy breadcrumbs, fried onions, grilled chicken, steak strips, shrimp, ranch, blue cheese dressing, and balsamic glaze.

Lighter, Keto, Vegetarian, and No-Blue-Cheese Options

The blue cheese version is rich, but it is easy to adjust without losing the point of the salad: cold crunch, dressing that grips the layers, and toppings with texture.

Lighter Wedge Salad

For a lighter-feeling wedge salad, use a Greek yogurt-based dressing, reduce the bacon, and add more fresh toppings like tomatoes, cucumber, radish, herbs, or grilled chicken. Keep the dressing creamy enough that the salad still feels satisfying.

For a simple protein to turn it into a fuller plate, slice in some juicy baked chicken breast.

Keto Wedge Salad

The main version can be keto-friendly with iceberg lettuce, full-fat blue cheese dressing, bacon, blue cheese, and low-carb toppings. Skip sweet balsamic glaze or use only a tiny drizzle.

Check bottled dressing labels if you are strict keto, and keep tomatoes, onions, and any balsamic glaze modest.

For a fuller low-carb meal, serve it with bunless burgers or burger bowls from these keto burger ideas.

Vegetarian Wedge Salad

Skip the bacon and add crunch with crispy chickpeas, smoked almonds, toasted walnuts, fried onions, roasted corn, or crispy breadcrumbs. Avocado adds richness if you are also skipping blue cheese.

For a strict vegetarian version, use vegetarian Worcestershire or skip it, and choose a vegetarian-friendly blue cheese if needed.

Wedge Salad Without Blue Cheese

Go with ranch, creamy garlic dressing, green goddess, buttermilk herb dressing, Caesar dressing, or a vinaigrette. Ranch is the closest creamy substitute.

Wedge Salad Without Bacon

Replace bacon with crispy chickpeas, croutons, toasted breadcrumbs, fried shallots, toasted nuts, roasted seeds, or smoked almonds for crunch.

Dairy-Free Wedge Salad

Choose a dairy-free ranch or a vinaigrette-style dressing. Skip the blue cheese crumbles and add avocado, crispy chickpeas, or nuts for richness.

What to Serve with Wedge Salad

This is the salad to make when dinner is already rich and hot, but you still want something cold, crisp, and a little showy on the plate.

It is especially good beside a burger, steak, baked potato, roast chicken, or anything smoky from the grill.

  • Steakhouse-style dinners: steak, grilled shrimp, mashed potatoes, and anything finished with a rich creamy mushroom sauce.
  • Casual meals: burger patties, air fryer burgers, and barbecue meals.
  • Comfort dinners: roast chicken, pork chops, casseroles, baked potatoes, and slow-cooked mains.
  • Lighter plates: baked chicken, roasted vegetables, soups, or simple pasta dinners.

For lunch, a cold wedge also works well beside sandwiches, especially when you want something fresher than chips.

Make-Ahead and Storage Tips

The finished salad is best assembled right before serving, but the parts can be prepared ahead.

Component Make Ahead? Notes
Blue cheese dressing Yes, 2–3 days Keep refrigerated and stir before using.
Ranch dressing Yes, 2–3 days Keep cold and thin slightly if needed before serving.
Bacon Yes, 1–2 days Store chilled and re-crisp briefly if needed.
Lettuce wedges Same day ideal Wash, dry, wrap, and chill.
Tomatoes and onion Same day ideal Store separately so they do not water down the lettuce.
Fully assembled salad No Dress right before serving.

A simple prep schedule works best: make the dressing and cook the bacon earlier in the day, wash and dry the wedges about an hour before serving, then assemble the plates just before serving.

Once dressed, the lettuce wilts, the bacon softens, and the dressing becomes watery.

This make-ahead style works well when the main dish is already taking care of itself, like a slow cooker pork loin.

For broader cold-storage guidance beyond this salad, FoodSafety.gov has a helpful cold food storage chart.

Common Mistakes

Most wedge salad problems come from water, weak texture, or assembling too early. Use this as a final checklist.

  • Wet lettuce: dressing slides off instead of sitting on the wedge.
  • Core removed too early: the wedge falls apart.
  • Thin dressing: it pools on the plate.
  • Warm bacon: it softens the lettuce and loosens the dressing.
  • Large toppings: they roll off instead of sticking to the wedge.
  • Early assembly: the salad turns watery before serving.
  • Too much balsamic glaze: the plate becomes sweet and sticky.

How to Eat a Wedge Salad

This is a knife-and-fork salad, so do not fight it. Cut down through the wedge so each bite has lettuce, dressing, bacon, tomato, onion, and blue cheese.

If the large wedge feels awkward, make the chopped version instead. It has the same flavor but is easier to eat from a bowl.

FAQs

These quick answers cover dressing swaps, cutting iceberg, make-ahead timing, toppings, and ways to keep the salad crisp.

What is a wedge salad?

It is a cold quarter of iceberg lettuce topped with creamy dressing, bacon, tomatoes, onion or chives, blue cheese, and black pepper. It is usually served as a knife-and-fork side salad or starter.

Why is it called a wedge salad?

It is called a wedge salad because the lettuce is served as a wedge, usually a quarter of a head of iceberg, instead of being chopped or tossed.

How many wedge salads does one head of iceberg make?

One medium head of iceberg makes 4 large wedges or 6 smaller starter wedges.

What lettuce is best for wedge salad?

Iceberg is the classic choice because it is crisp, sturdy, and tightly layered. It holds its shape under dressing better than softer greens.

Why is iceberg lettuce used?

Iceberg has a mild flavor, high crunch, and compact structure, which is why it holds up so well as a wedge.

How do you cut iceberg lettuce for wedge salad?

Remove damaged outer leaves, rinse and dry the head, then cut it in half through the core. Cut each half through the core again to make 4 wedges.

Why does my wedge salad fall apart?

It usually falls apart because the core was removed too early or the lettuce was cut across the head. Cut through the core, keep a small piece attached, and trim the hard part only after plating.

Do you wash iceberg lettuce before making this salad?

Yes. Rinse the head or wedges under cold water, drain well, and pat very dry. Wet lettuce makes the dressing slide off.

What dressing goes on wedge salad?

Blue cheese dressing is traditional. Ranch is the easiest milder swap. Creamy garlic, buttermilk herb, green goddess, Caesar, or vinaigrette can also work.

Can I use store-bought blue cheese dressing?

Yes. Choose a thick dressing, preferably refrigerated. To improve it, stir in extra black pepper, lemon juice, and a spoonful of blue cheese crumbles.

What can I use instead of buttermilk?

Use regular milk with a small squeeze of lemon juice, or use milk alone and adjust the tang with lemon juice or vinegar.

Is wedge salad better with blue cheese or ranch?

Blue cheese gives the traditional steakhouse flavor: tangy, rich, and sharp. Ranch is milder and easier for a crowd. Serve both if you are not sure.

Can I make it with ranch?

Yes. Ranch works well if you want a milder dressing. Choose a thick ranch so it stays on the lettuce.

What toppings go on wedge salad?

Classic toppings include bacon, tomatoes, red onion, chives, blue cheese crumbles, and black pepper. Avocado, egg, cucumber, fried onions, crispy breadcrumbs, chicken, steak, shrimp, and balsamic glaze also work.

Can I cook the bacon in the oven?

Yes. Bake bacon on a lined sheet pan at 400°F / 200°C until crisp, usually 15–20 minutes depending on thickness.

What is in an Outback-style wedge salad?

An Outback-style version usually includes iceberg lettuce, blue cheese dressing, bacon, grape or cherry tomatoes, red onion, blue cheese crumbles, and balsamic glaze.

Is this an Outback copycat wedge salad?

No. It is not an official restaurant recipe, but the Outback-style variation uses the same general idea: iceberg, blue cheese dressing, bacon, tomatoes, red onion, crumbles, and a light balsamic glaze drizzle.

Can I make it without blue cheese?

Yes. Use ranch, creamy garlic dressing, buttermilk herb dressing, green goddess, Caesar, or vinaigrette. Skip the crumbles or add avocado for richness.

Can I make it without bacon?

Yes. Use crispy chickpeas, toasted breadcrumbs, fried shallots, smoked almonds, croutons, roasted seeds, or toasted nuts for crunch.

Is wedge salad keto?

It can be keto-friendly with iceberg lettuce, full-fat blue cheese dressing, bacon, blue cheese, and low-carb toppings. Check bottled dressing labels and keep tomatoes, onions, and balsamic glaze modest if you are strict keto.

Is wedge salad healthy?

It can be lighter or richer depending on the dressing and toppings. For a fresher version, use less bacon, choose a lighter dressing, and add cucumber, tomatoes, herbs, or grilled chicken.

Can I make it ahead of time?

You can make the dressing, cook the bacon, and prep toppings ahead. Wash, dry, and chill the lettuce the same day, then assemble just before serving.

How long does wedge salad last after dressing?

It is best served immediately. Once dressed, the lettuce softens, the bacon loses crunch, and the plate can become watery.

How do I keep it from getting watery?

Dry the lettuce well, use thick dressing, drain juicy tomatoes, and dress the wedges right before serving.

How do you eat a wedge salad?

Use a knife and fork. Cut the wedge into bite-size pieces on the plate so each bite gets lettuce, dressing, bacon, tomatoes, onion, and cheese.

What do you serve with it?

Serve it with steak, burgers, grilled chicken, roast chicken, barbecue meals, baked potatoes, pasta, sandwiches, soups, or grilled shrimp.

Once the lettuce is cold and dry, the dressing has body, and the toppings are crisp and small, wedge salad becomes what steakhouses know it can be: simple, dramatic, refreshing, and far more satisfying than a quarter of iceberg has any right to be.