Posted on Leave a comment

Hibachi Ginger Sauce Recipe — Japanese Steakhouse Brown Sauce

A small ceramic bowl of brown hibachi ginger sauce with visible ginger and onion flecks, served with shrimp, steak bites, fried rice, zucchini, mushrooms, and onion.

If you have ever dipped hibachi shrimp, steak, or fried rice into that sharp brown ginger sauce and wished you had a jar at home, this is the one to make.

This hibachi ginger sauce is pourable, tangy, salty, lightly sweet, and full of fresh ginger-onion bite. It is the brown dipping sauce from the little Japanese steakhouse cup — not creamy yum yum sauce and not the orange ginger dressing from the salad.

The first spoonful should taste like the dip you remember: salty at the start, bright in the middle from lemon and rice vinegar, and warm with ginger at the end. Blend it in 5 minutes, chill it if you can, and serve it with shrimp, steak, chicken, fried rice, noodles, vegetables, dumplings, tofu, or rice bowls.

Before You Blend

  • Use fresh ginger if possible. Ginger paste works in a pinch, but fresh ginger gives the cleanest bite.
  • Choose low-sodium soy sauce. Regular soy sauce can make this dip too salty after it rests.
  • Pulse, don’t fully puree. Tiny ginger and onion flecks are part of the steakhouse-style texture.
  • Let it chill when you can. One hour in the fridge softens the raw onion and makes the sauce taste more rounded.

Quick Answer: What Is Hibachi Ginger Sauce?

Hibachi ginger sauce is a Japanese steakhouse-style dipping sauce made with fresh ginger, onion, soy sauce, rice vinegar, lemon juice, and a little sugar. It is usually served with grilled meats, seafood, vegetables, noodles, and fried rice.

When people ask for the brown sauce from hibachi restaurants, they usually mean this ginger-soy dipping sauce. Yum yum sauce is the creamy pink-orange one. On salad, the orange or tan sauce is usually Japanese ginger dressing.

It is especially good with shrimp fried rice, steak bites, grilled chicken, sautéed mushrooms, zucchini, dumplings, spring rolls, tofu, salmon, and rice bowls.

Hibachi Ginger Sauce Recipe

A 5-minute no-cook Japanese steakhouse-style ginger sauce made with fresh ginger, onion, soy sauce, rice vinegar, and lemon juice. The flavor is salty-tangy first, then bright and gingery, with a little onion bite that mellows after chilling.

Prep Time5 minutes
Cook Time0 minutes
Optional Chill Time1 hour
Total Time5 minutes, or 1 hour 5 minutes with chilling
YieldAbout 1 cup / 240 ml
Servings8
Serving Size2 tablespoons / 30 ml
TexturePourable, lightly textured

Ingredients

  • 2 tablespoons fresh ginger, peeled and grated or finely chopped, about 15 g
  • ½ cup chopped yellow onion, about 70–80 g
  • ⅓ cup low-sodium soy sauce or tamari, 80 ml
  • 3 tablespoons rice vinegar, 45 ml
  • 2 tablespoons fresh lemon juice, 30 ml
  • 1 teaspoon sugar or brown sugar, 4 g
  • ½ teaspoon lemon zest, optional
  • 1 small garlic clove, optional

Equipment

  • Blender, food processor, or mini chopper
  • Microplane, grater, or sharp knife
  • Cutting board
  • Measuring cups and spoons
  • Small jar or airtight container

No blender? Grate the ginger, mince the onion as finely as possible, then shake everything hard in a jar. The dip will be chunkier and more intense, but it still works for dipping.

Instructions

  1. Peel the ginger and grate it, or chop it finely so it blends easily.
  2. Chop the onion into small pieces. Smaller pieces help the mixture blend faster without turning foamy.
  3. Add the ginger, onion, soy sauce, rice vinegar, lemon juice, sugar, and optional lemon zest or garlic to a blender or food processor.
  4. Pulse until the sauce is loose and spoonable. Stop while tiny pieces of ginger and onion are still visible.
  5. Taste before you change anything. Add more lemon juice if it tastes flat, a tiny pinch of sugar if it tastes too strong, or 1–2 tablespoons water if it tastes too salty.
  6. Serve right away, or cover and chill for 1 hour so the flavor tastes smoother and more rounded.

Recipe Notes

  • Do not judge the sauce in the first minute after blending. Raw onion and ginger taste loud at first; chilling is part of the recipe if you want a smoother restaurant-style flavor.
  • Start with 2 tablespoons fresh ginger. Very mild ginger can take another ½ tablespoon after blending. Older, woody, or very hot ginger should rest in the sauce before you add more.
  • Low-sodium soy sauce keeps the sauce from becoming too salty.
  • Use a food processor for a slightly textured sauce and a blender for a smoother one.
  • The dip may separate in the fridge. Stir or shake before serving.
  • Yield may vary slightly depending on how finely the onion is chopped and blended.
  • Store in an airtight jar in the refrigerator and use within 5 days.

Choose Your Version

The main recipe is balanced for home cooking: bold enough for hibachi-style plates, but not so salty that it overwhelms rice, vegetables, or dumplings. Use this quick guide before you add more soy sauce, sugar, or lemon.

A tabletop guide showing hibachi ginger sauce served with steak bites, dumplings, fried rice, a rice bowl, and a jar method.
Start with the base sauce, then adjust it for the meal in front of you. Keep it loose for fried rice, make it bolder for steakhouse plates, or add garlic and sesame oil when serving it with dumplings.
Want This Result?Do This
Closest steakhouse biteAdd extra soy sauce, rice vinegar, lemon, and ginger from the stronger restaurant-style adjustment below.
Less salty everyday sauceStay with the main recipe and use low-sodium soy sauce.
Best for dumplingsAdd the optional garlic and a few drops of toasted sesame oil.
Best for fried riceKeep it loose and bright. Do not thicken it.
Best texturePulse until tiny ginger and onion flecks remain.
No blender versionGrate the ginger, mince the onion finely, and shake everything in a jar.

Already made the sauce? Jump to adjustments after blending or troubleshooting. Still deciding how you want it to taste? Start with why the balance works.

Why This Ginger Sauce Recipe Works

Some restaurant-style ginger sauces lean hard on soy sauce and vinegar. They taste bold with grilled steak or shrimp, but they can become too salty for home dinners. This version keeps the familiar ginger-onion base and balances it with lemon, rice vinegar, and a small amount of sugar.

The finished sauce should hit salty first, then tangy, then gingery. It should not taste creamy, oily, syrupy, or thick. If the onion tastes raw right away, chill the sauce before changing the recipe.

Quick Taste Check

The dip should taste balanced, not sweet or heavy. Flat sauce needs lemon, a too-strong batch needs chill time, and salty sauce needs water 1 tablespoon at a time. When one bite of rice makes you want another, the balance is right.

Chopsticks holding white rice dipped in brown hibachi ginger sauce above a small bowl of sauce, with grilled vegetables and fresh ginger nearby.
Plain rice is the quickest way to test the flavor because it does not hide the sauce. When the bite tastes lightly salty, bright, and gingery, the hibachi ginger sauce is ready.

That balance is why the dip works with a whole plate, not just one bite. It cuts through butter, soy, and seared edges without covering up the shrimp, steak, rice, or vegetables. Use it as a dip, a spoon-over sauce for fried rice, or a brighter alternative when a thicker stir fry sauce would feel too heavy.

What Is Hibachi Ginger Sauce?

The easiest way to understand hibachi ginger sauce is by where it sits on the plate: beside grilled food, not on salad. It cuts through richness, wakes up rice, and adds a fresh ginger bite to shrimp, steak, chicken, vegetables, and noodles.

You may see it called Japanese steakhouse ginger sauce, Benihana-style ginger sauce, hibachi brown sauce, or simply ginger sauce. Most of those names point to the same ginger-soy dipping cup sauce.

Ingredients You’ll Need

The goal is not to make the strongest sauce possible. Aim for that familiar first dip: bright, salty, gingery, and balanced enough that you keep going back for one more bite of rice.

Fresh ginger root, grated ginger, chopped yellow onion, soy sauce, rice vinegar, lemon halves, sugar, and garlic arranged on a wooden board.
Fresh ginger and onion create the bite, while soy sauce, rice vinegar, lemon, and a small amount of sugar bring balance. Together, they keep the sauce savory and bright instead of flat, sour, or overly salty.

Fresh Ginger

Fresh ginger is the main flavor. It gives the sauce its clean bite, gentle heat, and bright fragrance. Peel it first, then grate or finely chop it so it blends evenly.

Two tablespoons gives the sauce a clear ginger flavor without overwhelming everything else. Use 1½ tablespoons for a milder dip or 2½ tablespoons for a stronger one.

Yellow Onion

Onion is what keeps the dip from tasting like soy sauce with ginger stirred in. Yellow onion gives the best balance; white onion tastes sharper, and red onion changes the color and flavor too much for this style.

Soy Sauce or Tamari

Soy sauce brings salt, color, and savory depth. Low-sodium soy sauce is the safest choice because this is a dipping sauce, and salt builds quickly.

Tamari works well for a deeper flavor or a gluten-free version. Coconut aminos can work for a soy-free version, but it is sweeter and less salty, so reduce or skip the sugar and brighten the sauce with extra vinegar or lemon if needed.

For a sweeter cooked soy-ginger glaze instead of a fresh dipping sauce, this teriyaki sauce recipe is the better direction.

Rice Vinegar

Rice vinegar gives the sauce a clean tang without making it harsh. Unseasoned rice vinegar gives you the most control. If using seasoned rice vinegar, blend first, then add sugar only if the sauce still needs rounding.

Lemon Juice

Fresh lemon juice lifts the ginger, keeps the soy sauce from tasting heavy, and gives the dip a clean finish. Lemon zest is optional; use only a little because too much can make the sauce bitter.

Sugar

The sugar is not there to make the sauce sweet. It just rounds off the raw onion, vinegar, lemon, and ginger so the dip tastes balanced instead of harsh. Brown sugar tastes rounder; white sugar keeps the flavor cleaner.

Garlic, Optional

Garlic pushes the dip away from the clean steakhouse flavor and toward a stronger dumpling or noodle sauce. Add one small clove for that version, or leave it out for a cleaner ginger-onion base.

Fresh Ginger vs Ginger Paste vs Ground Ginger

Fresh ginger is best here because the sauce is supposed to taste lively. Dried ginger cannot give the same clean bite.

Ginger OptionDoes It Work?How to Use It
Fresh gingerBest choiceUse 2 tablespoons / about 15 g for the main recipe.
Ginger pasteWorks in a pinchStart with 1½ tablespoons, blend, then add more after tasting.
Ground gingerEmergency onlyStart with ¼ teaspoon. The flavor will be warmer and duller.

Check the label on ginger paste. Some brands include salt, vinegar, oil, or preservatives, and those can change the balance.

How to Make Ginger Sauce

No cooking needed here — just chop, blend, taste, and rest. A blender or food processor gives the cleanest texture, but a hand-chopped jar version still works when you want the sauce quickly.

1. Prep the ginger and onion

Peel the ginger and grate it, or chop it finely. Cut the onion into small pieces so it breaks down quickly.

Fresh ginger being grated on a metal grater beside chopped yellow onion on a wooden cutting board.
Grating the ginger before blending helps its flavor spread evenly through the sauce. Likewise, chopping the onion small gives body without leaving big raw pieces in the finished dip.

2. Add the sauce ingredients

Add the ginger, onion, soy sauce, rice vinegar, lemon juice, sugar, and optional lemon zest or garlic to a blender or food processor.

Chopped onion, fresh ginger, soy sauce, rice vinegar, lemon juice, and sugar inside a food processor before blending.
This no-cook ginger sauce comes together in the food processor. Add the aromatics and liquids together, then pulse in short bursts so the sauce stays loose and lightly textured.

3. Pulse until spoonable

Pulse until the sauce is loose and easy to pour. Stop before it becomes a creamy puree. Tiny visible bits of ginger and onion are a good sign.

Pulsed brown hibachi ginger sauce inside a food processor with small visible pieces of ginger and onion.
Stop pulsing while tiny ginger and onion flecks are still visible. That light texture is what gives Japanese steakhouse ginger sauce its fresh bite instead of a dull, over-blended finish.

4. Taste and adjust

Taste before you change anything, and do not panic if it feels loud at first. This sauce can swing from perfect to too salty quickly, so small adjustments are better than big ones. Add lemon if it tastes flat, a tiny pinch of sugar if it tastes too strong, or 1–2 tablespoons water if it tastes too salty.

5. Chill for smoother flavor

You can serve the sauce right away, but it tastes better after resting. After about an hour in the fridge, the onion relaxes, the ginger settles, and the sauce starts tasting more like the restaurant cup.

Blender vs Food Processor: What Texture Should Ginger Sauce Have?

Both tools work, but they give slightly different results.

Two bowls of brown ginger sauce on a tray, one labeled blender with a smoother texture and one labeled food processor with more visible flecks.
Use a blender for a smoother ginger sauce and a food processor for a more flecked steakhouse-style dip. Either works, but the tool changes the final texture.
ToolBest ForTexture
BlenderSmoother sauceMore even, less textured, easy to pour.
Food processorSteakhouse-style textureLightly textured, with tiny ginger and onion flecks.
Mini chopperSmall batchesWorks well, but scrape the sides once or twice.
No blenderQuick hand-chopped versionChunkier and stronger, but still useful for dipping.

The ideal texture is pourable and lightly flecked. It should not look like mayonnaise, salad dressing, or a thick glaze.

If the sauce turns pale or foamy after blending, let it sit for a few minutes and stir. Air can lighten the color temporarily; after resting, the sauce usually settles into a deeper brown.

Taste and Texture Target

You’ll know the sauce is right when it smells gingery, pours easily from a spoon, tastes bright but not biting, and leaves tiny flecks behind in the cup. It should be brighter than salad dressing and lighter than teriyaki sauce.
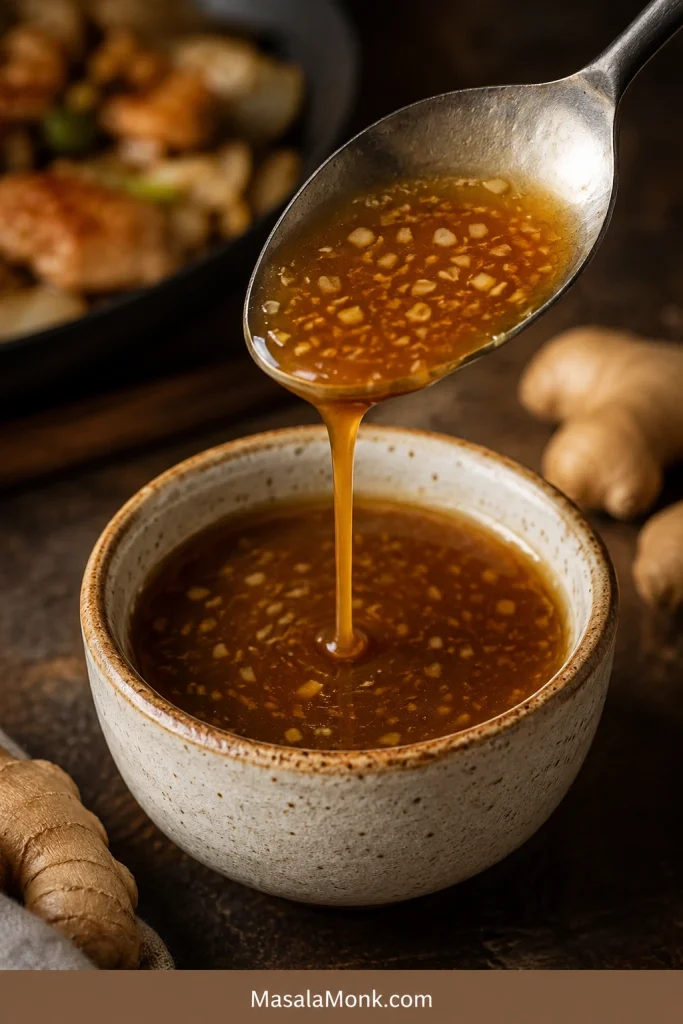
A spoon pouring brown hibachi ginger sauce with small flecks back into a ceramic bowl.
The finished sauce should fall easily from a spoon. That pourable texture lets it brighten rice, shrimp, steak, chicken, and vegetables without feeling heavy like a glaze.

How to Adjust the Sauce After Blending

Once the dip is blended, change it slowly. A spoonful of water, lemon, sugar, or soy sauce can move the whole batch.

GoalWhat to Do
More restaurant-styleAdd 1–2 tablespoons soy sauce, 1 tablespoon rice vinegar, and a little extra grated ginger.
Less saltyAdd 1–2 tablespoons water after blending, or use a little less soy sauce next time.
Less intenseChill for 1 hour and add ½ teaspoon sugar if needed.
More gingeryAdd ½ tablespoon more fresh grated ginger.
More texturedUse a food processor and stop while tiny pieces are visible.
SmootherUse a blender and blend a little longer, but stop before it turns foamy.
Gluten-freeUse tamari or certified gluten-free soy sauce.
Soy-freeUse coconut aminos, reduce or skip the sugar, and add extra vinegar or lemon to balance the sweetness.
Better for dumplingsAdd the optional garlic and a few drops of toasted sesame oil.

Benihana-Style Notes

Think of this as Benihana-style, not a claim that it is the restaurant’s exact formula. Benihana’s own ginger sauce notes emphasize fresh ginger, onion, rice vinegar, lemon juice, and low-sodium soy sauce, which lines up with the flavor profile people expect from the brown dipping sauce.

This version keeps that profile but adjusts the balance for a home kitchen. Use the stronger adjustment below when the sauce in your memory was sharper, saltier, and more intense. For a dip you can spoon over rice and use all week, stay with the main recipe.

A small bowl of dark brown Benihana-style ginger sauce with visible flecks, served near shrimp, steak bites, fresh ginger, lemon, and chopsticks.
For a stronger Benihana-style direction, add soy sauce, rice vinegar, lemon, and extra ginger a little at a time. Small changes matter because this dipping sauce can turn too salty quickly.

For a Stronger Restaurant-Style Sauce

After blending the main recipe, make it sharper and more soy-forward by adding:

  • 1–2 extra tablespoons soy sauce
  • 1 extra tablespoon rice vinegar
  • ½ tablespoon extra lemon juice
  • ½ tablespoon extra grated ginger

Add these slowly and taste as you go. It is easier to make the sauce stronger than to rescue a sauce that has become too salty or too sour.

Ginger Sauce vs Ginger Dressing vs Yum Yum Sauce

These sauces often get mixed up because they all show up around hibachi and Japanese steakhouse meals. The easiest way to tell them apart is to look at where they show up on the table: ginger sauce is for the dipping cup, ginger dressing is for salad, and yum yum sauce is the creamy one people spoon over shrimp and fried rice.

Three small cups labeled ginger sauce, yum yum sauce, and ginger dressing, showing a brown sauce, a creamy pink-orange sauce, and an orange-tan dressing.
This side-by-side view clears up the common hibachi sauce mix-up. Brown ginger sauce is for dipping, yum yum sauce is creamy, and Japanese ginger dressing usually belongs on salad.
SauceTextureMain FlavorBest Use
Hibachi ginger sauceBrown, pourable, lightly texturedGinger, onion, soy, vinegar, lemonShrimp, steak, chicken, vegetables, fried rice
Japanese ginger dressingOrange or tan, dressing-likeCarrot, onion, ginger, oil, vinegarGreen salad
Yum yum sauceCreamy, pale pink or orangeMayo, tomato or ketchup, sugar, spicesShrimp, chicken, fried rice, vegetables
Hibachi mustard sauceSmooth, mustard-forwardMustard, soy, sesame, or cream depending styleSteak and chicken
Ginger scallion sauceOil-based and spoonableGinger, scallions, hot oilRice, noodles, poached chicken, tofu

For salad, ginger dressing is usually the better match. Beside hibachi shrimp, steak, chicken, vegetables, or fried rice, this brown ginger sauce is the right one.

What to Eat With Ginger Sauce

Use this sauce beside something rich: buttery mushrooms, seared shrimp, fried rice, grilled steak, or chicken thighs. It makes rice taste brighter, shrimp taste sweeter, and steak feel less heavy after a few bites.

Hibachi-style favorites

  • Hibachi shrimp
  • Steak bites or grilled steak
  • Chicken thighs or chicken breast
  • Salmon or tuna
  • Grilled zucchini, onion, mushrooms, and broccoli
  • Fried rice
  • Hibachi noodles

Takeout-style snacks

  • Dumplings
  • Potstickers
  • Egg rolls
  • Spring rolls
  • Lettuce wraps

For a creamier dip beside spring rolls or noodles, keep this ginger sauce as the bright option and add a bowl of peanut sauce for contrast.

A wooden appetizer board with dumplings, spring rolls, lettuce wraps, brown ginger sauce, and a separate creamy dipping sauce.
This brown ginger dipping sauce also works beyond hibachi dinners. Try it with dumplings, potstickers, spring rolls, and lettuce wraps when you want a bright soy-ginger dip instead of a creamy sauce.

Everyday bowls and meals

  • Rice bowls
  • Noodle bowls
  • Tofu
  • Roasted vegetables
  • Leftover grilled chicken
  • A flexible salmon bowl when you want the sauce with fish

Complete Your Hibachi Night

For a full hibachi-style plate, serve this ginger sauce with fried rice or steamed rice, sautéed zucchini and mushrooms, shrimp or chicken, and one creamy sauce on the side. The ginger sauce brings the bright tang; the creamy sauce brings richness.

A hibachi-style dinner plate with fried rice, shrimp, steak, chicken, zucchini, mushrooms, onion, and a small bowl of brown ginger sauce.
Serve this ginger sauce beside rich hibachi foods. Its ginger, lemon, vinegar, and soy cut through fried rice, seared shrimp, steak, chicken, mushrooms, and buttery vegetables.

Cold leftover rice works especially well because the sauce cuts through the salty, savory flavor. For a fresh base, use this how to cook rice guide before adding shrimp, steak, chicken, tofu, or vegetables.

Optional Warm Drizzle for Bowls and Noodles

Classic hibachi ginger sauce is served cold or at room temperature. But if you want a warmer drizzle for noodles, bowls, or stir-fried vegetables, you can thicken a small portion.

Quick thickened version

  1. Mix ½ teaspoon cornstarch with 1 tablespoon water.
  2. Add ½ cup ginger sauce to a small pan.
  3. Warm over medium-low heat.
  4. Stir in the cornstarch slurry.
  5. Cook for 1–2 minutes, stirring, until lightly thickened.

Heating changes the personality of the sauce. It becomes more of a warm bowl drizzle, and the fresh ginger-onion bite softens. Thicken only what you plan to use right away and keep the rest cold for dipping.

Troubleshooting Ginger Sauce

Fresh ginger and onion can taste strong before they rest. Most problems are easy to fix with a small adjustment.

A troubleshooting board for hibachi ginger sauce with a bowl of brown sauce, lemon wedges, sugar, soy sauce, water, onion, and text explaining flavor fixes.
Fix the sauce in small steps after blending: lemon wakes up a flat batch, chilling softens onion bite, water reduces saltiness, and sugar rounds out too much acid.
ProblemWhy It HappenedHow to Fix It
Too onionyToo much raw onion or not enough resting timeChill for 1 hour. Add a small splash of soy sauce or lemon juice. Use less onion next time.
Overly saltyRegular soy sauce or too much soy sauceAdd 1–2 tablespoons water, a little more onion, or a squeeze of lemon.
Sharp or sourToo much vinegar or lemon juiceAdd ½–1 teaspoon sugar and a small splash of soy sauce.
Flavor feels intenseGinger, onion, vinegar, and lemon are all strongChill the sauce. Add a tiny bit more sugar. Dilute with 1 tablespoon water if needed.
BitterToo much lemon zest or old gingerSkip zest next time. Add a little sugar to round out the bitterness.
Runny textureClassic ginger sauce is naturally looseServe as-is, or use the warm drizzle variation for bowls and noodles.
Chunky textureNot blended enoughPulse 10–20 seconds more, or strain only if you prefer a cleaner pour.
Smooth or foamyOver-blendedLet it settle and stir. Next time, pulse instead of blending continuously.
Separated in the fridgeNormal for a fresh blended sauceShake or stir before serving.

Storage and Make-Ahead

Store the sauce in an airtight jar in the refrigerator and use it within 5 days for the freshest flavor.

Homemade hibachi ginger sauce stored in a glass jar labeled Hibachi Ginger Sauce, with a spoonful of sauce, fresh ginger, garlic, and kitchen ingredients nearby.
Store homemade hibachi ginger sauce in an airtight jar and shake before serving. As it rests, the fresh ginger, onion, and soy-vinegar base can naturally settle.

The flavor is loudest right after blending. After 1 hour in the fridge, the onion and ginger settle down and the soy, vinegar, and lemon taste more balanced. By the next day, the sauce feels rounder, and it is the kind of small jar you end up spooning over leftover rice, cold chicken, or roasted vegetables without planning to.

Shake or stir before serving because the sauce can separate as it sits.

Can you freeze ginger sauce?

You can freeze it in small portions, but the texture will not be as fresh after thawing. The onion and ginger can become slightly watery. For the best dipping texture, make it fresh and refrigerate it instead.

Can you use ginger sauce as a marinade?

Yes, but it is best as a dipping sauce first and a quick marinade second. Use it for shrimp, chicken, tofu, or vegetables when you want a fast ginger-soy flavor.

Because it contains vinegar and lemon juice, do not marinate delicate seafood for too long. Shrimp or fish only needs 10–15 minutes; chicken or tofu can sit for 15–30 minutes.

FAQ

What is the brown sauce at hibachi restaurants?

It is usually ginger sauce: a soy-based dipping sauce made with fresh ginger, onion, vinegar, and lemon. Restaurants commonly serve it with shrimp, steak, chicken, vegetables, noodles, and fried rice.

Is this the same as Benihana ginger sauce?

It is Benihana-style, not the restaurant’s exact formula. The recipe keeps the fresh ginger, onion, soy, vinegar, and lemon profile while using a balanced home-kitchen ratio. Benihana says its signature ginger sauce is prepared fresh and is not sold in stores or bottles. Read Benihana’s note here.

Is ginger sauce the same as yum yum sauce?

No. Ginger sauce is brown, tangy, and soy-based. Yum yum sauce is creamy, usually mayo-based, and pale pink or orange.

Is hibachi ginger sauce the same as ginger salad dressing?

No. Hibachi ginger sauce is a dipping sauce for grilled food and rice. Japanese ginger dressing is usually smoother, often made with carrot, onion, ginger, oil, vinegar, and soy sauce, and served on salad.

Do you serve ginger sauce hot or cold?

Serve it cold, chilled, or at room temperature. It can sit beside hot steak, shrimp, chicken, vegetables, or fried rice, but the sauce itself does not need to be heated.

How long does homemade ginger sauce last?

Use it within 5 days for the freshest flavor. Keep it in an airtight jar in the refrigerator and stir or shake before serving.

Fresh ginger, paste, or powder — which is best?

Fresh ginger is best. Ginger paste can work as a shortcut, but it may contain salt or vinegar. Ground ginger is not recommended because it does not give the same lively flavor.

Can I make ginger sauce without a blender?

Yes. Grate the ginger, mince the onion very finely, add the remaining ingredients to a jar, and shake hard. The sauce will be chunkier and stronger, but it still works for dipping.

Why does my ginger sauce taste too oniony?

Raw onion can taste strong right after blending. Chill the sauce for 1 hour before judging it. If it still tastes too oniony, add a little soy sauce, lemon juice, or sugar to balance it. Next time, use slightly less onion.

What can I serve with ginger sauce?

Serve it with hibachi shrimp, steak, chicken, fried rice, noodles, grilled vegetables, dumplings, spring rolls, tofu, salmon, rice bowls, or roasted vegetables.

Final Tip

The sauce should taste like the first bright bite at the hibachi table: salty, tangy, gingery, and fresh enough to make you want another spoonful of rice or another piece of shrimp. Blend it, chill it if you can, and keep the texture lightly flecked. That little bit of ginger and onion is the whole point.
Posted on 12 Comments

Katsu Curry Rice (Japanese Recipe, with Chicken Cutlet)

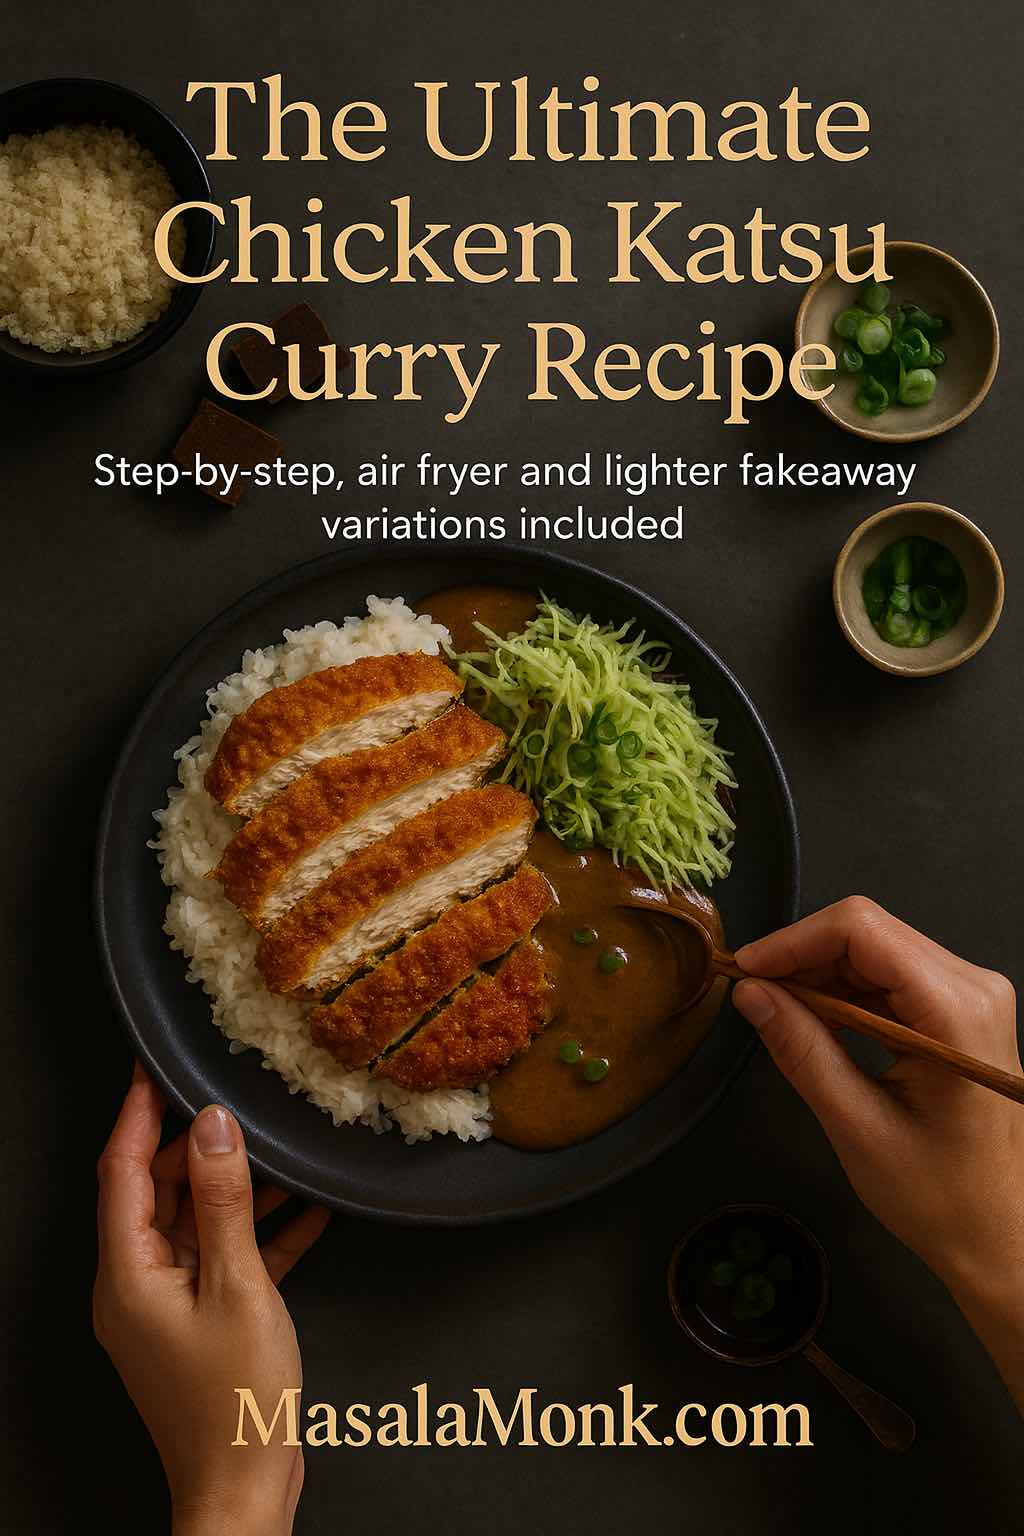
Overhead shot of a plate of chicken katsu curry with sliced crispy chicken, rice, shredded cabbage and curry sauce, with hands holding the dish and spoon, for The Ultimate Chicken Katsu Curry Recipe on MasalaMonk

There are some recipes you cook because you need to eat, and then there are recipes you cook because you want a small event at the table. A good chicken katsu curry recipe always feels like the second kind. You get the sizzle of hot oil, the comfort of a thick Japanese-style curry, and a mound of rice that soaks it all up.

In this post we’ll walk through a detailed, home-cook-friendly chicken katsu curry recipe, then build out variations: pork and tofu versions, air-fryer and lighter “fakeaway” spins, plus quick cheats using curry roux. You’ll also see ideas for what to serve alongside, how to turn leftovers into entirely new meals, and a bit of backstory on how this dish went from Tokyo comfort food to global obsession.


What exactly is chicken katsu curry?

In Japan, katsu curry means curry rice served with a breaded, fried cutlet on top. The cutlet is the “katsu” (usually pork, sometimes chicken), and the curry is a thick, mellow, slightly sweet Japanese-style sauce ladled over rice. According to the entry on katsu curry, the dish is typically built as rice on one side, curry sauce on the other, and sliced cutlet laid neatly across.

Unlike many Indian curries, Japanese curry is usually based on a roux: flour and fat cooked together with curry spices, then loosened with stock to form a glossy, spoon-coating sauce. Over time, Japanese manufacturers turned that idea into the curry roux blocks you see in Asian supermarkets. Writers like Nagi from RecipeTin Japan break down how home cooks now rely on these blocks to make a quick katsu curry with chicken cutlet, using them much like we use bouillon cubes.

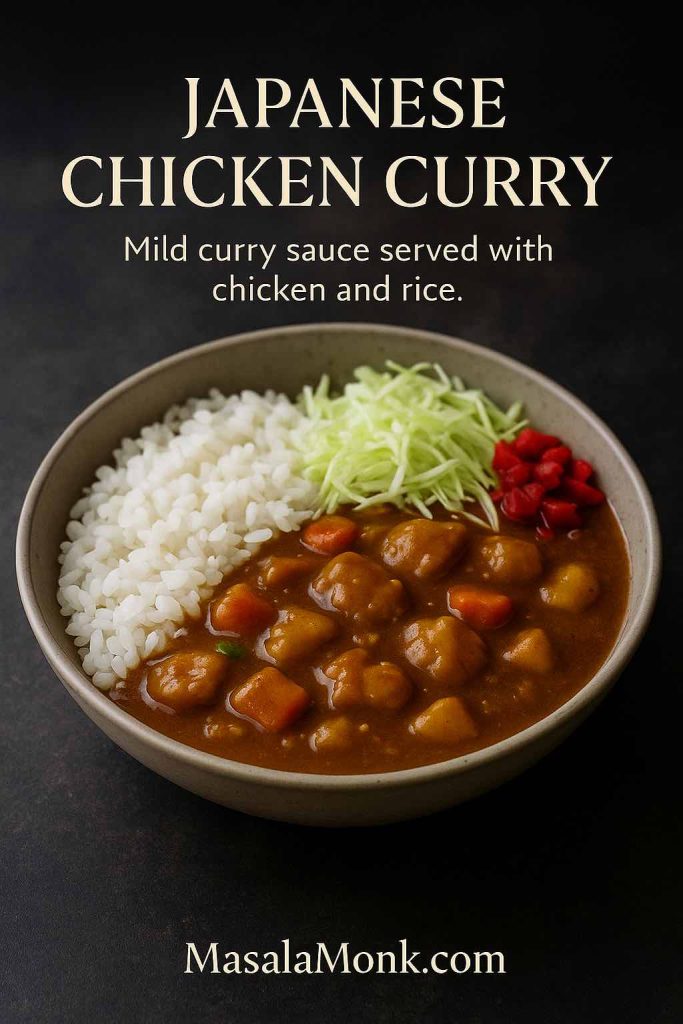
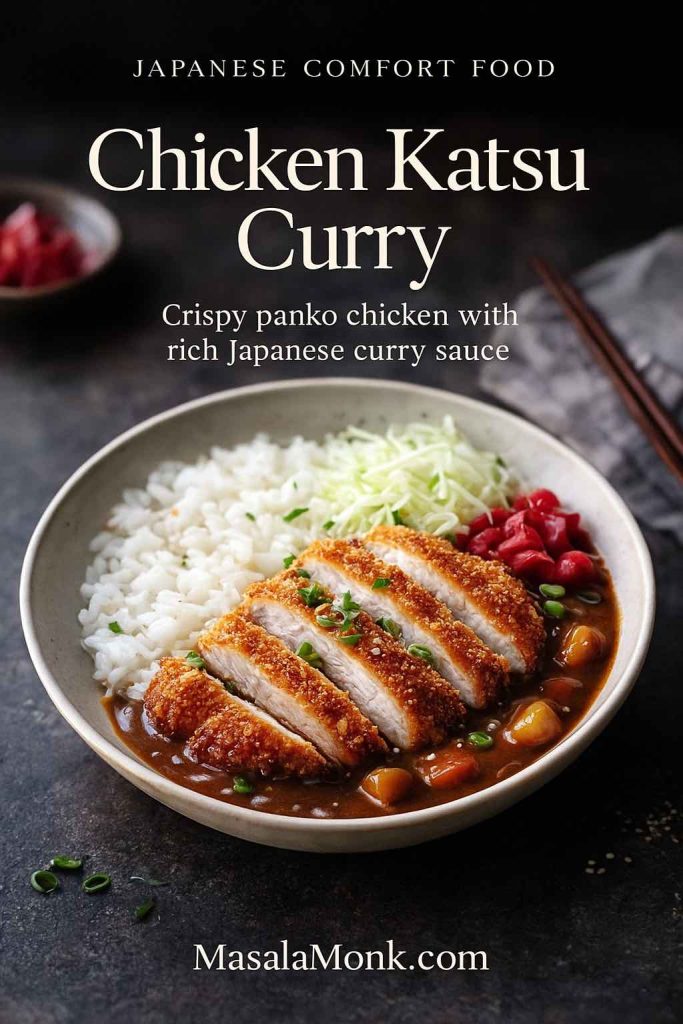
Chicken katsu curry recipe card with sliced panko chicken, rice and Japanese curry in a bowl.
Crispy panko chicken, glossy Japanese curry and fluffy rice – this is the finished chicken katsu curry you’re cooking towards.

Origins of Japanese chicken katsu curry and its recipe

The origin story often credited for katsu curry is surprisingly specific. One popular telling goes back to Grill Swiss, a Western-style restaurant in Tokyo’s Ginza district. A regular customer complained that ordering curry and tonkatsu separately took too much time, so the kitchen served the cutlet on top of the curry, all on one plate. That little act of laziness birthed a dish that spread across Japan, as explored in an essay on the origins of katsu curry.

Outside Japan, the story takes another turn. In the UK especially, “katsu curry” exploded on high-street menus in the 2000s; JETRO even has a piece on how katsu curry conquered the UK, tracing its rise through chains like Wagamama and Wasabi. Somewhere along the way, people started using “katsu” to mean “any Japanese curry” or even just “that brown katsu sauce,” which isn’t how the term is used in Japan at all.

Here, we’ll lean towards the Japanese understanding: crispy breaded cutlet + Japanese curry + rice. Once that foundation is clear, the rest of the variations fall into place very naturally.

Also Read: Crispy Homemade French Fries From Fresh Potatoes (Recipe Plus Variations)


Ingredients for this chicken katsu curry recipe

To make this chicken katsu curry recipe feel doable on a regular weeknight, it helps to see the dish in three parts:

  1. The chicken katsu (breaded cutlet)
  2. The Japanese curry sauce
  3. Rice and toppings

Once you get comfortable with that structure, you can mix and match ingredients, proteins and cooking methods without getting lost.

Chicken katsu (serves 4)

  • 4 small chicken breasts or 2 large, butterflied and pounded to about 1 cm thick
  • 1 teaspoon fine salt
  • ½ teaspoon ground black or white pepper
  • ½ teaspoon garlic powder (optional but tasty)
  • 60 g (½ cup) plain flour
  • 2 large eggs, beaten
  • 120 g (about 2 cups) panko breadcrumbs
  • Neutral oil for frying (sunflower, canola, rice bran)

Panko is key here. Regular breadcrumbs will work, but panko gives you that light, craggy crust you see on proper tonkatsu and classic chicken katsu.

Japanese curry sauce

We’ll build a hybrid sauce: part scratch, part shortcut. You can go fully homemade or lean on curry roux blocks when life gets hectic.

  • 2 tablespoons neutral oil or butter
  • 1 large onion, thinly sliced
  • 2 cloves garlic, minced
  • 1 teaspoon grated fresh ginger
  • 2 medium carrots, cut into chunks
  • 2–3 small waxy potatoes, peeled and cubed
  • 2 tablespoons plain flour
  • 1–2 tablespoons mild curry powder (Japanese curry powder if available)
  • ½ teaspoon garam masala (optional)
  • 750 ml (3 cups) chicken or vegetable stock
  • 1–2 teaspoons soy sauce
  • 1–2 teaspoons honey or sugar
  • 1 tablespoon grated apple or a splash of apple juice
  • Salt to taste

If you prefer, you can replace the flour and curry powder with roughly 4 squares of Japanese curry roux from a pack, stirring them in as described later.

Rice and toppings

  • 300–400 g uncooked short-grain Japanese rice (or any medium/short-grain rice you enjoy)
  • Finely shredded cabbage
  • Sliced spring onions
  • Japanese pickles (fukujinzuke, takuan) if you can find them

The contrast of hot, savoury curry sauce with cool, crisp cabbage might seem unusual if you’re used to Indian curries, but once you try it, it makes perfect sense.

Also Read: Simple Bloody Mary Recipe – Classic, Bloody Maria, Virgin & More


Step-by-step chicken katsu curry recipe

Now let’s bring it all together. Although this plate looks impressive, the workflow is surprisingly logical: curry first, rice while it simmers, then katsu at the end so it stays crisp.

Cook the rice

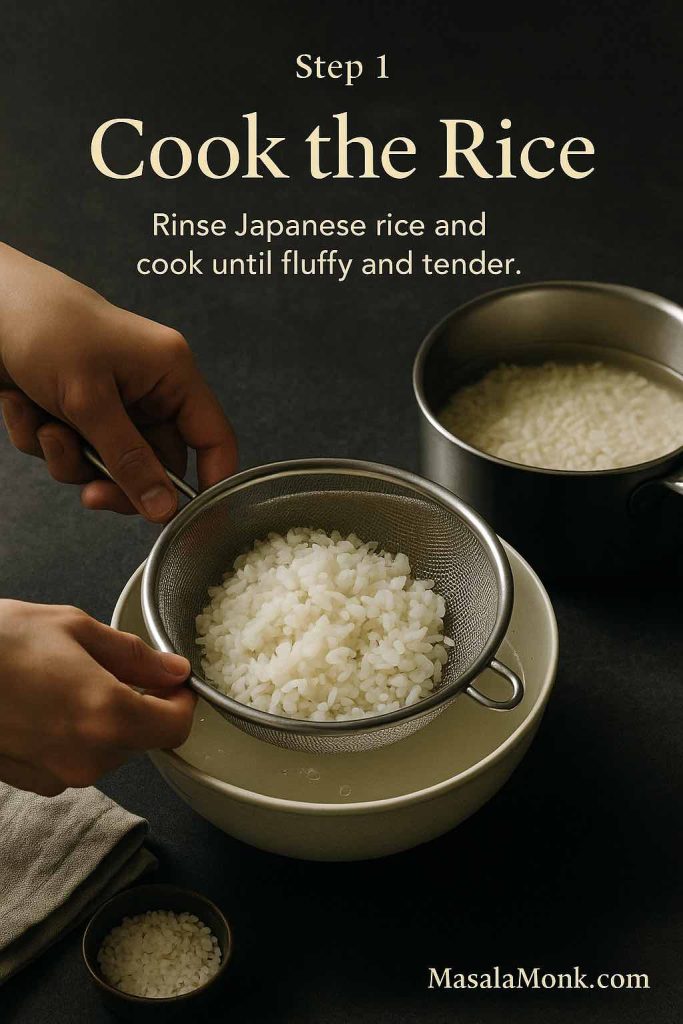
Begin with the rice so it’s ready to welcome everything else. Rinse it in cold water until the water runs mostly clear, then cook in a rice cooker or in a saucepan using the absorption method. The goal is fluffy but slightly sticky grains, similar to what you see in recipes like chicken katsu curry rice from The Woks of Life.

Once it’s done, keep the lid on and the heat off. The rice will stay warm and steam gently while you handle the rest.

Hands rinsing Japanese rice in a sieve over a bowl as part of chicken katsu curry prep.
Start your chicken katsu curry with well-rinsed Japanese rice so every grain cooks up fluffy and ready to soak up the sauce.

Make the Japanese curry sauce

While the rice cooks, start the curry:

Sweat the aromatics

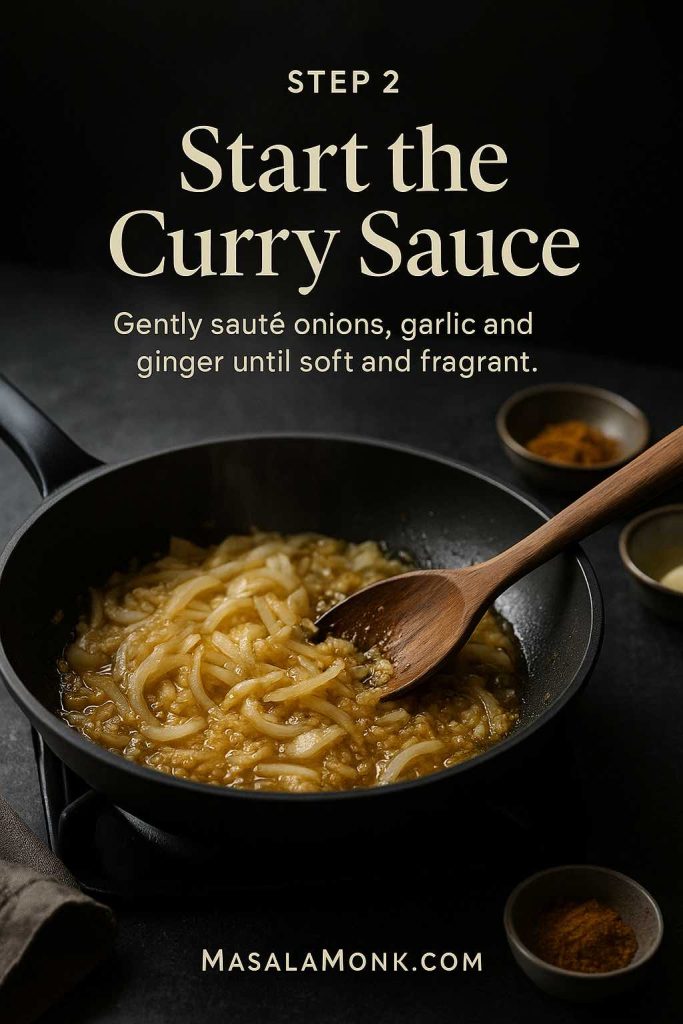
Set a wide saucepan or deep skillet over medium heat and add the oil or butter. Scatter in the sliced onion with a pinch of salt and cook slowly for 8–10 minutes. Stir now and again until the onion softens and turns pale gold. This patient step builds sweetness and depth into your curry.

Add garlic, ginger and vegetables

Stir in the garlic and ginger and cook for about 30 seconds, just until fragrant. Immediately add the carrot and potato chunks, tossing them through the onion mixture for a couple of minutes so they start to absorb those flavours

Onions, garlic and ginger sautéing in a pan to begin the Japanese curry sauce.
Slowly sautéing onions with garlic and ginger builds the sweet, savoury base that makes the katsu curry sauce so comforting.

Create a curry roux base

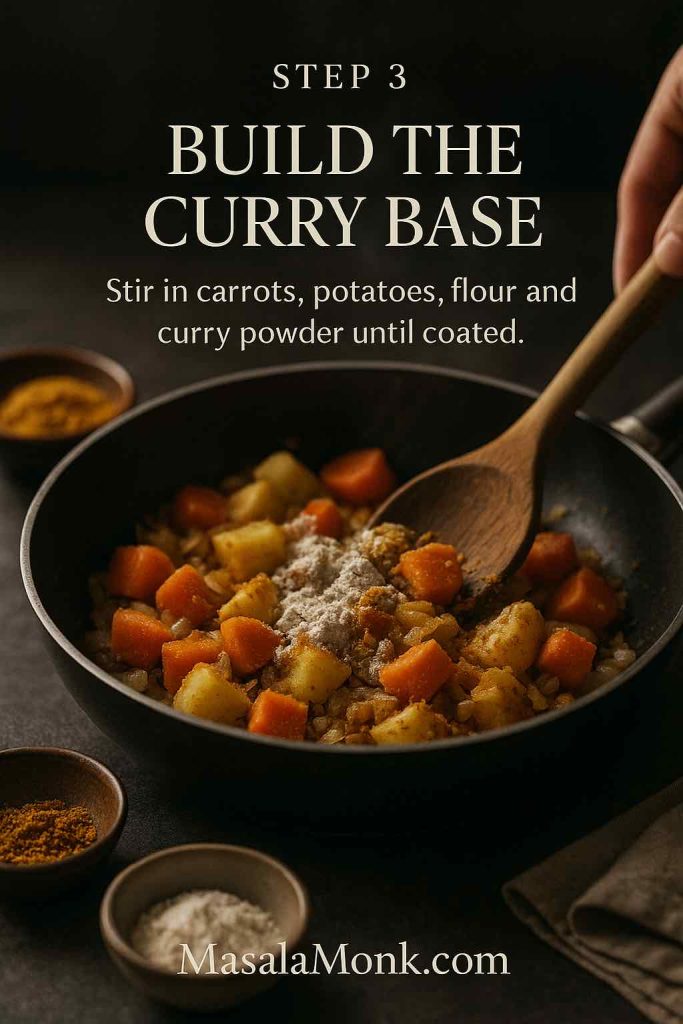
Sprinkle the flour and curry powder over the vegetables. Stir well so everything gets coated and the flour begins to absorb the oil. Let it cook for 1–2 minutes; the mixture will look slightly pasty and stick to the pan. That’s the beginning of your roux.

Build the sauce

Pour in a splash of stock while stirring to release any sticky bits from the bottom, then gradually add the rest, stirring all the while to avoid lumps. Add soy sauce, honey or sugar, and the grated apple. The apple brings gentle sweetness and helps mimic the rounded flavour you get from Japanese curry blocks.

Carrots and potatoes coated with flour and curry powder in a pan for katsu curry base.
Coating the carrots and potatoes in flour and curry powder turns the vegetables into a rich roux that thickens the Japanese curry beautifully.

Simmer until tender

Bring the sauce to a gentle simmer, then lower the heat and cook for 15–20 minutes, stirring occasionally. The vegetables should become tender, and the sauce should thicken into a glossy, spoon-coating consistency. If it ever feels too thick, loosen it with a little extra stock or water.

Adjust the seasoning

Taste and tweak. Perhaps it needs a touch more soy for savoury depth, a pinch of salt, or a little extra honey if your curry powder is particularly sharp. For warmth, sprinkle in garam masala towards the end and simmer for another minute.

At this point, you have a solid Japanese curry base. If you’d like a smoother texture, you can mash some of the potato and carrot against the side of the pan or briefly blend a ladleful and stir it back.

Also Read: French 75 Cocktail Recipe: 7 Easy Variations

Pan of Japanese katsu curry sauce simmering with carrots and potatoes, a ladle lifting the thick glossy curry.
After adding stock, let the Japanese curry simmer gently until it turns thick and glossy and the carrots and potatoes are perfectly tender.

Preparing the chicken katsu

With the curry gently bubbling away, you can turn your attention to the cutlets. This part feels almost like making schnitzel, just with panko and Japanese flavours.

Season and pound the chicken

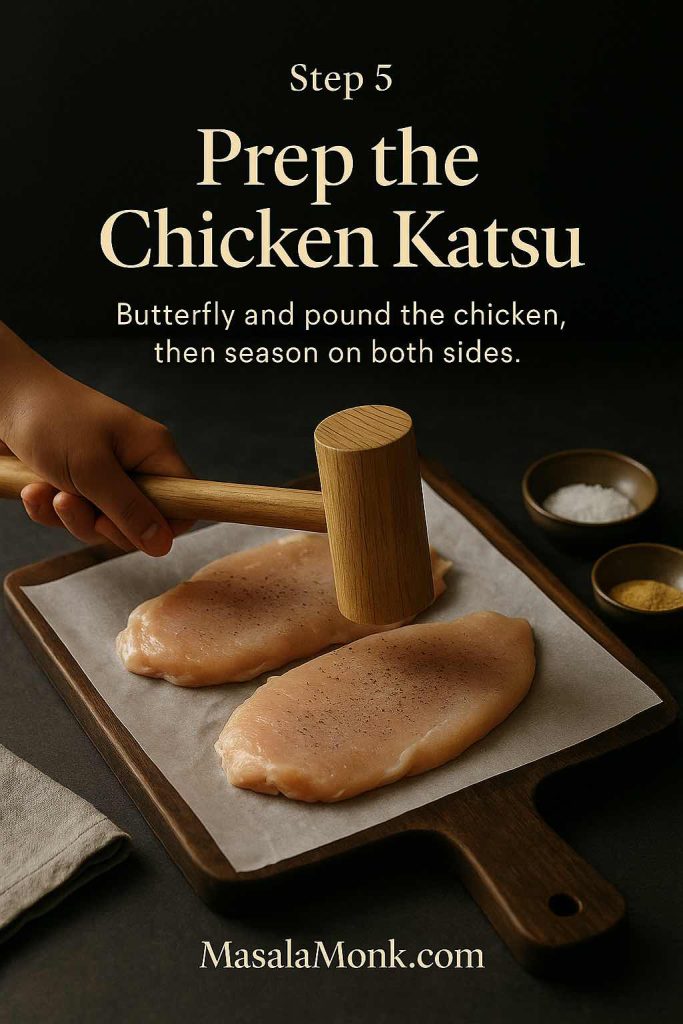
Lay each chicken breast between two sheets of baking paper or cling film. Gently pound with a rolling pin or meat mallet until it’s an even 1 cm thickness. Even thickness means even cooking and less chance of dry patches.

Season both sides with salt, pepper and garlic powder. Leave the chicken to sit while you set up your breading station; the salt will start to work its way in.

Chicken breasts being pounded flat on a board and seasoned for chicken katsu.
Butterfly and gently pound the chicken so it cooks evenly, then season both sides before you start breading the katsu.

Set up the breading station

Arrange three shallow bowls:

  1. Flour in the first
  2. Beaten eggs in the second
  3. Panko breadcrumbs in the third

To keep the crumbs especially crisp, you can mix a small pinch of salt and a drizzle of oil into the panko. The oil helps them brown more evenly in the pan or air fryer.

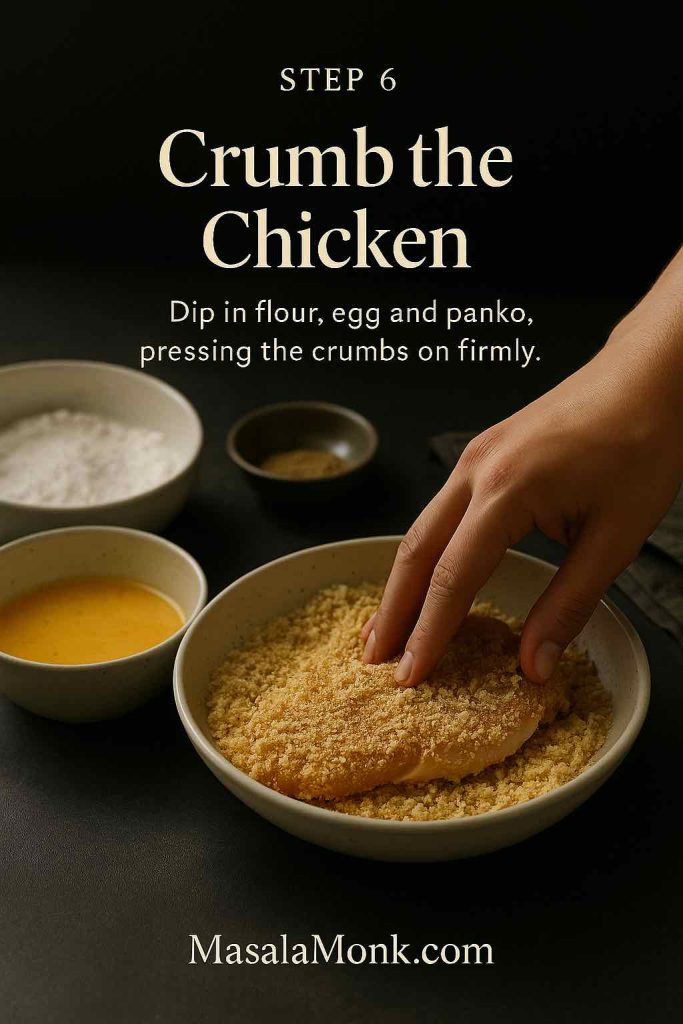
Dip each seasoned cutlet into the flour, shaking off excess so only a thin, even layer remains. Then pass it through the beaten egg, letting any drips fall back into the bowl. Finally, press the cutlet into the panko, turning to coat all sides. Press firmly so the crumbs really hug the surface.

Hand pressing a chicken fillet into a bowl of panko breadcrumbs with bowls of flour and beaten egg beside it for chicken katsu.
Coat each seasoned fillet in flour, egg and a generous layer of panko, pressing the crumbs on firmly so the chicken katsu fries up extra crisp.

Place the breaded cutlets on a wire rack or plate and let them rest for 5–10 minutes. This pause allows the coating to hydrate slightly and stick better, reducing the risk of it sliding off in the oil.


Frying or air-frying the katsu

A hallmark of any good chicken katsu curry recipe is that contrast between a juicy centre and a shatteringly crisp crust. There are two main paths to get there: traditional frying or a lighter air-fryer version.

Shallow or deep-frying

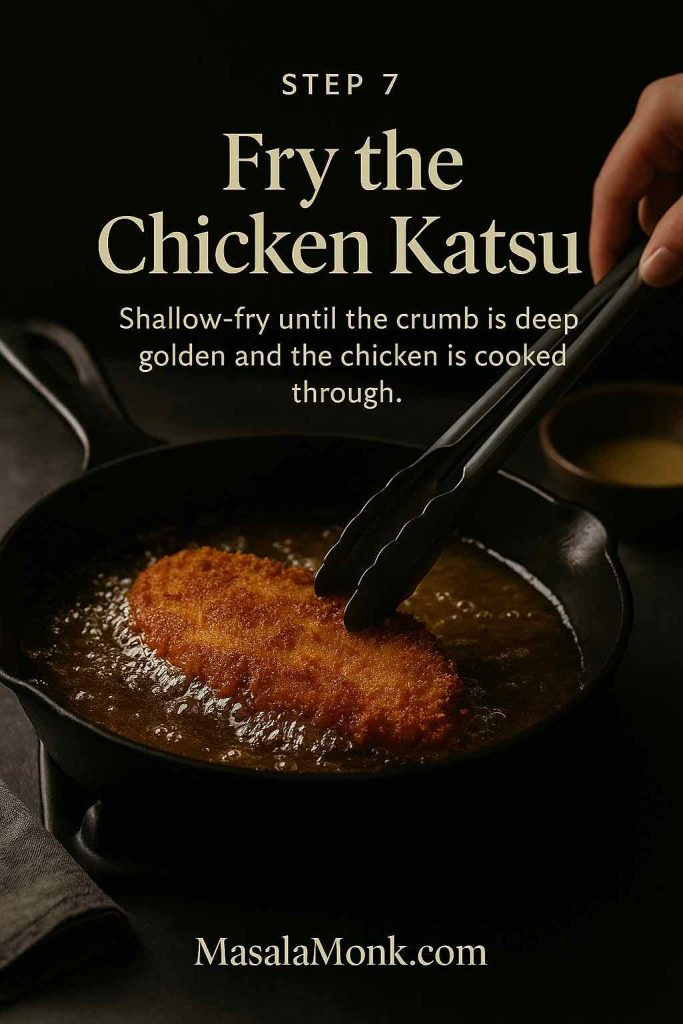
Set a large skillet or saucepan over medium-high heat and pour in enough oil to reach 1–2 cm up the sides. Heat until a breadcrumb dropped in the oil sizzles immediately and turns golden within about 30 seconds (around 170–180°C).

Carefully lay in the cutlets, two at a time if your pan is large. Fry for roughly 3–4 minutes on the first side until deep golden, then flip and cook another 3–4 minutes. As they fry, adjust the heat to keep the colour even; if they’re browning too quickly, lower the temperature slightly.

Once they’re beautifully golden and cooked through, transfer each cutlet to a rack or paper-towel-lined tray. Sprinkle with a tiny pinch of salt while they’re still hot.

Golden panko-coated chicken katsu frying in hot oil in a skillet, being turned with tongs.
Shallow-fry the crumbed chicken katsu in hot oil until the coating is deep golden and the meat inside is just cooked through and juicy.

Air-fryer recipe for chicken katsu curry

If you’re craving something lighter without sacrificing crunch, an air fryer is extremely handy. Food bloggers like CJ Eats and Okonomi Kitchen have shown that air fryer chicken katsu and air-fried panko cutlets can emerge every bit as crisp when cooked at around 190–200°C.

To air-fry:

  1. Lightly mist both sides of each breaded cutlet with oil spray.
  2. Preheat the air fryer to 190–200°C.
  3. Arrange the cutlets in a single layer, leaving a little room around each one.
  4. Cook for 12–15 minutes, flipping halfway, until golden and cooked through.

Because every air fryer model is slightly different, peek a little earlier the first time you make this. Once you’ve dialled in your perfect timing, this method becomes a reliable “fakeaway” option: all the joy, far less grease.

Also Read: Peanut Butter Cookies (Classic Recipe & 3 Variations)


Assembling your bowl of chicken katsu curry

Now comes the best part: putting it all together so every bite has crunch, sauce and rice.

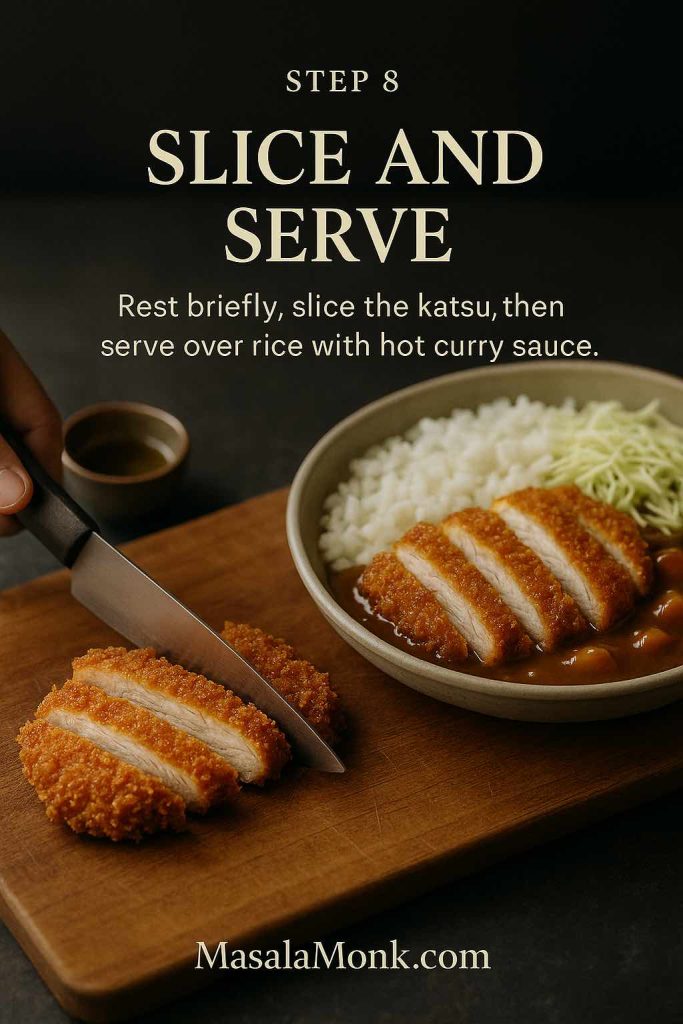
  1. Slice the katsu
    Place each cutlet on a board and slice across on a slight diagonal into 1.5–2 cm strips. Keep the pieces in order so you can re-create that neat “fan” on the plate.
  2. Plate the rice and curry
    Spoon a generous mound of rice into a shallow bowl or wide plate. Ladle the hot curry sauce alongside, letting a bit of it seep into the rice but keeping some white patches for contrast.
  3. Lay the katsu on top
    Lift the sliced katsu with a wide knife and transfer it onto the plate, arranging it across the curry and rice. You want the bottom edges to catch a little sauce while the tops stay crisp, just like in that idealised katsu curry plate you see in Japanese cookbooks and in dishes like the one on The Woks of Life.
  4. Add fresh toppings
    Finish with a tumble of finely shredded cabbage, a sprinkle of sliced spring onions and, if you have them, a spoonful of pickles. The fresh crunch cuts through the richness and keeps the whole dish from feeling heavy.
Sliced chicken katsu on a board next to a bowl of rice, curry sauce and cabbage, showing the final step of serving chicken katsu curry.
Let the fried chicken katsu rest for a moment, then slice it into neat strips and lay it over rice with plenty of hot Japanese curry sauce.

At this stage, your classic chicken katsu curry recipe is complete. Nevertheless, once you’ve done it once or twice, it’s hard to resist playing with variations.

Also Read: Green Tea Shot with Jameson | Recipe & 10 Variations


Variations on the chicken katsu curry recipe

Because this dish is modular, it’s incredibly forgiving. A small swap in the sauce, a different protein, or a new cooking method can produce a meal that feels distinct without forcing you to learn an entirely new recipe.

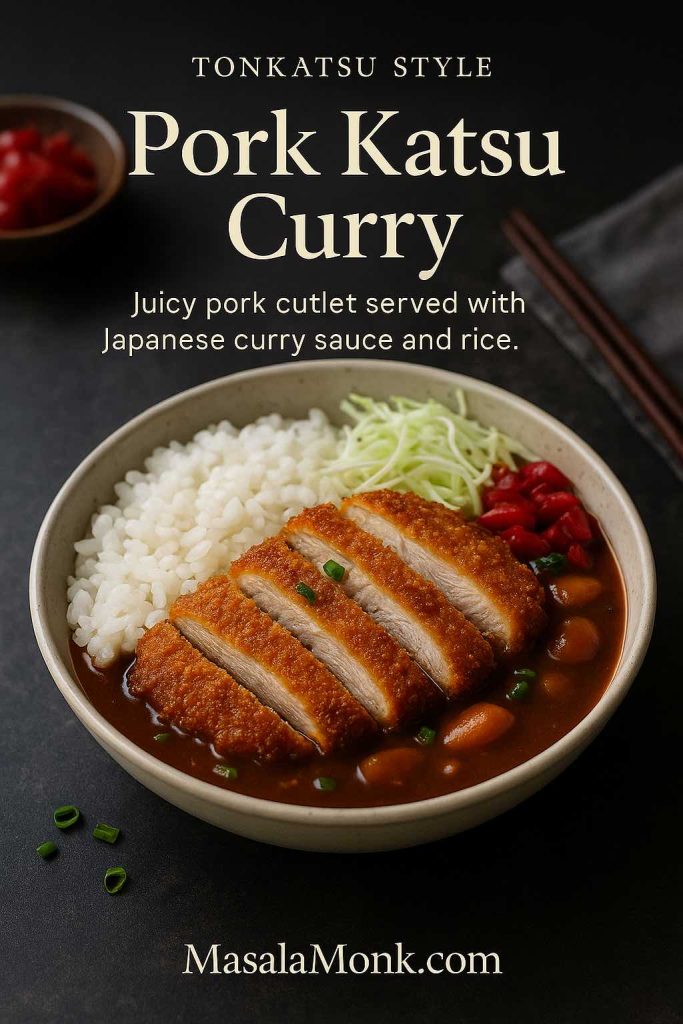
Pork katsu curry (tonkatsu)

Strictly speaking, the original Japanese katsu curry is usually made with pork. To follow that path:

  • Use boneless pork loin or fillet sliced about 1–1.5 cm thick.
  • Pound lightly to even them out.
  • Season, bread and cook exactly as you would the chicken.
Bowl of pork katsu curry with sliced golden pork cutlet, Japanese curry sauce, rice, shredded cabbage and pickles.
Make a classic tonkatsu-style pork katsu curry by swapping the chicken for a juicy pork cutlet and serving it with the same rich Japanese curry sauce and rice.

Pork tends to cook slightly faster than chicken breast at the same thickness, so start checking for doneness after 3 minutes per side if you’re shallow-frying. Slice, serve over rice and curry, and you’ve got a comforting tonkatsu curry that leans a little richer and more savoury.

Plain Japanese chicken curry recipe (no katsu)

On evenings when frying feels like too much effort, you can turn this chicken katsu curry recipe into a simpler Japanese chicken curry.

Bowl of Japanese chicken curry with tender chicken pieces, rice, shredded cabbage and pickles in a creamy brown curry sauce.
When you don’t feel like frying, this Japanese chicken curry gives you the same cosy flavours as katsu curry with tender chicken simmered directly in the sauce.

Instead of breading the chicken:

  1. Cut the raw chicken into bite-sized pieces.
  2. After the onions, carrots and potatoes have simmered for about 5 minutes in the curry base, stir in the chicken.
  3. Simmer for another 10–15 minutes, until the chicken is just cooked and the sauce is thick.

You lose the crunch, but you gain a one-pot comfort bowl that sits somewhere between Japanese curry and Indian-inspired dishes like a lighter spinach chicken curry.

Recipe for Slimmer “fakeaway” chicken katsu curry

If you’re tracking calories or simply don’t love the idea of deep-frying on a Tuesday night, a slimmer version keeps the flavour but trims the excess.

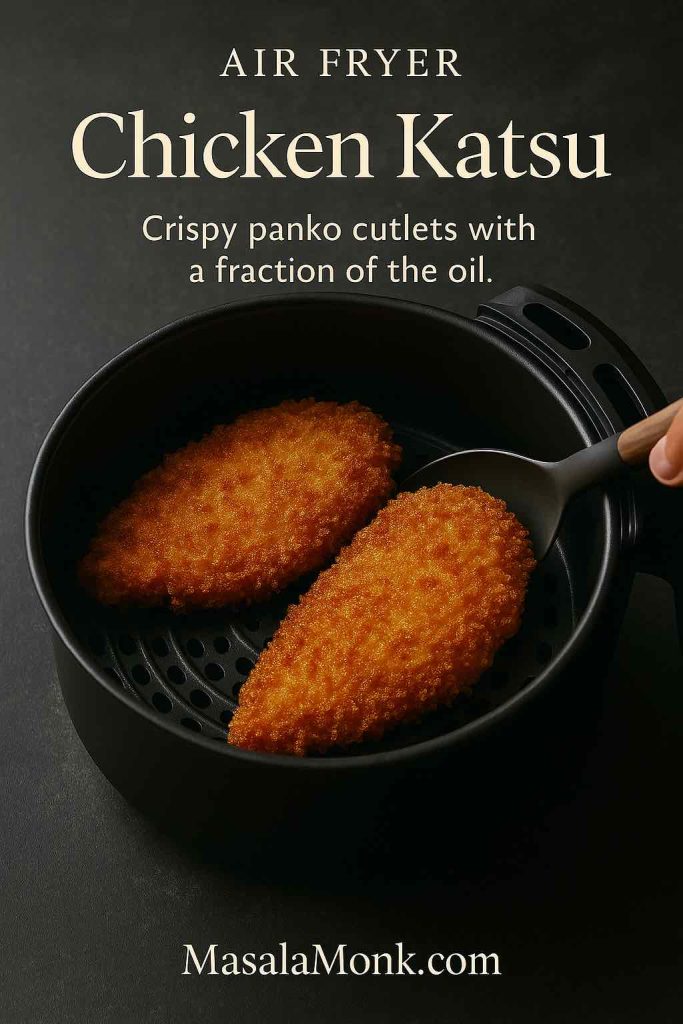
Two golden panko-coated chicken katsu cutlets in a black air fryer basket, showing the air fryer version of chicken katsu.
Use the air fryer for chicken katsu that’s just as crisp and juicy, but made with a fraction of the oil—ideal for lighter katsu curry nights.

You can:

  • Air-fry or oven-bake the breaded cutlets on a rack, using oil spray instead of pouring centimetres of oil into a pan.
  • Drop the oil in the curry base to 1 tablespoon and rely more on stock and vegetables for body.
  • Serve with extra shredded cabbage and steamed vegetables, and slightly reduce the rice portion.

On weeks when you’re deliberately alternating richer dinners with lighter ones, you might pair this “fakeaway” with a genuinely lean meal on another night, such as a Kerala-style coconut vegetable stew or a big pot of authentic Punjabi rajma.

Vegetarian and vegan katsu curry

Katsu doesn’t have to mean meat. In fact, the structure of this dish lends itself beautifully to vegetarian and vegan cooking.

Tofu katsu

  • Press firm tofu for at least 20–30 minutes to remove excess moisture.
  • Slice into slabs about 1.5 cm thick.
  • Season lightly with salt and a splash of soy sauce.
  • Dust with flour, dip into a plant-based milk and flour mixture or aquafaba instead of egg, then coat in panko and fry or air-fry.

Serve the tofu katsu over the same curry sauce made with vegetable stock, and you have a fully meat-free plate that still delivers serious crunch.

Vegetarian katsu curry with sliced tofu katsu, rice, shredded cabbage and Japanese curry sauce in a bowl.
Swap the chicken for tofu or vegetable katsu and you still get all the crunch and rich Japanese curry flavour in this vegetarian katsu curry bowl.

Vegetable katsu

Root and starchy vegetables make wonderful katsu bases:

  • Thick slices of aubergine
  • Rounds of sweet potato or pumpkin
  • Sturdy slabs of celeriac

Par-cook them briefly in boiling water or the steamer if they’re very firm, then cool, bread and fry. The sweet, soft interior surrounded by crisp crumbs is addictive.

For readers who are exploring plant-based eating more broadly, it’s worth looking at seitan and other high-protein meat alternatives. Guides like the one on seitan as “the vegan’s chicken” show just how many curry-style dishes can be made without animal protein at all.

Also Read: ‘Tofu’ Instead of ‘Eggs’: 5 High Protein Plant-Based Breakfast Ideas


Sauce options: scratch, roux blocks and katsu dipping sauce

Many people first fall in love with this dish because of the sauce. It’s gentle, cosy and not as fiery as some Indian curries, which makes it ideal for families and spice-shy eaters.

Fully from-scratch Japanese curry sauce

The version at the start of this post is already close to a scratch sauce: you’re making a roux in the pan, then adding stock and flavourings. To lean even more into that direction, you can:

  • Toast whole spices like coriander, cumin and black pepper gently before grinding them.
  • Add a teaspoon of tomato paste with the garlic and ginger for deeper colour.
  • Stir in a little grated dark chocolate or a dab of miso at the end for extra umami.

Food writers who specialise in Japanese home cooking, like those behind RecipeTin Japan, often mention how this style of roux-based curry evolved from European-influenced cooking in the late nineteenth century. Today, it feels as firmly Japanese as miso soup or ramen.

Using Japanese curry roux blocks

On busy nights, it’s absolutely fine to lean on curry blocks. The technique is slightly different:

  1. Sauté onion, garlic, ginger and vegetables as before.
  2. Add stock and simmer until the vegetables are almost tender.
  3. Turn off the heat and stir in rough chunks of curry roux until they dissolve completely.
  4. Turn the heat back on and let the sauce bubble gently until thick and glossy.

Different brands offer varying levels of spice and sweetness, so you may find one that becomes “your” flavour. You can still customise it with a splash of soy, a little grated apple or a pinch of garam masala.

Simple katsu dipping sauce

Sometimes, when people search for a chicken katsu curry recipe, what they really want is the crispy cutlet with a thick, tangy brown sauce rather than the full curry. That sauce is tonkatsu or katsu sauce, and it’s very easy to replicate at home.

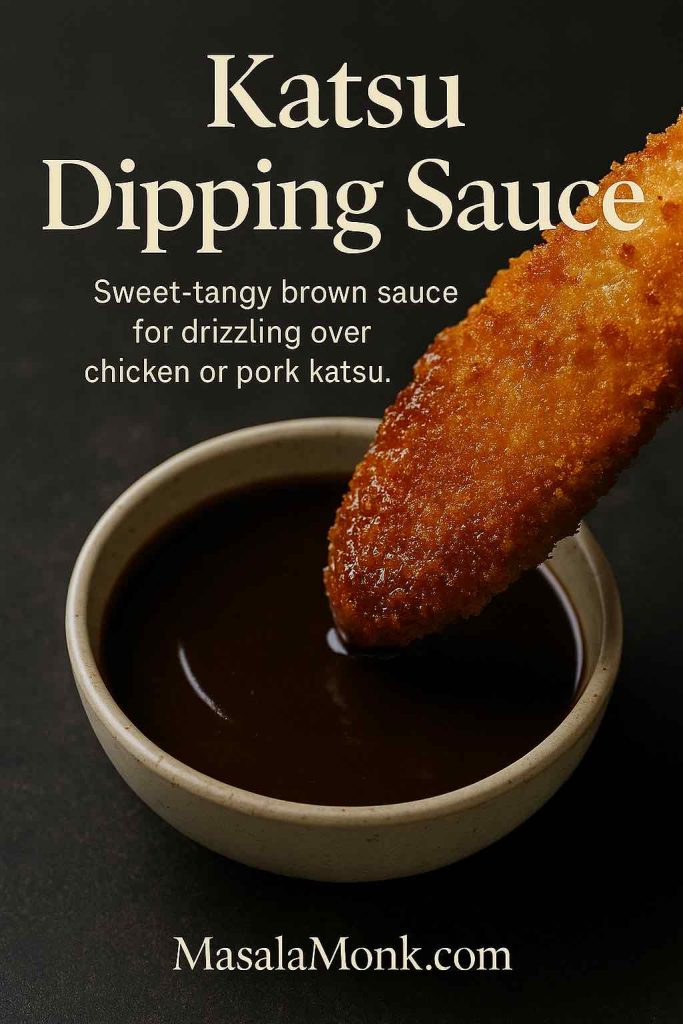
Crispy piece of katsu being dipped into a small bowl of dark katsu dipping sauce.
This quick katsu dipping sauce adds a sweet-tangy hit that’s perfect for drizzling over hot chicken or pork katsu, even when you’re not serving it with curry.

Stir together:

  • 2 tablespoons ketchup
  • 1 tablespoon Worcestershire sauce
  • 1 teaspoon soy sauce
  • ½–1 teaspoon sugar or honey
  • Optional: a tiny splash of rice vinegar or lemon juice

Taste and adjust until it’s sweet-tangy and savoury. This is perfect drizzled over sliced katsu, whether you’re serving it with curry or simply over a bowl of rice and shredded cabbage.

Also Read: Mustard Fish Curry Bengali Style (Shorshe Bata Rui Maach)


What to serve with chicken katsu curry

Because this dish is already a full meal in a bowl, you don’t need elaborate side dishes. That said, a few smart additions can turn dinner into more of a Japanese-inspired feast or an easy weekend gathering.

Fresh, cooling sides

Shredded cabbage and pickles are the traditional companions, but you can easily widen the spread.

A crisp salad with a yoghurt-based dressing works beautifully. For instance, you could borrow the idea of a garlicky, herb-heavy yoghurt from a mezze table and adapt it to your pantry. If that appeals, you might enjoy exploring a master recipe like the one for Greek tzatziki with ten variations, then adjust the herbs and garlic to suit your katsu night.

On evenings when you’re hosting a group and want nibbles on the table while the curry simmers, a warm bread and dip platter works nicely. Something like a spinach dip collection with cold and baked options gives guests something to scoop up with bread or veggie sticks while you focus on slicing katsu.

Drinks that pair well with katsu curry

Rich, fried food is often happiest next to drinks that are bright, slightly acidic or effervescent.

If you enjoy cocktails, a citrus-forward gin drink can cut right through the creaminess of the curry sauce. A set of creative gin cocktail recipes gives you plenty of options, from herbaceous to lightly sweet, so you can choose something that suits the mood.

For brunchy or celebratory lunches, leftover katsu can top rice bowls or even appear beside scrambled eggs. In that case, a sparkling drink like a mimosa fits the vibe. A guide to ten easy mimosa variations shows how quickly you can shift from classic orange to seasonal twists like apple or berry.

If you prefer something bolder and tomato-based, especially on a lazy weekend, a well-made Bloody Mary is another fun option. A recipe collection that covers classic, tequila-based and virgin Bloody Mary versions lets everyone at the table pick their own level of kick and alcohol.

Desserts that follow katsu curry beautifully

After a salty-sweet, savoury meal like this, a cool and milky dessert is incredibly satisfying. One excellent option is a slice of tres leches cake: soft sponge soaked in three kinds of milk, chilled and topped with whipped cream. The gentle sweetness and cold temperature balance the warmth and spice of the curry.

On cooler days, you might lean towards baking that fills the kitchen with warm spice. Having a jar of homemade pumpkin pie spice ready makes that as simple as stirring a spoonful into your batter. A guide to mixing your own pumpkin pie spice blend shows how to get the cinnamon-nutmeg-ginger balance just right.

Also Read: Baked Jalapeño Poppers (Oven) — Time, Temp & Bacon Tips


Make-ahead, freezing and leftovers

One of the biggest advantages of mastering a detailed chicken katsu curry recipe is that it’s extremely meal-prep friendly. A little planning turns a single cooking session into multiple easy meals.

Tray of uncooked breaded katsu cutlets beside labeled containers of katsu curry sauce, showing meal prep for freezer-friendly katsu curry.
Bread the chicken katsu and portion the curry sauce into containers, then freeze them so you can throw together an easy katsu curry bowl any weeknight.

Freezing katsu for later

You can freeze katsu either before or after cooking:

  • Before frying
    • Bread the chicken as usual.
    • Arrange the cutlets in a single layer on a tray and freeze until solid.
    • Transfer to freezer bags or containers with baking paper between layers.
    • Cook from frozen in the oven or air fryer, adding a few minutes to the cooking time.
  • After frying
    • Let the cooked cutlets cool completely.
    • Wrap each one tightly or place in an airtight container.
    • Reheat in the oven or air fryer until hot and crisp again.

The key is to avoid microwaving, which tends to make the crust soggy.

Storing and reheating the curry sauce

The curry sauce keeps well:

  • In the fridge: up to 3–4 days in a sealed container
  • In the freezer: up to 1–2 months, ideally in portioned tubs

When reheating, warm gently over low heat, adding a splash of water or stock if it has thickened in the fridge.

Turning leftovers into new meals

Leftover components are a gift. A few ideas:

  • Katsu rice bowls
    Warm the curry and rice, then reheat sliced katsu in the oven or air fryer. Finish with a soft-boiled or jammy egg (an air fryer makes those straightforward; recipes for air-fried hard-boiled eggs walk you through timing and peeling tricks).
  • Breakfast with a twist
    The morning after a rich dinner, you might want something lighter but still satisfying. High-protein overnight oats with multiple flavour variations are simple to prep in jars while the curry simmers; then breakfast is sorted for the next day or two.
  • Second-day curry night
    Use leftover curry sauce as a base and add new ingredients: chickpeas, roasted vegetables, or seared paneer. You can even pour it over crisp roasted potatoes for a Japanese twist on curry chips, though you may find you don’t miss the chips at all once you’ve fallen in love with katsu.

If your overall routine includes training, fasting days or careful hydration around heavier meals, there’s room to think about drinks as well as food. Homemade electrolyte mixes, such as the ones in MasalaMonk’s recipes for natural electrolyte drinks or fasting-friendly electrolyte blends, can sit in the fridge ready for gym sessions or long walks.


A brief look at katsu curry’s journey

To round things out, it’s worth taking a step back and appreciating how this humble plate of rice, curry and cutlet travelled so far.

Historically, Japanese curry itself is a product of global zigzagging. Articles like the one on how India gave Japan its beloved katsu curry describe how British naval officers introduced an Anglicised form of Indian curry to Japan in the late nineteenth century. Japanese cooks then adapted it, thickening the sauce, toning down the heat and eventually turning it into something that feels distinctly Japanese.

Katsu, on the other hand, came from Western cutlet culture. When those two strands met on a plate at places like Grill Swiss in Ginza, the result was a dish that bridged European technique and Japanese comfort. Writers at Food Sake Tokyo talk about how katsu curry became popular with students, office workers and families precisely because it was affordable, filling and easy to serve from canteens.

Later, as Japan’s food culture spread abroad, katsu curry became a kind of ambassador dish, particularly in the UK where fast-casual restaurants turned it into an icon. The story of that journey is laid out in JETRO’s piece on katsu curry taking over British menus, and you can see its influence every time a non-Japanese restaurant lists “katsu” as shorthand for “Japanese-ish curry.”

Cooking it at home, though, brings the focus back to what made the dish appealing in the first place: the tactility of breading and frying, the inhale of curry steam when you lift the lid, the first bite where crisp crumb, soft rice and velvety sauce come together.


Bringing it all together

By now, you’ve seen that a chicken katsu curry recipe is really a template:

  • A comforting Japanese curry sauce, built either from scratch or with roux blocks
  • A crisp, breaded cutlet – chicken, pork, tofu or vegetables
  • A bowl of rice and a handful of crunchy toppings to tie it all together

Once you’ve cooked it once, you can improvise almost endlessly: swap in air-fried cutlets for a lighter take, lean into vegetarian versions, or double the curry and freeze half for an easy future dinner. You can follow it with Indian favourites like creamy butter chicken on another night, or pivot into cocktails and dessert with a lemon drop martini and a tray of tres leches cake when you’re feeding friends.

Most importantly, this is the kind of dish that rewards repetition. The second or third time you make it, your hands move more confidently: you salt the rice water without thinking, you know exactly when the curry is thick enough, and you recognise the moment the katsu turns the right shade of gold. That’s when a recipe stops being just words on a screen and becomes part of your personal kitchen repertoire—ready to be pulled out whenever you want the table to go a little quiet on the first bite.

FAQs about Katsu Curry Recipe with Chicken

1. What is chicken katsu curry, exactly?

Chicken katsu curry is a Japanese-style dish made of three parts: a crispy breaded chicken cutlet (chicken katsu), a thick and mildly spiced Japanese curry sauce, and steamed rice. In a classic chicken katsu curry recipe, the cutlet is sliced and served on top of rice, with the curry ladled to one side so the crumbs stay partly crisp while still soaking up the sauce.


2. Is chicken katsu curry Japanese or Indian?

Chicken katsu curry is considered Japanese, although the curry itself was originally inspired by Indian flavours that arrived via Britain. Over time, Japan developed its own curry powder blends, curry roux blocks and a characteristic thick, mellow sauce. As a result, a chicken katsu curry recipe today tastes very different from most Indian curries, with less heat and more comforting sweetness.


3. How spicy is a typical chicken katsu curry recipe?

Generally, chicken katsu curry is mild to medium in heat. Japanese curry powders and roux mixes are often sold in mild, medium and hot versions, but even the hot styles are usually gentler than many Indian or Thai curries. If you prefer a mild chicken katsu curry, use a mild curry powder and skip extra chilli; if you enjoy more kick, add chilli flakes, fresh chillies or a hotter curry powder while still keeping the sauce thick and cosy.


4. Can I make chicken katsu curry without deep frying?

Yes, absolutely. A chicken katsu curry recipe works very well with air-fried or oven-baked cutlets instead of deep-fried ones. Coat the chicken in flour, egg and panko as usual, then bake on a rack or cook in an air fryer with a light spray of oil until golden and cooked through. This method keeps the katsu crunchy but uses far less oil, which suits anyone looking for a lighter version or a “fakeaway” style katsu curry at home.


5. How do I make katsu curry sauce from scratch?

To make katsu curry sauce from scratch, start by slowly frying sliced onions in a little oil or butter until soft and lightly golden. Next, add garlic, ginger, carrots and potatoes, then sprinkle over flour and curry powder to form a simple roux. Gradually whisk in stock, then season with soy sauce, a touch of sugar or honey and a little grated apple. Simmer until the vegetables are tender and the sauce is thick and glossy. This forms the heart of any homemade chicken katsu curry recipe.


6. Can I use curry roux blocks, powder, paste or cubes for katsu curry?

You can use any of these, as long as you adjust the liquid and seasoning. Curry roux blocks and cubes are the most traditional for Japanese curry; they already contain flour, fat and spices, so you just dissolve them into stock after sautéing your vegetables. Even curry powder works well if you cook it with flour and oil to form a roux. You can pick up curry paste as well, which is stronger, so use less and balance it with extra sweetness and stock. In every case, taste the katsu curry sauce towards the end and adjust thickness and flavour so it coats the back of a spoon.


7. How can I make a healthier or Slimming World–style chicken katsu curry?

A lighter chicken katsu curry recipe focuses on reducing oil and increasing vegetables. First, bake or air-fry the breaded chicken instead of deep frying it, using oil spray instead of submerging it in oil. Second, use a smaller amount of fat in the curry base and rely on onions, carrots and potatoes for body, boosting flavour with stock, soy and spices rather than cream. Finally, serve the curry with extra shredded cabbage or steamed vegetables and a slightly smaller portion of rice. These small shifts keep the katsu experience but bring the meal closer to Slimming World–style “fakeaway” comfort food.


8. How do I make vegetarian or vegan katsu curry?

To make vegetarian or vegan katsu curry, replace the chicken with tofu or vegetables and use vegetable stock in the curry sauce. For tofu katsu, press firm tofu, slice it into slabs, then bread and fry or air-fry it just like chicken. If you are making vegetable katsu, use slices of aubergine, sweet potato or pumpkin. And for a fully vegan version, swap the egg wash for plant milk mixed with a little flour or use aquafaba (chickpea water) to help the panko stick. As long as you check that your curry roux or powder contains no animal products, you can enjoy a plant-based katsu curry that still feels indulgent.


9. Can I use pork or other meats instead of chicken in this katsu curry?

Definitely. In fact, pork katsu curry (tonkatsu curry) is probably the most common version in Japan. Simply substitute chicken with boneless pork loin or fillet, pound it slightly, then bread and cook in the same way. You can also adapt the method for turkey, firm white fish or even prawns, although you may need to tweak cooking times. Since the curry and rice remain the same, changing the protein is a simple way to create new meals from the same basic katsu curry recipe.


10. What are the best chicken cuts and breading tips for katsu?

Chicken breast is the most popular choice for katsu because it pounds out evenly, slices neatly and cooks quickly. However, chicken thigh cutlets give a juicier result if you don’t mind trimming them a bit. For breading, start with well-dried, evenly pounded pieces, then follow a flour–egg–panko sequence. Press the crumbs on firmly and let the coated chicken rest for a few minutes before cooking so the breading adheres. This approach gives a crisp, even crust that doesn’t slide off when you slice the katsu for your curry bowl.


11. Can I freeze chicken katsu curry and how should I reheat it?

You can freeze both components, but it’s best to freeze them separately. Freeze the breaded chicken either raw (before frying) or cooked and cooled; in both cases, reheat in an oven or air fryer so the crust becomes crisp again. Freeze the curry sauce in containers, leaving a little space at the top, and defrost it gently on the stove, adding a splash of water or stock if it has thickened. When you’re ready to eat, warm fresh rice, reheat the katsu and curry, and assemble as usual. This way, a homemade chicken katsu curry recipe becomes an easy grab-from-the-freezer dinner.


12. Is chicken katsu curry halal and how can I adapt it?

Chicken katsu curry can be halal as long as all ingredients meet halal requirements. Use halal-certified chicken, ensure the stock contains no non-halal meat or alcohol, and avoid adding mirin or sake to the curry sauce. The breading ingredients (flour, eggs, panko) are usually fine, so the main considerations are the meat and any liquids used for flavour. Once those are checked, the rest of the chicken katsu curry recipe can stay the same, giving you a halal-friendly version of this Japanese comfort dish.

Posted on 2 Comments

Authentic Butter Chicken Recipe (Murgh Makhani) Creamy and Flavorful

If there’s one dish that defines North Indian comfort food, it’s Butter Chicken. Known locally as Murgh Makhani, this iconic dish is rich, creamy, mildly spiced, and loaded with flavor. Whether you’re making it for a dinner party or a cozy night in, this recipe will deliver restaurant style butter chicken right from your home kitchen.

Ingredients

For Chicken Marination:

  • 500g boneless chicken (thighs preferred), cut into bite-sized pieces
  • 1/2 cup thick yogurt (curd)
  • 1 tbsp lemon juice
  • 1 tbsp ginger-garlic paste
  • 1 tsp red chili powder (Kashmiri for color, regular for heat)
  • 1/2 tsp turmeric
  • 1 tsp garam masala
  • Salt to taste

For the Makhani (Butter) Gravy:

  • 2 tbsp butter (plus 1 tbsp for later)
  • 1 tbsp oil
  • 1 large onion, chopped
  • 2 cups tomatoes, roughly chopped or 4 medium ripe tomatoes
  • 8–10 cashews
  • 1 tbsp ginger-garlic paste
  • 1–2 green chilies (optional)
  • 1 tsp red chili powder (Kashmiri for color)
  • 1 tsp sugar (balances acidity)
  • Salt to taste
  • 1/2 tsp kasuri methi (dried fenugreek leaves)
  • 1/2 cup fresh cream
  • 1/4 cup water (as needed)

Method

In a bowl, mix all marinade ingredients with the chicken. Cover and refrigerate for at least 2 hours (overnight for best flavor).

Heat a grill pan or non-stick pan. Add a little oil. Cook the marinated chicken until it’s charred and cooked through. Set aside.

In a pan, heat 2 tbsp butter and 1 tbsp oil. Add onions and sauté until translucent. Add ginger-garlic paste, green chilies, and cashews. Sauté for 2–3 mins. Add tomatoes and cook until mushy and oil begins to separate. Add chili powder and salt. Let the mixture cool slightly, then blend into a smooth puree.

In the same pan, add 1 tbsp butter. Pour in the blended gravy. Add sugar and a splash of water. Let it simmer for 5–7 mins. Add cooked chicken pieces and simmer for 5 more minutes. Crush kasuri methi between palms and add. Stir in the cream.

Optional: Add a small piece of charcoal in a bowl inside the curry, drop a little ghee on it, cover the pan for 5 minutes for a smoky dhaba-style flavor.

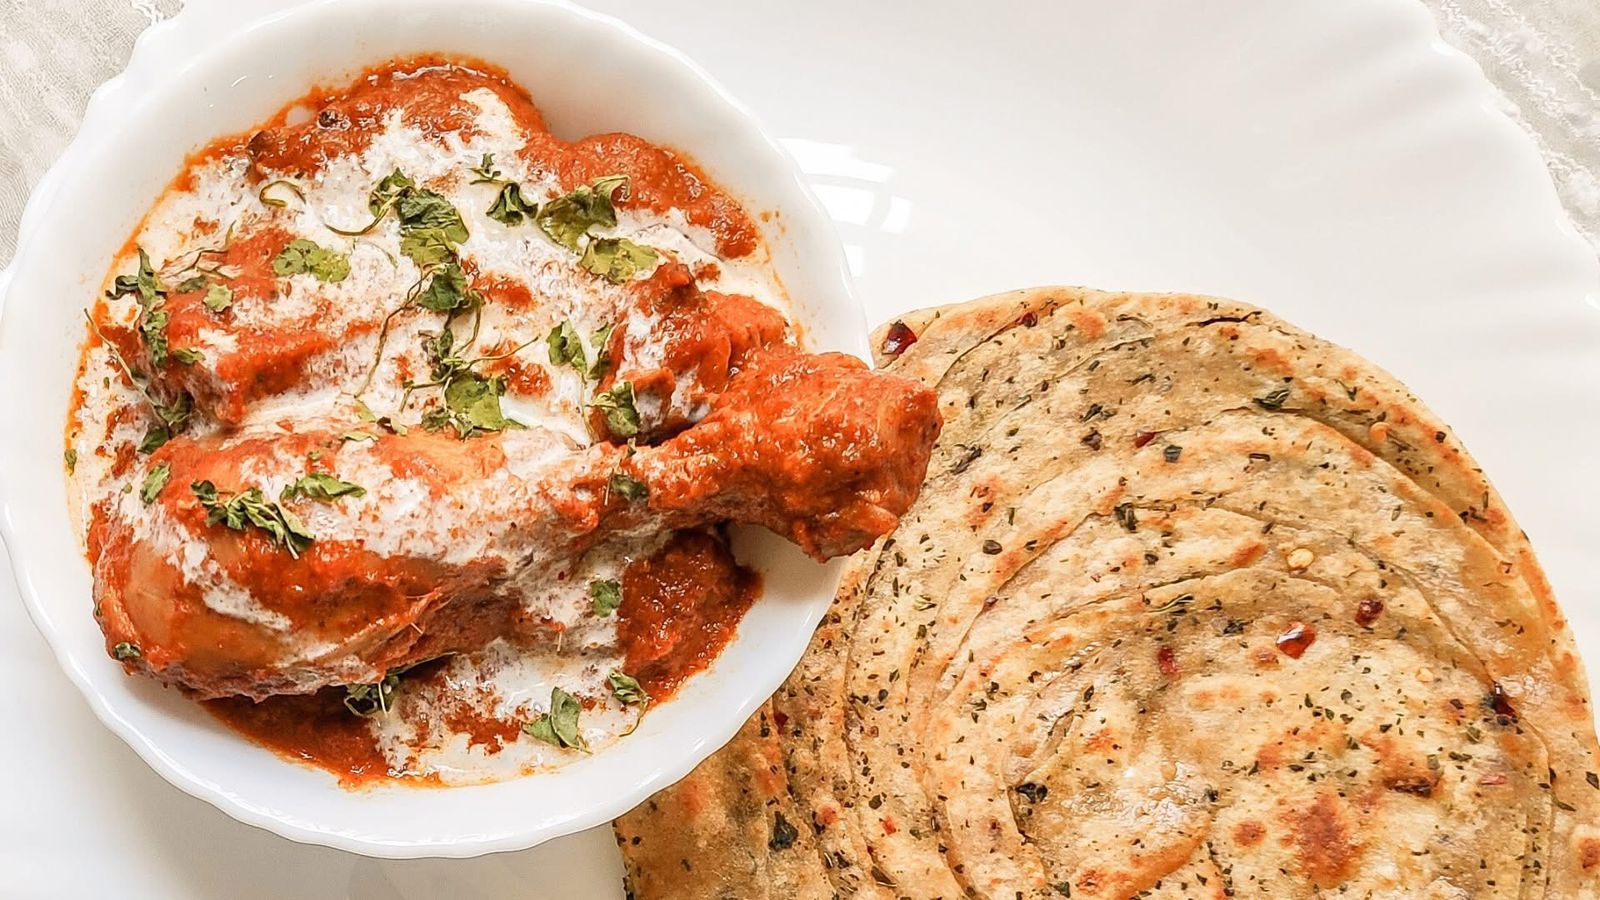
Serve hot with butter naan, tandoori roti, jeera rice, or lachha paratha. Don’t forget to garnish with a swirl of cream and fresh coriander!

 Tips & Tricks for Perfect Butter Chicken:

  • Balance the spice: Butter chicken is meant to be flavorful, not fiery. Use Kashmiri chili for color without too much heat.
  • Cream substitute: Use malai or even a mix of milk and cashew paste if you’re out of fresh cream.
  • Tomatoes: Use ripe red tomatoes for that classic tang. Avoid canned unless you’re in a pinch.
  • Make ahead: The curry tastes even better the next day as flavors deepen.

Butter Chicken FAQs

Q: Can I use pre-cooked tandoori chicken?
Yes! It’s a great shortcut and adds an extra smoky flavor.

Q: Is butter chicken sweet?
It has a mild sweetness to balance the acidity of the tomatoes, but it’s not a sugary dish.

Q: Can I make it dairy free?
Use coconut cream and oil instead of butter and dairy cream, though flavor will vary.

Butter Chicken is more than just a recipe it’s a warm, nostalgic experience in every bite. With these simple steps and tried-and-tested tips, you’ll be making the best Murgh Makhani of your life right at home.

Try it out and tag us with your creations!

Posted on Leave a comment

A Taste of Nostalgia: Recipe to Make Khatta Meetha aur Imly Aam Papad

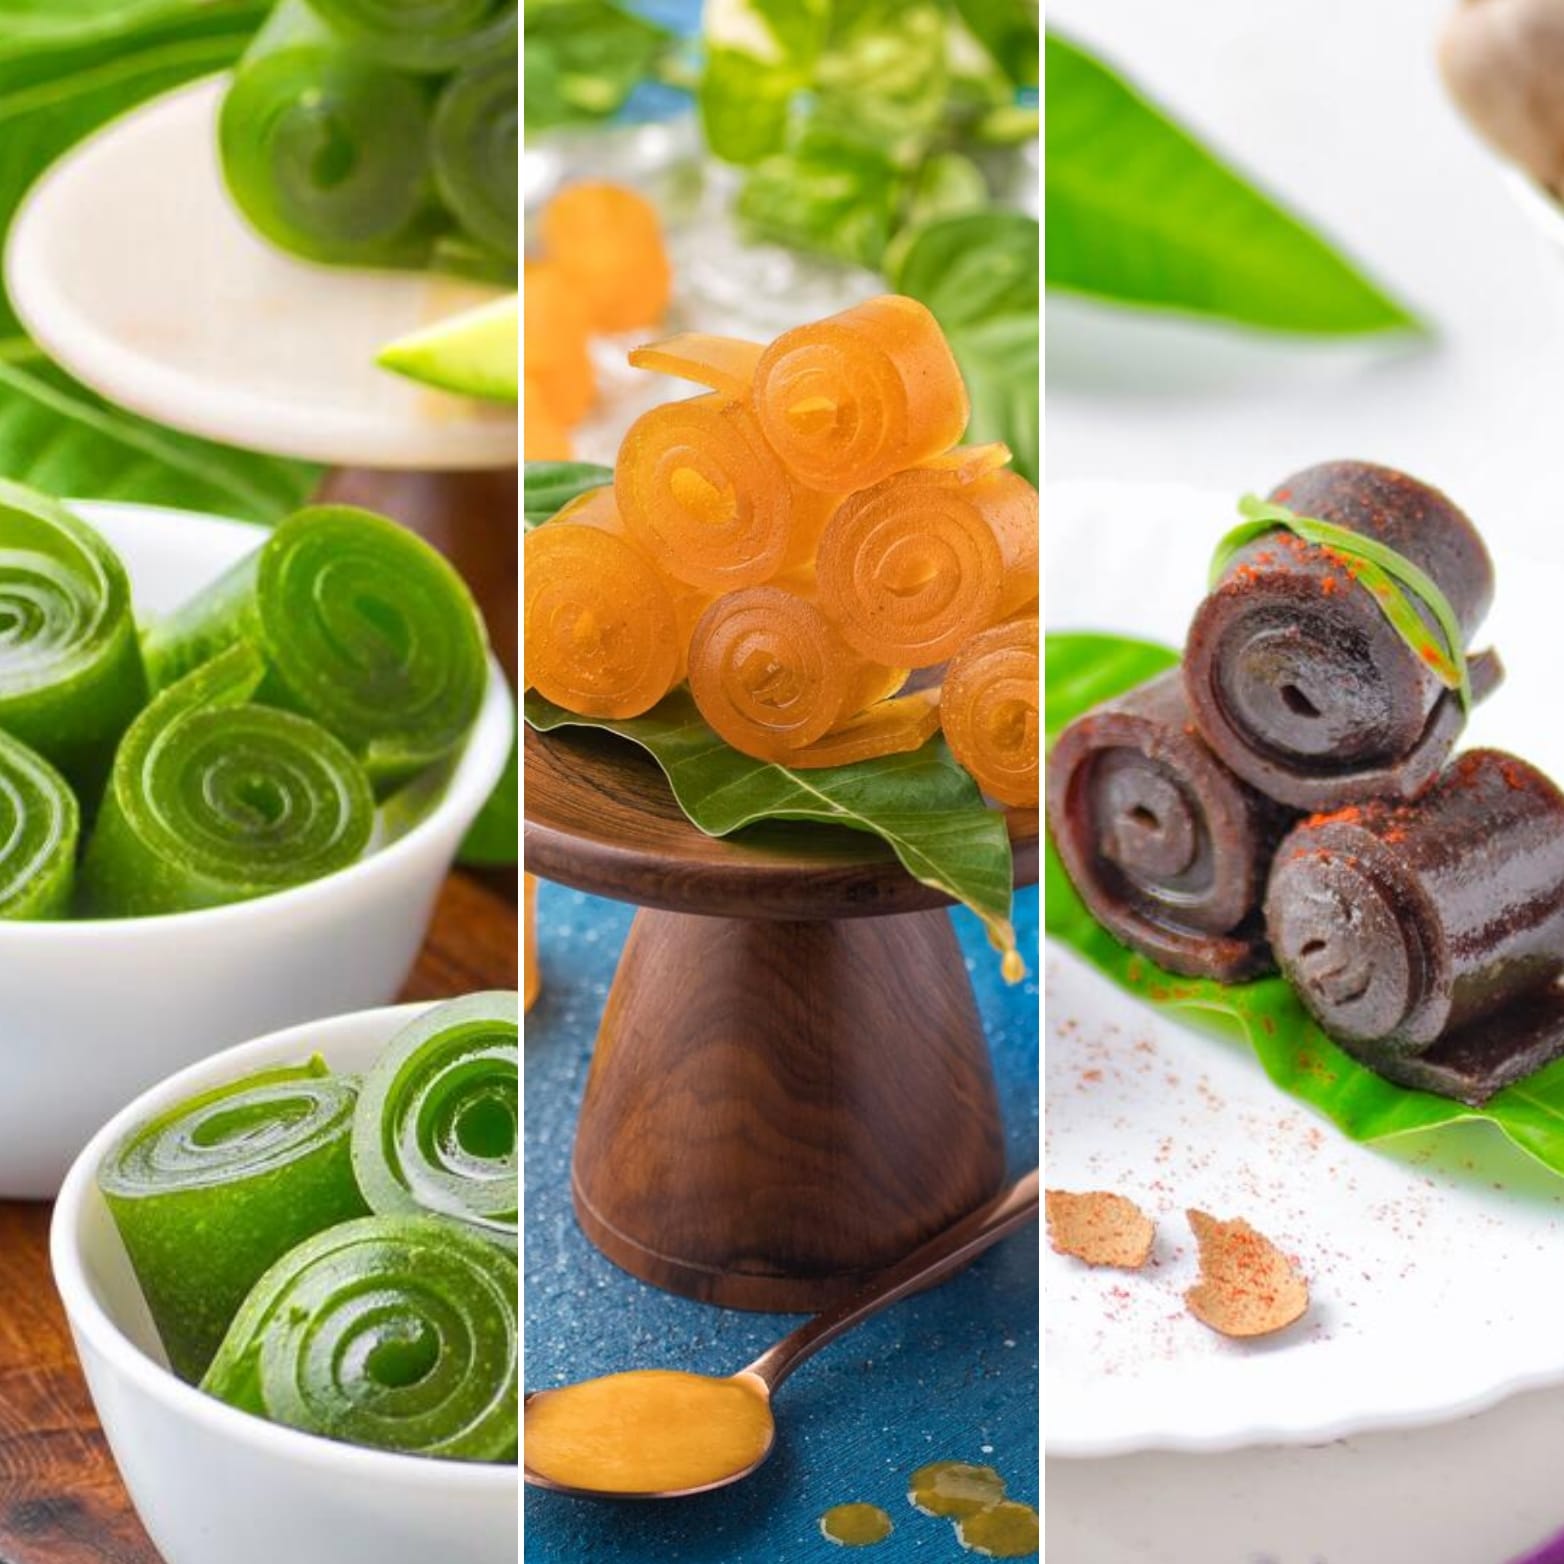
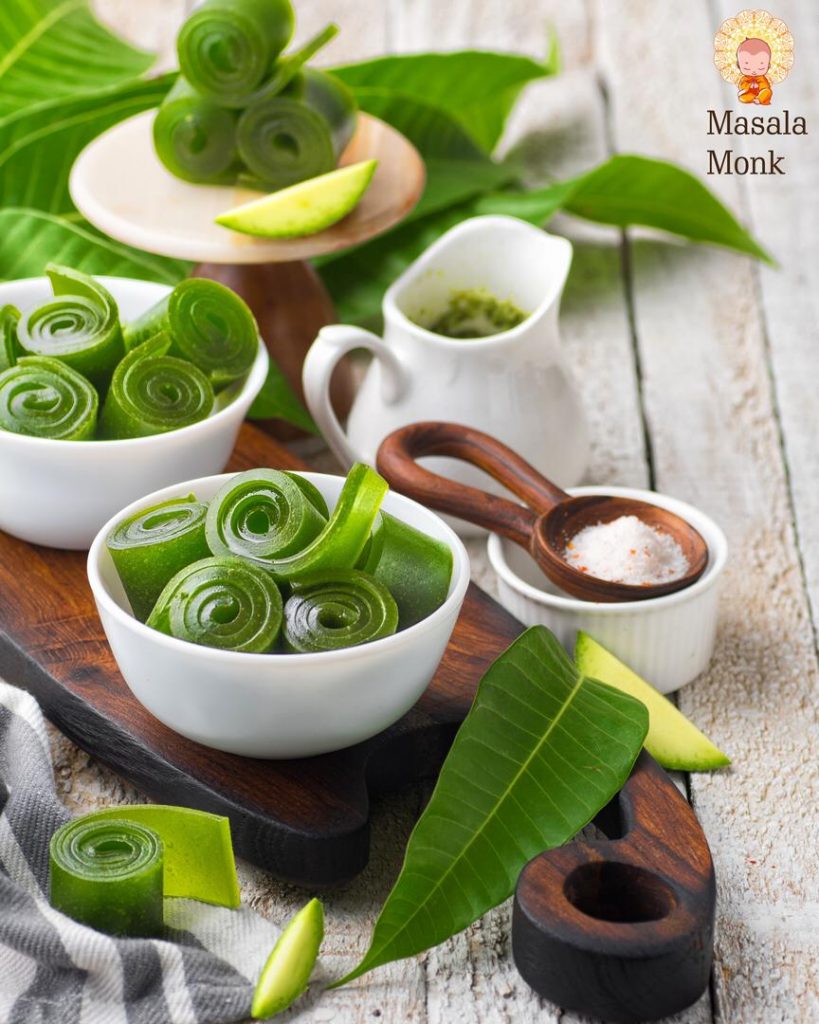
From my childhood and even now, I have always loved to eat this tasty, delicious, and mouth-watering aam papad in different flavors. Whether it’s meetha (sweet), khatta (sour), or the spicy tangy imly aam papad, each bite takes me back to childhood days. I craved for this aam papad way too much during my pregnancy days, and I am sure many of you must have gone through the same. You can read more about Aam Papad during Pregnancy : Cravings, Nutrition & Side Affects.

During such precious times, it’s crucial to ensure the food we consume is hygienic and made with care. That’s why I encourage all expecting mothers to try this aam papad recipe at home. If you don’t want to get into the hustle, you can buy this delicious treat from our website, knowing it’s made with the highest standards of hygiene and love. Enjoy the taste of nostalgia and take care of your health and your little one’s!

I am excited to share with you an easy recipe to make aam papad at home, covering all three variants. So let’s get started.

Ingredients:

  • 6-8 ripe mangoes (preferably Alphonso or Safeda)
  • 1 cup sugar (adjust according to the sweetness of the mangoes)
  • 1 tablespoon lemon juice

For Khatta Aam Papad:

  • 1 tablespoon tamarind pulp

For Spicy Tangy Imly Aam Papad:

  • 1 tablespoon tamarind pulp
  • 1 teaspoon red chili powder
  • 1/2 teaspoon black salt

Method:

Prepare the Mango Puree:

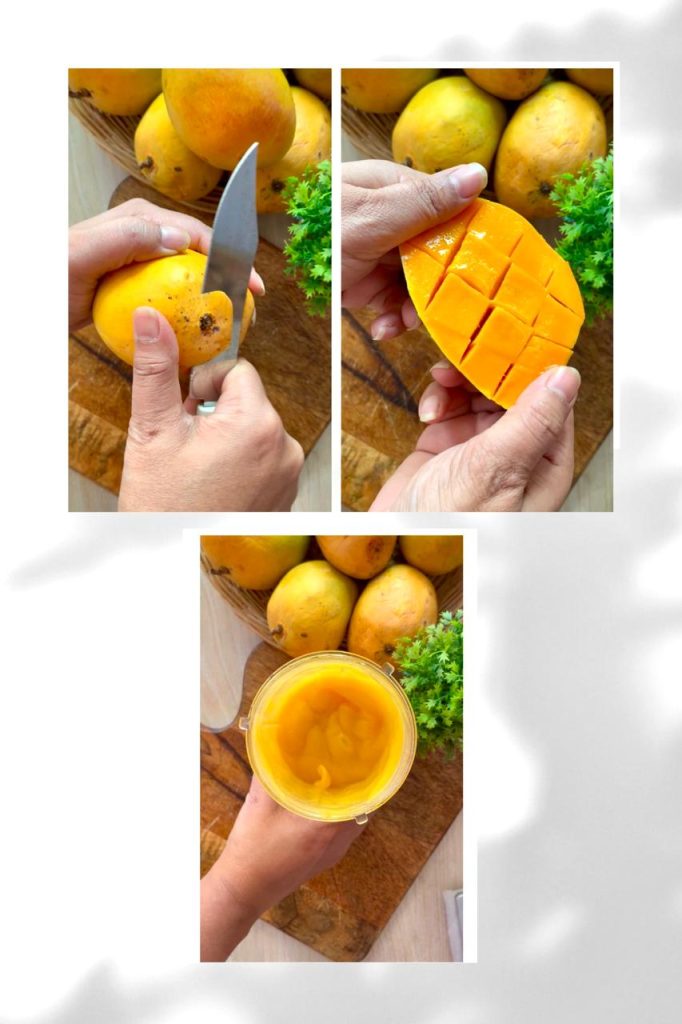
Peel and chop the ripe mangoes. Blend them into a smooth puree. Pass the puree through a sieve to remove any fibrous parts, ensuring a smooth texture.

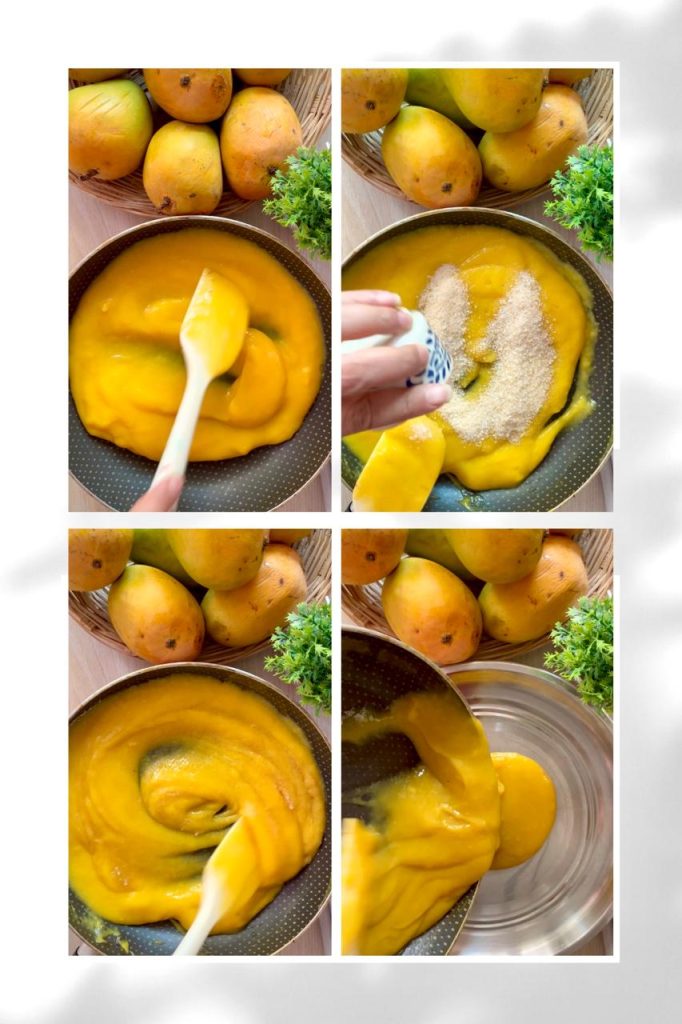
In a heavy-bottomed pan, add the mango puree and sugar. Cook on low heat, stirring continuously until the mixture thickens and reduces to a jam-like consistency. This can take around 30-40 minutes. Add lemon juice and mix well.

Prepare for Different Flavors:

For Meetha Aam Papad: Spread a portion of the cooked mango mixture evenly on a greased tray or a baking sheet lined with parchment paper.

For Khatta Aam Papad: Add tamarind pulp to a portion of the cooked mango mixture, mix well, and spread it on another tray.

For Spicy Tangy Imly Aam Papad: Add tamarind pulp, red chili powder, and black salt to the remaining mango mixture. Mix well and spread it on a separate tray.

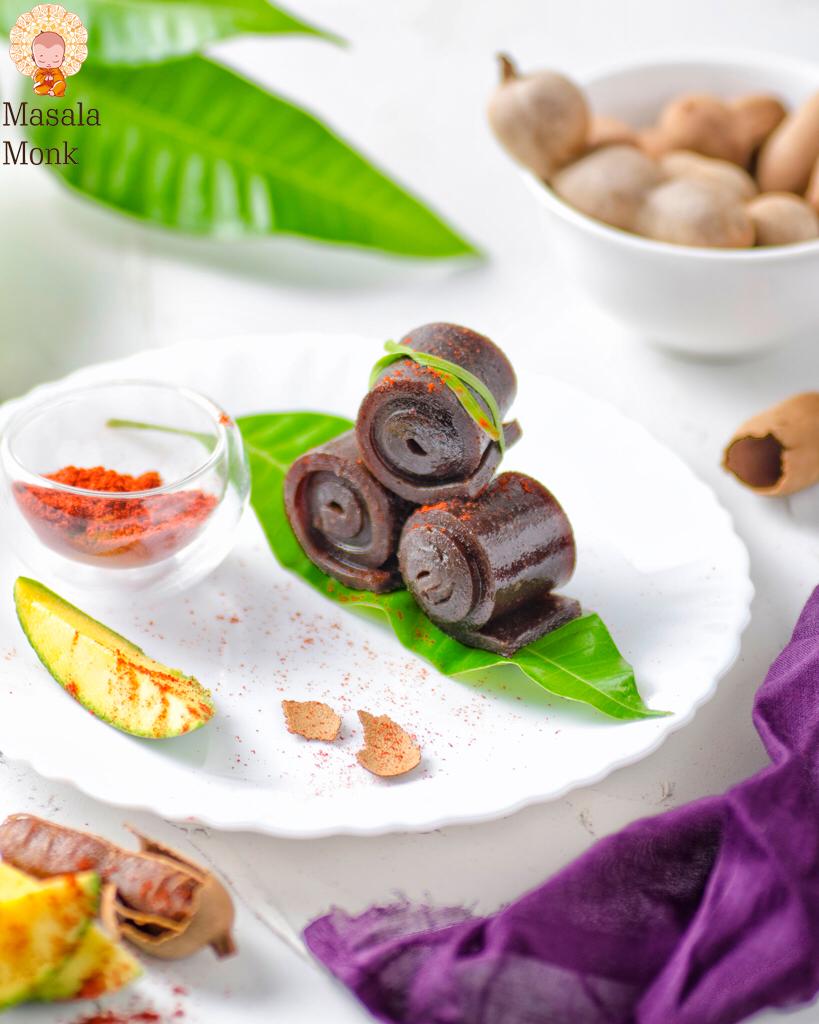
tangi imli aam papad masala monk

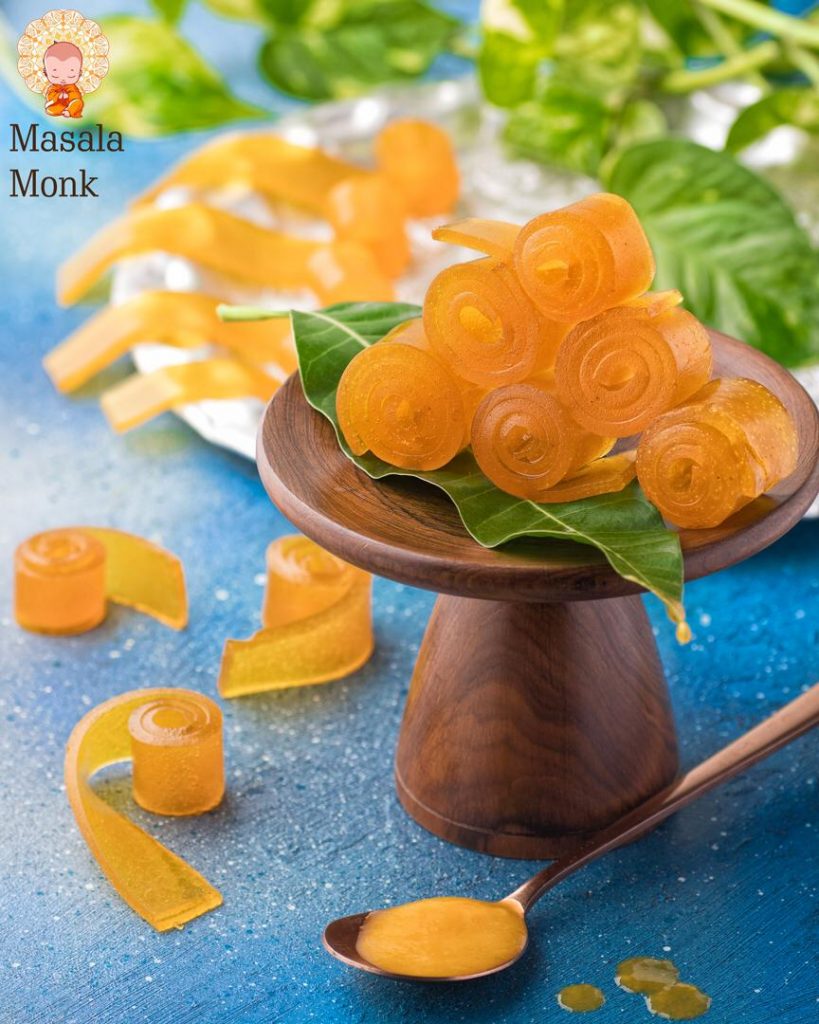
Allow the spread mixtures to cool completely. Once cooled, place the trays in a warm, dry place or under the sun to dry. This can take 2-3 days, depending on the weather. The aam papad is ready when it is firm and no longer sticky to the touch. Once dried, cut the aam papad into desired shapes using a knife or pizza cutter. Roll them up or store them flat in an airtight container.

Making aam papad at home is not only a fun but also a way to recreate those cherished childhood memories. You can make your own aam papad or if you are looking for a homemade, preservative free and authentic experience, without getting into hassle of making your own, you can always explore Masala Monk’s Meetha Aam Papad , Khatta Aam Papad and Spicy and Tangy Imli Aam Papad which ships all over India.

Enjoy the meetha, khatta, and spicy tangy imly aam papad with your loved ones. Do try this recipe and share your feedback in the comments below!

Happy snacking!