
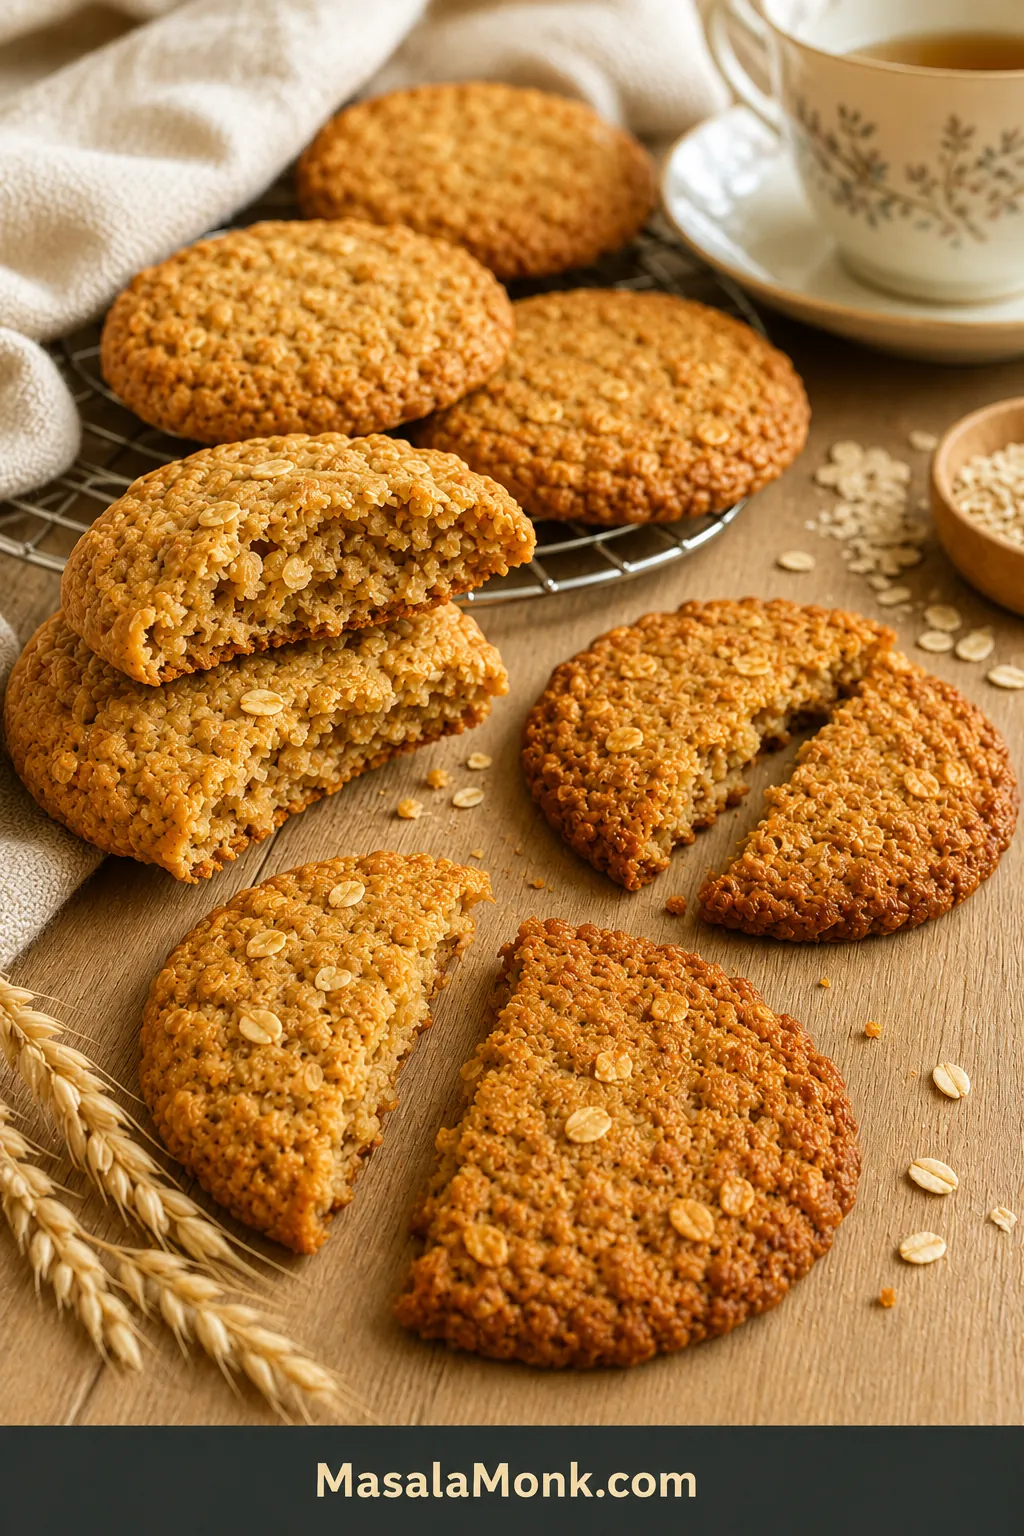
An Anzac biscuit reveals its true texture only after it cools. Straight from the oven, every version feels soft. One bends at the centre. Another crisps around the edge but stays chewy inside. A deeply golden one settles into a clean snap. All three carry the warm, toasty scent of oats, coconut, butter and golden syrup.
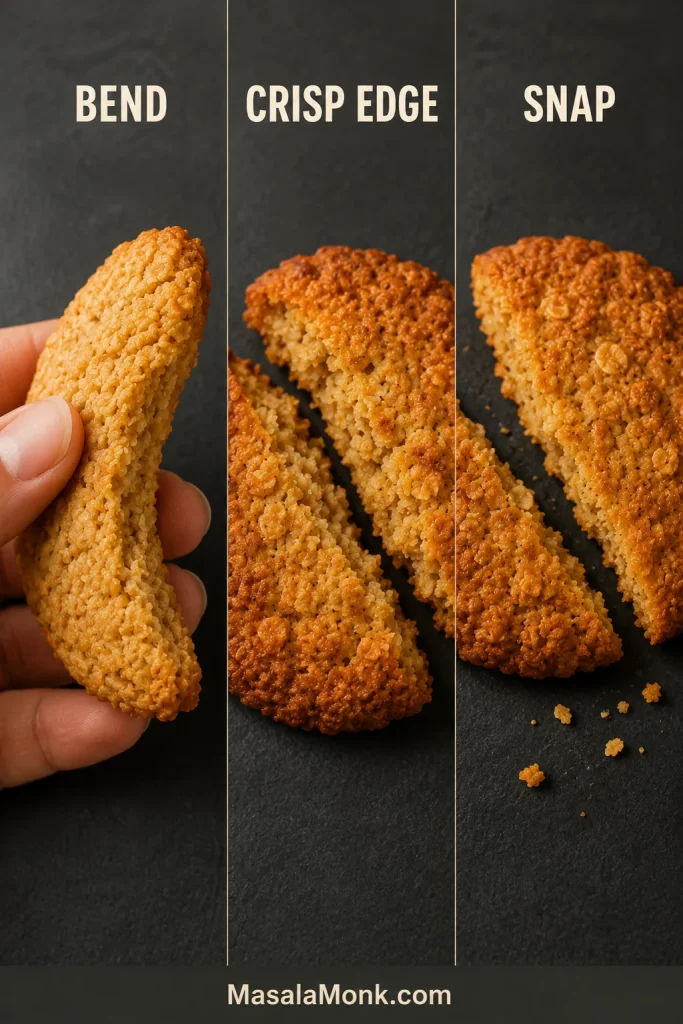
Better still, you do not need three separate recipes. One oat-and-coconut mixture can produce every finish, so everyone at the table can have the biscuit they prefer.
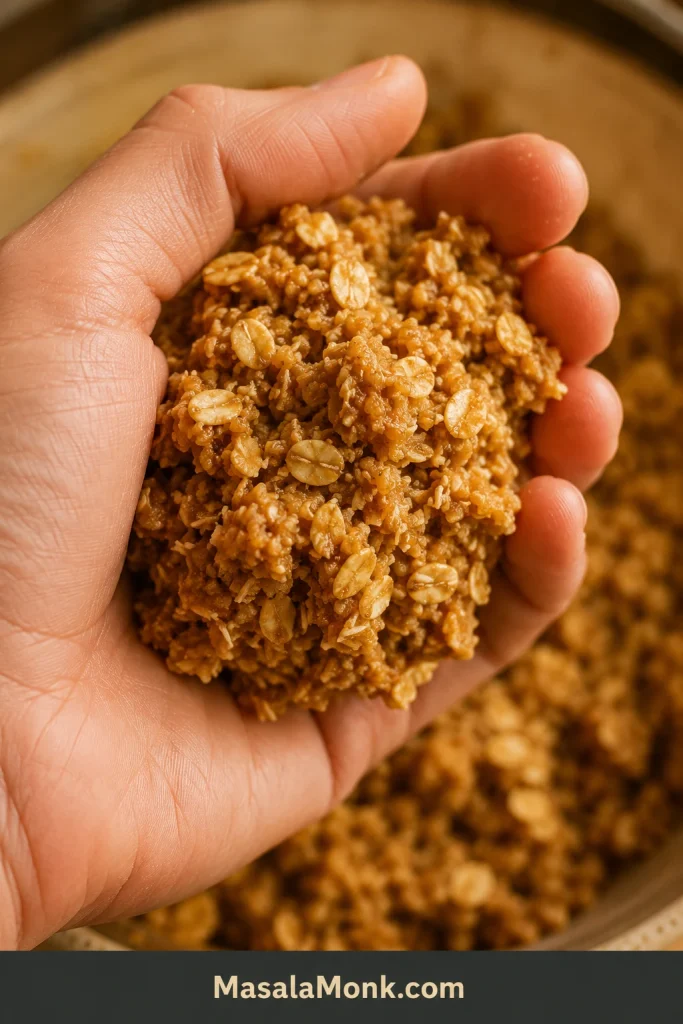
One stage that often makes bakers hesitate is the mixture itself. The bowl will look rougher than ordinary cookie dough, and that is exactly right. When a firmly squeezed spoonful holds together, you are ready to shape. If it falls apart, a teaspoon of water is often enough to bring it back.
Start here
Start with crisp edges and a chewy centre
Shape: Use 28 g portions and press them to about 8 mm / ⅓ inch thick. They should be roughly 5–5.5 cm / 2–2¼ inches wide.
Bake: Use 170°C conventional or 150°C fan. Begin checking at 14 minutes, then continue in 1-minute increments and let the colour, not just the clock, make the final call.
Remove: Take them out when the edges are clearly golden and the centre no longer looks wet. They will feel soft at first, then settle into crisp edges with a chewy centre.
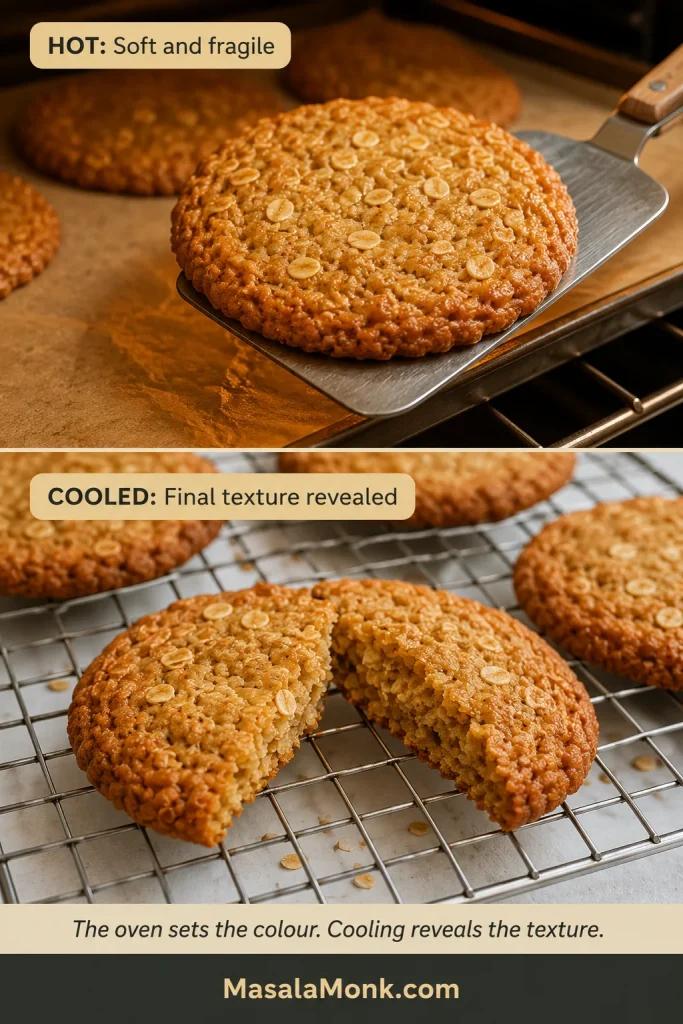
Remember: the oven sets the colour; cooling reveals the texture.
Make it now
Anzac Biscuits Recipe
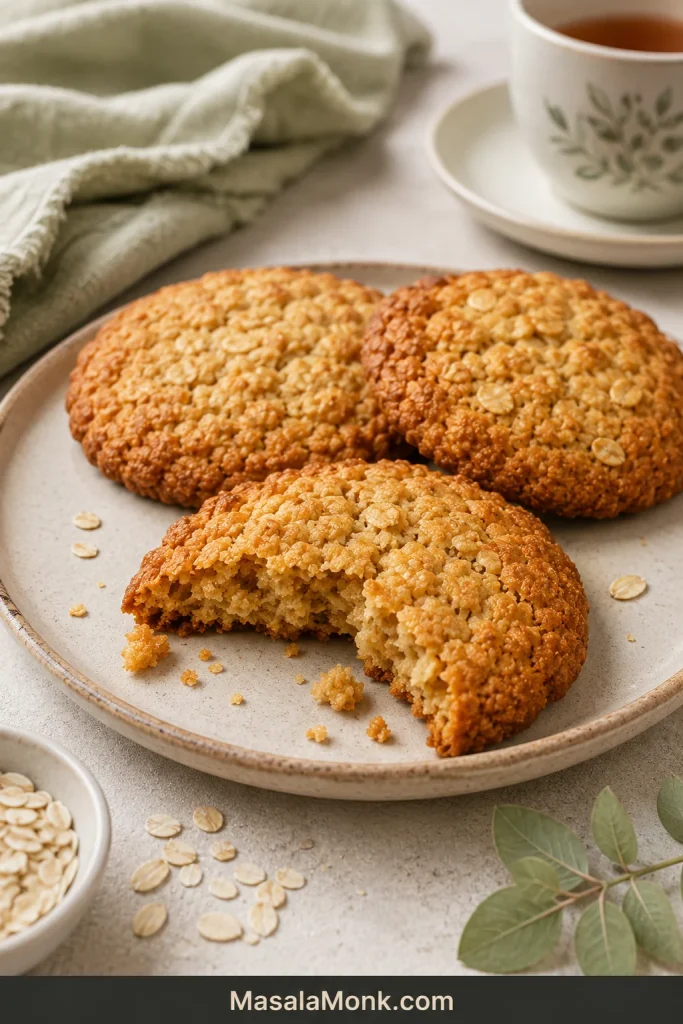
Rolled oats, coconut, brown sugar, butter and golden syrup make the classic oat-and-coconut biscuit. Keep the portions thicker for a softer bend, use the middle timing range for crisp edges and a chewy centre, or press them flatter and let the colour deepen for a clean snap.
Recipe at a glance
- Yield: About 24 medium biscuits
- Portion: 28 g / 1 oz each
- Preparation: About 20 minutes
- Bake: 11–19 minutes per tray, depending on texture
- Tray rest: 5 minutes for chewy; 8–10 minutes for crunchy
- Rack cooling: 10–15 minutes after the tray rest
- Total for two trays baked one at a time: About 60–80 minutes
- Oven: 170°C conventional / 150°C fan / 340°F conventional / 300°F convection
- Difficulty: Easy; no mixer or chilling required
Equipment
- Digital kitchen scale
- Large mixing bowl
- Medium saucepan
- Silicone spatula or wooden spoon
- Two large, light-coloured metal baking trays
- Baking paper or parchment paper
- Cookie scoop or dessertspoon
- Fork or flat-bottomed glass for shaping
- Wire cooling rack
Ingredients
- 150 g / 5.3 oz plain flour or all-purpose flour — about 1 Australian cup or 1¼ US cups; weight is strongly recommended
- 90 g / 3.2 oz traditional rolled oats — about 1 cup; called old-fashioned oats in the US
- 60 g / 2.1 oz unsweetened desiccated coconut — about ¾ cup
- 150 g / 5.3 oz light brown sugar — approximately ¾ Australian cup or a scant ¾ US cup when packed; use the weight for consistency
- ¼ teaspoon fine salt
- 125 g / 4.4 oz unsalted butter, cut into pieces
- 60 g / 2.1 oz golden syrup — about 40 ml
- 30 ml boiling water
- ½ teaspoon / approximately 2.5 g bicarbonate of soda, also called baking soda
Important regional measurement note: cup measures vary with country, ingredient and packing, so the gram weights are the reliable standard here. An Australian tablespoon holds 20 ml, while a standard US, UK or New Zealand tablespoon generally holds about 15 ml. For the golden syrup and boiling water, use the gram or millilitre quantities above.
Method
Mix the base mixture
- Prepare the oven and trays. Heat to 170°C conventional, 150°C fan, 340°F conventional or 300°F convection. Put a rack in the centre and line two light-coloured trays with baking paper or parchment paper.
- Combine the dry ingredients. Stir together the flour, rolled oats, coconut, brown sugar and salt, breaking up any firm sugar lumps.
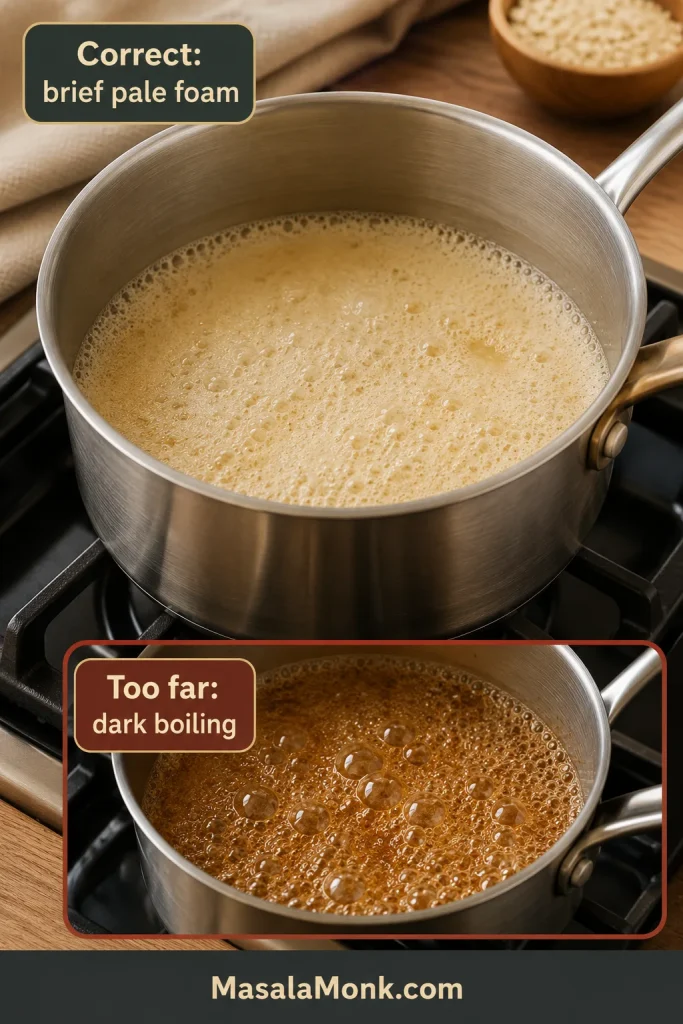
- Melt the butter and syrup. Warm them gently until smooth, then remove from the heat. Stir the bicarbonate into the boiling water and add it carefully; the saucepan mixture will foam briefly.
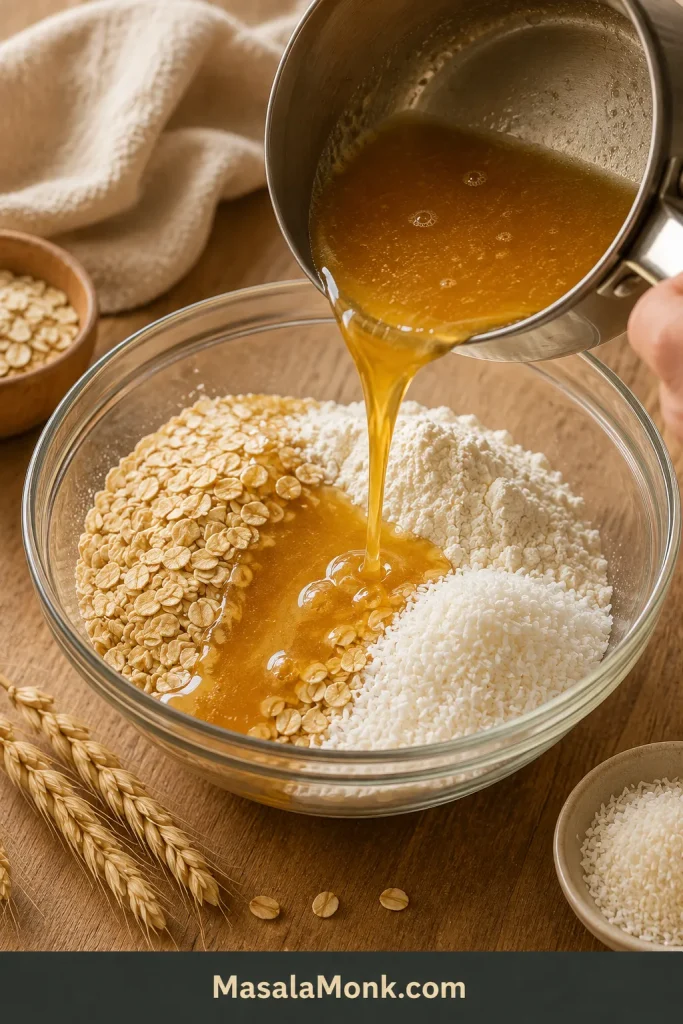
- Mix and check the bowl. Pour the warm liquid over the dry ingredients and stir until no dry flour remains. The mixture may look glossy while warm, but a firmly squeezed spoonful should hold together without pooled oil. If it falls apart, add 5 ml / 1 teaspoon boiling water and check again.
Portion and shape the tray
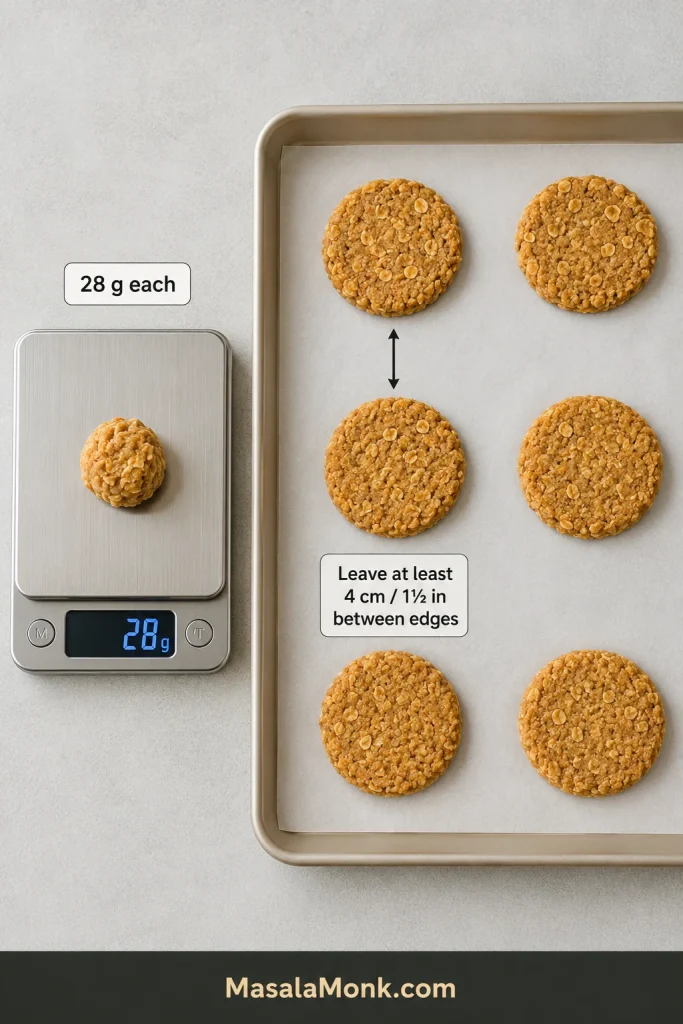
- Portion and shape. Use 28 g / 1 oz pieces and leave at least 4 cm / 1½ inches of clear space between their shaped edges.
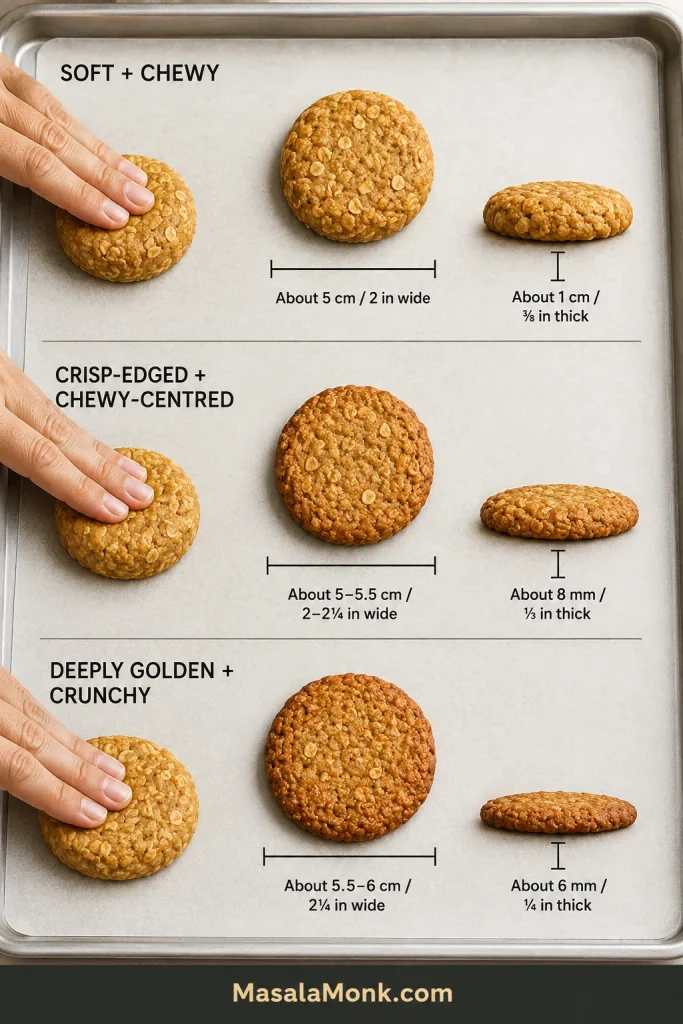
- Soft and chewy biscuits: about 5 cm / 2 inches wide and 1 cm / ⅜ inch thick.
- Crisp-edged and chewy-centred biscuits: about 5–5.5 cm / 2–2¼ inches wide and 8 mm / ⅓ inch thick.
- Deeply golden and crunchy biscuits: about 5.5–6 cm / 2¼ inches wide and 6 mm / ¼ inch thick.
Bake, rest and cool
- Bake one tray at a time. Check soft and chewy biscuits at 11 minutes, crisp-edged and chewy-centred biscuits at 14 minutes, and deeply golden and crunchy biscuits at 17 minutes. Continue in 1-minute increments until the edge and centre match the guide.
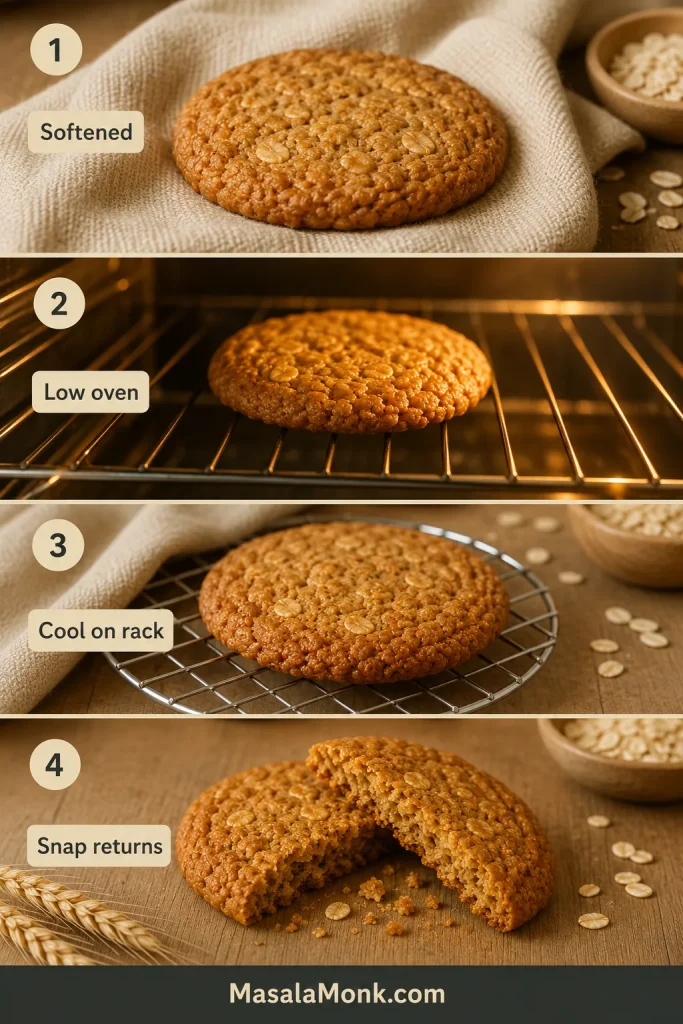
- Let the biscuits set. Rest soft or chewy biscuits on the tray for 5 minutes and crunchy biscuits for 8–10 minutes. Transfer to a wire rack and cool completely before judging the final bend or snap.
Recipe notes
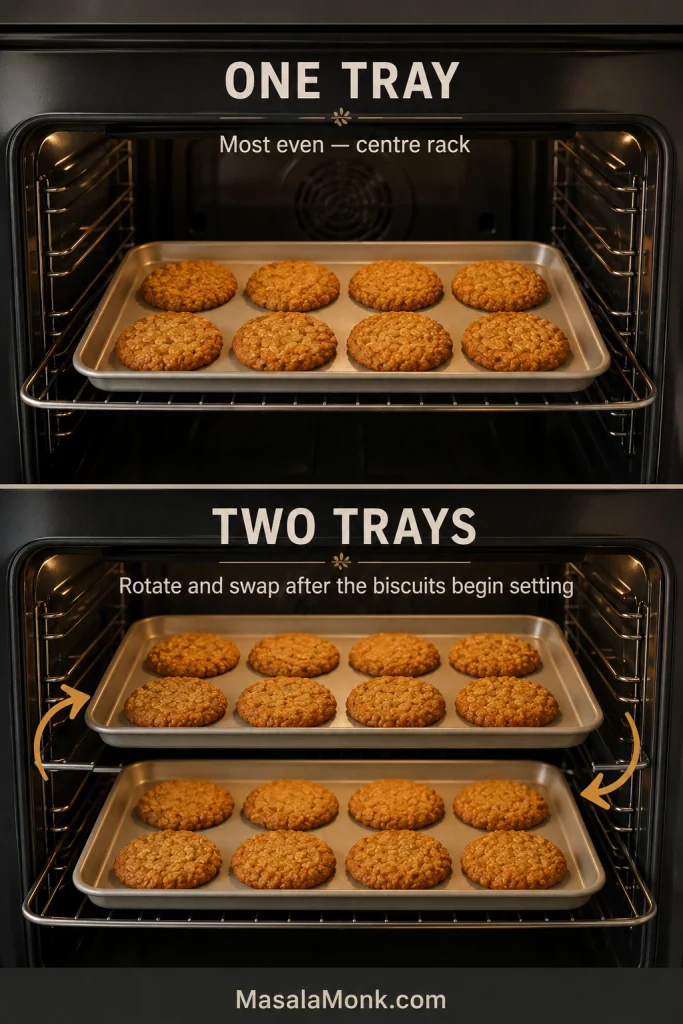
- For even colour: one tray on the centre rack gives the most predictable result. If baking two together, rotate them front to back and swap positions once the biscuits have begun setting.
- Start each batch on a cool tray: hot reused metal increases spread and darkens the base.
- Test biscuit, if needed: the standard recipe can go straight into the oven. Bake one first only when changing the syrup or oats, measuring mainly by cups, using a dark tray or learning an unfamiliar oven; see when a test biscuit helps.
The recipe above is enough to begin. The sections below show how to choose the exact texture, recognise the mixture and adjust the next tray when your oats or oven behave differently.
Fine-tune your batch
Understand the biscuits
How to make Anzac biscuits chewy or crunchy
Choose the finish before shaping: a soft bend, crisp edges with a chewy centre, or a deeply golden snap. Keep the portion size and oven temperature steady, then use thickness, bake time and removal colour to guide the result.
Shape for the texture you want
Check timing and removal colour
| Texture | Shape before baking | Start checking | Remove when | After cooling |
|---|---|---|---|---|
| Soft and chewy | About 5 cm / 2 inches wide and 1 cm / ⅜ inch thick | 11 minutes; continue in 1-minute increments | Edges are set and lightly golden; centre still looks soft | Tender centre with an easy bend |
| Crisp-edged and chewy-centred | About 5–5.5 cm / 2–2¼ inches wide and 8 mm / ⅓ inch thick | 14 minutes; continue in 1-minute increments | Edges are medium golden; centre is just set | Crisp edge with a yielding centre |
| Deeply golden and crunchy | About 5.5–6 cm / 2¼ inches wide and 6 mm / ¼ inch thick | 17 minutes; continue in 1-minute increments | Colour is deep and even from edge towards centre | Crisp throughout with a clean snap |
Compare the cooled biscuits
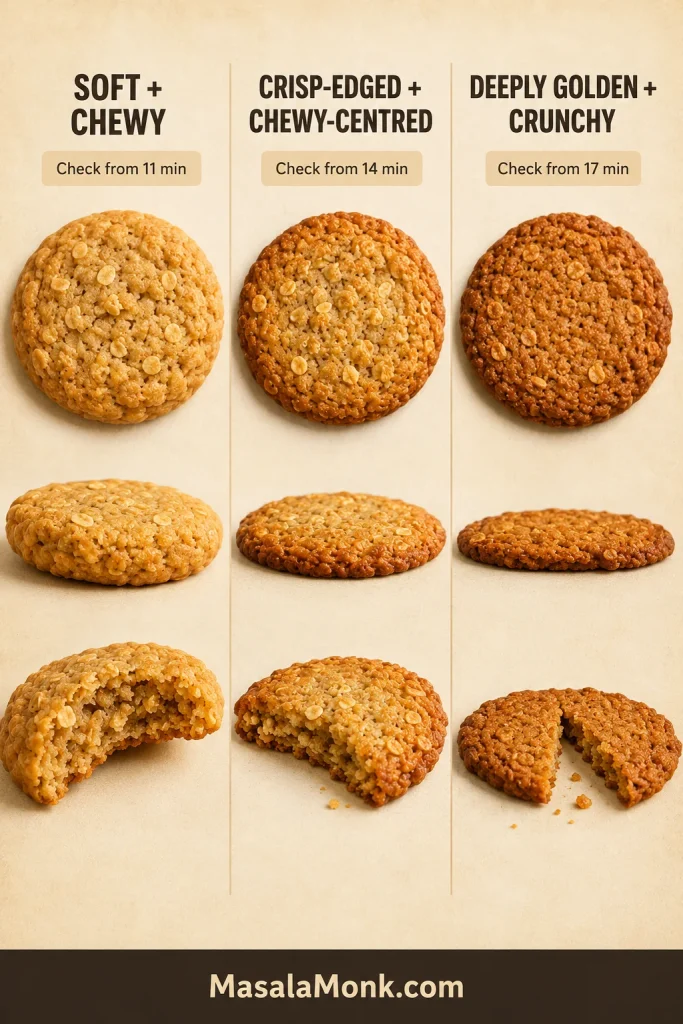
Soft and chewy
Shape: About 5 cm / 2 inches wide and 1 cm / ⅜ inch thick.
Check: From 11 minutes.
Remove: Lightly golden edges; centre still looks soft.
After cooling: Tender centre with an easy bend.
Crisp-edged and chewy-centred
Shape: About 5–5.5 cm / 2–2¼ inches wide and 8 mm / ⅓ inch thick.
Check: From 14 minutes.
Remove: Medium-golden edge; centre just set.
After cooling: Crisp edge with a yielding centre.
Deeply golden and crunchy
Shape: About 5.5–6 cm / 2¼ inches wide and 6 mm / ¼ inch thick.
Check: From 17 minutes.
Remove: Deep, even gold moving towards the centre.
After cooling: Crisp throughout with a clean snap.
Use one mixture for different preferences
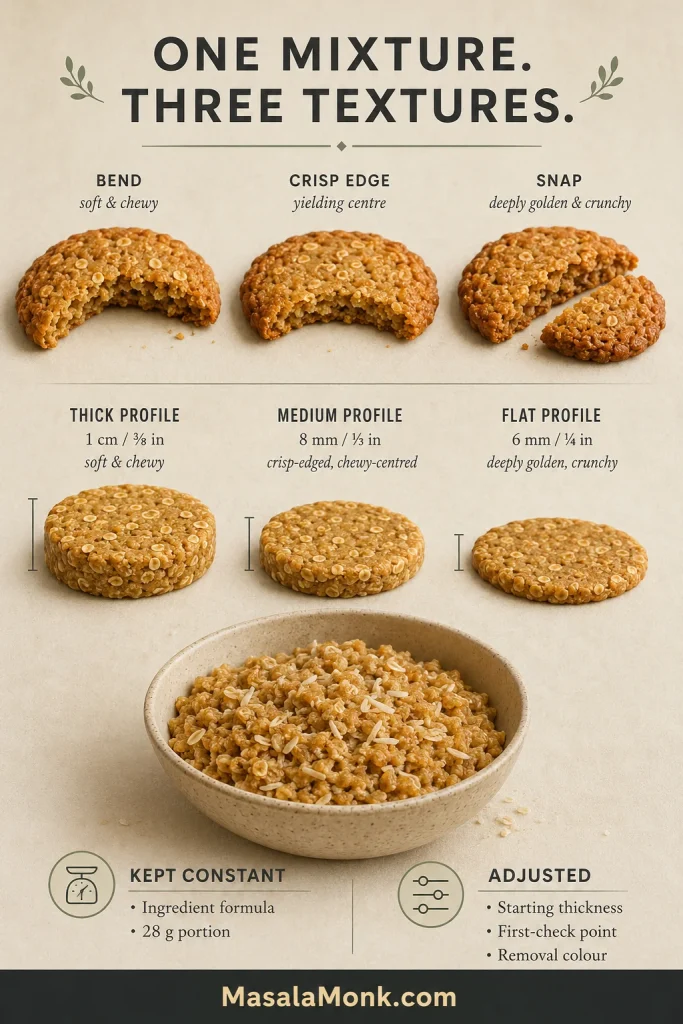
How the three textures are controlled: the ingredient formula and 28 g portion stay the same. The starting thickness, first-check time and removal colour change. Oat absorption, tray colour and ovens vary, so the timings are starting points and the visual cues make the final decision.
If your household is divided: shape one tray thicker and the next flatter. Bake the thicker tray first, then use its colour and spread to fine-tune the second. All three can come from the same bowl.
Continue from here: see why one mixture makes three textures, check what the mixture should look like, or go back to the recipe card.
Why the same mixture can be chewy or crunchy
This mixture does not need an egg to hold together. Golden syrup, melted butter and a small amount of water coat the oats and coconut, while the flour gives the biscuit enough structure to set as it cools. Bicarbonate helps the portions spread and brown, contributing to their crisp structure as they cool.
The moderate oven gives the melted butter and syrup time to spread before the edges set too firmly. Thicker discs hold more moisture in the centre, while flatter discs heat through and dry sooner. The biscuits leave the oven soft because their sugars and fats continue firming as they cool.
What each Anzac biscuit ingredient does
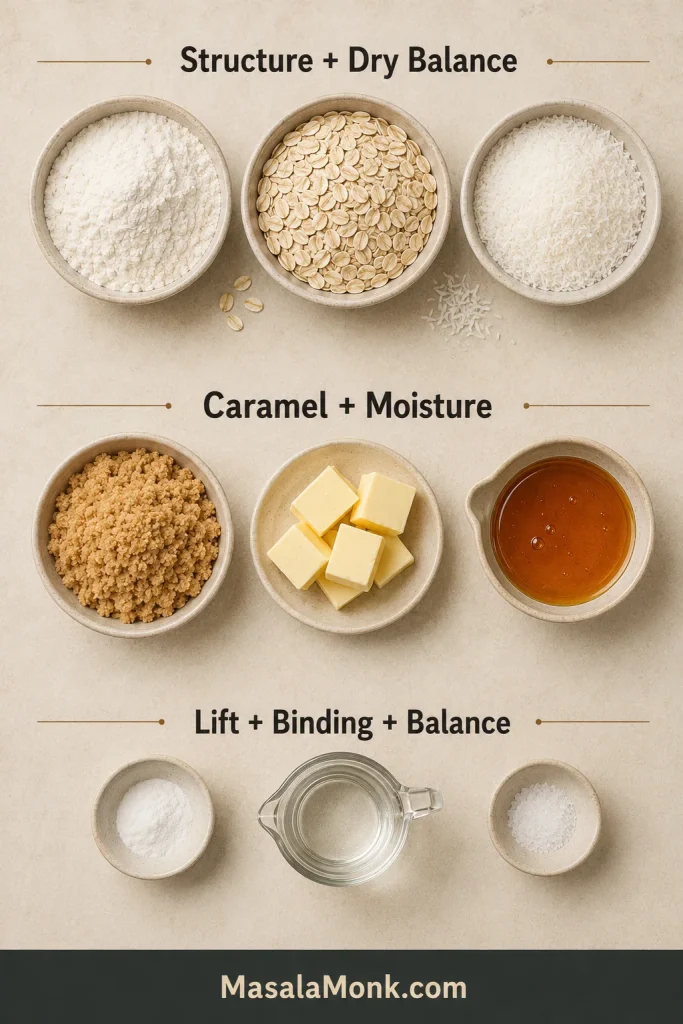
Most of the texture comes from two balances: flour, oats and coconut decide how firmly the mixture holds, while sugar, butter and syrup influence spread, moisture and caramel flavour. Bicarbonate encourages spread and browning, water gives the dry mixture enough moisture to press together, and salt balances the caramel sweetness.
Flour, oats and coconut
Plain flour or all-purpose flour helps the biscuits hold their shape. Too much makes the mixture dry and limits spread, so use 150 g when possible. For volume measuring, use about 1 Australian cup or 1¼ US cups, spooned lightly into the cup and levelled.
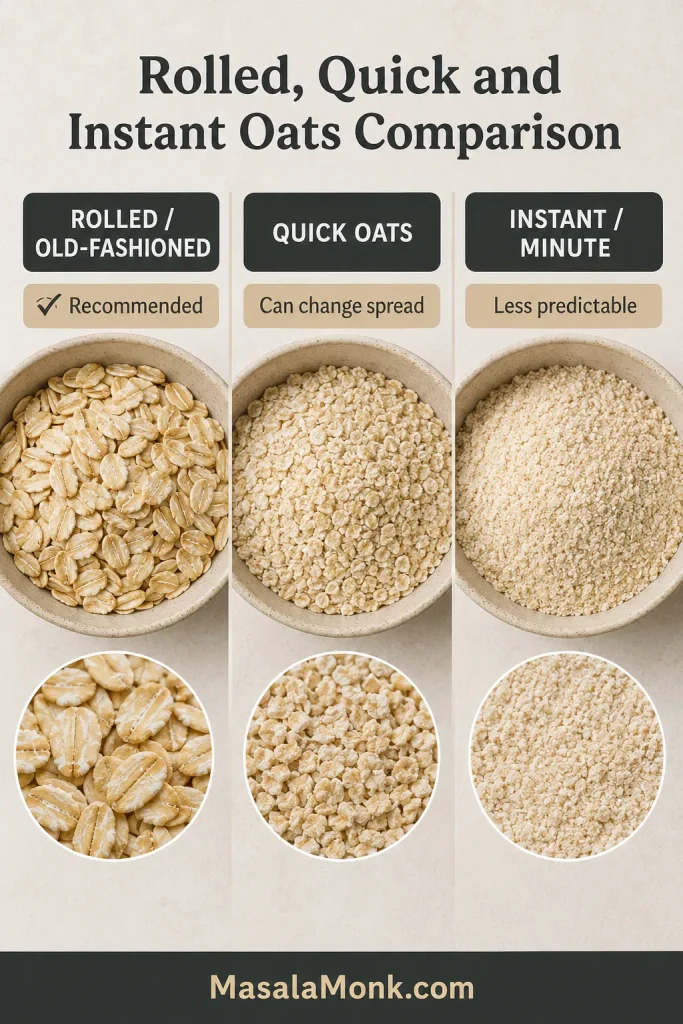
Traditional rolled oats—often labelled old-fashioned oats in the US—give the clearest oat texture. Those names usually describe the same product; this guide to old-fashioned oats and rolled oats explains the regional wording. Quick oats are finer and may absorb the liquid faster, changing spread and chew; instant or minute oats are less predictable here.
Unsweetened desiccated coconut gives the biscuits their fine coconut texture and toasted aroma while absorbing part of the butter-and-syrup mixture. Sweetened shredded coconut is usually moister, sweeter and stringier, so it is not an invisible swap.
Sugar, butter and golden syrup
Light brown sugar adds caramel flavour, moisture and browning, helping a shorter bake retain a yielding centre. A large reduction can leave the biscuits thicker, drier and less crisp.
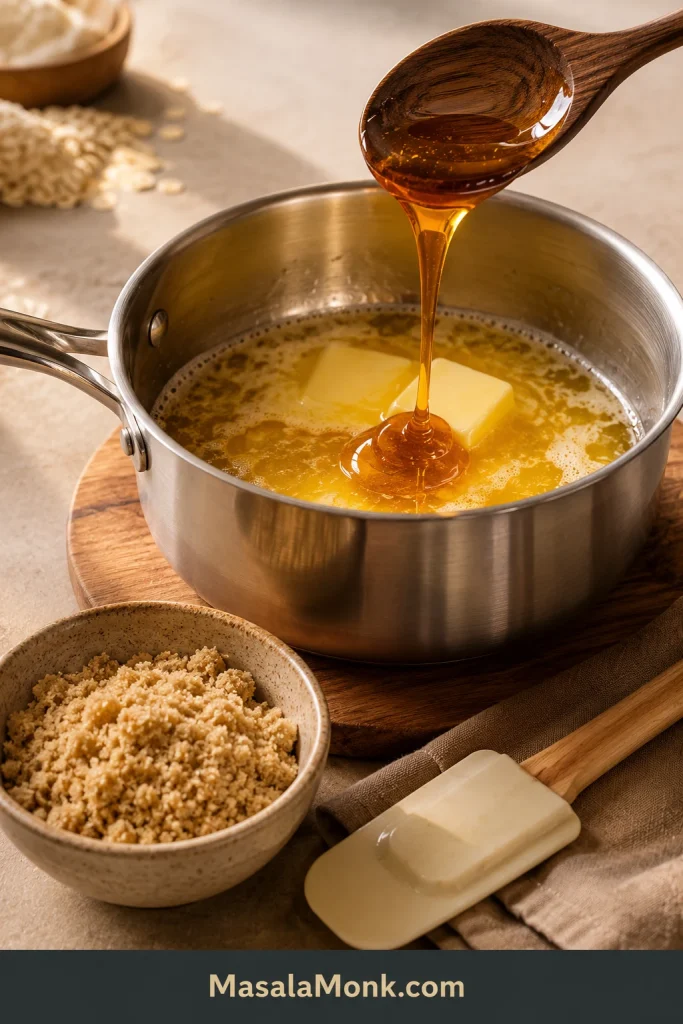
Butter carries flavour and helps the biscuits spread and crisp. Melt it gently with the syrup and stop as soon as the mixture is smooth. Salted butter is fine; omit the added salt.
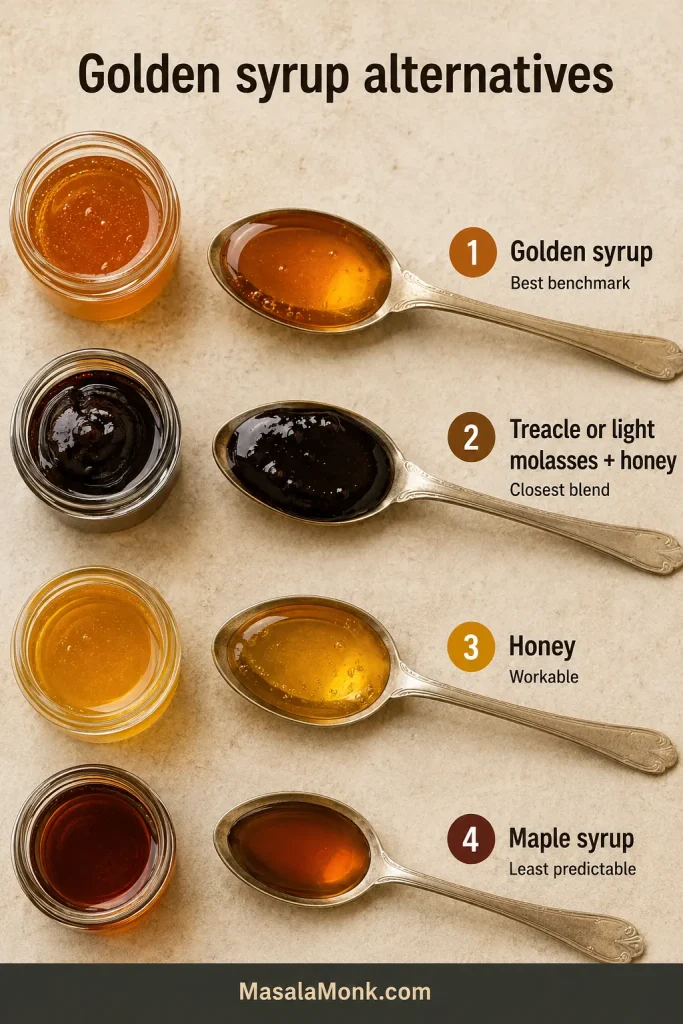
Golden syrup is thick, caramel-like and central to the classic flavour and amber colour. Look for it in the baking aisle, an imported-food section or online. When it is unavailable, the treacle-and-honey option below comes closer to its thickness and caramel depth than maple syrup alone.
Bicarbonate, water and salt
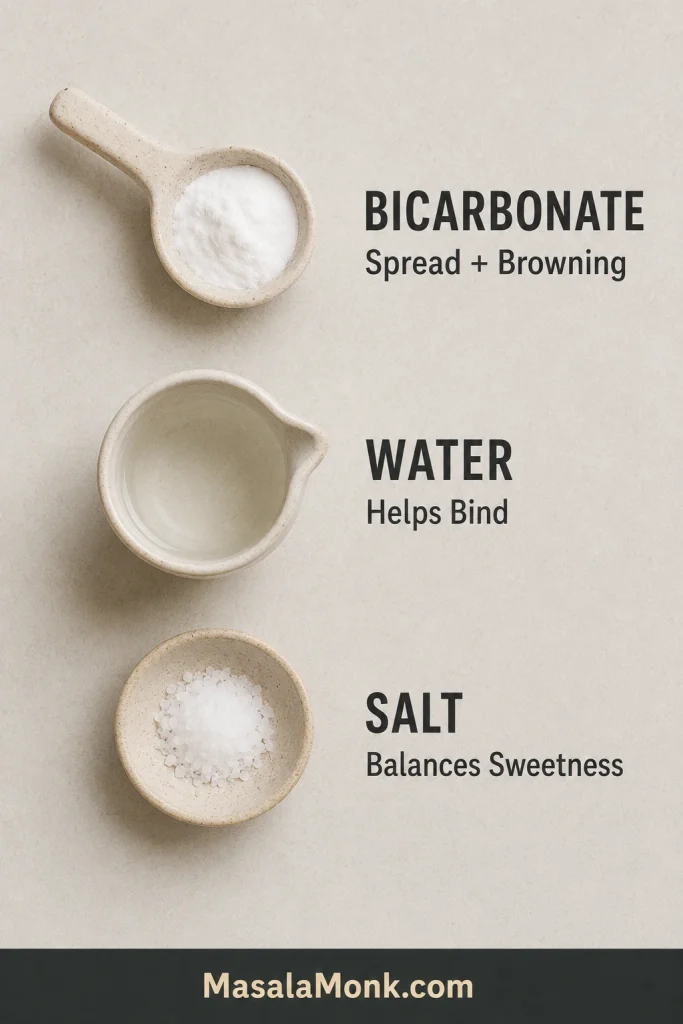
Bicarbonate of soda is the same ingredient as baking soda, not baking powder. It encourages browning and spread, contributing to the biscuit’s crisp structure as it cools. Dissolve it in the boiling water, then add it to the warm butter and syrup, where the mixture will foam briefly. The measured water gives the dry mixture just enough moisture to press together, so use the full 30 ml.
Fine salt sharpens the toasted oat, coconut and caramel flavours. It is a flavour choice rather than a historical requirement and can be omitted when using salted butter.
The equipment that matters
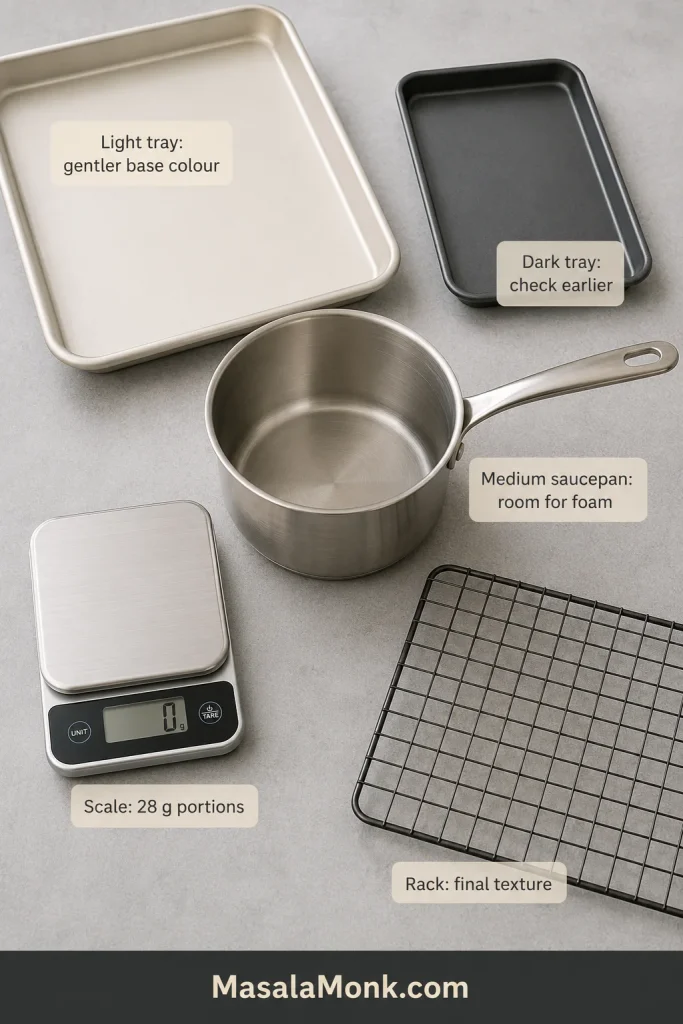
No electric mixer is needed. Most ordinary baking tools will work, but four choices make the result easier to read and repeat.
- Digital kitchen scale: keeps the ingredient amounts and 28 g portions consistent.
- Light-coloured metal trays: make the bases easier to judge than dark-coated metal.
- Medium saucepan: leaves room for the brief foam when the bicarbonate mixture is added.
- Wire rack: lets air move beneath the biscuits after their tray rest.
Before mixing, confirm the oven mode and decide which texture you want. Keep every biscuit on a tray close to the same thickness, and shape while the warm mixture still compacts easily.
Before the bowl: go to what the mixture and biscuits should look like, or return to the chewy-versus-crunchy guide before choosing thickness.
What the mixture and biscuits should look like
This is the stage when the bowl often looks less convincing than it really is. Coarse is normal; collapsing crumbs, pooled fat or a scorched base are not.
1. The brief foam
Once the bicarbonate water reaches the warm butter and golden syrup, expect a light foam that rises briefly and stays contained inside the saucepan. A fiercely boiling or darkening mixture means the pan is too hot.
After the foam settles, pour the warm syrup mixture into the dry ingredients and stir only until the bowl looks rough and coated.
2. A coarse mixture that compacts
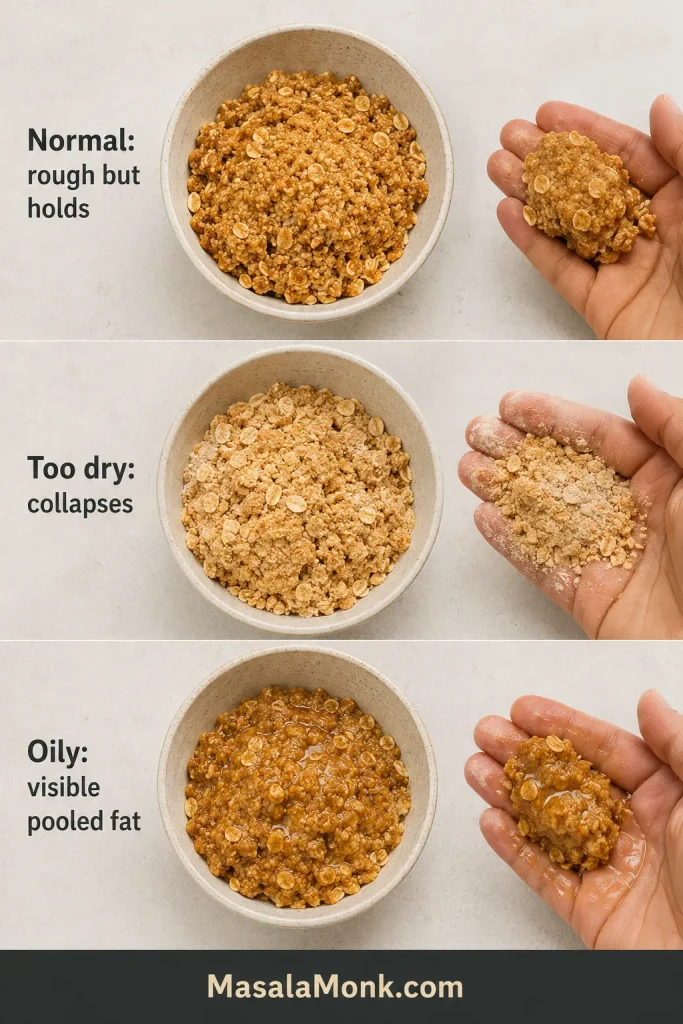
The oats and coconut should remain visible, with no pockets of dry flour or pooled fat. The mixture should look rough, but it should not collapse into loose crumbs.
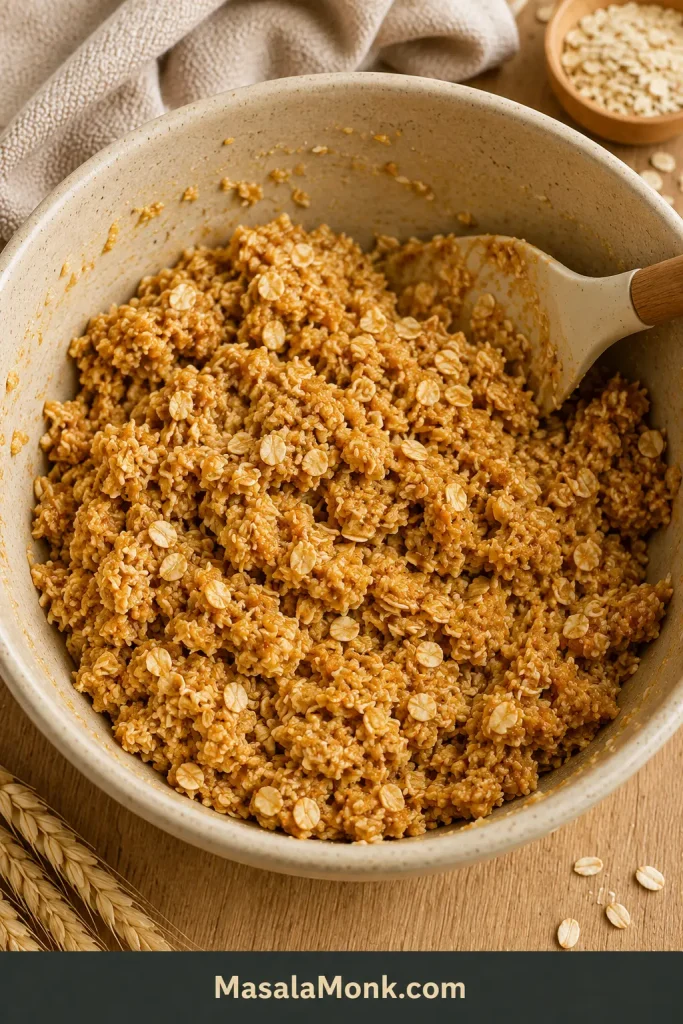
A heaped spoonful should compress into one piece in your hand, even if a few cracks remain on the surface. If it collapses immediately, add water in tiny increments and squeeze again.
3. The shaped disc from above and the side
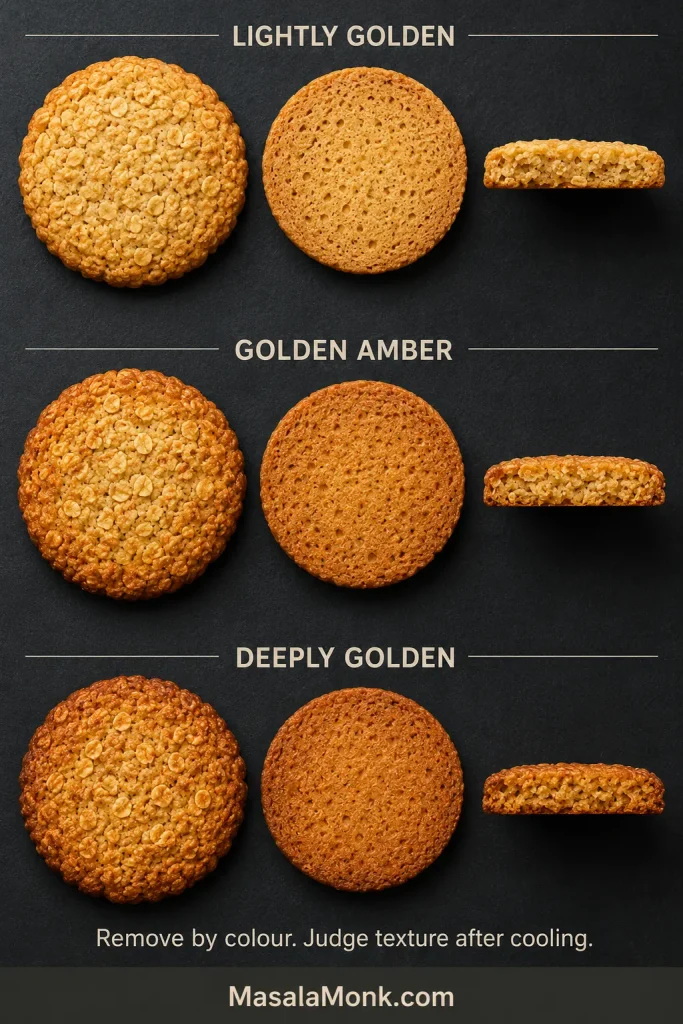
The starting width and thickness work together. Flatter discs heat through and dry sooner, while thicker discs protect more moisture in the centre. The biscuits will spread further in the oven, and the exact amount depends on the mixture, tray and heat. Aim for the overall shape rather than perfect geometry.
4. Three removal colours
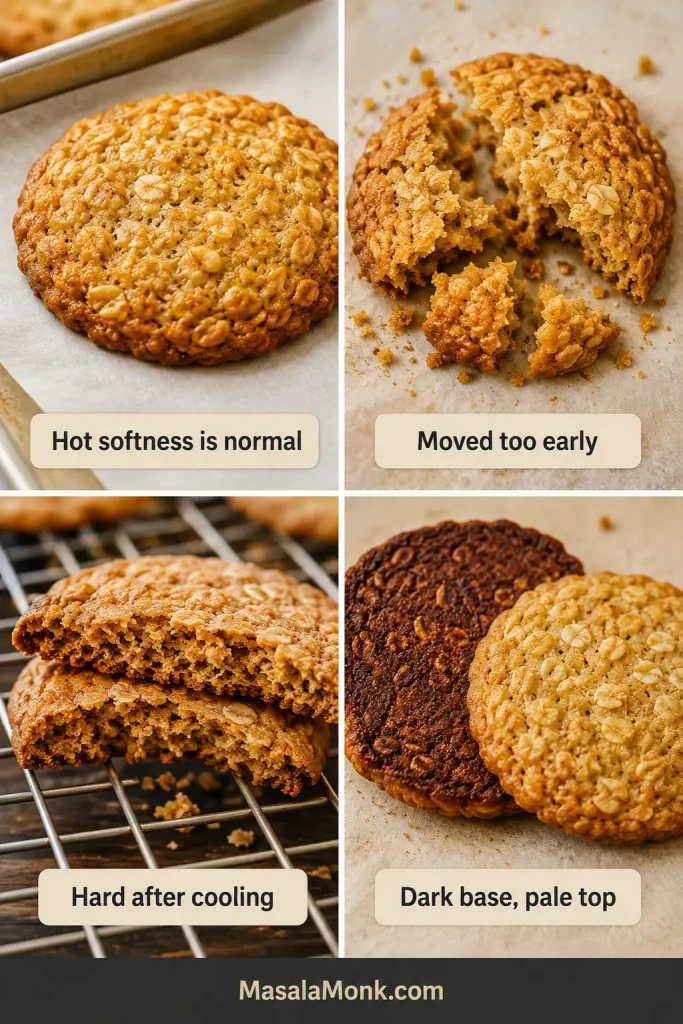
Soft biscuits have lightly golden edges and a soft-looking centre. The crisp-edged version has a medium-golden perimeter and no wet shine. Deeply golden biscuits are evenly coloured towards the centre. A very dark base beneath a pale top signals excess heat from below rather than a properly crunchy finish.
Simple fixes for dry, hard or spreading Anzac biscuits
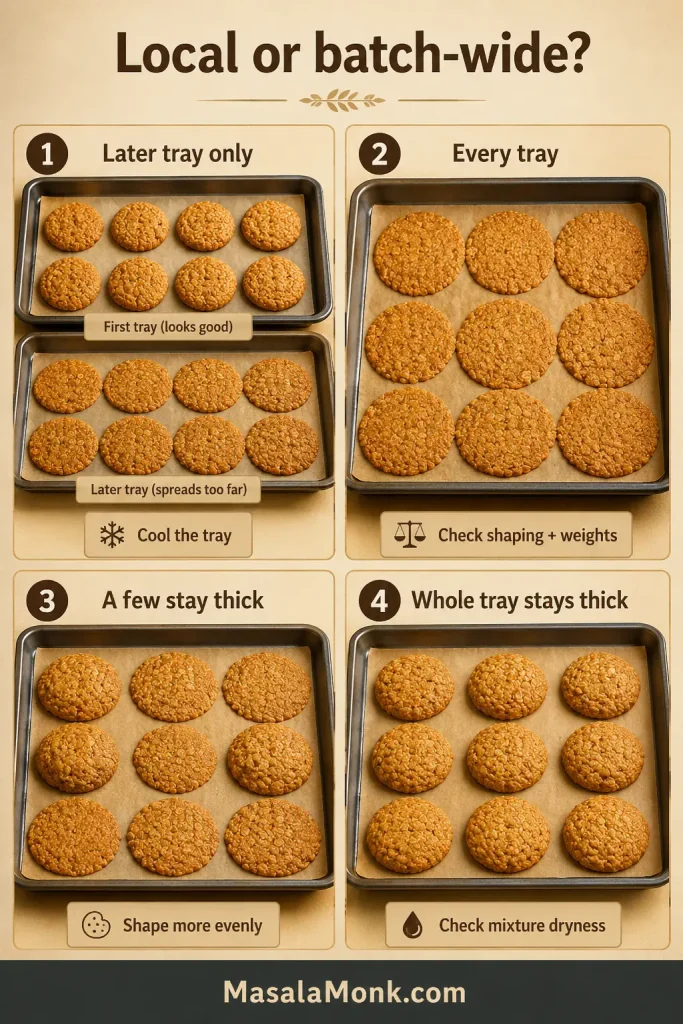
A disappointing first tray does not mean the whole bowl is lost. Most problems show themselves early and are easy to correct in the next batch. Adjust one thing at a time so you can see what helped.
When a test biscuit helps
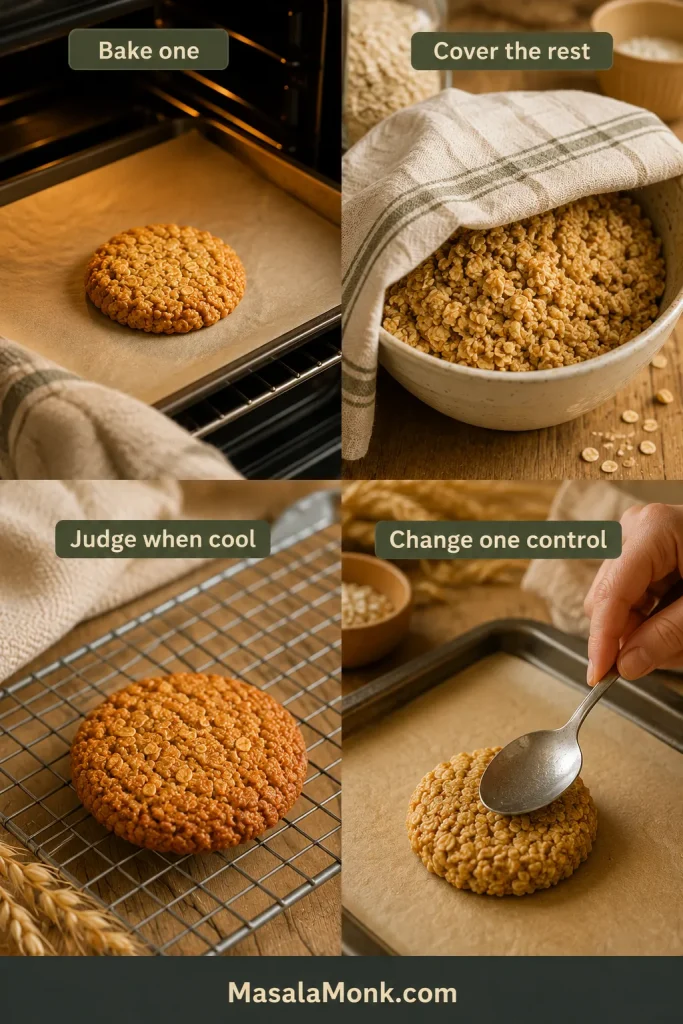
The standard recipe on a light tray can go straight into the oven. A test biscuit is most useful with cup measurements, a syrup substitute, quick oats, a dark tray or an unfamiliar oven.
While it bakes, loosely portion the remaining mixture and keep it covered. Use the cooled test mainly to adjust flattening and bake time. Oats and coconut continue absorbing moisture as they stand, so reassess the bowl before adding flour or water.
Is the mixture genuinely too dry or oily?
Crumbly but binding: normal. A portion that collapses in your hand needs a little more moisture. Add 5 ml / 1 teaspoon boiling water, mix and squeeze again; repeat only in the same small increment.
Glossy while warm: usually normal. If the mixture still slumps and leaves visible oil after 2–3 minutes—and the butter and syrup were weighed correctly—mix in no more than 8 g / 1 tablespoon flour.
Match the tray pattern to the next fix
| What you see | Most likely explanation | What to change next |
|---|---|---|
| Wide, thin or merging biscuits | A later tray spreading often points to warmer metal. If every tray spreads, check shaping, measurements and oat type. | Start with a cool tray, flatten less and verify the butter and syrup weights. |
| Thick biscuits with very little spread | A few thick biscuits usually mean uneven shaping. A whole thick tray points to a dry mixture or inaccurate measurements. | Check that a squeezed portion binds; if it does, flatten the next biscuits slightly more. |
| Hard after cooling | The portions were too thin or baked beyond the intended colour. | Keep more thickness and remove the next tray earlier. |
| Break when moved | The hot biscuits have not set enough on the tray. | Give chewy biscuits about 5 minutes and crunchy biscuits 8–10 minutes before transferring. |
| Crumble after cooling | The mixture was genuinely too dry or the portions were not compacted firmly enough. | Add boiling water 1 teaspoon at a time and squeeze before adding more. |
| Dark bases with paler tops | Dark metal, a low rack, strong fan heat or a hot reused tray. | Use a light-coloured tray on the centre rack; raise the rack or place an empty tray underneath if needed. |
Separate hot softness from real failures
On smaller screens, scroll horizontally to compare all columns.
After troubleshooting: use safe swaps and bigger changes; otherwise jump ahead to storage and freezing once the biscuits are baked.
Safe swaps and bigger recipe changes
A substitute can still make a good biscuit, but it will not behave exactly like the original ingredient. Weigh the replacement and expect some change in spread, colour, flavour or texture.
Changes that can work with care
| Change | Likely result | Best guidance |
|---|---|---|
| Light brown sugar to caster or granulated sugar | Lighter caramel flavour with a different spread and cooled texture | Use the same weight, bake one biscuit first and judge it only after cooling |
| Rolled oats to quick oats | Finer texture with less predictable absorption, spread and chew | Rolled oats are preferred; if using quick oats, keep the weight the same and bake one biscuit first. Avoid instant or minute oats. |
| Unsalted butter to salted butter | Similar spread with a saltier finish | Use the same weight and omit the added salt |
On smaller screens, scroll horizontally to compare all columns.
Can I make Anzac biscuits without golden syrup?
Yes, although no substitute behaves exactly like golden syrup. The closest practical alternative is 15 g mild treacle or light molasses plus 45 g mild honey. A full 60 g of mild runny honey is workable but gives a more pronounced flavour and often a softer finish. Maple syrup is thinner and the least predictable option for spread, so check the first biscuit’s spread and cooled texture before shaping the rest.
Changes that need their own formula
- Sweetened shredded coconut: it is usually moister, sweeter and stringier than desiccated coconut.
- Vegan block fat: different melting behaviour can alter spread and crispness.
- Gluten-free flour: the flour blend changes structure, and oats also require separate consideration.
Can I make Anzac biscuits without coconut?
Coconut-free Anzac biscuits are possible, and some documented early oat-based recipes omitted coconut. This particular batch, however, uses 60 g coconut as part of its dry balance. Removing it alone would leave too much butter and syrup for the remaining ingredients, so a coconut-free version needs different oat, flour and liquid amounts.
Looking for a different kind of oat biscuit? These easy healthy oat cookies use a deliberately lower-sugar, butter-free balance rather than relying on several substitutions in this formula.
How to store, freeze and serve Anzac biscuits
Room-temperature storage
Cool the biscuits completely before sealing them in a container; trapped warmth creates condensation and softens the edges. Store airtight at cool room temperature for about one week for the best texture and flavour.
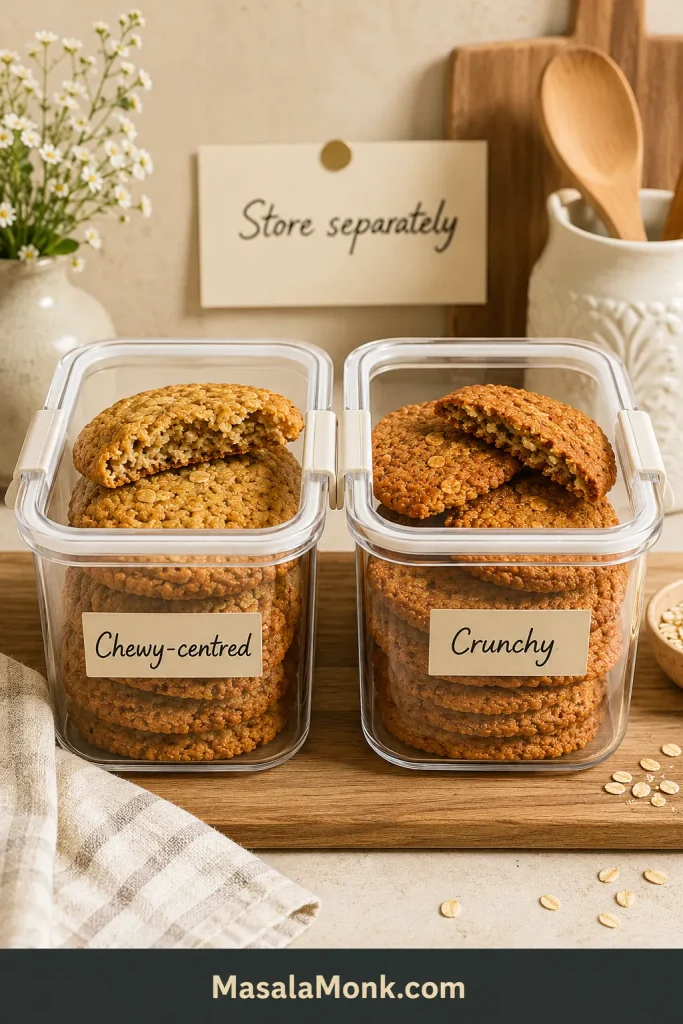
If you baked more than one texture, give them separate containers. Otherwise, the chewy biscuits gradually lend their moisture to the crunchy ones. Humid weather can soften even a well-baked crisp biscuit.
How to restore crunch
Arrange softened biscuits in a single layer on a lined tray. Warm at 150°C conventional, 135°C fan, 300°F conventional or 275°F convection for 5–8 minutes, checking at 5 minutes. Cool completely on a wire rack before judging the restored snap.
Freezing baked Anzac biscuits
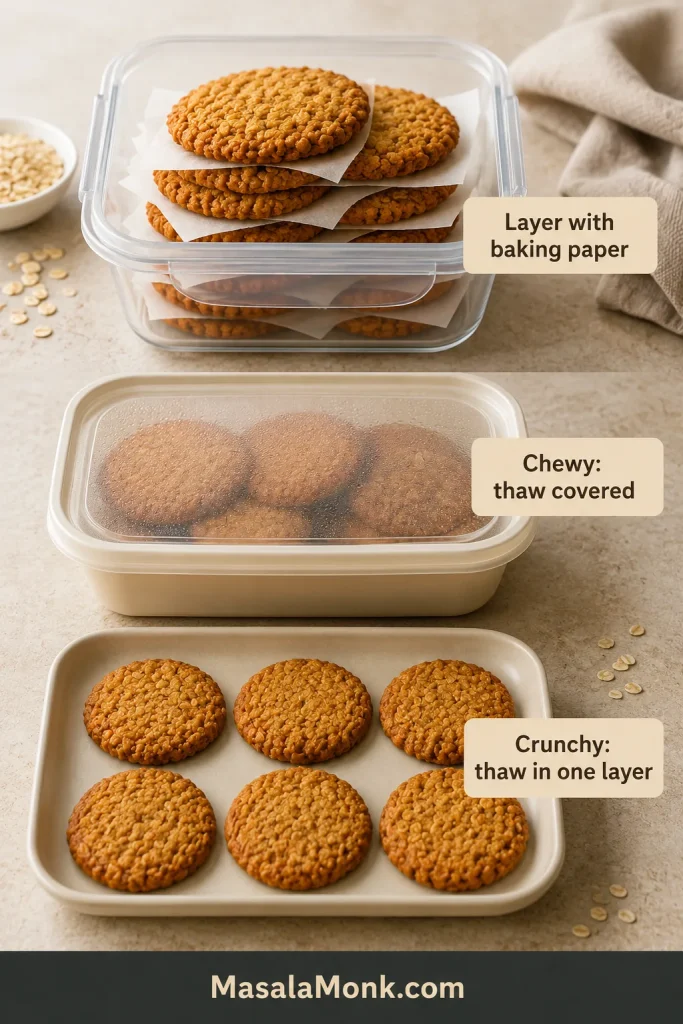
Once completely cool, layer the biscuits between baking paper in a freezer-safe container and freeze for up to three months for best quality. Thaw chewy biscuits in their container at room temperature. Thaw crunchy biscuits in a single layer so moisture can escape, then re-crisp if needed.
Serving and packing
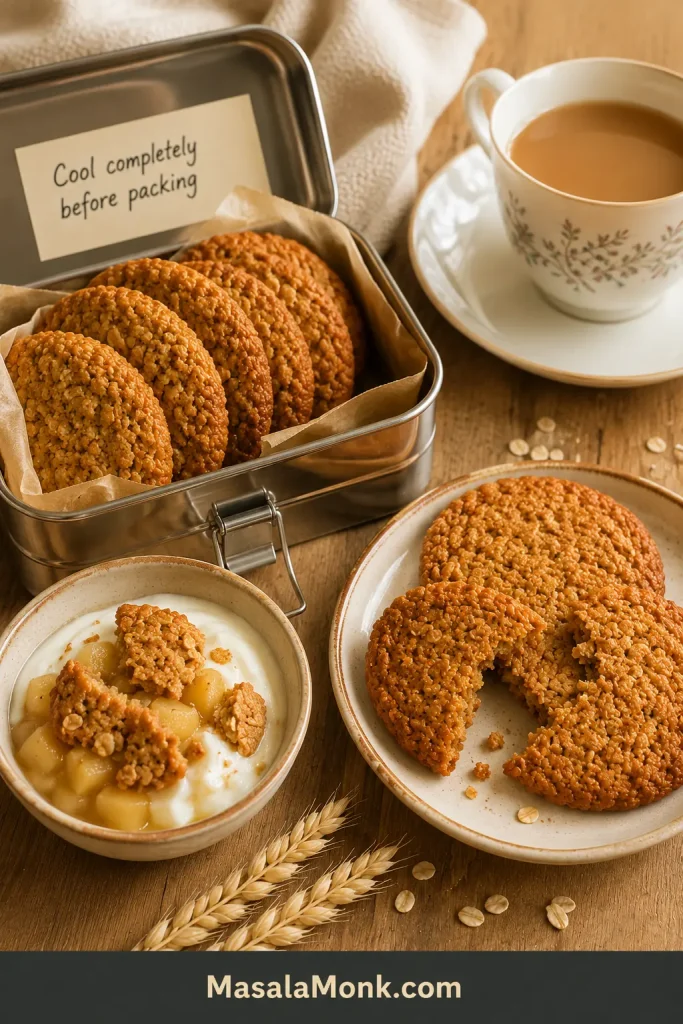
Pack any version only after it has cooled completely. The chewy-centred biscuits travel especially well in lunchboxes, while the crisp batch is ideal with tea or coffee. Broken pieces are lovely over vanilla ice cream, yogurt or warm stewed apples.
Near the end: read the traditional-style history note, check quick FAQs, or go back to the top.
Are these traditional or original Anzac biscuits?
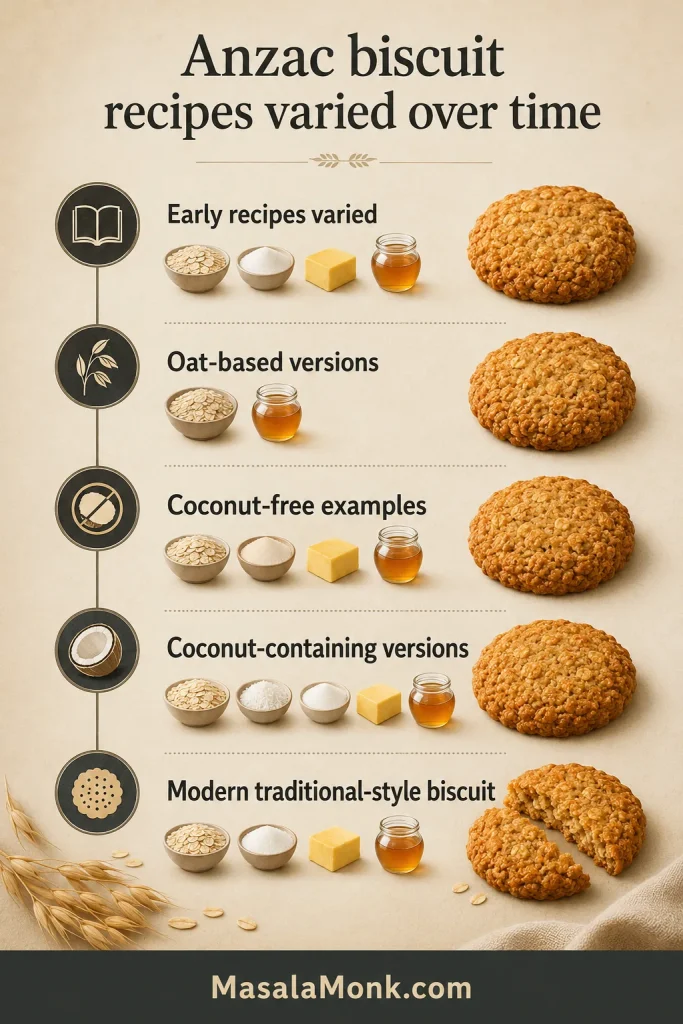
This is a traditional-style modern Anzac biscuit: eggless, oat-rich and made with butter, golden syrup and bicarbonate of soda, with coconut in the version most people recognise today. It is not presented as one uncontested “original 1914 recipe,” because the historical record is more varied than that phrase suggests.
The Department of Veterans’ Affairs Anzac Portal notes that many recipe variations exist and that early recipes could include ingredients such as eggs and jam while omitting coconut.
In the Australian War Memorial’s collection of Anzac biscuit recipes, a 1926 oat-based version appears without coconut, while a 1933 Country Women’s Association version included it.
Do not confuse the sweet homemade biscuit with the hard army biscuit or “Anzac wafer” used as a bread substitute. Because the name is tied to remembrance as well as baking, the history deserves more care than a neat but unsupported origin story. Over time, the familiar biscuit emerged through several recipes, and those variations are part of what community cookbooks and home kitchens preserved.
A note on the name
The DVA also notes that many Australians prefer the customary term Anzac biscuit. Discussing “Anzac cookies” or making recipe variations is not itself a breach, although, under Australian regulations, commercially sold Anzac biscuits need a permit to use the word “Anzac.”
Frequently asked questions
Can I use quick oats instead of rolled oats?
Rolled or old-fashioned oats are recommended for the spread and texture described here. Quick oats can be used as a variation, but their finer particles may absorb the liquid faster and change spread and chew, so bake one biscuit before shaping the entire batch. Avoid instant or minute oats, which are less predictable; this guide to quick oats and instant oats explains the distinction.
Can I bake two trays at once?
Yes, although one tray on the centre rack usually colours more evenly. For two trays, wait until the biscuits have begun setting, then turn each tray and trade rack levels for more even colour.
Why do Anzac biscuits usually contain no egg?
The warm syrup mixture gives the dry ingredients enough moisture to bind, while the flour sets the biscuit without egg. Some earlier recipes associated with the name did contain egg.
Is bicarbonate of soda the same as baking soda?
Yes. Bicarbonate of soda is the Australian and UK term for baking soda; it encourages browning, spread and crispness. It is not baking powder, which behaves differently.
Why are they called biscuits rather than cookies?
International readers may recognise this style of bake as a cookie, but Anzac biscuit is the customary name in Australia and New Zealand. The DVA naming guidance is summarised in the historical section above.
Make the Anzac biscuit your household loves
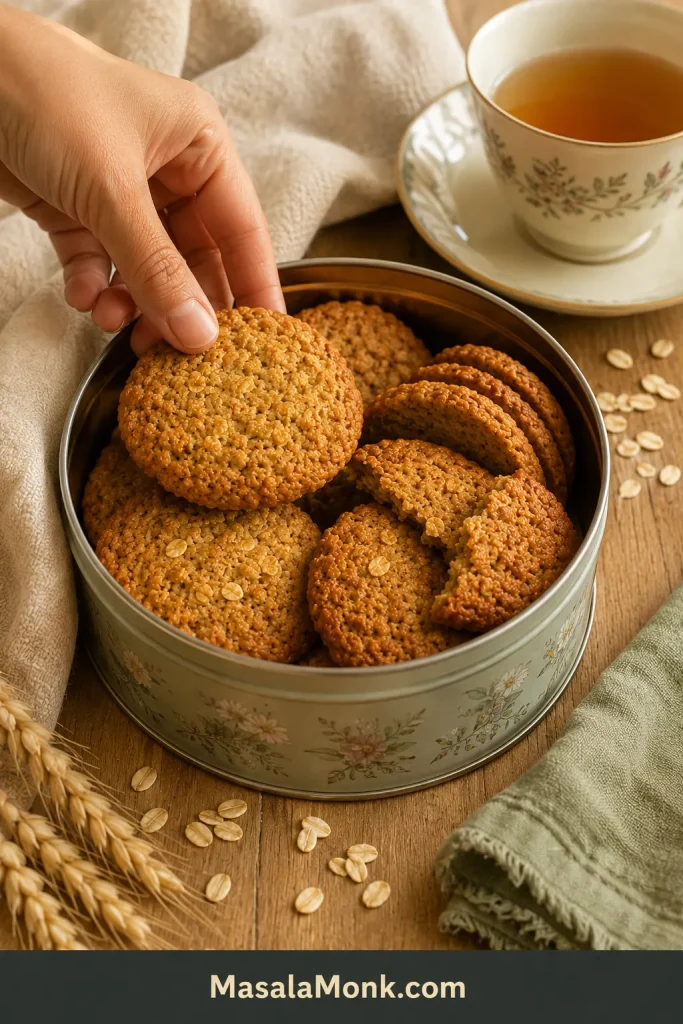
Part of the pleasure of Anzac biscuits is the small debate around the biscuit tin: the soft bend, the crisp edge or the deep golden snap. Whichever tray disappears first, the toasted oats, coconut and golden syrup will still taste unmistakably like an Anzac biscuit.
Which texture wins in your kitchen: soft and chewy, crisp around the edges, or deeply golden and crunchy?








