Posted on Leave a comment

Roasted Carrots Recipe: Easy Oven Roasted Carrots With Honey, Maple & Garlic

Roasted carrot pieces on a cream platter with browned edges, fresh herbs, lemon wedges, and a light glossy finish.

Roasted carrots should be easy: browned at the edges, tender through the center, and sweet enough to make everyone reach for more. The trouble is that carrots can also turn pale, dry, wrinkled, mushy, or sticky-burnt when the pieces are uneven, the pan is crowded, or the glaze goes in too early.

This roasted carrots recipe keeps the main method simple first: carrots, olive oil, salt, pepper, a hot oven, and a roomy sheet pan. Once that tray works, every other version is just a finish — honey roasted carrots, maple glazed carrots, garlic butter carrots, brown sugar carrots, baby carrots, whole carrots, rainbow carrots, or a prettier holiday platter.
The promise is dependable roasted carrots without babysitting the pan. Make the plain olive-oil tray once, then use the same method whenever you want a glossy honey finish, a buttery maple holiday version, a savory garlic butter side, or warm spiced carrots with cumin, chili, and lemon.

Quick Answer: How to Roast Carrots

Roast carrots at 425°F / 220°C for 20 to 30 minutes, depending on thickness. Cut them into even 2 to 3 inch diagonal pieces, toss with olive oil, salt, and pepper, then spread them in one layer on a rimmed sheet pan. They are done when the centers are fork-tender and the edges are browned.

For most cut carrots, 425°F / 220°C gives the best mix of browned edges and tender centers. Move down to 400°F / 200°C for large whole carrots, very thin pieces in a strong fan oven, or heavier maple and brown sugar glazes.

Honey and maple are least likely to scorch when added during the final 5 to 10 minutes or tossed with the carrots after roasting. Fresh garlic is best added halfway, warmed in butter first, or used as a finish. Garlic powder can go in from the start.

The rule that saves the tray: make the pieces similar in thickness, give them space, and add sweet glazes late. That is the difference between roasted carrots and steamed, dry, or burnt carrots.

Ready to cook? Jump to the recipe card. Still choosing a finish? Compare the roasted carrot versions.

Roasted Carrots Recipe Card

Easy Oven Roasted Carrots With Honey, Maple & Garlic Options

A reliable tray of oven roasted carrots for 2 to 3 inch carrot pieces, with browned edges, tender centers, and optional honey, maple, brown sugar, garlic butter, baby carrot, and rainbow carrot finishes.

Yield: 4 to 6 servings
Prep time: 10 minutes
Cook time: 22 to 30 minutes for 2 to 3 inch pieces
Total time: About 35 to 40 minutes
Method: Oven roasted
Oven temperature: 425°F / 220°C
Texture target: Fork-tender centers, browned edges
Diet: Vegetarian; vegan if using olive oil and maple syrup instead of butter or honey

Ingredients

  • 2 lb / 900 g carrots, peeled or scrubbed
  • 2 tablespoons / 30 ml olive oil
  • ½ to ¾ teaspoon fine sea salt, plus more to taste
  • ¼ teaspoon black pepper, or to taste
  • ½ teaspoon garlic powder, optional
  • 1 tablespoon / 15 ml honey or maple syrup, optional, for a light glaze
  • 1 to 2 tablespoons chopped parsley, thyme, dill, or chives
  • 1 to 2 teaspoons lemon juice, optional

Optional light glaze: use 1 tablespoon honey or maple syrup for a gentle shine, or up to 2 tablespoons for a sweeter finish. Add near the end of roasting or toss with the carrots after roasting. For a simple savory tray, skip the glaze and finish with herbs, lemon, and salt.

Instructions

  1. Heat the oven to 425°F / 220°C. Place a rack in the center of the oven.
  2. Wash and dry the carrots. Peel rough-skinned carrots, or scrub fresh thin-skinned carrots well.
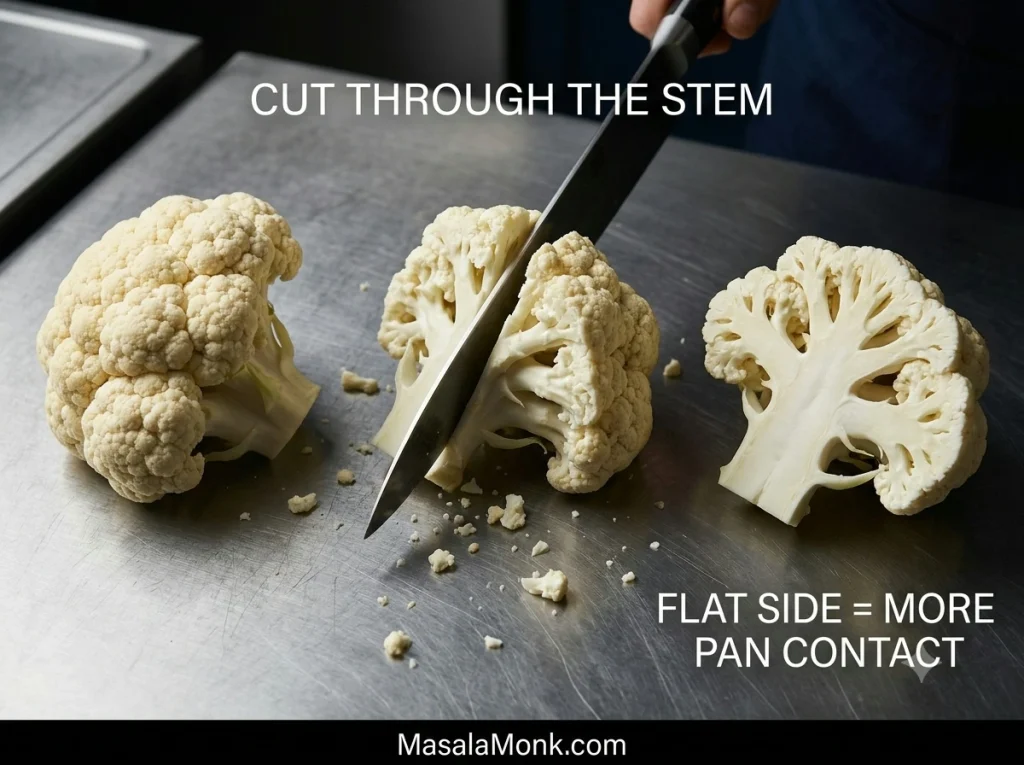
  3. Cut the carrots diagonally into 2 to 3 inch pieces. Halve or quarter thick pieces lengthwise so the carrots are similar in thickness.
  4. Toss the carrots with olive oil, salt, pepper, and garlic powder if using. The pieces should look lightly shiny, not drenched.
  5. Spread the carrots in one layer on a large rimmed sheet pan. Give them space now, because a crowded pan can smell good and still give you pale carrots.
  6. Roast for 22 to 30 minutes, tossing halfway, until the edges are browned and the centers are fork-tender.
  7. For honey or maple roasted carrots, drizzle with honey or maple syrup during the final 5 to 10 minutes, or toss with the glaze just after roasting. The carrots should look roasted before they look glazed.
  8. Finish with herbs, lemon juice, and a little extra salt if needed. Serve warm.

Success Notes

  • Do not crowd the pan: use two pans if the carrots overlap.
  • Deeper browning: use a bare metal sheet pan.
  • Easy cleanup: use parchment rated for 425°F / 220°C for the basic recipe, or foil for sticky maple and brown sugar glazes.
  • Fresh garlic: add it halfway, warm it in butter first, or toss it with the carrots after roasting.
  • Baby carrots: pat them very dry before roasting so they do not steam.
  • Large or dry carrots: parboil until just crisp-tender, dry well, then roast for softer centers and less shriveling.
  • Fan or convection ovens: start checking 3 to 5 minutes earlier, especially with thin or glazed carrots.
  • Scaling: for every extra 1 lb / 450 g carrots, add about 1 tablespoon / 15 ml oil and ¼ teaspoon salt.
  • Doubling the recipe: use two sheet pans and rotate them halfway. Do not pile 4 lb / 1.8 kg carrots onto one pan.

Want the method explained with visuals? See the step-by-step guide. If your carrots usually turn pale, dry, or burnt, jump to troubleshooting.

The 5-Point Roasted Carrot Check

The tray usually fails before it ever goes into the oven. Run this quick check first and roasted carrots become almost boringly reliable.

  • Similar thickness: thick tops are halved or quartered so they cook with the thinner ends.
  • Roomy pan: carrots sit in one layer instead of steaming in a pile.
  • Dry surface: especially important for bagged baby carrots and mini carrots.
  • Protected garlic: garlic powder can start early; fresh garlic needs gentler timing.
  • Late sweet glaze: honey, maple, and brown sugar should shine, not burn before the centers soften.

The biggest visual fixes are usually pan spacing, even cut size, and late glaze timing.

Pan note: for better browning, use a roomy bare metal sheet pan. Parchment makes cleanup easier but gives slightly lighter edges. Honey and maple taste cleanest when the carrots already look roasted before the glaze goes on.

Which Roasted Carrot Version Should You Make?

Make the simple olive-oil tray first if you are unsure. The first tray teaches you more than any variation. Every version below uses the same roasting method; only the finish changes.

SituationBest VersionWhy It Works
First time making thisSimple olive oil roasted carrotsTeaches the timing without glaze risk
Kids or family dinnerHoney roasted carrotsGlossy, sweet, familiar
Thanksgiving, Christmas or EasterMaple butter carrots with thymeWarm, shiny, holiday-friendly
Roast chicken, beef or porkGarlic butter lemon carrotsSavory enough for rich mains
Less sweet versionCumin, chili, lemon and herbsWarm and bright without being sugary
Pretty platterRainbow carrots with feta, herbs or pomegranateColorful and finished-looking

Choose Your Roasted Carrot Finish

Once the base tray works, the finish decides the mood: plain and savory for a weeknight, honey-glossed for family dinner, maple-buttery for holidays, garlic butter for roast dinners, or cumin-chili-lemon when you want something warmer and less sweet.

After choosing a version, use this table to keep the finish balanced and timed correctly.

VersionFlavorWhat to AddTiming
Simple oven roasted carrotsSavory, sweet, cleanOlive oil, salt, pepper, garlic powderSeason before roasting
Honey roasted carrotsGlossy, sweet-savoryHoney, lemon, herbs, black pepperAdd honey near the end or after roasting
Maple glazed carrotsWarm, buttery, festiveMaple syrup, butter, thyme, chili flakesAdd maple near the end; use 400°F for heavy glaze
Brown sugar carrotsCaramel-like, richBrown sugar, butter or oil, flaky saltUse lightly and watch closely
Garlic butter carrotsRich, savory, butteryButter, fresh garlic, parsley, lemonToss with finished carrots
Baby or mini carrotsSweet, simple, quickOil, salt, pepper, optional honeyPat dry first; check around 18 minutes
Whole or rainbow carrotsElegant, colorful, naturally sweetMaple, herbs, lemon, feta, nuts, pomegranateCut evenly and finish after roasting
Sweet spiced roasted carrotsWarm, bright, lightly spicedCumin, coriander, chili, honey, lemonSpices before roasting; honey and lemon after

If you are cooking now, the recipe card above is enough. The sections below explain how to adjust the same tray for different carrot cuts, glazes, ovens, holiday servings, and the little problems that can make carrots turn pale, dry, or sticky-burnt.

Why This Roasted Carrots Recipe Works

A hot oven gives the tray its roasted flavor. At 425°F / 220°C, the edges can brown while the centers become tender instead of collapsing.

What Browned Roasted Carrot Edges Should Look Like

Use the browned edges as your visual cue. The centers should look tender, while the outside has enough color to taste sweet, savory, and roasted.

Close-up of roasted carrots with caramelized browned edges, black pepper, green herbs, and tender orange centers.
The browned edges are the flavor signal. Once the carrots look caramelized outside and tender inside, they only need a light finish to taste complete.

Even thickness makes the timing predictable. Carrots taper, so thick tops need to be split lengthwise. A single layer lets steam escape, which is why roomy pans brown better than crowded pans.

The glaze is controlled instead of dumped on early. A light glaze should cling to the carrots, not sit in puddles on the pan. Add it late and the carrots turn glossy instead of bitter.
If roasted carrots have disappointed you before, it was probably a cut-size, pan, or glaze-timing problem — not a carrot problem.

Roasted Carrots Ingredients and Smart Swaps

The ingredient list stays short because the oven does most of the work. What matters is starting with dry carrots, coating them lightly but evenly, salting them enough, and keeping sweet glazes controlled.

Carrots, olive oil, salt, pepper, honey, maple syrup, lemon, herbs, and butter arranged for making roasted carrots.
The base tray stays simple with carrots, oil, salt, and pepper. Then honey, maple, butter, lemon, garlic, or herbs can change the flavor without changing the method.
  • Carrots: medium carrots are easiest. Baby-cut carrots, mini carrots, whole slim carrots, and rainbow carrots all work, but very wet carrots need extra drying.
  • Olive oil: use about 1 tablespoon per pound / 450 g carrots. The pieces should look lightly shiny, not slick.
  • Salt and pepper: salt makes carrots taste sweeter and fuller; pepper balances the natural sweetness.
  • Garlic powder: the most reliable garlic option from the start because it does not burn as easily.
  • Fresh garlic: best warmed in butter, added halfway, or tossed with finished carrots.
  • Honey, maple or brown sugar: use lightly and add near the end or after roasting for a glossy finish.
  • Lemon, vinegar, herbs or chili: small bright finishes keep sweet carrots from tasting flat.
  • Butter: best as a finish or glaze; olive oil is easier for the main high-heat roast.

Best Pan for Roasted Carrots

The pan is where most roasted carrots are won or lost. Seasoning matters, but space matters more. A large rimmed sheet pan gives moisture room to escape, which helps the carrots brown instead of steam.

Crowded Pan vs Spaced Carrots

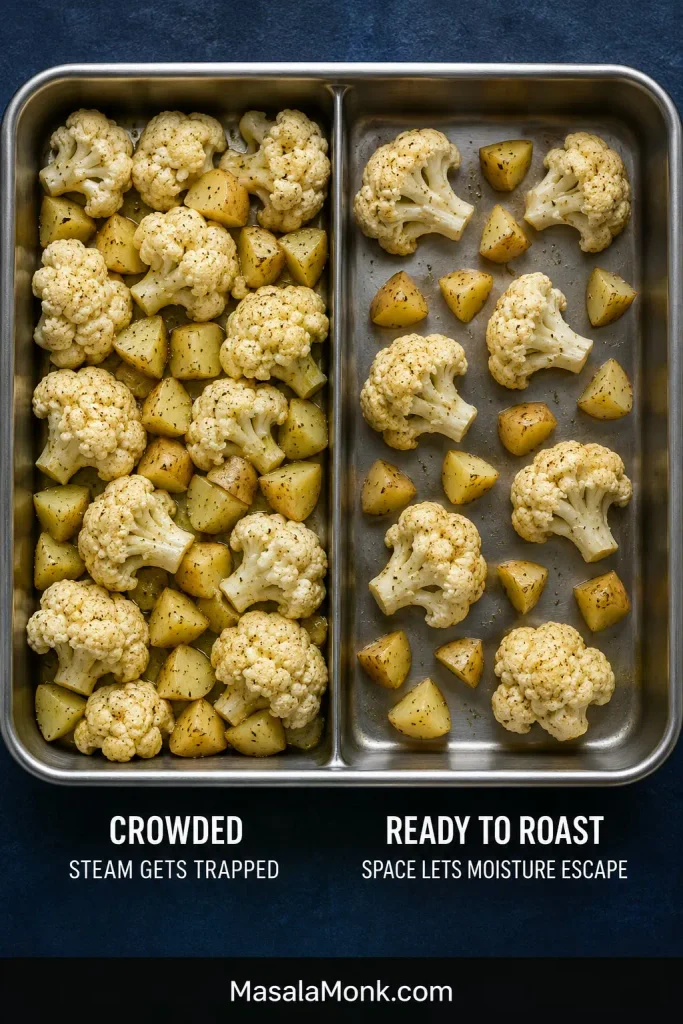
The same carrot cut can come out pale or caramelized depending on pan space. If the pieces overlap, spread them onto a second sheet pan before roasting.

Side-by-side comparison of crowded pale carrots and properly spaced browned carrots on sheet pans.
Crowding changes the result fast. A second sheet pan is often the difference between soft steamed carrots and caramelized roasted edges.
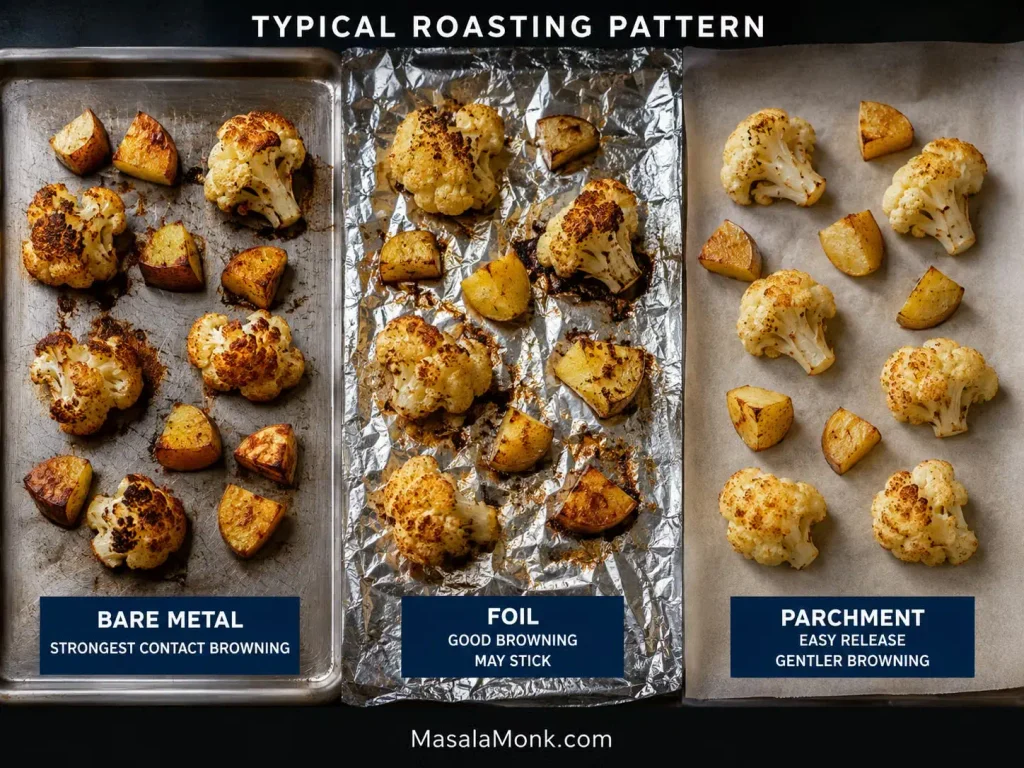
  • Bare metal: best for deeper browning.
  • Parchment: easier cleanup if rated for 425°F / 220°C, with slightly lighter browning.
  • Foil: useful for sticky maple, honey, or brown sugar glazes.
  • Preheated sheet pan: helpful for wet baby carrots, but use carefully and skip it for your first heavy sugar-glaze batch.

How to Roast Carrots Step by Step

1. Heat the oven

Preheat the oven to 425°F / 220°C. A properly hot oven helps the carrots brown instead of slowly drying out.

2. Wash, dry and peel

Scrub the carrots well, then dry them. Peeling is optional for fresh, thin-skinned carrots. Older carrots with rough skins usually look and taste better peeled.

3. Cut even pieces

Cut the carrots diagonally into 2 to 3 inch pieces. Split thick tops lengthwise so the pieces are close in thickness, even if they are not identical in shape.

Carrots cut into 2 to 3 inch diagonal pieces on a wooden board, with thicker carrot tops split lengthwise.
Even thickness matters more than perfect shape. Therefore, split thick carrot tops lengthwise so the centers soften before the narrow edges dry out.

4. Toss with oil and seasoning

Toss with olive oil, salt, pepper, and garlic powder if using. The oil should coat the carrots lightly and evenly.

Carrot pieces tossed in a bowl with olive oil, salt, pepper, and seasoning before roasting.
Aim for a light, even coating before the carrots hit the pan. Too little oil can make them dry, while too much can make them greasy instead of roasted.

5. Spread with space

Give the carrots room on the pan. If they look crowded before roasting, they will taste crowded after roasting — softer, paler, and less caramelized.

Carrot pieces spread in a single layer with visible space between them on a rimmed sheet pan.
Leave a little breathing room on the sheet pan. That small gap helps moisture escape, which is what turns plain carrots into browned oven roasted carrots.

6. Roast and toss halfway

Roast for 12 to 15 minutes, toss or flip, then continue roasting until the centers are tender and the edges are browned.

Carrots halfway through roasting on a sheet pan, being turned with a spatula as the edges begin to brown.
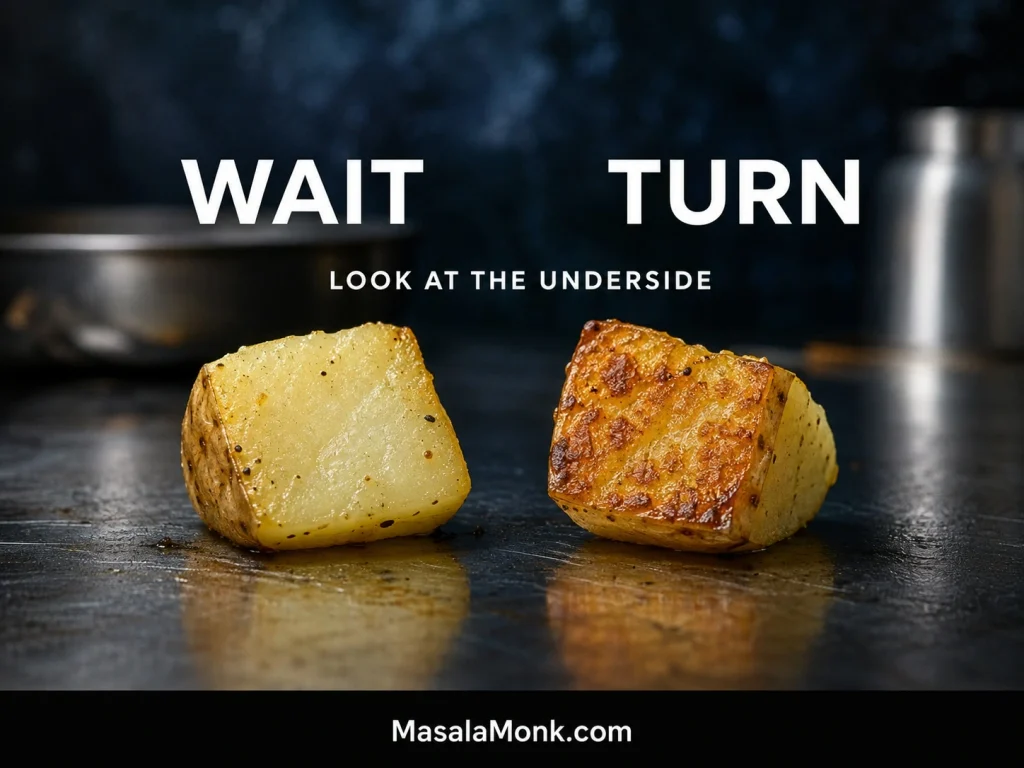
The halfway toss is not just busywork. It exposes new sides to the hot pan, so the carrots brown more evenly instead of roasting on one face.

7. Add glaze after the carrots start roasting

For honey, maple, or brown sugar carrots, let the carrots roast first and glaze second. Add the sweet glaze during the final 5 to 10 minutes or toss it with the carrots after roasting. For garlic butter carrots, warm the garlic in butter and toss with the finished tray.

Roasted carrots on a pan with a small bowl of honey or maple glaze nearby before the glaze is added.
Think of honey or maple as the finishing layer, not the main cooking step. Add it after browning so the glaze shines instead of burns.

8. Finish bright

Once the carrots are hot and browned, a small finish — lemon, herbs, flaky salt, chili, feta, tahini, yogurt, or toasted nuts — makes them taste brighter and more complete.

Roasting Time Chart for Carrots

The timer is a guide, not a contract. Thin carrots finish quickly; thick carrots need more time. Start checking early when pieces are thin, glazed, or close to the edge of the pan.

Carrot Type or CutOven TemperatureApprox. TimeBest Use
Thin diagonal slices425°F / 220°C15 to 20 minutesFast weeknight side
2-inch chunks425°F / 220°C20 to 25 minutesEveryday roasted carrots
2 to 3 inch diagonal pieces425°F / 220°C22 to 30 minutesBest default cut
Baby-cut carrots425°F / 220°C18 to 25 minutesNo-chop convenience
Whole slim carrots425°F / 220°C25 to 35 minutesHoliday presentation
Thick whole carrots400°F / 200°C35 to 45 minutesGentler cooking for large carrots
Large whole carrots with rich glaze400°F / 200°C35 to 50 minutesHoliday-style glazed carrots

How to Know Roasted Carrots Are Done

Roasted carrots are done when a fork slides into the center with light resistance. They should be tender but not collapsing. You want bend, not collapse.

Fork-Tender Roasted Carrots

The fork test matters more than the timer. Check the thickest pieces first, because they decide whether the tray is truly done.
A fork testing a roasted carrot piece to show a tender center and browned outside.
Use the fork test before pulling the tray. The carrot should offer light resistance, which means it is tender without turning soft or mushy.

The edges should look browned and slightly caramelized. If the carrots are browned but still firm in the middle, lower the oven to 375°F / 190°C and roast for a few more minutes. If they are soft but pale, the pan was probably crowded, the oven was too low, or the carrots were too wet.

Temperature is the next lever: hotter for browning, gentler for large carrots or heavier glazes.

Best Temperature for Roasted Carrots

The best default temperature for roasted carrots is 425°F / 220°C. It gives the best balance of browned edges and tender centers for most cut carrots. For larger whole carrots or heavier sweet glazes, move down to 400°F / 200°C. Choose 375°F / 190°C only for gentler roasting, such as after parboiling or when your oven runs hot.

Using a fan or convection oven? Start checking 3 to 5 minutes earlier. If your oven browns aggressively, use 400°F / 200°C for glazed carrots or thin pieces.

Once the carrots roast properly, the finish is where the same pan can become a weeknight side, a kid-friendly dinner vegetable, or the glossy holiday dish people actually take seconds of.

Honey, Maple, Brown Sugar and Garlic Butter Finishes

The glaze should shine, not swim. A light coating makes carrots glossy; too much glaze turns the pan sticky before the centers finish cooking. The carrots should taste like roasted carrots first, with sweetness around the edges.

Honey makes the carrots glossy and familiar, maple makes them deeper and more holiday-like, and garlic butter pulls the whole tray back toward savory dinner territory.

Sweet carrots also need a small counterpoint — lemon, vinegar, salt, black pepper, chili, or fresh herbs — so the flavor stays balanced. The lemon or vinegar at the end is small, but it is what keeps sweet carrots from tasting like dessert.

Looking for a specific finish? Jump to honey, maple, brown sugar, garlic butter, or savory roasted carrots without honey.

Glaze Formula Table

Use these amounts for a 2 lb / 900 g tray. Keep the glaze light for the main recipe, especially at 425°F / 220°C.

VersionFor 2 lb / 900 g CarrotsWhen to AddBest Finish
Honey roasted carrots1 to 2 tbsp / 15 to 30 ml honeyFinal 5 to 10 minutes or after roastingLemon, parsley, thyme, black pepper
Maple glazed carrots1 to 2 tbsp / 15 to 30 ml maple syrupFinal 5 to 10 minutes; use 400°F for heavy glazeButter, thyme, rosemary, chili flakes
Brown sugar carrots1 to 2 tbsp / 12 to 25 g brown sugar + oil or butterLight amount before roasting or near the endFlaky salt, lemon, black pepper
Garlic butter carrots2 to 3 tbsp / 28 to 42 g butter + 2 to 3 garlic clovesAfter roastingParsley, lemon juice
Honey garlic butter carrots3 tbsp / 42 g butter + 1½ to 2 tbsp / 22 to 30 ml honey + 3 garlic clovesBrush lightly near the end; toss more after roastingLemon, parsley, flaky salt
Honey balsamic carrots1 tbsp / 15 ml honey + 1 tbsp / 15 ml balsamic vinegarNear the endThyme, black pepper
Sweet spiced carrots½ tsp cumin + ½ tsp coriander + pinch chili + 1 tbsp honey + lemonSpices before roasting; honey and lemon afterCilantro, mint, yogurt, tahini

Honey Roasted Carrots

The best honey version should look glossy, not sticky. Use 1 to 2 tablespoons honey for 2 lb / 900 g carrots and add it near the end or after roasting. Finish with lemon, black pepper, flaky salt, parsley, thyme, or a tiny pinch of chili. These carrots work well beside a salty, smoky, or mustardy main like honey glazed ham.

Honey roasted carrots on a cream plate with lemon, herbs, black pepper, and a light glossy glaze.
Honey roasted carrots should taste sweet but still balanced. Finish with lemon, herbs, or black pepper so the glaze feels bright rather than heavy.

Maple Glazed Carrots

Maple carrots are the holiday version: buttery, shiny, and a little deeper than honey. Use 1 to 2 tablespoons maple syrup for 2 lb / 900 g carrots. For a heavier maple glaze, roast at 400°F / 200°C, use foil for easier cleanup, and toss more often. They sit nicely beside a creamy side like sweet potato casserole.

Maple glazed carrots with thyme, browned edges, and a warm buttery finish on a rustic plate.
Maple brings a deeper, cozier sweetness than honey. As a result, these carrots work especially well beside roast chicken, turkey, ham, or holiday mains.

Brown Sugar Roasted Carrots

Brown sugar gives carrots a caramel-like flavor. Use 1 to 2 tablespoons brown sugar, mixed with olive oil or melted butter so it coats evenly. Balance the sweetness with lemon juice, vinegar, black pepper, chili, or flaky salt.

Brown sugar roasted carrots with caramelized edges, flaky salt, thyme, butter, and a glossy finish.
Brown sugar creates a richer caramel-like finish. However, a light hand matters here; flaky salt, lemon, or pepper keeps the side from tasting too sweet.

Garlic Butter Roasted Carrots

Garlic butter carrots should smell savory first, sweet second. Melt 2 to 3 tablespoons butter with 2 to 3 minced garlic cloves, warm just until fragrant, then toss with the roasted carrots at the end. Add parsley and lemon juice before serving. This version is especially good with cozy mains such as cream of mushroom chicken.

Garlic butter being spooned over roasted carrots with parsley and lemon on a ceramic plate.
Garlic butter is best added after roasting. The hot carrots melt it into the edges, while the garlic stays fragrant instead of turning bitter.

Honey Garlic Butter Carrots

For honey garlic butter carrots, warm 3 tablespoons / 42 g butter with 3 minced garlic cloves just until fragrant, then take it off the heat and stir in 1½ to 2 tablespoons honey. Brush a little over the carrots during the final few minutes, then toss with the rest after roasting for a glossy finish.

Honey Balsamic Roasted Carrots

For a tangy-sweet version, use 1 tablespoon honey and 1 tablespoon balsamic vinegar near the end of roasting. Balsamic gives the carrots depth and keeps the glaze from tasting only sweet.

Sweet Spiced Roasted Carrots

For a less-sweet version, season the carrots with olive oil, salt, pepper, ½ teaspoon cumin, ½ teaspoon coriander, and a small pinch of chili powder. Roast as usual, then finish with honey, lemon juice, and fresh herbs.

Savory roasted carrots with cumin, chili flakes, lemon, herbs, black pepper, and a creamy dip.
For savory roasted carrots, skip the sweet glaze and lean on cumin, chili, lemon, herbs, and salt. The oven still brings out the carrots’ natural sweetness.

Simple glaze timing: oil, salt, pepper, and garlic powder can go in before roasting. Honey, maple, brown sugar, lemon, vinegar, fresh herbs, yogurt, tahini, and delicate toppings are usually better near the end or after roasting.

Baby, Mini, Whole and Rainbow Carrots

Baby-cut carrots

Baby carrots and packaged baby-cut carrots roast well, but they need to be dry. Bagged baby carrots often hold surface moisture, which makes them steam instead of brown. Pat dry, toss with oil and seasoning, then roast at 425°F / 220°C for 18 to 25 minutes.

Raw baby carrots being dried on a kitchen towel before roasting, with a sheet pan and seasonings nearby.
A quick towel-dry gives baby carrots a better start. Less surface moisture means more browning, better texture, and less tray steam.

Mini carrots

Mini carrots roast like baby carrots, but timing depends on thickness. Slim mini carrots may finish around 15 to 18 minutes; thicker ones may need 22 to 25 minutes.

Whole carrots

Whole roasted carrots look beautiful on a platter. Use slim carrots when possible, or halve thick carrots lengthwise so the centers soften before the outside overcooks. Whole slim carrots usually take 25 to 35 minutes at 425°F / 220°C.

Whole slim roasted carrots arranged on an oval platter with herbs, lemon wedges, and browned edges.
Whole carrots make a simple side dish look more elegant. For the best texture, choose slim carrots or halve thicker ones before roasting.

Rainbow carrots

Rainbow carrots roast almost the same way as orange carrots. Cut them to similar thickness and finish simply: maple, lemon, herbs, feta, tahini, toasted nuts, or pomegranate is enough to make the plate feel special.

Rainbow roasted carrots in orange, purple, yellow, and pale colors with herbs, feta, and pomegranate.
Rainbow carrots cook like regular carrots, but they bring instant color to the table. Keep the toppings restrained so the roasted vegetables stay the focus.

How to Make Roasted Carrots for Holidays

For Thanksgiving, Christmas, Easter, or Sunday roasts, choose whole slim carrots or rainbow carrots if you want a platter that looks finished. They bring color, shine, and sweetness between creamy, buttery, rich dishes.

The holiday formula is simple: pretty carrots + light maple or honey glaze + herbs + one finishing touch. Try thyme and flaky salt, parsley and lemon, feta and pomegranate, or tahini and toasted nuts. The best tray should look glossy at the edges, smell sweet-savory, and still taste balanced beside all the creamy sides.

Holiday Roasted Carrots Platter

For a party table, the garnish should support the carrots instead of covering them. Choose one colorful finish, then keep the platter easy to serve.

Holiday roasted carrots on a serving platter with herbs, light glaze, pomegranate, and a warm table setting.
For a holiday roasted carrots platter, use pretty carrots, a light honey or maple glaze, fresh herbs, and one colorful finish. The side feels festive without becoming fussy.

For a classic holiday spread, pair these carrots with one creamy side and one green vegetable. Green bean casserole gives the table that familiar savory-creamy contrast, while garlic mashed potatoes make the plate feel fuller without competing with the carrots.

Holiday shortcut: peel and cut the carrots 1 to 2 days ahead, mix the glaze separately, and roast the carrots fresh. If oven space is tight, slightly under-roast earlier in the day, then reheat and finish with herbs or garnish before serving.

Best Seasonings for Roasted Carrots

Think of seasoning as the mood of the tray. Choose one direction and keep the finish focused.

  • Classic: olive oil, salt, pepper, parsley.
  • Honey garlic: honey, butter, garlic, lemon.
  • Maple holiday: maple syrup, butter, thyme, chili flakes.
  • Brown sugar: brown sugar, butter, pepper, flaky salt.
  • Honey balsamic: honey, balsamic vinegar, thyme.
  • Herby: rosemary, thyme, dill, parsley.
  • Warm spice: cumin, coriander, paprika, cinnamon.
  • Creamy finish: yogurt, tahini, feta, or miso-maple drizzle after roasting.

Roasting Carrots With Other Vegetables

Carrots roast well with other vegetables, but timing matters. Potatoes, sweet potatoes, parsnips, cauliflower, and Brussels sprouts can share the pan if everything is cut thoughtfully and kept in one layer. Broccoli and asparagus cook faster, so add them later. Roast beets separately if you do not want color bleeding.

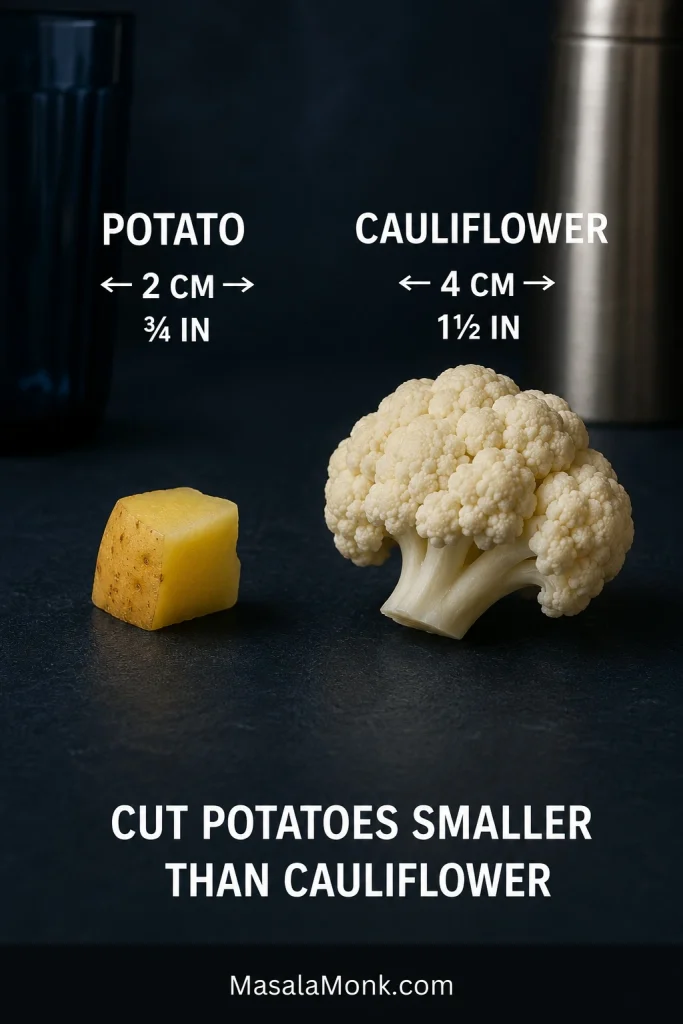
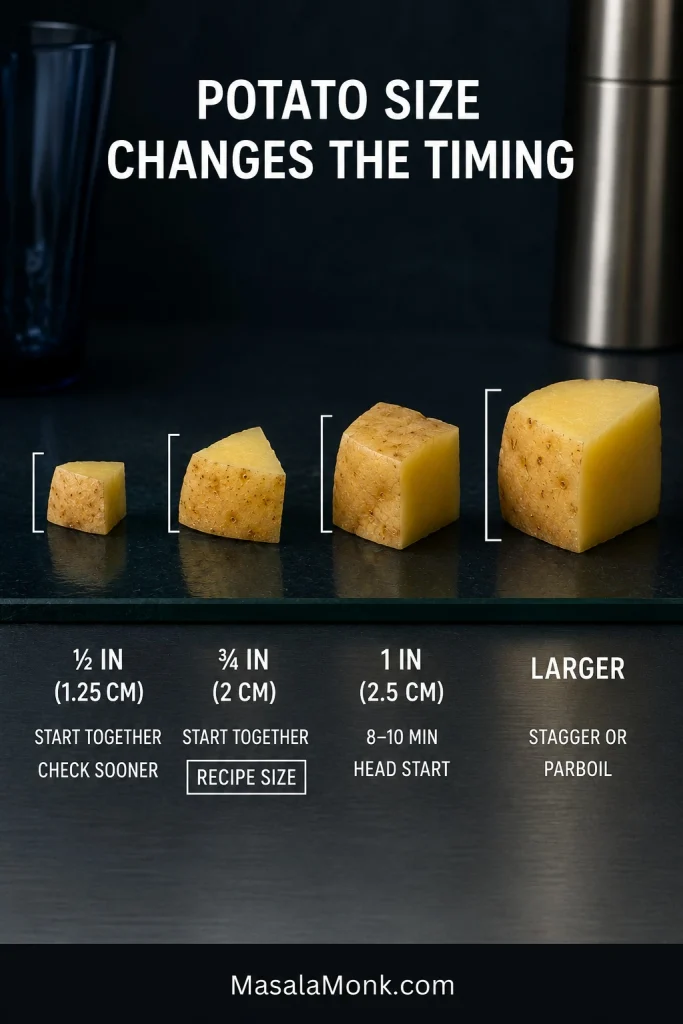
Potatoes need the most planning. Cut them smaller than the carrots or start them first. If you want a separate potato side, this ranch roasted potatoes recipe is a better second tray.

Air Fryer Roasted Carrots

The oven gives the best full-tray roasted carrots. Use the air fryer for small batches when the oven is full.

Cook carrots at 380°F to 400°F / 193°C to 204°C, shaking halfway. Thin pieces may take 10 to 12 minutes; thicker pieces may need 15 to 20 minutes. The air fryer is less forgiving with sticky glazes, so add honey or maple lightly, or toss with extra glaze after cooking. These carrots can go beside air fryer boneless pork chops when the oven is busy.

Air fryer roasted carrots with browned edges and herbs served beside an air fryer basket.
Air fryer roasted carrots work best in a loose layer. Shake the basket halfway, then add any sweet glaze lightly near the end.

If the first tray does not come out exactly right, the problem is usually easy to spot from the way the carrots look.

Troubleshooting Roasted Carrots

Roasted Carrots Troubleshooting Guide

Use the visual cues first, then check the table below for the likely cause. Most tray problems come back to moisture, spacing, cut size, time, or glaze timing.

Five-panel troubleshooting guide showing pale steamed carrots, dry shriveled carrots, hard thick carrots, burnt glazed carrots, and properly roasted carrots.
Most roasted carrot problems show up in the way the tray looks. Pale means steam, dry means too thin or too long, hard means undercooked, and burnt usually means the glaze went on too early.

If your carrots come out dry, pale, mushy, hard in the center, or burnt at the tips, the fix is usually small. Use this table for the next tray.

Common Roasted Carrot Problems and Fixes

ProblemLikely CauseFix
Dry or shriveled carrotsPieces too thin, roasted too long, or carrots naturally dryCut thicker pieces, coat evenly with oil, avoid over-roasting, or parboil large/dry carrots first.
Mushy carrotsOvercooked, cut too small, or crowdedCut larger pieces, use one layer, and check earlier.
Hard carrotsPieces too thick, oven too low, or not enough timeKeep roasting until a fork slides in with light resistance; parboil very large carrots next time.
Pale carrotsOven too low, pan crowded, or carrots wetUse 425°F, dry the carrots, and give them space.
Honey burnedHoney added too early or too much usedAdd honey near the end or after roasting.
Maple glaze got sticky and darkToo much syrup or too much heat for too longUse less maple, toss more often, or roast heavy glazes at 400°F.
Garlic burnedFresh garlic added from the beginningAdd fresh garlic halfway, warm it in butter, or use garlic powder.
Uneven carrotsPieces different thicknessesHalve or quarter thick carrot tops lengthwise.
Baby carrots wateryWet from the bag or crowdedPat dry, use a hot pan, and roast in one layer.
Glaze too sweetToo much honey, maple, or brown sugarAdd lemon, vinegar, chili, herbs, black pepper, or flaky salt.

Fixed the issue? Return to the recipe card, choose a glaze finish, or go back to the top.

Should you parboil carrots before roasting?

Most weeknight trays do not need parboiling. A hot oven, even cuts, enough oil, and a single layer are enough.

Parboiling helps when carrots are large, dry, or leathery. Simmer in salted water until just crisp-tender, drain well, let the surface steam dry, then roast until browned. The center softens first, so the oven can focus on caramelized edges.

Make Ahead, Storage and Reheating

Roasted carrots taste best fresh, but the prep is easy to do ahead. Peel and cut the carrots 1 to 2 days in advance and store them in an airtight container in the fridge. If you store cut carrots in water, drain and dry them very well before roasting.

Store leftover roasted carrots in an airtight container in the refrigerator for 3 to 4 days, in line with general USDA leftovers and food safety guidance. Let the carrots cool before covering so steam does not collect inside the container and soften them further.

How to Store Leftover Roasted Carrots

Store the carrots so they stay useful, not soggy. A shallow airtight container helps them cool evenly and makes leftovers easier to add to quick meals.

Leftover roasted carrots stored in a glass container beside a grain bowl, lemon, herbs, fork, and storage note.
Leftover roasted carrots can still work hard. Reheat them as a side, or add them to grain bowls, salads, wraps, couscous, soups, and quick meal-prep lunches.

Reheat in a 375°F / 190°C oven until warm, or use an air fryer for small portions. The microwave works, but it softens the edges. Leftover roasted carrots are good warm as a side, chopped into grain bowls, folded through couscous, tossed into salads with something tangy, or blended into a quick soup.

You can freeze roasted carrots, but they soften after thawing. Freeze them only if you plan to use them in soups, purees, sauces, or mash.

Making another tray? Back to the recipe card, check troubleshooting, or back to top.

What to Serve With Roasted Carrots

Roasted carrots bring sweetness, color, and warmth without demanding much attention from the cook. Match the finish to the rest of the plate.

  • Honey or maple glazed carrots: pair them with salty, smoky, or savory mains like ham, roast chicken, turkey, pork, or beef.
  • Creamy mains: finish the carrots with lemon, herbs, black pepper, or something crisp like cucumber salad.
  • Cozy dinners: garlic butter carrots work well beside whole chicken in the crock pot, beef roast, or pork tenderloin in the oven.
  • Fish or salmon: keep the carrots lighter with olive oil, lemon, dill, parsley, or a small honey-balsamic finish. They would work well beside this sockeye salmon recipe.
  • Vegetarian plates: use cumin, chili, lemon, tahini, yogurt, chickpeas, lentils, rice bowls, couscous, or quinoa.
  • Holiday plates: pair the carrots with one creamy side, one green side, and a bright garnish so they do not disappear among rich dishes.

FAQ

These quick answers cover the timing, temperature, glaze, make-ahead, and texture questions that usually come up after the first tray.

What temperature is best for roasting carrots?

425°F / 220°C is the best default. Use a gentler 400°F / 200°C oven for large whole carrots or richer maple and brown sugar glazes.

How long do carrots take to roast at 425°F?

Most cut carrots take 20 to 30 minutes at 425°F / 220°C. Thin slices can finish in 15 to 20 minutes; whole or thick carrots may need 30 to 40 minutes.

Do convection or fan ovens work for roasted carrots?

Yes. Use the same temperature and start checking 3 to 5 minutes earlier. For thin or glazed carrots, 400°F / 200°C may be safer in a strong fan oven.

Should carrots be covered while roasting?

No. Leave them uncovered so steam can escape and the edges can brown. Covering the pan gives softer, less caramelized carrots.

Do you peel carrots before roasting?

Peeling is optional. Fresh, thin-skinned carrots can be scrubbed well. Older or rough-skinned carrots usually taste and look better peeled.

Do baby carrots roast well?

Yes. Pat baby carrots dry first because they are often wet from the bag. Roast them in one layer at 425°F / 220°C for 18 to 25 minutes.

Should honey or maple go on before or after roasting?

Add honey or maple during the final 5 to 10 minutes, or toss it with the carrots after roasting. The carrots should roast first and glaze second.

Can I make roasted carrots without honey or maple?

Yes. Use olive oil, salt, pepper, garlic powder, and herbs, then finish with lemon or vinegar. The carrots will still taste naturally sweet from roasting, just less glossy.

Why did my roasted carrots burn?

The carrots may have been cut too thin, the oven may have been too hot for the glaze, or honey, maple, brown sugar, or fresh garlic may have gone in too early.

Why are my roasted carrots dry?

Carrots can turn dry if they are cut too thin, roasted too long, or not coated with enough oil. Cut medium-thick pieces and pull them when they are just fork-tender with browned edges.

Why are my roasted carrots still hard?

They were probably cut too thick, roasted at too low a temperature, or pulled too early. Keep roasting until a fork slides in with light resistance; for very large carrots, parboil first or roast longer at 400°F / 200°C.

Do you boil carrots before roasting?

Most cut carrots do not need it. Parboil large, dry, or leathery carrots until just crisp-tender, dry them well, then roast for softer centers and less shriveling.

Can roasted carrots be made ahead for holidays?

Yes, but they taste best freshly roasted. For holidays, peel and cut them 1 to 2 days ahead, mix the glaze separately, then roast fresh or slightly under-roast and reheat before serving.

Do carrots and potatoes roast well together?

Yes, but potatoes often need smaller cuts or a head start. Keep everything in one layer so both vegetables brown instead of steam.

Are roasted carrots better with oil or butter?

Oil is better for the base recipe because it handles high heat well. Butter gives richer flavor, but it is best mixed with oil, used in a glaze, or added after roasting.

Final Tips for Better Roasted Carrots

Once the pieces are even, the pan is roomy, and the glaze goes on late, roasted carrots become one of the easiest sides to trust.

  • Safest first tray: keep it simple with olive oil, salt, pepper, and garlic powder.
  • Glossy family side: add honey near the end and finish with lemon or herbs.
  • Holiday platter: use maple, butter, thyme, and one bright or pretty finish.

Once you have made the plain tray once, the rest becomes instinctive. Keep them plain and savory for a weeknight, glossy with honey for family dinner, maple-rich for holidays, or bright with cumin, chili, lemon, and herbs when the plate needs balance. The method stays simple; the finish does the work.

Back to top

Posted on Leave a comment

Hibachi Ginger Sauce Recipe — Japanese Steakhouse Brown Sauce

A small ceramic bowl of brown hibachi ginger sauce with visible ginger and onion flecks, served with shrimp, steak bites, fried rice, zucchini, mushrooms, and onion.

If you have ever dipped hibachi shrimp, steak, or fried rice into that sharp brown ginger sauce and wished you had a jar at home, this is the one to make.

This hibachi ginger sauce is pourable, tangy, salty, lightly sweet, and full of fresh ginger-onion bite. It is the brown dipping sauce from the little Japanese steakhouse cup — not creamy yum yum sauce and not the orange ginger dressing from the salad.

The first spoonful should taste like the dip you remember: salty at the start, bright in the middle from lemon and rice vinegar, and warm with ginger at the end. Blend it in 5 minutes, chill it if you can, and serve it with shrimp, steak, chicken, fried rice, noodles, vegetables, dumplings, tofu, or rice bowls.

Before You Blend

  • Use fresh ginger if possible. Ginger paste works in a pinch, but fresh ginger gives the cleanest bite.
  • Choose low-sodium soy sauce. Regular soy sauce can make this dip too salty after it rests.
  • Pulse, don’t fully puree. Tiny ginger and onion flecks are part of the steakhouse-style texture.
  • Let it chill when you can. One hour in the fridge softens the raw onion and makes the sauce taste more rounded.

Quick Answer: What Is Hibachi Ginger Sauce?

Hibachi ginger sauce is a Japanese steakhouse-style dipping sauce made with fresh ginger, onion, soy sauce, rice vinegar, lemon juice, and a little sugar. It is usually served with grilled meats, seafood, vegetables, noodles, and fried rice.

When people ask for the brown sauce from hibachi restaurants, they usually mean this ginger-soy dipping sauce. Yum yum sauce is the creamy pink-orange one. On salad, the orange or tan sauce is usually Japanese ginger dressing.

It is especially good with shrimp fried rice, steak bites, grilled chicken, sautéed mushrooms, zucchini, dumplings, spring rolls, tofu, salmon, and rice bowls.

Hibachi Ginger Sauce Recipe

A 5-minute no-cook Japanese steakhouse-style ginger sauce made with fresh ginger, onion, soy sauce, rice vinegar, and lemon juice. The flavor is salty-tangy first, then bright and gingery, with a little onion bite that mellows after chilling.

Prep Time5 minutes
Cook Time0 minutes
Optional Chill Time1 hour
Total Time5 minutes, or 1 hour 5 minutes with chilling
YieldAbout 1 cup / 240 ml
Servings8
Serving Size2 tablespoons / 30 ml
TexturePourable, lightly textured

Ingredients

  • 2 tablespoons fresh ginger, peeled and grated or finely chopped, about 15 g
  • ½ cup chopped yellow onion, about 70–80 g
  • ⅓ cup low-sodium soy sauce or tamari, 80 ml
  • 3 tablespoons rice vinegar, 45 ml
  • 2 tablespoons fresh lemon juice, 30 ml
  • 1 teaspoon sugar or brown sugar, 4 g
  • ½ teaspoon lemon zest, optional
  • 1 small garlic clove, optional

Equipment

  • Blender, food processor, or mini chopper
  • Microplane, grater, or sharp knife
  • Cutting board
  • Measuring cups and spoons
  • Small jar or airtight container

No blender? Grate the ginger, mince the onion as finely as possible, then shake everything hard in a jar. The dip will be chunkier and more intense, but it still works for dipping.

Instructions

  1. Peel the ginger and grate it, or chop it finely so it blends easily.
  2. Chop the onion into small pieces. Smaller pieces help the mixture blend faster without turning foamy.
  3. Add the ginger, onion, soy sauce, rice vinegar, lemon juice, sugar, and optional lemon zest or garlic to a blender or food processor.
  4. Pulse until the sauce is loose and spoonable. Stop while tiny pieces of ginger and onion are still visible.
  5. Taste before you change anything. Add more lemon juice if it tastes flat, a tiny pinch of sugar if it tastes too strong, or 1–2 tablespoons water if it tastes too salty.
  6. Serve right away, or cover and chill for 1 hour so the flavor tastes smoother and more rounded.

Recipe Notes

  • Do not judge the sauce in the first minute after blending. Raw onion and ginger taste loud at first; chilling is part of the recipe if you want a smoother restaurant-style flavor.
  • Start with 2 tablespoons fresh ginger. Very mild ginger can take another ½ tablespoon after blending. Older, woody, or very hot ginger should rest in the sauce before you add more.
  • Low-sodium soy sauce keeps the sauce from becoming too salty.
  • Use a food processor for a slightly textured sauce and a blender for a smoother one.
  • The dip may separate in the fridge. Stir or shake before serving.
  • Yield may vary slightly depending on how finely the onion is chopped and blended.
  • Store in an airtight jar in the refrigerator and use within 5 days.

Choose Your Version

The main recipe is balanced for home cooking: bold enough for hibachi-style plates, but not so salty that it overwhelms rice, vegetables, or dumplings. Use this quick guide before you add more soy sauce, sugar, or lemon.

A tabletop guide showing hibachi ginger sauce served with steak bites, dumplings, fried rice, a rice bowl, and a jar method.
Start with the base sauce, then adjust it for the meal in front of you. Keep it loose for fried rice, make it bolder for steakhouse plates, or add garlic and sesame oil when serving it with dumplings.
Want This Result?Do This
Closest steakhouse biteAdd extra soy sauce, rice vinegar, lemon, and ginger from the stronger restaurant-style adjustment below.
Less salty everyday sauceStay with the main recipe and use low-sodium soy sauce.
Best for dumplingsAdd the optional garlic and a few drops of toasted sesame oil.
Best for fried riceKeep it loose and bright. Do not thicken it.
Best texturePulse until tiny ginger and onion flecks remain.
No blender versionGrate the ginger, mince the onion finely, and shake everything in a jar.

Already made the sauce? Jump to adjustments after blending or troubleshooting. Still deciding how you want it to taste? Start with why the balance works.

Why This Ginger Sauce Recipe Works

Some restaurant-style ginger sauces lean hard on soy sauce and vinegar. They taste bold with grilled steak or shrimp, but they can become too salty for home dinners. This version keeps the familiar ginger-onion base and balances it with lemon, rice vinegar, and a small amount of sugar.

The finished sauce should hit salty first, then tangy, then gingery. It should not taste creamy, oily, syrupy, or thick. If the onion tastes raw right away, chill the sauce before changing the recipe.

Quick Taste Check

The dip should taste balanced, not sweet or heavy. Flat sauce needs lemon, a too-strong batch needs chill time, and salty sauce needs water 1 tablespoon at a time. When one bite of rice makes you want another, the balance is right.

Chopsticks holding white rice dipped in brown hibachi ginger sauce above a small bowl of sauce, with grilled vegetables and fresh ginger nearby.
Plain rice is the quickest way to test the flavor because it does not hide the sauce. When the bite tastes lightly salty, bright, and gingery, the hibachi ginger sauce is ready.

That balance is why the dip works with a whole plate, not just one bite. It cuts through butter, soy, and seared edges without covering up the shrimp, steak, rice, or vegetables. Use it as a dip, a spoon-over sauce for fried rice, or a brighter alternative when a thicker stir fry sauce would feel too heavy.

What Is Hibachi Ginger Sauce?

The easiest way to understand hibachi ginger sauce is by where it sits on the plate: beside grilled food, not on salad. It cuts through richness, wakes up rice, and adds a fresh ginger bite to shrimp, steak, chicken, vegetables, and noodles.

You may see it called Japanese steakhouse ginger sauce, Benihana-style ginger sauce, hibachi brown sauce, or simply ginger sauce. Most of those names point to the same ginger-soy dipping cup sauce.

Ingredients You’ll Need

The goal is not to make the strongest sauce possible. Aim for that familiar first dip: bright, salty, gingery, and balanced enough that you keep going back for one more bite of rice.

Fresh ginger root, grated ginger, chopped yellow onion, soy sauce, rice vinegar, lemon halves, sugar, and garlic arranged on a wooden board.
Fresh ginger and onion create the bite, while soy sauce, rice vinegar, lemon, and a small amount of sugar bring balance. Together, they keep the sauce savory and bright instead of flat, sour, or overly salty.

Fresh Ginger

Fresh ginger is the main flavor. It gives the sauce its clean bite, gentle heat, and bright fragrance. Peel it first, then grate or finely chop it so it blends evenly.

Two tablespoons gives the sauce a clear ginger flavor without overwhelming everything else. Use 1½ tablespoons for a milder dip or 2½ tablespoons for a stronger one.

Yellow Onion

Onion is what keeps the dip from tasting like soy sauce with ginger stirred in. Yellow onion gives the best balance; white onion tastes sharper, and red onion changes the color and flavor too much for this style.

Soy Sauce or Tamari

Soy sauce brings salt, color, and savory depth. Low-sodium soy sauce is the safest choice because this is a dipping sauce, and salt builds quickly.

Tamari works well for a deeper flavor or a gluten-free version. Coconut aminos can work for a soy-free version, but it is sweeter and less salty, so reduce or skip the sugar and brighten the sauce with extra vinegar or lemon if needed.

For a sweeter cooked soy-ginger glaze instead of a fresh dipping sauce, this teriyaki sauce recipe is the better direction.

Rice Vinegar

Rice vinegar gives the sauce a clean tang without making it harsh. Unseasoned rice vinegar gives you the most control. If using seasoned rice vinegar, blend first, then add sugar only if the sauce still needs rounding.

Lemon Juice

Fresh lemon juice lifts the ginger, keeps the soy sauce from tasting heavy, and gives the dip a clean finish. Lemon zest is optional; use only a little because too much can make the sauce bitter.

Sugar

The sugar is not there to make the sauce sweet. It just rounds off the raw onion, vinegar, lemon, and ginger so the dip tastes balanced instead of harsh. Brown sugar tastes rounder; white sugar keeps the flavor cleaner.

Garlic, Optional

Garlic pushes the dip away from the clean steakhouse flavor and toward a stronger dumpling or noodle sauce. Add one small clove for that version, or leave it out for a cleaner ginger-onion base.

Fresh Ginger vs Ginger Paste vs Ground Ginger

Fresh ginger is best here because the sauce is supposed to taste lively. Dried ginger cannot give the same clean bite.

Ginger OptionDoes It Work?How to Use It
Fresh gingerBest choiceUse 2 tablespoons / about 15 g for the main recipe.
Ginger pasteWorks in a pinchStart with 1½ tablespoons, blend, then add more after tasting.
Ground gingerEmergency onlyStart with ¼ teaspoon. The flavor will be warmer and duller.

Check the label on ginger paste. Some brands include salt, vinegar, oil, or preservatives, and those can change the balance.

How to Make Ginger Sauce

No cooking needed here — just chop, blend, taste, and rest. A blender or food processor gives the cleanest texture, but a hand-chopped jar version still works when you want the sauce quickly.

1. Prep the ginger and onion

Peel the ginger and grate it, or chop it finely. Cut the onion into small pieces so it breaks down quickly.

Fresh ginger being grated on a metal grater beside chopped yellow onion on a wooden cutting board.
Grating the ginger before blending helps its flavor spread evenly through the sauce. Likewise, chopping the onion small gives body without leaving big raw pieces in the finished dip.

2. Add the sauce ingredients

Add the ginger, onion, soy sauce, rice vinegar, lemon juice, sugar, and optional lemon zest or garlic to a blender or food processor.

Chopped onion, fresh ginger, soy sauce, rice vinegar, lemon juice, and sugar inside a food processor before blending.
This no-cook ginger sauce comes together in the food processor. Add the aromatics and liquids together, then pulse in short bursts so the sauce stays loose and lightly textured.

3. Pulse until spoonable

Pulse until the sauce is loose and easy to pour. Stop before it becomes a creamy puree. Tiny visible bits of ginger and onion are a good sign.

Pulsed brown hibachi ginger sauce inside a food processor with small visible pieces of ginger and onion.
Stop pulsing while tiny ginger and onion flecks are still visible. That light texture is what gives Japanese steakhouse ginger sauce its fresh bite instead of a dull, over-blended finish.

4. Taste and adjust

Taste before you change anything, and do not panic if it feels loud at first. This sauce can swing from perfect to too salty quickly, so small adjustments are better than big ones. Add lemon if it tastes flat, a tiny pinch of sugar if it tastes too strong, or 1–2 tablespoons water if it tastes too salty.

5. Chill for smoother flavor

You can serve the sauce right away, but it tastes better after resting. After about an hour in the fridge, the onion relaxes, the ginger settles, and the sauce starts tasting more like the restaurant cup.

Blender vs Food Processor: What Texture Should Ginger Sauce Have?

Both tools work, but they give slightly different results.

Two bowls of brown ginger sauce on a tray, one labeled blender with a smoother texture and one labeled food processor with more visible flecks.
Use a blender for a smoother ginger sauce and a food processor for a more flecked steakhouse-style dip. Either works, but the tool changes the final texture.
ToolBest ForTexture
BlenderSmoother sauceMore even, less textured, easy to pour.
Food processorSteakhouse-style textureLightly textured, with tiny ginger and onion flecks.
Mini chopperSmall batchesWorks well, but scrape the sides once or twice.
No blenderQuick hand-chopped versionChunkier and stronger, but still useful for dipping.

The ideal texture is pourable and lightly flecked. It should not look like mayonnaise, salad dressing, or a thick glaze.

If the sauce turns pale or foamy after blending, let it sit for a few minutes and stir. Air can lighten the color temporarily; after resting, the sauce usually settles into a deeper brown.

Taste and Texture Target

You’ll know the sauce is right when it smells gingery, pours easily from a spoon, tastes bright but not biting, and leaves tiny flecks behind in the cup. It should be brighter than salad dressing and lighter than teriyaki sauce.

A spoon pouring brown hibachi ginger sauce with small flecks back into a ceramic bowl.
The finished sauce should fall easily from a spoon. That pourable texture lets it brighten rice, shrimp, steak, chicken, and vegetables without feeling heavy like a glaze.

How to Adjust the Sauce After Blending

Once the dip is blended, change it slowly. A spoonful of water, lemon, sugar, or soy sauce can move the whole batch.

GoalWhat to Do
More restaurant-styleAdd 1–2 tablespoons soy sauce, 1 tablespoon rice vinegar, and a little extra grated ginger.
Less saltyAdd 1–2 tablespoons water after blending, or use a little less soy sauce next time.
Less intenseChill for 1 hour and add ½ teaspoon sugar if needed.
More gingeryAdd ½ tablespoon more fresh grated ginger.
More texturedUse a food processor and stop while tiny pieces are visible.
SmootherUse a blender and blend a little longer, but stop before it turns foamy.
Gluten-freeUse tamari or certified gluten-free soy sauce.
Soy-freeUse coconut aminos, reduce or skip the sugar, and add extra vinegar or lemon to balance the sweetness.
Better for dumplingsAdd the optional garlic and a few drops of toasted sesame oil.

Benihana-Style Notes

Think of this as Benihana-style, not a claim that it is the restaurant’s exact formula. Benihana’s own ginger sauce notes emphasize fresh ginger, onion, rice vinegar, lemon juice, and low-sodium soy sauce, which lines up with the flavor profile people expect from the brown dipping sauce.

This version keeps that profile but adjusts the balance for a home kitchen. Use the stronger adjustment below when the sauce in your memory was sharper, saltier, and more intense. For a dip you can spoon over rice and use all week, stay with the main recipe.

A small bowl of dark brown Benihana-style ginger sauce with visible flecks, served near shrimp, steak bites, fresh ginger, lemon, and chopsticks.
For a stronger Benihana-style direction, add soy sauce, rice vinegar, lemon, and extra ginger a little at a time. Small changes matter because this dipping sauce can turn too salty quickly.

For a Stronger Restaurant-Style Sauce

After blending the main recipe, make it sharper and more soy-forward by adding:

  • 1–2 extra tablespoons soy sauce
  • 1 extra tablespoon rice vinegar
  • ½ tablespoon extra lemon juice
  • ½ tablespoon extra grated ginger

Add these slowly and taste as you go. It is easier to make the sauce stronger than to rescue a sauce that has become too salty or too sour.

Ginger Sauce vs Ginger Dressing vs Yum Yum Sauce

These sauces often get mixed up because they all show up around hibachi and Japanese steakhouse meals. The easiest way to tell them apart is to look at where they show up on the table: ginger sauce is for the dipping cup, ginger dressing is for salad, and yum yum sauce is the creamy one people spoon over shrimp and fried rice.

Three small cups labeled ginger sauce, yum yum sauce, and ginger dressing, showing a brown sauce, a creamy pink-orange sauce, and an orange-tan dressing.
This side-by-side view clears up the common hibachi sauce mix-up. Brown ginger sauce is for dipping, yum yum sauce is creamy, and Japanese ginger dressing usually belongs on salad.
SauceTextureMain FlavorBest Use
Hibachi ginger sauceBrown, pourable, lightly texturedGinger, onion, soy, vinegar, lemonShrimp, steak, chicken, vegetables, fried rice
Japanese ginger dressingOrange or tan, dressing-likeCarrot, onion, ginger, oil, vinegarGreen salad
Yum yum sauceCreamy, pale pink or orangeMayo, tomato or ketchup, sugar, spicesShrimp, chicken, fried rice, vegetables
Hibachi mustard sauceSmooth, mustard-forwardMustard, soy, sesame, or cream depending styleSteak and chicken
Ginger scallion sauceOil-based and spoonableGinger, scallions, hot oilRice, noodles, poached chicken, tofu

For salad, ginger dressing is usually the better match. Beside hibachi shrimp, steak, chicken, vegetables, or fried rice, this brown ginger sauce is the right one.

What to Eat With Ginger Sauce

Use this sauce beside something rich: buttery mushrooms, seared shrimp, fried rice, grilled steak, or chicken thighs. It makes rice taste brighter, shrimp taste sweeter, and steak feel less heavy after a few bites.

Hibachi-style favorites

  • Hibachi shrimp
  • Steak bites or grilled steak
  • Chicken thighs or chicken breast
  • Salmon or tuna
  • Grilled zucchini, onion, mushrooms, and broccoli
  • Fried rice
  • Hibachi noodles

Takeout-style snacks

  • Dumplings
  • Potstickers
  • Egg rolls
  • Spring rolls
  • Lettuce wraps

For a creamier dip beside spring rolls or noodles, keep this ginger sauce as the bright option and add a bowl of peanut sauce for contrast.

A wooden appetizer board with dumplings, spring rolls, lettuce wraps, brown ginger sauce, and a separate creamy dipping sauce.
This brown ginger dipping sauce also works beyond hibachi dinners. Try it with dumplings, potstickers, spring rolls, and lettuce wraps when you want a bright soy-ginger dip instead of a creamy sauce.

Everyday bowls and meals

  • Rice bowls
  • Noodle bowls
  • Tofu
  • Roasted vegetables
  • Leftover grilled chicken
  • A flexible salmon bowl when you want the sauce with fish

Complete Your Hibachi Night

For a full hibachi-style plate, serve this ginger sauce with fried rice or steamed rice, sautéed zucchini and mushrooms, shrimp or chicken, and one creamy sauce on the side. The ginger sauce brings the bright tang; the creamy sauce brings richness.

A hibachi-style dinner plate with fried rice, shrimp, steak, chicken, zucchini, mushrooms, onion, and a small bowl of brown ginger sauce.
Serve this ginger sauce beside rich hibachi foods. Its ginger, lemon, vinegar, and soy cut through fried rice, seared shrimp, steak, chicken, mushrooms, and buttery vegetables.

Cold leftover rice works especially well because the sauce cuts through the salty, savory flavor. For a fresh base, use this how to cook rice guide before adding shrimp, steak, chicken, tofu, or vegetables.

Optional Warm Drizzle for Bowls and Noodles

Classic hibachi ginger sauce is served cold or at room temperature. But if you want a warmer drizzle for noodles, bowls, or stir-fried vegetables, you can thicken a small portion.

Quick thickened version

  1. Mix ½ teaspoon cornstarch with 1 tablespoon water.
  2. Add ½ cup ginger sauce to a small pan.
  3. Warm over medium-low heat.
  4. Stir in the cornstarch slurry.
  5. Cook for 1–2 minutes, stirring, until lightly thickened.

Heating changes the personality of the sauce. It becomes more of a warm bowl drizzle, and the fresh ginger-onion bite softens. Thicken only what you plan to use right away and keep the rest cold for dipping.

Troubleshooting Ginger Sauce

Fresh ginger and onion can taste strong before they rest. Most problems are easy to fix with a small adjustment.

A troubleshooting board for hibachi ginger sauce with a bowl of brown sauce, lemon wedges, sugar, soy sauce, water, onion, and text explaining flavor fixes.
Fix the sauce in small steps after blending: lemon wakes up a flat batch, chilling softens onion bite, water reduces saltiness, and sugar rounds out too much acid.
ProblemWhy It HappenedHow to Fix It
Too onionyToo much raw onion or not enough resting timeChill for 1 hour. Add a small splash of soy sauce or lemon juice. Use less onion next time.
Overly saltyRegular soy sauce or too much soy sauceAdd 1–2 tablespoons water, a little more onion, or a squeeze of lemon.
Sharp or sourToo much vinegar or lemon juiceAdd ½–1 teaspoon sugar and a small splash of soy sauce.
Flavor feels intenseGinger, onion, vinegar, and lemon are all strongChill the sauce. Add a tiny bit more sugar. Dilute with 1 tablespoon water if needed.
BitterToo much lemon zest or old gingerSkip zest next time. Add a little sugar to round out the bitterness.
Runny textureClassic ginger sauce is naturally looseServe as-is, or use the warm drizzle variation for bowls and noodles.
Chunky textureNot blended enoughPulse 10–20 seconds more, or strain only if you prefer a cleaner pour.
Smooth or foamyOver-blendedLet it settle and stir. Next time, pulse instead of blending continuously.
Separated in the fridgeNormal for a fresh blended sauceShake or stir before serving.

Storage and Make-Ahead

Store the sauce in an airtight jar in the refrigerator and use it within 5 days for the freshest flavor.

Homemade hibachi ginger sauce stored in a glass jar labeled Hibachi Ginger Sauce, with a spoonful of sauce, fresh ginger, garlic, and kitchen ingredients nearby.
Store homemade hibachi ginger sauce in an airtight jar and shake before serving. As it rests, the fresh ginger, onion, and soy-vinegar base can naturally settle.

The flavor is loudest right after blending. After 1 hour in the fridge, the onion and ginger settle down and the soy, vinegar, and lemon taste more balanced. By the next day, the sauce feels rounder, and it is the kind of small jar you end up spooning over leftover rice, cold chicken, or roasted vegetables without planning to.

Shake or stir before serving because the sauce can separate as it sits.

Can you freeze ginger sauce?

You can freeze it in small portions, but the texture will not be as fresh after thawing. The onion and ginger can become slightly watery. For the best dipping texture, make it fresh and refrigerate it instead.

Can you use ginger sauce as a marinade?

Yes, but it is best as a dipping sauce first and a quick marinade second. Use it for shrimp, chicken, tofu, or vegetables when you want a fast ginger-soy flavor.

Because it contains vinegar and lemon juice, do not marinate delicate seafood for too long. Shrimp or fish only needs 10–15 minutes; chicken or tofu can sit for 15–30 minutes.

FAQ

What is the brown sauce at hibachi restaurants?

It is usually ginger sauce: a soy-based dipping sauce made with fresh ginger, onion, vinegar, and lemon. Restaurants commonly serve it with shrimp, steak, chicken, vegetables, noodles, and fried rice.

Is this the same as Benihana ginger sauce?

It is Benihana-style, not the restaurant’s exact formula. The recipe keeps the fresh ginger, onion, soy, vinegar, and lemon profile while using a balanced home-kitchen ratio. Benihana says its signature ginger sauce is prepared fresh and is not sold in stores or bottles. Read Benihana’s note here.

Is ginger sauce the same as yum yum sauce?

No. Ginger sauce is brown, tangy, and soy-based. Yum yum sauce is creamy, usually mayo-based, and pale pink or orange.

Is hibachi ginger sauce the same as ginger salad dressing?

No. Hibachi ginger sauce is a dipping sauce for grilled food and rice. Japanese ginger dressing is usually smoother, often made with carrot, onion, ginger, oil, vinegar, and soy sauce, and served on salad.

Do you serve ginger sauce hot or cold?

Serve it cold, chilled, or at room temperature. It can sit beside hot steak, shrimp, chicken, vegetables, or fried rice, but the sauce itself does not need to be heated.

How long does homemade ginger sauce last?

Use it within 5 days for the freshest flavor. Keep it in an airtight jar in the refrigerator and stir or shake before serving.

Fresh ginger, paste, or powder — which is best?

Fresh ginger is best. Ginger paste can work as a shortcut, but it may contain salt or vinegar. Ground ginger is not recommended because it does not give the same lively flavor.

Can I make ginger sauce without a blender?

Yes. Grate the ginger, mince the onion very finely, add the remaining ingredients to a jar, and shake hard. The sauce will be chunkier and stronger, but it still works for dipping.

Why does my ginger sauce taste too oniony?

Raw onion can taste strong right after blending. Chill the sauce for 1 hour before judging it. If it still tastes too oniony, add a little soy sauce, lemon juice, or sugar to balance it. Next time, use slightly less onion.

What can I serve with ginger sauce?

Serve it with hibachi shrimp, steak, chicken, fried rice, noodles, grilled vegetables, dumplings, spring rolls, tofu, salmon, rice bowls, or roasted vegetables.

Final Tip

The sauce should taste like the first bright bite at the hibachi table: salty, tangy, gingery, and fresh enough to make you want another spoonful of rice or another piece of shrimp. Blend it, chill it if you can, and keep the texture lightly flecked. That little bit of ginger and onion is the whole point.

Posted on Leave a comment

Mashed Potatoes Recipe

Creamy mashed potatoes in a cream ceramic bowl with melted butter, chives, black pepper, and a blurred gravy boat behind.

This is the mashed potato bowl people reach for first: soft, buttery, creamy enough to feel rich, and fluffy enough to hold a spoonful of gravy. It works for holidays, roast dinners, weeknights, and those “everything else is ready but the potatoes need help” moments.

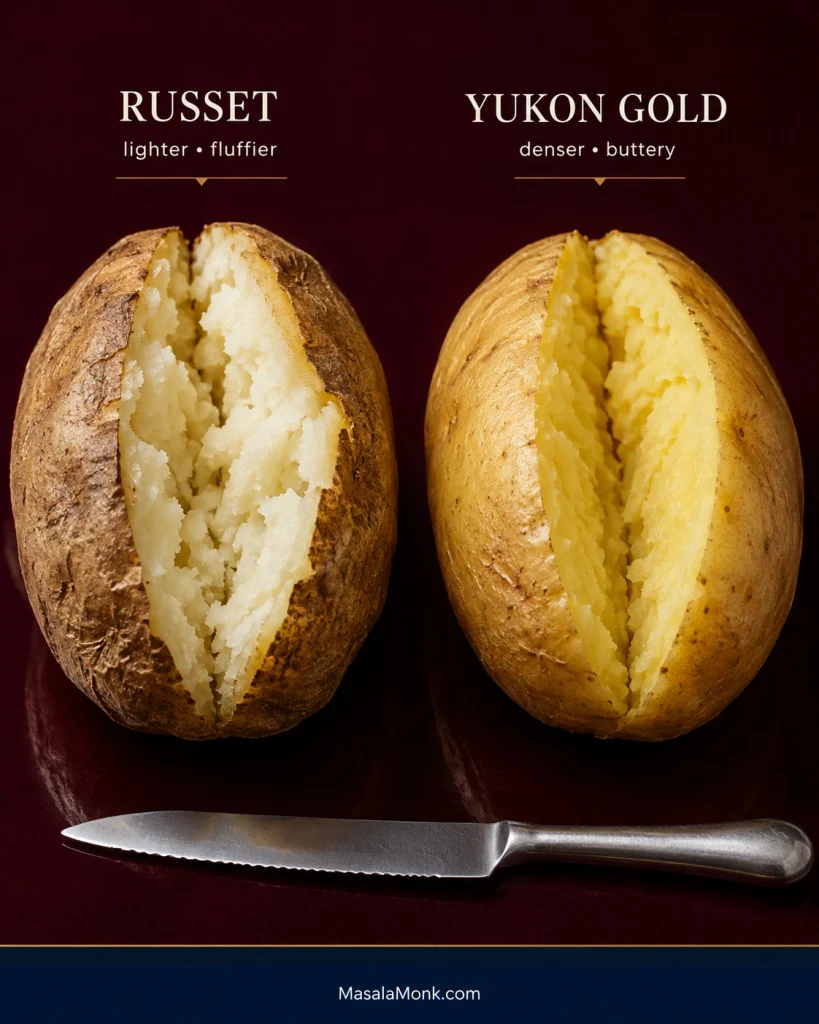
The ingredients are simple, but the finish matters. Yukon Gold potatoes make the mash naturally creamy, russets make it lighter, warm milk blends in smoothly, and a gentle hand keeps the texture soft instead of sticky.

This recipe is built for real mashed potato moments: the holiday batch, the weeknight side, the dry mash that needs saving, the no-milk emergency, and the serving dish that has to stay warm while dinner catches up.

Quick Answer: How to Make Mashed Potatoes

To make mashed potatoes, simmer peeled potato chunks in cold salted water until very tender, drain well, dry them briefly in the hot pot, then mash with butter and warm milk or cream. Season to taste and add more warm liquid only until the potatoes are soft, creamy, and spoonable.

The finish is where the bowl is won. Dry the potatoes well, add warm liquid gradually, and stop as soon as the mash looks soft and spoonable.

Recipe at a Glance

Best potatoes Yukon Gold, russet, or a 50/50 mix
Texture Creamy, fluffy, buttery, and soft enough for gravy
Prep time 15 minutes
Cook time 20 minutes
Total time 35 minutes
Servings 4 generous or 5 smaller side servings
Best tool Masher for cozy homemade texture; ricer or food mill for a smoother, lighter finish
Main mistake to avoid Overmixing, especially with a blender or food processor
Why this method is worth saving: It gives you one reliable base recipe, then shows you how to steer it creamy, fluffy, richer, dairy-free, make-ahead, or rescue-ready without starting over.

Creamy Mashed Potatoes Recipe

Description: Creamy, fluffy mashed potatoes made with Yukon Gold or russet potatoes, warm milk, butter, and a gentle method that keeps the mash soft, gravy-ready, and easy to rescue if dinner gets ahead of you.

Success cue: Soft, steamy, spoonable potatoes that hold gentle ridges when dragged with a spoon and fall slowly instead of pouring or clumping.

Prep Time15 minutes
Cook Time20 minutes
Total Time35 minutes
Servings4 generous or 5 smaller side servings

Base Ingredients

  • 1 kg / 2.2 lb Yukon Gold potatoes, russet potatoes, or a mix
  • 75–100 g / about 5–7 tbsp unsalted butter
  • 180–240 ml / 3/4–1 cup whole milk, half-and-half, or milk and cream, warmed
  • 2 tsp to 1 tbsp kosher salt for the cooking water, depending on pot size and water volume
  • Fine salt, added gradually after mashing, to taste
  • 1/4–1/2 tsp black pepper

Optional Add-Ins

  • 60 ml / 1/4 cup sour cream
  • 60–100 g / 2–3.5 oz cream cheese
  • Chopped chives, parsley, extra melted butter, or gravy for serving

Instructions

  1. Peel the potatoes for a smooth bowl, or scrub them well if making a rustic version with some skin. Cut into even 1 1/2–2 inch / 4–5 cm chunks.
  2. Place the potatoes in a large pot and cover with cold water by about 1 inch / 2.5 cm. Add kosher salt to the water.
  3. Bring to a boil, then reduce to a steady simmer. Cook for 15–20 minutes, or until a fork slides through easily with almost no resistance.
  4. Drain well. Return the potatoes to the hot empty pot for 30–60 seconds so extra steam escapes and the surface looks dry. Do not rinse them.
  5. Mash gently with a potato masher. For a smoother finish, use a ricer or food mill.
  6. Add the butter and about 180 ml / 3/4 cup warm milk or cream. Mash or fold gently until creamy.
  7. Add more warm milk or cream only as needed. Start with less; you can always loosen the mash once the texture tells you what it needs.
  8. Season with fine salt and pepper. Taste and adjust. Add sour cream or cream cheese if using. Serve hot with extra butter, herbs, or gravy.

Recipe Notes

  • For the best all-purpose bowl, use a 50/50 mix of Yukon Gold and russet potatoes.
  • The potatoes are ready to mash when a fork slides through with almost no resistance. If they fight back at all, cook them longer.
  • Do not rinse after draining. Let steam escape in the hot pot instead.
  • A masher, ricer, or food mill keeps you in control. Save the blender for soups.
  • If using sour cream or cream cheese, add less milk at first. You can loosen the potatoes later, but you cannot easily remove excess liquid.
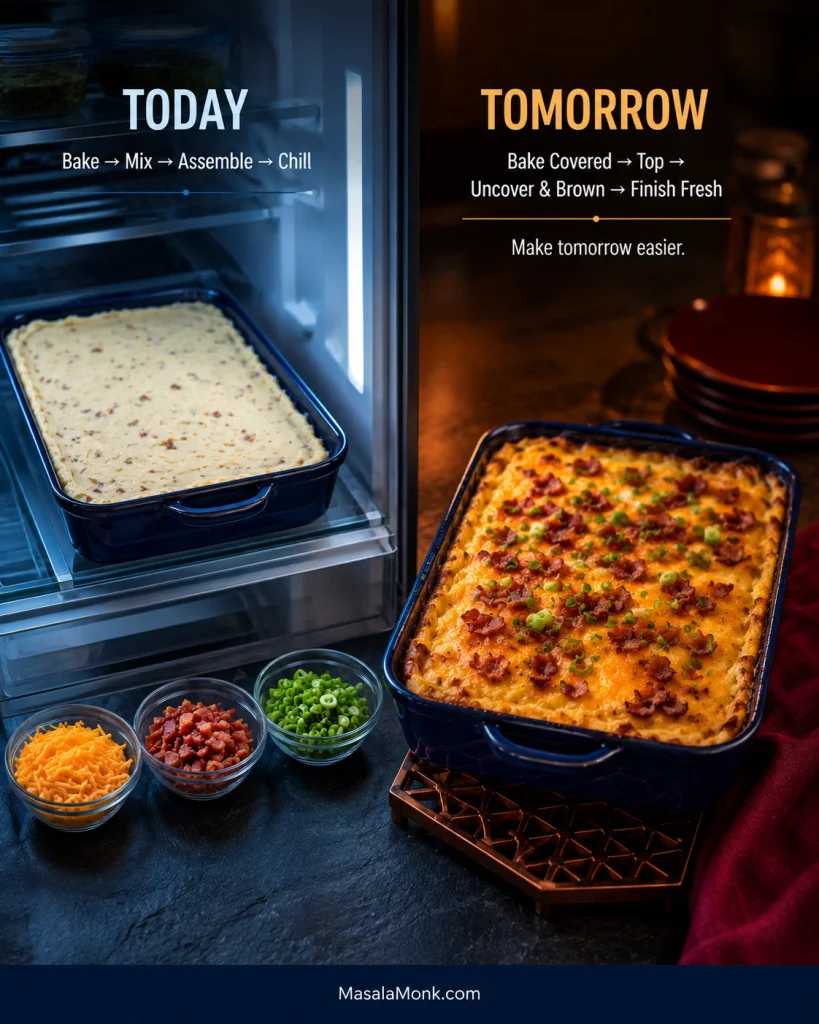
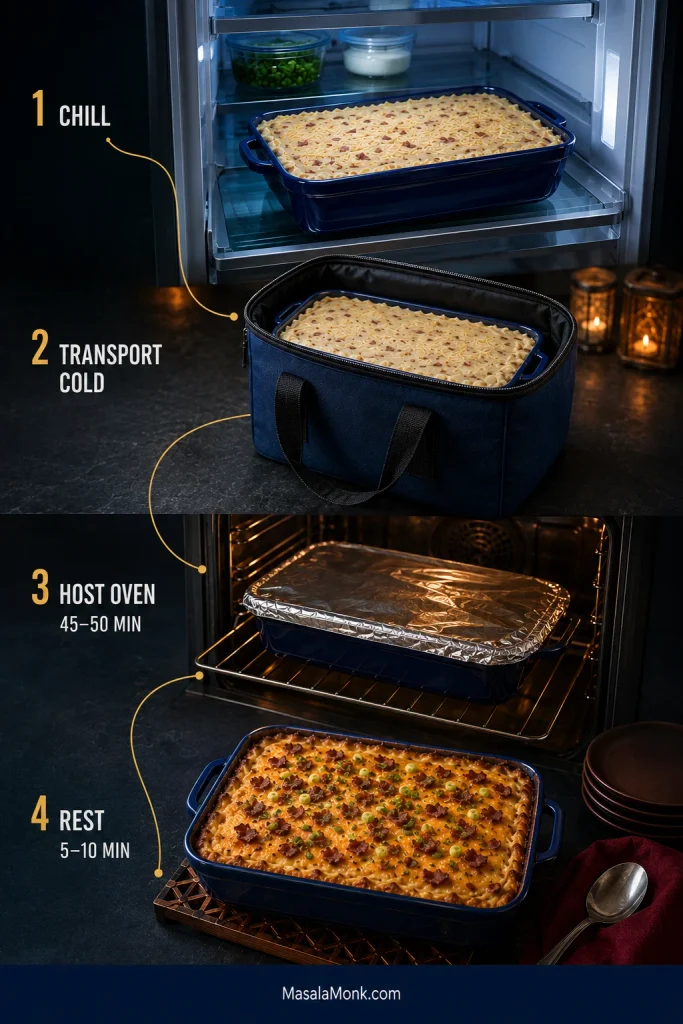
  • For make-ahead prep, make the mash slightly looser than usual and reheat gently with extra warm milk or butter.
Cook’s note: This method is built around the places mashed potatoes usually fail: undercooked centers, watery potatoes, cold dairy, too much mixing, and last-minute reheating.

Choose Your Mashed Potato Texture

Before you start, decide what kind of mash you want on the table. A fluffy classic mash and a rich holiday batch use the same base method, but they need slightly different choices.

Once you choose the texture first, the rest of the recipe becomes easier: the potato, tool, dairy, and add-ins all have a job.

Three small servings of mashed potatoes showing smooth, fluffy, and rustic skin-on textures.
First choose the texture, then choose the tool. Smooth, fluffy, and rustic mashed potatoes all start similarly but finish differently.
You want Use Do this
Creamy everyday mash Yukon Gold potatoes Use warm milk and butter; mash gently.
Fluffy classic mash Russet potatoes Use a ricer or light masher; avoid heavy mixing.
Best balanced mash 50/50 Yukon Gold and russet Use moderate milk, enough butter, and stop when spoonable.
Rich holiday mash Yukon/russet mix + sour cream or cream cheese Make slightly looser before chilling or holding.
No-milk mash Reserved potato water, broth, butter, or olive oil Add slowly so the mash loosens without turning soupy.

Once the style is clear, the potato choice becomes easier. Yukon Golds lean creamy, russets lean fluffy, and a mix gives the safest balance.

The Mashed Potato Texture Rule

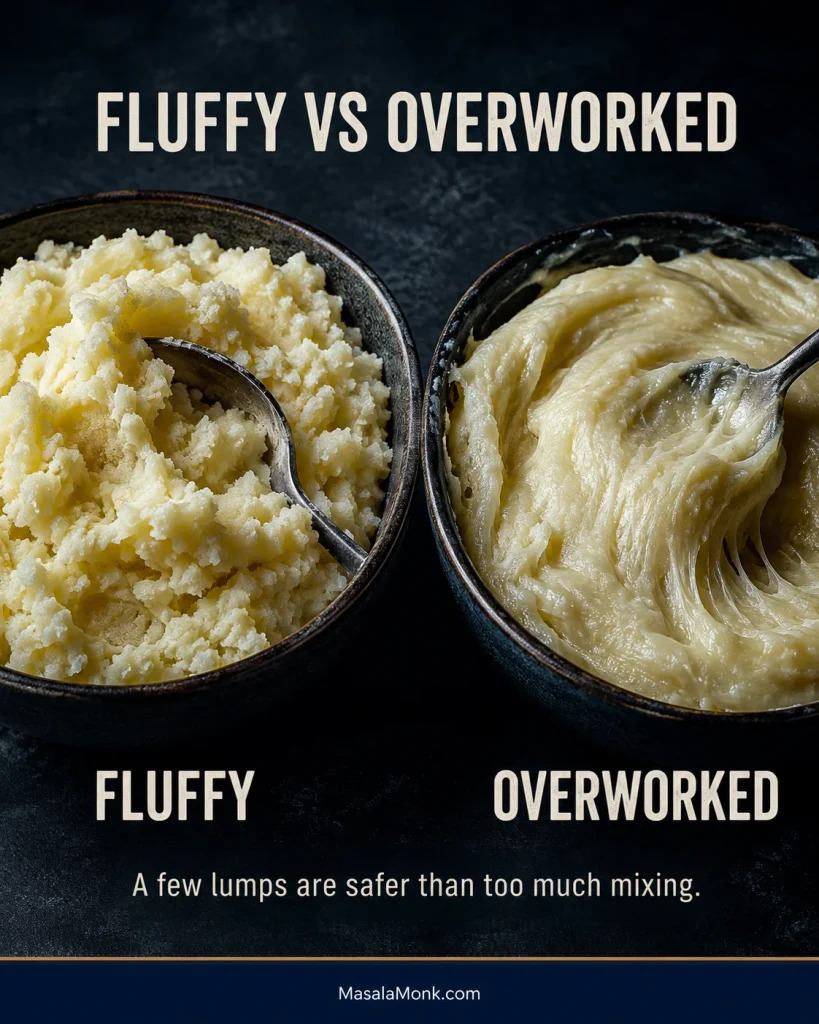
The rule that protects the bowl: Dry the potatoes first, add warm liquid slowly, and stop when the mash looks soft and spoonable. If it feels dry, loosen it gently. If it looks wet or sticky, pause before adding or mixing more.

Most mashed potato problems happen in the last few minutes, not at the ingredient stage. The right mash should look relaxed, not wet; soft, not slumped; ridged, not rubbery. Once you know that cue, the recipe becomes much easier to trust.

Why This Recipe Works

Great mashed potatoes do not come from adding every rich ingredient at once. They come from tender potatoes, enough salt, good draining, warm dairy, and a light hand at the end.

In practice, great mashed potatoes come down to moisture control and starch control. Cook the potatoes until fully tender, let surface steam escape after draining, then fold in fat and dairy without beating the mash into paste. That is what keeps the bowl creamy and light instead of watery or gluey.

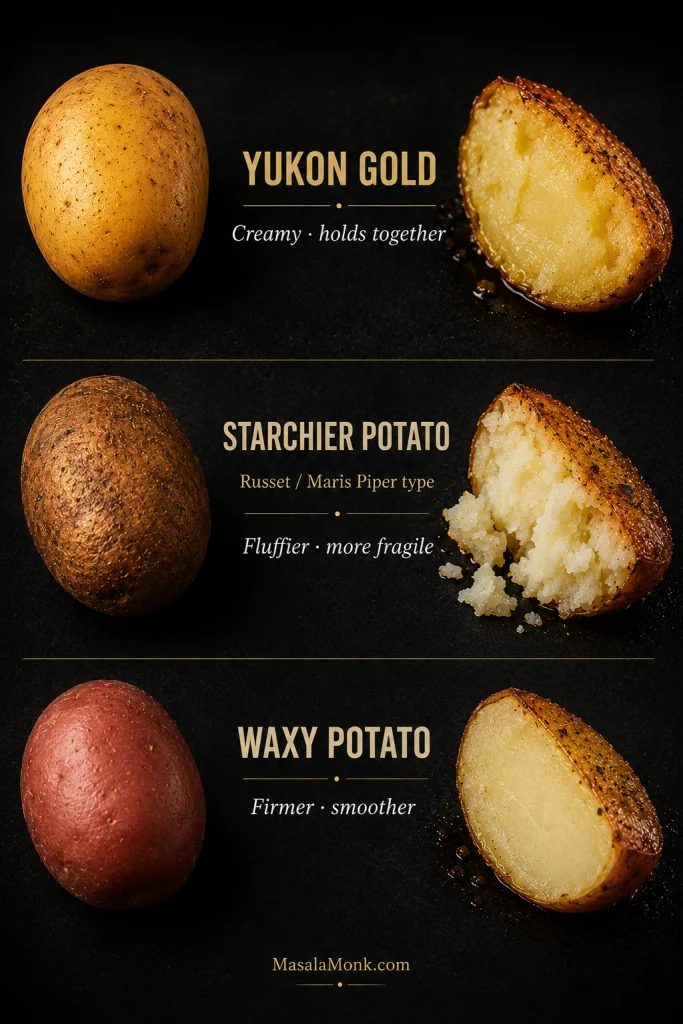
Yukon Gold potatoes bring a naturally buttery texture. Russets are drier and fluffier. Using both gives you a reliable middle ground: rich enough for holidays, but not so dense that the serving dish feels heavy.

The drying step matters because boiled potatoes carry surface moisture. Letting steam escape in the hot pot keeps the mash from turning watery before the butter and milk go in.

Work the starch as little as possible after cooking. The more you beat the potatoes, the more the texture moves toward sticky and pasty.

Best Potatoes for Mashed Potatoes

Potato choice decides whether the mash leans creamy, fluffy, rustic, or dense. If you are standing in the store and do not want to think about it, buy Yukon Golds. Choose russets for the fluffiest result, or use both if you want the best balance.

Yukon Gold potatoes and russet potatoes with whole potatoes and cut halves on a wooden board.
Yukon Golds bring buttery creaminess, while russets bring lift. Together, they give mashed potatoes a balanced texture that feels smooth without turning heavy.
Potato Texture Best for
Yukon Gold Creamy, buttery, naturally rich Smooth everyday mashed potatoes
Russet / Idaho Fluffy, light, slightly drier Classic fluffy mashed potatoes
Yukon Gold + Russet mix Creamy and fluffy Best all-purpose mashed potatoes
Red potatoes Waxy, rustic, holds shape Skin-on mashed potatoes
New potatoes / fingerlings Firm and waxy Not ideal for classic mash

Peel the potatoes for a smooth finish. For a rustic mash, leave some or all of the skin on, especially with Yukon Gold or red potatoes. Russet skins are thicker, so they are usually better peeled unless you want a very rustic texture.

Red potatoes are delicious, but they do not give the same classic fluffy texture as russets or the same smooth richness as Yukon Golds. Waxy new potatoes and fingerlings hold their shape well, but they do not mash into the same soft finish.

The Best Ratio

This ratio keeps the recipe flexible without turning it into a guessing game. You can scale it for two people, eight people, or a full holiday table without losing the texture.

For every 1 kg / 2.2 lb potatoes, use 75–100 g butter and 180–240 ml warm milk, half-and-half, or cream. Start with the lower amount of liquid, then add more only if the potatoes need it.

For salt, season the cooking water generously but carefully. For 1 kg / 2.2 lb potatoes, start with about 2 teaspoons kosher salt in a medium pot, or up to 1 tablespoon for a large pot of water. The water should taste seasoned, not harshly salty. After mashing, add fine salt in small pinches or 1/4 teaspoon increments until the flavor tastes full and balanced.

Kosher salt brands vary in weight, so use the cooking-water amount as a starting point and trust the final tasting step more than the spoon measurement.

Ingredient Everyday creamy mash Richer holiday mash
Potatoes 1 kg / 2.2 lb 1 kg / 2.2 lb
Butter 75 g / about 5 tbsp 100 g / about 7 tbsp
Milk or half-and-half 180 ml / 3/4 cup 240 ml / 1 cup
Optional sour cream Skip or use 2 tbsp 60 ml / 1/4 cup
Optional cream cheese Skip 60–100 g / 2–3.5 oz

This is the ratio that keeps you from guessing when the guest count changes.

Useful rule: Start with the everyday column. If you add sour cream, cream cheese, or extra butter, reduce the milk at first because rich add-ins loosen the mash too.

Ingredients

With mashed potatoes, a short ingredient list does not mean the details do not matter. The potato decides the texture, the butter softens the edges, the dairy loosens the mash, and the salt makes the whole dish taste complete.

The amounts are in the recipe card and ratio table above. Here is what each one does once it hits the potatoes.

Raw potatoes, butter, milk, salt, and pepper arranged on a wooden board.
Before technique matters, the base stays simple: potatoes, butter, milk or cream, salt, and pepper. The magic comes from how gently those basics are handled.

Potatoes

Yukon Gold potatoes make the mash naturally creamy and buttery. Russets make it lighter and fluffier. A mix gives the most reliable everyday result.

Peel them for a smooth bowl, or scrub them well and leave some skin on for a rustic version.

Butter

Butter gives richness, but it also helps the texture feel soft instead of dry. Unsalted butter gives you more control; salted butter works if you season carefully at the end.

Milk, half-and-half, or cream

Whole milk gives a classic creamy texture. Half-and-half or cream makes the mash richer. Warm the dairy before adding it so it blends smoothly instead of cooling the potatoes down and making the texture tighten.

Salt

Salt the boiling water and season again after mashing. With so few ingredients, blandness has nowhere to hide. If the potatoes taste dull, they usually need a little more salt, butter, or both.

Black pepper

Black pepper gives a gentle warmth. Use white pepper if you want the potatoes to look very smooth without black specks.

Sour cream or cream cheese

Sour cream adds tang and balances the richness of butter. Cream cheese makes the mash thicker and richer, which is especially useful for make-ahead prep. Add less milk at first when using either one.

Herbs and toppings

Chives, parsley, thyme, roasted garlic, melted butter, parmesan, or crispy bacon can all be added depending on the meal. When using salty add-ins like parmesan, bacon, salted butter, broth, or gravy, season lightly at first and adjust at the end.

Equipment

You are not trying to purée potatoes into smoothness. You are breaking them down gently, then folding in enough butter and dairy to make them soft. That is why a masher, ricer, or food mill is safer than anything that spins fast.

  • Potato masher: best for a classic homemade bowl with a little texture.
  • Ricer: best for a very smooth, light finish.
  • Food mill: useful for larger batches or silky mash.
  • Hand mixer: okay on low speed, but stop as soon as the potatoes are smooth.
  • Blender or food processor: save these for soups; they can make mashed potatoes gluey.
Potato ricer pressing cooked potatoes into fluffy strands over a bowl.
A potato ricer creates fine strands before mixing begins. That means smoother, fluffier mashed potatoes with less handling and less risk of gumminess.

Tool choice matters most when the potatoes are already tender. Before mixing too far, see How to Avoid Gluey Mashed Potatoes.

How to Make Mashed Potatoes Step by Step

Start with the recipe card if dinner is already moving. The step-by-step notes below are for getting the texture exactly right — not just edible, but soft, warm, and worth passing around again.

1. Peel and cut the potatoes

Peel the potatoes if you want a smooth bowl. If you prefer a rustic finish, scrub them well and leave some or all of the skin on.

Cut into even 1 1/2–2 inch / 4–5 cm chunks. The pieces do not need to be tiny, but they should be similar in size so they cook evenly.

Hands cutting peeled potatoes into even chunks on a wooden cutting board.
Even potato chunks are small insurance against lumps. Because they cook at the same pace, you need less force when it is time to mash.

If you cut them ahead, keep them covered in cold water in the refrigerator for a few hours. Drain before cooking and start with fresh cold water so the flavor stays clean.

2. Start in cold salted water

Place the potato chunks in a large pot and cover with cold water by about 1 inch / 2.5 cm. Add kosher salt to the water; use about 2 teaspoons for a medium pot or up to 1 tablespoon for a larger pot.

Starting in cold water helps the pieces cook evenly. Salted water seasons them from the inside instead of leaving all the seasoning for the end.

Potato chunks in a pot of cold water with salt being added before boiling.
Seasoning starts in the pot, not at the end. Cold salted water helps the potatoes cook through evenly and taste good before butter goes in.

3. Boil until very tender

Bring the water to a boil, then reduce to a steady simmer. Cook for 15–20 minutes, depending on the size of the pieces.

Use the clock only as a guide; the fork test tells you the truth. When a fork slides through with almost no resistance, the potatoes are ready to mash. Around the edges, they may look slightly softened, but the centers should be fully tender, not chalky.

Fork sliding into a tender boiled potato chunk with steam rising from the pot.
Look for tenderness, not just time. Once the fork slides through cleanly, the potatoes are ready to mash without stubborn centers.

Slightly over-tender potatoes mash better than undercooked ones. Do not leave cooked potatoes sitting in the hot water after they are tender, or they can absorb more water and make the final mash too thin.

4. Drain and dry

Drain very well in a colander. Then return the potatoes to the hot empty pot for 30–60 seconds. Shake the pot gently once or twice so steam escapes.

Skip the rinse after draining. The hot pot does the work here: it lets steam escape without washing away flavor. The potatoes should steam instead of shine.

Drained boiled potatoes steaming in a hot empty pot before mashing.
Steam is useful here. After draining, a brief rest in the hot pot lets surface moisture escape so the mash stays creamy instead of loose.

5. Mash gently

Use a potato masher for a classic texture. For a smoother bowl, pass the potatoes through a ricer or food mill.

Hand using a potato masher to mash cooked potatoes in a pot.
Stop before the potatoes fight back. Gentle mashing gives you control, while heavy beating can push the starch toward sticky and dense.

If you use a hand mixer, keep it on low speed and stop as soon as the potatoes are smooth.

6. Add butter and warm milk gradually

Warm the milk, half-and-half, or cream before adding it. It should be warm to the touch or lightly steaming, not boiling. Add the butter and about 3/4 cup / 180 ml warm liquid first, then mash or fold gently.

Warm milk being poured into mashed potatoes while butter melts into the mixture.
Add richness slowly. Warm milk or cream loosens the potatoes in stages, while butter folds in more smoothly when the mash is still hot.

Start with less liquid; you can always loosen the mash once the texture tells you what it needs. Stop when it mounds softly on a spoon — that is the sweet spot before it turns too thin.

Final texture cue: soft, spoonable mashed potatoes

The final texture should be easy to see before you taste it. The mash should mound softly on a spoon, hold gentle ridges for a moment, and fall back without stretching, pouring, or clumping.

Spoon lifting creamy mashed potatoes with soft ridges, steam, and a light butter sheen.
This spoon lift is the final cue: the mash should mound softly, hold ridges for a moment, and fall back without stretching.

7. Season and finish

Taste before serving. Add fine salt in small pinches or 1/4 teaspoon increments, then add pepper, more butter, or a splash of warm milk if needed.

If dinner is moving fast, this is the moment to slow down for one minute. The potatoes are cooked; this last minute is what keeps them soft, warm, and worth serving.

If the texture is not where you want it yet, do not keep mixing blindly. Use the troubleshooting guide to fix dry, watery, lumpy, bland, or gluey mashed potatoes.

Creamy vs Fluffy Mashed Potatoes

Not every batch should be the same. Some dinners need rich, creamy potatoes. Others need a lighter mash that can hold gravy without feeling heavy. Neither version is better; the best texture is the one that fits the meal.

Two servings of mashed potatoes showing one smoother creamy texture and one lighter fluffy texture.
Creamy mashed potatoes sit smoother and richer, while fluffy ones hold lighter peaks. The better choice depends on the sauce, timing, and plate.

For a fluffy bowl

Use mostly russets, moderate liquid, and a light hand. Stop mixing as soon as the potatoes look soft.

For a creamy bowl

Use more Yukon Golds, warm half-and-half or cream, and a little more butter.

For a rich holiday batch

Add sour cream or cream cheese, but reduce the milk at first. You can always loosen the mash later.

For a rustic finish

Leave some skin on and use a potato masher. The uneven texture works beautifully beside gravy and roast meats.

If you think of these as whipped potatoes, use a ricer first, then fold in the butter and milk until smooth. Avoid aggressive whipping; the texture can move from smooth to gluey quickly.

For this creamy, classic version, skip rinsing after boiling and let the potatoes dry in the hot pot instead. If you are chasing an ultra-fluffy russet-only style, some methods rinse away extra starch, but this version keeps the process simpler and the flavor fuller.

How to Avoid Gluey Mashed Potatoes

Gluey mashed potatoes are frustrating because they usually happen at the very end, after everything looked fine. The good news is that the problem is predictable: sticky texture usually comes from overworked starch.

Fluffy mashed potatoes compared with a denser, glossier spoonful of gluey mashed potatoes.
The visual difference is easy to spot: fluffy mash looks soft and ridged, while gluey mashed potatoes look dense, glossy, and overworked.
Do this Avoid this
Use a masher, ricer, or food mill Blender or food processor
Cook until fully tender Mashing undercooked centers
Fold gently after mashing Beating hard after smooth
Add liquid gradually Pouring everything in at once
Stop when spoonable Trying to fix texture by mixing more

If the potatoes are already gluey, do not keep beating them. Truly gluey mash will not fully return to fluffy, but you can soften the mouthfeel with warm butter or cream. If it is very dense, use the leftovers for potato cakes, croquettes, soup, or a casserole topping.

How to Fix Mashed Potatoes That Went Wrong

A batch of imperfect mashed potatoes is usually not a disaster. Before you add more liquid or start mixing harder, pause and match the problem to the right fix.

The goal is not perfection at every step. The goal is knowing when to stop, when to loosen, and when to turn imperfect potatoes into something else delicious.

Texture problems

Problem Why it happened How to fix it
Gluey texture Overmixed starch, blender, food processor, or too much beating Stop mixing. Gently fold in warm butter or cream. If the mash is truly gluey, repurpose dense leftovers instead of trying to whip them back.
Watery texture Potatoes were not drained or dried well, or too much liquid was added Warm gently over low heat to release moisture. Fold carefully. Add potato flakes only as a last resort.
Lumps Potatoes were undercooked or cut unevenly Cook potatoes until completely tender. Use a ricer next time for smoother results.
Dry texture Not enough liquid or fat, or reheated without moisture Add warm milk, cream, broth, or butter a little at a time.
Too thin Too much milk or cream Warm gently to evaporate moisture. Add a few potato flakes only if needed.
Too stiff Not enough warm liquid Loosen a little at a time, folding only until the texture comes back.
Sticky after using a hand mixer The potatoes were beaten too long Stop mixing immediately. Fold in warm butter or cream. Use leftovers for cakes or casserole topping if needed.
Grainy after reheating The mash was too lean or reheated too aggressively Warm slowly and fold in butter, cream, or sour cream until smoother.

Flavor and serving problems

Problem Why it happened How to fix it
Bland flavor Cooking water was not salted, or not enough final seasoning was added Add salt gradually, then finish with butter, pepper, herbs, garlic, sour cream, or cheese.
Flat flavor even after salting They may need fat, tang, herbs, or deeper seasoning Add butter, black pepper, chives, roasted garlic, sour cream, parmesan, or a little gravy.
Got cold before serving They sat too long or the serving dish was cold Reheat gently with warm milk or butter. Next time, warm the serving dish and keep them covered.
Too much garlic or pepper The seasoning is overpowering the potatoes Fold in more plain mash if available, or soften the flavor with cream, butter, or sour cream.

Most fixes are small. The important thing is not to panic-mix the potatoes into a worse texture. Serve them warm if they still taste good, or save them for cakes, croquettes, soup, or a casserole topping where the texture can work in your favor.

Variations

Once the base mash is right, variations should support the meal, not bury the potatoes. Keep the flavor simple for rich mains, or add garlic, cheese, herbs, or tang when the potatoes need to carry more of the plate.

Garlic Mashed Potatoes

Use roasted garlic when you want mellow sweetness, sautéed garlic when you want a sharper savory edge, and garlic butter when you want the flavor to spread through the whole mash. For a deeper version with the garlic balance already worked out, use this garlic mashed potatoes recipe.

Cream Cheese Mashed Potatoes

Use cream cheese when you want a thicker, richer mash that reheats well. Let it soften first so it melts in easily, and add less milk at the beginning.

Sour Cream Mashed Potatoes

Use sour cream when you want tang that cuts through butter, gravy, steak, pork chops, or roast chicken. It makes the mash taste richer without feeling too heavy.

Loaded Mashed Potatoes

Fold in shredded cheddar, crispy bacon, chopped chives, and a spoonful of sour cream. Loaded mashed potatoes work well as a side dish or as the base for a comfort-food plate.

Parmesan Herb

Fold in grated parmesan, chopped parsley, chives, thyme, or a little roasted garlic. Parmesan adds saltiness and depth, so taste before adding more salt.

Buttermilk

Use warm buttermilk for a tangy Southern-style version. Keep the heat gentle and do not boil the buttermilk.

Extra Buttery

For holiday-style potatoes, increase the butter to 100–125 g / about 7–9 tbsp per 1 kg / 2.2 lb potatoes and use half-and-half or a mix of milk and cream.

Mashed Potatoes Without Milk

If this is an emergency “I already boiled the potatoes and there is no milk” moment, start with reserved potato water and butter. It is the safest fix because the water is already starchy and neutral.

No milk does not mean no comfort. It just means choosing the right liquid for the job. Potato water keeps the flavor clean, broth makes it more savory, and olive oil or vegan butter can add richness without dairy.

Mashed potatoes with cups of broth, potato cooking water, olive oil, and a butter-like block nearby.
No milk does not end the recipe. Potato water keeps things clean, broth adds savory depth, and olive oil or dairy-free butter brings richness.

Plant milk can work, but choose an unsweetened neutral version. Potato water is usually safer because it tastes like potato, not oat, almond, or coconut.

Situation Best substitute Notes
No milk at home Reserved potato water + butter Neutral, easy, and already starchy enough to loosen the mash.
No milk, but dairy is okay Cream cheese, sour cream, or thick plain yogurt Add gently so the flavor does not become too tangy or thin.
More savory flavor Warm chicken or vegetable broth Good with gravy, meatloaf, chicken, pork chops, and roast dinners.
Dairy-free version Olive oil + reserved potato water Gives richness without dairy. Add slowly.
Vegan version Vegetable broth + vegan butter or olive oil Use neutral plant milk only if you like the flavor.

If the no-milk mash still feels dry, stiff, or too thin, use the troubleshooting table. For leftovers or dairy-free make-ahead prep, see how to reheat mashed potatoes gently.

Make-Ahead Mashed Potatoes

Mashed potatoes are usually not finished in a quiet kitchen. They happen while gravy is thickening, mains are resting, and someone is asking when dinner is ready.

Make-ahead mashed potatoes are not about being fancy. They are about giving yourself one less thing to panic over when the oven is full, the gravy is waiting, and dinner is moving fast.

Hands covering a shallow dish of mashed potatoes with butter and a small milk jug nearby.
Make-ahead mashed potatoes should go into storage a little softer than serving texture. Later, that extra moisture helps them reheat without drying out.

For the best texture, make them up to 1–2 days ahead, keep them covered in the refrigerator, and reheat gently with extra warm milk, cream, butter, sour cream, or cream cheese.

The most important trick is to make them slightly softer than usual before chilling, because the fridge will firm them up. A little extra moisture and fat gives you room to reheat without drying them out.

For holiday serving, warm the serving dish, cover the potatoes tightly, and keep extra warm milk or butter nearby for a quick loosen before they go to the table.

Make-Ahead Method

  1. Prepare the base recipe as usual.
  2. Make the mash slightly looser than you want it at serving time.
  3. Add a little extra butter, milk, cream, sour cream, or cream cheese so it stays soft.
  4. Cool and store in a covered shallow dish or airtight container in the refrigerator.
  5. Reheat gently with extra warm milk or butter.
  6. Stir only as much as needed to bring the texture back.

Once the potatoes are made ahead, the real success comes from reheating them well. Jump to How to Reheat Mashed Potatoes before serving.

How to Reheat Mashed Potatoes

Cold mashed potatoes rarely look promising at first. They firm up in the fridge, but they usually come back with low heat, patience, and a little extra moisture.

Mashed potatoes being reheated with melting butter, warm milk, steam, and a spoon folding through them.
Reheating is a recovery step, not a second mash. Low heat, steam, butter, and warm milk bring back creaminess without rough stirring.

Reheating is less about stirring hard and more about giving the potatoes back moisture slowly. Warm them gently for texture, but make sure leftovers are hot all the way through. If you are checking with a thermometer, aim for 165°F / 74°C.

Method How to do it Best for
Stovetop Place in a pot over low heat. Add warm milk, cream, or butter and stir gently until hot. Small to medium batches
Oven Place in a covered baking dish and reheat at 350°F / 175°C for 25–40 minutes. Add butter on top if the potatoes look dry. Holiday meals and larger batches
Microwave Reheat at medium power in short intervals, stirring every 1–2 minutes. Add a splash of milk or cream. Leftovers and single servings
Slow cooker Reheat first, then keep warm in the slow cooker. Add butter or milk if the surface starts drying out. Holding for a crowd
Slow cooker note: A slow cooker is good for holding hot mashed potatoes warm, but it is not the best way to slowly heat cold mashed potatoes from the fridge. Reheat them first, then transfer to the slow cooker on warm.

How Much to Make Per Person

A good side-dish estimate is 225–250 g / 1/2 lb raw potatoes per person. For a holiday meal with many sides, you can go slightly lower. For a mashed-potato-heavy dinner with gravy, meatballs, steak, or chicken, plan a little more.

If mashed potatoes are the side everyone reaches for first, round up. Leftovers are easier to use than an empty serving dish is to explain.

People Raw potatoes Approx. butter Approx. milk/cream
2 500 g / 1.1 lb 40–50 g 90–120 ml
4 1 kg / 2.2 lb 75–100 g 180–240 ml
8 2 kg / 4.4 lb 150–200 g 360–480 ml
10 2.25 kg / 5 lb 170–225 g 420–540 ml
20 4.5 kg / 10 lb 340–450 g 850 ml–1.1 L

For a lighter meal with many sides, use the lower end. For gravy-heavy dinners, holiday plates, or mashed-potato lovers, use the higher end.

What to Serve with Mashed Potatoes

Mashed potatoes are often the quiet thing holding the whole plate together. When they are soft, warm, and well-seasoned, even a simple dinner feels more complete.

The easiest rule is simple: if the main dish has gravy, pan juices, cream sauce, onion sauce, or mushrooms, mashed potatoes probably belong beside it.

Dinner plate with mashed potatoes, gravy, sliced roast chicken, green beans, and a gravy boat in the background.
Mashed potatoes earn their place beside saucy mains because they catch gravy and pan juices. That is what turns a simple plate into comfort food.

Best mashed potato pairings

Think of mashed potatoes as the soft landing for the plate: one saucy main, one green vegetable, and one simple extra like rolls, salad, or roasted carrots is usually enough.

Keep the potatoes plain and buttery when the main dish is strongly flavored. Add garlic, cheese, sour cream, or herbs when the main dish is simple.

Meal type Best pairings Why it works
Gravy-heavy comfort dinners Meatloaf, meatballs, smothered pork chops, creamy mushroom mains The potatoes soak up sauce and make the plate feel complete.
Beef dinners Steak, pot roast, roast beef, beef stew, cottage pie Beef and mashed potatoes are classic because the richness balances well with butter and salt.
Chicken dinners Roast chicken, chicken gravy, creamy mushroom chicken, slow cooker French onion chicken Mashed potatoes turn chicken into a fuller comfort meal.
Pork dinners cream of mushroom pork chops, pork loin, sausages, ham Pork works well with creamy mash, mustardy sauces, onion gravy, or pan juices.
Seafood Salmon, white fish, fish cakes, shrimp in garlic butter Keep the potatoes simple so they do not overpower the fish.
Vegetarian meals Mushroom gravy, lentils, roasted mushrooms, green beans, peas, carrots Earthy vegetables and legumes pair well with buttery potatoes.
Holiday plates Turkey, ham, stuffing, gravy, sweet potato casserole, hashbrown casserole Mashed potatoes are the soft, savory anchor for a full holiday spread.

If the main dish does not have much sauce, add a simple brown gravy, mushroom gravy, chicken gravy, or onion gravy. Mashed potatoes taste best when there is something warm and savory to spoon over the top.

What to Do with Leftover Mashed Potatoes

Leftovers are not a problem here. Cold mash is one of those rare leftovers that can become better at holding its shape the next day. Leftover mash is already halfway to something crispy.

Use it for potato cakes, breakfast patties, croquettes, or fish cakes when you want something crisp outside and soft inside.

  • Mashed potato pancakes
  • Potato cakes
  • Croquettes
  • Fish cakes
  • Shepherd’s pie or cottage pie topping
  • Potato soup
  • Loaded mashed potato casserole
  • Breakfast patties
  • Waffles
  • Stuffed rolls
  • Crispy fried mashed potato balls

For quick mashed potato cakes, start with 2 cups cold mashed potatoes, 1 egg, 2–4 tablespoons flour or breadcrumbs, and a little cheese or herbs. Shape into patties and cook in a lightly oiled skillet until golden on both sides.

If you would rather turn leftovers into a full casserole-style dinner, use the mash as a topping for cottage pie, or move into another cozy potato bake like tater tot casserole. It keeps the same comfort-food mood while changing the texture completely.

If the leftover mashed potatoes are very soft, add flour, breadcrumbs, or grated cheese a little at a time before shaping them into cakes or patties. Cold mash holds together better than warm mash.

How to Store Mashed Potatoes

Store leftovers in an airtight container in the refrigerator for 3–4 days. When reheating, make sure they are hot all the way through; if you are checking with a thermometer, aim for 165°F / 74°C. For detailed safety guidance, the USDA leftovers guide is useful.

As they warm, add a splash of milk, cream, broth, or a little butter so the texture turns creamy again instead of dry or stiff.

Can You Freeze Mashed Potatoes?

Yes, they can be frozen, but the texture depends on how much fat and dairy they contain. A batch made with butter, cream, sour cream, or cream cheese freezes better than a lean version made with only potatoes and water.

To freeze, cool the mash completely and pack it into freezer-safe containers. The texture is usually best within the first month. It can be kept frozen longer, but it may become more watery or grainy over time.

Thaw overnight in the refrigerator and reheat gently with extra milk, cream, or butter. If the texture looks a little separated after thawing, warm the potatoes slowly and fold in extra butter or cream.

FAQs

These are the questions that usually come up once the potatoes are already peeled, boiling, or waiting on the stove.

1. What are the best potatoes for mashed potatoes?

Yukon Golds and russets are the safest choices. Yukon Golds make the mash creamy and buttery; russets make it lighter and fluffier. A mix gives the best balance.

2. Should I peel potatoes for mashed potatoes?

Peel them for a smooth mash. Leave some or all of the skin on for a rustic texture, especially with Yukon Gold or red potatoes.

3. Do you start mashed potatoes in cold or boiling water?

Start potatoes in cold water so the pieces cook evenly from outside to center. Boiling water can soften the edges before the middle is cooked.

4. How long should potatoes boil for mashed potatoes?

Potato chunks usually take 15–20 minutes. They are ready when a fork slides through easily with almost no resistance.

5. Why are my mashed potatoes gluey?

They turn gluey when the starch is overworked. This often happens from using a blender, food processor, or beating the potatoes too much.

6. Can I fix gluey mashed potatoes?

You can improve them, but you usually cannot make truly gluey potatoes fluffy again. Stop mixing, fold in warm butter or cream, and use dense leftovers for cakes, croquettes, soup, or casserole topping.

7. How do I make mashed potatoes without milk?

Use reserved potato cooking water, warm broth, olive oil, vegan butter, or unsweetened plant milk. Add gradually and taste as you go.

8. Can I use cream instead of milk?

Yes. Cream makes the potatoes richer and thicker. Use all cream for a holiday-style mash, or part milk and part cream for balance.

9. Can I use a hand mixer for mashed potatoes?

Yes, but use low speed and stop as soon as the potatoes are smooth. Overmixing can make the texture gluey.

10. Can I make mashed potatoes ahead of time?

Yes. Make them slightly softer than usual, refrigerate for 1–2 days, then reheat gently with extra warm milk, cream, or butter. Sour cream or cream cheese helps them reheat smoothly.

11. How do I reheat mashed potatoes without drying them out?

Reheat gently over low heat or in a covered dish. Add warm milk, cream, broth, or butter a little at a time until creamy again.

12. Can you freeze mashed potatoes?

Yes, but they freeze best with enough butter, cream, sour cream, or cream cheese. Thaw overnight and reheat slowly with extra dairy or fat.

13. How much mashed potato do I need per person?

Plan on about 225–250 g / 1/2 lb raw potatoes per person. For 4 people, use about 1 kg / 2.2 lb; for 8 people, use about 2 kg / 4.4 lb.

14. What can I add to mashed potatoes for more flavor?

Add roasted garlic, sour cream, cream cheese, parmesan, chives, parsley, black pepper, browned butter, cheddar, bacon, or gravy.

15. What is the secret to creamy mashed potatoes?

Use Yukon Gold potatoes, drain them well, add warm dairy gradually, and stop before the mash is overworked. Butter and warm half-and-half make the creamiest everyday version.

Final Thoughts

Once the method is in your hands, you can take the same potatoes creamy, fluffy, garlicky, cheesy, dairy-free, make-ahead, or gravy-ready without learning a new recipe each time.

That is why this method is worth saving: it gives you a good bowl when everything goes right, and a way back when the potatoes need help.

Posted on Leave a comment

Irresistible Glazed Carrots with Honey: A Sweet and Savory Delight

Glazed Carrots with Honey

Carrots are often unsung heroes on the dinner table, but with the right glaze, they transform into a dish that’s both comforting and elegant. If you’ve never made honey-glazed carrots before, get ready for a side that’s more than just a bit player—these carrots are truly irresistible. This post covers everything you need: recipe, science, feedback from real cooks, time-saving hacks, and creative twists to make it your own.


🥕 Why Glazed Carrots with Honey?

Carrots have a natural sweetness, which is brought to life by roasting or simmering. When you add honey and butter, you get a glossy, caramelized glaze that balances sweet and savory in every bite. The addition of a touch of citrus or warm spice can take the flavor to another level, cutting the richness and creating complexity.

But it’s not just about taste. Glazed carrots are:

  • Quick to prep: Minimal chopping and hands-on time.
  • Budget-friendly: Carrots are inexpensive, and the rest are pantry staples.
  • Visually appealing: Especially with rainbow carrots, they bring color to the plate.
  • Loved by kids and adults alike: Even picky eaters have been known to sneak seconds.

⭐ What Makes a Great Glazed Carrot?

Based on feedback from hundreds of home cooks, here’s what separates a good glazed carrot from a showstopper:

  • Caramelization: Roasting at high heat or finishing under the broiler gives carrots those irresistible golden edges.
  • Balance: The glaze needs both sweetness (honey) and brightness (lemon or orange juice). A little salt and pepper, plus optional spices, round it out.
  • Texture: Tender, not mushy. Uniform slicing helps.
  • Visual pop: Rainbow or heirloom carrots make it special, but classic orange carrots work beautifully too.

📋 The Best Honey-Glazed Carrots Recipe (Oven & Stovetop)

Adapted from Chef Dennis and top-rated home cook tips (2025)

Ingredients

  • 1½ lb (≈ 680 g) carrots (rainbow or classic), peeled and sliced on a bias, ½-inch thick
  • 2 Tbsp unsalted butter (or vegan substitute)
  • 2 Tbsp honey (or maple syrup for vegan)
  • 1 Tbsp fresh lemon juice (or orange juice for more warmth)
  • 1–2 cloves garlic, minced
  • 1 tsp kosher salt
  • ½ tsp black pepper
  • Optional: ¼ tsp ground cinnamon, ½ tsp ground ginger, pinch of chili flakes
  • Fresh parsley, thyme, or chives for garnish

Kitchen Equipment

  • Sheet pan lined with parchment (for oven method)
  • Skillet (for stovetop)
  • Medium saucepan (to make glaze)

Step-by-Step: Oven-Roasted Glazed Carrots

  1. Prep the Carrots:
    Peel and slice carrots to about ½-inch thick, cutting on a diagonal for more surface area. Uniformity = even cooking.
  2. Preheat & Arrange:
    Set oven to 400°F (200°C). Arrange carrots in a single layer on a parchment-lined sheet pan.
  3. Make the Glaze:
    In a small saucepan over medium heat, melt butter. Add honey and garlic; stir until fragrant (about 1 minute). Whisk in lemon juice, salt, pepper, and any spices.
  4. Coat & Roast:
    Pour glaze over carrots, toss well to coat, and spread carrots out again. Roast for 20 minutes. Toss/flip, then roast another 10–15 minutes, until fork-tender and caramelized at edges.
  5. Finish & Garnish:
    For extra caramelization, broil for 2–3 minutes at the end. Transfer to serving dish, top with fresh herbs, and serve immediately.

Quick Stovetop Glazed Carrots (Ready in 15 Minutes)

  1. Simmer:
    Add carrots to a large skillet with ½ cup water. Cover and simmer over medium-high heat until almost tender, about 5–7 minutes. Drain any excess water.
  2. Glaze:
    Add butter, honey, garlic, lemon juice, salt, pepper, and spices. Toss over medium heat until carrots are fully coated and glaze is sticky and reduced (another 3–5 minutes).
  3. Serve:
    Garnish and serve!

🧑‍🍳 Real User Feedback: What Works, What Doesn’t

  • “This is my favorite way to eat carrots now. The glaze is amazing and rainbow carrots make it a showstopper for guests.”
  • “Good basic recipe—needed more flavor. I added ginger and a little cinnamon, and broiled at the end for extra char.”
  • “Steaming then glazing on the stovetop saved time for a weeknight. Kids loved it!”
  • “I tried with maple syrup instead of honey for a vegan friend—delicious!”

🔬 Why Does This Recipe Work?

Carrots’ sugars caramelize at high heat, creating those sweet, nutty flavors and golden color.
Honey and butter help this along by browning and thickening into a glossy, clingy glaze.
Citrus juice (lemon or orange) provides acidity, keeping the dish from tasting cloying.
Salt and a pinch of spice (ginger, cinnamon, chili) balance the sweetness and add subtle warmth.


🛠️ Practical Tips & Variations

  • Uniform slicing: Helps all carrots cook evenly—no raw bits or mushy ends.
  • Double-glazing: Toss carrots halfway through roasting with a little extra glaze for extra stickiness.
  • Make ahead: Glaze can be made in advance. Toss with carrots just before roasting.
  • Vegan? Use olive oil or vegan butter, and swap honey for maple syrup or agave.
  • Extra flavor: Try adding za’atar, cumin, or chopped rosemary for a more complex profile.
  • Add-ins: Top with feta, toasted nuts, or pomegranate seeds for color and crunch.
  • Leftovers: Glazed carrots taste great cold in salads, grain bowls, or as lunchbox snacks.

🍽️ Perfect Pairings

Honey-glazed carrots are as versatile as they are delicious. Try them with:

  • Roast chicken, turkey, or ham
  • Baked salmon or white fish
  • Lentil or grain bowls (for a hearty vegetarian meal)
  • As part of a vibrant holiday spread
  • Chilled, as a colorful addition to salads

🌟 Final Thoughts: Your New Go-To Side Dish

Whether it’s a holiday meal or a weeknight dinner, Irresistible Glazed Carrots with Honey will brighten your table and win over even the vegetable skeptics. They’re quick, adaptable, crowd-pleasing, and just as tasty as they are pretty.


Have you tried this recipe?

Drop your tweaks, tips, or winning pairings in the comments below. Let’s make glazed carrots everyone’s favorite side!

🥕 10 Frequently Asked Questions (FAQs) for Irresistible Glazed Carrots with Honey

1. Can I make glazed carrots ahead of time?
Yes! You can prep and glaze the carrots a day in advance. Store them in an airtight container and reheat in a 350°F (175°C) oven or on the stovetop until warmed through. Add a splash of water or extra glaze if needed to keep them moist.

2. What’s the best way to cut carrots for glazing?
Cut carrots on a diagonal (bias) into ½-inch thick slices for maximum surface area and even cooking. Baby carrots can be left whole or halved lengthwise.

3. Can I use maple syrup instead of honey?
Absolutely! Maple syrup is a great vegan alternative and gives a slightly different, richer flavor.

4. How do I prevent my carrots from becoming mushy?
Avoid overcooking and slice your carrots evenly. Check doneness with a fork at the minimum cooking time and roast in a single layer for even heat.

5. Are glazed carrots gluten-free?
Yes—if you use pure honey or maple syrup and no added sauces with gluten. Always check your ingredient labels if cooking for someone with celiac disease.

6. Can I add other vegetables to this recipe?
Definitely! Parsnips, sweet potatoes, and beets all work well. Cut all vegetables to similar sizes so they cook evenly.

7. What herbs and spices work best with honey-glazed carrots?
Parsley, thyme, rosemary, cinnamon, ginger, or even a little cumin or za’atar add great flavor.

8. Can I use frozen carrots?
Yes, but thaw and dry them first. Frozen carrots may cook faster and can be softer, so watch the roasting time.

9. How do I get extra caramelization?
For deeper caramelization, broil the carrots for 2–3 minutes at the end of roasting. Watch closely to avoid burning.

10. What dishes pair well with honey-glazed carrots?
They’re perfect with roast meats (chicken, turkey, ham), salmon, grain bowls, or as part of a holiday meal.

Posted on Leave a comment

Kurkure Karele| Crispy Bitter Gourd Recipe| Crispy Karela

Bitter gourd or Karela was enough to make my face look disgusted back then. Whenever my mom used to tell me “Aaj karele bane hain,” I would refuse to eat lunch at home and go to my aunt’s house instead. Even after living alone in a different city, whenever I made karela, I made sure it was crispy like chips. A few years back, I discovered this crispy karela recipe with a great twist, and now I cook this recipe very frequently. So let’s quickly see the ingredients and method to make this crispy karela.

Ingredients:

  • 4 medium-sized Karela (bitter gourd)
  • 1/2 teaspoon turmeric powder
  • 1 teaspoon coriander powder
  • 1 teaspoon red chili powder
  • 1 teaspoon amchoor powder (dried mango powder)
  • 2 tablespoons cornflour
  • 2 tablespoons besan (gram flour)
  • Oil for deep frying
  • Salt to taste

Method:

Cut the Karela (bitter gourd) lengthwise from the middle and remove the seeds using a knife or spoon. The Karela should be hollowed out.

In a large bowl, add water and salt. Place the Karela in the saltwater solution and let it soak for about 30 minutes. This helps reduce the bitterness of the Karela. After 30 minutes, remove the Karela from the water and pat them dry using a kitchen towel. Ensure the karela is completely dry.

In a plate spread the cut karela and combine turmeric powder, coriander powder, red chili powder, amchoor powder, cornflour, besan, and salt to make a dry spice mixture.

Take each Karela and generously mix them with the dry spice. Ensure the mixture is evenly distributed in all the Karela.

Heat oil in frying pan and carefully place the Karela into the oil one by one. Fry the Karela until they turn golden brown and crispy from both sides. This will take approximately 8-10 minutes. Flip the Karela occasionally to ensure even frying. Once the Karela is cooked and crispy, remove them from frying pan.

Serve the Kurkure Karele hot as a side dish with dal chawal or snack. They can be enjoyed with mint/ Coriander chutney or ketchup.

Note: Kurkure Karele are best enjoyed immediately after frying, as they tend to lose their crispiness with time. So, serve them fresh!

I hope you enjoyed reading this recipe. Do give this recipe a shot. If you try this recipe, do give us a shout out. Just click a picture and tag us on @masala.monk or use the hashtag #MasalaMonkRecipe and share on Instagram and Facebook. We would love to hear from you.