
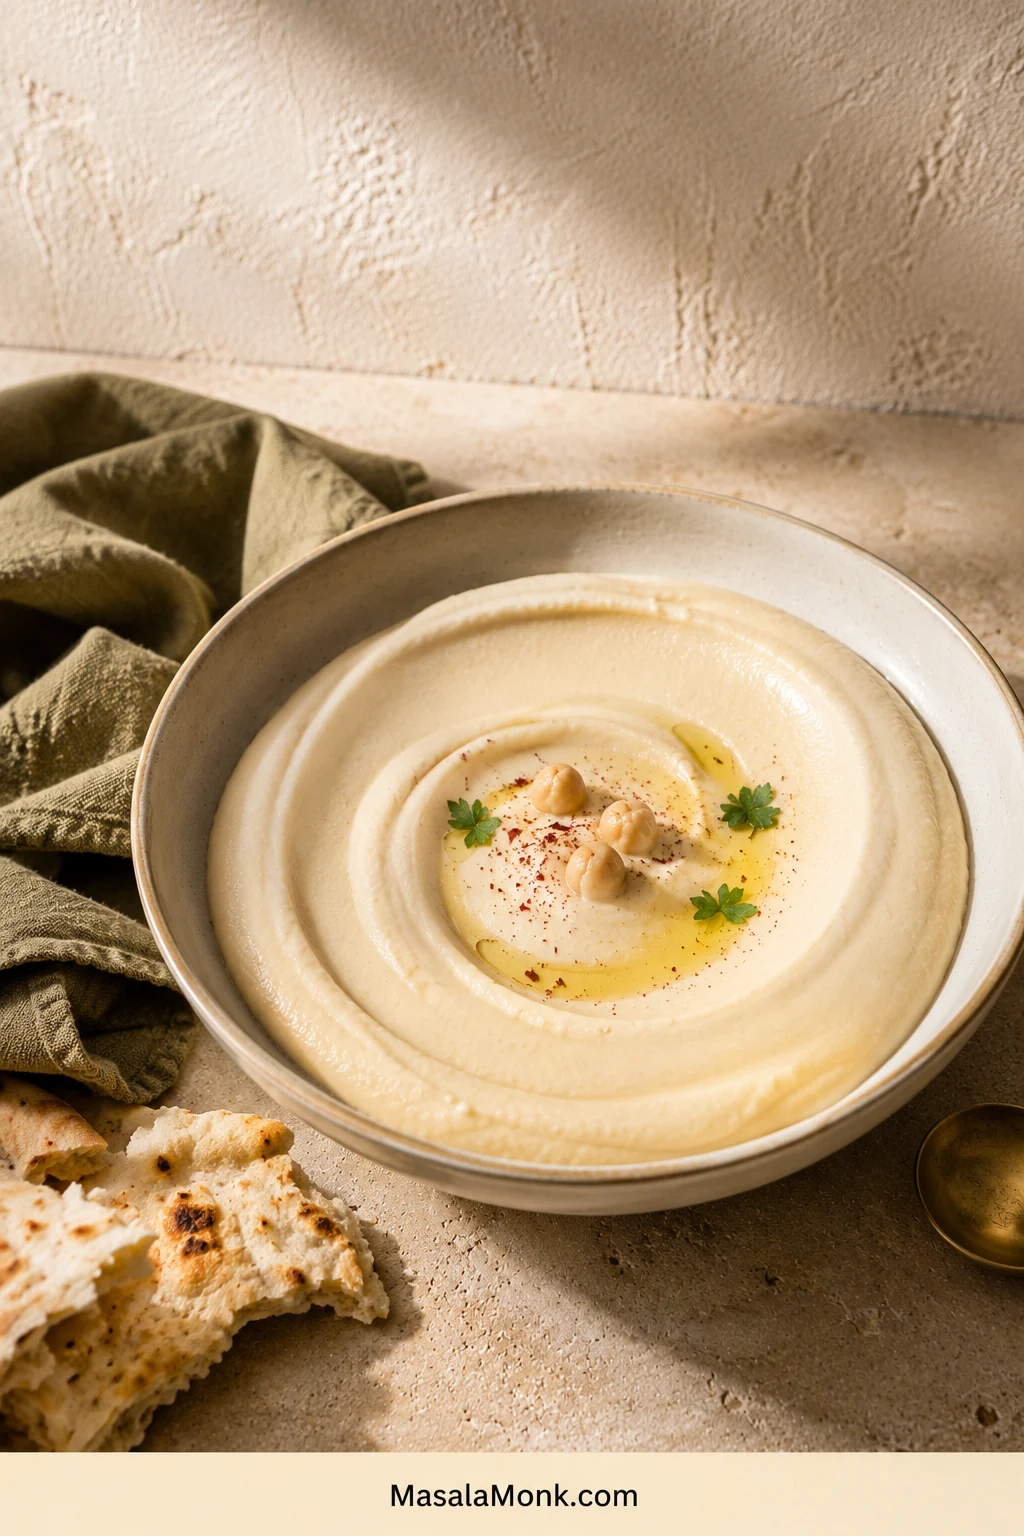
Homemade hummus can contain all the right ingredients and still feel wrong. It may taste pleasant enough, yet land on the table grainy, heavy or stiff enough to pull a piece of soft pita apart.
Good hummus moves differently. It is pale and spoonable, with enough body to hold a shallow swirl and catch a drizzle of olive oil. You taste chickpeas and sesame first, brightened by lemon, while the garlic stays quietly in the background.
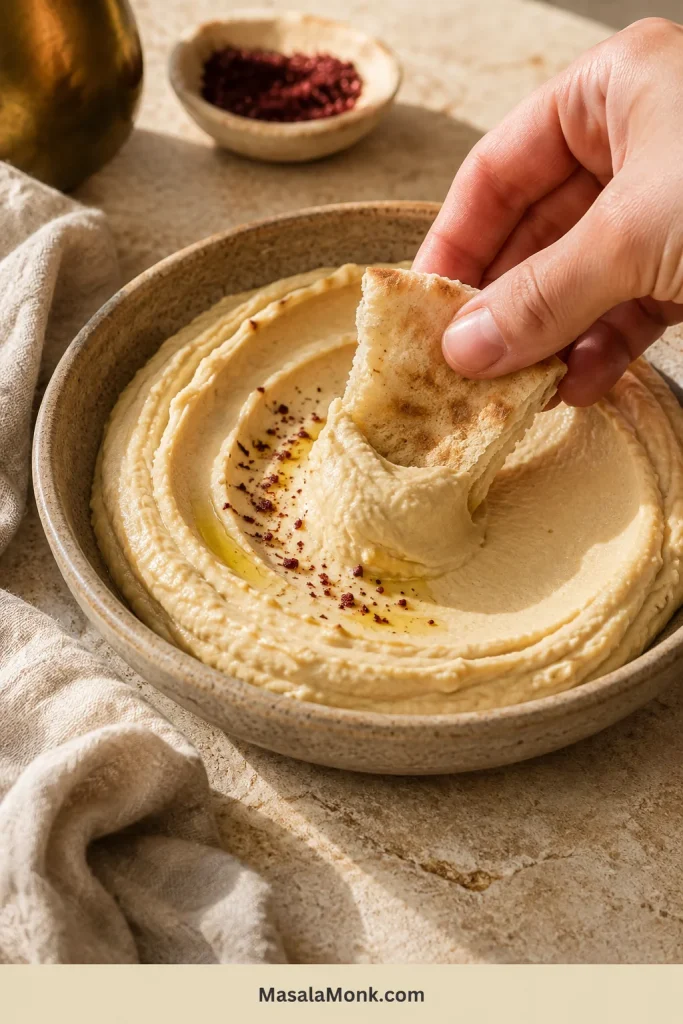
The method becomes straightforward once you know what to look for. Chickpea brands, tahini and machines behave differently, so this recipe uses cues you can see and feel rather than assuming one fixed cooking time or water amount will suit every can and appliance.
There is no need to peel the chickpeas one by one. A short simmer softens their skins along with their centers.
Quick Answer: How Do You Make Creamy Hummus?
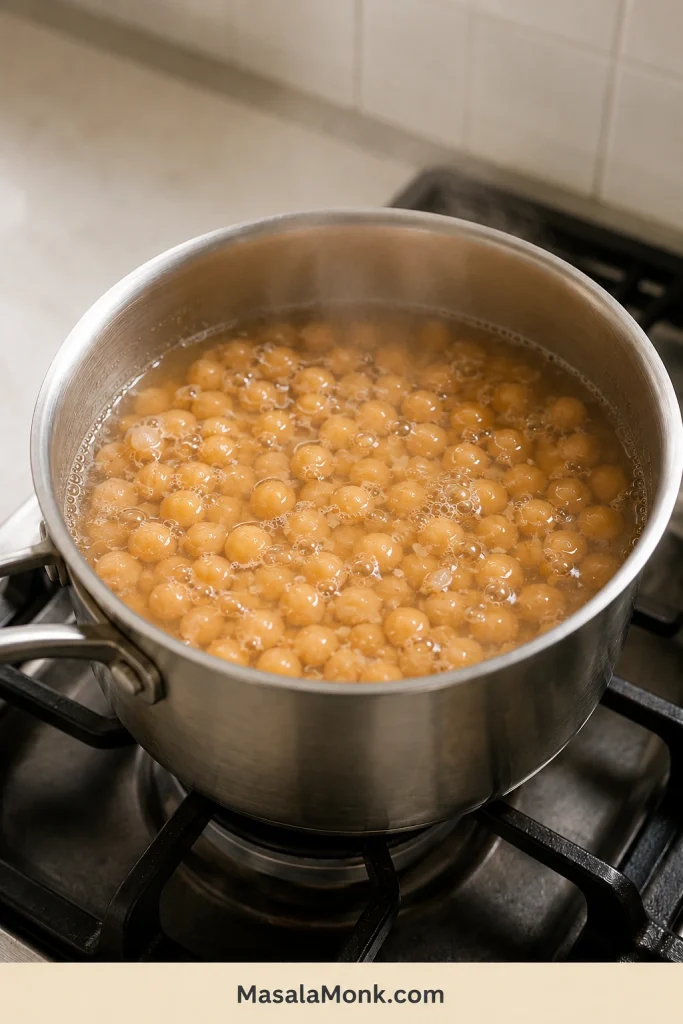
Let 3 tablespoons/45 ml lemon juice, one small garlic clove and ¾ teaspoon/4 g fine salt stand for 10 minutes. Meanwhile, put 1 drained can of chickpeas, about 250 g, in a saucepan, cover with fresh water and add ½ teaspoon baking soda. Bring to a boil, lower to a lively simmer and begin checking after seven minutes. Continue until a chickpea crushes easily between your fingers.
Drain and rinse the chickpeas thoroughly. Blend the lemon mixture with ⅓ cup/80 g tahini, then stream in ¼ cup/60 ml cold water. Add the chickpeas and process for about four minutes, scraping once or twice. Blend in more water, 1 tablespoon/15 ml at a time, until the hummus falls softly from the spatula and holds a shallow swirl.
Choose Your Method
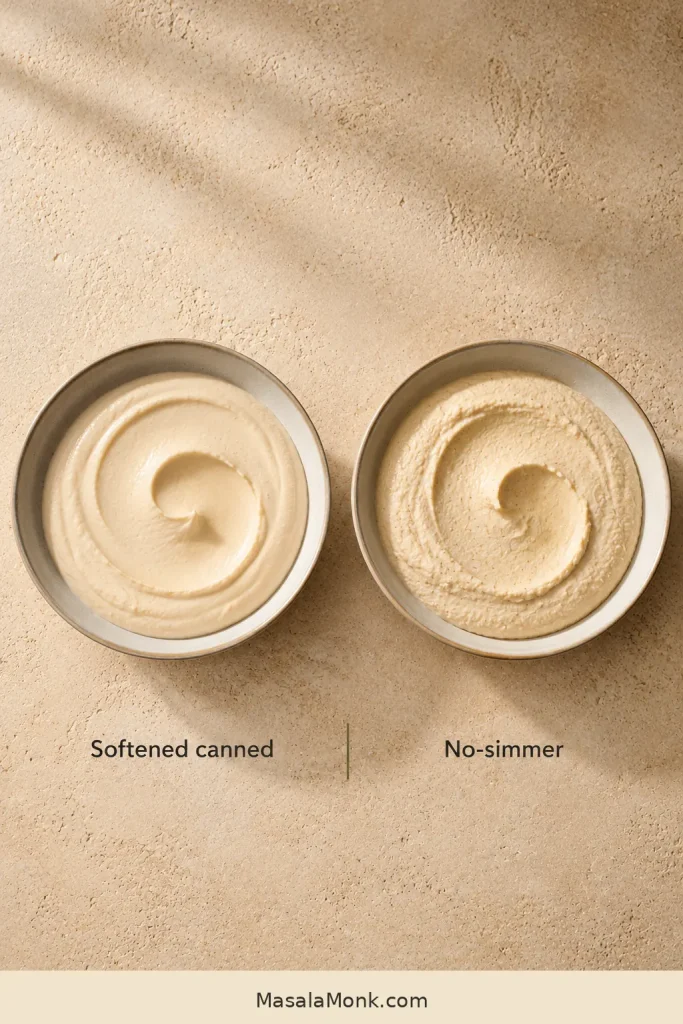
Start with the softened-canned method unless speed matters more than an especially fine texture.
| Route | Time | Best for |
|---|---|---|
| Softened canned — recommended | About 30–40 minutes | A practical balance of speed and smooth texture |
| No-simmer canned | About 15–20 minutes | The fastest everyday batch |
| Dried-chickpea quantity conversion | Soaking plus cooking | Using chickpeas you have cooked yourself |
Classic Extra-Creamy Hummus
This method cooks canned chickpeas until their centers are extremely tender, helping them blend into light, spoonable hummus. The tahini is loosened separately with lemon and cold water before the chickpeas go in, creating creaminess without relying on a large amount of olive oil.
Serve it fresh from the processor or let it settle to room temperature; it can also be made a day ahead.
Timing note: The garlic rests while the chickpeas heat, so it does not add another 10 minutes to the total.
Doubling the recipe: Blend two separate batches unless your processor can circulate a doubled quantity freely. An overfilled bowl can leave dense or grainy pockets around the edges.
Equipment
- Small or medium saucepan
- Fine-mesh strainer or colander
- A 7–9 cup food processor is ideal; a larger bowl may need more scraping
- Measuring spoons or a digital scale
- Silicone spatula
Ingredients
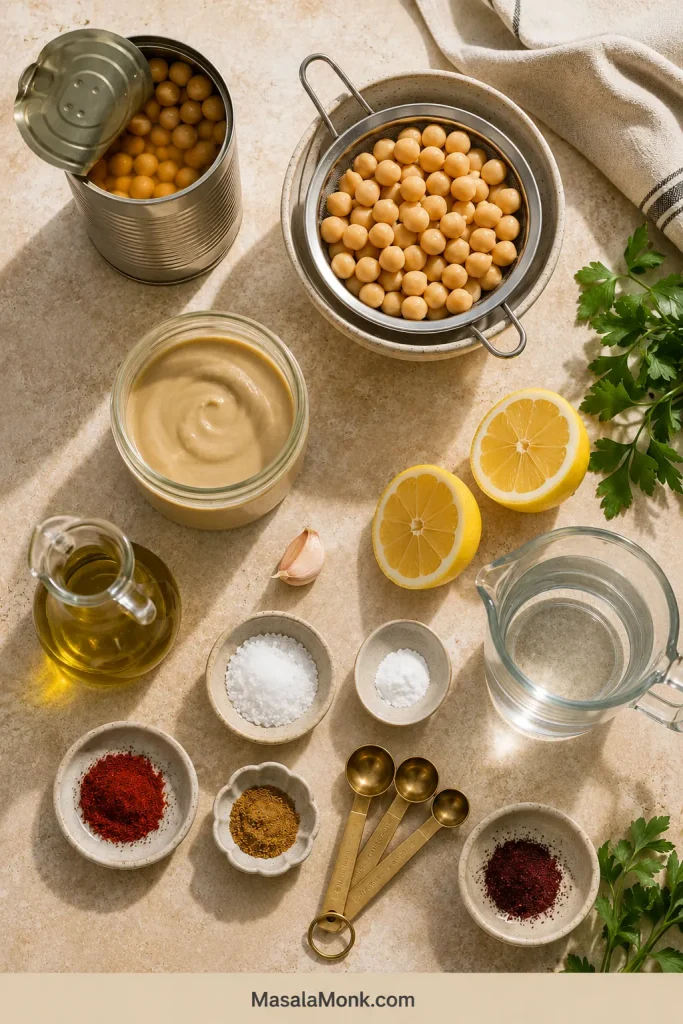
- 1 can chickpeas, 15–15.5 oz or about 425–440 g before draining; approximately 250 g drained
- ½ teaspoon baking soda, about 2–2.5 g
- ⅓ cup well-stirred tahini, 80 g
- 3 tablespoons fresh lemon juice, 45 ml, plus more to taste
- 1 small garlic clove, about 3–4 g, roughly chopped
- ¾ teaspoon fine sea salt or table salt, about 4 g; use the gram weight if your salt is coarse or flaky
- ¼ cup cold water, 60 ml, plus up to 2 additional tablespoons or 30 ml as needed
- ¼ teaspoon ground cumin, optional
- Extra-virgin olive oil, for serving
- Paprika, sumac, parsley or reserved whole chickpeas, optional, for serving
Chickpea-weight note: Use the full drained can when it weighs approximately 240–260 g. The 250 g figure is the reference weight for the stated tahini and water quantities.
Prepare the Garlic and Chickpeas
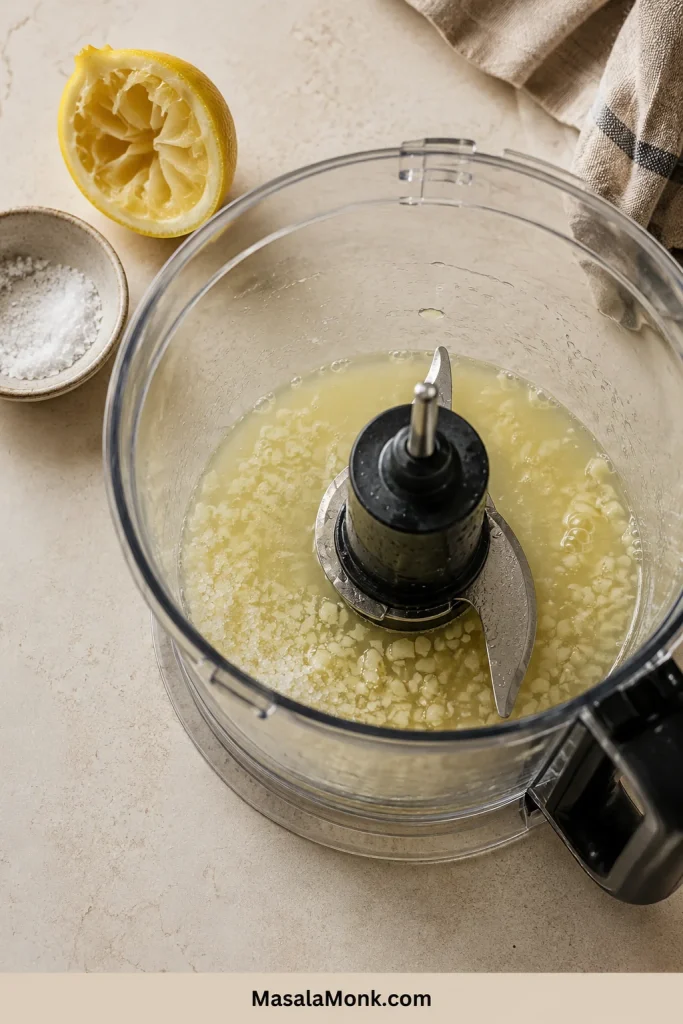
- Begin with the lemon and garlic. Put the lemon juice, garlic and salt in the food processor. Let them stand for 10 minutes while you soften the chickpeas. This mellows the sharpest edge of the raw garlic without adding extra time.
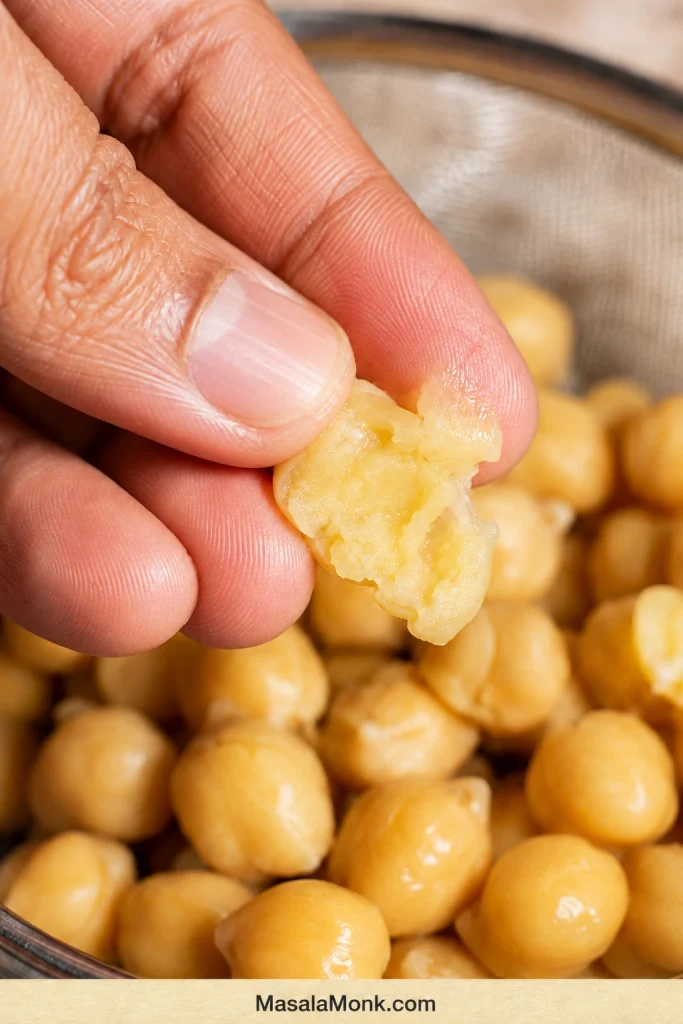
- Soften the chickpeas. Drain and rinse them, then place them in a saucepan with the baking soda. Cover by about 2 inches/5 cm with fresh water and bring to a boil. Lower to a lively simmer and begin checking after seven minutes. Continue simmering, usually for 12–15 minutes, until a chickpea crushes easily between your fingers. Firmer brands may need longer. Splitting beans and loose skins are welcome here—they mean the chickpeas are becoming tender enough for hummus.
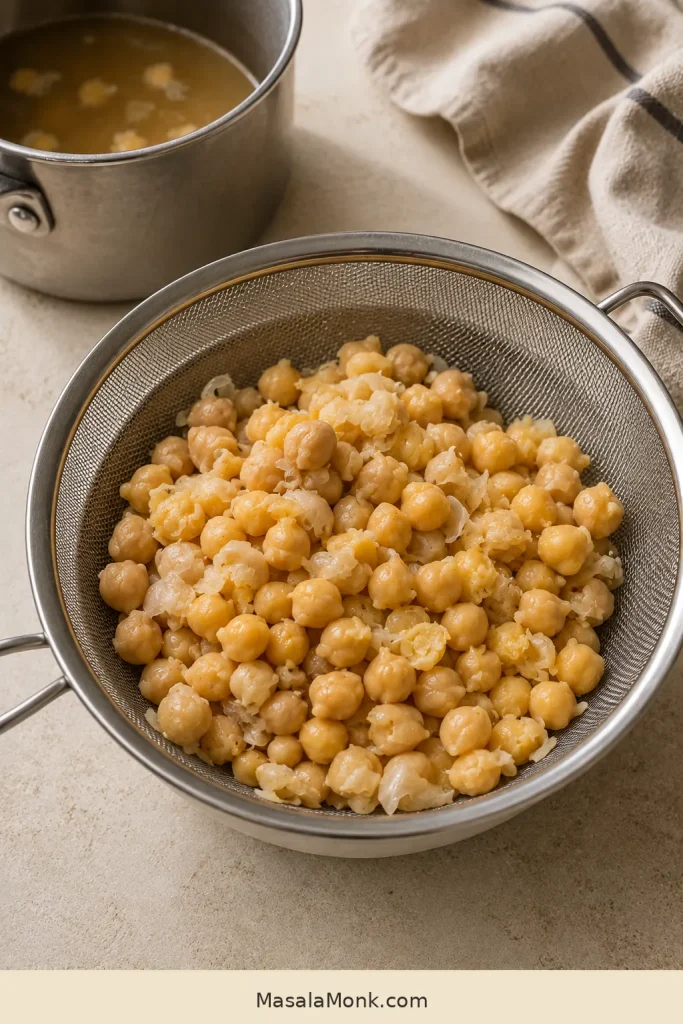
- Drain and rinse well. Rinse the chickpeas thoroughly under running water, moving them gently so loose skins and any baking-soda residue wash away. Drain well. They may still be warm when added to the processor.
Build the Tahini Base
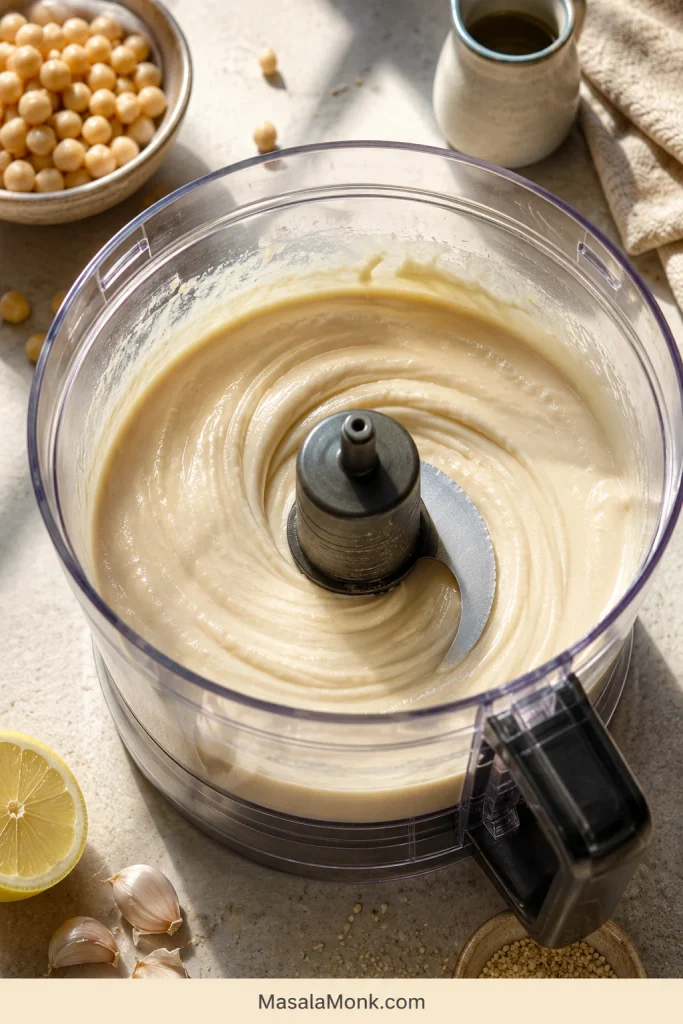
- Blend the tahini base. Add the tahini and optional cumin to the lemon mixture. Blend until combined. The tahini may suddenly become thick enough to look wrong. Nothing has gone wrong—the water will loosen it.
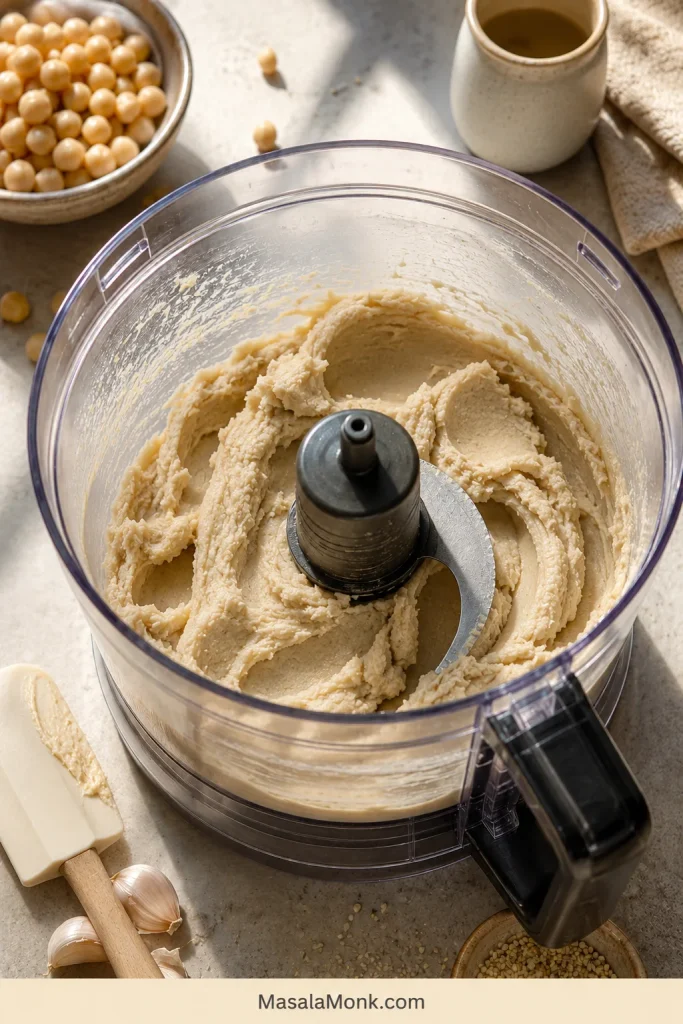
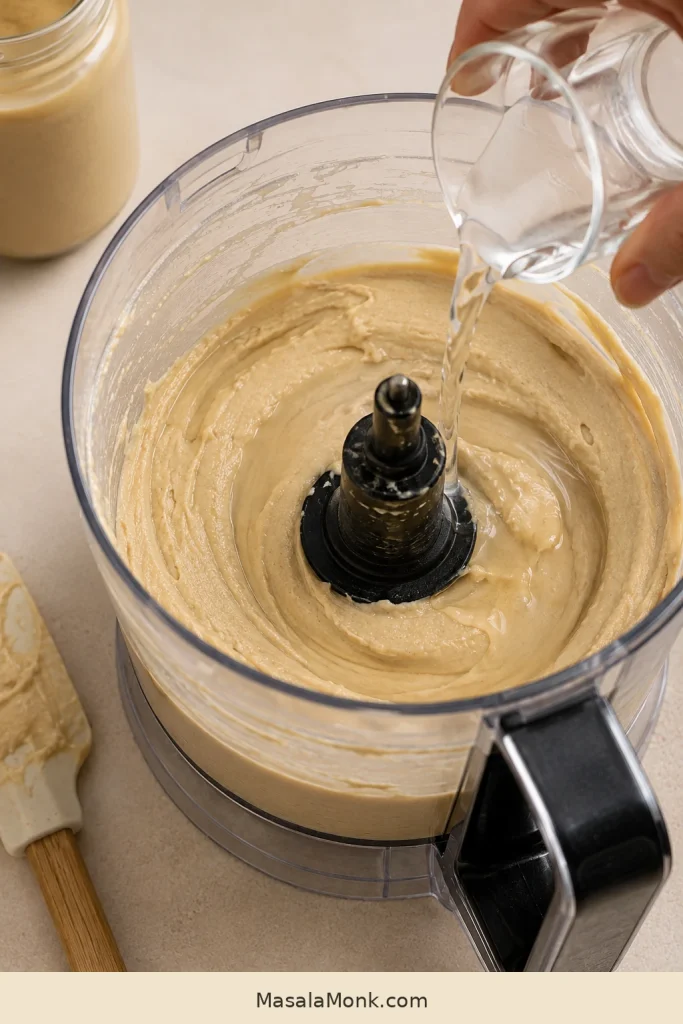
- Add the cold water. With the processor running, slowly stream in the first 60 ml. Continue until the tahini looks lighter and moves freely around the bowl.
Blend and Finish
- Reserve a garnish, if desired. Set aside 1 tablespoon of the softened chickpeas for serving. Add the remainder to the processor.
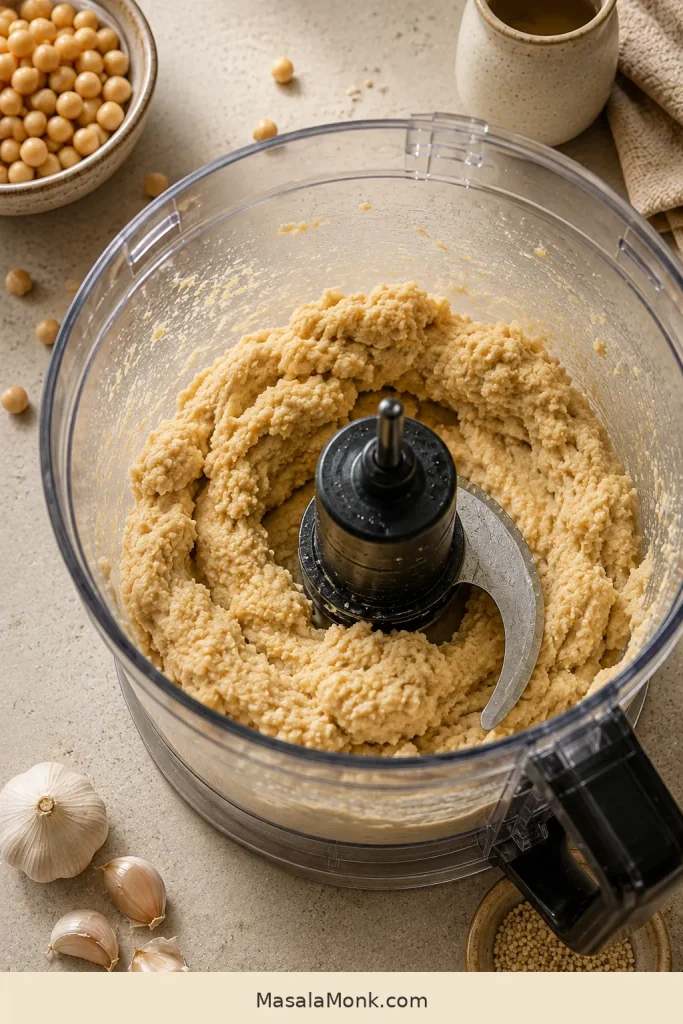
- Process until fine. Blend for about two minutes, stop and scrape the bowl, then continue for another two minutes.
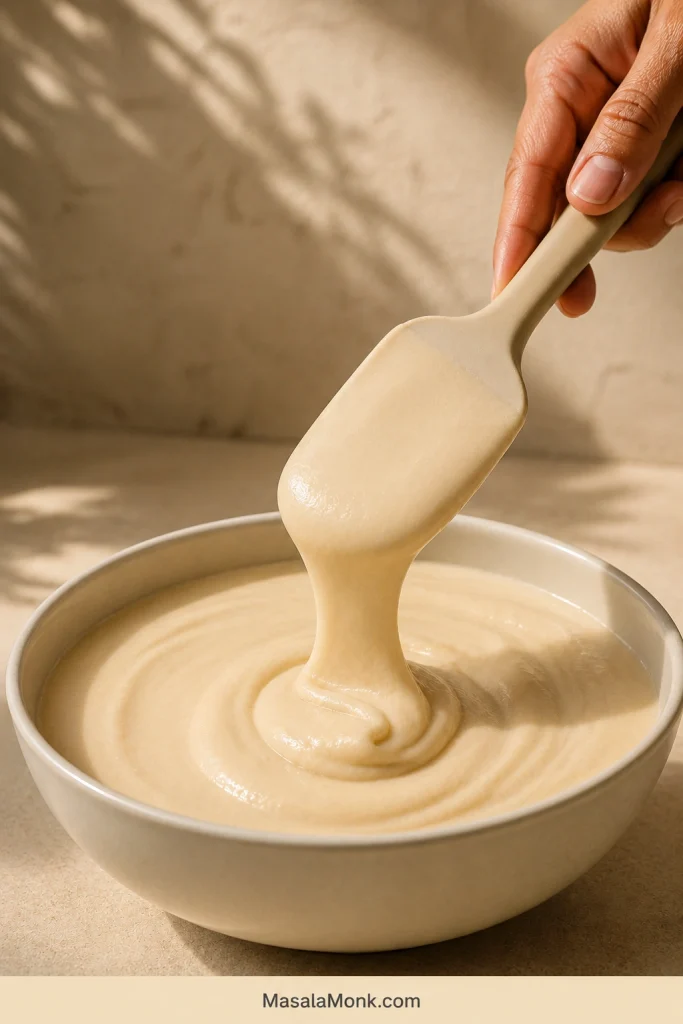
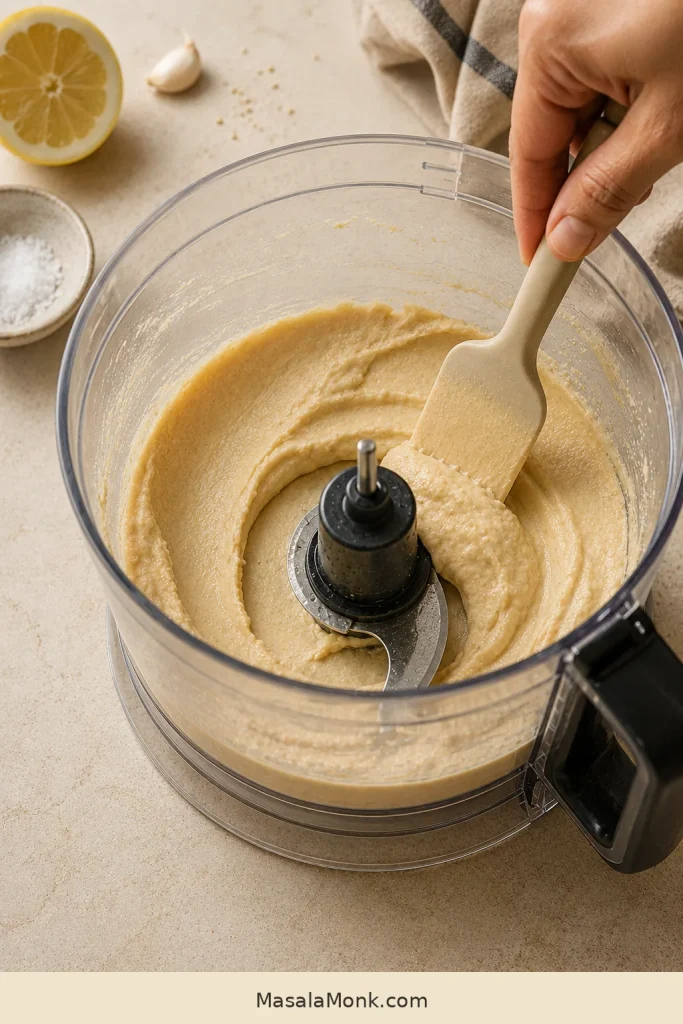
- Adjust the thickness. Blend in more cold water 1 tablespoon or 15 ml at a time, letting each addition disappear before deciding whether it needs more. Stop when the hummus falls softly from the spatula and holds a shallow swirl. Do not worry if it looks softer than expected; it will firm as it rests.
- Taste it now. A thick hummus can make every flavor seem muted, so correct the salt first. Add lemon only if the salted hummus still needs brightness. When the flavor is right but the texture feels heavy, add water.
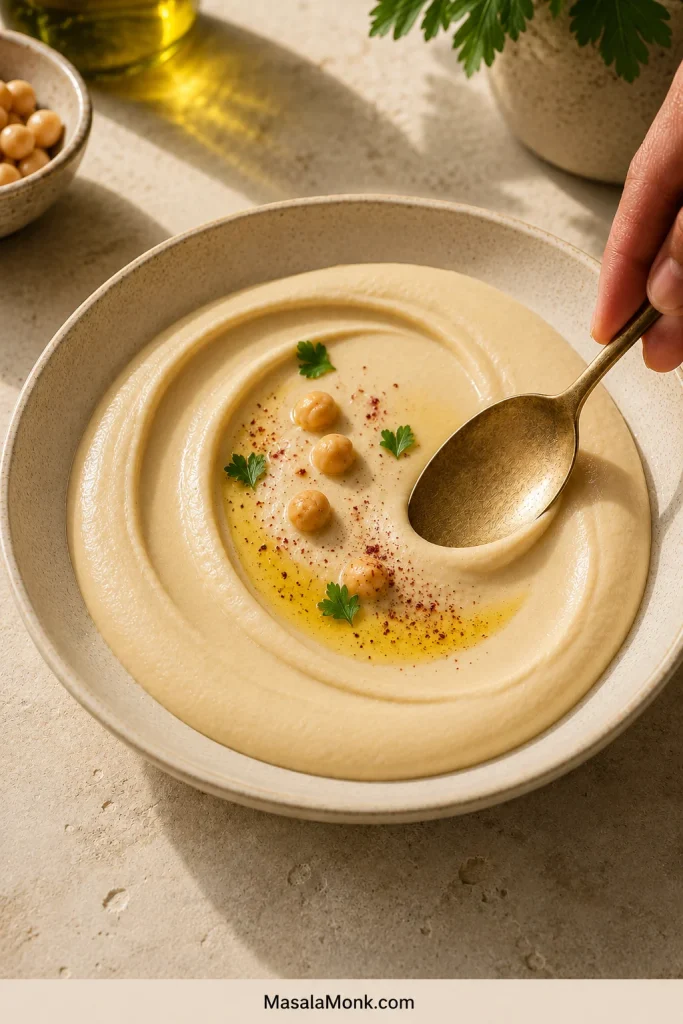
- Plate and finish. Spoon the hummus onto a shallow plate or bowl. Sweep the back of a spoon through it to make a broad swirl, then add olive oil, the reserved chickpeas and any other garnishes.
Making it ahead: Stop while the hummus is slightly softer than your preferred serving texture.
You can stop here and have a very good bowl of hummus. The two alternatives below are useful when speed matters more, or when you are starting with dried chickpeas.
Other Ways to Make This Hummus
Quick No-Simmer Method
Let the garlic, lemon and salt stand for 10 minutes. Add the tahini and blend, then stream in the first 60 ml cold water before adding 250 g drained and rinsed canned chickpeas.
Process for approximately 5–6 minutes total, stopping twice to scrape. If the mixture stalls, add more water 1 tablespoon/15 ml at a time. Firmer canned chickpeas may need another 30–45 ml. The result can still be creamy, though it will usually retain more chickpea texture than the simmered version.
Dried-Chickpea Quantity Conversion
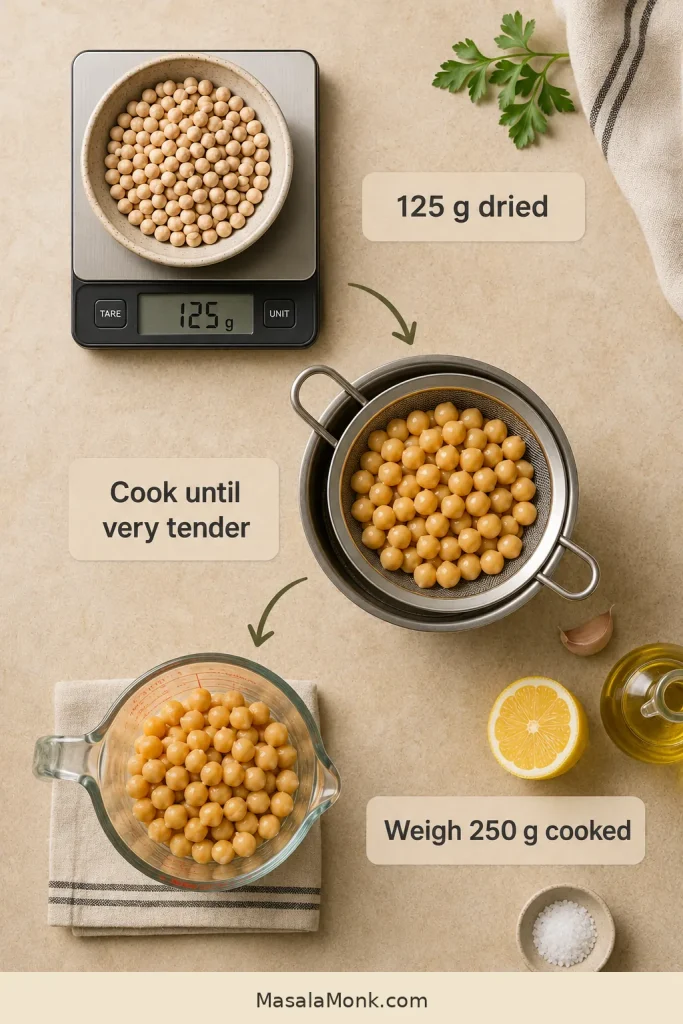
This section gives you the dried weight needed for the main recipe; it is not a separately tested dried-chickpea method.
Soak approximately 125 g dried chickpeas in plenty of water for 8–12 hours. Drain, cover with fresh water and cook until the centers are extremely tender. Chickpea age changes the timing considerably, so keep cooking until they crush easily rather than relying on one fixed time.
Drain the cooked chickpeas, weigh out 250 g and continue with the tahini, lemon, garlic and water quantities in the main recipe. Soaking, cooking time and any baking-soda treatment may need to be adjusted for the chickpeas you use.
The rest of the guide explains why the method works, how to adapt it to your machine and how to rescue a batch that is not quite right.
Creaminess, Troubleshooting and Serving Guide
Why Does Hummus Become Extra-Creamy?
Great texture begins before the processor is switched on. Very tender chickpeas, a loosened tahini base and enough water make the machine’s job much easier.
Start with very tender chickpeas
Chickpeas intended for a fresh chickpea salad should retain their shape and a little bite. Chickpeas for hummus need to go further. Press one between your fingers. If the center remains chalky or breaks into firm crumbs, give it another minute.
Some canned chickpeas contain calcium chloride, which helps them stay firm in the can. Those brands may simply need a longer simmer.
Loosen the tahini first
Tahini often becomes dramatically thicker when lemon juice is added. Watch what happens when the cold water goes in: the dense paste loosens, lightens and begins moving freely around the bowl.
Use water and blending time to finish the texture
Water loosens the hummus without covering its chickpea and sesame flavors with more oil. Gradual additions keep the bowl spoonable rather than runny. Cold water also helps offset some of the heat generated during several minutes of processing.
The first minute makes hummus. The next few minutes make it finer and lighter. Stop once or twice to scrape the bowl. If the machine or hummus becomes noticeably hot, pause briefly.
| What you see | What it means | What to do |
|---|---|---|
| The chickpea breaks into firm crumbs | The center is still too firm | Continue simmering |
| The chickpea crushes easily | It is tender enough to blend | Drain and rinse thoroughly |
| The tahini thickens after lemon is added | Nothing has gone wrong | Stream in the cold water |
| The tahini looks lighter and moves freely | It is ready for the chickpeas | Add them to the processor |
| The hummus moves but still looks grainy | It needs more time or better circulation | Scrape, add a little water and continue processing |
| The hummus is smooth but stands stiffly | It needs more water | Add water gradually |
| A soft ribbon falls and a shallow swirl remains | The texture is ready | Taste and adjust the seasoning |
When it is ready, the hummus feels light rather than sticky, and warm pita slides through it without dragging.
Food Processor, Blender or Mixer-Grinder?
Use the machine you already own, but expect the result and liquid needs to vary.
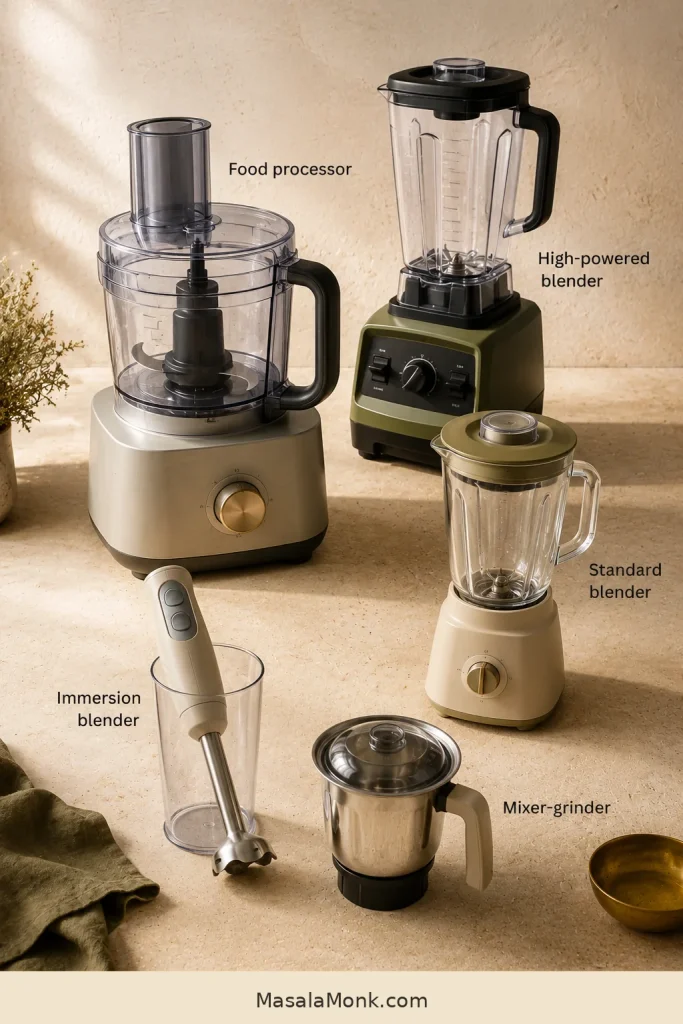
| Equipment | Best approach | What to watch |
|---|---|---|
| Food processor | Use the recipe as written and stream in water gradually | Stopping before the hummus becomes fine and light |
| High-powered blender | Build the lemon–tahini base near the blades, then use the blender’s tamper after adding the chickpeas | A batch too small to circulate in a very large jar |
| Standard blender | Scrape frequently; if the mixture stalls, add another tablespoon/15 ml water | The mixture sitting above the blades |
| Immersion blender | Use a narrow, deep vessel and extremely tender chickpeas | Uneven blending and splashing |
| Mixer-grinder | Use a jar small enough for the blades to stay covered and blend in short runs | Heating the motor and hummus |
| Fork or masher | Mash into a rustic chickpea spread | A textured rather than silky result |
A food processor is the most forgiving choice. Blenders and mixer-grinders can also produce smooth hummus with careful liquid adjustment; a fork or masher gives a deliberately rustic result.
When the blade spins beneath a motionless layer, stop and scrape before adding another small amount of water. If the hummus still refuses to move—or moves but remains grainy—the troubleshooting guide below separates machine problems from ingredient problems.
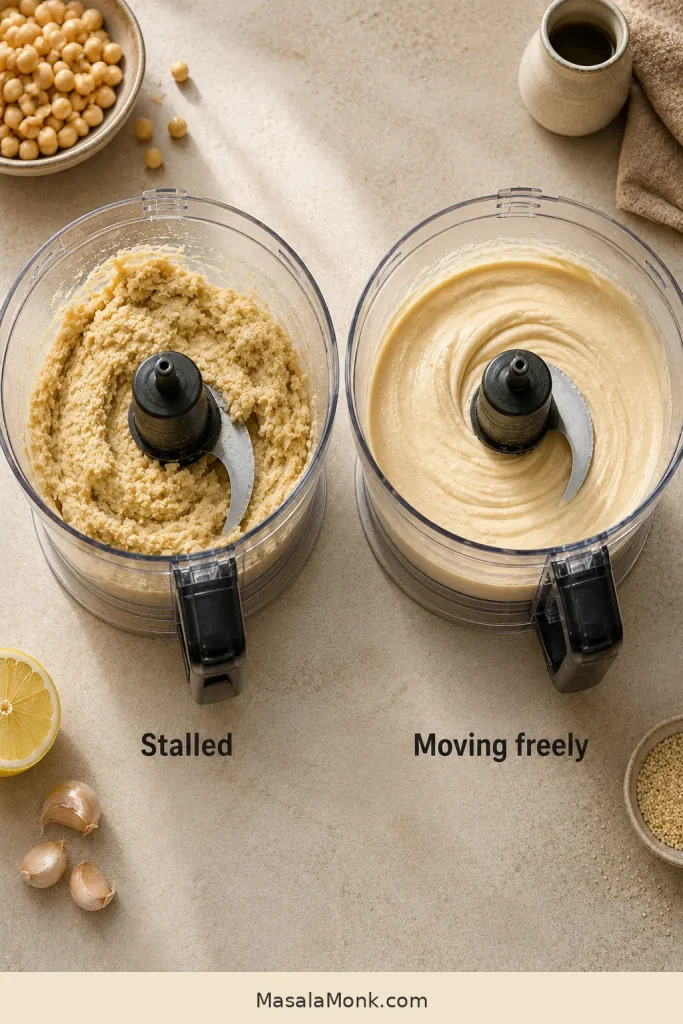
Hummus Troubleshooting
Most hummus problems are fixable, especially when the flavor is already close. Change one thing at a time so you can tell whether the bowl needs more water, more seasoning, additional blending or a different balance of ingredients.
Match the Symptom to the Fix
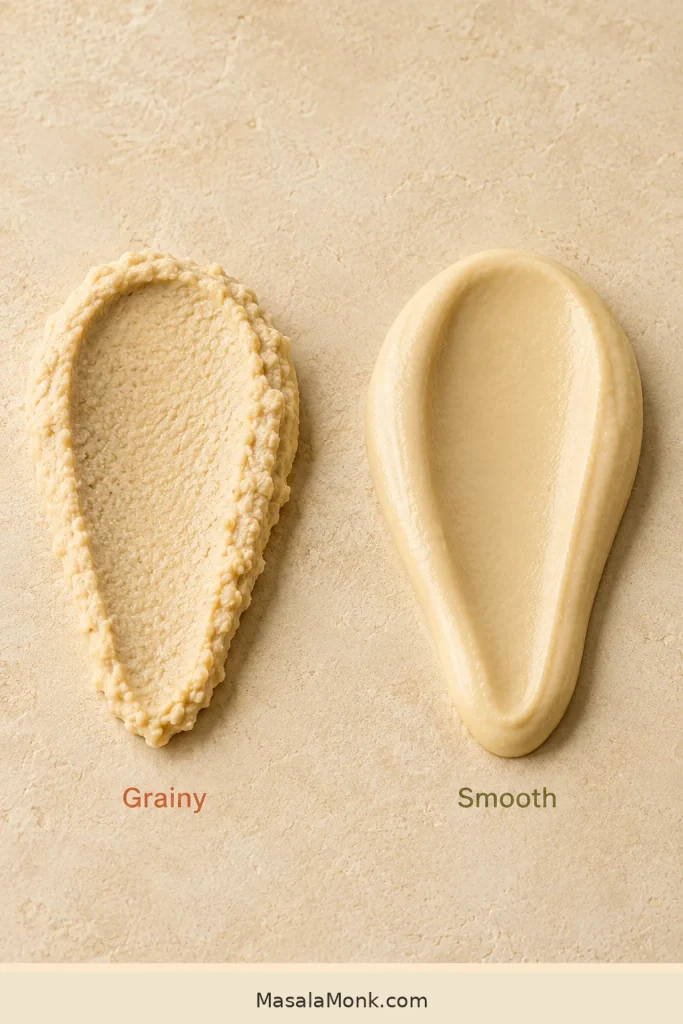
| Problem | Likely reason | What to do |
|---|---|---|
| Grainy | Firm chickpeas, too little liquid or inadequate processing | Scrape, add a little water and process longer; cook the chickpeas further next time |
| Too thick or pasty | Too little liquid or normal chilling | Let it stand, then blend or stir in water gradually |
| Too thin | Liquid was added too quickly | Let it rest first; if it remains loose, blend in cooked chickpeas gradually |
| Bitter or harsh | Aggressively bitter tahini or too much raw garlic | Mild harshness may soften with more chickpeas and tahini; rancid tahini cannot be meaningfully repaired |
| Soapy or alkaline | Baking-soda residue | A faint note may soften when diluted; a strongly soapy batch is difficult to rescue |
| Too garlicky | A large or unusually strong clove | Dilute it with more cooked chickpeas and a little tahini, then recheck the salt and water |
| Too acidic | Too much lemon | Add chickpeas first, then enough tahini to restore richness before correcting the water |
| Bland | Not enough salt, lemon or both | Correct the salt first, then add lemon if it still needs brightness |
| Oily | Too much oil was blended into the base | For a slightly oily batch, blend in more chickpeas and a little water; next time, reserve most of the oil for serving |
Cold, Loose or Strongly Seasoned Hummus
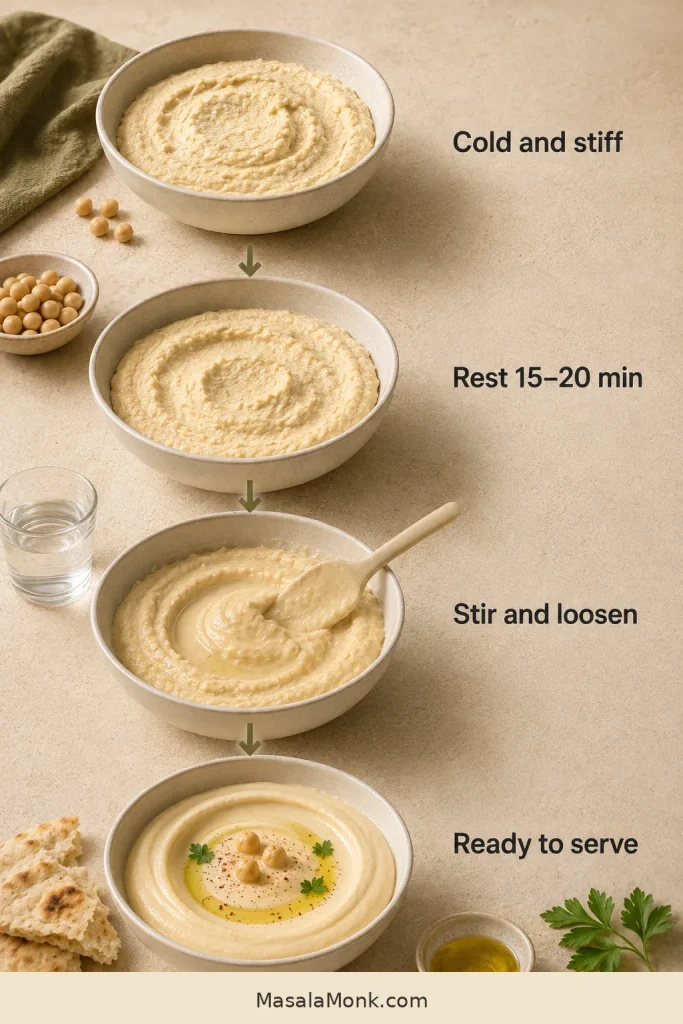
Cold and stiff: Let refrigerated hummus stand for 15–20 minutes before adding water.
Fresh and loose: Let newly blended hummus rest before adding more chickpeas or tahini. The tahini and chickpea starch may absorb part of the liquid.
When a fix requires more chickpeas: Use extra plain cooked chickpeas when available. Without them, a loose or strongly seasoned batch may work better as a sandwich spread, bowl sauce or dressing than as classic plated hummus.
What Is Classic Hummus Made Of?
In Arabic, hummus means chickpeas. The chickpea-and-tahini dish most English speakers simply call hummus is often known as hummus b’tahini.
At its heart, the dish combines chickpeas and tahini with lemon, garlic, salt and water. Across Palestinian, Lebanese, Syrian and other Levantine kitchens, the proportions and serving styles vary.
Some bowls are deeply sesame-rich, others lean brighter with lemon, and cumin may appear in the hummus, over the top or not at all. This guide to hummus and wider Arab chickpea traditions explores that variety in greater depth.
Chickpeas and tahini
Chickpeas, also called garbanzo beans, give hummus its body. A typical 15-ounce can provides approximately 240–260 g after draining, and the full drained can will work in this recipe.
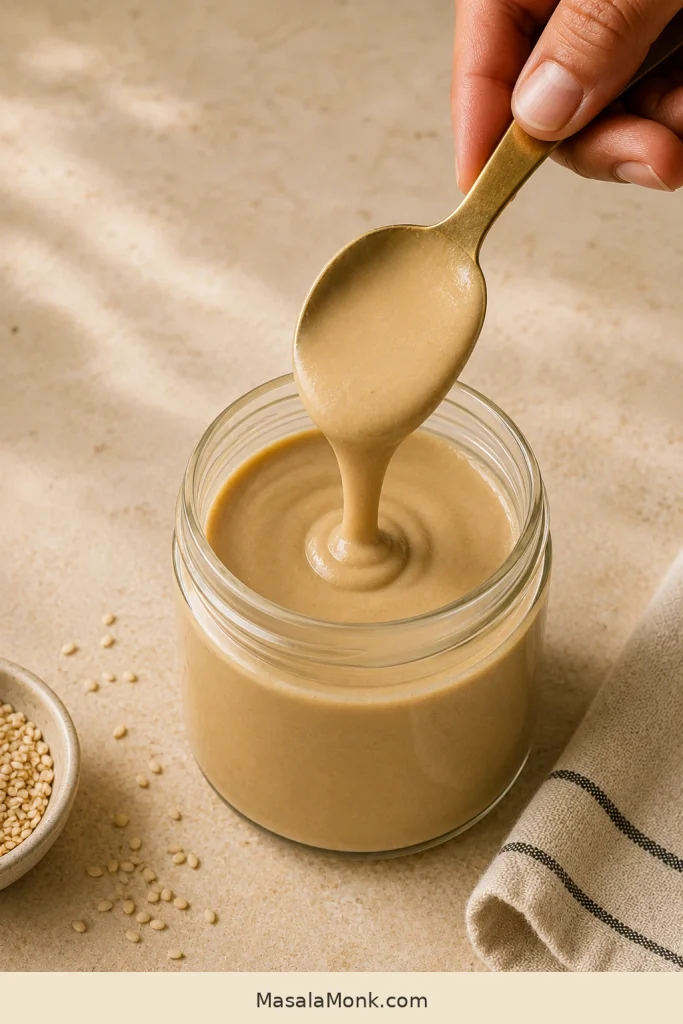
Tahini is a paste made from ground sesame seeds. It brings nuttiness, richness and much of the hummus’s silky body. Stir the jar until the oil and paste are uniform, then taste it. Gentle roasted bitterness is normal; stale, rancid or aggressively bitter tahini will dominate the finished bowl.
Lemon, garlic and salt
Measured lemon juice is more dependable than “one lemon.” One small garlic clove adds savory depth without taking over, though its flavor becomes stronger as the hummus rests. Salt often wakes up the lemon already present, which is why the final adjustment begins with salt rather than more acid.
Water, olive oil and optional additions
Water controls the texture without covering the chickpea and sesame flavors with more oil. Optional: Replace 1 tablespoon/15 ml with aquafaba—the liquid from the chickpea can—then taste before using more, especially if it is salty or strongly flavored.
Olive oil is most noticeable when added to the finished bowl, so choose one you enjoy tasting on its own. This guide to virgin versus extra-virgin olive oil explains the practical differences. Cumin is optional: add a little to the hummus, dust it over the top or leave it out.
Classic hummus is naturally vegan and dairy-free. Its usual ingredients are also gluten-free, although packaged tahini, spices and foods served alongside it should be checked when cooking for celiac disease or an allergy.
Lower-sodium starting point: Choose no-salt-added chickpeas, use plain water instead of aquafaba and begin with approximately 2 g fine salt. Add more only after blending.
Once the chickpeas are tender and the tahini, lemon and salt are balanced, the finished bowl needs very little at the table.
Serving Ideas
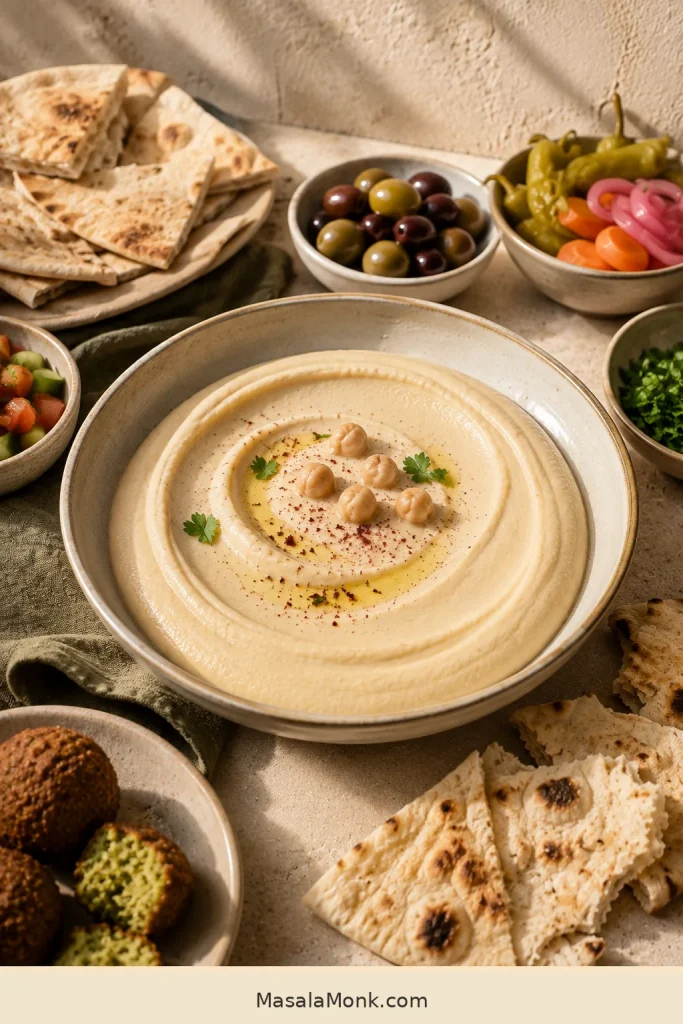
Warm bread, a generous drizzle of olive oil and something crisp, sour or herb-filled beside it are often enough. Set the hummus in the middle while the pita is still warm and most of the work is already done.
When the rest of the meal feels rich, a crisp cucumber salad with vinegar and dill brings welcome coolness and crunch.
Build a mezze plate
- Warm pita bread or crisp pita chips
- Crisp homemade falafel
- Olive oil, paprika, sumac or a small pinch of cumin
- Whole chickpeas, chopped parsley, olives and pickled vegetables
- Lemony parsley-first tabbouleh for freshness and herbs
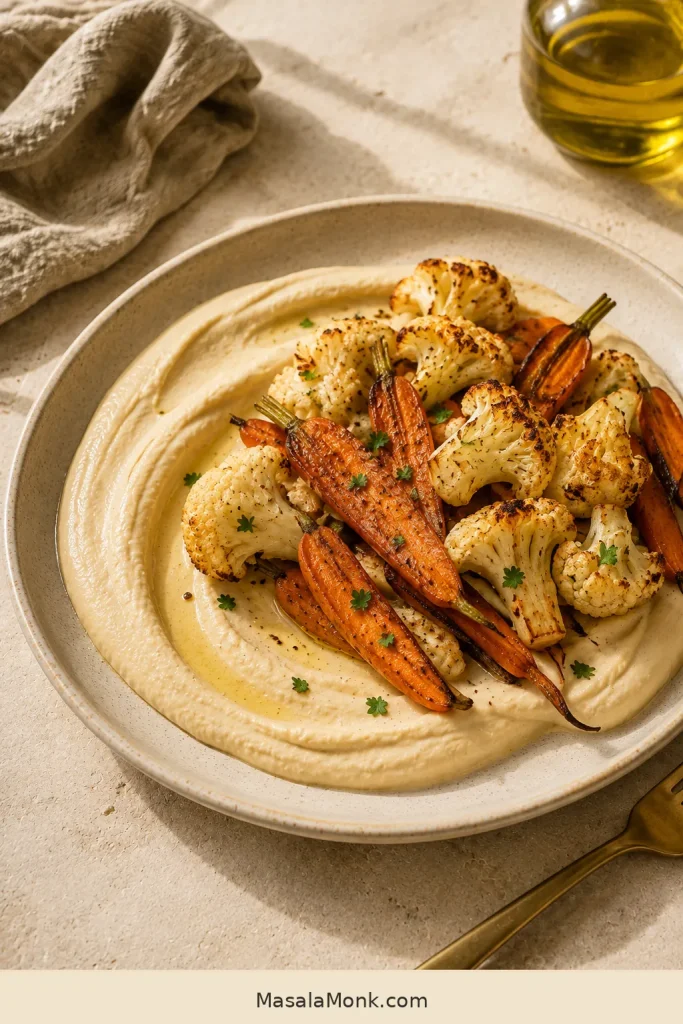
Hummus also makes a generous base for roasted vegetables. Try it beneath cauliflower, eggplant or cumin-and-lemon roasted carrots.
Turn it into lunch or dinner
- Spread it inside wraps or build a crunchy hummus vegetable sandwich with cucumber, tomato, greens and something pickled.
- Spoon it into grain bowls with lentils, chopped vegetables, olives and seeds.
- Serve it beneath grilled chicken, eggs or vegetable fritters.
- Thin it with lemon and water for a quick dressing.
- Loosen it with hot pasta water for a creamy sauce.
Hummus does not have to be refrigerator-cold. As it warms, the lemon, sesame and garlic become clearer, and the texture softens enough for pita to glide through the bowl.
Three Flavor Ideas for Your Next Batch
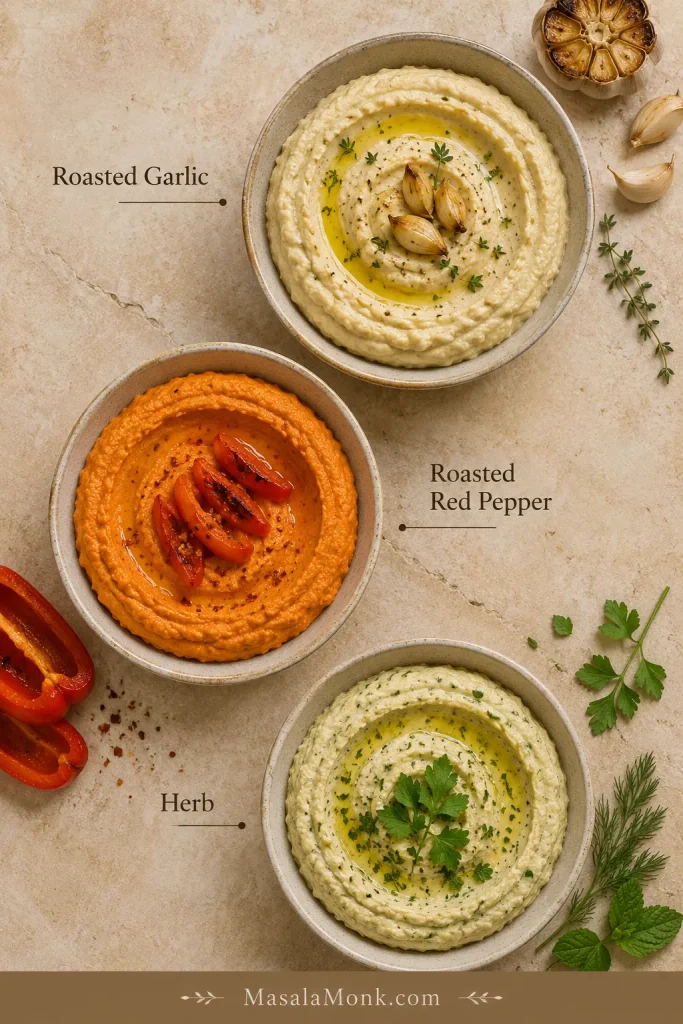
These are starting directions rather than fixed formulas because roasted garlic, peppers and herbs vary in strength and moisture. Add them only after the classic base is smooth, and hold back some water until you see how the texture changes.
- Roasted garlic: Replace the raw clove with a little soft roasted garlic. Blend, taste and increase only if needed.
- Roasted red pepper: Blend a well-drained piece into the finished hummus, then recheck the salt, lemon and water.
- Fresh herbs: Pulse in parsley, cilantro, mint or a mixture at the end so the flavor and color stay fresh.
Beet, chocolate, black bean, edamame and completely tahini-free hummus need their own ingredient balances rather than one small adjustment to this recipe.
Storage, Make-Ahead and Freezing
Transfer leftover hummus to a clean airtight container and refrigerate it promptly. Follow USDA leftovers and food-safety guidance: keep it at 4°C/40°F or below and use it within four days.
When hummus is served at a party, return it to the refrigerator within two hours—or within one hour when the surrounding temperature is above 32°C/90°F. Discard it if you notice visible mold, bubbling, an unusual smell or another clear sign of spoilage.
How to bring refrigerated hummus back to life
Cold hummus becomes quieter and firmer. A short rest and a spoonful of water usually bring back its softness and aroma.
- Let the hummus stand for 15–20 minutes.
- Stir it vigorously.
- Add cold water one teaspoon at a time if it remains stiff.
- Recheck the salt and lemon.
- Add fresh olive oil and garnishes when serving.
Can hummus be made ahead or frozen?
Hummus is well suited to making a day ahead. Stop while it is slightly softer than your preferred serving texture, then loosen it after chilling only if needed.
Freeze plain hummus in small airtight portions. For the best texture, use it within roughly three months. Thaw it in the refrigerator, stir or blend thoroughly and add water if needed. Fresh herbs, whole chickpeas and finishing oil are best added after thawing.
Frequently Asked Questions
Do I need to peel chickpeas for smooth hummus?
No. Peeling every chickpea can make a small difference, but cooking the chickpeas until very tender gives most home cooks a much better return on the effort.
Do canned chickpeas need to be simmered with baking soda?
No. Canned chickpeas are already cooked and can be blended immediately. Simmering them produces a finer texture, while a small amount of baking soda helps them soften faster. You can leave the baking soda out, although firmer brands may need a longer simmer.
Can I make hummus without tahini?
Yes, although it will not have the same sesame flavor or silky body as classic hummus. A tahini-free version needs its own balance of chickpeas, liquid and richness. For a sesame allergy, sesame seeds and sesame oil are not safe replacements.
A Bowl That Invites Another Swipe
A good bowl of hummus should invite another swipe: pale and lemony, rich with sesame, soft enough for warm pita and sturdy enough to carry olive oil, herbs or something sharp and pickled.
Once you recognize the right movement, hummus stops feeling like a rigid formula and starts feeling forgiving.
Did the extra simmer change the texture for you, or was the quick no-simmer version smooth enough? Tell us which chickpeas and machine you used—your note may save another reader from a grainy batch.








