

At its best, onigiri is wonderfully simple: warm, lightly salted rice, a concentrated little pocket of filling, and—if you use it—roasted nori that can be crisp enough to crackle or soft enough to cling to the rice.
The texture matters just as much as the filling. Pick up a good onigiri and it stays together; take a bite and the other half remains in your hand. Yet the rice still feels soft and light, with individual grains you can see and feel rather than a tightly compressed rice brick.
Onigiri gets much easier once you know what the rice should feel like. Rice problems look different from filling and shaping problems: rice that is too wet, too dry or poorly suited to shaping behaves one way, while overfilling or squeezing too hard creates another.
This recipe makes six medium Japanese rice balls and gives you several filling options, including tuna mayo, salmon, umeboshi, okaka and kombu. Make triangles if you like, keep them round, use plastic wrap, or reach for a mold. The rice matters much more than the geometry.
What Is Onigiri?
Onigiri are Japanese rice balls made from cooked rice and served plain, salted, filled or mixed with seasonings. They can be triangular, round or cylindrical. That’s part of what makes them so practical: a bowl of rice becomes something you can pick up, pack into lunch or eat as a quick snack with one hand.
You may also see the word omusubi; in everyday usage, the terms commonly refer to the same broad kind of rice ball. Salmon, umeboshi and okaka are established fillings and also appear in Japan’s Ministry of Agriculture, Forestry and Fisheries guidance on onigiri.
What Should the Inside of Onigiri Look Like?

Is Onigiri Sushi?
No. Onigiri is generally made with plain or lightly salted rice, while sushi uses rice seasoned with vinegar. The same type of raw short-grain rice can be used for both, but for this recipe leave the rice unvinegared.
Table of Contents
- Easy Onigiri Recipe
- The Rice Test
- Which Rice Works Best?
- More Onigiri Filling Ideas
- Other Ways to Shape Onigiri
- Nori for Onigiri
- How to Serve Onigiri
- Why Is My Onigiri Falling Apart?
- Onigiri Variations
- Make Ahead, Freeze and Pack
Easy Onigiri Recipe
This batch gives you six medium onigiri. After the small tasting portion used for the Rice Test, divide the remaining cooked rice into six roughly equal portions, usually about 105–110 g each. For smaller onigiri, 70–80 g is a comfortable size.
Recipe at a Glance
| Yield | 6 medium onigiri |
|---|---|
| Uncooked rice | 300 g / 10.6 oz |
| Cooked yield | About 650–660 g / 23 oz |
| Rice per medium onigiri | Usually about 105–110 g / 3.7–3.9 oz |
| Filling to start with | About 1 tsp / 5 ml each |
| Total elapsed time | About 70–85 minutes |
Most of that time is soaking, cooking or resting. Get the rice underway first, then use the waiting time to prepare your filling.
How Much Filling Goes in One Onigiri?
For a medium onigiri made with about 105–110 g cooked rice, start with roughly 1 teaspoon of filling. Once sealing feels easy, compact fillings can be increased toward 2 teaspoons.

Ingredients
- 300 g (10.6 oz / about 1½ US cups) Japanese short-grain white rice
- 400 ml (13.5 fl oz / about 1⅔ US cups) water, for the saucepan method
- About ½ tsp fine salt, for seasoning your hands; you may not use all of it
- 2 full sheets plain roasted nori, optional
- Your choice of filling, using one or more of the small batches below
Equipment
A saucepan with a well-fitting lid or a rice cooker, a sieve, a bowl, a rice paddle or spoon, and a small bowl of water are enough. A kitchen scale is handy while you learn the portion size. Plastic wrap and an onigiri mold are optional.
Start the Rice
- Measure the rice. Put 300 g Japanese short-grain rice in a bowl and add plenty of cool water.
- Rinse and drain. Drain the first water quickly, add fresh water, and wash the rice gently another 2–3 times. The final water can still be slightly cloudy.
- Soak for 20–30 minutes. While the rice soaks, prepare your filling.
Prepare a Filling While the Rice Soaks
For the simplest batch, choose one filling for all six. If you want a sampler, these are deliberately small batches; most will fill about two onigiri, although you may have a little extra depending on how generously you fill them.
Tuna mayo: Mix 35 g (1.2 oz) very well-drained canned tuna with 2 tsp Japanese-style or regular mayonnaise and ⅛–¼ tsp soy sauce, to taste. The mixture should sit on a teaspoon rather than run from it.
Salmon: Use 25–30 g (about 1 oz) cooked salmon, flaked into small pieces, with a pinch of salt if needed. Leftover cooked salmon or well-drained canned salmon both work well.
Umeboshi: Remove the pit from 1 large or 2 small salted Japanese plums and divide the flesh between two onigiri.
Okaka: Mix 3 g bonito flakes with about ½ tsp soy sauce. The flakes should stay fluffy rather than become soaked.
Kombu: Use about 15–20 g prepared kombu tsukudani for two pieces, chopping it smaller if necessary.
Five Classic Onigiri Fillings

Want more choices? See more onigiri filling ideas ↓
Cook and Rest the Rice
Saucepan Method
- Drain. Once the soaking time is up, drain the rice well in a sieve.
- Cook. Put the drained rice and 400 ml water in a saucepan and cover with a well-fitting lid. Bring it to a boil over medium heat.
- Lower the heat. When you hear vigorous bubbling and see steady steam escaping around the lid, reduce the heat to low. Cook, covered, for 12–13 minutes.
- Rest. Turn off the heat and leave the pan covered for 10–15 minutes.
- Fluff. Lift and turn the rice with a paddle or spoon instead of stirring or mashing it.
The rice should look soft and slightly glossy, with no loose water or pasty texture.
What Properly Cooked Onigiri Rice Looks Like

Rice Cooker Method
If your rice cooker uses the small 180 ml cup supplied with many Japanese-style machines, 300 g rice is about 2 cooker cups.
Use your machine’s 2-cup water line instead of the saucepan’s 400 ml measurement. Follow the manufacturer’s soaking instructions as well; some programs account for soaking, while others expect it beforehand. When the cycle finishes, fluff the rice before moving on to the Rice Test.
The Rice Test: Check Before You Add Filling
Properly cooked onigiri rice should hold together with light pressure while the individual grains remain visible.
Let the rice release enough steam to become comfortable to handle while remaining distinctly warm. Take a small spoonful—not one of your six full portions—and press it together.
- It stays together when you lift it.
- The grains are still clearly visible.
- It feels soft and lightly tacky rather than wet or mushy.

Rice that falls apart here is telling you something. Check the variety, hydration and cooking before changing five things at once.
Loose, Cohesive or Over-Compressed?

Turn that little tester into a plain rice ball and taste it. The point is to learn how little pressure properly cooked rice needs before you start adding fillings.
Rice not holding properly? Jump to onigiri troubleshooting ↓
Fill and Shape
Wash and dry your hands thoroughly before shaping. Wash again before touching the cooked rice if you have handled raw fish, meat or eggs while preparing another filling.
- Divide the rice. Divide the remaining warm rice into six roughly equal portions, usually about 105–110 g each. Keep portions you are not shaping covered.
- Dampen and salt your hands. Wet them lightly, shake off excess water, then rub a small pinch of salt over your palms and fingers.
- Make a shallow well. Flatten one portion into a thick round in your palm and press an indentation into the center.
- Add the filling. Start with about 1 teaspoon. A compact filling can be increased toward 2 teaspoons once sealing the rice feels easy.
- Seal it. Bring rice over the filling until the center is completely enclosed.
- Shape it. Cup one hand underneath as the base and bend the other over the top to form a corner. Press, rotate and repeat only until the rice reliably holds together.
- Add the nori, if using. Wrap it now for softer nori. For a crisp wrapper, keep it separate and add it just before eating.
How Much Pressure Should You Use?

That first teaspoon of filling can look almost comically small beside a full portion of rice. Once the rice closes around it, though, the concentrated center flavors several bites and the seam is far easier to keep closed.
The First-Bite Test
Shape one first and take a bite. If the other half stays in your hand without feeling compressed and heavy, the pressure is about right. Taste the outside too; you can use a little more or less salt on your hands for the remaining pieces.

Prefer plastic wrap or a mold? See other shaping methods ↓ · Want crisp nori? See the nori guide ↓
Which Rice Works Best for Onigiri?
When shopping, look first for Japanese short-grain white rice. Packages may also label suitable short-grain rice as “sushi rice.” You do not need a particular premium cultivar such as Koshihikari for a successful batch.
| Rice | Verdict |
|---|---|
| Japanese short-grain white rice | Best. The most dependable choice for shaping. |
| Rice labelled “sushi rice” | Usually very good. Check that it is Japanese-style short-grain rice. |
| Calrose or similar medium-grain rice | Good fallback. Usually cohesive enough to shape. |
| Jasmine rice | Difficult. Its longer grains tend to stay too separate. |
| Basmati rice | Difficult. Its dry, separate texture works against shaping. |
| Glutinous / sweet rice | Unnecessary. Classic onigiri does not require it. |
Why Short-Grain Rice Is Easier to Shape

Already-cooked rice: refrigerated Japanese short-grain rice can work after thorough reheating, although chilling makes it firmer. Microwave or pre-cooked Japanese rice can work too, depending on the product. Reheat either until warm enough to shape; don’t try to soften firm rice by stirring in butter or oil because added fat can make the grains more slippery.
For more on rice varieties, soaking and cooking methods, see MasalaMonk’s guide to cooking rice.
More Onigiri Filling Ideas
The mild warmth of the rice is what makes a concentrated filling so satisfying. One bite may be mostly soft rice, and the next hits something salty, creamy, smoky, spicy or sour.
| Filling or Seasoning | What It Brings |
|---|---|
| Tarako or mentaiko | Salted or seasoned pollock roe with plenty of flavor in a small amount. |
| Takana or other pickled greens | Salty and tangy. Chop finely and drain well. |
| Kimchi | Spicy and sour against plain rice. Chop and drain it before filling. |
| Furikake | A dry Japanese rice seasoning better folded through the rice than stuffed in the center. |
| Wakame and sesame | Seaweed aroma and nutty sesame in an easy mixed-rice version. |
| Spicy tuna | Tuna with mayonnaise and a little chilli sauce or seasoning. Keep it thick enough to stay centered. |
| Shrimp mayo | Chopped cooked shrimp with just enough mayonnaise to bind it. |
| Glazed chicken | Finely chopped cooked chicken with a reduced sauce that clings rather than runs. |
What Makes a Filling Easy to Use?

For vegetarian or vegan onigiri, umeboshi, pickled greens, sesame-wakame mixtures and suitable kombu or furikake products are good options. Check packaged seasonings because some contain bonito or other fish ingredients.
If gluten-free matters, check soy sauce, tsukudani and seasoning mixes for wheat as well.
Other Ways to Shape Onigiri
Bare hands give you the clearest feel for the rice, but plastic wrap is convenient when the rice still feels quite warm or you want less mess. A mold gives you uniform pieces quickly.
Hands, Plastic Wrap or a Mold?
For plastic wrap, place the rice on the wrap, add and seal the filling, then gather the wrap around it and shape.

Using an Onigiri Mold
- Moisten the mold and lid lightly, then shake off excess water.
- Add enough rice to cover the bottom and come partway up the sides.
- Make a shallow well and add about 1 teaspoon filling.
- Cover the filling completely with more rice.
- Press only until the rice holds together.
- Release the onigiri, then add nori if you want it.
A mold fixes shape. It does not fix bad rice.
Nori for Onigiri
When you add the nori determines its texture. Wrapped around warm rice, it absorbs moisture and becomes soft and snug. Kept separate until eating, it stays dry enough to crackle at the first bite.
Crisp Nori or Soft Nori?

Leaving the nori off entirely is fine too.
For simple lower-half wraps, cut a standard nori sheet into thirds.
Japanese convenience-store wrappers keep dry nori physically separated from moist rice until the package is opened. At home, packing the rice balls and nori separately gives you the same basic advantage.
Plain roasted nori meant for sushi or rice balls makes the easiest wrapper. Seasoned snack seaweed is often thinner, oily and more fragile. Nori that already feels leathery before it touches the rice has usually picked up moisture from the air, so keep opened sheets tightly sealed and dry.
How to Serve Onigiri
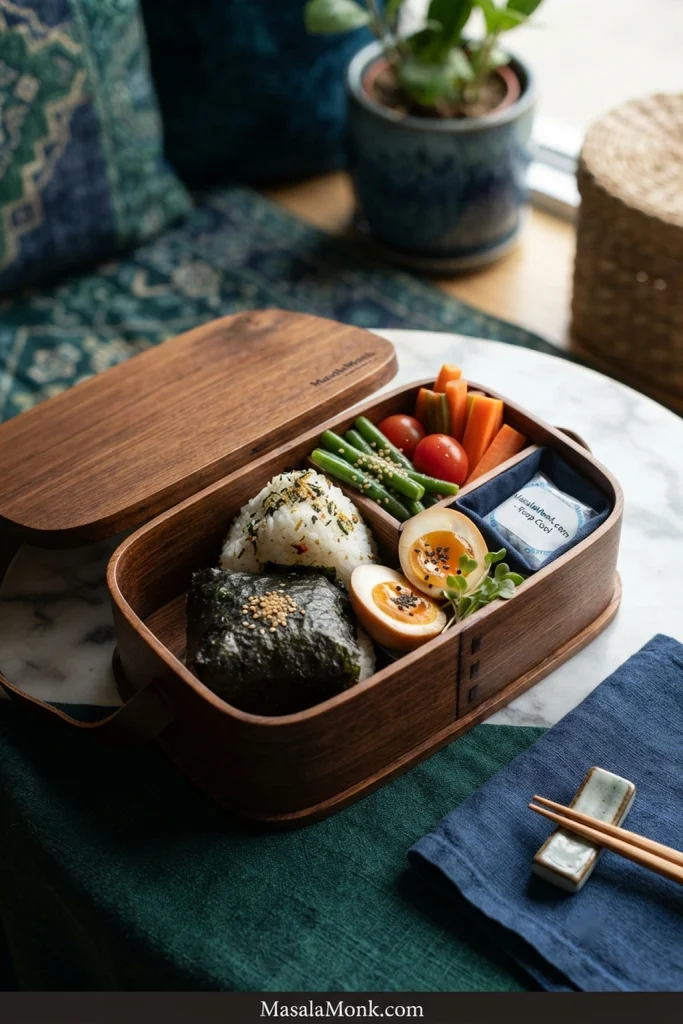
One medium onigiri makes an easy snack. Two with soup, vegetables, eggs, tofu, fish or another simple protein can make a satisfying lunch. A cool, crunchy cucumber salad is especially good beside soft rice and salty fillings such as tuna mayo, salmon or umeboshi.
Turning Onigiri Into a Complete Lunch

Packing onigiri for later? Jump to lunch storage and safety ↓
Why Is My Onigiri Falling Apart?
If plain warm rice will not hold, the problem starts with the rice—not the filling. If plain rice holds but a filled onigiri splits, look at filling amount, moisture and sealing.
| If This Happens | Try This |
|---|---|
| Plain rice crumbles | Check the rice variety and cooking. Properly cooked Japanese short-grain rice is the most dependable starting point. |
| Rice is wet and gummy | It may have too much water or be overcooked. The grains should remain recognizable rather than turning pasty. |
| Rice sticks all over your hands | Very hot rice is harder to handle. Let some steam escape and use lightly damp hands. |
| The seam splits open | Use less filling, keep it centered, and make sure the rice completely covers it before shaping. |
| It breaks after the first bite | Give the piece enough pressure to hold reliably, but stop before the rice becomes dense. |
| It feels dense and heavy | Too much pressure is usually the culprit. Stop shaping as soon as the rice holds. |
| It sticks in the mold | Moisten the mold lightly, shake off excess water, and avoid compressing the rice harder than necessary. |
If the onigiri tastes mostly like plain rice, use a little more salt on the outside or choose a more assertive filling.
Want considerably more filling? Onigirazu is usually a better format than forcing more into a thin shell of rice.
↑ Recheck the Rice Test · Recheck the First-Bite Test
A Few Onigiri Variations
Yaki Onigiri
Shape the rice firmly enough to hold, then pan-sear or grill it until the underside has formed a crust before turning. Brush on soy sauce or a soy-based glaze near the end so it can brown without scorching before the rice has set.

Onigirazu
This sandwich-style version makes sense when you want generous layers rather than a small center. Lay nori flat, add a layer of rice and your fillings in the middle, top with more rice, fold the nori around the stack and wrap briefly before slicing.
Brown rice: Short-grain brown rice can work, but it is less forgiving. Cooking brown and white rice using methods appropriate to each, then mixing them while warm, usually makes shaping easier than relying on brown rice alone.
Make Ahead, Refrigerate, Freeze and Pack Onigiri
Onigiri tastes best the day you make it, while the rice is still soft. Overnight refrigeration works when you need it; for longer storage, freezing without the nori usually protects the rice’s texture better than several days in the fridge.
Same Day or Overnight
Let excess steam escape briefly before closing freshly made onigiri into a container. For overnight storage, wrap each piece well before refrigerating so the surface does not dry out. Homemade onigiri will usually feel noticeably firmer after a night in the fridge than commercially packaged Japanese convenience-store onigiri.
Freezing and Reheating Onigiri
- Shape the onigiri without nori.
- Wrap each piece well and freeze promptly.
- For best texture, use within about 1 month.
- Reheat until steaming hot throughout, then let it cool to a comfortable eating temperature.
- Add crisp nori after reheating.

A frozen onigiri that is merely thawed and eaten cold will usually be firmer than one that has been reheated. For lunches without access to reheating, smaller fresh batches may be more satisfying than freezing a week’s worth at once.
Leftover Rice and Lunch Safety
Safely stored leftover Japanese short-grain rice can be reheated thoroughly, then cooled until comfortably warm before shaping. Rice that has become very dry and separate may be happier in fried rice instead.
Rice looks harmless sitting on the counter, but cooked rice deserves the same food-safety attention as other leftovers. FoodSafety.gov lists rice and leftovers among foods associated with Bacillus cereus when they are held improperly.
Refrigerate perishable food within 2 hours, or within 1 hour when the temperature is above 32°C/90°F. Rice that has already been left out beyond those limits should be discarded rather than reheated in an attempt to make it safe. FoodSafety.gov’s food-poisoning guidance has more detail on rice and Bacillus cereus.
Properly refrigerated leftovers should be reheated to 74°C/165°F. Use adequate cold packs for lunches containing tuna mayo, salmon, egg, meat or other perishable fillings. The salt on your hands is seasoning, not a preservation method.
Packing Onigiri for Lunch
Make One, Then Adjust
After one or two, onigiri starts feeling far less mysterious. Eat one while the rice is still soft, the center is punchy and the nori—if you waited to add it—still crackles at the edges.
Your first onigiri may come out round, squat or slightly lopsided. Eat it anyway. The rice will not know the difference.
↑ Back to the recipe · ↑ Table of contents · ↑ What is onigiri?








