Posted on Leave a comment

Chicken Chow Mein Recipe: Easy Takeout-Style Noodles With Homemade Chow Mein Sauce

Chicken chow mein in a dark carbon-steel wok with thin chicken strips, medium-thin noodles, green cabbage, bean sprouts, carrots and scallions, with glossy strands and scattered browned edges.

Chow mein does not give you much time to think once the pan is hot. Chicken comes out, vegetables go in, noodles hit the hot surface, and the sauce has only a minute or two to turn everything glossy before dinner is ready.

That speed is part of the appeal—and the reason homemade chicken chow mein can unravel so quickly. Noodles go in wet. Cabbage cools the pan. Chicken keeps cooking while everything else catches up. A little more sauce seems like the answer, and suddenly the noodles are soft instead of fried.

When it goes right, you can smell the difference before the pan reaches the table: toasted noodles, hot garlic and ginger, the savory edge of soy and oyster sauce. The chicken stays juicy, the vegetables snap, and a few noodle strands catch darker around the edges while the rest remain springy.

This recipe gets there by keeping the jobs separate. Thin strips of chicken get a short cornstarch marinade, the vegetables cook and come out, and the noodles get a mostly empty pan. Everything meets again only when each part is ready.

A wok is excellent, but you do not need restaurant equipment. A wide skillet works too.

Quick Answer

Good chow mein depends on timing and space as much as ingredients. The useful cue is simple: noodles should bend, separate and arrive at the wok without dripping. Anything already cooked can then make room for the next stage.


How to Make Chicken Chow Mein

Recipe card: servings, timings, ingredients, equipment and the complete method are below.

The chicken and vegetables come out before the noodles go in. It can look fussy on paper, but it makes the cooking easier: nothing sits around overcooking while you fight for space. It is one pan, just not one pile.

Once everything is sliced and the sauce is mixed, the actual stir-frying is only a handful of short stages.

Serves4 as a generous main course
DifficultyEasy, but fast-moving once the pan is hot
PrepAbout 20–25 minutes
CookingAbout 12–15 minutes
TotalAbout 35–40 minutes
Best pan14-inch / 35 cm wok; a roomy 12-inch / 30 cm skillet also works with batching

Chicken and Quick Marinade

  • 450 g / 1 lb boneless skinless chicken thighs or chicken breast
  • 1 tablespoon / 15 ml Chinese light soy sauce or regular/all-purpose soy sauce
  • 1 tablespoon / 15 ml Shaoxing wine
  • 1 tablespoon / about 8 g cornstarch (cornflour in the UK)
  • 1 tablespoon / 15 ml water
  • 1 teaspoon / 5 ml neutral cooking oil
  • ¼ teaspoon white pepper

Cut the chicken about 5–6 mm / ¼ inch thick and roughly 5 cm / 2 inches long where practical. Slice chicken breast across the grain.

Thin strips of raw chicken being sliced for chow mein beside a small bowl of marinade on a dark kitchen work surface.
For cleaner, thinner chicken strips, start with meat that is very cold and slightly firm. Consistent pieces cook at a similar pace, which matters once a fast stir-fry leaves little time to chase individual pieces for doneness.

Sauce Ingredients

  • 2 tablespoons / 30 ml Chinese light soy sauce or regular/all-purpose soy sauce
  • 2 teaspoons / 10 ml dark soy sauce
  • 2 tablespoons / 30 ml oyster sauce
  • 1 tablespoon / 15 ml Shaoxing wine
  • 2 teaspoons / about 8 g sugar
  • ¼ teaspoon white pepper
  • 1 teaspoon / 5 ml toasted sesame oil
  • 1 teaspoon / about 3 g cornstarch (cornflour in the UK)
  • ¼ cup / 60 ml water or unsalted chicken stock
  • ¼ teaspoon MSG or ½ teaspoon chicken powder, optional

Keep another 2 tablespoons / 30 ml water beside the stove in case the noodles need loosening at the end.

Measured ingredients for homemade chow mein sauce arranged in small bowls and vessels, including soy-based sauces, seasonings and liquid ingredients.
Give the sauce one final stir before it hits the wok. That keeps the seasoning and cornstarch evenly dispersed, so the sauce behaves consistently from the first splash to the last.

Noodles, Vegetables and Aromatics

  • 250 g / 9 oz dried Chinese egg or dried chow mein noodles
  • Using fresh noodles? Use the package amount intended for about 4 servings. Fresh noodle products vary too much in hydration and cooking state for one reliable gram-for-gram conversion from dried noodles.
  • 3 tablespoons / 45 ml neutral high-heat oil such as peanut, canola, grapeseed or rice-bran oil, divided
  • 1 teaspoon neutral oil for drained noodles only if they are prone to sticking
  • 250 g / 9 oz green cabbage, thinly shredded
  • 1 medium carrot, about 100 g / 3½ oz, cut into fine matchsticks
  • 150 g / 5 oz bean sprouts
  • 4 scallions (spring onions), cut into 2.5–5 cm / 1–2 inch lengths
  • 3 garlic cloves, finely chopped
  • 15 g / ½ oz fresh ginger, finely grated or minced

Instructions

Have Everything Ready Before the Wok Gets Hot

Prepared chicken chow mein ingredients beside an empty wok, including marinated chicken, noodles, sauce, cabbage, carrots, bean sprouts, scallions, garlic, ginger and cooking oil.
Arrange the station in cooking order: keep the quick finishing ingredients separate so they can hit the wok only when the final texture needs them.

Prep Before the Wok

  1. Mix the sauce. Whisk the light soy, dark soy, oyster sauce, Shaoxing wine, sugar, white pepper, sesame oil, cornstarch, water or stock, and optional MSG or chicken powder until smooth. Set it aside and stir again just before it goes into the pan; the cornstarch will settle.
  2. Cut the vegetables, then marinate the chicken. Prepare the cabbage, carrot, scallions, garlic and ginger first. On a separate or thoroughly cleaned board, slice the chicken and mix it with the marinade ingredients. Wash your hands and clean the knife, board and anything else that touched the raw chicken immediately. Leave the chicken for 10–15 minutes while you prepare the noodles.
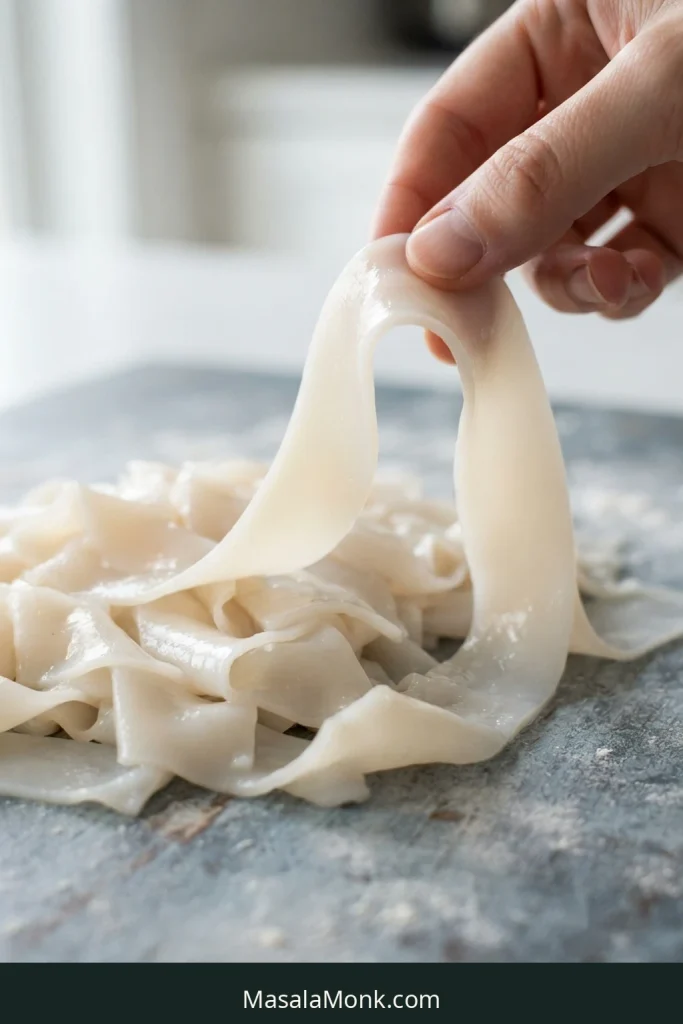
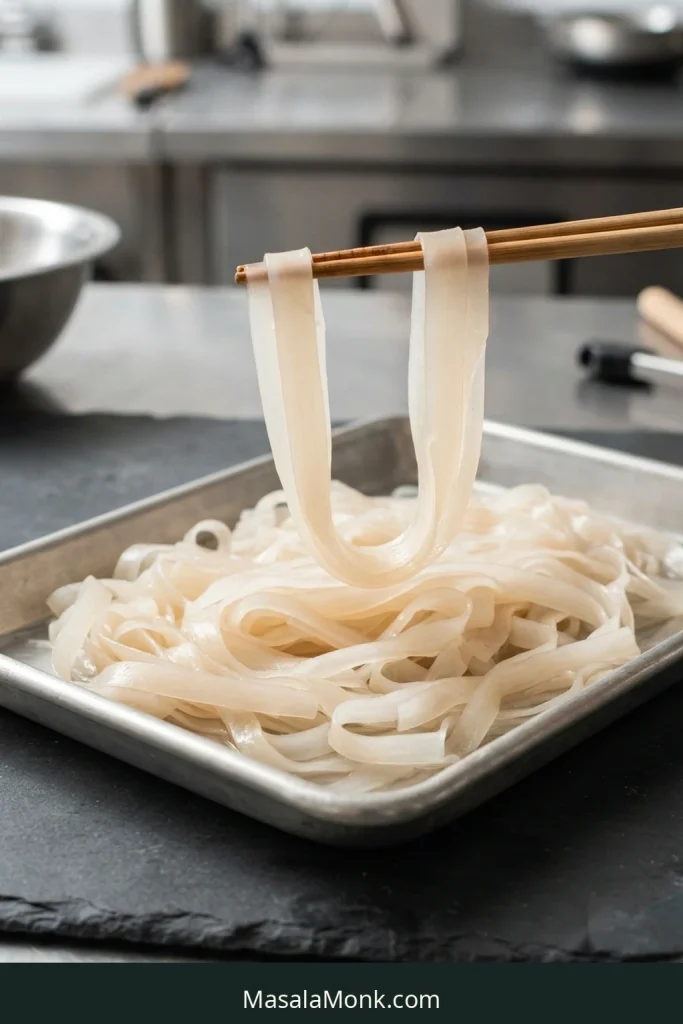
  3. Prepare the noodles last. Start checking dried noodles about a minute before the package’s full cooking time. Stop when the strands bend and separate easily but feel firmer than you want to eat. Drain and briefly rinse under cool water, then shake the colander firmly. Spread the noodles loosely for a couple of minutes. Lift a small handful; dripping noodles need more draining or a gentle blot with a clean kitchen towel. Toss with 1 teaspoon oil only when the strands are prone to sticking.

Cook in Stages

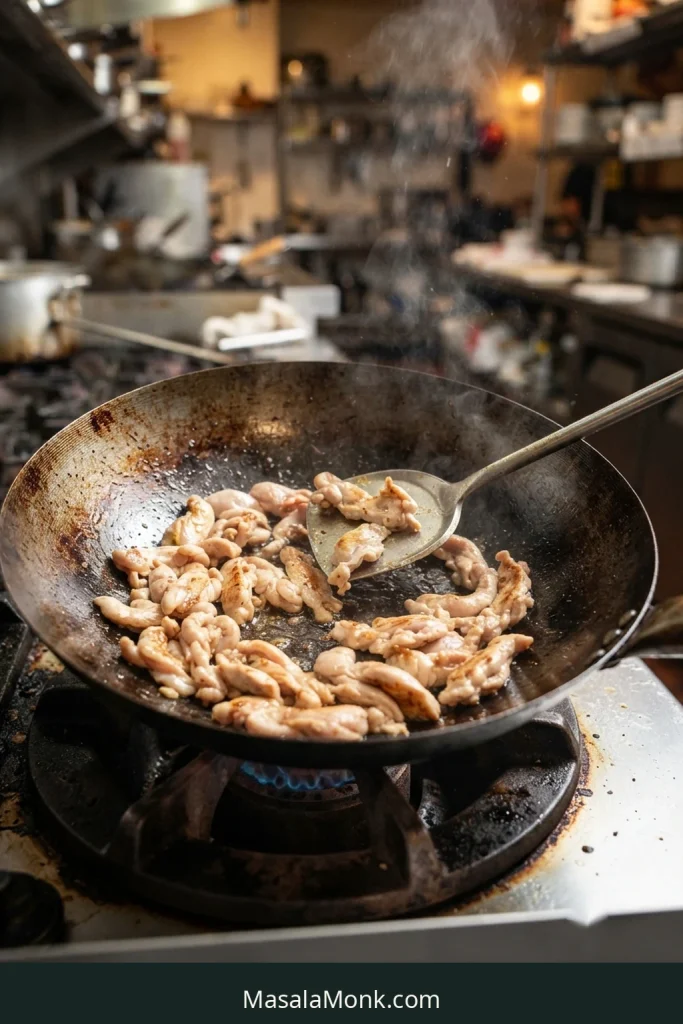
  1. Partially cook the chicken. Heat the wok or skillet over medium-high heat until hot. Add 1 tablespoon oil and spread the chicken into a loose layer. An immediate sizzle is what you want. Cook in two batches when the pieces would otherwise heavily overlap. Stir-fry for about 2 minutes, until most surfaces are opaque with a little browning. Transfer to a clean plate or bowl; the thickest pieces may remain slightly underdone inside.
  2. Cook the cabbage and carrot. Add another tablespoon oil and stir-fry for about 1½–2 minutes. The cabbage should soften at the edges while keeping some bite; the carrot should bend but not flop. Add the garlic and ginger for the final 20–30 seconds, just until their raw sharpness disappears and the aroma turns strong and savory. Let obvious liquid evaporate, then transfer everything to a bowl.
Lightly browned chicken strips and briefly stir-fried cabbage, carrots and other vegetables in a hot wok, with the vegetables still bright and structured.
Let excess cooking juices stay behind. The chicken and vegetables have already done their job; bringing that liquid back can make the final noodle toss wetter than intended.
  1. Give the noodles the pan. Add the final tablespoon of oil and spread the noodles across as much hot surface as possible. Leave them alone for 30–45 seconds, then lift and turn. Continue for about 2 minutes. The pan should sound like frying, not simmering. Some strands will curl, wrinkle or darken while others stay pale. Uneven browning is fine. Those toasted patches give the noodles a deeper, nuttier edge that comes through after the sauce goes in.
Medium-thin yellow chow mein noodles spread across a dark wok with exposed metal and scattered golden-brown toasted patches, without chicken, vegetables or sauce.
Lift and turn the noodles in broad sections instead of stirring constantly. More strands get direct pan contact, so you build toasted edges without sacrificing the softer noodles underneath.

Finish and Serve

  1. Finish the stir-fry. Stir the sauce again and pour it over the noodles. Immediately return the chicken and vegetables. Leave behind any noticeable puddle of thin watery liquid on the chicken plate. Toss for 1–2 minutes, adding the reserved water 1 tablespoon at a time only when the noodles need loosening. A crowded 12-inch skillet is easier to handle as two half-batches.
  2. Add the bean sprouts and scallions. Give them 30–60 seconds. The sprouts should be hot, juicy and crisp. The thickest piece of chicken should reach 165°F / 74°C.
  3. Taste one forkful. It should be savory first, with mild sweetness and white-pepper warmth behind it. No single flavor component should dominate. The best forkful has chicken, cabbage or a crisp bean sprout tangled through noodles that are soft in places and toasted in others. Very little sauce should remain at the bottom. Turn off the heat and serve immediately.

Prefer softer noodles? Shorten the dedicated noodle-frying stage a little. For more browned edges, give them another 30–60 seconds of pan contact before the sauce goes in.

A Little Uneven Is Fine

The noodles should pull apart easily, the chicken should stay juicy, and some crunch should remain in the vegetables. Broken strands, darker patches and slightly softer cabbage are normal.

Finished chicken chow mein in a wok with separate glossy noodles, thin chicken strips, cabbage, bean sprouts, carrots and scallions, with little visible liquid underneath.
Use appearance and movement as the final check: glossy strands, little loose liquid, visible vegetables and chicken spread through the noodles. When those cues line up, turn off the heat and serve.

If this does not look like the chow mein you grew up ordering, you’re probably not misremembering it.

Why Chicken Chow Mein Looks Different Depending Where You Live

At its broadest, chow mein refers to noodles that are fried or stir-fried, but the dish can look very different depending on region and restaurant tradition. This recipe is the lightly glazed stir-fried-noodle style, with chicken and vegetables folded back through noodles that have had direct contact with the pan.

Some Cantonese restaurant versions use a crisp noodle base topped with saucy meat and vegetables. Some old-fashioned American-Chinese or Subgum-style chow mein is a chicken-and-vegetable gravy dish served with crunchy fried noodles.

Lo mein usually starts with cooked noodles that are tossed through sauce rather than deliberately fried for browned edges. It tends to be softer and more sauce-forward; this chow mein puts more emphasis on direct pan contact and noodle texture.

Here, the target is springy noodles, scattered browned edges, crisp vegetables and tender chicken.

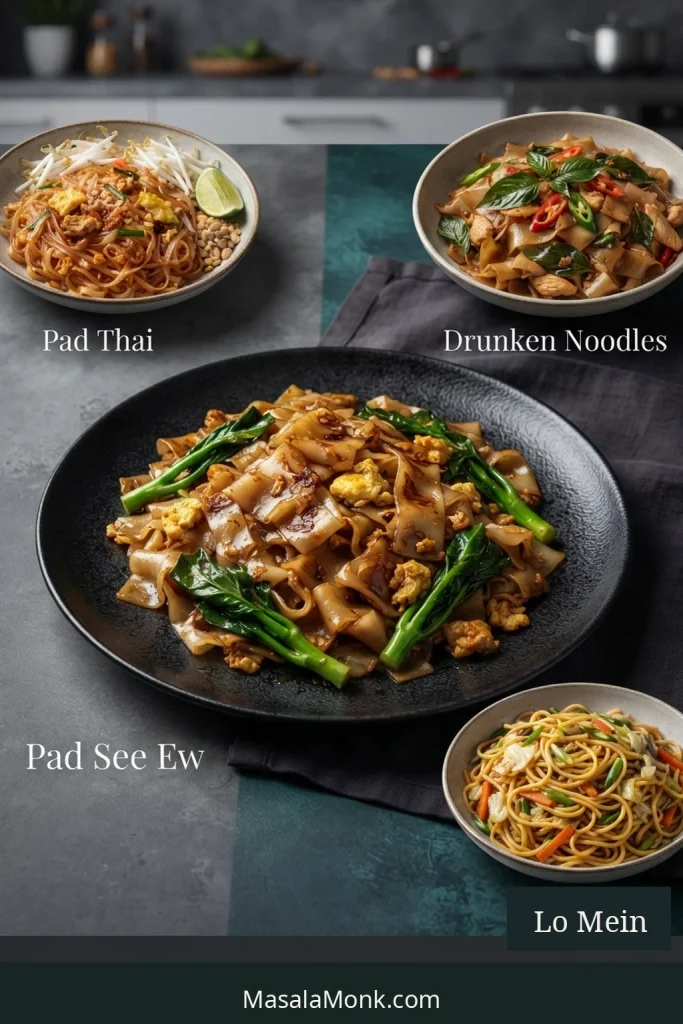
Four noodle dishes compare lightly glazed stir-fried chicken chow mein, crisp noodles with a saucy topping, American-Chinese chow mein with gravy and crunchy noodles, and soft sauce-tossed lo mein.
Menu wording can hint at the expected texture: “crispy,” “pan-fried” or “lo mein” often point toward different noodle treatments. Regional usage varies, though, so the dish description matters more than the name alone.

The Chow Mein Noodle Guide

If you’ve ever followed the noodle packet perfectly and ended up with a sticky heap in the wok, you may not have cooked the noodles “wrong.” They may simply have been too soft—or too wet—for another round of heat.

Open the packet before the water boils and see what you actually bought. Raw noodles, steamed noodles and ready-to-wok noodles can look remarkably similar while starting at very different stages of cooking.

Which Chow Mein Noodles Did I Buy?

Guide comparing several noodle products used or sold for chow mein, including fresh or steamed noodles, dried noodles and crisp fried noodles, with the crispy product identified separately.
Package names are clues, not guarantees. Two products labeled “chow mein noodles” may have undergone very different amounts of cooking, so the preparation directions on an unfamiliar packet are often more useful than the product name itself.
If the package says…What you probably haveWhat to do
Dried chow mein / Chinese egg noodlesDry and uncookedBoil until flexible but firmer than serving doneness, then cool and drain thoroughly.
Fresh raw / unsteamed egg noodlesFresh but uncookedCook according to the package, often with a brief boil or blanch. Stop while they retain some firmness.
Fresh steamed / cooked noodlesAlready substantially cookedUsually loosen or briefly blanch rather than giving them a full boil.
Ready-to-wok / straight-to-wok noodlesHydrated and prepared for quick pan cookingLoosen as directed and avoid unnecessary boiling. Watch for extra surface moisture.
Instant ramenDry and very quick-cookingDiscard the seasoning packet and cook only until barely flexible.
Crispy chow mein noodlesAlready fried and crunchyNot the noodle for this recipe.

A note on “Hong Kong-style” noodles: the name describes a noodle style, not one universal preparation state. They may be sold raw, steamed or dried, so the package directions matter more than the words “Hong Kong-style” on the front.

Fresh noodle labels can be maddeningly vague. One yellow packet wants several minutes in boiling water; the packet beside it wants to go almost straight into the wok. The Woks of Life’s Chinese noodle guide (opens in a new tab) is useful when the refrigerated case looks like a wall of nearly identical noodles.

Four Things to Check Before the Wok

  1. Flexible: the noodle bends and separates without cracking.
  2. Firm enough: noodles you boil yourself should remain slightly underdone; pre-cooked noodles need enough firmness to handle another brief cook.
  3. Dry outside: the strands are not carrying obvious water into the pan.
  4. Loose: the noodles are separate instead of compressed into one warm, starchy block.
Four noodle readiness checks labeled Flexible, Firm Enough, Dry Outside and Loose, showing a bent strand, an intact strand, surface-dry noodles and separated strands.
Each noodle check guards against a different failure: flexibility limits breakage, firmness survives the second cook, a dry exterior protects pan heat, and loose strands expose more noodle surface to the wok. Together, they predict behavior rather than merely doneness.

Doneness and dryness are separate problems. A noodle can be cooked correctly and still be wet enough to cool the pan. It can also be dry and separate but already too soft to handle another few minutes of heat.

If water drips when you lift a handful, give the noodles more time in the colander or blot them gently. Wet noodles steal heat.

Two woks compare wet noodles producing heavy steam with surface-dry noodles making direct pan contact and developing browned patches; labels read “Wet → Steams” and “Surface-Dry → Fries.”
“Surface-dry” does not mean dehydrated, cold or stiff. Chow mein noodles can still be warm and flexible; the useful difference is that free water is no longer coating them and consuming the wok’s heat before frying can begin.

Homemade Chow Mein Sauce: Coat, Don’t Pool

For this version, a good chow mein sauce is almost invisible once dinner is finished. You should taste it everywhere without seeing much of it underneath.

Matched pans labeled Coat and Pool compare glossy separated chicken chow mein with little liquid underneath against wetter noodles sitting in visible dark sauce.
Judge chow mein sauce after it has been tossed over heat for a moment, not at the instant it enters the wok. Cornstarch thickens as it heats, while chicken and vegetables can release moisture of their own, changing the final consistency.

If the noodles taste salty but flat, more soy only pushes the salt higher. Deeper flavor also comes from oyster sauce, Shaoxing wine, white pepper, aromatics and the browning the noodles picked up in the pan.

Light or all-purpose soy does most of the seasoning. Dark soy is there mainly for color and deeper soy flavor. Oyster sauce gives the noodles body and a little sweetness; Shaoxing brings an aromatic note that suits this version. White pepper adds warm, earthy background heat.

One label is worth checking closely here: Shaoxing products sold specifically as cooking wine sometimes contain added salt. That can push an otherwise balanced sauce much farther than expected.

Toasted sesame oil goes into the sauce for aroma, not into the wok as the main frying oil. Sugar softens the salty edges, while the small amount of cornstarch helps the sauce cling. MSG or chicken powder is optional for extra savory depth. You do not need a separate seasoning packet; this sauce already does that job.

The homemade stir-fry sauce guide (opens in a new tab) uses many of the same building blocks for other stir-fries.

When the balance is right, the noodles remain the main event—only darker, fuller and more savory, with an occasional toasted edge coming through.

Tender Chicken, Vegetables With Some Bite

Chicken thigh gives you a little more margin before it dries out. Breast works well too, especially when thinly sliced across the grain. The cornstarch leaves a light coating around either cut during both trips through the heat; baking soda is not necessary for this method.

Keep the vegetables long and fairly thin. Cabbage works well in narrow ribbons, carrots in matchsticks and scallions in 1–2 inch lengths. Once everything comes back together, the chicken and vegetables should weave through the noodles rather than sitting in separate piles on top.

Wok or Skillet?

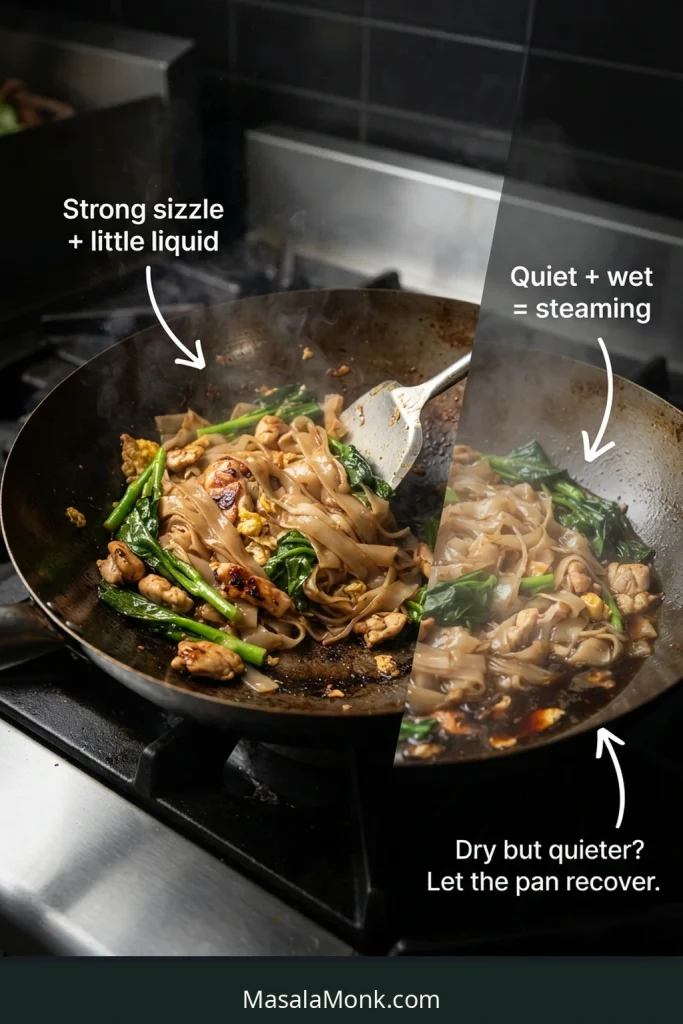
On a normal home stove, listen to the pan. A sharp sizzle means the food is frying; a wet, quiet simmer means moisture is taking over.

  • 14-inch / 35 cm flat-bottom carbon-steel wok: the best size for the full recipe. Wok shape and burner strength vary, so split the final stage if it feels cramped.
  • 12-inch / 30 cm large skillet: completely workable. Batch the chicken when needed and expect two half-batches when everything goes back in if the skillet is shallow.
  • Coated nonstick pan: usable, but follow the manufacturer’s heat guidance rather than automatically heating it until it smokes.
Large carbon-steel wok holding chicken chow mein beside a 12-inch stainless skillet with a smaller batch, illustrating the difference in usable cooking and tossing space.
A wok gives you more vertical room to move food; a skillet depends more on its flat cooking surface. That makes spreading and batching especially useful as the pan fills.

A home burner will not give you exactly the same smoky char and aroma as very high-heat restaurant wok cooking. That’s fine. Good direct pan contact gives the noodles plenty of toasted character.

Cooking for more people? Make two complete batches. Double the ingredients, not the pan load.

Chicken Chow Mein Troubleshooting

If dinner is already in the pan, don’t start over. Find the problem that looks familiar and fix that first. You can analyze dinner later.

Four troubleshooting scenes show watery steaming chow mein with food being removed, pale noodles resting against the pan, plain noodles and cabbage added to an overly seasoned batch, and water added to dry clumped noodles.
Before changing the seasoning, identify the actual failure: too much moisture, poor pan contact, too much salt or dry/tight noodles. Fix the physical problem first; otherwise one rescue can create another.

Before the wok

ProblemFix
Noodles already too softCool and drain immediately. Keep their later frying and saucing brief.
Noodles stuck in one blockLoosen gently. A quick cool rinse can help boiled dried noodles; drain and dry them again afterward.
Vegetables dripping wetPat them dry before they enter the pan.
Sauce tastes far too saltyDilute it slightly with water before cooking. Check the stock, chicken powder and cooking wine too.
Cornstarch lumpyWhisk the lumps smooth with a small amount of liquid before mixing them back into the sauce.

While frying

ProblemFix
Pan filling with water / everything steamingStop adding food. Remove some if needed and let the liquid cook off before continuing; finish in batches.
Noodles stickingCheck crowding and moisture before adding more liquid. Lift gently instead of scraping hard.
No noodle browningGive the strands 30–45 seconds of contact before turning instead of stirring continuously.
Chicken cooking too fastTake it out and return it near the end.
Noodles and vegetables will not mixLift and toss. Loosen clumps gently instead of chopping through the strands.

After the sauce goes in

ProblemFix
Too saltyAdd plain noodles or extra unseasoned vegetables if you have them, or a small splash of water if the dish can absorb it. Sugar will not remove salt.
Too sweetAdd a small splash of water and toss. Extra plain noodles or vegetables help even more.
BlandCheck salt first. Then try a little oyster sauce, white pepper or optional MSG/chicken powder. Add soy only a teaspoon at a time.
Too dry or sauce gummyAdd water 1 tablespoon at a time and toss over heat until the noodles loosen and regain their gloss.
Too wetKeep the pan uncovered and reduce the liquid. Remove some food first if necessary.
Chicken toughNext time, slice it thinner and remove it sooner during the first fry.

Substitutions and Variations

Chow mein substitution guide showing Chinese noodles with instant ramen and thin pasta, dark soy sauce, oyster-style sauces and small vessels representing Shaoxing wine alternatives.
When using instant ramen, the noodle block is the useful substitute—not the seasoning packet. The packet can push the dish far saltier than the homemade sauce is designed to be.
Instead of…Try…Expect…
Chow mein / Chinese egg noodlesInstant ramen — the closer quick substituteThinner, softer noodles. Discard the seasoning packet and cook only until barely flexible.
Chow mein / Chinese egg noodlesThin spaghetti or angel hair — a pantry fallbackA firmer, more pasta-like chew.
Dark soy sauceOmit it rather than replacing it volume-for-volume with regular soyThe noodles will be paler, but the sauce balance stays closer to the original.
Oyster sauceVegetarian mushroom oyster-style sauceThe closest straightforward replacement.
Oyster sauceHoisin sauceNot a neutral swap; the result will be sweeter. Reduce or omit the sugar.
Shaoxing wineDry sherryA similar aromatic role.
Shaoxing wineStock or waterLess aromatic depth, but the method works.
Bean sproutsExtra cabbage, bok choy or another crisp vegetableA different crunch without changing the basic method.

For chicken and mushroom chow mein: add about 150 g / 5 oz sliced mushrooms and reduce the cabbage to about 150 g / 5 oz. Cook the mushrooms until most of the water they release has evaporated. Keeping the full cabbage quantity as well works better when the mushrooms get their own turn in the pan.

Make it spicy

Add chili crisp, chili oil, sliced fresh chili or a little chili-garlic sauce at the end. Sweet chili sauces change the balance, so use less sugar in the chow mein sauce when needed.

Dietary adjustments

Lower sodium: use lower-sodium soy sauce and unsalted stock, skip the chicken powder, and compare the sodium on the noodles, oyster sauce and cooking wine. Some Shaoxing cooking wines contain added salt.

Gluten-free: use noodles labeled for a gluten-free diet, certified gluten-free tamari or soy sauce, and a gluten-free oyster-style sauce. Check the Shaoxing wine and optional chicken powder too; many Shaoxing products are not gluten-free. Use a verified gluten-free dry sherry or sake, or replace the wine with stock or water when needed.

Halal: use halal-certified chicken and check the noodles, sauces and stock according to the requirements you follow. Replace Shaoxing wine with stock, water or an appropriate certified alcohol-free cooking seasoning.

Using leftover cooked chicken: skip the raw-chicken marinade and add sliced cooked chicken near the end, giving it enough time to reheat fully to 165°F / 74°C. Adding it much earlier usually dries it out.

Make-Ahead, Storage and Reheating

The sauce, cabbage and carrot can be prepared up to a day ahead and refrigerated separately. Raw chicken can be sliced ahead too, but keep it covered and completely separate from the vegetables. Leave the bean sprouts and scallions until close to cooking time.

If you need to boil the noodles ahead, cool them promptly, drain and surface-dry them well, toss with a very small amount of neutral oil and refrigerate them separately.

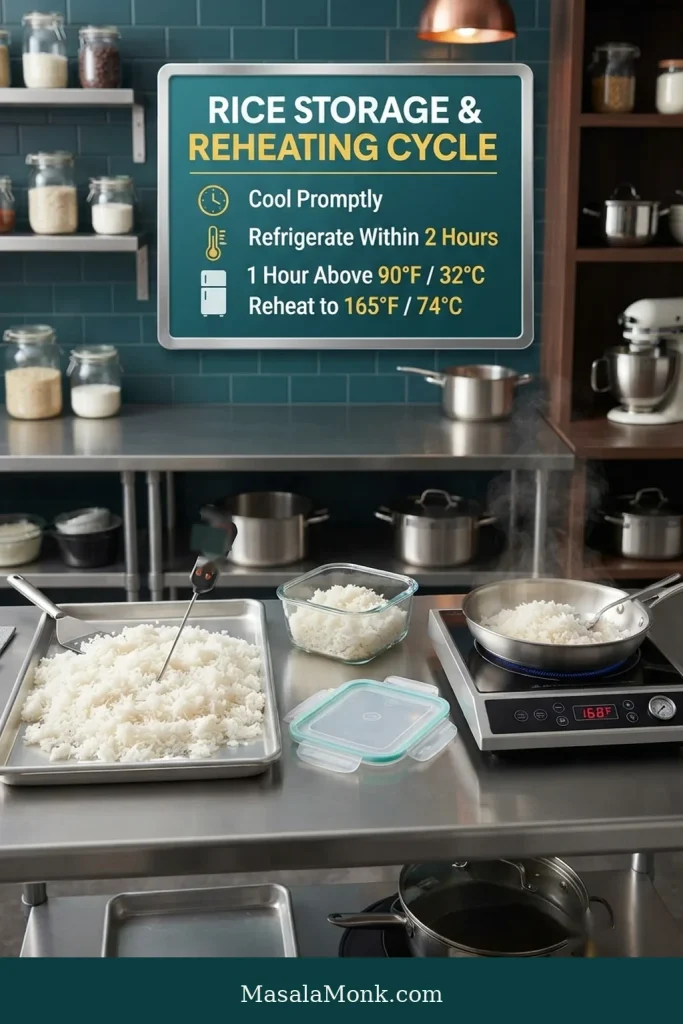
Cool leftover chicken chow mein promptly and refrigerate it in a covered container for up to 3–4 days. The USDA’s food-safety guidance (opens in a new tab) recommends reheating leftovers to 165°F / 74°C.

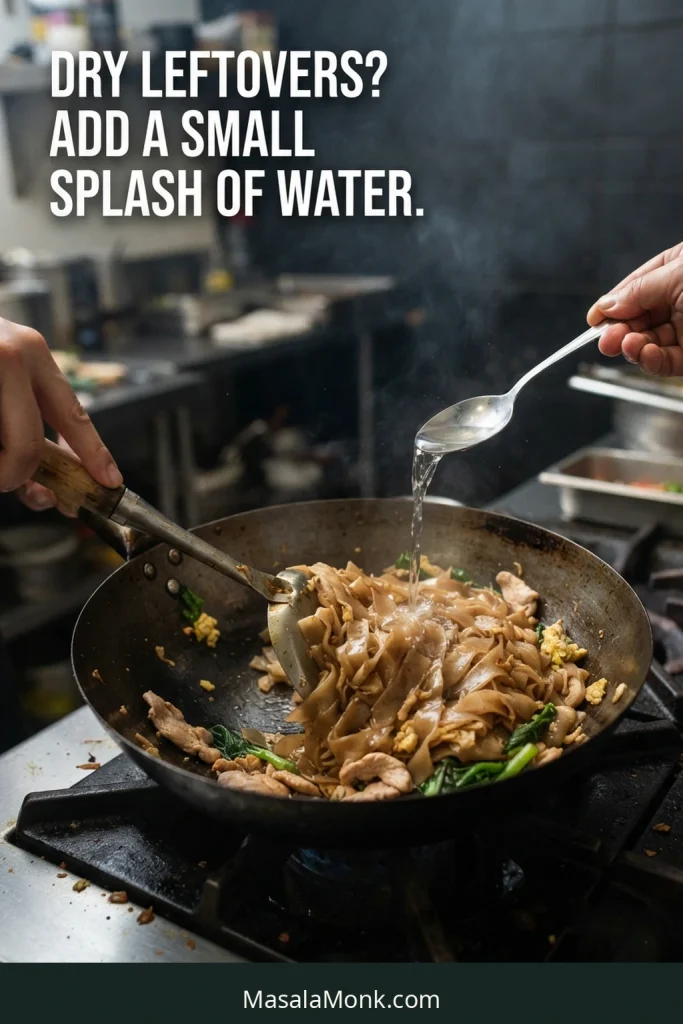
A skillet or wok gives chilled noodles the best chance of loosening without turning mushy. Add about 1 tablespoon water per serving and toss over medium-high heat until steaming hot and the added water has mostly evaporated.

Leftover chicken chow mein reheating in a dark skillet while a hand adds a tablespoon of water near the pan edge, with steam rising from noodles, chicken and vegetables.
Let steam loosen cold noodle clumps first rather than forcing them apart with a spatula. Once the strands relax, gentle tossing reheats them with less tearing.

For the microwave, cover loosely and heat in short intervals, stirring between them.

Freezing is possible but not ideal. The noodles soften and bean sprouts lose much of their crunch after thawing.

What to Serve With Chicken Chow Mein

Chicken chow mein is already a full meal, so sides work best when they bring a different texture or temperature rather than more heaviness. A small bowl of egg drop soup (opens in a new tab) keeps things light and broth-based, while a cool cucumber salad (opens in a new tab) gives the hot, savory noodles a crisp, sharp contrast.


Once the noodles are glossy, the vegetables still have some bite and the pan is nearly dry, dinner is done.

Get the chow mein onto plates while it still looks a little unruly. Browned strands, crisp bean sprouts and chicken tucked through the noodles are exactly where they should be.

Close-up chopsticks lifting glossy chow mein noodles with a thin browned chicken strip, cabbage, bean sprout and scallion against a dark background.
The best bite is intentionally varied: toasted noodle edges beside softer strands, tender chicken and a crisp sprout. Serve immediately, while those contrasts are still distinct.
Posted on Leave a comment

Wonton Soup Recipe: Easy Homemade Wontons in a Clear, Savory Broth

Steaming bowl of pork-and-shrimp wonton soup with clear amber broth, baby bok choy, sliced scallions and a wonton lifted on a white spoon.

Wonton soup leaves very little to hide. The broth is clear, the wrapper is thin, and the filling is small enough that you notice quickly when any one of them is off.

At its simplest, wonton soup is a Chinese soup of small filled dumplings made with thin wheat wrappers and served in broth. The details change considerably from one region, restaurant and household to another: thin skins or chewy ones, pork or shrimp or both, a spare broth or something much more assertive.

The bowl we are aiming for here sits on the lighter side: thin-to-medium wrappers, a juicy pork-and-shrimp center, and a clear ginger-scallion broth with enough savory depth to taste complete without becoming heavy or soy-dominated. Bite through a good wonton and you get tender wrapper first, then juicy pork and firmer little pieces of shrimp, all against that light broth.

The thick, chewy wontons from an American-Chinese takeout shop are simply a different target, and wrapper choice makes an enormous difference. Homemade broth can miss in another direction: a rich packaged stock sometimes leaves you with chicken soup that happens to contain wontons. Both problems are fixable.

Folding takes some time on a first batch, but the technique gets easier quickly. Cook one wonton before folding the rest, taste what you actually made, and adjust while the bowl of filling is still sitting in front of you. Then cook enough for dinner and freeze the rest raw.

The second bowl is much less work than the first.

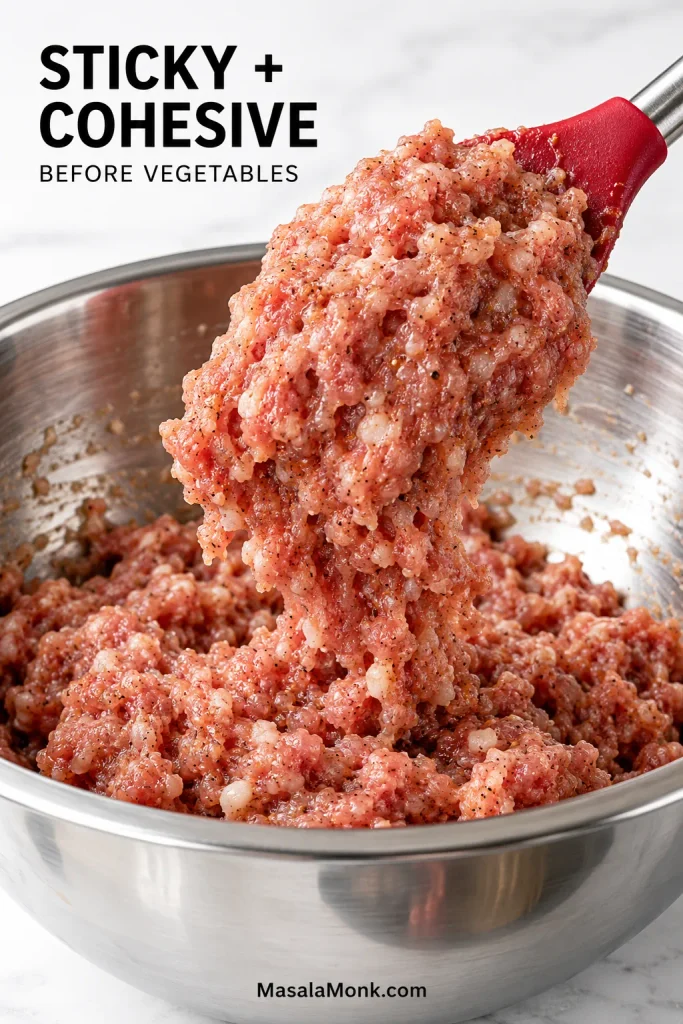
Mix until sticky. Seal lightly. Boil separately.

Quick Answer: How to Make Wonton Soup

Mix equal weights of ground pork and chopped shrimp with scallions, ginger, Chinese light soy sauce, Shaoxing wine, sesame oil, white pepper and cornstarch until the filling turns sticky and cohesive. Use a modest amount of filling and only enough water to make the wrapper seam tacky.

Simmer a light chicken broth with ginger and scallions, season it gently, and cook the wontons in separate water so loose wrapper starch stays out of the serving broth. Wontons of this size take about 4–5 minutes fresh or 6–8 minutes from frozen.

For a main bowl, plan on roughly 8–10 wontons with 1¼–1½ cups / 300–350 ml broth. Assemble only when you are ready to eat. The wrappers keep absorbing broth once they are in the bowl.


Wonton Soup Recipe

Prep & folding50–60 minutes
Cook time15–20 minutes
Total time1 hour 5 minutes–1 hour 20 minutes; allow longer for a first batch
YieldAbout 50 wontons; expect roughly 45–60 depending on wrapper size
BrothAbout 6 cups / 1.42 litres
Serving4 generous bowls, with extra wontons to freeze
Fresh wontons4–5 minutes
Frozen homemade wontons6–8 minutes

Your first tray may take longer. Folding gets much faster once your hands learn the movement. You need a large pot for the wontons, a medium saucepan, a mixing bowl, a tray or several plates, and a slotted spoon or spider. A kitchen scale and instant-read thermometer are useful extras.

Treat the quantities below as the starting point and the first cooked wonton as the final say. Wrapper thickness, pork, soy sauce and salt vary enough that a small adjustment to your particular batch is completely normal.

Ingredients

For the Pork and Shrimp Wontons

  • 225 g / 8 oz ground pork, preferably regular rather than extra-lean
  • 225 g / 8 oz raw peeled and deveined shrimp
  • Enough square wonton wrappers for about 50–60 wontons, preferably 3½–4 inches / 9–10 cm
  • 2 scallions (green onions), very finely sliced
  • 2 teaspoons finely grated fresh ginger
  • 1 tablespoon / 15 ml Chinese light soy sauce
  • 1½ tablespoons / 22 ml Shaoxing wine
  • 1½ teaspoons / 7.5 ml toasted sesame oil
  • 2 teaspoons / about 6 g cornstarch (cornflour in India and the UK)
  • ¼ teaspoon ground white pepper
  • ½ teaspoon fine sea salt
  • 1 tablespoon / 15 ml cold water or unsalted chicken stock, only if needed

Chinese light soy sauce does not mean reduced-sodium soy sauce. It is the thinner, lighter-colored everyday soy used in Chinese cooking. Dark soy will change both the color and flavor of the broth. Regular all-purpose soy sauce is fine too; taste before adding extra salt.

No Shaoxing wine? Dry sherry is the closest easy substitute. For an alcohol-free version, use unsalted stock or water. You lose some of the fermented-wine aroma, but the wontons still work.

A 1 lb / 454 g package of ground pork leaves you with roughly half a pack after this recipe. Conveniently, the remaining 225 g / 8 oz is also the amount used in Dan Dan Noodles.

For the Clear Broth

  • 6 cups / 1.42 litres mild chicken stock total; for a particularly dark or roasted stock, use 5 cups stock + 1 cup / 240 ml water
  • A little extra hot water or stock for topping up after simmering, if needed
  • 20 g / about ¾ oz fresh ginger, sliced
  • 3 scallions, white and light-green parts lightly bruised; reserve green tops
  • 1 tablespoon / 15 ml Chinese light soy sauce
  • ½ teaspoon sugar
  • ¼ teaspoon ground white pepper
  • 1 teaspoon / 5 ml toasted sesame oil
  • Fine sea salt, only if needed
  • Optional for adjusting the finished broth: ½ teaspoon Chinese chicken powder, bouillon according to package strength, or a small pinch / about ⅛ teaspoon MSG

Choose a mild, fairly neutral stock. A particularly dark or roasted one is better diluted before you start.

MSG, chicken powder and bouillon are optional adjustments rather than automatic additions. Taste the finished broth first.

For Serving

  • 4 small heads baby bok choy, halved or quartered
  • Sliced scallion greens
  • Chili oil, optional
  • Extra white pepper, optional
  • Cilantro, optional
  • A few drops toasted sesame oil, optional

Method

1. Chop the Shrimp

Pat the shrimp dry and chop them into small pieces. Keep going until part of the shrimp becomes sticky and paste-like while plenty of little pieces remain. Those pieces give the cooked filling its small springy bites.

Three stages of raw shrimp preparation labeled Whole, Chopped and Ready, progressing from peeled shrimp to chopped pieces and a sticky finely chopped mixture.
The uneven chop is deliberate: if every shrimp piece is still distinct, keep going; if the mixture becomes completely smooth, you have gone past the useful middle ground.

2. Mix Until the Filling Turns Sticky

Put the pork, shrimp, scallions, ginger, soy sauce, Shaoxing wine, sesame oil, cornstarch, white pepper and salt in a large bowl. Stir vigorously with chopsticks, a fork or a sturdy spoon until the mixture becomes tacky and cohesive.

It starts loose and granular. Keep mixing until it clings to the spoon and pulls together when lifted. An unusually stiff mixture can take the tablespoon of cold water or stock; work it in until no loose liquid remains.

Stop once the texture has clearly changed. The cooked center should hold together and stay juicy.

Comparison of loose, granular pork-and-shrimp wonton filling beside properly mixed filling that looks sticky, moist and cohesive.
Use texture rather than a timer to judge wonton filling: stop when it has enough cohesion to shape cleanly, before vigorous mixing turns into unnecessary overworking.

3. Cook One Before You Fold the Rest

Bring a small saucepan of water to a boil. It is a much easier way to check the filling than heating a huge pot and leaving it there while you fold fifty wontons.

For a 3½-inch / 9 cm wrapper, begin with about 1 rounded teaspoon / 9–10 g filling. A roomier 4-inch / 10 cm wrapper can take roughly 1 generously rounded teaspoon / 11–12 g.

Two square wonton wrappers with measured portions of pork-and-shrimp filling showing the appropriate amount for 3½-inch and 4-inch wrappers.
Leave a clean border around the wonton filling. The easiest way to avoid overstuffing is to judge how much wrapper remains available for sealing, not how generously filled the center looks.

Moisten the sealing edge lightly, fold the wonton and boil it for 4–5 minutes for the sizes used here, until the wrapper is translucent and the filling is cooked through.

Then eat it.

This is where the recipe stops being theoretical. Check the salt and ginger, but also pay attention to the proportions. Too much meat for the wrapper makes the wonton feel heavy; too many folded layers can already be chewy at the corners.

One intact cooked wonton and one cut-open wonton with labels for Taste: salt and ginger, Look: wrapper to filling, and Bite: tender skin and folded corners.
If the seasoning tastes right but the folded corners still chew heavily, change the fold rather than the filling. One cooked wonton can diagnose those two problems separately.

Make those corrections now. Once it tastes right, drain and wash the saucepan; you will use it for the broth.

4. Fold the Wontons

Set out the filling, wrappers, a small bowl of water and a parchment-lined tray or a few plates. Keep the unused wrappers covered while you work.

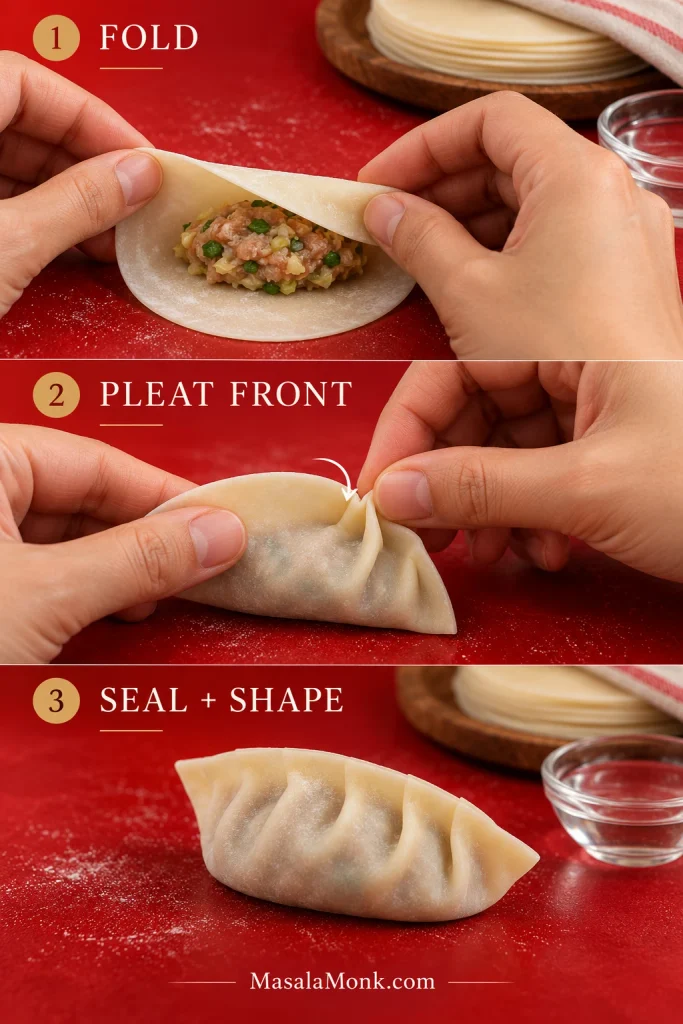
  1. Lay one square wrapper on a clean, dry surface with one straight edge facing you.
  2. Add the appropriate amount of filling just below the center.
  3. Moisten the far edge and the upper part of the two side edges with a thin film of water. The wrapper should become tacky, not wet and slippery.
  4. Fold the wrapper in half over the filling to make a rectangle. Press from around the filling outward toward the edges, pushing out trapped air as you seal.
  5. Check that the sealed edge is clean and that no filling has been trapped in it.
  6. Lightly dampen one of the two bottom corners on the filling side. Curve the two bottom corners toward each other, overlap them slightly, and press to seal.
  7. Put the finished wonton on the tray and keep it loosely covered while you continue.
Six-step overhead sequence showing a square wonton wrapper filled, moistened, folded into a rectangle, sealed and finished by joining the two lower corners.
In this wonton fold, the rectangle does the real sealing; the final corner join mainly shapes the parcel, so it should never become a thick knot of wrapper.

The first few will probably be less tidy than the last few. Leave them alone when the seam holds; crooked wontons taste the same.

On a warm day or during a long folding session, keep the filling chilled and move finished wontons to the refrigerator in batches rather than leaving raw pork and shrimp on the counter.

5. Start the Broth and Wonton Water Together

Near the end of folding, put the washed saucepan and the large wonton pot on the stove together.

Combine the stock, water if using, sliced ginger and bruised scallion pieces in the saucepan and bring it to a gentle simmer for 8–10 minutes. Meanwhile, bring the large pot of plain water to a boil. Reached boiling too soon? Turn it down and bring it back up when the bok choy and wontons are ready to go in.

Remove the ginger and scallions from the broth. Top it back up with hot water or stock to about 6 cups / 1.42 litres if simmering has reduced it noticeably. Add the soy sauce, sugar and white pepper, then taste before adding salt.

The finished broth should smell first of ginger, scallion and white pepper, then taste clean and savory enough that you want another spoonful between wontons. Salt already right but the broth still hollow? Add a small pinch of MSG. A generally weak broth needs chicken powder or bouillon instead—start modestly and taste again.

Stir in the sesame oil at the end. You should notice it as the bowl reaches you, not taste sesame as the main event.

6. Blanch the Bok Choy, Then Cook the Wontons

Blanch the bok choy in the boiling water for 60–90 seconds, until bright green and tender-crisp, then lift it out with a spider or slotted spoon. Use the same water for the wontons.

Add only enough wontons to move comfortably and stir gently as they go in so the wrappers do not settle onto the bottom. Four dinner bowls will often be easier to cook in two loose batches in an average home pot.

Fresh wontons of this size take about 4–5 minutes. They rise and become more translucent as they cook. Once that happens, start checking rather than adding several precautionary minutes.

Cut open one of the larger wontons when you are unsure about the center, or use an instant-read thermometer. The USDA safe-temperature chart gives 160°F / 71°C for ground pork.

A cooked wonton should have a tender, translucent wrapper that still holds its shape, juicy cohesive pork, and little shrimp pieces with some bounce left in them. The seam should bite through cleanly rather than hanging around as a hard knot of dough.

Translucent cooked wontons lifted in a round wire skimmer above gently boiling water, with more wontons floating in a stainless-steel pot and the text “Floating = Start Checking.”
Once a wonton floats, the useful question changes from “How many minutes?” to “What does the wrapper and center look like now?” Floating begins the doneness check; it does not end it.

7. Assemble the Bowls

Put 8–10 wontons and some bok choy in each large bowl. Ladle over about 1¼–1½ cups / 300–350 ml hot broth, then scatter over the sliced scallion greens.

The finished bowl should look almost simpler than the counter that produced it: clear broth, green bok choy and intact wontons sitting just below the surface.

Clear golden broth pouring from a metal ladle into a blue bowl of cooked wontons, baby bok choy and sliced scallions.

Chili oil, cilantro, extra white pepper or a few drops of sesame oil can all go on at the table. Serve straight away. Any wontons waiting for a second bowl are better off outside the broth.

Recipe Notes

  • Wrapper size changes the yield; expect roughly 45–60 wontons from this batch.
  • Buy a few extra wrappers because package counts vary and occasional skins tear or arrive dry.
  • Check that you have picked up one wrapper rather than two stuck together.
  • Cook homemade frozen wontons directly from frozen rather than thawing them.
  • Store cooked wontons separately from the broth.
  • Standard wonton wrappers usually contain wheat; the filling also contains shellfish, soy and sesame unless suitable substitutes are used.

What to Serve With Wonton Soup

A smaller bowl with 4–6 wontons makes a light starter before something fuller such as Chicken Fried Rice. At 8–10 wontons, the soup is substantial enough to be dinner by itself; something cold and crisp such as a simple cucumber salad is plenty alongside it.

Cut one open and the filling should look cohesive rather than densely packed: moist pork holding everything together, with small pieces of shrimp still visible throughout. That is the texture all the chopping and vigorous mixing were meant to produce.

Cut-open pork-and-shrimp wonton showing moist ground pork mixed with small chopped shrimp pieces and a few green scallion flecks.
A cut pork-and-shrimp wonton should show one moist, compact center with small shrimp pieces distributed throughout—not separate layers of meat and seafood.

At this point, you have everything you need to make the soup. The sections below are there when you need to choose a wrapper, fix the broth, cook frozen wontons or work out what went wrong.

Jump to wrappers · filling & folding · broth · frozen wontons · troubleshooting · make-ahead & storage

Which Wonton Wrappers Should You Buy?

Wonton wrappers vary more than the name suggests. For this bowl, look for thin-to-medium square wrappers around 3½–4 inches / 9–10 cm. They cook tender without being quite as fragile as the thinnest specialty skins.

In Asian groceries, you may see yellow Hong Kong-style skins and white Shanghai-style skins. Yellow wrappers are often thinner; white wrappers can be somewhat sturdier. Brand differences matter more than color, though. Pick up the package and look for skins that appear flexible and fresh rather than dry around the edges.

Thin wrappers give a more delicate, silky wonton. Medium skins are easier to handle.

Then there are the intentionally thick, chewy wontons served by some American-Chinese restaurants—the version people sometimes spend years trying to recreate after moving away from a favorite takeout shop. That texture is a style, not evidence that somebody overcooked the wrapper.

Three raw wonton wrappers labeled Thin, Medium and Thick, displayed to show differences in translucency, edge thickness and flexibility.
Wonton wrapper thickness is a texture choice, not a quality grade: delicate soup wontons and chewier takeout-style wontons can both be correct for different targets.

Dry white edges, curled corners and visible cracks are more worrying than the wrapper’s color. Frozen wrappers are fine too; thaw the unopened package slowly in the refrigerator until the skins are completely pliable, then keep the opened stack covered while you work.

Macro comparison labeled Fresh, Double and Dry showing a supple single wonton wrapper, two wrappers stuck together and a dry wrapper with curled or cracked edges.
Two different wrapper problems can later look like “tough wontons”: a doubled skin creates excess chew, while a dry edge creates sealing trouble before the dumpling even reaches the pot.

Extra wrappers can become another batch of wontons, or take a completely different route in Crab Rangoon, where the same little square skins turn crisp instead of tender.

Wrappers cracking or turning chewy? Jump to Troubleshooting.

Getting the Filling and Fold Right

Once the filling tastes right, most remaining problems are mechanical: how much goes into each wrapper, what gets trapped in the seam, and how many layers collect at the corners.

Most leaks begin before the wonton reaches the water: filling caught in the seam, dry wrapper edges, trapped air or simply too much filling. A wrapper that already looks under pressure on the tray is unlikely to become happier in boiling water.

Four wontons labeled Good, Too Full, Dirty Seam and Air Pocket, demonstrating common sealing problems that can cause wontons to open during cooking.
Read the failed seam before changing the cooking time: stretched skin, trapped air or filling on the edge are folding problems, so extra boiling cannot repair them.

Decorative folds create a different problem. Several layers bunched together at one point need longer to soften, leaving a chewy knot after the rest of the wrapper is tender.

Soup wontons do not need much architecture.

Three close-up stages labeled Rectangle, Curve and Overlap, showing the two lower wrapper corners being brought together and crossed at the front.
The corner overlap needs only enough contact to hold. A larger overlap adds extra wrapper precisely where a finished wonton is most likely to feel chewy.

By the middle of the tray, your hands will usually have settled on their own amount of filling and their own version of the fold.

How to Make Wonton Broth Taste Clear but Not Bland

Wonton soup broth can be as simple as mild chicken stock seasoned with ginger, scallion, white pepper, Chinese light soy sauce and a little sesame oil. It does not need to be rich or elaborate. It just needs enough savory depth that the spoonful between wontons tastes complete.

More soy is not the automatic answer to weak broth. It can make the soup darker and saltier without giving it the depth you were looking for. At the other extreme, a rich roasted stock can turn the bowl into chicken soup with wontons in it.

Cooking the wontons in separate water keeps most loose wrapper starch out of the broth. Egg Drop Soup uses another light chicken-broth base, but turns it silky with egg ribbons instead of wrappers and filling.

Matching vessels labeled Clear and Starchy showing transparent amber wonton broth beside noticeably cloudier broth affected by wrapper starch.
Clear wonton broth is partly a process choice, not a seasoning fix. Once wrapper starch clouds the liquid, more ginger, soy or sesame cannot restore that visual clarity.

Restaurant broth can head in several directions. Cantonese and Hong Kong versions may build depth with poultry, pork or dried seafood; some American-Chinese takeout bowls lean harder on chicken powder, bouillon or MSG.

How to Fix Wonton Broth

For this recipe, the broth should support the wontons, not bury them.

Your broth tastes…What to change
Under-saltedAdd salt a little at a time.
Salty enough but hollowTry a small pinch of MSG instead of more soy.
Weak and missing chicken depthAdd a little chicken powder or bouillon and taste again.
Too chicken-forwardDilute with water, then rebalance the seasoning.
Too soy-heavyDilute with unsalted stock or water.
Good but aromatically flatAdd scallion, white pepper or a few drops of sesame oil at the finish.
Cloudy or starchyBoil the wontons separately next time.
Broth troubleshooting graphic pairing seven taste problems with corrections including salt, MSG, chicken powder, dilution, unsalted stock or water, scallion and white pepper, and cooking wontons separately.
For wonton soup broth, think in four buckets before reaching for more soy: seasoning, savory depth, concentration and aroma. The right correction depends on which one is actually missing.

Back to Recipe · Back to Top

Using Frozen Wontons

Frozen wontons turn the same broth into a much faster dinner. Homemade wontons can go straight from freezer to boiling water. Thawing them first only gives the filling more time to wet the wrapper.

  1. Make the broth and bring a separate pot of water to a boil.
  2. Add the frozen wontons in slightly smaller batches than you would use for fresh ones.
  3. Stir gently soon after they go in; frozen wontons spend longer near the bottom before floating.
  4. Start checking around 6 minutes. Homemade wontons of this size take roughly 6–8 minutes, but wrapper thickness and filling size matter more than the clock.
  5. Move them into bowls as soon as the wrappers are tender and the centers are hot throughout.
Frosted homemade wontons spaced apart in a cold freezer setting with the text “Do Not Thaw” and “Cook straight from frozen.”

Store-bought frozen wontons are their own case. Start with the package directions. A large, thick-skinned commercial wonton may behave very differently from the homemade ones here.

A batch that repeatedly comes out chewy usually needs gentler cooking before it needs more time. Smaller batches help too, especially with very thin skins surrounding a still-frozen center.

A 10–15 Minute Shortcut With Store-Bought Frozen Wontons

Sometimes the bag of frozen wontons is dinner, not a make-ahead project. This shortcut makes 2 generous bowls and keeps the same general broth-to-bowl proportions as the main recipe.

  • 3 cups / about 710 ml mild chicken broth
  • About 10 g fresh ginger, cut into 5–6 thin slices
  • 2 scallions, whites lightly bruised and greens sliced
  • 1½ teaspoons / 7.5 ml Chinese light soy sauce
  • ¼ teaspoon sugar
  • ⅛ teaspoon ground white pepper
  • 12–16 store-bought frozen wontons, depending on size
  • 2 small heads baby bok choy, or a handful of spinach
  • ½ teaspoon / 2.5 ml toasted sesame oil

Bring the broth, ginger and bruised scallion whites to a simmer and let them infuse for about 8 minutes. Add the soy sauce, sugar and white pepper, then taste. Remove the ginger and scallion pieces and stir in the sesame oil at the end.

While the broth simmers, cook the frozen wontons in a separate pot according to the package directions and blanch the bok choy in the same water for the final 60–90 seconds. Spinach can simply wilt in the hot broth.

Divide the wontons and greens between two bowls, ladle over about 1½ cups / 350 ml broth per bowl, and finish with the sliced scallion greens. Six to eight commercial wontons can be plenty when they are larger than the homemade ones here; use the package size and your appetite rather than forcing the main-recipe count onto them.

Finished bowl of quick frozen wonton soup with clear broth, enclosed wontons, greens and scallions, labeled “10–15 Minute Frozen Wonton Soup.”

Freezing your own batch? Jump to Make Ahead & Storage.

Troubleshooting

ProblemLikely cause → what to change
Wontons open in the waterOverfilled, filling in the seam, trapped air or rough boiling → use slightly less filling, keep the edge clean, press out air and maintain a steady rather than violent boil.
Wrappers crack while foldingDry or old wrappers → keep the stack covered and replace badly dried skins.
Wrappers are unusually thick or chewyTwo skins stuck together, a thick wrapper style or too many folded layers → check for double skins and use a simpler fold.
Wontons are mushyOvercooking or sitting in broth → stop cooking once tender and assemble only at serving time.
Filling is crumblyThe mixture never became cohesive → mix until tacky before folding the next batch.
Filling is dry or toughVery lean pork or excess cooking → use pork with some fat and stop cooking once the center is done.
Broth is cloudyWrapper starch → boil the wontons separately.
Broth is salty but flatSalt is already high but savory depth is missing → try a small pinch of MSG rather than more soy.
Broth tastes strongly of soyToo much soy or a salty stock → dilute with unsalted stock or water.
Broth tastes like chicken noodle soupStock is too rich or chicken-forward → dilute it and rebalance the seasoning.
Frozen wontons turn chewyThin wrapper plus prolonged aggressive boiling → use smaller batches and gentler cooking before adding more time.

For broth problems, the broth table above gives the fuller seasoning diagnosis. The useful question is not simply “what can I add?” but “what is the broth actually missing?”

Back to Recipe · Broth Fixes · Back to Top

Make Ahead, Freeze and Store

Freezing Raw Wontons

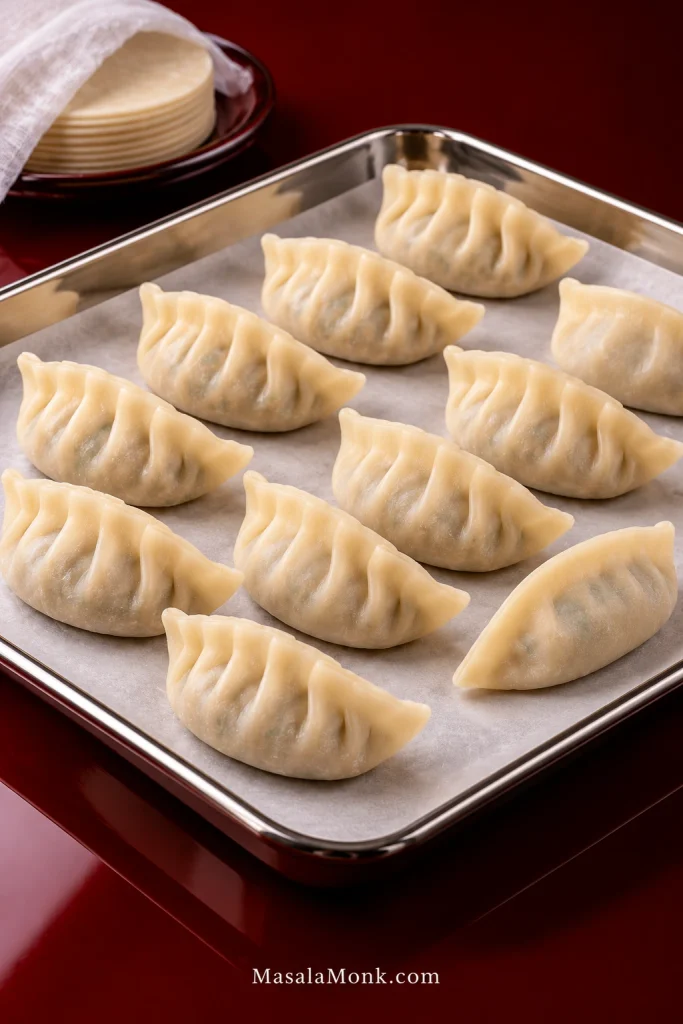
Arrange raw wontons in one layer on a parchment-lined tray, plate or shallow pan without letting them touch. Freeze until completely firm, then transfer them to a freezer bag or airtight container.

Three-stage freezer workflow labeled Tray, Frozen Solid and Bag, showing wontons spaced on a tray, frozen firm and then transferred to a freezer bag.
When you freeze homemade wontons, the tray is the anti-clumping step; the bag is only storage. Freeze them firm before they ever touch one another in a container.

A full sheet pan is not necessary. Two or three dinner plates work perfectly well in a small freezer, and once the wontons are solid they take up surprisingly little room. Protect the wrappers from being crushed and use them within about 2–3 months for the best quality.

A week later, those frozen wontons turn the longest part of this recipe into something you have already done.

For same-day prep, folding the wontons a few hours ahead is workable. Keep them covered in a single layer in the refrigerator at 40°F / 4°C or below. For the best wrapper texture, freeze them rather than refrigerating overnight; filling moisture gradually softens the skins.

Using frozen shrimp? Thaw it in the refrigerator and keep it cold while preparing the filling. Freeze assembled wontons promptly when they are not being cooked. Repeated warming, chilling and refreezing is poor for both safety and texture. The FDA seafood-safety guidance covers thawing and handling in more detail.

Leftovers and Reheating

Store the broth and cooked wontons separately.

Cooked wrappers keep taking up liquid after dinner. Left overnight in broth, they can swell, soften too far or start falling apart. Refrigerate drained wontons in one covered container and the broth in another; for the best texture, use the cooked wontons within about 2–3 days.

Bring the broth back to a boil when reheating, lower the heat, then add the cooked wontons only long enough to heat them through to 165°F / 74°C. They need reheating, not another full cooking session.

Give them a little room in the container too. Warm cooked wontons packed tightly together like to stick.

Cooking from frozen? Return to Frozen Wontons · Back to Recipe.

Variations

The filling can move in several directions without changing the basic method. Pork-only wontons benefit from meat with some fat and may take a little extra water or stock. Increasing the shrimp gives you a sweeter, springier center. Ground chicken works too, though lean chicken dries more easily and deserves to be treated as its own filling rather than a perfect one-for-one pork substitute. Ground-chicken wontons should reach 165°F / 74°C in the center.

The bowl itself is easier to improvise. Bok choy, spinach, napa cabbage and mushrooms all make sense; tender greens belong near the end. Chili oil is easiest to add at the table. Noodles change the identity of the dish more substantially: once they become a major part of the bowl, you are moving into wonton noodle soup, and they are best cooked separately so their starch stays out of the clear broth.

Deconstructed wonton soup skips the individual folding and cooks the filling and wrapper separately. It is a shortcut format rather than simply another regional name for the same bowl.

Which Kind of Wonton Soup Is This?

Order wonton soup in Hong Kong or Shanghai, at an Australian-Chinese restaurant or from an American-Chinese takeout shop, and you may get noticeably different bowls. The wrapper can be very thin or deliberately chewy, the filling can shift, and the broth may be spare and clean or much more strongly seasoned.

This recipe uses techniques found across several Chinese wonton traditions without pretending that one version can represent all of them.

Four vertically stacked bowls labeled Lighter Home-Style, Wonton Noodle Soup, Thick-Wrapper Takeout-Style and Wor Wonton Soup, each showing a visibly different serving style.
From lighter home-style bowls to wonton noodle soup and wor wonton soup, these are useful style directions rather than rigid taxonomy: wrapper, noodles, vegetables and broth intensity can vary independently.

Names change with geography too. In Australian-Chinese restaurant terminology, short soup generally means wonton soup, while “long and short” combines wontons with noodles. Wonton noodle soup makes noodles a central part of the bowl and often has its own Cantonese cooking traditions.

Wor wonton soup, sometimes called subgum wonton soup, is usually a more loaded Chinese-American bowl with vegetables and often extra meat or seafood.

A Few Common Questions

Can I use dumpling wrappers instead of wonton wrappers?

Sometimes. Round dumpling wrappers are often thicker, so the finished dumpling will be chewier. Square wonton wrappers are the closer match for the relatively delicate wontons here.

Can I make the broth without chicken stock?

Yes. Building it from water means using chicken powder or bouillon according to the package strength first, then adding the ginger, scallion, soy sauce and white pepper from this recipe and adjusting from there.

Can I make wonton soup gluten-free?

Standard wonton wrappers contain wheat, and ordinary soy sauce may contain wheat as well. You need suitable gluten-free wrappers plus gluten-free versions of the sauces and seasonings. Rice-paper sheets are not a direct substitute for boiled wonton wrappers; they behave very differently in hot water.

Can I cook the wontons directly in the broth?

Yes. It saves a pot and works perfectly well when convenience matters most. The broth will be cloudier and slightly starchier, and the wontons absorb some liquid as they cook. Start with a little extra broth or water when using this method.


The First Wonton Is the Slowest One

A stack of wrappers beside a bowl of raw filling can make dinner look like a bigger job than it is. Then one comes out of the pot, you taste it, and suddenly the rest of the tray makes more sense.

That first tray teaches you things measurements cannot quite capture: how much filling your particular wrappers want, how damp the seam needs to be, and when the cooked skin has gone from merely done to properly tender.

By the last few wontons, your hands have already started making some of those decisions before you consciously think about them. The next time you make wontons, you will probably look at this recipe less.

Finished bowl of wonton soup above a row of handmade raw wontons progressing from a slightly awkward first fold to cleaner, more confident later folds.

After a counter full of wrappers, filling and little bowls of water, the finished soup is almost surprisingly spare: tender wontons, something green, and clear hot broth poured over just before you eat.

Back to Recipe · Back to Top

Posted on Leave a comment

Beef and Broccoli Recipe: Tender Beef, Crisp Broccoli & Chinese-Style Stir-Fry Sauce

Finished beef and broccoli stir-fry with browned beef strips and bright green broccoli coated in glossy brown sauce, served with white rice.

When beef and broccoli is right, the beef bends easily under your fork, the broccoli stays bright with some bite in the stalks, and the brown sauce catches along the edges before slipping into the hot rice underneath.

It can also look perfectly respectable and disappoint at the first bite. Pink beef can be chewy. Wet broccoli can loosen a sauce that seemed fine moments earlier. And a skillet set to “high” can cool so quickly under a pile of cold meat that searing quietly turns into steaming.

Only a few things really need your attention: thin slices across the grain, enough heat under the pan, dry broccoli and sauce that thickens before the final toss. This version of the Chinese-American takeout staple keeps the brown sauce savory rather than sweet, with oyster sauce, soy sauce and Shaoxing wine plus a brief tenderizing marinade for flank steak.

It is built for an ordinary home stove, whether you’re using a wok or a wide skillet. Keeping the pan hot matters more than trying to imitate a restaurant wok. The beef rests while you prepare everything else, so dinner can be on the table in about 30 minutes once the steak is ready to slice.

How to Make Beef and Broccoli Stir Fry

Serves4 with rice
DifficultyEasy, but fast-moving
PrepAbout 20 minutes
CookingAbout 10 minutes
Elapsed timeAbout 30 minutes once the steak is ready to slice
Best pan12-inch (30-cm) heavy skillet or well-heated wok

Beef and Marinade

  • 1 lb (450 g) flank steak
  • 1 tablespoon (15 ml) water
  • 1 teaspoon light or regular soy sauce
  • ¼ teaspoon (about 1 g) baking soda
  • 1 tablespoon (about 8 g) cornstarch
  • 1 teaspoon neutral cooking oil

Using sirloin or flat iron? Both are naturally tender, so you can reduce or omit the baking soda. Firmer cuts need more care; chuck steak can work, while round and stew meat are less forgiving.

Stir-Fry Sauce

  • ½ cup (120 ml) unsalted or low-sodium chicken stock, beef stock or water
  • 2 tablespoons (30 ml) oyster sauce
  • 1 tablespoon (15 ml) light or regular soy sauce
  • 1 tablespoon (15 ml) Shaoxing wine
  • 1 teaspoon dark soy sauce
  • 1½ teaspoons (about 6 g) sugar
  • ½ teaspoon toasted sesame oil
  • ⅛ teaspoon white pepper, or a small pinch

Cornstarch slurry: mix 2 teaspoons (about 6 g) cornstarch with 1 tablespoon (15 ml) cold water.

Broccoli, Aromatics and Oil

  • 1 lb (450 g) broccoli florets, weighed after trimming and cut into fairly even pieces
  • 2–3 tablespoons (30–45 ml) neutral high-heat cooking oil, divided as needed
  • 3 garlic cloves, finely chopped or minced
  • 2 teaspoons finely grated fresh ginger
  • Steamed rice, for serving

Before the pan gets hot: have the beef, broccoli, sauce, slurry, garlic and ginger beside you. Once stir-frying starts, there is very little waiting around.

1. Slice and Marinate the Beef

If the steak is already cold and easy to slice, go straight to the knife. Very soft steak is easier to cut after 15–30 minutes in the freezer, just until it firms up. That optional firming time is extra and is not included in the roughly 30-minute recipe time.

Find the long muscle fibers and cut across them into strips about ⅛–¼ inch (3–6 mm) thick. Keep the slices reasonably even so they cook at about the same rate.

Put the beef in a bowl. Add the water, soy sauce and baking soda and mix until the liquid coats the meat. Mix in the cornstarch, then work in the teaspoon of oil. Leave the beef for about 20 minutes while you prepare the sauce and broccoli.

Two-panel guide showing flank steak sliced perpendicular to its visible grain into thin strips, beside raw beef strips with a light glossy marinade coating in a stainless-steel bowl.
Across the grain shortens the long muscle fibers; after marinating, the strips should still separate easily with only a light sheen.

2. Mix the Sauce

Check your Shaoxing bottle first. Some bottles sold as cooking wine contain added salt; if yours does, use unsalted stock and be cautious with any extra soy later.

Combine the stock, oyster sauce, light soy sauce, Shaoxing wine, dark soy, sugar, sesame oil and white pepper.

Taste only to catch an obviously over-salty combination—the uncooked sauce should taste stronger than the finished dish. Don’t worry about the sharp edge of the Shaoxing; that softens as it cooks.

Give the slurry a quick stir and leave it beside the stove. The cornstarch will settle again before you use it. That’s normal.

3. Give the Broccoli a Head Start

Bring a large saucepan or pot of unsalted water to a strong boil. Add the broccoli and cook for about 30–60 seconds for small-to-medium florets. Larger pieces can need closer to 90 seconds.

Trust the stalk more than the clock. Take the broccoli out when it has turned vivid green and looks almost ready to eat, but the stalks still have some firmness.

Drain thoroughly and let the steam escape. If the florets still look wet, spread them over a clean kitchen towel or paper towels for a minute.

Two-panel comparison showing bright green broccoli just after blanching in a stainless strainer and drained broccoli resting on a rack with dry-looking surfaces.
Pull the broccoli while the stalks still resist slightly, then spread it out so steam and surface moisture can escape.

Water on the broccoli becomes water in the sauce.

4. Sear the Beef

Heat a 12-inch (30-cm) heavy skillet over medium-high to high heat until hot. A carbon-steel wok can go hotter; with nonstick cookware, stay within the manufacturer’s recommended heat range.

Add about 1 tablespoon oil and spread the beef into a mostly single layer. Your first batch will tell you a lot about the pan. If the beef keeps sizzling, carry on. When the sound dies and liquid gathers around the slices, cook less meat at once.

Side-by-side skillets showing crowded beef strips steaming in released liquid and spaced beef strips browning against a drier hot pan.
Use exposed pan as a batch-size check: if the beef would cover almost the whole skillet, split the batch. Open hot metal gives moisture somewhere to escape, helping the beef sear instead of steam.

Give the first side a moment of uninterrupted contact, then toss. Cook until the surfaces are browned and the meat is nearly done, usually about 2 minutes for thin slices.

Transfer the first batch to a plate. Wipe away blackened marinade residue, add fresh oil if the pan looks dry, then cook the remaining beef in another batch if needed.

5. Finish the Sauce

Turn the heat down slightly if the empty pan is fiercely hot. Add a splash of oil when needed, followed by the garlic and ginger. Stir for about 15 seconds. The kitchen should smell of garlic and ginger almost immediately. That’s enough.

Pour in the sauce and bring it to a lively simmer. As it bubbles, the color deepens and the sharp edge of the Shaoxing softens.

Stir the slurry again—cornstarch settles quickly—then pour in about three-quarters while stirring the bubbling sauce. Give it 20–30 seconds before deciding whether it needs the rest.

Glossy brown stir-fry sauce simmering in a black wok while a metal spoon moves through the thickening sauce.
A spoon trail should close again quickly. If the channel stays sharply open behind the spoon, stop adding slurry—the sauce is already heading toward too thick.

The sauce is ready when it leaves a light coating on a spatula and moves easily around the skillet. Don’t chase thickness after that point.

6. Bring Everything Together

Return the broccoli and beef, along with any small amount of juices on the plate, while the sauce is bubbling. If there is an unusually large watery puddle from the beef, leave most of it behind. Toss until the beef has just cooked through and everything is evenly coated, usually 30–60 seconds.

Thin beef strips and bright green broccoli being tossed above a hot wok with glossy brown sauce droplets and visible steam.

The sauce should catch along the edges of the broccoli and beef without burying them. Take the pan off the heat while it is slightly looser than you want on the plate; cornstarch sauces tighten as they cool.

Taste before adding more seasoning. A few drops of soy can fix a sauce that needs salt; a tablespoon of hot water or unsalted stock can loosen one that has become too intense or thick.

Serve Over Hot Rice

Spoon it over hot rice. The best bites have a strip of beef, a floret and enough sauce underneath to soak into the grains.

A spoonful of beef and broccoli held above white rice as glossy brown sauce flows from the spoon into the rice.
The finished sauce should slip between the rice grains rather than sit on top in a sticky mound.

How to Keep the Beef Tender

Velveting helps, but beef that stays chewy even with a pink center usually points to the cut, slicing direction or thickness. A thick strip cut with the grain won’t become tender just because it spent a few fewer seconds in the skillet.

What Is the Best Steak for Beef and Broccoli?

CutWhat to expectHow to use it
Flank steakLean, beefy, clearly grainedThe default here. Slice thinly across the grain and use the light marinade.
SirloinTender and forgivingAn easy substitute; little or no baking soda is needed.
Flat ironVery tenderExcellent for quick cooking; little or no baking soda is needed.
Skirt steakDeep flavor, strong visible grainSlice thinly and clearly across the grain.
Chuck steakBeefy and firmer than flank or sirloinSlice very thinly across the grain. It can work here, but expect a little more chew with this light marinade.
RoundLean and fairly firmSlice very thinly. Flank or sirloin is easier for this quick method.
Pre-cut stir-fry stripsConvenient, variable qualityChoose thin, even strips intended for fast cooking.
Chuck roast or stew beefUsually better suited to slower cookingSkip it for this quick stir-fry.
Beef grain guide showing flank and skirt with strong visible grain, sirloin and flat iron with finer grain, firmer chuck steak and round, and chuck roast or stew beef for slower cooking.
Use the label to identify the cut, then use the visible fibers to decide slicing direction. Grain direction matters more than the steak’s trimmed shape.

What the Beef Marinade Actually Does

This is a light velveting treatment, not an aggressive tenderizing soak. Soy seasons the surface, water gives the beef some moisture to absorb, and the modest amount of baking soda helps flank steak stay tender during fast cooking. Cornstarch forms a thin coating before the oil goes in.

Baking soda tenderizes. Cornstarch coats. That’s the useful distinction.

For flank steak, ¼ teaspoon baking soda for 1 lb (450 g) is deliberately modest. Sirloin or flat iron may not need it. Too much baking soda—or leaving the beef in it much longer than intended—can create an alkaline taste and an unnaturally soft texture.

Beef and Broccoli Sauce: Savory and Not Too Sweet

Oyster sauce does most of the heavy lifting here, giving the brown sauce its depth and body. Soy brings the salt, while the teaspoon of dark soy is mainly there for deeper color. Shaoxing adds its characteristic wine aroma, and the small amount of sugar rounds everything without turning the sauce sweet.

If you want a sweeter, more glaze-like sauce, that’s closer to homemade teriyaki sauce. Here, the sauce stays looser and less sweet so it can coat the beef, broccoli and rice without turning sticky.

How Thick Should the Sauce Be?

Think coating, not pudding. The sauce should cling lightly to the beef and broccoli, then flow back into the pan when you move a spatula through it. If it barely moves, loosen it before the final toss.

Three-panel comparison showing thin brown sauce running quickly from a spoon, correctly thickened sauce lightly coating and flowing, and overly thick sauce clinging in a slow heavy ribbon.
Thin sauce usually needs more simmering before more starch; overly thick sauce needs hot water or unsalted stock. The middle is the stopping point.

Want Extra Sauce for Rice?

Increase the stock to ¾ cup (180 ml) and the oyster sauce to 2½ tablespoons. Keep the light soy, Shaoxing wine, dark soy, sugar, sesame oil and white pepper at their original amounts.

This version is deliberately a little lighter rather than simply scaling every salty ingredient upward. You get more for the rice without making the whole bowl overly salty.

For the larger slurry, mix 1 tablespoon (about 8 g) cornstarch with 2 tablespoons (30 ml) cold water. Add it gradually; you may not need all of it. The consistency should still be glossy and coating, but you’ll have more left in the pan to spoon over the rice.

Fresh or Frozen Broccoli?

Frozen broccoli is useful here too. Skip the blanch. Heat it separately only until thawed and barely hot, then drain and blot away obvious moisture before it meets the sauce.

It won’t have the firmness of fresh broccoli, and that’s fine. The important part is keeping its extra water out of the skillet.

Side-by-side comparison of fresh broccoli after a brief blanch and thawed frozen broccoli with visible released water on a stainless-steel tray.
With frozen broccoli, moisture control matters more than extra cooking: thaw, drain and blot before the florets meet the sauce.

Wok or Skillet?

A carbon-steel wok shines over a strong gas flame. On many electric and induction stoves, a broad 12-inch (30-cm) skillet gives the beef a larger hot surface underneath it. If your burner is weaker, smaller batches matter more than pan shape.

Doubling the recipe means doubling the batches too. The skillet doesn’t get larger because the ingredient list did.

Side-by-side comparison of beef and broccoli cooking in a carbon-steel wok over a strong blue gas flame and in a broad skillet on a flat electric or induction cooktop.
Strong gas suits a wok; flat electric or induction heat often gives a broad skillet the more useful contact area.

Ingredient Substitutions

Some swaps barely change the dish; others can throw off the beef texture or the balance of the sauce.

Instead of…Try…What changes
Flank steakSirloin or flat ironUsually needs little or no baking soda.
Oyster sauceMushroom-style vegetarian oyster sauceThe closest easy substitute; use it in roughly the same way. Check labels if allergies matter.
Oyster sauceHoisinNot a direct substitute. If it is all you have, expect a sweeter, different sauce and reduce or omit the added sugar.
Soy sauceCoconut aminosSweeter and usually less salty. Reduce the sugar. Check the other condiments too if the entire dish needs to be soy-free.
Shaoxing wineDry sherryThe easiest close substitute.
Shaoxing wineMirinSweeter and less savory. Start with slightly less than the Shaoxing amount and omit the recipe sugar; adjust after tasting.
No cooking wine availableUnsalted stockThe sauce will be simpler and less aromatic.
Dark soyOmit itThe sauce will be lighter. Don’t replace it measure-for-measure with regular soy.

Don’t confuse rice wine with rice vinegar. Rice vinegar is much more acidic and is not a substitute for Shaoxing wine here.

For a gluten-free version: use gluten-free tamari, a gluten-free oyster-style sauce and gluten-free stock. Shaoxing wine is traditionally made with a wheat-based starter, so dry sherry is the simpler choice unless you know your bottle is gluten-free. Check the other packaged sauces too, since brands vary.

Variations

Mushrooms. After the beef comes out of the pan, brown sliced mushrooms until their released water has cooked away. Then continue with the garlic, ginger and sauce.

Carrots. Slice them thin and add them to the blanching water shortly before the broccoli so they get extra time to soften.

Bell peppers. After the beef comes out, stir-fry thinly sliced bell pepper briefly, then continue with the garlic and ginger; leave the pepper slightly crisp.

Spicy. Add crushed red pepper with the garlic and ginger, or finish individual bowls with chili oil or chili crisp.

What to Serve With Beef and Broccoli

Steamed jasmine rice or long-grain white rice is the easiest pairing. Brown rice works too. If you’d rather not guess at the rice, the guide to cooking rice has ratios and timings for the common varieties.

A cold cucumber salad gives the meal something completely different: crisp, cool and acidic against the warm brown sauce.

Complete beef and broccoli dinner with glossy beef strips and green broccoli on a dark serving plate, with white rice and a separate cucumber salad.

Storage, Reheating and Prep Ahead

This stir-fry is best straight from the pan. The next day it can taste very good, but the broccoli softens and the sauce loses some of its freshly cooked texture.

Refrigerate leftovers within 2 hours of cooking, or within 1 hour when the surrounding temperature is above 90°F / 32°C. Use refrigerated leftovers within 3–4 days.

The USDA leftovers guidance recommends reheating leftovers to 165°F / 74°C.

Warm only what you plan to eat. A skillet over moderate heat gives you good control, and a spoonful of water or unsalted stock can loosen sauce that tightened in the refrigerator.

You can cut the broccoli, slice the steak and mix the sauce earlier in the day and refrigerate them separately. Add the baking soda and the rest of the short beef marinade closer to cooking.

Freezing works, but it isn’t the best storage choice for this dish. The broccoli softens noticeably after thawing, which takes away much of the texture that makes the stir-fry good.

Troubleshooting Beef and Broccoli

Start with what changed. Did the sauce thin only after the broccoli went in? Did the beef turn gray as soon as it hit the pan? Is it chewy even though the center isn’t overcooked? Those clues tell you more than simply adding heat, starch or cooking time.

Beef Problems

What happenedWhat to do
The beef is chewy, even though it may still be pink inside.
A firmer cut, slices running with the grain or pieces that are too thick can all stay chewy before the beef looks obviously overcooked. Dry, gray beef may simply have cooked too long.
Now: If the beef is still underdone, finish cooking it only as much as needed; extra cooking won’t fix chewiness caused by the cut, grain or thickness. Keep it well coated with sauce and cut unusually large strips smaller before serving.
Next time: Choose a suitable cut, slice about 3–6 mm across the grain and remove the beef while it is still just shy of done.
Some pieces are tender and others are tough.
Uneven slicing is the usual reason.
This can’t really be evened out after cooking. Next time, keep the slices as consistent in thickness as practical.
The beef tastes alkaline or feels strangely soft.
Too much baking soda was used, or the beef sat in it for too long.
The texture can’t really be reversed. Extra unsalted sauce, vegetables and rice may soften an alkaline taste. Next time, measure the baking soda carefully and keep to the short marinade rest.
The beef is gray and sitting in liquid.
The pan lost too much heat.
Now: Stop adding beef, let the moisture cook away and finish the remaining meat separately.
Next time: Use smaller batches and let the pan recover between them.

Sauce Problems

Thickness and Texture Problems

What happenedWhat to do
The sauce won’t thicken.
The slurry may have settled, the sauce may not be simmering, or there may be too little starch for the liquid in the pan.
Now: Remove already-cooked beef and broccoli if necessary. Mix 1 teaspoon cornstarch with 2 teaspoons cold water and add it gradually to the bubbling sauce.
Next time: Re-stir the slurry immediately before pouring and give it a moment to cook.
The sauce was thick until the broccoli went in.
The vegetables probably carried water into the skillet.
Now: Remove finished beef and broccoli and reduce the sauce briefly before reaching for more starch.
Next time: Drain and dry the broccoli thoroughly.
The sauce is gummy.
Too much starch went in, or the sauce reduced too far.
Now: Add unsalted stock or water 1 tablespoon (15 ml) at a time until it flows again.
Next time: Add the slurry gradually.

Flavor Problems

What happenedWhat to do
The sauce is too salty.
Soy, oyster sauce, stock and sometimes salted Shaoxing cooking wine can add up.
Now: Slightly salty? Loosen it with unsalted stock or water. Badly oversalted? Spoon out some sauce first, then replace that volume with unsalted liquid. Plain rice or extra unseasoned broccoli can soften the overall saltiness.
Next time: Check condiment labels and taste the uncooked sauce only for an obviously over-salty combination.
The sauce is too sweet.
Too much sugar went in, or a sweeter substitute such as hoisin or mirin wasn’t accounted for.
Now: Add a splash of unsalted stock or water first. If the sauce then tastes flat, add oyster sauce or soy a few drops at a time.
Next time: Reduce the added sugar when using sweeter substitutes.
The sauce tastes bitter.
The garlic, ginger or dark residue in the pan probably scorched.
Now: Remove the burned pieces and taste. A few scorched flecks may not ruin the sauce. If the bitterness has spread through it, wipe the pan clean and remake the sauce mixture.
Next time: Lower the heat before adding the aromatics and move on as soon as they smell fragrant.

Broccoli and Pan Problems

What happenedWhat to do
The broccoli is hard.
The florets were large or needed more of a head start.
Now: Take the beef out, add a splash of water, cover the pan briefly and let the broccoli steam until the stalks begin to yield. Uncover, let excess water cook away, then return the beef.
Next time: Cut the florets more evenly and use stalk tenderness as the cue, not only the clock.
The broccoli is mushy.
It cooked too far before or during the final toss.
The texture can’t be restored once it becomes soft. Next time, take it out of the blanching water earlier and remember that it cooks again during the final toss.
The second beef batch tastes burned.
Marinade residue from the first batch scorched in the pan.
Now: Remove burned solids before continuing.
Next time: Wipe away blackened residue between batches and add fresh oil when needed.
A doubled recipe turns watery.
Twice the cold food went into the same-size skillet.
Now: Remove some of the food and finish it in batches.
Next time: Double the ingredients, not the amount your pan is expected to sear at once.

Once it looks right, stop fussing with it. Spoon everything over hot rice and eat it while the pan is still steaming.

Posted on Leave a comment

Dan Dan Noodles Recipe: Spicy Sichuan Noodles With Pork & Chili Oil

Bowl of Dan Dan noodles with thin sauce-coated wheat noodles, browned ground pork, ya cai, scallions and greens, with a small bundle lifted by chopsticks.

Good Dan Dan noodles should make you want the next bite before the first one has quite finished: springy wheat noodles slicked with a rusty-red sesame-chili sauce, crisp pieces of pork, salty-fermented mustard greens, scallions, and enough Sichuan pepper to leave a citrusy tingle on your lips.

Dan Dan noodles—dàndàn miàn (担担面)—are rooted in Sichuan street food: wheat noodles, chili oil, Sichuan pepper, preserved vegetables, and usually a modest savory pork topping, all packed into an intensely flavored serving.

A good bite changes as you eat it. Chili and dark vinegar arrive first; pork and ya cai bring the deep savory middle; roasted sesame softens the sharper edges; then Sichuan pepper leaves that unmistakable buzz behind after you’ve swallowed.

The ingredient list may contain a few unfamiliar jars, but once they’re in the pantry, this becomes a 30–35 minute dinner. This version keeps the bowl concentrated and sauce-clinging, uses prepared chili oil to keep the work manageable, and uses just enough sesame paste to round the sauce without hiding the black vinegar, ya cai, chili, or Sichuan pepper.

Coat the noodles, don’t drown them. The measurements get you close; the final toss tells you when to stop.

Bowl of Dan Dan noodles with thin sauce-coated wheat noodles, browned ground pork, ya cai, scallions and greens, with a small bundle lifted by chopsticks.
Before serving, give the bowl one last deep toss. Dan Dan noodles eat better when pork and ya cai are threaded through the strands instead of sitting as a decorative cap.

Quick Answer: How to Make Dan Dan Noodles

For 4 bowls in about 30–35 minutes, brown 225 g / 8 oz ground pork until its released moisture disappears and the crumbles begin frying. Season with Shaoxing wine, a little soy sauce, and 25–30 g / about 1 oz sui mi ya cai while you whisk the sesame-chili sauce.

Cook 500 g / about 18 oz fresh Chinese wheat noodles or 300–325 g / about 10½–11½ oz dried noodles until springy. Put sauce into four bowls, start each with 1 tbsp / 15 ml hot noodle water, add the noodles, and toss. Add more water only a teaspoon at a time if needed, then finish with pork, greens, scallions, chili oil, and Sichuan pepper.

Timeline for 30–35 minute Dan Dan noodles showing water heating and peppercorn toasting, pork cooking, sauce mixing, noodles and greens, tossing and serving.
Use the water-heating window instead of waiting on it: toast the Sichuan pepper, brown the pork and mix the sauce before the noodles ever need your full attention.

Dan Dan Noodles Recipe

Spicy Sichuan wheat noodles with tangy sesame-chili sauce, browned pork, preserved mustard greens, and heat you can adjust at the table.

There are really only three main jobs here: brown the pork, mix the sauce, and cook the noodles.

Prep15 minutes
Cook15–20 minutes
Total30–35 minutes
Serves4

Serving note: With several other dishes on the table, this batch can make about 6 smaller portions. For six bowls, start with about 2 tsp / 10 ml noodle water per bowl, then adjust only as needed.

Heat: moderate as a starting point, with extra chili oil and Sichuan pepper available for individual bowls.

Equipment

  • Large pot for the noodles
  • 12-inch / 30 cm skillet or wok
  • Medium mixing bowl
  • Four serving bowls
  • Strainer, spider, or tongs
  • Mortar and pestle or spice grinder

Ingredients

Noodles & Finishing

  • 500 g / about 18 oz fresh thin-to-medium Chinese wheat noodles, preferably alkaline if available
    OR 300–325 g / about 10½–11½ oz dried Chinese wheat noodles
  • 150 g / about 5 oz baby bok choy, choy sum, or another tender Asian green, optional
  • 2 scallions, thinly sliced
  • 2 tbsp roasted peanuts, roughly chopped, optional
  • Extra chili oil, for serving
  • Extra freshly ground Sichuan pepper, for serving
  • 1 cup / 240 ml hot noodle water, reserved before draining; you probably won’t use all of it

Pork & Ya Cai

  • 225 g / 8 oz ground pork
  • 1 tsp neutral oil, only if the pork is particularly lean or the pan needs it
  • 1 tbsp / 15 ml Shaoxing wine — Shaoxing cooking wine is fine; dry sherry also works
  • 1 tsp / 5 ml Chinese light soy sauce
  • 25–30 g / about 1 oz sui mi ya cai (Sichuan preserved mustard greens), finely chopped
  • 1 tsp finely grated fresh ginger, optional but recommended

Dan Dan Sauce

  • 2 tbsp / about 32 g Chinese sesame paste, stirred smooth before measuring
  • 3 tbsp / 45 ml Chinese light soy sauce
  • 2 tbsp / 30 ml Chinkiang black vinegar
  • 3 tbsp / 45 ml Chinese chili oil, stirred before measuring, plus more to taste
  • 1½ tsp sugar
  • 2 garlic cloves, finely grated or minced
  • 1½ tsp whole Sichuan peppercorns

Before you cook, check three things.

  • Ya cai: pleasantly salty is fine; aggressively salty needs a brief rinse and a very good squeeze.
  • Chili oil: one jar may be mostly aromatic while another is genuinely fierce.
  • Sesame paste: stir the separated oil completely back into the paste before measuring.

There’s usually no need to salt the noodle water. The soy sauce, preserved vegetables, and many bottles of Shaoxing cooking wine already bring plenty of seasoning.

Instructions

Prep the Pepper and Brown the Pork

Sichuan pepper guide showing red aromatic husks to keep, hard black seeds and woody stems to remove, followed by husks gently toasting in a skillet.
If the citrus aroma becomes vivid before the peppercorns look dramatically darker, trust your nose. Sichuan pepper can cross from fragrant to scorched faster than its color suggests.
  1. Start the noodle water and toast the Sichuan peppercorns. Fill the noodle pot and set it over high heat. While the water comes toward a boil, pick out any obvious hard black seeds or woody stems from the peppercorns, then put the aromatic husks in the dry skillet you’ll later use for the pork. Toast over medium-low to medium heat for about 1–2 minutes, shaking frequently, until intensely citrusy and lightly blistered. Tip them out before they darken, grind reasonably fine, and reserve about half for the table.
  2. Brown and season the pork. Return the skillet to medium-high heat. Add oil only if needed, then spread in the pork and break it into small irregular crumbles. At first you’ll hear a wet hiss. Keep cooking until the visible moisture disappears and the sound changes to a sharper fry. Continue until you see dark browned spots and crisp edges, usually 6–8 minutes total. Add the ginger for about 20 seconds, pour the Shaoxing wine around the hot edge of the pan, and add the teaspoon of soy sauce. Once that liquid has nearly disappeared, stir in the ya cai and fry for another 1–2 minutes. Ground pork should reach at least 160°F / 71°C; the finished topping should also look browned and relatively dry.
Three stages of ground pork cooking: pale and wet with steam, drier after moisture evaporates, then browned with crisp edges.
Pour in the Shaoxing wine only after the pan sounds like frying rather than steaming. That timing helps preserve the crisp browned pork edges you just worked to create.

Mix the Sauce and Cook the Noodles

Three Dan Dan sauce stages showing a thick tightened sesame mixture, a smoother blended sauce and a final glossy reddish-brown satiny sauce.
Let the concentrated Dan Dan sauce finish coming together before you loosen it. Noodle water is a final-fit adjustment, not a remedy for sesame paste tightening temporarily.
  1. Mix and taste the sauce. Put the sesame paste in a medium bowl and gradually whisk in the 3 tablespoons soy sauce. The paste may tighten briefly; keep whisking until it becomes smooth. Add the Chinkiang vinegar, sugar, garlic, and about half of the ground Sichuan pepper, then whisk in the chili oil until the sauce looks satiny and even. Taste a tiny dab. It should seem deliberately intense but balanced because the plain noodles will soften every flavor.
  2. Cook the greens and noodles. Blanch tender leafy greens for about 30–45 seconds; halved baby bok choy may need closer to 60–90 seconds. Lift them out when the leaves are bright and the stems crisp-tender. Add the noodles and begin checking 30–60 seconds before the package time ends. Bite one: it should be cooked through but still push back slightly between your teeth. Reserve 1 cup / 240 ml noodle water before draining.
Chinese wheat noodles lifted from boiling water for a doneness check, with cooked samples showing the springy texture to look for.
Pull one noodle early and bite it. Residual heat plus tossing will finish the job, while softness gained from overcooking in the pot cannot really be taken back.

Assemble and Finish

Four-step Dan Dan noodle assembly showing concentrated sauce, a small amount of hot noodle water, drained noodles added and noodles tossed until coated.
Different noodles absorb sauce differently. Starting small with hot noodle water lets each bowl find its own ideal consistency instead of forcing every batch to the same hydration.
  1. Sauce the noodles bowl by bowl. Divide the concentrated sauce among four bowls and whisk about 1 tbsp / 15 ml hot noodle water into each. Drain the noodles well, divide them among the bowls, and toss thoroughly from the bottom. If the strands remain heavy or clumped, add more hot water only 1 tsp / 5 ml at a time. They’re ready when the noodles lift cleanly and the sauce comes with them.
  2. Top, toss, and adjust. Add the pork and ya cai, greens, scallions, and peanuts if using. Toss enough topping through the noodles that pork and preserved greens show up throughout the serving. Taste. More chili oil increases the burn; freshly ground Sichuan pepper increases the citrusy buzz; a few drops of Chinkiang vinegar can wake up a bowl that feels heavy. Eat while the noodles are hot and lively.

Recipe Notes

  • Use the listed fresh or dried noodle weight. Fresh noodles carry substantially more water, so equal package weights produce different amounts of noodle.
  • For this hot version, drain and sauce the noodles immediately. An unusually starchy fresh noodle that begins sticking can have a very quick rinse; shake it extremely dry and move straight to the sauce.
  • Prepared chili oil keeps this weeknight-friendly. Homemade oil is excellent when you already have it.
  • Start modestly with Sichuan pepper. Anyone who wants a stronger buzz can add more to their own serving.

The Finished Noodles: What You’re Looking For

  • Noodles: springy and easy to lift in separate strands.
  • Sauce: clinging to the strands with no thin pool underneath.
  • Pork: dark in spots, relatively dry, and crisp around some of the smaller edges.
  • Flavor: layered and lively, without one ingredient flattening everything else.
Close-up of thin Dan Dan noodles lifted with chopsticks, showing separated strands evenly coated with sauce and small pieces of browned pork and ya cai.
Use the lift as a distribution test: if sauce, little pork crumbles and ya cai rise with the noodles, the savory topping has made its way through the bowl.

Now take a bite. The noodles should be hot and slippery, black vinegar should give the first mouthful a quick acidic snap, browned pork and ya cai should keep appearing between strands, and the peppercorn tingle should build gradually, leaving the vinegar, pork, sesame, and preserved mustard easy to notice.

Something cold and crisp is especially good beside all that richness. A simple cucumber salad gives the meal an easy vinegary counterpoint.

Cooking right now? You can stop here. Everything below is for choosing ingredients, understanding why versions differ, or fixing something that didn’t behave as expected.

Explore the Dan Dan Noodles Guide

What Are Dan Dan Noodles? Name, Street-Food Roots & Variations

Dan Dan noodles are a Sichuan wheat-noodle dish traditionally associated with street vendors and a concentrated mix of chili, Sichuan pepper, preserved vegetables, and savory toppings. The name dàndàn miàn comes from the dàn, or carrying pole, associated with vendors who sold the noodles.

You may also see Szechuan Dan Dan noodles. Szechuan is an older English romanization that remains common on menus and in recipe searches.

How Traditional Is This Version?

Dan Dan noodles vary considerably from cook to cook and shop to shop, so there isn’t one modern formula that defines every Sichuan bowl. Some servings are drier, others carry more seasoned liquid; sesame paste appears in some versions and not others, and pork quantities range from a light topping to much more substantial portions.

This version keeps wheat noodles, chili oil, Sichuan pepper, preserved mustard greens, Chinkiang vinegar, and dry-fried pork at the center while making the portions substantial enough for a main meal.

Two servings of Dan Dan noodles side by side, comparing a smaller bowl for a shared meal with a more substantial main-meal portion.
Portion size changes the role of the noodles more than the identity of the dish: a smaller bowl joins a larger spread, while this recipe turns the same concentrated flavors into dinner.

For broader context on Sichuan cooking and the many forms dishes like Dan Dan noodles can take, Fuchsia Dunlop’s The Food of Sichuan is an excellent English-language reference.

Why Good Dan Dan Recipes Look So Different

Compare a few good recipes and you’ll quickly run into doubanjiang, fermented black beans, sweet bean sauce or hoisin, dark soy, five-spice, sesame paste, peanuts, stock—or none of the above.

The variations are not random. Different cooks build fermented depth, sweetness, savoriness, heat, and richness in different ways.

Here, the pork stays fairly simple so chili oil, Sichuan pepper, ya cai, black vinegar, and roasted sesame remain easy to pick out. Doubanjiang adds another powerful fermented-bean note and more salt. It belongs comfortably in other versions; this one gets its fermented depth elsewhere.

Are Dan Dan Noodles Dry or Soupy?

Dan Dan noodles range from quite dry to noticeably more saucy. Many Sichuan and Chengdu-style bowls use only a modest amount of intensely seasoned liquid, while other traditional versions are looser.

Four bowls showing Dan Dan noodles progressing from dry-ish to coated, saucier and brothy, with this recipe marked near the coated end.
The useful distinction is coating versus broth. A Dan Dan bowl can look glossy and still be fairly dry when the seasoned liquid stays on the noodles instead of surrounding them.

Even a dry-ish bowl still carries plenty of chili oil and concentrated seasoning. Japanese tantanmen and Dan Dan-inspired noodle soups take this flavor family much farther toward a full broth, which produces a distinctly different eating experience.

What Noodles Are Best for Dan Dan Noodles?

Thin-to-medium Chinese wheat noodles are the best fit. Fresh alkaline noodles are especially springy, while dried Chinese wheat noodles make an excellent pantry option.

In a Chinese or well-stocked Asian grocery, look for fresh noodles in the refrigerated case. The strands should be thin enough to tangle easily around chopsticks, with much less heft than udon.

Comparison of fresh alkaline wheat noodles, fresh plain Chinese wheat noodles, dried Chinese wheat noodles, ramen-style noodles, spaghetti and thick udon.
When package names are vague, compare the strands themselves. Thin-to-medium wheat noodles with some resilience are a better shopping clue than chasing one supposedly perfect label.
Noodle How it behaves Verdict
Fresh alkaline wheat noodles Springy, slippery, resilient Excellent when available
Fresh plain Chinese wheat noodles Slightly softer chew Excellent
Dried Chinese wheat noodles Reliable and easy to keep in the pantry Excellent everyday option
Plain ramen-style noodles Good chew and enough structure for the sauce Good substitute
Spaghetti Less springy, but carries the sauce surprisingly well Use it if that’s what you have
Rice noodles Different absorption and texture A bigger departure
Udon Much thicker and asks for a different sauce balance Better saved for another version

If all you can find is spaghetti, make dinner. The noodles didn’t come from the Chinese aisle, but the sauce still has plenty to hold onto.

Why Fresh and Dried Noodles Need Different Weights

About 500 g / 18 oz fresh or 300–325 g / 10½–11½ oz dried gives you the intended four-bowl batch. Fresh noodles already carry substantial water weight, so equal package weights produce very different amounts of actual noodle.

Fresh Chinese wheat noodles measured at 500 grams beside about 300–325 grams of dried wheat noodles, both intended to make four servings.
Fresh and dried Chinese wheat noodles are not interchangeable package weights. Keep the recipe’s separate gram amounts, then let texture—not the number on the bag—decide when cooking is finished.

Whatever you buy, begin checking before the printed cooking time ends. Let the clock tell you when to check; let the noodle decide when it’s done.

Get the Dan Dan Sauce Right

Dan Dan sauce is built from chili oil, soy sauce, Sichuan pepper, black vinegar and, in this version, Chinese sesame paste, garlic, and a little sugar.

It starts concentrated because the noodles soften both flavor and texture. Sesame paste also varies considerably from jar to jar, which makes noodle water more useful as a final adjustment than as a fixed quantity.

Start each serving with about a tablespoon of hot noodle water. Toss completely, then add another teaspoon only when the strands still feel heavy.

What you see What’s happening What to do
Strands stick in a heavy clump and sauce sits in thick patches Too thick Add hot noodle water a teaspoon at a time
The sauce coats the strands and lifts cleanly with them Right Put the measuring spoon down
Thin liquid slips off the strands and gathers underneath Too loose Add no more water; toss thoroughly
An oil slick surrounds noodles that still seem poorly coated Poorly integrated Toss vigorously and let the sauce come together
Four sauce states on noodles: too thick and clumped, correctly glossy and separated, too loose with liquid pooling below, and poorly integrated with uneven oil.
Dan Dan sauce consistency belongs to the toss. A sauce that seems thick by itself may become exactly right once hot noodles and a little noodle water enter the equation.

What the Concentrated Sauce Should Taste Like

Before the noodles go in, the sauce should taste deliberately bold: roasted sesame underneath, clear black-vinegar acidity, aromatic chili warmth, assertive saltiness, and a noticeable Sichuan-pepper hum. None of those flavors should erase the others.

An obvious imbalance is easiest to correct now. A heavy sauce often needs brightness; a nearly heatless one may simply be meeting a mild chili oil. Sesame should round the sharper flavors, not become the whole story.

That roasted richness comes from a deliberately modest amount of Chinese sesame paste.

Chinese Sesame Paste vs Tahini vs Peanut Butter

Sesame paste is common in many Dan Dan noodle versions, but it isn’t universal across Sichuan. This recipe uses enough to add roasted depth while leaving room for chili, black vinegar, ya cai, and Sichuan pepper.

Chinese sesame paste has a darker, toastier character than most tahini because its sesame seeds are roasted more deeply. A substitute still makes excellent noodles without requiring a large dose of extra sesame oil.

Chinese sesame paste, tahini and natural peanut butter compared side by side, showing different colors, textures and starting amounts.
A substitution changes the personality of the bowl: tahini keeps the flavor sesame-led, while peanut butter makes the peanut note more obvious. Neither needs to be disguised.
What you have Starting point Expect
Chinese sesame paste 2 tbsp / about 32 g Deep roasted sesame flavor
Tahini 2 tbsp tahini; optionally add about ½–1 tsp toasted sesame oil A lighter sesame flavor
Natural unsweetened peanut butter 2 tbsp A clearer peanut note; extra sesame oil isn’t required
Sweetened peanut butter Start with no added sugar; add some only after tasting the finished sauce Sweeter, more peanut-forward noodles

No Chinese sesame paste today? Dinner is still very much on. These are starting points, and the finished sauce gets the final say.

Make Sure the Jar Is Actually Sesame Paste

Imported labels can be confusing. A jar translated as “sesame sauce” may contain plain sesame paste, or it may already include soy, sugar, vinegar, and other seasonings.

Check the ingredient list. A pre-seasoned sesame sauce changes the salt, sweetness, and acidity of the recipe before you add anything else.

Prefer a creamier noodle where peanut butter is meant to lead? Our peanut noodles recipe starts from that balance.

Pork & Ya Cai: Get the Topping Right

How to Get Crisp Pork Instead of Gray Pork

If the pork still sounds wet, it isn’t really browning yet.

Ground pork normally goes through a steamy stage first. Then the visible moisture disappears, the sound becomes sharper, and the crumbles begin frying in their own rendered fat. That’s when the color deepens and crisp edges start to appear.

Add Shaoxing wine and soy after browning begins. The hot pan reduces them quickly around the meat and preserves those fried edges.

For food safety, ground pork should reach at least 160°F / 71°C. The temperature tells you the meat is safe; the browned dry edges tell you it has reached the texture worth putting on the noodles.

Once those crumbles are browned and dry around the edges, ya cai gives them the salty-fermented bite that makes the topping much more than plain ground pork.

What Is Sui Mi Ya Cai?

Sui mi ya cai is a Sichuan preserved mustard vegetable with salty, fermented, slightly sweet depth. Its chewy-crisp pieces are especially good tucked among the browned pork.

Sui mi ya cai shown in a generic packet, a small dish and close-up, revealing its finely chopped dark brown preserved mustard-vegetable texture.
Shopping shortcut: sui mi ya cai should already look finely chopped and preserved. Long stems or large leafy pickles usually mean you’ve found a different mustard vegetable.

At a Chinese grocery, look for Sui Mi Ya Cai, Yibin preserved vegetable, or 碎米芽菜, often in small vacuum-sealed packets. No Chinese grocery nearby? Search those exact names online; generic “pickled mustard greens” can lead to several different preserved vegetables.

Should You Rinse Ya Cai?

Do not make rinsing automatic. Make tasting automatic. Packets differ in saltiness and seasoning. Use pleasantly salty ya cai as it is. Aggressively salty ya cai gets a brief rinse and a thorough squeeze before chopping.

Best Substitutes for Sui Mi Ya Cai

Four preserved vegetables compared: finely chopped ya cai, firmer zha cai, Tianjin preserved vegetable and wetter red kimchi as increasingly different substitutes.
Choose the substitute by moisture as well as flavor. Zha cai mainly needs fine chopping; kimchi, however, benefits from draining and extra pan time before it joins the pork.
  • Zha cai: the closest practical substitute here. Chop it finely and account for its saltiness.
  • Tianjin preserved vegetable or another Chinese preserved mustard: different in character, but still useful for salty fermented depth.
  • Kimchi: changes the flavor noticeably but works in an emergency. Drain or squeeze it very well, chop finely, and cook off the remaining moisture after adding it to the pork.
  • Nothing: the noodles still work, but you’ll lose one of the salty-fermented notes that makes Dan Dan noodles immediately recognizable.

How Spicy Are Dan Dan Noodles? Má vs Là

Dan Dan noodles range from moderately spicy to fiercely hot depending on the chili oil and Sichuan pepper. More importantly, they contain two distinct sensations: is chili heat, while is the citrusy, lightly numbing effect of Sichuan peppercorns.

Má and là flavor map showing chili heat increasing horizontally and Sichuan pepper tingle vertically, with gentle, chili-led, pepper-led and full málà zones.
Change one dial at a time. More chili oil answers “not hot enough”; more Sichuan pepper answers “not tingly enough.” That makes málà much easier to control.
  • Less heat overall: reduce both chili oil and Sichuan pepper.
  • More burn with roughly the same tingle: add chili oil.
  • More citrusy tingle with roughly the same chili heat: add freshly ground Sichuan pepper at the table.
  • Full-on málà: increase both gradually.

The first proper hit of Sichuan pepper can be surprising. That electric, citrusy sensation is part of the pleasure. A dull, woody pepper may simply be stale; harsh bitterness more often points to scorching, an excessive amount, or too much hard dark seed material in the grind.

Sichuan peppercorns compared as fresh reddish husks, duller stale pepper and dark scorched pepper, with aroma and flavor cues for each condition.
Crush a Sichuan pepper husk between your fingers before cooking. A vivid citrus aroma is a stronger freshness clue than color alone.

Part of what makes the bowl so satisfying is the contrast: slippery noodles, dry-crisp pork, chewy preserved mustard, and a red chili-oil sheen carrying all that heat and aroma through the strands.

Shaoxing Wine, Vinegar, Soy Sauce & Chili Oil

These aren’t one-recipe purchases. Chinkiang vinegar, Shaoxing wine, chili oil, and Sichuan pepper all earn their place quickly if Chinese food appears regularly in your kitchen.

Seven specialty ingredients for Dan Dan noodles: Chinese sesame paste, chili oil, Chinkiang vinegar, light soy, Shaoxing wine, sui mi ya cai and Sichuan peppercorns.
Once these seven Sichuan pantry ingredients are stocked, most future Dan Dan noodle nights begin with measuring rather than shopping. The unfamiliar part gets familiar surprisingly quickly.

Shaoxing Cooking Wine

A bottle labeled “Shaoxing cooking wine” is completely normal. Many inexpensive cooking versions contain added salt, which is one reason this recipe doesn’t automatically add salt to the pork or noodle water.

No Shaoxing wine? Use dry sherry in the same 1 tbsp / 15 ml amount.

Chinkiang Black Vinegar

Use another dark Chinese rice vinegar in the same starting amount. Chinkiang has a particularly deep, malty character, so the flavor will change slightly, but the sauce will still have the acidity it needs.

Light Soy vs Dark Soy

Chinese light soy sauce is ideal. Start with the same quantity of ordinary all-purpose soy sauce when that’s what you have, keeping in mind that some bottles are noticeably saltier than others.

Light soy sauce and dark soy sauce compared in matching dishes, showing translucent reddish-brown light soy beside much darker, more opaque dark soy.
If Chinese light soy is unavailable, ordinary all-purpose soy is usually a closer direction than dark soy. Because brands vary in saltiness, taste before making any further correction.

Dark soy is much deeper in color and normally used more sparingly. It changes both the appearance and balance of the sauce, so use light or all-purpose soy here when possible.

Choosing the Chili Oil

Look for a fragrant Chinese or Sichuan-style red chili oil with visible chili sediment. Stir the jar before measuring so some of those aromatic solids reach the sauce too.

Chinese Sichuan chili oil with mostly red oil and chili sediment beside a solids-heavy jar of chili crisp, showing why they are not automatic substitutes.
Use the spoon test, not just the jar: mostly red oil with some sediment suits this Dan Dan sauce well; a spoon packed with crunchy solids behaves more like chili crisp.

Heat varies enormously by brand. Three tablespoons of one can be pleasantly warm; three tablespoons of another can be an entirely different evening.

Homemade Sichuan chili oil is another option. The Sichuan chili oil section in our pepper sauce guide gives you the from-scratch route when you want it.

Chili crisp needs a more conservative starting amount. Its garlic, sweetness, salt, oil-to-solids ratio, and heat vary too much between brands for a dependable spoon-for-spoon swap. Add some, toss the noodles, then decide whether the bowl wants more.

Dan Dan Noodles Troubleshooting

Already tossed everything together and something tastes wrong? Don’t start throwing ingredients at it. Find the problem first. Most of these are fixable.

Flavor Problems

Problem Save it now Next time
Too salty Add unseasoned noodles or greens; a little hot water can soften the intensity Check the ya cai, soy sauce, and cooking wine before adding extra salt
Too sour Add more noodles or a little sesame component; use a tiny pinch of sugar only if needed Use slightly less vinegar if your bottle is particularly sharp
Too sweet Add a little vinegar and chili oil Reduce the sugar, especially with sweetened peanut butter
Too spicy Add noodles, greens, and a little sesame component Use less of a particularly hot chili oil in the base
Too numbing, bitter, or medicinal Dilute with more noodles or sauce without extra Sichuan pepper Use less pepper and toast gently; avoid scorching it
Too sesame- or peanut-heavy Add noodles, vinegar, and chili to restore balance Measure the paste instead of using a heaped spoonful
Flat or bland Don’t assume it needs more soy; use the diagnostic below Build the bowl from fresh peppercorns, flavorful chili oil, and properly seasoned pork

Texture Problems

Three controlled noodle lifts comparing sticky clumped noodles, springy separated noodles as the target and limp swollen noodles that are overcooked.
Sticky can still be rescued; mushy cannot. If the noodles retain structure, loosen and toss them. If the strands have collapsed, serve promptly and adjust the cooking time next round.
Problem Save it now Next time
Sticky noodles Loosen gently and toss immediately; add only as much water as necessary Start checking the noodles earlier and sauce them promptly
Mushy noodles Serve immediately; the texture cannot really be reversed Pull them 30–60 seconds earlier
Gray, soft pork Keep frying until released moisture disappears and browning develops Use a wider hot pan and add liquid seasonings later

Before You Reach for More Soy Sauce

A bowl can taste flat without needing more salt. A few drops of Chinkiang vinegar may supply the missing brightness. Fresh Sichuan pepper brings back the citrusy buzz; chili oil restores warmth; tossing the pork and ya cai properly through the noodles can bring the savory pieces into every bite.

Dan Dan noodle bowl surrounded by Chinkiang vinegar, chili oil, Sichuan pepper and pork with ya cai, each labeled for the flavor dimension it adds.
Name the missing sensation before adding anything: brightness, warmth, citrusy tingle or savory depth. That one-word diagnosis is more useful than automatically reaching for more soy sauce.

Make Ahead, Store & Reheat

Planning to cook right now instead? Jump back to the recipe card; the storage section is here when you want the make-ahead route.

For fast Dan Dan noodles later in the week, make the pork topping and a garlic-free sauce base ahead. Another serving then comes down to fresh noodles, a quick blanch of greens, warmed pork, a spoonful of sauce, and the final chili-oil/Sichuan-pepper adjustment.

Keep the components separate when possible. Pork and sauce wait much more gracefully than cooked noodles do.

Make-ahead Dan Dan noodle components stored separately: pork with ya cai, reddish-brown sauce base, fresh uncooked noodles and an assembled bowl marked least ideal for storage.
Think in order of texture loss: pork and sauce wait well, uncooked noodles wait better than cooked ones, and a fully assembled Dan Dan bowl should be last in line.
  • Chili oil: store according to the jar label or the instructions for the homemade chili-oil recipe you used.
  • Sauce base: refrigerate for up to about 3–4 days. Leave the raw garlic out and stir it in shortly before serving.
  • Pork and ya cai: refrigerate promptly in a covered container and use within about 3–4 days.
  • For longer storage: freeze the cooked pork topping separately, thaw it in the refrigerator, then reheat it in a skillet. Cook fresh noodles for serving.
  • Noodles: cook near serving whenever possible. Refrigerated noodles lose their spring and separation sooner than the other components.
  • Fully assembled noodles: least ideal for make-ahead because the strands continue absorbing sauce as they sit.

How to Reheat Dan Dan Noodles

Already assembled: Cover one leftover bowl loosely with a damp paper towel and microwave in short bursts, tossing once or twice. Add a teaspoon of water only if the noodles seem dry.

Components stored separately: Warm the pork in a skillet, loosen the cold sauce with a small splash of warm water, and combine everything with freshly cooked noodles when possible. This gives you the best texture.

Whichever route you use, wake the serving back up with fresh scallions, chili oil, vinegar, or Sichuan pepper as needed. Reheat leftovers to 165°F / 74°C.

Easy Ways to Change the Recipe

Ground Chicken

Ground chicken gives you a lighter topping. Its lower fat content often benefits from a little neutral oil. Cook away the released moisture before adding the Shaoxing wine and soy, and bring ground chicken to at least 165°F / 74°C.

Four Dan Dan noodle topping options shown separately: crisp ground pork, lighter browned chicken, deeper-brown beef, and browned tofu with mushrooms.
Changing the topping also changes the pan strategy: chicken may need extra fat, beef needs rendered-fat control, while tofu and mushrooms need stronger browning to build savory depth.

Ground Beef

Ground beef brings deeper meat flavor and more richness. Choose a fairly lean grind so rendered beef fat doesn’t overwhelm the chili oil. Brown it until relatively dry before adding the liquid seasonings, and cook ground beef to at least 160°F / 71°C.

Tofu & Mushrooms

Finely chopped firm tofu and mushrooms make a good meatless topping. Cook the mushrooms until their moisture is gone, then give the tofu time to pick up some color before seasoning. Browning and mushroom savoriness supply some of the depth that pork normally contributes.

A full 1 lb / 454 g package of pork will leave roughly half for another meal. That’s an excellent excuse to make Pad Kra Pao another night: browned pork, garlic, chili, basil, and rice.

Make It Milder

Use less chili oil and Sichuan pepper in the base sauce, then put both on the table. One person can keep their serving gentle while somebody else adds another spoonful of chili oil and a fresh pinch of pepper.

A Cold Dan Dan Noodle Adaptation

This particular recipe is at its best hot, when the sauce is fluid and the pork is at its crispest, but it also adapts well to a cool or room-temperature bowl.

Hot bowl: normally leave the noodles unrinsed. Cold bowl: rinse deliberately. For the cold version, cook until just springy, rinse thoroughly under cool water to stop the cooking and remove excess surface starch, then drain extremely well.

Split guide showing hot noodles drained directly into sauce and cold noodles rinsed under cool water before being thoroughly drained.
Rinsing is not an automatic anti-stick trick. Instead, it is a deliberate cooling step for cold Dan Dan noodles; the hot version keeps its surface starch and goes straight toward sauce.

Loosen the sauce with cooled reserved noodle water or room-temperature water. Start with roughly 1–2 tsp / 5–10 ml per serving, toss, and add a little more only when the sauce still feels heavy.

For a larger spread, vegetable spring rolls add another crisp texture alongside the noodles.

Made these? Tell us which noodles and chili oil you used—and whether you kept the bowl gentle or pushed the málà.

The first batch may have you reading labels on sesame paste, ya cai, and black vinegar. By the second, those jars are already familiar and your attention has moved where it belongs—to the pork in the pan and the noodles in the bowl.

Partly eaten bowl of Dan Dan noodles on a dark dinner table with chopsticks, chili oil, cucumber salad and a second bowl in the background.
By this point, the specialty jars have done their job. What remains is dinner: a bowl worth eating while it is lively rather than another problem to solve.

↑ Back to Recipe Back to Top

If the noodles still have spring and those crisp pork-and-ya-cai bits keep turning up between bites, stop tinkering and eat.

Posted on Leave a comment

Egg Drop Soup Recipe: Silky Chinese Restaurant-Style Soup in 15 Minutes

Steaming black bowl of golden egg drop soup with broad pale-yellow egg ribbons, sliced scallions, and a metal soup spoon on a dark reflective table.

Sometimes egg drop soup is the first thing you want from a Chinese takeout order: a steaming bowl, soft ribbons drifting through savory broth, a few scallion greens on top, and just enough body to make every spoonful feel silky.

The base is simple. The egg pour is the only part worth slowing down for.

Too much movement can break the egg into tiny flecks. A heavy pour can leave dense clumps. Stir before the egg has set and the ribbons may disappear into cloudy broth.

Thicken first. Create the movement first. Let the egg set before you move it again.

Quick formula: For the base recipe, use 4 cups / 946 ml chicken broth, 2 large eggs, 2 teaspoons / 10 ml water for the eggs, and 1½ tablespoons / about 12 g cornstarch.

In this guide

Egg Drop Soup Recipe

This makes 4 starter bowls or 2 generous bowls. The finished soup is broth-forward and lightly thickened, with soft egg ribbons suspended throughout.

Recipe at a Glance

Serves4 starter bowls or 2 generous bowls
PrepAbout 5 minutes
CookAbout 10 minutes
TotalAbout 15 minutes
PotMedium saucepan, about 2½–3 qt

Equipment

  • Medium saucepan, about 2½–3 quarts
  • Small bowl for the cornstarch slurry
  • Spouted measuring cup or another easy-pouring cup for the eggs
  • Fork or small whisk
  • Ladle or large spoon

Ingredients

  • 4 cups / 32 fl oz / 946 ml low-sodium chicken broth
  • 2 scallions, thinly sliced, white and green parts separated
  • 2 thin slices fresh ginger, about 5 g
  • ½–1 teaspoon chicken powder or bouillon, optional, depending on your broth
  • ¼ teaspoon ground white pepper, plus more to taste
  • ⅛ teaspoon turmeric, optional, for warmer color
  • 1½ tablespoons cornstarch, about 12 g
  • 1½ tablespoons / 22 ml cold water, for the slurry
  • 2 large eggs, about 100 g without shells
  • 2 teaspoons / 10 ml water, for loosening the eggs
  • ½ teaspoon / 2.5 ml toasted sesame oil, optional, plus more by drops to taste
  • Salt, as needed after tasting
Overhead arrangement of chicken broth, two eggs, sliced scallions, ginger, cornstarch, white pepper, turmeric, sesame oil, salt, chicken powder, and water on a dark green surface.
Most of this recipe’s leverage sits in three things: broth for flavor, egg for texture, and cornstarch for body. The rest should stay deliberately restrained.

1. Season the Broth

Add the chicken broth, scallion whites, ginger, white pepper, and optional turmeric to a medium saucepan.

Bring to a boil, lower the heat, and simmer for 2–3 minutes. Remove the ginger slices after they have flavored the broth.

Now taste. If the chicken flavor is good but the broth simply tastes underseasoned, add salt. If the chicken flavor itself feels weak or hollow, add ½ teaspoon chicken powder or bouillon, let it dissolve, and taste again before using more.

Get the broth tasting good here. Cornstarch will change its texture and egg will add richness, but neither one can supply the savory foundation the broth is missing.

Golden broth in a white tasting spoon between a dish of salt and a dish of chicken powder, labeled for underseasoned broth versus weak chicken flavor.
If the broth is salty enough but still tastes hollow, the missing piece may be chicken depth rather than more salt.

2. Thicken the Broth

Mix the cornstarch with 1½ tablespoons / 22 ml cold water until smooth.

Stir the slurry again immediately before using it; cornstarch settles quickly. Pour it gradually into the simmering broth while stirring.

Cook for about 45–60 seconds, then drag a spoon through the pot. The broth should have a slight sheen, and the path behind the spoon should close almost immediately. A lingering trench means the soup is becoming too thick. If it looks almost unchanged from plain stock, give the starch another few seconds at a simmer.

The texture should remain fluid enough to move easily around the saucepan, with just enough body to feel silky on the spoon.

Metal spoon dragged through lightly thickened golden broth in a stainless saucepan, leaving a shallow trail that begins closing behind the spoon.
Think of the trail as a wake, not a trench. You want to glimpse where the spoon passed without leaving a channel that sits open behind it.

3. Prepare the Eggs

Beat the eggs with 2 teaspoons / 10 ml water until the yolks and whites are evenly combined and no clear, stringy ropes of egg white remain.

The added water makes the eggs easier to pour in a narrow stream. Stop once the mixture is smooth and fluid; foam does not help the ribbons.

Three clear vessels compare beaten eggs with stringy whites, excessive foam, and a smooth fluid mixture ready for making egg ribbons.
The smooth sample gives you the most predictable pour. Stringy whites create uneven pieces, while excess foam makes the stream harder to control.

4. Make the Egg Ribbons

For this simmer-based method, keep a few quiet bubbles breaking the surface.

Give the broth one broad circular stir to create a slow current, then put the spoon down.

Pour the egg in a thin, steady stream around the pot, allowing the moving broth to carry it instead of repeatedly pouring into one spot.

Thin stream of beaten egg being poured from a small spouted cup into mostly clear golden broth with a gentle circular current and the first egg wisps forming.
Because the spoon is out of the pot, the slow current can stretch a narrow pour into ribbons instead of breaking the setting egg into flecks.

Leave the soup untouched for about 10–15 seconds, or until the egg is opaque and distinct ribbons are visible. Use one or two easy strokes to separate pieces that have joined together.

Close overhead view of pale egg ribbons blooming and setting in hot golden broth, with no spoon or stirring utensil touching the soup.
Watch the color change: translucent streaks become opaque folds. That shift—not the stopwatch alone—tells you the egg is ready for gentle separation.

Once those ribbons are visible, the tricky part is over.

A spouted cup gives you the most control. With a wider cup, hold a fork across the lip and let the beaten egg pass through the tines in a narrower stream.

5. Finish and Serve

Turn off the heat. Add the scallion greens and, if you like it, ½ teaspoon toasted sesame oil.

Taste once more. Add salt only when needed. Increase the sesame oil by drops so its toasted fragrance stays in the background.

Serve while the soup is steaming and the ribbons are soft.

Before You Sit Down: Check the Soup

  • The broth pours easily from the ladle.
  • The egg floats through it as ribbons or soft flowers instead of one heavy mass.
  • White pepper gives the sip a quiet warmth.

The ribbons do not need to look identical. When the soup tastes good and looks inviting, stop adjusting it and eat it hot.

Close-up metal spoon lifting several soft folded egg ribbons and golden broth above a bowl of finished egg drop soup, with droplets falling from the spoon.
Lifted from the broth, tender ribbons should drape and fold rather than stand stiff like curds. That softness is more useful to judge than perfect shape.

Egg Drop Soup Ingredients: What Matters Most

Start with a clean-tasting chicken broth rather than one dominated by heavy roasting, tomatoes, or strong herbs. A mild broth is fine because you can correct its salt and savory strength before making the ribbons.

Cornstarch gives many restaurant-style versions their lightly glossy body and helps keep the egg suspended. The amount determines how broth-like or thick the finished soup feels.

White pepper supplies the familiar earthy warmth. Chicken powder or bouillon strengthens weak chicken flavor, while sesame oil is an optional finishing aroma and is best added cautiously.

Turmeric only adjusts color here. It is not needed for the flavor or for successful egg ribbons.

Choose Your Texture

One restaurant may serve egg drop soup almost broth-like while another makes it thick enough to cling to the spoon. Ribbon size varies too.

You want…Try this
A lighter brothStart with about 1 tbsp / 8 g cornstarch
The silky defaultUse 1½ tbsp / about 12 g
A thicker takeout textureIncrease gradually toward 2 tbsp / about 16 g
More eggUse 3 large eggs
Fine wispsUse a finer stream with more movement in the broth
Broad soft flowersGive the egg more stillness once it enters

These are starting points, not pass-or-fail rules. The difference between wisps, ribbons, and broad flowers is mostly texture and appearance.

Three clear soup spoons compare lighter, silky-default, and thicker egg drop soup, labeled with 1 tablespoon, 1½ tablespoons, and about 2 tablespoons cornstarch.
Read the drips, not the color. Lighter broth runs cleanly off the spoon; a thicker takeout-style egg drop soup coats and releases more slowly.

Soup already too thin or thick? Jump to the texture fixes.

How to Get Silky Egg Ribbons

The shape of the egg comes down to four controls: broth body, heat, pour width, and movement.

A little starch slows the egg enough to help it remain suspended instead of immediately sinking through thin broth. Too much starch goes the other way and makes the soup heavy. Heat matters too: vigorous boiling can break delicate egg apart, while broth that has cooled too far may not set the stream cleanly with this simmer-based method.

Pour width changes the size of the pieces that enter the soup. A narrow stream produces finer ribbons; a heavier stream naturally forms broader ones. Movement determines how much those setting pieces are broken apart.

After you create a slow current, the broth can do most of the work. Continued stirring during the pour breaks the setting egg into smaller pieces before the ribbons have time to hold together.

Create the current → stop stirring → pour → wait → gently separate.

Saucepan of golden broth during an egg pour with labels pointing to broth body, gentle heat, thin pour width, and the circular movement of the liquid.
Use this as a diagnosis map rather than a formula. Large pieces point you toward pour width and stillness; tiny flecks point you toward excess movement or heat.

That same pause-before-stirring principle is useful in Hot and Sour Soup, where the egg shares the broth with tofu, mushrooms, and stronger seasonings.

Got clumps, flecks, or cloudy broth instead? Jump to troubleshooting.

Why Homemade Egg Drop Soup Doesn’t Taste Like the Restaurant

The frustrating batch is the one that looks right but tastes nothing like the soup you had in mind.

The difference is usually broth strength, salt and savory depth, white pepper, or how heavily sesame and soy are used. Start with what you can actually taste instead of adding every seasoning at once.

Weak chicken flavor: add some chicken powder or bouillon. Mild carton broth benefits more from this than a rich homemade stock.

Savory but flat: check the salt first. When the salt tastes right, add a very small pinch of MSG, stir, taste, and add more only if the broth needs it. Many chicken powders already contain MSG, so read the label before adding more. The FDA’s overview of MSG has more background on the ingredient and its use in food.

Missing warmth: add another touch of white pepper. Its heat tends to arrive toward the back of the sip without dominating the first taste.

Missing aroma: try a few drops of toasted sesame oil and stop when the fragrance becomes noticeable.

Tastes too busy: simplify. Skip the soy sauce, reduce or omit sesame oil, and let chicken broth, white pepper, ginger, and scallion carry the soup. Some takeout versions are much more restrained than heavily seasoned homemade recipes.

Dark red and black restaurant-style still life with egg drop soup surrounded by chicken powder, salt, white pepper, and sesame oil, with labels explaining five flavor adjustments.
Restaurant-style flavor often comes from restraint. The best correction is usually the smallest adjustment that makes the broth taste complete, then stopping there.

Do You Need Soy Sauce?

No. Soy sauce is perfectly usable, but it changes both the color and flavor of the broth.

For a pale, clean-tasting soup, build the chicken flavor first. Add soy when you specifically want its savory fermented character.

Why Is Restaurant Egg Drop Soup Yellow?

Egg drop soup can be naturally pale yellow; brighter restaurant-yellow versions may use turmeric or food coloring. Color has nothing to do with whether the ribbons formed correctly.

Chicken broth and egg yolks on their own can range from cream-gold to soft yellow.

For a warmer shade, the base recipe needs only ⅛ teaspoon turmeric. More can begin changing the flavor instead of simply warming the color.

Some Chinese-American restaurants use food coloring for a brighter takeout look. It is entirely cosmetic.

Pale soup is not failed soup.

Three clear ladles of egg drop soup compare natural pale gold, warmer turmeric-yellow, and brighter restaurant-style yellow while keeping similar egg ribbons.
Color and technique are separate variables. A pale bowl can have perfect ribbons, while brighter restaurant-yellow soup may simply use turmeric or coloring.

Troubleshooting

Broth problems are easier to rescue than cooked egg. You can thicken a watery soup, loosen an over-thickened one, and strengthen a bland broth. After the egg has cooked into a particular shape, the useful question is what caused it and what can be done with the bowl you already have.

My Egg Disappeared and the Broth Turned Cloudy

The egg dispersed before distinct ribbons had time to set. Continuous stirring is the usual culprit; broth that has cooled too far can also make clean setting harder with this method.

Give the poured egg more stillness while it sets. The broth may stay cloudy, but that does not stop it from tasting good.

Two tall clear glasses compare golden broth with distinct egg ribbons against cloudier broth containing finely dispersed egg particles.
Glass makes the difference easy to see: distinct ribbons hold their shape, while dispersed egg turns the broth hazier. The cloudy version is different—not wasted.

I Got Scrambled-Looking Clumps

Large dense pieces usually mean too much egg reached one area at once, or thick ropes of white were still present in the beaten eggs.

A narrower pour and fully blended eggs prevent most of this. Separate the clumps lightly in the soup you already have and carry on. The texture is different, but dinner is still dinner.

I Got Tiny Flecks

The egg was broken apart by too much movement while it was trying to set.

Use less agitation after the pour. The flecks will not turn back into broad ribbons, but the soup itself is perfectly usable.

I Got One Big Sheet of Egg

The egg set with too little separation and joined into one connected piece.

Break the sheet gently into ribbons. When newly poured egg turns opaque, one or two careful strokes are enough to separate it before the whole mass sets together.

My Soup Is Too Thin

Give the original slurry about a minute at a simmer before assuming you need more starch.

Still too light? Mix 1 teaspoon / about 3 g cornstarch + 1 teaspoon / 5 ml cold water. Add part of it, simmer briefly, and reassess before using the rest.

My Soup Is Too Thick

Add hot low-sodium chicken broth a splash at a time, moving the spoon carefully around the ribbons.

If it takes a substantial amount of broth to loosen the soup, use less cornstarch when you make it again.

Egg drop soup ladle between a glass of cornstarch slurry for thin soup and a pitcher of hot broth for thick soup, with rescue amounts and a silky-fluid target.
Both rescues are deliberately incremental. Cornstarch keeps developing as it simmers, while extra broth also dilutes seasoning—so correct a little, then reassess.

Other Quick Fixes

  • Ribbons sank: thin broth, heavy pieces of egg, too much egg, or broth that cooled too far can contribute. Keep the base egg ratio and make sure the broth is back at a quiet simmer before pouring.
  • Rubbery egg: prolonged boiling after the ribbons have set is usually responsible. When the egg is opaque and set, finish the soup and get it off the heat.
  • Cornstarch lumps: if you spot them before adding the egg, strain the broth and return it to the saucepan. After ribbons have formed, remove obvious lumps with a spoon instead of sending the finished soup through a strainer.
  • Too much sesame oil: dilute the soup with more broth. Sesame is much easier to add than remove.
  • Broth looks brown: dark stock or soy sauce is usually responsible. The color alone does not mean anything went wrong.
  • Soup tastes of turmeric: dilute it when practical and use less in the next pot.
Six clear tasting dishes show ideal silky egg ribbons, dense clumps, tiny flecks, a connected egg sheet, sunk ribbons, and firmer rubbery ribbons with brief cause labels.
Identify the shape before choosing the fix. Clumps, flecks, sheets, sinking, and rubbery ribbons point back to different moments in the egg-drop process.

Ready to try again? Back to the recipe steps.

How to Scale Egg Drop Soup for One, Two or a Crowd

Egg drop soup is especially handy when you are cooking only for yourself. One egg and a couple of cups of broth are enough for a hot lunch or easy dinner without leaving a large pot behind.

NeedStarting brothEggCornstarch
1 generous bowl2 cups / 473 ml1 large / ~50 g2¼ tsp / ~6 g
Base recipe4 cups / 946 ml2 large / ~100 g1½ tbsp / ~12 g
6 starter bowls6 cups / 1.42 L3 large / ~150 g2¼ tbsp / ~18 g

Use about 1 teaspoon / 5 ml water per large egg to loosen the mixture.

Scale broth, eggs, and cornstarch by measurement. Salt, bouillon, and chicken powder are better adjusted by taste because brands vary so much.
One large bowl, a saucepan of egg drop soup, and a tray of six small starter bowls labeled with broth, egg, and cornstarch quantities for each batch size.
Scaling changes more than the arithmetic. A larger pot can take longer to recover a gentle simmer, so re-check the heat before the egg pour.

Variations and Substitutions

Can I Make Egg Drop Soup Without Cornstarch?

Yes. Leave the cornstarch out and the egg will continue to form wisps or ribbons. The broth will simply be lighter and more delicate, without the glossy body common in many Chinese-American restaurant versions.

Other Easy Variations

  • Potato starch: make a cold slurry and begin with less than the full cornstarch quantity. Add gradually until the broth reaches the same spoon-path cue used in the base recipe; different starches do not always thicken one-for-one.
  • Vegetable broth: choose a clean, savory one. Dark roasted or tomato-heavy broth changes the character of the soup considerably.
  • Tofu: warm small cubes of soft or silken tofu in the seasoned broth before adding the slurry and egg. For a tofu-centered meal, serve the soup alongside Mapo Tofu and rice.
  • Shrimp: poach peeled, deveined shrimp until barely cooked, lift them out, and continue with the slurry and egg. Return the shrimp at the end just long enough to heat through.
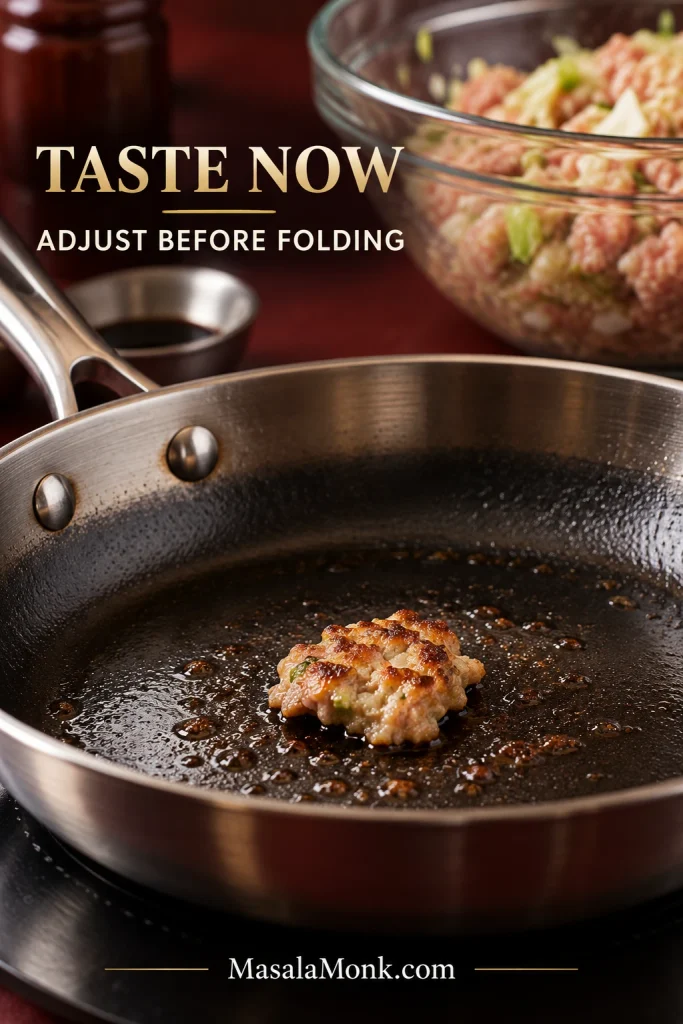
  • Vegetables: peas, finely diced carrot, mushrooms, spinach, and other quick-cooking vegetables fit easily. Add firm vegetables earlier and delicate greens near the end.
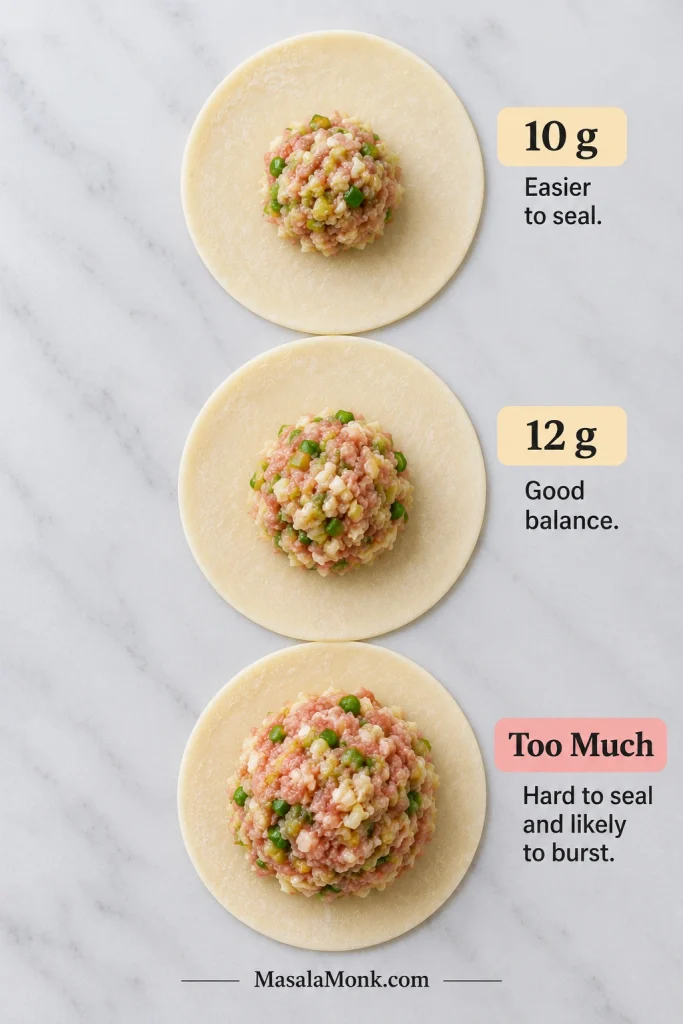
  • Corn: a handful adds sweetness and texture. With enough corn to become a main flavor, the soup takes on a noticeably sweeter, fuller character.
  • Rice: spoon cooked rice into individual bowls so leftovers do not absorb most of the broth. Starting from dry rice? Our guide to cooking rice covers the basics.
Three bowls of golden egg drop soup show tofu cubes, cooked shrimp, and a corn-and-vegetable variation in green, black, and blue ceramic bowls.
Whatever you add, leave enough open broth for the egg ribbons to move and stay visible. The variation should support the soup rather than crowd it.

Is Egg Flower Soup the Same as Egg Drop Soup?

Yes. Egg drop soup and egg flower soup generally refer to the same broad family of soups. “Egg flower” describes the soft, flower-like shapes created when beaten egg sets in hot broth.

The exact soup changes from kitchen to kitchen. Some versions are clear and delicate with fine wisps; others have broad flowers and noticeably more body.

Three clear ladles compare very fine egg wisps, medium silky ribbons, and broad petal-like egg flowers in translucent golden broth.
This spectrum also explains why two restaurants can serve visibly different soups under the same name: ribbon geometry varies even when the underlying technique belongs to the same family.

Chinese home-style soups may include tomato, seaweed, tofu, corn, or vegetables. Many Chinese-American restaurant versions lean toward concentrated chicken flavor, some starch thickening, white pepper, and egg suspended through a pale or yellow broth.

Egg plays a completely different role in Egg Foo Young, another Chinese-American restaurant favorite where it becomes the body of the dish instead of delicate ribbons in broth.

Your favorite restaurant may serve its soup thinner, thicker, brighter, or more egg-heavy. The controls above make those differences easy to adjust.

What to Serve With Egg Drop Soup

As a starter, egg drop soup works especially well with something that brings more texture or substance to the table.

A small bowl before Chicken Fried Rice makes an easy takeout-style dinner: hot soup first, followed by separate grains, vegetables, egg, and chicken.

Crispy spring rolls add crunch; steamed dumplings, plain rice, Chinese-style noodles, stir-fried vegetables, and simple chicken or beef dishes all fit comfortably beside it.

Steaming bowl of egg drop soup in the foreground with chicken fried rice and three crisp spring rolls on a dark red restaurant table behind it.
After all the technique, texture contrast is what makes the meal satisfying: soft soup beside fried rice, crisp spring rolls, dumplings, or another substantial side.

Two generous cups can also make a light lunch on their own, especially on a day when cooking anything elaborate sounds unnecessary.

Make Ahead, Store & Reheat

Egg drop soup is nicest when the ribbons have just been made, but the seasoned broth is easy to prepare ahead. That gives you most of the convenience while saving the egg for the last few minutes.

Best Make-Ahead Method

  1. Prepare the seasoned broth, remove the ginger slices, cool it, and refrigerate without cornstarch or egg.
  2. Bring the broth back to a simmer when you want the soup.
  3. Add a freshly mixed slurry.
  4. Add freshly beaten egg when the broth has the body you want.
  5. Finish with scallion greens and optional sesame oil.

A few minutes at the stove later, you have fresh ribbons without remaking the broth from the beginning.

Clear container of seasoned golden broth beside fresh cornstarch slurry and smooth beaten egg, labeled to reheat the broth, thicken it, then add the egg.
Broth waits better than ribbons do. For make-ahead egg drop soup, hold the seasoned base, then thicken and pour the egg close to serving.

Storing Leftovers

Refrigerate leftovers promptly in a covered, shallow container. For the nicest ribbon and broth texture, aim to eat the soup within 1–2 days. Properly refrigerated cooked leftovers generally have a broader 3–4 day food-safety window at 40°F / 4°C or below.

Get leftovers into the refrigerator within 2 hours of cooking, or within 1 hour when the surrounding temperature is above 90°F / 32°C. The USDA guide to leftovers and reheating has the broader food-safety guidance.

Reheating

Bring leftover soup to a rolling boil when reheating and make sure it reaches 165°F / 74°C. After the soup is thoroughly hot, take it off the heat so the cooked ribbons spend as little extra time boiling as possible.

In the microwave, heat in shorter intervals and stir between them so the soup warms evenly.

If chilled soup has lost some of its original body, mix 1 teaspoon / about 3 g cornstarch + 1 teaspoon / 5 ml cold water. Add only as much of that slurry as the reheated soup needs.

Covered shallow glass container of cooled egg drop soup beside a steaming saucepan being reheated, with storage temperatures, refrigeration timing, and 165°F or 74°C reheating guidance.
The shallow container is part of the method, not just storage. It helps leftovers cool more quickly and evenly; reheating then brings the soup back to serving temperature.

Can You Freeze It?

The seasoned broth base freezes better than the completed soup. Thaw and reheat the broth, then add fresh slurry and egg when you are ready to eat.


The best part of learning the egg pour is not making every ribbon look identical. It is knowing that a saucepan of broth and a couple of eggs can become that familiar steaming soup whenever you want it.

Some nights it is a starter before dinner. Some nights it is the whole point: something warm, savory, and comforting on the table in about 15 minutes.