
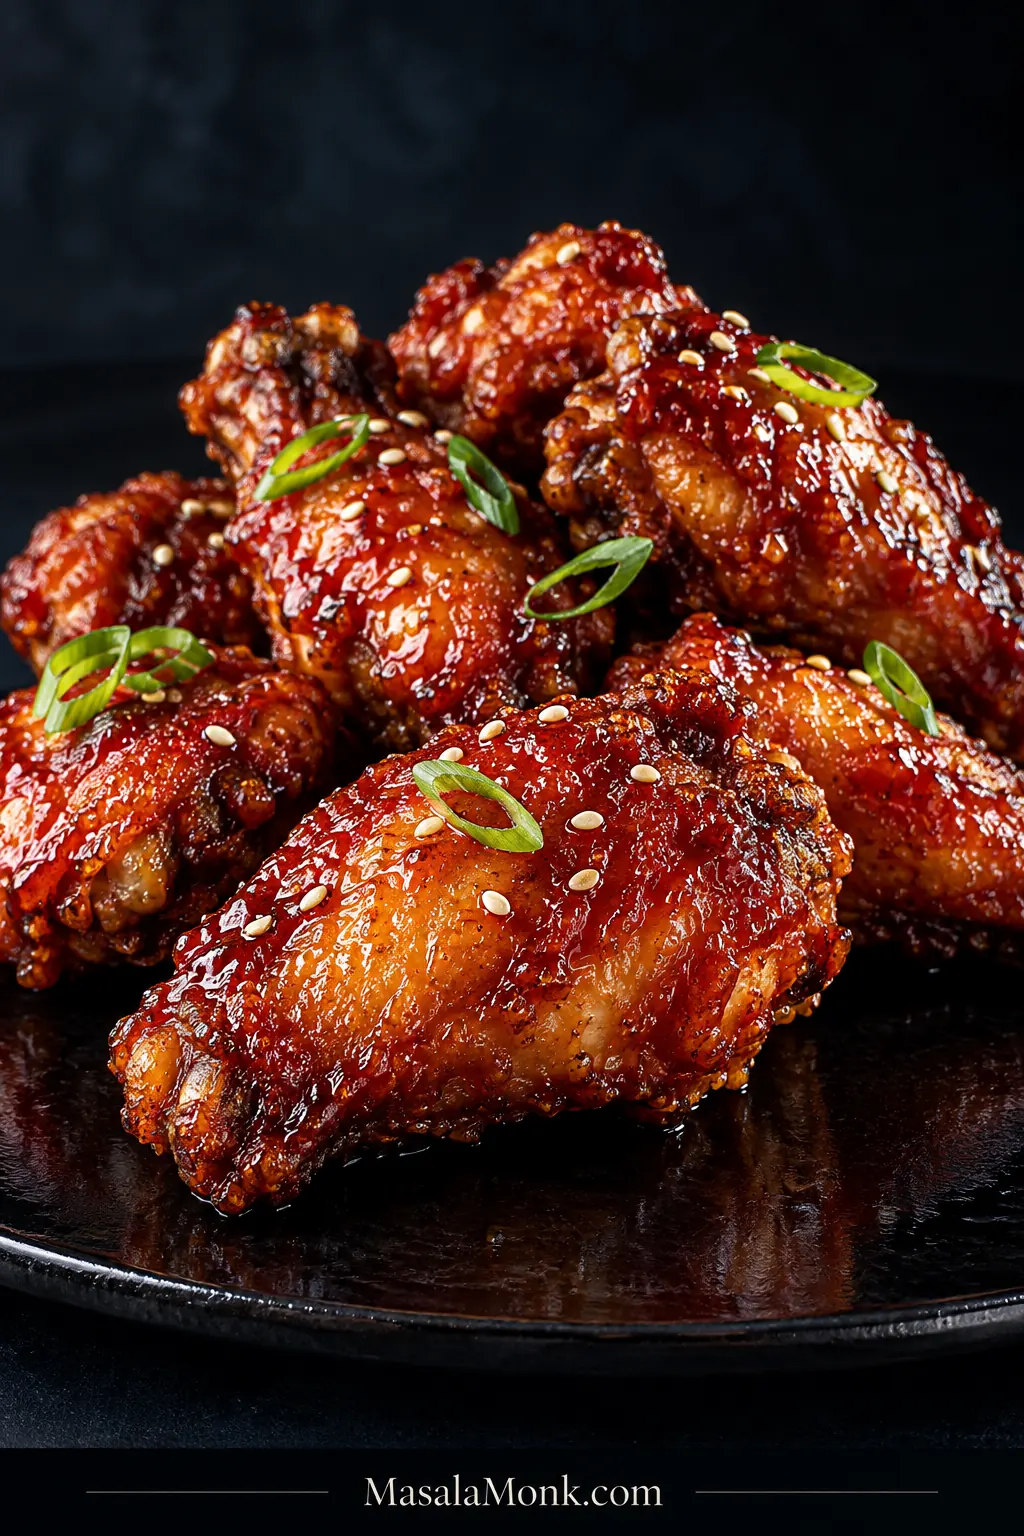
The best Korean fried chicken has a crust that looks almost too thin to deliver the crunch it does. Bite through it and the shell cracks first, then gives way to juicy, seasoned chicken underneath. A light glaze adds flavor without burying that texture.
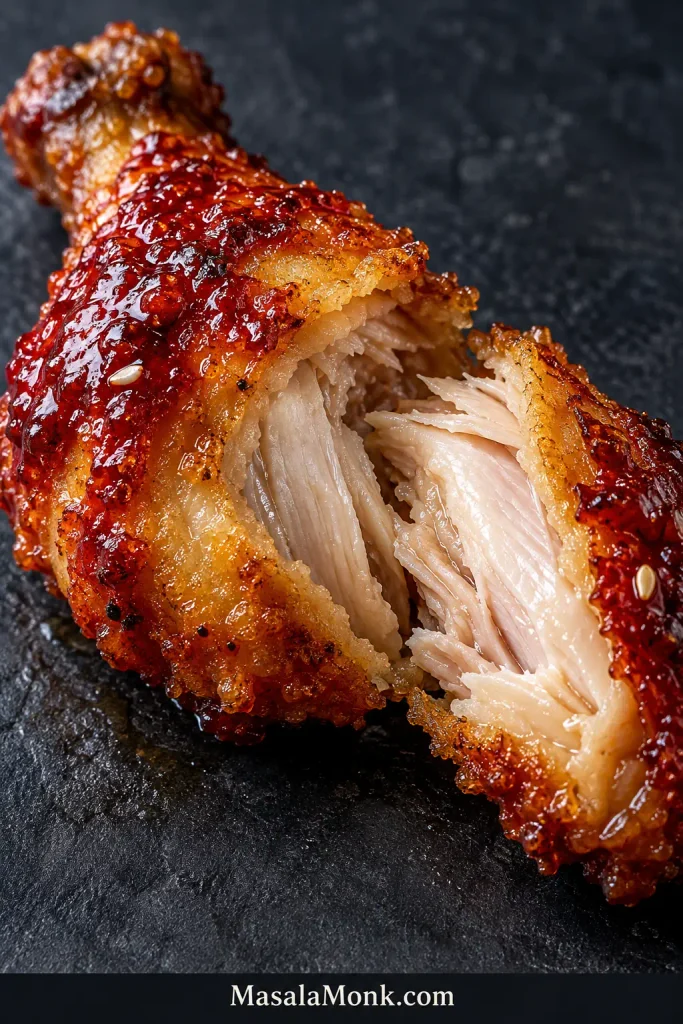
Wet chicken loosens the coating. Heavy batter turns hard. Too many wings cool the oil. Then, just when the crust is finally crisp, an overly wet glaze can soften it again.
This Korean fried chicken method uses split wings and a thin flour-and-potato-starch coating, followed by a gentler first fry, a short rest, and a hotter second fry. Once the crust is finished, choose sweet-spicy gochujang, savory soy-garlic, or divide the batch and make both.
Research note: This recipe is a research-led synthesis of established Korean fried chicken techniques, recurring troubleshooting guidance, and food-safety recommendations; it is not presented as an in-house test-kitchen trial.
At a Glance: Four Things to Get Right Before the Oil
- Surface: remove loose liquid before coating. The chicken can be slightly moist, but it should not drip.
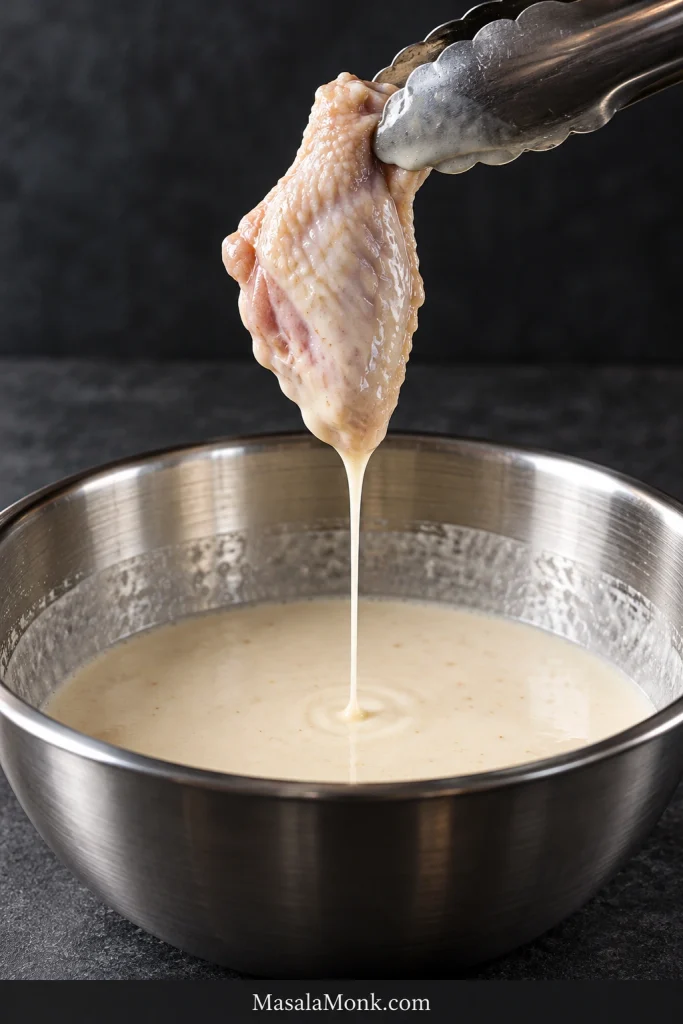
- Batter: think thin veil, not a jacket. Most of it should run back into the bowl when you lift a wing.
- Oil: 330°F / 165°C is where the first fry starts. Watch what happens after cold chicken goes in.
- Sauce: make it before frying. It should coat a spoon and still move easily under a brush.
The first fry should look unfinished. If the wings are already deeply golden and ready to serve, you have left very little room for the hotter second fry.
Korean Fried Chicken Recipe
Thin, extra-crispy Korean fried chicken wings with a two-stage fry and your choice of sweet-spicy gochujang or soy-garlic glaze.
Equipment
- 5–6 quart heavy pot or Dutch oven, deep enough to leave plenty of space above the oil
- Clip-on deep-fry/candy thermometer, or another thermometer rated for continuous oil-temperature monitoring
- Instant-read thermometer for checking the chicken
- Wire rack set over a sheet pan
- Spider/skimmer or sturdy tongs
- 1 small saucepan, or 2 if making both glazes at once
- Pastry brush, optional but useful for a light, even glaze
Ingredients
Chicken
- 2 lb / 32 oz / 900 g split chicken wings, flats and drumettes
- 1 tsp / about 5 g fine sea salt
- 1 tsp / about 2 g finely grated fresh ginger
- ½ tsp / about 1 g black pepper
Light Starch Dusting and Thin Batter
- Up to 2 tbsp potato starch, for a very light dusting; you may use less
- ½ cup / 60 g all-purpose flour
- ⅓ cup / about 50 g potato starch
- ¾ tsp / about 3 g baking powder
- ½ tsp / about 3 g fine sea salt
- ¾ cup / 180 ml cold water, plus up to 1–2 tbsp / 15–30 ml more if needed
For Frying
- Neutral high-heat frying oil, enough to reach about 2 inches / 5 cm deep in your pot
Canola, vegetable, peanut, rice bran, and grapeseed oil all work well.
For half-and-half: make both glazes as written. If you want one flavor on all the wings, double that glaze.
Sweet-Spicy Gochujang Glaze — Half Batch
- 2 tbsp / about 35 g gochujang
- 2 tbsp / about 30 g ketchup
- 1½ tbsp / about 30 g rice syrup, or 1 tbsp / about 21 g honey
- 1 tbsp / 15 ml regular or all-purpose soy sauce, not dark soy sauce
- 1 tbsp / 15 ml rice vinegar
- 1 tbsp / 15 ml water
- 2 tsp / about 6 g minced garlic
- ½ tsp / 2.5 ml toasted sesame oil, stirred in off heat
Soy-Garlic Glaze — Half Batch
- 1½ tbsp / 22 ml regular or all-purpose soy sauce, not dark soy sauce
- 2 tbsp / 30 ml water
- 1 tbsp / about 20 g rice syrup, or 2 tsp / about 14 g honey
- 2 tsp / about 8 g brown sugar
- 2 tsp / 10 ml rice vinegar
- 2 tsp / about 6 g minced garlic
- ½ tsp / about 1 g finely grated fresh ginger
- ½ tsp / 2.5 ml toasted sesame oil, stirred in off heat
Optional for serving: toasted sesame seeds and thinly sliced scallions.
Instructions
Prep, Glaze and Coat the Wings
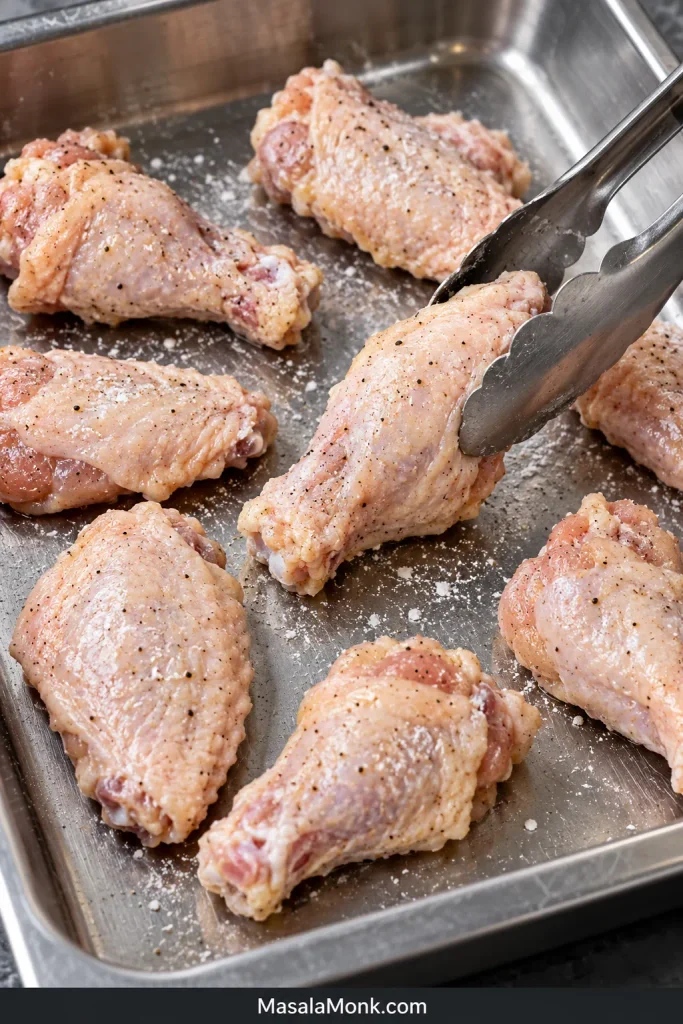
- Season the wings. Toss with the salt, ginger, and black pepper. Refrigerate for at least 30 minutes; 2 hours is better, and overnight is fine. Before coating, blot away loose liquid.
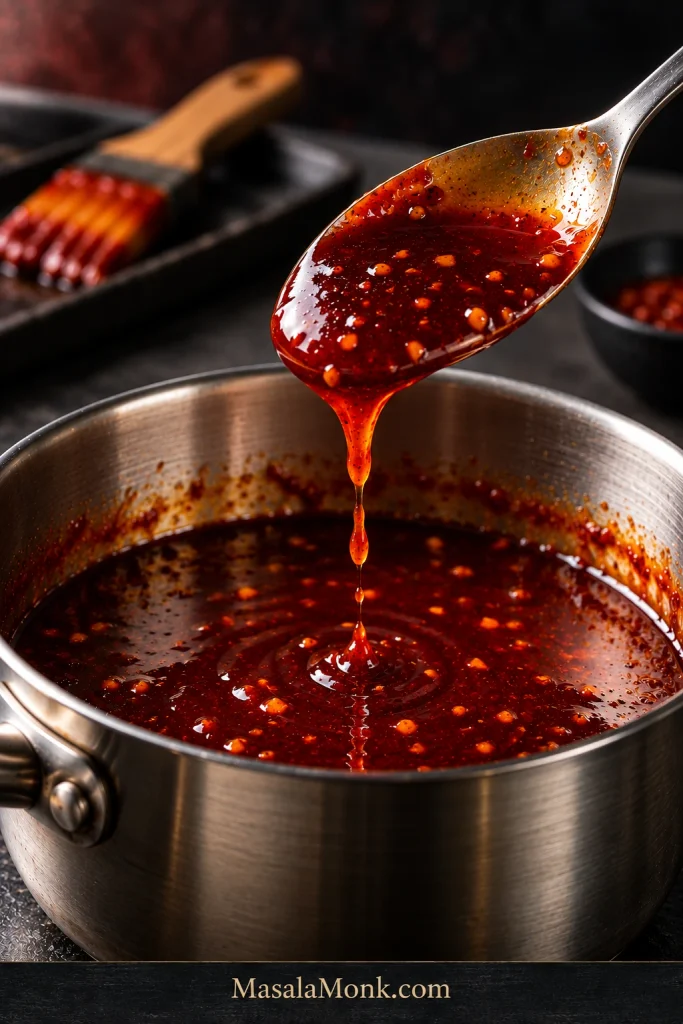
- Make the glaze or glazes. Combine everything for the glaze you are making except the toasted sesame oil. Simmer gently, stirring often: gochujang for about 2–4 minutes; soy-garlic for 3–5 minutes. Remove when a spoon comes out coated but the sauce still pours, then stir in the sesame oil. For half-and-half, prepare each glaze separately.
- Heat the oil. Pour enough oil into a deep heavy pot to reach about 2 inches / 5 cm. Leave generous empty space above the oil. Heat to 330°F / 165°C and set a wire rack over a sheet pan beside the stove.
- Dust the chicken lightly. Add only enough potato starch to remove the surface slickness; you may not need all 2 tablespoons. Toss gently and shake off loose excess. Aim for a thin matte haze, not a white dredge.
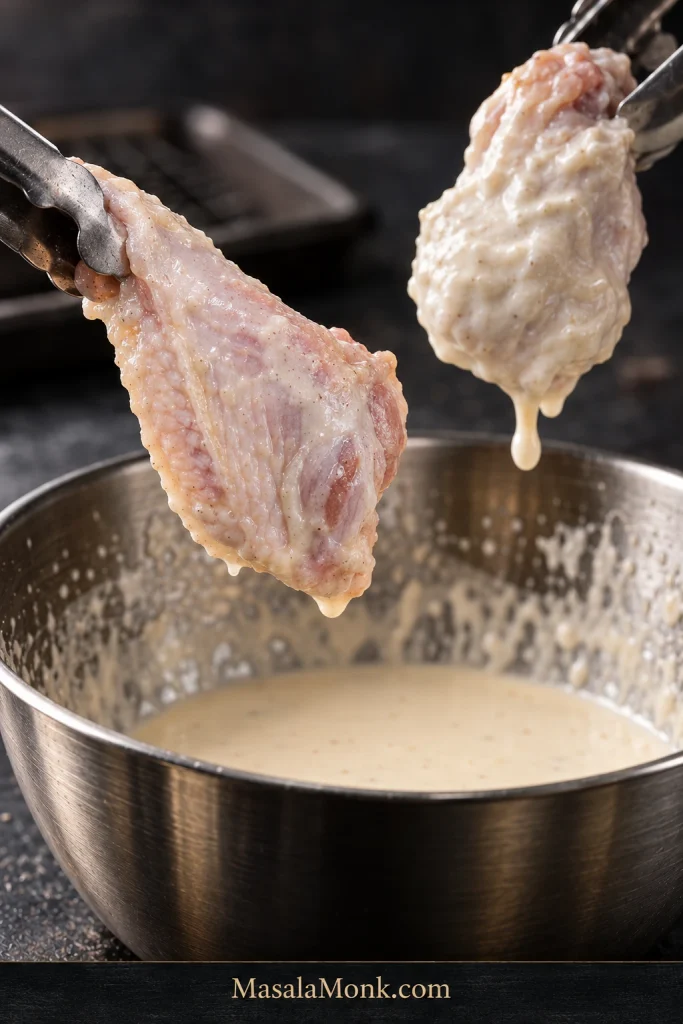
- Mix the batter. Whisk the flour, ⅓ cup / 50 g potato starch, baking powder, and salt, then add ¾ cup / 180 ml cold water. Lift one wing: most batter should stream back, leaving a thin film. If it hangs heavily, add cold water 1 tablespoon / 15 ml at a time, up to 2 tablespoons / 30 ml. Re-whisk before each batch because the starch settles.
Before frying, check one wing: the batter should drain freely and leave the natural ridges and joints visible beneath a thin film.
First Fry and Rest
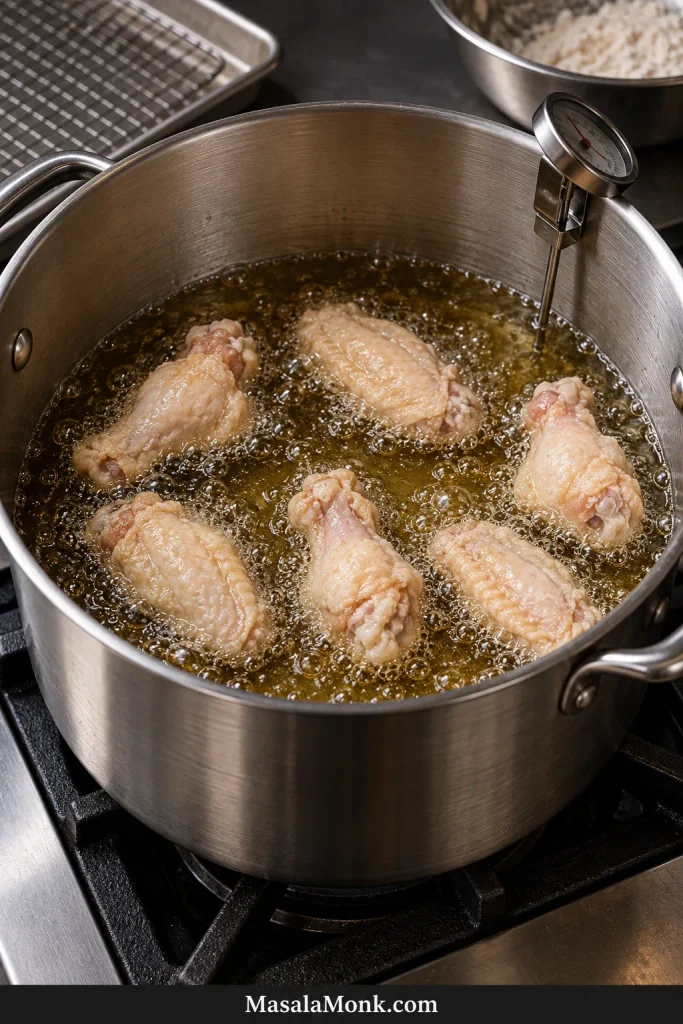
- First fry. Dip the wings and let excess batter drain for a couple of seconds. Carefully lower about 6–8 pieces at a time into a typical 5–6 quart pot; use fewer if the wings are large or the oil struggles to recover. Once the chicken is in, keep the oil around 315–330°F / 157–165°C and fry for about 6–7 minutes. The wings may look almost disappointingly pale. That is exactly what you want: the coating should be set and dry, but the real color and crunch come later. Transfer the wings to the rack, skim out loose crumbs, and let the oil recover before the next batch.
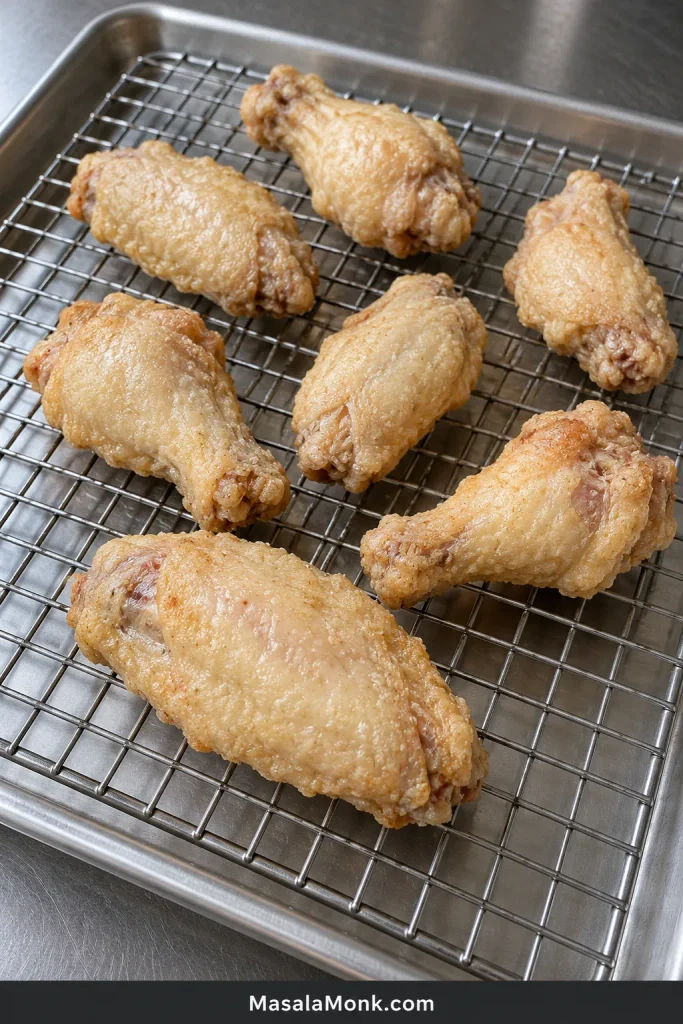
- Rest, then raise the heat. Let each first-fried batch rest on the rack for at least 5 minutes. With several batches, the earliest wings will naturally rest longer while the remaining batches finish. Keep this as one continuous cooking session: the wings are not ready to eat after fry one, and should not be refrigerated or saved to finish later. Once the first-fry batches are done, bring the oil to 375°F / 190°C.
Second Fry, Sauce and Serve
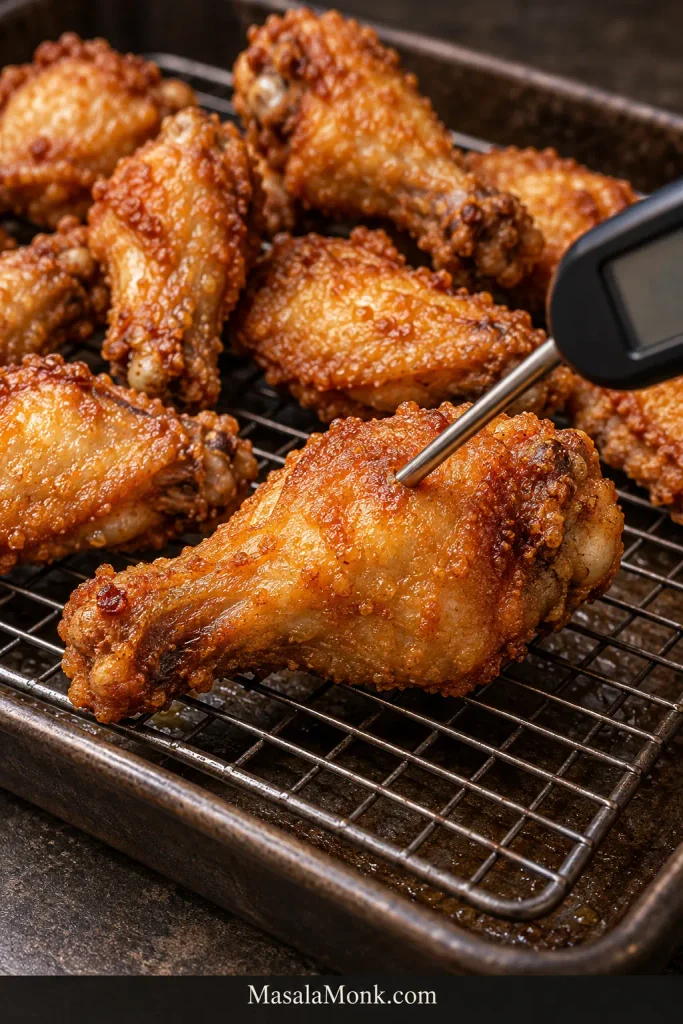
- Second fry and check doneness. Fry again in small batches for about 3–5 minutes, starting to check at 3 minutes. Once the wings are in, aim to keep the oil around 365–375°F / 185–190°C. They should feel different now: firmer and drier under the tongs, with a brittle crust instead of the softer coating from fry one. Look for deeper gold and bubbling that has noticeably calmed. This is the payoff from the second fry: a dry, brittle crust sturdy enough for a light glaze, with juicy chicken underneath. Check one of the largest pieces in each batch, especially a thick drumette, with an instant-read thermometer inserted into the thickest meaty part without touching bone. Poultry should reach at least 165°F / 74°C.
At this point, two checks should agree: the crust should look dry and tight, while the thermometer confirms the thickest drumette is safely cooked.
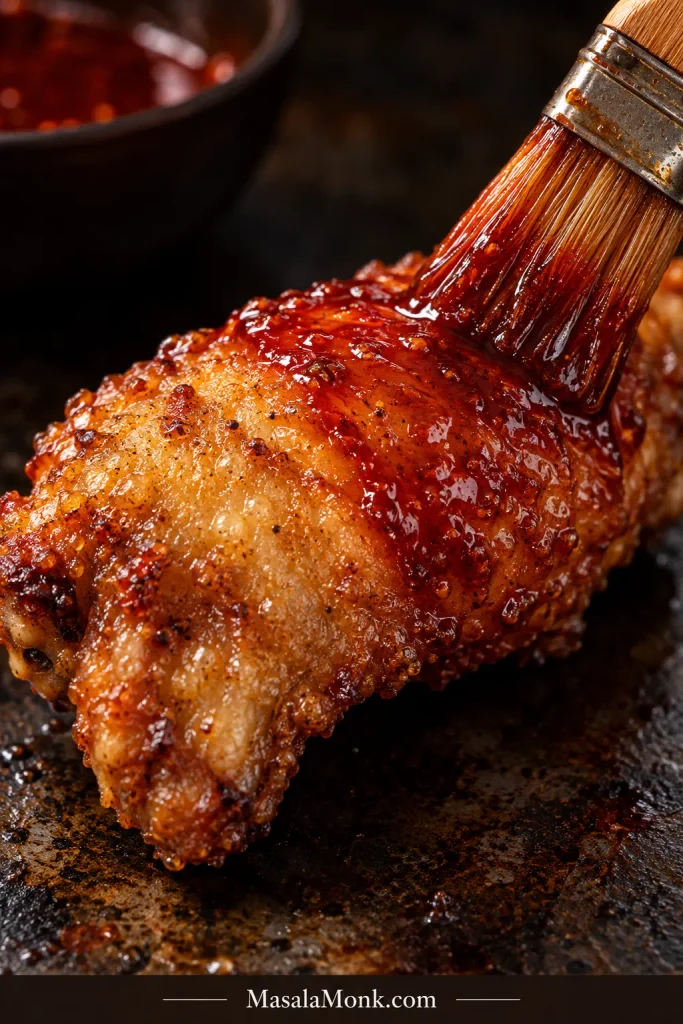
- Finish with sauce. Rest the wings for a minute or two. Warm the glaze gently if needed. Brush on a thin layer for the best balance of sauce and exposed crust, toss quickly for fuller coverage, or leave the wings plain and dip them at the table. After brushing, you should still be able to see the fried texture beneath the glaze.
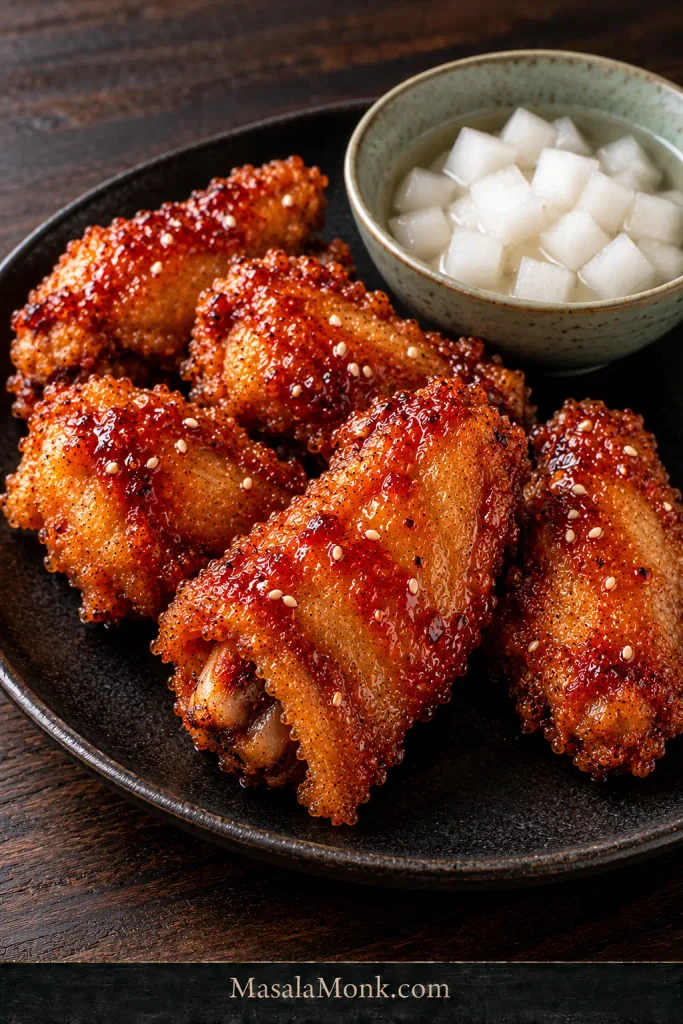
- Serve right away. For half-and-half chicken, glaze one half with gochujang and the other with soy-garlic. Finish with sesame seeds or scallions if you like.
Recipe Notes
- Wing size: these frying times are for split flats and drumettes. Large drumsticks, whole wings, and other bone-in cuts need different timing.
- Potato starch: it gives the crust the brittle character we want here. Cornstarch works if that is what you have.
- Sticking: if battered wings tend to stick to the bottom of the pot, use tongs to hold each one partly submerged for a second before releasing it.
- Leftovers: leave any wings you expect to save unsauced whenever possible.
How the Method Works
The Crust: Thin, Crisp and Built to Take Sauce
Korean fried chicken does not have one universal coating. You will find starch-only versions, frying mixes, thin batters, and heavier dredges. Here, the goal is a close-fitting crust with a brittle bite and very little bread-like bulk.
For this version, flour gives the coating structure while potato starch gives it the brittle crackle. Potato starch on its own produces a thinner, glassier crust.
| Coating | What You Get |
|---|---|
| Flour + potato starch | Thin, structured and brittle-crisp. This is the main method in the recipe. |
| Potato starch only | A thinner, glassier crackle with almost no bread-like character. |
| Cornstarch | Still light and crisp, but generally a little less brittle and glassy than potato starch. |
| Korean frying mix | A convenient seasoned frying blend that often combines flour and starch with leavening. Formulas vary, so follow the package’s liquid guidance. |
Flour and starch absorb water a little differently from one brand to another, so watch the batter rather than worshipping the measuring cup. The lift test in the recipe matters more than forcing every batch to take exactly the same last spoonful of water.
Why the Seasoning Stays Relatively Dry
Salt, ginger, and black pepper season the meat without leaving much extra liquid on the surface. Rice wine and other liquid marinades can be delicious, but here they leave more surface moisture just when the thin coating needs a clean grip.
Why Korean Fried Chicken Is Fried Twice
The first fry starts the cooking and sets the coating; the rack rest lets steam escape; the hotter second fry dries the crust and builds the final brittle texture.
Watch the temperature after the wings go in, not just before. Six pieces may be fine in one pot and too many in another. If the oil stays below the target range instead of beginning to climb back, reduce the next batch.
Choose Your Glaze: Gochujang or Soy-Garlic
Sweet-Spicy Gochujang
This sweet-spicy Korean fried chicken style is often called yangnyeom chicken; yangnyeom means seasoned. Gochujang gives the red glaze fermented heat and depth. Ketchup softens the sharper edges, soy adds salt and savoriness, and rice vinegar keeps the finish from feeling overly sweet.
Rice syrup adds shine and body with a relatively neutral flavor. Honey is stronger and sweeter, which is why the recipe uses less of it. Taste once the glaze has reduced; brands of gochujang vary enough that the final adjustment is better made in the saucepan than on paper.
Soy-Garlic
Soy-garlic is the less chile-forward option: salty-sweet, deeply garlicky, and light enough that more of the fried crust comes through.
If you do not have gochujang, make this version rather than replacing gochujang 1:1 with ordinary hot sauce. Pull the glaze from the heat while it still pours; it thickens further as it cools.
Half-and-Half Korean Fried Chicken
Each glaze covers roughly 1 lb / 450 g of wings. Split the chicken after the second fry and finish each half differently, or double one glaze for the full batch. Half-and-half is especially useful when some people want the gochujang heat and others would rather stay with soy-garlic.
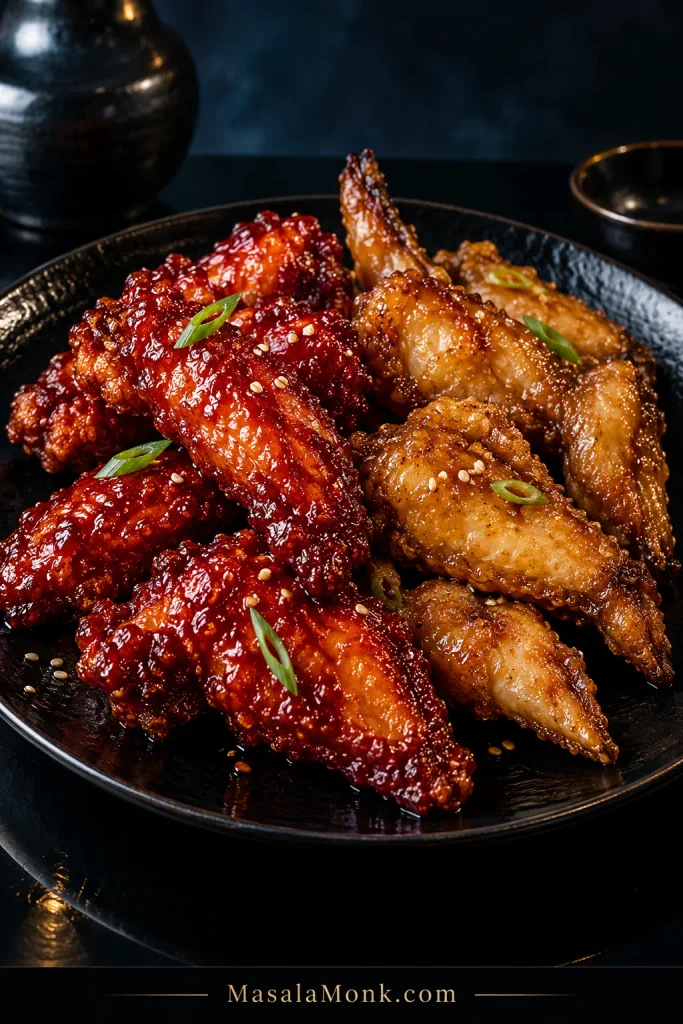
Sauce Is Where Crisp Chicken Goes Soft
The second fry dries the Korean fried chicken crust. Sauce starts softening it almost immediately, so application matters.
| Finish | What Happens |
|---|---|
| Brush | You get plenty of flavor while leaving some crisp crust exposed. |
| Quick toss | Coverage is fuller, but the crust softens sooner. |
| Dip | The wings stay at their crispest until the moment you eat them. |
Whatever you choose, reduce the glaze until it clings and apply it as close to serving as you can.
When the Crunch Goes Wrong
For Korean fried chicken, this troubleshooting check is easiest before frying: batter thickness is much easier to correct while you can still compare the coating against the wing’s natural shape.
| What You See | Likely Cause + Fix |
|---|---|
| Batter slides away before frying | The surface is too wet. Blot away loose liquid first, then use only a light starch dusting before battering. |
| Coating falls off later | The coating may have been too heavy, not firmly set, or knocked loose during tossing. Drain excess batter well, let the first fry set the coating, and brush rather than toss a fragile batch. |
| Pale, greasy crust | The oil stayed too cool. Fry fewer pieces and let the oil recover fully. |
| Thick or hard crust | The batter was too heavy or the wings fried too long. Thin the batter and drain each piece well. |
| Crisp plain, soft after glazing | The sauce is too thin, too heavy, or went on too early. Reduce it further and use less. |
| Sauce will not cling | It needs a little more reduction. |
| Glaze turns sticky or gluey | It reduced too far. Loosen it carefully with a little warm water. |
Ways to Adapt the Method
Boneless Korean Fried Chicken
Chicken thighs are the best choice for boneless pieces because they stay juicy through two fries. Cut them into chunks about 1½ inches / 4 cm across and use the same seasoning, starch dusting, batter, and sauces.
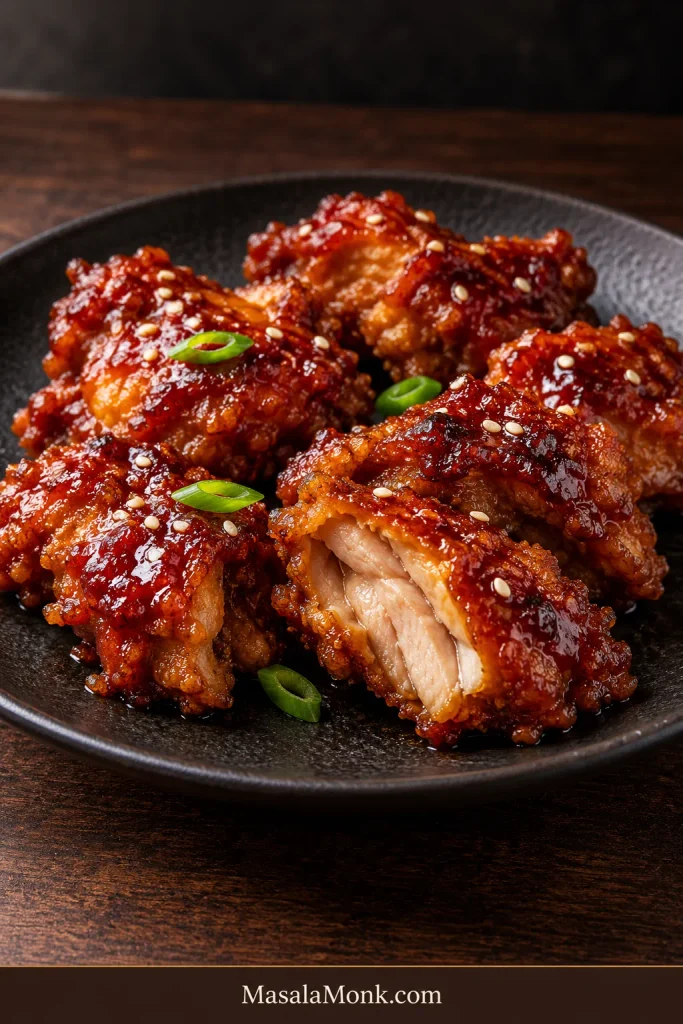
Start checking the first fry around 4–5 minutes and the second around 2–3 minutes. The exact time depends on piece size, so use the thermometer as well as the clock. Breast meat can work, but it gives you less margin before drying out.
Another crisp boneless option is our Sesame Chicken, which uses smaller pieces and a different sweet-savory glaze.
Potato-Starch-Only Crust
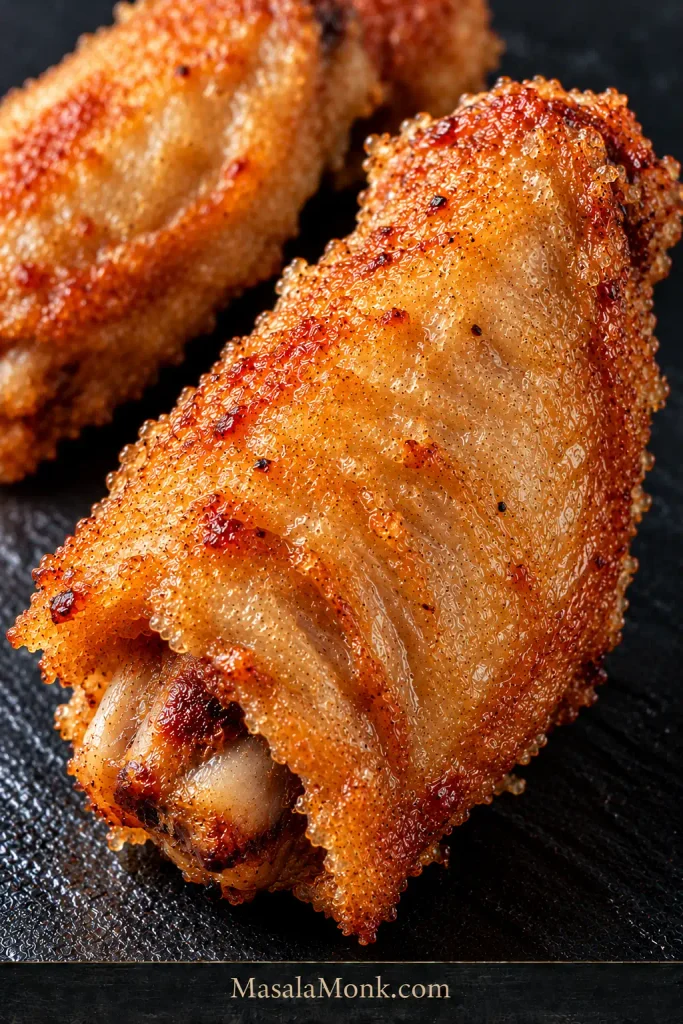
For a thinner, harder crackle, skip both the starch dusting and wet batter. A 2 lb / 900 g batch of wings needs about ½ cup / 75–80 g potato starch.
- Season and blot the wings as directed.
- Coat them directly in the potato starch, pressing lightly so the surface is covered.
- Shake off all loose excess before frying.
- Use the same two-stage frying method and temperature targets as the main recipe, checking the crust and internal temperature rather than relying on time alone.
The result is a more glassy, less bread-like Korean fried chicken crust than the main batter. If the whole dish needs to be gluten-free, check the gochujang and soy sauce labels too and use certified gluten-free versions where needed.
Can You Make Korean Fried Chicken in an Air Fryer?
An air fryer can make crisp Korean-style wings, but the wet batter above is designed for oil. For an air fryer, the potato-starch-only route is easier: coat the wings, mist the surface well with oil, leave space around them, and glaze only after they are crisp.
If deep frying is off the table, our Air Fryer Chicken Wings guide has the full timing and spacing.
For a Party: Prep Ahead, Fry Close to Serving
For Korean fried chicken at a party, do the quiet prep earlier. Leave the battering, frying, and glazing for close to the time everyone is ready to eat.
Earlier in the Day
- Season the wings and keep them refrigerated.
- Make the glazes up to a day ahead and refrigerate them.
- Measure the dry batter ingredients, leaving the water until frying time.
If Cucumber Salad is going alongside the wings, slice the vegetables earlier but dress them closer to serving so they keep their snap.
Close to Serving
- Mix the batter and heat the oil.
- First-fry the batches, then move through the hotter second fry as one continuous cooking session.
- Warm the glaze and finish the wings only when you are ready to serve them.
Storing and Reheating Korean Fried Chicken
Refrigerate cooked chicken within about 2 hours — or within 1 hour if the surrounding temperature is above 90°F / 32°C — and use it within 3–4 days.
Reheat unsauced wings in an oven or air fryer until the thickest pieces reach 165°F / 74°C and the exterior is crisp again, then add warm glaze. Already-sauced wings will improve with dry heat, but they will not return completely to their just-fried texture.
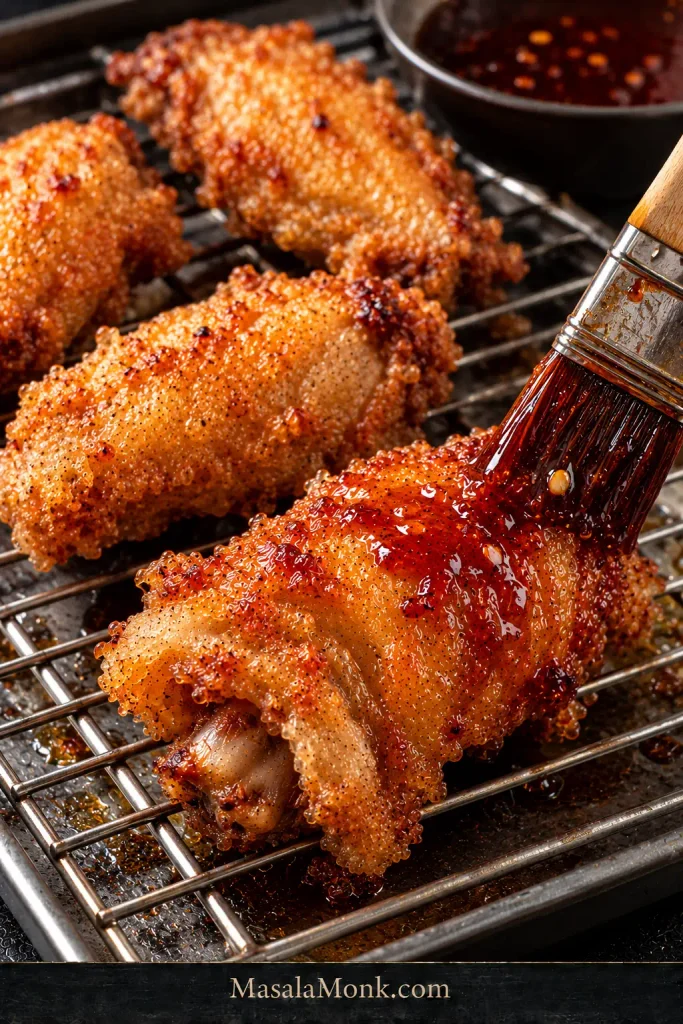
If the exterior needs more help in the oven, our Crispy Baked Chicken Wings guide shows how a rack and dry oven heat can bring back more of the crust.
The easiest leftover rule: sauce only what you are eating now.
What to Serve With It
Cold, crisp chicken-mu—Korean pickled radish—cuts through Korean fried chicken with sharp acidity and crunch. Steamed rice keeps the plate simple; Fried Rice turns the wings into a fuller meal.
For another cool side, our Coleslaw brings crunch and a little creaminess against the hot chicken.
Then eat the chicken while the timing is still on your side: second fry finished, glaze just brushed on, shell still audibly crisp.








