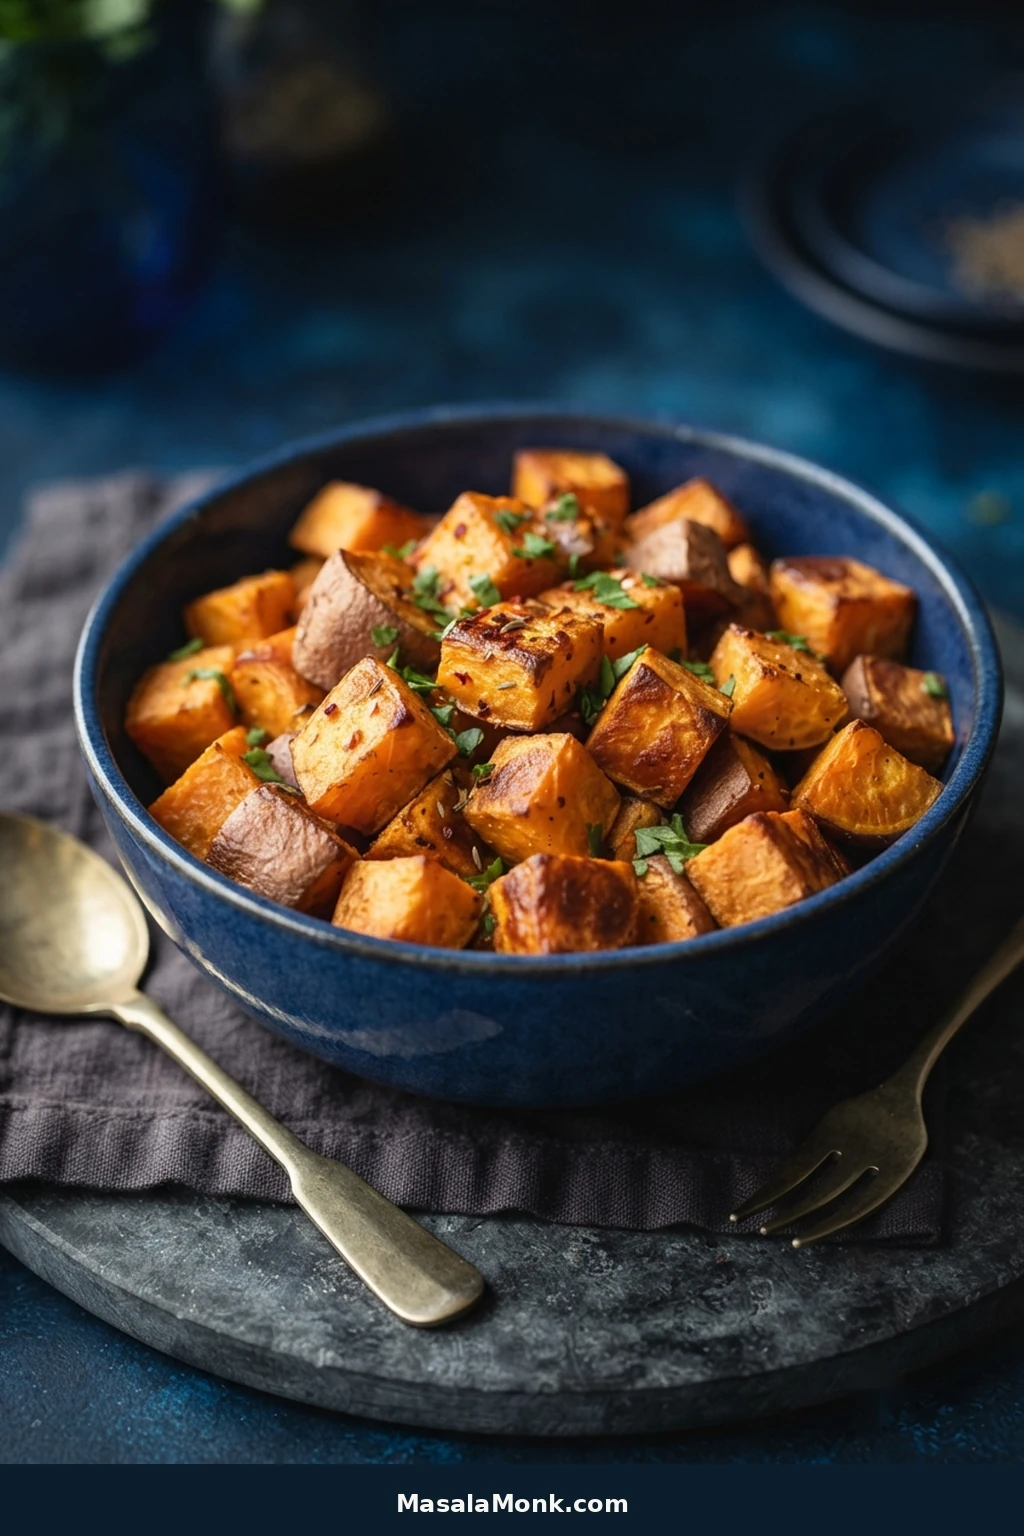
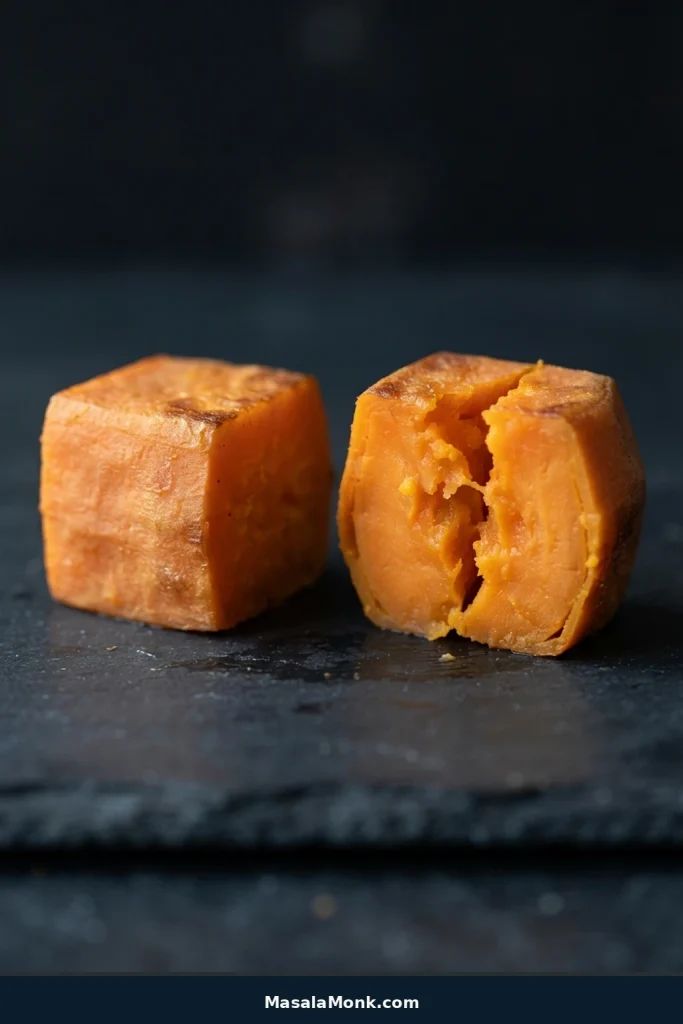
A good tray of roasted sweet potatoes has deeply golden cut sides, caramelized corners, and creamy centers that yield easily without falling apart. The edges have enough bite to contrast with the soft, sweet middle.
Cut the pieces fairly evenly, dry them well, coat them lightly with oil, and leave room around them on the pan. Roughly ¾-inch (2-cm) cubes at 425°F (220°C) give you plenty of browning without drying out the center.
Orange sweet potatoes stay creamy inside even when the cut sides are well roasted. Think crisp edges and golden corners rather than a hard shell around every cube. Serve them straight from the tray as a side, or use them in bowls, salads, tacos, or breakfast the next day.
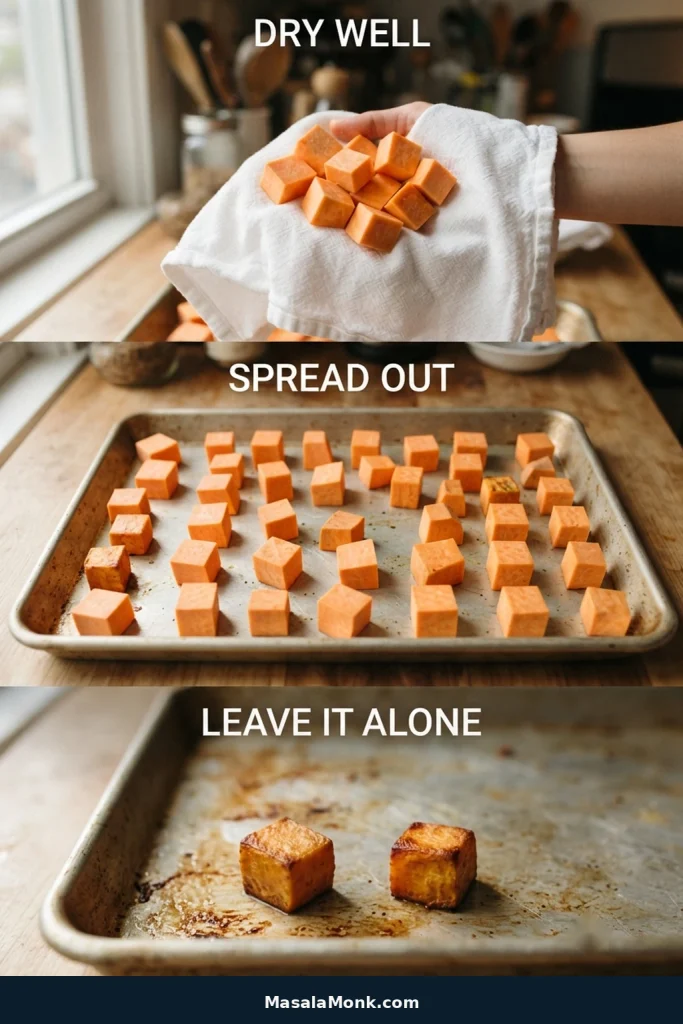
The short version: dry them well, spread them out, and leave the first side alone. Get those three things right and the rest is mostly adjustment.
Roasted Sweet Potatoes Recipe
Savory roasted sweet potato cubes with browned edges, creamy centers, and a simple paprika-garlic seasoning that lets the natural sweetness come through.
No soaking or parboiling is needed for roasting: season the cubes, spread them in one layer, roast them undisturbed, then flip once to finish.
Ingredients
- 2 lb (900 g) orange-fleshed sweet potatoes
- 2 tablespoons (30 ml) olive oil or avocado oil
- ¾ teaspoon fine sea salt (roughly 4 g), plus more to taste after roasting
- ½ teaspoon garlic powder (about 1.5 g)
- ½ teaspoon mild or sweet paprika (about 1 g)
- ¼ teaspoon freshly ground black pepper (about 0.5 g)
Equipment
- Large, sturdy rimmed baking sheet, ideally light-colored bare aluminum, about 13 × 18 inches (33 × 46 cm)
- Sharp chef’s knife
- Cutting board
- Large mixing bowl
- Thin, wide spatula
- Vegetable peeler, optional
Instructions
- Heat the oven. Preheat to 425°F (220°C). Use the middle rack for one pan; for two pans, use the upper and lower thirds.
- Prep the sweet potatoes. Scrub and dry them well. Leave the skin on for extra chew, or peel for a more uniformly tender exterior. Trim narrow ends, then cut into planks, strips, and roughly ¾-inch (2-cm) cubes. Reasonably even is enough.
- Oil and season. Toss the cubes with the oil, salt, garlic powder, paprika, and black pepper until lightly and evenly coated.
- Give them room. Spread the cubes in one layer with visible gaps, placing broad cut sides against the pan where practical. If the tray looks packed, use two pans.
- Roast the first side. Check underneath a few cubes at around 15 minutes. If they are pale, keep roasting. Once a browned cube releases cleanly, it is ready to turn; if it clings, wait another minute rather than scraping.
- Flip and finish. Turn once. Rotate a single pan 180 degrees if your oven browns unevenly; with two pans, rotate and swap rack positions. Continue until the largest cubes are tender and several flat sides are deeply browned. Most one-pan batches take 25–35 minutes total.
- Season and serve. Taste while hot, add another pinch of salt if needed, and serve while the freshly roasted sides are at their best.
Recipe Notes
- Convection/fan oven: if your oven does not automatically convert conventional temperatures, use about 400°F (205°C) and begin checking early. If your oven adjusts automatically, set it to 425°F (220°C) as written.
- Pan choice: a light-colored bare aluminum sheet pan is the best default. It gives the potatoes direct contact for good browning without the especially aggressive heat of a dark-coated pan.
- Parchment: it makes cleanup easier and still works, though the sides touching the paper will usually stay a little lighter. Check the manufacturer’s temperature rating.
- Sweet potato variety: this recipe is written for moist orange-fleshed sweet potatoes. Many Japanese, white, and purple varieties are denser and drier, so their texture and roasting time can differ.
Method note: This version is based on established sweet-potato roasting methods and recurring home-cook troubleshooting. MasalaMonk has not independently kitchen-tested this exact version.
For texture, the biggest variables are cut size, oven heat, and how much contact the potatoes get with the pan.
Roasted Sweet Potato Guide
Get the Roast Right
Change or Fix the Tray
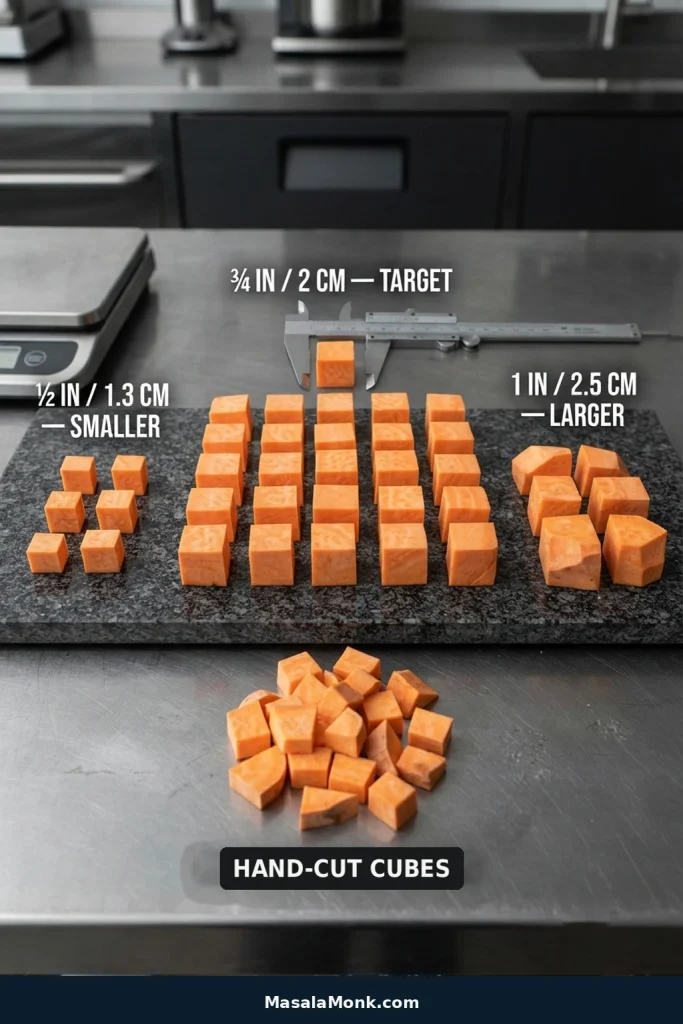
Why ¾-Inch Sweet Potato Cubes Work So Well
For this method, ¾ inch / 2 cm is our preferred size.
| Cut Size | What Changes |
|---|---|
| ½ inch / 1.3 cm | Cooks quickly and exposes plenty of cut surface to the heat, but can dry or darken sooner. |
| ¾ inch / 2 cm | Our preferred balance: plenty of browning with a tender center. |
| 1 inch / 2.5 cm | Takes longer and gives you more soft interior with less browned exterior in each bite. |
Aim for consistency rather than perfection. Very small scraps will be ready sooner than the larger cubes, so trimming especially narrow ends makes the whole tray easier to judge.
Temperature and Timing
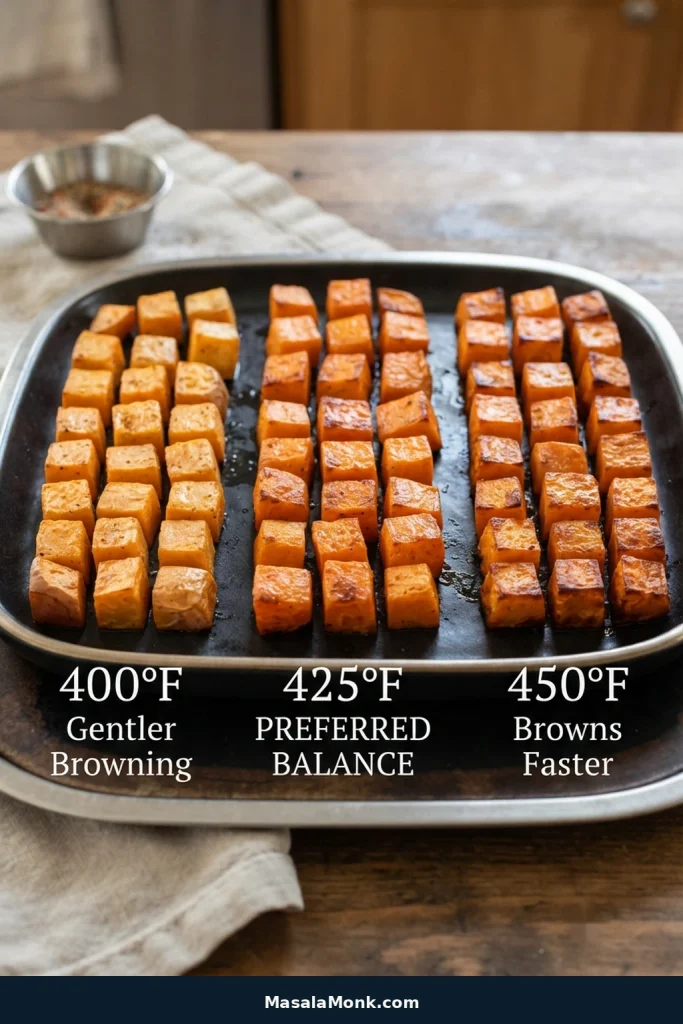
For ¾-inch (2-cm) sweet potato cubes, roast at 425°F (220°C) for about 25–35 minutes, starting to check around 15 minutes.
At 425°F, cubes this size have time to soften through before the edges get too dark. By comparison, 400°F (205°C) gives a gentler roast and usually needs a little more time. Meanwhile, 450°F (230°C) darkens the outsides faster, so smaller pieces need closer attention.
Use the potatoes rather than the timer as the final judge. One of the largest cubes should yield easily to a fork or paring knife.
Same-oven dinner: our baked chicken breast also cooks at 425°F / 220°C. Start the sweet potatoes first and let each dish finish by its own doneness cues.
How to Get Better Browning and Crisp Edges
Dry Them and Give Them Room
Dry the sweet potatoes thoroughly after washing, then spread them so steam can escape between the pieces. Surface water and a crowded tray both work against browning. A thin sheen of oil is enough.
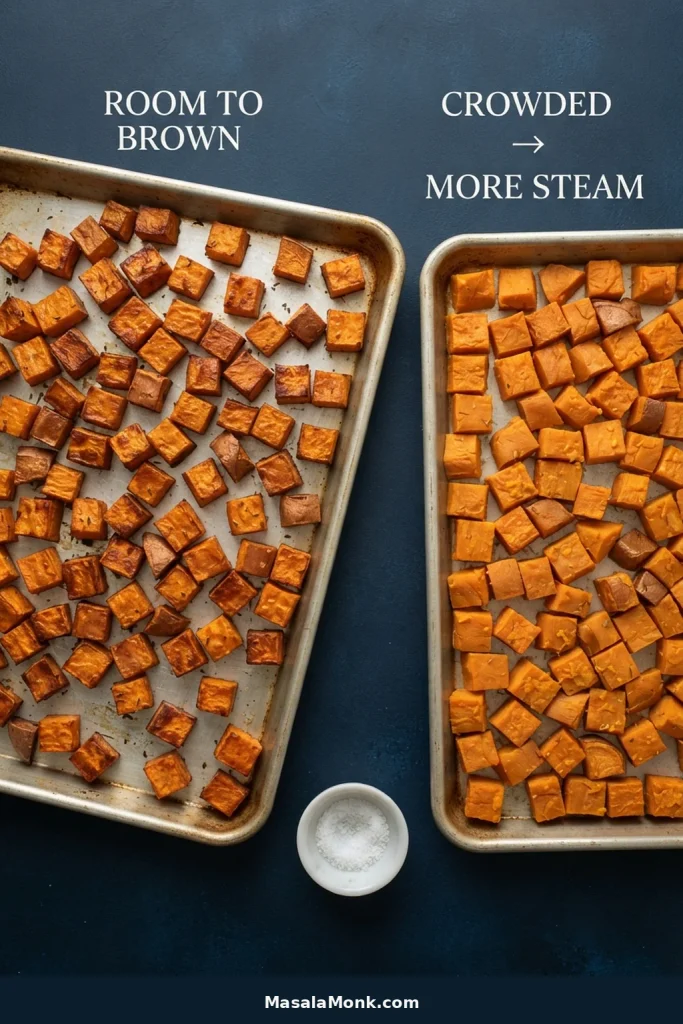
Two pans? Swap rack positions and rotate them when you flip.
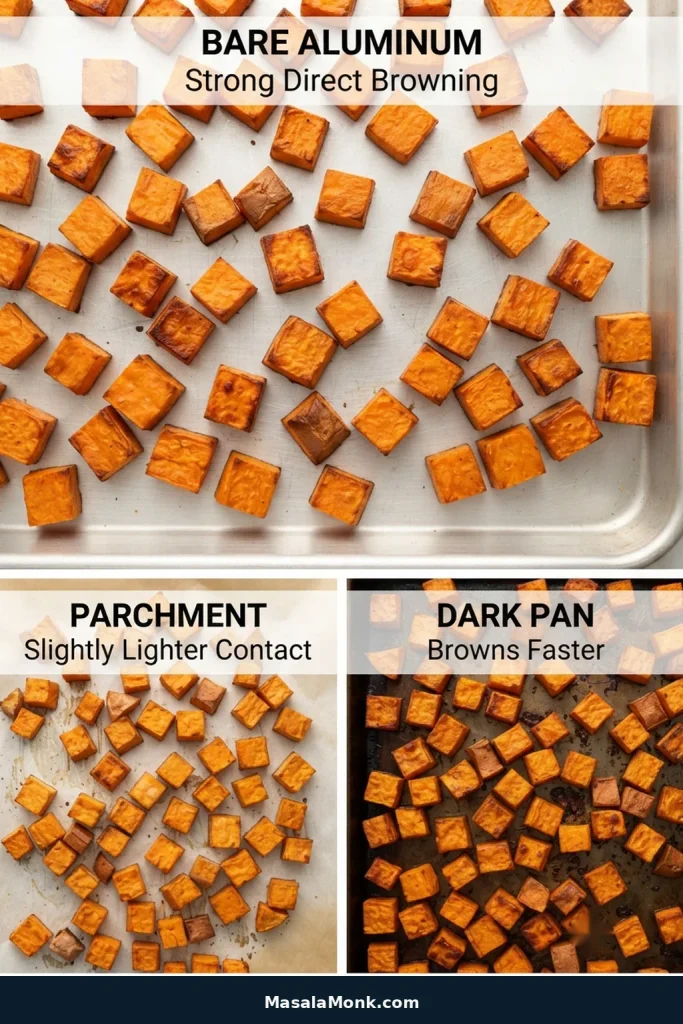
Bare Metal or Parchment?
For the deepest browning, use bare metal rather than parchment. The sweet potatoes sit directly against the hot pan. A side-by-side vegetable roasting test that included sweet potatoes also found the strongest browning on bare metal.
Parchment makes cleanup easier and still works; expect the sides touching it to stay a little lighter.
Give the First Side Time
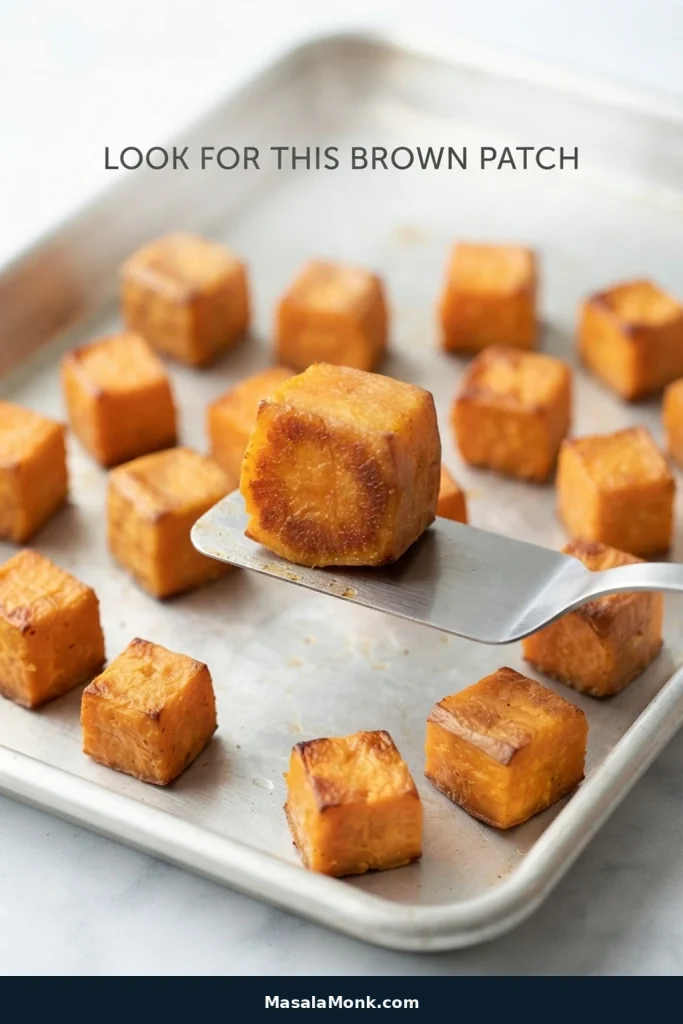
Leave the cubes alone long enough for the side touching the pan to brown properly. Lift one cube and look underneath: a broad brown patch is what you are waiting for. Once that side is ready, it usually releases more easily too. If one end of your oven runs hotter, rotate the pan when you flip.
Want a Crunchier Coating?
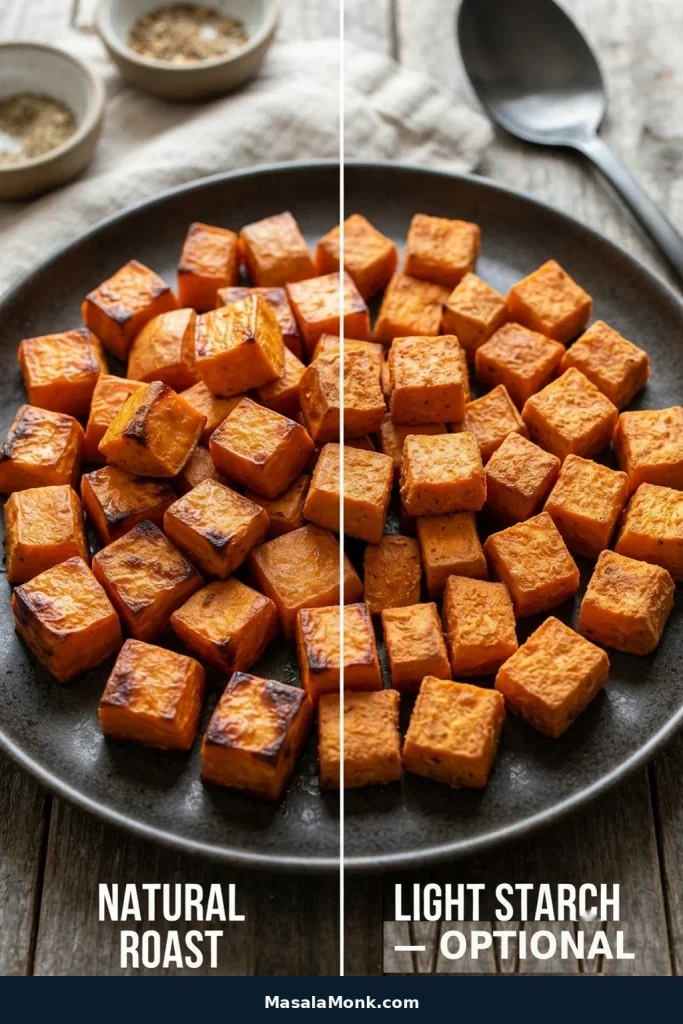
For this version, toss the 2 lb / 900 g sweet potatoes with the oil first. Mix up to 1 tablespoon cornstarch or potato starch with the dry seasonings, sprinkle it over the potatoes, toss briefly, and roast immediately.
Keep the coating light. Too much can turn dusty, and letting the seasoned cubes sit can draw out moisture and make the coating gummy.
Skip the starch when you want the smoother, naturally roasted finish.
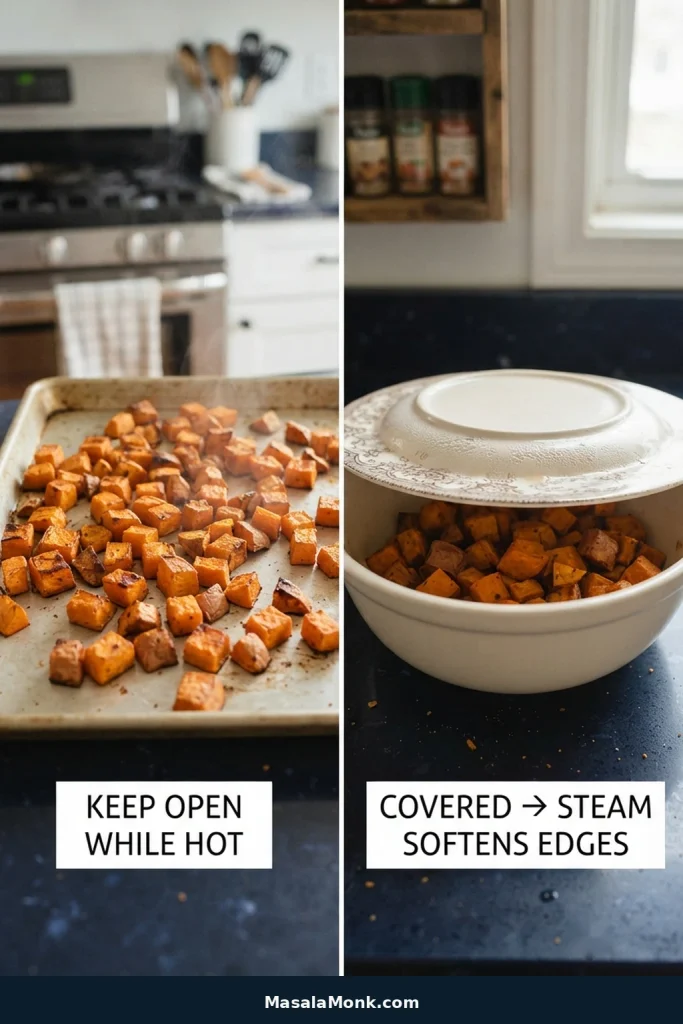
Once the tray comes out of the oven, do not undo that browning by trapping steam. Piling the hot cubes into a deep covered bowl softens the freshly roasted sides quickly.
Season the Tray for Dinner
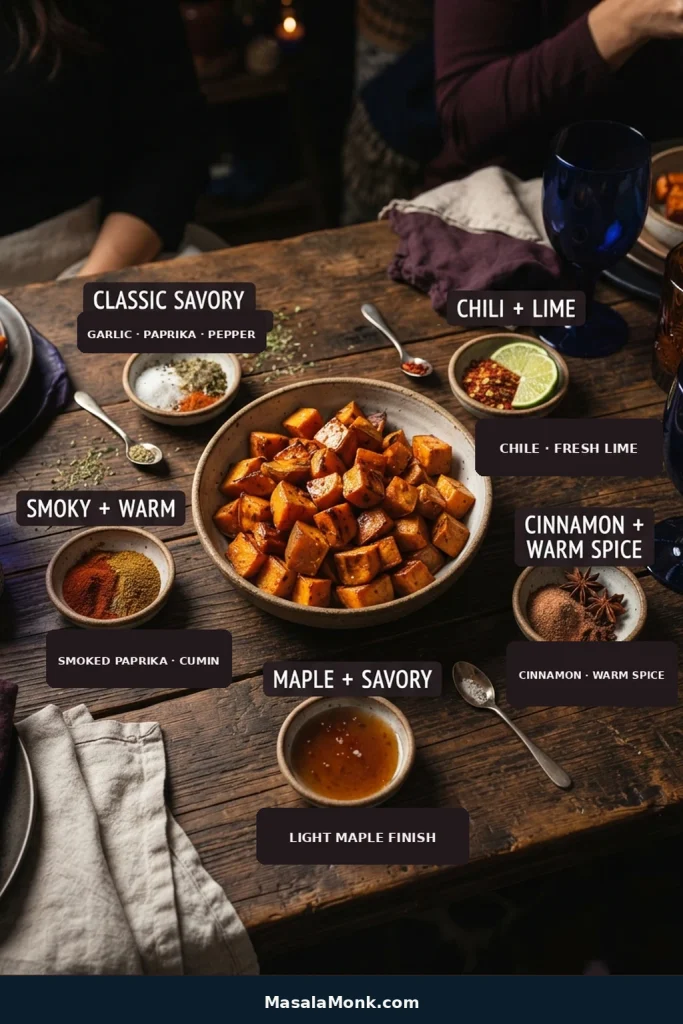
Once the roasting method is set, this is where the tray can follow the rest of dinner. Each option below is scaled for 2 lb / 900 g sweet potatoes with 2 tablespoons (30 ml) oil.
Choose a Flavor Direction
| Flavor Direction | Seasoning |
|---|---|
| Classic savory | ¾ tsp fine sea salt + ½ tsp garlic powder + ½ tsp mild paprika + ¼ tsp black pepper. |
| Smoky + warm | ¾ tsp fine sea salt + ½ tsp smoked paprika + ½ tsp ground cumin + ¼ tsp garlic powder + a pinch of cayenne for heat, or ¼ tsp chili powder for milder chile flavor. |
| Chili + lime | ¾ tsp fine sea salt + ½ tsp chili powder + ½ tsp ground cumin + ¼ tsp garlic powder; finish with fresh lime juice to taste after roasting. |
| Cinnamon + warm spice | ¾ tsp fine sea salt + ½ tsp ground cumin + ½ tsp mild paprika + ¼ tsp garlic powder + ⅛ tsp ground cinnamon. |
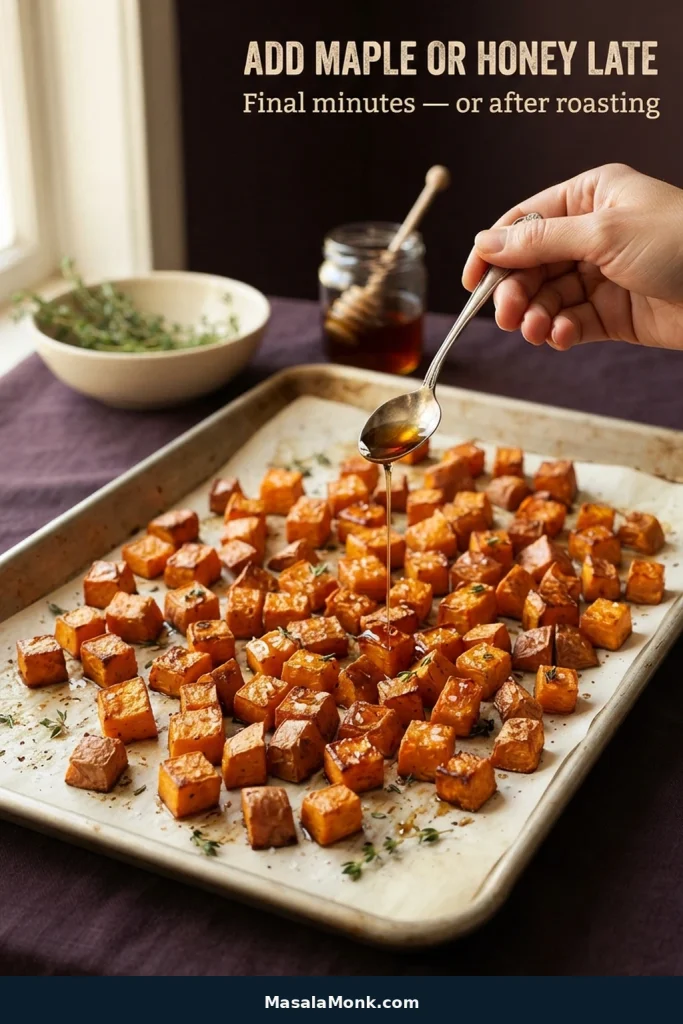
| Maple + savory | ½ tsp fine sea salt + ¼ tsp garlic powder + ⅛ tsp ground cinnamon; add 1 tbsp (15 ml) maple syrup or honey during the final few minutes or drizzle it over the finished potatoes. |
The table gives exact, measured combinations. The visual below works as a broader flavor map, so use it to choose a direction while keeping the roasting method itself unchanged.
Smoky + warm potatoes work especially well beside chicken shawarma, where cumin and warm spices already belong on the plate.
For the chili-lime version, add the lime after roasting so its acidity stays bright and does not add surface moisture before the cubes brown.
When to Add Maple or Honey
Add honey or maple near the end so the sugars do not get too dark before the potatoes are ready. For a softer, sticky-sweet holiday side with brown sugar and warm spice, our candied yams recipe is the better direction.
However you season the tray, the sweet potato should still taste like itself. Roasting should deepen its sweetness, not bury it.
Fix a Tray of Roasted Sweet Potatoes
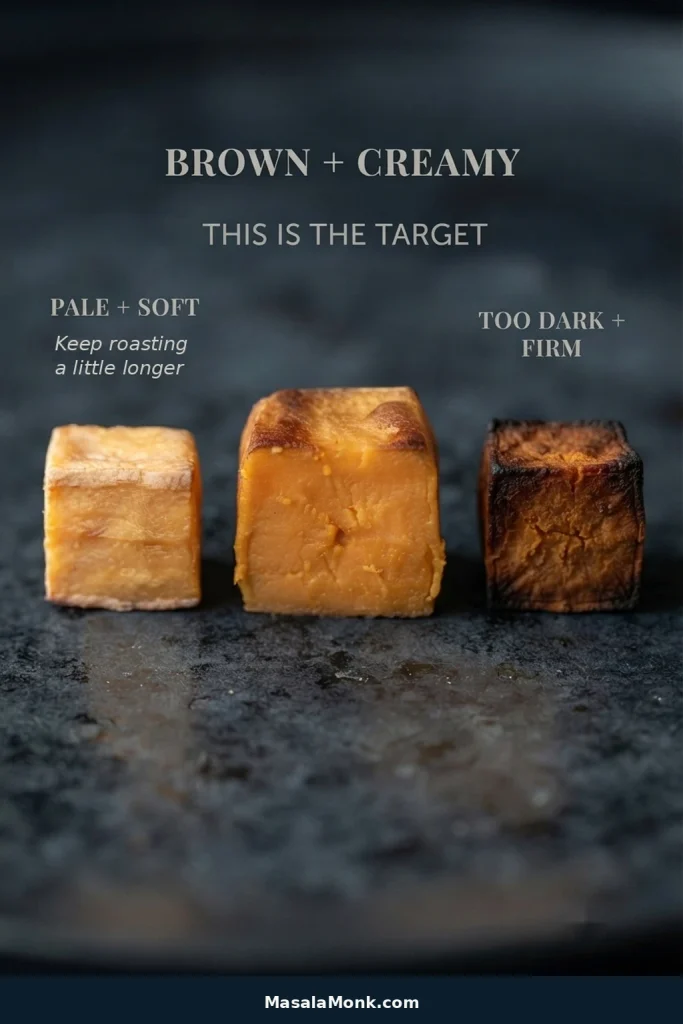
Soft and pale usually points to excess moisture, crowding, or weak pan contact. Deeply browned but still creamy is different: orange sweet potatoes naturally stay softer than regular roasted potatoes even when the edges are well roasted.
Match the Problem to the Pattern
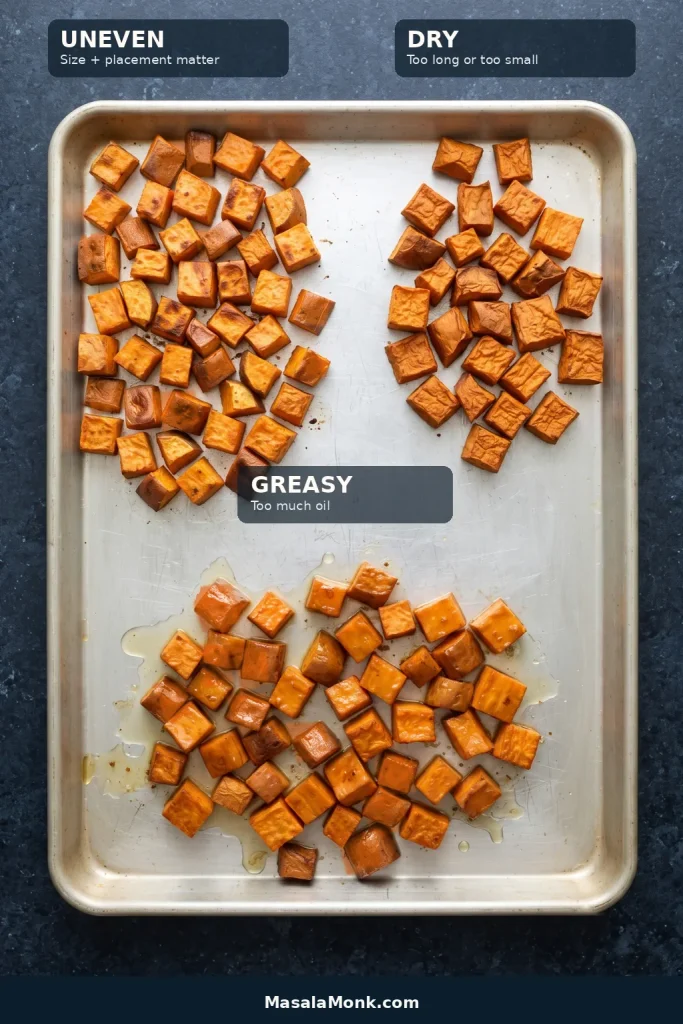
| What Happened? | What to Do |
|---|---|
| Soft and pale | Now: spread the cubes farther apart and keep roasting a little longer if the centers aren’t already very soft. Next time: dry them well and use a larger pan or two pans. |
| Brown but still very soft | Now: stop before the edges burn. Orange sweet potatoes naturally keep a creamy center. Next time: spread the pieces out and place broad cut sides directly against the hot pan, or use the optional starch coating if you want more crunch. |
| Dark outside, firm inside | Now: lower the heat slightly if needed and keep roasting until the centers are tender. Next time: cut oversized pieces a little smaller and keep the cubes more even. Watch convection ovens and dark sheet pans if the outside tends to brown too quickly. |
| Some pieces burnt, others underdone | Now: take out the finished pieces and let the larger ones continue. Next time: aim for a more even cut and rotate the pan when you flip. |
| Dry or shriveled | Now: use them in a sauced bowl or another dish where the dryness matters less. Next time: cut slightly larger and begin checking earlier. |
| Greasy | Now: leave excess oil behind on the pan. Next time: measure the oil and aim for a light sheen on the cubes. |
A batch that has softened still has plenty of life in it. Once chilled, the cubes work nicely in the roasted sweet potato variation in our potato salad ideas, with beans or chickpeas, lime, chili, and cilantro.
Make Ahead, Store and Reheat
Prep the Sweet Potatoes Up to a Day Ahead
Peel and cut them, then keep the cubes submerged in cold water in a covered container in the refrigerator for up to about 24 hours.
Keeping the cubes submerged helps prevent the exposed sides from drying and discoloring in the refrigerator. Drain them before cooking, dry them extremely well, then add the oil and seasonings shortly before roasting.
Refrigerate Leftovers Promptly
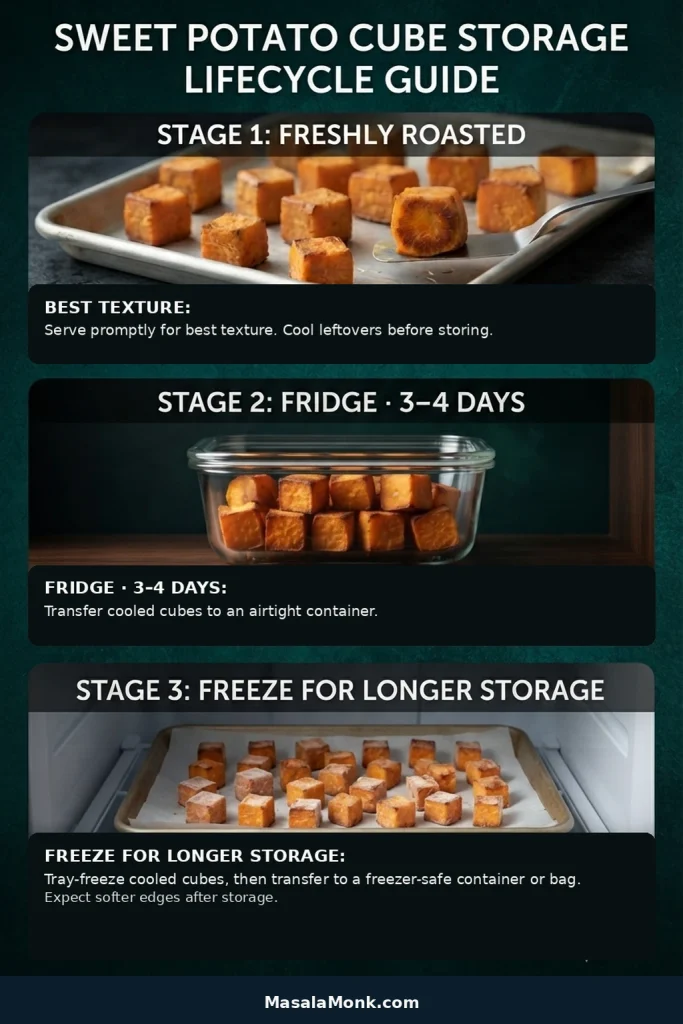
Transfer leftovers to a shallow, covered container and refrigerate them within 2 hours. There is no need to leave them on the counter until they are completely cool.
The USDA’s leftover-safety guidance recommends using most refrigerated cooked leftovers within 3–4 days. The roasted sides will soften somewhat as the potatoes chill; that is normal.
Freezing and Frozen Sweet Potato Cubes
For cooked leftovers, refrigerate them promptly, then spread the chilled cubes on a tray and freeze until firm. Transfer them to a freezer-safe container once frozen. Expect softer edges after freezing; that texture change is normal.
Starting with plain frozen sweet potato cubes? Roast them from frozen rather than thawing first. If the package gives oven directions, use those as your starting point because cube size and pre-cooking vary between products.
Reheat with Dry Heat for Better Texture
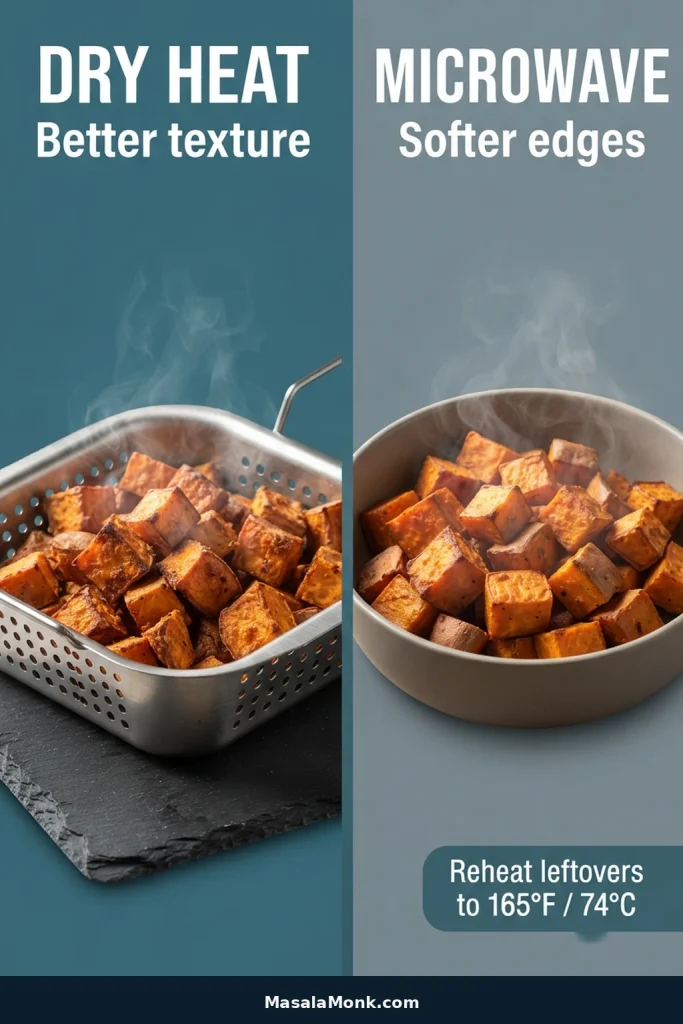
An oven or air fryer does the best job of bringing some texture back. Need them fast? The microwave will reheat them, though the cubes stay softer.
Reheat leftovers thoroughly; general USDA guidance for reheated leftovers is 165°F / 74°C.
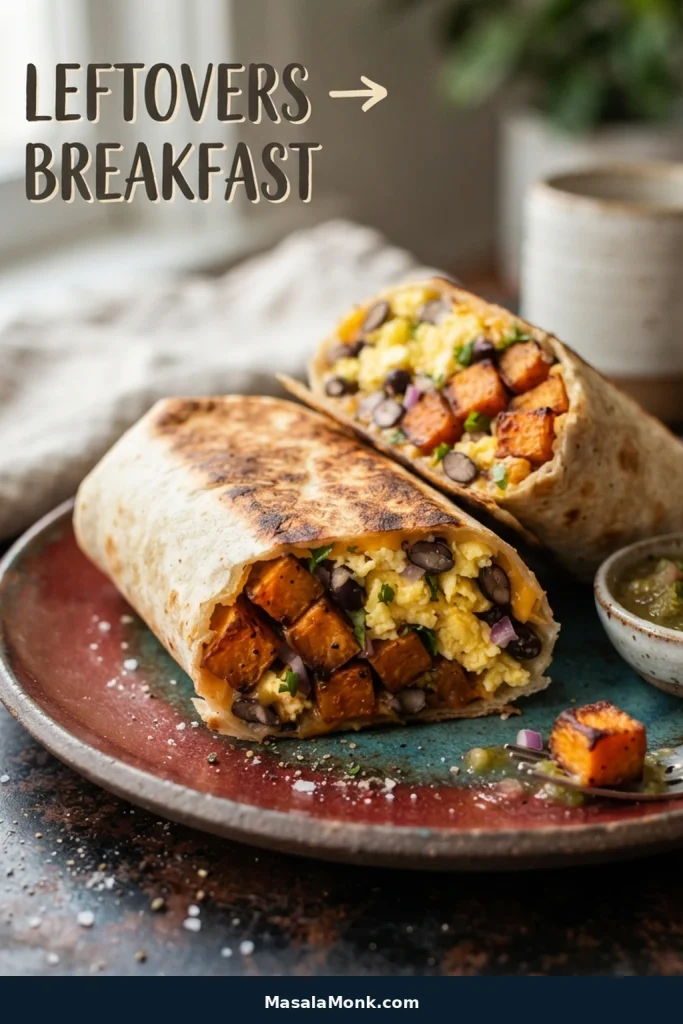
Leftover cubes are also excellent tucked into breakfast burritos with eggs and beans.