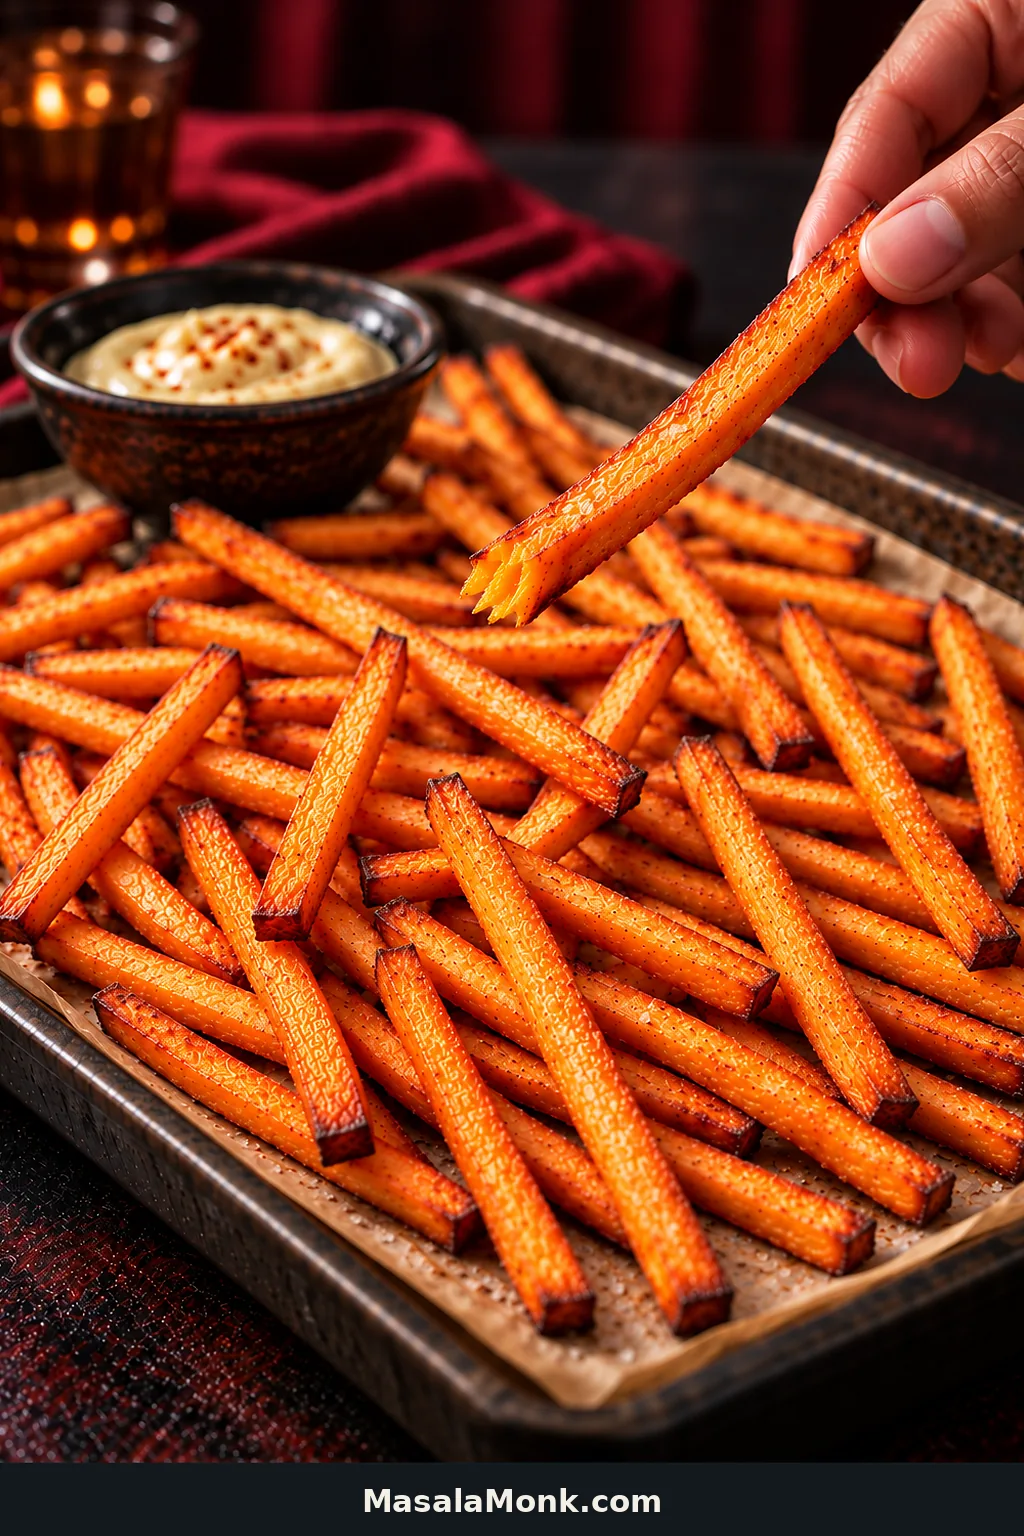
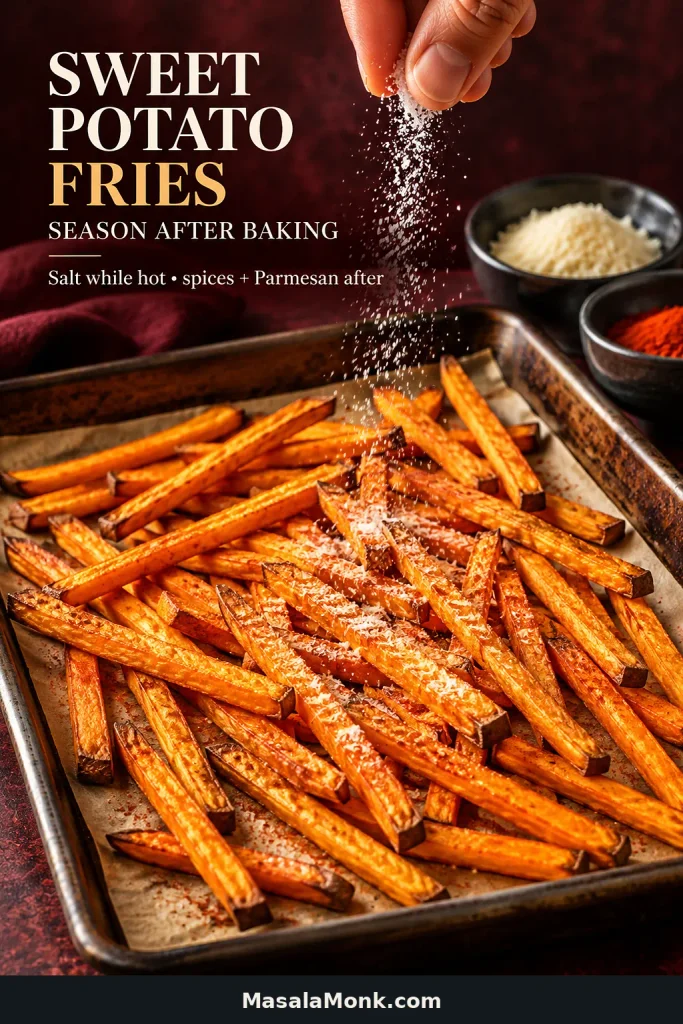
Pick up a sweet potato fry while it’s still hot: browned and caramelized around the edges, lightly crisp outside, with a tender, sweet center.
The frustrating tray looks very different. Thin tips darken while thicker pieces stay floppy. Some fries brown beautifully on top but remain pale where they touched their neighbors. Leave them in longer and the middle can start drying out without the outside getting much better.
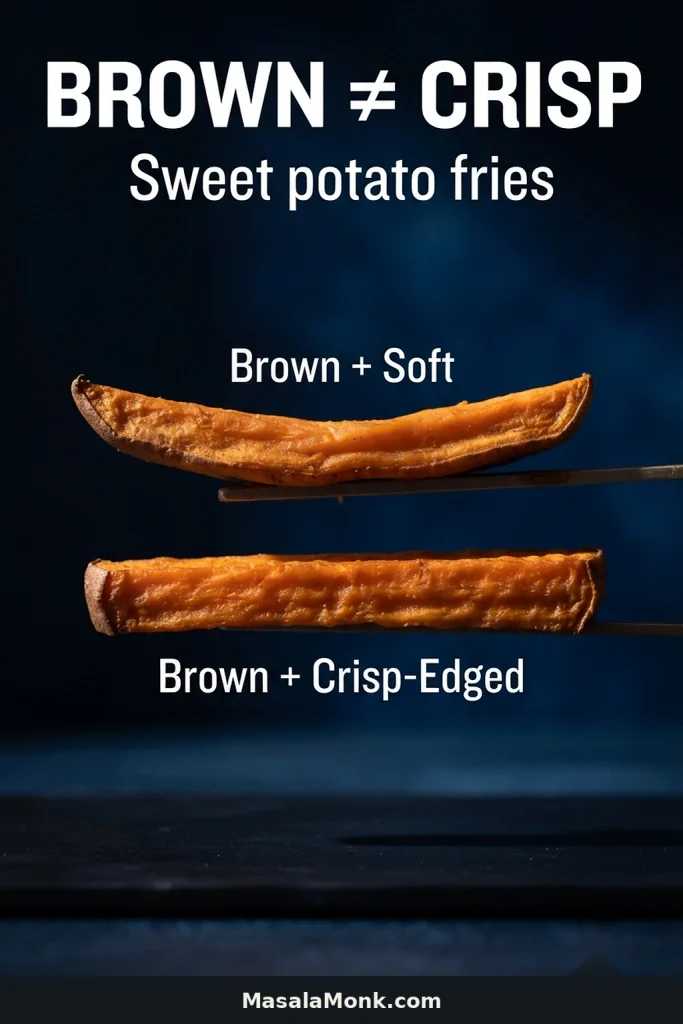
Brown is not the same as crisp.
If that sounds like your last batch, more oven time probably wasn’t the whole answer. The method is simpler than it sounds: cut the potatoes evenly, dry them well, use a light cornstarch coating and give them room across two pans.
You don’t need to soak the potatoes or crank the oven unusually high. And because these are baked rather than deep-fried, expect a lighter, more delicate crispness than a restaurant fry.
Cornstarch: faint dusting before oil; no obvious white patches afterward
Oil: a thin sheen, with none pooling on the pan
Space: two large pans, with visible parchment around most fries
Oven: 425°F / 220°C conventional; about 400°F / 205°C convection unless your oven converts the temperature automatically
Done: browned in patches, surface no longer shiny, tender inside
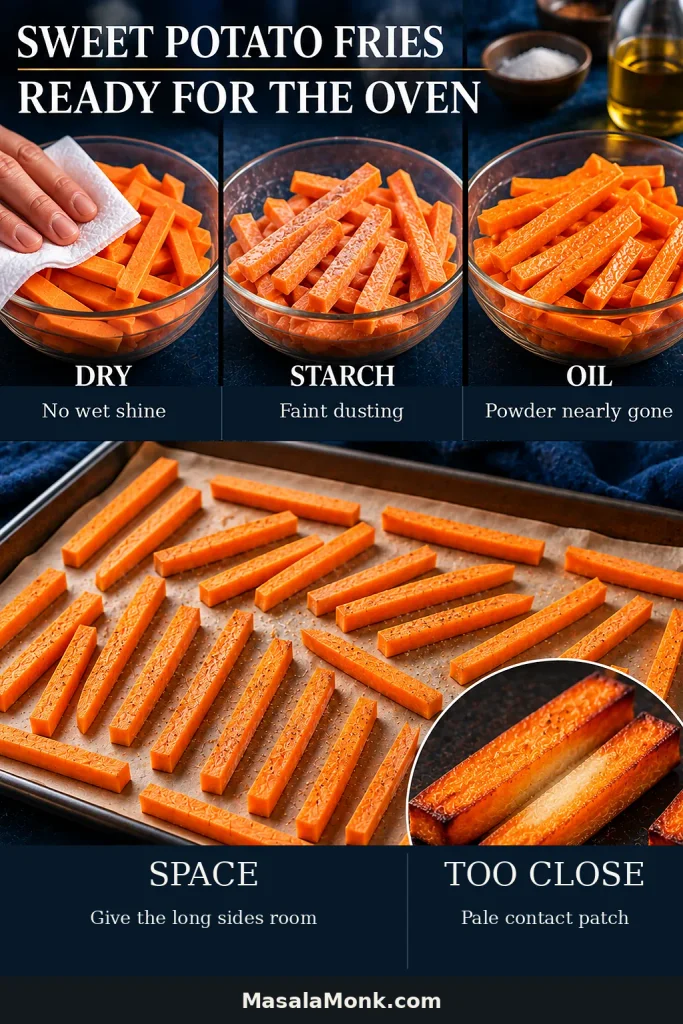
Dry surfaces, a nearly invisible starch coating, a thin sheen of oil and visible space between fries work together; if one part is off, extra oven time usually cannot fully compensate.
Baked Sweet Potato Fries Recipe
Prep Time: 15 minutes Cook Time: 35 minutes Total Time: 50 minutes Yield: 4 side servings Oven: 425°F / 220°C
Equipment
Sharp chef’s knife
Cutting board
Large mixing bowl
Clean kitchen towels or paper towels
2 large rimmed half-sheet pans, about 18 × 13 inches / 46 × 33 cm
Parchment paper
Thin spatula or turner
Ingredients
2 lb / 907 g orange-fleshed sweet potatoes
1 tablespoon (8 g) cornstarch
2 tablespoons (30 ml) olive, avocado or neutral oil
½ teaspoon fine salt, plus more to taste
Optional finishing seasonings include smoked or sweet paprika, garlic powder, black pepper, cayenne and finely grated Parmesan.
1. Cut the Sweet Potatoes Evenly
Heat the oven to 425°F / 220°C. Set racks in the upper and lower thirds and line both pans with parchment.
Using convection? Use about 400°F / 205°C and check a few minutes earlier. Some ovens automatically lower the temperature when convection is selected. If yours does, enter 425°F / 220°C and let the oven make the adjustment for you.
Remove the skin for a smoother, more uniform fry, or scrub the sweet potatoes thoroughly and leave it on if you like the texture.
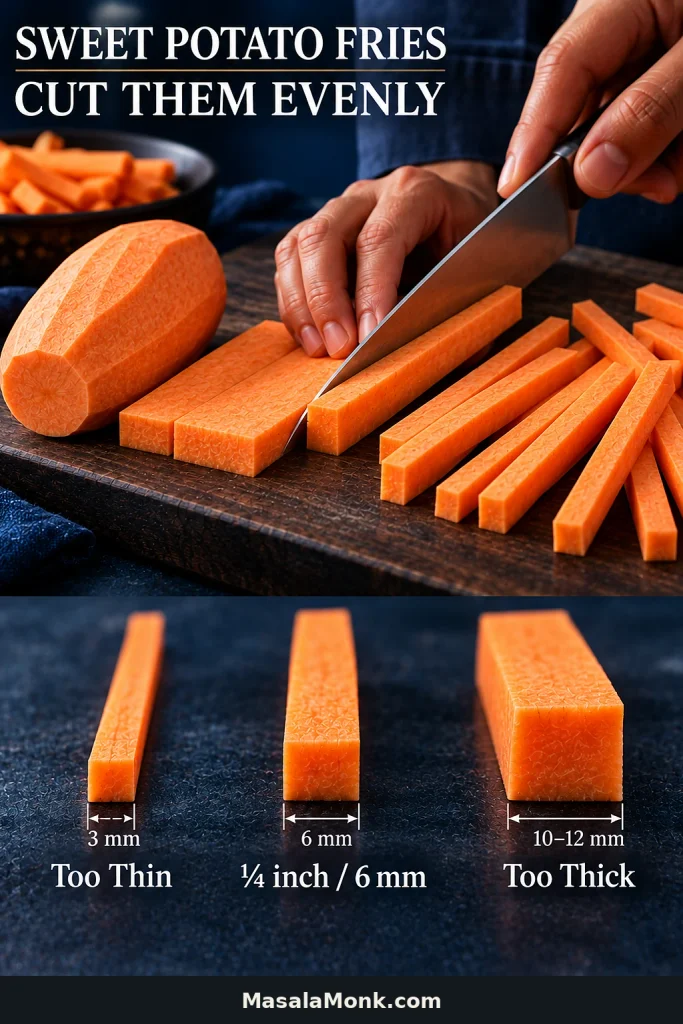
Raw sweet potatoes can be awkward to cut, so give yourself a stable starting point. Trim the ends and slice a thin piece from one side so the potato sits securely on the board. Cut it into planks, then into sticks about ¼ inch / 6 mm thick.
Some fries will be shorter than others. That’s fine. Consistent thickness matters much more than identical length. Trim very skinny tapered ends or keep them to one side so you can pull them from the oven sooner.
2. Dry the Cut Sides Well
Spread the cut fries over clean towels and pat them thoroughly, turning them as you work. Don’t stop while the cut sides still look wet or shiny. Once that shine is gone, they’re ready for the cornstarch.
3. Add Cornstarch, Then Oil
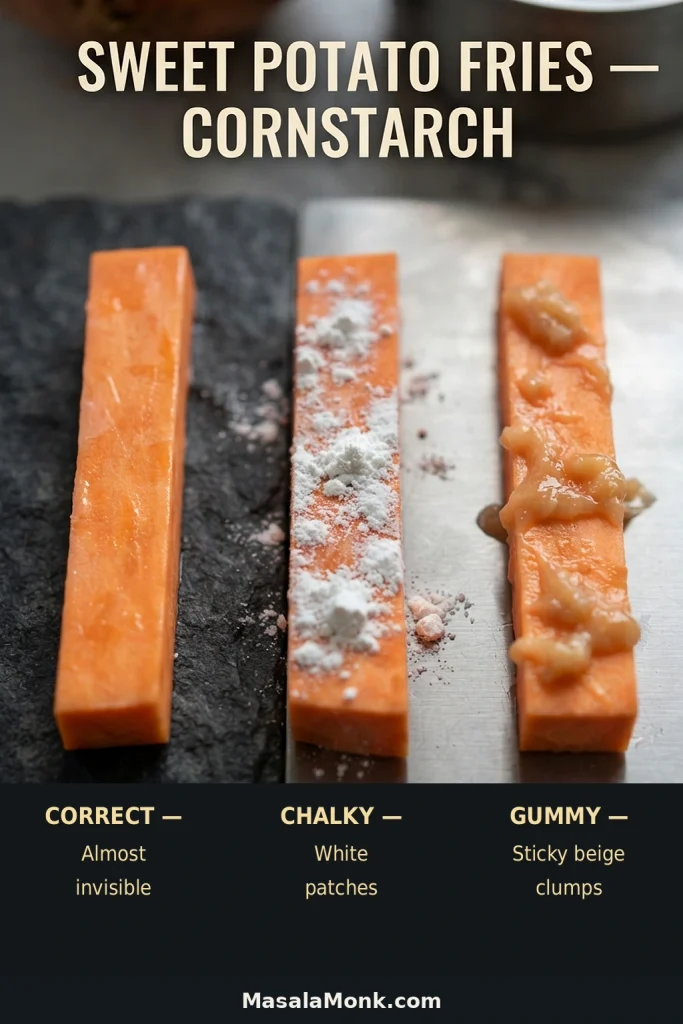
Put the fries in a large bowl, sprinkle over the cornstarch and toss until they carry a faint, even dusting. Add the oil and toss again. The powdery look should mostly disappear, leaving a thin sheen and no obvious white patches.
4. Spread Them Across Two Pans
Divide the fries between the pans in a single layer. Leave visible parchment around most pieces. A few touching tips are fine; long sides pressed together are where trouble starts.
Only one large pan? Use two batches instead of squeezing everything together.
5. Bake the First Side
Give the first side about 20 minutes. Take a look through the oven door around 15 minutes, especially if some fries are thinner than the rest.
Leave them alone while the first side browns. Moving the fries repeatedly makes it harder for the underside to develop good color.
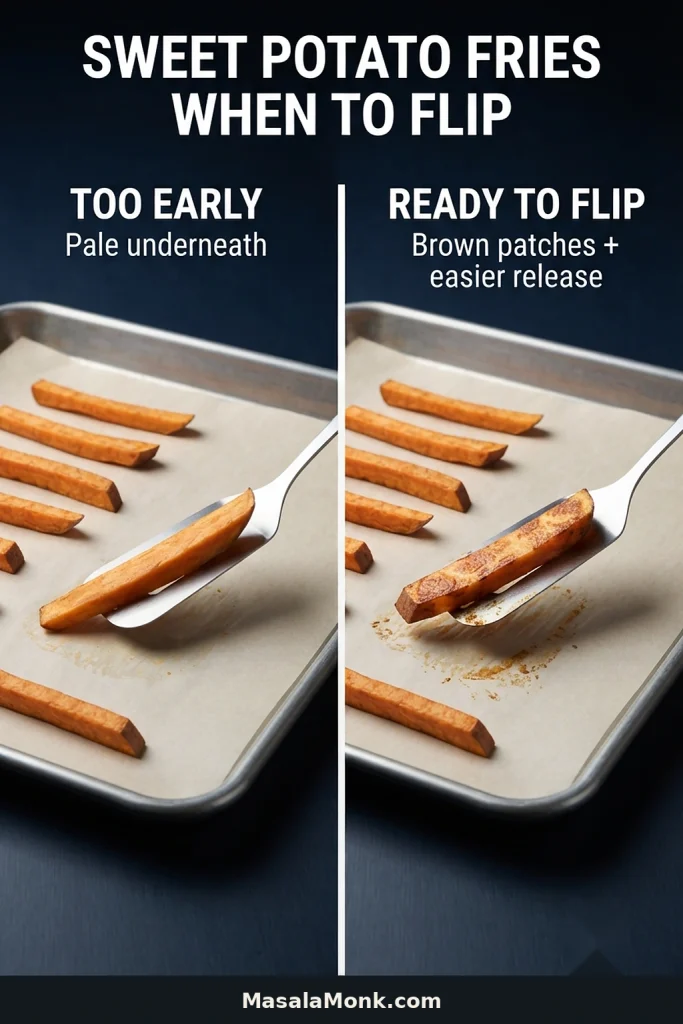
Turn over one of the thicker pieces before flipping the batch. You want definite golden-brown patches underneath and easier release from the parchment.
Look at the underside before you look at the clock. Still pale and firmly stuck? Give it another couple of minutes before trying again.
A browned underside usually releases more readily. If a fry is still pale and firmly stuck, give that contact surface a little more time before turning the batch.
6. Flip, Rotate and Swap
Turn the fries, putting a paler side down when you can. Rotate both pans from front to back and swap their rack positions.
7. Finish by Sight
Bake for another 10–15 minutes. Begin checking at 10 minutes. Smaller pieces may be ready first; take them out and let the thicker ones catch up.
The fries are ready when several sides have browned, the surface looks set rather than glossy and the centers are tender. Season immediately with the salt, taste, then add more if needed. Add any other finishing seasonings while the fries are hot.
Serve promptly. The darkest corners should taste almost caramelized against the salt, while the middle stays tender and distinctly sweet.
What Done Looks Like
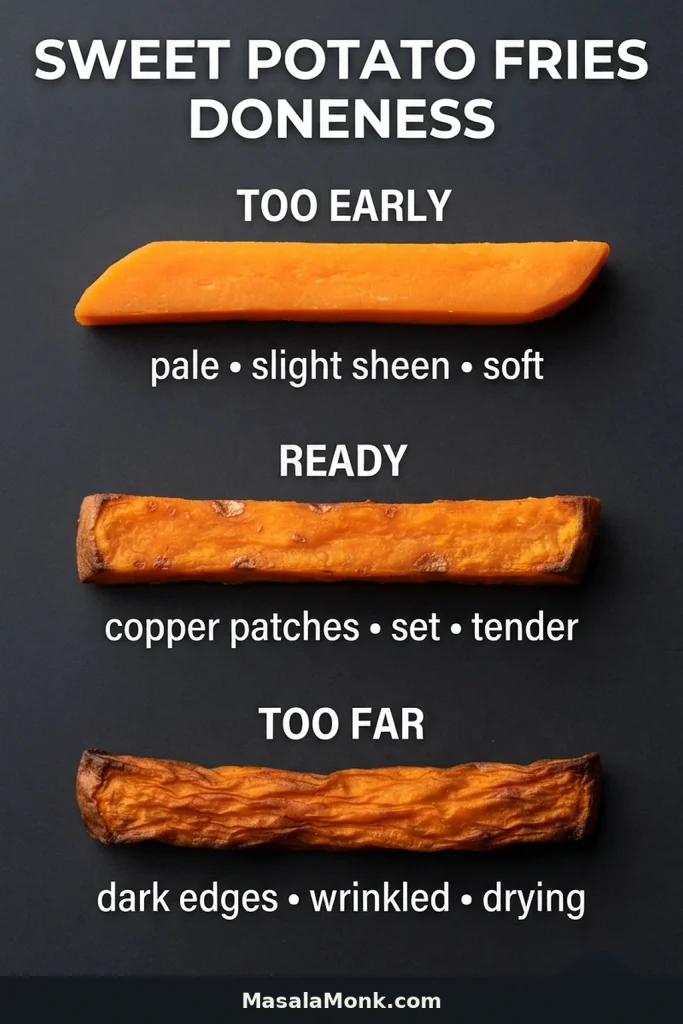
Too early: pale, glossy and floppy.
Ready: browned across several surfaces, with a set exterior and a tender center.
Too far: very dark and shriveled, with the center starting to dry out.
Treat doneness as a range, not an exact color match: most fries should look set and browned without crossing into very dark, shriveled edges.
A few fries will be darker than others. Homemade fries don’t need to match.
Sweet potato fries can turn brown before they become crisp because their natural sugars color quickly. If they’re already brown but still soft, more heat isn’t automatically the answer.
Brown + soft points back to the setup; brown + set is closer to the target. Darker color alone cannot tell you whether the fries are actually getting crisper.
Sweet potatoes don’t behave quite like the Russets commonly used for homemade French fries. Push the heat too far and skinny ends can burn before the rest of the fry improves.
More time has a limit too. Once the middle starts drying out, the fries turn leathery instead of getting crisper. If the color is already there, look back at the setup before chasing a darker shade. Start with the cut.
Why a ¼-Inch Cut Works
Thickness changes how quickly the outside browns relative to the center. Around ¼ inch / 6 mm gives you a useful middle ground.
Make one ¼-inch / 6 mm reference stick first, then compare width rather than length as you cut; it is faster than measuring every fry and keeps the tray more consistent.
Cut
What Usually Happens
Very thin
Tips and edges can scorch before the rest finishes.
¼ inch / 6 mm
Browns well while keeping a tender center.
Thick
A thicker center with less browned exterior.
You do not need machine-cut fries. A few short pieces, crooked edges and odd ends are part of making them at home. Watch for pieces that taper sharply from thick to thin. The skinny end can blacken while the thick end is still underdone—the same fry is trying to cook at two different speeds.
Do Sweet Potato Fries Need to Soak?
No. You can skip the soak for this method.
Once the fries are cut, you can go straight to drying and coating. If you’re soaking them—or holding cut potatoes in water ahead of time—drain them well and dry the surfaces thoroughly before the cornstarch goes on.
Cornstarch Should Almost Disappear
For 2 lb / 907 g sweet potatoes, 1 tablespoon / 8 g cornstarch is enough. After the oil goes in, the coating should be almost invisible.
A perfectly white coating isn’t the goal. Obvious white patches after the oil goes in mean the starch is heavier than it needs to be. Sticky beige clumps tell you something different: there was probably still water on the potatoes when the cornstarch hit them.
Chalky white patches call for a lighter, more even starch layer; sticky beige clumps send you back to the drying step instead of toward more starch or oven time.
This is only a thin starch film. Battered fries use a much more substantial coating and produce a different kind of crust.
Can You Make Them Without Cornstarch?
Yes. Keep the same cut, oil and spacing. The fries will still brown and develop crisp edges, but the outside will be closer to a well-roasted sweet potato than the lightly coated version above.
Why Sweet Potato Fries Aren’t Crispy: Read the Tray
If you’ve followed sweet potato fry recipes before and still pulled out a tray of soft orange sticks, the baking time may not have been the real problem.
“Not crispy” isn’t one problem. A pale, floppy fry failed differently from one that is beautifully brown but still soft. Chalky white fries are telling you something else again.
Start with what you can see on the tray.
Match the Symptom to the Fix
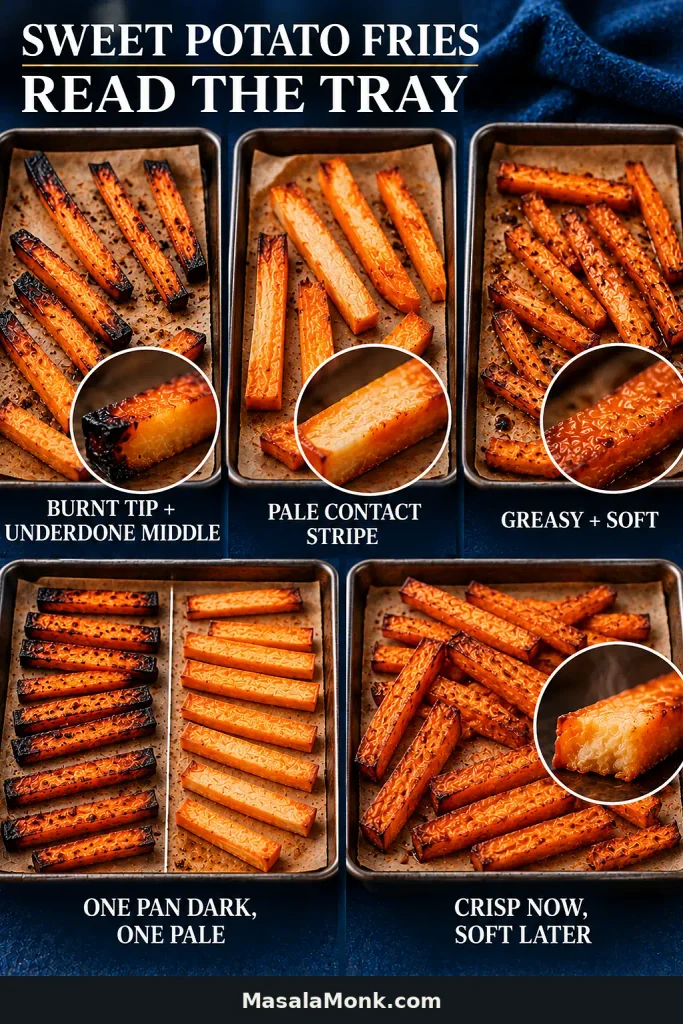
Use the tray like a one-variable test: match the visible symptom to its likely cause, change that variable next time and keep the rest of the method steady.
What You See
Check First
Try Next
Pale + floppy
Moisture, spacing, browning
Dry more thoroughly, leave more space and confirm the underside is browning.
Brown + soft
Cut, coating, spacing
Fix the setup before adding more oven time.
Burnt tips + underdone centers
Uneven or tapered cuts
Avoid sharply tapered pieces and keep the sticks close to ¼ inch / 6 mm thick.
White + chalky
Too much or uneven cornstarch
Use a lighter, more even dusting.
Sticky or gummy patches
Water before cornstarch
Dry the cut surfaces more thoroughly before coating.
Greasy + soft
Oil and spacing
Measure the oil and spread the fries out.
One pan dark, one pale
Rack position or oven hot spots
Rotate the pans and swap rack positions.
Crisp at first, soft later
Trapped steam
Keep them uncovered and serve promptly.
Dry + leathery
Overbaking
Stop earlier; more time will not fix the original problem.
Firmly stuck + pale
Browning and release
Give the first side another couple of minutes before forcing it loose.
Crisp at First, Soft Later
Some softening is normal as moisture from the hot center works its way outward. Pile the fries into a deep bowl or cover them and that steam gets trapped around them.
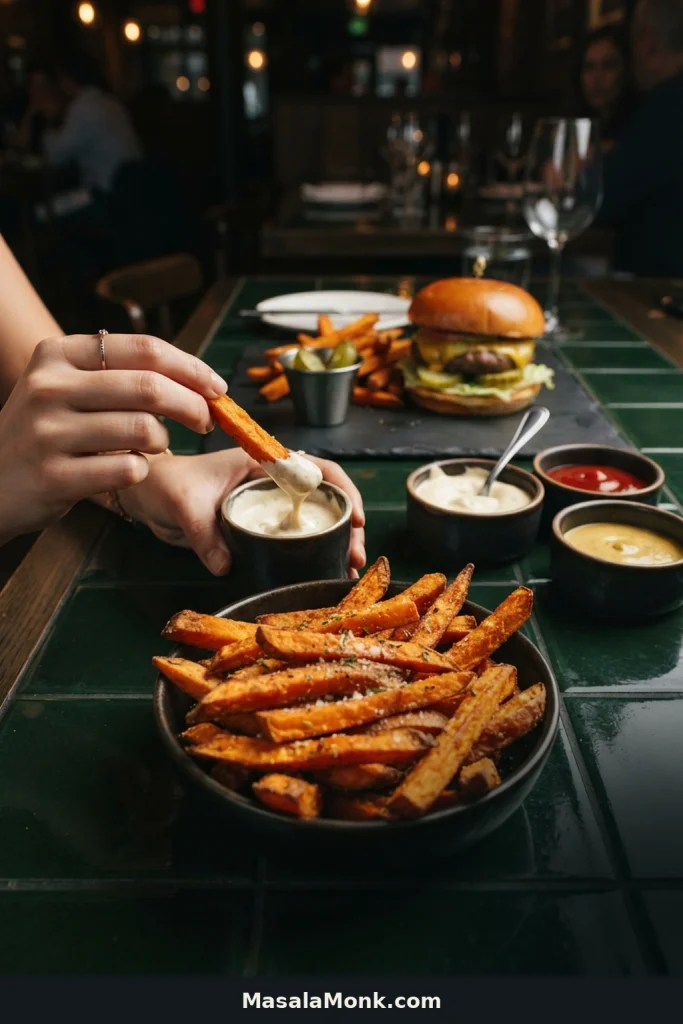
Keep them spread out until serving and put wet sauces alongside. A cool, thick garlic aioli gives you the creamy contrast without soaking the whole tray.
The base fries bake without paprika, garlic powder or Parmesan so those flavors can go on afterward instead of darkening before the potatoes are ready. Salt the fries as soon as they leave the oven, then add anything else while they’re still hot.
Smoked paprika, garlic powder and black pepper make an easy smoky version; add a little cayenne or chile powder for more heat. For garlic-Parmesan fries, toss with garlic powder, black pepper and finely grated Parmesan, which catches especially well on the browned edges.
Divide the hot batch before finishing it if you want several flavors; one tray can become smoky paprika, cayenne and garlic-Parmesan fries without changing the baking method.
What to Serve with Sweet Potato Fries
Sweet potato fries are especially good with something salty, tangy or spicy to push against their sweetness. A hot fry dragged through a cool dip is hard to improve on. The fries also make an easy side for a homemade burger patty with sharp pickles or mustard.
For dipping, homemade ketchup is the classic. Want something creamier? Stir ¼ cup / 60 ml mayonnaise with 1–2 teaspoons Sriracha or another hot sauce and a squeeze of lime. A thicker honey mustard works particularly well if you want tang without much heat.
Keep the sauce alongside instead of pouring it over the tray so the fries stay crisp longer.
Match the dip to the fries: simply salted fries can carry a bolder spicy or tangy sauce, while strongly seasoned fries often benefit from a cleaner creamy contrast.
Make Ahead, Store & Reheat
Cut Ahead
You can prepare cut sweet potatoes up to 24 hours ahead. Keep them submerged in cold water in a covered container in the refrigerator.
Drain them before cooking and dry the cut surfaces thoroughly. The water is useful for holding the potatoes; you just don’t want it following them into the cornstarch bowl.
Store Leftovers
Refrigerate leftover fries promptly and use them within 3–4 days, in line with USDA leftover-storage guidance. They will soften in the refrigerator, but an oven or toaster oven can firm the outside up again.
Reheat Sweet Potato Fries
Spread the fries in a single layer and reheat at 400°F / 205°C until hot and the outside has firmed up again, usually around 5–10 minutes. A toaster oven works well for a small portion.
Microwaving gets them hot, but it won’t bring the crisp edges back.
After one tray, you’ll know more than a timer can tell you: whether your cuts are even, where your oven browns fastest and what a properly browned underside looks like.
Then get the fries to the table while they’re hot. The crispest edges won’t wait around forever.
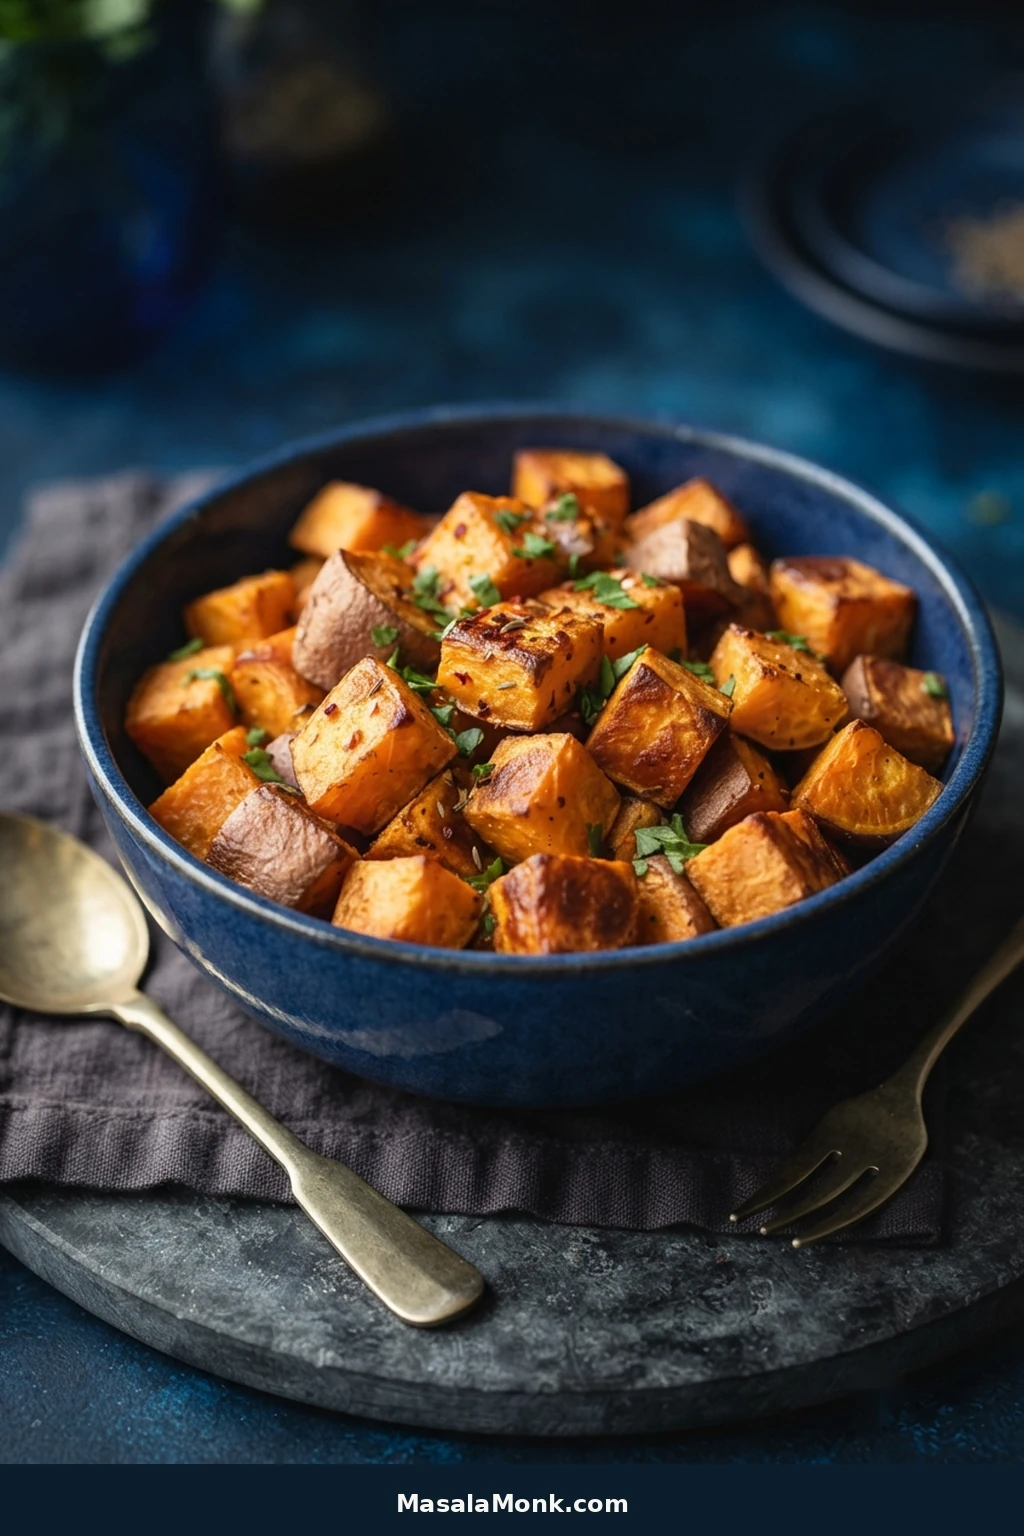
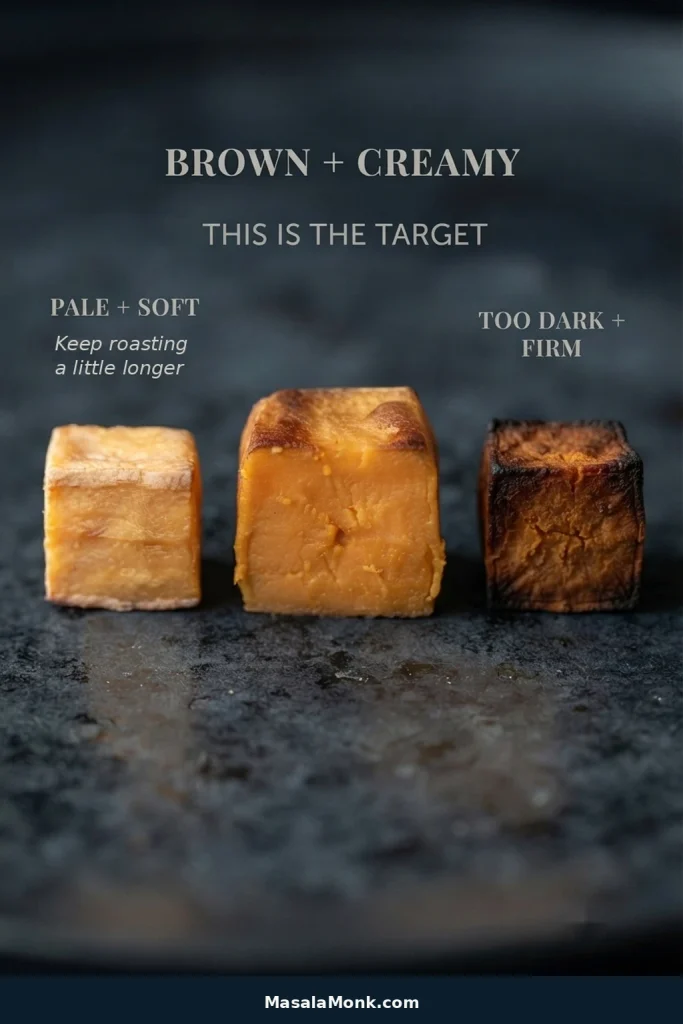
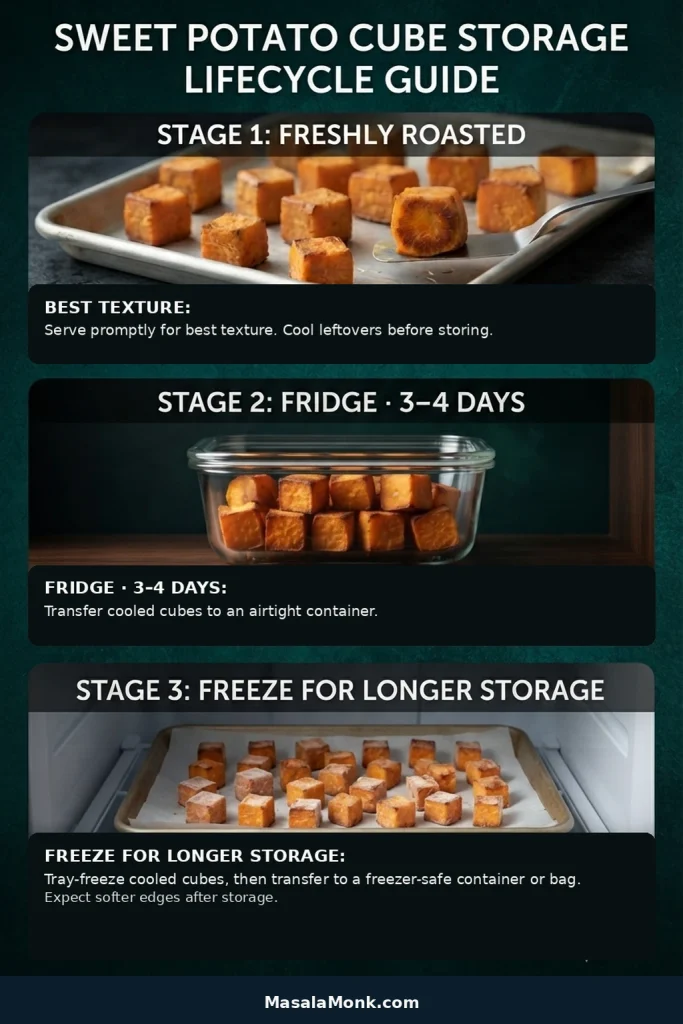
A good tray of roasted sweet potatoes has deeply golden cut sides, caramelized corners, and creamy centers that yield easily without falling apart. The edges have enough bite to contrast with the soft, sweet middle.
Cut the pieces fairly evenly, dry them well, coat them lightly with oil, and leave room around them on the pan. Roughly ¾-inch (2-cm) cubes at 425°F (220°C) give you plenty of browning without drying out the center.
Orange sweet potatoes stay creamy inside even when the cut sides are well roasted. Think crisp edges and golden corners rather than a hard shell around every cube. Serve them straight from the tray as a side, or use them in bowls, salads, tacos, or breakfast the next day.
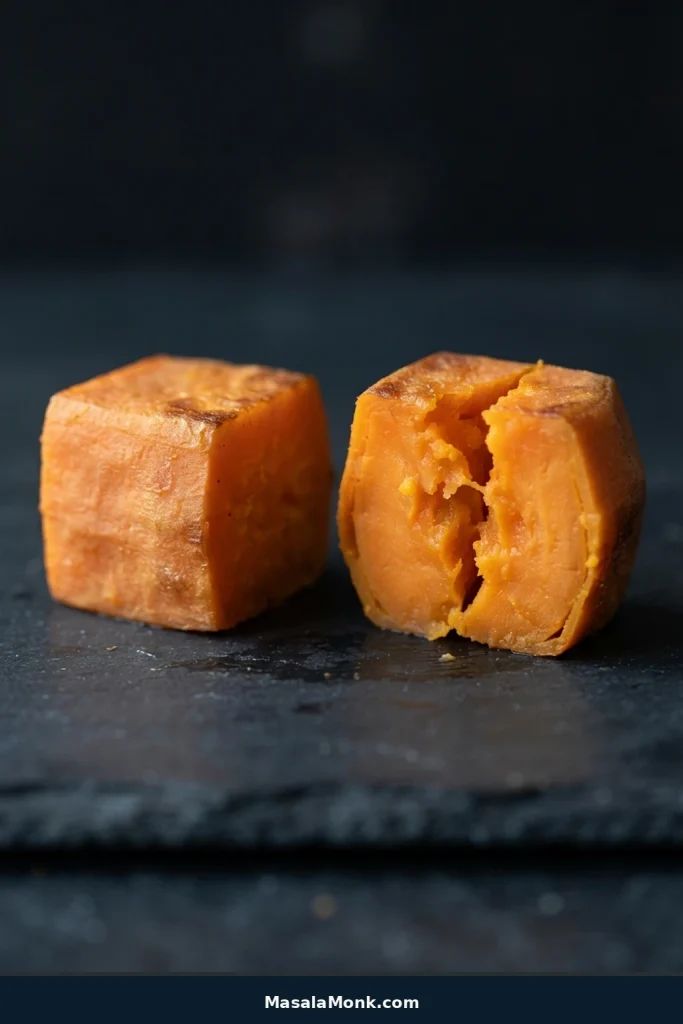
A finished cube should yield easily while the center still looks cohesive rather than mashed. Meanwhile, the browned exterior should stay relatively thin—if it becomes a thick, hard shell, the pieces have moved beyond the texture this roast is aiming for.
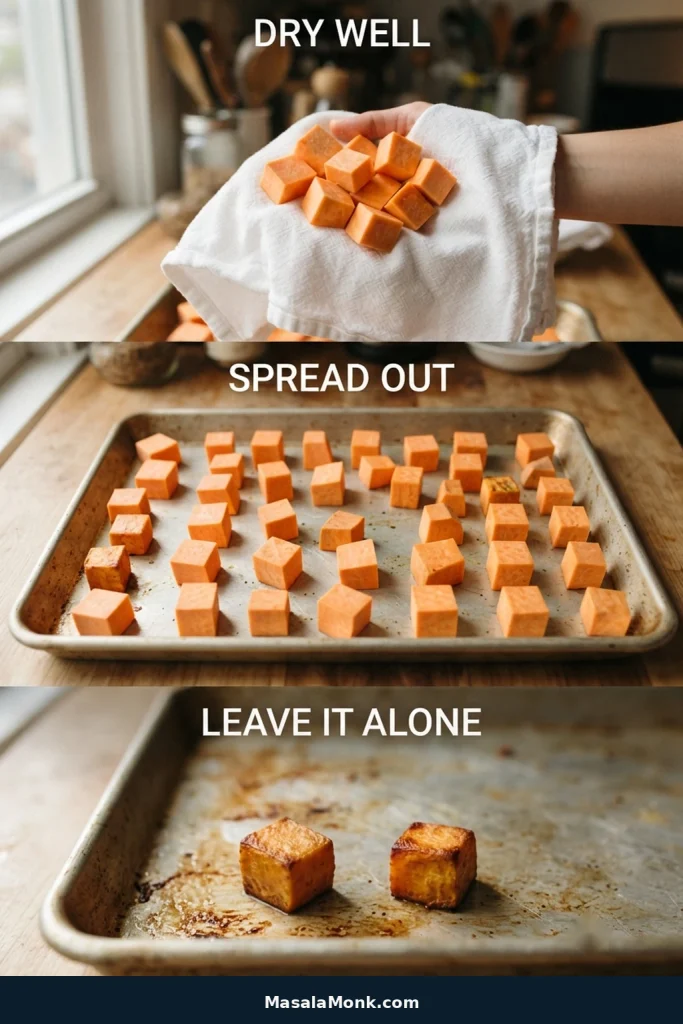
The short version: dry them well, spread them out, and leave the first side alone. Get those three things right and the rest is mostly adjustment.
Savory roasted sweet potato cubes with browned edges, creamy centers, and a simple paprika-garlic seasoning that lets the natural sweetness come through.
No soaking or parboiling is needed for roasting: season the cubes, spread them in one layer, roast them undisturbed, then flip once to finish.
Prep Time 15 minutes
Cook Time 25–35 minutes
Total Time 40–50 minutes
Yield About 6 side servings
Ingredients
2 lb (900 g) orange-fleshed sweet potatoes
2 tablespoons (30 ml) olive oil or avocado oil
¾ teaspoon fine sea salt (roughly 4 g), plus more to taste after roasting
½ teaspoon garlic powder (about 1.5 g)
½ teaspoon mild or sweet paprika (about 1 g)
¼ teaspoon freshly ground black pepper (about 0.5 g)
Equipment
Large, sturdy rimmed baking sheet, ideally light-colored bare aluminum, about 13 × 18 inches (33 × 46 cm)
Sharp chef’s knife
Cutting board
Large mixing bowl
Thin, wide spatula
Vegetable peeler, optional
Instructions
Heat the oven. Preheat to 425°F (220°C). Use the middle rack for one pan; for two pans, use the upper and lower thirds.
Prep the sweet potatoes. Scrub and dry them well. Leave the skin on for extra chew, or peel for a more uniformly tender exterior. Trim narrow ends, then cut into planks, strips, and roughly ¾-inch (2-cm) cubes. Reasonably even is enough.
Oil and season. Toss the cubes with the oil, salt, garlic powder, paprika, and black pepper until lightly and evenly coated.
Give them room. Spread the cubes in one layer with visible gaps, placing broad cut sides against the pan where practical. If the tray looks packed, use two pans.
Roast the first side. Check underneath a few cubes at around 15 minutes. If they are pale, keep roasting. Once a browned cube releases cleanly, it is ready to turn; if it clings, wait another minute rather than scraping.
Flip and finish. Turn once. Rotate a single pan 180 degrees if your oven browns unevenly; with two pans, rotate and swap rack positions. Continue until the largest cubes are tender and several flat sides are deeply browned. Most one-pan batches take 25–35 minutes total.
Season and serve. Taste while hot, add another pinch of salt if needed, and serve while the freshly roasted sides are at their best.
Recipe Notes
Convection/fan oven: if your oven does not automatically convert conventional temperatures, use about 400°F (205°C) and begin checking early. If your oven adjusts automatically, set it to 425°F (220°C) as written.
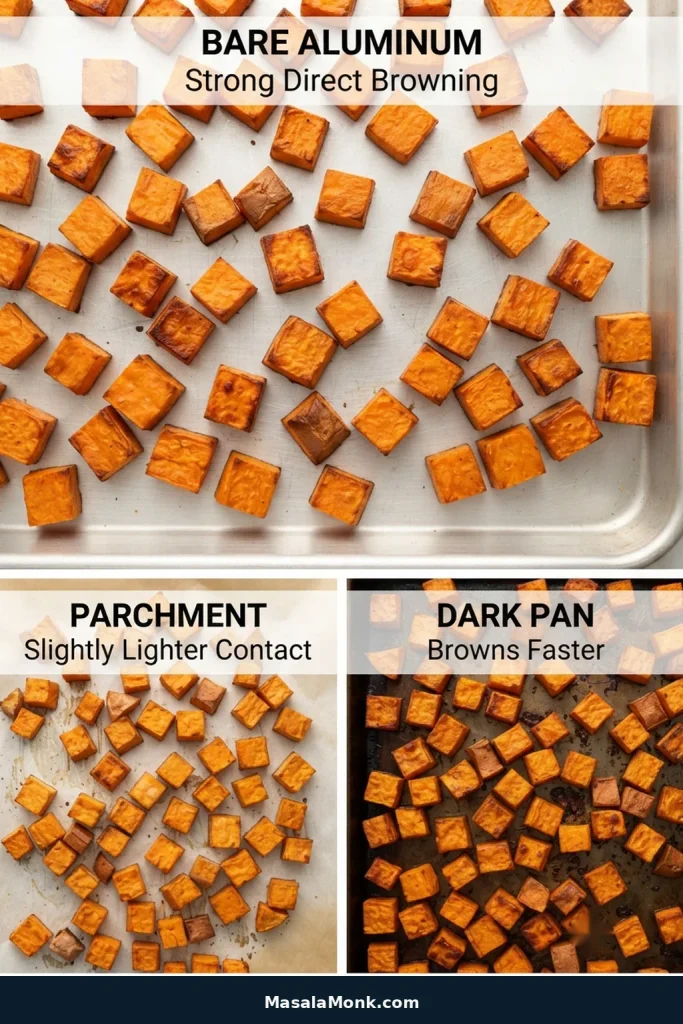
Pan choice: a light-colored bare aluminum sheet pan is the best default. It gives the potatoes direct contact for good browning without the especially aggressive heat of a dark-coated pan.
Parchment: it makes cleanup easier and still works, though the sides touching the paper will usually stay a little lighter. Check the manufacturer’s temperature rating.
Sweet potato variety: this recipe is written for moist orange-fleshed sweet potatoes. Many Japanese, white, and purple varieties are denser and drier, so their texture and roasting time can differ.
Method note: This version is based on established sweet-potato roasting methods and recurring home-cook troubleshooting. MasalaMonk has not independently kitchen-tested this exact version.
For texture, the biggest variables are cut size, oven heat, and how much contact the potatoes get with the pan.
These three moves help browning in different ways. Drying removes surface water, spacing lets steam escape, and leaving the first side alone preserves uninterrupted contact with the hot sheet pan.
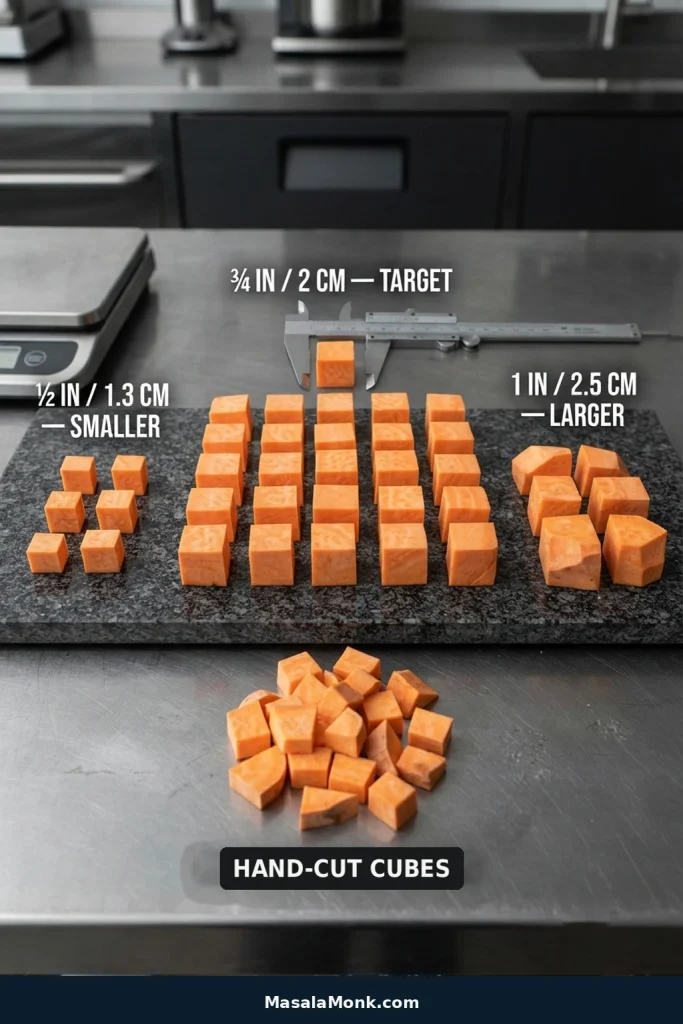
For this method, ¾ inch / 2 cm is our preferred size.
Cut Size
What Changes
½ inch / 1.3 cm
Cooks quickly and exposes plenty of cut surface to the heat, but can dry or darken sooner.
¾ inch / 2 cm
Our preferred balance: plenty of browning with a tender center.
1 inch / 2.5 cm
Takes longer and gives you more soft interior with less browned exterior in each bite.
Aim for consistency rather than perfection. Very small scraps will be ready sooner than the larger cubes, so trimming especially narrow ends makes the whole tray easier to judge.
Use the ¾-inch (2-cm) cube as a visual reference. If a few scraps are much smaller, pull them early rather than over-roasting the rest; oversized chunks may need a little extra time.
Temperature and Timing
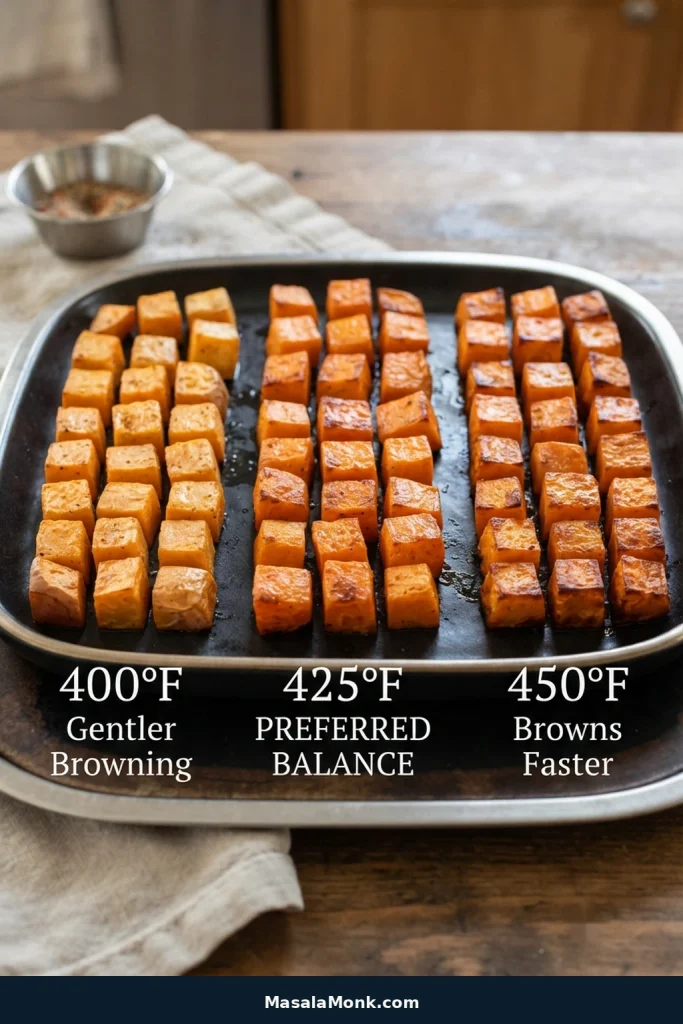
For ¾-inch (2-cm) sweet potato cubes, roast at 425°F (220°C) for about 25–35 minutes, starting to check around 15 minutes.
At 425°F, cubes this size have time to soften through before the edges get too dark. By comparison, 400°F (205°C) gives a gentler roast and usually needs a little more time. Meanwhile, 450°F (230°C) darkens the outsides faster, so smaller pieces need closer attention.
Use the potatoes rather than the timer as the final judge. One of the largest cubes should yield easily to a fork or paring knife.
The doneness target does not change with oven temperature—the checking window does. At higher heat, contact faces deepen sooner, so start watching earlier; at lower heat, expect browning to build more gradually before the largest cubes become tender.
Same-oven dinner: our baked chicken breast also cooks at 425°F / 220°C. Start the sweet potatoes first and let each dish finish by its own doneness cues.
How to Get Better Browning and Crisp Edges
Dry Them and Give Them Room
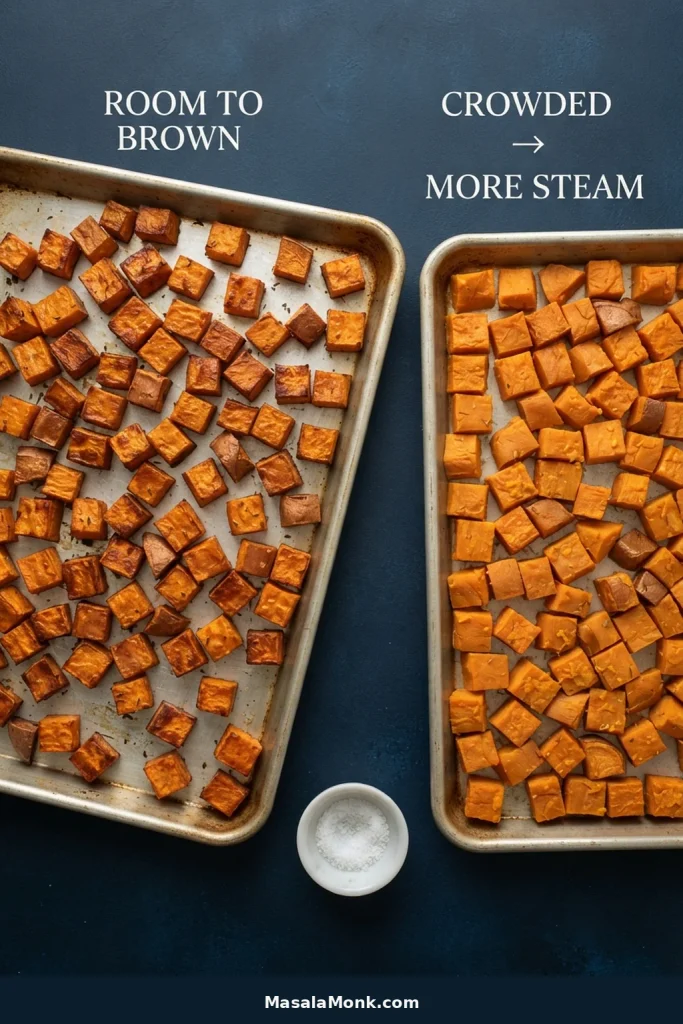
Dry the sweet potatoes thoroughly after washing, then spread them so steam can escape between the pieces. Surface water and a crowded tray both work against browning. A thin sheen of oil is enough.
You do not need to measure the gaps. Instead, look for exposed sheet pan around most cubes; if several pieces touch on multiple sides, the tray is crowded enough to hold extra steam and weaken direct pan contact.
Two pans? Swap rack positions and rotate them when you flip.
Bare Metal or Parchment?
For the deepest browning, use bare metal rather than parchment. The sweet potatoes sit directly against the hot pan. A side-by-side vegetable roasting test that included sweet potatoes also found the strongest browning on bare metal.
Parchment makes cleanup easier and still works; expect the sides touching it to stay a little lighter.
Think of pan choice as a trade-off. Bare aluminum favors strong direct browning, parchment favors easier cleanup, while a dark pan rewards earlier underside checks because it can build contact color faster than the recipe’s default light sheet pan.
Give the First Side Time
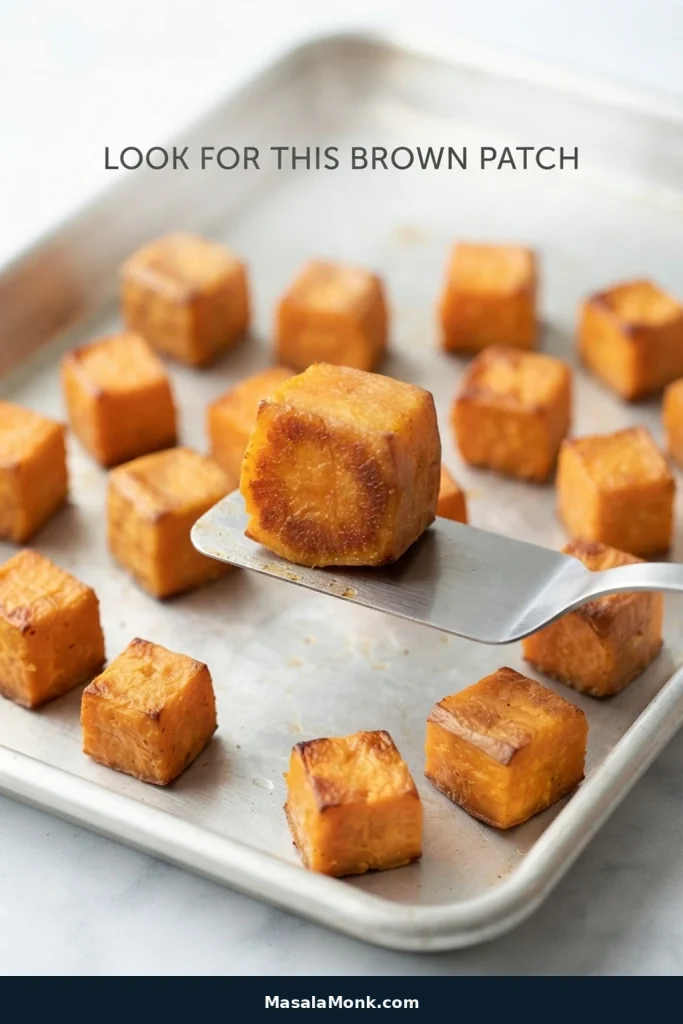
Leave the cubes alone long enough for the side touching the pan to brown properly. Lift one cube and look underneath: a broad brown patch is what you are waiting for. Once that side is ready, it usually releases more easily too. If one end of your oven runs hotter, rotate the pan when you flip.
One browned cube proves only that one spot is ready. Therefore, check two or three pieces from different parts of the pan before flipping the batch—especially if your oven or sheet pan tends to brown more strongly on one side.
Want a Crunchier Coating?
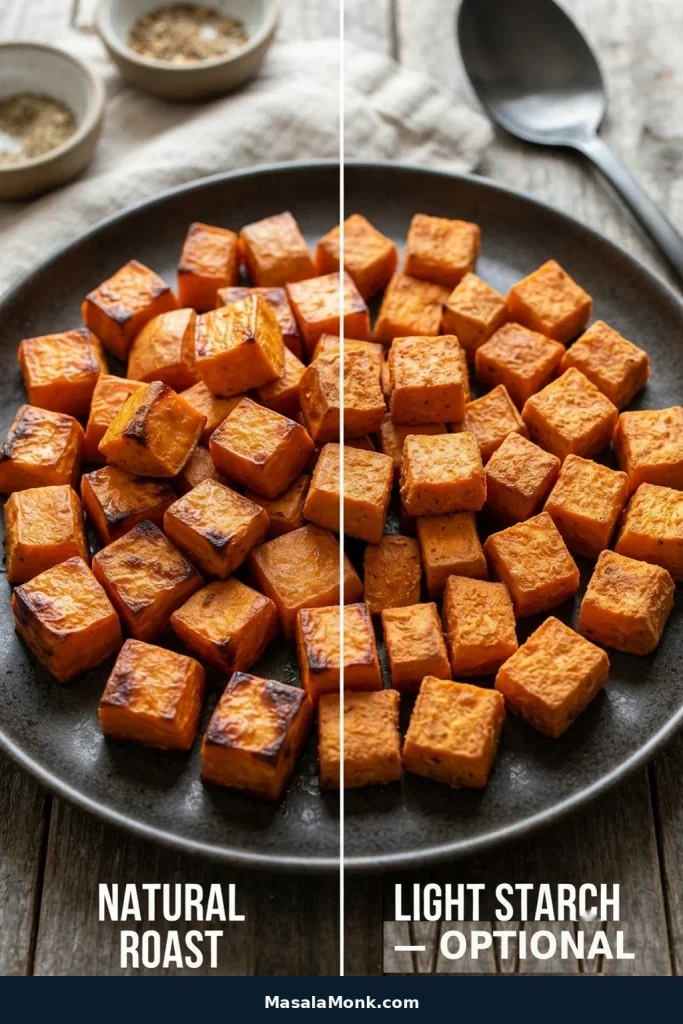
For this version, toss the 2 lb / 900 g sweet potatoes with the oil first. Mix up to 1 tablespoon cornstarch or potato starch with the dry seasonings, sprinkle it over the potatoes, toss briefly, and roast immediately.
Keep the coating light. Too much can turn dusty, and letting the seasoned cubes sit can draw out moisture and make the coating gummy.
Skip the starch when you want the smoother, naturally roasted finish.
Treat starch as a texture adjustment, not a rescue technique. First fix drying, spacing and pan contact; then decide whether you want the slightly drier, finer surface that a light starch coating can add to roasted sweet potatoes.
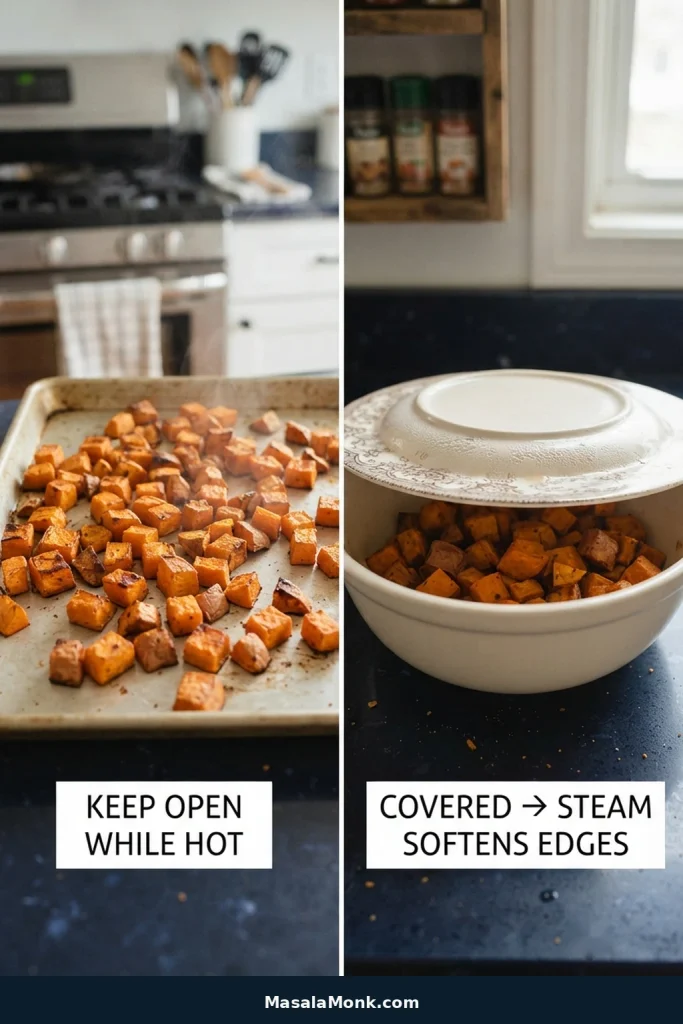
Once the tray comes out of the oven, do not undo that browning by trapping steam. Piling the hot cubes into a deep covered bowl softens the freshly roasted sides quickly.
For immediate serving, a wide platter exposes more surface area than a deep bowl. If the potatoes must be covered for transport, let the first rush of steam escape before sealing them in.
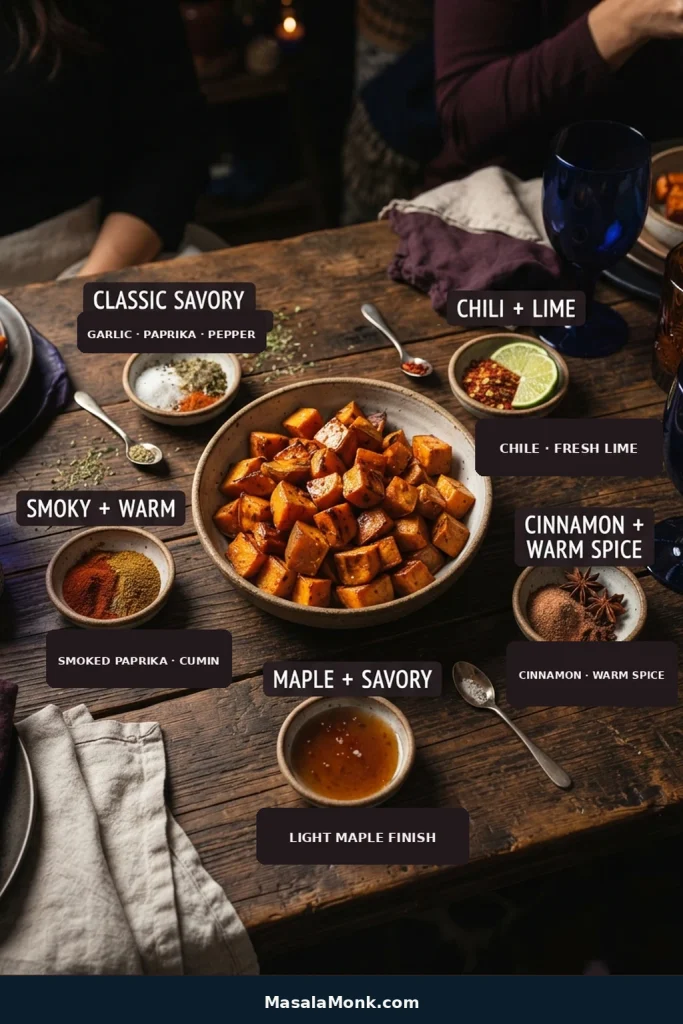
Once the roasting method is set, this is where the tray can follow the rest of dinner. Each option below is scaled for 2 lb / 900 g sweet potatoes with 2 tablespoons (30 ml) oil.
Choose a Flavor Direction
Flavor Direction
Seasoning
Classic savory
¾ tsp fine sea salt + ½ tsp garlic powder + ½ tsp mild paprika + ¼ tsp black pepper.
Smoky + warm
¾ tsp fine sea salt + ½ tsp smoked paprika + ½ tsp ground cumin + ¼ tsp garlic powder + a pinch of cayenne for heat, or ¼ tsp chili powder for milder chile flavor.
Chili + lime
¾ tsp fine sea salt + ½ tsp chili powder + ½ tsp ground cumin + ¼ tsp garlic powder; finish with fresh lime juice to taste after roasting.
Cinnamon + warm spice
¾ tsp fine sea salt + ½ tsp ground cumin + ½ tsp mild paprika + ¼ tsp garlic powder + ⅛ tsp ground cinnamon.
Maple + savory
½ tsp fine sea salt + ¼ tsp garlic powder + ⅛ tsp ground cinnamon; add 1 tbsp (15 ml) maple syrup or honey during the final few minutes or drizzle it over the finished potatoes.
The table gives exact, measured combinations. The visual below works as a broader flavor map, so use it to choose a direction while keeping the roasting method itself unchanged.
Smoky + warm potatoes work especially well beside chicken shawarma, where cumin and warm spices already belong on the plate.
For the chili-lime version, add the lime after roasting so its acidity stays bright and does not add surface moisture before the cubes brown.
Use the flavor labels as a decision map, not five new roasting methods. Keep cube size, oil and pan setup stable; then change the seasoning or finishing flavor without changing how the potatoes roast.
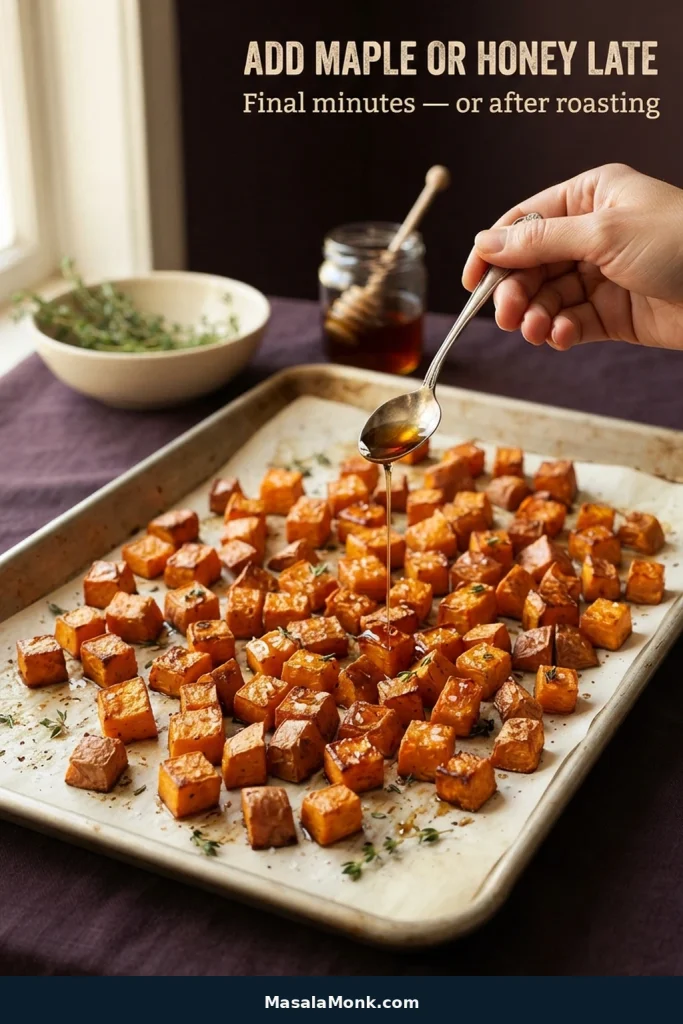
When to Add Maple or Honey
Add honey or maple near the end so the sugars do not get too dark before the potatoes are ready. For a softer, sticky-sweet holiday side with brown sugar and warm spice, our candied yams recipe is the better direction.
Late sweetening gives you two useful choices. Add maple or honey during the final minutes if you want it to warm and cling to the cubes; drizzle after roasting if you want the sheet-pan browning to stay completely separate from the added sugar.
However you season the tray, the sweet potato should still taste like itself. Roasting should deepen its sweetness, not bury it.
Fix a Tray of Roasted Sweet Potatoes
Soft and pale usually points to excess moisture, crowding, or weak pan contact. Deeply browned but still creamy is different: orange sweet potatoes naturally stay softer than regular roasted potatoes even when the edges are well roasted.
Read the exterior and center together. Pale, soft cubes usually point toward weak browning conditions, while a dark exterior with a firm center means the outside is cooking faster than the middle—not that the sweet potato is automatically finished.
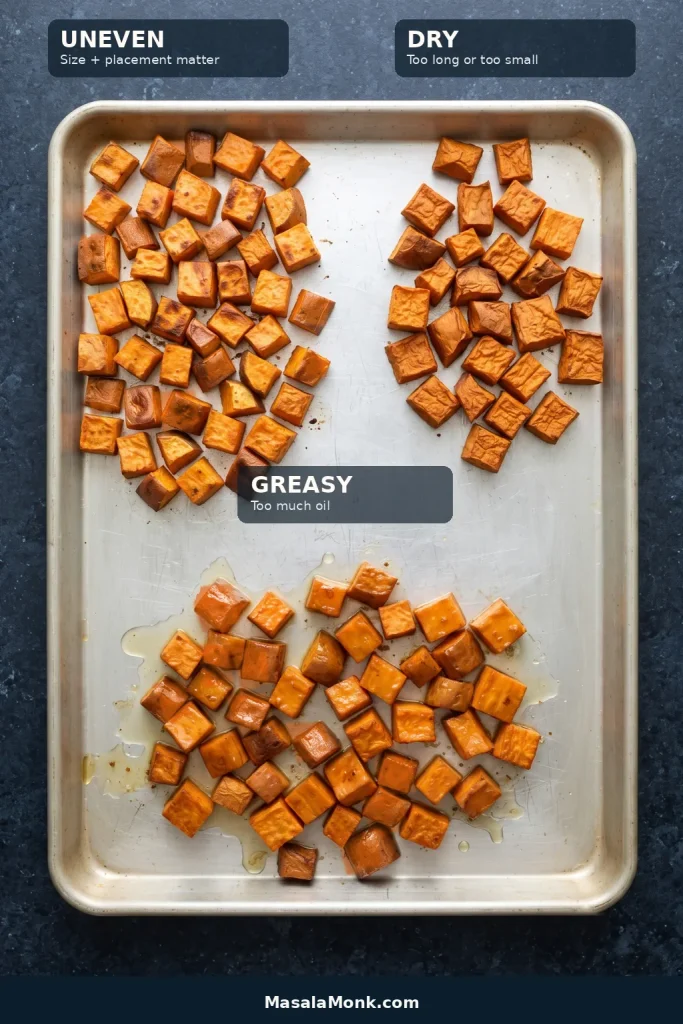
Match the Problem to the Pattern
What Happened?
What to Do
Soft and pale
Now: spread the cubes farther apart and keep roasting a little longer if the centers aren’t already very soft. Next time: dry them well and use a larger pan or two pans.
Brown but still very soft
Now: stop before the edges burn. Orange sweet potatoes naturally keep a creamy center. Next time: spread the pieces out and place broad cut sides directly against the hot pan, or use the optional starch coating if you want more crunch.
Dark outside, firm inside
Now: lower the heat slightly if needed and keep roasting until the centers are tender. Next time: cut oversized pieces a little smaller and keep the cubes more even. Watch convection ovens and dark sheet pans if the outside tends to brown too quickly.
Some pieces burnt, others underdone
Now: take out the finished pieces and let the larger ones continue. Next time: aim for a more even cut and rotate the pan when you flip.
Dry or shriveled
Now: use them in a sauced bowl or another dish where the dryness matters less. Next time: cut slightly larger and begin checking earlier.
Greasy
Now: leave excess oil behind on the pan. Next time: measure the oil and aim for a light sheen on the cubes.
Diagnose the pattern before changing the recipe: local variation suggests size or placement; tray-wide wrinkling suggests excess roasting; pooled oil points to over-oiling.
A batch that has softened still has plenty of life in it. Once chilled, the cubes work nicely in the roasted sweet potato variation in our potato salad ideas, with beans or chickpeas, lime, chili, and cilantro.
Peel and cut them, then keep the cubes submerged in cold water in a covered container in the refrigerator for up to about 24 hours.
Keeping the cubes submerged helps prevent the exposed sides from drying and discoloring in the refrigerator. Drain them before cooking, dry them extremely well, then add the oil and seasonings shortly before roasting.
Refrigerate Leftovers Promptly
Transfer leftovers to a shallow, covered container and refrigerate them within 2 hours. There is no need to leave them on the counter until they are completely cool.
The USDA’s leftover-safety guidance recommends using most refrigerated cooked leftovers within 3–4 days. The roasted sides will soften somewhat as the potatoes chill; that is normal.
Freezing and Frozen Sweet Potato Cubes
For cooked leftovers, refrigerate them promptly, then spread the chilled cubes on a tray and freeze until firm. Transfer them to a freezer-safe container once frozen. Expect softer edges after freezing; that texture change is normal.
A shallow container helps roasted sweet potatoes cool more evenly than a deep pile. Once chilled, softer edges are normal; plan on dry-heat reheating later if restoring surface texture matters.
Starting with plain frozen sweet potato cubes? Roast them from frozen rather than thawing first. If the package gives oven directions, use those as your starting point because cube size and pre-cooking vary between products.
Reheat with Dry Heat for Better Texture
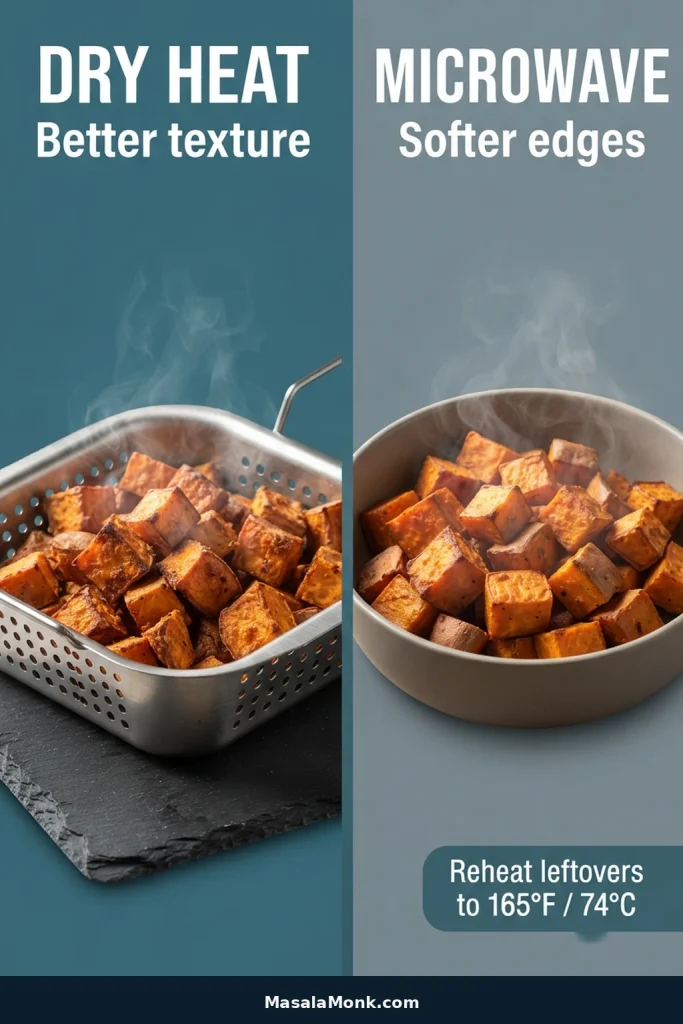
An oven or air fryer does the best job of bringing some texture back. Need them fast? The microwave will reheat them, though the cubes stay softer.
Reheat leftovers thoroughly; general USDA guidance for reheated leftovers is 165°F / 74°C.
Spread leftovers in one layer when reheating with dry heat so steam can escape again. If the cubes are going into a hash, bowl or burrito, the microwave’s softer finish may not matter.
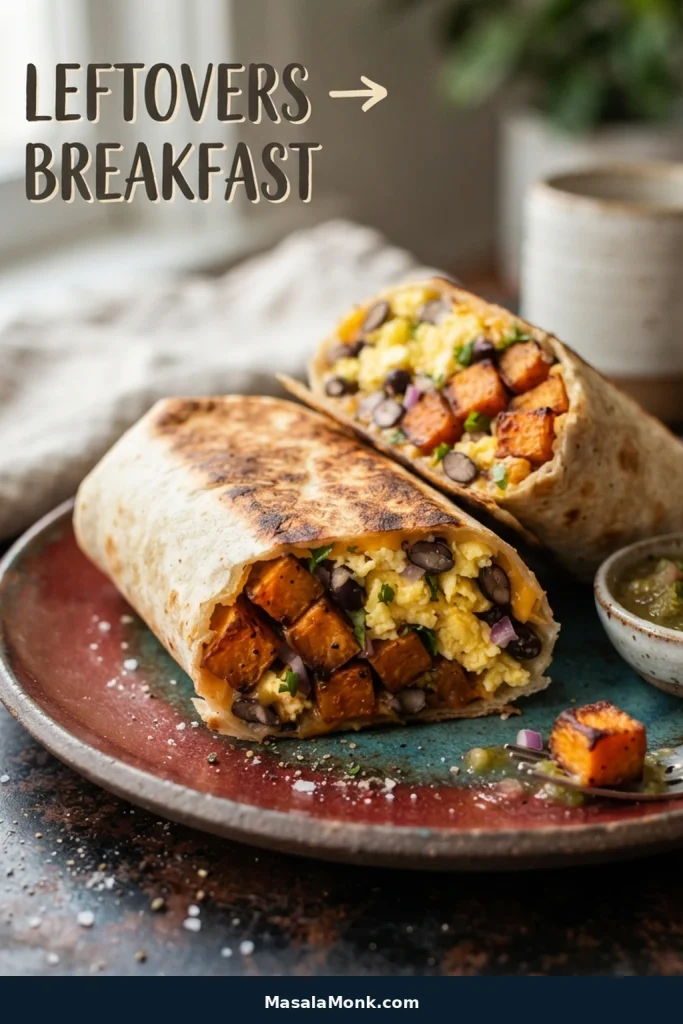
Leftover cubes are also excellent tucked into breakfast burritos with eggs and beans.
Storage softens the edges, which is actually useful inside a breakfast burrito: the sweet potato integrates with eggs and beans instead of needing to regain its original crispness.
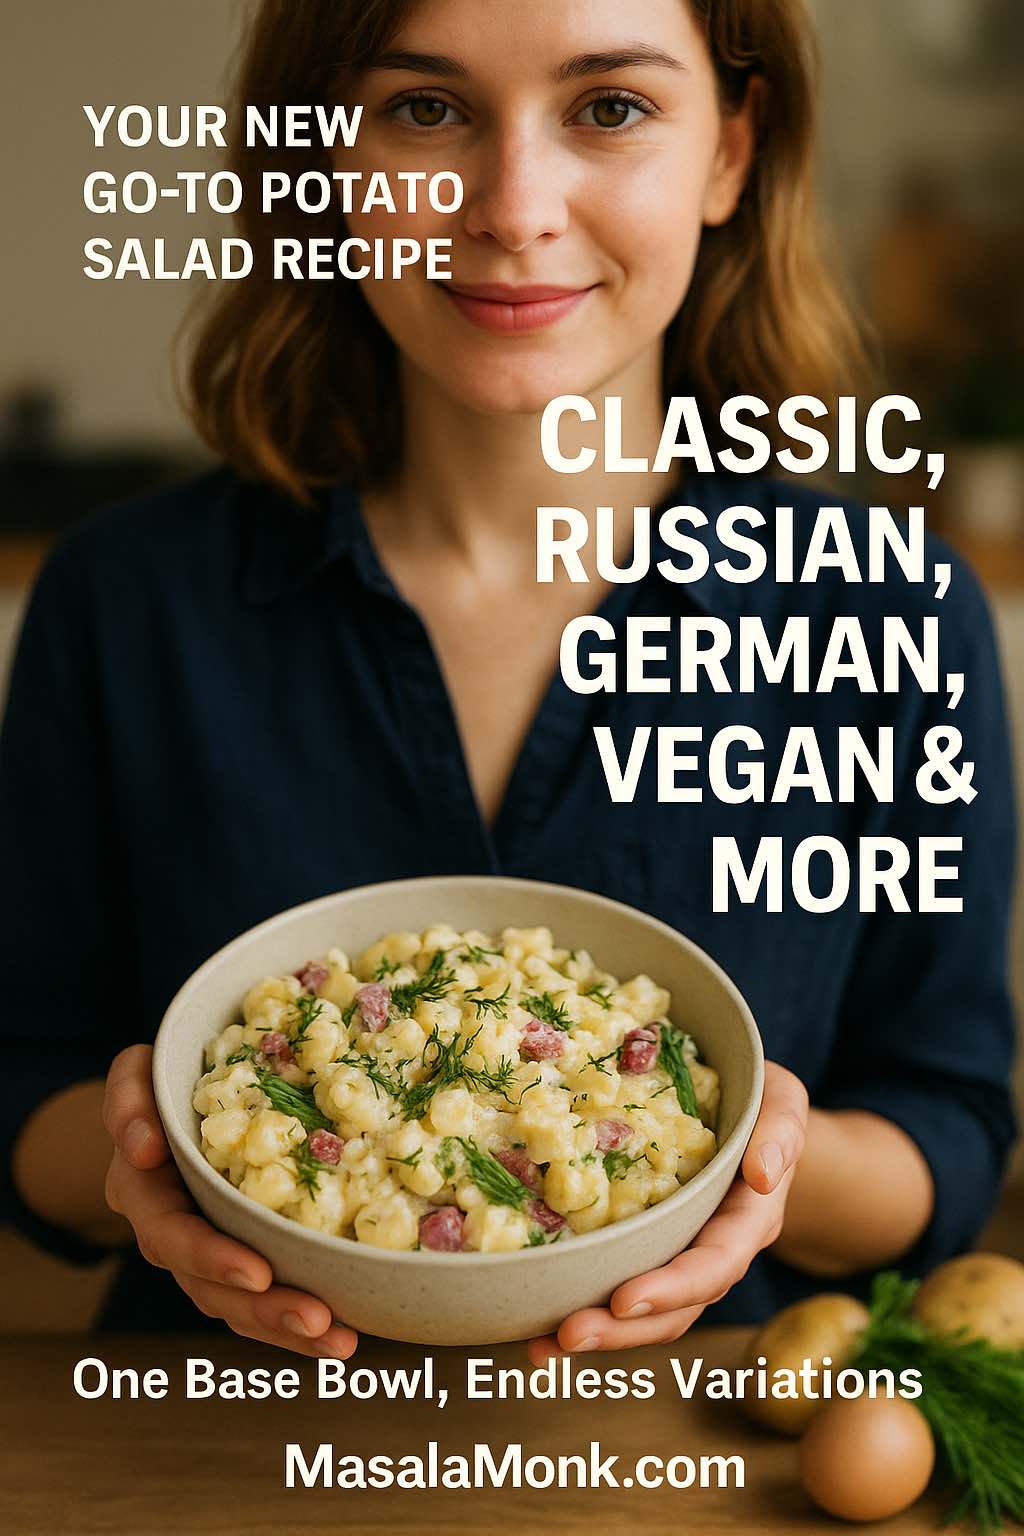
There’s something wonderfully comforting about a big bowl of potato salad. It fits in almost anywhere: summer barbecues, winter potlucks, Eid spreads, Christmas dinners, brunch tables, even quiet weekday lunches with leftovers. Some days you crave a classic creamy potato salad recipe with egg and mayo; on others, a tangy German potato salad, a rich Russian salad (Olivier salad), a colourful beet and potato salad, or a lighter Greek yogurt or vegan potato salad with a fresh, herby vinaigrette feels just right.
Because there are so many versions, it makes sense to begin with one reliable, easy potato salad recipe and treat that as your base. From there, you can branch out into the styles you love—warm potato salad with bacon, dill potato salad, Japanese potato salad, cold sweet potato salad, chicken potato salad, vegan potato salad, even the occasional Amish-style or Filipino potato salad. As you’ll see in this guide, once you understand the basic potato salad ingredients and procedure, you can turn that simple foundation into countless potato salad recipes without much extra effort.
Why Potato Salad Is More Than “Just a Side”
Before we make the first bowl, it’s worth answering a simple question: is potato salad just comfort food, or can it actually fit into a balanced way of eating?
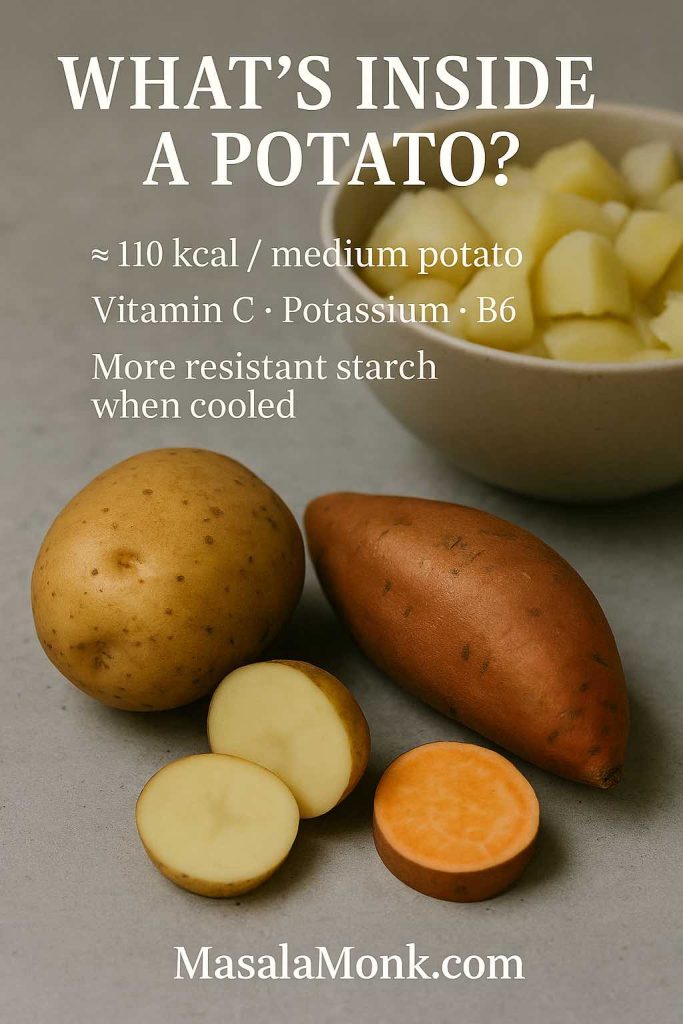
Potatoes: What’s Really Inside
A medium potato (about 5.3 oz) brings around 110 calories, almost no fat, and useful amounts of vitamin C, potassium and vitamin B6. Resources like PotatoGoodness’ nutrition breakdown, describe potatoes as nutrient-dense complex carbohydrates, not empty calories.
Potatoes bring around 110 calories per medium tuber plus vitamin C, potassium and B6—and when cooled for potato salad, some of their starch turns into gut-friendly resistant starch.
Furthermore, when you cool cooked potatoes – which is exactly what happens in a cold potato salad – some starch turns into resistant starch. Many nutrition writers and dietitians point out that resistant starch digests more slowly and may support better blood sugar and gut health than freshly mashed, steaming potatoes.
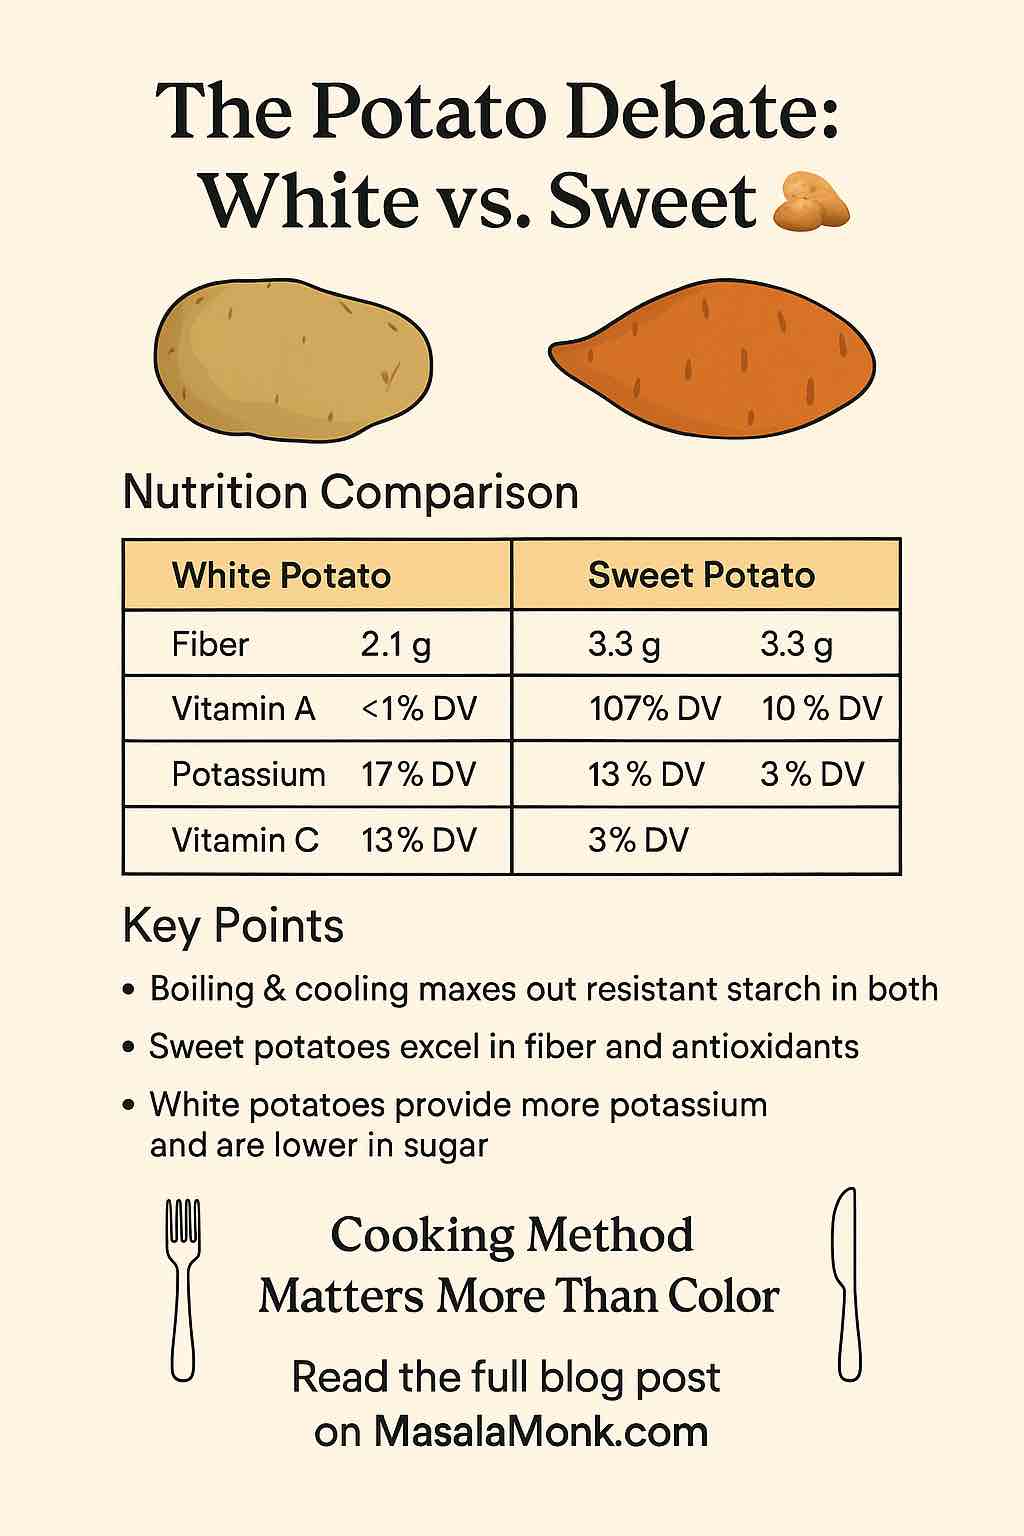
If you like digging into the details, MasalaMonk’s article “The Potato Debate: White vs Sweet” compares white potatoes and sweet potatoes in terms of glycemic index, calories and context on how to use both wisely.
Why Dressing and Portion Size Matter
Of course, the dressing can change everything. A heavy potato salad mayonnaise dressing with bacon, cheese and extra sugar is not the same as a simple potato salad with yogurt and herbs. Nevertheless, both still start from the same base ingredient.
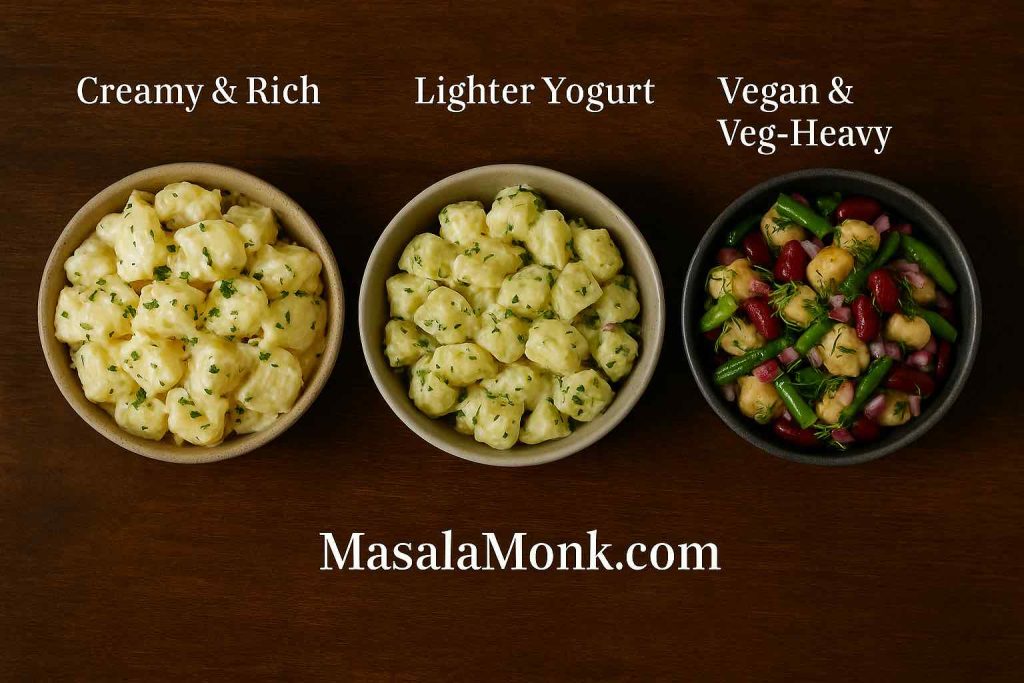
Because of that, you can easily slide along a spectrum:
From creamy and rich to lighter yogurt and fully vegan with beans and vegetables, your choice of dressing decides whether a potato salad feels indulgent or everyday-healthy.
From classic southern potato salad with eggs, mustard, mayo and relish
To a healthy potato salad with olive oil, lemon, herbs and lots of vegetables
To a vegan potato salad recipe built with eggless mayo and beans
Thought the focus on this post is on potato salad recipe, but behind that phrase you actually have a whole library of possibilities.
Now that you know potatoes themselves are not the villain, you can choose the right type and the best supporting cast.
Starchy potatoes give soft, mashy salad, waxy potatoes hold their shape in neat cubes, and all-purpose potatoes sit in between—pick your potato type to match the texture you want before you start your next potato salad recipe.
Best Potatoes for Potato Salad
Different potato salad recipes favour different potatoes:
Starchy potatoes (like russets)
Great for softer, slightly mashed potato salad
Good in old-fashioned potato salad recipe versions
Waxy potatoes (like red or new potatoes)
Hold their shape in chunky potato salad
Ideal for German potato salad, red potato salad recipe and warm potato salad
All-purpose potatoes
Sit in the middle
Excellent for an easy potato salad recipe or basic potato salad recipe with egg and mayo
You can use potatoes with skins for a rustic potato salad with skins, or peel them for a smoother traditional potato salad recipe. For pretty bowls, people often love new potato salad or red skin potato salad, because the small potatoes look good simply halved with dressing.
Other Potato Salad Building Blocks
Besides potatoes, most versions share a few key building blocks that you can mix and match to create anything from a simple potato salad to the best potato salad recipe with bacon and dill.
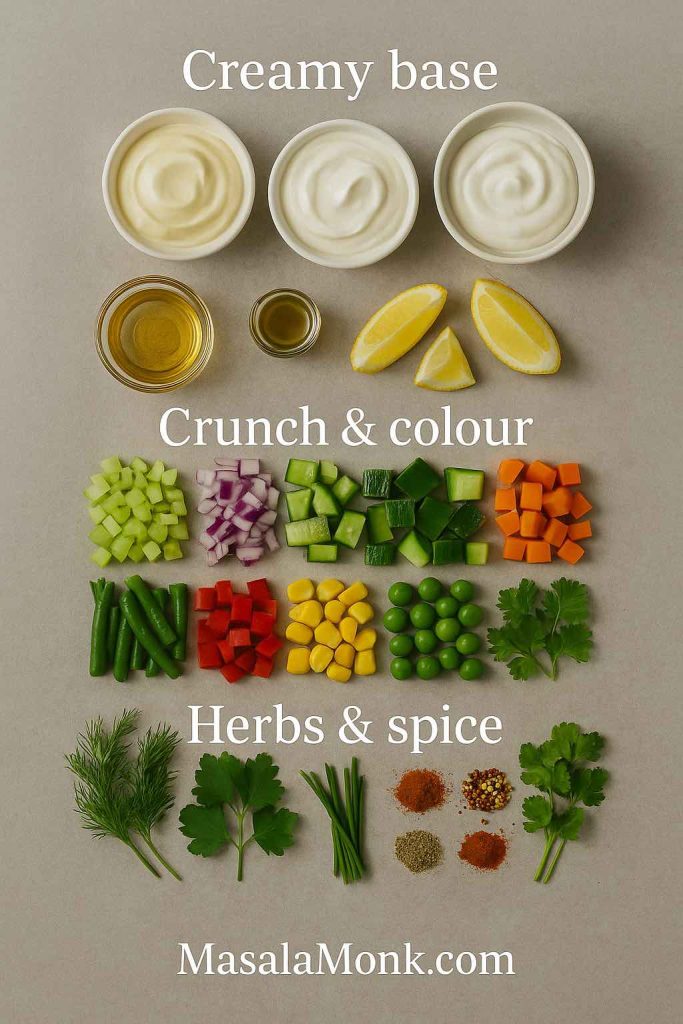
With a creamy base, a splash of acid, plenty of crunchy vegetables and fresh herbs and spice, you can turn any simple potato salad into dill, bacon-and-egg or beet and potato salad in minutes.
Creamy base
Mayonnaise
Sour cream or hung curd
Greek yogurt
Any combination of these
Acid and tang
Vinegar (white, apple cider or wine vinegar)
Pickle brine or gherkin juice
Lemon juice
Yellow, Dijon or wholegrain mustard
Crunch and colour
Celery
Onions (red, white or spring onions)
Cucumbers
Bell peppers
Green beans
Corn
Peas
Carrots
Herbs and spices
Dill
Parsley
Chives
Coriander (cilantro)
Paprika or smoked paprika
Cayenne or chilli flakes
Cajun seasoning
Garlic or garlic powder
Once these simple elements live in your kitchen, it becomes very easy to move from a basic, simple potato salad to richer ideas like a creamy dill potato salad, a bacon and egg potato salad, or even a colourful beet and potato salad with hardly any extra effort.
Core Potato Salad Procedure (The Backbone of Almost Every Version)
Almost every potato salad recipe, from classic American to German salad potato dishes, follows the same simple flow. Once you memorise this, you’ll never feel lost.
Step 1: Prep and Boil the Potatoes
First, scrub or peel the potatoes. Cut them into even chunks. For small potato salad, keep them smaller; for chunky potato salad, keep them slightly larger.
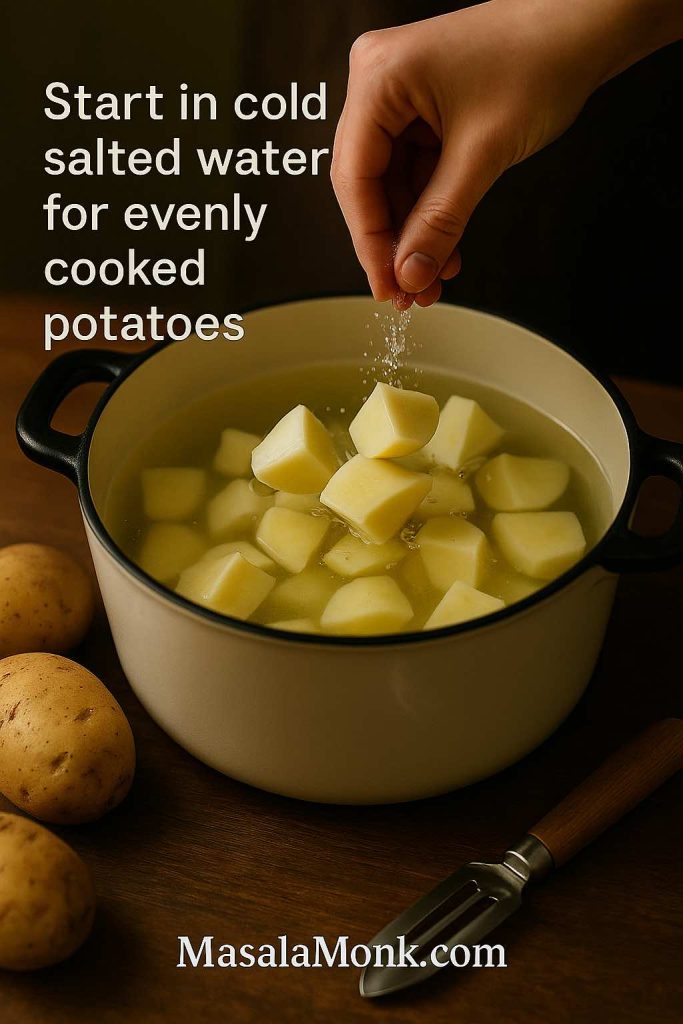
Start potato chunks in cold salted water so they heat through at the same rate—this keeps them tender inside without turning the outside to mush in your potato salad.
Place the potatoes in cold, salted water. Then bring the pot to a gentle boil. Simmer until the potatoes are just tender when pierced with a knife. Try not to let them fall apart, otherwise you’ll land in mashed potato salad territory.
Step 2: Drain and Season While Warm
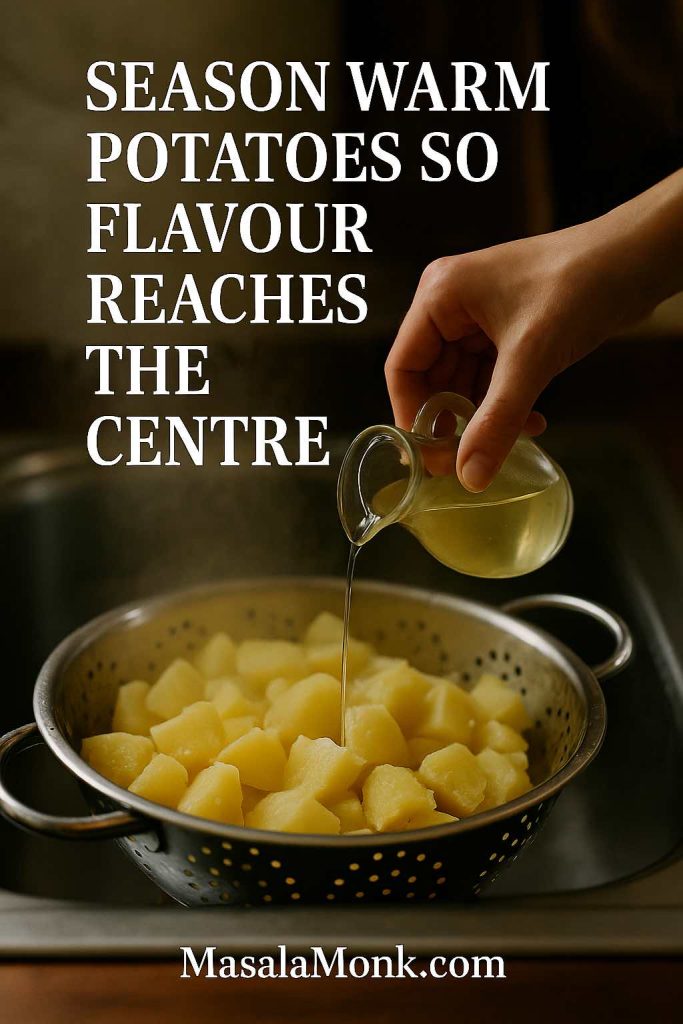
Next, drain the potatoes well and leave them in the colander to steam dry. While they’re warm, you can sprinkle them with a spoonful of vinegar or pickle brine. That trick – also used in recipes like Serious Eats’ classic potato salad – lets the potatoes absorb flavour all the way to the centre.
Drizzle vinegar or pickle brine over potatoes while they’re still warm and steaming—this helps the flavour soak into the centre of each piece instead of sitting only on the surface.
Step 3: Make the Dressing
Meanwhile, mix your dressing in a large bowl:
Start with mayonnaise or a mix of mayo and sour cream.
Add mustard, vinegar or lemon juice and seasonings.
Stir in chopped onion, celery and pickles.
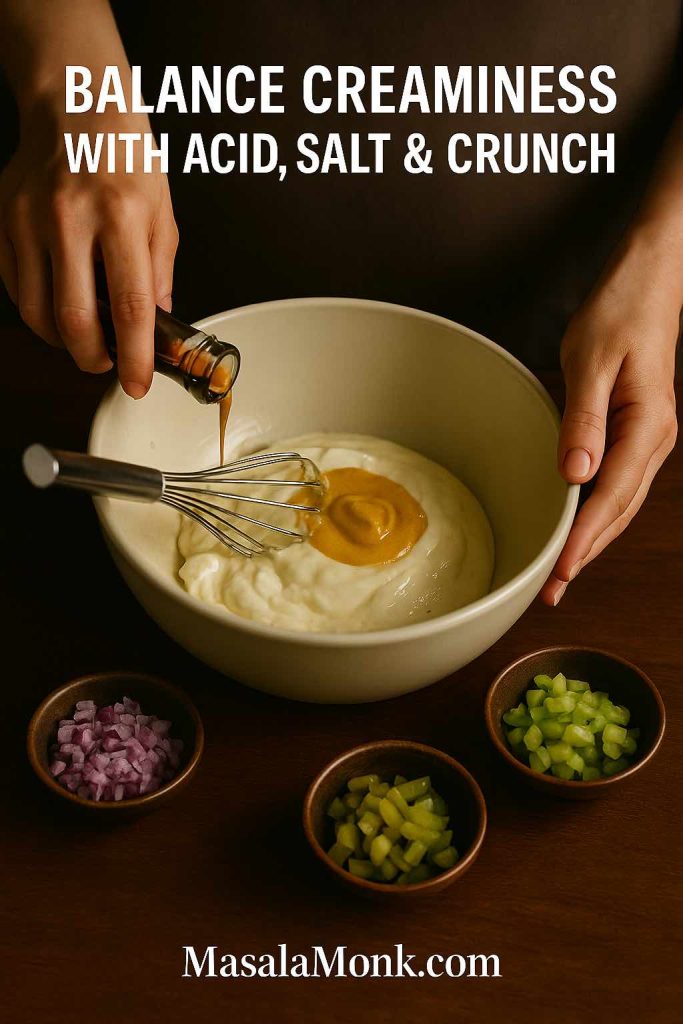
The best potato salad dressing starts creamy, then gets sharpened with mustard and vinegar and finished with crunchy onions, celery and pickles for texture.
This is the moment where a Hellmann’s potato salad recipe, a Best Foods potato salad recipe or a German potato salad recipe warm start to part ways. The brand of mayo matters less than the balance between creaminess, tang and salt.
Step 4: Fold Everything Together
After that, tip the warm potatoes into the bowl with the dressing. Fold gently until every piece is coated. If you’re making potato salad with egg, fold in chopped hard-boiled eggs at the end so they don’t break down too much.
Use a gentle folding motion rather than rough stirring so your potato salad keeps those satisfying chunky pieces of potato instead of collapsing into mashed potatoes in dressing.
Because this step is gentle, it also works when you add bacon, chopped chicken, canned tuna, green beans, beetroot or even canned potatoes for potato salad.
Step 5: Chill or Serve Warm
Finally, decide whether you want a warm potato salad or a chilled one.
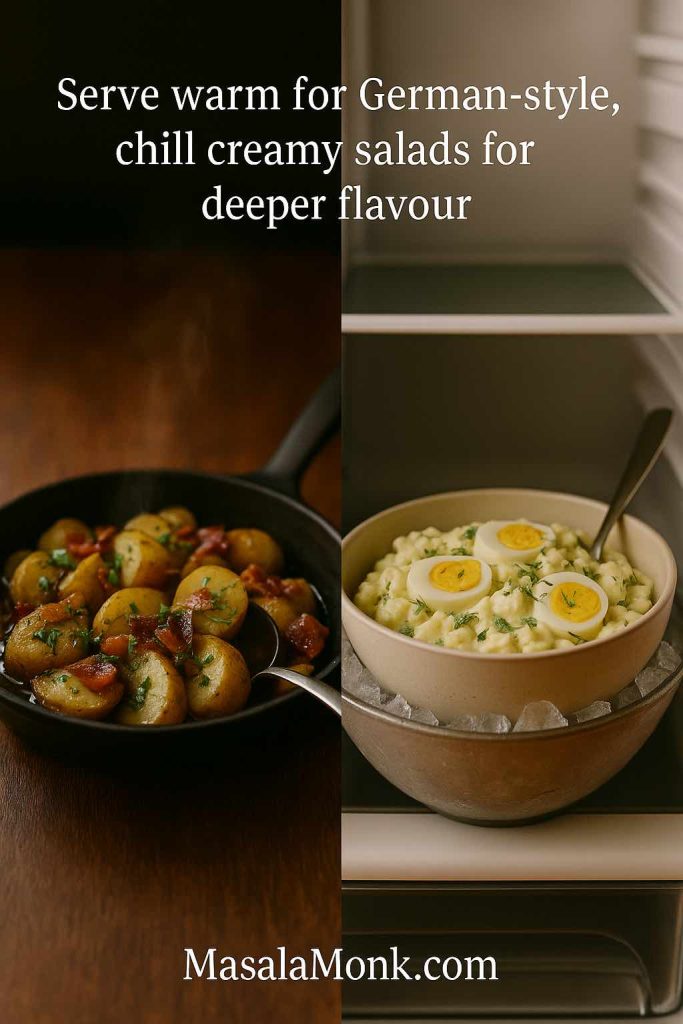
For German potato salad and some mustard potato salad styles, serve the dish slightly warm.
For classic potato salad, Russian salad, Amish potato salad, Hawaiian potato salad or Filipino potato salad, chill the bowl for a few hours so the flavours marry.
Serve German and mustard-based potato salads slightly warm, but let creamy classic potato salad chill on ice or in the fridge so the flavour deepens and the dressing sets.
Once you understand this structure, you can handle almost any potato salad ingredients and procedure list you see online.
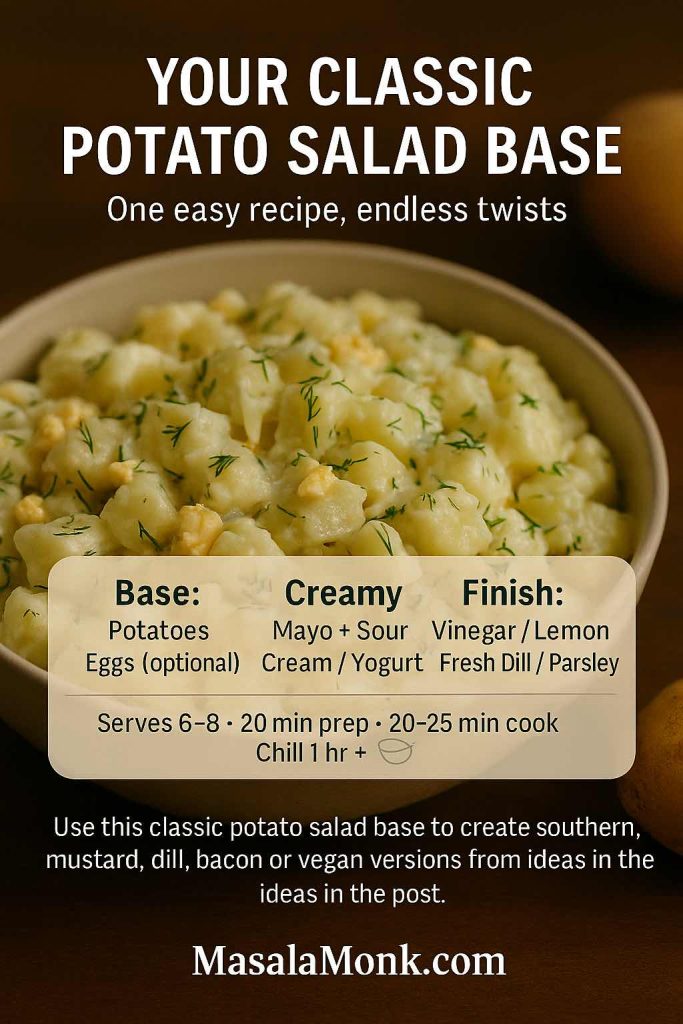
Let’s anchor everything with one classic creamy potato salad recipe. You can make it exactly as written or use it as your “mother recipe” for dozens of variations.
Ingredients (Serves 6–8)
1 kg potatoes, peeled or scrubbed
3 large eggs (omit for potato salad recipe no egg)
½ cup mayonnaise
¼ cup sour cream or thick yogurt
1–2 tablespoons mustard (yellow or Dijon)
2–3 tablespoons chopped dill pickles or relish
2–3 tablespoons finely chopped red onion or spring onion
2 tablespoons finely chopped celery
1–2 tablespoons vinegar or lemon juice
½ teaspoon sugar (optional)
Salt and black pepper to taste
A handful of chopped dill or parsley
If you prefer an eggless creamy base, you can swap the mayo for an egg-free option. For instance, MasalaMonk sells several eggless mayonnaises, and these work well in a vegan potato salad or a potato salad vegetarian version.
This classic potato salad base shows you the core ingredients and timings so you can quickly build any version—southern, mustard, dill, bacon or vegan—without relearning the method each time.
Method
Cut the potatoes into even chunks and place them in a pot of cold, salted water.
Bring to a gentle boil and cook until just tender. Drain and let them steam dry in the colander for a few minutes.
At the same time, hard-boil the eggs. Cool them in cold water, peel and chop into pieces. For an easy way to prep eggs, you can also use the air fryer method from MasalaMonk’s air fryer hard-boiled eggs guide.
In a large mixing bowl, whisk together mayonnaise, sour cream or yogurt, mustard, vinegar or lemon, sugar, salt and pepper. Stir in onion, celery and pickles.
Add the warm potatoes to the bowl and fold gently so they’re coated in dressing.
Fold in the chopped eggs and herbs. Taste and adjust seasoning.
Chill the potato salad for at least an hour before serving.
This simple base already gives you a good potato salad recipe. However, with tiny adjustments you can pivot towards classic southern potato salad, mustard potato salad, dill red potato salad, creamy potato salad with bacon, and several more.
Classic Twists: Old-Fashioned, Southern, Mustard and Dill
Once you’ve tried the master bowl a couple of times, you can turn the dial in different directions without starting over.
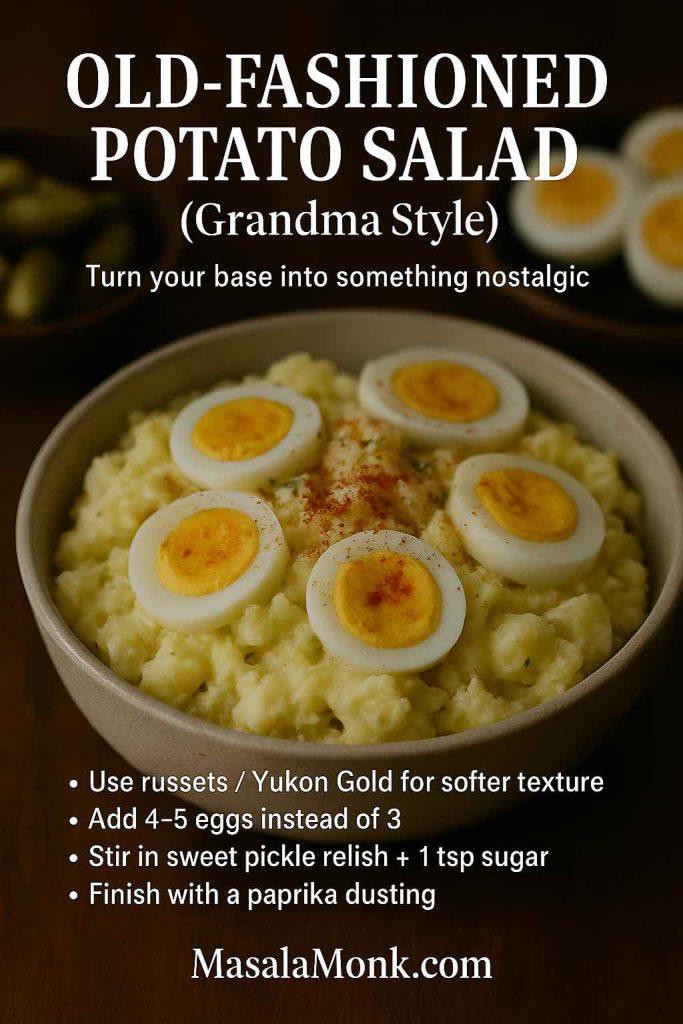
Old-Fashioned Potato Salad Recipe with Egg
An old-fashioned potato salad feels soft, comforting and a bit nostalgic.
Turn your classic base into an old-fashioned “grandma style” potato salad by switching to softer russet or Yukon Gold potatoes, adding more eggs, stirring in sweet pickle relish and sugar, and finishing with a paprika dusting.
To get that feel:
Use potatoes that break down a little, such as russets or Yukon Gold.
Increase the eggs to four or five.
Use sweet pickle relish and a spoon of sugar.
Sprinkle paprika on top.
The result is close to many “grandma’s potato salad” styles. It also scales well as potato salad for a crowd at weddings, church suppers and long family lunches.
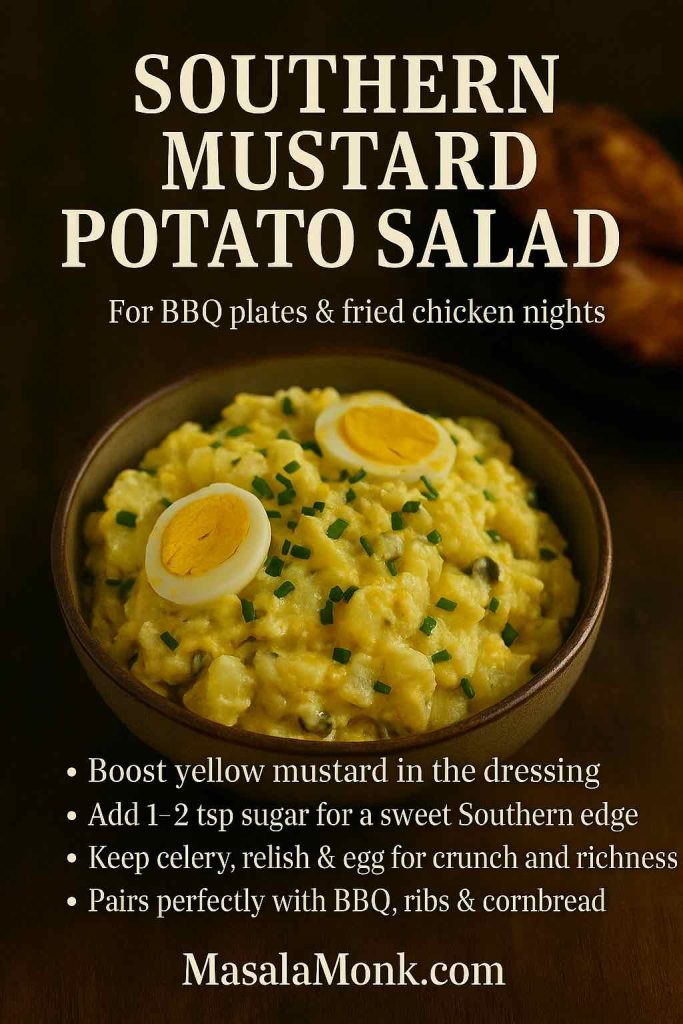
Southern Potato Salad and Mustard Potato Salad
Southern potato salad often leans into mustard and sweetness.
Turn your classic potato salad into a Southern mustard version by loading up the yellow mustard, adding a touch of sugar and keeping celery, relish and eggs for crunch—perfect next to BBQ, fried chicken and cornbread.
To take your master recipe there:
Use a generous spoon of yellow mustard.
Add a teaspoon or two of sugar.
Keep relish, celery and egg.
Because of the sweetness and mustard, this kind of potato salad recipe sits beautifully next to fried chicken, ribs, collard greens and cornbread. If you like Hidden Valley–style flavours, you can even echo that profile and make a Hidden Valley ranch potato salad recipe by adding ranch seasoning and herbs.
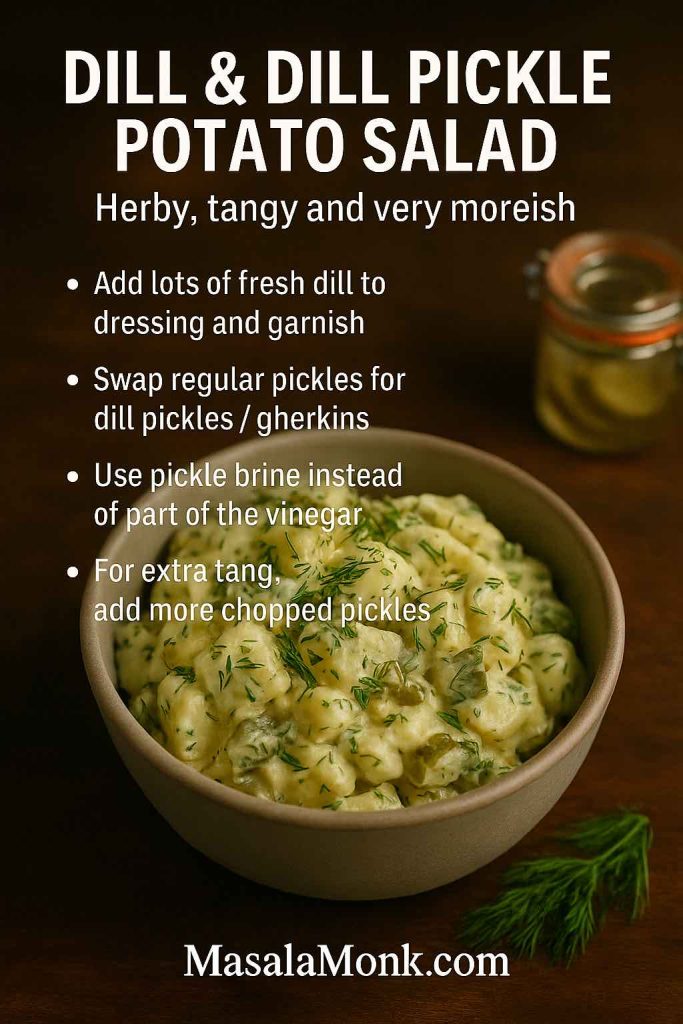
Dill Potato Salad and Dill Pickle Potato Salad
If you love dill, the easiest way to celebrate it is inside potato salad.
To turn your classic potato salad into a dill lover’s dream, pile in fresh dill, swap regular pickles for dill pickles or gherkins and use pickle brine for extra tang.
Simply:
Add plenty of chopped fresh dill to your dressing.
Use dill pickles or gherkins instead of regular pickles.
Splash in some pickle brine for extra tang.
In that way you land on a classic dill potato salad. If you push the pickles even more, you end up with a dill pickle potato salad that’s sharply tangy and very moreish.
Protein-Packed Potato Salad: Egg, Bacon, Tuna and Chicken
Sometimes you want potato salad to carry the whole meal. In that case, protein turns the bowl into something hearty and satisfying.
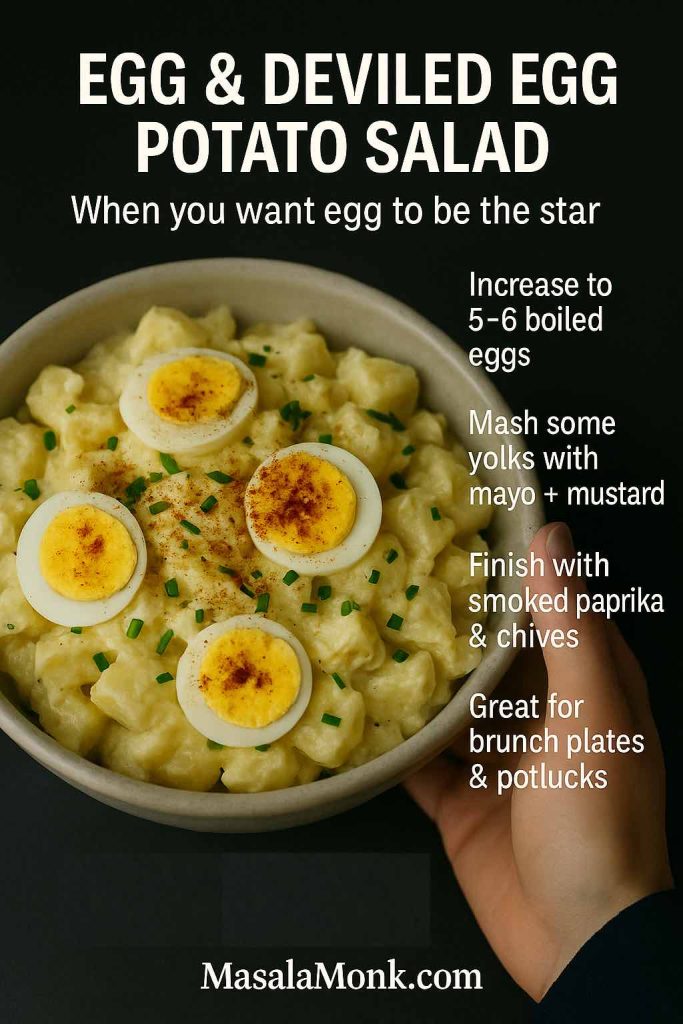
Potato and Egg Salad / Egg and Potato Salad Recipe
You already have a potato and egg salad if you keep the three boiled eggs in the master recipe. Yet you can go further.
Turn your base into an egg-forward, deviled-egg style potato salad by using more boiled eggs, mashing some yolks with mayo and mustard, and finishing with smoked paprika and chives.
For an egg-forward version:
Increase eggs to five or six.
Mash a couple of yolks with mustard and mayo.
Sprinkle the top with smoked paprika and chives.
This starts to feel like a deviled egg potato salad. If you’d like more inspiration, MasalaMonk’s deviled egg recipe post shows deviled egg fillings that also work nicely as potato salad flavour ideas.
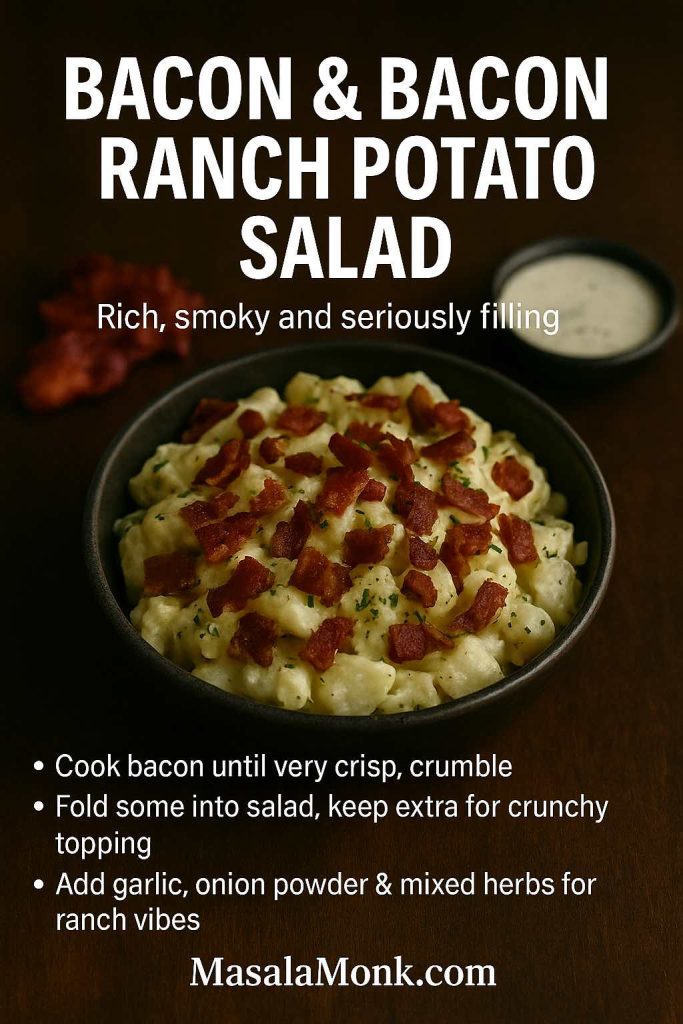
For a rich, smoky potato salad, crisp your bacon hard, fold some into the bowl and keep extra on top—then add garlic, onion powder and herbs to turn it into a full-on bacon ranch potato salad.
To make a bacon and potato salad:
Cook bacon until crisp, then crumble.
Fold some pieces into the salad and use the rest as a garnish.
For bacon egg potato salad or bacon and egg potato salad, combine bacon with chopped eggs. The trio of potato, egg and bacon gives you a rich, almost brunch-level bowl.
If you enjoy ranch flavours, stir in herbs, garlic and onion powder to create a bacon ranch potato salad. You can also echo the flavours from MasalaMonk’s one-pot chicken bacon ranch pasta and bring those same notes into a cold salad version.
Tuna Potato Salad and Potato Salad Tuna
Tuna potato salad is a smart way to use pantry staples.
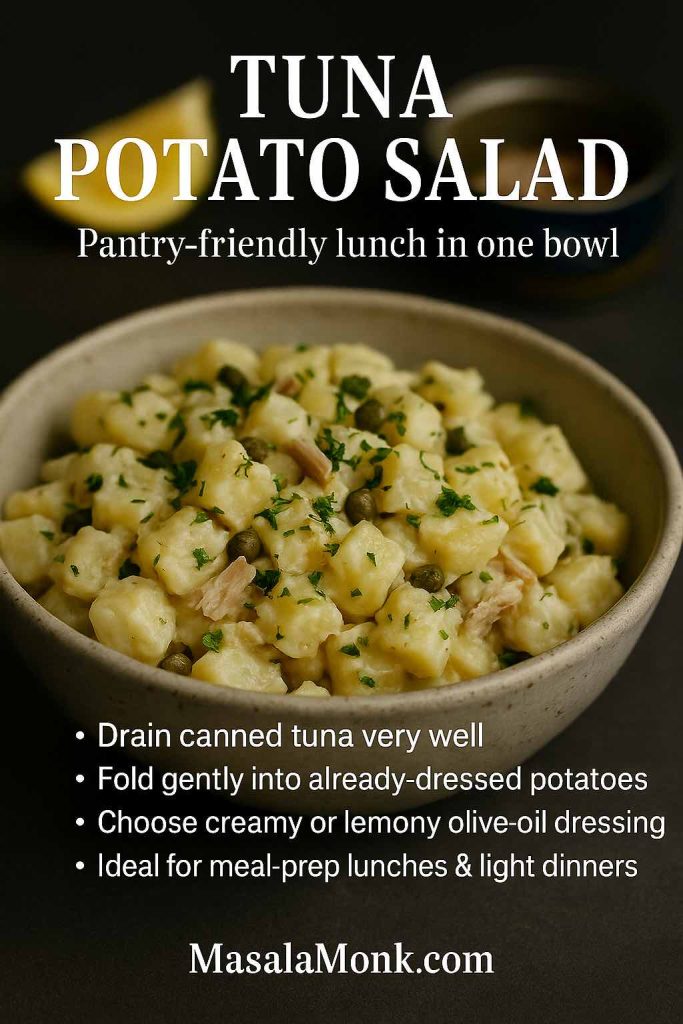
For a pantry-friendly potato salad that works as a full lunch, drain canned tuna really well, fold it gently into already-dressed potatoes and finish with either a creamy or lemony olive oil dressing.
To make it:
Drain canned tuna very well.
Flake it gently and fold it into the dressed potatoes.
You can keep the dressing creamy or switch to a lemony olive oil one. Either way, you get a complete potato salad tuna bowl that works well for lunches.
Chicken Potato Salad and Chicken and Potato Salad Recipe
Chicken potato salad turns leftovers into something new.
Turn leftover roast or grilled chicken into a full meal by folding it into your potato salad, lightening the dressing with yogurt and adding peas or green beans, then serving it with salad and bread.
For a simple chicken and potato salad:
Add shredded roast chicken or grilled chicken pieces.
Keep the dressing a little lighter by using more yogurt.
Toss in peas or green beans for colour.
This style pairs well with green salad, fresh bread and cold drinks, creating a full meal from one big mixing bowl.
Even though creamy salad is comforting, there are days when you want something that sits more lightly. Fortunately, potato salad adapts well.
Potato Salad Recipe Without Mayo
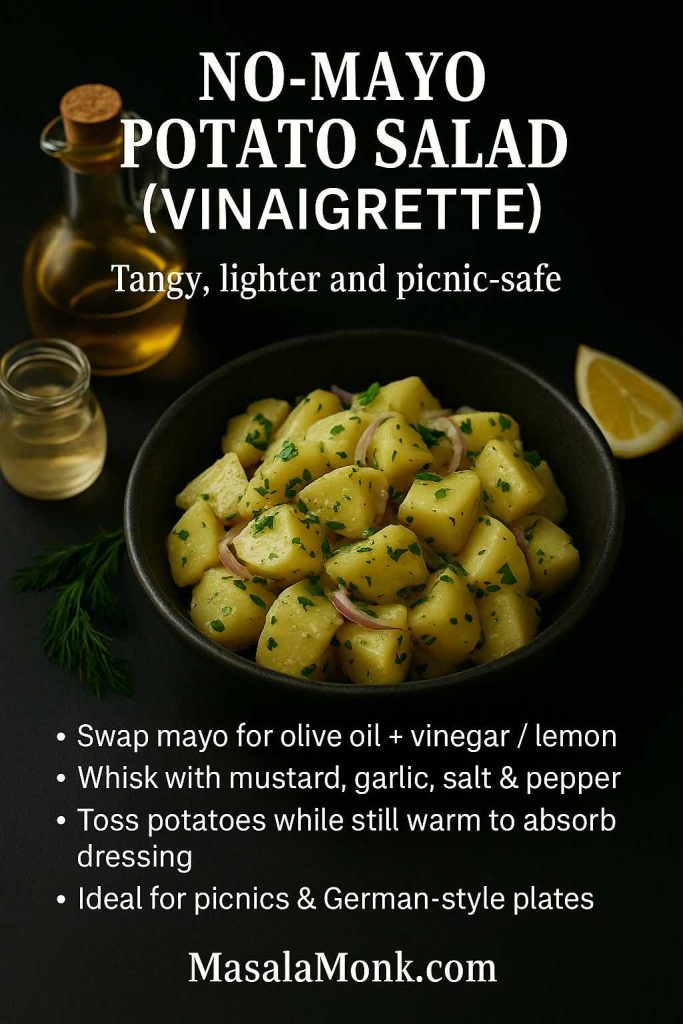
A potato salad recipe without mayo usually uses a vinaigrette.
For a lighter, picnic-safe potato salad, skip the mayo and toss warm potatoes with an olive oil, mustard and vinegar or lemon dressing so they soak up tangy flavour all the way through.
You can whisk together:
Olive oil
Vinegar or lemon juice
Mustard
A little garlic
Salt, pepper and herbs
Then you toss warm potatoes in this dressing. This style echoes many German salad potato recipes and Austrian kartoffelsalat. For a reference point, look at Serious Eats’ Erdäpfelsalat recipe, which uses onions, vinegar and mustard in a light sauce.
Because there is no mayo, this salad feels tangy and bright. It also works well for picnics where you want to reduce the risk of a heavy mayo-based dish sitting out too long.
Greek Yogurt Potato Salad and Potato Salad with Sour Cream
If you still want creaminess, but with a fresher feeling, Greek yogurt potato salad and potato salad with sour cream are ideal.
For a lighter but still creamy potato salad, swap half the mayo for Greek yogurt or sour cream, then brighten it with lemon, garlic and plenty of fresh dill or other herbs.
For a simple version:
Replace half the mayo with Greek yogurt or sour cream.
Add lemon, garlic and herbs.
This is similar to the approach The Kitchn suggests in their classic potato salad tutorial and their later testing of different dressing bases with yogurt and sour cream. The combination keeps things creamy and tangy, yet a bit lighter than pure mayo.
You can also lean into Greek flavours by starting with the Greek tzatziki sauce recipe from MasalaMonk and turning it into a potato salad dressing. That instantly gives you a Greek potato salad or Greek salad potato salad vibe: potatoes, cucumber, garlic, yogurt and dill.
Vegan Potato Salad and Vegetarian Potato Salad
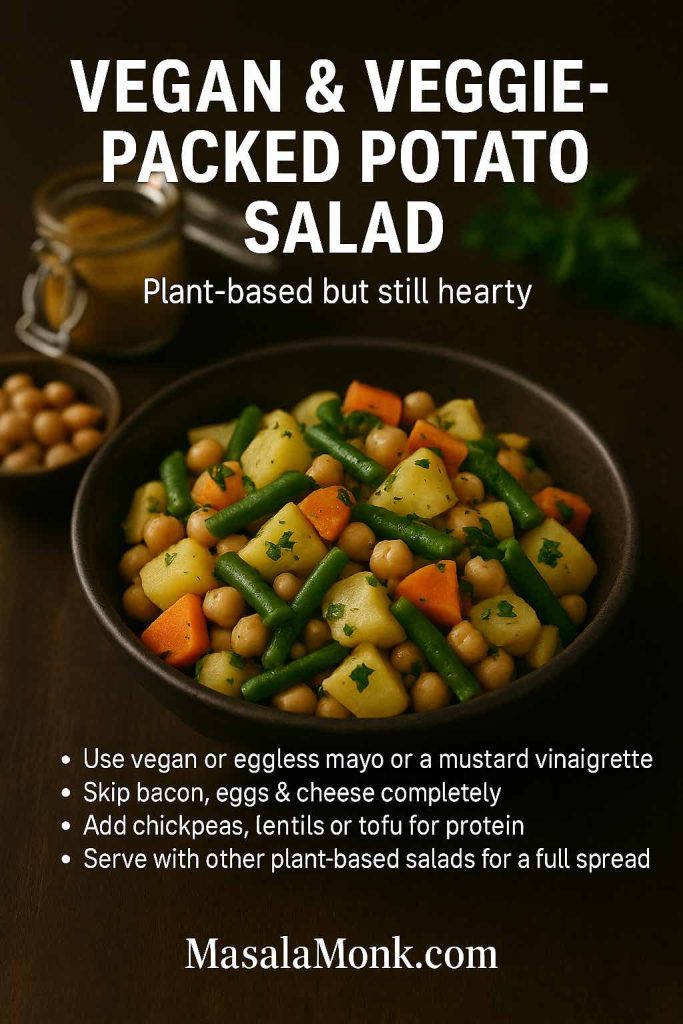
For a vegan potato salad recipe, you simply ensure that:
The dressing uses vegan mayo or an eggless mayonnaise.
You skip bacon, eggs and cheese.
You add plant proteins such as chickpeas, lentils or tofu.
Build a vegan but still hearty potato salad by skipping bacon, eggs and cheese, using vegan mayo or a mustard vinaigrette and loading the bowl with chickpeas, lentils and colourful vegetables.
A bowl of potatoes, green beans, chickpeas and a mustard vinaigrette becomes a sturdy vegan potato salad that feels complete. To round out a fully plant-based spread, you can pair it with MasalaMonk’s Vegan Som Tam raw papaya salad and their lentil salad recipes for weight loss.
A vegetarian potato salad, on the other hand, might still include eggs and dairy while avoiding meat. Classic potato salad with egg, a potato salad with sour cream, or even a cream cheese potato salad all fit comfortably into that category.
As soon as you look beyond your own kitchen, you realise that “potato salad” changes character completely from one region to another. However, the basic boiled potato remains the star.
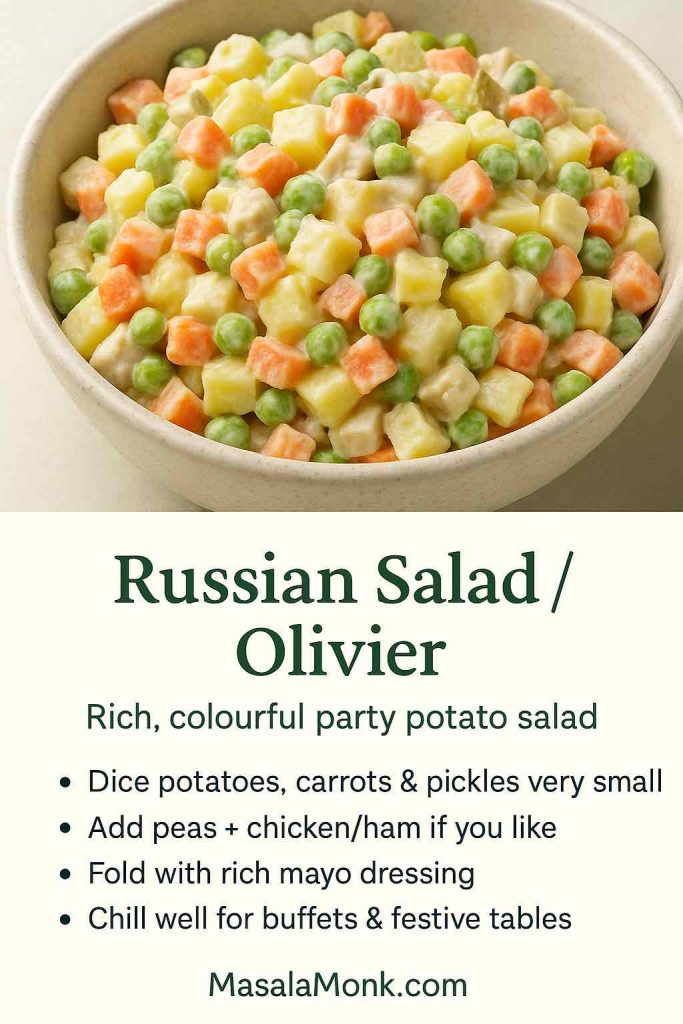
Russian Salad (Olivier Salad)
Russian salad, also known as Olivier salad, is a beloved party dish in many countries. It usually includes:
Diced potatoes
Carrots and peas
Pickles
Often chicken, ham or sausage
A generous amount of mayonnaise
For a deeper dive into its origins and variations, you can read the Olivier salad article on Wikipedia, which traces the dish back to a 19th-century restaurant in Moscow.
Russian salad, or Olivier, turns tiny cubes of potato, carrot, peas and pickles in rich mayo into a colourful party potato salad that’s perfect for buffets and festive spreads.
To make a simple Russian salad at home:
Dice potatoes, carrots and pickles into small cubes.
Cook potatoes and carrots until tender.
Mix with peas, pickles and a rich mayo dressing.
Chill thoroughly before serving.
Because it is rich and colourful, Russian salad works beautifully on festive tables and buffets.
German Potato Salad and Austrian Kartoffelsalat
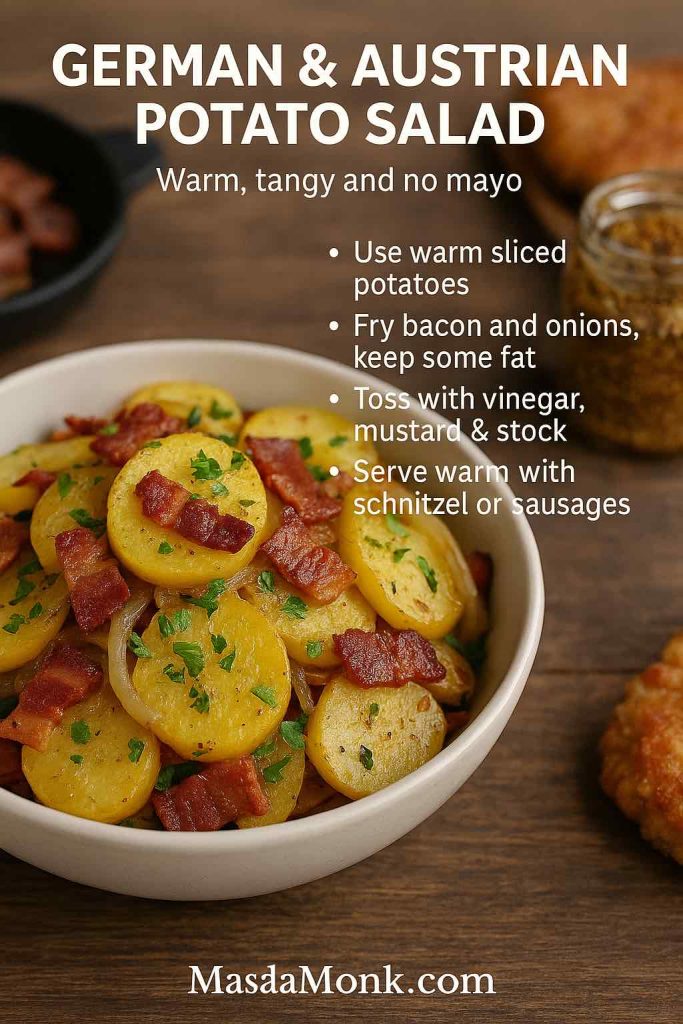
German potato salad and Austrian potato salad (kartoffelsalat) tend to skip mayo and instead use a warm dressing.
German and Austrian potato salad skip the mayo and keep things warm: sliced potatoes tossed with bacon, onions, vinegar, mustard and a little stock, perfect next to schnitzel or sausages.
Typically they feature:
Warm sliced potatoes
Bacon and bacon fat
Onions
Vinegar and mustard
Herbs like parsley and chives
For a lighter Austrian-style example, see Serious Eats’ Erdäpfelsalat, which uses onions, vinegar and mustard in a light sauce. This kind of salad is excellent alongside schnitzel, sausages and grilled meats.
Japanese Potato Salad
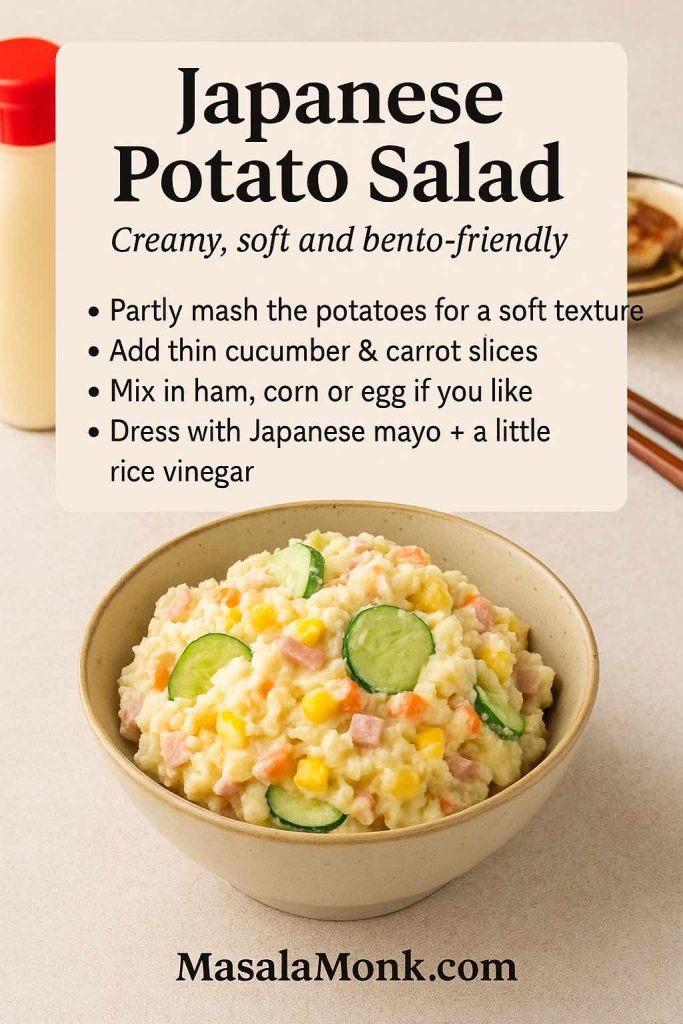
Japanese potato salad is creamier and softer than many Western versions. It often feels like a cross between mashed potatoes and chunky salad.
Japanese potato salad is softer and creamier than most Western versions: partly mashed potatoes plus thin cucumber and carrot slices, a little ham or egg and Japanese mayo with rice vinegar make it perfect for bento boxes and fried chicken nights.
A typical bowl includes:
Potatoes, boiled and partly mashed
Very thin slices of cucumber and carrot
Sometimes ham, corn or egg
Japanese mayo and a little rice vinegar
Because part of the potato is mashed, the dressing clings to every bite. This style makes a great side for katsu curry, karaage or bento boxes.
Greek and Mediterranean Potato Salad
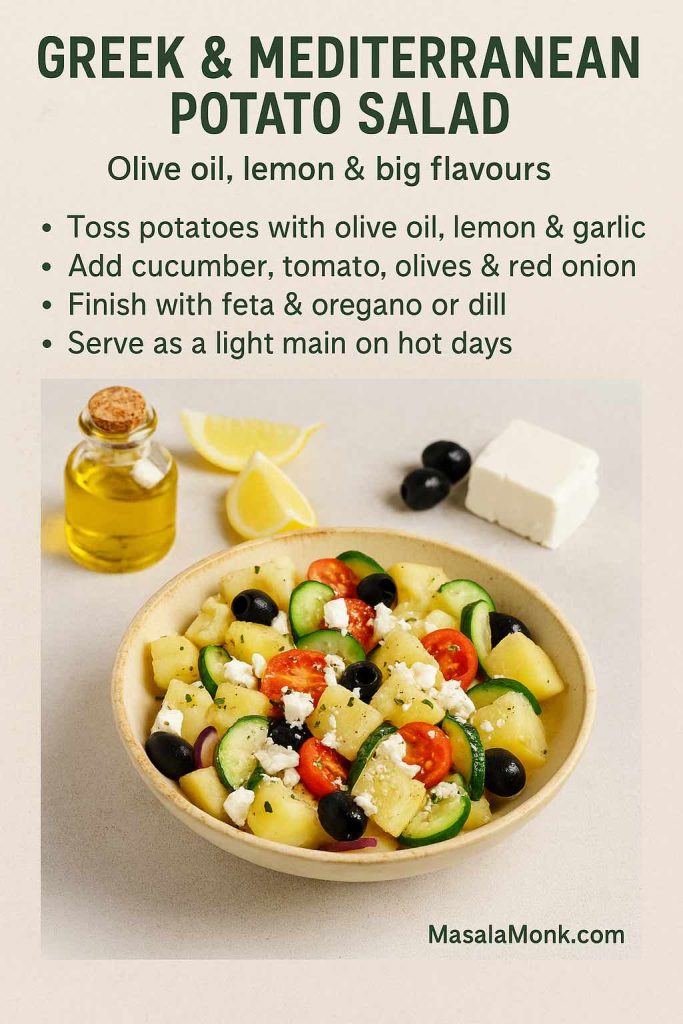
Greek potato salad and broader Mediterranean potato salad recipes focus on olive oil, lemon and herbs rather than heavy mayo.
This Greek and Mediterranean potato salad skips heavy mayo in favour of olive oil, lemon, garlic, fresh vegetables and feta, turning simple potatoes into a bright, light main for hot days.
You might:
Toss potatoes with olive oil, lemon juice, garlic and oregano.
Add cucumbers, olives, tomatoes and red onion.
Crumble feta cheese on top.
This style becomes even fresher if you use a yogurt-based tzatziki dressing, like the one in MasalaMonk’s Greek tzatziki master recipe. In that case, you end up with a potato salad with yogurt dressing that works as a light main dish on hot days.
Hawaiian, Filipino and South African Potato Salad
Elsewhere, potato salad leans into sweetness or special local ingredients.
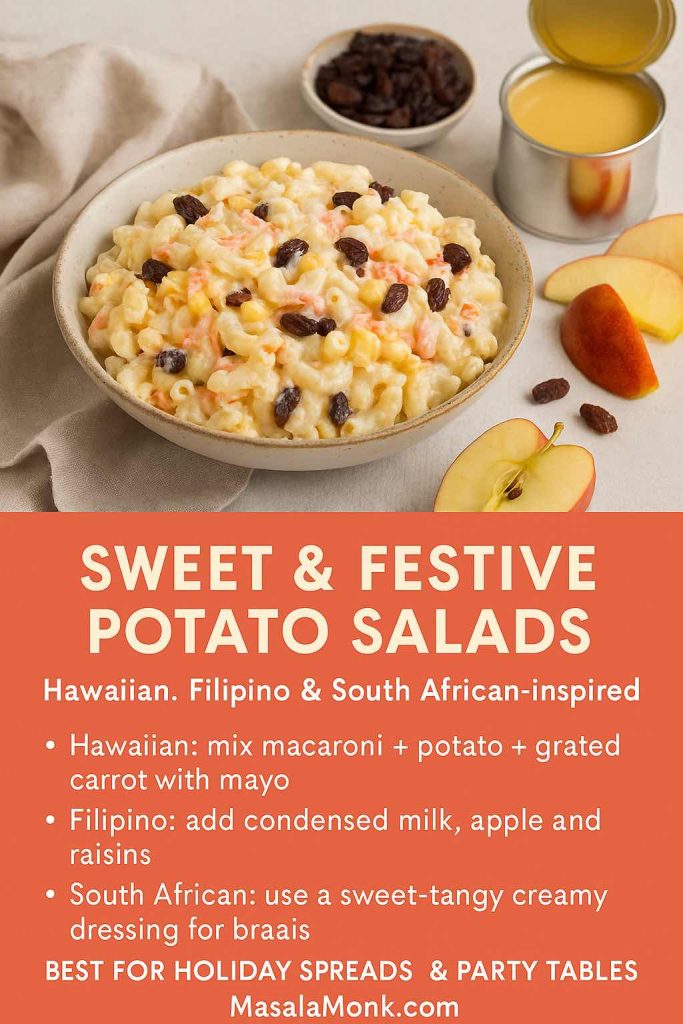
Hawaiian, Filipino and South African-inspired potato salads lean sweet and creamy—think macaroni and grated carrot, condensed milk with apples and raisins, or a sweet-tangy dressing for braais, all perfect for holiday spreads and party tables.
Hawaiian potato salad often mixes macaroni and potatoes with mayo and grated carrot.
Filipino potato salad or pinoy potato salad typically includes condensed milk, apples or fruit cocktail, raisins, eggs and mayo.
Potato salad South Africa sometimes appears as a condensed milk potato salad or a creamy potato salad served at braais.
Even though the flavours feel very different from German salad or Japanese potato salad, the base technique remains the same: boil potatoes, mix dressing, combine and chill.
Once you’ve mastered the base, adding more vegetables turns potato salad into a full meal in a bowl.
Beet and Potato Salad / Beetroot Potato Salad
Beet and potato salad looks stunning because beetroot tints everything pink.
This pretty-in-pink beet and beetroot potato salad uses cooked beet cubes, potatoes, dill, onion and walnuts in a light dressing, making it a striking side for holiday and brunch spreads.
You can make it by:
Roasting or boiling beetroot until tender, then dicing it.
Mixing beets with potatoes and a light dressing.
Adding dill, onion and perhaps walnuts for crunch.
This gives you beet and potato salad, beet potato salad or beetroot and potato salad, depending on how much beet you use. It looks especially good on festive and holiday tables.
Sweet Potato Salad and Mixed Potato Salad
Sweet potato salad recipes highlight natural sweetness and go well with tangy dressings or spices.
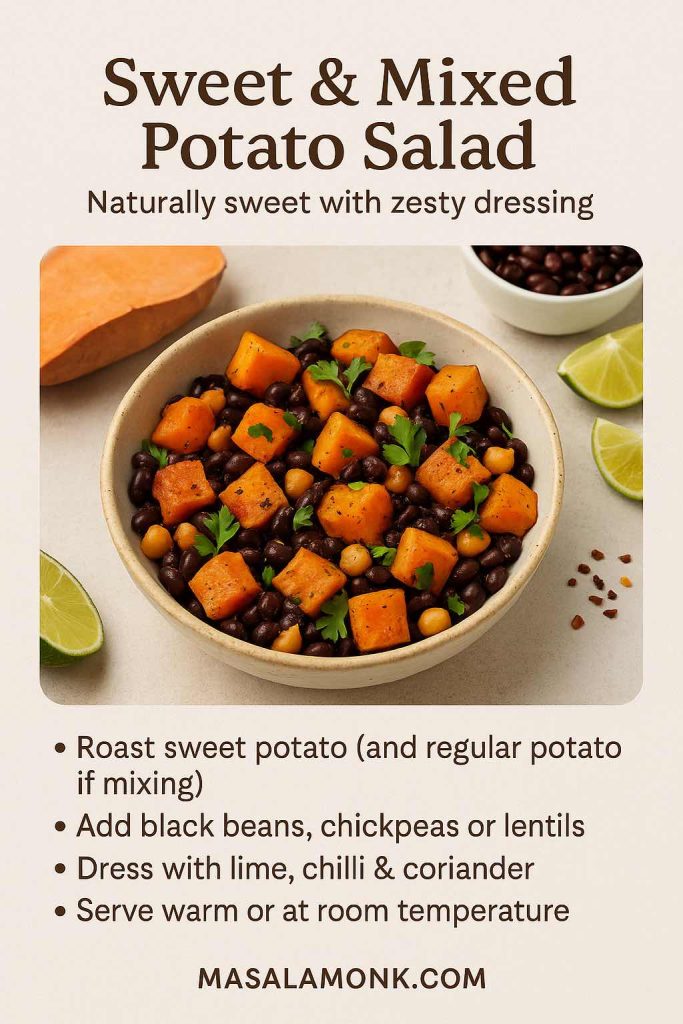
This sweet and mixed potato salad roasts sweet (and optional regular) potatoes, then tosses them with black beans or chickpeas, lime, chilli and coriander for a naturally sweet, zesty side that works warm or at room temperature.
For example, you might:
Roast sweet potato chunks with olive oil.
Toss them with black beans, chickpeas or lentils.
Dress them in lime, chilli and coriander.
You can also combine regular potatoes and sweet potatoes in one bowl. That yields a potato and sweet potato salad or even a potato marble salad when you mix different colours.
If you want to understand sweet potato nutrition more deeply, MasalaMonk’s sweet potato nutrition breakdown explains calories, carbohydrates and macros for both 100 g portions and whole potatoes.
Green Bean Potato Salad, Corn Potato Salad and Cauliflower Potato Salad
Beyond beets and sweet potatoes, other vegetables also work beautifully.
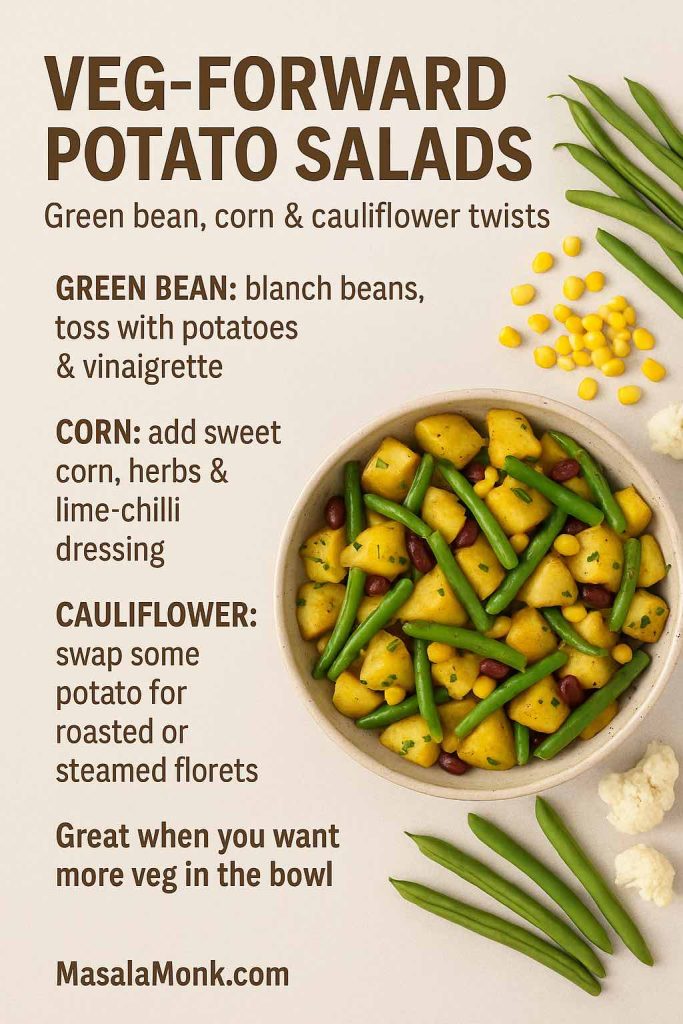
When you want more vegetables in the bowl, turn your base into a veg-forward potato salad with green beans, sweet corn and cauliflower twists.
Green bean potato salad: Blanch green beans until crisp-tender, cool them and toss with potatoes and a vinaigrette.
Corn and potato salad: Mix boiled or roasted potatoes with sweet corn kernels, herbs and perhaps a lime-chilli dressing.
Cauliflower potato salad: Replace some potatoes with steamed or roasted cauliflower florets to lower the carb load while keeping the general feel.
If you feel like a hot dish instead, MasalaMonk’s easy aloo gobi recipe shows how potatoes and cauliflower pair up in a spiced, comforting way rather than as a cold salad.
Small Batch, Big Batch and Store-Bought Shortcuts
Real life doesn’t always match recipe yields. Sometimes you just need potato salad for 2. Other times you need a huge tub.
Potato Salad for 2 and Small Potato Salad Bowls
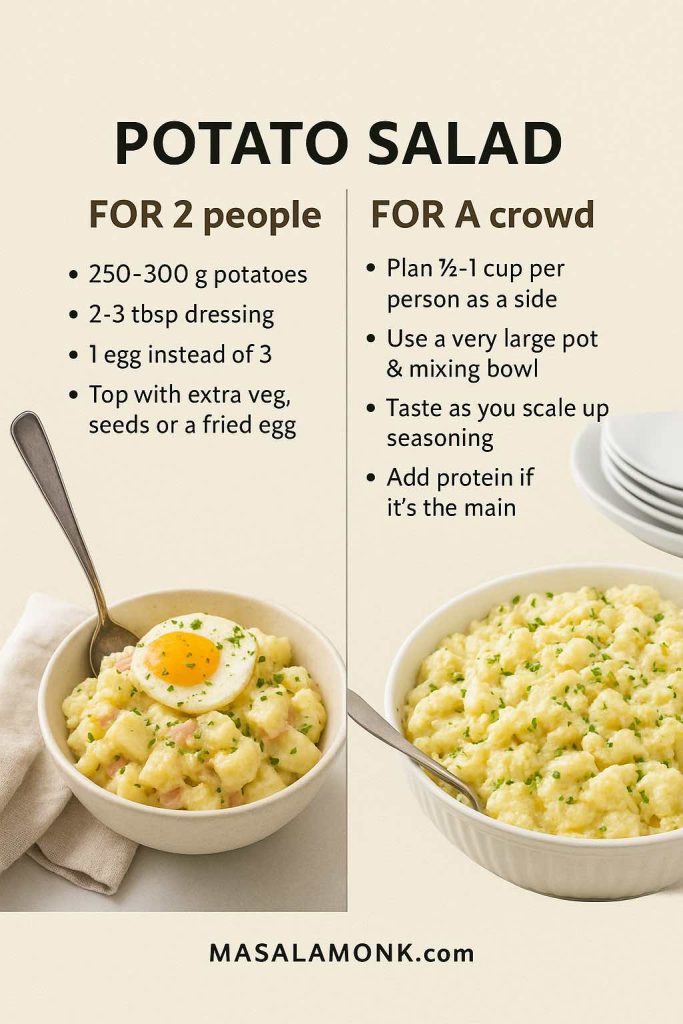
For potato salad for two people, you can:
Use about 250–300 g potatoes.
Scale the dressing to two or three tablespoons.
Use one egg instead of three.
Consequently, you get a small potato salad that fits into one bowl. You can also treat it as a potato salad bowl meal by topping it with extra vegetables, seeds or a fried egg.
Use this quick guide to scale potato salad: a small cosy bowl for two with 250–300 g potatoes and a little dressing, or a big party bowl where you plan ½–1 cup per person and keep tasting as you scale up.
Potato Salad for a Crowd
For potato salad for a crowd, simply multiply the master recipe.
A rough guide:
As a side dish, plan ½–1 cup per person.
For a main dish, allow more, especially if there’s plenty of protein mixed in.
The potato salad ingredients and procedure stay exactly the same. However, you will need a larger pot and mixing bowl, and you should taste as you go to balance the seasoning.
Canned Potatoes and Instant Shortcuts
When time is tight, you may look at canned potatoes for potato salad or canned German potato salad.
You can still make a decent bowl if you:
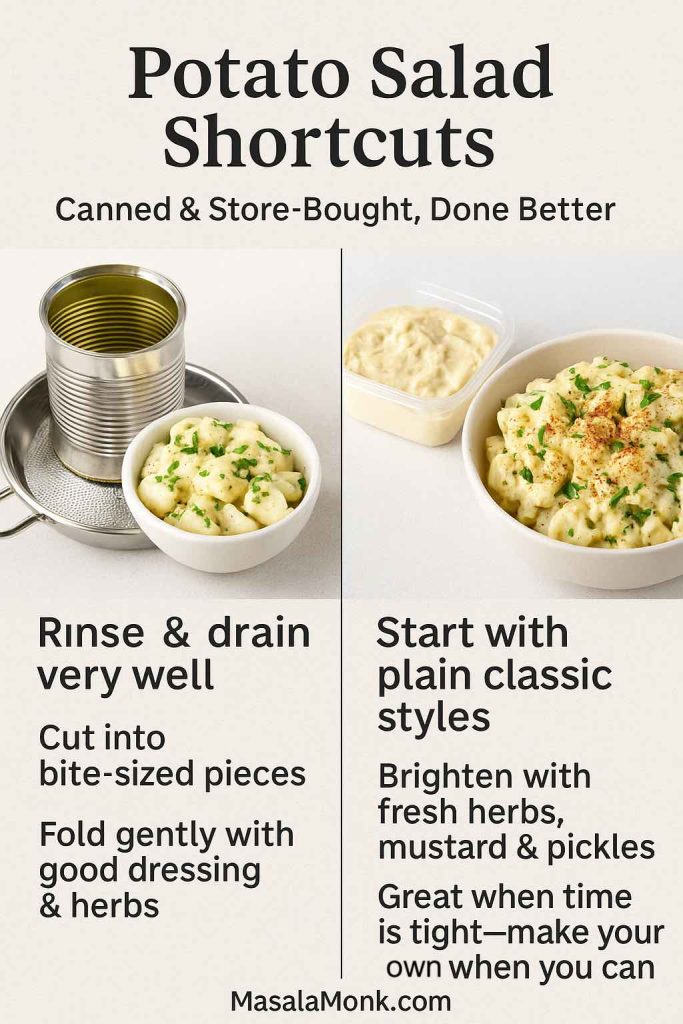
Rinse and drain the canned potatoes thoroughly.
Cut them into bite-sized pieces if necessary.
Handle them gently when folding in the dressing.
It won’t match the texture of freshly boiled potatoes, but it can rescue last-minute meals.
On busy days, you can still get a decent bowl by rinsing and dressing canned potatoes properly or by brightening plain store-bought potato salad with fresh herbs, mustard and pickles.
Store-Bought Potato Salad
Finally, there are days when you just buy potato salad.
Supermarkets and delis often sell:
Classic creamy potato salad
Deviled egg potato salad
German potato salad
Dill potato salad
Loaded or bacon ranch potato salad
Big-box stores might offer potato salad bulk tubs (similar to what you see when people say “potato salad at Sam’s Club” or “Costco potato salad”). Local chains sometimes have their own styles, like “Kroger potato salad”, “Safeway potato salad”, “Vons potato salad” or “Sainsbury’s potato salad”.
These options are convenient. However, if you find yourself constantly searching for “best potato salad near me”, “Russian salad near me” or “German potato salad near me” and feeling disappointed, it may be time to trust your own cooking. With a simple potato salad recipe in hand, you’ll often do better at home.
Potato salad is delicious, yet it can turn dangerous if left out too long. The good news is that you only need a few simple rules.
How Long Can Potato Salad Sit Out?
Food safety experts repeat one guideline: potato salad should not sit at room temperature for more than two hours. If the temperature is above 32°C / 90°F, limit it to one hour.
Articles like Allrecipes’ guide on potato salad safety and Food & Wine’s explanation emphasise that the real risk is not just the mayonnaise. Instead, cooked potatoes, eggs and cut vegetables form a perfect environment for bacteria in the “danger zone” between 4°C and 60°C.
Therefore:
Keep potato salad in the fridge until just before serving.
Nest the serving bowl in a larger bowl filled with ice at outdoor events.
Refrigerate leftovers promptly.
How Long Does Potato Salad Last in the Fridge?
Refrigerated potato salad generally stays safe for about three to five days. When you store it:
Use shallow, covered containers so it chills quickly.
Keep it at a consistent fridge temperature.
Stir gently and taste before serving leftovers.
Guides like Allrecipes’ and Southern Living’s discussions of how long potato salad can sit out and keep in the fridge explain this window clearly. In short, if you’re not sure about a container that’s been lurking for a week, it’s better to throw it away.
Can You Make Potato Salad Ahead?
Yes, you can. In fact, many people feel a classic potato salad recipe tastes better the next day.
To make it ahead:
Boil and dress the potatoes as usual.
Chill the salad overnight.
Add fresh herbs and any crispy toppings (like bacon) just before serving.
If you want to prep even further ahead, you can boil potatoes and store them plain in the fridge for one or two days, then dress them on the day of serving. That approach helps maintain a good texture.
Potato salad is rarely alone on the table. It almost always sits next to something grilled, baked or roasted.
At a BBQ or picnic, let potato salad sit in the middle of the table alongside grilled chicken and sausages, crispy potato bites, a fresh green salad with fruity dressing and a couple of dips so everyone can build a complete plate.
Picnic, Cookout and BBQ Ideas
For a picnic or barbecue, potato salad fits perfectly next to grilled meats and vegetables.
For extra freshness, you can also drizzle green salads with something like MasalaMonk’s sweet and spicy mango salad dressing, which balances nicely against creamy potato salad.
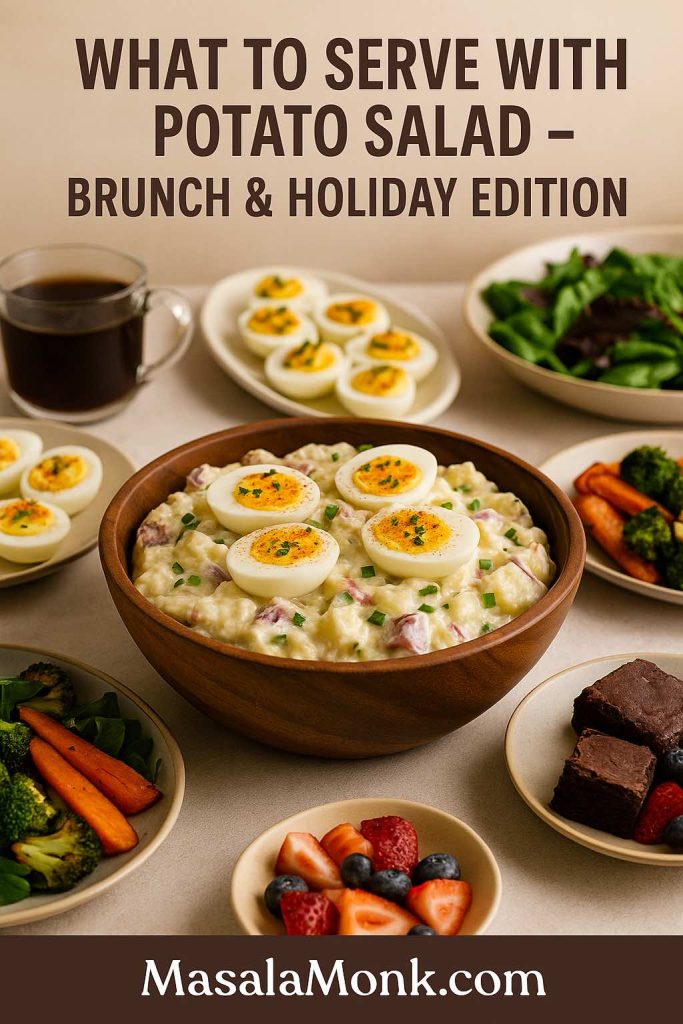
For brunches and holidays, pair potato salad with deviled eggs, a fresh green salad, roasted vegetables and simple desserts like fruit and brownies so the whole spread feels generous but balanced.
Brunch and Holiday Menus
Potato salad also feels comfortable on brunch tables.
For instance, you might serve:
A potato and egg salad or deviled egg potato salad
A platter of deviled eggs (inspired by MasalaMonk’s deviled egg ideas through Classic Deviled Eggs post)
A green salad and some roasted vegetables
Brunch drinks or mocktails for a relaxed weekend
During holidays, Russian salad or Olivier salad, beetroot potato salad, German salad and condensed milk potato salad styles often appear next to roasts, pies, stuffed vegetables and desserts.
Easy Desserts That Pair Well
Because potato salad can be rich, dessert doesn’t need to be complicated.
Light fruit-based desserts and cookies both balance a heavier bacon ranch potato salad or German potato salad recipe warm from the stove.
Bringing It All Together
By now, you’ve walked through a whole world of potato salad. You started with a master potato salad recipe and then wandered through:
Old-fashioned potato salad recipe with egg
Classic southern potato salad and mustard potato salad
Dill potato salad and dill pickle potato salad
Bacon and egg potato salad, bacon ranch potato salad and tuna potato salad
Chicken potato salad and chicken and potato salad recipe ideas
Vegan potato salad, potato salad recipe without mayo and potato salad with yogurt dressing
International styles like Russian salad, German potato salad, Japanese potato salad, Greek potato salad, Hawaiian and Filipino potato salad
Colourful versions such as beetroot potato salad, beet and potato salad, sweet potato salad, potato and sweet potato salad, green bean potato salad and cauliflower potato salad
Practical notes on potato salad for 2, potato salad for a crowd, canned potatoes and store-bought shortcuts
Safety and storage tips so your potato salad stays delicious and safe
Not only that, you’ve also seen how quickly you can shift from a creamy potato salad recipe with egg and mayo to a lighter, Mediterranean-style salad, or even to a fully vegan potato salad recipe with lentils and beans.
Potato salad really does work for every table—from cosy dinners with friends to big family feasts—whether you serve it classic, beetroot-pink, German-style or piled high with eggs and herbs.
Conclusion
In the end, the best potato salad recipe is simply the one you actually enjoy making and eating. Once you’ve cooked this dish a few times, played with different potatoes, swapped in Greek yogurt or sour cream, tried dill and mustard, added bacon or chickpeas and maybe experimented with beetroot and sweet potatoes, you’ll inevitably find your own favourite version.
That version will be the one friends ask you to bring “every time”, the one that disappears first from the table, and the one that quietly proves that a humble potato salad recipe can be as interesting and satisfying as any main course.
A classic potato salad recipe usually starts with boiled potatoes, hard-boiled eggs, mayonnaise, mustard, vinegar or lemon juice, and a few crunchy vegetables like celery and onion. After cooking the potatoes until just tender, you drain them well and gently fold them into a creamy potato salad dressing while they’re still warm, then chill everything so the flavours meld. This simple potato salad is the base you can turn into countless variations later.
2. How can I make an easy potato salad recipe with few ingredients?
For an easy potato salad recipe, you only really need potatoes, mayo, a little mustard, salt, pepper and one crunchy element such as onion or cucumber. Just boil the potatoes, cool them slightly, then stir in the dressing and your chosen vegetable. This kind of quick potato salad is perfect when you want a basic potato salad recipe on the table fast without a long ingredient list.
3. What goes into a traditional potato salad recipe with egg and mayo?
In a traditional potato salad recipe with egg and mayo, the potatoes are combined with chopped hard-boiled eggs, mayonnaise, mustard, vinegar, celery, onion and sometimes sweet pickle relish. Typically, this kind of creamy potato salad is seasoned with salt, pepper and a sprinkle of paprika on top. The result is a classic potato salad recipe that tastes like the one many people remember from family gatherings.
4. How do I make a potato salad recipe no egg?
If you prefer a potato salad recipe no egg, you can simply leave the eggs out and increase the crunch and herbs instead. For example, you might add extra celery, cucumber, dill or parsley to keep the texture interesting. In this way, the potato salad still feels satisfying and familiar, just without the egg component.
5. How do I make a potato salad recipe without mayo?
To create a potato salad recipe without mayo, you can swap the creamy base for a vinaigrette. Mix olive oil, vinegar or lemon juice, mustard, garlic, salt and pepper, then toss the warm potatoes in this dressing. That gives you a lighter, tangier potato salad recipe without mayo that works well as a side for grilled meats, fish or tofu.
6. What is the difference between potato salad, Russian salad and Olivier salad?
Potato salad usually focuses on potatoes, eggs and a simple dressing, while Russian salad and Olivier salad add more small diced vegetables like carrots, peas and pickles, plus extra richness. Often, Olivier salad also includes chicken, ham or sausage along with a generous amount of mayonnaise. As a result, Russian salad feels like a dressed-up potato salad recipe with more colour, texture and party vibes.
7. How is German potato salad different from classic creamy potato salad?
German potato salad is usually served warm or at room temperature and relies on a vinaigrette made with vinegar, mustard, onions and sometimes bacon, instead of a heavy mayonnaise base. Classic creamy potato salad, on the other hand, is chilled and built around mayo, sour cream or yogurt. Consequently, German potato salad tastes sharper and lighter, while traditional American potato salad tastes richer and softer.
8. How can I make a healthy potato salad or lighter version?
To turn a regular potato salad recipe into a healthy potato salad, you can reduce the mayonnaise and bring in Greek yogurt, sour cream or a simple olive-oil dressing. Then, add plenty of vegetables such as cucumbers, green beans, peas, corn, bell peppers or herbs. Suddenly, your potato salad becomes a balanced bowl with more fibre, less fat and a brighter flavour.
9. How do I make vegan potato salad?
For a vegan potato salad, you need to replace any animal products with plant-based options. Instead of eggs and regular mayonnaise, use egg-free mayo or an olive-oil vinaigrette, and skip bacon or dairy. Additionally, you can add chickpeas, lentils, beans, nuts or seeds so the vegan potato salad recipe feels filling enough to stand on its own.
10. What are some good flavour variations like dill potato salad or bacon potato salad?
Once you master a basic potato salad recipe, you can customise the bowl in many directions. For dill potato salad, fold in fresh dill and dill pickles; for dill pickle potato salad, add extra pickle brine and chopped gherkins. If you want potato salad with bacon, simply stir in crisp bacon pieces and a little extra mustard. Likewise, you can create red potato salad, sweet potato salad, or crunchy potato salad by switching the potato type and adding more vegetables or toppings.
11. How much potato salad do I need for 2 people or for a crowd?
If you’re planning potato salad for 2 people, about 250–300 g of potatoes plus dressing is usually enough as a side. By contrast, potato salad for a crowd often needs ½ to 1 cup per person, depending on what else you’re serving and whether the salad is a side dish or the main part of the meal. Scaling up or down is straightforward once you know roughly how many potatoes you cook per person.
12. How long does potato salad last in the fridge, and can it sit out?
Generally, homemade potato salad lasts about three to five days in the fridge when stored in a covered container. Nevertheless, it should not stay at room temperature for more than two hours, or one hour in very hot weather, because bacteria can grow quickly. Therefore, always chill potato salad promptly after serving and avoid leaving it on the table for the entire party.
13. How do I fix potato salad if it’s too dry, too runny or bland?
If your potato salad seems too dry, gently stir in more dressing or a spoonful of mayo, yogurt or olive oil until it loosens. Conversely, when a potato salad turns out too runny, you can add extra potatoes or chopped vegetables, then chill it so it firms up. If it tastes bland, simply adjust the salt, acid (vinegar or lemon), mustard and herbs until the flavours pop.
14. What can I serve with potato salad to make a complete meal?
Potato salad pairs well with grilled chicken, sausages, kebabs, burgers, roasted vegetables, baked fish and even hearty bean dishes. Moreover, you can serve it alongside green salads, coleslaw, corn on the cob or simple tomato salads to round out the plate. With those extras, a classic potato salad recipe, a German potato salad or a vegan potato salad can easily anchor a full, satisfying meal.
There’s a special kind of joy in biting into crispy homemade french fries that you made yourself. The outside is shatteringly crisp, the inside is fluffy and hot, and you can taste actual potato instead of just salt and grease. Once you learn how to do diy french fries at home, it becomes hard to go back to limp, lukewarm fast-food versions.
In this guide, we’ll walk through:
A straightforward french fries ingredients and procedure section you can follow every time
The best way to cook fries using a classic double-fry method
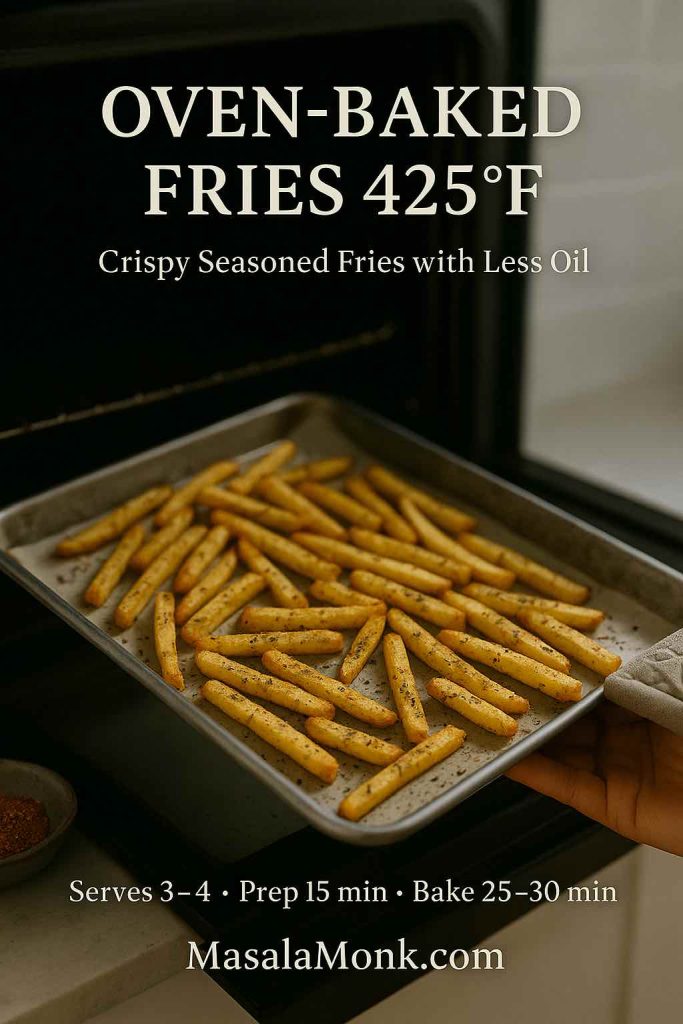
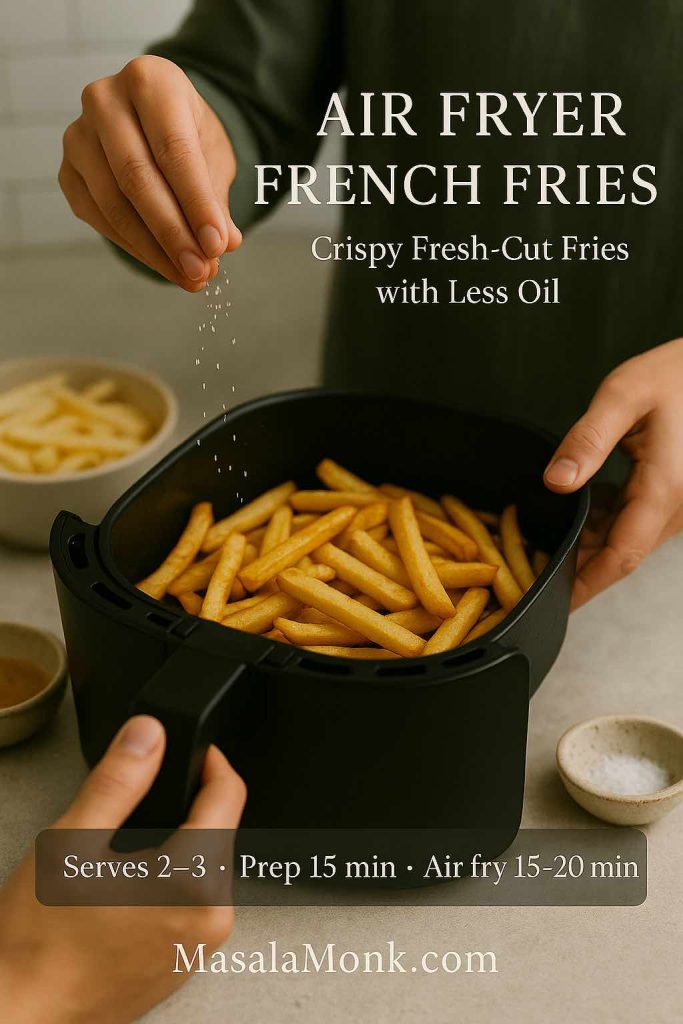
Easier options like oven fries at 425°F and air fryer frozen french fries
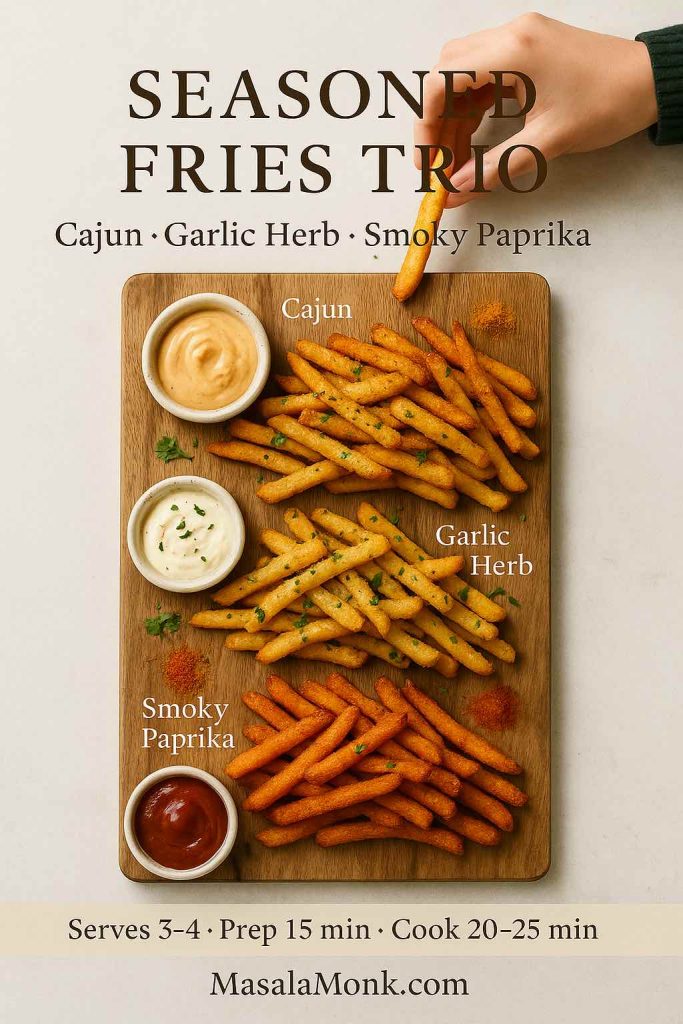
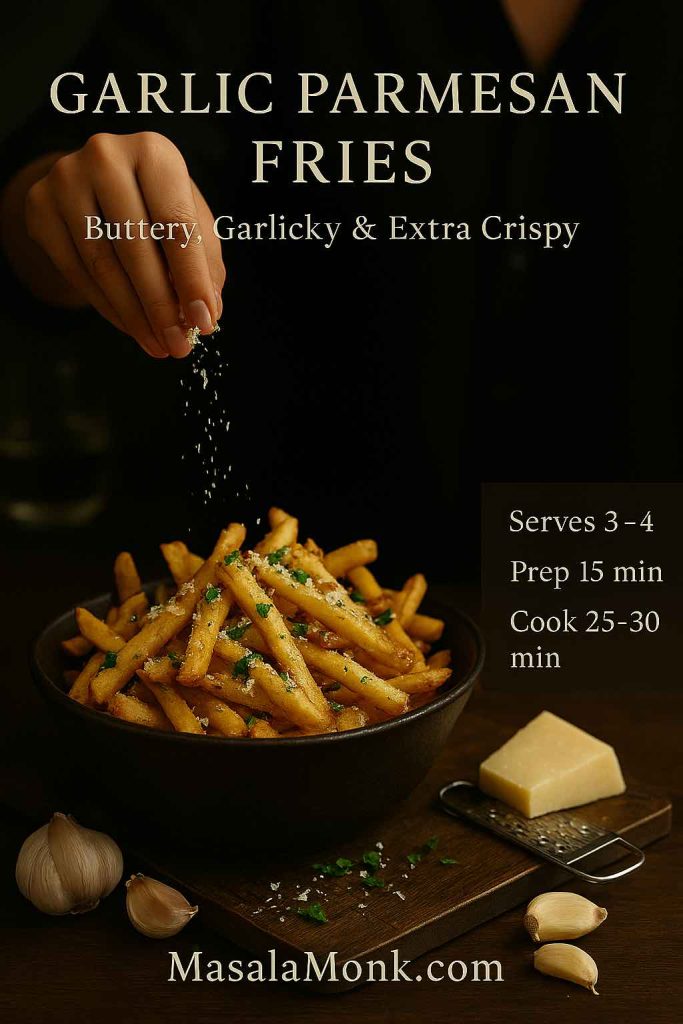
Fun variations: seasoned fries, garlic parmesan french fries, chili cheese french fries, truffle fries, and more
Smarter choices for healthy potato fries, from oil selection to veggie alternatives
The aim is simple: by the end, you’ll be able to make perfect french fries in several styles, whether you’re cooking for movie night, a party tray of loaded fries, or just a snack for one.
At first glance, buying a bag of frozen fries or grabbing a portion from a takeaway seems easier. However, at home french fries come with a few big advantages.
To begin with, you control the ingredients. You choose the potatoes, the oil, and the salt level. You can keep things minimal for a simple fries recipe, or go wild with flavors like cajun french fries or cheese french fries. When you’re in charge, “quality fries” actually means something.
Moreover, you get to decide how indulgent you want your fries to be. Potatoes themselves are not villains. According to Potatoes USA’s nutrition overview, a medium potato has around 110 calories, zero fat, and offers vitamin C, potassium, and fiber when you keep some peel on. Deep frying adds fat and energy, of course, but with homemade fries, you can:
Use better oils
Fry at the right temperatures
Or choose oven fries potatoes and air fryer french fries most of the time
A typical restaurant portion of fries can be high in fat and sodium. Overviews like Verywell Fit’s french fries nutrition facts break down just how quickly calories add up when fries are cooked in old oil and then heavily salted. Making real potato fries at home lets you adjust all of that.
Finally, the flavor is simply better. Fresh potato fries have a clean, sweet, potato-forward taste that frozen fries rarely match. Once you’ve had real french fried potatoes straight from your own kitchen, it’s hard not to feel a tiny bit smug.
The heart of any good potato french fries recipe is, unsurprisingly, the potato. Not all varieties behave the same in hot oil or a hot oven, so it’s worth thinking about the type you buy.
Starchy vs “gold” potatoes
For classic crispy fries with fluffy interiors, starchy potatoes are ideal:
Russet / Idaho potatoes: High starch and low moisture. These are perfect for french fries from russet potatoes if you want that restaurant-style contrast between crisp outside and soft inside.
Yukon Gold and other yellow potatoes: Slightly waxier, with more moisture, but very creamy. These are excellent for gold potato fries or yukon gold french fries when you want a rich, buttery interior and deep golden exterior.
Side-by-side comparisons, like this piece on Russet vs Yukon Gold, point out that Russets crisp up more dramatically than yellows because of their starch and lower moisture, whereas Yukon Golds keep their shape and feel denser and creamier. That matches what you’ll see in your pan: Russets are your friend for the crispiest french fries, while golds are great when you lean toward golden potato french fries that feel more substantial.
In short:
For extra crispy french fries or skinny fries → choose Russet/Idaho.
For rich, slightly softer thick cut fries or steak fries → try Yukon Gold or another yellow potato.
You can mix them too, especially if you like serving a variety of textures on one platter.
Oils, Heat, and Tools for Homemade French Fries that are Crispy
Once you’ve got your potatoes sorted, the next question is: what do you fry them in, and how?
Oils that work well for fries
When you’re deep-frying, you want oils that can handle high temperatures and stay reasonably stable:
Refined peanut or sunflower oil
Canola or rapeseed oil
Rice bran oil
High-oleic vegetable blends
Light or refined olive oil (for fries in olive oil, not extra virgin)
Articles on the healthiest oils for cooking and frying highlight avocado, refined olive, peanut, and similar oils because they combine decent smoke points with more monounsaturated fats. They’re not magic health potions, but they’re a smarter choice than repeatedly overheated, low-quality oils.
For full-on indulgence, some people love beef tallow fries or duck fat french fries. Both fats give incredible flavor, but they are obviously richer and make the most sense for occasional “wow” dinners. On the other end of the spectrum, you can choose very light oil coatings in the oven or air fryer for healthier french fries.
Helpful tools (and what you can skip)
You do not need a dedicated “french fry fryer” to make excellent fries. You can absolutely make french fries at home using basic tools:
A heavy pot or deep frying pan
A thermometer (to manage that best way to fry fries temperature window)
A large bowl for soaking
A colander or sieve
A clean towel for drying
A wire rack and tray for draining cooked fries
A dedicated fryer can make things more convenient if you make home made fries often, but it’s not a requirement. A sharp knife is also plenty for cut fries, although a mandoline or fry cutter can be fun if you often crave french fries shoestring, crinkle cut french fries, or thick cut french fries.
The nice part about a simple french fries recipe is how short the shopping list is. Here’s a good base for four people.
Core ingredients
1 kg (about 2.2 lb) potatoes (Russet for crispiest; Yukon Gold for creamier)
Oil for frying (enough to fill your pot 5–7 cm / 2–3 inches deep)
2–3 teaspoons fine salt
That’s your essential french fries ingredients list: nothing fancy, just the basics that define fresh french fries.
Optional extras for crunch and flavor in Crispy Homemade French Fries
If you’d like to push things toward the crunchy fries recipe end of the spectrum or turn out seasoned fries, keep these on hand:
Cornstarch or rice flour (for french fries with crispy coating)
Garlic powder, onion powder, smoked paprika, chili powder (for seasoned french fries or cajun french fries)
Grated Parmesan, cheddar, or other cheese (for parmesan french fries or cheesy french fries)
Truffle oil and fresh parsley (for truffle french fries recipe)
Fresh garlic and butter or olive oil (for garlic french fries recipe)
With these extras, the same basic batch of fries can become restaurant style fries, garlic parmesan fries, or loaded french fries without much extra effort.
Step-by-Step Crispy Homemade French Fries (Stovetop)
Let’s start with the classic version: crispy homemade french fries cooked in oil on the stove. This method gives you extra crispy fries if you follow the temperatures and timing closely.
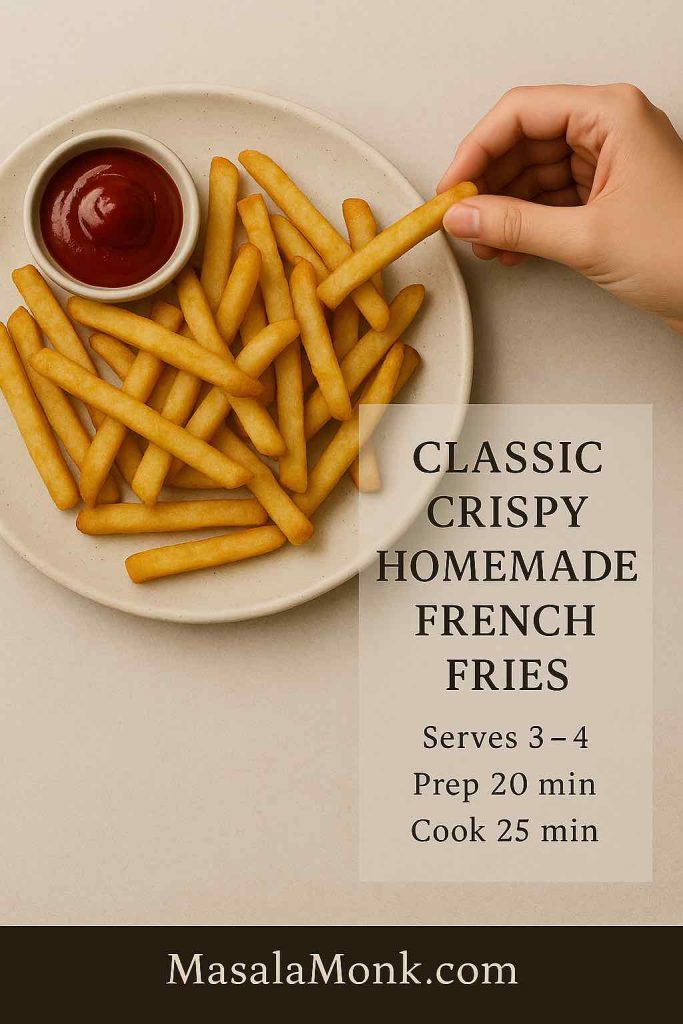
Classic crispy homemade French fries – a MasalaMonk recipe card with serving size and cook times, perfect for pinning or saving for later.
Step 1: Cut and soak the potatoes
First, scrub your potatoes well. You can peel them if you prefer, but leaving the skins on makes more rustic real potato fries and adds a touch of fiber.
Cut the potatoes into sticks about 8–10 mm thick. For skinny french fries or french fries shoestring, go thinner; for steak fries or thick cut fries, cut chunky batons or wedges.
As soon as you cut them, drop the sticks into a big bowl of cold water. This rinses away surface starch and stops oxidation. Swish them around, then drain and refill with fresh cold water. If you like, add a spoonful of vinegar or lemon juice; it can help them hold their structure during cooking.
Soaking for 20–30 minutes helps prevent the outside from turning gummy and gives you a better chance at truly crispy french fries rather than soggy ones. Once you’re done soaking, drain the potatoes thoroughly and spread them out on a clean towel. Pat them dry until they feel matte. Water on the surface is the enemy here: it lowers oil temperature and encourages splattering.
Step 2: First fry (par-cooking)
Heat your oil to around 150–160°C (300–320°F). At this stage, the goal is to cook the potatoes through without browning them much. For deep frying, a two-stage cook—first at a lower temperature, then at a higher one—is key to combining a fluffy interior with crisp exterior.
Working in small batches, gently lower the dried potato sticks into the hot oil. Fry for about 4–6 minutes. They should turn from opaque to slightly translucent and feel tender if you poke them with a knife, but they should not yet be golden.
Lift them out with a slotted spoon and place them on a rack set over a tray. Repeat with the remaining batches. At this point, you have par-cooked fries: soft, pale, and flexible. You can pause here, cool them, and even refrigerate for several hours if you want to fry just before serving. That’s how many restaurant style french fries are prepped.
Step 3: Second fry (crisping and coloring)
For the second fry, raise the oil temperature to 185–190°C (365–375°F). That hotter environment is where you’ll develop the golden crust that makes crispiest french fries such a pleasure.
Again in small batches, slide the par-cooked fries back into the oil. Fry for 2–4 minutes, until they’re uniformly golden, with little blistered areas and crisp edges. Keep an eye on their color; you’re aiming for golden potato french fries, not dark brown or burnt ones.
There’s a health reason for that, too. When starchy foods like potatoes are fried or baked at high heat, they can form acrylamide, a compound that health agencies monitor. The US FDA’s guidance on acrylamide in foods suggests aiming for light golden colors and avoiding burnt bits whenever possible. The National Institute of Environmental Health Sciences also notes that french fries and similar foods can be significant acrylamide sources when heavily browned. So, aim for gold, not mahogany.
Once the fries are ready, lift them onto the rack or a paper-towel-lined tray. Immediately sprinkle them with salt while they’re still sizzling, so the crystals cling. If you like seasoned fries, this is the moment to toss with paprika, garlic powder, or any spice mix you enjoy.
And just like that, you’ve completed the core french fries procedure: cut, soak, dry, par-fry, then finish hot.
Slightly Smarter, Still Crispy: Health Notes and Oil Choices
Even though fried fries recipes are not exactly health food, you can still make better choices without losing all pleasure.
First, use fresh or properly filtered oil and avoid letting it smoke. Overheated, repeatedly reused oil isn’t just unpleasant in flavor; it can contribute to off flavors and degraded fats. A thermometer makes it much easier to maintain that best way to fry french fries temperature range, whether you’re in a pot or a countertop fryer.
Second, consider how often you go for fully deep-fried crispy french fries versus lighter versions. You might save deep-fried extra crispy french fries for weekends, while turning to oven fries or air fryer homemade fries on busy weeknights.
Third, balance your plate. Fries alongside grilled chicken, salad, or roast vegetables feel different from fries plus more fried items. That’s where side dishes and smarter recipes around your fries come in—and we’ll circle back to those in a bit.
When you’d rather not deal with a pot of hot oil, oven fries 425°F are a great compromise. They won’t be identical to deep-fried fries, yet you can get delicious baked seasoned fries with crisp edges and tender middles.
Oven-baked fries at 425°F – crispy seasoned fries with less oil, with prep and bake times highlighted so you can see the whole MasalaMonk method at a glance.
Basic oven fries method
Preheat your oven to 220°C / 425°F.
Cut your potatoes into wedges or sticks, just as before.
In a bowl, toss them with 1–2 tablespoons of oil—this can be olive, avocado, or any neutral oil you like.
Season generously with salt, pepper, and any spices you enjoy: garlic powder, smoked paprika, dried thyme, or a ready-made seasoning blend.
Spread the fries out in a single layer on a baking sheet, leaving a bit of space between pieces. Crowding leads to steaming rather than crisping.
Bake for about 20–25 minutes, turning once halfway through, until the edges are golden brown and the fries are tender inside.
At this point, you’ve made seasoned oven fries that work beautifully with the same sauces and toppings you’d use for deep-fried versions. They’re particularly nice as a side to oven-baked mains or as part of a lighter tray meal.
If you’re planning a party spread that doesn’t revolve solely around fries, you can point guests toward other potato-centric snacks too. A collection like MasalaMonk’s potato appetizers fits naturally alongside oven fries on a buffet table, giving people more variety while still leaning into that potato comfort.
Air Fryer Fries: Crispy Homemade French Fries With Less Oil
Next, let’s move to fries airfryer style. Air fryers circulate very hot air around food, using far less oil than deep frying. Comparative work on deep-fried vs air-fried potatoes has shown that air-fried samples can have dramatically less fat and slightly fewer calories per serving, which makes them a handy tool when you’d like healthier french fries more often.
Air fryer French fries made from fresh-cut potatoes – a MasalaMonk recipe card that highlights how to get crispy fries with less oil, plus prep and air-fry times at a glance.
Fresh potato fries in the air fryer
For easy french fries recipe done in the air fryer:
Cut your potatoes into sticks and soak them as you would for deep frying.
Drain and dry thoroughly.
Toss with 1–2 teaspoons of oil, salt, and seasonings.
Place them in the air fryer basket in a loose, even layer.
Cook at 190°C / 375°F for 15–20 minutes, shaking every 5 minutes so they brown evenly.
For extra crispy french fries, finish with a final 3–5 minutes at 200°C / 400°F.
This method gives you healthy potato fries that still feel indulgent. They’re especially good as skinny fries, where the higher surface area means lots of crunchy bits.
Frozen Crispy Homemade French Fries in the air fryer
For those nights when you want the best frozen fries for air fryer with minimal fuss:
Preheat the air fryer to 200°C / 400°F.
Tip frozen shoestring fries, straight cut fries, frozen waffle fries, or other shapes into the basket. Try not to overstack them.
Air fry for 10–18 minutes depending on thickness, shaking halfway through.
Season as soon as they come out of the basket.
Most brands are already partially fried in oil, so you often don’t need extra. However, a light spray of oil can help paler brands crisp a little better. This technique works well if you want to focus your kitchen time on main dishes but still end up with crispy fries recipe results.
If you’re fond of multitasking with your air fryer, ideas like air fryer hard-boiled eggs fit nicely into the same workflow. You might prepare homemade fries for dinner and a batch of eggs for breakfast with very little extra effort.
Playing With Shapes: Shoestring, Thick Cut, Steak, and Crinkle
Once you have a reliable french fries recipe, the next step is having fun with shapes. Different cuts give you different textures and cooking times.
Skinny and shoestring fries
Thin skinny fries or french fries shoestring are all about extreme crispness:
Cut the potatoes into matchsticks.
Soak, dry, and fry exactly as for the classic recipe.
Shorten the par-fry to keep them from overcooking, and watch carefully during the second fry—they go from golden to too dark very quickly.
Shoestring fries are fantastic when you’re making loaded french fries recipe variations like chile-topped fries, because so many edges catch sauce and cheese.
Thick cut fries and steak fries
On the opposite end, thick cut french fries and steak fries are all about a soft, potato-y center:
Cut the potatoes into chunky batons or wedges.
Lengthen the par-fry slightly or start them in the oven with a bit of water in the pan, then finish in hot oil or under the broiler.
Because there’s more potato in each piece, they stay creamy inside even when the exterior is thoroughly crisp.
Thick cut fries shine alongside robust dishes: grilled steak, roasted chicken, or as part of a plate with gravy and vegetables.
Crinkle cut and waffle fries
For crinkle cut french fries, fries crinkle cut, or french fries crinkle, you’ll need a crinkle cutter or a mandoline that makes ridges. The technique stays the same—soak, dry, par-fry, then crisp—but the ridges create extra surface area. That means more crunch, and it also means they hold onto seasonings and sauces really well.
Similarly, frozen waffle fries from the store become great canvases for fancy fries toppings. Their lattice structure acts like a little basket for cheese, carne asada, or creamy sauces.
Veggie Fries: Sweet Potato, Yuca, Jicama, and Rutabaga
While classic french fries from white potatoes are iconic, you can also explore veggie french fries when you’re craving variety or want to shift the nutrition profile a bit.
Sweet potato fries
Sweet potato french fries deserve their own shout-out. They bake and air fry beautifully, and they pair well with both sweet and savory seasonings, from cinnamon and chili to garlic and smoked paprika. You can even make crinkle cut sweet potato fries for added texture.
Sweet potatoes tend to be softer and more prone to burning at high heat, so a light coating of cornstarch and oil, plus slightly lower temperatures, often work best. For more detail on how sweet potatoes differ nutritionally from white potatoes, you might enjoy MasalaMonk’s sweet potato nutrition breakdown and their piece on the potato debate: white vs sweet. Those articles go into fiber, vitamins, and even blood sugar considerations in a way that helps you decide when to reach for which.
Crispy, spiced sweet potato fries with a creamy dip – a MasalaMonk recipe card that highlights this naturally sweet, oven or air-fried alternative, complete with prep and cook times.
Yuca, jicama, and rutabaga fries
Beyond sweet potatoes, you can experiment with:
Yuca french fries: dense, starchy, and very satisfying. They need peeling and careful boiling before frying, but the final texture is almost creamy.
Jicama french fries: lower in carbs, with a fresh crunch and a subtle sweetness. These are typically best baked or air fried with strong seasonings.
Rutabaga french fries: slightly earthy and sweet, good roasted until caramelized and then tossed with spices.
These alternatives work well when you want healthy potato fries style sides on repeat without always using white potatoes. They’re also fun for guests who’ve never tried such variations.
Veggie fries medley: sweet potato, yuca, jicama and rutabaga, for nights when you want all the crunch of fries with a little extra colour and variety on the MasalaMonk table.
Seasoned, Spiced, and Coated Fries
Once you’ve mastered the basics, it’s time to play with seasoned fries, homemade seasoned french fries, and light coatings for texture.
Basic seasoned Crispy Homemade French Fries
For a straightforward seasoned fries recipe, start with fresh, hot fries and toss them with:
Fine salt
Garlic powder
Onion powder
Smoked paprika
A pinch of black pepper or chili powder
This base mix instantly transforms simple french fries into something closer to best seasoned fries, and you can adjust the heat level to taste.
Seasoned fries three ways – Cajun, garlic herb and smoky paprika – so you can turn one batch of MasalaMonk fries into a full flavour tasting board.
Cajun and herby variations
To steer your fries toward cajun french fries, blend:
Paprika
Cayenne
Garlic powder
Oregano
Thyme
A bit of brown sugar and black pepper
Toss this through hot fries and you’ll have spicy, deeply flavored seasoned homemade fries that go especially well with tangy dips like tzatziki or yogurt-based sauces.
Alternatively, if you’d rather lean into herbs, use rosemary, thyme, cracked black pepper, and flaky salt. These herby seasoned french fries feel more rustic and pair beautifully with roast meats and vegetables.
Crispy coatings for Homemade French Fries
If you want french fries with crispy coating without turning them into full battered french fries, a light dusting of starch can help. After soaking and drying, toss the raw potato sticks in a spoonful of cornstarch or rice flour, shake off the excess, and then fry as usual. The coating makes subtle bubbles and ridges on the surface, giving you extra crispy fries that stay crunchy a little longer.
Now comes the most playful part: turning a bowl of fries into a full meal or an irresistible shareable plate.
Garlic parmesan fries
To create garlic parmesan french fries, start with a batch of hot, freshly fried fries.
In a small pan, gently warm a bit of butter or olive oil with minced garlic until fragrant, not browned.
Toss the hot fries with this garlic mixture.
Add a handful of grated Parmesan and chopped parsley.
Season with salt and pepper as needed.
This same approach also works for simple parmesan french fries if you skip the garlic or for sweet french fries if you play with honey and chili flakes instead.
Buttery, garlicky parmesan fries piled high in a bowl – a MasalaMonk recipe card that highlights this extra-crispy variation, complete with prep and cook times for easy reference.
Chili cheese and carne asada fries
For fully loaded chili cheese french fries, layer:
A bed of crispy fries
A ladle of hot chili (vegetarian or meaty)
Grated cheddar or Monterey Jack
Jalapeños, scallions, maybe a drizzle of sour cream
Slide the whole thing under the broiler for a minute until the cheese melts. Suddenly, your crispy fries have become serious comfort food.
Chili cheese loaded fries served in a cast iron skillet – a MasalaMonk recipe card for the ultimate comfort fry platter, complete with prep and bake times for easy game-night planning.
Similarly, carne asada french fries combine:
Fries
Chopped grilled steak
Pico de gallo or salsa
Guacamole
Sour cream or crema
Fresh coriander
They’re messy, delicious, and perfect for sharing.
Carne asada fries loaded with steak, salsa, guacamole and sour cream – a MasalaMonk feast that turns a simple tray of fries into a full-on meal.
Truffle and “fancy” fries
When you want fancy fries without too much effort, truffle french fries recipe style toppings make a big impression.
Toss hot fries with a little truffle oil (a few drops go a long way).
Add grated Parmesan and parsley.
Season with salt and cracked pepper.
Because truffle oil can dominate, it’s best used with neutral, simply salted fries rather than heavily seasoned ones.
If you’d like more ideas for dips and cheesy sides that pair well with loaded fries, MasalaMonk’s spinach dip collection and their buffalo chicken dip recipes offer plenty of inspiration. Both kinds of dip are excellent alongside loaded french fries or even spooned over the top.
Skinny truffle fries finished with parmesan, herbs and a side of aioli – a simple MasalaMonk twist that turns fries into a wine-bar style treat.
Sauces and Dips for Crispy Homemade French Fries
Good fries deserve good sauces. Beyond ketchup, you can easily mix and match flavors for your own french fry dip recipe collection.
Creamy dips
For creamy dipping sauce for french fries, try ideas like:
A simple garlic mayonnaise with lemon juice
A smoky paprika mayo
A yogurt-based dip with herbs and garlic
These work especially well with seasoned fries and cajun fries, where the spices already bring a lot of personality.
If you want to branch out further, the cool, garlicky punch of tzatziki is a great contrast to hot fries. A guide like MasalaMonk’s Greek tzatziki sauce recipes shows how versatile that sauce can be across different herbs and add-ins, and every version is happy to share a plate with crispy fries.
Four quick fries dipping sauces – garlic mayo, smoky ketchup, spicy mayo and herb yogurt – so you can switch up the flavour of every MasalaMonk fries night in minutes.
Cheesy and baked dips for Crispy Homemade French Fries
Meanwhile, cheesy dips make perfect companions to french fries loaded with toppings. Spinach and artichoke dip, hot cheese dips, or buffalo chicken dip can all sit in the center of a platter surrounded by straight cut french fries, curly french fries, or crinkle cut fries for dipping.
Because fries and rich dips can be quite substantial, you may find it useful to round out your menu with lighter but still indulgent favorites. Dishes like classic deviled eggs with variations or high-protein snacks and breakfasts, such as overnight oats recipes, help keep things balanced over the course of a day, even if dinner is definitely in “treat” territory.
What to Serve With Crispy Homemade French Fries
Rather than thinking of fries as an afterthought, you can build entire meals around them in a way that feels intentional and satisfying.
Classic comfort plates
On one hand, there’s the timeless pairing of chicken and french fries:
Grilled or fried chicken
Homemade fries (deep-fried, oven-baked, or air fried)
Coleslaw or a fresh salad
You can also swap chicken pieces for sandwiches. A platter of fries next to juicy sandwiches from a range like MasalaMonk’s chicken sandwich recipe collection makes a complete, crowd-pleasing spread.
For full comfort food mode, consider serving fries alongside creamy classics:
Those casseroles and bakes give you vegetables and dairy in forms people love, while the fries bring crunch and a salty edge to balance the creaminess.
Party spreads and grazing boards
For parties or movie nights, a fries-centric board can be a huge hit. You might:
Alongside that, including a few extra nibbles from potato-focused ideas like MasalaMonk’s potato appetizers roundup keeps everyone happy without making fries the sole attraction.
Leftovers, Crispy Homemade French Fries, and Casseroles
Every now and then, you might find yourself with cooked fries left over. They won’t be as crisp the next day, but they are far from useless.
Turning fries into home fries
One option is to make a sort of shortcut home fries recipe:
Chop leftover fries into bite-sized pieces.
Heat a skillet with a spoon of oil or butter.
Add onions or peppers if you like, then the chopped fries.
Cook over medium-high heat until the edges crisp and the pieces heat through.
Season again and serve with eggs for breakfast.
These cooking home fries from leftover fries are especially good with runny yolks or as part of a brunch plate.
Turn last night’s fries into this cosy breakfast home fries skillet, topped with sunny-side eggs and peppers for an easy MasalaMonk-style brunch.
Casseroles with Crispy Homemade French Fries
Another route is to layer leftover fries into a bake:
Assemble a cheeseburger casserole with french fries: fries on the bottom, cooked ground meat or meat alternative, cheese, and pickles or onions, then bake until bubbly.
Create a riff on shepherd’s pie using fries as a topping instead of mashed potatoes.
These dishes aren’t traditional, but they’re a fun way to avoid waste and to reimagine fries in a new context.
To sum everything up, making french fries at home doesn’t need to be complicated. You start with good potatoes, a sensible approach to oil and heat, and a simple french fries recipe that you can repeat without thinking too hard. From there, the world opens up: you can lean toward healthy potato fries most days, then indulge in deep-fried extra crispy french fries when the mood hits.
You’ve seen how to:
Choose between Russet and Yukon Gold for the best french fry potato
Use soaking, drying, and double frying to achieve reliably crispy homemade french fries
Swap in oven fries, air fryer fries, or veggie french fries like sweet potato, yuca, jicama, and rutabaga
Turn plain fries into seasoned fries, garlic parmesan fries, chili cheese fries, carne asada fries, and truffle fries
Build full meals and snack boards around fries with dips, casseroles, sandwiches, and brunch ideas
Whether you keep it simple with a plate of lightly salted fresh french fries, or go all out with a giant platter of loaded french fries recipe piled high with cheese and toppings, you now have the tools to make them taste the way you want, every time you crave them.
1. What is the best potato for crispy homemade french fries?
For truly crispy homemade french fries, starchy potatoes work best. Russet or Idaho potatoes are usually considered the best french fry potato because they have a high starch, low moisture content that turns fluffy inside and crisp outside after frying. Yukon Gold or other “gold” potatoes also make excellent golden potato french fries, although they come out a little creamier and denser. If you prefer extra crunch and light interiors, reach for Russets; if you like a richer bite, go for Yukon Golds.
2. How do I keep fries crispy and not soggy?
To keep fries crunchy instead of limp, several small steps matter. Dry the potatoes thoroughly after soaking so you’re not dropping water into the oil. Then, cook them twice: a gentle first fry to cook the potato through, followed by a hotter second fry that creates the crisp crust. Avoid crowding the pan, since too many fries at once will cool the oil and make everything greasy. Salt and season fresh french fries right after the second fry while they are still hot, and serve them soon so the crust stays crisp.
3. Why do recipes tell me to soak potatoes before frying?
Soaking sliced potatoes in cold water helps pull out surface starch, which can otherwise form a gummy coating and prevent crispy fries from developing. A soak of 20–30 minutes is usually enough for a simple french fries recipe. After soaking, draining and drying thoroughly is just as important. When excess starch and moisture are removed, the fries brown more evenly and stay crisp longer, which is essential for the crispiest french fries.
4. Can I make crispy homemade french fries without a deep fryer?
Yes, you absolutely can make homemade fries without a dedicated fryer. A deep, heavy pot or a sturdy frying pan works fine as long as you use enough oil to submerge the potatoes and maintain consistent heat. A thermometer helps you hit the right temperature range. In addition, you can make oven fries and air fryer fries with just a thin coating of oil if you’d rather skip deep-frying altogether. The technique changes slightly, yet you still end up with easy french fries that taste fantastic.
5. What is the best way to fry french fries for perfect results?
A classic double-fry method is often considered the best way to fry french fries. First, fry the potatoes at a lower temperature so they cook through without much color. Then, after a short rest, fry them again at higher heat so the outside turns crisp and golden. During both steps, keep the oil temperature steady and avoid crowding the pan. Using this approach, even a beginner can turn out perfect french fries from a straightforward easy french fries recipe.
6. How hot should the oil be for french fries?
For the first fry, aim for oil around 150–160°C (300–320°F). This lets the interior of the potato cook gently without the outside browning too quickly. For the second fry, raise the temperature to about 185–190°C (365–375°F). At this higher heat, the surface dries out and browns into a crisp shell. Keeping the oil in this range is one of the main secrets behind extra crispy french fries and prevents the fries from soaking up too much oil.
7. Can I make french fries without oil?
You can make french fries without oil in the strict sense by baking or air frying plain potato sticks, though they will taste more like roasted potatoes than true fries. More realistically, very small amounts of oil—just enough to lightly coat the potatoes—create healthy potato fries that still feel indulgent. Oven-baked oven fries 425 and air-fried potatoes both work well with only a teaspoon or two of oil per serving, especially when you add bold seasonings.
8. Are homemade fries healthier than fast food fries?
While fries are still an occasional treat, homemade fries can be a better option than many fast-food versions. You decide the portion size, which oil to use, and how much salt to add. You can also make french fries from fresh potatoes instead of relying on heavily processed products. If you alternate deep-fried batches with oven fries or air fryer homemade fries, and you pair them with protein and vegetables, french fry meals can fit more comfortably into a balanced way of eating.
9. What’s the difference between shoestring, thick cut, steak fries, and crinkle cut?
All these names refer mainly to shape and thickness. Shoestring fries and skinny fries are very thin and cook quickly, giving you lots of crunchy texture. Thick cut fries and steak fries are chunkier sticks or wedges with a soft, fluffy center. Crinkle cut french fries have wavy ridges that increase surface area and help hold onto sauce and seasoning. You can use the same basic french fries recipe for each style; just adjust cooking time so the inside cooks before the outside browns too much.
10. How do I make seasoned fries at home?
To make a seasoned fries recipe at home, start with freshly cooked, hot fries. Immediately toss them with salt, then add your favorite flavors. A simple mix might include garlic powder, onion powder, smoked paprika, and black pepper. For cajun french fries, you can add cayenne, oregano, and thyme. If you prefer herby seasoned homemade fries, try rosemary, thyme, or mixed Italian herbs. Because you apply the spices while the fries are hot, they cling well and create deeply flavorful seasoned french fries.
11. How can I make fries extra crispy with a coating?
For french fries with crispy coating, a light starch layer helps. After soaking and drying the potatoes, toss them in a spoonful of cornstarch or rice flour until just lightly dusted. Shake off the excess, then fry using the usual two-step method. The starch forms tiny bubbles and ridges on the surface, leading to extra crispy fries. You still get the flavor of real potato fries, but with a more pronounced crunch that holds up better under sauces and toppings.
12. Can I make french fries in the air fryer from frozen?
Yes, air fryer frozen french fries are one of the easiest weeknight options. Place frozen fries in air fryer—whether they are shoestring, waffle, or steak-cut—in a single layer, set the temperature around 200°C / 400°F, and cook until they’re crisp and hot, shaking the basket once or twice. Many people look for the best frozen fries for air fryer because par-fried frozen fries crisp quickly and take well to extra seasonings. With this method, you still get satisfying crunch without using much additional oil.
13. Can I microwave french fries?
You can microwave fries, yet they rarely come out crisp. Microwave french fries tend to steam rather than brown, so they soften instead of staying crunchy. If you want to use the microwave, you can briefly pre-cook thick wedges or steak fries, then finish them in a hot oven, pan, or air fryer to reintroduce crispness. For reheating leftovers, a skillet or air fryer generally gives better results than the microwave alone.
14. How do I reheat leftover fries so they don’t turn floppy?
To revive fries, spread them in a single layer in a hot pan with a thin film of oil, or place them in a preheated air fryer basket. Heat until the outside becomes crisp again and the centers are warmed through. This method works for frozen fried potatoes, french fries and chips, or leftover home made fries from the day before. Reheating on a baking sheet in a hot oven also helps, though it may take slightly longer to recapture the original crunch.
15. How can I make fries healthier without losing too much flavor?
If you want healthier french fries without giving them up entirely, there are several strategies. Bake or air fry potato sticks with just a small amount of oil instead of deep-frying. Switch between white potatoes and alternatives like sweet potato french fries, yuca french fries, jicama french fries, or rutabaga french fries for more variety in fiber and nutrients. Additionally, serve your crispy homemade french fries as a side with lean protein, salads, or vegetable-rich dishes rather than pairing them only with other heavy foods.
16. What sauces go well with homemade fries?
Although ketchup is classic, homemade fries welcome a wide range of sauces. Garlic mayonnaise, mustard-based dips, smoky paprika mayo, yogurt-and-herb sauces, and spicy chili dips all pair beautifully with crispy fries. Cheese-based sauces turn simple fries into french fries loaded with flavor, while lighter dips like tzatziki give a refreshing contrast. By keeping a few favorite sauces on hand, you can turn one basic easy fries recipe into many different experiences just by changing what you serve alongside.
Few foods are as beloved—and as hotly debated—as the humble potato. Whether you’re a fan of the classic white potato (think mashed potatoes at Thanksgiving) or the vibrant sweet potato (hello, sweet potato fries), chances are you’ve wondered: Which is healthier? Which is better for my goals? Does it really matter how I cook them?
Today, we’re peeling back the layers on both spuds—exploring nutrition, health effects, cooking tips, and the real story behind the hype. Get ready for some surprises, a few myth-busters, and plenty of practical tips you can use at your next meal.
Nutrition Showdown: White Potato vs. Sweet Potato
Let’s start with the basics—a head-to-head comparison.
Nutrient (per 100g, cooked)
White Potato
Sweet Potato
Calories
87
90
Carbohydrates
20g
21g
Fiber
2.1g
3.3g
Protein
2g
2g
Fat
0.1g
0.2g
Potassium
17% DV
10% DV
Vitamin C
13% DV
3% DV
Vitamin A
<1% DV
107% DV
Antioxidants
Moderate
High (esp. in colored varieties)
Key Takeaways:
Both are nutritious, low-fat, and loaded with healthy carbs.
Sweet potatoes win big on fiber and vitamin A (beta-carotene).
White potatoes bring more potassium and vitamin C to the table.
Glycemic Index: The Truth About Blood Sugar
You may have heard that potatoes are “bad for blood sugar”—but the full story is more nuanced:
White potatoes have a variable glycemic index (GI), ranging from moderate (~56, for boiled red potatoes) to very high (up to 111, for baked russets). The GI jumps if you bake, fry, or mash.
Sweet potatoes generally score lower, especially when boiled (GI ~44), but can still spike blood sugar if baked or mashed (GI up to ~91).
Practical tip: How you cook your potatoes matters more than which type you eat! Boil and cool them (think potato salad) to maximize resistant starch and blunt the blood sugar spike.
Resistant Starch: Your Gut’s Secret Weapon
Here’s a little-known potato superpower: when you cook and cool potatoes (white or sweet), they form “resistant starch.” This special fiber-like carb:
Feeds your gut bacteria (prebiotic effect)
Promotes satiety and may help with weight control
Improves insulin sensitivity over time
Reduces inflammation in the gut
Studies show that cooled potato salad or reheated boiled potatoes (not fried) are gut-health gold. So don’t toss those leftovers—chill them and give your microbiome a treat!
Antioxidants and Unique Nutrients
Sweet potatoes—especially the orange and purple types—are packed with antioxidants, including beta-carotene (vitamin A) and anthocyanins. These protect your cells from oxidative damage and support immune health.
White potatoes contain their own beneficial compounds, like vitamin C, potassium, and glycoalkaloids, which have antioxidant and anti-inflammatory effects.
Color tip: The deeper the color (think purple or deep orange), the more antioxidants you’ll get!
Which Potato Fits Your Goals?
Trying to boost vitamin A?
Go sweet potato—especially orange or purple varieties.
Need more potassium (for blood pressure, muscle health)?
White potatoes are your friend—more potassium than a banana!
Watching blood sugar?
Boiled and cooled potatoes of any type are best.
Always pair potatoes with healthy fats (olive oil) and protein (beans, eggs, fish) to slow sugar absorption.
Want a fiber boost and gut health?
Sweet potatoes have the edge, but cooled white potatoes also deliver.
Cooking Matters More Than Color
Let’s bust a myth: Frying, over-baking, or drowning potatoes in cream, butter, or sugar cancels out most health benefits, no matter the type.
Healthiest Ways to Prepare Potatoes:
Boil with the skin on: Preserves fiber and nutrients.
Cool and eat as salad: Maximizes resistant starch.
Roast with olive oil and herbs: Boosts flavor without adding junk.
Pair with protein/fiber: Slows down the blood sugar rise.
Want a next-level hack? Try cold potato salad with a vinegar-based dressing—great for gut health and blood sugar control.
Busting Common Myths
Are white potatoes “bad” for you? No! They’re a real food—nutritious and filling if prepared well.
Are sweet potatoes “superfoods”? They’re excellent for vitamin A and antioxidants, but variety matters most. No single food can be a magic bullet!
Should you avoid potatoes for weight loss or diabetes? No, but portion size and cooking style matter. Use boiled or cooled potatoes, moderate your portions, and skip the heavy toppings.
Real-World, Practical Advice
Rotate your spuds: Variety = better nutrition and less boredom.
Shop for color: Try purple, orange, yellow, and white varieties for a rainbow of nutrients.
Meal-prep hack: Boil a big batch, cool, and store for use in salads, quick breakfasts, or sides all week.
Don’t peel unless you have to: The skin holds much of the fiber and nutrients.
2024–2025 Science Snapshot
Recent studies confirm that both white and sweet potatoes offer gut, metabolic, and anti-inflammatory benefits—if you cook them wisely.
Resistant starch is gaining buzz as a “postbiotic” powerhouse for gut health, especially in cooled potatoes.
Glycemic impact can be minimized through preparation—not just by switching spud types.
Conclusion: Which Potato Wins?
Here’s the final word: Both white and sweet potatoes can be part of a healthy, enjoyable diet. Your best bet? Eat a mix, focus on smart cooking, and savor every bite.
The real winner: You, when you enjoy potatoes as part of a balanced, diverse diet!
Recipe Ideas to Try
Zesty Potato Salad
Boiled baby potatoes (white or sweet), cooled
Chopped red onion, celery, parsley
Olive oil, lemon, Dijon mustard dressing
Sprinkle of seeds or chopped eggs for protein
Oven-Roasted Rainbow Fries
Mixed wedges of white, orange, and purple potatoes
Toss in olive oil, smoked paprika, rosemary
Roast at 425°F until crisp
Sweet Potato Breakfast Hash
Diced sweet potatoes, sautéed with onions, bell pepper
Add black beans and spinach
Top with a poached egg for a full meal
What’s your favorite way to enjoy potatoes? Share your thoughts, questions, or your best recipe below! Let’s keep the spud conversation growing.
FAQs
1. Are sweet potatoes really healthier than white potatoes? Sweet potatoes offer more vitamin A and fiber, while white potatoes provide more potassium and vitamin C. Both are healthy if prepared well—neither is automatically “better” than the other.
2. Which type of potato is better for managing blood sugar? Boiled and cooled sweet potatoes have the lowest glycemic impact, but boiled and cooled white potatoes are also good. Preparation is key: avoid frying or baking at high temps for either type.
3. Can I eat potatoes if I’m trying to lose weight? Yes, in moderation. Potatoes are filling and nutrient-dense. To support weight loss, boil or roast them (not fry), keep the skin on, and avoid heavy, high-calorie toppings.
4. What is resistant starch, and how do I get more of it from potatoes? Resistant starch forms when potatoes are cooked and then cooled. It feeds gut bacteria and can improve insulin sensitivity. Potato salad (with cooled, boiled potatoes) is a great source.
5. Are potato skins good for you? Yes! Potato skins are rich in fiber, vitamins, and minerals. Unless you have to peel them, leave the skin on for the best nutritional value.
6. Do sweet potatoes have more sugar than white potatoes? Yes, sweet potatoes have slightly more natural sugars, but they also have more fiber, which slows the absorption. The total carb content is very similar between the two.
7. What’s the healthiest way to cook potatoes? Boiling with skins on, cooling, and then eating as a salad or reheating is the healthiest. Roasting with olive oil and herbs is also great. Avoid deep frying and loading with butter, cream, or cheese.
8. Can potatoes be part of a diabetic-friendly diet? Yes, if portion sizes are reasonable and preparation is healthy (boiled, cooled, roasted). Pair potatoes with lean protein and healthy fats to help control blood sugar.
9. Do colored potatoes (like purple or red) have extra health benefits? Colored potatoes (especially purple and orange) are higher in antioxidants like anthocyanins and beta-carotene, offering extra cellular protection.
10. Is it better to eat potatoes hot or cold? Cold (or gently reheated) potatoes contain more resistant starch, which is better for gut health and lowers the glycemic impact. Hot potatoes are still healthy, but for extra benefits, try them chilled or as leftovers.