This Rotel dip recipe is for the moment when the chips are open, people are hovering, and the cheese needs to stay creamy long after the first scoop. It is not fancy food. Think warm, glossy, salty, tomato-chile cheese dip that does exactly what party food should do: disappear from the table.
The best bowl should be soft enough to drag through with a chip, thick enough to cling, but not so stiff that the chip snaps. That texture comes from a few simple choices: use the Rotel undrained, melt the cheese gently, drain the meat well, and keep the finished dip warm instead of hot.
Keep it classic with Velveeta and Rotel when you need something fast. Add ground beef when you want it hearty and mild. Choose sausage when you want a bolder game-day bowl. Stir in cream cheese when you want it thicker and richer. Use the slow cooker when people are going to keep coming back for one more scoop.
Quick Answer: How to Make Rotel Dip
To make classic Rotel dip, combine 16 oz Velveeta with one 10 oz can of Rotel, undrained. Melt gently on the stovetop, in the microwave, or in a slow cooker until smooth. For a heartier dip, add 1 lb cooked and drained sausage or ground beef.
For the best all-around party dip, use sausage. A milder, family-friendly bowl works better with ground beef. Need the fastest version? Skip the meat. Want the thickest scoop? Add cream cheese.
There is no fancy sauce technique here. The Rotel liquid loosens the cheese, Velveeta keeps it steady, and cooked meat makes it hearty. Once everything is melted, your only job is to keep it soft and stir it now and then.
- Classic ratio: 16 oz Velveeta + one 10 oz can Rotel, undrained
- Cream cheese version: add 4 to 8 oz cream cheese for a thicker scoop
- Crock pot version: cook on low for 2 to 3 hours, then switch to warm
- Main rule: melt gently; do not boil the cheese mixture
The Easy Rotel Dip Ratio
This simple ratio gives the dip enough cheese to stay creamy, enough Rotel to loosen it, and enough meat to feel like a real party bowl.

Rotel Dip Recipe Card
Rotel Dip Recipe
A creamy, scoopable cheese dip made with Velveeta, Rotel tomatoes with green chilies, and optional ground beef or sausage. Make it on the stovetop for a quick appetizer, or move it to a crock pot to keep it warm for a crowd.
- Prep time: 5 minutes
- Cook time: 10 to 15 minutes
- Total time: 15 to 20 minutes
- Servings: 10 to 12 appetizer servings
- Best for: game day, potlucks, parties, movie nights, nachos, and snack boards
Ingredients
- 1 lb ground beef or breakfast sausage / 454 g, optional but recommended for a heartier dip
- 16 oz Velveeta, cubed / 454 g
- 1 can Rotel diced tomatoes and green chilies, undrained / 10 oz / about 283 g
- 1/2 tsp chili powder or 1 to 2 tbsp taco seasoning, optional
- 1 to 3 tbsp milk / 15 to 45 ml, optional, only if the cheese needs thinning
- 4 to 8 oz cream cheese / 113 to 227 g, optional, for a thicker and richer dip

Instructions
- Brown the ground beef or sausage in a large skillet over medium-high heat, breaking it into small crumbles as it cooks.
- Drain the meat very well. Keep the crumbles, not the grease.
- Reduce the heat to medium-low.
- Add the cubed Velveeta, undrained Rotel, and chili powder or taco seasoning if using.
- If using cream cheese, add it now in small cubes so it melts evenly.
- Stir until the cheese melts and the mixture looks smooth, glossy, and creamy.
- If it is too thick, add milk 1 tablespoon at a time until it is easy to scoop.
- Taste before serving. Add a pinch of chili powder, taco seasoning, or hot sauce only if it needs more flavor.
- Serve warm with tortilla chips, or transfer to a slow cooker on warm for parties.
Recipe Notes
- For 2-ingredient Rotel dip, skip the meat and use only Velveeta and Rotel.
- Mild breakfast sausage keeps the batch crowd-friendly, while hot sausage adds more heat.
- Lean ground beef works well because it keeps the bowl hearty without adding too much grease.
- Use 4 oz cream cheese for a slightly richer dip or 8 oz for a thick sausage-style batch.
- If using sausage or taco seasoning, taste before adding extra salt.
- Cook ground beef or sausage fully before adding the cheese. Ground meat and sausage should reach 160°F / 71°C; FoodSafety.gov has a safe minimum temperature chart if you want a reference.
- Do not boil the cheese after it melts. Low, steady heat keeps the texture smoother.
In This Recipe
Start Here
Make It
What the Dip Should Look Like
Finished Rotel dip should look glossy, melted through, and thick enough to coat a chip. You should see small tomato and green chile pieces suspended in the cheese, not watery liquid around the edges.
When the dip falls from a spoon in slow ribbons, it is ready. A stiff clump needs gentle heat and a little milk. Grease pooling on top usually means the meat needed more draining. The final test is simple: a sturdy chip should scoop through without snapping.
Look for Slow Ribbons
The spoon tells you more than the clock. Smooth ribbons mean the cheese has melted evenly and the dip is ready to serve.

Which Version Should You Make?
Keep this ratio handy: 16 oz Velveeta, one 10 oz can Rotel, and 1 lb meat if you want the bowl hearty. From there, choose the version that fits the table.
| Situation | Make This |
|---|---|
| Need dip in 10 minutes | 2-ingredient Velveeta + Rotel |
| Want the best all-around party bowl | Sausage + Velveeta + Rotel |
| Serving kids or spice-sensitive guests | Ground beef + mild Rotel |
| Want thicker scoops | Add 4 to 8 oz cream cheese |
| Want the richest version | Sausage + cream cheese + Velveeta + Rotel |
| Keeping it warm for a party | Use the crock pot on warm after melting |
| Dip got too thick | Rewarm gently and add milk slowly |
| Making a bigger party batch | 32 oz Velveeta + two cans Rotel + 1 to 2 lb meat |
Match the Version to the Table
Use the version guide when you are choosing between fast, mild, bold, thick, or slow-cooker friendly.

For most parties, sausage with original Rotel is the safest bold version. A milder family bowl is easier to love with ground beef and mild Rotel.
Need more detail before choosing? Compare the ground beef version, sausage version, cream cheese version, or crock pot method.
Why This Cheese Dip Works
This dip works because every ingredient has a job, and none of them ask much from you.
- Velveeta melts smoothly. It gives the bowl that classic creamy texture without needing a roux or careful cheese sauce technique.
- Rotel adds flavor and moisture. The tomatoes and green chilies bring tang, gentle heat, and enough liquid to loosen the cheese.
- Well-drained meat keeps it clean. Ground beef or sausage makes the bowl more filling, but extra grease can float on top if the meat is not drained.
- Low heat protects the texture. Cheese dip does not need to boil. It needs to melt gently until loose, glossy, and dippable.
- A slow cooker solves the party problem. Once melted, the warm setting keeps the cheese soft enough for chips without constant reheating.
If you like understanding why cheese turns smooth instead of grainy, this easy cheese sauce recipe goes deeper into gentle heat and creamy texture.
What Is Rotel Dip?
Rotel dip is the quick American-style cheese dip people make when they want melted cheese, tomato-chile flavor, and almost no prep. The classic version uses Velveeta because it melts smoothly and stays creamy, while Rotel adds tomatoes, green chilies, and just enough liquid to loosen the cheese.
The familiar 10 oz can plus 16 oz cheese ratio is also the brand-style queso formula. Ro-Tel’s Famous Queso Dip uses a 10 oz can of Ro-Tel, undrained, with a 16 oz package of Velveeta.
Searchers may call this Rotel cheese dip, Velveeta Rotel dip, Rotel queso dip, sausage Rotel dip, or hamburger cheese dip, but the idea is usually the same: melted cheese, Rotel, and sometimes meat.
Once you know the basic idea, the ingredient choices are simple: cheese controls the texture, Rotel brings the tomato-chile flavor, and meat decides how filling the bowl feels.
Ingredients You’ll Need
Velveeta
Velveeta gives this recipe its familiar party texture: creamy, steady, and almost impossible to mess up if you keep the heat low. A 16 oz block gives one standard batch the texture people expect from Velveeta Rotel dip.
Regular Velveeta gives the classic flavor. Queso blanco Velveeta also works for a lighter-colored dip. Shredded cheddar alone can turn grainy, so it works better with cream cheese in the no-Velveeta option.
Rotel Tomatoes and Green Chilies
One 10 oz can is the right amount for one 16 oz block of Velveeta. Pour in the tomatoes, chilies, and liquid together; that liquid keeps the cheese from turning stiff. The tomato and green chile pieces also keep the bowl from tasting flat.
Original Rotel is the default for that familiar tomato-chile bite. Mild Rotel is better for a gentle, crowd-friendly bowl. Hot Rotel works when you want more heat.
Ground Beef or Sausage
Meat is optional, but it makes the cheese dip more filling. Ground beef brings a milder, heartier flavor. Sausage makes it bolder, saltier, and more game-day friendly.
For one standard batch, cook 1 lb of ground beef, breakfast sausage, pork sausage, or hot sausage. Break it into small crumbles, spoon off excess fat, and then add the cheese and Rotel.
Cream Cheese
A little cream cheese gives the dip more body; a full 8 oz block turns it into a thicker, richer party scoop. It works especially well with sausage and in no-Velveeta versions.
Cut it into small cubes before adding it so it melts evenly. Use 4 oz when you still want classic queso energy; go up to 8 oz when you want the chip to come up loaded.
Seasoning and Heat
You do not need much seasoning because Velveeta, Rotel, and sausage already bring flavor. For more depth, add a little chili powder, taco seasoning, garlic powder, hot sauce, or chopped jalapeños. Start light, especially with sausage or taco seasoning.
How to Make Rotel Dip
The method is simple: cook the meat if you are using it, turn the heat down, melt the cheese with Rotel, and thin only if the dip needs it.
Stovetop Method
- Brown the ground beef or sausage in a large skillet over medium-high heat.
- Drain the meat well and return it to the pan.
- Lower the heat to medium-low.
- Add cubed Velveeta and undrained Rotel.
- Add cream cheese now if using it.
- Stir until the cheese melts into a smooth dip.
- Add a splash of milk only if the dip is too thick.
Drain the Meat Well
Draining the meat is the small step that keeps the finished dip rich instead of oily.

Once the meat is drained, add the Rotel with its liquid. That can liquid is part of the sauce, helping the cheese loosen while carrying tomato-chile flavor through the whole pan.
Use the Rotel Liquid
Pour in the tomatoes, green chilies, and liquid together before the cheese fully melts, so the mixture has enough moisture from the start.

Stop when the cheese looks glossy and the dip moves slowly from the spoon, not when it starts bubbling. High heat can make the edges oily, the texture heavy, or real cheese grainy.
Melt the Velveeta Gently
Low heat gives the cheese time to melt into the Rotel liquid, so the dip stays glossy and smooth.

Making this ahead for a crowd? Use the crock pot method. If the texture changes while it sits, the troubleshooting guide will help you bring it back.
Microwave Method
The microwave is best when you are making the fast meatless version and just need cheese dip on the table now. Add cubed Velveeta and undrained Rotel to a microwave-safe bowl. Microwave on high for 2 to 3 minutes, stir well, then continue in 30 to 60 second bursts until the cheese is melted through.
If adding ground beef or sausage, cook and drain the meat separately first, then stir it into the melted cheese mixture.
Slow Cooker Method
For parties, the slow cooker is the easiest method. Brown and drain the meat first, then add the meat, cubed Velveeta, and undrained Rotel to the slow cooker. Cook on low for 2 to 3 hours or high for 1 to 2 hours, stirring occasionally. Once smooth, switch to warm for serving.
2-Ingredient / Meatless Rotel Dip
When speed matters more than making it hearty, skip the meat and keep the bowl simple: Velveeta and Rotel. This is the fastest version and the easiest one to make at the last minute.
- 16 oz Velveeta, cubed / 454 g
- 1 can Rotel, undrained / 10 oz / about 283 g
Melt them together on the stovetop or in the microwave, stirring until smooth. It is lighter than the ground beef or sausage batch, but it still gives you that classic warm cheese-and-chile flavor. Corn or beans can make it more filling, but they move the recipe into a different style.
Ground Beef Version
Start here when you want the dip to feel like food, not just a snack, but still keep the flavor mild enough for everyone. Ground beef makes the bowl feel more like a filling snack than plain melted cheese, while still letting the tomato-chile flavor come through.
For one batch, use 1 lb ground beef, 16 oz Velveeta, and one 10 oz can Rotel. Brown the beef, break it into small crumbles, and drain it well before adding the cheese and Rotel. You may know this as hamburger Rotel dip, hamburger cheese dip, or Velveeta cheese dip with hamburger meat.

Sausage Version
Sausage is the game-day version: bolder, saltier, and a little more “people keep coming back” than ground beef. The sausage version smells richer and more savory as it melts, which is why it feels especially right for game day.
A standard sausage batch needs 1 lb breakfast sausage, 16 oz Velveeta, and one 10 oz can Rotel. Mild sausage keeps the dip crowd-friendly. Hot sausage makes it spicier and pairs well with original or hot Rotel. Cook the sausage fully, drain it well, and leave the grease behind before the cheese goes in.

This is also the option that works especially well with cream cheese. Add 4 to 8 oz when you want a thicker, richer scoop.
Cream Cheese Version
Cream cheese is for the thick-scoop people. It turns the dip into a heavier, richer scoop — the kind that sits on a sturdy chip instead of sliding right off.
Add 4 oz cream cheese for extra creaminess or 8 oz cream cheese for a thick sausage-style dip. Cut it into small cubes and let it soften slightly so it melts evenly.

Because cream cheese makes the dip thicker, it pairs especially well with the chip test and the sturdy serving ideas below.
Slow Cooker / Crock Pot Rotel Dip
The slow cooker is the best choice when the cheese needs to stay soft for a party. It melts everything gently and keeps the finished bowl ready for repeat scoops.
| Batch | Use This | Slow Cooker Size |
|---|---|---|
| Standard batch | 1 lb cooked meat + 16 oz Velveeta + 1 can Rotel | 3 to 5 quart |
| Small meatless batch | 16 oz Velveeta + 1 can Rotel | 2 to 3 quart |
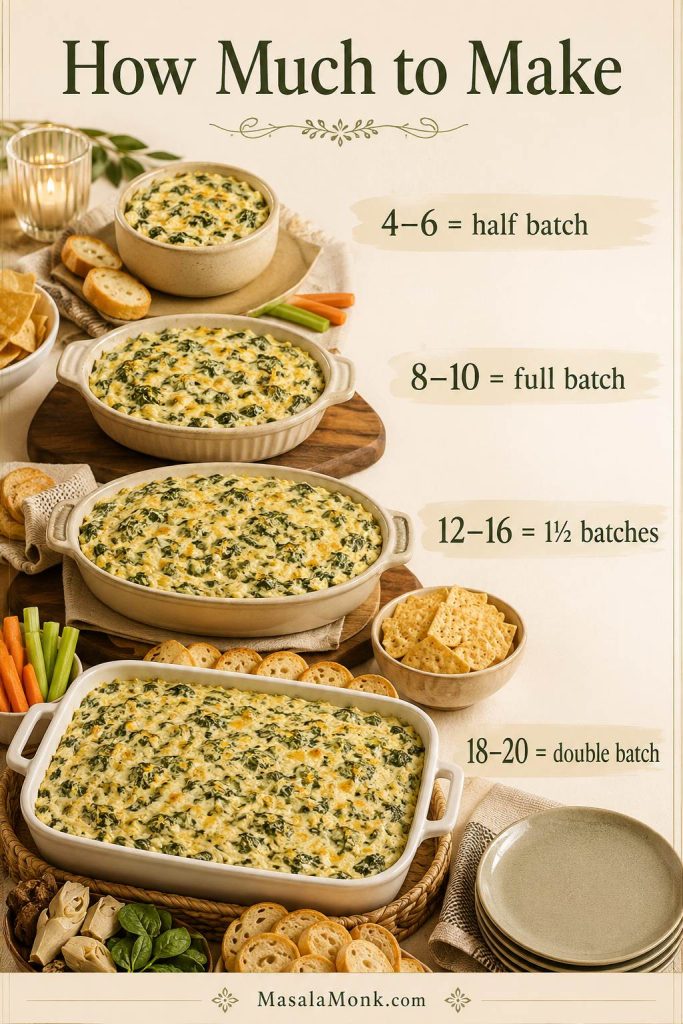
| Big party batch | 1 to 2 lb cooked meat + 32 oz Velveeta + 2 cans Rotel | 4 to 6 quart |

Cook on low for 2 to 3 hours or high for 1 to 2 hours. Once the cheese is smooth, switch to warm. A large slow cooker batch may need up to 1/4 to 1/2 cup milk as it sits, but add it slowly so the cheese does not become thin.
Do not add raw ground beef or sausage directly into the cheese dip. Cook and drain the meat first. If using 2 lb sausage, taste before adding seasoning because sausage can make the dip salty.
Serving this for a longer party? Keep the dip on warm, then use the troubleshooting section if it thickens, turns oily, or needs loosening later.
For another slow-cooker bite that can stay warm for a crowd, grape jelly meatballs fit the same potluck and game-day table.
Do You Drain the Rotel?
No, do not drain Rotel for regular cheese dip. The liquid in the can helps the cheese melt into a smooth, creamy, dippable texture. The Rotel pour visual above shows how the tomatoes, green chilies, and liquid go in together.
Drain part of the liquid only for a very thick bowl, a doubled recipe that needs more control, or a different recipe where extra moisture causes problems. For the classic dip, use the whole can.
No-Velveeta Version
Real cheese can work, but it will not behave exactly like Velveeta. The no-Velveeta version tastes more like homemade queso, with stronger cheese flavor but less foolproof texture. Keep the heat low and give it help from cream cheese so it stays smoother.
- 8 oz cream cheese / 227 g
- 1 to 1 1/2 cups freshly shredded cheddar or pepper jack
- 1 can Rotel, partly drained if you want a thicker dip
- A splash of milk if the cheese needs loosening
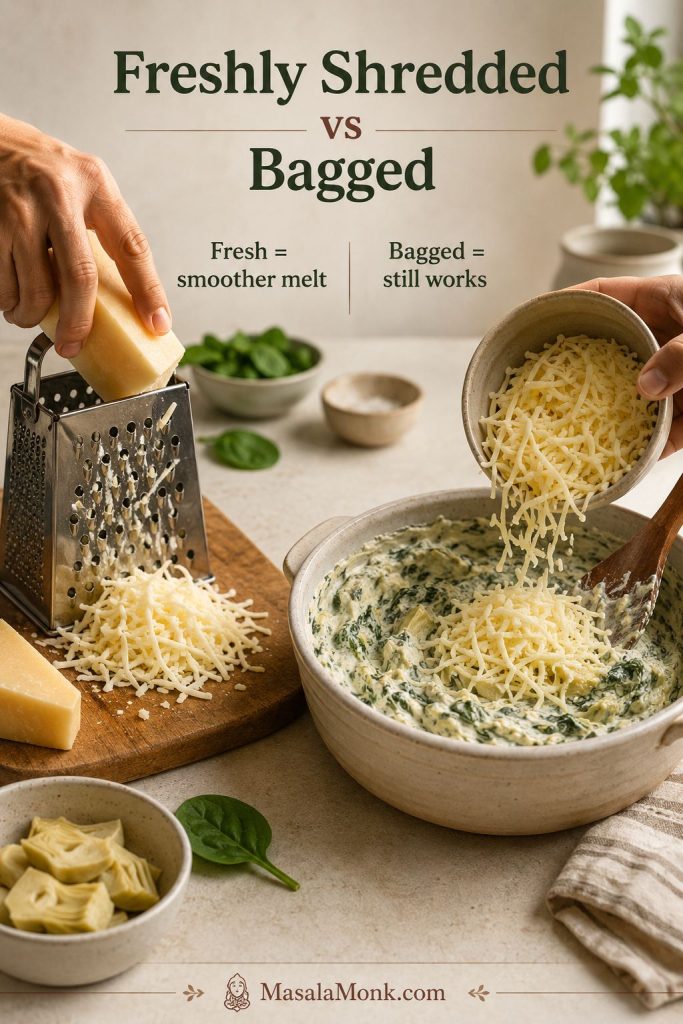
Freshly shredded cheese melts better than pre-shredded cheese because bagged shredded cheese often has anti-caking ingredients. Add shredded cheese off the heat or over very low heat, and stir gently.
How to Make It Spicier
The easiest way to add heat is to use hot Rotel instead of original. For a stronger kick, add spicy sausage, chopped jalapeños, cayenne, hot sauce, pepper jack, or a little extra chili powder.
Add heat slowly. Cheese dip can become too spicy faster than expected, especially if you use hot sausage and hot Rotel together. For a brighter bowl beside all that cheese, salsa verde adds a tangy green contrast for chips, tacos, bowls, and nachos.
How to Keep It Creamy and Warm
Rotel dip is best when it stays soft enough to scoop. As it cools, the cheese naturally tightens; that is normal, and it is easy to fix.
- Serve it from a slow cooker on warm.
- Stir every 20 to 30 minutes during a party.
- Keep the lid on when people are not serving.
- Add milk slowly if it gets too thick.
- Keep the heat low after the cheese melts.
- Drain meat well so grease does not collect on top.
If the bowl has been sitting for a while, stir it before adding more liquid. Sometimes the top looks thick, but the inside is still creamy once stirred. The same rule applies to other dairy-heavy dips, like spinach artichoke dip: once it is hot and melted, warm is safer than high.
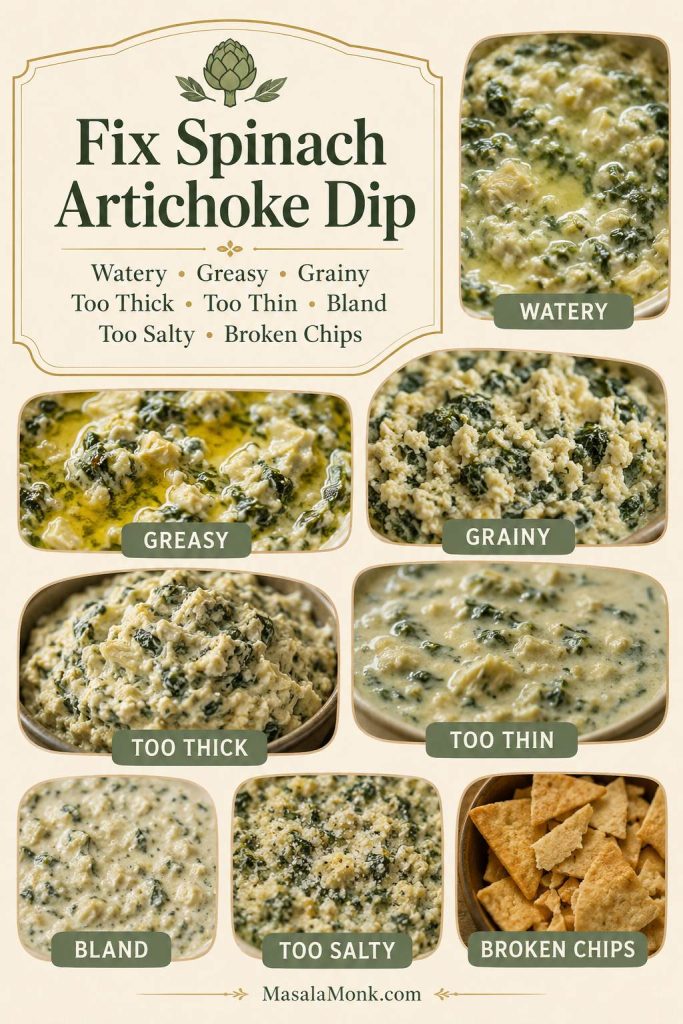
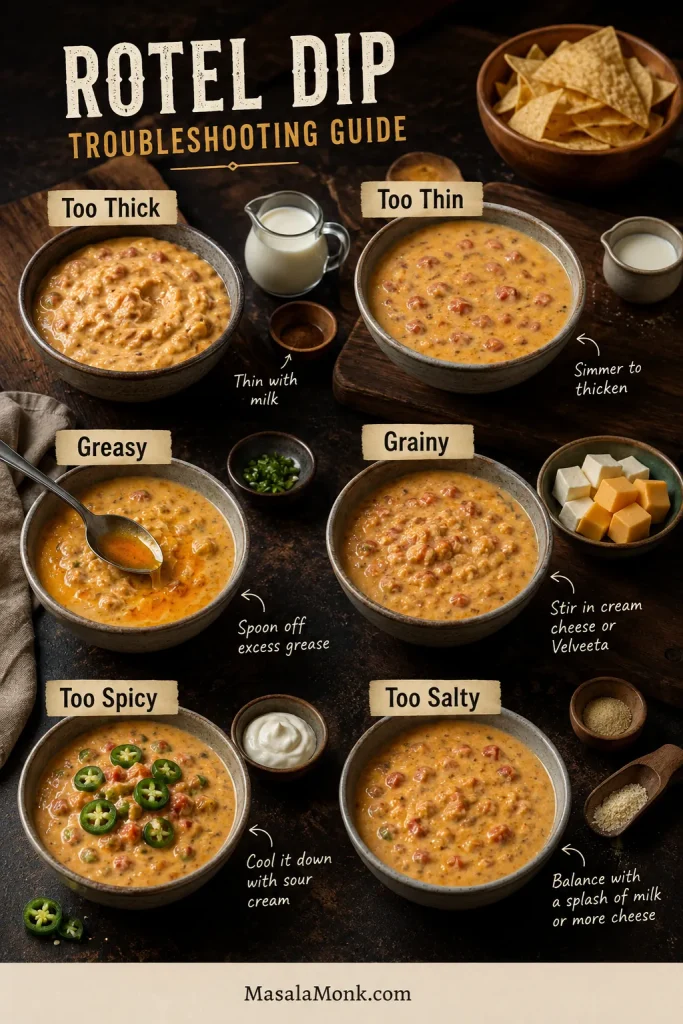
Troubleshooting
When the cheese changes while it sits, do not panic. Warm dips thicken, cool, and sometimes look oily before a quick stir brings them back. Most problems are easy to fix if you control heat, thickness, and grease.
| Problem | Why It Happens | How to Fix It |
|---|---|---|
| Too thick | The cheese cooled, or too much liquid evaporated | Warm gently and add milk 1 tablespoon at a time |
| Too thin | Too much liquid or not enough cheese | Add more cubed Velveeta, or warm uncovered on low for a few minutes while stirring often |
| Greasy | The meat was not drained well | Spoon off excess grease or blot the surface lightly |
| Oily edges | The heat is too high, or the meat was greasy | Lower the heat, stir gently, and spoon off excess oil |
| Grainy | Heat was too high, or real cheese did not melt smoothly | Lower the heat and use Velveeta or cream cheese for a smoother base |
| Skin on top | It sat uncovered or unstirred for too long | Keep covered and stir every 20 to 30 minutes |
| Too spicy | Hot Rotel, spicy sausage, or too much hot sauce | Add more Velveeta or cream cheese to mellow it |
| Bland | Mild meat and mild Rotel need more seasoning | Add taco seasoning, chili powder, garlic powder, or hot sauce |
| Too salty | Sausage, Velveeta, or seasoning added more salt than expected | Add cream cheese, a splash of milk, or more unsalted meat if you have it |
Quick Fix Guide
Most dip problems come down to heat, liquid, or grease. Fix one at a time and the bowl usually comes back quickly.
What to Serve with Rotel Dip
Once the cheese is warm and glossy, the only real question is what gets dipped first. Set out the sturdy chips first. The thin ones can wait for salsa.
Use the Chip Test Before Serving
A sturdy tortilla chip should scoop through the dip without snapping. That tells you the dip is thick enough to cling but still soft enough to serve.

- Best dippers: thick tortilla chips, scoop-style corn chips, Fritos Scoops, pretzels, or sturdy crackers.
- Fresh contrast: celery sticks, bell pepper strips, cucumber rounds, jalapeño slices, green onion, cilantro, pico de gallo, or a little sour cream drizzle.
- Load it onto: nachos, fries, tater tots, baked potatoes, tacos, rice bowls, burgers, or hot dogs.
- Game-day spread: pair it with something crisp and savory like air fryer chicken wings.
The best scoop should bring up cheese, tomato, chile, and little bits of meat in one bite. That is why thick chips matter, especially with sausage or cream cheese versions.
Make Ahead, Storage, Reheating, and Freezing
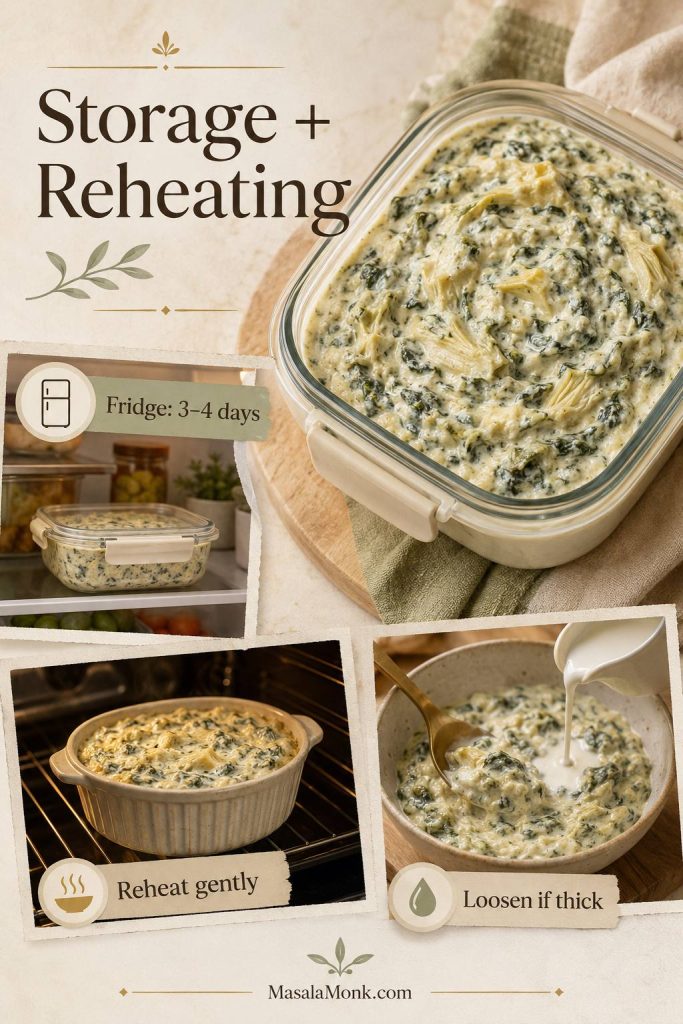
Yes, you can make Rotel dip ahead. Let it cool, store it in the fridge, and reheat it gently on the stovetop, in the microwave, or in a slow cooker. Add a splash of milk if it has thickened.
Store leftovers in an airtight container in the fridge for 3 to 4 days. Refrigerate leftovers within 2 hours; during serving, keep the dip warm rather than letting it sit at room temperature for long stretches.
Reheating is easy; the only trick is not rushing it. Use low heat on the stovetop or short microwave intervals, stirring often so the edges do not overheat before the center is warm.
Freezing is not ideal. Cheese dips can separate, turn grainy, or lose their smooth texture after thawing. For the best texture, refrigerate leftovers and reheat them within a few days instead.
Make It a Snack Table
A good snack table needs contrast. Keep this cheese dip warm, add a cold 7 layer dip, set out something crunchy, and bring in one savory bite like wings, meatballs, or sliders. That way the Rotel dip stays the warm centerpiece without having to carry the whole table.
Build the Serving Board
Put sturdy chips closest to the warm dip, then use vegetables, jalapeños, green onion, pico, and toppings to add freshness around the rich cheese.

For a second warm dip, buffalo chicken dip brings a spicy, creamy option beside this cheesy one. If you are turning the snack table into dinner, slow cooker pulled pork works for sliders, nachos, rice bowls, and loaded baked potatoes.
FAQ
What is Rotel dip made of?
The classic version is Velveeta plus Rotel diced tomatoes with green chilies. Many versions also add ground beef, sausage, cream cheese, taco seasoning, or chili powder.
Do you drain Rotel before adding it?
No. Use Rotel undrained for regular cheese dip. The liquid helps the cheese melt smoothly and keeps the texture scoopable.
How much Velveeta do I need for one can of Rotel?
Use 16 oz Velveeta for one 10 oz can of Rotel. That is the classic ratio for smooth, scoopable Rotel dip.
Is Rotel dip better with sausage or ground beef?
Sausage gives the dip a bolder, saltier, more party-style flavor. Ground beef is milder and better for a crowd that does not want much spice.
How do you make Rotel dip in a crock pot?
Cook and drain the meat first, then add it to the slow cooker with cubed Velveeta and undrained Rotel. Heat on low for 2 to 3 hours or high for 1 to 2 hours, then switch to warm.
What does cream cheese do in Rotel dip?
Cream cheese makes the dip thicker, richer, tangier, and sturdier on chips. Use 4 oz for a small creamy boost or 8 oz for a thick sausage-style batch.
How do I thin Rotel dip without making it watery?
Warm it gently and add milk 1 tablespoon at a time. Stir before adding more because the center may be creamier than the top looks.
What can I use instead of Velveeta?
Use cream cheese with freshly shredded cheddar or pepper jack. It will taste more like homemade queso, but it will not be as foolproof as classic Velveeta dip.
How long does Rotel dip last in the fridge?
Leftover Rotel dip keeps well in an airtight container in the fridge for 3 to 4 days. Reheat gently and stir in a little milk if it has thickened.
Does Rotel dip freeze well?
Freezing is not the best choice because the cheese can separate or turn grainy after thawing. Refrigerate leftovers and reheat them within a few days for the best texture.
Rotel dip should make the table easier, not more complicated. Start with Velveeta and Rotel, add sausage or ground beef if the bowl needs to feel hearty, stir in cream cheese for a thicker scoop, and let the slow cooker do the quiet work while people come back for more.
Made it with sausage, ground beef, cream cheese, or just Velveeta and Rotel? Tell us which version disappeared first.