Muhammara is a thick Syrian roasted red pepper and walnut dip from Aleppo, traditionally made with pomegranate molasses, breadcrumbs, olive oil and gently warming Aleppo pepper. It is rich and savory but still bright enough to keep you reaching for the bread.
When it is right, a spoon leaves a groove through the dip and a piece of warm homemade pita picks it up cleanly. Roasted pepper comes through first, followed by walnut richness, fruity pomegranate tang and mild chile warmth.
The number that matters in this muhammara recipe is not how many peppers you buy. It is 350 g / about 12 oz of roasted, peeled and well-drained pepper flesh. Starting there makes the rest of the recipe much easier to control.
Roasted, walnut-rich, sweet-tart and mildly spicy; thick and lightly coarse
Syrian-Style Muhammara Recipe
This version keeps roasted pepper firmly in front. The walnuts add depth and the breadcrumbs help the dip cling to bread, but neither should take over. Muhammara is forgiving; the two things most worth watching are excess pepper moisture and how far you process the walnuts.
Muhammara Ingredients
900 g–1 kg / about 2–2¼ lb ripe red peppers; exact pepper count varies considerably by size. After roasting, peeling, seeding and draining, you need 350 g / about 12 oz prepared pepper flesh
85 g / 3 oz walnuts, about ¾ cup loosely measured
30 g / 1 oz plain dry breadcrumbs or panko, plus up to another 10 g if needed; fresh breadcrumbs also work but absorb differently
1½ tbsp / about 22 ml pomegranate molasses, plus more to taste if needed
2 tbsp / 30 ml extra-virgin olive oil, plus a little extra for adjusting and serving
1½–2 tsp Aleppo pepper, the dried crushed chile seasoning, to taste
¾ tsp ground cumin
1 small garlic clove, finely grated or minced
1 tbsp / 15 ml fresh lemon juice
½ tsp fine salt, then more as needed
The raw pepper weight is a shopping estimate. Different peppers lose very different amounts of water as they roast, which is why the prepared weight matters more than pepper count.
The 350 g is the weight after roasting, peeling, seeding and draining. Skins, seeds and pooled liquid do not count—the useful weight is the roasted red pepper flesh that actually goes into the muhammara.
No added sugar is needed here; ripe peppers and pomegranate molasses provide enough sweetness, though molasses brands vary.
Moisture → structure → balance. Drain the peppers well, add just enough body, then adjust the seasoning. That is the method in miniature.
1. Roast the Peppers
Heat the oven to 425°F / 220°C conventional / 200°C fan. Put the whole peppers on a rimmed baking sheet and roast for about 30–35 minutes, turning once or twice, until they are soft and slumped with blistered skins and plenty of dark patches.
Ready when: the peppers have collapsed and smell deeply roasted. They do not need to be black from end to end.
Watch the pepper flesh more than the skin. Dark blisters are useful because they peel away; underneath, the pepper should still be supple and juicy rather than dry at the edges.
For a faster route, char them beneath a very hot broiler/grill, turning as the skins blacken, usually for 12–15 minutes in total. Direct flame works too if that is already a method you use comfortably.
2. Steam, Peel, Drain and Weigh
Move the hot peppers to a bowl and cover for 10–15 minutes. The trapped steam loosens the skins. Remove the stems and seeds, then peel away most of the blackened skin.
Peeling roasted peppers is messy, and they do not need to look immaculate. Don’t chase every last black fleck. A little char belongs here; large sheets of burnt skin do not.
Avoid rinsing the peppers under running water; it washes away some of the concentrated roasted flavor. Set the cleaned flesh in a sieve over a bowl for several minutes, then blot away obvious surface moisture.
Save the pepper juice underneath. It may be exactly what you need if the fresh batch becomes too stiff.
Drain, don’t wring. Squeezing roasted peppers can remove flavorful juice along with excess water; instead, a short rest in a sieve followed by light blotting gives you much better moisture control.
Now weigh 350 g / about 12 oz roasted, peeled, seeded and well-drained pepper flesh. Anything around 325–375 g is close enough; the breadcrumb adjustment later absorbs that small difference.
The fiddly part is over. From here, the dip comes together quickly.
3. Toast the Walnuts and Prepare the Garlic
Taste one walnut before using the batch. If it tastes stale or rancid, replace the nuts. Check briefly for stray shell fragments too.
Toast the walnuts in a dry skillet over medium-low heat for 3–5 minutes, stirring often, just until fragrant and lightly darkened. Or toast them at 350°F / 175°C conventional / 160°C fan for 8–10 minutes. Let them cool.
Raw walnuts work too; light toasting gives this version a deeper walnut flavor. For particularly pungent garlic, stir it into the lemon juice for about 5 minutes to soften the raw edge.
4. Build the Muhammara
Add the peppers, garlic and lemon juice, 1½ tbsp pomegranate molasses, Aleppo pepper, cumin and salt to the food processor. Pulse until the peppers have broken down into a thick, fairly even mixture, scraping down the sides when needed.
For a more distinct walnut texture, finely chop the toasted walnuts by hand and keep them aside. Process the pepper base with the breadcrumbs and olive oil, then fold the chopped walnuts in at the end.
For the simpler food-processor route, add the cooled walnuts, 30 g breadcrumbs and 2 tbsp olive oil to the pepper base. Pulse in short bursts until everything comes together and small walnut flecks remain.
This is the point where it should begin to look unmistakably like muhammara: deep brick-red, cohesive and softly glossy, with tiny walnut flecks still visible. It should look like a spread, not a silky purée.
Stop there. Taking the walnuts much further can release more oil, making the dip heavier and its color muddier.
If coarse pieces are clinging to the processor wall, scrape them down instead of simply blending longer. Short pulses give you far more control over the walnut texture in muhammara than one continuous run.
5. Wait and Check the Texture
Leave the muhammara for 5–10 minutes before deciding whether it needs more bread. The breadcrumbs are still absorbing pepper juice, and a mixture that initially looks loose may settle perfectly on its own.
Drag the back of a spoon through it.
A groove that disappears quickly means the dip still needs more body. Add some of the reserved breadcrumbs, pulse briefly and wait again.
A stiff fresh batch needs moisture. Add reserved roasted-pepper juice 1 teaspoon at a time.
A groove that already holds means no more breadcrumbs are needed.
The last spoonful of breadcrumbs should earn its way in.
The middle bowl is the target: the groove holds, but the edges stay soft rather than cracked.
6. Season and Rest
A sweet, flat dip usually needs salt before anything else. Add a pinch, taste, and then use a small squeeze of lemon if it still feels heavy. Add more Aleppo pepper if you want a warmer finish; it should still taste of roasted pepper first.
The muhammara should already be close. Cover it and let it rest for at least 30 minutes when possible; the flavors settle and the crumbs finish hydrating as it sits.
Before You Serve It
Drag a spoon through the muhammara once more. The groove should hold while the dip still scoops easily. Before you add the finishing olive oil, the dip itself should look cohesive, not oily or separated.
Muhammara is best after it has lost the refrigerator chill. The roasted pepper should still lead, with walnut underneath and enough pomegranate acidity to keep the sweetness lively. If you’re close, leave it alone.
Jarred roasted peppers cut the preparation to about 15 minutes, plus resting time. Fresh peppers give you more control over the char, but the texture can be every bit as good with jarred peppers when they are drained thoroughly.
Taste a pepper first. If the packing liquid has left it unusually salty, acidic or strongly flavored, rinse the peppers briefly. Then drain thoroughly, blot dry and weigh 350 g / about 12 oz. Oil-packed peppers should be drained especially well so they do not bring extra oil into the dip.
For more char, blister the drained peppers briefly beneath a hot broiler/grill or in a dry grill pan, then continue with the walnut step.
Muhammara makes the most sense as shared food: a shallow plate in the middle, warm bread within reach and a few other dishes around it.
Build a mezze plate by contrast rather than quantity. Muhammara supplies richness and sweet-tart depth, so crisp vegetables, pickles and herb-heavy salads keep each scoop lively while warm pita does the carrying.
Pita is the classic choice. On a larger mezze table, muhammara’s richer sweet-tart flavor works especially well beside something fresh and herb-heavy such as tabbouleh, plus olives, pickles, cucumber, tomato and other crisp vegetables.
Spread it inside pita or flatbread with homemade falafel, herbs and pickles. One spoonful gives the sandwich pepper, walnut, tang and chile without needing several separate sauces.
It is equally good beside chicken shawarma, grilled chicken or lamb. The pomegranate cuts through richer bites while the walnuts give the dip enough weight to sit beside charred meat.
Roasted eggplant, cauliflower, carrots and squash work well too. Spread the muhammara beneath the vegetables and let the hot browned edges pick up the cooler dip as you eat.
Leftovers belong on toast and sandwiches, in grain or lentil bowls, swirled through labneh or thick yogurt, or thinned with a splash of pasta water into a quick sauce.
For serving, spread the muhammara over a shallow plate and make loose ridges with the back of a spoon. Add a small drizzle of olive oil. Chopped walnuts, Aleppo pepper or pomegranate seeds are optional.
Fix My Muhammara
Most batches are fixable. Change one thing at a time so you do not lose the roasted pepper while chasing the problem.
Problem
Quick diagnosis & fix
Too thin
Rest it first. Still loose after 5–10 minutes? Add breadcrumbs gradually.
Too thick immediately
The crumbs may be very absorbent or the peppers unusually dry. Loosen a fresh batch with reserved pepper juice, 1 teaspoon at a time.
Perfect yesterday, thick today
Breadcrumbs kept absorbing moisture. Let it warm slightly, stir, then loosen with water a teaspoon at a time.
Too sweet
Add a pinch of salt first, then a small squeeze of lemon if needed.
Too sour
Fold in more roasted pepper and walnut if available. Once the dip is sharply sour, there is no clean way to take that acidity back out.
Too hot
Add more roasted pepper, walnut and a little breadcrumb to dilute the heat. Without more of the base ingredients, a big correction is difficult.
Bitter
Check for stale walnuts, burnt nuts or too much scorched pepper skin.
Greasy
The walnuts may have been processed too far or too much oil was added. More pepper mixture can help if available.
Brown or muddy
Very finely ground walnuts can darken the dip. The flavor may still be fine.
Harsh garlic
Let the dip rest. Use a smaller or fresher clove next time.
Why Is My Muhammara Too Runny?
First make sure it is actually too runny. Breadcrumbs need time to hydrate, so a loose-looking dip straight from the processor can become properly scoopable after a 5–10 minute rest.
Still flowing instead of holding a spoon mark? The pepper flesh probably carried in more water than usual. Add a small amount of the reserved breadcrumbs, wait again and stop as soon as the groove holds. A large handful added all at once can take the dip from loose to heavy very quickly.
Why Did It Get Thicker Overnight?
This is different from muhammara that starts out too thick. Dry breadcrumbs and panko can continue taking up moisture for hours, and refrigeration firms the dip further.
Let it lose some of its chill and stir before changing anything. If you refrigerated some of the reserved roasted-pepper juice, use that first; otherwise loosen the dip with water, 1 teaspoon at a time. Use olive oil when it needs more richness as well as a softer consistency.
Why Does My Muhammara Taste Bitter?
Bitterness has several possible sources, and they do not taste the same. Fresh walnuts naturally have a mild tannic edge; rancid walnuts can taste stale, soapy, chemical or paint-like. Darkly burnt nuts and large pieces of scorched pepper skin create a harsher bitterness.
A slight walnut bitterness can sit comfortably inside the finished dip. Rancid nuts or strongly burnt flavors are much harder to disguise, which is why tasting one walnut before you begin is worth the few seconds it takes.
Ingredient Substitutions
What Can I Use Instead of Pomegranate Molasses?
Nothing quite duplicates pomegranate molasses. If you need a homemade substitute, reduced unsweetened pomegranate juice is the closest route worth making. Simmer ½ cup / 120 ml until you have roughly 2 tablespoons / 30 ml and the juice is lightly syrupy. Cool it before using; it will thicken further as it cools.
A useful pomegranate molasses substitute has to replace concentration and acidity, not sweetness alone. That is why reduced unsweetened pomegranate juice is a closer fit for muhammara than an ordinary sweet syrup.
A small amount of balsamic reduction is the emergency option. It provides sweet-sour intensity, although the flavor is different. Plain molasses, maple syrup and date syrup are not direct substitutes because they bring sweetness without the same acidity.
What Can I Substitute for Aleppo Pepper?
Use mostly sweet paprika with a very small pinch of cayenne or ordinary chile flakes. That comes closer to Aleppo pepper’s fruitiness, color and gentle heat than replacing it 1:1 with a much hotter chile.
Kashmiri chile powder or gochugaru can also work, but start cautiously because products vary.
Gluten-Free or Bread-Free Muhammara
For gluten-free muhammara, use gluten-free dry breadcrumbs or panko in the same gradual way as regular breadcrumbs.
For a bread-free version, replace the 30 g breadcrumbs with about 25–30 g ground almonds, or begin with roughly 15–20 g additional walnuts. Either route makes the dip more nut-forward, so keep the peppers in front and judge the final thickness after a short rest.
Why Muhammara Recipes Vary
This version starts from fresh-roasted peppers rather than concentrated pepper paste. Turkish preparations related to acuka often lean much more heavily on pepper paste, so two related recipes can look surprisingly different before they even reach the walnuts.
Muhammara itself has strong roots in Aleppo and Syrian cooking, but variation from kitchen to kitchen is normal. Some versions use fresh bread, others dry crumbs or panko. Walnuts may be raw or toasted, and the texture can range from coarse to nearly smooth. Tahini, onion, tomato paste, concentrated pepper paste or sumac appear in some recipes and not in others.
Sami Tamimi describes muhammara as Syrian in origin while also placing it within the wider cooking of Palestine and Lebanon. That overlap helps explain why one family’s muhammara can look quite different from another’s and still be recognizably the same dish.
Muhammara vs Hummus: What’s the Difference?
Muhammara is built from roasted peppers and walnuts; hummus is built from chickpeas and tahini. That difference changes the flavor and texture completely.
Hummus is usually smooth, creamy and mellow. Muhammara is fruitier, tangier and more textured. That texture is part of the distinction: hummus is usually served silky-smooth, while this muhammara is better with a little walnut and pepper texture still intact.
Same food processor, different endpoint: hummus benefits from sustained blending for silkiness, whereas muhammara keeps more character when you stop before its walnut texture disappears.
Put both on the table and they do very different jobs. Our extra-creamy hummus supplies the cool, smooth side of that contrast while muhammara brings roasted pepper, walnut and pomegranate tang.
Make Ahead, Storage & Freezing
Make Ahead
Muhammara benefits from resting. Thirty minutes helps; several hours give the flavors more time to settle. Making it the day before works well too, although the breadcrumbs may make it slightly firmer overnight.
Let it warm slightly before serving. Stir first; a dip that is still too firm can be loosened with water 1 teaspoon at a time, or with a small amount of olive oil when it also needs more richness.
Freeze
Finished muhammara can be frozen, although it may be slightly softer after thawing. Defrost it in the refrigerator, stir well and check the consistency before serving.
Another option is to freeze roasted, peeled and drained pepper flesh in 350 g portions. Thaw one, drain any liquid released during freezing and make the muhammara fresh.
English pronunciations vary slightly, but moo-HAM-ma-ra is a good approximation. The Arabic name is commonly glossed as “reddened” or “reddish.”
2. Is Muhammara Spicy?
Usually only mildly. Aleppo pepper brings gentle warmth and fruity chile flavor rather than aggressive heat.
3. Should Muhammara Be Served Warm or Cold?
Cool room temperature is ideal. Straight-from-the-fridge muhammara feels firmer and its flavors are more muted, so give it a little time before serving.
Tear the bread, set the muhammara in the middle of the table and eat it while the flavors are awake.
A torn piece of warm soft pretzel should come out of the bowl carrying a generous coat of beer cheese: enough to settle into the salty browned grooves, but not so much that it slides straight back off before the first bite.
This dip takes about 15 minutes, but cheddar gives you very little warning before creamy turns grainy. Too much heat can push out oil, tighten the cheese, or split what should have been a smooth sauce.
Cook the base. Melt the cheese. Let the beer-and-milk mixture thicken first. Then take the saucepan off the heat and stir in the cheddar a little at a time.
The result is a warm, melted pub-style dip made for homemade soft pretzels and pretzel bites—not the cold, spreadable style usually associated with Kentucky beer cheese.
Use 285 g / 10 oz sharp cheddar, 160 ml / ⅔ cup balanced lager, 180 ml / ¾ cup whole milk, and a light butter-and-flour roux.
Cook the beer-and-milk base until it lightly coats a spoon, then take the pan off the heat before adding the cheddar gradually.
Helles or a balanced pale lager is the easiest beer choice. An amber Märzen-style Oktoberfest lager is toastier and particularly good with salty pretzels. Use 0.0% beer if avoiding alcohol.
Beer Cheese Recipe for Pretzels
There’s no cream cheese in this version. A light roux gives the cheddar enough body to stay creamy while keeping the flavor firmly cheddar-forward.
Prep
5 minutes
Cook
About 10 minutes
Total
About 15 minutes
Yield
About 2½ cups / 600 ml; around 6–8 appetizer servings
You’ll need: a 2- to 3-quart / 2- to 3-liter saucepan, whisk and box grater. A kitchen scale is especially helpful for the cheddar. A small slow cooker is optional if you need to keep the finished dip warm.
Ingredients
285 g / 10 oz sharp cheddar, freshly grated from a block
28 g / 2 tbsp unsalted butter
16 g / 2 tbsp all-purpose flour
180 ml / ¾ cup whole milk
160 ml / ⅔ cup balanced lager, such as Helles, pale lager, pilsner or Märzen
1 tsp Dijon mustard
1 tsp Worcestershire sauce
½ tsp garlic powder
¼ tsp smoked paprika
Pinch to ⅛ tsp cayenne, to taste
Freshly ground black pepper, to taste
Fine salt, only if needed after the cheese is melted
Instructions
Grate and weigh the cheddar first. Have all 285 g / 10 oz ready beside the stove before you start.
Make the light roux. Melt the butter over medium to medium-low heat. Whisk in the flour and cook for about 1 minute. Keep it pale and gently bubbly. Once the raw flour smell is gone, move on.
Add the milk, then the beer. Whisk in the milk gradually so the roux stays smooth. Pour in the beer and keep whisking through the foam. It may puff up briefly; that’s normal.
Thicken and season the base. Bring it to a gentle simmer and cook for roughly 1–3 minutes, whisking regularly. Stop when it lightly coats the back of a spoon but still pours readily. It’ll look thinner than finished cheese dip, and that’s where you want it—the cheddar is still coming. Whisk in the Dijon, Worcestershire, garlic powder, smoked paprika and cayenne.
Ignore the beer foam and watch the liquid underneath. When the base lightly coats a spoon but still moves freely, it is ready for the off-heat cheese-melting stage.
Now Melt the Cheese
Take the saucepan completely off the heat. Let the active bubbling settle before the cheese goes in.
Add the cheddar in 4–6 handfuls. Let each addition mostly disappear before adding the next. Once the first couple of handfuls melt in smoothly, you’re on the right track—keep going at the same unhurried pace.
If the last handful needs help, use the lowest heat. A few seconds is enough. Stir until it loosens, then pull the pan away again. Don’t let the finished sauce boil.
Wait 1–2 minutes before judging the texture. Beer cheese thickens as it cools, so don’t rush to fix a sauce that may already be right.
Taste, then season. The cheddar is what you want to notice first, with the beer still clearly there. Dijon, Worcestershire, paprika and cayenne should sit underneath rather than tasting like separate ingredients. Finish with salt and black pepper only as needed.
Recipe Notes
Weigh the cheddar if you can. A loose cup and a packed cup of grated cheese can hold very different amounts, so weight is more reliable.
Whole milk gives the best body. 2% works too, though the dip may finish slightly looser.
Sweet paprika can replace smoked paprika if you don’t want the faint smoky edge.
For a vegetarian version, use a vegetarian Worcestershire-style sauce; traditional Worcestershire commonly contains anchovies.
If the sauce is smooth and the pretzels are warm, you can stop here. The rest is for choosing a different beer or cheese, understanding what happened in the pan, fixing a troublesome batch, or keeping the bowl creamy for a crowd.
What Beer Works Best for Beer Cheese?
For the easiest first batch, choose Helles or a balanced pale lager. Märzen is the strongest match with a salty soft pretzel.
Choose by intensity: pale lager keeps cheddar forward; maltier or hoppier beers make the beer more assertive. If you dislike its bitterness beside cheddar, the saucepan won’t hide it.
How Different Beer Styles Change the Dip
Beer style
What it does in the dip
Pale lager / Helles
Clean, mild and gently malty. The easiest all-around choice.
Pilsner
Crisper, with a slightly more noticeable hop edge.
Märzen / amber Oktoberfest-style lager
Toastier and maltier; especially good against a browned, salty pretzel crust.
Amber / brown ale
Adds deeper caramel and toasted-malt notes.
Stout
Darkens the sauce and adds roasted, sometimes bitter notes that can compete with sharp cheddar.
IPA
Use it when you genuinely want hop bitterness in the finished dip; aggressive hops can become more noticeable with heat.
You don’t need expensive or unusual craft beer here. A straightforward lager often makes a better dip than a beer with so much personality that the cheddar has nowhere to go.
With a pale lager, the cheddar stays firmly in front. Märzen adds enough toasted malt that it almost feels like an extension of the browned pretzel crust.
For stronger beer flavor, choose a maltier or more assertive style before increasing the quantity. Pouring in more beer also adds more liquid and can leave the sauce thinner than you wanted.
Does the alcohol cook out? Not completely during a short recipe like this. USDA nutrient-retention data account for alcohol that can remain after food preparation, so don’t rely on simmering to make regular beer alcohol-free. To avoid alcohol, choose beer labeled 0.0%. If you need to avoid alcohol completely, check the alcohol statement on the label.
Best Cheese for Beer Cheese
Build this around sharp cheddar. It keeps enough character after milk and beer soften it. Extra-sharp gives you more bite, though very dry aged cheddar is less forgiving in a smooth melted sauce.
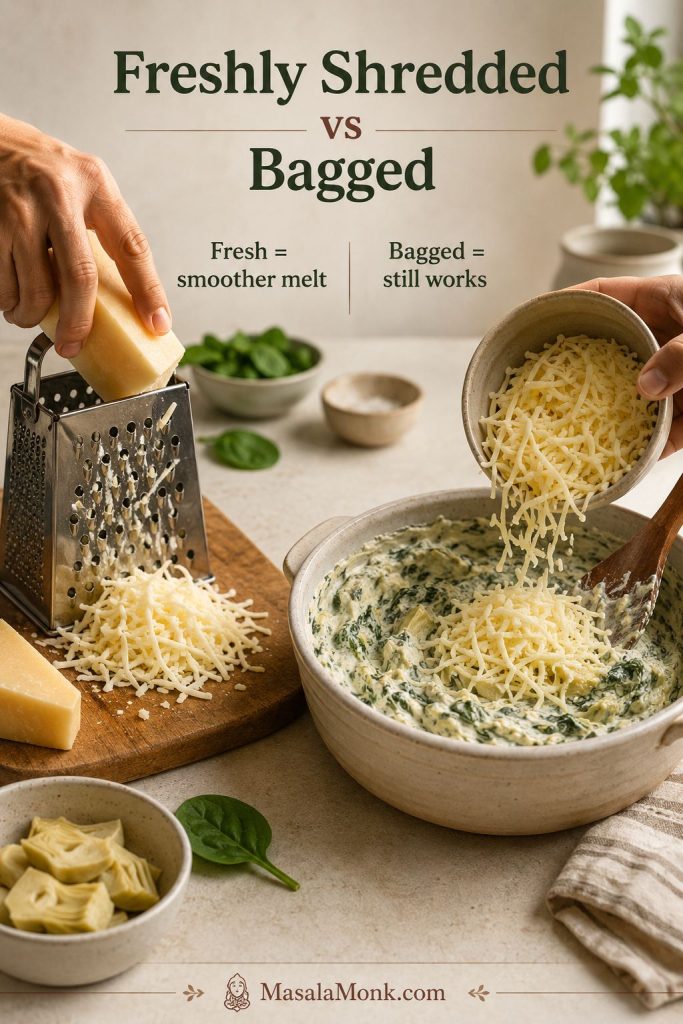
Freshly grated block cheese is the easier route. Bagged cheddar may melt perfectly well, but block cheese gives you one less variable while you’re watching the heat.
For a nuttier, slightly rounder edge, replace about 55 g / 2 oz of the cheddar with Gruyère while keeping the total cheese at 285 g / 10 oz.
Whichever cheese you use, heat matters more than almost anything else.
Why Beer Cheese Breaks
Cheddar holds fat and water inside a protein network. Too much heat can tighten those proteins and push the fat and moisture apart instead of letting them stay together in a creamy sauce.
That’s why the roux-and-milk base gets cooked first and the cheese goes in later. Once the base is ready, the job changes from cooking to melting.
The cheese sauce guide goes further into roux ratios, cheese behavior and beer-free cheddar sauces if you want the deeper technique.
What the Right Consistency Looks Like
Two visual cues matter most. Before the cheddar, the base lightly coats a spoon. After it, the finished sauce coats a pretzel.
A heavy ridge on the spoon means the base has gone too far; sauce that sheets off the pretzel is still too loose. Judge movement, not minutes.
Drag a torn pretzel through the bowl and lift it. The cheese should fill the grooves in the crust, stay attached on the way to your mouth, and slowly level itself again after the pretzel leaves a trail through it.
Smooth but too thick? Add warm milk. Smooth but too thin? Let it rest, then use low heat if needed. Grainy, oily or clumped? Stop heating it first.
Identify the failure before changing the pan. More cheese can make an already-tight dip heavier, and more heat can worsen separation. Diagnose first; adjust second.
The dip is too thin
If it’s still smooth but obviously runny after resting, return it to very low heat and stir until it tightens slightly. Pull it away again before it boils. A slightly loose dip still tastes good; a grainy one is much harder to fix.
The dip is too thick or pasty
Add warm milk 1 tbsp / 15 ml at a time. Stop when the spoon trail begins closing slowly behind the spoon. Cooling, reducing the base too far, excess flour or too much cheese can all make it tighten.
The sauce is grainy or oily
Stop heating it and let the pan cool for a moment. Stir or whisk gently. A splash of warm milk or cream may help a mildly separated sauce come back together.
For slight grit, a brief pass with an immersion blender can improve the texture. A badly broken sauce may never become completely smooth again, and turning the heat up usually makes things worse.
There’s a rubbery cheese lump in watery liquid
The cheddar seized instead of melting into the base, usually because it got too hot too quickly. Stop cooking. A severe break is difficult to recover completely.
The sauce is stringy
Try a splash of warm milk if the sauce is otherwise smooth. Too much cheese—especially when shredded cheese is estimated by volume instead of weighed—or a particularly stretchy cheese can push the sauce toward strings.
It tastes bland
Check the salt first. Then taste for Dijon, Worcestershire and cayenne. If the cheddar itself seems lost, choose a sharper cheese next time rather than adding more to an already-thick sauce.
It tastes bitter
A heavily hopped beer or beer that has reduced too far is the usual suspect. Extra dairy can soften the edge, but strong hop bitterness is difficult to erase completely.
It turns stiff as it cools
Some thickening is normal. Cheese fat firms as the temperature drops. Warm the dip gently and stir in a splash of milk if it needs loosening.
People eat very differently around a snack table, so these numbers are starting points rather than strict portions.
Guests
How much to make
6–8
1 batch / about 2½ cups / 600 ml
9–12
1 batch with several substantial appetizers; 2 batches if pretzels and cheese are a major part of the spread
13–16
2 batches / about 5 cups / 1.2 L
A batch stretches farther when there’s something substantial and cold on the table too, such as 7 layer dip. When warm pretzels and beer cheese are the main attraction, make more.
Keeping the Dip Warm
Don’t worry about keeping it exactly as loose as it was when it left the stove. It just needs to stay hot, creamy and easy to scoop while people keep coming back for another pretzel.
Make the dip on the stove, then transfer it while hot. For longer service, keep the dip at 140°F / 60°C or warmer, following USDA hot-holding guidance.
Keep the heat gentle enough that the cheese isn’t bubbling steadily around the edges.
Slow-cooker WARM settings vary, so check the actual temperature if the dip will be sitting for a while. Stir occasionally and add warm milk when it begins to tighten.
If the dip needs to stay smooth for a long party, replace 30–55 g / 1–2 oz of the cheddar with American cheese. Its emulsifying salts make a long warm hold more forgiving—the same reason dips such as Rotel dip stay smooth and scoopable.
Reheat refrigerator-cold leftovers separately before transferring them to the slow cooker. Use the cooker to hold already-hot dip, not to slowly reheat a chilled batch.
Serving it without hot holding? Don’t leave the dip at room temperature for more than 2 hours, or more than 1 hour when the surrounding temperature is above 90°F / 32°C.
What to Serve With Beer Cheese
Soft pretzels are still the best answer. Their browned crust and salt cut through the richness, while the chewy middle is sturdy enough to scoop without falling apart.
Build contrast around the beer cheese: something chewy, something crisp or fresh, and something hearty. Pretzels, apples or vegetables, and sausage or potatoes make an easy mix.
Soft pretzels and pretzel bites
Pretzel rods or pretzel bread
Bratwurst or smoked sausage
Crusty bread
Apple slices
Broccoli or cauliflower
French fries or potato wedges
Jalapeño poppers for a hotter bite on the same table
For something crisp alongside the pretzels, crispy homemade fries work especially well; keep the cheese slightly looser so it coats rather than buries them. Baked jalapeño poppers add heat on the side without making the entire bowl spicy.
Make Ahead, Storage and Reheating
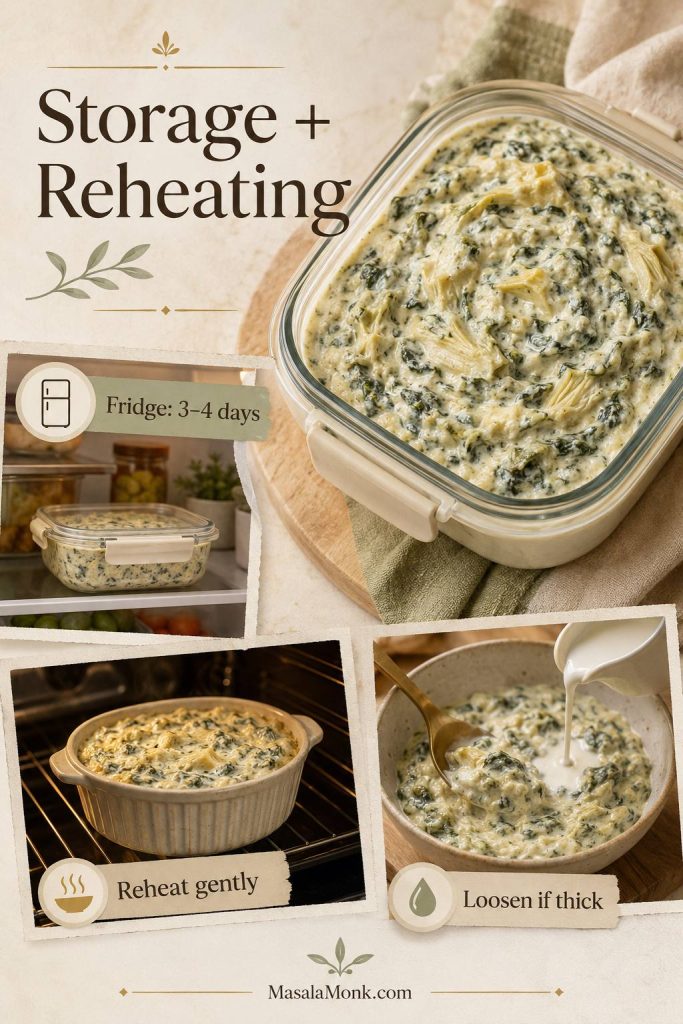
Fresh is silkiest, but you can make beer cheese a day ahead. Cool it promptly, refrigerate it in a covered container, then reheat gently with a splash of milk if it has tightened.
Use refrigerated leftovers within 3–4 days. Cold beer cheese will look much firmer because the cheese fat has set, so judge the texture only after it’s warm again.
Reheat the beer cheese fully before judging its texture. Once it is hot and smooth, add milk only if it still needs loosening; it will tighten again as it cools.
USDA leftovers guidance recommends reheating refrigerated leftovers to 165°F / 74°C. Reheat gently on the stove or in short microwave intervals, stirring often.
If you’re holding the reheated dip for serving, keep it at 140°F / 60°C or warmer.
Freezing isn’t the best choice for texture. Dairy-and-cheese sauces can come back grainy or slightly separated after thawing, so refrigeration is much more reliable.
Variations and Dietary Options
Want it hotter? Add more cayenne, hot sauce or finely chopped jalapeño.
Need it flourless? Use a formula built around cornstarch or sodium citrate rather than simply leaving the flour out of this one. Sodium citrate is an emulsifying salt that helps melted cheese stay smooth, and those approaches need different ratios.
Need it gluten-free too? Use a flourless version or a gluten-free thickener, and make sure the beer is certified gluten-free.
What About Kentucky Beer Cheese?
It’s a different kind of beer cheese. This recipe is hot and flowing, built for dipping pretzels. Kentucky beer cheese is generally served cold or at room temperature, with a thicker spreadable texture and often a sharper, spicier flavor. Crackers and vegetables are common companions.
When the bowl is right, there isn’t much ceremony left: a pretzel still warm enough to smell buttery when you tear it open, a spoon trail that slowly disappears into the cheese, and enough sauce caught in the crust to make the next piece inevitable.
Cook the base. Melt the cheese. Then get the bowl to the table while the pretzels are still warm.
The first scoop tells you whether jalapeño popper corn dip is working. A good one brings sweet corn, fresh jalapeño and creamy cheese up with the chip. It feels rich without turning heavy, and you taste the pepper before the heat starts to build.
The annoying batches tend to go wrong in opposite directions. Too much water and the edges turn loose. Too much cream cheese or shredded cheese—or too much time cooling on the table—and the dip firms up until even a sturdy tortilla chip has to work too hard.
This one aims for the middle: enough corn to remain unmistakably a corn dip, enough cream cheese for the jalapeño-popper character, and enough sour cream and melting cheese to keep a warm scoop creamy without swallowing the kernels. The corn and jalapeños get a quick turn in the pan first, where the peppers lose some of their raw grassy smell, the corn starts smelling sweeter and loose water has somewhere to go before the dairy arrives.
Fresh, frozen and well-drained canned corn all work, and you can keep the heat gentle or let it build. Bacon is optional, as is the crisp panko finish. For a longer gathering, the finished dip can move to a slow cooker to stay warm.
Quick Answer: How to Make Jalapeño Popper Corn Dip
To make jalapeño popper corn dip, crisp the bacon if using, sauté the corn and jalapeños, fold them into the creamy cheese base, then bake until the edges bubble and the center is hot. The quick skillet step cooks off loose corn moisture, brings out the corn’s sweetness and takes the raw edge off the jalapeños before the dairy goes in.
Cook 400 g / about 2½ cups corn kernels with chopped jalapeños until the pan has lost its wet sheen and a few kernels begin turning golden. Fold them into 227 g / 8 oz softened block cream cheese, sour cream and freshly shredded cheese, then add green onion and crisp bacon if using.
Spread the mixture in a 10-inch / 25 cm oven-safe skillet or roughly 2-quart / 2-litre baking dish. Bake uncovered at 375°F / 190°C for about 18–22 minutes, until the edges bubble gently and the center is hot and creamy. Let it rest for 5–10 minutes; that short pause takes it from molten to much easier to scoop.
Keeping the early jobs separate matters: bacon can crisp and corn can shed moisture before the dairy arrives. Once the creamy base goes in, the goal shifts from evaporation to gentle heating.
Choose Your Corn, Heat and Finish
Start with the balanced combination, then change only the part that matters to you.
Swipe or scroll sideways to see the full table.
Decision
Start here
Change it when…
Corn
Fresh or frozen
Use thoroughly drained canned corn for convenience or fire-roasted corn for a smokier edge.
Heat
As a balanced starting point, trim two jalapeños well and leave a little of the hotter inner ribs in the third
Trim all three more thoroughly for mild heat, or leave more of the inner ribs attached for a hotter batch.
Bacon
Optional, but good for smoky popper flavor
Leave it out for a vegetarian dip; fire-roasted corn can bring back some of that smoky character.
Top
Melty cheese
Add buttered panko for the creamy-inside, crisp-outside contrast of a breaded popper.
Think of these as separate levers: the corn changes bite and smokiness, jalapeño prep controls the heat, and the topping changes crunch. You can adjust one without rebuilding the dip.
The balanced version
Creamy Jalapeño Popper Corn Dip
Sweet kernels folded through a creamy jalapeño-cheese base, with bacon if you want the extra smoky edge. The bite should start sweet from the corn, turn rich and tangy through the cheese, then finish with fresh jalapeño warmth and whatever crisp edge you chose—bacon, panko or both.
Prep About 15 minutes
Cook About 30–40 minutes
Ready in About 50–65 minutes, including the 5–10 minute rest
Serves About 8–10 as one of several appetizers
Best pan 10-inch / 25 cm oven-safe skillet or about 2-quart / 2-litre baking dish
Finished texture Creamy and corn-studded; easy to scoop while warm but substantial enough to stay on a sturdy tortilla chip
Equipment
10-inch / 25 cm oven-safe skillet or roughly 2-quart / 2-litre baking dish
Large mixing bowl
Flexible spatula or sturdy spoon
Box grater if shredding cheese from a block
Ingredients
For the Dip
400 g / about 2½ cups corn kernels, fresh, frozen or thoroughly drained canned corn
15 ml / 1 tablespoon neutral oil, or reserved bacon fat
3 medium fresh jalapeños, about 50–60 g total before trimming, finely chopped
227 g / 8 oz full-fat block cream cheese, softened
120 g / ½ cup sour cream
115 g / 1 cup freshly shredded Monterey Jack or Colby Jack
55 g / ½ cup freshly shredded sharp cheddar
½ teaspoon garlic powder
¼ teaspoon onion powder
¼ teaspoon freshly ground black pepper
¼ teaspoon fine salt, plus more only if needed; start lighter when the bacon or cheese is especially salty
115 g / 4 oz raw bacon, optional
2 green onions / scallions, thinly sliced, divided
Optional Crunchy Popper Topping
25 g / ⅓ cup panko breadcrumbs
14 g / 1 tablespoon butter, melted
For Serving
Thick tortilla chips or corn chips
Celery, bell pepper strips or toasted baguette, optional
Measure the corn after prep. The target is about 400 g / 14 oz ready-to-cook kernels. Fresh corn works out to roughly 4–5 medium ears, depending on size and how deeply you cut. Frozen corn is easiest to weigh at 400 g. With canned corn, use the drained kernel weight, not the weight of the can and its liquid.
The useful ratio is visible even before cooking: corn should still be the dominant ingredient, while the dairy and cheeses are there to coat, bind and enrich the kernels rather than replace them.
Method
Prep and Cook Off Moisture
Heat the oven. Preheat to 375°F / 190°C. If you are not using an oven-safe skillet, lightly grease a roughly 2-quart / 2-litre baking dish.
Cook the bacon, if using. Cook the bacon in the skillet over medium heat until crisp. Transfer it to a paper-towel-lined plate and crumble when cool enough to handle. Reserve up to 1 tablespoon of the rendered fat for the corn if you like; otherwise discard the fat safely and use neutral oil.
Cook the corn and jalapeños. Heat the oil or reserved bacon fat over medium-high. Add the corn and chopped jalapeños and cook for 4–6 minutes, stirring occasionally, until the corn is hot, the pan no longer looks watery and a few kernels begin turning golden. Fresh kernels should still look plump rather than wrinkled. Remove the skillet from the heat while you mix the dairy.
A few golden spots are enough. Once the skillet is dry, chasing deeper color starts trading the plump corn bite for a drier, more roasted texture.
Build the Creamy Dip
Mix the creamy base. Press the softened cream cheese with a spatula; it should yield easily without looking shiny or melted. Stir in the sour cream, then mix in about two-thirds of both shredded cheeses, the garlic powder, onion powder, black pepper and salt.
Fold everything together. Add the warm corn and jalapeños, about two-thirds of the crumbled bacon if using and half of the green onions. Fold until the kernels are evenly coated. Taste before deciding whether it needs more salt.
Drag a spatula through the mixture: it should leave a clear track but still move easily. That middle ground keeps the kernels suspended while the finished corn dip stays scoopable.
Fill, Bake and Rest
Fill the pan. Spread the mixture evenly in the skillet or prepared baking dish. Scatter over the remaining shredded cheese. For the crunchy version, combine the panko and melted butter and sprinkle that over the top.
Let some corn and jalapeño remain visible through the cheese. If the surface disappears beneath a thick cheese blanket, you lose one of the easiest visual checks while the dip bakes.
Bake uncovered. Bake for 18–22 minutes, until the edges are gently bubbling and the center is hot and creamy. Yellow kernels and green flecks of jalapeño should still be visible through the melted cheese. If the top browns before the middle is ready, tent it loosely with foil. If the center is ready but the surface still looks pale, broil for 1–2 minutes only in broiler-safe cookware, watching continuously.
Rest and serve. Leave the dip alone for 5–10 minutes. Scatter over the reserved bacon and green onions. Straight from the oven it will be looser; after a few minutes the cheese settles more closely around the kernels and the texture becomes easier to serve.
Recipe Notes
For a bacon-free batch: leave the bacon out and taste the salt again before baking; fire-roasted corn is especially good here.
For a smaller, deeper dish: expect a longer bake. A wider, shallower dish heats faster and exposes more cheese to browning.
To make it ahead: assemble, cover and refrigerate for up to one day. Keep any crisp topping separate until baking.
Fresh vs Frozen vs Canned Corn: Which Is Best?
Fresh corn gives the clearest bite, frozen corn is the easiest year-round choice, and well-drained canned corn is the quickest pantry option. All three work well here; the target stays at about 400 g / 14 oz prepared kernels.
Swipe or scroll sideways to see the full table.
Corn
Amount for this recipe
Prep
What you get
Fresh
About 400 g kernels; roughly 4–5 medium ears
Cut from the cob and sauté until hot with a few golden spots
Firm, juicy kernels and the freshest corn flavor
Frozen
400 g / 14 oz
Remove loose ice or pooled thawing water, then sauté
Excellent year-round texture with little prep
Canned
About 400 g / 14 oz after draining
Drain thoroughly before weighing, then sauté
Softer kernels and the easiest pantry route
Fire-roasted
400 g / 14 oz prepared kernels
Drain or thaw as needed, then heat through
A smokier dip with almost no extra work
Fresh, frozen and canned corn mainly change moisture and bite; fire-roasted corn also changes the flavor. That smoky edge is especially useful when you are making the dip without bacon.
Fresh Corn
You want the kernels to keep that tiny burst when you bite them. Cook until the raw starchiness fades and a few spots turn golden, but stop while the corn still looks plump and juicy. That juicy contrast against the creamy cheese is the reason this tastes like corn dip rather than ordinary jalapeño popper dip with a handful of kernels mixed in.
Frozen Corn
Loose kernels with only a little frost can go straight into the skillet. A solid icy clump or a puddle of thawing water needs a little attention first.
Listen as it cooks. The pan starts damp and steamy, then shifts toward a clearer sizzle. That sound change is often more useful than watching the clock.
Sound works as a second moisture gauge when color is hard to judge: loose water muffles the pan, while a cleaner sizzle tells you evaporation is nearly finished.
Canned Corn
Measure the drained kernels, not the weight of corn plus packing liquid. Can sizes and drained yields vary enough that the scale is more dependable than promising every kitchen will need exactly two cans.
Can sizes vary, so count the prepared corn rather than the cans: after draining, the target for this recipe is about 400 g / 14 oz of kernels.
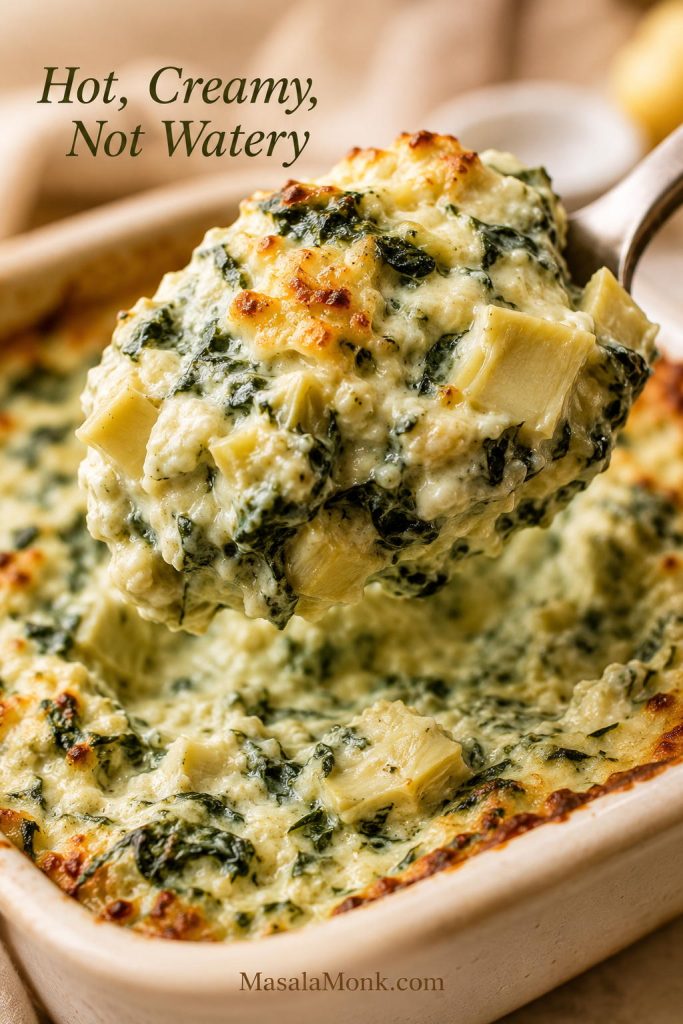
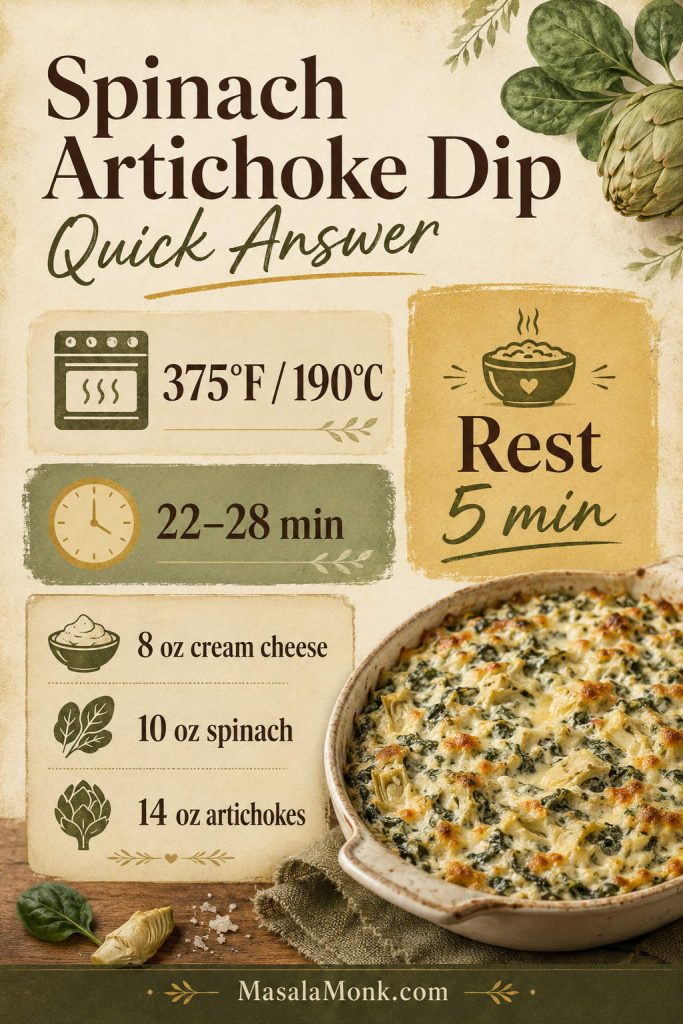
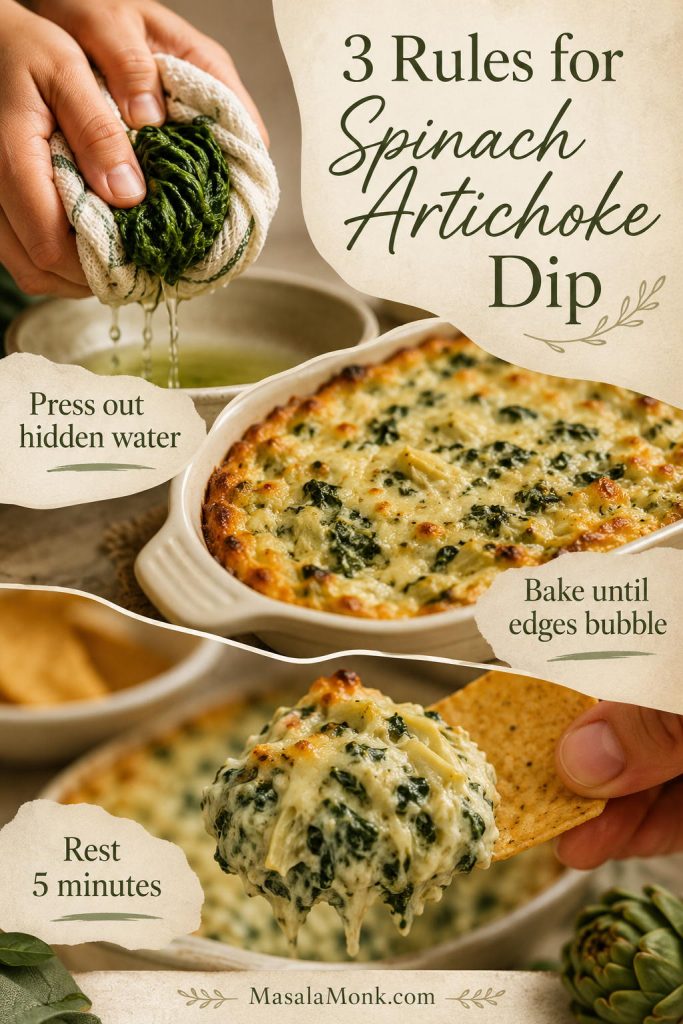
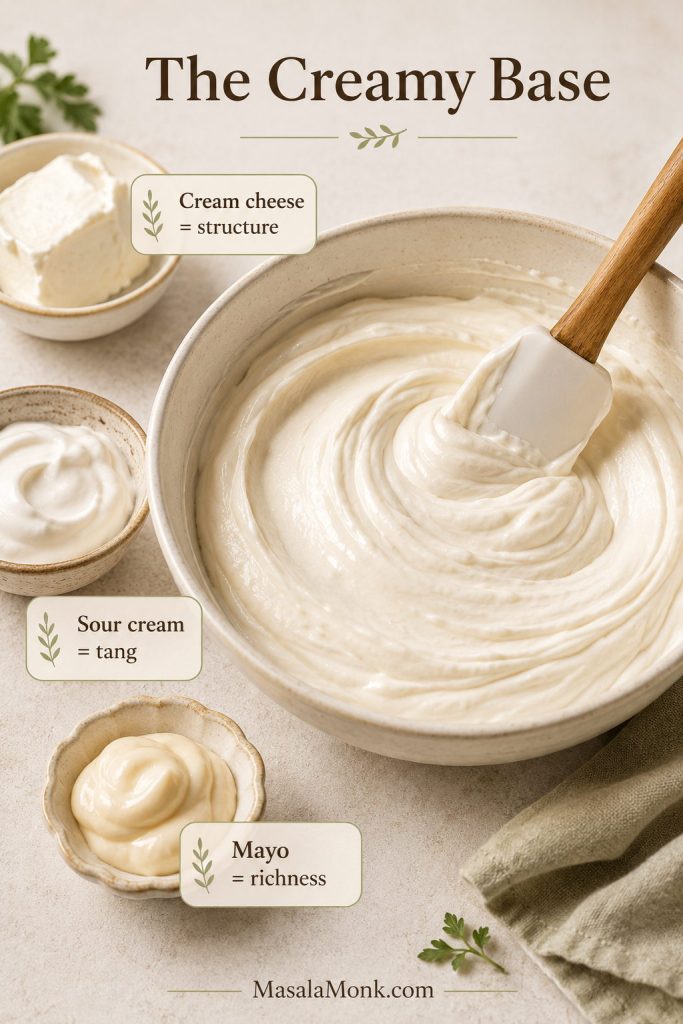
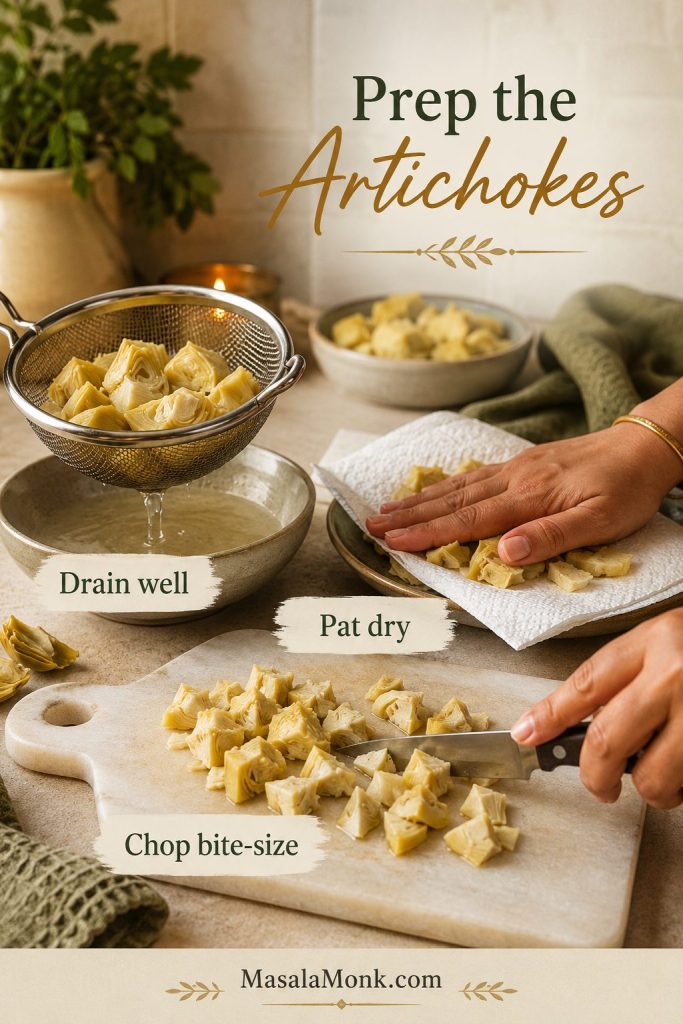
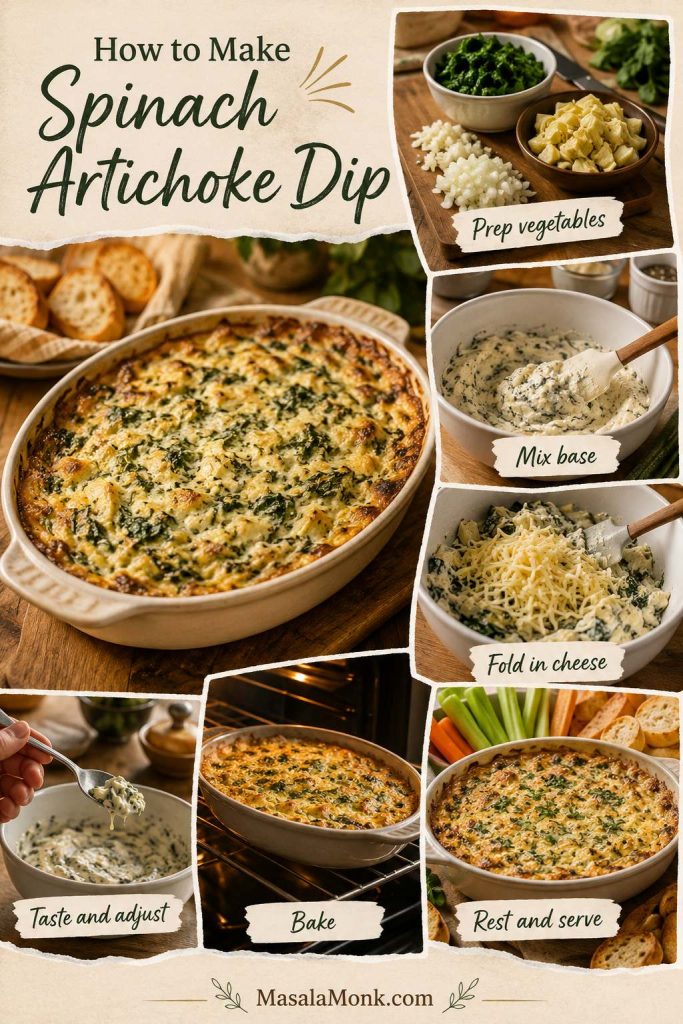
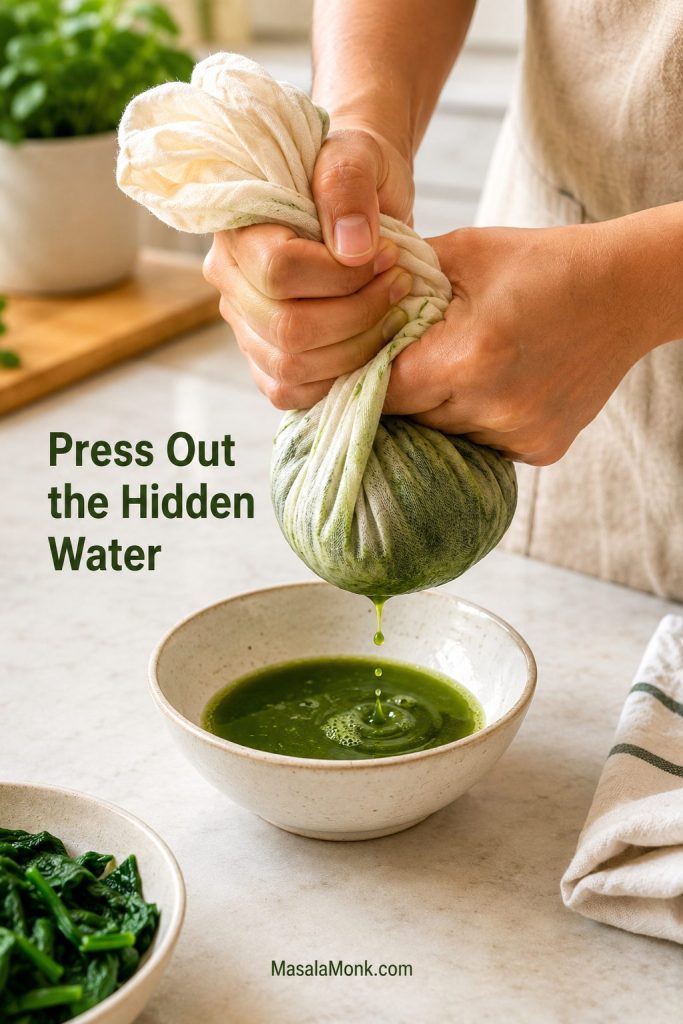
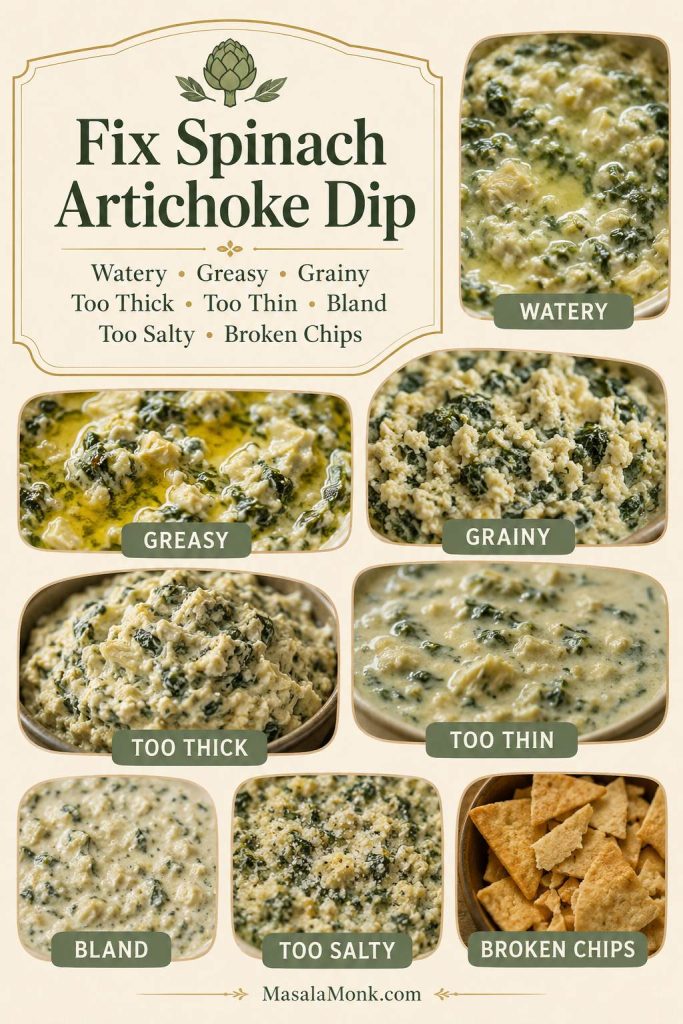
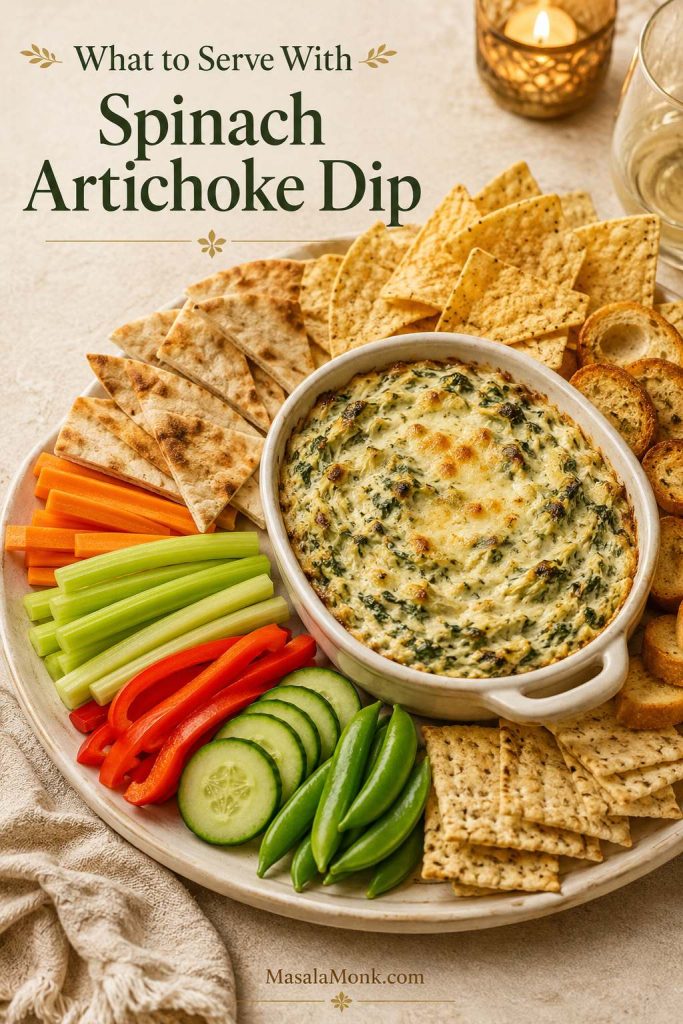
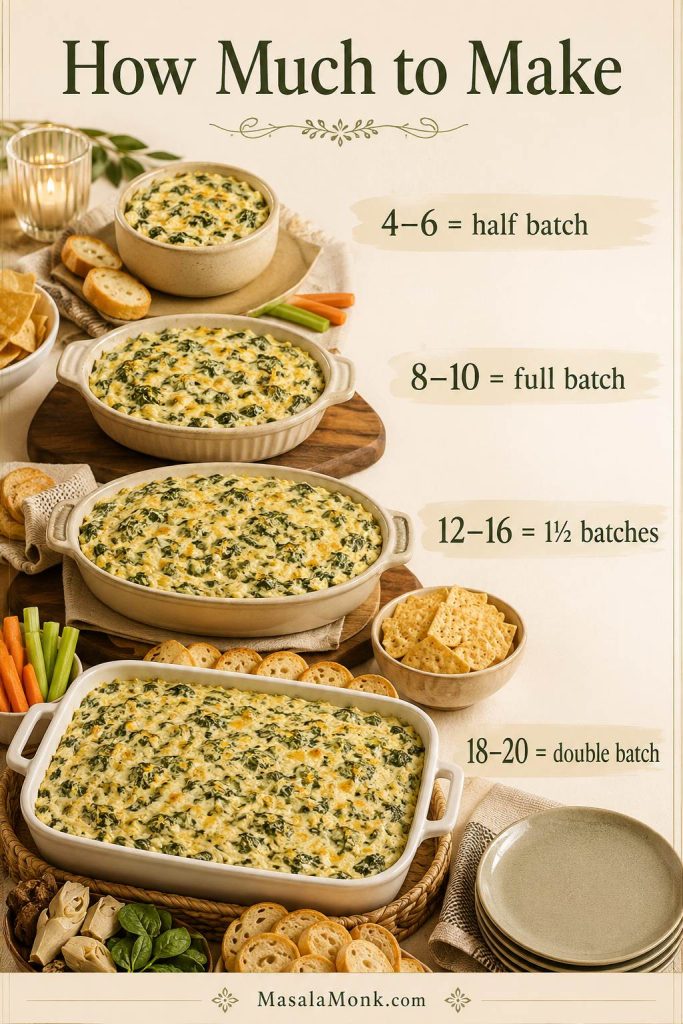
The same moisture lesson matters in other creamy vegetable dips too. In this spinach artichoke dip, loose vegetable water is much easier to deal with before it reaches the creamy base.
How to Control Jalapeño Flavor and Heat
For a milder dip, trim most of the pale inner ribs from all three jalapeños. For a balanced starting point, leave a little attached in one pepper; for a hotter batch, leave more attached.
Heat is only half the question. You may want more fresh jalapeño flavor without dramatically increasing the burn.
Why the Pale Inner Tissue Matters
Most of a jalapeño’s heat is concentrated around the pale inner placental tissue, not produced by the seeds themselves. The seeds can still taste hot because they sit against that tissue. Individual peppers vary too, which is why three jalapeños do not guarantee exactly the same heat every time. New Mexico State University’s chile research explains that anatomy and natural variation in more detail.
A jalapeño can be nearly seedless and still carry plenty of heat if much of the pale inner tissue remains. Conversely, a few loose seeds alone tell you very little about how hot the pepper will taste.
In kitchen terms, trimming the pale inner ribs and attached tissue changes the heat far more reliably than chasing every loose seed around the cutting board.
Control Heat Without Losing Jalapeño Flavor
Swipe or scroll sideways to see the full table.
You want…
What to do
What changes
Mild
Trim away most of the pale inner ribs from all three peppers
Fresh green-pepper character with much less heat
Balanced starting point
Trim two well and leave a little inner rib attached in the third
Noticeable warmth without deliberately pushing the heat
Hot
Leave more of the inner ribs attached
A stronger heat that builds through the bite
More jalapeño flavor, not much more heat
Add more well-trimmed green flesh
More fresh pepper flavor without simply turning up the burn
Tangier pepper flavor
Replace part of the fresh jalapeño with well-drained pickled jalapeño
More acid, salt and softness
If a batch tastes hot but oddly not very jalapeño-forward, more inner rib is not the answer. Instead, add more well-trimmed green flesh for stronger fresh-pepper character without deliberately adding more burn.
When the balance is right, the jalapeño shows up before the heat does: fresh and green at first, then warmer as you finish the bite.
A hotter batch is especially good beside this cold cucumber salad, which gives the table something crisp and vinegary between rich, peppery bites.
Fresh or Pickled Jalapeño?
Fresh jalapeños give the cleanest green-pepper flavor and a little bite. Pickled jalapeños bring more acidity, salt and a softer texture, so drain them before measuring. Using mostly fresh pepper with a smaller amount of pickled jalapeño gives you both green flavor and a brighter tang.
Pickled jalapeño softens into the creamy base more readily, while fresh pieces keep more bite and definition. That texture difference matters as much as the extra tang.
Handling hot peppers? Avoid touching your eyes or face while chopping. Wash your knife, board and hands well afterward; gloves are useful if chile oils tend to irritate your skin.
Why the Creamy Base Works
Cream Cheese, Sour Cream and the Right Consistency
One 227 g / 8 oz block of cream cheese gives the dip the tangy richness associated with jalapeño poppers without burying 400 g of corn. The ½ cup sour cream loosens the base just enough and adds another layer of tang, helping the warm dip stay pleasant to serve as the cream cheese naturally firms.
The result should feel creamy around the kernels rather than like the corn has disappeared into a bowl of melted cheese. The kernels should still taste sweet and distinct inside all that richness.
Look for a base that holds a soft ridge when the spatula passes through it. That gives the corn somewhere to sit rather than letting the kernels disappear into a loose cheese sauce.
Monterey Jack Melts; Cheddar Brings the Cheese Flavor
Monterey Jack or Colby Jack melts quietly into the background, while sharp cheddar brings the more noticeable cheese flavor. Freshly shredded block cheese generally melts more smoothly than heavily coated pre-shredded cheese, though bagged cheese is fine when that is what you have.
Bacon Is Here for Smoke and Crunch
Bacon is optional here. It brings smoke, salt and crisp little pieces that stand out against the creamy cheese. Stir most of it through and save a little for the top, where it has a better chance of staying crisp.
How to Make Jalapeño Popper Corn Dip: What to Look For
The timings help, but your eyes, ears and spoon tell you more.
Before the Dairy Goes In: Listen for the Sizzle
At first, especially with frozen or canned corn, the skillet may look steamy and damp. As the loose water cooks away, the sound becomes a clearer sizzle. A few kernels will catch golden spots, the corn will smell sweeter and the jalapeño will smell less raw.
Stop there. You want hot corn with some bite left, not dried-out kernels.
Before and During Baking
Before it goes into the oven, the mixture should hold kernels throughout but still spread without wrestling the spatula. A little softness is fine. A genuinely soupy mixture needs attention before baking.
Gloss from the dairy is normal; free liquid is the warning. Look for actual pooling around or between the kernels before deciding the pre-bake mixture is too wet.
In the oven, watch the edge and center separately. Gentle bubbles around the perimeter tell you the outside is hot. Disturb the middle with a spoon: it should feel creamy and fully heated rather than dense and cool.
The top does not need to look perfectly smooth. Yellow corn should still peek through the cheese, green jalapeño should be visible, and the skillet edge may have a few browned spots where everything met the hot pan.
Once the center is there, stop.
Browning can lag behind doneness. If the center is already hot and creamy, waiting for a uniformly golden top can tighten the cheese and encourage greasy separation.
Give It Five Minutes Before You Judge It
Fresh from the oven, hot dairy and melted cheese are at their loosest. If the dip looks a little more relaxed than you expected, give it several minutes before changing anything.
As it settles, the cheese hugs the corn more closely and the serving texture gets fuller. Left on a cool table long enough, it eventually heads the other way and starts firming up.
Resting fixes temperature-driven looseness, not excess water. If a real puddle remains after the planned rest, waiting longer is unlikely to solve the same problem.
The useful test
The Scoopability Test
Push a sturdy tortilla chip through the warm dip. A good scoop should bring up creamy cheese, several kernels and visible jalapeño.
A dip that runs straight off the chip may simply need the planned few minutes of rest.
A dip you have to force the chip through may have cooled too far.
A bite that is mostly cheese with almost no corn has lost the part that makes this corn dip.
The sweet spot is substantial but easy to scoop: the dip stays on the chip and the kernels come with it. That matters even more at a party, where the people coming back twenty minutes later deserve a good scoop too.
This test separates temperature problems from balance problems: looseness or stiffness can change with resting and warming, while a scoop that is mostly cheese has lost the corn-dip ratio itself.
A baking dish and an oven-safe skillet both give you the oven-baked version; the difference is mostly cleanup and presentation. The slow cooker earns its place when the dip needs to stay hot for a longer gathering.
Swipe or scroll sideways to see the full table.
Setup
Best for
Main advantage
Watch for
Baking dish
The standard version
Easy assembly and even oven heating
A deeper dish can take longer than a wide, shallow one
Oven-safe skillet
Fewer dishes
Sauté and bake in the same pan
Take the skillet off the burner before the dairy goes back in
Slow cooker
Parties and potlucks
Easy hot holding after the dip is ready
Overheated edges and gradual thickening during a long hold
The slow cooker is the outlier: choose it for a long, creamy serving window rather than expecting the browned surface of an oven-baked dip.
Slow Cooker: Best for a Longer Party
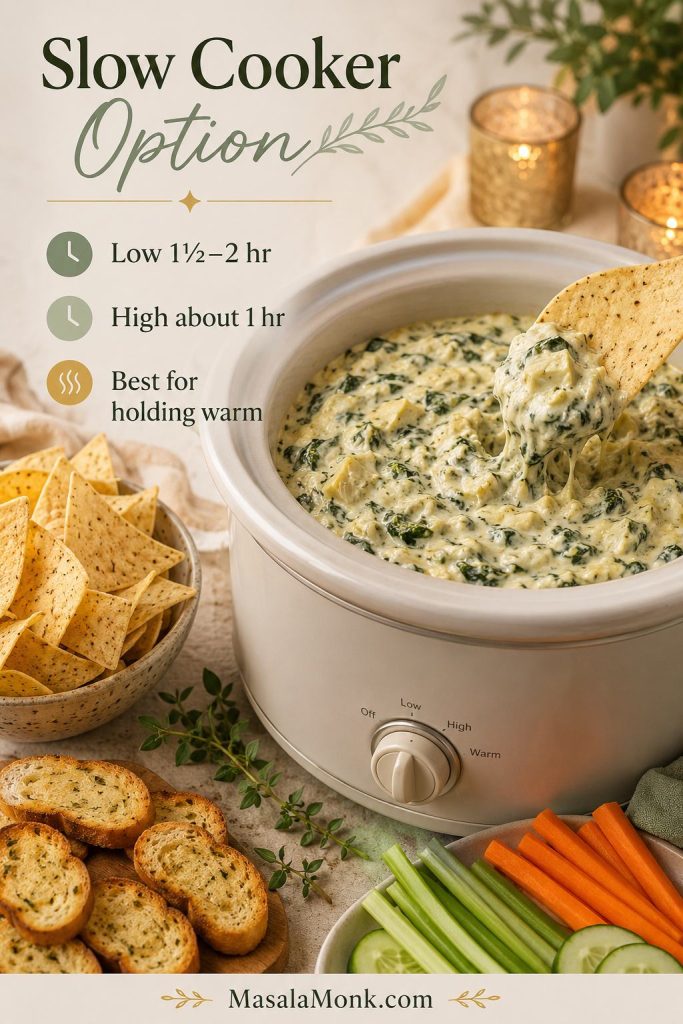
Use roughly a 3- to 4-quart slow cooker. Cook the corn and jalapeños first if possible, then combine them with the cream cheese, sour cream, shredded cheese, seasonings and optional cooked, crumbled bacon.
Cook on LOW and start checking around 1½ hours. Stir once the cheese has softened enough to combine, then continue until the center is thoroughly hot and creamy. Slow cookers vary enough that those cues matter more than a promised finish time.
Once hot, switch to WARM and stir periodically. Crockpot buffalo chicken dip gives the table something tangier alongside it when you want a second warm dip.
A spoon trail should slowly fill back in rather than leaving a dry, crusted channel. Stir periodically so the hotter edges do not thicken long before the center does.
Melty Cheese or Crunchy Jalapeño Popper Finish?
A simple layer of melted cheese gives you the easiest serving texture. Nothing else is required.
If the crisp shell of a breaded jalapeño popper is part of the appeal, mix 25 g / ⅓ cup panko with 14 g / 1 tablespoon melted butter and scatter it over the cheese before baking.
Crushed tortilla chips work too. Add them closer to the end so they keep more crunch.
Panko gives a fine, even crunch; crushed tortilla chips give larger salty shards but soften faster. That makes the crushed-chip finish best when it goes on late.
If you would rather keep the creamy filling inside the peppers, these baked jalapeño poppers give you that crisp-edged, cheesy bite in a more traditional form.
Make Ahead, Transport and Keep Warm
A hot dip earns its place at a party when most of the work happens before people walk through the door. Ideally, you are slicing green onions or opening chips when the doorbell rings—not standing over the stove trying to rescue the texture.
Make It Up to a Day Ahead
Cook the bacon, corn and jalapeños, assemble the dip in its baking dish, cover and refrigerate for up to one day. Keep panko, crushed chips, reserved bacon and fresh green onion separate so they stay crisp and bright.
An easy cheese ball can handle the cold-appetizer slot while this dip waits for its turn in the oven.
Baking From Refrigerator-Cold
A refrigerated batch will need more time than one you have just assembled. Start checking about 5 minutes later, then follow the bubbling edges and hot, creamy center rather than adding a fixed number of extra minutes. Deep, very cold dishes can take longer.
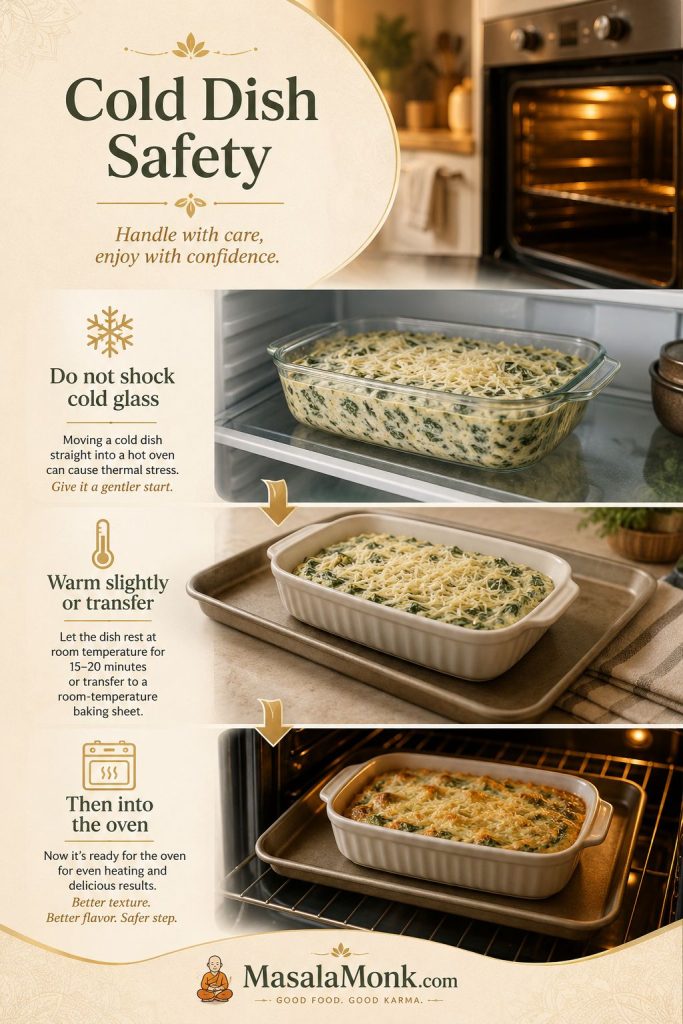
Using glass bakeware? Follow the manufacturer’s instructions for moving it from refrigerator temperature into a hot oven; avoid sudden temperature changes unless the manufacturer specifically says the dish is designed for them.
Taking It Somewhere Else
An oven at the destination makes life easiest: carry the assembled dip cold, keep it properly chilled and bake it when you arrive.
For food that needs to travel hot, use a suitable insulated hot-food carrier and check that it stays at a safe temperature. At the destination, a plugged-in, preheated slow cooker can take over the hot-holding job.
Pack garnishes and crisp toppings separately from the chilled dip. The carrier protects temperature; keeping those finishing pieces apart protects their crunch and freshness.
Keep It Safely Hot
Keeping it out for a long party?
Keep hot dip at 140°F / 60°C or warmer. A slow cooker or warmer can help, but the word Warm on the control is not a temperature reading, so use a food thermometer when the dip will be sitting for a while.
For a long serving window, stir periodically and recheck the dip’s temperature. The slow-cooker dial tells you the appliance setting; the thermometer tells you what is happening in the dip.
If the dip is not being kept safely hot, do not leave it at room temperature for more than 2 hours; that drops to 1 hour above 90°F / 32°C. The same timing matters before leftovers return to the refrigerator. See the USDA food-safety guidance for the underlying holding and leftover recommendations.
For a second dip on a long grazing table, I would go cold rather than add another hot-holding job. A 7 layer dip gives you beans, salsa, sour cream and fresh toppings beside this hot skillet.
Reheating Leftovers for Hot Holding
Using yesterday’s dip in a slow cooker? Reheat the refrigerated dip first in the oven, microwave or on the stovetop until the center reaches 165°F / 74°C. Then transfer it to a preheated slow cooker for safe hot holding.
If the texture or heat is not where you wanted it, the fix is usually simple. Most problems come back to water, temperature, fat or pepper balance.
Texture and Consistency Problems
Swipe or scroll sideways to see the full troubleshooting table.
Problem
Likely cause
Fix now
Next time
Watery
Wet canned/frozen corn or another loose addition
Keep it uncovered and hot briefly, then stir
Drain well and sauté until the pan no longer looks wet
Loose straight from oven
The dairy and cheese are extremely hot
Rest 5–10 minutes first
Judge the texture after the short rest
Too thick
The dip has cooled or the base is overly firm
Warm and stir first. If a full batch is still too thick once hot, mix in 1 tablespoon sour cream or milk and check again.
Keep it warm during a longer serving window
Greasy
Excess bacon fat, too much cheese or prolonged heat
Blot obvious surface fat and stir gently
Drain bacon well and stop baking once the center is hot
Grainy
Overheated cheese or a less-smooth melting cheese
Lower the heat and stir gently
Use freshly shredded melting cheese and avoid extended high heat
Chips keep breaking
The dip has cooled too far or the chips are too delicate
Warm the dip and switch to sturdy chips
Keep the dip warm and serve with thicker tortilla or corn chips
Read the appearance before choosing a fix: pooled liquid points toward water, visible oil toward fat separation, graininess toward broken cheese, while a glossy molten dip can still be completely normal.
Heat and Pepper Balance Problems
Problem
Likely cause
Fix now
Next time
Bland
Not enough seasoning or fresh pepper character
Add salt cautiously, green onion or finely chopped jalapeño
Taste the fully mixed base before baking
Too spicy
Hot peppers or too much inner rib/tissue
Fold in more corn and creamy base if available
Trim the peppers more thoroughly
Not spicy enough
Mild peppers or heavily trimmed jalapeños
Add jalapeño, pickled jalapeño or hot sauce at the table
Leave more inner rib attached in one pepper
Hot but not jalapeño-forward
Heat is present but there is not enough green pepper flesh
Add finely chopped, well-trimmed fresh jalapeño
Increase the green flesh while controlling heat separately
Substitutions and Variations That Still Make Sense
Pickled jalapeño for some of the fresh: drain it well and expect more tang, salt and softness.
Pepper Jack for part of the Monterey Jack: adds more chile heat while keeping a similarly melty texture.
Crushed tortilla chips for panko: more corn flavor and a chunkier crunch. Add them late enough that they do not soften completely.
Those swaps still taste like the same dip. Once tomatoes, lime, cotija, salsa or a lot of extra liquid start piling in, you are heading toward a different recipe—and that is fine.
Can I add Rotel? You can, but tomatoes and green chiles pull the dish in a different direction and bring extra liquid with them. If that molten tomato-and-chile combination is what you are after, a Rotel dip is built around it from the start.
What to Serve With Jalapeño Popper Corn Dip
Do not overthink the dippers. Put out a generous bowl of sturdy tortilla chips and one fresh, crunchy option and you are basically done.
Thick tortilla chips: the default. They cut through a warm cheese dip far better than delicate restaurant-style ones.
Corn chips: compact, strong and especially useful once the dip becomes a little firmer.
Toasted baguette or crostini: substantial enough for a panko-topped batch.
Celery: cold and crisp against the rich dairy.
Bell pepper strips: sturdy, fresh and naturally sweet.
Carrot sticks: cut them thick enough to dip rather than into delicate matchsticks.
As the dip cools and firms, corn chips and crostini become especially forgiving because they resist snapping better than delicate chips; crisp vegetables keep providing a fresh contrast throughout the serving window.
Air fryer chicken wings bring crackly skin and browned edges to a table that already has plenty of soft, melted cheese.
A fresh mango salsa takes things in the other direction, with lime, fruit, onion and jalapeño giving the same tortilla chips something cool and bright to pick up.
How to Store, Freeze and Reheat the Dip
Refrigerator: Refrigerate leftovers promptly in shallow covered containers and use them within 3–4 days.
Oven: Place the dip in an oven-safe dish, cover loosely and warm at about 325°F / 165°C until the center reaches 165°F / 74°C. Uncover near the end if you want to refresh the surface.
Microwave: Heat smaller portions in short bursts, stirring between rounds so the edge does not become greasy while the middle stays cold. Reheated leftovers should reach 165°F / 74°C.
If the texture needs help after reheating: stir first. If a full batch is still too thick once hot, begin with 1 tablespoon sour cream or milk. For a small bowl, start with a teaspoon and mix completely before adding more.
Judge leftover texture only after reheating and stirring. A cold cream-cheese dip naturally looks firmer, so thinning it before it is fully hot can leave you with a looser dip than you intended.
Can You Freeze It?
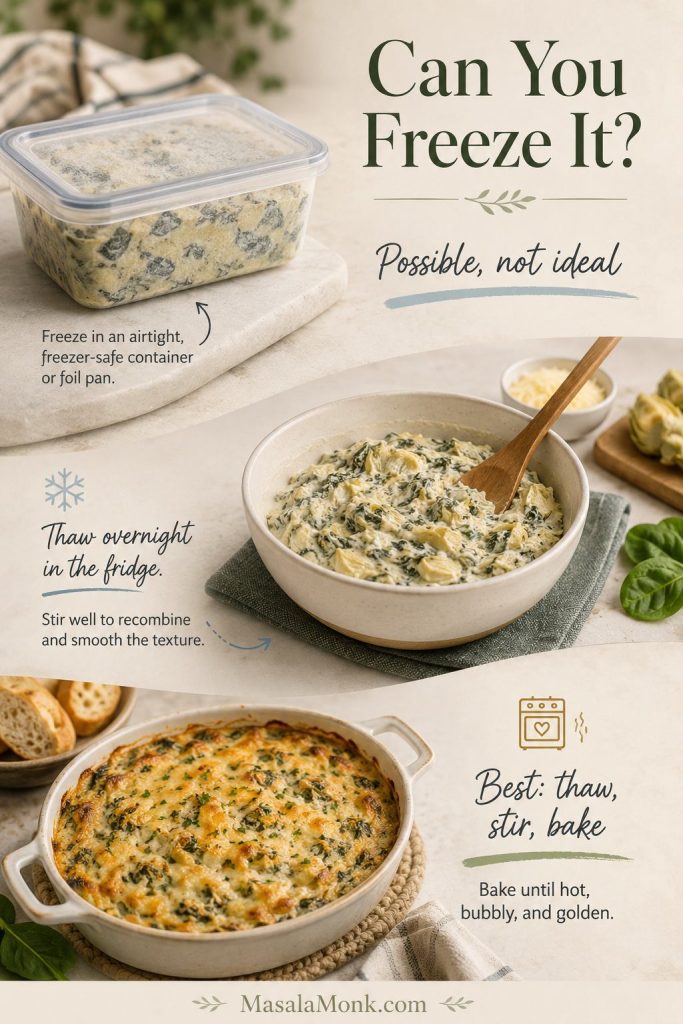
I would not freeze this dip when the smoothest texture matters. It can be frozen, but cream cheese and sour cream may look grainier or slightly separated after freezing and thawing.
For a party, assembling the dip a day ahead and refrigerating it is the better plan. If you do freeze it, leave off the crisp topping, thaw in the refrigerator and expect some texture change after reheating.
When the First Scoop Is Right
This dip does not need the biggest possible pile of cheese to feel indulgent. It needs sweet kernels that still have a little bite, jalapeño that tastes green and lively, and enough creamy cheese to hold everything together without turning the bowl into one heavy, uniform mouthful.
When those pieces line up, you notice it immediately: corn in every scoop, jalapeño before the heat, browned cheese around the edge and little crisp bits of bacon or panko against the creamy center. Give it a few quiet minutes out of the oven, scatter over the scallions and bring it to the table warm.
The goal is not a dramatic cheese pull; it is a skillet that still gives up a clean, corn-rich scoop after the first rush at the table has passed.
And put the thicker chips out from the beginning. Nobody should have to excavate this with a broken triangle.
This Rotel dip recipe is for the moment when the chips are open, people are hovering, and the cheese needs to stay creamy long after the first scoop. It is not fancy food. Think warm, glossy, salty, tomato-chile cheese dip that does exactly what party food should do: disappear from the table.
The best bowl should be soft enough to drag through with a chip, thick enough to cling, but not so stiff that the chip snaps. That texture comes from a few simple choices: use the Rotel undrained, melt the cheese gently, drain the meat well, and keep the finished dip warm instead of hot.
Keep it classic with Velveeta and Rotel when you need something fast. Add ground beef when you want it hearty and mild. Choose sausage when you want a bolder game-day bowl. Stir in cream cheese when you want it thicker and richer. Use the slow cooker when people are going to keep coming back for one more scoop.
To make classic Rotel dip, combine 16 oz Velveeta with one 10 oz can of Rotel, undrained. Melt gently on the stovetop, in the microwave, or in a slow cooker until smooth. For a heartier dip, add 1 lb cooked and drained sausage or ground beef.
For the best all-around party dip, use sausage. A milder, family-friendly bowl works better with ground beef. Need the fastest version? Skip the meat. Want the thickest scoop? Add cream cheese.
There is no fancy sauce technique here. The Rotel liquid loosens the cheese, Velveeta keeps it steady, and cooked meat makes it hearty. Once everything is melted, your only job is to keep it soft and stir it now and then.
Classic ratio: 16 oz Velveeta + one 10 oz can Rotel, undrained
Cream cheese version: add 4 to 8 oz cream cheese for a thicker scoop
Crock pot version: cook on low for 2 to 3 hours, then switch to warm
Main rule: melt gently; do not boil the cheese mixture
The Easy Rotel Dip Ratio
This simple ratio gives the dip enough cheese to stay creamy, enough Rotel to loosen it, and enough meat to feel like a real party bowl.
For the easiest Rotel dip ratio, use 16 oz Velveeta, one 10 oz can of Rotel, and 1 lb cooked meat for a heartier batch.
Rotel Dip Recipe Card
Rotel Dip Recipe
A creamy, scoopable cheese dip made with Velveeta, Rotel tomatoes with green chilies, and optional ground beef or sausage. Make it on the stovetop for a quick appetizer, or move it to a crock pot to keep it warm for a crowd.
Prep time: 5 minutes
Cook time: 10 to 15 minutes
Total time: 15 to 20 minutes
Servings: 10 to 12 appetizer servings
Best for: game day, potlucks, parties, movie nights, nachos, and snack boards
Ingredients
1 lb ground beef or breakfast sausage / 454 g, optional but recommended for a heartier dip
16 oz Velveeta, cubed / 454 g
1 can Rotel diced tomatoes and green chilies, undrained / 10 oz / about 283 g
1/2 tsp chili powder or 1 to 2 tbsp taco seasoning, optional
1 to 3 tbsp milk / 15 to 45 ml, optional, only if the cheese needs thinning
4 to 8 oz cream cheese / 113 to 227 g, optional, for a thicker and richer dip
Before cooking, set up each ingredient by job: Velveeta melts smoothly, Rotel adds tomato-chile flavor, meat adds body, and cream cheese makes the dip richer.
Instructions
Brown the ground beef or sausage in a large skillet over medium-high heat, breaking it into small crumbles as it cooks.
Drain the meat very well. Keep the crumbles, not the grease.
Reduce the heat to medium-low.
Add the cubed Velveeta, undrained Rotel, and chili powder or taco seasoning if using.
If using cream cheese, add it now in small cubes so it melts evenly.
Stir until the cheese melts and the mixture looks smooth, glossy, and creamy.
If it is too thick, add milk 1 tablespoon at a time until it is easy to scoop.
Taste before serving. Add a pinch of chili powder, taco seasoning, or hot sauce only if it needs more flavor.
Serve warm with tortilla chips, or transfer to a slow cooker on warm for parties.
Recipe Notes
For 2-ingredient Rotel dip, skip the meat and use only Velveeta and Rotel.
Mild breakfast sausage keeps the batch crowd-friendly, while hot sausage adds more heat.
Lean ground beef works well because it keeps the bowl hearty without adding too much grease.
Use 4 oz cream cheese for a slightly richer dip or 8 oz for a thick sausage-style batch.
If using sausage or taco seasoning, taste before adding extra salt.
Cook ground beef or sausage fully before adding the cheese. Ground meat and sausage should reach 160°F / 71°C; FoodSafety.gov has a safe minimum temperature chart if you want a reference.
Do not boil the cheese after it melts. Low, steady heat keeps the texture smoother.
Finished Rotel dip should look glossy, melted through, and thick enough to coat a chip. You should see small tomato and green chile pieces suspended in the cheese, not watery liquid around the edges.
When the dip falls from a spoon in slow ribbons, it is ready. A stiff clump needs gentle heat and a little milk. Grease pooling on top usually means the meat needed more draining. The final test is simple: a sturdy chip should scoop through without snapping.
Look for Slow Ribbons
The spoon tells you more than the clock. Smooth ribbons mean the cheese has melted evenly and the dip is ready to serve.
Once the cheese falls from the spoon in slow ribbons, the texture is right: melted through, easy to dip, and still strong enough for chips.
Which Version Should You Make?
Keep this ratio handy: 16 oz Velveeta, one 10 oz can Rotel, and 1 lb meat if you want the bowl hearty. From there, choose the version that fits the table.
Situation
Make This
Need dip in 10 minutes
2-ingredient Velveeta + Rotel
Want the best all-around party bowl
Sausage + Velveeta + Rotel
Serving kids or spice-sensitive guests
Ground beef + mild Rotel
Want thicker scoops
Add 4 to 8 oz cream cheese
Want the richest version
Sausage + cream cheese + Velveeta + Rotel
Keeping it warm for a party
Use the crock pot on warm after melting
Dip got too thick
Rewarm gently and add milk slowly
Making a bigger party batch
32 oz Velveeta + two cans Rotel + 1 to 2 lb meat
Match the Version to the Table
Use the version guide when you are choosing between fast, mild, bold, thick, or slow-cooker friendly.
Next, match the version to the table: meatless for speed, ground beef for mild flavor, sausage for game day, and cream cheese for thicker scoops.
For most parties, sausage with original Rotel is the safest bold version. A milder family bowl is easier to love with ground beef and mild Rotel.
This dip works because every ingredient has a job, and none of them ask much from you.
Velveeta melts smoothly. It gives the bowl that classic creamy texture without needing a roux or careful cheese sauce technique.
Rotel adds flavor and moisture. The tomatoes and green chilies bring tang, gentle heat, and enough liquid to loosen the cheese.
Well-drained meat keeps it clean. Ground beef or sausage makes the bowl more filling, but extra grease can float on top if the meat is not drained.
Low heat protects the texture. Cheese dip does not need to boil. It needs to melt gently until loose, glossy, and dippable.
A slow cooker solves the party problem. Once melted, the warm setting keeps the cheese soft enough for chips without constant reheating.
If you like understanding why cheese turns smooth instead of grainy, this easy cheese sauce recipe goes deeper into gentle heat and creamy texture.
What Is Rotel Dip?
Rotel dip is the quick American-style cheese dip people make when they want melted cheese, tomato-chile flavor, and almost no prep. The classic version uses Velveeta because it melts smoothly and stays creamy, while Rotel adds tomatoes, green chilies, and just enough liquid to loosen the cheese.
The familiar 10 oz can plus 16 oz cheese ratio is also the brand-style queso formula. Ro-Tel’s Famous Queso Dip uses a 10 oz can of Ro-Tel, undrained, with a 16 oz package of Velveeta.
Searchers may call this Rotel cheese dip, Velveeta Rotel dip, Rotel queso dip, sausage Rotel dip, or hamburger cheese dip, but the idea is usually the same: melted cheese, Rotel, and sometimes meat.
Once you know the basic idea, the ingredient choices are simple: cheese controls the texture, Rotel brings the tomato-chile flavor, and meat decides how filling the bowl feels.
Ingredients You’ll Need
Velveeta
Velveeta gives this recipe its familiar party texture: creamy, steady, and almost impossible to mess up if you keep the heat low. A 16 oz block gives one standard batch the texture people expect from Velveeta Rotel dip.
Regular Velveeta gives the classic flavor. Queso blanco Velveeta also works for a lighter-colored dip. Shredded cheddar alone can turn grainy, so it works better with cream cheese in the no-Velveeta option.
Rotel Tomatoes and Green Chilies
One 10 oz can is the right amount for one 16 oz block of Velveeta. Pour in the tomatoes, chilies, and liquid together; that liquid keeps the cheese from turning stiff. The tomato and green chile pieces also keep the bowl from tasting flat.
Original Rotel is the default for that familiar tomato-chile bite. Mild Rotel is better for a gentle, crowd-friendly bowl. Hot Rotel works when you want more heat.
Ground Beef or Sausage
Meat is optional, but it makes the cheese dip more filling. Ground beef brings a milder, heartier flavor. Sausage makes it bolder, saltier, and more game-day friendly.
For one standard batch, cook 1 lb of ground beef, breakfast sausage, pork sausage, or hot sausage. Break it into small crumbles, spoon off excess fat, and then add the cheese and Rotel.
Cream Cheese
A little cream cheese gives the dip more body; a full 8 oz block turns it into a thicker, richer party scoop. It works especially well with sausage and in no-Velveeta versions.
Cut it into small cubes before adding it so it melts evenly. Use 4 oz when you still want classic queso energy; go up to 8 oz when you want the chip to come up loaded.
Seasoning and Heat
You do not need much seasoning because Velveeta, Rotel, and sausage already bring flavor. For more depth, add a little chili powder, taco seasoning, garlic powder, hot sauce, or chopped jalapeños. Start light, especially with sausage or taco seasoning.
How to Make Rotel Dip
The method is simple: cook the meat if you are using it, turn the heat down, melt the cheese with Rotel, and thin only if the dip needs it.
Stovetop Method
Brown the ground beef or sausage in a large skillet over medium-high heat.
Drain the meat well and return it to the pan.
Lower the heat to medium-low.
Add cubed Velveeta and undrained Rotel.
Add cream cheese now if using it.
Stir until the cheese melts into a smooth dip.
Add a splash of milk only if the dip is too thick.
Drain the Meat Well
Draining the meat is the small step that keeps the finished dip rich instead of oily.
After browning sausage or ground beef, drain it well so the cheese dip stays savory and rich without a greasy layer on top.
Once the meat is drained, add the Rotel with its liquid. That can liquid is part of the sauce, helping the cheese loosen while carrying tomato-chile flavor through the whole pan.
Use the Rotel Liquid
Pour in the tomatoes, green chilies, and liquid together before the cheese fully melts, so the mixture has enough moisture from the start.
When adding Rotel, pour in the tomatoes, green chilies, and liquid together; that juice loosens the Velveeta and keeps the dip scoopable.
Stop when the cheese looks glossy and the dip moves slowly from the spoon, not when it starts bubbling. High heat can make the edges oily, the texture heavy, or real cheese grainy.
Melt the Velveeta Gently
Low heat gives the cheese time to melt into the Rotel liquid, so the dip stays glossy and smooth.
As the Velveeta melts, keep the heat gentle. The goal is glossy, dippable cheese, not a bubbling pot that turns heavy or oily.
Making this ahead for a crowd? Use the crock pot method. If the texture changes while it sits, the troubleshooting guide will help you bring it back.
Microwave Method
The microwave is best when you are making the fast meatless version and just need cheese dip on the table now. Add cubed Velveeta and undrained Rotel to a microwave-safe bowl. Microwave on high for 2 to 3 minutes, stir well, then continue in 30 to 60 second bursts until the cheese is melted through.
If adding ground beef or sausage, cook and drain the meat separately first, then stir it into the melted cheese mixture.
Slow Cooker Method
For parties, the slow cooker is the easiest method. Brown and drain the meat first, then add the meat, cubed Velveeta, and undrained Rotel to the slow cooker. Cook on low for 2 to 3 hours or high for 1 to 2 hours, stirring occasionally. Once smooth, switch to warm for serving.
2-Ingredient / Meatless Rotel Dip
When speed matters more than making it hearty, skip the meat and keep the bowl simple: Velveeta and Rotel. This is the fastest version and the easiest one to make at the last minute.
16 oz Velveeta, cubed / 454 g
1 can Rotel, undrained / 10 oz / about 283 g
Melt them together on the stovetop or in the microwave, stirring until smooth. It is lighter than the ground beef or sausage batch, but it still gives you that classic warm cheese-and-chile flavor. Corn or beans can make it more filling, but they move the recipe into a different style.
Ground Beef Version
Start here when you want the dip to feel like food, not just a snack, but still keep the flavor mild enough for everyone. Ground beef makes the bowl feel more like a filling snack than plain melted cheese, while still letting the tomato-chile flavor come through.
For one batch, use 1 lb ground beef, 16 oz Velveeta, and one 10 oz can Rotel. Brown the beef, break it into small crumbles, and drain it well before adding the cheese and Rotel. You may know this as hamburger Rotel dip, hamburger cheese dip, or Velveeta cheese dip with hamburger meat.
For a milder bowl, ground beef gives this dip taco-night flavor that works with chips, nachos, baked potatoes, or a mixed crowd.
Sausage Version
Sausage is the game-day version: bolder, saltier, and a little more “people keep coming back” than ground beef. The sausage version smells richer and more savory as it melts, which is why it feels especially right for game day.
A standard sausage batch needs 1 lb breakfast sausage, 16 oz Velveeta, and one 10 oz can Rotel. Mild sausage keeps the dip crowd-friendly. Hot sausage makes it spicier and pairs well with original or hot Rotel. Cook the sausage fully, drain it well, and leave the grease behind before the cheese goes in.
For a bolder party dip, sausage brings deeper savory flavor, more texture, and a stronger game-day feel than ground beef.
This is also the option that works especially well with cream cheese. Add 4 to 8 oz when you want a thicker, richer scoop.
Cream Cheese Version
Cream cheese is for the thick-scoop people. It turns the dip into a heavier, richer scoop — the kind that sits on a sturdy chip instead of sliding right off.
Add 4 oz cream cheese for extra creaminess or 8 oz cream cheese for a thick sausage-style dip. Cut it into small cubes and let it soften slightly so it melts evenly.
Add cream cheese when you want a heavier scoop; it makes the cheese dip richer, sturdier, and easier to load onto thick chips.
Because cream cheese makes the dip thicker, it pairs especially well with the chip test and the sturdy serving ideas below.
Slow Cooker / Crock Pot Rotel Dip
The slow cooker is the best choice when the cheese needs to stay soft for a party. It melts everything gently and keeps the finished bowl ready for repeat scoops.
Batch
Use This
Slow Cooker Size
Standard batch
1 lb cooked meat + 16 oz Velveeta + 1 can Rotel
3 to 5 quart
Small meatless batch
16 oz Velveeta + 1 can Rotel
2 to 3 quart
Big party batch
1 to 2 lb cooked meat + 32 oz Velveeta + 2 cans Rotel
4 to 6 quart
For parties, the crock pot is about holding as much as cooking. Once melted, the warm setting keeps each scoop soft and ready.
Cook on low for 2 to 3 hours or high for 1 to 2 hours. Once the cheese is smooth, switch to warm. A large slow cooker batch may need up to 1/4 to 1/2 cup milk as it sits, but add it slowly so the cheese does not become thin.
Do not add raw ground beef or sausage directly into the cheese dip. Cook and drain the meat first. If using 2 lb sausage, taste before adding seasoning because sausage can make the dip salty.
Serving this for a longer party? Keep the dip on warm, then use the troubleshooting section if it thickens, turns oily, or needs loosening later.
For another slow-cooker bite that can stay warm for a crowd, grape jelly meatballs fit the same potluck and game-day table.
Do You Drain the Rotel?
No, do not drain Rotel for regular cheese dip. The liquid in the can helps the cheese melt into a smooth, creamy, dippable texture. The Rotel pour visual above shows how the tomatoes, green chilies, and liquid go in together.
Drain part of the liquid only for a very thick bowl, a doubled recipe that needs more control, or a different recipe where extra moisture causes problems. For the classic dip, use the whole can.
No-Velveeta Version
Real cheese can work, but it will not behave exactly like Velveeta. The no-Velveeta version tastes more like homemade queso, with stronger cheese flavor but less foolproof texture. Keep the heat low and give it help from cream cheese so it stays smoother.
8 oz cream cheese / 227 g
1 to 1 1/2 cups freshly shredded cheddar or pepper jack
1 can Rotel, partly drained if you want a thicker dip
A splash of milk if the cheese needs loosening
Freshly shredded cheese melts better than pre-shredded cheese because bagged shredded cheese often has anti-caking ingredients. Add shredded cheese off the heat or over very low heat, and stir gently.
How to Make It Spicier
The easiest way to add heat is to use hot Rotel instead of original. For a stronger kick, add spicy sausage, chopped jalapeños, cayenne, hot sauce, pepper jack, or a little extra chili powder.
Add heat slowly. Cheese dip can become too spicy faster than expected, especially if you use hot sausage and hot Rotel together. For a brighter bowl beside all that cheese, salsa verde adds a tangy green contrast for chips, tacos, bowls, and nachos.
How to Keep It Creamy and Warm
Rotel dip is best when it stays soft enough to scoop. As it cools, the cheese naturally tightens; that is normal, and it is easy to fix.
Serve it from a slow cooker on warm.
Stir every 20 to 30 minutes during a party.
Keep the lid on when people are not serving.
Add milk slowly if it gets too thick.
Keep the heat low after the cheese melts.
Drain meat well so grease does not collect on top.
If the bowl has been sitting for a while, stir it before adding more liquid. Sometimes the top looks thick, but the inside is still creamy once stirred. The same rule applies to other dairy-heavy dips, like spinach artichoke dip: once it is hot and melted, warm is safer than high.
Troubleshooting
When the cheese changes while it sits, do not panic. Warm dips thicken, cool, and sometimes look oily before a quick stir brings them back. Most problems are easy to fix if you control heat, thickness, and grease.
Problem
Why It Happens
How to Fix It
Too thick
The cheese cooled, or too much liquid evaporated
Warm gently and add milk 1 tablespoon at a time
Too thin
Too much liquid or not enough cheese
Add more cubed Velveeta, or warm uncovered on low for a few minutes while stirring often
Greasy
The meat was not drained well
Spoon off excess grease or blot the surface lightly
Oily edges
The heat is too high, or the meat was greasy
Lower the heat, stir gently, and spoon off excess oil
Grainy
Heat was too high, or real cheese did not melt smoothly
Lower the heat and use Velveeta or cream cheese for a smoother base
Skin on top
It sat uncovered or unstirred for too long
Keep covered and stir every 20 to 30 minutes
Too spicy
Hot Rotel, spicy sausage, or too much hot sauce
Add more Velveeta or cream cheese to mellow it
Bland
Mild meat and mild Rotel need more seasoning
Add taco seasoning, chili powder, garlic powder, or hot sauce
Too salty
Sausage, Velveeta, or seasoning added more salt than expected
Add cream cheese, a splash of milk, or more unsalted meat if you have it
Quick Fix Guide
Most dip problems come down to heat, liquid, or grease. Fix one at a time and the bowl usually comes back quickly.
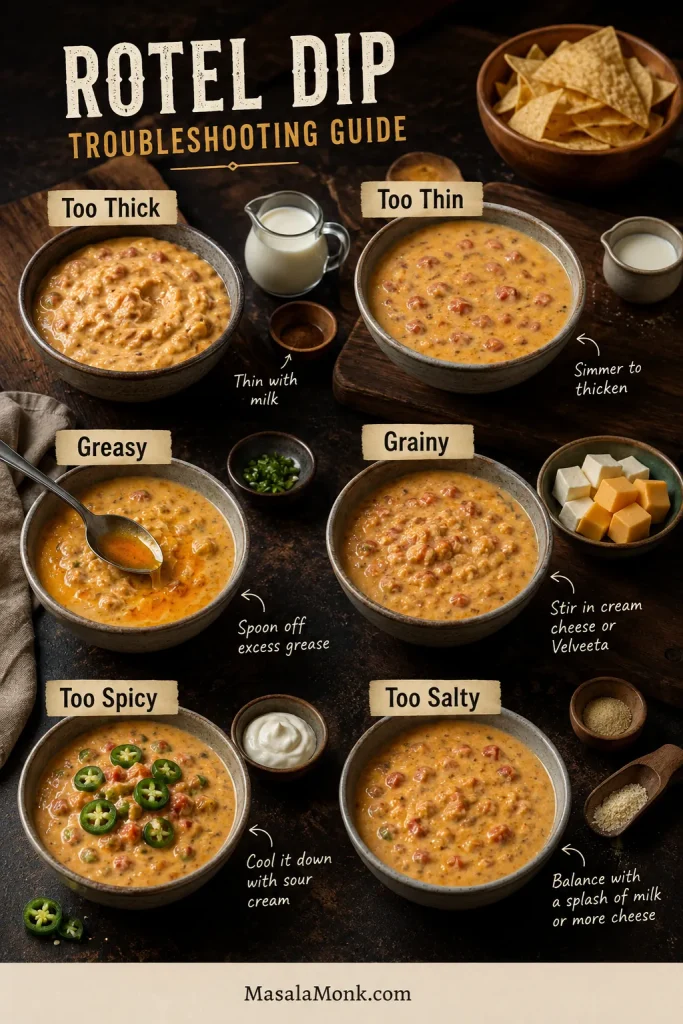
If the dip gets too thick, thin, greasy, grainy, spicy, or salty, small fixes like milk, gentle heat, cream cheese, or extra cheese can bring it back.
Once the cheese is warm and glossy, the only real question is what gets dipped first. Set out the sturdy chips first. The thin ones can wait for salsa.
Use the Chip Test Before Serving
A sturdy tortilla chip should scoop through the dip without snapping. That tells you the dip is thick enough to cling but still soft enough to serve.
Before serving, try the chip test: a sturdy tortilla chip should scoop through cleanly and bring up cheese, meat, tomato, and chile.
Best dippers: thick tortilla chips, scoop-style corn chips, Fritos Scoops, pretzels, or sturdy crackers.
Fresh contrast: celery sticks, bell pepper strips, cucumber rounds, jalapeño slices, green onion, cilantro, pico de gallo, or a little sour cream drizzle.
Load it onto: nachos, fries, tater tots, baked potatoes, tacos, rice bowls, burgers, or hot dogs.
The best scoop should bring up cheese, tomato, chile, and little bits of meat in one bite. That is why thick chips matter, especially with sausage or cream cheese versions.
Make Ahead, Storage, Reheating, and Freezing
Yes, you can make Rotel dip ahead. Let it cool, store it in the fridge, and reheat it gently on the stovetop, in the microwave, or in a slow cooker. Add a splash of milk if it has thickened.
Store leftovers in an airtight container in the fridge for 3 to 4 days. Refrigerate leftovers within 2 hours; during serving, keep the dip warm rather than letting it sit at room temperature for long stretches.
Reheating is easy; the only trick is not rushing it. Use low heat on the stovetop or short microwave intervals, stirring often so the edges do not overheat before the center is warm.
Freezing is not ideal. Cheese dips can separate, turn grainy, or lose their smooth texture after thawing. For the best texture, refrigerate leftovers and reheat them within a few days instead.
Make It a Snack Table
A good snack table needs contrast. Keep this cheese dip warm, add a cold 7 layer dip, set out something crunchy, and bring in one savory bite like wings, meatballs, or sliders. That way the Rotel dip stays the warm centerpiece without having to carry the whole table.
Build the Serving Board
Put sturdy chips closest to the warm dip, then use vegetables, jalapeños, green onion, pico, and toppings to add freshness around the rich cheese.
Finally, serve the dip with sturdy chips first, then add scoop chips, vegetables, jalapeños, green onion, pico, and toppings for contrast.
For a second warm dip, buffalo chicken dip brings a spicy, creamy option beside this cheesy one. If you are turning the snack table into dinner, slow cooker pulled pork works for sliders, nachos, rice bowls, and loaded baked potatoes.
FAQ
What is Rotel dip made of?
The classic version is Velveeta plus Rotel diced tomatoes with green chilies. Many versions also add ground beef, sausage, cream cheese, taco seasoning, or chili powder.
Do you drain Rotel before adding it?
No. Use Rotel undrained for regular cheese dip. The liquid helps the cheese melt smoothly and keeps the texture scoopable.
How much Velveeta do I need for one can of Rotel?
Use 16 oz Velveeta for one 10 oz can of Rotel. That is the classic ratio for smooth, scoopable Rotel dip.
Is Rotel dip better with sausage or ground beef?
Sausage gives the dip a bolder, saltier, more party-style flavor. Ground beef is milder and better for a crowd that does not want much spice.
How do you make Rotel dip in a crock pot?
Cook and drain the meat first, then add it to the slow cooker with cubed Velveeta and undrained Rotel. Heat on low for 2 to 3 hours or high for 1 to 2 hours, then switch to warm.
What does cream cheese do in Rotel dip?
Cream cheese makes the dip thicker, richer, tangier, and sturdier on chips. Use 4 oz for a small creamy boost or 8 oz for a thick sausage-style batch.
How do I thin Rotel dip without making it watery?
Warm it gently and add milk 1 tablespoon at a time. Stir before adding more because the center may be creamier than the top looks.
What can I use instead of Velveeta?
Use cream cheese with freshly shredded cheddar or pepper jack. It will taste more like homemade queso, but it will not be as foolproof as classic Velveeta dip.
How long does Rotel dip last in the fridge?
Leftover Rotel dip keeps well in an airtight container in the fridge for 3 to 4 days. Reheat gently and stir in a little milk if it has thickened.
Does Rotel dip freeze well?
Freezing is not the best choice because the cheese can separate or turn grainy after thawing. Refrigerate leftovers and reheat them within a few days for the best texture.
Rotel dip should make the table easier, not more complicated. Start with Velveeta and Rotel, add sausage or ground beef if the bowl needs to feel hearty, stir in cream cheese for a thicker scoop, and let the slow cooker do the quiet work while people come back for more.
Made it with sausage, ground beef, cream cheese, or just Velveeta and Rotel? Tell us which version disappeared first.
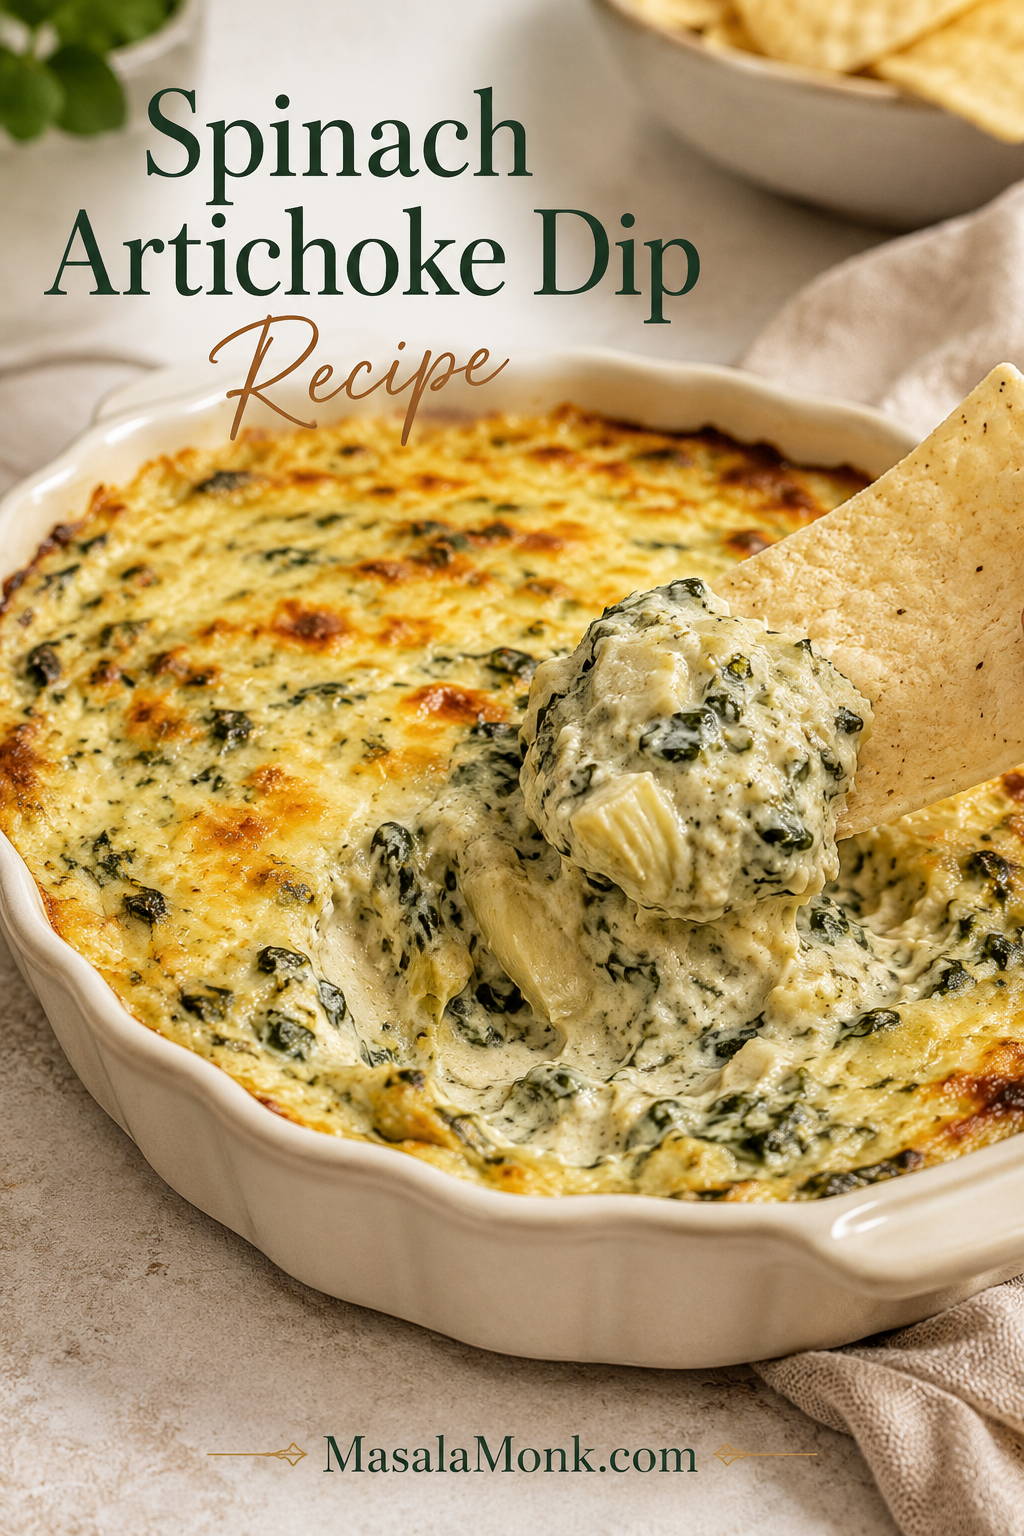
A good spinach artichoke dip recipe has a very specific kind of magic: the edges are bubbling, the top is lightly golden, and the first scoop pulls up creamy cheese, tender spinach, and little bites of artichoke without leaving a watery puddle behind. It is the kind of hot, cheesy appetizer people hover around at a party, pretending they are only taking one more chip.
The challenge is getting all that richness to behave. Spinach and artichokes bring moisture, the cheese needs gentle heat, and the creamy base needs enough structure to stay smooth. This version keeps the classic party-dip comfort, but it uses spinach pressed free of hidden water, well-drained artichokes, a stable cream cheese base, and a controlled bake so the dip stays plush, spoonable, and full of flavor.
What you get is a warm baked spinach artichoke dip that is rich but balanced, sturdy enough for chips, and easy enough to make ahead for game day, holidays, potlucks, movie nights, or any table where a bubbling dish of dip disappears faster than expected.
This guide focuses on the details that usually make or break the bowl: how dry the spinach should be, which artichokes work best, which cheeses melt smoothly, when to stop baking, and how to keep the dip warm without turning it oily.
Spinach Artichoke Dip Texture Goal
Before the recipe details, look for the first success cue: a thick scoop with visible vegetables and no watery puddle.
This close-up shows the texture you are aiming for: soft-set, rich, and full of visible vegetables, but still thick enough to hold together.
Use this guide to make a classic hot spinach artichoke dip, choose the right ingredients, adjust the pan and bake time, and keep the texture smooth, rich, and chip-friendly.
Quick Answer: Best Ratio, Bake Time, and Texture Cue
For this spinach artichoke dip recipe, use 8 oz cream cheese, ½ cup sour cream, ⅓ cup mayonnaise, 10 oz frozen spinach, one 14 oz can artichoke hearts, Parmesan, and mozzarella or Monterey Jack. Bake it at 375°F / 190°C for 22–28 minutes in a 1½- to 2-quart baking dish or an 8×8-inch dish, until the edges bubble and the top is lightly golden.
After baking, rest the dip for 5 minutes before serving. That short pause matters because the cheese and cream base settle into a thicker, chip-friendly texture instead of running the moment a chip hits the dish.
Detail
Use This
Oven temperature
375°F / 190°C
Bake time
22–28 minutes
Dish
1½- to 2-quart glass or ceramic dish, or 8×8-inch dish
Servings
8–10 appetizer servings
Spinach
10 oz / 280 g frozen spinach, thawed and squeezed very dry
Artichokes
14 oz / 390–400 g canned artichoke hearts, drained and patted dry
Texture cue
Bubbling edges, creamy center, lightly golden top
Rest time
5 minutes before serving
Spinach Artichoke Dip Ratio at a Glance
Keep these core numbers in mind before you mix: dairy base, vegetables, oven temperature, bake time, and rest cue.
Use the ratio as your starting point, but judge the finish by the dish: bubbling edges, a hot center, and a short rest create the best texture.
Three rules: press the vegetables free of hidden water, bake until the edges bubble, then rest the dip for 5 minutes. The finished dip should look smooth in the center and scoop without leaking liquid into the dish.
Three Rules for a Dip That Holds Together
These three habits are the safety net. Once they make sense, the full step-by-step method shows exactly when to mix, fold, bake, and rest the dip.
This is the easiest way to remember the recipe: dry the vegetables well, stop baking once the edges bubble, and give the dip a few minutes to settle.
Why This Spinach Artichoke Dip Works
The creamy texture comes down to balance. Spinach and artichokes bring moisture, the dairy brings richness, and the cheese gives the dip body. When those parts work together, you get a warm, scoopable appetizer instead of a dip that turns loose, oily, or heavy.
That is why this spinach artichoke dip recipe uses a cream cheese base, a moderate oven temperature, and vegetables that are dried before they meet the cheese.
The Creamy Base Has Structure
Cream cheese gives the dip structure and helps hold the base together. Sour cream adds tang, so the richness does not feel flat. A smaller amount of mayonnaise gives the classic party-dip flavor without making the whole dish taste oily or heavy.
That smaller mayo amount is intentional. You still get the familiar richness, but the dip stays closer to a soft, velvety baked appetizer than a heavy mayo-based spread.
How the Base Holds Together
The base is not just richness; it is the part that holds the vegetables and cheese together.
The base works because every dairy ingredient has a job: cream cheese holds the dip together, sour cream brightens it, and mayo adds classic party-dip richness.
The Vegetables Are Dried First
Frozen spinach is reliable because you can thaw it and press out a surprising amount of hidden water before it ever touches the baking dish. Artichoke hearts need the same attention: drain them well, pat them dry, and chop them into bite-size pieces so every scoop has a little artichoke without making the dip wet.
That is the difference between a dip that looks good for five minutes and one that still scoops cleanly after people have been grazing for a while.
The Cheese Melts Gently
Parmesan gives salty, savory depth, while mozzarella or Monterey Jack gives the soft melt. A moderate 375°F / 190°C bake is hot enough to warm the center and brown the top, but not so harsh that the dairy breaks before the dip is ready.
Why this version stays creamy: cream cheese gives the base structure, a smaller amount of mayo keeps it rich without tasting heavy, a full 10 oz package of spinach gives real flavor, and a moderate 375°F bake lets the cheese melt gently.
The main idea is simple: remove water before the dip goes into the oven, then bake just until the cheese melts and the edges bubble. That one-two combination keeps the dip smooth, rich, and chip-friendly.
Ingredients for Creamy Spinach Artichoke Dip
The ingredients are familiar, but the details matter. Use softened cream cheese, fully drained spinach, dry artichokes, and a cheese combination that melts well instead of turning grainy.
Ingredients Before You Mix
Before mixing, it helps to have the base, vegetables, cheese, and seasonings ready at the same time.
The ingredient list is simple, but the balance matters; once the dairy, cheese, spinach, and artichokes are in the right ratio, the dip tastes generous without feeling heavy.
Cream Cheese
Use one 8 oz / 226 g block of full-fat cream cheese, softened to room temperature. Block cream cheese gives the dip the best structure. If it is too cold, it will be harder to mix and may leave small lumps in the base.
Sour Cream and Mayonnaise
Sour cream gives the dip a gentle tang and a looser, spoonable texture. A smaller amount of mayonnaise adds richness and helps the dip feel classic without taking over. If you dislike mayo, you can use more sour cream or Greek yogurt instead; just know that the flavor will be tangier and slightly less rich.
Parmesan and Mozzarella or Monterey Jack
Parmesan gives the dip savory, salty flavor. Mozzarella gives the classic stretchy melt. Monterey Jack is a little creamier and smoother if you want a softer restaurant-style texture. You can use all mozzarella, all Monterey Jack, or a mix of the two.
Choose mozzarella if you want more stretch, or Monterey Jack if you want a softer, smoother scoop. For the most balanced version, use one of those for melt and Parmesan for flavor.
Freshly shredded cheese melts a little smoother, but bagged mozzarella or Monterey Jack still works here because the cream cheese base helps keep the dip soft.
Spinach
Frozen spinach is the easiest route here because the big shrinking-down step has already happened; your main job is getting rid of the hidden water. Thaw it completely, then squeeze it until it feels like a compact damp ball instead of wet leaves. If you use fresh spinach, cook it down first, cool it, chop it, and squeeze out the extra liquid.
Artichoke Hearts
Canned artichoke hearts in water or brine are the easiest default. Drain them well, pat them dry, and chop them into bite-size pieces. Marinated artichokes work too, but they add more oil, salt, and tang, so drain them very thoroughly and taste before adding extra salt.
Quartered artichoke hearts are easiest because they are already close to scoopable size. Whole hearts work too, but chop them smaller so they do not release big pockets of liquid into the dip.
If the jar smells boldly herby or vinegary, assume that flavor will show up in the finished dip.
Garlic, Lemon, Pepper, and Optional Heat
Garlic gives the dip its savory backbone. Lemon zest or a little lemon juice cuts through the richness without making the dip taste lemony. Black pepper adds warmth, and a pinch of red pepper flakes or a few dashes of hot sauce can wake up the whole dish.
Fresh vs Frozen Spinach for Spinach Artichoke Dip
Fresh spinach and frozen spinach both work, but they do not behave the same way. Frozen spinach is easier for most home cooks because it has already been cooked down. Once thawed, you can squeeze out the water and add it straight to the creamy base.
Fresh spinach has a cleaner flavor, but it takes more prep. Once it cooks down, the leaves still need to be cooled and squeezed; otherwise, the dip can turn loose instead of thick and scoopable.
Best Spinach Choice for the Dip
The best spinach is the one you can prep and dry thoroughly, even if frozen spinach is the easiest route.
Frozen spinach saves prep time because it is already cooked down, but it still needs one important step: press out the water before it reaches the cheese base.
Spinach Type
Amount
How to Use It
Frozen chopped spinach
10 oz / 280 g
Thaw completely and squeeze very dry.
Frozen cut-leaf spinach
10 oz / 280 g
Use if available for a slightly better leafy texture. Thaw and squeeze dry.
Fresh baby spinach
About 1 lb / 450 g
Cook down first, cool, chop, and squeeze dry.
Frozen creamed spinach
Shortcut only
Changes the dairy, salt, and texture. Reduce other creamy ingredients if using it.
Most important rule: the success of this dip depends less on fresh vs frozen spinach and more on how dry the spinach is before it goes into the bowl.
After squeezing, the spinach should feel compact and damp, not juicy. If you press it and liquid still runs out, keep going. Once the spinach is ready, it should break apart easily when you stir it into the base instead of leaving green liquid behind in the bowl.
How Dry the Spinach Should Look
The table explains the options; this cue shows the texture you want before the spinach enters the cheese base. If your dip has turned loose before, the troubleshooting section explains how to fix watery dip and prevent it next time.
This is the spinach texture to aim for: compact and damp, not juicy. If liquid still runs out when you press it, keep going.
Canned vs Marinated Artichokes
For classic spinach artichoke dip, canned artichoke hearts are the easiest choice. They are tender, mild, and easy to chop. The only catch is moisture. Drain them well, press away excess liquid with paper towels or a clean kitchen towel, and chop them into pieces small enough to scoop.
Marinated artichokes can taste great, but they bring oil, herbs, salt, and tang. Drain them extra well before they go into the creamy base, especially if you do not want the dip to taste sharp or oily.
Best Artichokes to Use
Before choosing a can or jar, remember that artichokes change both flavor and moisture.
Artichokes affect both moisture and flavor. For the cleanest baked dip, choose mild canned or brined hearts and dry them well before mixing.
Artichoke Type
Use It?
What to Know
Canned in water
Yes
The easiest default. Drain well, pat dry, and chop.
Jarred in brine
Yes
Drain well. Rinse if they taste very salty.
Marinated in oil
Yes, with care
More flavor, more oil. Drain very thoroughly.
Frozen artichokes
Yes, if available
Thaw, drain, pat dry, then chop.
Fresh artichokes
Not ideal here
Too much prep for a creamy baked dip.
How to Prep Artichokes for Dip
Once you choose the artichokes, the prep is simple but important: drain, dry, and chop them small enough for clean scoops.
Smaller, drier artichoke pieces mix more evenly into the cheese base, so every scoop gets flavor without hidden wet pockets.
Best Cheese for Spinach Artichoke Dip
The best cheese for spinach artichoke dip is usually a mix of one cheese for melt and one cheese for flavor. Mozzarella or Monterey Jack gives the creamy pull. Parmesan gives the savory bite.
The goal is not just stretch. You want a dip that feels melty and generous, but still has enough savory edge from Parmesan to keep each bite from tasting like plain cream.
A dramatic cheese pull is fun, but the better party dip is the one that stays smooth enough for the next person’s chip.
Best Cheese Blend for Spinach Artichoke Dip
Cheese choice helps, but bake control matters too; the bake-time guide shows when to stop before the dairy overheats.
The best cheese blend does two things at once: mozzarella or Monterey Jack gives melt, while Parmesan adds the savory bite that keeps the dip from tasting flat.
Classic Cheese Combination
Use mozzarella and Parmesan for the familiar creamy, cheesy party dip. Mozzarella melts softly, and Parmesan keeps the flavor from tasting flat.
Creamiest Cheese Combination
Use Monterey Jack and Parmesan if you want a smoother, less stretchy dip. Monterey Jack melts beautifully and works especially well if you are serving the dip from a slow cooker or keeping it warm for a party.
Sharper Restaurant-Style Option
Use white cheddar with Parmesan for a sharper flavor. Keep the amount moderate, because too much aged cheese can make the dip salty or slightly grainy.
Cheese to Use Carefully
Gruyère, Swiss, and aged cheddar can add great flavor, but they are best in smaller amounts. For the smoothest dip, do not make aged cheese the entire cheese base.
Freshly Shredded vs Bagged Cheese
This is a practical choice, not a dealbreaker. Fresh shreds melt smoother, but the cream cheese base keeps good bagged cheese workable.
Freshly shredded cheese melts a little smoother, but bagged mozzarella or Monterey Jack still works because the cream cheese base helps keep the dip soft.
How to Make Spinach Artichoke Dip
This is an easy spinach artichoke dip, but the order matters: dry the vegetables first, mix the base until smooth, fold gently, and bake just until the edges bubble.
Method at a Glance
Here is the whole workflow before the step-by-step details.
The method is simple, but the order matters: dry the vegetables first, smooth the base, fold gently, and bake only until the dip is hot and bubbling.
Step 1: Prep the Spinach and Artichokes
Thaw the frozen spinach completely. Wrap it in a clean kitchen towel, cheesecloth, or several layers of paper towel, then squeeze until no more liquid runs out. Drain the artichokes, pat them dry, and chop them into bite-size pieces.
How to Press Out Hidden Water
This is where the dip is won or lost: twist firmly, then keep pressing until the spinach stops giving off liquid.
Pressing out the hidden water is the most important prep step because wet spinach is one of the fastest ways to make the dip loose.
Step 2: Mix the Creamy Base
In a large bowl, mix softened cream cheese, sour cream, mayonnaise, garlic, lemon zest or juice, black pepper, and optional red pepper flakes or hot sauce. The base should look mostly smooth before you add the vegetables.
Mix the Base Before Adding Vegetables
A smooth base makes the vegetables easier to fold in evenly, especially when the cream cheese is fully softened.
Mix the base before adding spinach and artichokes; otherwise, cold cream cheese can leave lumps and make the vegetables harder to fold in evenly.
Step 3: Fold in Cheese, Spinach, and Artichokes
Fold in most of the Parmesan and mozzarella or Monterey Jack, saving some for the top. Add the squeezed spinach and chopped artichokes, then stir until evenly combined. Do not mash everything into a paste; little artichoke pieces are part of the charm.
Step 4: Taste and Adjust
Taste the mixture before baking and add salt only if needed, since Parmesan and artichokes can already be salty. This is also the moment to add a little more lemon, pepper, or hot sauce if the base tastes flat.
Step 5: Bake Until Bubbly
Spread the mixture into a greased 1½- to 2-quart glass or ceramic baking dish, or an 8×8-inch dish. Top with the reserved cheese. Bake at 375°F / 190°C for 22–28 minutes, until the edges bubble and the top is lightly golden.
Step 6: Rest Before Serving
Let the dip rest for 5 minutes before serving. It will still be hot, but the base will settle into a thicker, smoother scoop.
Spinach Artichoke Dip Recipe Card
This spinach artichoke dip recipe makes a hot baked dip with a velvety cheese base, tender spinach, bite-size artichokes, and enough structure to hold on sturdy chips, crackers, crostini, pita, or vegetables.
Prep Time15 minutes
Bake Time22–28 minutes
Rest Time5 minutes
Total TimeAbout 45 minutes
Servings8–10
YieldAbout 5 cups
Oven375°F / 190°C
Dish1½- to 2-quart or 8×8-inch
Ingredients
8 oz / 226 g cream cheese, softened
½ cup / 120 g sour cream
⅓ cup / 75–80 g mayonnaise
¾ cup / 65–75 g grated Parmesan, divided
1½ cups / 150–170 g shredded mozzarella or Monterey Jack, divided
10 oz / 280 g frozen spinach, thawed and squeezed very dry
1 can / 14 oz / about 390–400 g artichoke hearts, drained, patted dry, and chopped
2–3 garlic cloves, minced
1 tsp lemon zest or 1 tbsp lemon juice
¼ tsp black pepper
¼ tsp red pepper flakes or a few dashes of hot sauce, optional
Salt, only after tasting
Tortilla chips, pita chips, crostini, crackers, or vegetables, for serving
Instructions
Heat the oven to 375°F / 190°C. Lightly grease a 1½- to 2-quart glass or ceramic baking dish, or an 8×8-inch baking dish.
Thaw the spinach completely, then squeeze it very dry in a clean kitchen towel, cheesecloth, or several layers of paper towel.
Drain the artichoke hearts, pat them dry, and chop them into bite-size pieces.
In a large mixing bowl, stir together the softened cream cheese, sour cream, mayonnaise, garlic, lemon zest or juice, black pepper, and optional red pepper flakes or hot sauce until mostly smooth.
Fold in ½ cup Parmesan and 1 cup mozzarella or Monterey Jack. Save the remaining cheese for topping.
Fold in the squeezed spinach and chopped artichokes until evenly distributed.
Taste the mixture before baking and add salt only if needed, since Parmesan and artichokes can already be salty.
Spread the mixture into the prepared baking dish. Top with the remaining Parmesan and mozzarella or Monterey Jack.
Bake for 22–28 minutes, until the dip bubbles at the edges and the top is lightly golden.
For a more browned top, broil for 1–2 minutes at the end, watching closely.
Rest for 5 minutes before serving warm with sturdy chips, crackers, crostini, pita, or vegetables.
Notes
Do not rush the spinach step. A few extra squeezes are the difference between a dip that holds together and one that leaks at the bottom.
If baking from the fridge, add 10–15 minutes depending on the depth of the dish.
If using fresh spinach, cook down about 1 lb / 450 g fresh spinach, cool it, chop it, and squeeze it dry before adding.
If the dip seems too thick after baking, stir in a spoonful of warm milk, sour cream, or softened cream cheese.
If the dip seems watery, the spinach or artichokes likely needed more draining. Bake uncovered a little longer and use the troubleshooting table below for next time.
For the smoothest texture, serve the dip warm after a 5-minute rest, not straight from the oven while it is still bubbling aggressively.
What the Finished Dip Should Look Like
When the dip is ready, the edges should be bubbling, the top should be lightly golden, and the center should look soft rather than dry. After a 5-minute rest, a chip or spoon should pull up a thick, creamy scoop with visible spinach and artichoke pieces.
Serve it while the top is still just-baked and lightly golden, but not so hot that the cheese runs. That is the sweet spot where the dip holds on a chip, the artichokes still taste bright, and the garlic-cheese aroma does half the work for you.
If the dip tastes a little flat after baking, add a tiny squeeze of lemon or a few dashes of hot sauce on top before serving. Warm dairy and cheese can mute seasoning slightly, so a small bright finish can make the whole dish taste more awake.
Why the 5-Minute Rest Matters
The finished dip should not be served at its most molten moment; a brief rest gives the first scoop a better chance to hold together.
Resting gives the cheese base time to settle, so the first chip pulls up a thick scoop instead of dragging loose dip back into the dish.
Bake Time by Pan Size
The right bake time for this spinach artichoke dip recipe depends on the depth of the dish. A shallow dish heats faster and browns sooner. A deeper dish takes longer for the center to become hot and creamy.
Time gets you close, but the visual cue matters more. If your oven runs hot or your dish is shallow, start checking early: the edges should bubble before the top gets deeply browned.
Best Pan Size for Baking
Choose the dish before you rely on the timer. Wider dishes brown faster, while deeper ones need more time in the center.
Pan depth changes bake time. A shallow dish browns faster, while a deeper dish needs more time for the center to become hot.
Dish or Setup
Bake Time at 375°F / 190°C
Texture Cue
1½- to 2-quart baking dish
22–28 minutes
Bubbling edges, creamy center
8×8-inch dish
22–25 minutes
Hot through, lightly golden top
Shallow pie dish
18–22 minutes
Watch the top; it browns faster
9×9-inch dish
20–25 minutes
Good for a slightly thinner layer
From the fridge
Add 10–15 minutes
Center should be hot, not just edges
Broiled top
1–2 minutes only
Watch constantly so the cheese does not overheat
Doneness Cues Before You Pull the Dish
Pair the bake-time table with what you see in the dish: bubbling and lightly golden, not deeply browned.
Use time as a guide, then trust what you see: the dip should bubble at the edges and look lightly golden before it goes too far.
350°F vs 375°F vs 400°F
350°F is gentler and works well for deeper dishes, but the dip may take longer. 375°F is the best default because it heats the center and browns the top without rushing the dairy. A 400°F oven works for a faster bake in a shallow dish, but watch it closely so the top does not brown before the center is fully hot.
Make Ahead Spinach Artichoke Dip
This spinach artichoke dip recipe is a great make-ahead appetizer because you can assemble it 1–2 days ahead, refrigerate it tightly covered, and bake it when you are ready to serve.
Make-Ahead Setup
The easiest party timing is simple: assemble ahead, keep it chilled, then bake close to serving time. If you are assembling in glass or ceramic, check the cold dish safety note before baking.
For the smoothest make-ahead dip, handle the moisture first; once the spinach and artichokes are dry, the rest of the prep becomes easy.
How Far Ahead Can You Assemble It?
For the best texture, assemble the dip 1 day ahead. Two days is still fine, but the spinach and artichokes need to be very well drained so the dip does not loosen as it sits.
This is the kind of appetizer you want ready before people drift into the kitchen asking what smells good. Assemble it ahead, then bake it when the table is almost ready.
How to Bake It From the Fridge
If the dip is cold from the fridge, add 10–15 minutes to the bake time. The top may look ready before the center is hot, so check the middle before serving.
Cold Dish Safety Note
A cold glass or ceramic baking dish should not go straight from the refrigerator into a fully hot oven. Let the dish sit at room temperature briefly, place it on a room-temperature baking sheet, or transfer the dip to a room-temperature baking dish before baking. This helps protect the dish from thermal shock.
Cold Dish Safety Before Baking
This fridge-to-oven step protects the dish: let cold glass or ceramic warm slightly, or move the dip into a room-temperature baker.
If the dip was refrigerated in glass or ceramic, avoid shocking the dish with sudden heat; instead, let it warm slightly or transfer the dip before baking.
Best party prep: mix the dip in an airtight container, refrigerate it, then transfer it to the baking dish before baking. That gives you more flexibility and avoids putting an ice-cold glass dish into a hot oven.
Storage and Reheating
Store leftover spinach artichoke dip in an airtight container in the refrigerator for 3–4 days. Refrigerate leftovers within 2 hours of serving, especially because this is a dairy-heavy dip.
Party safety tip: if the dip has been sitting out for more than 2 hours, especially in a warm room, do not keep returning it to the fridge and reheating it. For longer parties, keep a smaller amount out and refill with a clean spoon, or keep the dip warm in a slow cooker once it is fully heated.
To reheat a larger portion, cover loosely and warm in a 325–350°F oven until hot. For a small portion, microwave in short bursts, stirring between each burst. If the dip has thickened in the fridge, stir in a spoonful of milk, sour cream, or cream cheese to bring back the creamy texture.
How to Store and Reheat Leftovers
Leftovers need gentle heat, not aggressive reheating. If you need to store the dip longer than a few days, the freezing section explains the texture tradeoff.
Leftover dip thickens as it chills, so reheat it gently and stir in a little dairy if it needs help becoming smooth again.
For general leftover safety, USDA FSIS recommends reheating leftovers to 165°F / 74°C; their leftovers and food safety guide is a useful reference for reheating and storing cooked foods.
Can You Freeze Spinach Artichoke Dip?
You can freeze spinach artichoke dip, but it is not the best make-ahead method if you want the creamiest texture. Dairy-based dips can loosen, separate, or turn slightly grainy after freezing and thawing.
If you need to freeze it, freeze the dip unbaked in a freezer-safe container or disposable foil pan. Thaw overnight in the refrigerator when possible, stir well, top with a little fresh cheese, and bake gently until hot.
Freezing Spinach Artichoke Dip
Freezing is possible, but the best result comes from thawing, stirring, and baking gently.
You can freeze this dip, but refrigeration gives the best texture. When freezing is necessary, thaw it, stir it well, and bake gently.
Method
Works?
What to Know
Refrigerate unbaked
Yes
Use within 1–2 days for the creamiest result.
Freeze unbaked
Possible
Texture may loosen after thawing.
Freeze baked leftovers
Not ideal
Dairy can separate when reheated.
Bake from frozen
Possible in a foil pan
Takes longer and may be less creamy.
Thaw, stir, then bake
Best freezer route
Restores the texture better than baking straight from frozen.
Slow Cooker Spinach Artichoke Dip Option
To make slow cooker spinach artichoke dip, mix the recipe as written and spread it into a lightly greased 3-quart slow cooker. Cook on low for 1½–2 hours or on high for about 1 hour, stirring once or twice, until the dip is hot and creamy.
Once it is hot, switch the slow cooker to warm for serving. Stir occasionally so the edges do not overheat. If the dip thickens as it sits, loosen it with a splash of warm milk or a spoonful of sour cream.
Just know that the slow cooker is best for holding the dip warm and soft; it will not give you the same browned top as the oven.
Slow Cooker Serving Option
For long parties, the slow cooker solves the holding problem even though it will not brown the top. For timing, pair it with the make-ahead plan.
Use the slow cooker when you care more about easy serving than a golden top; it keeps the dip warm, soft, and ready for grazing.
Slow cooker tip: do not leave dairy-heavy dip on high for too long. Once it is melted and hot, warm is the safer party setting.
If you want a second hot dip for the same party table, MasalaMonk’s buffalo chicken dip recipe gives you a spicier baked, crockpot, and game-day option.
No Mayo, Healthy, and Greek Yogurt Variations
The classic version uses a little mayonnaise because it adds richness and gives the dip that familiar party-appetizer flavor. You can still make it without mayo, with Greek yogurt, or in a lighter style if you keep enough cream cheese to hold the dip together.
For a broader look at cold spinach dip, baked spinach dip, bread-bowl versions, and lighter yogurt-based ideas, MasalaMonk’s spinach dip recipes guide is a useful companion.
Ways to Adapt the Dip
Once the base recipe is balanced, these swaps are much easier to control because the moisture and cheese structure stay steady.
Once the base recipe is balanced, you can change the style without losing the texture: go no-mayo, Greek yogurt, lighter, spicy, or extra cheesy.
Spinach Artichoke Dip Without Mayo
Replace the ⅓ cup mayonnaise with ⅓ cup sour cream. This is the easiest no-mayo version because the flavor stays creamy and familiar. For a tangier no-mayo dip, use ⅓ cup full-fat Greek yogurt instead.
No-mayo ratio: 8 oz cream cheese + ⅔ cup sour cream, or ½ cup sour cream + ⅓ cup full-fat Greek yogurt, with no mayo. Keep the cheese, spinach, and artichokes the same.
Healthy Spinach Artichoke Dip
For a lighter spinach artichoke dip, replace the mayo with Greek yogurt, use part-skim mozzarella, and keep the full amount of spinach and artichokes. Do not remove all the cream cheese unless you want a much lighter, tangier dip with less classic party-dip texture.
Lighter ratio: 8 oz cream cheese + ½ cup sour cream + ⅓ cup full-fat Greek yogurt + part-skim mozzarella. This keeps the dip smooth and scoopable while reducing the mayo-heavy richness.
Greek Yogurt Spinach Artichoke Dip
Greek yogurt adds tang and protein, but it can separate if overheated. Use full-fat Greek yogurt if possible, keep the cream cheese in the base, and avoid baking the dip too aggressively. Greek yogurt works best as a mayo replacement, not as the only creamy ingredient.
Spicy Spinach Artichoke Dip
Add minced jalapeño, red pepper flakes, cayenne, or hot sauce. Start small. The goal is warmth and lift, not a dip that hides the artichoke flavor.
Extra Cheesy Restaurant-Style Dip
Add an extra ½ cup mozzarella, Monterey Jack, or white cheddar. If you add more cheese, keep the spinach and artichokes very dry so the dip stays creamy instead of greasy.
How to Fix Watery, Greasy, Grainy, or Bland Spinach Artichoke Dip
A great spinach artichoke dip recipe should stay smooth and scoopable from the first chip to the last. If the dip turns watery, greasy, grainy, or bland, do not change the whole recipe first. Most problems are fixable once you know where they started: excess water, aggressive heat, or seasoning that needs more contrast.
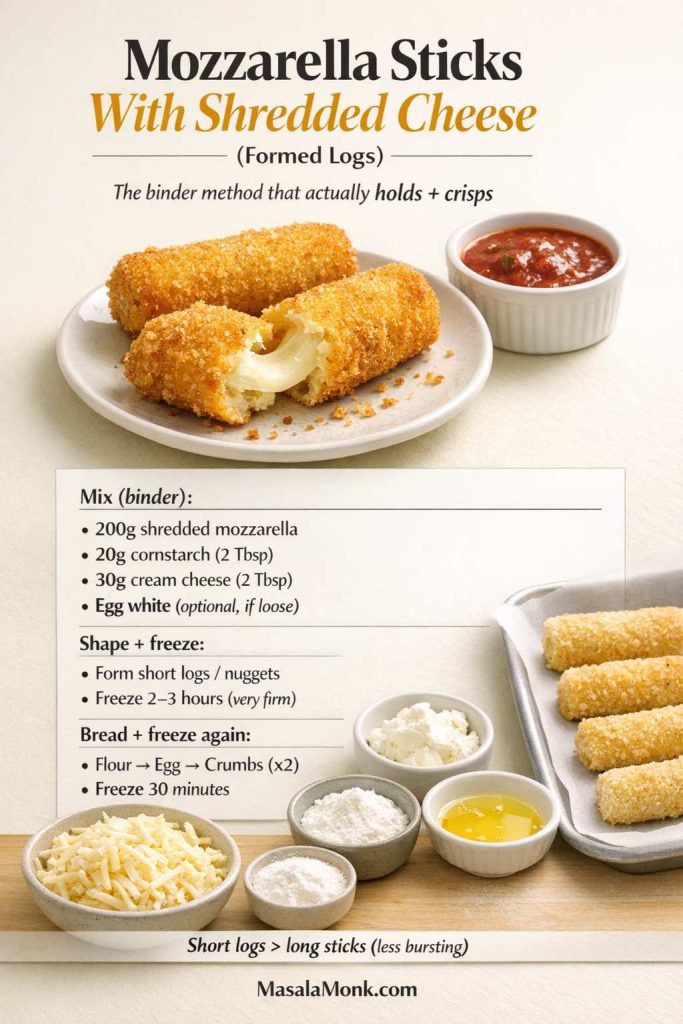
Quick Fix Guide
Before changing the recipe, diagnose the problem first. The table below gives the full cause-and-fix details.
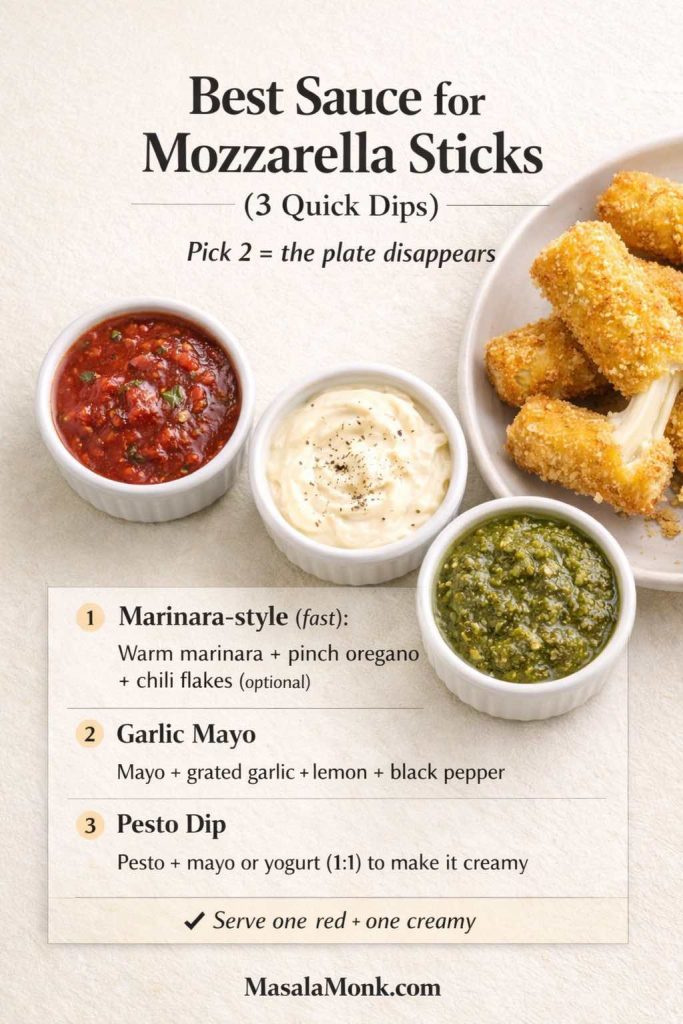
Most dip problems come from moisture, heat, or seasoning, so diagnosing the issue first makes the fix much easier.
Problem
Likely Cause
Fix
Watery dip
Spinach or artichokes were too wet
Squeeze spinach harder, pat artichokes dry, and bake uncovered a little longer.
Greasy top
Dairy or cheese overheated
Use moderate heat, avoid a long broil, and remove the dip once the edges bubble.
Grainy texture
Cheese overheated or too much aged cheese
Use mozzarella or Monterey Jack for melt, Parmesan for flavor, and avoid overbaking.
Too thick
Too much cheese or overbaking
Stir in warm milk, sour cream, or a spoonful of softened cream cheese.
Too thin
Too much liquid in the vegetables or base
Bake uncovered a little longer and add a small handful of cheese if needed.
Bland
Not enough acid, garlic, pepper, or savory cheese
Add lemon zest or juice, black pepper, garlic, Parmesan, or a few dashes of hot sauce.
Too salty
Brined artichokes, salty cheese, or too much added salt
Rinse brined artichokes next time and salt only after tasting the mixed dip.
Chips keep breaking
Dip is too thick or dippers are too thin
Use pita chips, crostini, sturdy tortilla chips, crackers, or vegetables.
Dish cracked
Cold glass or ceramic dish went straight into a hot oven
Let the dish warm slightly, transfer the dip, or use a room-temperature baking dish.
What to Serve With Spinach Artichoke Dip
Spinach artichoke dip is thick, warm, and cheese-rich, so sturdy dippers are best. Thin chips can snap if the dip is very cheesy, especially right out of the oven.

Because the dip is rich, the best spread has contrast: something salty, something crisp, something fresh, and something sturdy enough to scoop through the warm cheese without snapping.
What to Serve With It
Build contrast around the rich dip: sturdy, crisp, fresh, and easy to scoop. If this is the main hot appetizer, check the party quantity guide before deciding whether to make a full or double batch.
The best dippers bring contrast: sturdy chips and crostini handle the thick dip, while fresh vegetables keep the appetizer board from feeling too heavy.
How Much Spinach Artichoke Dip to Make for a Party
One full batch makes about 5 cups, which is enough for 8–10 appetizer servings. If this is the main hot appetizer on the table, make more than you think you need.
Crowd Size
Amount to Make
What to Know
4–6 people
Half batch
Good for a small snack spread.
8–10 people
1 full batch
The standard party size for this recipe.
12–16 people
1½ batches
Useful when there are several appetizers.
18–20 people
Double batch
Best for game day, holidays, or buffet-style serving.
Party Quantity Visual Guide
If this is the main hot appetizer, check this quantity guide before deciding whether a full batch is enough.
If this is the main hot appetizer, make a little more than you think; it is the dish people keep returning to while they graze.
For a party where people will graze for a while, a double batch is safer than it sounds. Hot spinach artichoke dip has a way of becoming the dish everyone “just checks on” every time they pass the table.
For a full appetizer table, balance the rich dip with something crisp, something fresh, and something hot from the oven or air fryer. That keeps the spread from feeling too heavy.
Crunchy Dippers
Tortilla chips, pita chips, pretzel crisps, bagel chips, sturdy crackers, and thick potato chips all work well. Sturdy dippers matter because nobody wants the chip to snap halfway through the first scoop.
Bread and Crostini
Serve the dip with toasted baguette slices, sourdough crostini, focaccia strips, garlic bread, naan chips, or a bread bowl for a party-style presentation. For a warmer bread option, slice a homemade garlic bread loaf into thick pieces and serve it beside the dip instead of plain crostini.
Fresh Vegetable Dippers
Carrot sticks, celery, bell pepper strips, cucumber rounds, broccoli, cauliflower, and snap peas add freshness and crunch next to the rich dip. A low-carb spread still works beautifully here: serve crunchy vegetables or choose sturdier ideas from MasalaMonk’s keto chips guide.
On a grazing table, this dip can be the warm centerpiece. Build the rest of the board with MasalaMonk’s charcuterie board 3-3-3-3 rule.
Leftover Spinach Artichoke Dip Ideas
Although leftovers are rare, spinach artichoke dip has a second life built in. It is already creamy, garlicky, cheesy, and full of vegetables, so it can become a shortcut sauce, filling, or spread for another meal.
Spinach artichoke pizza: spread a thin layer over pizza dough, flatbread, or naan, then add mozzarella and bake until the edges are crisp.
Stuffed chicken breast: tuck a spoonful inside chicken breasts before baking.
Grilled cheese: spread a thin layer inside the sandwich with extra mozzarella.
Quesadillas: use it with chicken, turkey, or extra vegetables.
Pasta sauce: loosen with milk or pasta water and toss with short pasta for a fast creamy dinner.
Baked potatoes: spoon warm dip over baked potatoes or sweet potatoes.
Omelets or scrambled eggs: use a small spoonful as a creamy filling.
Stuffed mushrooms: fill mushroom caps and bake until hot.
Turkey or chicken sandwich spread: use a thin chilled layer instead of mayo.
Ways to Use Leftover Dip
Leftovers are more useful when you treat the dip like a filling or sauce, not just something to reheat.
Leftover spinach artichoke dip already works like a creamy filling or shortcut sauce, so it can turn into pizza, pasta, sandwiches, stuffed chicken, or baked potatoes the next day.
If you turn leftover dip into flatbread or pizza and want a tomato layer underneath, MasalaMonk’s pizza sauce recipes can help you keep the base creamy, garlicky, or more tomato-forward.
Once you understand the moisture, heat, and seasoning balance, spinach artichoke dip becomes one of those reliable appetizers you can make almost on autopilot. Keep the spinach dry, bake gently, serve it warm, and let the dippers do the rest.
FAQs About Spinach Artichoke Dip
Is spinach artichoke dip better with fresh or frozen spinach?
Frozen spinach is the safer choice for most home cooks because the hard part — wilting it down — is already done. The only job left is to thaw it fully and press out the hidden water. Fresh spinach works too, but it needs to be cooked, cooled, chopped, and squeezed before you add it to the dip.
Why did my spinach artichoke dip turn watery?
The spinach or artichokes probably carried too much water into the creamy base. The fix starts before baking: thaw frozen spinach completely, squeeze it until it feels compact, drain the artichokes well, and pat them dry before mixing.
What temperature should spinach artichoke dip be baked at?
375°F / 190°C is the best default temperature. It is hot enough to melt and brown the dip, but gentle enough to protect the creamy dairy base. A 350°F oven is gentler and slower, while 400°F browns faster but needs closer watching.
Should spinach artichoke dip be served hot or warm?
It is best served warm. Straight from the oven, the dip can be too hot and loose; after a 5-minute rest, it becomes thicker, smoother, and easier to scoop.
How long does spinach artichoke dip last in the fridge?
Leftover spinach artichoke dip keeps for 3–4 days in an airtight container in the refrigerator. Reheat only what you need, because repeated warming and chilling can make the dairy base less smooth.
What is the best cheese for spinach artichoke dip?
Mozzarella or Monterey Jack is best for melt, while Parmesan is best for savory flavor. Choose mozzarella if you want more stretch; choose Monterey Jack if you want a softer scoop. Either way, Parmesan keeps the dip from tasting flat.
Is mayo necessary in spinach artichoke dip?
No. Mayo adds richness, but the dip still works with sour cream or full-fat Greek yogurt in its place. Greek yogurt makes the dip tangier and can separate if overheated, so it works best with cream cheese rather than as the only base.
How do you keep spinach artichoke dip warm for a party?
The easiest way is to use a slow cooker on the warm setting after the dip is fully heated. Stir occasionally and loosen with a splash of warm milk or a spoonful of sour cream if it thickens too much.
What chips are best for spinach artichoke dip?
Use dippers with backbone: pita chips, crostini, sturdy tortilla chips, pretzel crisps, crackers, or crisp vegetables. Thin chips are fine for salsa, but they snap too easily in a thick cheese dip.