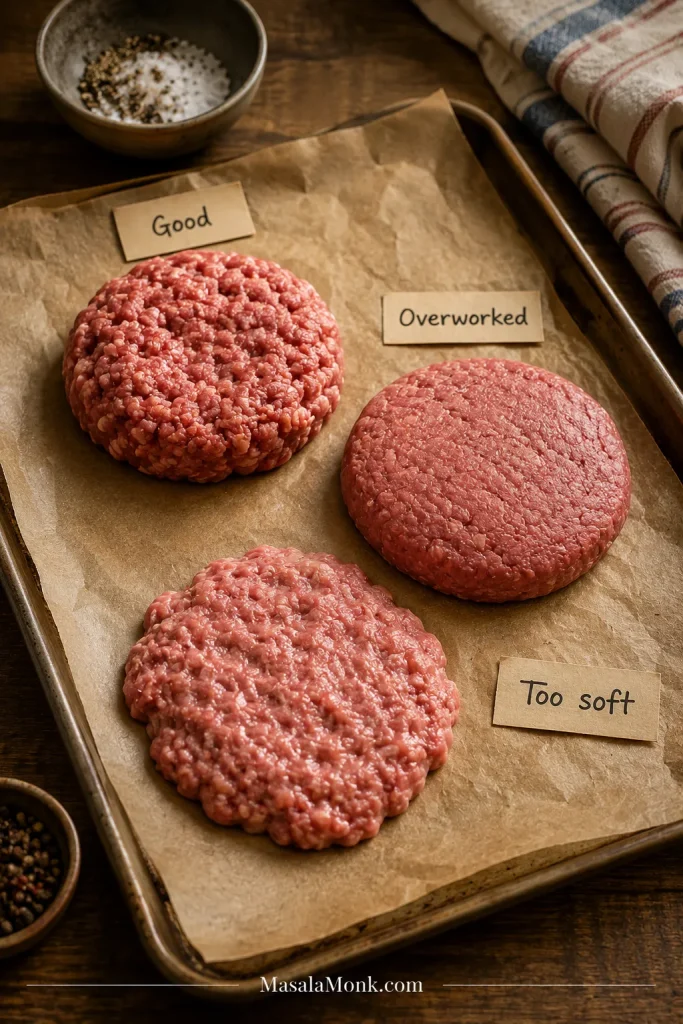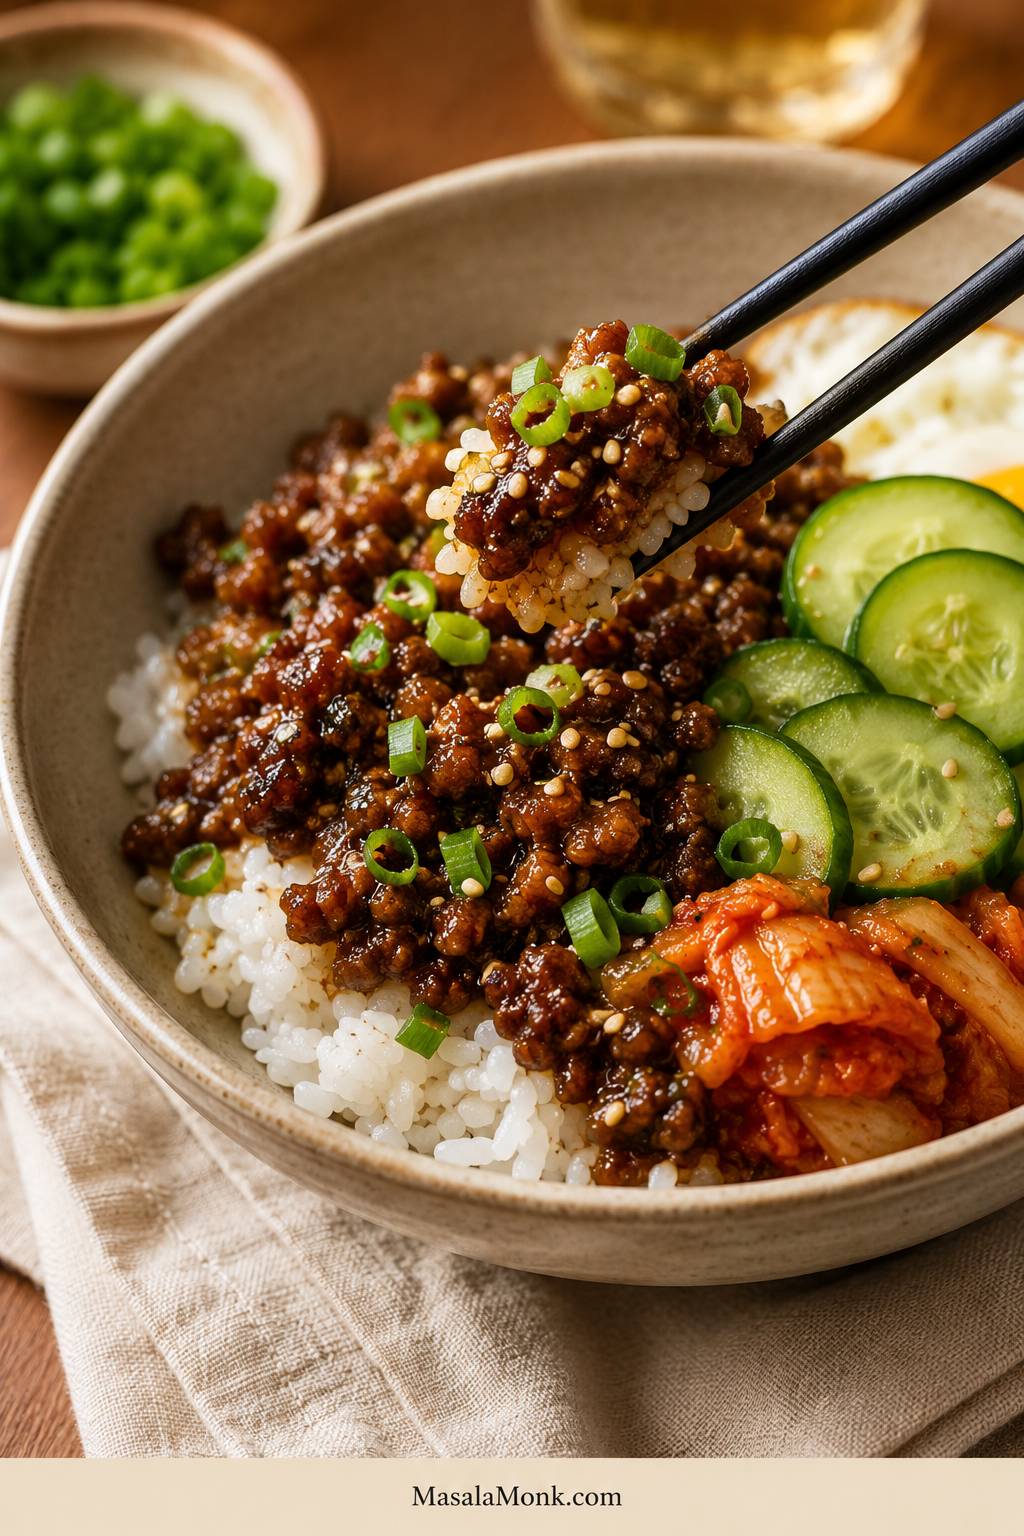
This Korean beef bowl recipe is for the nights when you have ground beef in the fridge, rice ready or almost ready, and no patience for a complicated dinner. In about 20 minutes, the beef turns saucy, garlicky, a little sweet, and deeply savory, with browned edges and a pan sauce that clings to every crumble.
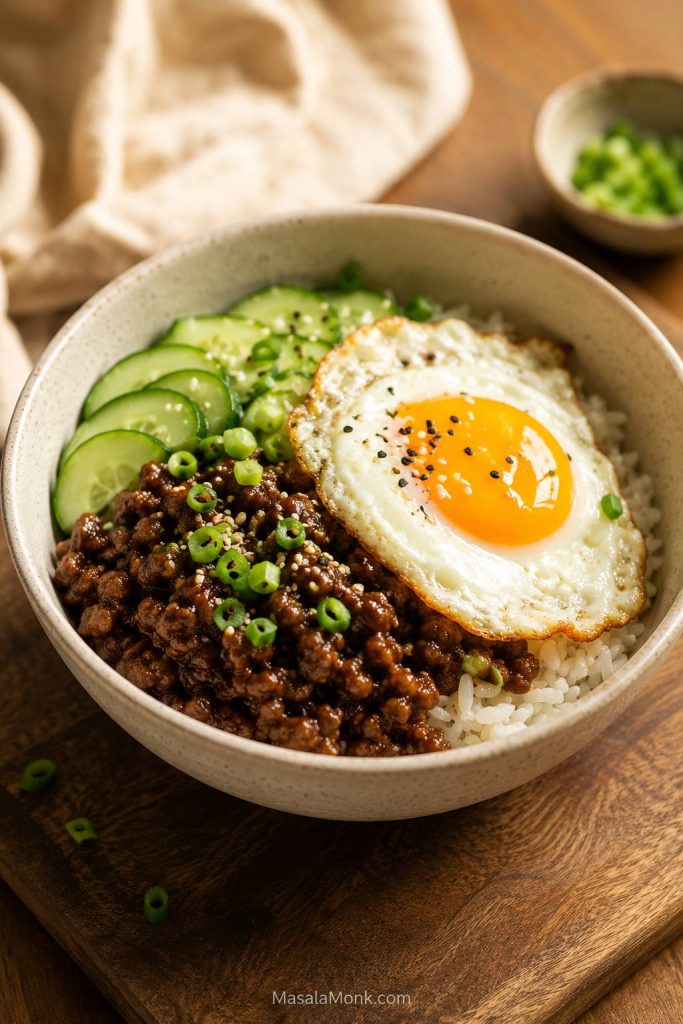
With rice, beef, and one fresh topping, this is already dinner. Everything else — kimchi, carrot, sesame seeds, a fried egg, or a creamy gochujang drizzle — just makes it feel more complete.
You do not need a perfect topping spread. One crunchy or bright thing is enough to make the bowl work.
The idea is simple: one sauce ratio, three flavor paths, and a bowl you can build around whatever you have. Keep it mild, add gochujang for heat, or make it rounder and more bulgogi-style with grated apple or pear.
Make This Tonight
If you want the fastest path to dinner, start here. This gives you the full sweet-savory Korean-inspired beef bowl feeling with the fewest moving parts.
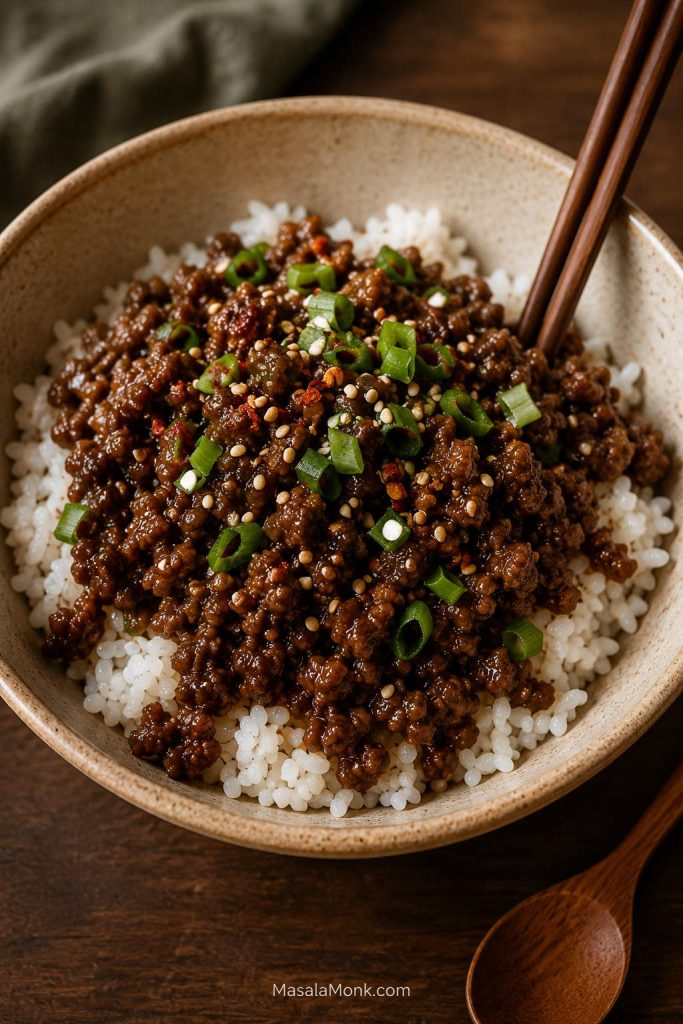
Bowl formula: warm base + saucy beef + one fresh crunch + one finish. That can be as simple as rice, beef, cucumber, and sesame seeds.
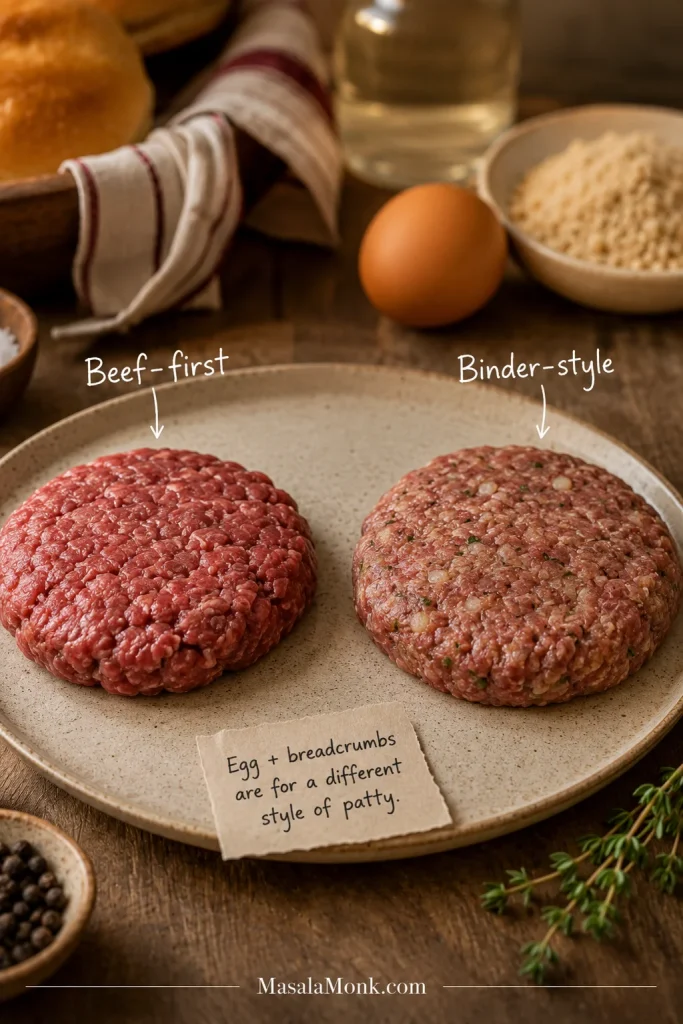
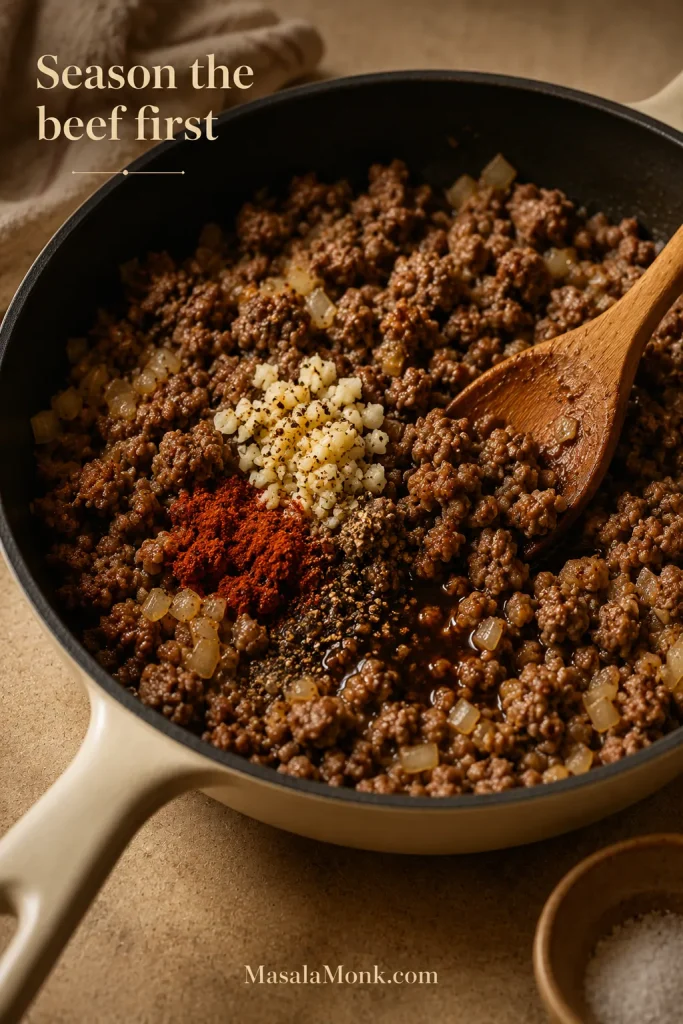
The key move is to brown the beef first, then add the sauce. If the sauce goes in too early, the beef simmers and tastes flatter. Brown it first, and the sauce clings to deeper, better-tasting crumbles.

What You’ll Need
You do not need much to make this taste good. The beef brings richness, the sauce brings that salty-sweet garlic-soy flavor, and the toppings keep everything fresh enough to go back for another bite.

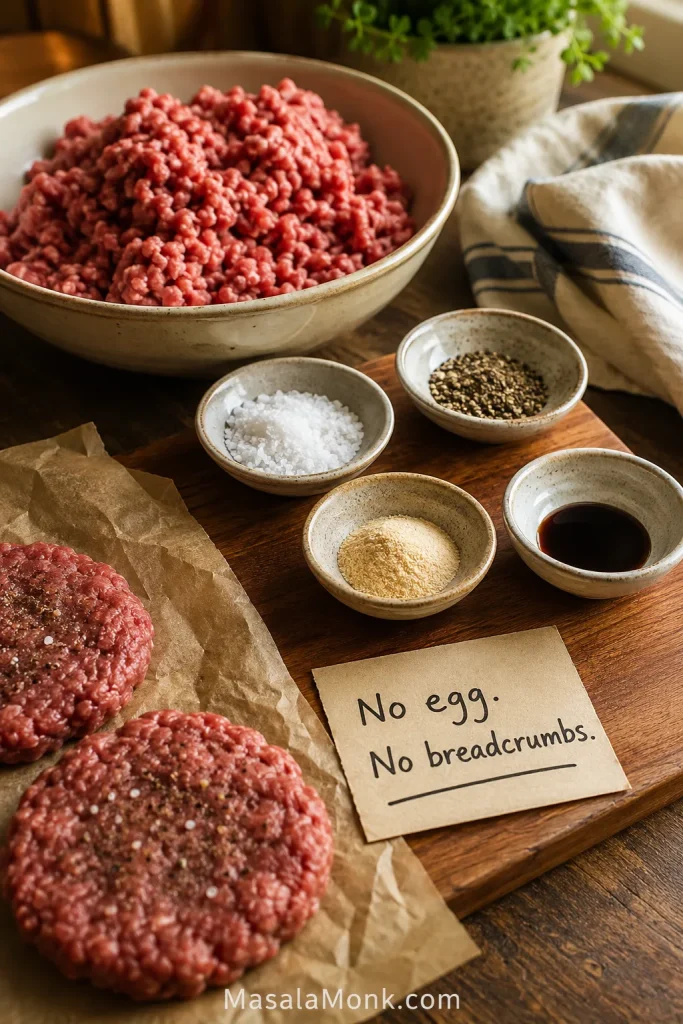
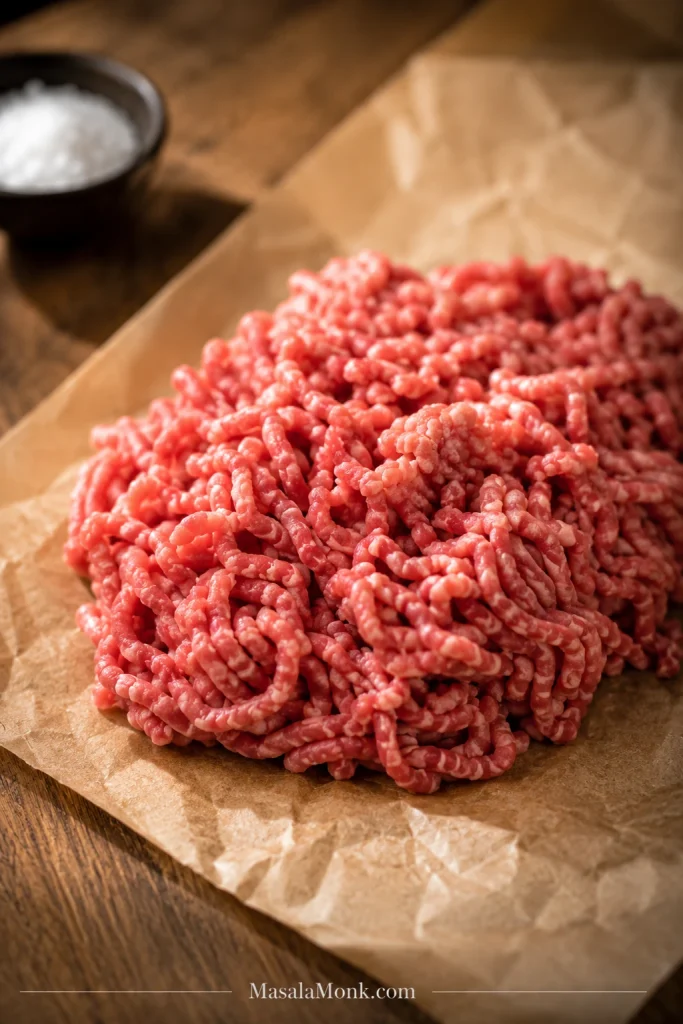
Ground Beef or Beef Mince
Use 1 lb / 450–500 g ground beef or beef mince for 4 bowls. The method is the same either way, so use the pack size and wording common where you live.
If you only remember one thing, use 90/10. It browns nicely, stays juicy, and does not leave the bowl greasy. 85/15 tastes richer but often needs draining, while 93/7 is leaner and needs a little more care so it does not dry out.
| Beef type | Best for | Cooking note |
|---|---|---|
| 85/15 | Juicier bowls, better browning, richer flavor. | Drain excess fat if the pan looks greasy before adding sauce. |
| 90/10 | Best all-purpose choice. | Enough flavor, but not too greasy. |
| 93/7 | Leaner meal prep bowls. | Add a little oil if needed and avoid overcooking. |
Aromatics
Fresh garlic and ginger make the pan smell like dinner almost immediately. Use 3–4 garlic cloves and about 1 teaspoon grated ginger. Scallion whites or a little grated onion can also go into the pan for extra depth.
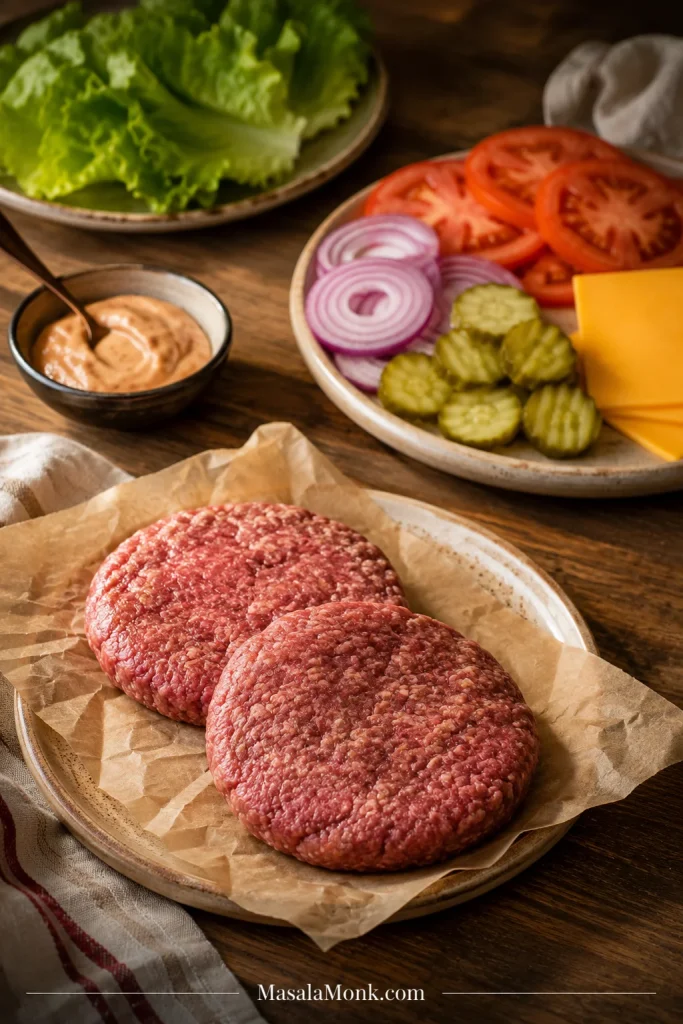
Rice and Toppings
Warm cooked rice is the easiest base. For toppings, use cucumber, carrot, cabbage, scallions, sesame seeds, kimchi, or egg. Even a simple bowl with rice, beef, scallions, and sesame seeds can still feel complete.
US and Metric Measurements
Measurements are forgiving here. The sauce does not need laboratory precision, but these amounts give you a reliable starting point before you adjust sweetness, heat, or salt at the end.
| Ingredient | US measure | Metric measure |
|---|---|---|
| Ground beef / beef mince | 1 lb | 450–500 g |
| Low-sodium soy sauce | ¼ cup | 60 ml |
| Brown sugar | 2–3 tbsp | about 25–38 g |
| Honey, if using instead | 2–3 tbsp | about 42–63 g |
| Rice vinegar | 1 tbsp | 15 ml |
| Toasted sesame oil | 2 tsp | 10 ml |
| Gochujang, optional | 1–2 tbsp | 18–36 g |
| Cooked rice | 3–4 cups | about 500–750 g, depending on rice type |
| Grated apple or pear, optional | 2–3 tbsp | 30–45 g |
| Grated onion, optional | 1–2 tbsp | 15–30 g |
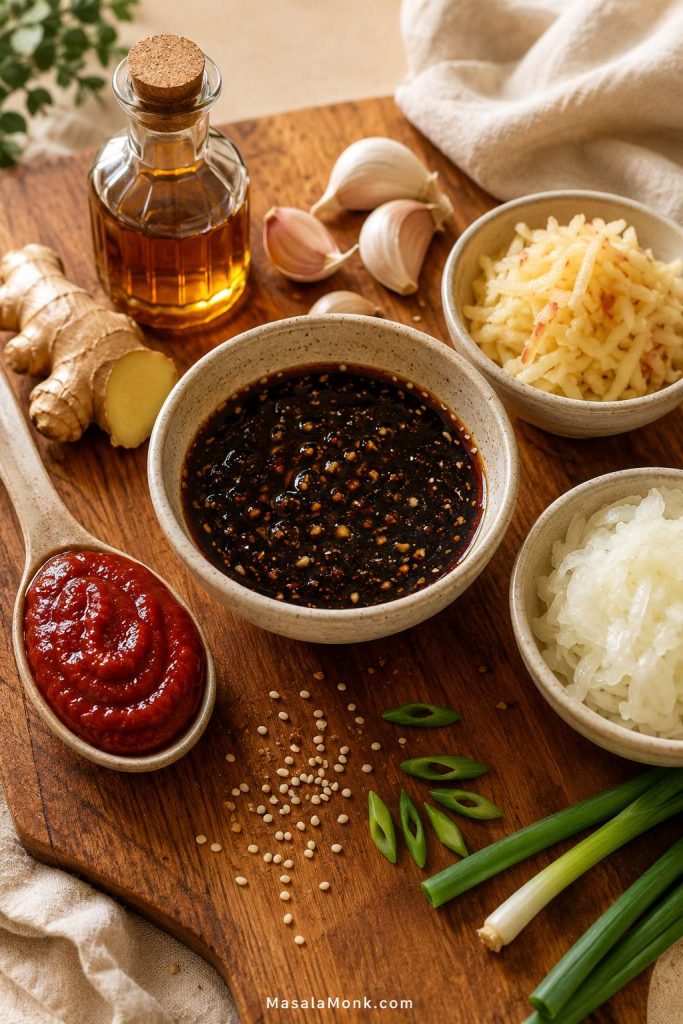
Korean Beef Bowl Sauce
The sauce is what makes the beef taste deeper than a 20-minute dinner usually does. It works because every bite has balance: salty soy, sweetness from brown sugar or honey, acidity from rice vinegar or kimchi, fat from beef and sesame oil, heat if you add gochujang, and crunch from cucumber or cabbage.
That is why the bowl tastes complete even when the topping list is short.
Save This Sauce Ratio
For 1 lb / 450–500 g beef, remember this base formula:
- ¼ cup / 60 ml low-sodium soy sauce for salt and savoriness
- 2–3 tablespoons brown sugar or honey for sweetness and gloss
- 1 tablespoon rice vinegar for balance
- 2 teaspoons toasted sesame oil for aroma
- Garlic + ginger for the flavor base
- Optional: 1–2 tablespoons gochujang for heat, or grated apple/pear for bulgogi-style sweetness
Make It Mild, Medium, Spicy, or Bulgogi-Style
- Mild: skip the gochujang and use the soy-garlic-sesame sauce as written.
- Medium: add 1 tablespoon gochujang for color, depth, and gentle heat.
- Spicy: add 2 tablespoons gochujang, then balance the bowl with cucumber, cabbage, rice, or egg.
- Bulgogi-style: add 2–3 tablespoons grated apple or pear and 1–2 tablespoons grated onion.
Not sure which one to make? Start with the mild version. For the best all-around bowl, add 1 tablespoon gochujang and 2 tablespoons grated apple or pear; it stays balanced, slightly spicy, and deeper without becoming difficult.
Quick Sauce Adjustments
- Less sweet: use 2 tablespoons brown sugar or honey instead of 3.
- More saucy: add 1–2 tablespoons water while simmering.
- Spicier: add more gochujang, gochugaru, chili flakes, or sriracha-style sauce.
- Brighter: finish with a small splash of rice vinegar.
- More sesame-rich: finish with sesame seeds or a tiny drizzle of toasted sesame oil.
Ingredient Swaps
Dinner can still happen even if you are missing one ingredient. The flavor will change slightly, but these swaps keep the bowl moving in the same sweet-savory direction.
| If you do not have… | Use instead |
|---|---|
| Rice vinegar | Apple cider vinegar, white vinegar, or a squeeze of lime juice. |
| Gochujang | Chili flakes, gochugaru, sriracha-style sauce, or simply skip it. |
| Fresh ginger | ¼–½ teaspoon ground ginger, or leave it out if needed. |
| Brown sugar | Honey, maple syrup, white sugar, or coconut sugar. |
| Soy sauce | Tamari for gluten-free, or coconut aminos for a milder option. |
| Sesame oil | Skip it if needed, then finish with sesame seeds for some nuttiness. |
| Apple or pear | Leave it out, or use a little grated onion for body. |
Simple Equipment
No special equipment is needed, but a wide skillet makes a real difference. A crowded pan traps moisture, which makes the beef steam instead of brown. You only need a wide skillet, a small bowl for the sauce, and a spatula or wooden spoon.
How to Make the Bowls
Once the sauce is mixed, the skillet part moves fast: brown the beef, simmer until the sauce coats the crumbles, then build the bowls while everything is still hot.
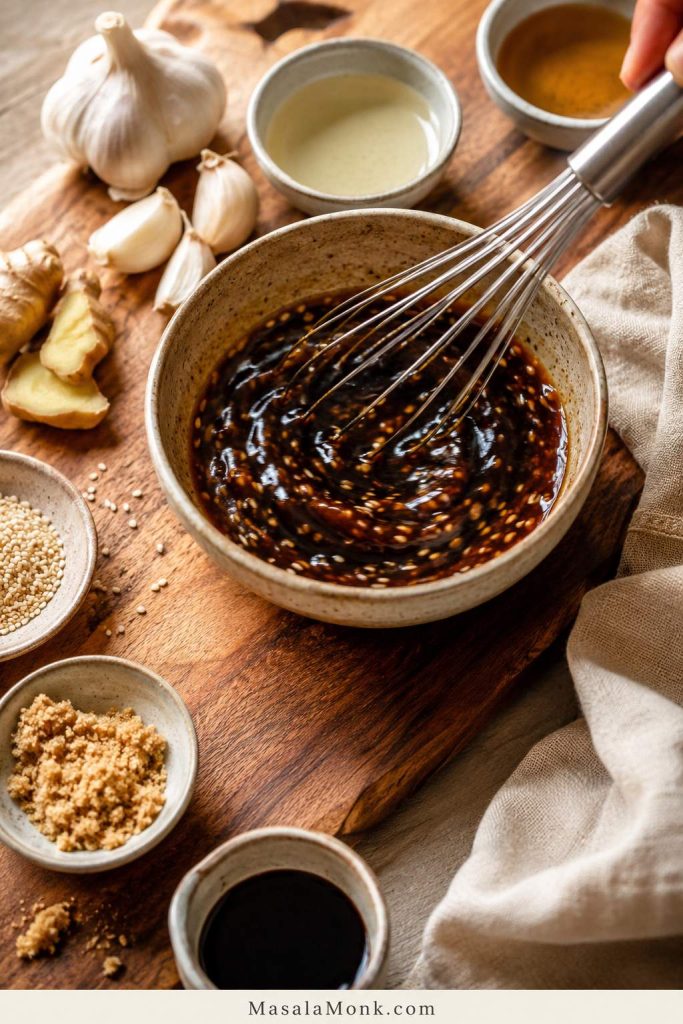
Step 1: Make the Sauce
In a small bowl, whisk together soy sauce, brown sugar or honey, rice vinegar, garlic, ginger, and optional gochujang. Whisk in the sesame oil too, or save half to drizzle in at the end for a stronger sesame aroma. For the bulgogi-style version, add grated apple or pear, grated onion, and optional mirin.
Whisk until the sugar dissolves and the gochujang, if using, is fully mixed in.
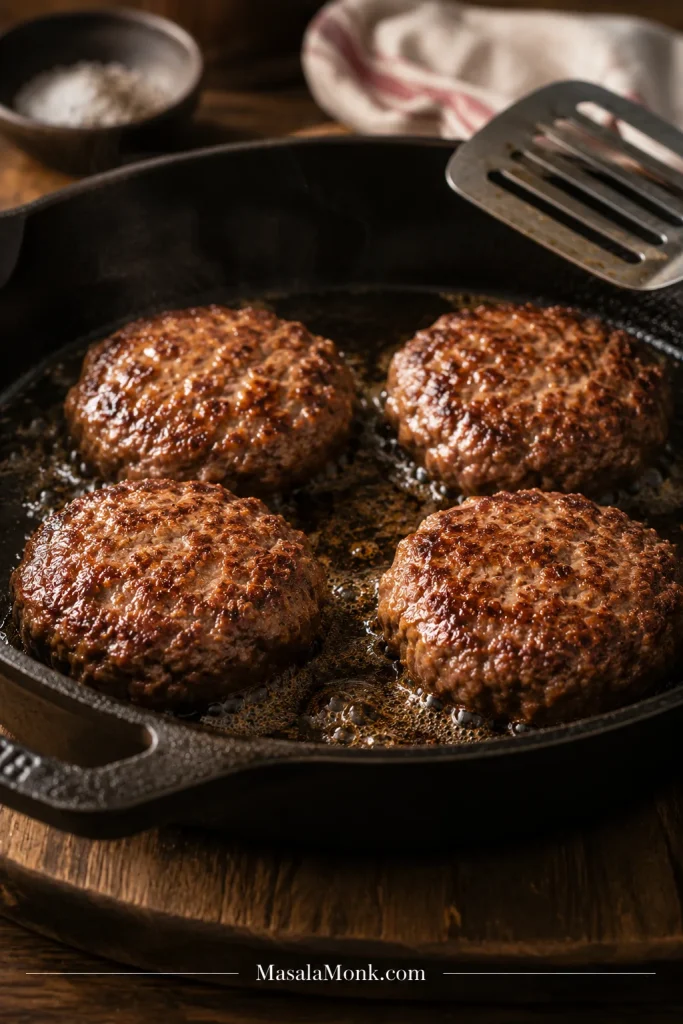
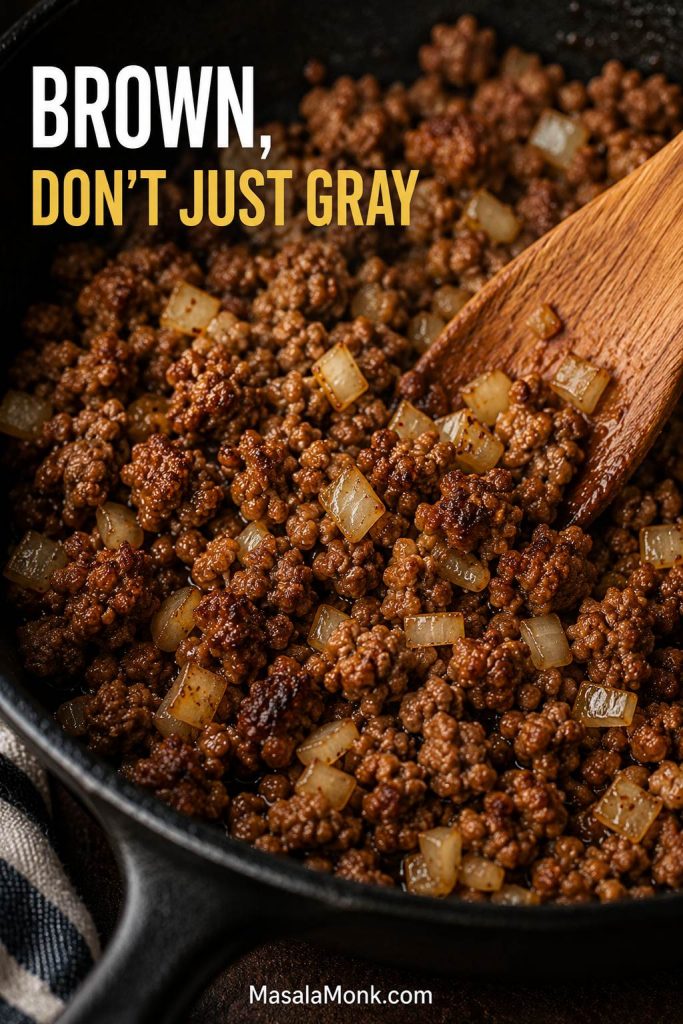
Step 2: Brown the Beef
Heat a wide skillet over medium-high heat. Add the beef. If it is very lean, add 1 tablespoon neutral oil first.
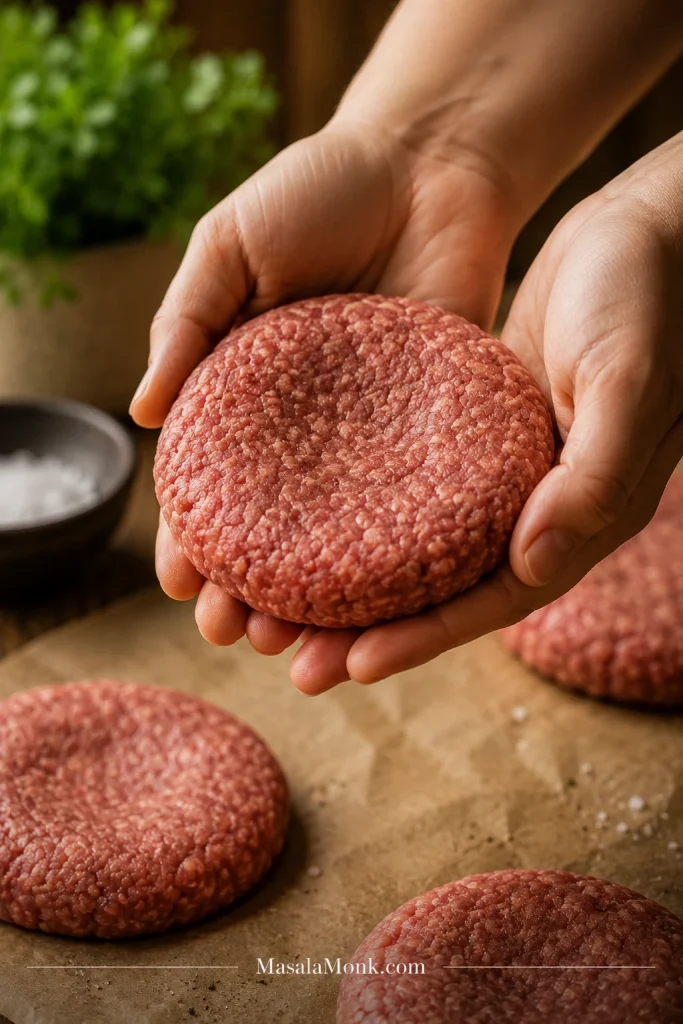
Press the beef into an even layer and let it cook undisturbed for 1–2 minutes before breaking it apart. That short pause helps the bottom brown instead of turning gray and watery.
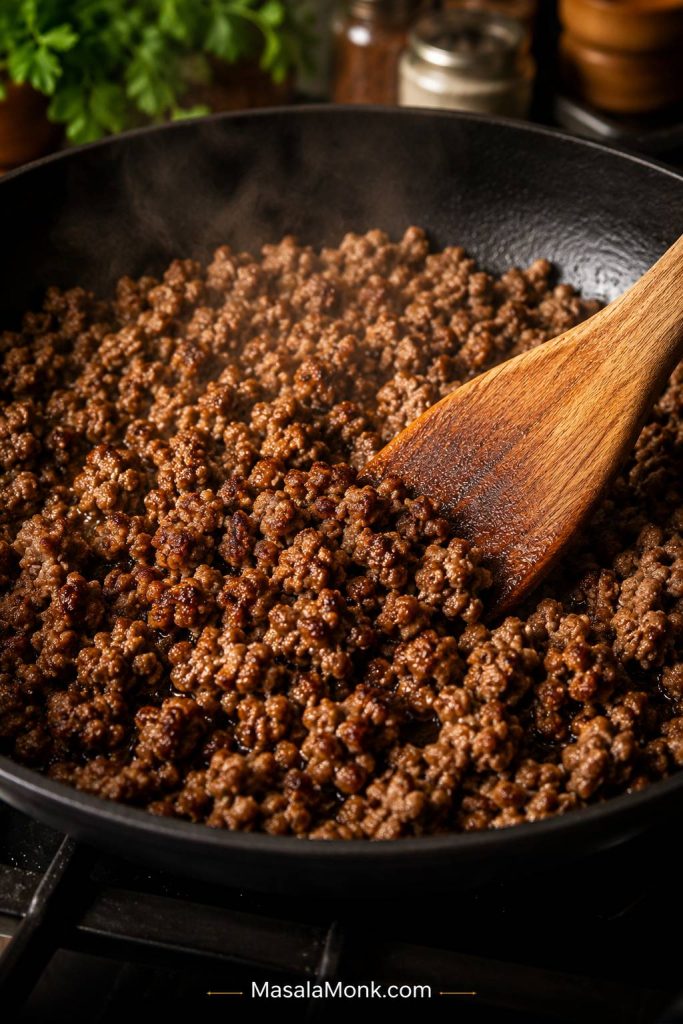
Step 3: Break It Into Crumbles
Use a wooden spoon or spatula to break the beef into small crumbles. Cook until browned and fully cooked. If the pan looks watery before the sauce goes in, drain it; sauce clings to browned beef, not liquid.
Step 4: Add the Sauce
Pour the sauce into the skillet and stir well. When the garlic and ginger hit the hot beef, it should smell savory and warm almost immediately. If anything smells sharp or scorched, lower the heat before the sauce reduces too far.
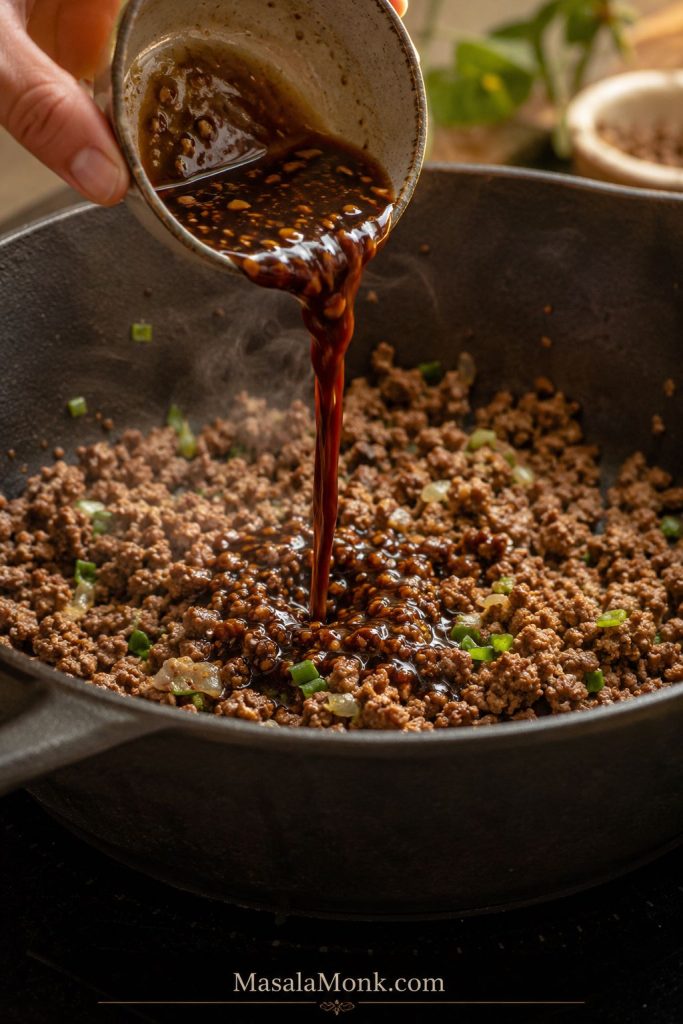
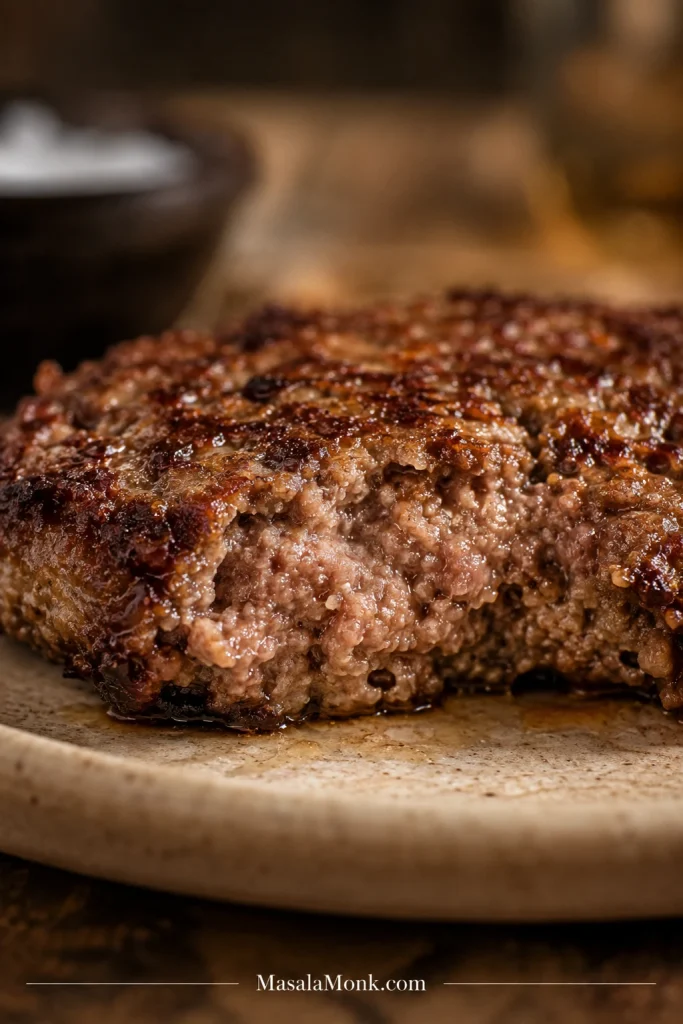
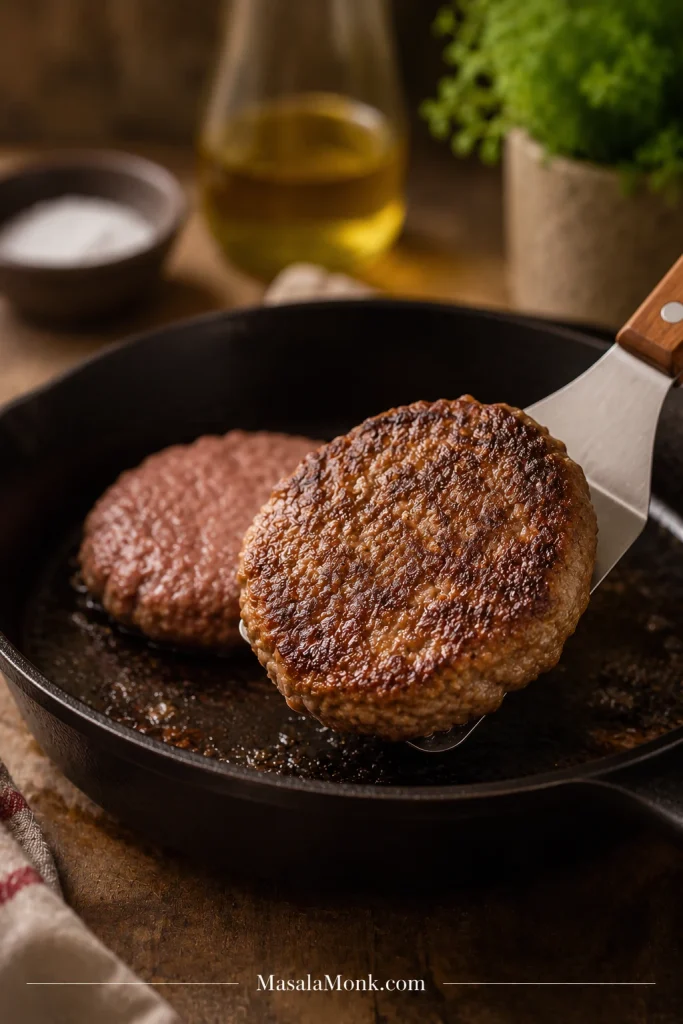
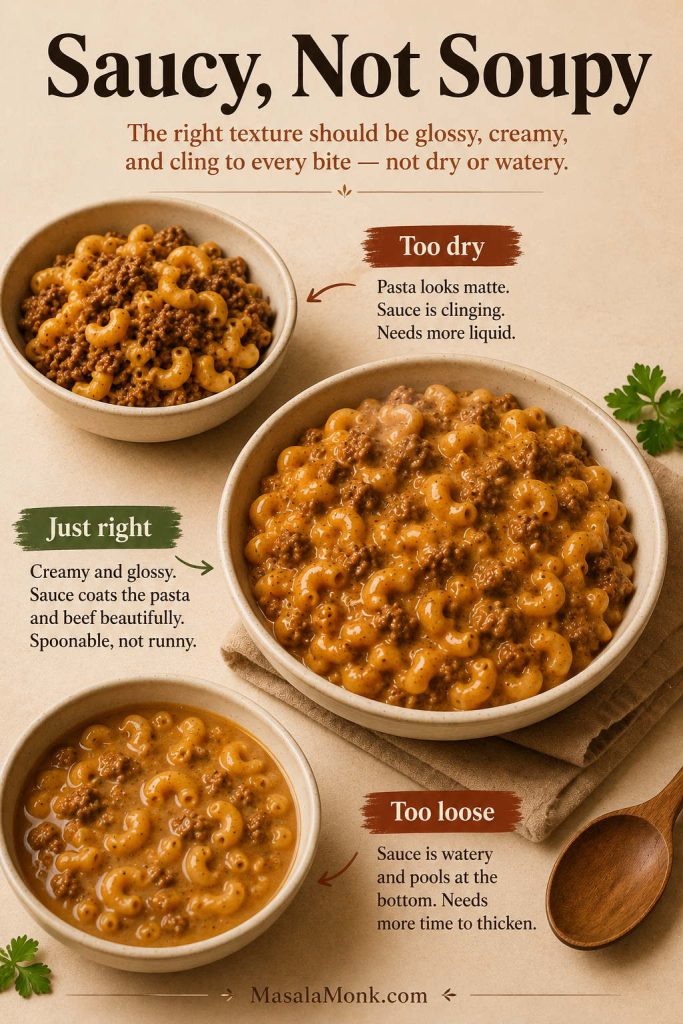
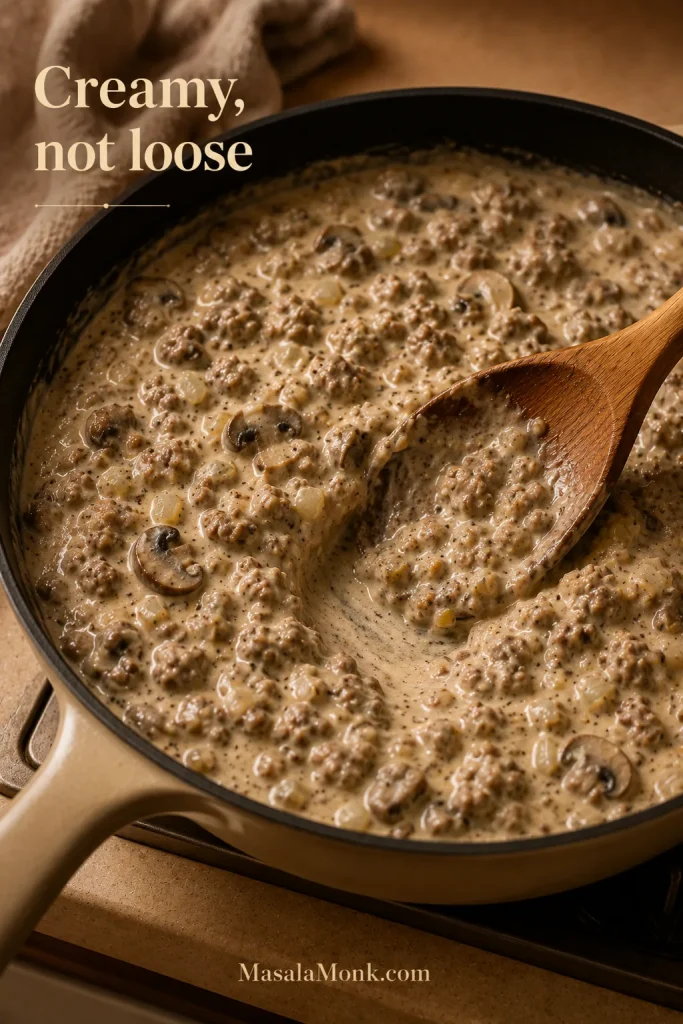
What Glossy Korean Ground Beef Should Look Like
Let the sauce bubble gently for 2–4 minutes, until it looks glossy, reduced, and clings to the beef instead of running across the pan. It should coat the crumbles, not pool like soup.
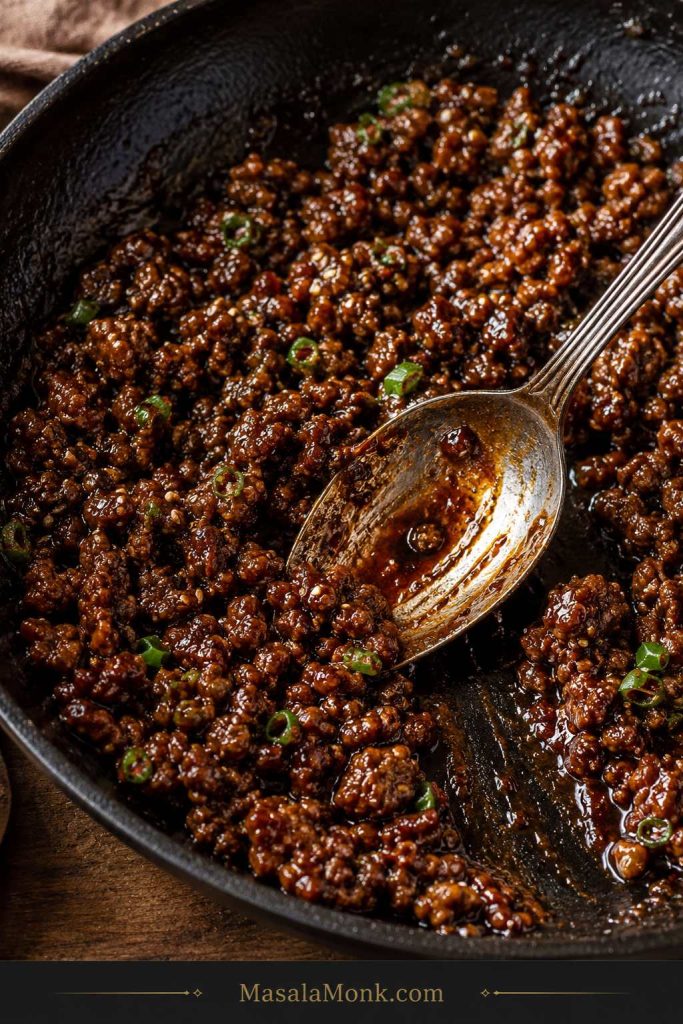
Taste the beef before you build the bowls. Too salty? Add more rice or cucumber. Flat? Splash in rice vinegar. Want more heat? Stir in a little gochujang at the end.
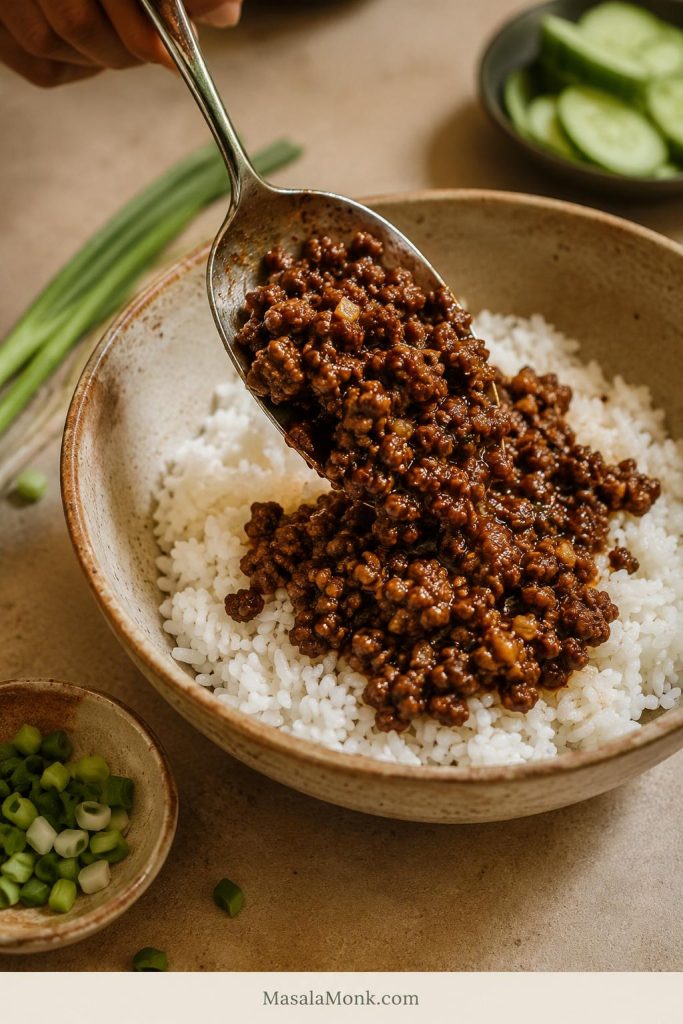
Step 5: Build the Bowls
Divide warm rice between bowls. Spoon the saucy beef over the rice. Add cucumber, carrot, cabbage or lettuce, scallions, sesame seeds, kimchi, and egg if using.
Step 6: Finish and Serve
Finish with extra sesame seeds, sliced scallions, a drizzle of sesame oil, or a spoonful of gochujang sauce. For a creamy drizzle, mix 2 tablespoons mayo with 1–2 teaspoons gochujang and a few drops of rice vinegar. Add a tiny splash of water only if you want it thinner. For a homemade version, this mayo guide includes a gochujang mayo variation.
Serve while the beef is hot, the rice is warm, and the vegetables are still crisp.
Korean Beef Bowl Recipe
Easy ground beef or beef mince rice bowls with sticky soy-garlic beef, warm rice, crunchy toppings, optional gochujang heat, and a bulgogi-style apple or pear upgrade.
Total time assumes cooked rice is ready and toppings are simple. Add about 5 minutes for several toppings, fried eggs, or the bulgogi-style upgrade.
Equipment
- 12-inch skillet or large nonstick skillet
- Small mixing bowl
- Whisk or fork
- Spatula or wooden spoon
- Rice cooker or pot, if cooking rice fresh
- Optional microplane or box grater
Ingredients
For the Beef and Bowls
- 1 lb / 450–500 g ground beef or beef mince, preferably 90/10
- 3–4 cups cooked rice, warm and ready before the beef starts cooking
- 1 tablespoon neutral oil, only if using very lean beef
- 2–3 scallions, sliced, whites and greens separated if possible
- 1 small cucumber, sliced
- 1 medium carrot, shredded or julienned
- 1 cup shredded cabbage or lettuce
- 1–2 teaspoons sesame seeds
- Kimchi, optional
- 4 fried eggs or soft-boiled eggs, optional
For the Sauce
- ¼ cup / 60 ml low-sodium soy sauce
- 2–3 tablespoons brown sugar or honey
- 1 tablespoon rice vinegar
- 2 teaspoons toasted sesame oil
- 3–4 garlic cloves, minced
- 1 teaspoon fresh ginger, grated
- 1–2 tablespoons gochujang, optional
- 1–2 tablespoons water, if needed
Optional Bulgogi-Style Upgrade
- 2–3 tablespoons grated apple or Asian pear
- 1–2 tablespoons grated onion
- 1 tablespoon mirin or rice wine, optional
Instructions
- Have the rice ready. This recipe moves quickly once the beef starts cooking, so use warm cooked rice, leftover rice, microwave rice, or rice already prepared in a cooker.
- Make the sauce. In a small bowl, whisk together soy sauce, brown sugar or honey, rice vinegar, garlic, ginger, and optional gochujang. Whisk in the sesame oil too, or save half to drizzle in at the end for a stronger sesame aroma. If using the bulgogi-style upgrade, whisk in grated apple or pear, grated onion, and mirin.
- Brown the beef. Heat a large skillet over medium-high heat. Add the beef. Press it into an even layer and let it brown for 1–2 minutes before breaking it apart.
- Cook through. Break the beef into small crumbles and cook until browned, steaming hot, and cooked through. Drain excess liquid if the pan looks watery.
- Add the sauce. Pour the sauce over the beef and stir well. Simmer for 2–4 minutes, until it looks glossy, reduces slightly, and coats the crumbles. Add a splash of water if it becomes too thick.
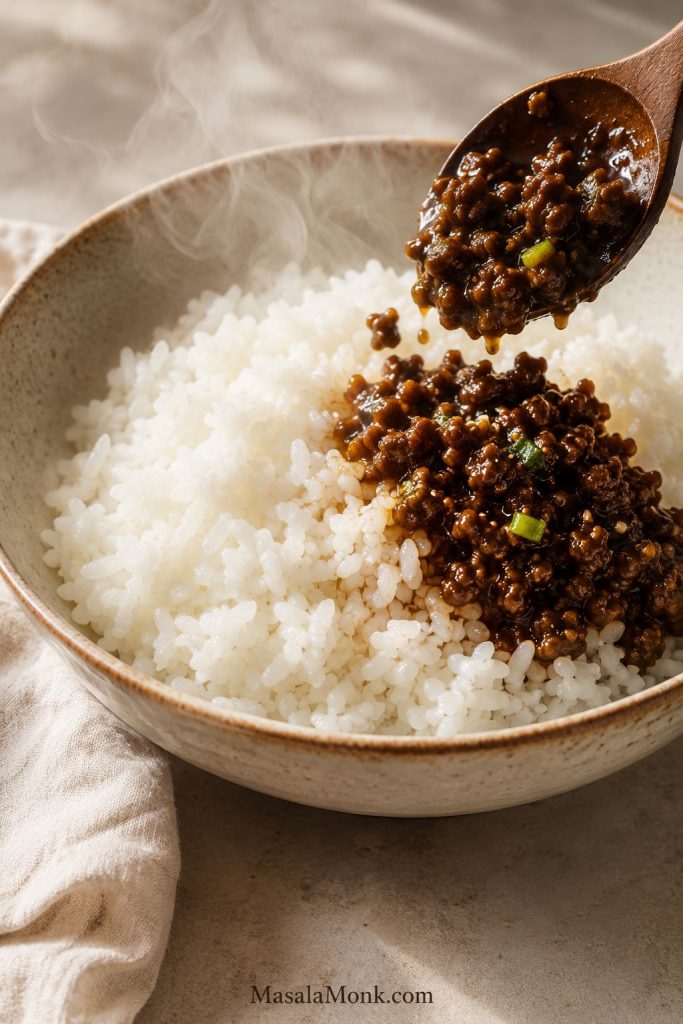
- Build the bowls. Divide warm rice between bowls. Spoon the saucy beef over the rice.
- Add toppings. Top with cucumber, carrot, cabbage or lettuce, scallions, sesame seeds, kimchi, and egg if using.
- Serve. Finish with extra sesame seeds, a drizzle of sesame oil, extra gochujang sauce, or a little gochujang mayo if you want a creamy finish.
Recipe Notes
- Cook ground beef to 160°F / 71°C for food safety.
- Use low-sodium soy sauce because the sauce reduces in the skillet.
- Total time assumes cooked rice is ready and toppings are simple.
- If you only have beef, sauce, rice, scallions, and sesame seeds, the bowl still works.
- Mild bowl: skip the gochujang or serve it on the side.
- Medium heat: use 1 tablespoon gochujang.
- Spicier version: use 2 tablespoons gochujang.
- Bulgogi-style flavor: add grated apple or pear and grated onion.
- Store beef, rice, and fresh toppings separately for the best meal prep texture.
What Makes This a Korean-Inspired Beef Bowl?
Think of this as a weeknight shortcut built from the flavors people love in Korean BBQ-style beef: soy, garlic, ginger, sesame, sweetness, and optional gochujang. Ground beef or beef mince makes it fast. Rice makes it filling. Cucumber, cabbage, kimchi, scallions, or egg make it feel like a complete bowl instead of just beef over rice.
Korean Beef Bowl vs Bulgogi vs Bibimbap
This bowl borrows the sweet-savory garlic-soy comfort people love in bulgogi-style beef, but it keeps the method simple. Here is the quick difference, so expectations are clear.
| Dish | What it usually means | How this recipe relates |
|---|---|---|
| Korean beef bowl | A beef and rice bowl with Korean-inspired sauce and toppings. | This recipe fits that style directly. |
| Bulgogi | Traditional Korean marinated beef, usually thinly sliced and cooked quickly. | This version uses ground beef, so it is faster but not traditional bulgogi. |
| Bulgogi bowl | A rice bowl built around bulgogi or bulgogi-style beef. | Add apple or pear and onion to the sauce for a closer bulgogi-style flavor. |
| Bibimbap | Korean mixed rice bowl with vegetables, gochujang, egg, and often beef. | Add egg and vegetables for a similar feel, while keeping this recipe simpler. |
For traditional bulgogi, use thinly sliced beef and marinate it before cooking. The Smithsonian Center for Folklife and Cultural Heritage describes bulgogi as thinly sliced beef marinated with soy sauce, sugar or honey, sesame oil, garlic, onion, and often Asian pear. That is why the apple-or-pear upgrade works so well in this shortcut version. Read more about bulgogi.
For tonight, ground beef gives you the shortcut: the same garlic-soy-sesame comfort, but in a pan that can be done while the rice is still steaming.
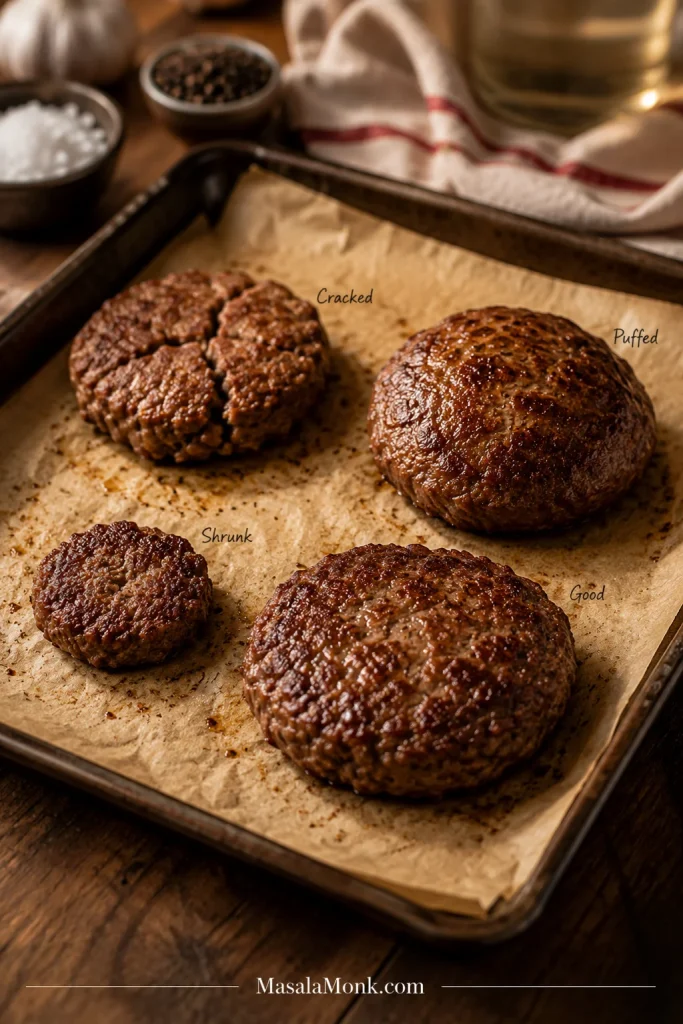
How to Brown Ground Beef Without Steaming It
If your beef turns gray or watery, the pan is usually crowded or stirred too soon. Use this checklist before adding sauce so the finished bowl tastes browned, not boiled.
- Use a wide pan. A crowded skillet traps moisture.
- Start with medium-high heat. The beef should sizzle when it hits the pan.
- Do not stir immediately. Let the beef sit for 1–2 minutes so it can form browned edges.
- Drain excess liquid. Sauce sticks better to browned beef than to watery beef.
- Add sauce after browning. If sauce goes in too early, the beef simmers before it browns.
Best Rice to Use
Warm white rice gives this bowl its soft, comforting base, especially when the beef is glossy and salty-sweet. Jasmine rice, short-grain rice, or medium-grain rice all work well because they catch the sauce and let the beef stay the main event.
| Base | Best for |
|---|---|
| White rice | Classic, soft, comforting bowl base. |
| Jasmine rice | Fragrant weeknight rice bowls. |
| Short-grain rice | Stickier bowl texture. |
| Brown rice | Meal prep and nuttier flavor. |
| Cauliflower rice | Low-carb bowls. |
| Noodles | Turning the beef into a noodle bowl. |
| Lettuce cups | A lighter, hand-held version. |
If using leftover rice, cool it quickly, refrigerate it in a covered container, and reheat it until steaming hot.
Best Toppings, Sides, and Finishes
The toppings are not decoration here; they are what make a fast bowl feel fresh instead of tired. A little cold crunch, a little acid, and maybe an egg can make ground beef and rice feel like dinner you planned.
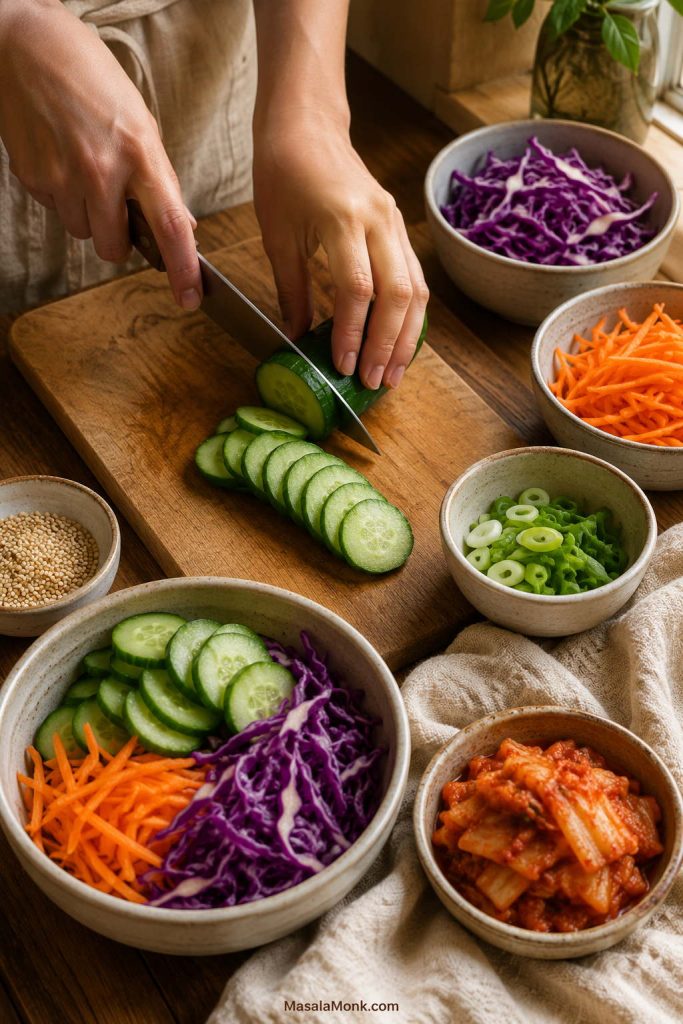
If you only have rice, beef, scallions, and sesame seeds, you still have a good bowl. Add cucumber, kimchi, cabbage, or pickled onions when you want freshness. Add egg, avocado, noodles, or extra rice when you want it heartier.
| Type | Options | Why it helps |
|---|---|---|
| Fresh and crunchy | Cucumber, carrot, cabbage, lettuce, scallions | Balances the rich beef and keeps the bowl from feeling heavy. |
| Acidic or fermented | Kimchi, quick cucumber topping, pickled onions | Adds brightness and cuts through the sweet-savory sauce. |
| Rich | Fried egg, soft-boiled egg, avocado, gochujang mayo | Makes the bowl more filling and satisfying. |
| Simple sides | Cucumber salad, cabbage slaw, steamed broccoli, mushrooms, spinach | Adds freshness or vegetables without changing the beef. |
| Flavor finish | Sesame seeds, sesame oil, gochugaru, chili flakes | Adds aroma, heat, and texture at the end. |
The same bowl logic works beyond beef: warm base, protein, sauce, crunch, and a fresh finish. Once that structure is clear, you can turn the beef into rice bowls, lettuce cups, noodle bowls, or meal prep boxes without starting over.
Add an Egg
A fried egg makes the bowl richer and gives it a bibimbap-style feel. The yolk mixes into the rice and beef like a quick sauce. For meal prep, soft-boiled or jammy eggs are easier to make ahead; this air fryer hard-boiled eggs guide is useful if you want soft, jammy, or fully set eggs without boiling water.
Quick Cucumber Topping
For a fast cucumber topping, mix thinly sliced cucumber with rice vinegar, a pinch of sugar or honey, a pinch of salt, sesame seeds, and optional chili flakes. Let it sit while the beef cooks.

It is not a full cucumber salad, but it gives the bowl a fresh, tangy contrast in just a few minutes. For a colder, crunchier side, this cucumber salad recipe works especially well with sweet-savory beef bowls.
Easy Bowl Builds
Use these when you want a quick decision instead of a long topping list. The beef is the same; the bowl changes depending on what you need that night.
Pantry Korean Beef Bowl
Use this build when you need dinner with the fewest toppings: rice, saucy beef, scallions, sesame seeds, and optional chili flakes.
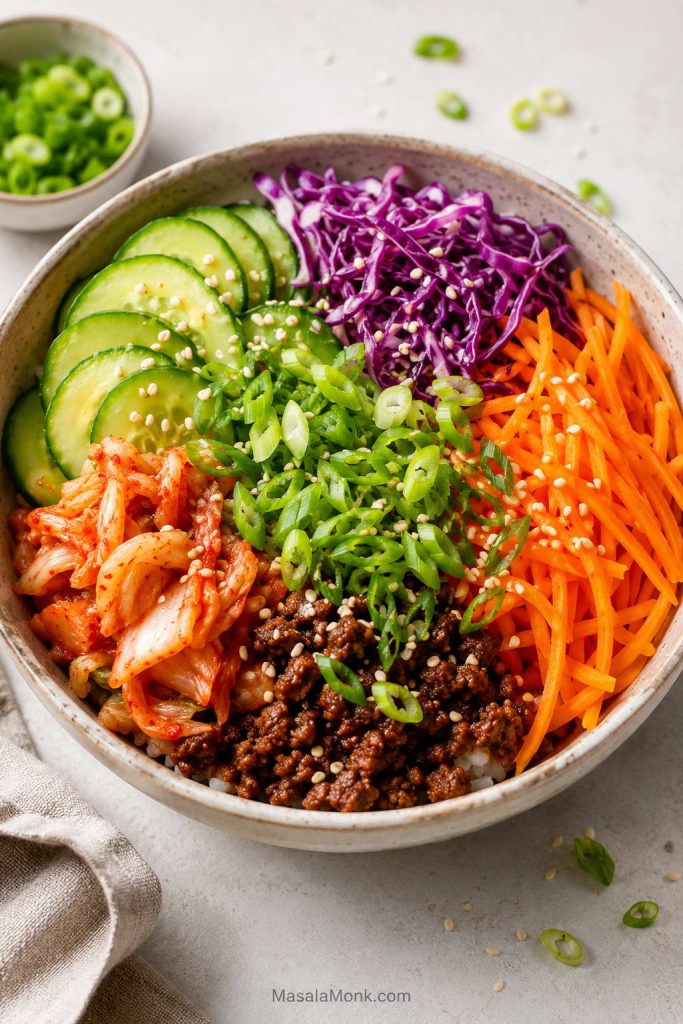
Fresh Korean Beef Bowl
Choose this version when the beef tastes rich and you want more crunch: rice, beef, cucumber, carrot or cabbage, kimchi, and scallions.
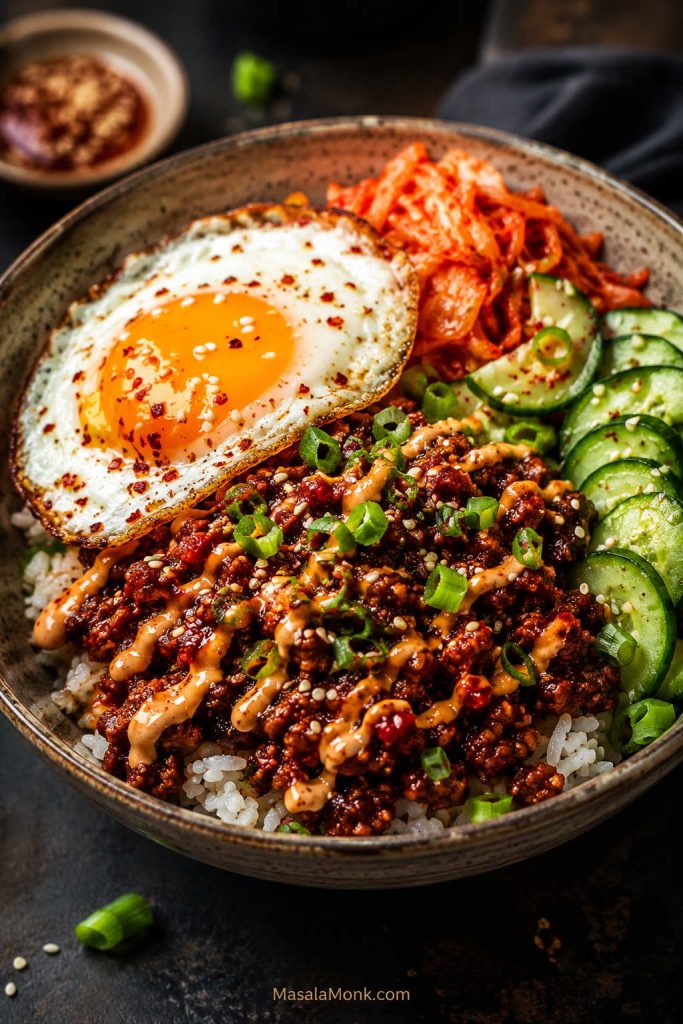
Loaded Gochujang Beef Bowl
Make this one when you want heat and fullness: gochujang beef, rice, fried egg, kimchi, cucumber, sesame, scallions, and a light creamy drizzle.
Other Ways to Use the Beef
Once you have the beef, it can go a lot of places: lettuce wraps, tacos, noodle bowls, fried rice, salad bowls, and meal prep boxes.
Low-Carb Korean Beef Bowl
For a lower-carb version, use cauliflower rice, shredded cabbage, lettuce cups, cucumber, or sautéed greens instead of rice. Keep the same sauce and add enough fresh crunch so the bowl still feels full and satisfying.

You can also use ground pork, turkey, or chicken with the same sauce. Pork tastes richer, while turkey and chicken are leaner and may need a little oil. Brown them well, cook them through, then let the sauce reduce until it coats the meat.
For a gluten-free bowl, use tamari or gluten-free soy sauce. Check your gochujang label too, because some brands contain wheat.
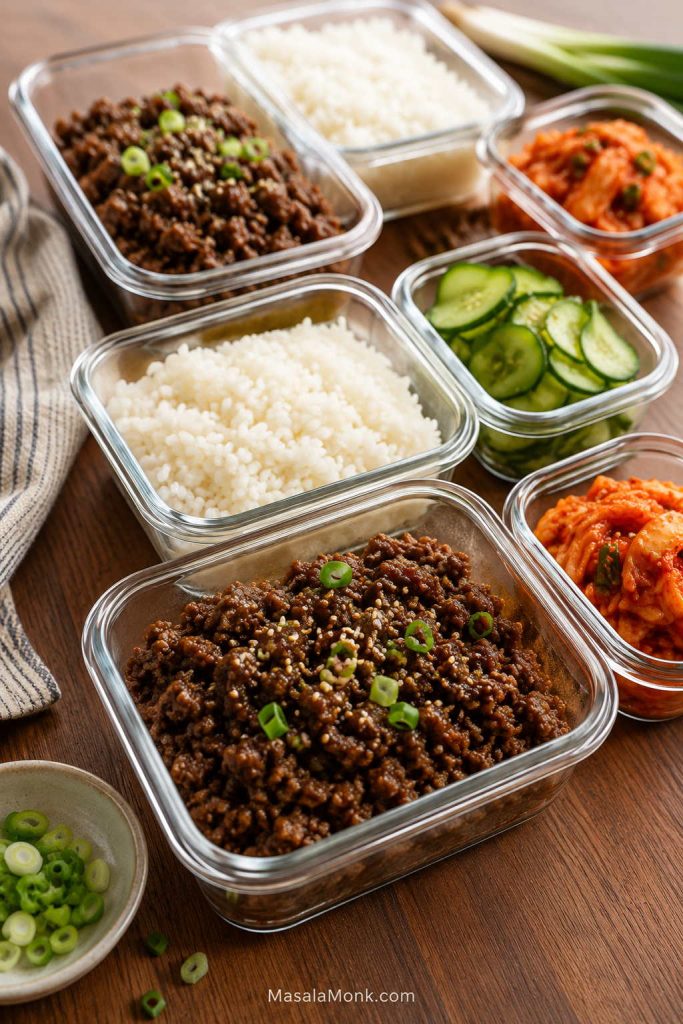
Meal Prep, Storage, and Reheating
These bowls work well for meal prep, but the best texture comes from storing the hot and fresh parts separately. The beef and rice can reheat together; the cold toppings should stay cold.
The only thing that really suffers in the fridge is the crunch, so keep cucumber, cabbage, kimchi, scallions, and creamy drizzles in separate containers. Add them after reheating so the bowl still tastes fresh.
Best Meal Prep Order
- Cook or reheat the rice.
- Cook the beef and sauce.
- Slice cucumber, carrots, cabbage, and scallions.
- Store beef and rice separately from fresh toppings if possible.
- Add egg, kimchi, cucumber, and drizzles just before serving.
| Part | How to store | Best note |
|---|---|---|
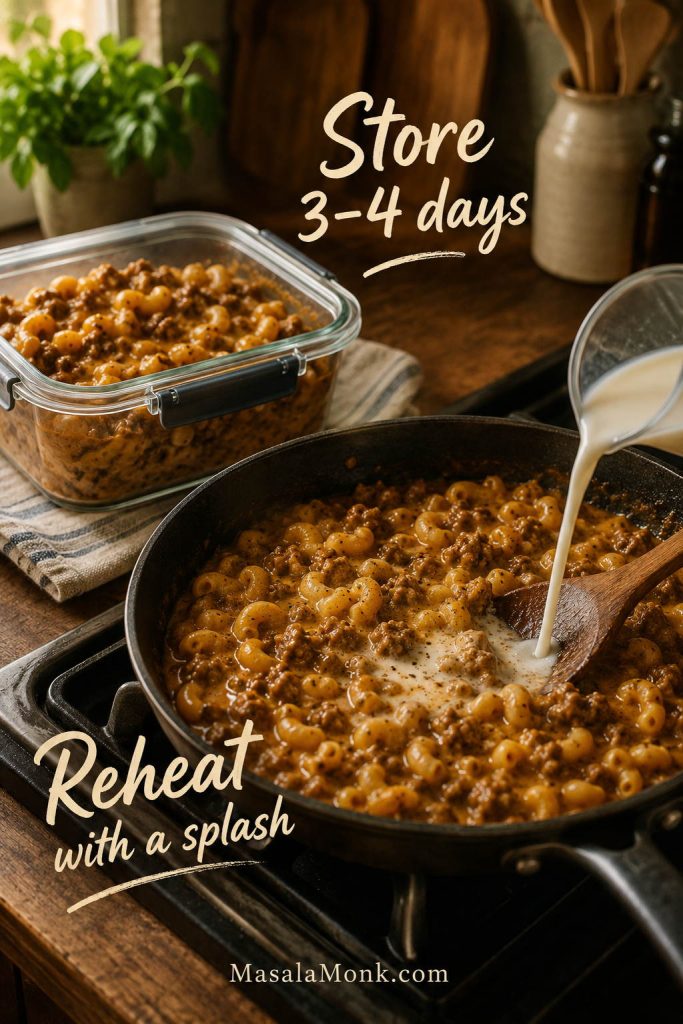
| Cooked beef | 3–4 days in an airtight container in the fridge. | Reheat with a splash of water to loosen the sauce. |
| Rice | Store separately from fresh toppings. | Cool quickly, refrigerate covered, and reheat until steaming hot. |
| Cucumber and lettuce | Keep cold and separate. | Add after reheating so they stay crisp. |
| Egg | Cook fresh if fried; soft-boiled eggs can be made ahead. | Best added just before serving. |
| Freezer | Freeze cooked beef for 2–3 months. | Freeze beef only, not assembled bowls. |
Troubleshooting: If Something Feels Off
Most problems come from pan size, beef fat, sauce balance, or simmering time. The good news is that this bowl is easy to fix before it reaches the table.
| Problem | Why it happened | How to fix it |
|---|---|---|
| Beef tastes greasy | The meat was fatty or the pan had too much rendered fat. | Drain excess fat before adding sauce. Use 85/15, 90/10, or leaner beef next time. |
| Beef is dry | The beef was very lean or overcooked. | Add a splash of water while reheating, or use 85/15 or 90/10 beef. |
| Beef steamed instead of browned | The pan was crowded or stirred too often. | Use a wider skillet, medium-high heat, and let the beef sit before breaking it up. |
| Sauce is too salty | Regular soy sauce was used or the sauce reduced too much. | Add more rice, vegetables, water, or a little honey. Use low-sodium soy next time. |
| Sauce is too sweet | Too much sugar or honey. | Add rice vinegar, gochujang, or a small splash of soy sauce. |
| Sauce is watery | Too much liquid in the pan. | Simmer uncovered until reduced. Drain beef better next time. |
| Sauce is too thick | It reduced too long or gochujang made it dense. | Add 1–2 tablespoons water and stir. |
| Too spicy | Too much gochujang or chili. | Add more rice, cucumber, honey, or a creamy drizzle. |
| Bowl tastes flat | It needs acid, freshness, or heat. | Add cucumber, kimchi, scallions, rice vinegar, or chili flakes. |
Nutrition Estimate
Nutrition will change depending on beef fat percentage, rice amount, egg, mayo drizzle, and toppings. As a rough estimate, one bowl made with 90/10 beef, about ¾ cup cooked white rice, sauce, cucumber, scallions, and sesame seeds is around 480–560 calories with about 26–32 g protein.
- Higher protein: use a generous beef portion or add an egg.
- Lower calorie: use leaner beef, less rice, more cucumber or cabbage, and skip mayo drizzle.
- Lower carb: use cauliflower rice, shredded cabbage, lettuce cups, or cucumber as the base.
- More filling: add egg, avocado, extra vegetables, or brown rice.
Frequently Asked Questions
Can I make Korean beef bowls with ground beef?
Yes. Ground beef is one of the easiest ways to make this bowl fast because it browns quickly and soaks up the soy-garlic-sesame sauce.
Can I use beef mince instead of ground beef?
Yes. Beef mince works just like ground beef here. Use 450–500 g and brown it well before adding the sauce.
Is Korean beef bowl the same as bulgogi?
Not exactly. Traditional bulgogi usually uses thinly sliced marinated beef. This recipe uses ground beef or beef mince with a bulgogi-style sauce, so it is faster and easier for weeknights.
Is this the same as bibimbap?
No. Bibimbap is a Korean mixed rice bowl with vegetables, gochujang, egg, and often beef. This bowl is simpler and centered around saucy ground beef over rice, though egg and vegetables can give it a similar feel.
What sauce goes in a Korean beef bowl?
A simple sauce usually includes soy sauce, brown sugar or honey, garlic, ginger, sesame oil, and rice vinegar. Add gochujang for heat or grated apple and onion for a deeper bulgogi-style sauce.
Do I need gochujang?
No. The bowl still tastes complete with just the mild soy-garlic-sesame sauce. Gochujang adds heat, color, and deeper flavor, but it is not required. For a family-friendly pan, skip it and let people add gochujang or chili at the table.
What can I use instead of gochujang?
Use chili flakes, gochugaru, sriracha-style sauce, or another chili paste you like. The flavor will not be exactly the same, but it will still add heat.
What rice is best for Korean beef rice bowls?
White rice is the easiest, jasmine rice is fragrant, short-grain rice feels stickier, and brown rice works well for meal prep. For a lower-carb bowl, use cauliflower rice, cabbage, or lettuce cups.
What vegetables go with it?
Fresh cucumber, cabbage, carrot, lettuce, and scallions are best when you want crunch. Broccoli, mushrooms, spinach, zucchini, bell pepper, and snap peas work well if you want cooked vegetables. Add tender greens at the end so they do not overcook.
Can I add an egg?
Yes. A fried egg is best when serving right away; soft-boiled or jammy eggs are easier for meal prep. Add the egg after reheating so it stays tender.
How do I make it more like bulgogi?
Add grated apple or Asian pear, grated onion, and optional mirin to the sauce. This gives the ground beef a sweeter, rounder, more bulgogi-style flavor.
Can I make this gluten-free?
Yes. Use tamari or gluten-free soy sauce. Check your gochujang label too, because some brands contain wheat.
Can I make this low-carb?
Yes. Serve the beef over cauliflower rice, shredded cabbage, lettuce, or cucumber instead of rice. Keep the same sauce and add plenty of crunchy toppings.
Can I meal prep it?
Yes. The beef reheats well, so it is a good meal-prep protein. Store beef and rice separately from cucumber, cabbage, scallions, kimchi, egg, and creamy drizzles. Reheat the beef and rice first, then add the cold toppings.
How long does the cooked beef last in the fridge?
Cooked beef keeps for 3–4 days in an airtight container in the fridge.
Can I freeze the beef?
Yes. Freeze the cooked beef for up to 2–3 months. Freeze the beef by itself, not the assembled bowls. Thaw overnight in the fridge and reheat with a splash of water to loosen the sauce.
Final Thoughts
Once you know the sauce ratio, this stops being one recipe and becomes a dinner you can rebuild all week: rice bowl tonight, lettuce wraps tomorrow, noodles for lunch, or meal prep boxes with cucumber and egg.
Try it mild first, then make the next pan yours: more gochujang, more cucumber, extra sesame, a creamy drizzle, or a fried egg on top. Once you make it once, it stops being a recipe you follow and becomes a bowl you know how to build.